Cherry Bakewell Rocky Road Bars

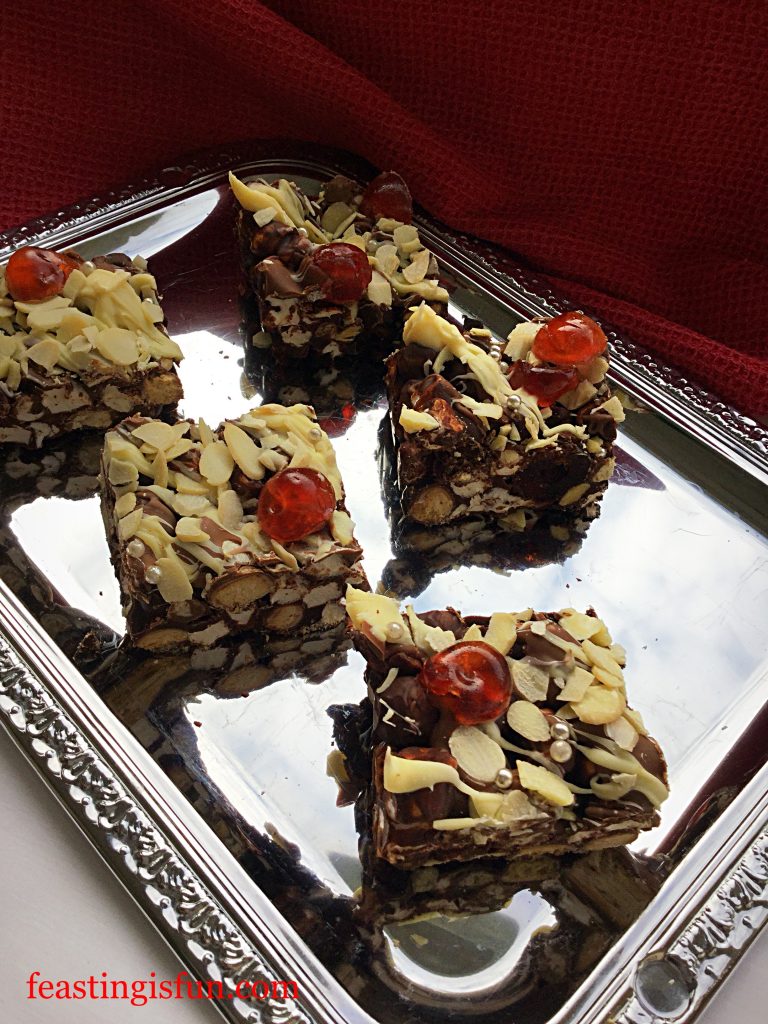
When it comes to entertaining, especially during busy times of the year, it’s really handy to have a few no bake recipes tucked up your sleeve. Also, should you need to transport your creation, something that won’t leak all over the car and travels well is a definite bonus. These Cherry Bakewell Rocky Road Bars tick all the boxes and taste utterly delicious to boot!
FF Cherry Bakewell Rocky Road Bars
Cherry Bakewell Rocky Road Bars

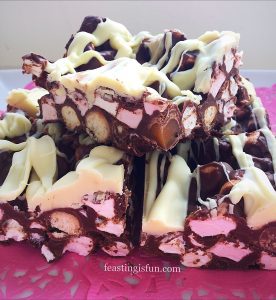
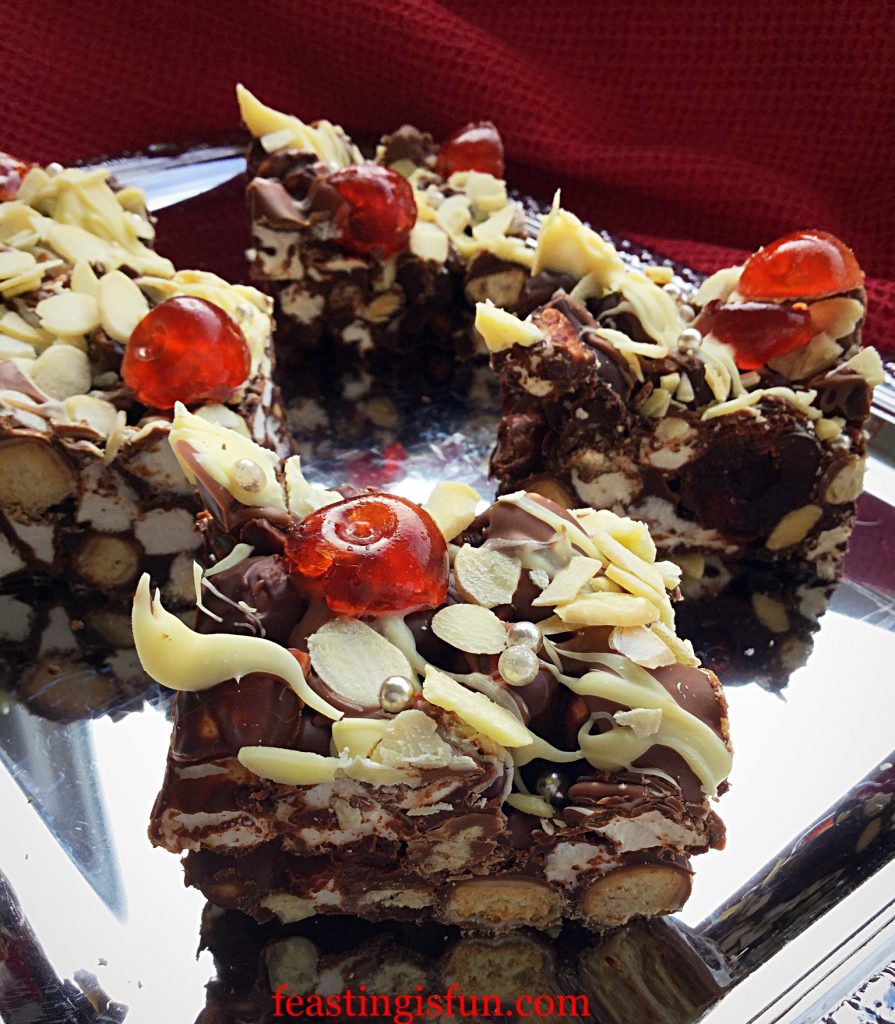
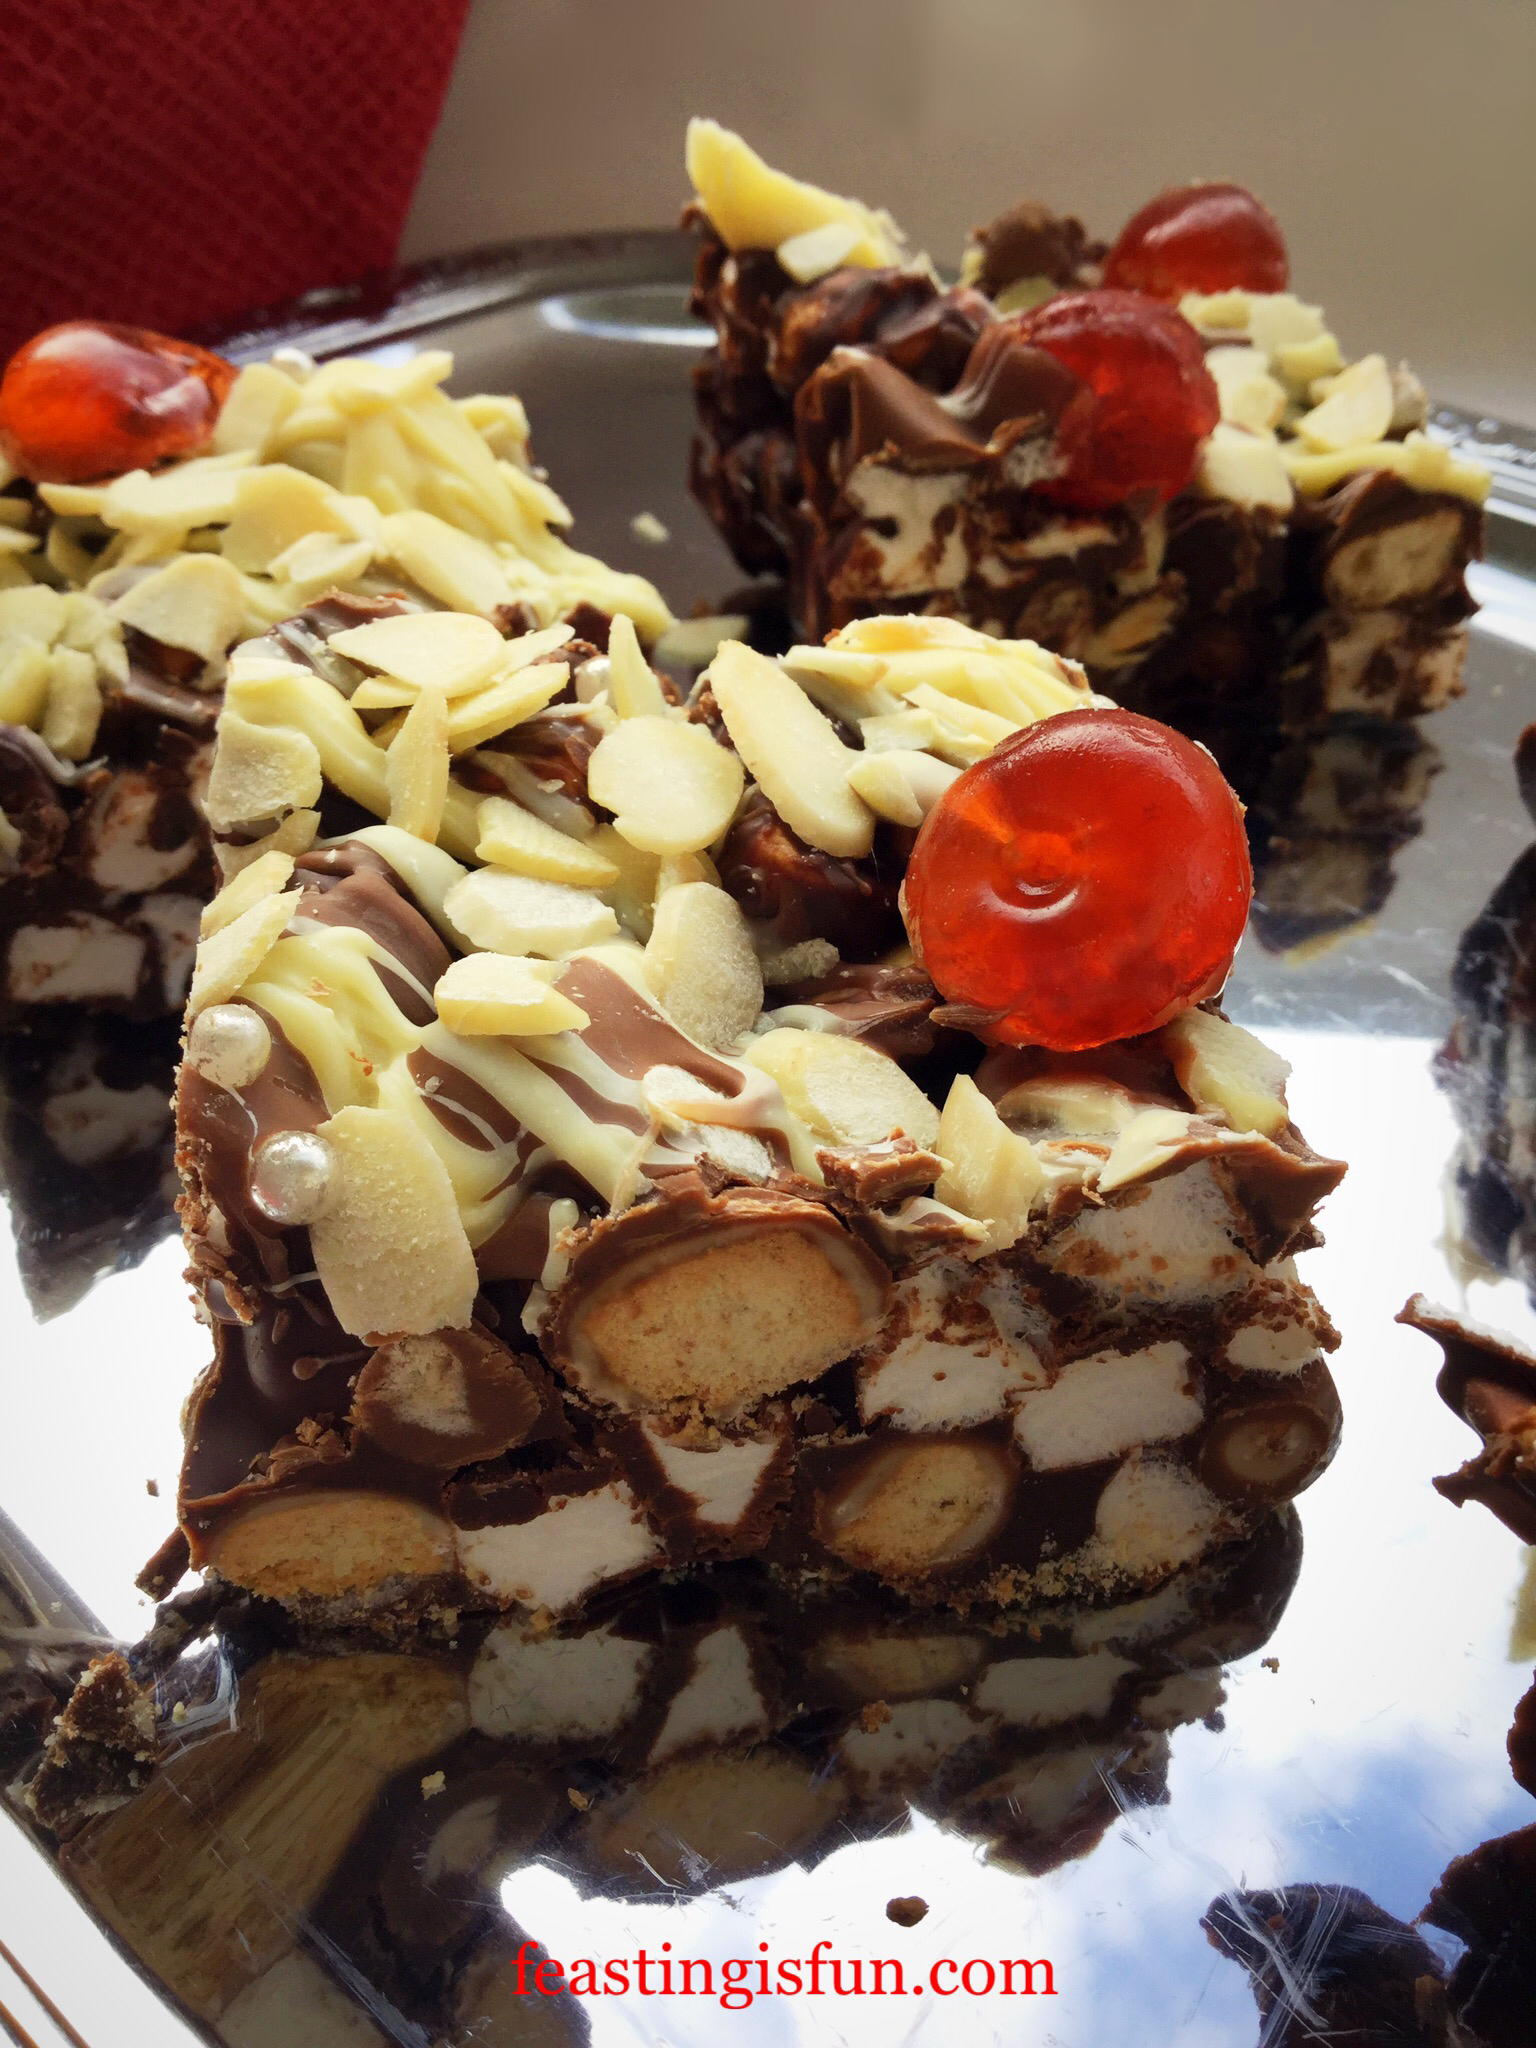
Since McVities Digestive Nibbles became available I take full advantage of skipping the ‘biscuit bashing’ step. Similar to my recipe for Caramel Crunch Rocky Road Bars.Because anything that makes life easier is a bonus in my book. Chocolate covered biscuit balls combine with whole, toasted almonds, providing great crunch and texture. While the glacé cherries and mini marshmallows add sweet chewiness, held together in a thick chocolate sauce.
FF Cherry Bakewell Rocky Road Bars
Cherry Bakewell Rocky Road Bars

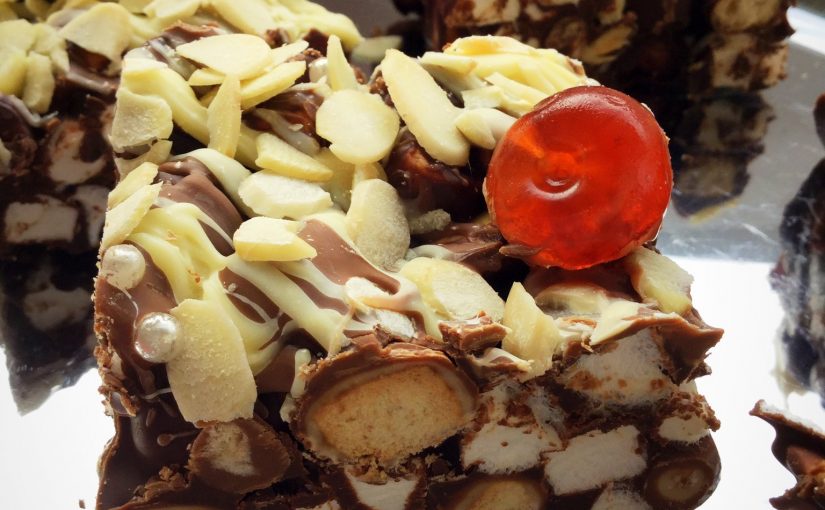
Finally each bar is finished with a double chocolate drizzle, flaked toasted almonds, more glacé cherries and sparkling silver balls. Most of all, the combination of ingredients ensures traditional cherry bakewell flavours are in every chewy, crunchy, delightful bite. Resulting in a delicious sweet treat that is as ideal to make and serve at home as it is easy to transport.
FF Cherry Bakewell Rocky Road Bars
Cherry Bakewell Rocky Road Bars

Each one of these Cherry Rocky Road Bars is a feast in itself. Also what better time to share these with friends and family, than over the holiday season? Since sharing food makes it taste so much better, these also make a great edible gift. Pop into cellophane bags tied with festive ribbon and give as gifts. A perfect festive treat.

Recipe: Cherry Bakewell Rocky Road Bars makes 24

For the bars:

200g/7oz Dark Chocolate minimum 70% cocoa solids

200g/7oz Milk Chocolate

100g/4oz Unsalted Butter

1/4tsp Sea Salt – I use Maldon

3tbsp Golden Syrup

100g/4oz Whole Almonds lightly toasted and cooled

3 Packs McVities Digestive Nibbles total 360g available from most supermarkets. Alternatively crush 360g digestive biscuits into roughly 1cm sized pieces

100g/4oz Glacé Cherries

175g/6oz Mini Marshmallows

Optional 1/2tsp Almond Extract – I use Nielsen-Massey

For the topping:

100g/4oz White Chocolate

100g/4oz Milk Chocolate

50g/2oz Flaked Almonds lightly toasted and cooled

50g/2oz Glacé Cherries cut in half

Silver Sugar Balls

Method:

  • First of all line a 22.5cm x 30cm (9” x 12”) deep tin with aluminium foil.
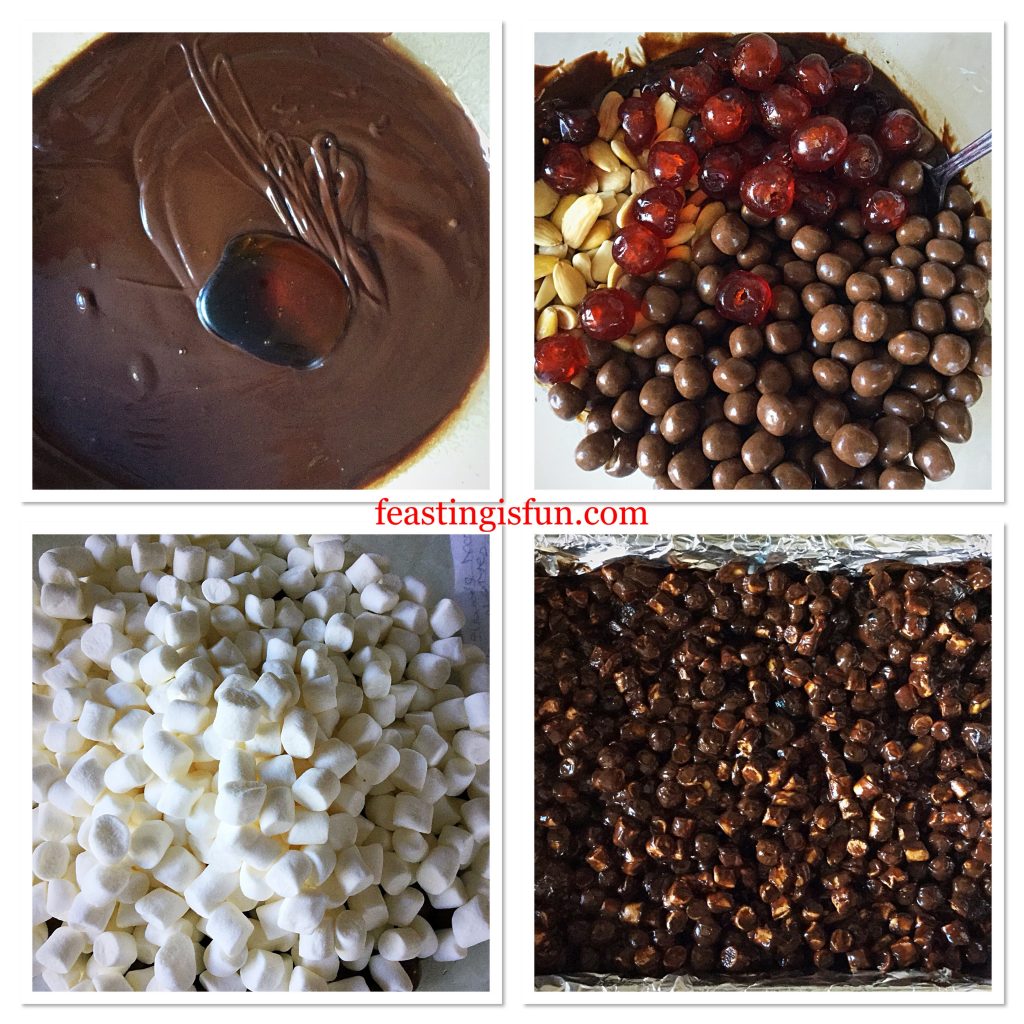
  • Next, into a large microwaveable bowl add the milk and dark chocolate, broken up or chopped into pieces. Also add the butter and sea salt.
  • Heat the chocolate and butter in the microwave, on medium power for 30 seconds at a time. Stir the mixture between each heating burst. As soon as the chocolate and butter start to melt stir continuously until completely liquid.
  • Add the golden syrup and stir to combine. Stir in the almond extract if using.
  • Into the bowl add the toasted almonds, glacé cherries, digestive nibbles (or broken biscuits). Finally add the mini marshmallows.
  • Mix to combine all of the ingredients, ensuring everything is slicked with the chocolate mixture.
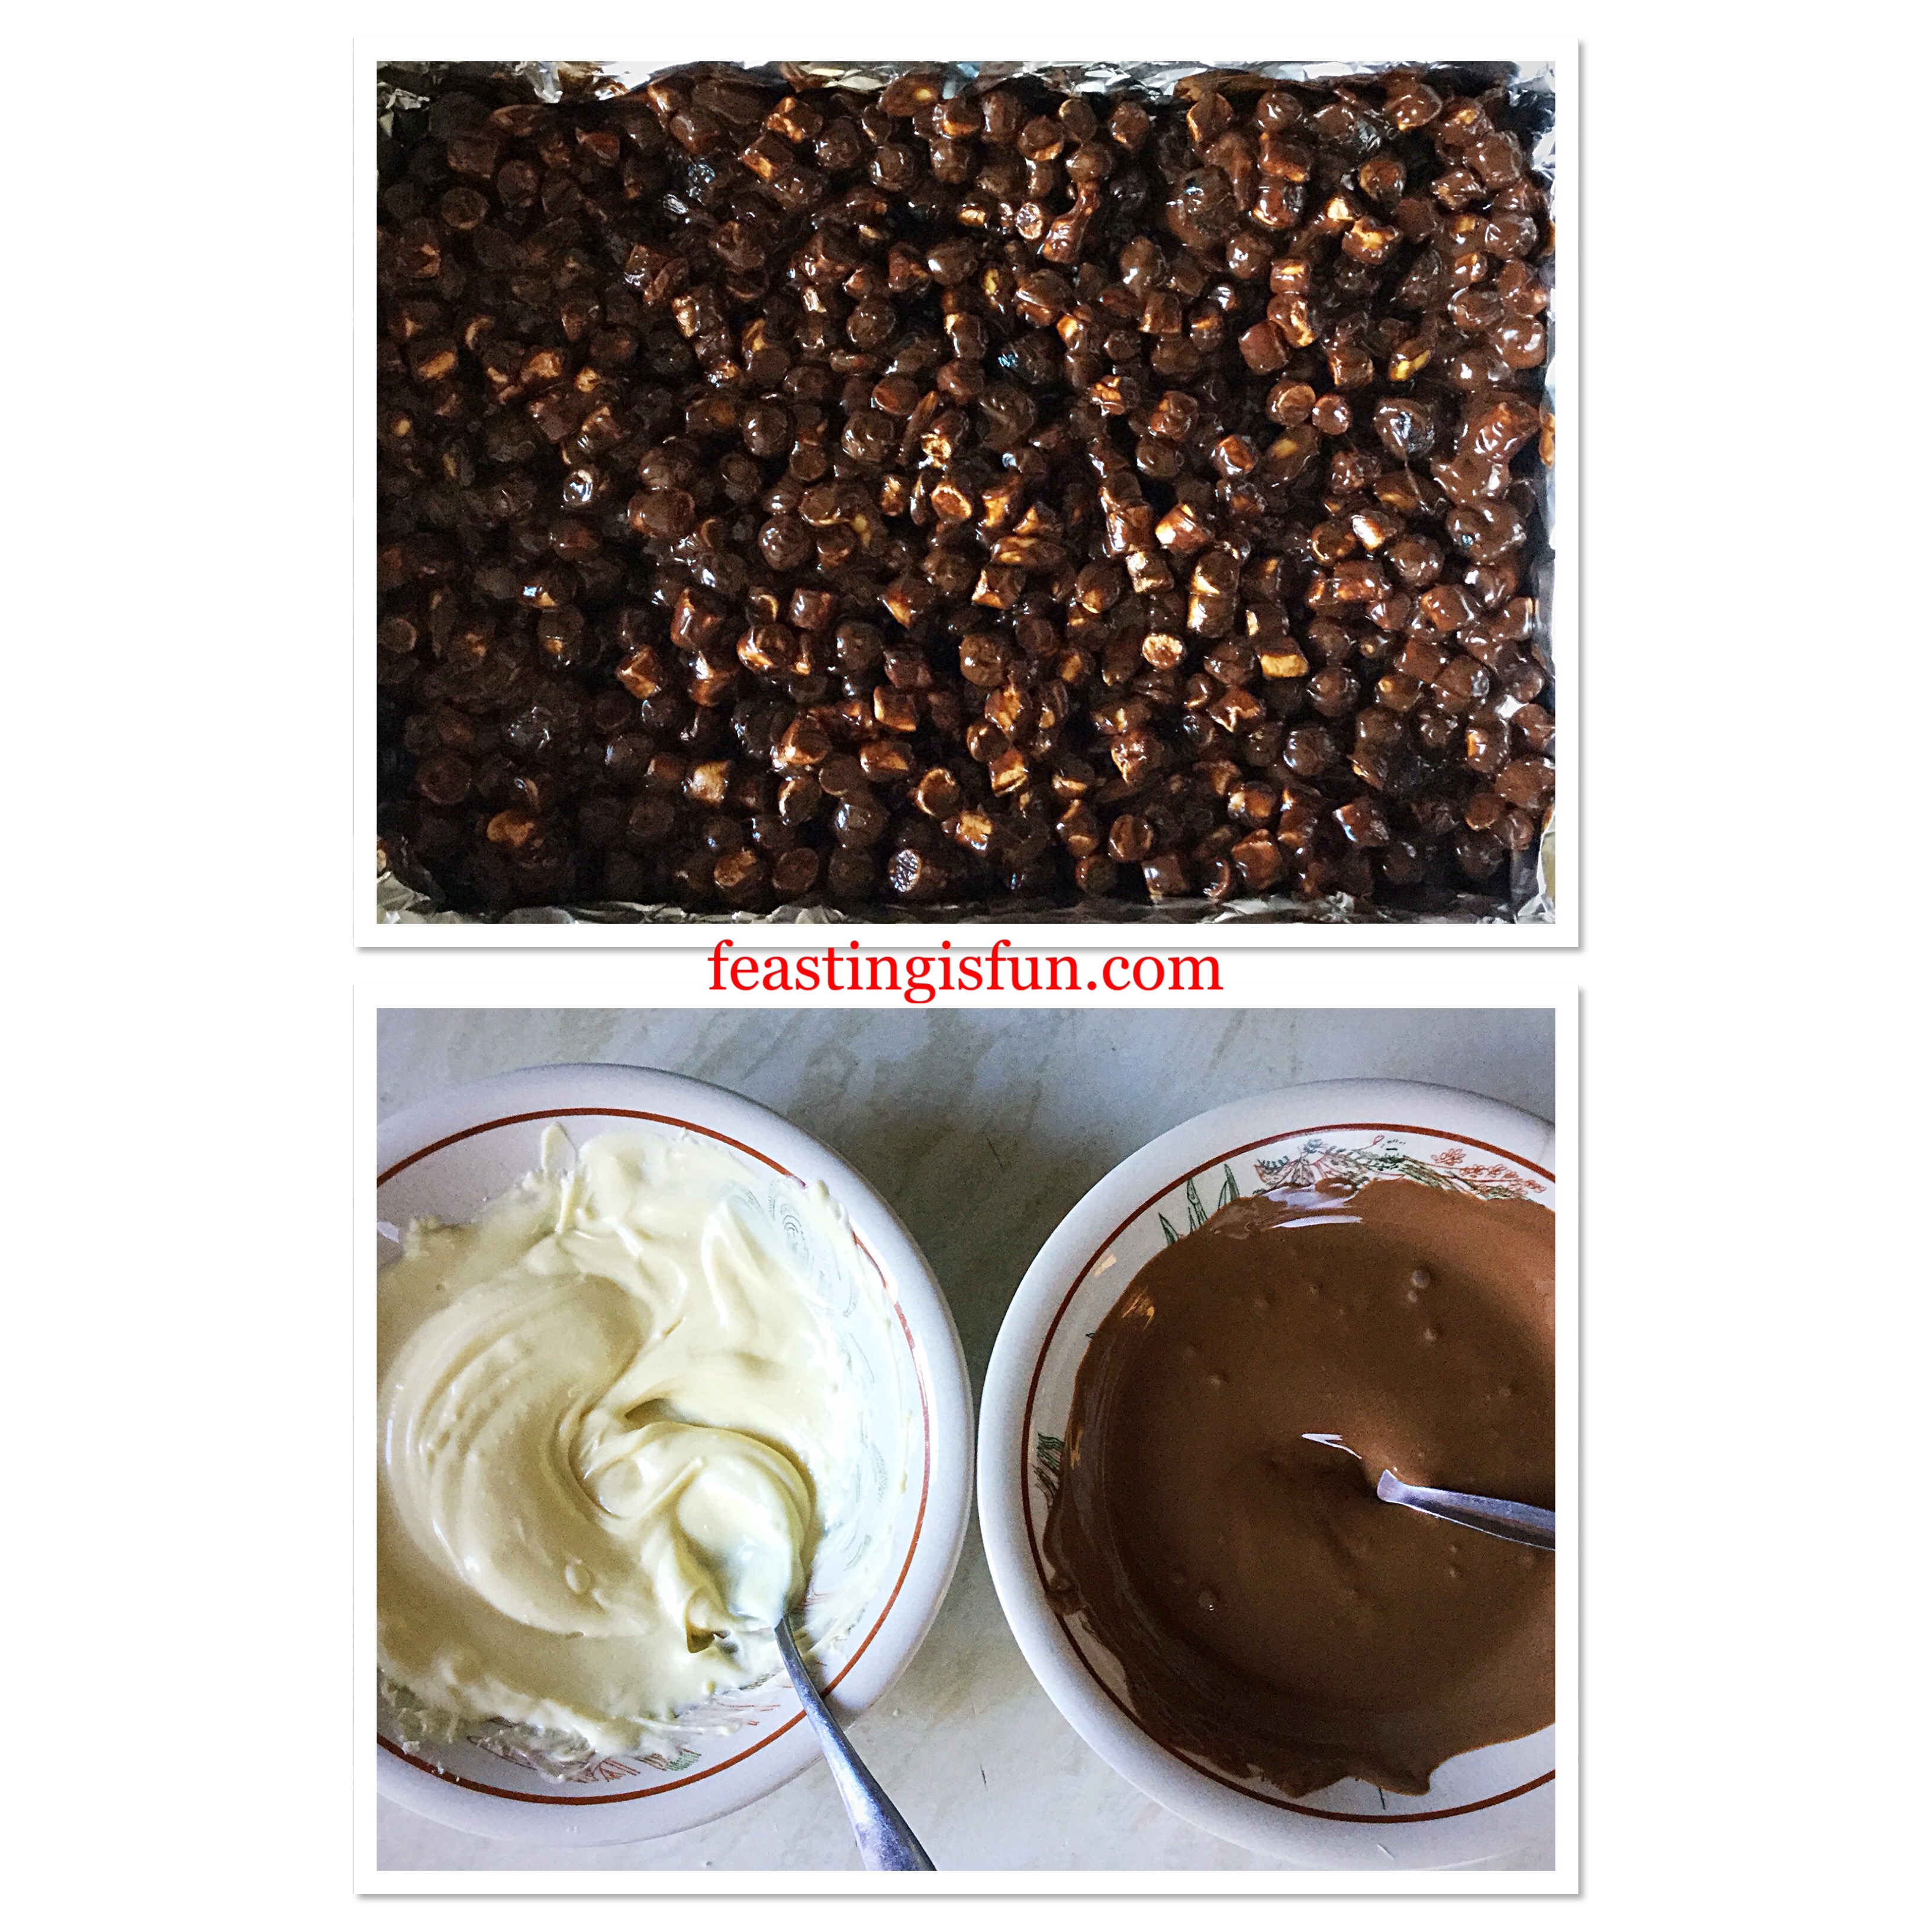
  • Spoon the mixture into the prepared tin, pressing with the back of a spoon and making sure that the tin is filled evenly.
FF Cherry Bakewell Rocky Road Bars
Cherry Bakewell Rocky Road Bars
  • Break up the milk and white chocolate and place into separate heatproof, microwaveable bowls.
  • Heat separately, as before, on medium. Stir after each heating burst until the chocolate is completely melted.
FF Cherry Bakewell Rocky Road Bars
Preparing the chocolate drizzle
  • Starting with the milk chocolate, use a teaspoon to diagonally drizzle the chocolate over the rocky road.
  • Continue with the white chocolate in the same manner.
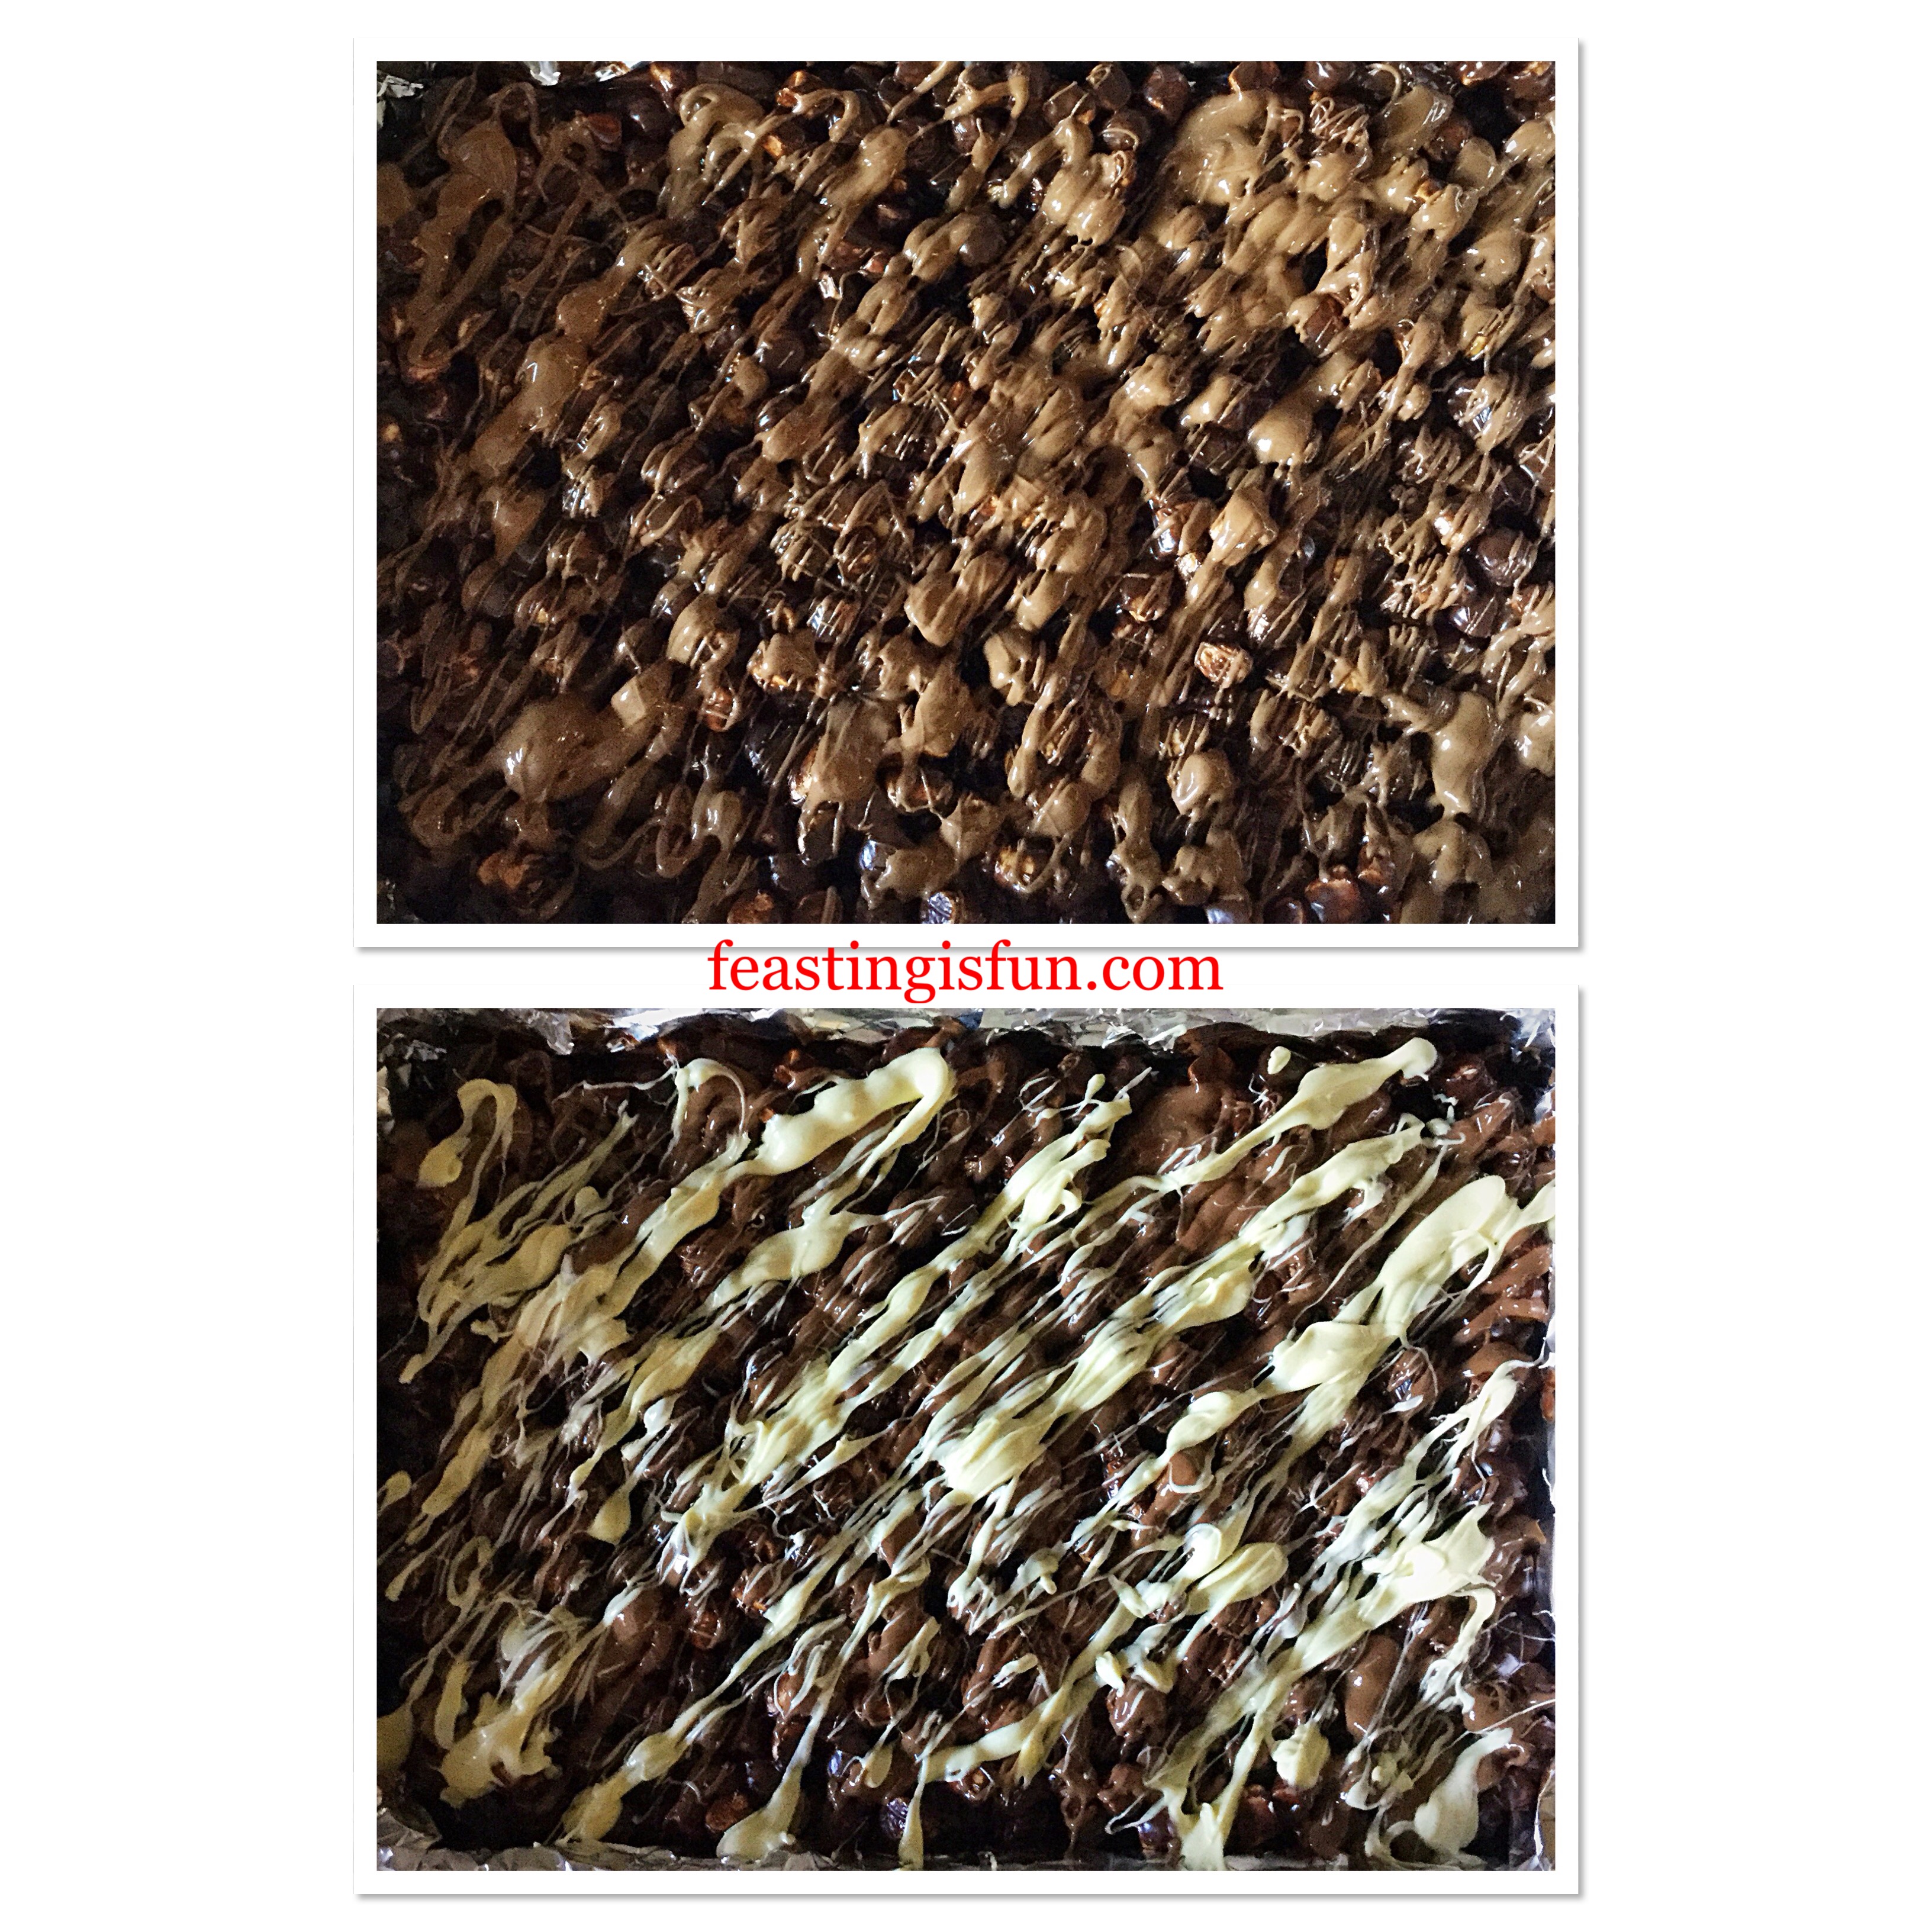
FF Cherry Bakewell Rocky Road Bars
Milk and white chocolate drizzle
  • While the chocolate is still un-set, sprinkle over the flaked almonds. Place the cherries evenly over the flaked almonds and finally scatter over silver balls for extra sparkle.
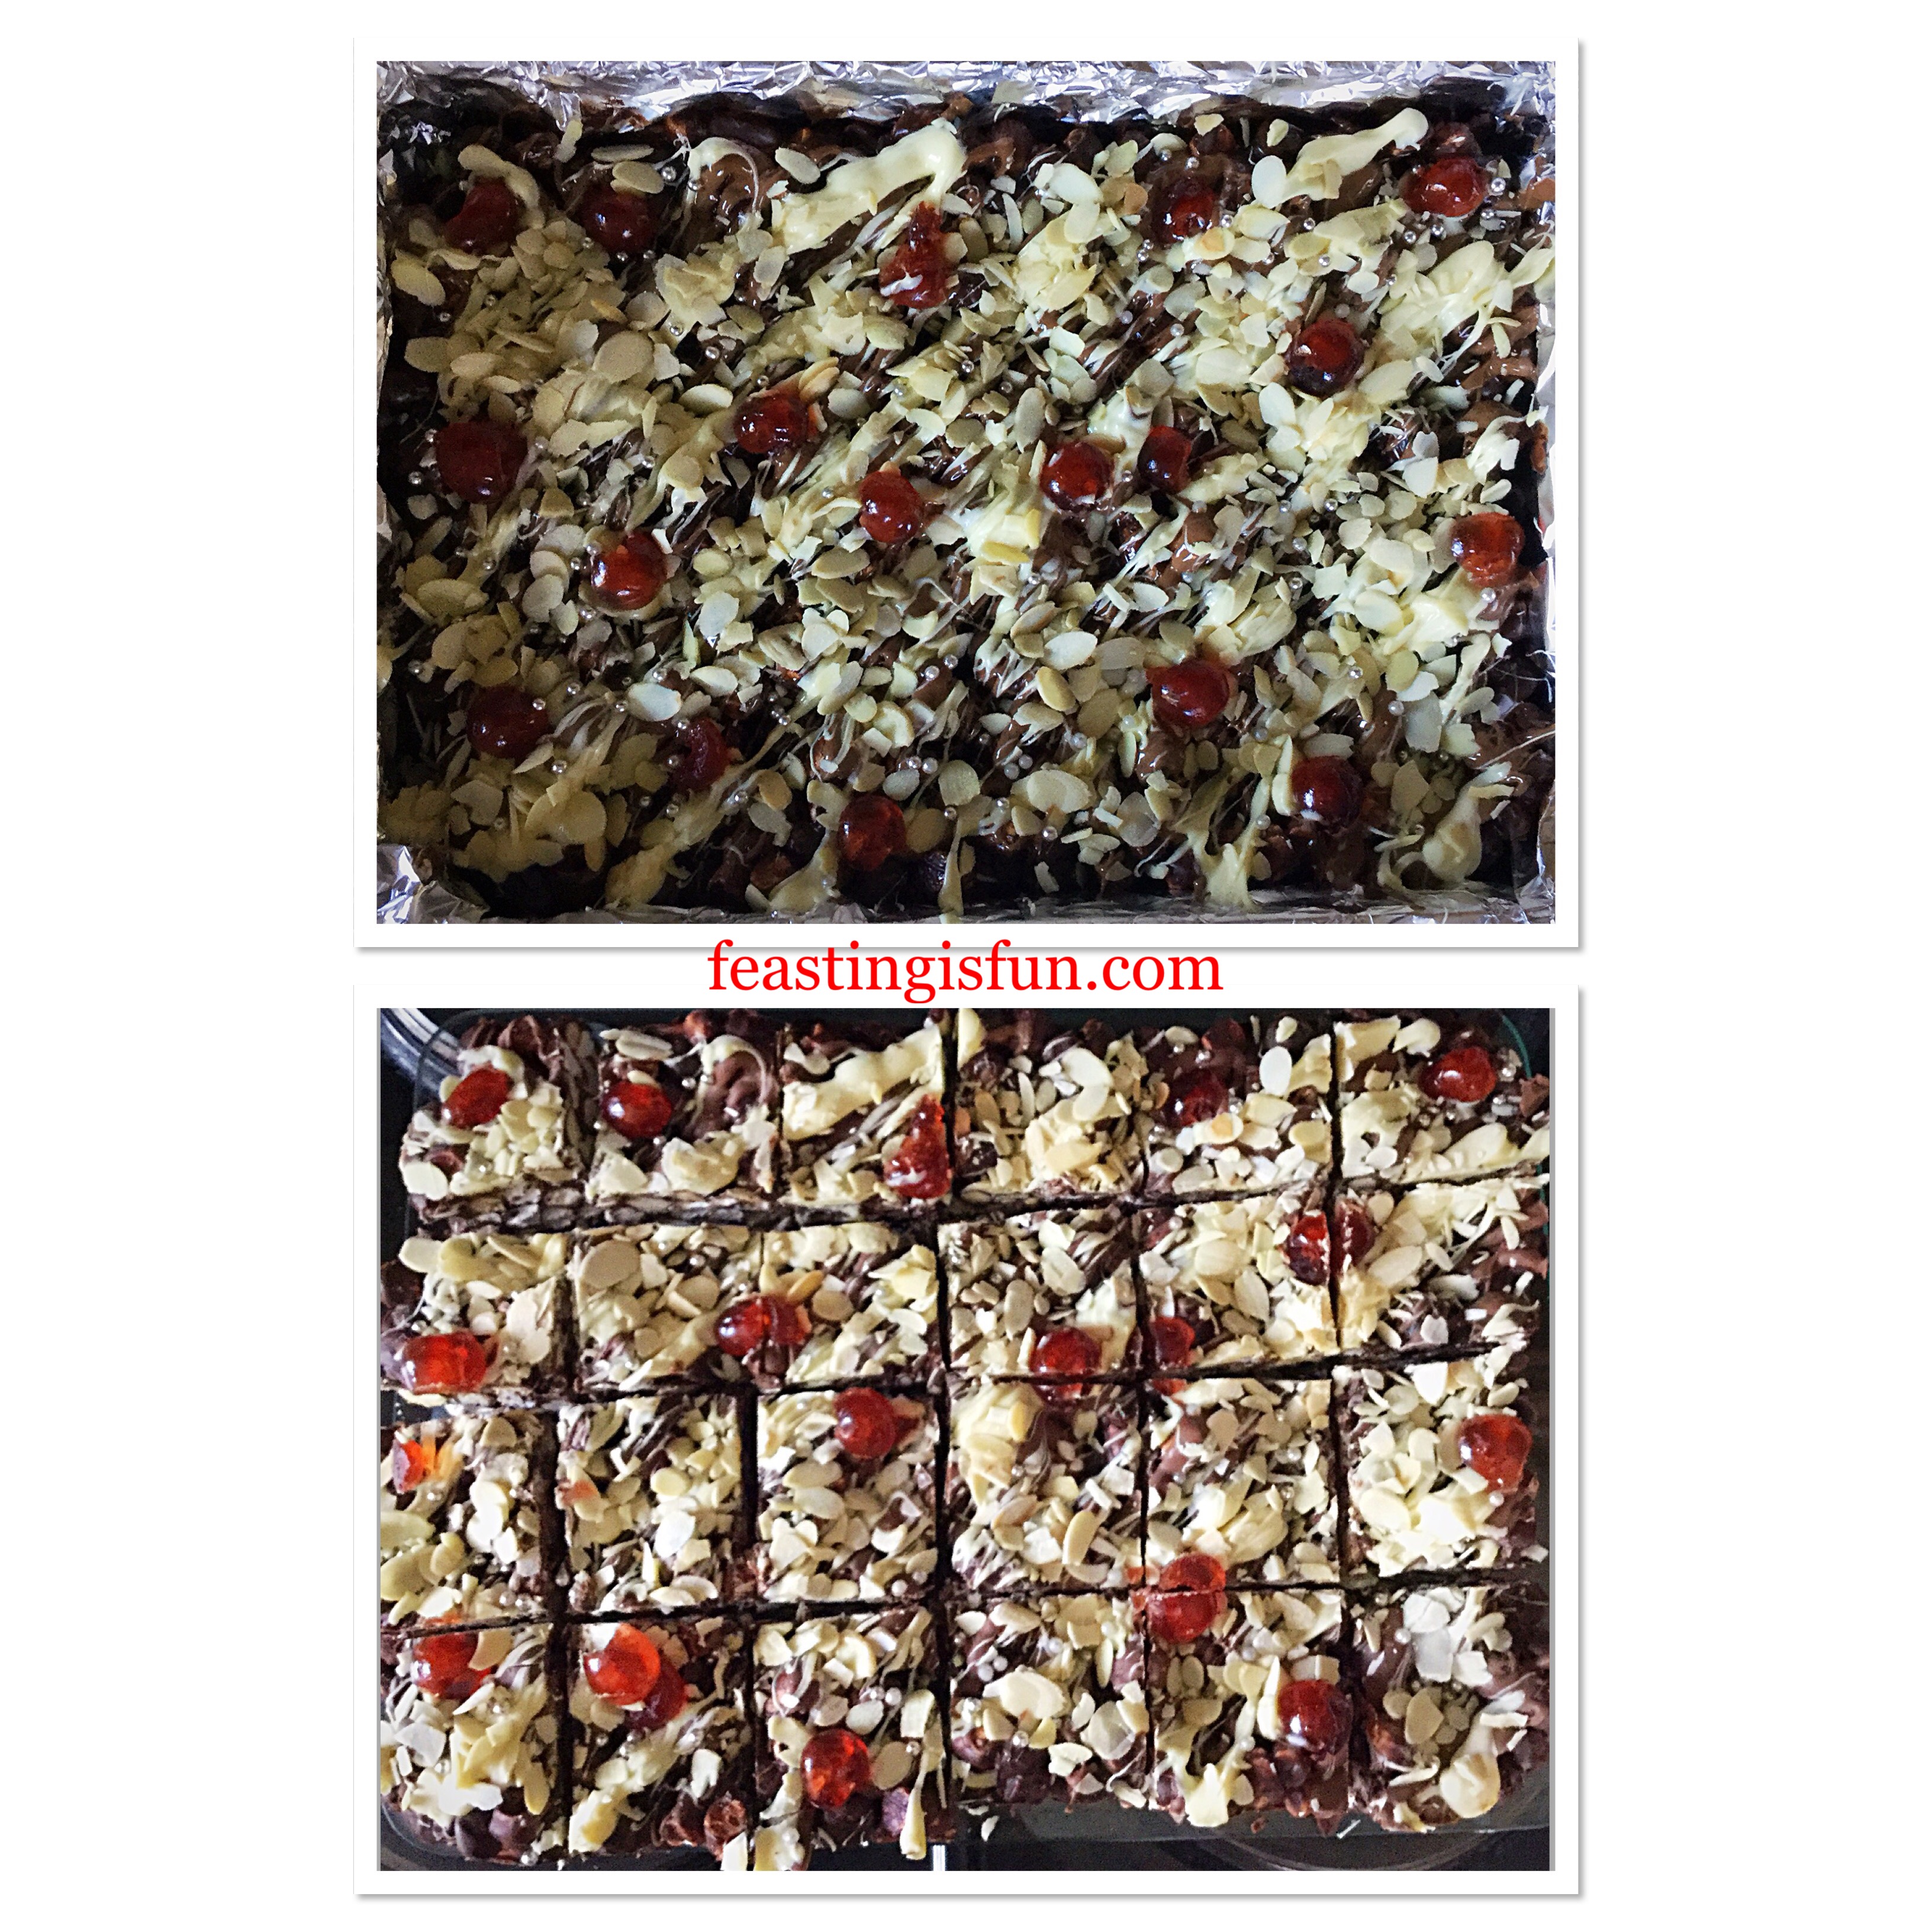
FF Cherry Bakewell Rocky Road Bars
Finishing the rocky road and then cutting into even bars.
  • Cover the tin tightly with aluminium foil and place in the fridge, or somewhere cool to set. I actually placed the tin in our very cold porch overnight!
  • Once set, lift the block of marshmallow and chocolate loveliness out of the tin. Peel away the foil and place on to a board.
  • Using a sharp knife cut across the width of the block, dividing it into four equal portions. Cut downwards through the middle and then again through the middle of each larger quarter, creating 24 individual bars.
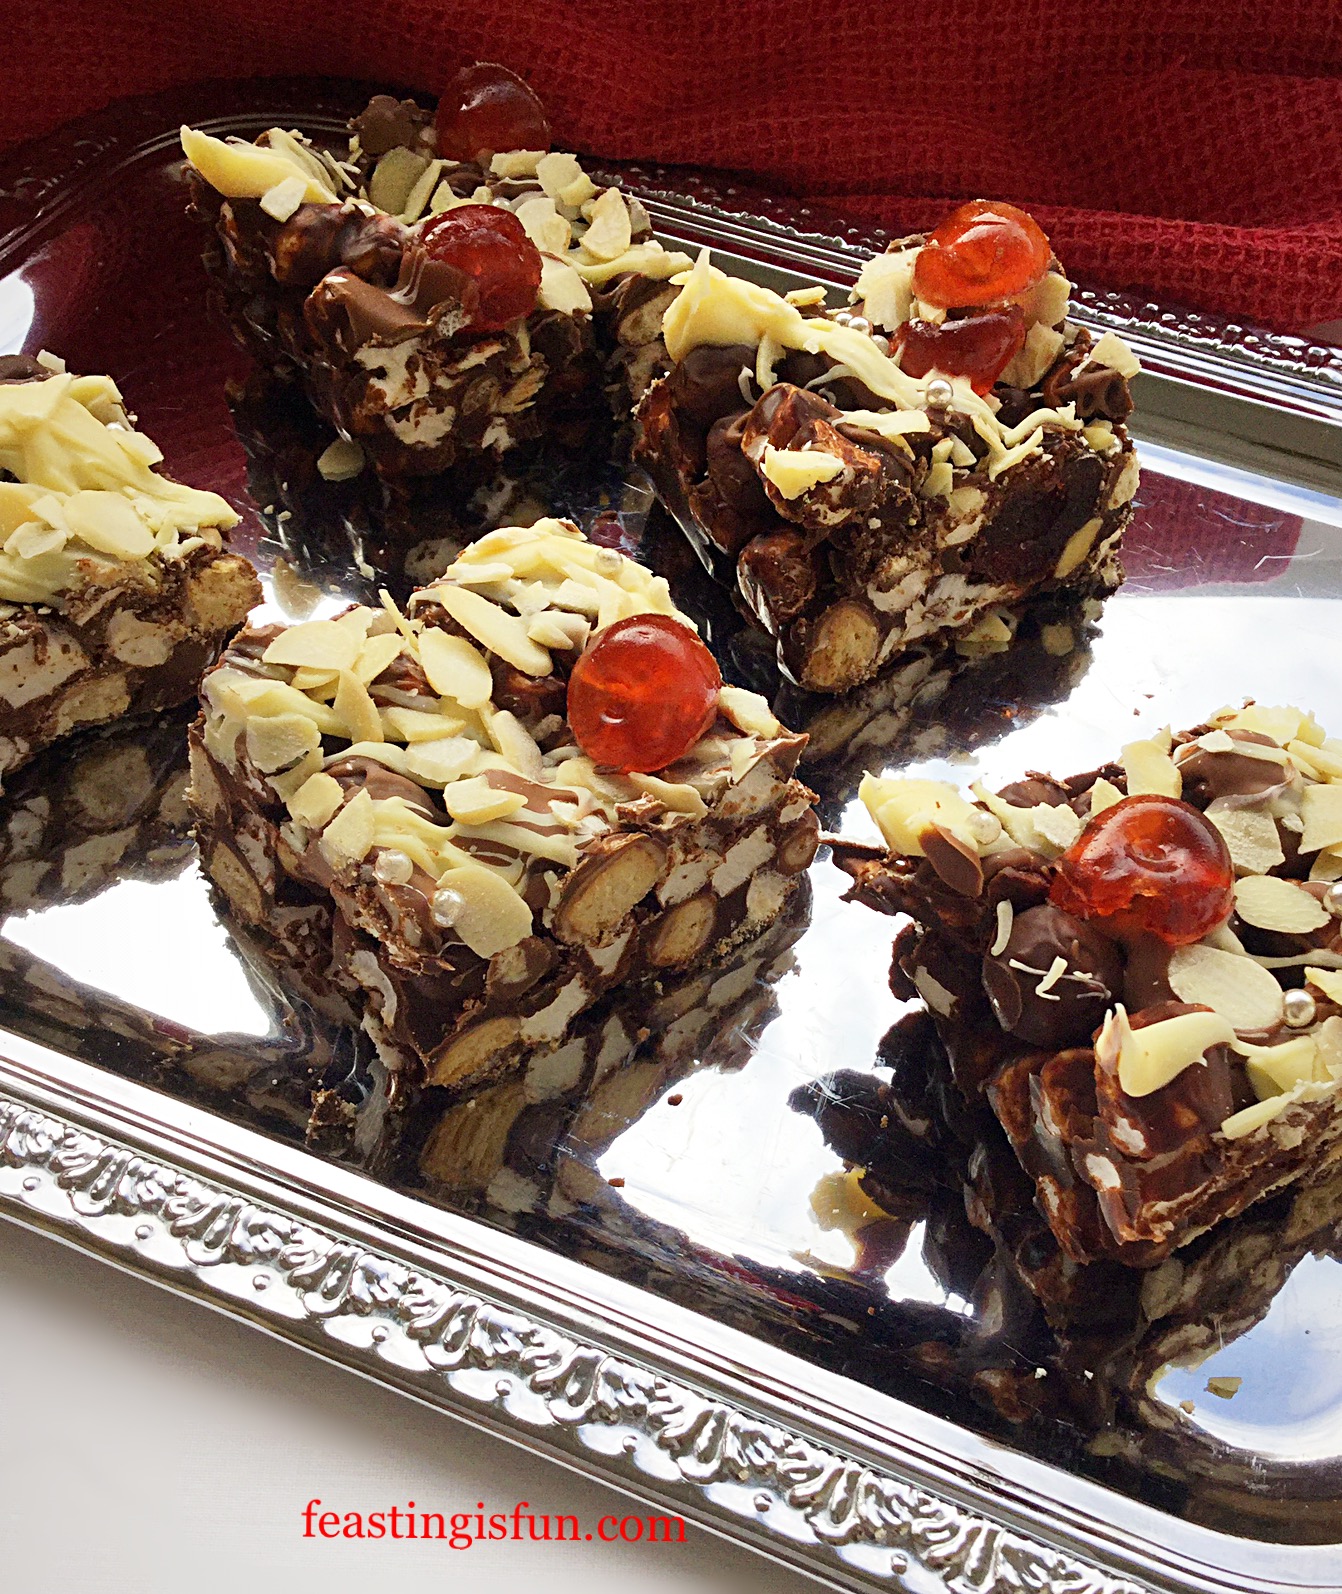
FF Cherry Bakewell Rocky Road Bars
Cherry Bakewell Rocky Road Bars

Serve on a pretty tray or platter. A silver tray highlights the silver balls on top of each bar, giving them a festive look.

Store in an airtight container, keep in the fridge during warmer weather. They will keep for up to one week, if they last that long!

If you have enjoyed this recipe for Cherry Bakewell Rocky Road Bars you may also like these:

Maltesers Popping Candy Cupcakes
FF Cherry Bakewell Rocky Road Bars
Maltesers Popping Candy Cupcakes

Almond Cacao Nib Shortbread Bars
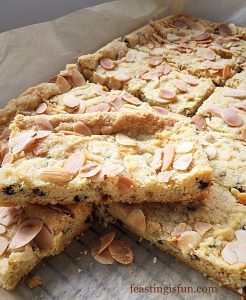
FF Cherry Bakewell Rocky Road Bars
Almond Cacao Nib Shortbread Bars

Double Strawberry Almond Muffins
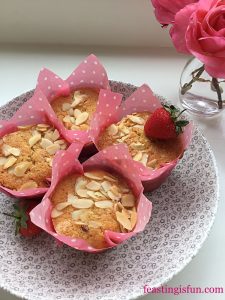
FF Cherry Bakewell Rocky Road Bars
Double Strawberry Almond Muffins


Making food for others is one of life’s greatest pleasures. Since taking time to create something special to be shared amongst those you love, care and appreciate is not only fun, but also a great way to show that you are thankful to have them in your life. Especially during Christmas time, sharing is important. Helping us to not become self centered and to put others first. For the ultimate selfless act please see Important Stuff.

Whatever you are making, baking and creating in your kitchens, have fun preparing and sharing your feast.

Sammie xx

No part of this post may be reproduced or replicated without the written permission of the owner. Please see my Disclosure Policy.
Peppermint Candy Cane Topped Brownies

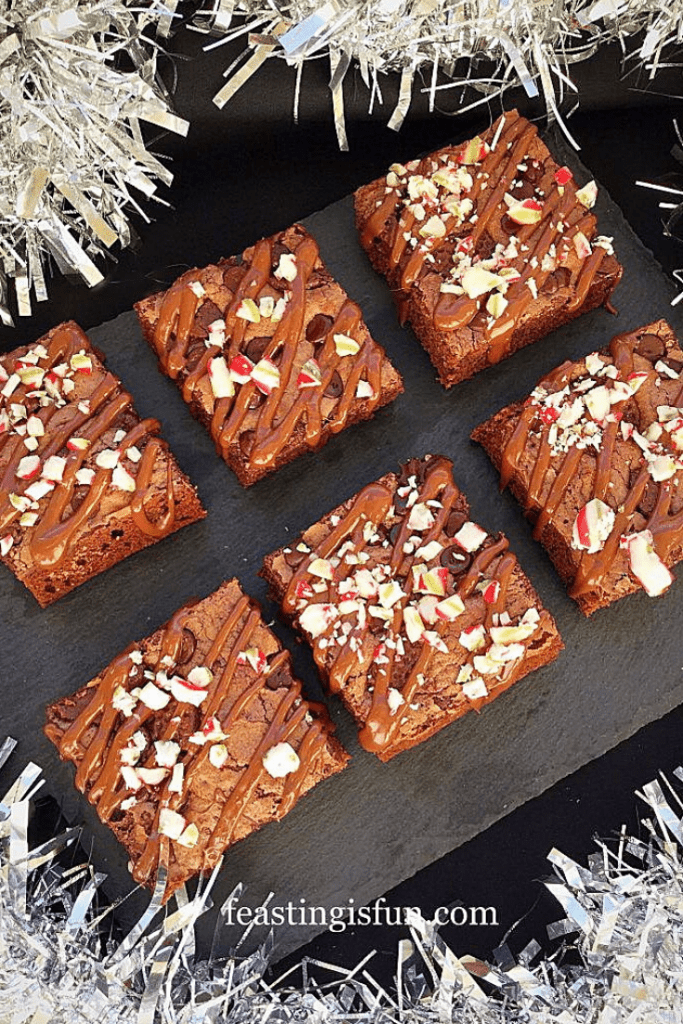
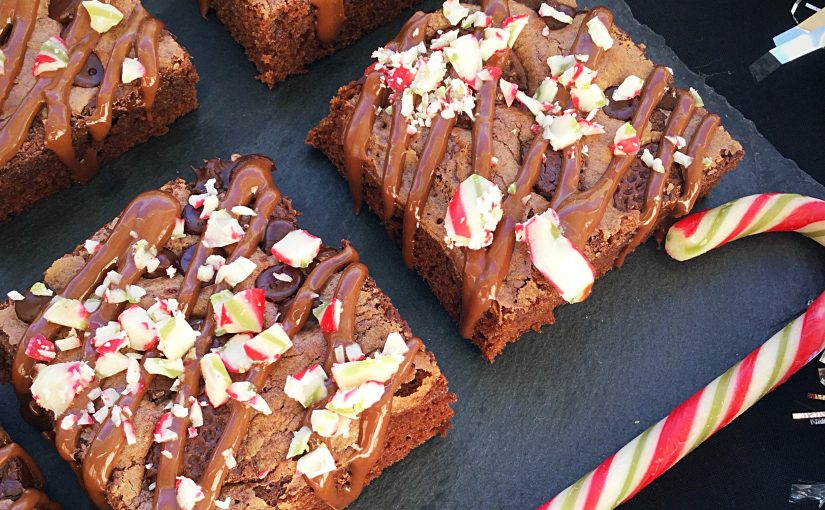
Chocolate and Christmas go together like strawberries and cream in summer. Add in traditional candy canes and you have an incredible combination.  So using a fantastic Classic Brownie Kit makes baking these Peppermint Candy Cane Topped Brownies easy and a super delicious Christmas treat.  And don’t worry if you can’t get hold of the kit, there’s a link before the recipe to help you make them from scratch.

FF Peppermint Candy Cane Topped Brownies
Peppermint Candy Cane Topped Brownies

While I enjoy baking from scratch, I am not averse to keeping good quality mixes and baking kits in the kitchen.  Using the Classic Brownie Kit to whip up a batch of Brownies, makes the house smell amazing. Also, adding extra mint chocolate chunks and a topping of crushed candy cane turns these into a festive treat. Especially handy during the busy Christmas holiday season.

FF Peppermint Candy Cane Topped Brownies
Peppermint Candy Cane Topped Brownies

As soon as you bite into these rich chocolate brownies a range of textures hits your mouth.  Soft fudgey chocolate brownie, crisp mint chocolate chunks, chewy crushed candy cane all blend together to create a flavour sensation.  Perfect for a quick bake when unexpected guests arrive.  Welcoming them in with the aroma of baking chocolate. Is there anything better?

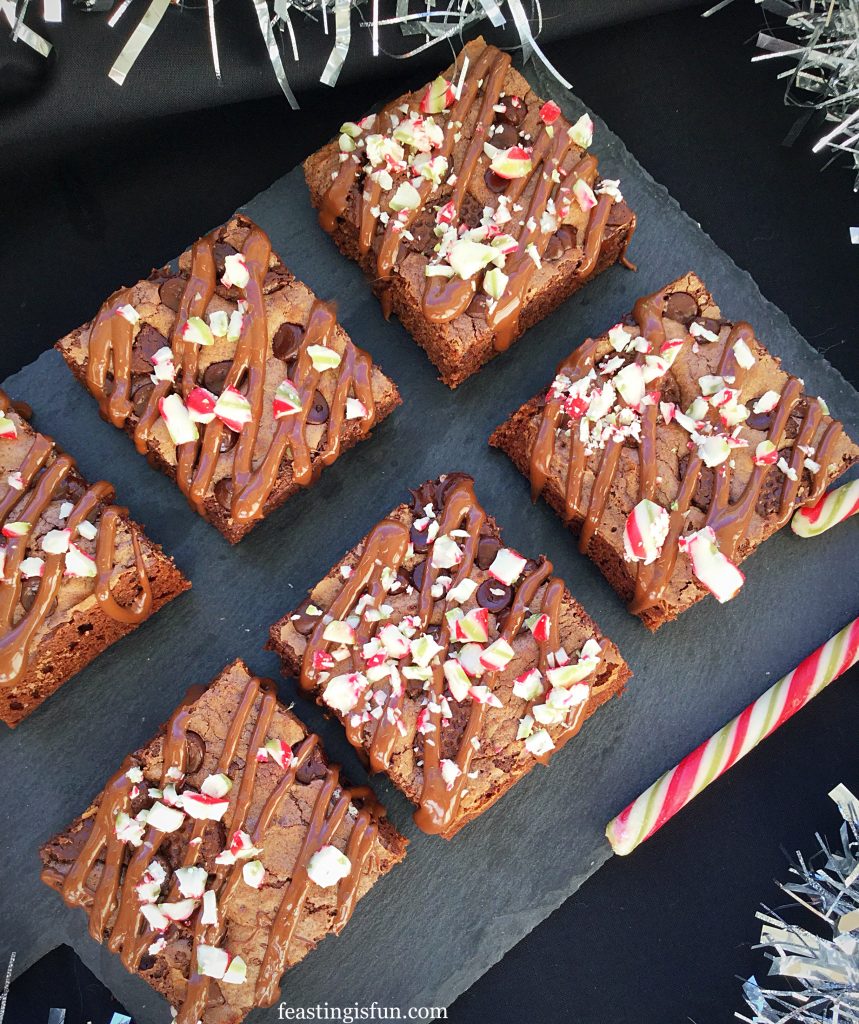
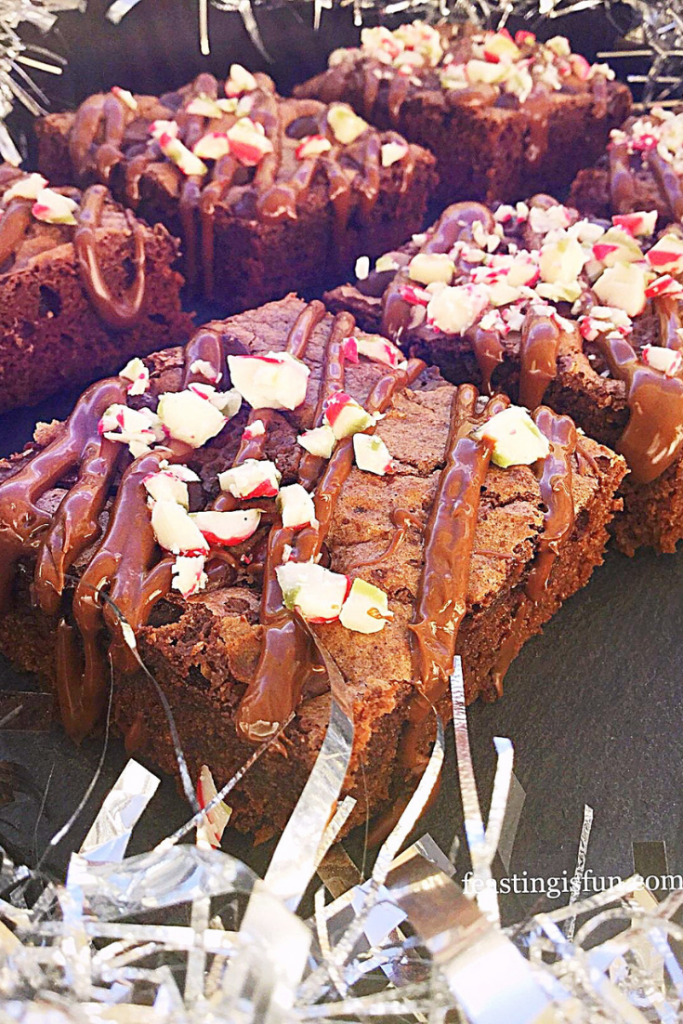
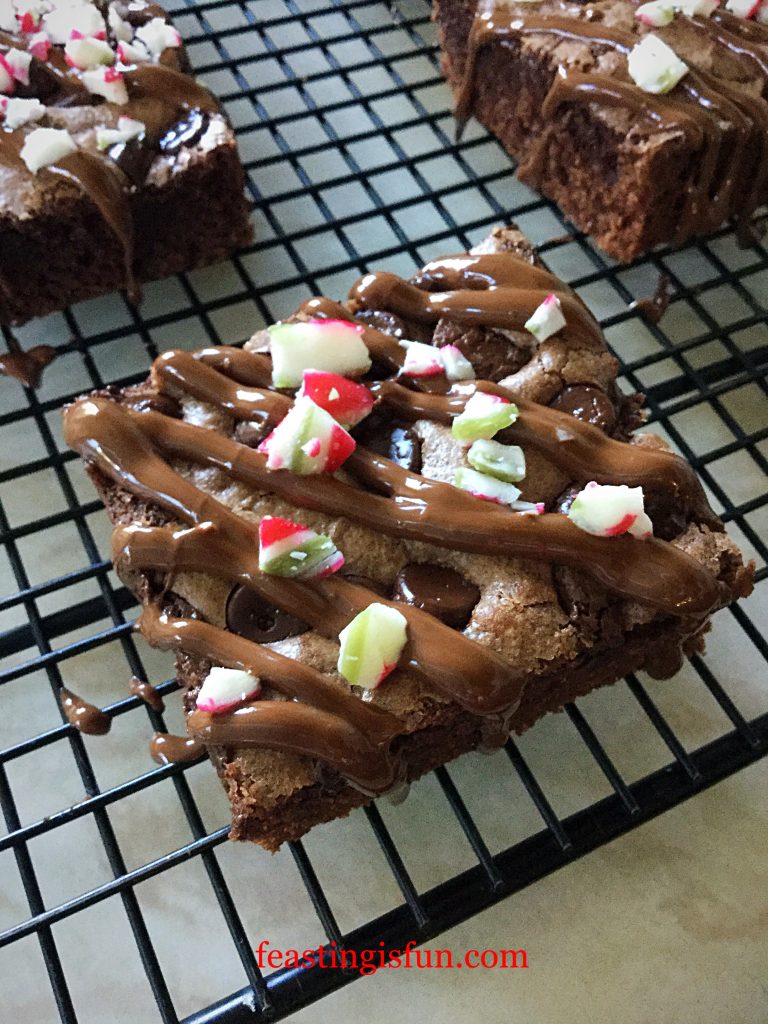
Close up of broken candy cane on top of a chocolate drizzled brownie.
Peppermint Candy Cane Topped Brownies

Everything you need to bake delicious Brownies is included in the kit.  Yet, if you are unable to get hold of the Classic Brownie Kit then please use the recipe for Chocolate Fudge Brownie Bites.  Either halve the recipe, or double the quantity of candy canes, chocolate drizzle and mint chocolate.

Recipe: Peppermint Candy Cane Topped Brownies makes 9

Classic Brownie Kit available from If I Knew You Were Comingalternatively use the brownie recipe for my Chocolate Fudge Brownie Bites *follow the ingredient list and tin size for * recipe. You will make more brownies

2 Large Free Range Eggs

115g/4.5oz Unsalted Butter softened at room temperature

50g/2oz Dark Mint Chocolate chopped into chunks – I use                                                                          Elizabeth Shaw Dark Mint Chocolates

100g/4oz Milk Chocolate

2 Peppermint Candy Canes

Method: Preheat oven to 200C/180C fan, gas mark 6, 400F.

Making The Brownie Batter

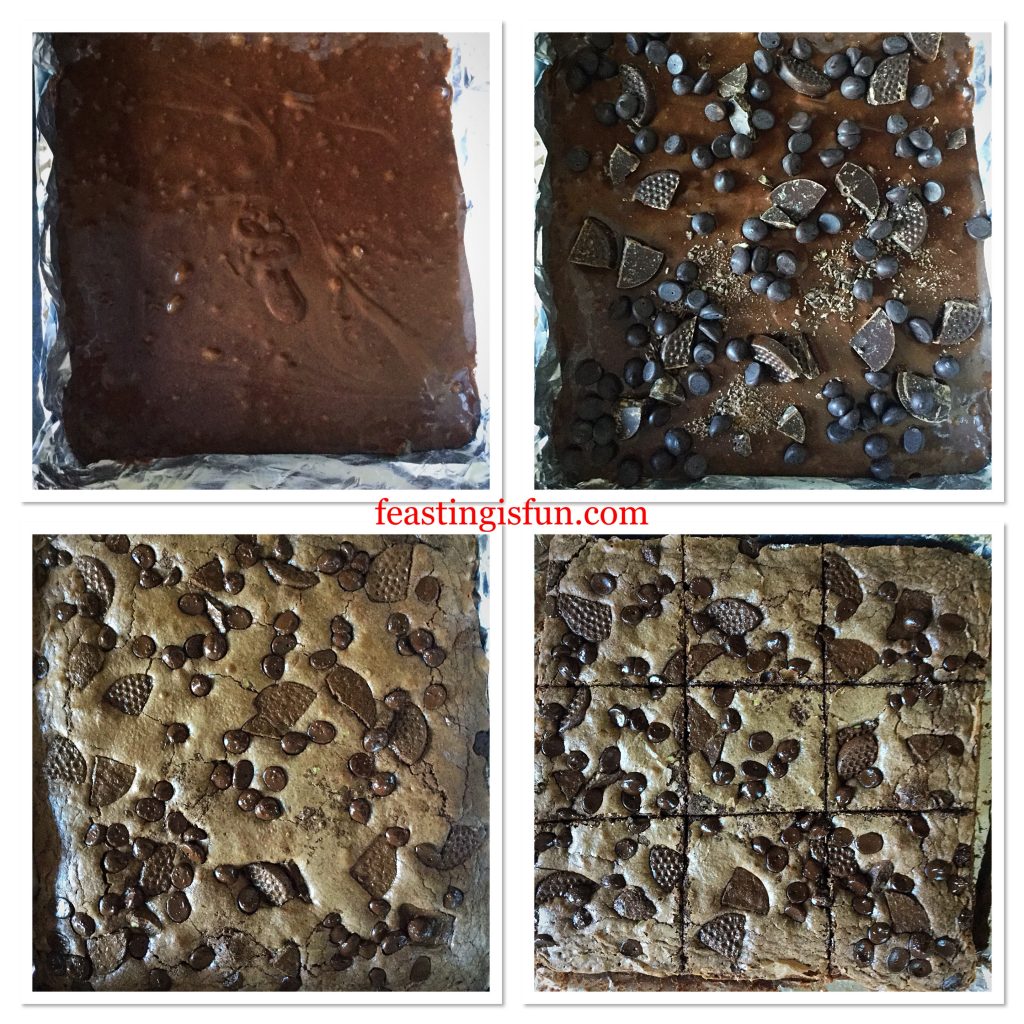
  • First of all set out the baking tin included in the kit and place on to a baking tray.  Alternatively line a 9” x 9” square tin with aluminium foil.
  • Place the chocolate and butter in a heatproof microwaveable bowl and heat on medium powder until just melted. Stir until completely liquid and set to one side to cool.
  • Whisk the eggs and sugar together until fully combined.
  • Pour the eggs slowly into the cooled chocolate mixture and stir to incorporate.
  • Sieve the cocoa and flour into the chocolate/egg mix and fold in until just combined.
FF Peppermint Candy Cane Topped Brownies
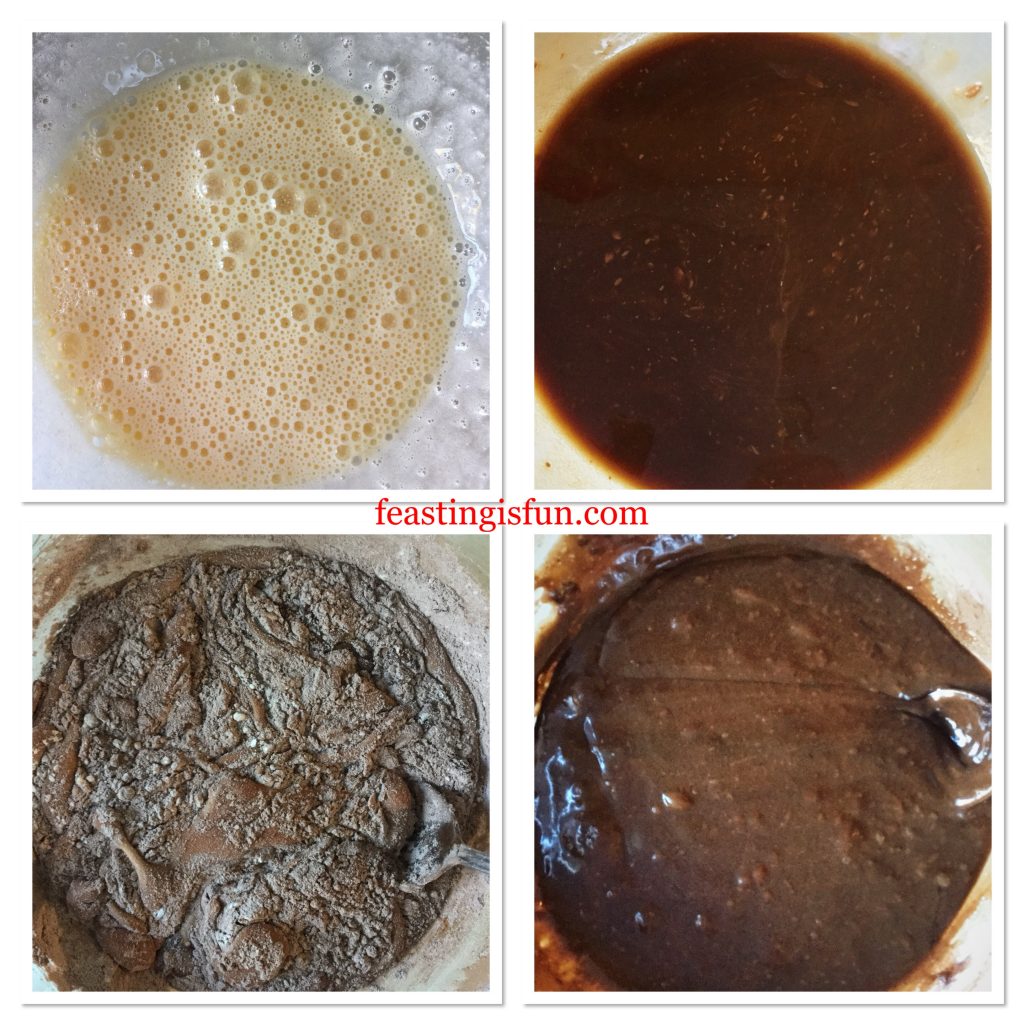
Making the Brownie batter.
  • Pour the thick, chocolate, brownie batter into the prepared baking tin.
  • Scatter over the chocolate chips from the kit and the mint chocolate chunks.

Baking The Peppermint Brownies

  • Place the Brownies into the centre of the preheated oven and bake for 15 – 20 minutes.
  • The Brownies are baked when the top is set and shiny with a slight crackle. There should be a very slight jiggle in the centre.
  • Once baked remove from the oven and allow to cool completely.
  • As soon as the Brownies are cooled peel away the foil.  Cut into 9 even sized squares and place on a cooling rack, spaced well apart.
FF Peppermint Candy Cane Topped Brownies
Making, baking and cutting the brownies.

Decorating The Candy Cane Brownies

  • Melt the milk chocolate for drizzling in the microwave and transfer to a small, disposable piping bag.  Alternatively use a plastic zip lock bag and cut one corner off, leaving a small hole.
  • Take the candy canes and place in a small plastic bag.  Place on to a solid surface and use a rolling pin to break the canes into small pieces.
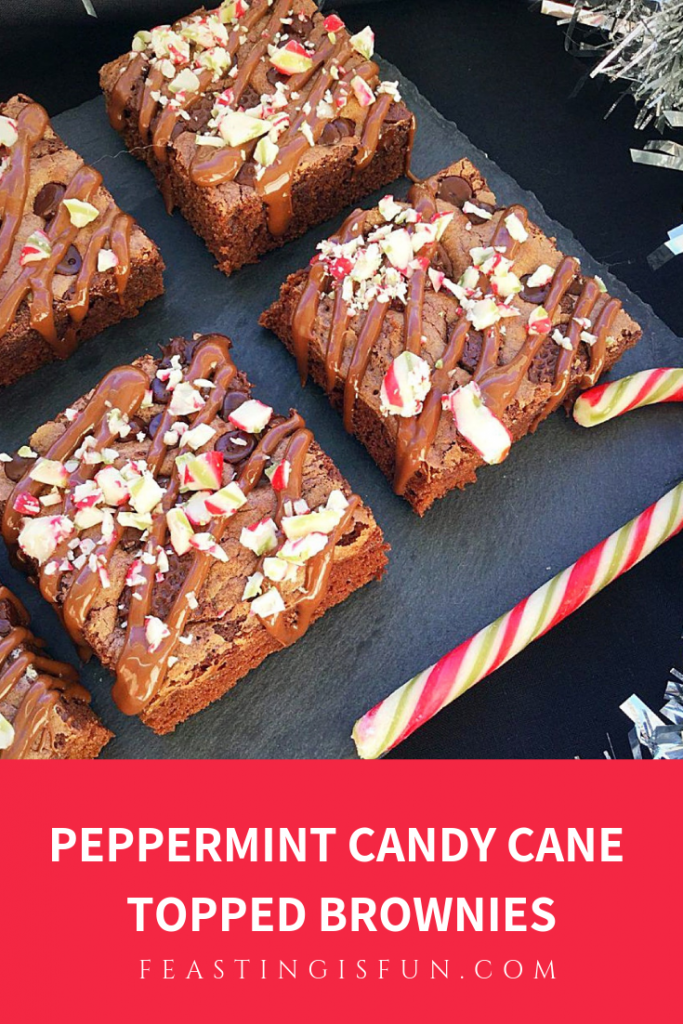
  • Drizzle melted chocolate over each individual brownie, then sprinkle over some crushed candy cane.
FF Peppermint Candy Cane Topped Brownies
Finishing the Peppermint Candy Cane Topped Brownies

Serve straight away, while the chocolate drizzle is still gooey.  Leave to set before storing in an airtight container.  Eat within 5 days.

Brownie Pinterest image with descriptive graphs.

If you have enjoyed this recipe for Peppermint Candy Cane Topped Brownies then you may also like these:

Dark Chocolate Ginger Brownies

FF Peppermint Candy Cane Topped Brownies
Dark Chocolate Ginger Brownies

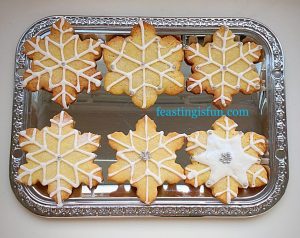
Peppermint Sparkling Snowflake Cookies

FF Peppermint Candy Cane Topped Brownies
Peppermint Sparkling Snowflake Cookies

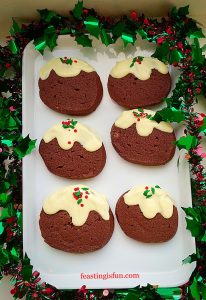
Chocolate Christmas Pudding Cupcakes

FF Peppermint Candy Cane Topped Brownies
Chocolate Christmas Pudding Cookies

Baking should be fun and not stressful. So having some reliable mixes and baking kits in the kitchen cupboard, especially during extra busy times of the year such as Christmas, simply makes sense. Also they make great presents for those who are just learning to bake. As well as being reliable the Complete Brownie Kit is also versatile see my recipe for Chocolate Brownie Raspberry Cheesecake.

So, whatever you are making, baking and creating in your kitchens, have fun preparing your feast.

Sammie xx

If I Knew You Were Coming provided the Complete Brownie Kit for me to make this recipe. I have not been paid to write this post. All content, opinions and photography are my own. No part of this post may be reproduced or duplicated without the written permission of the owner. Please see my Disclosure Policy.
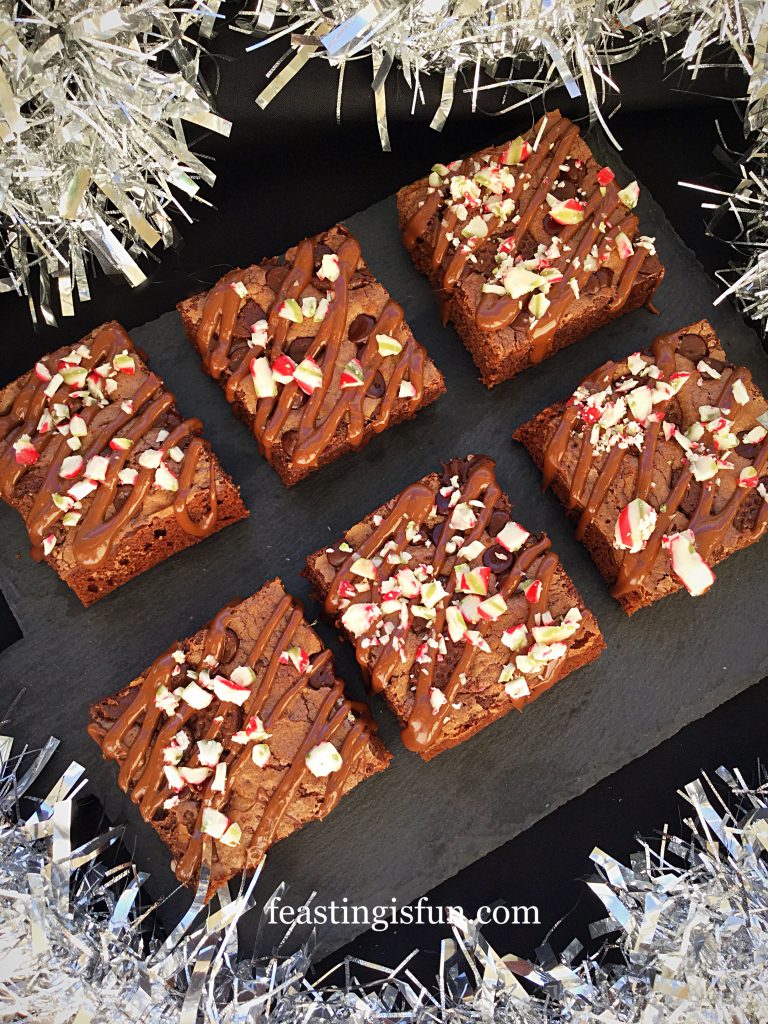
Festive mint chocolate baked squares on a slate platter surrounded with silver tinsel
Peppermint Candy Cane Topped Brownies

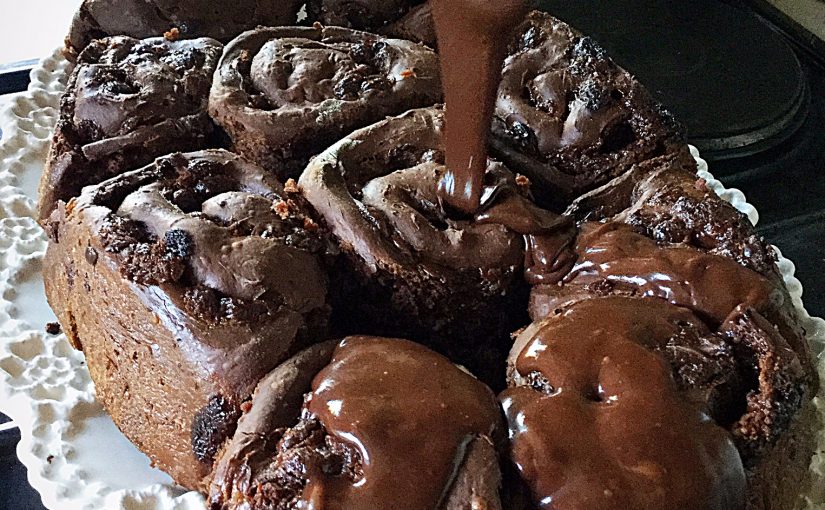
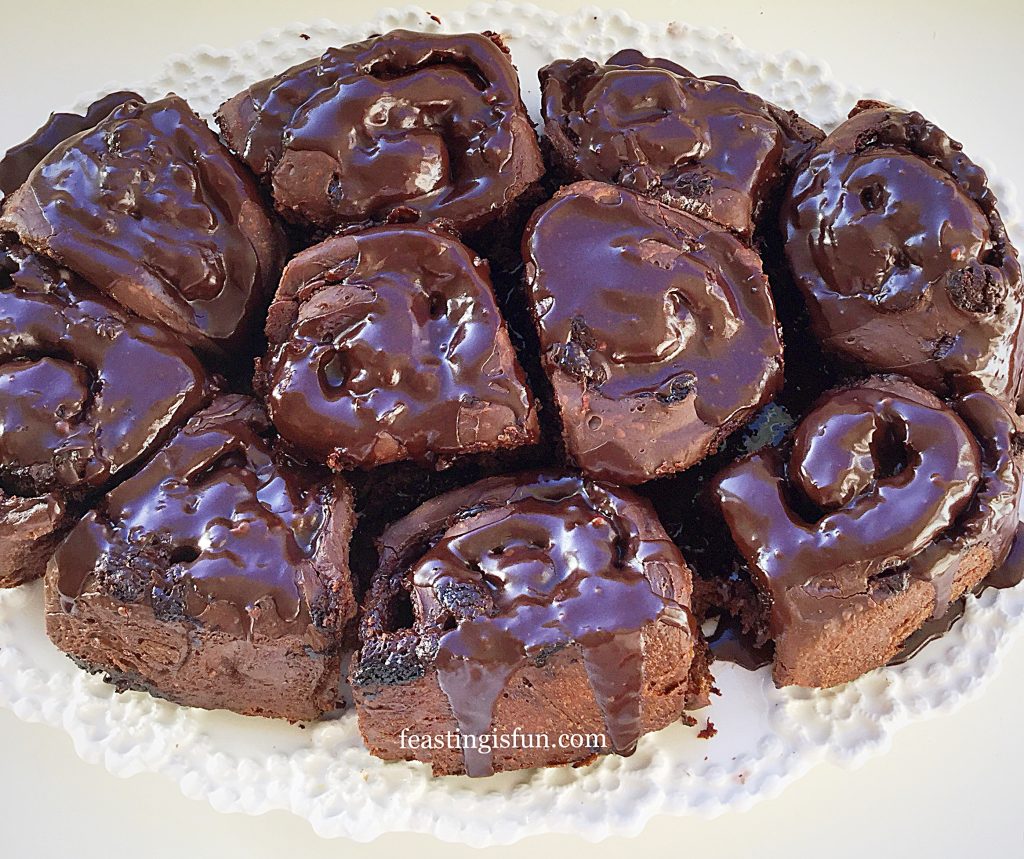
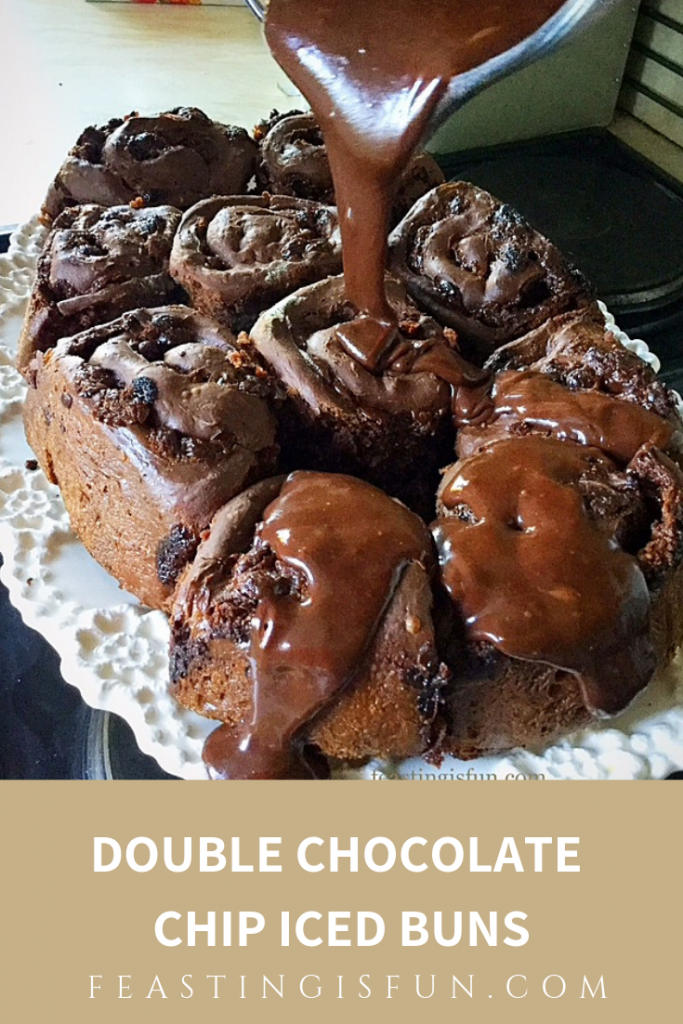
Double Chocolate Chip Iced Buns

Christmas will soon be upon us and among the festive food chocolate plays a prominent role.  Whether in advent calendars, selection packs, gold coins or the many foil wrapped, boxed and displayed chocolate treats, it is central to celebration feasting.  Therefore these Double Chocolate Chip Iced Buns are the perfect treat to share and enjoy over the holiday season, or any special occasion.

FF Double Chocolate Chip Iced Buns
Double Chocolate Chip Iced Buns

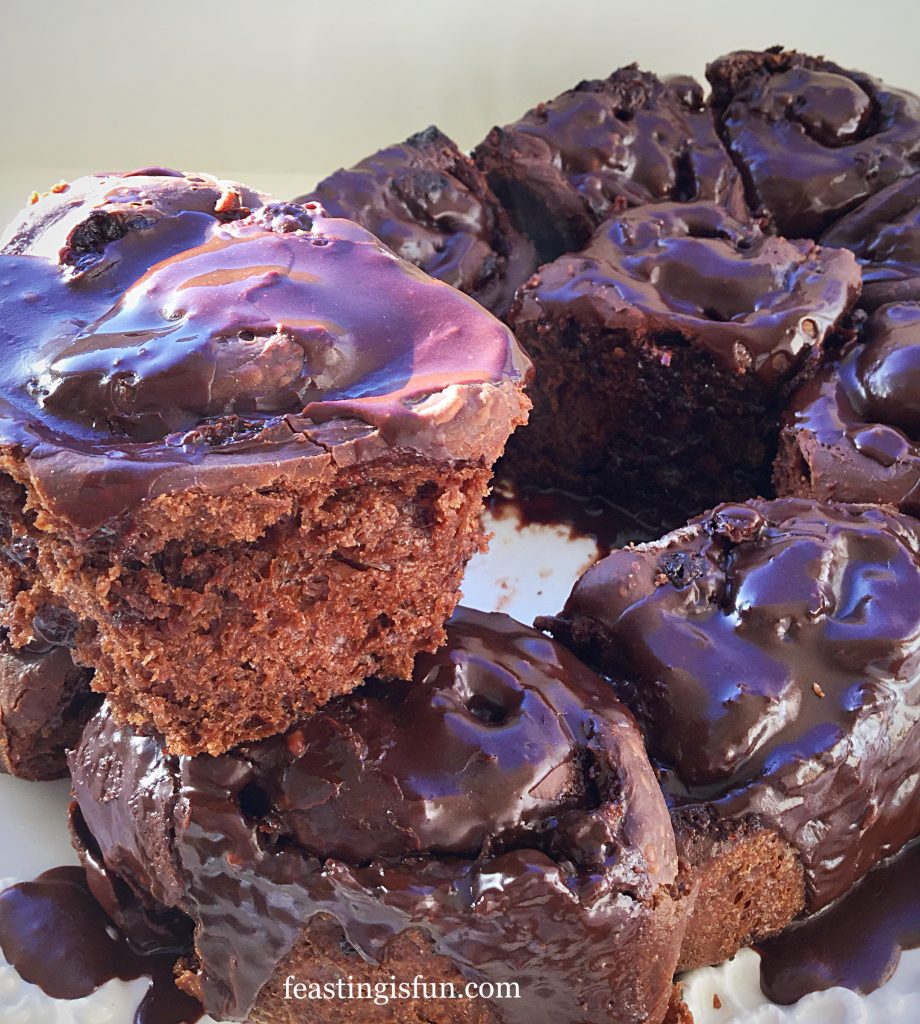
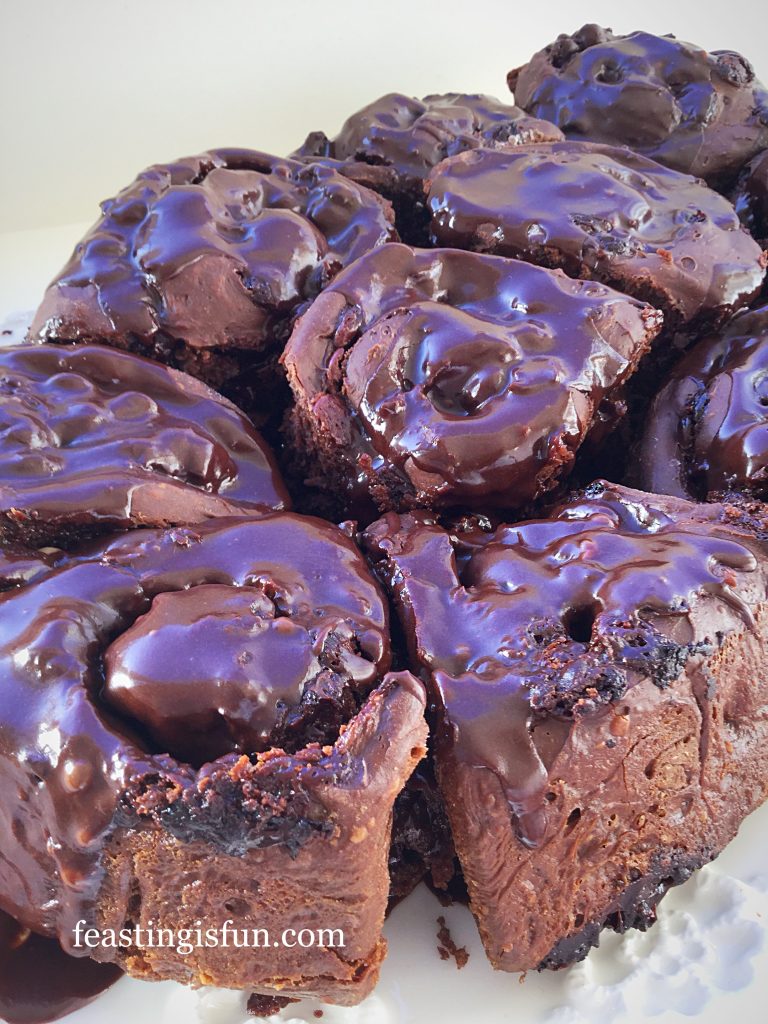
Since, if you’re going to make a chocolate bun it really should be THE BEST tasting chocolate bun ever.  While light and fluffy these buns are packed with chocolate chips and finished with a thick chocolate icing.  Also these buns tick every box , not too sweet, not too rich, simply the perfect balance of flavour and texture baked into the very best tasting breakfast bun.  Alternatively eaten with coffee as an afternoon treat, these buns need no excuse to be eaten!

FF Double Chocolate Chip Iced Buns
Double Chocolate Chip Iced Buns

Chocolate Buns – the ultimate breakfast – dessert

While these incredible tasting, chocolate packed buns were made with Christmas in mind, there really is no reason at all to stop you baking them at other times.  Any chocolate lover would appreciate a birthday breakfast of Double Chocolate Chip Iced Buns.  Especially if you have friends staying, sleepovers, special occasions, all the perfect excuse to bake.  Finally, they are made and left to prove overnight, so all that’s left to do is bake and glaze in the morning.  Easy.

FF Double Chocolate Chip Iced Buns
Double Chocolate Chip Iced Buns

As soon as my chief taste testers, here at Feasting headquarters had tasted these buns, success was proclaimed.  Even from the harshest of my critics.  Yummy, mmm are there more, escaped from messy chocolate mouths.  As for me, the harshest judge of all, well, I am impressed.  All of the attempts at making the perfect chocolate swirl bread have paid off.  Flavour and texture in perfect chocolate swirled harmony.

FF Double Chocolate Chip Iced Buns

Recipe: Double Chocolate Iced Buns makes 10

300ml/10.5fl oz Whole Milk

75g/3oz Unsalted Butter

7g Dried Yeast

2tsp Vanilla Extract – I use Nielsen-Massey

1tsp Caster Sugar

2 Large Free Range Eggs

50g/2oz Cocoa Powder – I use Callebaut

500g/1lb 2oz Strong White Flour

7g Salt – I use Maldon

250g/9oz Milk Chocolate Chips or chopped chocolate – do not use stabilised chocolate chips, as you would for chocolate chip cookies, the chocolate should melt when baked.

Glaze:

250g/9oz Icing Sugar

50g/2oz Cocoa Powder

Method:

Note: I strongly recommend using a stand mixer with dough hook attachment for mixing the dough.  The chocolate dough has a high butter content and is extremely sticky.  Using a stand mixer ensures thorough mixing of the dough.

Making the chocolate brioche dough

  • Measure the milk into a microwaveable jug and then add the butter broken into small pieces.  Zap in the microwave until the milk is slightly warmed.  It should feel the same as body temperature.  Also the butter will soften and start to melt.
  • Pour the warmed milk/butter into the bowl of the stand mixer.
  • Add the yeast, sugar, vanilla extract and both eggs to the bowl.
  • Next add the flour, cocoa powder and salt.
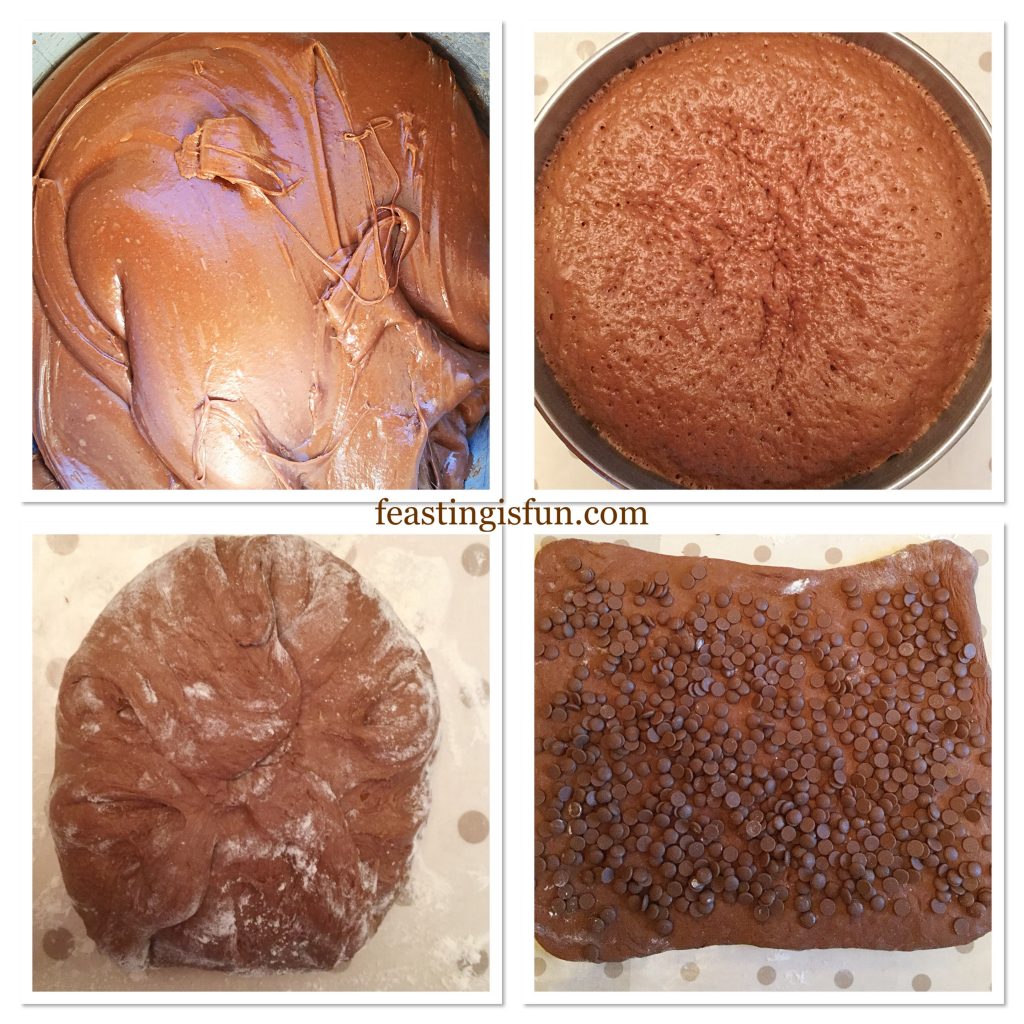
  • With the dough hook attached mix slowly until the ingredients are combined into a dough.  Continue mixing on medium speed for a further 20 minutes.
  • Stop the mixer, lift the dough hook and scrape any dough back into the bowl. Cover the bowl with cling film and leave in a draft free place until doubled in size.  This first prove may take up to 2 hours.

Shaping the chocolate dough into rolls

  • As soon as the dough is ready, turn out on to a lightly floured worktop.  A plastic scraper will help release all of the dough from the bowl.
  • Using the technique shown in Easy Homemade Cottage Loaf, pull out the dough and press into the centre. Continue around the edge until the dough is neat and smooth.
  • Roll the dough out until it is 30.5cm D x 35.5cm W (12” x 14”) rectangle.
  • Sprinkle the chocolate chips/chopped chocolate evenly over the dough.
FF Double Chocolate Chip Iced Buns
Making the dough and preparing the chocolate buns.
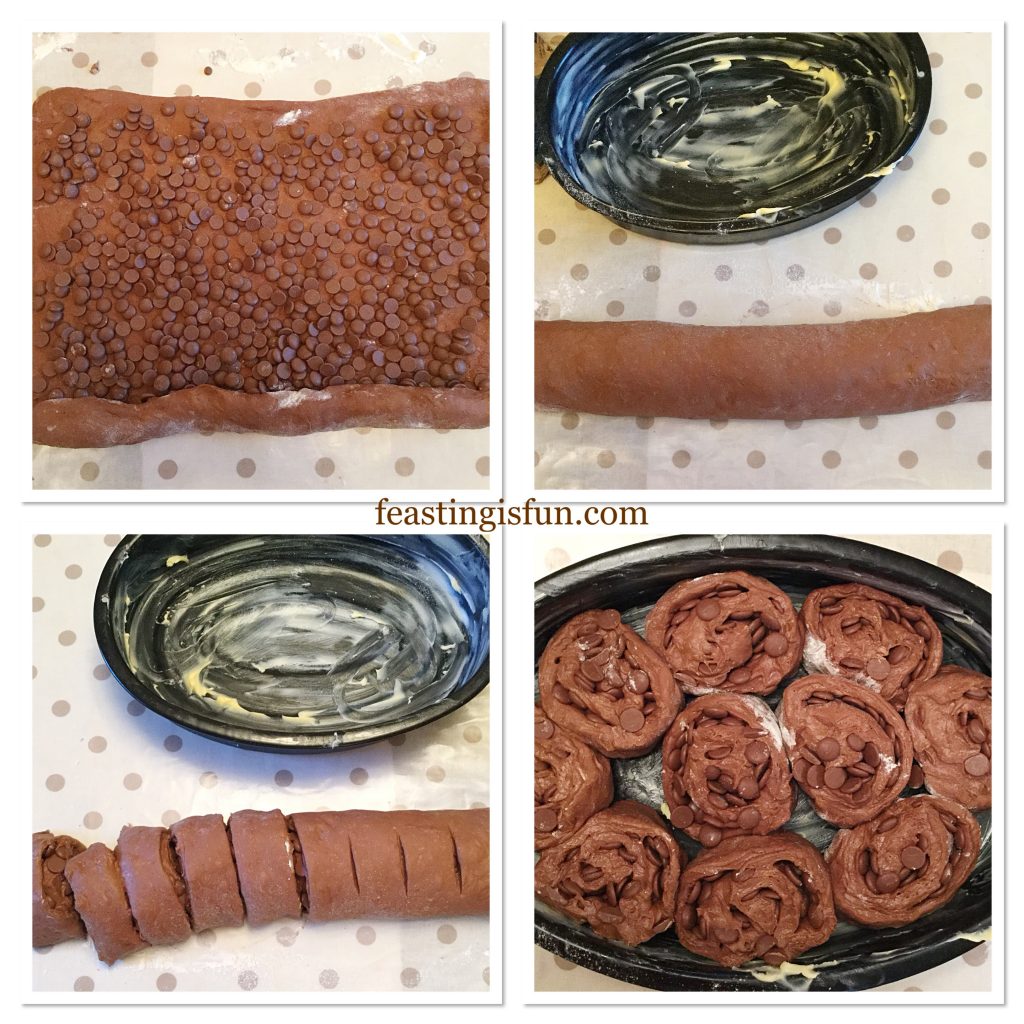
  • Rolling from the wide side of the dough, take the front edge, starting at one side, roll and tuck the chocolate and dough.  Continue across the front edge of the dough until you have formed the beginning of a roll.  Evenly roll the entire dough, tucking and ensuring it is even.  Finish with the seam underneath the finished roll.
  • Using a sharp knife cut off the uneven sides.  Divide the roll in half and then cut 5 even potions from each half.  Saw through the dough, using the blade to cut through.
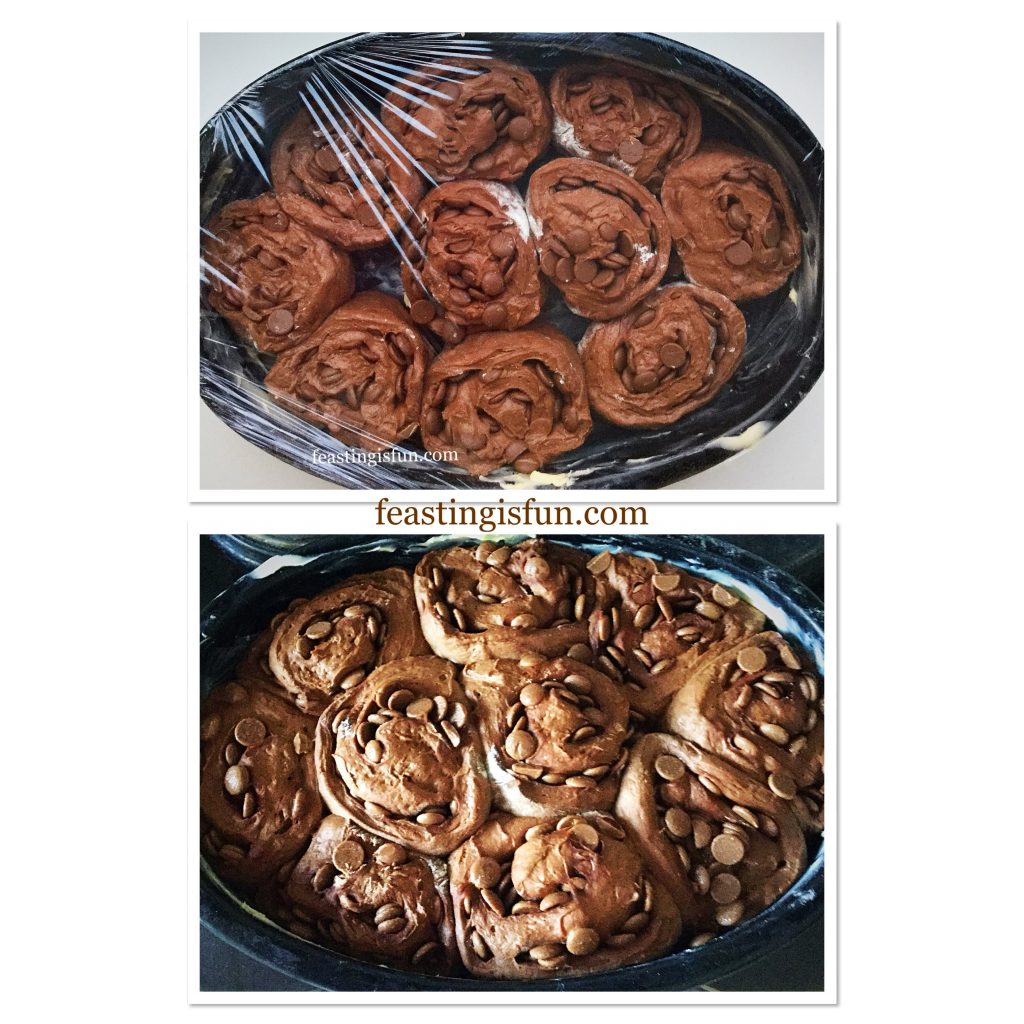
  • Place the buns into a large, well buttered baking tin with deep sides. Alternatively  butter 2 deep 8 inch cake tins and place 5 chocolate buns into each.  Cover with cling film and refrigerate overnight.  The dough will prove very slowly in the cold fridge.
Creating the perfect chocolate swirl.

Baking The Double Chocolate Chip Buns

  • The next morning remove the chocolate buns from the fridge and allow to come up to room temperature, approximately 30 minutes.
  • While the buns are warming preheat the oven 200C/180C fan, 400F, gas mark 6.
FF Double Chocolate Chip Iced Buns
Double Chocolate Chip Iced Buns before and after an overnight prove.
  • As soon as the buns have warmed place in to the centre of the oven and bake for 30-35 minutes.
  • While the buns are baking make the chocolate icing glaze.  Weigh the icing sugar and cocoa into a large jug.  Add approximately 6 tablespoons of hot water and stir to mix. The icing should be thick yet still able to pour.  If needed add extra hot water one tablespoon at a time.  Note – the icing will thicken on cooling.
  • Check the buns after 30 minutes.  They are baked when the top of the buns are firm and sounds hollow when tapped.
  • Once baked remove from the oven.
  • Run a palette knife around the outside edge of the buns, carefully lifting the edge of the buns as you do so.
  • Place a large board, (I use a chopping board) over the top of the baking tin. Using oven gloves to protect from the heat turn the buns out of the tin.
  • Again place a serving dish over the board flip over and the chocolate buns will be right side up, ready to be glazed.
  • Use a knife to gently cut through where each bun joins the next.  Move the buns so there is a small gap between them, this ensures the glaze can drip down the sides.
FF Double Chocolate Chip Iced Buns
Baking and turning out the buns.

Pouring on the icing

  • While the buns are still hot pour over the thick, glossy, chocolate icing.
FF Double Chocolate Chip Iced Buns
Glazing the Double Chocolate Chip Iced Buns

Serve the buns warm for breakfast as an extra special treat.  While these buns are best eaten on the day they are baked they will keep for 2 days in an airtight container.  A quick 10 second zap in the microwave warms cold buns ready to eat.

If you have enjoyed this recipe for Double Chocolate Chip Iced Buns you may also like these:

Homemade Chelsea Buns

FF Homemade Chelsea Buns
Homemade Chelsea Buns

Cinnamon Plaited Brioche Bread

FF Double Chocolate Chip Iced Buns
Cinnamon Plaited Brioche Bread

Christmas Spiced Fruit Loaf

FF Double Chocolate Chip Iced Buns
Christmas Spiced Fruit Loaf

Make ahead recipes  are a great way to enjoy incredible feasts without having to get up early or spend all day in the kitchen. Because spending time with family and friends enjoying food together is always more important than being stuck in the kitchen, away from the fun. While it is fun to bake and cook together, not everyone has large, open plan kitchens that make this possible. Therefore having this recipe enables you to serve freshly baked buns with minimal effort.

Would you like more make ahead recipes, here on Feasting is Fun?

Whatever you are making, baking and creating in your kitchens, have fun preparing your feast

Sammie xx

No part of this post may be reproduced or duplicated without the written permission of the owner. Please see my Disclosure Policy.
Coffee Pecan Nut Glazed Bundt Cake

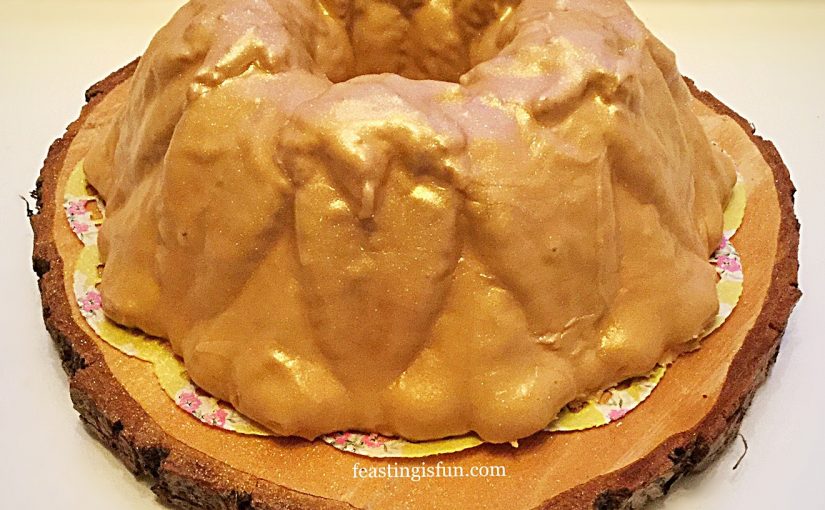
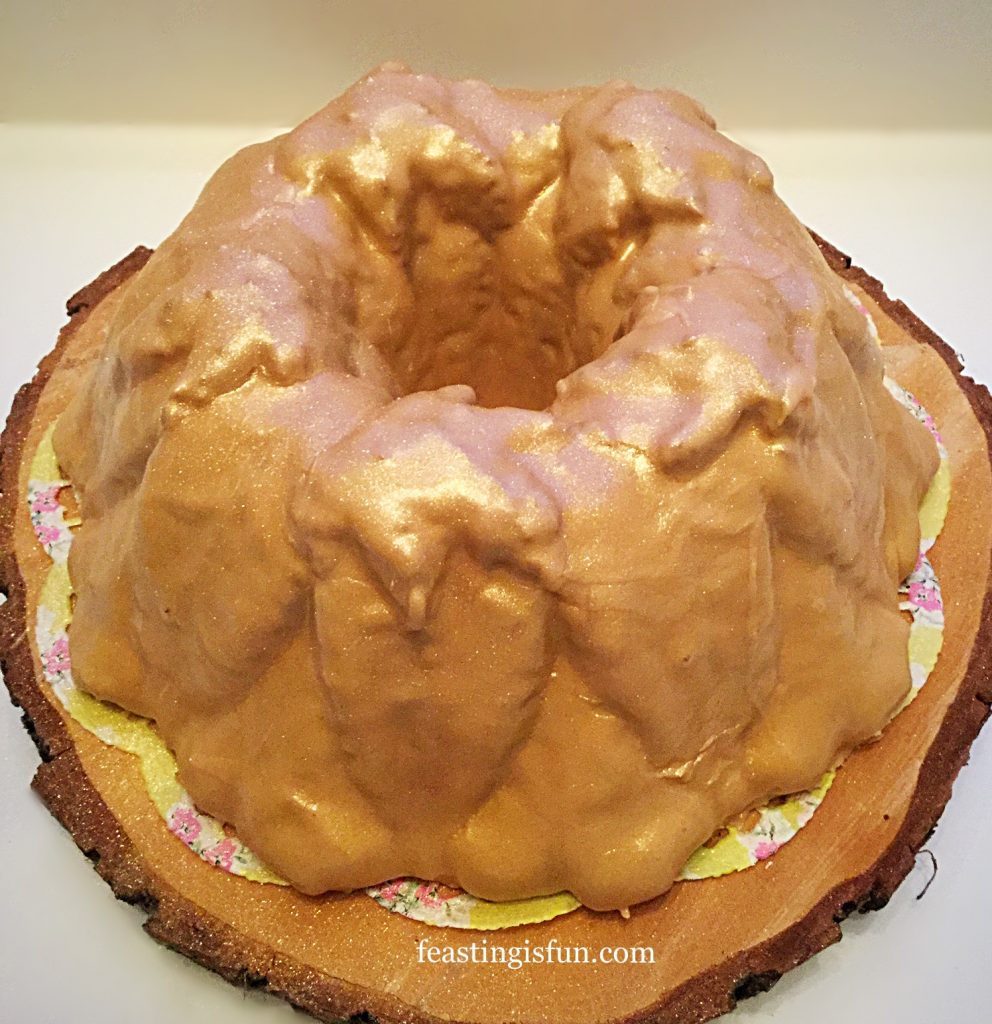
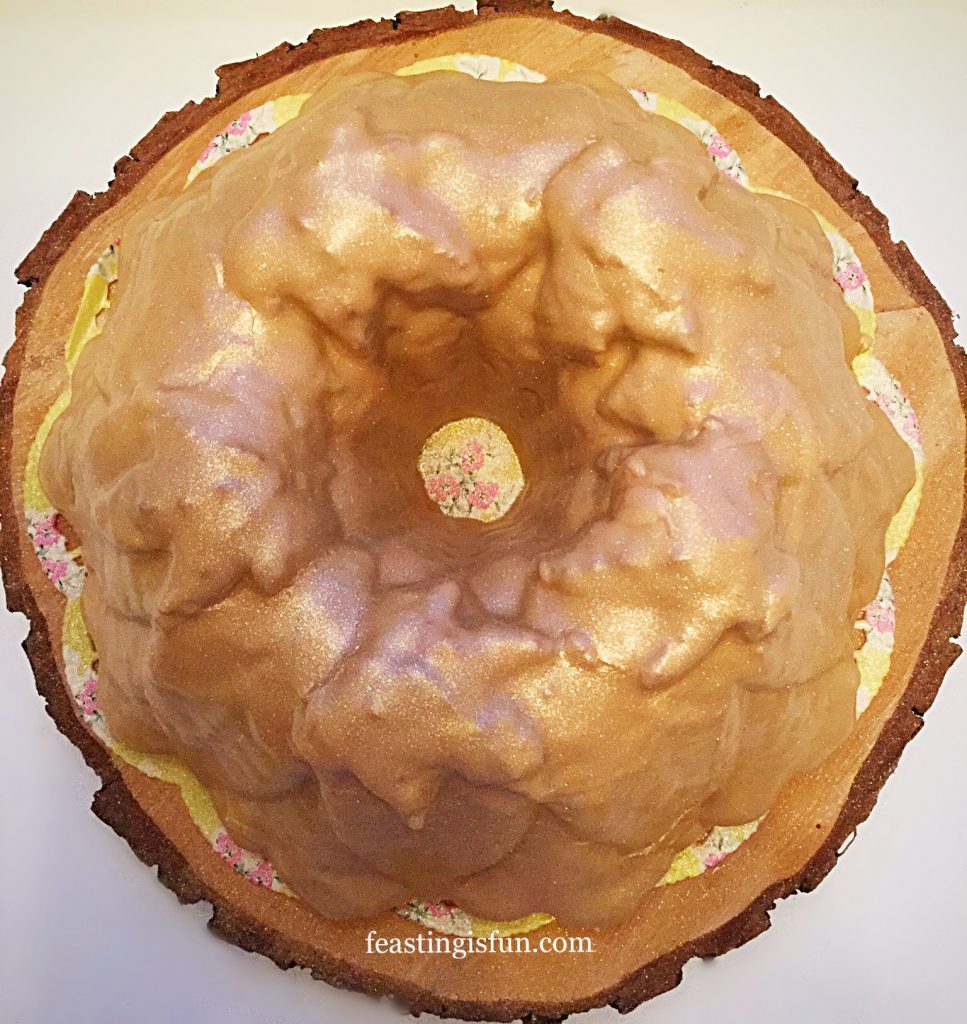
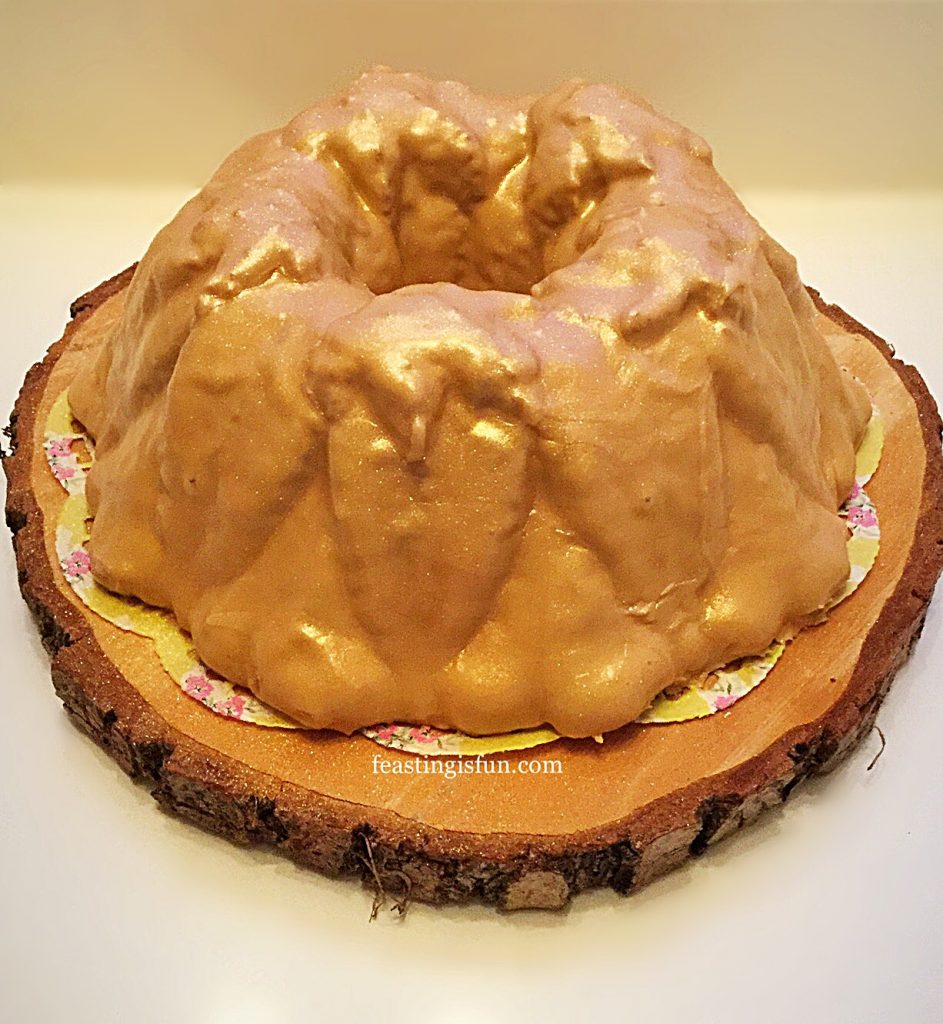
Every year I try to make my Father in law’s birthday cake. Since his favourite cake is Classic Coffee Walnut Cake, creating twists on the original are fun. So, this year I switched things up and made a Coffee Pecan Nut Glazed Bundt Cake. Baked in a beautiful Bundt pan and finished with a latte coloured coffee glaze. I am assured that this cake was a big hit.

FF Coffee Pecan Nut Glazed Bundt Cake
Coffee Pecan Nut Glazed Bundt Cake

While the nuts may have been switched up, the cake still has to deliver one hundred per cent on flavour. Using espresso powder gives an intense coffee flavour, without being overpowering or bitter. Adding chopped pecans provides crunch against the super moist crumb of the cake. Finally, a simple coffee icing glaze not only picks out the detail of the cake shape, but also provides a first, sweet, coffee bite into the cake.

FF Coffee Pecan Nut Glazed Bundt Cake
Coffee Pecan Nut Glazed Bundt Cake

Since a birthday must be celebrated and a celebration demands a cake (or it is just a meeting), baking a beautiful cake is something I take pleasure in. As much as everyone takes pleasure in eating it! Candles, beyond a certain age, most definitely become an option. Yet, a little sparkle adds a special edge. So edible gold glitter, liberally sprayed over provides the ‘wow’ that sets this cake apart from others.

FF Coffee Pecan Nut Glazed Bundt Cake
Coffee Pecan Nut Glazed Bundt Cake

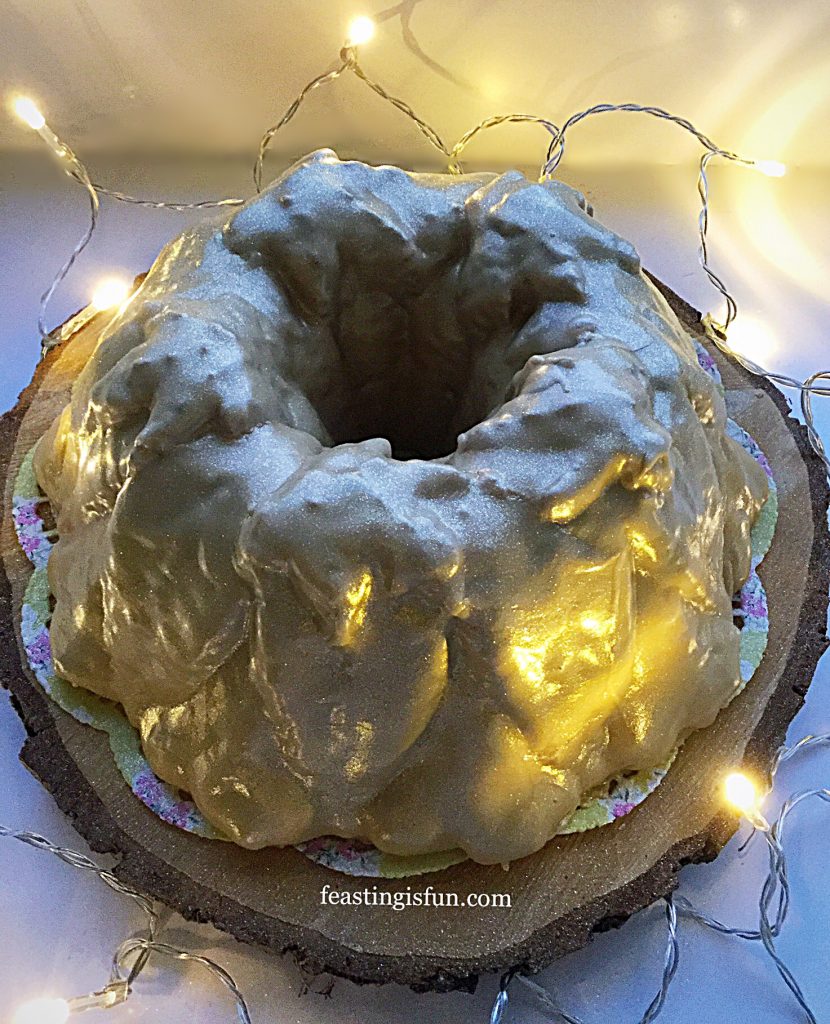
Photos were taken with artificial light, never ideal, show this cake as yellow gold. However, in natural light the glaze is a latte colour with a slight shimmer from the glitter.

Recipe: Coffee Pecan Nut Glazed Bundt Cake serves 8-10

For The Cake:

300g/11oz Unsalted Butter at room temperature

300g/11oz Caster Sugar

2tsp Espresso Coffee Powder dissolved in 1tbsp hot water and allow to cool – alternatively use 4tsp Camp Coffee

1/4tsp Salt I use Maldon

5 Large Free Range Eggs

1tsp Vanilla Extract I use Nielsen-Massey

100g/4oz Natural Full Fat Yoghurt such as Yeo Valley

150g/5oz Chopped Pecan Nuts

275g/10oz Plain White Flour

2.5tsp Baking Powder

For The Glaze:

400g/14oz Icing Sugar

1tsp Espresso Coffee Powder dissolved in 1tbsp hot water or 2tsp Camp Coffee

Optional – Edible Gold Glitter – available from My Cake Decor

Note – this recipe uses a 10 cup Harvest Leaf Bundt Pan from Nordicware. Ensure you use a 10 Cup Bundt. I recommend Wilton cake release spray (also available in a bottle, shake and brush on to the cake tin), to ensure the cake releases from the Bundt Pan.

Making The Bundt Cake Batter

Method: Preheat oven to 160C/140C fan, 325F, gas mark 3

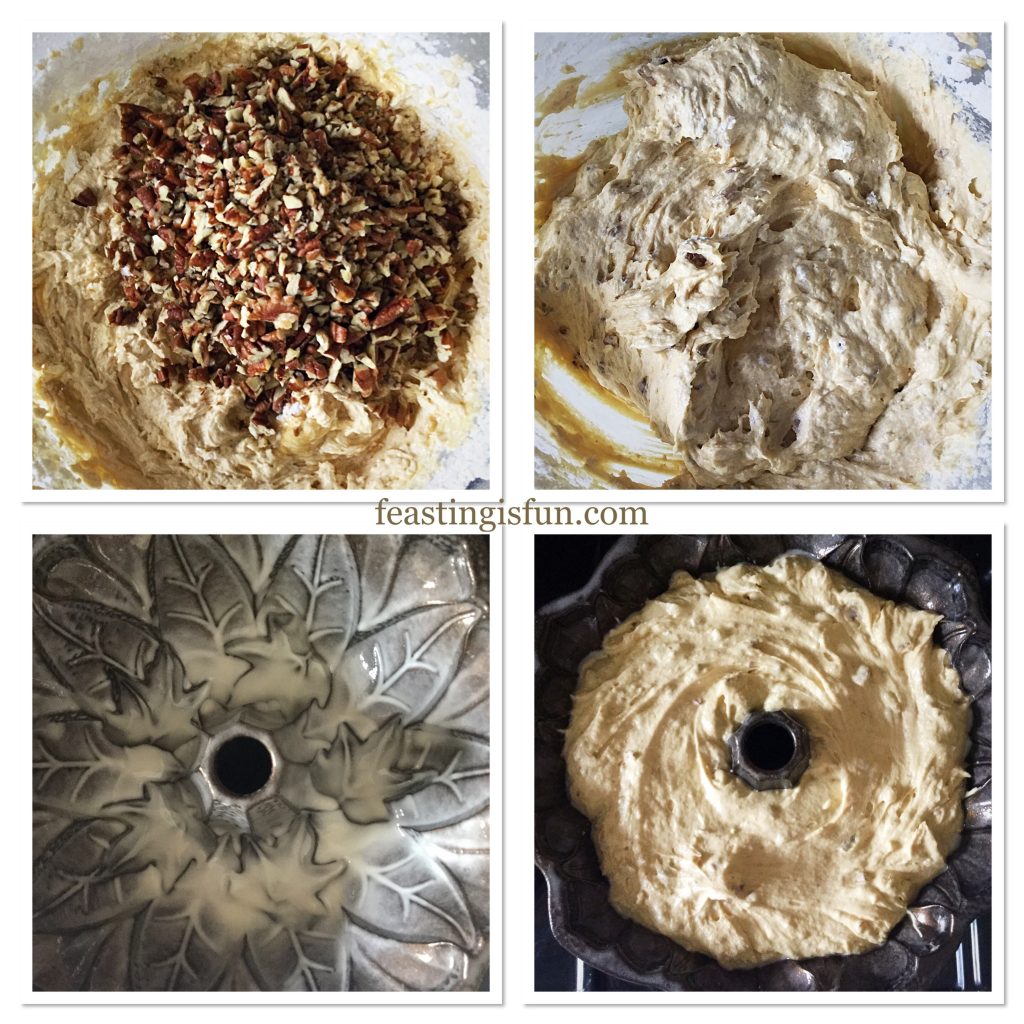
  • First of all prepare the Bundt pan. Spray with cake release and use a pastry brush to ensure every part of the Bundt interior is completely coated.
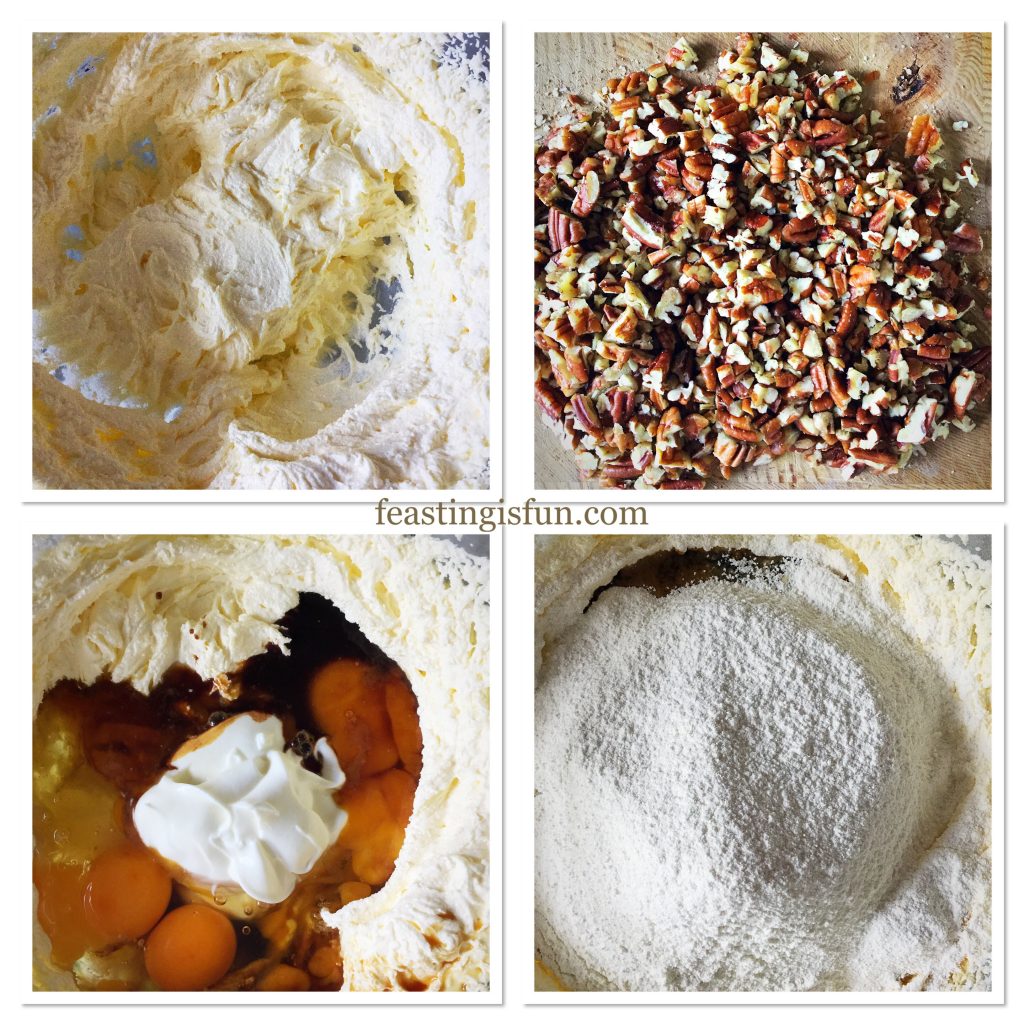
  • Next, in a large bowl add the butter, sugar and salt. Whisk together until pale and creamy.
  • Now add the eggs, vanilla extract, espresso and yoghurt.
  • Sift the flour and baking powder into the bowl. Whisk all ingredients together until just combined.
FF Coffee Pecan Nut Glazed Bundt Cake
Making the Bundt cake batter.
  • Finally add the chopped pecans to the cake batter and fold into the mix with a spoon.
  • Now spoon the pecan studded cake batter into the prepared Bundt Pan. Push the mixture down into the pan so the every part of the intricate mould is filled.
FF Coffee Pecan Nut Glazed Bundt Cake
Preparing and filling the Bundt pan.

Baking And Turning Out The Bundt Cake

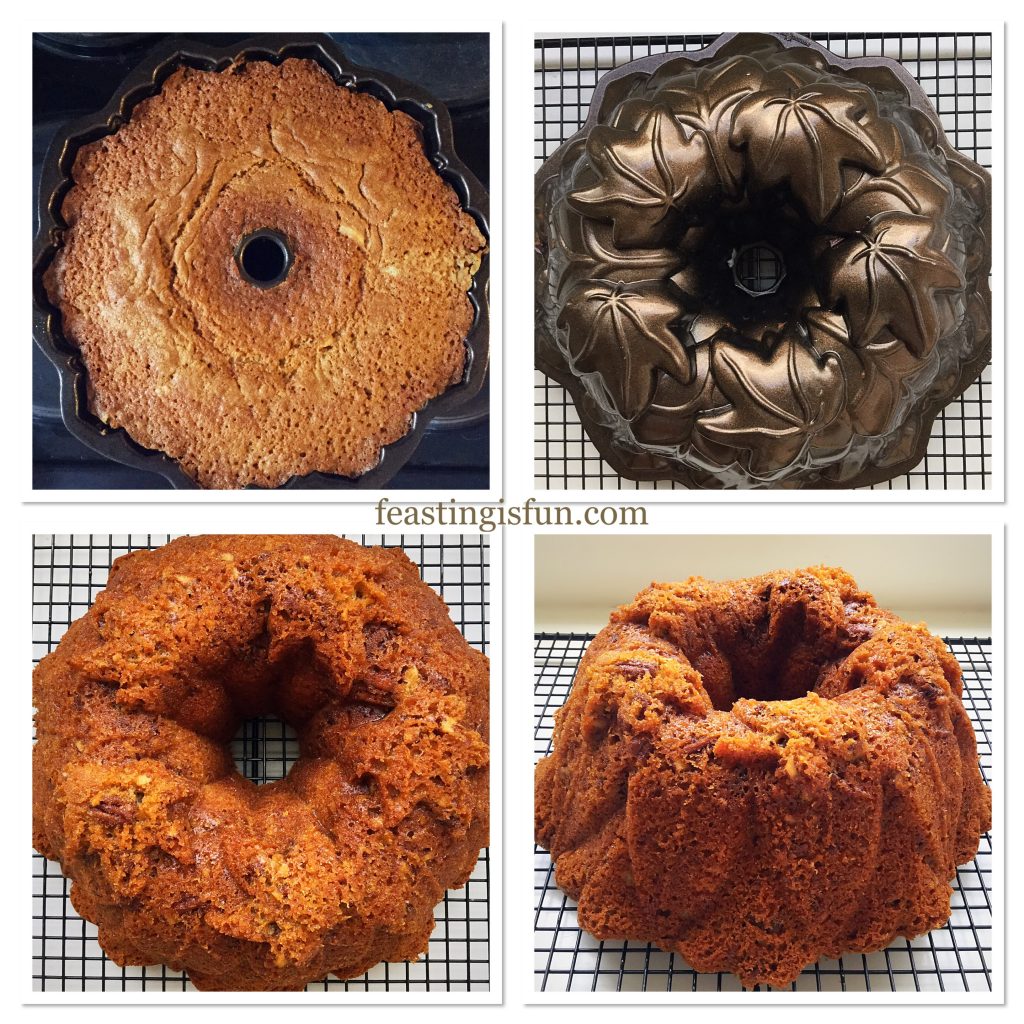
  • Place the cake into the centre of a preheated oven and bake for 60 – 70 minutes.
  • The cake is baked when it is golden in colour and an inserted skewer comes out clean.
  • Once baked remove the cake from the oven and leave to sit for 10 minutes in the pan.
  • Then turn the cake out on to a cooling rack and leave to cool completely.
FF Coffee Pecan Nut Glazed Bundt Cake
Baking and turning out the Bundt cake.

Glazing The Bundt Cake

  • As soon as the cake is cooled it is ready to decorate.
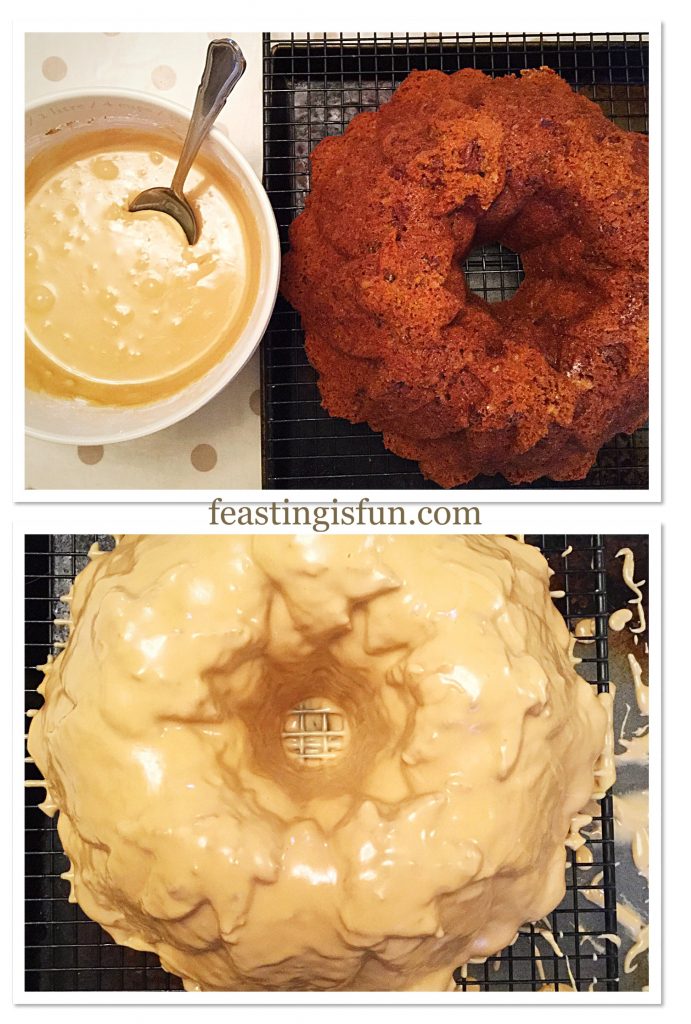
  • Sift the icing sugar into a bowl. Add the espresso liquid and enough water to create a thick glaze.
  • Place the cake, still on its cooling rack, over a clean baking tray.
  • Due to the addition of coffee in this glaze it forms a crinkle skin quickly. Work quickly, without rushing, when glazing the cake.
  • Starting at the top of the cake spoon over the thick glaze. Continue spooning the glaze around the cake until the entire cake is covered. If necessary spoon glaze that has dropped through to the tray over the cake, covering any holes in the glaze finish.
FF Coffee Pecan Nut Glazed Bundt Cake
Glazing the Bundt cake
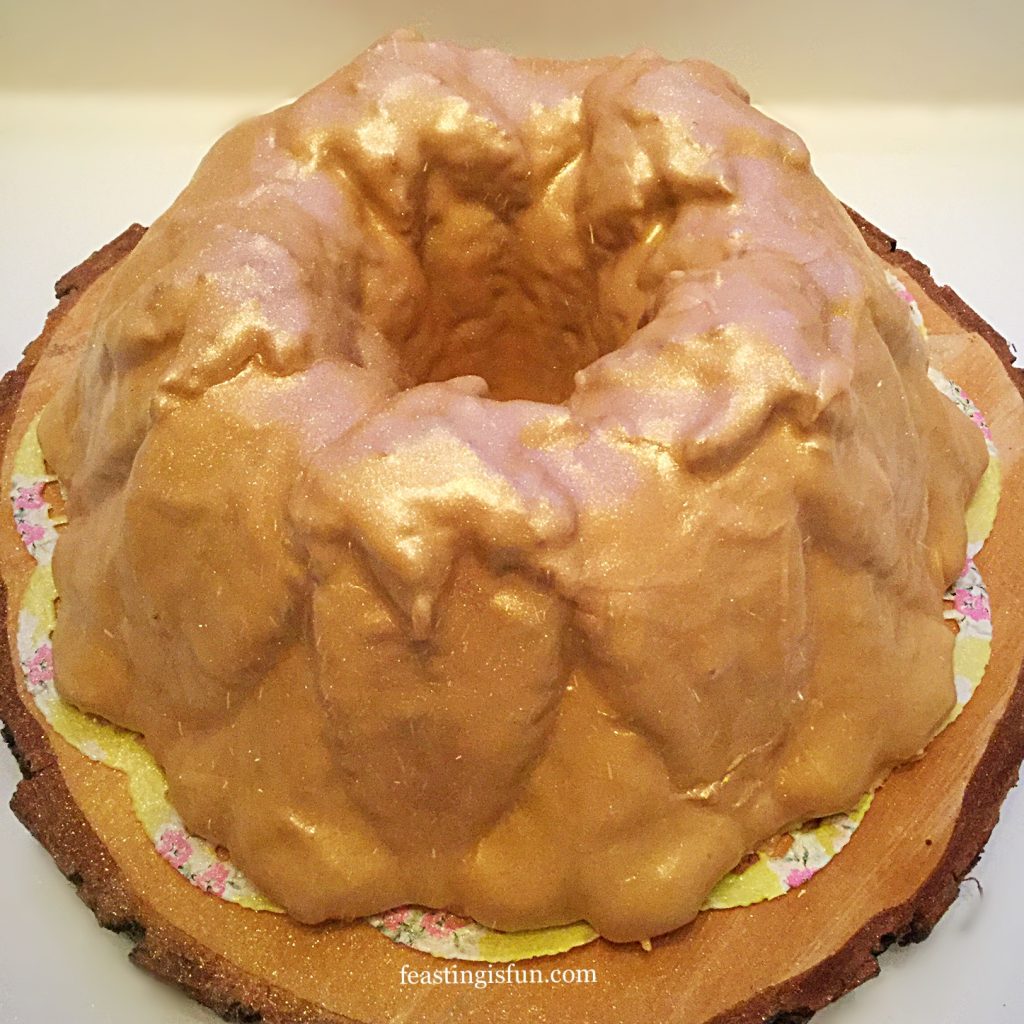
  • As soon as the glaze has stopped dripping and is starting to set transfer the cake to a board or plate.
  • Dust the cake with edible gold glitter once the glaze has fully set.
FF Coffee Pecan Nut Glazed Bundt Cake
Coffee Pecan Nut Glazed Bundt Cake finished with a spritz of glitter.

I couldn’t resist a photograph with fairy lights!

FF Coffee Pecan Nut Glazed Bundt Cake
Coffee Pecan Nut Glazed Bundt Cake lit up!

Slice the cake to serve.

Store in an airtight container for up to 5 days. Refrigerate during warmer weather.

If you have enjoyed this recipe for Coffee Pecan Nut Glazed Bundt Cake you may also like these:

Chocolate Cherry Chiffon Bundt Cake

FF Coffee Pecan Nut Glazed Bundt Cake
Chocolate Cherry Chiffon Bundt Cake

Maple Syrup Iced Coffee Bundt Cake

FF Coffee Pecan Nut Glazed Bundt Cake
Maple Syrup Iced Coffee Bundt Cake

Lemon Blueberry Bundt Cake

FF Coffee Pecan Nut Glazed Bundt Cake
Lemon Blueberry Bundt Cake


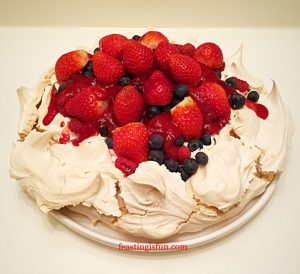
Baking for others is a great way show you care and treat them at the same time. While a birthday without a cake is unthinkable in many homes, other bakes can also be made. Our youngest daughter usually prefers this Raspberry Chocolate Pavlova, for her birthday and our eldest always has two cakes. An ice cream cake and a baked one. Whatever is baked and celebrated with, it contains one thing it’s mass produced copies don’t. Love. The most important ingredient in any bake.

Whatever you are making baking and creating in your kitchens, have fun preparing your feast.

Sammie xx

Please note, no part of this post may be reproduced or duplicated without the written permission of the owner. Please see my Disclosure Policy.


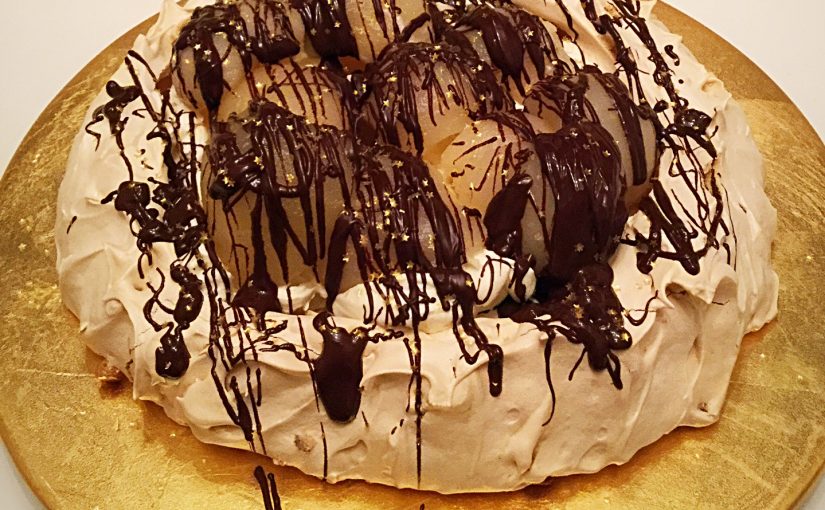
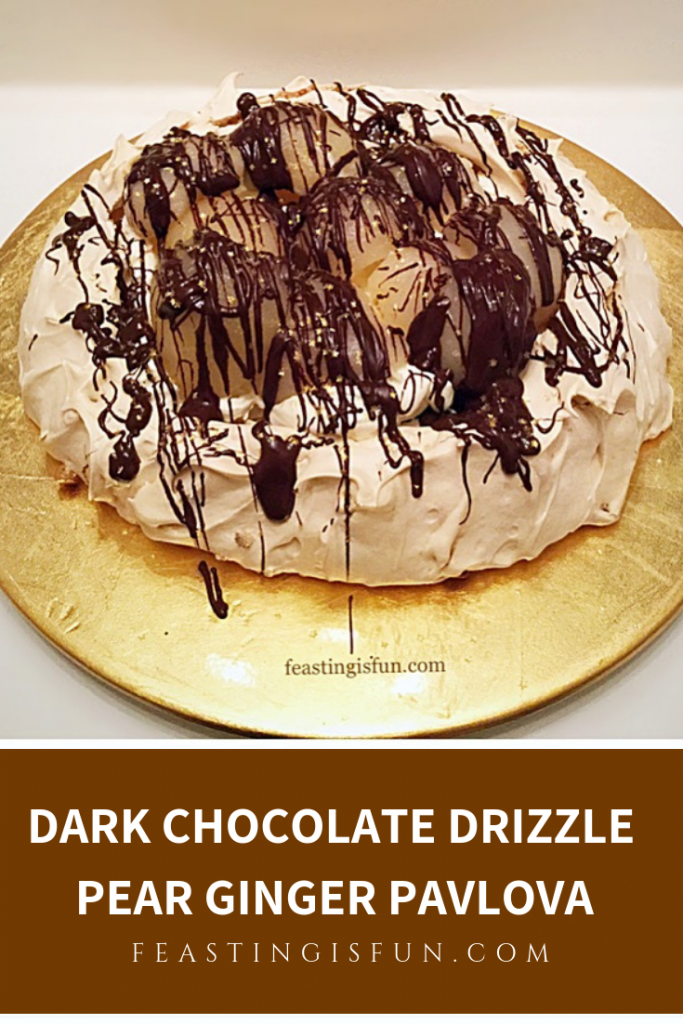
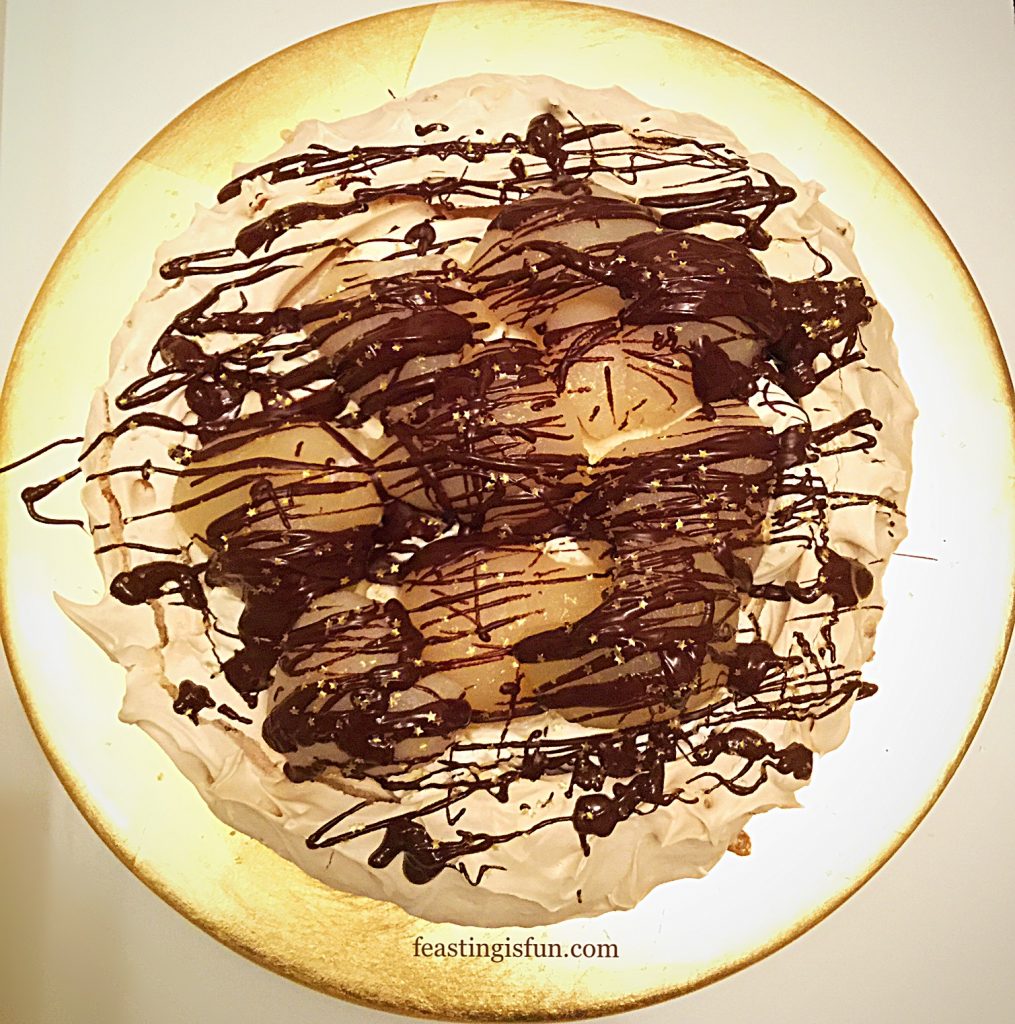
Dark Chocolate Drizzle Pear Ginger Pavlova

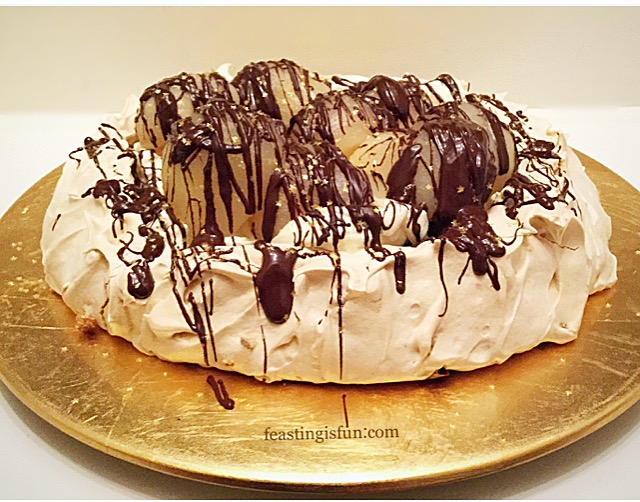
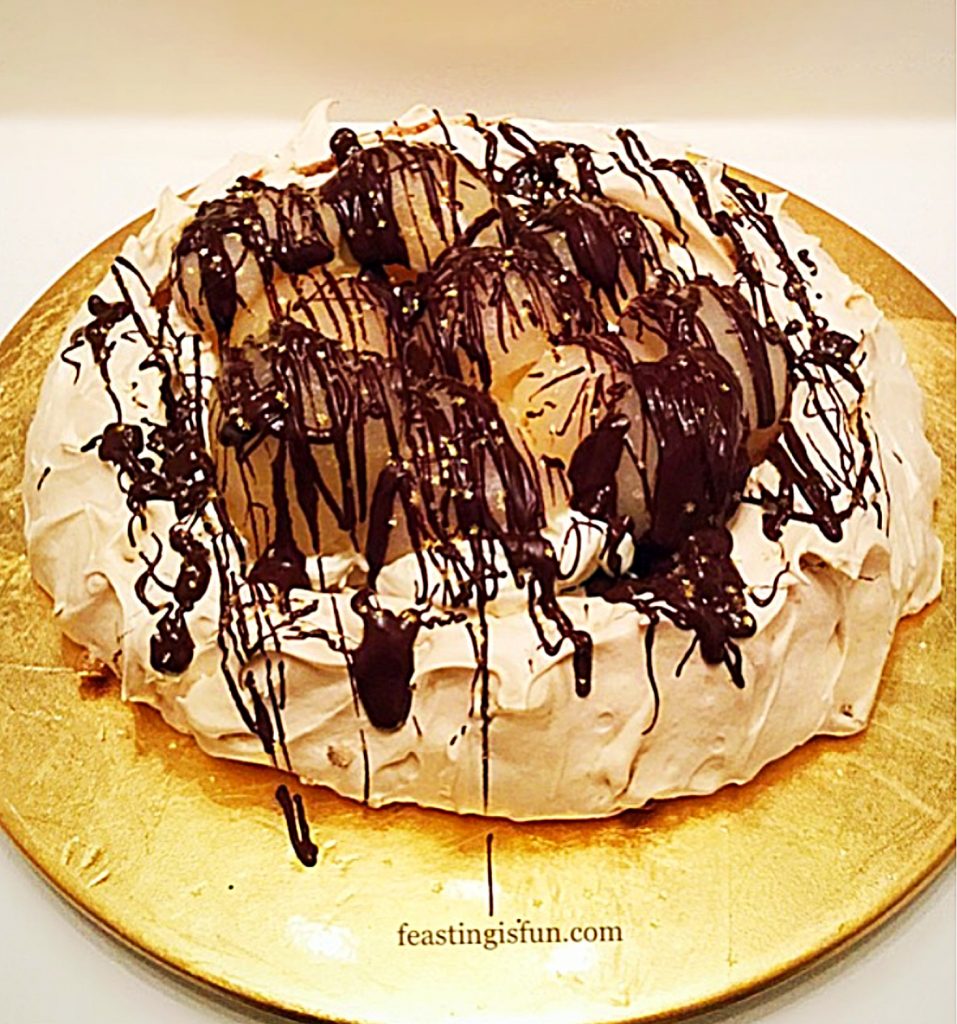
Sometimes ideas that seem to come out of nowhere, using simple, on hand ingredients, are the very best. And that’s exactly how this Dark Chocolate Drizzle Pear Ginger Pavlova came about. Since having egg whites left over, making a meringue is my go-to recipe. While adding in stem ginger for flavour and warmth, tinned pear halves, from the cupboard, as a topping seemed a no brainer! Finally, adding whipped cream, a dark chocolate drizzle and you have an elegant dessert that looks as sensational as it tastes.

FF Chocolate Drizzled Pear Ginger Pavlova

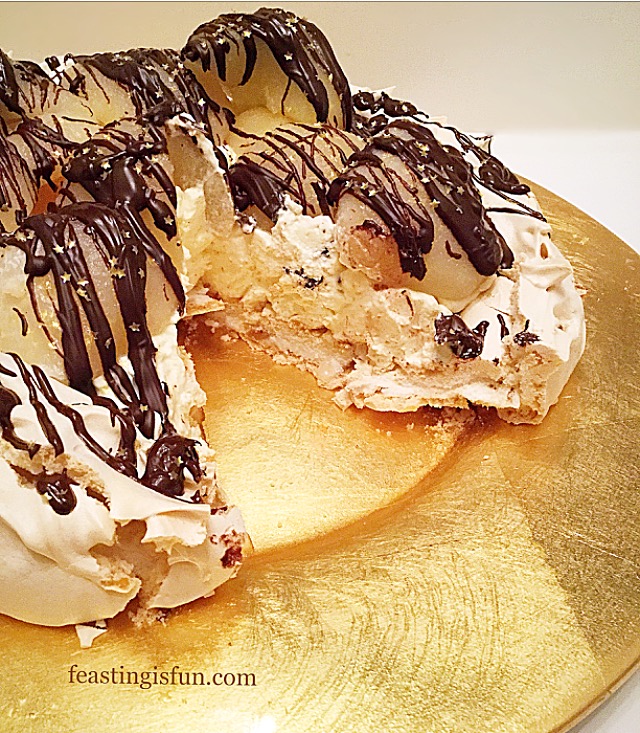
Using leftover egg whites to make Pavlova is a really great way to create something incredible. Since they whip up to a much greater volume when not fridge cold, I leave them out on the worktop the night before I need them. While it may seem strange to add white wine vinegar to meringue, it’s use results in a marshmallow, chewy inner. Resulting in a great texture contrast with the crisp outer shell.

FF Dark Chocolate Drizzle Pear Ginger Pavlova
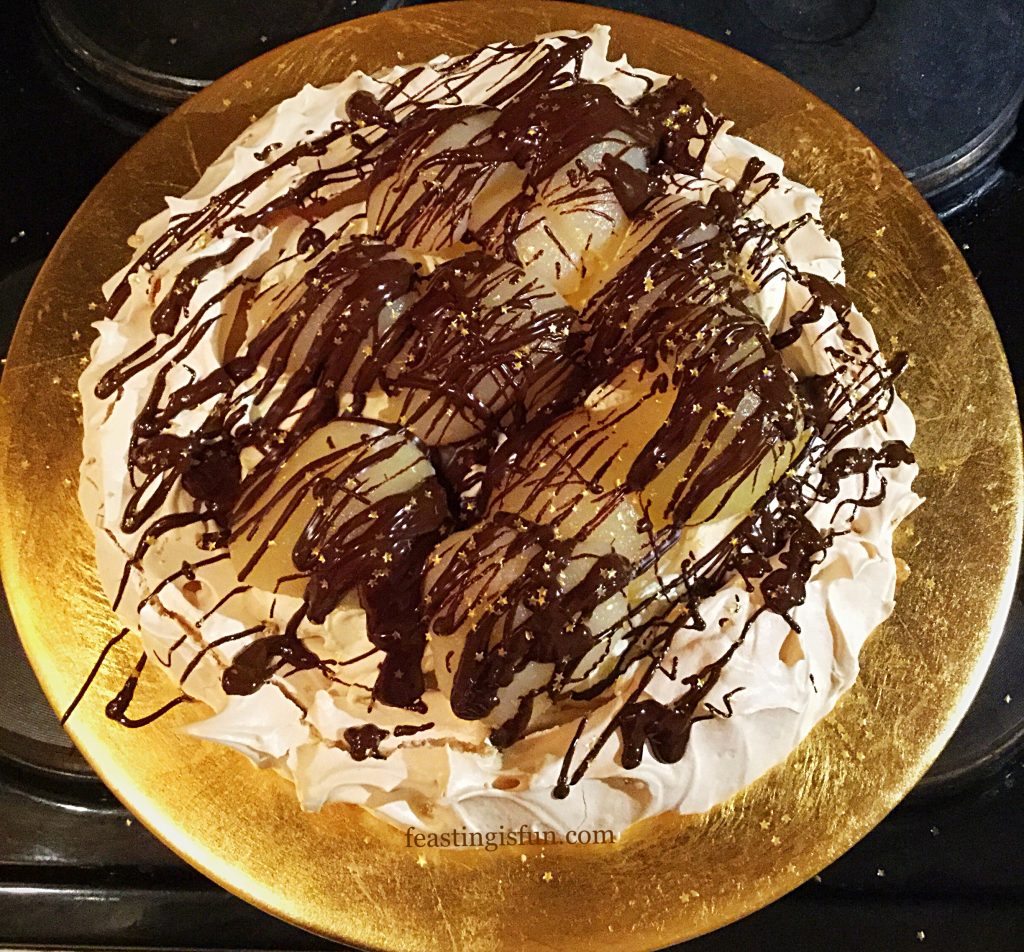
Dark Chocolate Drizzle Pear Ginger Pavlova a celebration centrepiece.

The Beauty Of Baking A Pavlova

Baking low and slow, dries the outer Pavlova shell, whilst protecting that cloud like inner. While the chopped stem ginger provides hits of warmth in every mouthful. Cool, flavoured whipped cream is the perfect topping for any Pavlova. And soft, yielding pears, drizzled in deep, dark chocolate complete the flavour profile of this dessert.

FF Dark Chocolate Drizzle Pear Ginger Pavlova
Dark Chocolate Drizzle Pear Ginger Pavlova

Glittering, sparkly and beautiful, this dessert is perfect to serve at the end of an elegant dinner party. Also, with Christmas, Thanksgiving and the holiday season coming up, not only do the flavours reflect the colder months of the year, it’s a simple dessert to pull together. And, aside from the initial whipping of the meringue, you need do nothing while this beauty bakes away in the oven. Since it’s really an assembly job, needing only a little whipping, a ping in the microwave. Resulting in an elegant dessert to share and wow your guests with.

Recipe: Dark Chocolate Drizzle Pear Ginger Pavlova serves 8-12

1/2 Fresh Lemon

4 Large Free Range Egg Whites at room temperature

200g/7oz Caster Sugar

1tsp Cornflour – I use Doves Farm as it is certified gluten free

1tsp White Wine Vinegar

2 Balls Stem Ginger chopped finely

400ml Double Cream

1tsp Ground Ginger

1/2tsp Vanilla Bean Extract – I use Nielsen-Massey

2tbsp Syrup from Stem Ginger Jar

2 x 415g tins Pear Halves in natural fruit juice

50g/2oz Dark Chocolate minimum 70% cocoa

Optional – Edible Gold Stars available from Lakeland

Method: Preheat oven to 180C/160C fan, 350F. gas mark 4

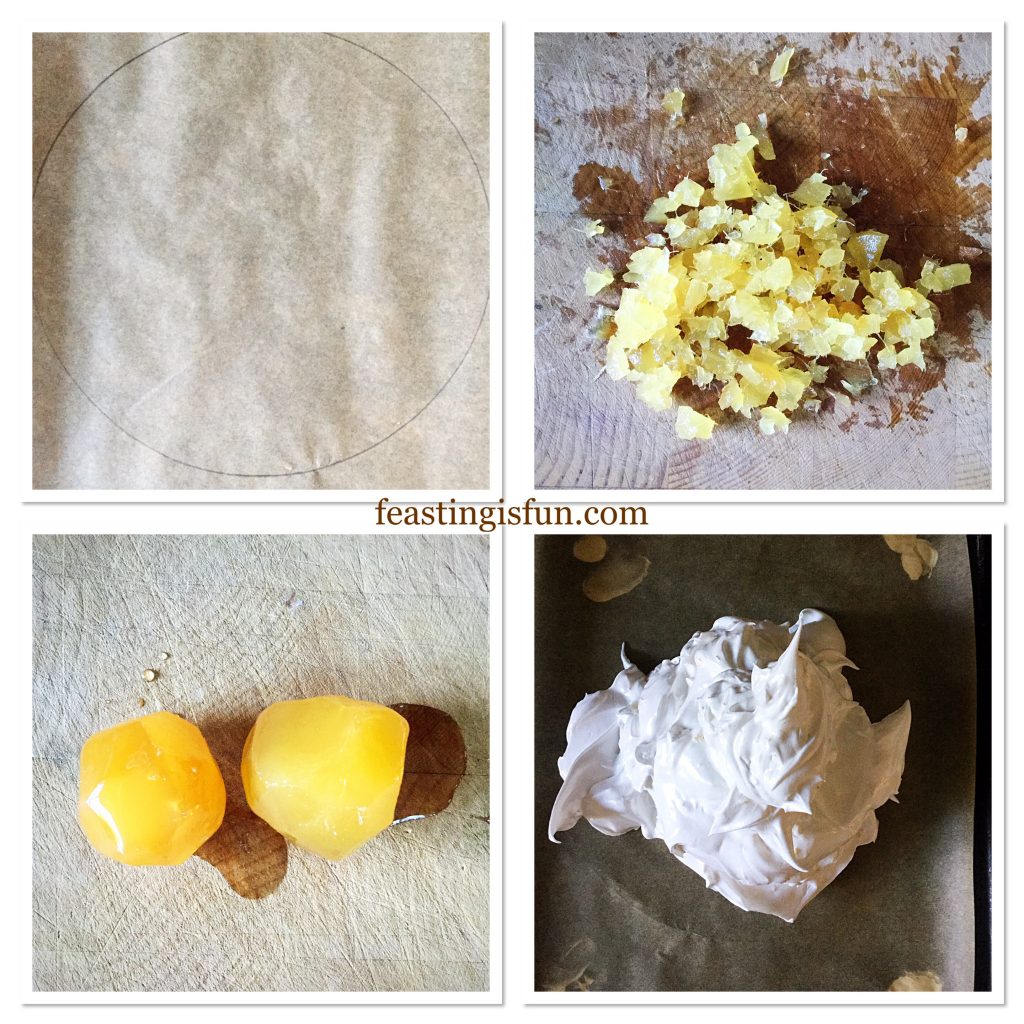
You will need a large baking tray lined with baking parchment. Draw a 22.5cm/9″ circle, in pencil, on to the baking parchment and then turn the baking parchment over. As soon as the meringue is made stick it down with a little of it. Also an electric whisk, either hand held or using a stand mixer, will make the whole process much easier.

Making And Baking The Ginger Spiced Pavlova

  • First of all, take the bowl in which the eggs will be whisked and rub the inside liberally with the lemon half.
  • Now add the egg whites to the bowl.
  • Whisk on a high speed until the whites are light and voluminous.
  • Add the caster sugar one tablespoon at a time, continually whisking on a medium/high speed. Whisk for 2-3 minutes between each addition.
  • As soon as half of the sugar is added, up the amount to 2 tablespoons each time.
  • Continue whisking until all of the sugar is added and has a glossy sheen.
  • Stop the whisk and rub a little of the meringue between your forefinger and thumb. If it feels gritty whisk for another couple of minutes.
  • When the meringue is silky and smooth add the cornflour, white wine vinegar and chopped stem ginger.
  • Using a large spoon fold the ingredients into the meringue, taking care to knock out as little of the whipped in air as possible.
  • Spoon the meringue on to the baking parchment.
FF Dark Chocolate Drizzle Pear Ginger Pavlova
Creating the ginger meringue base.
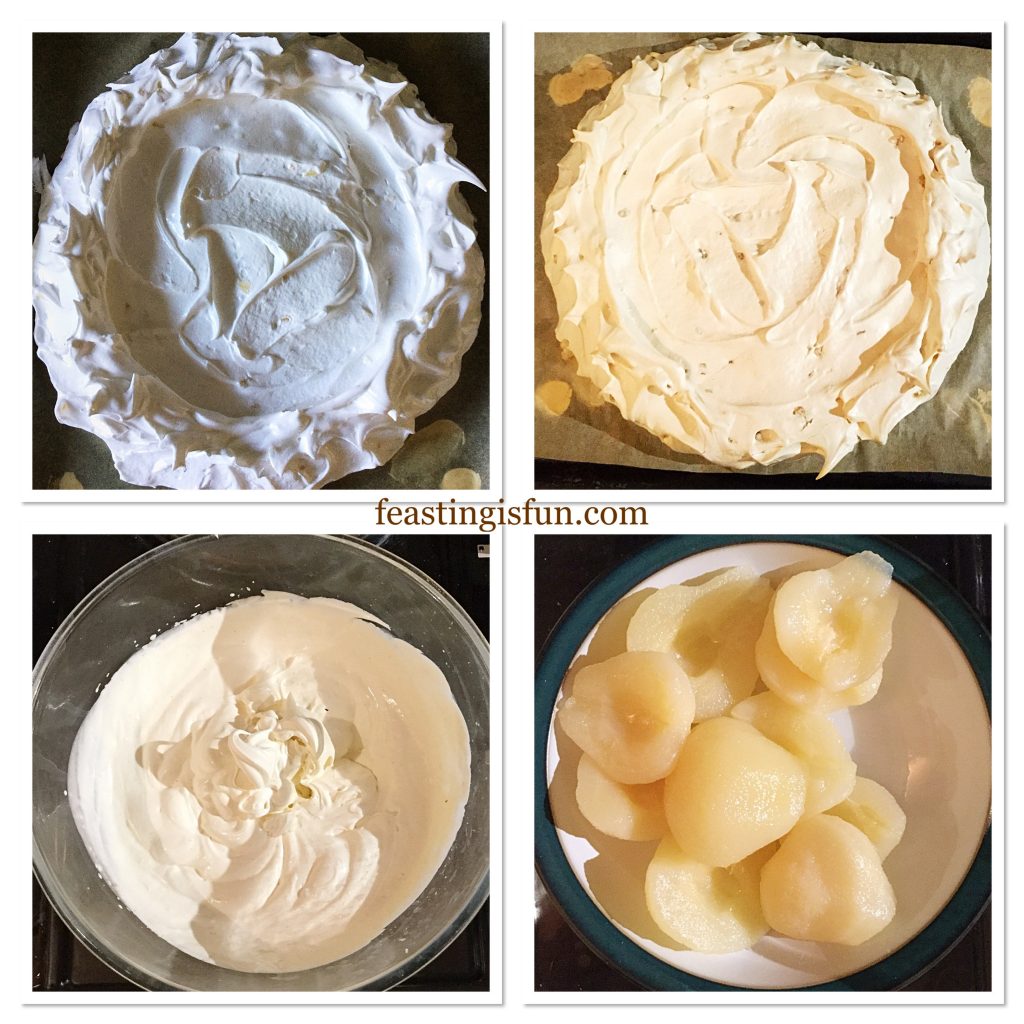
  • Using a palette knife spread the meringue out to fill the circle template.
  • Slightly build up the sides of the pavlova.
  • Place the pavlova into the centre of a preheated oven and immediately turn the heat down to 140C/120C fan, 275F, gas mark 1.
  • Bake for 2 and 1/2 hours.
  • After the baking time has elapsed turn the oven off and allow the meringue to cool slowly, as the oven cools.
FF Dark Chocolate Drizzle Pear Ginger Pavlova
Making and baking the Pavlova.

Filling The Baked Meringue

  • When the meringue has completely cooled it can be filled and decorated.
  • Drain the pears from the juice and leave in a bowl to slightly dry out.
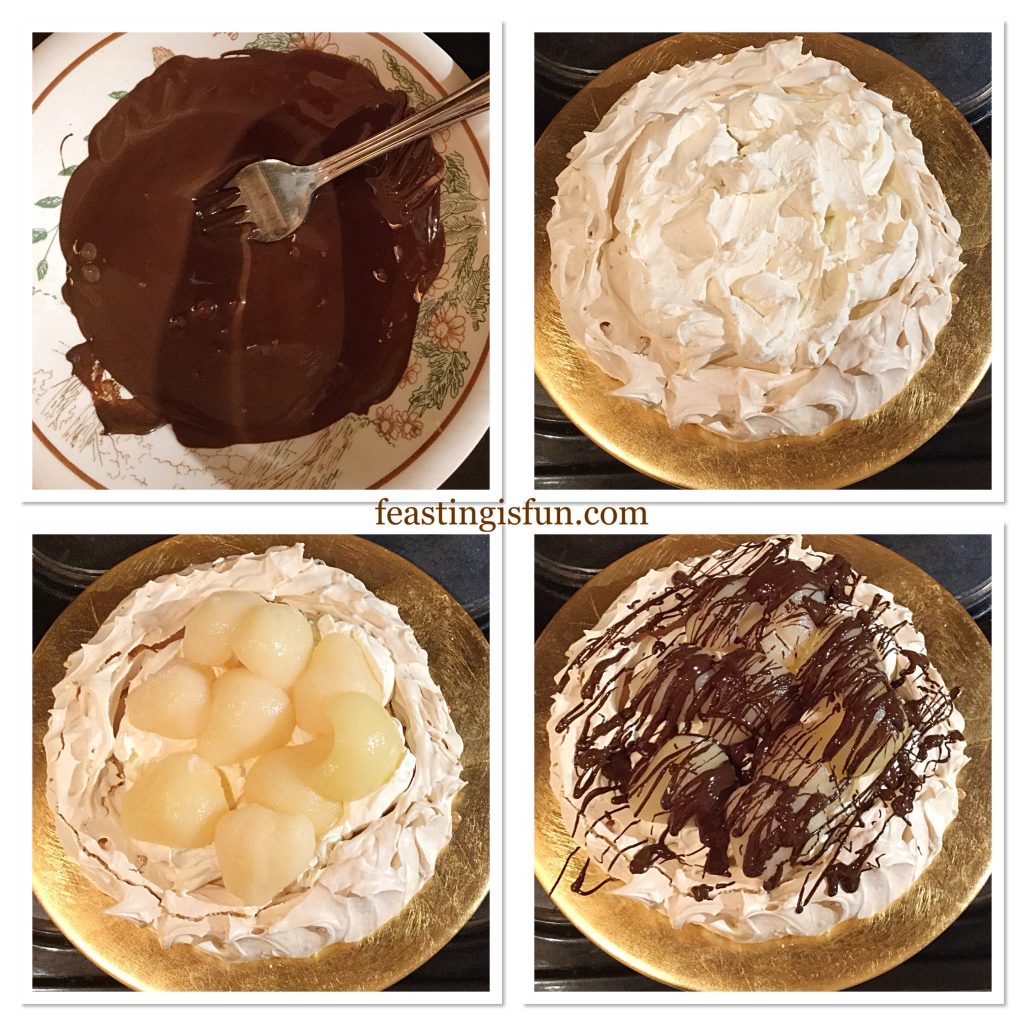
  • Chop up the dark chocolate, place in a heatproof, microwaveable bowl and heat on medium power for 30 seconds at a time. Stir the chocolate after each heating burst. As soon as it starts to melt remove from the microwave and continue stirring until it is fully melted. Set to one side to cool slightly.
  • Pour the chilled cream into a clean large bowl. Add the sugar, ground ginger and vanilla bean paste.
  • Whisk the cream until it is thickened, stopping when it is still smooth and floppy.
  • Remove the meringue from the parchment paper and place on to a plate.
  • Spoon the whipped cream on to the centre of the pavlova, inside the raised rim.
  • Drizzle two tablespoons of ginger syrup over the whipped cream.
  • Arrange the pear halves on top of the whipped cream.
  • Finally, drizzle dark chocolate over the entire pavlova.
Filling and decorating the Dark Chocolate Drizzle Pear Ginger Pavlova
  • Finish with a sprinkle of edible gold stars, or alternatively a dusting of edible glitter.
FF Dark Chocolate Drizzle Pear Ginger Pavlova
Dark Chocolate Drizzle Pear Ginger Pavlova


FF Dark Chocolate Drizzle Pear Ginger Pavlova
Dark Chocolate Drizzle Pear Ginger Pavlova

Most importantly, assemble at the last possible moment. While the meringue can be made earlier in the day or even the night before, whipping cream, melting chocolate and assembly should, at the earliest, take place just prior to serving dinner. Also, any remaining Pavlova should be covered with cling film and eaten within 24 hours.

Festive looking Pear and Ginger Pavlova with a dark chocolate drizzle and sprinkle of gold stars.

Since all food tastes better when shared, why not wrap up any leftovers and send them home with your guests?

If you have enjoyed this recipe for Dark Chocolate Drizzle Pear Ginger Pavlova you may also like these:

Raspberry Chocolate Pavlova

FF Dark Chocolate Drizzle Pear Ginger Pavlova
Raspberry Chocolate Pavlova

Strawberry Topped Chocolate Heart Pavlova

FF Dark Chocolate Drizzle Pear Ginger Pavlova
Strawberry Topped Chocolate Heart Pavlova

Raspberry Coulis Mixed Berry Pavlova

FF Dark Chocolate Drizzle Pear Ginger Pavlova
Raspberry Coulis Drizzled Mixed Berry Pavlova

Since Christmas is a time for giving, getting together and sharing, why not make and take this meringue to a family gathering, or dinner party. Because, almost everything can be prepared beforehand. And here are some shortcuts, use thickened cream and bought chocolate sauce. While this dessert is simplicity itself, a few added cheats are always helpful during a busy time of year. Finally it is the people with whom you share this dessert, that ultimately make it a feast.

So, whatever you are making, baking and creating in your kitchens, have fun preparing your feast.

Sammie xx

No part of this post may be reproduced or duplicated without the written permission of the owner. Please see my Disclosure Policy.
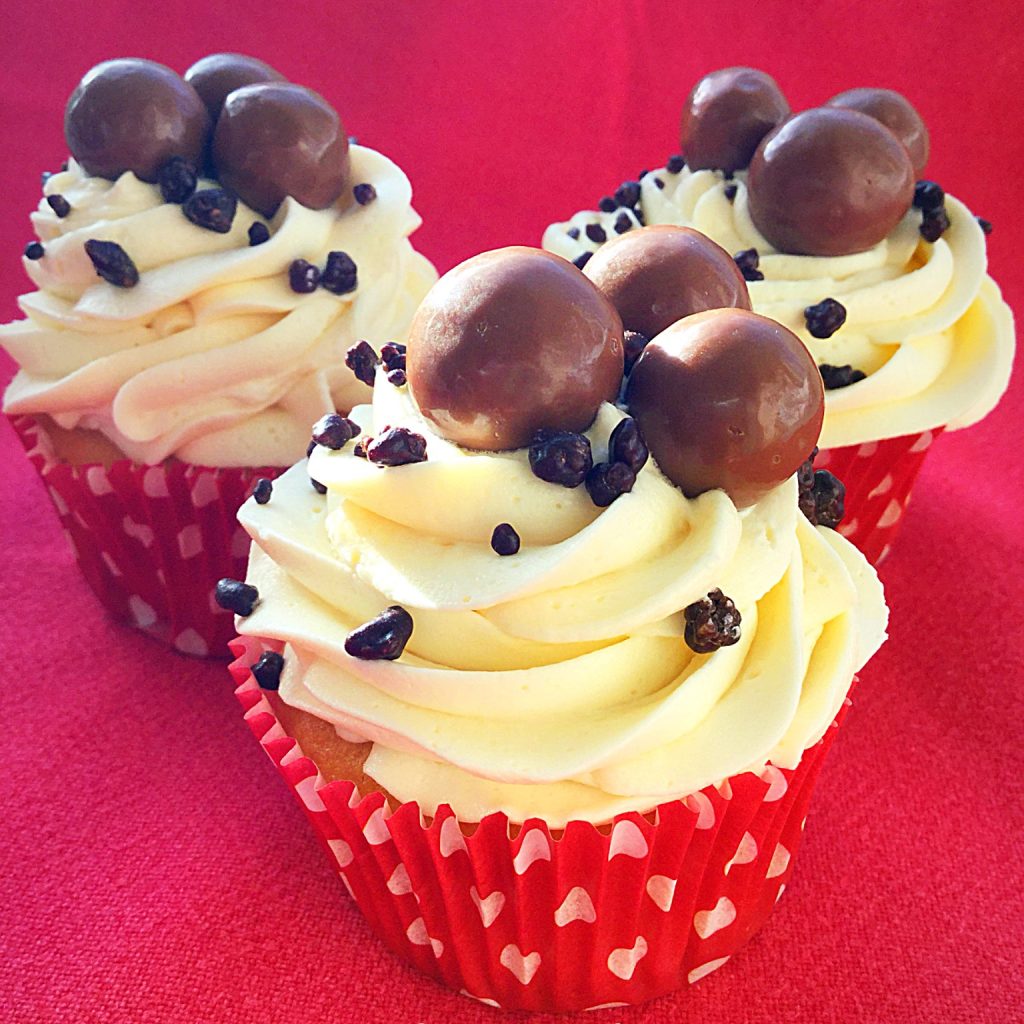
Maltesers Popping Candy Cupcakes

While thinking of what to name this blog, I wanted to express, succinctly, what cooking, baking, eating and sharing meant to me. Feasting is fun sums all of these things up perfectly. Eating a slice of toasted, homemade bread generously spread with butter, for breakfast is a feast in itself. As much as sitting around a groaning, food laden Christmas dinner table, laughing at cracker jokes with family and friends. While adding a twist to recipes that brings the unexpected. Fun! Maltesers Popping Candy Cupcakes fulfill everything Feasting is Fun stands for.

FF Maltesers Popping Candy Cupcakes

Cupcake – an entire cake to yourself

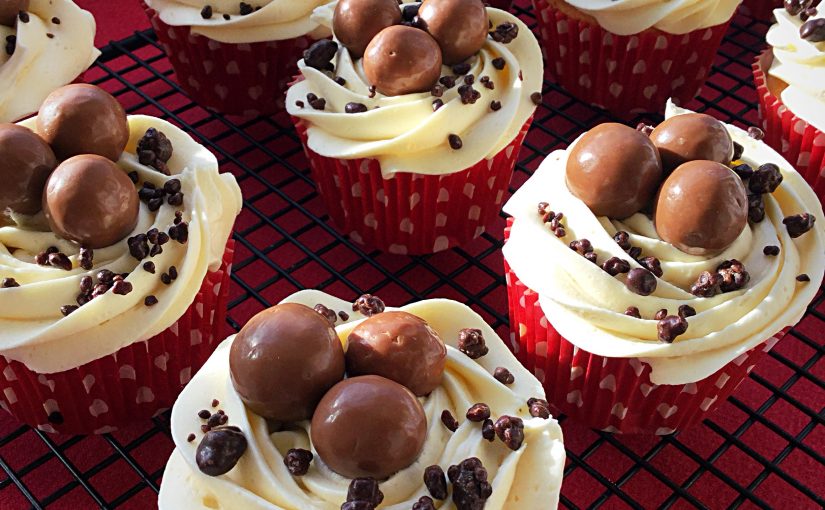
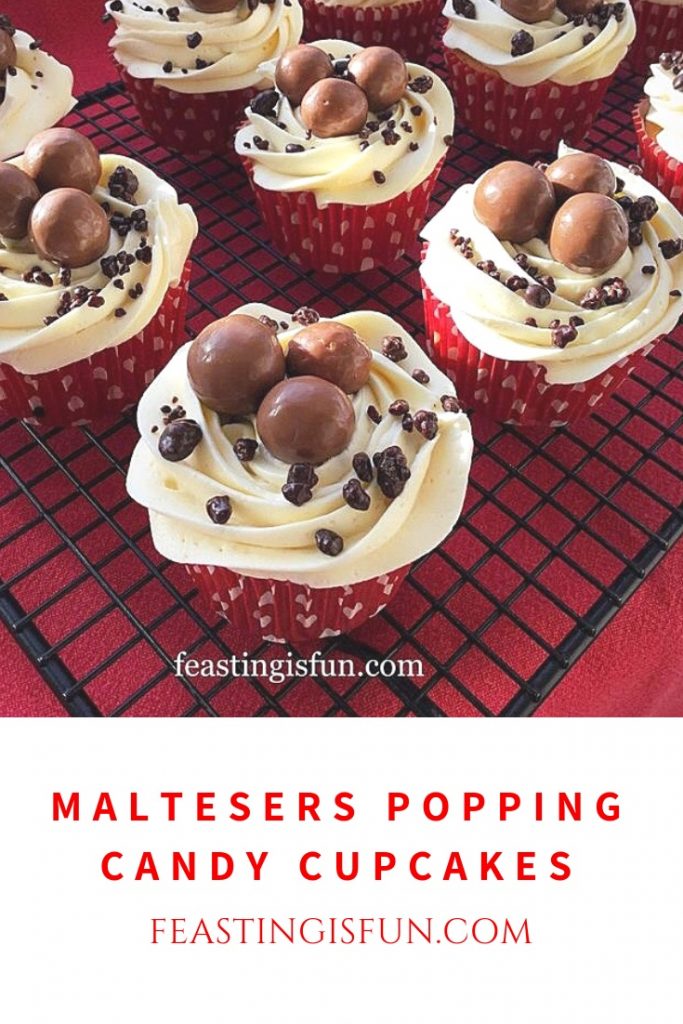
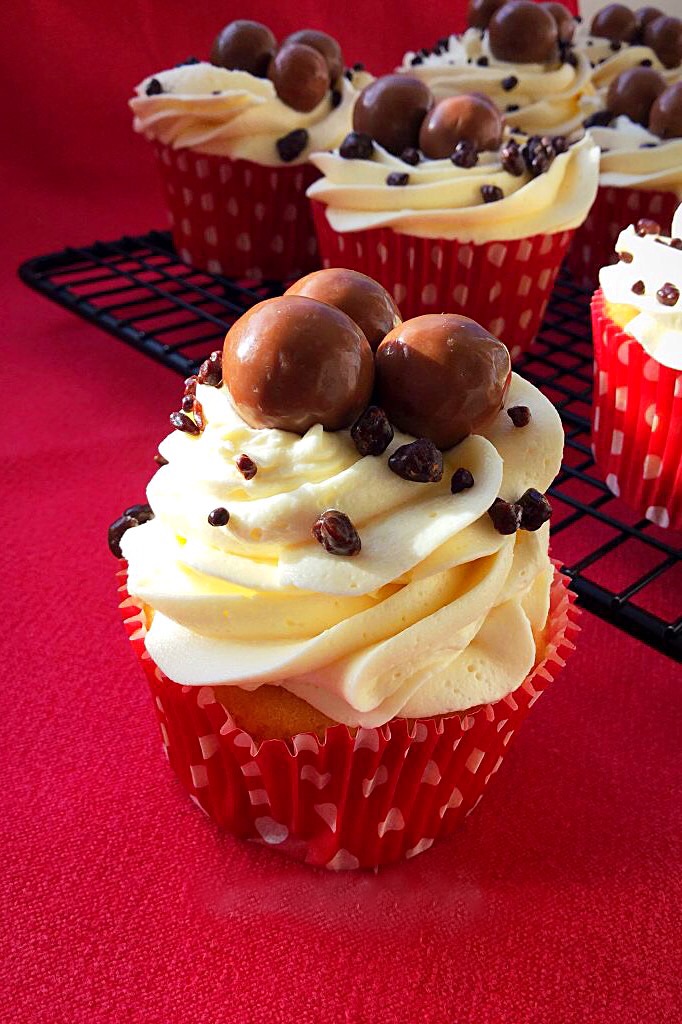
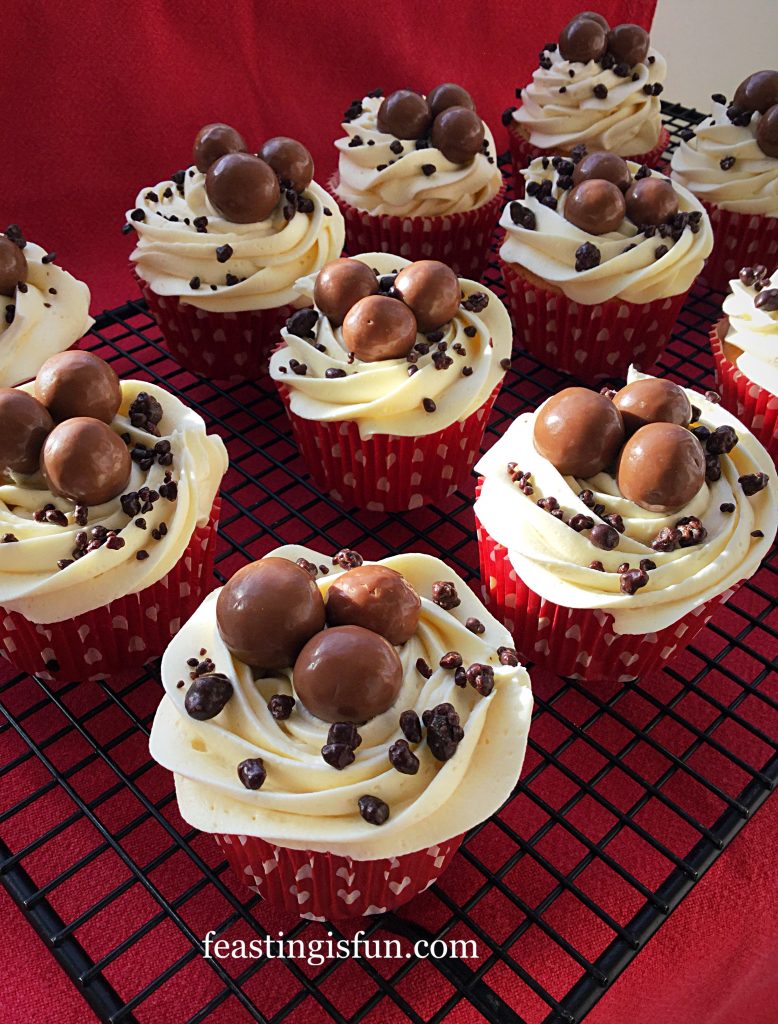
Vanilla sponge cupcakes topped with a swirl of vanilla buttercream and finished with a trio of Maltesers and a sprinkling of chocolate covered popping candy. A pretty, sweet treat that delivers a fun surprise. Popping candy is such a fun addition to any bake. Especially if you don’t warn those parting in this feast. Food that is fun is certainly the best kind.

Maltesers Popping Candy Cupcakes

Since these cupcakes are so easy to make, with no complicated techniques, they can be whipped up, literally, in moments. The recipe makes 12 cupcakes, which is perfect for a quick bake. Yet, it is easily doubled to cater for larger celebrations, such as birthday parties, or cheering up work colleagues on a Monday morning. Most of all, they are utterly delicious, with extra fun sprinkled on.

Maltesers Popping Candy Cupcakes

While the suggestion isn’t to bake and eat cupcakes everyday, I also strongly believe that a special occasion is not the only reason needed to make and eat them. Coffee mornings, the end or indeed middle of an audit at work, showing appreciation, are all good reasons to bake. Most especially bake these fun, tasty, flavour exploding cupcakes.

Recipe: Maltesers Popping Candy Cupcakes makes 12

Cupcakes:

100g/4oz Unsalted Butter softened to room temperature

100g/4oz Caster Sugar

1/8tsp Salt – I use Maldon

1tsp Vanilla Extract – I use Nielsen-Massey

3 Large Free Range Eggs

100g/4oz Plain White Flour

1tsp Baking Powder

Buttercream:

300g/12oz Icing Sugar

1tsp Vanilla Extract

175g/6oz Unsalted Butter at room temperature

1.5tbsp Very Hot Water

Maltesers and Chocolate Covered Popping Candy to decorate.

Method: Preheat oven to 160C/140C fan, 325F, gas mark 3.

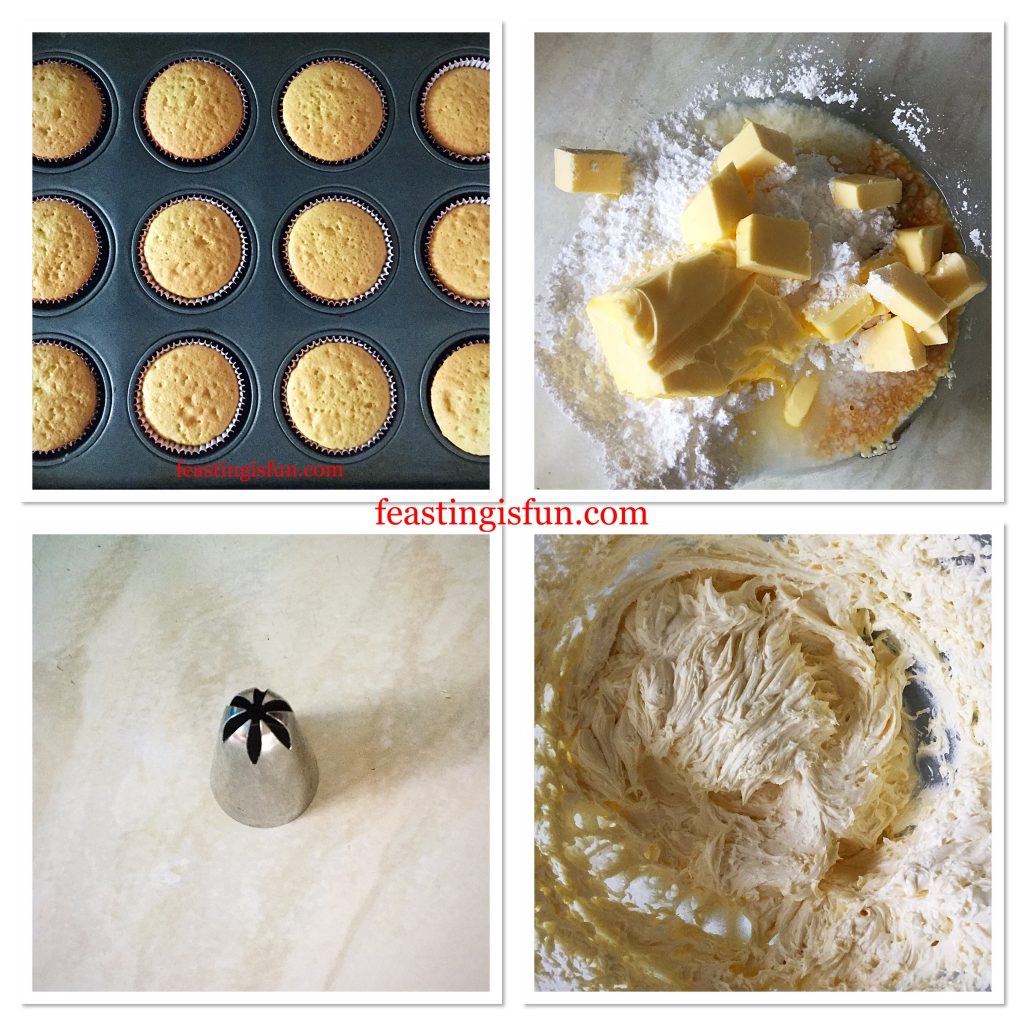
A quick note: When using coloured cupcake cases it really is worth choosing a good make. The cases used here are from a mixed set by Kitchen Craft. During the baking process they do not bleach and lose their colour. Also, I recommend a #2D drop flower decorating tip available from Wilton. This tip creates deep swirls when piping and is ideal for creating a piped rose.

Making the cupcakes

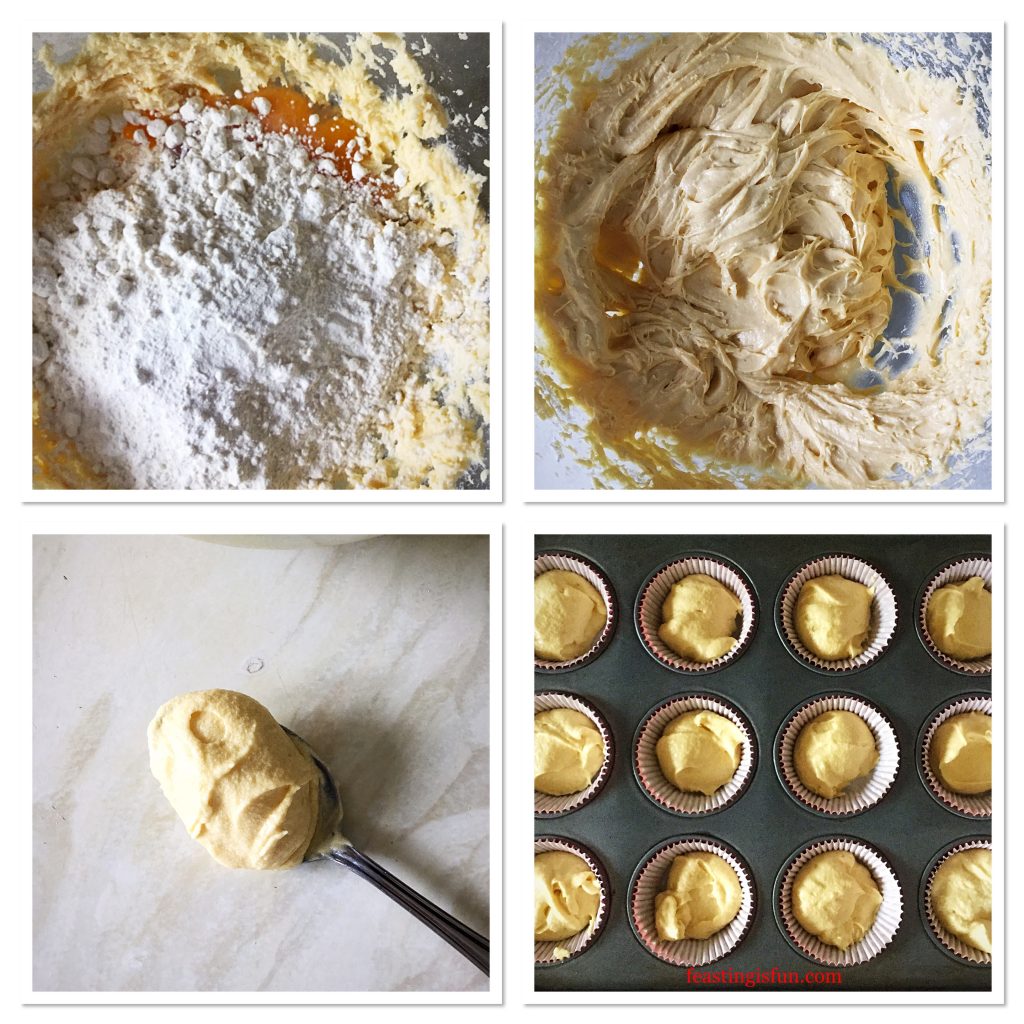
  • First of all, line a deep cupcake or muffin tin with cupcake cases.
  • Next into a large bowl add the butter, sugar and salt. Whisk until fully combined, light and creamy.
  • Add the vanilla extract and whisk thoroughly.
  • Now add the eggs, flour and baking powder. Whisk slowly until everything has come together and no lumps are present. Over whisking will create a tough cake crumb.
  • Scoop a dessert spoonful of cake batter into each cupcake case.
  • Place the cupcakes into the centre of the preheated oven and bake for 25-30 minutes.
FF Maltesers Popping Candy Cupcakes
Making the vanilla cupcake batter.
  • The cupcakes are baked when they are golden in colour and spring back from a light touch.
  • As soon as they are baked remove from the oven.
  • Transfer the cupcakes to a cooling rack.
  • While the cupcakes are cooling make the buttercream frosting.

Making the frosting and decorating the cupcakes

  • Into a large bowl add the icing sugar, butter, vanilla and hot water. Whisk together until very light and creamy.
  • Transfer the whipped buttercream to a piping bag fitted with a #2D Wilton piping tip.
FF Maltesers Popping Candy Cupcakes
Cupcakes baked and vanilla buttercream made.
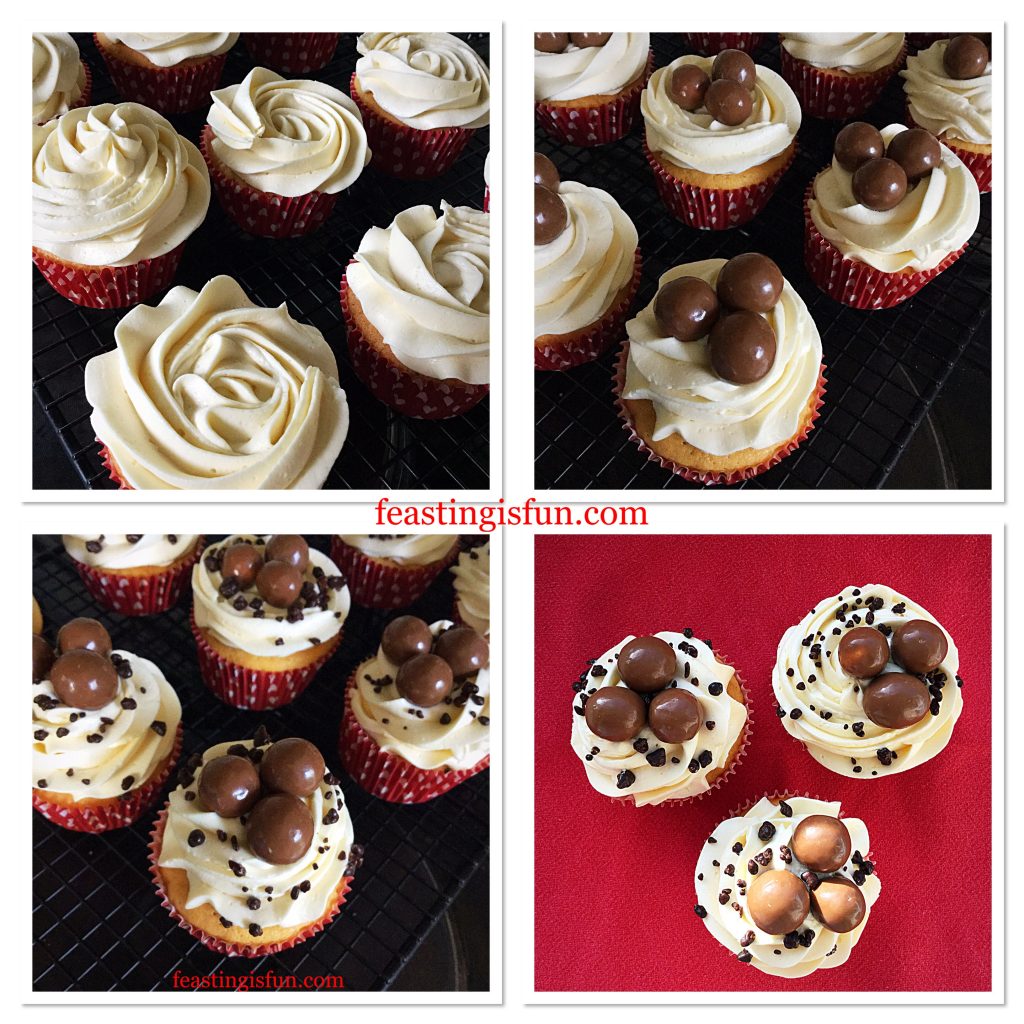
  • As soon as the cupcakes are completely cooled they can be decorated.
  • Starting in the centre of a cupcake pipe a swirl in the shape of an ‘e’. Continue round creating a rose. Continue piping around and up for a deeper buttercream topping.
  • Place 3 Maltesers on to each cupcake.
  • Finally, sprinkle chocolate covered popping candy over the buttercream.
FF Maltesers Popping Candy Cupcakes
Icing and decorating Maltesers Popping Candy Cupcakes

During warmer weather place the cupcakes into the fridge for an hour. Allowing the frosting to set. Especially if you plan to transport them.

FF Maltesers Popping Candy Cupcakes
Maltesers Popping Candy Cupcakes

Serve as they are, with a smile.

Store in an airtight container and eat within 5 days. During warmer weather keep refrigerated.

If you have enjoyed this recipe for Maltesers Popping Candy Cupcakes you may also like these:

Caramac Frosted Chocolate Cupcakes

Caramac Frosted Chocolate Cupcakes

Coconut White Chocolate Snowball Cupcakes

Coconut White Chocolate Cupcakes
Coconut White Chocolate Snowball Cupcakes

Marasachino Cherry Chocolate Drizzle Cupcakes

Maraschino Cherry Chocolate Drizzle Cupcakes

Cupcakes have withstood time and not lost their appeal. Since they are individual, whole cakes, who wouldn’t enjoy one? Available in an endless number of flavour and frosting combinations, they are perfect for sharing. Also, they are easier to handout and share, in some cases, than a large, cut cake. However you enjoy them, remember that they always taste better when shared.

Whatever you are making, baking and creating in your kitchens, have fun preparing your feast.

Sammie xx

No part of this post may be reproduced or duplicated without the written permission of the owner. Please see my Disclosure Policy.
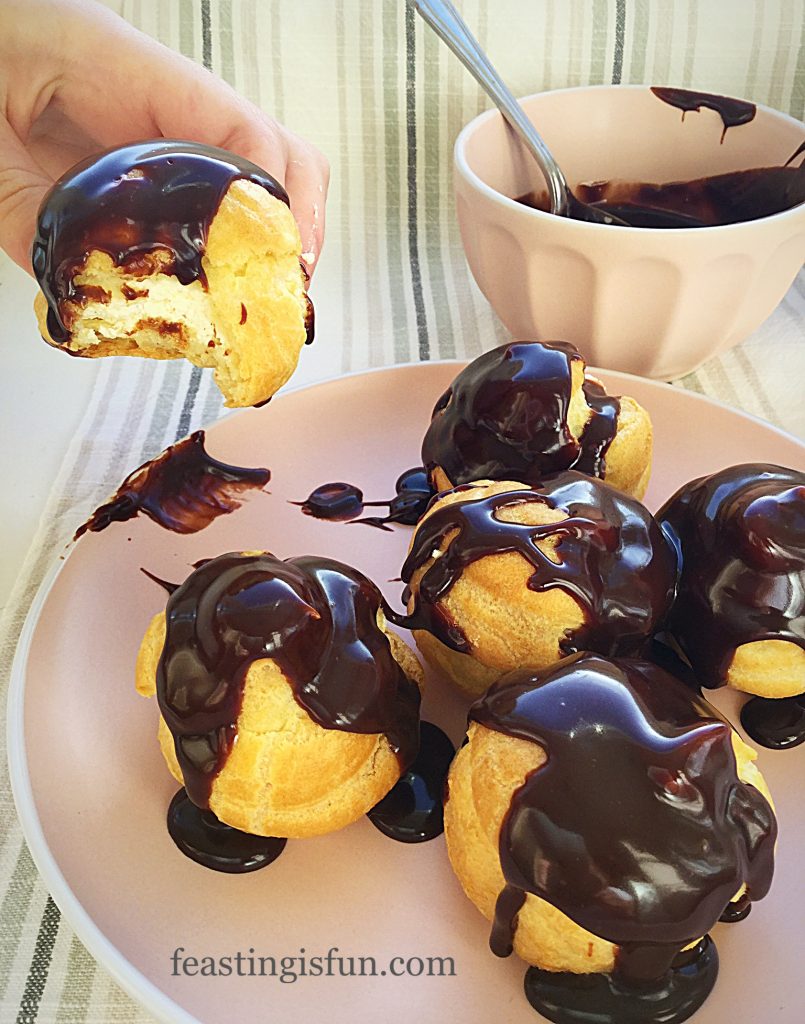
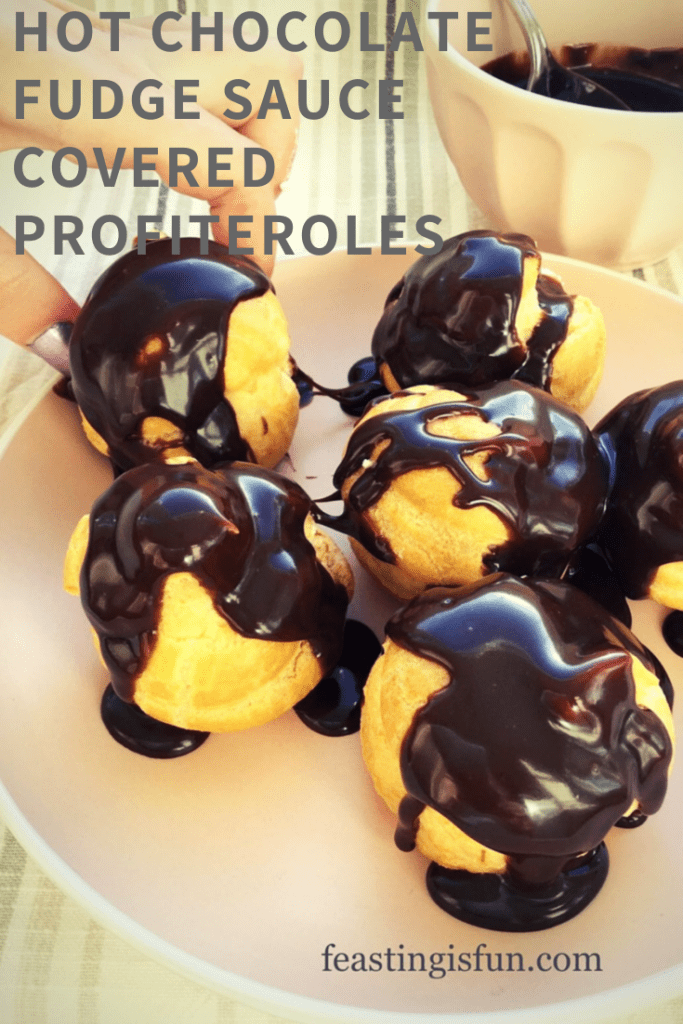
Hot Chocolate Fudge Sauce Covered Profiteroles

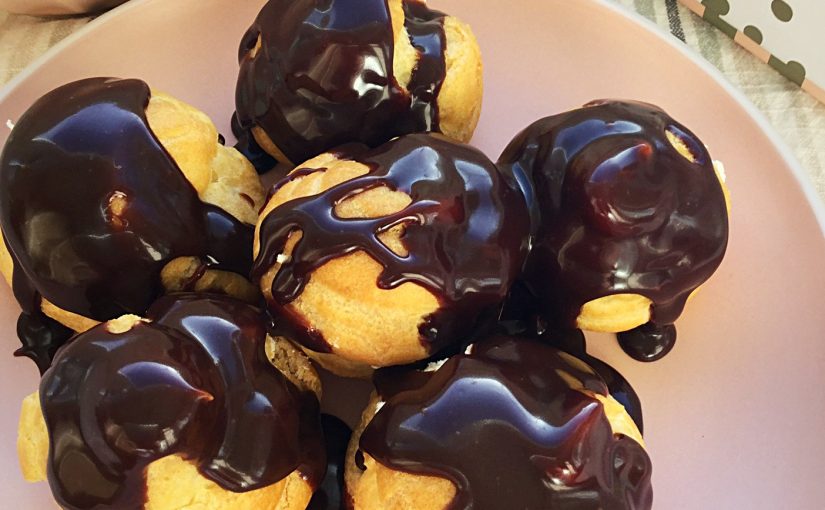
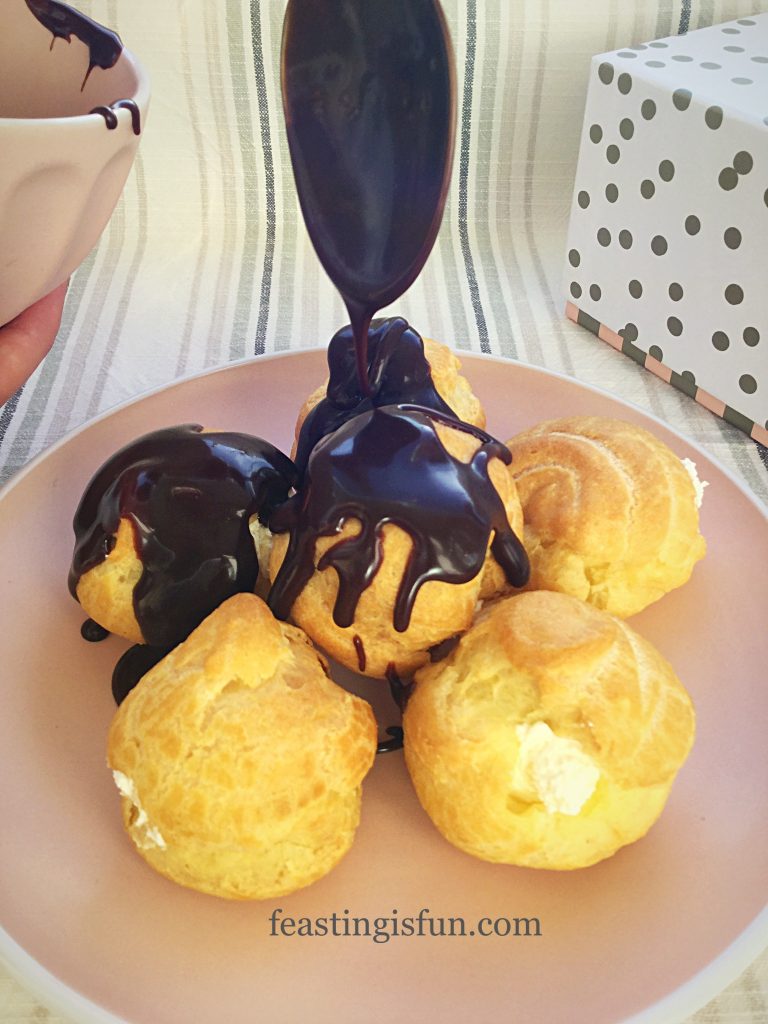
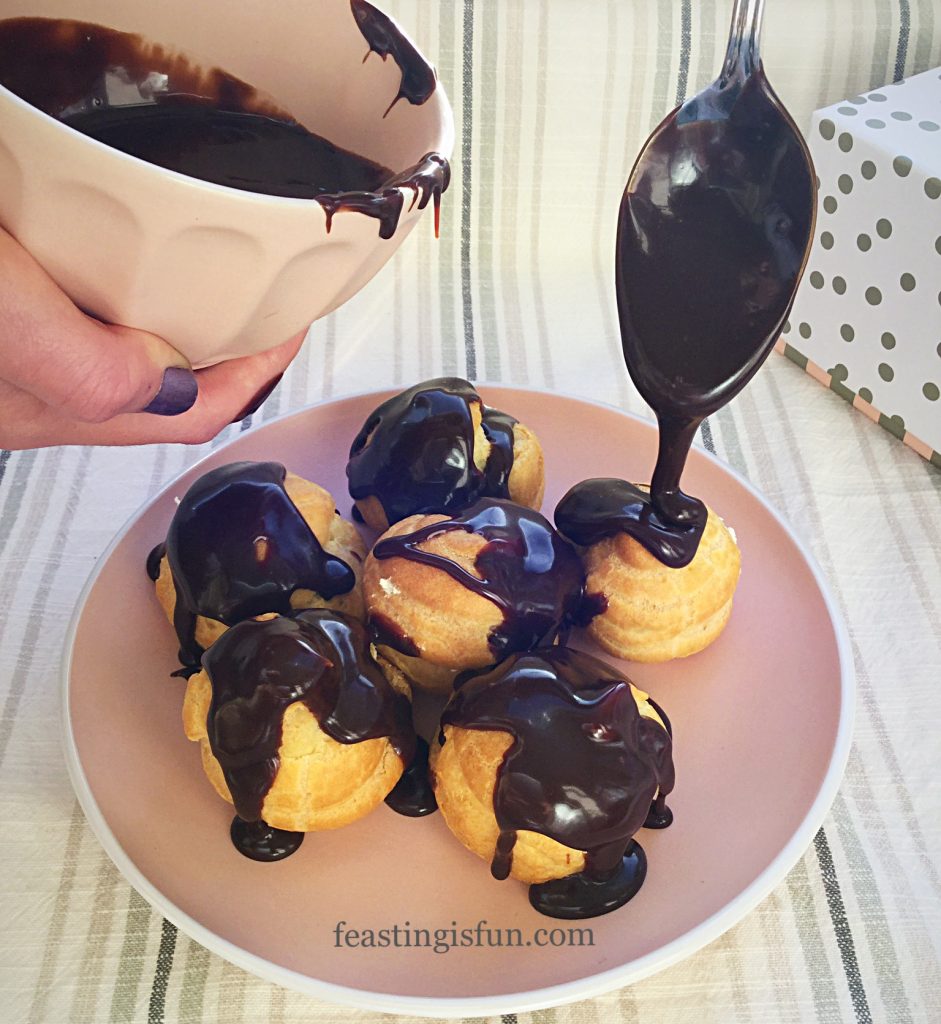
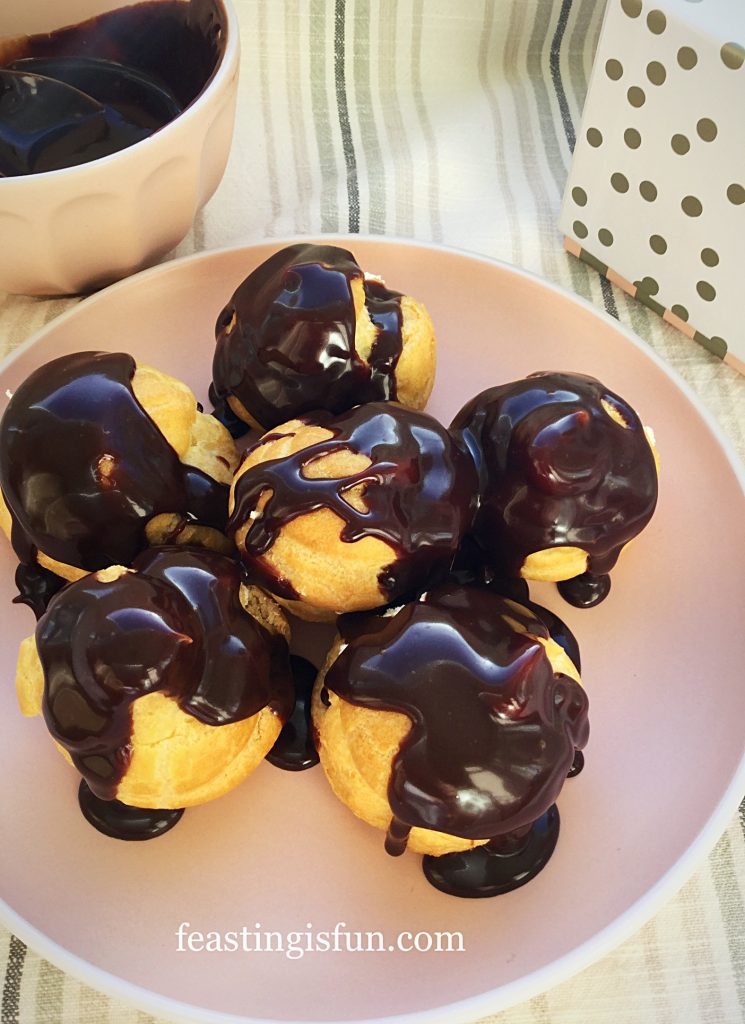
Every so often I create a recipe, that is not only delicious, also it can be used in many different ways. And these Hot Chocolate Fudge Sauce Covered Profiteroles are a great example. Light choux buns, filled with sweetened, whipped, chantilly cream and draped in dreamy, hot, chocolate fudge sauce. Which also has a hidden ingredient, the sauce raises the game of whatever dessert it adorns.

FF Hot Chocolate Fudge Sauce Covered Profiteroles
Hot Chocolate Fudge Sauce Covered Profiteroles

Choux Pastry – The Easiest Pastry You’ve Ever Made

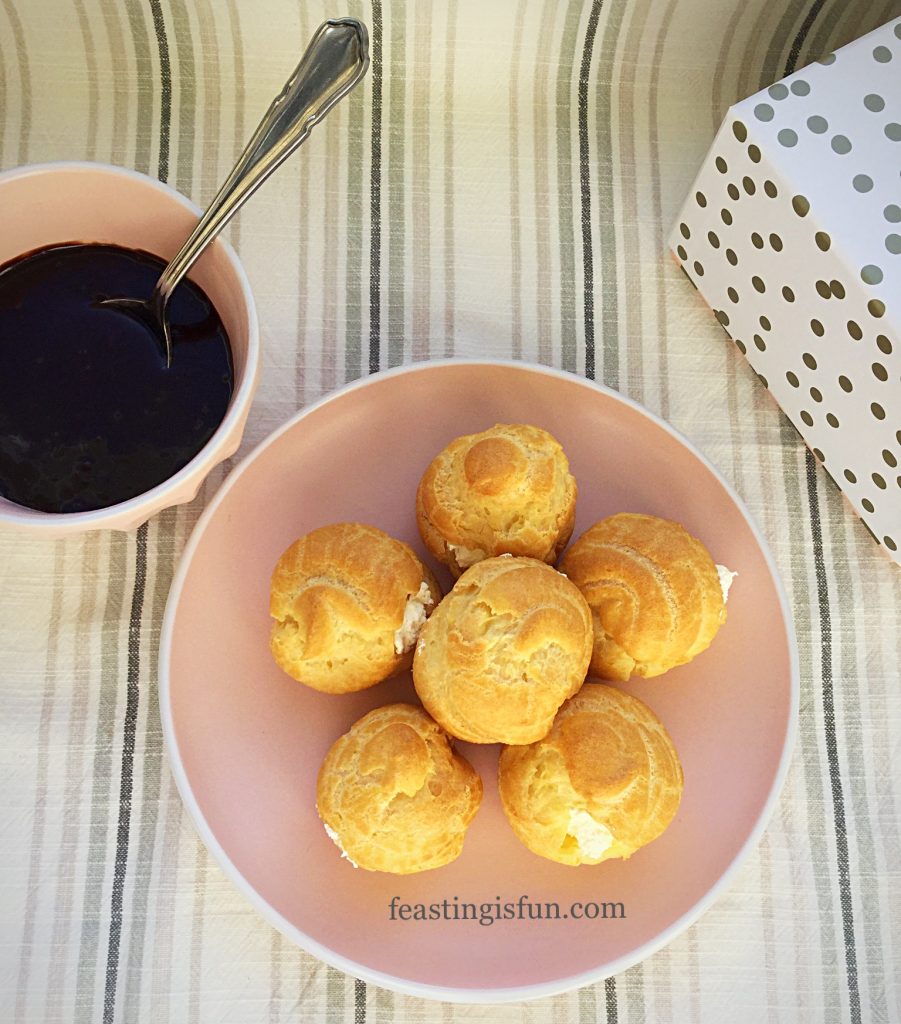
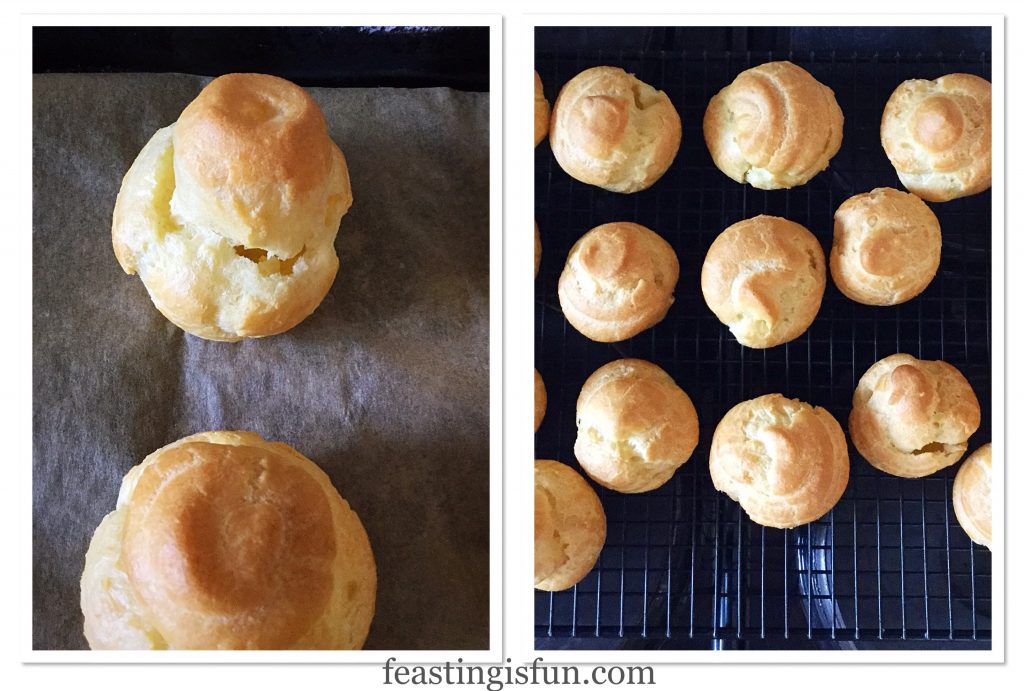
Choux pastry is incredibly easy to work with. Fear not, I will walk you step by step through the making and baking process. First of all the dough is cooked in a saucepan and then, after the addition of beaten eggs Piped into small buns. Hot water, present in the recipe, creates steam during the baking process, causing each choux bun to puff up. Creating a hollow centre that is perfect for filling.

FF Hot Chocolate Fudge Sauce Covered Profiteroles
Golden, puffed choux buns, ready for the hot chocolate fudge sauce.

A Hot Chocolate Fudge Sauce That Takes This Desser To Another Level

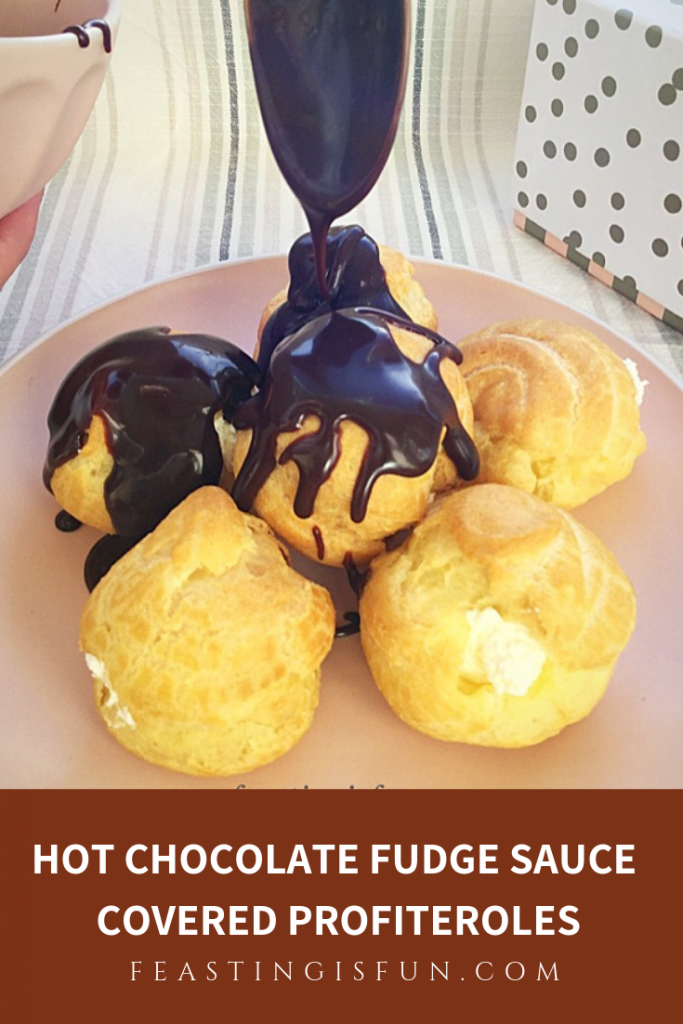
Although choux pastry on its own is rather bland it is a brilliant carrier of flavours. While each bun is filled first of all with sweetened, whipped cream, the draping and drizzling of hot chocolate fudge sauce gives each bun a perfect flavour hit. Resulting in a finger licking dessert that will keep you coming back for more.

FF Hot Chocolate Fudge Sauce Covered Profiteroles
Hot Chocolate Fudge Sauce Covered Profiteroles

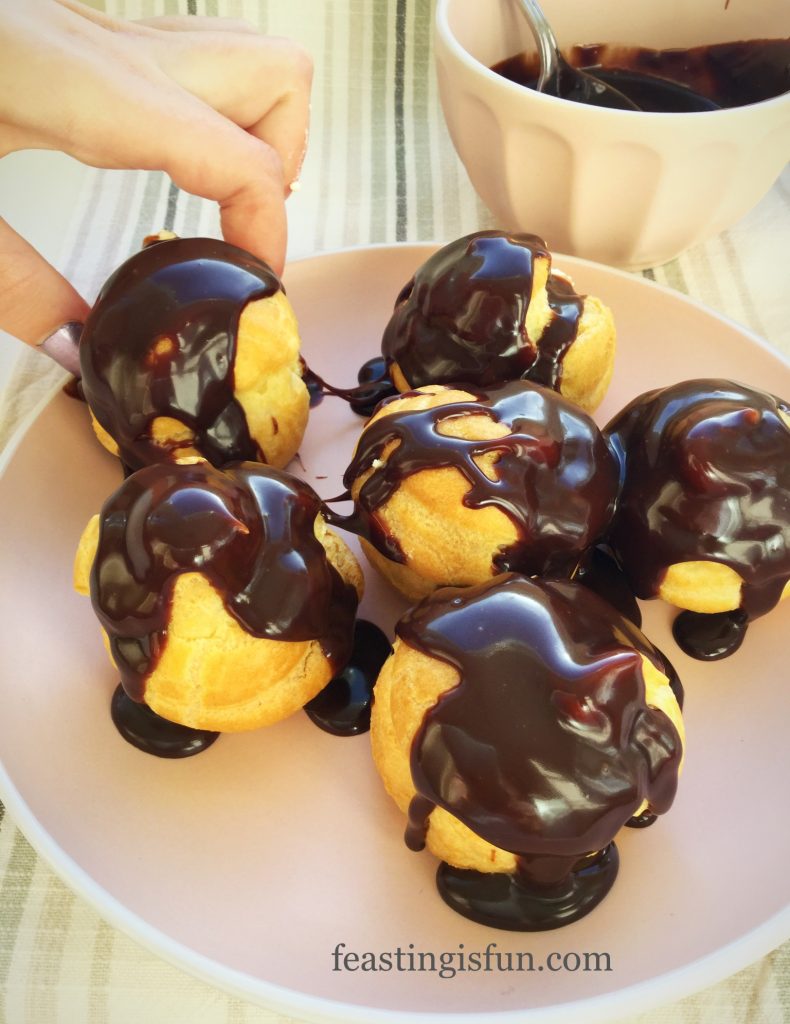
While the profiteroles can be made a few hours ahead, as can the sauce. assembly should take place as close as possible to serving. Doing so keeps the profiteroles light and crisp. Because if left for a while they can become soggy. Also the hot sauce should ideally be poured over as they are served. However, left over, sauce covered profiteroles taste incredible when sneaked from the fridge the day after making! A post party fridge raiding feast!

FF Hot Chocolate Fudge Sauce Covered Profiteroles
Hot Chocolate Fudge Sauce Covered Profiteroles

Ideally served with a spoon and fork, there will always be occasions when cutlery is not needed. Like here, during my photo shoot.

FF Hot Chocolate Fudge Sauce Covered Profiteroles
Hot Chocolate Fudge Sauce Covered Profiteroles

Recipe: Hot Chocolate Fudge Sauce Covered Profiteroles  – makes 26-30 serves 6-8

For The Profiteroles

350ml Water

125g/4.5oz Unsalted Butter

1/4tsp Salt – I use Maldon

200g/7oz Plain White Flour

4 Large Free Range Eggs – 222g out of shell

Chantilly Cream Filling 

300ml Double Cream

1tsp Vanilla Bean Paste – I use Nielsen-Massey

1tbsp Caster Sugar

Hot Chocolate Fudge Sauce

100g/4oz Milk Chocolate – I use Waitrose own label milk chocolate

150g/5oz Dark Chocolate – min cocoa content 70%

3 Tubes Rolo’s 52g each (156g total)

300ml Double Cream

Method: Preheat oven to 200C/180C fan, 400F, gas mark 6, 400F.

Making And Piping The Choux Pastry

  • First of all line 2 large baking trays with parchment paper.
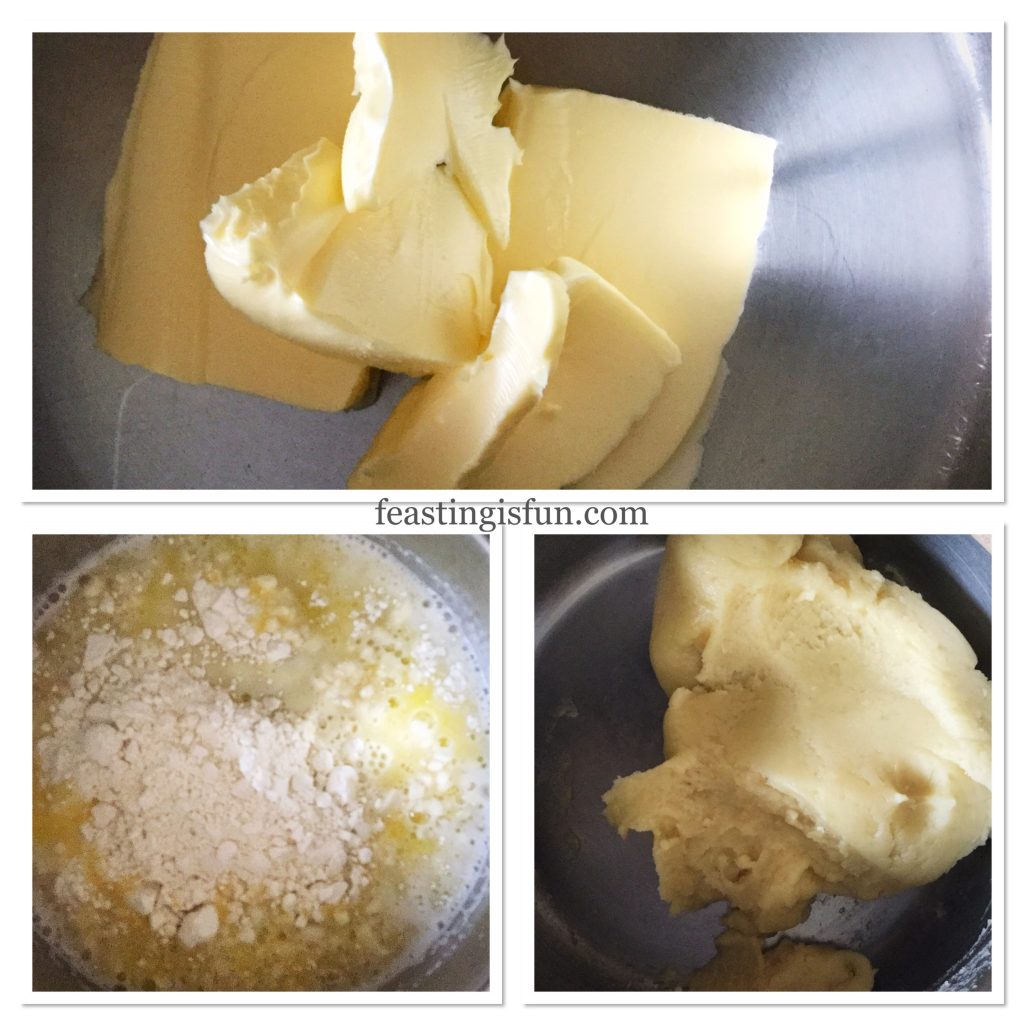
  • Into a large, heavy bottomed pan add  water, butter and salt. Place over a medium heat until the butter is completely melted into the hot water.
  • Keeping the saucepan over a low heat,  dump the flour straight into the hot, buttery water and immediately beat with a wooden spoon. Continue stirring until all lumps have disappeared.
FF Hot Chocolate Fudge Sauce Covered Profiteroles
Creating the flour, water and butter choux pastry base.
  • While the flour is being beaten it also cooks slightly.
  • As soon as the dough is lump free remove from the heat and allow to cool slightly.
  • While cooling, crack the eggs into a jug and weigh them. Make a note of the weight. If it is more than 5% or 233g, than the weight of eggs stated you may not need all of the eggs. Beat the eggs together and pour any excess egg into a separate container.
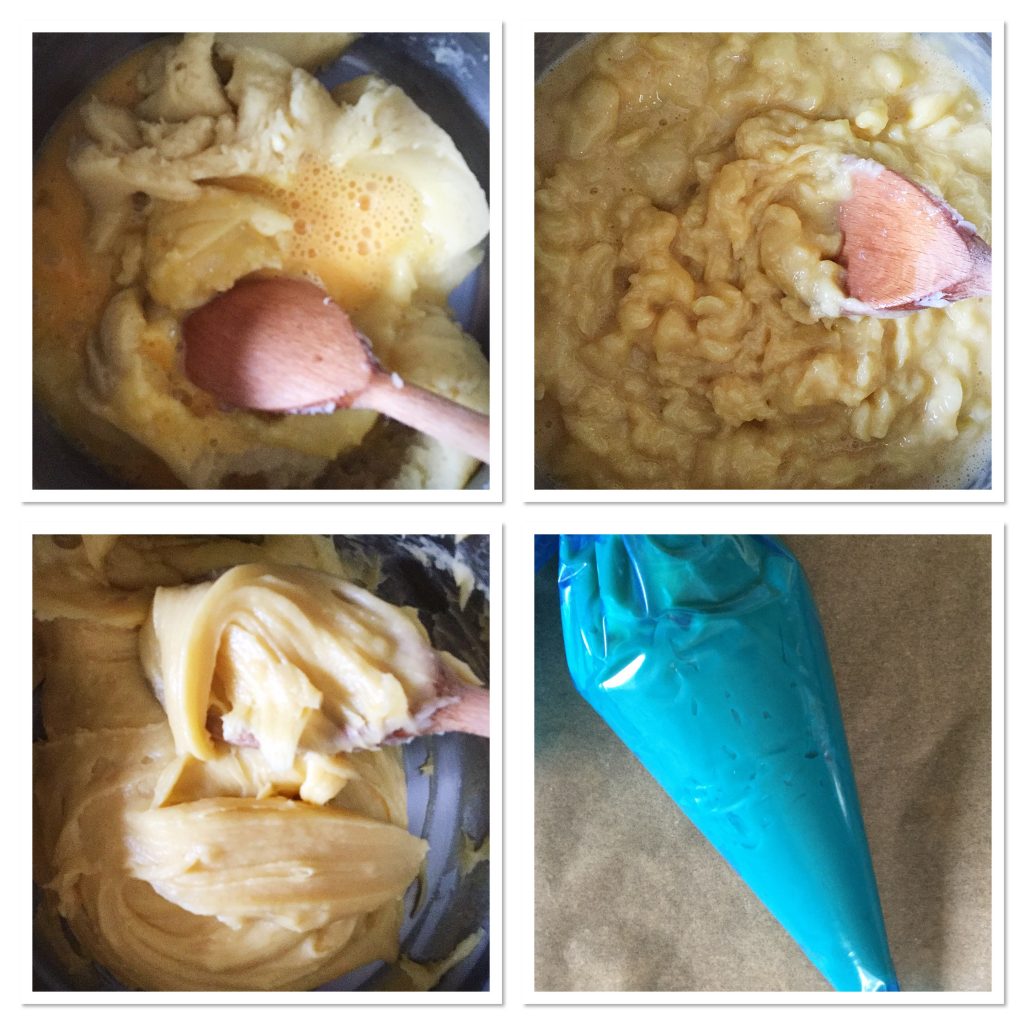
  • As soon as the flour dough has cooled slightly pour in half of the beaten eggs and stir continuously with a wooden spoon. When the eggs begin to incorporate into the mix add the remaining eggs from the jug.
  • Keep beating with the wooden spoon until you have a smooth, sticky paste.
  • Spoon the choux pastry dough into a piping bag,  fitted with a 1cm round nozzle.
FF Hot Chocolate Fudge Sauce Covered Profiteroles
Eggs added to the choux pastry base, beaten in and spooned into a piping bag.
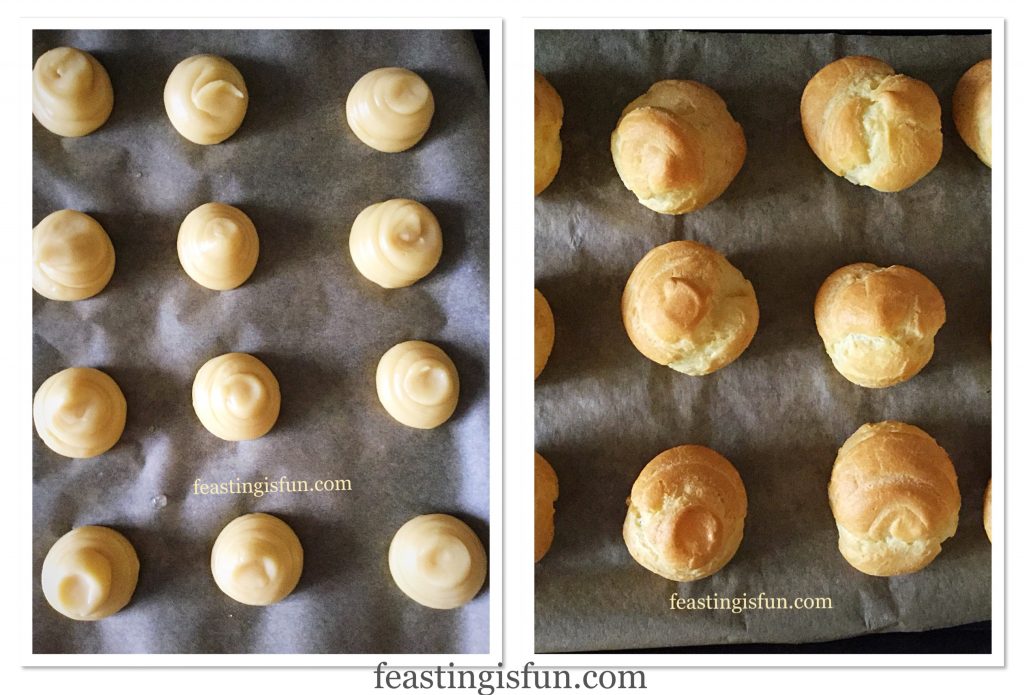
  • Pipe 2.5cm/1 inch rounds on to the baking parchment. Using a clean, damp finger press down any peaked tops on the piped profiteroles. Allow space between each profiterole as they will expand while baking.

Baking The Profiteroles

  • Place the baking trays into the preheated oven and bake for 20 minutes.
  • Check after the initial baking time. Each profiterole should be golden, with a firm outer. Bake for a further 5-10 minutes if necessary.
FF Hot Chocolate Fudge Sauce Covered Profiteroles
Piped profiteroles before and after baking.
  • Once fully baked remove from the oven. Taking care, as they will be very hot, cut or snip a 1cm hole on the side of each profiterole. Doing so allows any steam to escape.
  • Place the baking trays back into the oven and bake for a further 5 minutes.
  • Remove the crisp, dried profiteroles from the oven and immediately place them on to a cooling rack.
FF Hot Chocolate Fudge Sauce Covered Profiteroles
A small slit allows any steam to escape, then cooled on a baking rack.
  • Allow the profiteroles to fully cool before filling.

Whipping Up The Chantilly Cream And Filling The Profiteroles

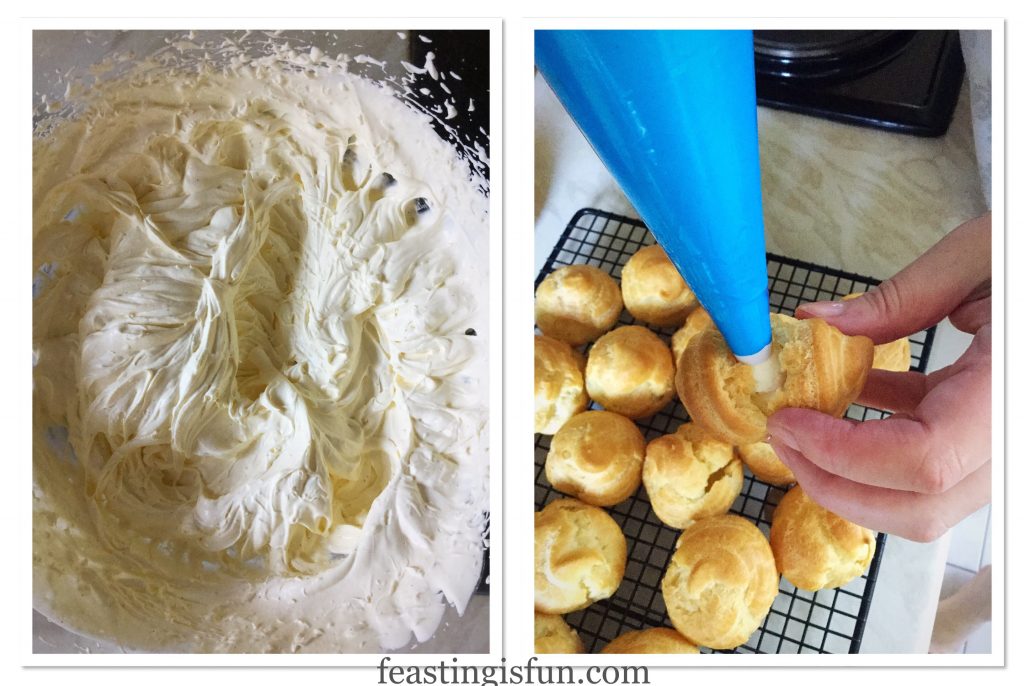
  • To make the sweetened whipped cream, pour the cream, vanilla bean paste and sugar into a large bowl. Whisk until the cream has thickened but not become dry and stiff.
  • Fit a piping bag with a 1cm round nozzle and fill with the sweetened, whipped cream.
  • Pushing through the slit made earlier, fill each profiterole with cream.
FF Hot Chocolate Fudge Sauce Covered Profiteroles
Whipping cream and filling each profiterole.

Making the Hot Chocolate Fudge Sauce


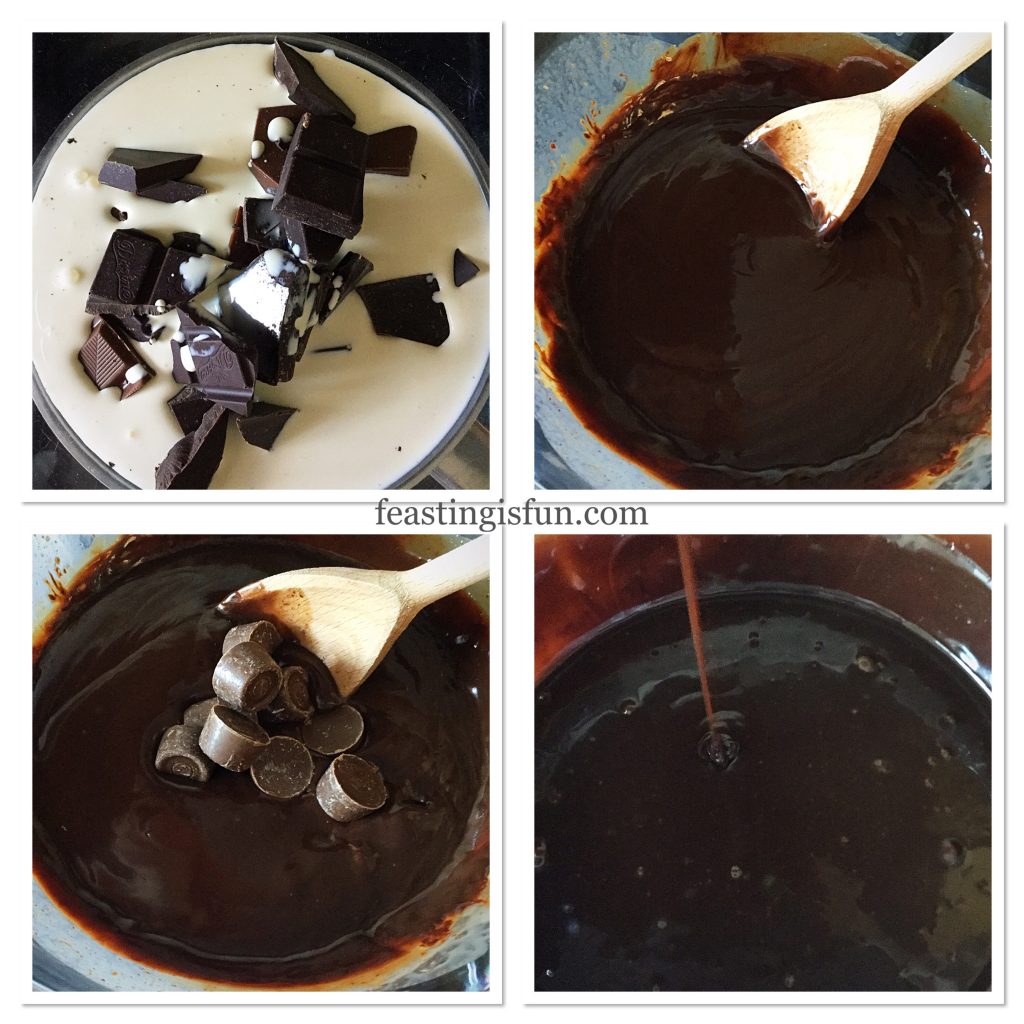
  • Fill a small saucepan with 2.5cm/1 inch of water. Put a heatproof bowl on top of the saucepan, taking care to ensure the base of the bowl does not touch the water. Place over a medium heat.
  • Place the cream and broken up milk and dark chocolate into the bowl. Do not add the Rolo’s at this stage.
  • Stir constantly until the chocolate is completely melted and combined into the cream.
  • Now add the Rolo’s and stir continuously until it becomes a slightly thicker, smooth sauce.
FF Hot Chocolate Fudge Sauce Covered Profiteroles
Making the Hot Chocolate Fudge Sauce.
  • To keep the sauce warm, for example to serve dessert after dinner, turn the heat down to very low, add extra water to the saucepan as needed. Keep the bowl on top of the saucepan and stir thoroughly when ready to serve.
  • When ready to serve, either portion the profiteroles, as in the photos above and spoon a generous amount of sauce over them.
FF Hot Chocolate Fudge Sauce Covered Profiteroles
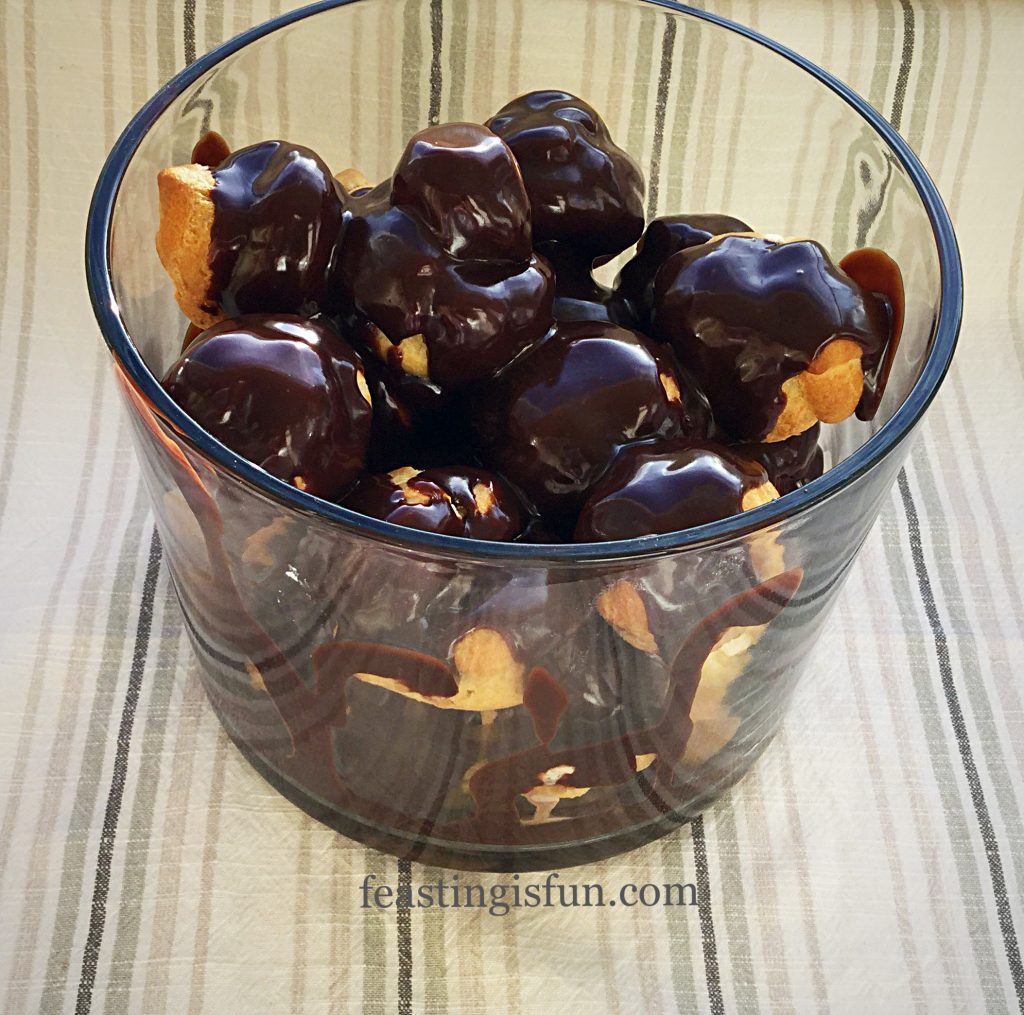
Hot Chocolate Fudge Sauce Covered Profiteroles served in a deep bowl.
  • Alternatively, place each of the cream filled profiteroles into a deep bowl and pour over the Hot Chocolate Fudge Sauce. Ideal for buffets or serve yourself occasions.
FF Hot Chocolate Fudge Sauce Covered Profiteroles
Hot Chocolate Fudge Sauce Covered Profiteroles

Hot Chocolate Fudge Sauce Covered Profiteroles are the ultimate sharing food. Eating as soon as possible after making should not be a problem.

FF Chocolate Profiteroles

If you have enjoyed this recipe for Hot Chocolate Fudge Sauce Covered Profiteroles then you may also like these:

Caramac Frosted Chocolate Cupcakes

FF Hot Chocolate Fudge Sauce Covered Profiteroles
Caramac Frosted Chocolate Cupcakes

Multi Millionaires Shortbread Squares

FF Hot Chocolate Fudge Sauce Covered Profiteroles
Multi Millionaires Shortbread Squares

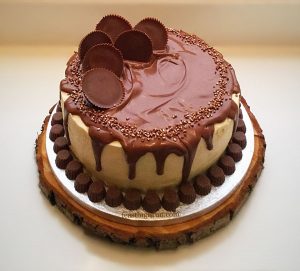
Chocolate Peanut Butter Drip Cake

FF Hot Chocolate Fudge Sauce Covered Profiteroles
Chocolate Peanut Butter Drip Cake

Hot Chocolate Fudge Sauce, is so versatile; pour over profiteroles, spoon it on to ice cream, use to cover as cake such as this Dreamy Chocolate Fudge Cake. One incredible tasting, easy to make Sauce that can be used in a variety of ways. Recipes such as this create the backbone of our cooking repertoire. What would you create using this recipe?

Whatever you are making, baking and creating in your kitchens, have fun preparing your feast.

Sammie xx

No part of this blog post may be reproduced or duplicated without the written permission of the owner. Please see my Disclosure Policy.
Mini whipped cream choux bun dessert with a unique cocoa and caramel topping.

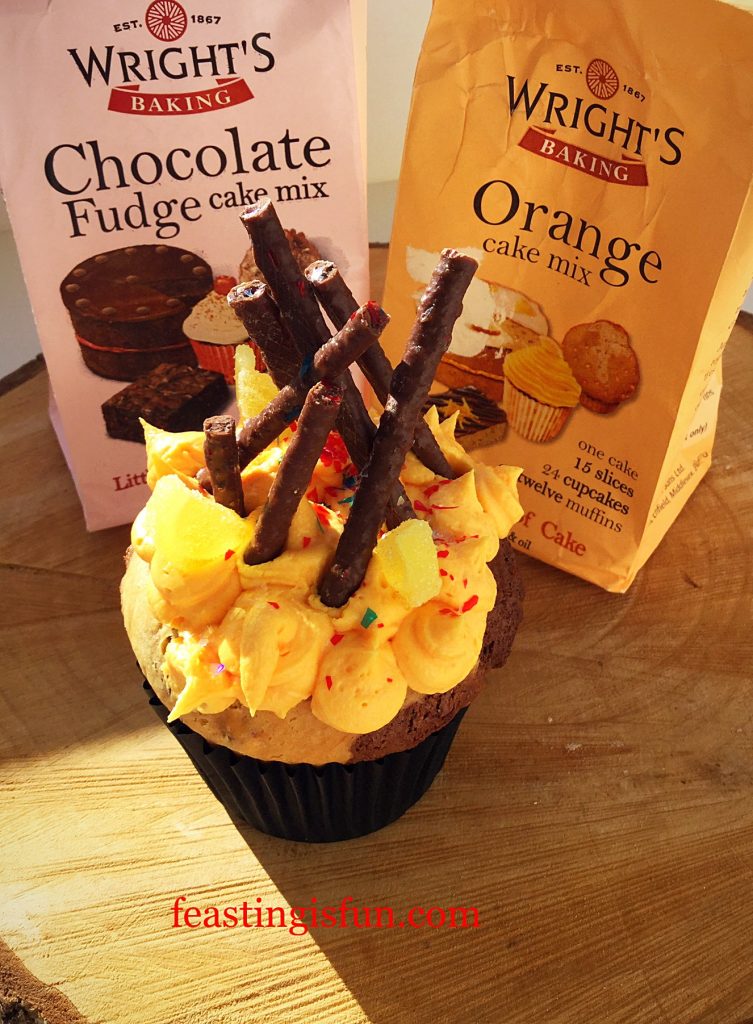
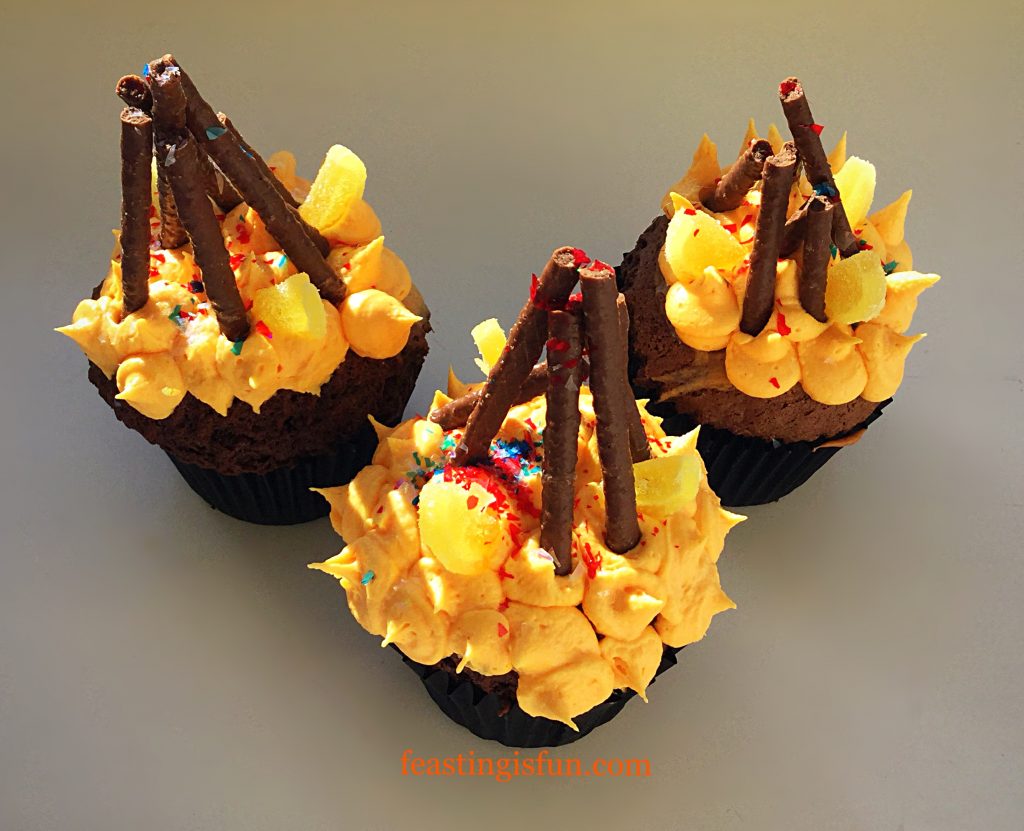
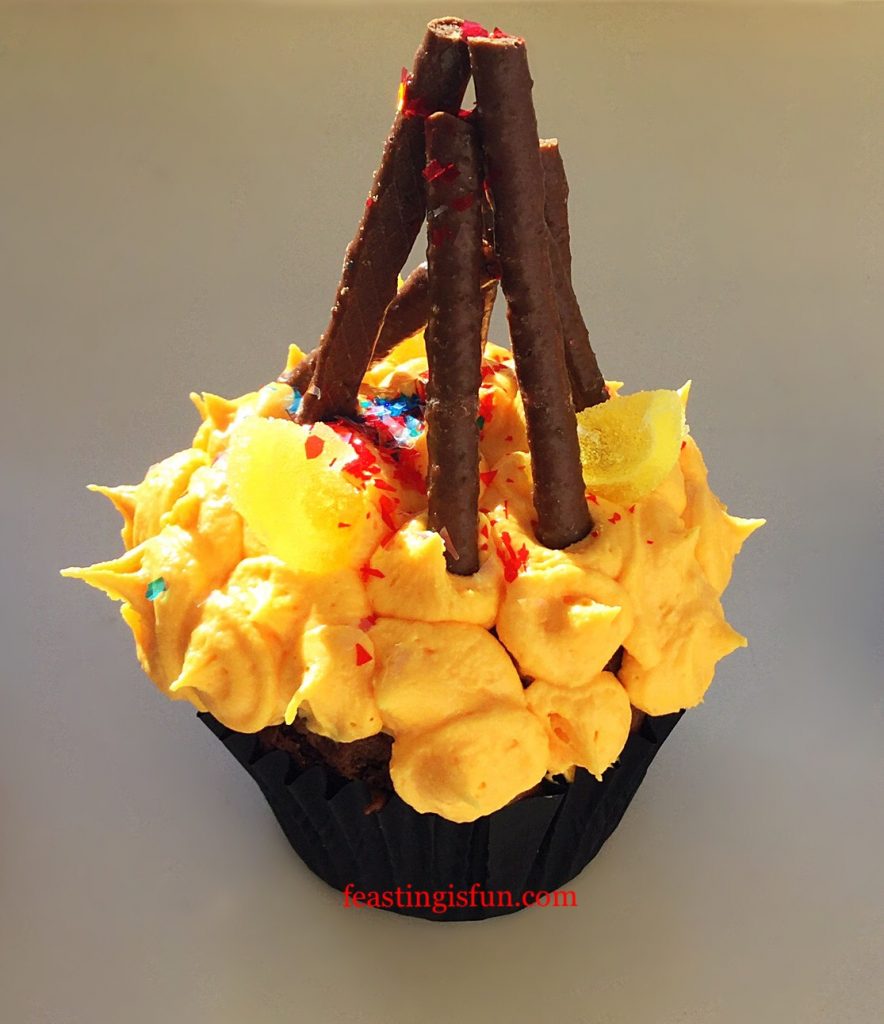
Marbled Chocolate Orange Bonfire Cupcakes

“Remember, remember the 5th of November, gunpowder, treason and plot.” Bonfire night, celebrated here in the U.K. on November 5th, each year remembers the over thrown plot, lead by Guy Fawkes, to blow up the Houses of Parliament. Bonfires are lit and fireworks set off in remembrance of this foiled attack. Standing around a bonfire with a hot chocolate and something sweet on a cold Autumn night only enhances the celebration.  While these Marbled Chocolate Orange Bonfire Cupcakes are ideal for eating, watching fireworks explode in the night sky.

FF Marbled Chocolate Orange Bonfire Cupcakes
Marbled Chocolate Orange Bonfire Cupcakes

While s’mores are traditionally eaten around a bonfire, this is not possible if attending an organised event. Something the Fire Services are increasingly urging us all to do for safety reasons. Yet these Marbled Chocolate Orange Bonfire Cupcakes can be eaten wherever you are. Even indoors watching through the windows, whilst keeping pets calm from the loud bangs and crackles. I love the idea of an edible bonfire that can be taken anywhere, without fear of danger.

FF Marbled Chocolate Orange Bonfire Cupcakes
Marbled Chocolate Orange Bonfire Cupcakes

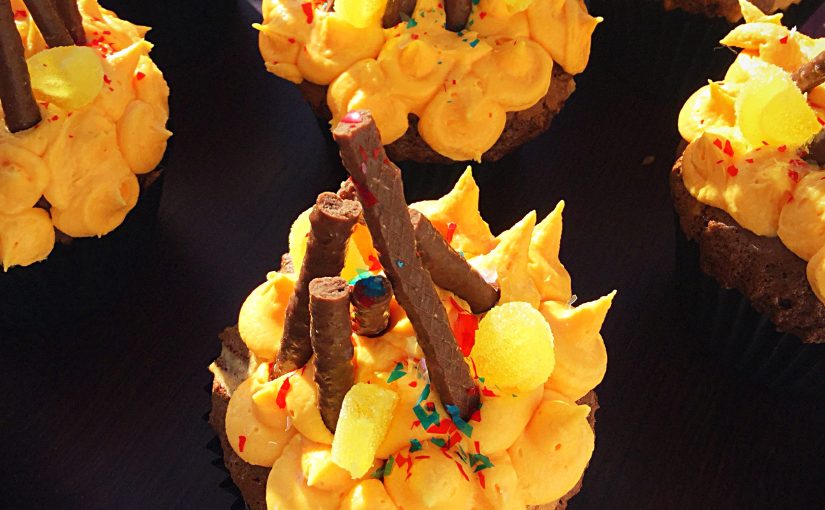
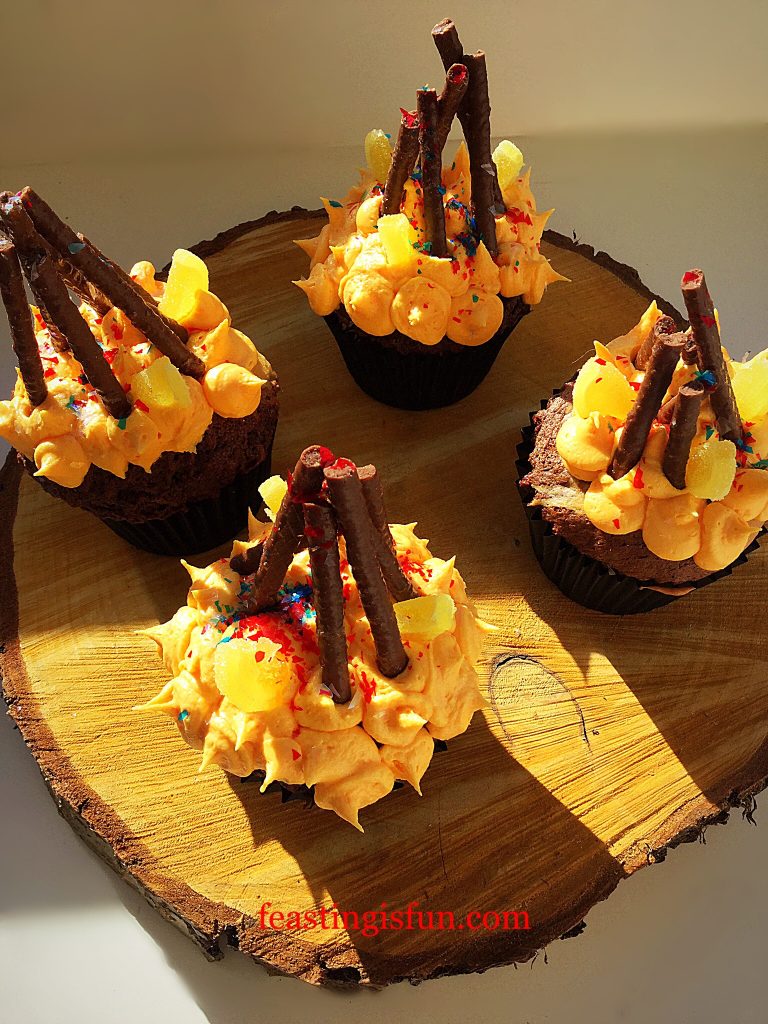
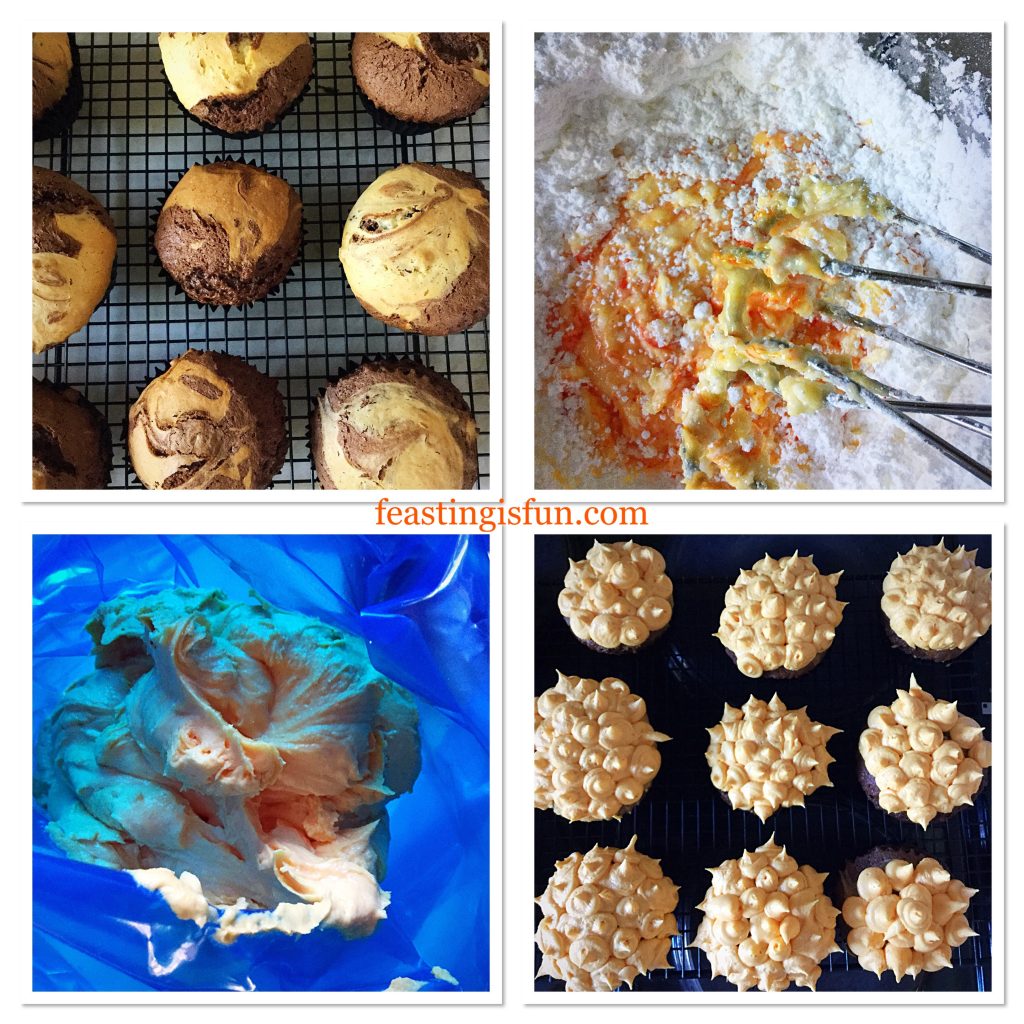
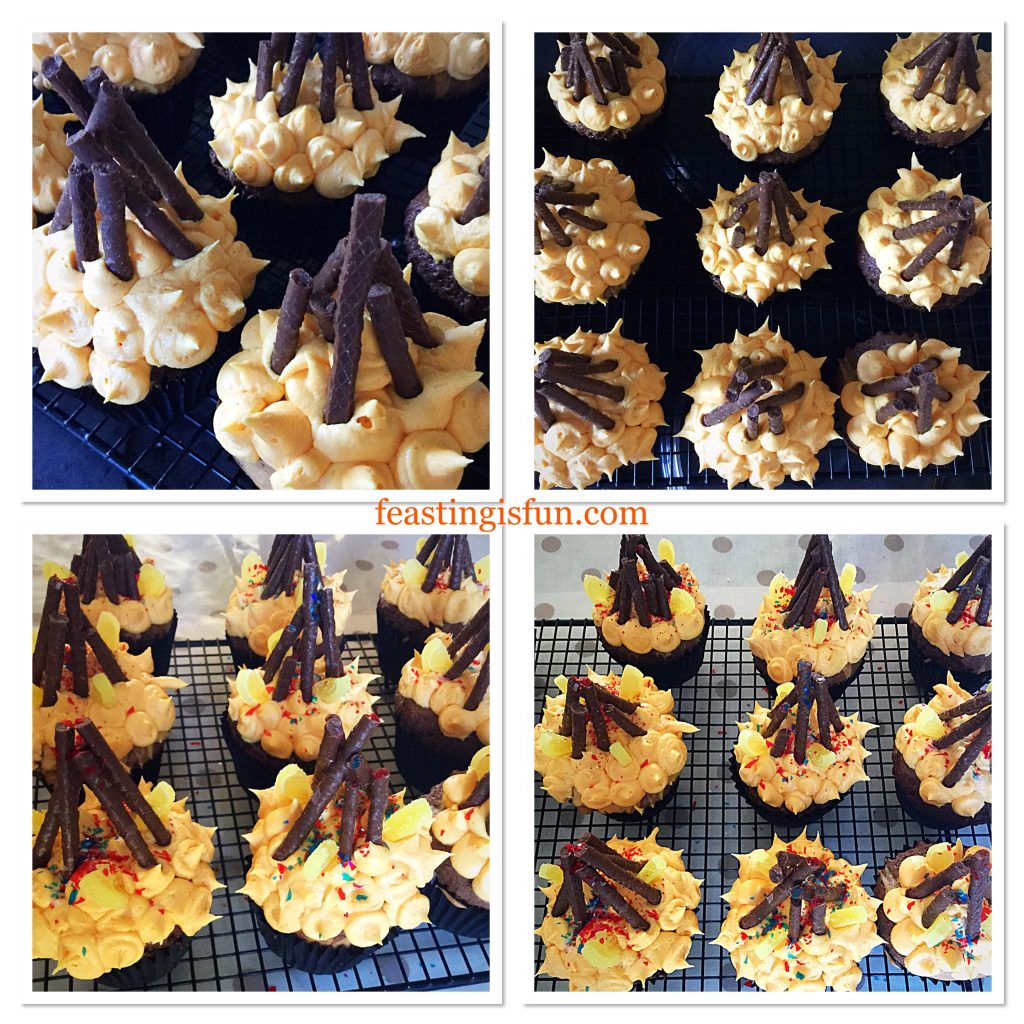
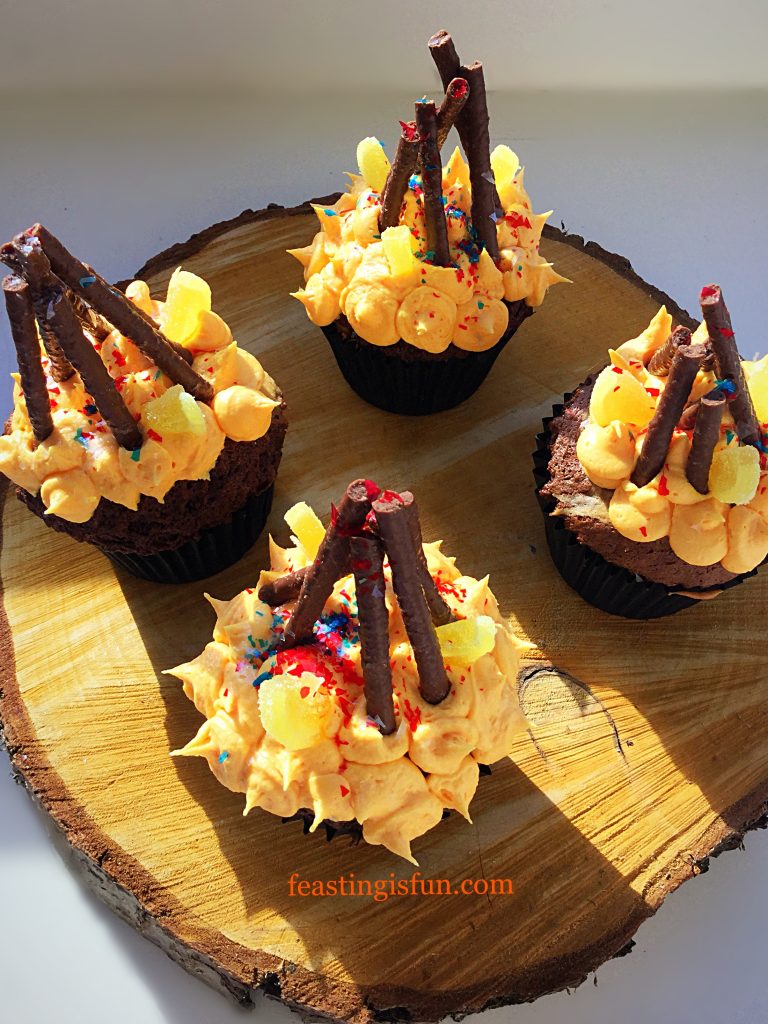
Using Wright’s Chocolate Fudge and Orange Cake mixes, marbled together creates a delicious cupcake. I topped them with flame like, piped orange butter cream, jelly lemons, chocolate orange matchmakers and a sprinkle of edible glitter, not only are these cupcakes tasty to eat, they are also fun to make and look at! Also the ‘bonfires’ do not need to be checked for hedgehogs or other small mammals. Something that should always be done by anyone hosting their own bonfire party.

FF Marbled Chocolate Orange Bonfire Cupcakes
Marbled Chocolate Orange Bonfire Cupcakes

While the sparkles, whooshing sounds and spectacular colours of fireworks are stunning, for me, being close enough to feel the warmth of a bonfire on my face really is my favourite part of bonfire night. I love the crackle, hissing and spitting of wood as it burns is mesmerising. Also, wrapping jacket potatoes in foil and placing in the fire itself is so much fun. Unwrapping piping hot potatoes, slathering with butter before tucking into them with a fork is one of life’s simplest pleasures.

FF Marbled Chocolate Orange Bonfire Cupcakes
Marbled Chocolate Orange Bonfire Cupcakes

Meanwhile, while the potatoes are baking, mugs of steaming hot chocolate perfectly accompany these delicious cupcakes. Since juggling a hot drink and a cupcake can be challenging, I suggest removing the wrappers before serving. Hot drink in one hand, cupcake in the other, with no finger acrobatics needed to enjoy both.

Recipe: Marbled Chocolate Orange Bonfire Cupcakes makes 24

1 packet each of Chocolate Fudge and Orange Cake Mixes available from Wright’s Baking 

Note: If you are unable to obtain the cake mixes, alternatively use the recipe for Caramac Frosted Chocolate Cupcakes 

adding finely grated zest of one orange to the cake batter.

450g/1lb Icing Sugar

1tsp Vanilla Extract – I use Nielsen-Massey

225g/8oz Unsalted Butter softened to room temperature

Scant Pinch of Salt – I use Maldon

Orange Food Colouring

1 Box Chocolate Orange Matchmakers

Optional – small lemon jellies and red/blue edible sprinkles

To make 12 cupcakes, use half of each bag of cake mix and icing.

Method: Preheat oven to 180C/160C fan, gas mark 4

  • First of all, fill 2 deep muffin tins with 24 cupcake/muffin cases.
  • Make both the Orange and Chocolate Fudge cake mixes up in separate bowls according to the packet instructions.
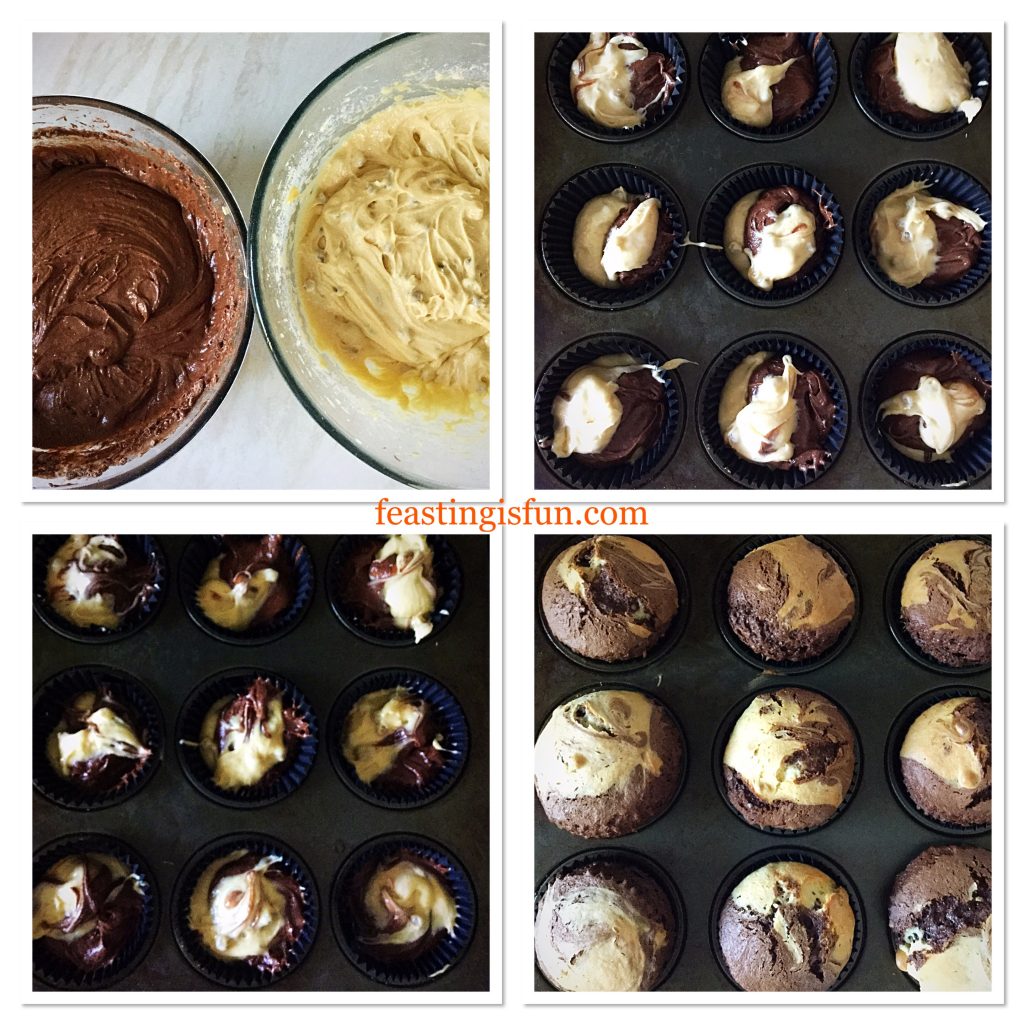
  • Spoon half a dessert spoonful of orange cake batter into each cupcake case. Now scoop a whole dessert spoonful of Chocolate Fudge cake batter on top of the orange. Follow by adding another half of a dessert spoonful of orange batter on to the top of the chocolate.
  • Using a cocktail stick, swirl the two different cake batters together.
  • Place the cupcake tins, spaced evenly apart, into the preheated oven and bake for 25-30 minutes.
FF Marbled Chocolate Orange Bonfire Cupcakes
Filling, marbling and baking the cupcakes.
  • As soon as the cupcakes are well risen and spring back from a light touch they are baked.
  • Remove the cupcake tins from the oven and immediately transfer the cupcakes to a cooling rack. Leave until completely cooled before decorating.
  • To make the icing, sift the icing sugar into a large bowl. Add the softened butter, salt, vanilla extract and food colouring to the same bowl.
  • Next add one tablespoon of very hot water. Immediately start whisking the ingredients together on a slow speed, increasing the speed as they combine.
  • Continue whisking until the buttercream is pale and creamy, adjusting the colour if necessary.
  • Once fully whisked transfer the buttercream to a piping bag fitted with a 1cm round nozzle.
  • Staring in the centre of a fully cooled cupcake pipe a dot and pull away the piping bag. This will leave a small peak which will resemble flames.
  • Continue until the top of each cupcake is covered.
FF Marbled Chocolate Orange Bonfire Cupcakes
Make buttercream and piping flames on to Cupcakes.
  • To create the bonfire effect, break up 2 or 3 matchmaker sticks and push into the icing so they look like logs on a bonfire.
  • Follow by adding the jellied lemons. Angle them outwards from the ‘logs’ to give the effect of flames licking at the wood.
  • Finally, to finish sprinkle first with red edible glitter and then again with slightly less blue edible glitter.
FF Marbled Chocolate Orange Bonfire Cupcakes
Finishing touches added to create the Bonfire effect.
  • Display the finished cupcakes on wooden boards, or slabs. Chopping boards and cheese boards can also be used to great effect.
FF Marbled Chocolate Orange Bonfire Cupcakes
Marbled Chocolate Orange Bonfire Cupcakes

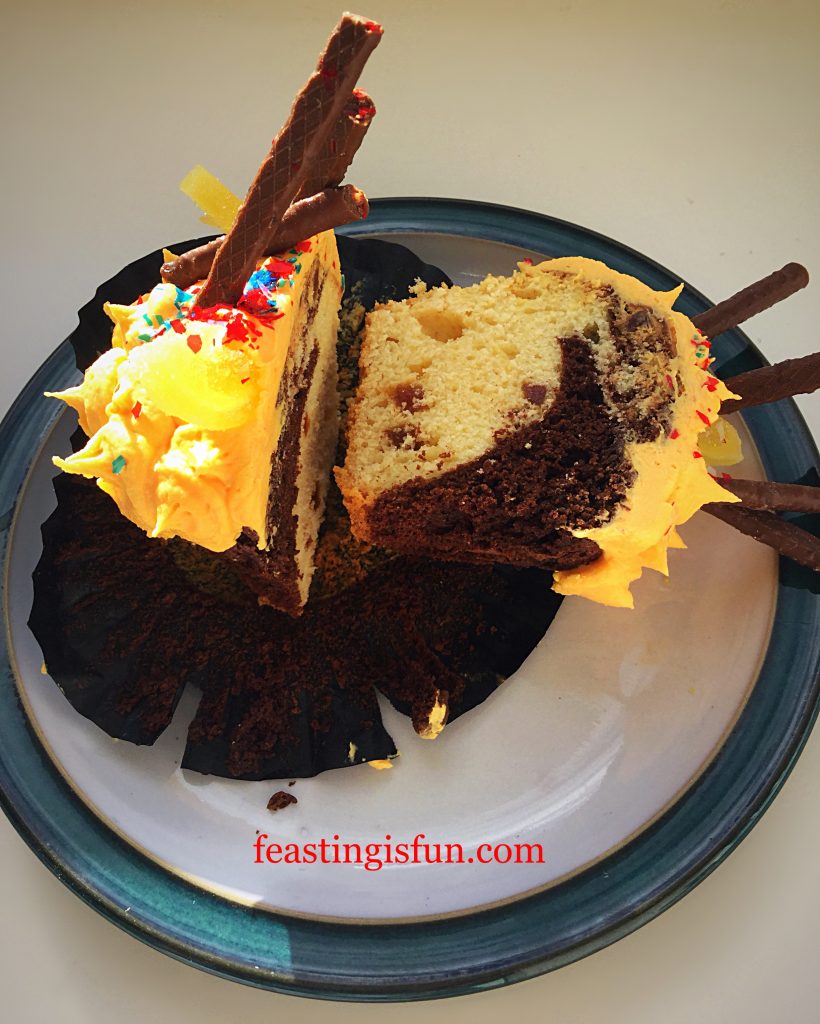
The marbled combination of chocolate and orange can be seen and tasted with the first bite into a cupcake.

The marbling effect in the cupcakes.

Easy to make and ideal for any firework party gathering. These cupcakes are sure to induce as many ooh’s and aah’s as the firework’s themselves.

Make ahead and store in an airtight container for up to 2 days.

If you have enjoyed this recipe for Marbled Chocolate Orange Bonfire Cupcakes then you may also like these:


Caramel Crunch Rocky Road Bars

FF Marbled Chocolate Orange Bonfire Cupcakes
Caramel Crunch Rocky Road Bars

Spicy Sausage Rolls

FF Marbled Chocolate Orange Bonfire Cupcakes
Spicy Sausage Rolls

Chocolate Sparkle Cake

FF Marbled Chocolate Orange Bonfire Cupcakes
Chocolate Sparkle Cake

Democracy is of upmost importance here in the U.K. Since this is exactly why we celebrate Bonfire Night. Since the very night that our democracy was due to be blown to pieces, by a group of men with different ideas, our freedom and democracy are celebrated and not taken for granted. While the very same can be said of terrorists and terror events in the modern day. People seeking disrupt and create chaos in countries where their ideas are not followed. Our privilege to speak freely, practice our own faith, without causing harm to others, is something that we must and should hold dear.

If you would like more information please see Important Stuff

Whatever you are making, baking and creating have fun preparing your feast. Also have a safe Bonfire Night.

Sammie xx

Wright’s Baking provided the cake mixes to create this recipe. All thoughts, opinions and content are my own. I was not paid to write this post.

No part of this post may be reproduced or duplicated without the written permission of the owner. Please see my Disclosure Policy

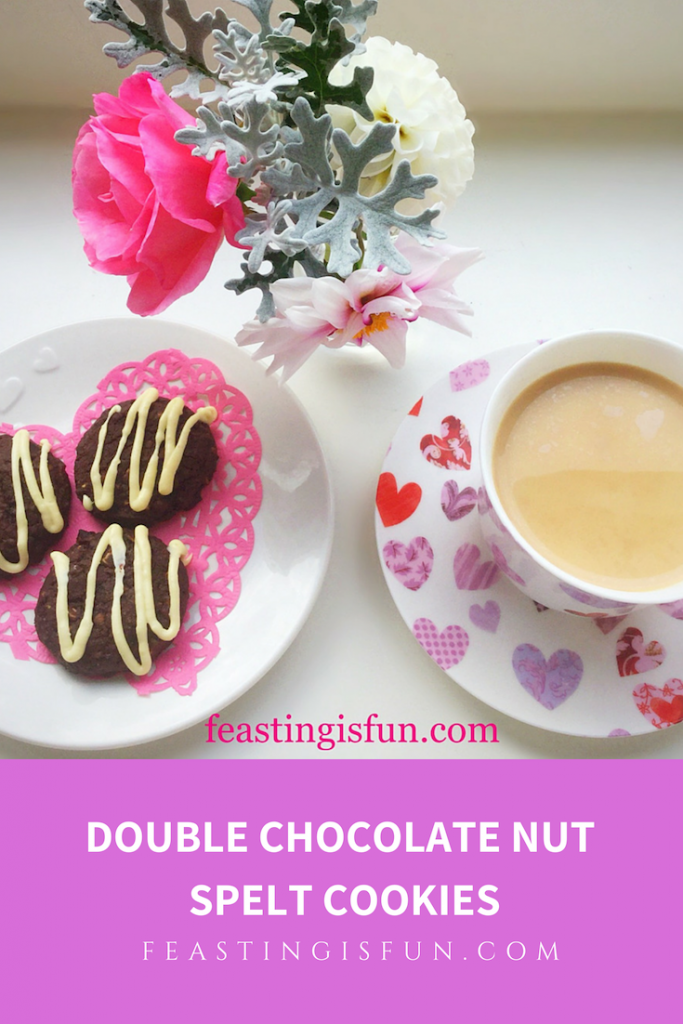
Double Chocolate Nut Spelt Cookies

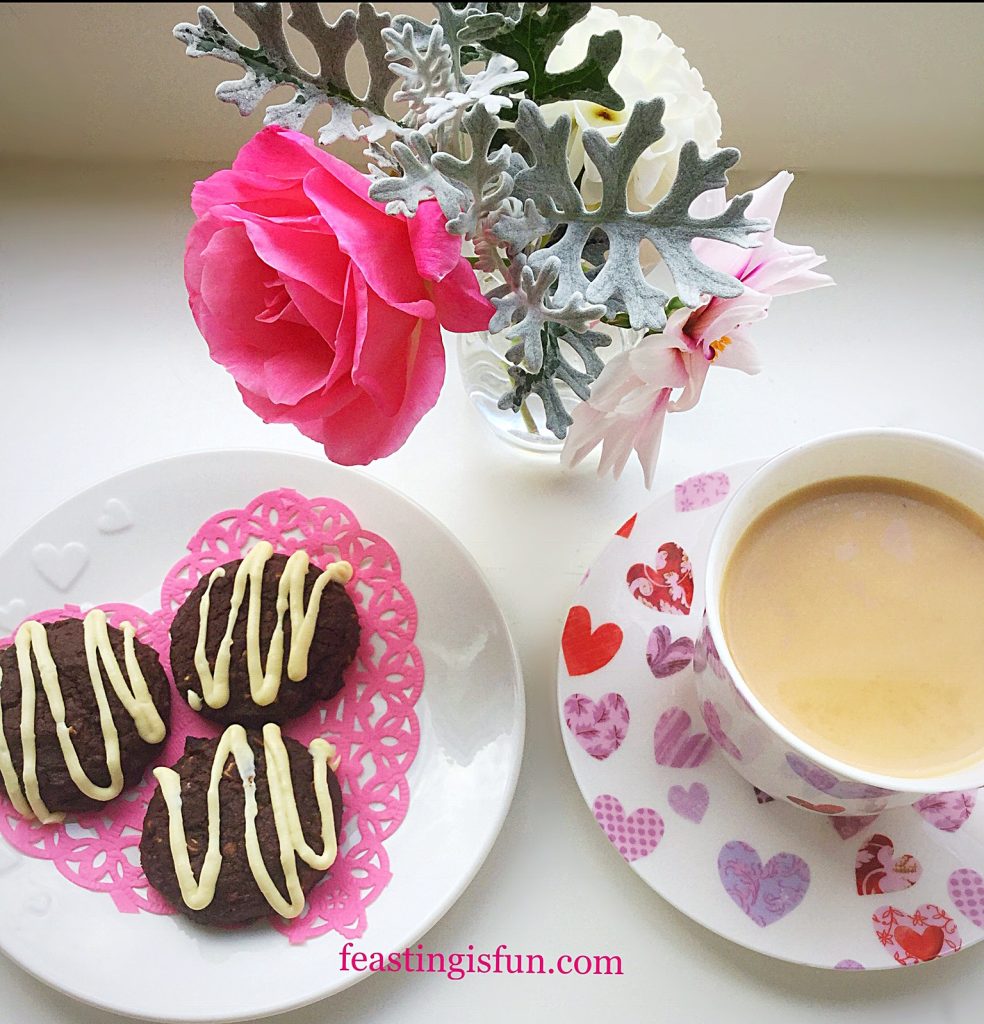
Here, at Feasting headquarters, cookies and biscuits are a food group all of there own. Since, I start everyday with a cup of tea and a cookie. A tradition started by my Grandad ever since I was a little girl. And something that has been carried on with our children. While each of us have our personal favourites, we all agree that these Double Chocolate Nut Spelt Cookies are perfectly delicious.

Double Chocolate Nut Spelt Cookies

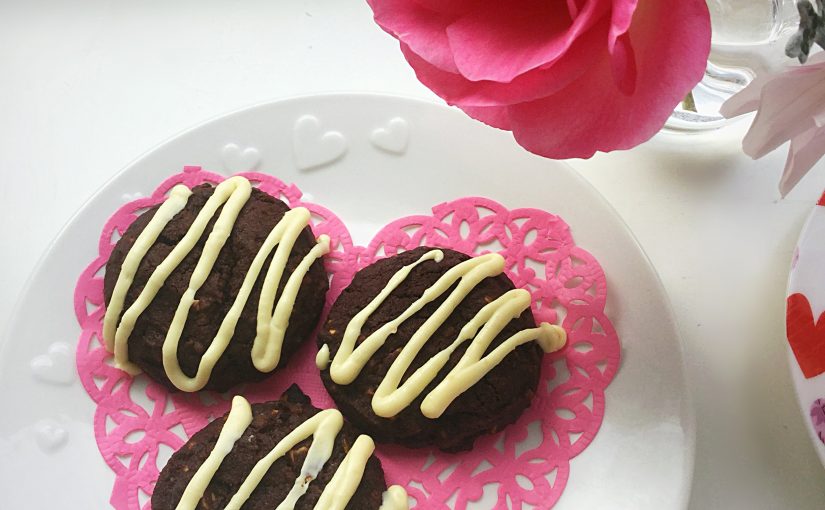
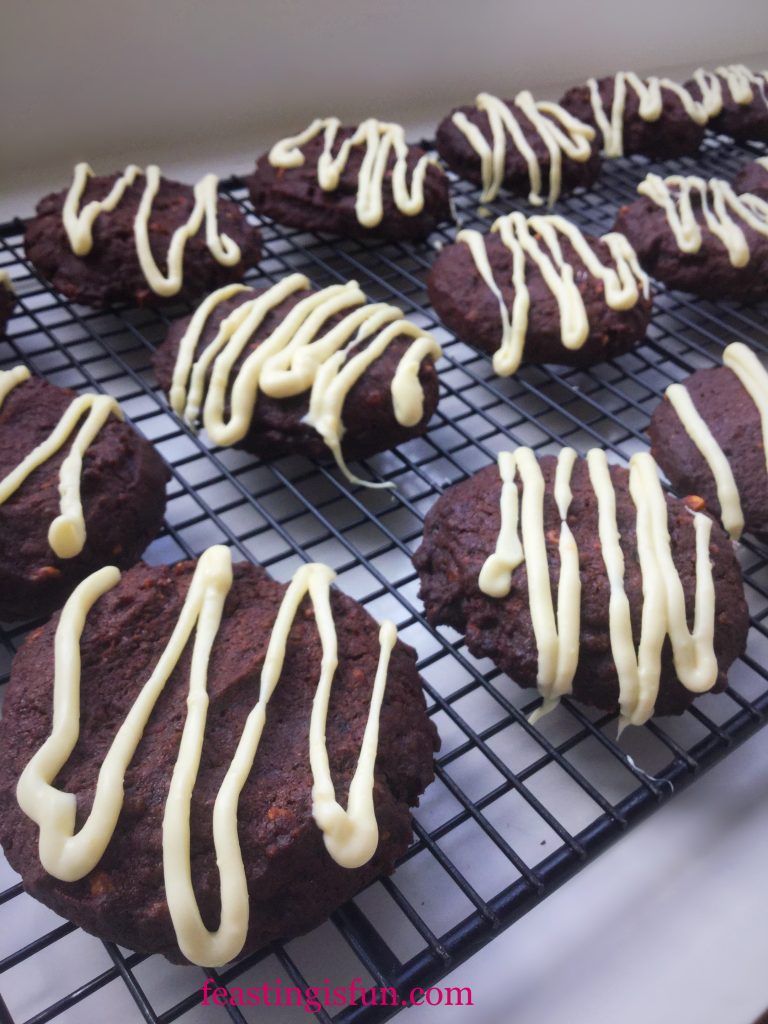
White spelt flour has a slight nutty flavour to it that is accented in these cookies with the addition of toasted hazelnuts. While white chocolate chunks provide pockets of sweetness in the dark chocolate. Also finished with a white chocolate drizzle, giving each cookie that extra special touch. Resulting in a perfectly flavoured, nutty chocolate cookie that satisfies any Cookie Monster craving.

FF Double Chocolate Nut Spelt Cookies
Double Chocolate Nut Spelt Cookies

Since these cookies are not only delicious but also easy to make, why not bake a double batch and give some away? Also, a gift of freshly baked cookies would surely be very welcome. A new mum and dad, sleep deprived with their first baby, or elderly neighbours that don’t get out very often. And it isn’t hard to find people that would love to receive a surprise cookie hamper.

FF Double Chocolate Nut Spelt Cookies
Double Chocolate Nut Spelt Cookies

Recipe: Double Chocolate Nut Spelt Cookies makes 24-28

150g/5oz Unsalted Butter at room temperature

1/4tsp Sea Salt – I use Maldon

225g/8oz Dark Brown Sugar

1 Large Free Range Egg

1tsp Vanilla Extract – I use Nielsen-Massey

50g/2oz Cocoa Powder – I use Callebaut

225g/8oz White Spelt Flour – I use Craggs and Co. – alternatively you can use the equivalent weight of plain white flour, the cookies will have a slightly subdued nutty flavour yet will still taste good.

1/2tsp Bicarbonate of Soda

100g/4oz White Chocolate Chunks

200g/7oz White Chocolate for melting

100g/4oz Chopped Toasted Hazelnuts

Method: Preheat the oven to 160C/140C fan, 325F gas mark 3

Making The Spelt Cookie Dough

  • First of all, line 2 or 3 large baking trays with baking parchment.
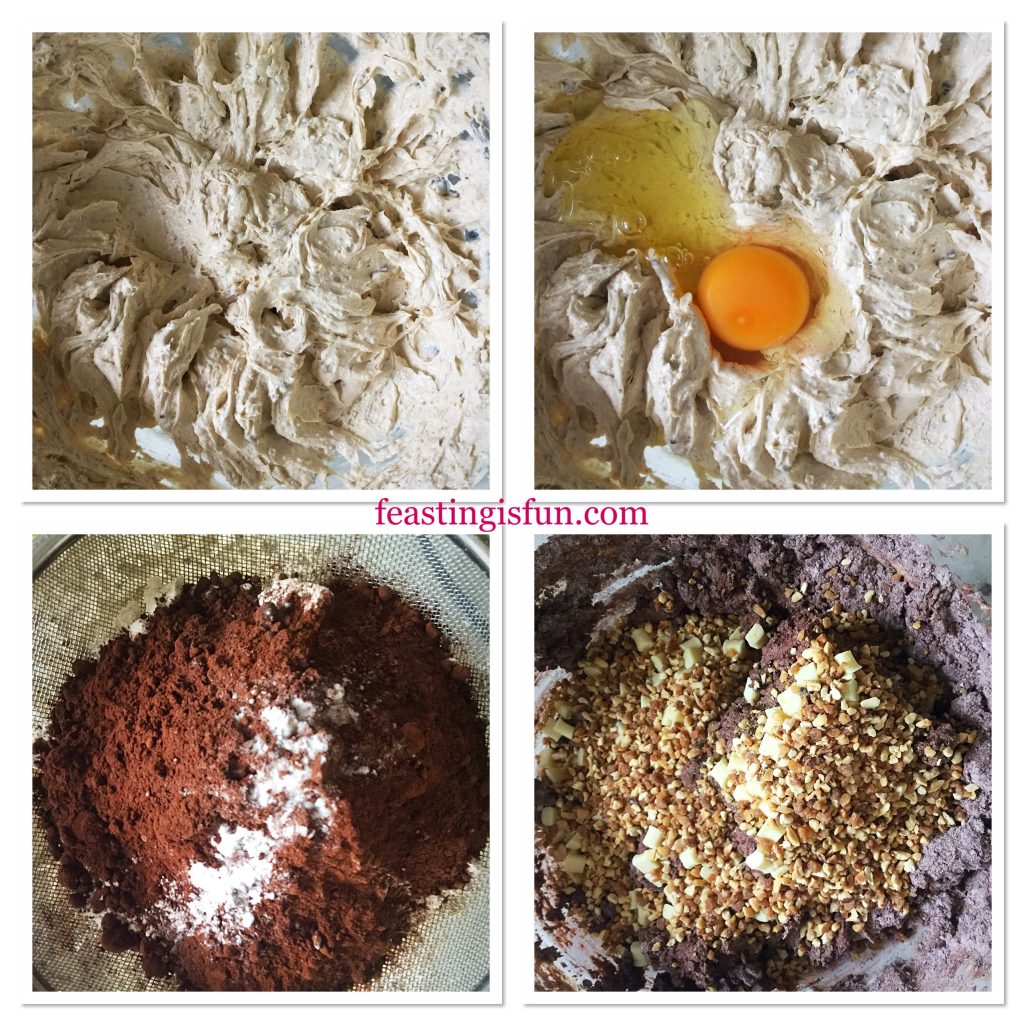
  • Place the butter, sugar and salt into a bowl and whisk together until pale and creamy.
  • Next add the egg and vanilla extract. Whisk together until combined.
  • Sift the spelt flour, cocoa and bicarbonate of soda into the same bowl.
  • Add in the chopped, roasted hazelnuts and white chocolate chunks.
  • Mix everything together until just combined.
FF Double Chocolate Nut Spelt Cookies
Preparing the cookie batter.
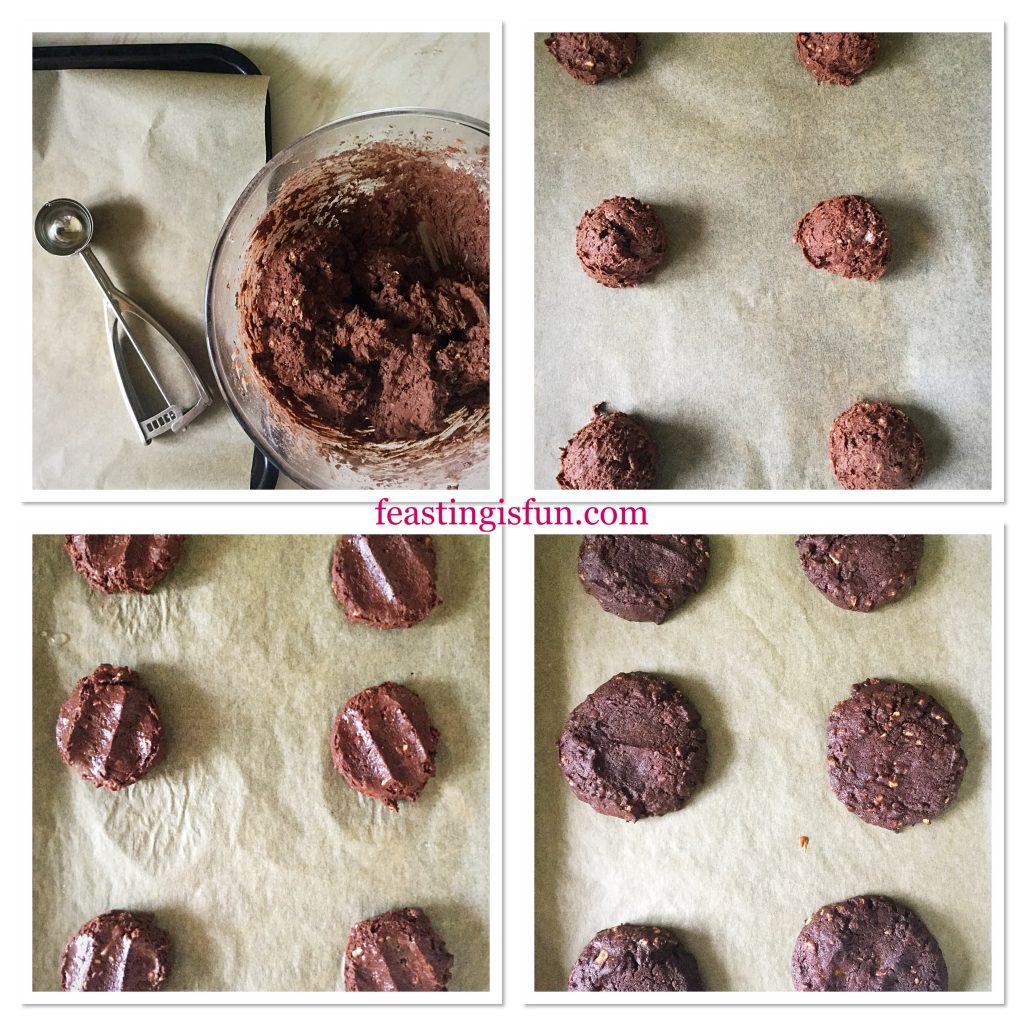
  • Use a one inch/5cm ice cream scoop or a dessert spoon, scoop a portion of cookie dough and place on to a parchment lined tray.
  • Space each cookie well apart. Finally, lightly press down with clean hands to slightly flatten each cookie.

Baking The Cookies

  • Place the baking trays into the oven and bake for 20 minutes exactly.
FF Double Chocolate Nut Spelt Cookies
Portioning, shaping and baking the cookies.
  • As soon as the 20 minutes has elapsed remove the cookies from the oven.
  • Leave the cookies to cool for 5 minutes on the trays before transferring to a cooling rack.
  • While the first batch of cookies are cooling, scoop and bake the rest.

Adding The White Chocolate Drizzle

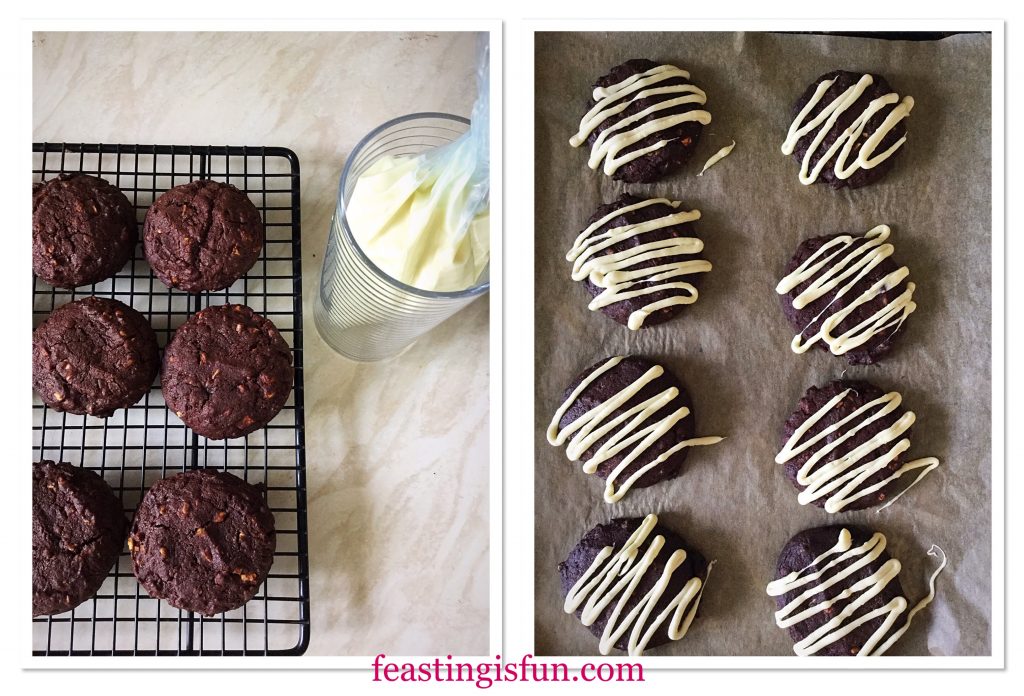
  • Chop the white chocolate into small pieces and place into a heatproof, microwaveable bowl. Heat on medium power for 30 second bursts, stirring after each heating session. As soon as the chocolate starts to melt remove the bowl from the microwave and stir until completely melted.
  • Spoon the melted chocolate into a small piping bag.
  • Snip off the end, leaving a small hole. Pipe white chocolate zig zags across each cookie.
FF Double Chocolate Nut Spelt Cookies
Decorating the Double Chocolate Nut Spelt Cookies.
  • Once all of the cookies have been decorated, set them aside to allow the chocolate to set.
FF Double Chocolate Nut Spelt Cookies
Double Chocolate Nut Spelt Cookies

As soon as the white chocolate drizzle has set these cookies are ready to be served.

Store in an airtight container for up to 5 days. Refrigerate during warmer weather.

Cookies served on a plate.
Double Chocolate Nut Spelt Cookies

If you have enjoyed this recipe for Double Chocolate Nut Spelt Cookies then you may also like these:

Almond Cacao Nib Shortbread Bars

FF Double Chocolate Nut Spelt Cookies
Almond Cacao Nib Shortbread Bars

Chocolate Fudge Double Hazelnut Brownies

FF Double Chocolate Nut Spelt Cookies
Chocolate Fudge Double Hazelnut Brownies

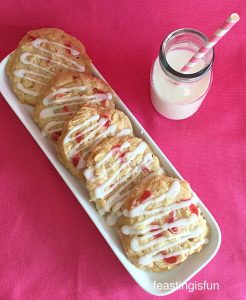
Cherry Bakewell Cookies

FF Double Chocolate Nut Spelt Cookies
Cherry Bakewell Cookies


Baking for others is such a rewarding experience. Especially when you know that the gift will be lovingly received. Although some people may be too proud to ask for help, stopping by, having a chat and handing over a food gift can break down many barriers. Because simply knowing that they have been thought about may brighten someone’s day more than you or I could ever know. And thing I am sure of is that I have never had a well intended food gift turned down.

So, whatever you are making, baking and creating, have fun prepping your feast and remember, food always tastes better when shared.

Sammie xx

No part of this post may be reproduced or duplicated without the written permission of the owner. Please see my Disclosure Policy.
Luxury Homemade Vanilla Bean Custard

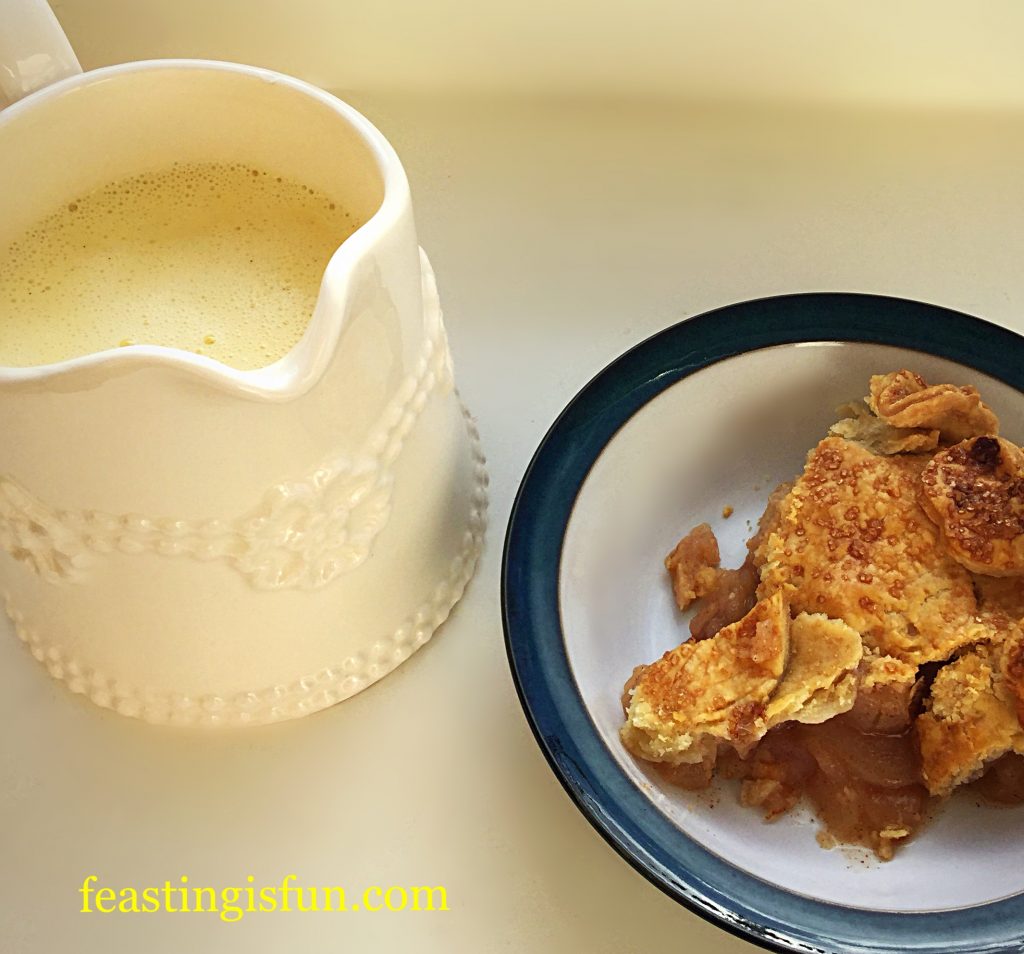
Custard, we British adore it. I adore it. Pour over hot fruit pies, or puddle around steaming puds. We simply cannot get enough of this delicious dessert accompaniment. So easily bought, ready made in cartons, or from the chilled cabinet in supermarkets. Also deliciously made using ‘Birds’ custard powder. While all of these are good options, the very best is to make your own, from scratch, at home. Let me show you my simple, yet Luxury Homemade Vanilla Bean Custard.

FF Luxury Homemade Vanilla Bean Custard


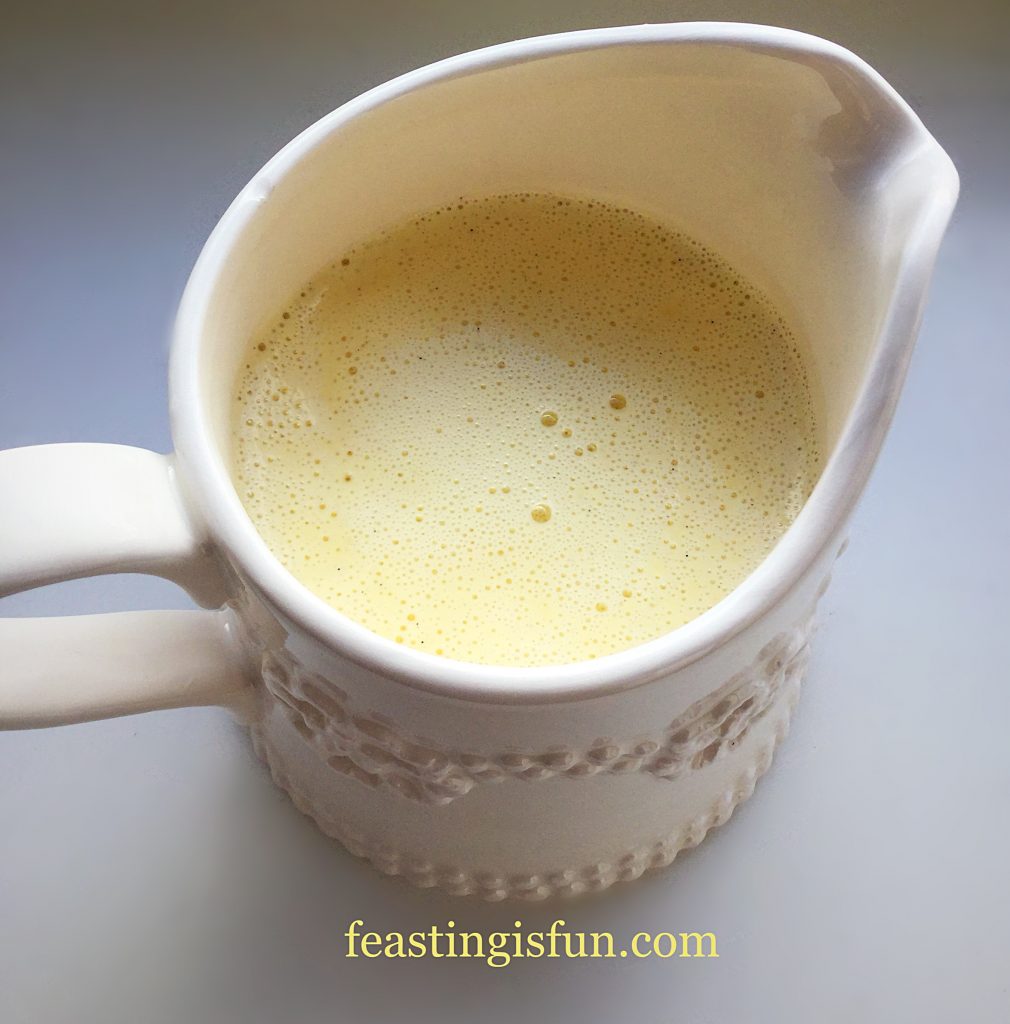
Since this recipe uses fresh egg yolks and cornflour, it is virtually foolproof. And also gluten free! Indeed, it takes no longer to create this fresh custard from scratch, than it does to make a jug of ‘Birds’ custard by hand. Yet the taste is far superior in every single imaginable way. Creamy, with a distinct vanilla flavour. Also known as Creme Anglaise, this is THE custard to serve alongside a hot dessert.
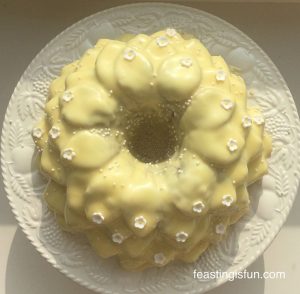
FF Luxury Homemade Vanilla Bean Custard
Luxury Homemade Vanilla Bean Custard

As egg yolks are essential to a great custard, it really does make sense to buy free range or organic eggs. While you are rewarded with deeply golden yolks, it’s handy to know that the whites can be frozen for up to one month. Simply defrost, bring up to room temperature and bake a Pavlova, such as my Mixed Berry Pavlova.

FF Luxury Homemade Vanilla Bean Custard
Luxury Homemade Vanilla Bean Custard

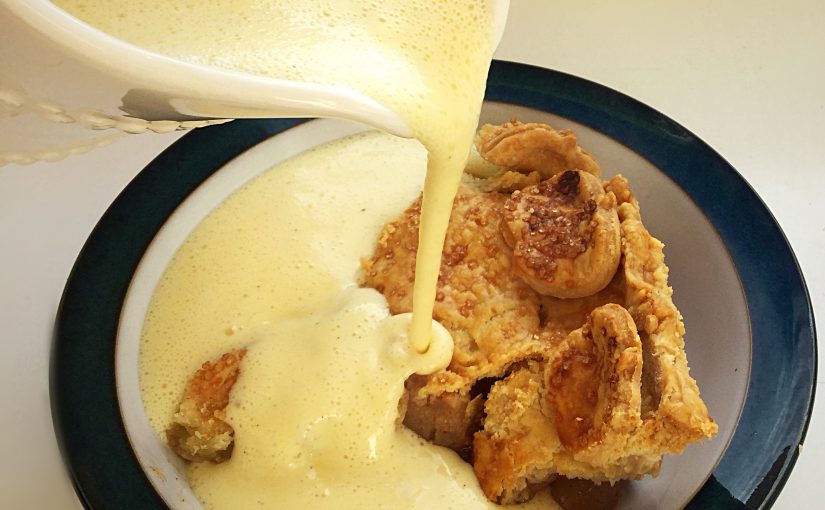
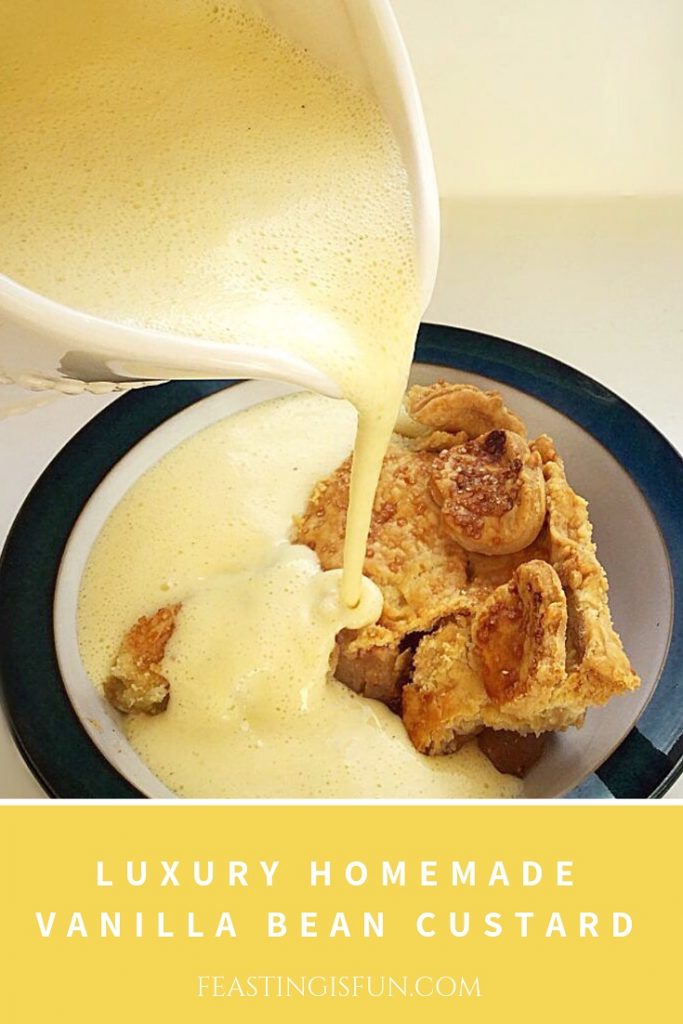
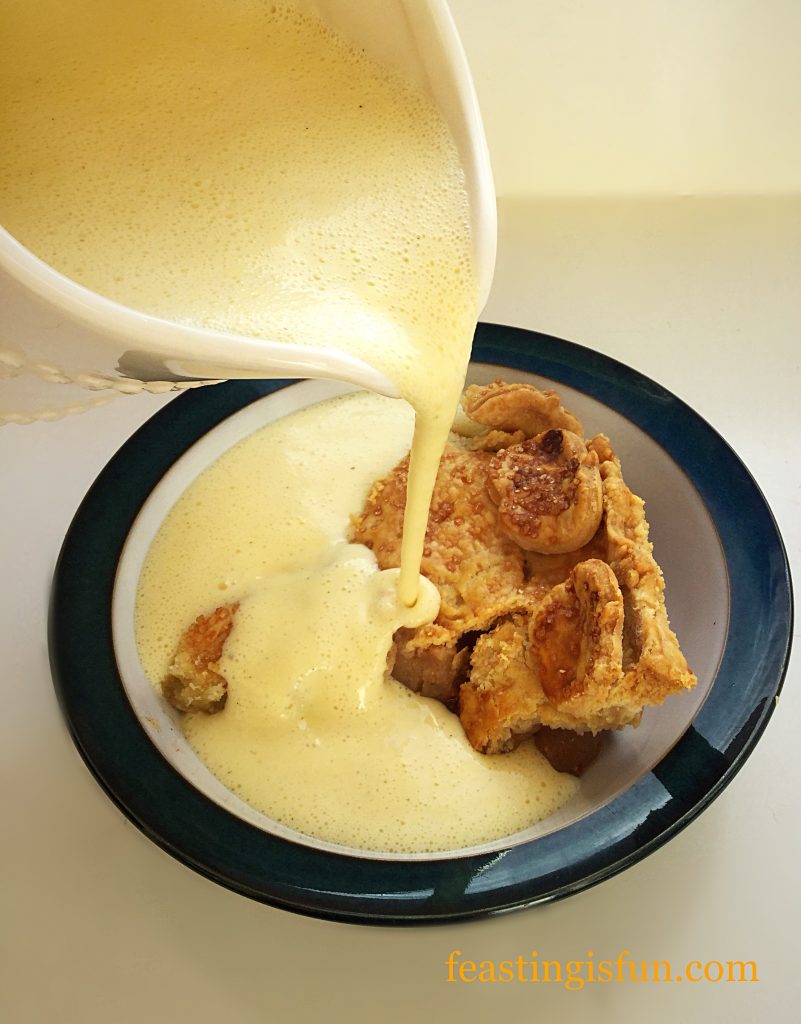
Homemade Amazing Apple Pie cries out to be covered in creamy, delicious, Luxury Homemade Vanilla Bean Custard. Also, if you, like me, enjoy the hot/cold combination of custard and vanilla ice cream. Well, let’s just say I’m absolutely not going to judge. If you haven’t tried it, you are seriously missing out!

Note: To make a thicker custard for trifles, increase the cornflour to 3 teaspoons.

Recipe: Luxury Homemade Vanilla Bean Custard makes 500ml

300ml Double Cream

200ml Whole Milk

4 Large Free Range Egg Yolks – the whites can be frozen for up to one month

1 Vanilla Pod or 1 tsp Vanilla Bean Extract

1 tsp Cornflour also known as corn starch – I use Doves Farm as this is certified gluten free

4 tbsp Caster Sugar

Scant 1/4tsp Salt – I use Maldon

Method:

Making The Custard

  • First of all, pour the milk and cream into a heavy bottomed saucepan. Place over a medium heat. Heat until bubbles appear around the edge of this liquid. This is known as the scalding point. Once scalding point is reached, remove the saucepan from the heat.
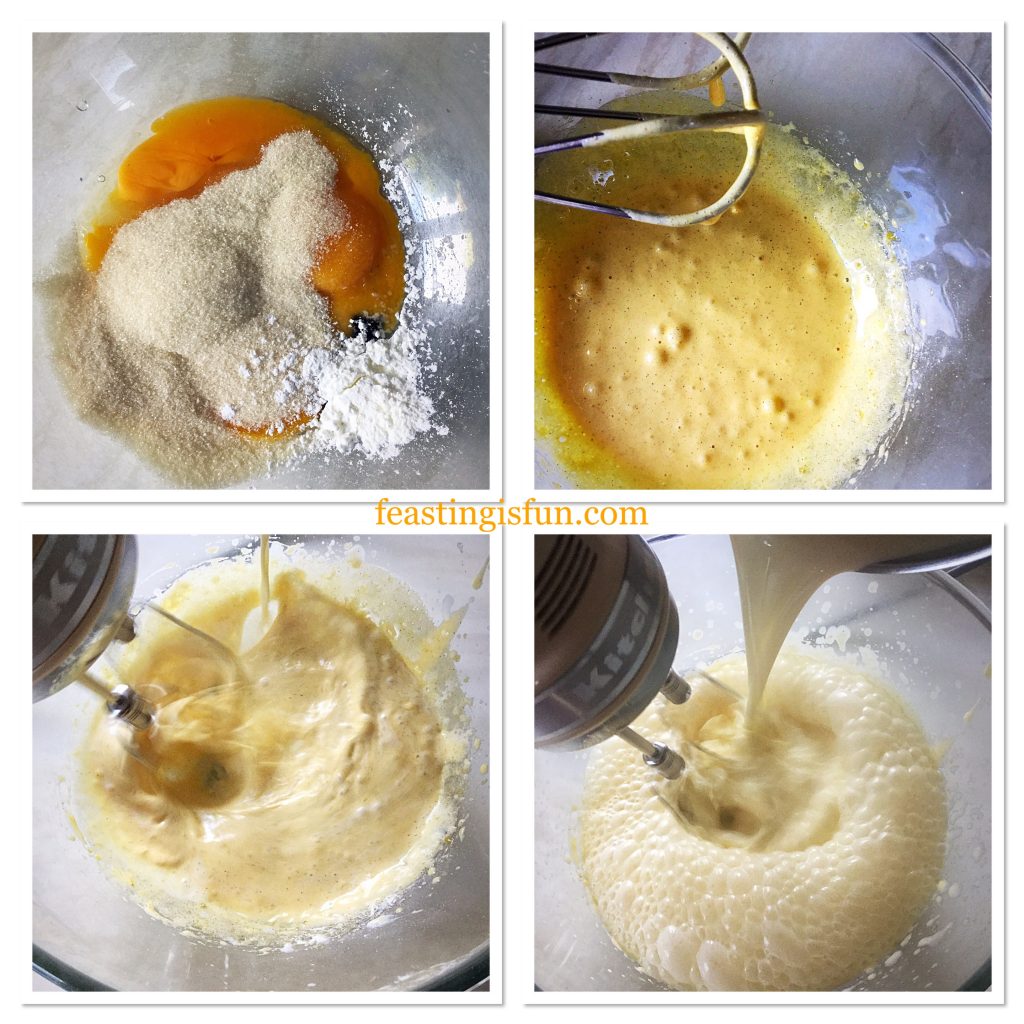
  • While the cream mixture is heating, make the egg base. Separate 4 eggs, placing the yolks into a large, heatproof bowl.
  • Next, add the cornflour, sugar and seeds from a vanilla pod, or vanilla bean extract.
  • Whisk the ingredients in the bowl together until fully combined.
  • With the whisk on slow, pour the scalded cream mixture slowly into the bowl, increasing whisking speed at the end.
FF Luxury Homemade Vanilla Bean Custard
Creating the Luxury Homemade Vanilla Bean Custard
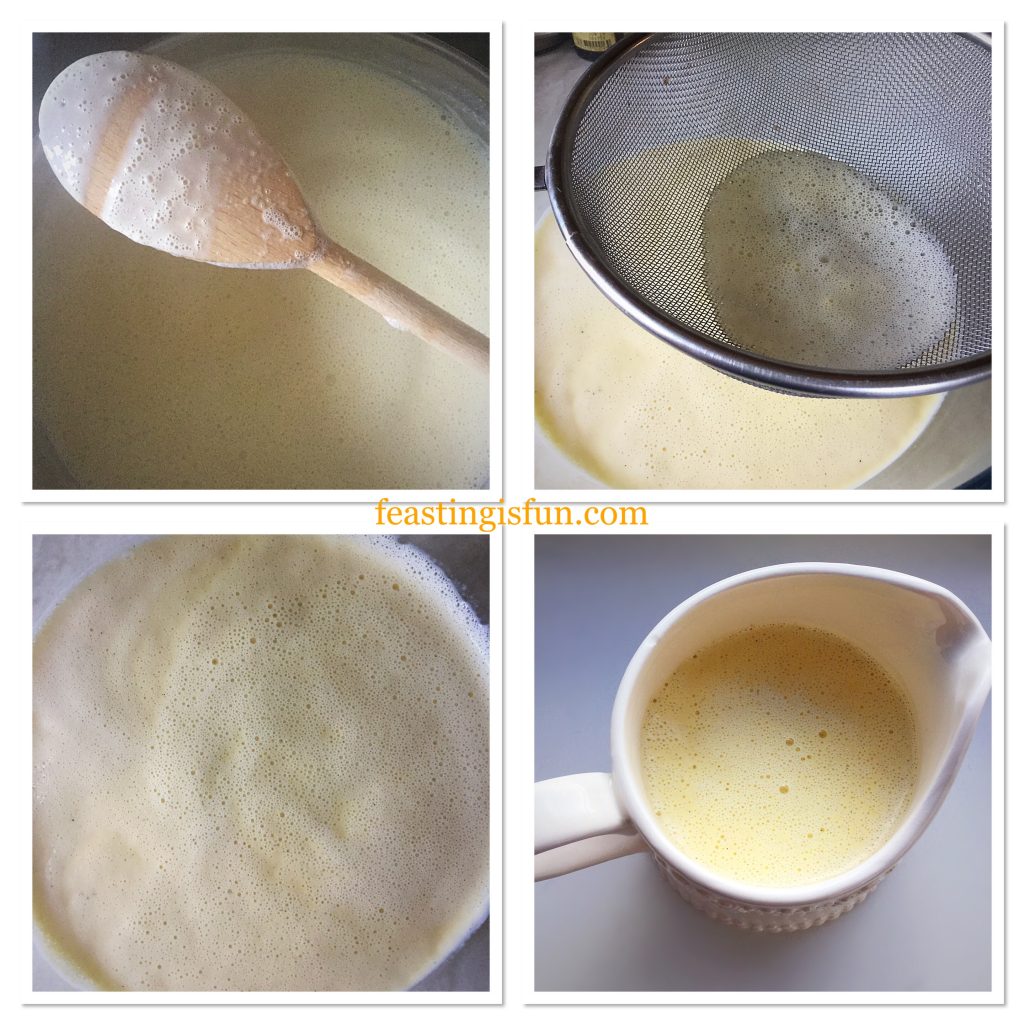
  • Pour the hot, liquid back into the saucepan and place back over a medium/low heat.
  • Stir continuously and the custard will start to thicken. DO NOT heat the custard until it bubbles vigorously, as could will result in a burnt, scrambled egg like mixture.
  • When the custard has thickened and coats the back of a wooden spoon remove from the heat.
  • Pour the custard through a sieve into a heatproof bowl. If making ahead, place cling film directly on top of the custard, to stop a skin from forming. Allow to cool and then refrigerate. To reheat, pour the custard back into a saucepan and heat over a low/medium temperature, stirrring continuously until it is hot. Don’t reheat in a microwave, as the custard may scramble.
  • To use immediately, pour the hot custard into a jug.
FF Luxury Homemade Vanilla Bean Custard
Cooking, sieving and preparing the custard to serve.

To serve, simply pour the custard over, or around your favourite dessert.

FF Luxury Homemade Vanilla Bean Custard
Luxury Homemade Vanilla Bean Custard

Store freshly made custard, cling filmed as above, in the fridge for up to 2 days.

If you have enjoyed this recipe for Luxury Homemade Vanilla Bean Custard then you may also like these:

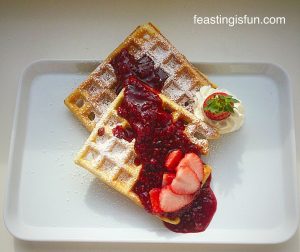
Boozy Berry Sauce

FF Luxury Homemade Vanilla Bean Custard
Boozy Berry Sauce

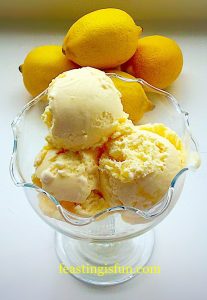
Lemon Ripple Ice Cream

FF Luxury Homemade Vanilla Bean Custard
Lemon Ripple Ice Cream

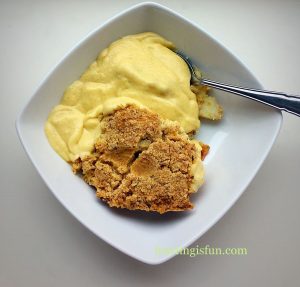
Toffee Apple Crumble

FF Luxury Homemade Vanilla Bean Custard
Toffee Apple Crumble

Since I use cornflour that is guaranteed to be gluten free, people with certain dietary restrictions can also enjoy this custard. Hot, homemade desserts are made more delicious when accompanied by this easy to make custard. There will always be a time when it’s pre-made alternative is necessary. Yet special occasions, such as Christmas are the perfect opportunity to treat your tastebuds to the very best.
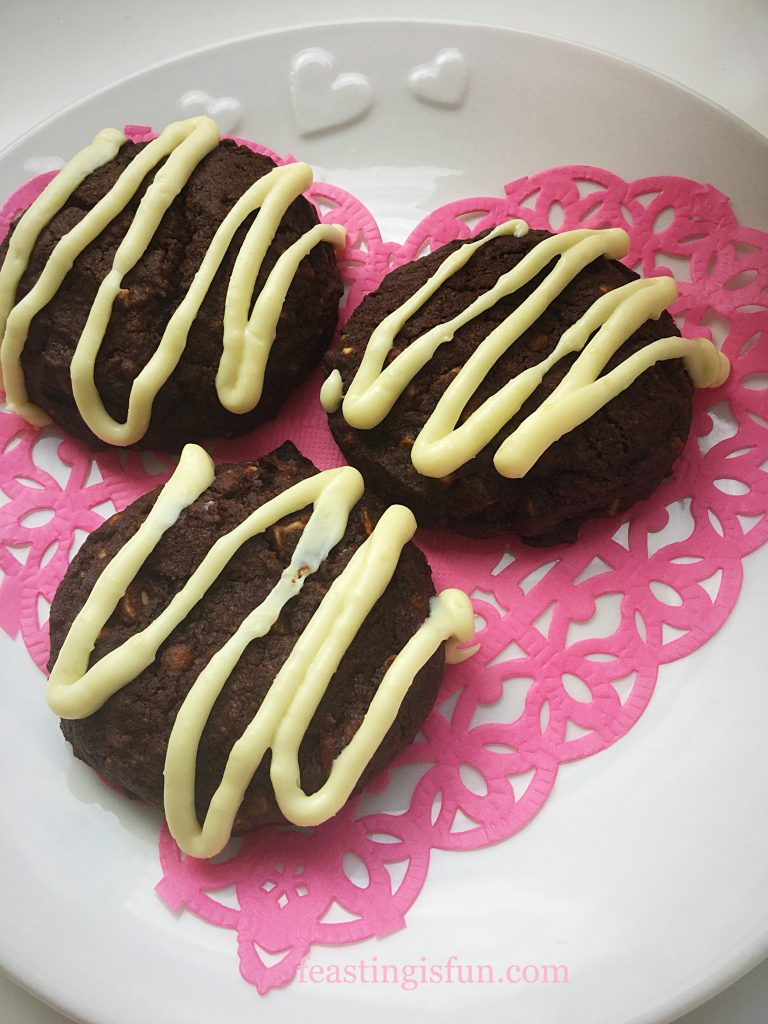
Whatever you are baking, making and creating in your kitchens, have fun preparing your feast.

Sammie xx

No part of this post may be reproduced or duplicated without the written permission of its owner. Please see my Disclosure Policy.