Marbled Chocolate Orange Bonfire Cupcakes

Share
Facebooktwitterpinterestlinkedintumblr

“Remember, remember the 5th of November, gunpowder, treason and plot.” Bonfire night, celebrated here in the U.K. on November 5th, each year remembers the over thrown plot, lead by Guy Fawkes, to blow up the Houses of Parliament. Bonfires are lit and fireworks set off in remembrance of this foiled attack. Standing around a bonfire with a hot chocolate and something sweet on a cold Autumn night only enhances the celebration.  While these Marbled Chocolate Orange Bonfire Cupcakes are ideal for eating, watching fireworks explode in the night sky.

FF Marbled Chocolate Orange Bonfire Cupcakes
Marbled Chocolate Orange Bonfire Cupcakes

While s’mores are traditionally eaten around a bonfire, this is not possible if attending an organised event. Something the Fire Services are increasingly urging us all to do for safety reasons. Yet these Marbled Chocolate Orange Bonfire Cupcakes can be eaten wherever you are. Even indoors watching through the windows, whilst keeping pets calm from the loud bangs and crackles. I love the idea of an edible bonfire that can be taken anywhere, without fear of danger.

FF Marbled Chocolate Orange Bonfire Cupcakes
Marbled Chocolate Orange Bonfire Cupcakes

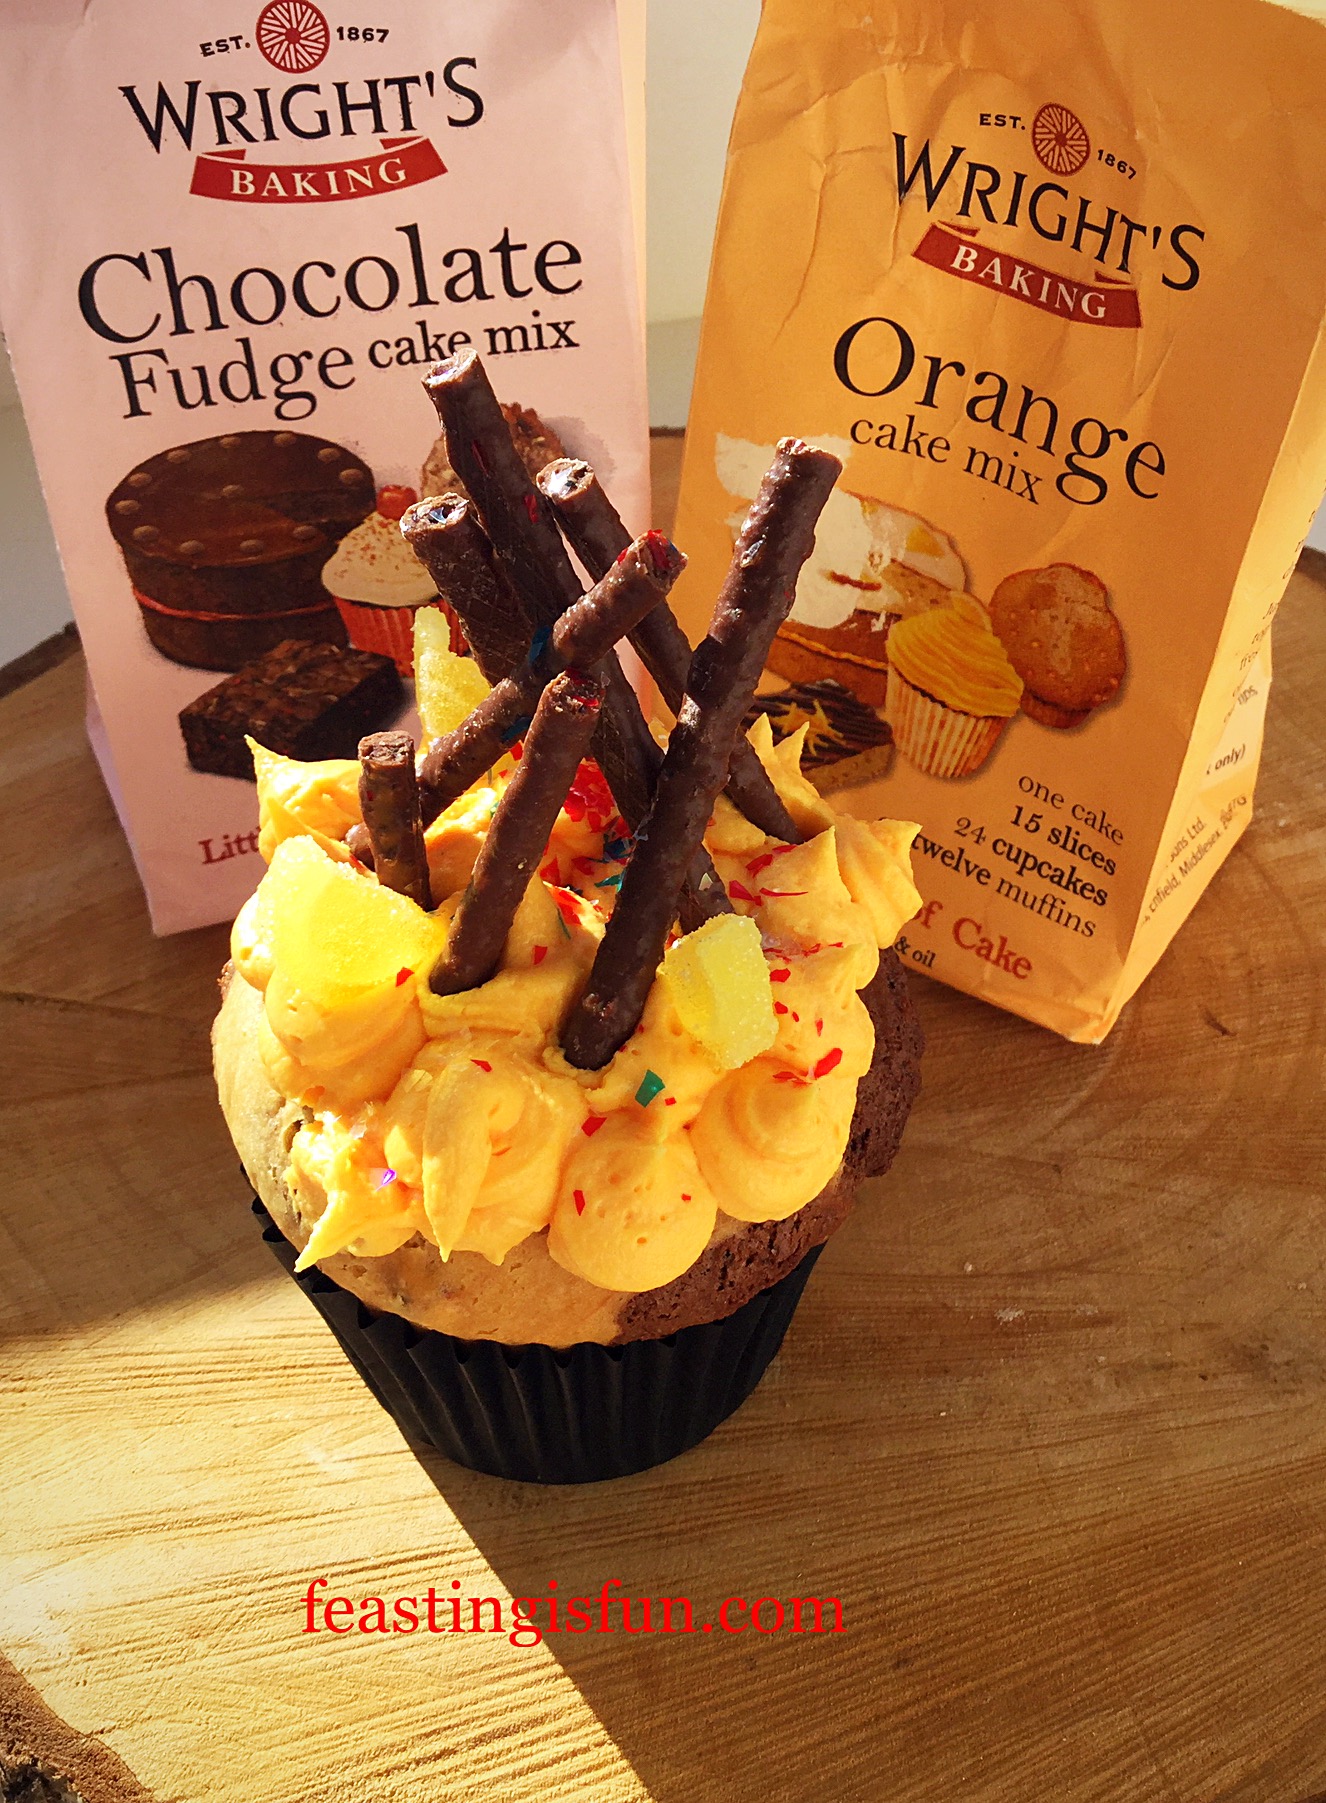
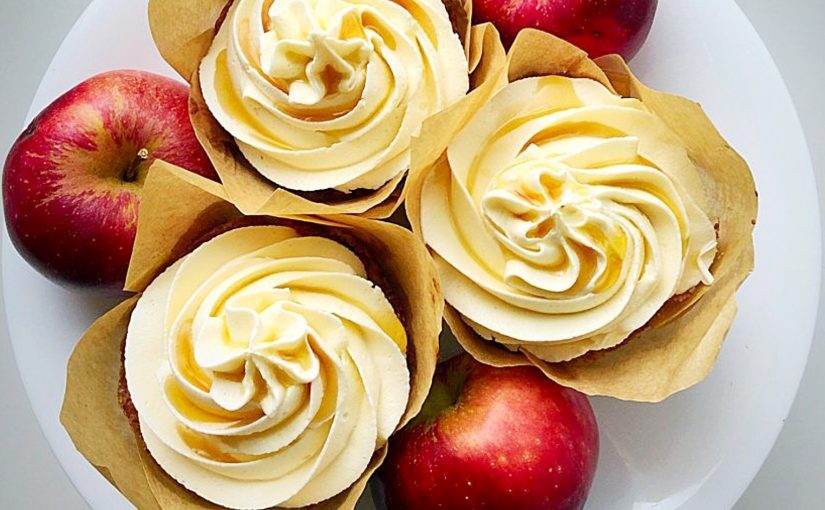
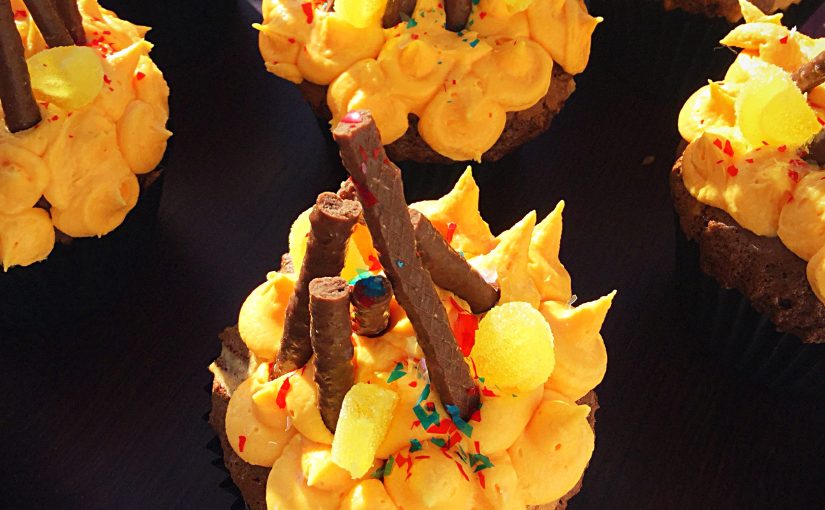
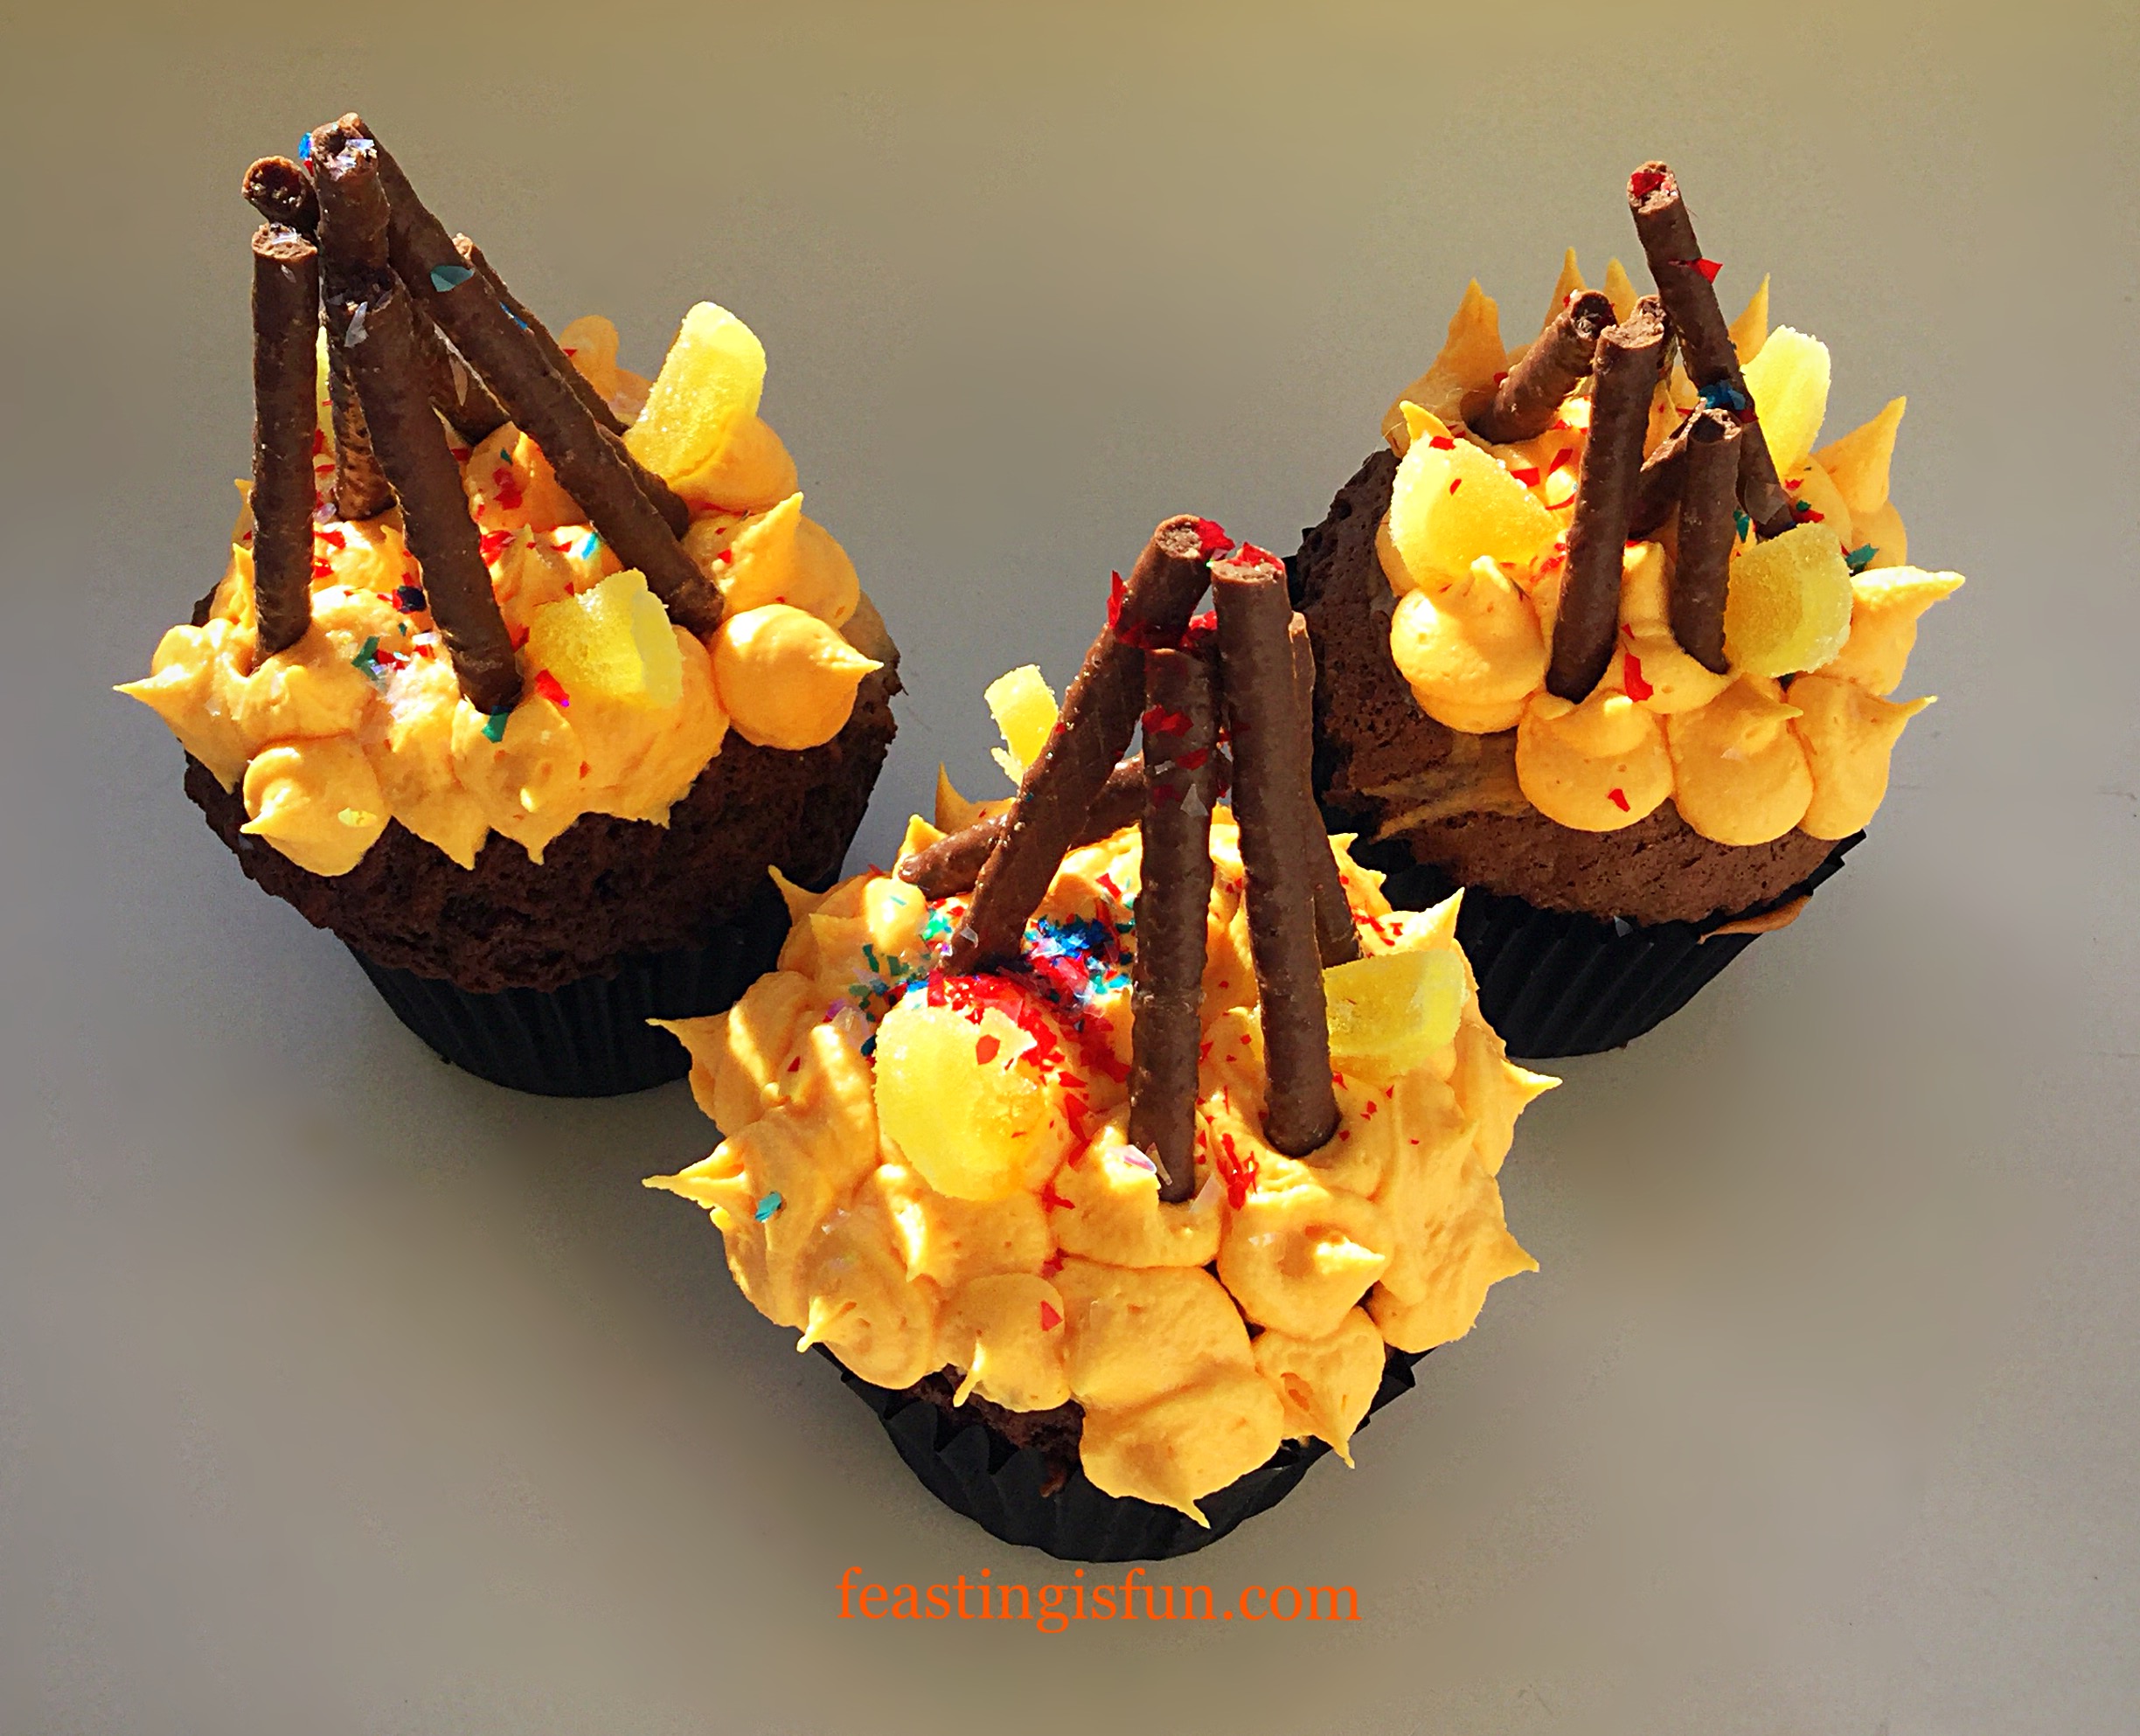
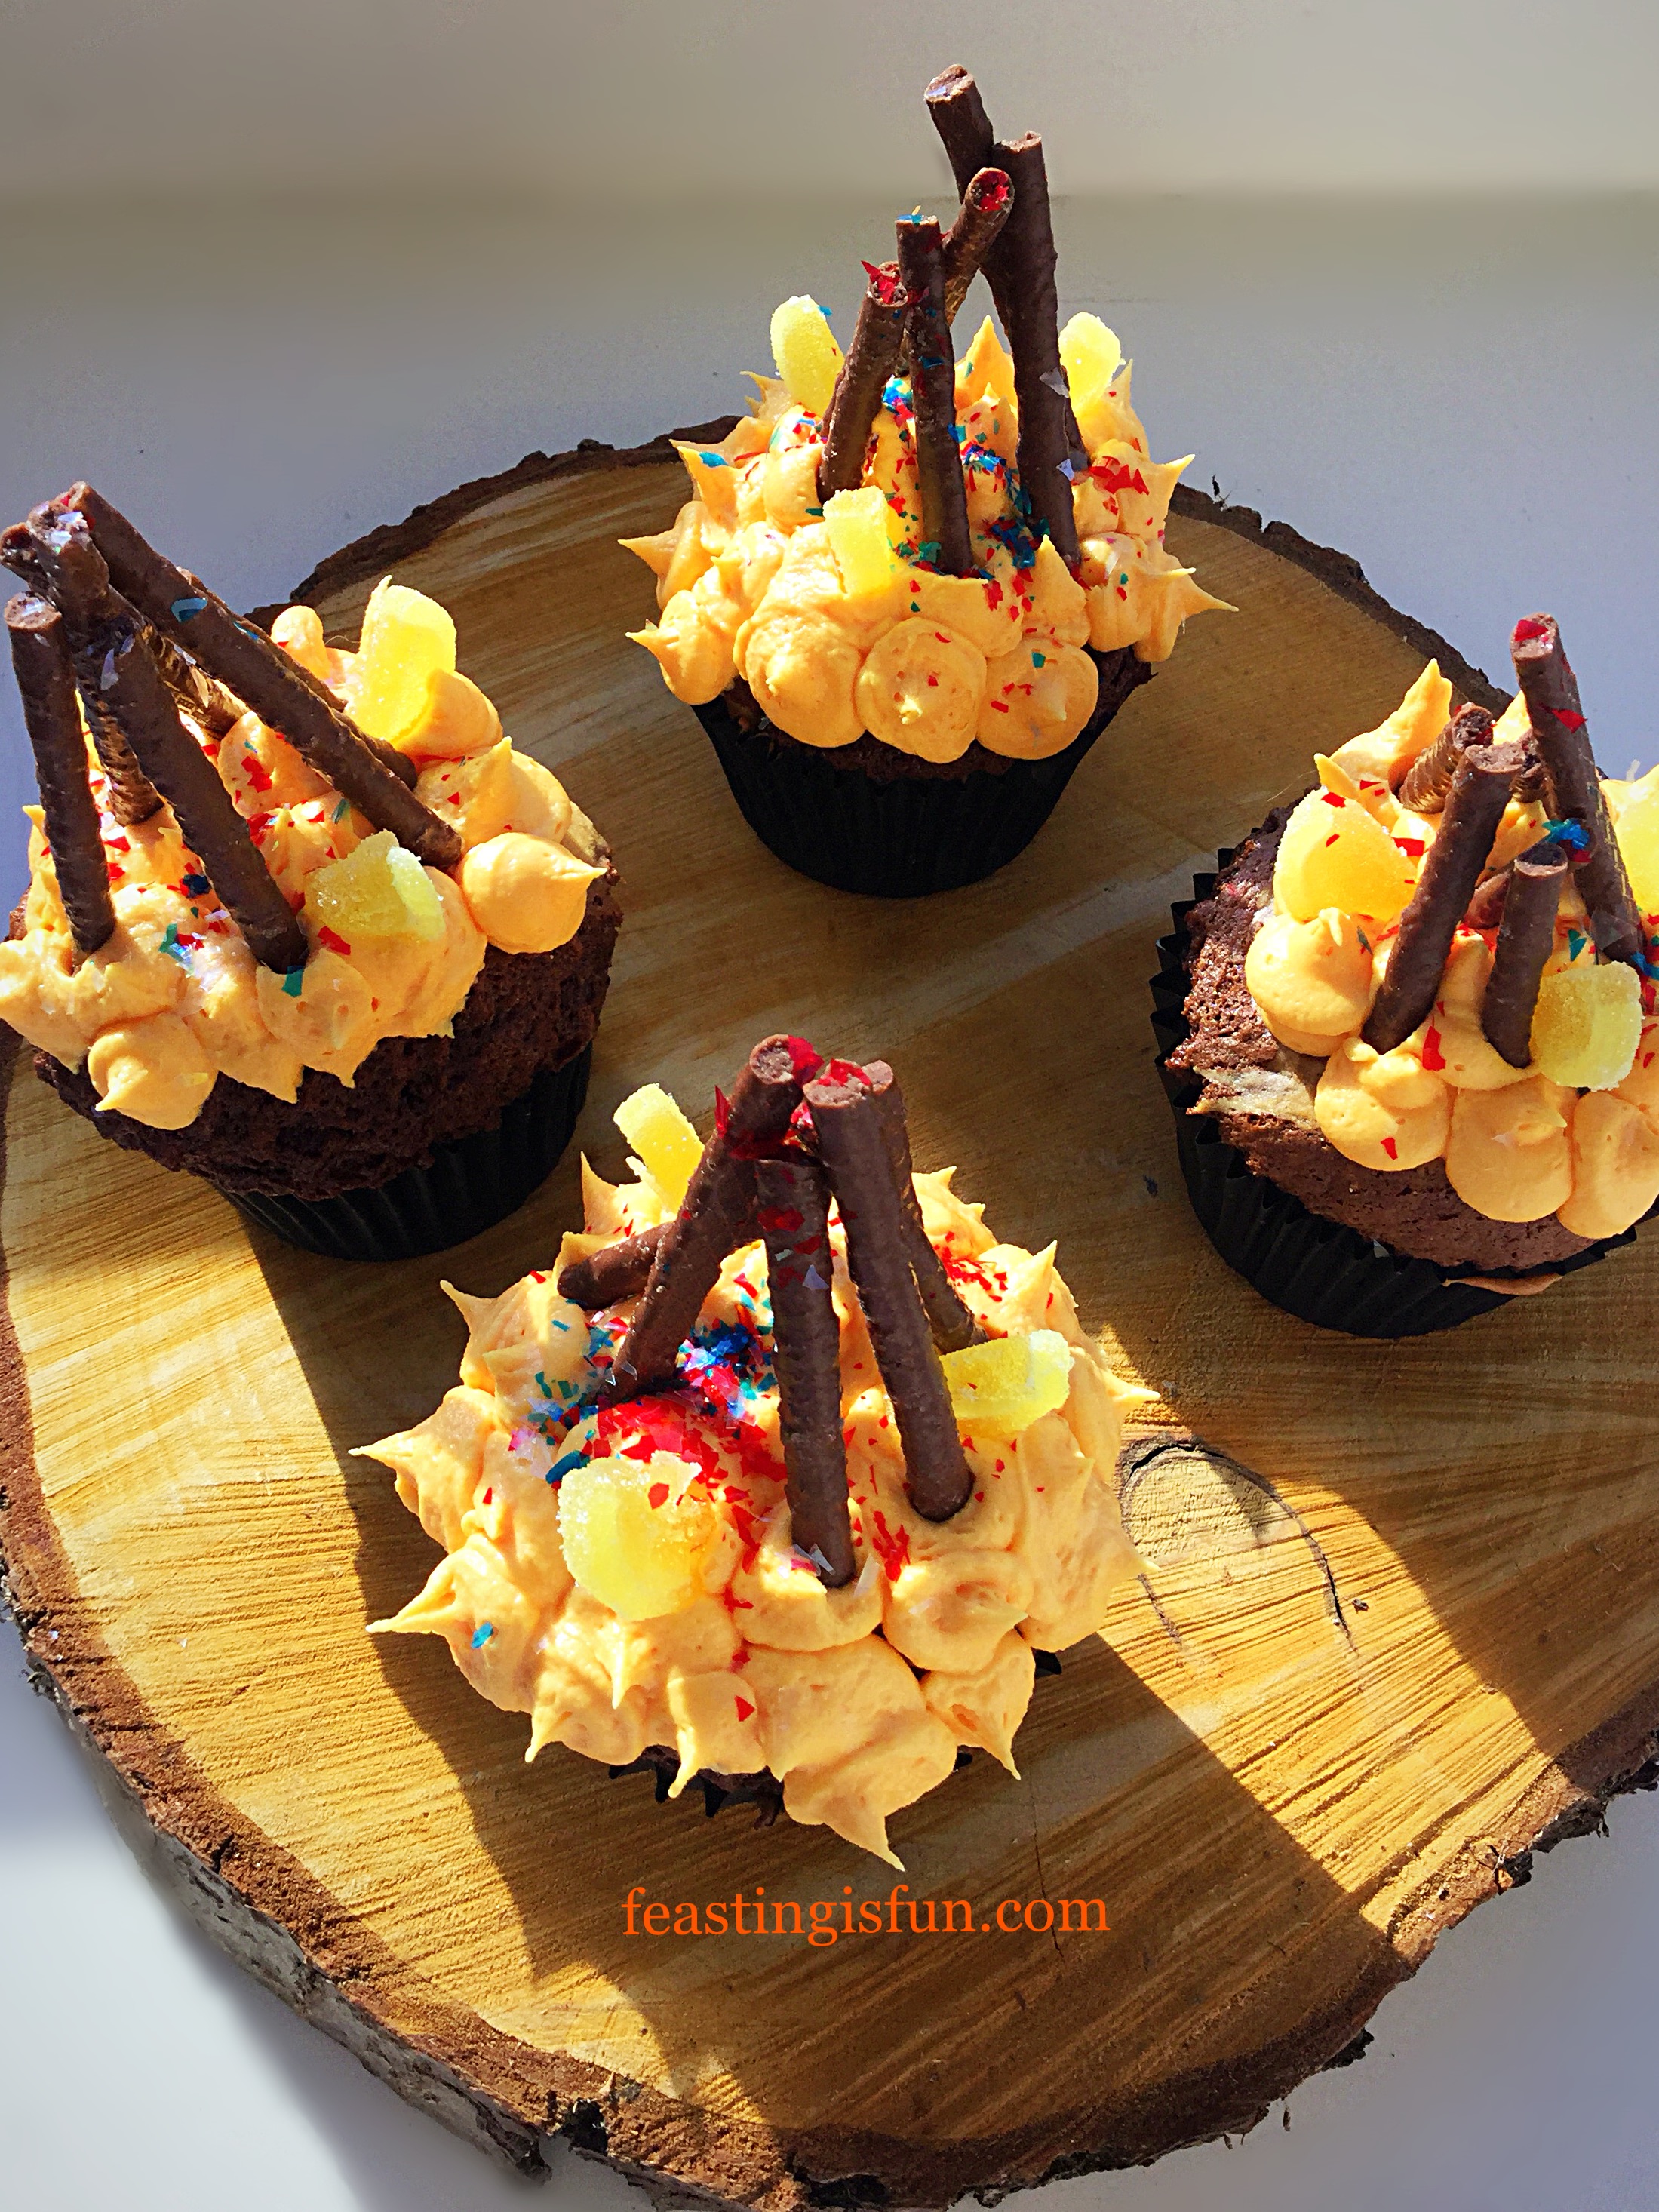
Using Wright’s Chocolate Fudge and Orange Cake mixes, marbled together creates a delicious cupcake. I topped them with flame like, piped orange butter cream, jelly lemons, chocolate orange matchmakers and a sprinkle of edible glitter, not only are these cupcakes tasty to eat, they are also fun to make and look at! Also the ‘bonfires’ do not need to be checked for hedgehogs or other small mammals. Something that should always be done by anyone hosting their own bonfire party.

FF Marbled Chocolate Orange Bonfire Cupcakes
Marbled Chocolate Orange Bonfire Cupcakes

While the sparkles, whooshing sounds and spectacular colours of fireworks are stunning, for me, being close enough to feel the warmth of a bonfire on my face really is my favourite part of bonfire night. I love the crackle, hissing and spitting of wood as it burns is mesmerising. Also, wrapping jacket potatoes in foil and placing in the fire itself is so much fun. Unwrapping piping hot potatoes, slathering with butter before tucking into them with a fork is one of life’s simplest pleasures.

FF Marbled Chocolate Orange Bonfire Cupcakes
Marbled Chocolate Orange Bonfire Cupcakes

Meanwhile, while the potatoes are baking, mugs of steaming hot chocolate perfectly accompany these delicious cupcakes. Since juggling a hot drink and a cupcake can be challenging, I suggest removing the wrappers before serving. Hot drink in one hand, cupcake in the other, with no finger acrobatics needed to enjoy both.

Recipe: Marbled Chocolate Orange Bonfire Cupcakes makes 24

1 packet each of Chocolate Fudge and Orange Cake Mixes available from Wright’s Baking 

Note: If you are unable to obtain the cake mixes, alternatively use the recipe for Caramac Frosted Chocolate Cupcakes 

adding finely grated zest of one orange to the cake batter.

450g/1lb Icing Sugar

1tsp Vanilla Extract – I use Nielsen-Massey

225g/8oz Unsalted Butter softened to room temperature

Scant Pinch of Salt – I use Maldon

Orange Food Colouring

1 Box Chocolate Orange Matchmakers

Optional – small lemon jellies and red/blue edible sprinkles

To make 12 cupcakes, use half of each bag of cake mix and icing.

Method: Preheat oven to 180C/160C fan, gas mark 4

  • First of all, fill 2 deep muffin tins with 24 cupcake/muffin cases.
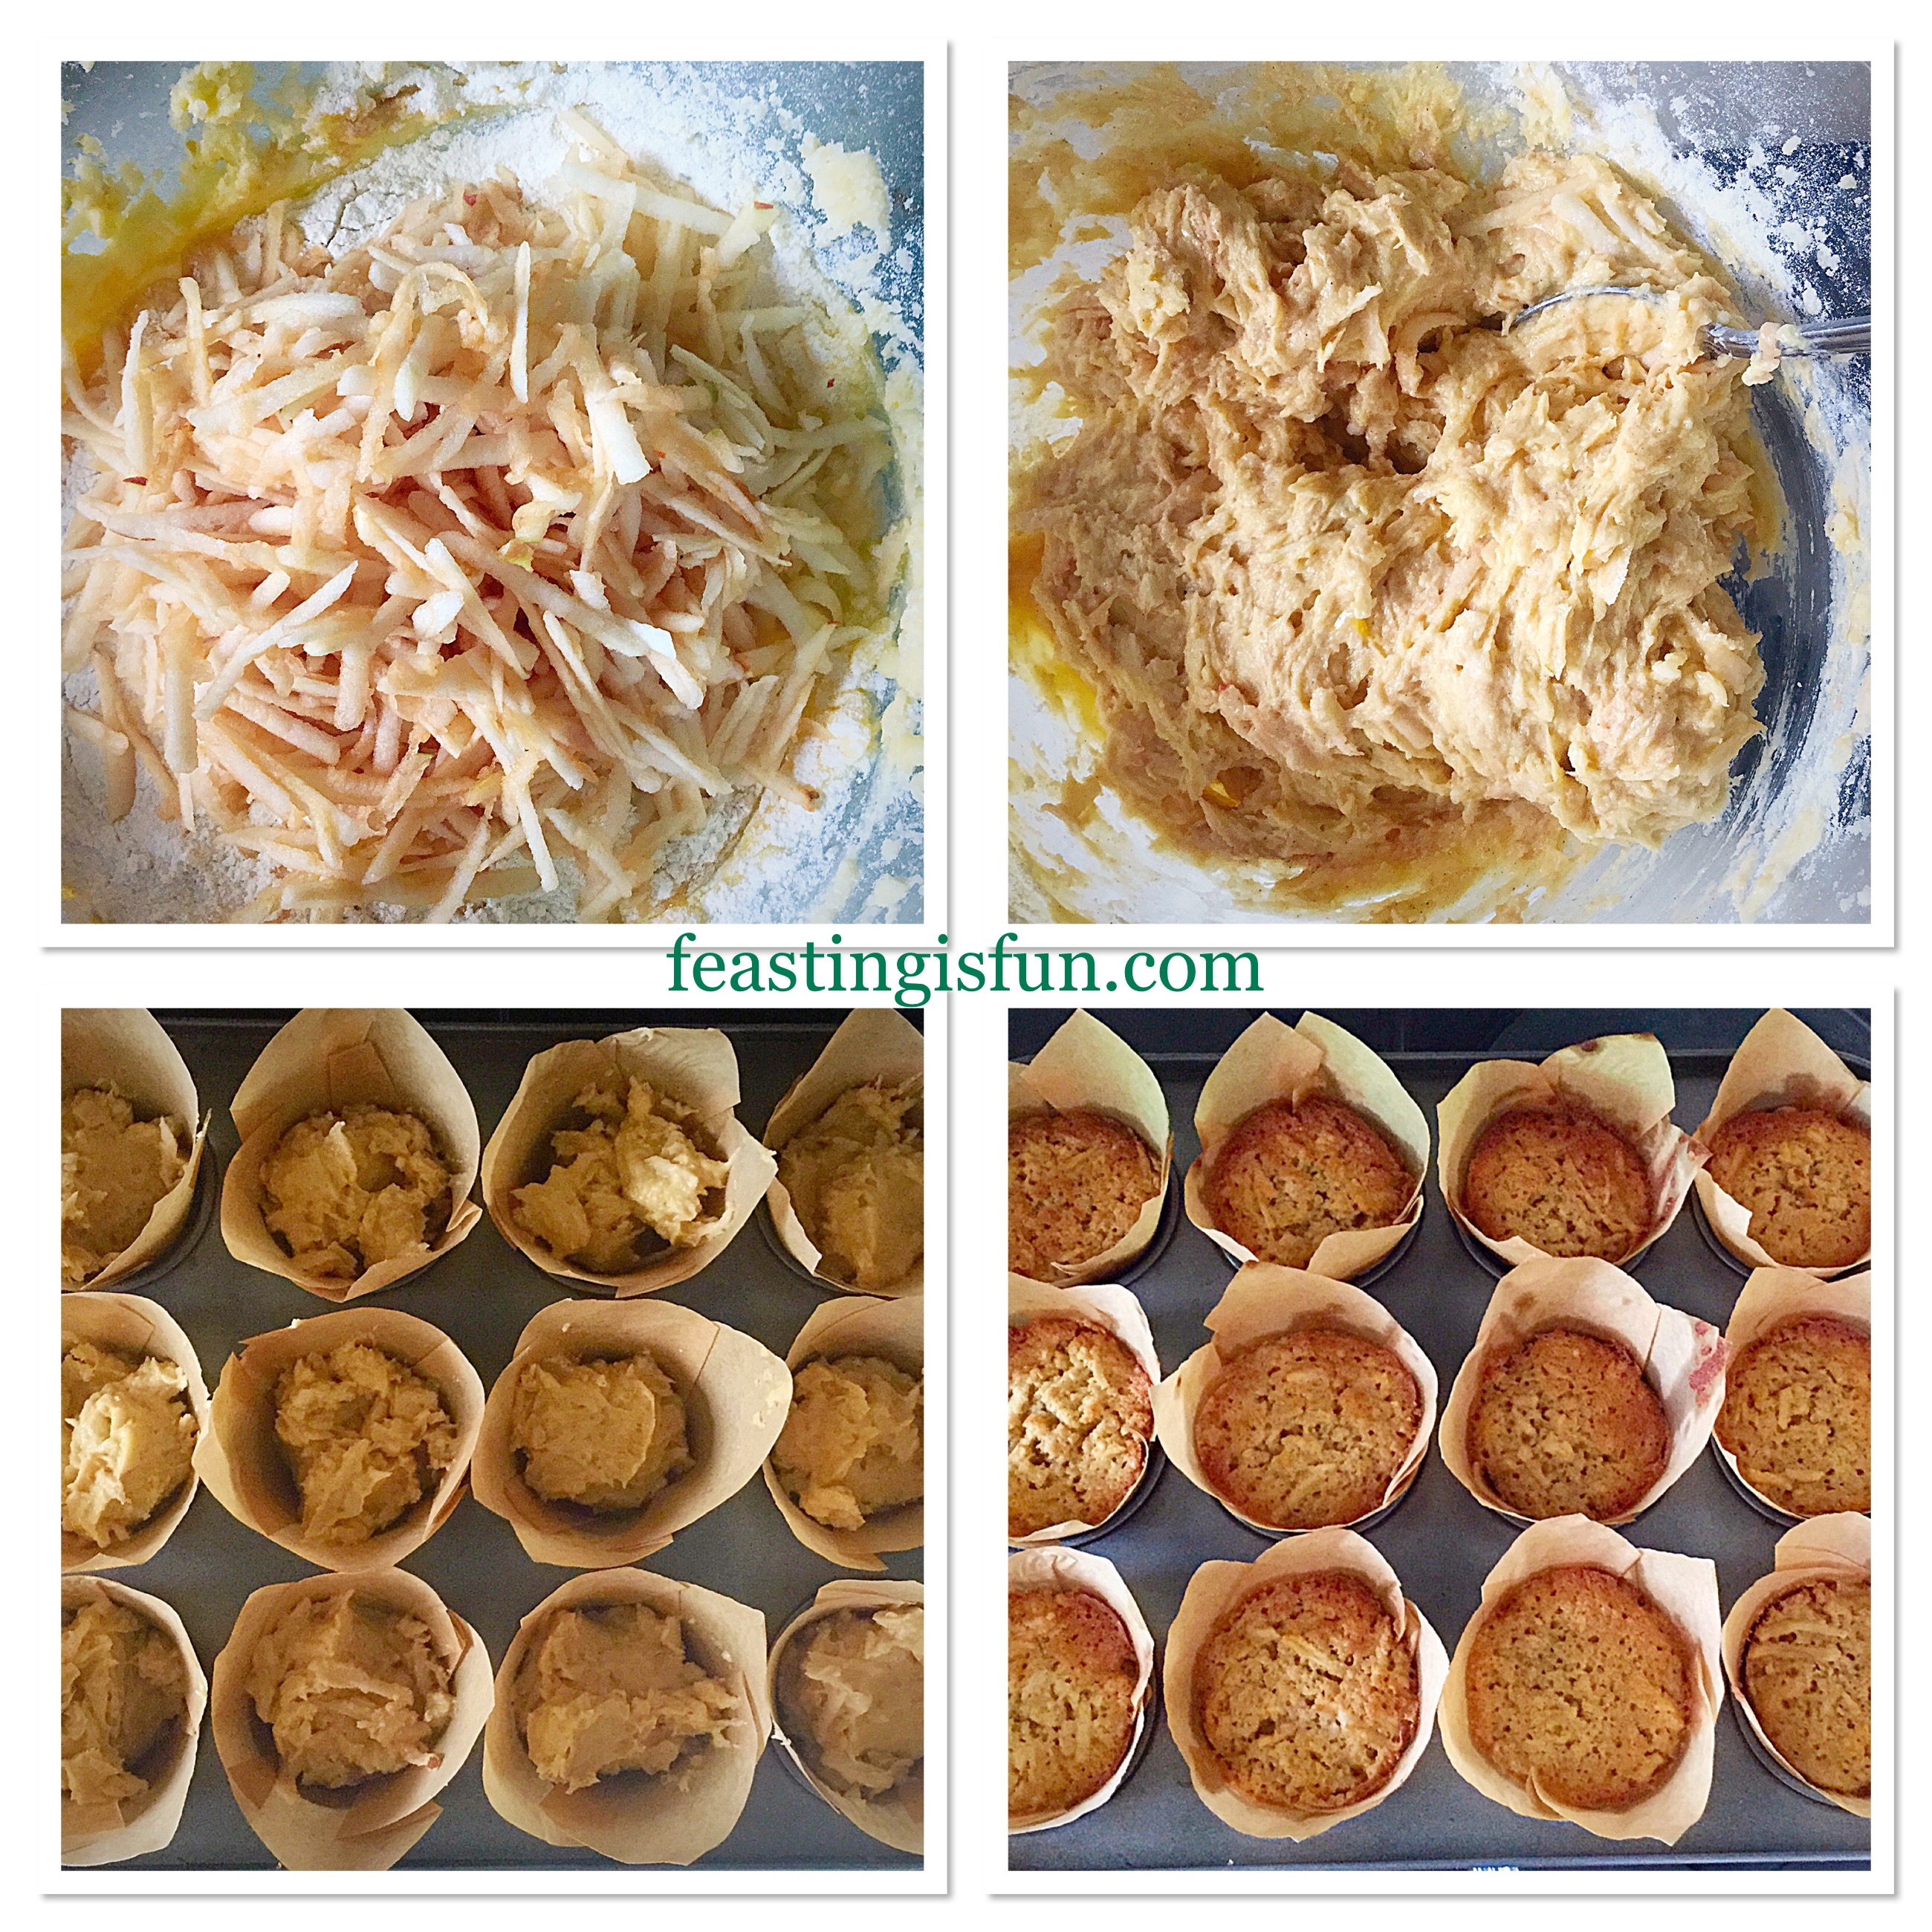
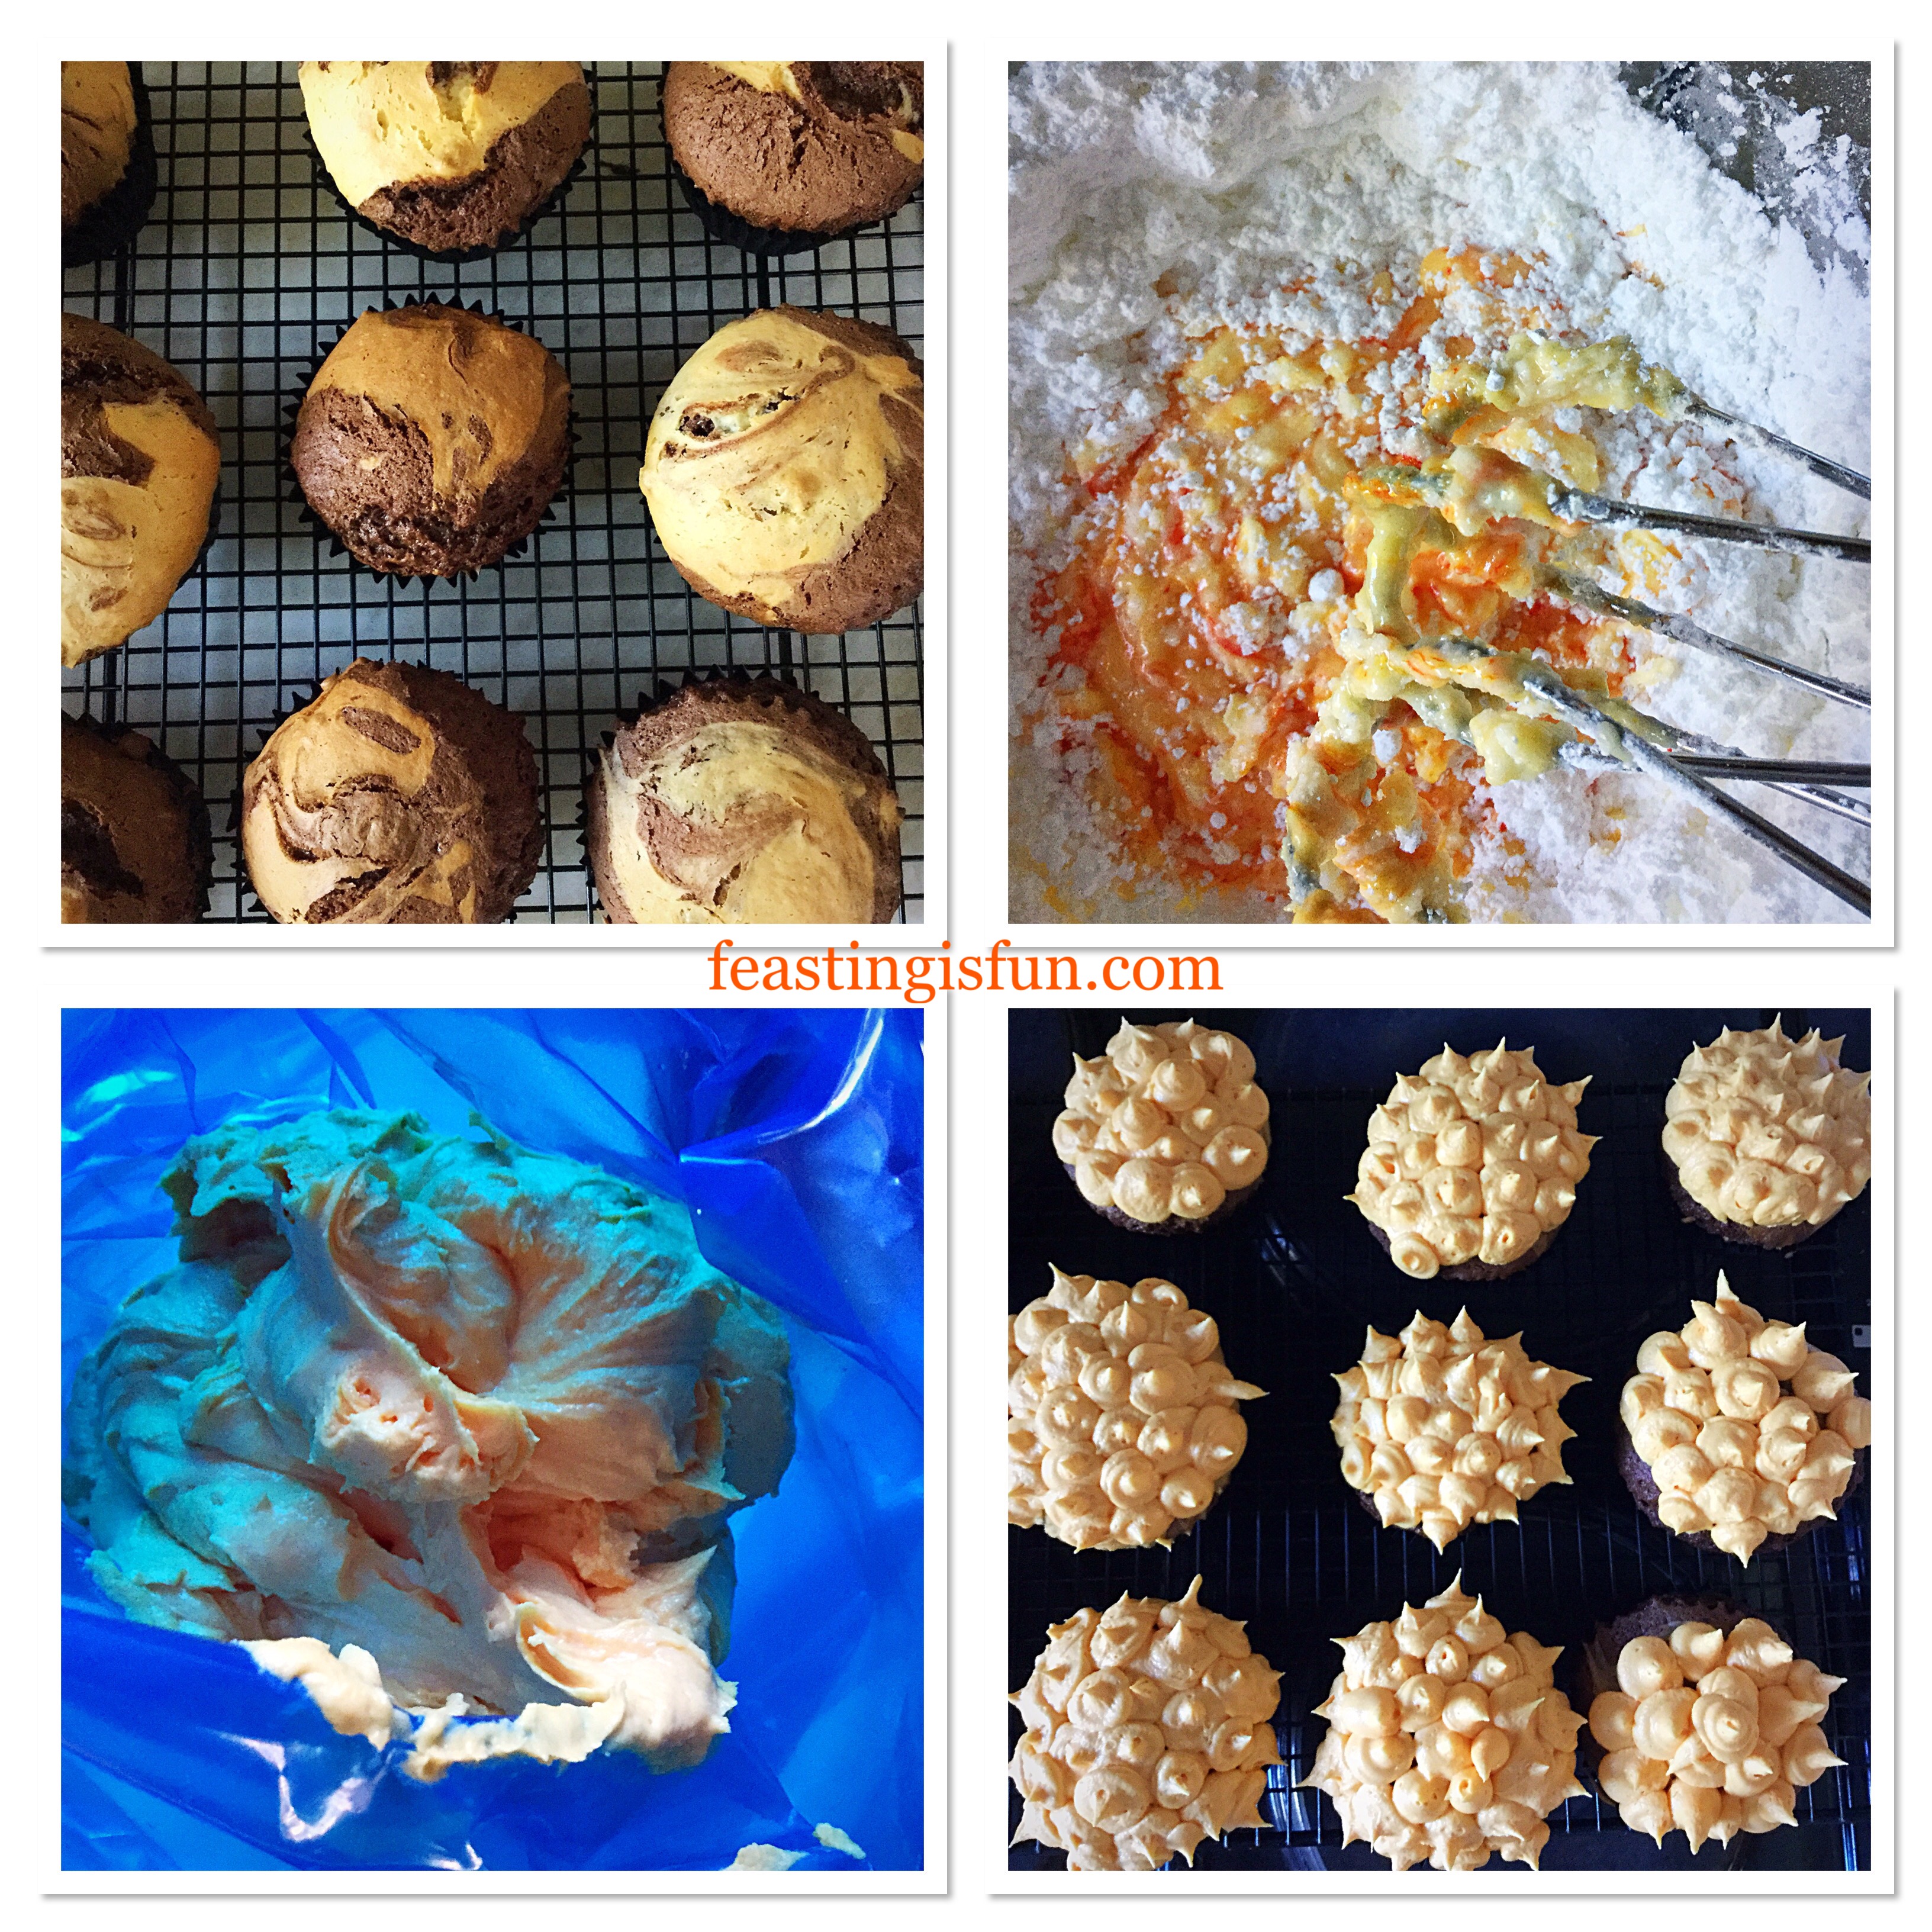
  • Make both the Orange and Chocolate Fudge cake mixes up in separate bowls according to the packet instructions.
  • Spoon half a dessert spoonful of orange cake batter into each cupcake case. Now scoop a whole dessert spoonful of Chocolate Fudge cake batter on top of the orange. Follow by adding another half of a dessert spoonful of orange batter on to the top of the chocolate.
  • Using a cocktail stick, swirl the two different cake batters together.
  • Place the cupcake tins, spaced evenly apart, into the preheated oven and bake for 25-30 minutes.
FF Marbled Chocolate Orange Bonfire Cupcakes
Filling, marbling and baking the cupcakes.
  • As soon as the cupcakes are well risen and spring back from a light touch they are baked.
  • Remove the cupcake tins from the oven and immediately transfer the cupcakes to a cooling rack. Leave until completely cooled before decorating.
  • To make the icing, sift the icing sugar into a large bowl. Add the softened butter, salt, vanilla extract and food colouring to the same bowl.
  • Next add one tablespoon of very hot water. Immediately start whisking the ingredients together on a slow speed, increasing the speed as they combine.
  • Continue whisking until the buttercream is pale and creamy, adjusting the colour if necessary.
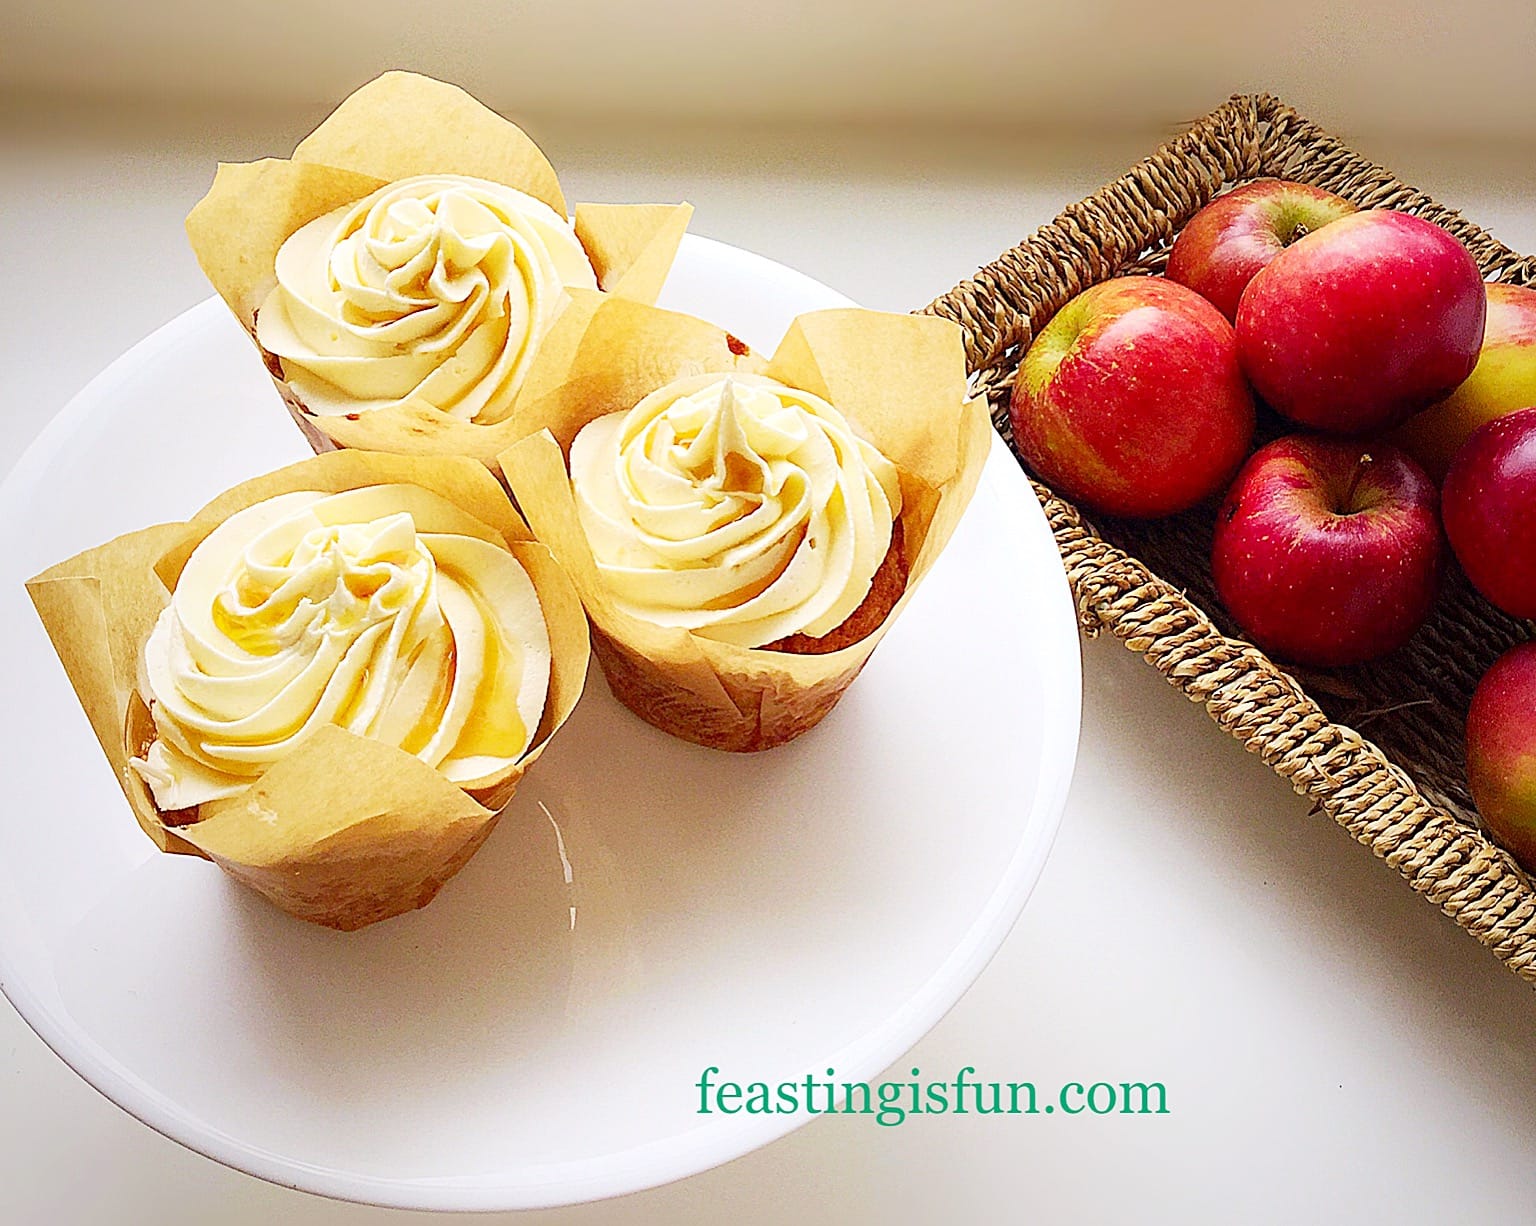
  • Once fully whisked transfer the buttercream to a piping bag fitted with a 1cm round nozzle.
  • Staring in the centre of a fully cooled cupcake pipe a dot and pull away the piping bag. This will leave a small peak which will resemble flames.
  • Continue until the top of each cupcake is covered.
FF Marbled Chocolate Orange Bonfire Cupcakes
Make buttercream and piping flames on to Cupcakes.
  • To create the bonfire effect, break up 2 or 3 matchmaker sticks and push into the icing so they look like logs on a bonfire.
  • Follow by adding the jellied lemons. Angle them outwards from the ‘logs’ to give the effect of flames licking at the wood.
  • Finally, to finish sprinkle first with red edible glitter and then again with slightly less blue edible glitter.
FF Marbled Chocolate Orange Bonfire Cupcakes
Finishing touches added to create the Bonfire effect.
  • Display the finished cupcakes on wooden boards, or slabs. Chopping boards and cheese boards can also be used to great effect.
FF Marbled Chocolate Orange Bonfire Cupcakes
Marbled Chocolate Orange Bonfire Cupcakes

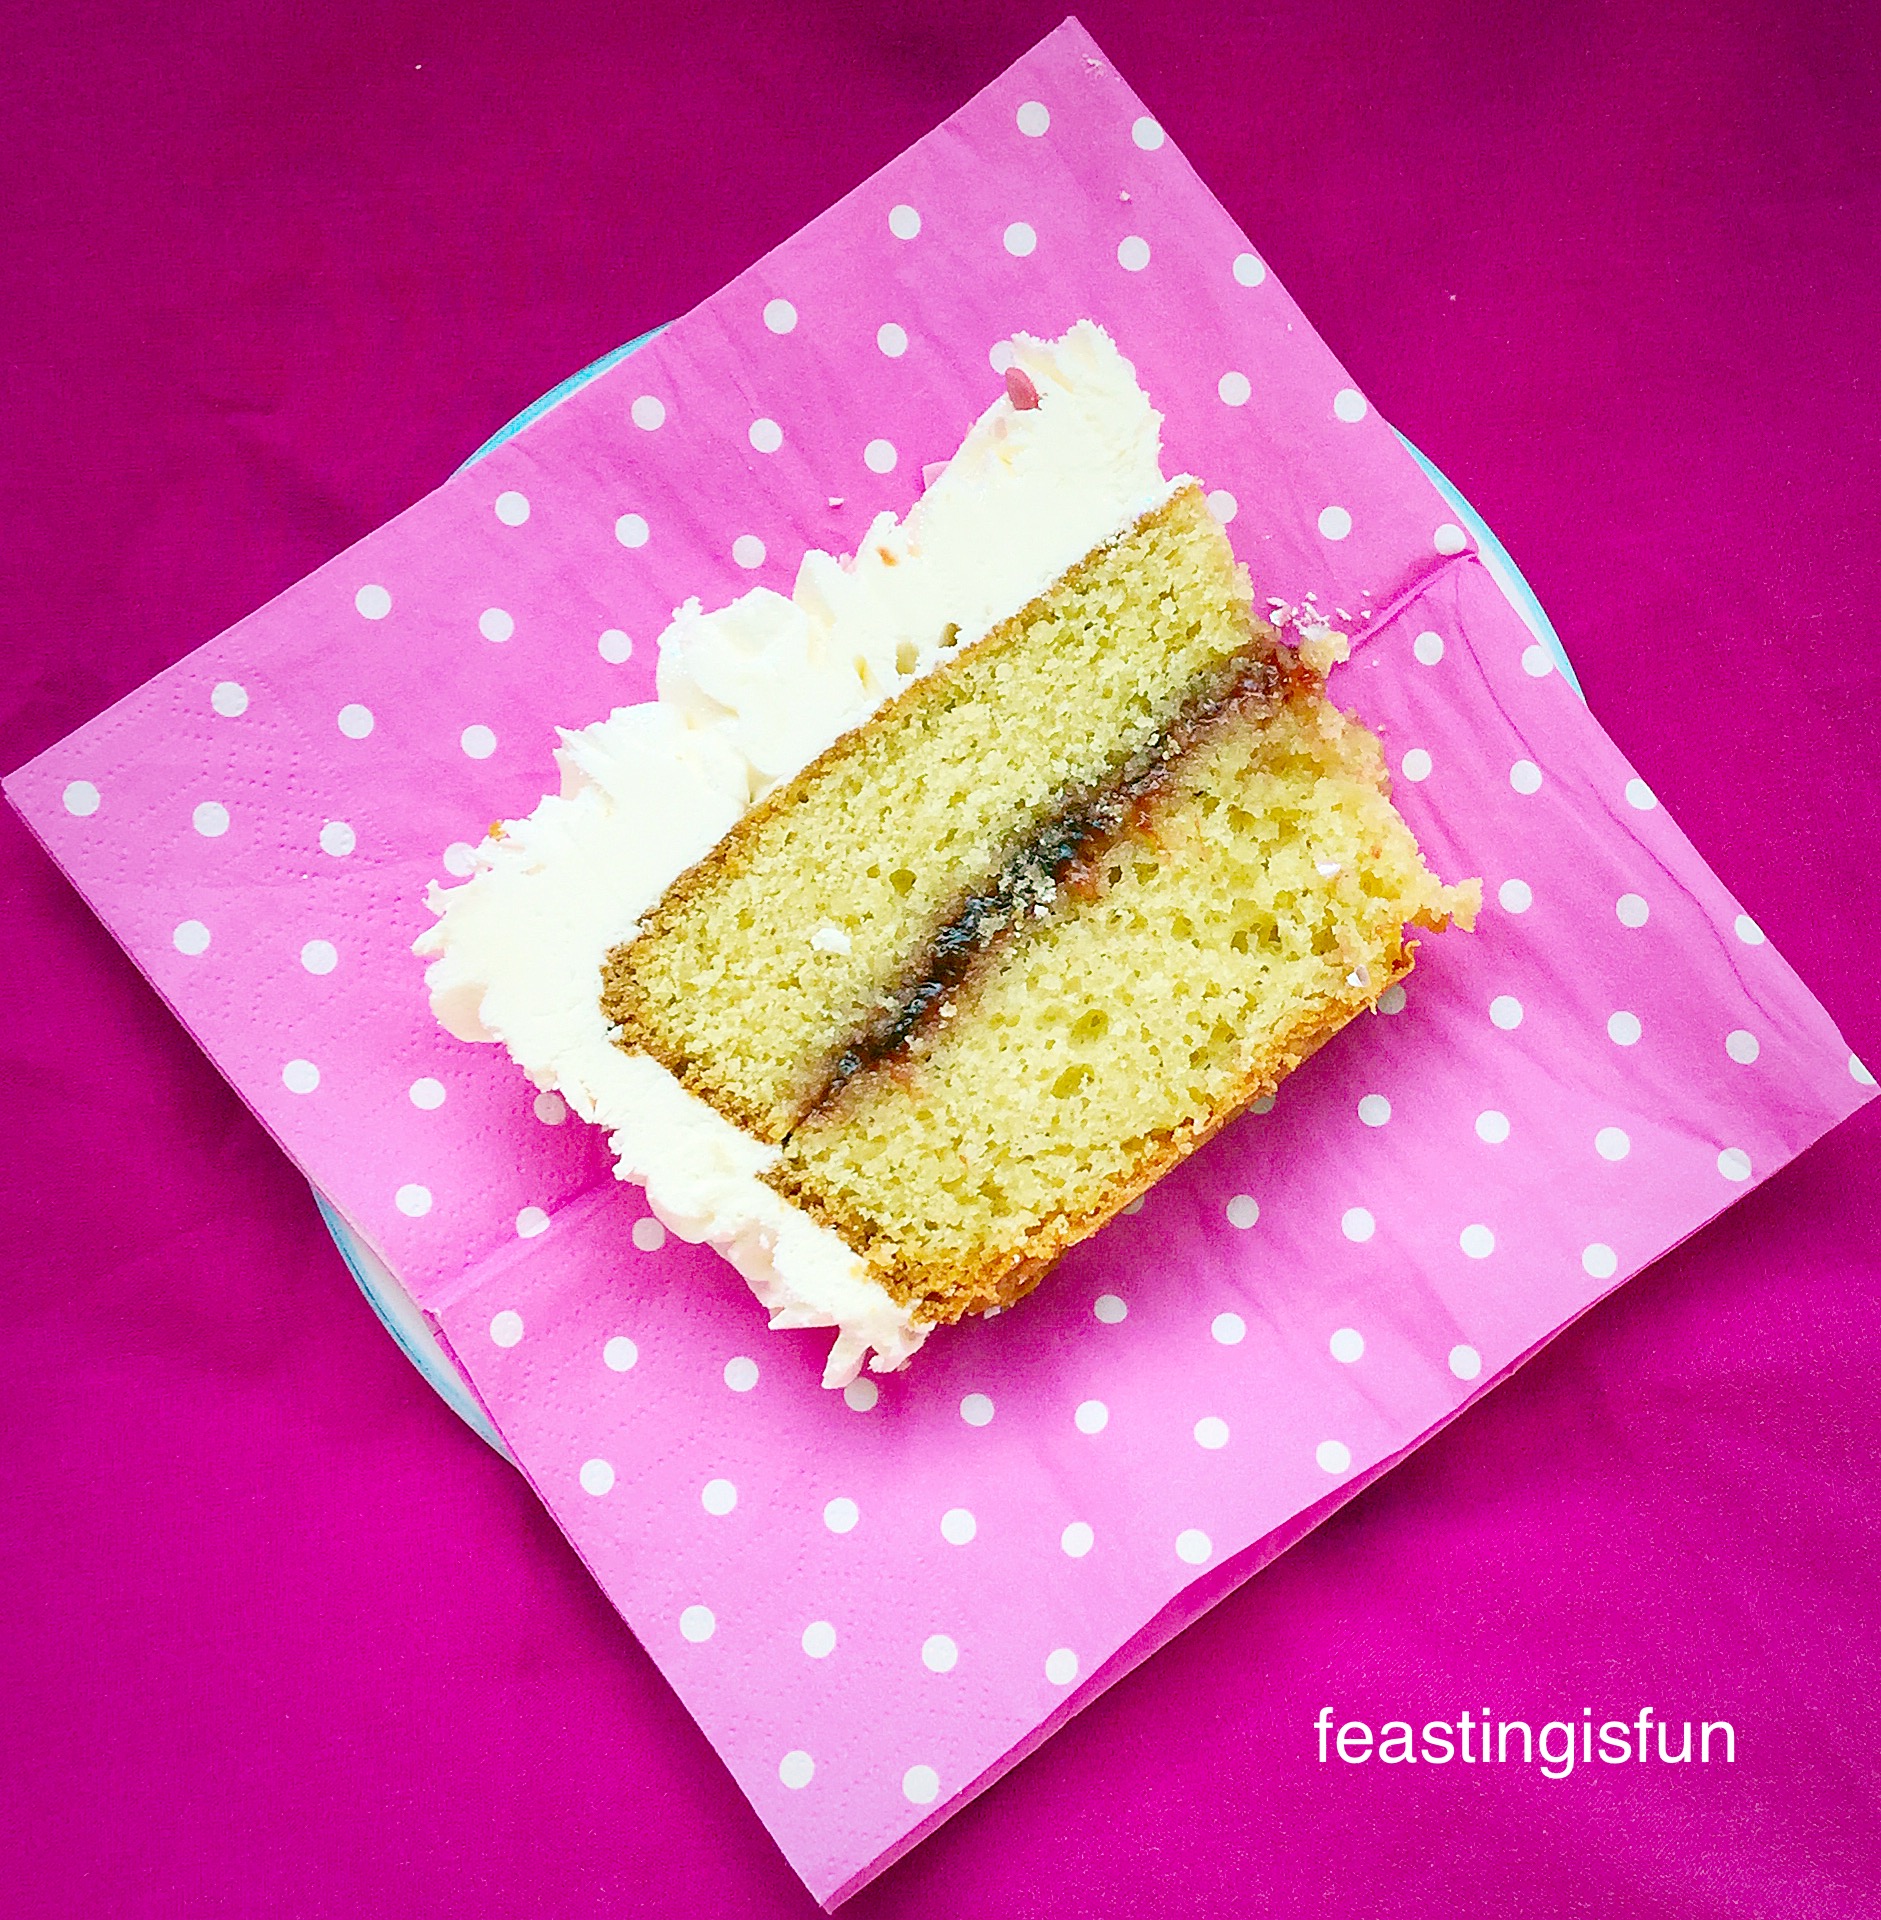
The marbled combination of chocolate and orange can be seen and tasted with the first bite into a cupcake.

The marbling effect in the cupcakes.

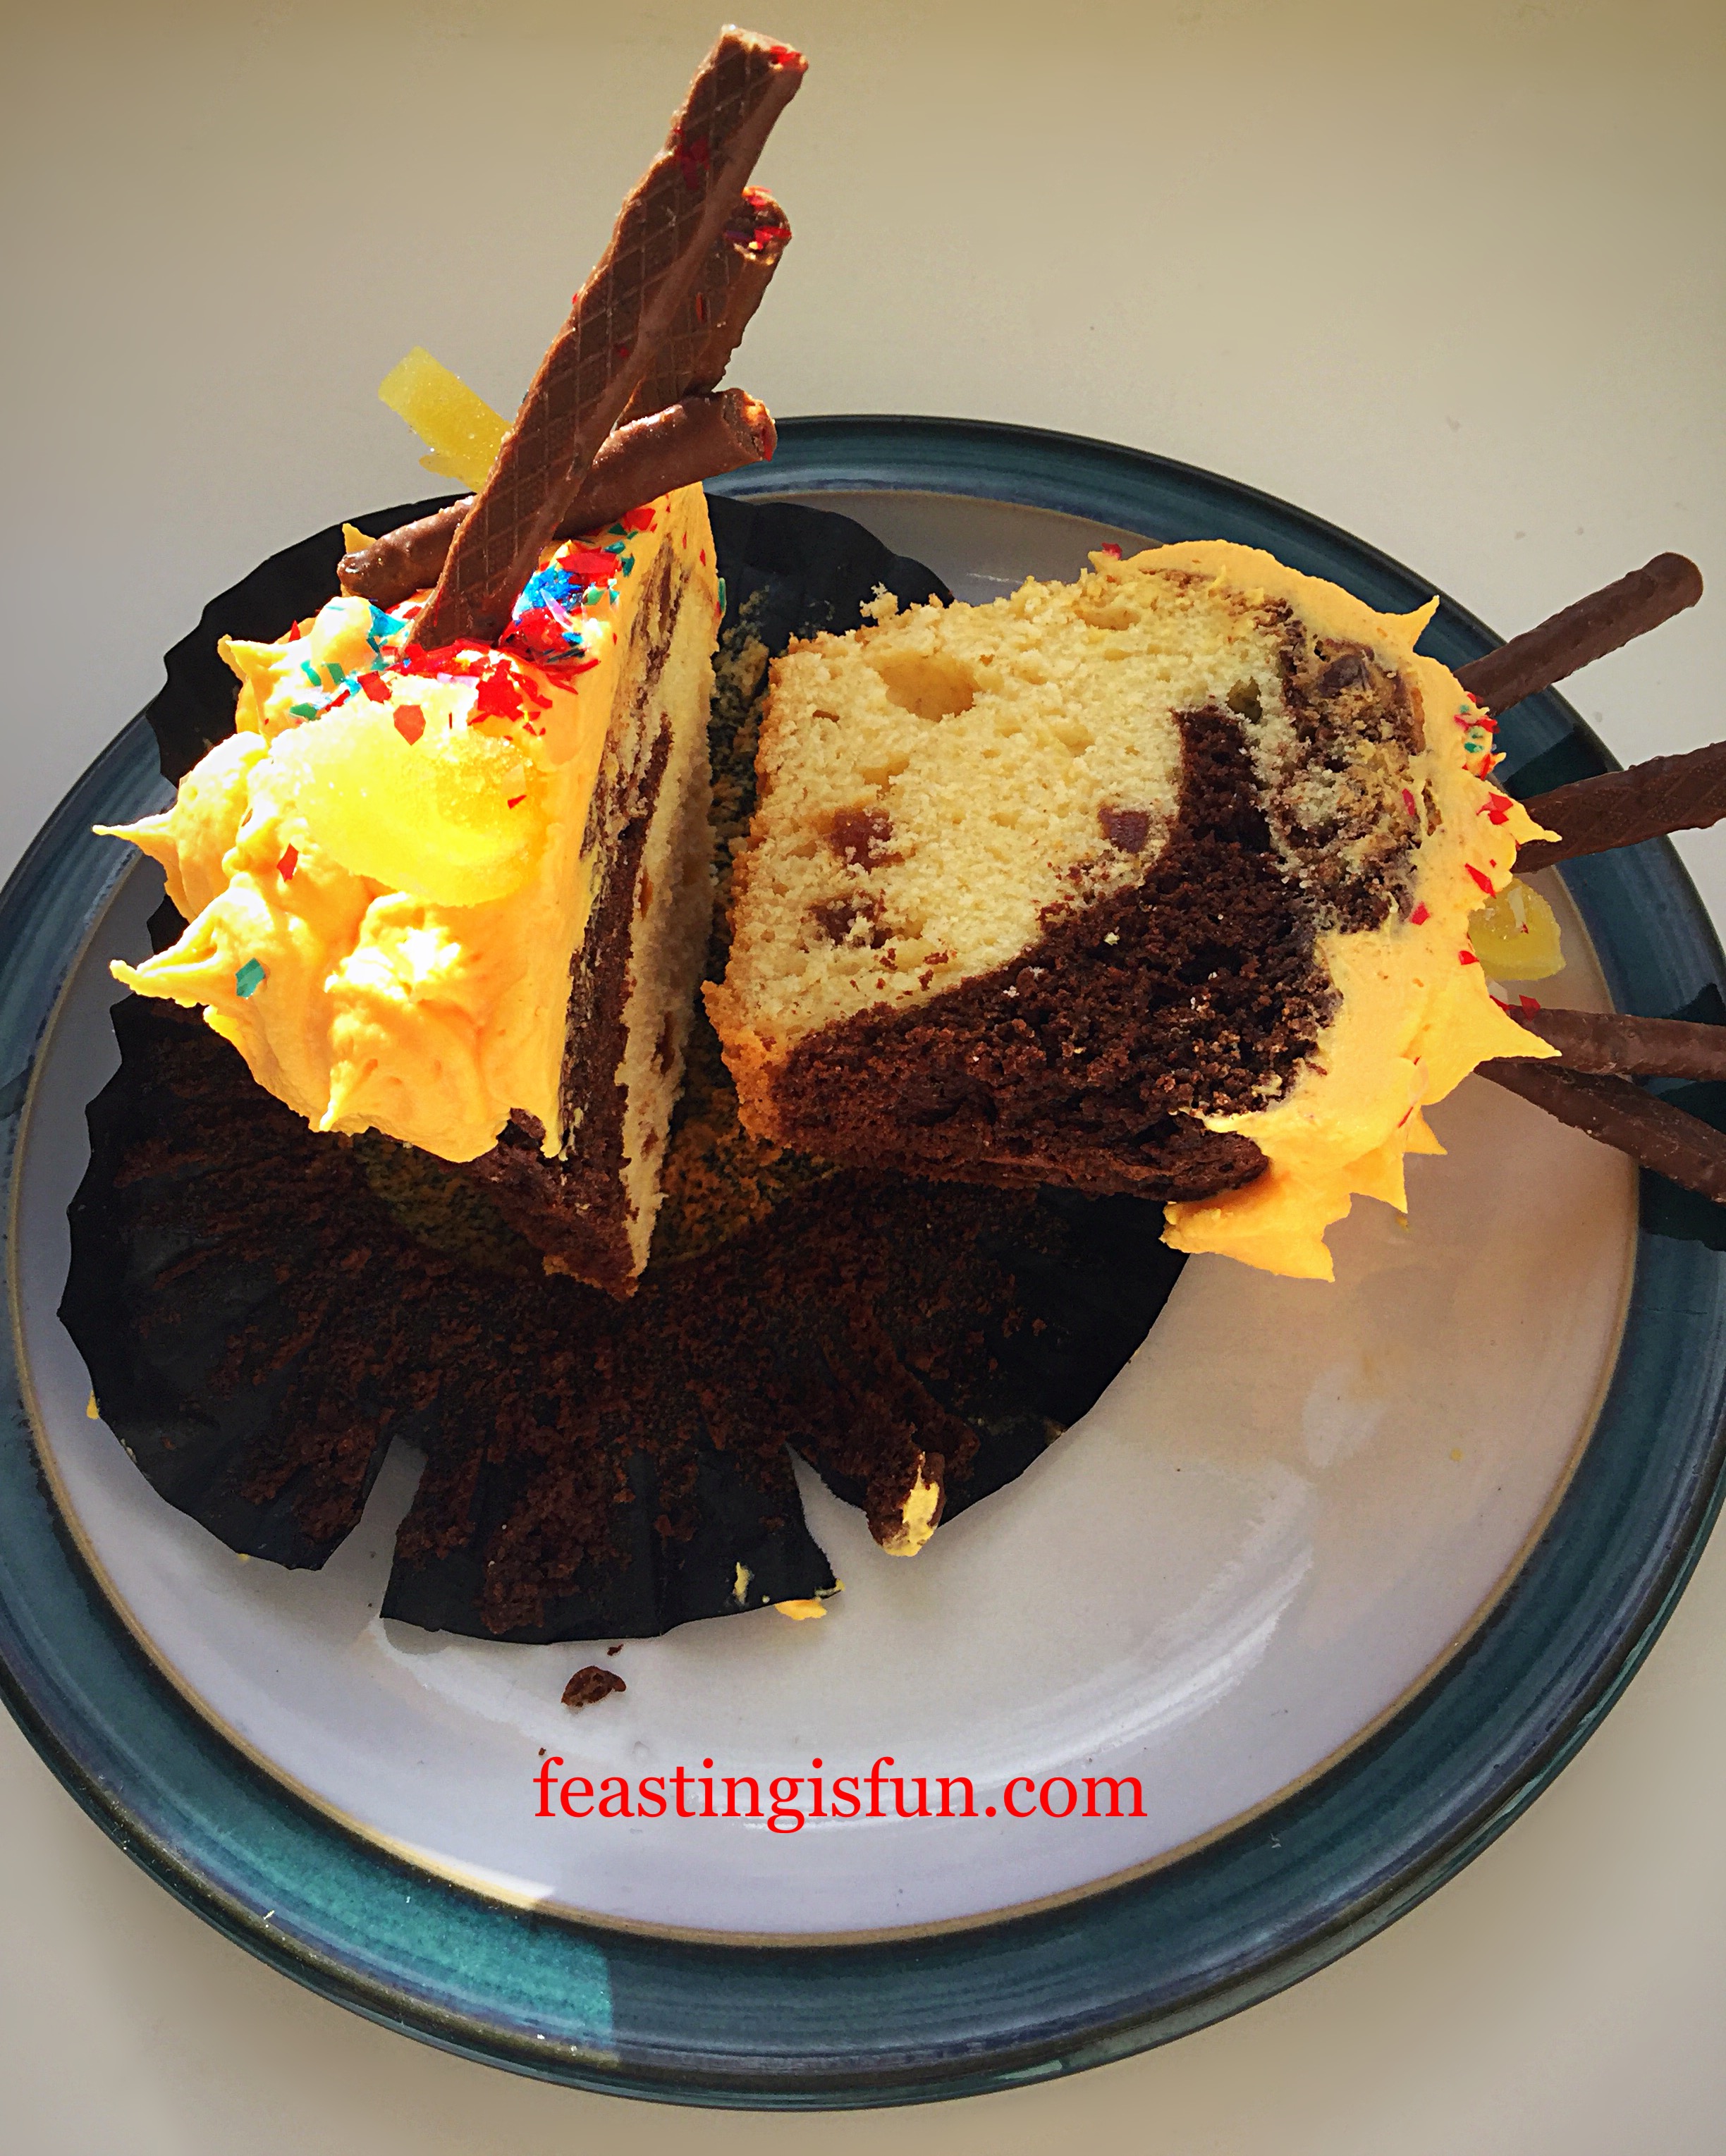
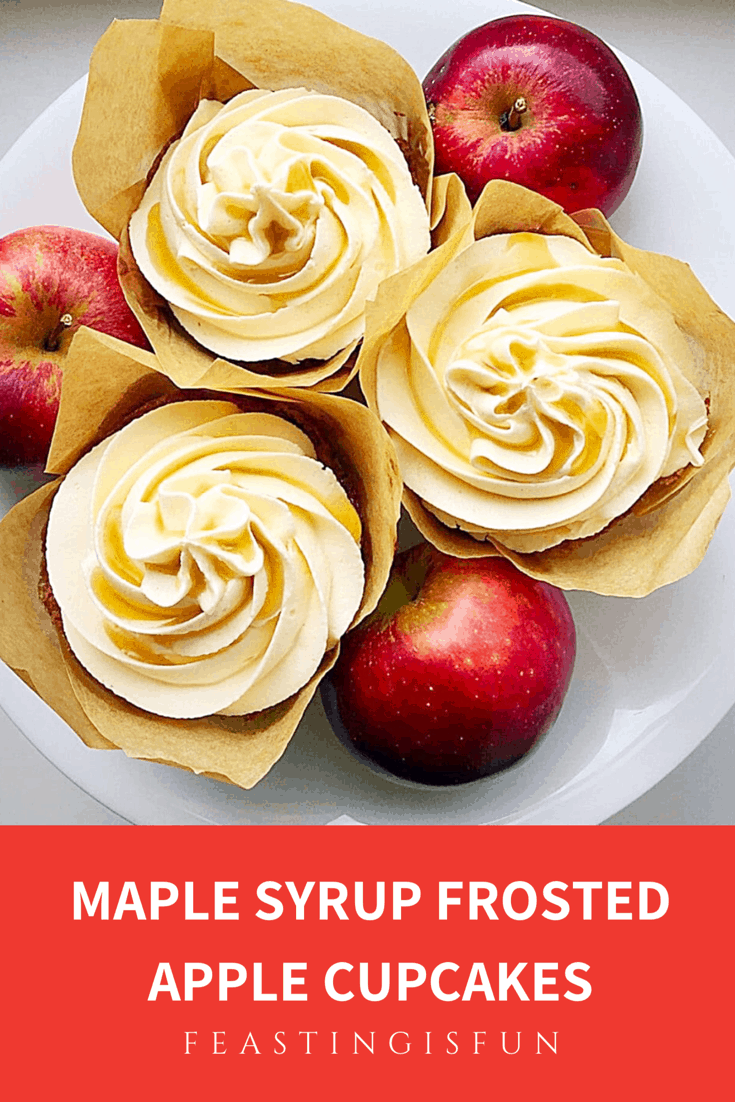
Easy to make and ideal for any firework party gathering. These cupcakes are sure to induce as many ooh’s and aah’s as the firework’s themselves.

Make ahead and store in an airtight container for up to 2 days.

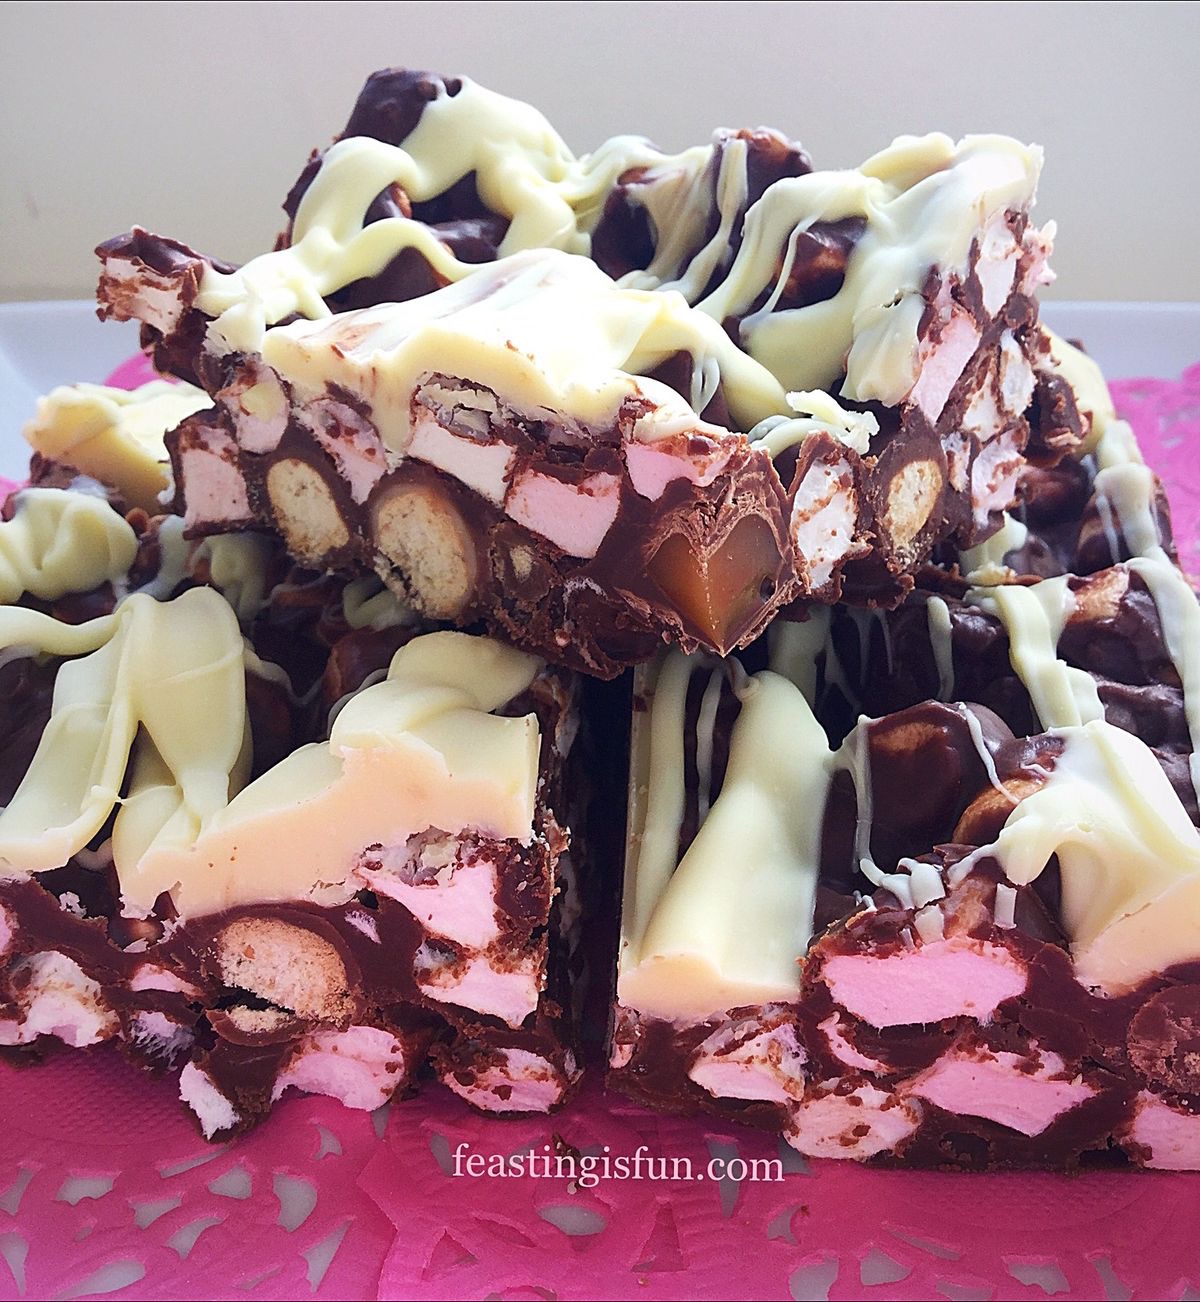
If you have enjoyed this recipe for Marbled Chocolate Orange Bonfire Cupcakes then you may also like these:


Caramel Crunch Rocky Road Bars

FF Marbled Chocolate Orange Bonfire Cupcakes
Caramel Crunch Rocky Road Bars

Spicy Sausage Rolls

FF Marbled Chocolate Orange Bonfire Cupcakes
Spicy Sausage Rolls

Chocolate Sparkle Cake

FF Marbled Chocolate Orange Bonfire Cupcakes
Chocolate Sparkle Cake

Democracy is of upmost importance here in the U.K. Since this is exactly why we celebrate Bonfire Night. Since the very night that our democracy was due to be blown to pieces, by a group of men with different ideas, our freedom and democracy are celebrated and not taken for granted. While the very same can be said of terrorists and terror events in the modern day. People seeking disrupt and create chaos in countries where their ideas are not followed. Our privilege to speak freely, practice our own faith, without causing harm to others, is something that we must and should hold dear.

If you would like more information please see Important Stuff

Whatever you are making, baking and creating have fun preparing your feast. Also have a safe Bonfire Night.

Sammie xx

Wright’s Baking provided the cake mixes to create this recipe. All thoughts, opinions and content are my own. I was not paid to write this post.

No part of this post may be reproduced or duplicated without the written permission of the owner. Please see my Disclosure Policy

Share
Facebooktwitterpinterestlinkedintumblr

Maple Syrup Frosted Apple Cupcakes

Share
Facebooktwitterpinterestlinkedintumblr

Today we are celebrating National Apple Day here in the U.K. Since there are two trees groaning under the weight of their abundant apple harvest in our back garden, an apple bake is needed. And a gift of maple syrup sparked inspiration  resulting in these Maple Syrup Frosted Apple Cupcakes. Finally, the finished result is better than I could imagine.

Three small cakes on a white plate next to a basket full of red fruit.
Maple Syrup Frosted Apple Cupcakes

One apple tree produces Spartan apples. Tennis ball sized, shiny red-green apples that are deliciously crunchy, sweet and ideal for little people hands! While the other apple tree variety is unknown. Sharper in taste than the Spartans, they are similar to a slightly sweeter version of Granny Smith apple. Also they are slightly larger with a similar colour that when rubbed becomes shiny. And fortunately, both apples are great for eating and cooking. Resulting in a combination of both being used for these cupcakes.

A single small cake on a white plate surrounded by the red-green fruit that are used in this recipe.
Maple Syrup Frosted Apple Cupcakes

Apples, The Core Of These Cupcakes:

Unlike Granny Smith apples, both varieties brown easily when sliced/grated and exposed to the air. While the grated apple be tossed in some fresh lemon juice, which would have prevented discolouration, I didn’t want to do this for two reasons. First of all, the lemon flavour would change the cupcake flavour, possibly overpowering the apple and frosting. Also, the lemon juice would have added moisture, resulting in a wetter batter, where the apple may not have kept it’s even distribution. Grating the apples into the cake batter keeps any discolouration to a minimum.

Freshly baked and frosted small cakes in caramel coloured tulip wrappers on a cooling rack.
Maple Syrup Frosted Apple Cupcakes

Preparing the cake batter first and then adding the grated batter works really well. As it ensures each cupcake has plenty of evenly distributed apple within a light, moist crumb. Without the maple syrup frosting, these could easily be served as muffins, in which case the addition of some toasted pecan or walnut pieces would bring added flavour and texture. Tasting these cupcakes with the dreamy frosting means I could not possibly eat them any other way now!

A small cake cut in half to shown even distribution of fruit in the bake.
A Maple Syrup Frosted Apple Cupcake cut in half.

Maple syrup frosting. Just think on those words for a moment!

Initially I had worried that the addition of maple syrup to a buttercream frosting would result in a too sweet topping. Instead, the opposite happened, with the maple syrup adding a very slight smoky, creamy flavour. Resulting in the sweetness of the unflavoured frosting being dumbed down. As a result, the final flavour paired beautifully with the lightly spiced apple cupcake.

Maple syrup swirled frosting on apple cupcakes.

Recipe: Maple Syrup Frosted Apple Cupcakes – makes 12

Cupcake Ingredients:

175g/6oz Unsalted Butter at room temperature

175g/6oz Soft Light Brown Sugar

1/8th tsp Salt – I use Maldon

3 Large Free Range Eggs

1tsp Vanilla Extract – I use Nielsen-Massey

200g/7oz Plain White Flour

3tsp Baking Powder

1/2tsp Cinnamon

200g/7oz Grated Eating Apple – approximately 3-4 peeled apples

Frosting Ingredients: you may have extra frosting left over

250g/9oz Salted Butter very soft, ideally removed from the fridge the night before

500g/1lb 2oz Sifted Icing Sugar

1tsp Vanilla Extract

2tbsp Maple Syrup – use real maple syrup not maple syrup flavouring

1tbsp Very Hot Water from a recently boiled kettle

Extra Maple Syrup to drizzle over the finished cupcakes

Method: Preheat the oven to 180C/160C fan, gas mark 4, 350F.

Making And Baking The Cupcakes:

  • First of all, line a 12 hole deep muffin tin with tulip cupcake wrappers, or deep muffin cases.
  • Next in a large bowl add the butter, sugar and salt. Whisk/beat them together until they are very pale and creamy.
  • Add the vanilla extract and all 3 eggs to the bowl. Whisk/beat briefly to partially mix the ingredients, without the risk of them curdling – no more than 30 seconds.
  • Now sift the flour, baking powder and cinnamon into the bowl. Set the bowl to one side.
  • Working quickly, yet carefully, peel and grate 200 grams of apple.
  • Add the grated apple on top of the flour, in the large bowl and using a spoon mix all the ingredients together, until they are just combined.
  • Next, using a dessert spoon, place a heaped spoonful of cake batter into each of the cupcake wrappers. Finish by dividing any remaining batter between the twelve cases, so that they are all equally filled.
  • Finally place the tin in the middle of the preheated oven and bake the cupcakes for 25-35 minutes.
  • The cupcakes are baked when they spring back from a light touch. Use an inserted skewer to check if they are baked, if it comes out clean they are ready to remove from the oven.
  • As soon as the cupcakes are baked remove them from the oven and leave them in the tin to fully cool, regardless of which type of wrapper/case has been used.
FF Maple Syrup Frosted Apple Cupcakes
The stages of making the cupcake batter, through to filling and baking them.
  • Allow the cupcakes to fully cool before frosting them.

Making The Frosting And Decorating The Cupcakes:

  • First, add the very soft butter to a large bowl.
  • Then sift the icing sugar into the bowl.
  • Next add the vanilla extract, maple syrup and very hot water.
  • Finally whisk the ingredients, starting slowly and increasing in speed, until you have a smooth, creamy, light buttercream.
  • Fit a large piping bag with a large star piping nozzle – Wilton #1M.
  • Fill the piping bag with the maple syrup frosting.
  • Start in the centre of each cupcake pipe swirls, so the entire top of the cupcake is covered and then, continue to pipe, bringing the tip back to the centre and finishing with a star, as the nozzle is pulled away.
  • Continue to pipe frosting until each cupcake is generously topped with frosting.
  • To finish the decoration, drizzle approximately 1/2 teaspoon of maple syrup on to the top of the frosting, allowing the drizzle to drip around the frosting swirls.
FF Maple Syrup Frosted Apple Cupcakes
Maple Syrup Frosted Apple Cupcakes ready to be served.

Maple Syrup Frosted Apple Cupcakes a taste of Autumn in a cupcake! If you enjoy the season of Autumn, or Fall as it’s also known, take a look at this non food related post Autumn The Most Beautiful Season.

Maple Syrup Frosted Apple Cupcakes

Baking these cupcakes certainly makes the most of seasonal fruit. Since there are plenty of apples freely available I will be making again. Another reason to bake them is also so they can be shared. While none of our friends or neighbours expect deliveries of cake, it is an extra special way of sharing our abundance of apples, which are also given away.

Lightly spiced apple cupcakes in tulip wrappers, topped with creamy, piped frosting and a drizzle of maple syrup on a speckled white plate with apples.

If you have enjoyed the recipe for these Maple Syrup Frosted Apple Cupcakes you may also like these:

Autumn Apple Almond Cake

Gluten free large cake topped with flaked almonds. A slice is cut and pulled slightly away from the Autumn inspired cake.
Gluten Free – Autumn Apple Almond Cake

Crazy Caramel Carrot Cake

Crazy Caramel Carrot Cake - a bundt style carrot cake drizzled with caramel and top with pecan nuts.
Crazy Caramel Carrot Cake

Cinnamon Drizzle Apple Walnut Cake Bars

Fruit and nut cake bars drizzled with cinnamon icing and finished with contrasting white sugar nibs.
Cinnamon Drizzle Apple Walnut Cake Bars

I enjoy baking and find the process very relaxing. And creating new recipes is also be very rewarding, especially as I get to share them here, on Feasting Is Fun. Firstly as a personal achievement and also because of the pleasure my baking brings to others. Watching faces full of pleasure as they bite into a delicious treat, big smiles when a friend receives a birthday bake and gracious thanks from a busy, tired family upon receipt of a homemade lasagne, all bring me a deep sense of joy. Life is for sharing and if my small contribution encourages others to do the same, well then, this blog, Feasting is Fun, will have served its purpose.

Do you share your makes and bakes?

Sammie xx

No part of this post may be reproduced or duplicated without the written permission of the owner. Please see my Disclosure Policy.


Share
Facebooktwitterpinterestlinkedintumblr

Chocolate Vanilla Viennese Finger Biscuits

Share
Facebooktwitterpinterestlinkedintumblr

Chocolate Vanilla Viennese Finger Biscuits sandwiched together with a light, white chocolate ganache. These light, melt in your mouth biscuits are perfect for an Afternoon Tea or morning coffee treat.

FF Chocolate Vanilla Viennese Finger Biscuits

The first time I made Chocolate Dipped Viennese Fingers was an experience, shall we say. It was relatively early on in my blog and in my wisdom I decided to set the dipped Viennese biscuits on a cooling rack!

Most of them stuck. Badly.

Resulting in a kitchen full of broken biscuits where I  managed to salvage just enough for a decent photograph. So, learning my lesson I did not make the same mistake when making these delicious, finger biscuits.

FF White Chocolate Ganache Filled Viennese Sandwich Biscuits
Chocolate Vanilla Viennese Finger Biscuits

These light, meltingly delicious Chocolate Vanilla Viennese Finger Biscuits are so yummy and are a favourite of my husbands.

Starting my day right

Now we all know I am a self confessed Cookie Monster. So are my whole family. When I was younger my Grandad would bring my youngest Auntie, my sister and I a cup of tea, in bed, every morning. And, no one can make tea like my Grandad did. Anyway, we would always get three biscuits, which we would swap so that we had our favourites. I still cannot understand the appeal of custard creams, but each to their own.

Chocolate Vanilla Viennese Finger Biscuits

Since I was little, staying in the comfort and security of my grandparents home having biscuits with my morning tea was my routine. It still is. I can miss breakfast and lunch, so long as I’ve had a cup of tea and a biscuit or cookie first thing in the morning. And, it is the one thing I would choose to never give up. It is part of my morning routine, so much so, that when I was in hospital last year see here, I would save my packet of 3 biscuits given out with the hot chocolate in the evening, so that I could have them with my morning tea.

Why Homemade Biscuits Are Best

While growing up, although my Grandma was an accomplished cook, I cannot recall her making biscuits. Yet for me, it was the very first skill I mastered in my kitchen. Although these days I tend towards lazy cookies rolled into balls, or scooped with an ice cream scoop. So, to actually pipe biscuits, make a ganache and sandwich them together is a first for me (not the piping), I’ve definitely never made sandwiched biscuits.

I made and baked one batch of my Chocolate Dipped Viennese Fingers and then tweaked the recipe to make a chocolate version. There’s a tiny bit more icing sugar in the chocolate finger biscuits as I wanted to offset any bitterness from the cocoa.

Chocolate Vanilla Viennese Finger Biscuits

Tomorrow morning, I will have a luxury start to my day. A Chocolate Vanilla Viennese Finger Biscuit to accompany my morning cup of tea!

Recipe: Makes 18-24 Chocolate Vanilla Viennese Finger Biscuits

200g/7oz Very Soft Unsalted Butter

60g/5.2oz Icing Sugar – sifted

Pinch 1/8tsp Salt – I use Maldon

1tsp Vanilla Extract – I use Nielsen-Massey

15g Corn Flour – approx 1tbsp

50g/2oz Cocoa Powder

100g/4oz Self Raising White Flour

50g/2oz Plain White Flour

100g/4oz White Chocolate – for dipping the ends of the biscuits

100g/4oz Dark Chocolate – for dipping the ends of the biscuits

For the white chocolate ganache:

100g/4oz White Chocolate

100mls Double Cream

Method: Preheat the oven to 180C/160C fan, gas mark 4, 350F.

Making And Piping The Viennese Biscuit Dough

  • First of all line 2 baking trays with non stick silicone mats or baking parchment.
  • Whisk the butter until it is very soft and pale – approx. 5 minutes.
  • Add the sifted icing sugar and vanilla extract and continue whisking for 2 minutes.
  • Next sift in the cocoa powder. Whisk for a further 2 minutes until the mixture is a dark, chocolatey brown colour.
  • Sift the corn flour, plain and self raising flour into the bowl.
  • Using a metal spoon mix the ingredients together until the are just combined, with no visible white streaks present.
  • Fit a large piping bag with a large, Wilton #1M star tip.
  • Fill the piping bag with the soft, chocolate biscuit dough.
  • Pipe 3″/7-8cm lengths of biscuit dough on to the lined baking tray.
FF Chocolate Vanilla Viennese Finger Biscuits
Piped Chocolate Vanilla Viennese Finger Biscuits ready for the oven.

Baking The Biscuit Halves

  • Place both trays of piped biscuits in the centre and lower part of the oven.
  • Bake the biscuits for 12 minutes. They will be firm to touch and may have spread a little.
  • As soon as the biscuits are baked remove from the oven and allow to cool completly on the tray.
FF Chocolate Vanilla Viennese Finger Biscuits
Chocolate Vanilla Viennese Finger Biscuits beautifully baked.

Making The White Chocolate Ganache Filling

  • While the biscuit fingers are cooling make the  chocolate ganache that will be piped on the underside of the fingers for sandwiching together.
  • In a heatproof, microwaveable jug add the white chocolate and double cream.
  • Zap for 1 minute on medium power.
  • Remove from the microwave and stir. If there are still lumps of unmelted chocolate, pop it back in for a further 30 seconds on medium.
  • Stir the ganache until the melted white chocolate is fully mixed into the cream.
  • Whisk the ganache to cool it and continue whisking until the ganache thickens and becomes airy – today it was so warm that I wasn’t able to get the ganache to solidify.
FF Chocolate Vanilla Viennese Finger Biscuits
Whisk the ganache until it is cool and thickened.
  • If the weather is cool the thickened ganache can be scooped into a piping bag with a medium round tip fitted – I poured the ganache into a disposable piping bag, which I then sealed with an elastic band and I placed it into the coldest part of the fridge until it had thickened.

Decorating And Filling The Chocolate And Vanilla Viennese Sandwich Biscuits

  • While the ganache was cooling I melted both the dark and white chocolate in small heatproof, microwaveable bowls.
  • Dip the chocolate fingers into the white chocolate and the vanilla fingers into the dark chocolate. Lay the dipped biscuit fingers on to anon stick silicone mat or baking parchment.
  • Not all of the biscuit fingers will be dipped in chocolate, that’s fine it is nice to have a variety.
  • When the ganache has firmed up to piping consistency, think buttercream, then you are ready to assemble your biscuits.
  • Pipe a line of white chocolate ganache down the length, flat side upper, of one biscuit.
  • Place a similar sized biscuit on top and set aside.
  • Continue until all of the biscuits are sandwiched together.
FF Chocolate Vanilla Viennese Finger Biscuits
Chocolate Vanilla Viennese Finger Biscuits sandwiched together with ganache.
  • NOTE: Due to the fragile, melting nature of the Viennese biscuits, it is inevitable that some will break. I thoroughly enjoyed ‘taste testing’ the few breakages with our 2 daughters!
  • I ended up with 18 perfectly sandwiched biscuits.
  • Due to the heat I popped all the filled biscuits on to a baking tray and placed them back into the fridge to set, before taking the photographs.

To store place the Chocolate Vanilla Viennese Finger Biscuits into a shallow tin and put in the fridge. With temperatures set to rise over the next few days, assuming they last that long 😉, they will keep for up to 4 days in the fridge.

FF Chocolate Vanilla Viennese Finger Biscuits
Chocolate Vanilla Viennese Finger Biscuits ooh I bet you go back for seconds!

Serve on a pretty plate, adorned with flowers from the garden. These Chocolate Vanilla Viennese Finger Biscuits are perfect with afternoon tea, or morning coffee.

If you have enjoyed these Chocolate Vanilla Viennese Finger Biscuits here are some other recipes you may like:

Apricot Oat Crumble Cookies

FF Chocolate Vanilla Viennese Finger Biscuits
Apricot Oat Crumble Cookies

Bakewell Shortbread Bars

FF Chocolate Vanilla Viennese Fingers Biscuits
Bakewell Shortbread Bars

Lemon Drizzle Cake Bars

FF Chocolate Vanilla Viennese Finger Biscuits
Lemon Drizzle Cake Bars

Sitting together with friends over a mid morning coffee, or with family for afternoon tea, doesn’t have to be a formal occasion. Yet when a little extra effort is made, for example, adding the rose to the centre of the plate, it really lifts the occasion.

All food should be feasted on and enjoyed, not just eaten for the sake of it (unless circumstances, for example illness, dictate otherwise). Food shared, tastes better and eating with company can be more fun.

Make the most of what’s left of the summer to eat outside. Watching the butterflies, listening to the birds, bees and ruffling leaves of the trees, adds an extra element of fun to our feasting.

Sammie xx

Share
Facebooktwitterpinterestlinkedintumblr

Strawberry Sweetheart Cake

Share
Facebooktwitterpinterestlinkedintumblr

So, this Strawberry Sweetheart Cake is what I bake for my wonderful Hubby, on  Valentine’s Day. Vanilla flavoured sponge, split in two with a slathering of strawberry jam in the middle, sealed with buttercream roses. Because is a there a better way to say those three precious words ‘I Love You’ than with cake?

FF Strawberry Sweetheart Cake

Since I’ve baked and created a few chocolate recipes for Valentine’s Day like Chocolate Heart Cookies, and Chocolate Fudge Brownie Bites which are utterly delicious, for the day itself I wanted to bake a cake with simple flavours. Sugar and Crumbs sell are range of naturally flavoured icing sugars. And so to make the buttercream frosting for this cake using the Strawberry Milkshake flavour is delicious. The taste is truly like strawberry milkshake and makes this cake absolutely sing on your tastebuds. Alternatively you can use plain icing sugar and flavour it. Also, Foodie Flavours sell a great range of natural food flavourings.

Strawberry Sweetheart Cake
Strawberry Sweetheart Cake swirled with roses and sprinkled with love.

Rather than cover the cake with a smooth layer of buttercream I chose to pipe roses over it. Although I am not a trained cake decorator, I promise that the piped roses are not difficult. Because if I, with my wobbly hands can pipe them, you can too. And the effect of the roses gives this Strawberry Sweetheart Cake a very professional finish. While only you and I will know how easy it really is.

Piping buttercream roses:

First of all fit a large star tip (I used a Wilton 1M piping tip) to your piping bag and fill with the buttercream. Practice on a clean plate first. Imagine writing the letter e, when you get to the end of the you contine round in a complete circle. It is that easy!! A few practices, keeping the pressure on your piping bag steady and you will have piped roses! This cake is only the second time I have piped these roses! The first time was these Raspberry Ripple Almond Cupcakes.

Strawberry Sweetheart Cake
Strawberry Sweetheart Cake roses piped around the sides.

I will admit that piping the roses around the sides was a bit harder. So I piped either side of the heart first and once I’d got the hang of it piped the final rose on the point of the heart. Continuing with the same tip, I piped little stars in between the roses to fill in any gaps and then defined the heart by piping stars all the way around the top edge.

Strawberry Milkshake Sweetheart Cake
Strawberry Sweetheart Cake a view of the side – using piped stars to fill in any gaps.

A sprinkle of sparkle:

Finally, glitter, shiny hearts and more heart sprinkles finished this cake off beautifully. At least that’s what my hubby thought and this cake was made especially for him!

Baking for my family, as I’ve mentioned before, is one way I like to show them my love. This past year has been very hard on us all, due to my seizures (see here). Especially my hubby, who has looked after not only me, but our three gorgeous children, as well as holding down a demanding, full time job. Wanting to show my love for him on this particular day was very important to me and as a family, we all get to eat the cake, my way of saying thank you and I Love You all.

Recipe: Makes One Strawberry Sweetheart Cake serves 20

250g/9oz Caster Sugar

250g/9oz Unsalted Butter – at room temp.

1/4tsp Salt – I use Maldon

1tsp Vanilla Bean Paste or Vanilla Extract

250g/9oz Plain White Flour

2tsp Baking Powder

6 Large Eggs – I always use free range

200g/7oz Strawberry Jam

Assortment of sprinkles and edible glitter

For the buttercream

500g/1lb 2oz Strawberry Milkshake Icing Sugar – or alternatively use plain icing sugar and add your own flavouring to taste.

250/9oz Unsalted Butter very soft

2tbsp Boiling Water

Method: Preheat the oven to 160C/140C fan, gas mark 3, 325F – this cake is cooked low and slow.

Making the cake:

  • First of all butter and line the base of a heart shaped tin with baking parchment. If the tins are shallow split the mixture, so that it comes half way up your cake tin.
  • Into a large bowl add the butter and sugar.
  • Whisk until pale and fluffy – 5 minutes.
  • Add the vanilla and whisk to combine.
  • Sift the flour, baking powder and salt into another bowl (dry ingredients).
  • Add one third of the dry ingredients and 3 eggs.
  • Whisk slowly until combined.
  • Repeat using one third of the dry mixture and 3 eggs.
  • Whilst whisking slowly add the final third of the dry mixture.
  • Remove the whisk and give the bowl a thorough mix using a soft spatula, ensuring all the ingredients are well combined.
Strawberry Sweetheart Cake
Fill the tin with cake batter and smooth the top.

Baking the cake:

  • Place the cake tin in the centre of the oven and bake for 1 hour 15 – 30 minutes.
  • The cake is baked when it is golden brown, springs back from a light finger press and an inserted skewer comes out clean.
Strawberry Sweetheart Cake
Remove the cake from the oven.
  • Place the cake tin on a large trivet or cooling rack.
  • Allow the cake to cool completely in the tin.

Filling and decorating the cake:

  • Once the cake is completely cold, tip out of the cake tin and place on a cake stand or board, so that the flat bottom is uppermost.
Strawberry Sweetheart Cake
Very carefully slice the cake in half.
  • Slice the cake in half.
  • Lay the uppermost half on a spare board.

Strawberry Sweetheart Cake

    Spread the strawberry jam over the bottom half so that it doesn’t quite reach the edge.
  • Sing a spoon spread jam on to the bottom half of the cake.
Strawberry Sweetheart Cake
Lay the top layer onto the jam covered bottom layer.

Making the buttercream:

  • Place the very soft butter into a large bowl.
  • Sift in the flavoured, or plain, icing sugar into the bowl and add 2 tablespoons of boiling water (add 1 teaspoon of vanilla extract, or th required amount of flavouring, if not using flavoured icing).
  • Starting slowly, whisk the ingredients together, increasing the speed as the icing sugar becomes fully incorporated.
  • Continue whisking for 5 minutes, this will ensure the icing is smooth and light.
  • Fit a large icing bag with a large star tip.
  • Finally, fill the icing bag with whpiped buttercream.

Icing the Strawberry Sweetheart Cake:

  • Start with the surface of the cake and pipe a rose swirl at the top, where the dip in the heart is.
  • Continue piping rose swirls symmetrically, either side, of the heart.
  • Finish with a rose swirl at the bottom point of the heart.
  • For the sides, start at the top of the heart bump, on one side and pipe rose swirls around one side and then the other, leaving the bottom point.
  • Go back to the top of the heart and pipe one rose in the heart dip and and additional rose to fill in between the two roses.
  • Repeat on the other side.
  • Now pipe a rose swirl on the bottom point of the heart.
  • Pipes stars wherever there are gaps and visible pieces of cake on the top and sides, trying to keep the pattern symmetrical – especially on the top of the cake.
  • Also pipe stars on the top of the cake around the heart outline.
Strawberry Sweetheart Cake
A beautifully covered Strawberry Sweetheart Cake.

Finishing touches:

Now you can sprinkle away. I firstly gave this beautiful cake a good dusting of white edible glitter and then sprinkled two different styles of hearts over it.

Strawberry Sweetheart Cake
Strawberry Sweetheart Cake shimmering and sparkling in the sunshine.

Place the cake somewhere cool to set for a couple of hours. This cake spent the night in our porch, since it was particularly chilly February evening.

Because of the addition of boiling water into the buttercream mixture, this buttercream will not develop a hard crust. As this not only improves the texture whilst eating the cake, but also means that the buttercream is a dream to slice through!

Strawberry Sweetheart Cake
Strawberry Sweetheart Cake one delicious slice – that didn’t last long!!!

This Strawberry Sweetheart Cake will keep in an airtight container, for up to 5 days, if left somewhere cool – I would advise keeping it in the fridge during the summer. Although, having just eaten a slice, I can’t imagine this cake hanging around for long, especially in our house!

Because making this cake is so beautifully easy, it would be perfect for birthdays, engagements, anniversaries and maybe even small weddings. Also, you can easily tint the buttercream with food colouring. I used Sugarflair and Wilton edible food colouring gels. You really only need a tiny (tip of a cocktail stick) amount to produce a beautiful pastel shade.

Whatever you are doing, whether alone or with others, I hope that you know you are loved, see Important Stuff.

If you have enjoyed this Strawberry Sweetheart Cake, then you may also like these:

Chocolate Heart Cake

Chocolate Heart Cake link
Chocolate Heart Cake

Heart Engagement Bundt Cake

FF Strawberry Sweetheart Cake
Heart Engagement Bundt Cake

Raspberry Lemon Celebration Layer Cake 

FF Strawberry Sweetheart Cake
Raspberry Lemon Celebration Layer Cake

While I love baking, I also recognise that I am not the world’s best cake decorator. Yet with a little practice I have perfected, the very “on trend” piped rose technique. There is truth in the saying “A little practise goes a long way.” Especially when seeing the finished results and the delight on the recipient’s face when presented with a stunning cake. Most importantly for me is the love that goes into making, baking and decorating a cake.

Sammie xxx

No part of this post may be reproduced or duplicated without the written permission of the owner. Please see my Disclosure Policy.

Share
Facebooktwitterpinterestlinkedintumblr