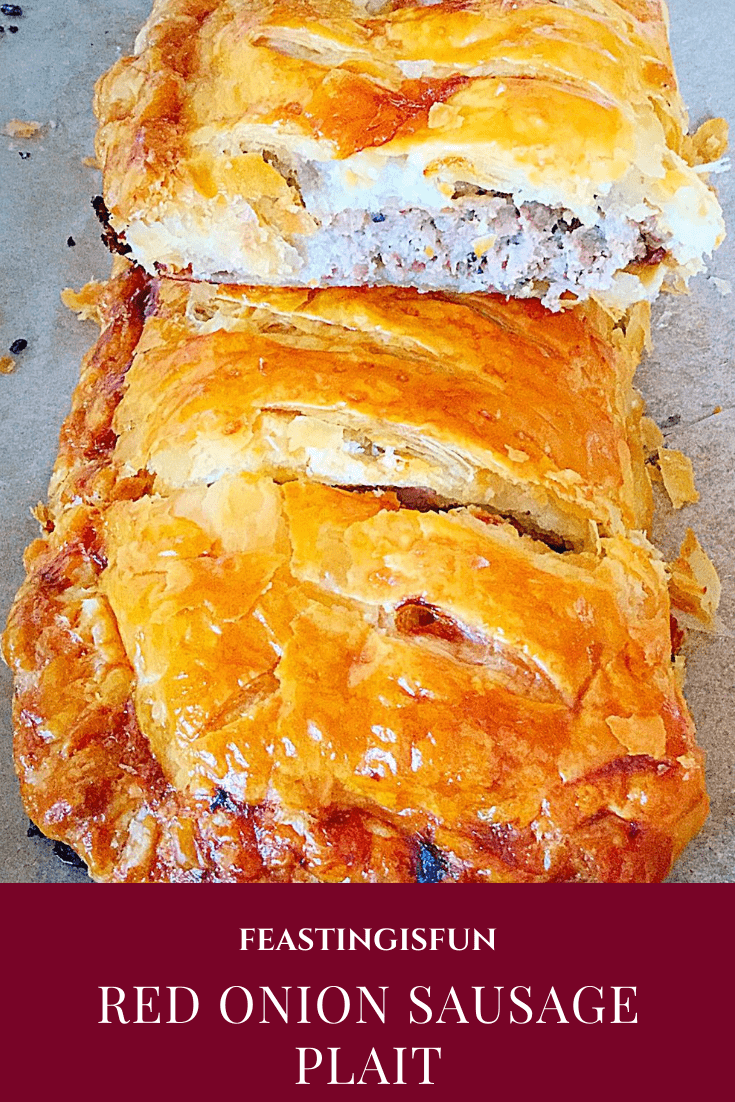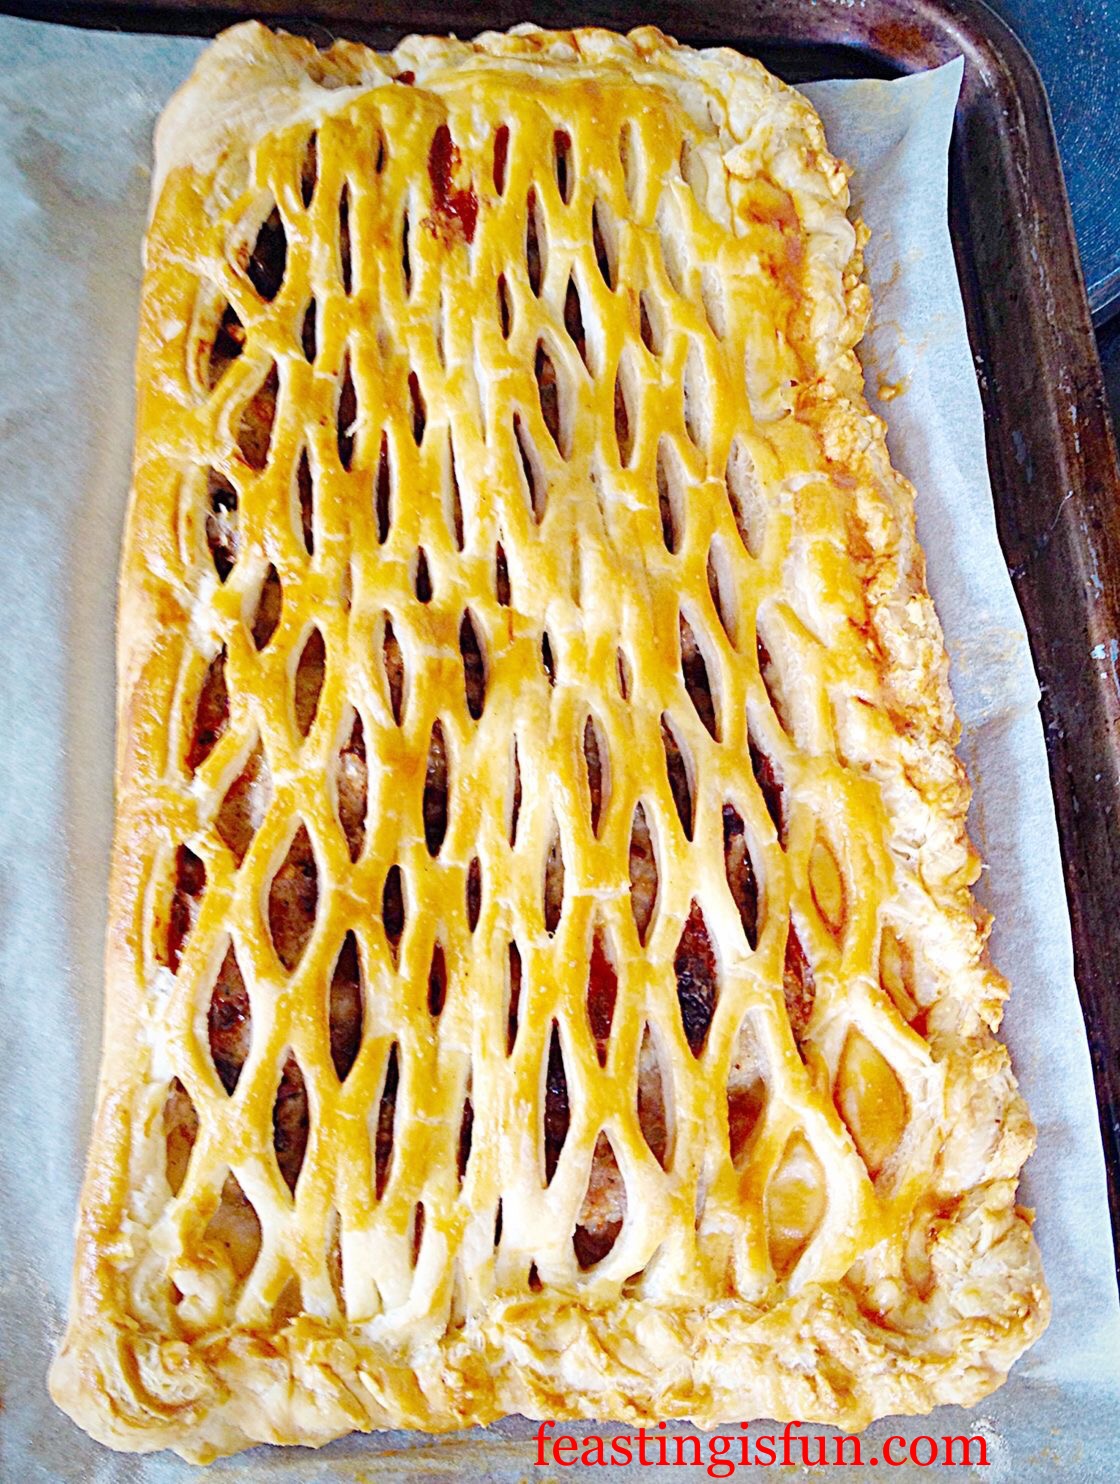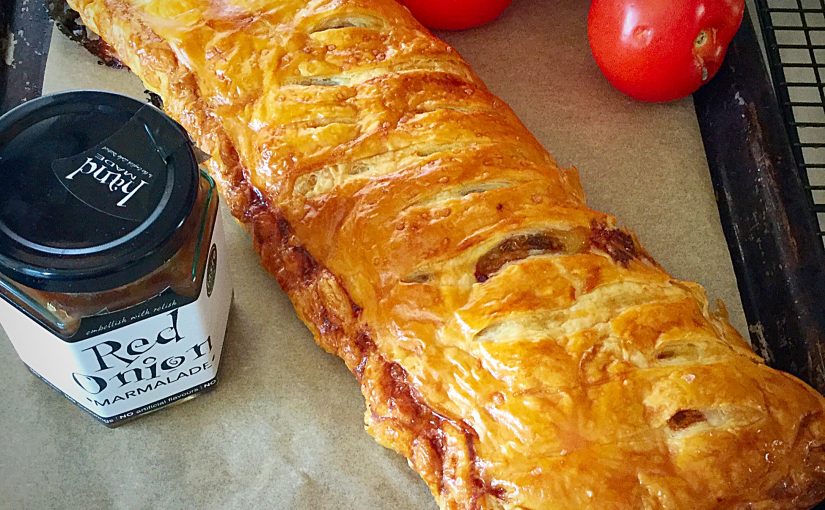
This week happens to be National Picnic Week and as you’ve probably realised by now, I’m a big fan of outdoor eating. So, my Red Onion Sausage Plait is not only perfect for picnics, it’s also delicious served for dinner too! Great quality sausage meat mixed with red onion marmalade, encased in golden, all butter puff pastry. Utterly delicious.

Using Condiments As Ingredients
The lovely people at Hawkshead Relish sent me some savoury relishes and marmalade to try out. I am a huge chutney fan, everything from jellies, to chutneys, relishes and marmalades. However, with this review, I wanted to use them as ingredients and see just how well they worked being in a dish. While also serving alongside as accompaniments.
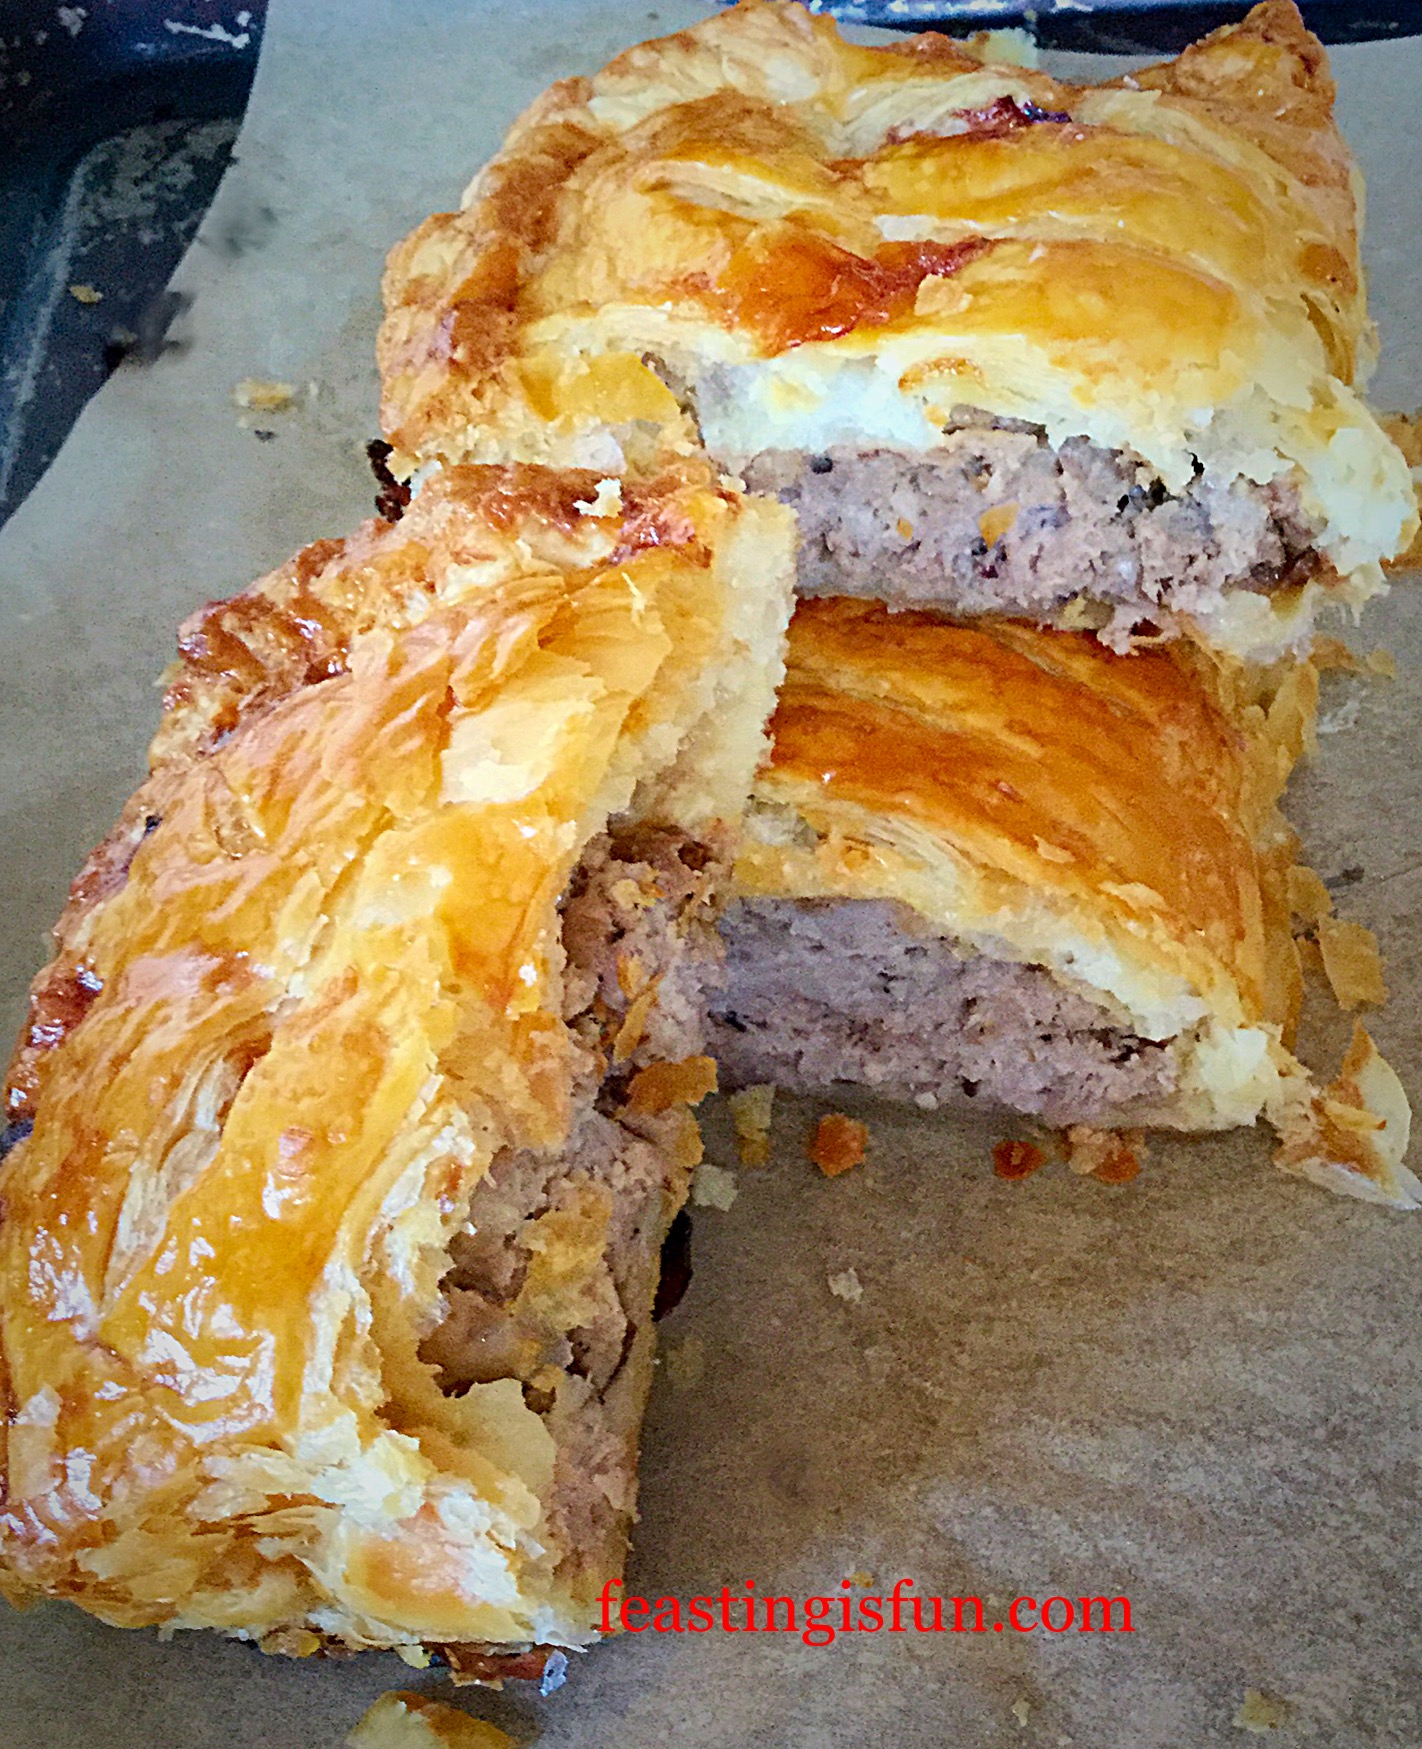
I made this Red Onion Sausage Plait twice, as unfortunately I wasn’t able to get good pictures the first time round. Although, nobody in our house complained that I had to make this again. Since we all enjoyed the flavour and added texture from the red onion marmalade that contains raisins and crunchy pine kernels.
So, I set about making another Red Onion Sausage Plait, with great enthusiasm. Because, I love, I mean absolutely, completely, adore this Red Onion Marmalade and I knew this would use the last of it. Still I cheered myself with the fact that it makes such a knockout recipe and that I’d be eating it for dinner!
Not Only For Picnics!
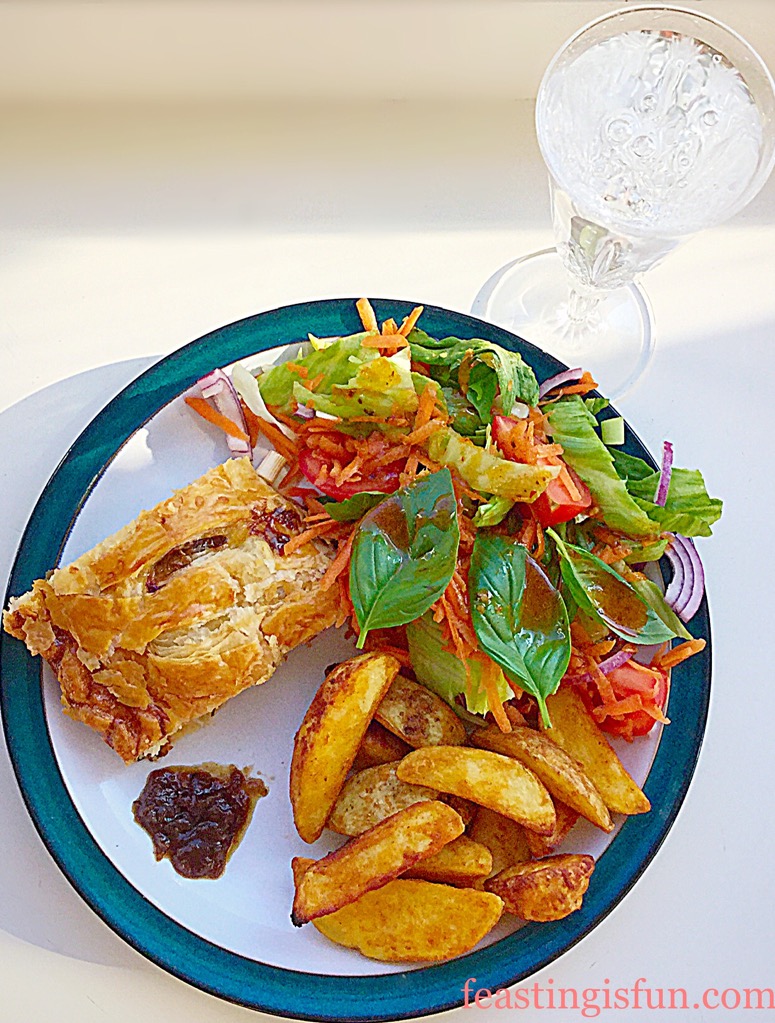
Warmed and served with a huge pile of salad and some potato wedges that I had in the freezer, this Red Onion Sausage Plait really does make a tasty, weekday meal. Also, it’s easily made ahead, left uncooked, wrapped in cling film and kept in the fridge until dinner time. Since it only takes 40 minutes to cook, which is why, seeing as the oven was already on I whacked in some potato wedges from the freezer.

The caramelised onion flavour works so well with the meaty pork sausage. This is definitely a firm, family favourite now and is made frequently. I always look forward to eating this Red Onion Sausage Plait, whether on picnics and for dinner many times in future.
Recipe: Makes one Red Onion Sausage Plait serves 4 – 6 people
450g/1lb Good Quality Pork Sausagemeat – free range or organic for preference
3 heaped tablespoons of Red Onion Marmalade from Hawkshead Relish
320g Ready Rolled All Butter Pastry Sheet – I used JusRoll
1 Medium Free Range Egg
Pinch of Sea Salt – I use Maldon
Making The Sausage Plait
Preheat the oven to 220C/200C fan, gas mark 7, 425F.
- First of all, line a large baking tray with baking parchment.
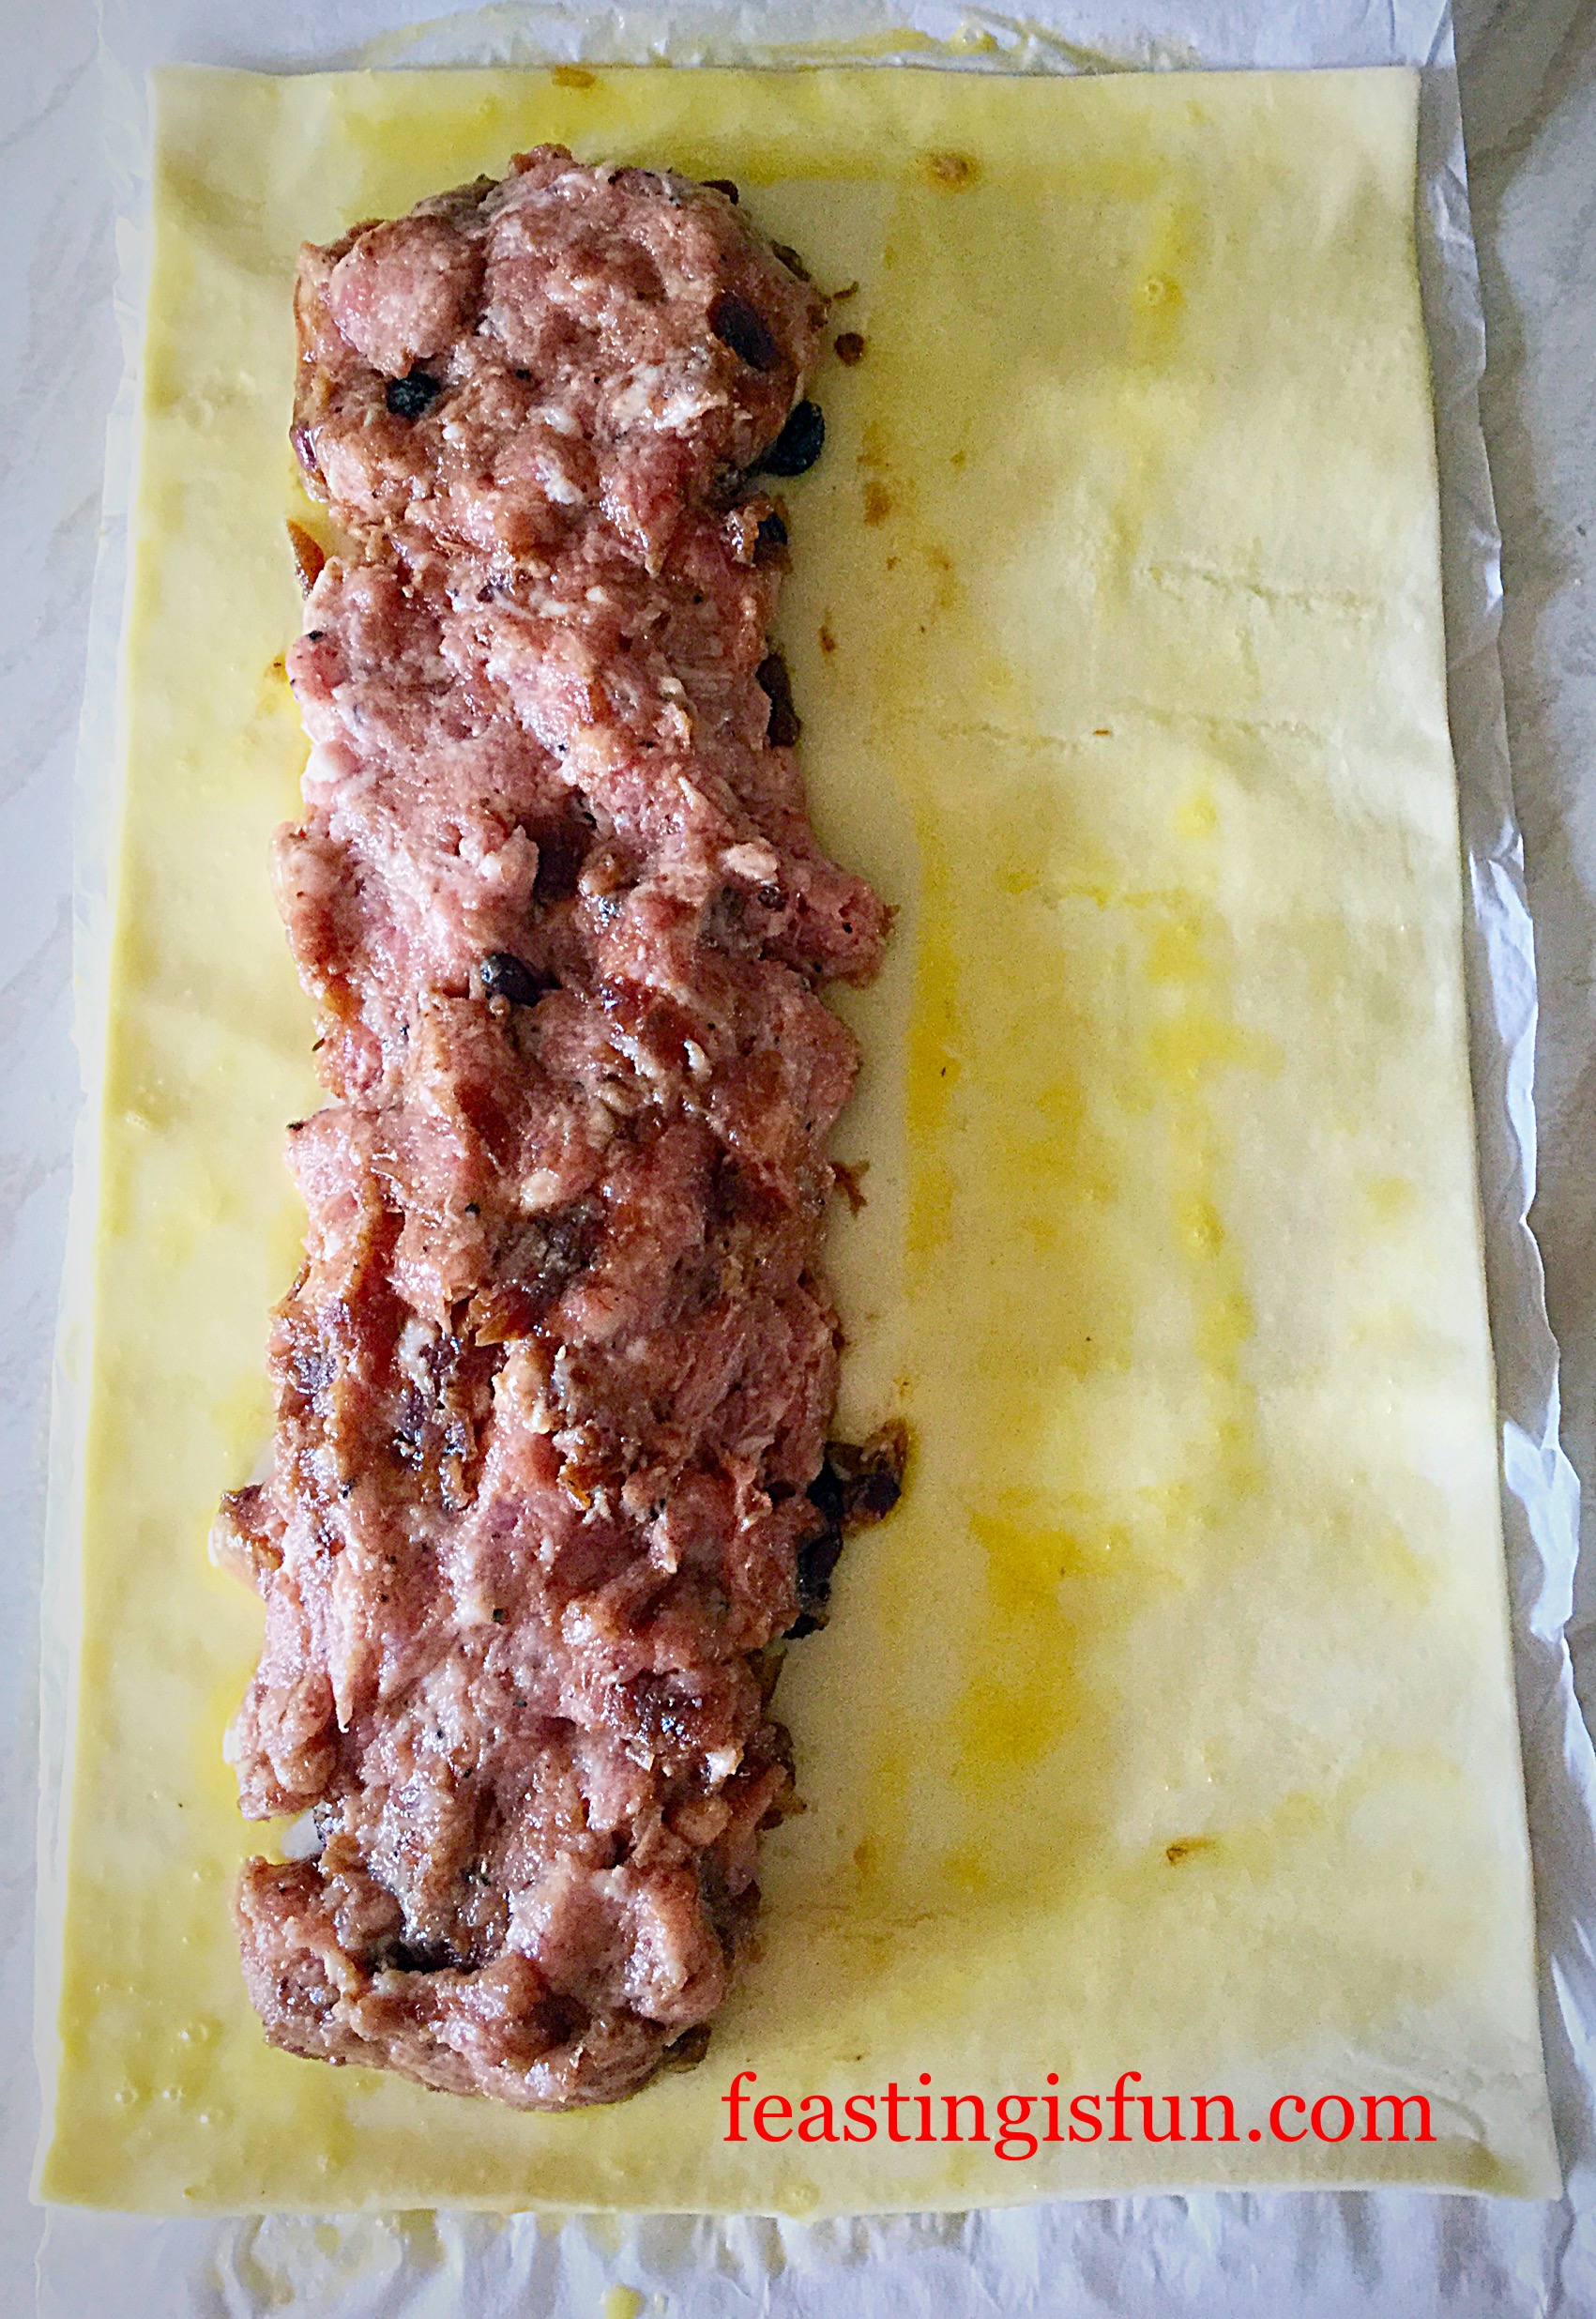
- Place the sausage meat in a bowl with the red onion marmalade.
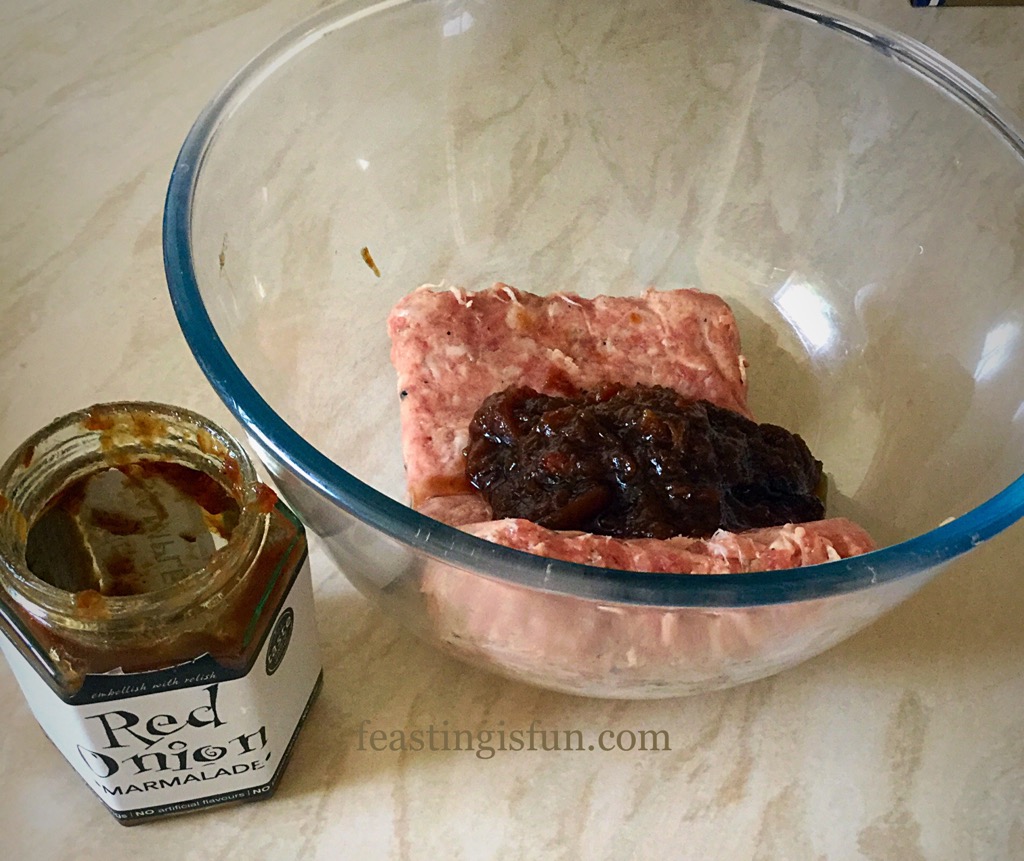
- Using clean hands smoosh the mixture together, through your fingers, until it is fully combined (a tack I particularly enjoy)! Set to one side and wash your hands.
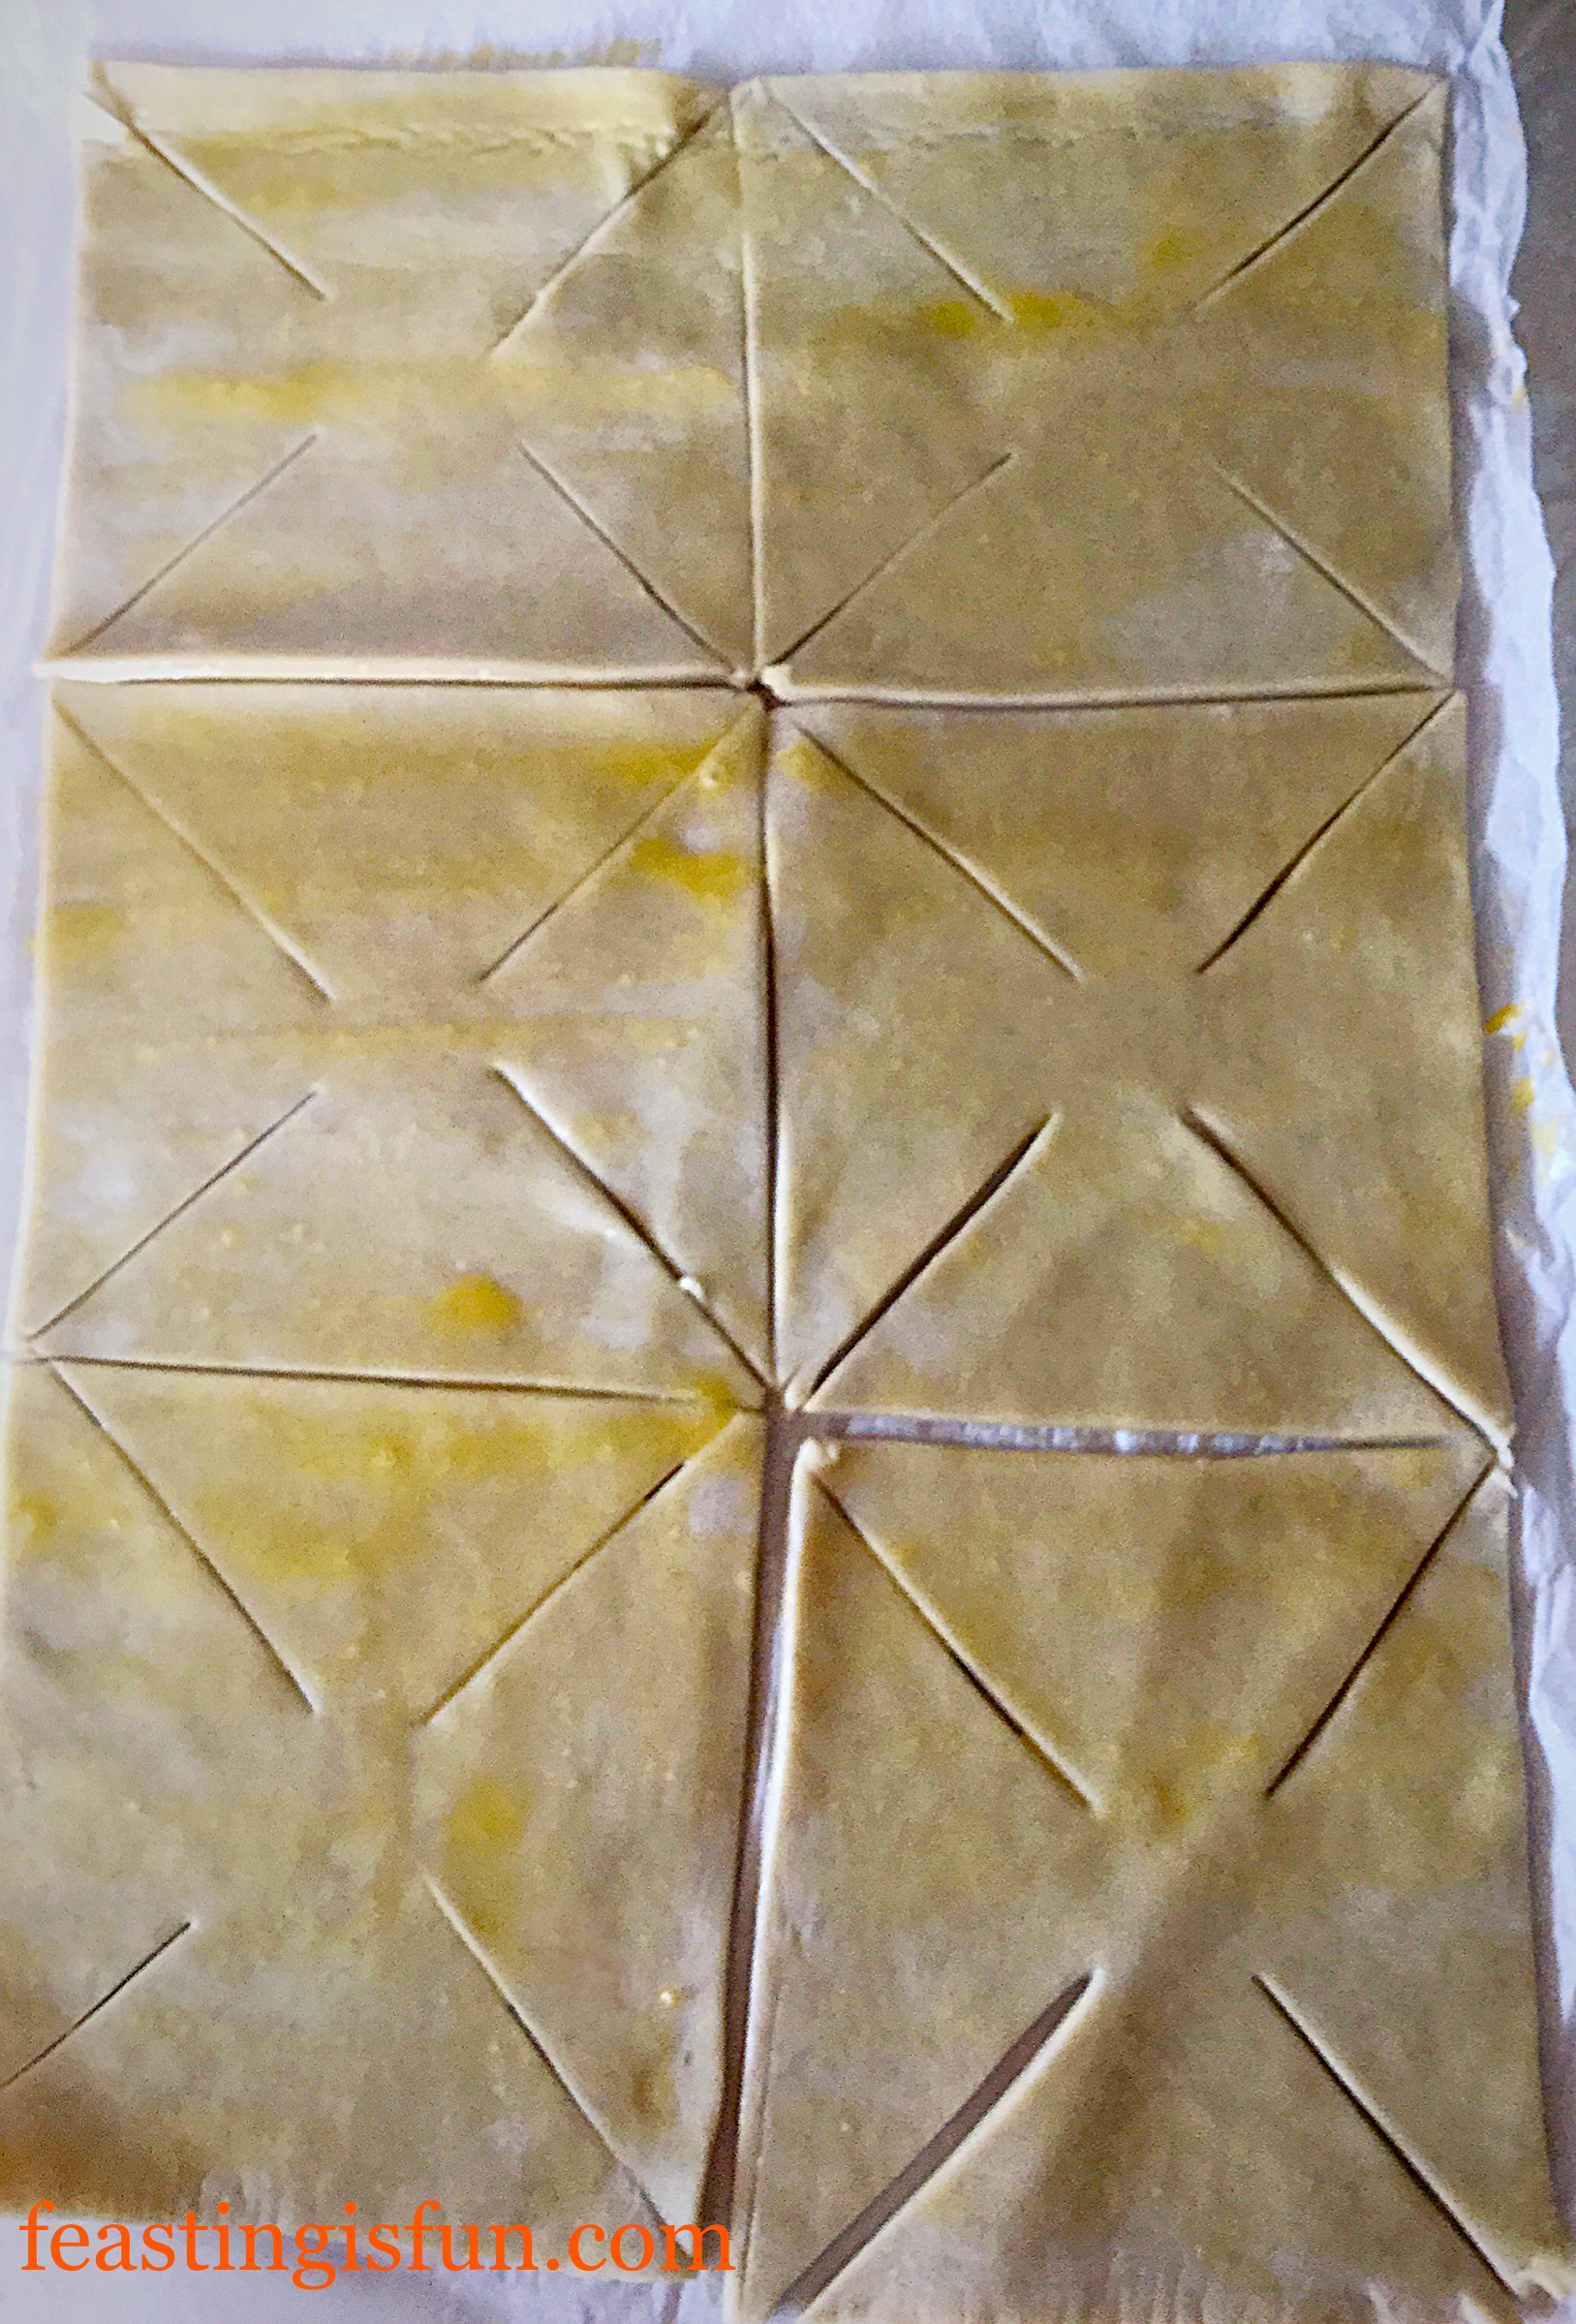
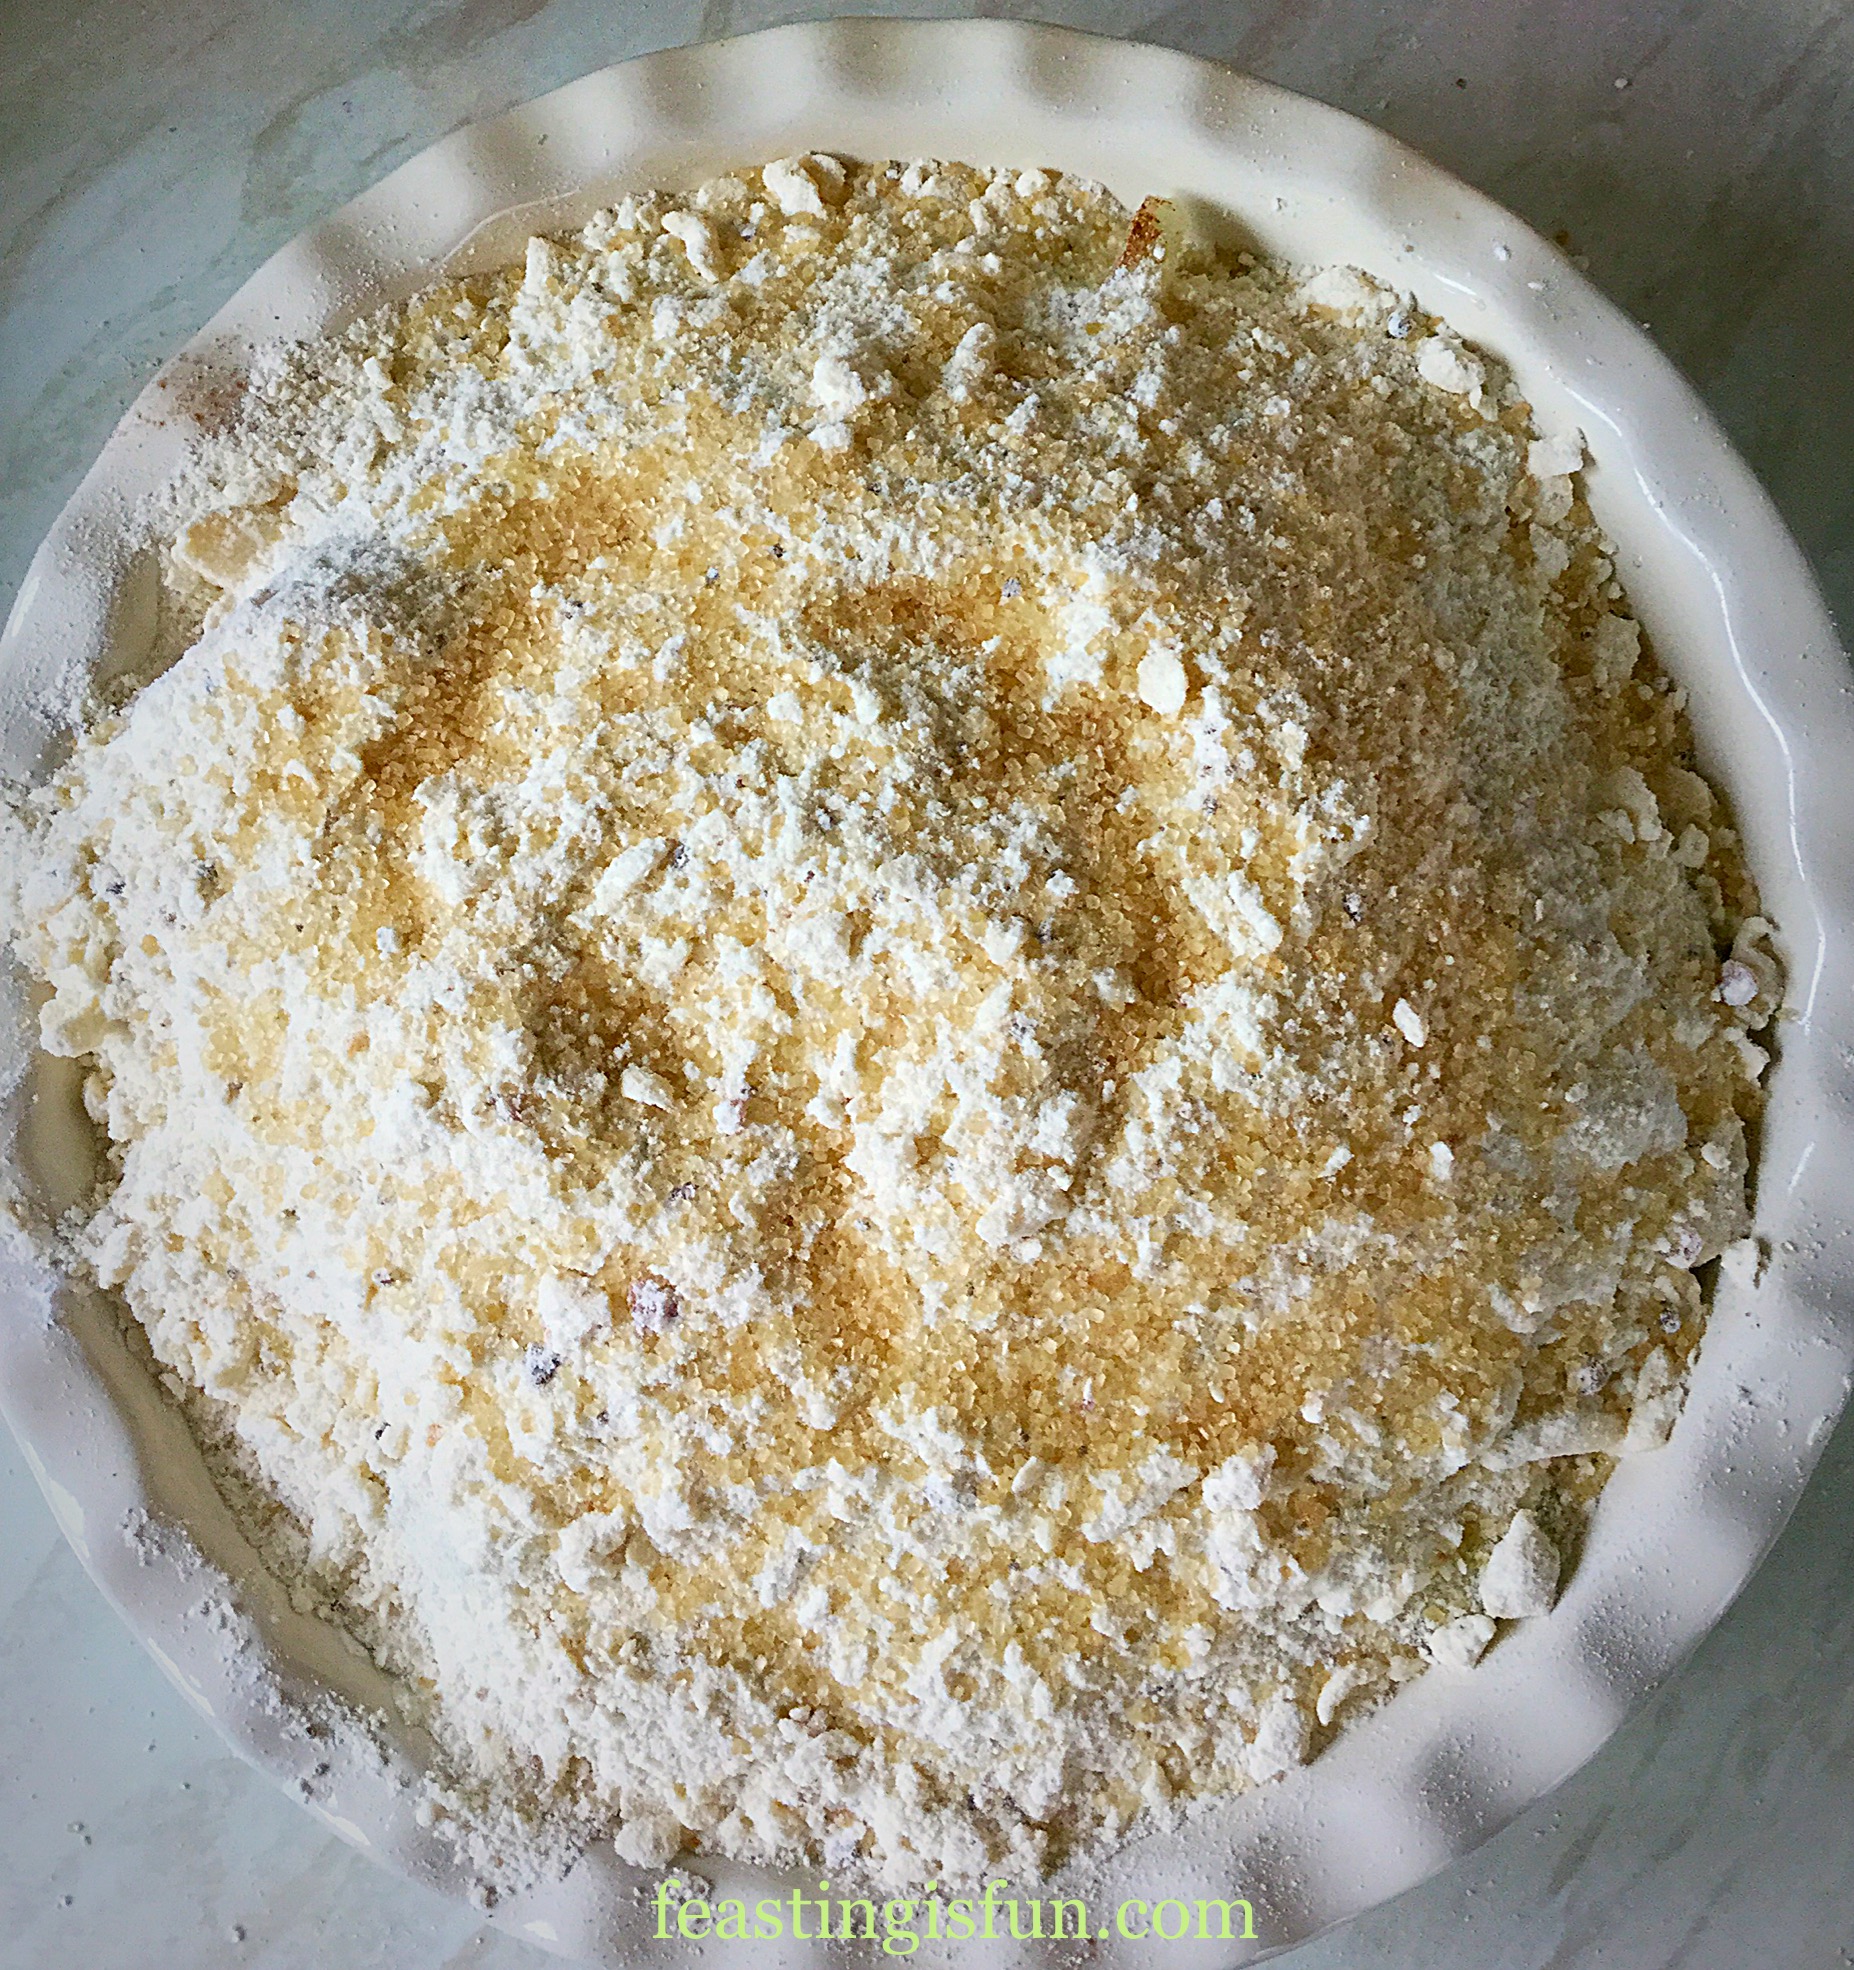
- On a clean work top unwrap the pastry sheet.
- Place the sausage meat mixture down one side of the pastry, rather like a huge sausage roll, leaving a gap at each end and the side of at least 2.5cm.
- Crack the egg into a small bowl and whisk with a fork until well mixed. This is known as an egg wash.
- Dip a pastry brushing into the egg wash and brush all of the visible pastry (not the sausage meat) with egg wash.
- Bring the right side of the pastry over the sausage meat so that both side edges are together.
- Crimp with a fork or twist all the pastry layers together, where they overlap to seal them.
- Transfer the Red Onion Sausage Plait to the baking tray. Mine fits only when placed at an angle!
- Brush over the entire outside of the sausage plait with egg wash. Finally sprinkle with a little sea salt.
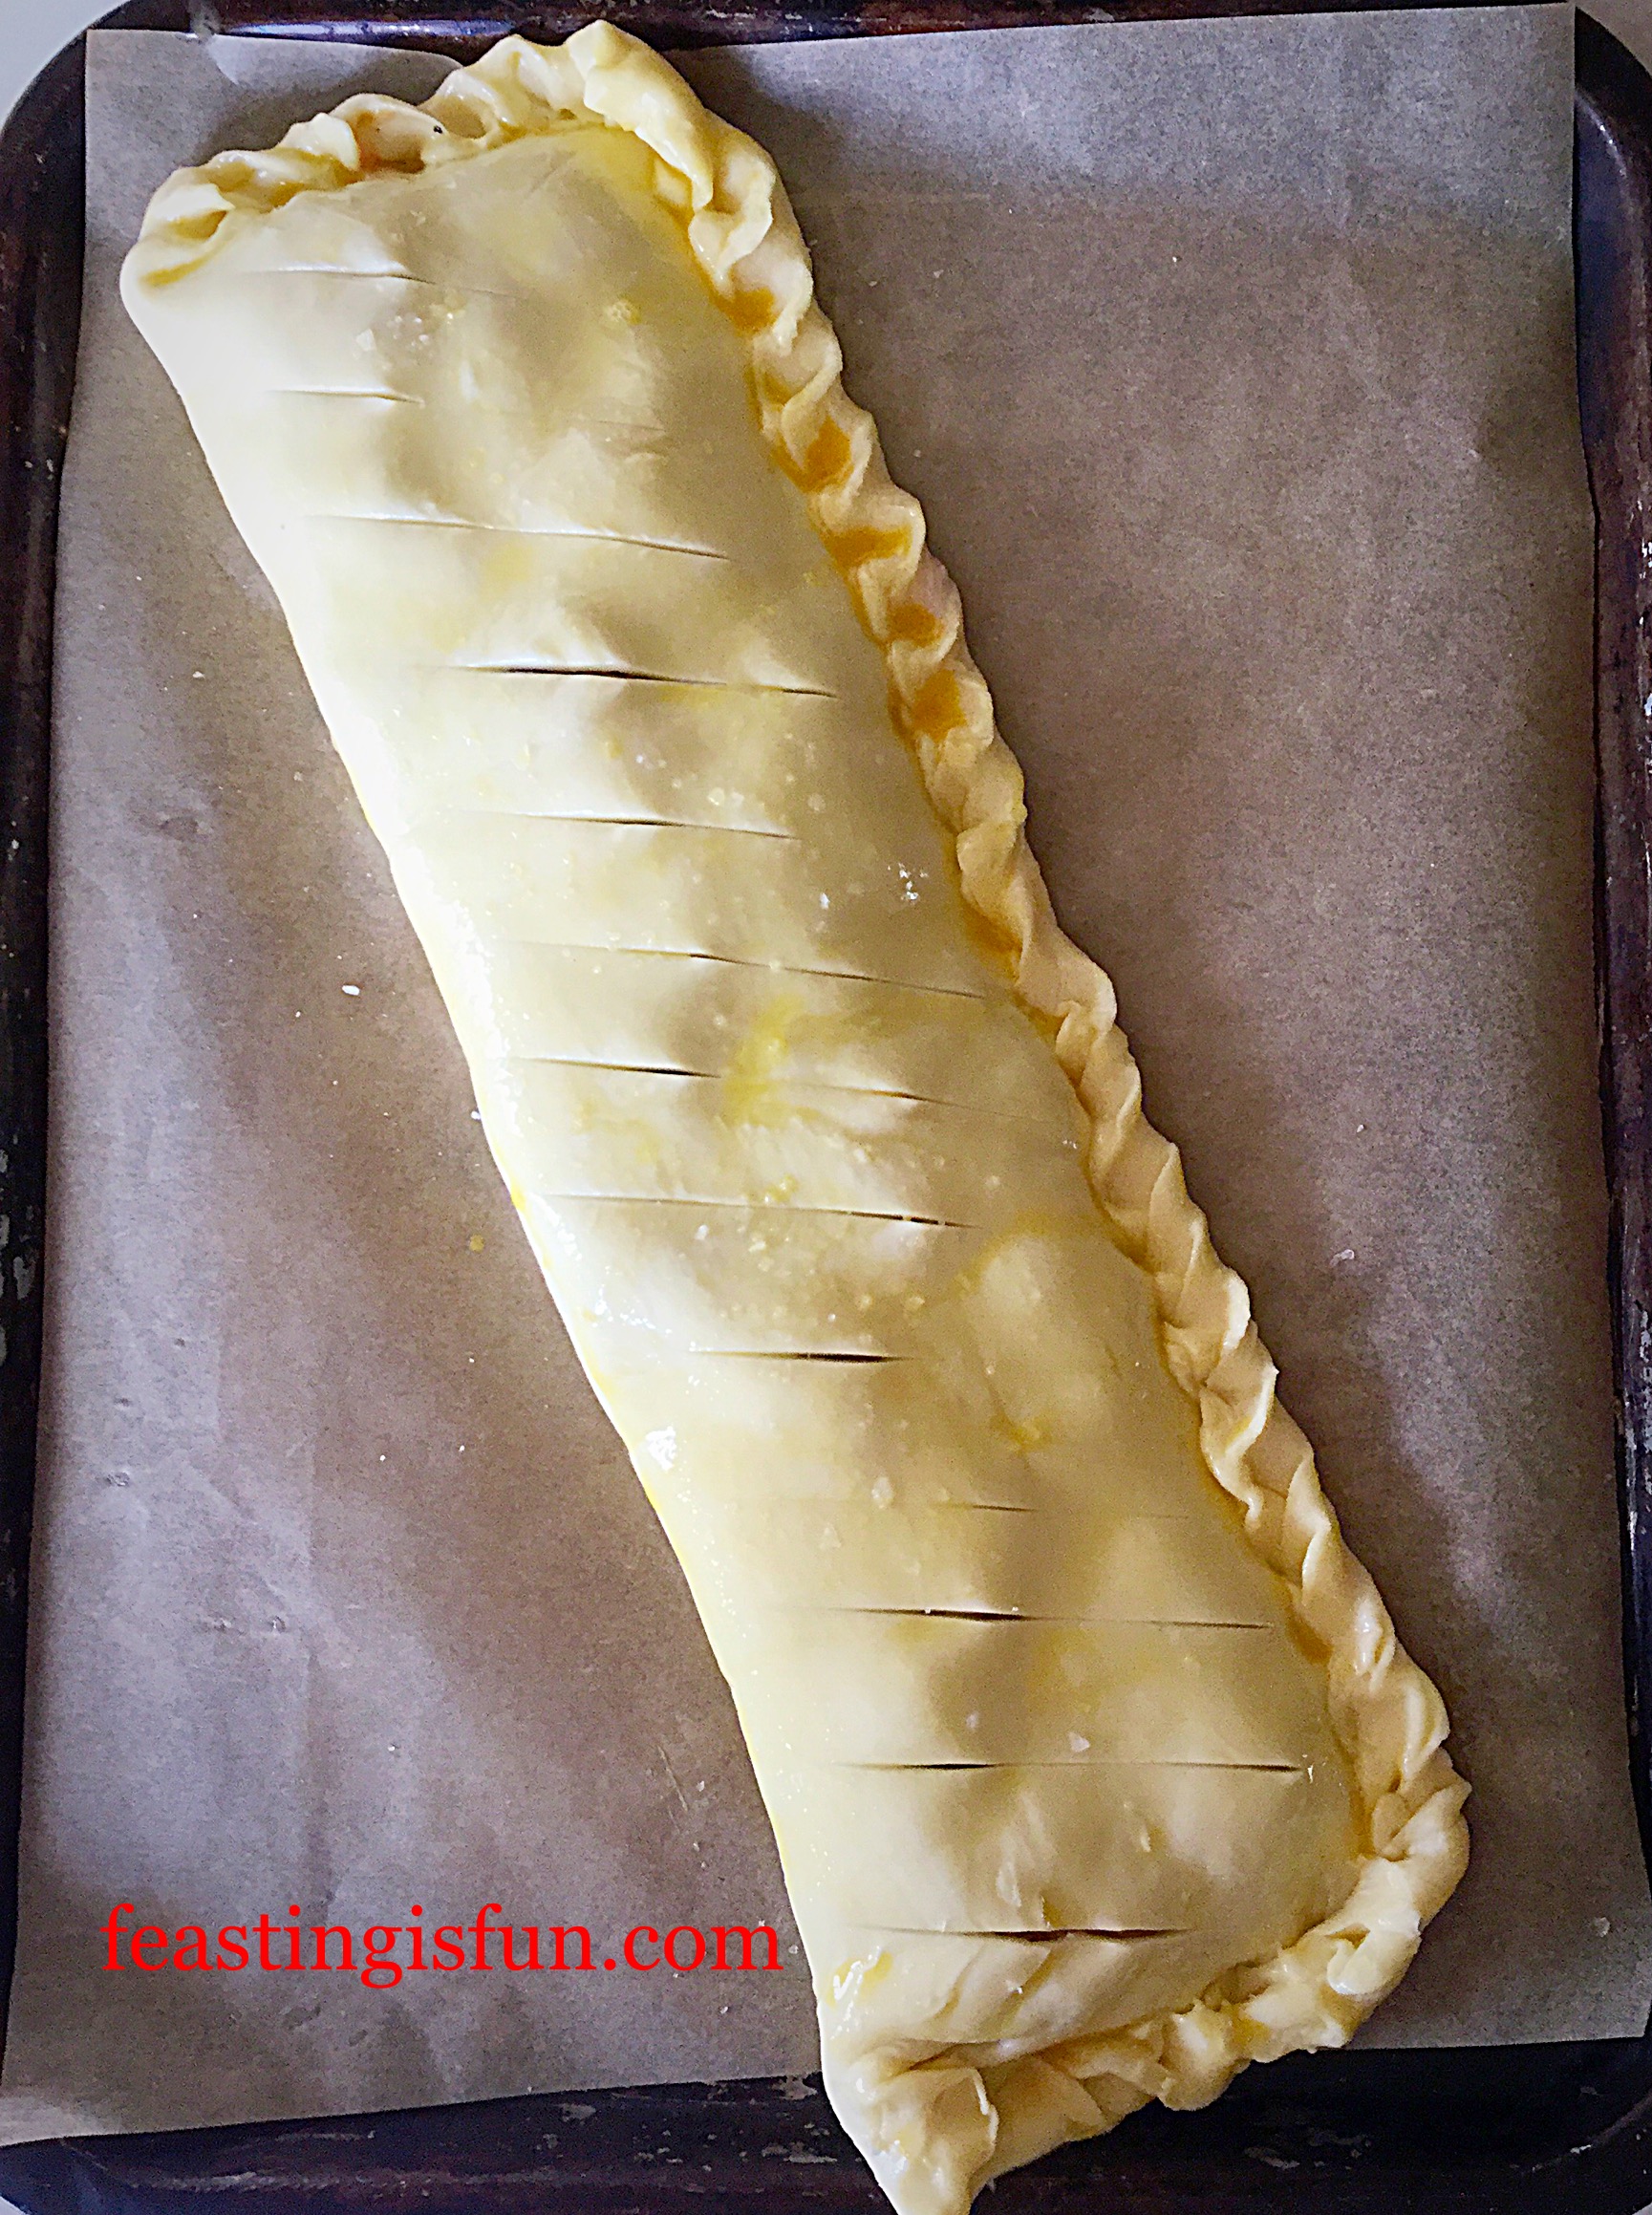
- Using a sharp knife cut light diagonal slits through the pastry. This allows steam to escape and enhances the look of the finished bake.
Baking The Sausage Plait
- If not baking straight away, wrap the entire tray and sausage plait in cling film and store in the fridge. For best results, bake within 24 hours.
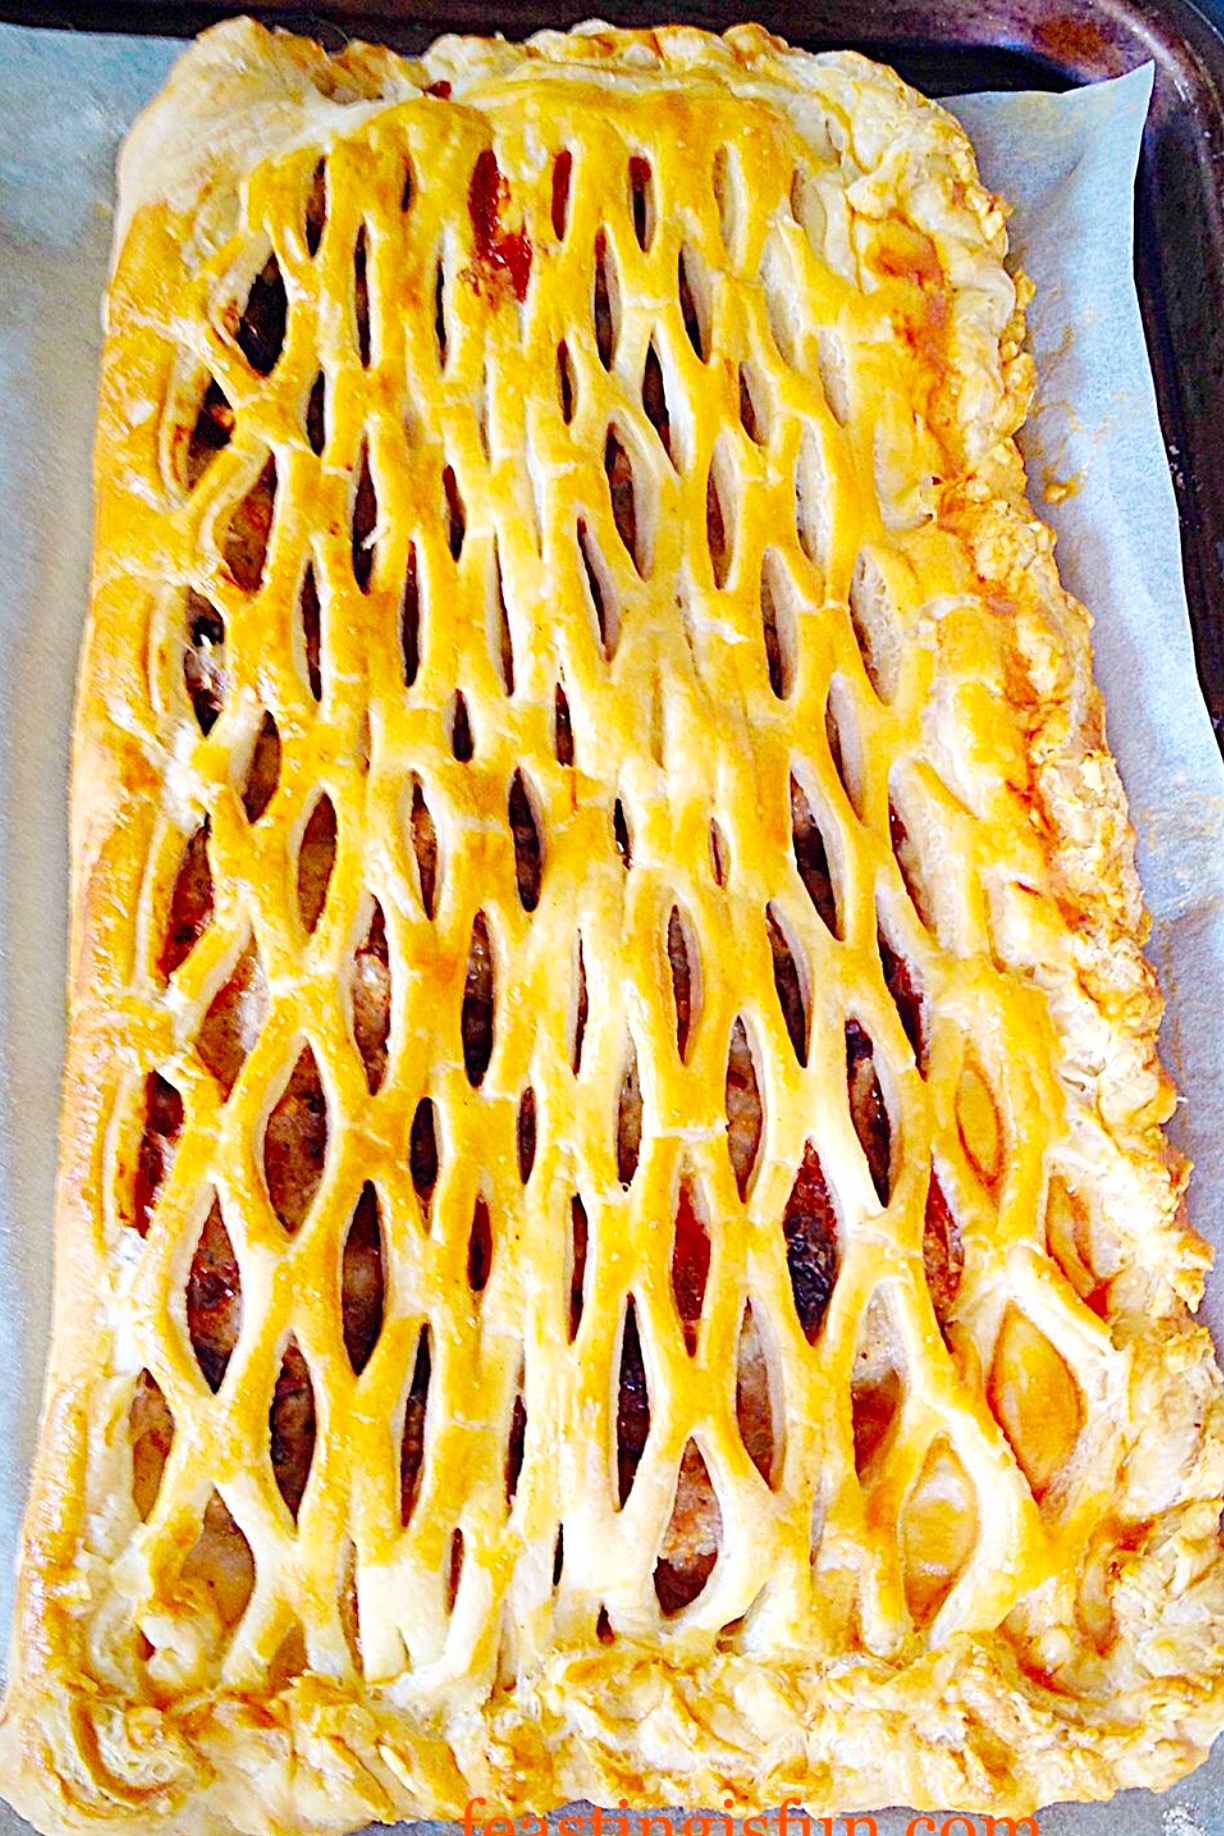
- When baking immediately, place the baking tray in the middle of a hot, preheated oven and bake for 40-45 minutes. The sausage plait should be a deep golden colour and any juices must run clear. If there is any doubt slice a portion of the plait off of the end and check. There should be absolutely no pinkness to the sausage meat, if there is pop back into the oven for 15 minutes and reduce the heat by 20C.
- As soon as Red Onion Sausage Plait is baked, remove from the oven and leave to cool slightly on the tray.
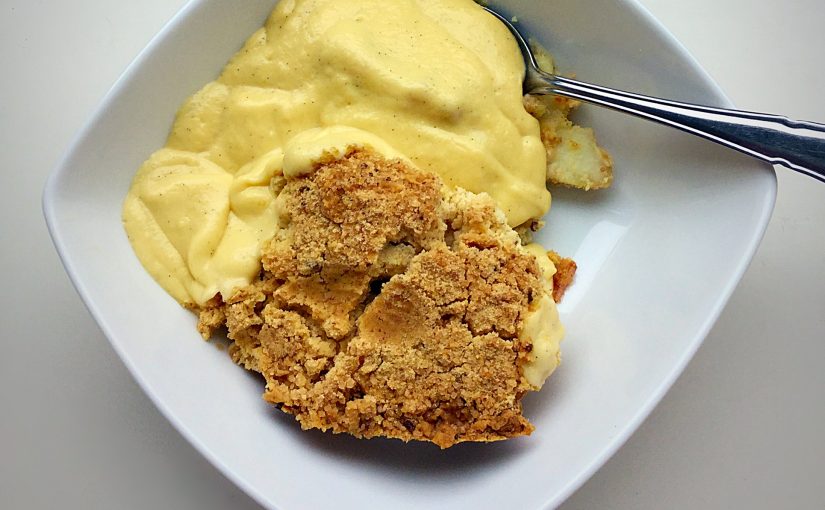
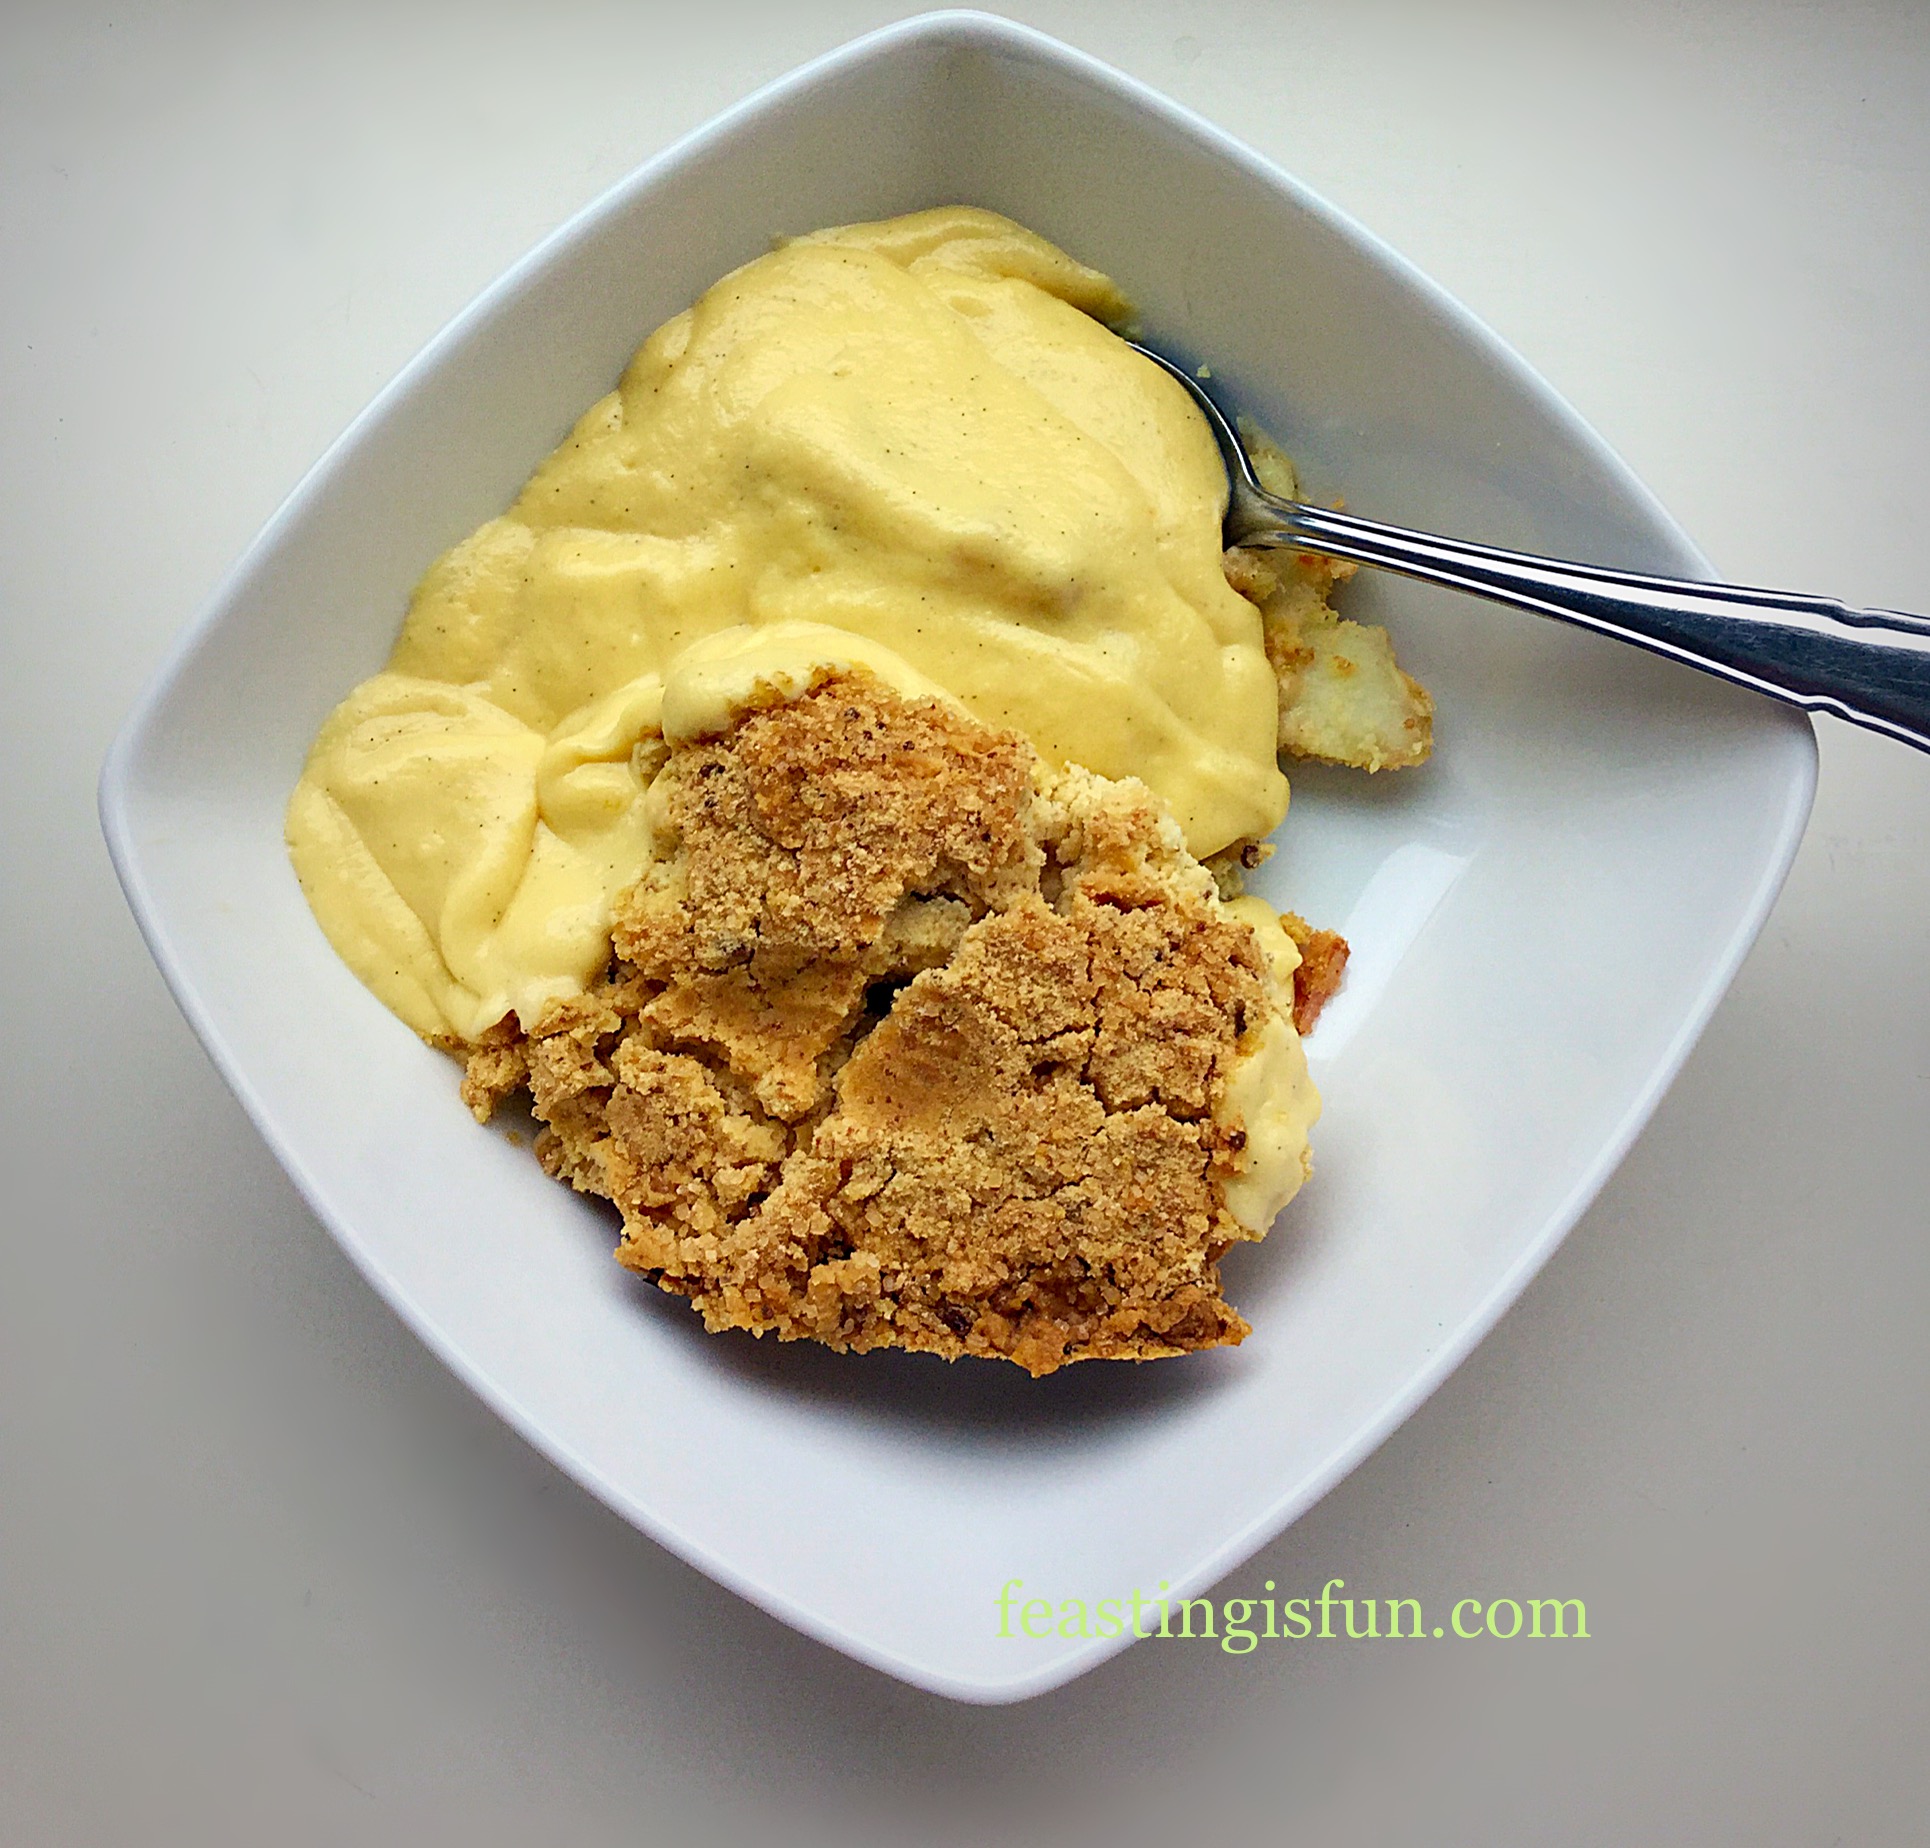
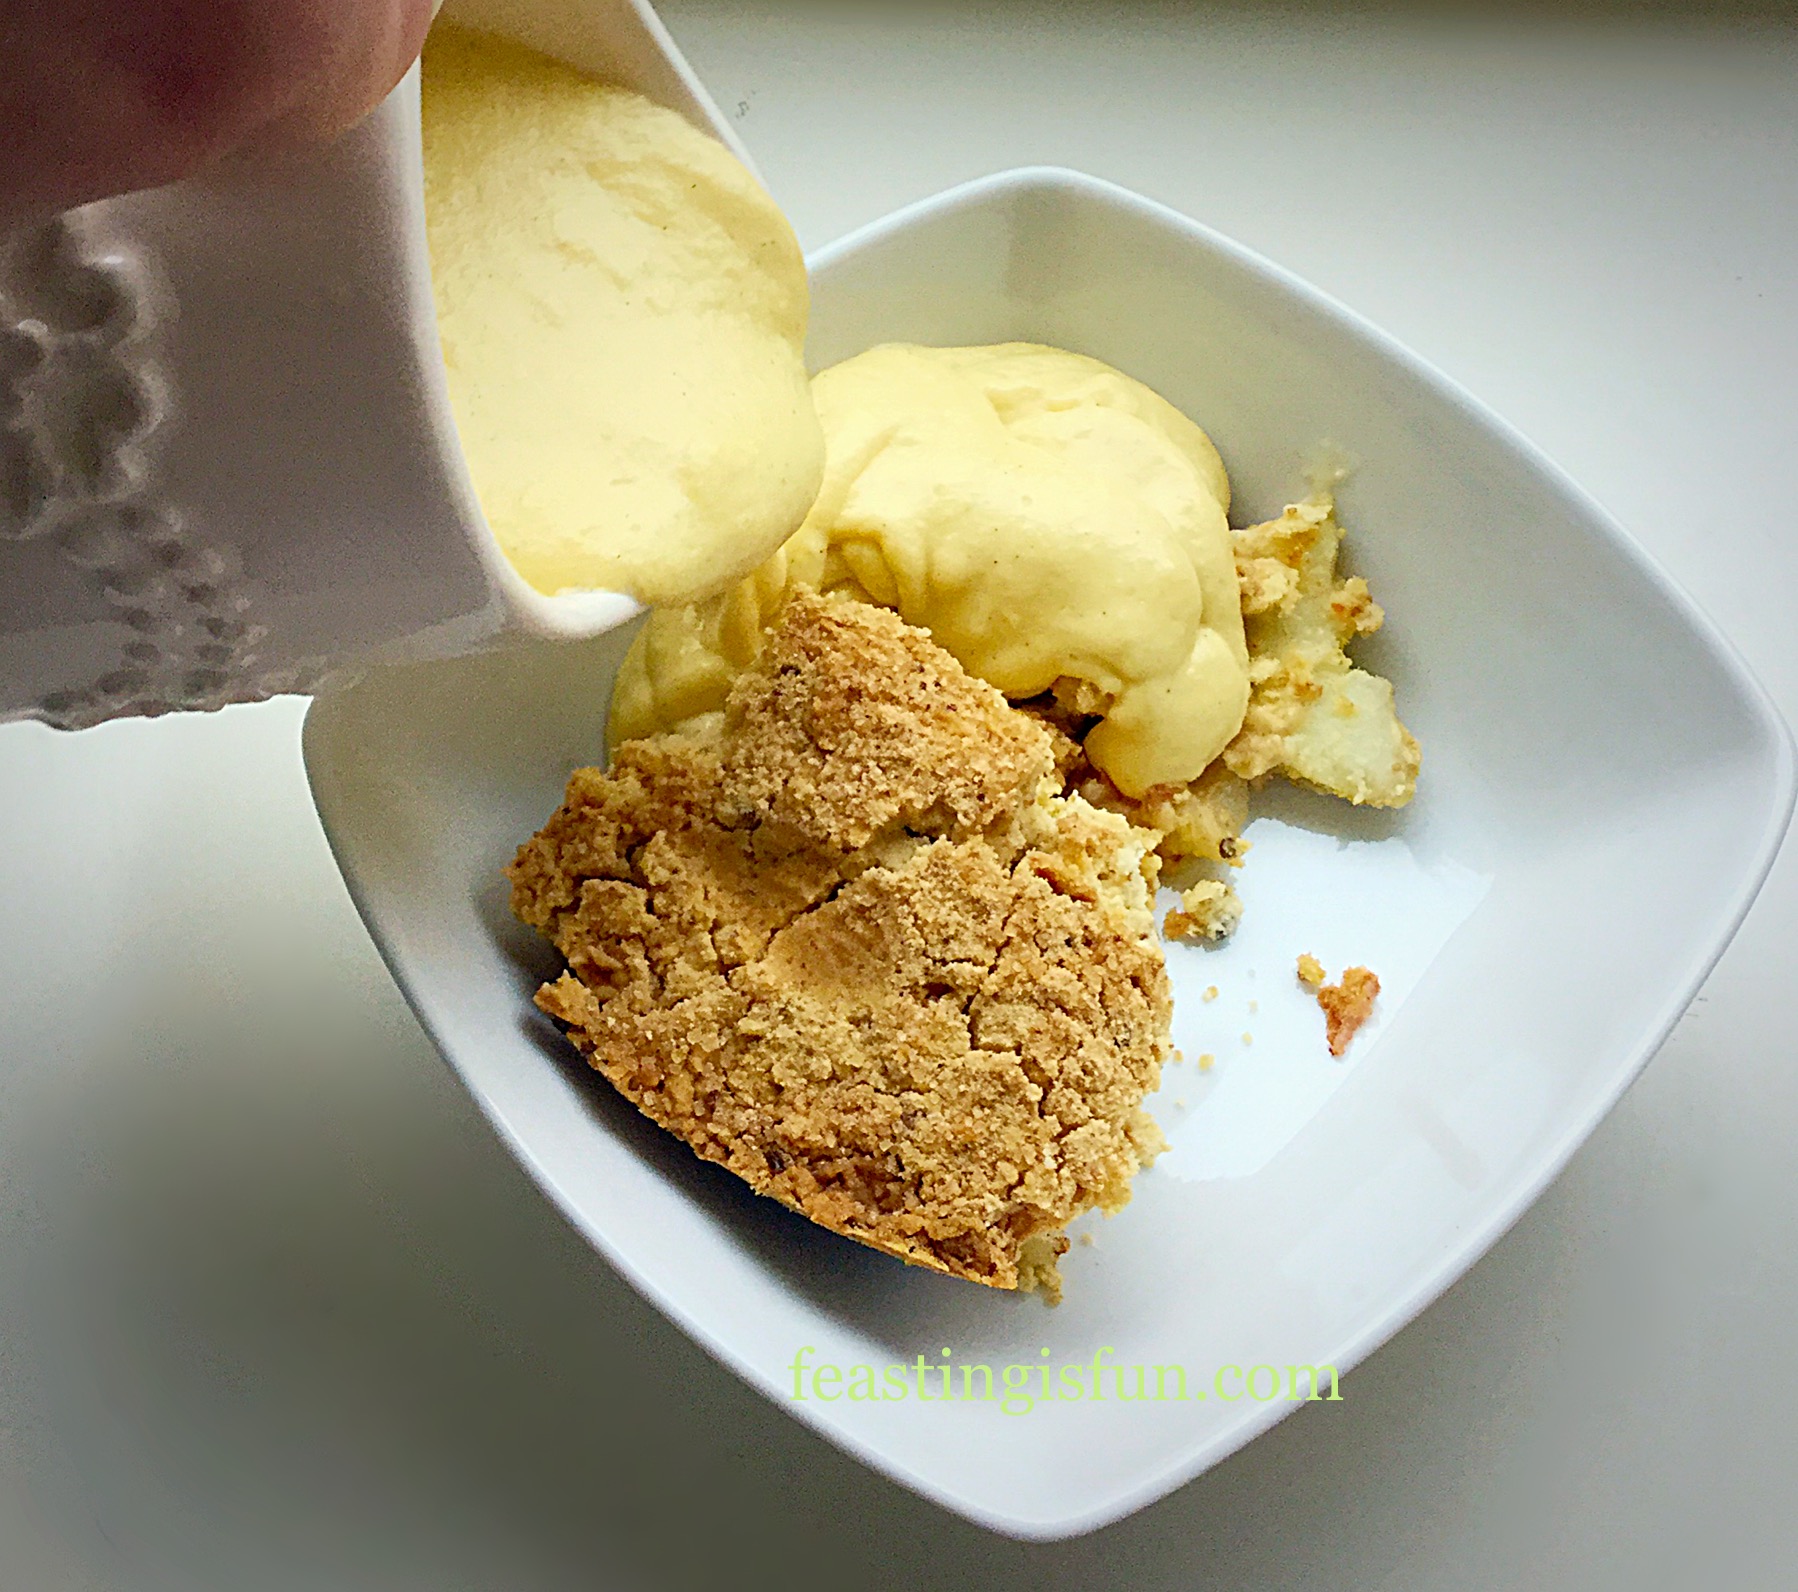
To serve, allow the Red Onion Sausage Plait to cool for at least 15 minutes, longer if possible. Slice into portions and serve with salad, or my Crunchy Homemade Coleslaw, new potatoes, or for ease potato wedges. Serving with my Tangy Lemon Potato Salad also compliments the sausage plait well.

To store and for packing up for a picnic, allow the sausage plait to cool. Cut into slices, I find a serrated knife is best when it’s cold. Pack the slices into an airtight container, or wrap in cling film. Store in the fridge for up to 3 days.
Delighfully savoury and full of texture, slices of this Red Onion Sausage Plait also make a welcome change to packed lunches!
If you have enjoyed this recipe for Red Onion Sausage Plait then here are some others you may also want to try:
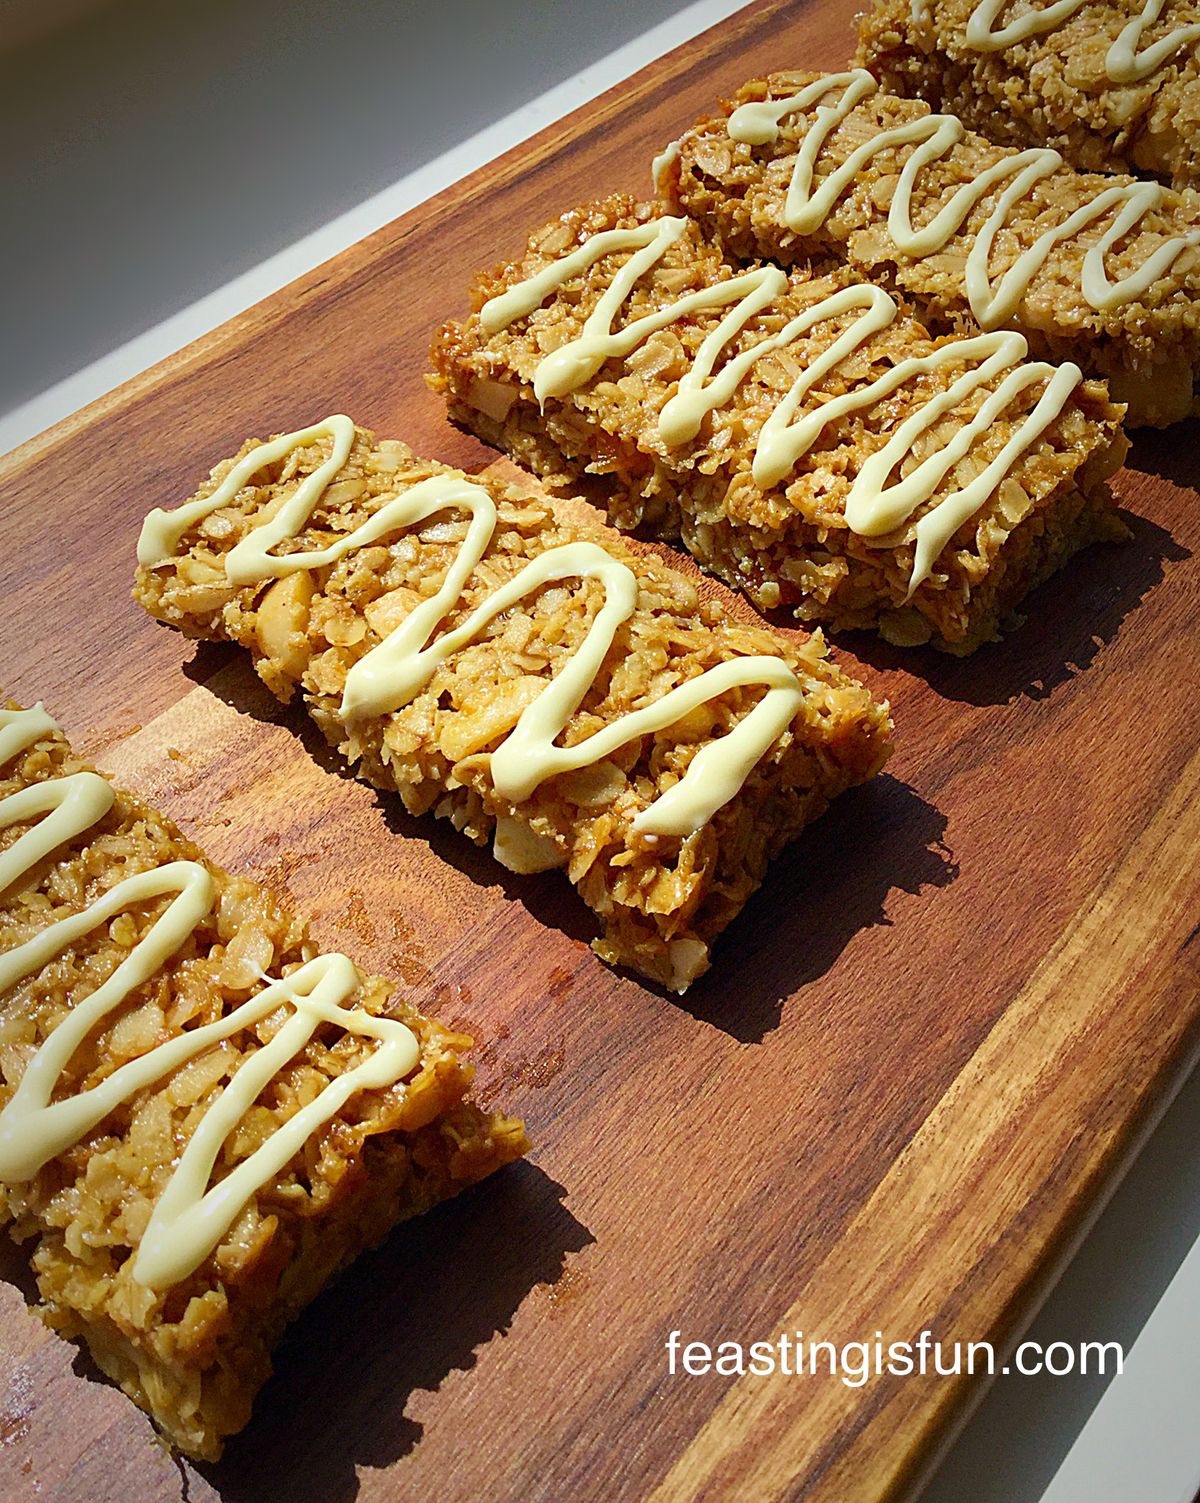
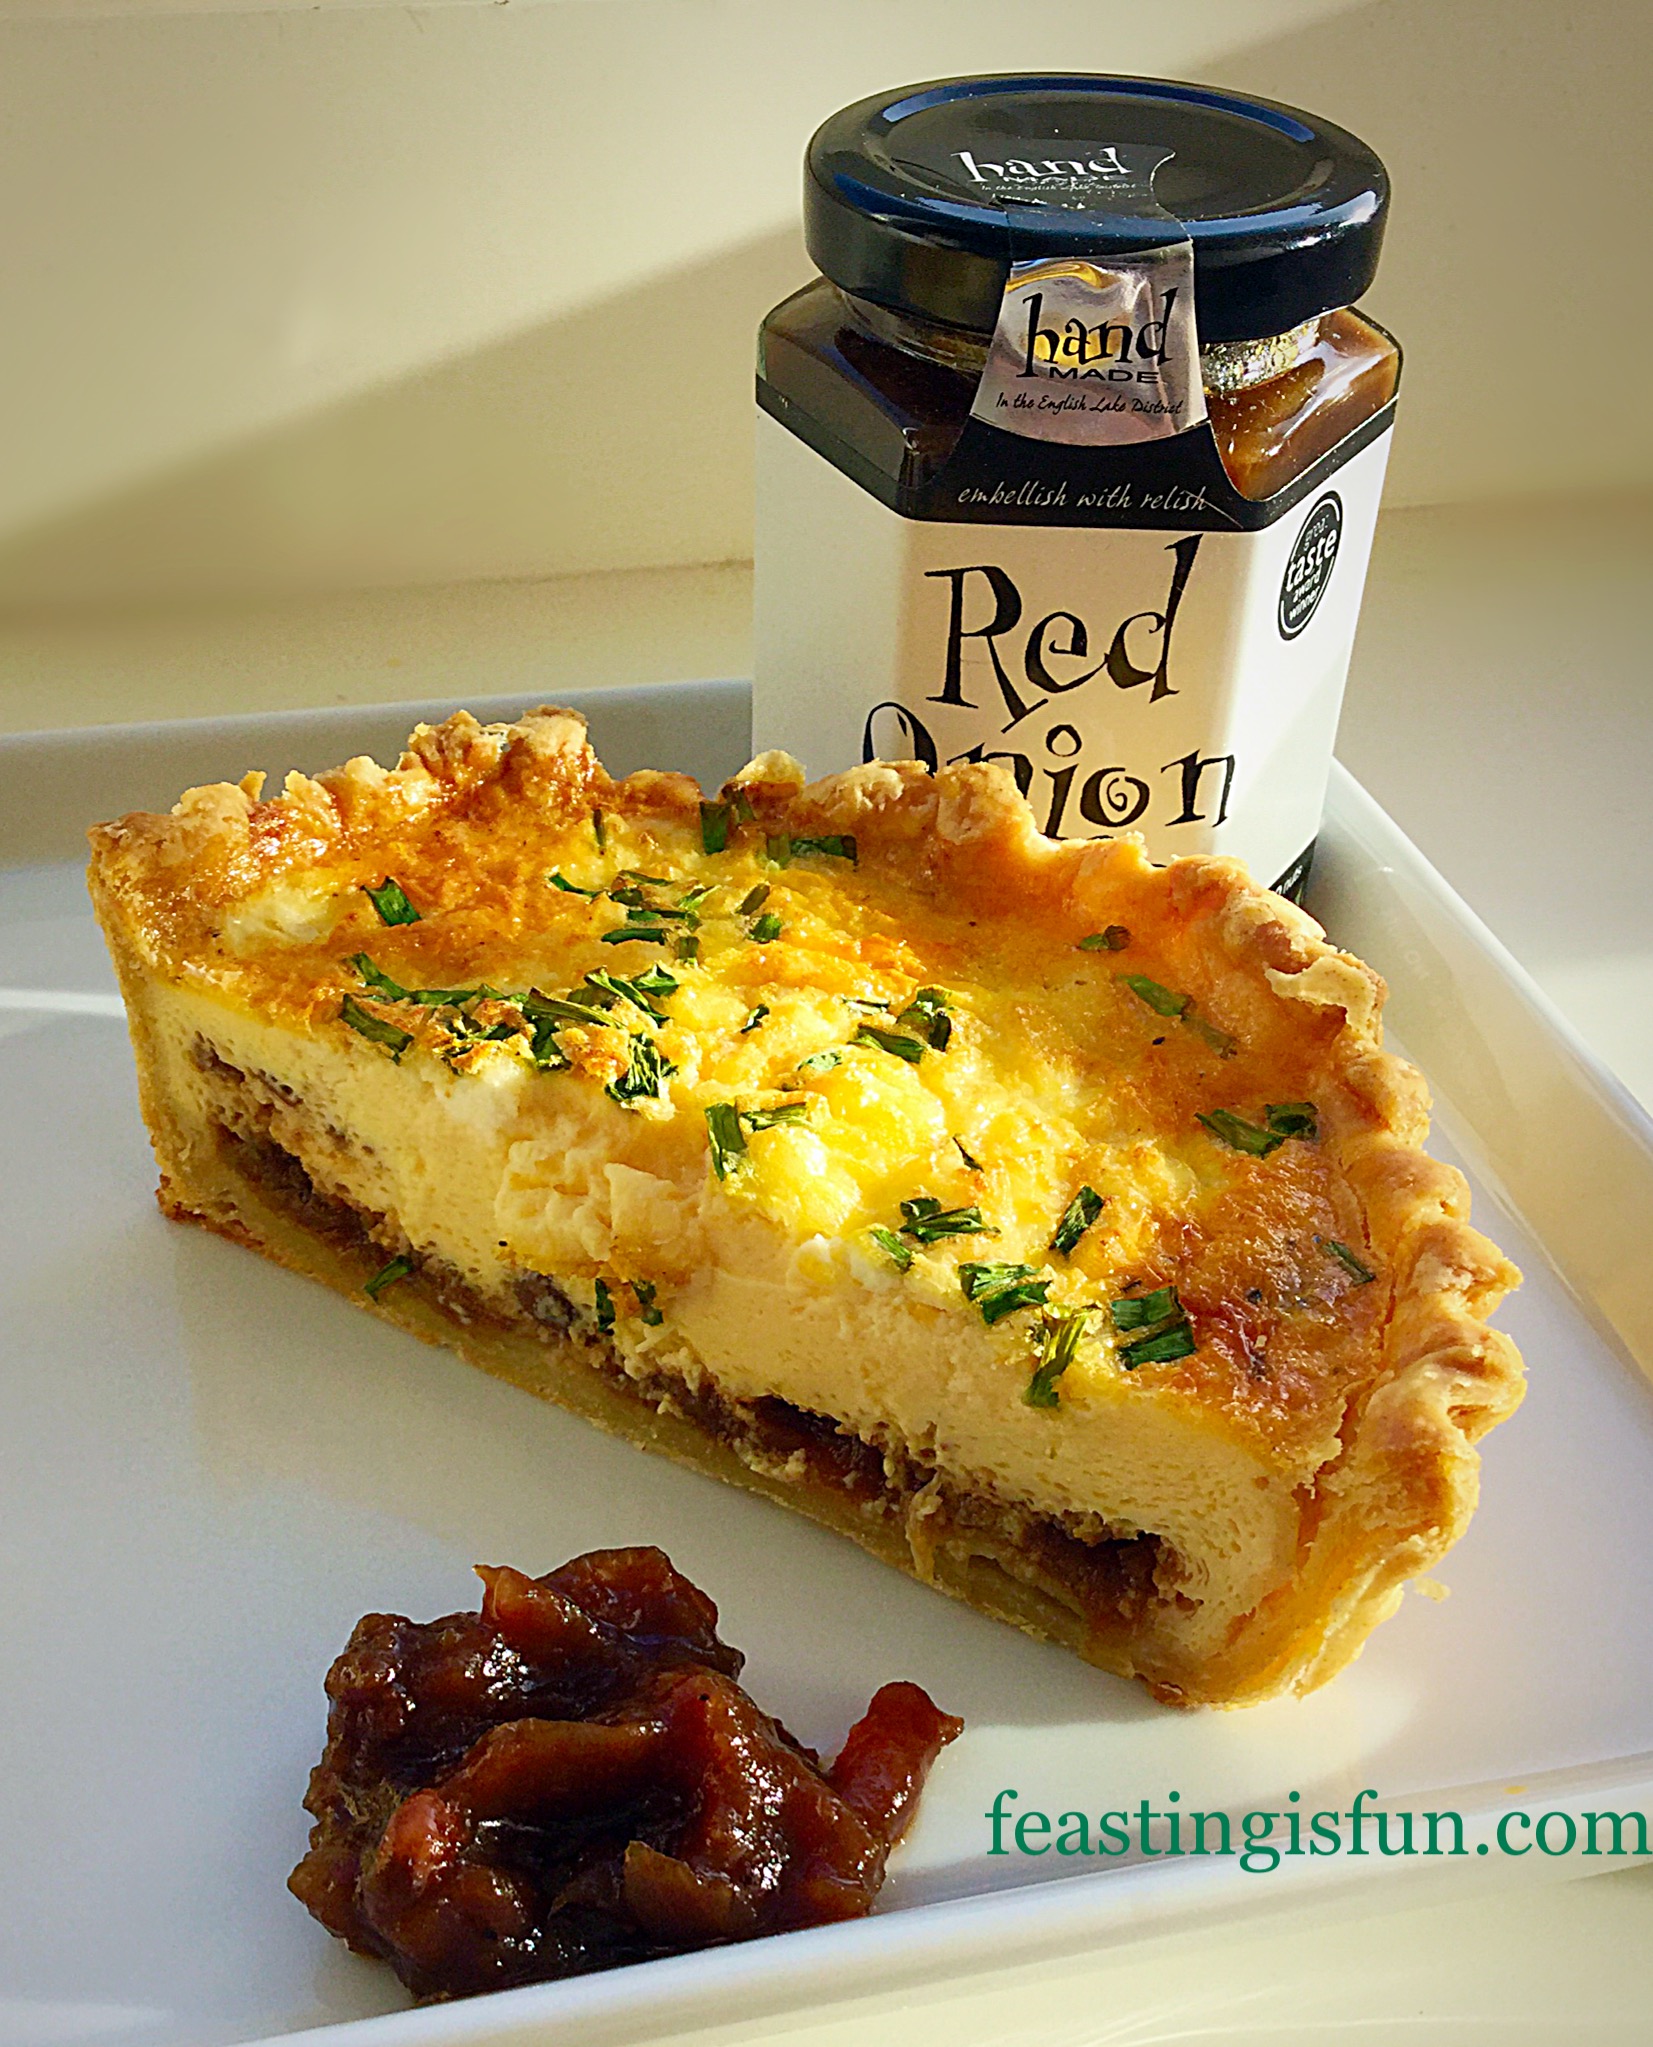
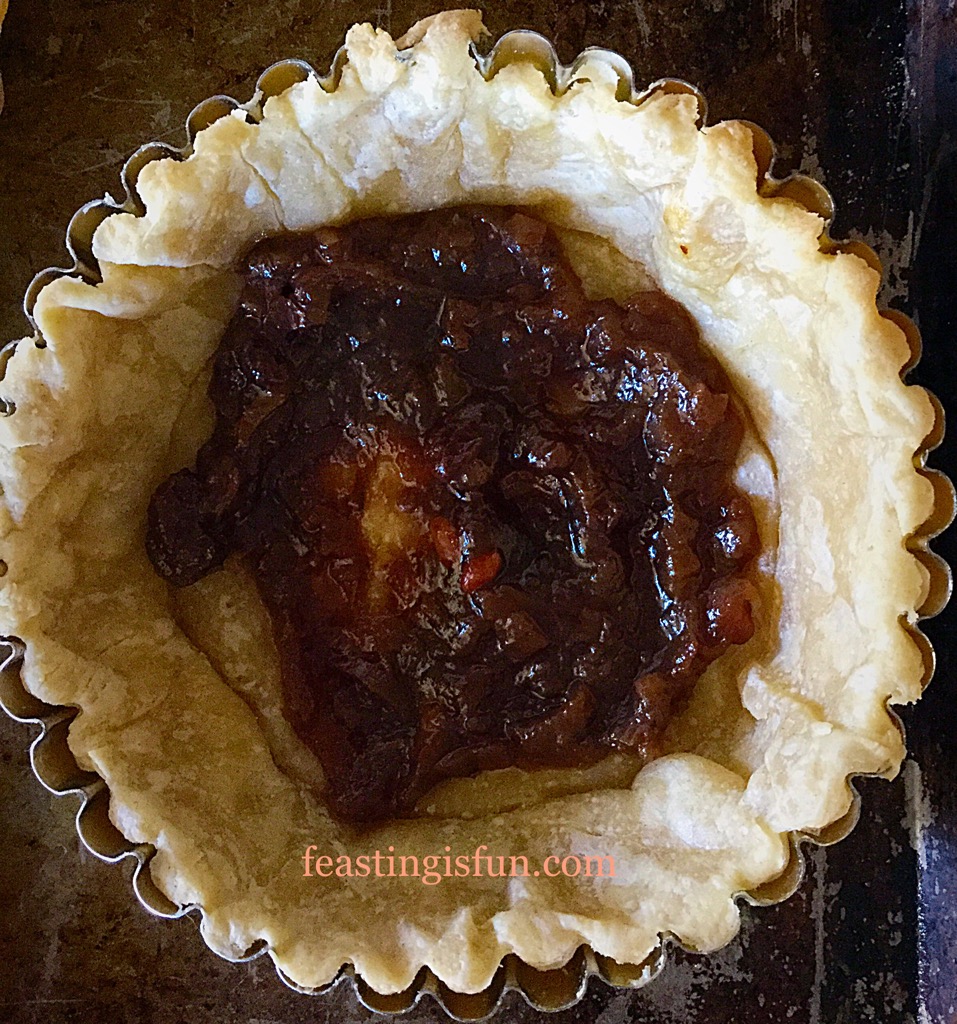
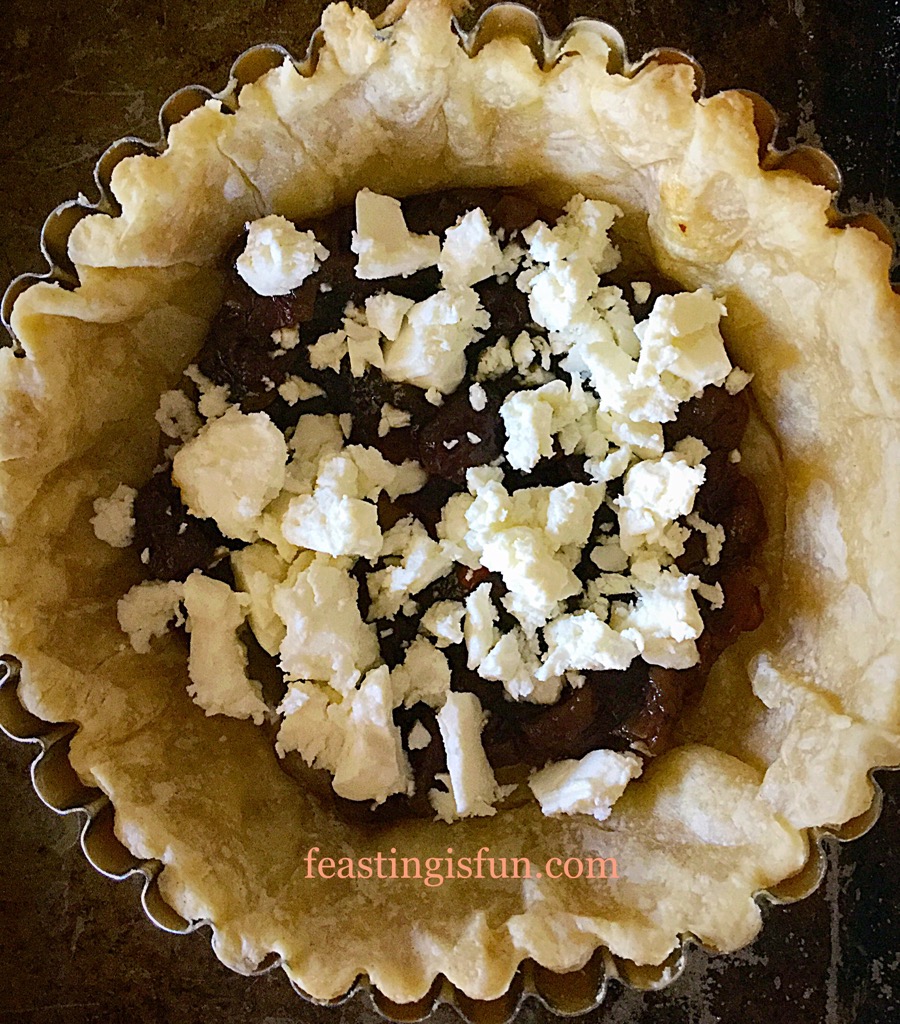
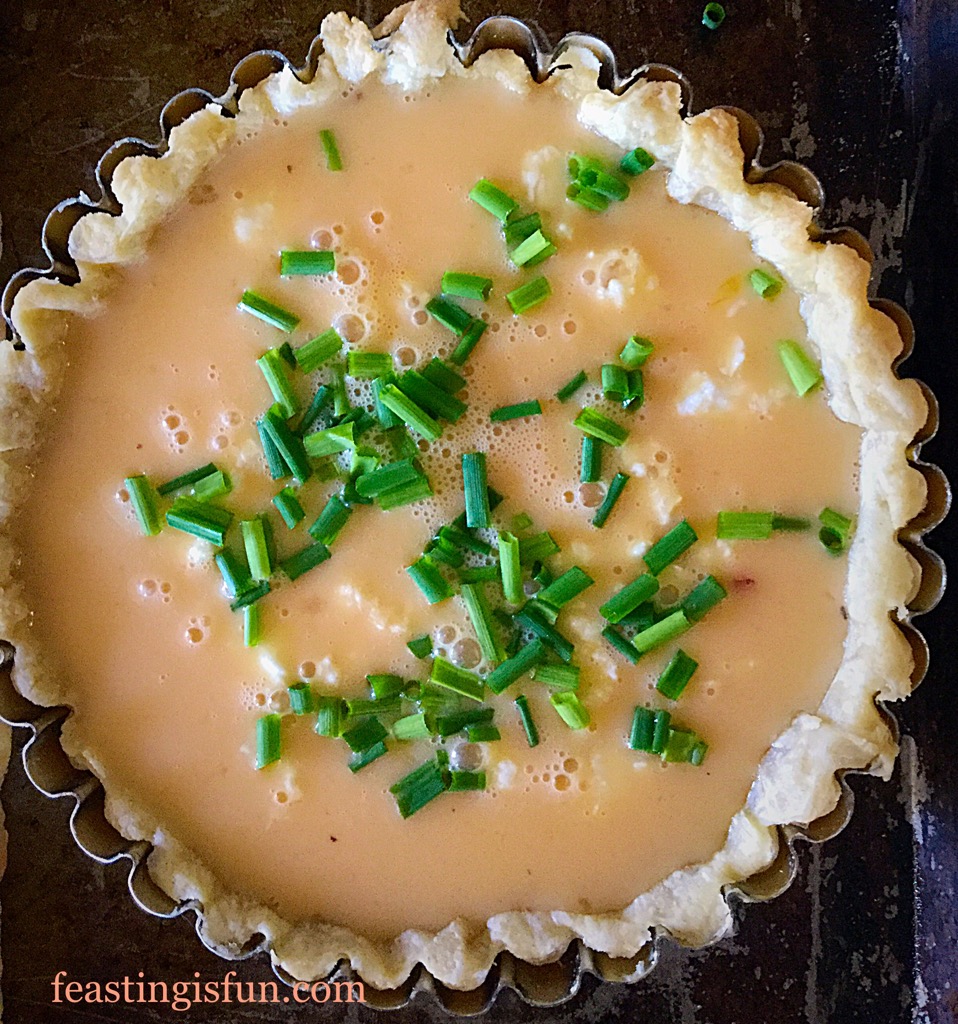
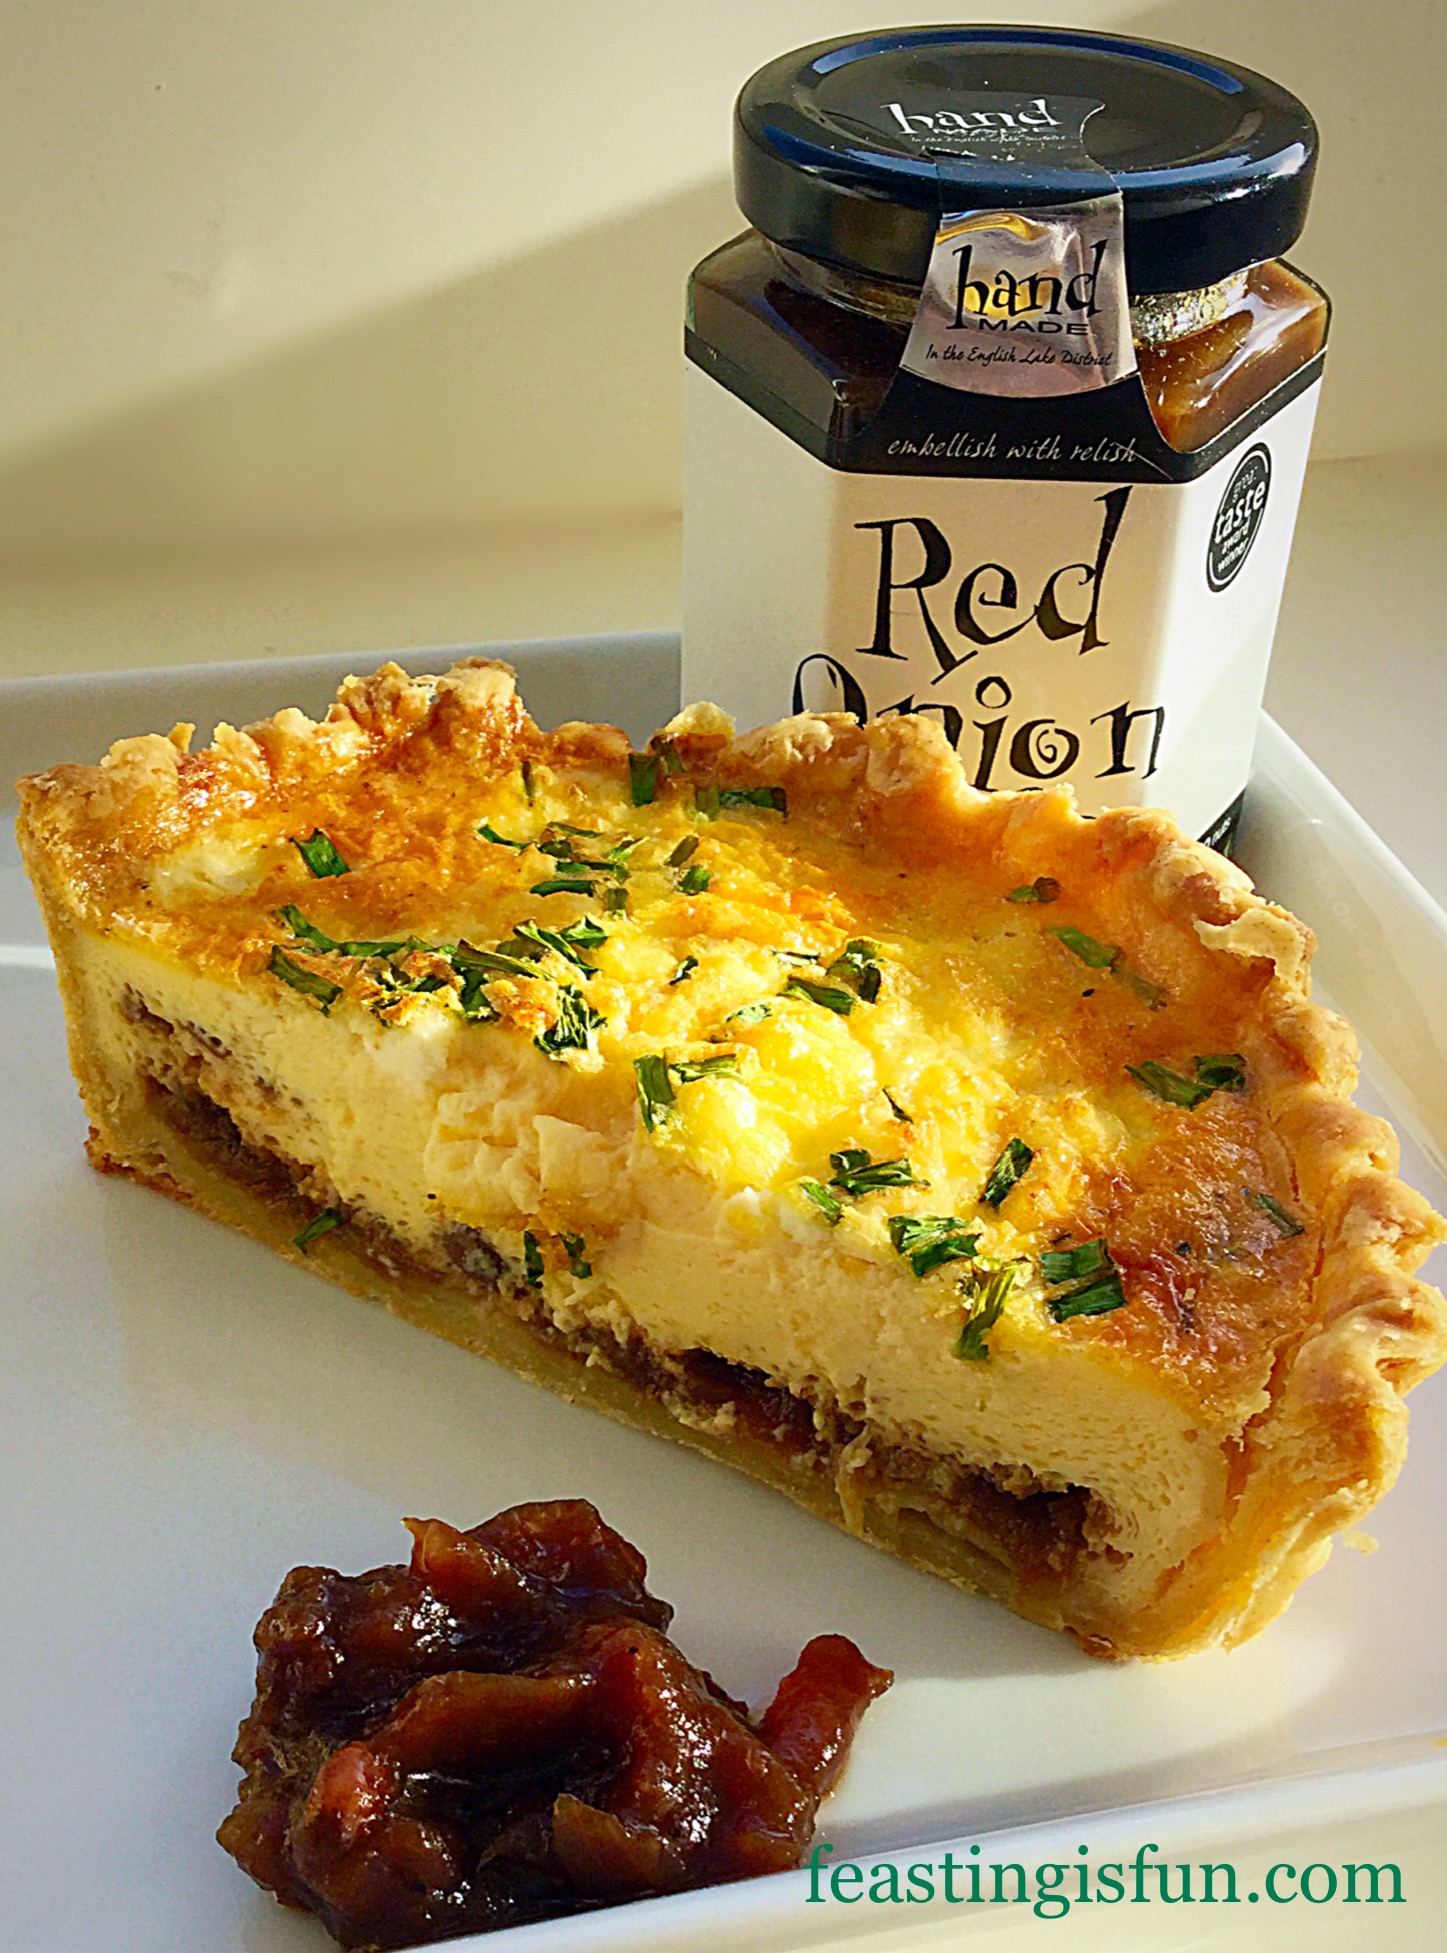
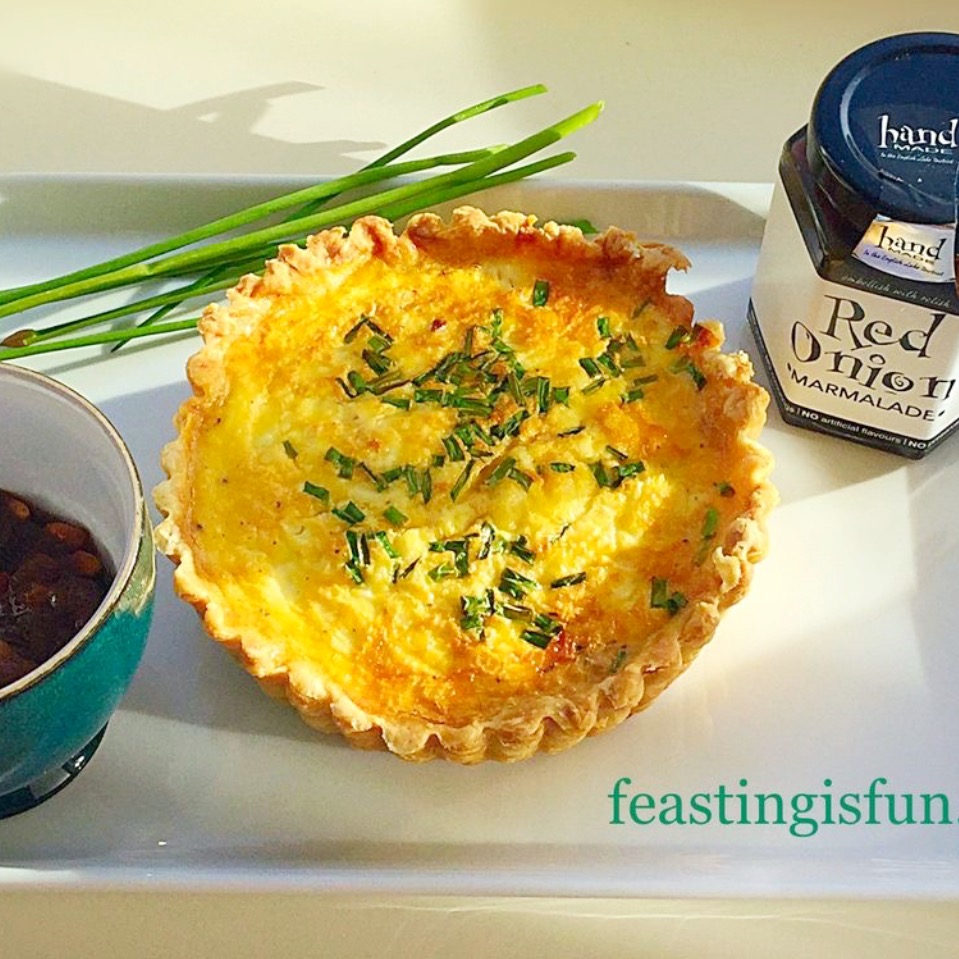
Feta Red Onion Marmalade Quiche

Using the Red Onion Marmalade as an ingredient, rather than just as a condiment has opened up a whole world full of flavours. I have so many more idea, from pasta dishes to soups, stews and many more.
Do you ever use condiments in your cooking? Let me know in the comments section. I’m always interested to here and learn about new recipes and cooking methods.
So, whatever you are making, baking and creating in your kitchens, have fun preparing and sharing your feast.
Sammie xx
Hawkshead Relish provided me with a sample jar of their red onion marmalade. All views and opinions are my own. All content, recipes and photographs are my own and covered by copyright law of the land. Please see my Disclosure Policy.