Chocolate Dunking Waffles

Share
Facebooktwitterpinterestlinkedintumblr

It’s still so cold even though it’s now March. Rather than shivering with cold I suggest a better way to warm up. A rich and creamy hot chocolate with Chocolate Dunking Waffles alongside.

Dipping a chocolate dunking waffle into a glass mug filled with hot chocolate.
Chocolate Dunking Waffles

On frosty, wind numbing days these Chocolate Dunking Waffles are the perfect way to give your body a warm hug!

Feasting is fun:

Food should be fun. Whether it’s licking the cake bowl out, eating the froth off your cappuccino with a spoon, always having two chocolates from the box (an absolute rule in our home).

So why not make waffles fun?

These Chocolate Dunking Waffles have a deep chocolate flavour and an almost fudgey, brownie like consistency. And they are incredibly more-ish. You don’t have to worry though, as each waffle is cut into four fingers.

Each waffle is drizzled in best quality white chocolate and then, for crunch, sprinkled with chocolate Crispearls. Resulting in a combination that is a taste bud party waiting to happen.

As soon as they are dunked into the hot beverage of your choice, the white chocolate melts a little as the spongy waffle soaks up the hot drink. The first bite is warm and chocolatey, with vanilla flavours and then the crunch of the Crispearls.

Trust me these Chocolate Dunking Waffles are so much more than the sum of their separate parts. So, if you love chocolate, this is one taste sensation you do not want to miss out on.

Chocolate Dunking Waffles

While I am an advocate of good table manners, however, sometimes it is fun to bend the rules a little – or even throw them right out of the window!!

Chocolate Dunking Waffles do just that. Like toast soldiers are to the perfect boiled egg, these fingers of chocolatey deliciousness are perfect for dipping and dunking into your favourite hot drink.

Also, when timing exactly how long to dunk a biscuit in a cup of tea, before it gets too wet, dunking these waffle fingers adds an extra element of fun to an already awesome combination.

Chocolate Dunking Waffles a tasty way to warm up!

Fairtrade – a fair day’s pay

As it is the start of Fairtrade Fortnight, bringing awareness to the farmers and producers who grow and harvest some of our favourite products, I choose to use Food Thoughts Cocoa in my recipe.

This cocoa is available from Sainsbury’s and Waitrose. It has a wonderful deep cocoa flavour, perfect for using in my Extreme Chocolate Cookiesor other recipes requiring cocoa.

Fairtrade Chocolate Dunking Waffles
Food Thoughts Cocoa perfect in these waffles and for making the hot chocolate!

Recipe: Makes 12-14 whole Chocolate Dunking Waffles

175g/7oz Unsalted Butter – melted and set aside to cool – the extra is for greasing the waffle plates

4 Large Free Range Eggs

75ml/3fl oz Whole Milk – semi skimmed may also be used

50g/2oz Light Brown Soft Sugar

1tsp Vanilla Extract – I use Nielsen-Massey

175g/7oz Plain White Flour

50g/2oz Cocoa Powder

2tsp Baking Powder

1/8tsp Salt

For the drizzle

200g/7oz White Chocolate

Chocolate vermicelli, sprinkles or Crispearls.

Method: Prepare your waffle maker according to the manufacturers instructions.

For the Andrew James Waffle Maker each plate it brushed with melted butter before switching on to heat up.

Making the waffle batter

  • While the butter is cooling crack the eggs into a large bowl. Give them a quick whisk.
  • Add the milk, sugar and vanilla extract to the eggs and lightly whisk to combine.
  • Once cooled weigh 150g of the melted butter into the egg, milk, sugar, vanilla extract mixture and whisk briefly to combine (wet ingredients).
  • Weigh the flour and sift along with the cocoa, baking powder and salt into the bowl containing the wet ingredients.
  • Gently mix both the wet and dry ingredients together until just combined – over mixing will lead to tough waffles.
Fairtrade Chocolate Dunking Waffles
Delicious Chocolate Waffle Batter

Using the waffle maker

  • Place 2 dessert spoons of chocolate waffle batter onto the waffle plates. This is a slightly thinner batter than you may be expecting – that is how it should be.
  • Close the lid of the waffle maker and cook for 6 minutes.
Fairtrade Chocolate Dunking Waffles
Two delicious cooked Chocolate Dunking Waffles
  • After 6 minutes, using oven gloves to protect your hands, press the button to open the lid of the waffle maker.
  • Using a wooden spatula (not metal as it may damage the non stick surface) remove the waffles from the waffle plate and place on a cooling rack or plate.
  • Continue as before until all of the waffles have been cooked.
Fairtrade Chocolate Dunking Waffles
A stack of Chocolate Dunking Waffles.                                                  
  • Place the waffles on a cooling rack or plate to cool completely before decorating.

Decorating the chocolate dunking waffles:

  • Break or chop the white chocolate up into small chunks and place in a heat proof, microwaveable bowl.
  • Zap for 20 seconds at a time, stirring after each zap.
  • When the chocolate has almost completely melted remove the bowl from the microwave and continue to stir. The residual heat will melt the remaining chocolate.
  • Layout all of the waffles on a worktop covered in baking parchment.
  • Use a teaspoon to drizzle the chocolate over each waffle.
  • Immediately sprinkle with your choice of topping.
  • Leave to set.
  • As soon as the chocolate has set cut each of the Chocolate Dunking Waffles into four fingers.
  • Serve with a hot drink and a smile!

Time to get dunking.

A glass mug filled with whipped cream topped hot chocolate that has a chocolate dunking waffle balanced across the top.
Chocolate Dunking Waffles

What would be your favourite drink to dunk these delicious beauties in?

If you make these, or any of my recipes, please pop a photo up on social media – @sammiefeasting Twitter/Instagram/Pinterest for me to see. I’m always amazed and inspired by your efforts, especially when you use one of my recipes.

If you have enjoyed these Chocolate Dunking Waffles then you may enjoy these:

Vanilla Bean Waffles

AJ Vanilla Bean Waffles
Vanilla Bean Waffles as pretty to look at as they are delicious to eat!

Double Chocolate Chip Iced Buns

Double Chocolate Chip Iced Buns

Bakery Style Soft Triple Chocolate Cookies 

Bakery Style Soft Triple Chocolate Cookies

While we always make the children a mug of hot chocolate during the midst of summer, when they have spent a rather long time in our rather large paddling pool, it has since become a summer tradition. And these Chocolate Dunking Waffles would be perfect, especially if the hot chocolate has a scoop of ice cream in the top! Since this site has fun in its name, I really hope that you do have fun whilst feasting on these delicious Chocolate Dunking Waffles.

So, whatever you are making, baking and creating in your kitchens, have fun preparing and sharing your feast.

Sammie xx

No part of this post may be reproduced or duplicated without the written permission of the owner. Please see my Disclosure Policy.


Share
Facebooktwitterpinterestlinkedintumblr

Vanilla Bean Waffles

Share
Facebooktwitterpinterestlinkedintumblr

Vanilla Bean Waffles. Just think on that for a while, whilst you gawp stare graciously at this picture.

Waffles on a plate with sliced strawberries and whipped cream.

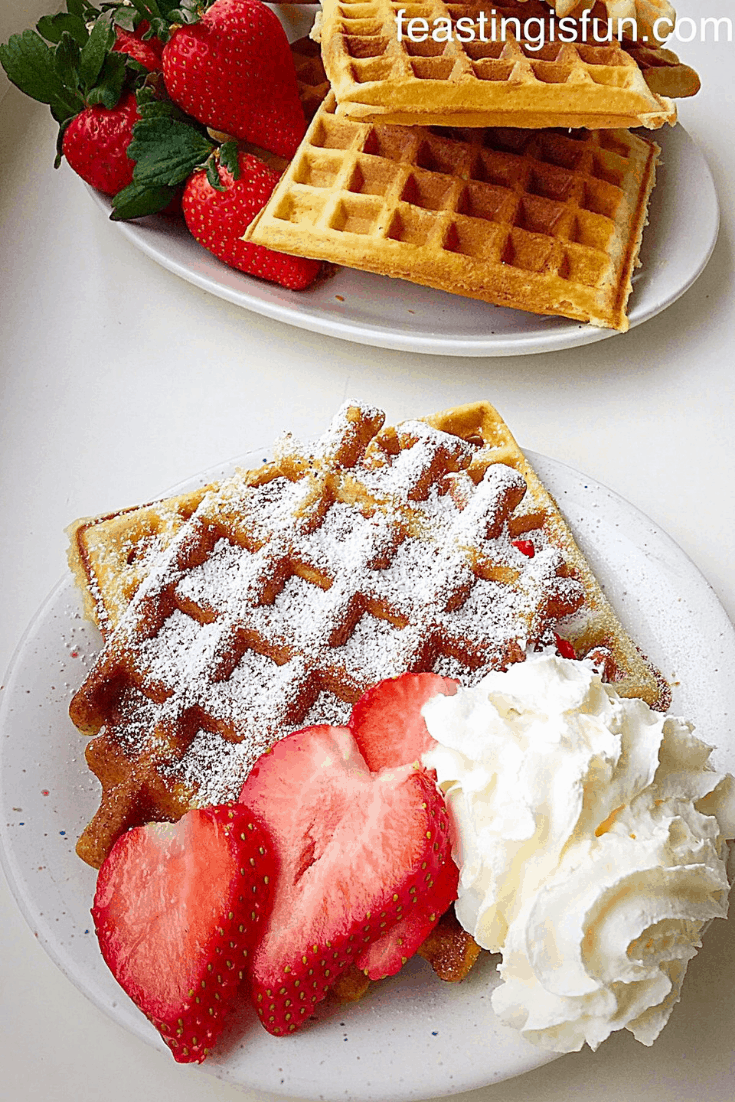
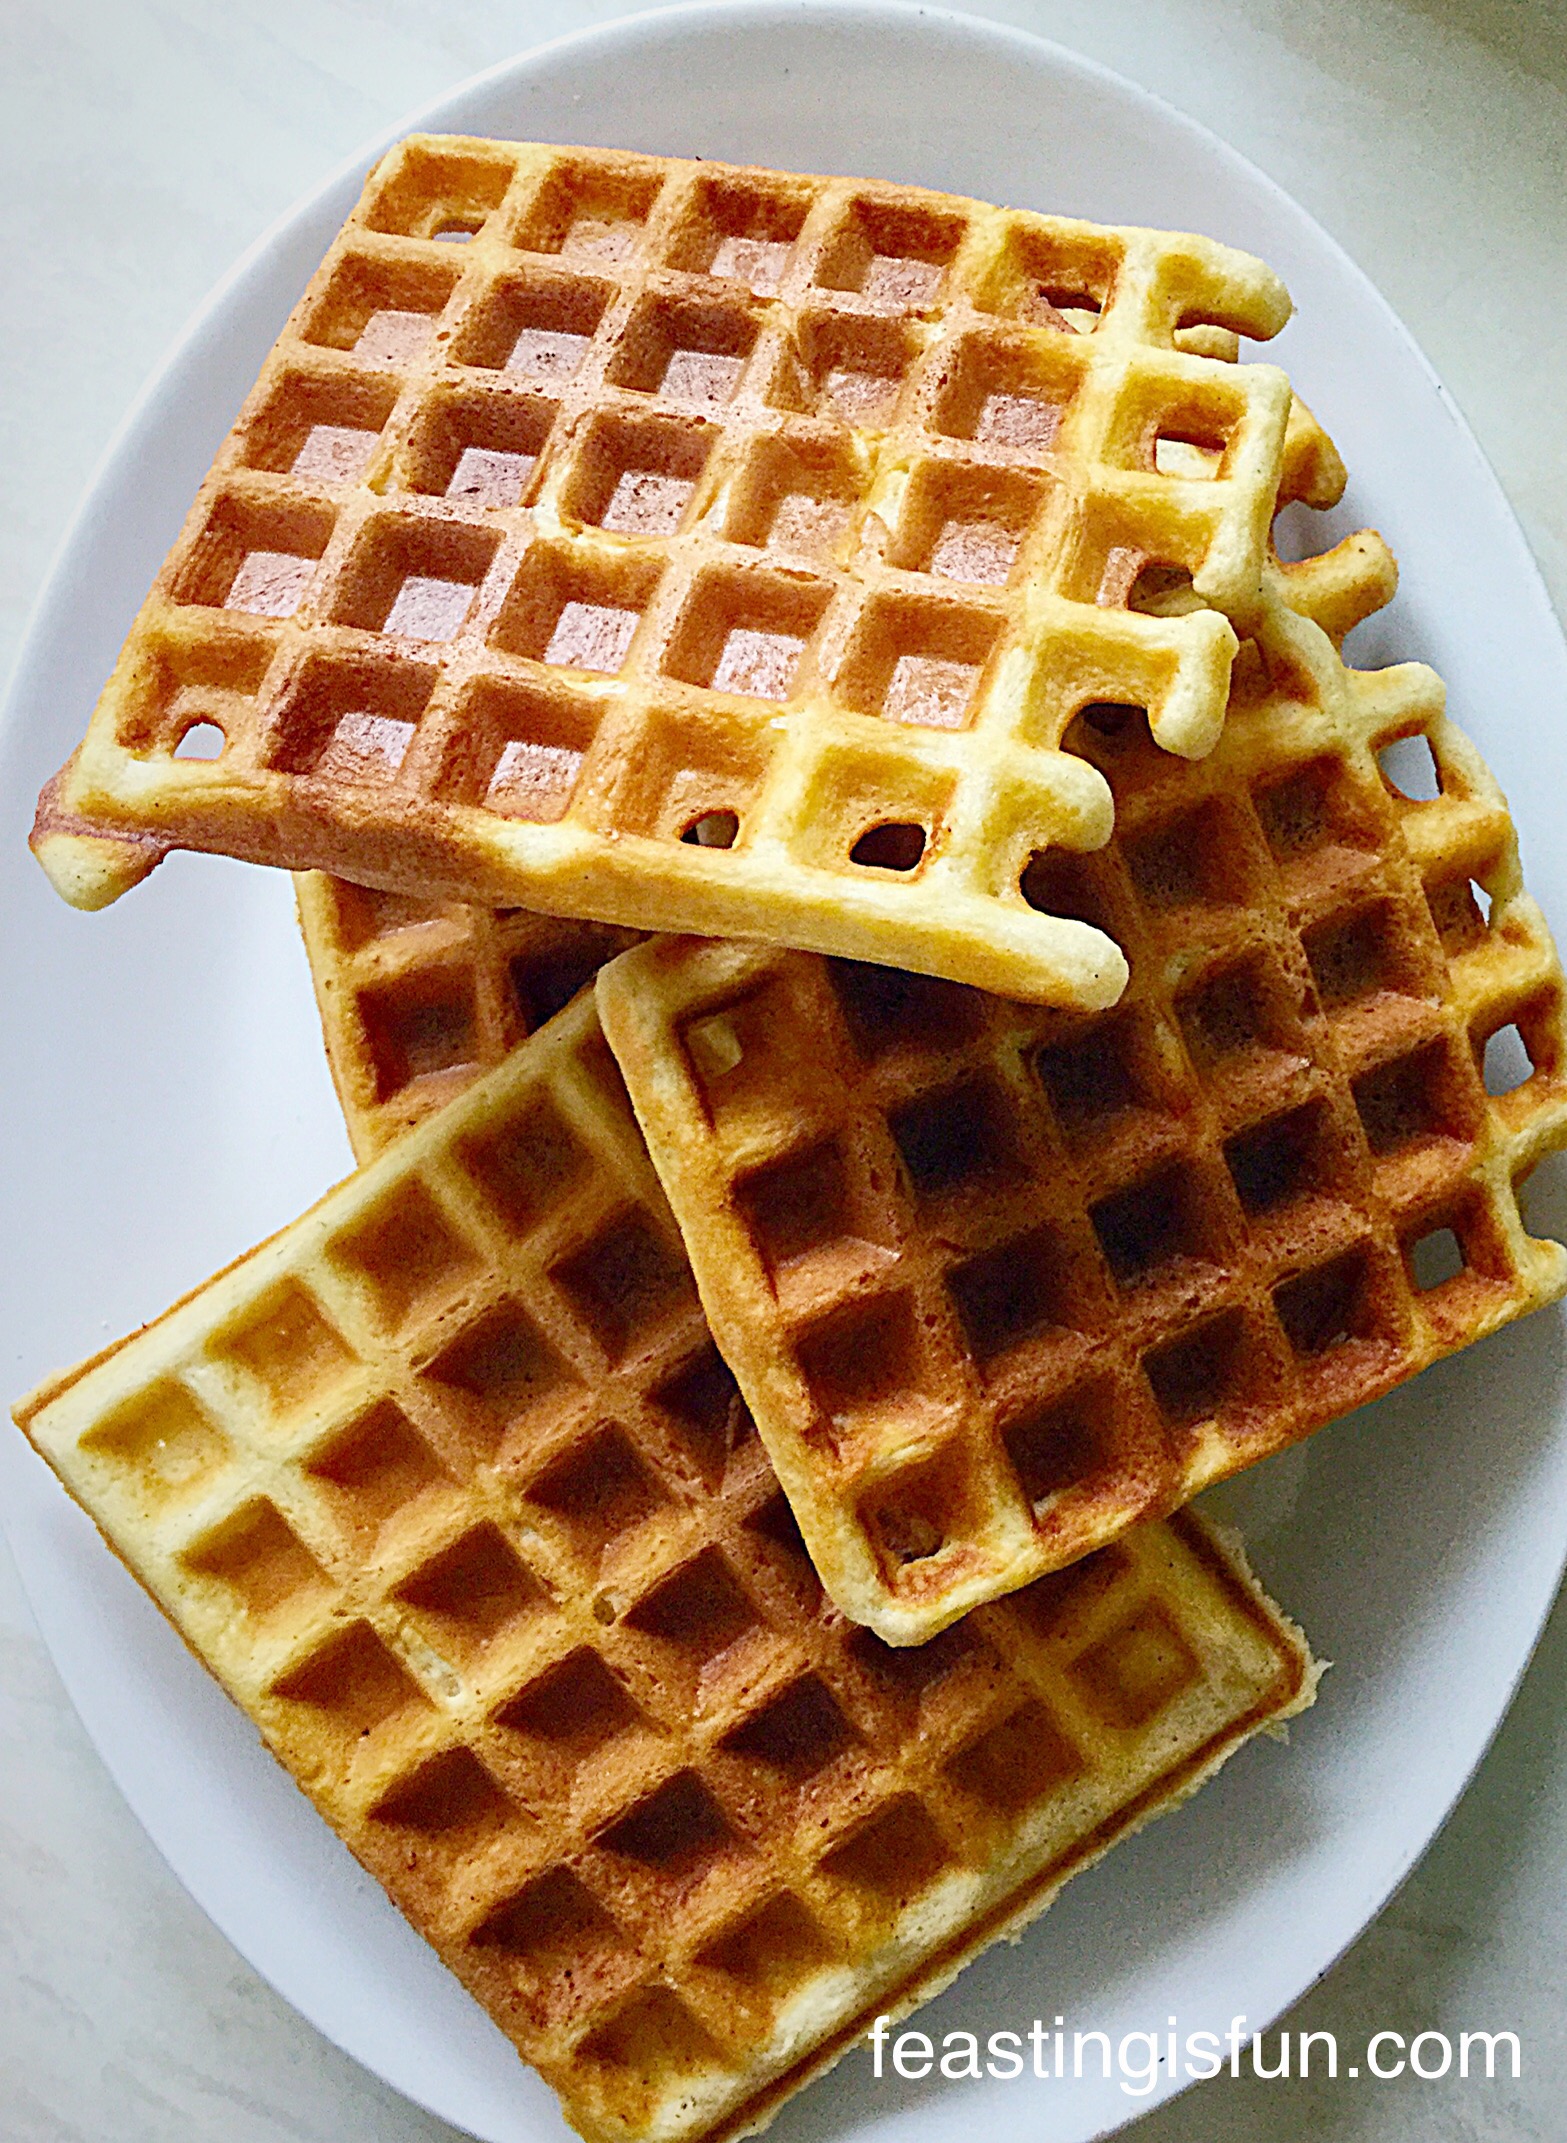
Light and fluffy inside, crispy and golden outer, these Vanilla Bean Waffles may just about be the best invention for breakfast, since sliced bread got a one-up and became toast!

Two waffles on a plate in the foreground with a stack of waffles and strawberries in the background.
Vanilla Bean Waffles

I have wanted a waffle maker for longer than I care to remember. This in itself is kind of odd, seeing as I’ve never eaten a waffle before in my life! Let alone made one. Yet after watching Diners, Drive-ins and Dives on Food Network UK, where Guy Fieri travels around the U.S. visiting various eating establishments. Since seeing all the incredible waffles sold all over the U.S.A I have been craving them. While I haven’t ever bought them pre-made from the supermarket, or even eaten them at a cafe or restaurant, I wanted to make them.

Homemade Food Tastes Better

It’s a little thing of mine, if I can buy it I want to make it. With only a couple of exceptions, don’t mention the croissants homemade always tastes better than pre-made, packaged, mass produced, supermarket produce.

Please don’t misunderstand me? I really couldn’t manage without the convenience of my weekly online grocery shop, especially as I cannot drive at the moment. Rather, it is simply that, fresh from the Waffle iron, these Vanilla Bean Waffles are a million miles away from their shop bought counterpart. Plus you can switch up what you add to them.

AJ Vanilla Bean Waffles
Vanilla Bean Waffles better than shop bought?

Fortunately our daughter has eaten (and loves) shop bought waffles. Her verdict after eating two Vanilla Bean Waffles was a firm 10 out of 10 and “so much better than any I’ve eaten before” verdict. And that response was thrilling. She can be a tough cookie and 8.5 out of 10 is usually the highest she goes! So I knew I’d struck gold with this recipe.

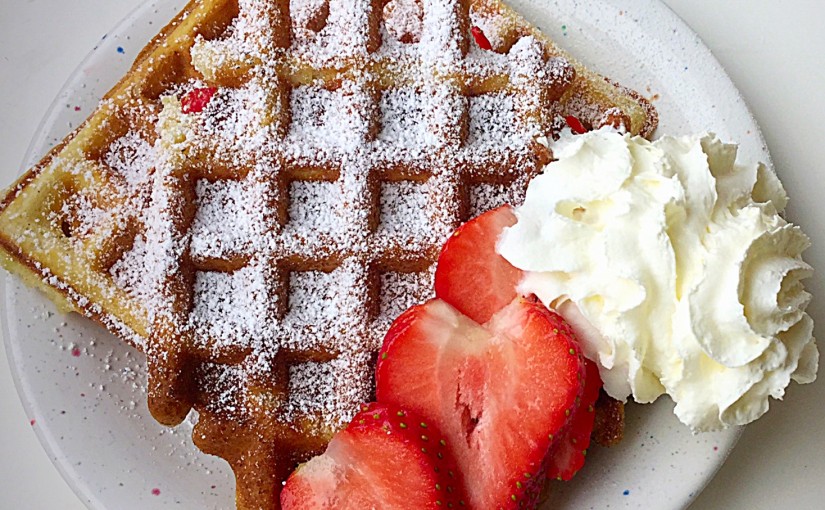
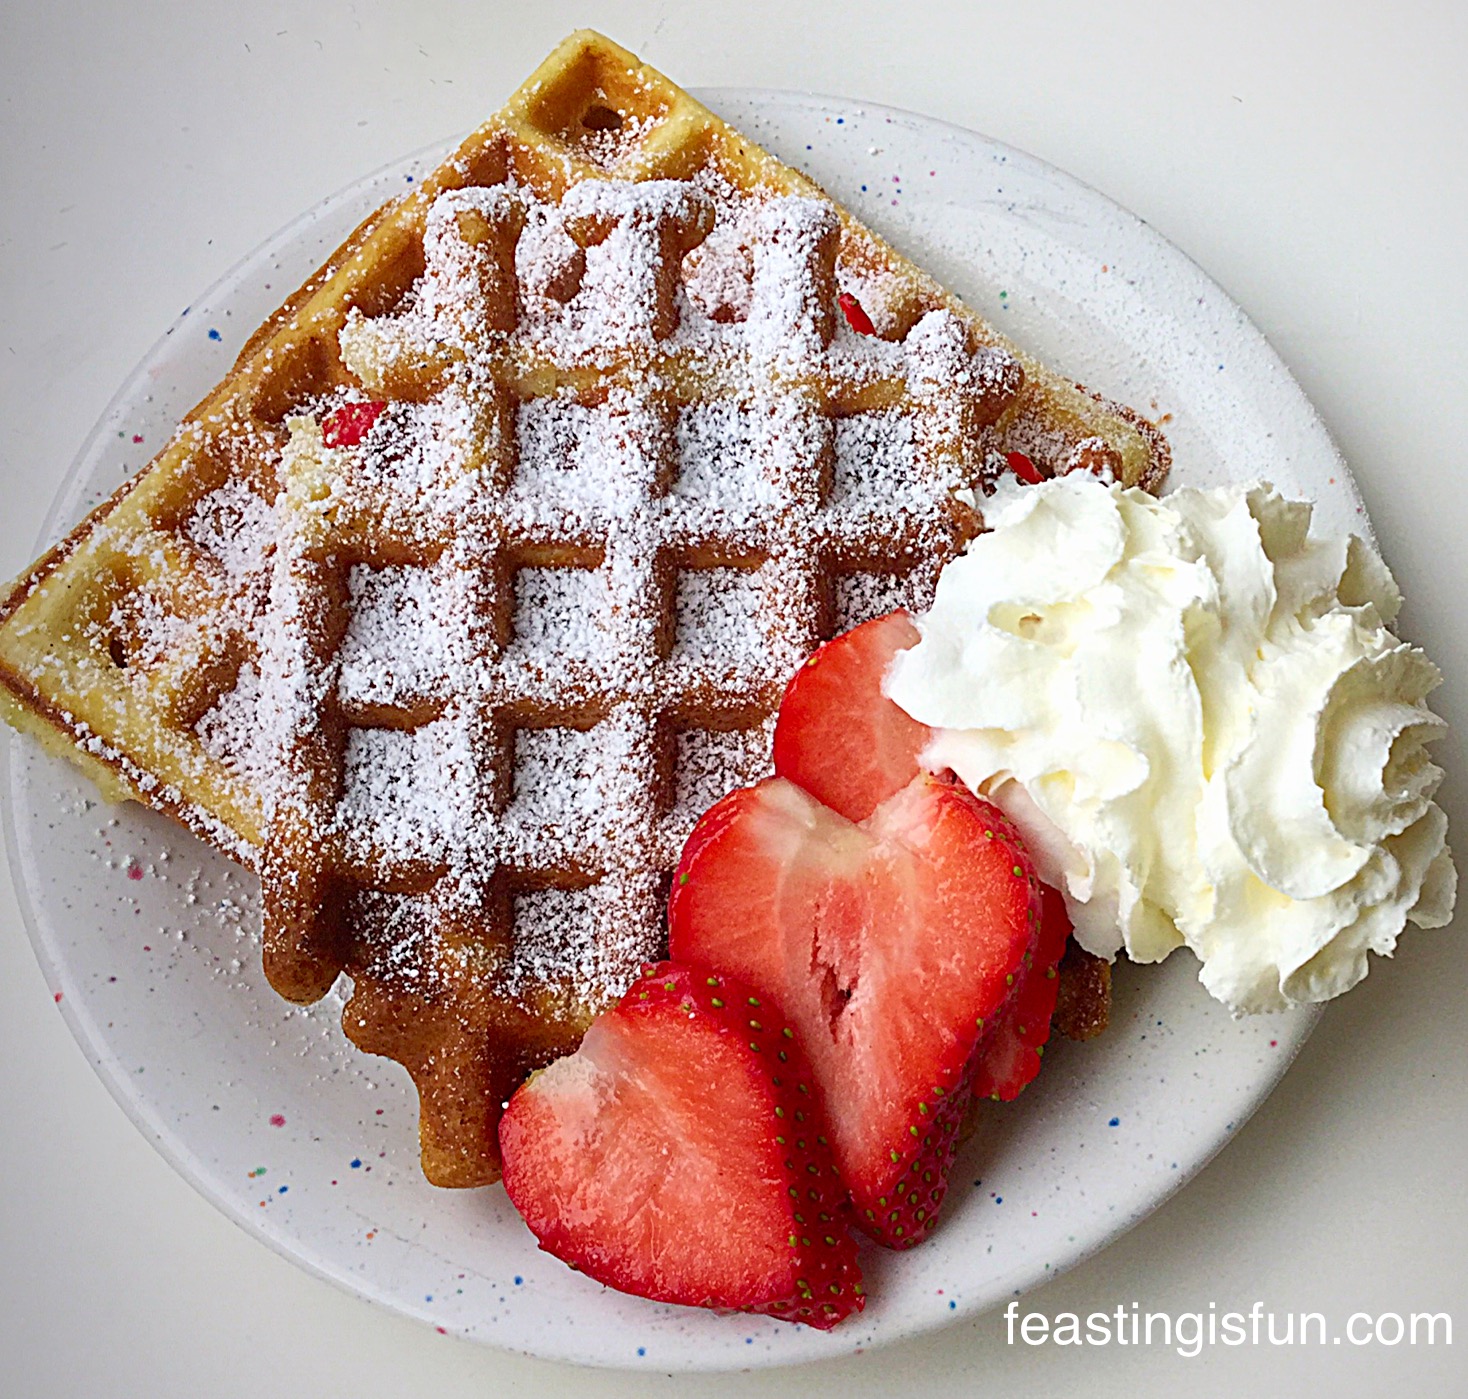
Served warm with a dusting of icing sugar, super fragrant strawberries and a swirl of cream to seal the deal, the plate you see above was my lunch.

Oh boy. Why have I waited so long? All these years I’ve been missing out on the absolute, utter deliciousness of homemade waffles. Plus I was pretty pleased that I’d managed to nail the recipe on my first attempt!

Back to the waffles. You must try these. Seriously, even if you’re not the worlds greatest cook, with this recipe and a trusted Andrew James Belgian Waffle Maker, you can’t go wrong.

Note: It is always recommended that you read through the entire recipe before proceeding. This applies to all recipes on this site and in general.

Recipe: Makes 10 Vanilla Bean Waffles

This recipe assumes that you have read the waffle maker’s instruction booklet and carried out any pre-treatment required. Mine was simple to wipe over the non stick plates with a clean, damp cloth.

  • 120g Unsalted Butter
  • 3 Large Free Range Eggs
  • 150ml/5fl oz Whole Milk
  • 1tsp Vanilla Bean Paste – I use Nielsen-Massey 
  • 30g/2tbsp Caster Sugar
  • 225g/8oz Plain Flour – Self Raising can be substituted, omit the baking powder
  • 2tsp Baking Powder
  • 1/8tsp Salt – I use Maldon-sea salt

Method:

Making The Waffle Batter

  • First of all place the unsalted butter into a small saucepan on a low – medium heat. Allow the butter to completely melt. Remove from the heat and allow to cool.
  • While the butter is cooling crack the eggs into a large bowl. Give them a quick whisk.
  • Add the milk, sugar and vanilla bean paste to the eggs and lightly whisk to combine.
  • Once cooled weigh 100g of the melted butter into the egg, milk, sugar, vanilla bean paste mixture and whisk briefly to combine (wet ingredients).
  • Weigh the flour and sift along with the baking powder and salt into the bowl containing the wet ingredients.
  • Gently mix both the wet and dry ingredients together until just combined – over mixing will lead to tough waffles.

Prepping The Waffle Maker


AJ Vanilla Bean Waffles

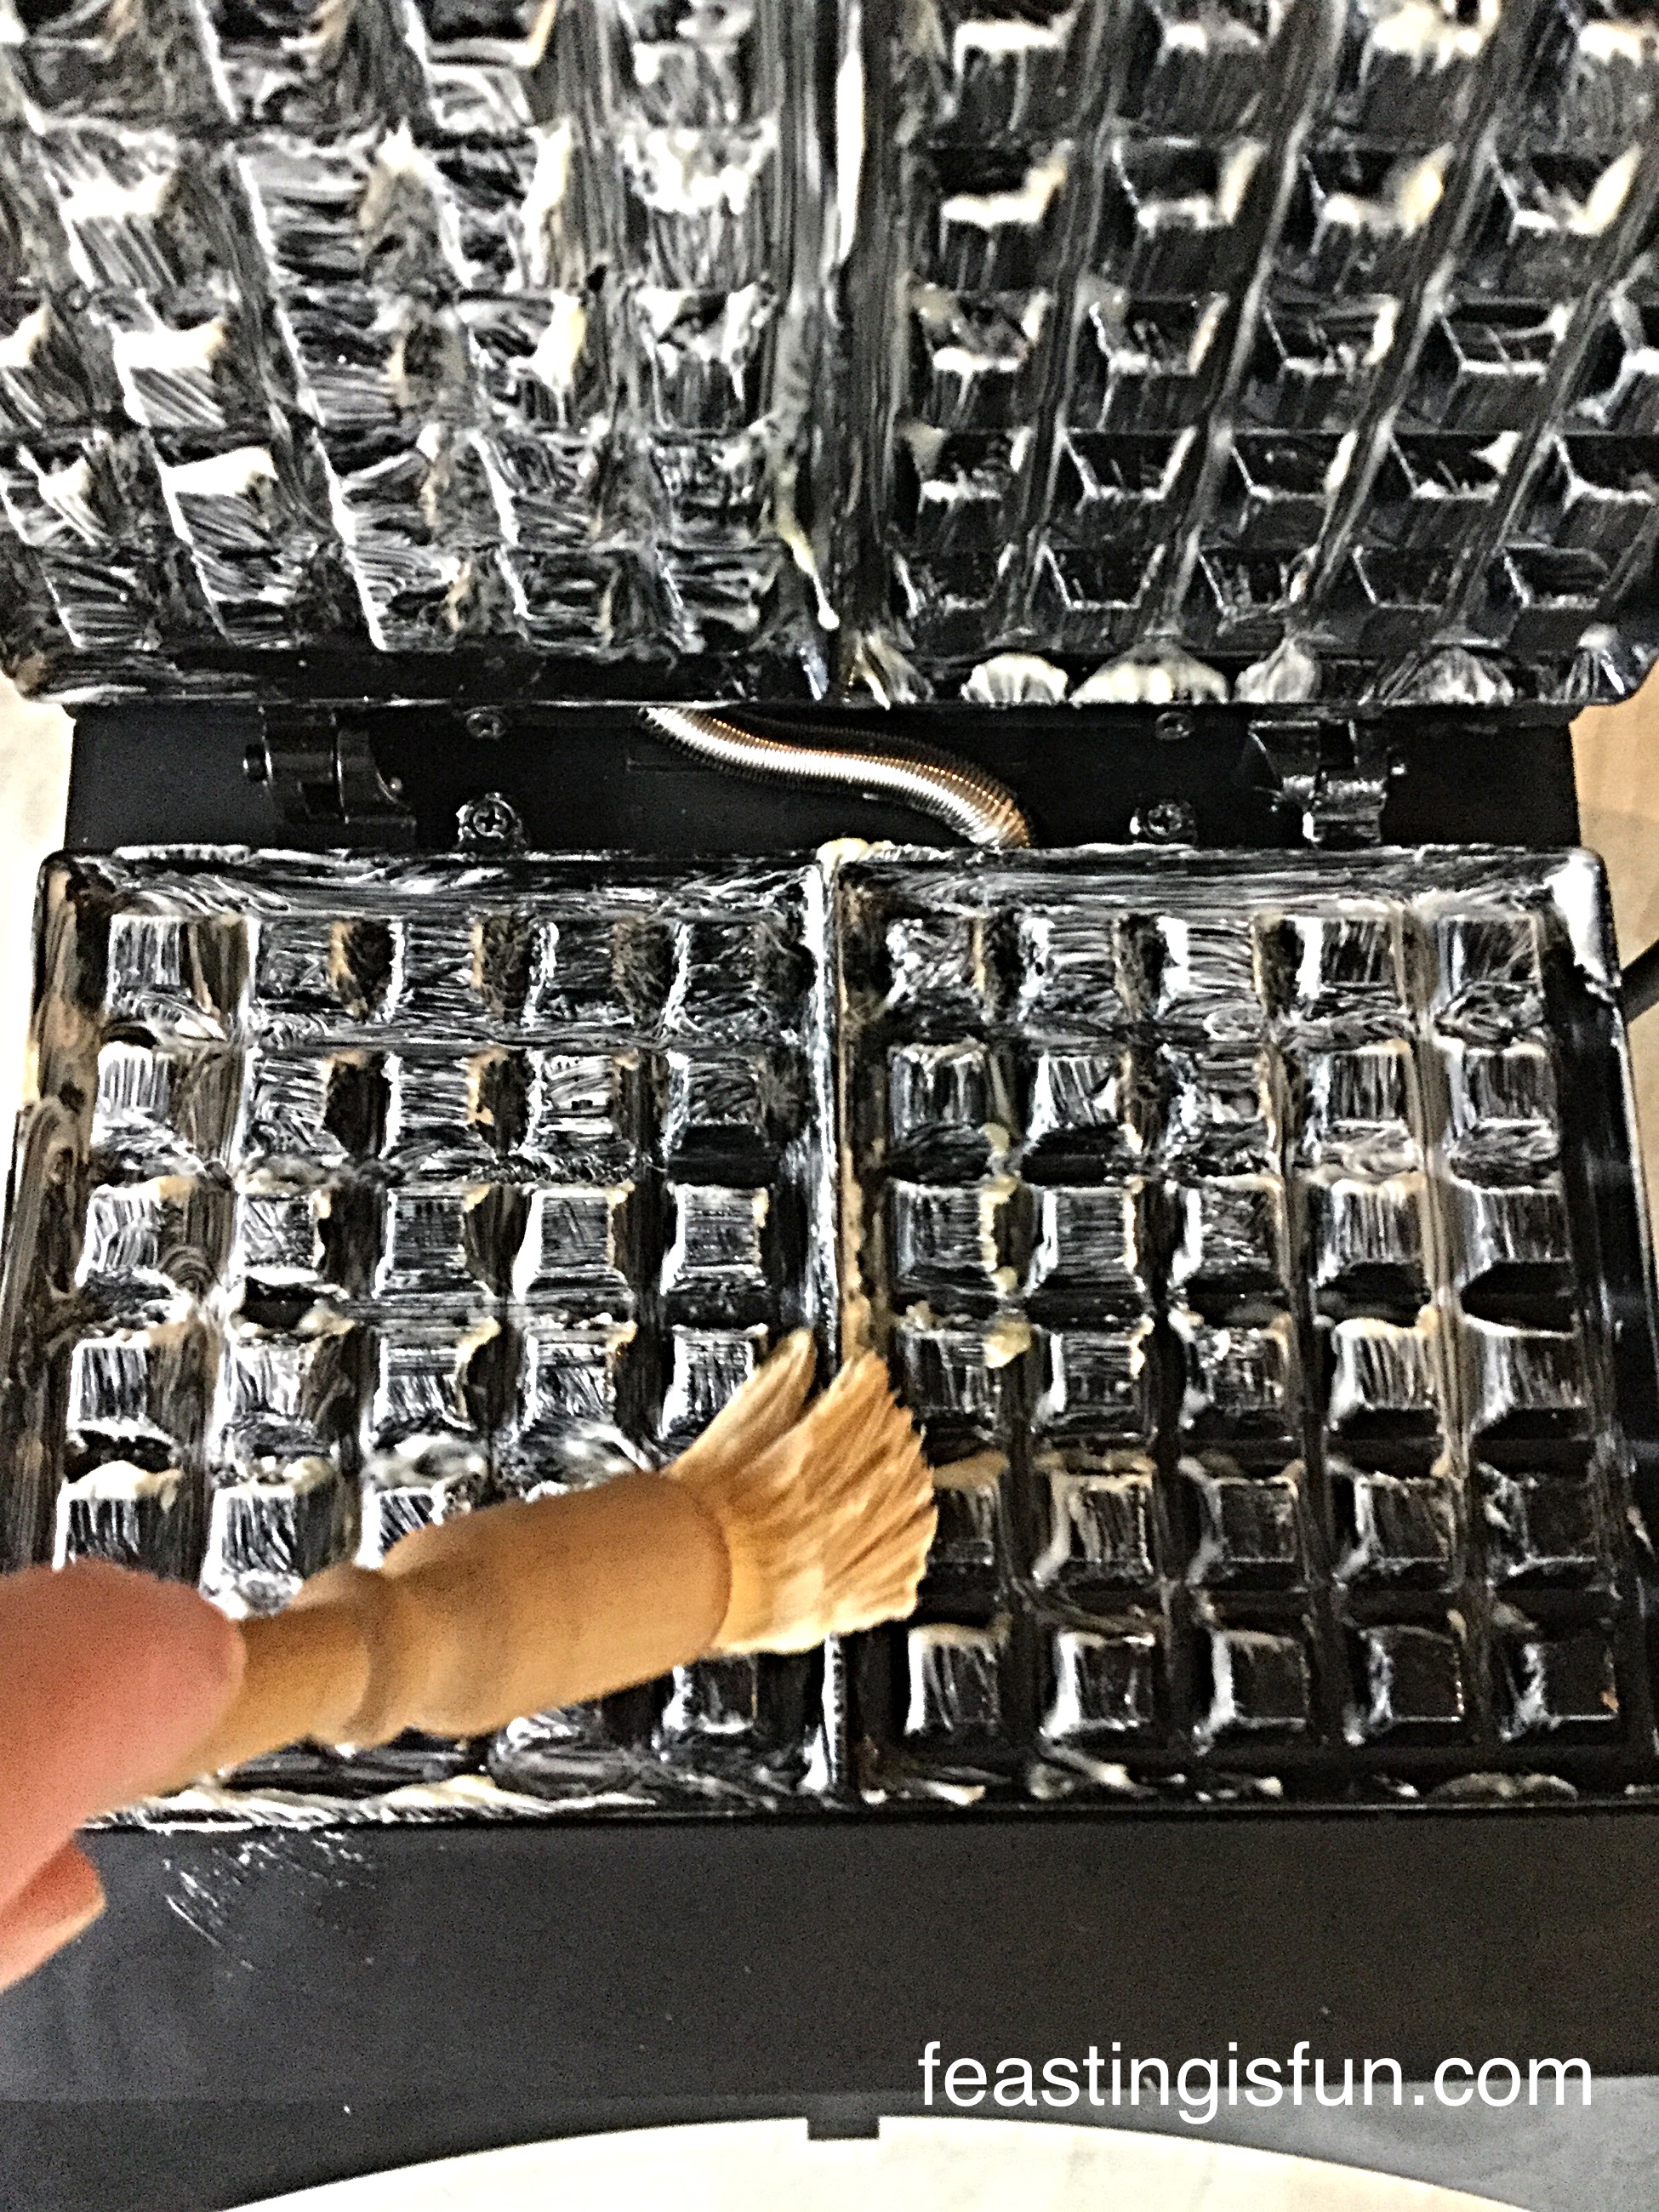
  • While the Waffle Maker is switched off brush the melted butter so that it completely covers each of the waffle plates.
  • Close the waffle maker and switch on. For the Andrew James Belgian Waffle Maker it is ready to cook with when the green ‘ready’ light illuminates.
  • Using oven gloves, to protect your hands, as the top of the waffle make plus the waffle plates get very hot, press the button and open the waffle maker.

AJ Vanilla Bean Waffles

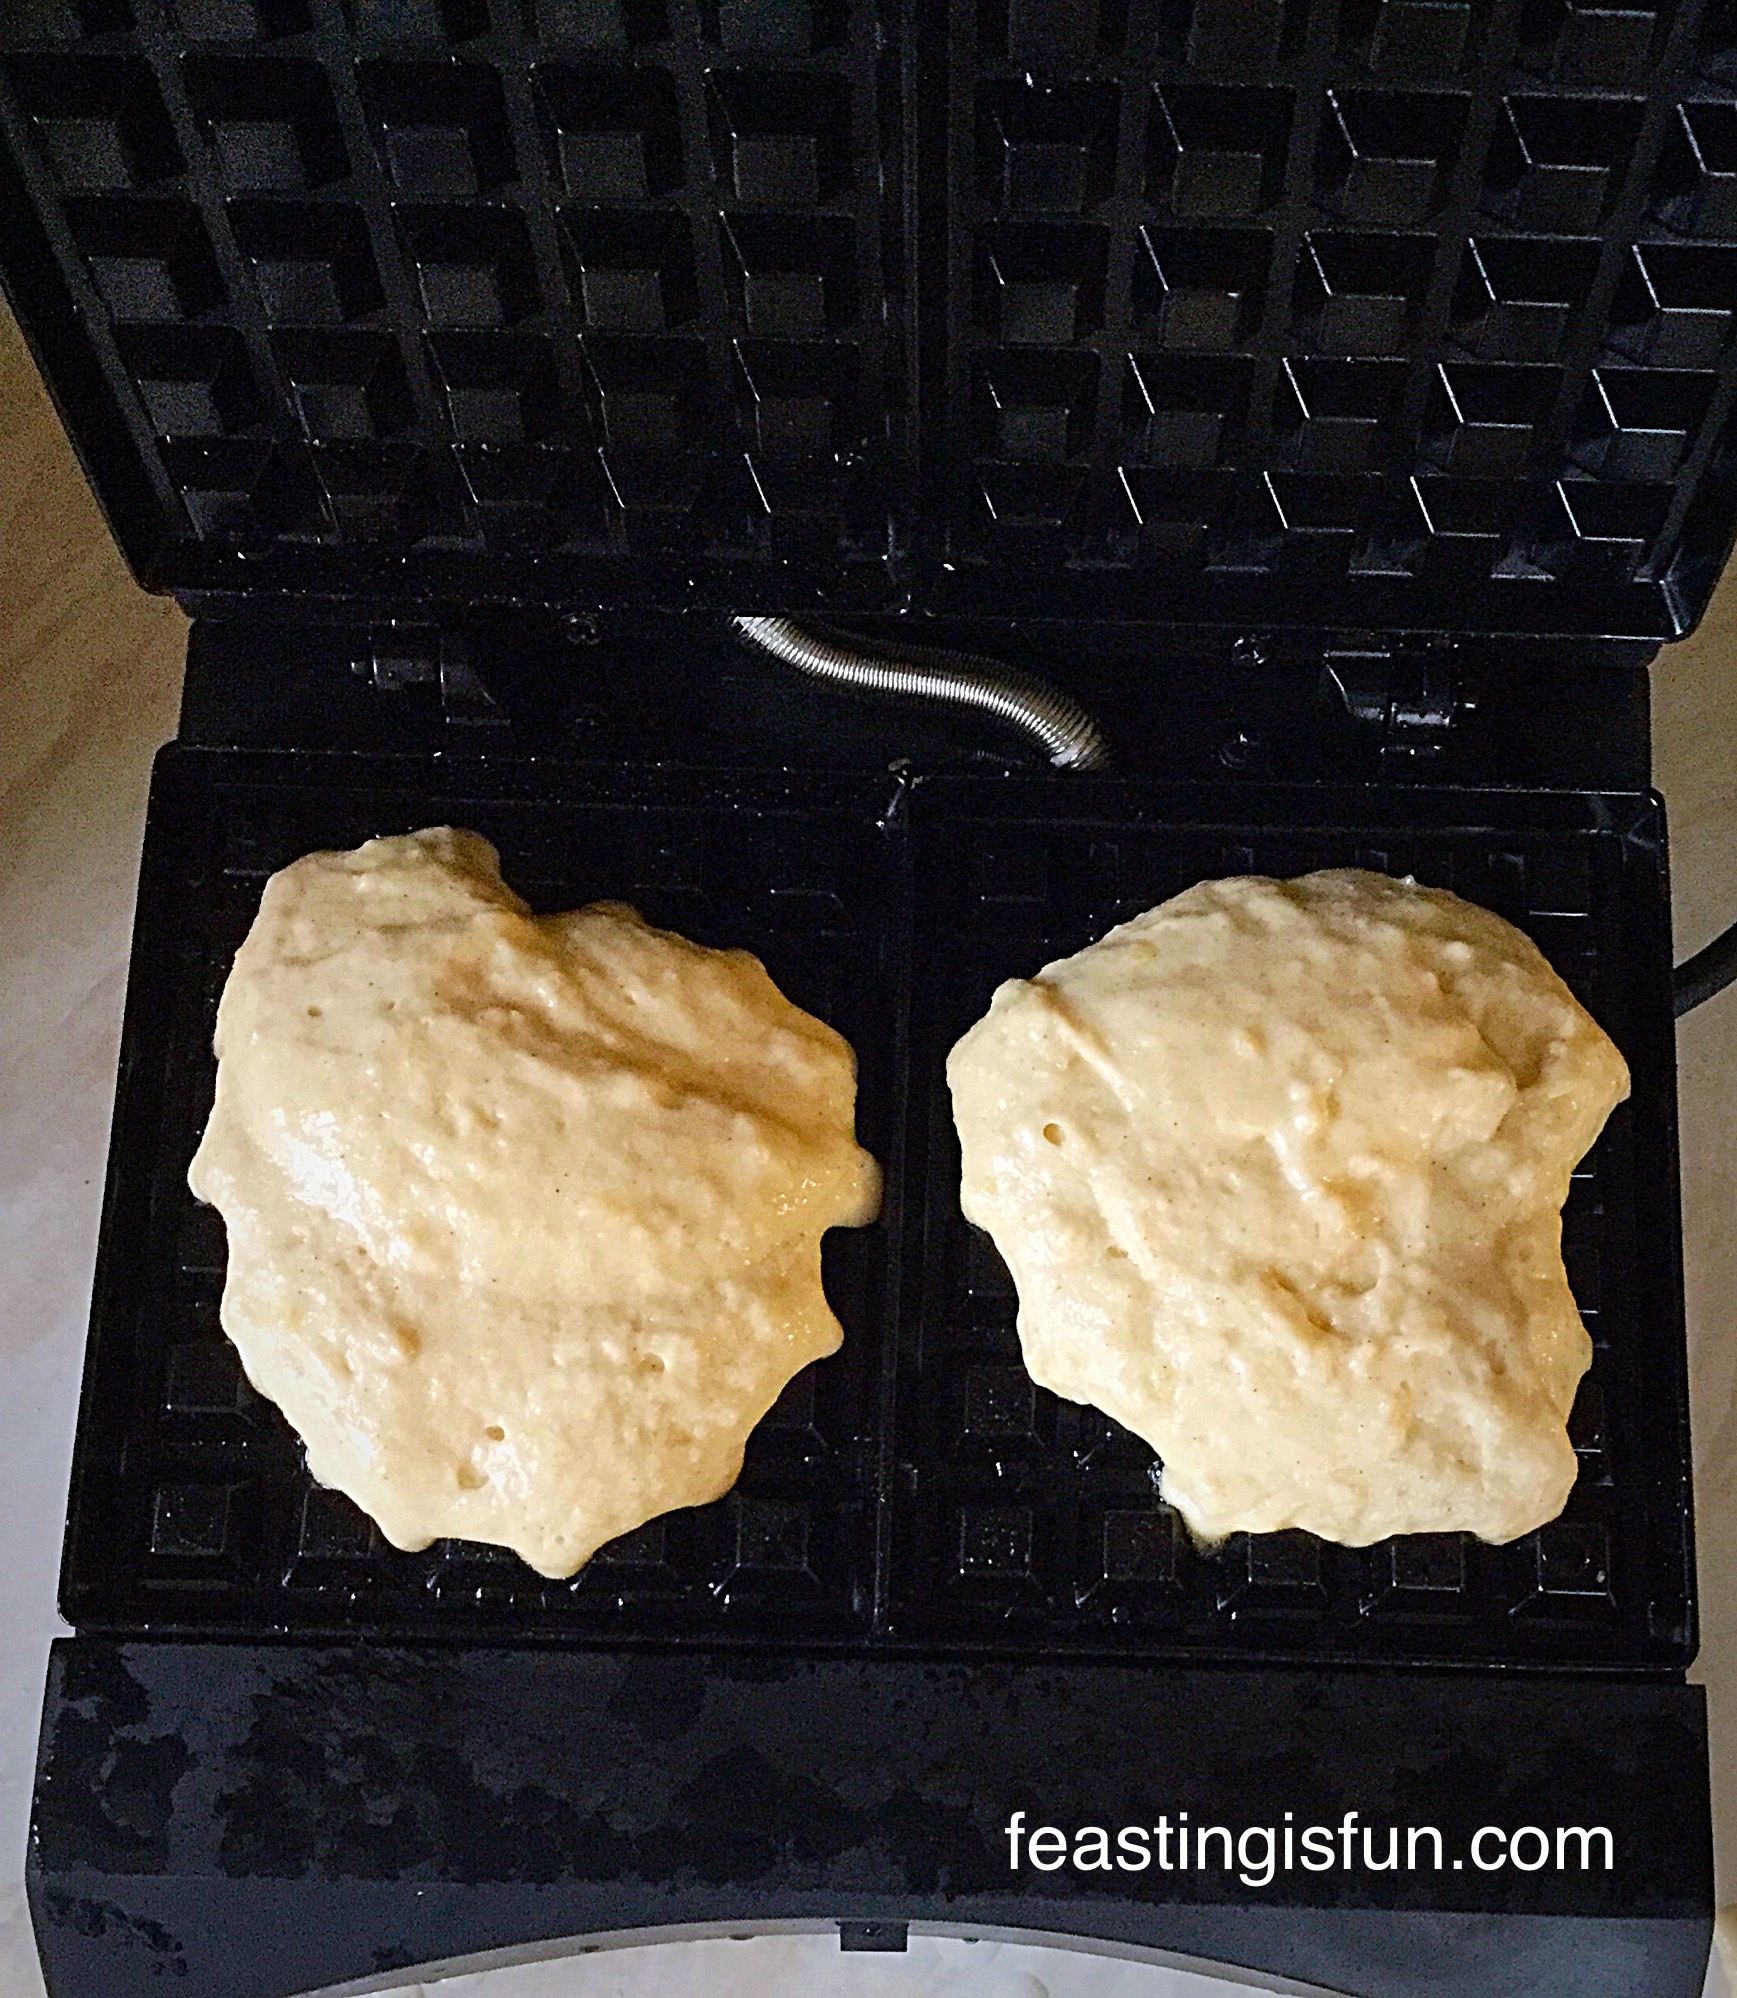
  • Use an American 1/4 cup measure (50ml – 2 heaped tablespoons).
  • Close the lid of the waffle maker and set a timer for 5 minutes.
  • Ensure the room is well ventilated as the cooking process produces steam.
  • I found 5 minutes to be the optimum time for cooking these Vanilla Bean Waffles in this waffle maker. Adjustments to time maybe needed if using a different brand.
  • Really enjoy the smell as the waffles are cooking – don’t be surprised if your neighbours line up at your front door!
  • After 5 minutes, wearing oven gloves, press the button to release the lid of the waffle maker.
AJ Vanilla Bean Waffles
Vanilla Bean Waffles.
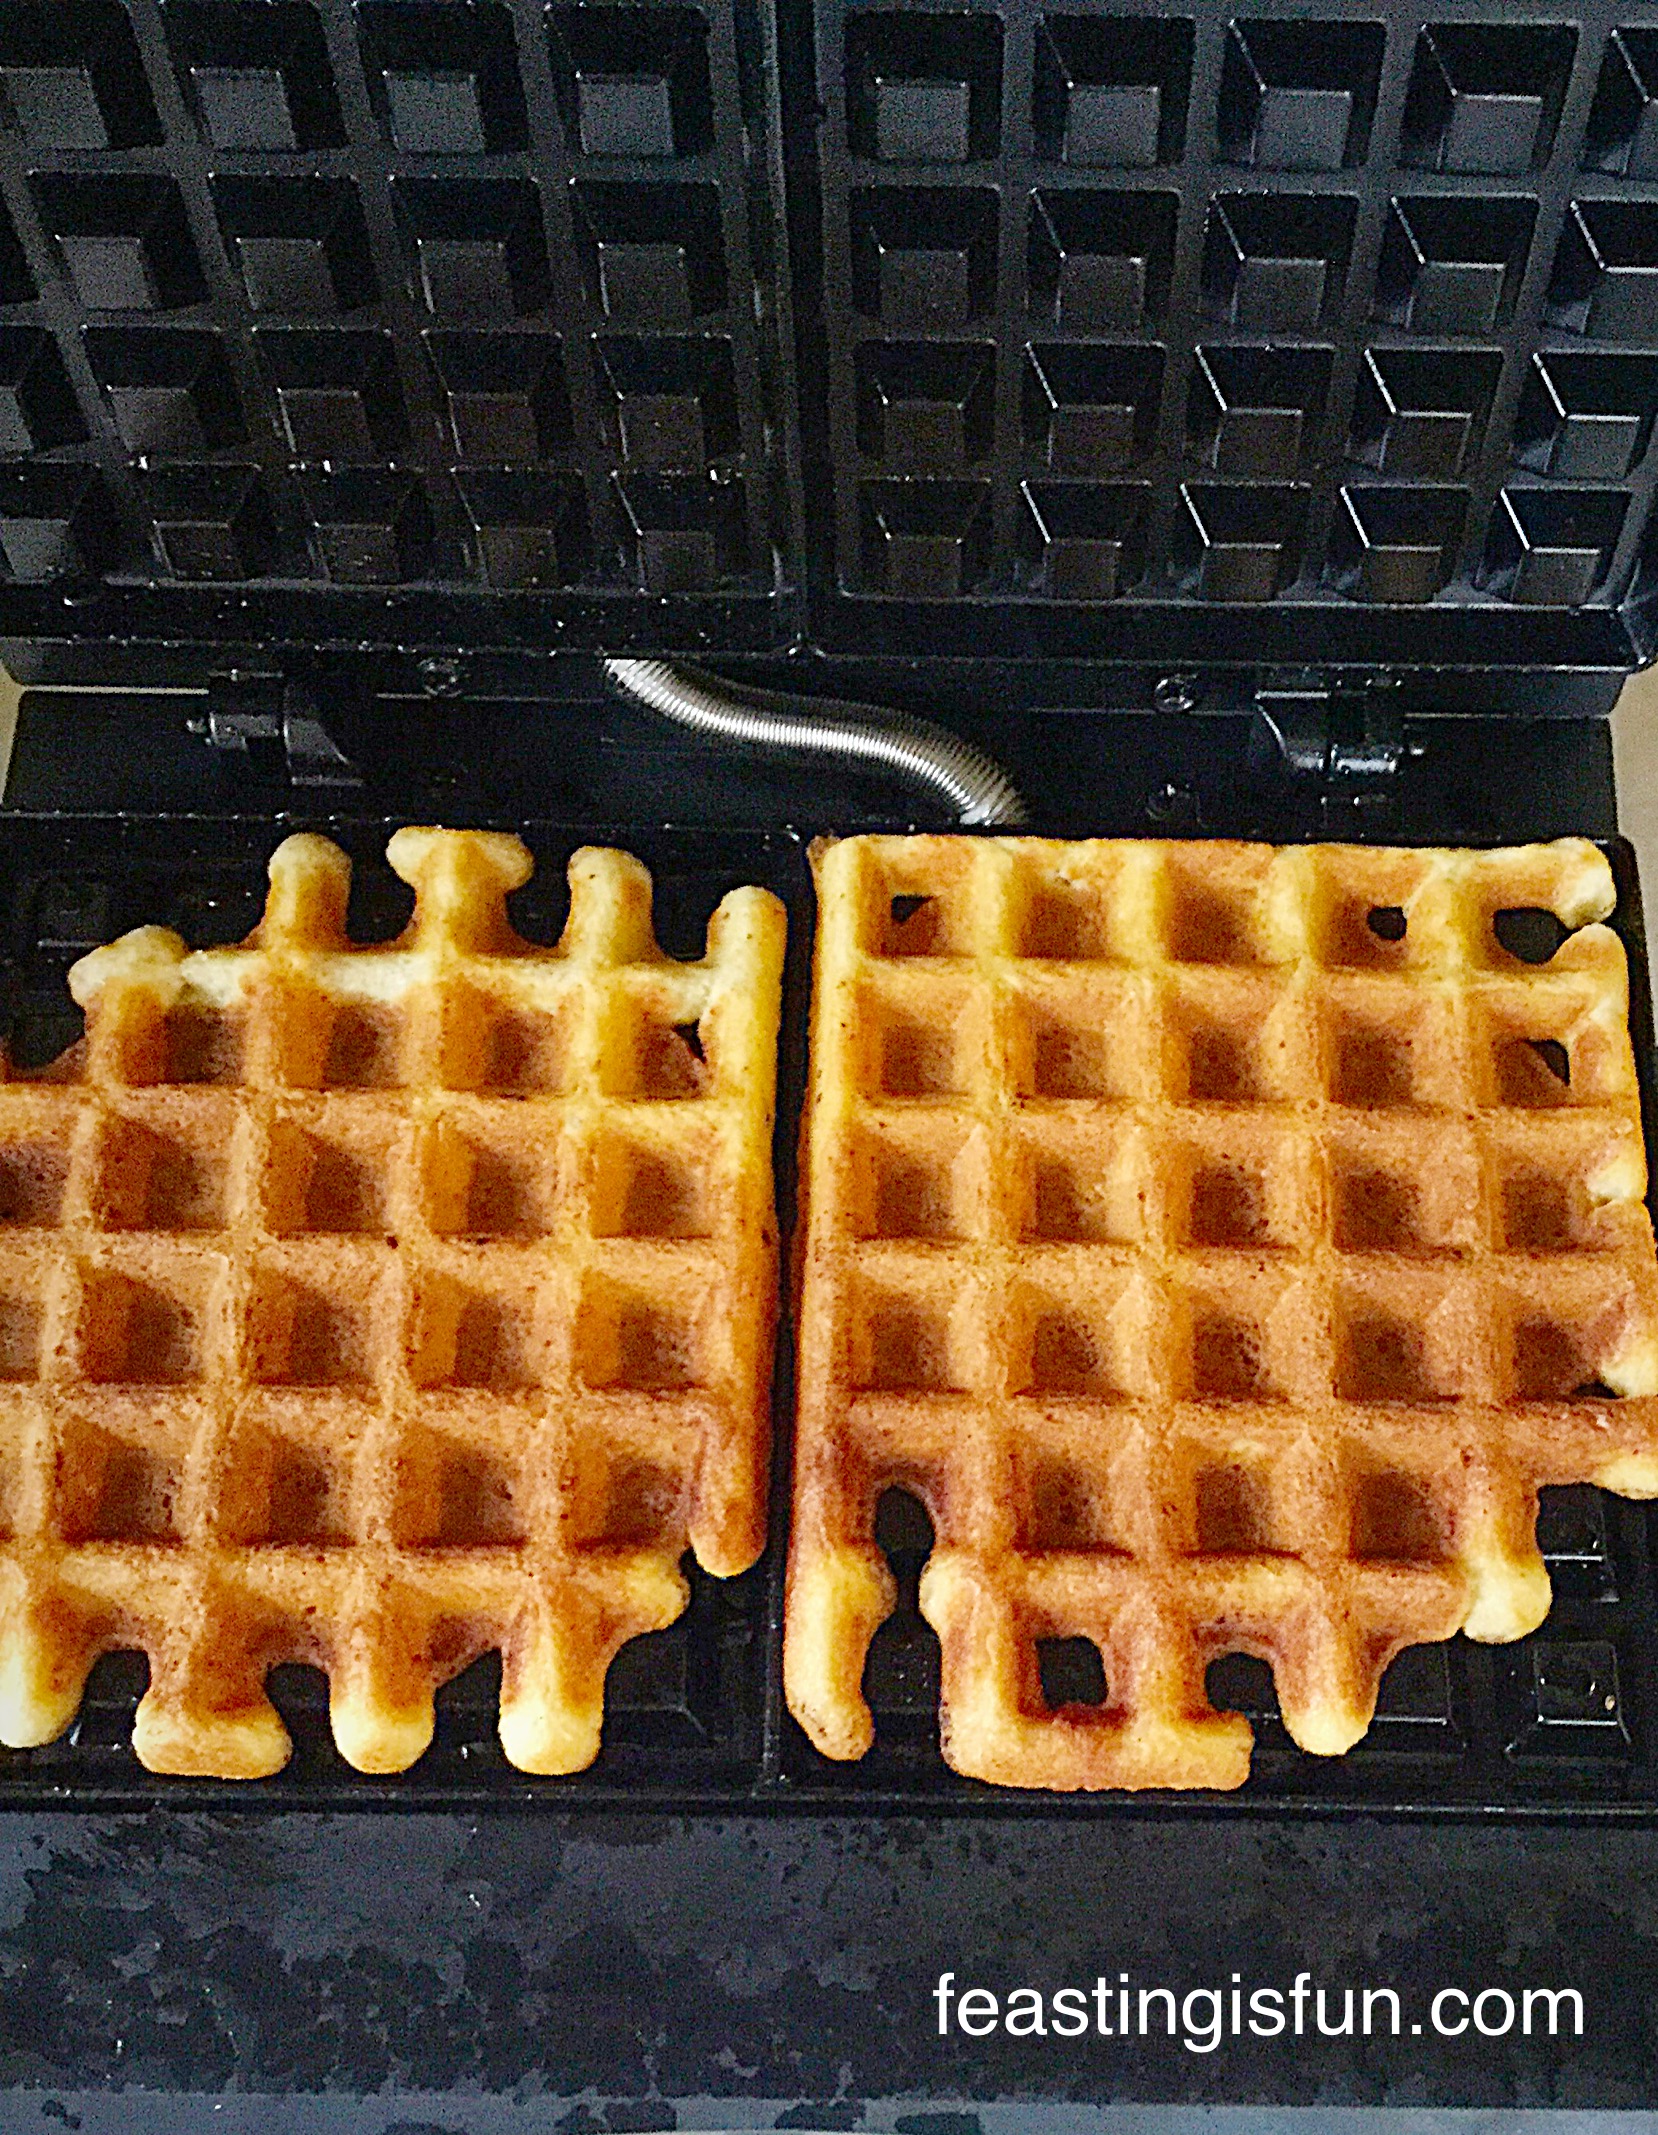
  • Use a wooden spatula to help remove the waffles from the plates. They come away really easily. Most importantly do not use anything metallic to remove the waffles as it could scratch the non stick coating on the waffle plates.
  • Repeat adding 1/4 cup (50mls) as before to each plate.
  • Continue until all the waffle batter has been used.
  • As soon as the last waffle has been removed switch the waffle maker off and leave to cool.
AJ Vanilla Bean Waffles
Vanilla Bean Waffles.

What I Added To The Waffles

Enjoy your Vanilla Bean Waffles however you want.

I added sliced strawberries, a dusting of icing sugar and some whipped cream. Our children reheated their waffles in the toaster, before adding various combinations of ice cream, Nutella and strawberries! What you put on yours is up to you. Flavoured fruit or spiced butters work well. Also a drizzle of maple syrup tastes amazing on these golden beauties.

They keep for up to 2 days in an airtight container and can be reheated in the toaster or oven. To freeze, ensure the waffles are completely cold then pack into zip lock bags or containers with an airtight lid. Keep for one month in the freezer.

AJ Vanilla Bean Waffles
Vanilla Bean Waffles

For a first attempt at waffle making I am surprised and pleased with how easy it is. I would happily make these at weekends, invite some friends over for a breakfast party.

Oh wow how much fun would that be?

However you enjoy your waffles, I really hope I have inspired you to have a go and make some at home. They simply taste so unbelievably good.

Vanilla Bean Waffles perfect for feasting, sharing and having fun!

If you have enjoyed making these Vanilla Bean Waffles you may also like these recipes:

Toffee Banoffee Waffles 

FF Vanilla Bean Waffles
Toffee Banoffee Waffles

Chocolate Dunking Waffles

FF Vanilla Bean Waffles
Chocolate Dunking Waffles


Cherry Bakewell Waffles

AJ Cherry Bakewell Waffles
Cherry Bakewell Waffles

Since discovering the deliciousness and versatility of homemade waffles, weekend brunches in our house have become something we all look forward to. And while I have the waffle maker out it makes sense to double up the recipe and freeze some for another day. Also, if you prefer savoury toppings on your waffles, simply leave the vanilla bean paste out of the recipe. Alternatively you could make some plain waffles and then add some vanilla for a sweeter version. Finally, to reheat cold waffles, simply pop them in the toaster.

So, whatever you are making, baking and creating in your kitchens, have fun preparing and sharing your feast.

Sammie xx

The Andrew James Belgian Waffle Maker was provided for the purposes of review. All opinions, recipes and content are my own. Please see my Disclosure Policy.


Share
Facebooktwitterpinterestlinkedintumblr

Wholemeal Hot Cross Buns

Share
Facebooktwitterpinterestlinkedintumblr

Is there anyone who doesn’t enjoy a hot, toasted and buttered Hot Cross Bun, in the run up to Easter? While my previous post shows you how to make the regular version I wanted to make a wholemeal version. Because some people, for various reasons, can only eat 100% wholemeal bread. Since they shouldn’t have to miss out on all the Easter food fun I developed this recipe for 100% Wholemeal Hot Cross Buns.

Wholemeal Hot Cross Buns
Wholemeal Hot Cross Buns perfect just as they are!

Almost everyone can enjoy these Wholemeal Hot Cross Buns, eaten as they are or split and toasted with a light spread of butter. While, the added beauty of these buns is the spicy, cinnamon aroma, filling the house as they bake and then again when they are toasted. Also these buns are packed full of fibre. So, they are tasty and good for you!

FF Wholemeal Hot Cross Buns

While I toasted a hot cross bun, there was a knock on the front door. Our postman had a parcel to deliver and as I stood there signing for the parcel, he revealed the smell of a toasted bun was making him hungry!

Wholemeal Hot Cross Buns
Wholemeal Hot Cross Buns a healthy breakfast or snack.

Most importantly, making Wholemeal Hot Cross Buns is as straightforward and easy as for the regular ones. While switching the flour from strong white bread flour, to 100% wholemeal flour, not bread flour, I also upped the yeast content and with a few more tweaks, these gorgeous buns were made.

Wholemeal Hot Cross Bun
The cross on this Wholemeal Hot Cross Bun is there as a reminder.

Why The Cross On Top Of The Bun?

The cross on top of the bun, is there to symbolise and remind us of The Cross on which Jesus died. Two days later His tomb was empty, He had risen from the dead, surprising many people, including some of His own disciples. So, the small symbol of a cross on a bun, reminds us that Jesus came for a reason. To love the unloved, to heal the sick, to befriend those that society cast out. And remember, within His followers, one was a tax collector and the other a prostitute!

So, amidst all the chocolate and bunnies, lovely though they are, take a moment to remember you are loved.

In the bible the book of John chapter 3 verse 16 says:

“For God so loved the world, that He gave His only Son, so that who so ever believes in Him shall not be lost (perish), but have everlasting life.”

One small verse packs quite a powerful punch. You and I are the who so ever. Whether you believe or not, know that you are loved. Regardless of your circumstances and the life you have lived, you are loved more than you could ever imagine.

If you would like to know more, please read Important Stuff.

Now, time to show your body some love by making these Wholemeal Hot Cross Buns.

Recipe: Makes 12 Wholemeal Hot Cross Buns

For the bun dough

500g/1lb 2oz Wholemeal Flour (not bread flour) – I use Duchy Organic from Waitrose

160ml/scant 6fl oz Whole Milk – slightly warmed (body temp)

120ml/4.5fl oz Water – slightly warmed (body temp)

2 Large Eggs – I use free range

1tbsp Honey – I use runny honey

14g/ 2 Sachets Fast Acting Dried Yeast – I use Allinsons

10g/ approx 1.5tsp Salt – I use Maldon 

50g/2oz Unsalted Butter at room temp. – plus extra for greasing the baking tray.

3tsp Cinnamon

150g/5oz Sultanas or Raisins

For the crosses:

50g/2oz Wholemeal flour

60ml/2.5fl oz Water

Apricot jam or honey to glaze approx 2tbsp

Method: This method is for use with a bread maker or stand mixer. Alternatively you can make these Wholemeal Hot Cross Buns by hand.

The ‘bowl’ refers to the bowl of a stand mixer or the mixing compartment of a bread maker.

Making The Wholemeal Bun Dough

  • First of all, add both the milk and water to the bowl.
  • Next add both eggs, the honey and yeast.
  • Swish about with clean fingers to mix.
  • Now add the flour on top of the liquid mixture.
  • Place the salt and butter on top of the flour.

For a bread maker, set the cycle to dough and press start. When prompted by the machine, or 5 minutes before mixing stops, add the cinnamon and Sultanas. Allow the bread maker to complete the dough cycle.

As soon as the bread maker has completed the dough cycle, ensure the dough has doubled in size, if not wait until it has. Then re start the dough cycle for 2 minutes, this will ‘knock back’ the dough for you.

For a stand mixer attach the dough hook. Start mixing on a low speed. Once the contents of the bowl resemble dough continue to mix on medium/slow speed for 5 minutes. Stop the mixer. Scrape all the dough, from the hook, into the bowl. Add the cinnamon and Sultanas. Lower the dough hook and mix on medium speed for a further 5 minutes.

After the 5 minutes mixing is complete, stop the mixer. Scrape all the dough back into the bowl, it will be very sticky, don’t worry. Cover with a damp cloth and leave in a draught free place until doubled in size – 1 – 1 1/2 hours. As soon as the dough has doubled in size it can be tipped out and shaped.

Shaping The Buns

  • Grease a large baking tray  (40cm x 28cm x 2.5 cm) with butter.
  • Tip the dough out onto a lightly floured surface.
  • Shape the dough into a ball and weigh. Divide the weight by 12 and this will give you the weight of dough needed for each individual bun.
  • Alternatively, cut the dough in half and then cut each half into 6 even portions.
Form the dough into a ball.
  • Cut the dough in half using a large knife or metal dough scraper.


Dividing the dough into 12 portions.
  • Roll each portion into a ball. Tucking the seam at the bottom.
Wholemeal Hot Cross Buns
Place each dough ball on the baking tray, spacing evenly apart.
  • Cover with a damp cloth and place in a draught free place until doubled in size – approx. 1 hour.
  • While the buns are proving make the paste for the crosses. Mix the flour and water together in a small bowl and then spoon into a small piping bag or plastic sandwich bag.

Wholemeal Hot Cross Buns

  • As soon as the buns have doubled in size, snip the end off of the piping bag (corner of a sandwich bag) to leave a small hole.
  • 10 minutes before the buns are ready to bake preheat the oven to 220C/200C fan gas mark 7, 425F.
  • Pipe crosses on to the buns.
Wholemeal Hot Cross Buns
 

Baking The Wholemeal Hot Cross Buns

  • Place the buns into the middle of the oven and bake for 20 minutes.
  • The Wholemeal Hot Cross Buns are baked when they are a deep golden brown and sound hollow when rapped on the base with your knuckle.
Wholemeal Hot Cross Buns
Once baked remove the Wholemeal Hot Cross Buns from the oven and transfer to a cooling rack.
  • As soon as the buns are baked remove from the oven and transfer to a cooling rack.
  • Place the apricot jam into a heatproof bowl and microwave for 20-30 seconds to melt.
  • Brush the warm buns with apricot jam using a pastry brush.
  • Leave to cool completely.

Wholemeal Hot Cross Buns ready to be shared with loved ones!

Wholemeal Hot Cross Buns
Wholemeal Hot Cross Buns packaged into a tin, ready to be given away.

Split in half, toast and spread with butter or eat as they are.

Store in an airtight tin for up to 3 days. Freeze in an airtight container for up to one month.

If you have the capacity, why not bake a double batch of these delicious Wholemeal Hot Cross Buns and give some away?

If you enjoyed this recipefor Wholemeal Hot Cross Buns you may also like these: then you may want to take a look at these:

Extra Fruity Hot Cross Buns

Extra Fruity Hot Cross Buns

Ginger Date Hot Cross Buns

Ginger Date Hot Cross Buns

Cherry Bakewell Hot Cross Buns

Cherry Bakewell Hot Cross Buns

Easter is a time when our family comes together and celebrates the resurrection of Jesus Christ our Saviour. And sitting together, around the table, giving thanks before a meal is important. Giving thanks for the food we share and the provisions we have however is not only for Easter. Rather, it is an important daily practise in our lives. So is sharing the love that Jesus shows us. Whether it be through words, or more practically. And that is why I am so passionate about sharing food outside of our normal circle on this blog.

So whatever you are making, baking and creating in your kitchens, have fun preparing and sharing your feast.

Sammie xx

No part of this post may be reproduced or duplicated without the written permission of the owner. Please see my Disclosure Policy.


Share
Facebooktwitterpinterestlinkedintumblr

Cranberry Walnut Flapjacks

Share
Facebooktwitterpinterestlinkedintumblr

Gosh mornings are busy. So much to do, yet so little time. Besides that awe are supposed to make time for the most important meal of the day – breakfast. Well I have a solution right here for you my friends –  Cranberry Walnut Flapjacks.

Cranberry Walnut Flapjacks
Cranberry Walnut Flapjacks perfect for breakfast on the go.

Breakfast, is just that – breaking the fast. Our bodies have just been starved for 6-7 hours (I’m being optimistic here), whilst we sleep. Eating a good breakfast helps kick our bodies into GO. If you are anything like me, I need a kick start in the morning!

That’s where these yummy Cranberry Walnut Flapjacks can help.

Packed full of good-for-you, slow release energy oats, one of these bars will keep you going until lunchtime. And, because it’s the morning and let’s face it eating anything can be a struggle, I threw in crunchy walnuts and chewy, slightly tart cranberries.

Yes there’s a squiggle of rich, dark chocolate on top of these beauties – it’s breakfast people, we need all the caffeine flavour we can get!!

Cranberry Walnut Flapjacks
Cranberry Walnut Flapjacks the perfect start to your day.

The beauty of these flavour and texture packed bars is that you make them ahead.

Making and baking ahead

Imagine this? It’s Sunday afternoon, you spend 15 minutes in the kitchen, whipping up a batch of these Cranberry Walnut Flapjacks and you have breakfast and snacks for the whole week.

Am I the only one who gets that mid afternoon dip around 3-4pm?

Thought not!

Also these bars also make a great mid afternoon snack and stop you grabbing for that chocolate bar/doughnut/cookie. Because we all know these give us an instant feel good sugar hit, only to slump in hunger again half an hour later. Therefore, why not wrap an extra one of these, in baking parchment and take it to work? It’ll keep those hunger pangs away until dinner time.

Cranberry Walnut Flapjacks
Wrap up one of the Cranberry Walnut Flapjacks and take it with you.

You can certainly mix up the fruit and nut element. Dried apricots with almonds, or dried figs with pecan nuts. Really the possibilities are endless, I would keep the weights the same, as the flapjack needs to hold together.

I have deliberately not used the word ‘healthy’ for these Cranberry Walnut Flapjacks, as I am aware of the sugar/butter content. I am not a nutritionist, although I would rather pop one of these bars into my daughter’s hand as she heads off for college, than have her grab a muffin or doughnut from a coffee shop!

Recipe: Make 16 Cranberry Walnut Flapjacks

250g/9oz Unsalted Butter

100g/4oz Golden Syrup (light corn syrup)

125g/5oz Light Brown Sugar

Scant pinch of salt – I use Maldon 

325g/11.5oz Rolled Oats (not quick cook) I use Waitrose essential oats

150g/5oz Dried Cranberries

100g/4oz Chopped Walnuts

50g/2oz Dark Chocolate (70% cocoa is ideal) – optional

Making and baking the Cranberry Walnut Flapjacks

Preheat the oven to 180/160C fan oven, 350F, gas mark 4
  • First of all, grease and line a 8″ x 11″ – 20cm x 28cm swiss roll tin/shallow baking tin, with butter and baking parchment.
  • Into a large bowl add the golden syrup.
  • Into a medium saucepan add the butter and sugar. Warm over a medium heat, stirring until melted.
  • Pour the melted butter/sugar mixture into the bowl containing the golden syrup. Stir continuously until combined.

Cranberry Walnut Flapjacks

  • Add the oats, cranberries and walnuts to the bowl.
  • Stir until all the oats, walnuts and cranberries are thoroughly coated in the melted butter/sugar.
  • Tip the mixture into the lined tin.

Cranberry Walnut Flapjacks


  • Using the back of a metal spoon press the mixture into the tin, forming an even layer.
  • Place the tin into the oven and bake for 20 minutes until golden brown.
  • Remove the tin from the oven and allow the Cranberry Walnut Flapjacks to cool in the tin.
  • The flapjacks will be very soft at this stage, but will harden on cooling.
Cranberry Walnut Flapjacks
When the flapjacks are slightly warm, remove from the tin.

Cutting and decorating the flapjacks

  • Using a sharp knife cut down the centre of the flapjacks. Then cut across the middle. Cut each quarter in half again. The flapjacks will still be slight soft.
  • Leave the flapjacks on the baking parchment to continue cooling and setting.
  • As soon as the Cranberry Walnut Flapjacks are completely cooled they can be drizzled with chocolate.
  • Break the chocolate into small pieces and melt in a heatproof bowl, in the microwave, using 30 second bursts. Stir well and when the chocolate is nearly melted keep stirring and the inherent heat will melt any solid pieces left.
  • You can use a teaspoon to drizzle the chocolate over the flapjacks or pour the chocolate into a disposable icing bag, snip the corner off and pipe the chocolate on.
Cranberry Walnut Flapjacks
Chocolate drizzled Cranberry Walnut Flapjacks
  • Allow the chocolate to set and then store in a tin.
Cranberry Walnut Flapjacks
Store layered with baking parchment in a tin.

While Cranberry Walnut Flapjacks are perfect anytime of day, they are especially handy to have, when time for breakfast disappears in the morning. Just grab one and eat on the go!

An added bonus, which does rely on checking the packaging, is that oats are gluten free. So even more people can enjoy a delicious, easy breakfast.

If you enjoyed these Cranberry Walnut Flapjacks then try these:

Bakewell Shortbread Bars 

FF Cranberry Walnut Flapjacks
Bakewell Shortbread Bars

Macadamia Apricot Flapjacks 

FF Cranberry Walnut Flapjacks
Macadamia Apricot Flapjacks

Lemon Drizzle Cake Bars

FF Cranberry Walnut Flapjacks
Lemon Drizzle Cake Bars

Why not bake a batch of these flapjacks and take them to work? Since I’m sure they would be appreciated. Especially by those who have skipped breakfast!

So, whatever you are making, baking and creating in your kitchens, have fun preparing and sharing your feast.

Sammie xx

No part of this post may be reproduced or duplicated without the written permission of the owner. Please see my Disclosure Policy.


Share
Facebooktwitterpinterestlinkedintumblr

Farmhouse White Loaf

Share
Facebooktwitterpinterestlinkedintumblr

Is there anything better than the smell and taste of freshly baked bread? This Farmhouse White Loaf is utterly delicious. If you’ve never baked bread before, read on and let me encourage you to give it a go.

Baking your own bread is such a rewarding experience. From a few simple ingredients, mixed together, the bread literally grows before your eyes.

This Farmhouse White Loaf is the perfect recipe to start with, if you have never made your own bread before.

You will need a loaf tin to bake your bread in. I recently reviewed a British company, that sells British manufactured bakeware you can read it here.

British Bakeware sell a range of loaf tins, my favourite and the one used for baking this loaf is the 3lb deep farmhouse loaf tin.

Farmhouse white bread loaf


Farmhouse White Loaf – Bread Baked In A Regular Oven

The advantage of having a deep loaf tin is, no muffin topped loaves. In the past I have baked bread in tins that weren’t as deep as this one and the bread rose and billowed out, like a mushroom. I’d have to cut away the sides of the bread, where it had stuck to the outside of the tin. Not they way to bake a great looking loaf!

The instructions given below for making this bread are, by hand (which everyone should do at least once in their lifetime), or using a stand mixer/bread maker to carry out the mixing, kneading and knocking back.

Personally I prefer bread baked in the oven. I have baked many a loaf in a bread maker, however, I never seem to get the gorgeous, crunchy crust, that I achieve with an oven baked loaf. Plus bread maker bread is always a little soft for my liking and there’s the inevitable hole in the bottom of the loaf where the mixing paddle is!

Bread dusted with flour and lightly scored to create a pretty finish once baked.
Farmhouse White Loaf

Bread As It Should Be – Without Unnecessary Additives

If you like baking bread in a bread maker I am most certainly not going to judge you. Any bread baked at home is infinitely better than plastic wrapped, pre-sliced, mass produced bread! Aside from speciality breads like my Tomato Thyme Garlic Focaccia, bread should contain nothing more than flour, water, yeast, salt, water and a little oil or butter.

Read the ingredients on the back of a shop bought loaf and you will be amazed at all the additives.

Baking your own bread is easy, once you get into a routine. Even when baking by hand, it still only takes 20 minutes, hands on time, to get a loaf ready to be baked. Once you taste real, homemade bread, it’s hard to go back to the bought stuff – that said, I’m a realist and I usually have a bought loaf stashed in the deep freeze for days when my body is playing up (see here). So I won’t judge!!

Farmhouse White Bread Loaf

Helpful Bread Making Tips

Just a quick tip: if you do start to bake bread regularly, it can pay to bulk buy your bread flour. I use organic flour that is stone ground, from Shipton Mill currently I buy it through Amazon UK using their subscribe and save, although Shipton Mill now have their own online shop. Buying in bulk, through Amazon UK, 5 x 2.5kg bags, means that we eat good quality, organic, stone ground British flour, for about 60 pence a loaf!

While I love baking with fresh yeast, the shelf life is very short, so I have used 7g sachets of fast action dried yeast. Alternatively, if you do use fresh yeast, simply double the quantity stated for dried.

Farmhouse White Bread Loaf

Recipe: Makes 1 Large Farmhouse White Bread Loaf

500g/1lb 2oz Strong White Bread Flour – I use Shipton Mill organic white flour

1 x  7g Sachet Fast Action Dried Yeast – I use Allinson Easy Bake in the green packet or pot

1tbsp Honey – alternatively use 1tsp regular sugar

320ml/11oz Tepid Tap Water (approx body temp)

7g Salt – I use Maldon Sea Salt

1 tbsp Rapeseed Oil (Canola Oil) – I use Kentish Oils alternatively add 25g/1oz of unsalted butter.

Farmhouse White Loaf – Making The Bread Dough

The ‘bowl’ is either a large bowl, with which to mix the bread by hand, or the stand mixer/bread maker bowl.

For all methods:

Pour the water into the bowl. Add the honey and yeast. Swish about with clean fingers to activate the yeast.

Add the flour on top of the liquid.

Add the salt and the oil/butter.

Bread Maker

If using a bread maker, set to dough cycle and start the program. Once the cycle is completed re-start for 2 minutes. This ‘knocks back’ the dough. Then remove the dough, shape into an oval/ball and place into a buttered loaf tin. Cover with a damp cloth, leave in a draught free place until doubled in size.

Stand Mixer – with dough hook attachment

If using a stand mixer, attach the dough hook and mix on medium speed until all the ingredients are combined. Continue to mix for a further 5 minutes, until the dough is smooth and elastic. Stop mixing. Scrape the dough from the dough hook and combine with the dough in the bowl. Form into a ball, place back into the bowl. Cover with a damp cloth and leave in a draught free place until doubled in size (approx. 1hour). Once doubled remove the cloth, mix for 2 minutes on medium speed using the dough hook. This ‘knocks back’ the dough. Remove the dough and form into an oval/ball shape, place into a buttered loaf tin. Cover with a damp cloth, leave in a draught free place until doubled in size.

By Hand

If hand mixing, bring all the ingredients together with your hand until they form a doughy mess! Place this dough onto a very lightly floured worktop. Knead for a good 10 minutes. If the dough gets sticky, keep kneading and working it – if you add extra flour the finished bread will be dry. After a good 10 minutes kneading, the dough should have a smooth elasticity. Place the kneaded dough into a buttered bowl, cover with a damp cloth and leave in a draught free place until doubled in size, 1-2 hours.

Shaping The Dough Ready For The Second Proof

Ensure the area that you are shaping your dough is draught free.

First of all lightly dust the work surface with flour

Tip out the dough, from its bowl, so the top of the dough is directly in contact with the worktop. This will help as we start to build tension within the dough.

Lightly flour your hands and pull out part of the sticky dough, then press it into the centre of the dough, as seen in the photos below.

Continue this process all the way around the outside of the dough until you have a smooth, rectangular shape, with no sticky sides.

Creating tension across bread dough after the first proof.

Shaping The Loaf

Using your fingers, lightly press the dough out into a square shape, roughly the same width as the length of your dough tin.

Fold the top third of the dough onto itself and then repeat with the bottom third of the dough, pulling it so that it overlaps the first fold.

Flip the folded dough over and tuck in the top and bottom to create an oval shape.

Shaping bread dough in stages.

Place the shaped dough, with the seams underneath, into the loaf tin.

Cover with a clean tea towel and leave in a draft free place until doubled in size.

Shaped bread dough in tin before and after second rise.

Baking Your Farmhouse White Loaf

10 minutes before the dough is ready to bake, preheat the oven to 220C/200C fan, gas mark 7, 425F. Also, place an inch (2.5cm) of water in a container and place on the bottom of the oven. This will create steam which allows the bread to rise more (known as oven spring ) before forming a crust.

Also, if desired, score the loaf before placing in the oven.

Place the loaf tin into the middle of the oven. Bake for 30 – 40 minutes. Tip the loaf out of the tin.

The bread is cooked when it has a deep golden crust and sounds hollow when rapped on the base with your knuckle.

For an extra crusty loaf place the bread directly on the oven shelf and bake for a further 5-10 minutes. Remove from the oven and place on a cooling rack.

Enjoy the wonderful aroma of baking bread as it fills your kitchen. That alone is worth baking this bread for!

Farmhouse White Bread Loaf

Enjoying Your Farmhouse White Loaf At It’s Best

Allow the Farmhouse White Loaf to cool completely before slicing. I know it is sooo tempting to tear into the hot, freshly baked loaf, but if you do the bread will all squidge (is that a word??) together and be very hard to slice.

Give yourself a big pat on the back for making a cracking loaf!

You deserve it.

White Sandwich Bread sliced
Farmhouse White Loaf

This was not a sponsored post. All opinions are my own and recommendations for products are purely from my own personal experience.

Bread is a staple in so many homes, treat yourself to a home baked loaf and I promise you won’t regret it.

FF Farmhouse White Loaf
A Farmhouse White Loaf slashed after the second prove.

Here To Help You Bake The Perfect Bread

I do not presume to be an expert, however, I have baked a fair few loaves over the years. Please ask if you are having any problems, need guidance or reassuring?

Either leave a comment or tweet (@sammiefeasting) me a question. I will do my very best to help.

If you have enjoyed this recipe for Farmhouse White Loaf you may like to try these:

Oat Bran White Bread

FF Farmhouse White Loaf
Oat Bran White Bread

Easy Homemade Cottage Loaf

FF Farmhouse White Loaf
Easy Homemade Cottage Loaf

Garlic Rosemary Focaccia Bread 

FF Farmhouse White Loaf
Garlic Rosemary Focaccia Bread

While baking bread is not only a satisfying and tasty experience, it can also work out much cheaper than buying a standard loaf at the shops. Also, you know exactly what has gone into your home baked bread. And, the more bread you make, the better you will become at making it. As you become confident baking a  white loaf you can get creative and try other bread recipes. Although, I should issue a warning, bread making can become addictive!

So, whatever you are making, baking and creating in your kitchens, have fun preparing and sharing your feast.

Sammie xx

No part of this post may be reproduced or duplicated without the written permission of the owner. Please see my
Disclosure Policy.

Freshly baked white bread with descriptive graphics.

Share
Facebooktwitterpinterestlinkedintumblr

Spiced Fruit Loaf

Share
Facebooktwitterpinterestlinkedintumblr

Hi, I have a double treat for you today. This absolutely delicious Spiced Fruit Loaf not only tastes amazing, but, the aroma, gently wafting from the oven, makes the whole house smell incredible. Cinnamon and bread filled with tasty dried fruit, baking together.

Who needs air freshener when you can bake this wonderful Spiced Fruit Loaf,


Spiced Fruit Loaf

If you have never baked bread before, bake this!

This Spiced Fruit Loaf is stuffed full of dried fruits. Don’t hide raisin haters! Although there are some dried vine fruits in this loaf (which you can absolutely leave out), there’s also dried cranberries and figs. Soft, golden, dried apricots would be a fantastic addition as well.

Spiced Fruit Loaf

The bread dough is enriched with egg, milk and butter and spiced with cinnamon and ginger. And as if bread baking didn’t smell good enough, this Spiced Fruit Loaf kicks it into another dimension.

A Great Breakfast Bread Loaf

My absolute favourite way to enjoy this bread is toasted, for breakfast. As my nose is assaulted with another spice hit as the bread toasts.

Perfect with a cup of good coffee.

Breakfast with back coffee and toasted fruit bread.
Spiced Fruit Loaf

I have been reviewing some baking products from British Bakeware, including their 3lb loaf pan. Having baked a range of breads I wanted to create something that really did the pan justice.

This Spiced Fruit Loaf does!

Spiced Fruit Loaf sliced and toasted with butter.
Spiced Fruit Loaf

One thick slice of this bread kept me full all morning – and it contains fruit, so it must be good for you. Right?

Everyone in our house was eager to try this tasty breakfast loaf this morning and they were not disappointed. As a mum I’m happier, during these chilly winter months, when they all have a hot breakfast. And I honestly do believe it is the most important meal of the day. So why not make it a tasty one?

Recipe: Makes 1 Spiced Fruit Loaf

500g/1lb 2oz Strong White Bread Flour

1 Large Free Range Egg

Approx 320ml/ just over 1/2 pint Whole Milk at room temperature

1tsp Honey

1 Sachet Fast Action Dried Yeast (7g)

1tsp/7g Salt – I use Maldon

75g/3oz Unsalted Butter plus extra for greasing the loaf pan

2tsp Cinnamon

1tsp Ginger

225g/8oz Dried Fruit – I used equal quantities of vine fruits, chopped dried figs and dried cranberries

You will need a 3lb loaf pan.

Making And Proving The Dough

  • Crack the egg into a jug. Make up to 340mls/12fl oz with milk. Using a fork, lightly beat together to break up the egg.
  • Pour this liquid into the bowl of a bread maker or stand mixer.
  • Add the honey and yeast.
  • Next add the flour.
  • Add the salt to the top of the flour and add the cubed butter.

If using a bread maker start the dough cycle, adding the spices and dried fruit when prompted by the machine, or 5 minutes before the mixing finishes.

If using a stand mixer, attach the dough hook. Mix on medium speed until all the ingredients are combined into a dough. Continue mixing for a further 5 minutes. Stop the mixer and scrape the dough from the hook, back down into the bowl. Add the spices and dried fruit and continue to mix on medium speed for a further 5 minutes. Stop the mixing and scrape all the dough from the hook. Form into a ball, place back into the mixer bowl, cover with a damp cloth and leave in a draught free place until doubled in size – approximately 1 hour.

Butter the loaf pan and set aside.

Knocking Back And Shaping The Dough

When the bread mixer has finished its dough cycle, restart again and allow the machine to mix (knock back) the dough for 2 minutes.

As soon as the dough in the stand mixer bowl has doubled in size, remove the cloth and mix, with the dough hook attached, on medium speed for 2 minutes. Again this knocks back the dough.

  • Turn your knocked back dough out onto a floured surface. It will be very sticky.
  • Press the dough to form a roughly rectangular shape.
  • Fold the bottom third of the dough up and then bring the top third down.
  • Turn the dough over, so that the seam is underneath. Form the dough into a log shape and place into the prepared loaf pan.
  • Finally, cover with a damp cloth and leave in a draught free place until doubled in size – approx 1 hour.

10 minutes before the loaf is ready to be baked preheat the oven to 220C/200C fan  oven, gas mark 7, 425F.

Unbaked spiced fruit bread loaf.
Spiced Fruit Loaf

Baking The Spiced Fruit Bread Loaf

  • As soon as the dough is doubled in size, remove the cloth and bake in the centre of a preheated oven for 30 minutes.
  • The loaf is baked when it has a dark, golden crust and sounds hollow when rapped on the base with your knuckle.
  • When baked, remove the bread from the oven.
  • Turn the loaf out of the pan and place on a cooling rack.
Bread filled with dried cranberries, figs and sultanas and flavoured with cinnamon and ginger.
Spiced Fruit Loaf

Leave to cool completely.

I know you want to tear into this Spiced Fruit Loaf the moment it comes out of the oven, but you shouldn’t. The butter and fruit in this loaf make it particularly squidgy whilst warm.

Trust me! As soon as this beauty is cool it will slice beautifully.

Enjoy as is, smothered in butter, or toasted and buttered.

If you enjoyed this recipe for Spiced Fruit Loaf then you may also like these:

English Muffins

English Muffins

Homemade Chelsea Buns

Homemade Chelsea buns with a lemon icing drizzle.
Homemade Chelsea Buns

Farmhouse White Loaf

Farmhouse style white bread loaf.
Farmhouse White Loaf

I absolutely love the smell and taste of hot cross buns around Easter and if you feel the same I know you too will enjoy this spiced and fruited bread. And a huge advantage to making bread at home is you can add whatever dried fruits you like. For example, I am allergic to oranges, yes it is annoying, but it means I can make Hot Cross Buns at home and leave the offensive ingredient out! Because that’s the beauty of baking at home, you chose what goes into your bakes.

So, whatever you are making, baking and creating in your kitchens, have fun preparing and sharing your feast.

Sammie xx

No part of this post may be reproduced or duplicated without the written permission of the owner. Please see my Disclosure Policy.

Pinterest image of spiced fruit bread loaf with descriptive graphics.


Share
Facebooktwitterpinterestlinkedintumblr

Homemade Chelsea Buns

Share
Facebooktwitterpinterestlinkedintumblr

Hi, so it’s mid November and the excitement for Christmas in our house is definitely building. We all love Christmas, even though we still have our daughter’s and my birthday to celebrate in December, before Christmas. These amazing Homemade Chelsea Buns are perfect for baking any time of the year, but especially in the run up to Christmas. The scent of cinnamon and bread, fills the house as these buns bake in the oven.

FF Homemade Chelsea Buns

I love the build up to Christmas. Stir up Sunday when we make our Christmas cake, advent calenders, present shopping, decorations. Spending time with friends and family, getting excited together.

As a family we all love each single thread that pulls together and makes a complete Christmas. The spicy scents, wafting from the kitchen, that evoke memories and shared experiences.

FF Homemade Chelsea Buns
Homemade Chelsea Buns

Creating a surprise

Our children and their parents, love these Homemade Chelsea Buns with a big mug of steaming coffee, or hot chocolate, for breakfast. Unravelling the light, spiced dough and uncovering juicy, plump, sweet, fruits. Sticky and sweet. Traditionally Chelsea Buns are finished with a sprinkle of sugar, however since discovering how good they taste with a lemon drizzle on top I wouldn’t want to make them any other way.

One of my favourite things to do at the weekend is to sneak downstairs, whilst everyone else is still asleep and make something scrumptious for breakfast. and that is exactly what I did a couple of weeks ago. I couldn’t sleep, so I snuck into the kitchen, fuelled by hot cups of tea and baked these Homemade Chelsea Buns.

Everyone was so happy when they awoke to the scent of home cooking and found a big plate of warm buns, waiting to be devoured, on the table.

Unfortunately, due to the early morning light, the photos weren’t great. Shame eh? So I made these again during the day and they were gone by the following afternoon! Happily I had snapped some photos, before they were all munched.

FF Homemade Chelsea Buns
Homemade Chelsea Buns

I wouldn’t want you to limit making these only over the festive season. They are however, a wonderful warm up to full on Christmas cooking and baking.

Recipe: Makes 12 Homemade Chelsea Buns

For the buns

500g/1lb 2oz  Strong White Bread Flour I use Shipton Mill (organic white bread flour)

10g Fast Action Dried Yeas – I use Allinson Dried Yeast in the green tub or sachets

250ml/8fl oz Whole Milk – at room temperature

2 Large Free Range Eggs

25g/1oz Caster Sugar

50g/2oz Unsalted Butter

10g Salt

225g/8oz Dried Mixed Fruits – alternatively, if you are not a fan of vine fruits, dried figs, dates, apricots and cranberries all work extremely well in this recipe.

100g/4oz Soft Light Brown Sugar

4tsp Cinnamon

For the glaze

150g/5oz Icing Sugar

Juice of 1 Lemon

Method: You will need a buttered or baking parchment lined 10″ x 12″ baking tin at least 2” deep (25cm x 30cm x 5cm).

Making the bun dough

In the bowl of a bread maker or a stand mixer, with a dough hook attached, add the milk, lightly beaten egg, caster sugar and yeast.

Add the flour, salt and butter.

Switch the bread maker cycle to dough and press start.

With a stand mixer, lower the dough hook and mix on medium speed until all the ingredients are combined. Continue mixing for a further 10 minutes. Turn the mixer off. Place all the dough into the bowl, cover with a clean cloth and leave until doubled in size – approximately 1-2 hours.

While the dough is proving mix the dried fruit, sugar and cinnamon together in a bowl. Set to one side.

Mix the dried fruit, sugar and cinnamon together.

When the bread maker has completed its dough cycle, restart for 2 minutes, to mix and knock back the dough.

With the stand mixer, once the dough has doubled in size, remove the cloth and turn out the dough on to a floured surface.

Shaping and filling the buns

  • Turn the bread out on to a floured surface and form into a ball.

Turn the dough out onto a floured surface.


  • Roll the dough out into a rectangle 12” x 9” (30cm x 22.5cm)

Roll the dough out into a rectangle.


  • Spinkle over the spiced fruit and sugar mixture so that it evenly covers the dough.

Sprinkle over the fruit/sugar mixture.

  • Roll the dough up as tightly as possible.

Roll up the dough as tightly as possible.

  • Ensure that the seam is underneath.

Ensure the dough seam is underneath.

  • Cut the rolled dough into 12 even portions. I find the easiest way is to cut the dough in half, cut each half in half and then cut each portion into 3.

Slice the rolled dough into 12 even portions.

  • Place the buns into the buttered/lined baking tin.

Pack the Chelsea Buns into a buttered pan.

Cover with a clean cloth, leave in a draught free place until doubled in size – approximately 30-45 minutes.

FF Homemade Chelsea Buns

Baking the buns and adding the lemon drizzle

  • Preheat the oven to 190C/170C fan, 10 minutes before the buns are ready
  • Place the tin in the middle of the oven and bake for 25-30 minutes.
  • The buns are cooked when they are golden and well risen.
  • As soon as the buns are baked remove from the oven.
  • Lift the baked buns out of the tin or use a pallet knife to loosen and lift the buns from the tin.
  • Place on to a cooling rack.
FF Homemade Chelsea Buns
Homemade Chelsea Buns
  • Weigh the icing sugar into a medium bowl. Stir briefly with a balloon whisk to break up any lumps.
  • Add the juice from one lemon.
  • Whisk the mixture together until it is smooth.
  • Either fill a small piping bag with the lemon icing, snip a small hole and pipe the drizzle diagonally across the buns, or use a spoon to drizzle over the icing.
FF Homemade Chelsea Buns
Homemade Chelsea Buns with a lemon icing drizzle.

Time to delve in and devour a bun. They are absolutely delicious warm. Whether it’s a family breakfast around the table, or after a long afternoon walk, these Homemade Chelsea Buns are perfect at any time!

These buns are at their best the day they are made. However a quick and I mean less than 10 seconds, ping in the microwave refreshes them the following day.

If you enjoyed baking these Homemade Chelsea Buns, you may also like:

Knotted Poppyseed Rolls

FF Knotted Poppyseed Rolls
Knotted Poppyseed Rolls

English Muffins

FF English Muffins
English Muffins

Sticky Pecan Sultana Buns

FF Homemade Chelsea Buns
Sticky Pecan Sultana Buns

Creating memories and new traditions is important to me. Food plays a crucial part in that. As we sit round the table for dinner, in front of the telly with snacks, or at the beach with a well packed picnic I am always aware that these will be the times we remember. One special memory, is of a bonfire night, spent with my sister and her family, toasting s’mores around the fire and laughing. That is when feasting truly is fun!

Whatever you are making, baking and creating in your kitchens, have fun preparing and sharing your feast.

Sammie xx

No part of this post may be reproduced or duplicated without the written permission of the owner. Please see my Disclosure Policy.

Sweat yeasted rolls filled with spices and dried vine fruits, overlaid with descriptive text

Share
Facebooktwitterpinterestlinkedintumblr

English Muffins

Share
Facebooktwitterpinterestlinkedintumblr

So today I have one of my greatest accomplishments to share with you. Welcome to my delicious, homemade, English Muffins.

English muffins
English Muffins

Honestly speaking, I am not really sure why I have hesitated so long before making these, all I can say is that I wish I hadn’t. Since these homemade English Muffins are a world away from their shop bought counterparts.

While I have eaten plenty of supermarket muffins in the past, I have always found them a bit heavy and dense and although they’ve been eaten and enjoyed I honestly couldn’t go back now, homemade is the way to go!

Homemade English Muffins
English Muffins

They say that Breakfast is THE most important meal of the day, a couple of these English Muffins will certainly keep you going until lunchtime.

Although we very rarely have tea as a meal anymore, these would be absolutely perfect. A plate piled high with warm, homemade English Muffins, butter, pots of jam, sliced bananas and a large glasses of milk. A scene straight out of an Enid Blyton book!

Freshly made English Muffins.
English Muffins.

I honestly cannot encourage you enough to make these English Muffins. The reward for effort put in is ridiculously good. These don’t require baking either. Just an iron skillet/griddle, if you own one, otherwise a heavy based frying pan will be fine.

A couple of tips:

The dough is quite sticky, but not unmanageable, as long as you dust your working surface well, with flour and polenta (cornmeal) and keep the dough moving whilst rolling out.

No fat needs to be added to the griddle. Simply follow the method and your English Muffins will be fantastic!

Recipe : Makes 12-14 English Muffins

350g/12oz Plain White Flour plus extra for dusting  – I use Shipton Mill 

7g/1 sachet Active Dried Yeast

1/2tsp Honey – the runny kind

7g Salt – I use Maldon 

1 Large Free Range Egg

200ml/7 fl oz Milk – whole or semi skimmed

7g/ 1/4oz Unsalted Butter

2-3 Tbsp Cornmeal/Polenta for dusting

Method :

Making The Muffin Dough

Using a stand mixer with a dough hook attachment or a bread maker,

Lightly whisk the egg into the milk. Pour into the bowl of your chosen machine.

Add the yeast and honey. Mix using clean fingers.

Then add the flour on top of the liquid.

Add the salt and butter.

If using a bread maker set the machine to dough cycle. Press start.

If using a stand mixer, mix on a low speed until all the ingredients have combined, then continue mixing for 5 minutes on a medium speed. Stop the machine, remove any dough from the dough hook and place back into the bowl. Cover the bowl with a clean, damp cloth and leave until the dough has doubled in size – approx. 1 hour.

When the dough cycle has finished, re-start your bread maker on the dough cycle and allow to mix for 2 minutes.

With a stand mixer, remove the cloth, mix with the dough hook for 2 minutes.

While the dough is proving dust 2 baking sheets with a 50/50 mix of flour and cornmeal (polenta is the same thing!).

Prepare the baking sheets by sprinkling with flour and polenta.


Cutting Out The English Muffins

First of all, prepare the work top by dusting with the same flour/cornmeal mixture. Keep some to the side to use whilst working/rolling the dough.

Place the dough onto the prepared worktop
Place the dough onto the prepared worktop.
Roll out the dough, moving it regularly so it doesn't stick, until it is about 1/2 inch thick.
Roll out the dough, moving it regularly so it doesn’t stick, until it is about 1/2 inch thick.

Use a 2.5in (6 and 3/4cm) diameter, plain round cutter to cut the muffin dough.

Place the cutout discs onto the prepared baking sheets.

Bring together the remnants of dough, left from cutting out the discs, knead back together and re-roll. Cut out the muffins as before.

Cover the baking sheets with a dry tea towel and leave the dough to rise, until doubled in size.

After 30-45 minutes proving the dough will have risen and have rounded edges.

Cooking The Muffins

Preheat your griddle/heavy based pan on the hob, over a medium heat.

Place the discs onto a preheated skillet/griddle.
English Muffins cook for 5 minutes and then flip over.

The English Muffins rise in the pan, as the cook before your very eyes. Our children were captivated! Either use a palette knife or fish slice to flip the muffins over.

They are cooked when they are well risen and set (you can pick one up and the sides hold their shape), both top and bottom should be golden brown and they will sound hollow when rapped with you knuckle.

Remove from the griddle.

English Muffins

Place the cooked English Muffins on a cooling rack.

These first 4 English Muffins were cooled for 5 minutes and then eaten straight away. Unbelieveably good.

Continue to cook the remaining muffins in the same way.


English muffins freshly baked on a wooden board.


Tasty Homemade Food

Finally and most importantly, these muffins lasted 5 minutes after I’d photographed them and then they were snaffled away to be eaten! Now that is definitely a sign of a great recipe.

Also, if you’ve never baked bread or cooked with yeast before, these English Muffins are the perfect starting point. No worrying if it is too early to open the oven door and take a peek, the cooking happens right before your very eyes. And if you are unsure if they are cooked through, remove one, cut through with a bread knife and check. What could be easier and more tasty?

And I can guarantee massive smiles all round when you serve up a big plate of these warm, delicious, English Muffins.

The muffins will keep for a couple of days in a bread bin and are delicious, split and toasted. Also, they be placed in a freezer bag, once absolutely cold and kept in the freezer for a month.

The gorgeous board that I’ve displayed the English Muffins on is from House of Frazer, that I picked up in the sale!

Have you put off making something, presuming it will be really hard, only to be surprised when you’ve taken the plunge and made it??

If you enjoyed making these English Muffins recipe you may also want to try other easy bread recipes:

Knotted Poppyseed Rolls

Knotted poppyseed rolls.
Knotted Poppyseed Rolls

Large White Bloomer

Large White Bloomer loaf
Large White Bloomer

Farmhouse White Loaf

Farmhouse style white bread loaf.
Farmhouse White Loaf

Please let me know if you make these, I love hearing from you?

Sammie x

No part of this post may be reproduced or duplicated without the written permission of the owner. Please see my Disclosure Policy.


Share
Facebooktwitterpinterestlinkedintumblr

Blueberry Banana Superfood Smoothies

Share
Facebooktwitterpinterestlinkedintumblr

Hello lovely people, thank you for stopping by to read my blog. I really do appreciate each and everyone of you. So I thought I’d share my latest Summer cool down drink with you, my Blueberry Banana Superfood Smoothies. A fabulously tasty way of cooling and recharging your system.

Four glasses filled with ice cream and fruit based cooling, purple drink.


So, why Superfoods? Because blueberries are full of antioxidants and are known to be good for your nervous system and brain. While bananas are also high in Vitamin C, fibre and can help regulate blood sugar levels. And together they can also help with mood enhancement. Also, these fruits have many other positive affects on the body, especially when eaten raw, which is how they are in the Blueberry Banana Superfood Smoothies.

Four glasses filled with purple Blueberry Banana Superfood Smoothies.
Blueberry Banana Superfood Smoothies


If you’re craving something sweet, as I was and don’t want to dive into a tub of chocolate ice cream, then these refreshing drinks will fix that craving and do your body good at the same time. And yes, there is ice cream and whole milk in this recipe, you can totally switch this recipe up and use frozen low fat yoghurt and skimmed milk. While the bananas will still give the smoothie a creamy taste.

Three glasses filled with naturally coloured vivid purple blueberry banana superfood smoothies.
Blueberry Banana Superfood Smoothies

Keeping Things Sweet!

I was actually really surprised that these smoothies didn’t need extra sweetening, considering the amount of blueberries added. Sometimes blueberries can be a bit tart, but the sweetness of the bananas offsets this, creating the perfect balance. Although I have used frozen blueberries,  fresh are also good. Also, to keep the cold in the smoothie just break the bananas up, pop in a bag and freeze.

Using bought frozen fruits keeps the cost down and gives them a longer use-by date. Yet, I have raspberries growing in our garden and if we have loads I would definitely put them in smoothies. You do whatever works for you! We’re pretty chilled about things like that, bit like the smoothies!

Recipe : Blueberry Banana Superfood Smoothies

400g/14oz Frozen Blueberries – I buy mine from Waitrose most supermarkets sell frozen fruit.

3 Large Ripe Bananas

250ml Whole Milk

4 Large Scoops Vanilla Ice Cream – approx 1/2pint – 300ml

Method :

Making The Purple Smoothies

First of all, peel the bananas, break into pieces and add to the jug of a blender. Add the frozen blueberries, ice cream and milk.

Ingredients for a frozen fruit drink in a blender.
Time to whizz up all the Blueberry Banana Superfood Smoothies ingredients ina blender.

With the lid on securely pulse the blender until the liquid is a unified colour and no lumps remain.

Vivid purple blended cold drink in a blender.
Blueberry Banana Superfood Smoothies

And look at THAT colour! If the mixture is still too thick add more milk. Finally whizz up and then pour into tall glasses.

Blueberry Banana Superfood Smoothies ready to drink.

For the best flavour and nutrition make and drink this smoothie on the same day. Relax, chill out and know those Blueberries and Bananas are doing you good on the inside. And if you switch up the fruit combo be sure to let me know.

If you have enjoyed this recipe for Blueberry Banana Superfood Smoothies then you may also like these:

Fresh Strawberry Simple Syrup

Tumbler filled with ice fizzy water and strawberry syrup, plus one strawberry.
Fresh Strawberry Simple Syrupo

Blueberry Bloom Ice Cream

Scoops of vivid purple blueberry and gin ice Cream in a martini glass.
Blueberry Bloom Ice Cream

Raspberry Banana Ice Cream Smoothies 

Tall glasses filled with candy pink raspberry and banana ice cream smoothies.
Raspberry Banana Ice Cream Smoothies

Since homemade smoothies are so refreshing and you can also adapt the ingredients to what you have on hand. While a stash of frozen fruits will add even more variety to this delicious drink. And then add in ice cream for super hot days when everyone is struggling in the heat and you will have smiley faces all round!

So, whatever you are making, baking and creating in your kitchens, have fun preparing and sharing your feast.

Sammie xx

No part of this post may be reproduced or duplicated without the written permission of the owner. Please see my Disclosure Policy.


Share
Facebooktwitterpinterestlinkedintumblr

Sticky Pecan Sultana Buns

Share
Facebooktwitterpinterestlinkedintumblr

Hi there, how are you today?  These Sticky Pecan Sultana Buns are so easy to make and are perfect for weekend breakfast with a large mug of Coffee!  They truly define the meaning of Lazy Weekend Breakfast Feasting.

FF Sticky Pecan Sultana Buns
Sticky Pecan Sultana Buns

Obviously, you don’t have to restrict eating these at breakfast time or just at the weekend – although, as scrummy as they are, I wouldn’t recommend having them everyday! These Sticky Pecan Sultana Buns are treats, in fact I had them for my birthday brekkie last year (& that was mid week!).

This recipe was inspired by Ina Garten, the Barefoot Contessa herself.  After following her recipe a few times I fiddled with it a bit.  The buns were scrummy, but I wanted Pecan nuts inside my buns and preferred the use of Sultanas.  I also changed the ratio of ingredients, as I changed from American cup measures to Metric weight.  I was extremely pleased with the results, I hope you will be to and this easy recipe will inspire you to have a go at making these buns!

Pecan Sultana Sticky Buns www.feastingisfun.com

Upside down buns

Firstly, I should say that these Sticky Sultana Pecan Buns are made upside down!  That is, they are very similar, in method, to an upside down cake – meaning that you place a brown sugar/butter mixture along with Pecan nuts into the bottom of a deep muffin/cupcake tin, place the buns in top and then when cooked turn the buns out so the bottom of the bun becomes the top!

Don’t worry!  It’s not as confusing as it sounds and I am ALWAYS amazed that the buns turn out perfectly, they never stick and always look so impressive for such little effort.  In fact it really is a Ta Dah moment (I imagine a drumroll in my head!) that never ceases to amaze me and I always end up with a huge smile on my face!

Just a quick note : A proper deep muffin/cupcake tin must be used for this recipe.  A bun/fairy cake tin is too shallow, not only will it be too small for your buns, but you’ll also end up with butter dripping all over your oven.  I also place a baking sheet, a little larger than my cupcake tin, on the rack below, just in case any butter bubbles up and drips over – soo much easier to clean than the whole oven!!

Recipe : Makes 12 Sticky Pecan Sultana Buns

For the Topping:

150g/5oz  Butter – unsalted and softened

75g/3oz Light, Soft Brown Sugar

100g/4oz Pecan Nuts – roughly chopped

1/4tsp Salt – I use Maldon

For the Buns :

450g/1lb Pack Shop Bought All Butter Puff Pastry

1tbsp  Butter – melted

1 1/2tsp  Cinnamon

150g/5oz Light, Soft Brown Sugar

250g/9oz  Sultanas

100g/4oz Pecan Nuts – roughly chopped

Method :

Preheat the oven to 200C (180C fan), 400F, gas mark 6

Making The Sticky Bun Topping

Firstly, for the topping of the buns mix the softened butter, sugar and salt until well combined.

Using a teaspoon (not a teaspoon measure) scoop 1/2 a teaspoon of the butter/sugar mixture and place into the bottom of the muffin tin, repeating 11 more times.

1/2 a teaspoon is just enough!
Each muffin cup has a dollop of the sugar/butter mixture!

Next, divide the 100g of Pecan nuts between each of the muffin cups, placing them on top of the sugar/butter mixture.  Remember, although this is going into the bottom of the tin, when turned out this will become the topping of the Sticky Pecan Sultana Buns!

The Pecan nuts become caramelised, golden and sticky during cooking. Yummy!!

Assembling The Buns

Lightly dust the worktop with plain, white flour.  Roll out the all butter puff pastry, with a floured rolling pin. You need a square shape that is approx 34 x 34cm.

All butter pastry really is essential as it adds to the flaky, buttery flavour of the buns.

Next, trim the top and bottom of the pastry square and brush with the melted butter.  Then sprinkle the sugar evenly over the whole of the square.

Don't worry about the odd few lumps in the sugar, they'll just add to the stickiness of the buns!!
Don’t worry about the odd few lumps in the sugar, they’ll just add to the stickiness of the buns!!

Sprinkle the cinnamon evenly over the sugar layer.

The smell of cinnamon fills the house when these buns are baking.

Now you can sprinkle firstly the Sultanas and the the chopped Pecan nuts, so they cover the pastry evenly.

Nice and evenly spread, now it's time to get a-rolling!!!
Nice and evenly spread, now it’s time to get a-rolling!!!

Starting at the front edge of the pastry, evenly roll over the edge of the pastry, tucking it under itself ( not too tightly). Then proceed to roll until you have a log shape, with the join underneath.

A nice even roll along the front edge of the pastry.
Keep rolling so the pastry is an even log shape.
Trim the side edges of the log.

Shaping the buns

Next, using a sharp knife, mark the middle of the log. Then mark each half of the log in the middle. Now divide each marked section into 3 separate pieces. You should now have 12 buns!

Use a very sharp knife to slice through each section - so you get a nice clean edge to each bun.
Use a very sharp knife to slice through each section – so you get a nice clean edge to each bun.

Carefully place each bun, cut side up, on top of the butter/sugar/Pecan mixture in the muffin tin. Squish a little bit if needed and don’t worry if a little of the filling falls out in transit, you can always pop errant Pecans and Sultanas into any gaps once all the buns are in the muffin tin!

All ready to be popped into the preheated oven.

Baking the Sticky Pecan Sultana Buns

Place the tin into a preheated oven and bake for 30 minutes. The Sticky Pecan Sultana Buns are cooked when the pastry is golden and puffed.

Ooh yummy! But be careful, they will come out of oven very hot.

I just love to watch them bubbling and breath in their cinnamon scent when they first come out of the oven – it’s the little things in life that give me most pleasure!!!!!

Turning The Sticky Pecan Sultana Buns Out

Wait a few (3 ish but no longer than 5) minutes, then wearing oven gloves place a baking sheet (that is at least the same size as your muffin tin) over the top of the muffin tin and turn over. I promise the buns will drop out! Remove the muffin tin and stare in amazement at your gorgeous Sticky Pecan Sultana Buns– all 12 of them!! See I told you, they really are easy and they turn out every single time.

Perfectly turned out Sticky Pecan and Sultana Buns.

Leave to cool – remember all that bubbling and sizzling was butter and sugar boiling very hot!!

Serve warm with nothing but a hot drink of your choice, sit back, relax and smile!

Made for sharing

These Sticky Pecan Sultana Buns are perfect for breakfast, brunch, mid afternoon coffee. I think these are at their most delicious shared with friends and family who unexpectedly pop round! These are best served warm, so pop in a 140C oven whilst the kettle boils and serve with a steaming cup of coffee and a smile!

These scrummy Sticky Pecan Sultana Buns keep well in an airtight container for up to 5 days. They can also be frozen for up to 1 month. When needed, remove from freezer, place on a baking sheet and allow to defrost (this doesn’t take long 1-2 hrs depending on the room temperature), refresh and warm in a 180C oven for 5 minutes and serve.

FF Sticky Pecan Sultana Buns
Sticky Pecan Sultana Buns

I really hope that you give the Sticky Pecan Sultana Buns a try as not only are they easy to make, they are scrumptious and everyone who tries them has a big smile on their face!!!

Sammie x


Share
Facebooktwitterpinterestlinkedintumblr