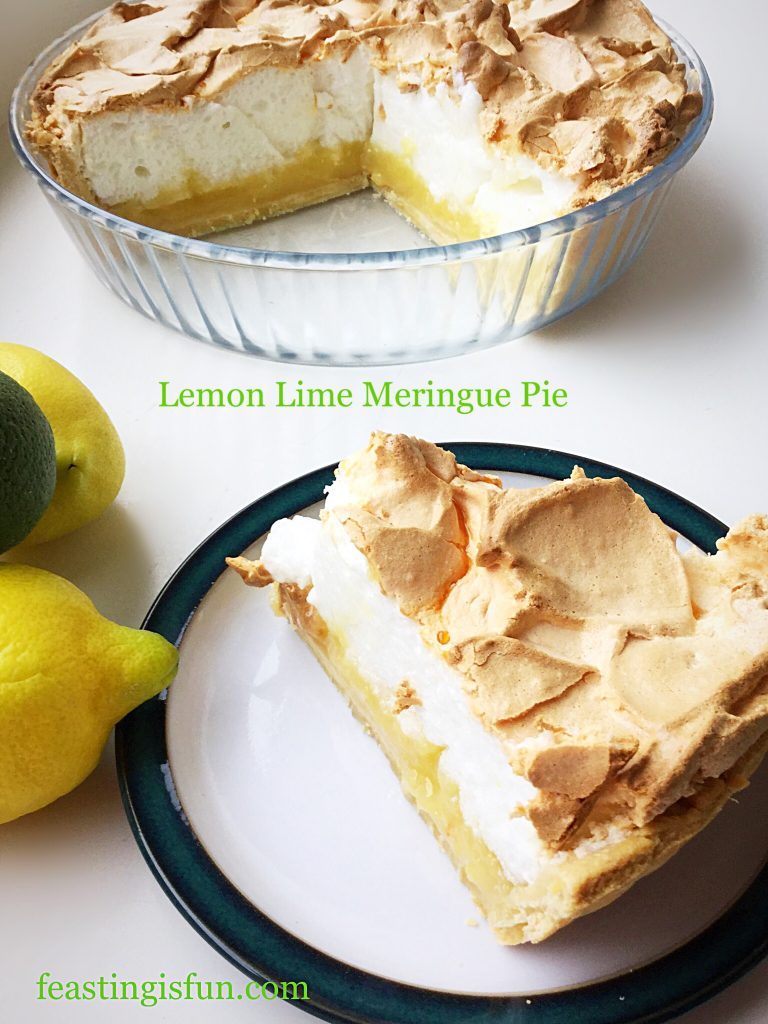
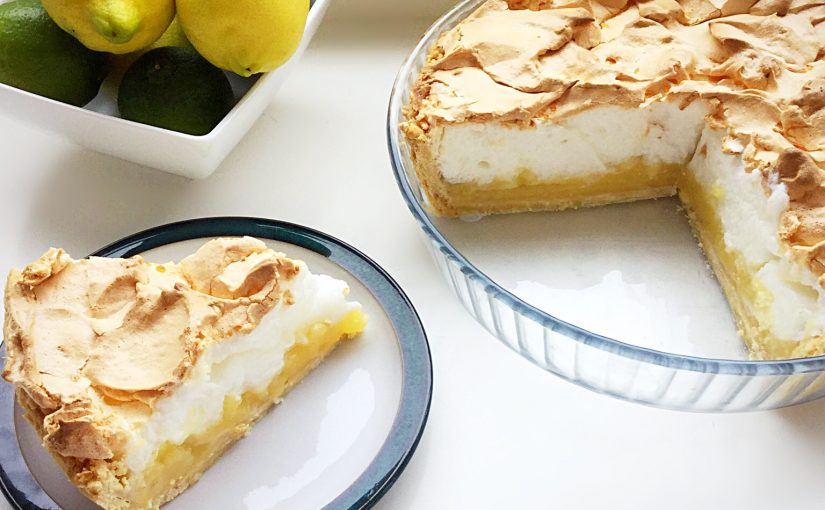
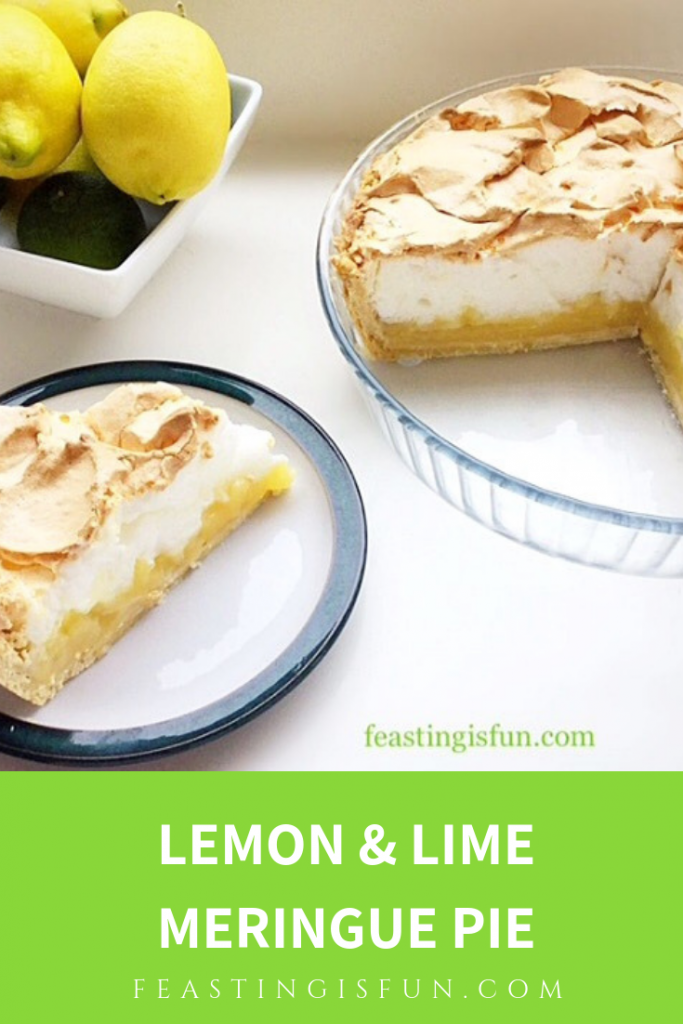
Lemon Lime Meringue Pie

It is no secret that I love both sweet and savoury recipes that include lemon or lime. My Lemon Ripple Ice Cream is a favourite not just with me, it is also one of the most popular recipes on this blog. Lime too, with its softer and more floral flavour is also a winner, showcased here in my Lime Ripple Luxury Ice Cream. This Lemon Lime Meringue Pie combines both fruits in the curd, creating an utterly sublime dessert dish.
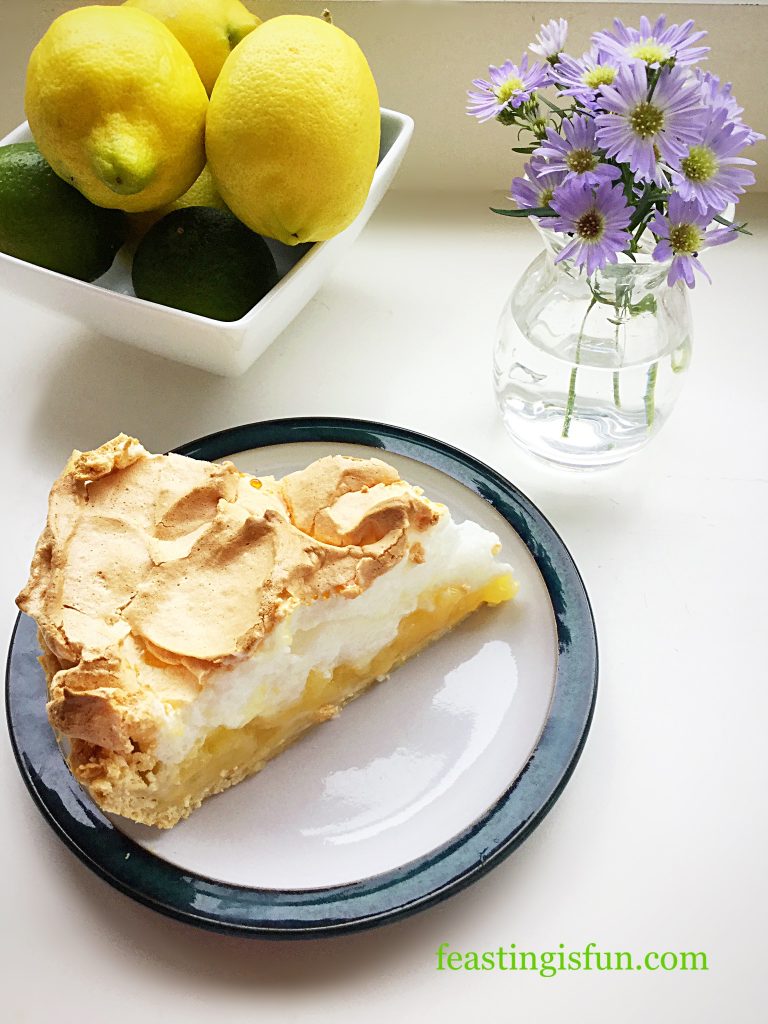
FF Lemon Lime Meringue Pie

FF Lemon Lime Meringue Pie
Lemon Lime Meringue Pie

Pyrex, quality kitchenware

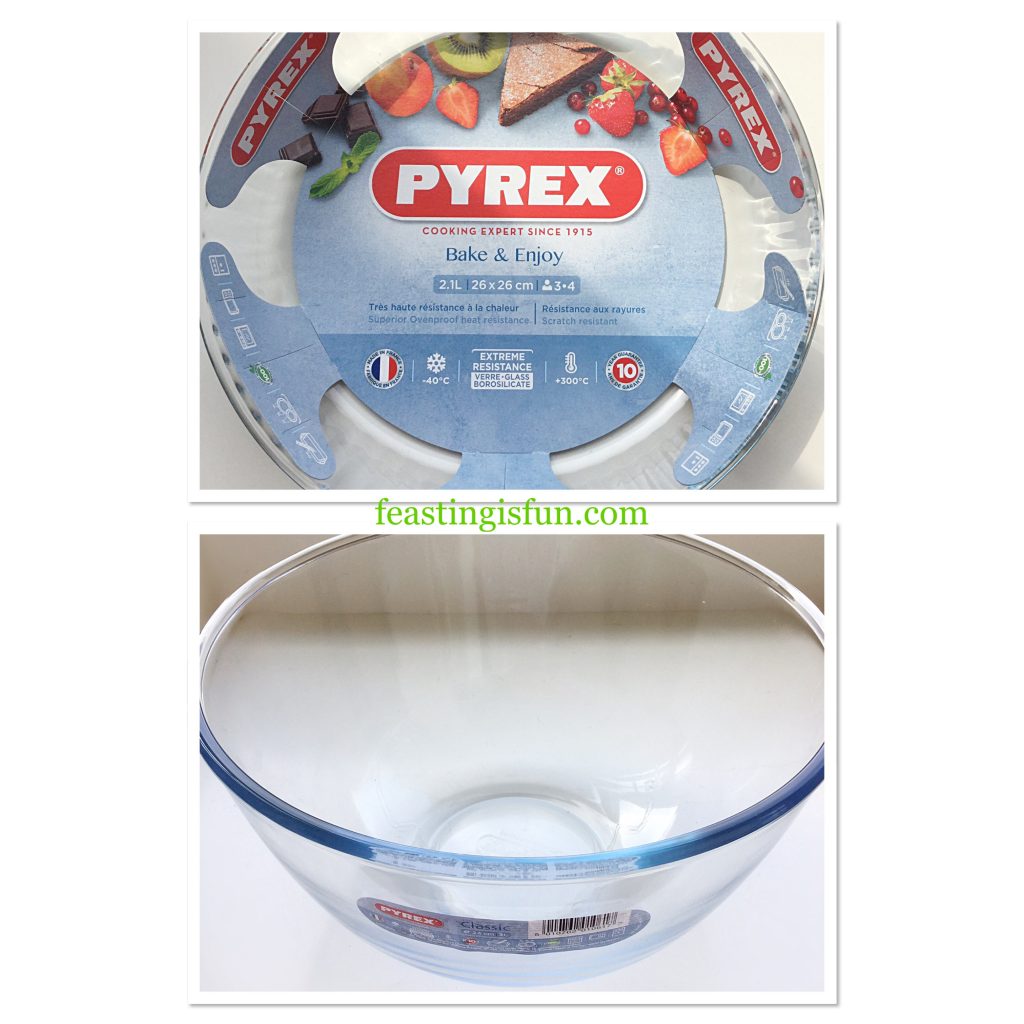
I was sent a Pyrex deep 26cm glass fluted flan dish and a Pyrex 3L classic glass bowl by Maha Home and I must say that both products were well packaged. When ordering online this really is of key importance to me. As soon as they were unwrapped I was keen to make a dessert that would show off both products. Pyrex have a recipe for Lemon and Lime Meringue Pie on their website and I used this as the basis for my dish. Since I naturally tweak anything I make, the recipe given is my interpretation of the original.
FF Lemon Lime Meringue Pie
Pyrex 26cm deep flan dish and 3L bowl.

Since I have been on the hunt for a deep flan dish I was particularly excited to try this out. As I have mentioned in previous posts, any new kitchen equipment has to earn it’s cupboard space in my home. Because, let’s face it, very few people have massive kitchens with tons of space! What Maha Home did not know, is that I already have and regularly use the 3L Pyrex glass bowl. I most certainly have room for 2 of these deep, hard wearing bowls in my kitchen.
FF Lemon Lime Meringue Pie
Lemon Lime Meringue Pie

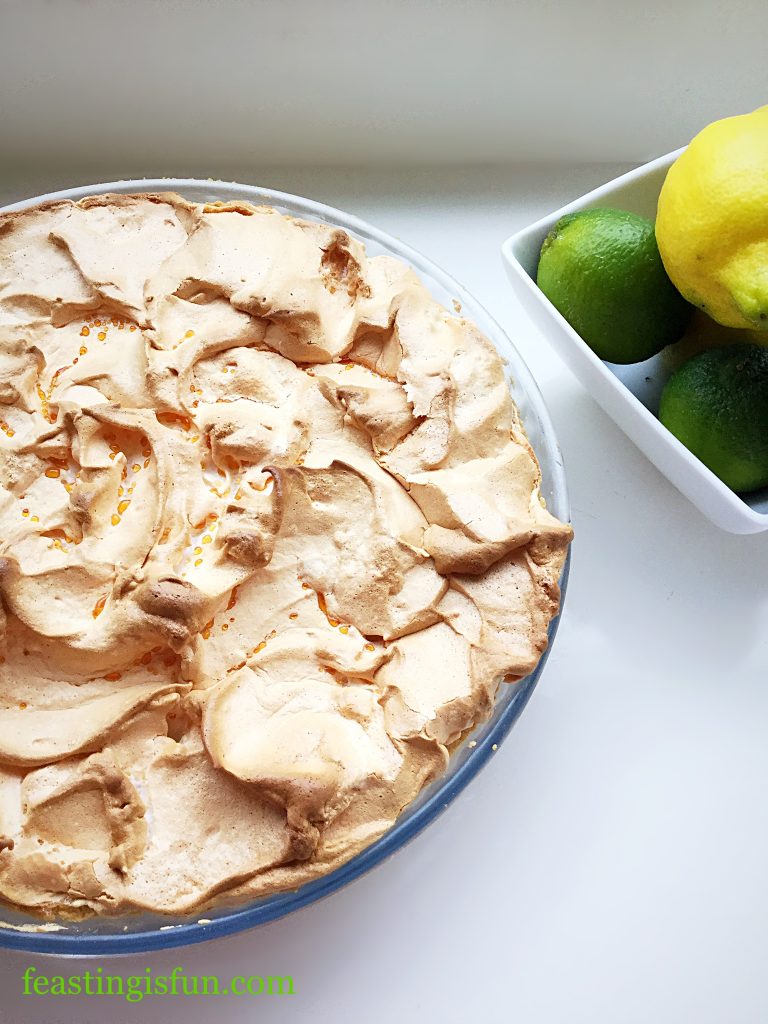
Creating The Layers In A Lemon Lime Meringue Pie

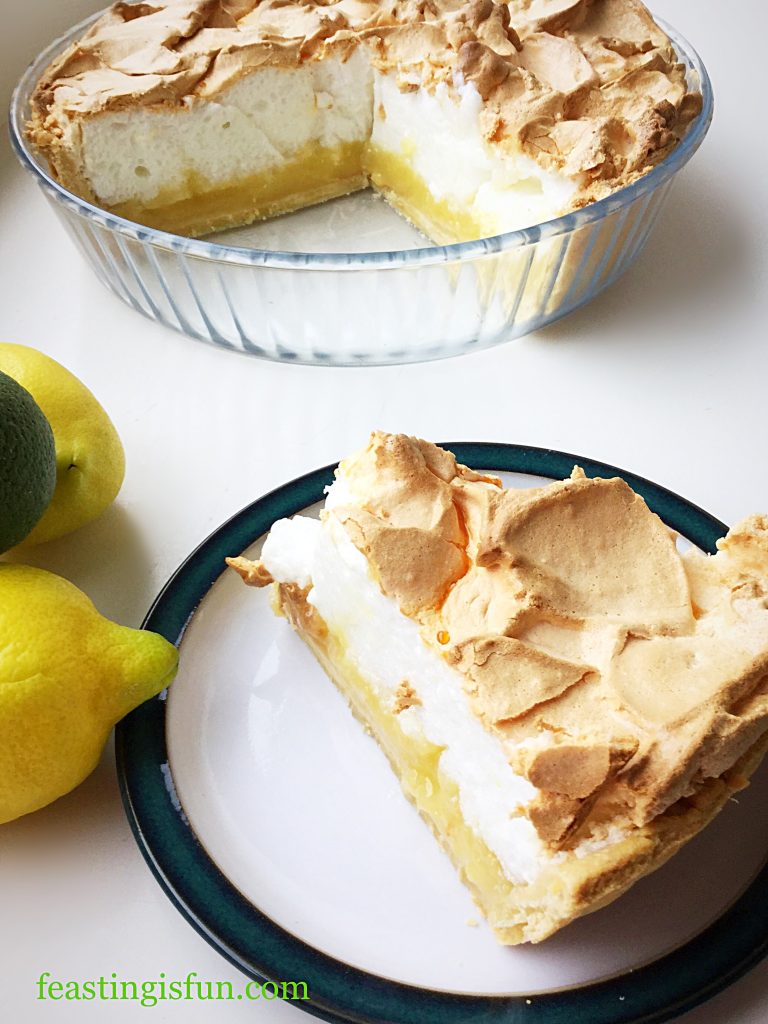
Creating the Lemon Lime Meringue Pie involves four separate stages. First of all making and baking the pie crust shell. Zesting, juicing and cooking the lemon and lime curd. Whisking up egg whites with sugar to create the light, airy, meringue topping and finally assembling and baking the pie. While there are four stages, making this pie does not feel like a chore. Since each step is relatively quick and the pie crust and curd can be made the day before, breaking the process down even further.
FF Lemon Lime Meringue Pie
Lemon Lime Meringue Pie

I made this pie on an extremely hot and humid day. In doing so I learned a thing or two. Most importantly is to make the meringue topping at the very last minute, literally just before it needs to be spooned on to the pie. Making it any earlier can cause it to lose volume. Also, once baked and cooled the pie must be refrigerated. Doing so allows the curd to set and makes for easier slicing. Finally, once chilled this pie is easy to transport, making it an ideal dessert to take to friends and family.

Recipe: Lemon Lime Meringue Pie serves 8-10

For the pie crust:

450g/1lb Shortcrust Pastry – I used my Perfect Butter Shortcrust Pastry recipe.  If buying ready made ensure it is all butter

1 tsp Vegetable Oil for greasing the flan dish – I used Rapeseed oil

For the filling:

3 Fresh Lemons – finely zested and juiced

2 Fresh Limes – finely zested and juiced

175g/6oz Caster Sugar

300ml/ 1/2 pint Water

6 tsp Cornflour (cornstarch) I use Doves Farm

4 Large Free Range Egg Yolks

For the topping:

4 Large Free Range Egg Whites I use Burford Brown Eggs from Clarence Court

150g/5oz Caster Sugar

3 tsp Cornflour (cornstarch)

Method: Preheat oven to 220C/200C fan, 425F,  gas mark 7

Making the shortcrust pie case

  • First of all make the pastry and place in the fridge to chill for one hour.
  • Pour one teaspoon of oil into the Pyrex flan dish. Using a clean sheet of kitchen paper ensure the inside of the dish is lightly coated in oil, taking special care around the inner rim.
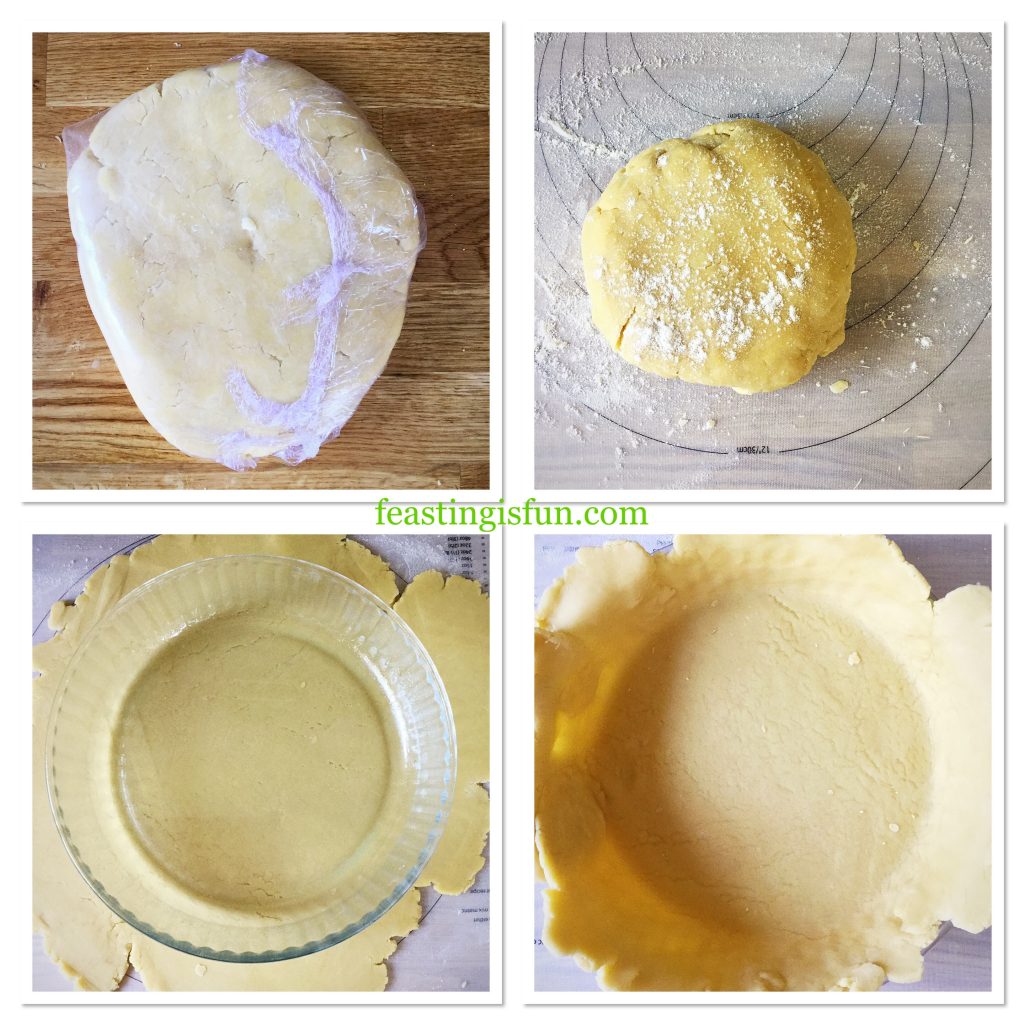
  • Remove the pastry dough from the fridge and place on a lightly floured worktop.
  • Knead the dough lightly so that it becomes pliable, taking care not to overwork it as this will result in a tough pastry crust.
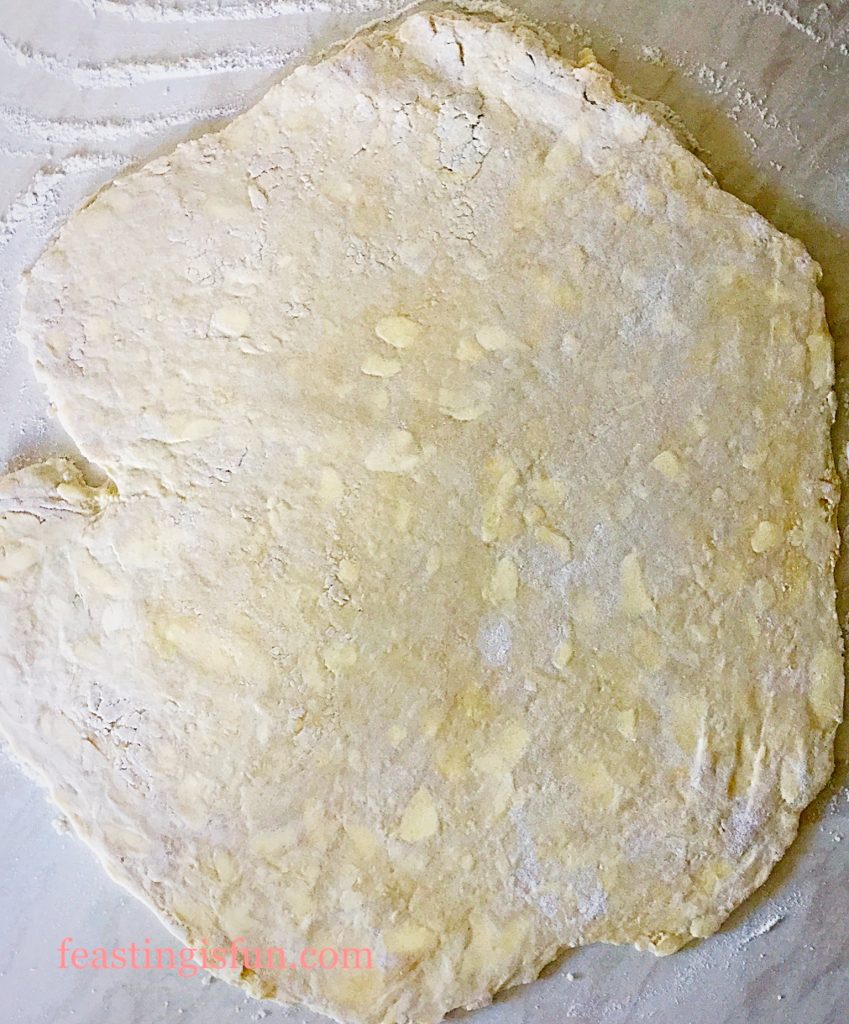
  • Roll out the pastry so that it is slightly bigger than the flan dish – see photo below.
  • Wrap the pastry over the rolling pin and place over the flan dish.
FF Lemon Lime Meringue Pie
Rolling out the chilled pastry to fit the flan dish.
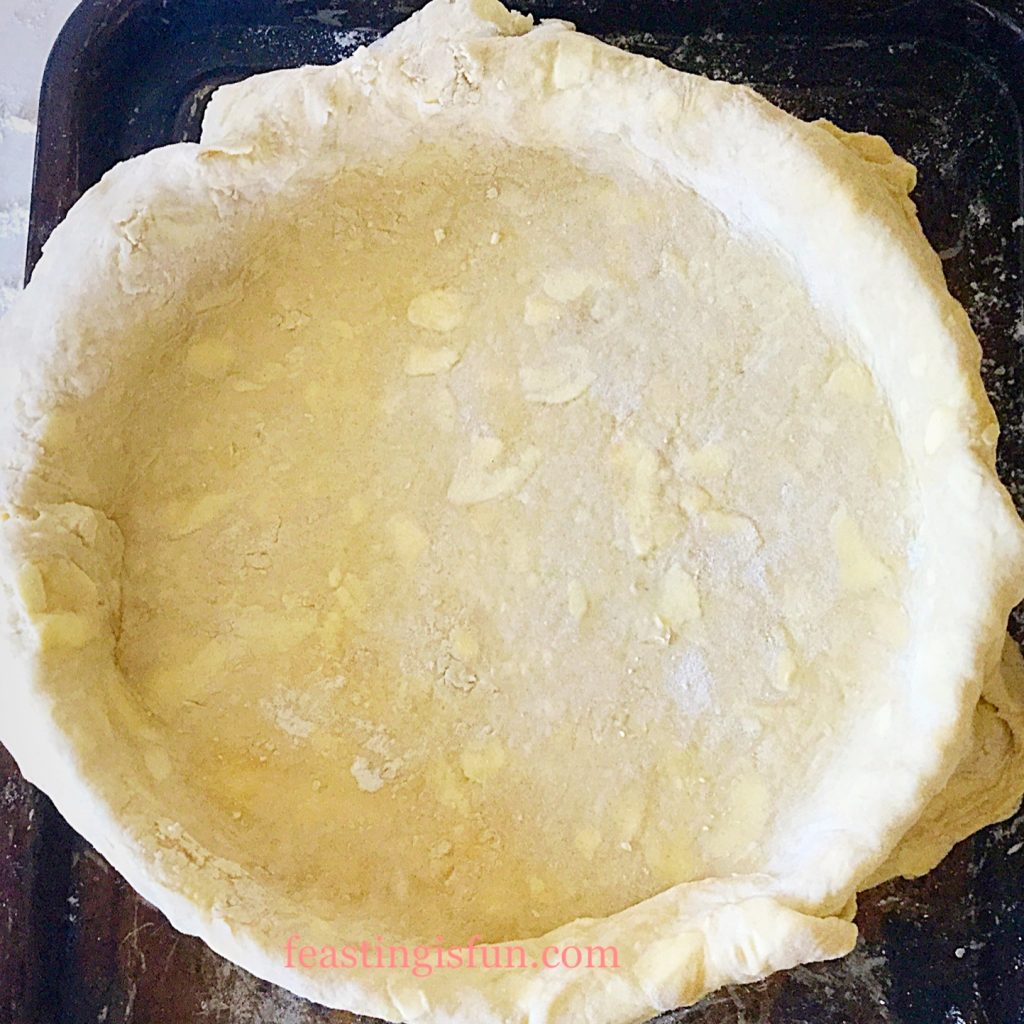
  • Press the pastry into the flan dish taking care not to stretch it, as this will cause the pastry to shrink on baking. Also if the pastry tears, patch using a little of the leftover pastry with a tiny amount of water.
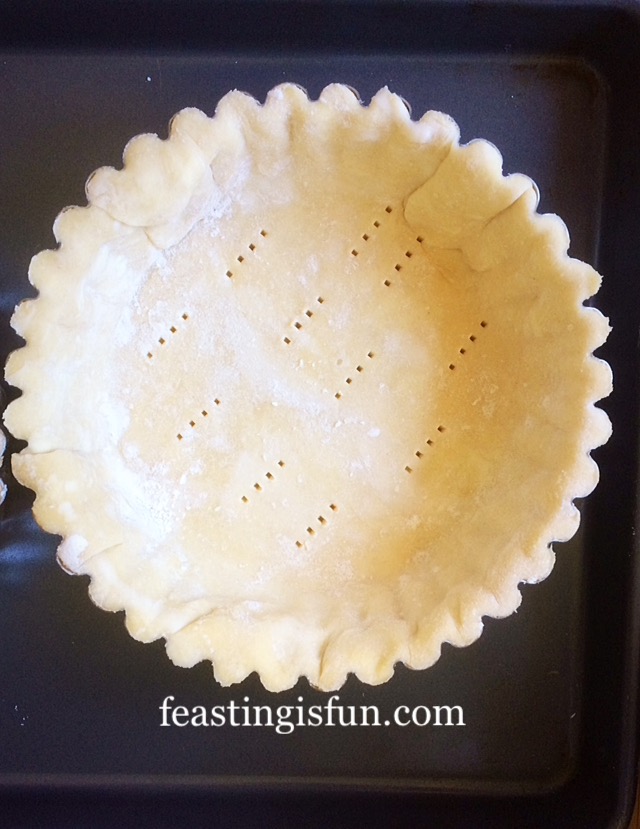
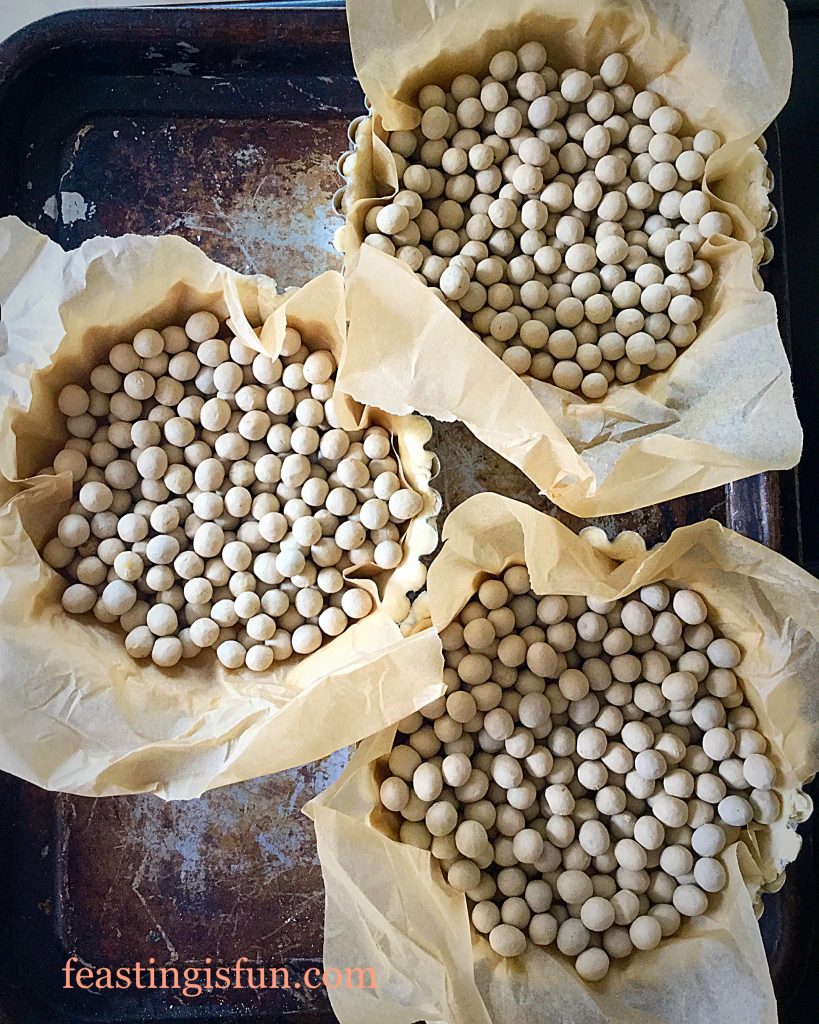
  • Trim the pastry and dock the bottom with a fork. Add baking parchment and baking beans.
  • Place on to a baking tray and into the centre of a preheated oven and bake for 15 minutes.
  • Remove the pie crust, immediately reduce the oven temperature to 200C/180C fan, 400F, gas mark 6.
  • Lift out the baking beans, taking care as they are hot.
  • If any cracks have appeared in the pastry patch, as before, using leftover pastry.
  • Return the pie crust to the cooler over and bake for a further 7 minutes.
  • As soon as the pie crust is baked remove from the oven.
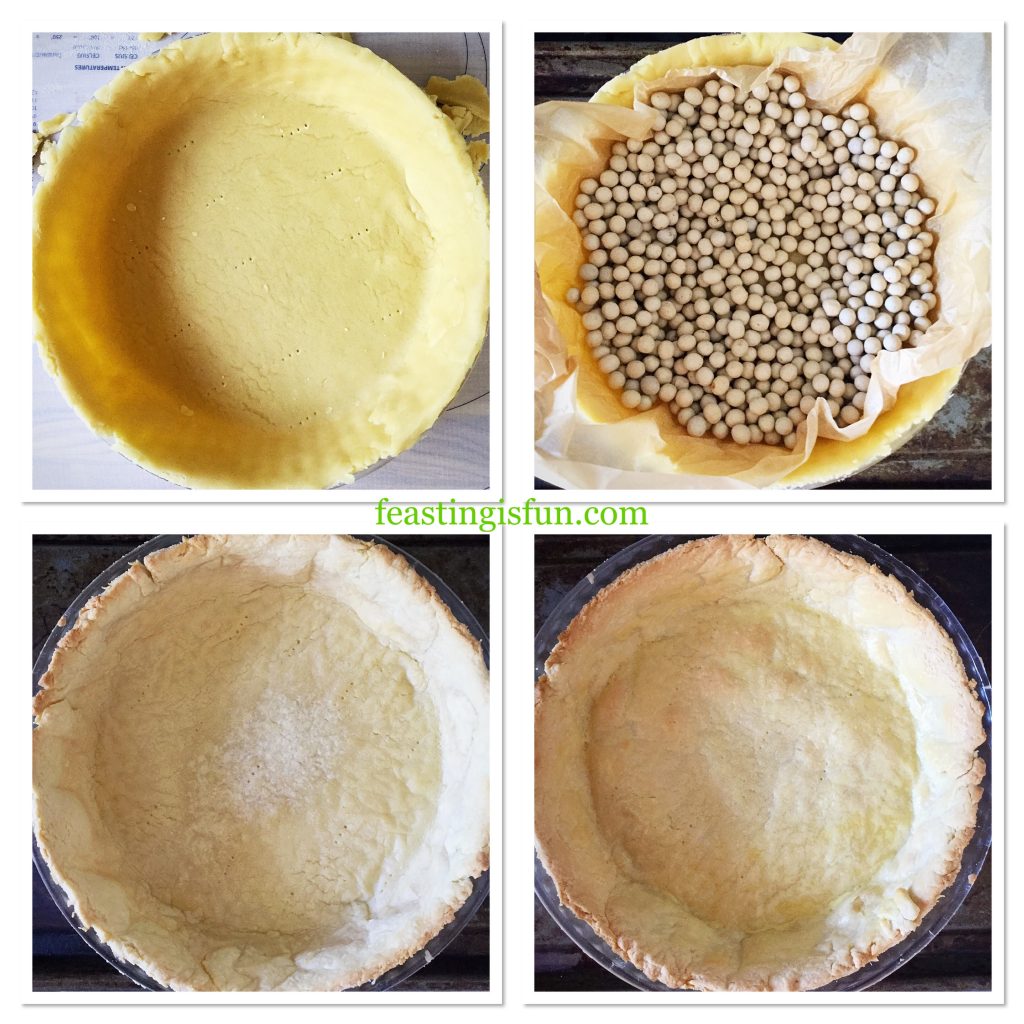
FF Lemon Lime Meringue Pie
Trimming and baking the pie crust.
  • While the pie crust is baking make the curd.

Making the lemon lime curd filling

  • Into a large, heavy bottomed saucepan add the lemon and lime zest and juice. Also add the water, sugar and cornflour. Gently mix with a whisk until there are no lumps.
  • Cook the liquid over a medium heat, stirring continuously.
  • As soon as the liquid has thickened and has turned from cloudy to clear turn off the heat.
  • Leave to cool for 5 minutes and then whisking continuously add the egg yolks one at a time.
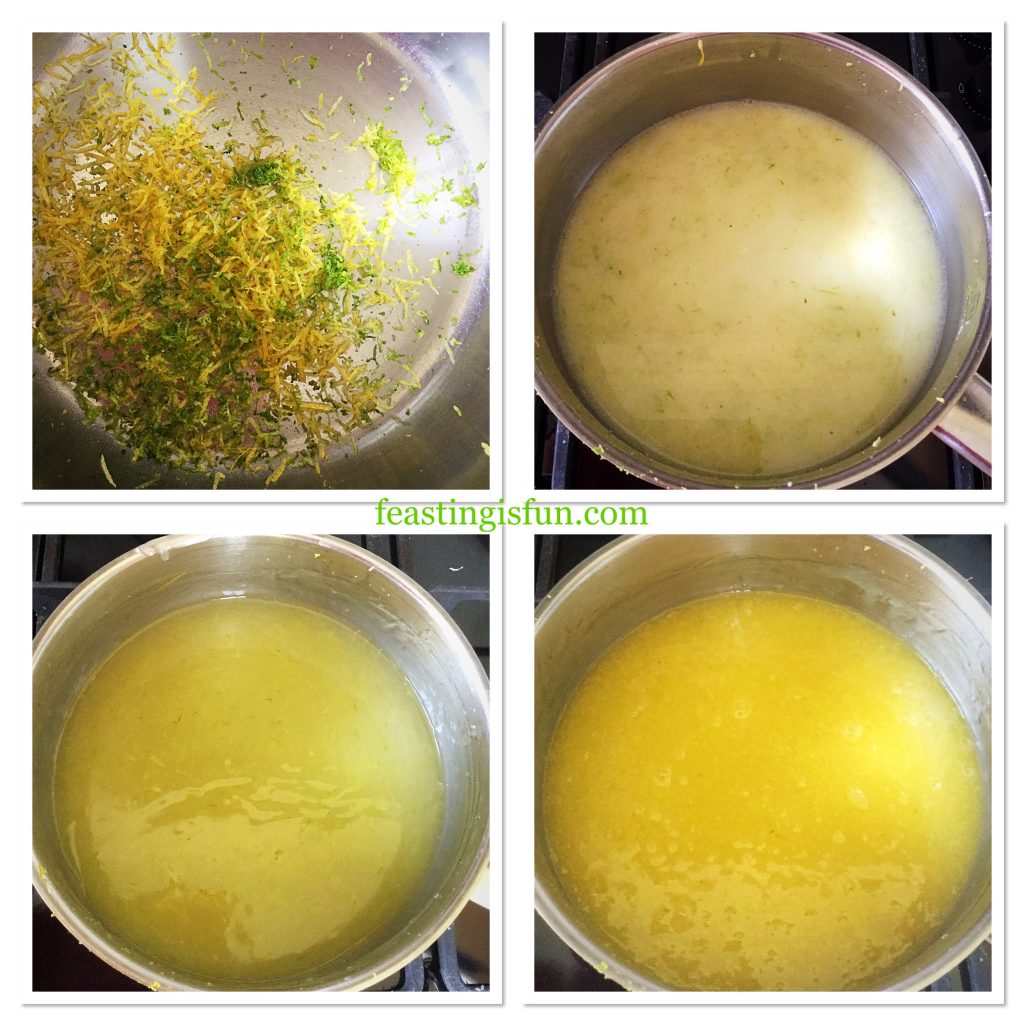
FF Lemon Lime Meringue Pie
Making the lemon and lime curd.
  • Pour the curd through a sieve into a wide jug. Press the liquid through using a clean spoon.
  • Place cling film directly on to the top of the curd, this will stop a skin from forming.
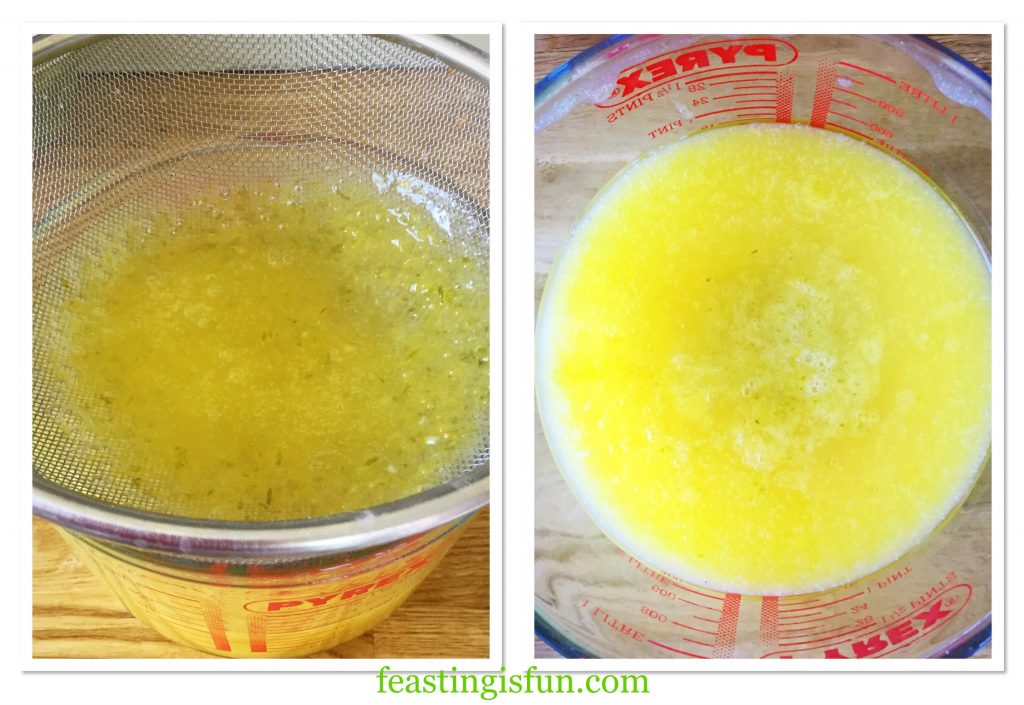
FF Lemon Lime Meringue Pie
Sieving the lemon and lime curd.
  • Just before you are about to assemble the pie make the meringue topping.

Whipping up the meringue topping

  • Into a large, scrupulously clean bowl add four large egg whites.
  • Whisk until the egg whites form stiff peaks.
  • Continue whisking adding a tablespoon of sugar at a time, until half of the sugar is incorporated.
  • Add the remaining sugar and one teaspoon of cornflour.
  • Using a large metal spoon fold the dry ingredients into the meringue, taking care not to deflate the air whisked into the meringue.
FF Lemon Lime Meringue Pie
Making the meringue topping
  • To assemble the pie ensure the oven is preheated to 200C/180C fan, 400F, gas mark 6.

Assembling and baking the pie

  • Remove the cling film from the curd and stir.
  • Pour the lemon and lime curd into the pie shell.
  • Spoon over the meringue so that the top of the pie is covered. Ensure the meringue touches the crust around the rim of the pie.
  • Place the pie on to a baking tray and put in the centre of the oven.
  • Bake for 25 minutes. If after 10-15 minutes the top is browning too quickly reduce the heat by 20C.
  • After the baking time has elapsed turn the oven off and leave the pie to cool in the oven for 30 minutes. This helps set the meringue and stop it from cracking.
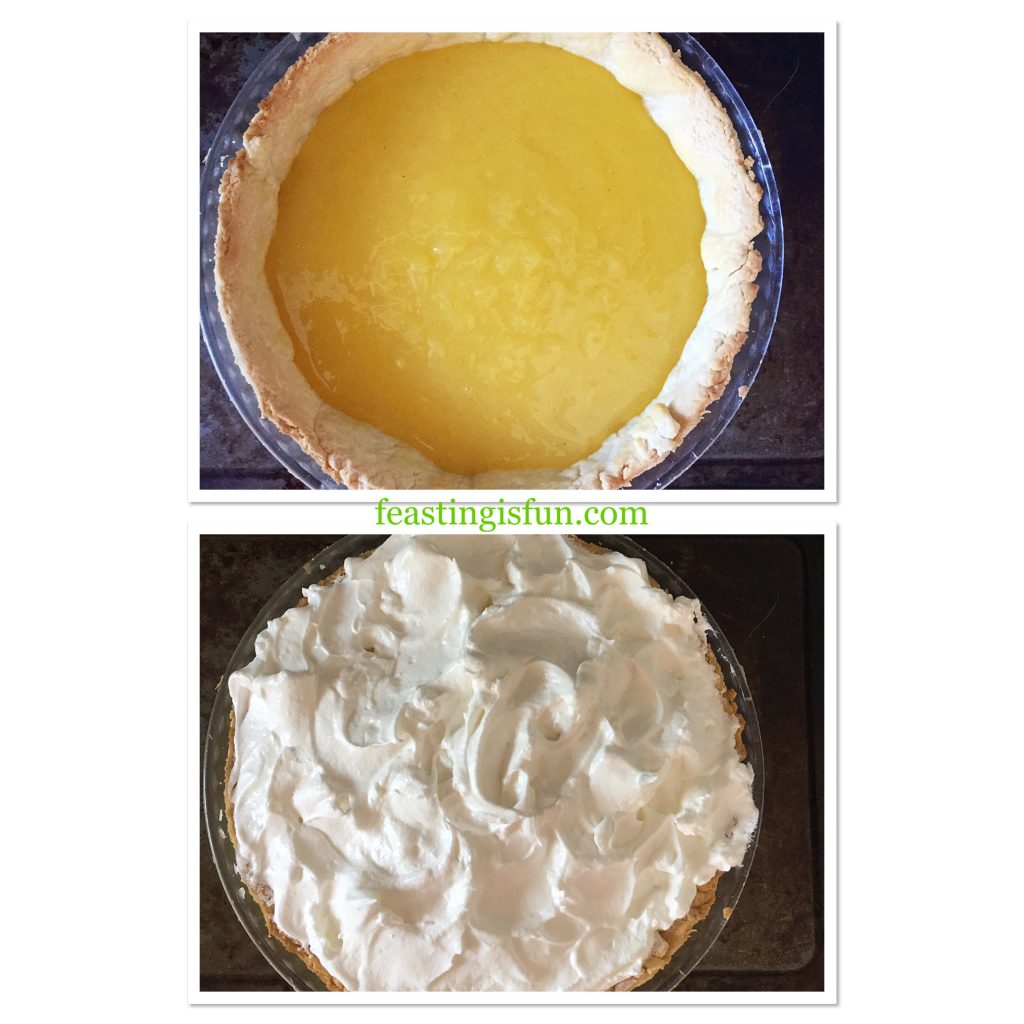
FF Lemon Lime Meringue Pie
Assembling the Lemon Lime Meringue Pie ready to bake.
  • After the oven cooling time has elapsed remove the pie from the oven and leave to cool to room temperature.
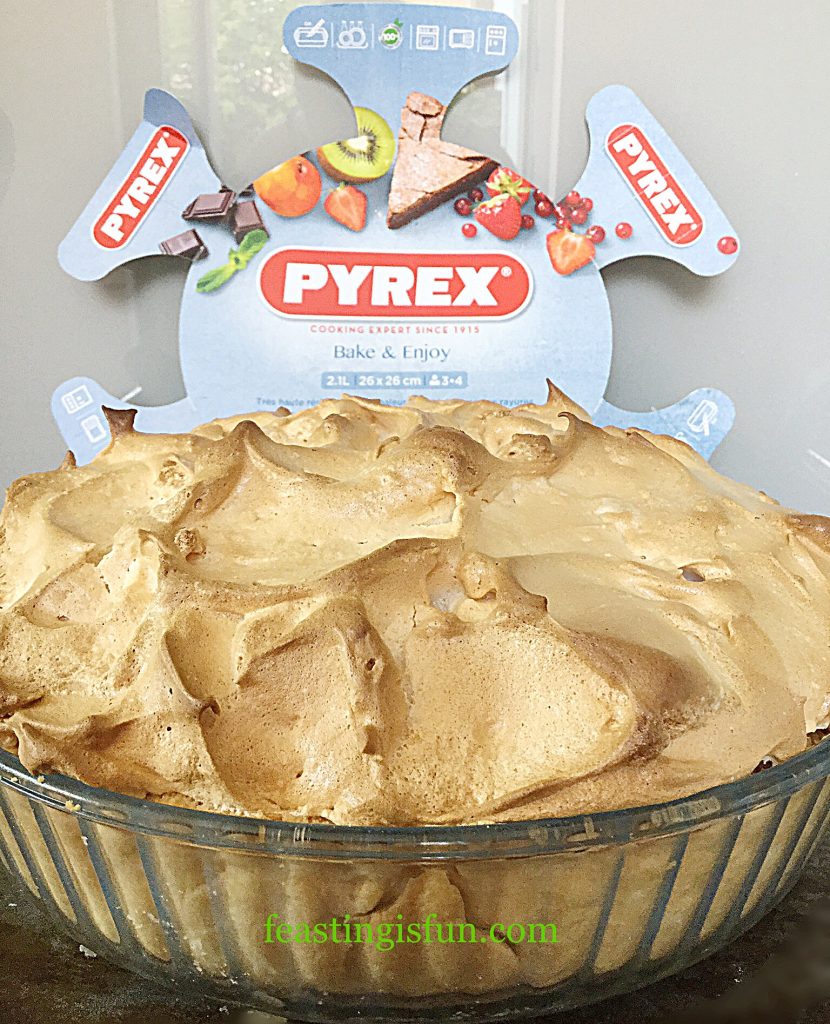
FF Lemon Lime Meringue Pie
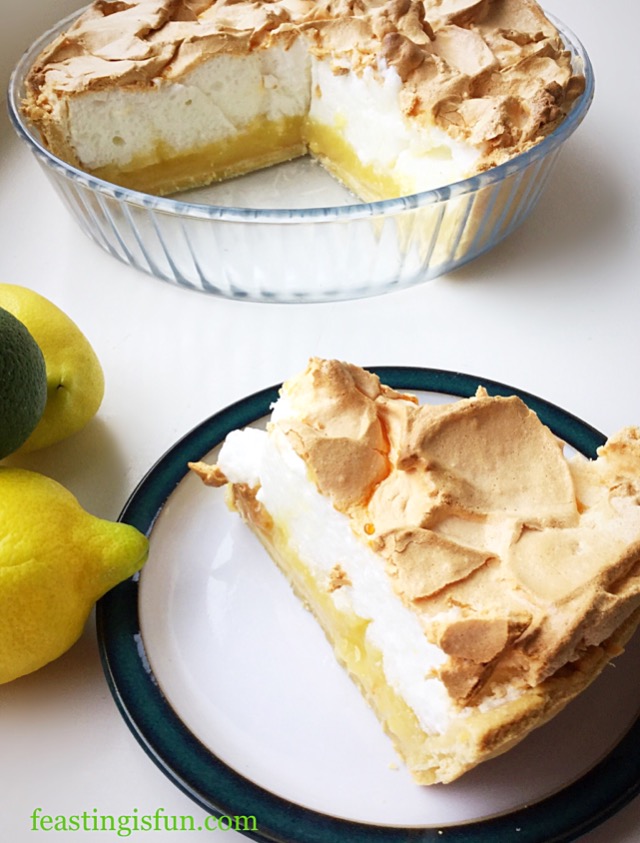
Caramel crusted Lemon Lime Meringue Pie
  • Refrigerate the cooled pie for at least 4 hours, ideally overnight before serving.
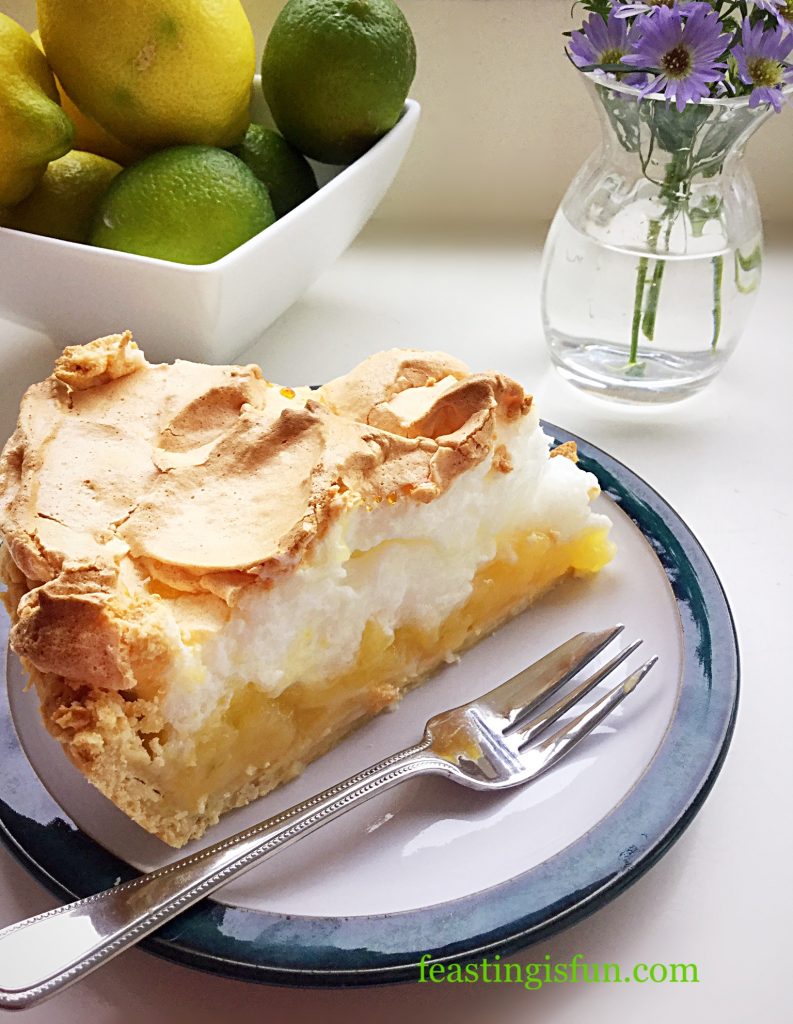
FF Lemon Lime Meringue Pie
Lemon Lime Meringue Pie

Serve slices of chilled Lemon Lime Meringue Pie as a refreshing dessert, or an afternoon treat.

Both pie crust and curd can be made a day ahead. Cool both, wrap the cold pie crust in foil and place somewhere cool and dry. Cling film the top of the jug and refrigerate the curd.

If you have enjoyed this recipe for Lemon Lime Meringue Pie you may also like these:

Raspberry Topped Lemon Curd Pavlova
FF Lemon Lime Meringue Pie
Raspberry Topped Lemon Curd Pavlova

Lemon Drizzle Cake

FF Lemon Lime Meringue Pie
Lemon Drizzle Cake 

Raspberry Lemon Celebration Layer Cake

FF Lemon Lime Meringue Pie
Raspberry Lemon Celebration Layer Cake
Lemon Curd Sponge Tart

FF Lemon Curd Sponge Tart
Lemon Curd Sponge Tart

Good quality kitchenware is essential to me in my cooking and baking. While Pyrex is a well known brand, made from toughened glass, baking with this flan dish has reminded me why it is such a vital kitchen staple. Even the jug (which is my own), used to capture the sieved curd is used daily in our house. For everything from microwaving milk for hot chocolate, to making jelly for a trifle. I will definitely be using both the bowl and flan dish frequently in my kitchen. Anyone for quiche?

Whatever you are making, baking and creating in your kitchens, have fun preparing and sharing your feast.

Sammie xx

Maha Home gifted me both the Pyrex deep flan dish and 3L large bowl for the purpose of reviewing. All opinions and views are my own. I have not been paid to write this post, neither do I receive any payment following sales of product as a result of this post.

No part of this post may be reproduced or duplicated without the written permission of the owner. Please see my Disclosure Policy.
FF Lemon Lime Meringue Pie
Lemon Lime Meringue Pie


Cheddar Tomato Basil Quiche

It would seem that Monday’s have become quiche days. This was not intentional, although I haven’t been cooking Sunday roasts for the last few weeks, so that may explain it. Plus we all love quiche in our house. It’s easy to make and bake in the morning, ready for a quick reheat in the evening for dinner. So today I give you my Cheddar Tomato Basil Quiche.

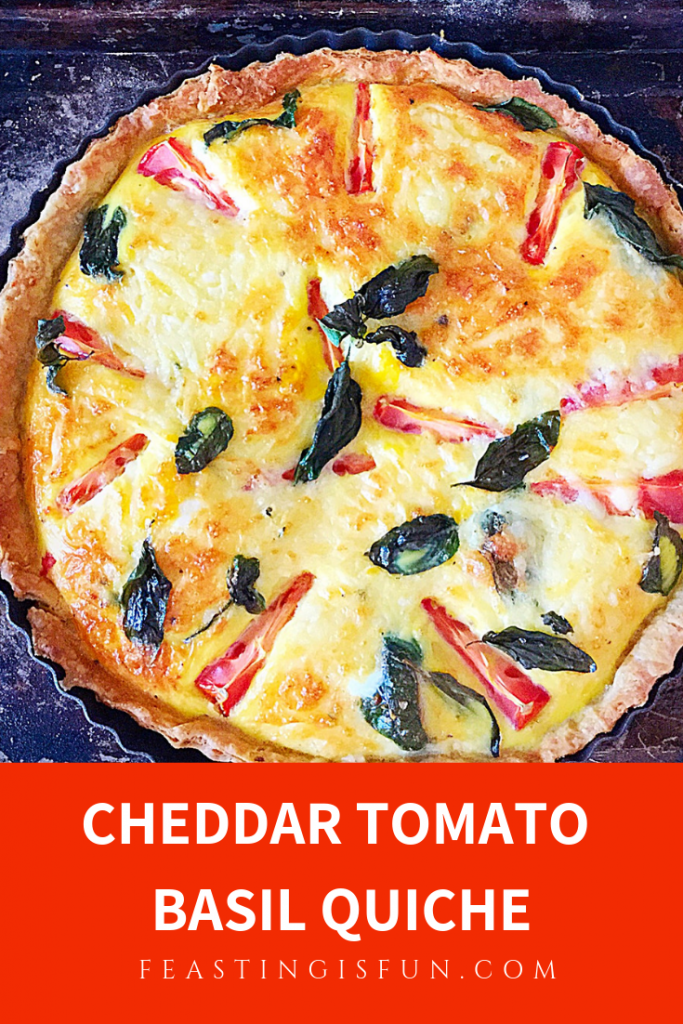
Pinterest sized image of quiche with descriptive graphics.

Now if you’re a little quirky like I am, you’ll understand why quiche is one of my most favourite pastry dishes. It’s the ratio of pastry to filling that I love. Technically a tart, a quiche has no pastry top. So this Cheddar Tomato Basil Quiche has sides and a base of delicious, homemade, all butter shortcrust pastry and lots of eggy filling.

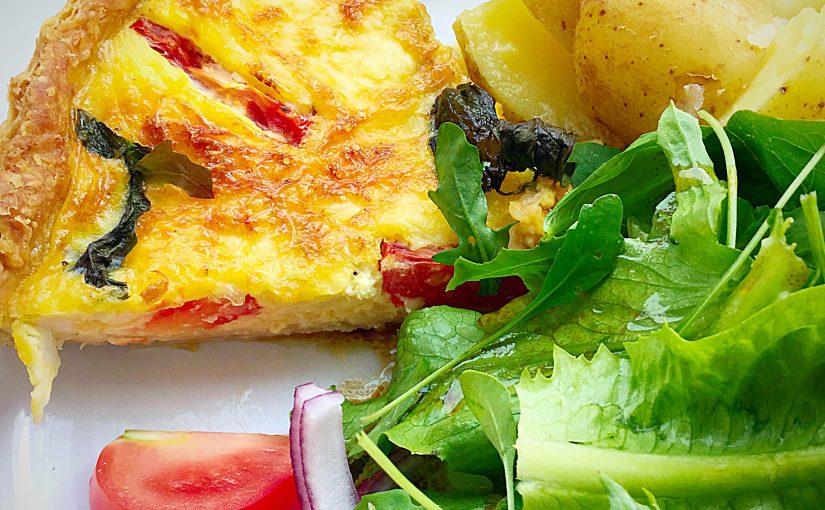
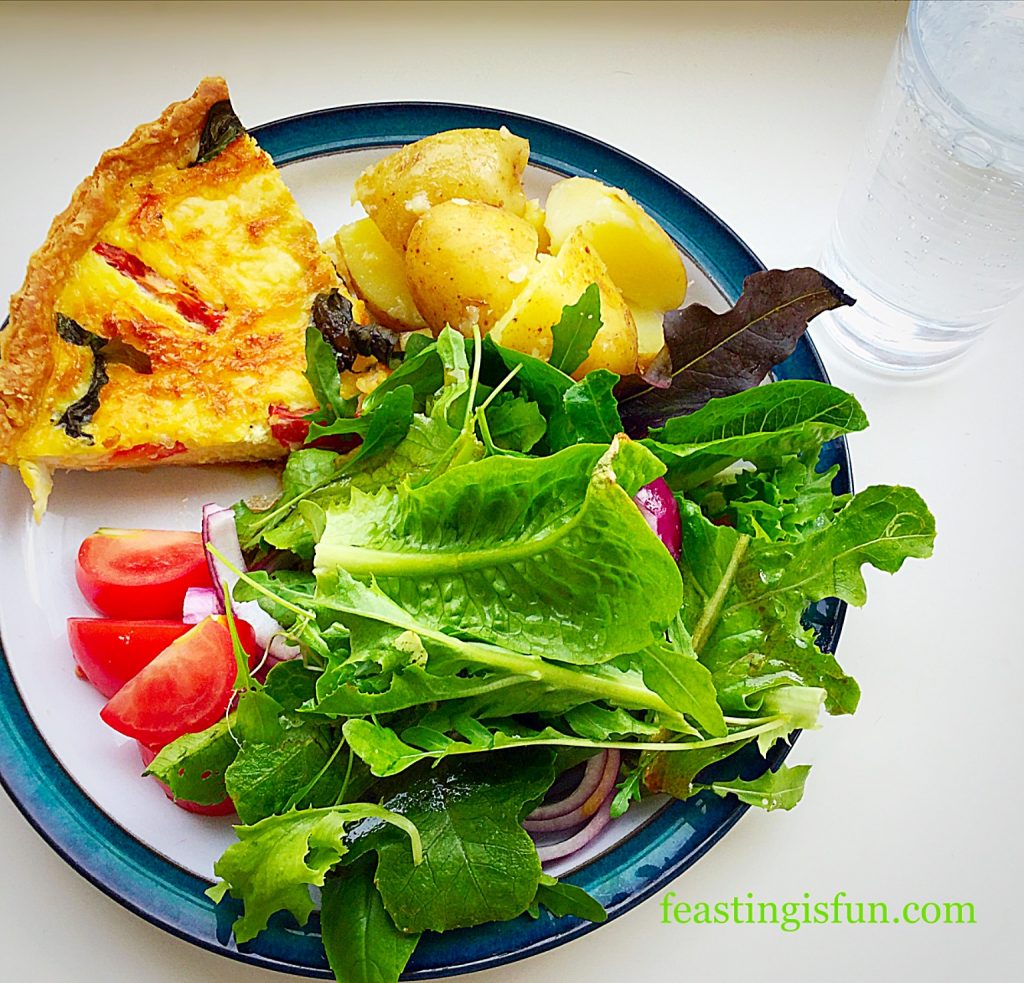
A portion of quiche served with new potatoes and salad leaves.
Cheddar Tomato Basil Quiche served with boiled new potatoes and homegrown salad leaves.

One quick word on eggs – I adore them and only ever buy free range or organic. They are my go to comfort food and also the one thing I can make myself eat when I’m tired or in pain. I still eat my boiled egg out of the chick covered eggcup holder I had when I was little. I love eggs in all guises but a really good dippy boiled egg, or soft fried egg are my favourites!

Quiche appreciation

Back to quiches and this Cheddar Tomato Basil Quiche in particular. I’ve made a few over recent weeks and I’ll link them at the bottom, but now I’m actively trying to make vegetarian ones. Twitter has a #MeatFreeMonday hashtag and so it fits in nicely with that for the time being. Most of my quiche recipes can be switched to veggie versions if you want to.

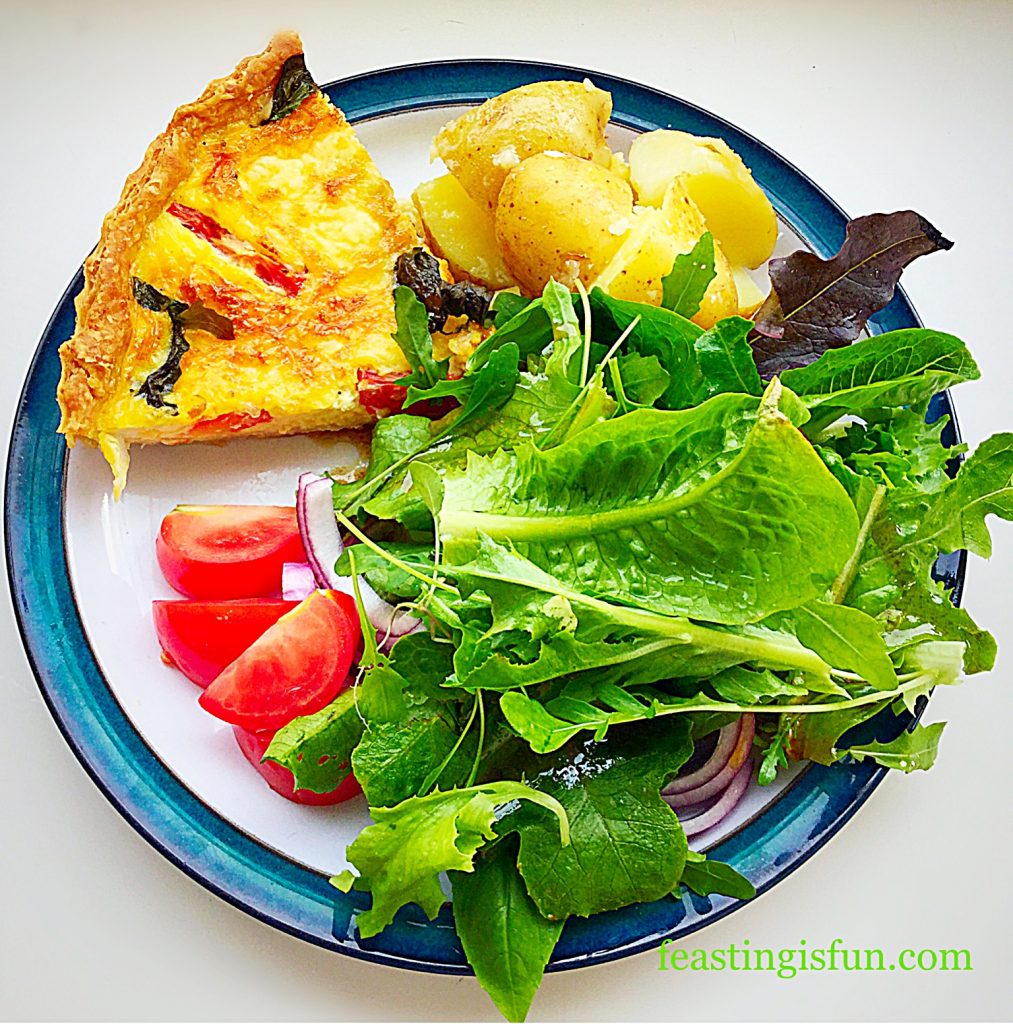
A dinner serving of quiche on a plate with new potatoes and salad.
Cheddar Tomato Basil Quiche

Pastry! I have written a recipe that is absolutely foolproof for making Perfect All Butter Shortcrust Pastry. Yes I totally get that we’ve all got busy lives and as yet, no I haven’t made my own puff pastry, but, my recipe is quick and simple. It’s also a lot cheaper than buying your own pastry, plus you know exactly what goes in it. So please be encouraged to try making it for this Cheddar Tomato Basil Quiche. You’ll have twice as much as you need and you can easily freeze the other half!

Recipe: Cheddar Tomato Basil Quiche

500g/1lb 2oz – 1/2 quantity of Perfect All Butter Shortcrust Pastry

Spare Plain Flour for dusting the work top and rolling pin

6 Large Free Range Eggs

2 Tablespoons Whole or Semi Skimmed Milk

2 Whole tomatoes – each cut into 6 wedges

150g/5oz Strong Cheddar Cheese Grated – I use Wyke Farms mature cheddar

Handful of Fresh Basil Leaves

Pinch of Salt – I use Maldon Sea Salt

Freshly Ground Pepper

Method: Peheat the oven to 220C/200C fan, gas mark 7, 425F

Making and pre-baking the tart case

  • Dust the work top with flour and rolling pin. Form the pastry into a ball.
  • Roll out from the centre of the pastry, in one direction until you have a circle slightly larger than your quiche tin.
  • Ensure the quiche tin is placed onto a baking tray.
  • Transfer the pastry to the tin by wrapping the rolled out pastry around the rolling pin.
  • Ensure the pastry is pushed, not stretched into position, pressing firmly against the sides of the tin.
  • Roll the rolling pin over the top of the tin. This creates a nice clean edge to the quiche.
  • Cut a piece of baking parchment slightly larger than the filled tin. Scrunch it up and then place on top of the pastry.
  • Fill with ceramic balls or baking beans and place in the top of a preheated oven for 15 minutes.
  • After 15 minutes baking time has elapsed remove the baking tray from the oven.
  • Using the parchment paper lift out the baking balls.
  • Return the pastry case to the oven and bake for a further 5-10 minutes until the pastry has just turned golden.
FF Cheddar Tomato Basil Quiche
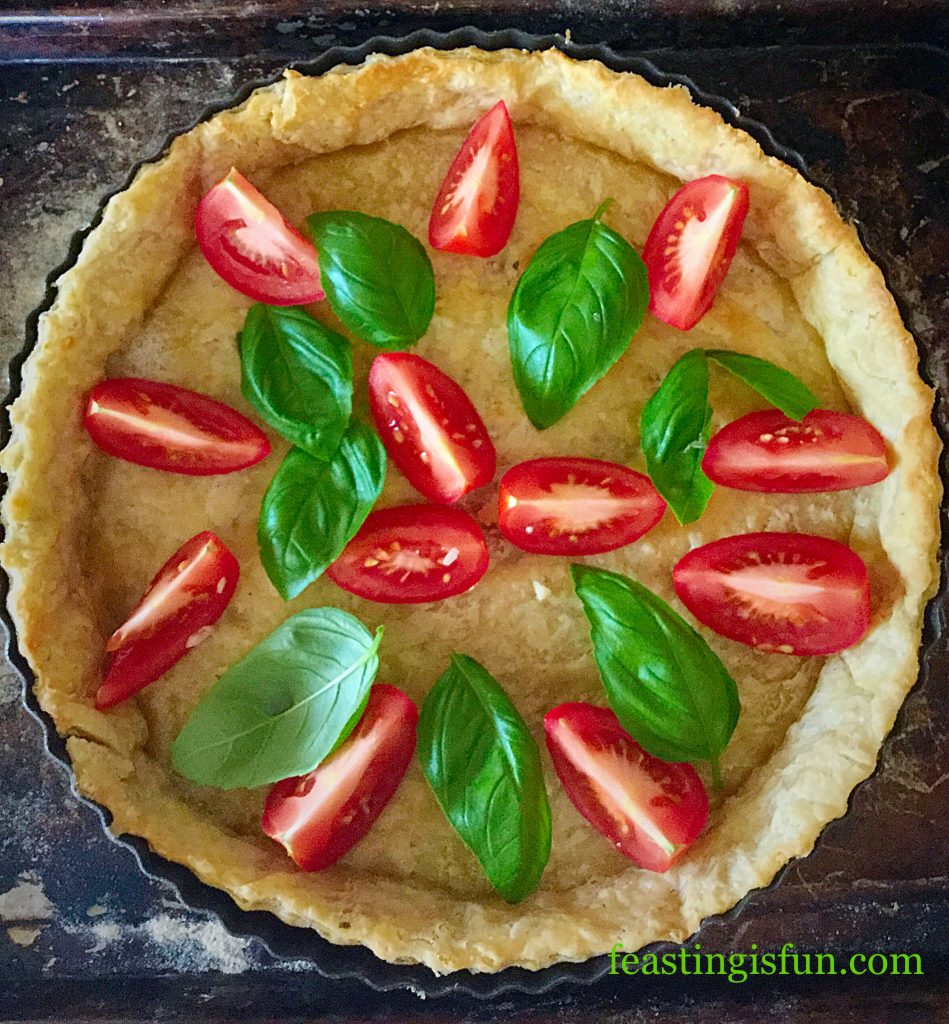
Place the tomatoes and half of the basil on the pastry base.

Filling and baking the Quiche

  • Next add the grated cheese in between the tomatoes.
  • Crack all the eggs into a large jug (I always crack mine into a separate bowl first).
  • Add the milk, salt and pepper and whisk lightly with a fork until combined.
  • Pour the egg mixture carefully over the filled quiche.
FF Cheddar Tomato Basil Quiche
Decorate the top of the quiche with the remaining basil leaves.
  • Place the quiche, still on the baking tray, into the centre of the oven and bake for 25-30 minutes.
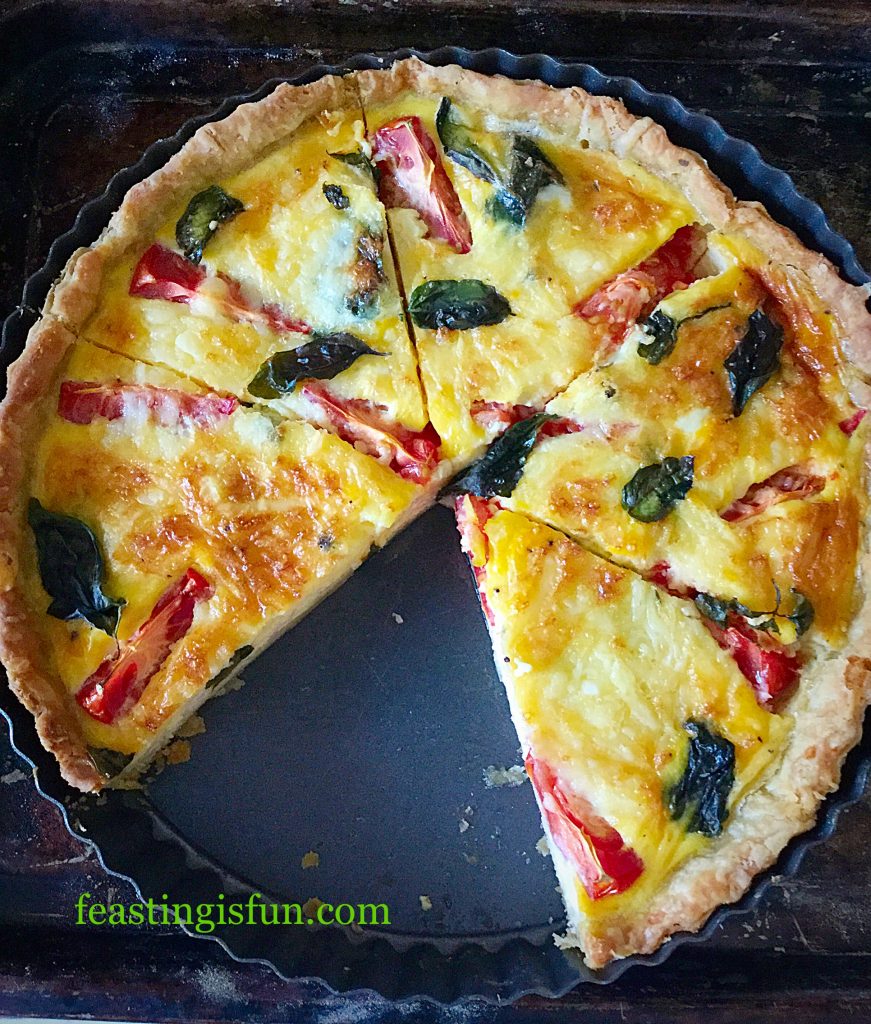
  • The Cheddar Tomato Basil Quiche is baked when it is golden and there is no wobble to the centre of the quiche.
  • Once baked remove the quiche from the oven and allow to cool for 15 minutes.
FF Cheddar Tomato Basil Quiche
Cheddar Tomato Basil Quiche so easy to make and easy to eat.

To serve slice into 6 portions. Serve warm with salad and new potatoes for a wonderful mid week meal. Likewise this delightful quiche is delicious at room temperature and is perfect for buffets, packed lunches, picnics and food on the go.

Ensure the Cheddar Tomato Basil Quiche is cold before wrapping in cling film or foil and store in the fridge for up to 4 days.

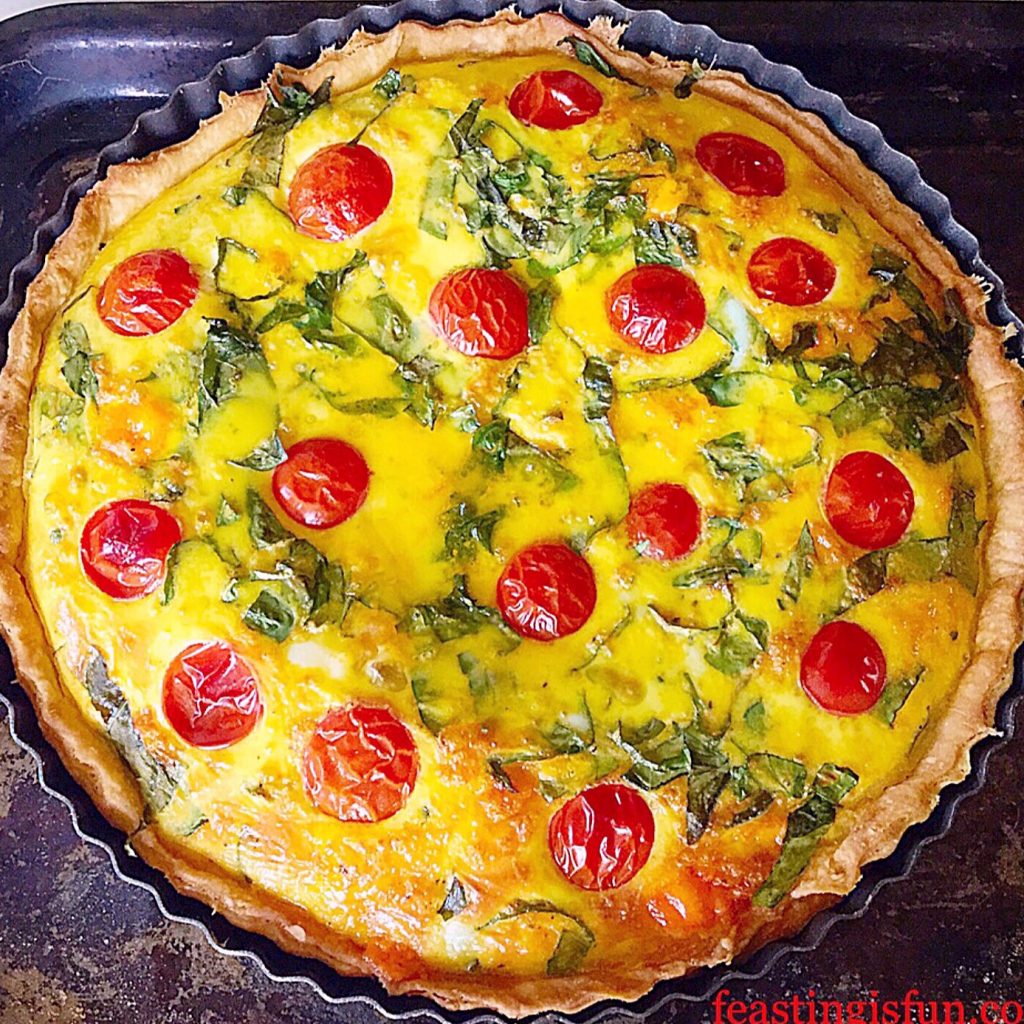
Alternatively, why not swap Red Leicester Cheese for the cheddar and add British cherry tomatoes, for a delicious twist on this recipe!

Red Leicester and Cherry Tomato Quiche

If you have enjoyed the recipe for this Cheddar Tomato Basil Quiche here are some other recipes you may also like:

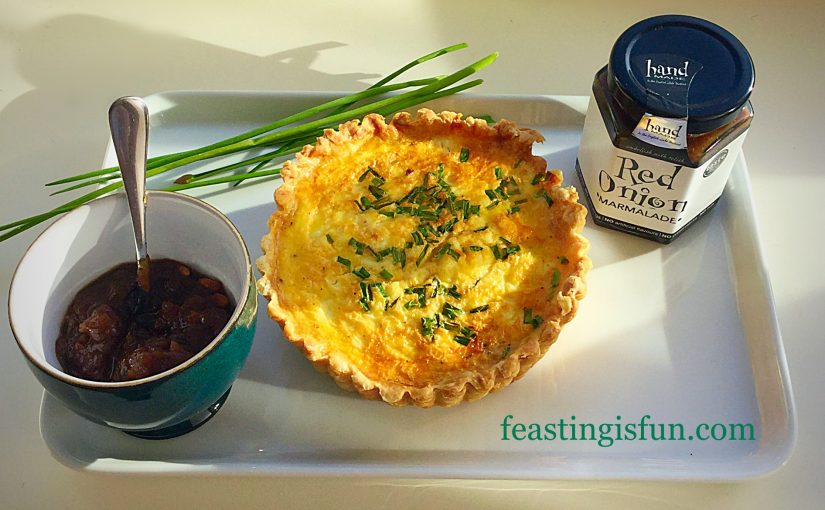
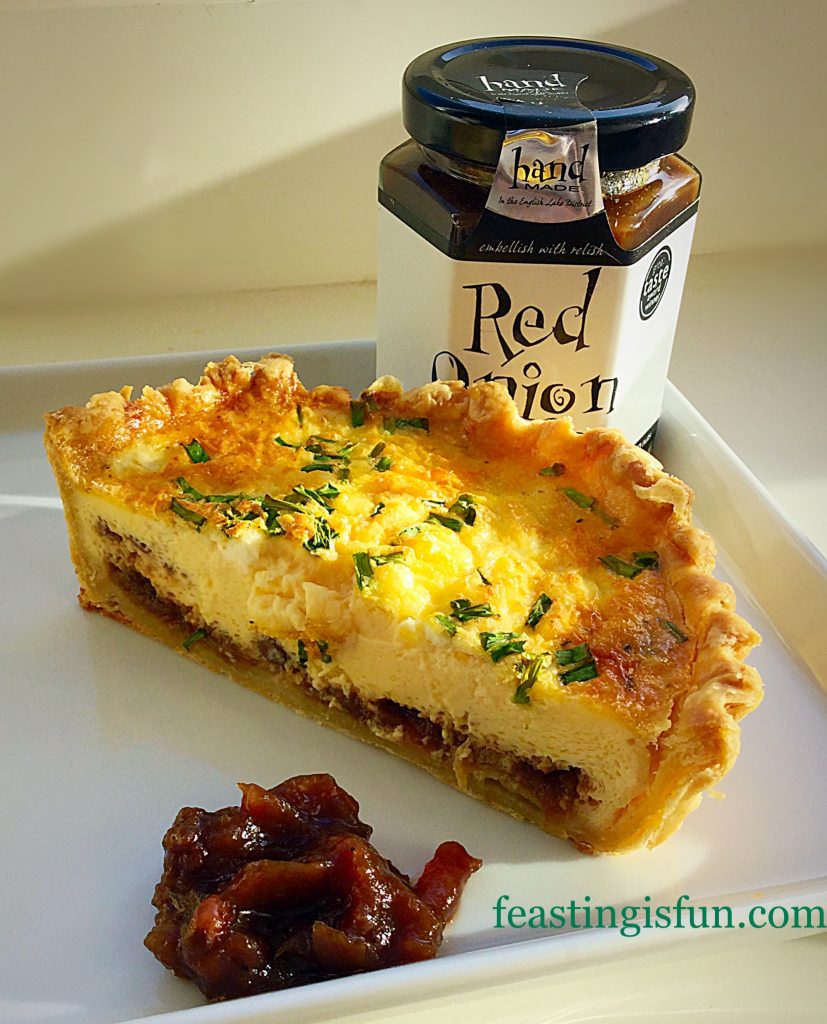
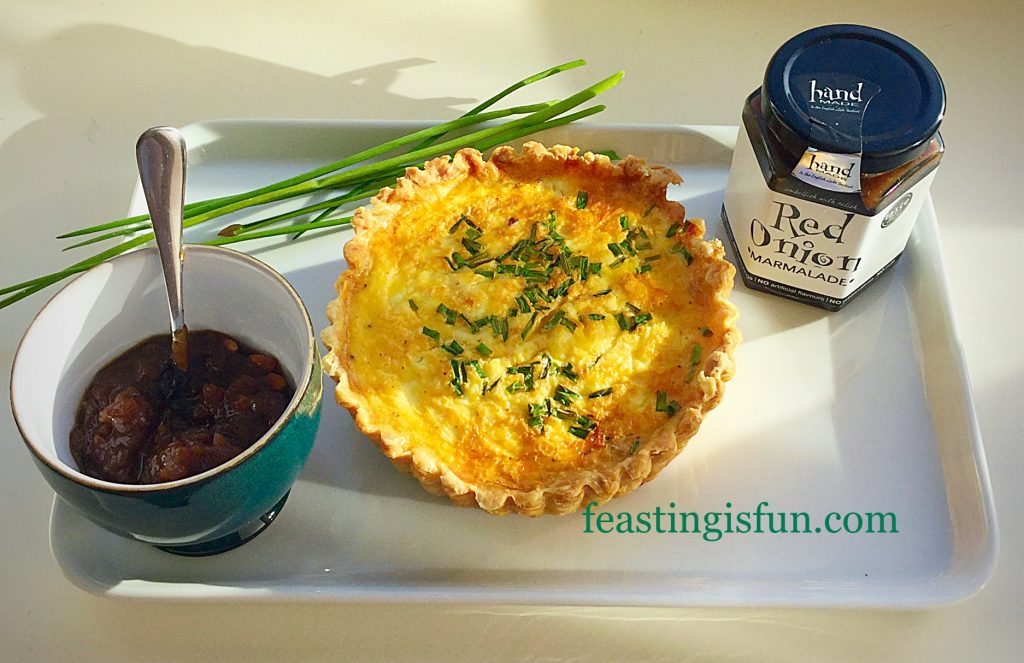
Feta Red Onion Marmalade Quiche

FF Feta Red Onion Marmalade Quiche
Feta Red Onion Marmalade Quiche delicious layers of flavour.

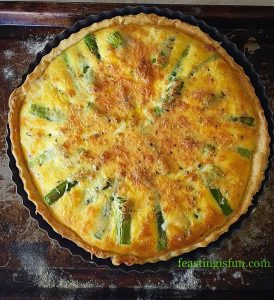
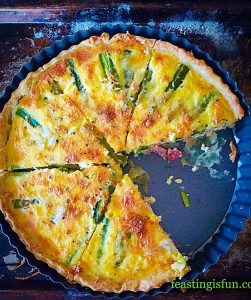
Smoked Bacon Asparagus Quiche

FF Smoked Bacon Asparagus Quiche
Smoked Bacon Asparagus Quiche a delightful combination of flavours.

Asparagus Proscuitto Ham Tart

FF Cheddar Tomato Basil Quiche
Asparagus Prosciutto Ham Tart made during a silicone baking mat review.


Quiches are so versatile. Layers of flavour can be built inside the egg tart. I’m particularly fond of quiches that use relish or condiments to build flavour. Likewise fresh herbs can really lift the flavour of a quiche. The basil in this Cheddar Tomato Basil Quiche turns a good quiche into a great one.

Play around with fresh herbs and good quality chutneys or relishes in your baking, especially in quiches. Their flavour can really add depth or freshness to the resulting flavour.

Whatever you are making, baking and creating in your kitchens, have fun creating your feast to share with others. Thank you for sharing photos of your amazing creations on Twitter and Instagram and for taking time to leave comments. It really makes my day to see what you come up with and how you interpret my recipes.

Sammie xx

Feta Red Onion Marmalade Quiche

I love chutneys, relish, chilli jam, savoury marmalade. So when I saw the varieties that Hawkshead Relish make and sell I was in my element. And challenged to use the jellies and marmalade as an ingredient, I immediately thought of quiche. So I set about making this delicious Feta Red Onion Marmalade Quiche.

FF Feta Red Onion Marmalade Quiche.
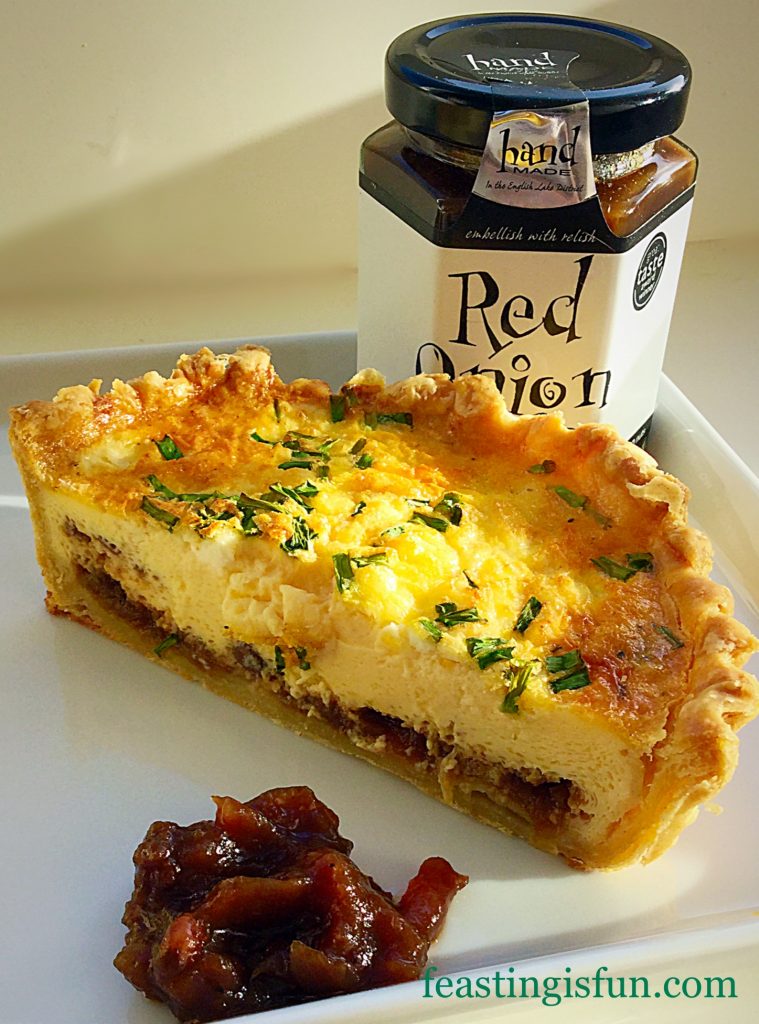
Feta Red Onion Marmalade Quiche a delightful combination of flavours.

Perfect Shortcrust Pastry

First of all, however, I set about creating a foolproof all butter shortcrust pastry recipe, for both sweet and savoury bakes. You can find it here – Perfect All Butter Shortcrust Pastry.Also, you will find another quiche recipe using Hawkshead Relish Ale Jelly as an ingredient!

So, with a reliable, consistent pastry recipe, that has been tested and retested, I was then able to let my creative imagination run wild.

FF Feta Red Onion Marmalade Quiche
Feta Red Onion Maramalade Quiche delicious layers of flavour.

Flavour Inspiration

We have some tea rooms near us that are joined to a local artists gallery and a wonderful shop that stocks local pottery, glass and a million other things. Going to the tea rooms is truly a treat day out. In the tea rooms they serve a range of dishes, from light lunches to hearty meals. One of my favourites is their Quiche Lorraine, particularly as it is always served with chutney and onion marmalade in separate little pots.

And this memory sparked my idea was to have the red onion marmalade inside the quiche. Then I needed to decide what to pair it with. A recent love affair with crumbly, salty, Greek Feta Cheese provided the answer. Finally, topped with freshly sniped chives from the garden this Feta Red Onion Marmalade Quiche is so much more than the sum of it’s separate parts.

FF Feta Red Onion Marmalade Quiche
Feta Red Onion Marmalade perfect for picnics and buffets.

Quiche Indulgence

The chives provide a beautiful top to the quiche and indeed echo the onion flavour from the marmalade. While the feta cheese mellows in the eggy custard providing the perfect balance to the warm red onion marmalade. The difference that a small amount of heat adds to the base layer of this quiche is quite dramatic.

If you enjoy Red Onion Marmalade with your cheese and crackers, using it as an ingredient in a dish lifts it to a whole different level. Since the sweet/sour caramelised onion flavours come alive on your tongue. It is pure heaven!

Recipe: This makes one deep Feta Red Onion Marmalade Quiche serves 2-3, baked in a loose bottom tart tin.

For a larger quiche, double the recipe.

1/3 Quantity All Butter Shortcrust Pastry

50g/2oz Feta Cheese

2-3tbsp Red Onion Marmalade from Hawkshead Relish

4 Large Free Range Eggs

2tbsp/30ml Whole Milk

1/4tsp Sea Salt I use – Maldon

1/4tsp Freshly Ground Black Pepper

1tsp Chopped Fresh Chives

Making And Baking The Feta Red Onion Marmalade Quiche

Method: Preheat the oven to 200C/180C fan, gas mark 6, 400F

  • Prepare the pastry and blind bake according to the instructions given for Perfect All Butter Shortcrust Pastry.
  • Reduce the oven temperature to 180C/160C fan, gas mark 4, 375F.
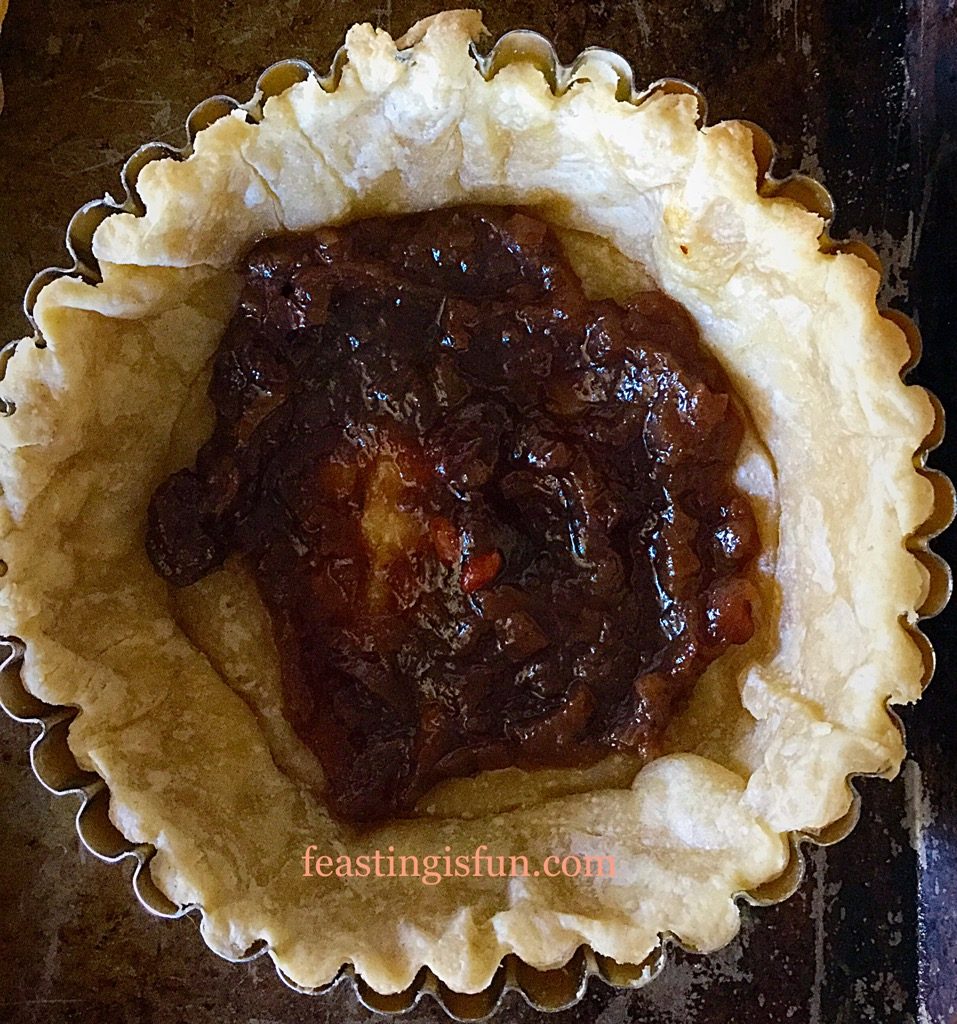
  • Spoon 2-3 tablespoons of Red Onion Marmalade into the bottom of the pastry tart shell.
FF Feta Red Onion Marmalade Quiche
A delicious layer of red onion marmalade at the base of the quiche.
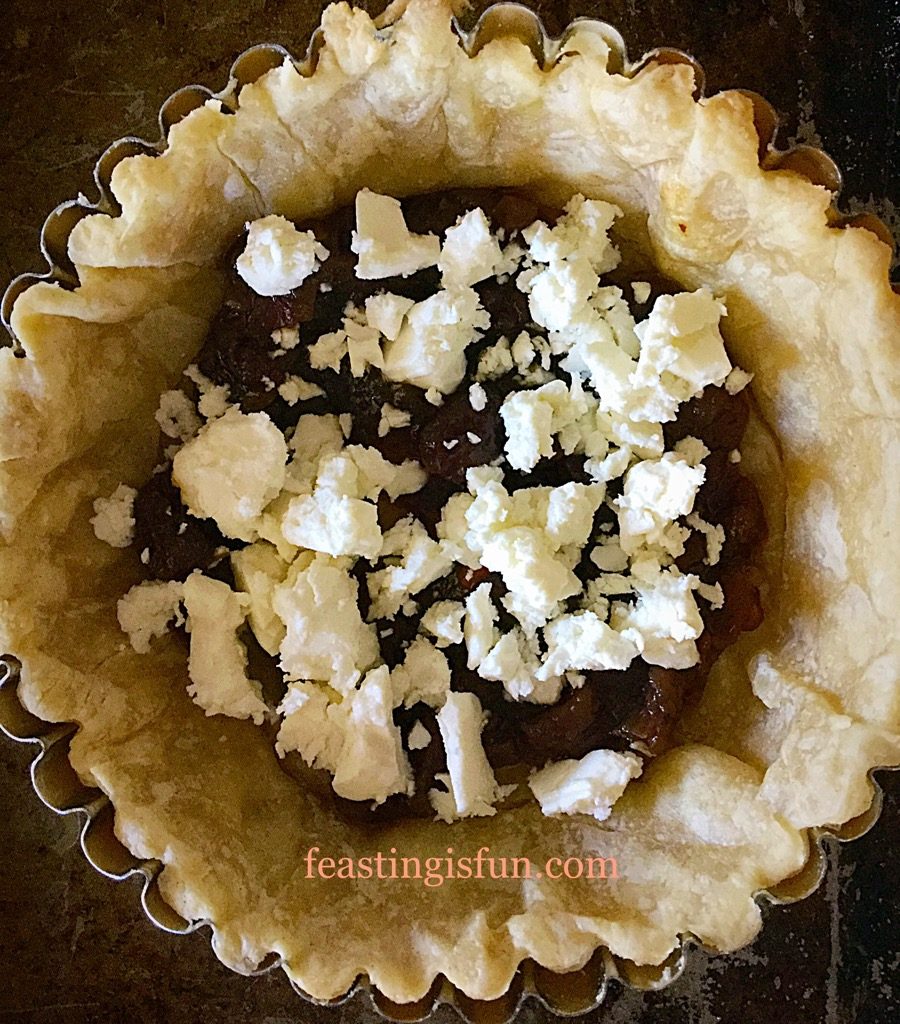
  • Crumble the feta cheese on top.
FF Feta Red Onion Marmalade Quiche
Salty feta crumbled on top of the savoury marmalade.
  • Crack the eggs into a jug. Add the milk and seasoning. Whisk to combine.
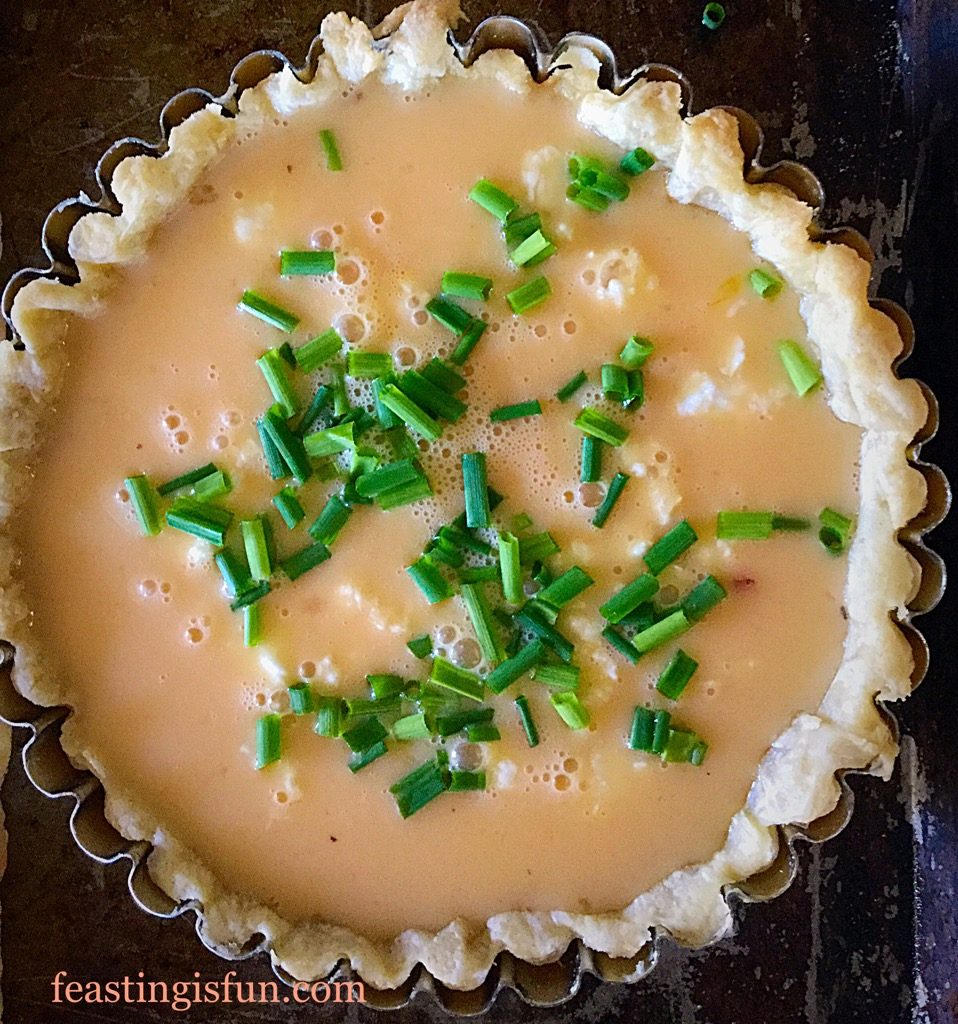
  • Carefully pour the egg mixture into the tart shell, taking care not to overfill it. Better to have some egg mixture left over, than over fill the tart case.
FF Feta Red Onion Marmalade Quiche
Leave about 1cm of the pastry unfilled.
  • Place the quiche carefully into the centre of the preheated oven.
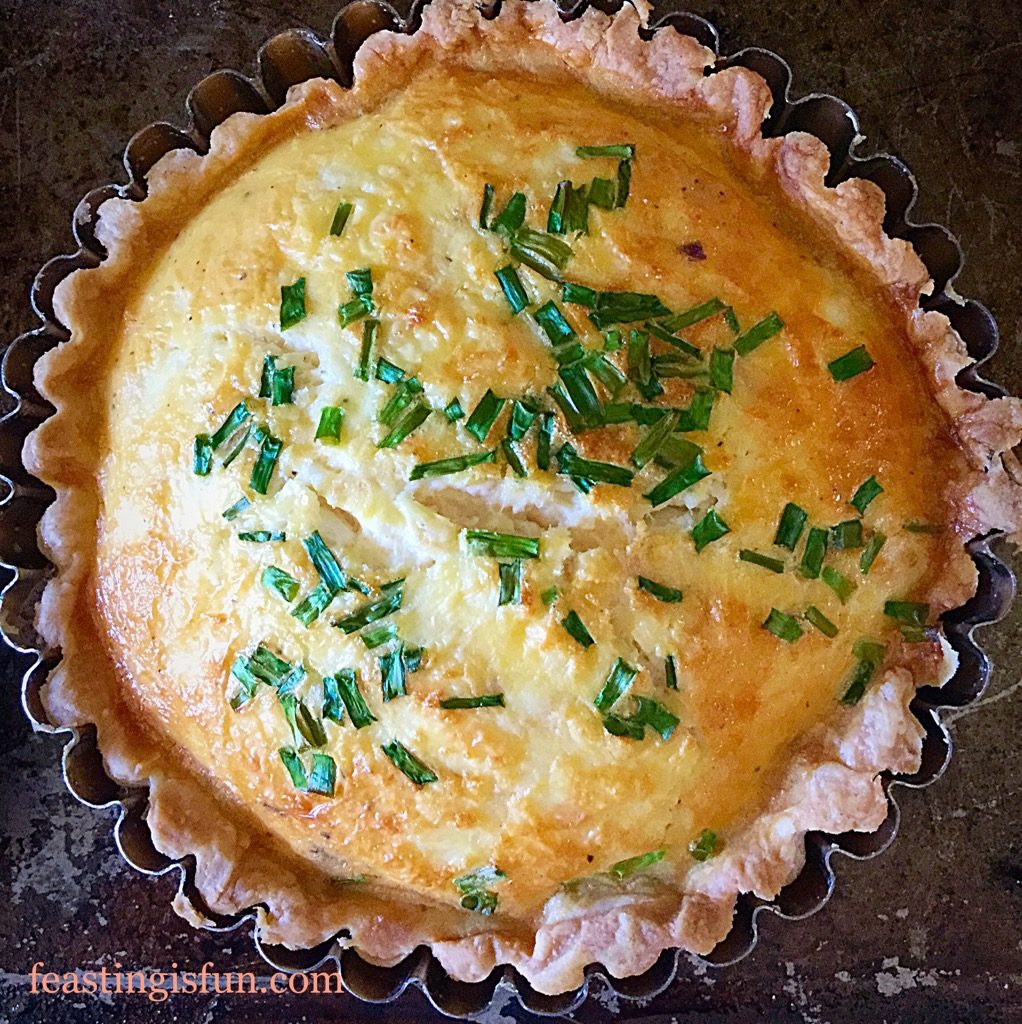
  • Bake for 35-40 minutes until the egg is set in the middle. It should be firm and not wobble.
FF Feta Red Onion Marmalade Quiche
Feta Red Onion Marmalade Quiche golden with bright green flecks from the chives.

Leave to cool slightly before serving.

I personally like this Feta Red Onion Marmalade Quiche best when it is warm. Served with a crisp, green salad, my Tangy Lemon Potato Salad and an extra spoonful of the delicious Red Onion Marmalade.

FF Feta Red Onion Marmalade Quiche
Feta Red Onion Marmalade Quiche absolutely delicious.

Perfect to take in your packed lunch as a change from sandwiches. Once cooled, wrap in cling film and store in the fridge. Also, this quiche freezes successfully for up to one month. Remove from the metal tart tin and wrap in cling film and then foil.

I found this really handy when I was recipe testing and made 6 quiches over one weekend!

If you have enjoyed this Feta Red Onion Marmalade Quiche recipe, here are a few others you may also like:

Spicy Sausage Rolls

FF Feta Red Onion Marmalade Quiche
Spicy Sausage Rolls these have a warming bite to them!

Quiche Lorraine

FF Feta Red Onion Marmalade Quiche
Quiche Lorraine delicious chunks of ham and strong cheddar in an egg custard.

Sausage Plait With A Twist

FF Feta Red Onion Marmalade Quiche
Sausage Plait with a delicious twist.

I was so thrilled with the outcome of this particular recipe. Because it had honestly never occurred to me before to use savoury chutneys and marmalades as ingredients. And look out for the upcoming Hawkshead Relish Review where there will be other tasty recipes using their products as ingredients.

The flavour and texture of the Red Onion Marmalade is very different from traditional, sticky onion marmalade. Since this marmalade has a chunky, more chutney texture and the flavour is delicious. Sweet, caramelised onions, with a very slight sour vinegar flavour that works to balance the whole taste experience.

Has this encouraged you to try using condiments as ingredients?

Thank you for sharing all of your makes and bakes with me on Twitter and Instagram. I not only enjoy seeing you bake my recipes, but whatever you make inspires me. Please keep the comments coming. Not only do I really enjoy reading them, but I’ve been told other readers also enjoy reading them too.

So, whatever you are making, baking and creating in your kitchens, have fun preparing and sharing your feast.

Sammie xx

Hawkshead Relish provided me with a sample of their Red Onion Chutney. All recipes, content, photography, views and opinions are my own. Please see my Disclosure Policy.


Perfect Butter Shortcrust Pastry

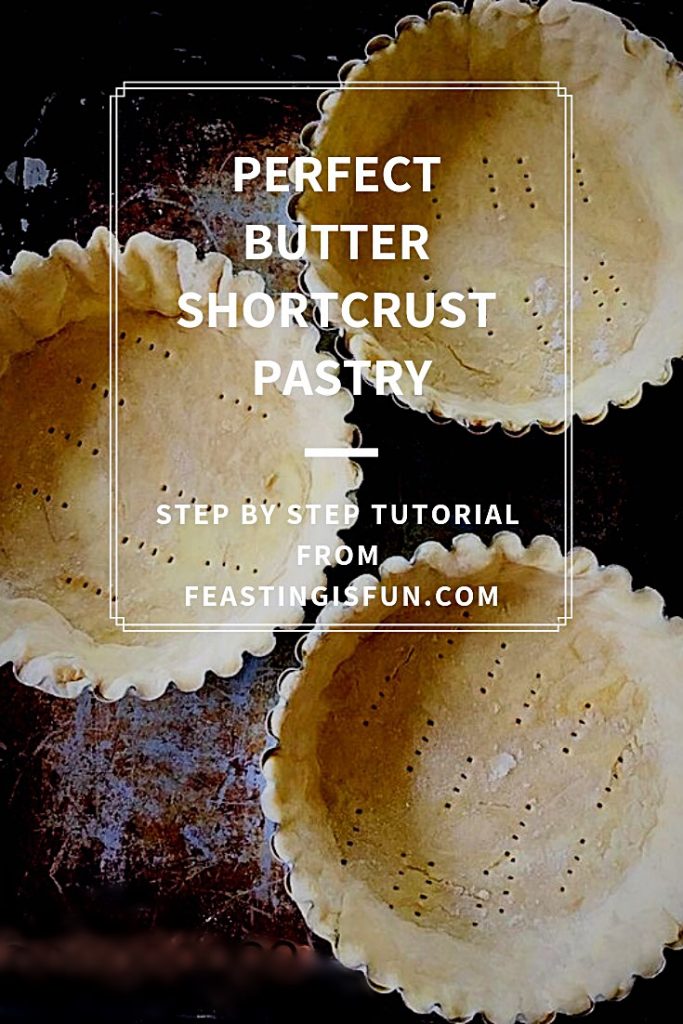
Is the prospect of making your own pastry daunting? Because, for many people it is. Therefore, today I am going to show you how to make foolproof, Perfect Butter Shortcrust Pastry, that works for both sweet such as this Lemon Lime Merigue Pie and savoury bakes like this Smoked Bacon Asparagus Quiche

FF Perfect Butter Shortcrust Pastry

Since being taught to make pastry from an early age, I wonder if the fear that surrounds making it is simply that the skill is not being passed down, through the generations like it used to be. Another reason could be that Home Economics and cooking are not taught as widely as they once were. Likewise, commercially made pastry is readily available in most grocery shops. Yet nothing compares to the crisp, buttery flavour of homemade pastry.

FF Lemon Lime Meringue Pie
Lemon Lime Meringue Pie

Watching cookery programmes, where they may portray the ‘art’ of pastry making as a complicated process can be off putting. So it is understandable that some people are terrified to make pastry and therefore never attempt it. Today, in this tutorial, you will learn how simple it is to make Perfect Butter Shortcrust Pastry, that turn’s out beautifully every single time.

FF Perfect Butter Shortcrust Pastry
Perfect Butter Shortcrust Pastry great for quiches.

Keeping Things Simple

First of all, to reassure you, no kitchen machinery is used. Not even a food processor. Because, if I’m being completely honest, setting the food processor up in my kitchen takes longer than actually making the pastry by hand. So I really can’t be bothered with the hassle. Rather, the only two pieces of equipment I use are a dinner knife and pastry cutter.

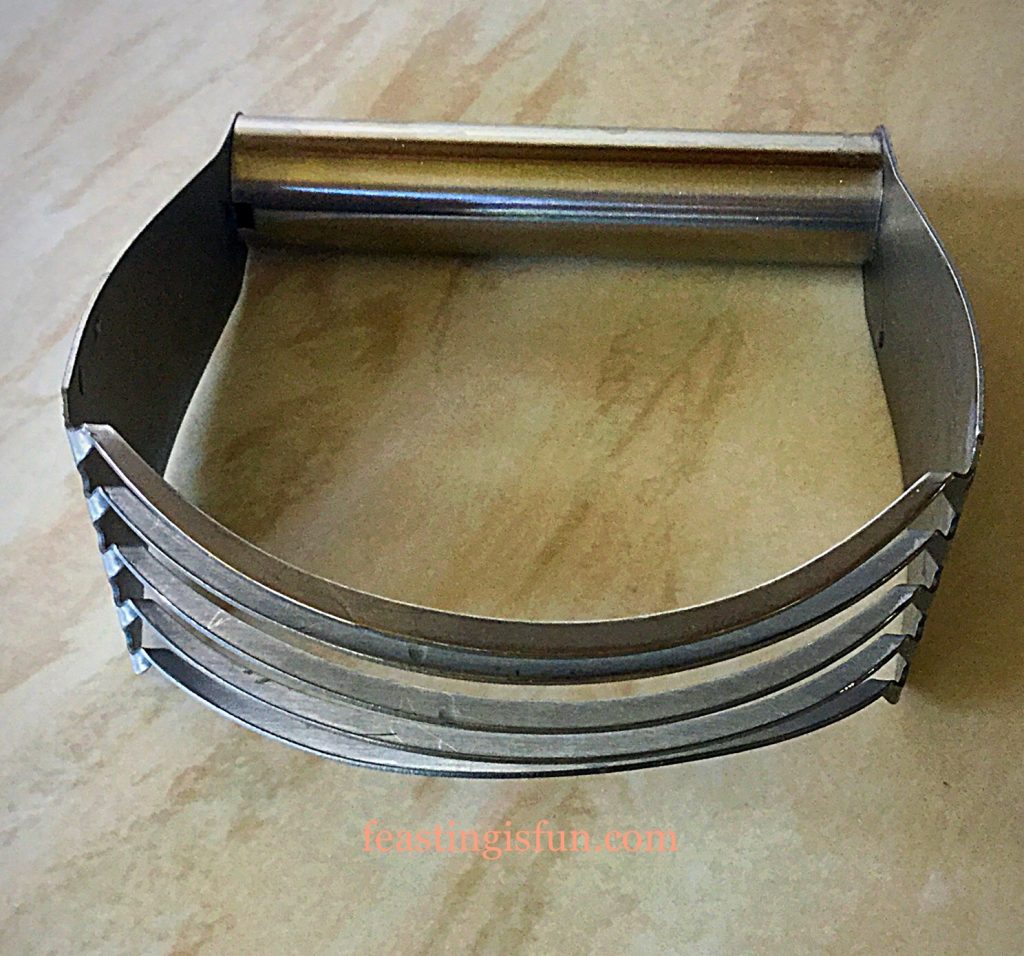
If you haven’t seen or heard of a pastry cutter, they look like this.

FF Perfect Butter Shortcrust Pastry
Pastry Cutter

They can be purchased inexpensively from Amazon or kitchenware shops. And a quick glance on the internet has assured me that the cost is £5 or under.

Keeping It Chilled

Most importantly, the simple key to making good pastry, is to work quickly and yet not rush, while keeping everything as cold as possible. Please, please do not become neurotic about it, as I have seen with some people.

Since my personal experience is that whenever I am stressed, rushed or uptight about something, if I bake, it inevetiably goes wrong. Or at least isn’t my best baking. Therefore, making pastry while relaxed and using a reliable recipe should guarentee good results.

FF Perfect Butter Shortcrust Pastry
Fabulous pastry for all your tarts and quiches.

Choosing The Best Ingredients

So that’s mindset and equipment sorted, next are ingredients. I use unsalted butter in all of my baking as it tends to be better quality than salted and also allows me to control the amount of salt in the recipe. Organic, stoneground flour and organic or free range eggs will always produce the tastiest pastry. Finally, adding salt is more important than you may think as it enhances the pastry’s flavour.  And in comparison, very little is added to commercially available, ready made pastry.

Also, the quantity of cold water added, is a guide, as different batches of flour, butter and the weather, can all affect how much water is needed to bring the dough together.  Don’t panic I will walk you through every step.

Recipe: Make 900g/2lb Perfect Butter Shortcrust Pastry

Enough to make 2 x 25cm/10in tart cases.

400g/14oz Plain White Flour

200g/7oz Unsalted Butter – cold from the fridge and cut into cubes

1/4tsp Sea Salt Flakes – I use Maldon

2 Large Free Range Egg Yolks – I use Waitrose own brand

Approx 180-200ml Cold Tap Water

Making The Perfect Butter Shortcrust Pastry Dough

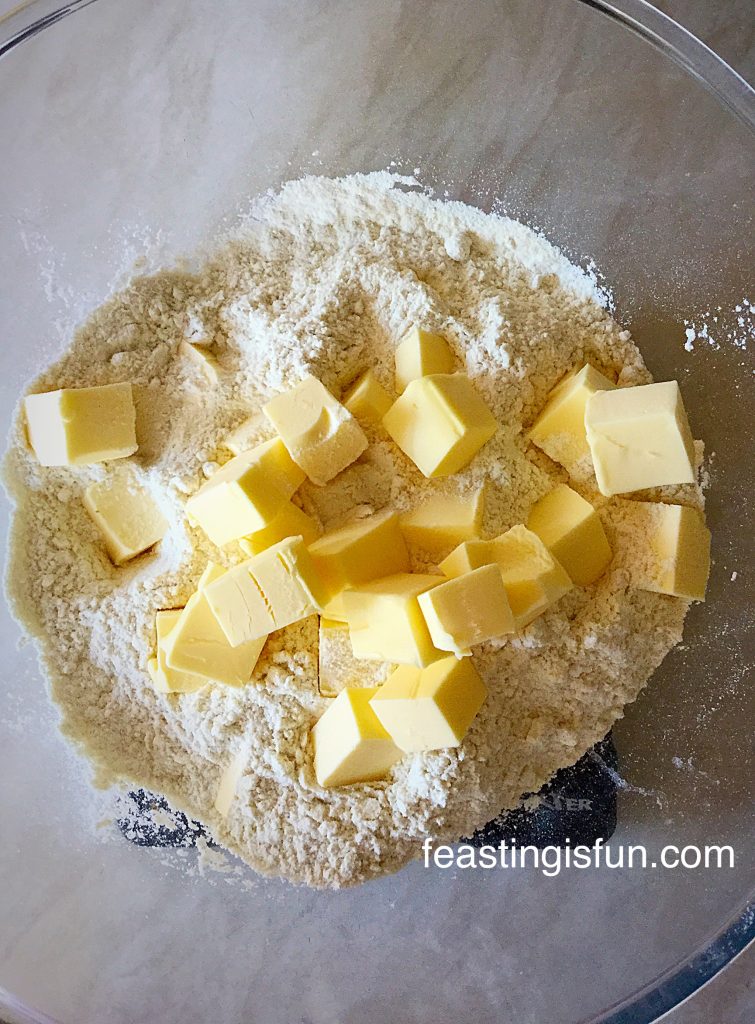
  • First of all, into a large bowl add the flour, salt and cold cubed butter.

Ready to start 'cutting in' the butter.

  • Using the pastry cutter, push and twist it into the flour, rotating the bowl occasionally. Scrape any butter that has become stuck on the pastry cutter off using a regular dinner knife.
  • Keep cutting the butter into the flour until it is about the size of peas.

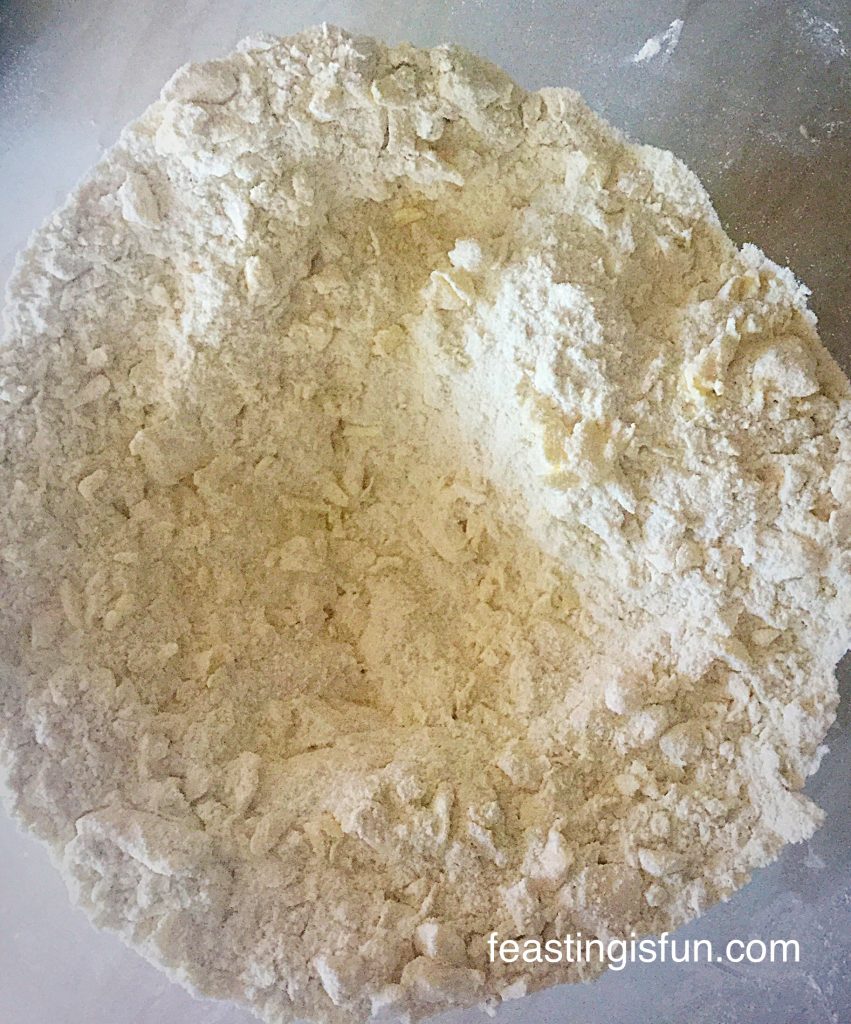
You can clearly see pieces of butter throughout the flour.

  • Note: the flour does not look like breadcrumbs. Traditionally this is how pastry making is taught, to rub, or cut into the flour until it resembles breadcrumbs. If you do this your pastry will be okat. Yet, if you leave pea sized pieces of butter in the flour you will end up with crisp, Perfect Butter Shortcrust Pastry.
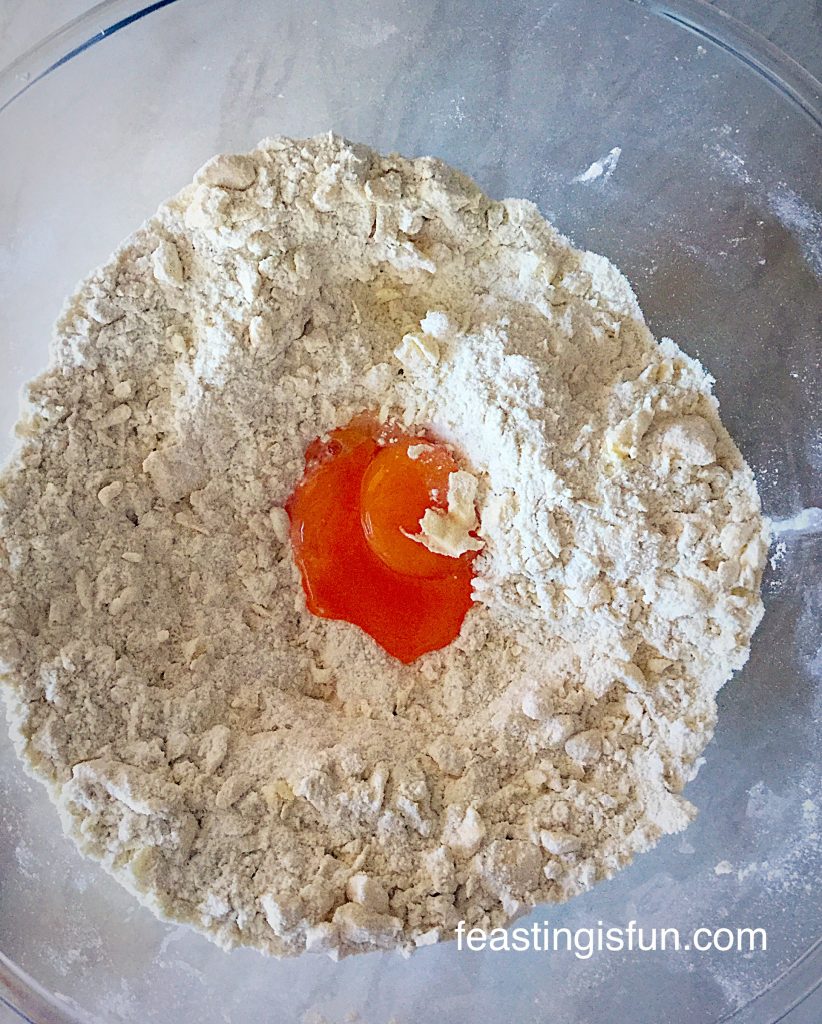
  • Next add the 2 egg yolks into the centre of the mix.

Look how beautifully golden the free range egg yolks are?

  • Add 150ml of cold tap water and stir the mixture using a dinner knife.
  • Continue adding water, in small amounts, 10mls, at a time, stirring with the knife until the pastry starts to come together.
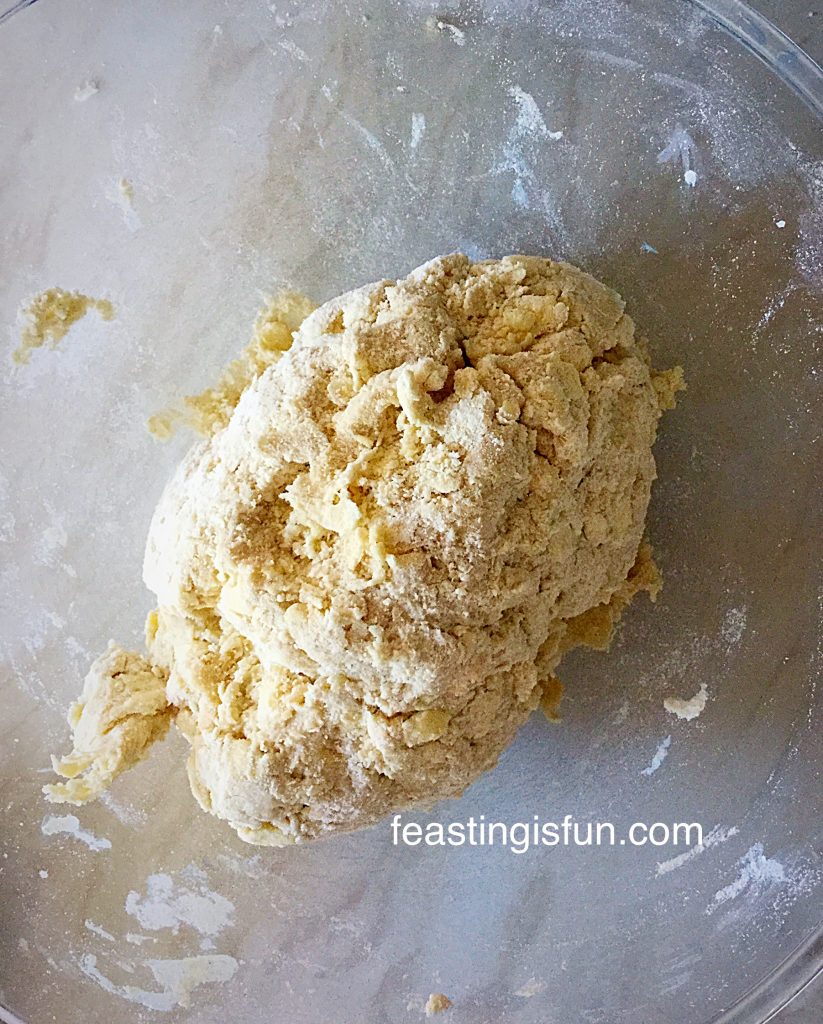
  • Now switch to using your hands. Create a claw-like figure with your fingers. Gently bring the dough together, adding a little more water as necessary, until it just holds together in a rough ball shape.

The perfect All Butter Shortcrust Pastry ball.

  • Wipe the worktop surface with a clean, damp cloth, then lay over a large piece of cling film – the wet surface helps the cling film to stick and not move about.
  • Tip out the ball of pastry onto the cling film.
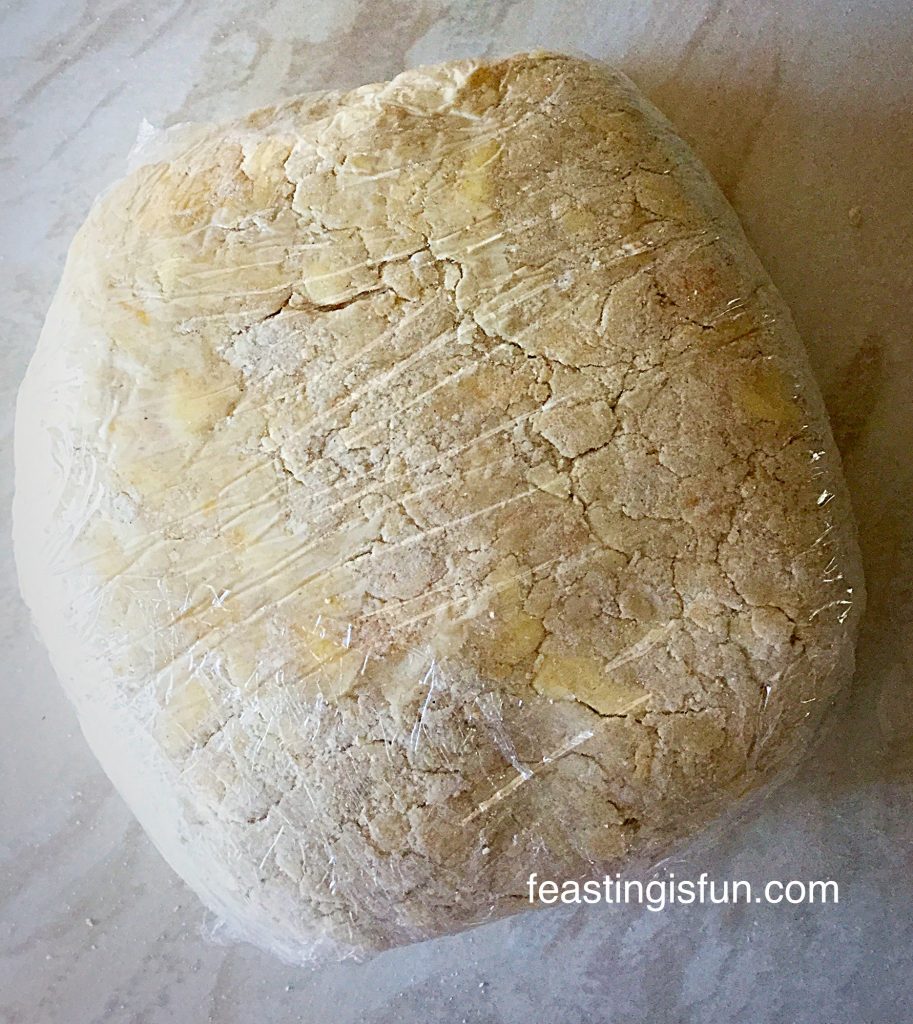
  • Wrap and shape into a large disc.

Your All Butter Shortcrust Pastry is now ready for some relaxation time!

Resting The Pastry

  • Place the wrapped pastry into the fridge and chill for at least one hour.
  • And now put the kettle on and congratulate yourself on making Perfect Butter Shortcrust Pastry.

This recipe makes enough pastry to bake a 2 x 25cm/10in quiches.

  • While the Perfect Butter Shortcrust Pastry is resting in the fridge, it is an ideal time to prepare the filling.

Rolling Out The Shortcrust Pastry

  • Remove the pastry from the fridge. Place on a lightly floured surface and knead lightly.
  • Weigh the pastry where a recipe calls for a specific amount. Alternatively cut in half when making a quiche.
  • Shape one piece of the pastry into a ball.
  • Roll out gently from the centre of the pastry to the edge. Ensure the pastry keeps moving by dusting underneath lightly with flower.
  • Ideally the pastry should be about the thickness of a £1 coin – approx 1/4 inch.
Rolling out the pastry.

Lining A Tin With Pastry

  • Loop the pastry around the rolling pin, this makes moving it easier and stops it stretching.
  • Gently allow the pastry to loosely fill your tin and then remove the rolling pin.
  • Ease the pastry into the tin, if it is fluted be sure to press the pastry into each of the flutes. Most importantly avoid stretching the pastry, as this will result in the pastry shrinking during baking.

  • Roll your rolling pin over the top of the tin and it will cut the edge of the pastry perfectly.
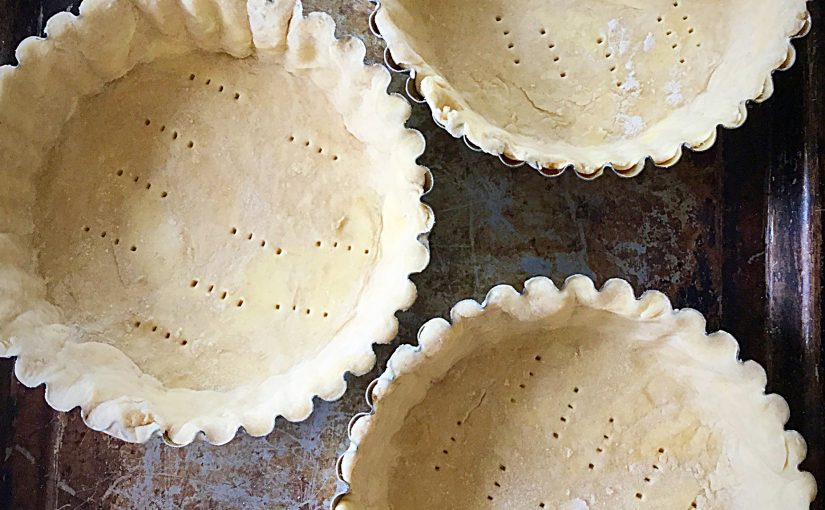
  • Dock (press with a fork) the pastry base, as this helps steam escape and creates a flat base.
Docked un-cooked Perfect Butter Shortcrust Pastry tart.
  • Place the tart tin back in the fridge for 30 minutes, this really helps the pastry keep it’s shape when being baked.
  • Cut some baking parchment larger than the width of your tin.
  • Scrunch up and then lay on top of the pastry in the tin. Fill the baking parchment with ceramic baking balls.
FF Perfect ButterShortcrust Pastry
The ceramic baking balls keep the pastry’s shape as it bakes in the oven.

Blind Baking The Pastry

  • Place the pastry lined tins onto a baking tray and put in a preheated oven at 200C/180C fan, gas mark 6. Bake for 15 minutes.
  • As soon as the baking time has finished remove the tin from the oven.
  • Using the baking parchment, lift the baking balls free from the pastry lined tin.
  • Place the baking balls in a heatproof bowl to cool.
  • Put the tart tins back in the oven and bake for another 5 minutes if using for a filled tart or quiche. If baking the tart shell until cooked, depending on size, bake for a further 15 minutes or until the pastry is golden brown and cooked through.
FF Perfect Butter Shortcrust Pastry.
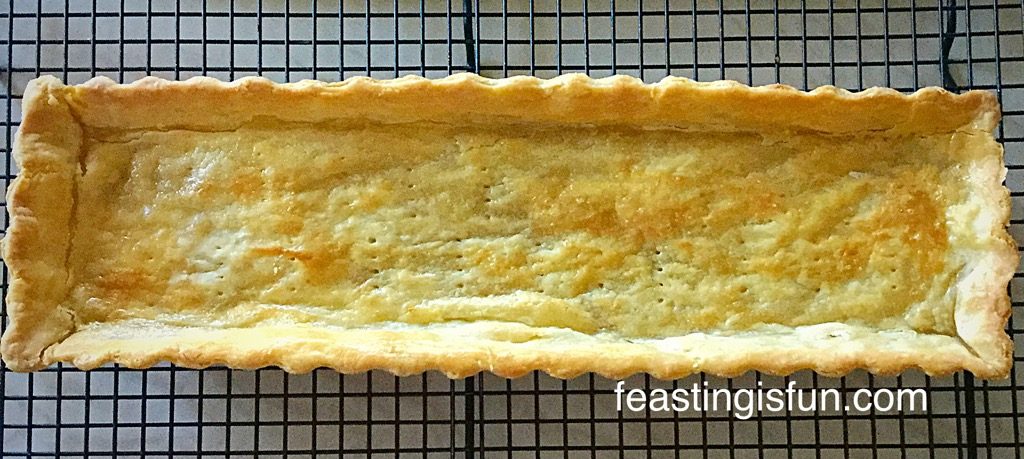
Beautifull be golden tart shell.

Look at the gorgeous Perfect Butter Shortcrust Pastry crust. Deliciously light, crisp and buttery.

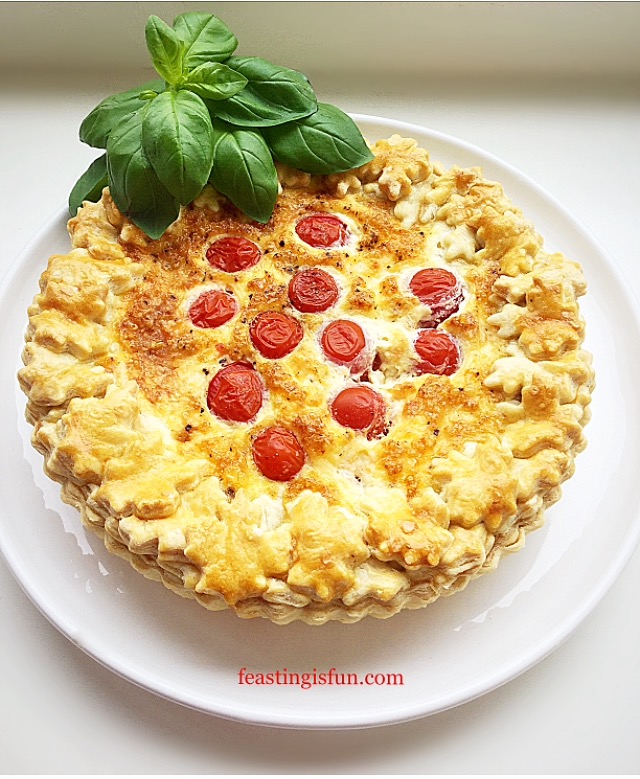
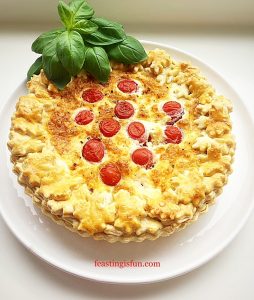
FF Cherry Tomato Mozzarella Basil Quiche
Cherry Tomato Mozzarella Basil Quiche

As you can see from the photos this recipe really does produce Perfect Butter Shortcrust Pastry. Also, the pastry has such a delicious flavour of it’s own, becoming part of the dish, not just a carrier of other flavours.

Unused Perfect Butter Shortcrust Pastry can be kept wrapped in cling film, in the fridge for up to 2 days, or it can be frozen, wrapped in cling film and popped into a freezer bag for up to 3 months.

Top Tip: Freeze any leftover pastry and after a while you’ll have enough for a recipe!

If you have enjoyed this Perfect Butter Shortcrust Pastry here are some other recipes you may like to try:

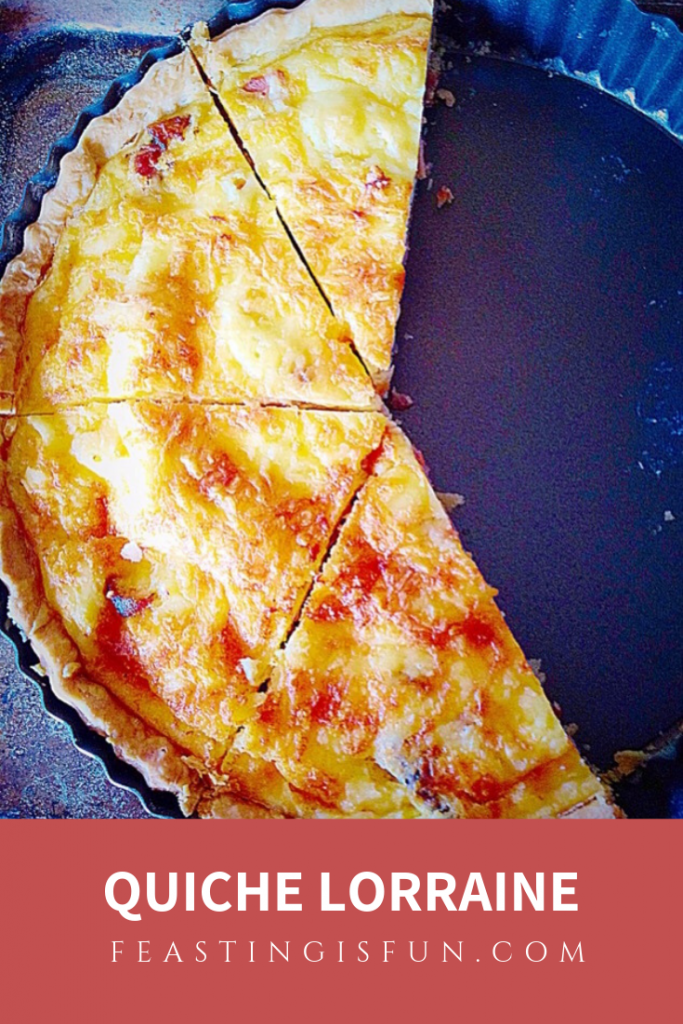
Quiche Lorraine

FF Perfect Butter Shortcrust Pastry
Smoked ham and cheese create a classic Quiche Lorraine.

Cheddar Tomato Basil Quiche 

FF Cheddar Tomato Basil Quiche
Cheddar Tomato Basil Quiche

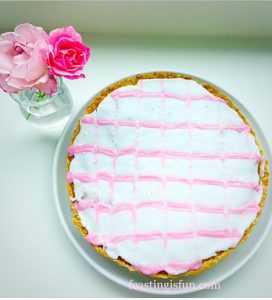
Iced Bakewell Tart

FF Iced Bakewell Tart
Iced Bakewell Tart

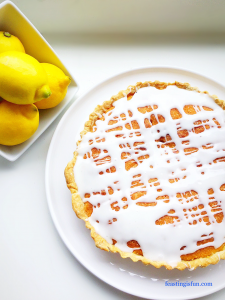
Lemon Curd Sponge Tart

FF Lemon Curd Sponge Tart
Lemon Curd Sponge Tart

As with anything new, practising will improve your technique and consequently the pastry that you make. Since homemade pastry requires only a few ingredients, it is handy to know how to make your own. Whether it is for sweet or savoury bakes, this pastry recipe works beautifully. Also, it is much cheaper to make your own from scratch compared to buying ready made. And you know exactly what has gone into making it.

So whatever you are making, baking and creating in your kitchens, have fun preparing and sharing your feast.

Sammie xx

No part of this post may be reproduced or duplicated without the written permission of the owner. Please see my Disclosure Policy.
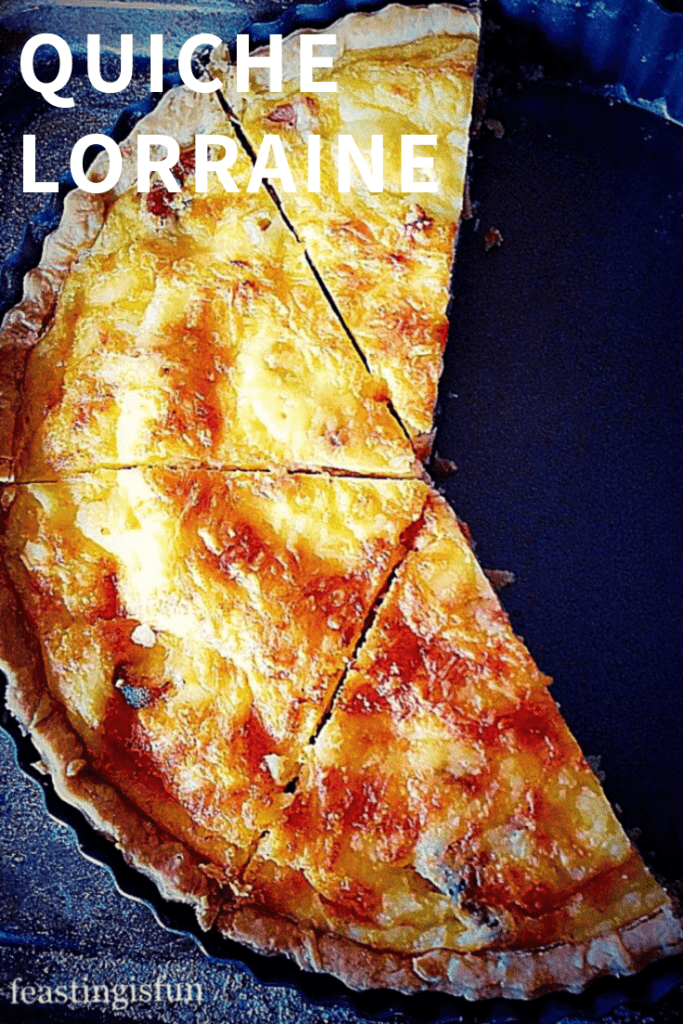
Quiche Lorraine

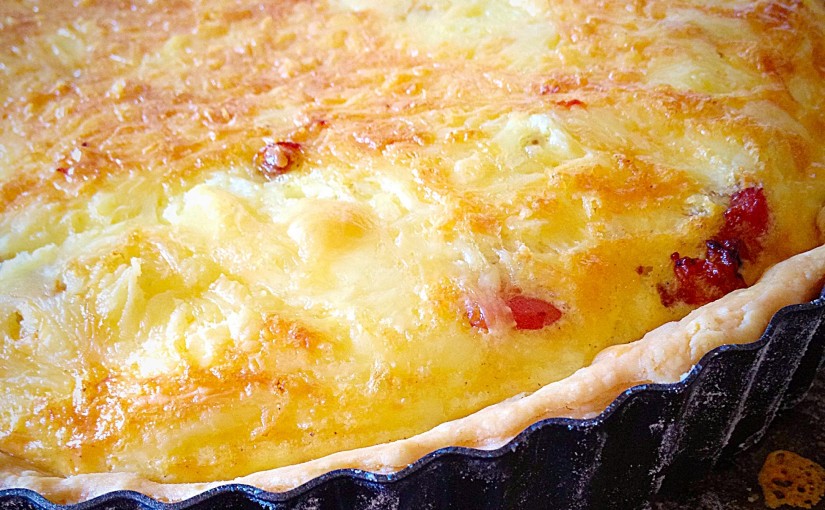
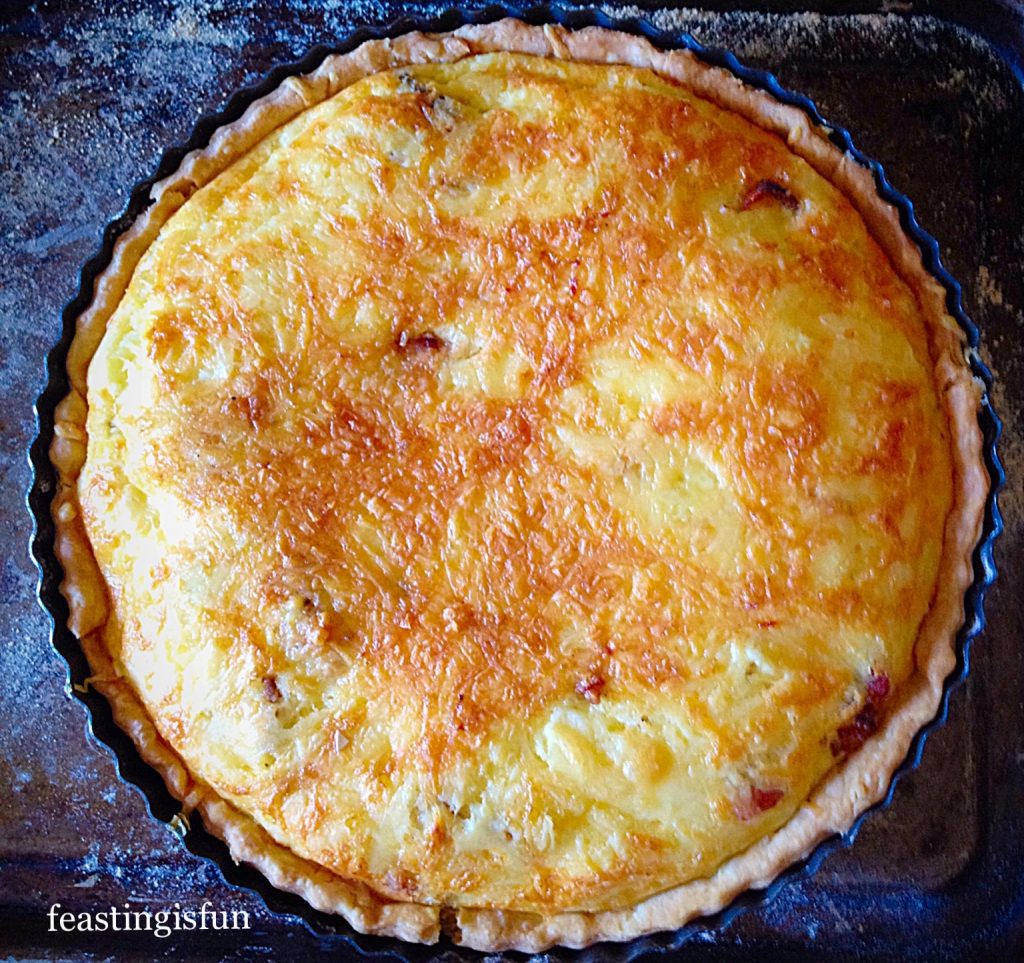
I was thrilled when my Mum yesterday, who is herself, a great quiche maker, complimented me. On seeing my Quiche Lorraine she said “The apple doesn’t fall far from the tree”. Although, thinking about it, that’s surely a compliment to her? Anyway, this cheddar cheese and smoked bacon tart is both easy to make and delicious to eat.

FF Cheddar Bacon Tart

I used a combination of bacon and lardons, as that’s what I had in the freezer and I’m trying to clear it out. So you get lovely chunks as well as pieces of delicious smoked bacon throughout the Quiche. Alternatively leftover cooked Gammon at Christmas, or indeed any other time of the year, works fabulously well in this Quiche Lorraine. Cut into chunks and use in place of the bacon, the beauty being no pre-cooking is required!

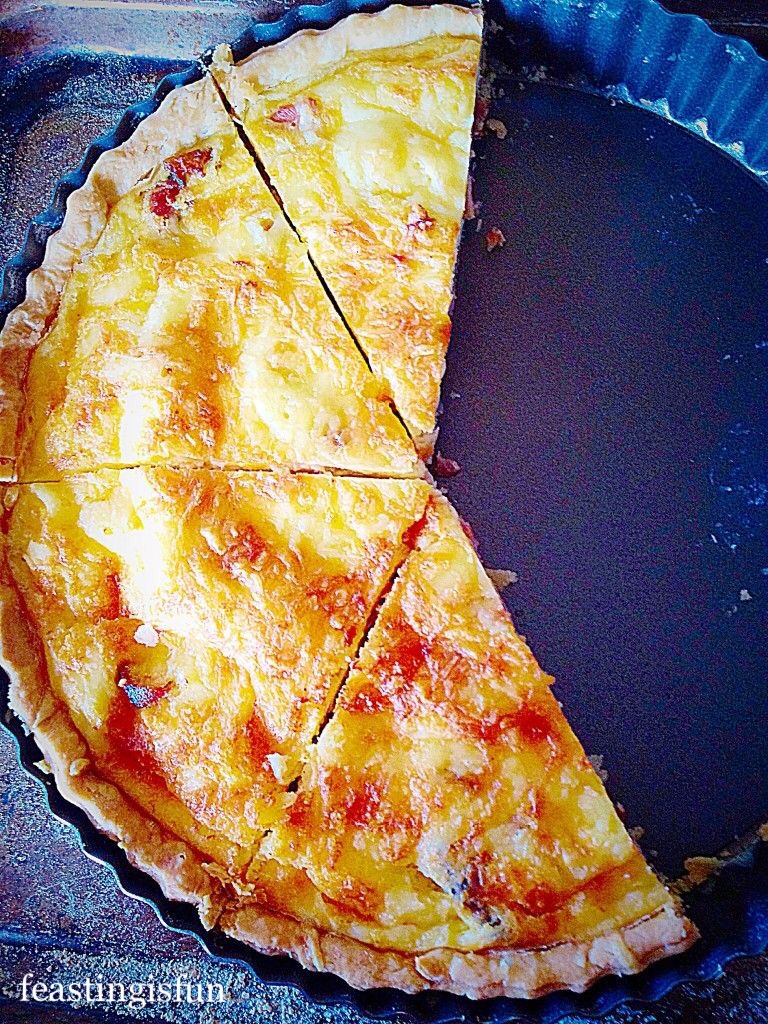
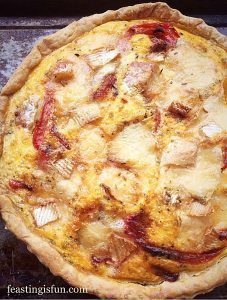
Quiche Lorraine a classic recipe using sharp cheddar, gammon or bacon in a shortcrust pastry egg tart.

Sooo I made the pastry for this quiche myself, but, umm, well let’s just say, I’m gonna leave that for another post. Which I know doesn’t help you, as you need pastry for this recipe. I’m sorry. Really I am. Either use your go-to shortcrust pastry recipe, or buy it!! Just know you’ll need 450g/1lb. I promise I will post my recipe ASAP. Finally I have the recipe, see the link in the recipe below for Pefect Butter Shortcrust Pastry.

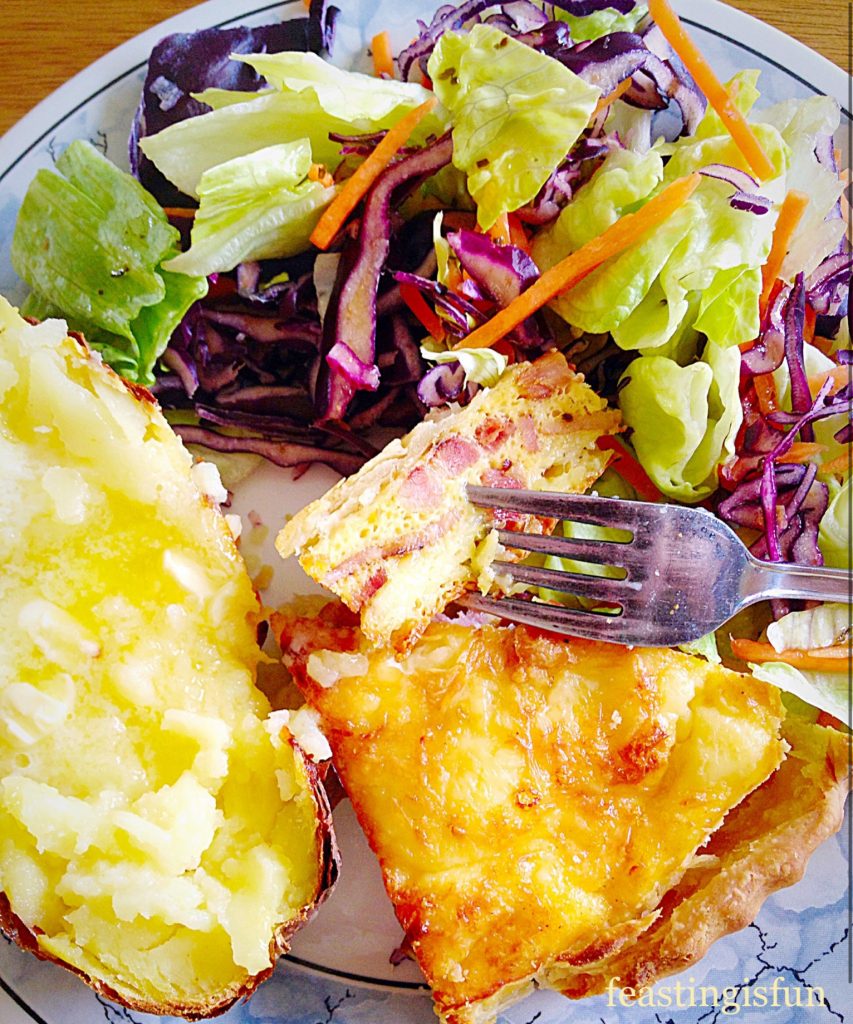
Cheddar, bacon and egg tart slice served on a plate with fresh salad and a baked potato.
A slice of quiche lorraine served with salad and a baked potato.

Quiche Lorraine is also perfect, portable, picnic food. So easy to slice and pack up with chunks of cucumber and cherry tomatoes. And as the evenings stay light we can always take our food and eat outside.

Makes 1 x 25cm/10” Quiche Lorraine serves 6-8

450g/1lb Shortcrust Pastry – see my recipe here

8 Large Eggs – I use Burford Brown eggs from Clarence Court

125ml/4.5fl oz Whole Milk

300g/11oz Smoked Bacon/Lardons – cooked and cooled on kitchen paper

175g/6oz Sharp Cheddar – grated – I use Wyke Farms Mature Cheddar

1/2tsp Ground Black Pepper

Method : Preheat oven to 200C/180C fan oven, gas mark 4, 350F.

You will need a 25cm/10in tart tin, preferably with a loose base.

Preparing The Tart Case

Roll out the pastry on a floured surface to approx 16″ across. This will ensure it fits easily inside the Quiche tin, without stretching.

If using a ceramic dish, grease thoroughly with butter before lining with pastry. For tins I don’t find it necessary, but grease if you’re worried about the pastry sticking.

Transfer the pastry by rolling it around the rolling pin and then carefully unrolling over the Quiche tin.


I always place my quiche tin on a baking sheet. Gently press the pastry into the sides and bottom of the tin. Then using the rolling pin, roll it over the top of the tin. This creates a clean finish to the pastry. If using a ceramic dish, neatly trim off the excess pastry with a knife.

Nice neat pastry finish.


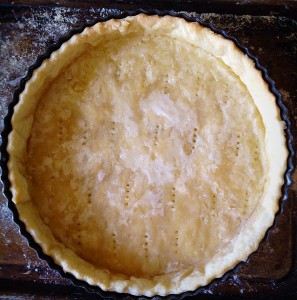
Next doc the pastry at the bottom of the tin with a fork. This will stop the pastry from rising up when baked.

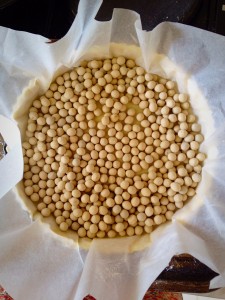
Place parchment paper onto the pastry and fill with baking beans or ceramic balls. These keep the pastry from collapsing during the blind baking.


Place the quiche tin into the oven and bake for 15 minutes. Remove from the oven and discard the parchment paper and baking beans. Return to the oven and bake for a further 5 minutes. Remove and allow to cool for 10 minutes.

The pastry case is now part baked. This ensures the egg mixture will not seep into the pastry. The quiche will have a crisp bottom, when fully cooked.

Making The Cheddar Bacon Filling And Baking The Quiche

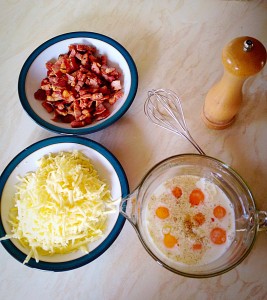
Whilst the pastry case is cooling gather the other ingredients together.


Add a good grinding of black pepper to the eggs and milk, then whisk together.

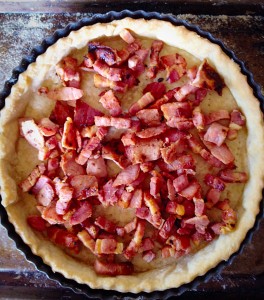
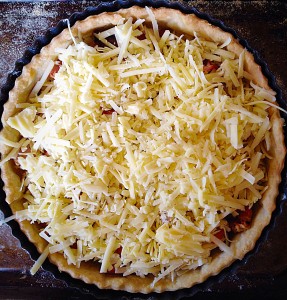
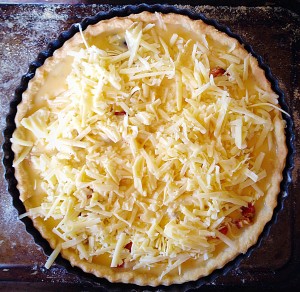
Sprinkle the cooked bacon evenly over the pastry base.
Then do the same with the grated cheese.

Slowly pour the egg mixture into the centre of the quiche, making sure that it doesn't flow over the top of the pastry.

Slowly pour the egg mixture into the centre of the quiche, ensuring it doesn’t flow over the edge if the pastry.

Reduce the oven temperature by 10C/25F, one gas mark lower. Place the Quiche Lorraine in the oven and bake for 20-25 mins until set and golden. Remove from oven. Allow to cool for at least 10 minutes before slicing and serving.

Quiche Lorraine

This Quiche is so versatile. It can be packed up for lunch, a picnic, or as part of a meal with an endless choice of sides.

If you have enjoyed this Quiche Lorraine recipe you may also like these:

Wigmore Cheese Red Pepper Tart

Wigmore Cheese Red Pepper Tart

Cherry Tomato Mozzarella Basil Quiche

Cherry Tomato Mozzarella Basil Quiche

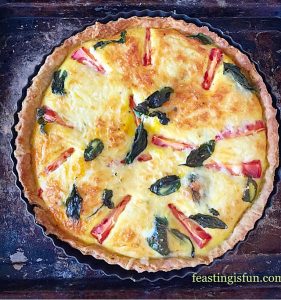
Smoked Bacon Asparagus Quiche

Smoked Bacon Asparagus Quiche

Because I enjoy making quiches and tarts so much, it makes sense to make my own pastry. Since one batch of pastry makes two tarts I always freeze half to use later. Also this Quiche Lorraine freezes really well, simply defrost overnight in a refrigerator and then reheat until hot all the way through.

Sammie x

No part of this post may be reproduced or duplicated without the written permission of the owner. Pleas see my Disclosure Policy.
Bacon and cheese, egg tart in tin.