White Chocolate Strawberry Cheesecake


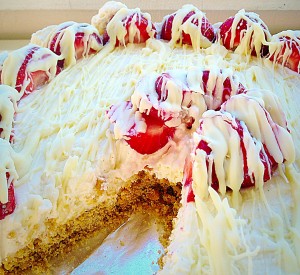
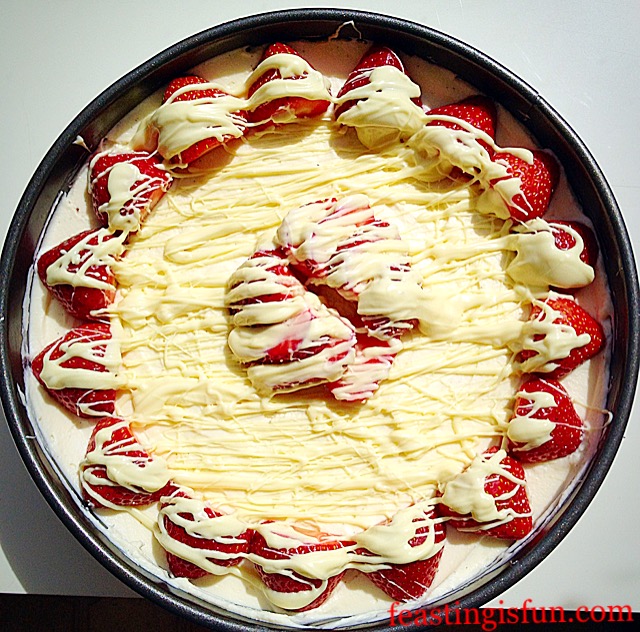
So Wimbledon starts today here in the UK and that can only mean one, two, oh well maybe a few things. First of all it means Strawberries, beautiful, British, luscious, red, ripe berries. While strawberries are available year round in the supermarkets, eating local, seasonal berries cannot be beaten. And to celebrate these gorgeous fruits I have created this White Chocolate Strawberry Cheesecake.

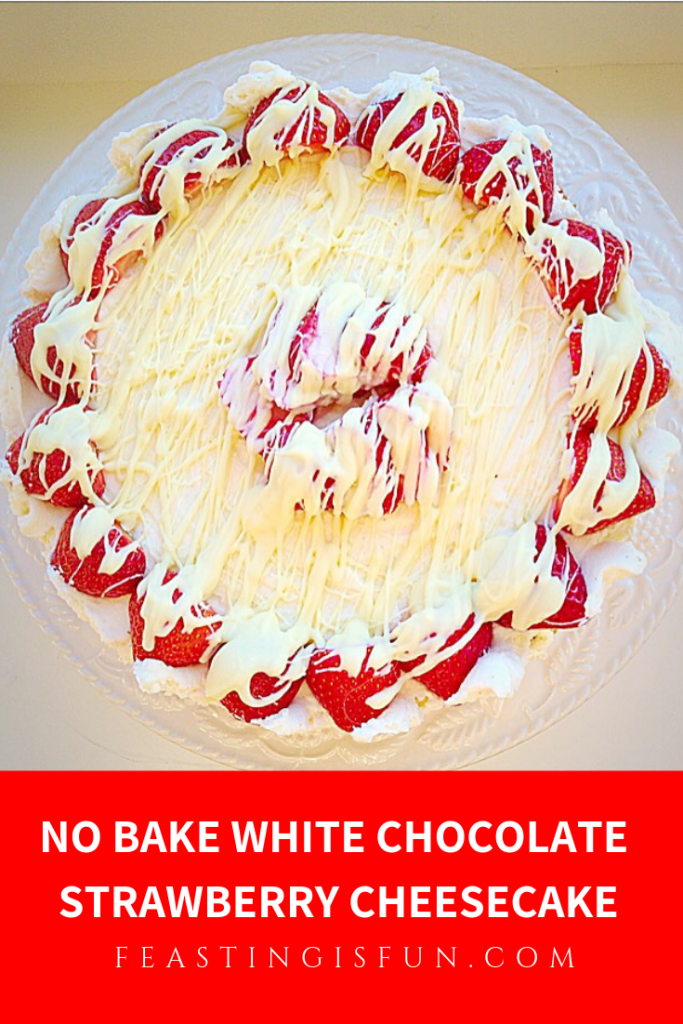
FF No Bake White Chocolate Strawberry Cheesecake

Which brings me onto my second point; many afternoons will be spent over the next fortnight watching copious amounts of tennis. I kid you not. Because Wimbledon is a national pastime. Will Murray make it through to the final? Will the Williams sisters reign supreme? Second to our preoccupation with the weather (which is actually my third point!), Wimbledon lovingly becomes THE subject of conversation. And taking precedence over my third point. Will the weather hold? Will the roof be closed. So much speculation, umming and aahing takes place during Wimbledon AND it’s FUN!!

Smiling at British eccentricities

I love the way we British, while watching a well known player blast their way through three sets against a relative unknown ALWAYS pull for the underdog. It’s one of the Great British traits I really admire. Yet for two weeks computers, iPhones, TV’s are all tuned to the BBC, for a glimpse of the All England Tennis Club’s freshly prepared, lawn courts, get thoroughly annihilated by some of the worlds top athletes.
FF No Bake Cheesecake
No Bake White Chocolate Strawberry Cheesecake

And Wimbledon is one of the highlights of my year. Can you tell? Since I  had the opportunity to go, back in the day when John McEnroe reigned supreme, I’ve been sold on it ever since. In fact, should you get the opportunity to visit SW19 it’s a wonderful, Wimbledon, experience!
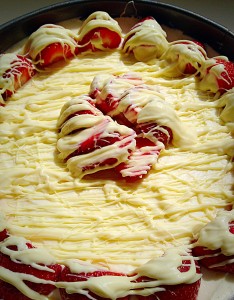
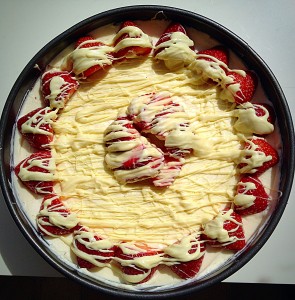
White Chocolate Strawberry Cheesecake - the perfect dessert for Summer.
White Chocolate Strawberry Cheesecake – the perfect dessert for Summer.

Recipe : White Chocolate Strawberry Cheesecake Serves 8-10

275g/10oz Digestive Biscuits – or Graham Crackers

125g/5oz Unsalted Butter

750g/Approx 1.5lb Mascarpone Cheese

2tbsp Icing Sugar

1tsp Vanilla Bean Paste – or 2tsp Vanilla Extract – I use Nielsen-Massey 

50ml/Splash of Whole Milk

200g/7oz Good Quality White Chocolate

250g/9oz Fresh Ripe Strawberries

Method : White Chocolate Strawberry Cheesecake

You will need a 25cm/10″ Springform Cake Tin for this recipe.

Since it can be quite difficult to remove the cheesecake from the base of the pan, I cover the base with aluminium foil and click into place.
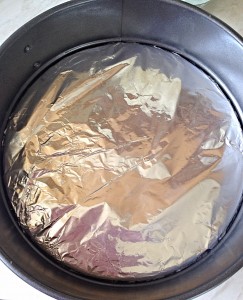
Covering the base of the pan with foil protects it from knife marks!
Cover the base of the pan with foil to protect it from knife marks

Making the cheesecake base:

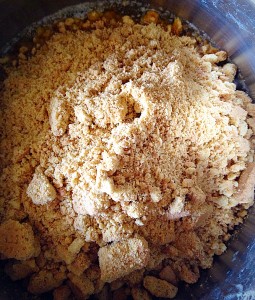
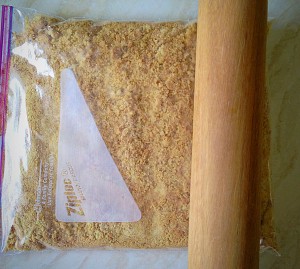
  • First of all, place the biscuits into a thick, sealed freezer bag and bash with a rolling pin, until they are broken and look like sand.

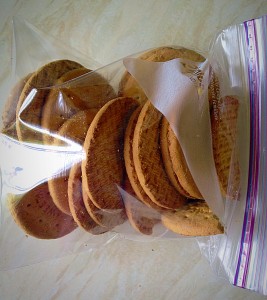
Place the digestive biscuits into a sealed freezer bag.

  • Bash the biscuits with a rolling pin until they are completely broken up and resemble sand.

Bash the biscuits with a rolling pin, until they are broken up and resemble dry sand.

  • Put the butter into a small saucepan and melt over a low heat. As soon as it is melted turn off the heat. Tip in the biscuit crumbs and mix thoroughly. The mixture should resemble damp sand.
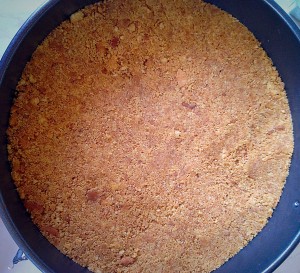
  • Press the biscuit base into the tin using the back of a spoon to create a compact, even layer.
  • Refrigerate for an hour.
Tip the damp sand mixture into the springform pan.
Press the mixture down evenly with the back of a spoon. Refrigerate for an hour to set.
Press the mixture down evenly with the back of a spoon. And refrigerate for an hour to set.

Making the cheesecake filling:

  • Next for the cheesecake filling – melt 75g/3oz white chocolate in the microwave, remove before completely melted and stir. The residual heat will ensure all the chocolate melts. So be careful, white chocolate is the easiest chocolate to overheat.
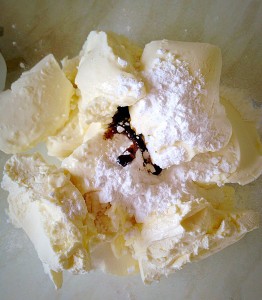
  • Into a large bowl add the mascarpone cheese, icing sugar, vanilla bean paste and a splash – 1tbsp of milk. Whisk until the mixture is smooth.

Into a large bowl add the Mascarpone, icing sugar, vanilla bean paste and a splash of milk. Whisk to thoroughly incorporate all the ingredients.

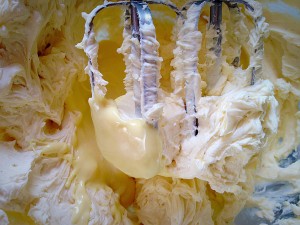
  • Pour the cooled, melted white chocolate into the mascarpone mix and whisk until silky smooth.

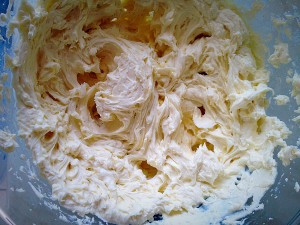
Pour in the cooled, melted white chocolate. Whisk until the cheesecake mixture is silkily combined.

Resist the urge to sit in the kitchen floor and eat the contents of this bowl with a spatula!!

  • Spoon the cheesecake mixture on top of the biscuit base and smooth the top.

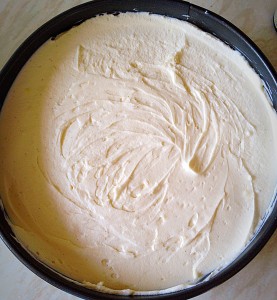
Add the cheesecake mixture to the top of the biscuit crust and smooth.

  • Pop the cheesecake in the fridge while you sit on the kitchen floor and lick the bowl and spatula clean. Mmmm not too shabby!

Decorating the cheesecake:

  • Melt the rest of the white chocolate, as before and set aside to cool a little.
  • Also pick two strawberries for the centre of the cheesecake. Hull and halve the rest of the strawberries.
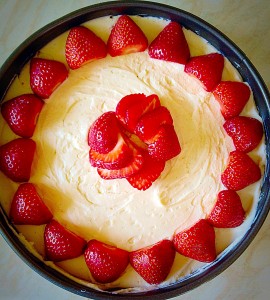
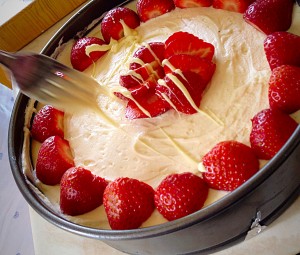
Arrange your strawberries in a pretty pattern, or just tumble them on top - it's your cheesecake!!
Arrange your strawberries in a pretty pattern, or just tumble them on top – it’s your cheesecake!!
Using a fork drizzle the melted white chocolate from side to side.
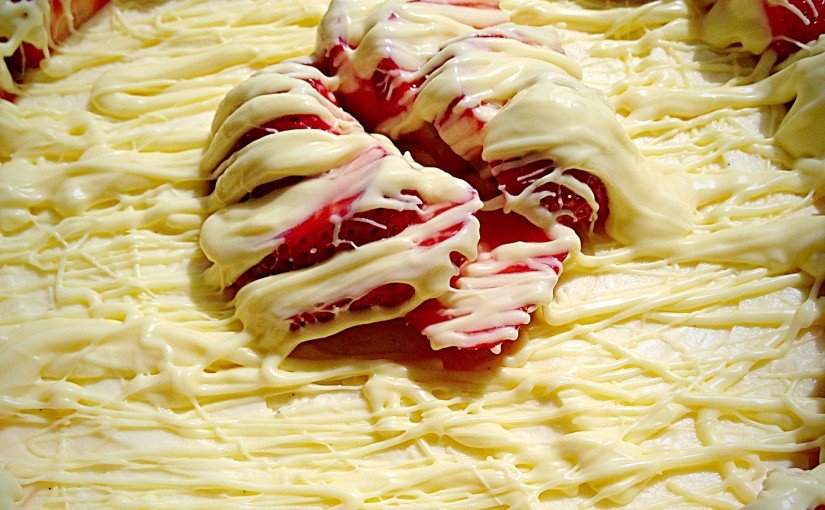
Continue drizzling until your White Chocolate Strawberry Cheesecake is complete.
  • Finally place the cheesecake in the fridge for at least 4 hours to set (overnight would be better – but who are we kidding?).
  • Run a palette knife around the edge of the cheesecake and release from the tin.
  • Finally place the cheesecake onto a plate or cake stand.
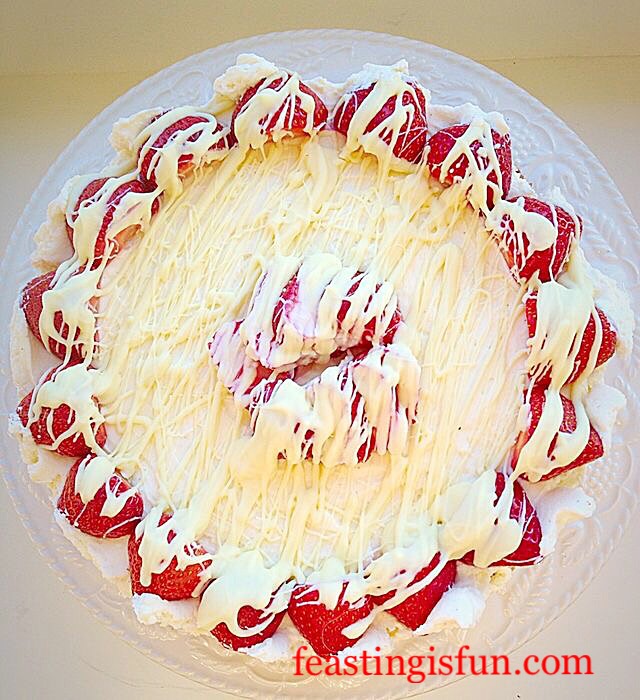
FF White Chocolate Strawberry Cheesecake
No Bake White Chocolate Strawberry Cheesecake
Crunch base with a soft, light, vanilla topping.

Slice the cheesecake using a sharp knife. And serve on dessert plates with an accompanying fork.

Cover with cling film and keep refrigerated. Eat within 3 days.

If you have enjoyed this recipe for White Chocolate Strawberry Cheesecake then you may also like these:

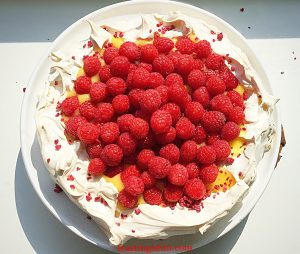
Raspberry Topped Lemon Curd Pavlova
FF White Chocolate Strawberry Cheesecake
Raspberry Topped Lemon Curd Pavlova

White Chocolate Drizzle Strawberry Cream Cake 

FF White Chocolate Strawberry Cheesecake
White Chocolate Drizzle Strawberry Cream Cake

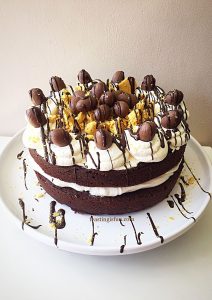
Chocolate Honeycomb Sponge Cake 
FF White Chocolate Strawberry Cheesecake
Chocolate Honeycomb Sponge Cake

While Wimbledon certainly is a highlight of my year, gathering with family to watch the final together is the biggest thrill. Because sharing time together is what matters most. Also, making memories and creating experiences that our children will tell their children about, is absolutely the heart of who I am as a parent. And I firmly believe that all food tastes better when shared. So getting together with friends and family turns simple food into a feast!

So whatever you are making, baking and creating in your kitchens, have fun preparing and sharing your feast.

Sammie xx

No part of this post may be reproduced or duplicated without the written permission of the owner. Please see my Disclosure Policy.
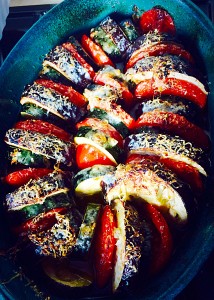
Fresh Summer Vegetable Bake

Summer is well and truly here and with it an abundance of gorgeous summer fruit and vegetables. I’ve just joined a veg box scheme – which means I get a lovely box of fresh fruit and veg delivered to my door every Monday. First delivery is tomorrow, so I’m excited to see what recipes I can come up with! To get in the mood I decided to make a Fresh Summer Vegetable Bake!

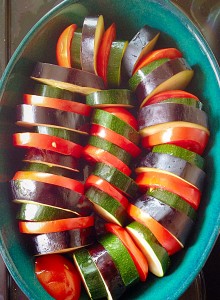
Fresh Summer Vegetable Bake - with a tasty Garlic, Thyme and Lemon Sauce.
Fresh Summer Vegetable Bake – with a tasty Garlic, Thyme and Lemon Sauce.


This may sound odd, but generally as a family we don’t like dry meals. So a sauce or gravy is essential! For this Fresh Summer Vegetable Bake I made a delicious sauce using garlic, lemon, thyme and Olive oil. This was poured over the beautifully arranged veggies and WOW – even Snugs, our youngest daughter loved it!! Now she’s not exactly picky, especially compared to others the same age, however, let’s say her taste buds aren’t as accepting as the rest of our family. So for her to love this dish, well I knew I was onto a winner!

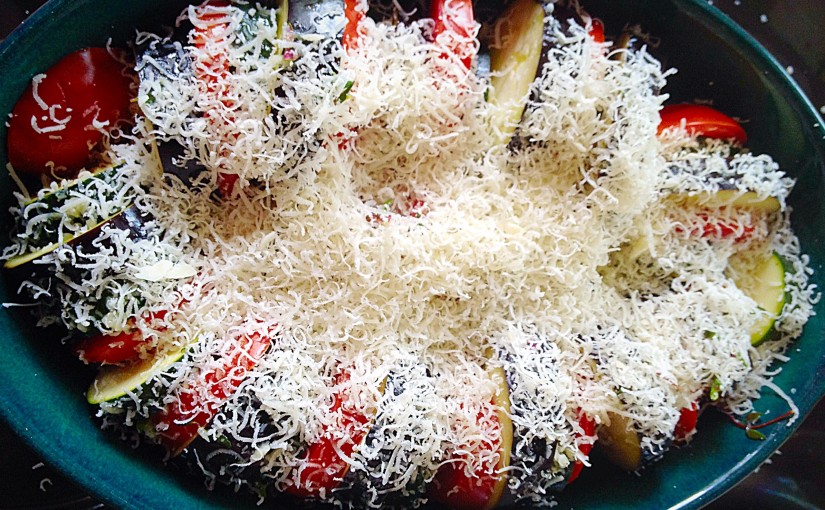
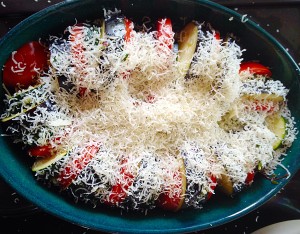
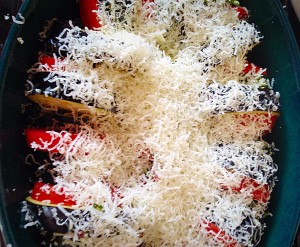
Fresh Summer Vegetable Bake - topped off with a generous grating of Parmesan.
Fresh Summer Vegetable Bake – topped off with a generous grating of Parmesan.


I used tomatoes, aubergines and green courgettes, but any squashes, potatoes, really any summer veg that you have an abundance of would work. Again the quantities I have given are for 4 adults, you could easily bulk this dish up with potatoes to make it go further, or even eat it as a main dish. The possibilities are endless!!

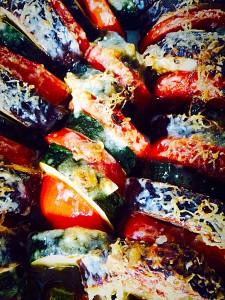
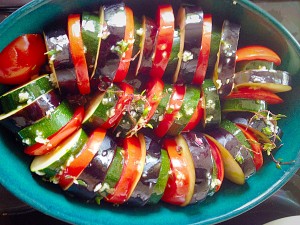
Fresh Summer Vegetable Bake - the thyme, garlic and lemon mix with the vegetable juices to create a sumptuous sauce.
Fresh Summer Vegetable Bake – the thyme, garlic and lemon mix with the vegetable juices to create a sumptuous sauce.


I’m excited to see what manner of unusual varieties of fruit and vegetables arrive in my veg box. I used to grow quite a few veggies with my lovely hubby’s help, one of the reasons being the ability to grow odd shaped squash or heirloom tomatoes. Most supermarkets only stock a scant supply of these during the summer months. Farmers Markets, however, are a treasure trove of different crops. I highly recommend, if you are able, to visit one. The experience itself is remarkable, with many stall holders happily sharing taste teasers of their wares. I’m waffling again……

Recipe : Serves 4 Adults as a Side

2 Medium Courgettes/Zucchini

2 Medium Aubergines/Egg Plant

6 Large Tomatoes

Juice of 2 Medium Lemons

Equal quantity of Olive oil (as lemons)

1 Clove Garlic – Crushed

Approx 1tbsp Fresh Thyme Leaves

Freshly Ground Black Pepper

1tsp Sea Salt

50g/2oz Parmesan Cheese – finely grated

Method : Preheat the oven to 190C/175C fan

Firstly to make the sauce.

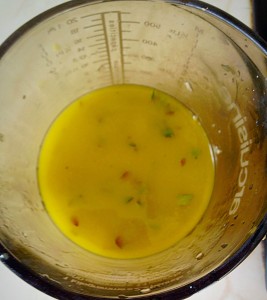
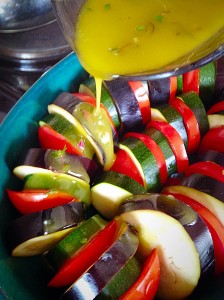
Place the lemon juice, oil, garlic, thyme, salt and a good grinding of pepper into a jug. Whisk until combined.

The sauce will emulsify - give a quick whisk again prior to pouring over the vegetables.
The sauce will emulsify – give a quick whisk again prior to pouring over the vegetables.


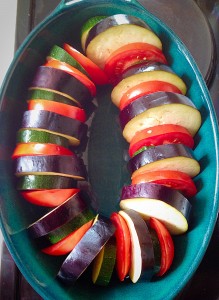
Next prepare all your vegetables by slicing them to the same thickness – approx 1cm/ 1/2″.

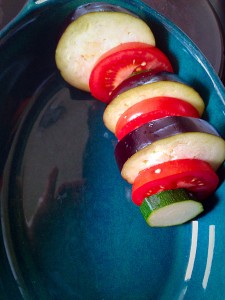
Arrange the round slices, on their side in the baking dish.
Continue packing the veggies tightly, they will shrink slightly on cooking.
Pack the dish full. It looks soo pretty!
Pour the sauce evenly over the vegetables....
Pour the sauce evenly over the vegetables….
The lemon juice not only makes the sauce taste delicious, it also stops the aubergines from turning brown.


Now you can grate over the Parmesan.

Your Fresh Summer Vegetable Bake is now ready for the oven.


Bake for 1 – 1 1/4 hours, until the vegetables are tender. Then remove from oven.

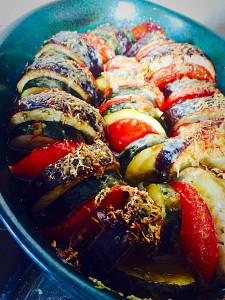
Mmm delicious - Fresh Summer Vegetable Bake.
Mmm delicious – Fresh Summer Vegetable Bake.


This light vegetable dish is perfect to accompany a Roast Chicken, baked fish – if the oven’s on let it do all the cooking!!!

I’d love to know if you are part of a veg box scheme, grow your own or enjoy Farmers Markets?

Sammie x


Hazelnut Chocolate Chunk Cookies Gluten Free

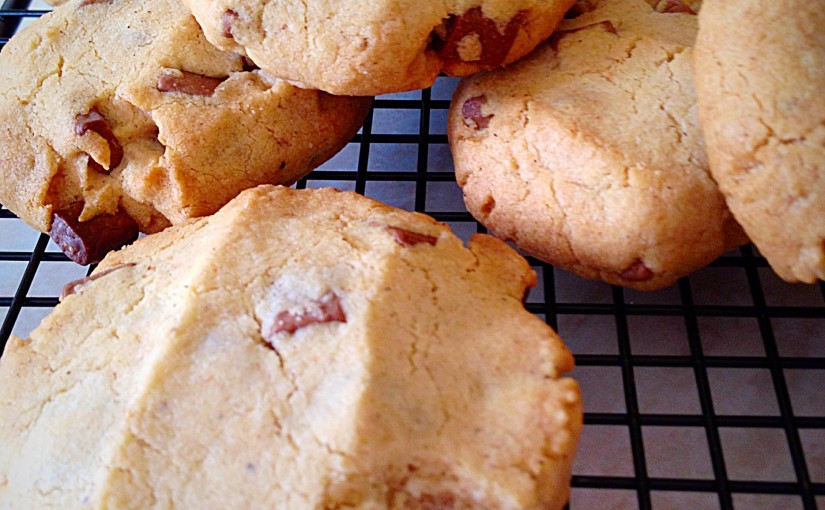
Hello lovely people, I have finally managed to come up with a Gluten Free cookie. As many of my regular readers may be aware, I’ve recently been having seizures. This has has had a MASSIVE impact on my life and the lives of our family. One of the biggest, non physical impacts is that I cannot drive for the foreseeable future. So my wonderful mummy has been collecting the children from school for us – everyday. Such a huge, selfless, commitment. As she is following a Gluten Free eating plan I wanted to make her a ‘treat’, hence Hazelnut Chocolate Chunk Cookies Gluten Free.

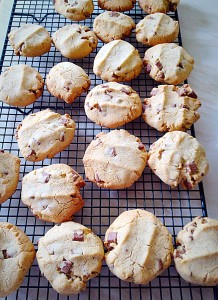
Hazelnut Chocolate Chunk Cookies Gluten Free - if you can't eat Gluten, you can have these!!
Hazelnut Chocolate Chunk Cookies Gluten Free – if you can’t eat Gluten, you can have these!!


I used Doves Farm Gluten Free Flour and Biona Hazelnut Butter, both items were purchased by myself. The Hazelnut Butter was bought to make Hazelnut Ice Cream (seriously good, will post recipe soon), the Gluten Free Flour was purchased for the sole reason of developing Gluten Free recipes, with Mum in mind. The texture of the cookies is very biscuity, not too dry, but definitely not a soft cookie. Using Doves Farm Gluten Free flour, there is no difference in taste or texture, when compared with White Wheat Flour in this recipe.

More than anything I am just so pleased to have made my Mummy some cookies and that I get to share the recipe with you! If you have a nut allergy you can absolutely substitute the Hazelnut Butter for Unsalted Butter. So hopefully everybody can enjoy Hazelnut Chocolate Chunk Cookies Gluten Free!

Mmm yummy - Hazelnut Chocolate Chunk Cookies Gluten Free.
Mmm yummy – Hazelnut Chocolate Chunk Cookies Gluten Free.


Our window cleaner happened to be cleaning the windows and offered to try a Cookie. Cheeky, yes! But he always does such a good job and I do like to share. He gave them a big thumbs up, remarking on how un-doughy they were for Gluten Free. Always good to have an unbiased opinion. The Green Goddess will be sent hers to try later today, but the opinion I’m most awaiting is my Mummy’s. After all she was the inspiration behind them.

So enough waffling, here’s what you need to make Hazelnut Chocolate Chunk Cookies Gluten Free.

Recipe : Makes 20-30 Cookies

150g/5oz Caster Sugar

175g/6oz Hazelnut Butter

50g/2oz Unsalted Butter

Pinch of Salt

1 Whole Large Egg – free range if poss

1tsp Vanilla Extract

250g/9oz Gluten Free Flour – Doves Farm

175g/6oz Chocolate Chunks

Method : Preheat oven to 175C/160C fan

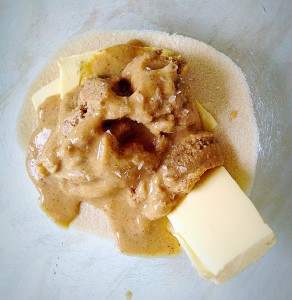
Place the hazelnut butter, butter, salt and sugar into a large bowl. Whisk until well combined.

The whisked butter/sugar mixture will seem a little grainy in texture – that’s normal.

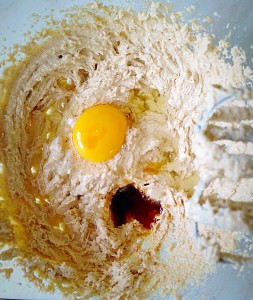
Add the whole egg and vanilla extract. Whisk for a good couple of minutes, until the mixture is lighter in colour and texture.
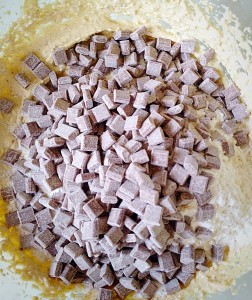
Add the Gluten Free Flour and the Chocolate Chunks. Stir until all the ingredients are combined.

I have used Callebaut Chocolate Chunks, these are coated in corn flour, which is Gluten Free.

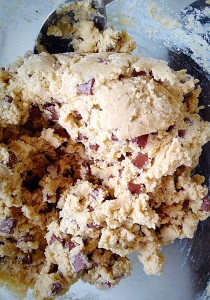
This is how your Hazelnut Chocolate Chunk Cookie Dough Gluten Free, should look.


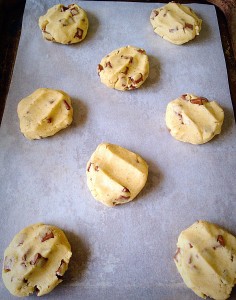
On parchment lined baking sheets, form small, balls of cookie dough.

Space the cookie dough balls evenly apart.
Using clean damp hands, use you fingers to press down and flatten the cookie balls.


Place the cookies in the oven and bake for 10-12 minutes, until golden.

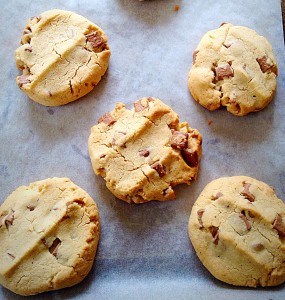
Delicious golden Hazelnut Chocolate Chunk Cookies Gluten Free.


Remove from the oven when cooked.  Allow the cookies to cool on the baking tray for 10 mins and then transfer to a cooling rack.

Hazelnut Chocolate Chunk Cookies Gluten Free - these cooling cookies smell amazing. A mixture of chocolate, hazelnut and vanilla - sooo good!
Hazelnut Chocolate Chunk Cookies Gluten Free – these cooling cookies smell amazing. A mixture of chocolate, hazelnut and vanilla – sooo good!


I made 24 cookies. Next time I will flatten them a little more, I wasn’t sure how far they would spread. They don’t!!!!

Now I can’t wait to see my Mummy to give her some cookies and see what she thinks?

NOTE : These cookies are at their best eaten on the day they are baked.

To store the cookie dough, wrap in cling film and keep in the fridge for up to a week.

Please let me know if you try these?

Happy Baking and Sharing.

Sammie x


Wholemeal Cob Loaf

Hi, I’m so excited. I have a secret to share with you. 100% wholemeal bread that’s not heavy! My Wholemeal Cob Loaf is delicious, nutritious and so tasty – oh and did I mention it’s not heavy, like some 100% wholemeal loaves can be.

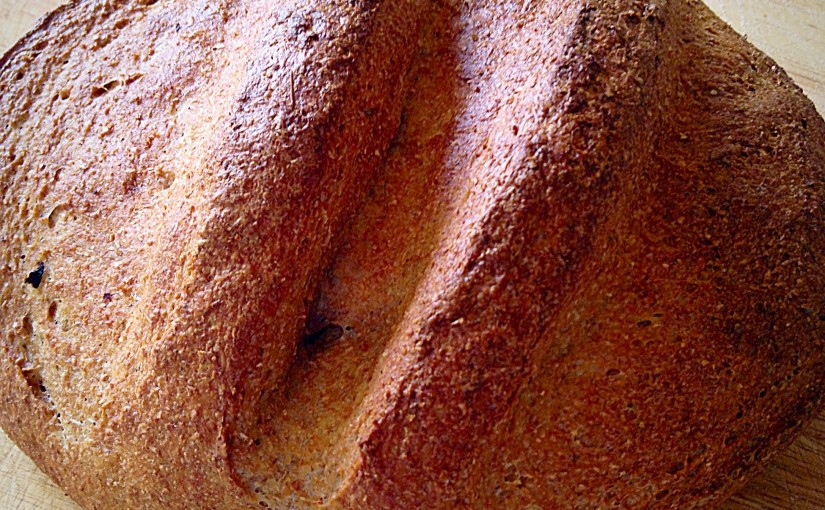
Wholemeal Cob Loaf - a gorgeous crust and delicious taste.
Wholemeal Cob Loaf – a gorgeous crust and delicious taste.


The trick, I’ve found, to make a Wholemeal Cob Loaf that ISN’T dense, is to triple prove the dough. This is most definitely a loaf that cannot be rushed. But hey, it’s not like you have to do anything while it’s proving! It’s very happy to be left alone!!! Also I used my bread maker to mix, prove, knock-back, prove etc. All I had to do was shape the final loaf. But it could easily be made by hand, with kneading and knocking back adding only a few extra minutes. Trust me it’s so worth it!

Wholemeal Cob Loaf - cutting through the top creates more crunchy crust.
Wholemeal Cob Loaf – cutting through the top creates more crunchy crust.

This Wholemeal Cob Loaf delivers massively on flavour. A deep flavoursome loaf that is part of a sandwich or toast, not just a medium for the topping or filling. Being 100% wholemeal ensures each slice is loaded with fibre and being homemade there are no artificial additives. A great tasting loaf that’s good for you. I also prefer to bake with Organic flour, so my loaf is as wholesome as it can be!

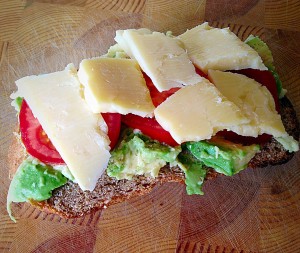
Lunch - as slice of Wholemeal Cob Loaf with Avocado, sliced Tomatoes and Strong Cheddar - delish!
Lunch – as slice of Wholemeal Cob Loaf with Avocado, sliced Tomatoes and Strong Cheddar – delish!


Recipe : Makes 2 Medium Wholemeal Cob Loaves (or 1 large)

450g/1lb Wholemeal Bread Flour

2tsp/1 x 7g Sachet Dried Yeast

1tbs Honey

300-350ml Water

1tsp Salt – or 1.5 tsp Maldon Sea Salt

1tbsp Butter or Olive Oil

Method : Given for bread maker/Stand mixer with dough hook.

Pour 300ml warm (body temp) water into the bowl. Add the honey and yeast. Swish around with clean fingers to mix.

Add the flour on top of the liquid mixture.

Next add the salt and butter/oil.

Set the bread maker to mix and prove the dough – the mixing cycle should last at least 10 minutes.

For a stand mixer switch on to a low/medium speed and mix for 15 minutes.In both cases check the dough, if the machne is labouring and the dough doesn’t seem soft, or it looks dry, add more water, 15ml at a time, until the dough is pliable and soft (no cracks).

The weather and flour can both influence how much water is needed. With wholemeal flour I would always err on the side of a slightly wetter dough, you don’t want to have dry bread!

With the stand mixer, after mixing place the dough in an oiled bowl, cover with cling film. When doubled in size return dough to the mixer bowl and mix again fo 15 minutes. Repeat proving and mixing process once more (total 3 proves,  3 mixes/knock backs).

If using a bread machine once the dough has been proved once, repeat the mixing (which will knock bake the dough) twice more.

Utimately this dough needs to be proved 3 times – trust me it’s worth it.

The third prove is the final prove, this is where you shape the dough.

Tip the knocked back dough onto an oiled baking sheet. Form into a round.

If baking one loaf, cover in oiled cling film and leave to double in size away from drafts.


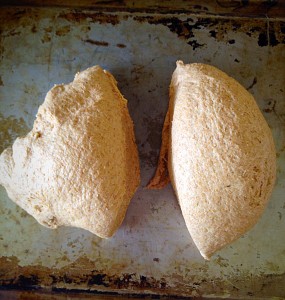
For 2 loaves cut the dough in half.
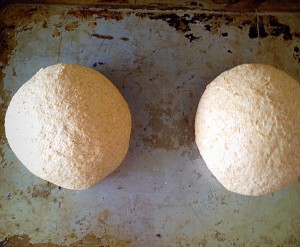
Rotate the dough on the baking sheet to form a tight ball.
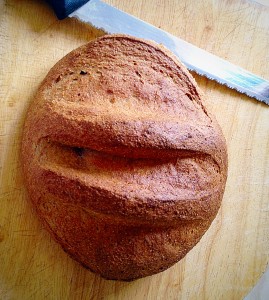
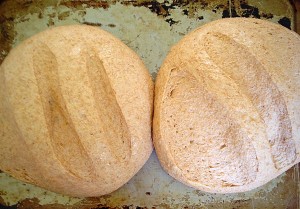
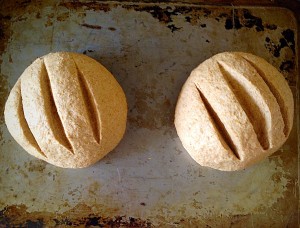
Cut three lines through each loaf - this is optional, but does give a better crust.
Cut three lines through each loaf – this is optional, but does give a better crust.
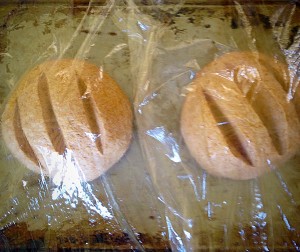
Cover with oiled cling film - this stops the loaves socking and drying out during their final prove. Leave to prove until doubled in size.
Cover with oiled cling film – this stops the loaves sticking and drying out during their final prove. Leave to prove until doubled in size.
15 minutes before your loaves are ready, preheat your oven to it's highest setting.
15 minutes before your loaves are ready, preheat your oven to it’s highest setting


Preheat your oven to its highest setting 230C/gas mark 8

If you have a water sprayer (I keep one especially for bread), once the cling film is removed, spray the loaves and the inside of your oven as you put the loaves in. If not place a tin of hot water in the bottom of the oven whilst you are preheating it. The steam not only helps the dough to rise more fully before it sets, it also helps create a lovely, crisp crust.

Bake for 15-20 minutes (longer if you are baking one large loaf 30 minutes). The loaves are baked when they have a deep golden crust and sound hollow when rapped on the bottom with your knuckle. Remove the loaves from the oven and allow to cool on a cooling rack.

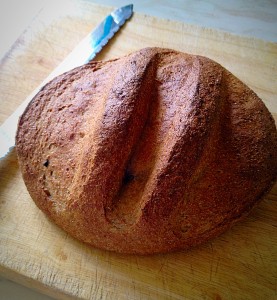
Gorgeous, golden, healthy, Wholemeal Cob Loaf
Gorgeous, golden, healthy, Wholemeal Cob Loaf.


I made 2 loaves and gave one to my mum. We were both really impressed with the flavour, texture and lightness of this bread.

This is without doubt the best 100% Wholemeal bread I’ve ever made, possibly ever tasted. I used Bacheldre Organic Wholemeal Bread flour.

Please let me know if you make this bread?

Also do you use your bread maker to do the hard work and then finish the loaves off in the oven, or is it just me??

if you enjoyed making this recipe how about trying these:

Wholemeal Loaf

Farmhouse White Loaf

Sammie x

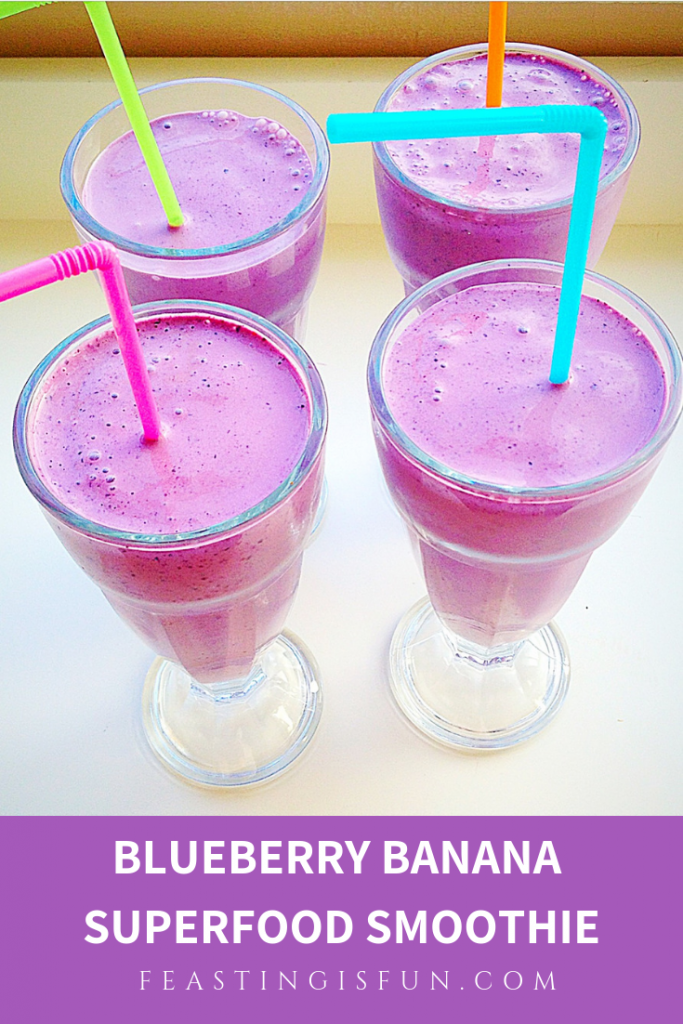
Blueberry Banana Superfood Smoothies

Hello lovely people, thank you for stopping by to read my blog. I really do appreciate each and everyone of you. So I thought I’d share my latest Summer cool down drink with you, my Blueberry Banana Superfood Smoothies. A fabulously tasty way of cooling and recharging your system.

Four glasses filled with ice cream and fruit based cooling, purple drink.


So, why Superfoods? Because blueberries are full of antioxidants and are known to be good for your nervous system and brain. While bananas are also high in Vitamin C, fibre and can help regulate blood sugar levels. And together they can also help with mood enhancement. Also, these fruits have many other positive affects on the body, especially when eaten raw, which is how they are in the Blueberry Banana Superfood Smoothies.

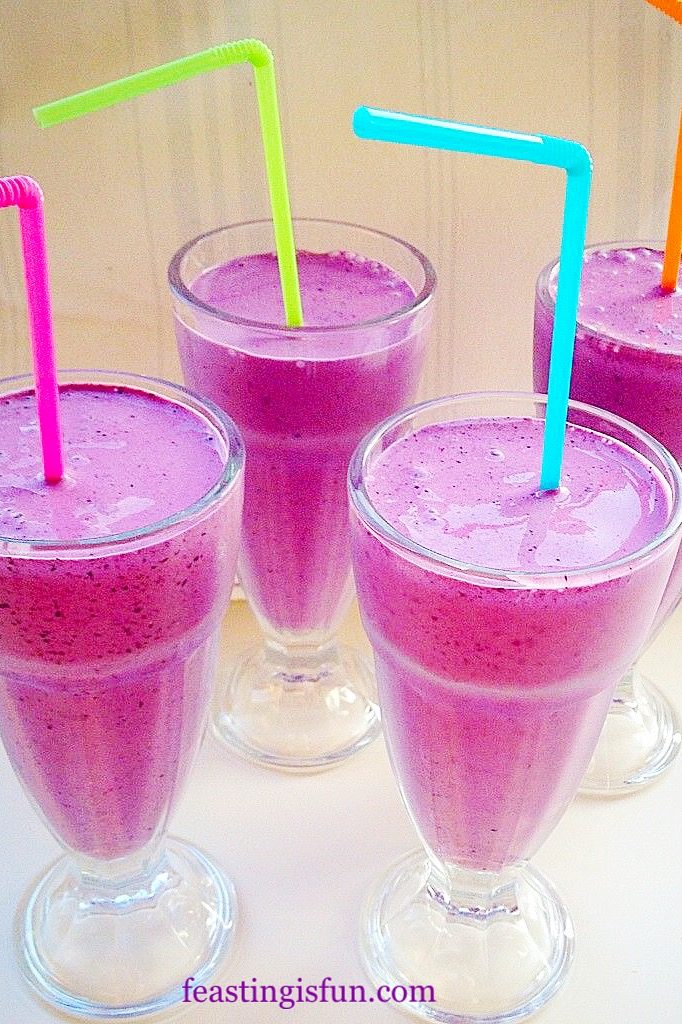
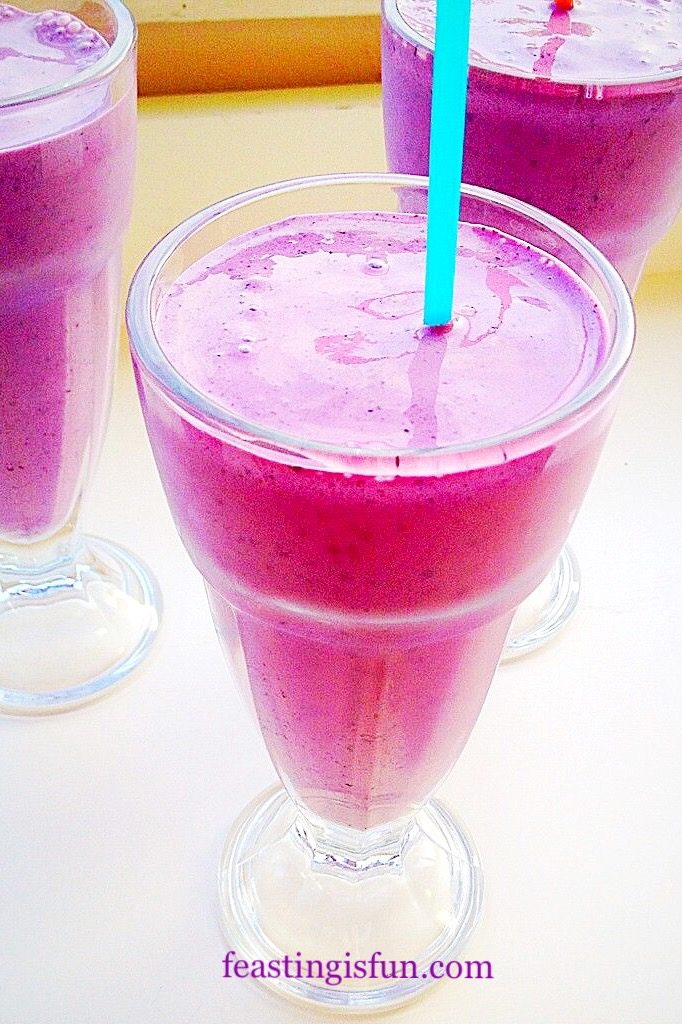
Four glasses filled with purple Blueberry Banana Superfood Smoothies.
Blueberry Banana Superfood Smoothies


If you’re craving something sweet, as I was and don’t want to dive into a tub of chocolate ice cream, then these refreshing drinks will fix that craving and do your body good at the same time. And yes, there is ice cream and whole milk in this recipe, you can totally switch this recipe up and use frozen low fat yoghurt and skimmed milk. While the bananas will still give the smoothie a creamy taste.

Three glasses filled with naturally coloured vivid purple blueberry banana superfood smoothies.
Blueberry Banana Superfood Smoothies

Keeping Things Sweet!

I was actually really surprised that these smoothies didn’t need extra sweetening, considering the amount of blueberries added. Sometimes blueberries can be a bit tart, but the sweetness of the bananas offsets this, creating the perfect balance. Although I have used frozen blueberries,  fresh are also good. Also, to keep the cold in the smoothie just break the bananas up, pop in a bag and freeze.

Using bought frozen fruits keeps the cost down and gives them a longer use-by date. Yet, I have raspberries growing in our garden and if we have loads I would definitely put them in smoothies. You do whatever works for you! We’re pretty chilled about things like that, bit like the smoothies!

Recipe : Blueberry Banana Superfood Smoothies

400g/14oz Frozen Blueberries – I buy mine from Waitrose most supermarkets sell frozen fruit.

3 Large Ripe Bananas

250ml Whole Milk

4 Large Scoops Vanilla Ice Cream – approx 1/2pint – 300ml

Method :

Making The Purple Smoothies

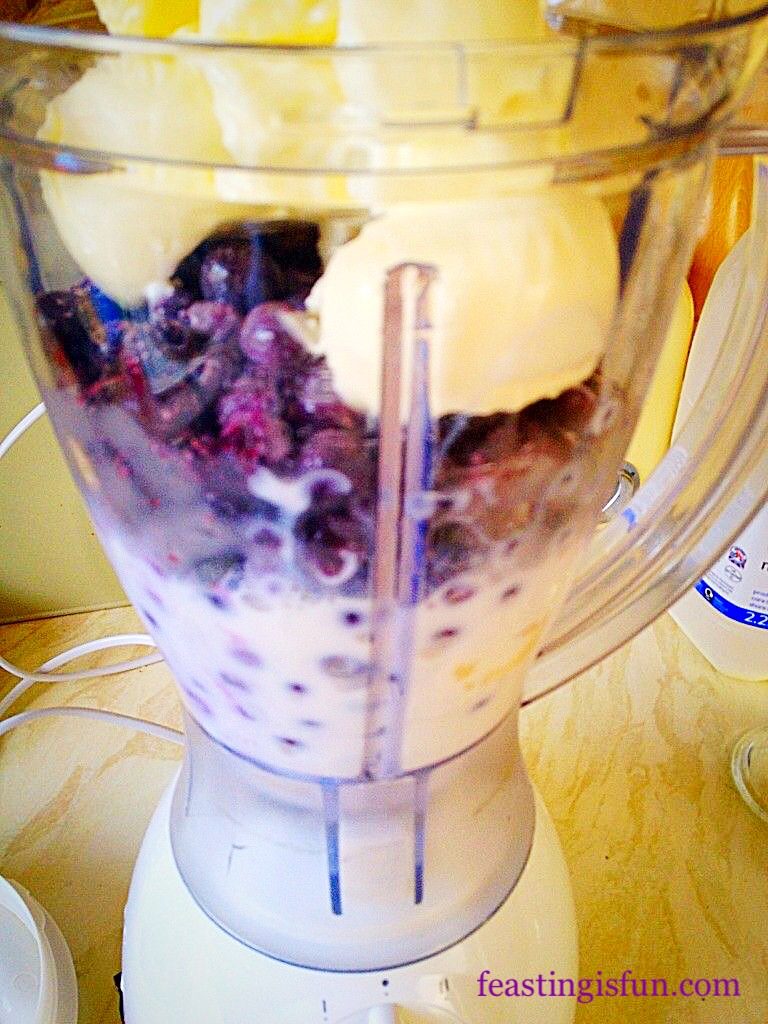
First of all, peel the bananas, break into pieces and add to the jug of a blender. Add the frozen blueberries, ice cream and milk.

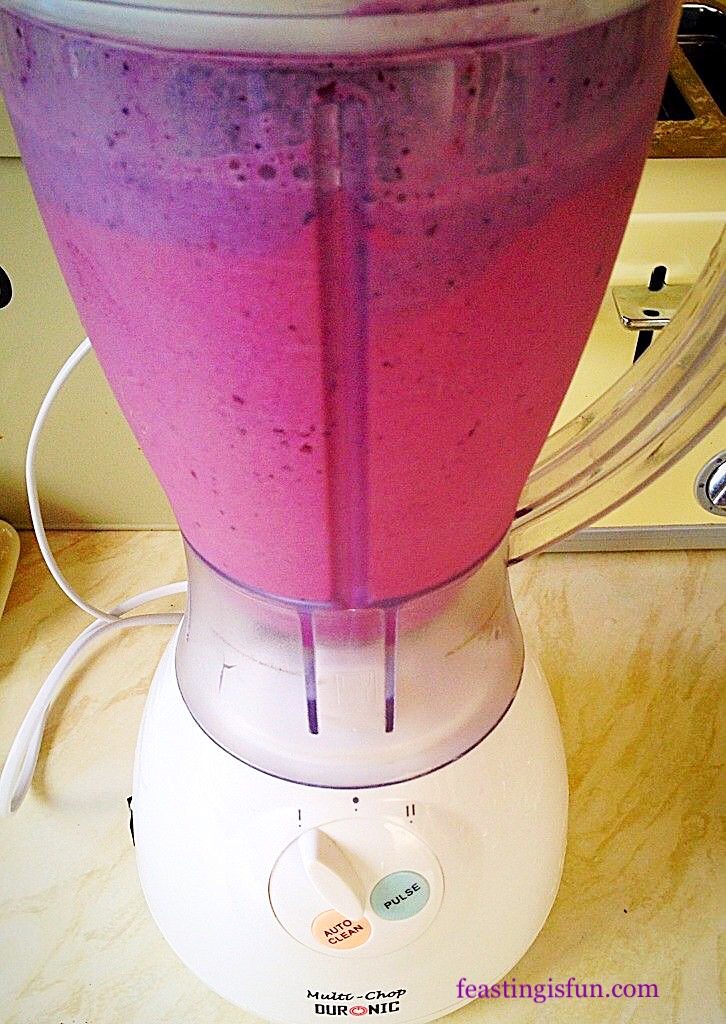
Ingredients for a frozen fruit drink in a blender.
Time to whizz up all the Blueberry Banana Superfood Smoothies ingredients ina blender.

With the lid on securely pulse the blender until the liquid is a unified colour and no lumps remain.

Vivid purple blended cold drink in a blender.
Blueberry Banana Superfood Smoothies

And look at THAT colour! If the mixture is still too thick add more milk. Finally whizz up and then pour into tall glasses.

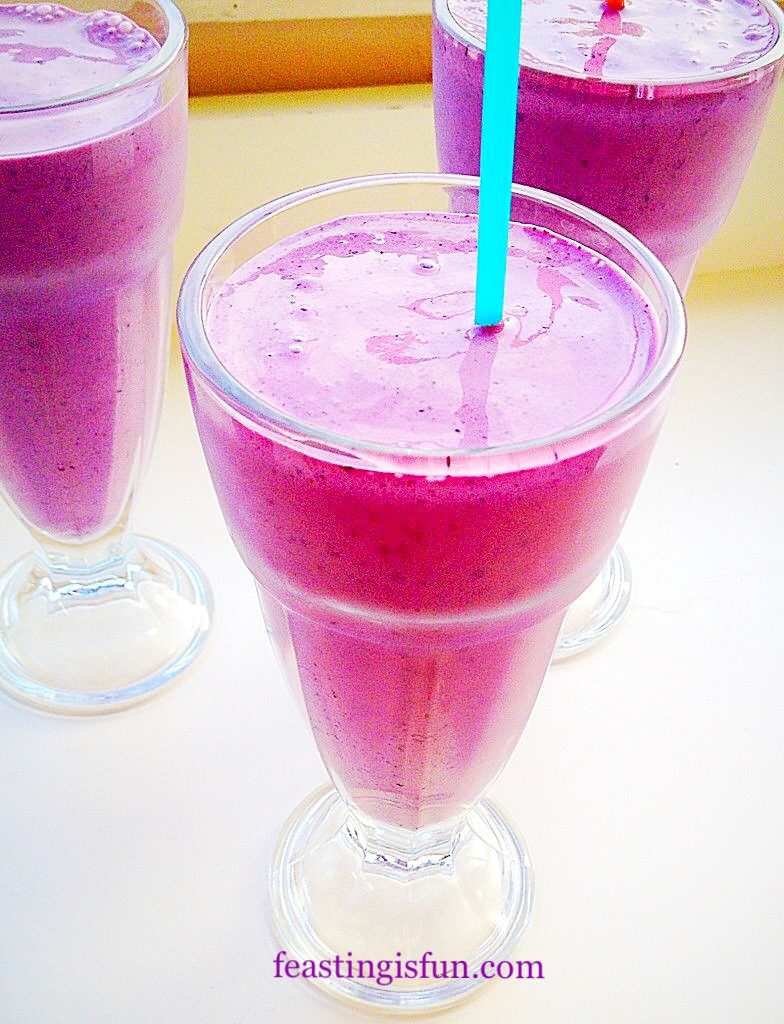
Blueberry Banana Superfood Smoothies ready to drink.

For the best flavour and nutrition make and drink this smoothie on the same day. Relax, chill out and know those Blueberries and Bananas are doing you good on the inside. And if you switch up the fruit combo be sure to let me know.

If you have enjoyed this recipe for Blueberry Banana Superfood Smoothies then you may also like these:

Fresh Strawberry Simple Syrup

Tumbler filled with ice fizzy water and strawberry syrup, plus one strawberry.
Fresh Strawberry Simple Syrupo

Blueberry Bloom Ice Cream

Scoops of vivid purple blueberry and gin ice Cream in a martini glass.
Blueberry Bloom Ice Cream

Raspberry Banana Ice Cream Smoothies 

Tall glasses filled with candy pink raspberry and banana ice cream smoothies.
Raspberry Banana Ice Cream Smoothies

Since homemade smoothies are so refreshing and you can also adapt the ingredients to what you have on hand. While a stash of frozen fruits will add even more variety to this delicious drink. And then add in ice cream for super hot days when everyone is struggling in the heat and you will have smiley faces all round!

So, whatever you are making, baking and creating in your kitchens, have fun preparing and sharing your feast.

Sammie xx

No part of this post may be reproduced or duplicated without the written permission of the owner. Please see my Disclosure Policy.


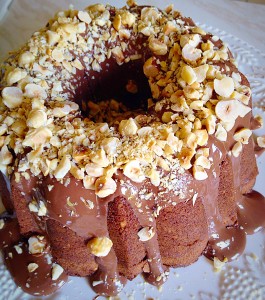
Chocolate Hazelnut Bundt Cake

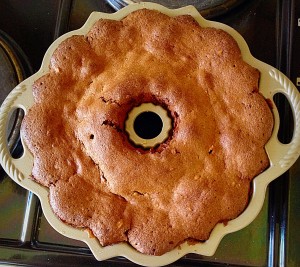
Hello lovelies, if you’ve got the Monday, back to work blues, or just fancy cake, then I have the ultimate solution, my Chocolate Hazelnut Bundt Cake.

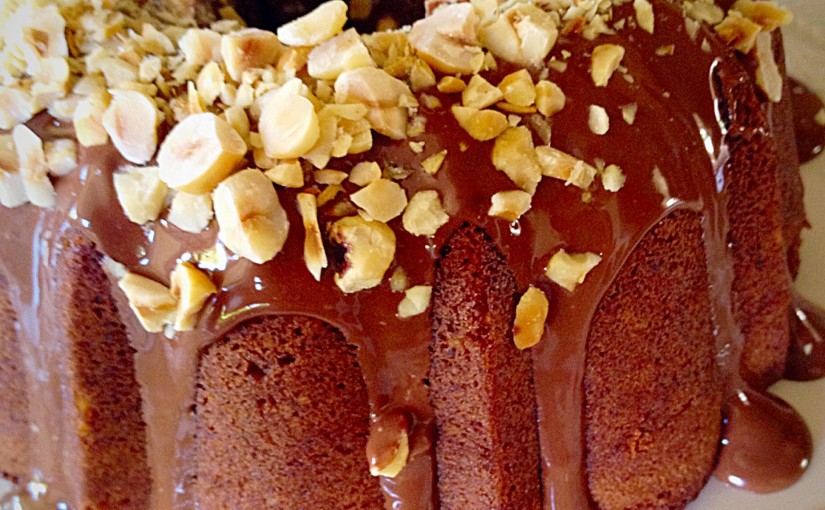
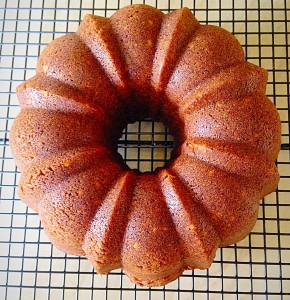
Chocolate Hazelnut Bundt Cake - light and moist.
Chocolate Hazelnut Bundt Cake – light and moist.


This Chocolate Hazelnut Bundt Cake is so beautiful thanks to the Bundt tin moulding and the delicious topping of chocolate and toasted hazelnuts. It is so easy to make and delicious to eat!

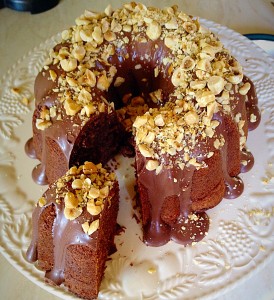
Chocolate Hazelnut Bundt Cake - delicious!
Chocolate Hazelnut Bundt Cake – delicious!


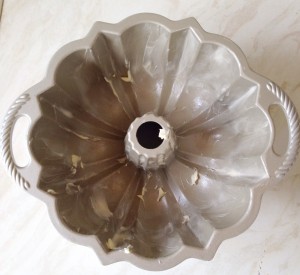
Making this cake was only my second attempt at using a Bundt tin. I gotta tell you, I love them!!! The beautiful moulding of the finished cake makes it look way more professional than I could take credit for. I also made sure I used a skewer to check the cake was cooked through (something I never normally do). The only potential problem with using a Bundt tin, is that it’s hard to specify a size, for example if I’m baking a cake in a regular cake tin I can give you it’s dimensions, with a Bundt tin that’s not possible. It’s all curved and moulded, with a hole in the middle!!! Fortunately the tin I used had a 6 cup measurement mark on the outside. So I just kinda winged it with the ingredient quantities and prayed for the best – and it worked!

Chocolate Hazelnut Bundt Cake - what's not to like?
Chocolate Hazelnut Bundt Cake – what’s not to like?


Recipe :

175g/6oz Caster Sugar

175g/6oz Unsalted Butter – room temp

Pinch of Salt

1tsp Vanilla Extract

3 Large Eggs – free range if poss

100g/4oz Blanched Hazelnuts

100g/4oz Plain White Flour

1 1/2 tsp Baking Powder

3 tbsp Cocoa Powder

50ml/2fl oz Whole Milk

150g Milk Chocolate – I used Green&Blacks

Method : Preheat oven to 180C/165C fan

Thoroughly grease the Bundt tin with butter.
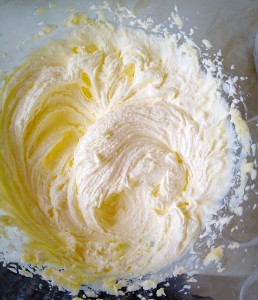
In a bowl thoroughly whisk/beat the sugar, salt and butter, until light and creamy.


Take half of the hazelnuts and process/chop them until they are very fine – similar to ground almonds.

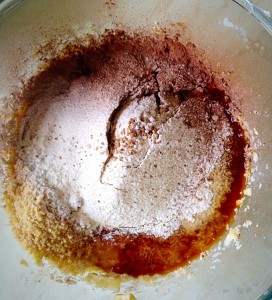
Into the bowl add the eggs, chopped hazelnuts and sift in the flour, cocoa powder and baking powder.
Into the bowl add the eggs, chopped hazelnuts,milk and sift in the flour, cocoa powder and baking powder.
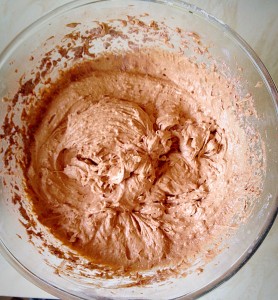
Whisk/beat until all the ingredients are thoroughly combined.


Using a rubber spatula give the cake batter a couple of good stirs to ensure all the ingredients, especially at the bottom of the bowl, are combined.

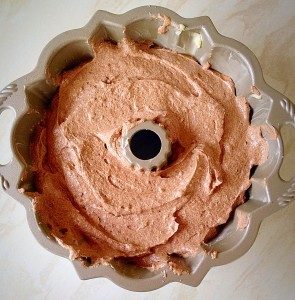
Fill the Bundt tin with the cake batter, smoothing out the surface.


Place the Bundt tin in the centre of the oven and bake for 35-40 minutes. The cake is cooked when an inserted skewer comes out clean.

Once cooked remove the cake from the oven.

Allow the Chocolate Hazelnut Bundt Cake to cool in the tin for 10 mins.
Chocolate Hazelnut Bundt Cake - soo pretty!
Chocolate Hazelnut Bundt Cake – soo pretty!


Turn the cake out onto a cooling rack and allow to cool completely.

Lightly chop the remaining hazelnuts and dry roast them, on a baking sheet for 5 minutes, after removing the cake from the oven. Remove and allow to cool.

To decorate the cake :

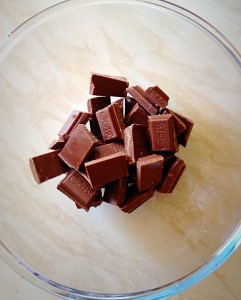
Break up the milk chocolate and melt either over a double boiler or in a microwave.
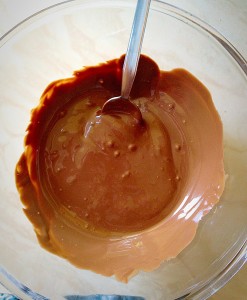
Remove the chocolate before it has fully melted and continually stir, allowing the residual heat to melt all of the chocolate.
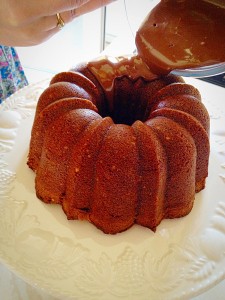
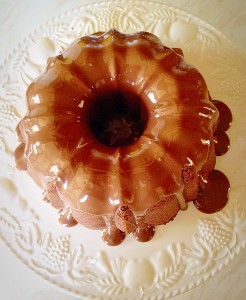
Pour the melted chocolate around the top of the cake. The chocolate will naturally flow down the sides and into the middle of the cake - yum!
Pour the melted chocolate around the top of the cake. The chocolate will naturally flow down the sides and into the middle of the cake – yum!
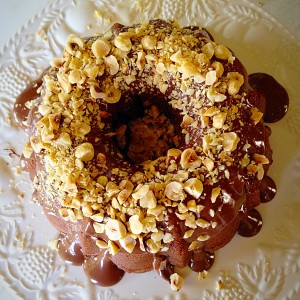
Milk chocolate topped Chocolate Hazelnut Bundt Cake.


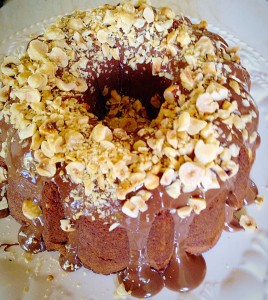
Next sprinkle the toasted chopped hazelnuts over the top of the cake. Now all you have to wait for is the chocolate to set – enough time to pop the kettle on, phone a friend and get ready to dive in and enjoy!!

Chocolate Hazelnut Bundt Cake - slices into portions perfectly.
Chocolate Hazelnut Bundt Cake – slices into portions perfectly.


I really am so pleased with this cake, it’s scrumptious and easy – what more could you ask for??

Do you know a way of measuring Bundt Tins??

Sammie x

Super Light Scones

Hi there, I hope wherever you are the sun is shining on you today. Here in Kent it is beautifully sunny, with a light breeze. Perfect Summer weather. So much so it inspired me to bake Super Light Scones for breakfast this morning.

FF Super Light Scones

Since I don’t make a habit of making scones every morning – in fact, as a general rule I don’t like scones! Well at least the heavy, dense prepackaged ones from the supermarket. I don’t know why, they’re just not my thing. However, it’s Summer and scones with clotted cream and jam are a MUST! And especially the clotted cream has to be Rodda’s from Cornwall!

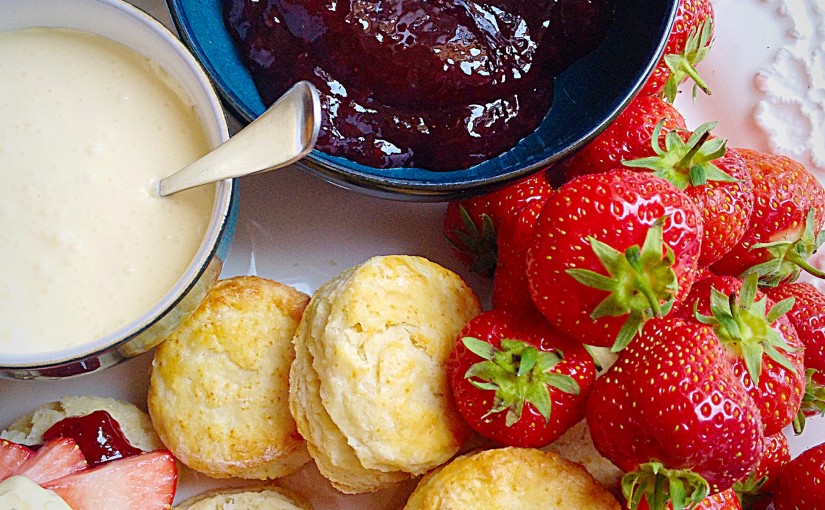
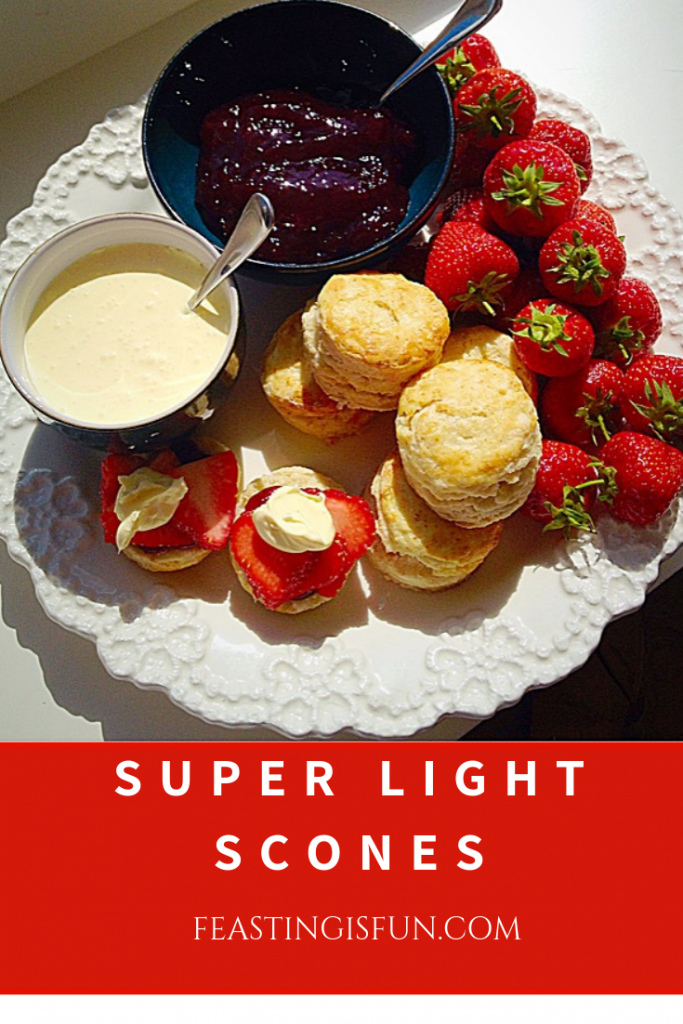
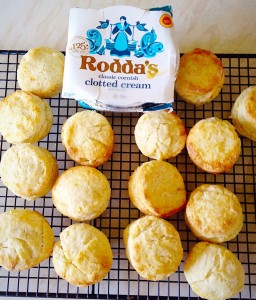
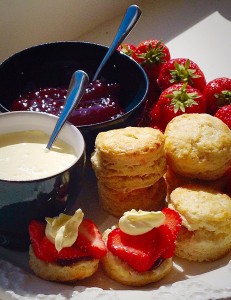
Super Light Scones, super easy to make and even easier to eat with a dollop of Rodda's clotted cream!
Super Light Scones, super easy to make and even easier to eat with a dollop of Rodda’s clotted cream!

Coming Up With A Great Scone Recipe

This probably sounds crazy, but I trawled through at least 8 cookbooks this morning, as well as looking online, but I just couldn’t find a recipe I was happy with. So I came up with my own! And it worked! I watch enough Food Network UK to have picked up some tips along the way and the Green Goddess (my friend, but unbiased taste tester) gave them the thumbs up – although she would have preferred them a little sweeter. Just trying to keep it honest round here.

Super Light Scones - the quintessential British cream tea.
Super Light Scones – the quintessential British cream tea.


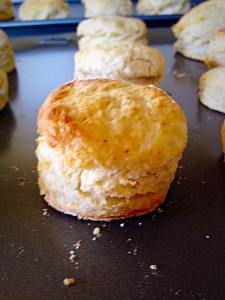
I had these Super Light Scones for my breakfast. They are so light with soft flaky layers inside. I didn’t even use a knife to cut them open, they pulled beautifully apart. I now like scones – these ones!


Super Light Scones - so light they just pull apart. Delicious!
Super Light Scones – so light they just pull apart. Delicious!


If you are not in the UK and wish to have the British cream tea experience, but can’t get hold of clotted cream, Mascarpone cheese would make a good substitute. Alternatively book  a holiday to the UK and stay in Dorset, Devon or Cornwall – cream tea’s are readily available. Although, I admit, it’s a long way to come for a cup of English tea and a cream scone – or maybe not??

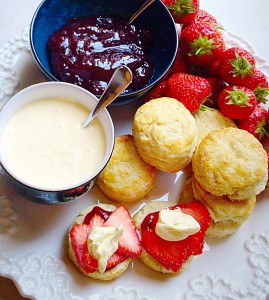
Super Light Scones - a very proper English Cream Tea - delish!
Super Light Scones – a very proper English Cream Tea – delish!

Recipe : Makes Approx 20 Super Light Scones

450g/1lb Plain White Flour

3tsp Baking Powder

1/4tsp Salt

50g/2oz Cold Unsalted Butter

25g/1oz Vegetable Shortening

2tbsp Caster Sugar

250mls/9fl oz Cold Whole Milk

3tbsp Milk – for brushing on top of scones

Method : Preheat oven to 220C/200C fan

Making The Scone Dough

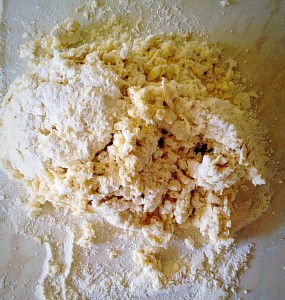
First of all, in a large bowl sift together the flour, baking powder and salt.

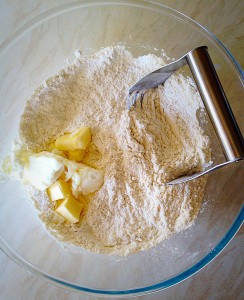
Add the butter and shortening, use a pastry cutter, or your fingers to work the fat into the flour.
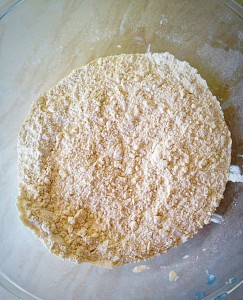
Small pea sized lumps of fat should be present in the mixture.


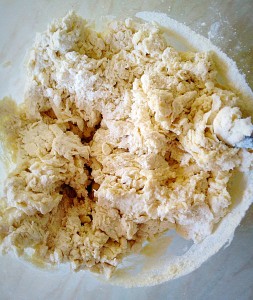
Add the sugar and stir through to mix. Make a well in the middle of the mixture, pour in the milk and stir together using a butter knife (ordinary eating knife).

Stir until the mixture just comes together.
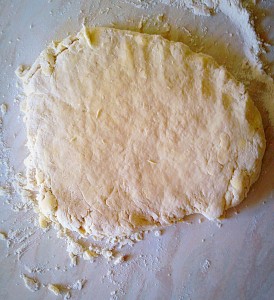
Tip the scone dough out onto a lightly floured surface.
Bring the dough together with your hands. Gently pat the dough out to approx 2.5cm thickness. The less you handle the dough the lighter the scones will be.

Cutting Out The Individual Scones

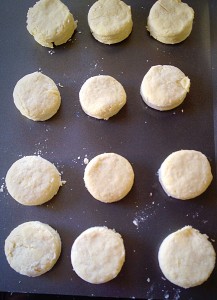
Using a straight sided, floured, 2 inch deep cutter, press straight down through the scone dough. Do not twist the cookie cutter as you press down as this will affect the rise on your scones. Cut out as many scones as possible then collect the pieces of dough together, pat out and cut out more scones until the dough is used up.

Place the cut out scones onto a non stick baking sheet, or line a baking tray with parchment paper.


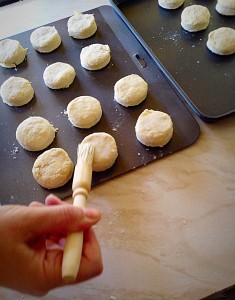
Lightly brush the top of each scone with milk. Try to avoid the milk dripping down the side of the scone - as this affects the rise of the scone.
Lightly brush the top of each scone with milk. Try to avoid the milk dripping down the side of the scone – as this affects the rise of the scone.

Baking The Super Light Scones

Place your scones into the oven and bake for 12-14 minutes. The scones are baked when well risen and lightly golden in colour. As soon as they are baked remove from the oven and transfer the scones to a baking rack to cool.

Delicious Super Light Scones - cooling!
Delicious Super Light Scones – cooling!


Once cooled, split in half and slather on your favourite jam. For added indulgence add a dollop of clotted cream and some sliced fruit. Enjoy with a refreshing cup of tea.

If you have enjoyed this recipe for Super Light Scones you may also enjoy these:

Cheese Bacon Breakfast Muffins 

FF Super Light Scones
Cheese Bacon Breakfast Muffins

Spicy Sausage Rolls 

FF Super Light Scones
Spicy Sausage Rolls

Super Easy Shortbread Cookies

FF Super Light Scones
Super Easy Shortbread Cookies

These are a great treat and perfect for Fathers Day – you could use a larger cutter, just add a couple of minutes onto the baking time.

Most Dads just want to know they are loved. Making or baking them a gift is such a personal way to say I LOVE YOU.

What jam and fruit combo do you like with your scones?

Sammie x

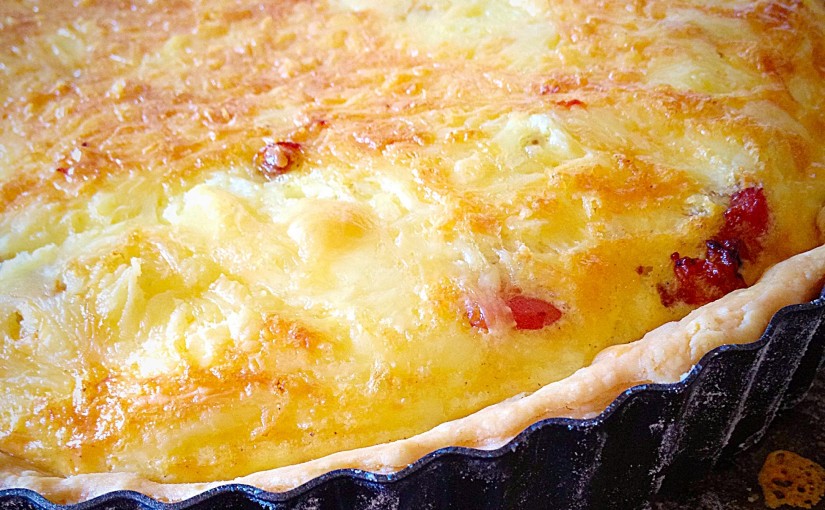
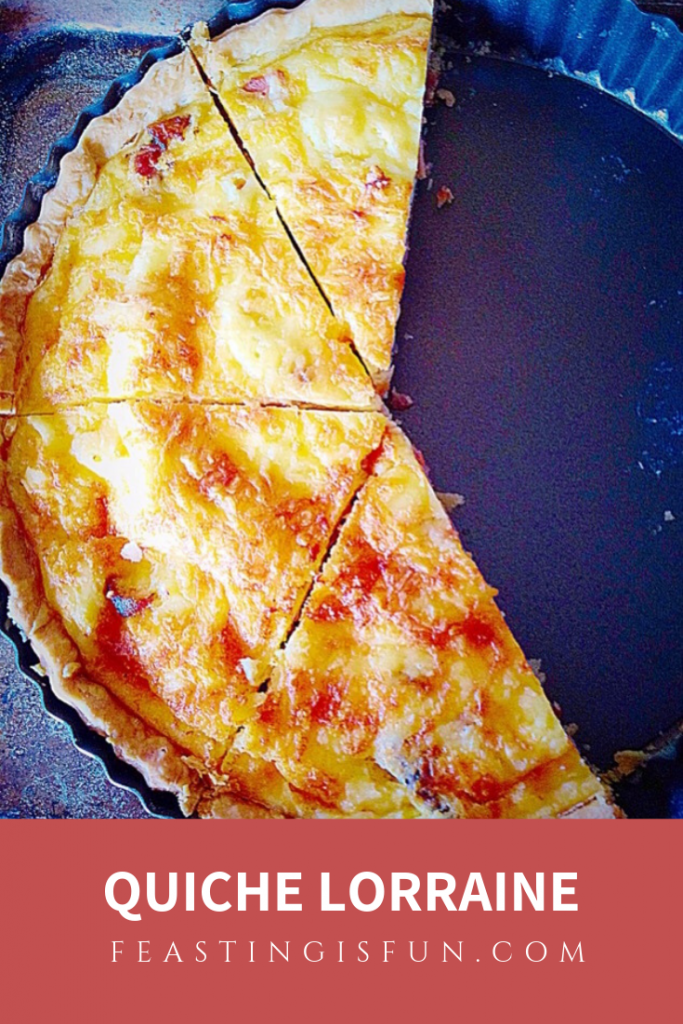
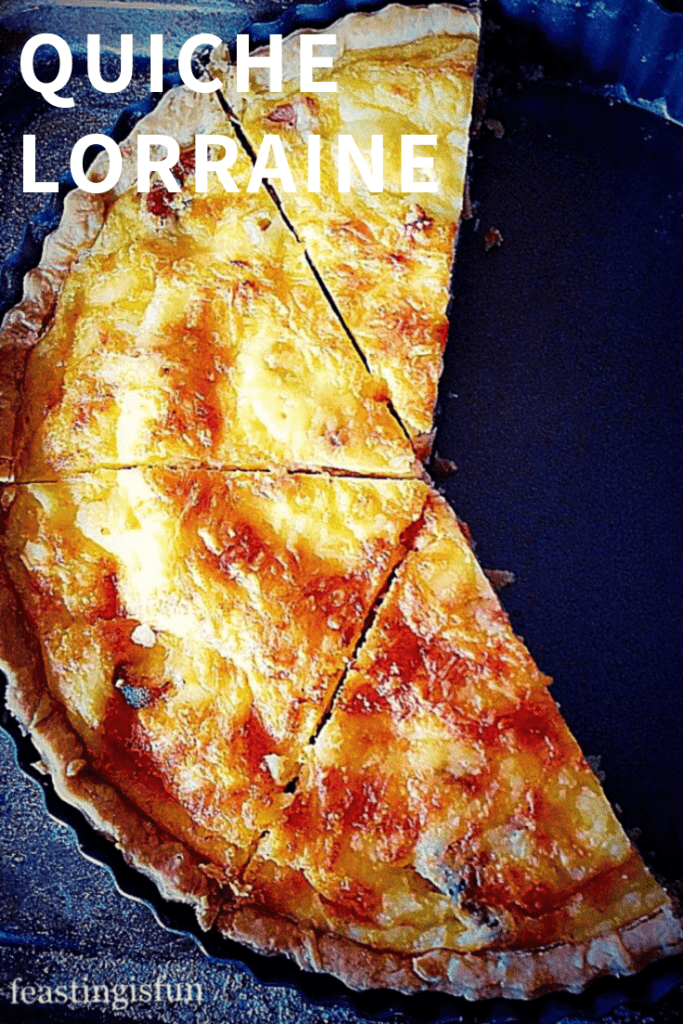
Quiche Lorraine

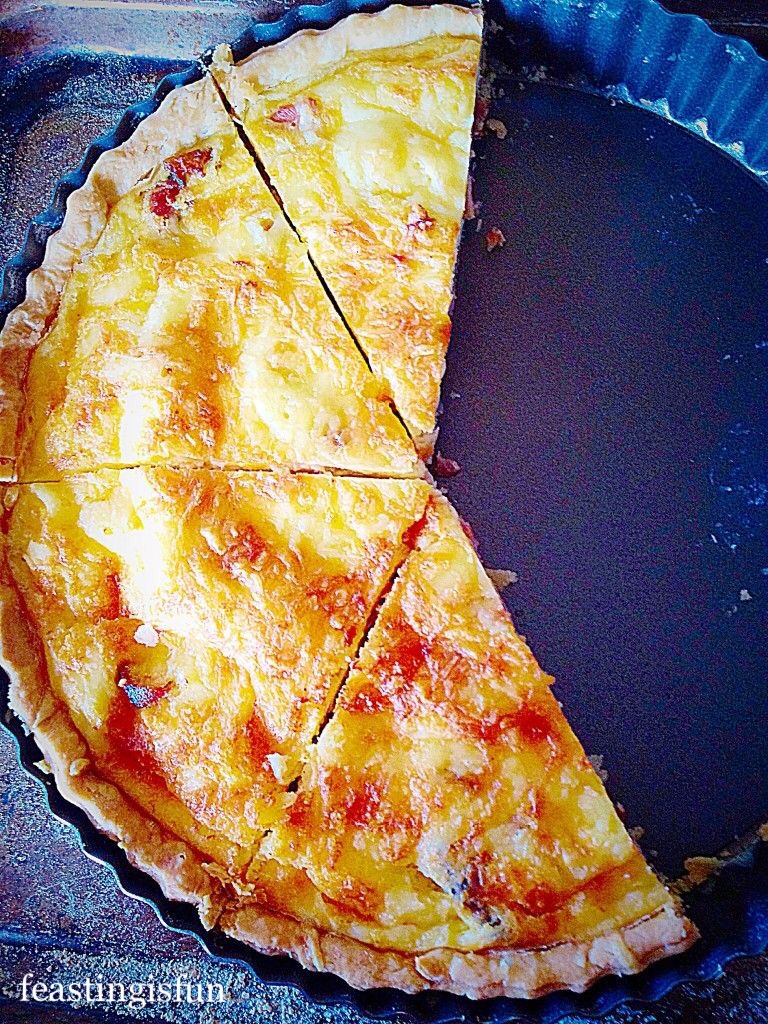
I was thrilled when my Mum yesterday, who is herself, a great quiche maker, complimented me. On seeing my Quiche Lorraine she said “The apple doesn’t fall far from the tree”. Although, thinking about it, that’s surely a compliment to her? Anyway, this cheddar cheese and smoked bacon tart is both easy to make and delicious to eat.

FF Cheddar Bacon Tart

I used a combination of bacon and lardons, as that’s what I had in the freezer and I’m trying to clear it out. So you get lovely chunks as well as pieces of delicious smoked bacon throughout the Quiche. Alternatively leftover cooked Gammon at Christmas, or indeed any other time of the year, works fabulously well in this Quiche Lorraine. Cut into chunks and use in place of the bacon, the beauty being no pre-cooking is required!

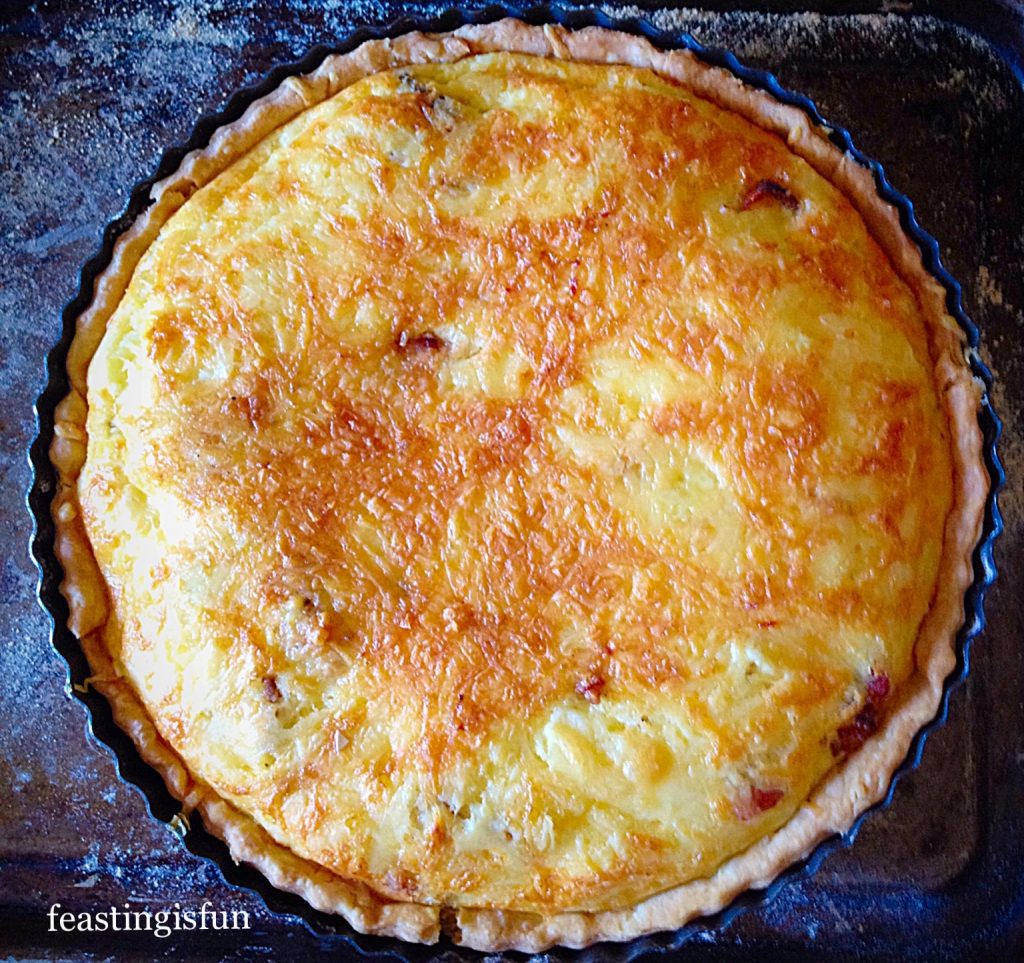
Quiche Lorraine a classic recipe using sharp cheddar, gammon or bacon in a shortcrust pastry egg tart.

Sooo I made the pastry for this quiche myself, but, umm, well let’s just say, I’m gonna leave that for another post. Which I know doesn’t help you, as you need pastry for this recipe. I’m sorry. Really I am. Either use your go-to shortcrust pastry recipe, or buy it!! Just know you’ll need 450g/1lb. I promise I will post my recipe ASAP. Finally I have the recipe, see the link in the recipe below for Pefect Butter Shortcrust Pastry.

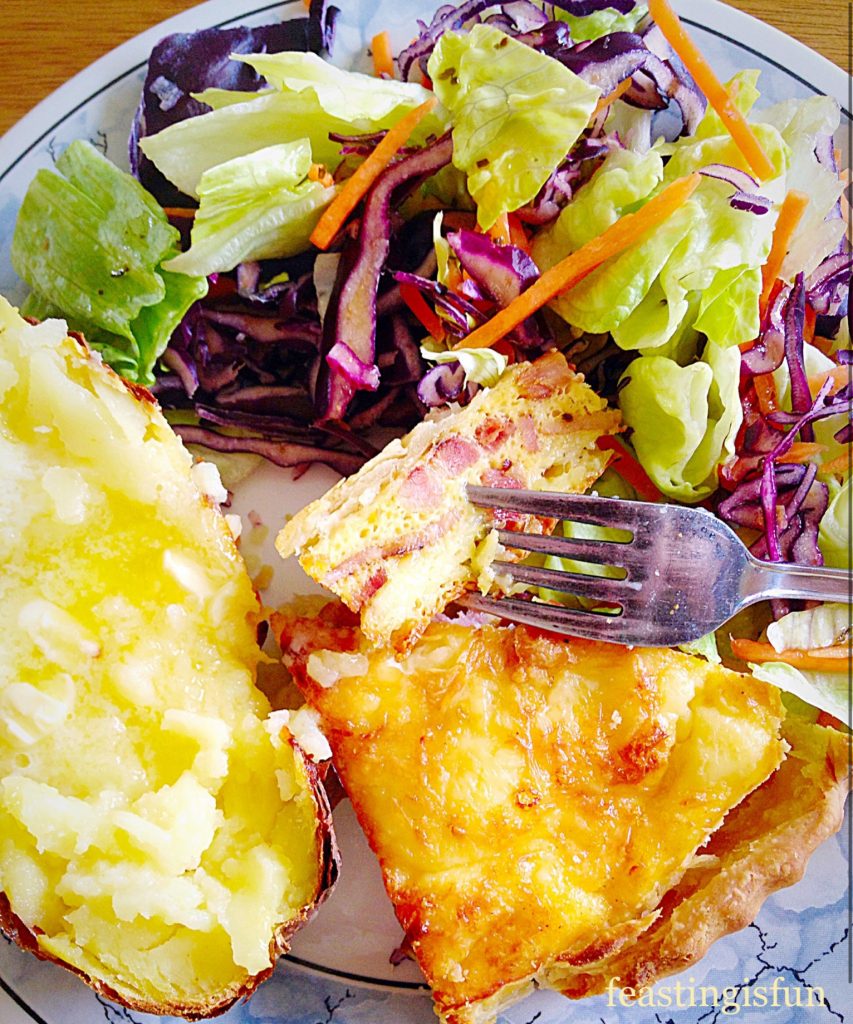
Cheddar, bacon and egg tart slice served on a plate with fresh salad and a baked potato.
A slice of quiche lorraine served with salad and a baked potato.

Quiche Lorraine is also perfect, portable, picnic food. So easy to slice and pack up with chunks of cucumber and cherry tomatoes. And as the evenings stay light we can always take our food and eat outside.

Makes 1 x 25cm/10” Quiche Lorraine serves 6-8

450g/1lb Shortcrust Pastry – see my recipe here

8 Large Eggs – I use Burford Brown eggs from Clarence Court

125ml/4.5fl oz Whole Milk

300g/11oz Smoked Bacon/Lardons – cooked and cooled on kitchen paper

175g/6oz Sharp Cheddar – grated – I use Wyke Farms Mature Cheddar

1/2tsp Ground Black Pepper

Method : Preheat oven to 200C/180C fan oven, gas mark 4, 350F.

You will need a 25cm/10in tart tin, preferably with a loose base.

Preparing The Tart Case

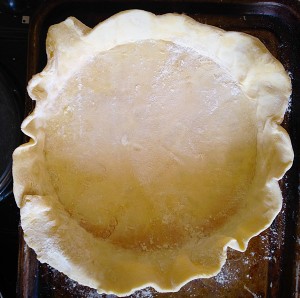
Roll out the pastry on a floured surface to approx 16″ across. This will ensure it fits easily inside the Quiche tin, without stretching.

If using a ceramic dish, grease thoroughly with butter before lining with pastry. For tins I don’t find it necessary, but grease if you’re worried about the pastry sticking.

Transfer the pastry by rolling it around the rolling pin and then carefully unrolling over the Quiche tin.


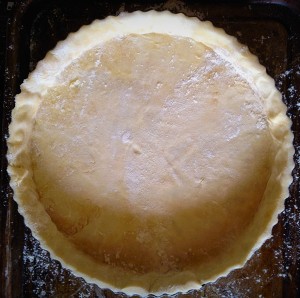
I always place my quiche tin on a baking sheet. Gently press the pastry into the sides and bottom of the tin. Then using the rolling pin, roll it over the top of the tin. This creates a clean finish to the pastry. If using a ceramic dish, neatly trim off the excess pastry with a knife.

Nice neat pastry finish.


Next doc the pastry at the bottom of the tin with a fork. This will stop the pastry from rising up when baked.

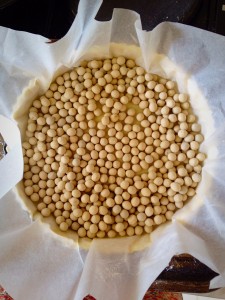
Place parchment paper onto the pastry and fill with baking beans or ceramic balls. These keep the pastry from collapsing during the blind baking.


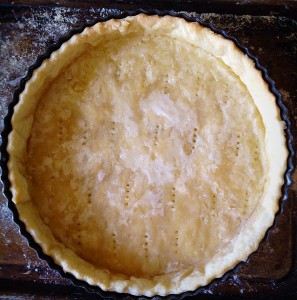
Place the quiche tin into the oven and bake for 15 minutes. Remove from the oven and discard the parchment paper and baking beans. Return to the oven and bake for a further 5 minutes. Remove and allow to cool for 10 minutes.

The pastry case is now part baked. This ensures the egg mixture will not seep into the pastry. The quiche will have a crisp bottom, when fully cooked.

Making The Cheddar Bacon Filling And Baking The Quiche

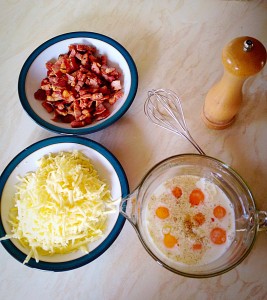
Whilst the pastry case is cooling gather the other ingredients together.


Add a good grinding of black pepper to the eggs and milk, then whisk together.

Sprinkle the cooked bacon evenly over the pastry base.
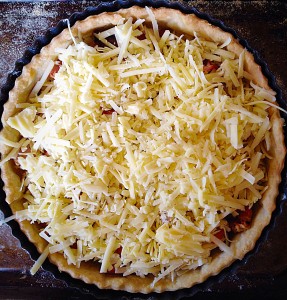
Then do the same with the grated cheese.

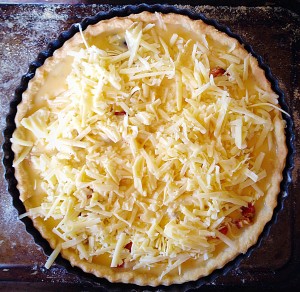
Slowly pour the egg mixture into the centre of the quiche, making sure that it doesn't flow over the top of the pastry.

Slowly pour the egg mixture into the centre of the quiche, ensuring it doesn’t flow over the edge if the pastry.

Reduce the oven temperature by 10C/25F, one gas mark lower. Place the Quiche Lorraine in the oven and bake for 20-25 mins until set and golden. Remove from oven. Allow to cool for at least 10 minutes before slicing and serving.

Quiche Lorraine

This Quiche is so versatile. It can be packed up for lunch, a picnic, or as part of a meal with an endless choice of sides.

If you have enjoyed this Quiche Lorraine recipe you may also like these:

Wigmore Cheese Red Pepper Tart

Wigmore Cheese Red Pepper Tart

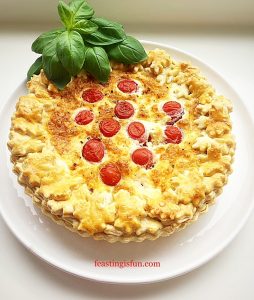
Cherry Tomato Mozzarella Basil Quiche

Cherry Tomato Mozzarella Basil Quiche

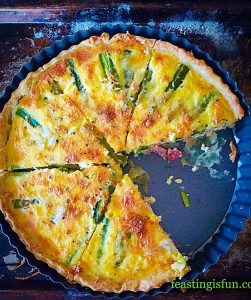
Smoked Bacon Asparagus Quiche

Smoked Bacon Asparagus Quiche

Because I enjoy making quiches and tarts so much, it makes sense to make my own pastry. Since one batch of pastry makes two tarts I always freeze half to use later. Also this Quiche Lorraine freezes really well, simply defrost overnight in a refrigerator and then reheat until hot all the way through.

Sammie x

No part of this post may be reproduced or duplicated without the written permission of the owner. Pleas see my Disclosure Policy.
Bacon and cheese, egg tart in tin.

Oat Topped Lemon Shortbread Bars

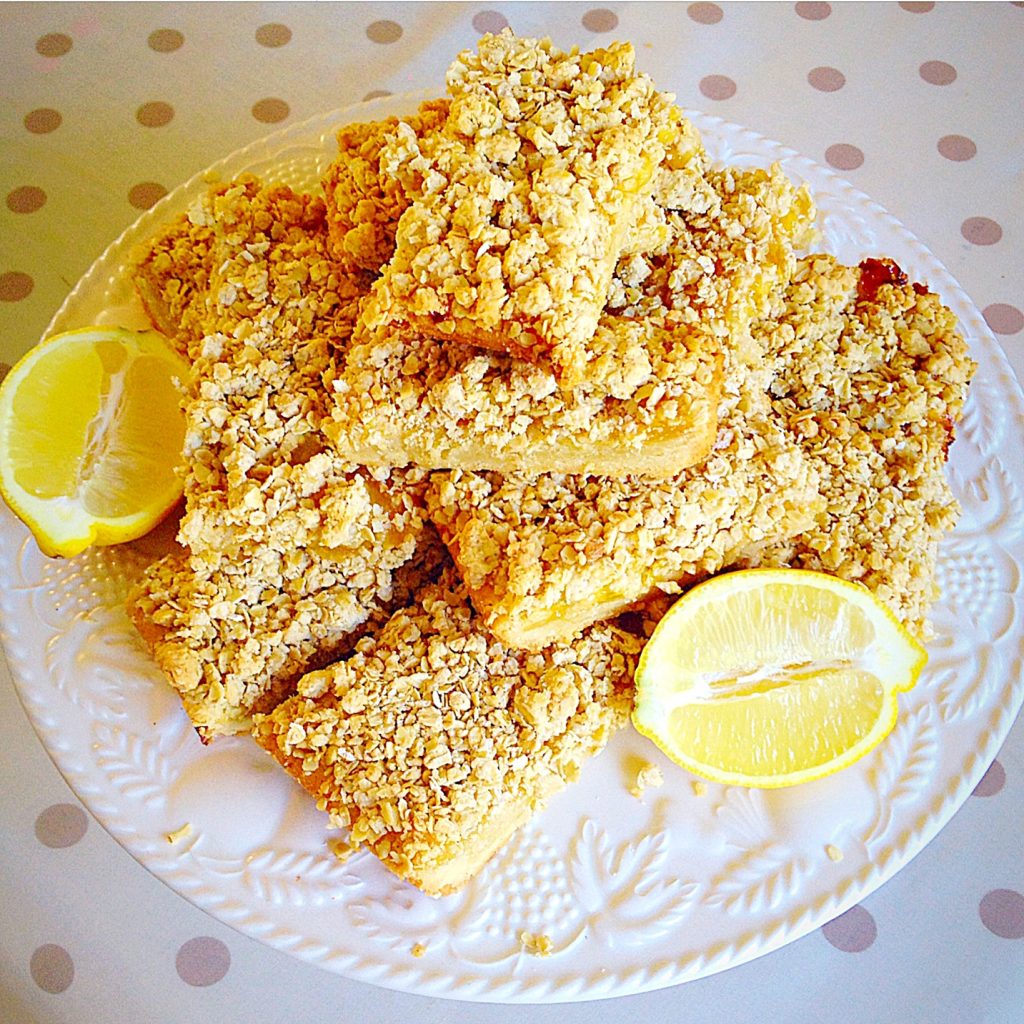
Hi and thank you for dropping by. I have a delightful treat for you today, my – Oat Topped Lemon Shortbread Bars.
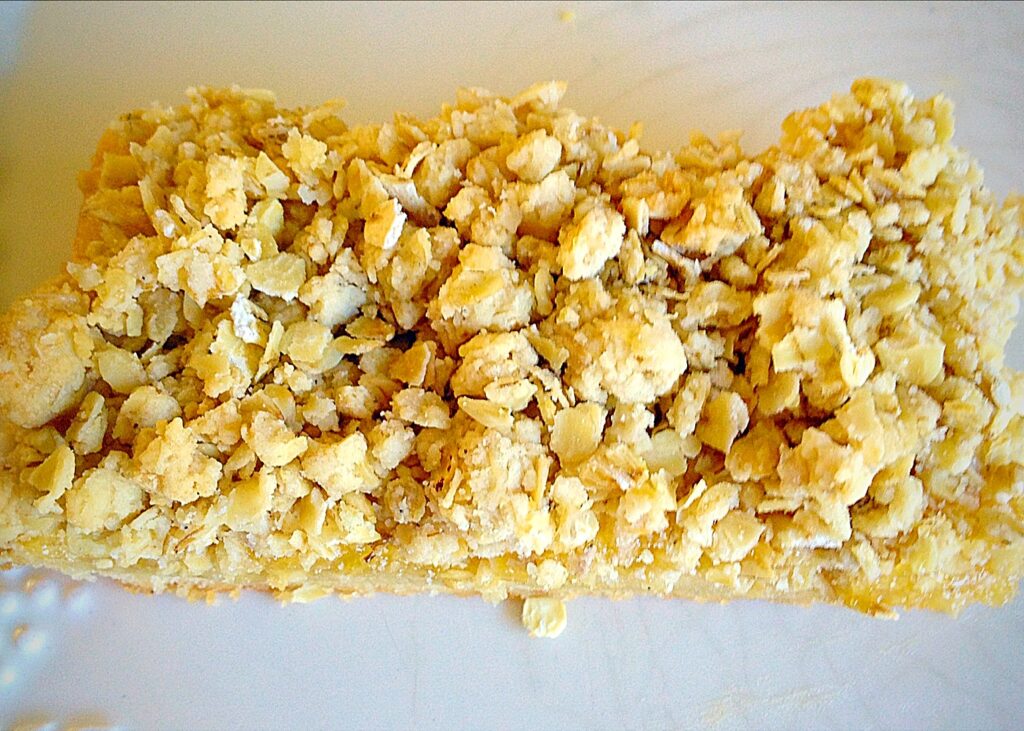
Oat topped lemon shortbread bars
Oat Topped Lemon Shortbread Bars


The other day I spotted a jar of Lemon Curd (unopened) in the cupboard. My brain started whirring with all the possibilities of how I could incorporate the Lemon Curd into my next bake. I didn’t fancy making pastry, let’s be honest, sometimes it seems like too much effort – even though it is really easy – anyhow, wasn’t feeling the pastry thing. Then I thought about a cake, but that wasn’t doing it for me either, I must’ve been having a funny day? Then I thought shortbread. But not as a biscuit, as a base. Yippee, I was finally getting somewhere. Everything good so far, shortbread base, slathered with lemon curd and then oats. Wasn’t quite sure how I was going to use them in the topping, just knew I needed oats – and that’s how these Oat Topped Lemon Shortbread Bars were born!


With the oat topping I decided to keep back a quarter of the shortbread dough and then crumble with the oats and pray that it would work – am not joking. It did! Although in all honesty, the bars were quite crumbly when I cut them up. Next time I would leave the whole tray bake intact, for at least a few hours, or even better overnight. The bars had firmed up beautifully by the next day.



Recipe : Oat Topped Lemon Shortbread Bars – makes 12

225g/8oz Unsalted Butter – room temp

150g/5oz Caster Sugar

1/4tsp Salt – I use Maldon 

1tsp Vanilla Extract

1 Large Egg Yolk – room temp

275g/10oz Plain White Flour

310g/11oz Jar Lemon Curd

175g/6oz Rolled Oats – not quick cook

Making The Shortbread Layer

Preheat the oven to 180C/160C fan, gas mark 4, 350F.
Butter and line with parchment paper a 30cm x 20cm (12″ x 8″) at least 4cm (1.5″) deep tin.

Into a large bowl whisk the butter, sugar and salt until light and fluffy.

Add the egg yolk and vanilla extract, whisk until fully incorporated.

Next add the flour and stir with a spoon until just combined.

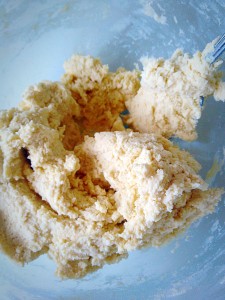
This is how your shortbread dough should look.


Reserve a quarter of the shortbread dough (for the topping).

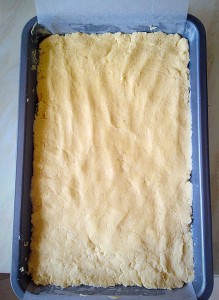
Using the remaining shortbread dough, press lightly into the pan, so it forms an even layer.
Using the remaining shortbread dough, press lightly into the tin, so it forms an even layer.


Pop the tin into the oven for 10 minutes. This will form a light crust on, but not fully cooked, the shortbread. After 10 minutes remove from the oven.

Adding The Lemon Layer

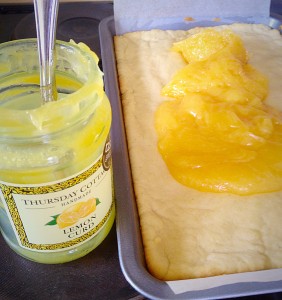
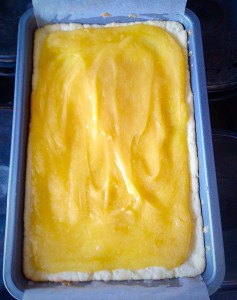
Immediately start spooning the Lemon Curd over the shortbread base
Immediately start spooning the Lemon Curd over the shortbread base.
Cover the entire shortbread base, just inside the edge.

Making And Using The Oat Crumble Topping

Set to one side whilst you make the oat topping.

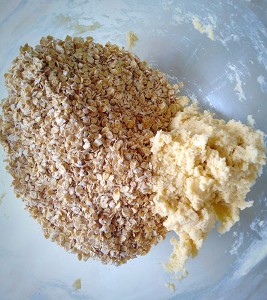
Add the oats to the remaining shortbread dough.
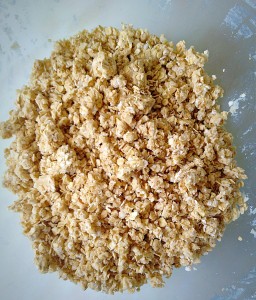
Using your fingers rub the buttery shortbread dough through the oats until you have an even crumble mix.
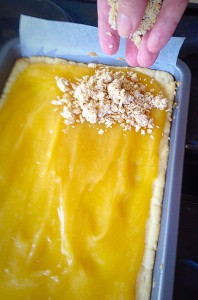
Starting at one corner sprinkle the oat crumble topping...
Starting at one corner sprinkle the oat crumble topping…
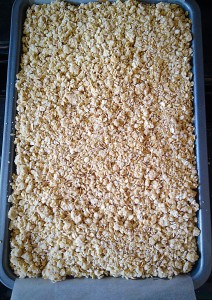
...until the entire top is covered. Very gently press down on the topping to slightly compact it.
…until the entire top is covered. Very gently press down on the topping to slightly compact it.

Baking The Oat Topped Lemon Shortbread Bars

Place in the oven for 25-30 minutes, until the oat topping is golden in colour, then remove from oven.

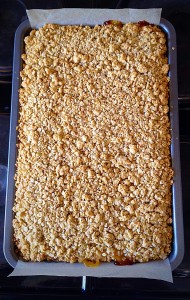
Oat Topped Lemon Shortbread Bars - allow to cool completely in the pan.
Oat Topped Lemon Shortbread Bars – allow to cool completely in the tin.


Once completely cooled, cut lengthways down the middle of the bake. Then cut into bars. Remove and store in an airtight container.

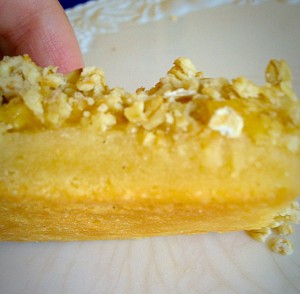
Oat Topped Lemon Shortbread Bars - pre-cooking the shortbread layer ensures it is cooked through with a lovely golden bottom.
Oat Topped Lemon Shortbread Bars – pre-cooking the shortbread layer ensures it is cooked through with a lovely golden bottom.


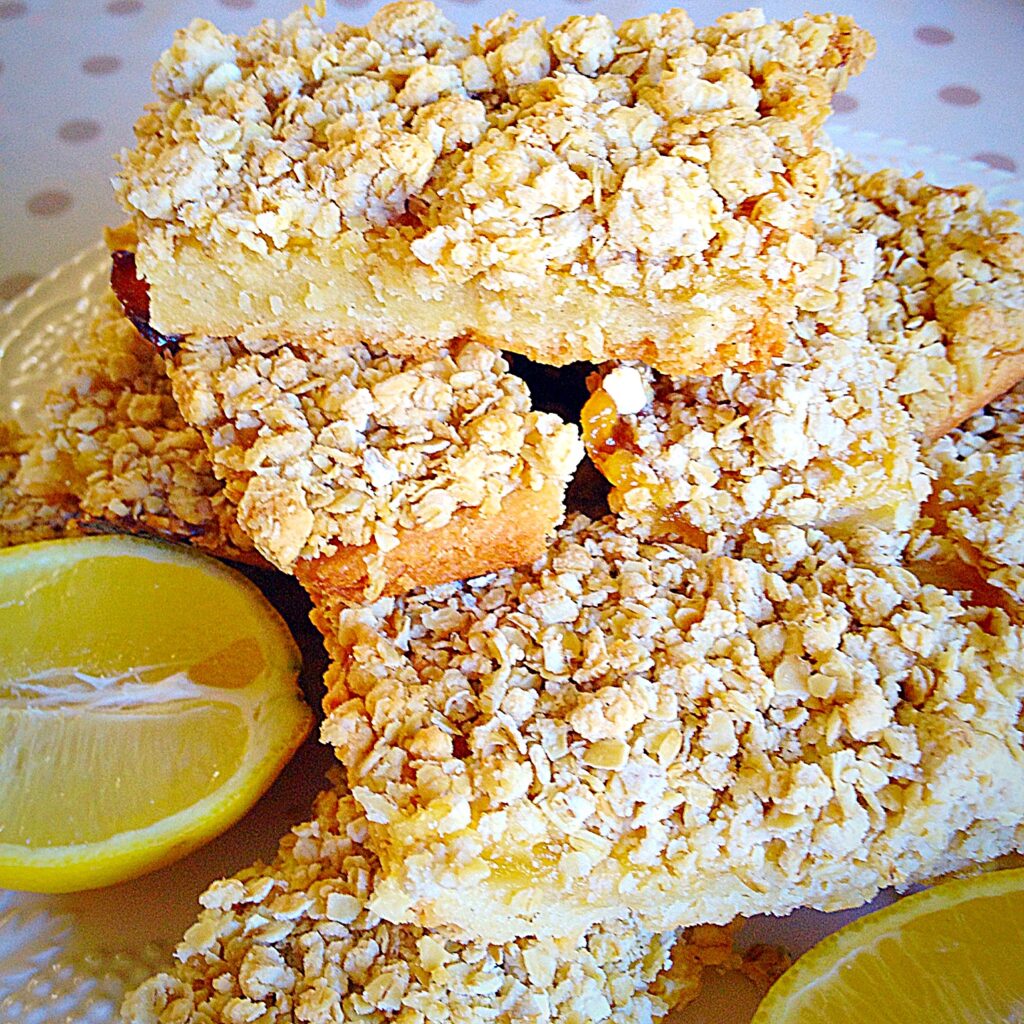
I really cannot emphasise how gorgeous these Oat Topped Lemon Bars are. The buttery shortbread, topped with good, tangy, lemon curd and then the crunch from the oat crumble topping.


Everyone who has tried these has loved them! That’s definitely a winner in my book (or blog!!!).

Perfect for sharing!

Please let me know what you think?

Sammie x

Raspberry Banana Ice Cream Smoothies

Finally it’s Friday – YAY. I have the perfect, cooling down drink, especially if you are  under exam pressure in hot weather. Or just fancy a delicious, fruit packed drink at the end of a long week. Let me introduce you to my Raspberry Banana Ice Cream Smoothies!

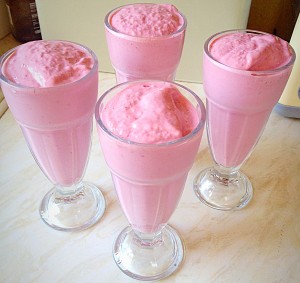
Raspberry Banana Ice Cream Smoothies - the perfect way to cool down in a hot day.
Raspberry Banana Ice Cream Smoothies – the perfect way to cool down on a hot day.


Only 4 ingredients are needed to make this yummy, thick, ice cream smoothie. I made these for us last night, after the children had finished another long, hot day, at school, sitting exams. They absolutely loved them, as did I – obviously I have to check what I make just to ensure it tastes good/won’t poison them/cos I wanted to!!!!!

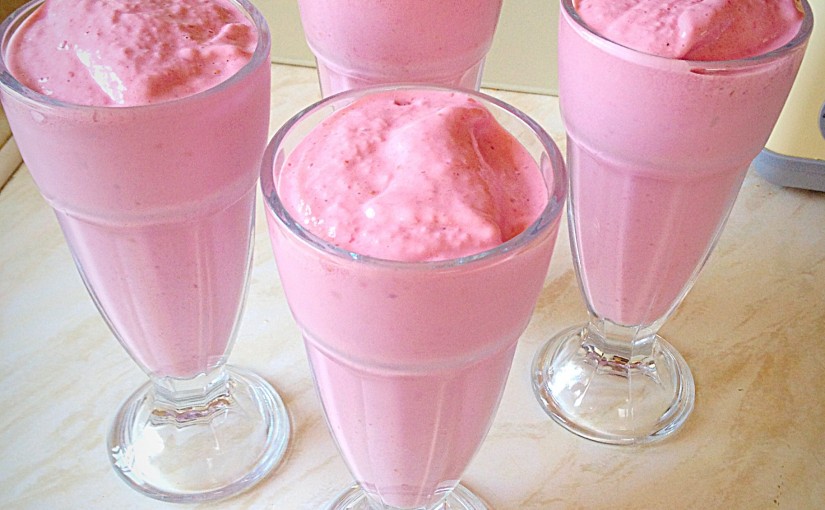
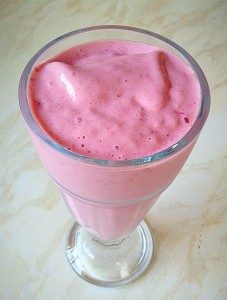
Raspberry Banana Ice Cream Smoothies - pretty, pink, cool, drink!
Raspberry Banana Ice Cream Smoothies – pretty, pink, cool, drink!i


This ice cream smoothie is the perfect treat during a long day of revision, after returning home from school or the office – any reason to celebrate Friday!!!

Now let’s get on with how to make this luscious smoothie!

This Raspberry Banana Ice Cream Smoothie may just be my favourite flavour yet!

Recipe : Makes 4 Large Smoothies

3 Ripe Bananas

300g/11oz Frozen Raspberries

500ml/1 pint Vanilla Ice Cream – I use Mackies Organic Vanilla Ice Cream

250ml/1/2 pint Milk – I used Whole milk

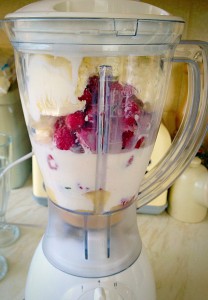
Break up the bananas and place in a blender. Add the frozen raspberries, ice cream and milk - then BLITZ until completely smooth.
Break up the bananas and place in a blender. Add the frozen raspberries, ice cream and milk – then BLITZ until completely smooth.


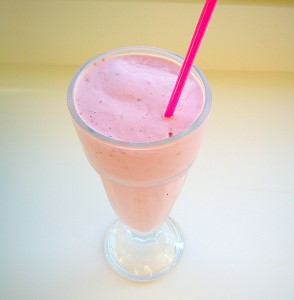
Pour your Raspberry Banana Ice Cream Smoothies into tall glasses, add a straw and slurp!

One very happy child, slurping his smoothie!!


These really are delicious, using frozen raspberries is much cheaper, however if you have an abundance of fresh berries, by all means use them.

If you have enjoyed this recipe for Raspberry Banana Ice Cream Smoothies you may also like these:

Fresh Strawberry Simple Syrup 

FF Raspberry Banana Ice Cream Smoothies
Fresh Strawberry Simple Syrup

Blueberry Banana Superfood Smoothies 

FF Raspberry Banana Ice Cream Smoothies
Blueberry Banana Superfood Smoothies

Lemon Ripple Ice Cream

FF Raspberry Banana Ice Cream Smoothies
Lemon Ripple Ice Cream


While they may not be super ‘healthy’ matcha tea green smoothies, they are packed with fruit. Since eating and drinking is all about balance I have no problem making these as an occasional treat. Especially when the weather is as hot as it is today!

Since I am already thinking of other flavour combinations, I’d love to hear your ideas?

Sammie xx

No part of this post may be reproduced or duplicated without the written permission of the owner. Please see my Disclosure Policy.