Maple Drizzled Apple Blueberry Loaf Cake

Share
Facebooktwitterpinterestlinkedintumblr

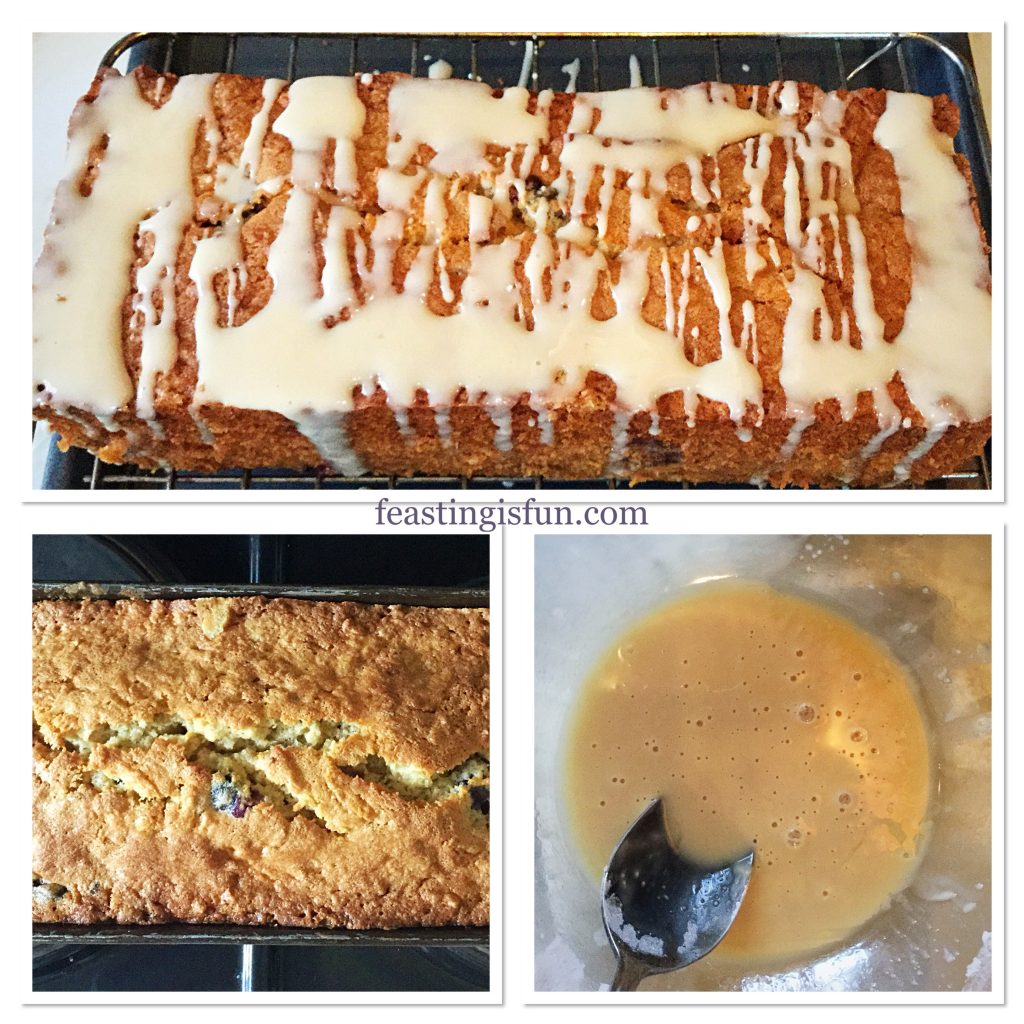
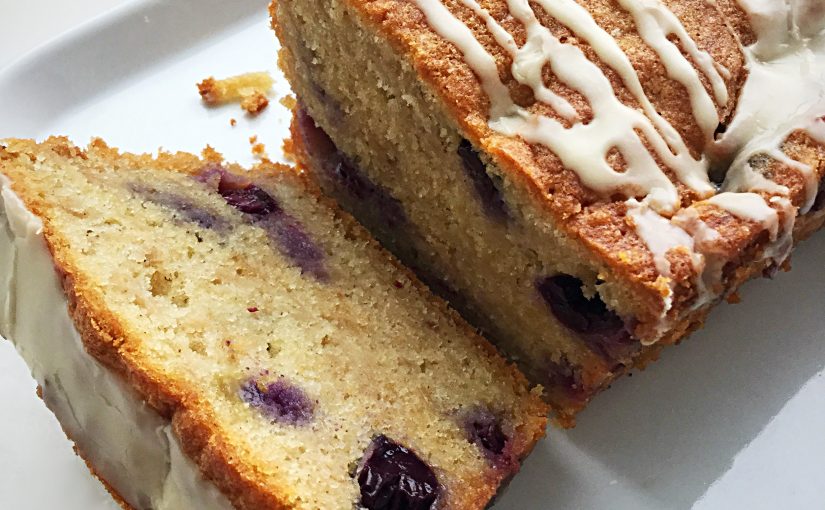
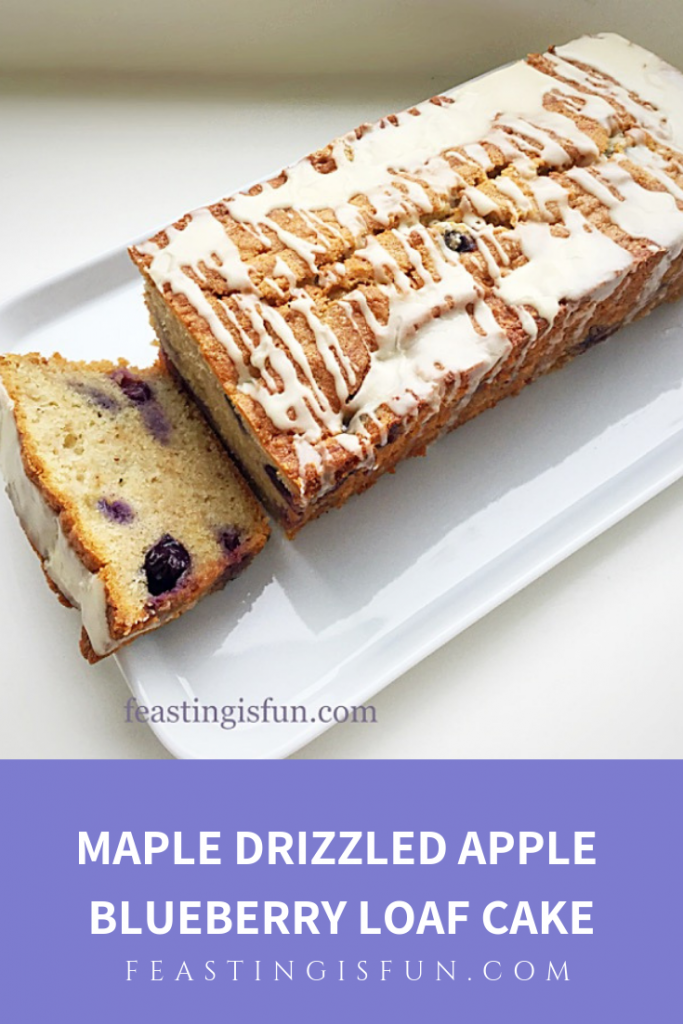
As a family we eat a fairly balanced diet, with lots of fruit and vegetables and the occasional takeaway. Because balance is everything, in life, as it is in cooking and eating. While I cook most of our meals from scratch I’m also realistic. So in our freezer there is usually a bag of oven chips, frozen peas and some good quality sausages. Occasionally though it’s treat time and my Maple Drizzled Apple Blueberry Loaf Cake  is not only delicious it’s also packed full of fresh fruit.

FF Maple Drizzled Apple Blueberry Loaf Cake

To be clear, I am not advocating that this cake is a ‘health food’. Rather, that anything homemade firstly, has to be better than a mass produced, long shelf life product and secondly, while cooking and baking, we become more aware of the ingredients that go into our food.
FF Maple Drizzled Apple Blueberry Loaf Cake
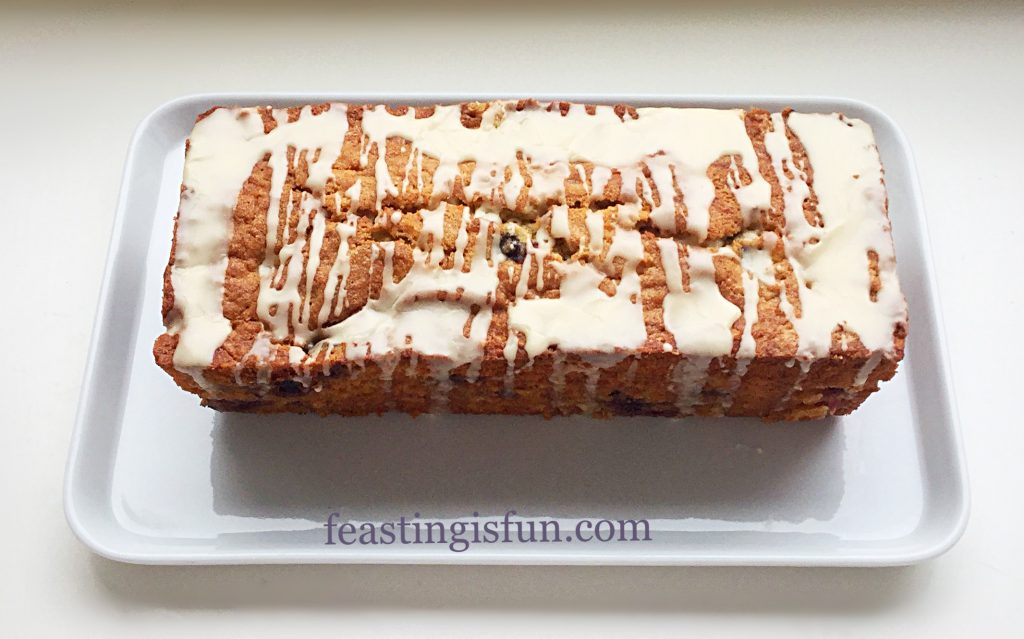
Maple Drizzled Apple Blueberry Loaf Cake perfect for sharing.

Because there is a large portion of fruit packed into this cake, it is extremely and deliciously moist. Ideal for slicing, wrapping and adding to a packed lunch. Yet equally enticing, shared with friends or neighbours over a mid morning cup of coffee. Since all food tastes better when shared, why not bake this cake and take it with you to work? Sharing does not have to be confined to our homes!
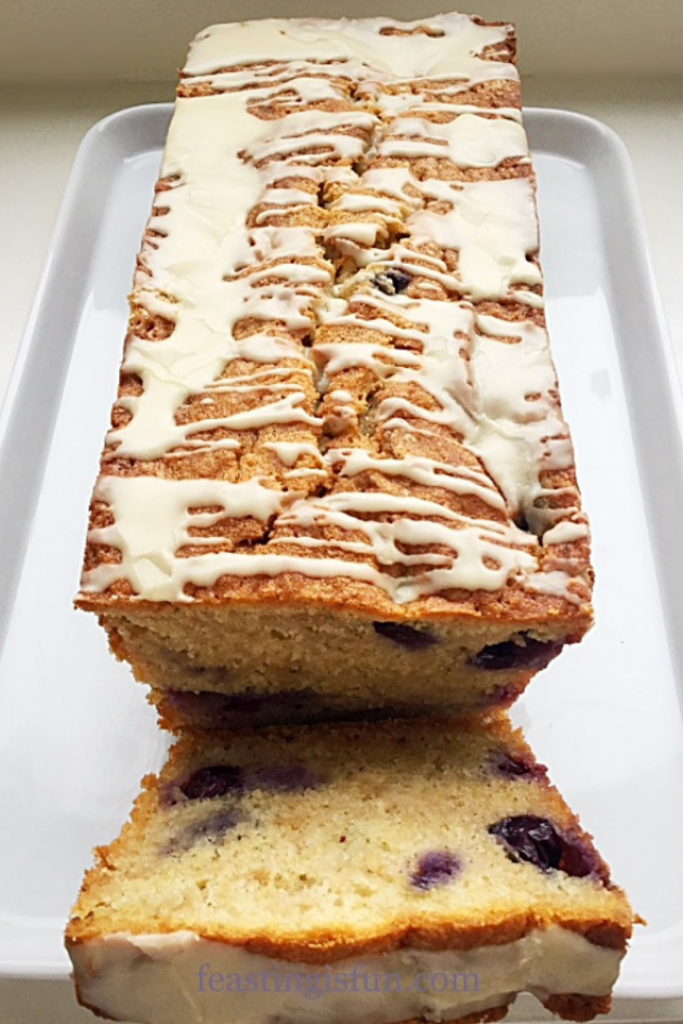
Maple Drizzled Apple Blueberry Loaf Cake

A quick note before making this cake: similar to Maple Syrup Frosted Apple Cupcakes, the cake batter is made before grating and adding the apple. Because a sweeter variety works best, unlike Granny Smith’s which are more acidic, this helps to ensure the apple browns as little as possible. Also, the skins are left on the apple quarters whilst grating.

Recipe: Maple Drizzled Apple Blueberry Loaf Cake serves 8

175g/6oz Unsalted Butter softened

150g/5oz Caster Sugar

1/8tsp Salt – I use Maldon

50g/2.5tbsp Maple Syrup I use – Pure Maple

1tsp Vanilla Extract I use – Nielsen-Massey

3 Large Free Range Eggs

225g/8oz Plain White Flour

2tsp Baking Powder

1/4tsp Cinnamon

225g/8oz Grated Apple preferably a sweeter variety

125g/4.5oz Blueberries

75g/3oz Icing Sugar

2tbsp Maple Syrup

Method: Preheat the oven to 160C/140C fan, gas mark 3, 315F

First of all grease a 2lb loaf tin, 26cm x 12cm x 7cm (approx. 10″ x 5″ x 3″). Line the base with baking parchment.

Making The Apple And Blueberry Filled Cake Batter

  • Into a bowl sift the flour, baking powder, cinnamon and salt – dry ingredients. Set this to one side.
  • Next, in a large bowl add the softened butter, caster sugar and 2.5 tablespoons of maple syrup. Beat until pale and creamy. Rub the mixture between your finger and thumb, it should feel smooth. If it feels gritty continue mixing until the sugar is fully combined with the butter.
  • Add the vanilla extract and beat to incorporate.
  • Now add all 3 eggs and then the sieved, dry ingredients. Gently mix until just combined.
  • To grate the apple set a bowl on to digital scales. Cut one apple at a time into quarters, removing the core. Use a box grater and grate the apple, using the coarse grater, until only skin remains. Continue until the whole apple has been grated. Add the grated apple to the bowl on the scales, this will give you an idea of how much each grated apple yields.
  • Continue grating the apples, as before, until you have the desired weight.
  • Tip the grated apple and whole blueberries into the cake batter.
  • Fold the fruit into the batter using a spoon and taking care not to break up the blueberries.
  • Spoon the cake batter into the prepared loaf tin and smooth the surface using the back of a spoon.
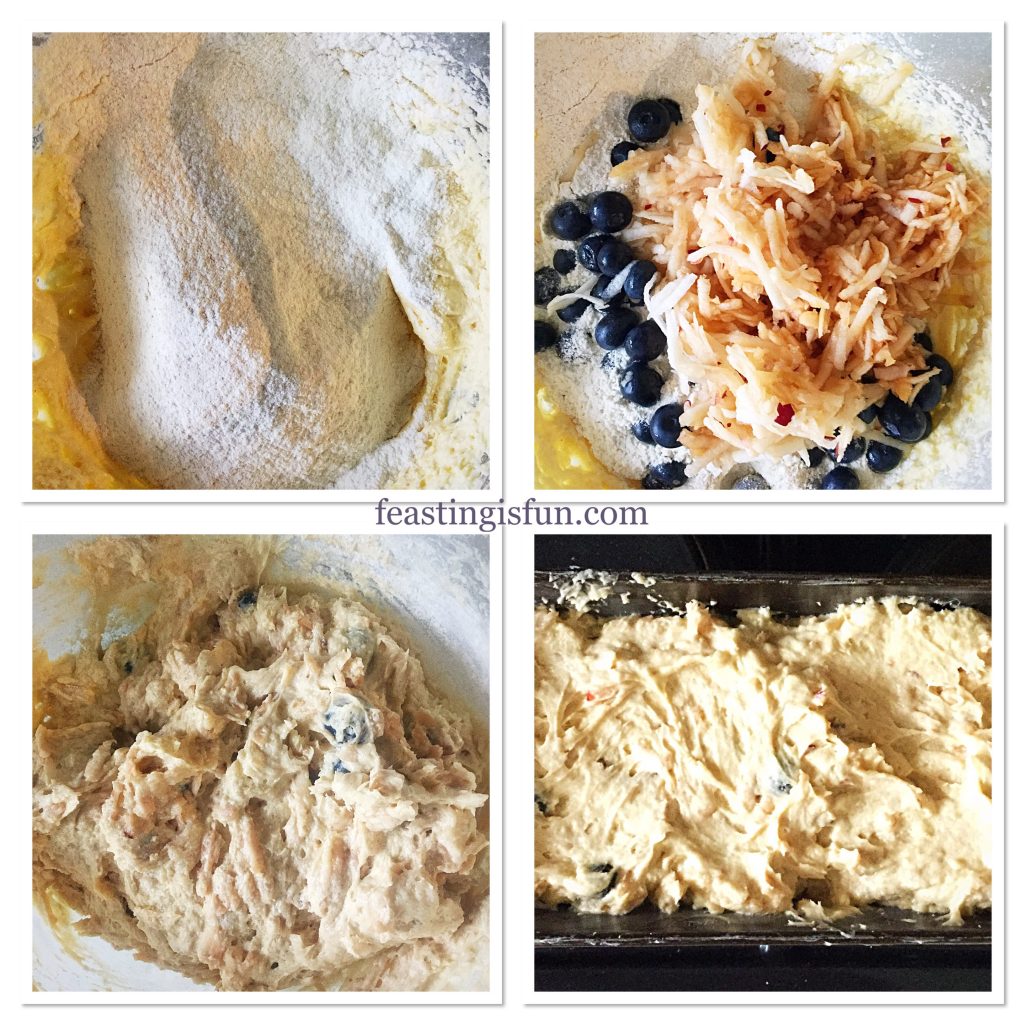
Ff Maple Drizzled Apple Blueberry Loaf Cake
Creating the delicious, fruit filled cake batter.

Baking The Loaf Cake

  • Place the tin into the centre of the oven and bake for 1 hour – 1 hour 20 minutes.
  • The cake is baked when an inserted skewer comes out clean.
  • As soon as the cake is baked remove from the oven and allow the cake to cool completely in the tin.
  • When the cake is cooled, use a palette knife to run around between the cake and the inside of the tin, releasing any sticky bits.
  • Now turn the cake out on to a cooling rack and gently peel away the baking parchment.
  • Place the cooling rack over a clean baking tray.


Making The Maple Syrup Drizzle And Decorating The Cake

  • Sift the icing sugar into a bowl. Then add 2 tablespoons of maple syrup and stir until the icing has a smooth consistency.
  • Use a spoon to drizzle the icing across the cake. Also encouraging the icing to drip down the sides of the cake.
  • Leave the cake to set.
FF Maple Drizzled Apple Blueberry Loaf Cake
Creating the drizzle effect on the cooled, baked cake.

While the icing is setting, put the kettle on and invite your neighbours round!
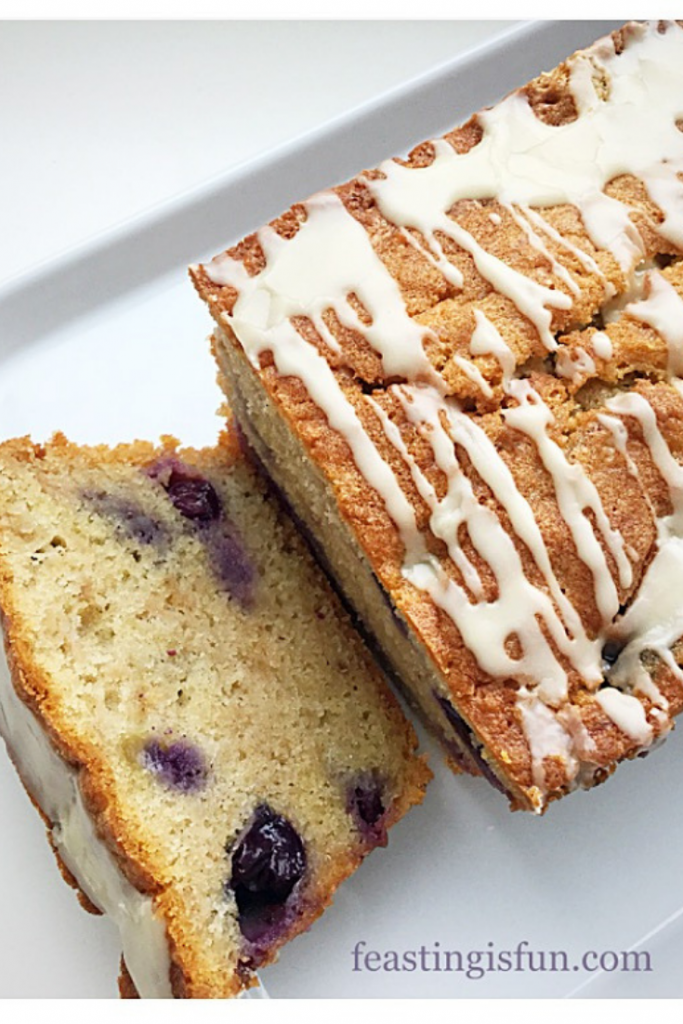
Maple Drizzled Apple Blueberry Loaf

Since this delicious cake was made a little while ago, it is very tempting to jump through the screen and grab a slice!

Serve this cake sliced and with a smile. It will keep in an airtight container for 3 days. During warmer weather store in the fridge.

If you have enjoyed this Maple Drizzled Apple Blueberry Loaf Cake you may also enjoy these:


Chocolate Chip Pumpkin Loaf Cake
FF Maple Drizzled Apple Blueberry Loaf Cake
Chocolate Chip Pumpkin Loaf Cake

Mascarpone Topped Carrot Cake

FF Maple Drizzled Apple Blueberry Loaf Cake
Mascarpone Topped Carrot Cake

Lemon Blueberry Bundt Cake

FF Maple Drizzled Apple Blueberry Loaf Cake
Lemon Blueberry Bundt Cake

Adding fresh fruit to cakes makes them deliciously moist. And fruit filled cakes are a million miles away from dry, moisture sucking, mass produced alternatives that are readily available in the shops. Most of all, home baked cakes not only taste so good, their flavour is far superior to most bought cakes.

Whatever you are making, baking and creating in your kitchens, have fun preparing your feast.

Sammie xx

No part of this post may be reproduced or duplicated without the written permission of the owner. Please see my Disclosure Policy.


Share
Facebooktwitterpinterestlinkedintumblr

Spiced Pumpkin Walnut Muffins

Share
Facebooktwitterpinterestlinkedintumblr

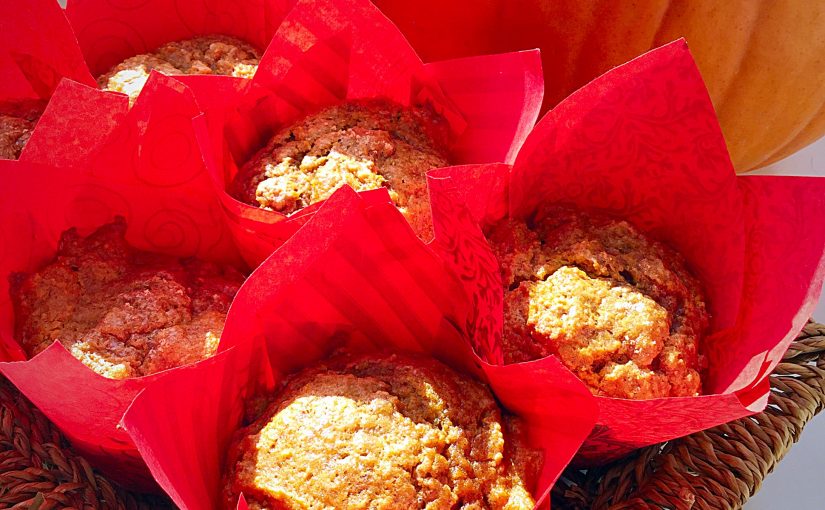
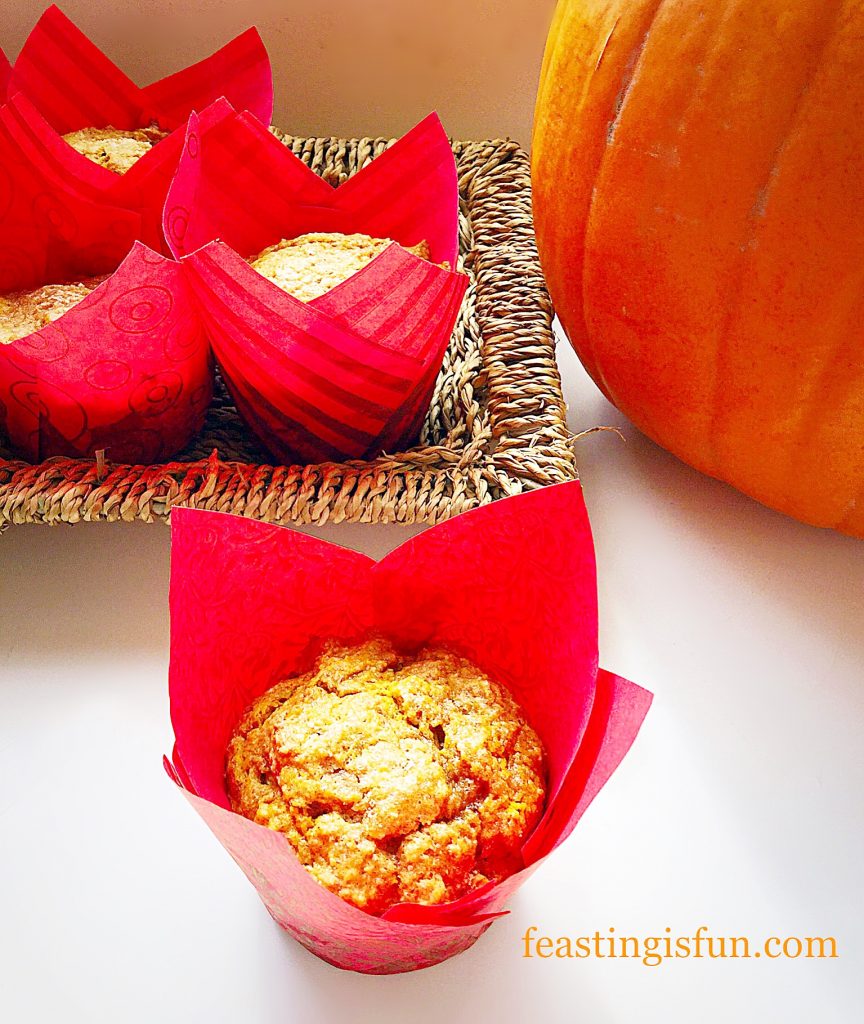
I have most definitely fallen in love. The kind of head over heels, mind consuming, heart compelling love that completely takes over one’s life. And the object of my desire is orange, coincidentally my favourite colour, big and round. Pumpkin where have you been all my life? It would seem, puréed in a can, far, far away. Until now, where I can hoard cans of this delicious ingredient, ready to make Spiced Pumpkin Walnut Muffins whenever I desire.

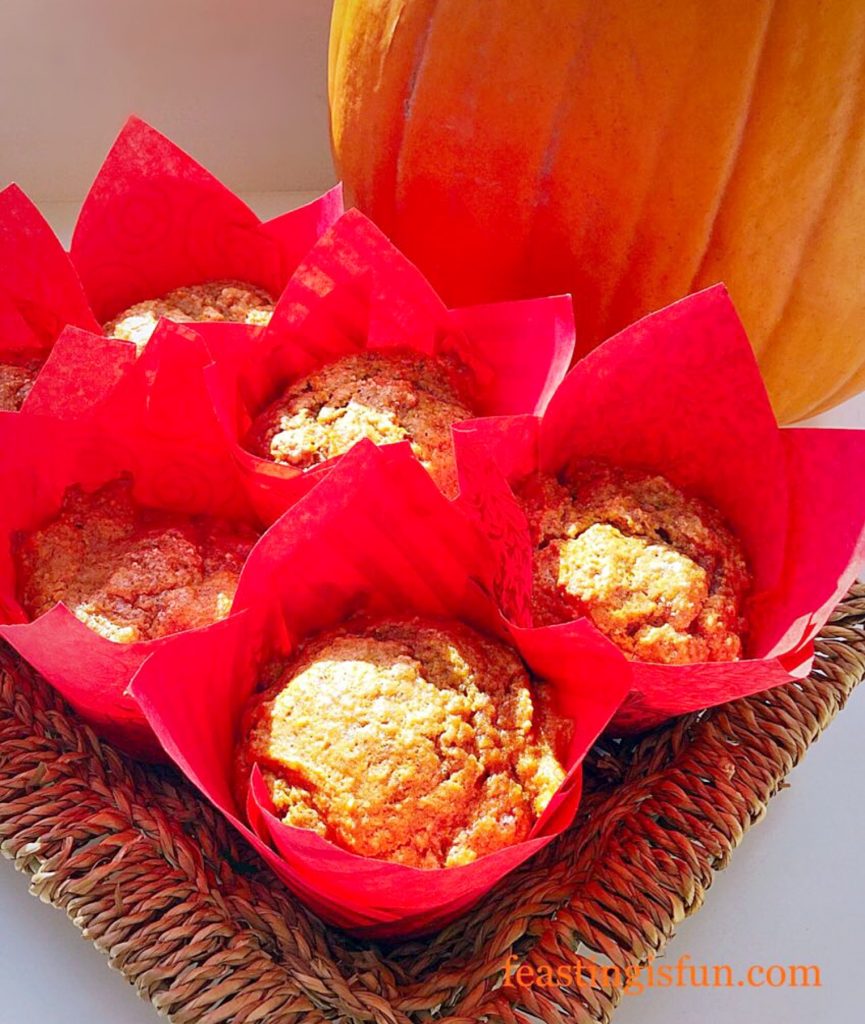
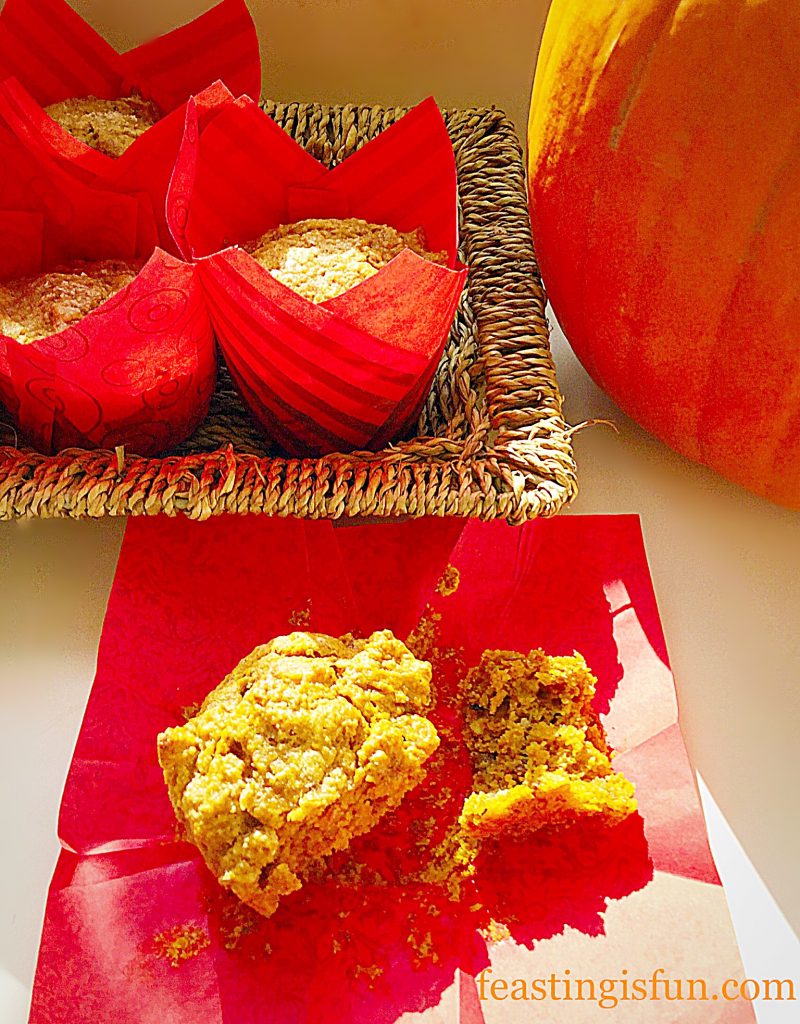
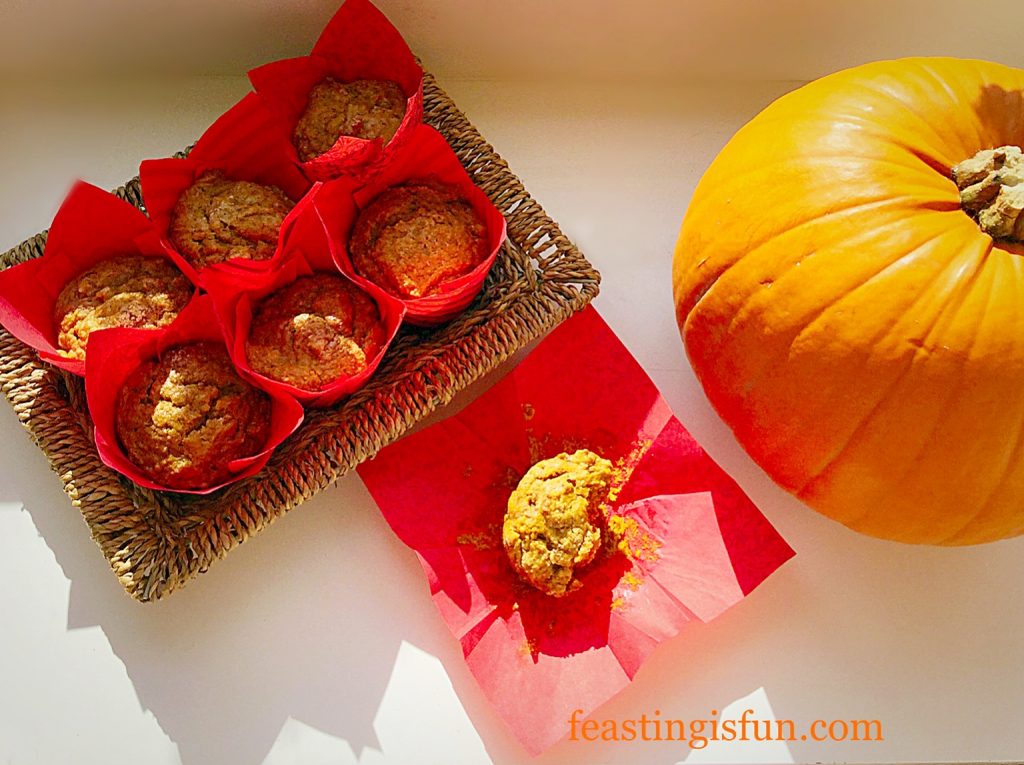
Autumnal bake with large orange squash.
Spiced Pumpkin Walnut Muffins

Americans, Canadians, no doubt many other countries have long known the delight that is pumpkin purée. While not the most compelling ingredient straight from the can, it lends a flavour and texture to bakes that other ingredients cannot.

Spiced Pumpkin Walnut Muffins

Late To The Pumpkin Party!

Since venturing into Pumpkin Spice World with my very first pumpkin bake, these doughnuts, I soon realised that I had uncovered an amazing ingredient. The tenderness, colour and delicate flavour that pumpkin purée lends to a bake is unique. Resulting in some of the best bakes I have ever tasted.

Spiced Pumpkin Walnut Muffins

So, now I have found a regular supplier long may this love affair continue. Since I intend to explore as many different bakes and desserts using my newly discovered love and they will be posted on here. Because sharing my passion seems only fair. Hopefully you will discover a love for all things pumpkin, by the time October ends.

Spiced Pumpkin Walnut Muffins

And as always, here on Feasting is Fun, sharing is a key part of my passion behind blogging. An example of how I share, just happened. Unable to drive at the present see here, I appreciate the Pharmacy, adjoined to my doctors, delivering my prescriptions. Just now, once I’d received my medications, I was able to share one of these Spiced Pumpkin Walnut Muffins with the delivery lady. The perfect way to show my thanks.

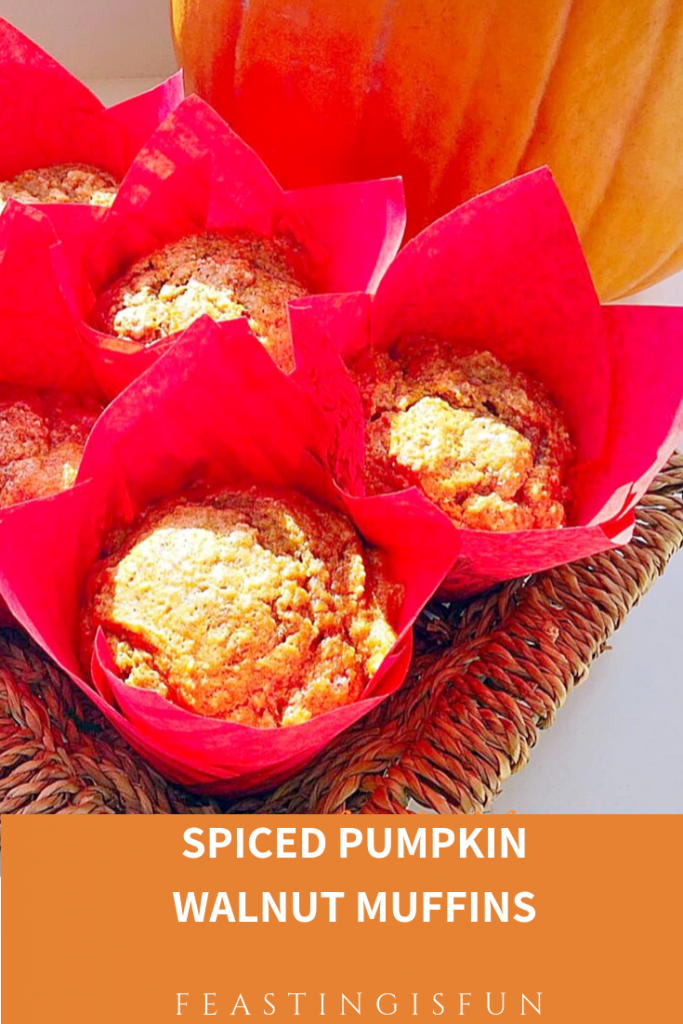
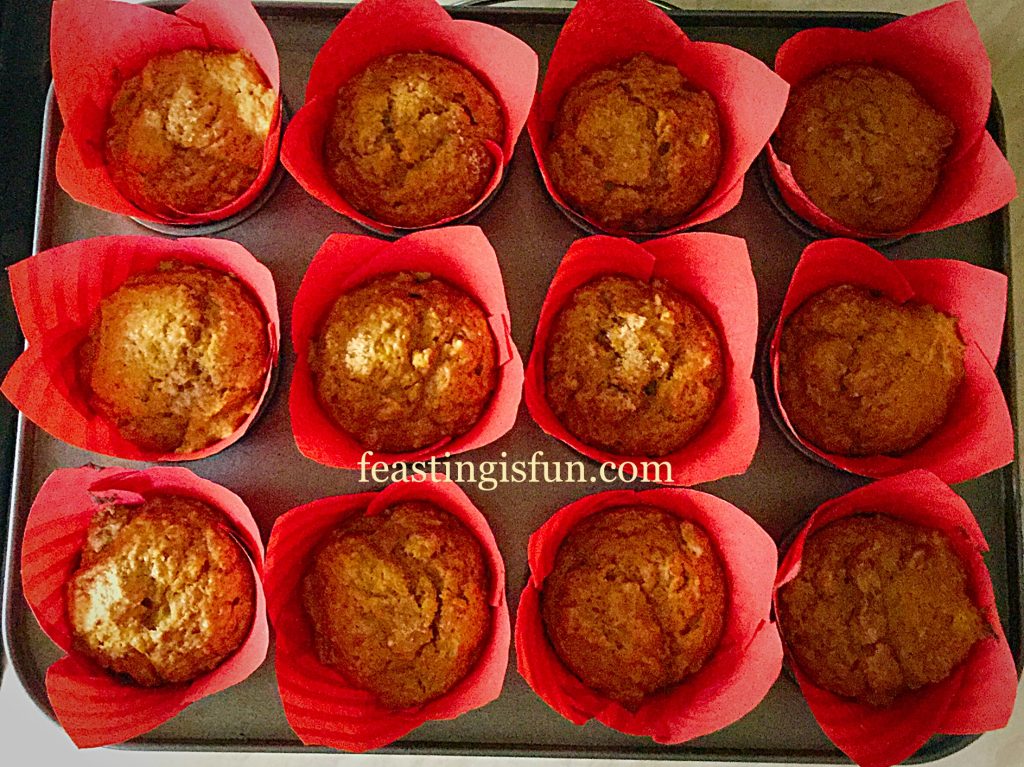
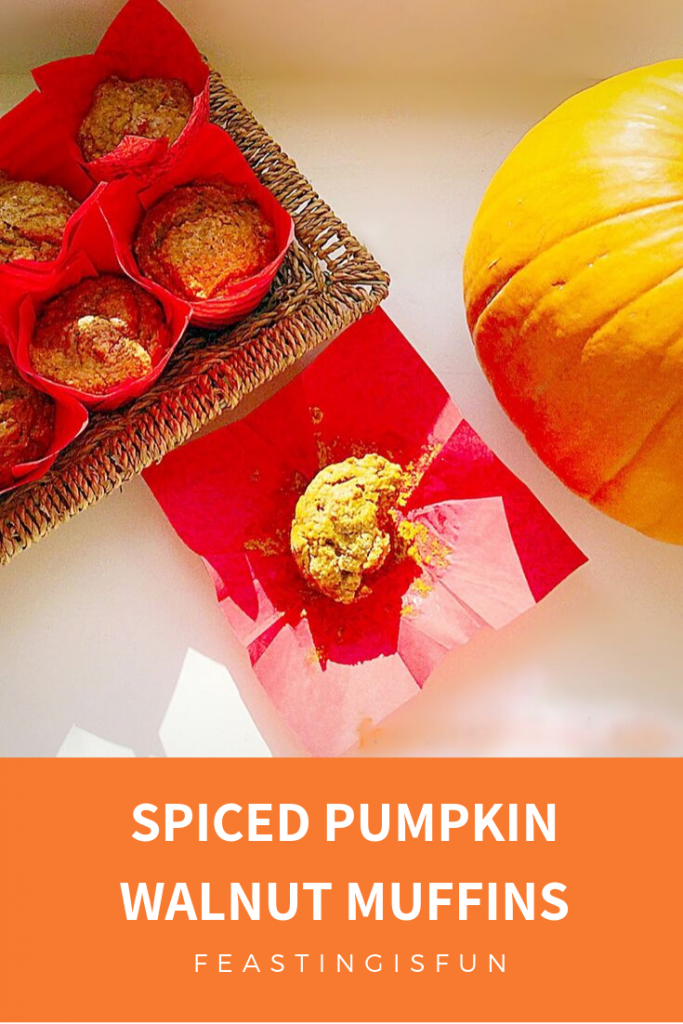
Autumn breakfast bake in tulip wrappers. Sized for Pinterest with descriptive graphics.

Recipe: Makes 12 Spiced Pumpkin Walnut Muffins

100g/4oz Unsalted Butter melted and cooled

200g/7oz Pumpkin Purée – available from Sainsbury’s

150g/5oz Full Fat Natural Yoghurt – I use Yeo Valley

2 Large Free Range Eggs

125g/4.5oz Plain White Flour

100g/4oz Wholemeal Flour

2tsp Baking Powder

85g/3.5oz Chopped Walnuts

1/4tsp Salt – I use Maldon

150g/5oz Soft Light Brown Sugar plus 1tbsp

2.5tsp Pumpkin Spice Mix see here if you would like to make your own

Method: Preheat the oven to 180C/160C fan, gas mark 3, 325F

Making The Muffin Batter

  • Firstly melt the butter in a heatproof, microwaveable jug and set to one side to cool.
  • Line a 12 hole muffin tin with cases, I used pretty tulip wrappers.
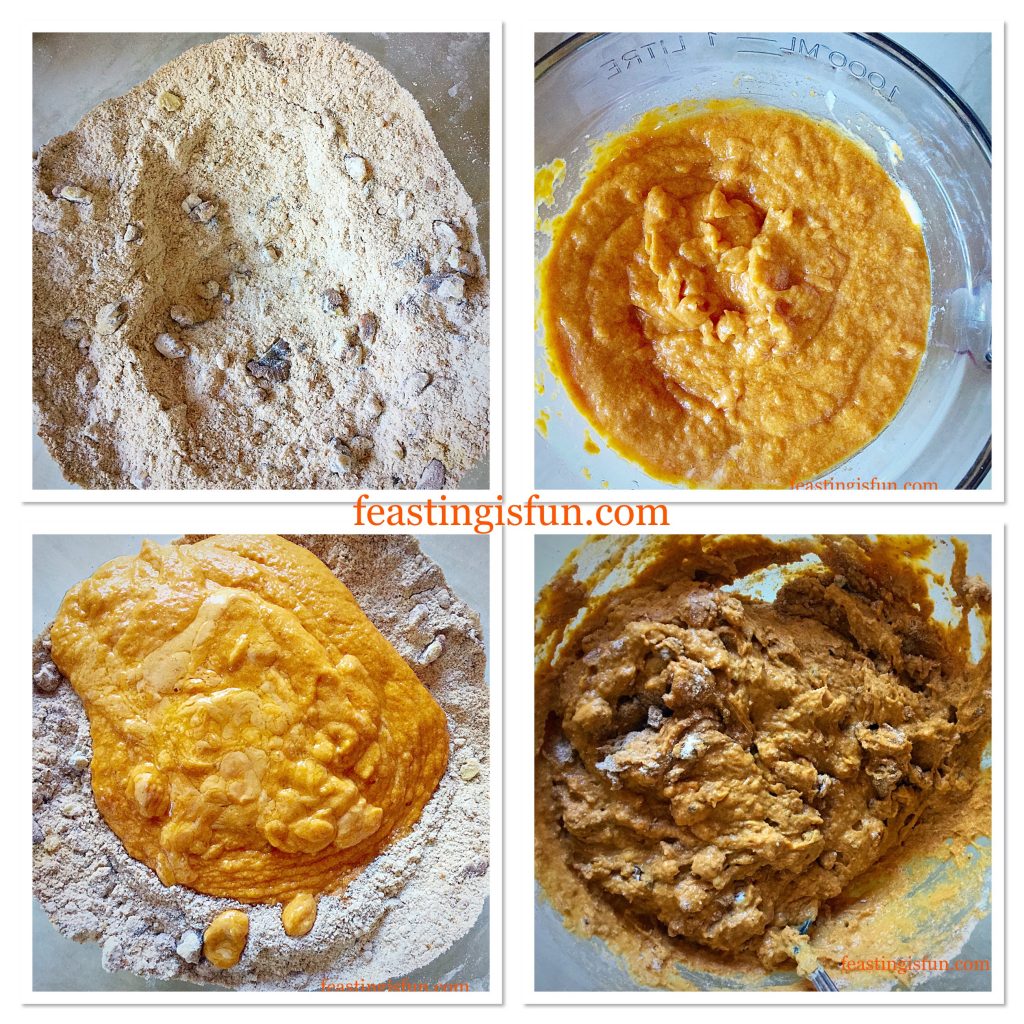
  • Next, in a large bowl add the flours, chopped walnuts, sugar, spice and salt. Stir with a balloon whisk to distribute the ingredients evenly and break up any lumps in the sugar. Dry ingredients.
  • As soon as the butter has cooled add in the yoghurt, pumpkin purée and eggs. Beat with a fork until the ingredients are combined. Wet ingredients.
  • Make a well in the centre of the dry ingredients and then pour the wet ingredients into the dry.
  • Mix until just combined. Over mixing will cause the muffins to become tough.
FF Spiced Pumpkin Walnut Muffins
Bringing the muffin batter together.
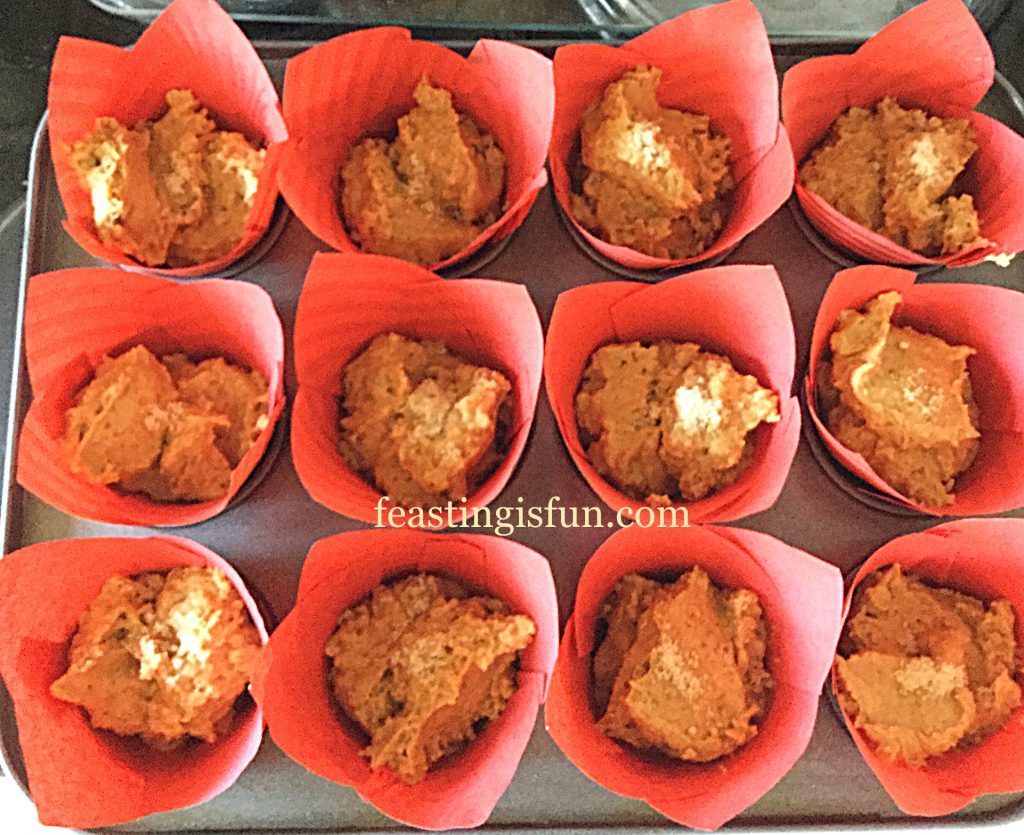
  • Spoon the muffin mix into the muffin cases, distributing the mix as evenly as possible.
  • Finally, using the extra tablespoon of sugar sprinkle a little over the top of each unbaked muffin.
FF Spiced Pumpkin Walnut Muffins
Spiced Pumpkin Walnut Muffins ready for the oven.

Baking The Spiced Pumpkin Walnut Muffins

  • Place the muffin tin in the centre of the preheated oven and bake for 20-25 minutes.
  • My muffins were baked at 25 minutes, but I started checking after 20 minutes.
  • Once baked the muffins should be just firm to the touch, without any visible wobble (this was present when checking at 20 minutes). The Spiced Pumpkin Walnut Muffins will have a slight sparkle, or sheen to them from the additional sugar sprinkled just prior to baking.
  • As soon as the muffins are baked remove the tin from the oven.
FF Spiced Pumpkin Walnut Muffins
Spiced Pumpkin Walnut Muffins their smell will fill your kitchen.
  • Inhale deeply. The baked pumpkin spices smell of warm, comforting, welcoming food. Who needs scented candles?
  • If you have used the tulip style muffin wrappers I strongly suggest leaving them to cool completely in the muffin tin. Because, I find doing so prevents them from unwrapping themselves, as can be the case if removed whilst hot.
  • Regular muffin cases can be removed after cooling for 10 minutes in the tin. Place on a cooling rack.
FF Spiced Pumpkin Walnut Muffins
Spiced Pumpkin Walnut Muffins best served warm.

These delightful Spiced Pumpkin Walnut Muffins are their best served warm. One of the benefits of using tulip style wrappers is that they unfold to create the perfect napkin, to hold and enjoy the experience of eating a muffin.

Pulled apart or bitten straight into, these muffins are all that is good about Autumn, wrapped up in an edible parcel. Also golden in colour, they imitate the autumnal palette, crunchy walnuts akin to walking through fallen leaves. Warm spices and tender crumb resemble falling into a big sofa near an open fire, after a crisp afternoon walk.

If you have enjoyed this recipe for Spiced Pumpkin Walnut Muffins you may also enjoy these:

Baked Pumpkin Spiced Doughnuts

Baked pumpkin spiced doughnuts displayed on a cake stand.
Baked Pumpkin Spiced Doughnuts

Autumn Apple Almond Cake

Gluten free apple and almond cake with a slice cut.
Autumn Apple Almond Cake a GLUTEN FREE recipe.

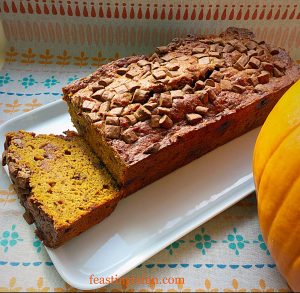
Chocolate Chip Pumpkin Loaf Cake 

Chocolate Chip Pumpkin Loaf Cake sliced at one end to show the tender crumb.
Chocolate Chip Pumpkin Loaf Cake

Baking these Spiced Pumpkin Walnut Muffins releases the aroma of the pumpkin spice mix within, creating a welcoming ambiance in the home. When visitors arrive, or the postman knocks on the front door, I want them to feel welcome. Nurtured by the warmth of our home and good food, they leave contented and comforted.

While baking, making and creating in the kitchen, my aim is to convey love, acceptance and warmth through food. Since sharing the food made, is an extension of home and all it represents. Because, meeting another’s needs on both a physical and emotional level, while sharing time and companionship over a coffee and a home baked treat, shows food really can be so much more than fuel.

So, whatever you are making, baking and creating in your kitchens, have fun preparing and sharing your feast.

Sammie xx

No part of the post may be reproduced or duplicated without the written permission of the owner. Please see my Disclosure Policy.

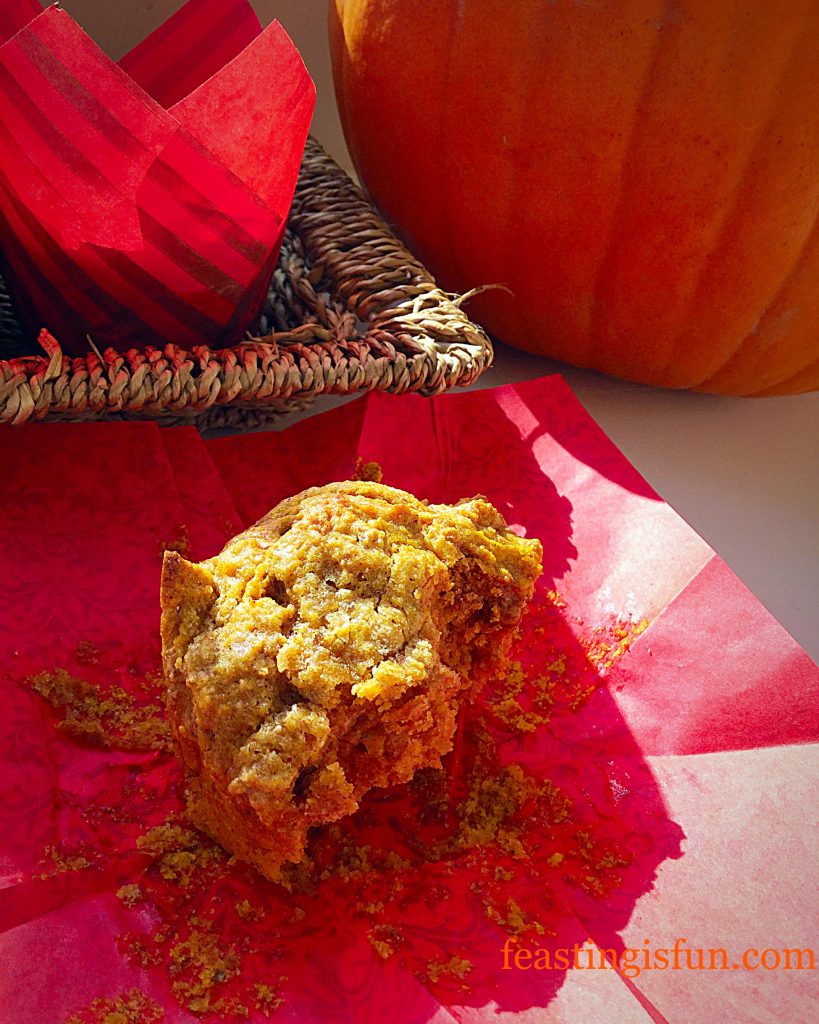
Image showing partially eaten muffin with a pumpkin and basket of spiced pumpkin muffins. Sized for Pinterest with descriptive graphics.


Share
Facebooktwitterpinterestlinkedintumblr

Crunchy Vanilla Shortbread

Share
Facebooktwitterpinterestlinkedintumblr

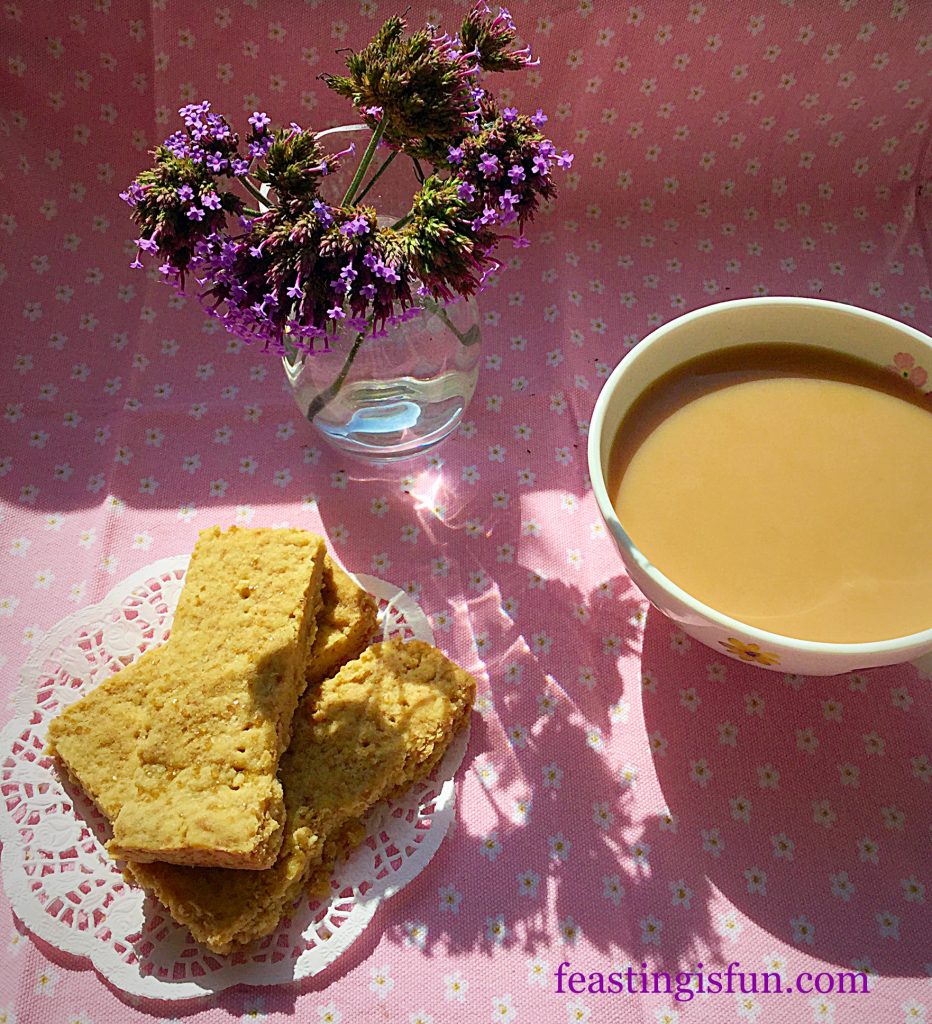
Well, we certainly have our ‘Indian Summer’. It is a gloriously sunny day, with a gentle breeze blowing, stopping the late summer air turning stuffy. Windows are open and I can only imagine how many days like today we have left, this year. In celebration of the beautiful weather I decided to make some Crunchy Vanilla Shortbread, to have, sitting in the sun, with a cup of tea.

FF Crunchy Vanilla Shortbread
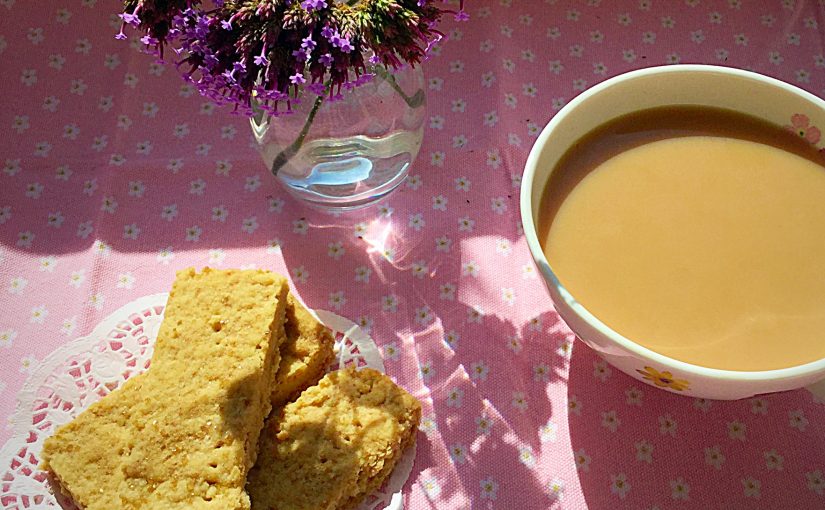
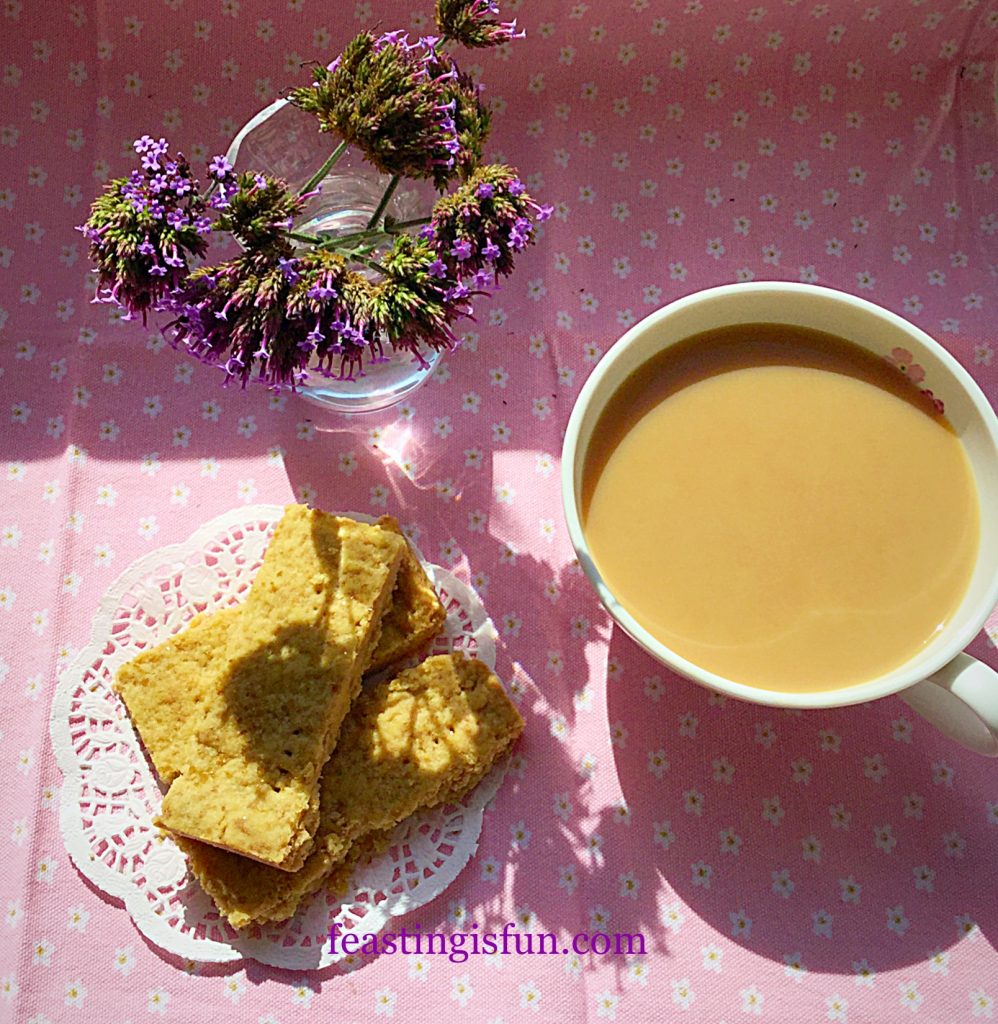
Crunchy Vanilla Shortbread perfect with a cup of tea.

I love the month of September, as summer’s hold loosens and hazy, low sunlight filters through the trees. Sitting in the garden, simply listening to the birds, or watching the bees and butterflies busily go about their way. It really is the month where it’s warm enough to still enjoy being outside, without piling on the layers.

FF Crunch Vanilla Shortbread
Crunchy Vanilla Shortbread perfect picnic food!

Of course this delicious Crunchy Vanilla Shortbread can and should be enjoyed anytime of the year. It just feels very luxurious to sit outside, mid September, with the sun warming my face and my cup of tea not getting cold!!

FF Crunchy Vanilla Shortbread
Crunchy Vanilla Shortbread perfect to make and take to work.

Traditional Shortbread

Whilst I have other shortbread recipes here and here, my Crunchy Vanilla Shortbread is a traditional version. By that I mean it follows the 3-2-1 rule. 3 parts flour, 2 parts butter and 1 part sugar. However, I have added a tiny pinch of salt and some vanilla bean extract. I adore the flavour of vanilla and in this shortbread it tempers the sweetness of the demerera sugar and balances the caramel flavours.

FF Crunchy Vanilla Shortbread
Crunchy Vanilla Shortbread a delightful treat.

For ease, this shortbread is baked in a tin, where it is simply pressed in and baked. No rolling out, chilling or cutting out required. It took less than 10 minutes to prepare and a further 30 minutes to bake. If you have visitors turn up, out of the blue, you could easily have this baking in the oven, by the time your guests have been settled and the kettle put on!

Sometimes it’s nice to have a simple recipe to hand, for when the occasion arises.

Recipe: Makes Crunchy Vanilla Shortbread

185g/6oz Unsalted Butter – plus a little extra for greasing the tin

75g/3oz Demerera Sugar – plus 1tsp for sprinkling on top

1tsp Vanilla Bean Paste – I use Nielsen-Massey

1/8th tsp Salt – I use Maldon

270g/9oz Plain White Flour

Making The Shortbread Dough

Method: Preheat the oven to 190C/170C fan, gas mark 5, 375F

  • Add the sugar, butter, salt and vanilla extract to a bowl.
  • Beat until the butter is pale and creamy.
  • Add the flour and mix with a spoon until you have a dough.
  • Line a lightly buttered, 20cm x 28cm x 5cm (8″ x 11″ x 2″) swiss roll tin with baking parchment.
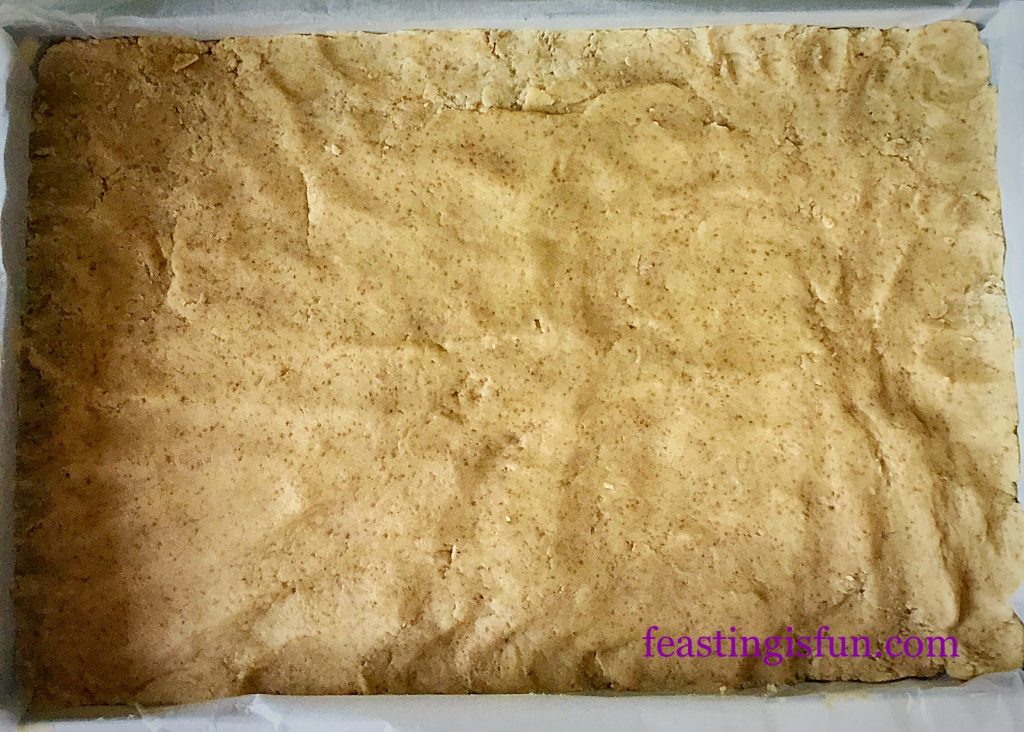
  • Tip the shortbread dough into the tin and press gently with your fingers until the dough completely covers the tin base evenly.
FF Crunchy Vanilla Shortbread
Crunchy Vanilla Shortbread dough ready to be docked and sprinkled with sugar before baking.
  • Dock the shortbread dough with a fork – this will prevent it from rising too much during baking.
  • Sprinkle over the reserved teaspoon of sugar. This really does make the shortbread sparkle once baked.

Baking The Shortbread

  • Place the tin in the middle of the oven and bake for 30 minutes, or until the shortbread is golden and has a set crumb.
  • Once baked remove the shortbread from the oven.
  • Score a line halfway through the length of the cooked shortbread, then score 7 strips – creating 14 Crunchy Vanilla Shortbread fingers.
  • Allow the shortbread to cool in the tin.
FF Crunch Vanilla Shortbread
Golden Crunchy Vanilla Shortbread scored and cooling.
  • Scoring the shortbread whilst it is hot makes it much easier to break into fingers once cooled. I’ll be honest I did have a couple of shortbread fingers break, they were my testers 😉.
  • Once cooled lift the shortbread out of the tin, using the baking parchment and break into individual fingers.

Store the shortbread in an airtight tin for up to 5 days, if it lasts that long!

FF Crunchy Vanilla Shortbread
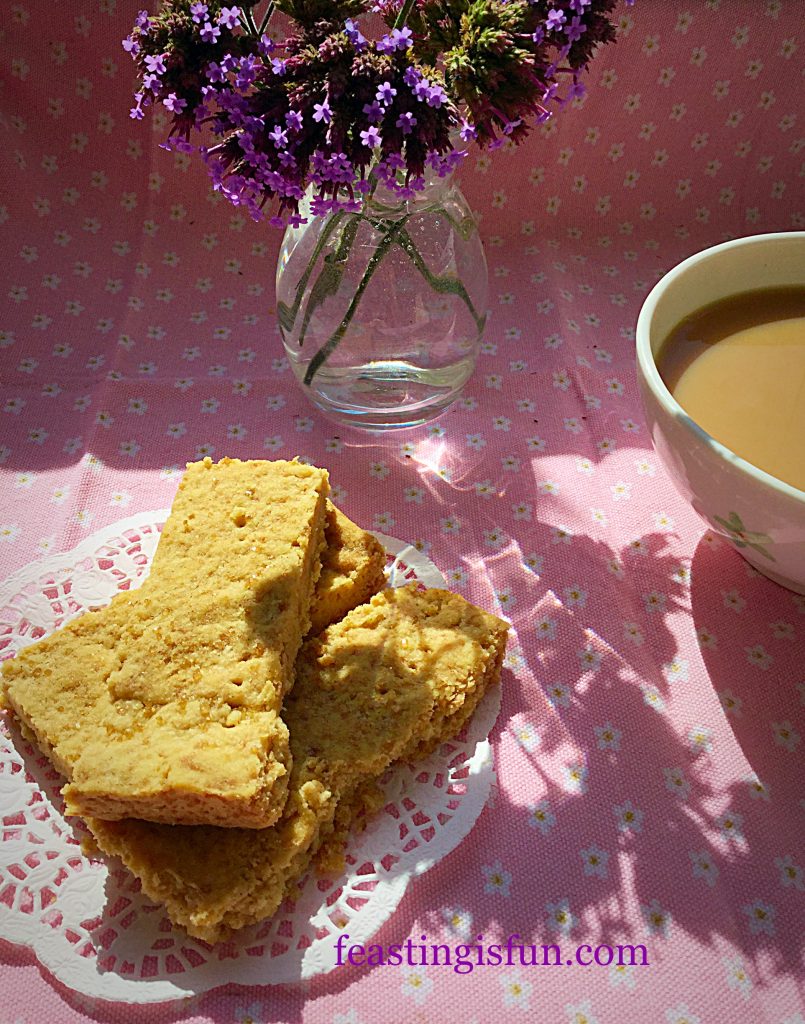
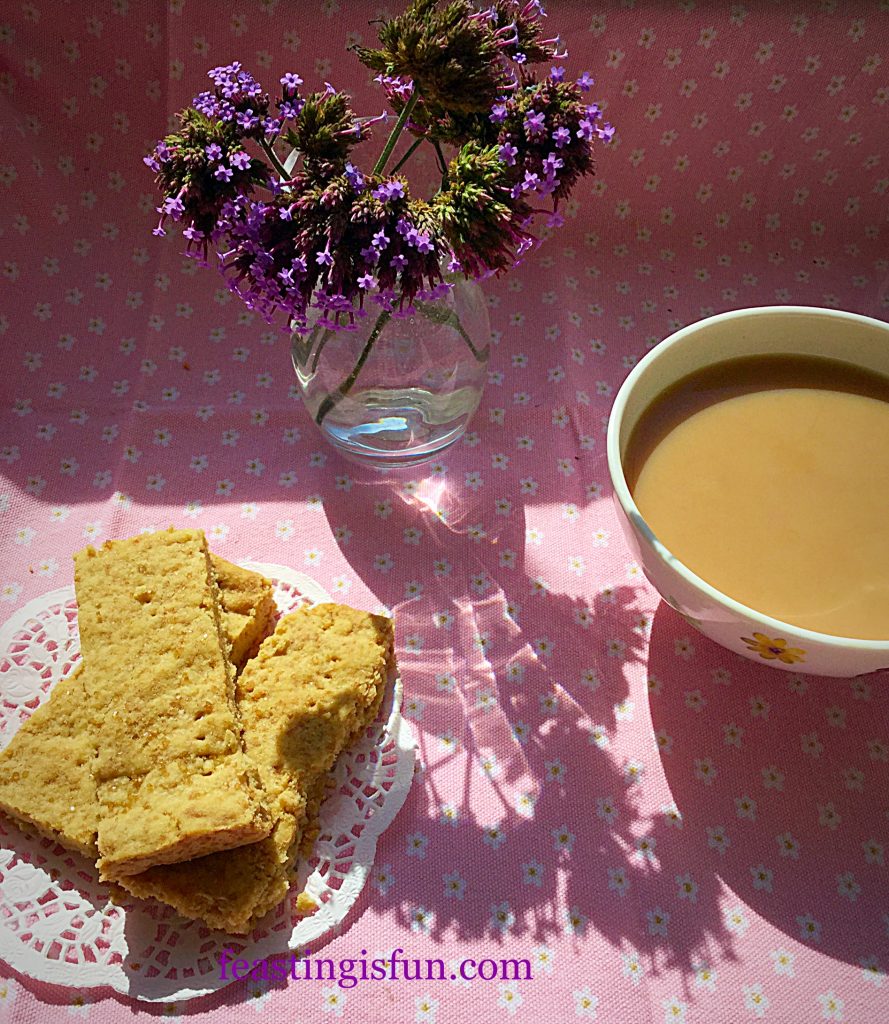
Crunchy Vanilla Shortbread see how it sparkles in the sunlight.

Serve this deliciously Crunchy Vanilla Shortbread with a good cup of tea or coffee. That said, these shortbread fingers would also pair very nicely with my Very Vanilla Ice Cream.

If you have enjoyed the recipe for Crunchy Vanilla Shortbread you make also like these:

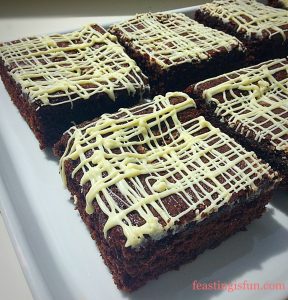
Vanilla Fudge Chocolate Brownies

FF Crunchy Vanilla Shortbread
Vanilla Fudge Chocolate Brownies.

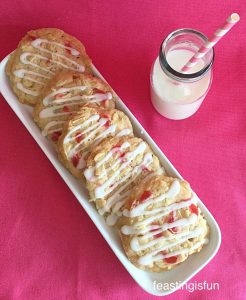
Cherry Bakewell Cookies

FF Crunch Vanilla Shortbread
Cherry Bakewell Cookies

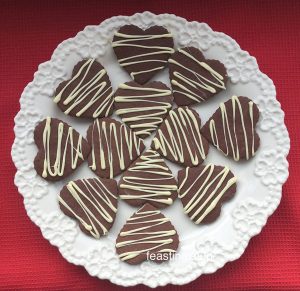
Chocolate Heart Cookies

FF Crunchy Vanilla Shortbread
Chocolate Heart Cookies.

I hope you are enjoying the last of the summer wherever you are.

I shall remember to look back at these photographs, in the midst of winter, to remind me of the warmth of the sun in summer.

Whatever you are making, baking and creating in your kitchens, have fun preparing your feast. Why not check on elderly neighbours, just pop in to make sure they have enough to drink and maybe stay for a cuppa and a natter? You could always take some home baked treats round?

Food always tastes better when it is shared.

Sammie xx

No part of this post may be reproduced or duplicated without the written permission of the owner. Please see my Disclosure Policy.


Share
Facebooktwitterpinterestlinkedintumblr

Twisted Fruity Jam Tarts

Share
Facebooktwitterpinterestlinkedintumblr

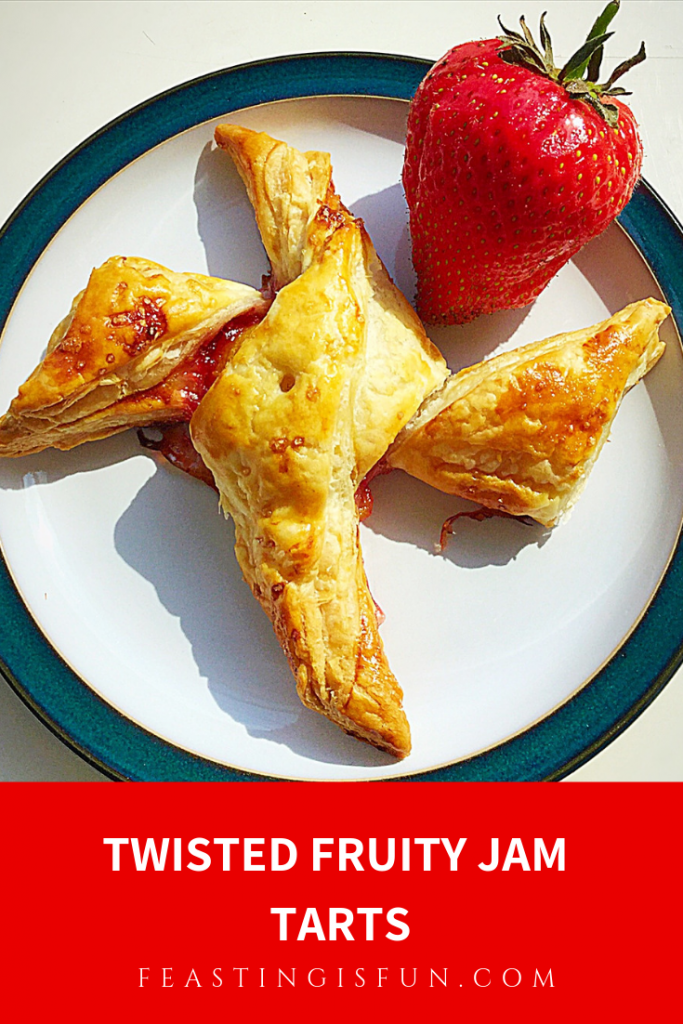
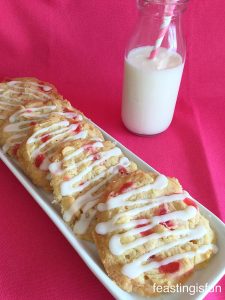
Who loves the idea of eating jam tarts for breakfast? I certainly do. My Twisted Fruity Jam Tarts are a fun way to start the day.

Since being inspired yesterday by a conversation on Twitter and with a spare packet of ready rolled, all butter pastry in the fridge, I challenged myself to come up with a twist on the regular jam tart. Literally! So I set about creating a tart that as well as being easy to pick up and eat, also has the filling covered.

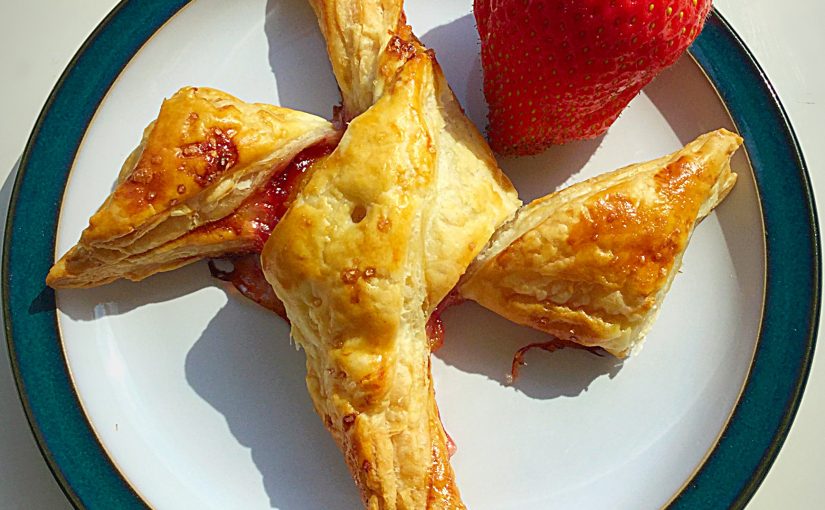
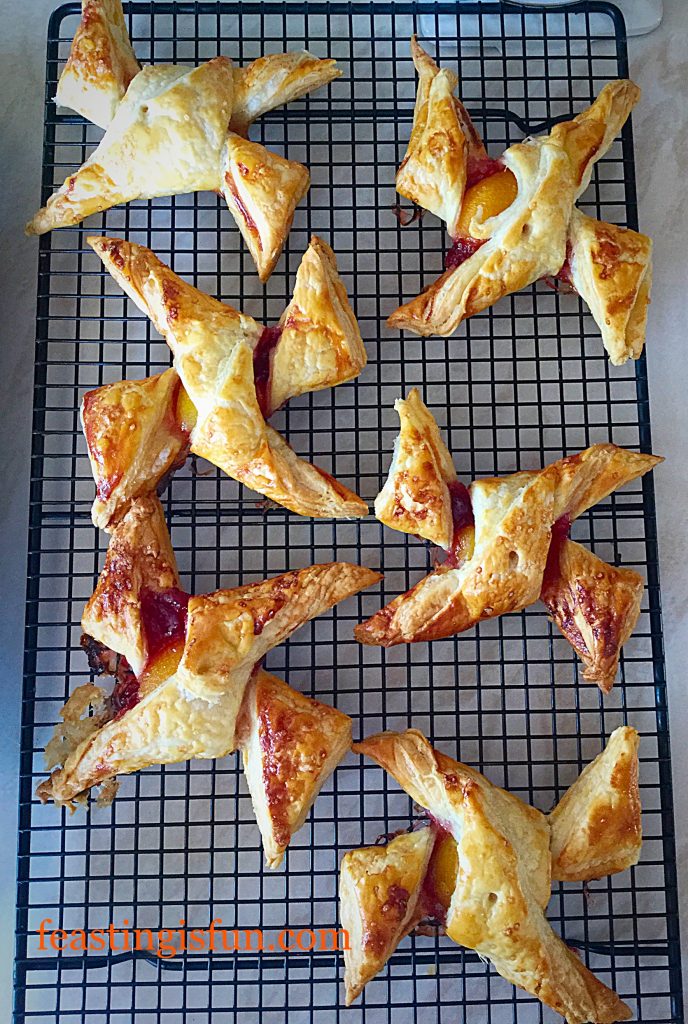
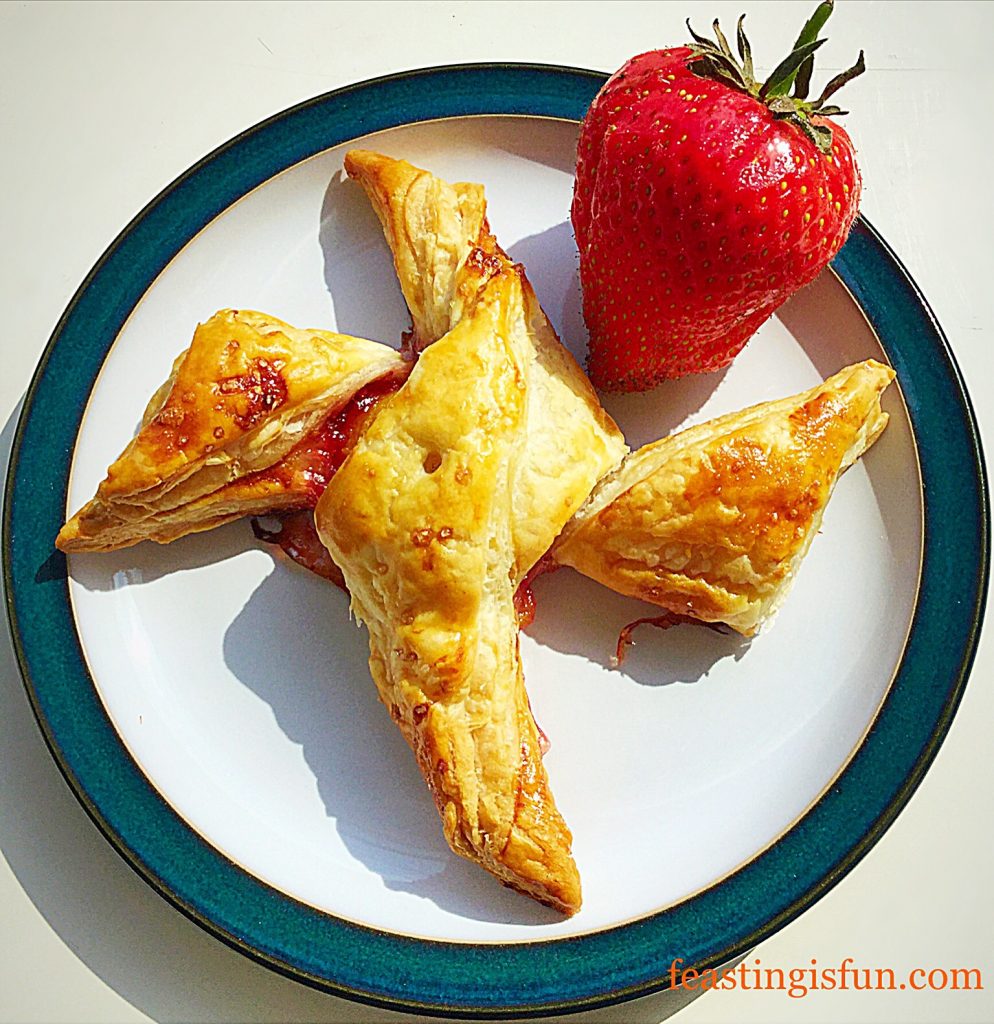
Resulting in these Twisted Fruity Jam Tarts, that taste rather like a Danish pastry. While being easy to make, the golden pastry hides an apricot half and strawberry jam. Follow with a final sprinkling of demerara sugar over the egg washed pastry, a quick bake and the result is a delicious, fruity, flaky pastry delight!

FF Twisted Fruity Jam Tarts
Twisted Fruity Jam Tarts so easy to make and easier to eat 😉

Having never tried to bake something like this before, I was unsure how they would turn out. I couldn’t have been more thrilled. Each twist is strong enough to hold the entire tart by, which makes them ideal as picnic and finger food.

Also, the demerara sugar caramelises on the pastry, nudging each twist into a sweeter flavour sensation. Combining apricots with strawberry jam was utter flavour heaven. While the bake softened, tart apricots are offset by the sweet strawberry jam. Most importantly, for the very best flavour, use all butter puff pastry when making these tarts.

Unusual shaped fruit pastry on a plate with a mug of tea to one side.
Twisted Fruity Jam Tarts

Making these Twisted Fruity Jam Tarts was one of those moments in the kitchen when everything goes to plan and turns out better than I could of ever hoped for. And if I can make these, then so can you!

Recipe: Makes 6 Twisted Fruity Jam Tarts

320g Ready Rolled All Butter Puff Pastry – I used Just Rol

6 Apricot halves – I used tinned ones from Waitrose

2-3tbsp Good Quality Strawberry Jam- I used Hartleys Best Strawberry Jam

1-2tbsp Demerara Sugar -I used Billingtons

1 Medium Free Range Egg

Method: Preheat the oven to 210C/190C fan, gas mark 6, 425F.

Assembling The Fruit Tarts

  • Unroll the puff pastry ensuring that you have a baking tray that fits the size of the pastry. Trim the paper that the pastry has been wrapped up in so that it fits within the tray, as you will be using it to bake the tarts on.
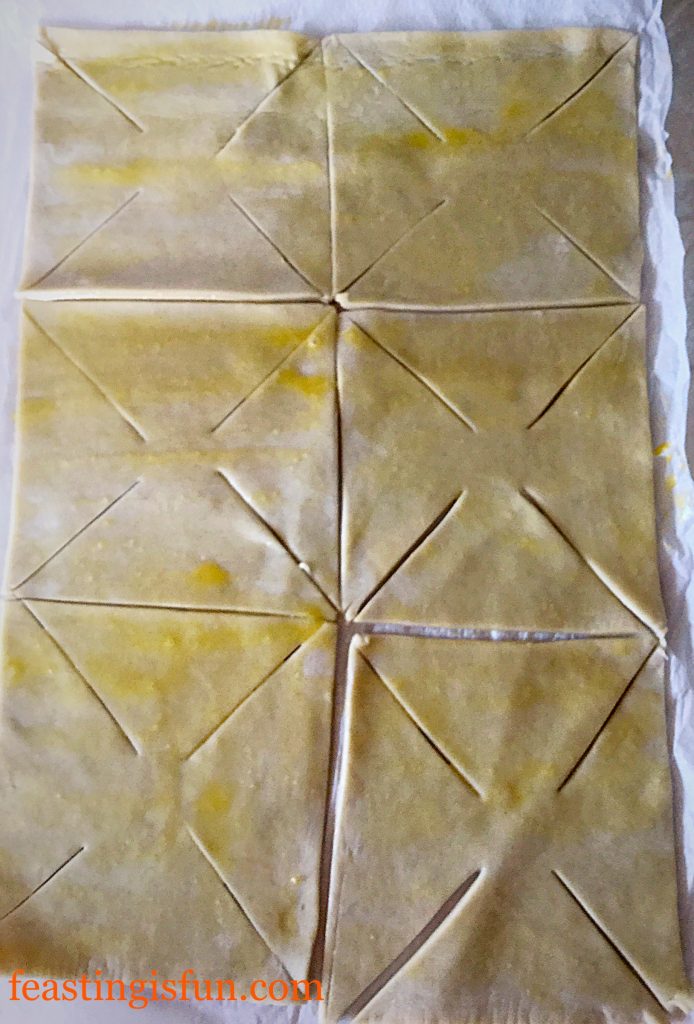
  • Use a sharp knife to cut the pastry into 6 equal squares.

FF Twisted Fruity Jam Tarts

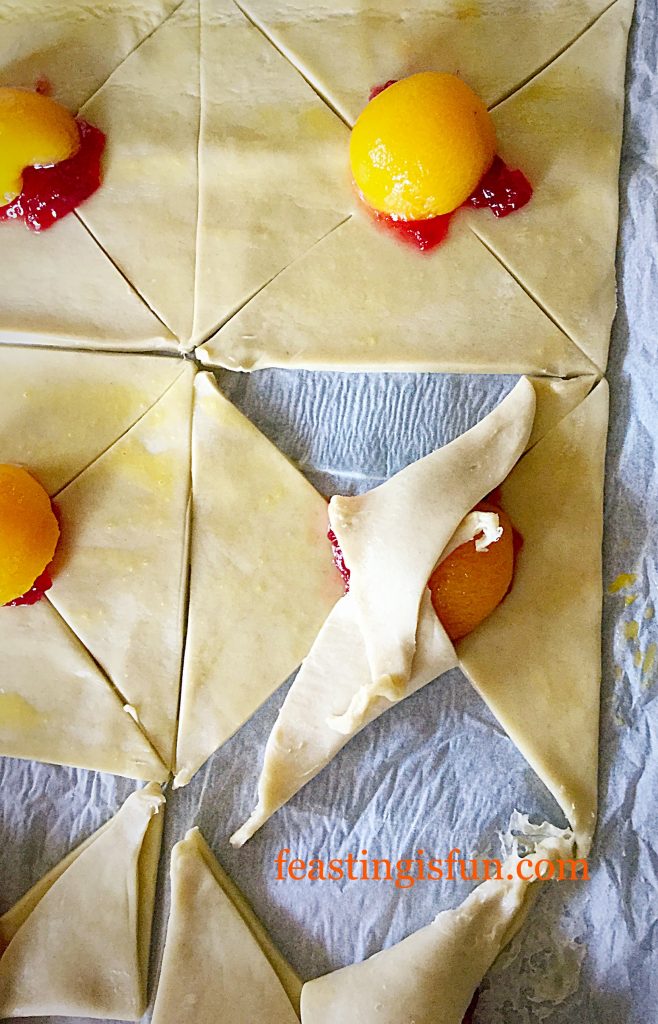
    This photo shows how to cut the squares.
  • Cut diagonally from each corner towards the centre two thirds of the way. See the photograph above.
  • Crack the egg into a small bowl and whisk. This is the egg wash.
  • Brush each of the squares with the egg wash.
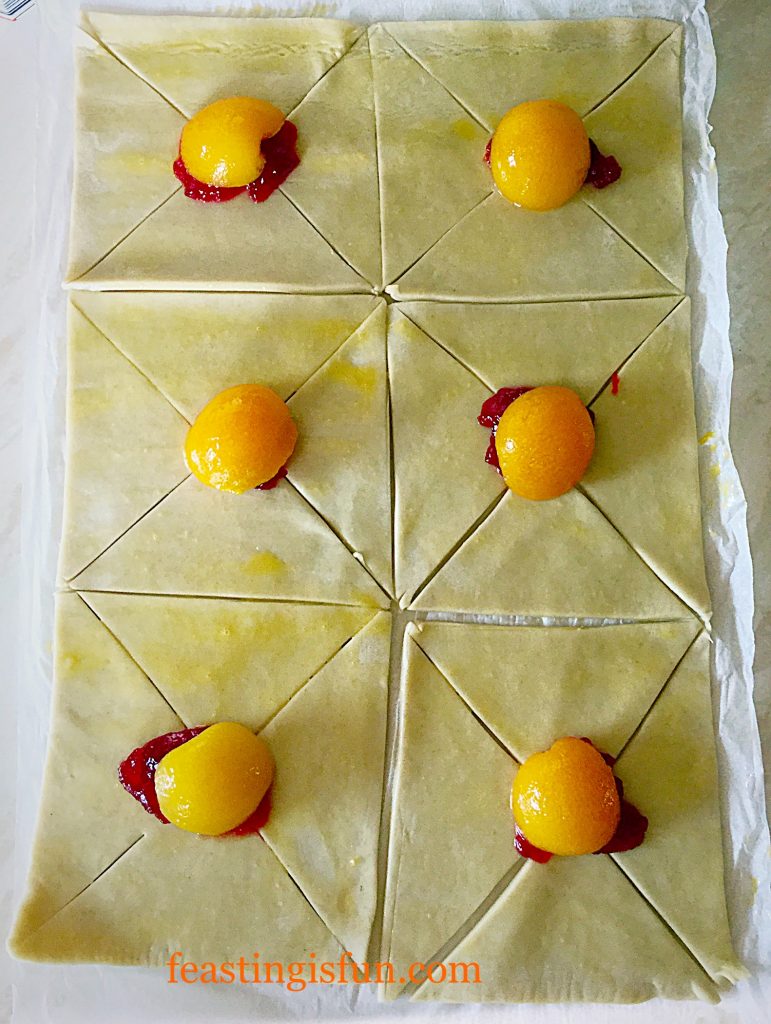
  • Place a scant teaspoon of strawberry jam in the centre of each tart.
  • Put half an apricot, flat side down, over the top of the jam.
FF Twisted Fruity Jam Tarts
Twisted Fruity Jam Tarts 
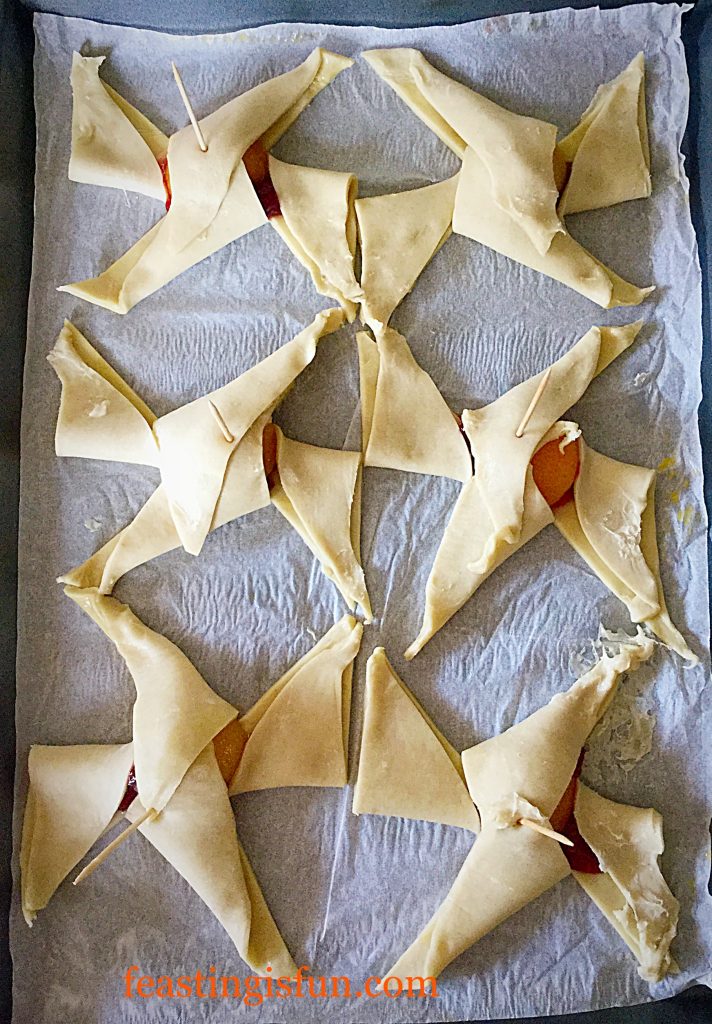
  • Take the right hand point of the triangle at the front and place it over the apricot. Pressing down to secure the fold.
  • Next take the left hand point of the opposite triangle and do the same.

FF Twisted Fruity Jam Tarts

  • Continue for each tart, placing a cocktail stick through the pastry and apricot in the centre to secure it while baking.
  • Next take the top right hand point of the triangle on the right of the tart and fold it so it is on top of the other point of the triangle.
  • Work in the opposite direction for the left hand triangle.
FF Twisted Fruity Jam Tarts
Each tart has an X type shape.
  • Brush the tarts with egg wash again and sprinkle over liberally with demerara sugar.

Baking The Tarts

  • Place the Twisted Fruity Jam Tarts in the preheated oven for 25-30 minutes and bake until they are puffed and golden.
  • As soon as the tarts are baked remove from the oven and transfer to a cooling rack.

The portion size of these fun and delicious tarts is perfect. And not having to transfer the tarts from a floured board to baking parchment really does make these so easy to whip up. Although I haven’t tried it, I suspect these Twisted Fruity Jam Tarts would also freeze well, for up to one month. Defrost overnight in the refrigerator and then refresh by reheating in a moderate oven for 10 minutes.

Twisted Fruity Jam Tarts

In future I will definitely make a double batch, as these tart have proved very popular here at home.

Also, I need to make these again soon as I am sure they would be delicious served warm with a scoop of my Very Vanilla Ice Cream

So there you go easy peasy jam tarts, with a twist!

If you have enjoyed this recipe for Twisted Fruity Jam Tarts you may also like these:

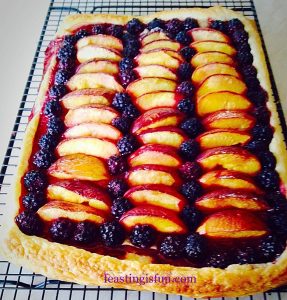
Blackberry Nectarine Tart

FF Twisted Fruity Jam Tarts
Blackberry Nectarine Tart 

Spicy Sausage Rolls

FF Twisted Fruity Jam Tarts
Spicy Sausage Rolls 

Perfect All Butter Shortcrust Pastry

FF Twisted Fruity Jam Tarts
Perfect All Butter Shortcrust Pastry 

Pastry is such a wonderfully versatile baking medium. I always have a stash of all butter puff pastry in the freezer. Because it is so handy when a quick meal, dessert, or even a decision to go out for the day tomorrow, as the weather looks good picnic!

If you try these Twisted Fruity Jam Tarts please let me know how you get on? I love reading your comments and appreciate you taking time to write them. Also, I love seeing your makes and bakes on Twitter and Instagram. And if you tag me in and I will be sure to give you a shout out and retweet.

So, whatever you are making, baking and creating in your kitchens, have fun preparing and sharing your feast.

Sammie xx

No part of this post may be reproduced or duplicated without the written permission of the owner. Please see my Disclosure Policy.


Share
Facebooktwitterpinterestlinkedintumblr

Feta Red Onion Marmalade Quiche

Share
Facebooktwitterpinterestlinkedintumblr

I love chutneys, relish, chilli jam, savoury marmalade. So when I saw the varieties that Hawkshead Relish make and sell I was in my element. And challenged to use the jellies and marmalade as an ingredient, I immediately thought of quiche. So I set about making this delicious Feta Red Onion Marmalade Quiche.

FF Feta Red Onion Marmalade Quiche.
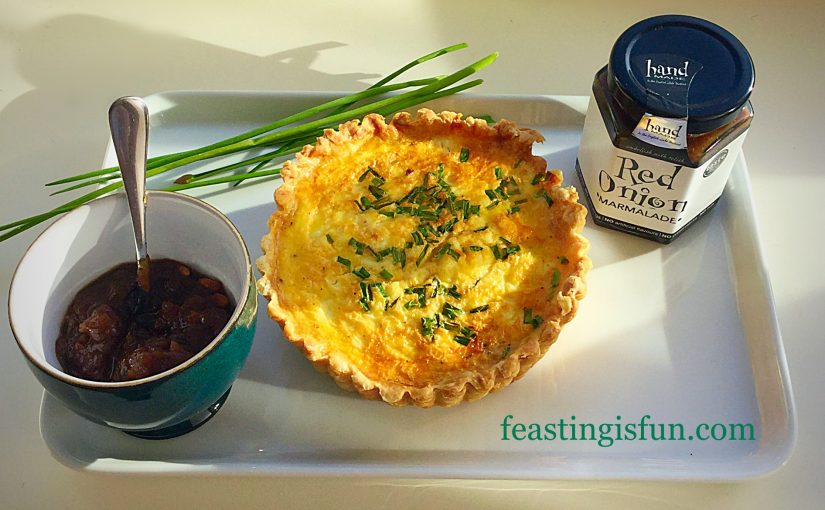
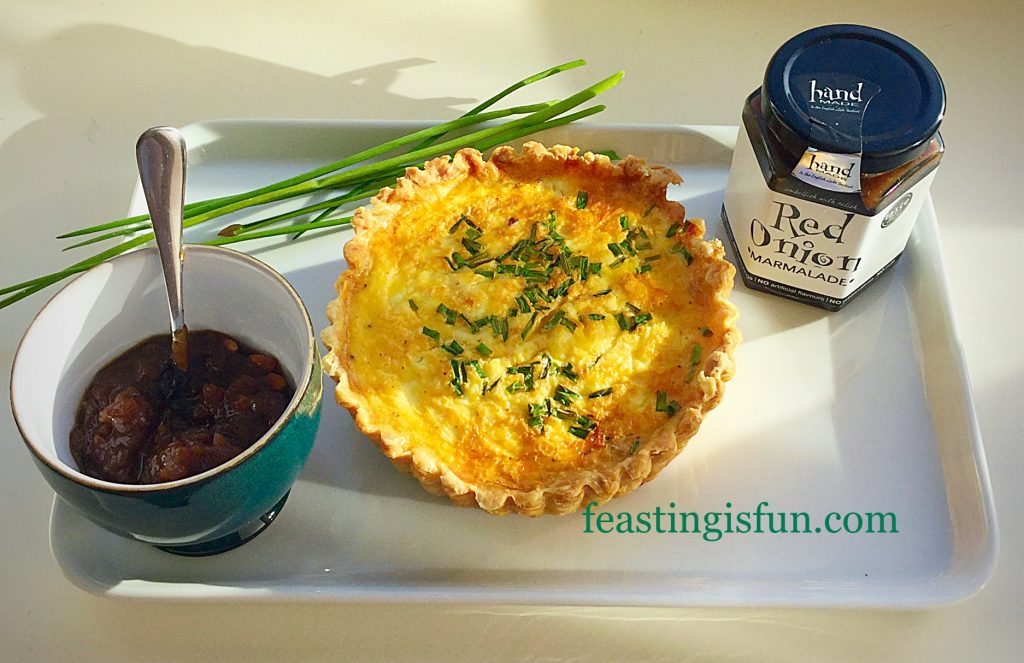
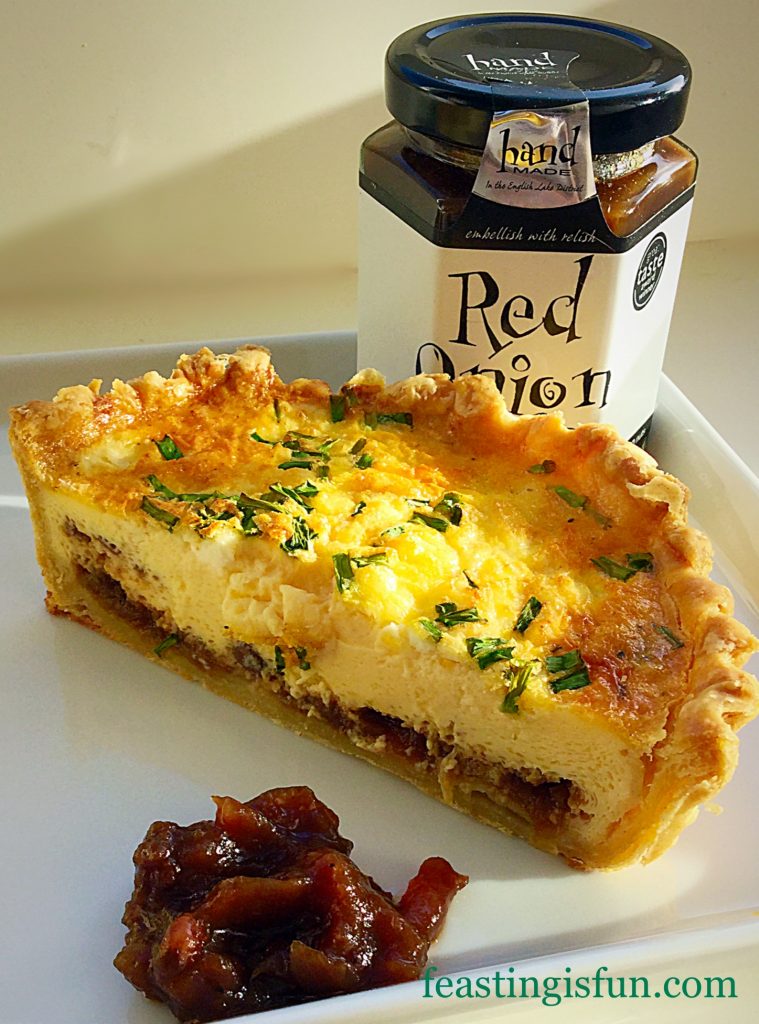
Feta Red Onion Marmalade Quiche a delightful combination of flavours.

Perfect Shortcrust Pastry

First of all, however, I set about creating a foolproof all butter shortcrust pastry recipe, for both sweet and savoury bakes. You can find it here – Perfect All Butter Shortcrust Pastry.Also, you will find another quiche recipe using Hawkshead Relish Ale Jelly as an ingredient!

So, with a reliable, consistent pastry recipe, that has been tested and retested, I was then able to let my creative imagination run wild.

FF Feta Red Onion Marmalade Quiche
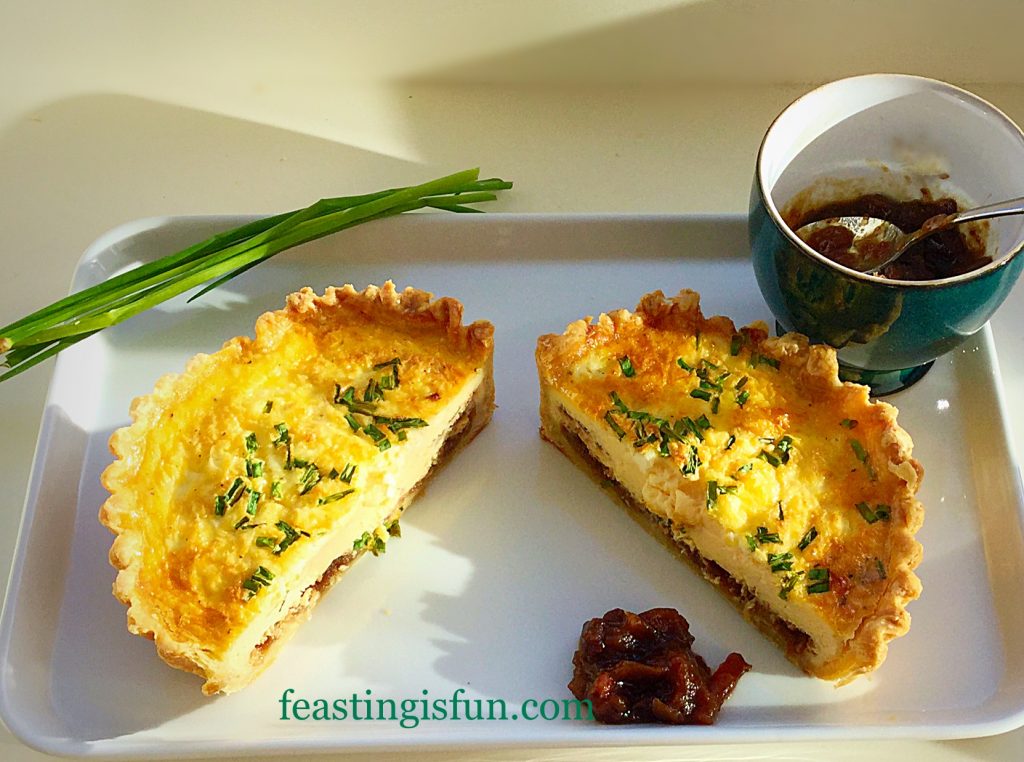
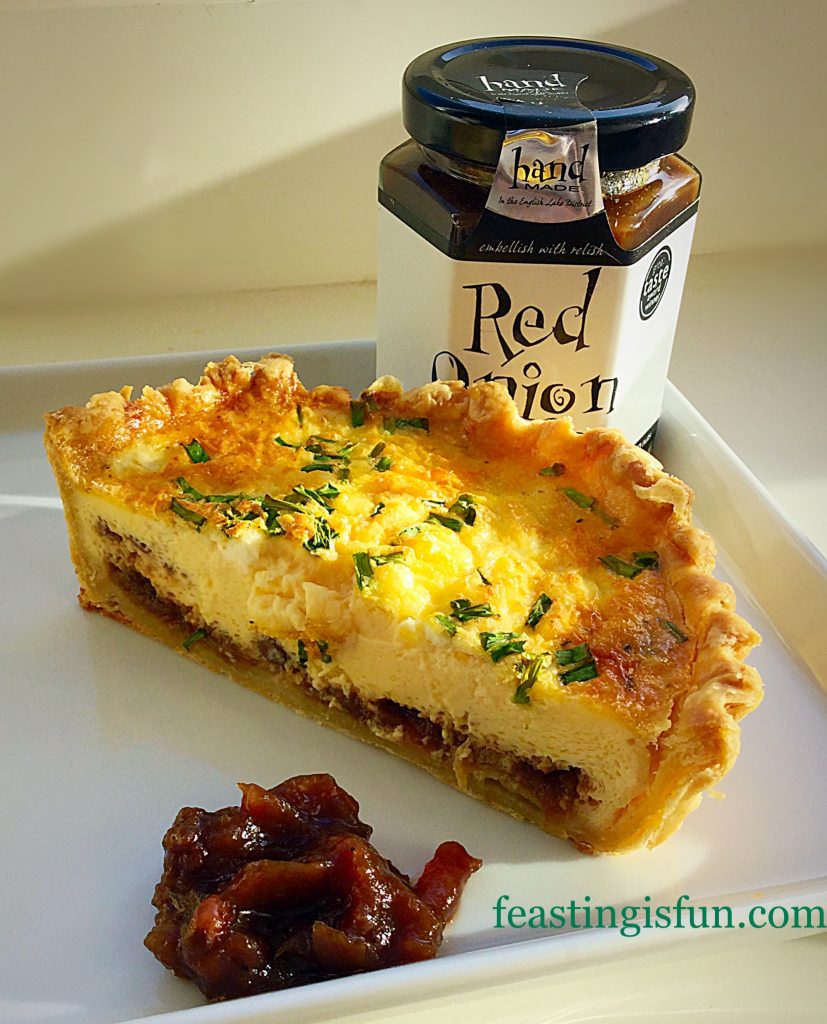
Feta Red Onion Maramalade Quiche delicious layers of flavour.

Flavour Inspiration

We have some tea rooms near us that are joined to a local artists gallery and a wonderful shop that stocks local pottery, glass and a million other things. Going to the tea rooms is truly a treat day out. In the tea rooms they serve a range of dishes, from light lunches to hearty meals. One of my favourites is their Quiche Lorraine, particularly as it is always served with chutney and onion marmalade in separate little pots.

And this memory sparked my idea was to have the red onion marmalade inside the quiche. Then I needed to decide what to pair it with. A recent love affair with crumbly, salty, Greek Feta Cheese provided the answer. Finally, topped with freshly sniped chives from the garden this Feta Red Onion Marmalade Quiche is so much more than the sum of it’s separate parts.

FF Feta Red Onion Marmalade Quiche
Feta Red Onion Marmalade perfect for picnics and buffets.

Quiche Indulgence

The chives provide a beautiful top to the quiche and indeed echo the onion flavour from the marmalade. While the feta cheese mellows in the eggy custard providing the perfect balance to the warm red onion marmalade. The difference that a small amount of heat adds to the base layer of this quiche is quite dramatic.

If you enjoy Red Onion Marmalade with your cheese and crackers, using it as an ingredient in a dish lifts it to a whole different level. Since the sweet/sour caramelised onion flavours come alive on your tongue. It is pure heaven!

Recipe: This makes one deep Feta Red Onion Marmalade Quiche serves 2-3, baked in a loose bottom tart tin.

For a larger quiche, double the recipe.

1/3 Quantity All Butter Shortcrust Pastry

50g/2oz Feta Cheese

2-3tbsp Red Onion Marmalade from Hawkshead Relish

4 Large Free Range Eggs

2tbsp/30ml Whole Milk

1/4tsp Sea Salt I use – Maldon

1/4tsp Freshly Ground Black Pepper

1tsp Chopped Fresh Chives

Making And Baking The Feta Red Onion Marmalade Quiche

Method: Preheat the oven to 200C/180C fan, gas mark 6, 400F

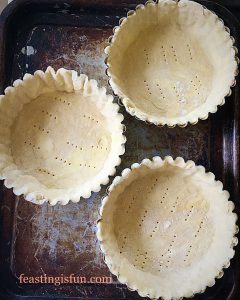
  • Prepare the pastry and blind bake according to the instructions given for Perfect All Butter Shortcrust Pastry.
  • Reduce the oven temperature to 180C/160C fan, gas mark 4, 375F.
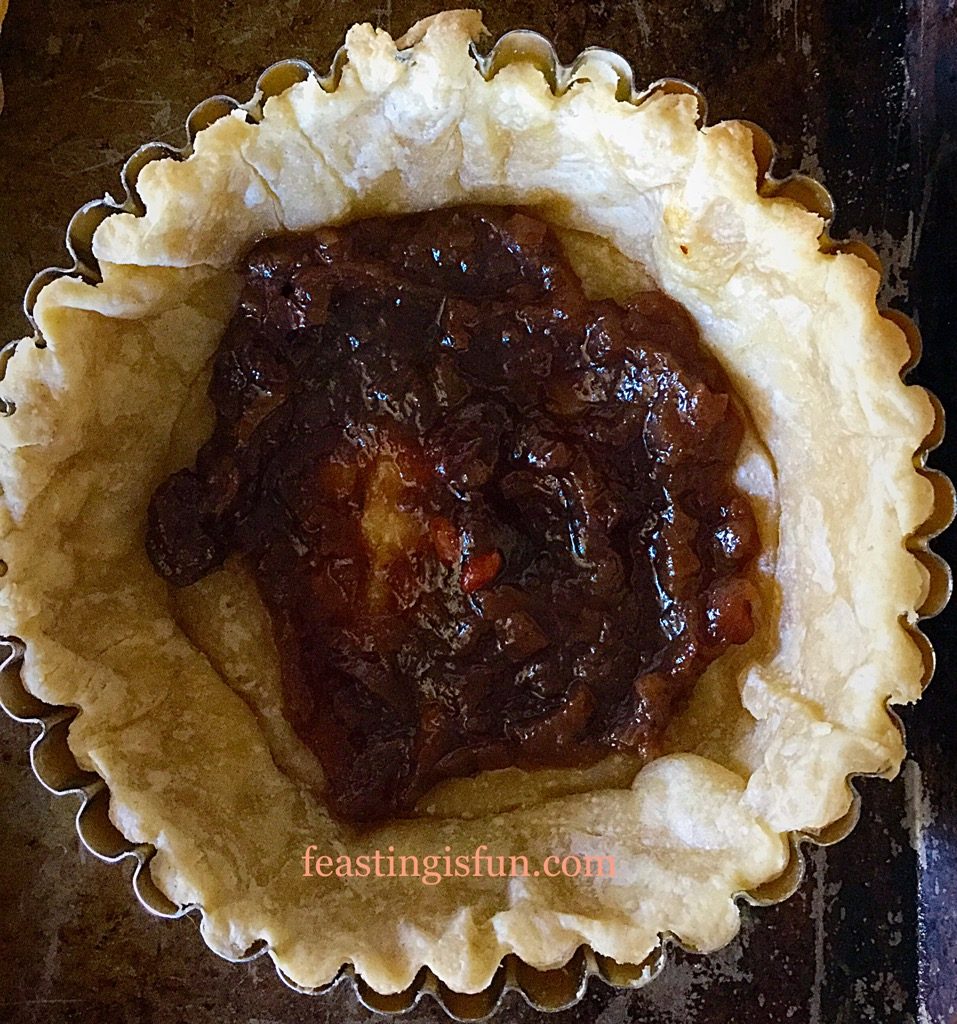
  • Spoon 2-3 tablespoons of Red Onion Marmalade into the bottom of the pastry tart shell.
FF Feta Red Onion Marmalade Quiche
A delicious layer of red onion marmalade at the base of the quiche.
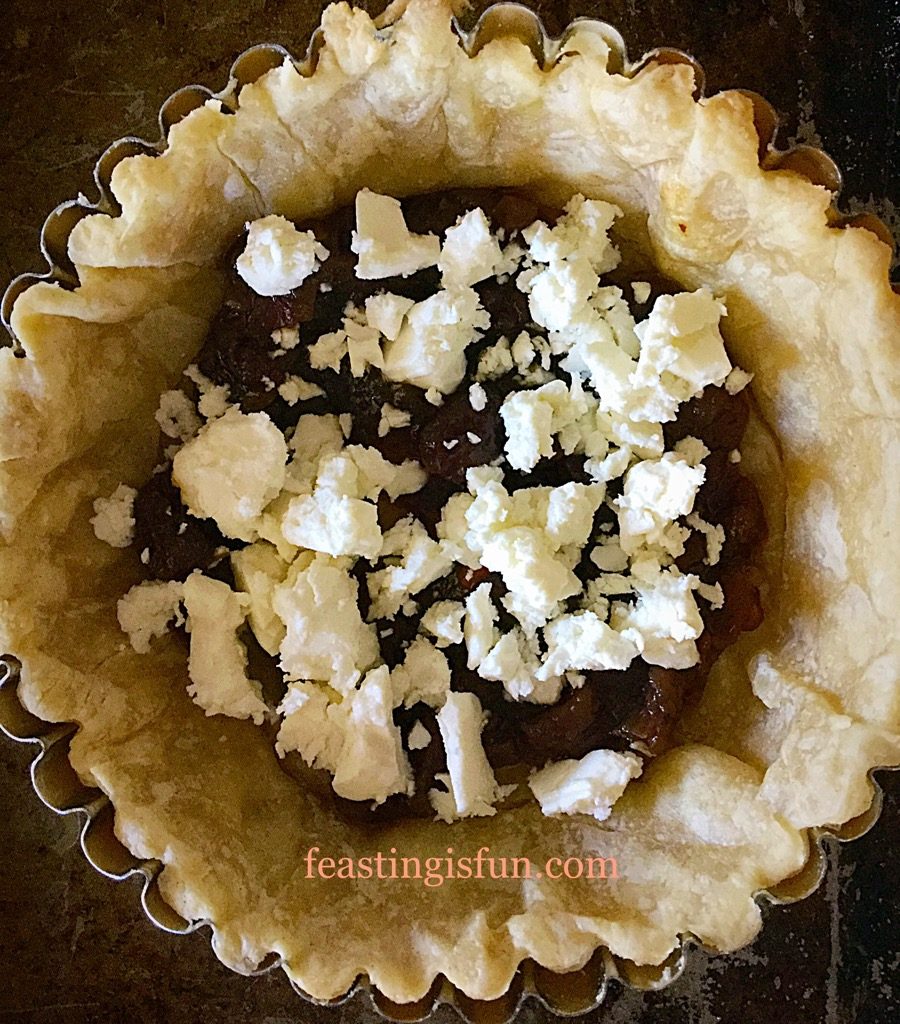
  • Crumble the feta cheese on top.
FF Feta Red Onion Marmalade Quiche
Salty feta crumbled on top of the savoury marmalade.
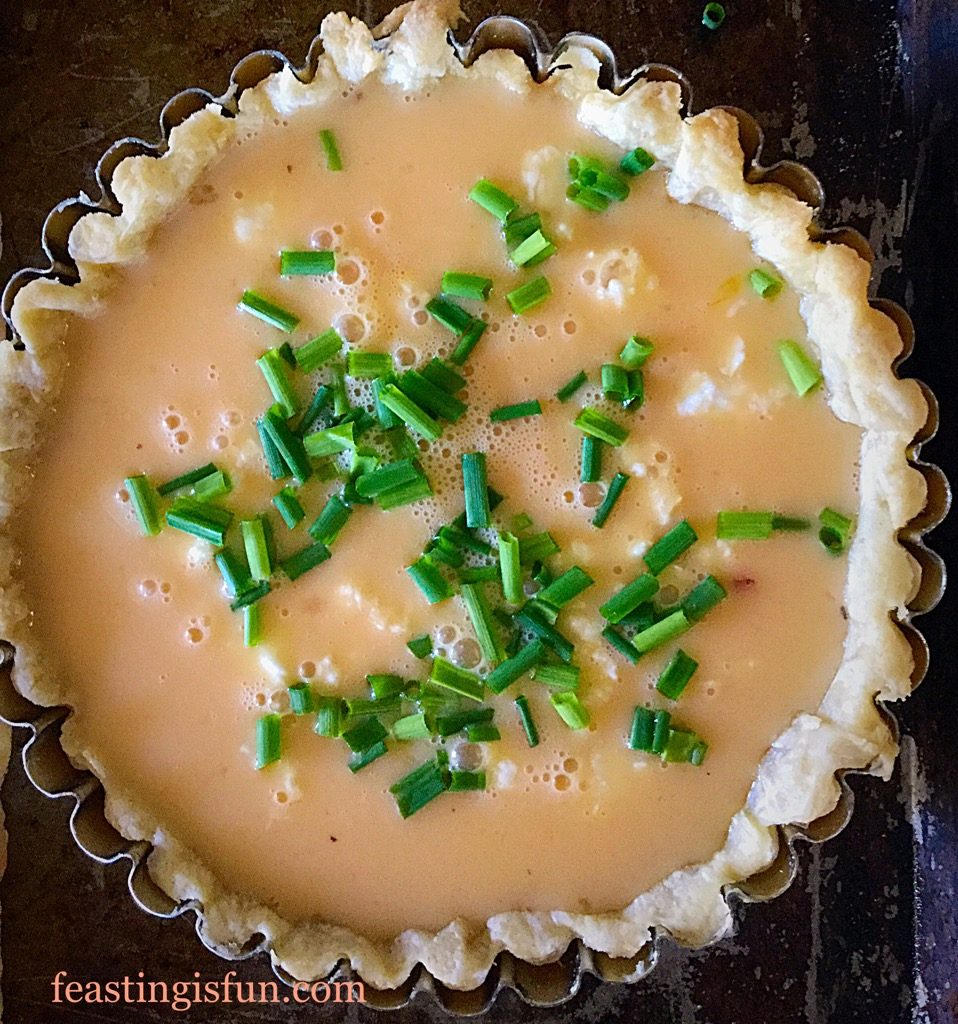
  • Crack the eggs into a jug. Add the milk and seasoning. Whisk to combine.
  • Carefully pour the egg mixture into the tart shell, taking care not to overfill it. Better to have some egg mixture left over, than over fill the tart case.
FF Feta Red Onion Marmalade Quiche
Leave about 1cm of the pastry unfilled.
  • Place the quiche carefully into the centre of the preheated oven.
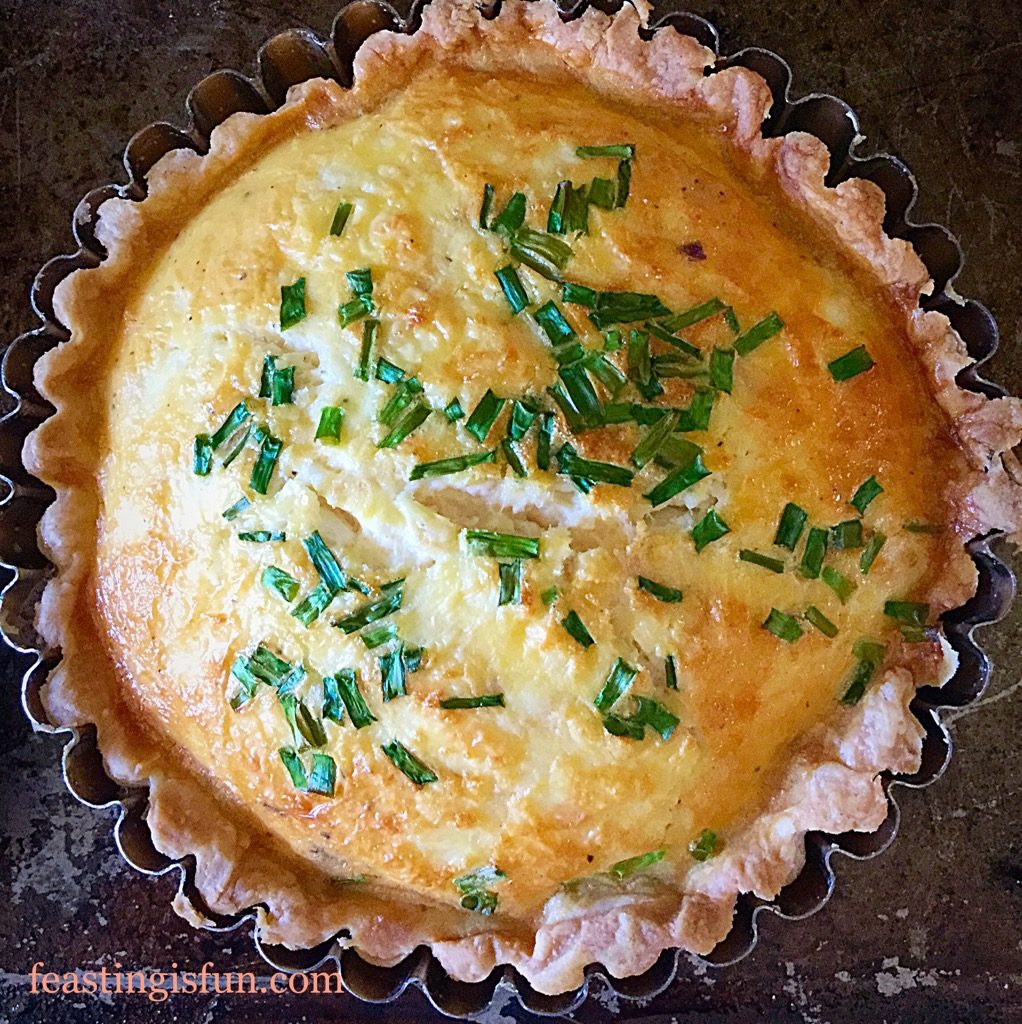
  • Bake for 35-40 minutes until the egg is set in the middle. It should be firm and not wobble.
FF Feta Red Onion Marmalade Quiche
Feta Red Onion Marmalade Quiche golden with bright green flecks from the chives.

Leave to cool slightly before serving.

I personally like this Feta Red Onion Marmalade Quiche best when it is warm. Served with a crisp, green salad, my Tangy Lemon Potato Salad and an extra spoonful of the delicious Red Onion Marmalade.

FF Feta Red Onion Marmalade Quiche
Feta Red Onion Marmalade Quiche absolutely delicious.

Perfect to take in your packed lunch as a change from sandwiches. Once cooled, wrap in cling film and store in the fridge. Also, this quiche freezes successfully for up to one month. Remove from the metal tart tin and wrap in cling film and then foil.

I found this really handy when I was recipe testing and made 6 quiches over one weekend!

If you have enjoyed this Feta Red Onion Marmalade Quiche recipe, here are a few others you may also like:

Spicy Sausage Rolls

FF Feta Red Onion Marmalade Quiche
Spicy Sausage Rolls these have a warming bite to them!

Quiche Lorraine

FF Feta Red Onion Marmalade Quiche
Quiche Lorraine delicious chunks of ham and strong cheddar in an egg custard.

Sausage Plait With A Twist

FF Feta Red Onion Marmalade Quiche
Sausage Plait with a delicious twist.

I was so thrilled with the outcome of this particular recipe. Because it had honestly never occurred to me before to use savoury chutneys and marmalades as ingredients. And look out for the upcoming Hawkshead Relish Review where there will be other tasty recipes using their products as ingredients.

The flavour and texture of the Red Onion Marmalade is very different from traditional, sticky onion marmalade. Since this marmalade has a chunky, more chutney texture and the flavour is delicious. Sweet, caramelised onions, with a very slight sour vinegar flavour that works to balance the whole taste experience.

Has this encouraged you to try using condiments as ingredients?

Thank you for sharing all of your makes and bakes with me on Twitter and Instagram. I not only enjoy seeing you bake my recipes, but whatever you make inspires me. Please keep the comments coming. Not only do I really enjoy reading them, but I’ve been told other readers also enjoy reading them too.

So, whatever you are making, baking and creating in your kitchens, have fun preparing and sharing your feast.

Sammie xx

Hawkshead Relish provided me with a sample of their Red Onion Chutney. All recipes, content, photography, views and opinions are my own. Please see my Disclosure Policy.


Share
Facebooktwitterpinterestlinkedintumblr

Double Cherry Drizzle Oat Bars

Share
Facebooktwitterpinterestlinkedintumblr

Hi lovelies, thank you so much for stopping by and taking a look at what I’ve been cooking up lately. While the sun is still shining and the sky a most glorious blue colour, my mind is once again on portable food. Picnics, packed lunches, outdoor parties, or even just something to have mid morning with a cup of coffee in the garden. May I present these Double Cherry Drizzle Oat Bars!

FF Double Cherry Drizzle Oat Bars
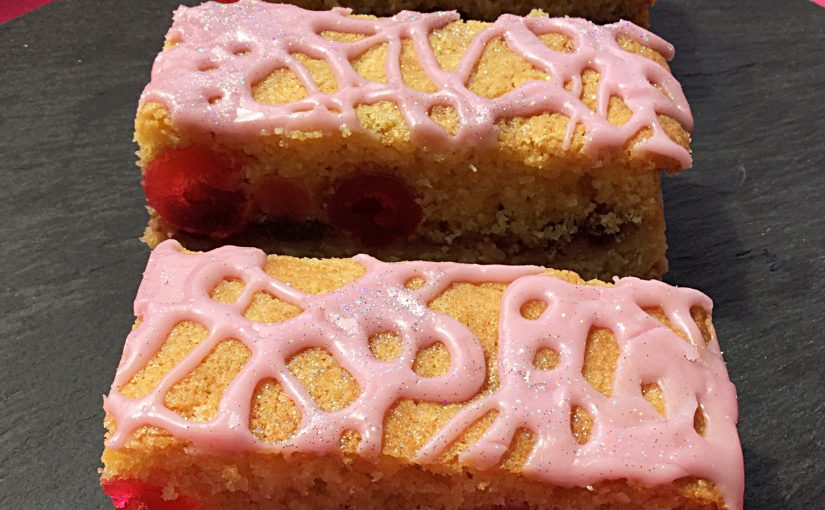
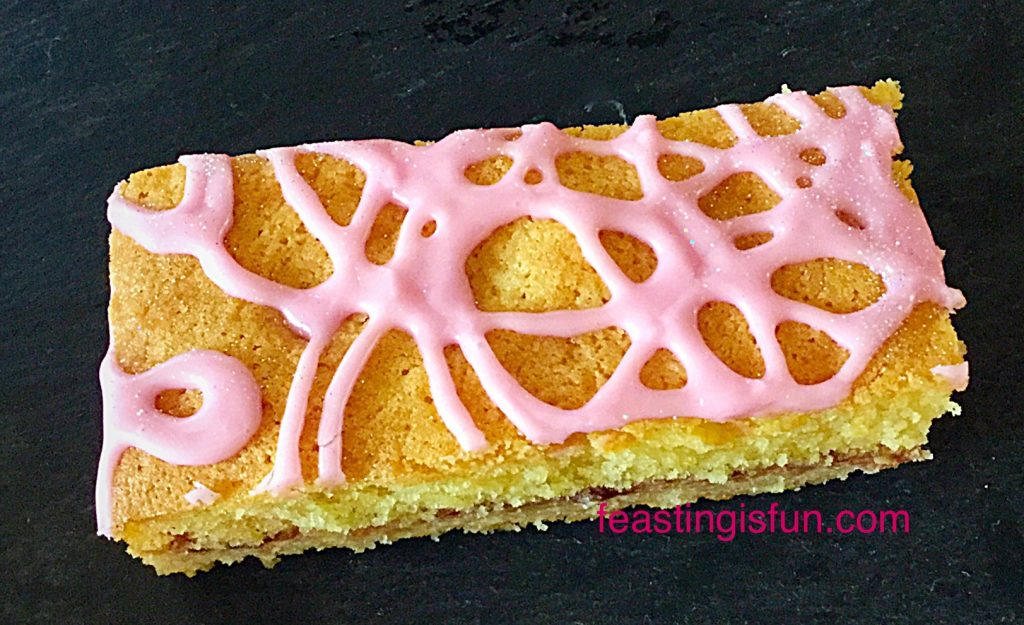
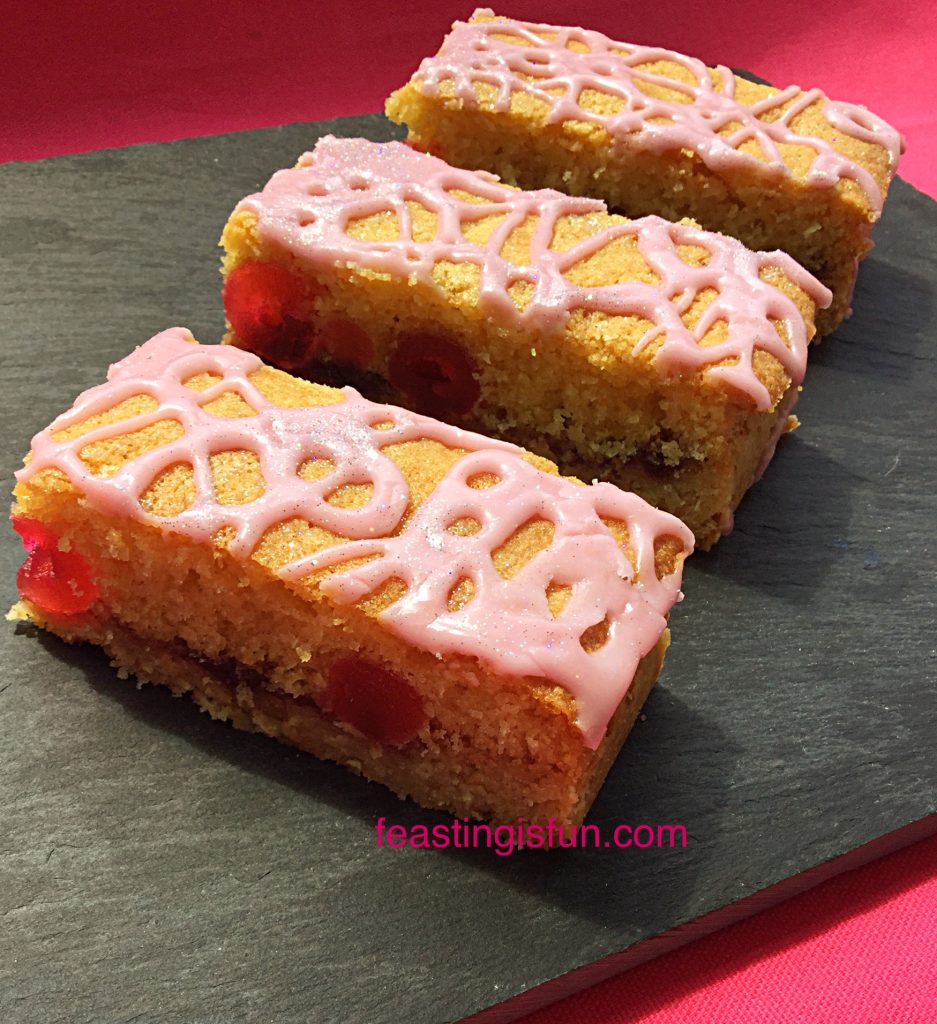
Double Cherry Drizzle Oat Bars swirly, sparkly deliciousness.

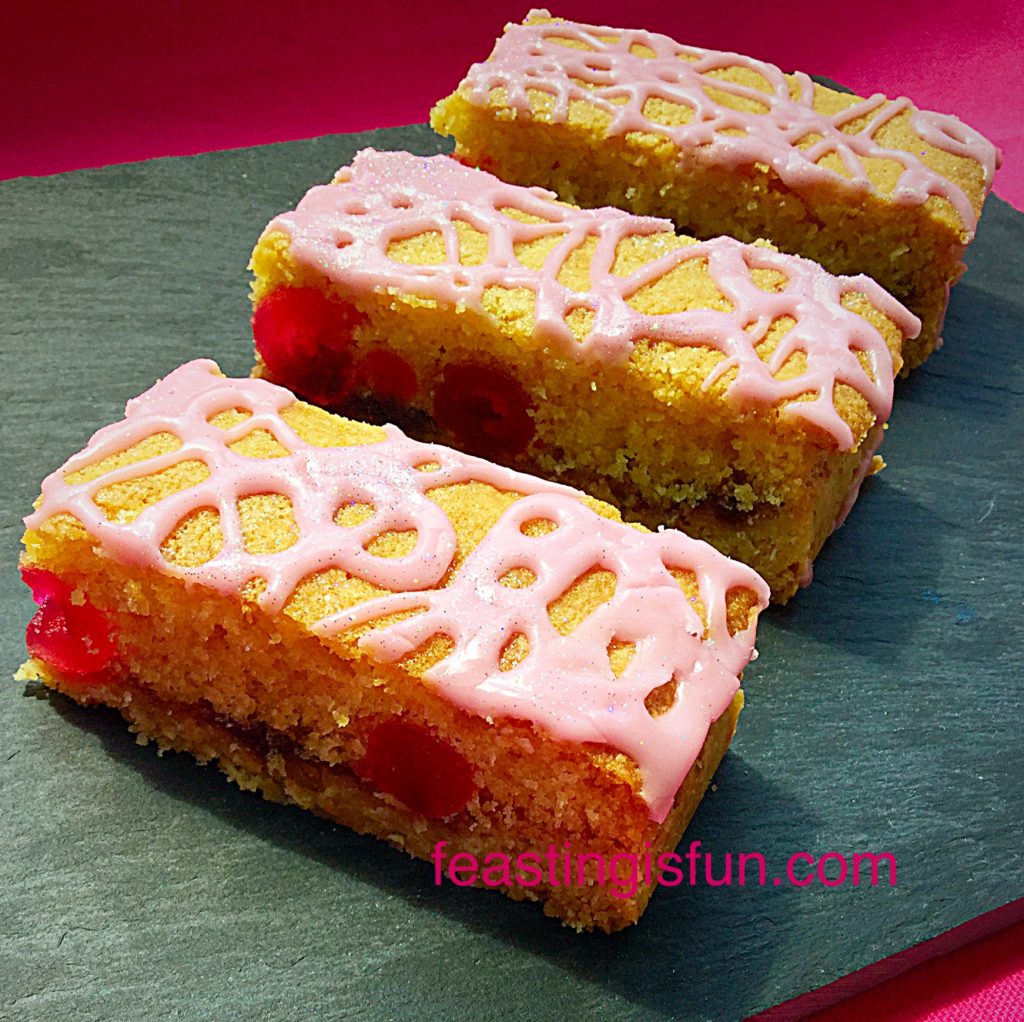
A crunchy oat biscuit provides the base for these delicious bars. Topped with cherry jam and then a thick layer of light, vanilla sponge studded throughout with glacé cherries. The Double Cherry Drizzle Oat Bars are then finished with a drizzle of cherry icing and a sprinkle of edible glitter!

FF Double Cherry Drizzle Oat Bars
Double Cherry Drizzle Oat Bars perfect with a cup of tea.

Incredibly tasty, these bars also hold together really well, very important when being packed up for lunch or a picnic.

Feel free to sit in the sun with a cup of coffee and one of these Double Cherry Drizzle Oat Bars and simply stare at how beautiful and sparkly they are.

I would!

I did!!

FF Double Cherry Drizzle Oat Bars
Double Cherry Drizzle Oat Bars

For an afternoon tea, you could easily cut these into 24 smaller, bite sized delights, in fact, if you decide to do that, it may well be worth icing them after they have been cut. That way you can loop the icing around each individual square, making them look even more elegant.

No matter whether you make these as beautiful bars or simple, elegant squares, there is one thing guarenteed and that is they taste amazing.

A perfect combination of pretty and pretty yummy!

Recipe: Makes 16 Double Cherry Drizzle Oat Bars

For the biscuit base:

225g/8oz Caster Sugar

125g/5oz Unsalted Butter – softened to room temperature – plus a little extra for greasing the tin

Tiny pinch of salt – 1/8 tsp – I use Maldon

50g/2oz Rolled Oats – not quick cook – I used Waitrose Essential Porridge Oats

225g/8oz Plain White Flour

1/2 Jar/4tbsp Cherry Jam – I used morello cherry

For the sponge top:

175g/6oz Unsalted Butter – softened to room temperature

175g/6oz Caster Sugar

3 Large Free Range Eggs

1tsp Vanilla Extract – I use Nielsen-Massey

Scant pinch of salt – see biscuit base

175g/6oz Plain Flour

Level 1.5tsp Baking Powder

175g/6oz Glacé Cherries

For the drizzle icing:

100g/4oz Icing Sugar

3tsp Black Cherry Syrup – I use Monin Syrup

if you do not have the syrup simple make up the icing adding a little extra water in lieu of the syrup – a tiny dot of pink food colour gel added will create a similar colour

1/4tsp Almond Extract – I use Nielsen Massey

Optional – edible glitter – I used holographic silver

Preheat the oven to 190C/170C fan, gas mark 5, 375F

Making And Baking The Oat Biscuit Base

  • Lightly grease and line with baking parchment a 28cm x 20cm x 5cm (12″ x 8″ x 2″) swiss roll tin.
  • In a large bowl add the butter and sugar and whisk/beat until pale and creamy.
  • Add the oats, flour and salt and mix gently until the dough just comes together.
  • Tip the biscuit dough into the prepared pan and press into a single, even layer with your fingers.
  • Place the tin in the fridge for at least 30 minutes to allow the dough to rest.
  • After the dough has chilled place the tin into the centre of the oven and bake for 20 minutes.
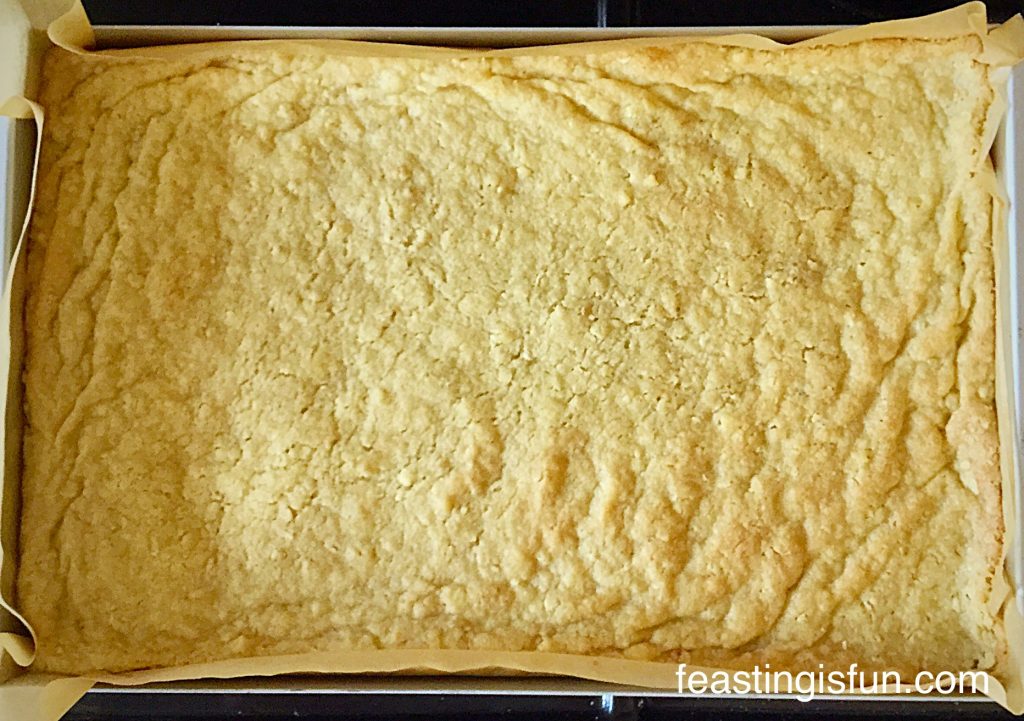
  • The biscuit base will be a lovely golden colour. Once the cooking time has elapsed remove the tin from the oven.
FF Double Cherry Drizzle Oat Bars
Beautifully golden oat biscuit base.
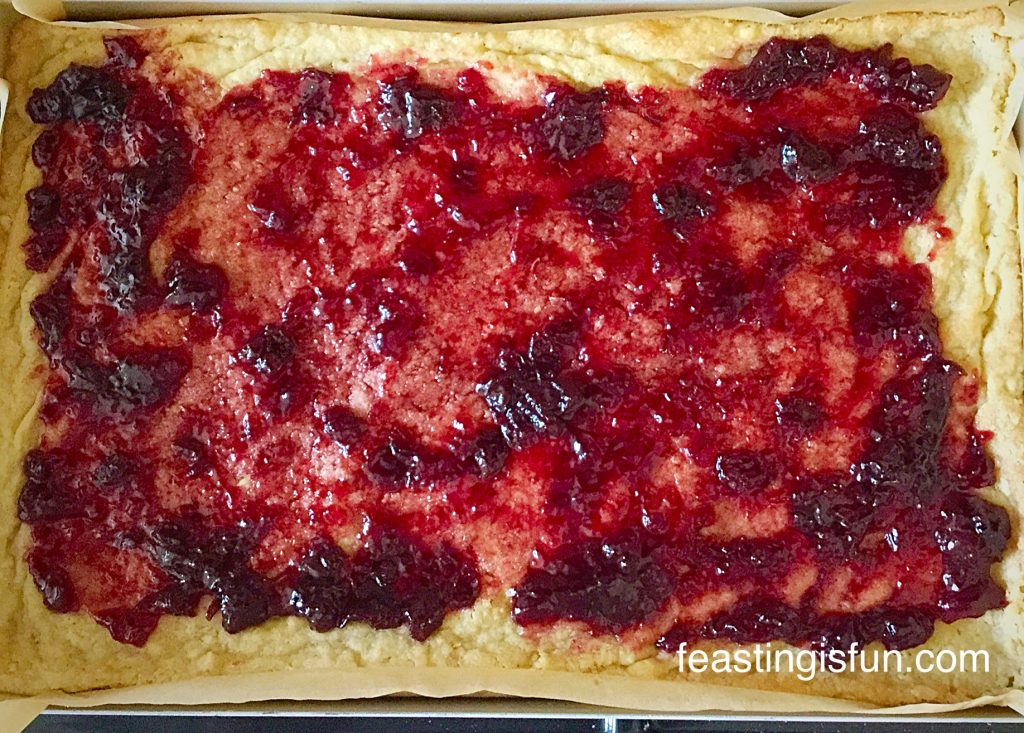
  • While the biscuit base is hot spoon over the cherry jam so that it covers the base but does not spread right to the edges.
FF Double Cherry Drizzle Oat Bars
Delicious morello cherry jam spread over the biscuit base.


Reduce the oven temperature to 160C/140C fan, gas mark 3, 325FMAKING.

Making And Baking The Cherry Sponge

  • In a large bowl cream together the butter and sugar until pale and creamy.
  • Add all 3 eggs and the vanilla extract. Whisk/beat until combined.
  • Reseve 1 tablespoon of the flour and sift the rest of the flour, salt and baking powder into the bowl.
  • Mix until the ingredients are just combined.
  • In a separate bowl toss the cherries in the reserved flour, this will prevent them sinking to the bottom of the cake whilst baking – although the cake layer in this Double Cherry Drizzle Oat Bars is not very deep, it is a good tip to remember.
  • Add the flour dusted glacé cherries to the cake batter and mix gently so that they are evenly dispersed.
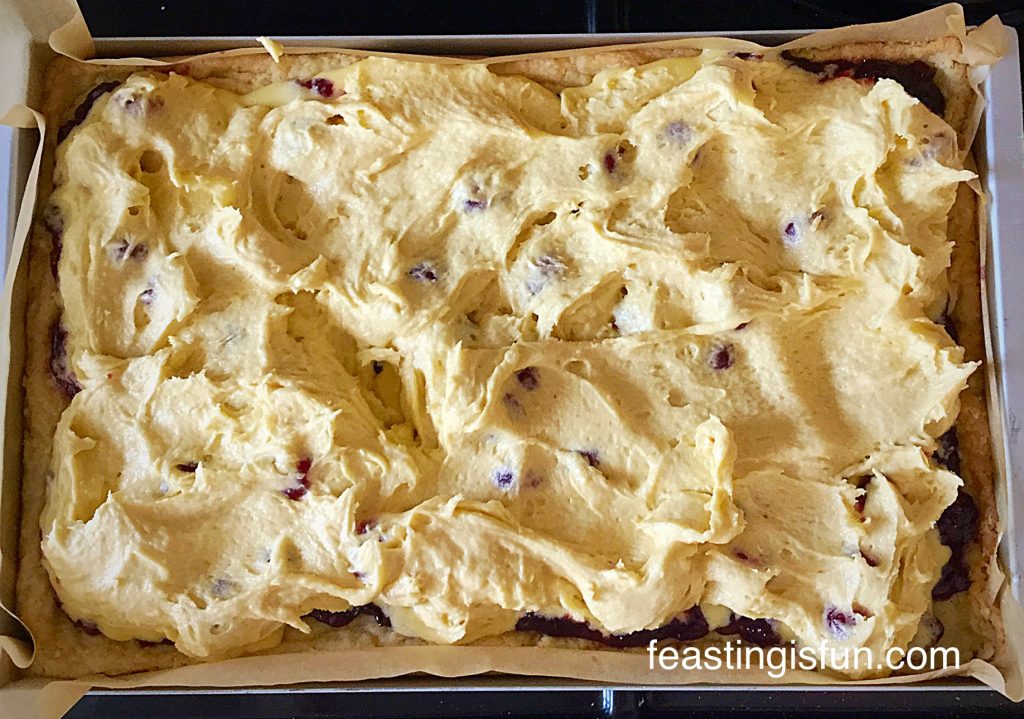
  • Using a spoon, evenly dollop the cake batter over the biscuit/jam base.
  • Spread out the cake batter until it almost reaches the edges – I used the back of a metal spoon. The cake will spread to fill the pan whilst baking.
FF Double Cherry Drizzle Oat Bars
Double Cherry Drizzle Oat Bars ready for the oven.
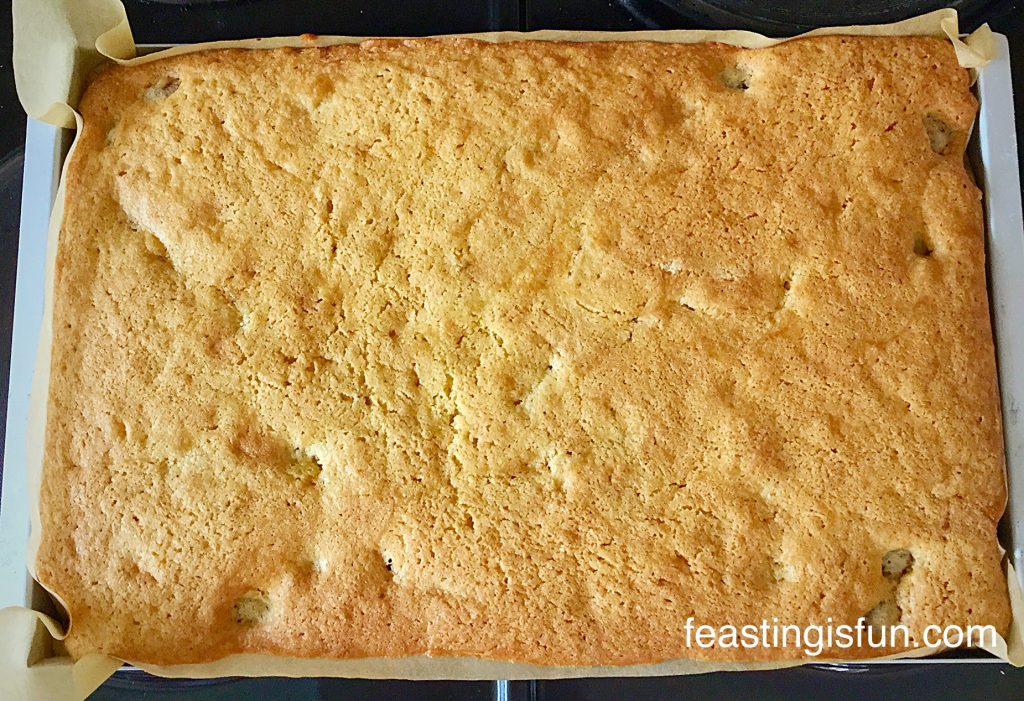
  • Place the tin into the centre of the oven and bake for 30-35 minutes.
  • The cake layer is baked with it is a golden colour and springs back from a light touch.
  • When baked remove the tin from the oven.
FF Double Cherry Drizzle Oat Bars
Double Cherry Drizzle Oat Bars a beautiful golden colour when baked.
  • Allow the Double Cherry Drizzle Oat Bars to cool completely in the tin.
  • When cooled invert onto a baking rack and carefully remove the baking parchment.
  • Place another cooling rack on top of the tray bake and flip over again, your bake should now be cake side up.

Making The Cherry Drizzle

  • Sift the icing sugar into a medium sized bowl.
  • Add the cherry syrup and stir.
  • Next add 3 teaspoons of cool tap water and the almond extract.
  • Stir to combine. You will have a thick, icing that will just hold it’s shape when piped.
  • Fill a small disposable piping bag with the pink, cherry icing.
  • Snip the very end of, leaving a small hole.
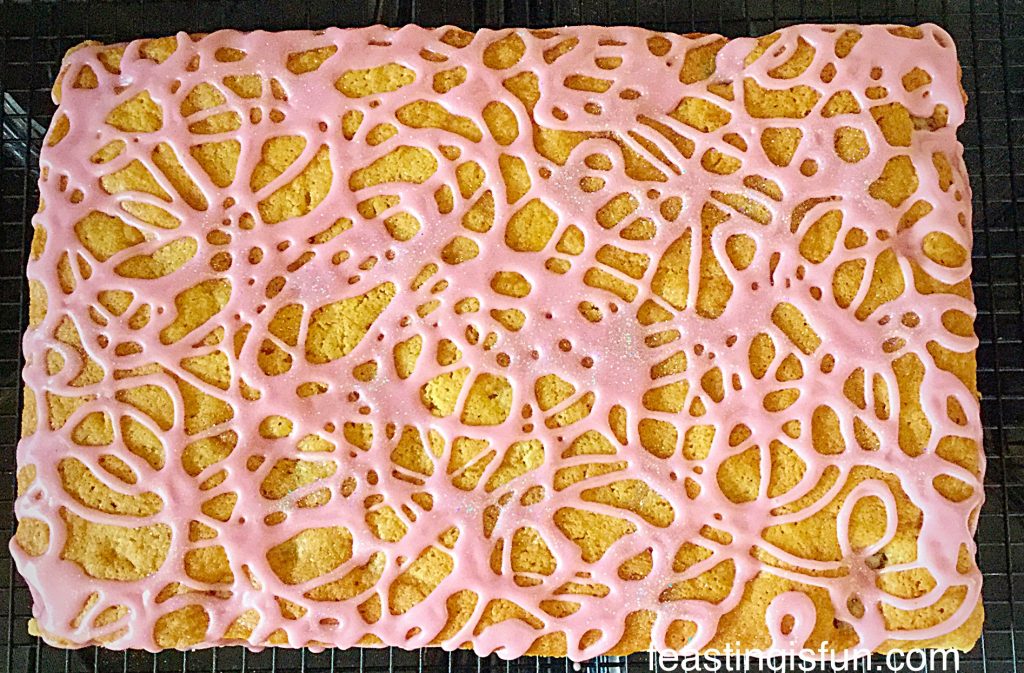
  • Pipe swirls and squiggles all over the top of the tray bake. Alternatively, use a teaspoon to lightly drizzle the icing over.
  • Dust with a sprinkle of your favourite edible glitter, if desired.
FF Double Cherry Drizzle Oat Bars
Double Cherry Drizzle Oat Bars decorated in black cherry swirled icing.
  • Allow the drizzle to completely set before slicing.
  • Transfer the Double Cherry Drizzle Oat Bar slab onto a flat surface. I use a glass kitchen saver, don’t use your best knife for cutting as the glass will blunt it!
  • First of all, cut down the centre length of the bake. Cut across the middle of the width to create 4 quarters. Finally, cut each quarter into 4 bars
FF Double Cherry Oat Bars
Double Cherry Drizzle Oat Bars sparkling in the sunshine.

Take lots of photos of these utterly dazzling Double Cherry Drizzle Oat Bars just because they are so pretty! Also don’t forget to pop a picture on Twitter/Instagram, tag me in and I will retweet, or give you a shout out.

Portable Food

I know in previous posts that I’ve mentioned not taking ‘anything’ iced on picnics, however, these bars are so completely delicious I’m going to make an exception. The nutty flavoured oat base and hint of almond extract in the cherry drizzle work together in complete harmony with the cherry studded sponge creating a perfectly flavour balanced bar. They stop the Double Cherry Drizzle Oat Bars from being too sweet.

Ok so the smart ones among you (that’s everyone, just to be clear), may have notice that these ‘double’ cherry are in fact triple cherry drizzle oat bars. I’d already written most of this post, edited and labelled photos, so I thought I’d throw in the extra one for free 😉

If you have enjoyed these Double Cherry Drizzle Oat Bars, here are some other recipes you may like too:

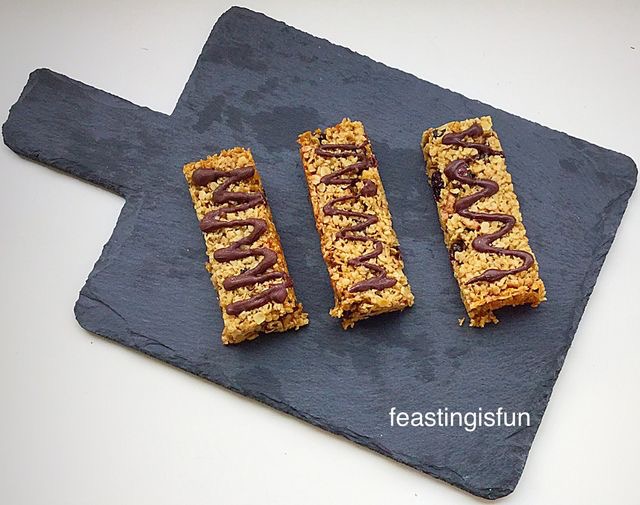
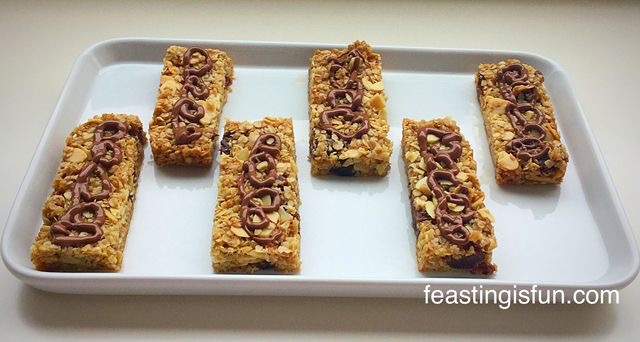
Macadamia Apricot Flapjacks

FF Double Cherry Drizzle Oat Bars
Macadamia Apricot Flapjacks delicious oaty goodness.

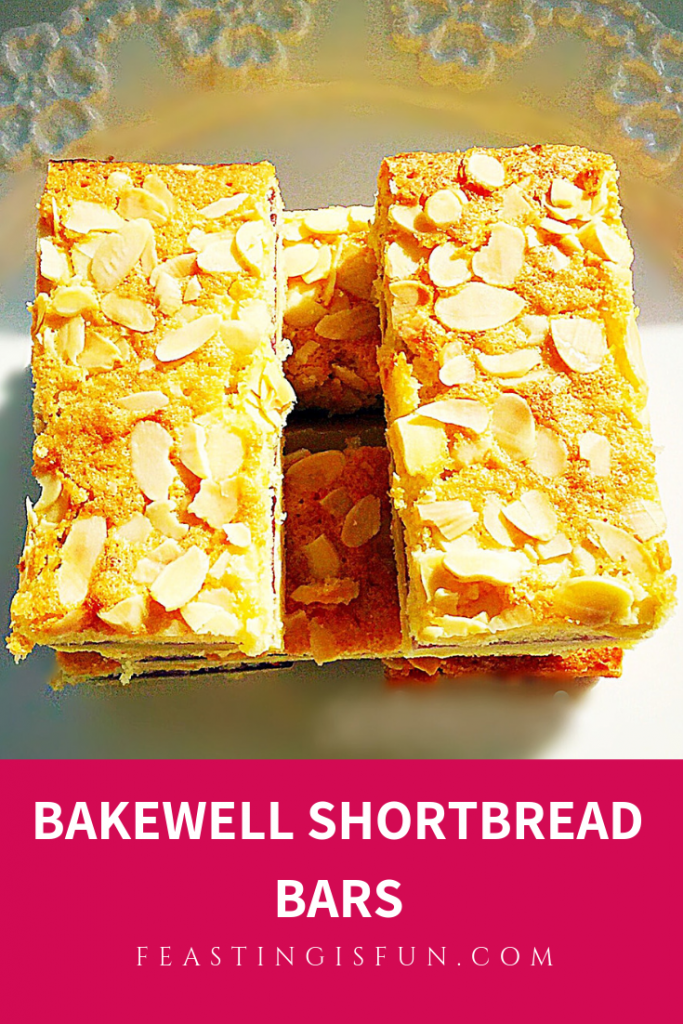
Bakewell Shortbread Bars

FF Double Cherry Drizzle Oat Bars
Bakewell Sortbread Bars utterly yummy.

Sticky Pecan Sultana Buns

FF Double Chocolate Cherry Drizzle Oat Bars
Sticky Pecan Sultana Buns so easy to make and incredibly delicious to eat.

Eating outside, whether on a picnic, at a barbecue or even in the garden, is such a great way of getting together with friends old and new. There is something so informal and relaxing being in the great outdoors. I can see why so many people choose to get married outside, as it’s a great way of mingling a diverse combination of guests in a relatively informal environment.

We are planning a fab get together with our friends and neighbours over the coming weeks, so watch out for fun, feasting and barbecue recipes coming up.

Are you planning on any outdoor get together’s?

Do you enjoy the great outdoors  – even if it’s only your back garden?

Sammie xx

No part of this post may be reproduced or duplicated without the written permission of the owner. Please see my Disclosure Policy.


Share
Facebooktwitterpinterestlinkedintumblr

Spicy Sausage Rolls

Share
Facebooktwitterpinterestlinkedintumblr

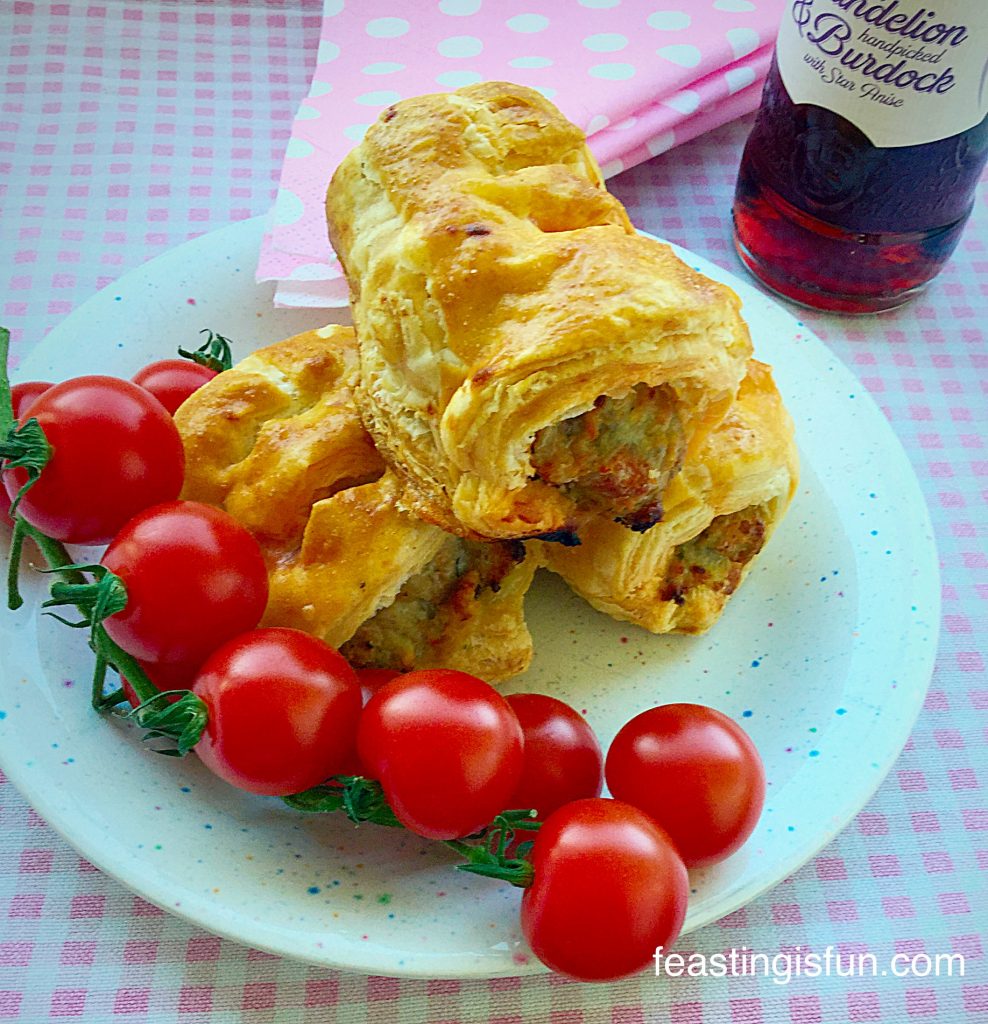
Sunshine, glorious sunshine. It lifts our spirits and makes everyday seem that little bit brighter – literally. Windows flung open, coats discarded, sunglasses at the ready. Who wants to eat lunch, or any meal for that matter, indoors? Not me! Even if my ‘picnic’ is sitting out in the garden with a cool glass of something refreshing and a plate of these jalapeño fired Spicy Sausage Rolls.

For those of you with a more gentle constitution, don’t worry these Spicy Sausage Rolls do not ‘blow your head off!’ Instead they have a gentle warming, fruity heat that lifts an otherwise everyday sausage roll to a whole different level.

The inclusion of some paprika filled chorizo sausage, further elevates the incredible flavour of these picnic favourites. Delicious good quality sausage meat,  mixed with finely chopped jalapeño chilli and just the right amount of chorizo, encased in flaky, all butter puff pastry, makes for the perfect addition to any packed lunch, picnic or easy meal.

Spicy Sausage Rolls change up your daily packed lunch!

If you like sausage rolls, you will absolutely love these Spicy Sausage Rolls!

Spicy Sausage Rolls an easy, tasty,mid week meal.
Spicy Sausage Rolls an easy, tasty, mid week meal.

Using The Freezer To Keep Grocery Costs Down

Puff pastry is such an incredibly handy product to have stashed away in the freezer. All butter is my preferred type, especially for sweet bakes such as my Blackberry Nectarine Tart , however, I do sometimes use the mixed vegetable fat/butter for savoury bakes, especially if it is on offer!

Having chatted to a few of my Twitter friends recently, we all concluded that the cost of groceries seems to have suddenly risen. For me, this means creating recipes that stretch more expensive ingredients that little bit further and also really trying hard to keep food waste to an absolute minimum.

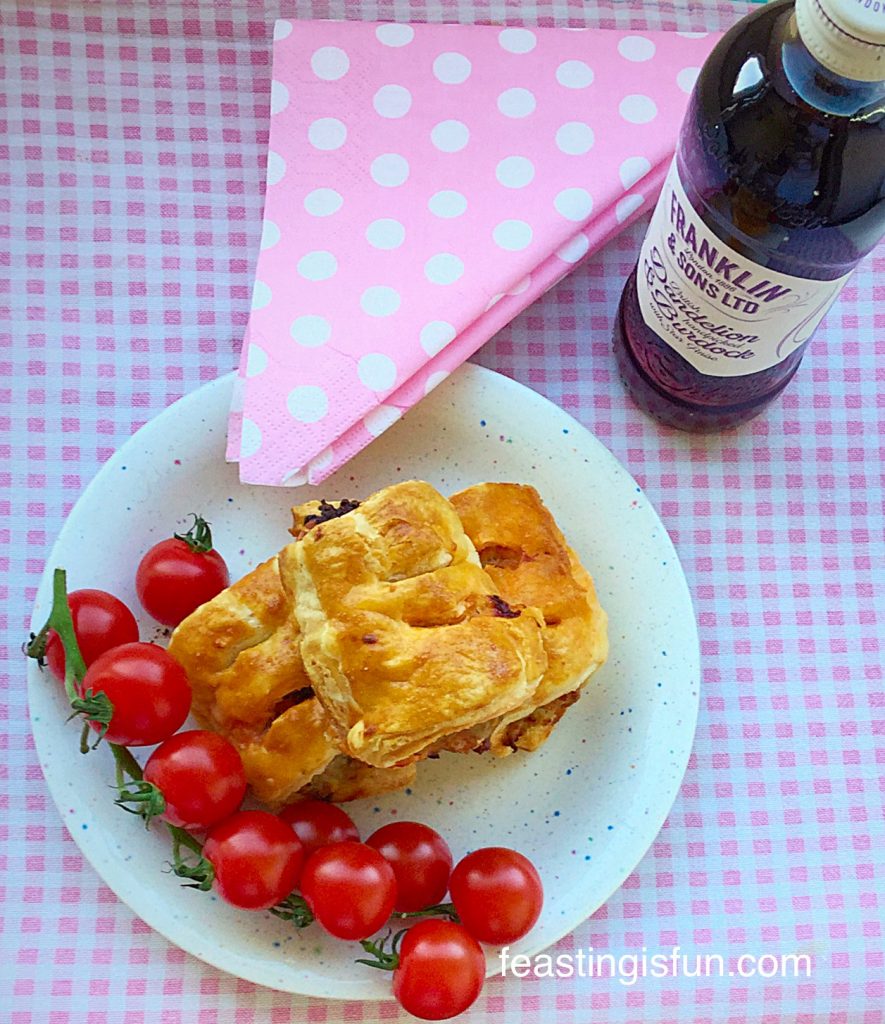
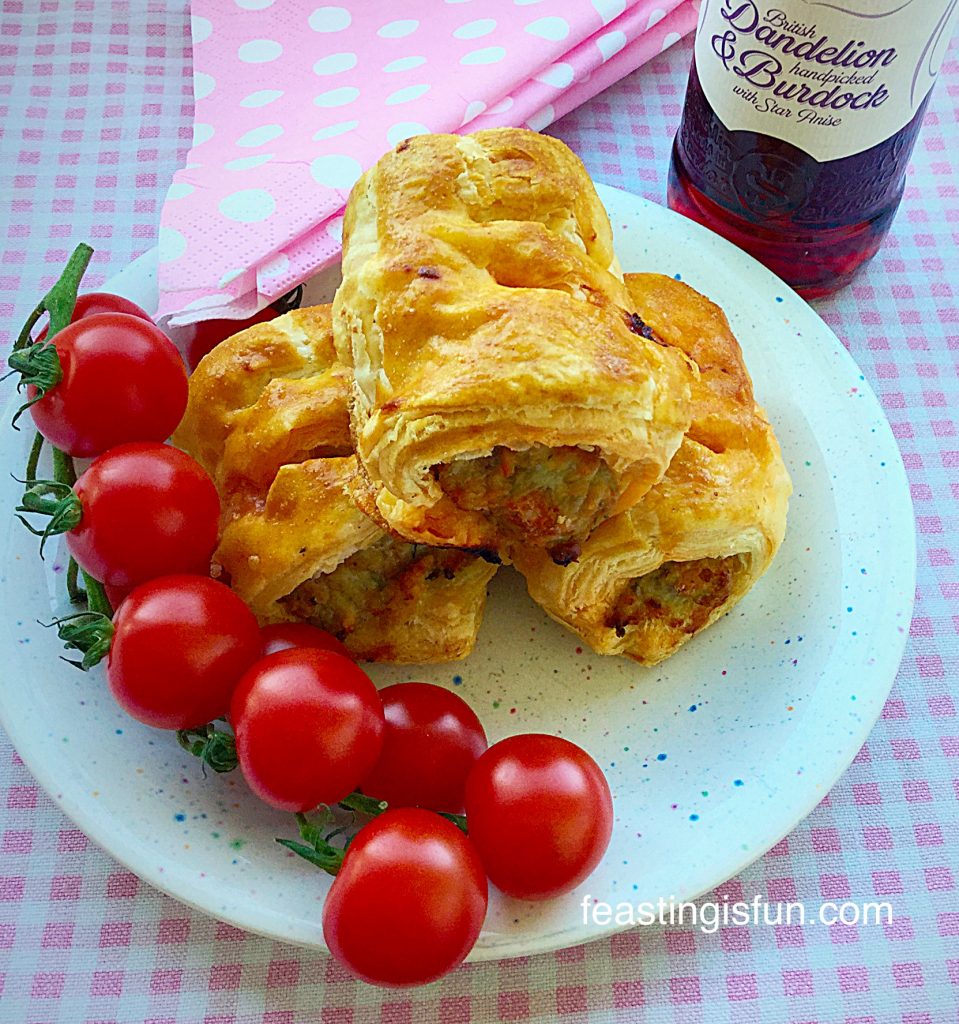
Spicy Sausage Rolls are great with a handful of cherry tomatoes off the vine.

As I spend a lot of time testing recipes and batch baking/cooking in the kitchen, the opportunity for waste can become even greater. Especially if after a few days cooking and baking I then spend the next few days in bed due to my health problems see here.

This is where the freezer becomes my best friend! Having made the Spicy Sausage Rolls on a day where I had also cooked dinner, they were in danger of getting forgotten about, boxed up in the back of the fridge. Of course we shared a couple between us to taste test them and we were not disappointed. After the photos were taken the following day, I popped the remaining sausage rolls in the freezer – keeping a couple out for our daughter and I to share for lunch.

I have no doubt that they will not stay in the freezer long, yet it saves potential waste. Which is primarily, not only good for our planet, but also our grocery budget!

Recipe: Makes 12 Spicy Sausage Rolls

350g/12oz Block of Puff Pastry all butter if possible- defrosted in the fridge overnight if frozen – I used frozen Just Rol all butter puff pastry, alternatively use my fantastic Perfect Butter Shortcrust Pastry recipe.

454g/1lb Pork Sausagemeat – good quality at least 85% Pork, any casings removed

50g/2oz Chorizo Sausage – casing removed

1 Jalapeño Chilli Pepper

1 Medium Free Range Egg – I use Burford Browns Eggs from Clarence Court

Method: Preheat the oven to 200C/180C fan, gas mark 6, 400F.

Making The Spicy Sausagemeat

  • Place the sausage meat into a bowl and add the chorizo sausage pulled into pieces.
  • Remove the seeds and membrane from the jalapeño chilli pepper and chop finely.
  • Add the chopped chilli to the bowl and squish (mix) everything together using clean hands.

Creating The Sausage Rolls

  • Roll out the puff pastry on a clean, flour dusted work top, until it is 30cm x 20cm (15″ wide by 8″ deep).
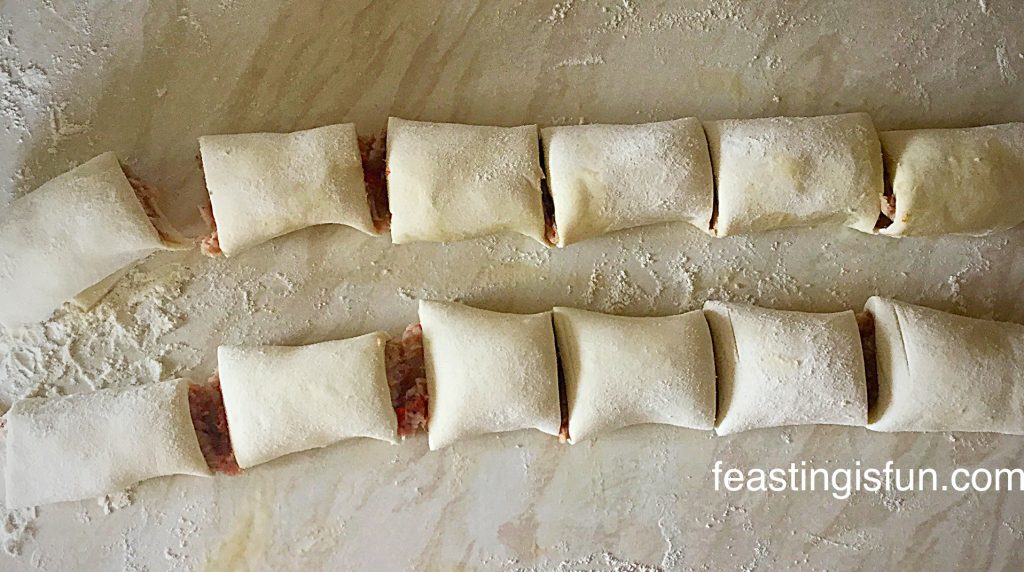
  • Trim the edges of the pastry and then divide the pastry in half width ways so that you have 2 long strips.
  • Divide the sausage meat mixture in two.
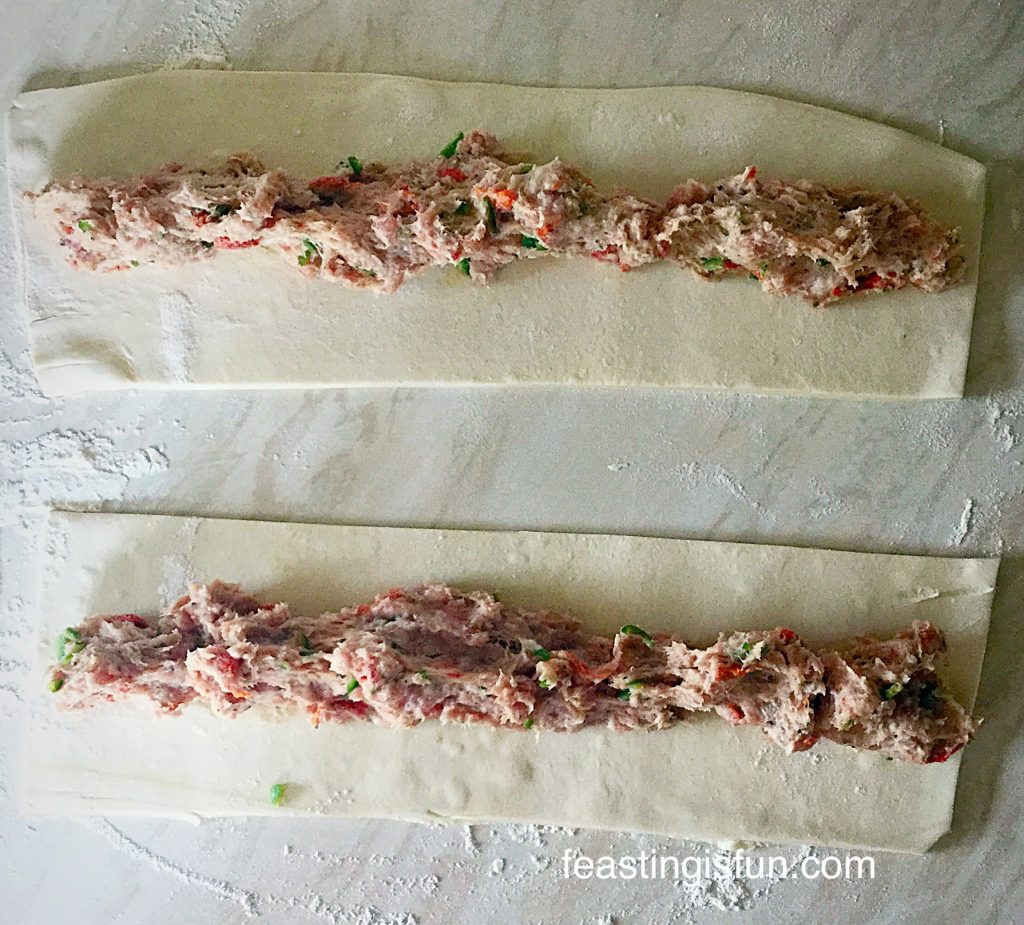
  • Evenly lay the sausage meat down the middle of each length of pastry.
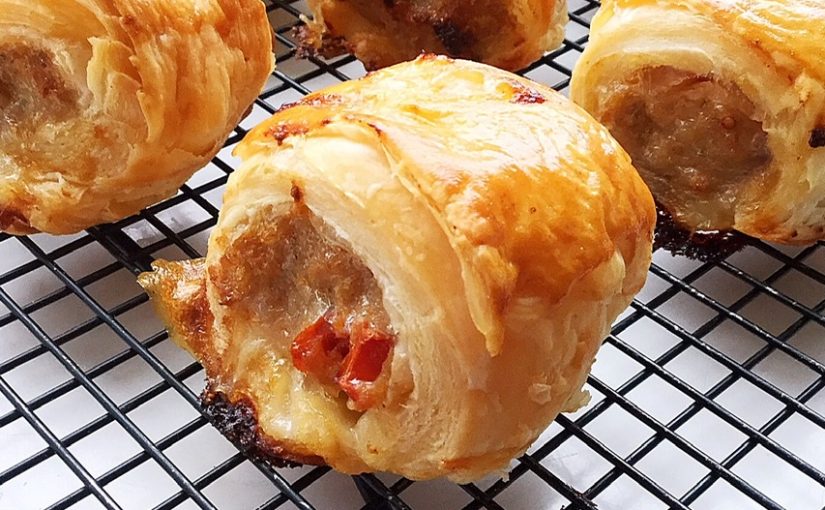
You can see the flecks of green chilli and red chorizo throughout the sausage meat.
  • Crack an egg into a small bowl and whisk with a fork.
  • Using a pastry brush, brush beaten egg down the length of the pastry, either side of the sausage meat.
  • Bring the top edge of the pastry evenly over the sausage meat and continue rolling so that the pastry overlaps (and seals) underneath the sausage rolls.
  • Using a sharp knife, cut each long roll in half and then cut each half into 3 even sized sausage rolls. In total you will have 12 medium sized sausage rolls.
Spicy Sausage Rolls ready for their egg wash and to be baked!
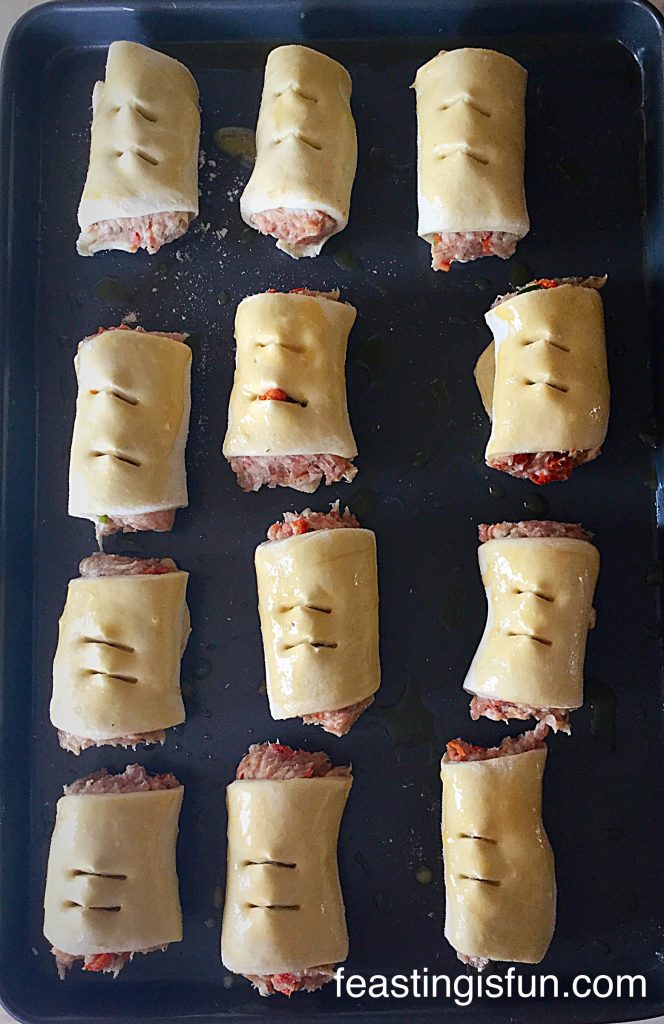
  • Place the sausage rolls on to a lightly oiled baking tray.
  • Brush each sausage roll with the beaten egg – this will give the pastry a wonderful, crisp, golden finish once baked.
  • Finally using a sharp, pointed pair of scissors, snip the top of each sausage roll twice – as can be seen in the picture below.
Spicy Sausage Rolls ready for the oven.

Baking The Spicy Sausage Rolls

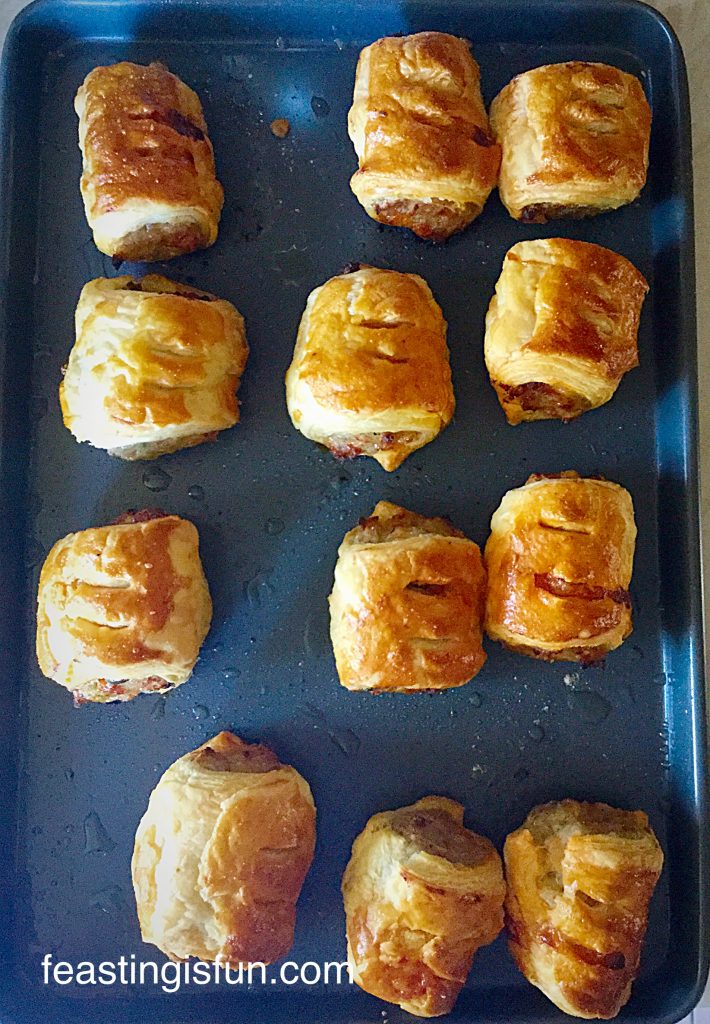
  • Place the baking tray into the middle/top part of the oven and bake for 25-30 minutes.
  • The Spicy Sausage Rolls are cooked when the pastry is flaky and golden brown all over. If in doubt cut a sausage roll in half, the meat should be cooked all the way through.
  • Once baked remove the sausage rolls from the oven.
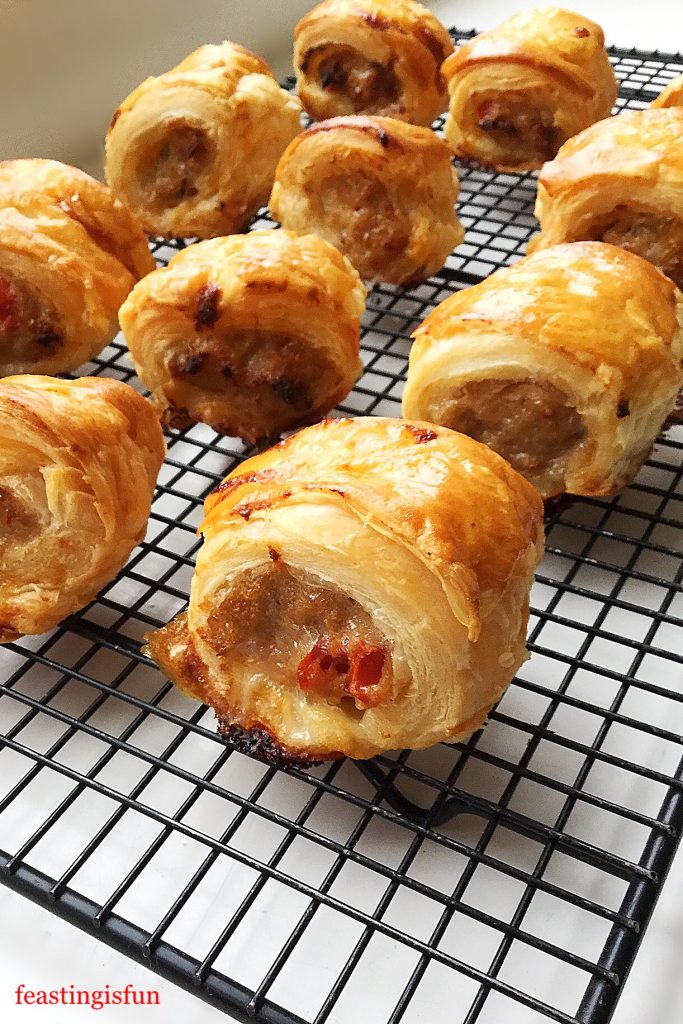
Golden, flaky, hot Spicy Sausage Rolls fresh from the oven.
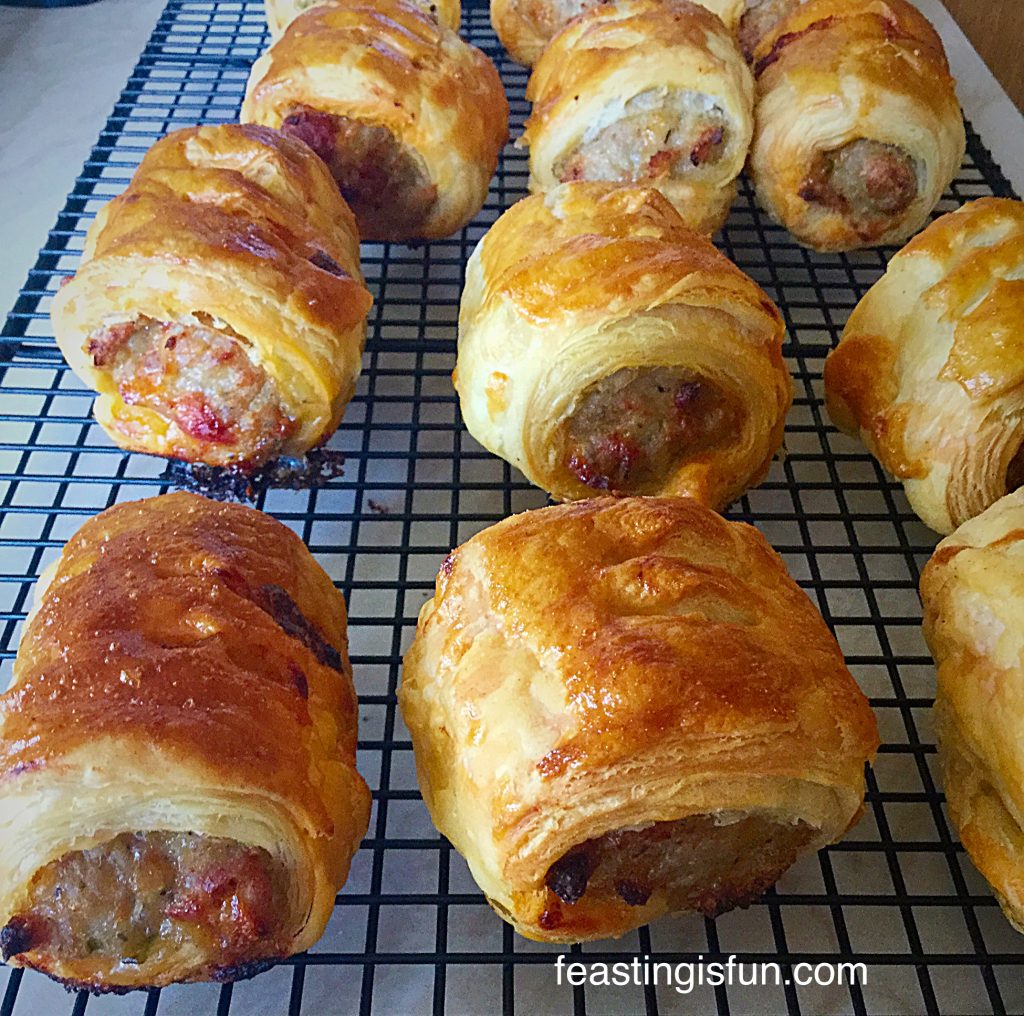
  • Transfer the baked sausage rolls to a cooling rack and allow to cool slightly before trying!
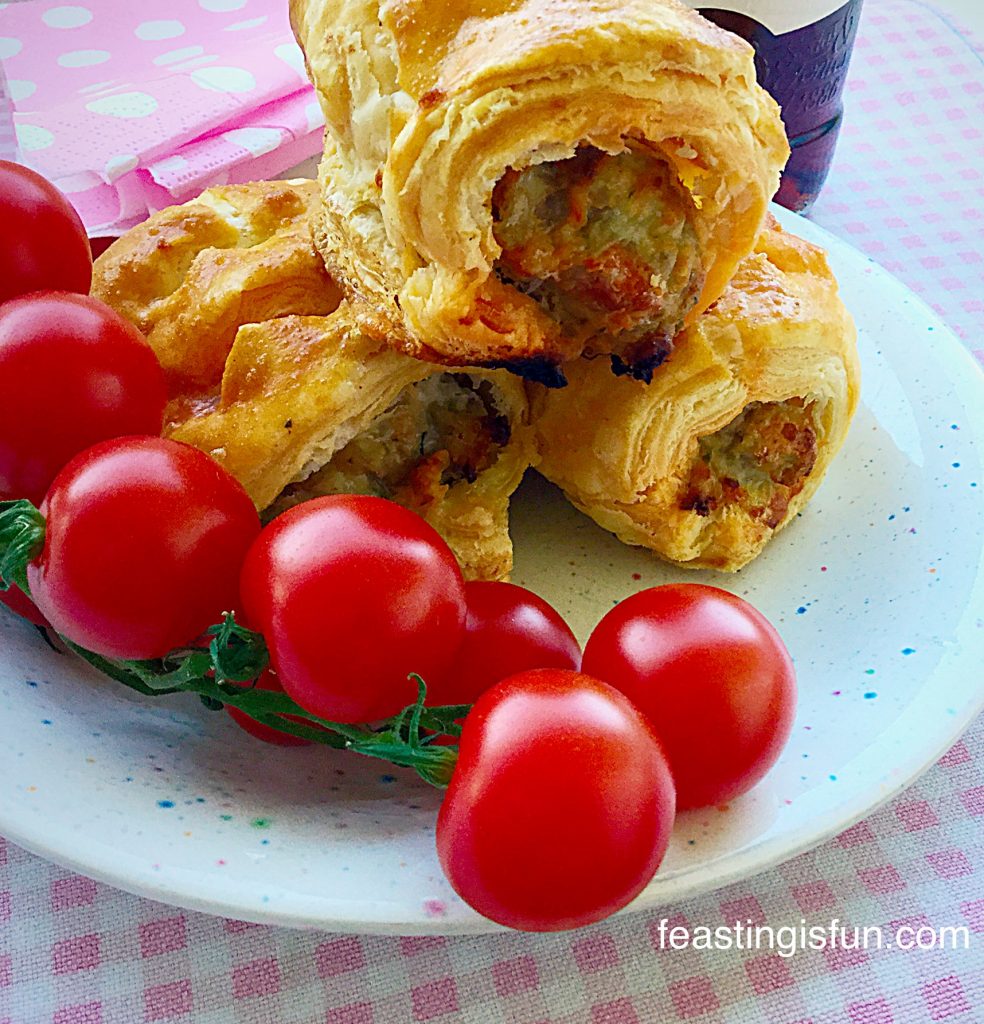
Spicy Sausage Rolls that smell so delicious and inviting.

Perfect eaten hot or cold, with a good chutney, some cherry tomatoes and a glass of something refreshing.

To store, allow to cool completely and then pack into an airtight container and keep in the fridge for up to 5 days. Alternatively, as I did, pack into a freezer bag or box, label and keep in the freezer for one month. Defrost thoroughly and reheat until piping hot in a moderate oven.

Serving The Sausage Rolls

If fresh puff pastry has been used, not frozen, these Spicy Sausage Rolls can also be frozen uncooked. Place some baking parchment on a baking tray, put the sausage rolls on top and then place into the freezer and freeze until solid. Once frozen pack into freezer boxes, separating each layer with baking parchment. To cook, remove as many sausage rolls as required, place onto an oiled baking tray and bake in a preheated oven as before. The sausage rolls will take approximately 45 minutes to bake from frozen. This can be particularly handy over the Christmas holiday period.

Spicy Sausage Rolls
Spicy Sausage Rolls perfect for a Christmas buffet, or any buffet!!

Sorry to mention Christmas, however, in our house a buffet is incomplete without a plate of hot sausage rolls. This year we can really turn the heat up!

Obviously you can control how spicy you make these, as well as the size. I would perhaps make them a little smaller for a buffet spread.

If you have loved these Spicy Sausage Rolls as much as we have you may also enjoy these other recipes:

Quiche Lorraine

Spicy Sausage Rolls
Quiche Lorraine bacon, cheddar and egg tart.

Sausage Plait With A Twist

Spicy Sausage Rolls
Sausage Plait With A Twist

Tomato Thyme Garlic Focaccia Bread

Spicy Sausage Rolls
Tomato Thyme Garlic Focaccia Bread

If you think about it, a buffet is really an indoor picnic!

Who doesn’t love unloading a picnic hamper or walking around a buffet table tasting little morsels of yummy different foods. We have a daughter who would happily eat from a buffet table/picnic hamper most days of the year.

The sun is blazing as I write up this post. Whether you make and bake during the sunshine or snow, have fun feasting with friends, family and neighbours.

Sammie xx

Share
Facebooktwitterpinterestlinkedintumblr

Macadamia Apricot Flapjacks

Share
Facebooktwitterpinterestlinkedintumblr

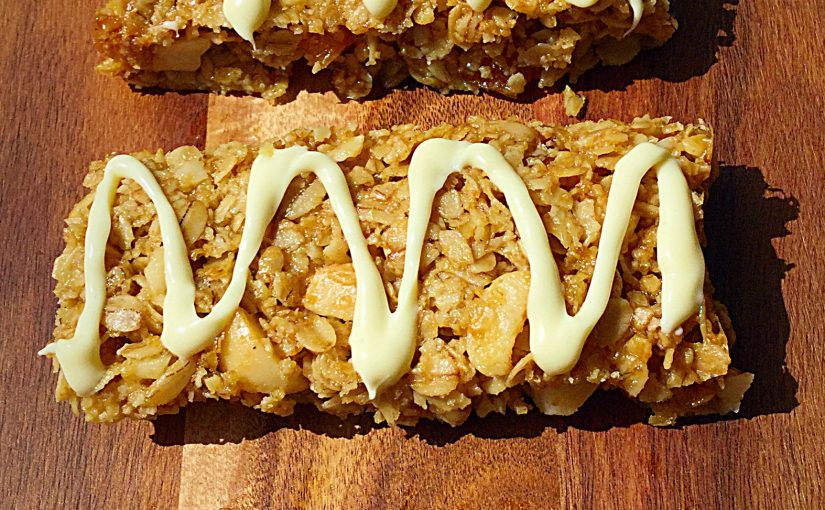
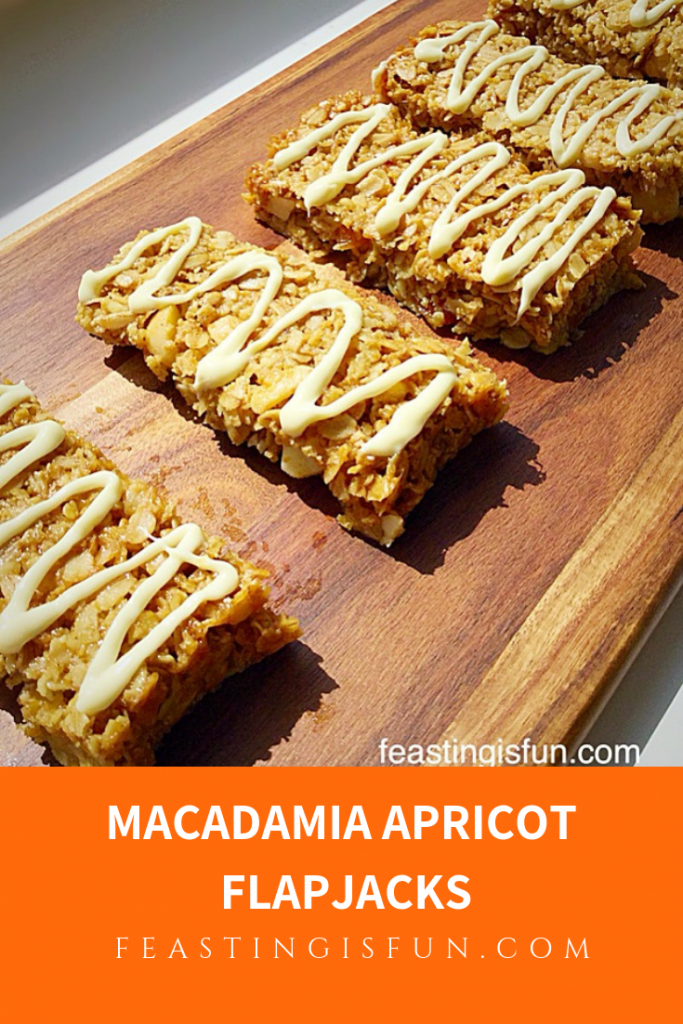
I am so loving the longer daylight hours at the moment. Feeling as though I want to make the most of every drop of sunshine. Winter being a distant memory, I’ve been out in the garden, clearing, ready for sowing and planting. Don’t worry I have also been in the kitchen baking and these Macadamia Apricot Flapjacks are the delicious result.

FF Macadamia Apricot Flapjacks

When the weather is warm and the sun is shining I simply love being in the garden. Listening to the chatter and chirruping of birds, feeling the warmth of the sun on my back, our garden becomes my haven again, after the long, cold winter months.

Easy Recipes For Breakfast On The Go

So being able to eat breakfast, or more usually brunch, outside is very much treasured. These Macadamia Apricot Flapjacks are perfect to munch on whilst sitting on our garden bench, hot cup of coffee to hand. Packed with slow energy release oats, they make a tasty, yet filling alternative to toast or cereal.

FF Macadamia Apricot Flapjacks
Macadamia Apricot Flapjacks so good with a cup of good coffee.

This recipe is so simple and quick. A few minutes in the kitchen melting, mixing, baking and cooling means that you can have a great, portable bar, that is perfect for breakfast on the go, packed lunches, getting through the late afternoon energy dip. Plenty of deicious bars to see you through the week.

That has to be a winning recipe – right?

FF Macadamia Apricot Flapjacks
Macadamia Apricot Flapjacks – crunchy, chewy bars of yum!

I love easy recipes – more so during the warmer months, when my passion for cooking and baking is matched by my passion for gardening. Yes I still have to work around my body (see – Living with siezures ), that just makes the time I have even more precious. Whilst in the winter I can happily spend all day – relatively speaking – in the kitchen, during warm spring and summer days my preference is to be outside.

Baking According To The Weather

My hubby jokes that I was born wearing Wellington boots! Whilst I may not be able to do the heavy digging of years past, I still like to get my hands dirty. I’ve also found, especially during the hotter months of summer, baking is best done first thing in the morning. That way there isn’t a hot oven baking bread, mid afternoon, just as the temperature outside is peaking.

Macadamia Nut Dried Apricot Flapjacks
Macadamia Apricot Flapjacks crunchy, chewy and full of flavour.

Easily Made Gluten Free Traybake

Back to the Macadamia Apricot Flapjacks! The macadamia nuts add a buttery crunch to these bars that I absolutely adore, however, I know they can be pricey. A great substitute would be almonds, either flakes or whole almonds that you chop yourself. I have used dried apricots that are the gorgeous tangerine orange of their fresh counterparts, however, if you prefer the darker, unsulphured apricots, use them instead. Good quality rolled oats, absolutely make these flapjacks the stars that they are.

I have specified that these Macadamia Apricot Flapjacks are gluten free, please check the labels of ingredients carefully to ensure that they are so. This is vital when baking for someone on a restricted diet. Their health absolutely cannot be compromised.

Recipe: Makes 12 Macadamia Apricot Flapjacks

250g/10oz Unsalted Butter – plus a little extra for greasing the tin

100g/4oz Golden Syrup (light corn syrup)

1/4tsp Salt – I use Maldon

125g/5oz Light Brown Sugar

325g/11.5oz Rolled Oats (not quick cook) – I used Delicious Alchemy as they are 100% gluten free

150g/5oz Dried Apricots – chopped into rough quarters

100g/4oz Chopped Macadamia Nuts – I buy whole nuts and roughly chop them myself

Optional – 100g White Chocolate – alternatively use milk or dark chocolate

Method: Preheat the oven to 180C/160C fan, gas mark 4, 350F

Making The Flapjacks

  • Grease and line a 8″ x 11″ – 20cm x 28cm swiss roll tin/shallow baking tin, with butter and baking parchment.
  • Into a medium saucepan add the butter and sugar. Warm over a medium heat, stirring until melted.
  • In a large bowl add the golden syrup.
  • Pour the melted butter/sugar mixture into the bowl containing the golden syrup. Stir continuously until combined.
  • Add the oats, chopped apricots and macadamia nuts and stir to thoroughly combine.
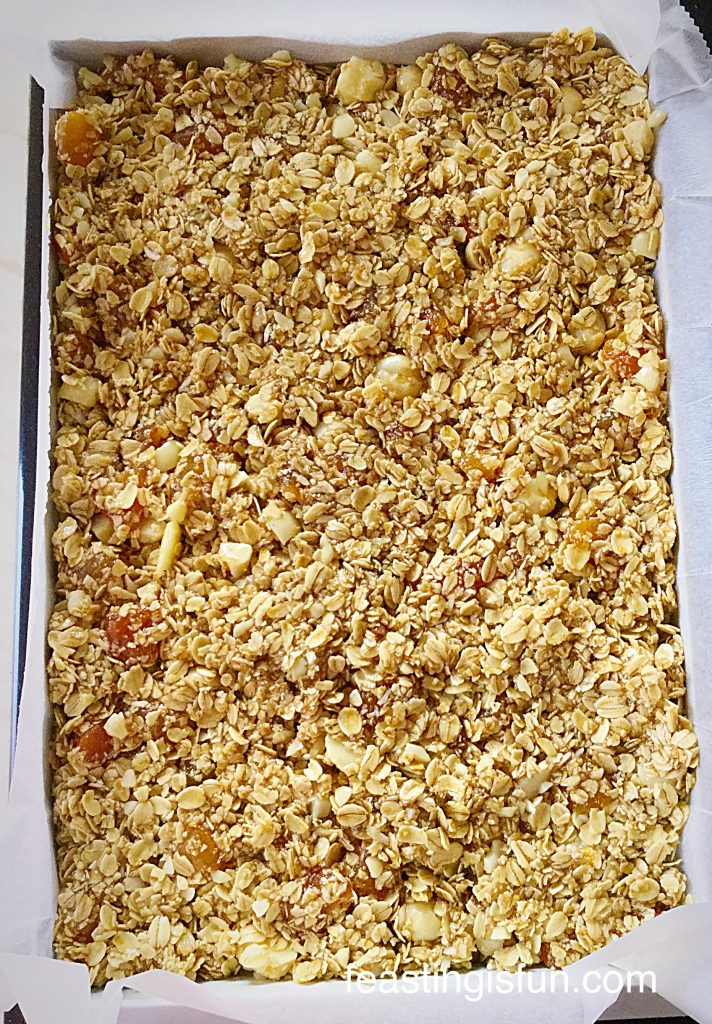
  • Tip the mixture into the prepared tin and press down using the back of a metal spoon, until the mixture is one even layer.
FF Macadamia Apricot Flapjacks
The Macadamia Apricot Flapjack mixture compacted into an even layer and ready for the oven.

Baking The Macadamia Nut Apricot Flapjacks

  • Place the tin in the middle of the oven and bake for 20 minutes exactly.
  • The flapjacks will be a light golden colour when baked – do not be tempted to bake them for longer as this will result in them being hard, not chewy!
  • As soon as the flapjacks are baked remove the tin from the oven and allow to cool completely.
  • When completely cooled remove the entire flapjack bake from the tin, using the excess baking parchment to help lift it out.
Macadamia Apricot Flapjacks
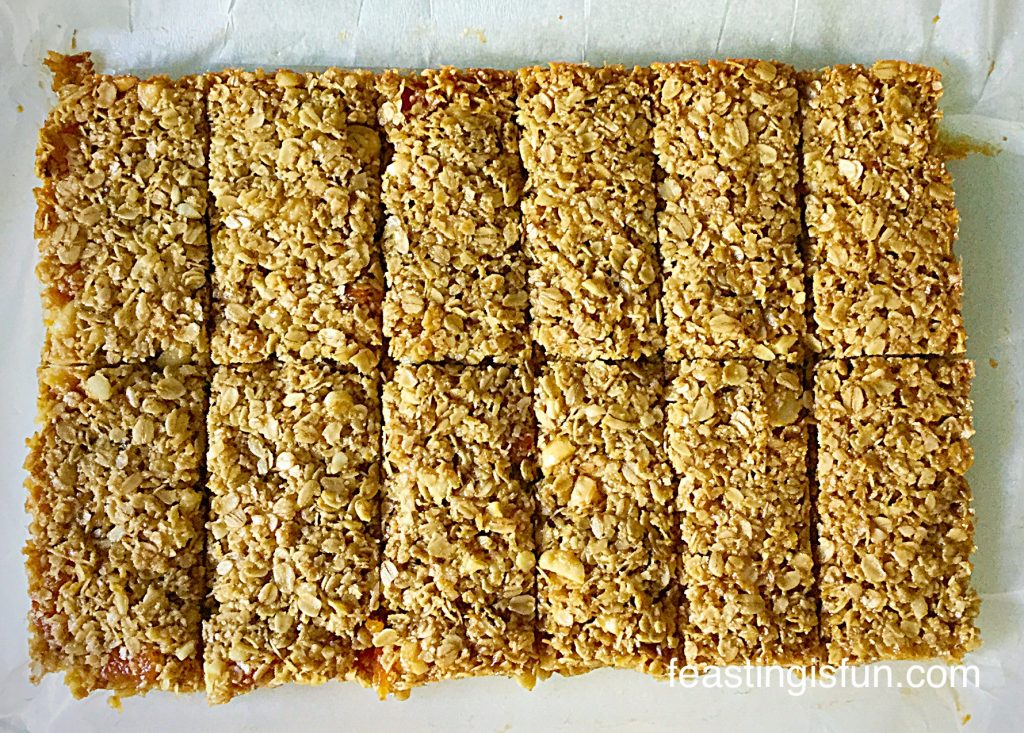
Macadamia Apricot Flapjacks ready for the finishing touch.
  • As seen above, cut down the middle length of the bake and then across the width.  Cut each quarter into 3 generous bars – you could cut each quarter into 4 making 16 individual flapjacks in total.
FF Macadamia Apricot Flapjacks
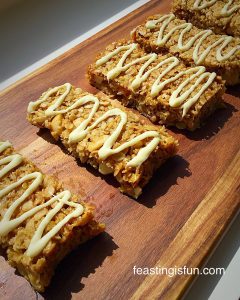
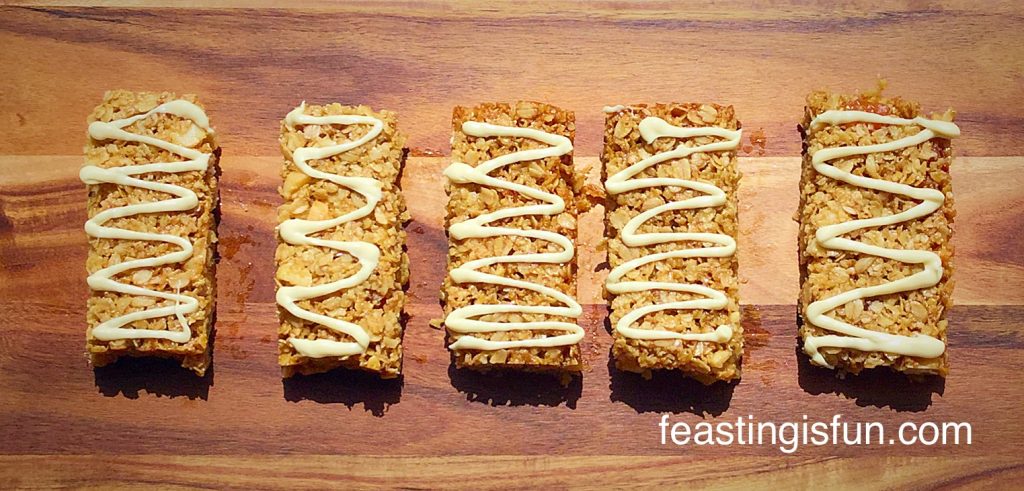
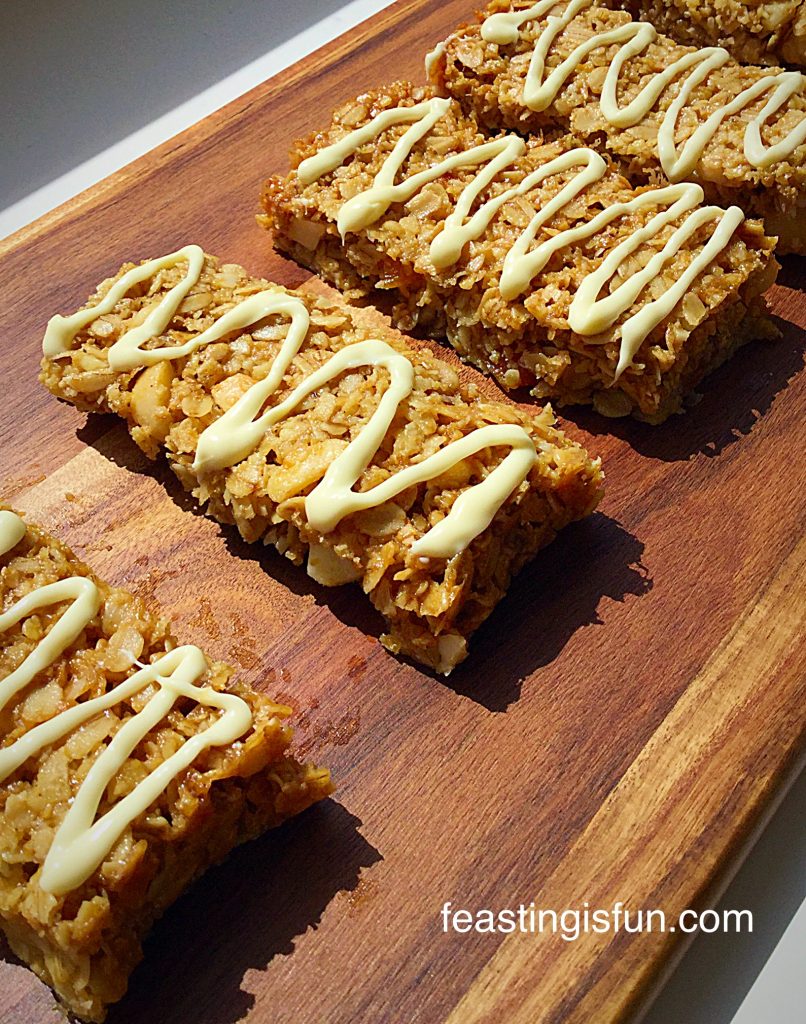
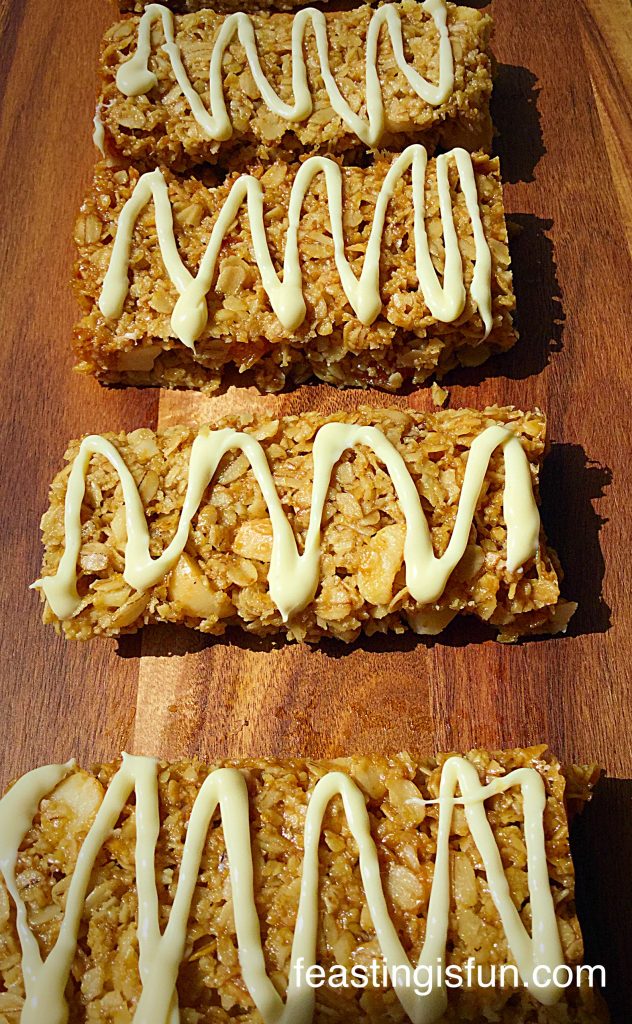
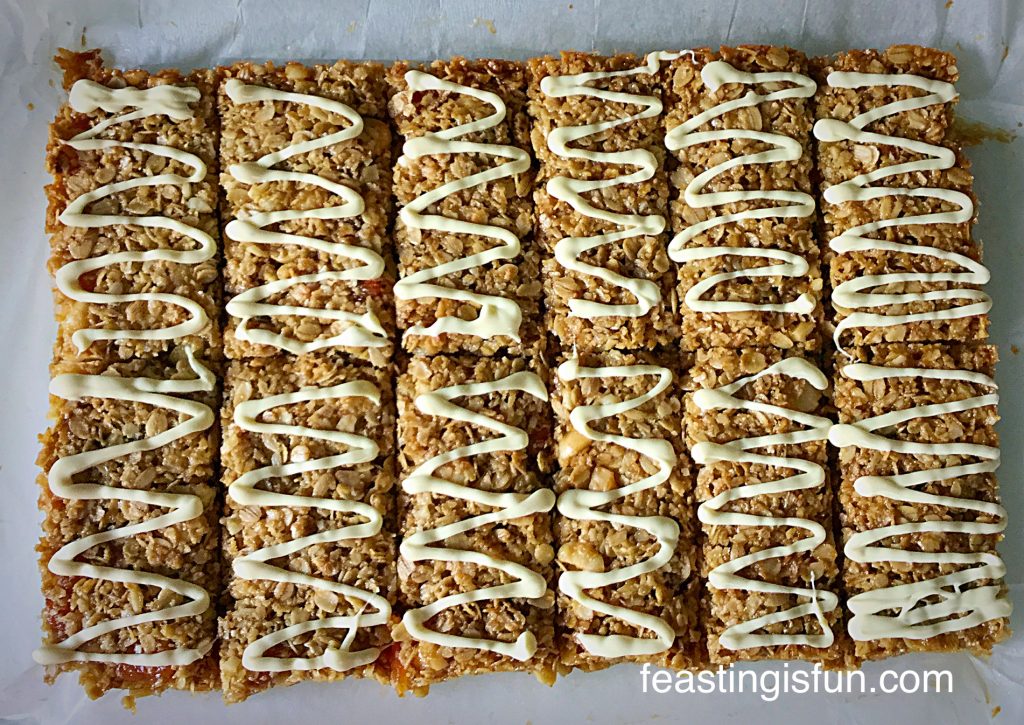
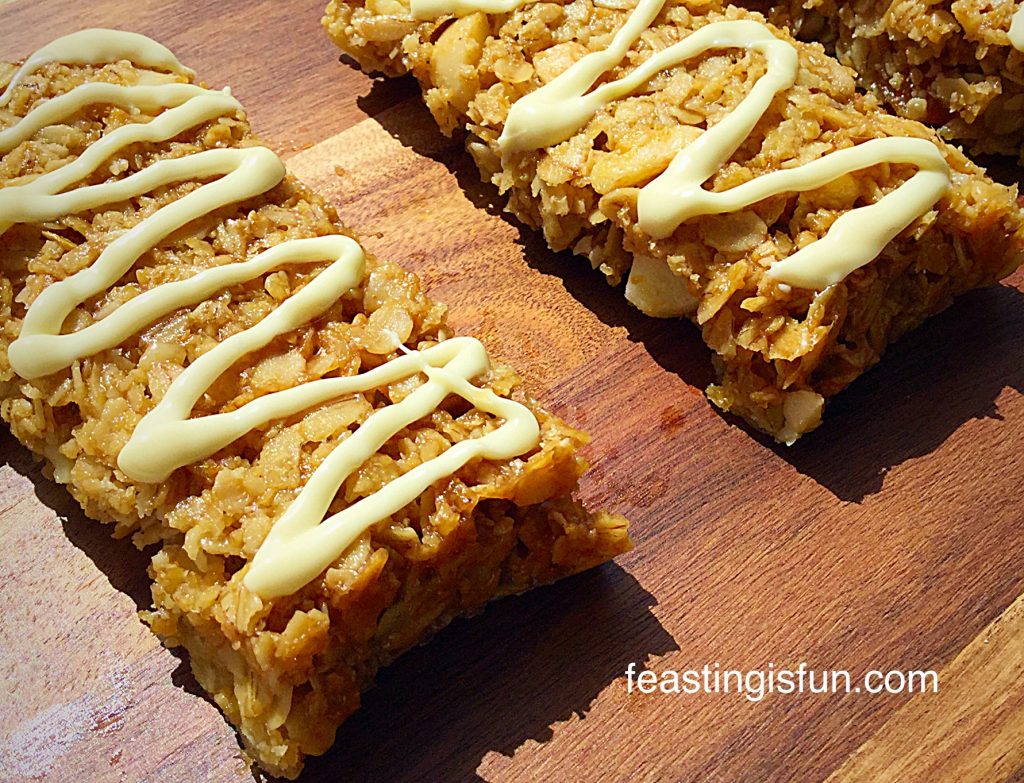
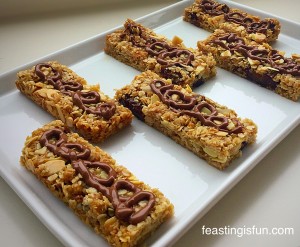
Macadamia Apricot Flapjacks with a drizzle of white chocolate.

Finishing With A Chocolate Drizzle

  • To finish the flapjacks – chop the white chocolate into small pieces and place in a heatproof, microwaveable bowl.
  • Zap for 20 seconds at a time, stirring between each heating session.
  • When the chocolate is half melted, remove from the microwave and stir until completely liquid.
  • Fill a small disposable piping bag with the melted chocolate.
  • Snip off the very end of the bag, creating a small hole.
  • Pipe swirls or zig zags of chocolate onto each flapjack to provide a beautiful finish.
FF Macadamia Apricot Flapjacks
Macadamia Apricot Flapjacks as pretty to look at as they are delicious to eat.

Ooh how completely yummy do these Macadamia Apricot Flapjacks look?

A couple of notes: During the summer, once the flapjack bake has cooled to room temperature, if the ambient temperature is 25C or above, it may be worth popping the tin in the fridge for an hour to allow the flapjacks to completely set. Likewise, unless the flapjacks are stored in the fridge I would leave off the white chocolate drizzle. If these Macadamia Apricot Flapjacks are going to get warm throughout the day, whether in a packed lunch box, or a bag, the white chocolate will melt and create a whole lotta mess!

This is just my advice as a mum of three and wife to hubby who takes a packed lunch to work.

Im just sayin’!!!

Love these Macadamia Apricot Flapjacks? Here are a couple of other recipes you may like to try as well.

Coconut Almond Date Flapjacks

FF Macadamia Apricot Flapjacks
Coconut Almond Date Flapjacks

Bakewell Shortbread Bars

FF Macadamia Apricot Flapjacks
Bakewell Shortbread Bars

Cranberry Walnut Flapjacks

FF Macadamia Apricot Flapjacks
Cranberry Walnut Flapjacks

While spending time in your kitchen, baking and cooking, have you ever thought of making extra and sharing some?

We all have people in our neighbourhood who are lonely and perhaps a little unhappy. Inviting them round for a chat over a cup of tea and delicious slice of cake, or flapjack, may seem such a small thing to us and yet can make the world of difference to someone else’s day.

Time seems to be so precious to many, which is why it is such a valuable gift to give.

Sammie xx

No part of this post may be reproduced or duplicated without the written permission of the owner. Please see my Disclosure Policy.

Share
Facebooktwitterpinterestlinkedintumblr

Bakewell Shortbread Bars

Share
Facebooktwitterpinterestlinkedintumblr

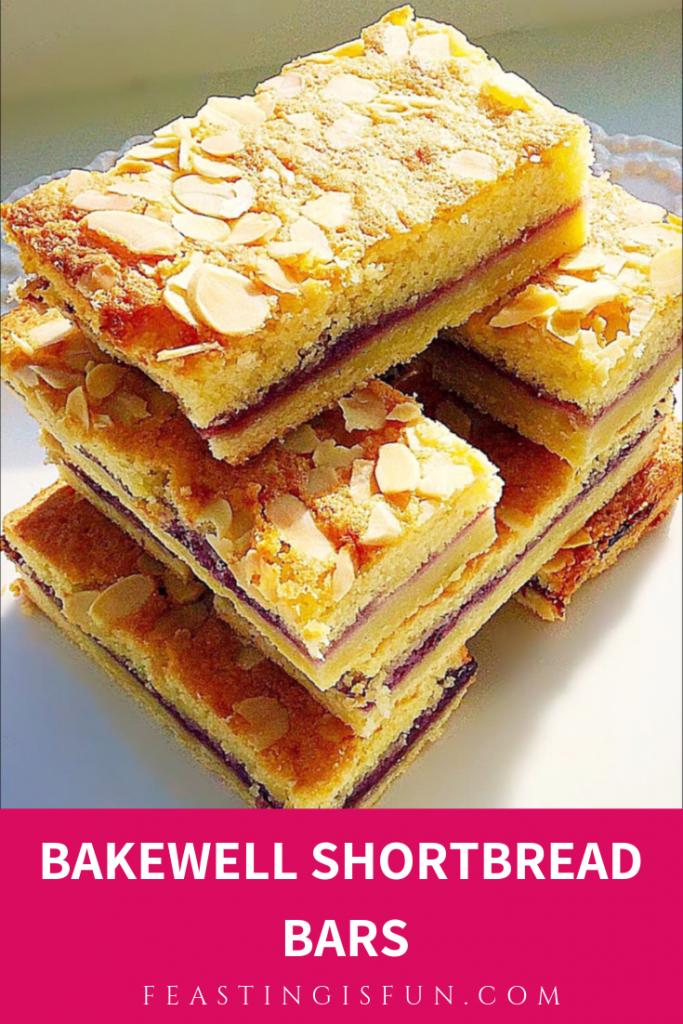
Hello my lovely readers, I have a real star of a recipe today. If you have spent anytime on this site, then you’ll know I’m a bit bonkers about all the flavours in a Bakewell Tart. And so I have made these very delicious Bakewell Shortbread Bars.

A stack of biscuit based baked treats with descriptive graphics for Pinterest


These actually came about by accident, sometimes that’s the best way with recipes! Because I had made some vanilla shortbread dough, which I had planned to turn into chocolate dipped hearts. Anyway, what with one thing and another, I didn’t get around to making them. Update: I have made them and the recipe is here Chocolate Dipped Shortbread Heart Cookies.

So, a couple of weeks ago, on a Sunday, Hubby was running through what we had for packed lunches that week. I hadn’t managed to make any Cranberry Walnut Flapjacks eek – then I had a moment of inspiration. These Bakewell Shortbread Bars are the result of me needing to make something delicious, that also travels well.

Bakewell Shortbread Bars

What a massive hit these have been with my family, ooh and me!

All the flavour of a Bakewell Tart

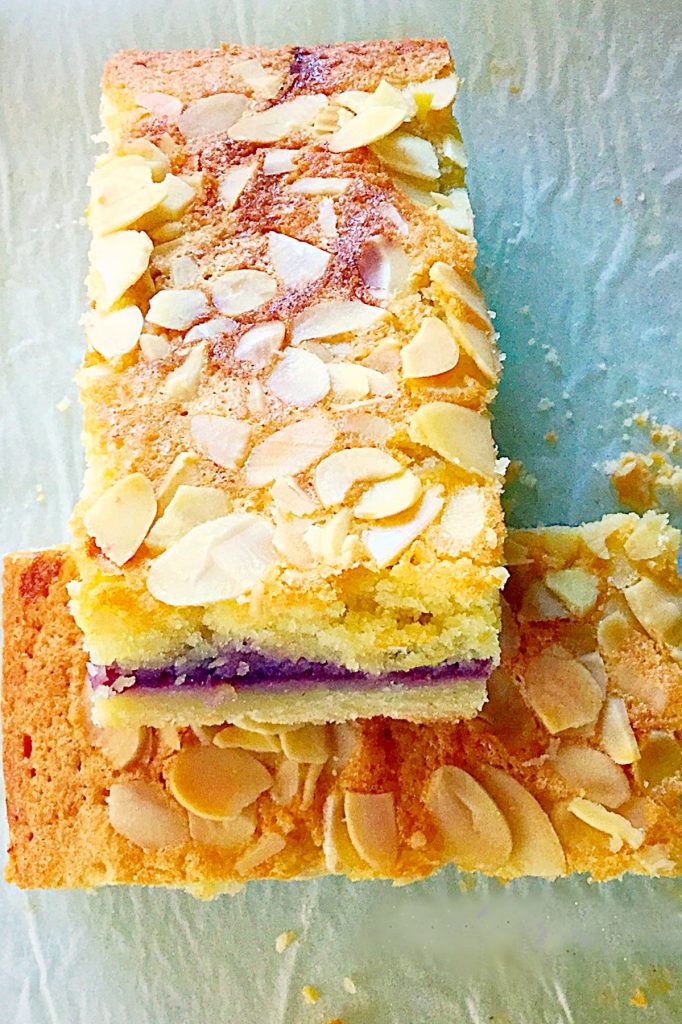
While the buttery shortbread base gives these Bakewell Shortbread Bars a sturdiness that is needed when food is to be transported. Topped with delicious raspberry jam, giving a hint of tart sweetness and then covered in a light, tender almond sponge with flaked almonds added for crunch, flavour and decoration.

Although I love Bakewell Tart, what I really love about this recipe, is that there isn’t any pie crust to roll out. With a pastry crust I certainly don’t want a big, thick wodge of it at the bottom of my bar, whereas, using shortbread dough I am more than happy to have a decently thick base.

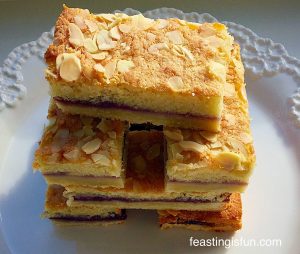
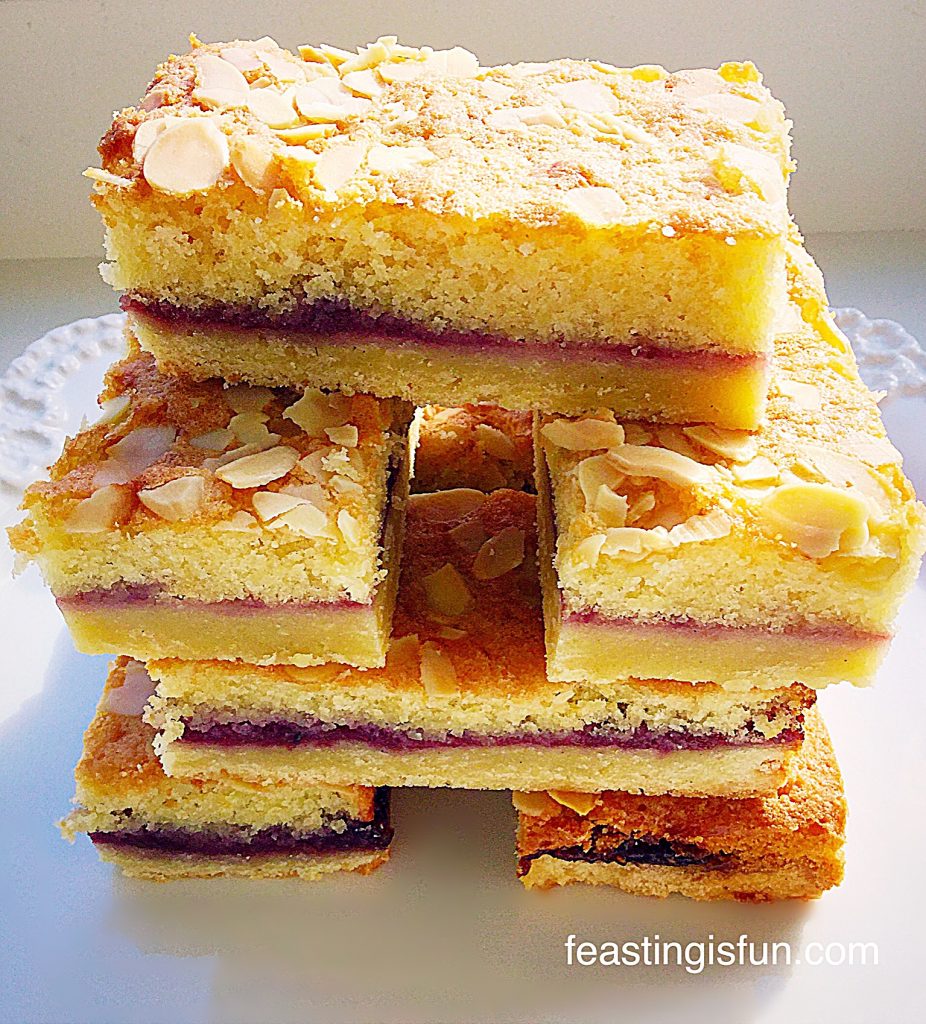
A stack of baked biscuit based, jam filled treats on a white plate.
Bakewell Shortbread Bars

Perfect Picnic Food

Because these Bakewell Shortbread Bars hold together well I will definitely be making them for picnics throughout the warmer months. I am not a fan of packing up food for lunches or picnics that is overly sweet or has any form of icing. I guess it just becomes too much of a bug magnet, or even worse wasps – and both cupcakes and iced cakes simply get too messy. Although our children are in their teens now, I want to relax while eating outside, not constantly dodging bugs or clearing up melted buttercream.

And that is NOT my idea of fun!

Actually, one year that we went to the beach with a big croud of friends, I made a fruit cake and a lemon drizzle cake (I know but the lemon drizzle only had a little bit of icing). I pre-cut them, popped the cakes into tins and mid afternoon we all had a cup of tea and slice of cake. I remember it being a very relaxing happy day and these Bakewell Shortbread Bars would certainly have travelled well and been enjoyed. A must bake for this year’s beach outings!

Now when I say this recipe is simple, it really is, the only slight faff is pre-cooking the shortbread. And I only say slight, because whilst the shortbread is cooking it is the perfect time to whip up the sponge.

Recipe: Makes 12 Bakewell Shortbread Bars

For the shortbread:

225g/8oz Unsalted Butter – softened to room temperature plus 1tbsp for greasing the tin

150g/5oz Caster Sugar

1tsp Vanilla Extract – I use Nielsen-Massey

1 Large Egg Yolk – I always use free range

275g/10oz Plain White Flour

1/4 tsp Sea Salt I use Maldon

For the cake batter:

175g/6oz Unsalted Butter – softened to room temperature

175g/6oz Caster Sugar

3 Large Free Range Eggs

1tsp Vanilla Extract

3/4 tsp Almond Extract

100g/4oz Ground Almonds

50g/2oz Plain White Flour

1tsp Baking Powder

Pinch of salt

175g/ Approx 1/2 Standard Jar of Raspberry Jam – I use Hartley’s

50g/2oz Flaked Almonds

Method: Preheat the oven to 180C/160C fan, gas mark 4, 350F.

You will need a swiss roll tin 28cm x 20cm x 5cm (12″ x 8″ x 2″) greased with butter and lined with baking parchment.

Making the shortbread base:

  • In a large bowl whisk/beat the butter and sugar together until pale and creamy.
  • Add the vanilla extract and egg yolk and whisk/beat until combined.
  • Sift the flour and salt into the bowl.
  • Mix using a spoon until the dough comes together.
  • Tip the dough out on to some cling film. Wrap up the dough into a disc shape and place in the fridge to chill for 30 minutes.
  • Once chilled break the dough up into large pieces and place them into the prepared tin.
  • Using clean hands, press the shortbread dough into the tin so that it forms a uniform layer.
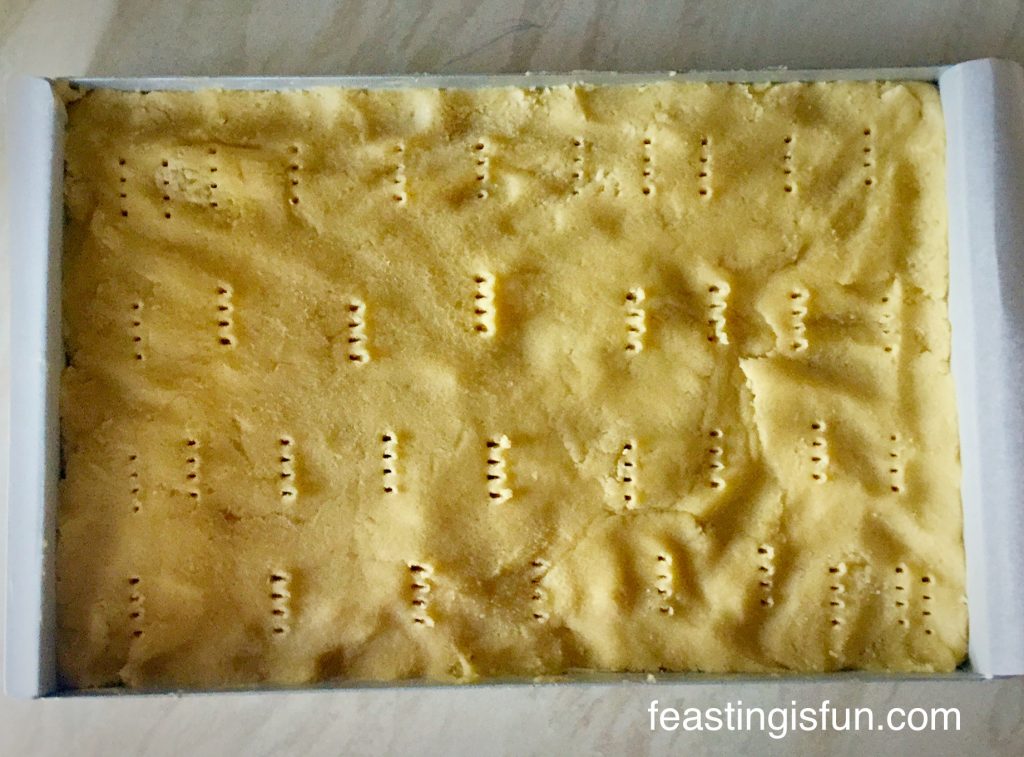
  • Dock the shortbread dough using a fork.
FF Bakewell Shortbread Bars
The shortbread base ready for the oven.
  • Place the tin into the centre of the oven and bake for 10 minutes.
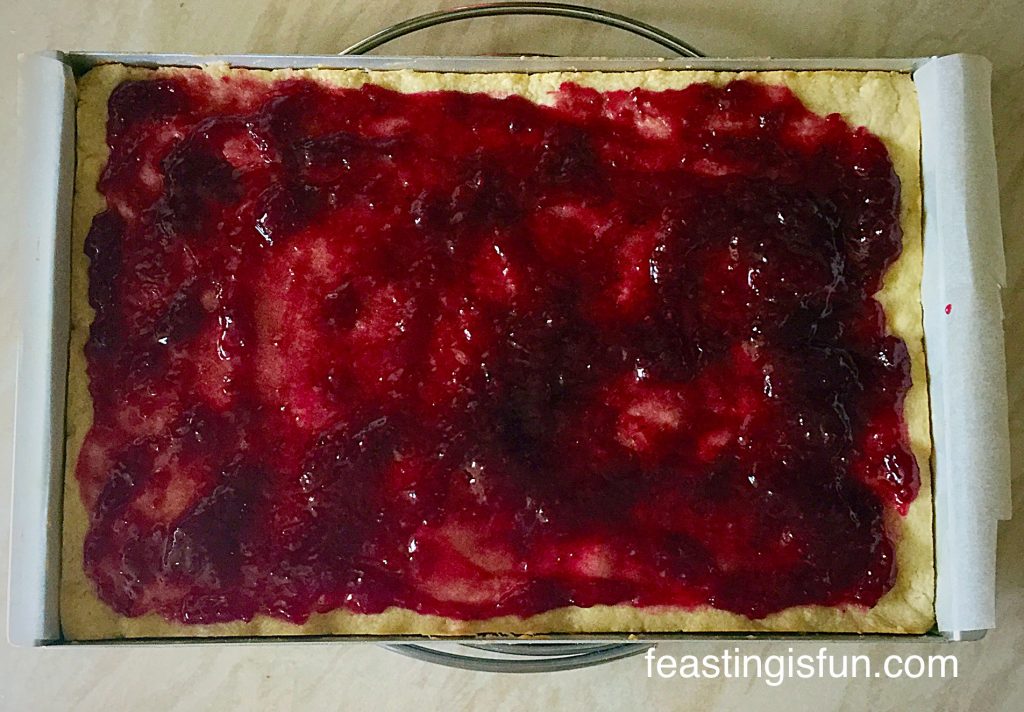
  • Remove the tin after 10 minutes and spread the jam over the part cooked shortbread. Leave a small gap between the jam and the edge of the shortbread.
  • Turn the oven temperature down to 160C/140C fan, gas mark 3, 325F.
FF Bakewell Shortbread Bars
The part cooked shortbread is slathered in raspberry jam.

Making the almond cake batter, assembling the Bakewell Shortbread Bars and then baking them:

  • In a large bowl whisk/beat the butter and sugar until pale and creamy.
  • Add the vanilla and almond extract and the 3 whole eggs. Whisk/beat for 1 minute.
  • Add the flour, baking powder, ground almonds and salt.
  • And then mix slowly until the batter is just combined.
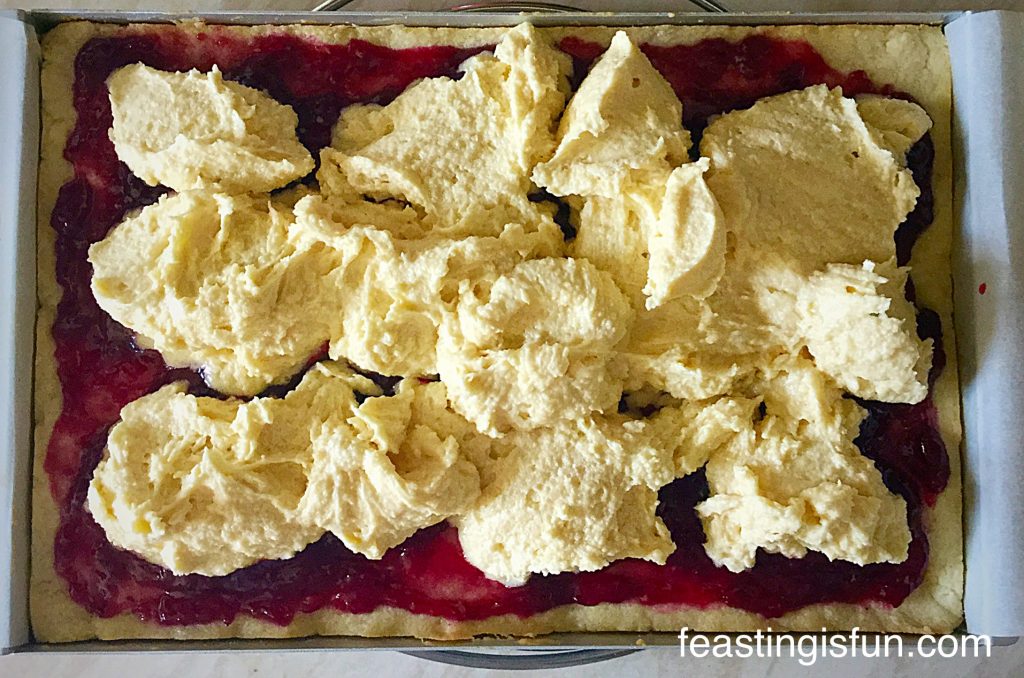
  • Spoon the cake batter over the jam coated shortbread.
FF Bakewell Shortbread Bars
Almond sponge is spooned on top of the raspberry jam covered shortbread.
  • Use an offset palette knife, or the back of a spoon to carefully spread the cake batter so that it almost covers the top of the shortbread, Don’t worry it will spread out during baking,
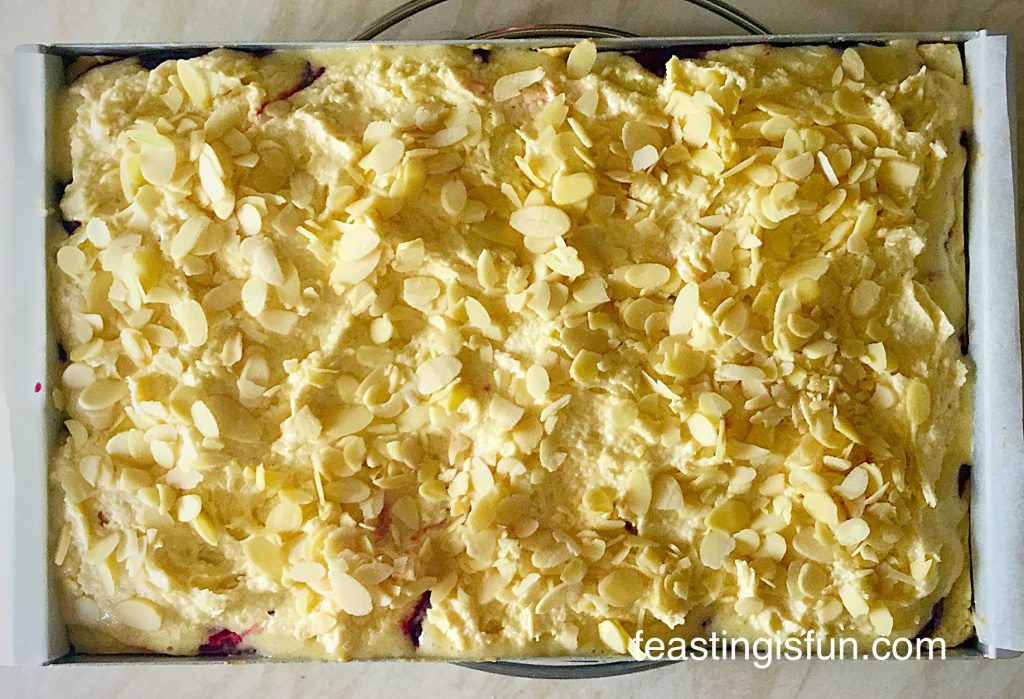
  • Sprinkle over the flaked almonds.
Bakewell Shortbread Bars
Ready for the oven. 
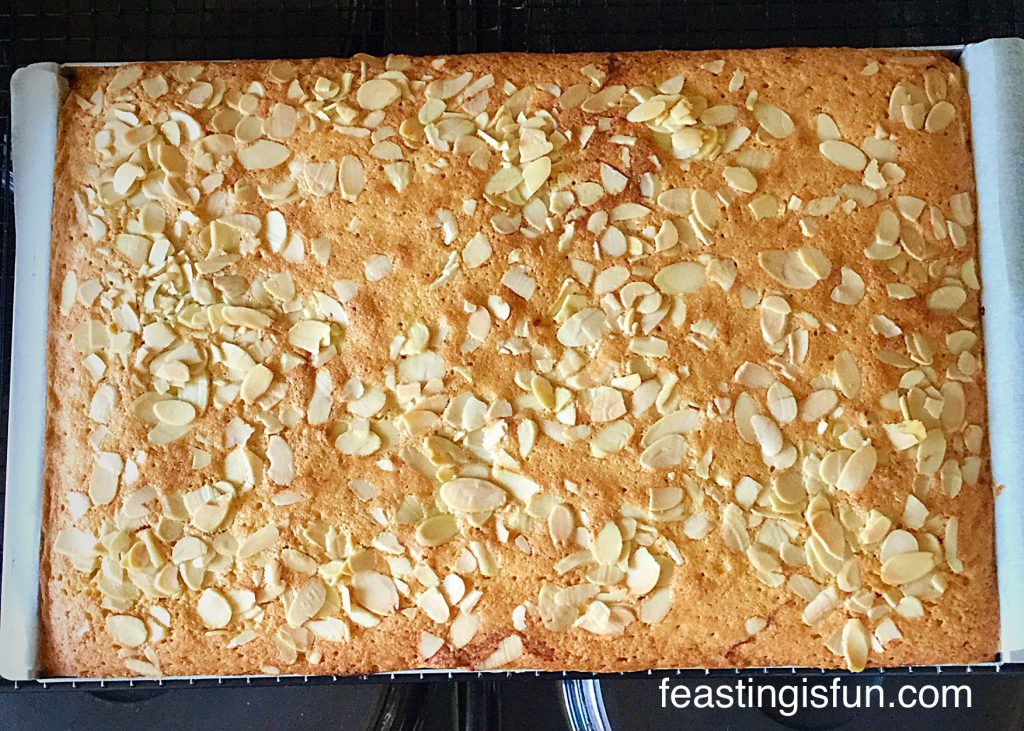
  • Place the tin into the centre of the oven and bake for 25-30 minutes. It is fully baked when the top is golden and feels firm to the touch.
  • As soon as it is baked remove the tin from the oven and allow to cool completely in the tin.
FF Bakewell Shortbread Bars
How gorgeous does this look?

Portioning the Bars

  • When completely cold run a knife around both long sides of the tin.
  • Using the spare parchment paper, lift the cake covered shortbread free from the tin.
  • Cut down the middle length of the bake.
  • Then cut across the width, in the middle.
  • Now cut each quarter into 3 bars.
  • Use a palette knife to lift the Bakewell Shortbread Bars free from the baking parchment.

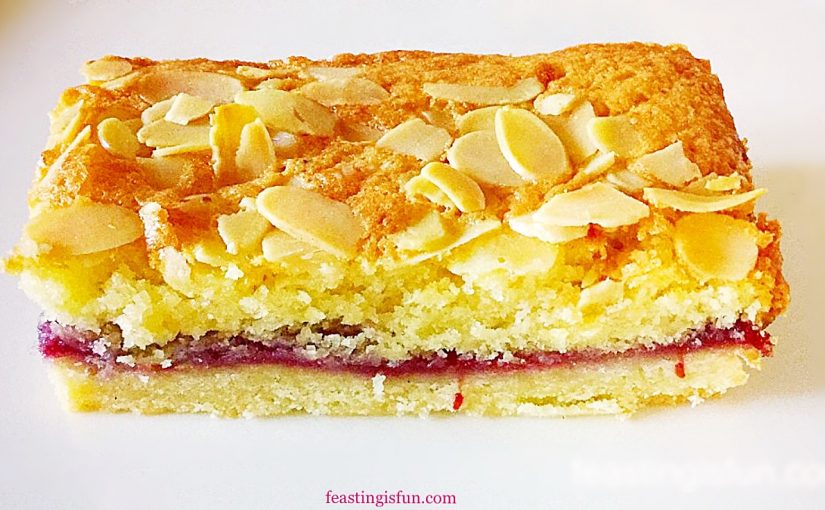
Flaked almond tops almond sponge followed by raspberry jam and a shortbread base. Cut into bars that are ideal for picnics and packed lunches.

How great do these Bakewell Shortbread Bars look? They can also be cut into squares for tasty party bites.

Store them in an airtight container for up to 5 days.

See! So easy to make. And such a brilliant addition to a packed lunch, picnic or just to have with a cup of tea or coffee.

I love recipes that are easy, yet produce stunning results. This is one of those recipes. Because all of the flavours work so well together, a buttery shortbread base, sweet and tart raspberry jam topped with almond sponge. The perfect combination. Finally you can have your cake and cookie all in one tasty Bakewell Shortbread Bar!

If you have enjoyed these Bakewell Shortbread Bars, here are some other recipes you might like to try:

Cranberry Walnut Flapjacks

FF Bakewell Shortbread Bars
Cranberry Walnut Flapjacks perfect to grab and go.

Coconut Date Almond Flapjacks

FF Coconut Date Almond Flapjacks
Coconut Date Almond Flapjacks healthy food to go.

Oat Topped Lemon Shortbread Bars

FF Bakewell Shortbread Bars
Oat Topped Lemon Shortbread Bars

Do you have favourite recipes for making good food to go?

Also, thank you for taking the time to leave a comment. I really appreciate it and love reading them. If you are on Twitter or Instagram please pop a photo up and tag me in. I love to see what you are baking and making in your kitchens and will happily retweet your pictures.

So, whatever you are making, have lots of fun making your feasts and sharing with friends and family.

Sammie xx

No part of this post may be reproduced or duplicated without the written permission of the owner. Please see my Disclosure Policy.

You may also like these:

Cherry Bakewell Cookies

Cherry and almond cookies.
Cherry Bakewell Cookies


Share
Facebooktwitterpinterestlinkedintumblr

Feta Cheese Herb Muffins

Share
Facebooktwitterpinterestlinkedintumblr

Oh wow, these Feta Cheese Herb Muffins certainly have a taste of the Mediterranean about them.

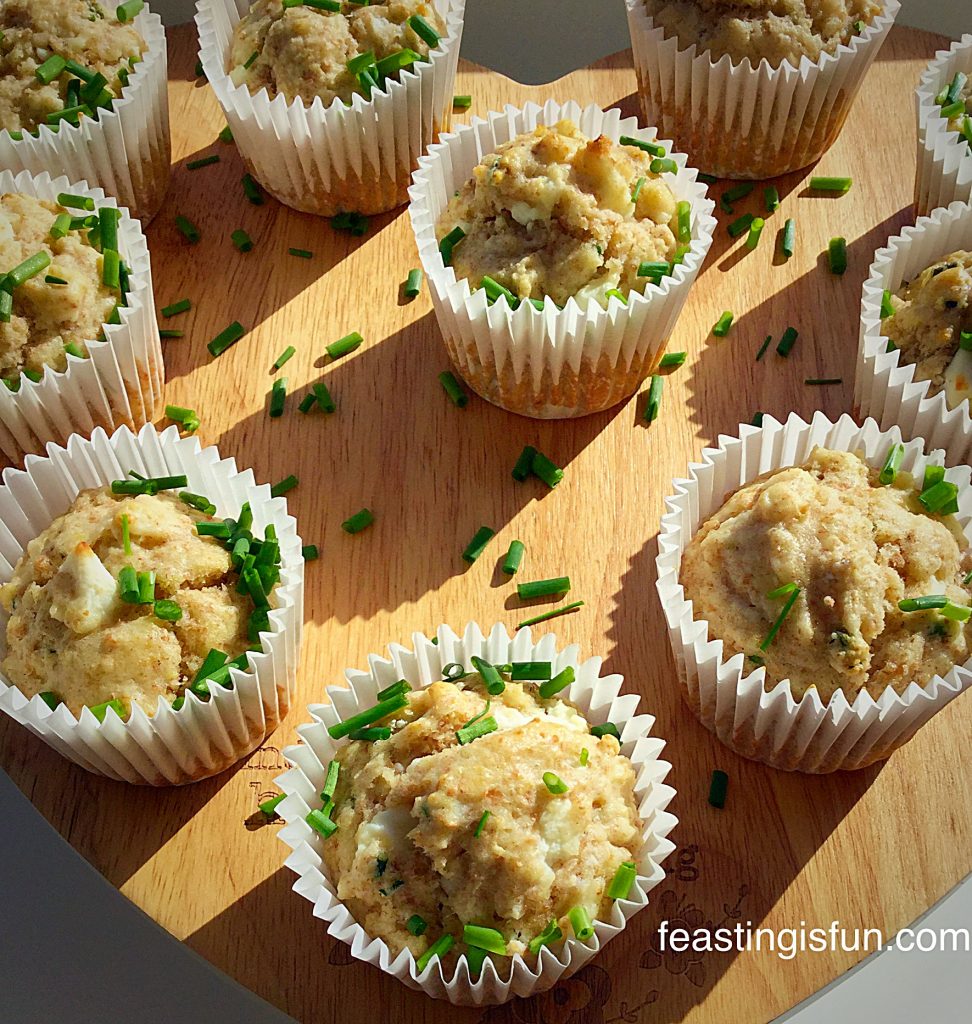
FF Feta Cheese Herb Muffins
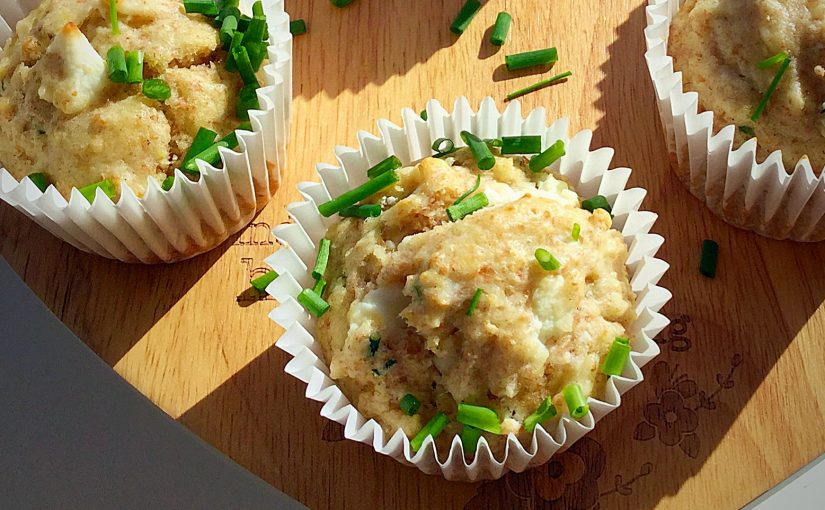
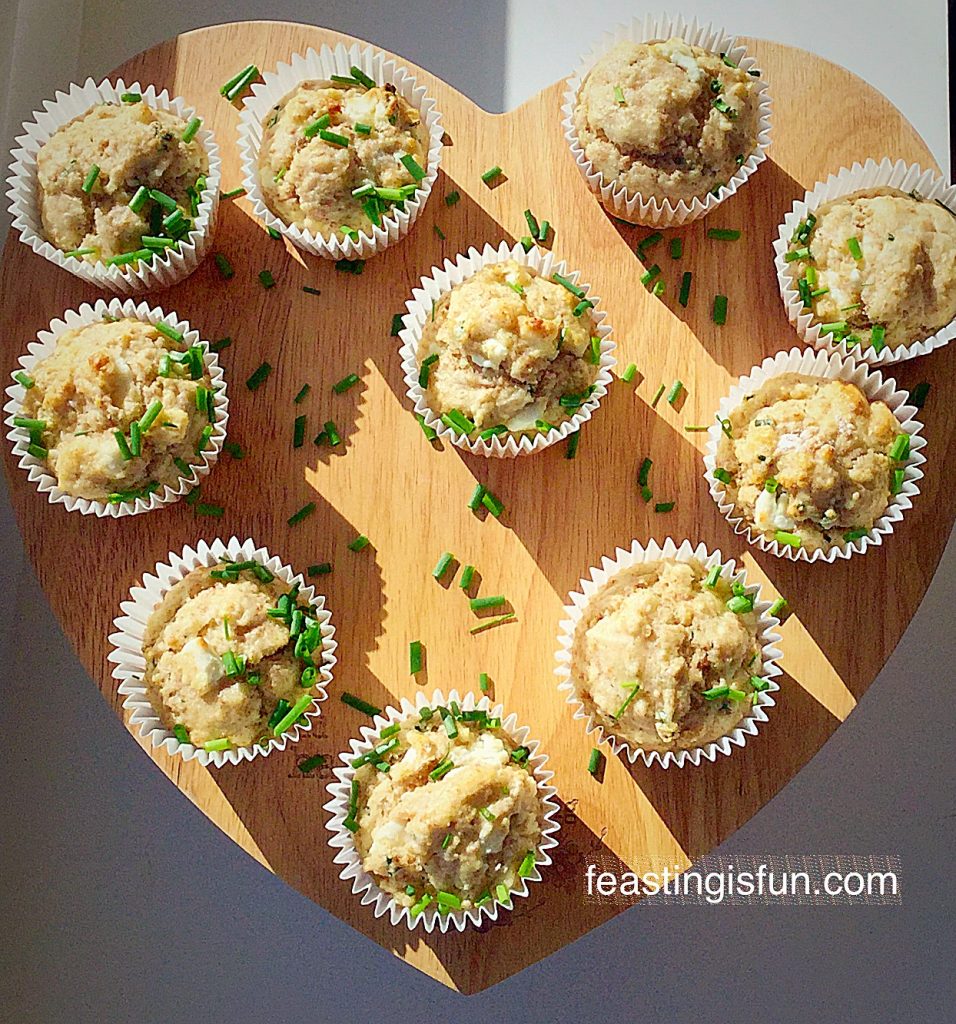
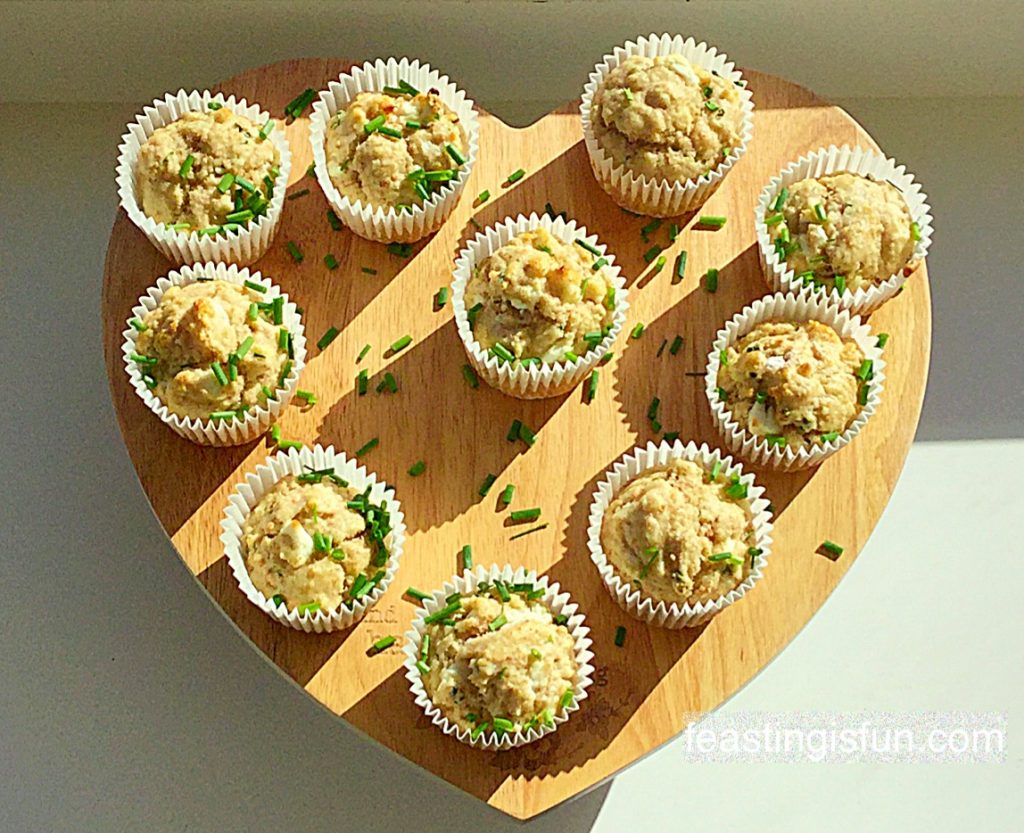
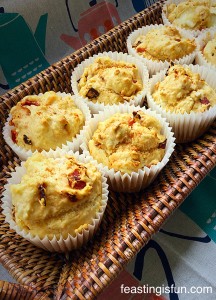
Feta Cheese Herb Muffins perfect for eating any time of the day!

Sorry, I know I usually write a little intro, but these Feta Cheese Herb Muffins are so, so good I wanted to tell you about them straight away. Like an excited child with news of their day at school, I am literally bursting with excitement over how good these are.
Salty feta cheese, that almost melts, in a slightly healthier muffin – I’ve added in some wholemeal flour, without any added heaviness – accompanied by the delicate onion flavour of fresh chives and just the teeny tiniest hint of fresh mint!

FF Feta Cheese Herb Muffins
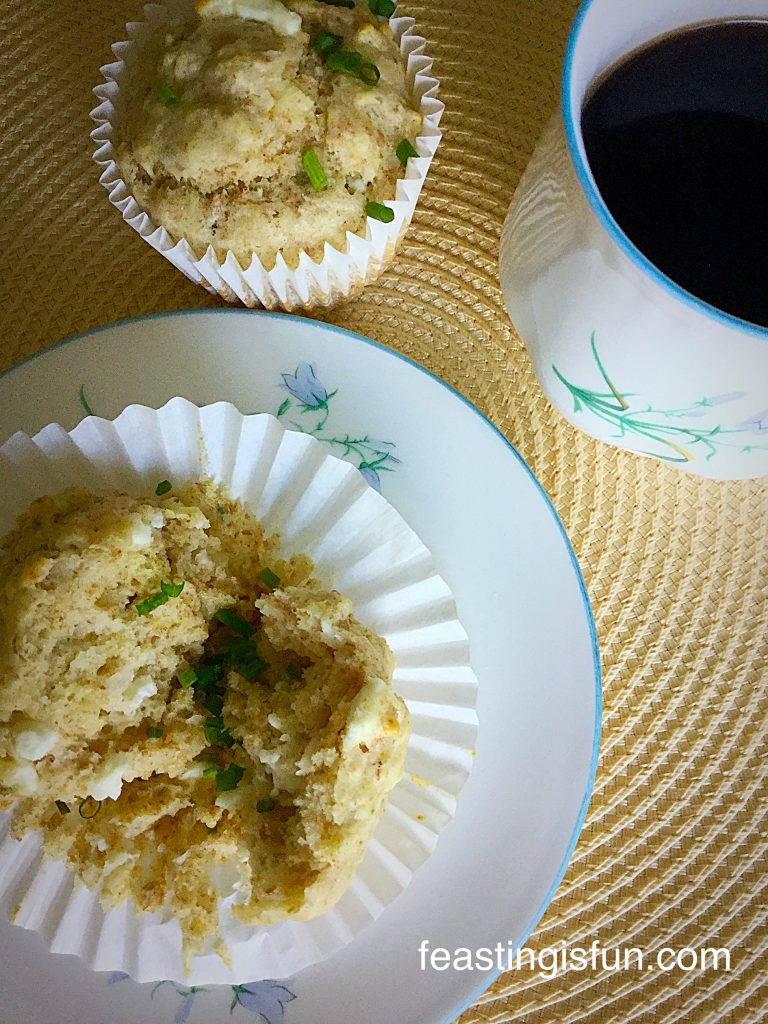
Feta Cheese Herb Muffins delicious warmed for brunch.

Having first made my friend, Jackie Heaton aka The Baking Nanna’s Cheese Bacon Breakfast Muffins which are absolutely delicious, I have loved coming up with different variations of the muffin.
Today I wanted to see if I could add wholemeal flour to the muffins, without making them heavy. So I replaced one third of the flour with plain, wholemeal flour. I increased the baking powder and hoped that the balance would work. It totally did.

The wholemeal flour adds a subtle depth of flavour that completely works with the salty feta cheese. I thoroughly enjoyed a late breakfast this morning feasting on these flavour packed morsels.

FF Feta Cheese Herb Muffins
Feta Cheese Herb Muffins so good and so easy to bake.

Freshly cut from the garden, both the chives and the mint add a subtle brightness to the Feta Cheese Herb Muffins. None of our children noticed the mint, I was a bit worried thinking that might be the deal breaker! There are only three mint leaves in the whole recipe, yet they provide a fantastic, fresh flavour, without making the muffins taste like toothpaste!!!

If you don’t have fresh herbs in your garden, they can easily be grown on a window-ledge. I buy mine growing in pots, from the supermarket. Woody herbs such as sage, thyme, oregano and rosemary grow in the garden, as do the chives, which have recently started to sprout. Mint I grow in a tub, as it can be a bit of a thug if planted in the open ground, rapidly spreading and smothering other plants.

There is a place for both fresh and dried herbs in my kitchen. In this recipe however, I would only recommend using fresh herbs. Look out for upcoming posts where I will share tips and recipes on the vegetables and herbs I grow.

FF Feta Cheese Herb Muffins
Feta Cheese Herb Muffins delicious, healthier and low in fat.

Recipe: Makes 12 Feta Cheese Herb Muffins

200g/7oz Plain White Flour

100g/4oz Plain Wholemeal Flour

3tsp Baking Powder

200g/7oz Feta Cheese – drained

1tbsp Chopped Fresh Chives – plus extra to garnish – I use scissors to snip the chives

3 Fresh Mint Leaves – finely chopped

200ml Whole or Semi-skimmed Milk

2 Large Free Range Eggs

2tbsp Vegetable Oil

2tbsp Extra Virgin Olive Oil

Approx 1tsp Freshly Ground Black Pepper – or less if desired

Method: Preheat the oven to 200C/180C fan, gas mark 6

  • Line a 12 cup muffin pan with muffin cases
  • Measure the milk into a jug. Crack in the 2 whole eggs and add the oils. Stir with a fork to combine – wet ingredients.
  • Into a large bowl add both the flours, the crumbled feta cheese, black pepper finely chopped mint and chives. Stir with a fork ensuring all the pieces of crumbled feta are coated in flour – dry ingredients.
  • Make a well in the centre of the dry ingredients and pour the wet ingredients into it.
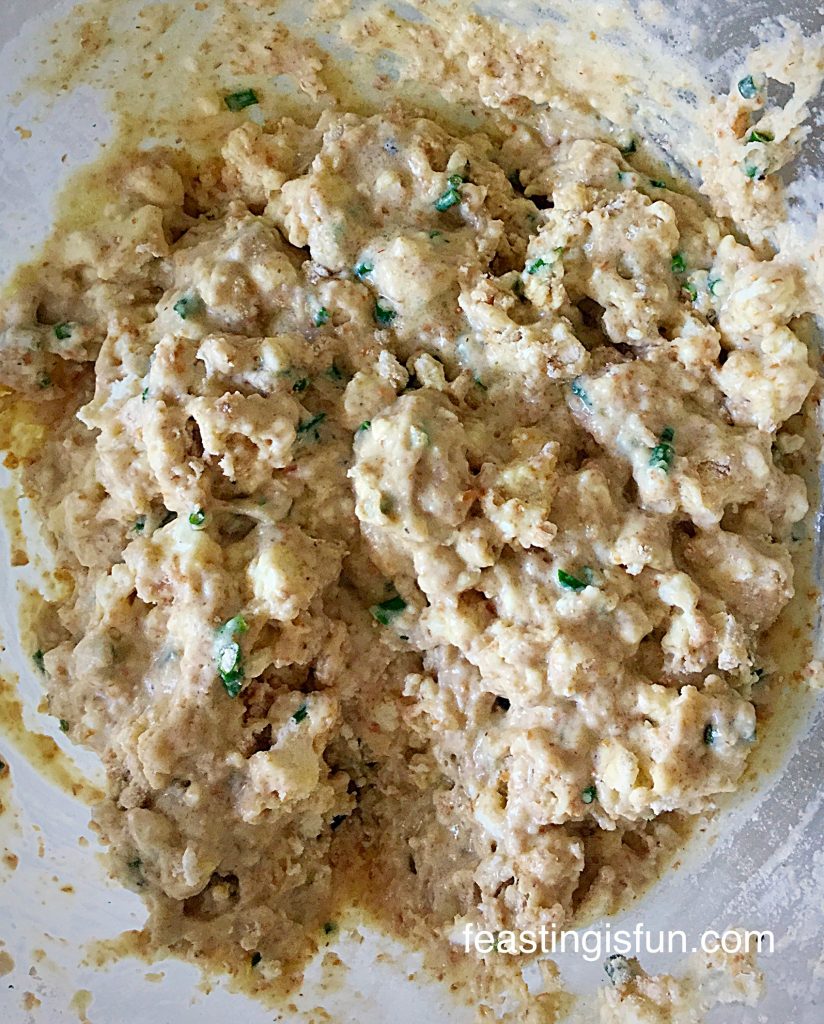
  • Stir lightly with a fork until almost combined. Note: lumpy batter ensures tender muffins, if you over mix the muffins will be tough!
FF Feta Cheese Herb Muffins
Here is good, lumpy batter.
  • Divide the batter equally between the 12 muffin cases.
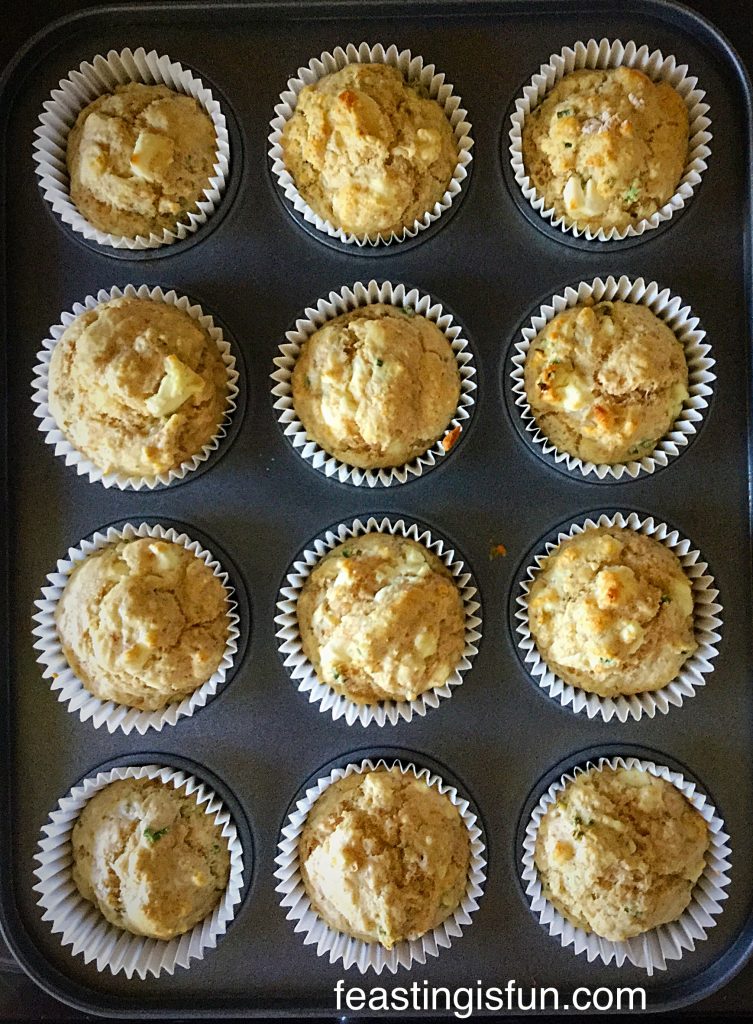
  • Place the muffin pan into the preheated oven and bake for 15-20 minutes (mine took 17 minutes).
  • The muffins are cooked when the are starting to turn golden brown and are firm to touch.
  • Once baked remove the muffins from the oven.
FF Feta Cheese Herb Muffins
Feta Cheese Herb Muffins hot straight from the oven.
  • Allow the Feta Cheese Herb Muffins to cool slightly on a cooling rack.

Serve the delicious Feta Cheese Herb Muffins warm with an extra sprinkling of freshly cut chives.

Store in an airtight container for up to 3 days. To refresh pop in a medium heated oven for 5 minutes and they will regain their freshly baked flavour.

These Feta Cheese Herb Muffins are the perfect addition to any packed lunch or picnic. They are a perfect, portable, fairly healthy snack and great for sharing. Long days at the office? These take barely 30 minutes to make and bake and then you have breakfast/lunch sorted for a few days!

I love coming up with easy to make, nutritious food, that means you always have something delicious to fall back on instead of always reaching for a chocolate bar or packet of crisps. With food made at home, you know exactly what has gone into it and it always tastes so much better than anything you can buy.

Loved these Feta Cheese Herb Muffins? Here are some other easy, food on the go recipes you may like to try:

Chorizo Goats Cheese Muffins 

FF Chorizo Goats Cheese Muffins
Chorizo Goats Cheese Muffins utterly delicious.

Coconut Almond Date Flapjacks

VC Coconut Almond Date Flapjacks
Coconut Almond Date Flapjacks a slow release energy bar wherever you are.

Cranberry Walnut Flapjacks

BN Cranberry Walnut Flapjacks
Cranberry Walnut Flapjacks – perfect for sustained energy release.

Are you good about eating breakfast and taking a packed lunch to work, or do you grab a sweet muffin with your morning latte?

Hopefully I’ve given you some tips to make mornings less stressful on some days? There are always going to be days when you oversleep, or no matter what you do, you’re running late. If you can plan just a little bit, then a bad start to the day needn’t set the tone for how the day pans out!

Thank you for taking the time to leave a comment. I really enjoy reading them. Likewise for all of you who have posted your makes and bakes on Twitter and Instagram. I love seeing how my recipe turns out in someone else’s kitchen!

Have fun making and baking your feast.

Sammie xx


Share
Facebooktwitterpinterestlinkedintumblr