Cherry Bakewell Soda Bread

Share
Facebooktwitterpinterestlinkedintumblr

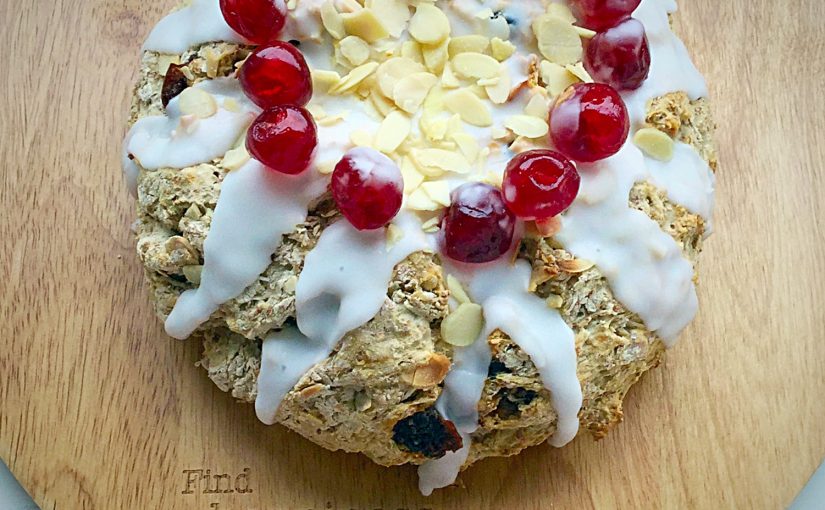
Nothing smells better than the aroma of homemade bread, baking in the oven. As many of my regular readers will know, I adore making bread. Yet sometimes, time is the enemy. Especially if it’s needed for breakfast and we have run out. The solution is to bake this beautiful and delicious Cherry Bakewell Soda Bread.

FF Cherry Bakewell Soda Bread
Cherry Bakewell Soda Bread crowned with cherries.

An un-yeasted bread, made even easier by using a packet of Wrights Scofa Bread Mix. All this tasty loaf requires is a little mixing, shaping and popping in a preheated oven to bake. The addition of cherries and flaked almonds gives this loaf the wow factor. Especially with the almond flavour icing, temptingly drizzled over the loaf and finished with ruby red, glacé cherries.

FF Cherry Bakewell Soda Bread
Cherry Bakewell Soda Bread hearty and delicious.

Since this loaf takes less than 45 minutes from start to baked, it is perfect for lazy weekend breakfasts. Still, if you are in a real rush, ditch the icing and crown of cherries and serve this sliced, warm from the oven, with butter if desired.

FF Cherry Bakewell Soda Bread
Cherry Bakewell Soda Bread perfect for afternoon tea.

While this bread can be made and baked in under an hour, leaving to cool allows for simple, yet stunning decoration. Thick, almond icing, draped over the rustic loaf, simply topped with jewelled cherries. Creating a sensation for the eyes as well as the palette. Cooled and sliced, I found this delicious, hearty loaf needed no further addition. Each bite full of almonds, cherries and rustic, wholemeal bread.

Recipe: Cherry Bakewell Soda Bread

1 Packet Scofa Bread Mix available from Wrights Baking

Cold Water

150g/5oz Glacé Cherries

100g/4oz Flaked Almonds

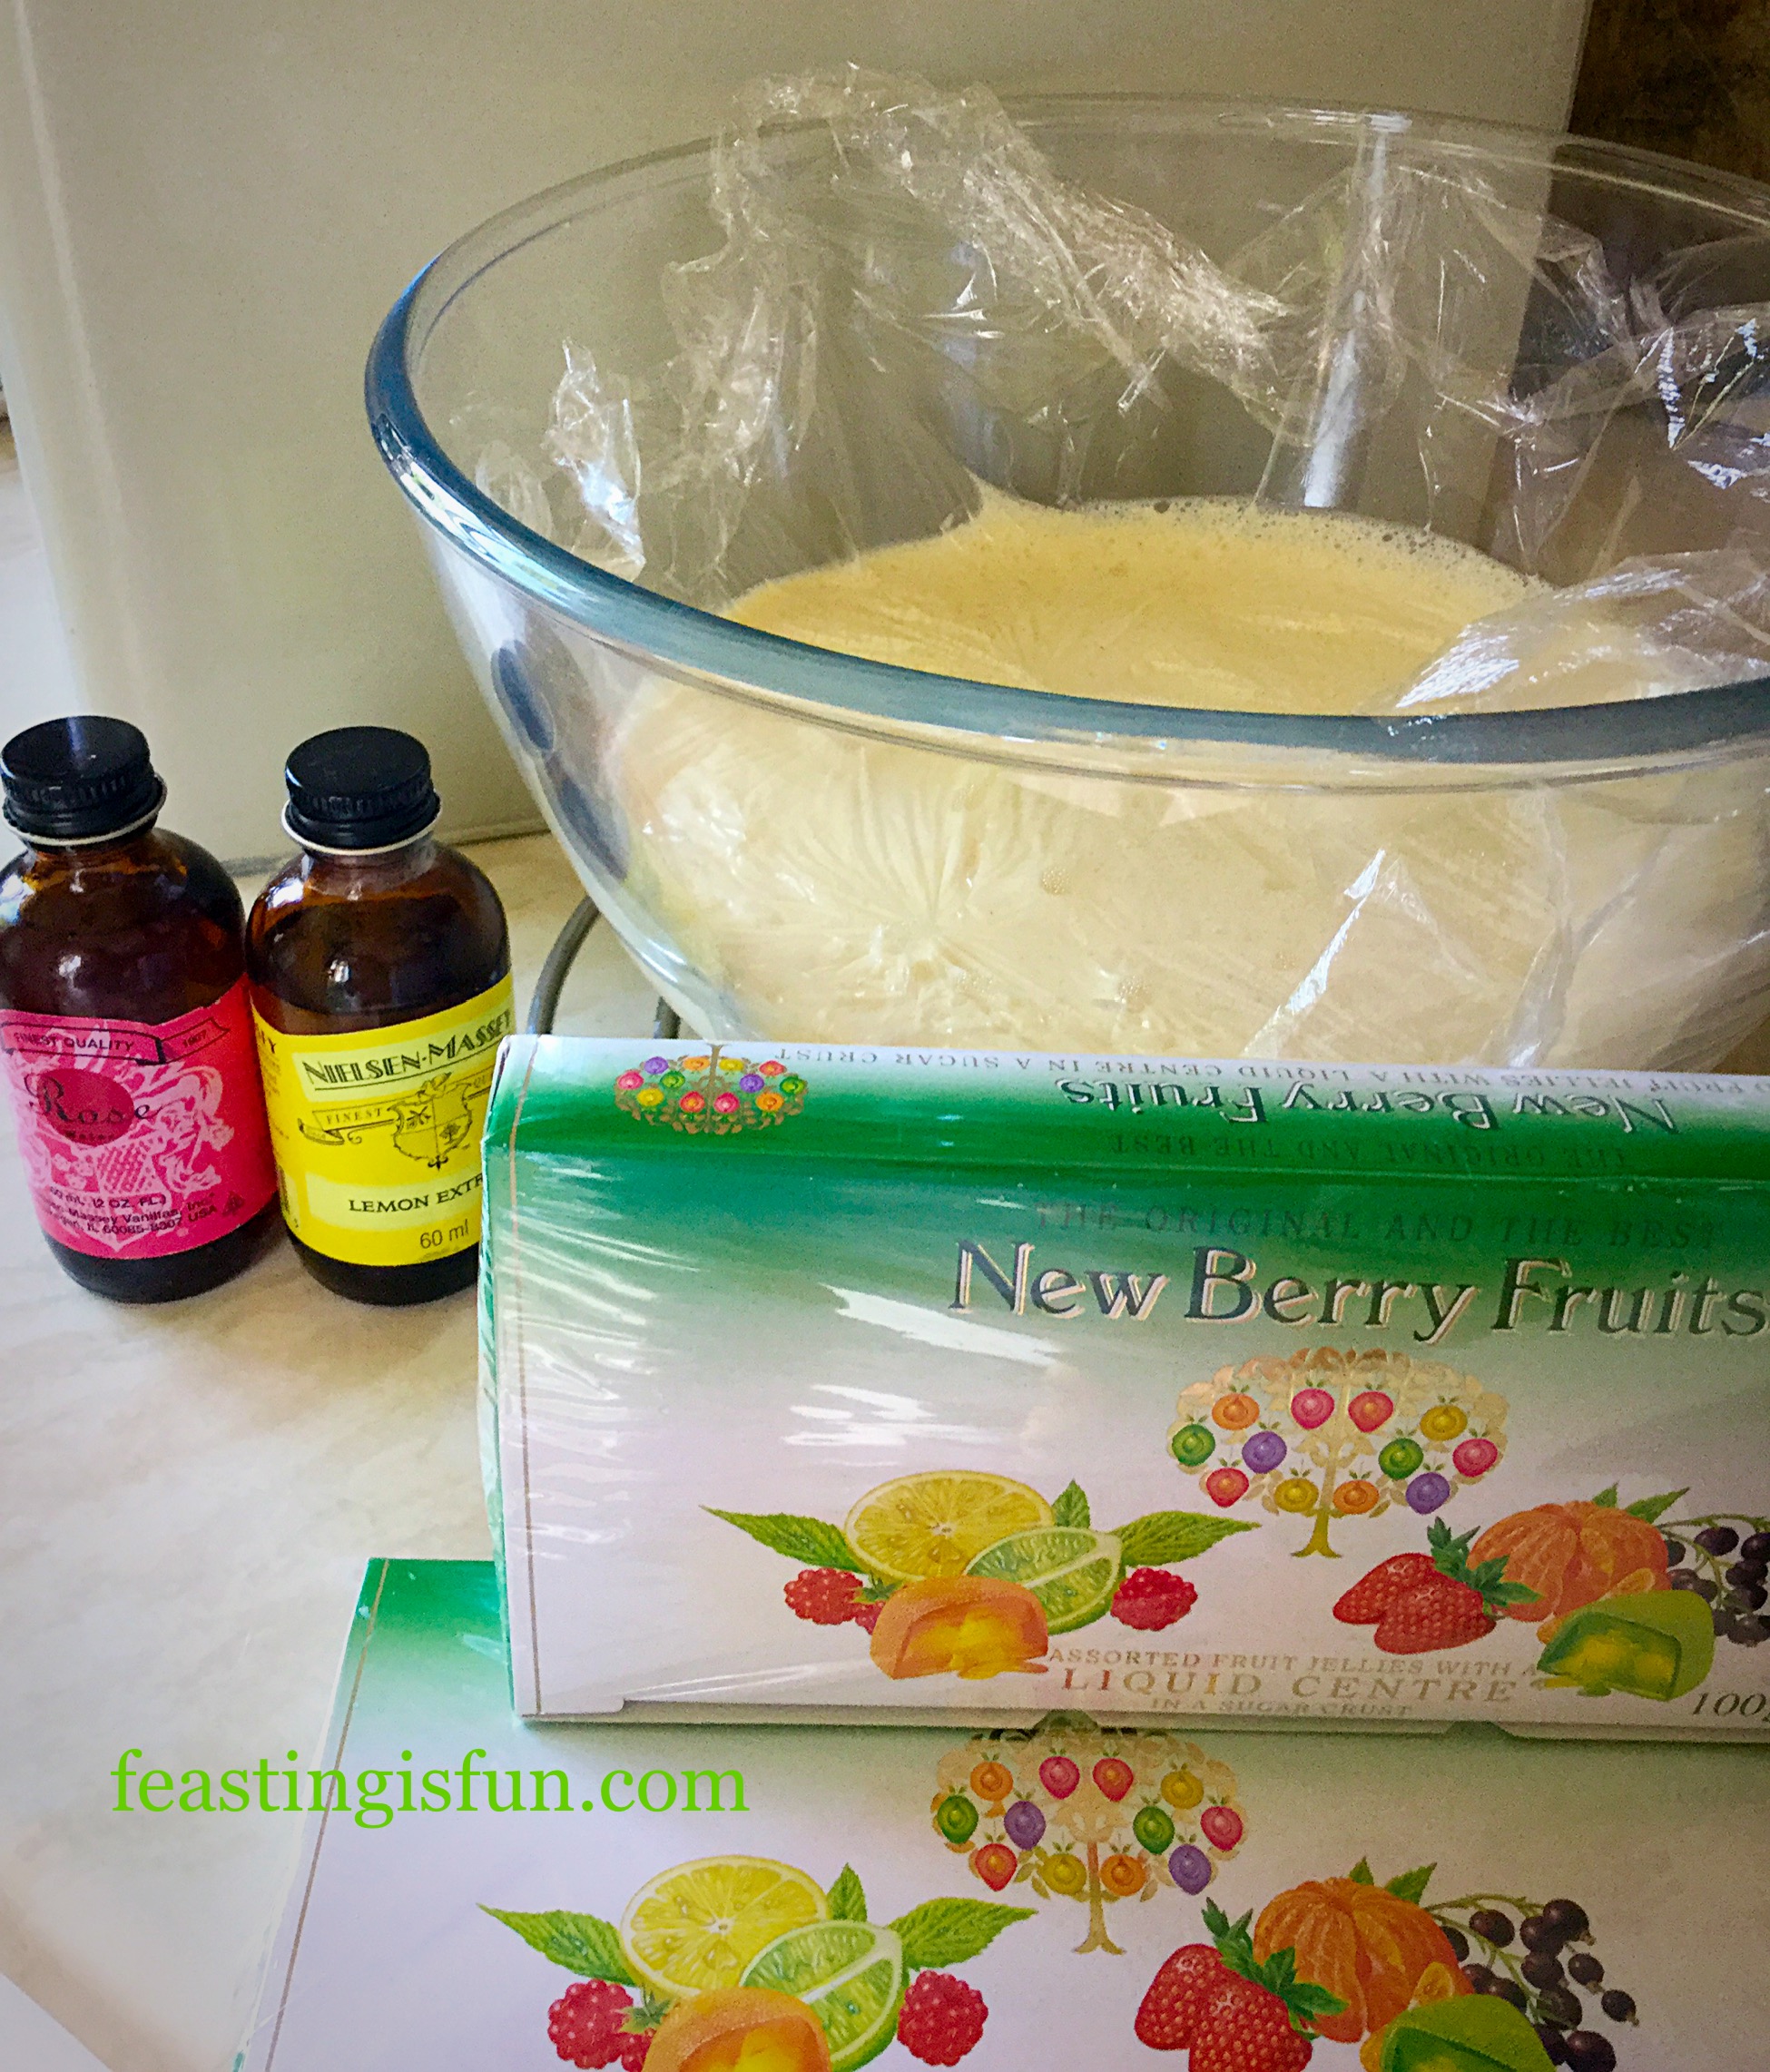
3tsp Almond Extract – I use Nielsen-Massey

200g/7oz Sifted Plain Icing Sugar

Method: Preheat the oven to 220C/200C fan, gas mark 7.

  • First of all, remove 12 whole glacé cherries and set them to one side for decoration.
  • Next cut all the remaining cherries in half.
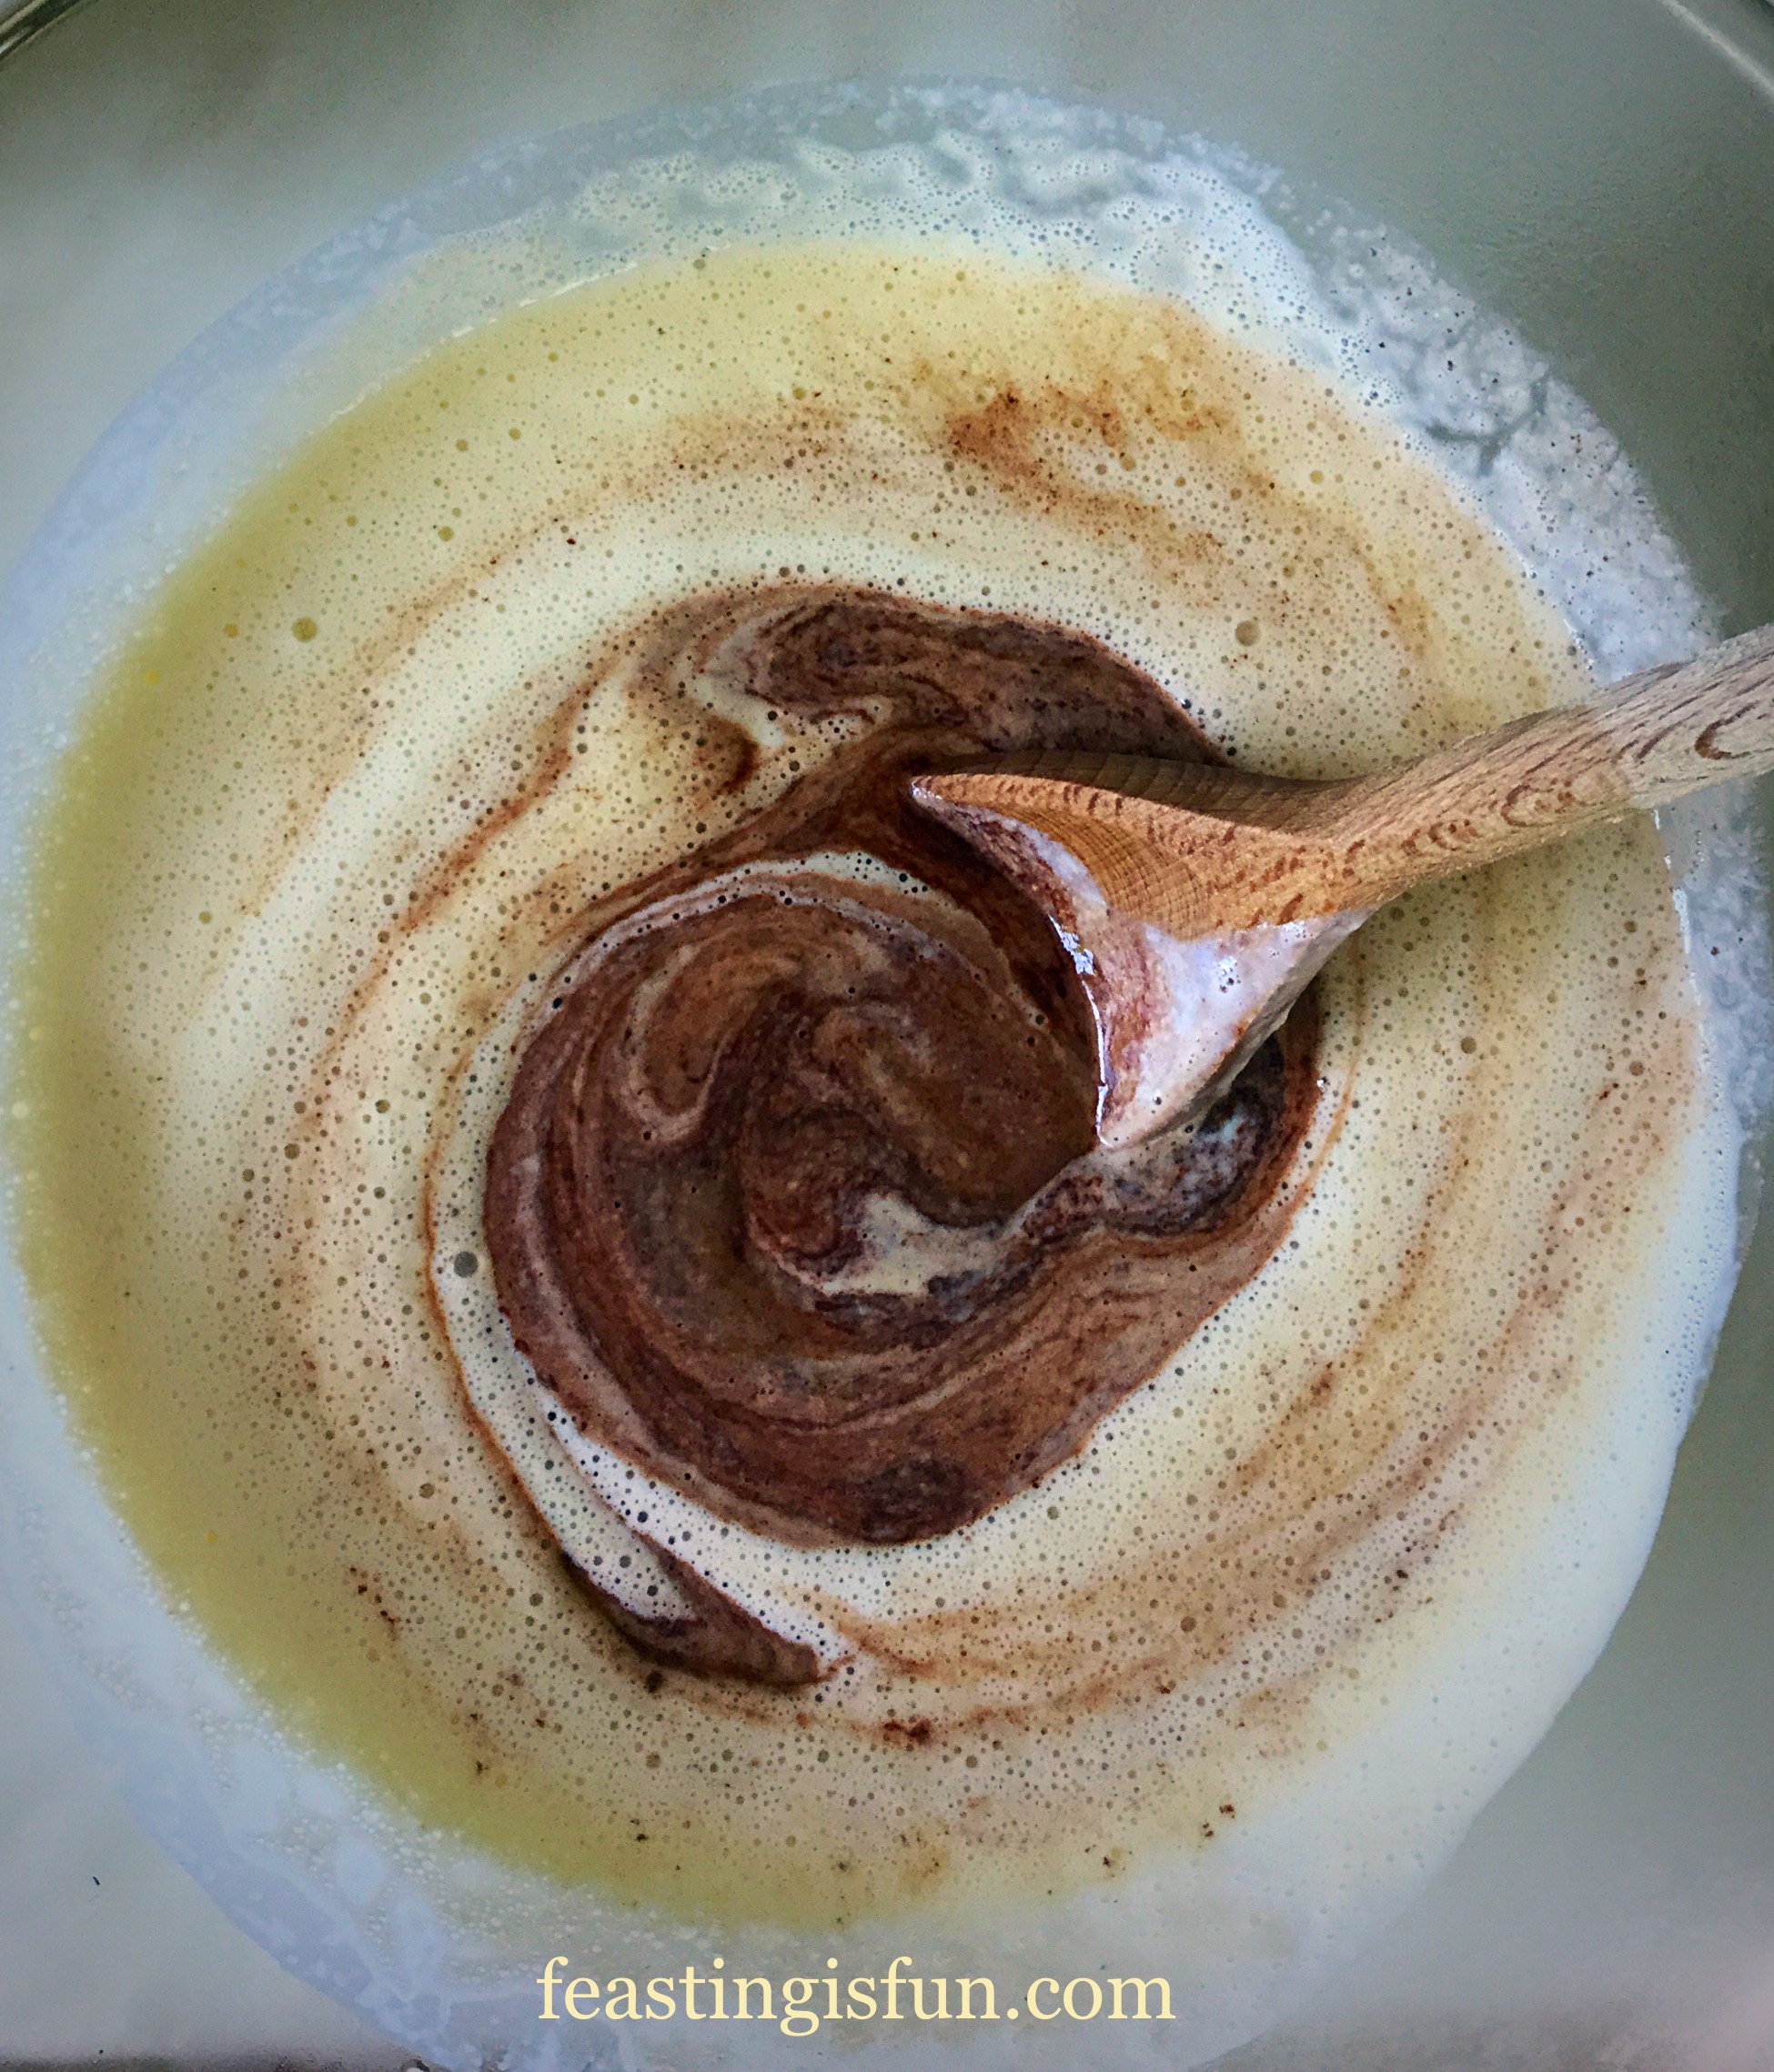
  • Place the volume of water, as specified on the packet, into a large bowl.
  • Add 1 teaspoon of almond extract to the water. Swirl to mix.
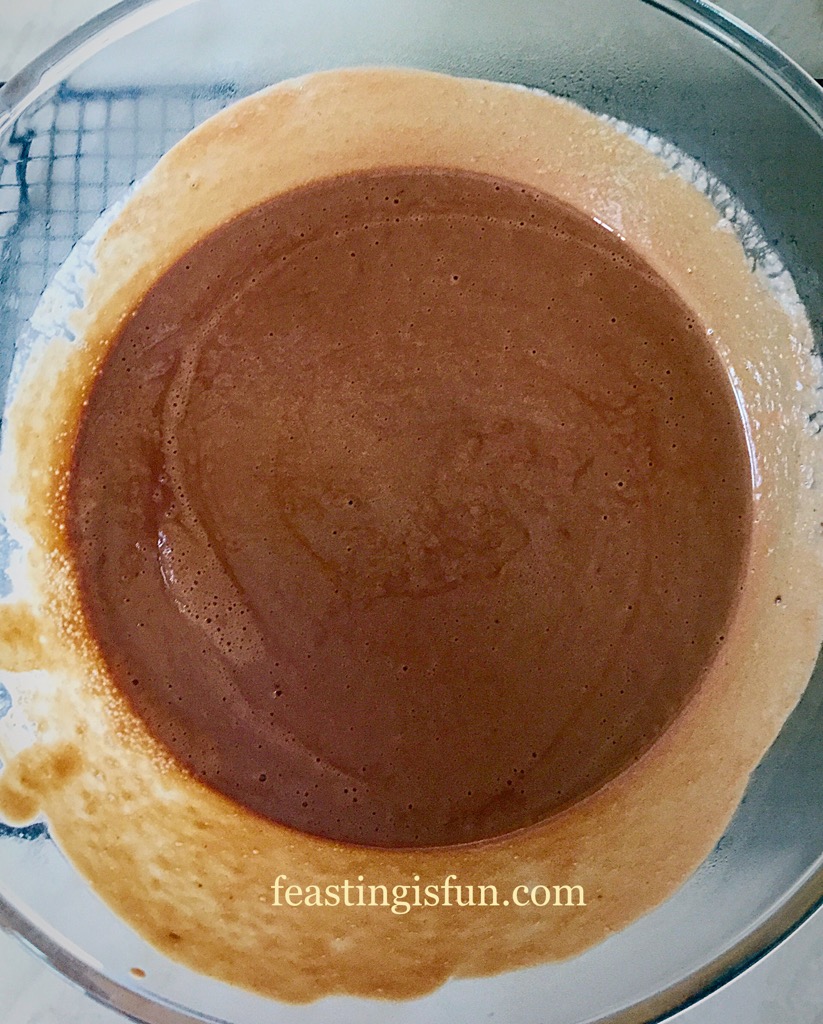
  • Add the entire packet of Scofa Bread Mix.
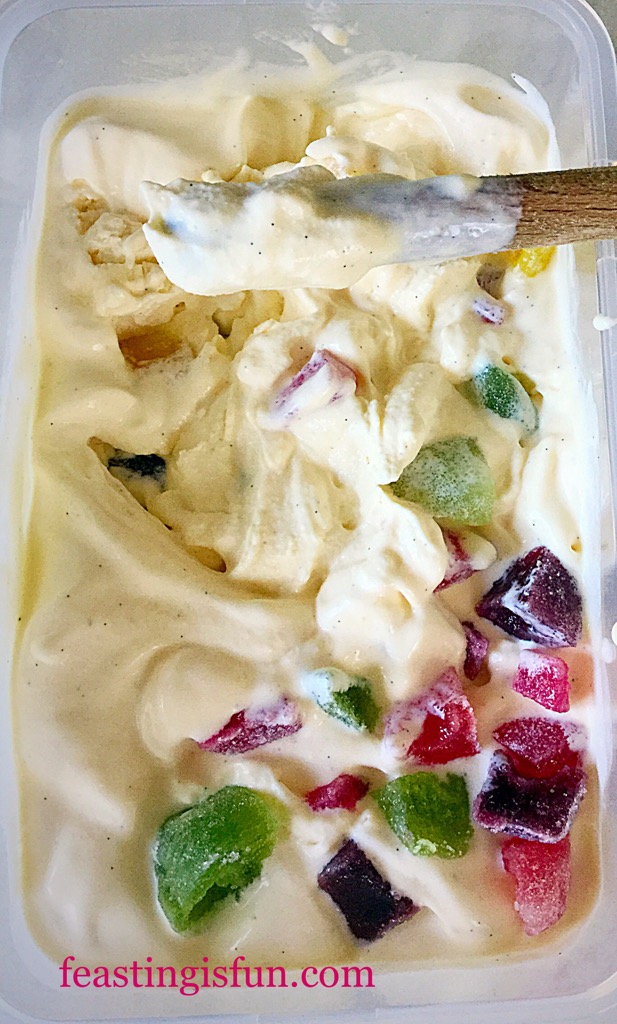
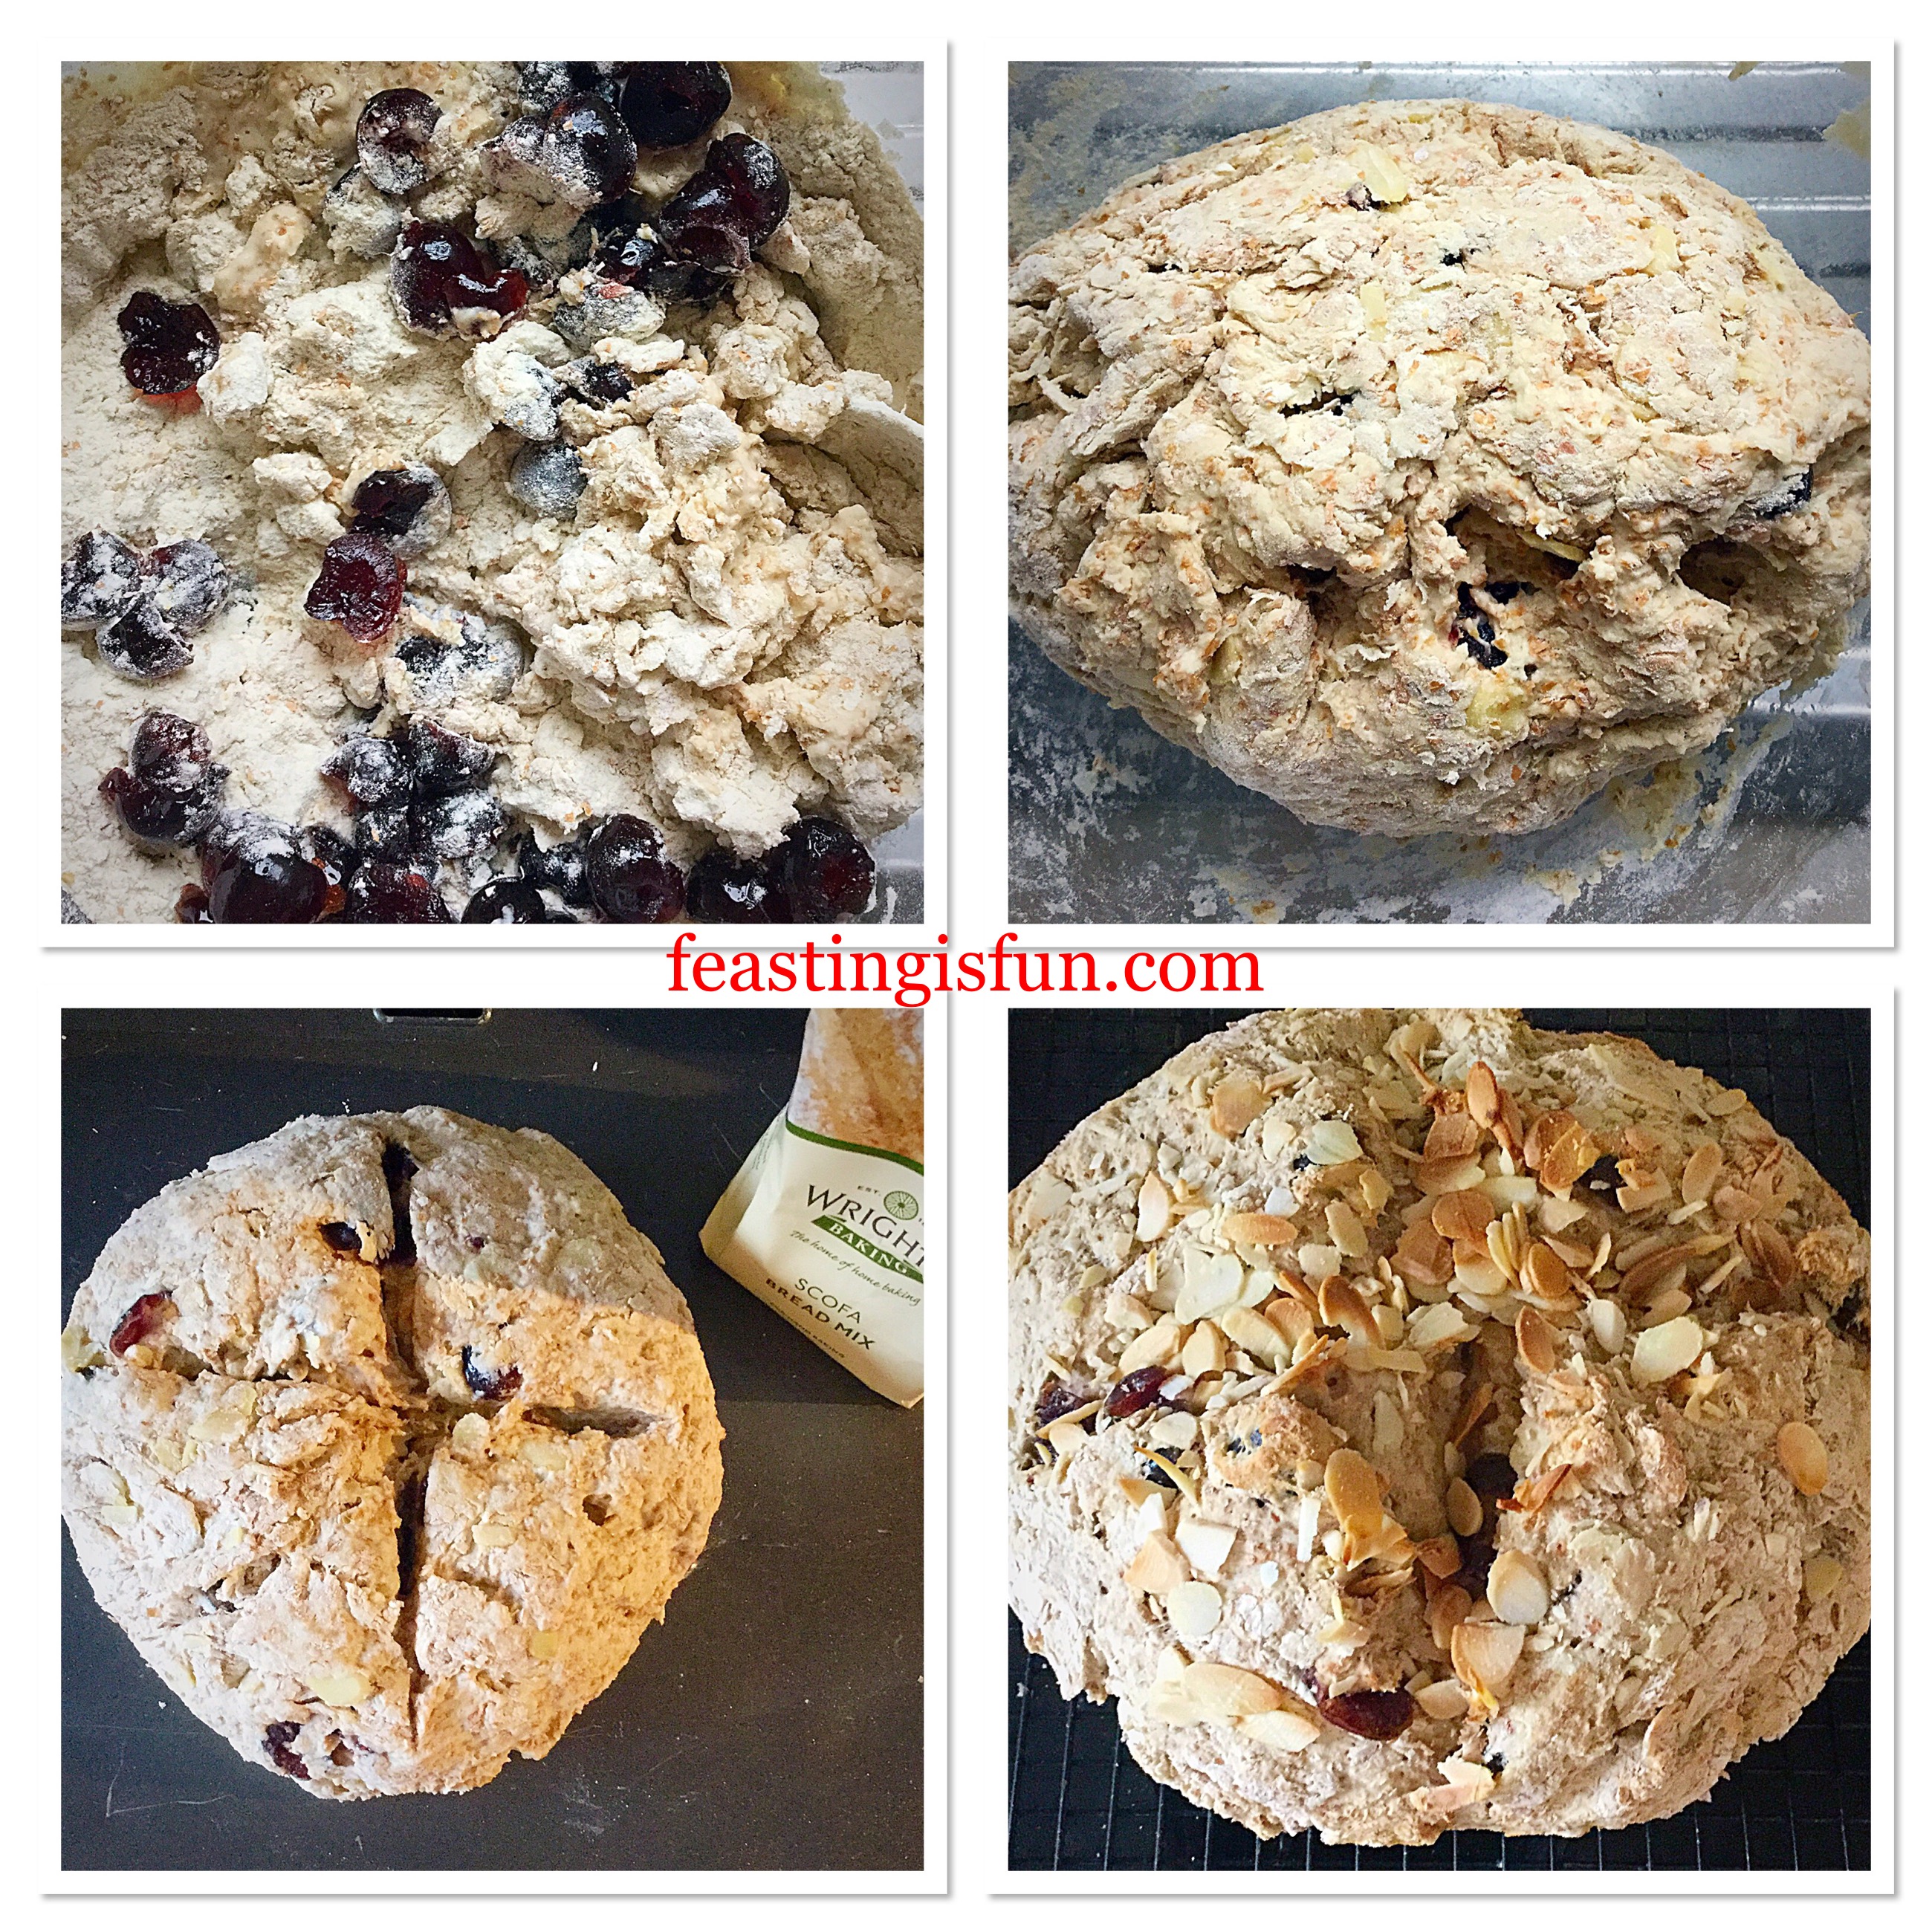
  • Now add the cherry halves on top of the bread mix, lightly dusting them with the mix to stop them sticking together.
  • Reserve one tablespoon of flaked almonds for decoration and add the rest to the bowl.
  • Use a wooden spoon to stir the mixture until it comes together.
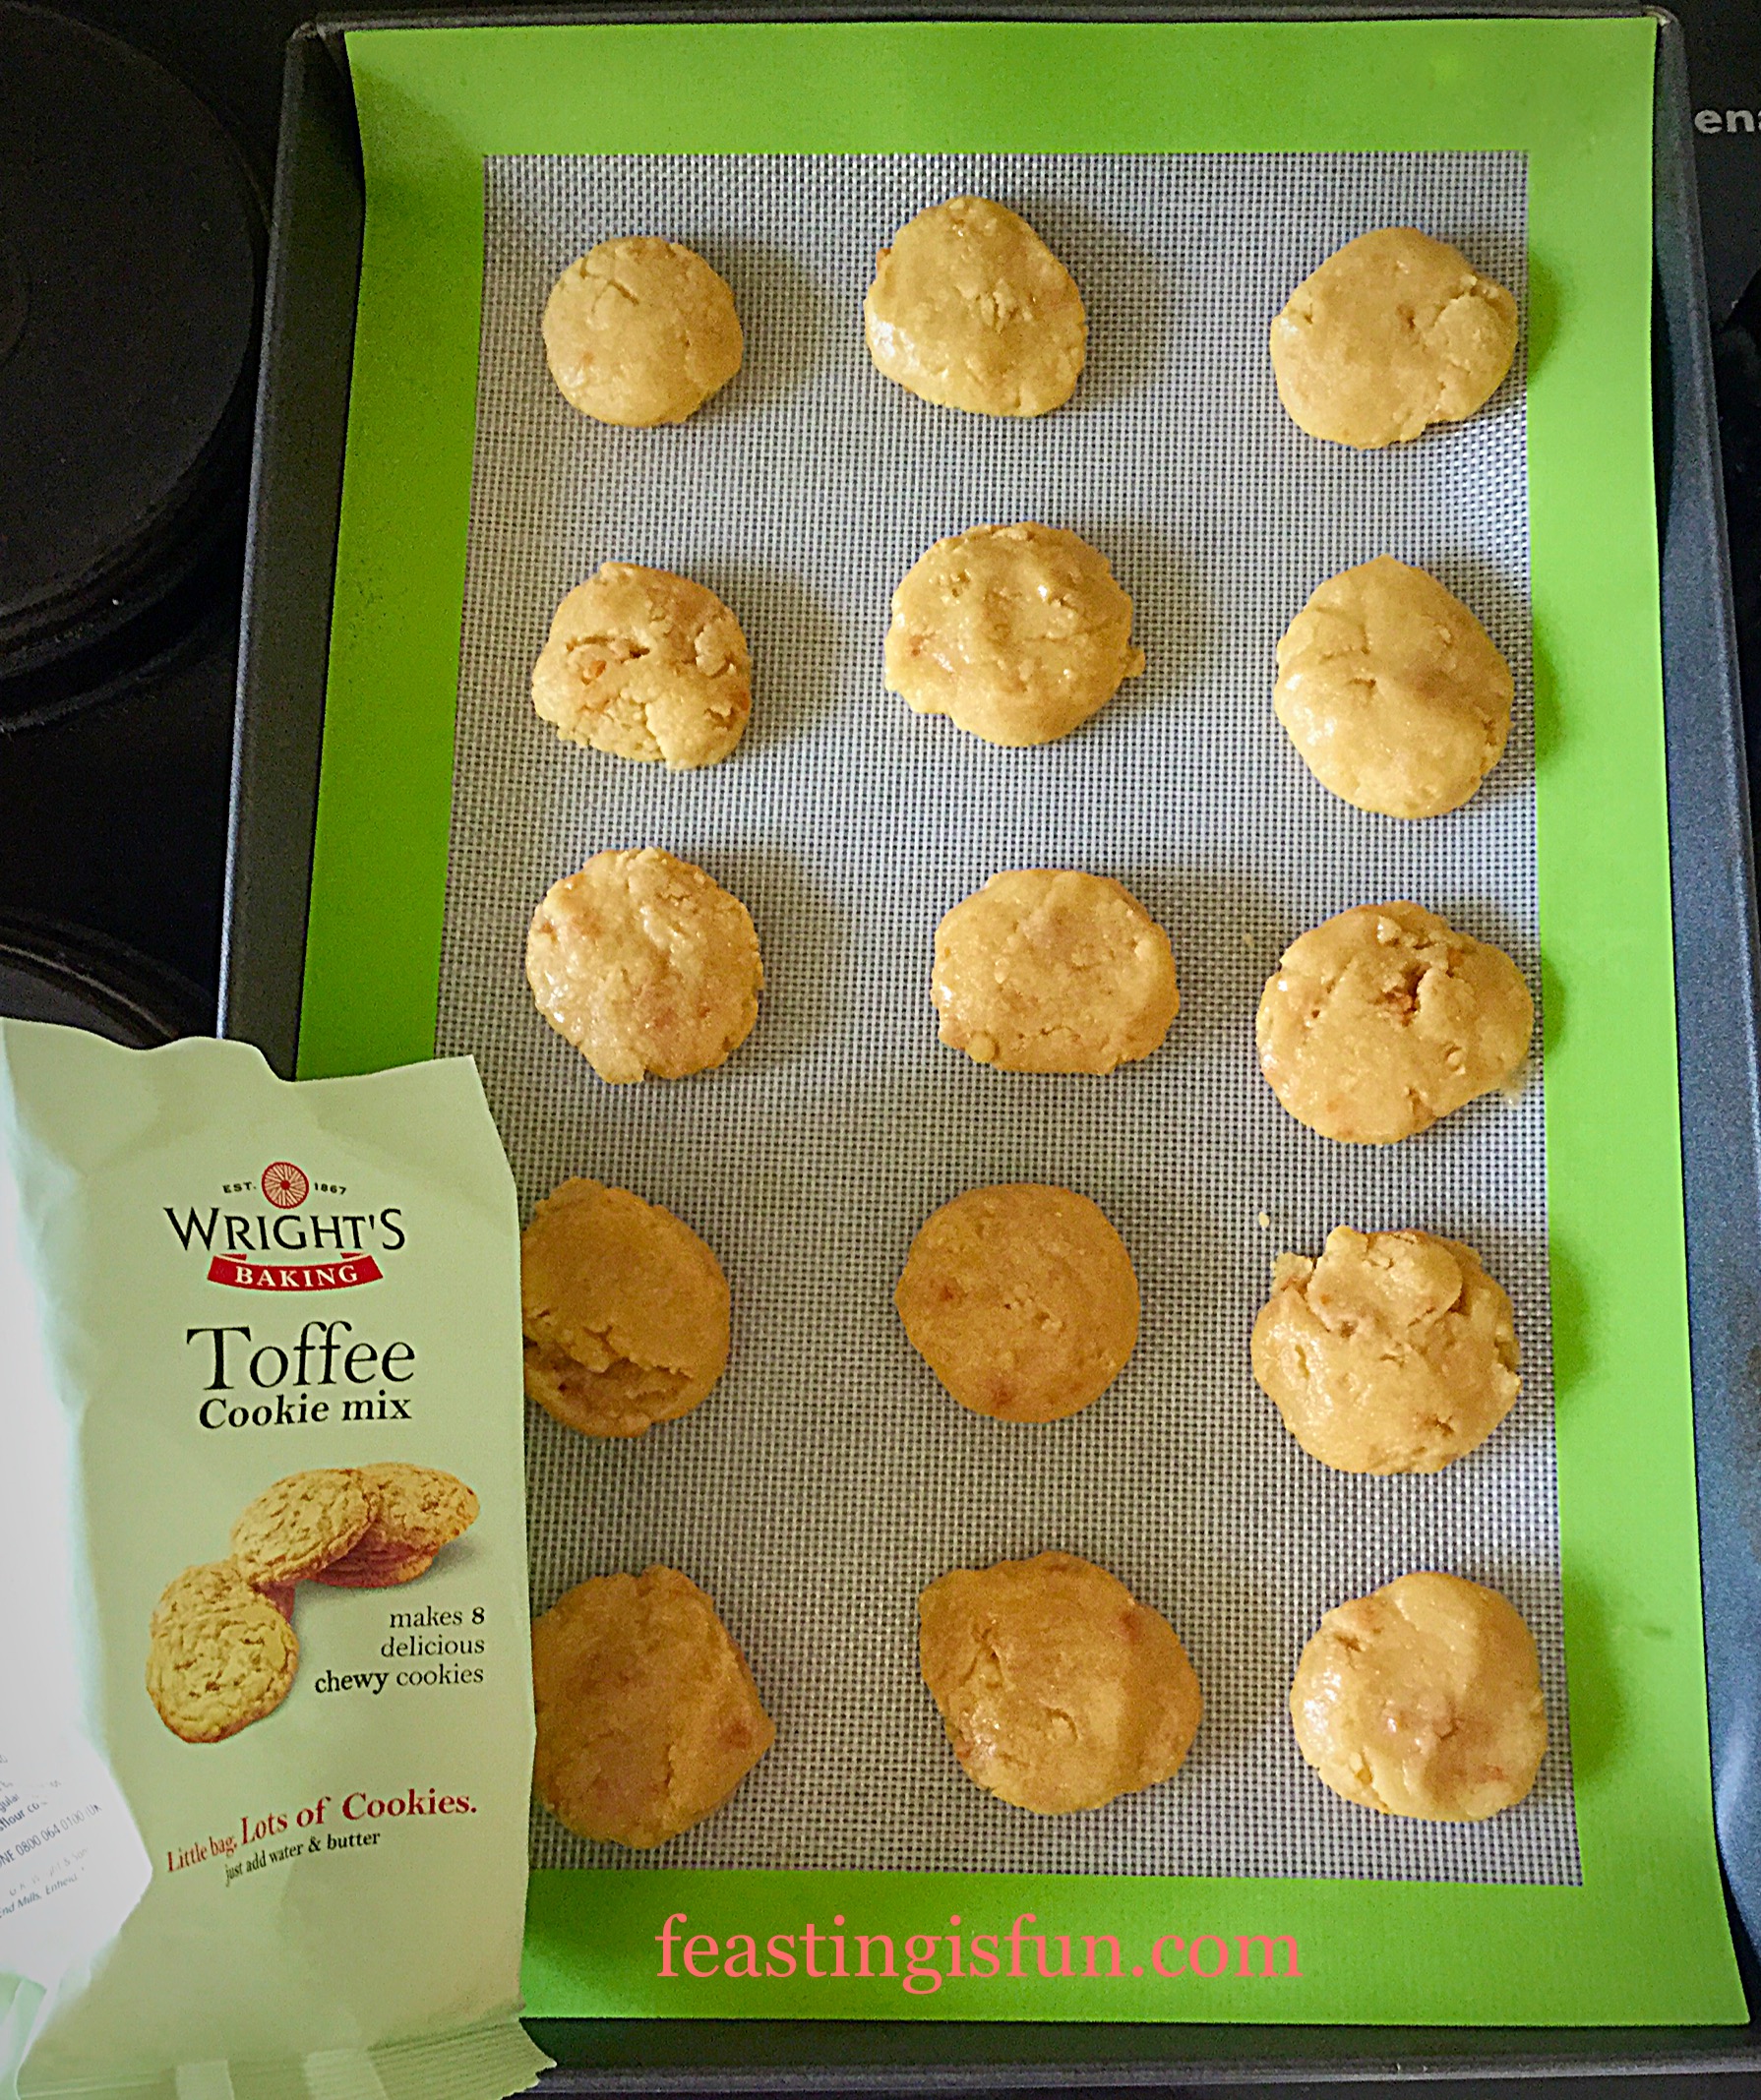
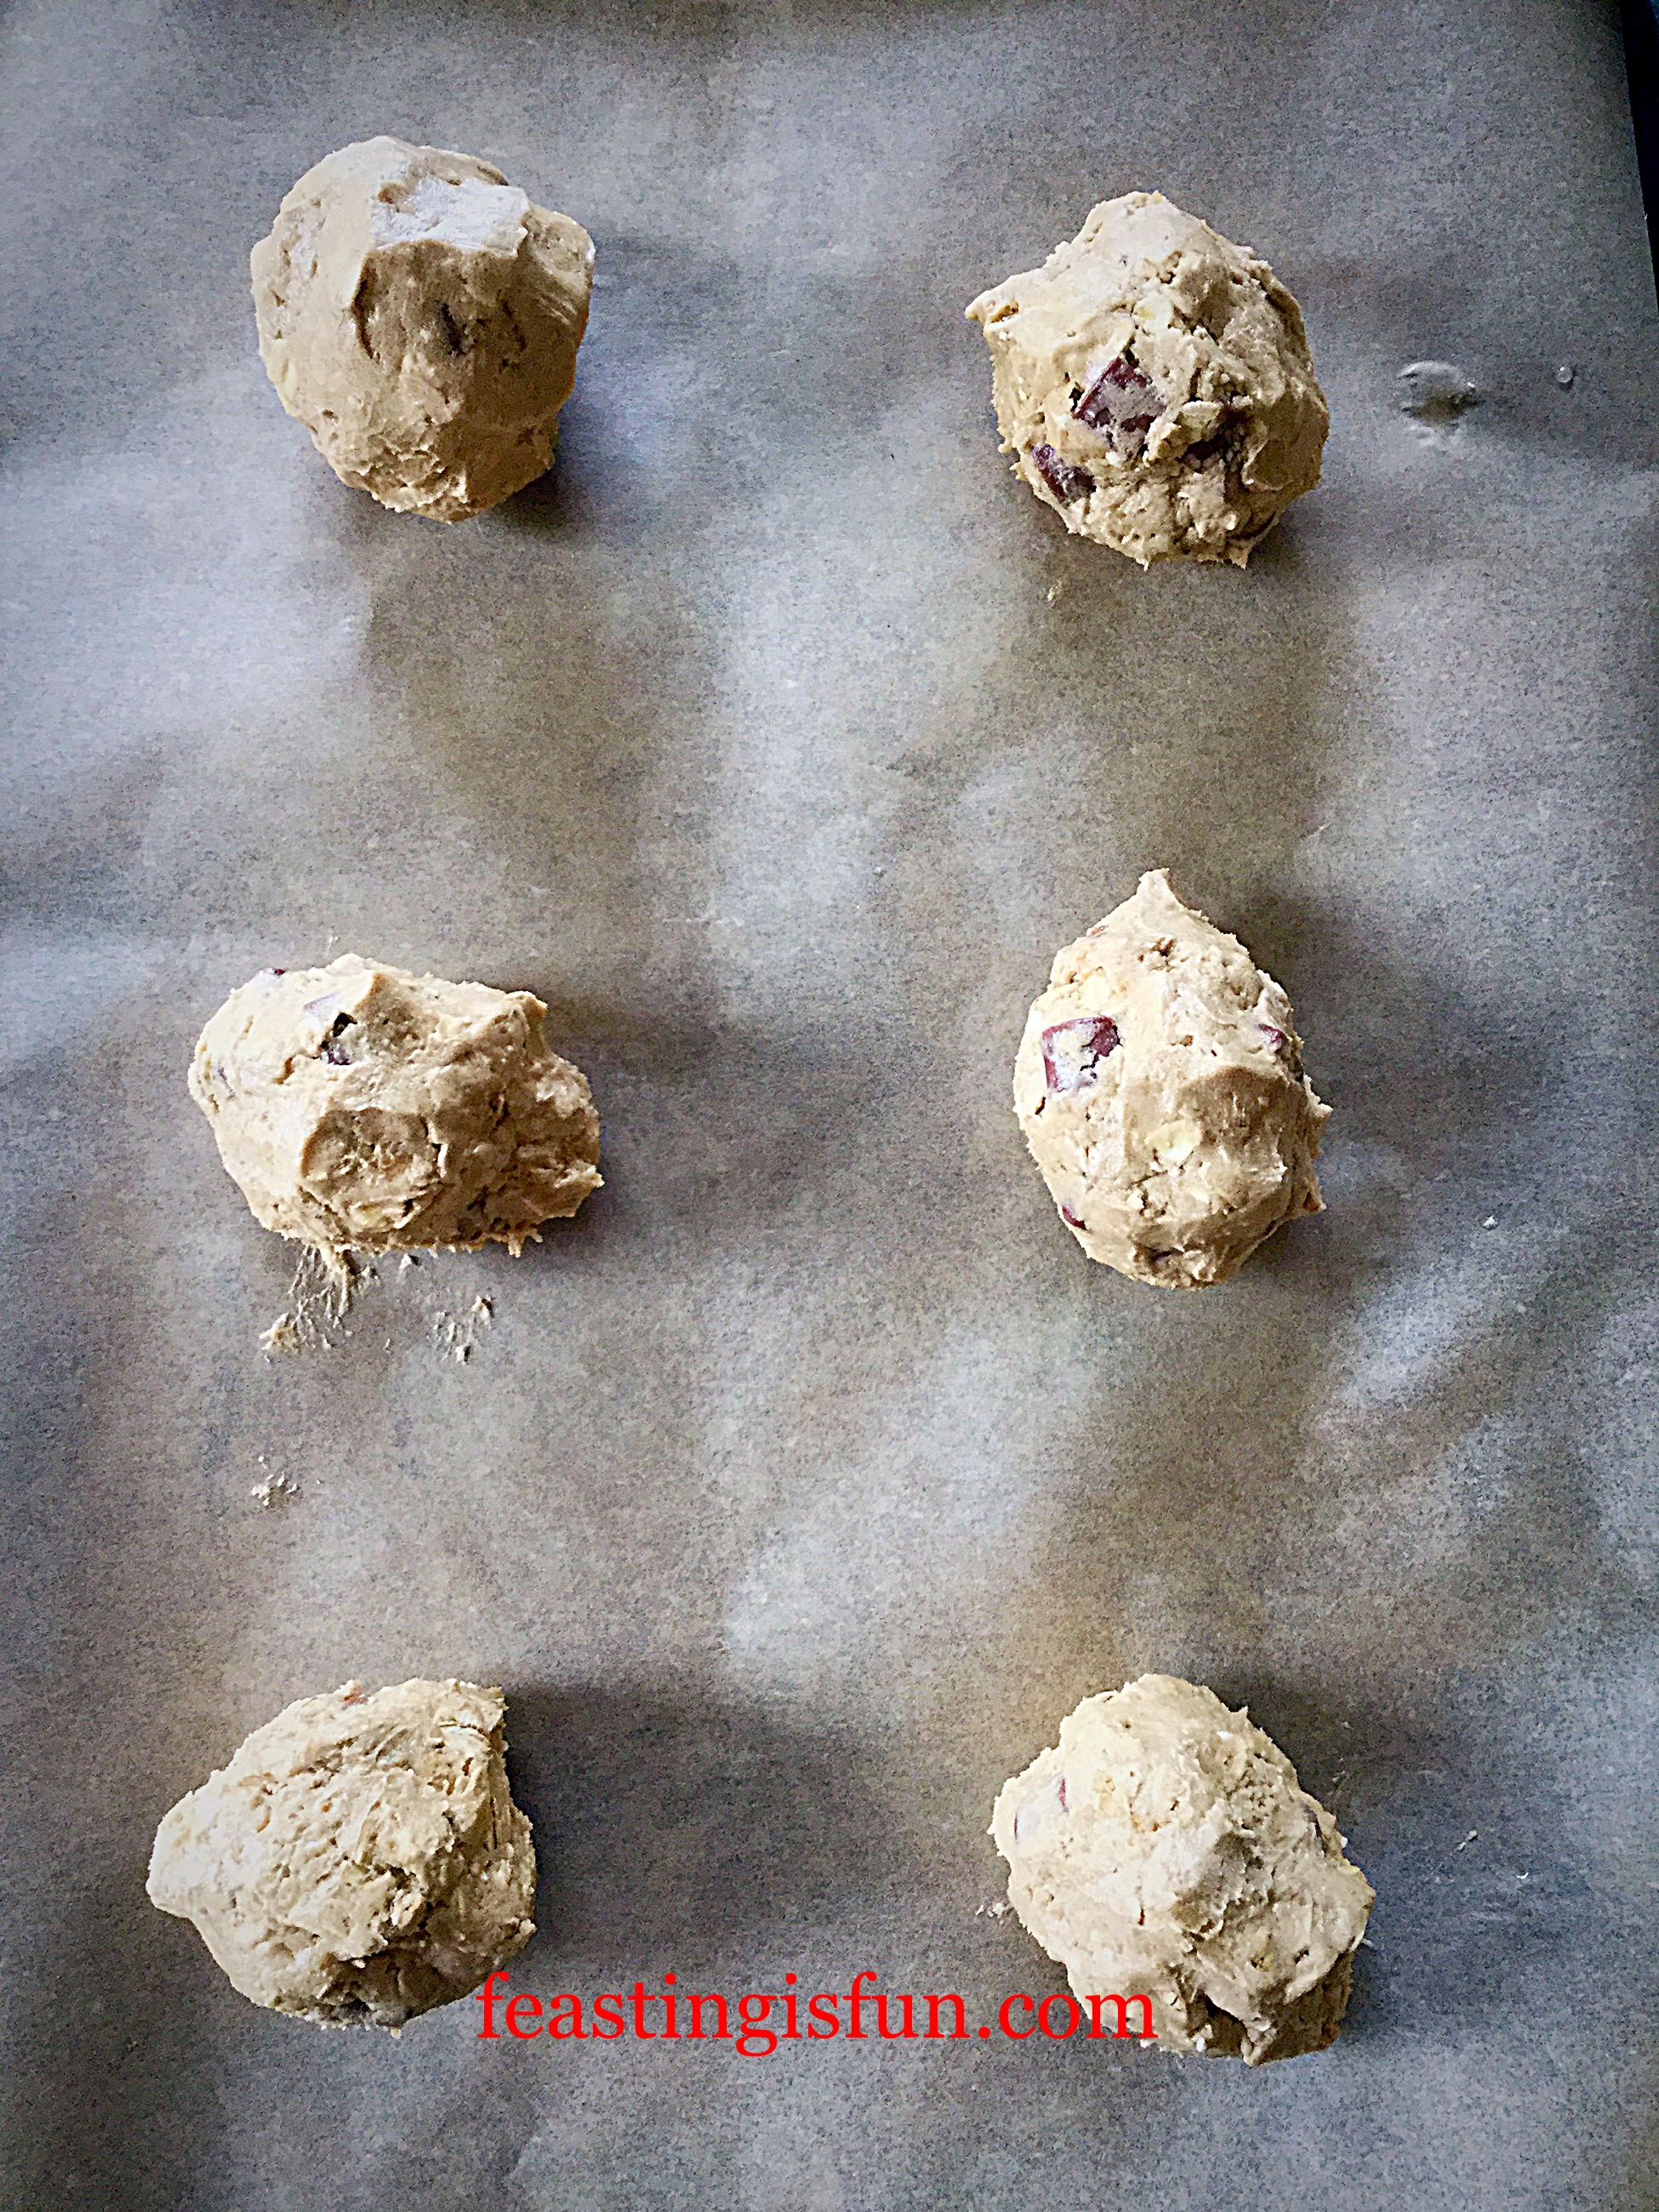
  • Tip the dough out on to a lightly floured work top and shape into a round.
  • Place the shaped dough on to a greased baking sheet.
  • Cut a deep cross into the dough, if not icing, sprinkle the remaining almonds over the bread.
  • Next place in the centre of a preheated oven.
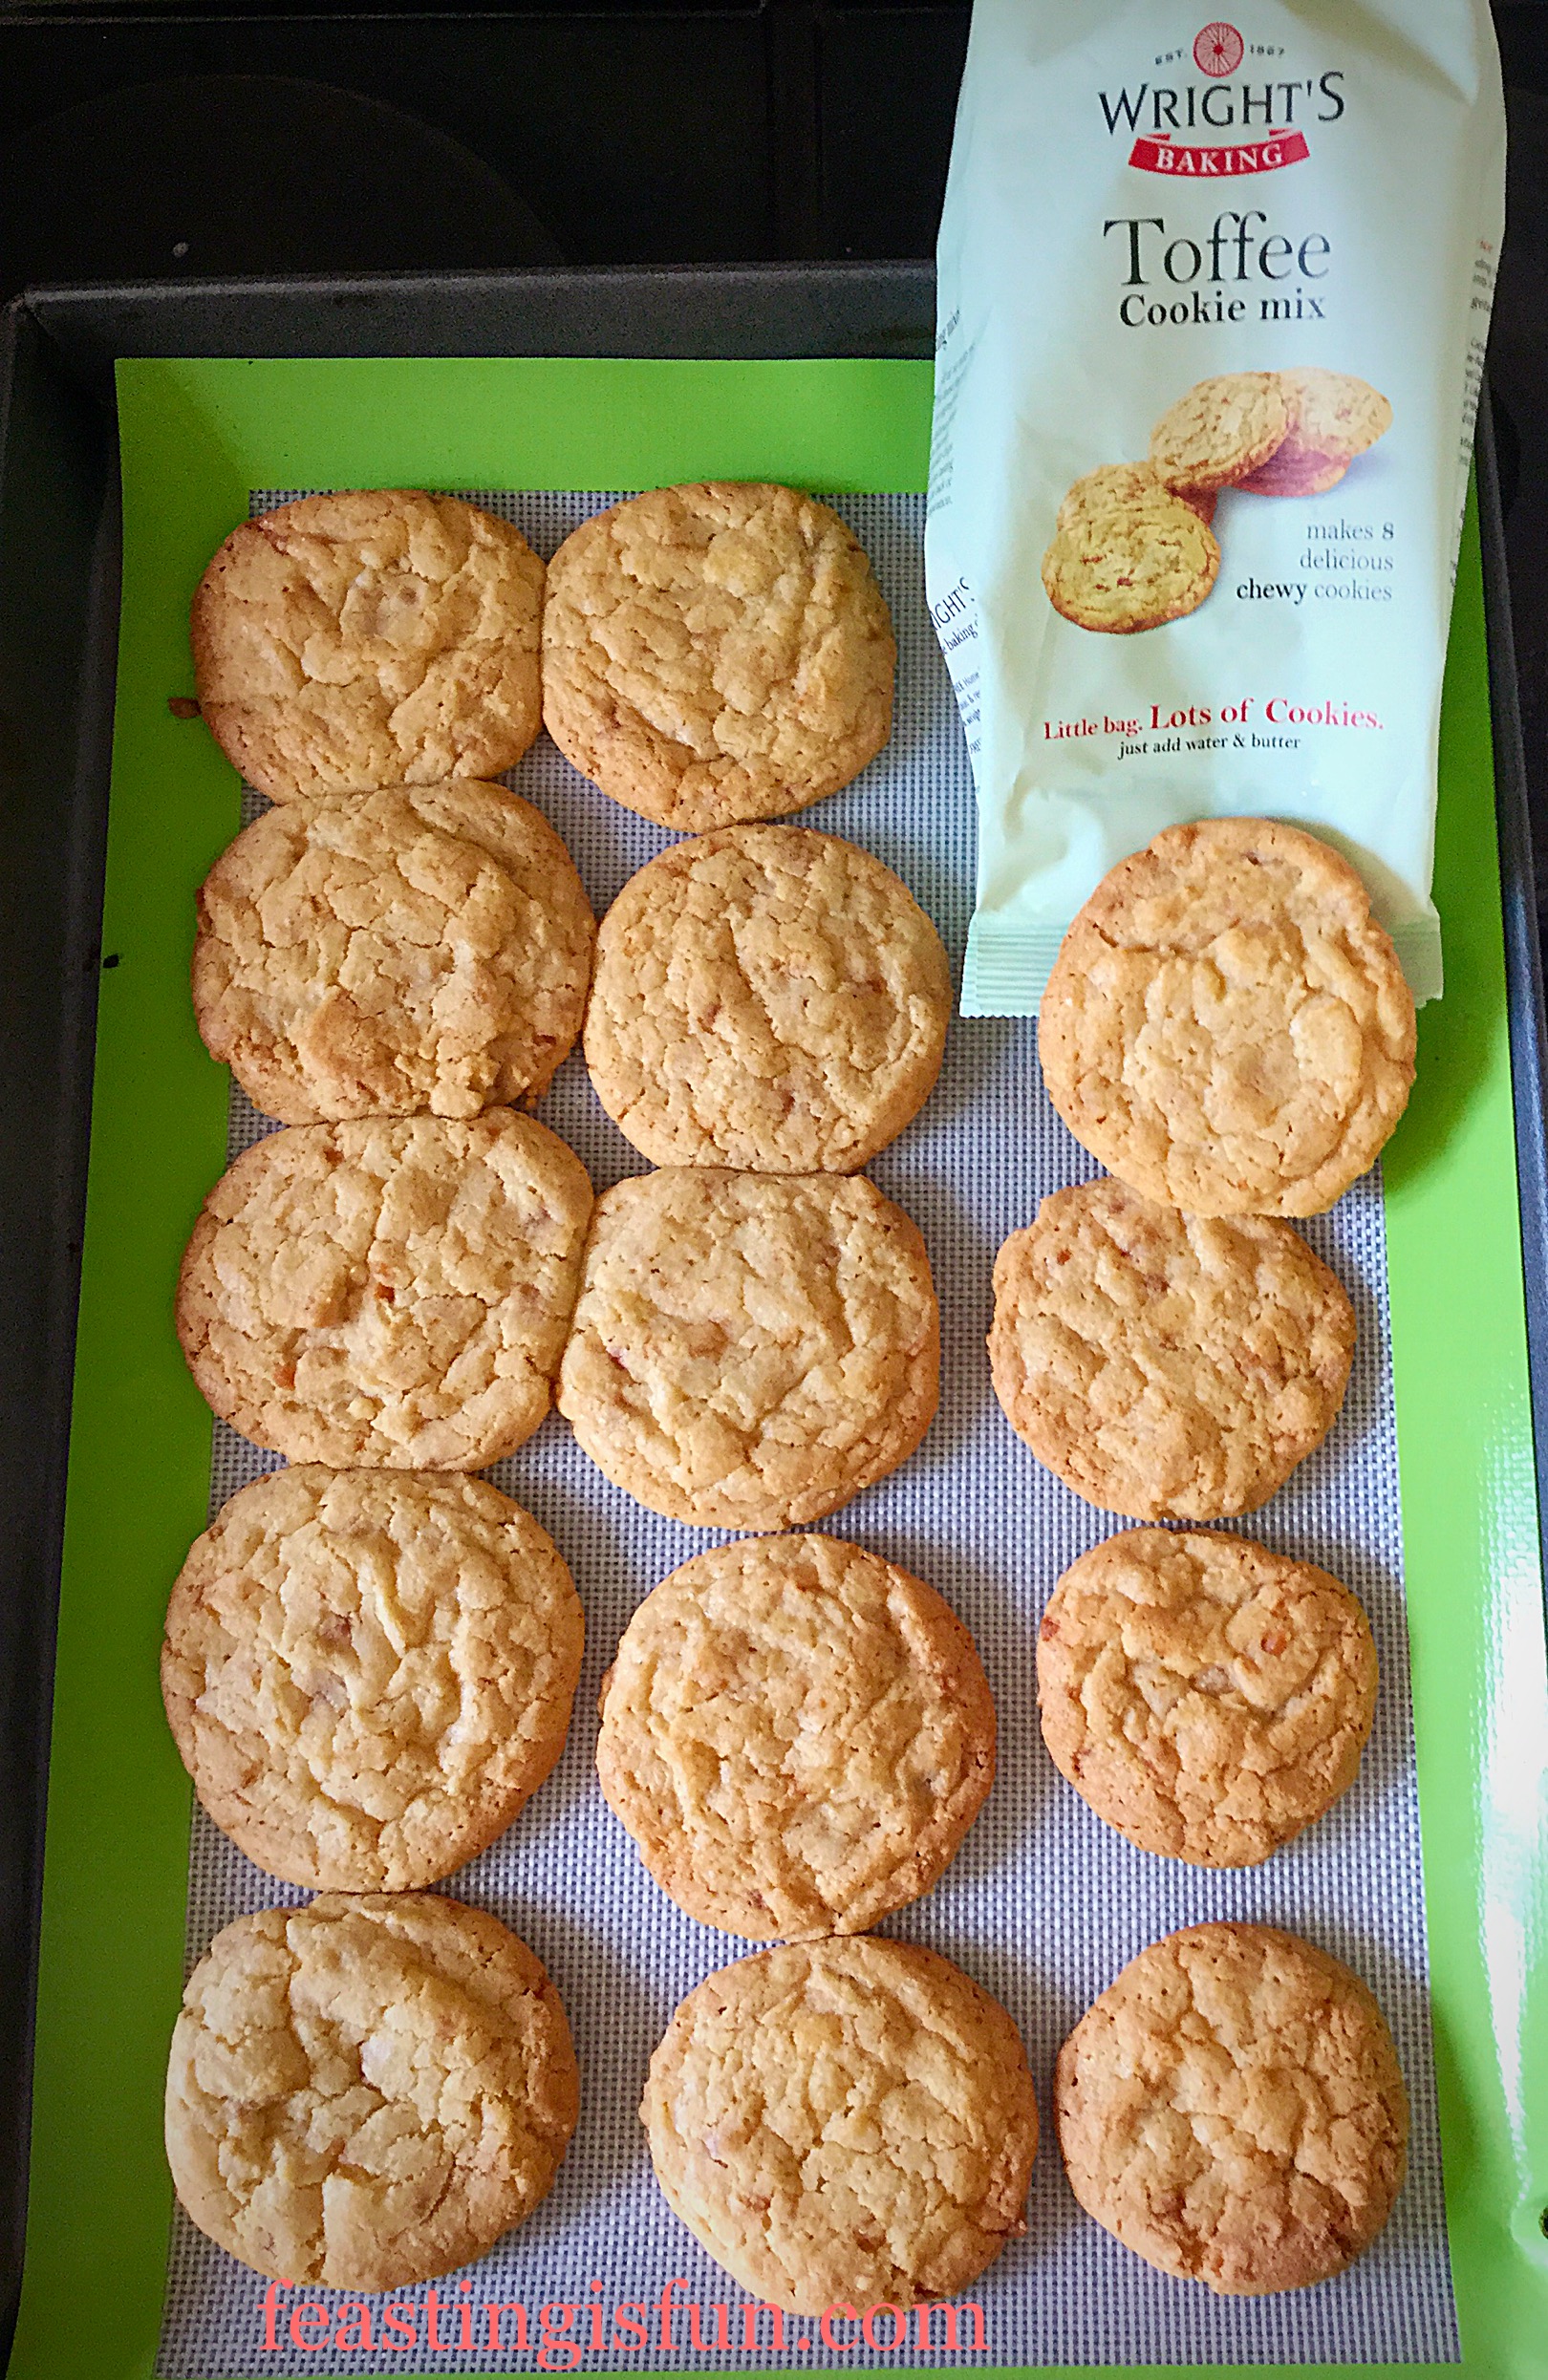
  • Bake the bread for 30-35 minutes. Once baked it will sound hollow when rapped on the base with your knuckle. Note – this baking time is slightly longer than specified on the packet. This is due to the addition of cherries and almonds.
  • Once baked remove the bread from the oven and place on a cooling rack.
FF Cherry Bakewell Soda Bread
Making, shaping and baking the Cherry Bakewell Soda Bread
  • Note – the bread doesn’t change colour very much whilst baking.
  • Allow the bread to completely cool before icing and decorating.
  • To make the icing: Add 2 teaspoons of almond extract to the sieved icing sugar. Now add enough water, approximately one tablespoon, to the icing and stir. It should be a thick paste that can hold a figure of eight for a few seconds.
  • Place the cooling rack with the bread on it, over a baking tray, to catch any drips.
  • Start in the centre. Spoon thick icing over the bread, encouraging it to drape down over the sides of the loaf.
  • Continue until the bread is evenly drizzled with the icing.
  • Next, place the reserved cherries on top of the bread, forming a crown-like circle.
  • Finally, scatter the reserved almond flakes over the bread.
FF Cherry Bakewell Soda Bread
Icing and decorating the Cherry Bakewell Soda Bread
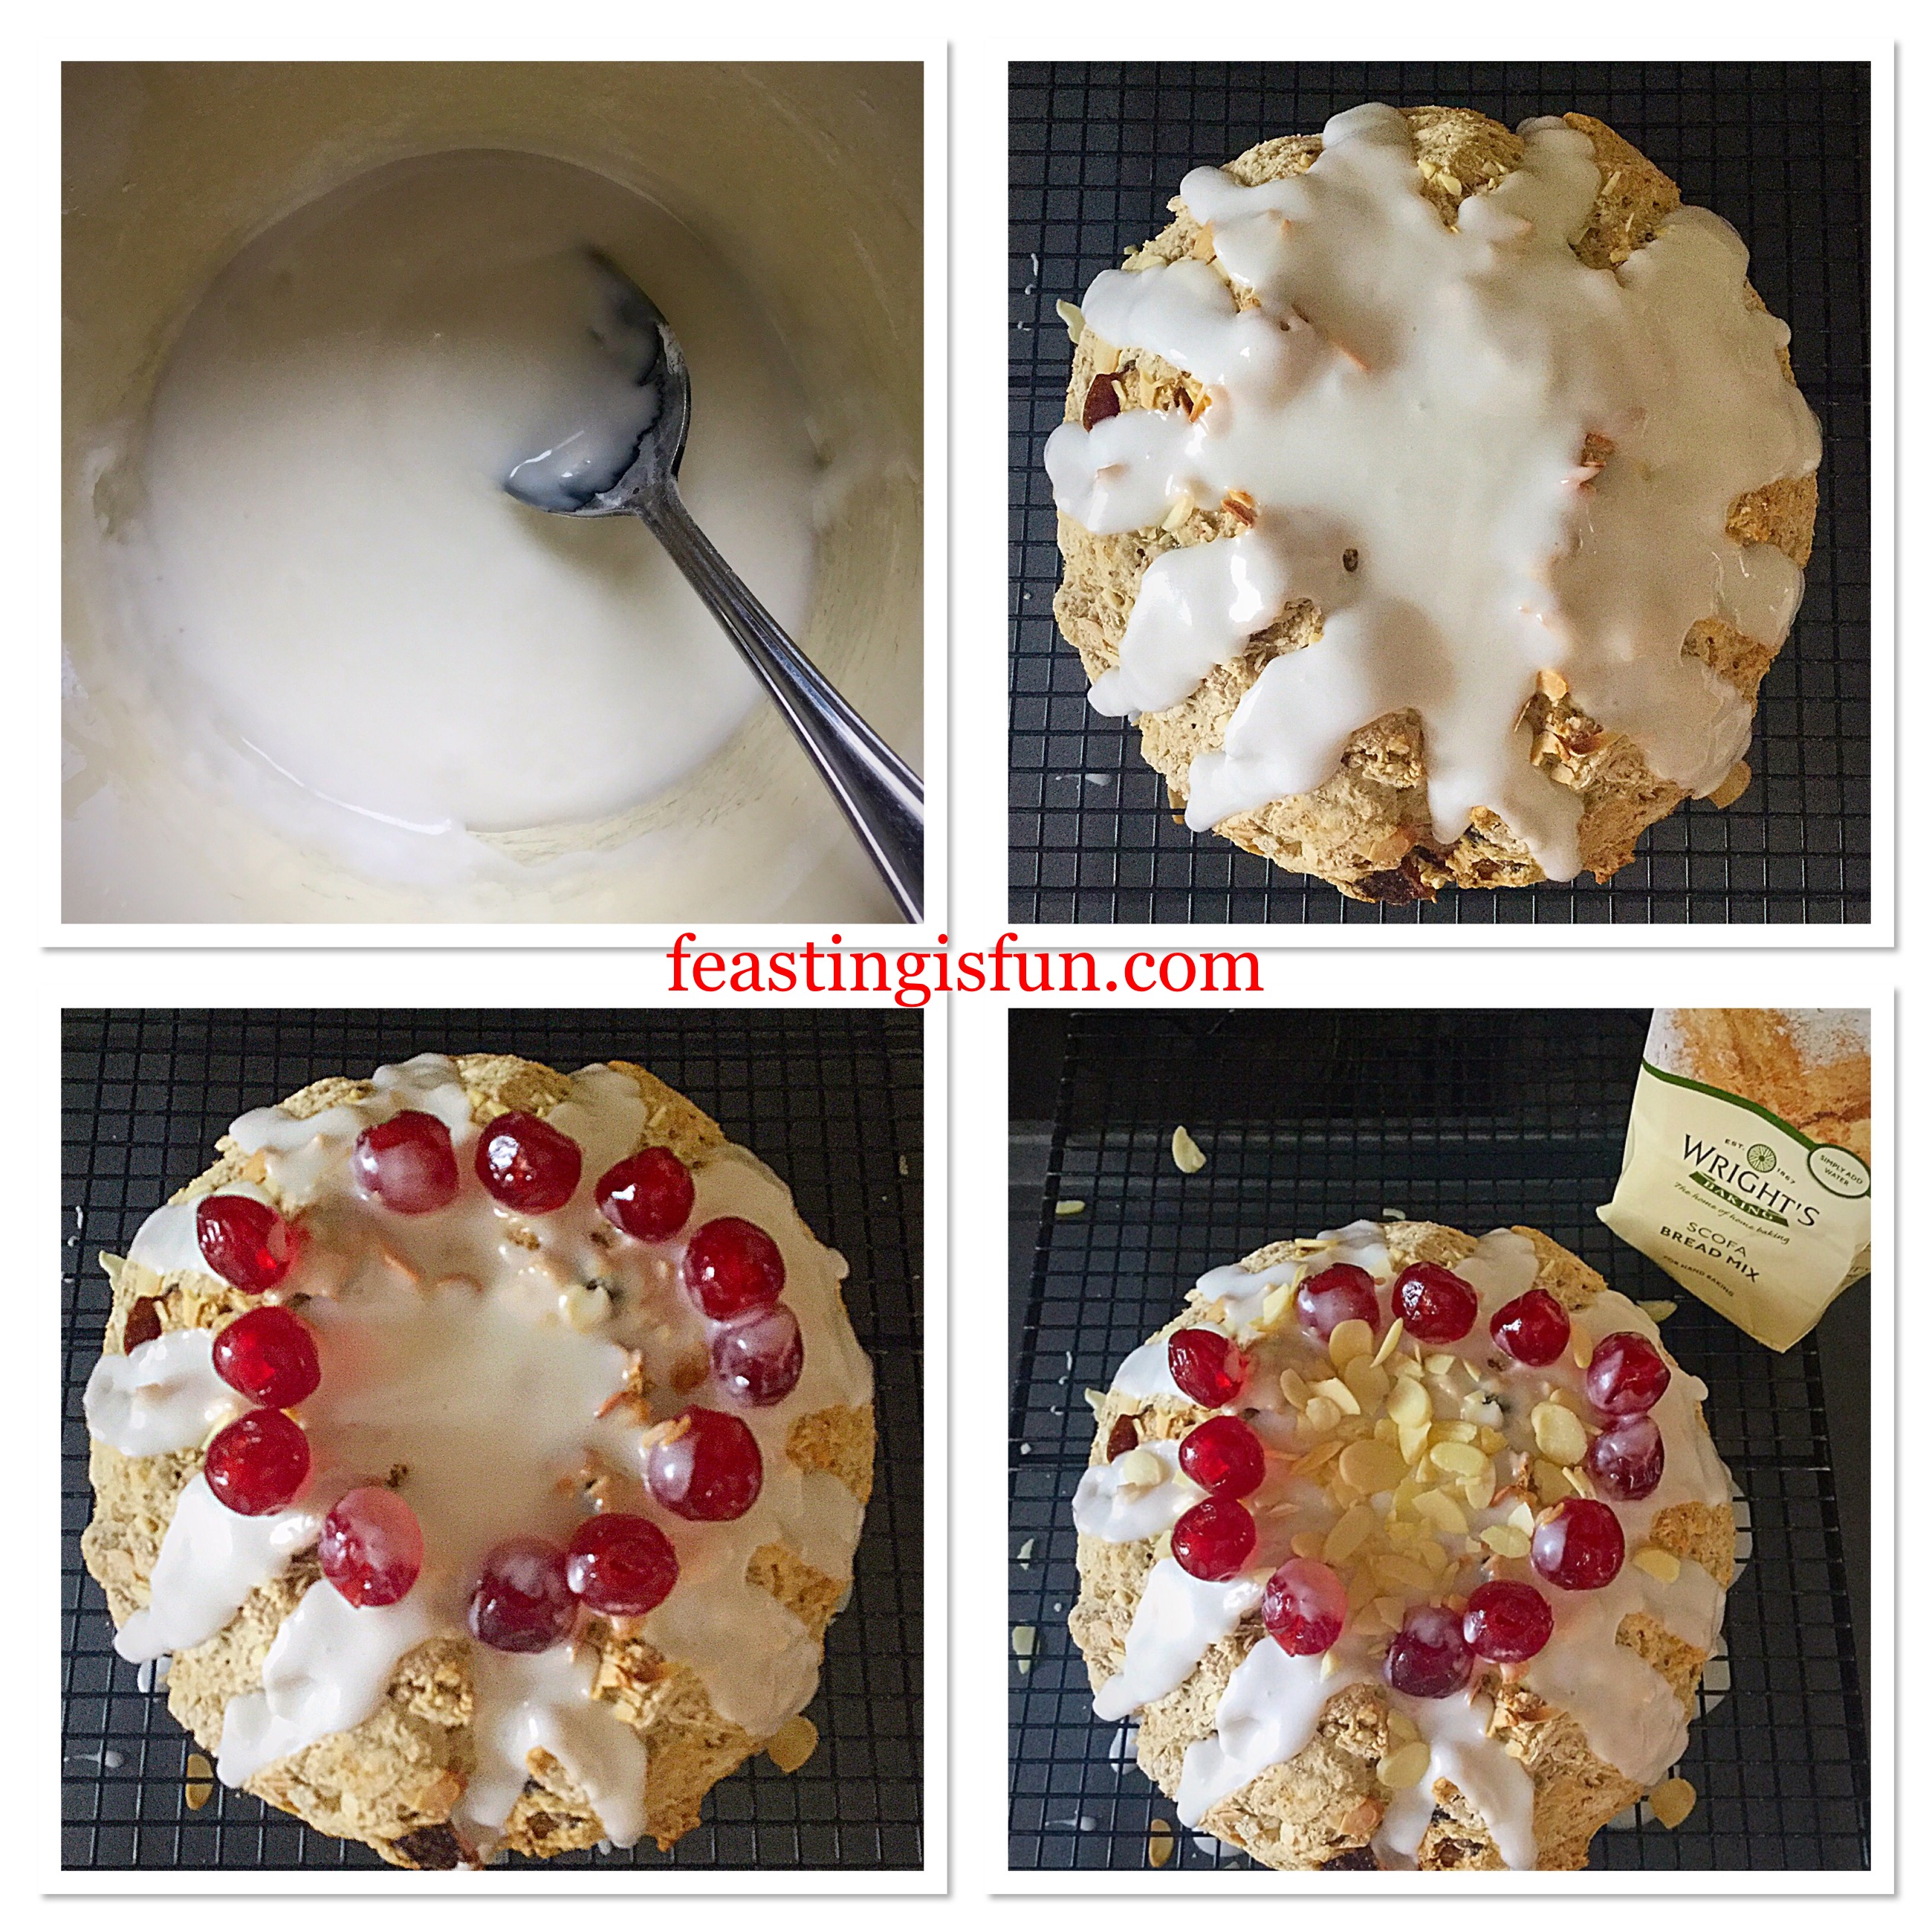
  • Set the decorated bread to one side to allow the icing to set.
FF Cherry Bakewell Soda Bread
Cherry Bakewell Soda Bread deliciously easy to make.

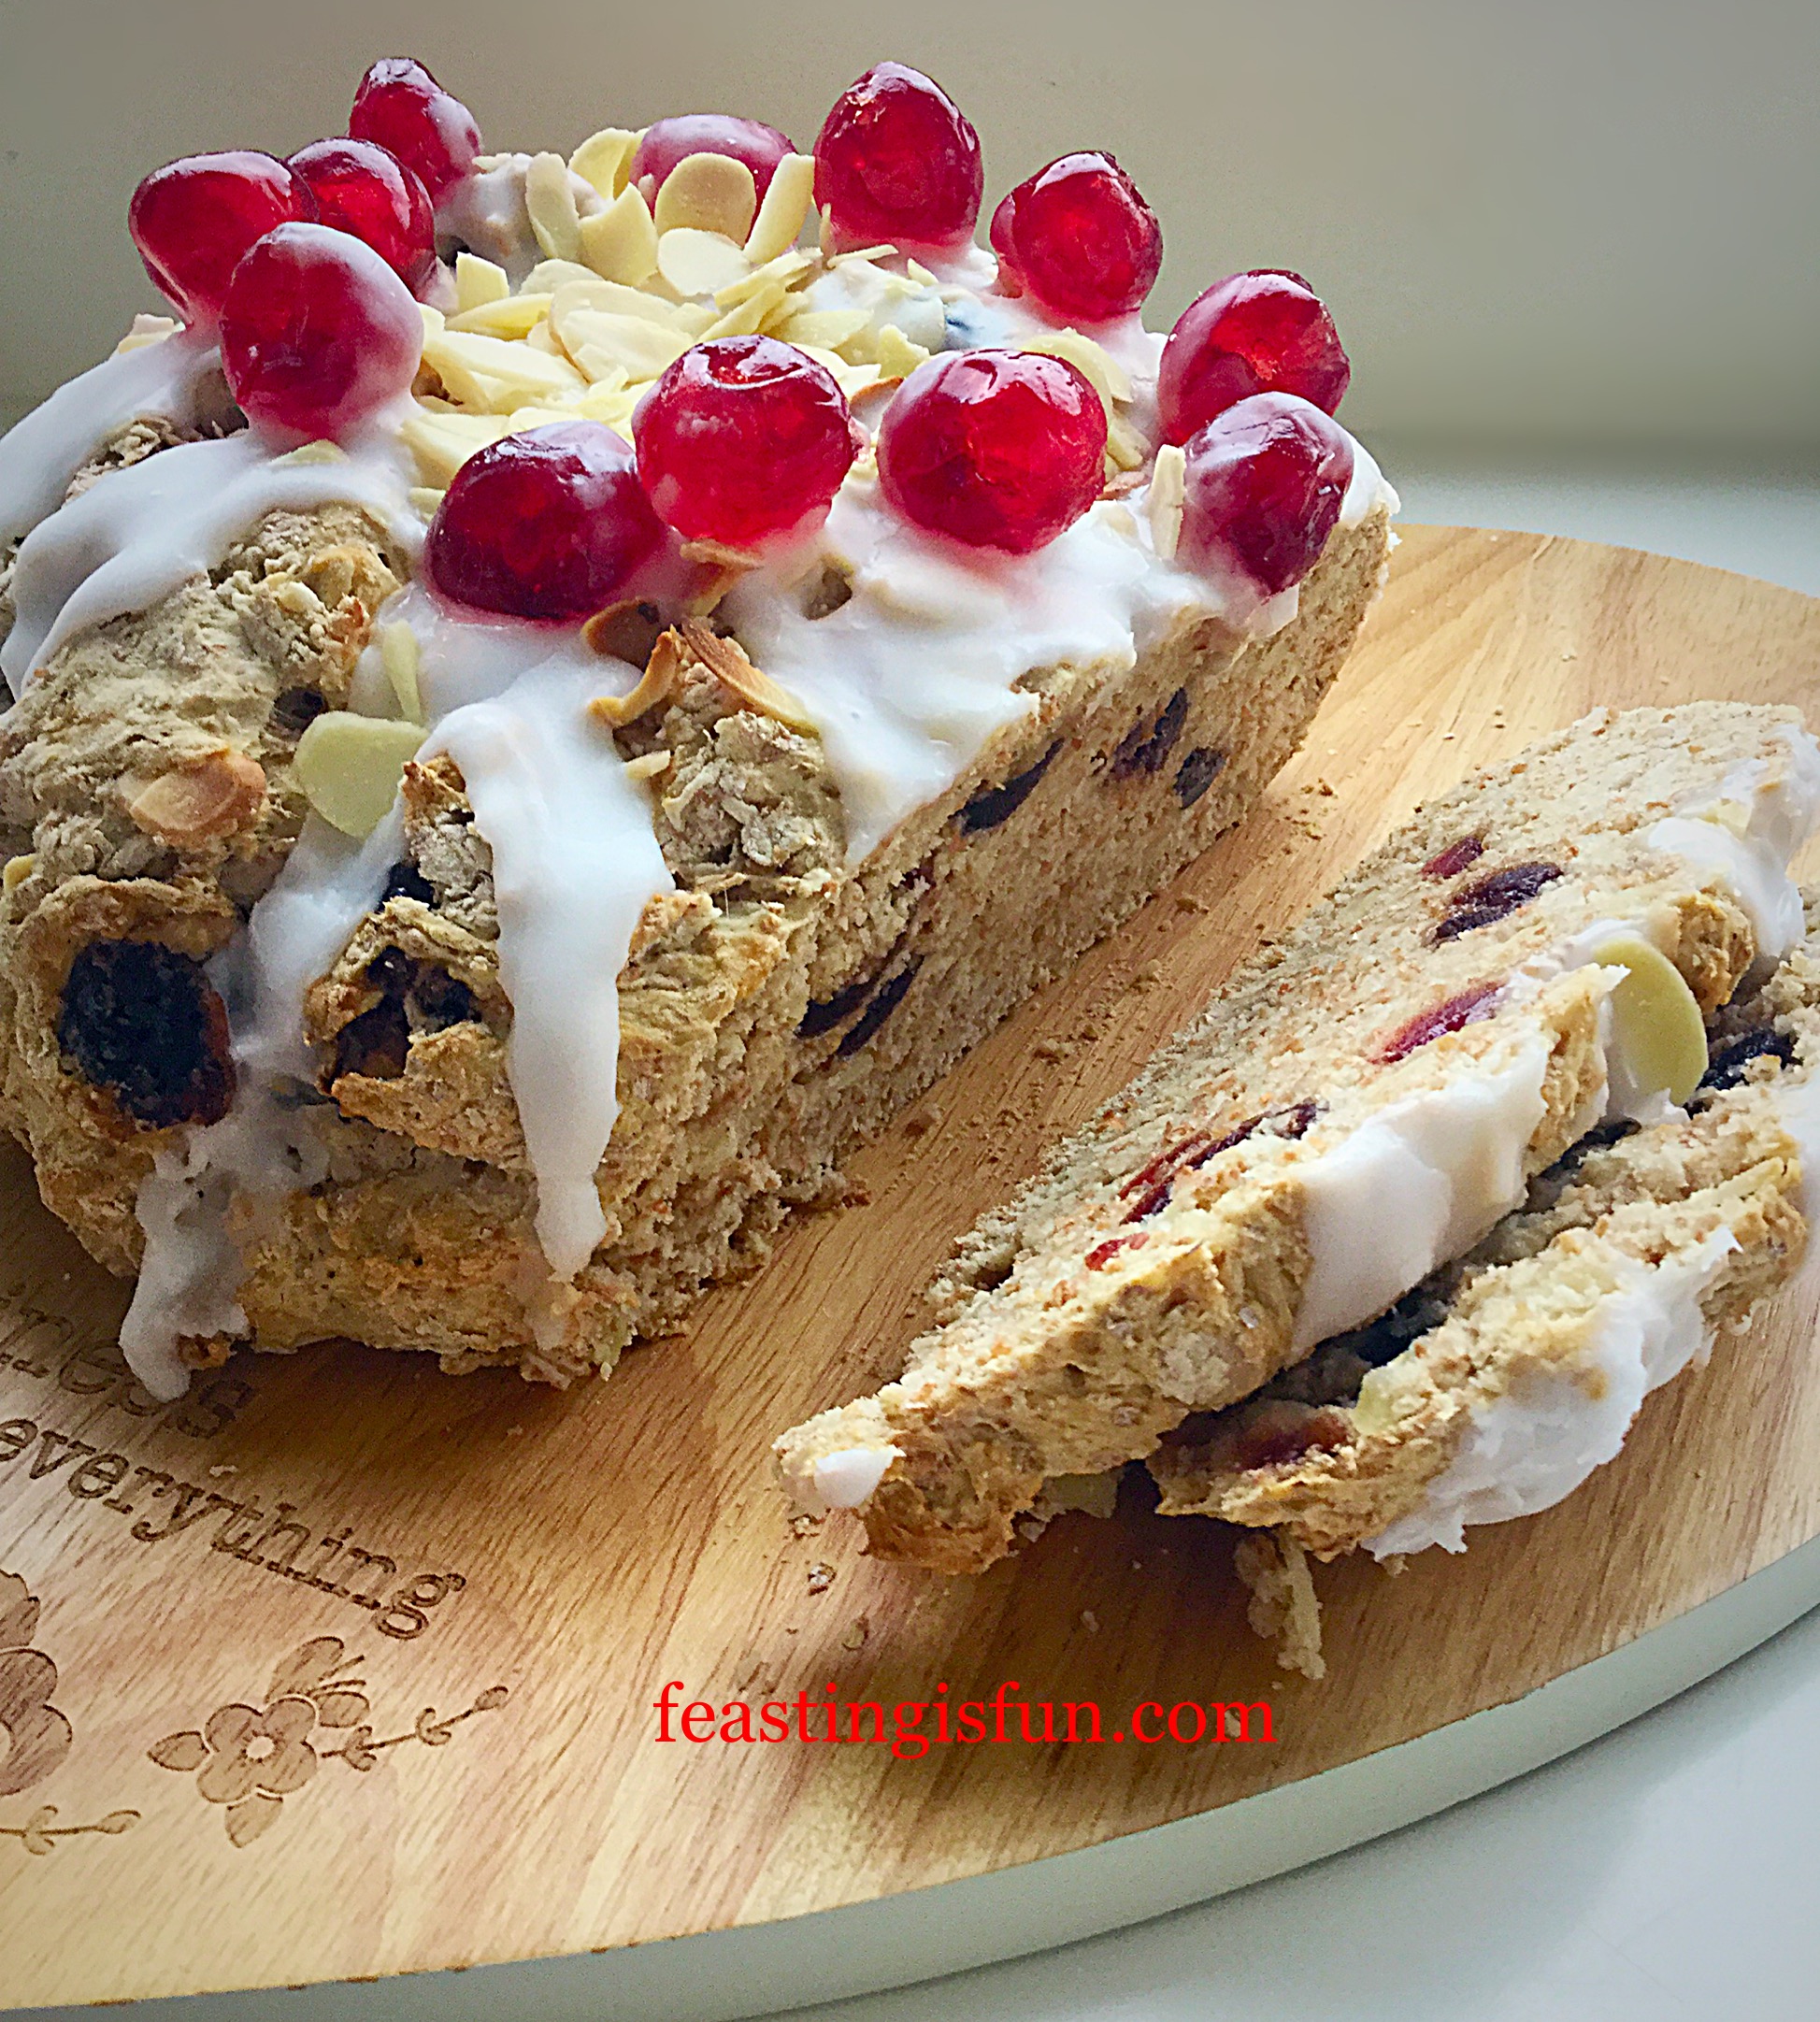
Serve this delicious bread sliced, for breakfast, lunch of afternoon tea. In fact, it is perfect for anytime of the day.

Store in an airtight container. This bread is at its best when eaten wishing 24 hours of baking. That shouldn’t be too much of a problem!

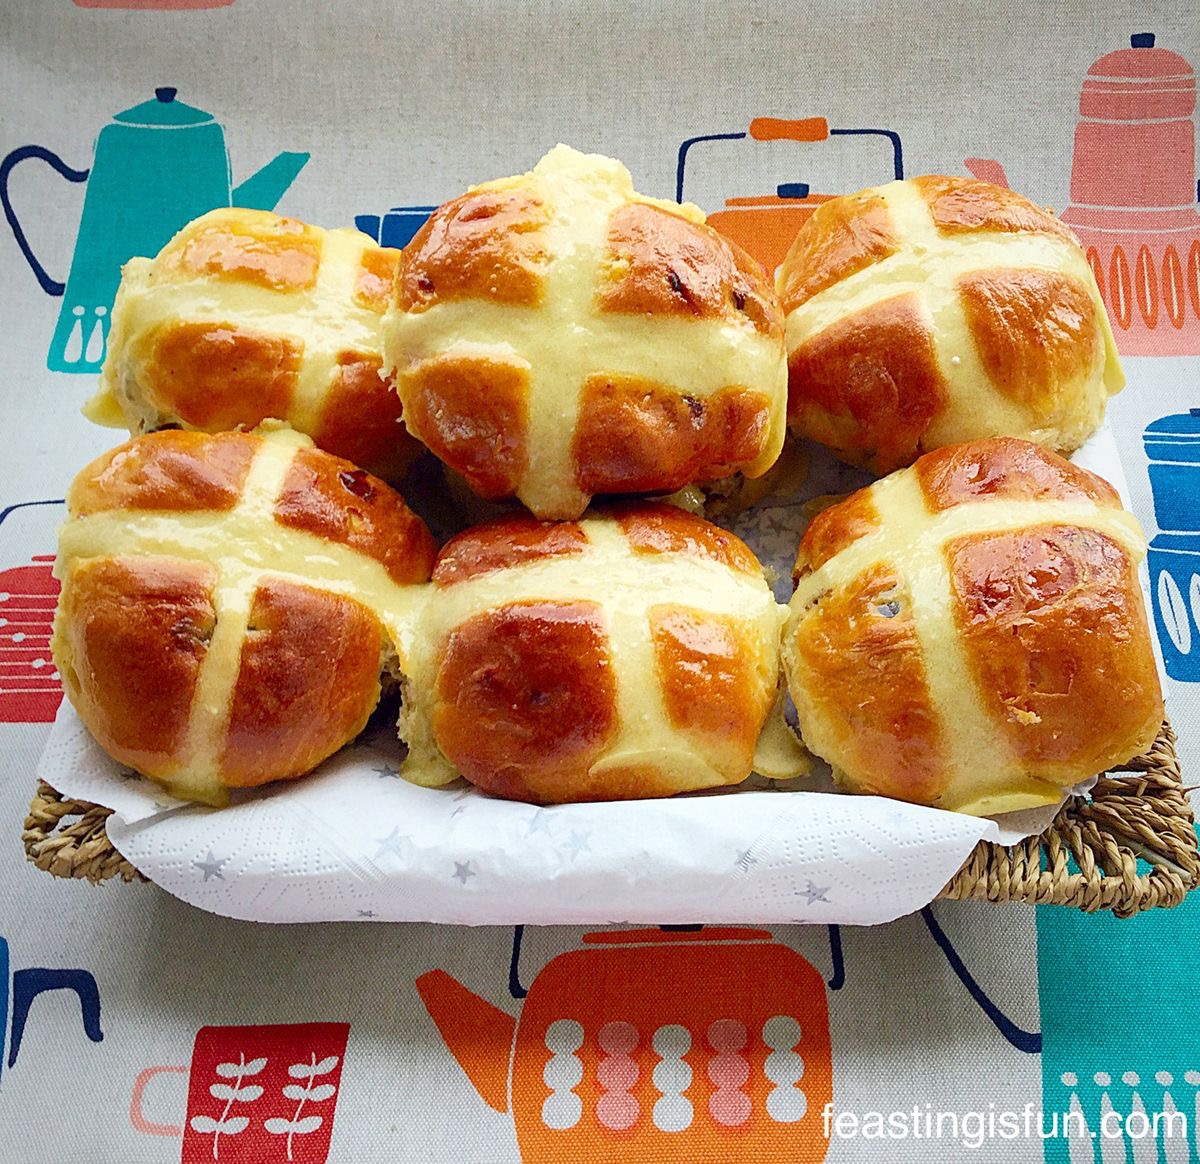
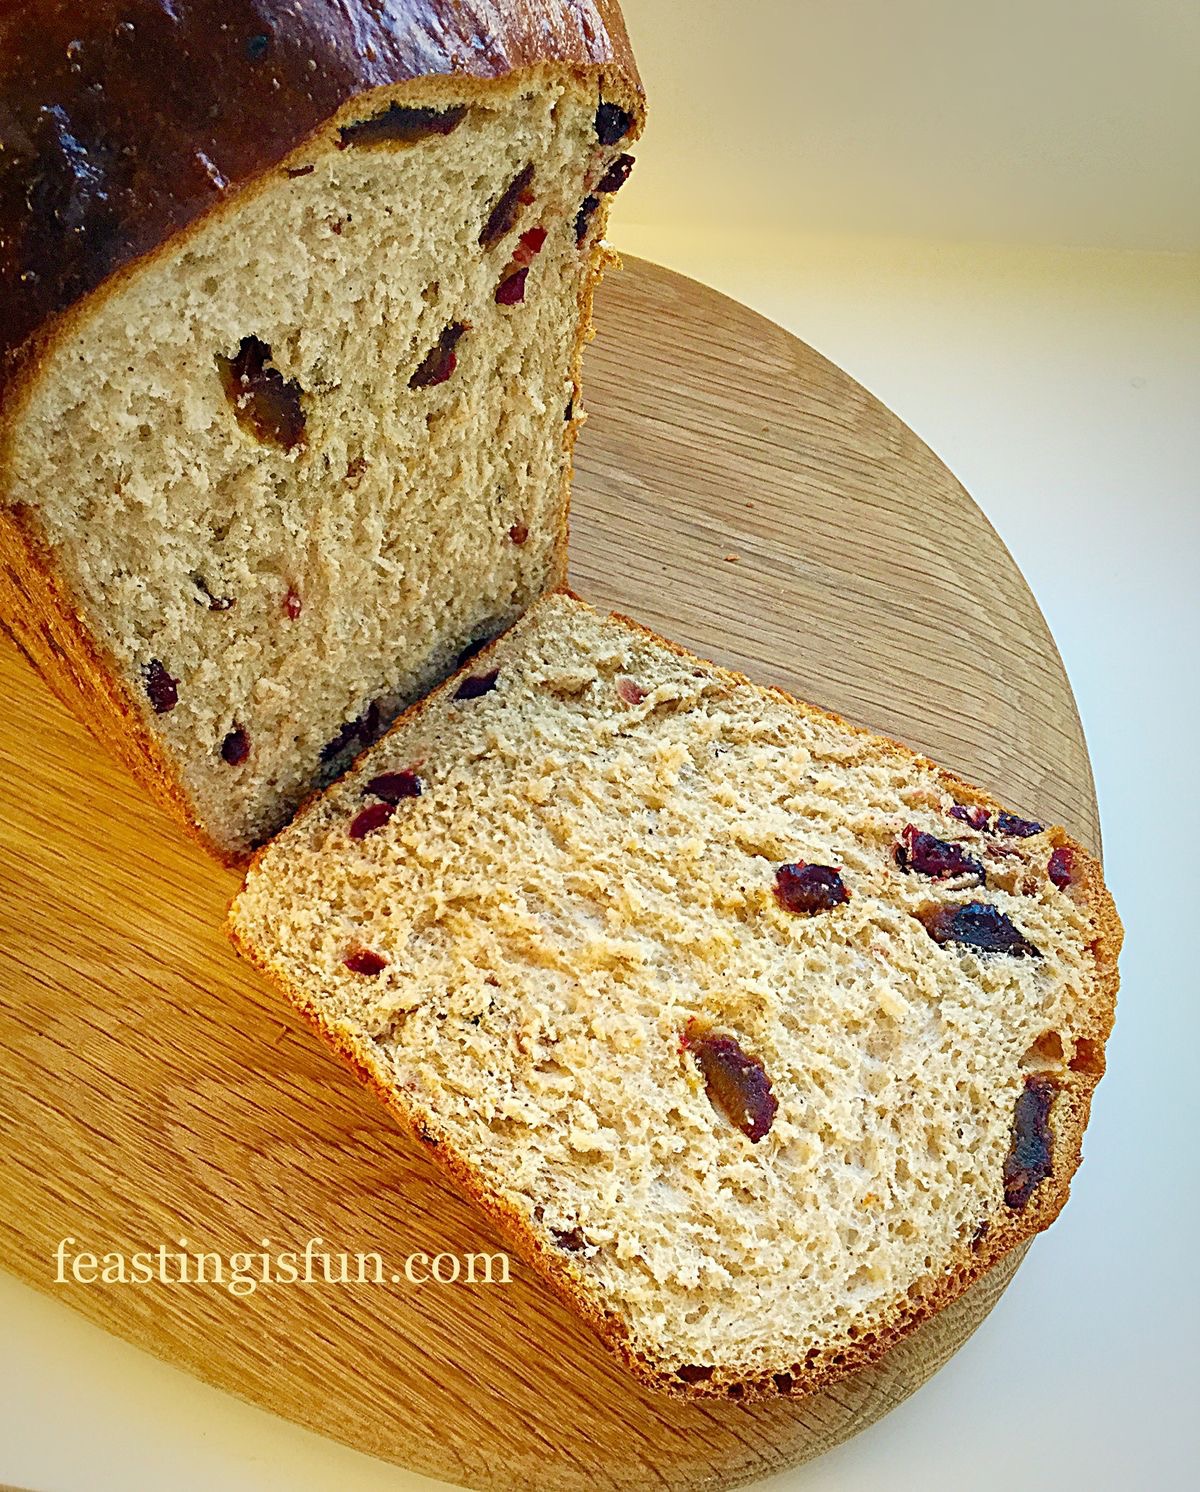
If you have enjoyed the recipe for this Cherry Bakewell Soda Bread you may also like these:

Ginger Date Hot Cross Buns

FF Cherry Bakewell Soda Bread
Ginger Date Hot Cross Buns

Christmas Spiced Fruit Loaf

FF Cherry Bakewell Soda Bread
Christmas Spiced Fruit Loaf

Toffee Banoffee Waffles

FF Cherry Bakewell Soda Bread
Toffee Banoffee Waffles

Making something different for breakfast at the weekend is a real treat. Whilst most of my baking is made from scratch, the convenience of having good quality packet mixes in the cupboard cannot be denied. Balancing time spent together as a family with, the time it takes to create a feast, is important.

Do you make breakfast more of a treat at the weekend?

After all, it is the most important meal of the day?

Sammie xx

Wrights Baking supplied me with the mix to create this recipe. All views, content and photography are my own. Please see my Disclosure Policy.

Share
Facebooktwitterpinterestlinkedintumblr

Gingerbread Frosted Ginger Christmas Cupcakes

Share
Facebooktwitterpinterestlinkedintumblr

Happy holidays to all of my lovely readers of Feasting Is Fun. Today’s recipe for Gingerbread Frosted Ginger Christmas Cupcakes topped with mini gingerbread men, I hope will excite you and add some festive cheer to your day.

FF Gingerbread Frosted Ginger Christmas Cupcakes

Is anyone else else excited about Christmas? For me a large part of the fun of Christmas is in the build up. Getting the children to write Christmas lists, putting up decorations and ordering our turkey and ham from Graig Farm. Finally making the Christmas cake, yet knowing it can’t be eaten until Christmas Day is always hard on certain members of the family. So, I baked these Gingerbread Frosted Ginger Christmas Cupcakes. Perfect festive sweet treats to enjoy, during the build up to the big day!

Single, individual spiced sponge with miniature festive person on to of the icing.

Warning, the frosting on these cupcakes is truly addictive! Because it really, REALLY, tastes of gingerbread and once you’ve tasted it I can guarantee that you will want more. And so, in order to provide balance, the cupcake itself is only lightly spiced with ginger. The final combination of both cake and frosting is absolutely perfect. Warming, sweet and not heavy, these really are the perfect festive, sweet treat.

A single small, spiced, festive individual cake with two candles alight behind it.
Gingerbread Frosted Ginger Christmas Cupcakes

Because these cupcakes are so yummy, they disappear very quickly. Always a good sign when everyone in the family absolutely loves them. And I have a feeling that making these may well become a Christmas tradition like so many other things have, in our home.

Christmas Traditions

Traditions include, decorations going up on December 1st, making mince pies then giving them to our neighbours whilst carol singing and cooking the ham on Christmas Eve. Also, tracking Santa Claus’ schedule, whilst munching on cheese straws and playing cards, have all become Christmas traditions. Each as important as putting out a drink, mince pie and carrot, before bed, on the night before Christmas.

Three festive spiced individual sponges topped with spiced whipped buttercream and a little man.
Gingerbread Frosted Ginger Christmas Cupcakes

Each of the traditions has crept upon us, unplanned. If something has been done two years in a row, the children automatically dictate that it is now a tradition. So, this year, I think I will make some Gingerbread Frosted Ginger Christmas Cupcakes to hand out whilst carol singing, alongside the warm mince pies. We are blessed to call our neighbours friends, so sharing homemade goodies with them, whilst they listen to our singing is always fun!

Do you have family traditions at Christmas? I’d love to hear about them.

Recipe: Gingerbread Frosted Ginger Christmas Cupcakes makes 12

For the cupcakes:

175g/6oz Unsalted Butter softened

175g/6oz Caster Sugar

3 Large Eggs – I use free range

1/8tsp Salt – I use Maldon

1tsp Vanilla Extract – I use Nielsen-Massey

2tsp Baking Powder

175g/6oz Plain White Flour

1tsp Ground Ginger

For the frosting:

500g/1lb 2oz Gingerbread Natural Flavoured Icing Sugar from Sugar and Crumbs

alternatively use the same quantity regular icing sugar (confectioners sugar) and add 2tsp of ground ginger

250g/9oz Unsalted Butter softened

2tbsp Very Hot Water

Mini Gingerbread Men (made by Culpitt and White Edible Glitter to decorate both available online from Amazon.

Preheat the oven to 160C/140C fan, gas mark 3, 325F.

Making and baking the cupcakes:

  • First of all, line a cupcake tin with 12 deep cupcake/muffin cases
  • Next, in a large bowl add the butter, sugar and salt. Whisk, gradually increasing the speed, until pale and creamy.
  • Now add the vanilla extract and whisk until fully incorporated.
  • Into the bowl add the eggs and sift in the flour, baking powder and ground ginger. Then mix together until just combined. Over mixing can result in a tough, not light and airy, cupcake.
  • Spoon the cake batter into the cupcake cases, taking care to ensure that they are evenly filled.
  • Place the tin into the centre of the preheated oven and bake for 40-45 minutes. Once baked each cupcake will spring back from a light touch. The cupcakes will be soft and fairly pale, this is because they have been cooked at a low heat to ensure a flat top.
  • As soon as the cupcakes are baked from the oven. Carefully take each cupcake out of the tin and place on a cooling rack. Allow the cupcakes to cool completely before icing.

FF Gingerbread Frosted Ginger Christmas Cupcakes

Making the frosting and decorating the cupcakes:

  • So, to make the icing; place the softened butter into a large bowl and sift the icing sugar on top of it. Next add 2 tablespoons of very hot water from a recently boiled kettle. Whisk, starting on a very slow speed and gradually increasing to a high speed. Continue until the icing is very light and creamy.
  • Fit an icing bag with a Wilton round piping tip #12, or use a large disposable piping bag. Fill the bag with the whipped, gingerbread frosting. If using a disposable bag without a tip, snip off the end to leave a 7mm diameter hole – approximately.
  • Check the cupcakes to ensure they are completely cooled, then begin piping the frosting. Keeping an even pressure on the bag pipe a double swirl. One on top of the other, pressing down in the centre before pulling away at the end.
  • Continue piping until all of the cupcakes are frosted.
  • Place a gingerbread man or woman in the centre of the frosting.
  • Finally, finish by sprinkling each cupcake with a dusting of edible glitter.

FF Gingerbread Frosted Ginger Christmas Cupcakes

Store the cupcakes in an airtight container. They will keep for up to 4 days, however, you’ll be lucky if they last that long, unless you hide them 😉.

Individual spiced sponge cut through to show inner crumb.
Light and fluffy cupcake sponge.

Serve each cupcake with a smile.

If you have enjoyed this recipe for Gingerbread Frosted Ginger Christmas Cupcakes here are some other festive recipe you may like:

Chocolate Christmas Pudding Cookies

FF Gingerbread Frosted Ginger Christmas Cupcakes
Chocolate Christmas Pudding Cookies

Sparkling Snowflake Cake

FF Gingerbread Frosted Ginger Christmas Cupcakes
Sparkling Snowflake Cake

Cream Cheese Pastry Mince Pies

FF Gingerbread Frosted Ginger Christmas Cupcakes
Cream Cheese Pastry Mince Pies

While it is nice enjoying the build up to Christmas Day, the excitement of children, unexpected guests, the hope of snow, it is also important to remember the true meaning of Christmas.

A baby boy, born of a virgin mother, Emmanuel – God with us. Jesus may not have been born on December 25th, yet that is the day we choose to remember His birth. So, amongst all of the hustle and bustle surrounding Christmas, it is important to remember why we celebrate it. Please see Important Stuff for more information.

So, whatever you are making, baking and creating in your kitchen, have fun preparing and sharing your feast.

Sammie xx

Note – this is not a sponsored post. I genuinely love Sugar and Crumbs products. No part of this post may be reproduced or duplicated without the written permission of the owner. Please see my Disclosure Policy.


Individual spiced cakes baked for the festive season, topped with spiced, whipped buttercream and a small decoration associated with the holidays. Sized for Pinterest with descriptive graphics.
Christmas lights and decorations in the background set the scene for a tray of festive spiced bakes which sparkle.

Share
Facebooktwitterpinterestlinkedintumblr

Camp Coffee Ice Cream

Share
Facebooktwitterpinterestlinkedintumblr

Camp Coffee Ice Cream with crunchy chocolate coffee beans.

It is mid September and here in the south of the U.K. the weather is still relatively warm. Not that you need it to be warm outside to enjoy my Camp Coffee Ice Cream.

FF Camp Coffee Ice Cream

Yes, ice cream is great to have during the hot, Summer months, but I happily eat it all year round. This particular ice cream with its inviting coffee flavour (without the caffeine) would be so good scooped on top of a warm chocolate brownie.

FF Camp Coffee Ice Cream
Camp Coffee Ice Cream great all year round.

Chocolate and coffee are a classic combination, which is why I decided to add a good measure of chocolate coffee beans to this ice cream.

The delicious chocolate/coffee crunch against the smooth, silky, coffee flavoured ice cream, keeps this interesting on the palette.

Camp Coffee Ice Cream with chocolate coffee beans.

Making your own ice cream at home gives you complete control over the intensity of flavours. This Camp Coffee Ice Cream is how I’d drink my coffee, medium strength. You, however, can put as much, or as little Camp coffee as you like!

Churning this ice cream, in an ice cream maker, ensures it is silky smooth. If you like your ice cream just like that, leave out the chocolate coffee beans. Again, what you add is completely in your control.

So let’s show you how to make this delicious dessert, or fun treat.

Recipe: Makes 750ml Camp Coffee Ice Cream

300ml/ 1/2pt Double Cream

300ml/ 1/2pt Milk – Whole or Semi Skimmed

2tsp Camp Coffee – widely available in stores and online

4 Large Free Range Egg Yolks – the whites can be frozen for a month

1tsp Vanilla Extract – I use Nielsen-Massey

1tsp Corn Flour – I use Doves Farm as it is certified gluten free

5tbsp Caster Sugar

100g/4oz Chocolate Coffee Beans – mine were from Waitrose

Method: Ensure the ‘Frozen’ container part of your ice cream maker has been in the freezer for 8 hours, overnight, or according to the manufacturer’s instructions.

Note: For a step by step guide, with photographs, on making ice cream please see Very Vanilla Ice Cream.

Making the ice cream base

  • Pour the cream and milk into a large, heavy bottomed saucepan and place over a medium heat.
  • Heat the liquid until scalding point is reached – a rim of small bubbles will appear around the outside edge of the liquid – remove from the heat.
  • Whilst the liquid is heating place the egg yolks, corn flour, sugar and vanilla extract into a large, heatproof bowl. Whisk until the eggs are pale and have increased in volume.
  • With the whisk still running on low, slowly add the scalded cream mixture to the eggs, continually whisking.
  • Whisk thoroughly until all the ingredients are combined.
  • Tip the custard ice cream base back into the saucepan and place back over a medium heat, stirring constantly.
  • Before putting the pan back on the heat I quickly wash and dry the original bowl used.
  • When the custard has thickened and coats the back of a spoon remove from the heat.
  • Pour the custard through a wire sieve into the large heatproof bowl.
  • Add the Camp coffee and stir thoroughly.
  • Place cling film directly on top of the ice cream base, to prevent a skin from forming.
  • Allow the custard to cool slightly before placing in the fridge to chill thoroughly.

Churning the ice cream

  • Once chilled, set up your ice cream maker according to its manufacturer’s instructions.
  • Remove the cling film, stir the ice cream base and taste. If you wish to have a stronger coffee flavour add more Camp coffee, stirring and tasting until the desired strength is reached.
  • With the ice cream machine switched on and churning, pour the ice cream base through the opening into the bowl.
  • Churn for 15-20 minutes until the ice cream is thick, but not frozen solid.
  • Switch off the machine and remove the top and the paddle.
FF Camp Coffee Ice Cream.
Deliciously softly frozen Camp Coffee Ice Cream
  • Scrape as much ice cream as possible from the paddle (and then lick the rest off 😉).
  • Using a deep silicone spatula transfer the rest of the ice cream to a freezer proof tub.
  • Add the chocolate coffee beans and swirl through the ice cream using the handle of a wooden spoon.
FF Camp Coffee Ice Cream
The chocolate coffee beans add a final crunch to the Camp Coffee Ice Cream.
  • Clip on a tight fitting lid and place the Camp Coffee Ice Cream into the freezer for at least 4 hours, longer if it is very hot weather, so that the ice cream completely freezes.

To serve, remove the ice cream from the freezer 15-20 minutes before scooping. As your ice cream is homemade and therefore does not contain any artificial softeners, preservatives or additives, it will take a little while to soften.

FF Camp Coffee Ice Cream
Camp Coffee Ice Cream a delicious dessert.

I like to serve Camp Coffee Ice Cream in a pretty bowl for dessert, or in a cone if we are eating in the garden and enjoying the sun. It’s not unheard of to be handing cones full of ice cream, over the fence to our neighbours either!

It’s definitely more fun to share.

If you have enjoyed this recipe for Camp Coffee Ice Cream you may also like these:

Blackberry Chocolate Chunk Ice Cream

FF Camp Coffee Ice Cream
Blackberry Chocolate Chunk Ice Cream

Chocolate Orange Ice Cream

FF Camp Coffee Ice Cream
Chocolate Orange Ice Cream

Strawberry Ripple Ice Cream

FF Camp Coffee Ice Cream
Strawberry Ripple Ice Cream

I have a thing for hot and cold food together. So my Vanilla Fudge Chocolate Brownies with a scoop or two of Camp Coffee Ice Cream and hot custard poured over, would be my idea of pudding heaven!

That is exactly why I enjoy cooking and baking so much at home. The flavours and combinations are limitless, plus it’s usually a lot cheaper to make it yourself and tastes a lot better. Why? Because you can make it exactly how you want it to taste.

Whatever to are making, baking and creating in your kitchens, have fun creating you feast. Also if you have the means to share some of your bakes, it is so rewarding. Seeing someone smile as you hand them a slice of cake, knowing they have not been forgotten about, simply because the can’t get out and about. We live in communities. Let’s make someone’s day with a surprise treat?

Sammie xx

Camp Coffee Club  provided me with the Camp coffee to make this recipe. All opinions, views, content and photography are my own. Please see my Disclosure Policy.

Share
Facebooktwitterpinterestlinkedintumblr

New Berry Fruits Ice Cream

Share
Facebooktwitterpinterestlinkedintumblr

Tutti fruity. Does anyone else remember that ice cream flavour? Or am I showing my youth 😉. Well that’s what I was aiming for when I created this New Berry Fruits Ice Cream, except……….. it is so much better than I ever remember. The jelly sweets have a true, intense, fruity flavour, that doesn’t diminish when frozen AND they stay chewy!

Win Win.

FF New Berry Fruits Ice Cream
New Berry Fruits Ice Cream so intensely fruity and delicious.

Each 100g box of New Berry Fruits contains 8 individual jelly sweets with a liquid centre and a crunchy, sugary coating.

FF New Berry Fruits Ice Cream
New Berry Fruits beautifully packaged and incredibly tasty.

These jelly fruits with the liquid centre are unbelievably good. Intensely fruity, chewy, hidden nectar in the centre. If you love sweets, you really need to try these.

As I am allergic to orange, I left them out of the ice cream. If you love orange they will totally work with all the other New Berry Fruits in the ice cream base that I’ve created.

FF New Berry Fruits Ice Cream
New Berry Fruits Ice Cream 2 Scoops and it was all mine 😉

To make this recipe you will need 2 boxes of New Berry Fruits. We are very honest here at Feasting is Fun, it is acceptable for one or three jellies to ‘go missing’ during the making of this New Berry Fruits Ice Cream. That’s all part of the fun and the ice cream will taste just as good.

You will also need both lemon and rose extract. You only need a little bit of each, however, they are what give this fruity ice cream it’s fantastic background flavour. I have other recipes that use the extracts, so it really is worth buying them. I only use Nielsen-Massey extracts and they are available in most major supermarkets as well as online.

FF New Berry Fruits Ice Cream
New Berry Fruits Ice Cream it may be worth making a double batch as it is soo good!

Time to show you how to make this cooling, fruity treat.

Recipe: New Berry Fruits Ice Cream makes 750ml approx.

2 Boxes of New Berry Fruits

300ml/ 1/2pint Double Cream

300ml/ 1/2pint Milk – Whole or Semi Skimmed

1/4tsp Lemon Extract

1/4tsp Rose Extract

1tsp Vanilla Extract

4 Large Free Range Egg Yolks – the whites can be frozen for up to 1 month

1tsp Corn Flour – also known as corn starch

4tbsp Caster Sugar

Method: Ensure the cooling ‘bowl’ of your ice cream maker has been in the freezer for at least 8 hours, ideally overnight, or as per manufacturer’s instructions.

Note: For photographic step by step instructions on how to make the custard base for the ice cream please see Very Vanilla Ice Cream.

  • Pour the milk and cream into a heavy bottomed saucepan over a medium heat.
  • Bring the liquid to scalding point – this is just before it boils, there will be a ring of bubbles that appear around the edge of the liquid. Once the bubbles appear remove from the heat.
  • Whilst the milk/cream is heating, into a large bowl add the egg yolks, corn flour, sugar and vanilla extract. Whisk until pale, thick and creamy.
  • With the mixer on slow, slowly add the scalded cream mixture to the egg mix, constantly mixing.
  • Tip the contents of the bowl back into the saucepan, over a low heat.
  • Stir until the custard ice cream base has thickened and coats the back of a wooden spoon. The base is now cooked.
  • Pour the custard base through a sieve into a clean bowl – I generally quickly wash up the original bowl that I was using.
  • Cover the top of the custard base with cling film, so that it is in direct contact. This stops a skin from forming.
FF New Berry Fruits Ice Cream
The custard base is cooling ready for it’s extra flavour boost!
  • Allow the custard base to cool slightly and then chill in the fridge.
  • Once chilled add 1/4 teaspoon of both lemon and rose extract. Stir to mix.
  • Set up your ice cream maker and then pour in the custard base and switch the machine on.
  • Whilst the ice cream is churning and freezing, chop each New Berry Fruit into 4 pieces.
FF New Berry Fruits Ice Cream
Chopped up New Berry Fruits ready to add to the frozen ice cream.
  • When the ice cream is thickly frozen, switch off the machine, remove the top and paddle and using a silicone spatula scoop the fruity flavoured ice cream into a freezer proof tub.
  • Add the chopped New Berry Fruits and stir with a spoon to distribute evenly throughout the ice cream.
FF New Berry Fruits Ice Cream
New Berry Fruits Ice Cream mixing in the delicious jellies.
  • Pop an air tight lid on to the tub and place in the freezer until frozen solid.
  • To serve remove the ice cream from the freezer 10-15 minutes prior to scooping this will allow it to soften a little.

This is a fun ice cream so scoop your New Berry Fruits Ice Cream into cones or waffle cups and enjoy the amazing flavours and chewy jellies.

FF New Berry Fruits Ice Cream
New Berry Fruits Ice Cream fruity luscious fun.

Oh this New Berry Fruit Ice Cream is so berry, berry good! The fabulous fruity background flavour of the ice cream works beautifully with the intense bursts of fruity, chewy flavour.

New Berry Fruits are widely available online and at Waitrose.

If you have enjoyed this recipe for New Berry Fruits Ice Cream you may also enjoy these:

Lemon Ripple Ice Cream

FF New Berry Fruits Ice Cream
Lemon Ripple Ice Cream

Strawberry Ripple Ice Cream

FF New Berry Fruits Ice Cream
Strawberry Ripple Ice Cream

Refreshing Tropical Fruit Sorbet

FF New Berry Fruits Ice Cream
Refreshing Tropical Fruit Sorbet

Fruity, delicious, homemade ice creams and sorbet. You know exactly what has gone into each batch you make. Perfect for those following a gluten free diet, just ensure that your corn flour is certified gluten free. Whilst the sorbet it is both gluten and dairy free.

If you haven’t ever tried making your own ice cream at home, I hope I’ve encouraged you to have a go. It is so much fun coming up with new flavour combinations. I really wouldn’t be without my Andrew James Which Best Buy, ice cream maker. I’ve said before that an appliance has to earn it’s place in my kitchen. This summer alone I must have made 30 plus new ice cream recipes. Not all are on here – yet 😉!

Sammie xx


Share
Facebooktwitterpinterestlinkedintumblr

Easy Butterscotch Dip With Toffee Cookies

Share
Facebooktwitterpinterestlinkedintumblr

It’s the summer holidays and I’m in the mood for fun! This Easy Butterscotch Dip With Toffee Cookies is just what it says. Quick and easy to make, this is a fun, sweet treat. Perfect for feasting and sharing.

FF Easy Butterscotch Dip With Toffee Cookies
Easy Butterscotch Dip With Toffee Cookies so easy and so good!

As much as I adore cooking and baking, my priority during the summer holidays is to spend time with our teenage children. I am well aware there are not that many summer holidays left where they’ll want to hang around as a family, so they come first.

That said, when we are all home, it can seem as if a swarm of locusts have gleaned the kitchen of anything edible in just a few days!!! Parents of teenagers will completely understand!

FF Easy Butterscotch Dip With Toffee Cookies
Easy Butterscotch Dip With Toffee Cookies these don’t hang around long here.

What I love when everyone is at home, is that we throw all the rules out of the window, for the whole summer. We all lay in, stay up late, the atmosphere is very chilled. Yes each person still has their ‘jobs’ to do for the day, so these get done first thing (that can be 11.30am – but they get done), so the rest of the day is free.

Friends drop by, we all go out together, or our three go out. So this recipe for Easy Butterscotch Dip With Toffee Cookies is perfect anytime, but especially now. It is so easy to make whilst you chat to unexpected visitors.

FF Easy Butterscotch Dip With Toffee Cookies
Easy Butterscotch Dip With Toffee Cookies once you start dunking it’s hard to stop!

I pulled this whole dish together in less than 20 minutes!

Yep you heard right – 20 minutes!

Have I got your attention now???

The cookies are made using Wright’s Baking new Toffee Cookie Mix, except that I made the cookies smaller so we had 15 cookies instead of 8. If you haven’t tried this new mix it is a dream to make. 5 minutes prep. time, 10 minutes in the oven and you’ll have the whole neighbourhood wondering where the delicious baked Toffee Cookie smell is coming from.

Shut the windows if you don’t want a queue at the front door 😉

FF Easy Butterscotch Dip With Toffee Cookies
Easy Butterscotch Dip With Toffee Cookies ooh this dip is so good.

The dip takes 7 minutes. I kid you not.

Who remembers Angel Delight?

Oh yes, that is the Easy Butterscotch Dip my friends. With a few white chocolate curls decorating the top.

Told you it was easy!

That is why I love this Easy Butterscotch Dip With Toffee Cookies, it is a simple, straightforward, snack. That also tastes so good. I had two cookies for breakfast this morning, after the photo shoot. I had to literally move away from the Butterscotch Dip and avoid any spoons, else I’d have hidden down the bottom of the garden and scoffed the lot.

Angel Delight was and is popular for a reason. It tastes so utterly I-can’t-stop-myself good.

Recipe: Easy Butterscotch Dip With Toffee Cookies 

1 packet Toffee Cookie Mix – from Wright’s Baking

25g Unsalted Butter plus water – see directions on the packet

1 packet Butterscotch Angel Delight

300ml Cold Milk – Whole or Semi Skimmed

Small bar of white chocolate

Method: Preheat the oven to 180C/160C fan gas mark 4

  • Line a large baking tray with a non stick silicone mat or baking parchment.
  • Make up the Toffee Cookies according to the packet instructions.
  • Form 15 smaller cookies (the mix calls for 8) from the cookie dough and place on the lined baking tray.
FF Easy Butterscotch Dip With Toffee Cookies
15 Toffee Cookies made from the Wright’s Baking mix.
  • Place the baking tray into the preheated oven and bake the Toffee Cookies for 10-12 minutes.
  • The Toffee Cookies are baked when they are golden in colour and have a shiny, wrinkled surface.
  • As soon as the cookies are baked remove from the oven and allow to cool completely on the tray. They will harden as they cool.
FF Easy Butterscotch Dip With Toffee Cookies
Perfect Toffee Cookies for Dunking in the Butterscotch Dip!
  • Whilst the Toffee Cookies are cooking it’s easy to whip up the Angel Delight – literally.
  • Add the milk to a bowl, add the Butterscotch Angel Delight and whisk according to the packet instructions.
  • Pour the Butterscotch Angel Delight into a wide bowl and using a vegetable peeler, shave curls of white chocolate over the dip to make it look pretty!
  • Place the Butterscotch Dip bowl in the centre of a large plate and surround with golden Toffee Cookies. Easy, see?

Serve immediately, or place the Butterscotch Dip in the fridge covered in cling and the cooled Toffee Cookies into an airtight container to store.

FF Easy Butterscotch Dip With Toffee Cookies
Easy Butterscotch Dip With Toffee Cookies dunking is so much fun!

What a fantastic change from savoury dips!

Feasting really can be fun.

Thank you Deb for suggesting the idea. Deb the bread is Wright’s Baking point of contact. If you have questions about their mixes she is the lady to ask.

If you’ve enjoyed this fun Easy Butterscotch Dip With Toffee Cookies you may also like these:

Toffee Cookie Cups

FF Easy Butterscotch Dip With Toffee Cookies
Toffee Cookie Cups perfect for filling with ice cream.

Toffee Banoffee Waffles

FF Easy Butterscotch Dip With Toffee Cookies
Toffee Banoffee Waffles perfect any time of the day.

Twisted Fruity Jam Tarts

FF Easy Butterscotch Dip With Toffee Cookies
Twisted Fruity Jam Tarts delicious for breakfast.


Even if you do not have children, I find summertime to be the season when people seem to be more carefree. Lunch breaks turn into impromptu picnics, glasses clinking in pub gardens across the land, salad eaten with a cool glass of white wine in the evening out in the garden.

I love our changing seasons here in England and by the end of one I am ready for the next. This summer I intend to have as much fun as I can!

Sammie xx

Wright’s Baking provided the toffee cookie mix for this post. All opinions, views, content and photographs are my own. I never get paid to write posts. Please see my Disclosure Policy.

Share
Facebooktwitterpinterestlinkedintumblr

Chocolate Rolo Ice Cream

Share
Facebooktwitterpinterestlinkedintumblr

Chocolate Rolo Ice Cream. Silky, chocolate ice cream packed full of chocolate/caramel Rolos.

FF Chocolate Rolo Ice Cream

The idea for this recipe came from my friend and amazing fellow blogger Jane from  Jane’s Patisserie. While creating the most wonderful recipes, she also has just got a new puppy called Rolo. So you see I had to create something to celebrate the new puppy Rolo coming home. Chocolate Rolo Ice Cream seemed the perfect solution.

Chocolate Rolo Ice Cream

This Chocolate Rolo Ice Cream recipe is so versatile. Once you have made the chocolate ice cream base you can add whatever you like. I rather like the idea of a Mars Bar version, with big chunks swirled through the ice cream.

I am loving my Andrew James Which Best Buy Ice Cream Maker. In fact I now have a second bowl, which I can pop in the freezer. This means I can either make one big double batch of the same ice cream or split it into two different flavours.

Making ice cream at home is easy, inexpensive, you have control over what goes in AND you are only limited by your imagination as to how many flavours you come up with! Someone asked me today why they’d never had Chocolate Rolo Ice Cream before, my answer was I’d only just invented it!!

Recipe: Makes 750ml Chocolate Rolo Ice Cream

300ml Double Cream

300ml Whole or Semi Skimmed Milk

4 Large Free Range Egg Yolks – freeze the whites in a bag for up to one month

1tsp Vanilla Bean Paste/Vanilla Extract – I use Nielsen-Massey

1tsp Corn Flour – I use Doves Farm  as it is certified gluten free

5tbsp Caster Sugar

100g Dark Chocolate 70% Cocoa

4 Packets of Rolos

Method: Ensure the frozen bowl part of the ice cream maker has been in the freezer for at least 8 hours, or according to manufacturers instructions.

Note – for step by step photographs of how to make the custard base please see Very Vanilla Ice Cream

Making The Chocolate Ice Cream Base

  • Pour the milk and cream into a heavy based saucepan over a medium heat.
  • Heat until the milk is scalded – little bubbles will appear around the rim of the liquid just before it boils. Once it has reached this point remove from the heat.
  • In a large heat proof bowl add the egg yolks, vanilla paste, corn flour and sugar.
  • Whisk until pale and creamy.
  • With the whisk still running on low, slowly pour the hot cream mixture into the bowl – this creates the custard base.
  • Pour the custard base back into the saucepan, over a low-medium heat, stirring continuously.
  • When the custard has thickened and coats the back of a wooden spoon remove the pan from the heat.
  • Chop up the dark chocolate and place into a clean bowl – I quickly rinse out the original bowl used.
  • Place a sieve over the bowl and pour the hot custard through the sieve on to the chocolate.
  • Stir the custard with a wooden spoon and the chocolate will melt into it.
FF Chocolate Rolo Ice Cream
Chocolate melting into the custard ice cream base.
FF Chocolate Rolo Ice Cream
Delicious chocolate ice cream base ready to cool.
  • Cover the chocolate custard base with cling film, so the film lays directly on the surface of the custard. This will stop a skin from forming.
  • Once cooled to warm on the work top place the bowl in the fridge to chill.
  • As soon as the base is chilled it is ready to be churned.

Churning The Ice Cream

  • Set up your ice cream maker as per the manufacturers instructions.
  • Mine has to be churning, prior to adding any liquid.
  • Pour the chocolate custard into the churning machine through the opening and leave to churn until frozen – for me that is when the ice cream is turning as one clump with the beater.
  • Switch the machine off and remove the top part of the ice cream maker.
FF Chocolate Rolo Ice Cream
Chocolate Ice Cream that needs Rolos!
  • Remove the beater, scraping off as much of the ice cream as you can. Then lick off the rest of the ice cream 😉
  • Decant the chocolate ice cream into a freezer proof tub.
  • Unwrap 3 packets of Rolos and cut each one in half.
  • Add to the ice cream and swirl through using the handle of a wooden spoon.
  • Unwrap the fourth packet and place the Rolos directly on top of the ice cream.
Chocolate Rolo Ice Cream ready for the freezer.
  • Pop on a tight fitting lid and place the Chocolate Rolo Ice Cream into the freezer for at least 4 hours, or until fully frozen.
  • To serve, remove the ice cream from the freezer 15-20 before scooping. As our delicious Chocolate Rolo Ice Cream doesn’t have any artificial softener, preservatives or additives added to it, it’ll need a few minutes to soften up.
FF Chocolate Rolo Ice Cream
Chocolate Rolo Ice Cream softens and ready to serve.

Serve in cones, bowls or these fun cups I found.

Chocolate Rolo Ice Cream

Why not have a go at making your own ice cream at home. It really is so much fun.

If you have enjoyed this Chocolate Rolo Ice Cream Recipe here are a few more you may like:

Lemon Ripple Ice Cream

FF Chocolate Rolo Ice Cream
Lemon Ripple Ice Cream incredibly refreshing.

Chocolate Honeycomb Ice Cream

FF Chocolate Rolo Ice Cream
Chocolate Honeycomb Ice Cream served in toffee cookie cups.

Blackberry Chocolate Chunk Ice Cream

FF Chocolate Rolo Ice Cream
Blackberry Chocolate Chunk Ice Cream a brilliant blend of flavours.

I hope these recipes have inspired you to make your own ice cream at home? It tastes so much better than most of the ice creams you can buy and you can create your own ice cream sundaes like my Raspberry Chocolate Ice Cream Sundae.

Whatever you are making, baking and creating in your kitchens this very warm weekend, here in the South East of England, have fun feasting with family and friends.

Sammie xx

No part of this post may be reproduced or duplicated without the written permission of the owner. Please see my Disclosure Policy.

Share
Facebooktwitterpinterestlinkedintumblr

Lemon Ripple Ice Cream

Share
Facebooktwitterpinterestlinkedintumblr

Lemon Ripple Ice Cream, this is THE ice cream I have wanted to make throughout my entire life. Creamy with tart lemon curd rippled through. If you love lemon, like I do, then trust me when I say you need to make this luscious ice cream.

FF Lemon Ripple Ice Cream

This luscious Lemon Ripple Ice Cream really is a dream come true for me. I adore lemons. Also, I heard Jamie Oliver once say that if there weren’t lemons in his kitchen he’d give up cooking. I doubt he meant it quite to that extreme, but I do understand his passion for them.

Happily I  use them in savoury recipes such as my Tangy Lemon Potato Salad and sweet recipes such as this delightful Lemony Strawberry Pavlova. Their flavour is so transferable between both sweet and savoury dishes.

FF Lemon Ripple Ice Cream
Lemon Ripple Ice Cream

Here, in this Lemon Ripple Ice Cream, there is a wonderful soft, creamy lemon background flavour, with bursts of tart, intense citrus lemon. The combination of both the subtle and vibrant creates a tastebud sensation that draws you into a dreamy world of lemony loveliness.

FF Lemon Ripple Ice Cream
Lemon Ripple Ice Cream all you need is a soon.

The Benefit Of Homemade Ice Cream

While you absolutely could eat this ice cream in a cone, for me, I wanted nothing to interrupt the pure creamy sensation of eating it with just a spoon. I wasn’t disappointed!

This Lemon Ripple Ice Cream is deceptively yummy. I feared whilst churning it yesterday in my new Andrew James Ice Cream Maker, that none would actually make it to the freezer. Happily I restrained myself. I am so glad that I did. Tasting it today, frozen, yet softened enough to scoop, was reward for my patience and restraint!

Just a quick note on ingredients; if you don’t have lemon extract, which is available online and in good supermarkets, don’t worry, the lemon curd added during the churning process will still provide a great lemon flavour. As for the lemon curd, use a good quality tart one, without bits. I love lemon curd with real peel in it, but this is not the place to use it.

Recipe: Makes 750ml Lemon Ripple Ice Cream

300ml Double Cream

300ml Whole or Semi Skimmed Milk

4 Large Free Range Egg Yolks

1tsp Corn Flour

1/8 tsp Salt – I use Maldon

6tbsp Caster Sugar

1tsp Vanilla Extract – I use Nielsen Massey

1tsp Lemon Extract – I use Nielsen-Massey 

300g Best Quality Lemon Curd – I used Waitrose new waitrose 1 lemon curd, it is beautifully tart

Method: Ensure the frozen ‘bowl’ of your ice cream maker has been in the freezer for 24 hours or according to the manufacturers instructions.

Note – For step by step photos of the custard base cooking process please see Very Vanilla Ice Cream

Making The Ice Cream Base

  • First of all pour the cream and milk into a large saucepan on a medium heat.
  • Heat until just before the liquid boils, you will see little bubbles form around the outside rim – this is known as the scalding point, once reached remove from the heat.
  • In a large bowl whisk together the egg yolks, sugar, extracts and corn flour until pale and thickened.
  • With the whisk still running on low, slowly pour the hot cream into the egg mixture.
  • Tip the entire mixture back into the saucepan, place over a medium/low heat stirring constantly until it thickens and coats the back of a wooden spoon.
  • Remove from the heat.
  • Pour the hot custard through a sieve into a large bowl.
  • Place cling film directly on to the surface of the custard to prevent a skin from forming.
FF Lemon Ripple Ice Cream
Leave the custard base to cool.
  • Leave to cool and then chill in the fridge. Once chilled transfer to a jug.

Churning The Ice Cream Base And Adding The Lemon Ripple

  • Set up your ice cream maker and if it is like mine, it will need to be switched on and churning before pouring in the custard.
  • Pour in the custard through the shoot and leave to churn until softly frozen.
  • Add half of the lemon curd, I use a teaspoon and added it one teaspoon at a time, through the hole, so that it slowly becomes incorporated within the ice cream.
  • When the ice cream is soft but can hold its shape stop the ice cream maker.
  • Transfer the ice cream to a freezer proof tub.
  • Spoon the remaining lemon curd on to the ice cream.
FF Lemon Ripple Ice Cream
Lemon Ripple Ice Cream ready to be rippled.
  • Use a spoon to gently ripple the lemon curd through the ice cream.
FF Lemon Ripple Ice Cream
Lemon Ripple Ice Cream ready for the freezer.
  • Resist the urge to just dive in with a spoon, as this really tastes better once it is properly frozen.
  • Pop the lid on and place in the freezer for 12 hours or ideally overnight. Why ideally? Because then you’ll be asleep and not thinking about the ice cream.
  • To serve, remove the tub from the freezer 15 minutes before scooping to allow it to soften.

Serving And Enjoying Homemade Ice Cream

Serve scooped into elegant dessert bowls or enjoy in an ice cream cone. Either way prepare yourself to fall completely, head over heels in love, with a new flavour of ice cream – Lemon Ripple Ice Cream.

FF Lemon Ripple Ice Cream

Lemon Ripple Ice Cream is very much a dreamily, creamy ice cream, not in any way a sorbet – which by the way I love and am working on a recipe.

This ice cream would make the perfect dessert after a spicy, hot meal. Refreshing, creamy and palette cleansing, yet you still feel like you’ve had dessert.

However and whenever you eat this delicious ice cream, be sure to enjoy it with others. Listen to the oohs and aahs of your loved ones enjoying something really, really good. It will make you smile 😀

If you have enjoyed this Lemon Ripple Ice Cream recipe here are some others that you may also want to try:

Strawberry Ripple Ice Cream

Strawberry ripple strawberry ripple ice cream in a cone.
Strawberry Ripple Ice Cream

Chocolate Orange Ice Cream

Chocolate orange ice cream scoops in a bowl.
Chocolate Orange Ice Cream

Strawberry Rose Ice Cream

Strawberry rose ice cream being scooped from a container.
Strawberry Rose Ice Cream

I love being able to create my own ice cream flavours at home. Having an ice cream maker makes it so easy. Preparing the custard takes 15 minutes, then the custard is left to cool. Churning takes about 20 minutes and you can eat the ice cream scooped from the ice cream maker, if you want a soft set ice cream. Otherwise overnight in the freezer and you have any flavour ice cream you like!

That can never be a bad thing eh???

Thank you for your comments, photos on social media, I absolutely love seeing your makes and bakes. It still thrills me every time someone uses one of my recipes.

Have fun feasting, sharing and making people smile.

Sammie xx

Andrew James provided me with an ice cream maker to review. All views, opinions, content, recipes and photographs are my own. Please see my Disclosure Policy.

Share
Facebooktwitterpinterestlinkedintumblr

Chocolate Orange Ice Cream

Share
Facebooktwitterpinterestlinkedintumblr

Finally, Summer is finally here. And I hope the sun shines throughout the day and any necessary rain falls at night! I’m loving using my new Which Best Buy Andrew James Ice Cream Maker  to create as many different flavoured ice creams as I can think of. Because there are lots and lots of them. This Chocolate Orange Ice Cream is my son’s idea of food heaven.

Pinterest sized image with descriptive graphics.

Our not so little man, more teenage strapping lad, adores Jaffa Cakes, so when Sugar and Crumbs sent me some of their Jaffa Twist Icing Powder as a gift, with an order I’d placed, I knew exactly what I was going to make with it. Can you imagine how great it felt to have my son hug me and say “Mum this ice cream tastes just like Jaffa Cakes”?

He had absolutely no idea what ingredients I’d used, which is rare as he loves being in the kitchen cooking alongside me. So 10 out of 10 for Sugar and Crumbs in the flavour department. Also, I used a Lindt Intense Orange Chocolate Bar to create a chocolate ganache ripple that runs through the Chocolate Orange Ice Cream.

Pinterest sized image.
Chocolate Orange Ice Cream

Why An Ice Cream Maker Is Worth The Space In Our Kitchens

Making the chocolate orange custard was simple, I simply switched the caster sugar for Jaffa Twist Icing Sugar. Churning the Chocolate Orange Ice Cream in an ice cream maker ensures that the finished product is silky smooth, the result of smaller ice crystals forming during the churning process. For around £25 it really is a worthwhile investment.

I am thrilled with the Which Best Buy Ice Cream Maker from Andrew James. It’s really straightforward to use & more importantly, from past experience, clean! It’s actually faster at freezing the ice cream than my old model & the freezing bowl takes up very little space in our freezer. If you are looking to purchase an ice cream machine, I thoroughly recommend this one.

FF Chocolate Orange Ice Cream
Chocolate Orange Ice Cream elegant enough for entertaining.

If you wanted to add a splash – tablespoon or two of your favourite orange liquer, the result would be a slightly softer set ice cream that is perfect served in pretty bowls, for dessert, when entertaining. Or alternatively you could reserve the chocolate ganache and pour whilst still warm over the cold Chocolate Orange Ice Cream. See with homemade ice cream the possibilities really are limitless!


Scoops of ice cream in a decorative glass bowl.
Chocolate Orange Ice Cream

Served in bowls or scooped into cones this Chocolate Orange Ice Cream is sure to be a huge hit with all Chocolate Orange lovers.

Recipe: Makes 750ml Chocolate Orange Ice Cream

400ml Double Cream

300ml Milk – whole or semi-skimmed

4 Large Free Range Egg Yolks – the whites can be frozen for 1 month – ideal to make my Lemony Strawberry Pavlova

6tbsp Jaffa Twist Icing Sugar by Sugar and Crumbs alternatively use 6tbsp of caster sugar (super fine sugar) and add 3tbsp Cocoa Powder  1/2tsp orange extract

1tsp Corn Flour – I use Doves Farm as it is certified gluten free

1/2tsp Vanilla Extract – I use Nielsen-Massey

100g Bar Lindt Intense Orange Chocolate Bar

Method: Place the freezing compartment of your ice cream maker into the freezer 24 hours prior to making this recipe.

Note: For photographic step by step instructions please see Very Vanilla Ice Cream

Making The Chocolate Orange Ice Cream Base

  • In a large heavy bottomed saucepan add the milk, 300mls of the double cream and the vanilla extract. Heat on medium until the milk is scalded – it has not yet boiled and little bubbles appear around the rim – remove from the heat at this stage.
  • In a large bowl whisk together the egg yolks, flavoured icing sugar (or cocoa powder and orange extract) and corn flour, until pale and thickened.
  • As soon as the cream mixture has reached scalding point, pour the hot cream slowly down the side of the bowl, with the whisk on, into the egg mixture. Continue whisking until everything is combined. This is now a custard base for the ice cream.
  • Pour the custard base back into the saucepan and heat on low, stirring continuously until the custard has thickened and coats the back of a wooden spoon.
  • Remove the saucepan from the heat and pour the custard, through a sieve into a large bowl.
  • Cover the custard with with cling film to stop the surface forming a skin.
FF Chocolate Orange Ice Cream
Chocolate Orange Ice Cream made with Jaffa Twist icing sugar.
  • Set the custard to one side to cool and then place in the fridge to chill completely.

Making The Chocolate Orange Ganache

  • Set a small saucepan with 5cm/1″ of water on to a medium heat.
  • In a heatproof bowl add 100mls of double cream and the chocolate orange bar, broken into pieces.
  • Place the bowl on top of the saucepan ensuring that the base of the bowl does not come into direct contact with the water – this is called a double boiler.
  • Stir the chocolate and cream continuously until the chocolate has completely melted and mixed in with the cream.
  • Remove the bowl from the saucepan and set to one side to cool.
FF Chocolate Orange Ice Cream
Chocolate orange ganache – the chocolate bar has bits in it which add texture to the finished ice cream.

Churning The Ice Cream Using Andrew James Ice Cream Maker

  • Set your ice cream maker up according to it’s instruction booklet.
  • With the Andrew James Ice Cream Maker, as with my previous model, the machine must be started prior to pouring the custard in – this prevents a thick layer of un-churned ice cream immediately freezing on contact with the freezer container.
  • Transfer the custard to a jug and then, with the mixer stirring pour through the open spout.
FF Chocolate Orange Ice Cream
Pouring the custard through the spout into the churning ice cream maker.
  • Churn the ice cream until it is a thick, but still slightly soft ice cream.
FF Chocolate Orange Ice Cream
Chocolate Orange Ice Cream ready to be decanted into a freezer container.
  • Turn the power off on the machine and at the plug. Remove the cover and then the paddle, scape as much ice cream off of the churning paddle as you can and then lick the rest off 😉.
  • Using a soft silicone spatula transfer the ice cream to a suitable, freezer proof tub.

Adding The Chocolate Orange Ganache

  • Pour over the cooled chocolate ganache.
FF Chocolate Orange Ice Cream
Chocolate Orange Ice Cream ready to be rippled!
  • Using the handle of a wooden spoon, or indeed the other end of the silicone spatula ripple the ganache through the Chocolate Orange Ice Cream.
  • Pop the lid on, label and place in the freezer to finish freezing.
Chocolate Orange Ice Cream a delicious dessert.

Remove the ice cream from the freezer 20 minutes prior to serving. Because there aren’t any artificial additives, homemade ice cream takes a little while to soften, ready to be scooped.

Serve scooped into bowls or cones. This is one very delicious and creamy ice cream, that should be savoured.

If the children are noisy during the summer holidays, give them a scoop full of this Chocolate Orange Ice Cream, not forgetting 2 scoops for yourself and buy yourself 10 minutes peace and quiet. Honestly nobody makes a sound when savouring this delicious treat.

Also, being homemade, you know exactly what ingredients have gone into your ice cream. In a consumer society that is increasingly interested in what goes into our food, making ice cream yourself removes any worries.

If you have enjoyed this Chocolate Orange Ice Cream Recipe, here are some others you may like too:

Strawberry Ripple Ice Cream

Strawberry ripple ice Cream in a cone.
Strawberry Ripple Ice Cream – also gluten free

Blackberry Chocolate Chunk Ice Cream

Blackberry chocolate chunk ice cream scoops in a glass bowl.
Blackberry Chocolate Chunk Ice Cream – also gluten free

Very Vanilla Ice Cream

Very Vanilla Ice Cream in a cone and a cookie sandwich.
Very Vanilla Ice Cream

Ice Cream is such a wonderful year round treat, yet during the Summer heat it is also very cooling. When it is very hot I quite often have just a cone with a couple of scoops of homemade ice cream. Knowing I have used fresh produce, including fruit, I am happy with my choice.

I have never believed in ‘good’ and ‘bad’ food. Preferring a balanced diet, with a heavy emphasis on homemade food, has ensured that over the years, not withstanding medication, my weight has always been fairly stable.

Do you struggle with guilt about food? I know a lot of people do and I am absolutely not here to judge you.

So, whatever you are making, baking and creating in your kitchens, have fun preparing and sharing your feast.

Sammie xx

Andrew James provided me with this ice cream maker for the purposes of a review. All opinions, views, content and photography is my own. Sugar and Crumbs sent me a free sample of their Jaffa Twist Icing Sugar with an order that I paid for. I have not been paid or reimbursed for writing this post, please see my Disclosure Policy.

Share
Facebooktwitterpinterestlinkedintumblr

Oat Chocolate Chip Cookies

Share
Facebooktwitterpinterestlinkedintumblr

So, if you’ve spent a little time on this blog, you’ll know that I am a self confessed Cookie Monster. And cookies are my favourite go to sweet treat. Perhaps that’s why there are 21 cookie recipes on here! Anyway I try to keep on the oat/nut/fruit side of things but I craved CHOCOLATE! So I caved and made these unbelievably good Oat Chocolate Chip Cookies.

Oat Chocolate Chip Cookies

They are so good!

Oat Chocolate Chip Cookies

Oh yes I did. I totally stacked a piles of these very yummy Oat Chocolate Chip Cookies. Because what’s better than one cookie? A whole stack of them!

So there you go, that’s my kind of maths.

Also adding oats to cookies does two important things; it nudges them slightly more toward the healthier end of the nutritional spectrum and it gives them a wonderful, chewy, almost nutty flavour.

Oat Chocolate Chip Cookies

A Family Of Cookie Lovers

While you all know how much I love and adore my family. I have the best hubby in the world, who has all but given up his office, so that I can store baking equipment. Bundt tins take up a lot of room you know! Also there’s my Star and Snugs, our two gorgeous girls who, help me so much. Whether it’s cooking dinner, cleaning, vacuuming and much more. Last but definitely not least is our little man, who isn’t so little anymore so I’ll call him by his best friends nickname, Bob. He is growing into a loving and strapping lad who is always ready to help, especially fixing things. And Bob has definitely inherited his paternal Grandad’s capability with his hands.

So you see I love them all – but – they also are cookie monsters. Which is fine I make food to be eaten, except out of this batch of 18 cookies I only ate 1. It didn’t help that I’d spent a few days in bed (see here ) after making these. While I appreciate that they bring me cups of tea, however, as I’d ordered some shortie biscuits, which I love, they brought those with my hot drink. So it was only a few days later, when I was able to venture downstairs that I realised they’d all gone!

A stack of Oat Chocolate Chip Cookies
Oat Chocolate Chip Cookies

I was sad for a teeny tiny moment and then very thankful and flattered that my lovely family had enjoyed them so much.

Family, My Biggest Supporters

Since they are my biggest supporters, along with extended family, it really gives me a warm, fuzzy feeling inside knowing I’ve made them something that they  have really enjoyed. Although, being stuck in bed is not fun, knowing there is a tin full of cookies downstairs in the kitchen, helps me to feel that I am more present, than in reality I am.

Recipe: Makes 16-18 Oat Chocolate Chip Cookies

225g/8oz Soft Light Brown Sugar – I used Billingtons

150g/5oz Unsalted Butter- at room temperature

2tsp Vanilla Extract – I use Nielsen-Massey

1 Large Free Range Egg – plus

1 Large Free Range Egg Yolk

175g/6oz Plain White Flour

100g/4oz Plain Rolled Oats – not quick cook

1/2tsp Bicarbonate of Soda

Pinch of Salt

150g/5oz Milk Chocolate Chips or Chunks

50g/2oz Dark Chocolate 70% cocoa

Method: preheat the oven to 170C/150C fan, gas mark 4, 350F

Making The Oat Cookie Dough

  • First of all, line 3 large baking trays with baking parchment.
  • Place the sugar and butter in a large bowl and whisk/beat for 5 minutes until pale and creamy – whisking for 5 minutes here and then after adding the eggs is very important to the finished texture of the cookie.
  • Add the vanilla extract and the eggs and continue whisking/beating for a further 5 minutes.
  • Sift in the flour, bicarb. salt and add the oats.
  • Add the chocolate chips.
  • Fold all the ingredients together until you have uniform cookie dough.
  • Using a medium sized ice cream scoop, or a spoon and your hands, scoop/roll 5cm/2″ ball of cookie dough and place onto the baking tray.
FF Oat Chocolate Chip Cookies
Cookie dough balls.
  • With slightly dampened fingers (it stops the cookie dough sticking to them), press down on each ball to flatten slightly.
FF Oat Chocolate Chip Cookies
Oat Chocolate Chip Cookies ready for the oven.

Baking The Oat Chocolate Chip Cookies

  • Place the baking trays in the centre and lower parts of the oven. I rotate mine halfway through baking.
  • Bake for 15-20 minutes. The cookies are baked when they have spread out and are golden brown.
  • As soon as the cookies are baked remove the cookies from the oven. Because they will still be very soft, leave on the baking tray to cool and set.
FF Oat Chocolate Chip Cookies
Oat Chocolate Chip Cookies baked and cooling on the tray.


  • As soon as they are cooled lift each cookie free of the baking parchment, use a palette knife to slide underneath the cookie first. Place the cookie back on the baking parchment.

Adding The Dark Chocolate Swirl

  • In a heatproof, microwaveable bowl add the chopped/broken up dark chocolate.
  • Zap for 20 seconds in the microwave stirring after each heating session. When the chocolate is almost melted remove from the microwave and continue stirring until fully melted.
  • Pour the liquid chocolate into a small disposable piping bag.
  • Snip the very end of the piping bag off, creating a small hole.
  • Pipe swirls onto each of the cookies. Use all of the chocolate up, simply pipe over the swirls again.
FF Oat Chocolate Chip Cookies
Oat Chocolate Chip Cookies with swirls of dark chocolate.
  • Set the cookies to one side to allow the chocolate to cool and set.
  • As soon as the chocolate is set, pop the kettle on, invite a neighbour round and spend some time chatting over a cup of coffee and delicious Oat Chocolate Chip Cookies.

In the United States and Canada where my friend Liz lives, they carry out cookie exchanges during the holiday season – usually from Thanksgiving through to Christmas. I love that idea! Baking up batches of cookies, sharing, swapping, making new friends, remembering old friends. Liz is an amazing cook and her attention to detail always leaves me impressed.

What do you think, should we have a cookie/biscuit exchange here?

Not because it’s ‘another American custom’ simply because it’s a great idea?

If you have enjoyed these Oat Chocolate Chip Cookies you may also like these:

Double Chocolate Nut Spelt Cookies

Double Chocolate Nut Spelt Cookies

Caramac Caramel Cookies

FF Oat Chocolate Chip Cookies
Caramac Caramel Cookies delicious chewy bites of nostalgia.

Rolo Chocolate Cookies

FF Oat Chocolate Chip Cookies
Rolo Chocolate Cookies chewy bites of cookie heaven.

Thank you to everyone who reads this blog. I really do appreciate you. It’s been wonderful seeing all the bake photos that you have been putting up on Twitter and Instagram. Please keep them coming and if you every have any questions about a particular recipe, either leave a comment, or probably for a quicker response send me a Tweet.

We have a three day bank holiday weekend coming up. So, whatever your plans, I hope that they involve lots of smiles, laughter, fun and feasting with friends, family and neighbours.

Sammie xx

No part of this post may be reproduced or duplicated without the written permission of the owner. Please see my Disclosure Policy.

Share
Facebooktwitterpinterestlinkedintumblr

Strawberry Ripple Ice Cream

Share
Facebooktwitterpinterestlinkedintumblr

I love ice cream. In fact I love it so much that I really enjoy making my own. There are endless flavour possibilities and combinations AND it’s made with real cream. Also no extra additives are needed. Today I bring you Strawberry Ripple Ice Cream.

FF Strawberry Ripple Ice Cream
Strawberry Ripple Ice Cream perfect on a hot sunny day.

Dreamy, creamy strawberry ice cream, with an intense strawberry syrup rippled through. This isn’t any ordinary ice cream, this is THE best Strawberry Ripple Ice Cream you could ever imagine.

And you too can make it at home. Because it’s so easy!

You make a vanilla custard, make a strawberry coulis, mix, freeze and that’s when the magic happens!

Ok so there’s a tiny little bit more to it than that, but preparation time for this delicious ice cream is about 15 minutes.

FF Strawberry Ripple Ice Cream
Strawberry Ripple Ice Cream you know you want to dig in?

Loving My Ice Cream Maker

I love properly churned ice cream, by that I mean ice cream that is mixed whilst it freezes. It allows the ice crystals to stay really small and results in the creamy texture we all associate with ice cream.

Hand holding an ice cream cone with descriptive graphics.

As our old ice cream maker is literally on it’s last legs, I have a new one from Andrew James it can be found here and has won a coveted Which Best Buy Award. While I’ve said before that any new piece of kitchen kit needs to earn it’s place in my kitchen, I’d say if you love ice cream, it definitely worth buying an ice cream maker. Since they are fairly small appliances and I keep the ‘frozen’ bowl part permenantly in the freezer, whilst the other parts stay in the box.

FF Strawberry Ripple Ice Cream
Bring out a tub of this Strawberry Ripple Ice Cream and see the smiles appear!

Because the ice cream custard base pretty much stays the same and then you can add whatever flavours. The flavour combinations are limitless! Therefore, having an ice cream maker in our kitchen for me, is essential.

Easy Gluten Free Dessert

For those of you on a gluten free diet, ensure the corn flour that you use is certified gluten free, then you can happily make these delicious, dreamy treats. should be able to enjoy ice cream, so for those of you with lactose/dairy/egg intolerance I will be working on some extra recipes so that you too can enjoy this delightful, cooling treat during the summer.

Supporting British And Local Farmers

There is one thing that I do feel passionately about and that is good quality, seasonal produce. And if you grow your own fruit even better! Using British frozen fruit, which I do often during the colder months is a great alternative, as is using tinned fruit. I use tinned peaches to make my Peach and Banana Smoothie in the winter and it tastes utterly delicious. That doesn’t mean I don’t eat some imported produce, but here in the UK we have incredible ‘Pick Your Own’ farms, farmers markets and even some supermarkets that stock local produce.

I guess what I’m saying is, life is about balance. If we can support our Britsh farmers and even grow some of our own fruit and veg (watch out or an exciting new gardening diary, coming soon on this blog) we are not only getting the freshest produce, picked at it’s peak, but also supporting our farmers and local producers too.

FF Strawberry Ripple Ice Cream
Strawberry Ripple Ice Cream

Recipe: Makes 1 litre Strawberry Ripple Ice Cream

400g British Strawberries

2tbsp Framboise – raspberry liquer – substitute with apple juice if preferred

1tbsp Fresh Lemon Juice

8tbsp Caster Sugar

300ml Double Cream

300ml Milk – whole or semi-skimmed

1tsp Corn Flour (also known as corn starch) – I use Dove Farm

4 Large Free Range Egg Yolks – the egg whites can be frozen for up to one month  (perfect for making Lemony Strawberry Pavlova)

1tsp Vanilla Extract – I use Nielsen-Massey

Method: Ensure the ‘frozen’ part of your ice cream maker has been in the freezer for at least 24 hours – or according to manufacturers instructions.

Making the Ice Cream Custard Base:

For step by step photographs of how to make the ice ceram custard base please see here

  • First of all pour the milk and cream into a heavy based saucepan over a medium heat.
  • In a heatproof bowl add the egg yolks, 6 tablespoons of caster sugar, vanilla extract and corn flour. Whisk until pale and frothy.
  • As soon as the cream/milk in the pan has reached scalding point, small bubbles appear around the edge of the milky liquid, remove the pan from the heat.
  • With the whisk on slow speed gently pour the hot milky liquid into the bowl with the whisked egg yolks.
  • Once combined tip the whole mixture back into the saucepan and cook over a low heat until the custard thickens and covers the back of a wooden spoon.
  • Pour the hot custard into a heatproof bowl, through a fine sieve
  • Place cling film directly on top of the custard to stop a skin from forming.
  • Allow the custard to cool slightly before placing the bowl in the fridge to chill.
FF Strawberry Ripple Ice Cream
Ice Cream base ready to be covered in cling film.

Making the Strawberry Coulis and Sauce:

  • Wash the strawberries and pat dry with a clean tea towel.
  • Remove all of the green stems (hull) and place the strawberries into a blender.
  • Add 1 tablespoon of caster sugar, the framboise (or apple juice) and lemon juice.
  • Pulse and then blend on a high speed until you have a very smooth purée.
FF Strawberru Ripple Ice Cream
Fresh strawberry coulis.
  • Pour half of the strawberry coulis into a small saucepan and add 1 tablespoon of caster sugar.
  • Cover the other half with cling film and place in the fridge.
  • Gently bring the strawberry coulis in the saucepan up to a boil and continue to let it bubble until reduced by half. You will be left with an intensely strawberry, jam like syrup. Pour into a bowl to cool.

Churning the Strawberry Ice Cream

  • First of all, set your ice cream maker up as per the instruction manual.
  • Pour the non concentrated strawberry coulis into the custard base and stir.
  • The pour the strawberry ice cream base into the machine maker and churn until you have a thick, but not solid, ice cream. Mine took approximately 20 minutes to curn to a thick, yet still soft, ice cream.
  • Stop the ice cream maker and remove the lid.
FF Strawberry Ripple Ice Cream
Creamy, thick strawberry ice cream.
  • Remove the plastic churning paddle and lick off all the soft ice cream to ensure it tastes good!
  • Using a silicone spatula transfer the ice cream to a suitable, freezer proof, ice cream tub.
  • Pour over the concentrated strawberry syrup and using a wooden spoon handle, ripple the intense strawberry syrup through the ice cream.


FF Strawberry Ripple Ice Cream
Strawberry Ripple Ice Cream such an intense strawberry colour.
  • Finally clip on a lid and place the Strawberry Ripple Ice Cream into the freezer to completely firm up, 4-8 hours.
  • To serve, remove the ice cream from the freezer 10 minutes before serving. The small amount of alcohol added, stops this ice cream from setting completely solid.
  • Scoop into a waffle cone or bowl and enjoy!
FF Strawberry Ripple Ice Cream
Strawberry Ripple Ice Cream creamy, with an intense ripple of strawberry running through!

Keeping My Summer Cool With Fruity Ice Cream

Ice Cream has to be right up, at the top, on my list of summer comfort foods. Whether it’s a sweltering hot day and I just want to cool down, or Wimbledon is on telly and I’m dragging out dinner, because the match is too good to miss. A cooling scoop of ice cream, in a cone, hits the spot.

If you haven’t tried making ice cream before, yet love it as much as I do, why not get an ice cream maker? You can play around with flavours, textures and make whatever combination you like!’

If you have enjoyed this recipe for Strawberry Ripple Ice Cream you may also like these:

Blackberry Chocolate Chunk Ice Cream

FF Strawberry Ripple Ice Cream
Blackberry Chocolate Chunk Ice Cream a great flavour combination.

Raspberry Chocolate Ice Cream Sundae

FF Strawberry Ripple Ice Cream
Raspberry Chocolate Ice Cream Sundae can be eaten any day of the week 😉

Very Vanilla Ice Cream

FF Strawberry Ripple Ice Cream
Very Vanilla Ice Cream great for sandwiching between two cookies!


Ice Cream is such a great dessert option for summer barbecues, where people have feasted on deliciously cooked fish and meat. It is portable in cones, and brings out the kid in everyone. As a result it is the perfect dessert for sharing with friends and family. Especially as I have yet to find someone who dislikes ice cream!

Whatever you are making, baking and creating in your kitchens, have fun preparing and sharing your feast.

Sammie xx

Andrew James UK Ltd provided me with this ice cream maker, for the purposes of review. All opinions, views, content and photography are my own. I was not paid to write this post. Please see my Disclosure Policy

Share
Facebooktwitterpinterestlinkedintumblr