Heart Engagement Bundt Cake

I’m going to let you into a secret, I absolutely love a surprises. Especially when it involves cake. So I made this Heart Engagement Bundt Cake in complete secrecy, for a couple who had recently become engaged.

MT Heart Engagement Bundt Cake
Heart Engagement Bundt Cake set up with the personalised bunting.

It was so much fun making this clandestine cake!

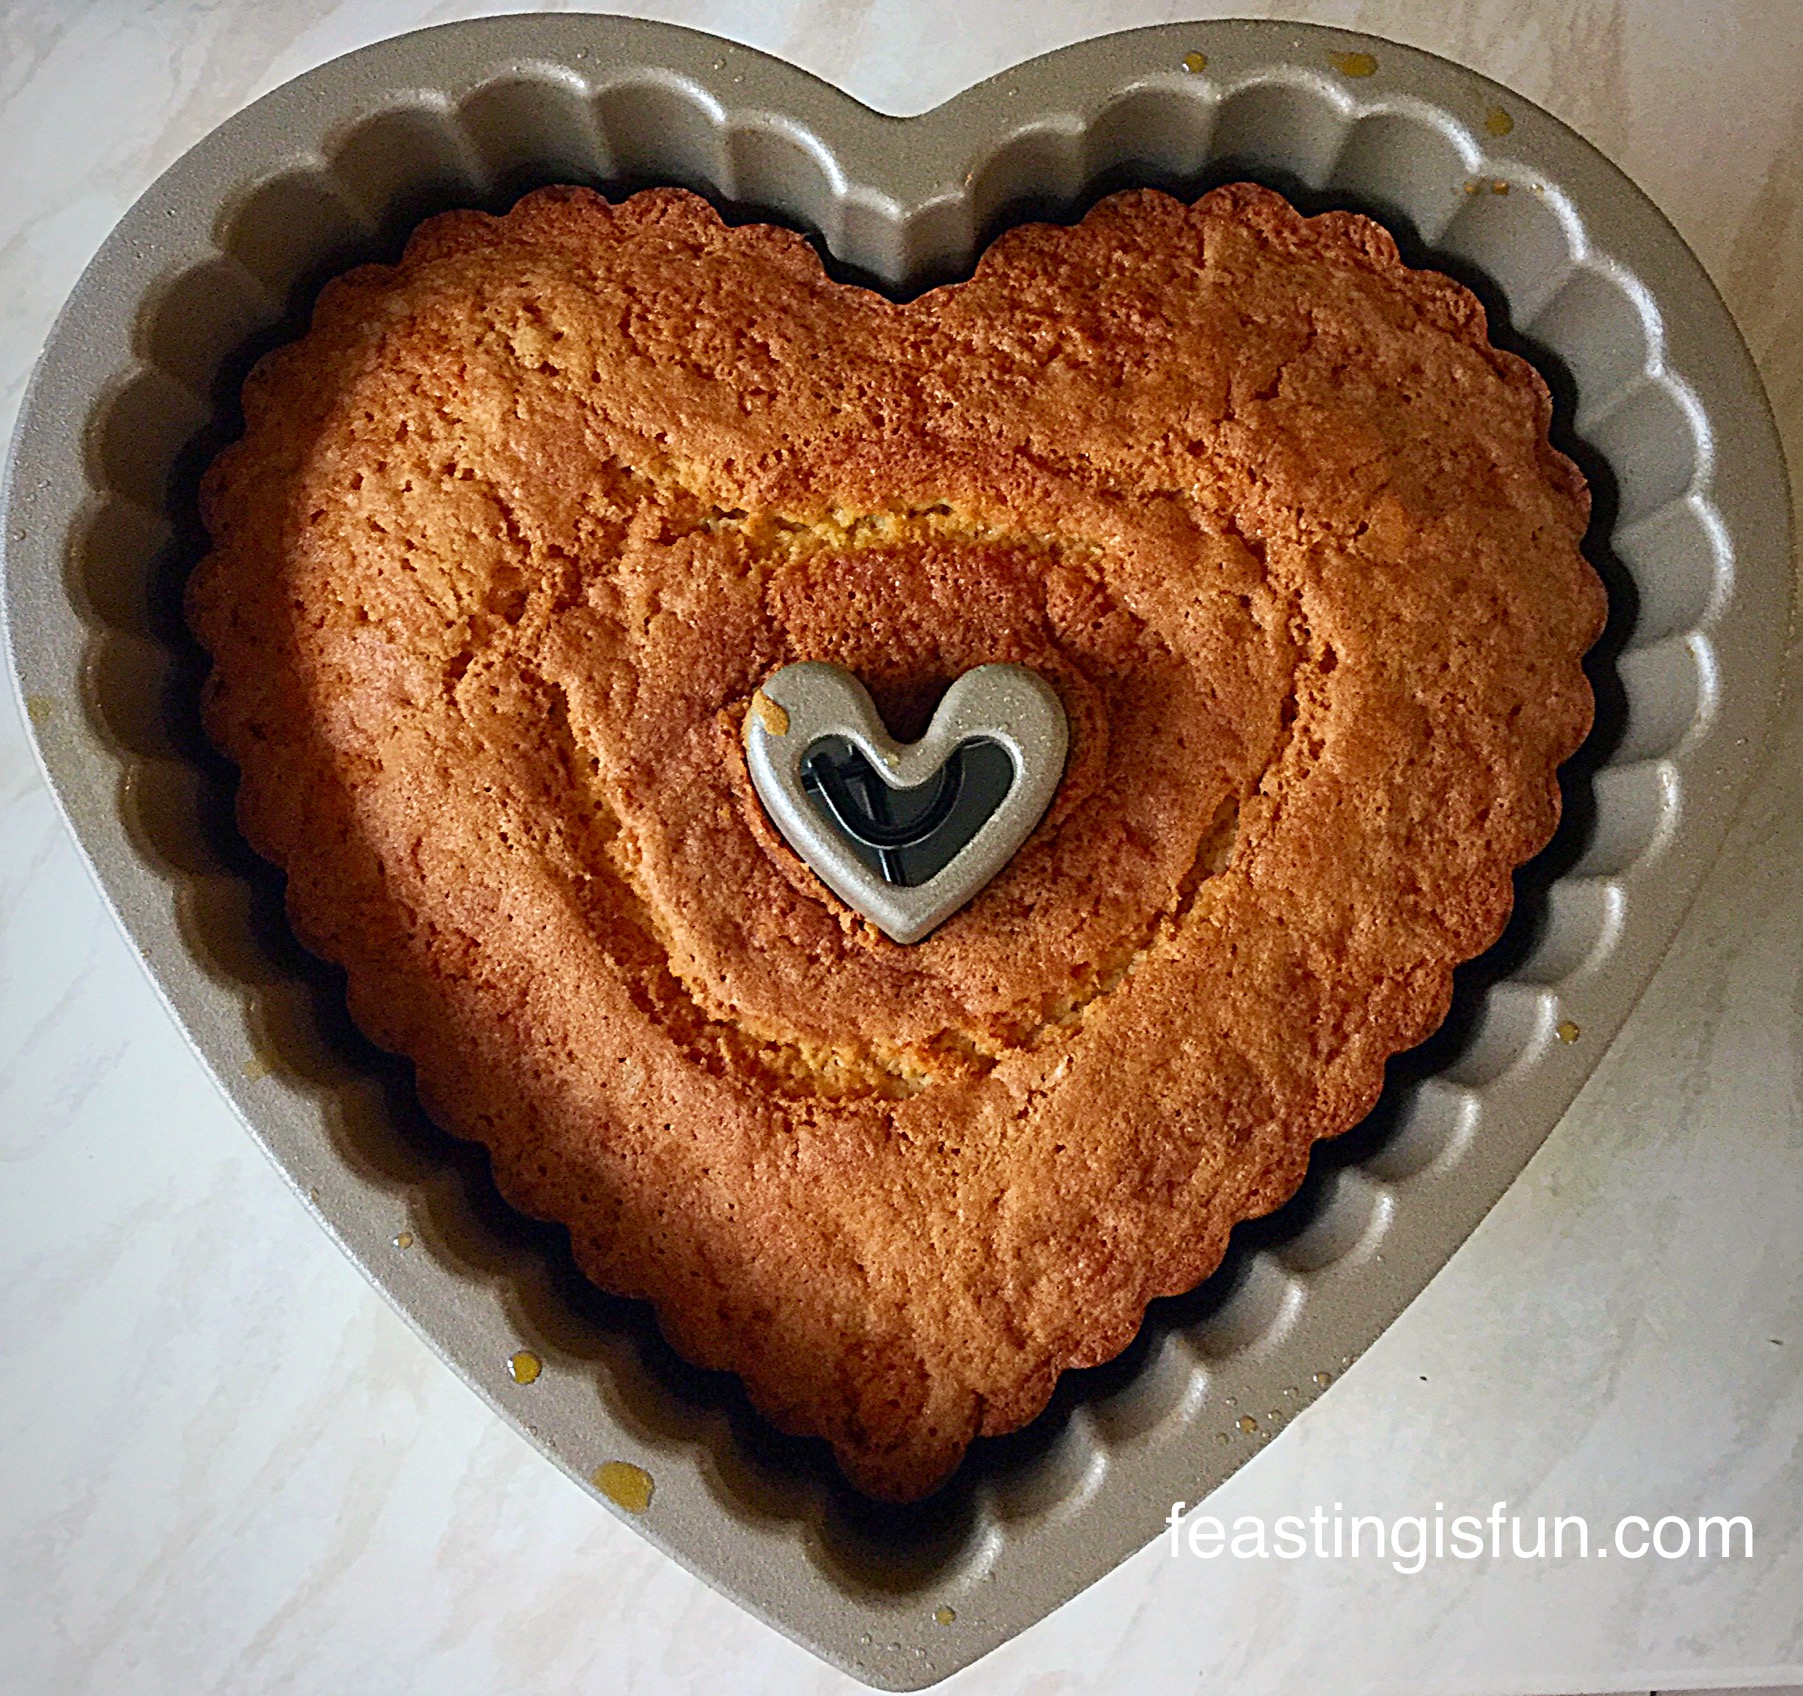
As the couple had been away, when they got engaged, we wanted to mark the occasion with a small celebration for family and friends. I offered to make the cake as I have a Tiered Heart Bundt Tin by Nordic Ware that I had still not baked with.

MT Heart Engagement Bundt Cake
Tiered Heart Bundt Tin by Nordic Ware

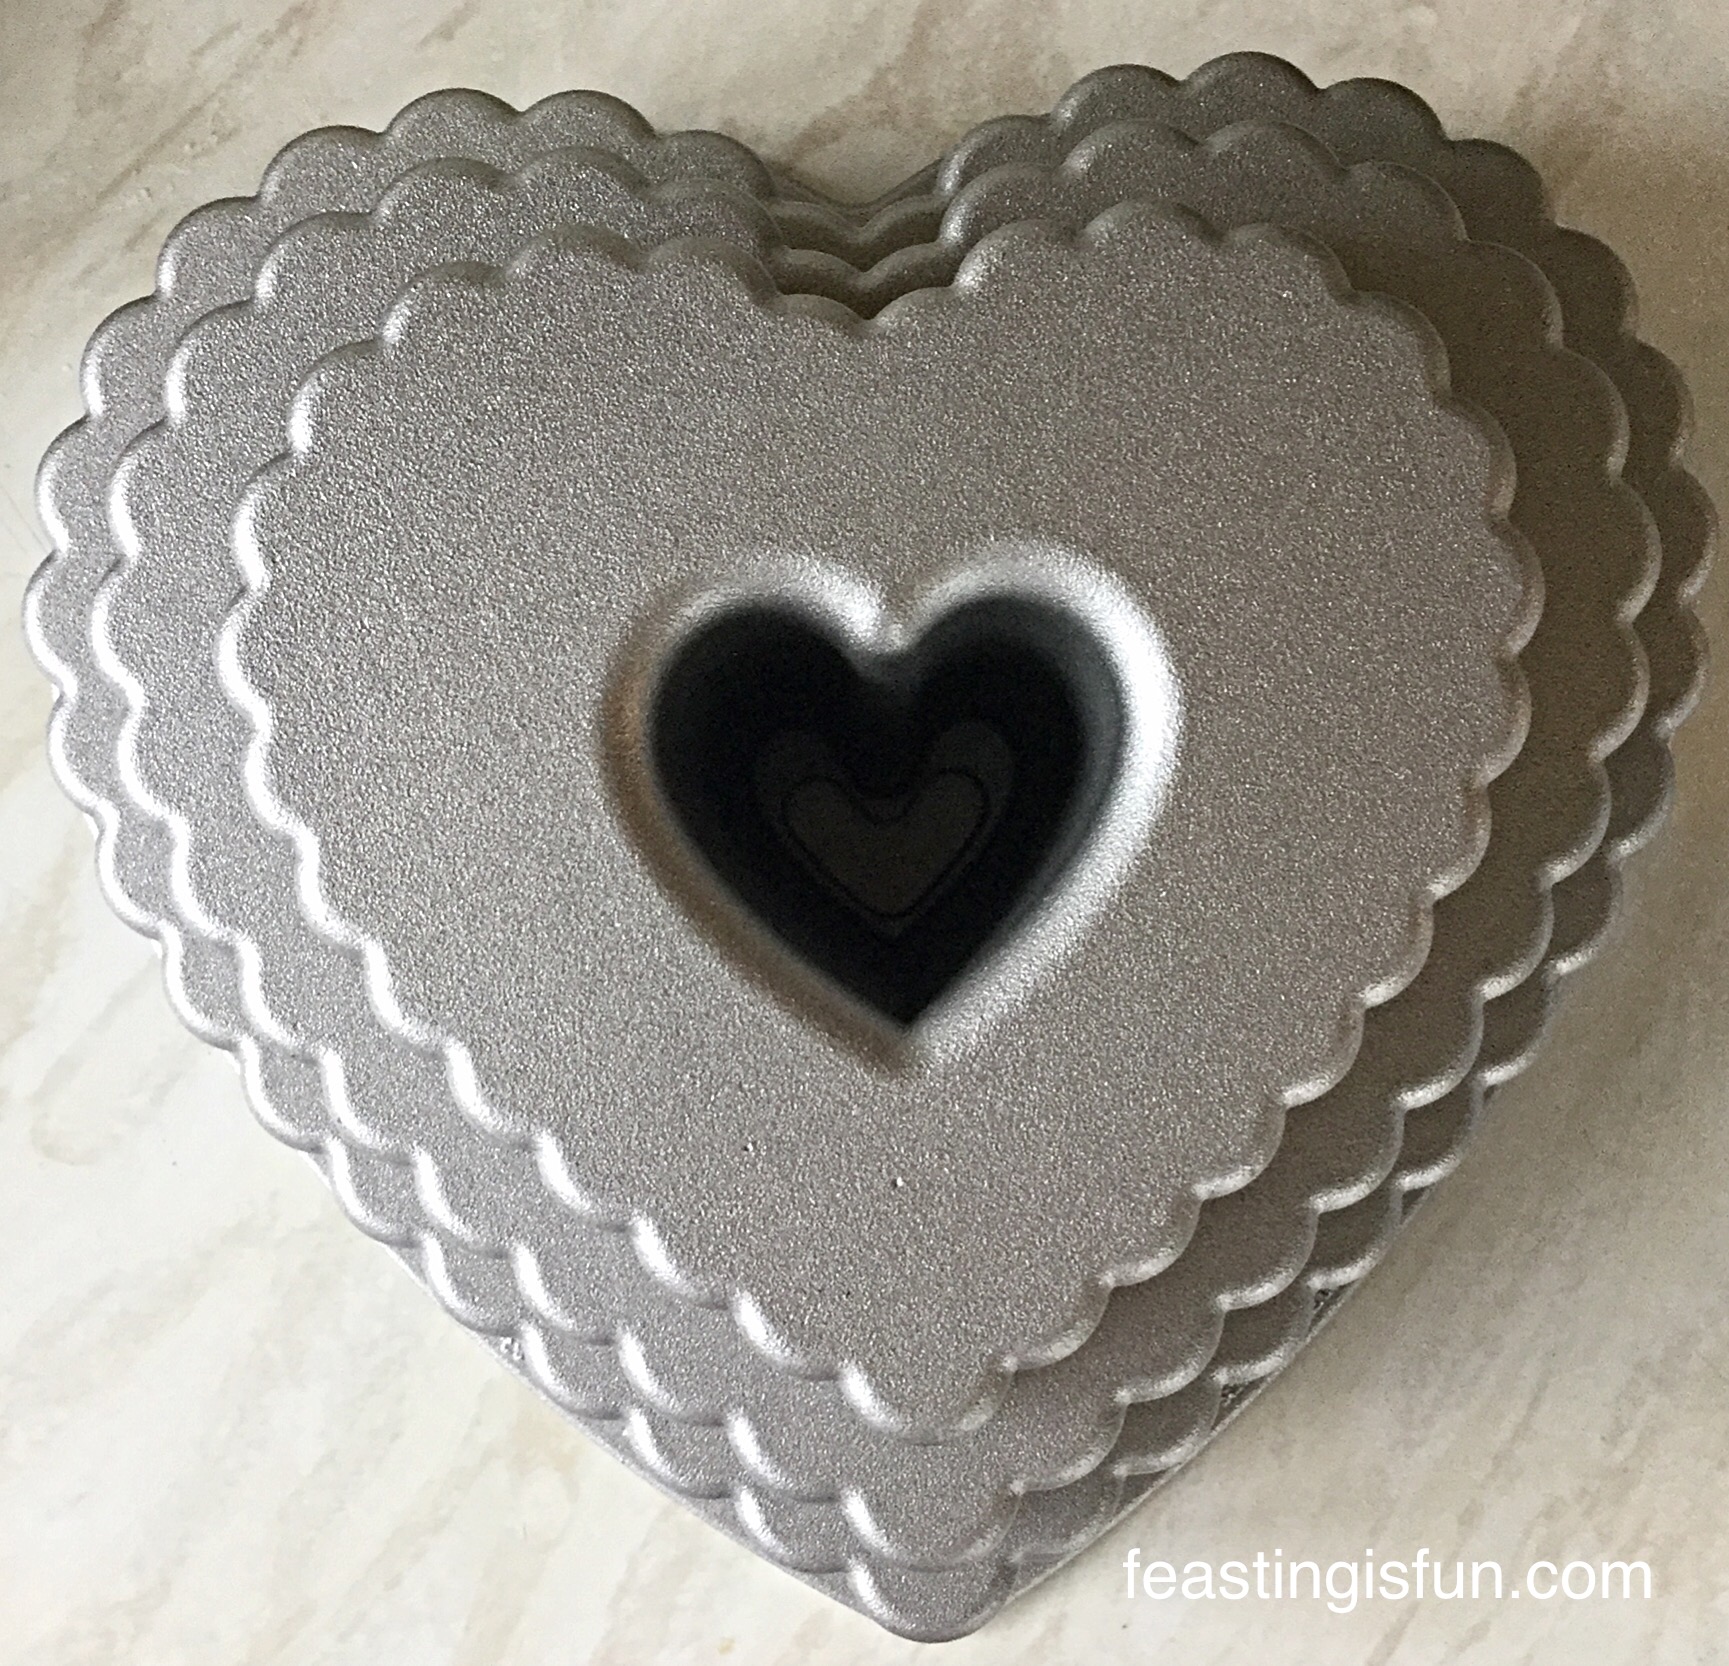
As I have never made a tiered, or stacked cake, this beautiful cake tin seemed the perfect choice. At the time of deciding to use this tin I had absolutely no idea how I would decorate or ice it. I’m big on planning NOT! Can you tell?

Fortunately I have a lovely friend, who I met on Twitter, called Tom. He has his own business Iced Rainbow where he makes absolutely beautiful jewellery. Happily for me, Tom is also a keen baker and creates the most beautiful cake toppers. It really is worth taking a look at his website.

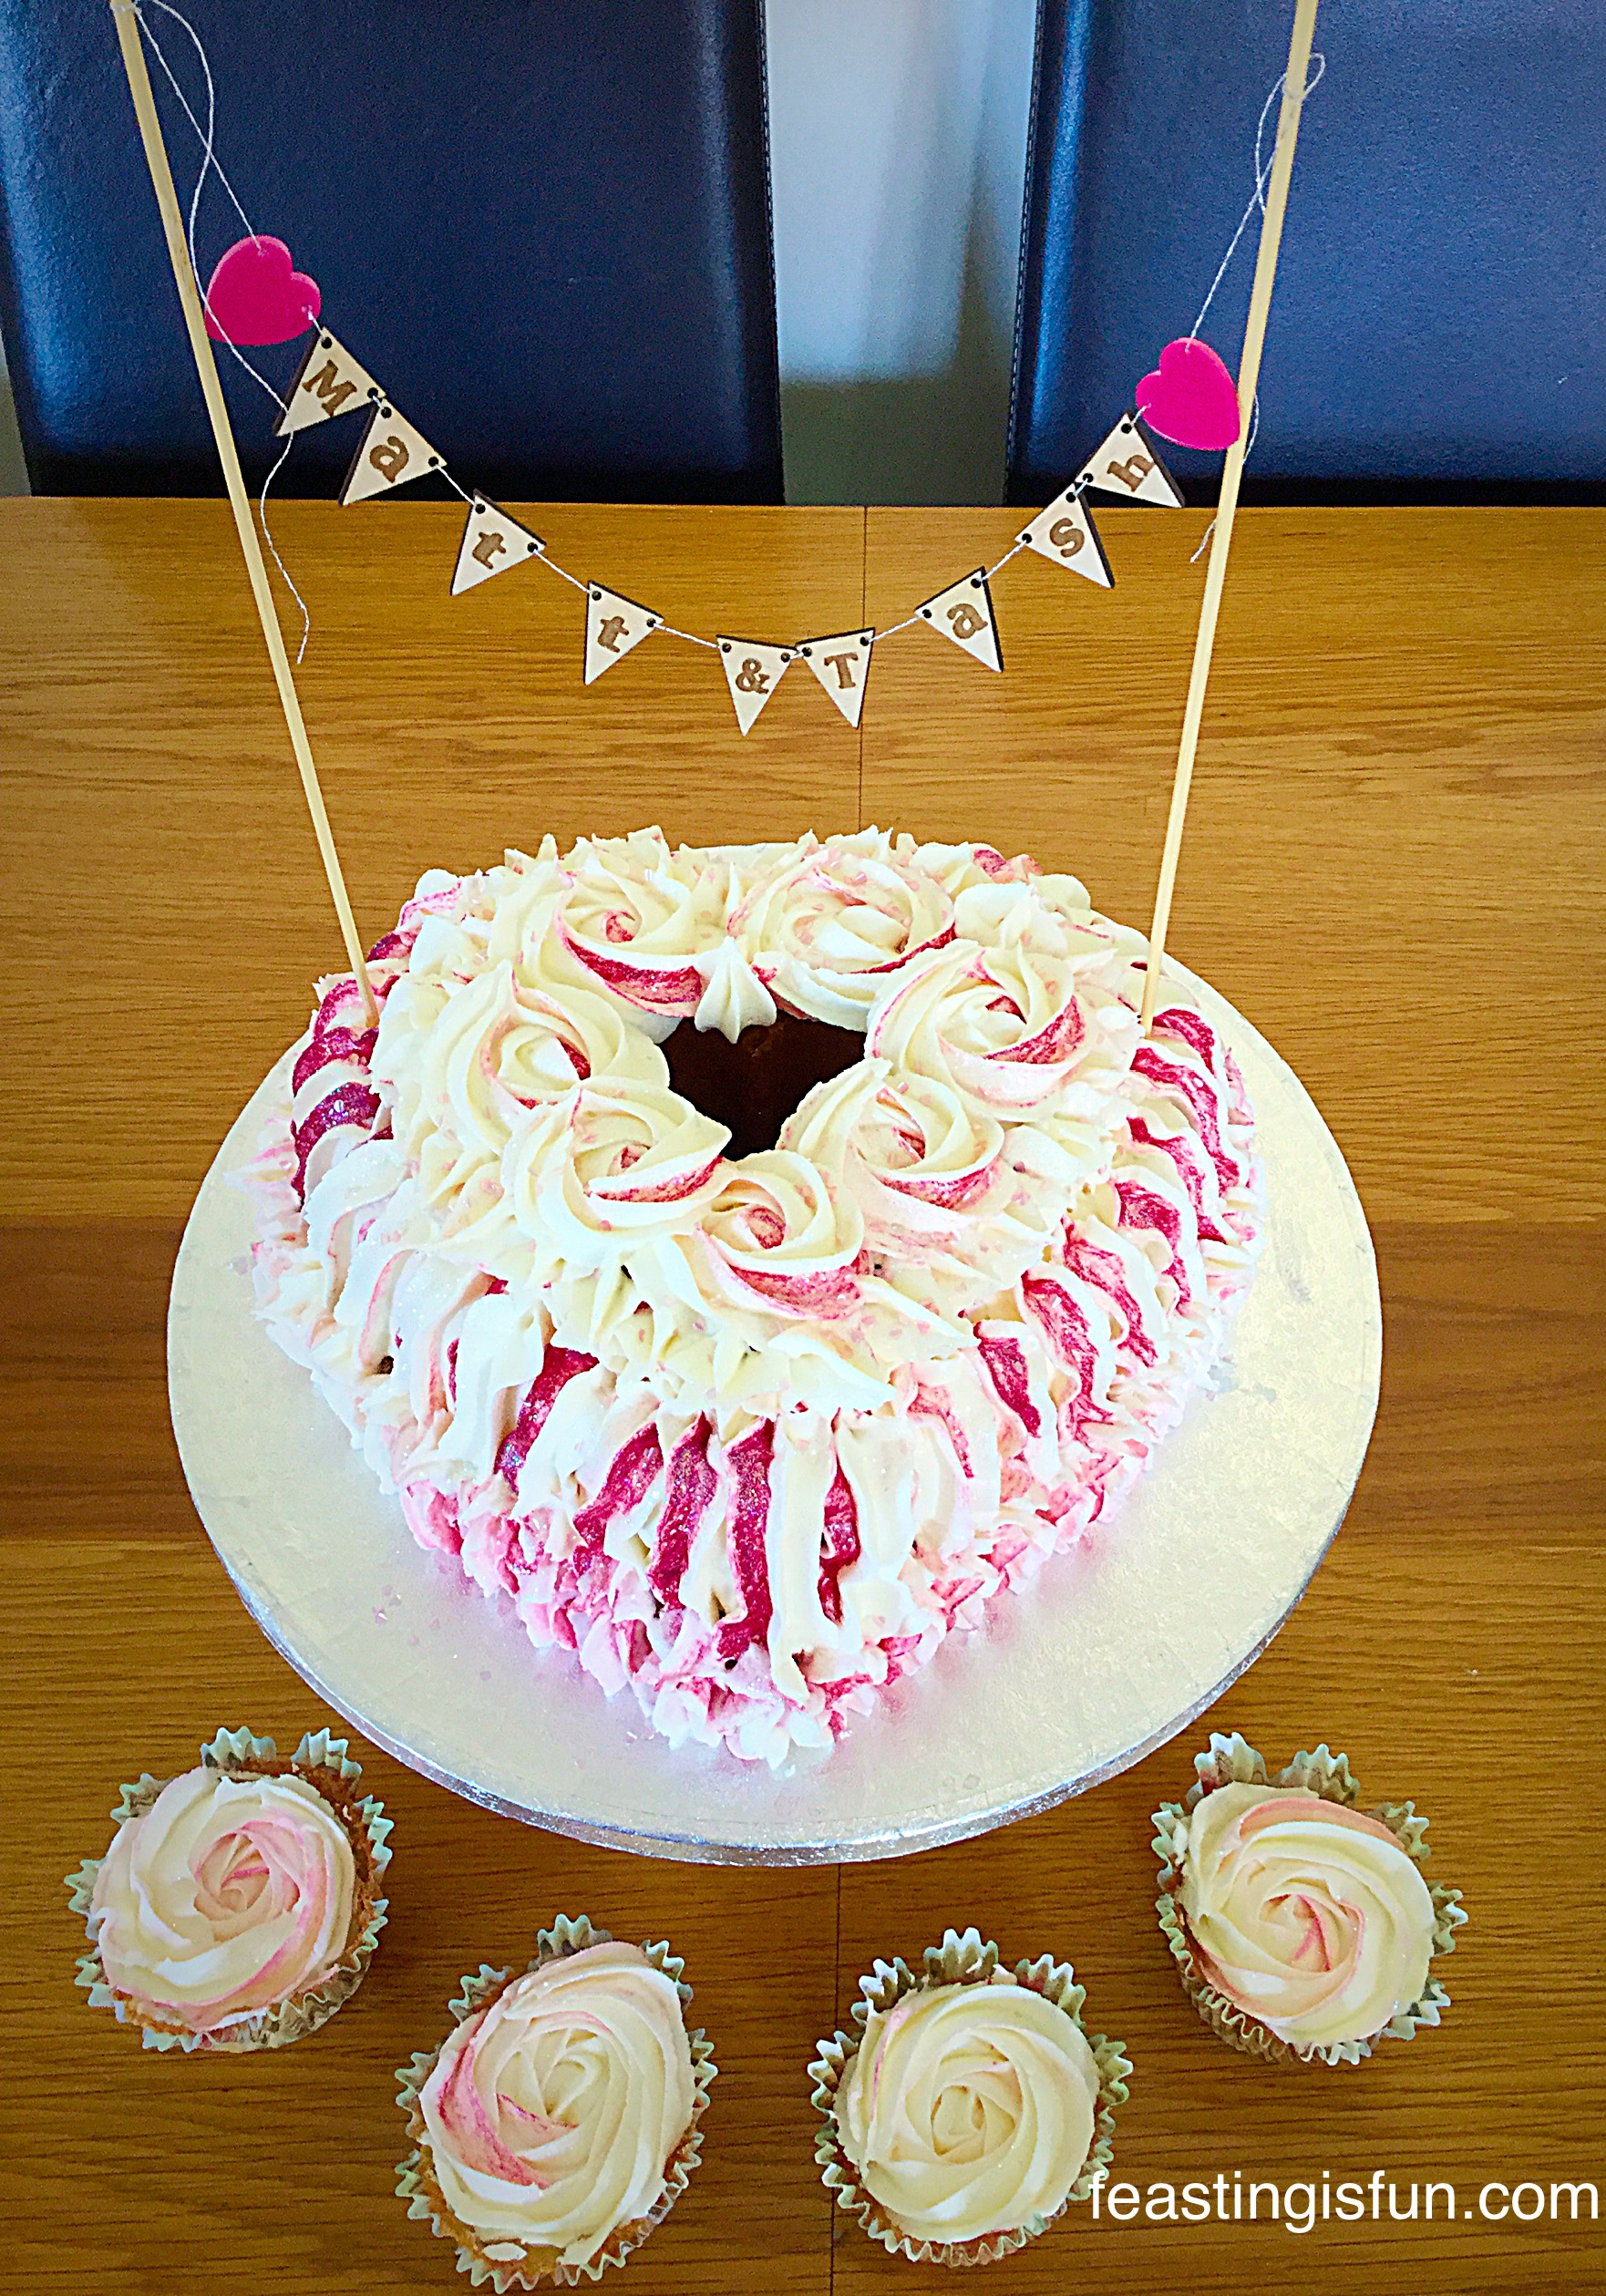
After discussion with the parents of the happy couple, I decided to opt for a personalised bunting topper. Due to the shape of the cake and the heart shaped hole in the middle, I thought it would not only look pretty, but also add height to the cake.

MT Heart Engagement Bundt Cake
Once the cake is eaten the happy couple have a beautiful, personalised keepsake.

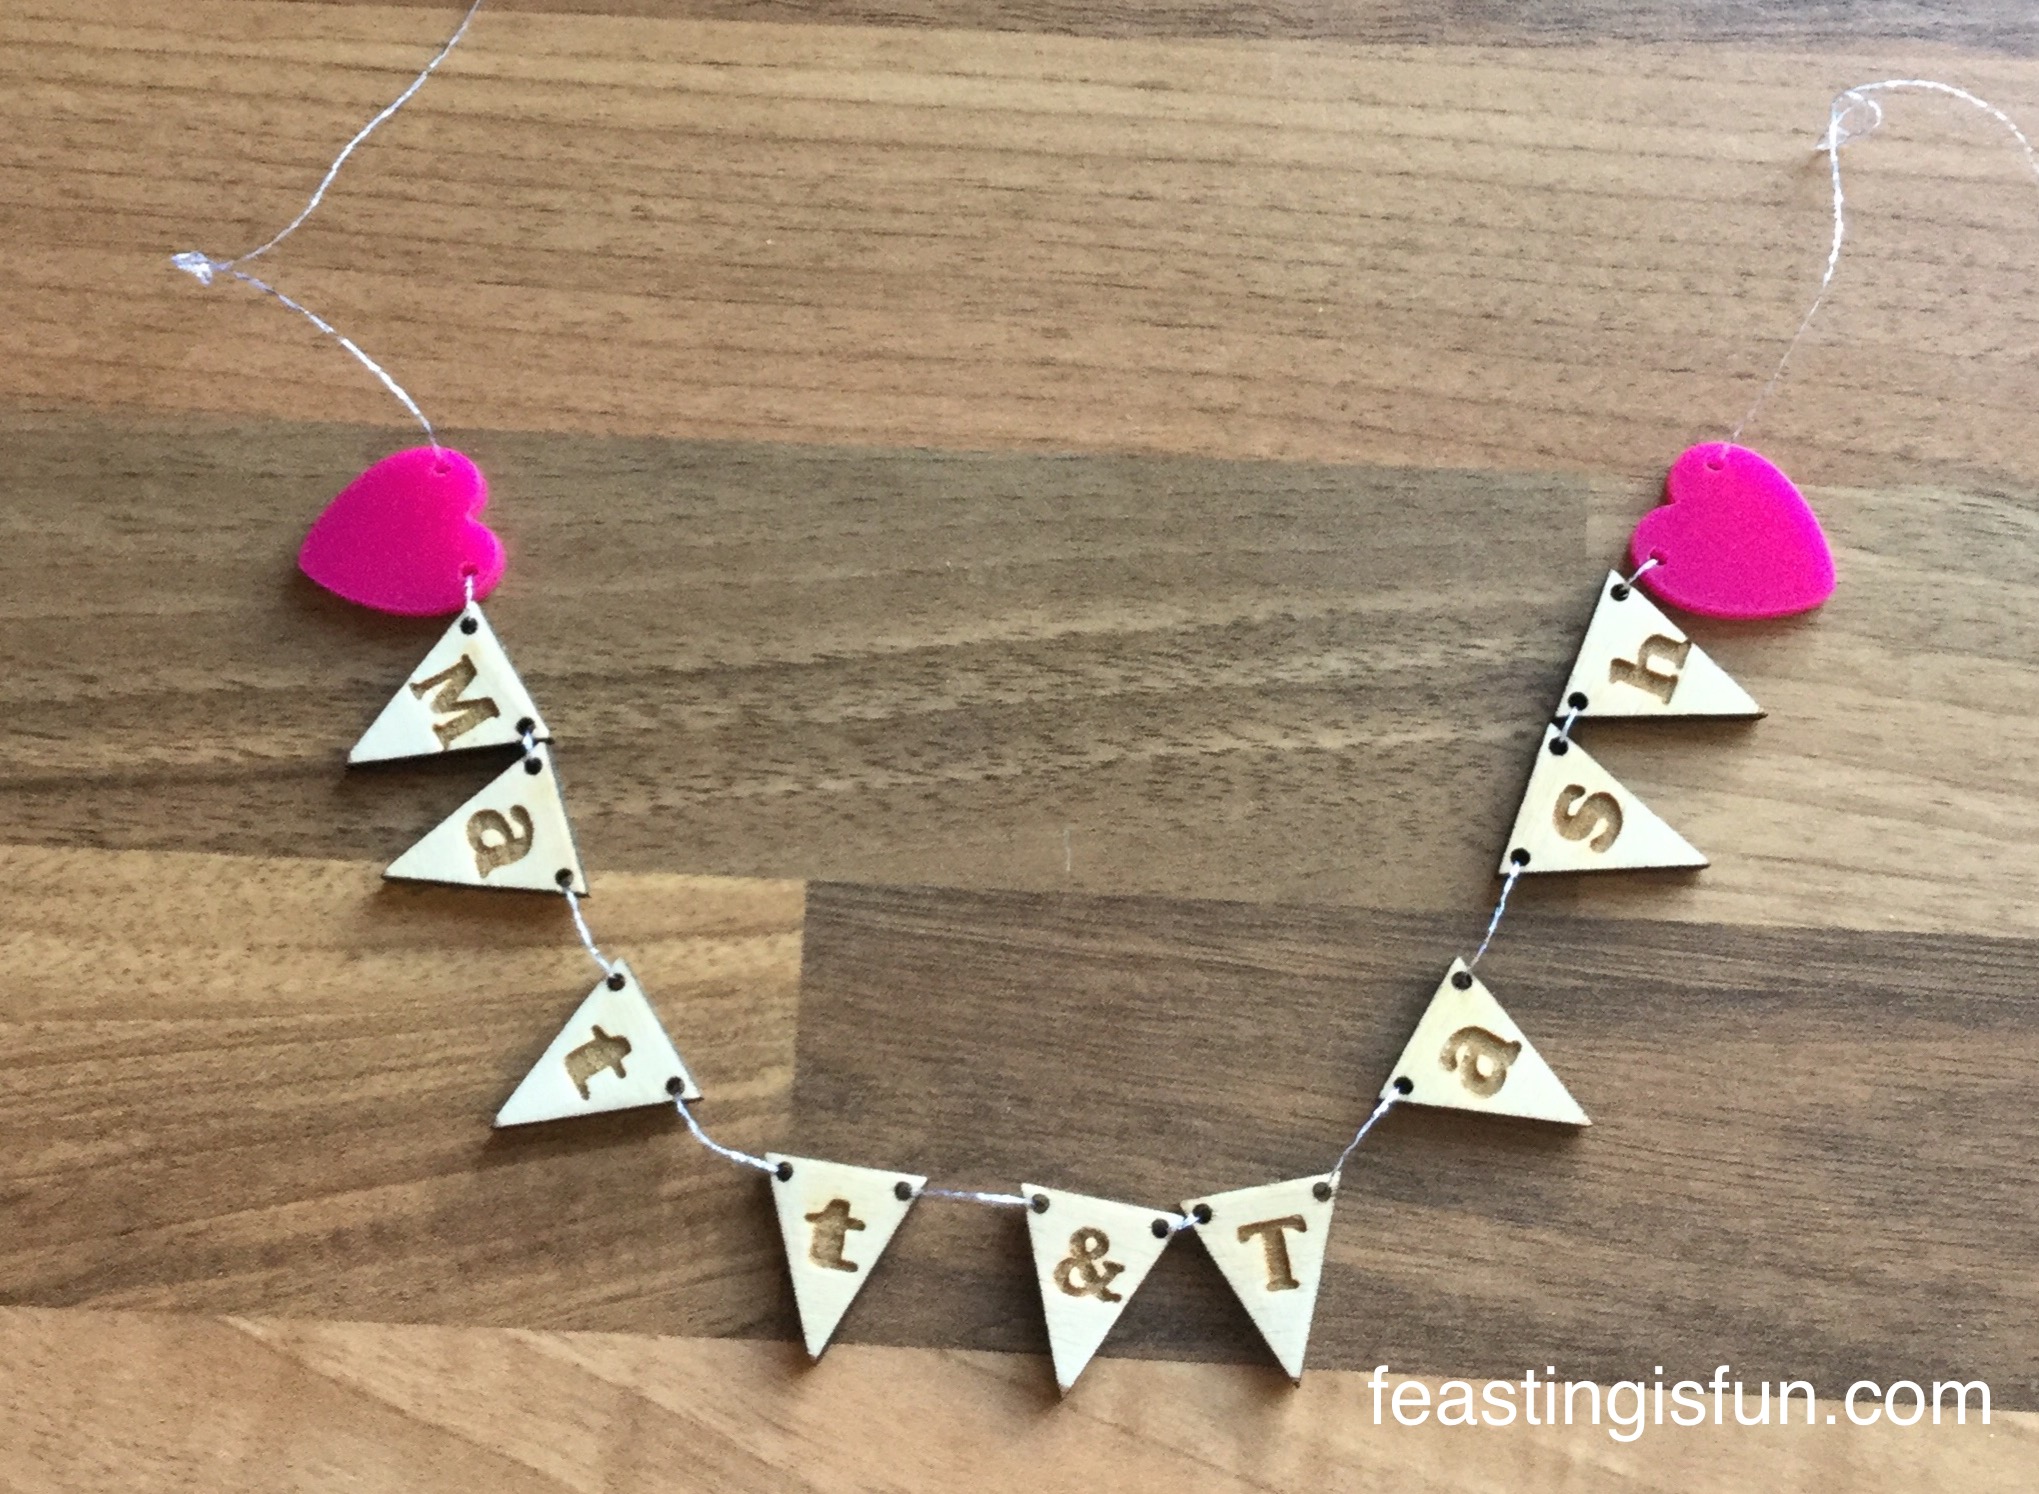
Tom was brilliant. He took my vision for how I wanted the bunting to look and turned it into a reality. Thank you Iced Rainbow for making my dreams a reality and for making the bunting at such short notice!

Next I had to decide on the flavours. Sugar and Crumbs sell a range of naturally flavoured icing sugars, amongst other baking ingredients and equipment. After much secret discussion, we decided to keep the cake plain, flavoured only with vanilla and use Sugar and Crumbs raspberry ripple flavoured icing. I was very happy as it is one of my personal favourites.

I still hadn’t decided how I was going to ice the cake!

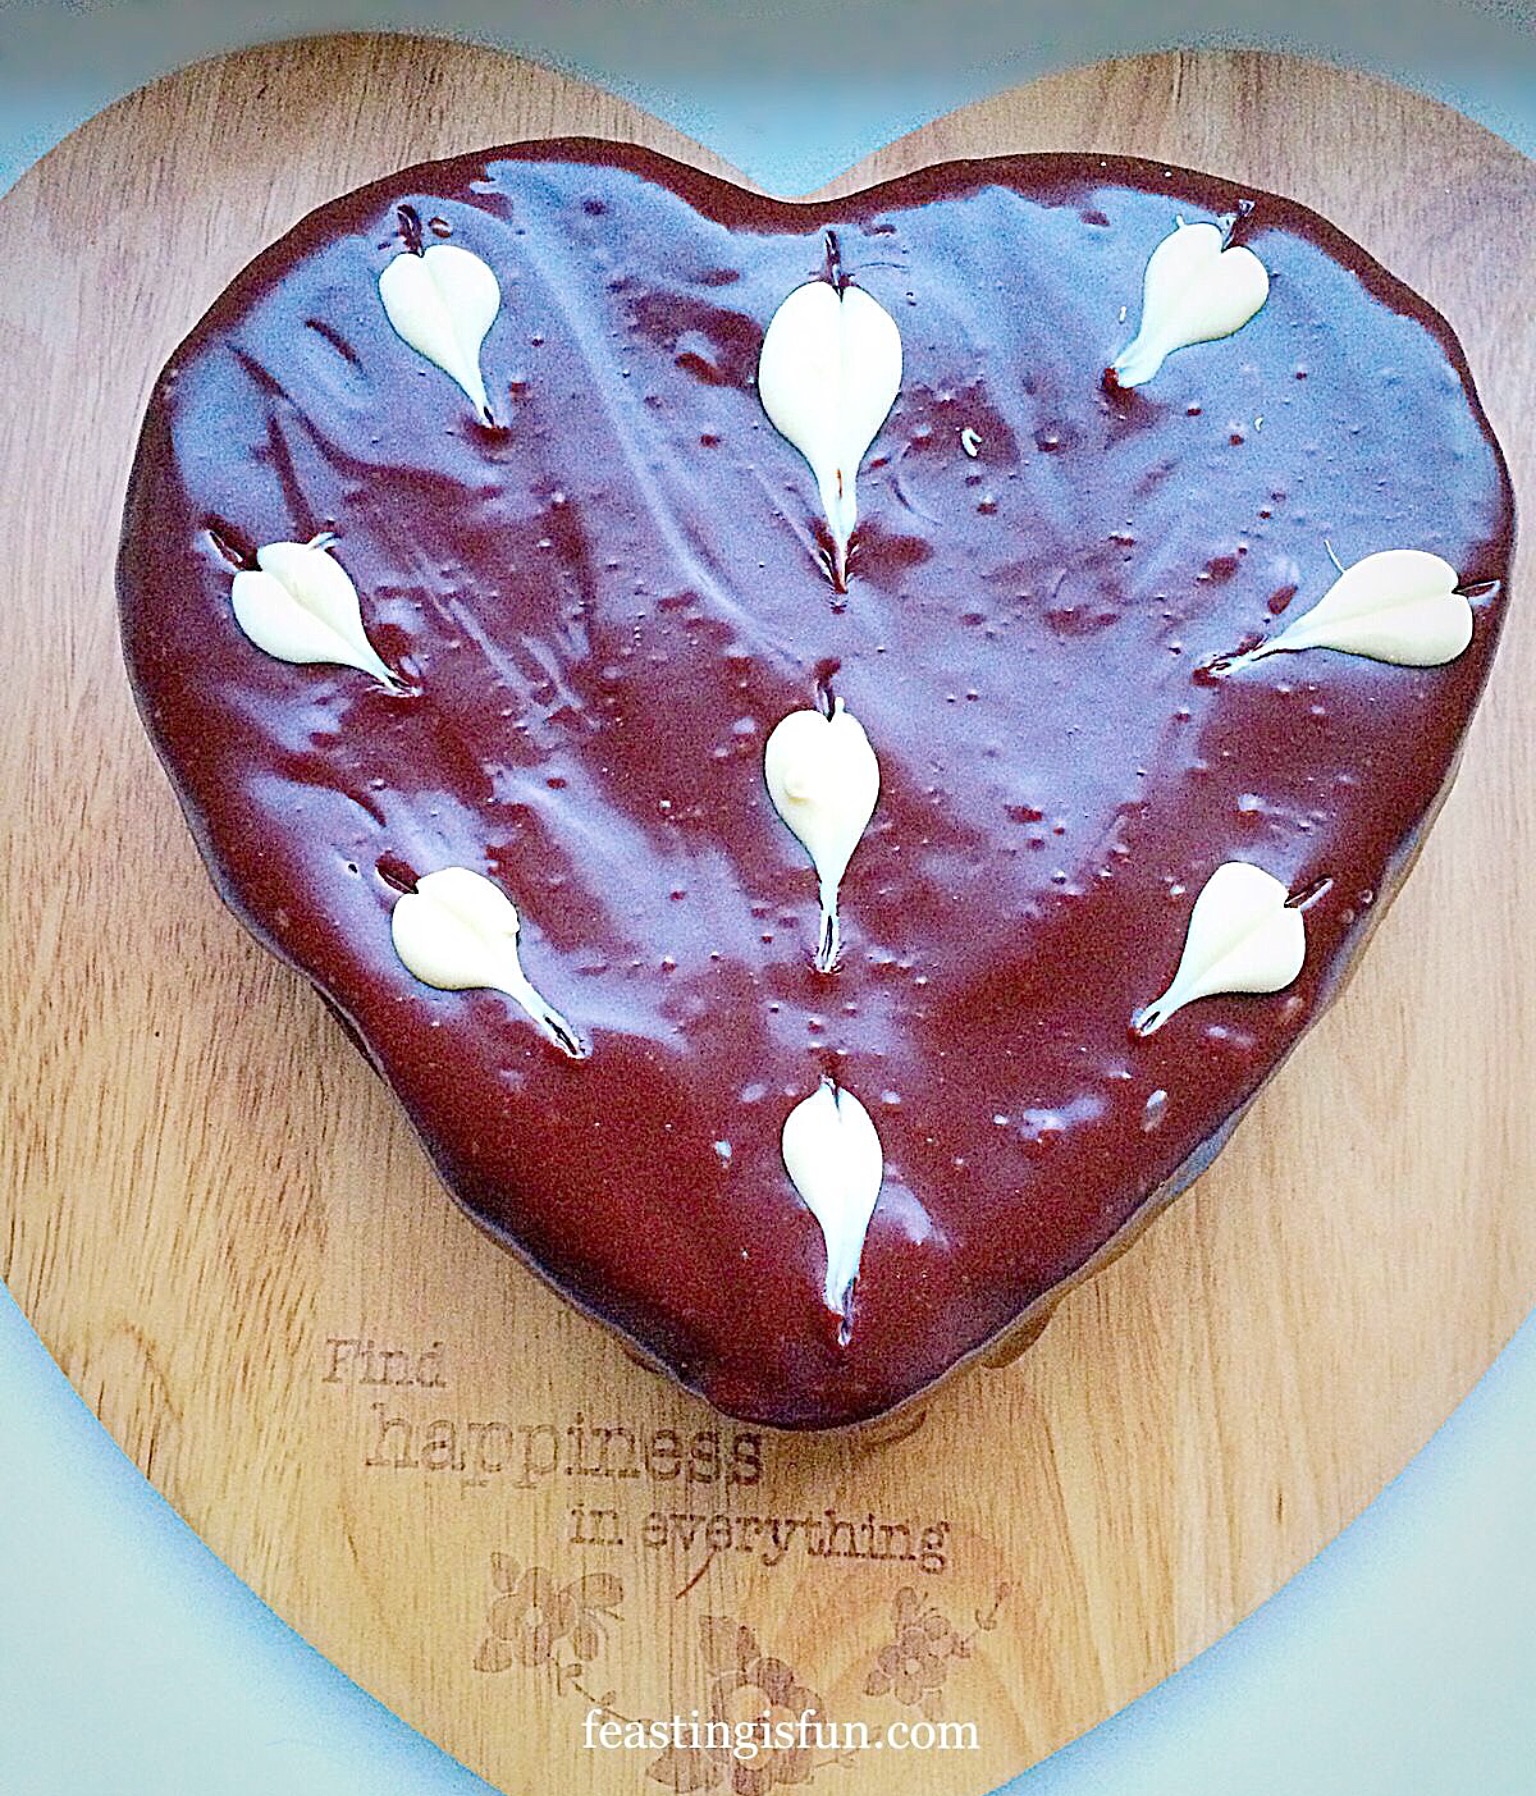
After having such success with glazing my Lemon Blueberry Bundt Cake I was tempted to do the same with the Heart Engagement Bundt Cake.

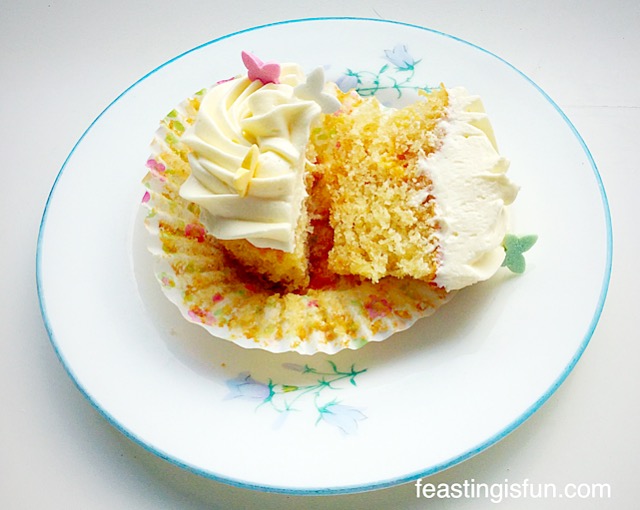
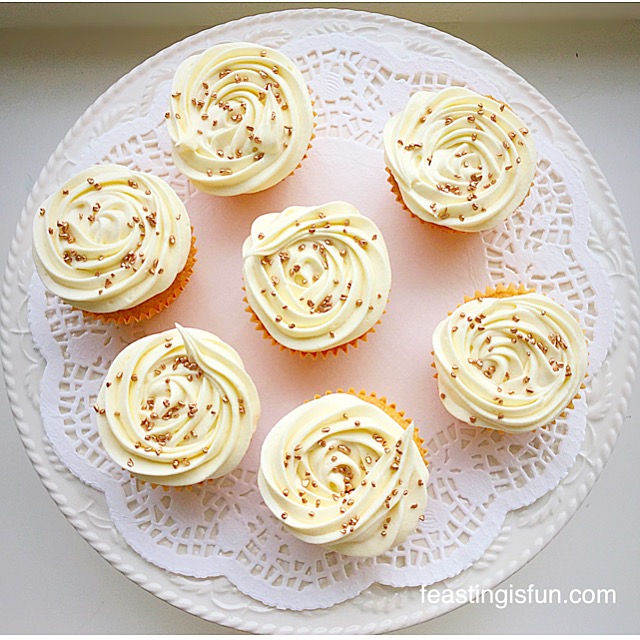
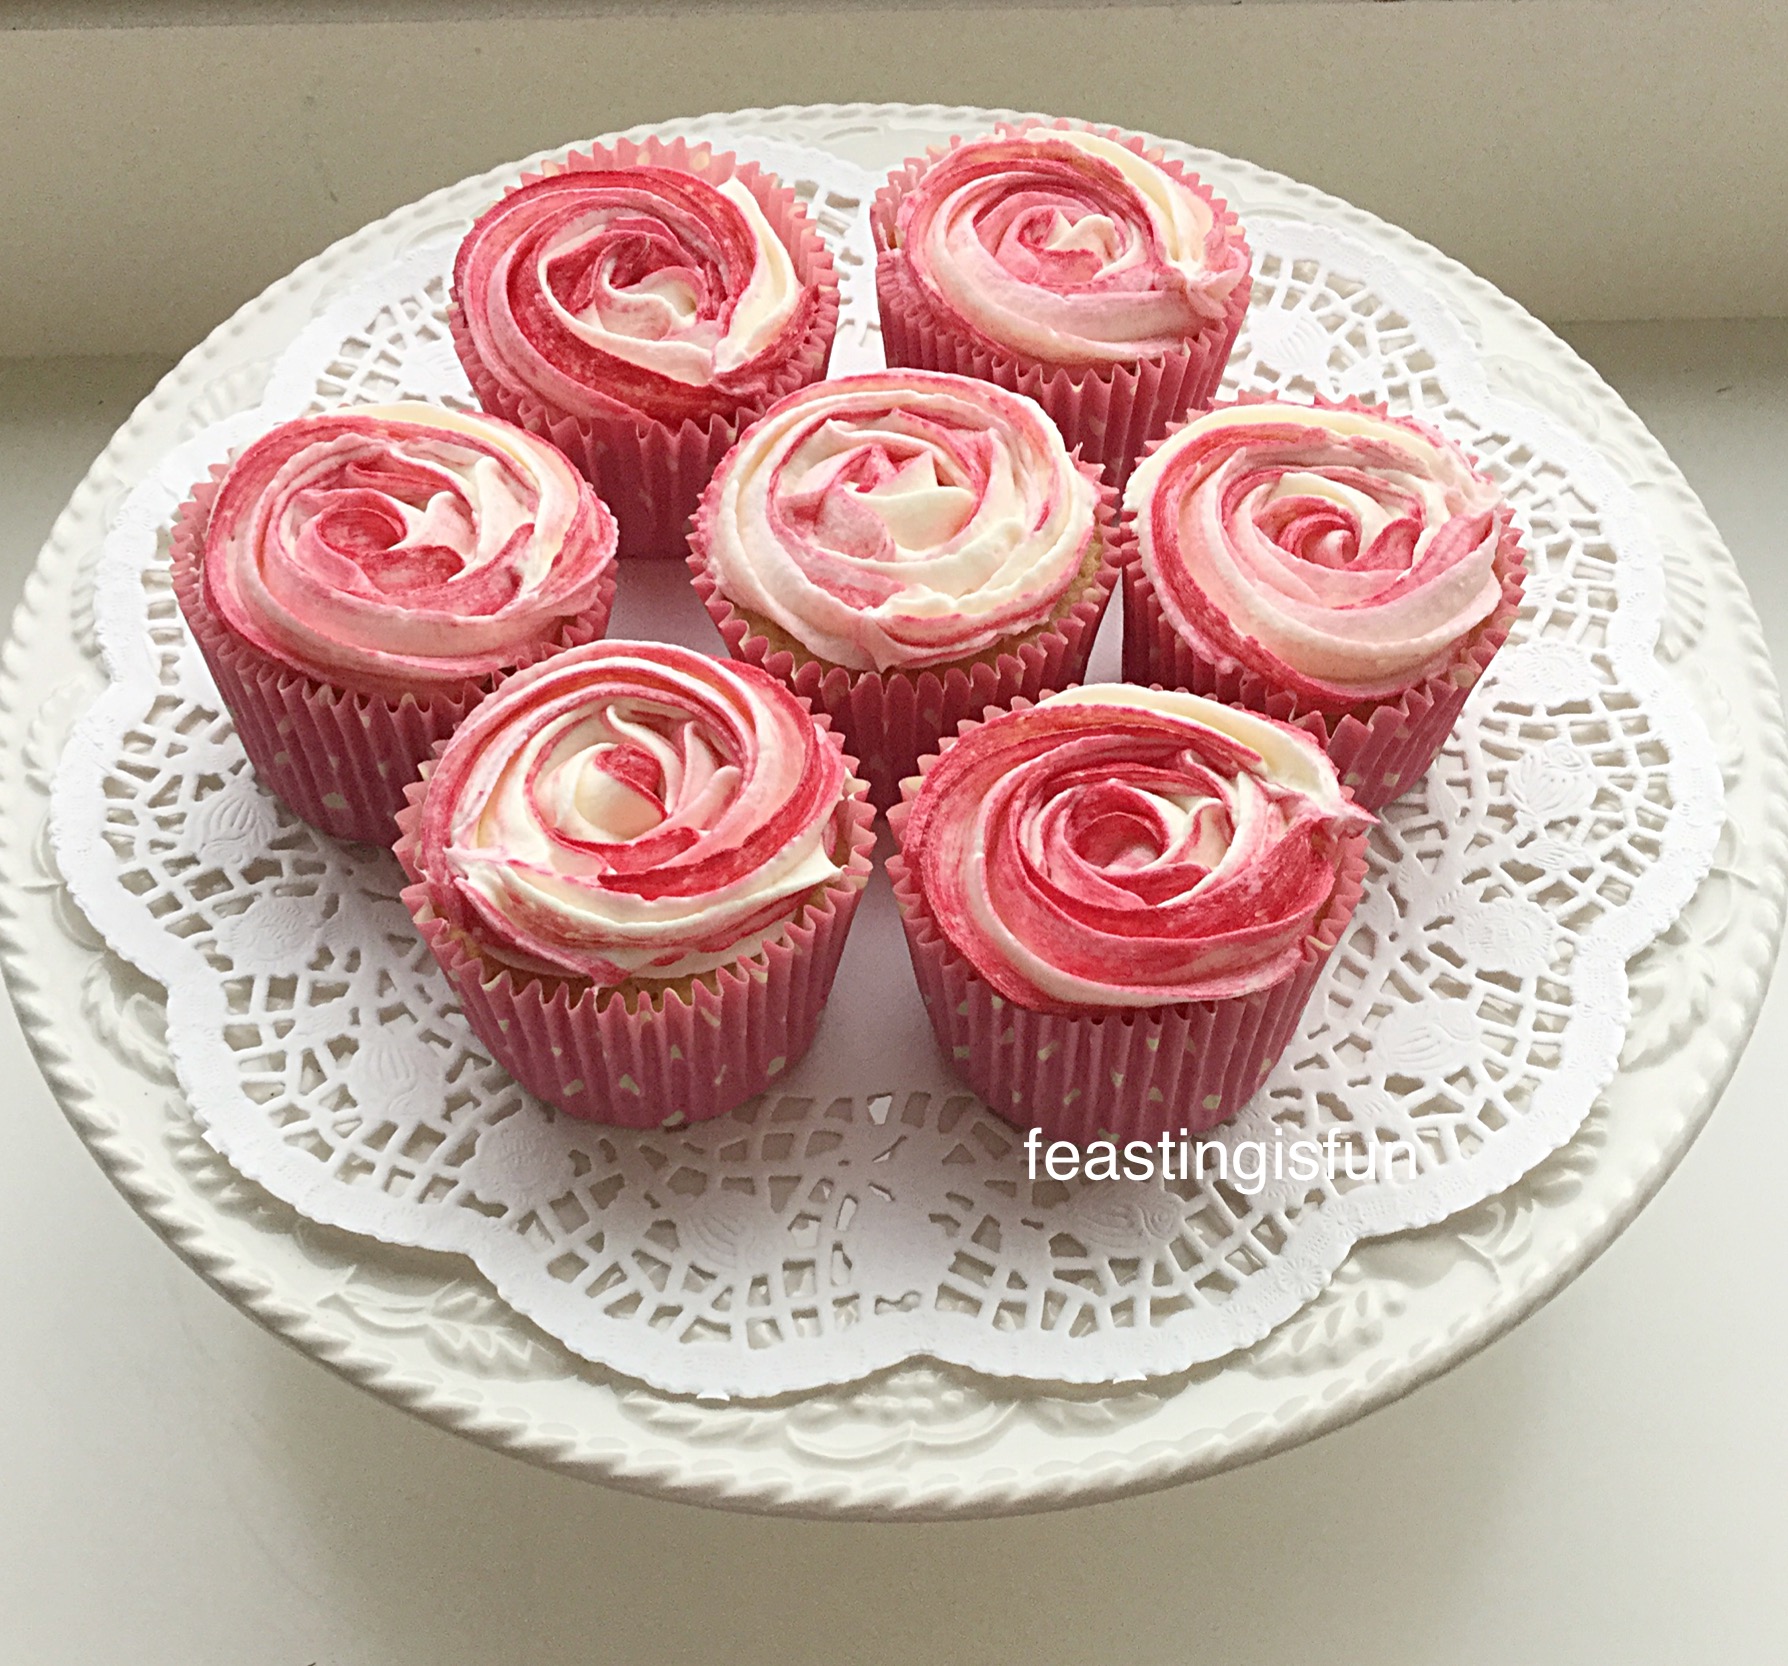
Using the raspberry ripple icing meant that if I used buttercream I could create the same rippled effect as on these Raspberry Ripple Almond Cupcakes.

MT Heart Engagement Bundt Cake
Heart Engagement Bundt Cake the buttercream roses look so pretty swirled on the top.

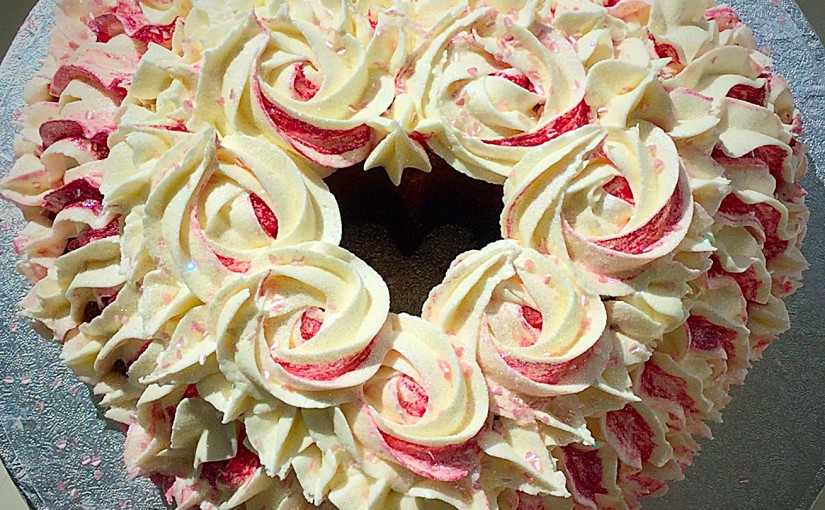
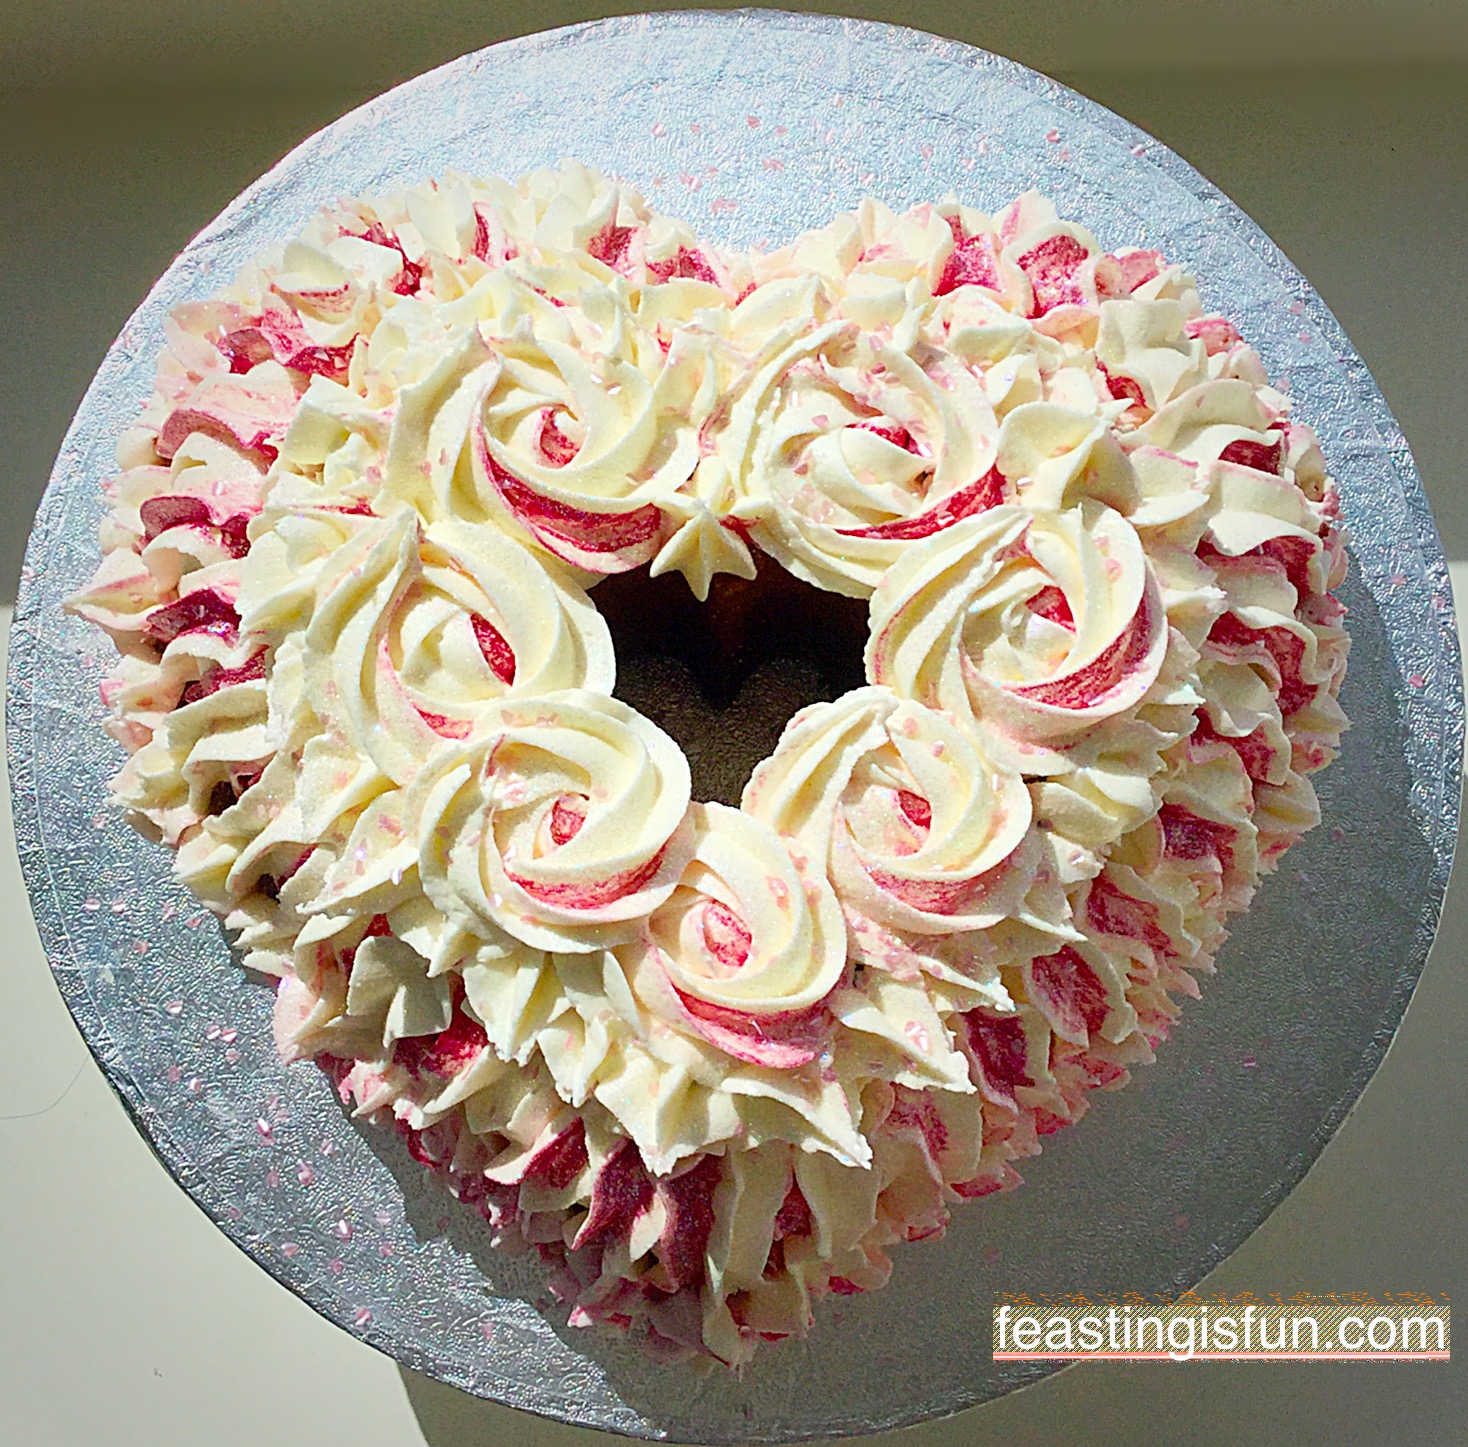
As you can see I decided to pipe raspberry ripple buttercream icing onto the cake. Aside from cupcakes this is only the second time I have fully covered a cake with piped buttercream. It wasn’t as scary as I had imagined!

The beauty of buttercream is that, if you do make a mistake, it can fairly easily be removed and piped over. I tell you this from experience 😉.

MT Heart Engagement Bundt Cake
Heart Engagement Bundt Cake here you can see the piping on the sides.

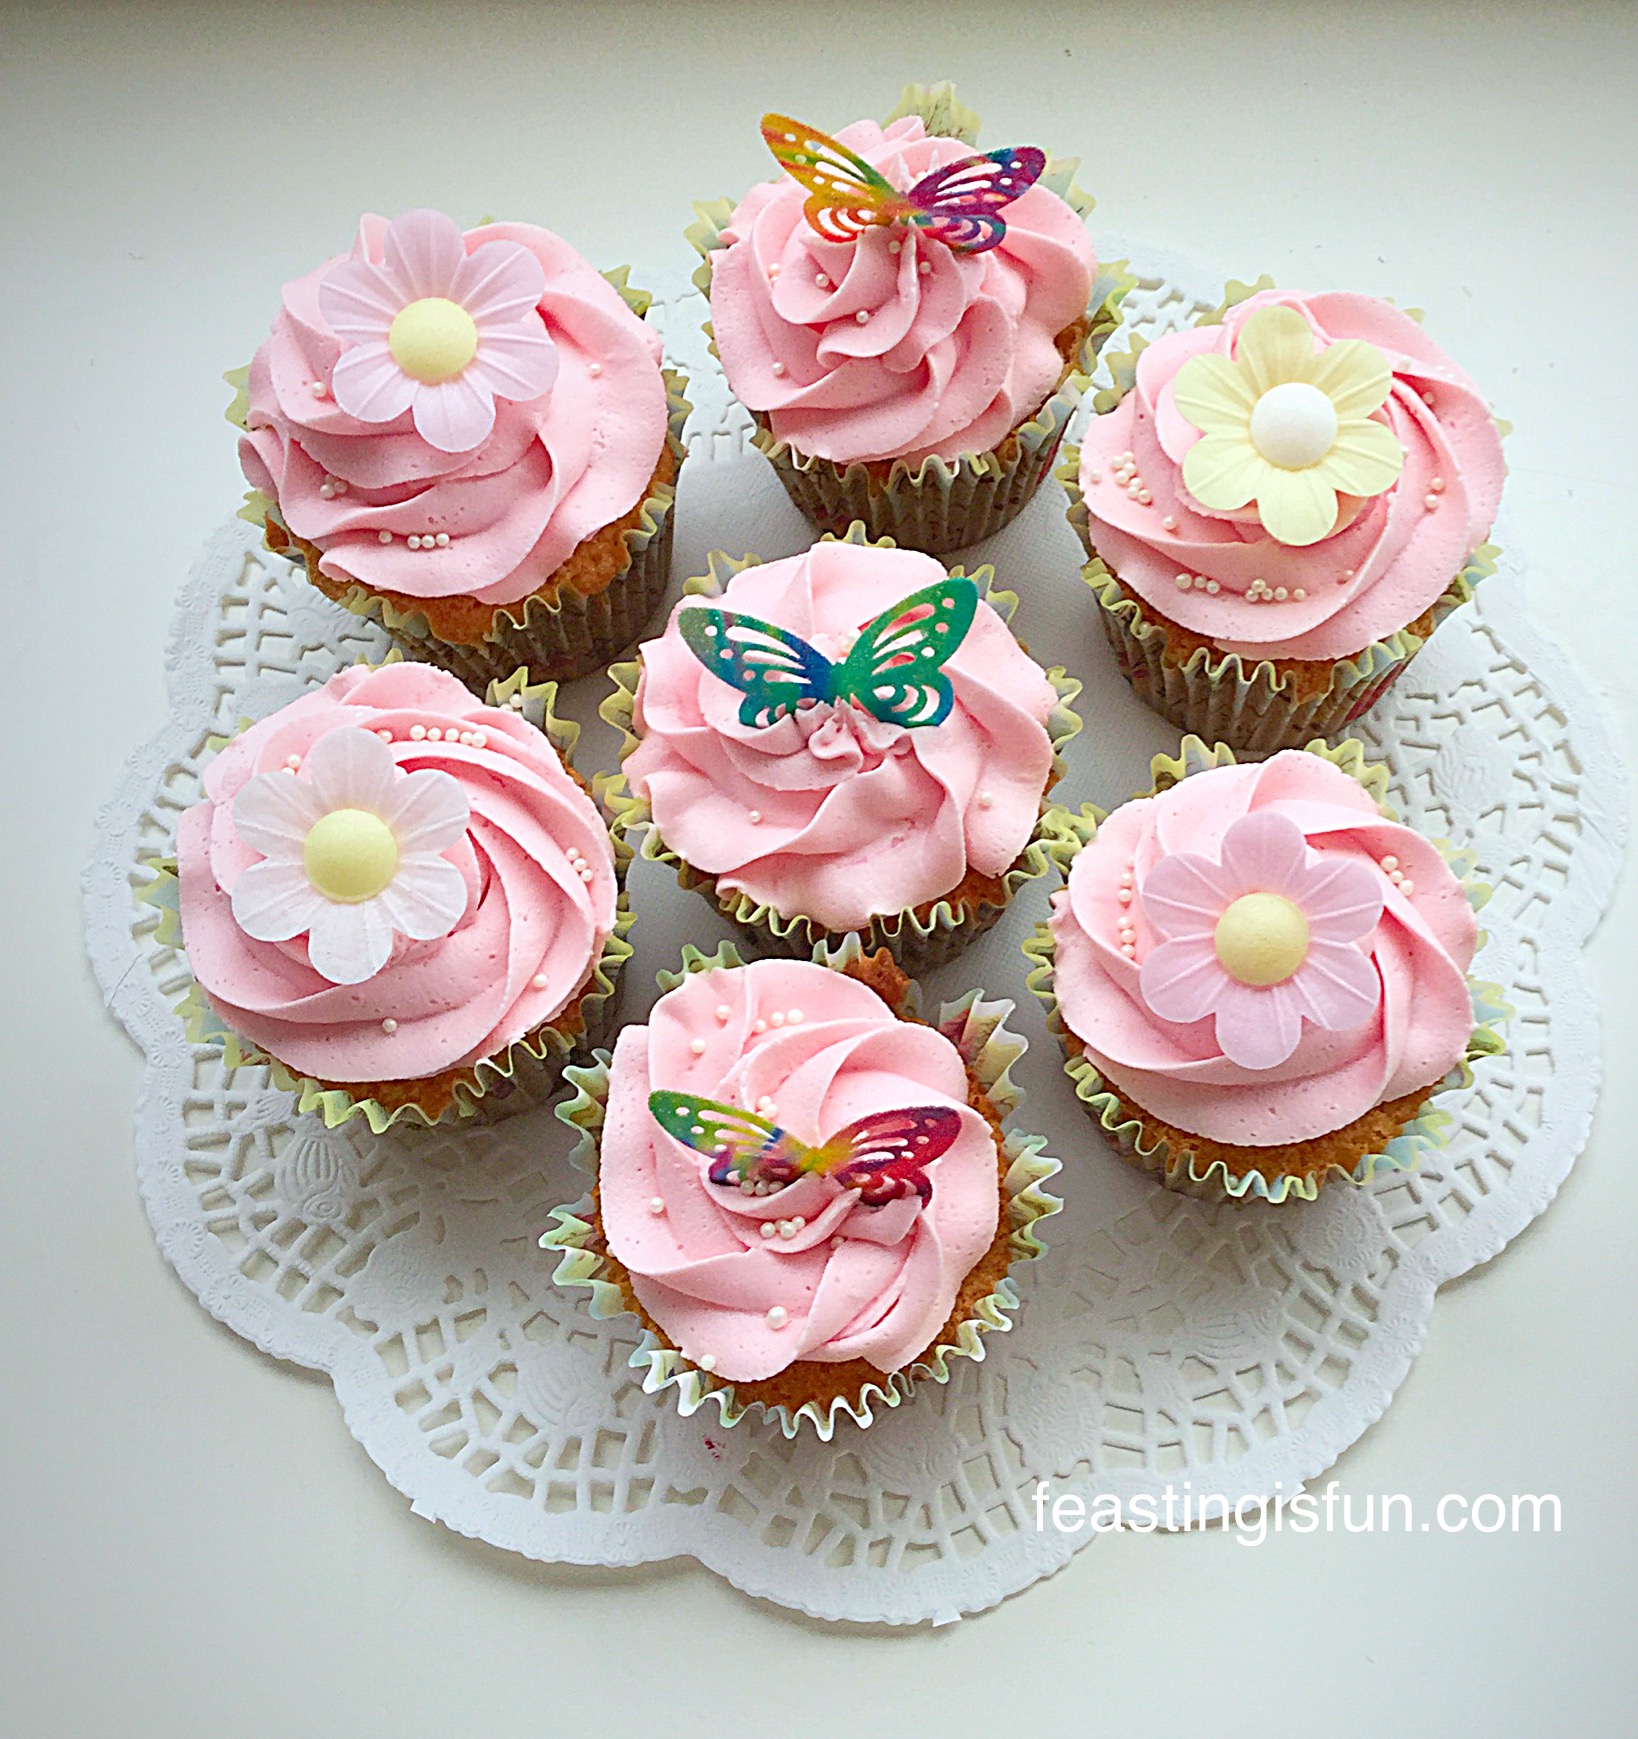
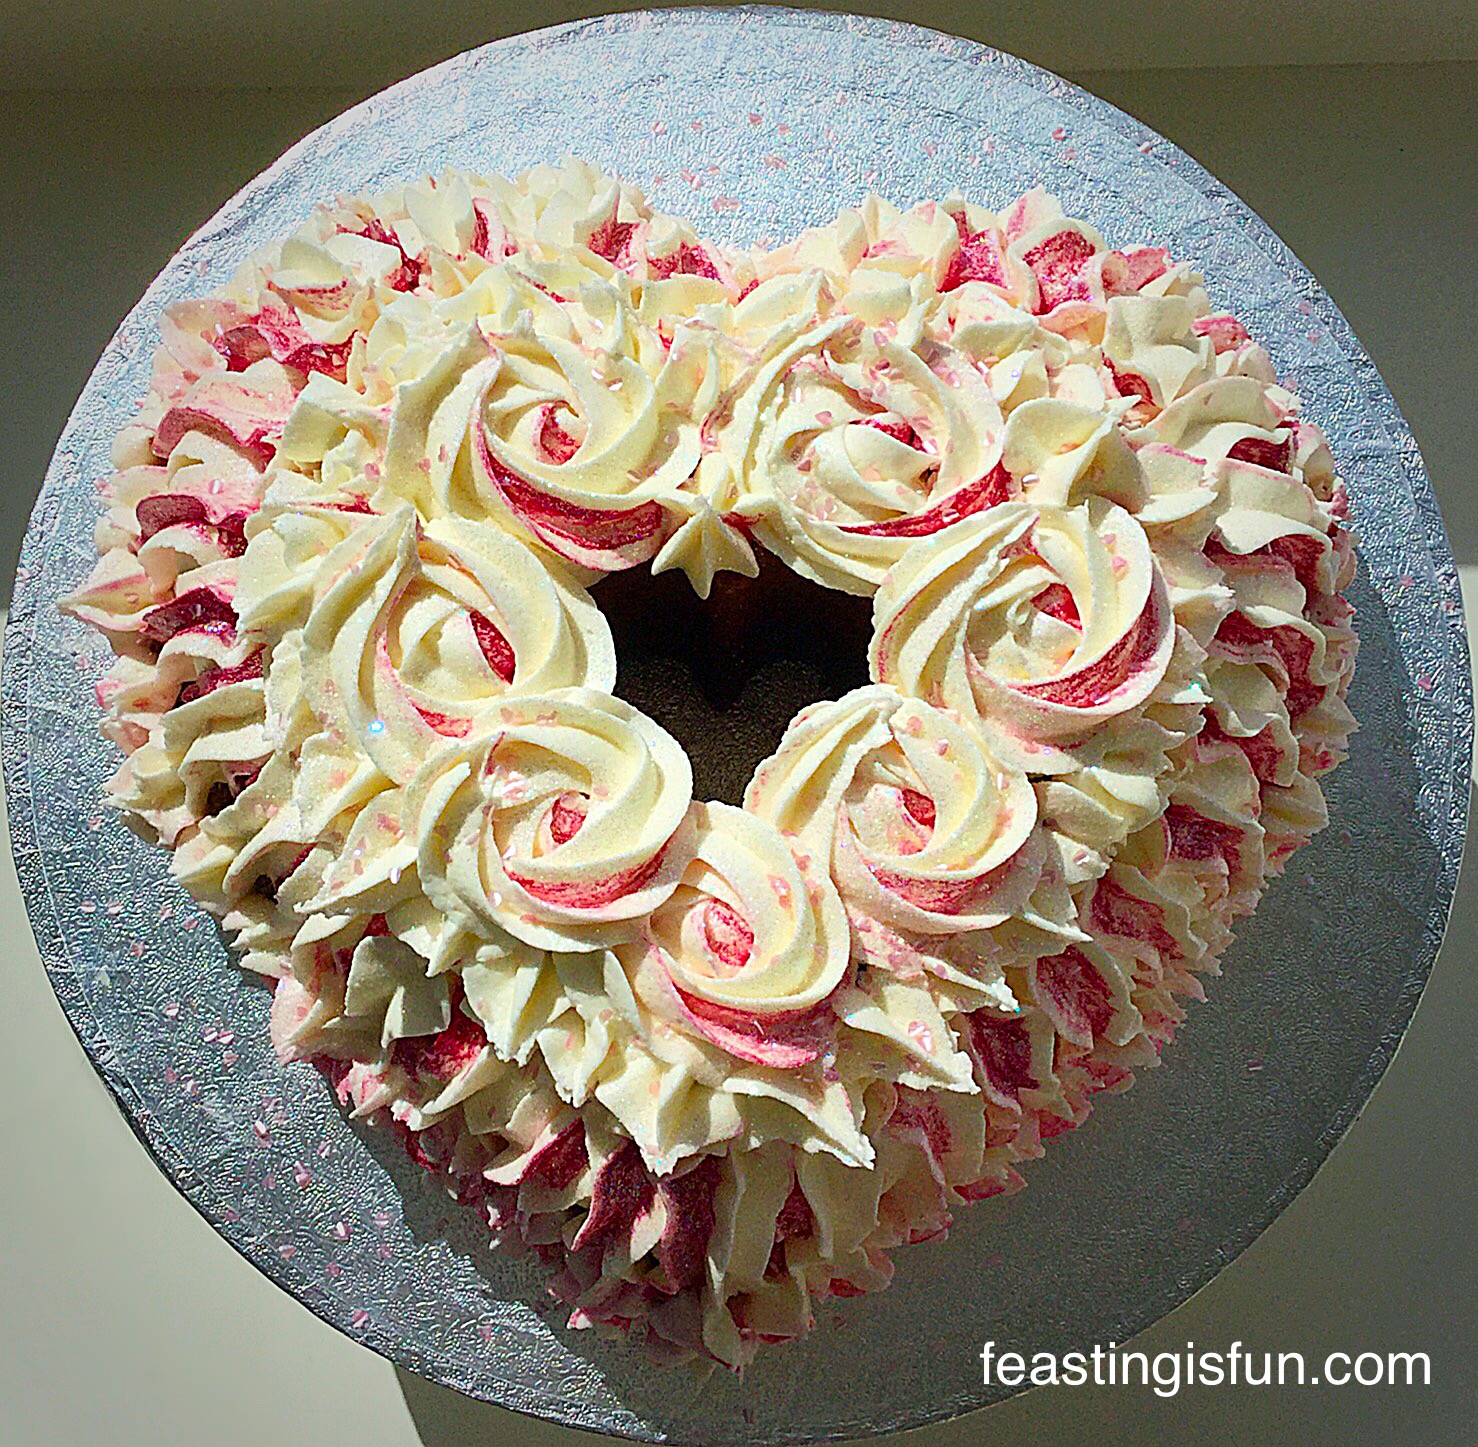
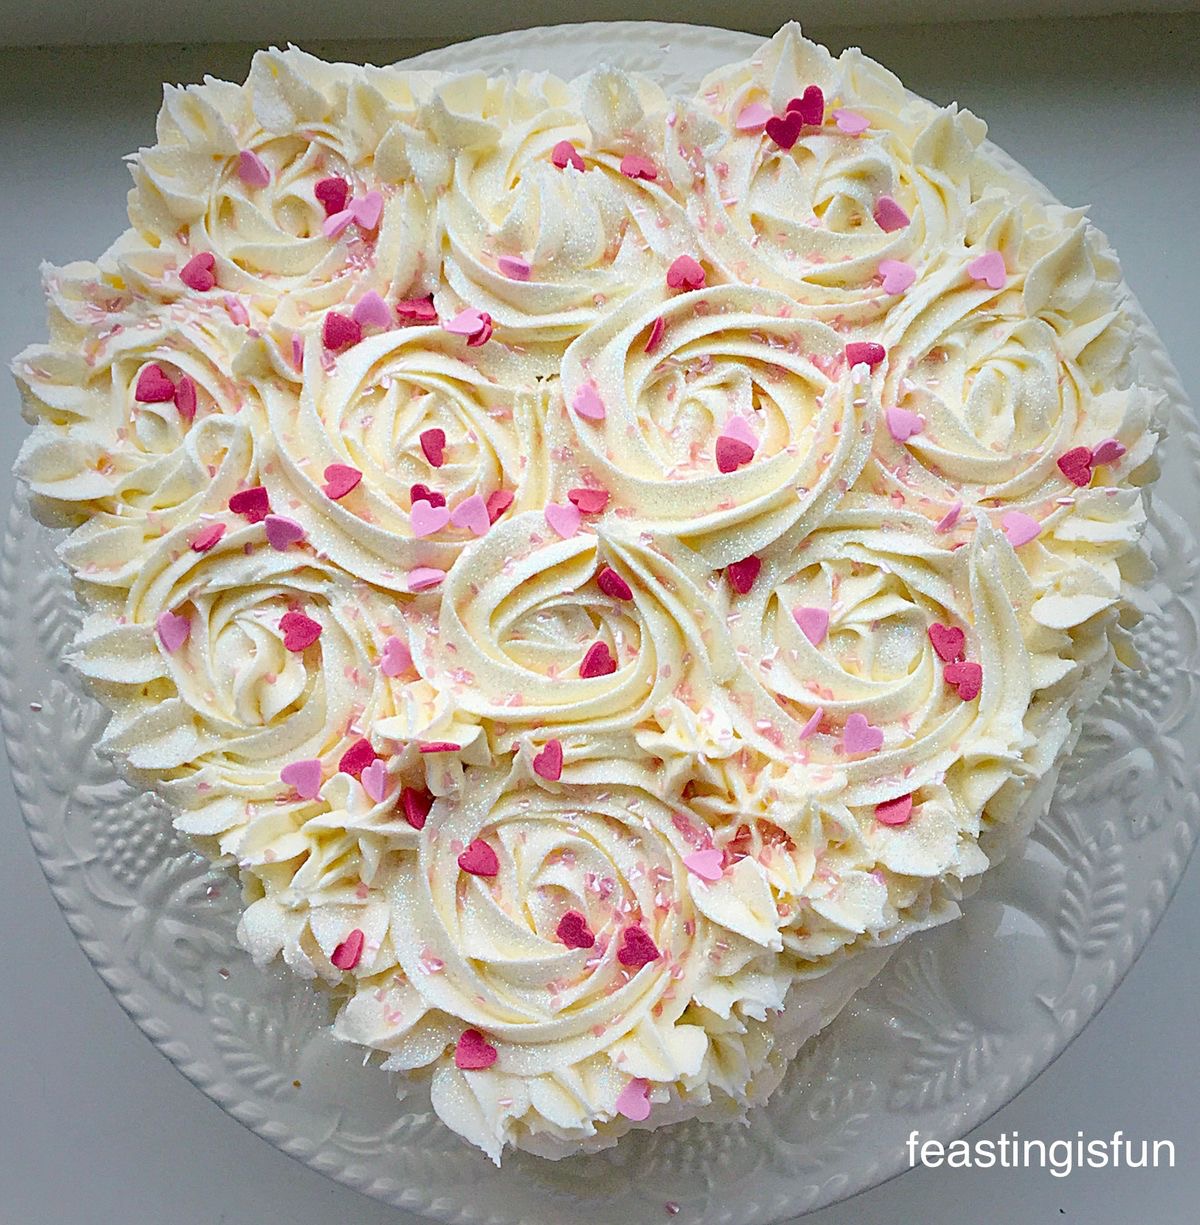
When deciding what pattern to pipe onto the cake, I knew I wanted to pipe swirled roses on the top. As for the sides, I really didn’t decide until I had the cake in front of me, piping bag in hand!

Once the roses were piped I decided to go with the lines of the cake and piped the second tier in fairly straight lines. Again I did the same for the bottom tier, although as this was not as deep, it looks like piped stars. I finished the top tier with piped stars to define the heart and fill in any gaps. All the piping was carried out using a Wilton #1M large star tip.

MT Heart Engagement Bundt Cake
Heart Engagement Bundt Cake the bunting perfectly sets off this beautiful cake.

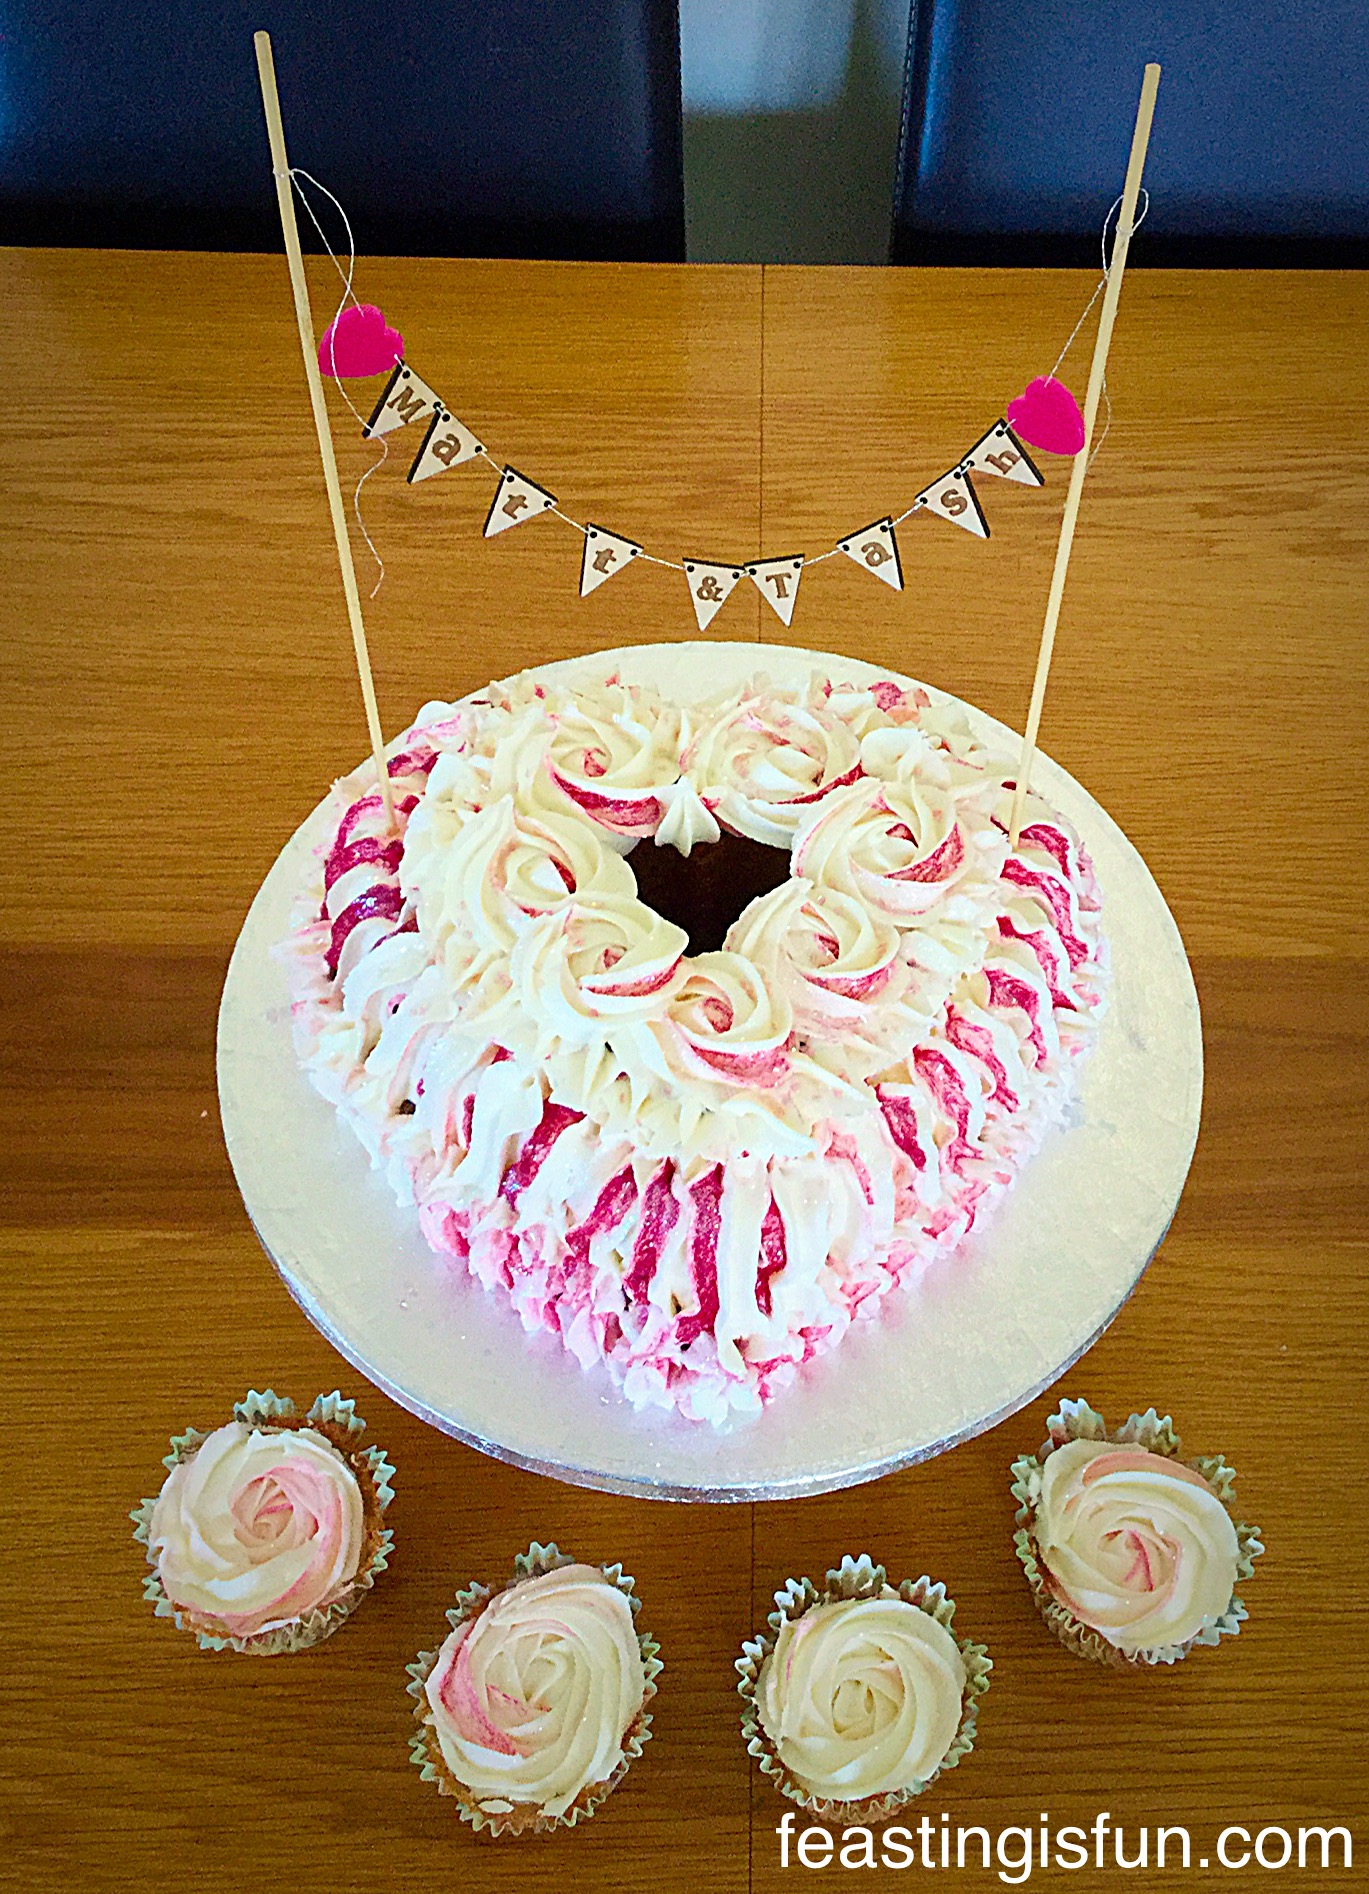
While it was great having a vision in my head of how the cake could look, once the bunting was in place, the finished version was so much better than I ever could have hoped for. A final sprinkle of tiny, pink, pearlised hearts and white, edible glitter and the Heart Engagement Bundt Cake was ready for the grand reveal.

The happy couple, Matt and Tash absolutely loved the surprise. Neither of them had any idea that this little surprise had been planned especially for them. They loved the cake and bunting, which was a huge relief for me! Together they enjoyed cutting the cake, good practice for their upcoming wedding and enjoyed eating it too.

I removed the bunting and packaged it back up, for them to keep and treasure forever. When all the cake has gone, they still have their personalised bunting from Tom at Iced Rainbow.

Recipe: Makes one Heart Engagement Bundt Cake – serves 20 people.

To make this cake you will need the Tiered Heart Bundt Tin made by Nordic Ware.

For the cake:

350g/12oz Unsalted Butter – at room temperature

350g/12oz Caster Sugar

2tsp Vanilla Extract – I use Nielsen-Massey

6 Large Free Range Eggs

350g/12oz Plain White Flour –

3tsp Baking Powder

1/4tsp Salt

Cake release spray – I use Wilton’s available from Amazon Uk, Lakeland and Hobbycraft

For the buttercream:

250g/9oz Unsalted Butter – very soft

500g/1lb 2oz Raspberry Ripple flavoured icing sugar – from Sugar and Crumbs

150g/5oz Plain Icing Sugar

3-4tbsp Very Hot Water

Pink food colouring gel

Optional – edible glitter, heart sprinkles.

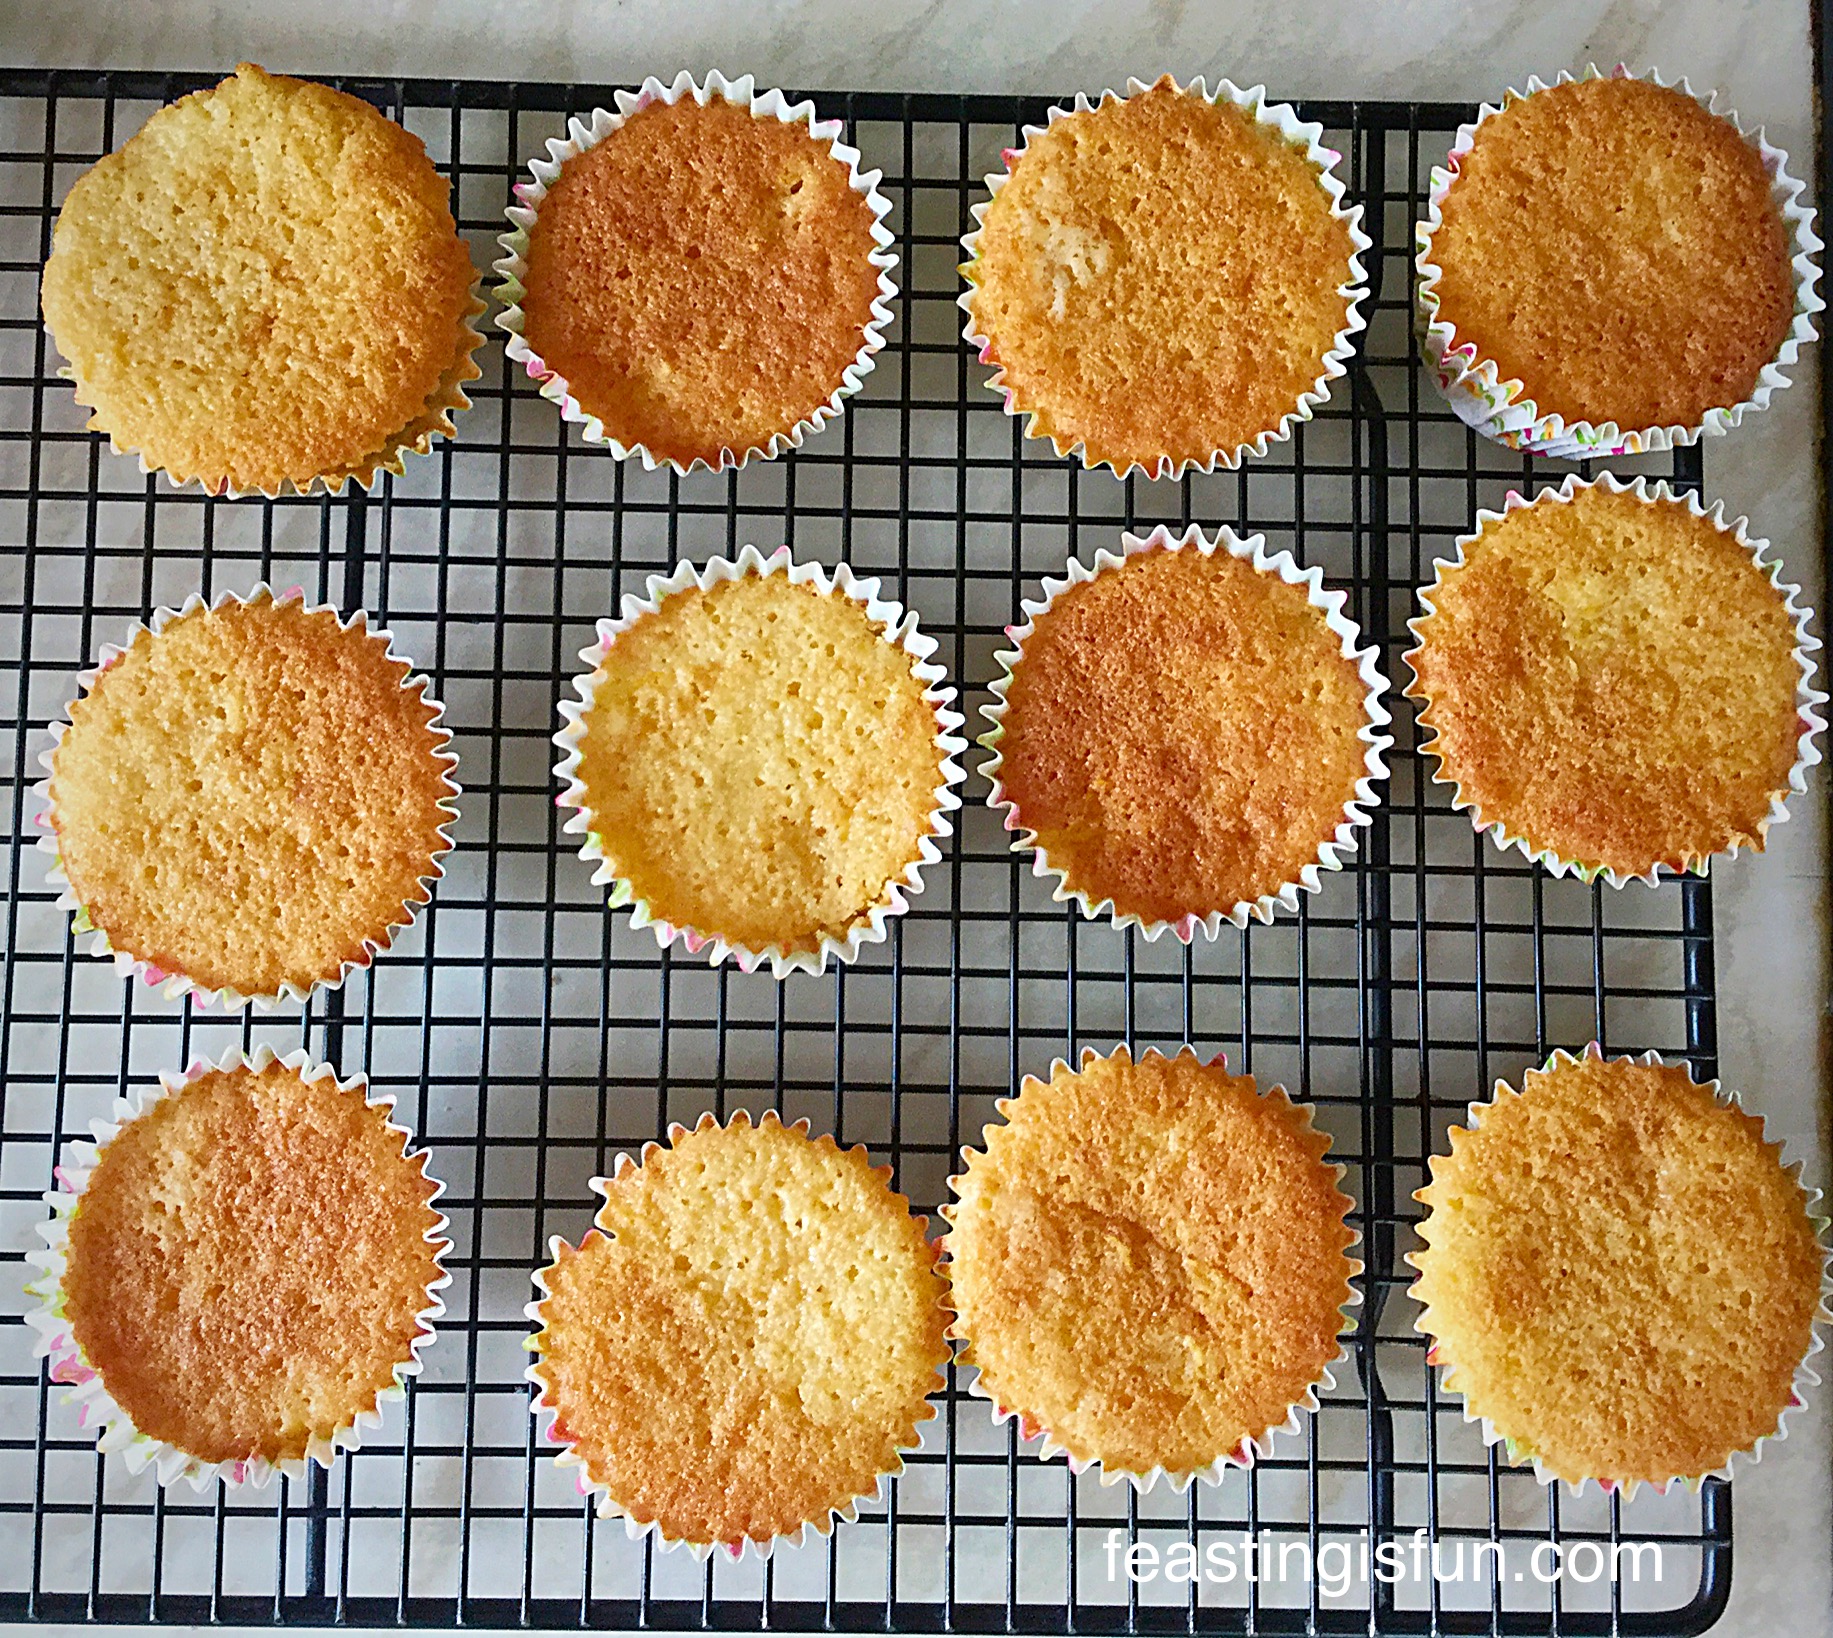
Method: Preheat the oven to 165C/150C fan, gas mark 3

  • Into a large bowl add the butter and sugar and whisk/beat for 5 minutes until very pale and creamy.
  • Add the vanilla extract and whisk/beat for a further 2 minutes.
  • Sift the flour, baking powder and salt into a separate bowl – dry ingredients.
  • Add one third of your dry ingredients and 2 eggs to your butter/sugar mixture. Whisk/beat until just incorporated.
  •  Repeat the last step.
  • Add the final third of dry ingredients and 2 eggs and mix by hand. Ensuring the bottom of the bowl is scraped, so that all of the ingredients are just combined.
  • Spray your tiered heart Bundt tin with cake release spray, ensuring it covers all areas inside the tin.
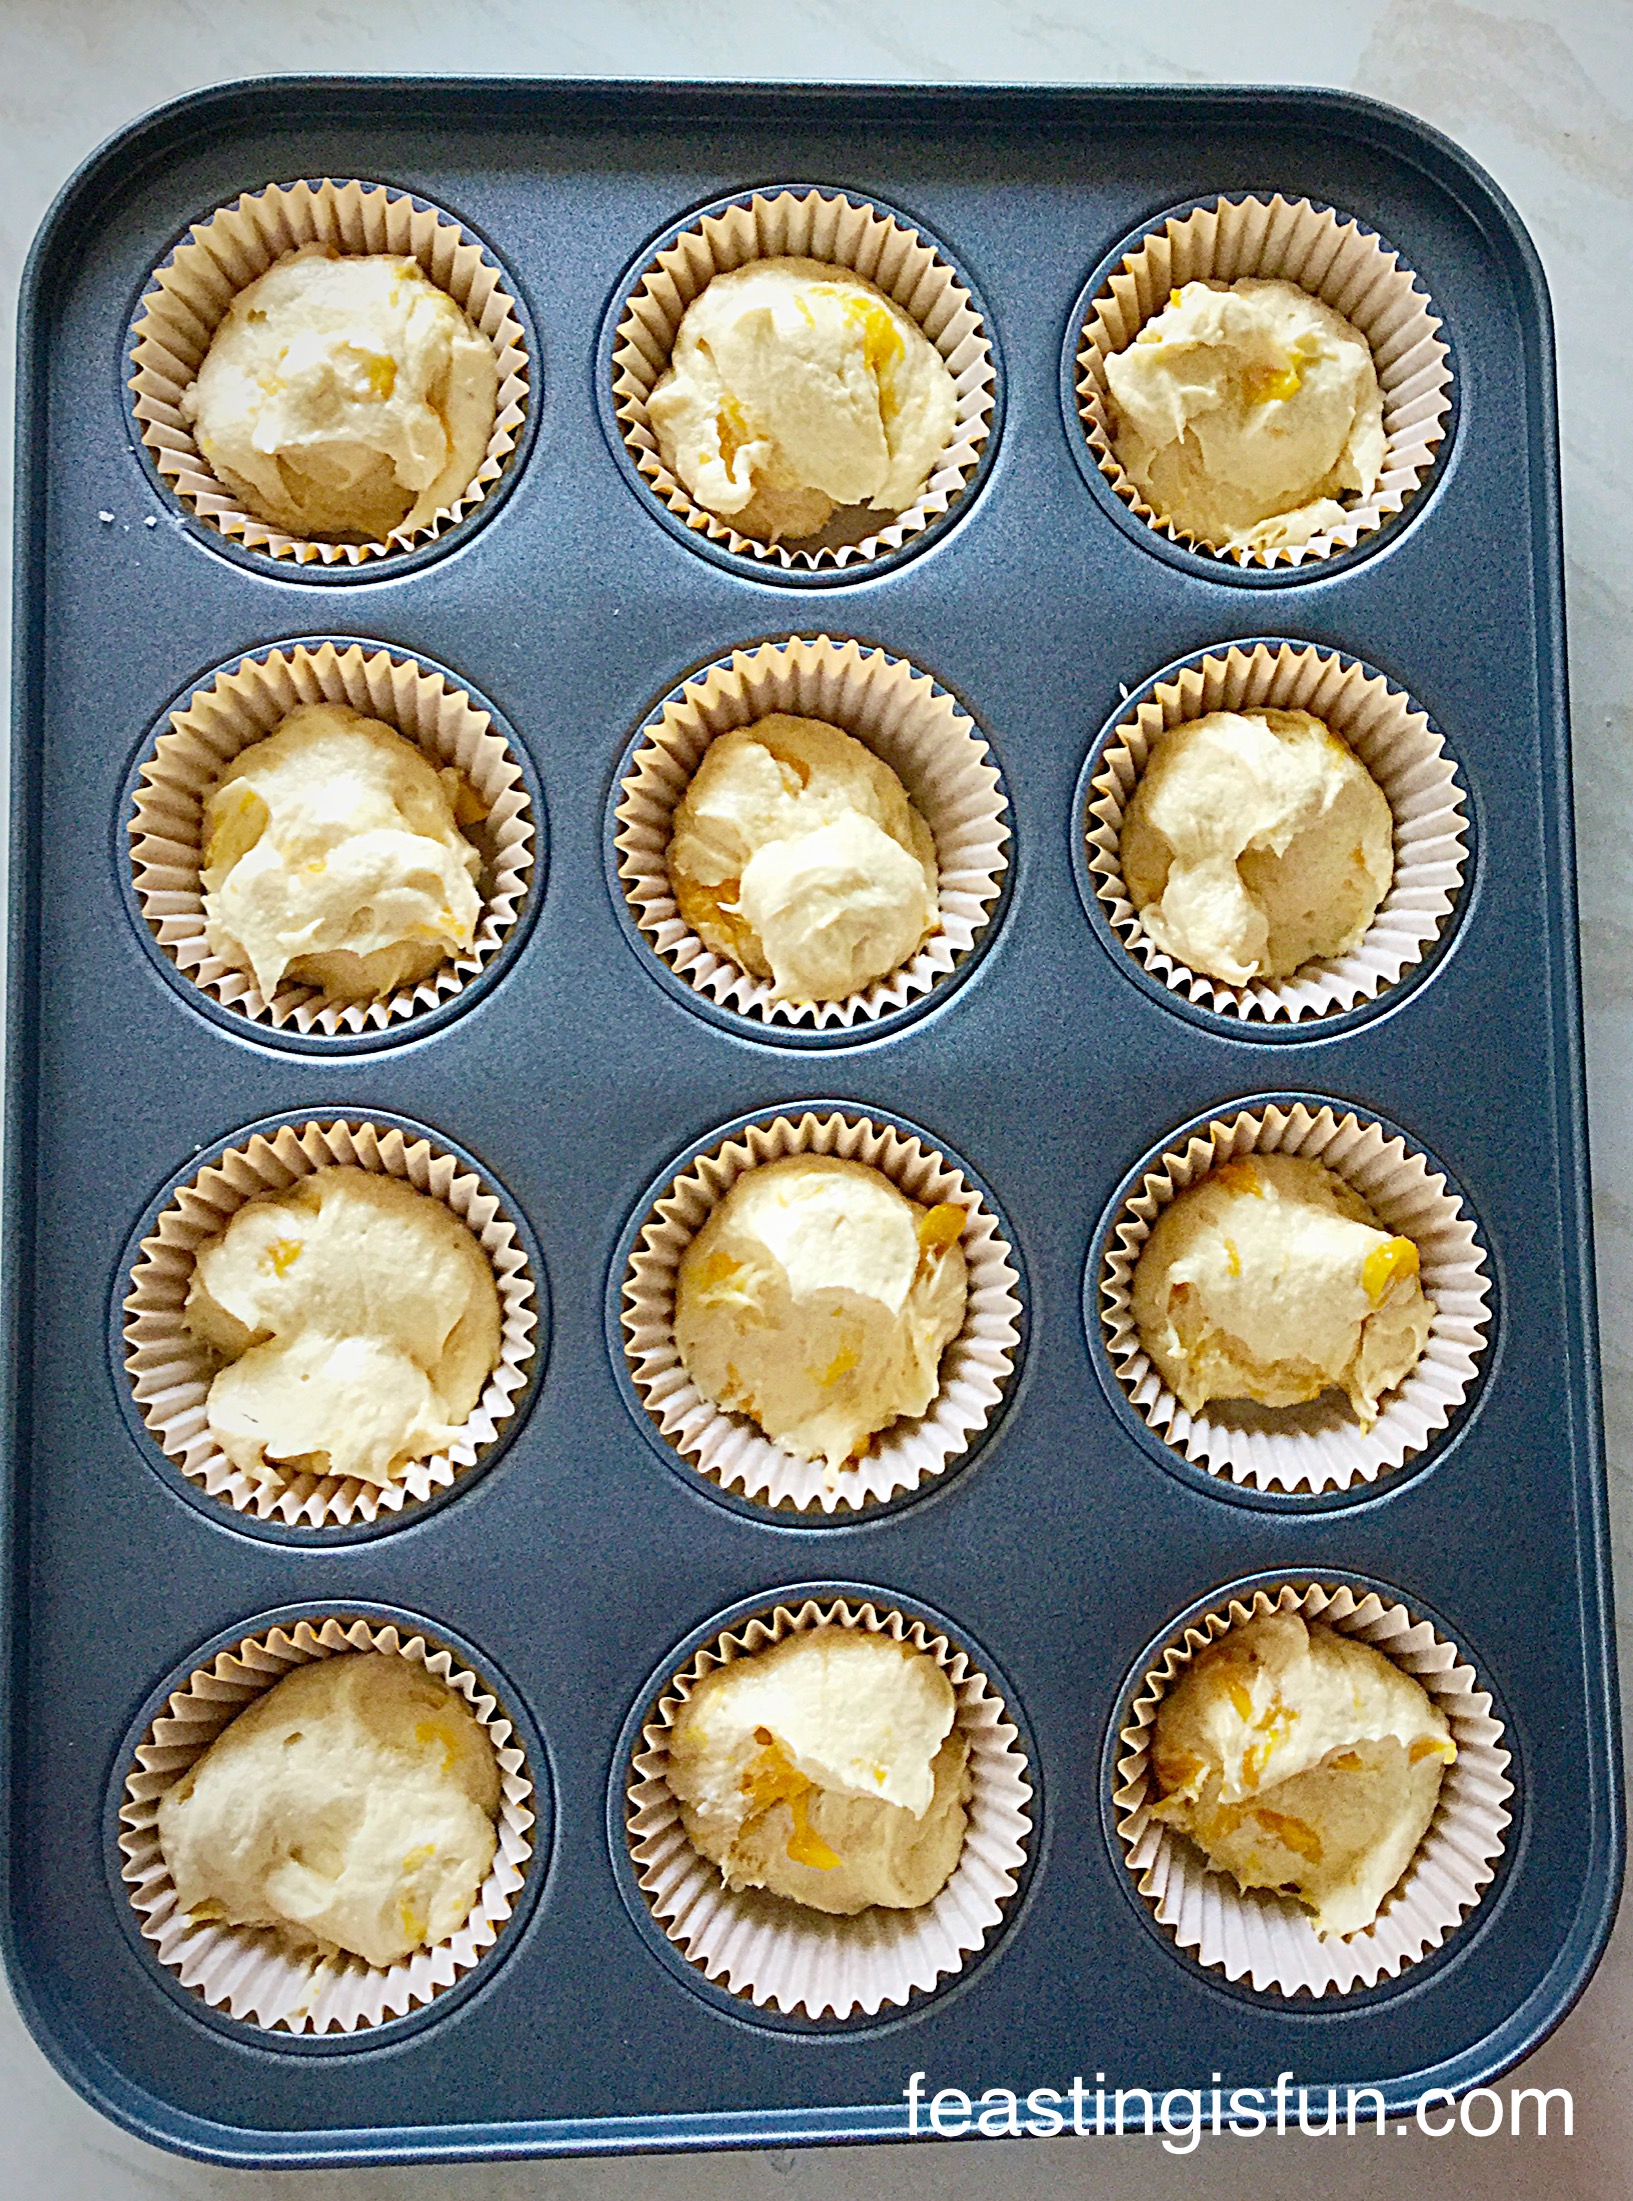
  • Spoon the cake mix into the Bundt tin, ensuring the batter is pushed into all parts of the tin, using a spoon.
MT Heart Engagement Bundt Cake
Never fill any Bundt tin more than 3/4 full.
  • Place the Bundt tin into the middle of the preheated oven and cook for approximately an hour.
  • The cake is cooked when it is golden brown, coming away from the sides of the tin and an inserted skewer comes out clean.
  • Once cooked remove the cake from the oven.
MT Heart Engagement Bundt Cake
Allow the cake to cool in the tin for 10 minutes.
  • After cooling in the tin for 10 minutes turn the cake out onto a cooling rack.
MT Heart Engagement Bundt Cake
Heart Engagement Bundt Cake – simply stunning.
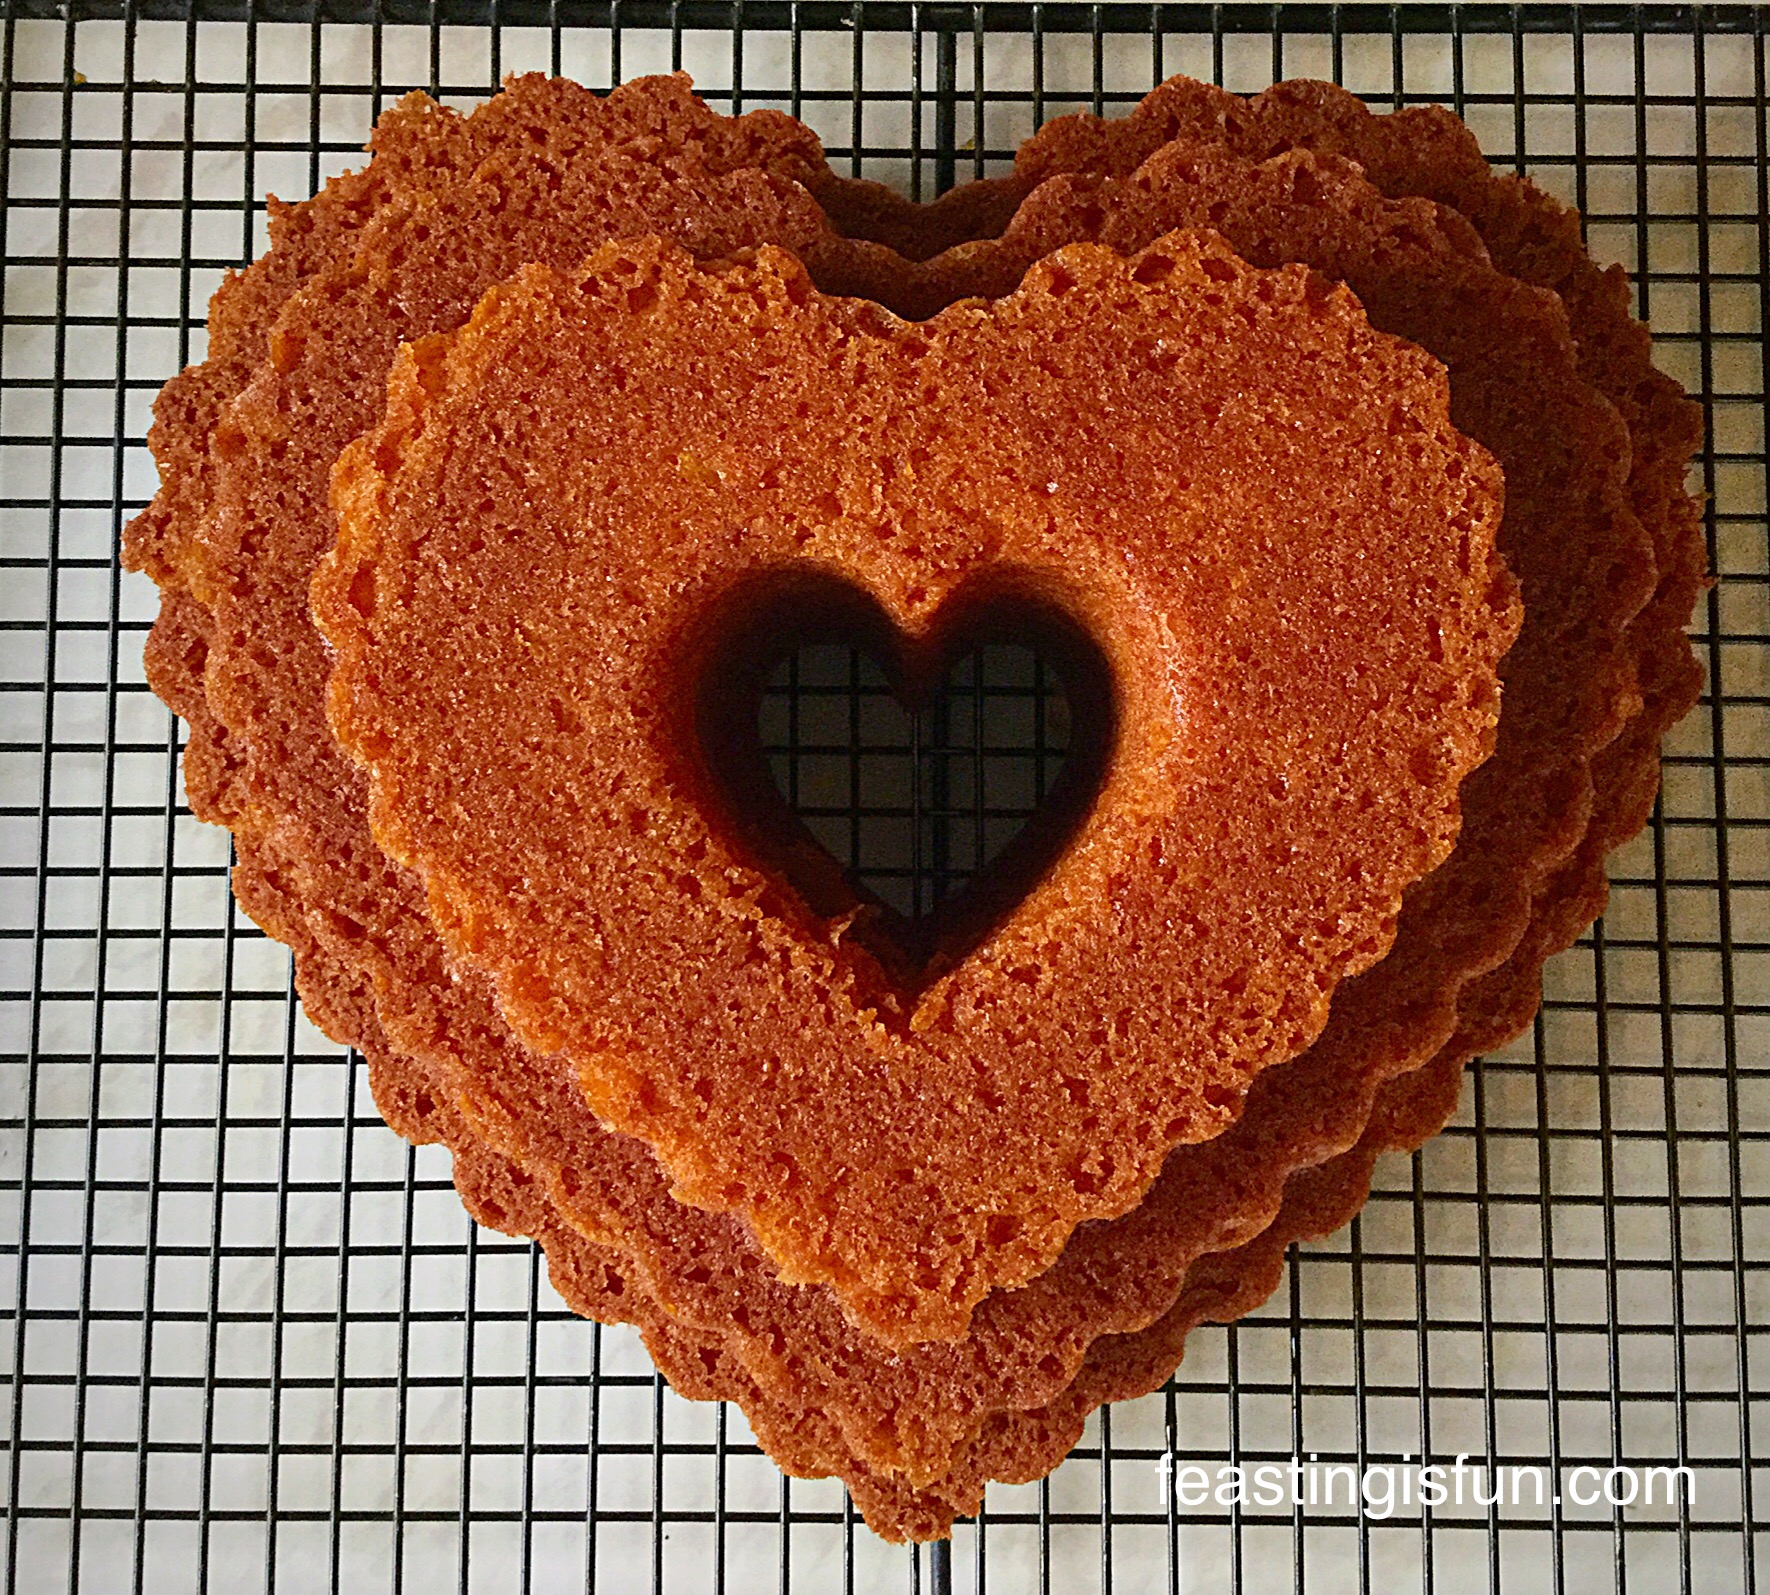
  • Allow the cake to cool completely before icing.

To make the buttercream:

  • Place the very soft butter into a large bowl.
  • Sift both the flavoured and plain icing sugars into the same bowl.
  • Add 3 tablespoons of very hot water from a kettle.
  • Starting on a low speed whisk all the ingredients together. Add the extra tablespoon of hot water if the buttercream is too stiff. Continue whisking at a higher speed until the buttercream is pale and creamy.
  • Fit a large Wilton #1M star piping nozzle to a large disposable piping bag.
  • Using a small brush, or the blunt end of a wooden skewer dipped into the pink piping gel, paint a line of colour on one side (inside) of the piping bag. You may have to dip the skewer into the gel again to finish the line.
  • Repeat this step on the opposite side. This is what gives the piping the ‘ripple effect’ and works especially well with the raspberry ripple flavoured icing.
  • Fill the piping bag with buttercream.

To decorate the cake:

MT Heart Engagement Bundt Cake
Heart Engagement Bundt Cake – sometimes a picture is better than words.
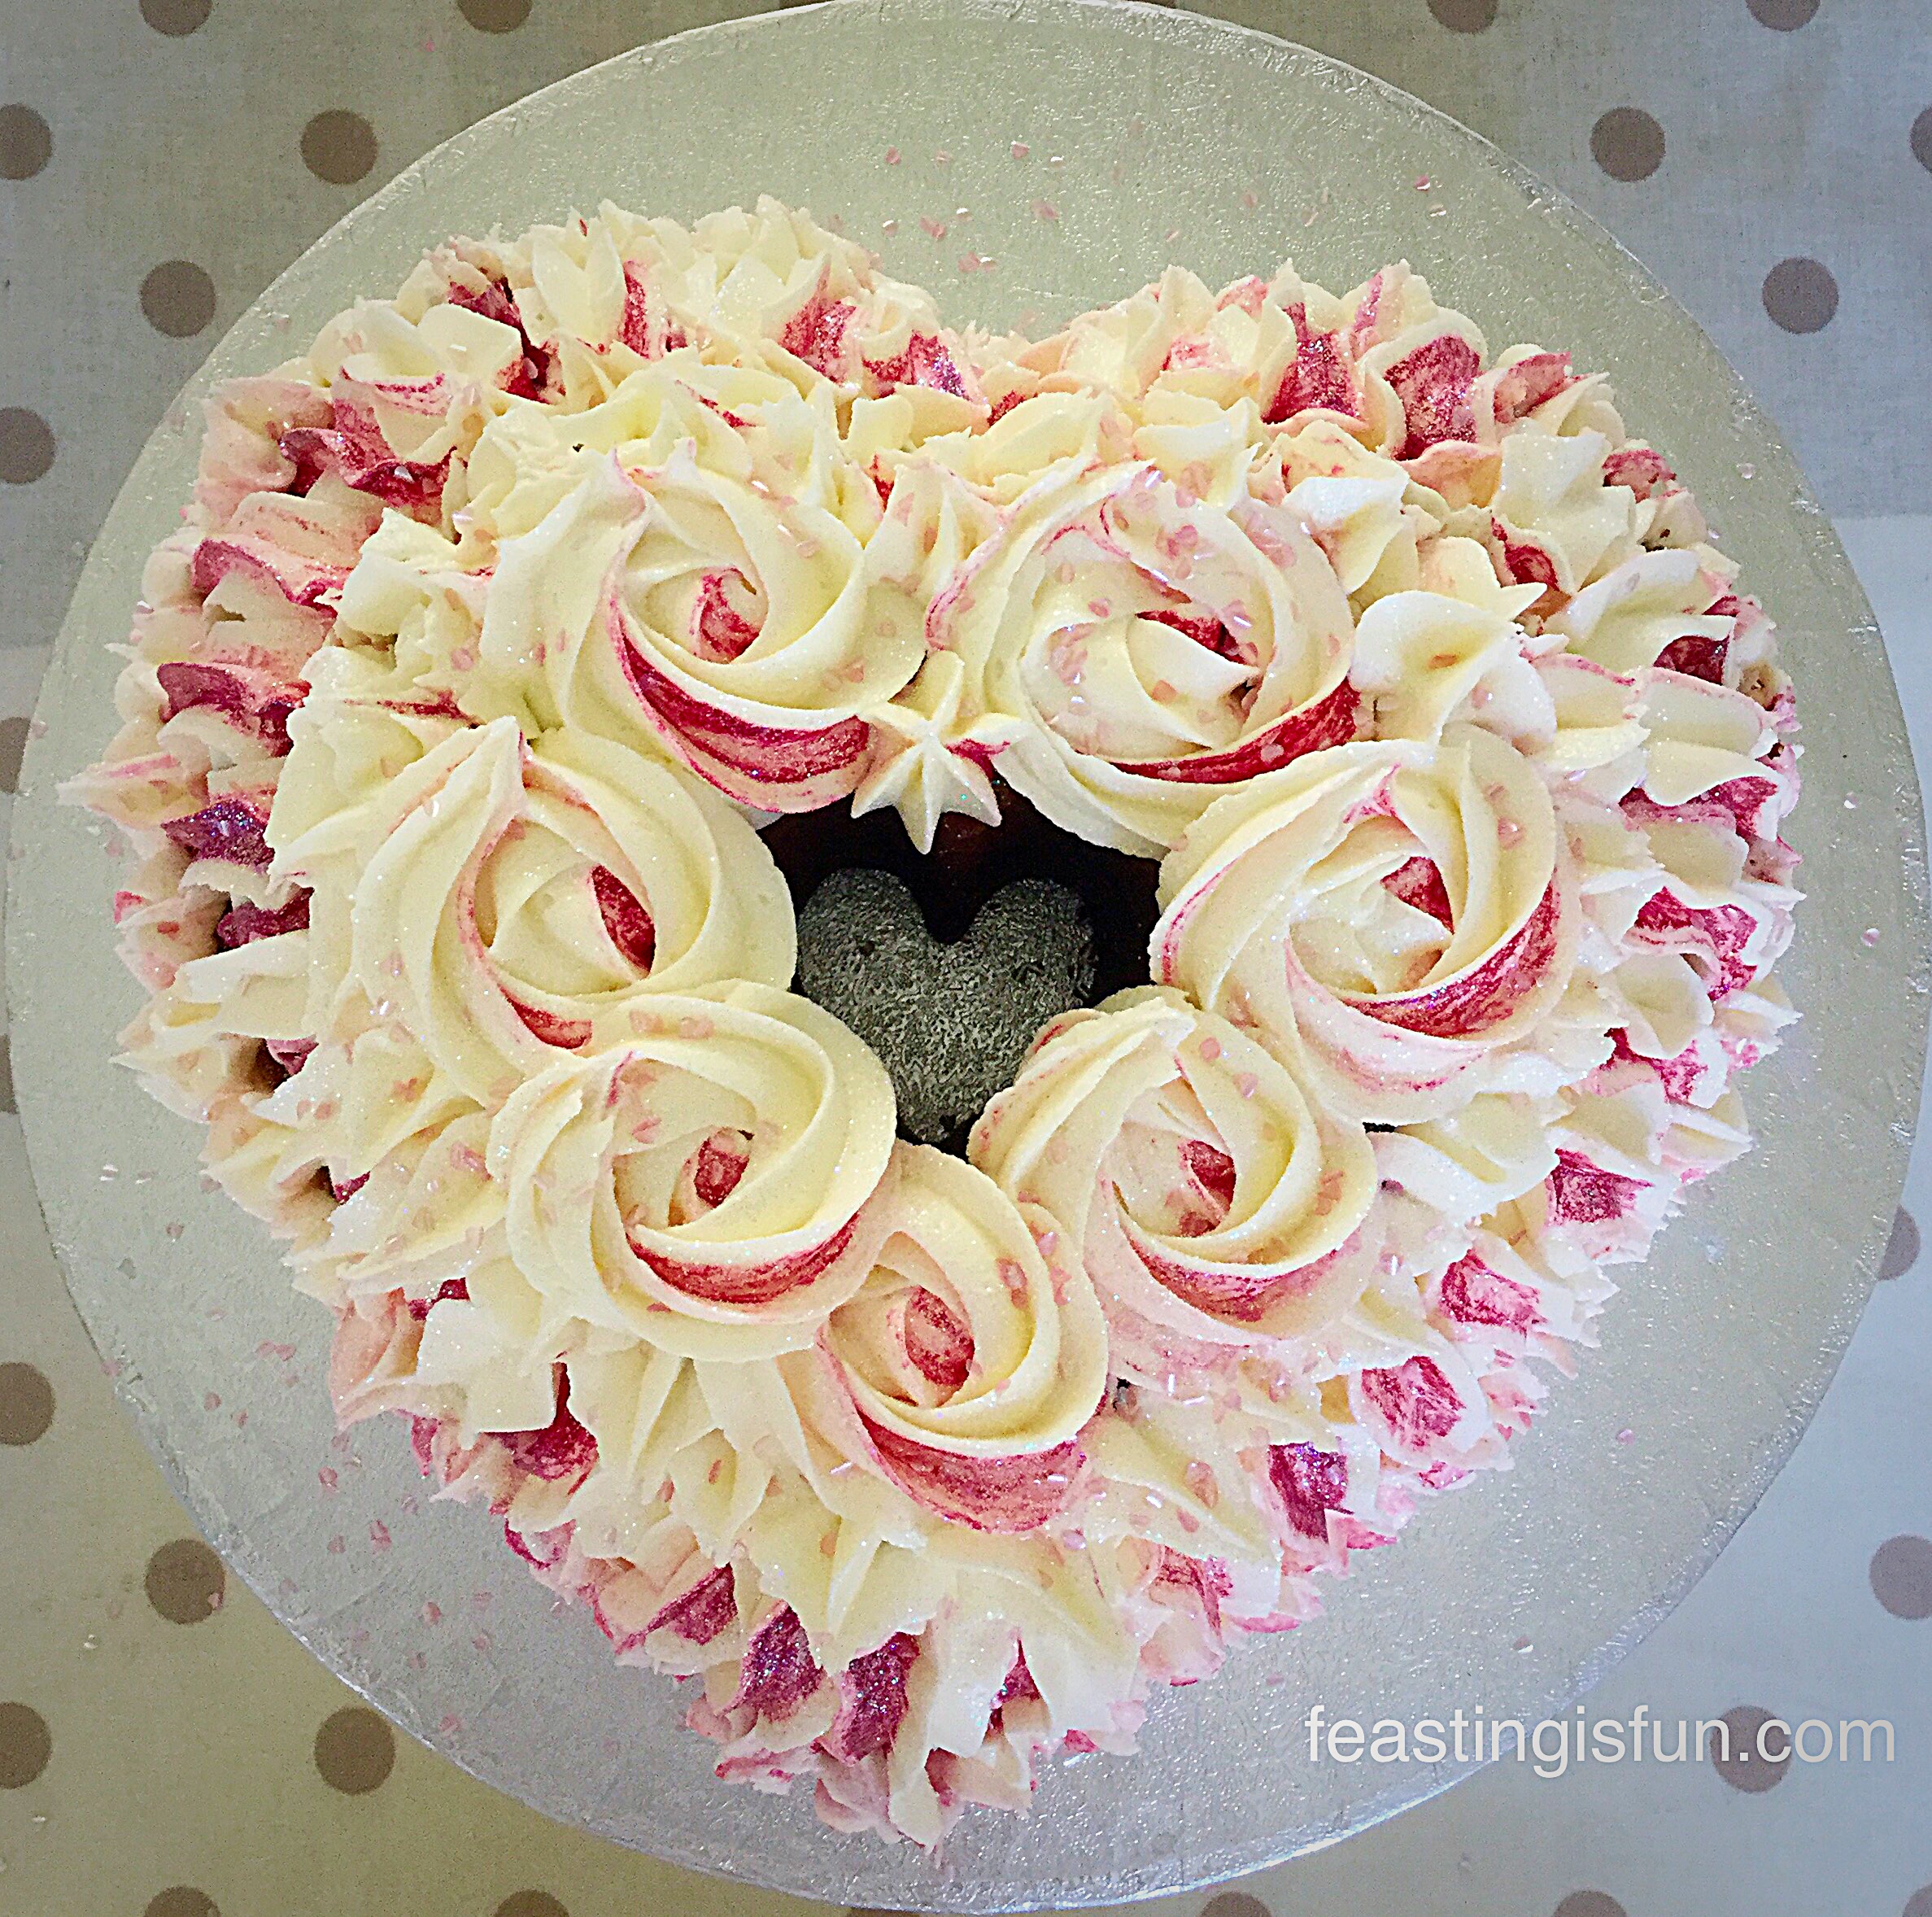
  • Start by piping a small rose, on top of the cake, either side of the heart dip.
  • Pipe a rose at the bottom point of the heart.
  • Pipe 2 more roses on each side of the heart, so that they very slightly overlap.
  • Next starting from the bottom of the second tier, pipe lines up, to meet the edge of the top tier. Continue all the way round the cake ensuring that a line is piped at the bottom point of the heart.
  • Continue in the same manner for the bottom tier, although I was able just to pipe a large star – as my bottom tier was a little short. The recipe has been adjusted to counter this.
  • Finish by piping a star in between the 2 roses at the top of the heart. Fill in any gaps around the edge of the top tier with piped stars.
  • Sprinkle over glitter and pearlised hearts.

Now stand back and admire the beautifully stunning Heart Engagement Bundt Cake that you have created – ooh and take a gazillion photographs.

It was a beautifully sunny day and I took advantage of the glorious light in our porch. It really is so hard to capture how sparkly this cake twinkled in the sunlight. The light danced of off the glittery icing and was mesmerising to look at.

MT Heart Engagement Bundt Cake
Heart Engagement Bundt Cake beautiful in the spring sunshine.

This Heart Engagement Bundt Cake had one very important ingredient that is not listed, love. My husband walked in and saw me smiling as I was writing up this post. When he asked what I was smiling about, I told him that I was remembering the look of love, between Matt and Tash in the photos I have of them. Because I respect their privacy I would not show you here.

To me this cake was so much more than  Heart Engagement Bundt Cake, it was a symbol of their deep love for each other and our love for the two of them, as a couple, starting their journey of being together forever.

This post is dedicated to them. May they have a long, happy, healthy life together and long may they continue to bring happiness to those who are part of their lives.

May true love always be celebrated.

Baking and decorating this cake was such an enormous pleasure, have you ever made a cake, or something else, that made you smile?

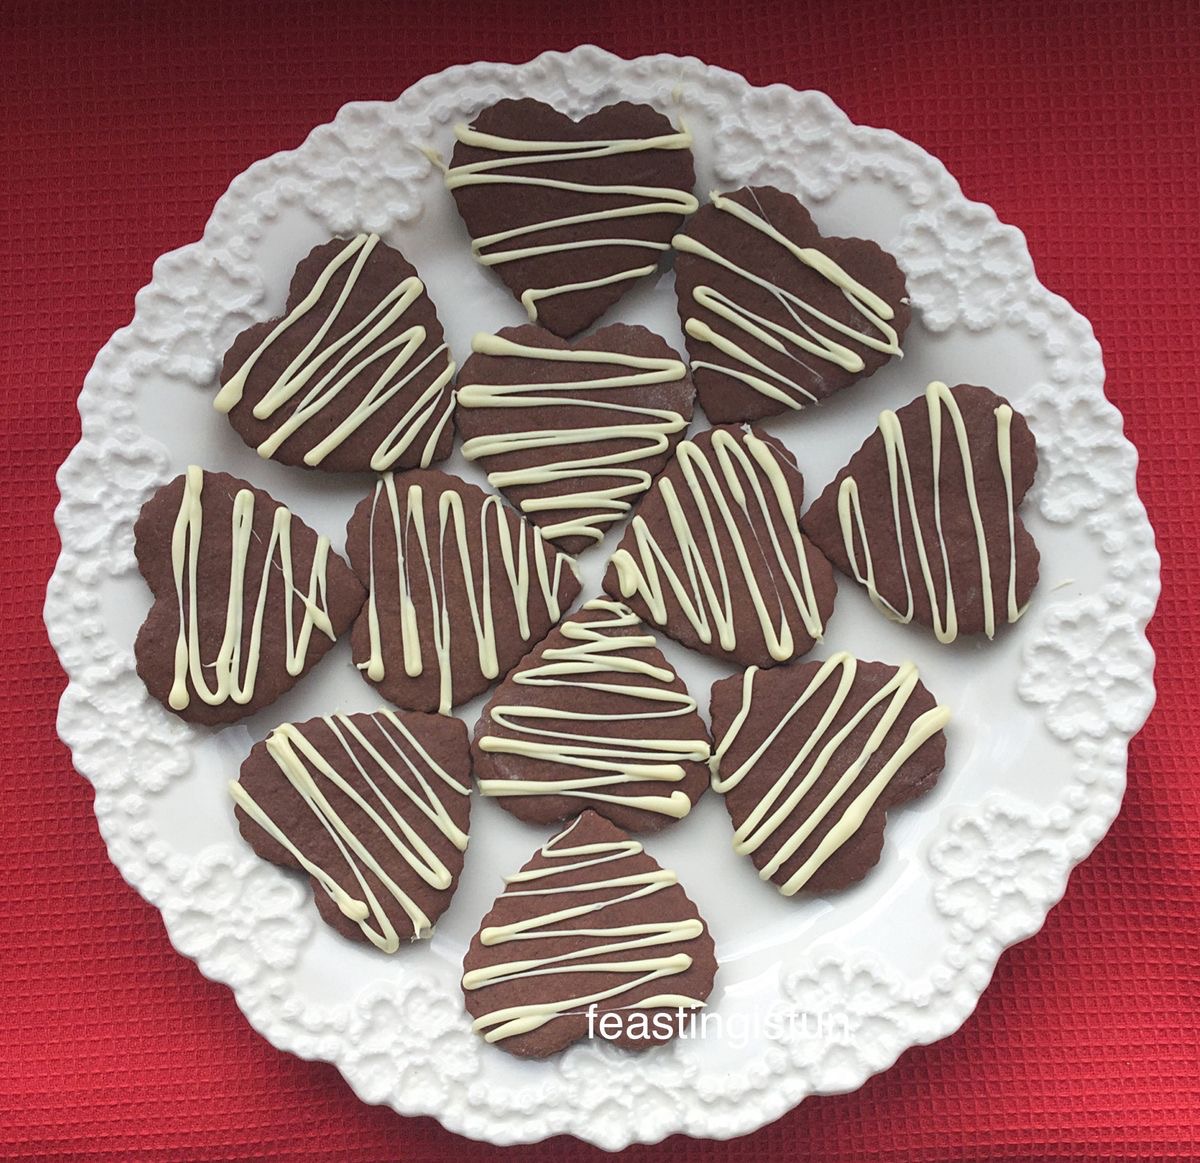
For all you true romantics, like myself, if you have enjoyed this beautiful Heart Engagement Bundt Cake here are some others that will make you smile:

Chocolate Heart Cake

FF Heart Engagement Bundt Cake
Chocolate Heart Cake

Strawberry Sweetheart Cake

MT Strawberry Sweetheart Cake
Strawberry Sweetheart Cake made for my hubby this Valentine’s Day

Chocolate Heart Cookies

MT Chocolate Heart Cookies
Chocolate Heart Cookies made for my family for Valentine’s Day this year.

I am so pleased that Matt and Tash gave me permission to share this cake with you. Also I hope you have enjoyed this post? I love seeing what cooking and baking you get up to. If you are on Twitter or Instagram please pop a photo up and I’ll be sure to give you a shout out or retweet.

Are you a romantic like me?

Sammie xx

@sammiefeasting Twitter/Instagram/Pinterest


Moroccan Lamb Stew

I have a recipe to share with you today that is unbelievably delicious. My Moroccan Lamb Stew served with Lime Couscous.

FF Moroccan Lamb Stew

After cooking my Slow Roasted Lamb Shoulder for Sunday lunch, I had plenty of leftover meat. In fact I’d actually cooked two whole lamb shoulders to make absolutely certain that I’d have enough meat for this Moroccan Lamb Stew.

You could absolutely use fresh diced lamb for this recipe, but there is something distinctly delicious about meat that has been slow cooked on the bone. So much more flavour and that was what I wanted for this dish.

Moroccan Lamb Stew

Having never cooked a dish like this before, I knew I was taking a gamble as to whether the children would eat it. They aren’t fussy and eat a wide range of foods, yet I know I wouldn’t have eaten this as a child.

Shame on me!

Each of them completely cleared their plate, loved this AND they’d figured out that I’d added dates to the stew!! They loved the gentle, yet spicey and fruity flavour of the Moroccan Lamb Stew served with the Lime Couscous.

Again shame on me for underestimating their appreciation of delicious food!

Making The Most Of Leftovers

Using leftover roast lamb made this dish incredibly easy to put together. Even though the lamb was pre cooked I still let this stew bubble and simmer away on a very low heat for a few hours. This didn’t make the lamb tough or dry. It resulted in fragrantly spiced lamb, that was so melt-in-the-mouth tender.

MD Morrocan Lamb Stew
Harissa and Medjool Dates create the fruity and spicey flavours in this dish.

I absolutely adore Dates and these Medjool Dates from The Medjool Date Co. are so completely delicious, I find that I’m popping them in my mouth, when I should be cooking with them. Oops!

During the slow cooking of this Moroccan Lamb Stew the Medjool Dates completely break down and become part of the sauce. They are not an overwhelming flavour, but instead add a fruity sweetness that you can’t quite put your finger on, yet simply know it tastes wonderful.

This recipe is a brilliant way to create another fantastic dish from leftover roast lamb.

Recipe: Moroccan Lamb Stew serves 4-6

650g/1.5lbs Leftover Roast Lamb – skin and bone removed

2tbsp Olive Oil

1 Large Onion

3 Medium Carrots

2 Celery Sticks

2tsp Harrisa Paste

6 Medjool Dates – stones removed and finely diced

1 Beef Stock Cube

Salt and Pepper to season

2tsp Corn flour (also called corn starch)

Method: Use a large heavy based pan for this recipe.

Making The Stew

  • Add the oil to the pan over a medium heat.
  • Finely chop the onion and sauté in the pan, stirring frequently, until softened.
  • Chop the carrots and celery into 1cm pieces, add to the sautéed onion in the pan and cook until just softened over a low heat.
  • Whilst the vegetables are slowly cooking prepare the lamb.
  • Remove any skin from the lamb and cut into 5cm chunks, obviously from a leftover roast there will be smaller pieces as well, that’s fine they all go into the stew!
  • Add the lamb to the pan and add the Harrisa paste and chopped Dates.
  • Stir to mix everything together.
  • Cover with hot water from the kettle.
  • Add a pinch of sea salt and some freshly ground black pepper.
  • Cover with a lid and leave on a very low heat for 5 hours.
  • After the cooking time has elapsed taste for seasoning – add more salt/pepper as necessary.
  • Mix the corn flour with 20mls of cold water to form a slurry.
  • Add the cornflour slurry to the Moroccan Lamb Stew. Stir well and increase the heat to medium.
  • Allow the corn flour to thicken the sauce (which naturally reduces during the long cooking period) and cook for five minutes.
  • Serve with Lime Couscous.
Moroccan Lamb Stew

This is a perfect dish to make for when friends/family are visiting or staying, especially if they have a long journey. The stew will happily sit over a very low heat until your guests arrive and the Lime Couscous  takes moments to make, leaving you free to greet and settle your guests.

Making Easy Meals

For me, this dish is fantastic as I can get dinner ready and started early in the day (see Living With Seizures ). And then if my body allows I can bake some delicious treats for my family and friends.

In fact the first time I made this Moroccan Lamb Stew I was so worried that it wouldn’t be eaten, I made a pudding. Now just to be clear, I bake quite a bit, when I am able to, but we rarely have dessert after dinner. Honestly I’m talking high days and holidays are the only time I make pudding. In fact I didn’t even make a dessert for Easter Sunday. On this occasion however, I made an apple tart – it’ll be on here very soon.

Can you imagine the children and my hubby’s faces when they saw the apple tart 😉! We all ate dinner and then had pudding, such piggies! If my husband had the choice, we would have pudding every day. After that day a tradition was started, when we have Moroccan Lamb Stew for dinner, there must be pudding for afters. I knew I should have hidden the apple tart!!!!

Do you like turning leftovers into another fabulous dish?

There will be more ‘leftovers’ recipes coming up on this blog. In the meantime if you enjoyed the Moroccan Lamb Stew I’m sure you’d like these:

Roast Chicken Noodle Soup

MD Roast Chicken Noodle Soup
Roast Chicken Noodle Soup a perfect way to make your roast chicken go further.

Slow Rosted Lamb Shoulder

GF Slow Roasted Lamb Shoulder
Slow Roasted Lamb Shoulder

Redcurrant Jelly Glazed Roast Lamb

GF Redcurrant Jelly Glazed Roast Lamb
Redcurrant Jelly Glazed Roast Lamb

Whatever you are cooking, baking or making I love seeing your results. Please pop a photo on Twitter/Instagram and tag me in. You can also leave me a comment if you try one of my recipes in the comment section.

Have fun whilst you are in the kitchen preparing a feast!

Sammie xx

Graig Farm provided the lamb for this recipe and The Medjool Date Co. provided the Dates. I was not paid to write this post. All opinions, recipes, content and photographs are my own. Please see my Disclosure Policy.


Lime Couscous

Today I have the easiest, most delicious and versatile side dish for you, my Lime Couscous.

FF Lime Couscous

So, for those of you who haven’t tried couscous yet, I’ll explain what it is. Couscous is small, crushed durum wheat semolina that requires steaming or soaking in boiling water to cook. And it is traditionally served with stew, much like my Moroccan Lamb Stew. Because couscous is made from durum wheat it IS NOT gluten free.

FF Moroccan Lamb Stew
Moroccan Lamb Stew served with Lime Couscous.

Since this couscous is full of fresh lime flavour and so easy to make, it will soon become part of your repertoire.

A sprinkle of fresh parsley and slices of lime give this dish the finishing touch.

And as the grains are so small it doesn’t even need cooking. Rather, it simply needs rehydrating with hot liquid.

How easy is that ?

Lime Couscous

I developed this recipe for Lime Couscous to specifically partner my Morrocan Lamb Stew. It is absolutely delicious with the stew. As it balances the fruity, spicey sauce, with its own tangy, citrus flavour.

Since couscous can be served at room temperature it is absolutely perfect for buffets and barbecues. While it’s fresh lime flavour pairs really well with fish, chicken, lamb kebabs – really the possibilities are endless. I cannot wait to try it with my Chunky Chilli.

Recipe: Lime Couscous serves 6 people.

300g/11oz Dried Couscous – allow 50g/2oz per person

2 Limes

1 Vegetable Stock Cube – I use Knorr’s

Boiling Water

Sea salt and freshly ground black pepper to taste

Method – Making The Couscous 

Note – Do not stir the Couscous at any point.

First of all, weigh out the couscous into a large, heatproof bowl.

Dissolve the stock cube in a jug of boiling water, approx 450mls/1 pint.

Squeeze the juice of one and a half limes and add this to the couscous.

Pour the stock over the couscous and top up with boiling water so that the liquid comes 2.5cm/1″ above the top of the couscous.

Cover the bowl with cling film, or I used a plate and leave for 15 minutes.

After this time the couscous will have absorbed all of the hot liquid.

MD Lime Couscous
The couscous has absorbed all of the stock and lime juice.

Remove the cling film/ plate.

Using a fork, fluff up the couscous, like you would with rice,

MD Lime Couscous
Fluff the couscous with a fork.

Importantly, taste the Lime Couscous and check for seasoning, adjust as necessary.

Finally, roughly chop a large handful of parsley leaves. Add these to the couscous and transfer to a serving dish.

Add a final touch by popping a few slices of lime to the couscous and a final sprinkle of parsley leaves on the top.

Lime Couscous

It really is that simple to make this dish!

Since Spring is now here and the promise of warmer days beckoning, this Lime Couscous is the perfect dish to serve, as it can sit at room temperature, not taking up fridge or oven space.

However you serve this Lime Couscous, it will be enjoyed and feasted on,  because it tastes so delicious.

If you have enjoyed this Lime Couscous, here are some other recipes that you might like to try:

Leek Colcannon

GF Leek Colcannon
Leek Colcannon

Lemon Garlic Vegetable Orzo

MD Lemon Garlic Vegetable Orzo
Lemon Garlic Vegetable Orzo

Baked Garlic Herb Potato Wedges

MD Garlic Herb Potato Wedges
Garlic Herb Potato Wedges

Since couscous is so easy to prepare, the possibilities are endless. Also, although it is perfectly fine eaten hot, I much prefer it slightly warm. It is also great for packed lunches. Simply add some chopped bell peppers, spring onions and cherry tomatoes and pack into an airtight container. And there you have it, packed lunch to go.

So, whatever you are making, baking and creating  in your kitchens, have fun preparing and sharing your feast.

Sammie xx

No part of this post may be reproduced or duplicated without the written permission of the owner. Please see my Disclosure Policy.


Vanilla Mini Egg Nest Cupcakes

Since Easter Sunday is tomorrow, I simply couldn’t resist one last Easter themed bake. So, here are my Easter Vanilla Mini Egg Nest Cupcakes.

FF Vanilla Mini Egg Nest Cupcakes

Vanilla cupcakes, swirled with real chocolate buttercream, sprinkled with dark chocolate curls and chocolate mini eggs nestling in the centre.

So, delicious and easy to make, Easter Vanilla Mini Egg Nest Cupcakes have the perfect balance of cake, chocolate buttercream and Cadbury’s mini eggs.

RT Vanilla Mini Egg Nest Cupcakes
Vanilla Mini Egg Nest Cupcakes beautiful in tulip wrappers.

So, with ALL of the chocolate that is around over the Easter period, a vanilla cupcake to provides the perfect balance. While I love a deep chocolatey cake, like my Chocolate Sparkle Cake sometimes too much chocolate can be over powering!

Also, I adore the crisp, vanilla shell on Cadbury’s mini eggs and wanted to echo that in the cupcake. Likewise, a lighter chocolate buttercream, piped on these cupcakes, works with the mini eggs, rather than swamping them.

RT Vanilla Mini Egg Nest Cupcakes
Vanilla Mini Egg Nest Cupcakes a little portion of edible happiness.

Homemade Easter Gifts

And these Easter Vanilla Mini Egg Nest Cupcakes are an inexpensive way of making a few packets of mini eggs go a long way and are great to give as gifts. Since I personally love homemade gifts, these would be a very welcome gift indeed.

Either wrap each cupcake in cellophane, tie with raffia or place in little cupcake boxes tied with ribbon, presentation is key. Now they are ready to be given as gifts. My niece made a version of these and gave them to her teachers at Primary School as an end of term, Easter thank you, where they are proving very popular!

Recipe: Makes 12 Easter Vanilla Mini Egg Nest Cupcakes

For the cupcakes 

100g/4oz Unsalted Buter at room temperature

100g/4oz Caster Sugar

1tsp Vanilla Extract – I use Nielsen-Massey

1/8tsp – pinch Sea Salt – I use Maldon 

2 Large Free Range Eggs

100g/4oz Plain White Flour – self raising can be substituted but don’t add the extra baking powder.

1tsp Baking Powder

For the Chocolate Buttercream

300g/11oz  Icing Sugar – sifted

150g/5oz Unsalted Butter – softened

175g/6oz Milk Chocolate

2 packets of Cadbury’s mini eggs

Dark chocolate curls, or Cadbury’s flake (x2)

Method: Preheat the oven to 160C/140C, gas mark 3, 325F

Making And Baking The Easter Vanilla Cupcakes

  • First of all place the butter and sugar into a bowl and whisk/beat until pale and fluffy.
  • Add the vanilla extract and whisk/beat until incorporated.
  • Next add 2 eggs, the sifted flour, baking powder and salt.
  • Whisk/beat slowly until all the ingredients are just combined.
  • Using a metal spoon stir the mixture 2-3 times to ensure everything is combined.
  • Place 12 cupcake wrappers into a cupcake pan.
  • Scoop just under a dessert spoonful of cake batter into each cupcake wrapper.
  • Place the cupcakes into the centre of the oven and bake for 20 minutes.
  • The cupcakes are cooked when they are a golden brown colour and spring back from a light touch.
  • As soon as they are baked remove the cupcakes from the oven.
  • If using tulip cupcake cases, as I have, allow to cool completely in the tin, if not cool for 5 minutes in the tin and then transfer to a cooling rack.
  • Transfer cupcakes in tulip wrappers to a cooling rack once cold.
RT Vanilla Mini Egg Nest Cupcakes
Vanilla Mini Egg Nest Cupcakes ready for frosting.
  • While the cupcakes are cooling make the buttercream.

Making The Frosting And Decorating The Easter Cupcakes

  • Break up the chocolate, place in a microwaveable bowl and heat on medium power for 30 seconds at a time, stirring in between, until the chocolate is completely melted. Set to one side.
  • Whisk the sieved icing sugar, butter and vanilla extract until pale and smooth.
  • Add the cooled chocolate, whilst whisking. Continue whisking until you have light, fluffy, buttercream.
  • Fit a piping bag with a large star tip.
  • Fill the piping bag with the chocolate buttercream.
  • Pipe a single swirl around the outside edge of each cupcake.
  • Repeat, piping another swirl on top of the previous one.
RT Vanilla Mini Egg Nest Cupcakes
Vanilla Mini Egg Nest Cupcakes the nests are almost ready for their eggs.
  • Sprinkle dark chocolate curls, or broken up Cadbury’s flake around the swirls of chocolate buttercream.
  • Add mini eggs to the centre of the cupcakes.
  • My mini egg colours were kept the same, for impact, however, they also look very natural when the colours are mixed – let you creative juices flow!
RT Vanilla Mini Egg Nest Cupcakes
Vanilla Mini Egg Nest Cupcakes I kept my mini eggs all the same colour.

These Easter Vanilla Mini Egg Nest Cupcakes are such an easy bake, yet look professional enough to give as gifts.

A Savvy Purchase

Finally, a quick note about the tulip cupcake cases. Since they can be quite expensive, so I buy mine in bulk from Amazon UK. where the price per wrapper is much cheaper than alternatives found in supermarkets. Alternatively, get together with a baking buddy and split the package and cost. I bought 100 wrappers a couple of years ago and still have plenty left!

FF Vanilla Mini Egg Nest Cupcakes
Easter Mini Egg Nest Cupcakes

A delicious gift for anyone at Easter time, taking around an hour to make, bake and decorate. Yet there is still time to make these before tomorrow.

As I said at the start of this post, Easter symbolises new birth. For me, as a Christian, that happened when I accepted Jesus Christ as my Lord and Saviour. If you would like to know more please see Important Stuff.

How you ever considered the true meaning of Easter and what it means to you?

If you have enjoyed these Easter Vanilla Mini Egg Nest Cupcakes here are some other mini egg recipes:

Chocolate Monster Mini Egg Cookies

Smartie Chocolate Monster Mini Egg Cookies
Chocolate Monster Mini Egg Cookies a delicious treat.

Mini Egg Millionaires Shortbread 

Mini egg millionaires shortbread squares displayed on a white platter showing the different layers.
Mini Egg Millionaires Shortbread

Chocolate Mini Egg Brownies

Smartie Chocolate Mini Egg Brownies
Chocolate Mini Egg Brownies served with a few extra eggs!

Mini Egg Bundt Cake

Mini Egg decorated Bundt Cake
Mini Egg Bundt Cake

I love reading your comments, so please keep them coming and seeing all your makes and bakes on Twitter/Instagram. Please pop a photo up and tag me in?

Wishing you all a very happy, healthy and blessed Easter.

Sammie xx

No part of this post may be reproduced or duplicated without the written permission of the owner. Please see my Disclosure Policy.

Ginger Date Hot Cross Buns

Oh boy do I have a treat for you. As Good Friday is tomorrow I decided to create one more Easter recipe, a twist on the traditional Hot Cross Buns that we all love to eat this time of year. May I present my Ginger Date Hot Cross Buns!

FF Ginger Date Hot Cross Buns

Having been sent some medjool dates from The Medjool Date Co. I wanted to incorporate them into different recipes. So in a moment of inspiration today I decided to use them in these Ginger Date Hot Cross Buns. How glad am I, that I had that moment of inspiration!

Now there are dates and there are medjool dates from Jordan. Once you have tried these medjool dates it is impossible to use any others – well for me it is! Big, sweet, but not tooth achingly so, good for you and they taste amazing. While I have been cooking and baking with them a few, maybe more than a few have been eaten along the way.

Ginger Date Hot Cross Buns

Creating A New Recipe

Knowing I had ordered some stem ginger in syrup from Waitrose a couple of weeks ago, instead of opting for crystallised ginger, I used their stem ginger. Finely diced it is the only ginger in the Ginger Date Hot Cross Buns. Using warm syrup from the stem ginger jar, to glaze the buns, still hot from the oven is the final touch.

These Ginger Date Hot Cross Buns are so utterly delicious eaten just as they are, sliced and buttered, or toasted and buttered. They make a fantastic alternative to traditional Hot Cross Buns and are great for those who dislike raisins/sultanas, or cinnamon.

RT Ginger Date Hot Cross Buns
Ginger Date Hot Cross Buns perfect buttered with a hot cup of tea.

I love baking our own hot cross buns for Good Friday. We always have them toasted, with butter and large cups of tea or coffee. For our family it is the start of Easter. The day we remember that Jesus Christ gave His life for us all on the cross at Calvery. In fact I’ve always wondered why it is called Good Friday? As truly thinking about what Jesus went through, for me, brings me to a place of deep conviction – please see Important Stuff if you’d like to know more.

Recipe: Makes 12 Ginger Date Hot Cross Buns

500g/1lb 2oz Strong White Bread Flour

140ml/scant 5fl oz Whole Milk – slightly warmed (body temperature)

120ml/4.5fl oz Water – slightly warmed (body temperature)

2 Large Eggs – I use free range

1tbsp Honey

10g/1.5 Sachet Fast Acting Dried Yeast

10g sea salt – I use Maldon

50g/2oz Unsalted Butter at room temperature

150g/5oz Medjool Dates – pitted and chopped to medium dice

2 Balls of Stem Ginger – removed from the syrup and finely diced

1/2tsp Freshly Grated Nutmeg

For the crosses:

50g/2oz Plain white flour

50ml/2fl oz Water

Approx 30mls of syrup from the stem ginger jar to glaze the baked buns

Method:

This method is for use with a bread maker or stand mixer, if you wish to make by hand, I suggest you look to the original recipe in Paul Hollywood’s book ‘How to Bake’ ISBN 9781 4088 19494.

Making The Spiced Sweet Bun Dough

The ‘bowl’ refers to the bowl of a stand mixer or the mixing compartment of a bread maker.

  • Add both the milk and water to the bowl.
  • Next add both eggs, the honey and yeast.
  • Swish about with clean fingers to mix.
  • Now add the flour on top of the liquid mixture.
  • Place the salt and butter on top of the flour.

For a bread maker, set the cycle to dough and press start. When prompted by the machine, or 5 minutes before mixing stops, add the chopped dates, finely diced stem ginger and nutmeg. Allow the bread maker to complete the dough cycle.

When the bread maker has completed the dough cycle, ensure the dough has doubled in size, if not wait until it has. Then re start the dough cycle for 2 minutes, this will ‘knock back’ the dough for you.

For a stand mixer attach the dough hook. Start mixing on a low speed. Once the contents of the bowl resemble dough continue to mix on medium/slow speed for 5 minutes. Stop the mixer. Scrape all the dough, from the hook, into the bowl. Add the chopped dates, finely diced stem ginger and nutmeg . Lower the dough hook and mix on medium speed for a further 5 minutes.

After the 5 minutes mixing is complete, stop the mixer. Scrape all the dough back into the bowl, it will be very sticky – don’t worry. Cover with a damp cloth and leave in a draught free place until doubled in size – 1 – 1 1/2 hours.

Once the stand mixer dough has doubled in size, lower the dough hook and mix on medium speed for 2 minutes, this will ‘knock back’ the dough for you.

Shaping the Ginger Date Hot Cross Buns

see Hot Cross Buns for full step by step photos.

  • First of all grease a large baking tray with butter.
  • Tip the dough out onto a lightly floured surface.
  • It will be quite sticky, so ensure you have floured your hands well.
  • Cut the dough in half and then cut each half into 6 even pieces.
  • Shape each piece into a ball and place on the baking tray – the dough was very sticky so some of my balls weren’t perfect!
RT Ginger Date Hot Cross Buns
Once shaped place each bun in rows of 3 on the baking tray.
  • When all 12 buns have been shaped, cover the baking tray with a clean tea towel.
  • Leave the buns in a warm, draught free place, until doubled in size.
  • While the buns are proving, make the flour paste for the crosses. Add the water to the flour and mix until you have a smooth paste.
  • Place in a small, disposable piping bag and secure the top with an elastic band.
  • 10 minutes before the buns are ready to bake preheat the oven to 220C/200C fan, gas mark 7, 425F.


RT Ginger Date Hot Cross Buns
Ginger Date Hot Cross Buns doubled in size and ready to be piped.
  • Snip the end off the piping bag, so there is a small hole.
  • Pipe down the line of buns and then across the line of buns.
RT Ginger Date Hot Cross Buns
Perfectly crossed buns, ready for the oven.

Baking And Adding A Glaze To The Buns

  • Place the Ginger Date Hot Cross Buns into the middle of the oven and bake for 20 minutes. They are baked when they are golden brown and sound hollow when rapped on the base with your knuckle.
  • As soon as the buns are baked remove from the oven.
  • Take the buns off of the baking tray and place onto a cooling rack.
  • Remove approx 30mls of syrup from the stem ginger jar.
  • Place into a microwaveable bowl and heat for 20 seconds.
  • Brush the warm syrup over the buns whilst they are still hot.
  • Leave to cool until at least warm.


RT Ginger Date Hot Cross Buns
Ginger Date Hot Cross Buns glazed with syrup.

Biting into my very first, warm, Ginger Date Hot Cross Bun is an experience I will never forget!

So light and fluffy.

So tomorrow morning on Good Friday, we have a choice of traditional Hot CrossBuns which I also baked today, or these delicious Ginger Date Hot Cross Buns.

Breakfast will truly be a feast, as much as making these has been fun!

If you’ve enjoyed these Easter Ginger Date Hot Cross Buns you may also want to try these other recipes:

Hot Cross Buns

RT Hot Cross Buns
Traditional Hot Cross Buns.

Wholemeal Hot Cross Buns

RT Wholemeal Hot Cross Buns
100% Wholemeal Hot Cross Buns.

Cherry Bakewell Hot Cross Buns

RT Cherry Bakewell Hot Cross Buns

Whatever you make or bake this Easter, I wish you a very happy time. I love seeing your bakes, so please pop a pic onto Twitter or Instagram and tag me in.

Sammie xx

@sammiefeasting Twitter/Instagram

Medjool Date Co. provided the dates for this recipe. All opinions, content and photographs are my own. I did not receive payment for writing this recipe. Please see my Disclosure Policy.

I have entered these Ginger Date Hot Cross Buns to the March Tea Time Treats Linky Party hosted by The Hedge Combers and Lavender and Lovage

Tea Time Treats Linky

Slow Roasted Lamb Shoulder

Finally, Easter is only a few days away and with it come various traditions. Most importantly for me and many other Christians is attending church to celebrate the resurrection of Jesus, our risen Saviour. Also, for me and many others, taking part in Easter an egg hunt is part of our Easter celebration. While another Easter tradition is eating lamb for the main meal, usually as part of a Sunday roast dinner. So, my Slow Roasted Lamb Shoulder, is easy to prepare and pop in the oven, while we are at church, or looking for eggs in the garden!

FF Slow Roasted Lamb Shoulder

Roast lamb is a real favourite of mine. So, whenever delicious, British lamb is in season I try to stock up the freezer. However  Graig Farm always has frozen lamb available. And so it is where I buy most of our lamb from, and I can honestly say it really is the most flavourful lamb available. Either cooked as Redcurrant Jelly Glazed Roast Lamb or this Slow Roasted Lamb Shoulder.
Especially, upon returning from church, when the aroma of the lamb fills the whole house and has our mouths watering!

FF Roast Lamb Dinner
Slow Roasted Lamb Shoulder

Cooking For A Crowd

While a whole shoulder of lamb will feed six people generously, if you are cooking for more people there’s an easy solution, simply double up! Since  roasting two shoulders guarantees plenty of meat for dinner and leftovers. And, cooking two Slow Roasted Lamb Shoulders  takes no more effort or energy to cook and guarantees plenty of leftovers. Especially, as an idea for another recipe began taking shape in my head!

So, whenever you are feeding a crowd, this is the perfect roast for feasting on. And after slow roasting for 5 hours, you have beautiful, melt in the mouth meat. In fact I pulled our lamb apart using two forks, much like you would for pulled pork. Since the lamb comes clean away from the bone and is so moist. Serve with golden, crunchy roast potatoes or this Leek Colcannon.

GF Slow Roasted Lamb Shoulder
Slow Roasted Lamb Shoulder so tender it can be pulled apart using forks.

Recipe: One Slow Roasted Lamb Shoulder will serve 6 adults

  • Each shoulder of lamb weighs  2.2kg from Graig Farm 
  • One onion, peeled and halved per shoulder.
  • Sprigs of rosemary.
  • Sea salt (I use Maldon)and freshly ground black pepper.
  • Optional –  peeled garlic cloves.

Method: Preheat the oven to 160C/140C fan, gas mark 3, 325F

Preparing The Lamb For Roasting

  • First of all, place the shoulder of lamb into a roasting tin that just fits.
  • Using a sharp knife make slashes through the skin into the shoulder of lamb.
  • Push small sprigs of rosemary (and garlic, if liked) into the holes.
  • Sprinkle over with sea salt and pepper.
  • Place the onion halves under the lamb.
GF Slow Roasted Lamb Shoulder
Two whole lamb shoulders fitted perfectly in my roasting tin.
  • Finally, cover the roasting tin tightly with aluminium foil. Make a folded pleat down the length of the foil and then crimp tightly to the tin. The pleat allows you to pull the foil away from the lamb, so that they don’t touch, it also gives room for steam to circulate as the lamb is slow cooking.
GF Slow Roasted Lamb Shoulder
The pleat in the foil allows for expansion.

Slow Roasting The Lamb Shoulder

  • Place the lamb into the centre of the preheated oven and cook for 5 hours.
  • NOTE: All ovens vary, the cooking time is a guide only,
  • The meat does not need to be basted. Because the natural fat and juices within the lamb baste it as it slow cooks.
  • After the cooking time has elapsed, remove the lamb from the oven.
  • Remove the foil and check the lamb is cooked by pulling at some of the meat with a fork. If it comes away easily the lamb is cooked.
  • If the lamb is not fork tender, cover again with foil and place back into the oven, checking half hourly until cooked.
  • Once cooked, if you like crispy lamb skin increase the oven temperature to 200C/180C fan, gas mark 6 and place the lamb back into the oven, leaving the foil off. Cook for 20-30 minutes, until you have golden, crispy skin.
FF Roasted Lamb
Two Slow Roasted Lamb Shoulders
  • As soon as it is cooked remove the lamb from the oven.
  • Take the lamb out of the pan and place on a board, or platter, cover in foil to rest for 30-40 minutes. Enough time to finish the roast potatoes in the oven!
  • To serve, pull the lamb apart into chunks, using 2 forks.
  • Because this Slow Roasted Lamb Shoulder tastes so mouth-wateringly good, you’ll be back for seconds – so maybe roasting two shoulders of lamb wouldn’t be such a bad idea after all 😉.

Whatever you do this Easter, I’d encourage you to take a moment to think about why we celebrate it – see Important Stuff.

If you have enjoyed this Slow Roasted Lamb Shoulder you may also like these recipes:

Redcurrant Jelly Glazed Roast Lamb

GF Redcurrant Jelly Glazed Roast Lamb
Redcurrant Jelly Glazed Roast Lamb

Slow Roasted Cider Pork

FF Slow Roasted Cider Pork
Slow Roasted Cider Pork

Lemon Thyme Roast Chicken 

FF Lemon Thyme Roast Chicken
Lemon Thyme Roast Chicken

Since I find cooking a roast dinner fairly easy, I often make it when we have friends for dinner. While a few extra roast potatoes make any meal go further, it is ideal for last minute guest invites. Yet I know that some people really struggle with the timing.

Do you have a favourite roast? Or do you struggle to cook a certain roast and you’d like help with it?

Sammie xx

Graig Farm gifted me the lamb for this post. All opinions, views, recipe and content are my own.
No part of this post may be reproduced or duplicated without the written permission of the owner. Please see my Disclosure Policy.


Cherry Bakewell Hot Cross Buns

Easter is nearly here and with it the traditional Hot Cross Bunswhich I absolutely love. However, after seeing Waitrose selling a variety of different flavours, I decided to take on the Cherry Bakewell Hot Cross Buns. Also, I’m very excited to say that this recipe is featured in The Guardian! See the end of this post for details.

FF Cherry Bakewell Hot Cross Buns

I wanted to use the basic egg and milk enriched dough from my traditional Hot Cross Buns and experiment will cherries and almond flavouring.

As much as I absolutely love all things almond, especially flaked almonds, I decided to keep them out of these Cherry Bakewell Hot Cross BunsI wasn’t sure how they would interact with the dough and I still wanted the buns to have a soft, pillowy, interior.

FF Cherry Bakewell Hot Cross Buns
Cherry Bakewell Hot Cross Buns

Playing Around With Flavours

Leaving out the almonds was a great decision. These Cherry Bakewell Hot Cross Buns are so light and very more-ish. Crunch would not have been a good thing!

Instead I used Sugar and Crumbs cherry bakewell icing sugar. Substituting it both for the honey in the dough mix and using it to glaze the buns, instead of apricot jam. This with the addition of some almond extract, gave the buns just the right hint of almond. The flavour is subtle and works so well with the fluffy, light bun.

FF Cherry Bakewell Hot Cross Buns
Cherry Bakewell Hot Cross Buns

Now for the cherries. I used both glacé and dried cherries. They both add their own flavour and pretty colour to these Cherry Bakewell Hot Cross Buns. The dried cherries also give a lovely chewiness, similar to that of raisins. While the glacé cherries add bursts of sweetness, similar to that of mixed peel (of which I am most definitely not a fan!).

Hot Cross Buns – Not Just For Easter

Over all these Cherry Bakewell Hot Cross Buns have been a huge hit in our home. So much so, that I can see myself making them all year round, although I’ll probably leave off the cross!

They are an utterly delicious bun, not dissimilar in taste to old fashioned, bakery, iced buns. Perfect toasted with butter, or eaten, as I did, just like an iced bun, with a lovely cup of tea.

FF Cherry Bakewell Hot Cross Buns
Cherry Bakewell Hot Cross Buns

Some Tips On How To Bake The Lightest Buns

If you haven’t made bread dough before, or used yeast in baking, please don’t be daunted by the prospect. Ensure the yeast you use is fresh. Yep, even fast action dried yeast, which is what we use in this recipe, loses its potency. So if you have yeast that’s been sitting in the cupboard for more than 6 months I really would recommend buying new.

I bake regularly enough to get through a tin of fast action dried yeast, every 2-3 weeks. It’s a regular on my grocery order. Don’t worry if all you can by is sachets, that’s fine as we weigh the yeast for this recipe.

Likewise with flour, you need good strong, white, bread flour. I buy mine from Shipton Mill via Amazon UK. It works out a lot cheaper than buying the best organic supermarket brand. That said, I’ve already mentioned that I bake a lot, so buy a good quality, organic if you can afford it, brand from the supermarket. All flour has a use by date, check yours.

The reason I have emphasised using fresh ingredients is, whilst this recipe is relatively easy, it can be heartbreaking to make a yeasted bun, only to find it doesn’t rise. So if you check everything before you start, you are much more likely to have a deliciously, positive outcome. Which is what we all want. Right?

FF Cherry Bakewell Hot Cross Buns

Recipe: Makes 12 Cherry Bakewell Hot Cross Buns

For the buns

500g/1lb 2oz Strong White Bread Flour

140ml/ Scant 5fl oz Whole Milk – warmed slightly to body temperature

120ml/4.5fl oz Water – warmed slightly to body temperature

2 Large Free Range Eggs

1tbsp Cherry Bakewell Icing Sugar – or plain icing sugar

10g/1.5 Sachets Fast Acting Dried Yeast

10g Salt – I use Maldon

50g/2oz Unsalted Butter – softened to room temperature

100g/4oz Dried Cherries

75g/3oz Glacé Cherries – chopped into quarters

1tsp Almond Extract

For the crosses

50g/2oz Strong White Bread Flour

1/2tsp Almond Extract

50ml/2fl oz Water

For the glaze

50g/2oz Cherry Bakewell Icing Sugar – or substitute plain icing sugar plus 1/4tsp almond extract.

Hot water approx 50mls/2fl oz

Method: This method is for use with a bread maker or stand mixer, if you wish to make by hand, I suggest you look to the original, traditional hot cross bun recipe in Paul Hollywood’s book ‘How to Bake’ ISBN 9781 4088 19494.

Making And Proving The Enriched Dough

The ‘bowl’ refers to the bowl of a stand mixer or the mixing compartment of a bread maker.

  • Add both the milk and water to the bowl.
  • Next add both eggs, the icing sugar and yeast.
  • Swish about with clean fingers to mix.
  • Now add the flour on top of the liquid mixture.
  • Place the salt and butter on top of the flour.

For a bread maker, set the cycle to dough and press start. When prompted by the machine, or 5 minutes before mixing stops, add the dried cherries, glacé cherries and almond extract. Allow the bread maker to complete the dough cycle.

When the bread maker has completed the dough cycle, ensure the dough has doubled in size, if not wait until it has. Then re start the dough cycle for 2 minutes, this will ‘knock back’ the dough for you.

For a stand mixer attach the dough hook. Start mixing on a low speed. Once the contents of the bowl resemble dough continue to mix on medium/slow speed for 5 minutes. Stop the mixer. Scrape all the dough, from the hook, into the bowl. Add the dried cherries, glacé cherries and almond extract. Lower the dough hook and mix on medium speed for a further 5 minutes.

After the 5 minutes mixing is complete, stop the mixer. Scrape all the dough back into the bowl, it will be very sticky – don’t worry. Cover with a damp cloth and leave in a draught free place until doubled in size – 1 – 1 1/2 hours.

Once the stand mixer dough has doubled in size, lower the dough hook and mix on medium speed for 2 minutes, this will ‘knock back’ the dough for you.

Shaping the Cherry Bakewell Hot Cross Buns 

Grease a large baking tray with butter – see Hot Cross Buns for full step-by-step pictures.

  • Tip the dough out onto a lightly floured surface.
  • It will be quite sticky, so ensure you have floured your hands well.
  • Cut the dough in half and then cut each half into 6 even pieces.
  • Shape each piece into a ball and place on the baking tray – the dough was very sticky so some of my balls weren’t perfect!
W Cherry Bakewell Hot Cross Buns
Cherry Bakewell Hot Cross Buns ready for their second prove.

Proving The Buns For The Second Time

  • Cover the buns with a clean tea towel and place in a warm, draught free place.
  • Leave until doubled in size.
  • While the buns are proving, make the flour paste for the crosses.
  • Add the water and almond extract to the flour and mix until you have a smooth paste. Place in a small, disposable piping bag and secure the top with an elastic band.
W Cherry Bakewell Hot Cross Buns
Doubled in size and almost round, these buns are ready for their crosses.
  • 10 minutes before the buns are ready for the oven, preheat it to 220C/200C fan, gas mark 7, 425F.

Piping Crosses Onto The Buns

  • Snip the end off of the piping bag, so there is a small hole.
  • Pipe down each line of buns and then again across each line of buns.
W Cherry Bakewell Hot Cross Buns
Ready for the oven.

Baking And Glazing The Cherry Bakewell Hot Cross Buns

  • Place the buns into the middle of the oven and bake for 20 minutes. They are baked when they are golden brown and sound hollow when rapped on the bottom with your knuckle.
  • Remove the Cherry Bakewell Hot Cross Buns from the oven.
  • Take the buns off of the baking tray and place onto a cooling rack.
  • Make the glaze by adding the very hot water to sifted icing sugar and stirring until completely dissolved.
  • Brush the glaze over the buns whilst they are still hot.
  • Leave to cool until at least warm, before diving in and taking your first bite!
W Cherry Bakewell Hot Cross Buns
Cherry Bakewell Hot Cross Buns glazed and cooling on a rack.

These Cherry Bakewell Hot Cross Buns may not have the traditional taste of the usual buns, but they are a complete and utterly delightful alternative!

For those people who are averse to raisins, sultanas or cinnamon, here is a bun they can thoroughly enjoy in the run up to Easter. In fact all year round.

Have you ever tried making hot cross buns?

Do you like the idea of the Cherry Bakewell Hot Cross Buns as an alternative?

I hope you have fun whatever you bake this Easter and also take a moment to consider what Easter really means, see Important Stuff.

If you have enjoyed these Cherry Bakewell Hot Cross Buns here are some more traditional recipes for you.

Hot Cross Buns

Hot Cross Buns

Wholemeal Hot Cross Buns

Wholemeal Hot Cross Buns

Ginger Date Hot Cross Buns

Ginger Date Hot Cross Buns

Whatever you make or bake over this Easter period, please pop a photo onto Twitter/Instagram? I love seeing your pictures and reading your comments.

Wishing you all a happy, safe Easter.

Sammie x

I’m thrilled to have my Cherry Bakewell Hot Cross Buns featured in The Guardian. To view the article by Stuart Heritage click on the link below.

https://www.theguardian.com/food/2021/mar/30/hot-cross-bun-bonanza-ten-brilliant-recipes-from-the-perfect-classic-to-prosciutto-and-parmesan

The Guardian newspaper article featuring hot cross bun recipes.

This recipe has been submitted to Baking Queen 74 for March’s Perfecting Patisserie.

March Perfecting Patisserie


No part of this post may be reproduced or duplicated without the written permission of the owner. Please seek my Disclosure Policy.


Chocolate Monster Mini Egg Cookies

Since Easter is fast approaching I decided to take advantage of the range of chocolate eggs available and start my Easter baking with them. These Easter Chocolate Monster Mini Egg Cookies are the perfect large cookie. Soft, chewy, buttery cookies with whole Smarties mini eggs baked into the batter.

FF Chocolate Monster Mini Egg Cookies

I am thoroughly enjoying the lead up to Easter this year. Especially as last year I was unwell and in hospital over Easter, see Living With Seizures which really sucked. Although I still have seizures every day, at least I am at home, with my family.

Baking An Easter Cookie Treat

Baking these Easter Chocolate Monster Mini Egg Cookies is a great way to share with our children, nephews, nieces, family and friends. I love seeing the excited look of anticipation. What has mummy baked today. Also, in spite of my health issues, it gives me real joy to see the pleasure a treat brings to someone else.

Smartie Chocolate Monster Mini Egg Cookies
Watch out, these Easter Chocolate Monster Mini Egg Cookies are very tempting!

As well as these delicious cookies, Smarties mini eggs have also made there way into Chocolate Mini Egg Brownies so I am definitely feeling the mini egg love this Easter!

I absolutely love Cadburys mini eggs and may well have polished of a packet or three whilst in hospital last year! They will feature in a recipe I have planned and can be used in this recipe, however the bright colours of the Smarties mini eggs really grabbed my attention. Especially as they keep their shape while baking, yet soften a little. Resulting in a combination that works beautifully in this Easter cookie recipe.

Colourful, large Easter biscuits on a white plate.

If you are a regular reader of this blog, you will know that I am a self confessed Cookie Monster. While I find no shame in admitting this, you should know this recipe makes 12 Easter Chocolate Monster Mini Egg Cookies. Absolutely perfect for cookie lovers like me!

Mindful of moderation

Due to their size these cookies are most definitely not a one bite and they’re gone. In fact I had one for my lunch today with a hot cup of tea and I have to say, I was one very happy bunny (see the Easter pun there 😉).

Obviously these are intended as a treat and that’s part of the reason I give so much of my baking away. It wouldn’t be very healthy if we ate all of every batch of say Marshmallow Frosted Mango Cupcakes that I bake.

So by sharing the love, I also share the calories, that are balanced out in our home with lots of fruit and vegetables.

Large, Easter mini egg cookies piled up on a white platter.

Recipe: Makes 12 Easter Chocolate Monster Mini Egg Cookies

225g/8oz Soft Light Brown Sugar

150g/5oz Unsalted Butter- at room temperature

2tsp Vanilla Extract – I use Nielsen-Massey

1 Large Free Range Egg – plus

1 Large Free Range Egg Yolk

275g/10oz Plain White Flour

1/2tsp Bicarbonate of Soda

Pinch of Salt – I use Maldon 

2 Packets Smarties Mini Eggs (2x100g) – alternatively Cadbury’s mini eggs also work well in this recipe

Method: Preheat oven to 170C/150C fan, gas mark 3, 325F

Making the cookie dough

  • First of all, place the sugar and butter in a large bowl and whisk/beat for 5 minutes until pale and creamy – whisking for 5 minutes here and then after adding the eggs is very important to the finished texture of the cookie.
  • Add the vanilla extract and the eggs and continue whisking/beating for a further 5 minutes.
Smartie Monster Mini Egg Cookies
This is how light and fluffy the mixture should look now.
  • Sift in the flour, bicarb. and salt.
  • Add both packets of Smarties mini eggs
  • Fold all the ingredients together until you have uniform cookie dough.

Shaping the cookies

  • Using an ice cream scoop, scoop mounds of cookie dough onto baking parchment lined baking trays.
Smartie Chocolate Monster Mini Egg Cookies
Chocolate Monster Mini Egg Cookie dough mounds.
  • I place 4 scoops per baking tray as these cookies do spread.
  • With clean damp hands, use your fingers to press down and flatten the mounds.
Smartie Chocolate Monster Mini Egg Cookies
These cookies are ready for the oven!

Baking The Easter Chocolate Monster Mini Egg Cookies

  • Place the cookies in the preheated oven and bake for exactly 15 minutes.
  • Once baked the cookies will be golden but still very soft. Remove from the oven and let the cookies cool completely on the baking tray. The cookies harden on cooling.
  • When cold store in an airtight container for up to 5 days. There is no way that they ever last that long in our house!!
Smartie Chocolate Monster Mini Egg Cookies
Chocolate Monster Mini Egg Cookies

These Easter Chocolate Monster Mini Egg Cookies are utterly irresistible and so satisfying to eat, due to their size.

They are sure to be a hit with whoever you share them with.

If you have enjoyed making these Easter Chocolate Monster Mini Egg Cookies here are some more cookie recipes:

Golden Egg Chocolate Sponge Cake

FF Golden Egg Chocolate Sponge Cake
Golden Egg Chocolate Sponge Cake

Vanilla Mini Egg Nest Cupcakes

FF Vanilla Mini Egg Nest Cupcakes
Vanilla Mini Egg Nest Cupcakes

Chocolate Mini Egg Sponge Cake

FF Chocolate Mini Egg Sponge Cake
Chocolate Mini Egg Sponge Cake

Also if you make any of these, or my other recipes I’d love to know how you get on. Please leave a comment and/or post a photo on Twitter/Instagram? Because seeing your bakes really makes my day!

So, whatever you are making, baking and creating in your kitchens this Easter, have fun preparing and sharing your feast.

Sammie xx

@sammiefeasting Twitter/Instagram

No part of this post may be reproduced or duplicated without the written permission of the owner. Please see my Disclosure Policy.

Also entered for the month of March Simply Eggcellent over at Belleau Kitchen

simply eggcellent linky


Supersized Easter cookies packed with Smarties chocolate mini eggs.

Marshmallow Frosted Mango Cupcakes

At long last, today is the first day of Spring! And as the sun shone this morning I listened to birds chirping in the garden. While people are outside in the sunshine mowing their lawns I was inspired to create a cupcake that celebrates the passing of Winter. So, here are my gluten free Marshmallow Frosted Mango Cupcakes.

FF Marshmallow Frosted Mango Cupcakes

Sarah at Heavenly Marshmallows sent me a selection of her homemade, artisan marshmallows. Since the selection included nine mango and passionfruit flavour I decided to use them in a recipe.

Because the mango and passionfruit marshmallows are gluten free I decided to make a gluten free cupcake, with mango in the cake batter.

HM Marshmallow Frosted Mango Cupcakes
Marshmallow Frosted Mango Cupcakes

While making gluten free cupcakes was first for me, I also wanted to incorporate the delicious mango and passionfruit marshmallows into the frosting. Since I had seen lots of different marshmallow frosting ideas on Pinterest. However, after reading through a few different recipes, as usual I decided to come up with something of my own.

Marshmallow Frosted Mango Cupcakes

The Gluten Free Taste Test

So, for these Marshmallow Frosted Mango Cupcakes I decided to make two cake batters. As can be seen, the first gluten free batch of cupcakes are baked in yellow cupcake cases. Because the cupcake wrappers are yellow floral they are ideal for Spring.

While the second batch are in the orange wrappers and are made using plain flour, that is NOT gluten free. Since no one in our home is gluten intolerant, my wonderful family were to serve as ‘taste testers’, in a blind taste testing.

FF Marshmallow Frosted Mango Cupcakes
Marshmallow Frosted Mango Cupcakes

Each batch of cake batter had some mango added to it. Because I didn’t have any fresh mango, I used mango from a pot in juice. Mashing up the mango with a fork and adding it to the cake batter. And, in both bakes, the mango stayed evenly distributed throughout the baked cupcake. Finally, I had successfully made gluten free cupcakes, with a good texture.

Marsmallow In The Frosting?

The Success Of Marshmallow Frosted Mango Cupcakes

Next came the frosting, which wasn’t as daunting as I’d imagined. While the hardest part was saying goodbye to each of the 8 mango and passionfruit marshmallows as I put them in a heatproof bowl, over a double boiler.

Effectively this dreamy marshmallow frosting is buttercream, with melted marshmallows added to it.  While there’s a bit more to making it than that, it is no more difficult than making a chocolate ganache, that is then whipped and piped.

FF Marshmallow Frosted Mango Cupcakes

Rather than the sticky, sweet, frosting I’d imagined, the opposite was true. Resulting in marshmallow frosting that is the stuff of dreams, where fairies and unicorns live and rain falls like glittery sprinkles. I took myself off into my dream world there. And the result is amazing. Because, the melted marshmallows lighten the buttercream frosting. Resulting in a mallow, sponginess, that doesn’t set hard and melts, almost like sherbet on your tongue.

Recipe: Makes 12 Marshmallow Frosted Mango Cupcakes

Alternatively these cupcakes can be made with regular wheat flower. Substitute the same quantity of plain white, wheat flour instead of gluten free flour. Method and cooking times are exactly the same.

For the Mango Cupcakes

100g/4oz Unsalted Butter-at room temperature

100g/4oz Caster Sugar

2 Large Free Range Eggs

1tsp Vanilla Extract – I use Nielsen-Massey

100g/4oz Gluten Free White Flour – I use Doves Farm

1tsp Baking Powder – Waitrose Cooks’ Homebaking baking powder as it is gluten free – check yours not all brands are gluten free.

1/4 tsp Salt – I use Maldon

75g/3oz Fresh or Tinned Mango – any juice strained off and mango mashed with a fork.

For the Marshmallow Frosting

Heavenly Marshmallows Mango and Passionfruit flavour marshmallows – see note at bottom of post Art of Mallow

1tbsp Glycerine

300g/11oz Icing Sugar – sifted

150g/6oz Unsalted Butter – very soft

3tsp Boiling Water

Sprinkles of your choice

Making And Baking The Mango Cupcakes

  • First of all, place 12 cupcake cases in a cupcake or muffin tin.
  • Add the caster sugar,vanilla and butter into a medium sized bowl and whisk/beat together until pale and creamy.
  • Sift in the gluten free flour, baking powder and salt.
  • Add 2 eggs.
  • Whisk/beat until all the ingredients have come together and the batter is smooth.
  • Always take care to not over mix the cake batter.
  • Add the mashed mango and fold into the cake batter.
  • Spoon the cupcake mixture evenly into the cupcake cases.
HM Marshmallow Frosted Mango Cupcakes
Mango Cupcakes ready for the oven.
  • Bake in the middle of the oven for 25-30 minutes. The low slow cooking will ensure flat tops, perfect for frosting.
  • The cupcakes are baked when they are golden brown and spring back from a light touch.
  • As soon as the cupcakes are baked remove from the oven.
  • Allow to cool for 5 minutes in the tin.
  • Remove the cupcakes from the tin and place on a cooling rack to cool completely.
HM Marshmallow Frosted Mango Cupcakes
Gluten Free Cupcakes cooling on the rack.

Making The Marshmallow Frosting

  • First of all, place the marshmallows into a heatproof bowl and place over a saucepan of barely simmering water.
HM Marshmallow Frosted Mango Cupcakes
Mango and Passionfruit Marshmallows starting to melt.
  • As the marshmallows melt it is important to keep stirring continuously.
  • As soon as they are melted remove the bowl from the saucepan and set to one side to cool.
HM Marshmallow Frosted Mango Cupcakes
Heavenly Melted Marshmallows!
  • While the melted marshmallows are cooling make the buttercream.
  • Add the softened butter and boiling water into the bowl of sifted icing sugar.
  • Whisk on a high speed until light and creamy.
  • Add the glycerine and whisk into the buttercream.
  • Pour the warm melted marshmallows into the buttercream, whilst the whisk is still mixing.
  • Continue mixing on a medium speed for 5 minutes.
  • Resulting in the lightest frosting to pipe onto your cakes.
HM Marshmallow Frosted Mango Cupcakes
Light, creamy, marshmallow frosting.

Piping The Marshmallow Frosting

  • Fit a large piping bag with a large star tip – I used Wilton #1M
  • Place the bag inside a sturdy jug or glass, folding back the sides of the bag.
  • Fill the bag with the marshmallow frosting.
  • Pipe swirls (like ice cream in cones) or roses see here.
  • Finally, sprinkle over the topping of your choice.
FF Marshmallow Frosted Mango Cupcakes
Marshmallow Frosted Mango Cupcakes

Unsurprisingly, these Marshmallow Frosted Mango Cupcakes are completely delicious and in a blind taste test the gluten free cupcakes tasted exactly the same as the regular ones! Most importantly, no difference at all was detected between the two versions. Obviously, as a recipe developer, this made me very happy.

And one part that was declared “exceptional” was the marshmallow frosting. So, this is a frosting that I will definitely be making again. Since both taste and texture are most definitely worth the extra step!

If you enjoyed this recipe for Marshmallow Frosted Mango Cupcakes You May Also Like These:

Raspberry Ripple Almond Cupcakes

Smartie Raspberry Ripple Almond Cupcakes
Raspberry Ripple Almond Cupcakes.

Springtime Vanilla Cupcakes

HM Springtime Vanilla Cupcakes
Springtime Vanilla Cupcakes

Maltesers Popping Candy Cupcakes 

FF Marshmallow Frosted Mango Cupcakes
Maltesers Popping Candy Cupcakes

So, if you make these, or indeed any of my recipes, please post a photo, if you are able, on Twitter or Instagram and tag me in. Because I really enjoy seeing your makes and bakes.

So, whatever you are making, baking and creating in your kitchens, have fun preparing and sharing your feast.

Sammie xx

Heavenly Marshmallows  provided me with the marshmallows for this recipe. All content, photographs and recipes are my own. Please see my Disclosure Policy.

Unfortunately Heavenly Marshmallows are no longer trading. So, I suggest Art of Mallow  Mango Passion Fruity Mallows, which I have tested using this recipe and are an equally good alternative.


Chocolate Mini Egg Brownies

Finally, Easter is nearly here and the shops are filling up with all sorts of chocolate goodies. Including chocolate bunnies, Easter chicks and eggs in every size, shape and colour. So, to have some Easter baking fun I added colourful mini eggs in these Chocolate Mini Egg Brownies.

Chocolate Mini Egg Brownies

Using Smarties mini eggs with their bright colours means they show up well on top of the chocolate brown, baked brownies. Also, Smarties mini eggs are hidden within each brownie, keeping their shape once baked.

And each of these Chocolate Mini Egg Brownies are deliciously fudgey as you bite into them, with extra crunch and chocolate when you find a hidden egg.

FF Chocolate Mini Egg Brownies

Since our children were little we have made up an Easter egg hunt for them. Sometimes friends and cousins get involved too, now they are a bit older. Yet, what never ceases to amaze me is the sharing that happens after the egg hunt is finished.

As each child and sometimes adults, sit down with their spoils from the hunt and make sure that everyone has the same number of eggs. Because, I can never remember where they were hidden the numbers aren’t always even! So a good tip is to have a few eggs stashed in the cupboard, ready to even out the numbers so it’s fair.

And, if they do manage to find all of the eggs, you’ve got a secret stash of chocolate hidden away.

FF Chocolate Mini Egg Brownies

What Easter Means To Me

While I celebrate Easter for it’s true Christian meaning, see Important StuffI’ve never found being a Christian to be boring.

We certainly have lots of fun in our home and making these Chocolate Mini Egg Brownies, really is good fun! And, I had specific instructions from one daughter to make them larger than the Chocolate Fudge Brownie Bites and also to bake them with whole, Smarties mini eggs, hidden inside.

Each Chocolate Mini Egg Brownie is drizzled in white chocolate before topping with more Smarties mini eggs. Easter is most definitely not the time in our house, for chocolate restriction!

In fact I’m not sure there ever is an appropriate time for that, however that’s a whole different conversation!

FF Chocolate Mini Egg Brownies

Recipe: Makes 16 Chocolate Mini Egg Brownies

200g/7oz Plain Chocolate – minimum 70% Cocoa solids

200g/7oz Milk Chocolate – minimum 35% Cocoa solids

4 Large Free Range Eggs

225g/8oz Unsalted Butter

225g/8oz Dark Brown Sugar

1tsp Vanilla Extract – I use Nielsen-Massey

1/4tsp Sea Salt – I use Maldon

4 Packets of Smarties Mini Eggs – 4 X 100g packets

75g/3oz Plain White Flour

1/2tsp Bicarbonate of Soda

100g/4oz White Chocolate – optional

Method: Preheat oven to 170C/150 fan, gas mark 3 1/2, 325F

Making The Brownie Batter

  • First of all, line a 22.5cm x 30cm (9″ x 12″) deep baking tin with aluminium foil
  • Break up the chocolate (or chop) into individual squares, dice the butter and place both into a heat proof bowl.Place the bowl over a simering pan of water (a double boiler) ensuring the bottom of the bowl doesn’t touch the water.
  • Stir continuously until both the chocolate and butter are two thirds melted.
  • Carefully remove the bowl from the pan and continue stirring until the contents are completely melted.
  • Set the chocolate aside to cool.
  • Into a separate bowl add the eggs, sugar and vanilla extract.
  • Whisk lightly to combine the ingredients.
  • When the chocolate has cooled to just warm pour it into the egg mixture slowly, while gently stirring.
  • Sift the flour, salt and bicarbonate of soda into the bowl and add two packets of the Smarties Mini Eggs.
  • Using a wooden spoon gently fold all the ingredients together.

Smartie Chocolate Mini Egg Brownies

  • Pour the brownie batter into the prepared tin.

Smartie Chocolate Mini Egg Brownies

  • Give the tin a couple of sharp taps against the worktop. This helps bring any trapped air bubbles to the surface.

Baking The Brownies

  • Place the tin into the middle of the preheated oven and bake for 35-40 minutes.
  • Halfway through the baking time carefully tap the tin against the oven shelf, this helps the brownies stay fudgey and not rise, like a cake.
  • The brownies are baked when the outside edge has set and the top has the familiar, sugar cracked look. There should still be a bit of wobble at the centre.
  • As soon as they are baked remove the tin from the oven and allow the brownies to cool in the tin.

Smartie Chocolate Mini Egg Brownies

  • Once cooled remove the brownies from the tin and peel away the sides of the foil.

Decorating The Easter Brownies

  • First of all break up the white chocolate and place into a heatproof, microwaveable bowl.
  • Zap in short 20 second bursts, stirring after each heating period.
  • When the chocolate has almost melted, remove and keep stirring until completely melted.
  • Using a teaspoon drizzle half of the chocolate over the brownie slab.
  • Next add as many Smarties mini eggs as you dare, the melted chocolate will help them stick.
  • Now drizzle the other half of the white chocolate over the eggs and brownie.
  • Leave to set in a cool place.

Smartie Chocolate Mini Egg Brownies

  • As soon as the chocolate has set cut the large brownie into quarters. Continue, cutting each quarter into quarters and you will have 16 delicious Chocolate Mini Egg Brownies!

Smartie Chocolate Mini Egg Brownies

  • Use a palette knife to remove each fudgey brownie from the foil.
  • Store any spare brownies in an airtight container for up to 5 days, however,  there’s no way they’d last that long in our house!

FF Chocolate Mini Egg Brownies

I like to serve these Chocolate Mini Egg Brownies with a few extra eggs, so that everyone can have the same number of eggs on top of their brownie. While watching their surprise when hidden mini eggs within the brownie.

And so, whatever your plans this Easter, I hope that you take a minute to remember the reason it is celebrated?

Jesus gave His life that we may all know Him, true forgiveness, unconditional love and peace. With Him life may not be perfect, but the journey is much easier.

If you’ve enjoyed these Easter Chocolate Mini Egg Brownies then you may like these recipes too:

Golden Egg Chocolate Sponge Cake

FF Chocolate Mini Egg Brownies
Golden Egg Chocolate Sponge Cake

Chocolate Mini Egg Sponge Cake

FF Chocolate Mini Egg Brownies
Chocolate Mini Egg Sponge Cake

Mini Egg Millionaires Shortbread

Mini Egg Millionaires Shortbread squares displayed on a white platter.
Mini Egg Millionaires Shortbread

Baking for any special occasion always feels like a treat to me. Especially with family wandering in and out of the kitchen, snatching nibbles of this and that. Ultimately, this time of year reminds me of Jesus and the family, his disciples, that He too surrounded Himself with. So important was family to Him that He asked His disciple John to take care of His mother, while hanging on the cross. And if family is important to Him, then it is also important to me.

Whatever you are making, baking and creating in your kitchens this Easter, have fun preparing and sharing your feast.

Sammie xx

No part of this post may be reproduced or duplicated without the written permission of the owner. Please see my Disclosure Policy.

Entered for March We Should Cocoa over at Tin and Thyme  and Lancashire Food

we should cocoa brownies

Easter sweet traybake filled and decorated with pretty little Easter eggs.