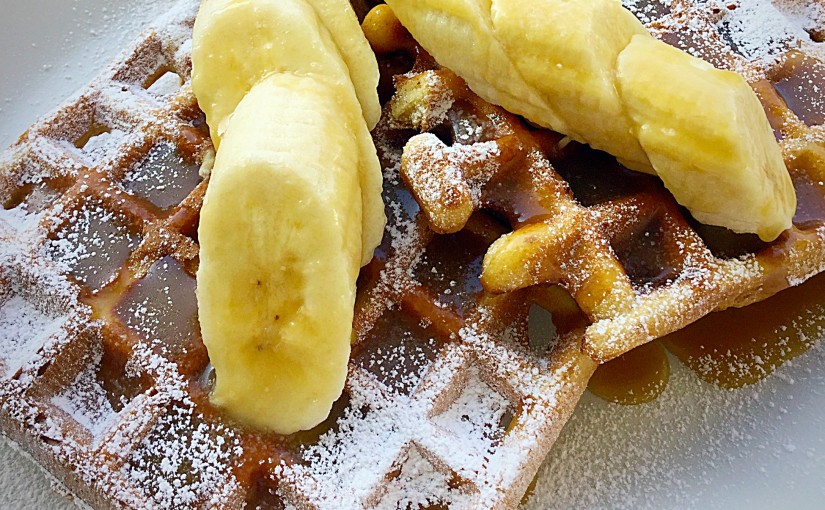
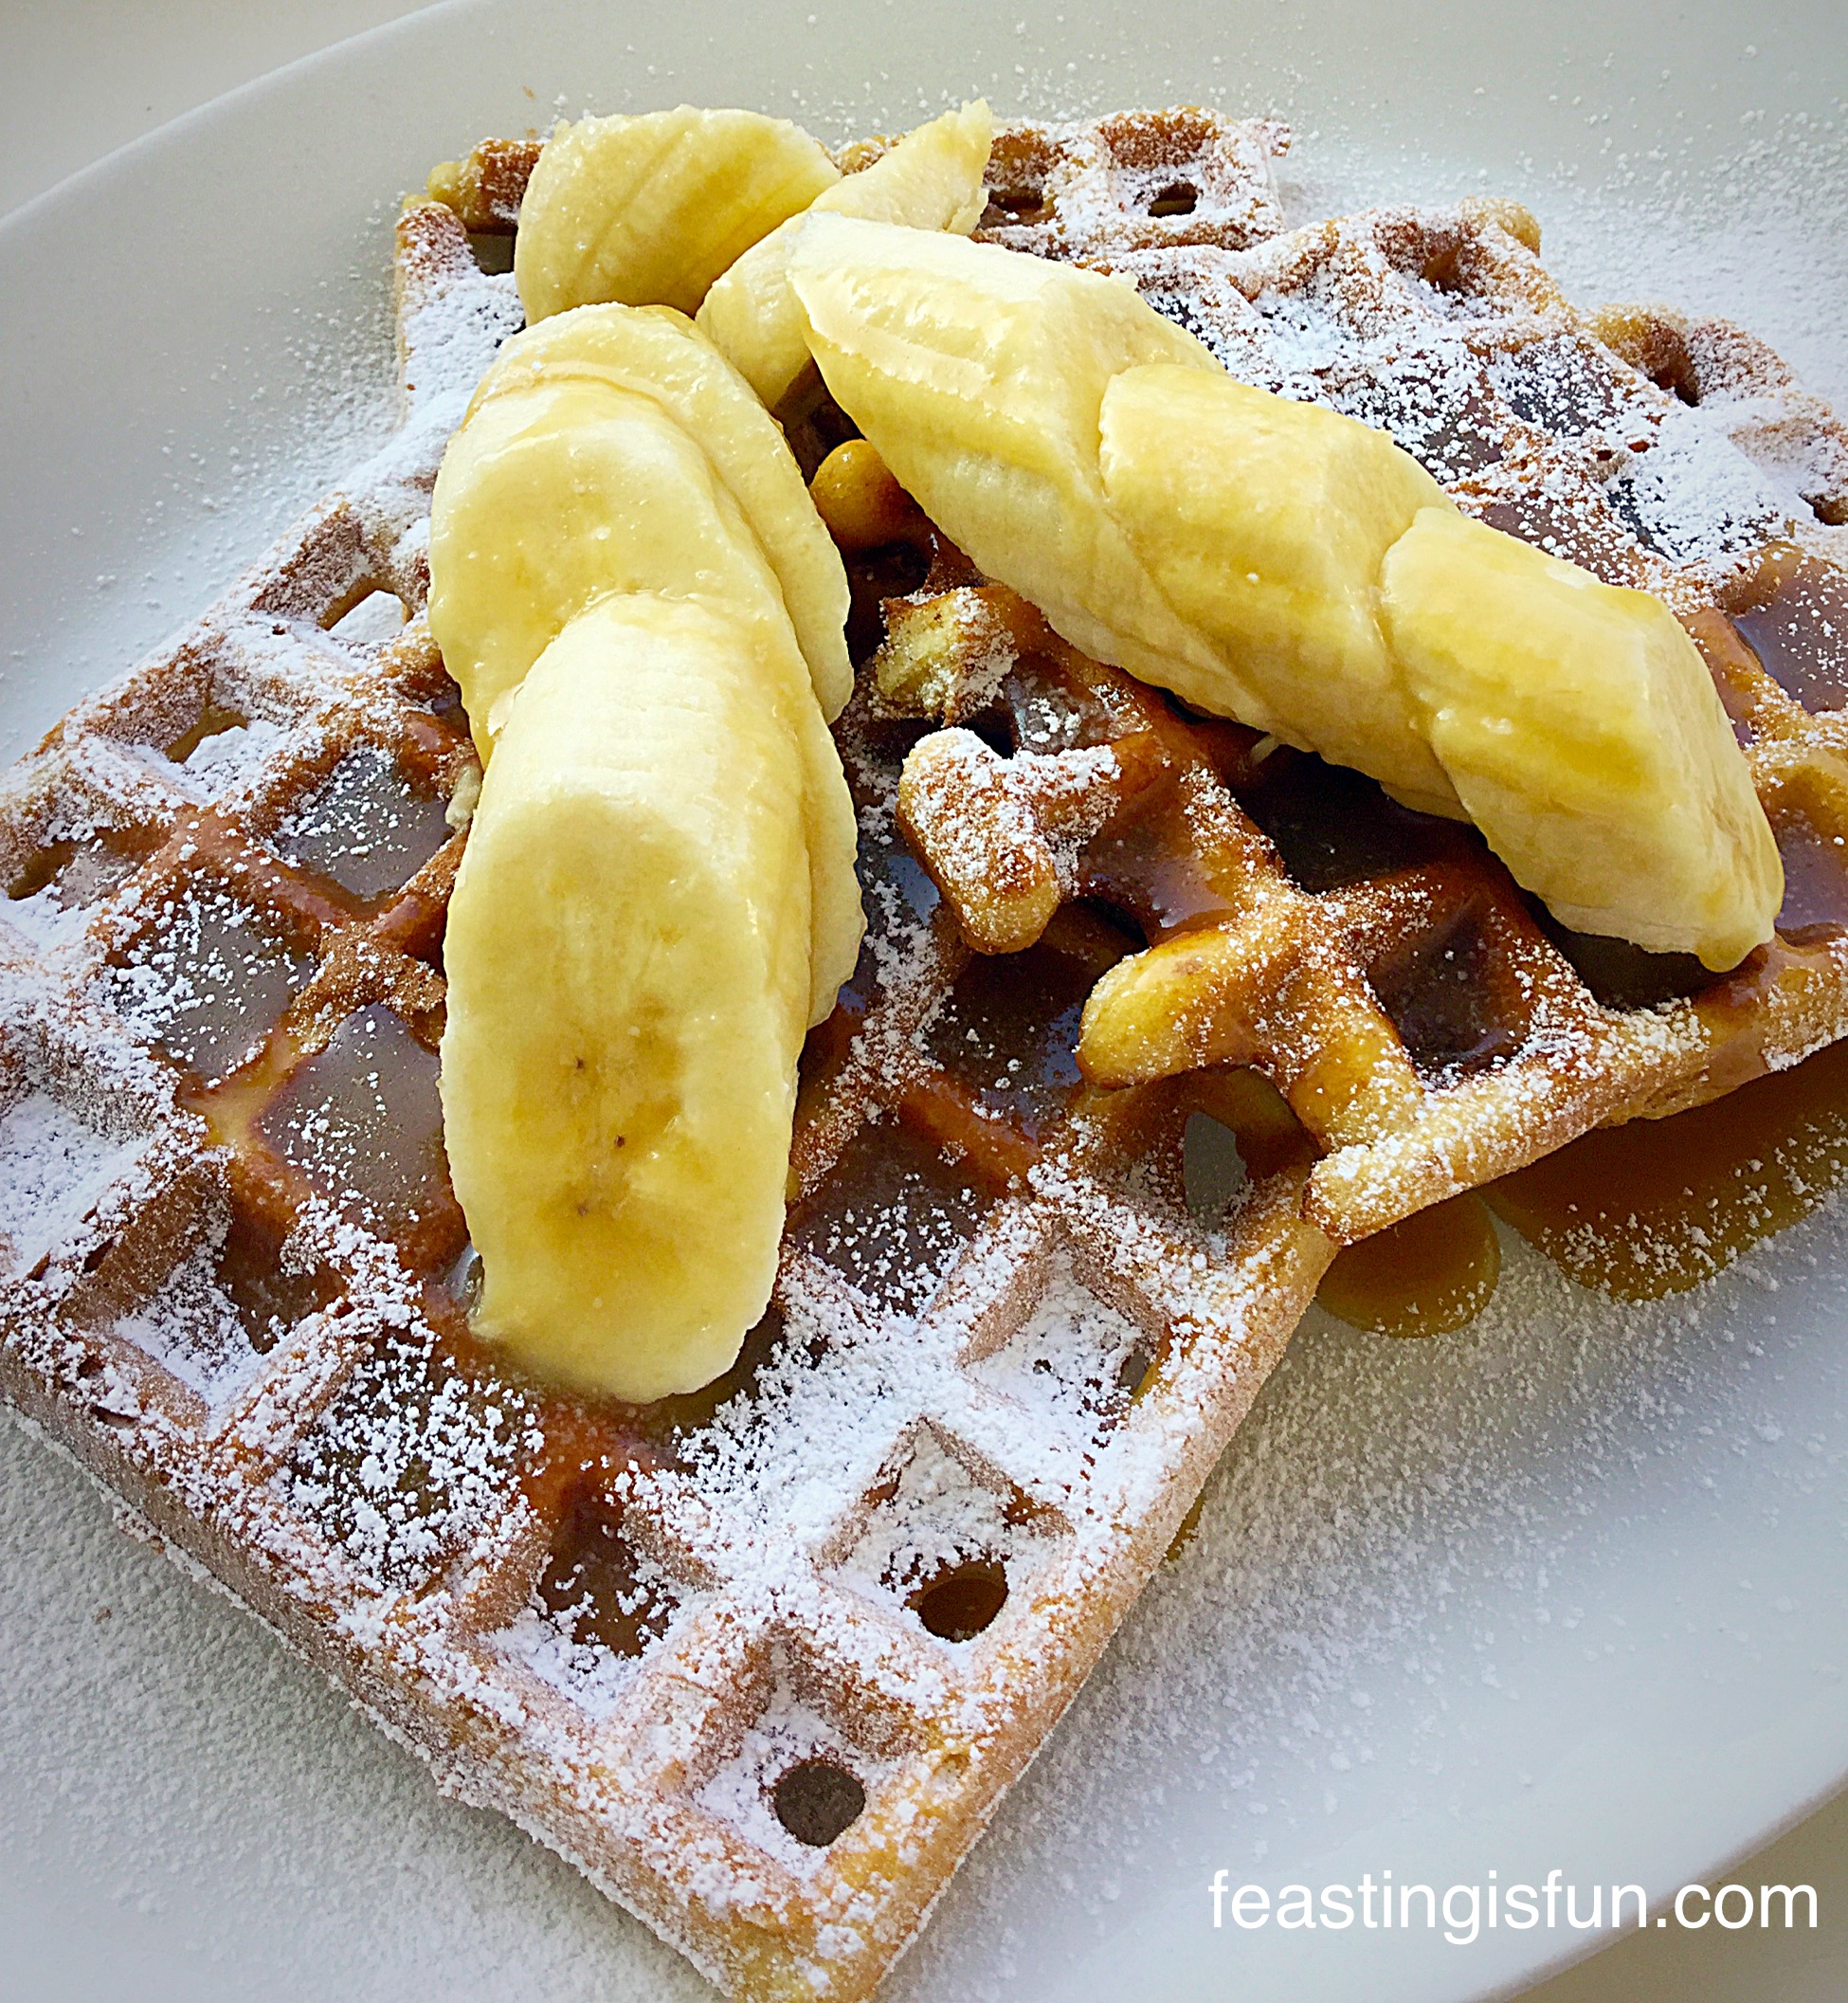
You may have noticed I’ve been Waffle-ing a lot on here lately? Because ever since I received my Waffle Makermy mind has been buzzing with different recipes. So much so that I wondered if I could make waffles using a packet cake mix – the result my Toffee Banoffee Waffles.
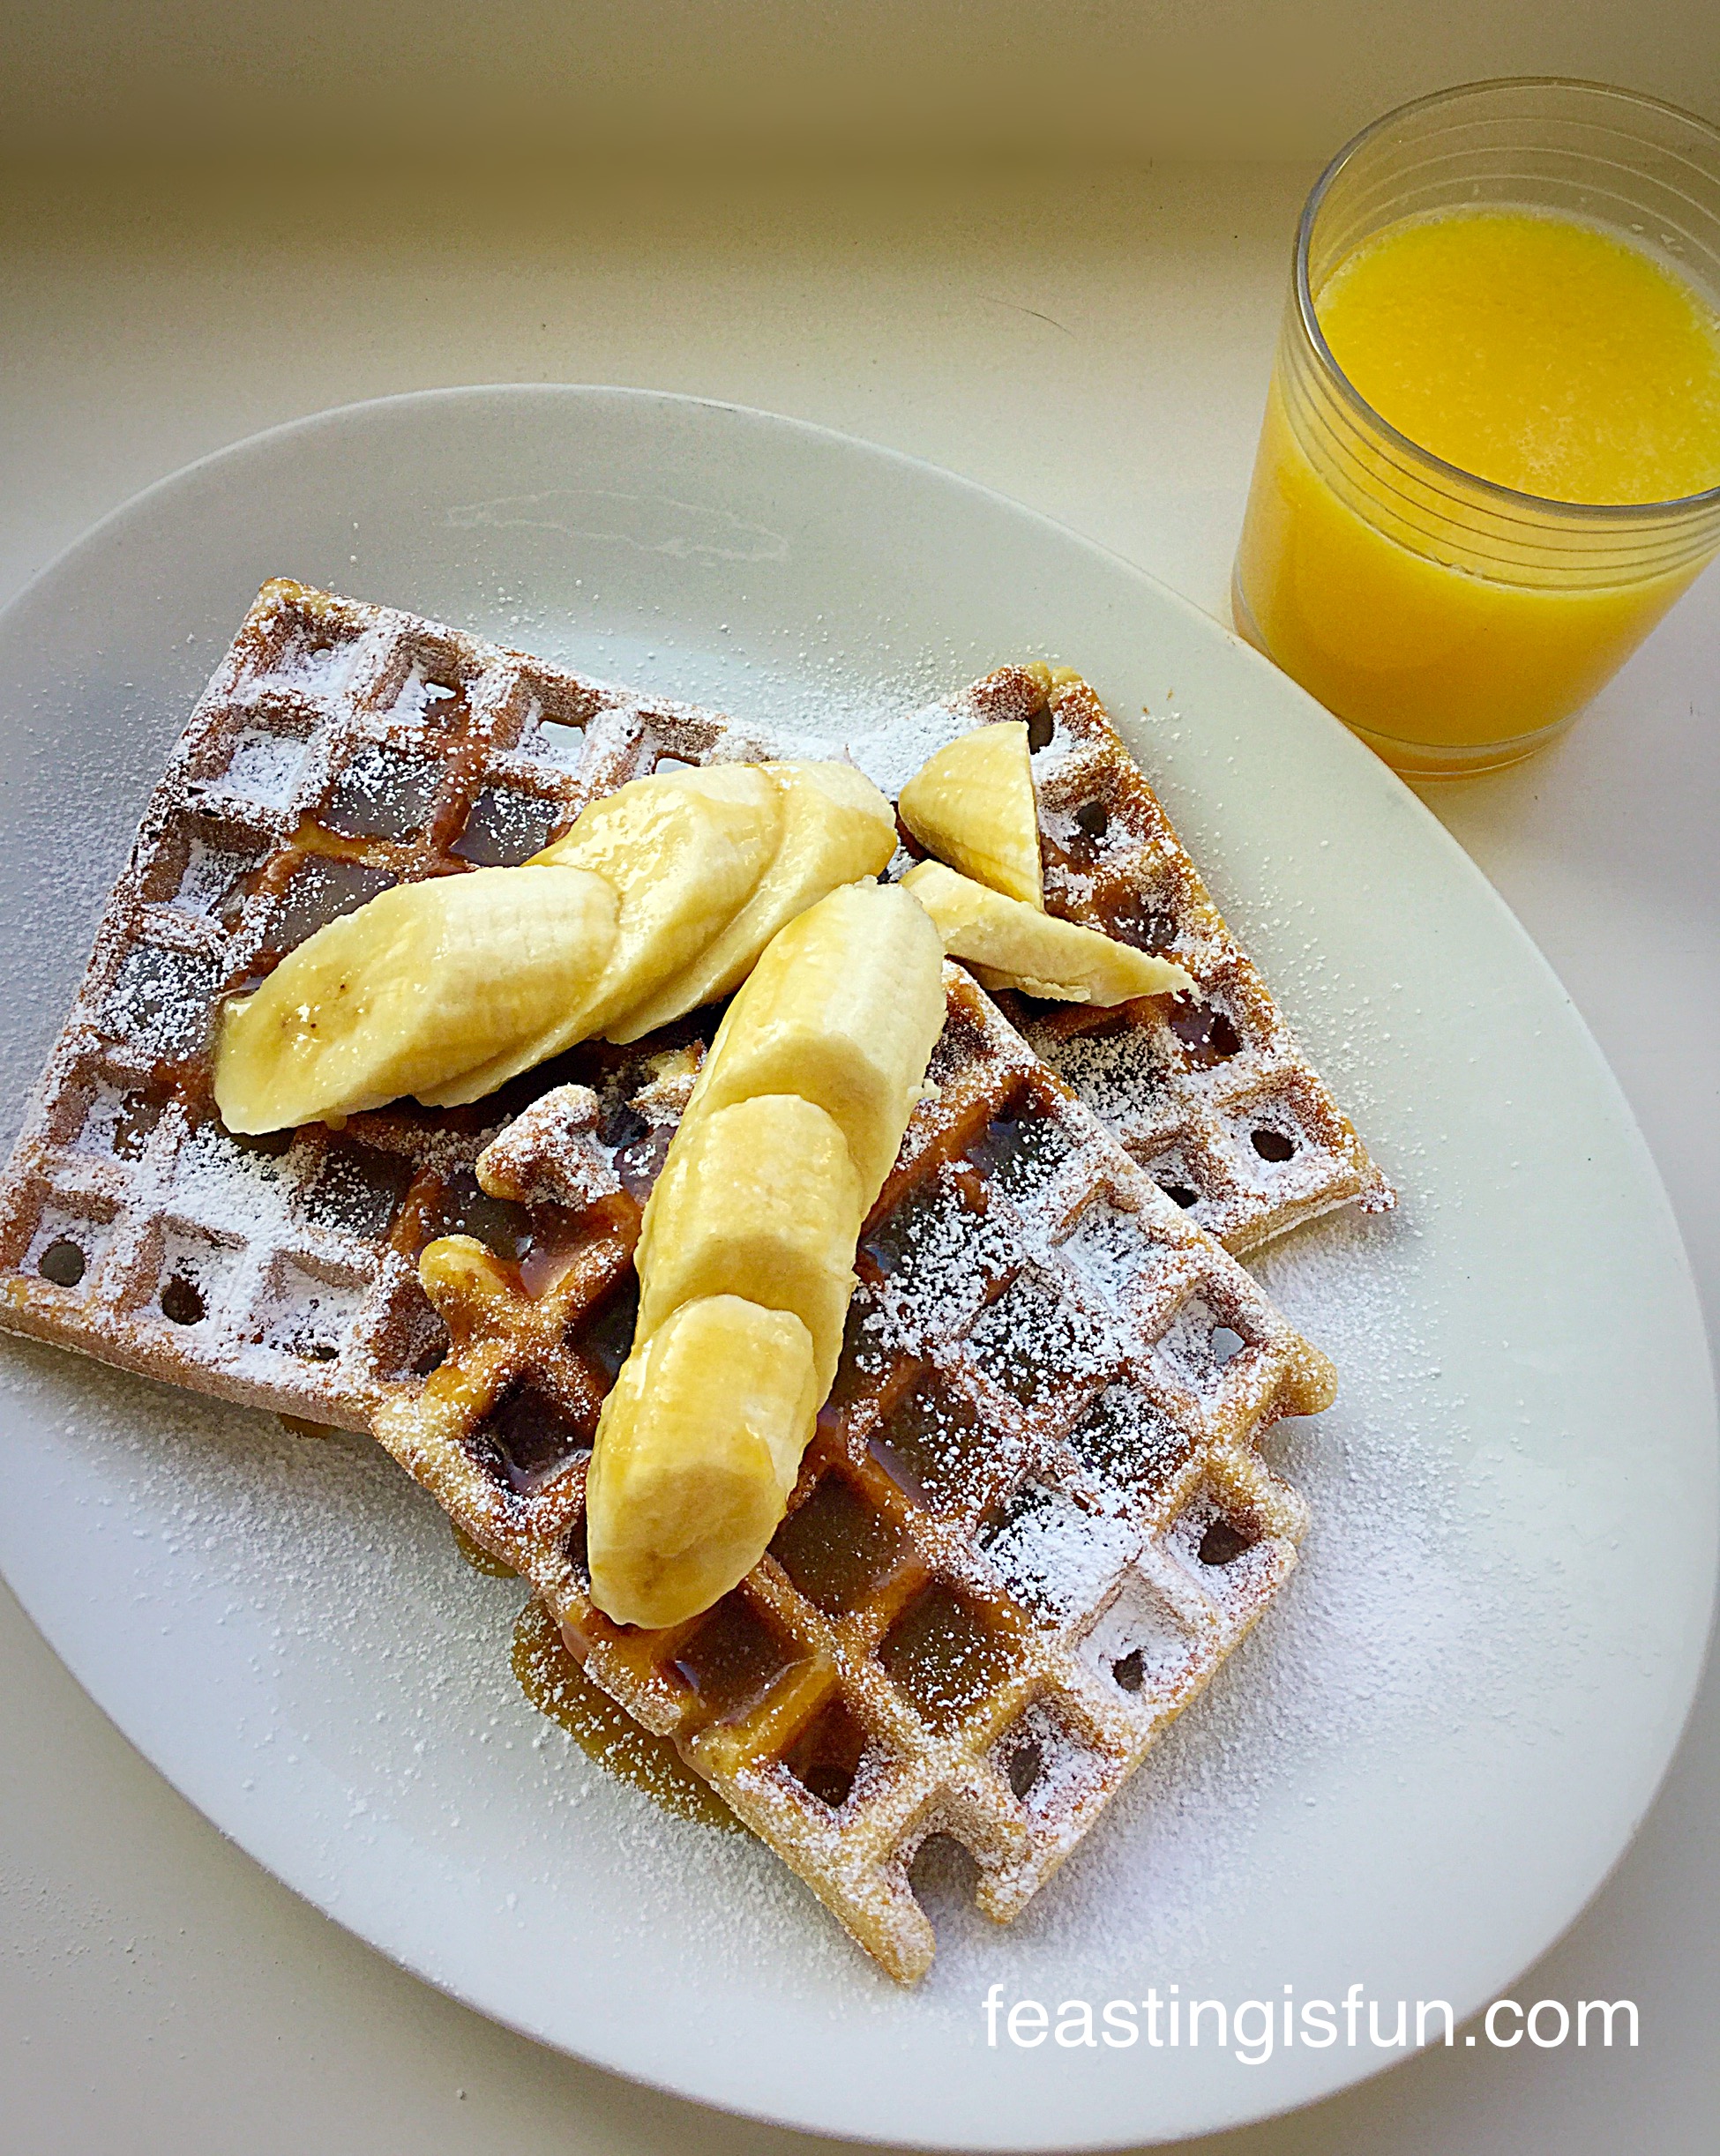
Toffee Banoffee Waffles perfect with a glass of fresh juice for breakfast.
Look good don’t they?
I have some very delicious, made from scratch recipes for waffles like my Vanilla Bean Waffleswhich are utterly delicious. Yet I’m aware that not everybody has the time, or confidence to make waffle batter from scratch and that’s ok. I’m not going to beat up on you because you want waffles but feel intimidated by not only cooking them yourself, but also having to follow a recipe.
Since everyone has to start somewhere and if using a packet mix is going to help you get started on the scary home baking journey, then Sammie is here to hold your hand.
Toffee Banoffee Waffles add a scoop of ice cream and you have a fabulous dessert!
Also I find it a great convenience knowing I have a reliable packet mix in the cupboard for when the urge to Waffle strikes 😉.
Finally, I set about testing some different cake mixes, so you can be sure your waffles will turn out brilliantly.
Using a mix isn’t cheating!
Wright’s Bakinghave a range of cake mixes that are very good quality. I was tempted by the toffee cake mix – with the idea of Toffee Banoffee Waffles already buzzing around my brain.
With one very small adaptation to the recipe the Wright’stoffee cake mix makes outstanding waffles. I mean these are seriously tasty and have a great texture too.
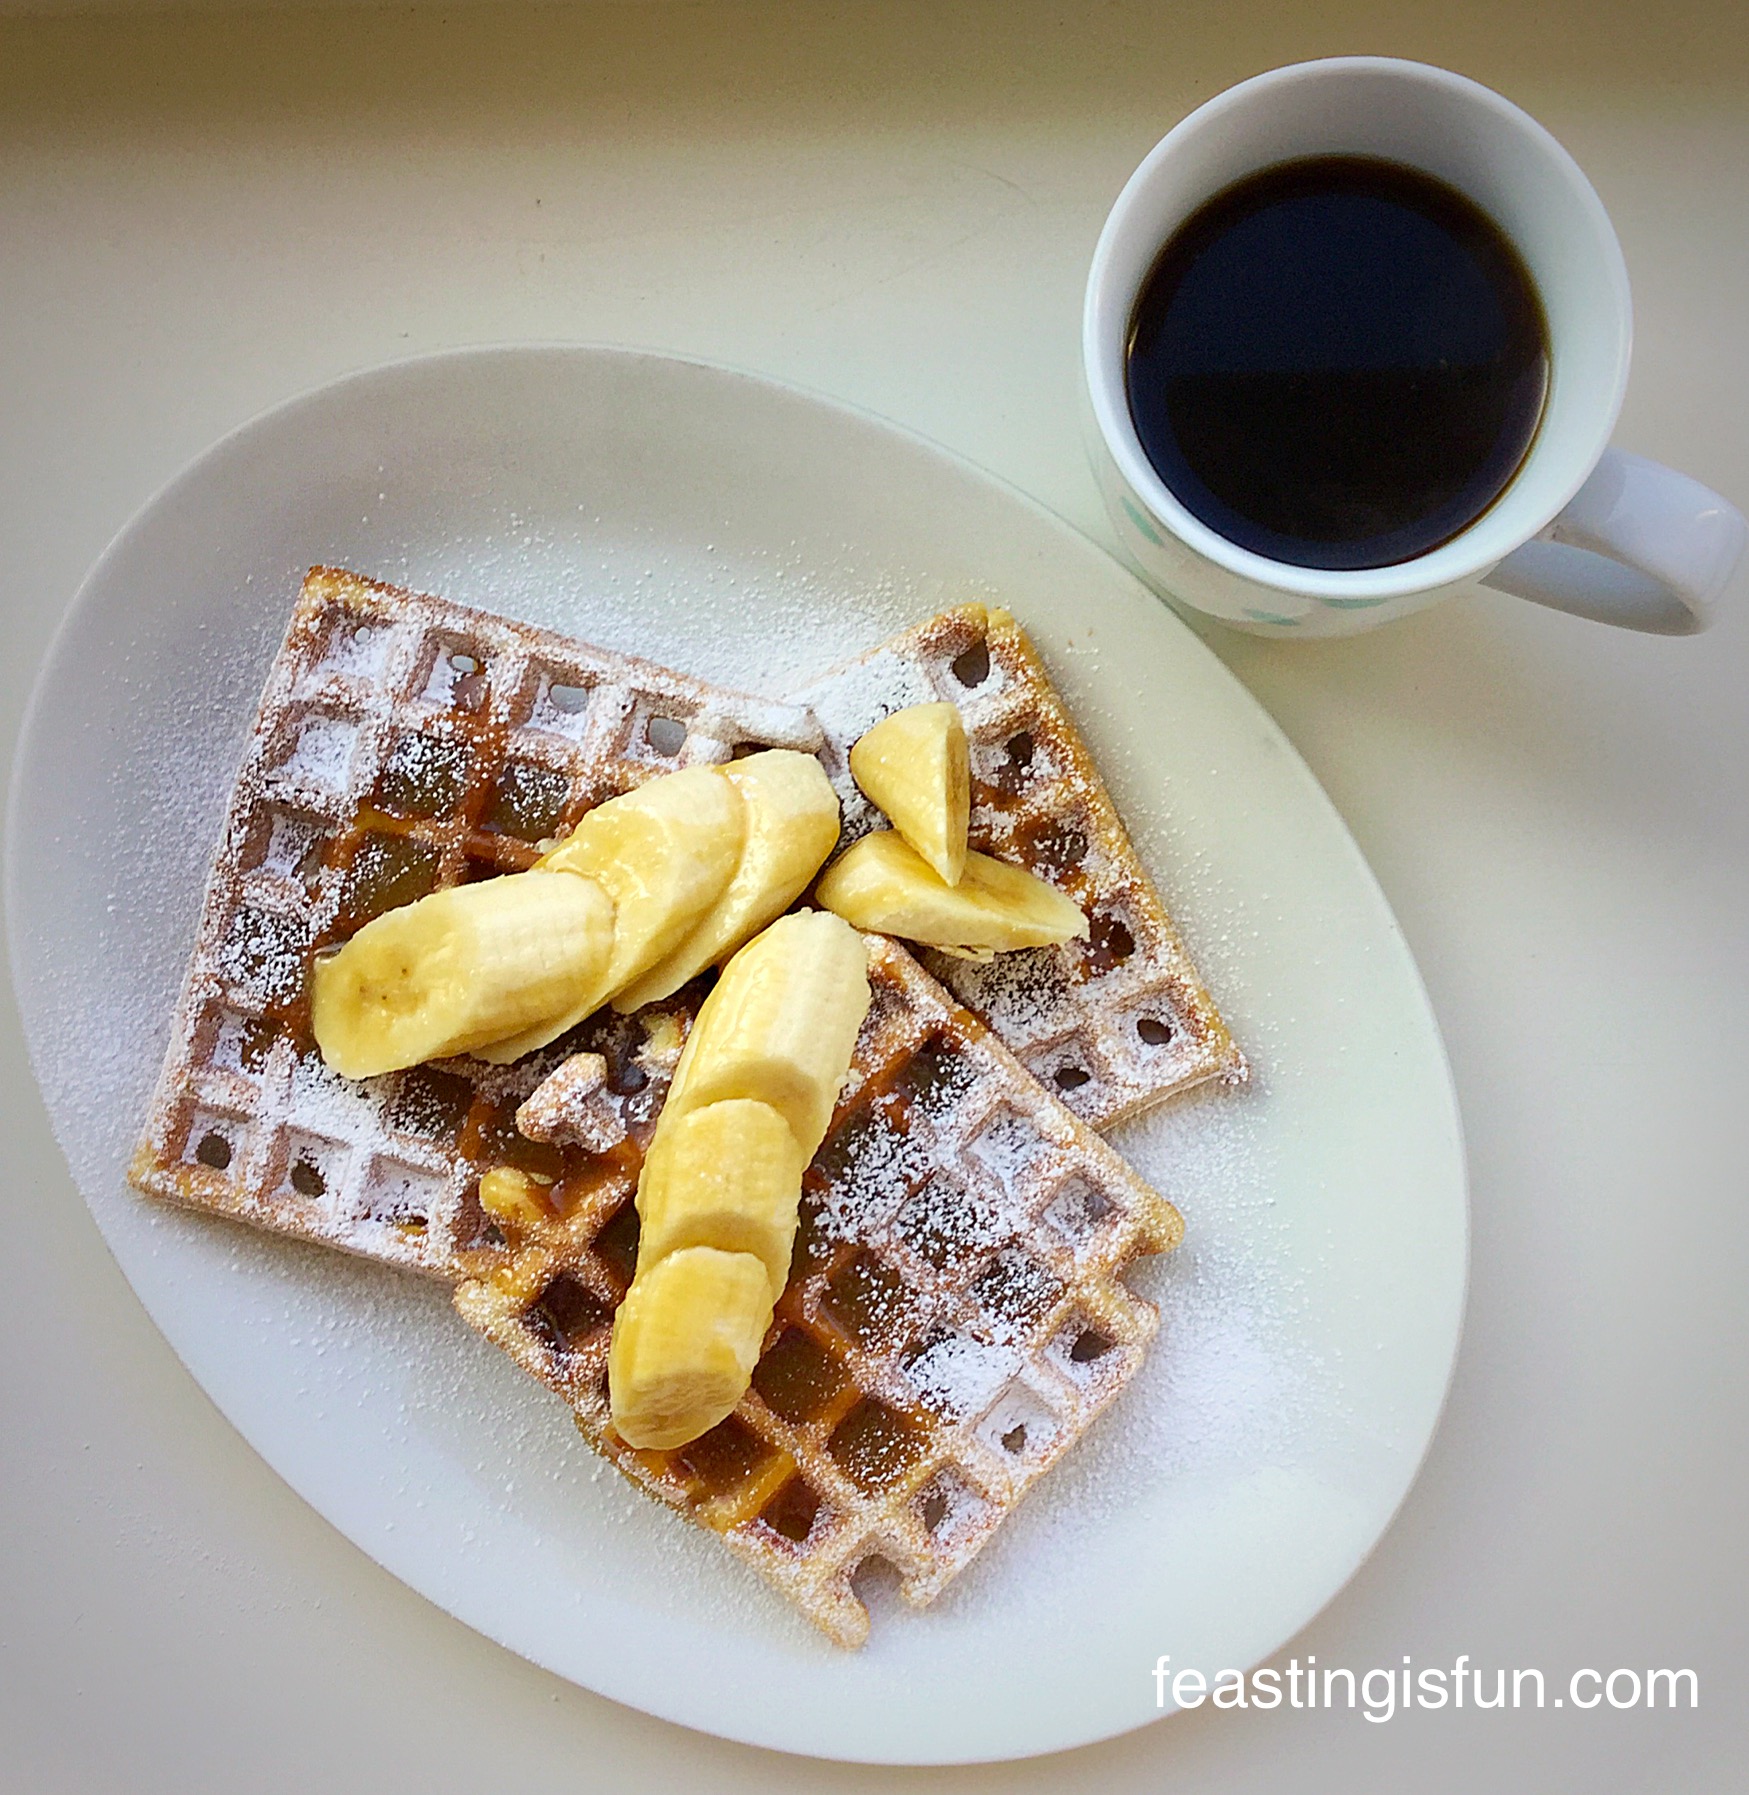
Toffee Banoffee Waffles perfect for a weekend lazy morning brunch.
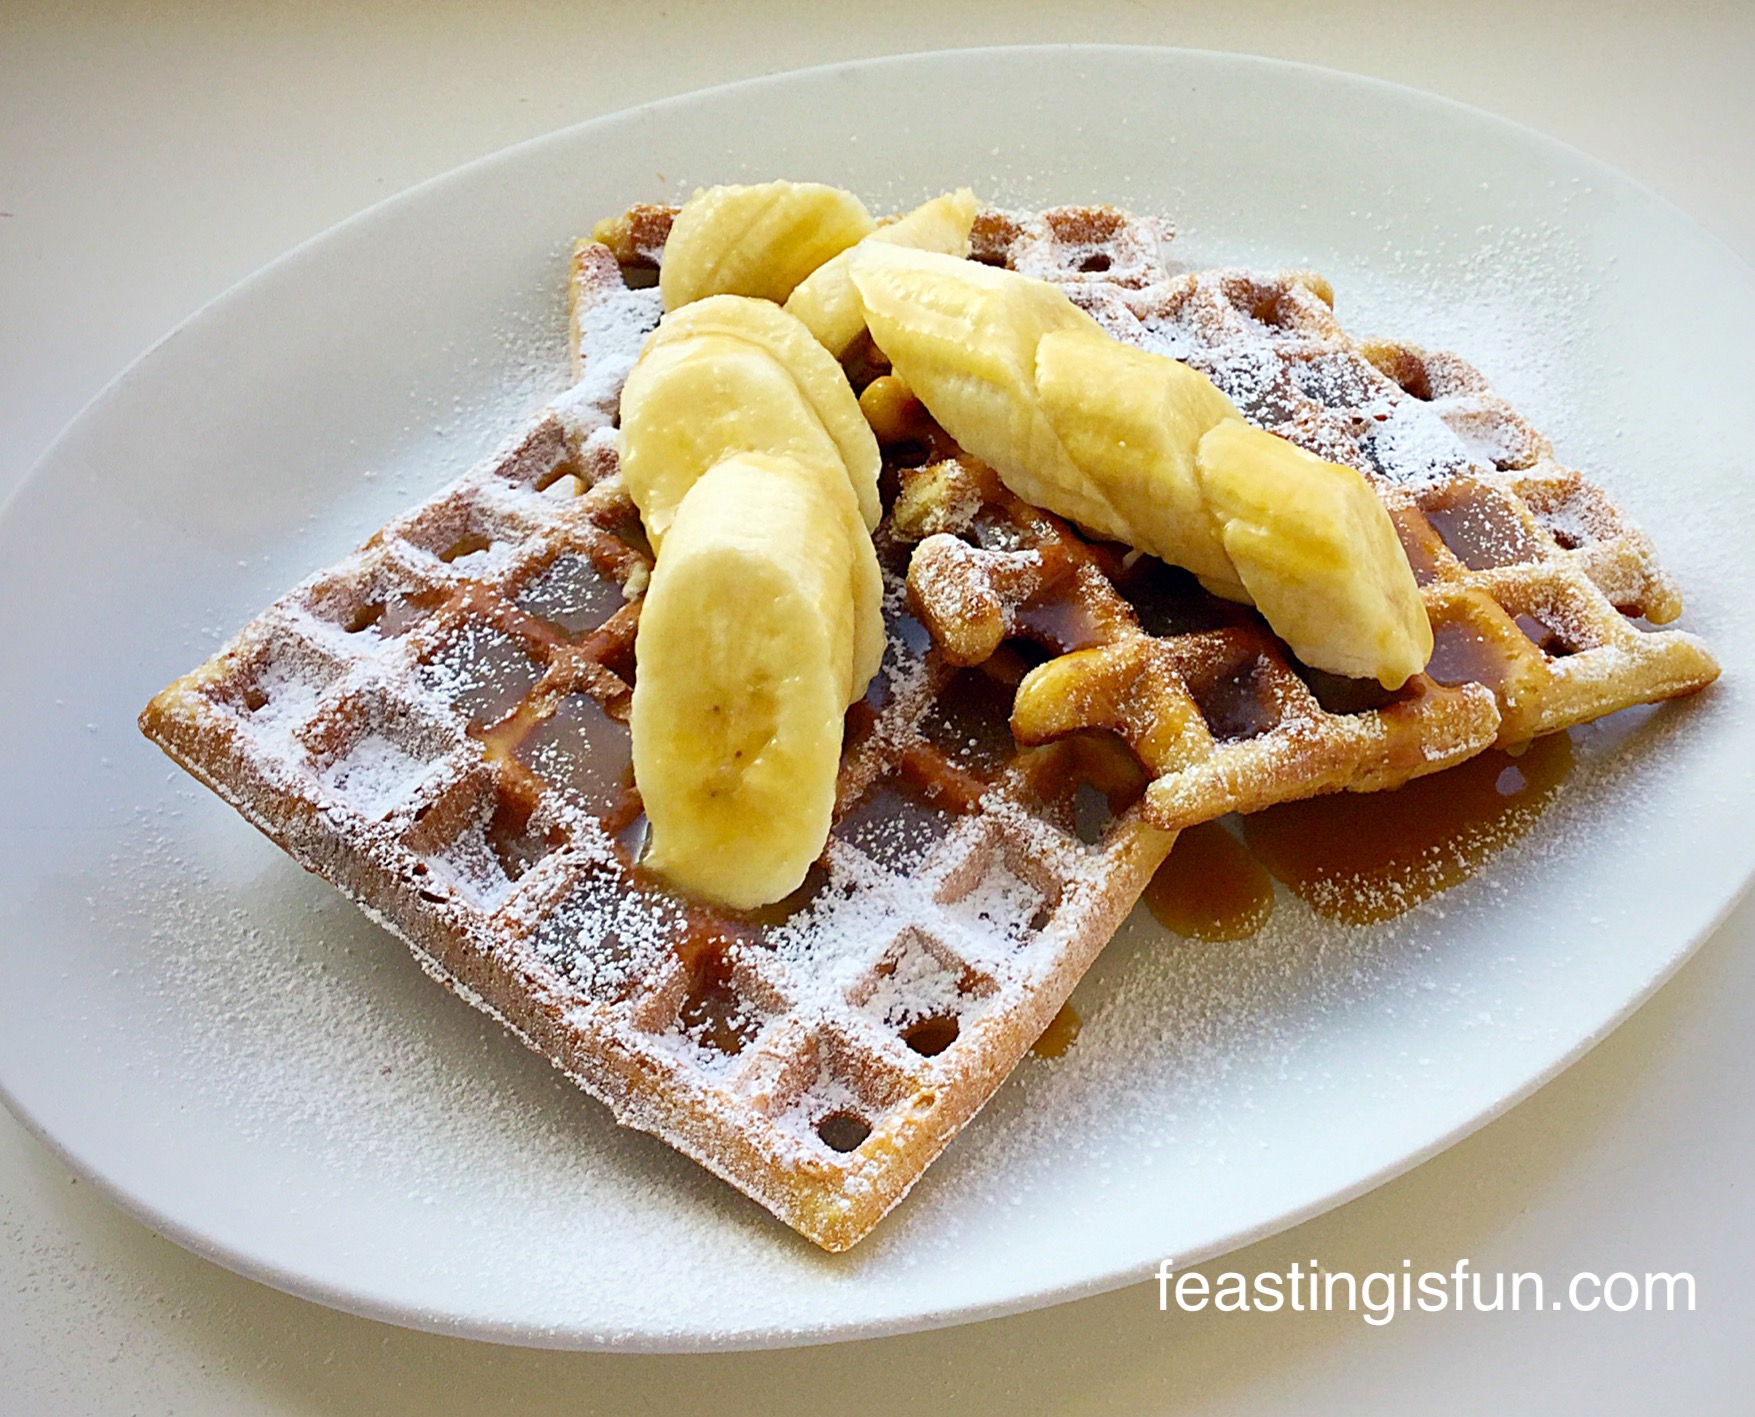
Toffee flavoured waffles, topped with banana slices and drizzled with caramel sauce – utterly scrummy!
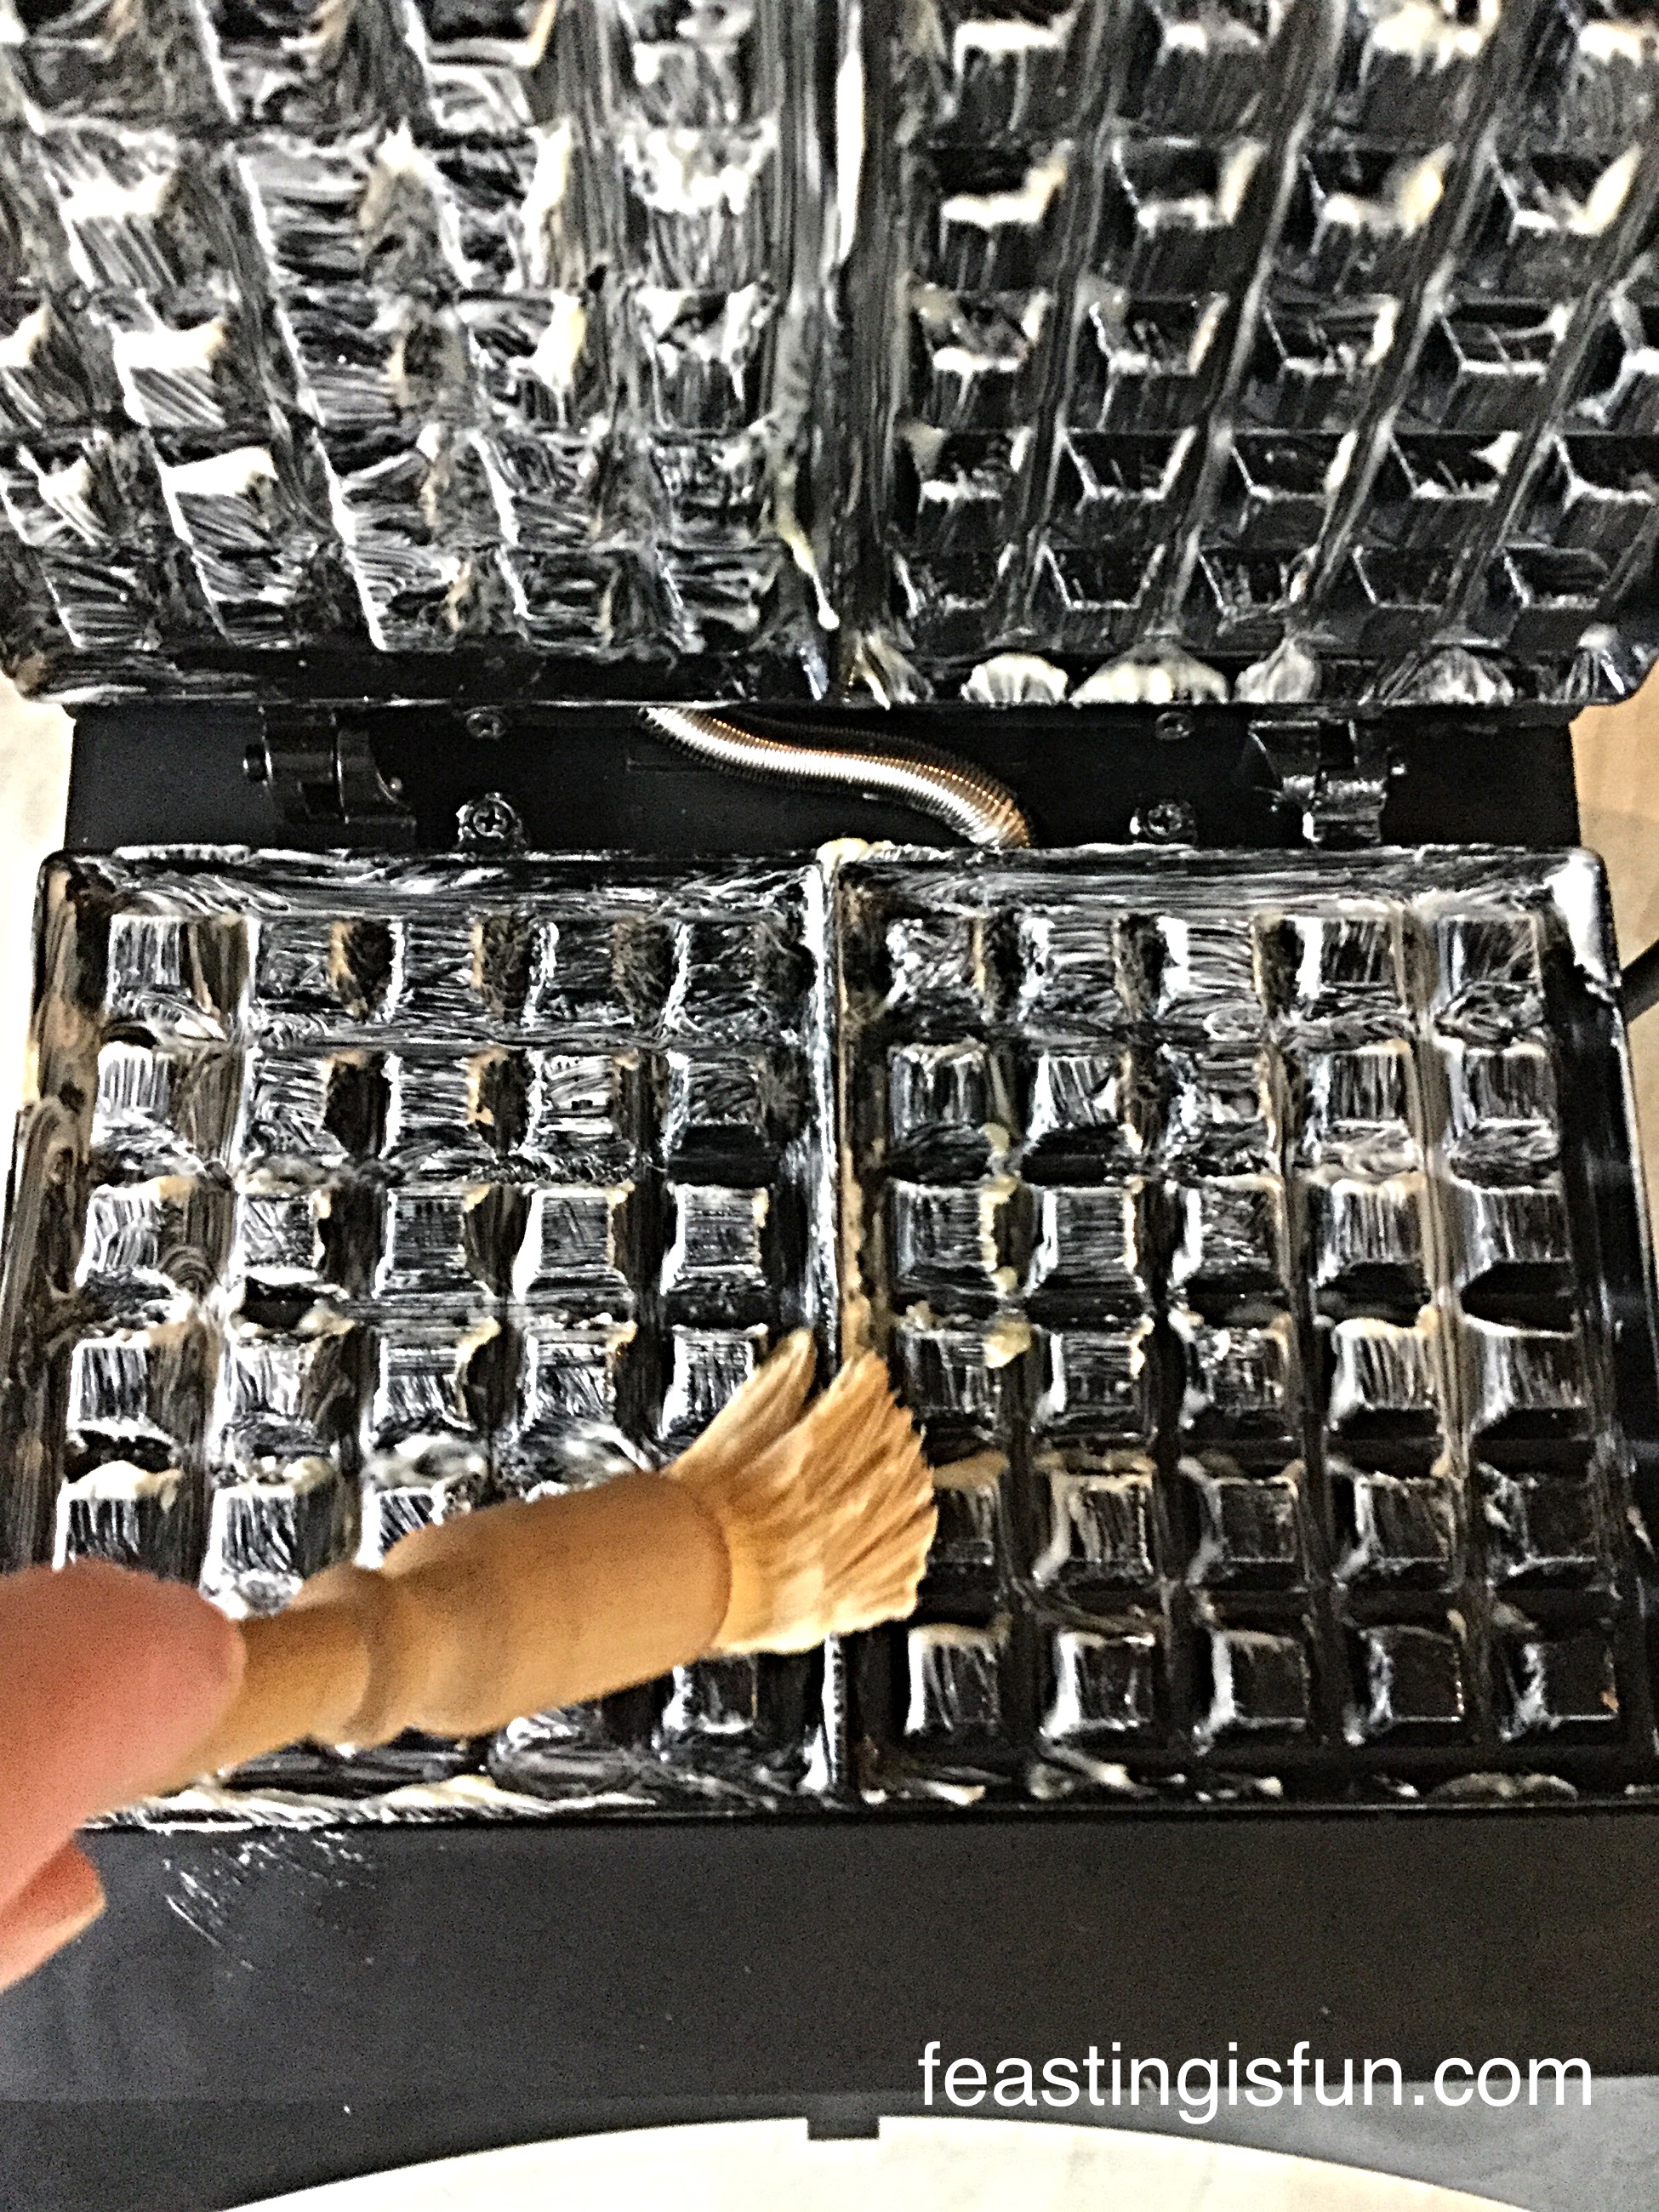
My waffle maker by Andrew James Ltd. recommends wiping (although I use a soft pastry brush) butter or vegetable fat over the waffle plates before use. I prefer to use melted butter. Because I was melting butter to prepare the waffle plates it made sense to add melted butter, instead of vegetable oil to the cake mix.
That is the only change I made. Tip the contents of the toffee cake mix into a bowl, add the specified amount of water and melted butter (I think the butter gives the waffles a more waffle-like taste), whisk as instructed and you have waffle batter in around 2 minutes!
How easy is that??!!
So here are the pictures to take you through making Toffee Banoffee Waffles step by step:
One packet of Wright’sToffee Cake Mix makes 12 waffles
Melt the butter and prep your waffle maker as per the instruction booklet.
Making the Waffles
First of all tip one packet of Wright’s Toffee Cake Mix into a bowl.
Add the water and melted butter, as per instructions on the packet.
Whisk for 1 minute.
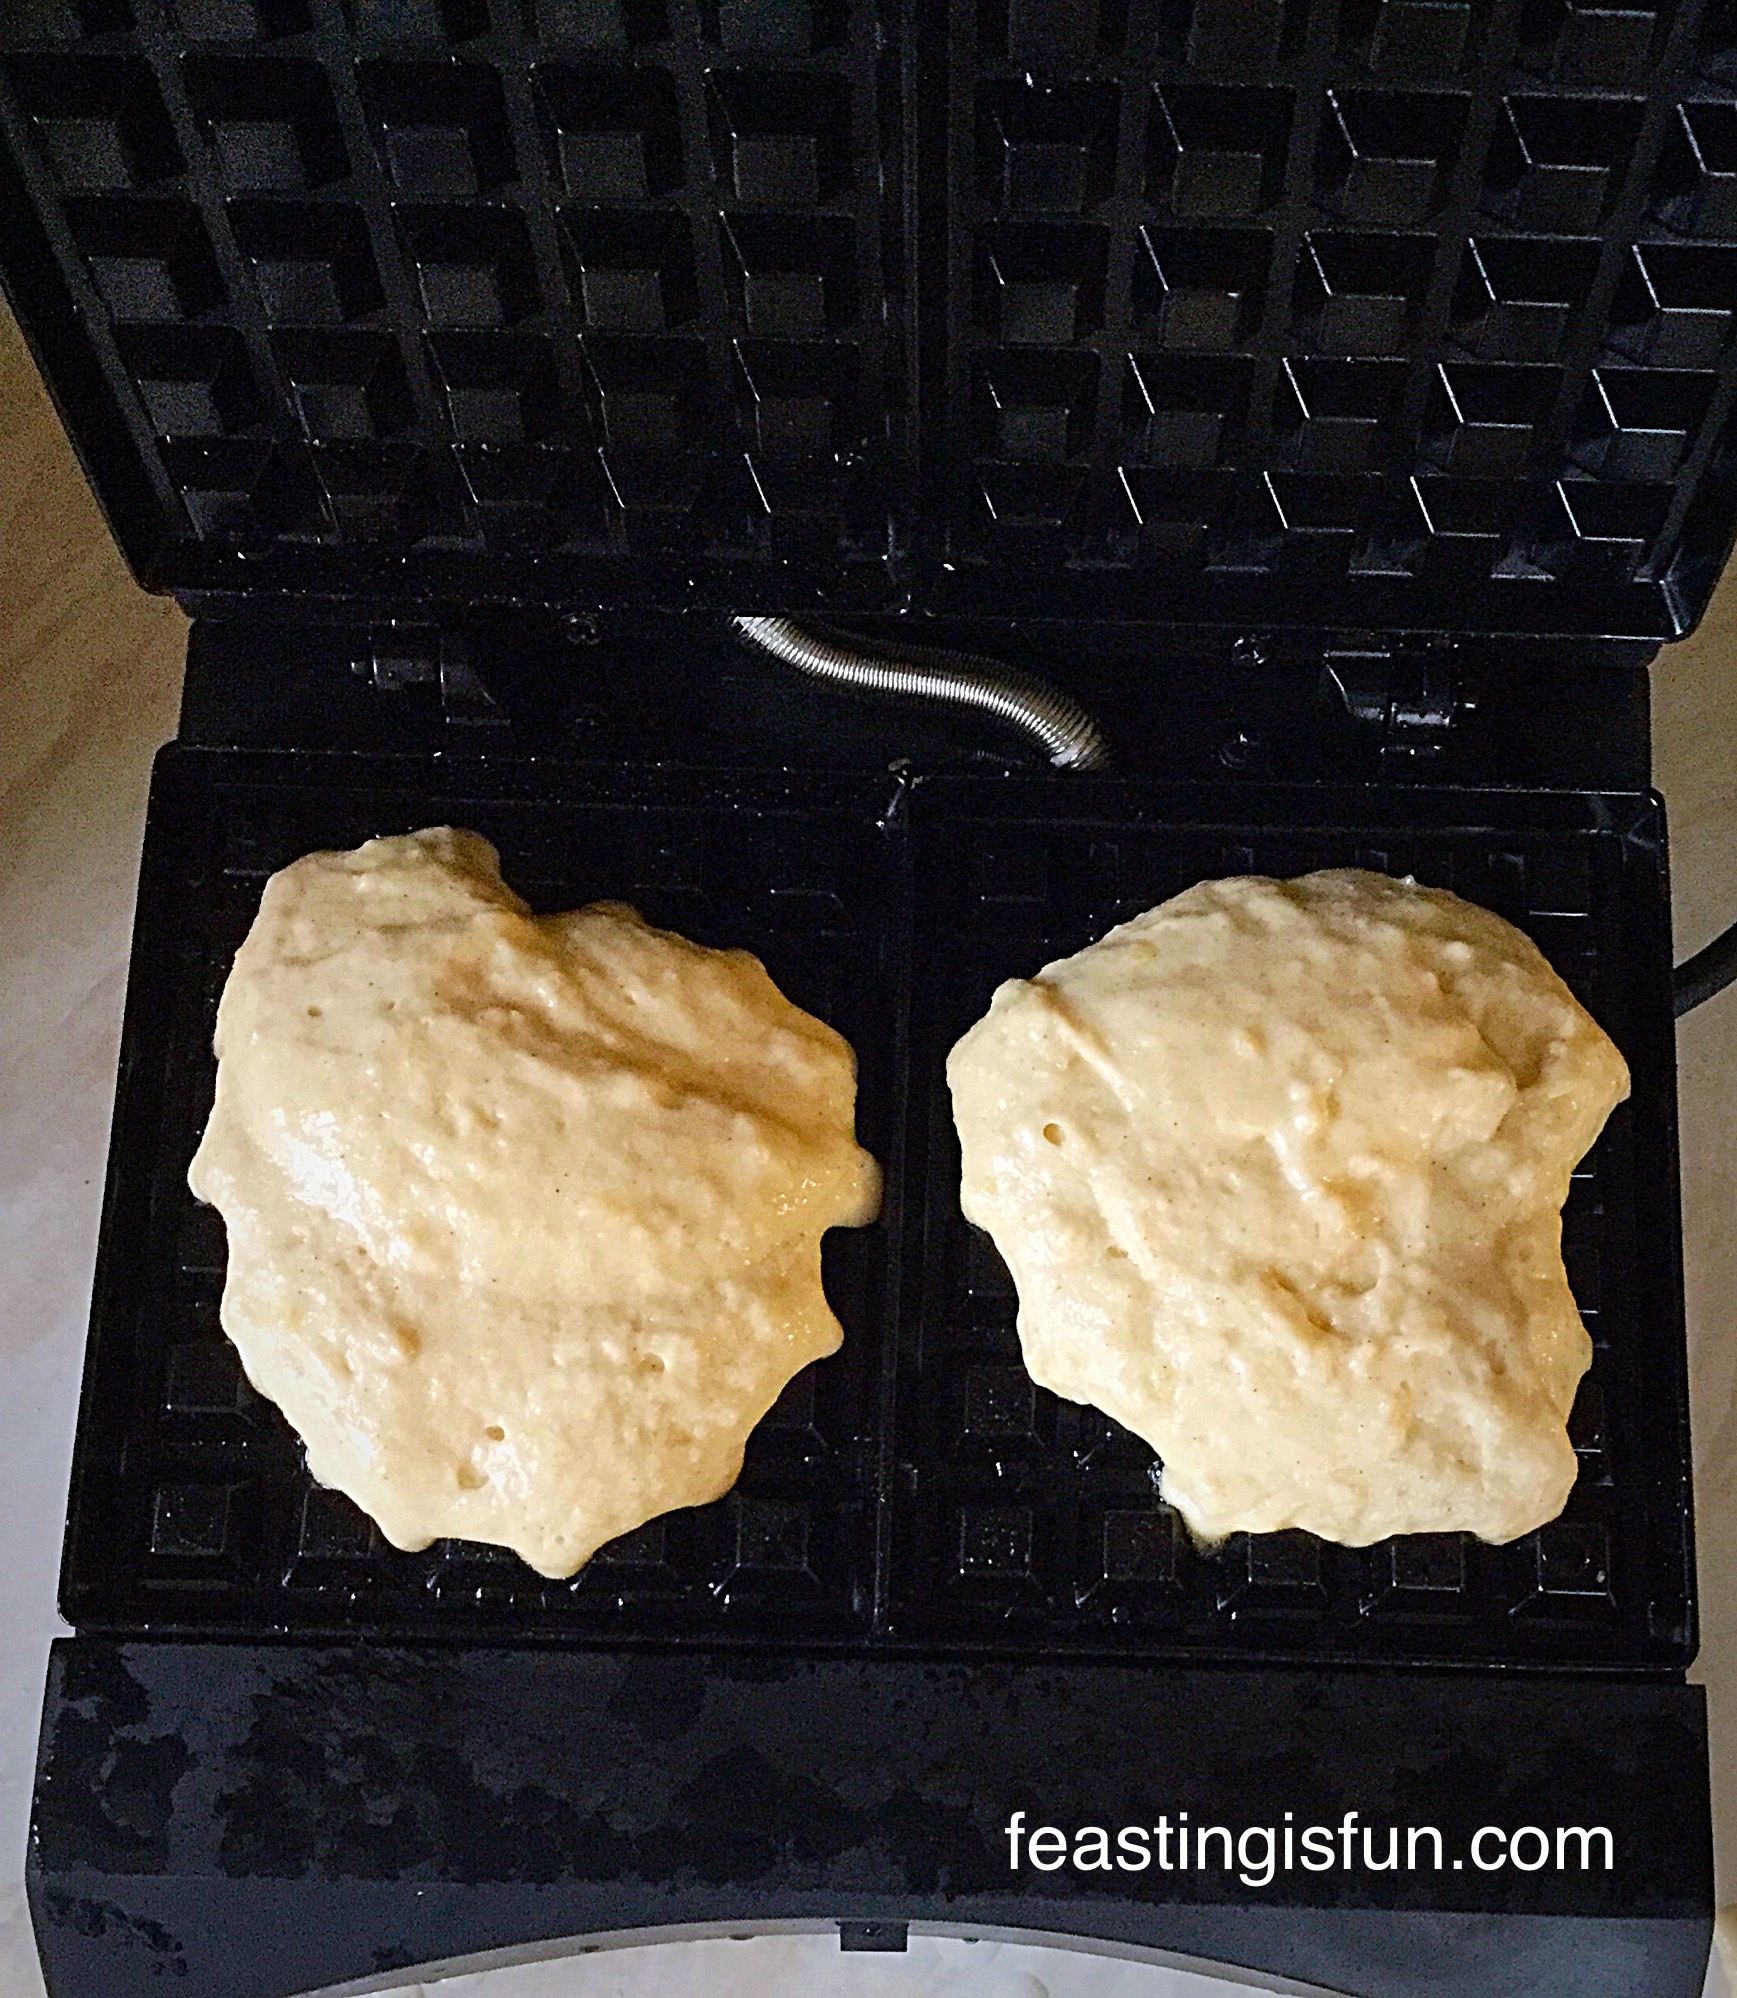
Spoon 2 dessert spoons of mixture (or specified quantity for your machine) onto each waffle plate.
Cake mix in a waffle maker? This Wright’s toffee one works a treat!
Close the lid and cook the waffles for 4-5 minutes.
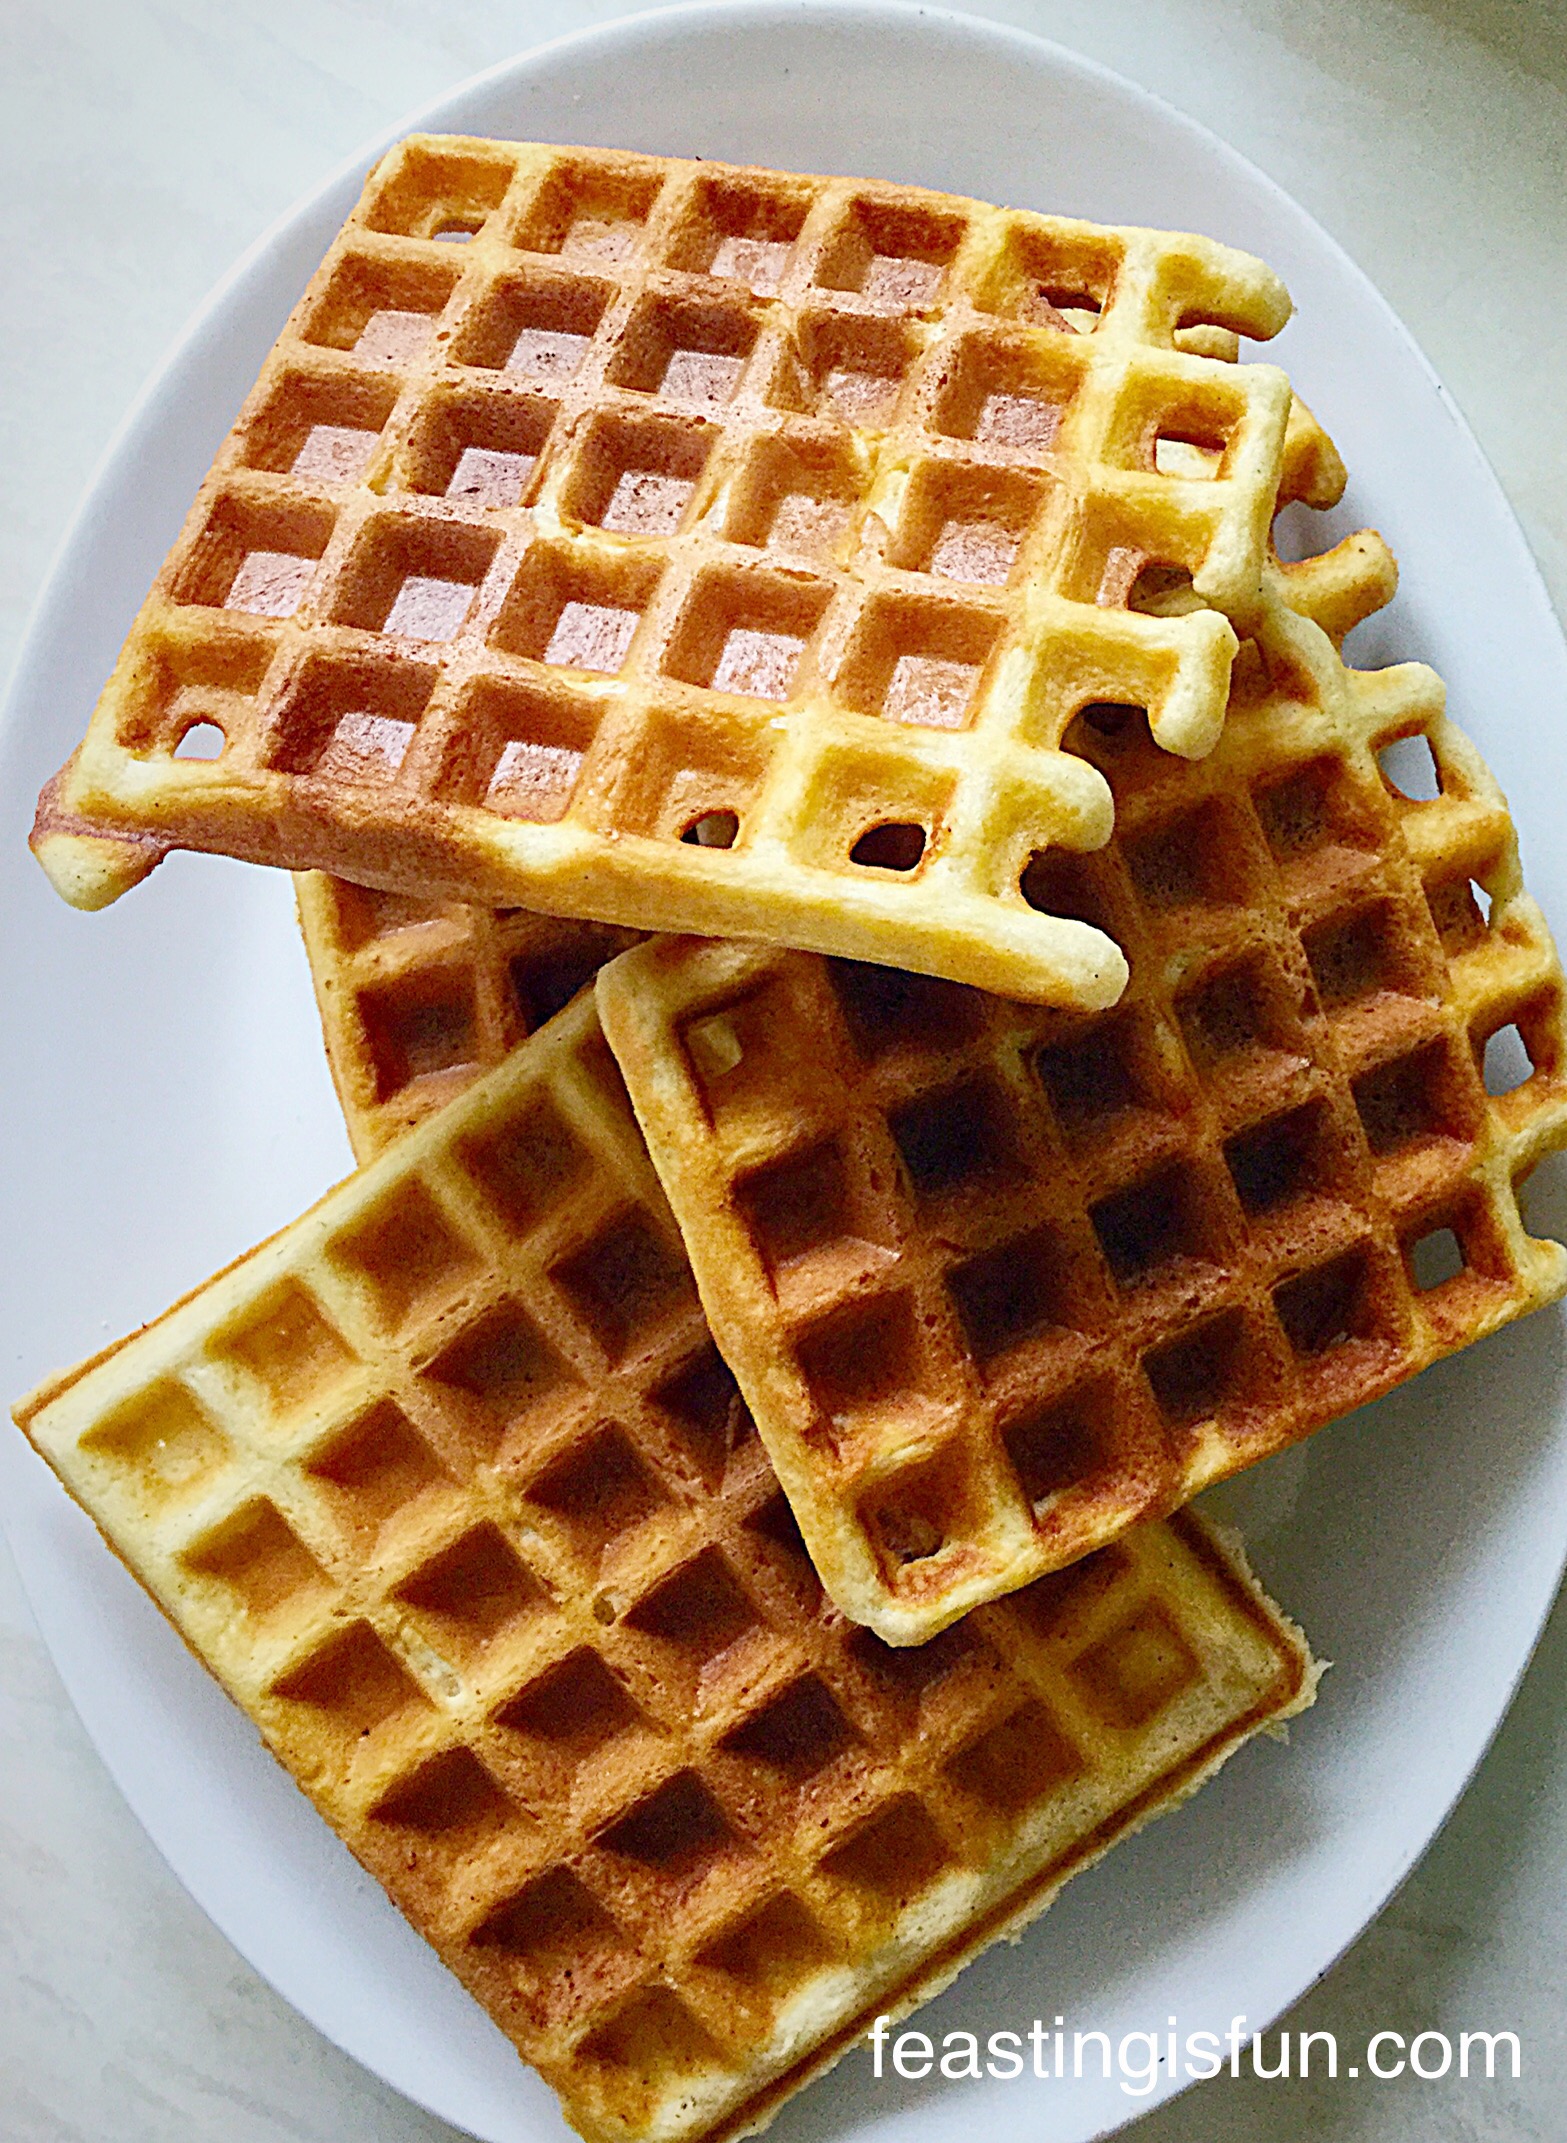
The waffles will be slightly soft when cooked but harden on cooling.
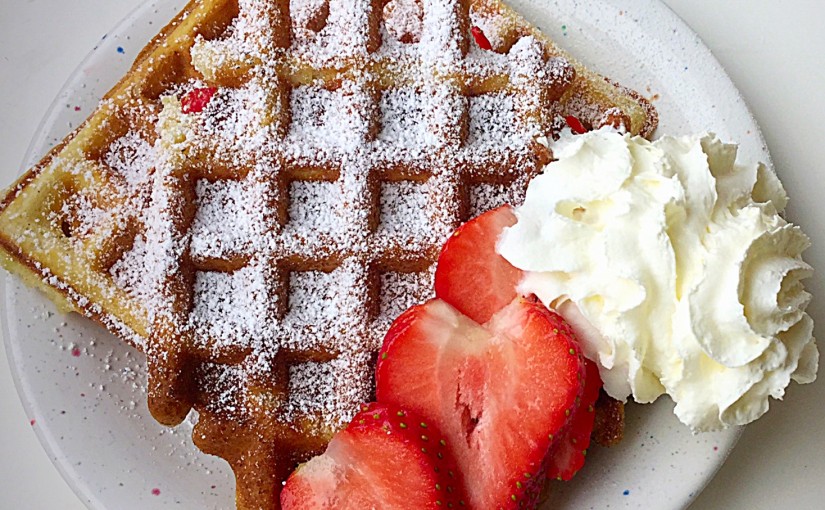
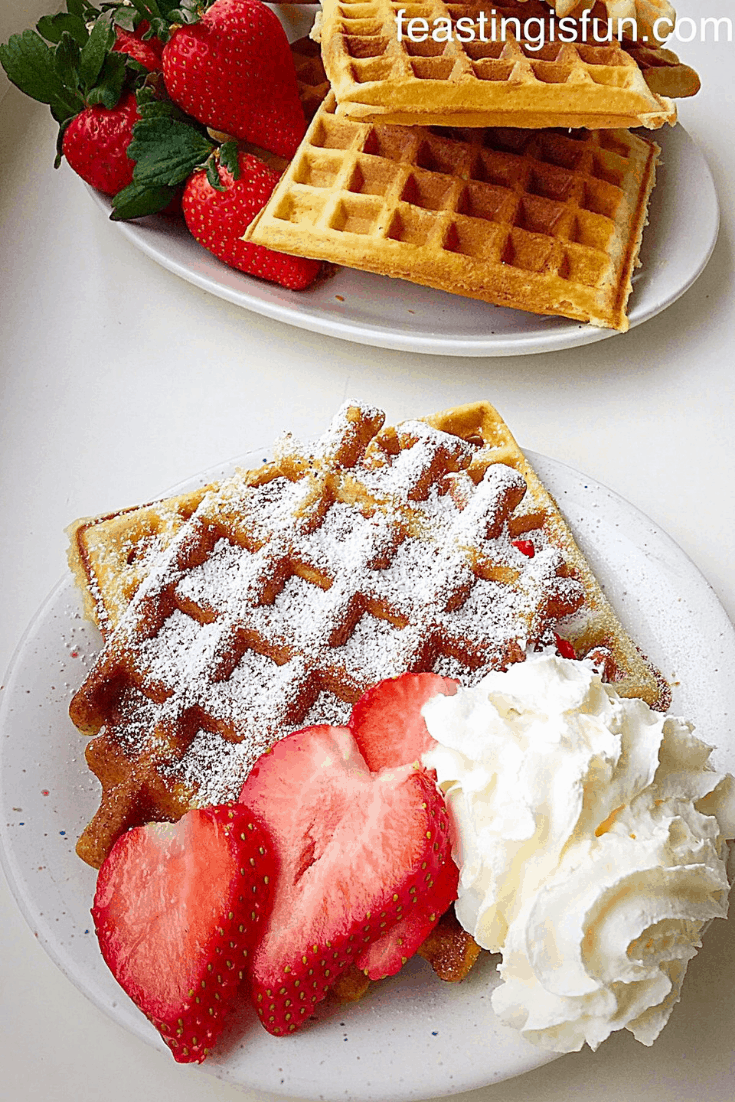
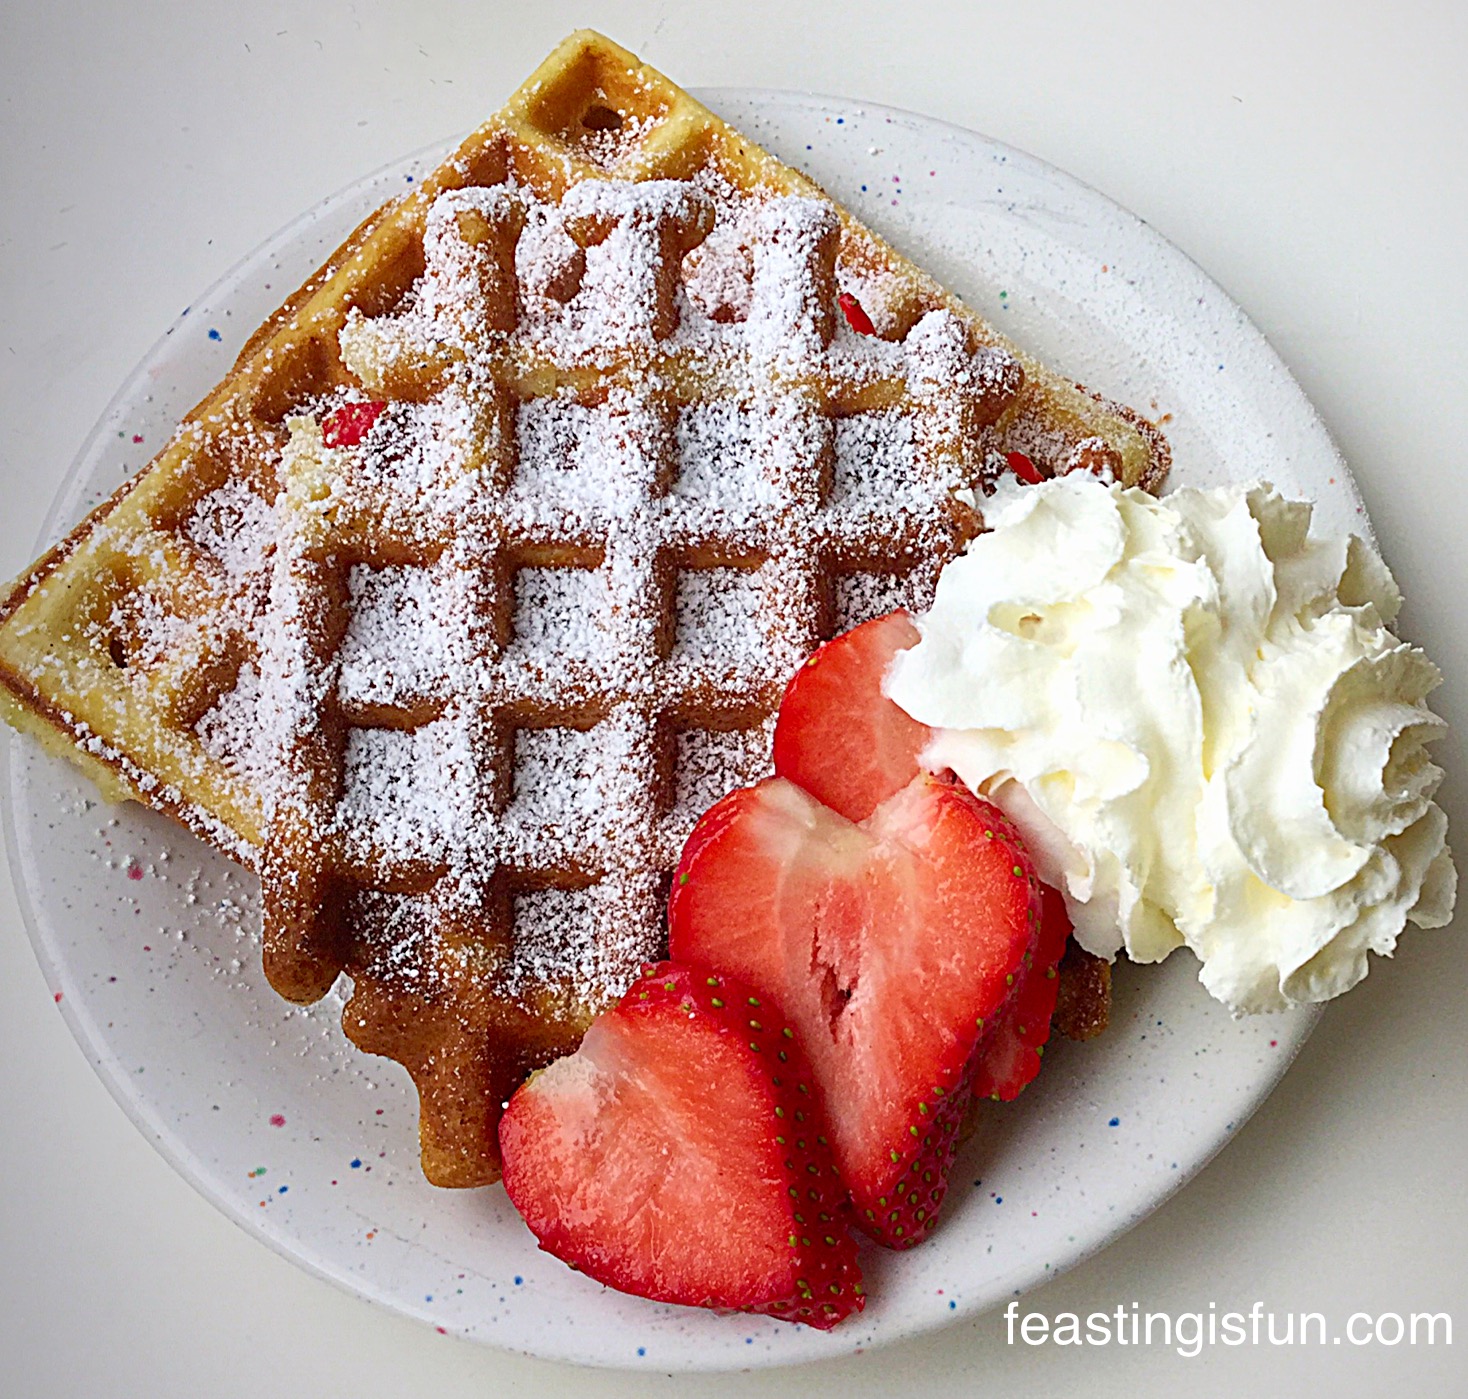
Toffee Banoffee Waffles serve straight away.
I recommend eating these waffles straight away with a sliced banana, drizzle of caramel sauce and dusting of icing sugar. Although if eating for dessert I would absolutely add a scoop of ice cream, or a swirl of whipped cream and sprinkle over some crumbled Cadbury’s Flake.
Perfect!
Sometimes cheats are necessary and if they work well why not?!
Note: I tested other cake mixes by the same company and they were not suitable for turning into waffles. If more mixes become available I will add/link them to this post.
Do you have a super successful cheat that you’d like to share?
If you have enjoyed these Toffee Banoffee Waffles and would like to try making your own from scratch, here are the recipes:
Chocolate Dunking Waffles perfect alongside a delicious hot chocolate.
Please tag me in on Twitter/Instagram with photos of your makes and bakes. I love seeing what you are making?
Whatever you are feasting on, enjoy and remember food tastes better when it’s shared!
Sammie xx
@sammiefeasting Twitter/Instagram/Pinterest
Wright’s Bakingprovided me with the cake mixes to review. I was not paid to write this post. All opinions, views and content are my own. Please see my Disclosure Policy.
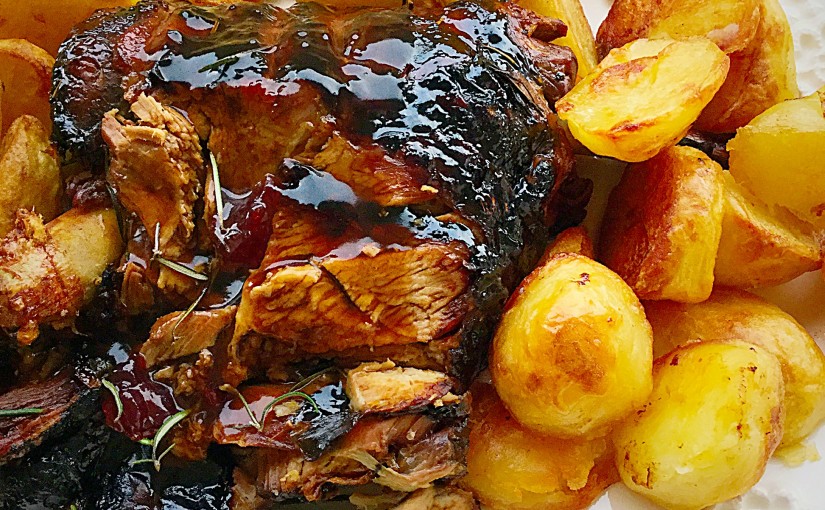
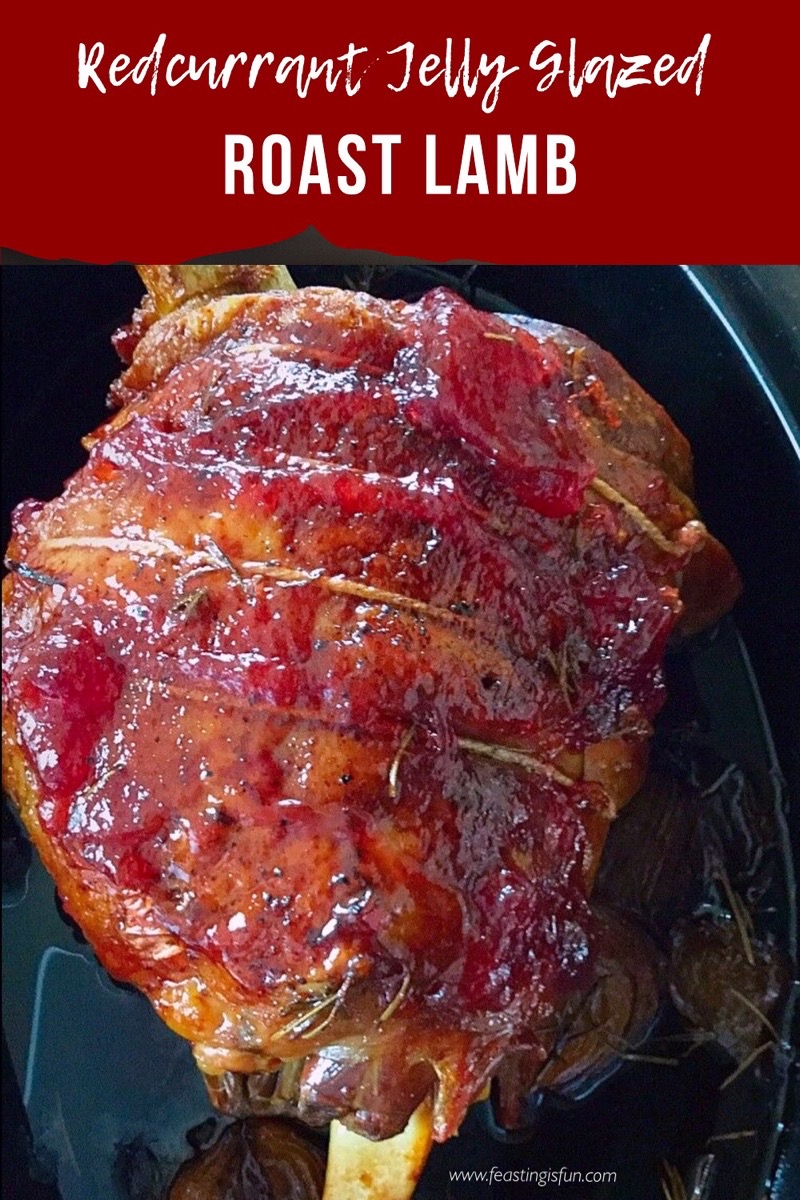
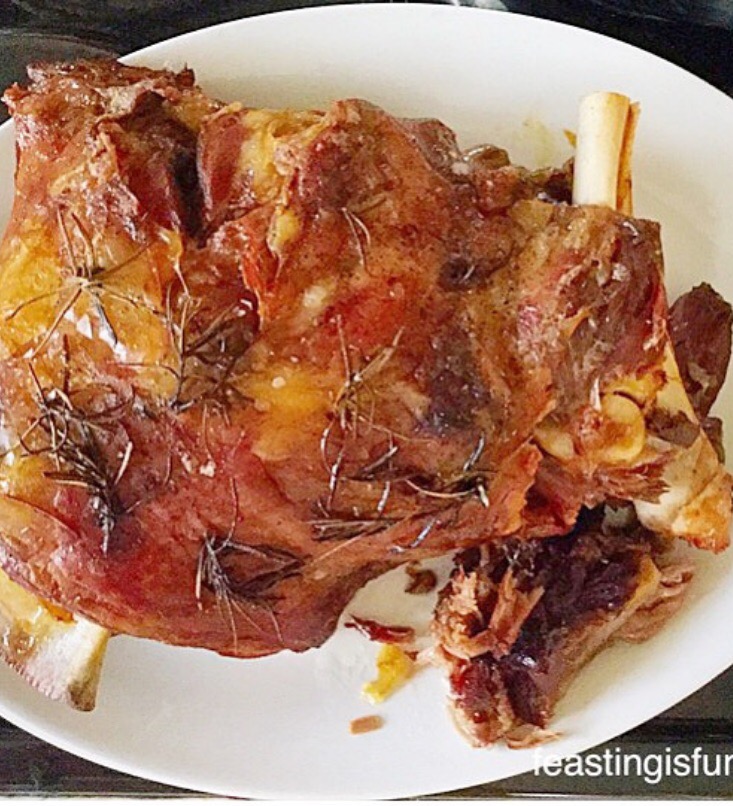
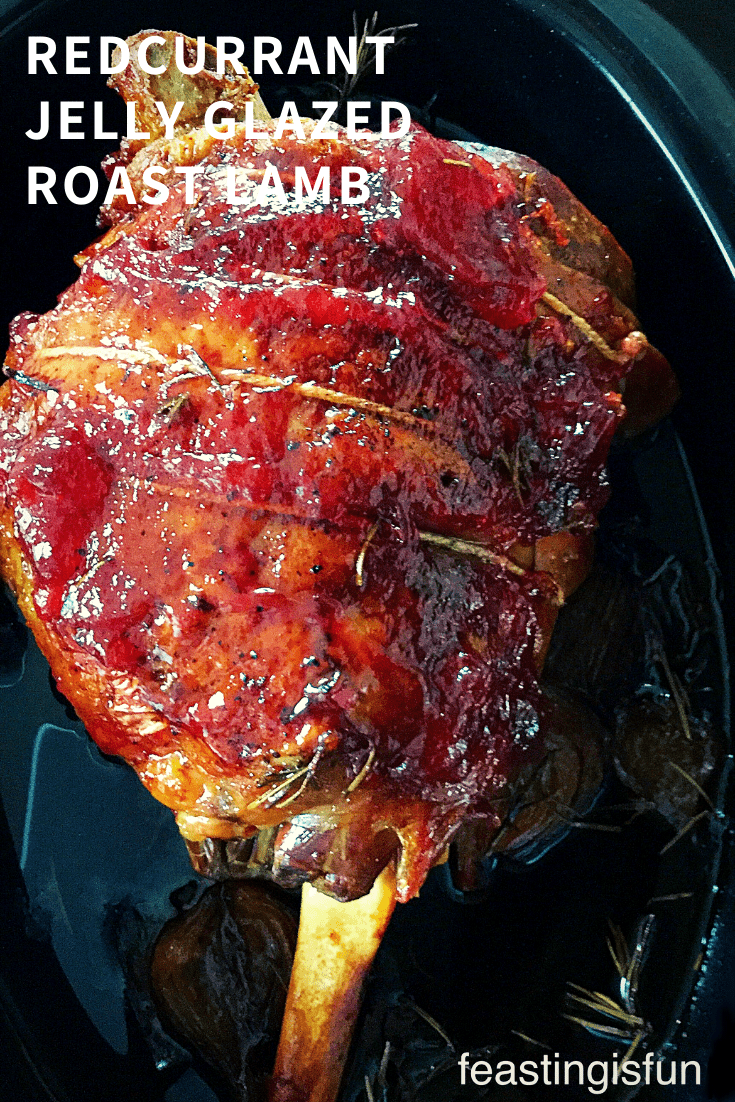
Finally, Easter Sunday is nearly here and this year we are celebrating with a Redcurrant Jelly Glazed Roast Lamb Leg. A twist on the traditional dish of roast Lamb that is usually served for the big Easter Sunday roast. And what a beautiful centrepiece the glazed lamb makes for an Easter table.
Redcurrant Jelly Glazed Roast Lamb
So, to ensure a great lamb roast I always turn to my favourite Organic meat supplier GraigFarm Organics. And, to date, I have been buying meat from this Welsh organic farm for almost three years. Most importantly, the quality of the meat is consistently excellent. Because, Graig Farm is a place where animals are reared using traditional methods and looked after with care and respect.
Finally, all Graig Farm‘s meat and poultry reflect the time and care that is put into raising and caring for their livestock. Resulting in a product that it is always utterly delicious, full of flavour and cooked properly, is the best meat I have ever tasted!
Because a lovely friend had given me a jar of homemade Redcurrant Jelly I knew it would work perfectly as a glaze on this roast leg of lamb. And trust me, if you enjoy a glazed Ham at Christmas, you will love this Redcurrant Jelly Glazed Roast Lamb!
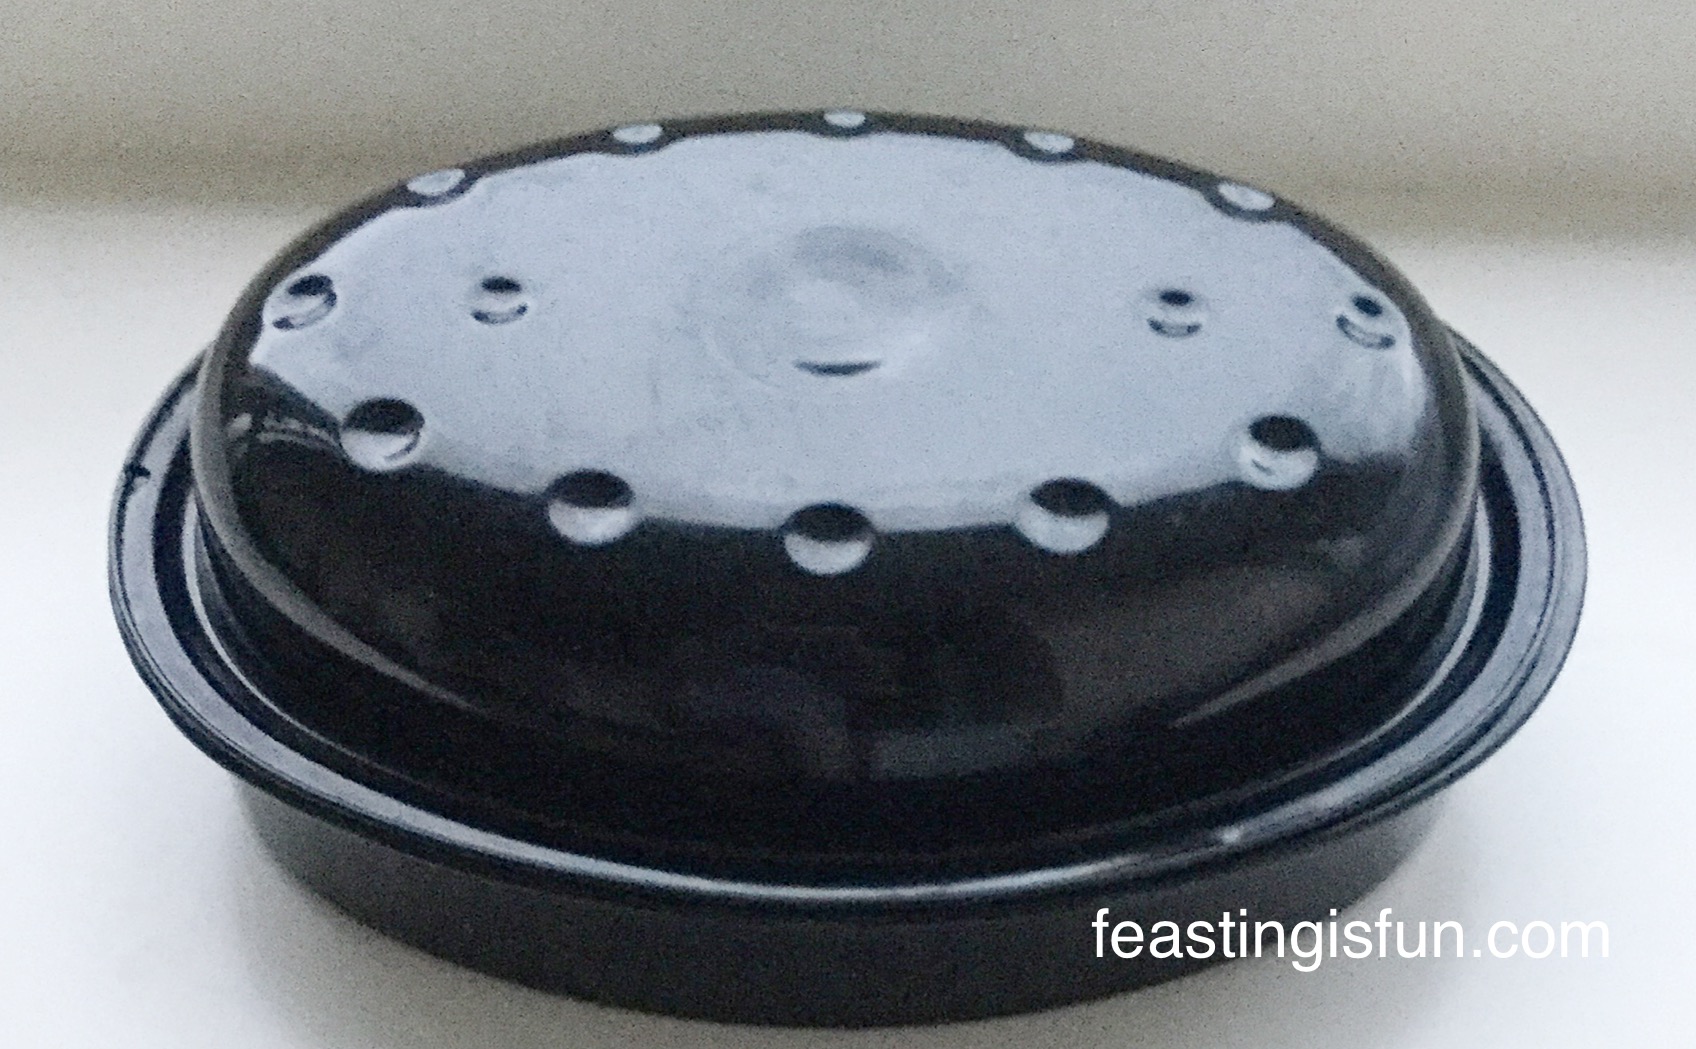
Since British Bakeware gifted me this Oval Roaster with lid, a recent addition to their range of British manufactured bakeware, it’s size and shape perfectly fitted the Lamb Leg, used in this recipe. And, you will see, it was the perfect size.
So we have British organic meat roasted in a British manufactured roaster!
Sea Salt – I use Maldon and freshly ground Black Pepper
Method: Preheat oven to 150C/130C fan, gas mark 1-2, 300F
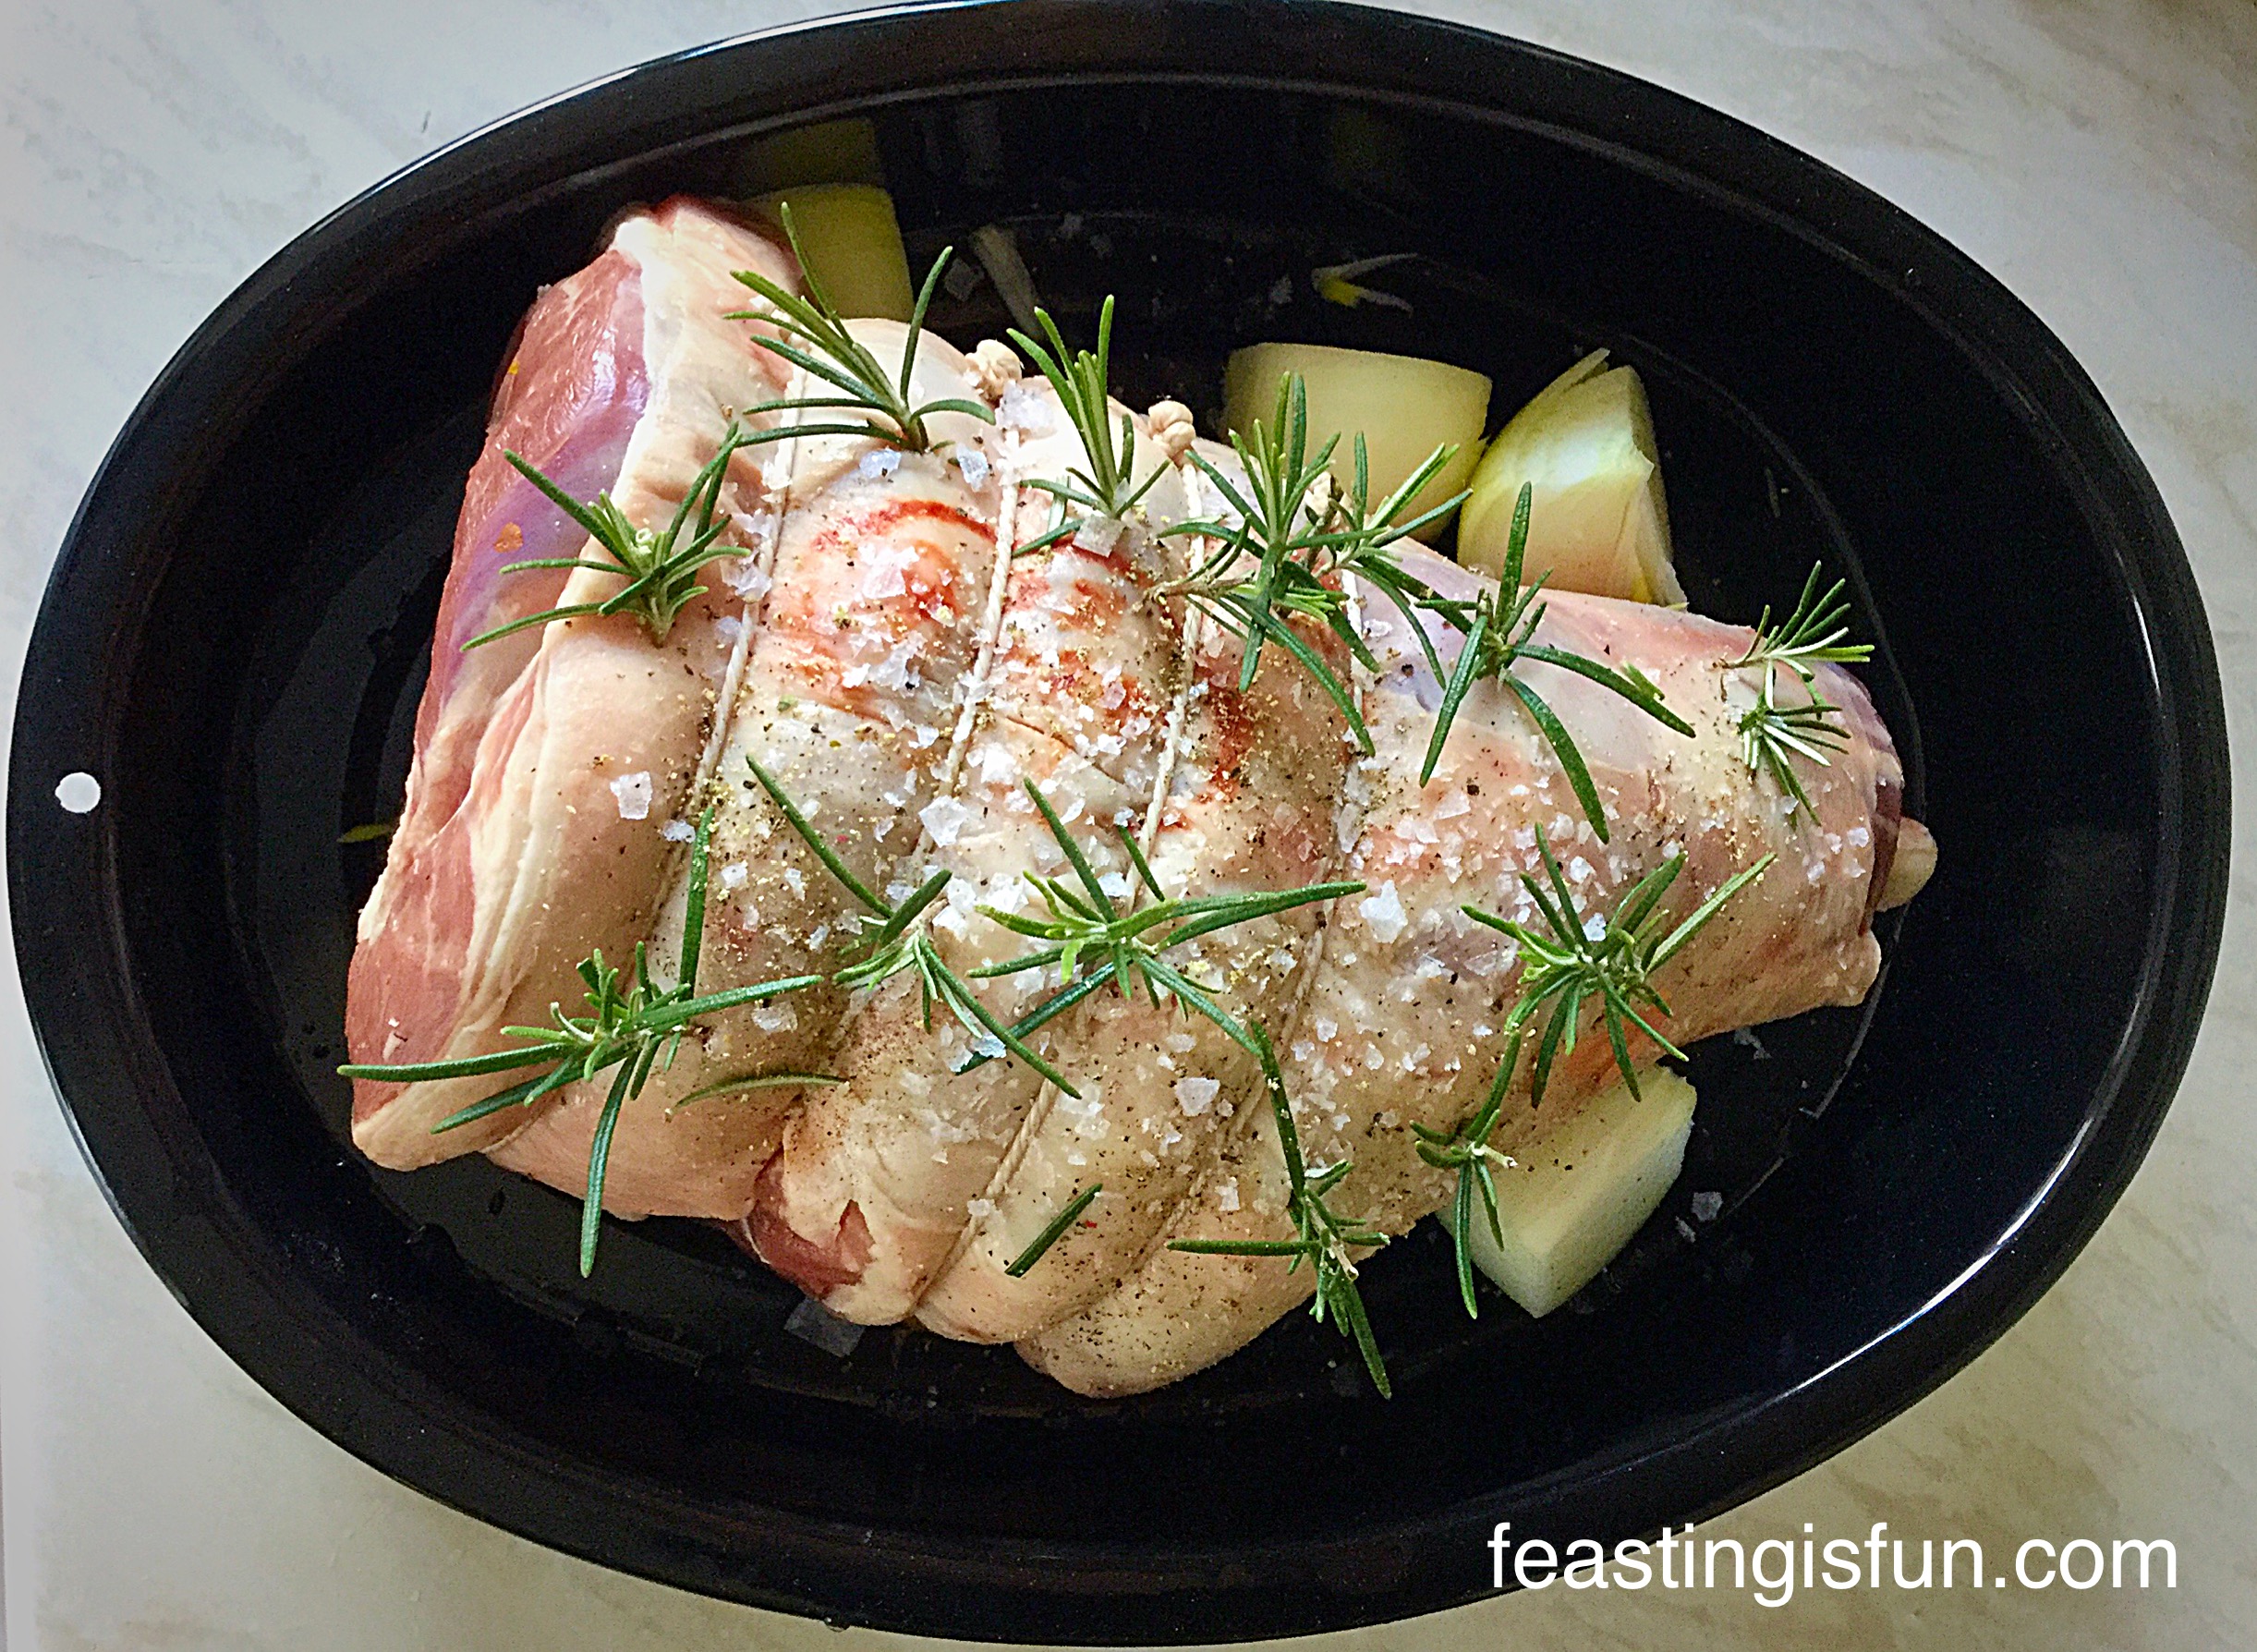
Preparing the leg of lamb
First of all take the lamb out of the fridge 1 hour before cooking.
Remove all packaging and pat dry with kitchen towel
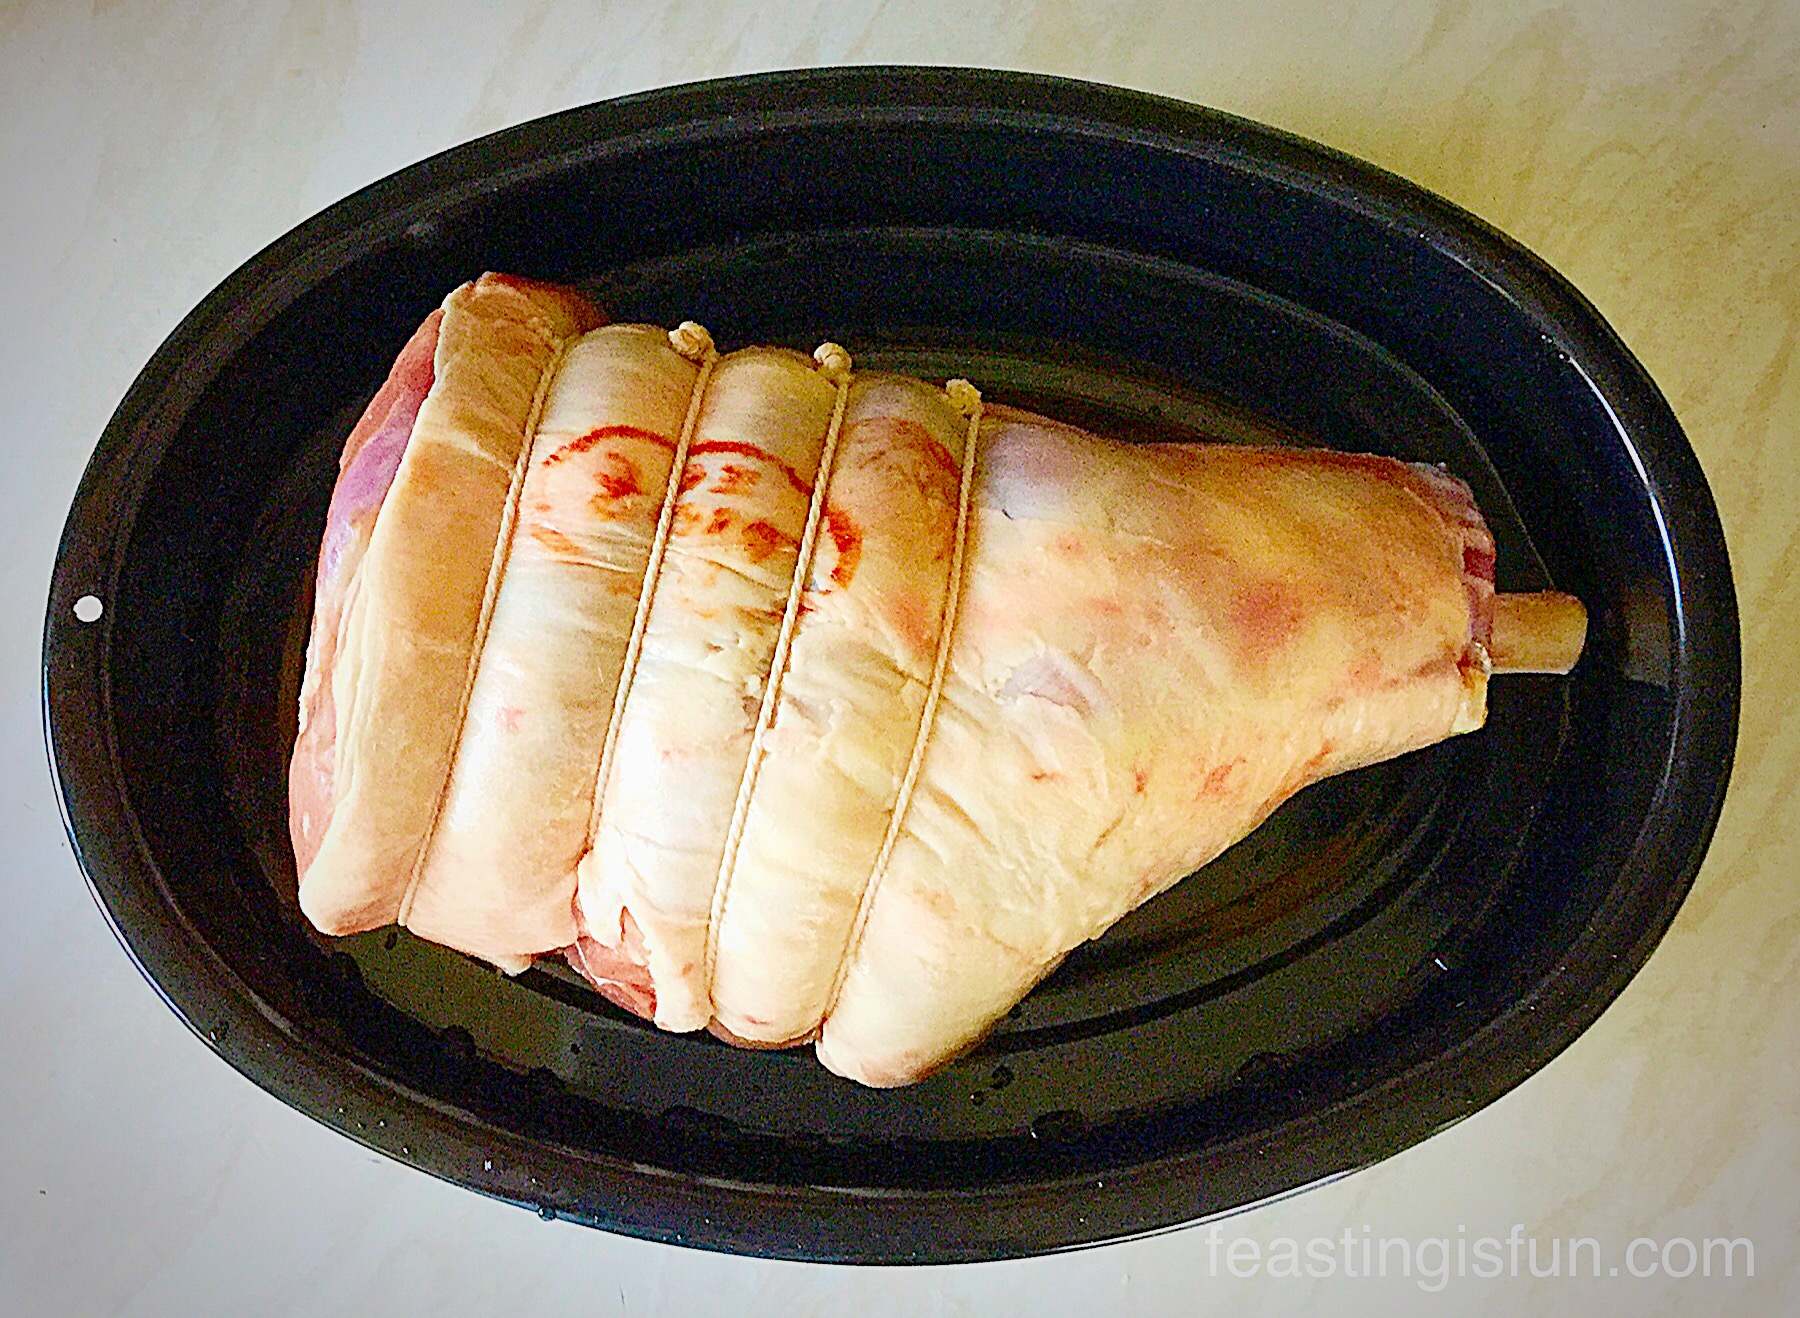
Place the lamb in in a roasting tin that is just big enough.
This roasting tin is a perfect fit for the leg of lamb.
Make incisions through the skin of the lamb with a sharp knife.
Poke small sprigs of rosemary into these holes.
Sprinkle over sea salt and freshly ground black pepper.
The Rosemary imparts such beautiful flavour to the lamb.
Also, cut up one onion and place under the leg of lamb.
Either place a lid on the roasting tin, or cover with foil, ensuring the foil doesn’t touch the lamb.
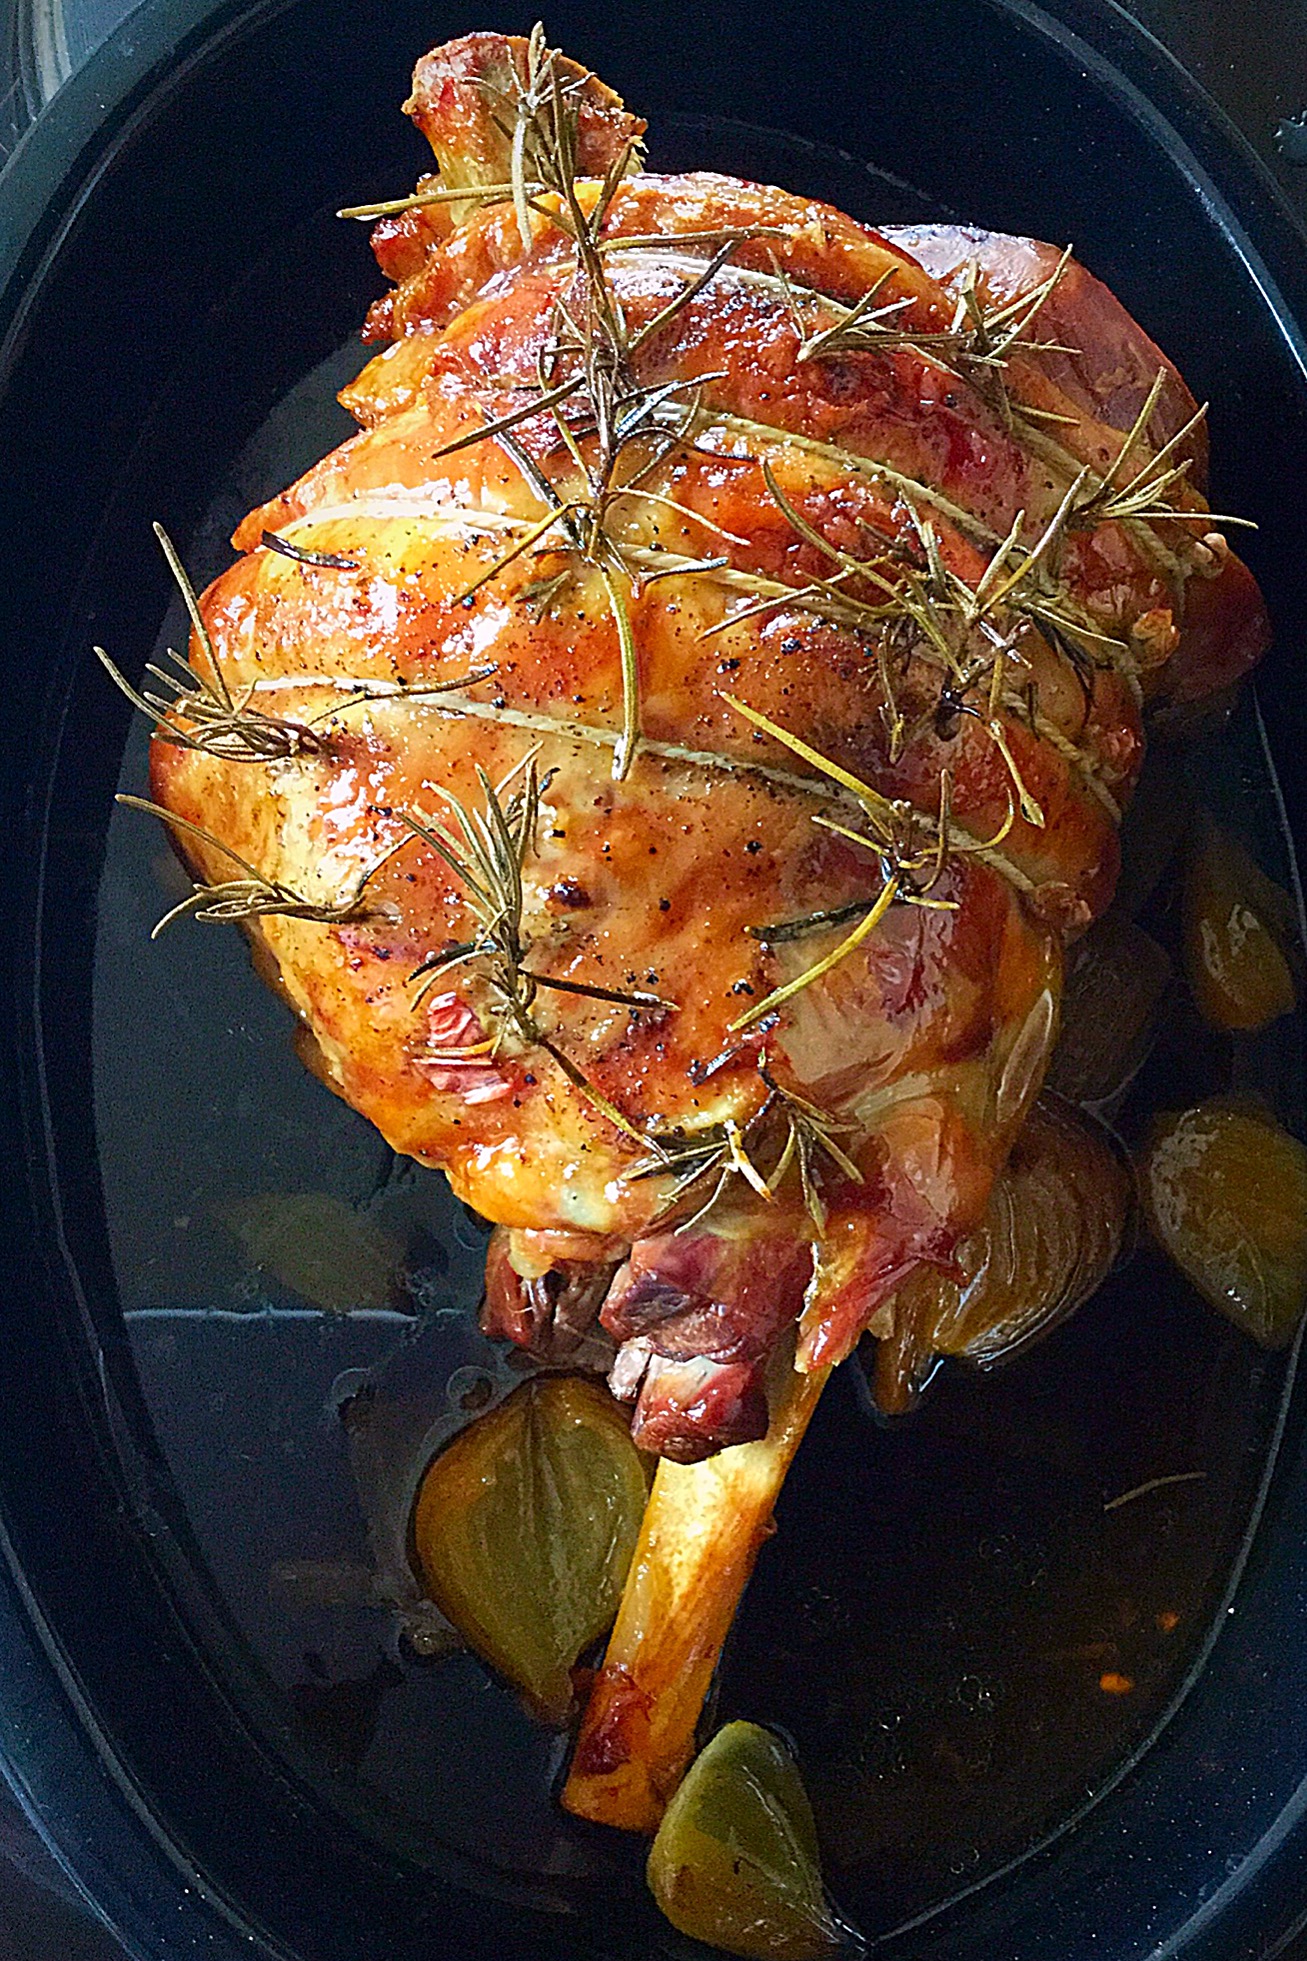
Roasting the lamb
Place in a preheated oven and cook for 4 1/2 hours.
Most importantly, ensure the leg of lamb is basted a couple of times while roasting. Take the tin out of the oven and place on a sturdy, heatproof trivet. Next, carefully remove the foil or lid and use a large spoon to scoop and pour the meat juices over the joint. Finally replacing the foil or lid before placing it back into the oven.
After the cooking time has elapsed remove the roasting tin from the oven.
Increase the oven temperature to 200C/180C fan, gas mark 6, 400F.
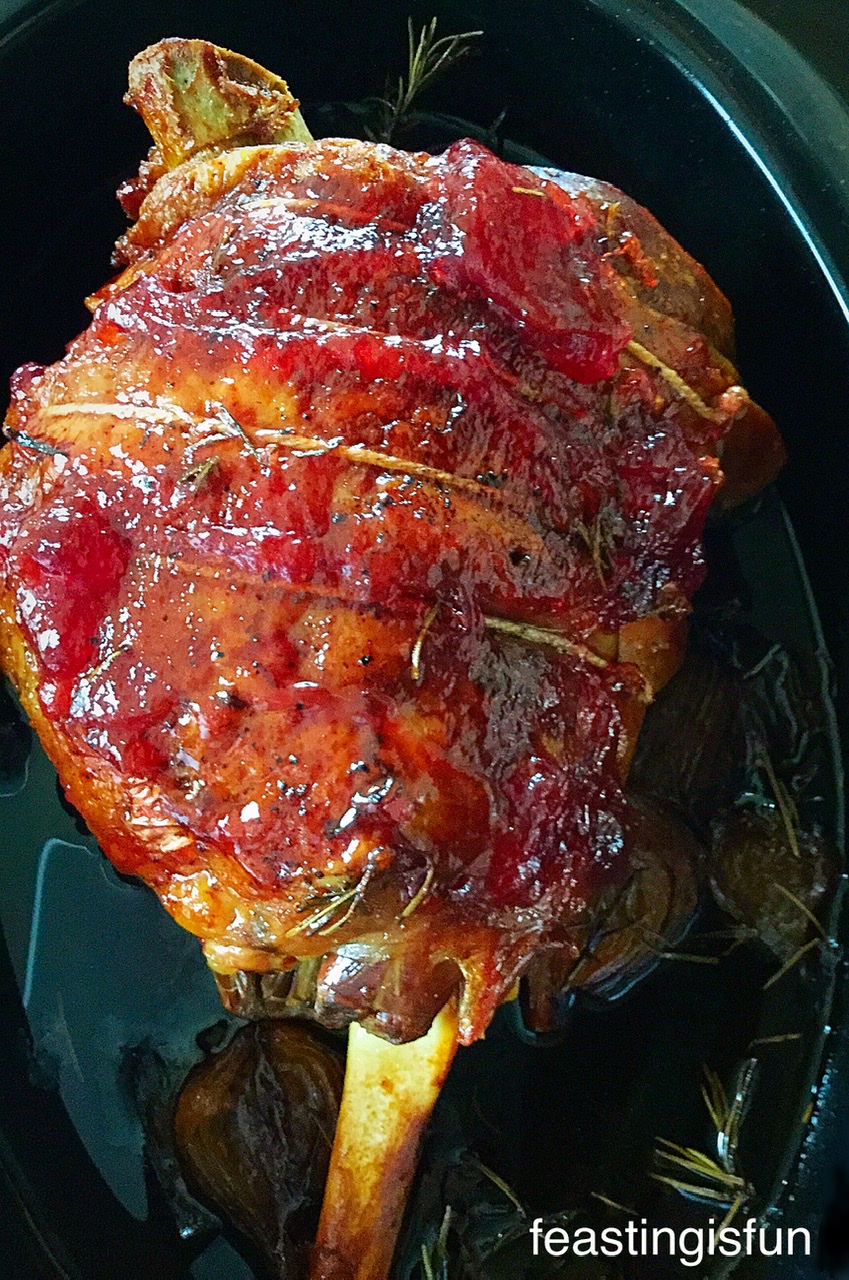
Applying the Redcurrant Jelly glaze
First of all, remove the lid or foil from the roasting pan.
Spoon the Redcurrant jelly all over the roast lamb, using the back of the spoon to spread the glaze.
Leave the lid or foil off and place the roasting tin back into the lowest part of the oven. Also, this will free up the top of the oven for crunchy roast potatoes!
Roast the lamb for a further 20-30 minutes, until the glaze has become deliciously dark and sticky.
Finally, when cooked, remove the roasting tin from the oven.
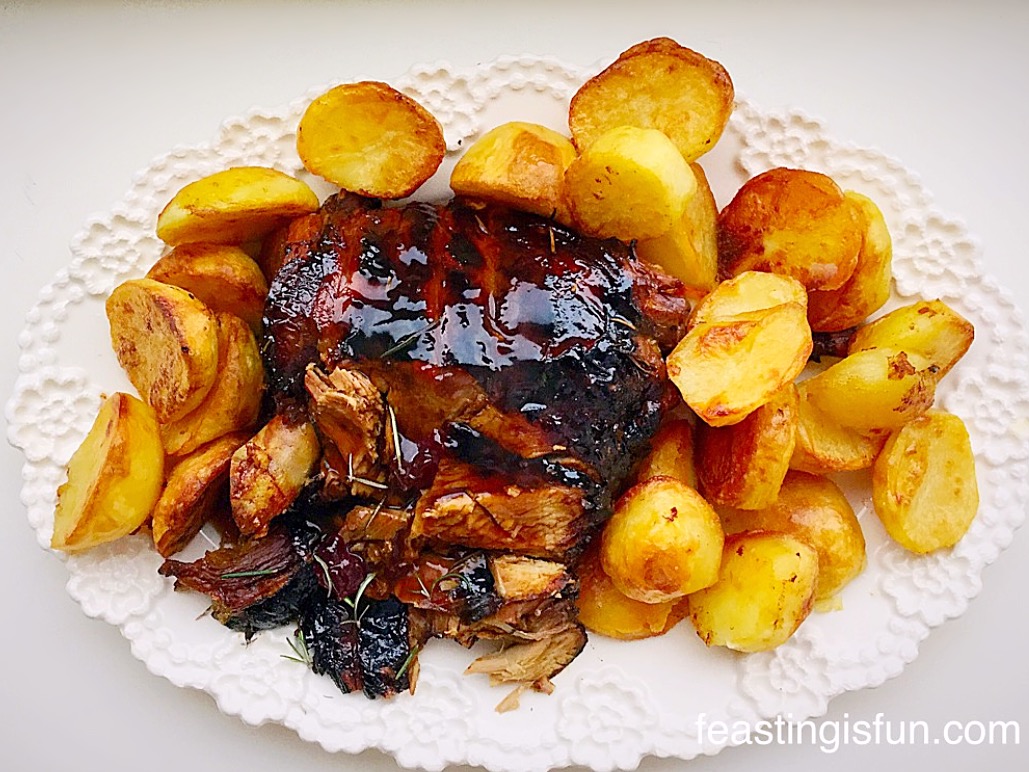
Resting and serving the lamb
Remove the Redcurrant Jelly Glazed Roast Lamb from the tin, set on a platter, cover in foil and leave to rest for 30-40 minutes. Doing so will leave plenty of time to finish cooking the crunchy roast potatoes and other vegetables.
Before serving remove any string.
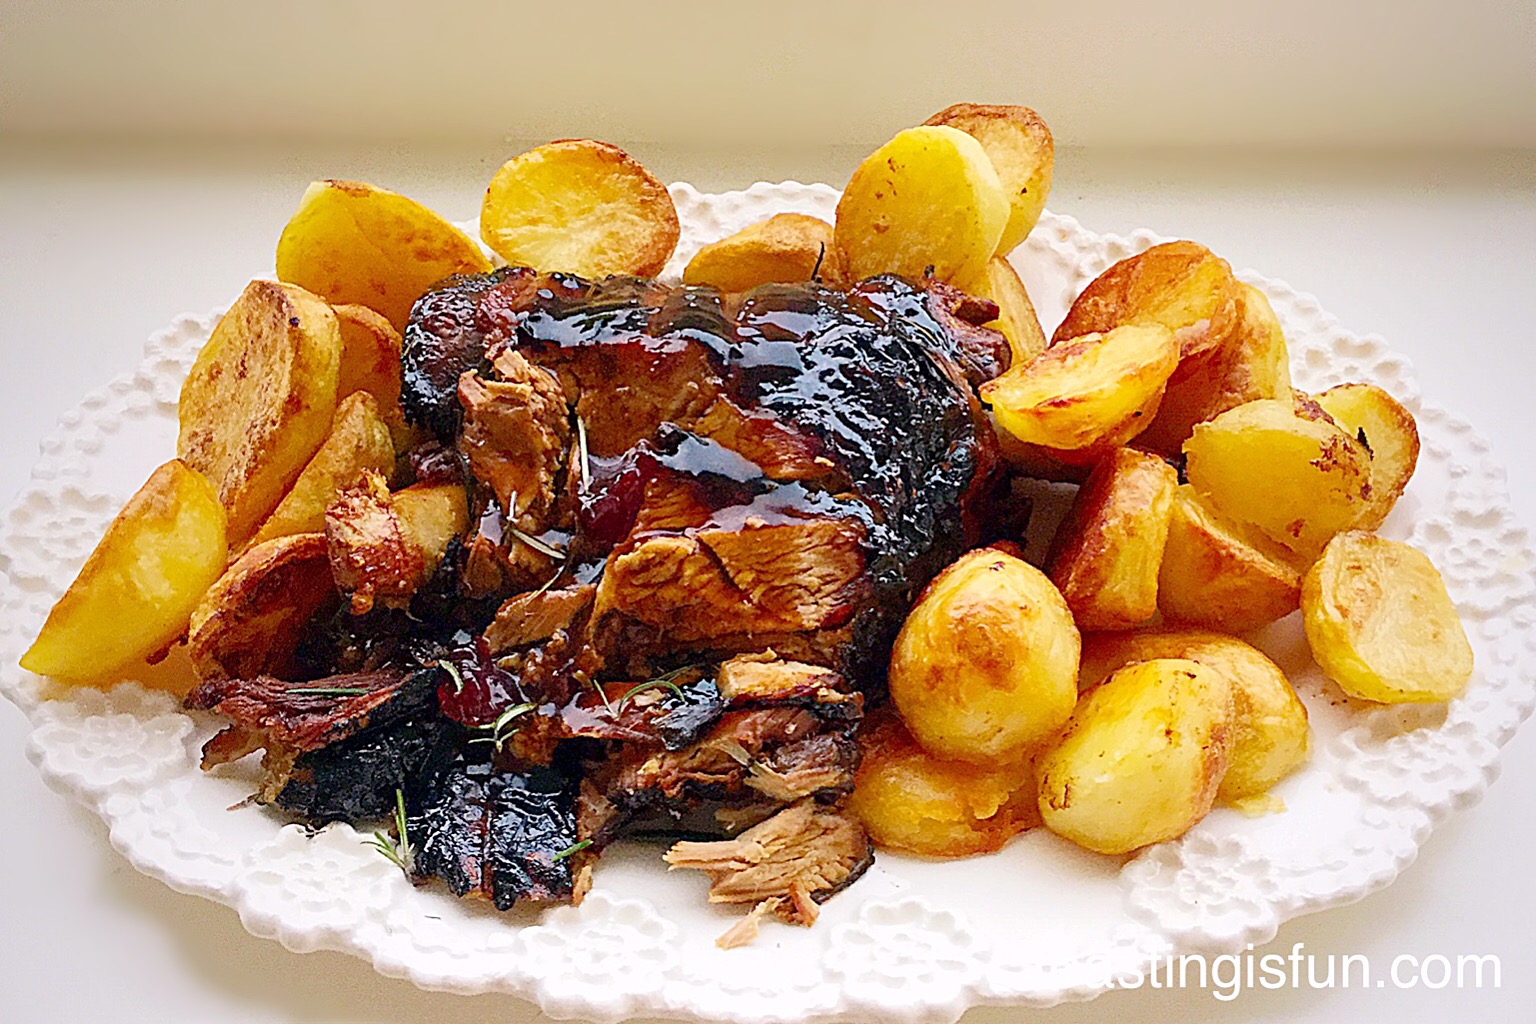
Finally, serve the delicious lamb on a platter surrounded by delicious, golden roast potatoes, with a side dish of freshly steamed vegetables.
Personally, there is nothing that says celebration to me more than a beautiful roast, on a platter, in the centre of the table.
And also, as Christians, on Easter Sunday we remember the resurrection of Jesus Christ, from the dead. Because He offers new life to all who seek Him, see Important Stuff for more information. And His resurrection is, most certainly, worthy of celebrating
Redcurrant Jelly Glazed Roast Lamb
Spring as a season heralds the beginning of new life.
Finally, Winter has passed and as blossom appears on the trees and birds build nests for their eggs, let’s take a moment to consider what a wonderful and beautiful world we live in.
Do you celebrate Easter?
If you have enjoyed this Redcurrant Jelly Glazed Roast Lamb, you may like to try these:
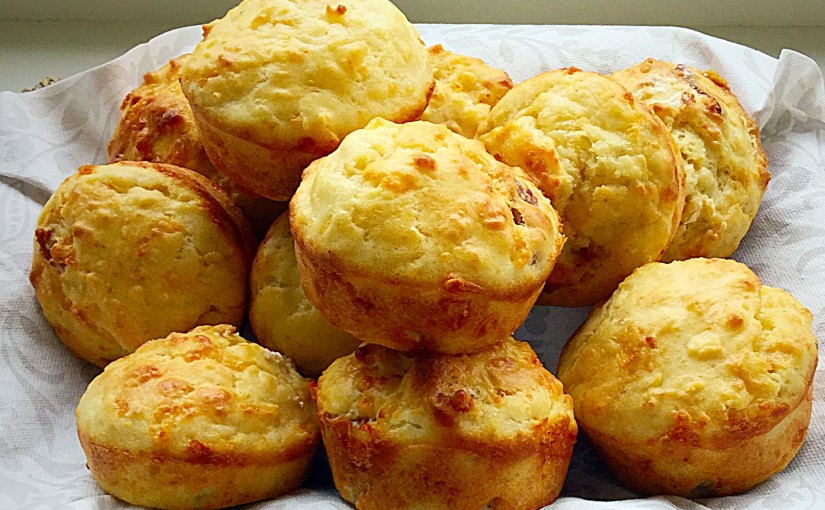
Are mornings busy in your house? Because they certainly are here. So, I always ensure there is a good breakfast on offer, as it is the most important meal of the day and today I am able to share these delicious Cheese Bacon Breakfast Muffins with you, my lovely readers.
The recipe for these Cheese Bacon Breakfast Muffins was given to me Jackie Heaton, she is known as The Baking Nanna.
Most importantly, these delicious muffins take under 30 minutes from start to baked. Especially good for weekend and holiday breakfast baking, or as I did today, make a batch, 5 minutes in the oven to warm through the next morning and breakfast is ready.
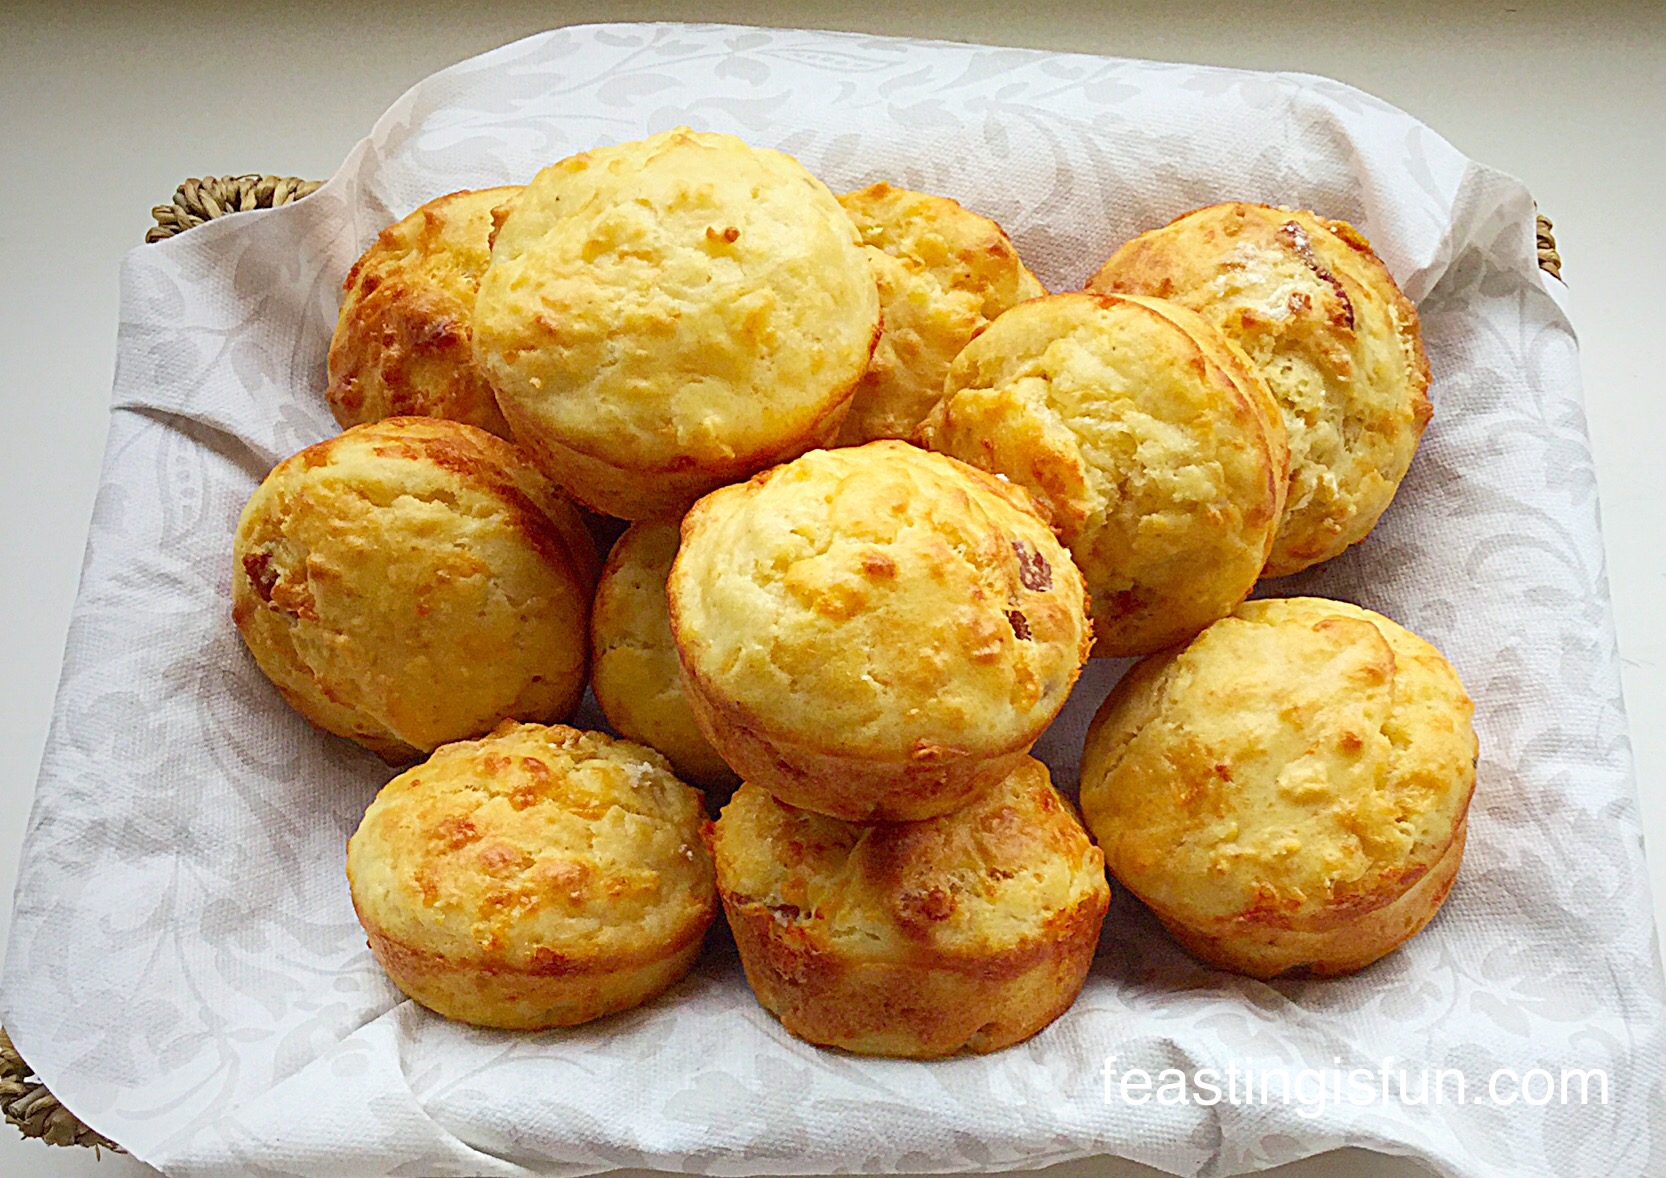
Cheese Bacon Breakfast Muffins
The Twitter Baking Community
I met Jackie through Twitter and she is now one half of #TwitterBakeAlong, a group baking challenge run on Twitter.
And, this morning, as I baked these muffins, within the hour people on Twitter were also baking these delicious, savoury treats. While some had a slight variations, others were coming up with ideas for future bakes. It was honestly so much fun. We laughed, smiled, shared and most of all enjoyed the fact that these Cheese Bacon Breakfast Muffins brought us all together.
Cheese Bacon Breakfast Muffins
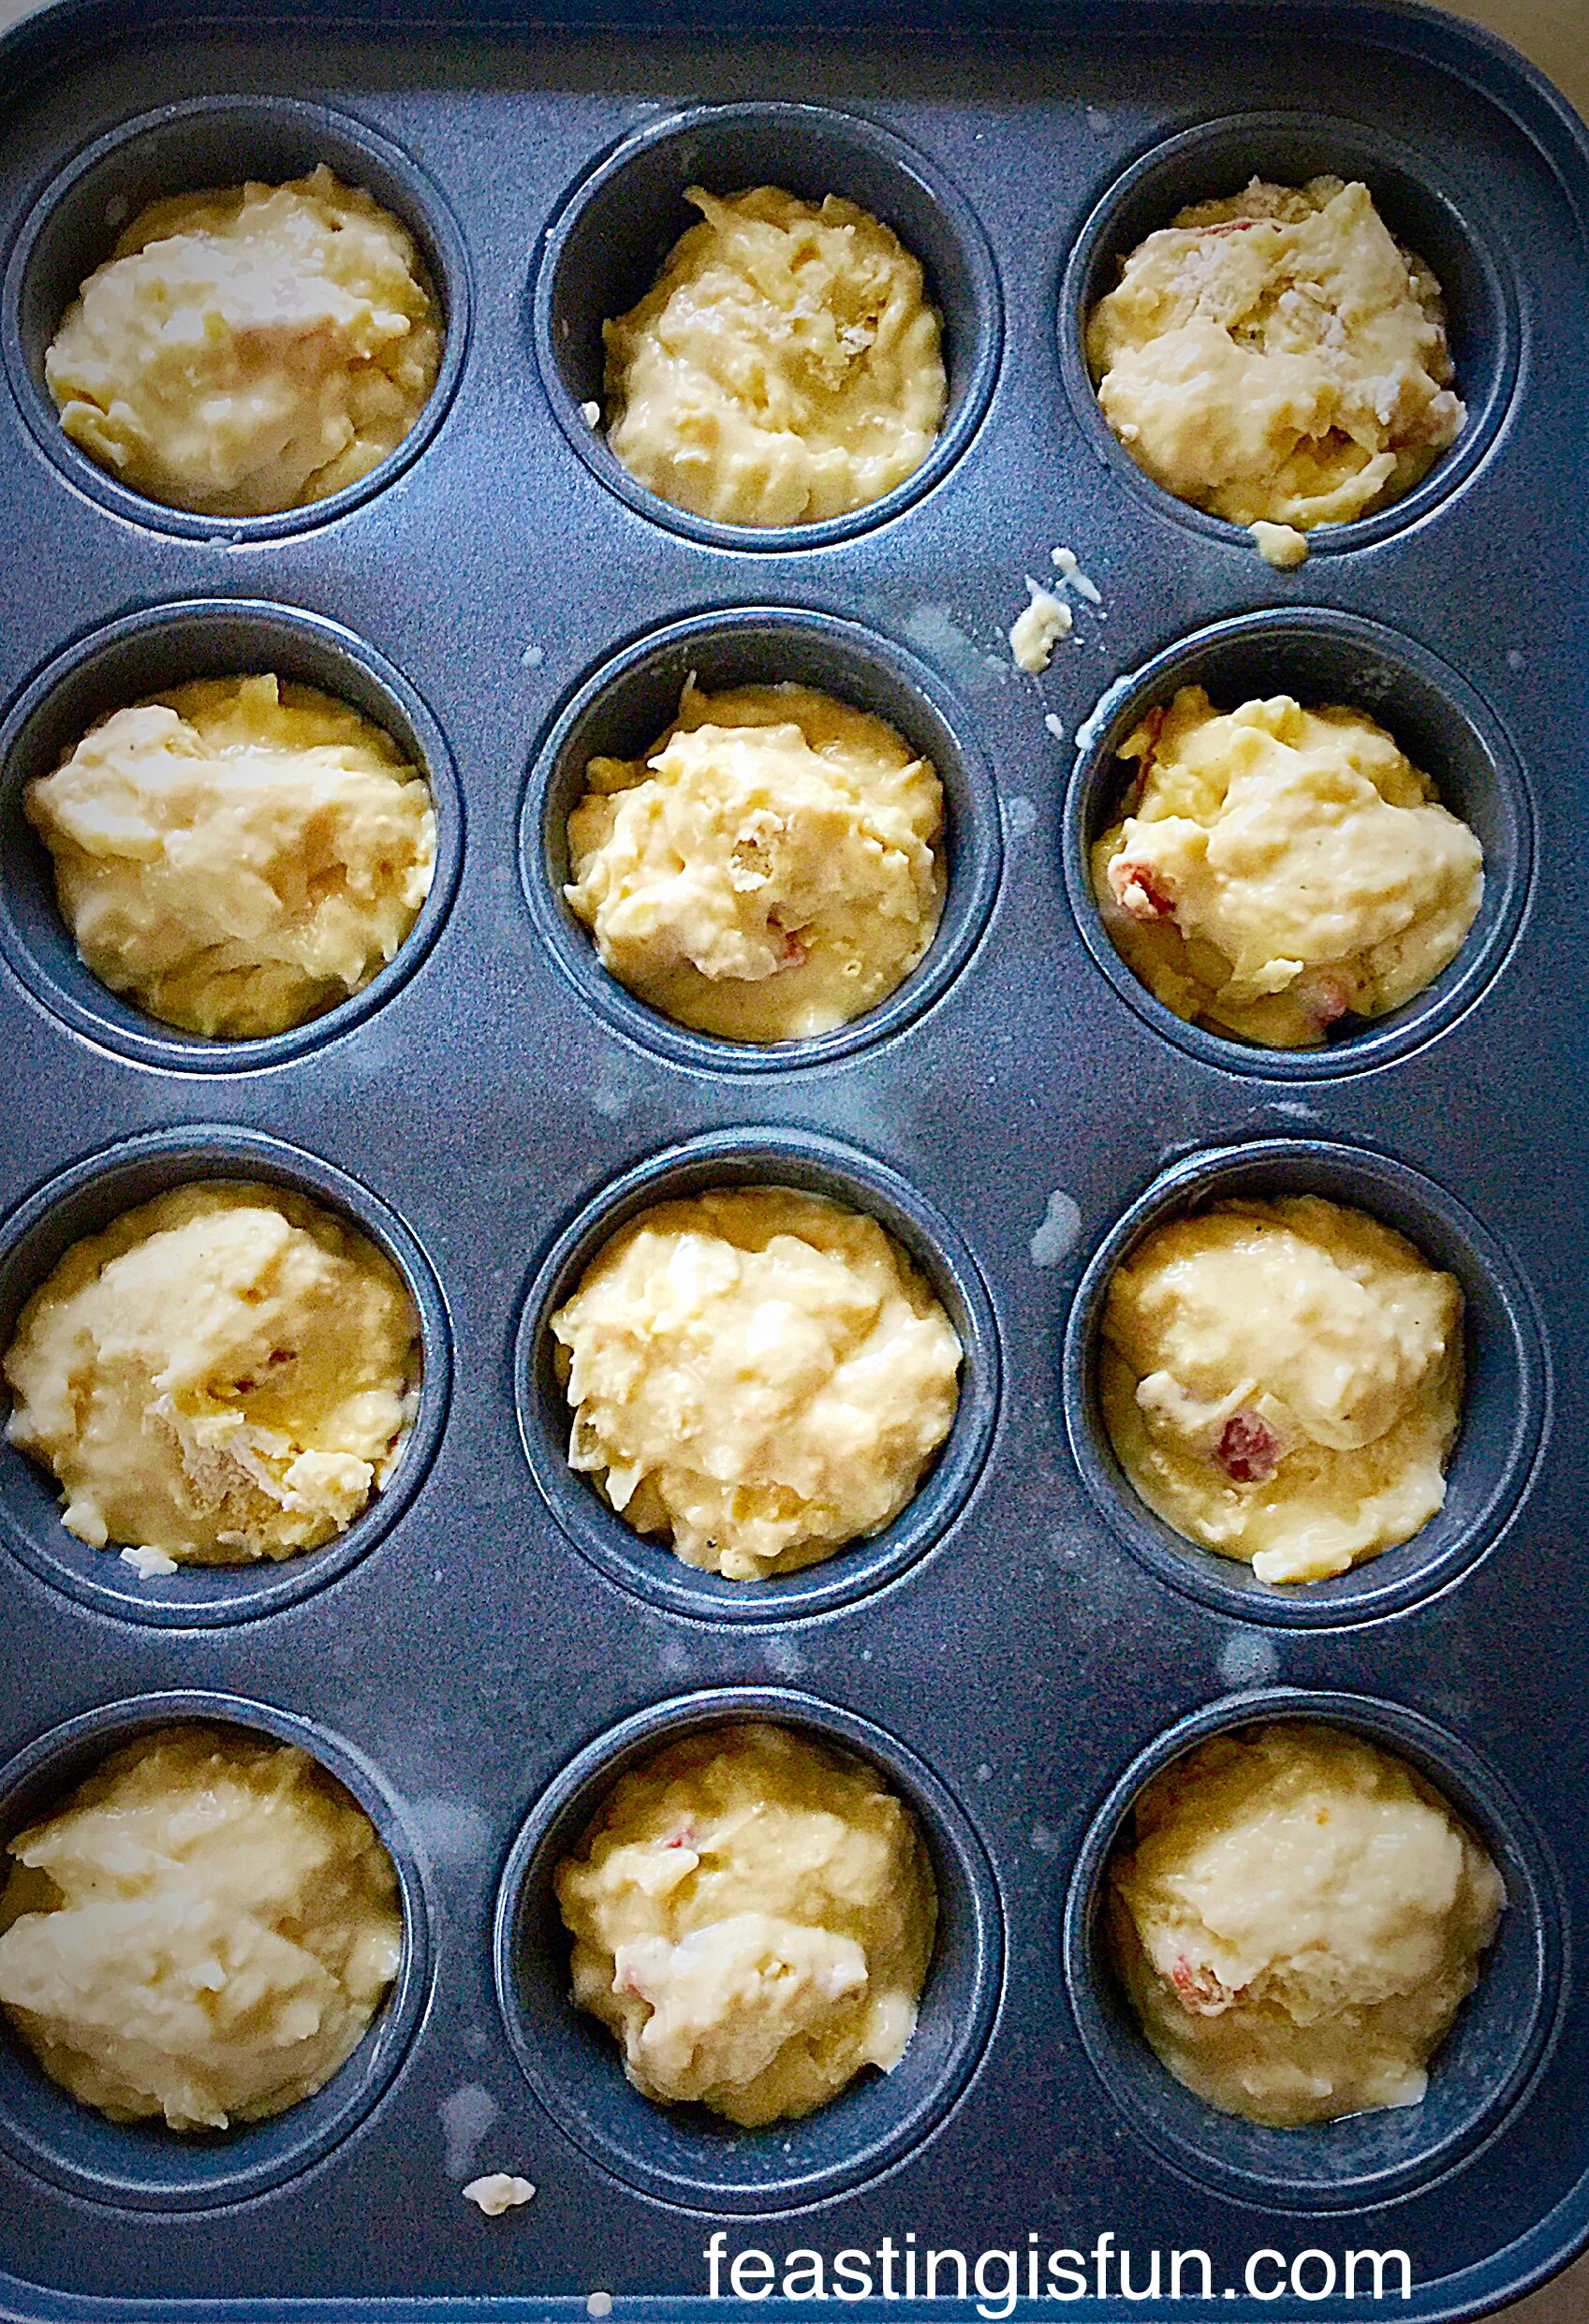
I baked these muffins without cases (I couldn’t lay my hands on any white ones – it was early!), I was confident a quick spray with Wiltoncake release and my British Bakewaremuffin pan would be more than up to the non stick job in hand.
By all means use muffin cases, I probably will next time, just as soon as I can find my plain white ones!
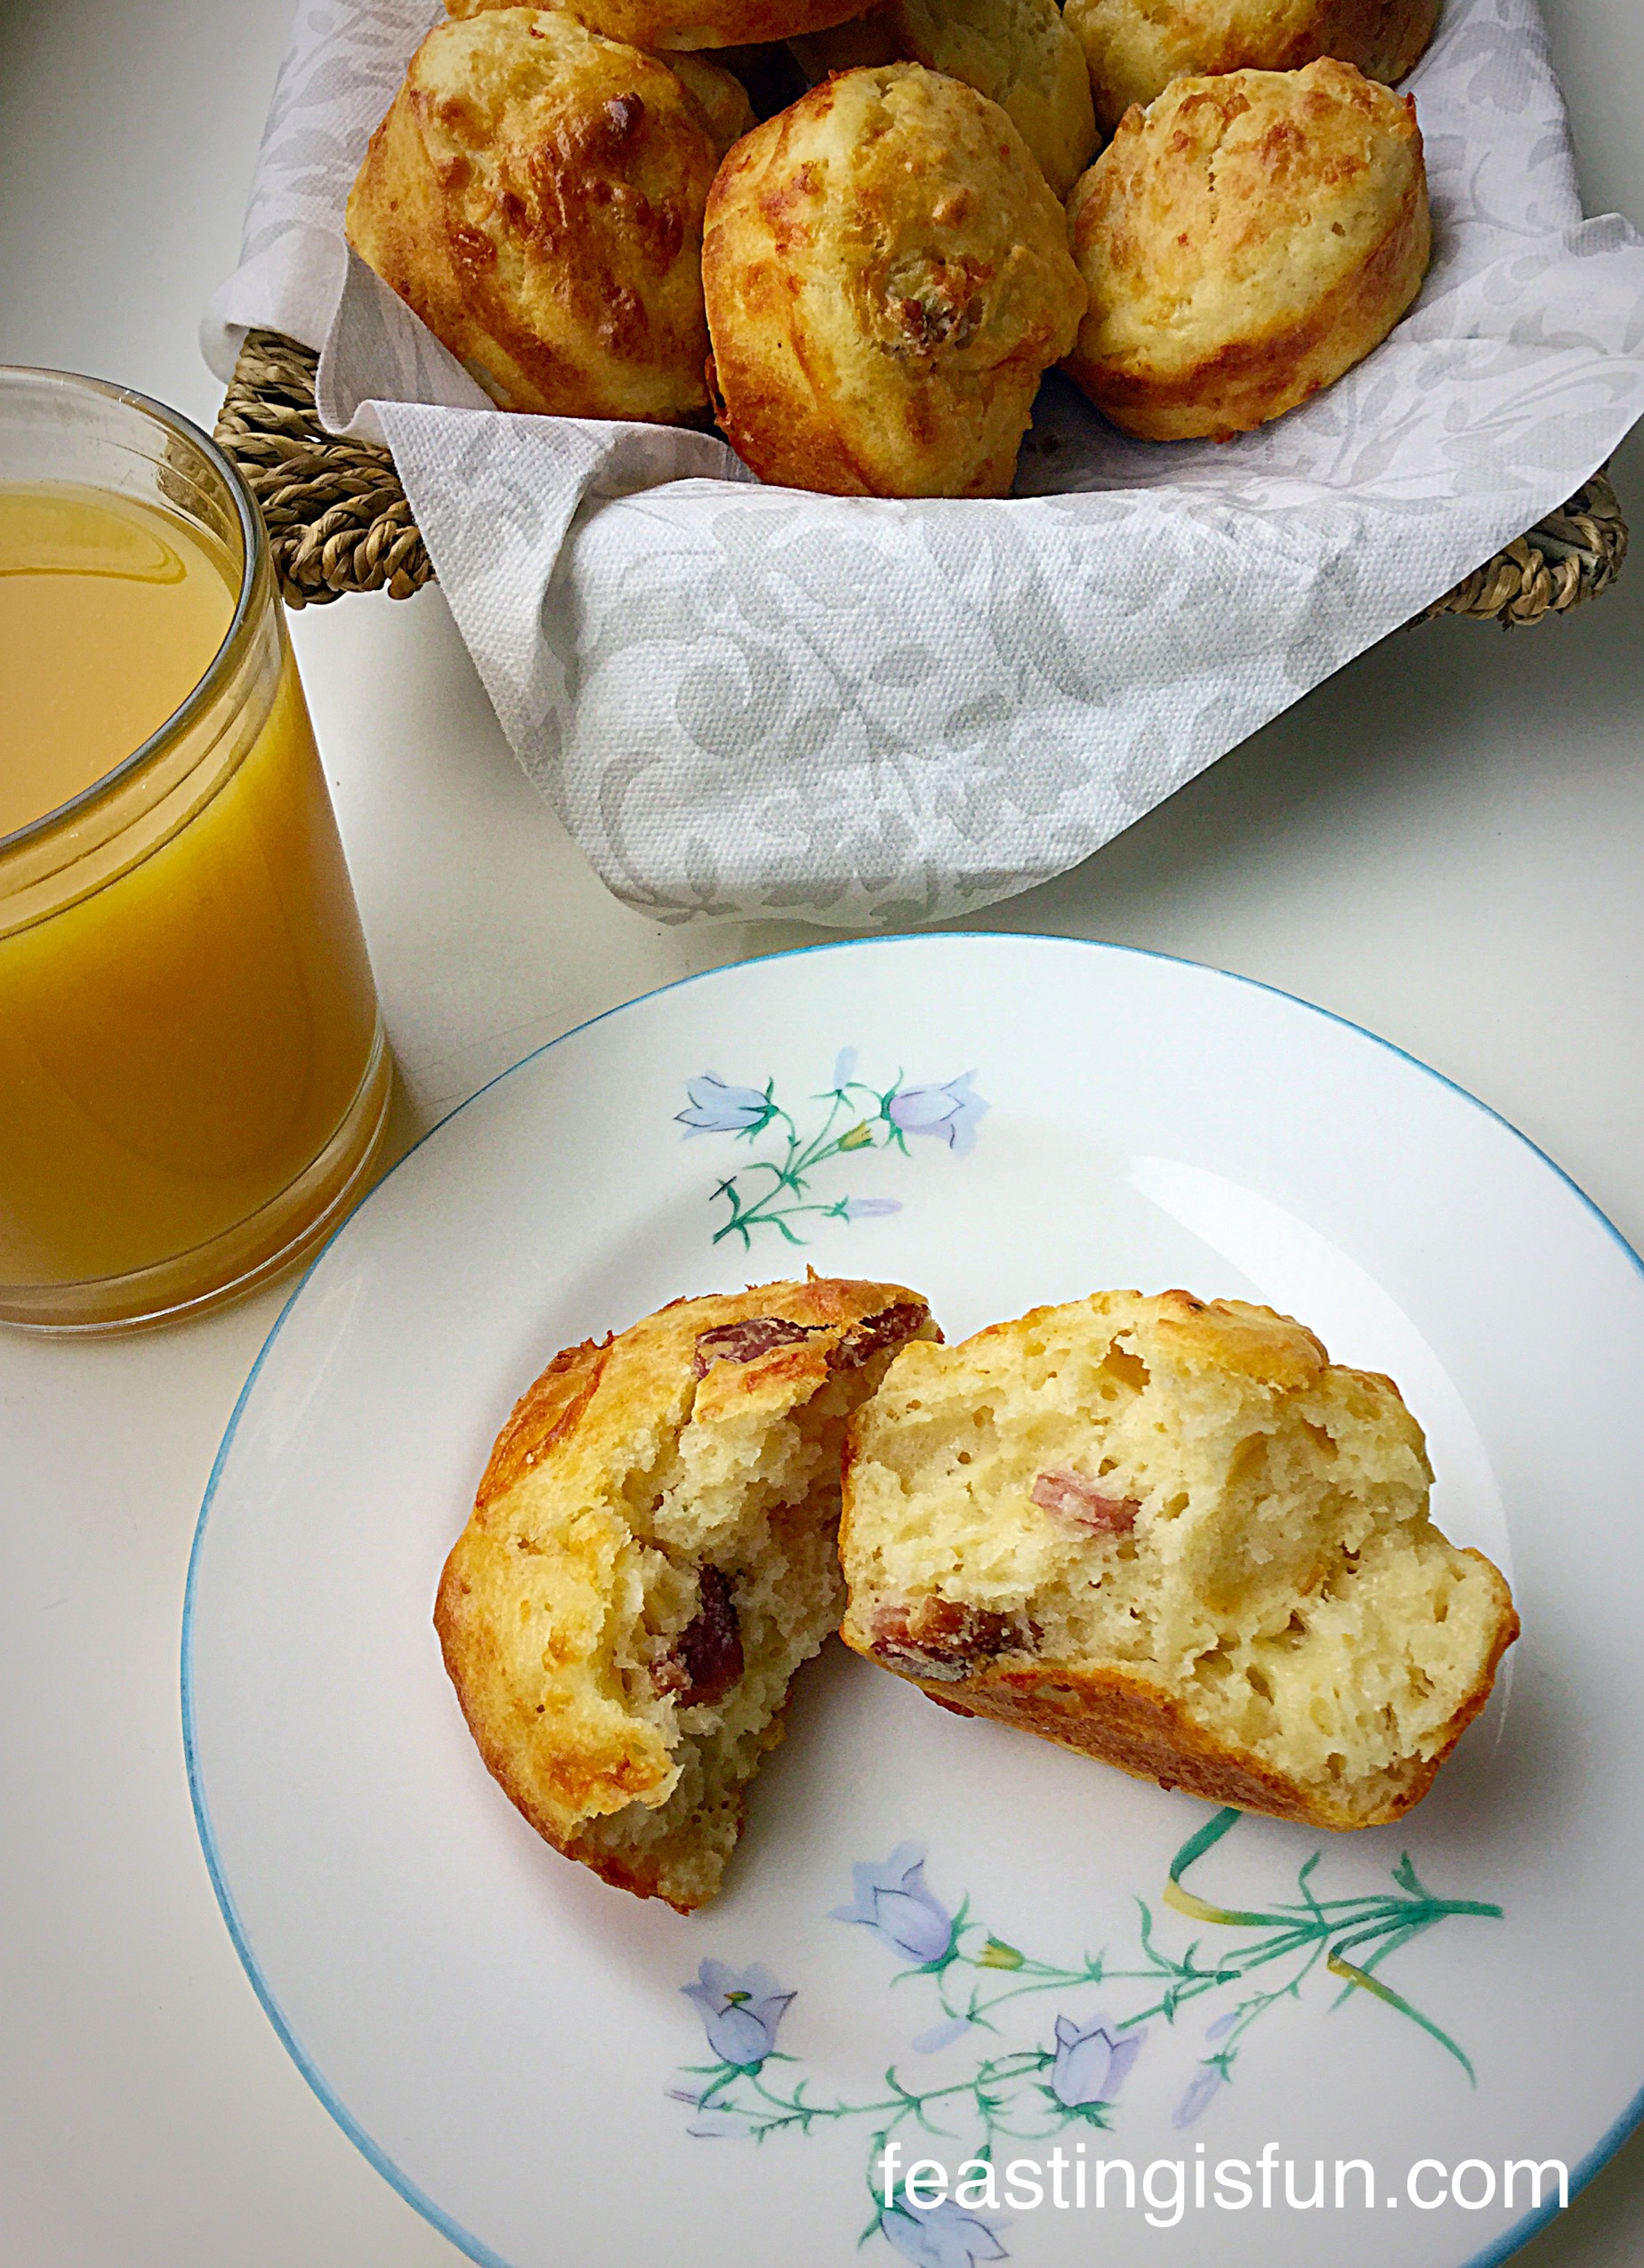
As well as eating these warm, for breakfast, they also make a great addition to packed lunches and picnics. The Baking Nanna also puts them on the top of stews and casseroles aren’t they the same thing wrappers removed, in place of dumplings.
Recipe: Makes 12 Cheese Bacon Breakfast Muffins
4 Rashers Streaky Bacon – I used unsmoked. Use whatever bacon you prefer.
Method: Preheat the oven to 200C/180C fan, gas mark 6, 400F
Making The Muffin Batter
First of all cook the bacon until it is just crispy. I used a skillet on the hob but you can grill or bake the bacon. Place on a plate to cool then chop into pieces.
Sift the flour and baking powder into a large bowl.
Add the chopped bacon, grated cheese and pinch of black pepper to the flour and stir through – dry ingredients.
In a jug measure the milk. Add the 2 eggs and vegetable oil and stir with a fork to combine – wet ingredients.
Pour the wet ingredients into the dry ingredients and stir until everything just comes together.
Muffin batter is meant to be lumpy, if you over mix you will have tough muffins.
Portioning And Baking The Muffins
Scoop the muffin mixture into the cases/pan.
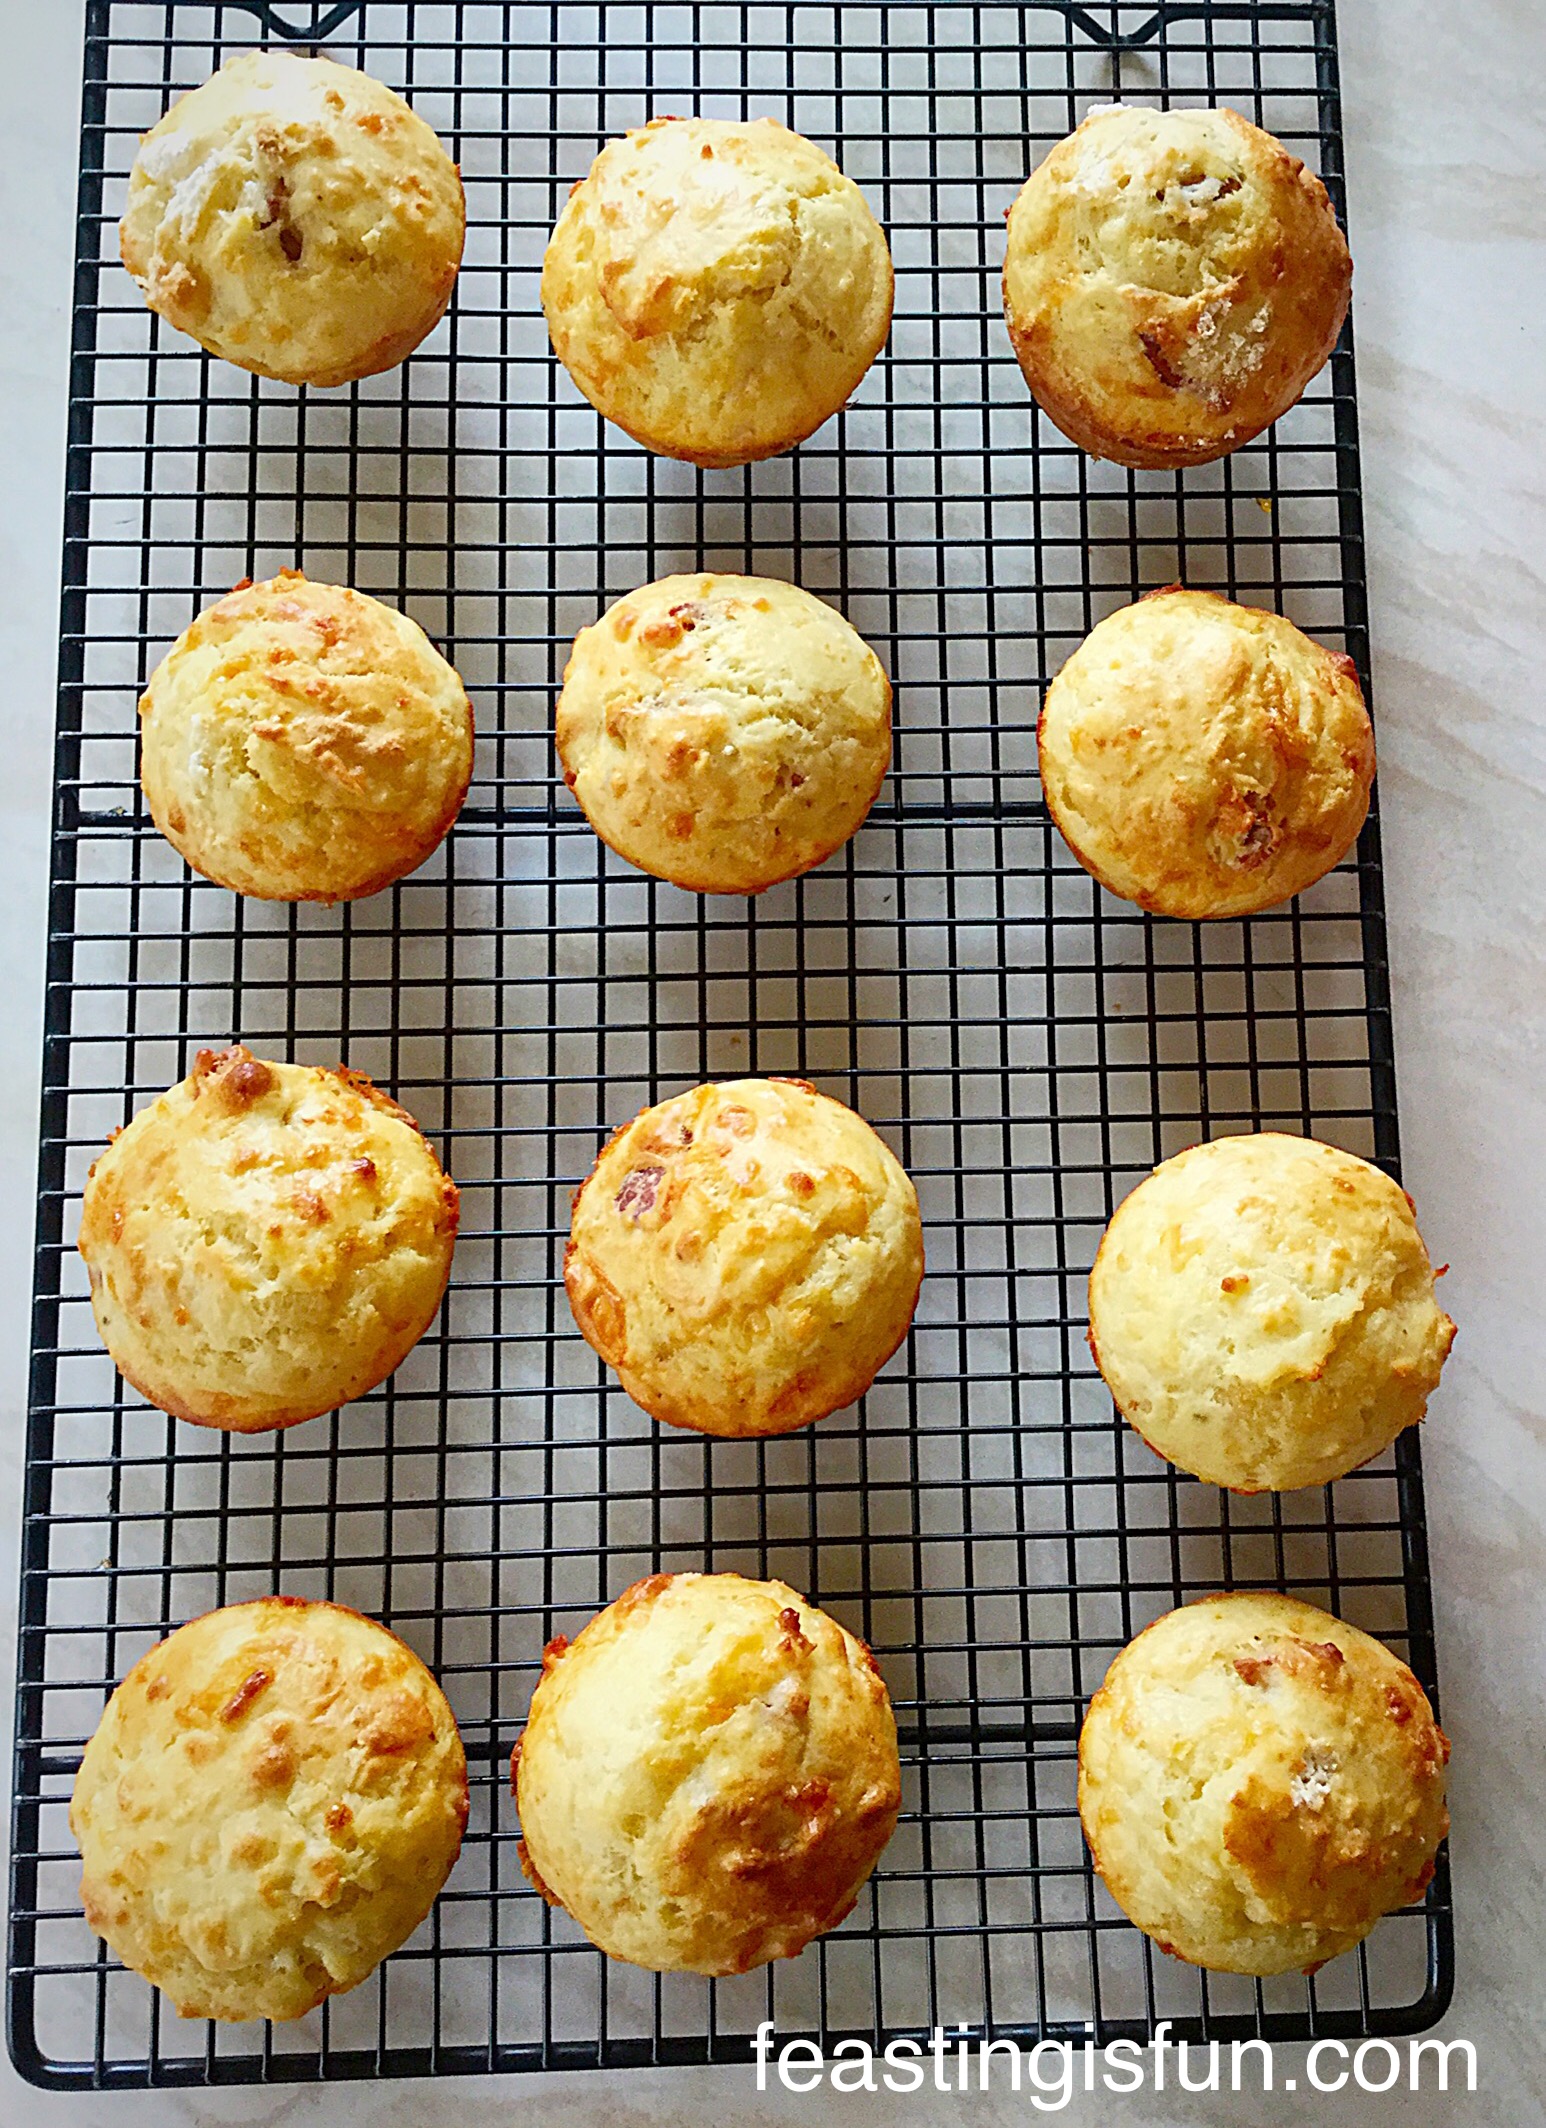
These muffins are ready for the oven.
Bake for 15-20 minutes until they are golden brown and firm to touch.
As soon as they are baked remove the muffins from the pan and place on a cooling rack.
Cheese Bacon Breakfast Muffins
Since this is such an easy recipe, producing light and tasty muffins – you’ve got nuffin to lose, by giving them a try!
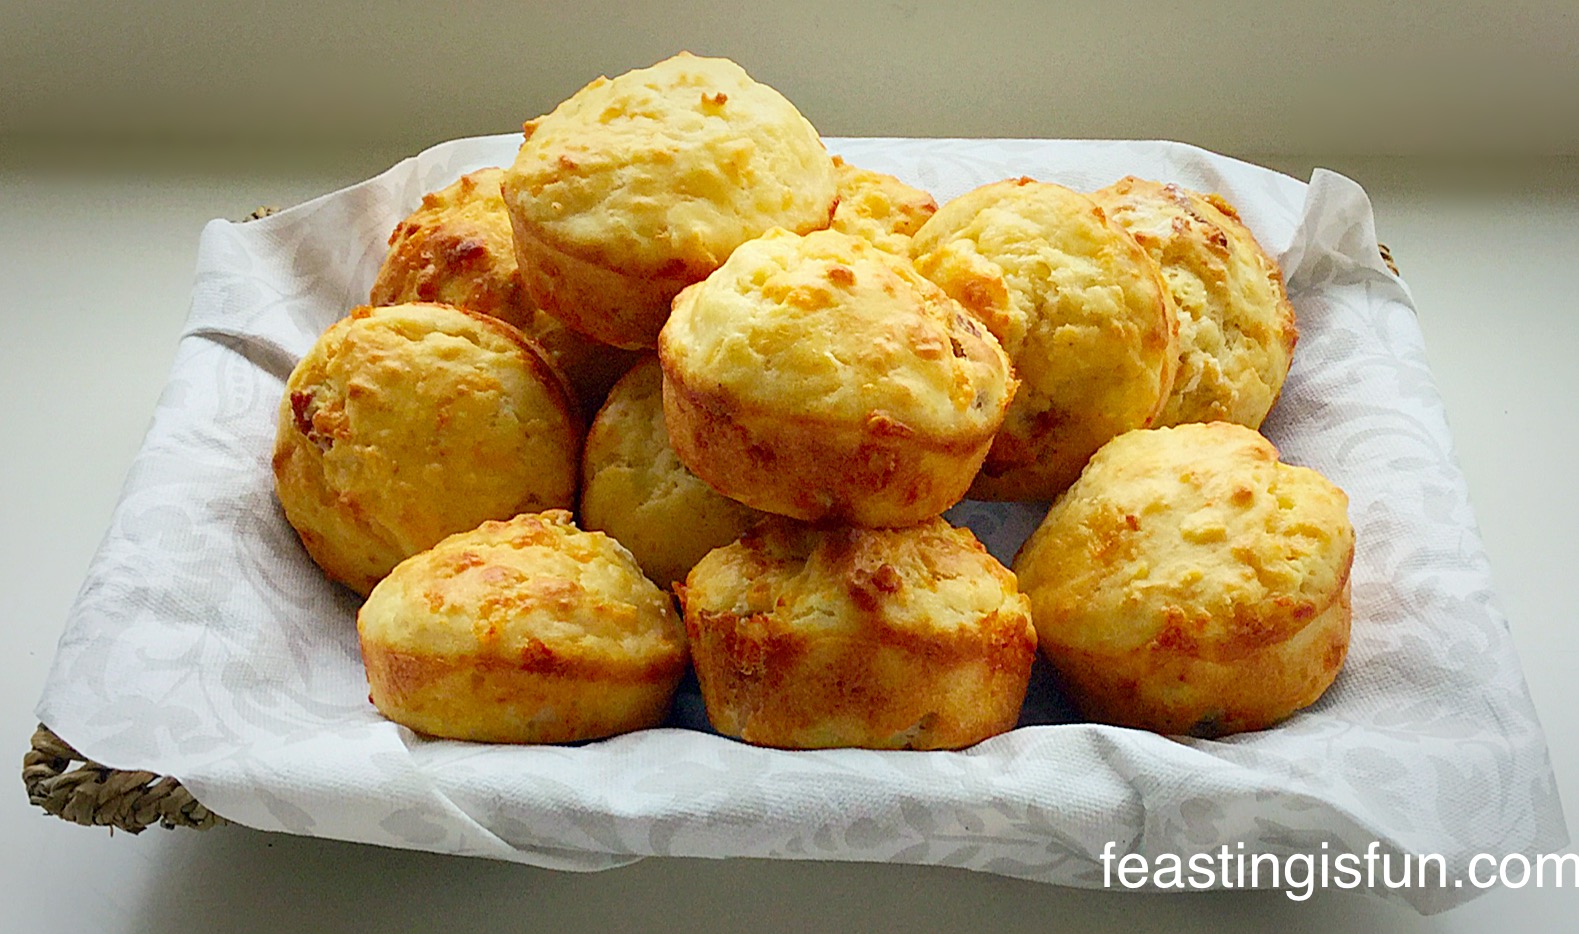
Most importantly, these muffins are best eaten within 24 hours of being made, store in an airtight container. Alternatively, they can be frozen for up to one month. Defrost fully and reheat before eating.
Cheese Bacon Breakfast Muffins perfect for feasting on in the morning.
Are your mornings hectic?
And do you have a strategy for getting everyone up, feed and on their way?
If you love the idea of these Cheese Bacon Breakfast Muffins being a great way to grab breakfast on the go, take a look at these other ideas:
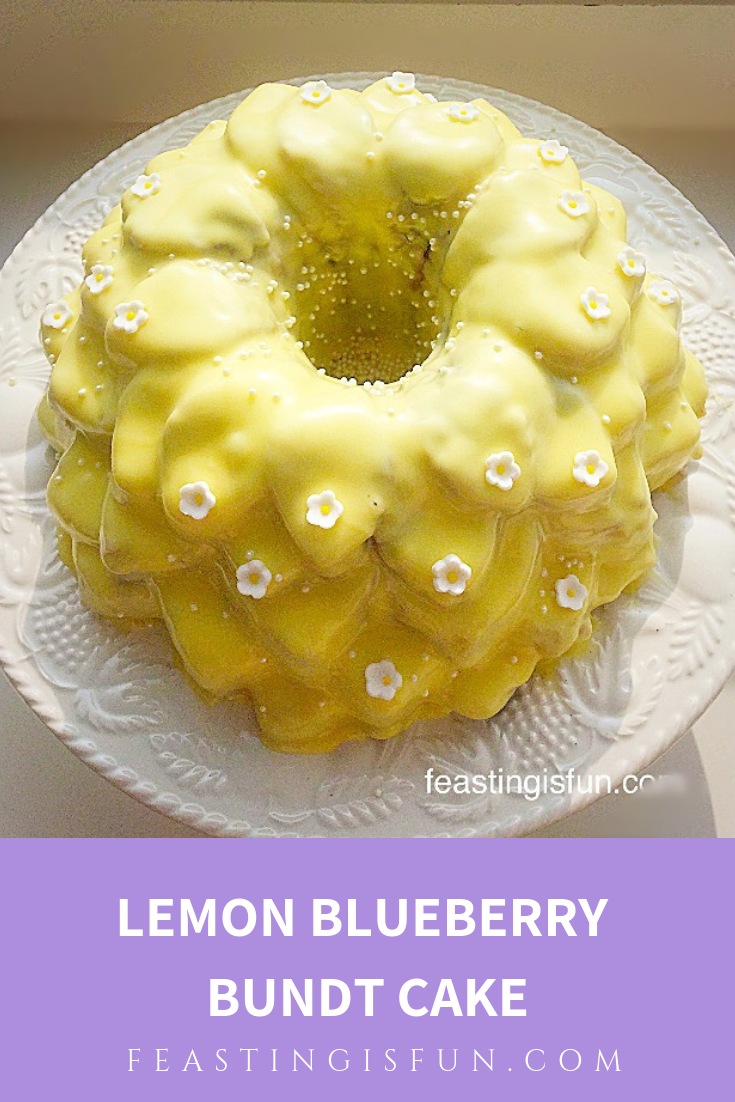
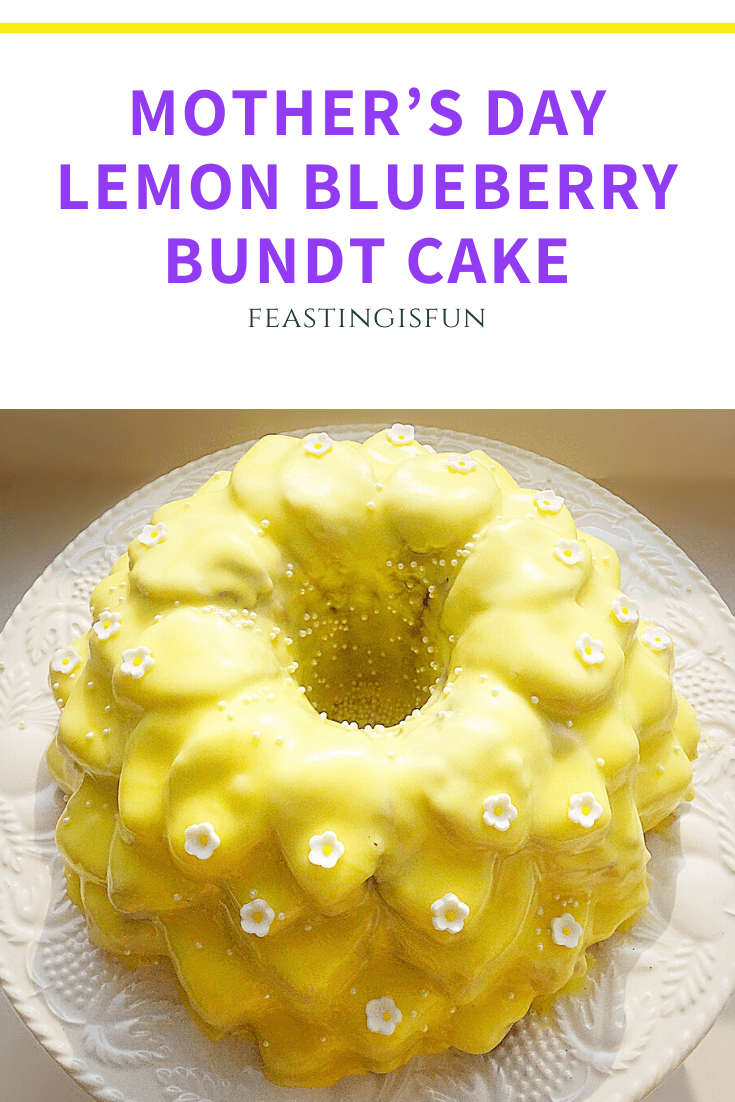
Today is Monday and while the sun is shining, a cold wind is whipping through the air. And it is making me feel very cold! So I am making this Lemon Blueberry Bundt Cake to cheer us all up on chilly days.
I absolutely adore the combination of lemon and blueberries together, in fact my Lemon Blueberry Cupcakesare one of my favourite recipes.
Jam Packed With Fresh Fruit
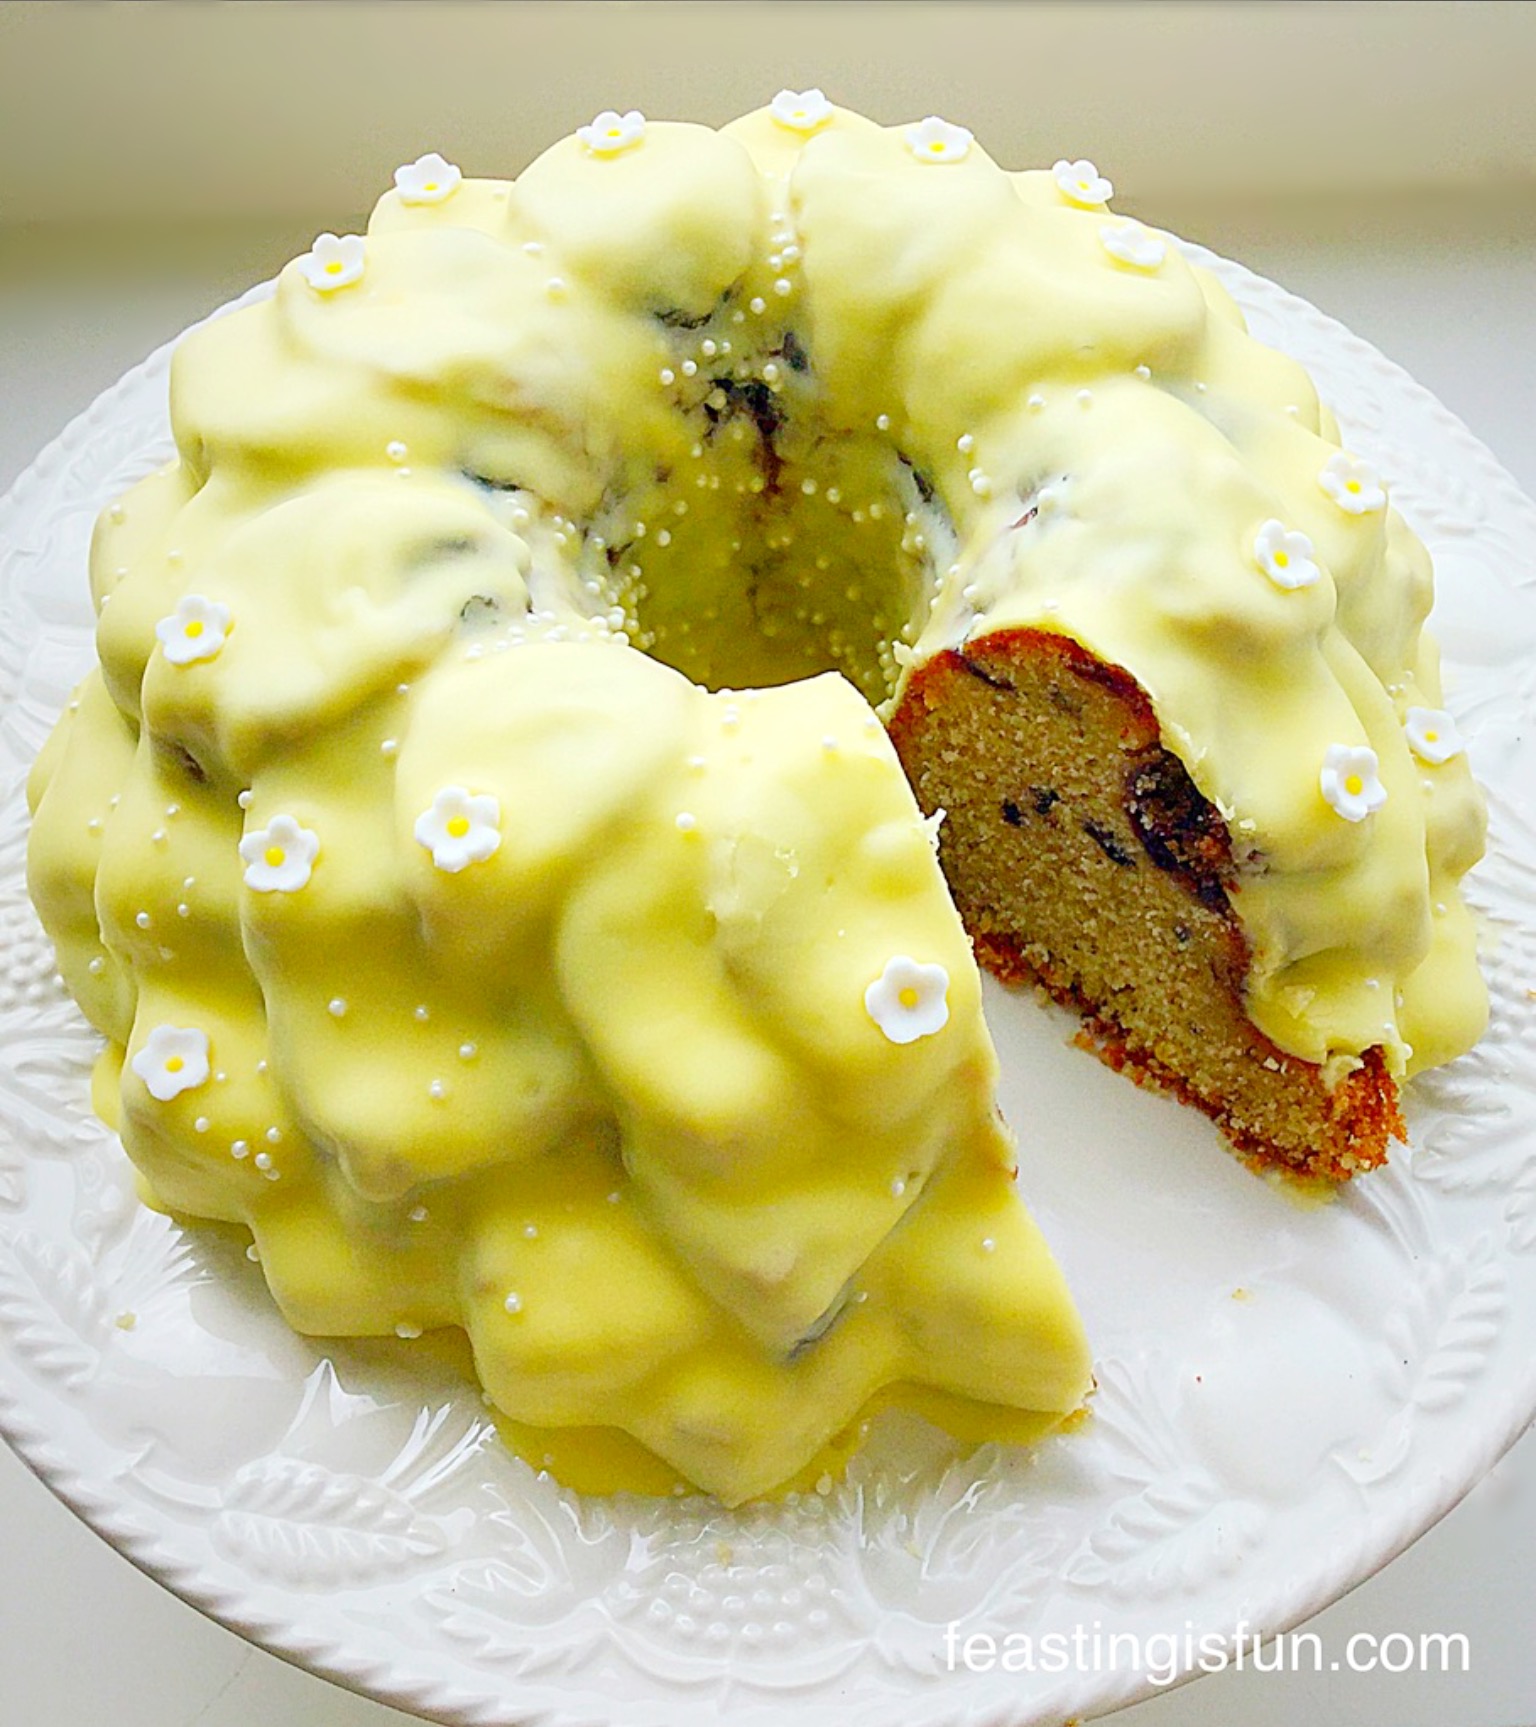
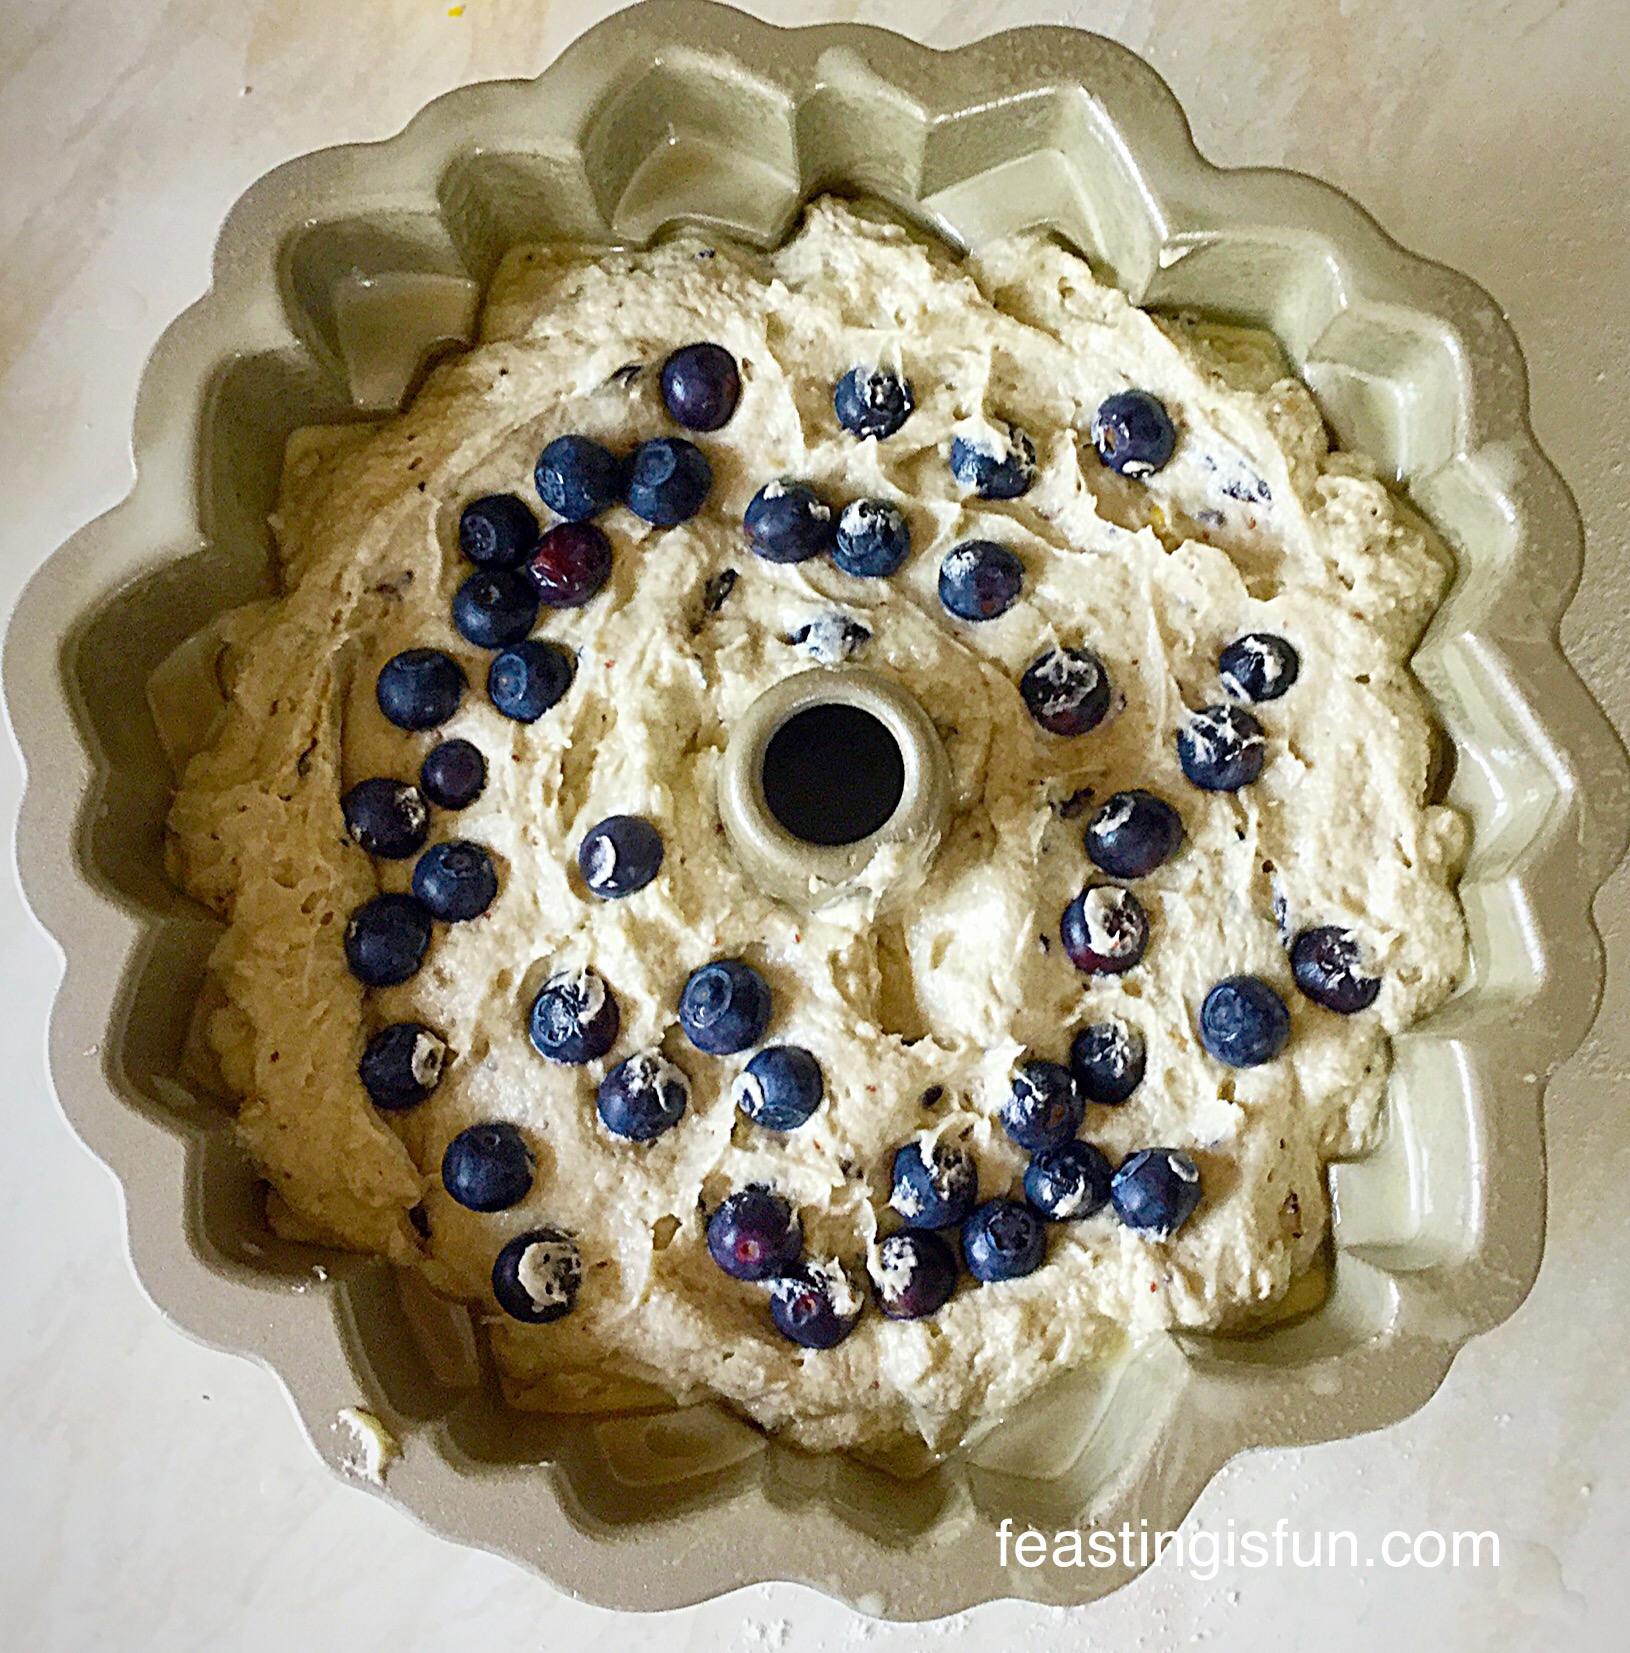
Because this Bundt cake has blueberries whisked into the cake batter, the finished cake is deliciously moist. Also I saved a few whole blueberries and added them to the batter. Resulting in little pods of blueberry jam throughout the baked cake.
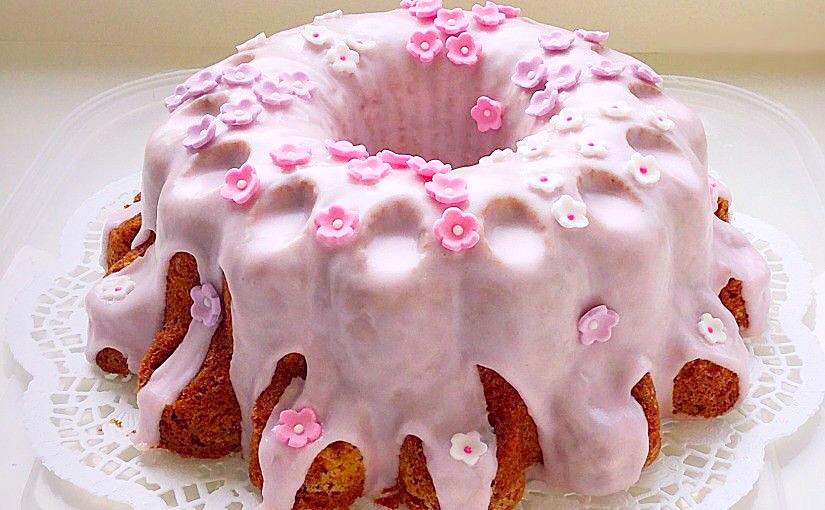
Lemon Blueberry Bundt Cake
What I hadn’t bargained for was, the extra moistness the broken blueberries would add to this cake. And plenty of fresh lemon zest added means this Lemon BlueberryBundt Cake delivers moist, flavourful, cake perfection, in every bite!
Lemon Blueberry Bundt Cake
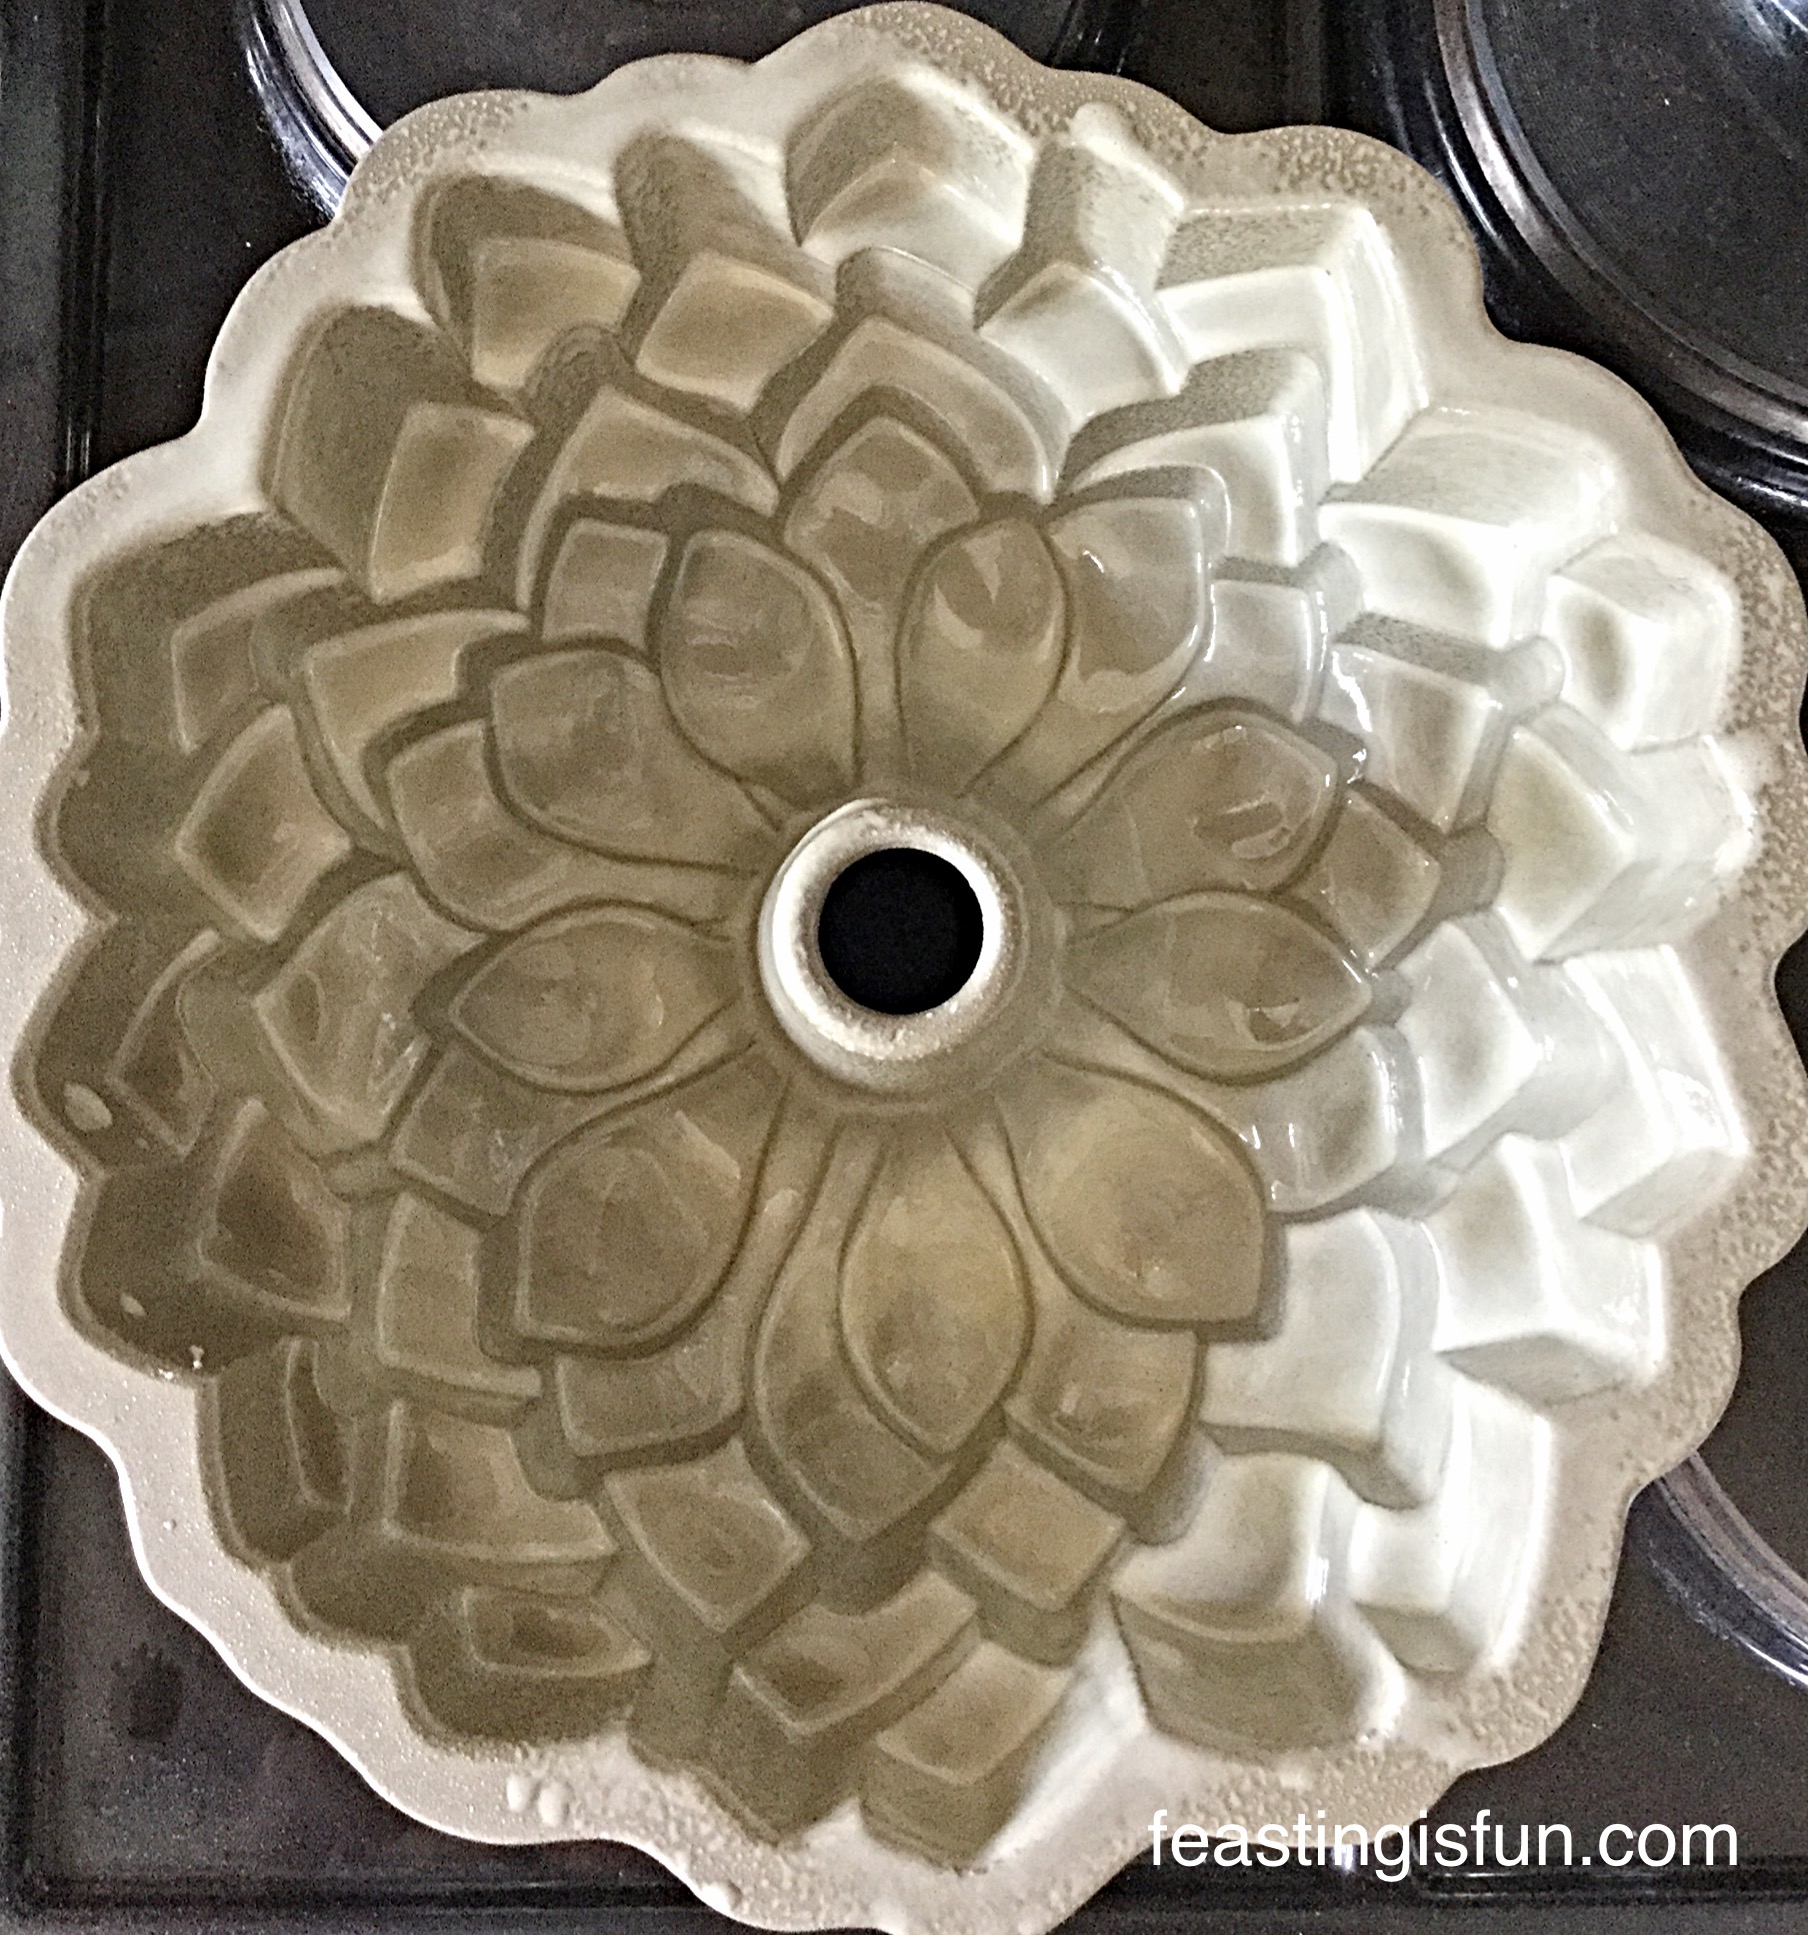
Since baking the beautiful Flower Vanilla Bundt Cakefor little baby Florrie and her mum, I wanted to make another cake with a sunny, Spring theme. So I chose my Blossom Bundt by Nordic Wareand set about creating the recipe.
I always prefer to use lemon zest in a cake, as it imparts a wonderful, zingy, lemon flavour. And the lemon juice, from the zested lemons, has its own starring role. Added to icing sugar to form the glaze for this cake, it is the first taste to hit your tongue as you bite into this cake, jolting your tastebuds awake!
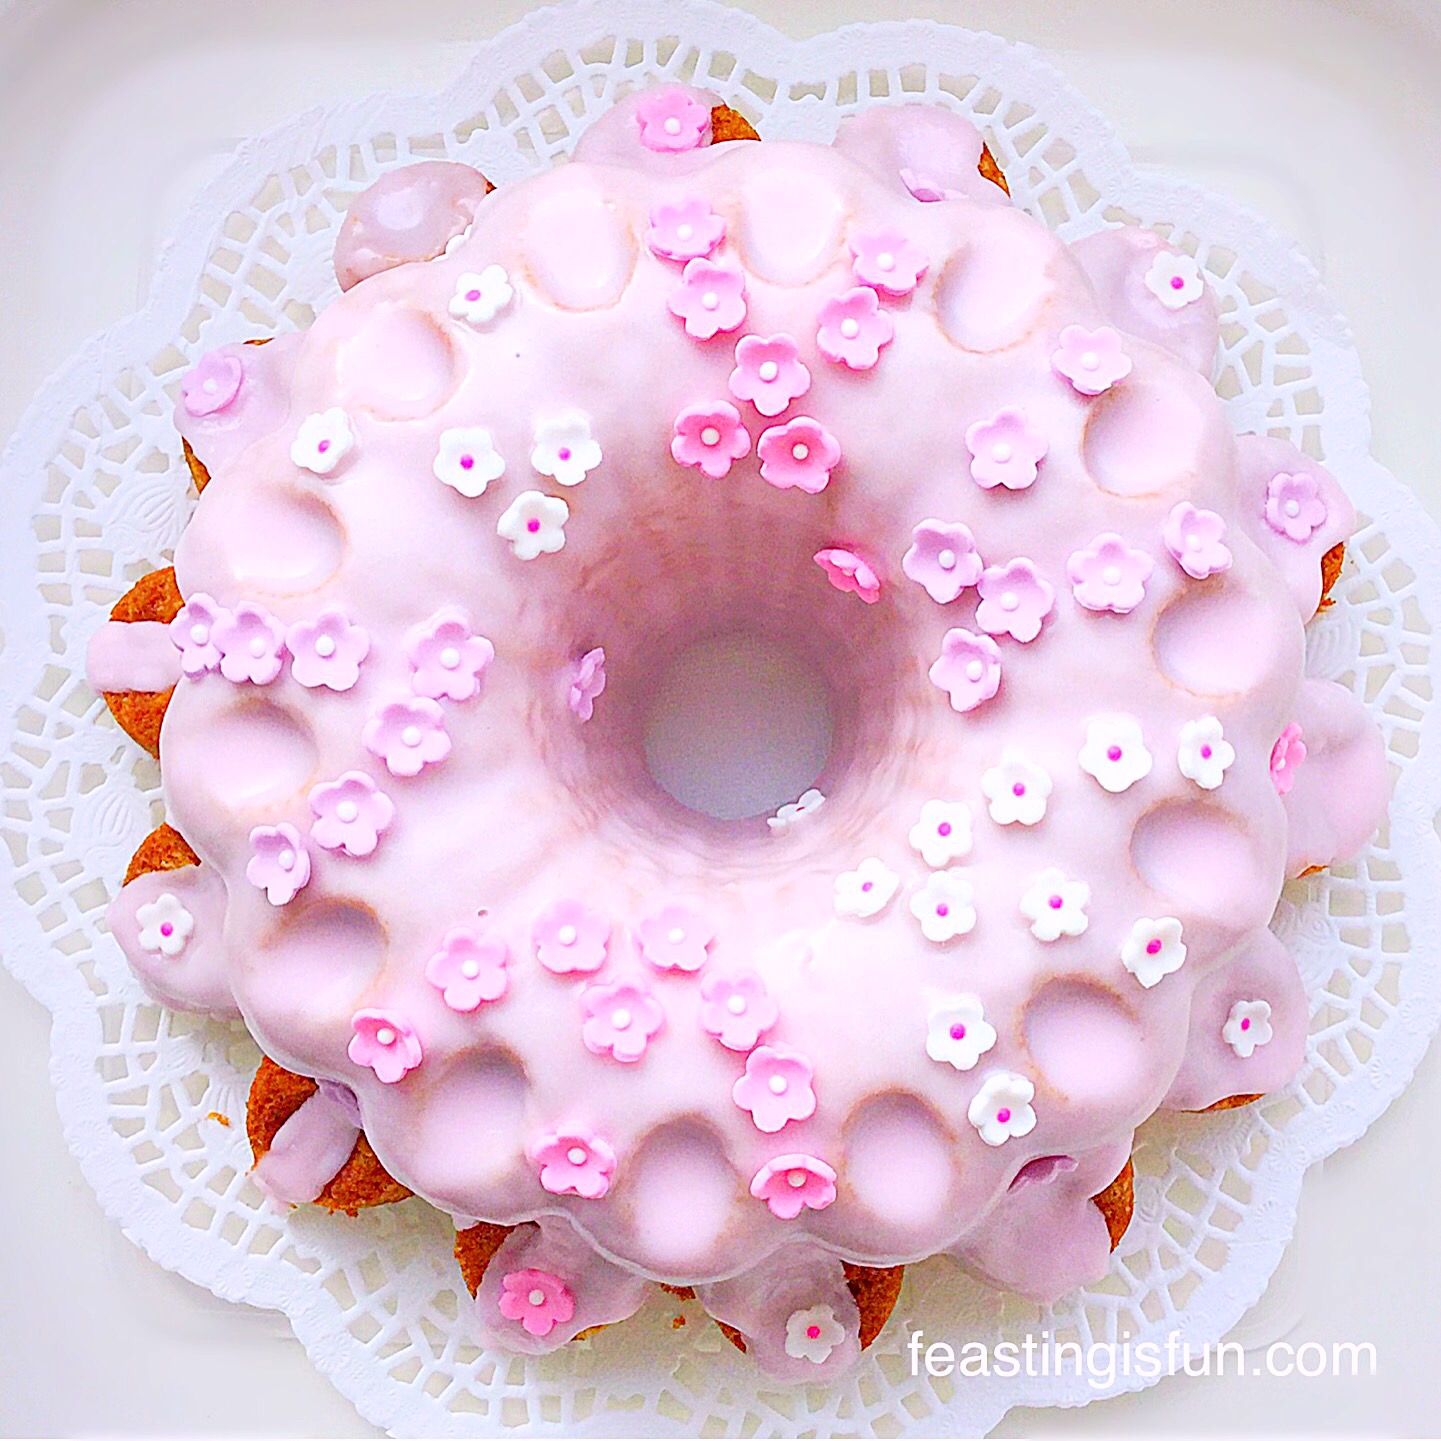
Lemon Blueberry Bundt Cake
The Brilliance Of Bundt Pans
Bundt tins are a great investment, especially if you aren’t very confident with your cake decorating skills. These beautifully shaped tins do all the work for you. This Lemon Blueberry Bundt Cake would still have looked pretty and tasted delicious with a light dusting of icing sugar.
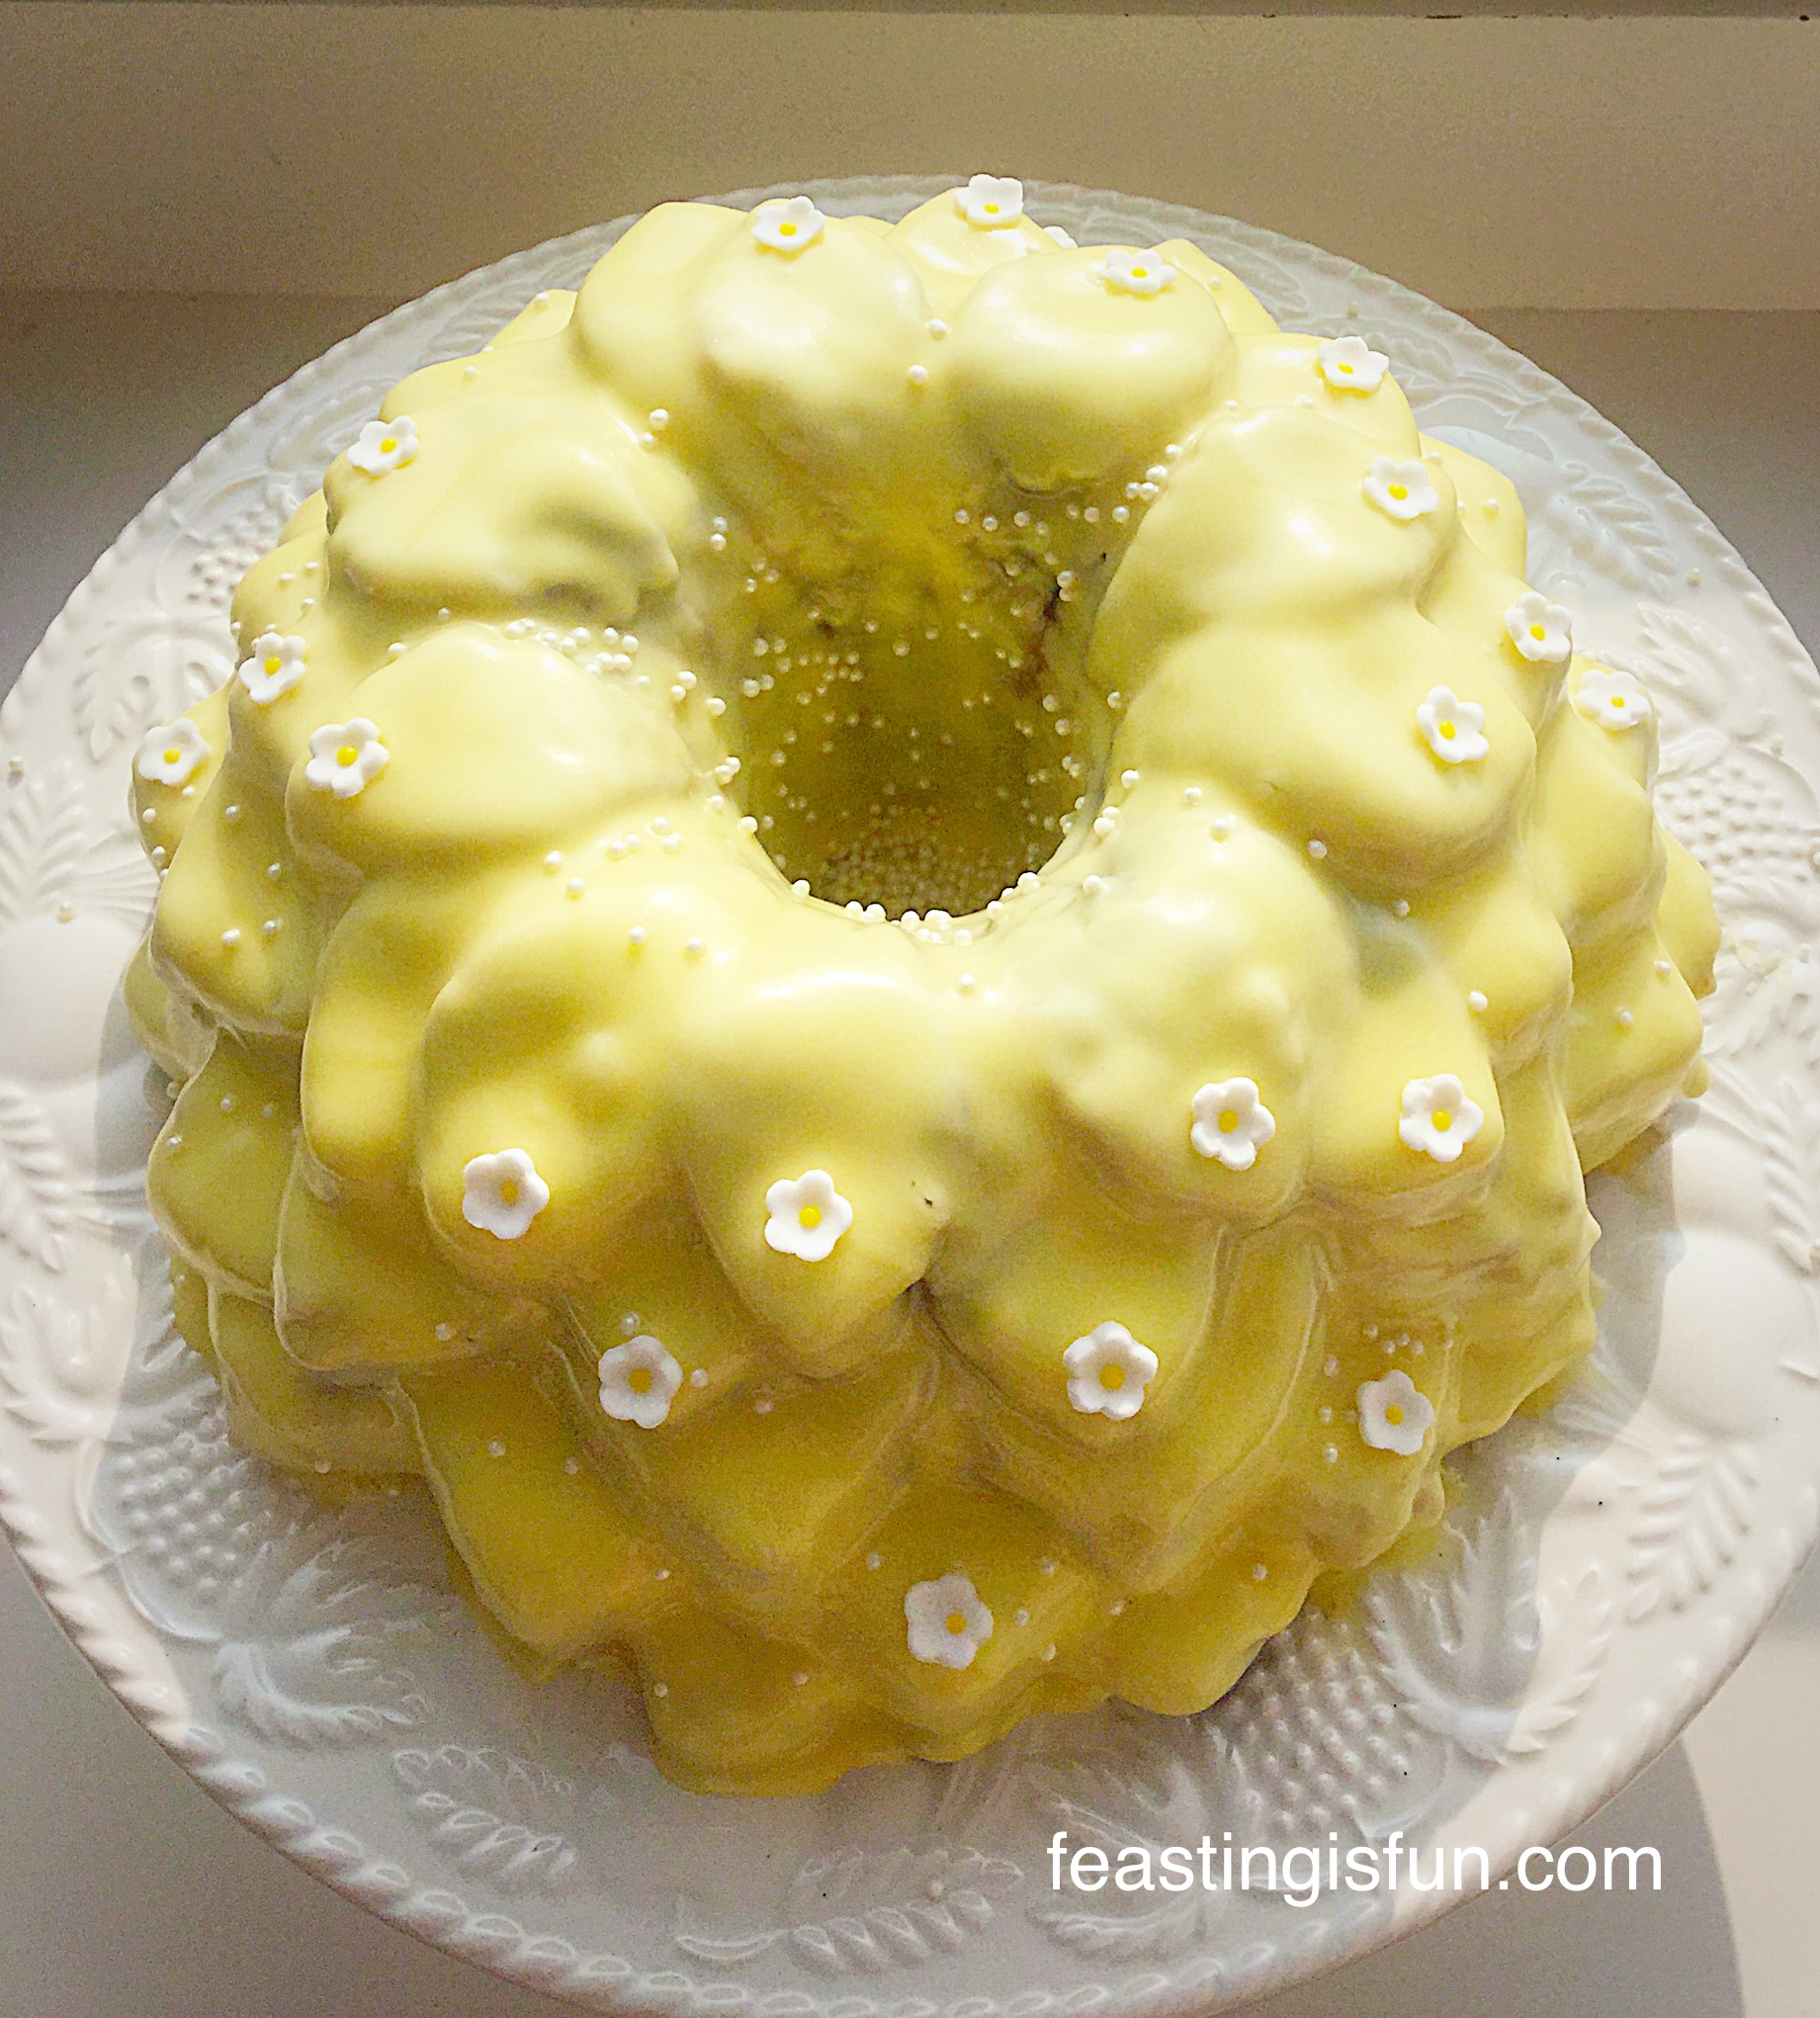
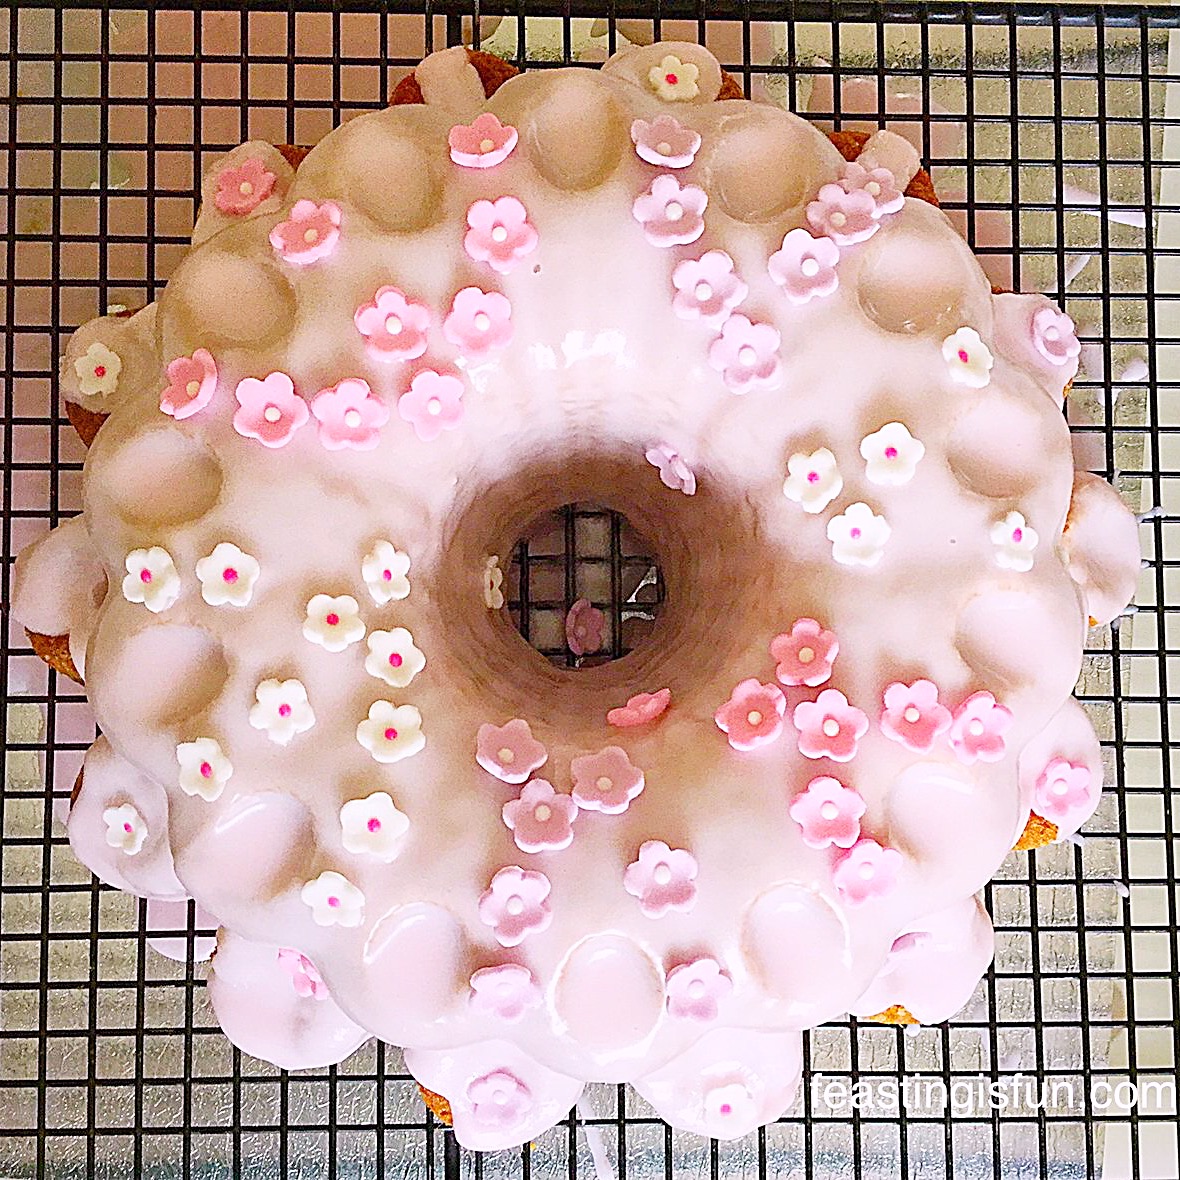
With a little care and proper preparation a Bundt tin will give you years of beautiful cakes, with no extra effort required by the baker. Although that doesn’t mean you can’t choose to decorate them. Since this is the first Bundt cake that I have fully glazed with a thicker icing and little sugar paste flowers. Alternatively my Glazed Lemon Bundt Cakeis fully glazed, with a thinner, lighter icing and is also completely delicious.
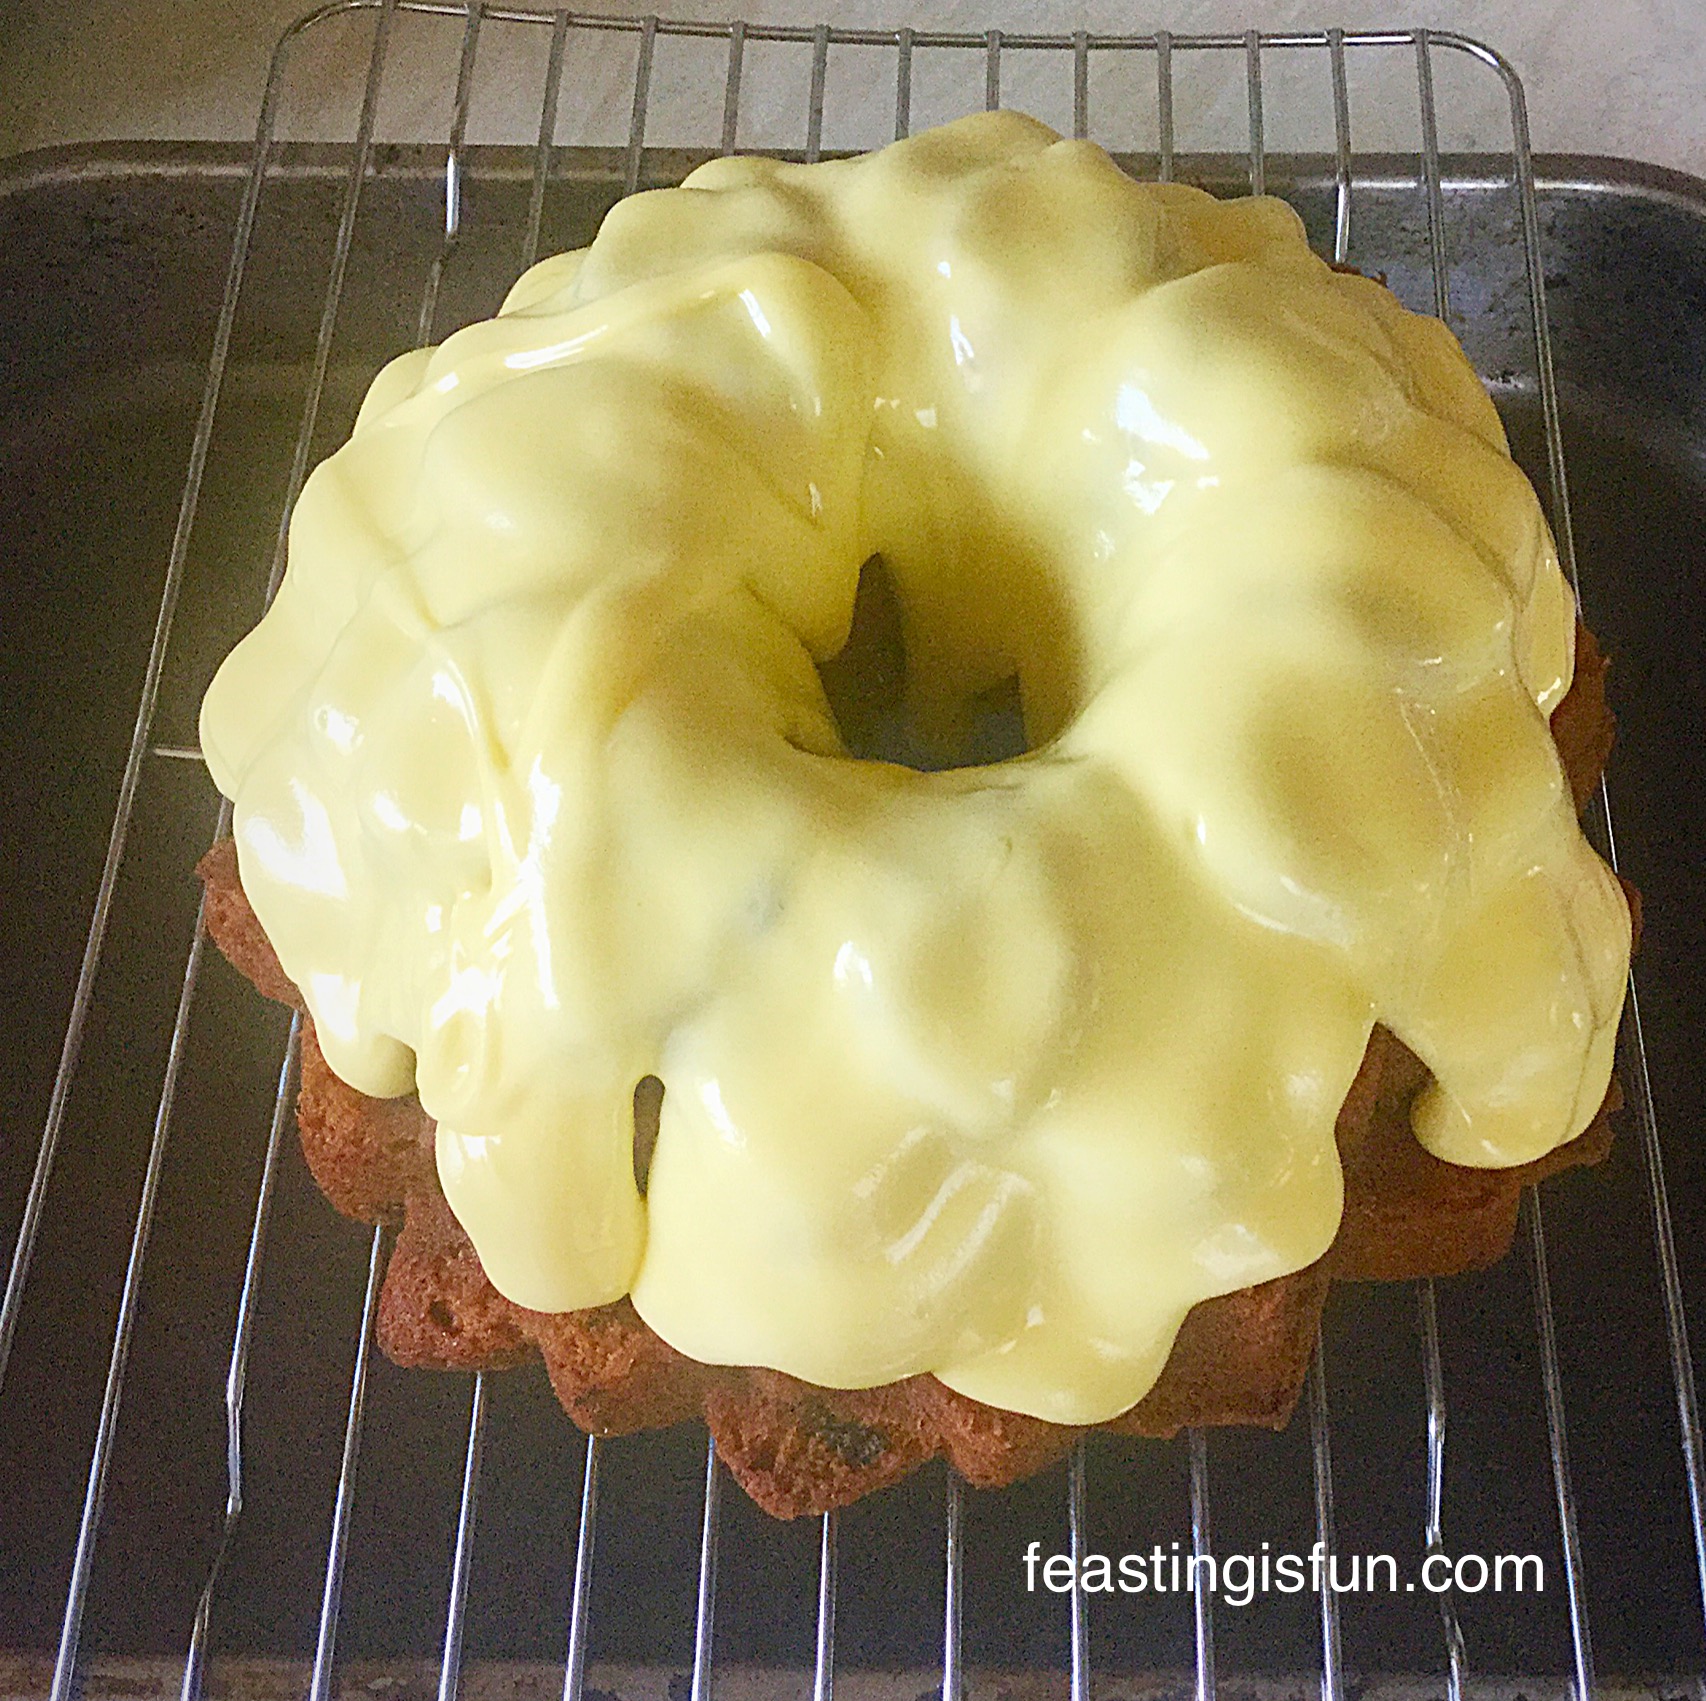
While I knew I would need a thicker icing to cover the dark blueberries near the surface of the cake. Yet I hadn’t envisaged the thickness of the icing, along with it’s pretty yellow colour, actually looked just like custard as I was spooning it onto the cake!!
We all had a giggle at the similarity – that’s what baking and experimenting with decorating is all about for me. Fun!
Let’s get on with making this cake!
Recipe: Makes one Lemon Blueberry Bundt Cake serves 10-12
Cake release spray – I use Wilton’sor extra butter & flour for preparing your Bundt tin
450g/1lb Icing sugar
Optional – Yellow Gel Food Colouring I use Wiltonfood colouring gel
Apperiels, white pre made sugar flowers – these are readily available in supermarkets and online.
Method: Preheat the oven to 170C/150C fan, 325F, gas mark 3
Making The Blueberry Lemon Cake Batter
First of all, into a large bowl add the sugar, butter and vanilla extract.
Whisk or beat until pale and fluffy – approx 5 minutes
Into a separate bowl sift the flour, baking powder and salt together (dry ingredients).
Add one third of the dry ingredients and two eggs to the creamed butter and sugar, whilst whisking/beating on a slow speed.
Repeat the last step.
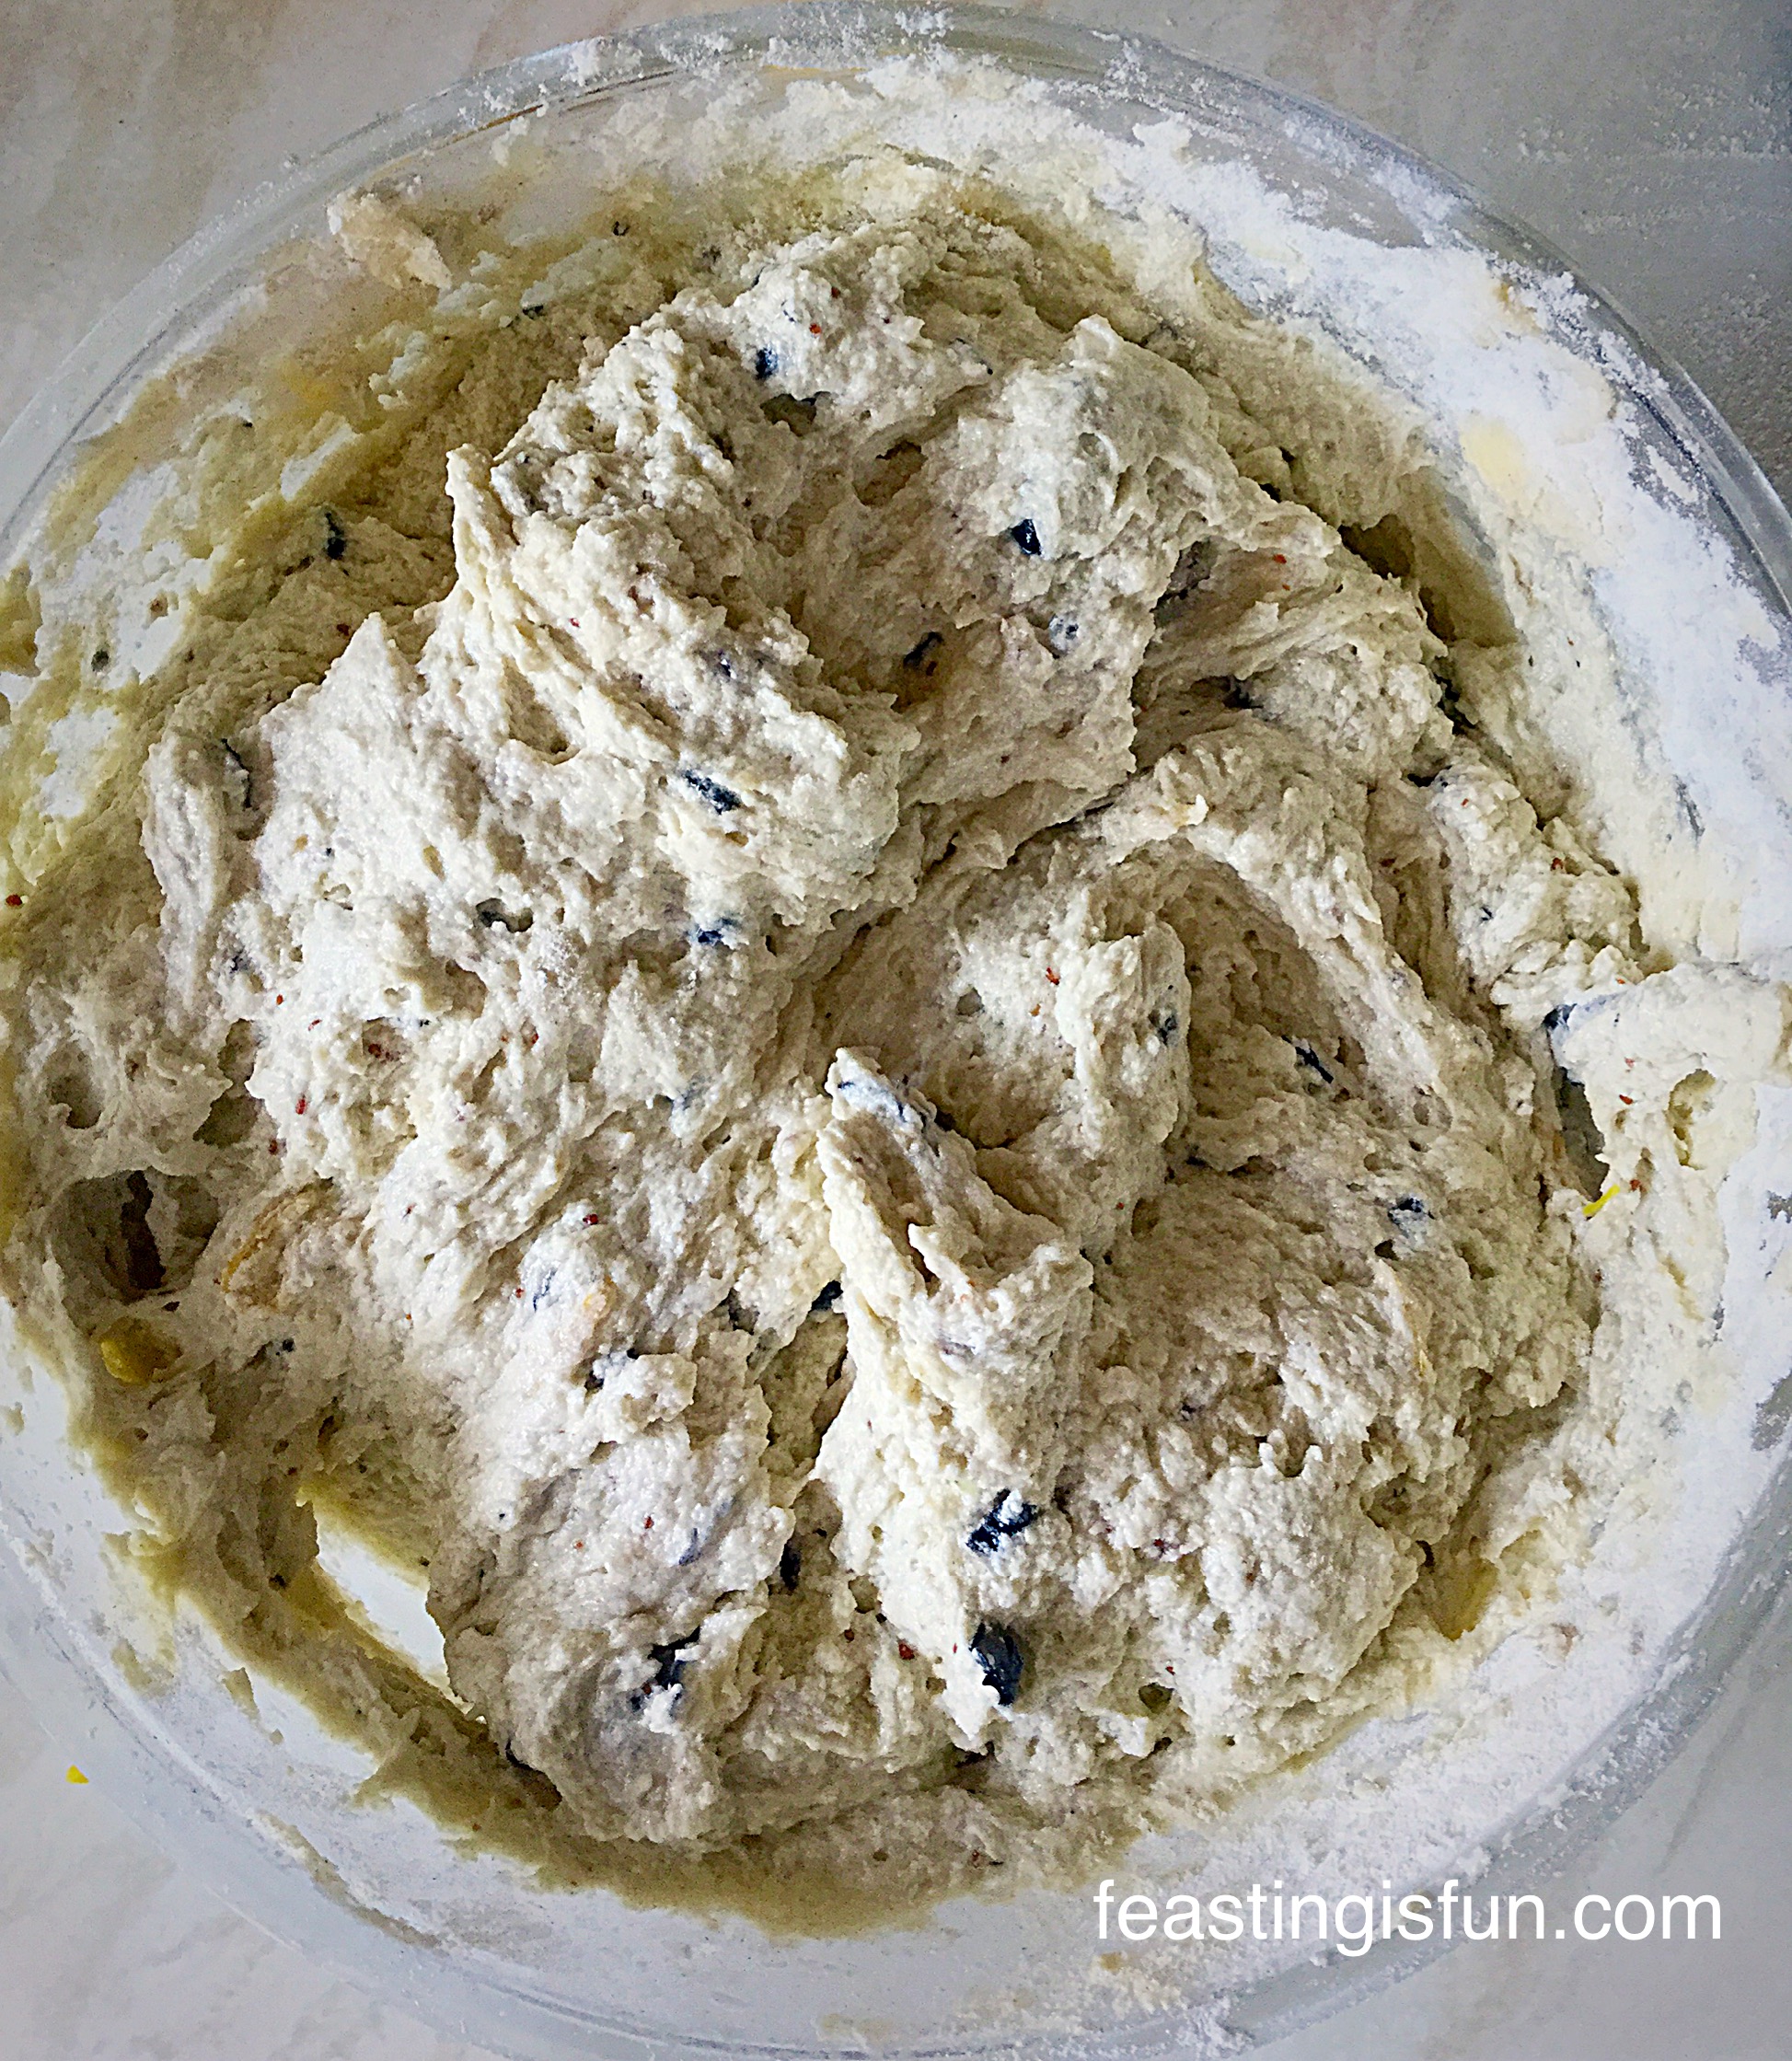
Add two thirds of the blueberries to the batter, the zest of two lemons, one egg and the final third of the dry ingredients. Whisk/beat on a slow speed until just combined.
The cake batter should be smooth with broken up blueberries throughout.
Prepare the Bundt tin by spraying well with Cake Release, or brush with melted butter, ensuring you completely cover all the groves in the pan – then add 2tbsp of plain white flour and rotate the tin ensuring the entire inside has a flour coating. Tip any excess flour out of the tin and dispose.
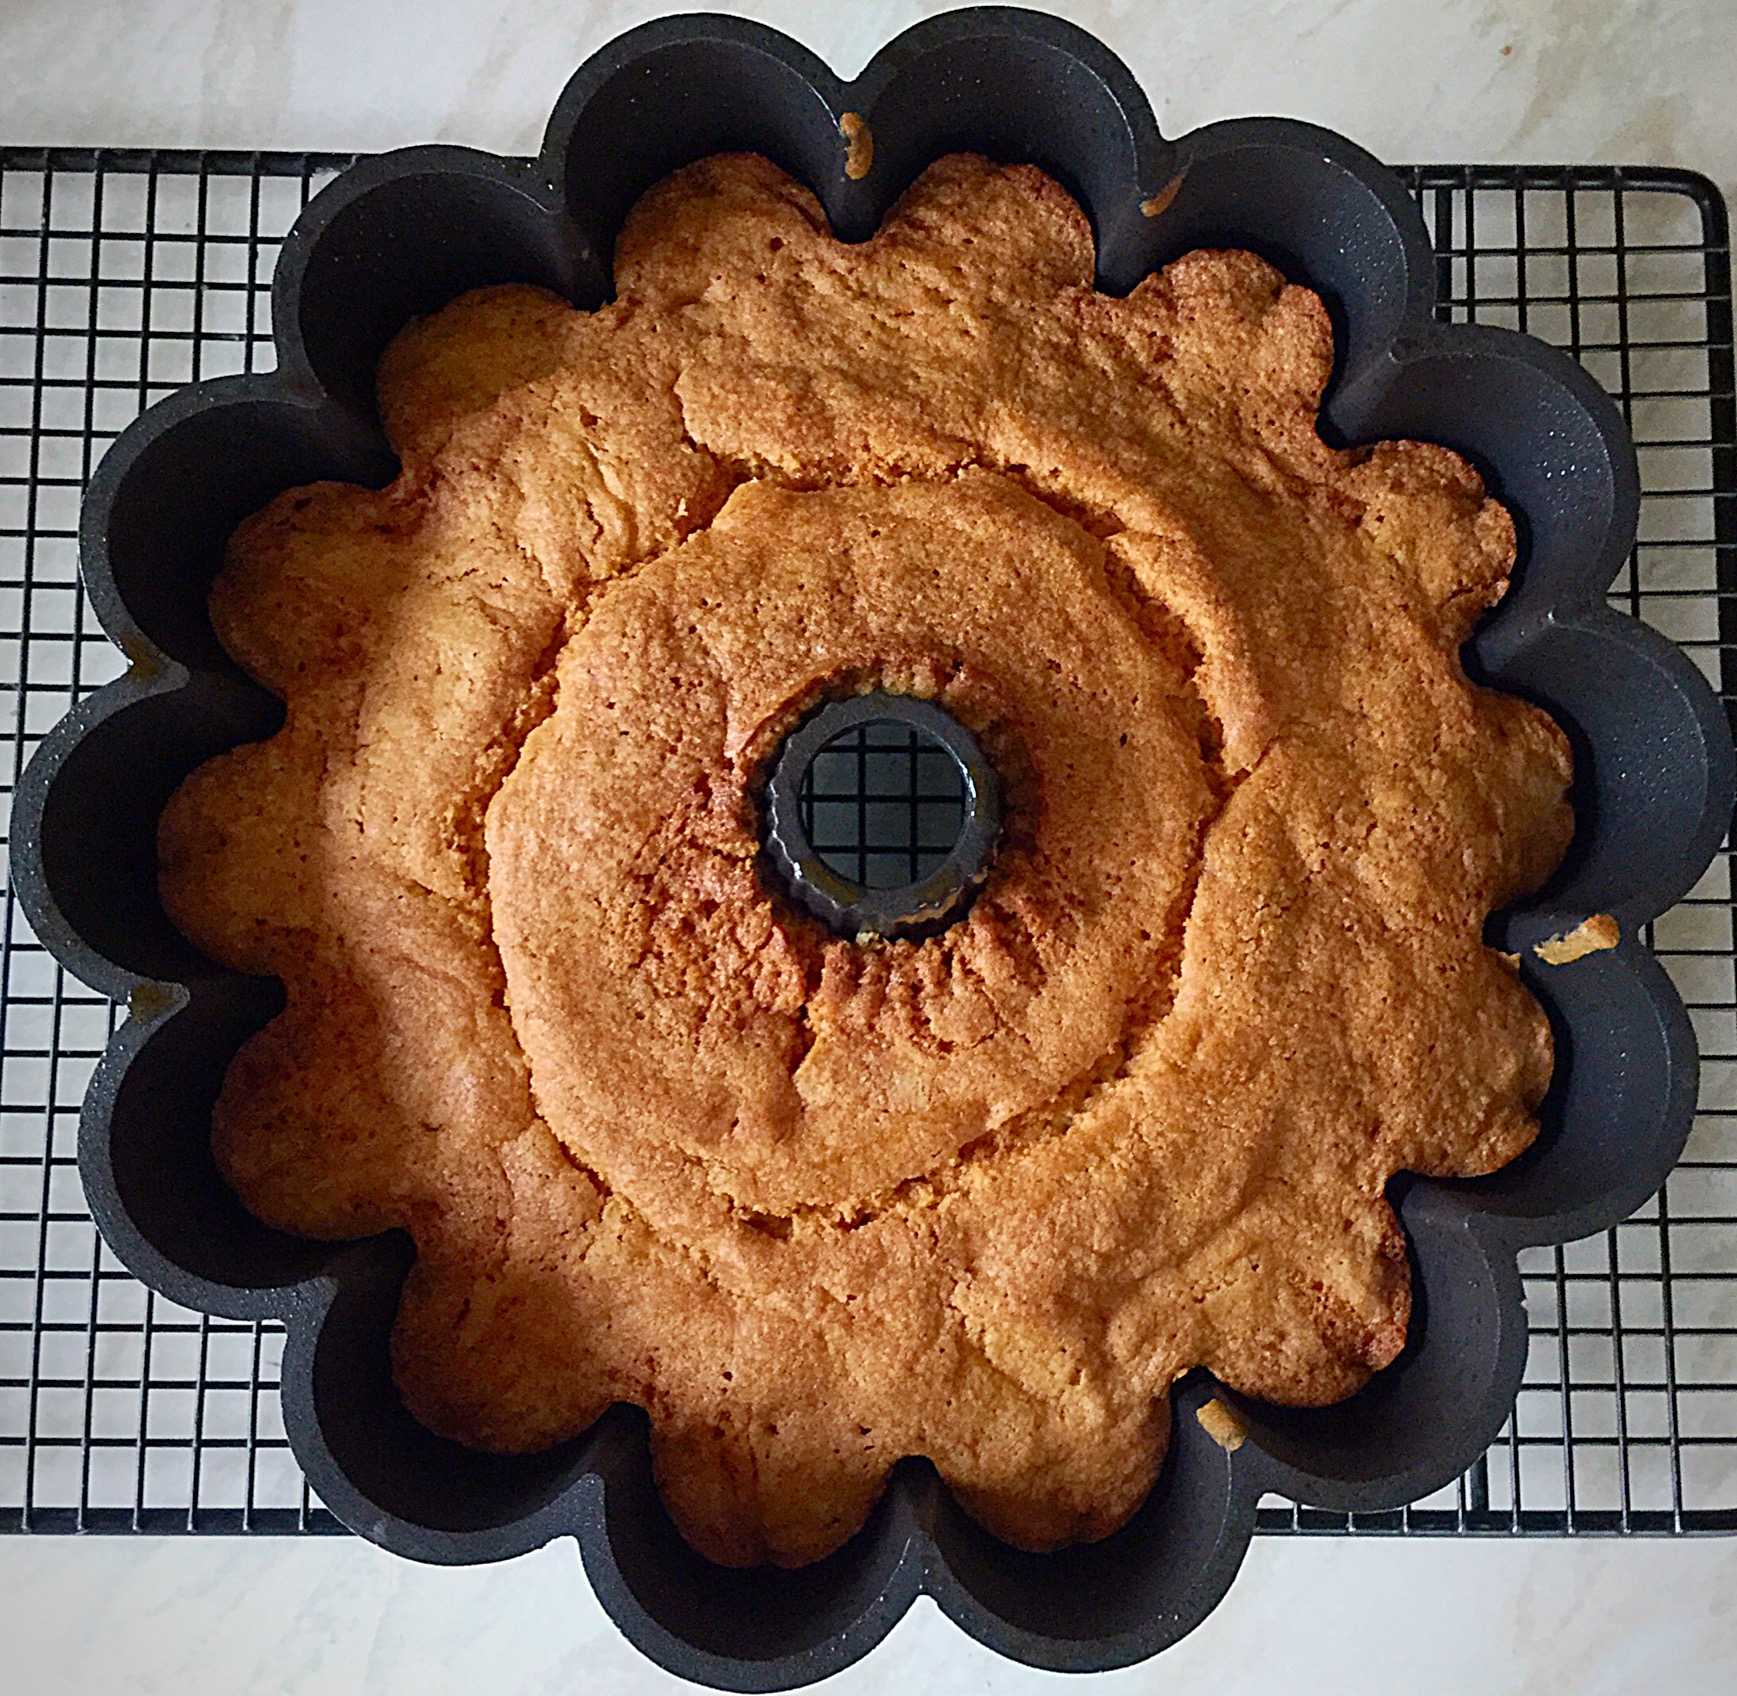
My Blossom Bundt Tin prepared with cake release spray.
Spoon the cake batter into the Bundt tin, pressing down as you do so to ensure the batter fills all the little dips and grooves.
Only fill the Bundt tin 3/4 full. Any excess batter can be baked as cupcakes once the main cake is cooked.
Press the remaining third of the blueberries into the top of the cake.
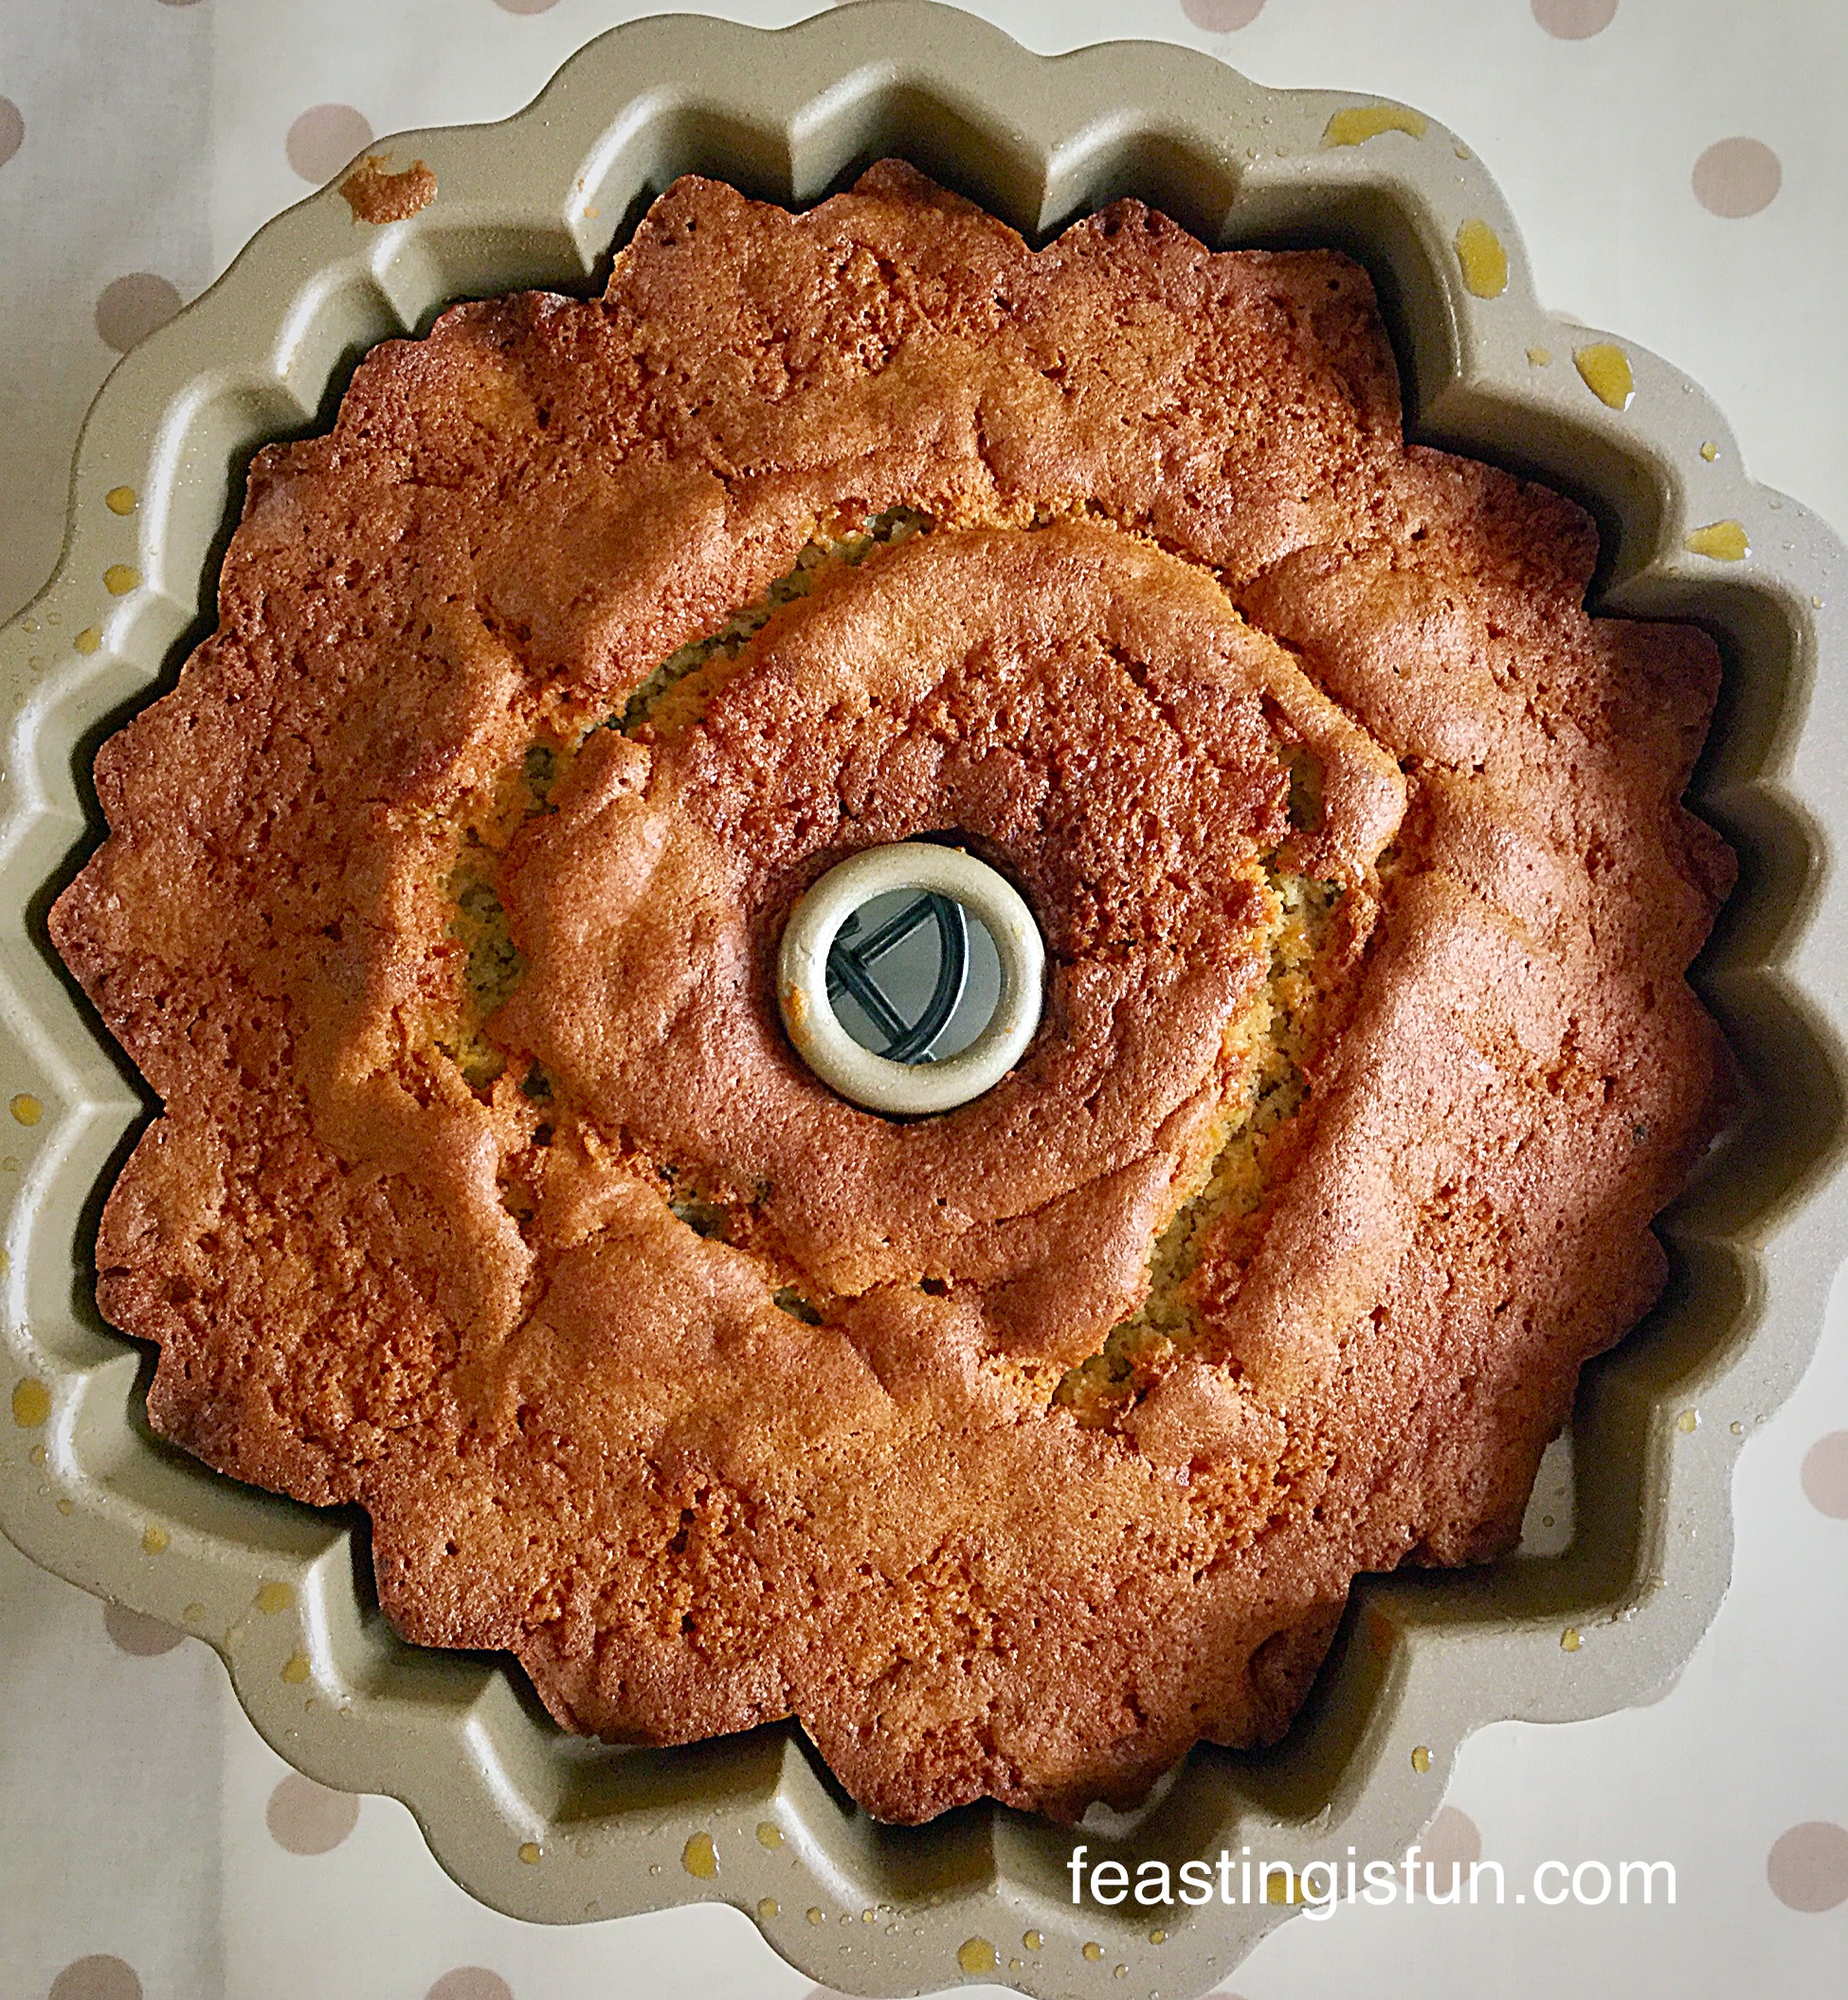
Baking The Bundt Cake
Place the Bundt tin into the middle of the preheated oven.
Bake for 1 hour, or until an inserted wooden skewer comes out clean.
As soon as the cake is baked remove from the oven.
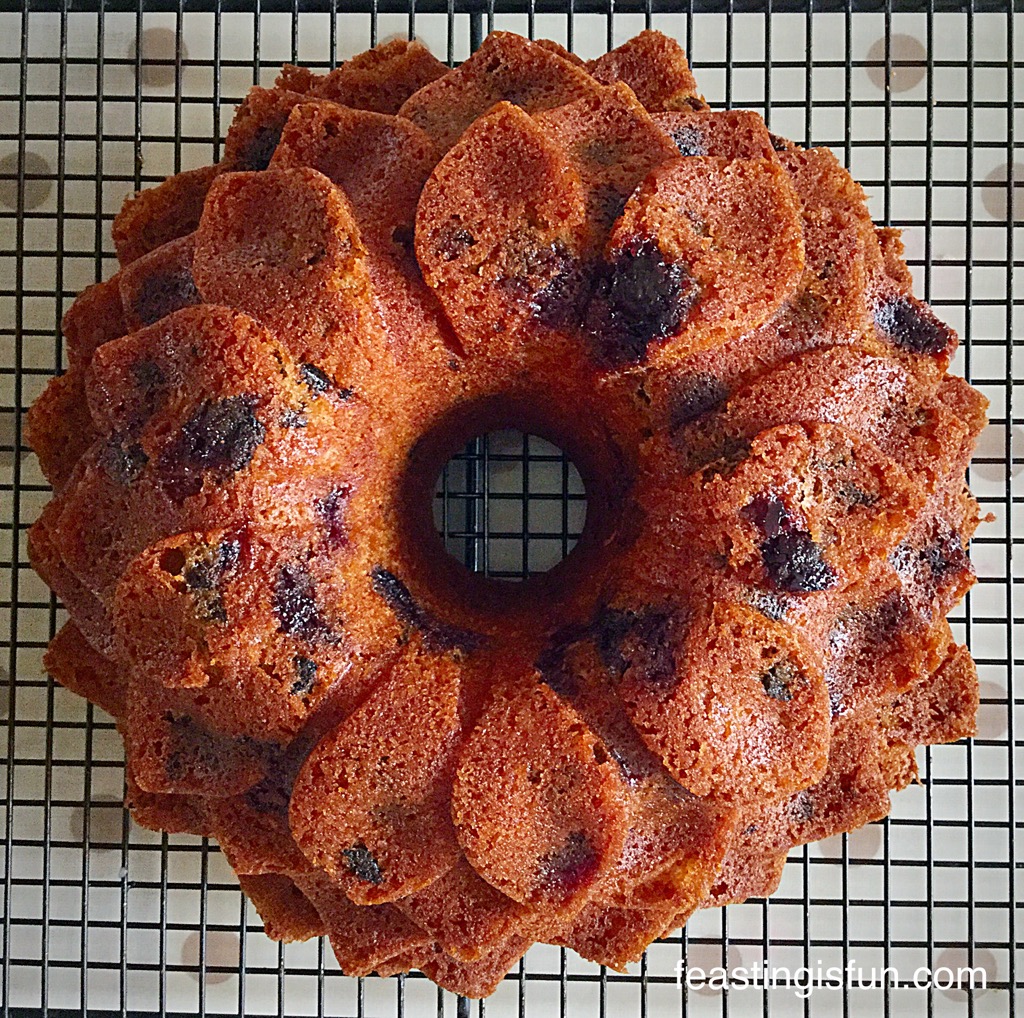
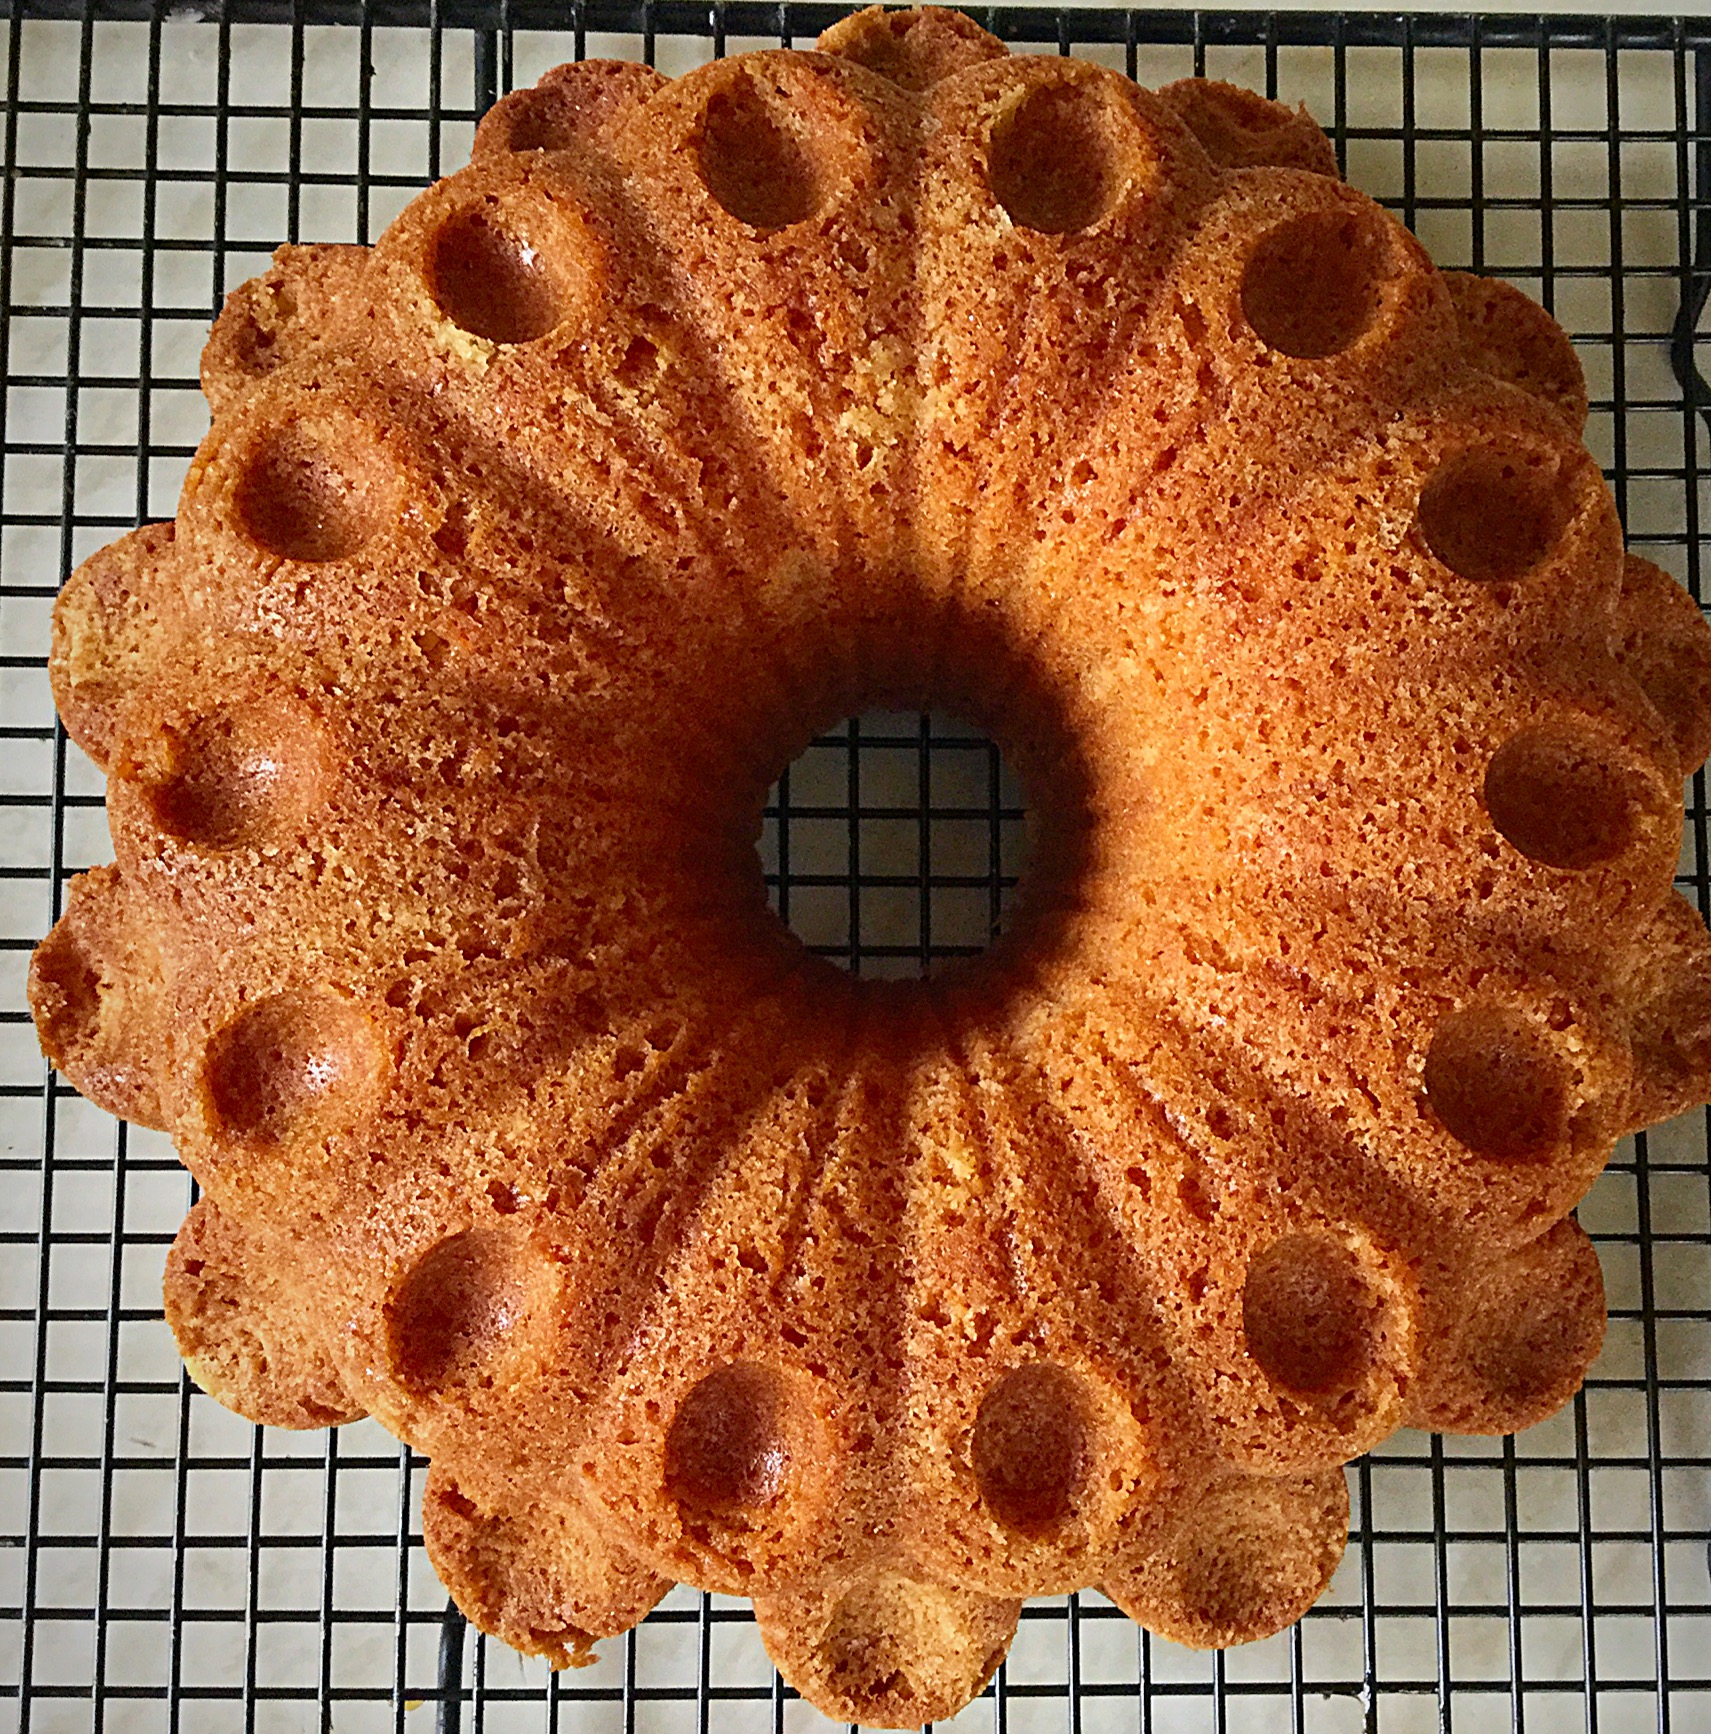
Allow the Lemon Blueberry Bundt Cake to cool in it’s tin for 10 minutes.After 10 minutes turn the Lemon Blueberry Bundt Cake out onto a cooling rack.
See how beautiful this cake is?
A light dusting of icing sugar and this Lemon Blueberry Bundt Cake would be perfect to serve alongside a nice, hot cup of tea or coffee.
Decorating The Bundt Cake
Ensure the cake is completely cold before icing.
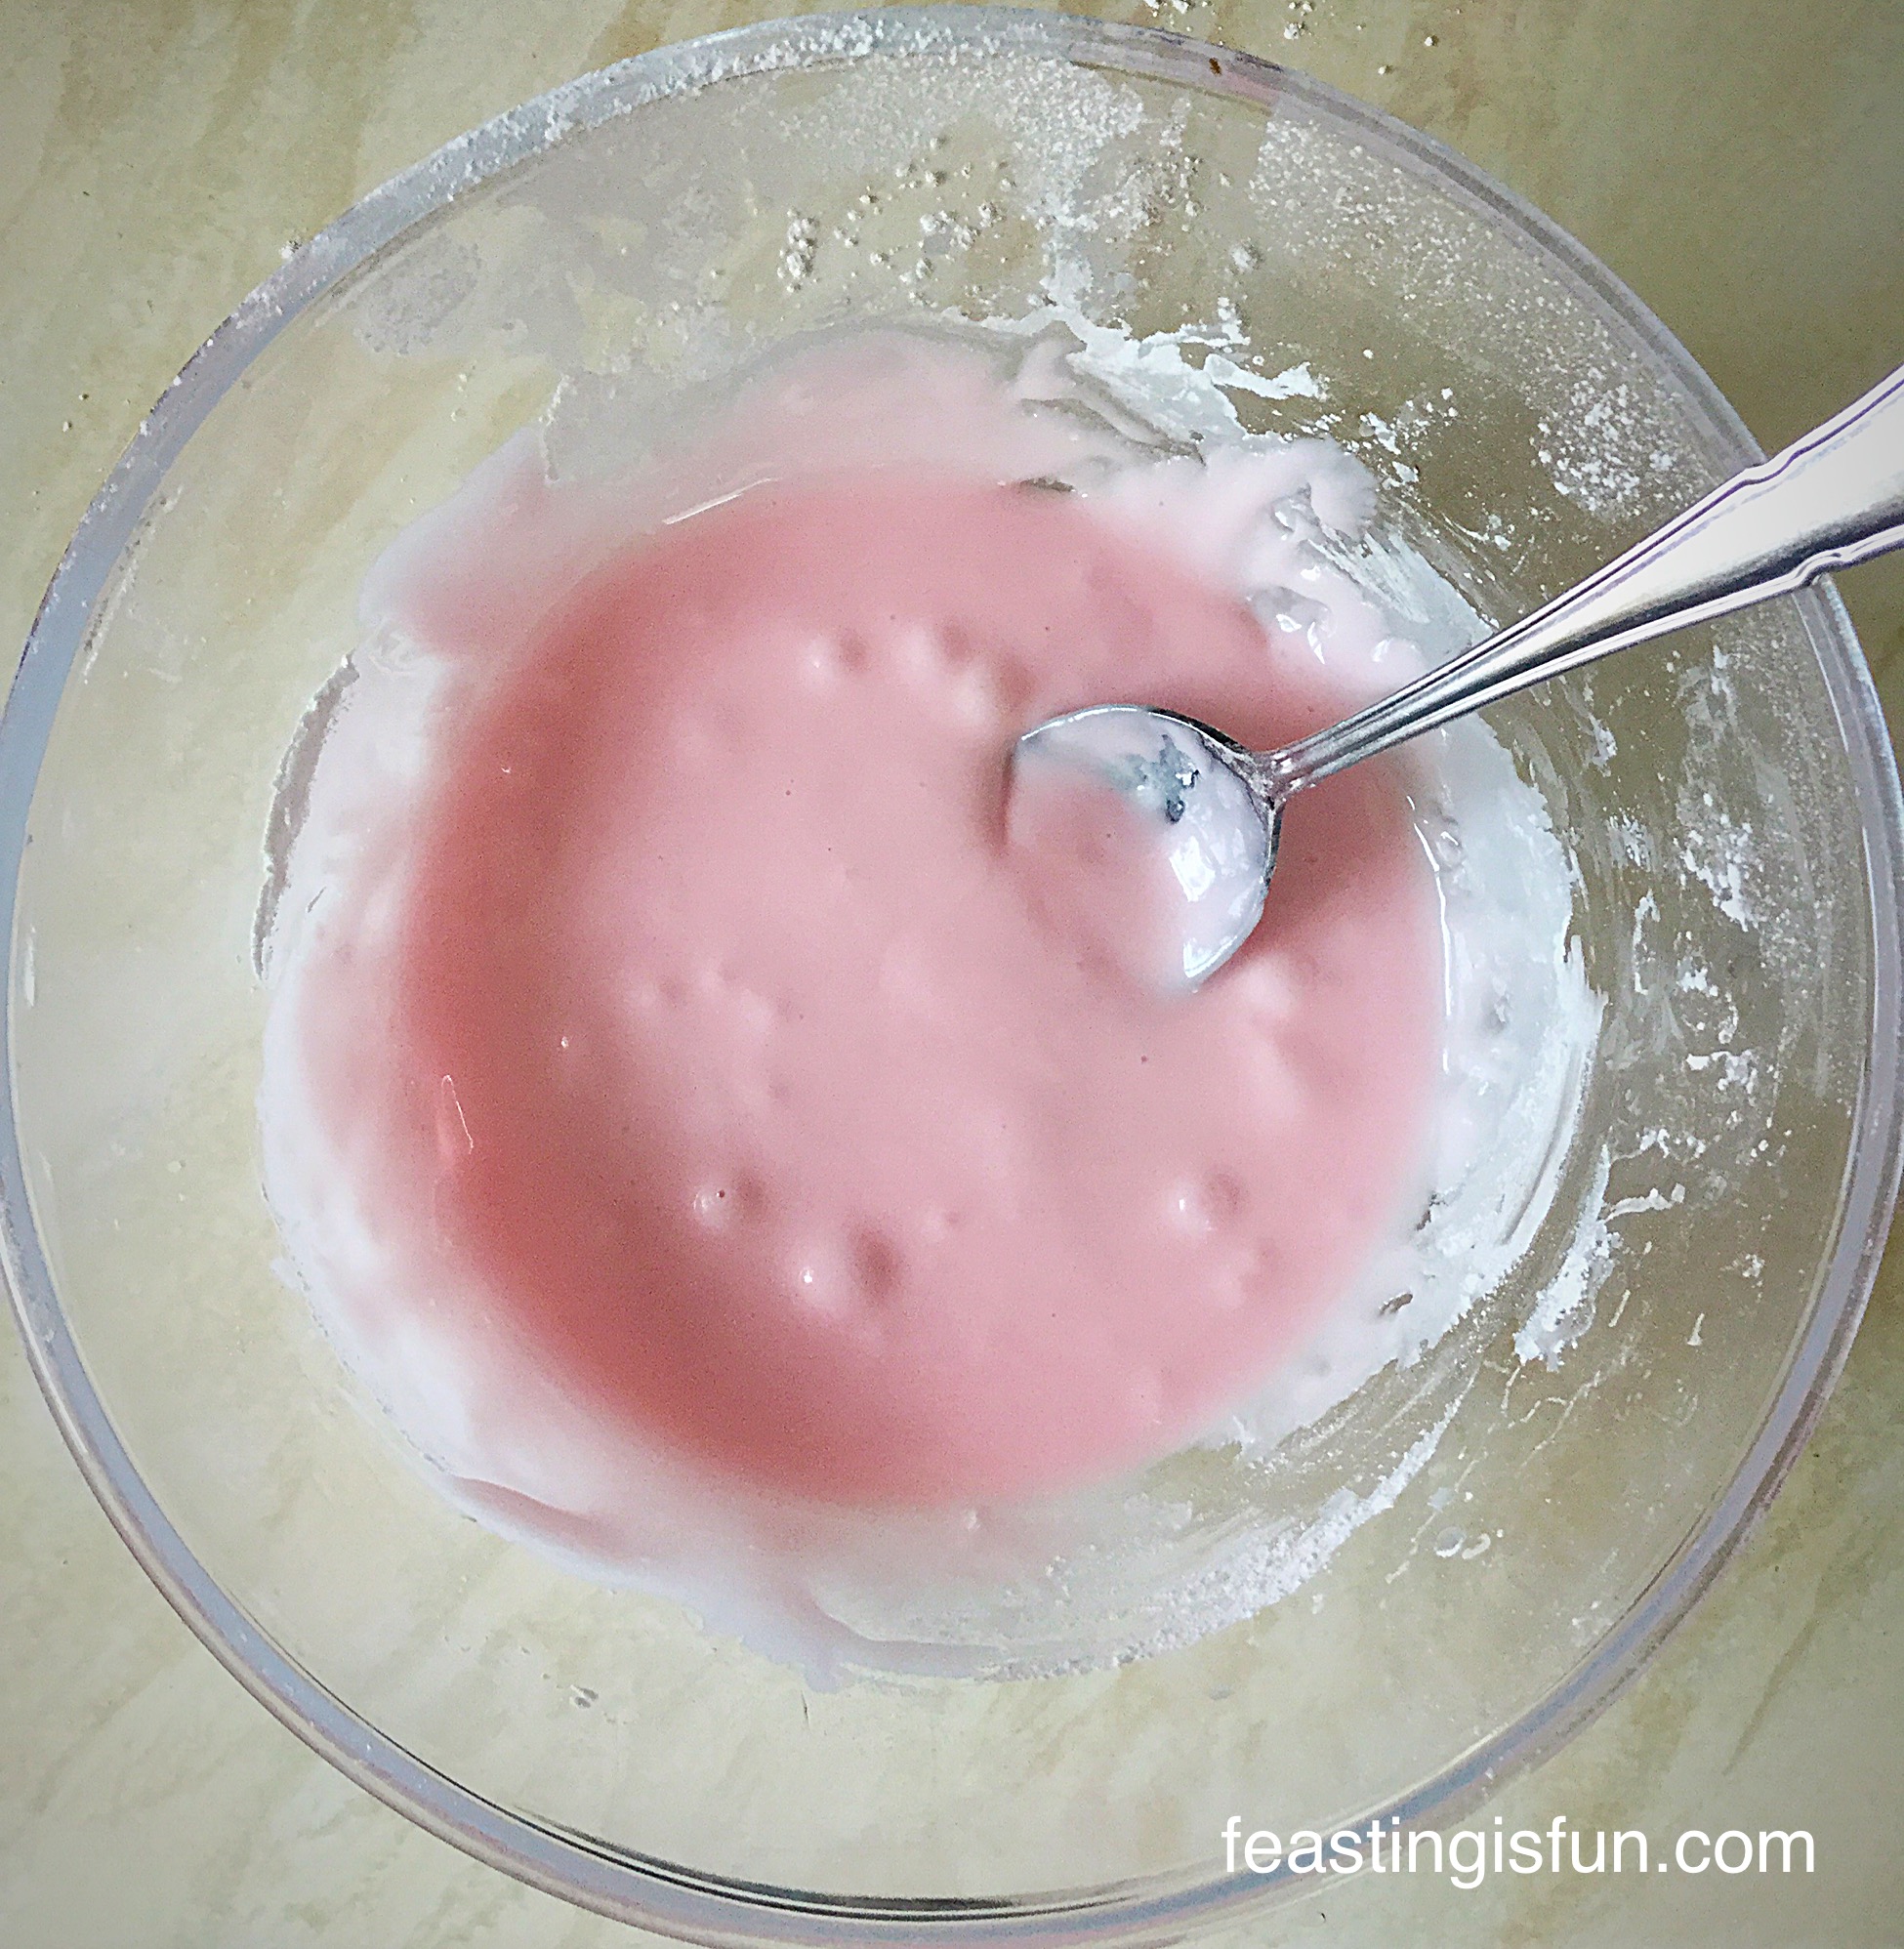
Sift the icing sugar into a large bowl.
Add the lemon juice and stir thoroughly to form a very thick paste – additional water can be added. The icing should hold a figure 8 for a few seconds.
Using a cocktail stick add a tiny amount of yellow gel icing, mix thoroughly, add more colouring until the desired colour is achieved. Mine really was the consistency and thickness of really good custard.
Place the Bundt cake on a rack over a tray – I used a roasting tin, as you will see.
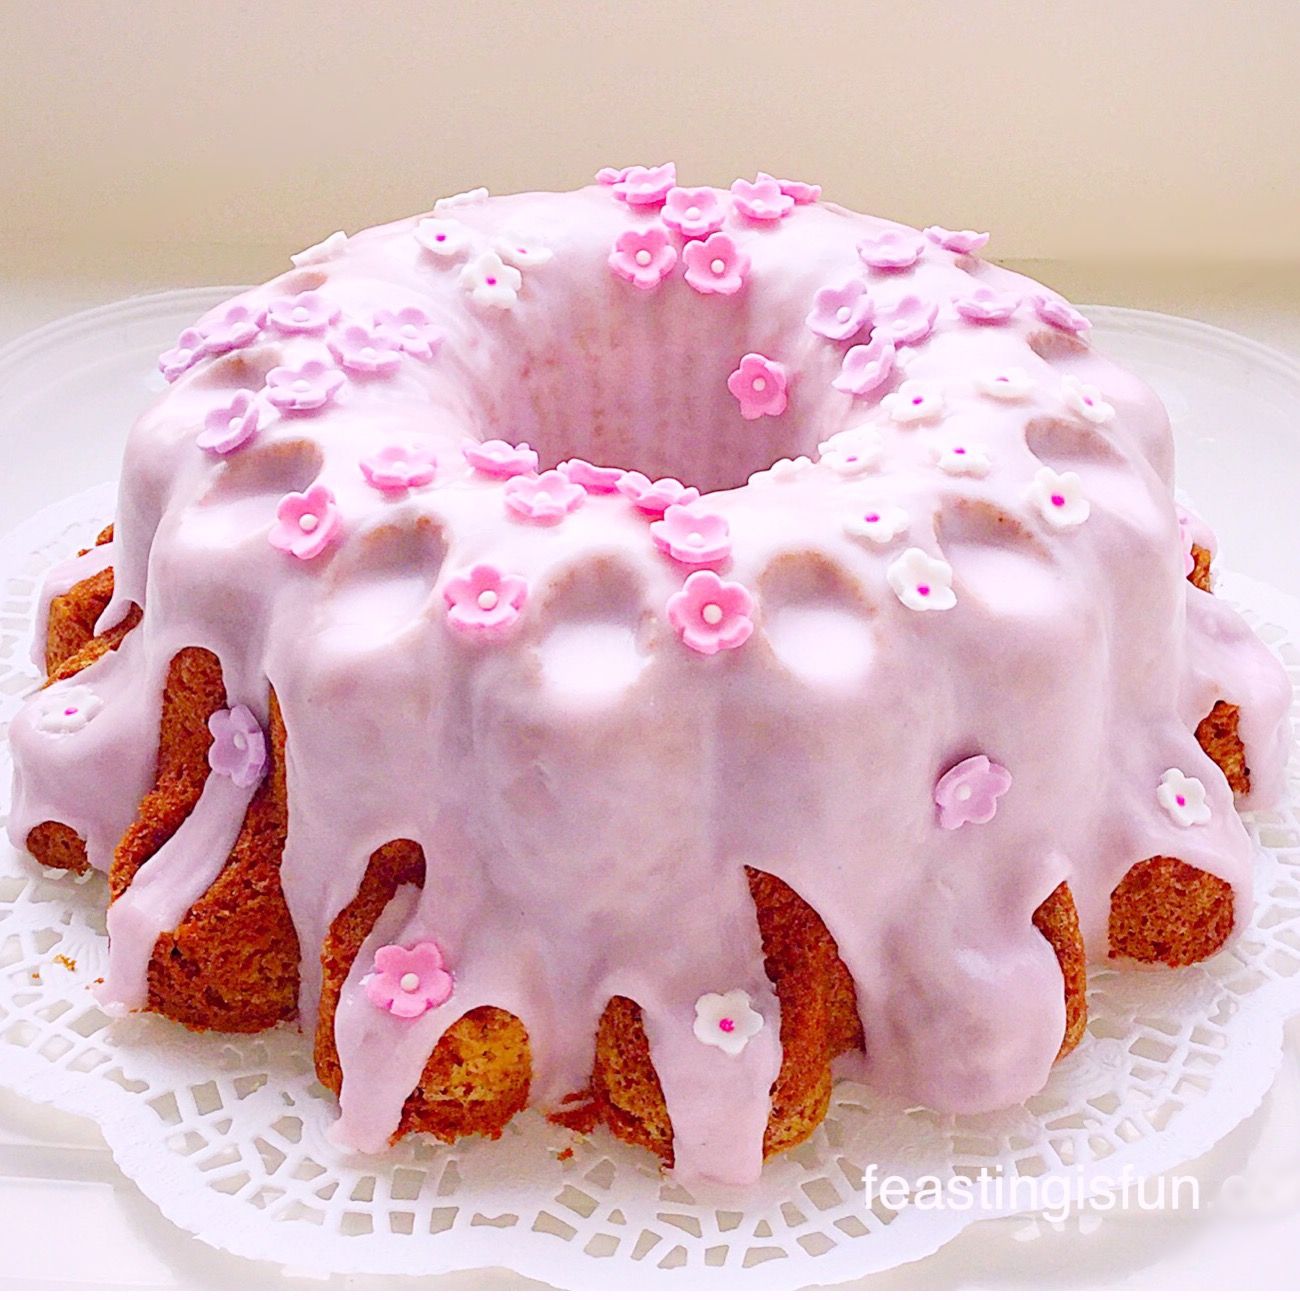
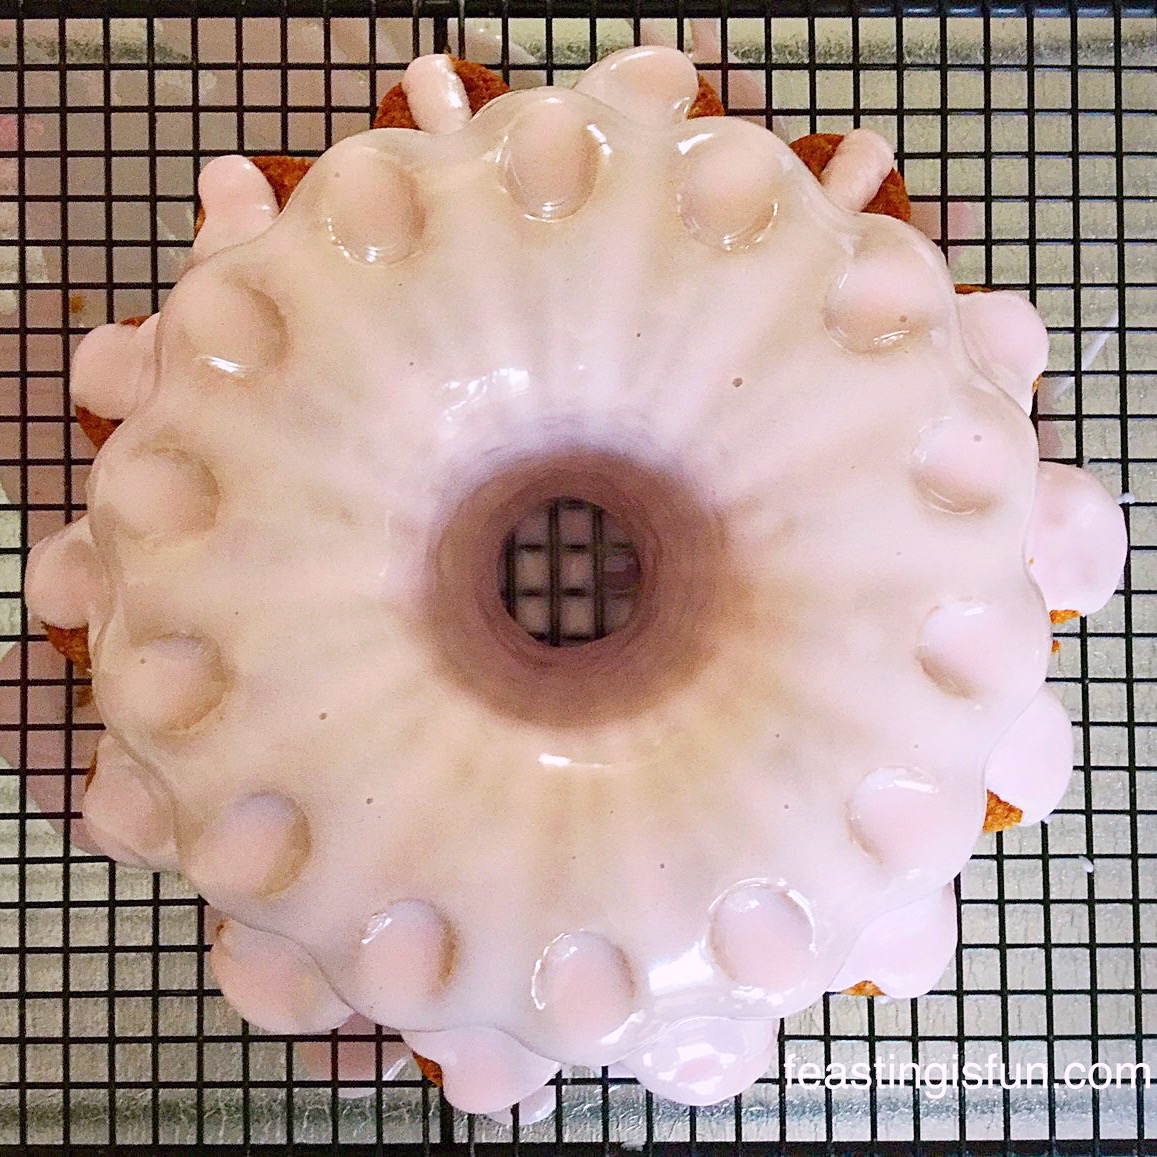
Yellow, lemon flavoured, thick icing.Carefully spoon the thick, lemon icing over the cake.
Starting at the top of the cake, spoon over the thick icing evenly.
Allow gravity to work and let the icing slowly drip down the cake.
Fill in gaps with more icing until the whole cake is completely covered.
I did spoon some of the icing, from the tray underneath, back over the cake to fill in gaps – just beware of cake crumbs!
As soon as the cake is completely covered and has settled – the icing is no longer moving – carefully place the cake onto a board/cake stand.
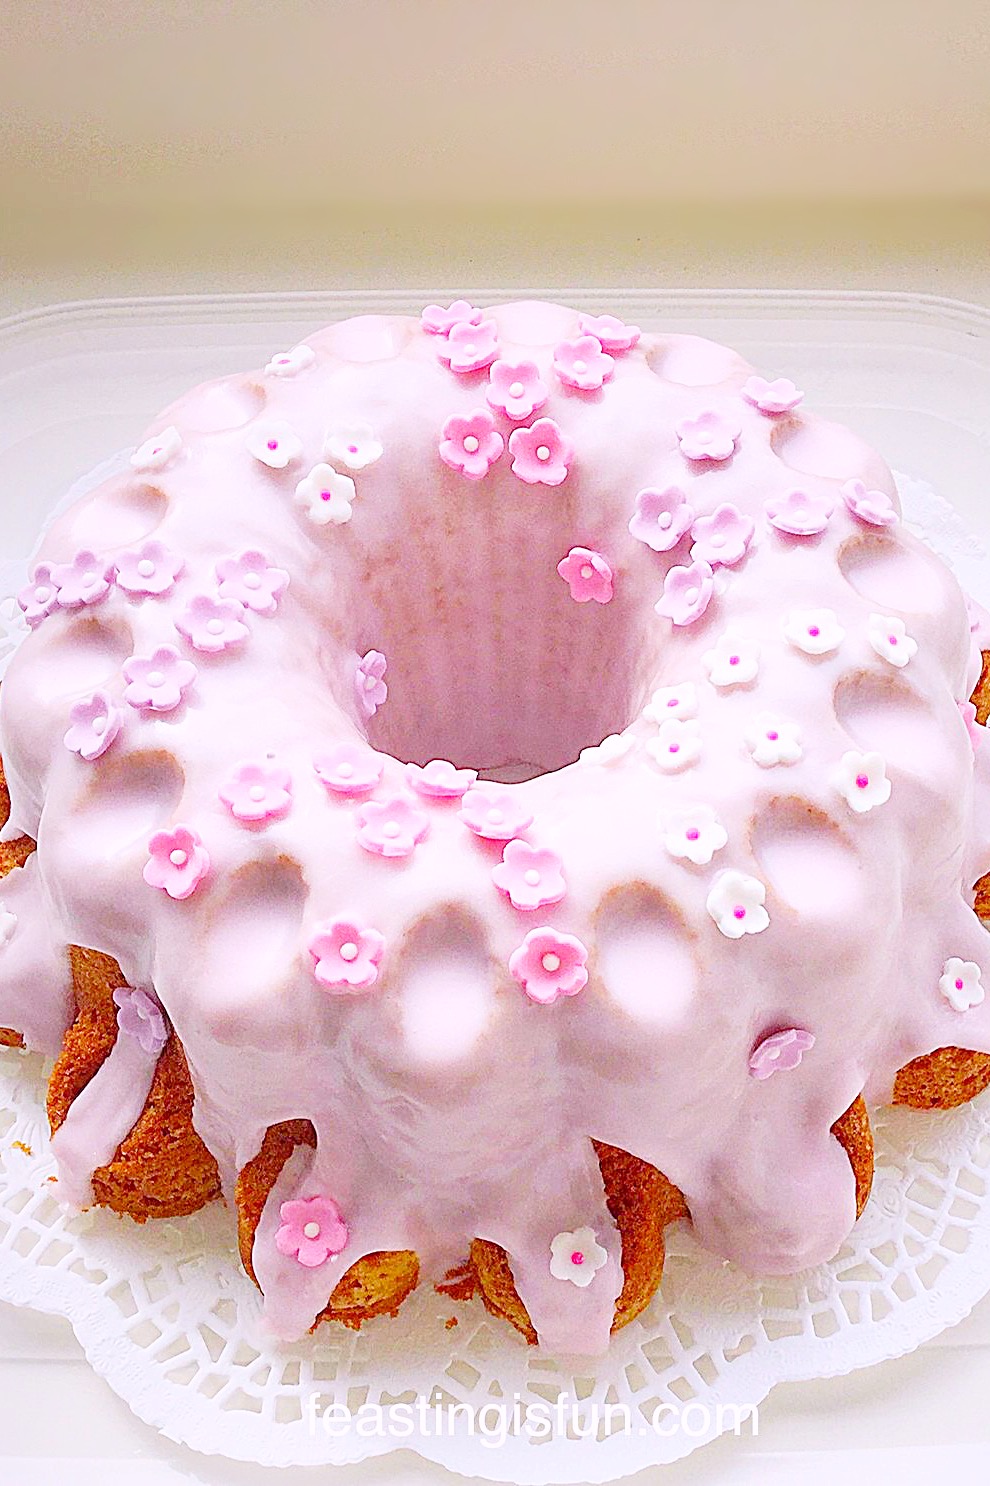
Add any further decorations whilst the icing is still slightly wet.
Set the cake aside to dry.
Take lots of photographs and give yourself a big pat on the back for creating such a beautiful Lemon Blueberry Bundt Cake.
The Finshed Cake
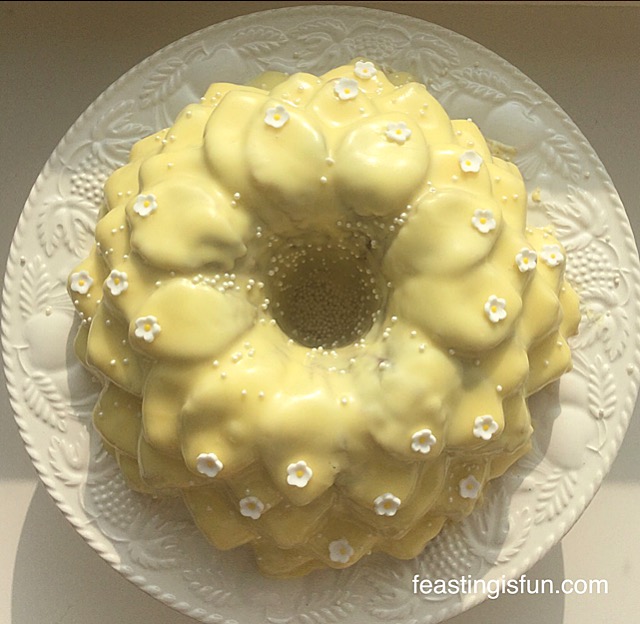
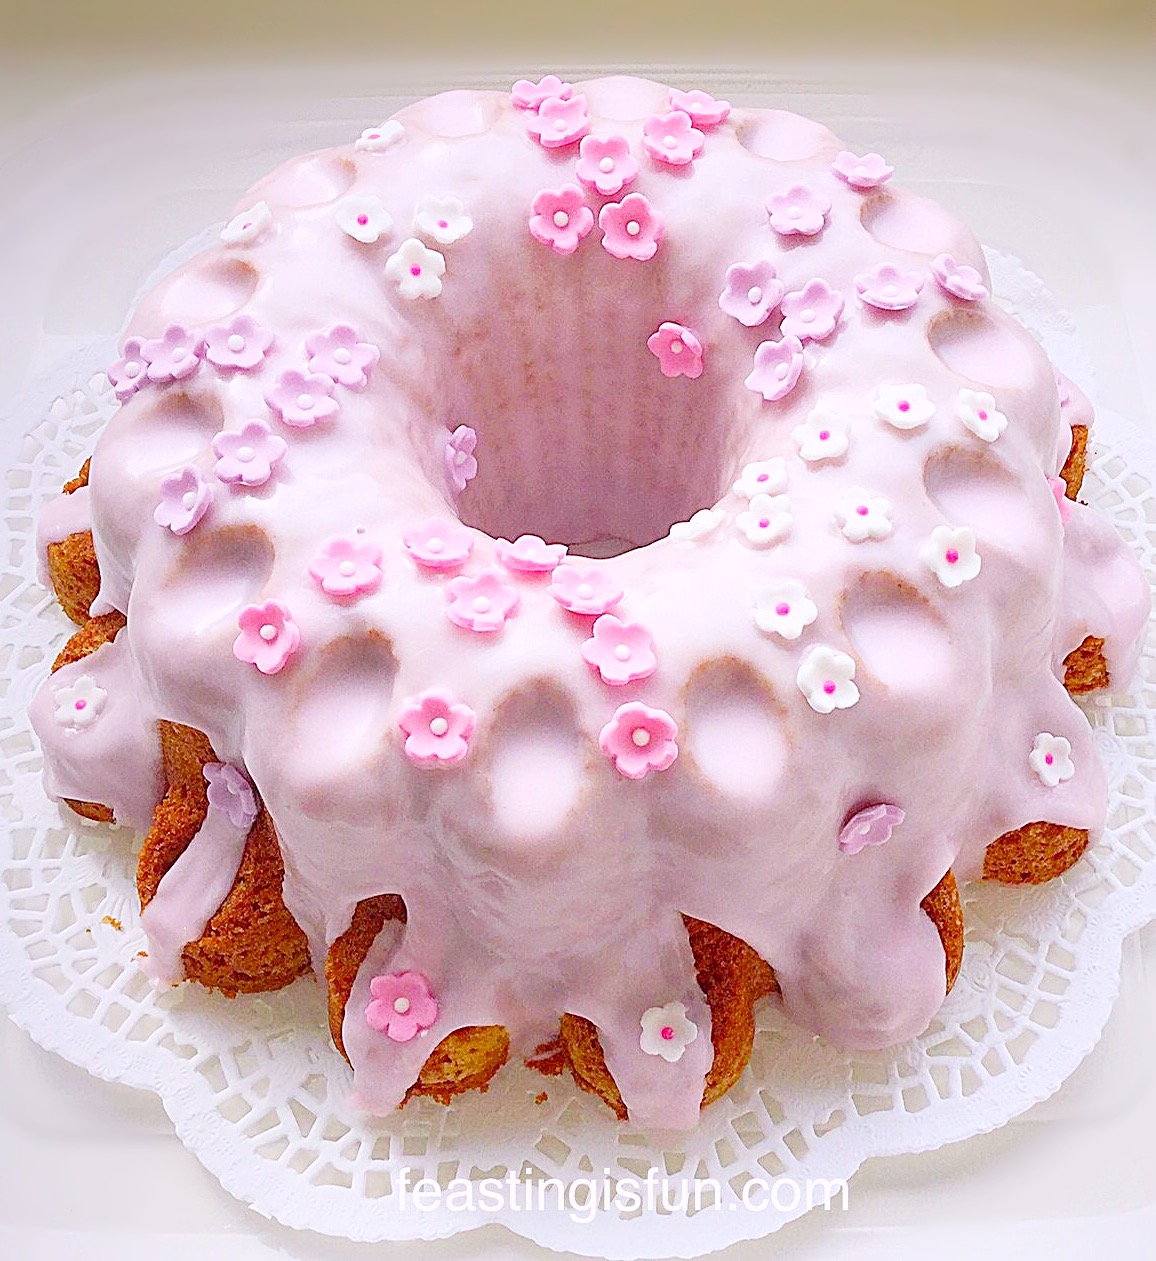
Lemon Blueberry Bundt Cake covered in a delicious lemon glaze.
This Lemon Blueberry Bundt Cake is certain to cheer up anybody’s day and they get a vitamin C boost as well!
While it may sound silly, looking at this cake really makes me smile. Also, in some ways it is a reflection of my personality, sunny whatever the weather.
If you like this Lemon Blueberry Bundt Cake you may also enjoy these:
Since I have discovered Bundt pans I have added more and more to my collection. When I bake with them I know that the cake will turn out beautiful. And if I’m not able to decorate the cake I am assured that it will look finished. As a result I am a firm Nordicware Bundt Pan fan!
So whatever you are making, baking and creating, have fun preparing and sharing your feast.
Sammie xx
No part of this post may be reproduced or duplicated without the written permission of the owner. Please see my Disclosure Policy
Waffles, I have been wanting to make my own forever – very slight exaggeration there, honestly though for a long time. I was sent an Andrew James Waffle Maker, by Andrew James UK Ltd to review and set myself the challenge of also coming up with a few recipes along the way!
Chocolate Dunking Waffle anyone????
When reviewing a product, especially a non-essential kitchen item, which is what I would have classed the Andrew James Waffle Maker as, I’m pretty tough. If another gadget or electrical appliance is going to take up precious space in my already overcrowded kitchen, well, it’s got to earn its place.
So I look for durability, consistency, versatility, ease of use and the one we all love to hate, how easy is it to clean. I’m a home cook, not a chef, but I still want good quality and a variety of recipes, in order for an appliance to warrant being kept.
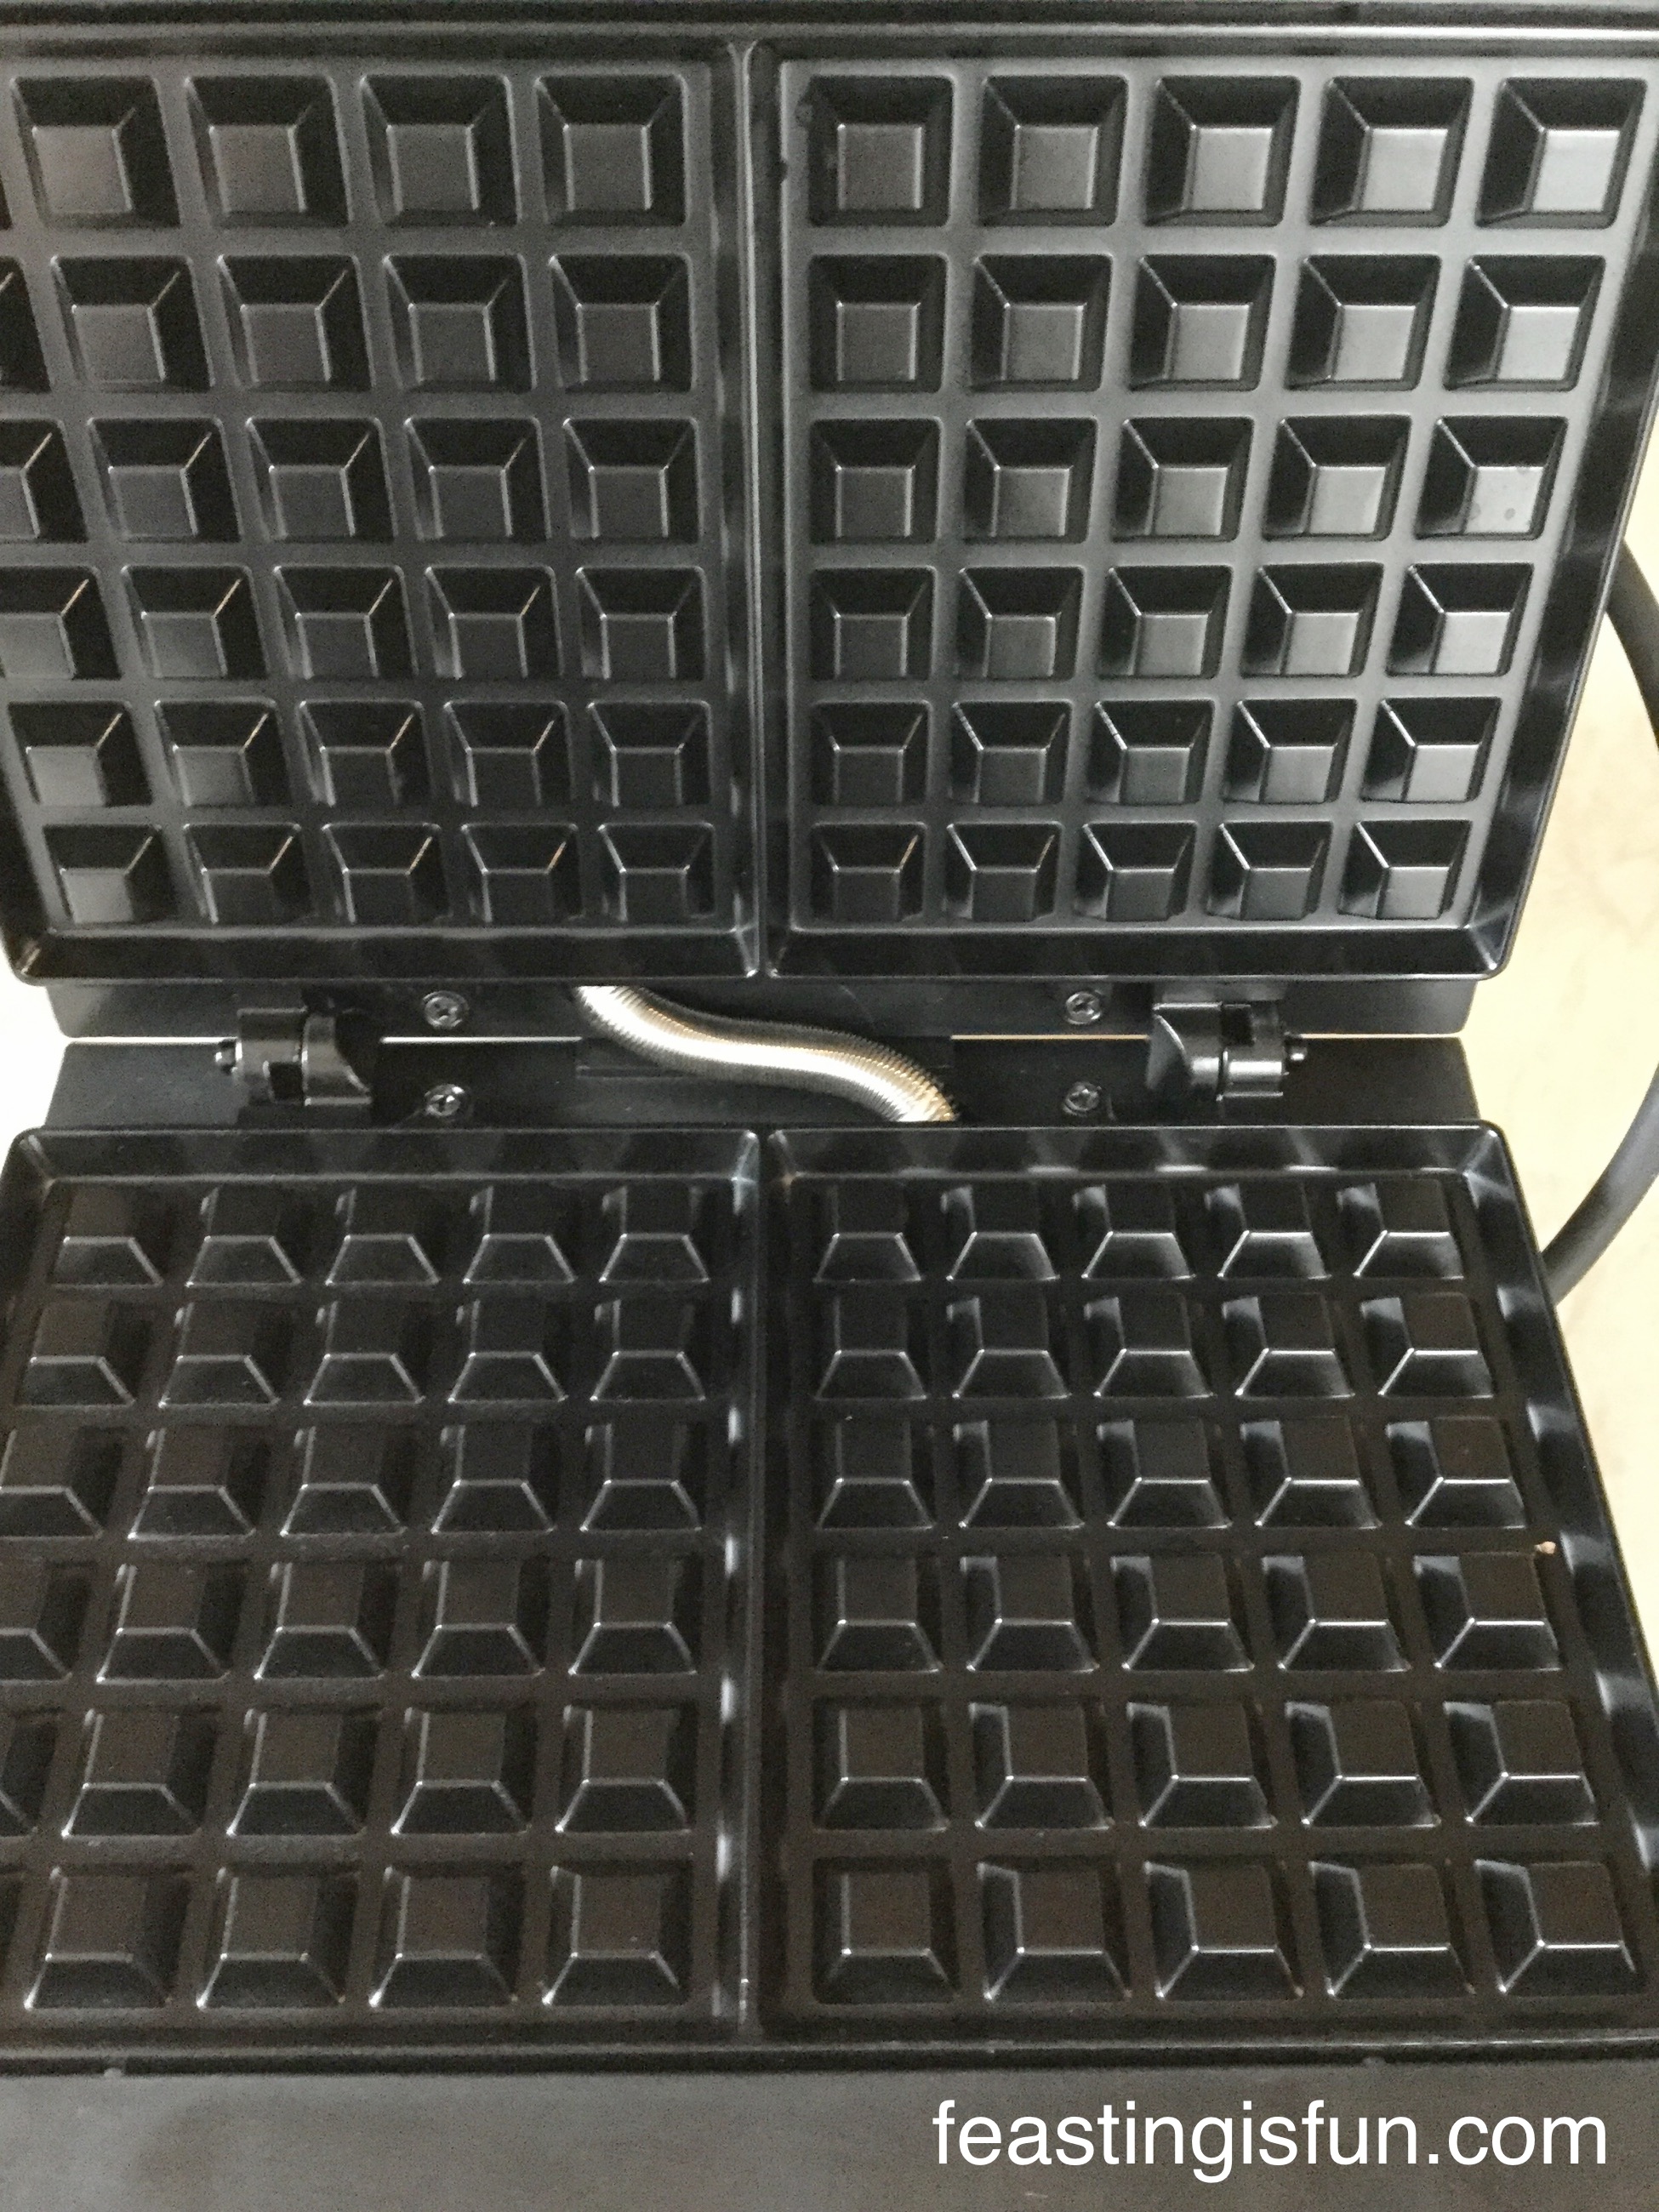
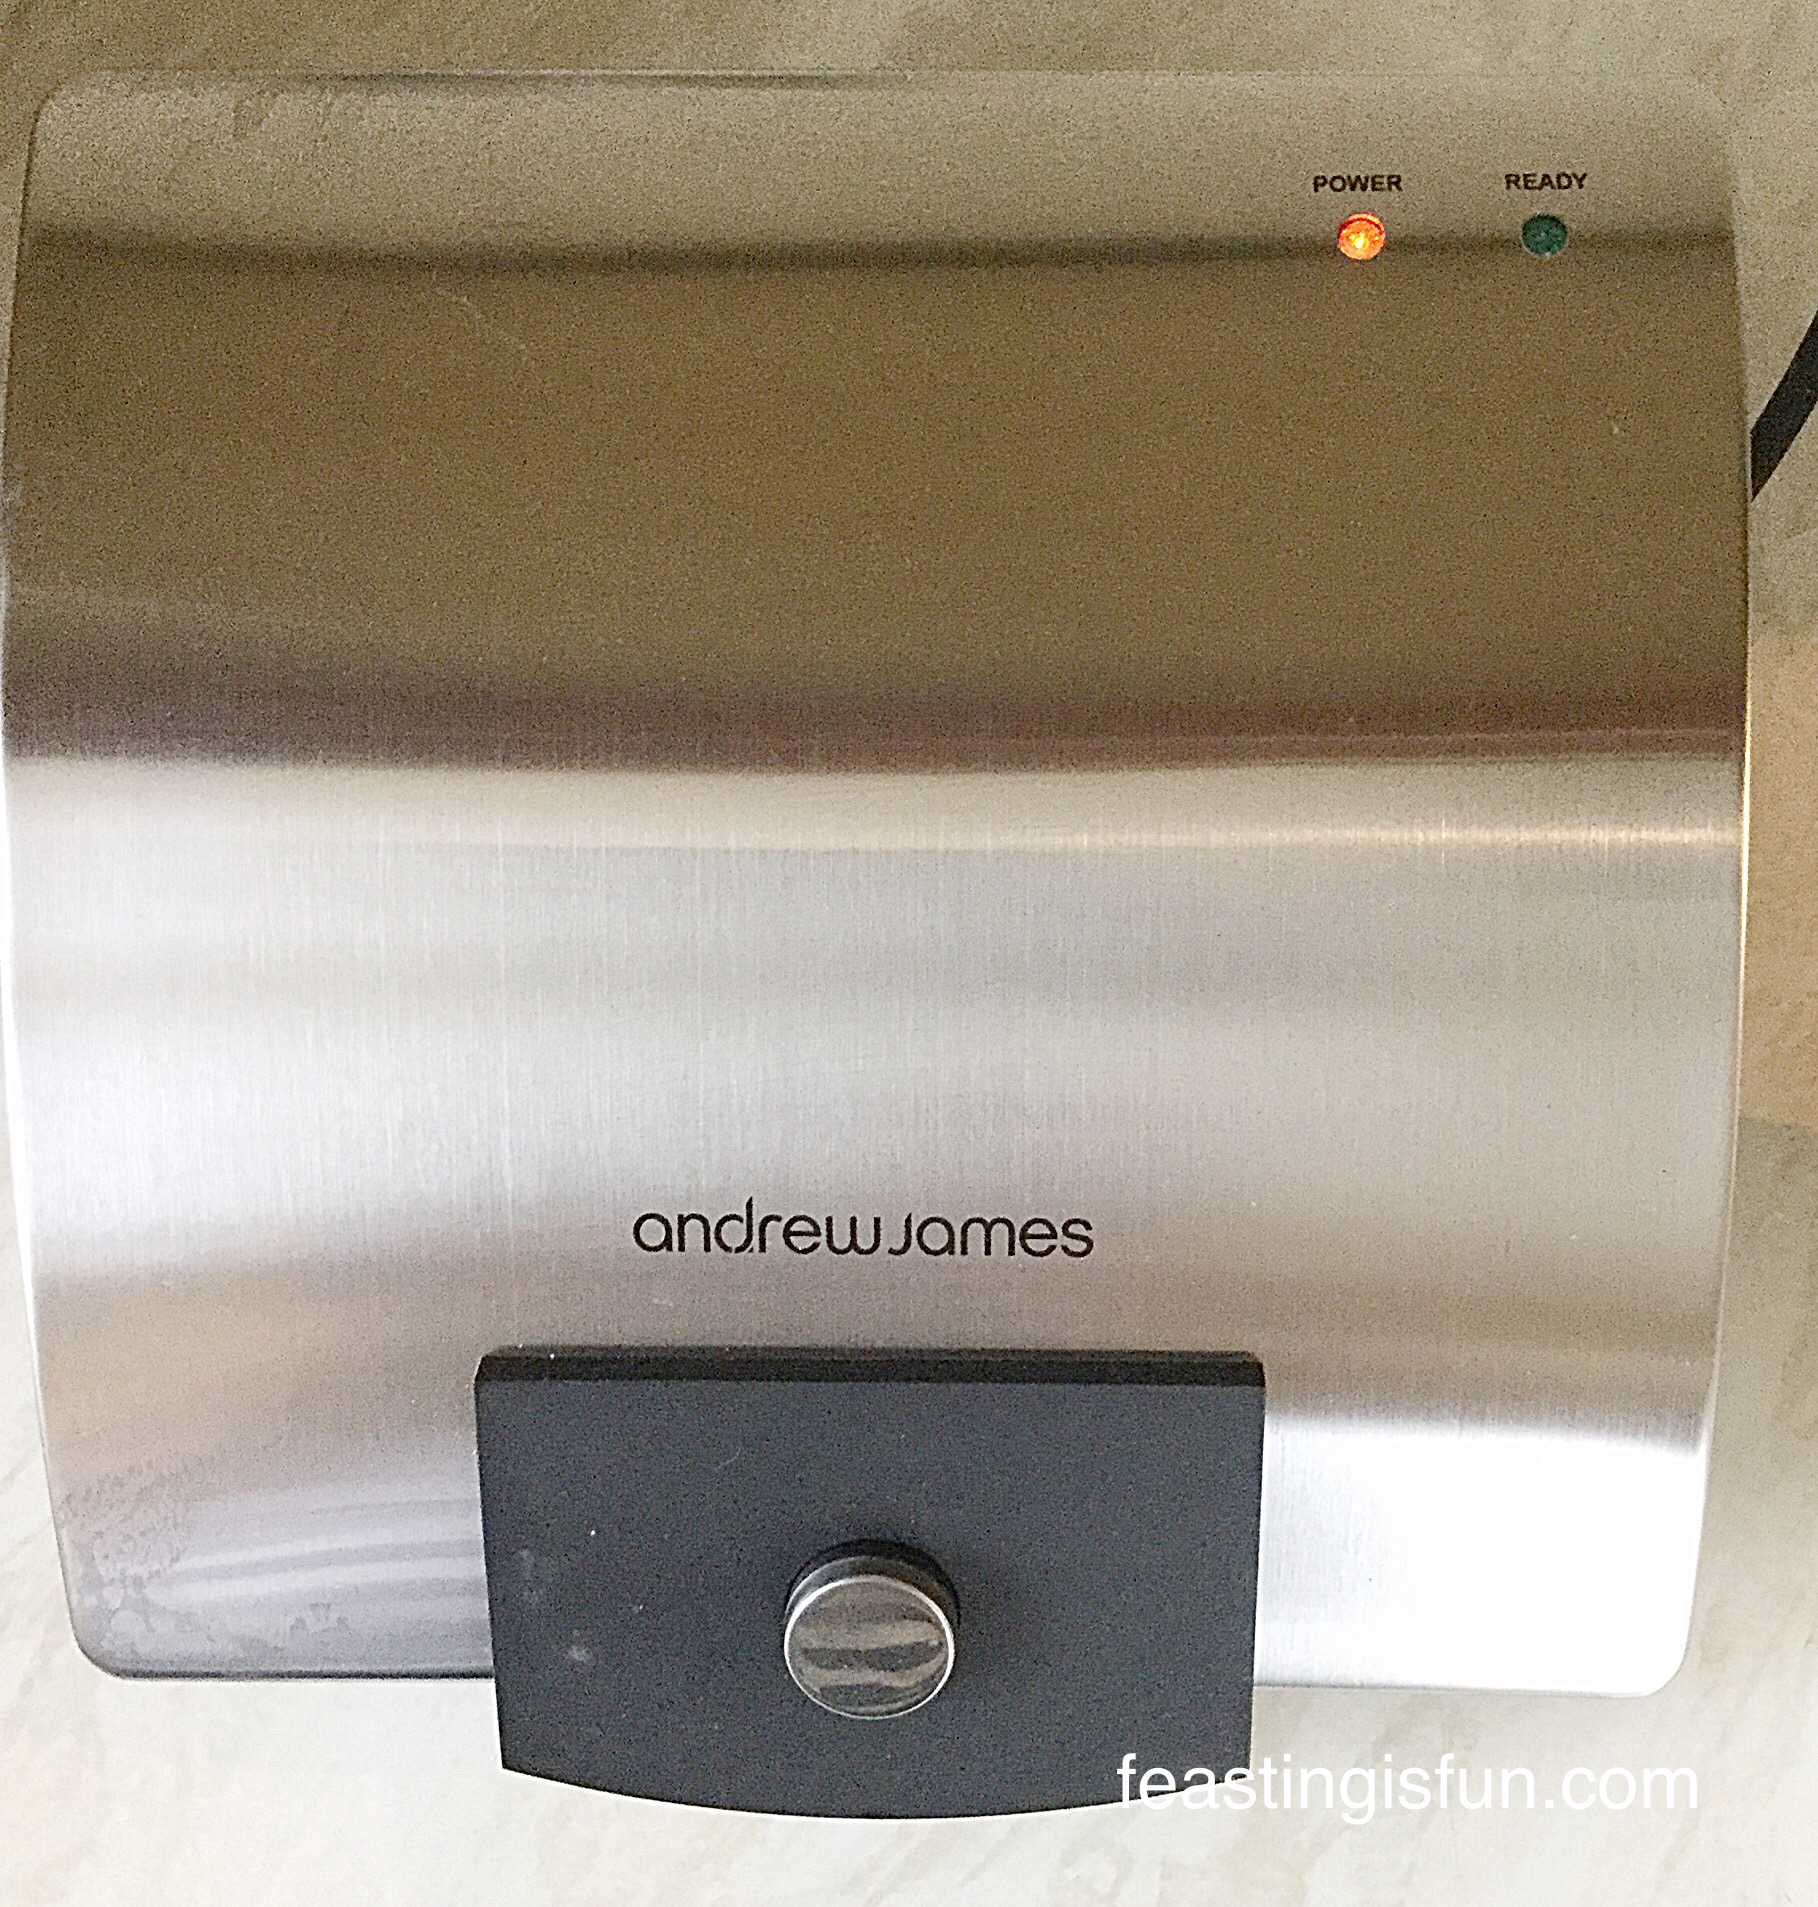
This is the Andrew James Waffle Maker that I reviewed.
Firstly I was impressed with how well the Andrew James Waffle Maker was packaged. There wasn’t any excess space in the box and the sides of the waffle maker were protected with polystyrene. Actually after use, once cooled and cleaned, I store it, in it’s protective packaging, back in the box.
I read through the instruction booklet, which was easy to follow, brief and concise. Before use it is recommended to wipe over the waffle maker, including the waffle plates with a clean damp cloth. This I did.
Press the big button and this is what the Andrew James Waffle Maker looks like.
The instruction booklet recommends wiping over the waffle plates with butter/vegetable fat, prior to each use, to maintain the non stick waffle plates. Having square ridges on the waffle plates meant this could potentially be quite tricky. Instead I opted to brush melted butter onto the plates with a soft pastry brush, although a silicone brush would be suitable as well. Using melted butter also ensures, that as it cools on the cold waffle plates, you can see if you have evenly covered the plates.
Using the Andrew James Waffle Maker for the first time, I decided to make a batch of Vanilla Bean Waffles.
Vanilla Bean Waffles – ooh so good.
As each waffle recipe calls for melted butter, that has been cooled, I melted an extra 20g of butter (than called for in the recipe), specifically for brushing onto the waffle plates.
Once the waffle plates have been brushed with melted butter, close the waffle maker and switch on via the plug. An orange light illuminates on the top of the waffle maker to show it is switched on. When the green light illuminates, the waffle maker is ready to use.
Andrew James Waffle Maker orange light indicates that it is heating up.
From the time of switching on ALWAYS use suitable heat protection for your hands whilst using.
I found it very easy to open and close the waffle maker whilst wearing oven gloves. Also be aware that the top and sides of the waffle maker get very hot!
Once the green light illuminates you can start cooking your waffles.
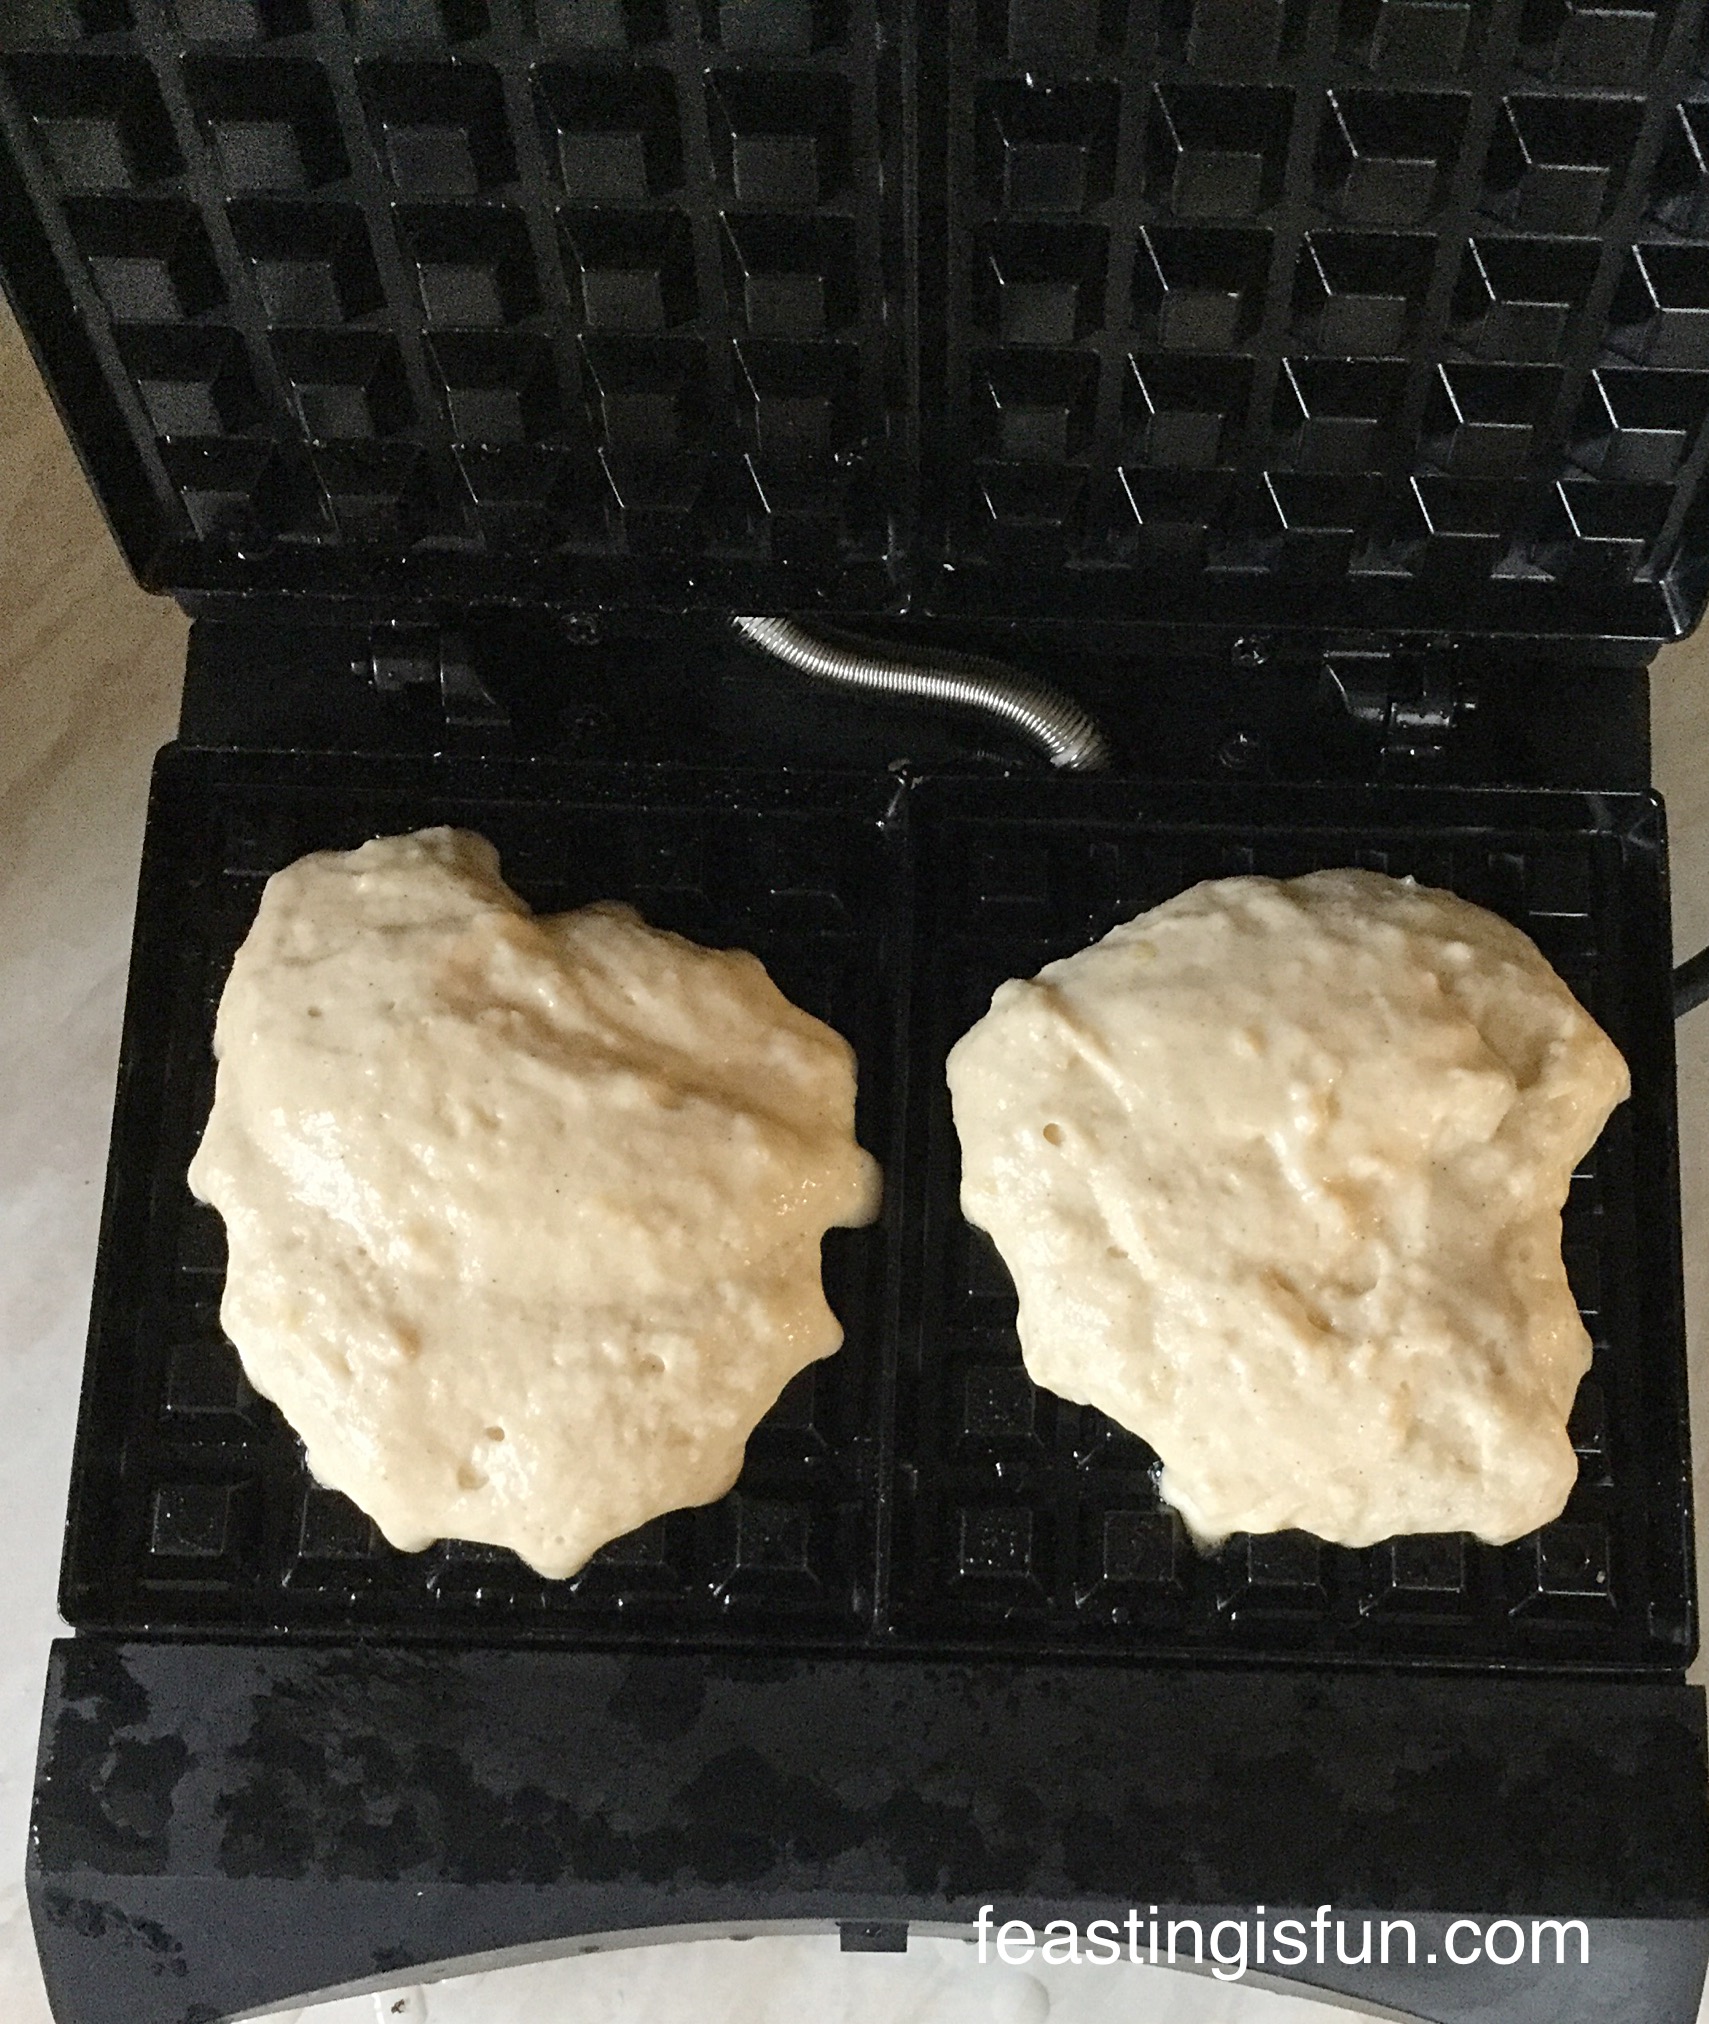
The instruction booklet does not give any guidance as to how much waffle mixture should be added to each plate. I found that for all the recipes I used, two dessert spoons of waffle batter was sufficient.
Andrew James Waffle Maker add the waffle batter to the middle of each waffle plate.
Close the lid of the waffle maker as soon as the batter has been added to the waffle plates. The length of time required for cooking each waffle varies with each recipe. As a guide it is between 4 – 6 minutes.
Whilst cooking, the waffle maker may emit steam. I simply wiped away any condensated water from the worktop after use.
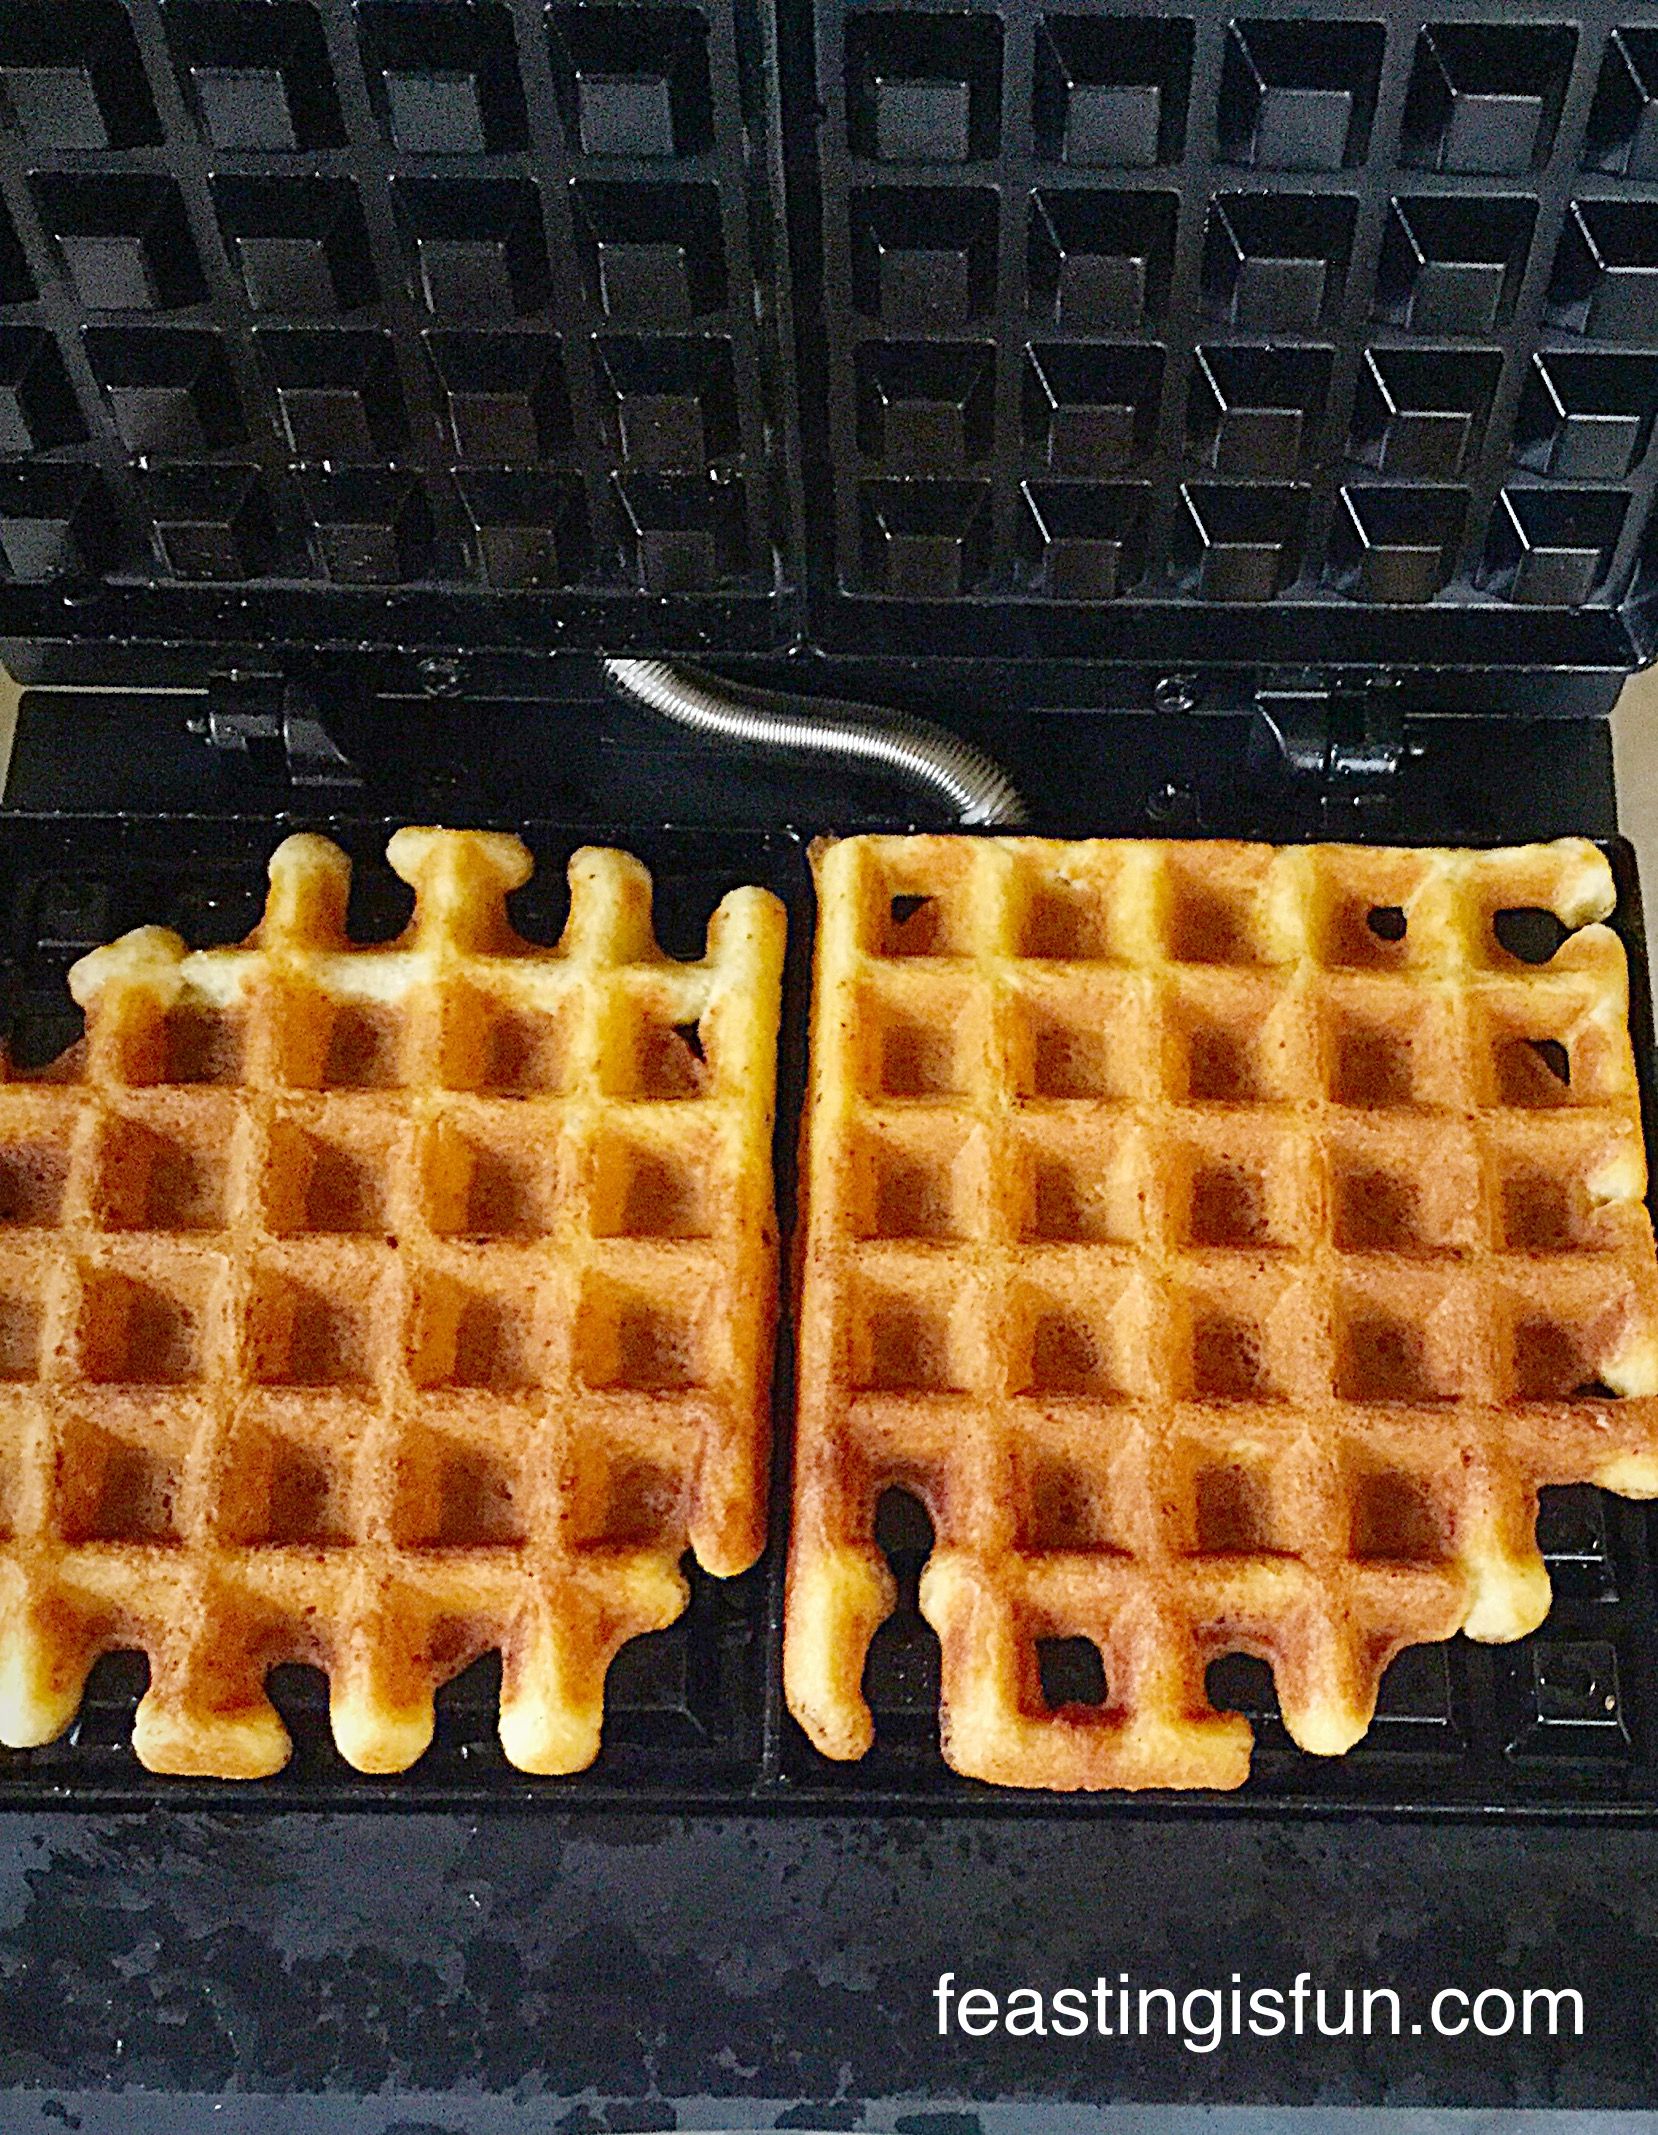
Once the cooking time had elapsed, wearing oven gloves, I pressed the large button, opened the waffle maker and there were my very first, deliciously cooked waffles.
I used a simple wooden spatula to lift each cooked waffle from the waffle plate. Again metal, or anything abrasive should not be used against the waffle plates, as this may damage their non stick surface.
Andrew James Waffle Maker and my first ever waffles!
You will notice that the waffles above have slightly irregular edges. This is because not enough waffle batter has been added to the waffle plates. However, from experience, I personally think it is better to slightly under fill the waffle maker. Once you have made your first two waffles you can slightly adjust the amount of batter added to the waffle plates.
If you overload the waffle plates with too much batter, you will still get beautiful waffles, as well as batter oozing out of the sides of the closed waffle maker and excess batter cooking on the hot surround of the waffle plates.
Although I found this relatively easy to clean up, it is a waste of waffle batter. I want all my batter to turn into delicious cooked waffles!
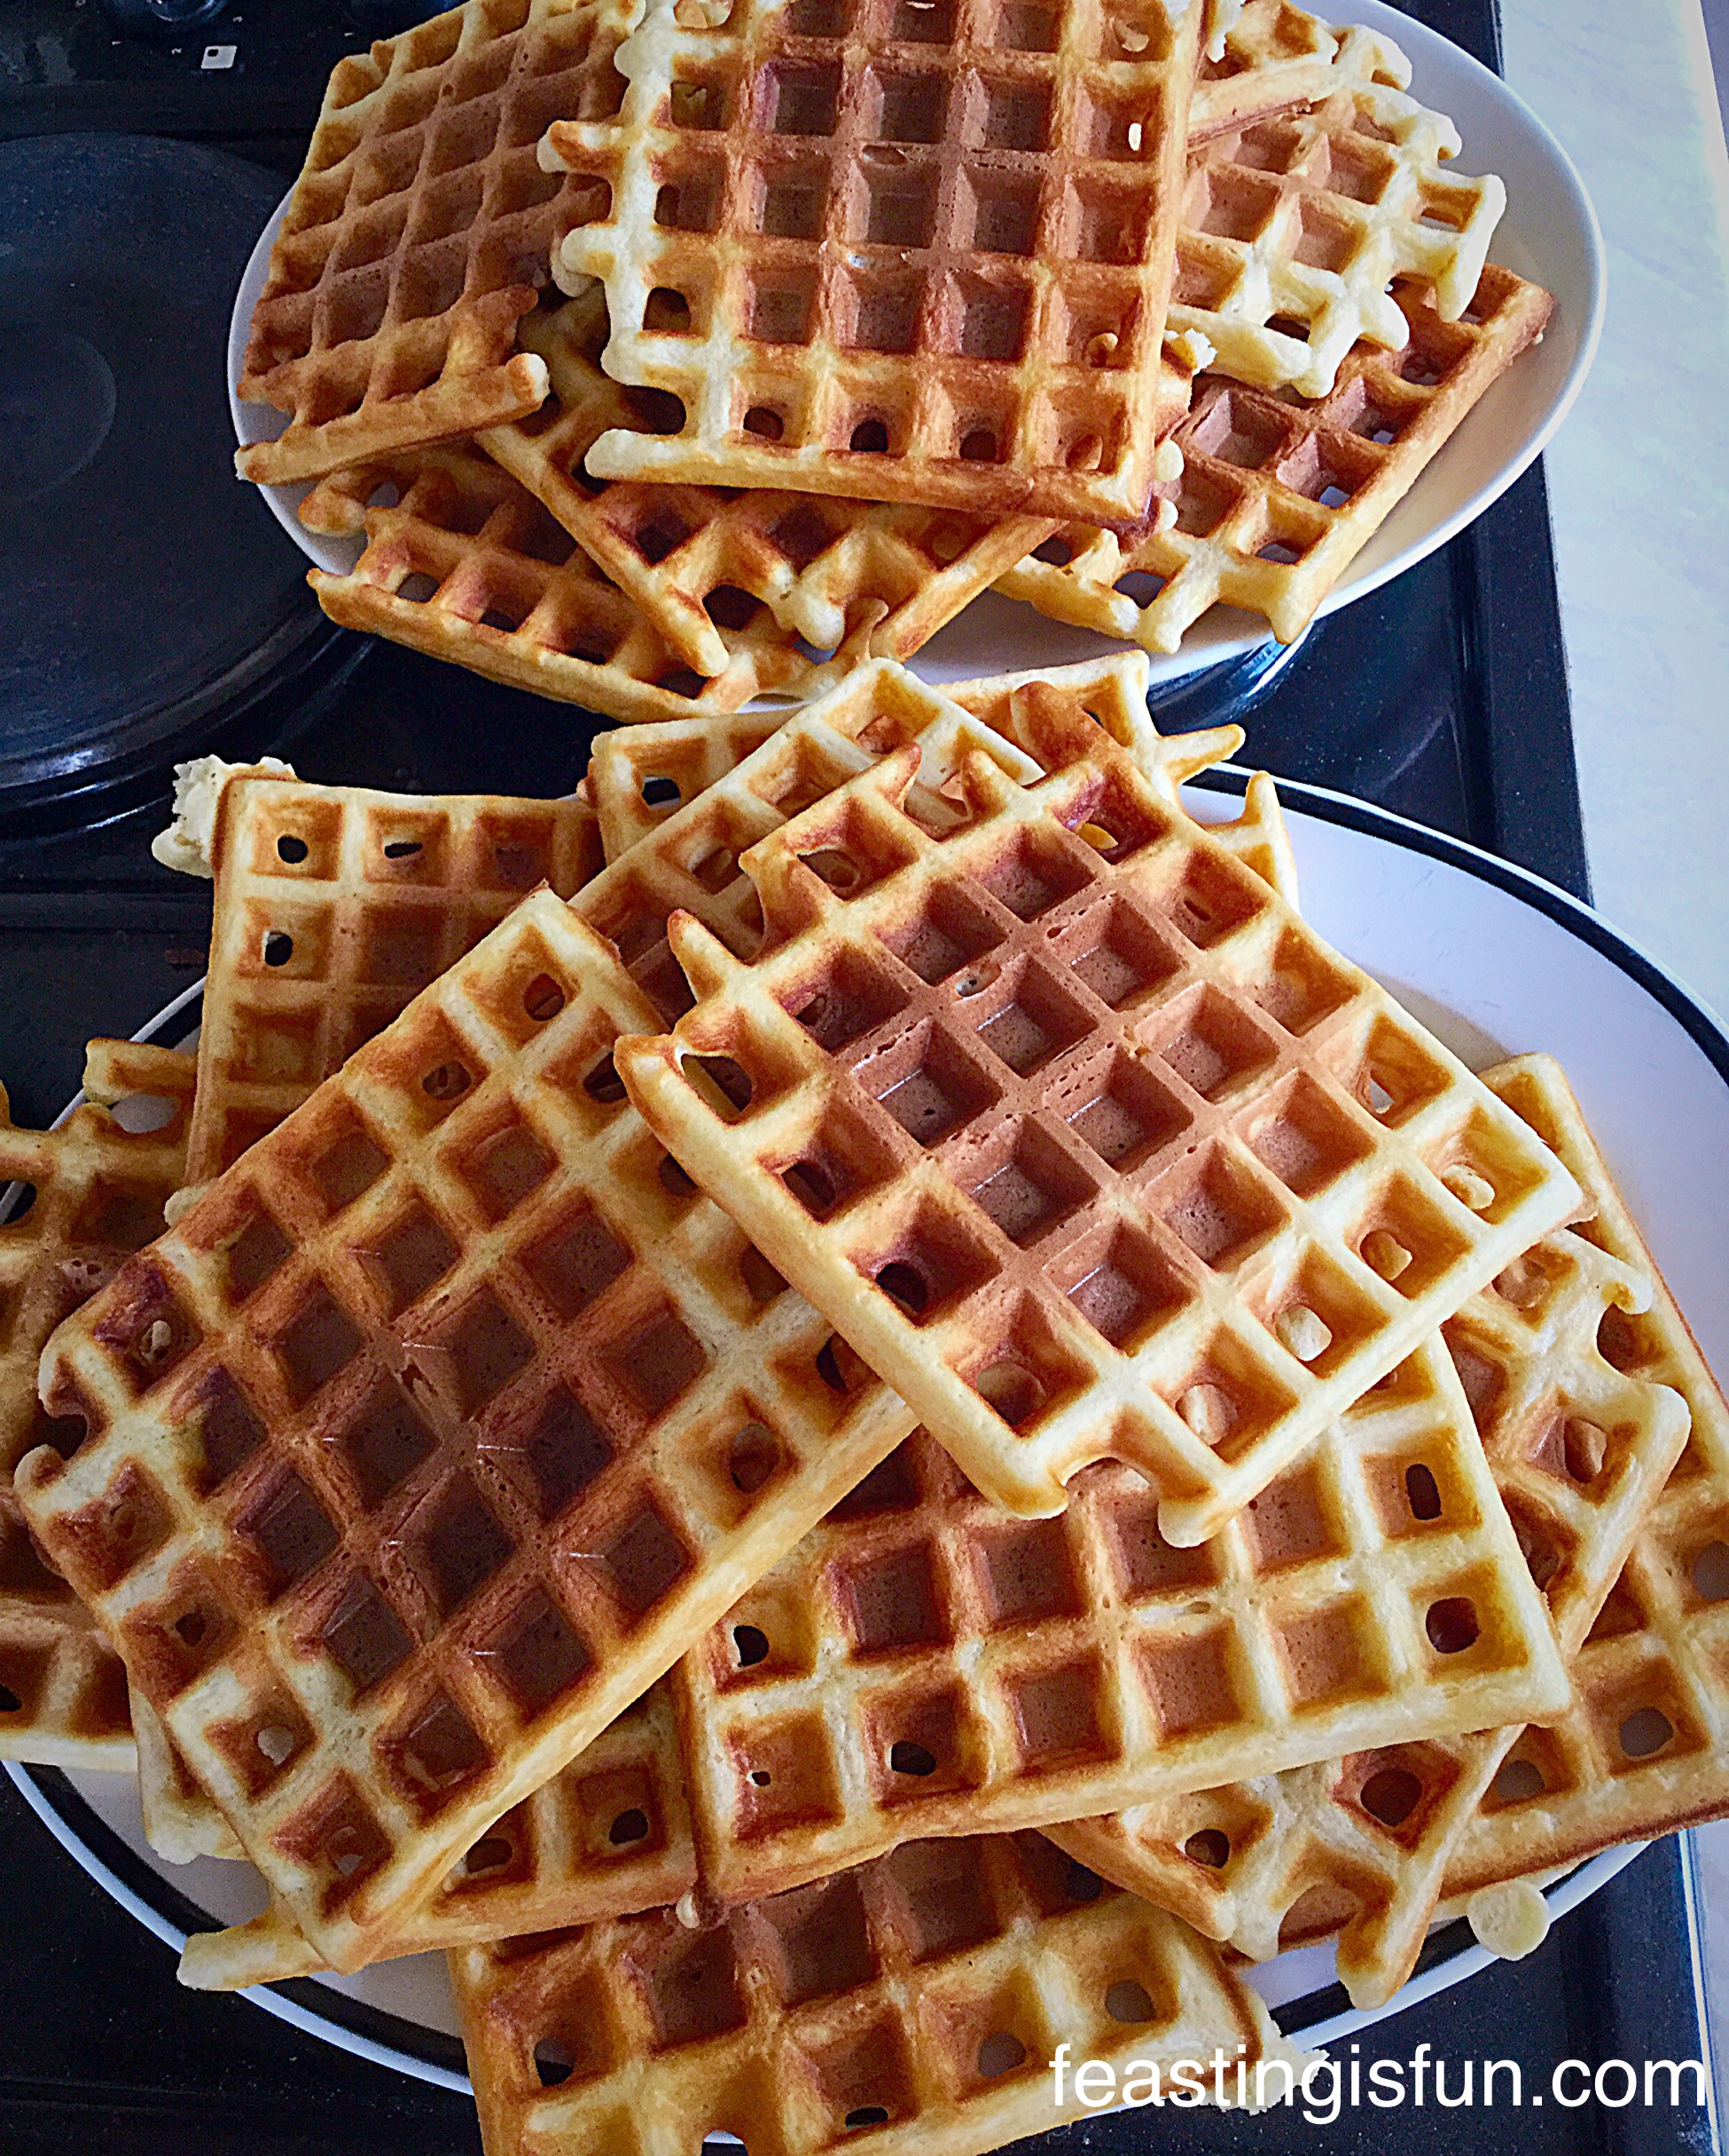
Stacks of waffles cooked two by two with the Andrew James Waffle Maker
Over the period of 2 weeks I cooked over 60 waffles using the Andrew JamesWaffle Maker. I tested different recipes and consistency. Above is a picture of 28 waffles cooked one after the other, with the waffle plates having only been greased at the start of the waffle making marathon.
What I found was complete consistency, throughout the process – obviously quantity of batter added to the plates and cooking time were kept the same. Also throughout the whole review period NOT A SINGLE WAFFLE STUCK!
After each cooking session was complete, the waffle maker was switched off and left open to cool before cleaning. To be completely honest this was the part that I was not looking forward to!
Cleaning the Andrew James Waffle Maker
Once cold and unplugged I used the wooden spatula to scrape any excess cooled batter from the waffle plate surround. Then using a cloth rinsed in warm soapy water I wiped over the entire inside of the waffle maker. Certainly on the waffle plate surround, where excess batter had stuck, I had to rub a few times to clean it off. I then wiped around the back of the waffle maker, where the hinges are. Finally I found that the underside of the waffle maker became greasy, so that was then thoroughly wiped. I left the waffle maker open to dry and before packing away gave the top a quick wipe over and then dried with a clean tea towel.
Each time I cleaned the waffle maker it took no longer than 5 minutes.
To conclude, I absolutely love this Andrew James Waffle Maker! It was very easy to operate and use. During the waffle making marathon it proved to be consistent and durable. I was able to create a range of new recipes, both savoury and sweet, so it ticked the versatility box.
The Andrew James Waffle Maker has most certainly earned it’s place in my kitchen and is now classed as an essential kitchen appliance for me. I thoroughly recommend this waffle maker.
If you like waffles, you will love the smell of them freshly cooking, in your own home, using the Andrew James Waffle Maker.
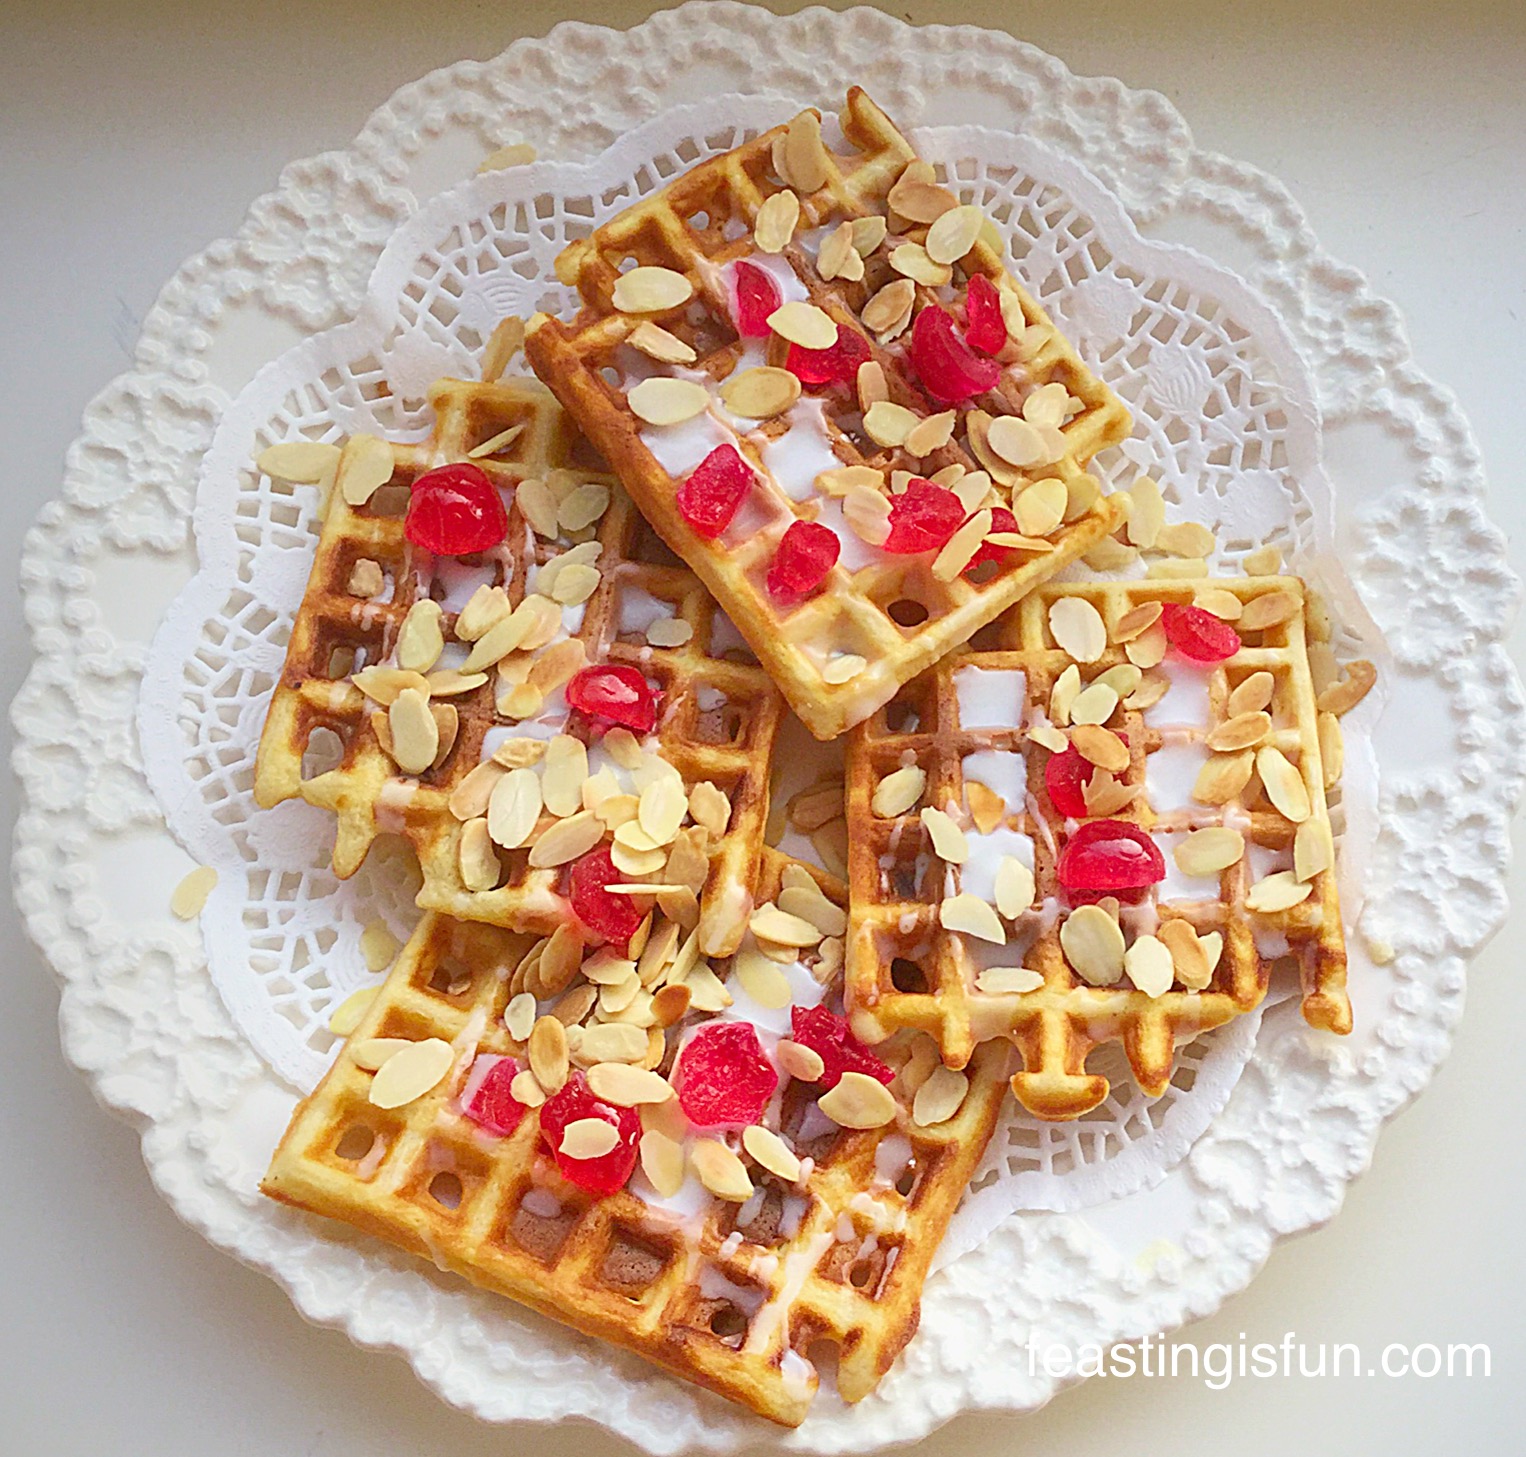
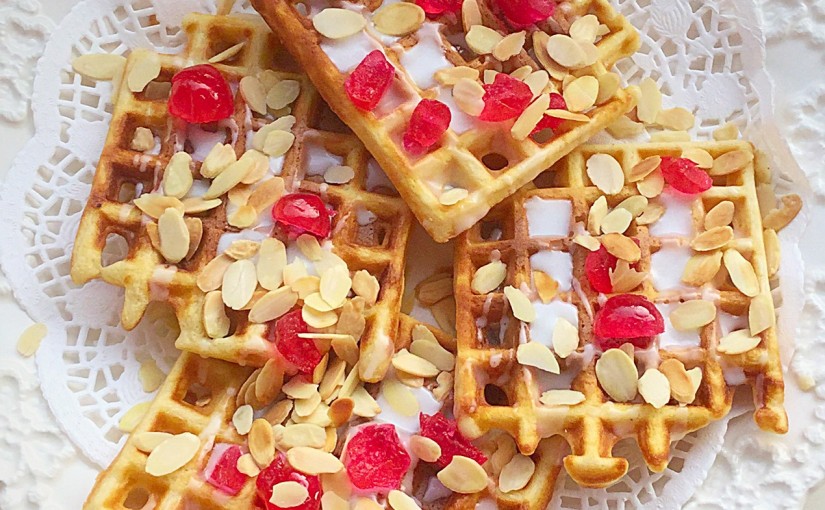
Drizzle the flavoured icing over the waffles. Add a few pieces of cherry to each waffle and then scatter over with toasted almond flakes. Serve immediately, or let cool and keep in an airtight container for 3 days.
These are great for afternoon tea, picnics, or with a large latte and a good book!
In fact, these Cherry Bakewell Waffles are perfect any time of the day.
Smoked Salmon Waffle Appetisersmakes 16
Smoked Salmon Waffle Appetisers
These Smoked Salmon Waffle Appetisers are a perfect savoury twist for the waffle and they are completely delicious! Perfect for parties.
Use the Vanilla Bean Wafflerecipe only adding 10g of sugar and leaving out the vanilla bean paste.
You need 4 waffles for this recipe – excess waffles can be frozen in a zip lock freezer bag for up to one month.
Toast each waffle so that it is slightly crisp. Set aside on a rack to cool.
Place 200ml Creme Fraiche into a bowl.
Add 4 heaped teaspoons of creamed horseradish sauce (I used the hot variety).
Stir to combine – add salt and pepper to taste.
Cut each waffle into quarters.
Place a teaspoonful of the horseradish/creme fraiche sauce on top of each waffle quarter.
Top with a slither of smoked salmon.
Sprinkle over chopped chives, or dill and serve on a platter.
If you have enjoyed the Andrew James Waffle Maker review you are sure to enjoy these recipes too:
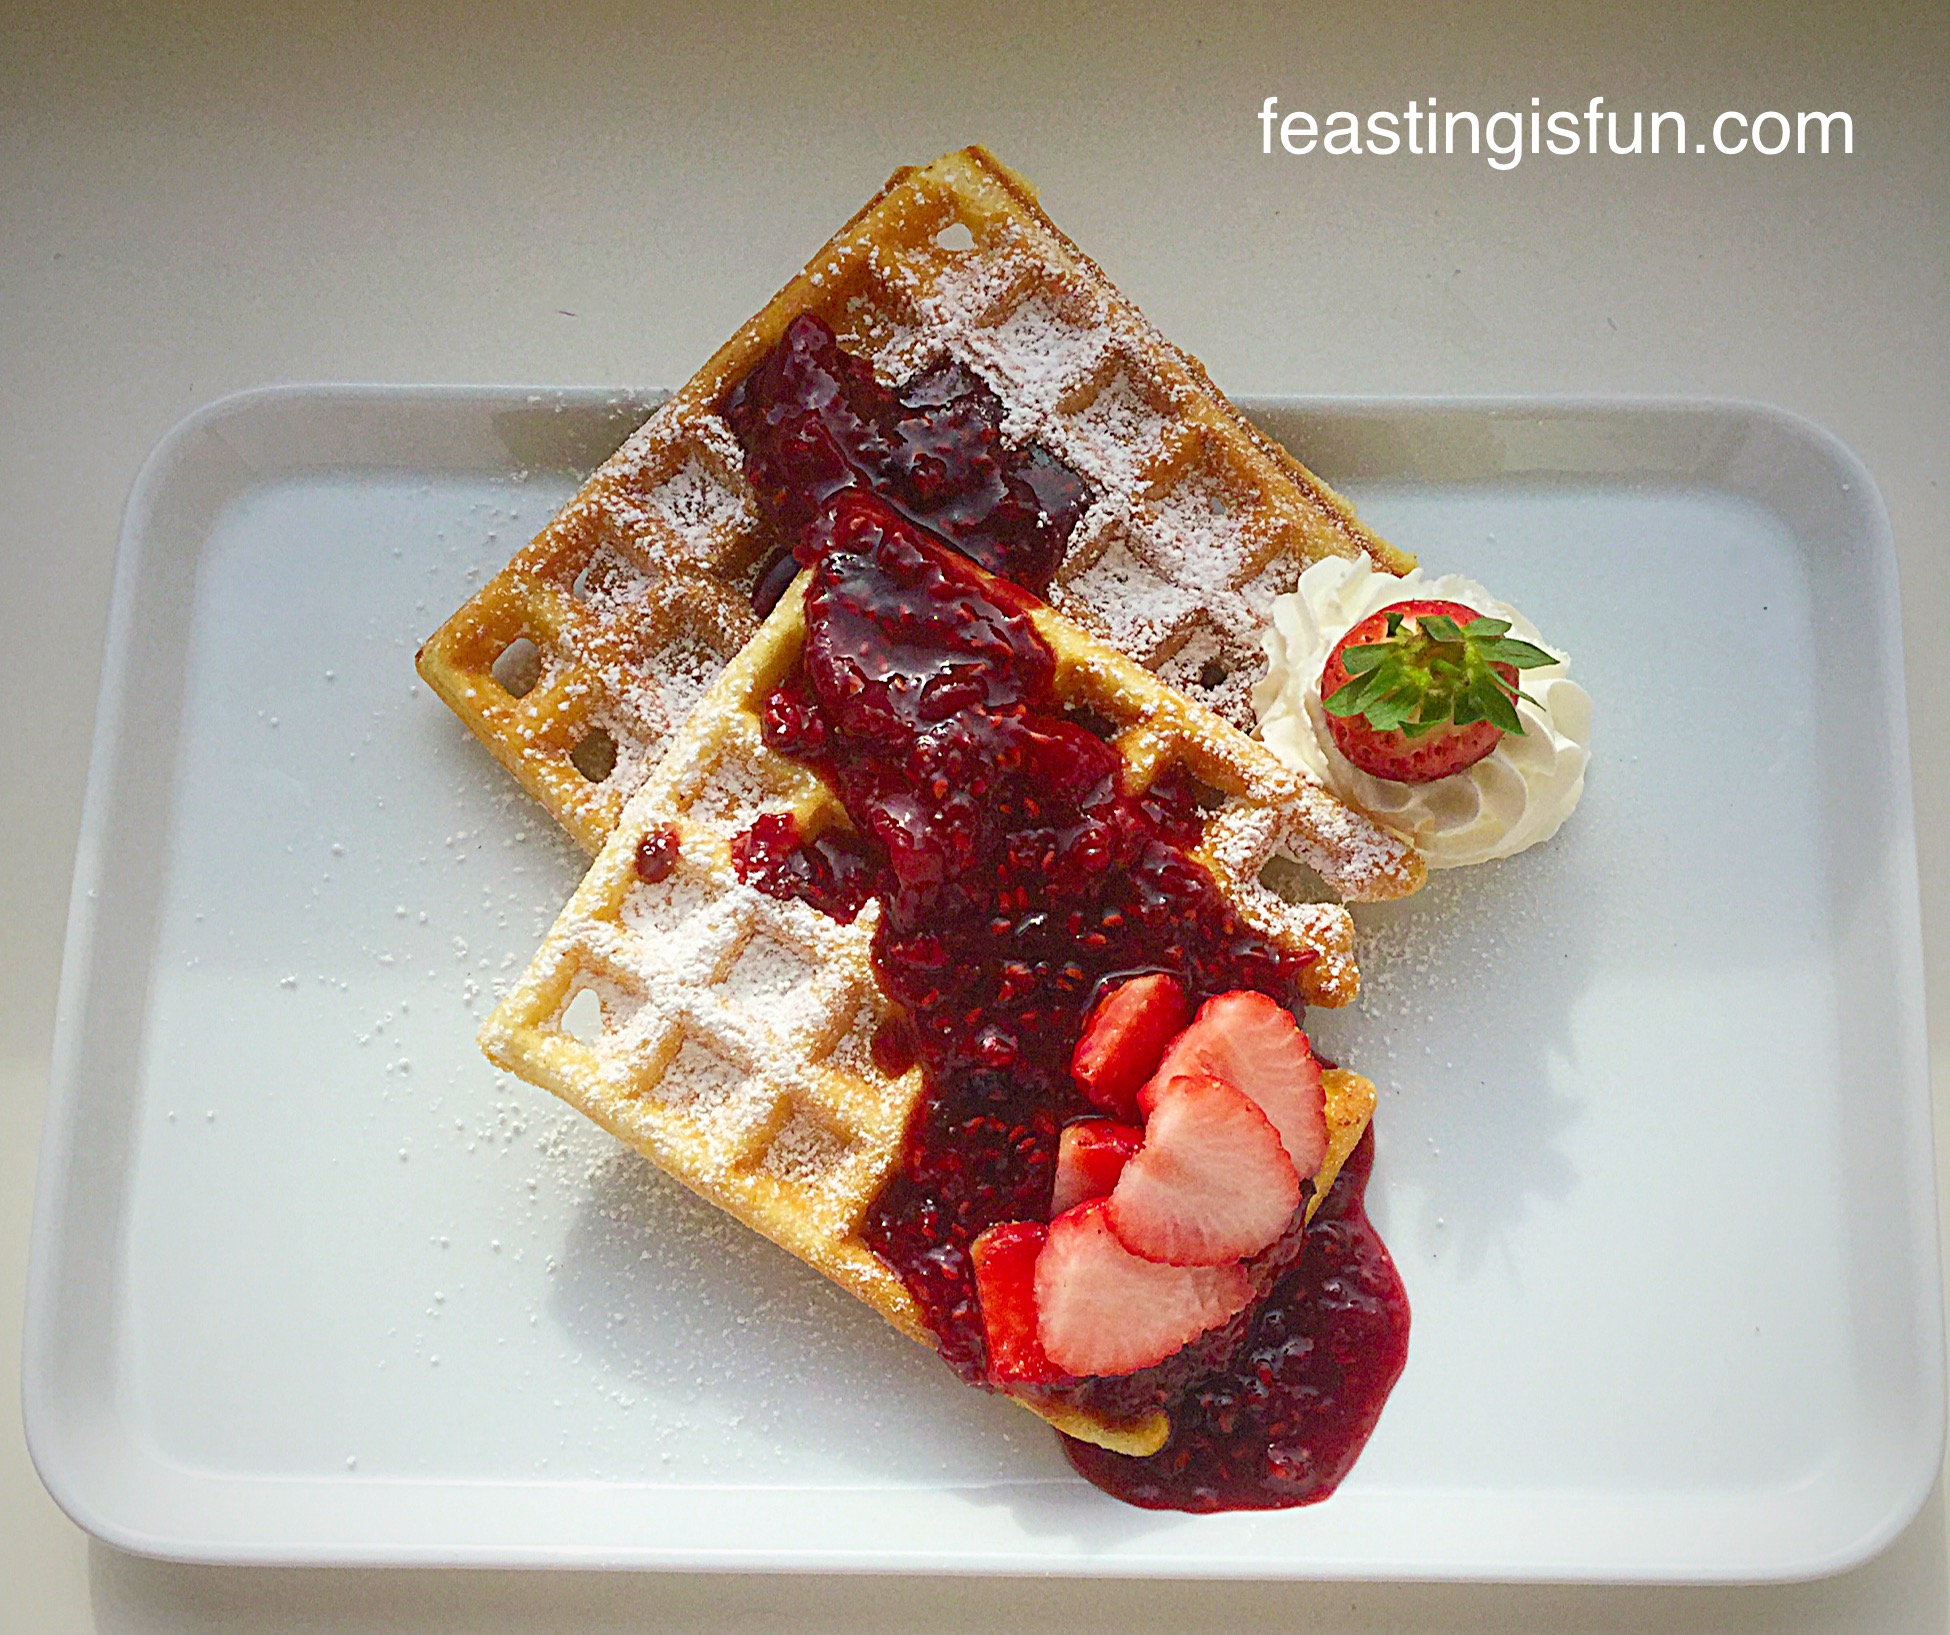
Vanilla Bean Waffles with Boozy Berry Sauce a classy dessert.
Do you love waffles?
Would you like to experience the aroma of freshly cooked waffles in your kitchen?
I for one am a complete waffle convert. I have loved seeing how tasty and versatile they are. Most of all, I have realised how much fun they can be. Breaking the ‘rules’ by dunking them in delicious hot chocolate, or serving as a classy appetiser with smoked salmon. Who knew??
As always have fun with your waffle experience. Enjoy the feasts you create and don’t forget to tag me in on Twitter/Instagram, I love seeing your makes and bakes.
Sammie xx
@sammiefeasting Twitter/Instagram/Pinterest
All opinions, recipes and content are my own. I did not receive payment for carrying out this review. Please see my Disclosure Policy.
To see the Andrew James Waffle Maker I reviewed please click here.
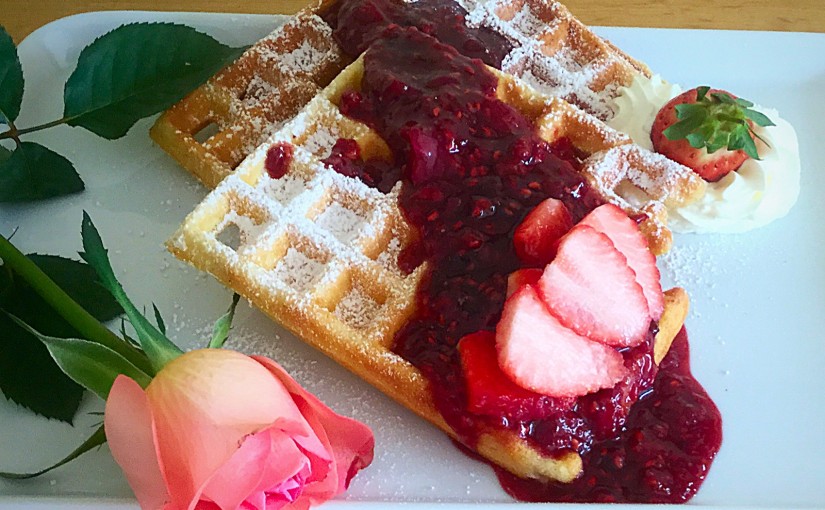
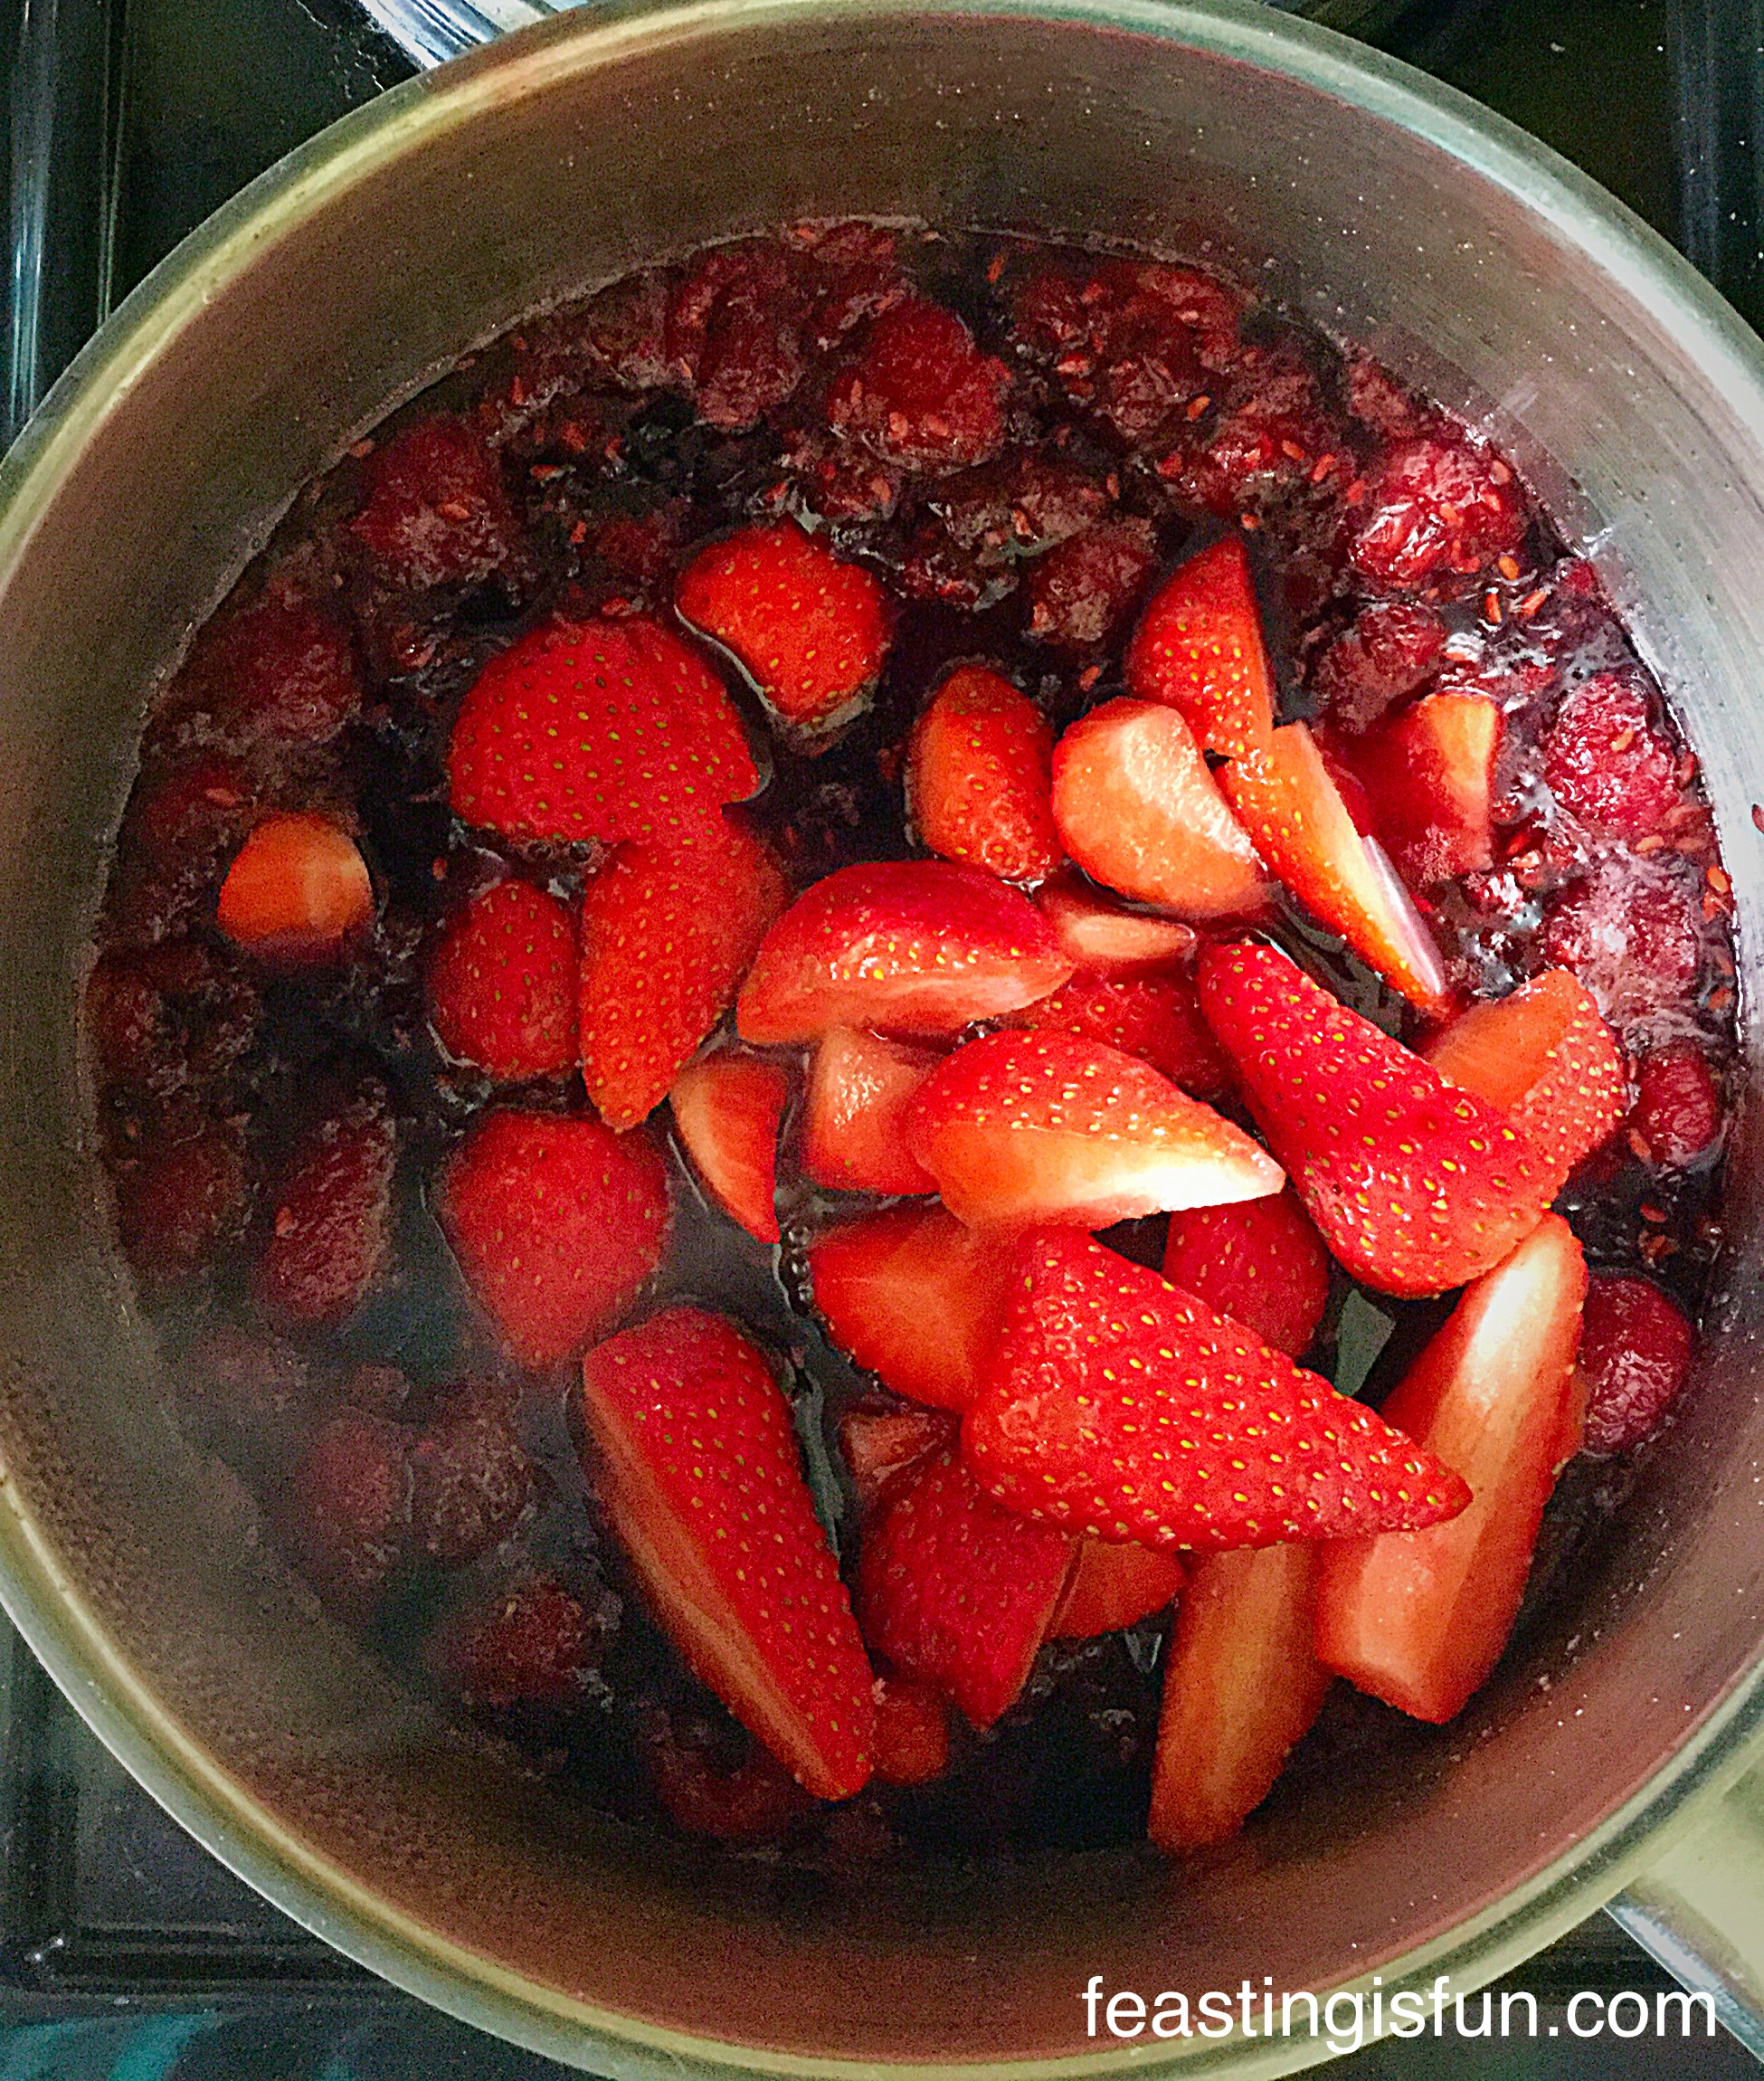
If you want to vamp up your desserts I have the perfect Boozy Berry Sauce to do it with. Raspberries, strawberries and morello cherry conserve, mingle together with a decent splash of Framboise, to make a very classy fruit sauce.
Boozy Berry Sauce delicious with Vanilla Bean Waffles.
This Boozy Berry Sauce is the work of moments, however, your dinner party guests won’t know that. We’ll just keep it a secret between us. Ok?
I firmly believe that if you can make a couple of sauces really well, it can transform your dessert menu. Pour this intensely fruity sauce, with it’s little hint of raspberry liquer, over good quality vanilla ice cream and you have yourself one extremely tasty after dinner treat!
I developed this recipe to go with my Vanilla Bean Waffles it was a fantastic pairing, what surprised me more was how well it went with my Chocolate Waffles.
Boozy Berry Sauce perfectly compliments these gorgeous chocolate waffles,
I should have realised that raspberries and chocolate are a classic pairing and this Boozy Berry Sauce with it’s delicious raspberry flavour, only need be poured over a chocolate waffle for the magic to happen. A taste bud party that you won’t want to end!
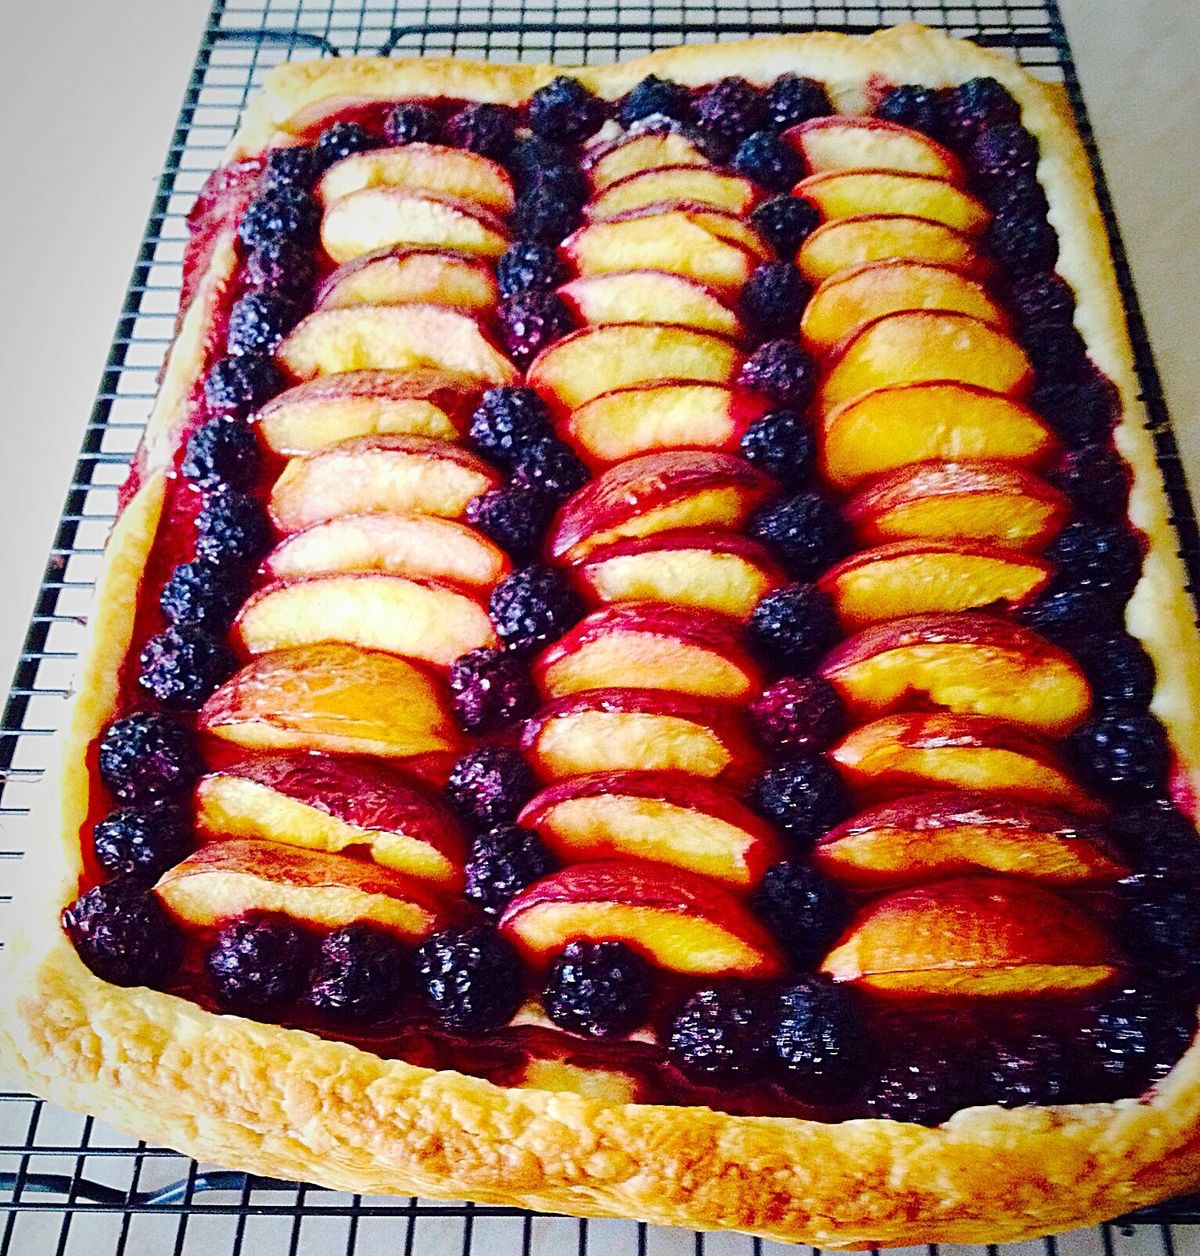
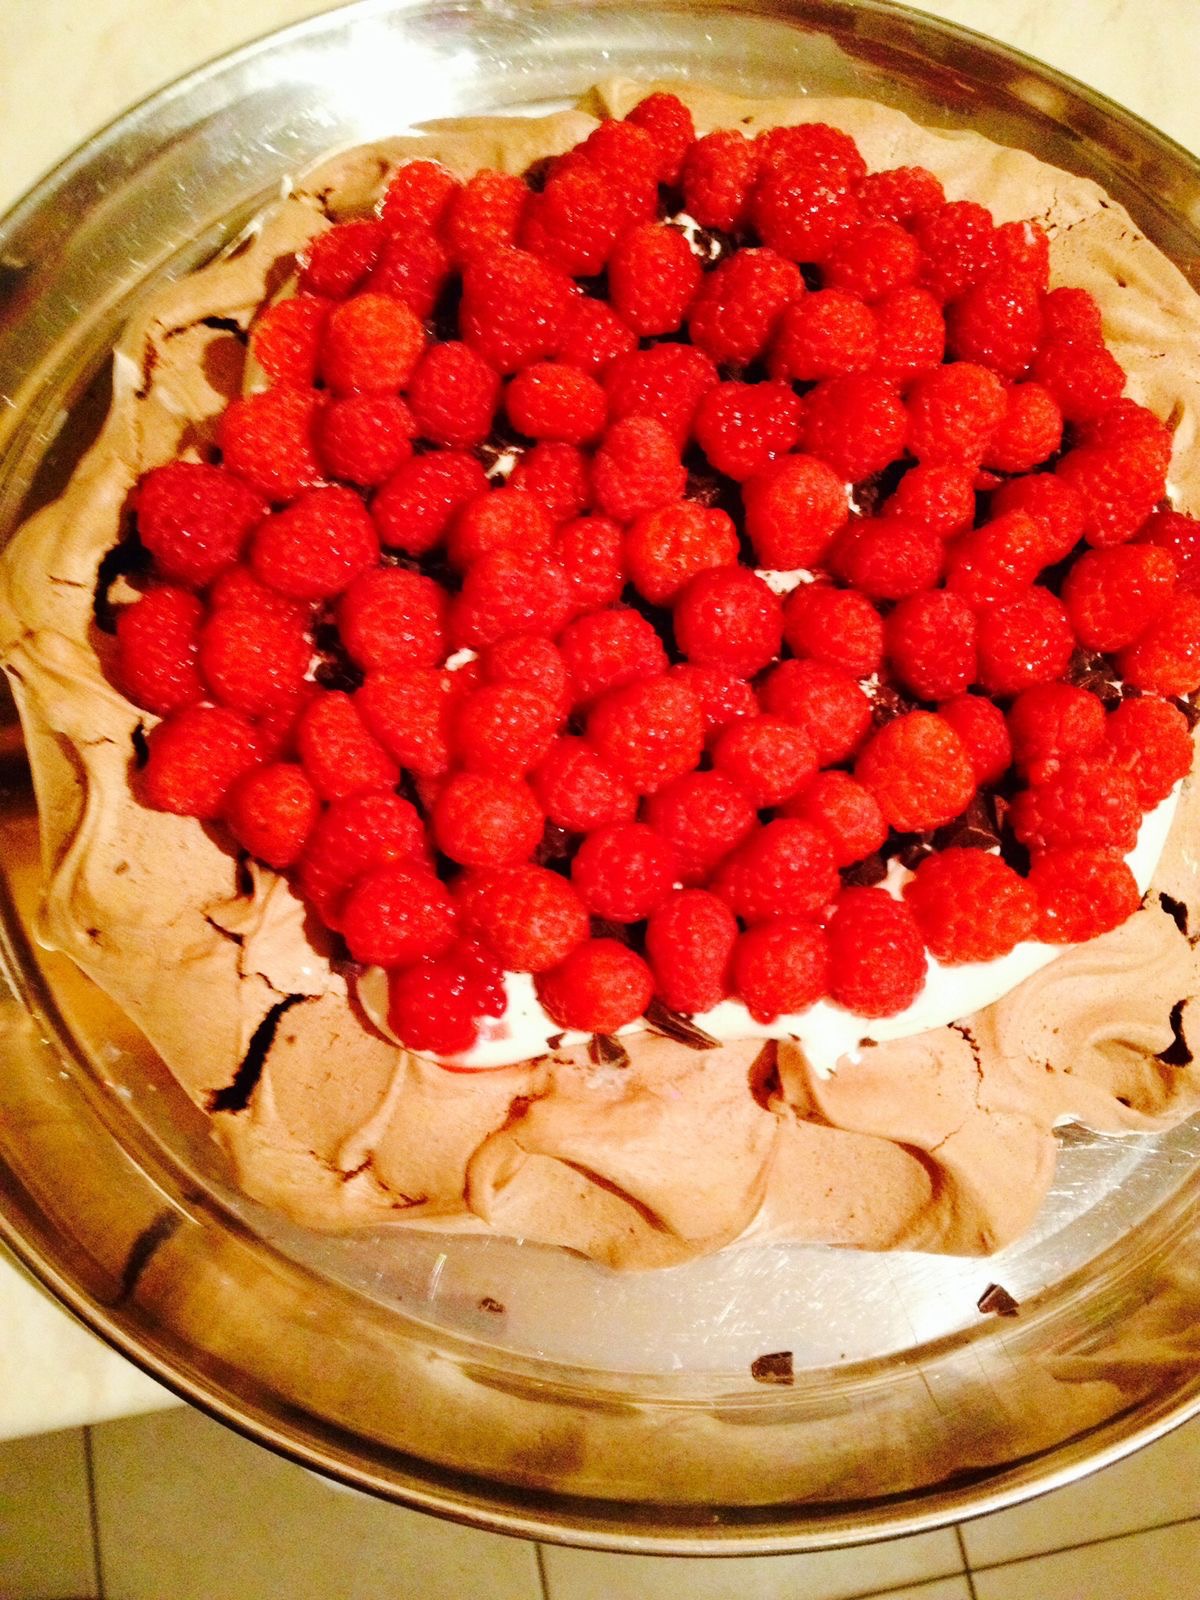
This rich fruity sauce is also perfect poured, warm, over a pavlova, piled high with whipped cream and fresh berries. Ooh crunchy meringue with marshmallow inner, fresh fruit, cream and this glorious Boozy Berry Sauce, that is one dessert I must make – soon!
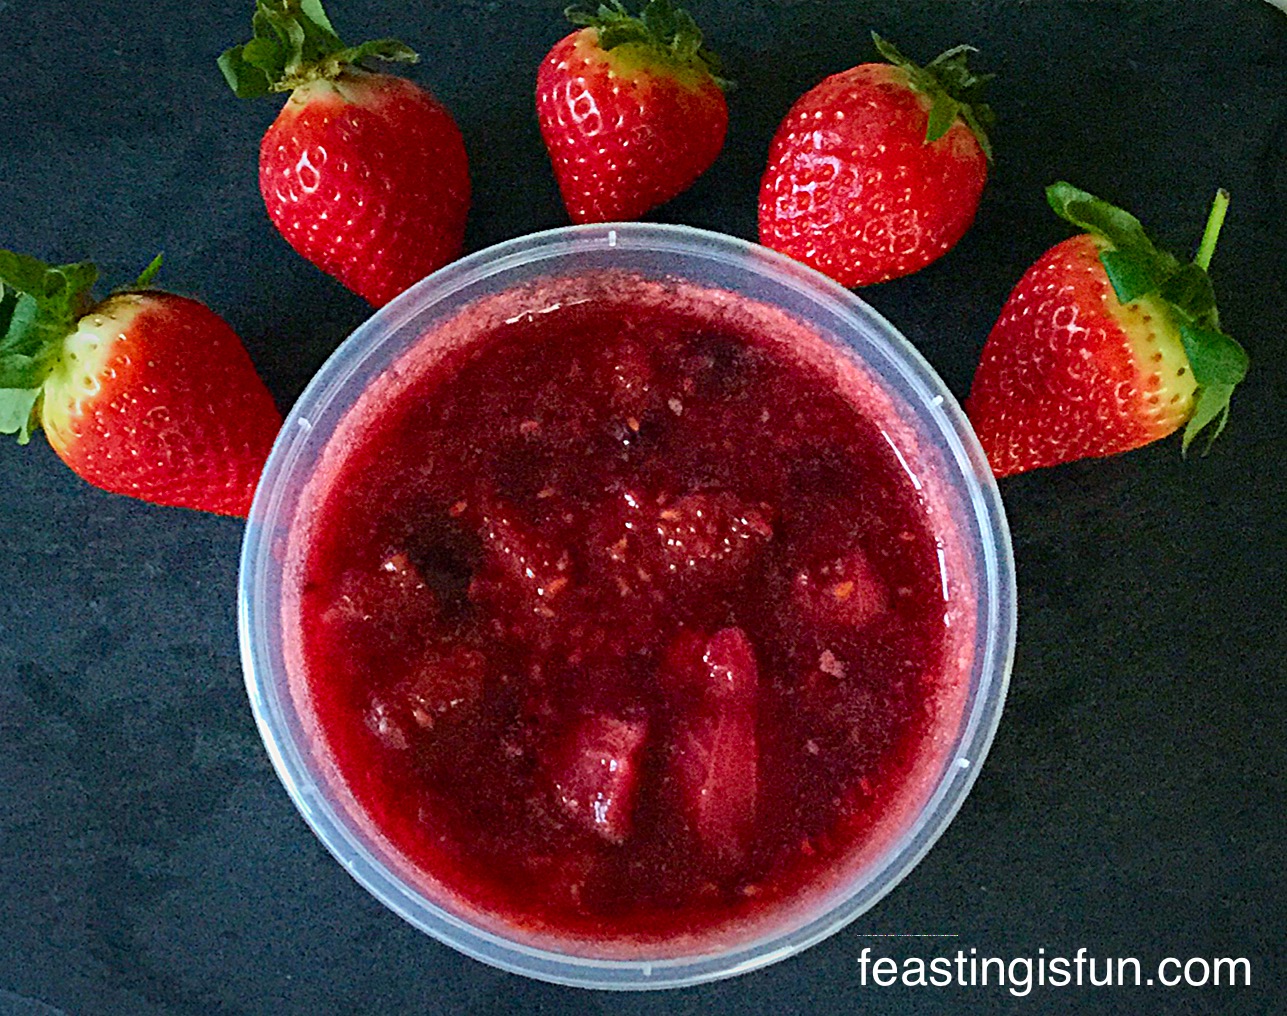
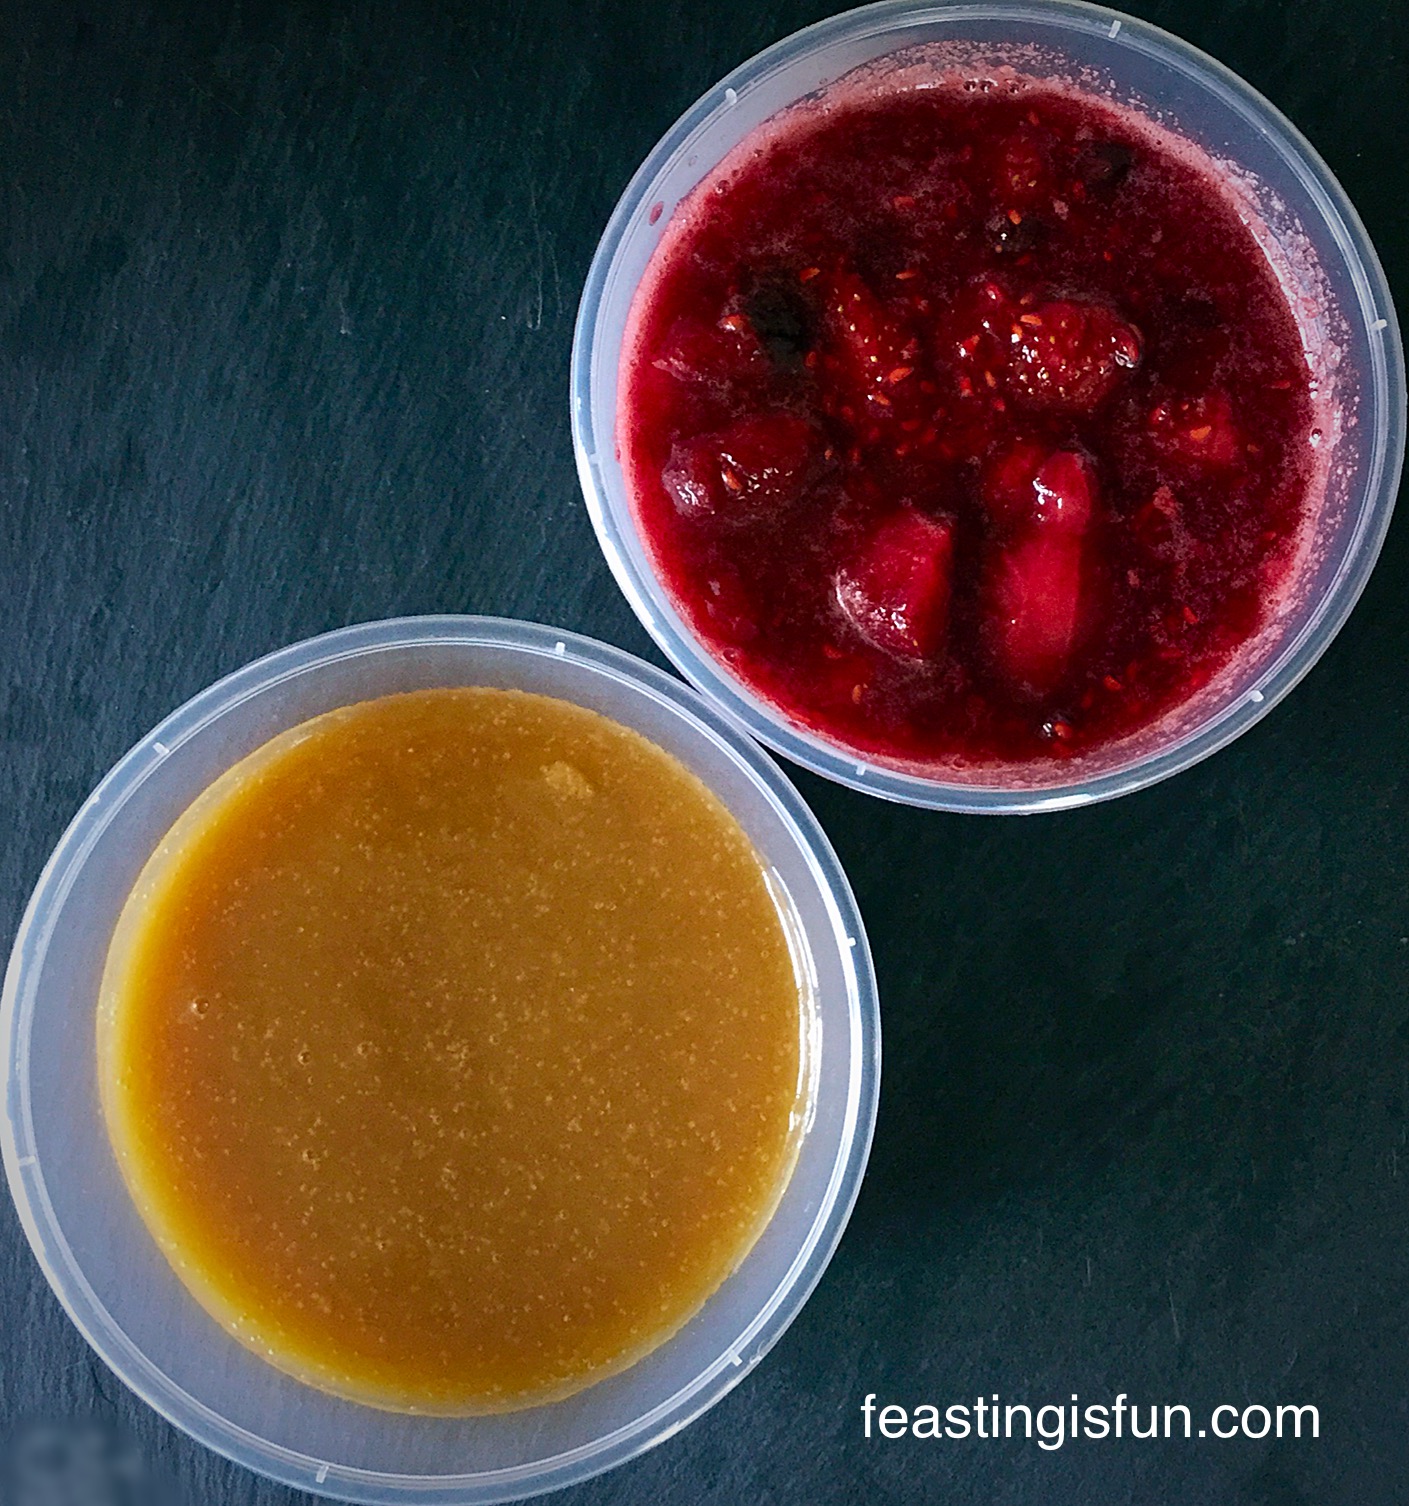
Boozy Berry Sauce perfect to make ahead and keep in the fridge.
You can of course substitute the raspberry liquer, for it’s blackcurrant counterpart Cassis, ooh that would be delicious. Of course you can leave the alcohol out altogether, in which case I’d recommend adding pomegranate juice, for it’s deep purple colour and intense flavour.
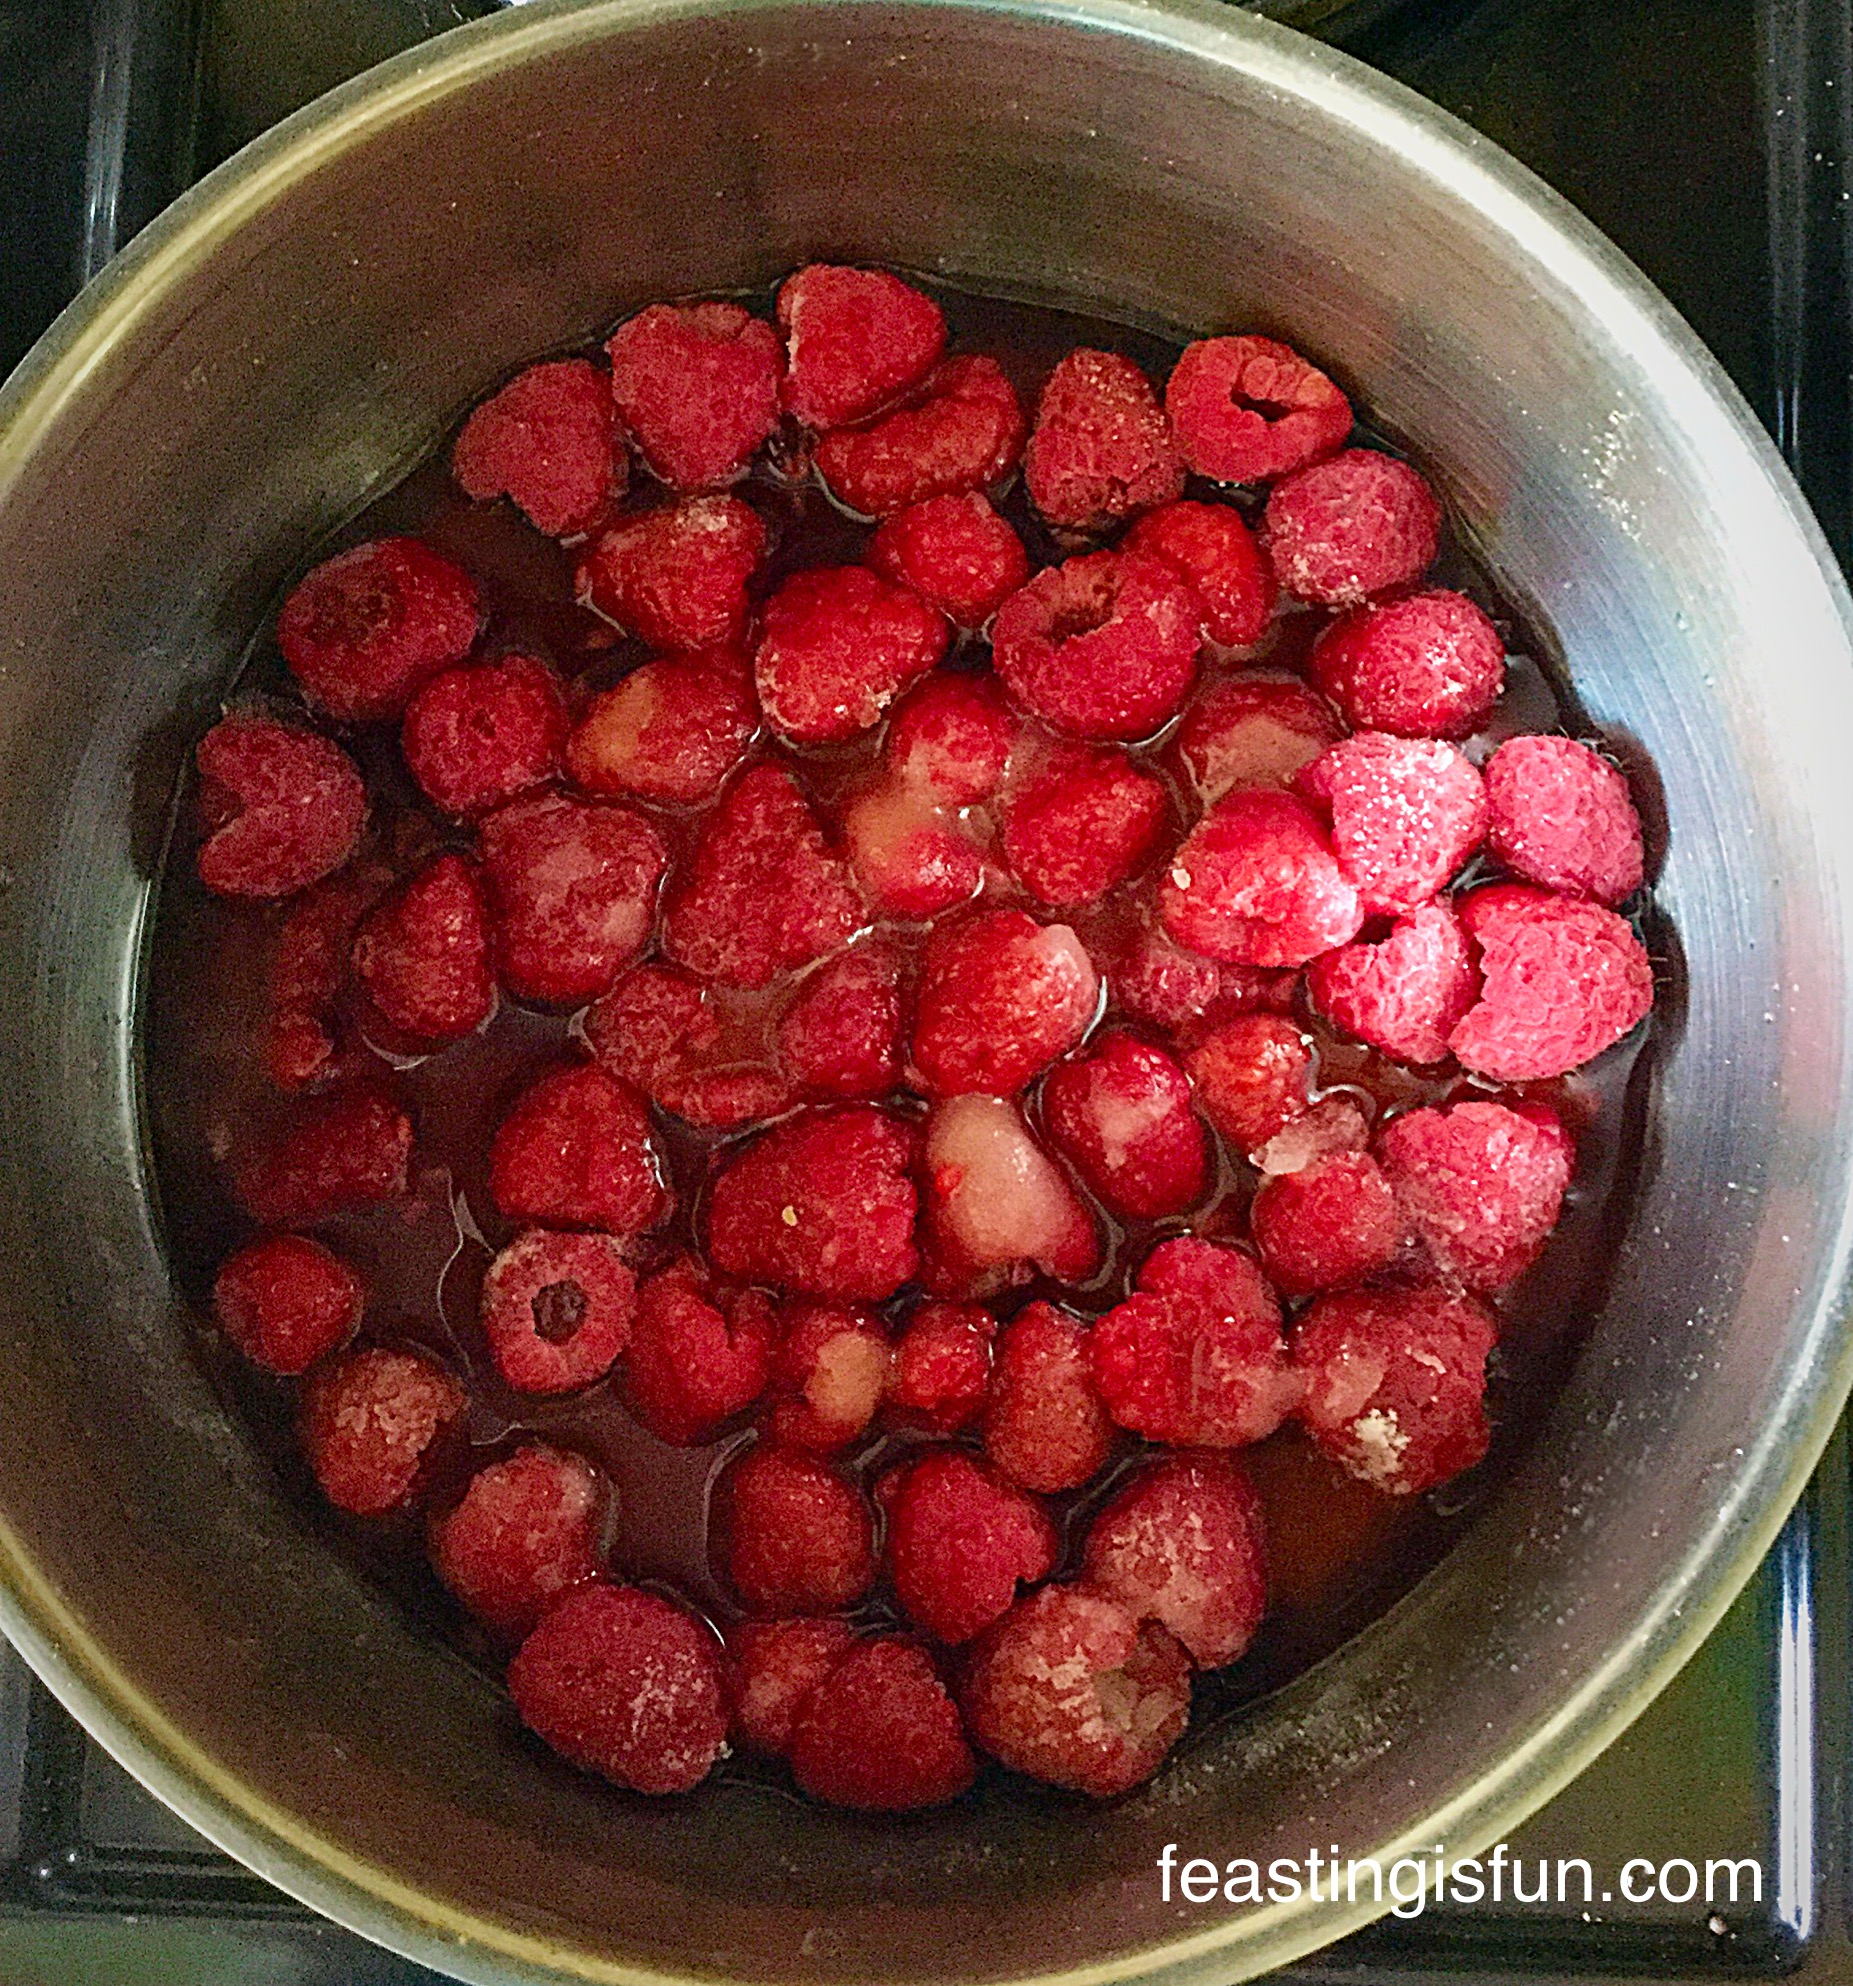
I do love a recipe that is versatile. With this sauce I actually used frozen raspberries. I see no reason why other berries can’t be substituted, providing the quantities are kept the same.
For the ‘boozy’ part of this sauce, if you have both Framboise and Cassis to hand, I’d say keep with the colours and flavour – so if you make this whilst blackberries are abundant add Cassis, for red berries and cherries I’d stick with Framboise. That said it is all a matter of taste and preference. I would advise against adding a stronger spirit, for example brandy, as it would completely over power the fruit flavour.
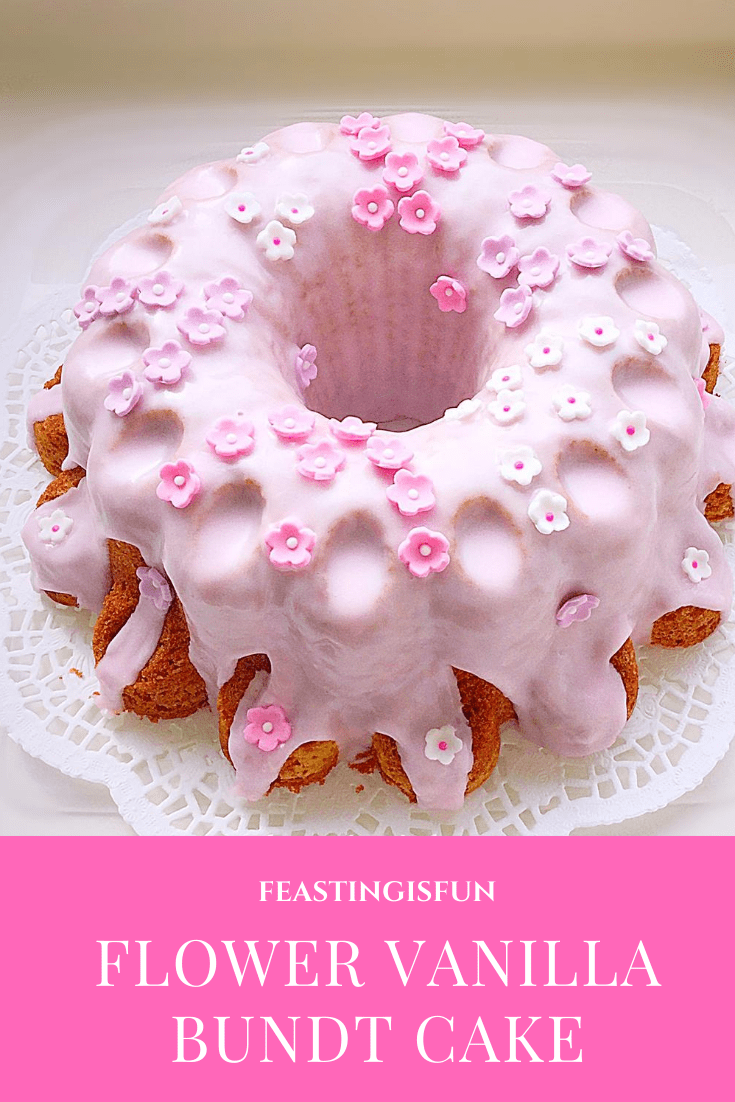
I have some wonderful news to share. One of my very best friends had her beautiful daughter Florrie, a little early, but mum and baby are doing so well. I am an adopted Auntie again! So, I simply had to make something to celebrate this gorgeous bundle of joy that has been brought into our lives. Resulting in Florrie’s FlowerVanilla Bundt Cake.
Flower Vanilla Bundt Cake
As the new mum is nursing her wonderful baby daughter, I kept everything in this cake as natural as possible. As whatever mummy eats, Florrie will have too and I want her to learn to love Auntie Sammie’s cakes, right from the start.
New babies bring such joy and pleasure into our lives. Since we have three wonderful children, I absolutely knew my friend would very much appreciate a little food hamper. A freshly baked Farmhouse White Loaf, simple dinners, pre-portioned so that mummy just has to pop them in the oven, like my Best Beef Casseroleand of course a little something sweet, Florrie’s Flower Vanilla Bundt Cake.
Flower Vanilla Bundt Cake
A New Mum And I Need Cake
I remember clearly when I became a new mum for the first time. While I had a safe delivery and the maternity suite at the hospital was brand new, there was one thing I craved – food! Although, all that seemed to be on offer was salad.
And salad alone, is not what a nursing mother needs!
This mummy needed carbs and lots of them. Had the salad been in a thick, carb rich sandwich I would have been fine. Fortunately I wasn’t in hospital for very long and I remember my husband making me the most unbelievably satisfying, bacon muffin with tomato ketchup, the first morning waking up in our own home, with our new baby girl. And to this day it is one of my favourite treats. Although now that I am no longer nursing, it has to remain just that, a treat.
Flower Vanilla Bundt Cake
I have alway been called ‘practical and sensible’ by my lovely Mother-in-law. I consider this to be a huge compliment and a true reflection of how I see myself. So when a new baby comes along, I’m not the type of person to go baby clothes shopping, or to send flowers. Both of which are wonderful gifts to receive, I may add.
Rather than gifts, my first thought is, how can I help?
How We Can Help New Mums
If you have spent time reading this blog, you will be aware that I have various health issues (see Living With Seizures). As a result this limits how I can help out with an adorable new baby, in a practical way. Usually, for me that means food! Since I can make bread easily, I had been cooking slightly extra, so that a single portion of Sausage and Bean Casserole(made without the addition of any alcohol), could be frozen for when it was needed. This is my way of helping.
When I am making a Chicken Lasagneit is so easy for me to pop a couple of individual portions, in foil containers and place them in the deep freeze. And this way I gradually build up enough meals for a food hamper, that can be delivered and make my friend’s life a little easier.
Being a new mum is hard enough, but when you are on your own you need all the support you can get! Plus my lovely friend is a big fan of my cooking and has been an ‘unofficial’ taste tester for many years now. So, let’s hope Florrie will grow to love good, homemade meals and delicious cake, like her Flower Vanilla BundtCake.
Recipe: Makes 1 Flower Vanilla Bundt Cake
Cake release spray – I use Wilton’sperfect for Bundt cakes
Preheat the oven to 170C/150C fan, gas mark 3, 325F.
First of all, place the butter and caster sugar into a large bowl and whisk, or beat for 5 minutes until pale and creamy.
Add the Vanilla Bean Paste and whisk/beat to incorporate.
Sift in 1/3 of the flour, baking powder and salt.
Add 2 eggs.
Whisk gently until just combined.
Repeat the last 2 steps twice more, adding only 1 egg on the last time.
Spray, or brush the Bundt tin liberally with cake release over the sink.
Spoon the cake batter into the Bundt tin pressing down on the batter as you fill the tin.
Ensure the cake batter fills the Bundt tin no more than two thirds full.
Place the Bundt tin in the middle of a preheated oven and bake for 50-55 minutes.
The cake is baked when it is golden in colour, is coming away from the sides of the Bundt tin and an inserted skewer comes out clean.
As soon as the cake is baked remove from the oven.
Place the tin on a cooling rack and allow the cake to cool for 10 minutes in the Bundt tin.
Flower Vanilla Bundt Cake leave to cool for 10 minutes.
After cooling for 10 minutes turn the cake out onto a cooling rack. Wear oven gloves as the Bundt tin will still be very hot.
Allow the cake to cool completely before decorating.
This Flower Vanilla Bundt Cake turned out beautifully.
Decorating The Cake
To make the glaze, sift the icing sugar into a large bowl. Add enough water to make a thick paste, that still slightly drips. Add a tiny amount of pink food gel colouring to the icing and mix thoroughly.
Beautiful baby pink, almond flavoured icing.
Place a tray underneath the cooling rack on which the Bundt cake sits. Since, this tray will catch any icing that drips through.
Using a dessert spoon thickly drizzle the top of the cake with the icing. Ensure the entire top and the internal hole of the cake of the cake are completely covered in icing. Any leftover icing can be used to add to the drizzle effect on the cake.
The excess icing drips into the tray beneath the cake.Add sugar flowers to your Flower Vanilla Bundt Cake.
Allow the cake to set before serving and eating.
Flower Vanilla Bundt Cake
The observant among you may have noticed that this beautiful Flower VanillaBundt Cake has been photographed on the lid of a plastic box. So, being practical (and in all honesty completely out of cake boxes!) as this cake is not very large or heavy, placing on the inside lid of a large box keeps the cake fresh.
Finally, once safely transported to my friend, the cake can be moved to an airtight container of her own. Most importantly, I only advise using this technique for very light cakes and definitely do not cut the cake whilst it is sitting on the lid.
So, do you like the idea of making someone a food hamper?
If you have enjoyed making this Flower Vanilla Bundt Cake you may like these recipes:
Since I absolutely love seeing photographs of your bakes, please tag me in on your Twitter and Instagram posts? Also, I’m available throughout the day on Twitter, most days, to answer any ‘mid-bake’ questions or worries. While not an expert, I am part of group of bakers on Twitter and between us there’s not usually a question that goes unanswered! Likewise, you can also leave a question in the comment section of this post. Either way, it’s a great way to interact and get to know my lovely readers.
So, whatever you are making, baking and creating in your kitchens, have fun preparing and sharing your feast.
Sammie xx
No part of this post may be reproduced or duplicated without the written permission of the owner. Please see my Disclosure Policy.
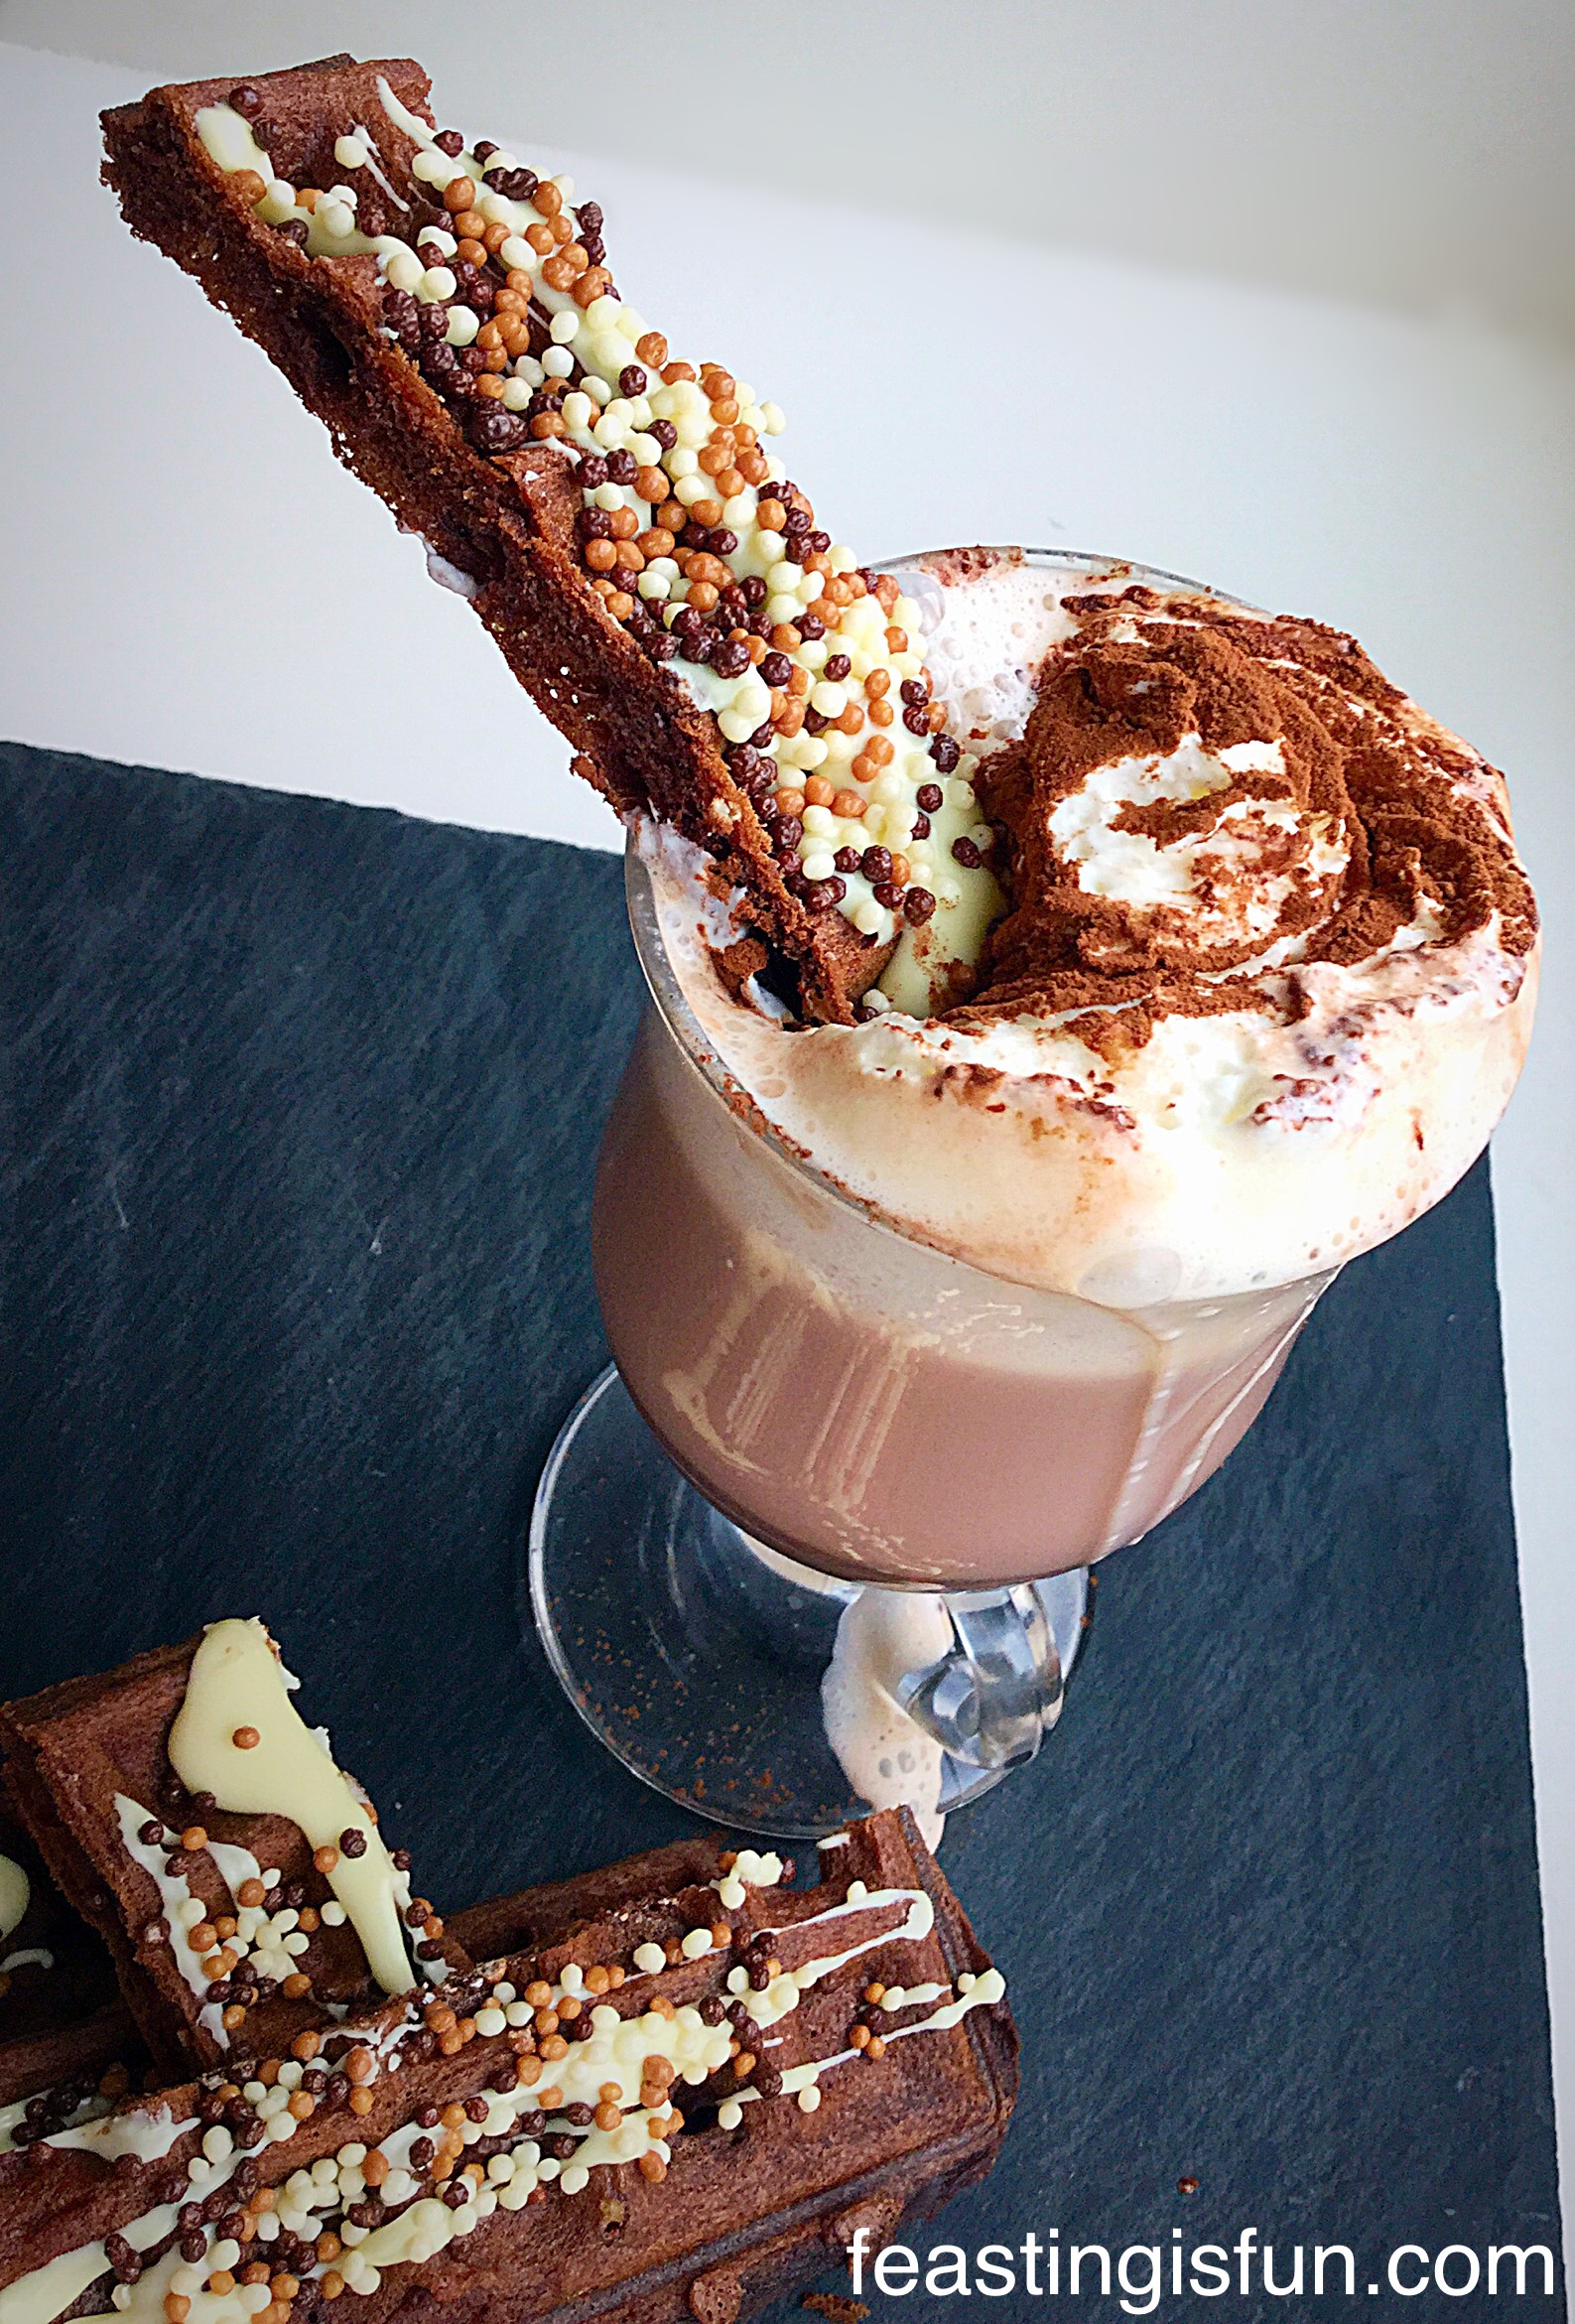
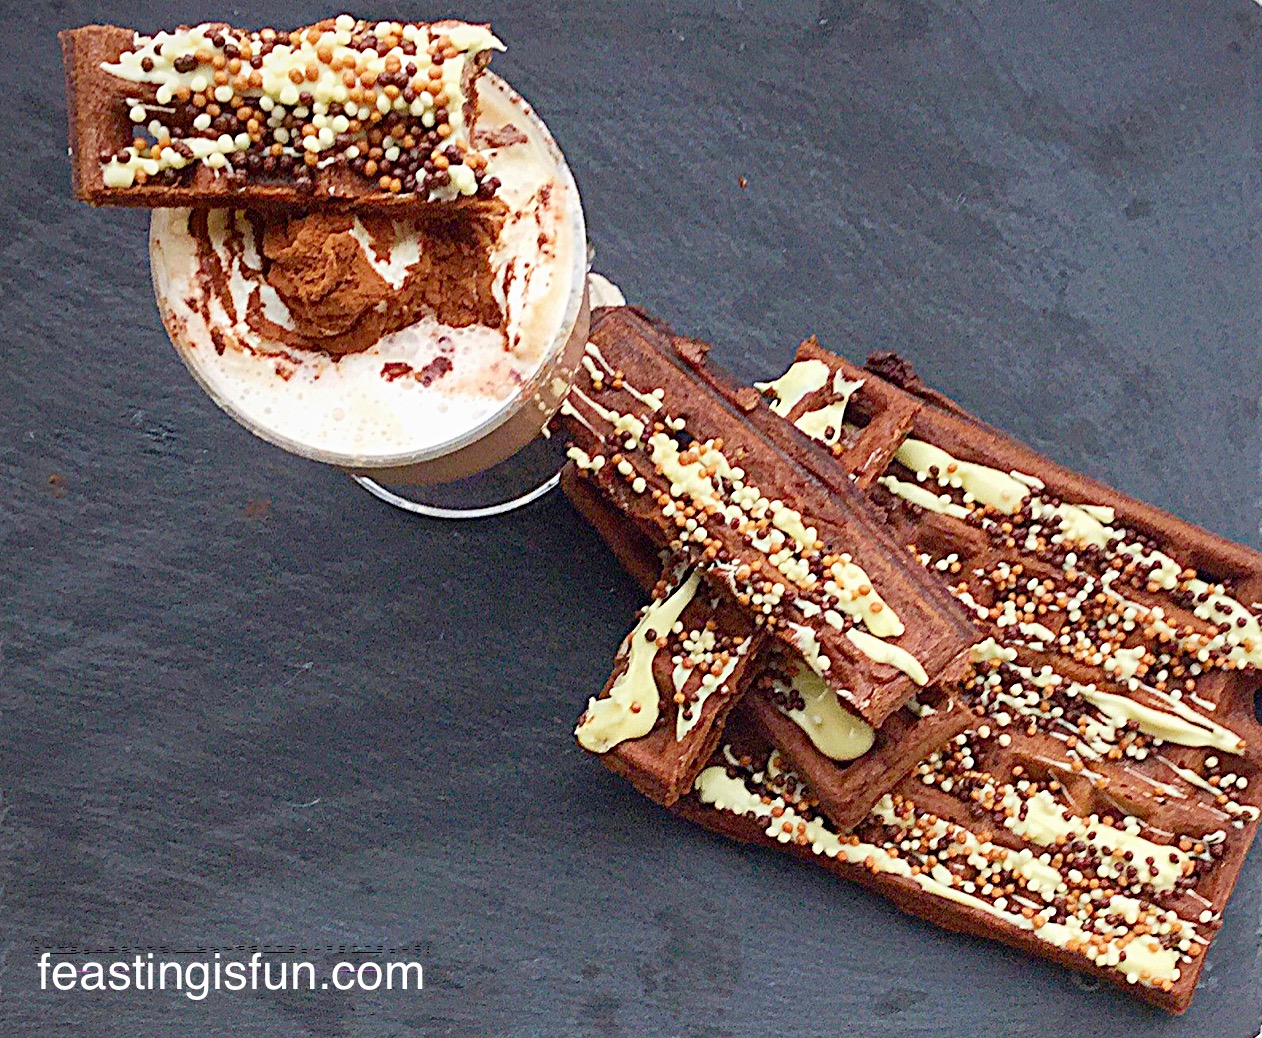
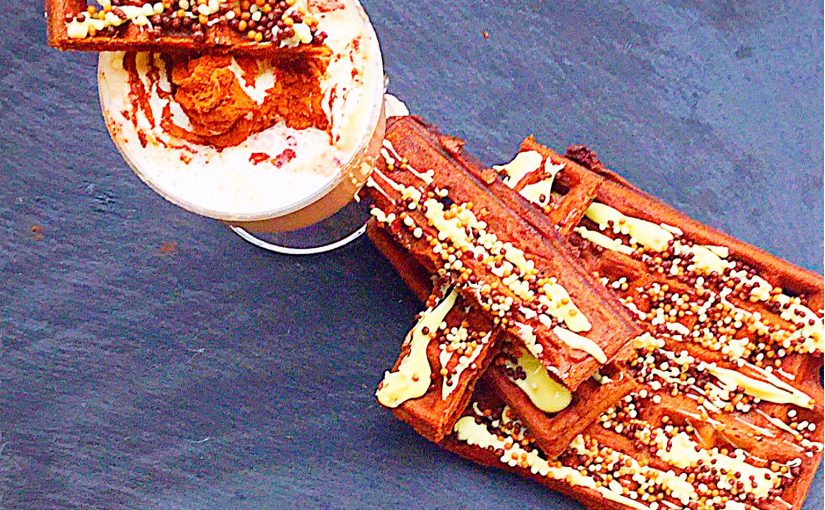
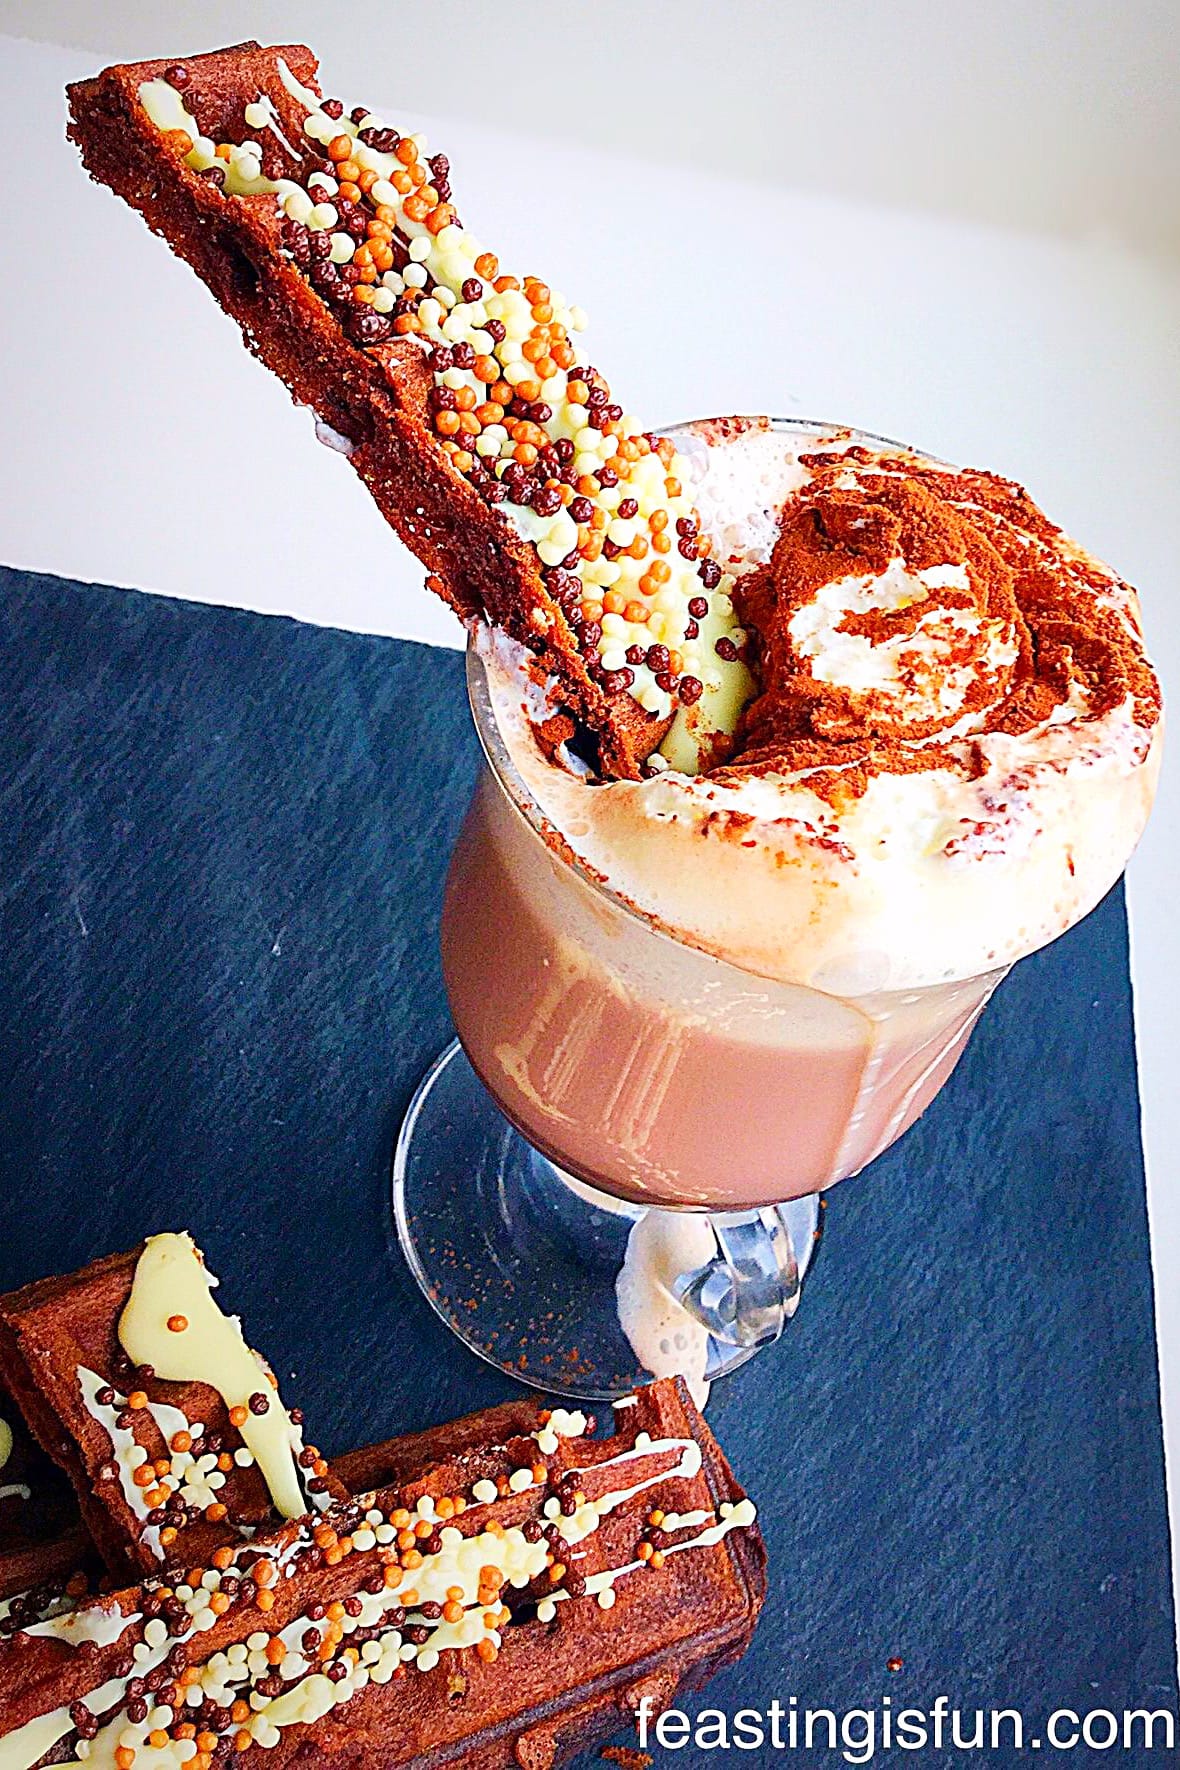
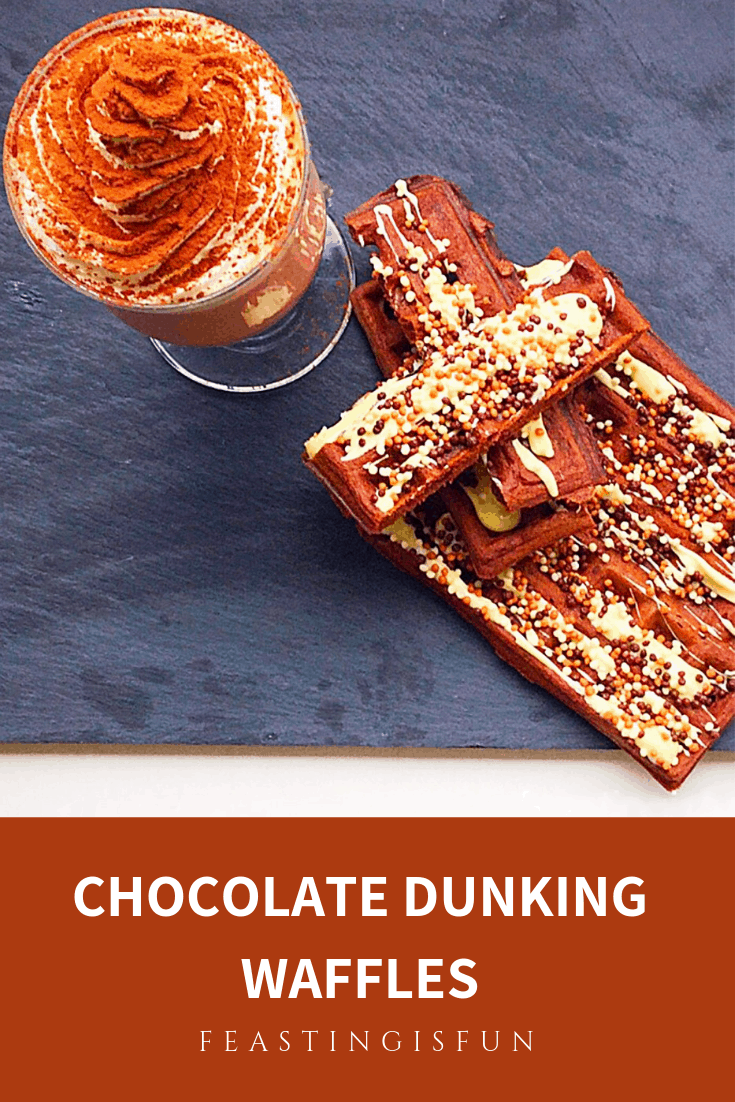
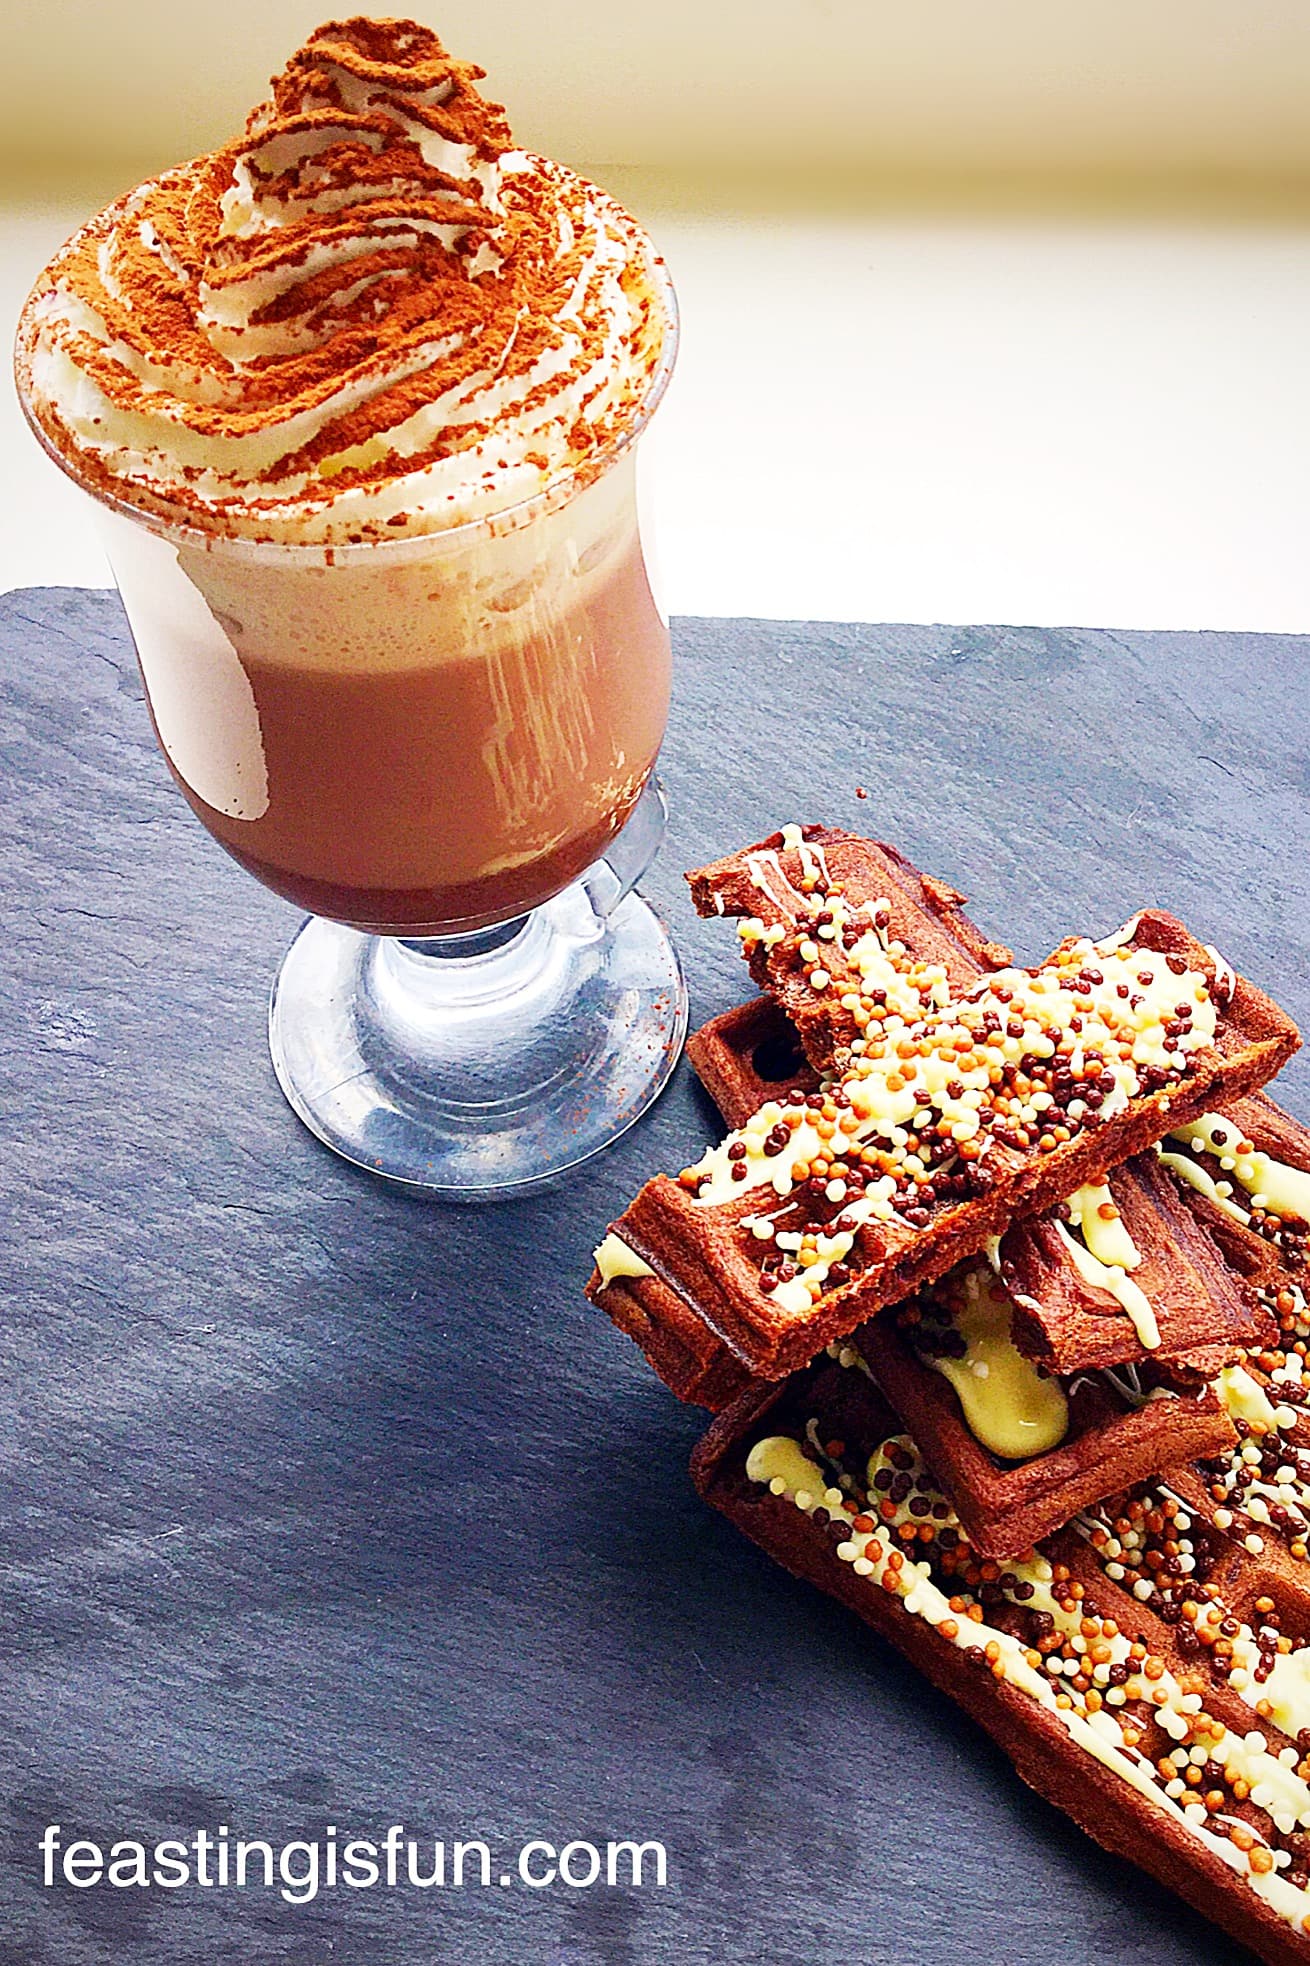
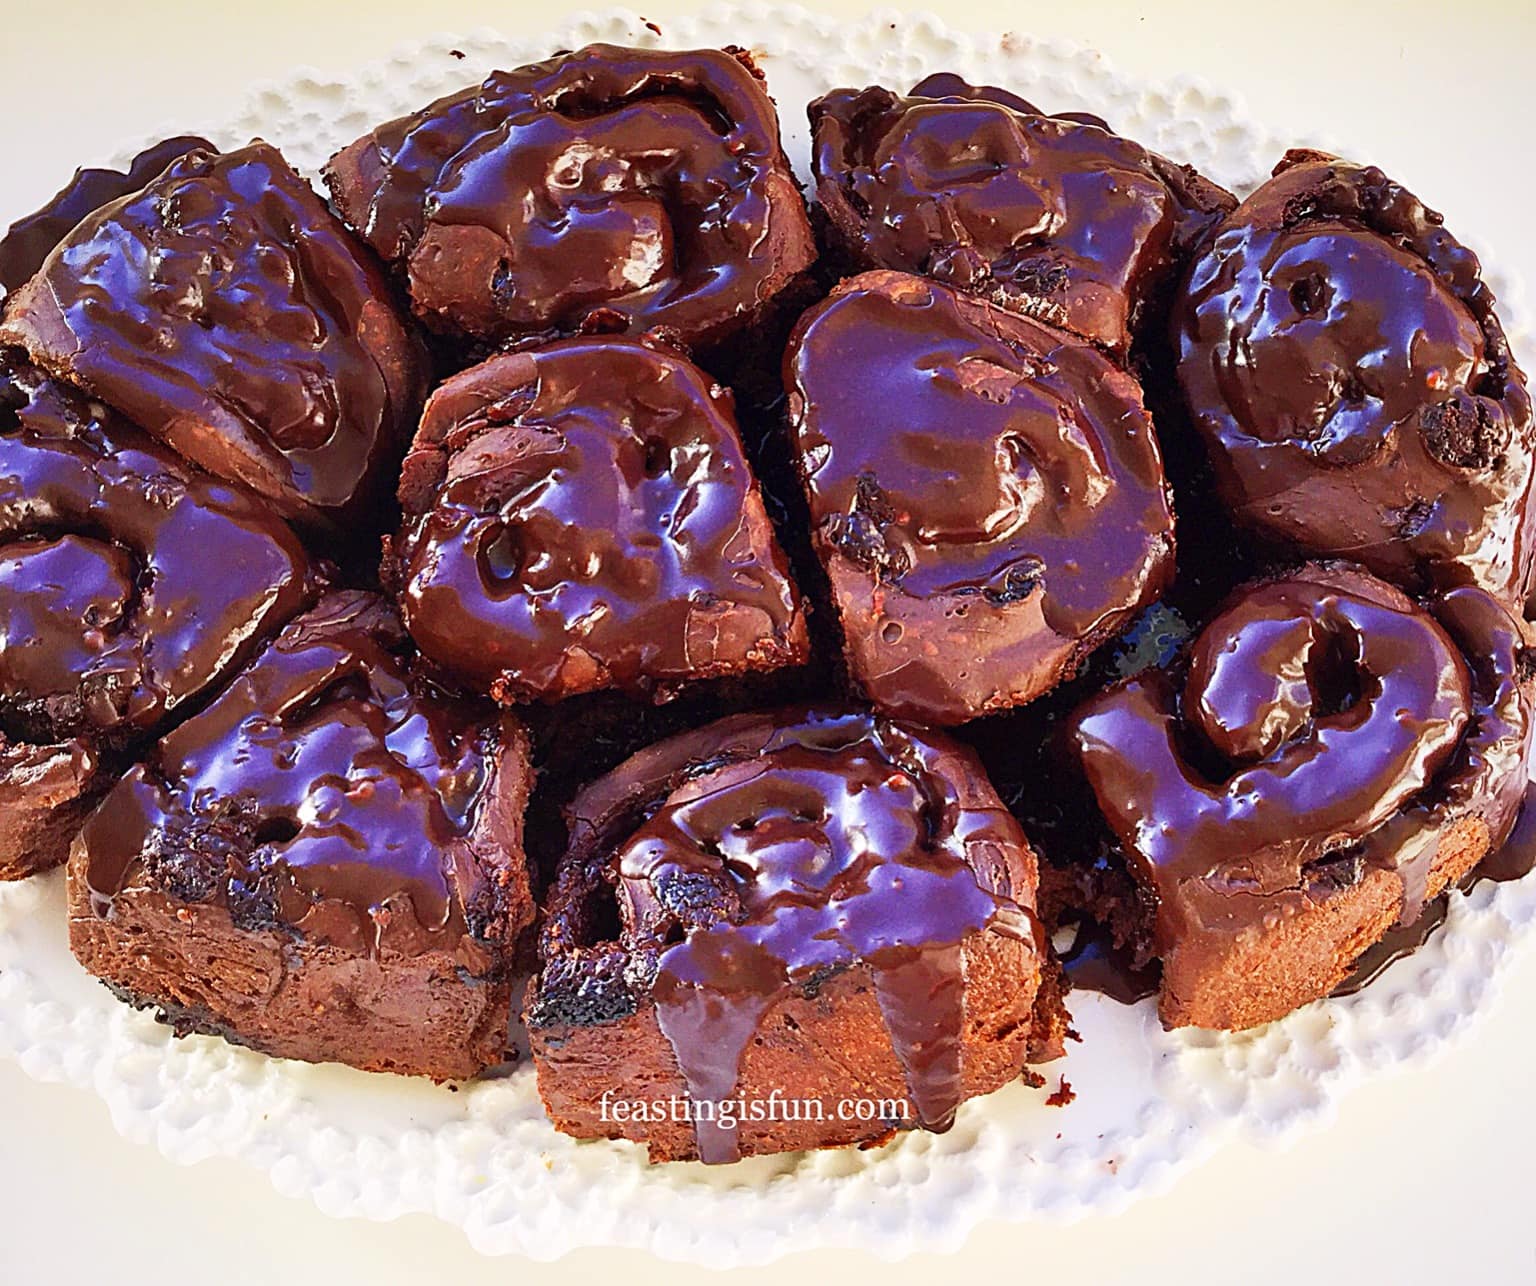
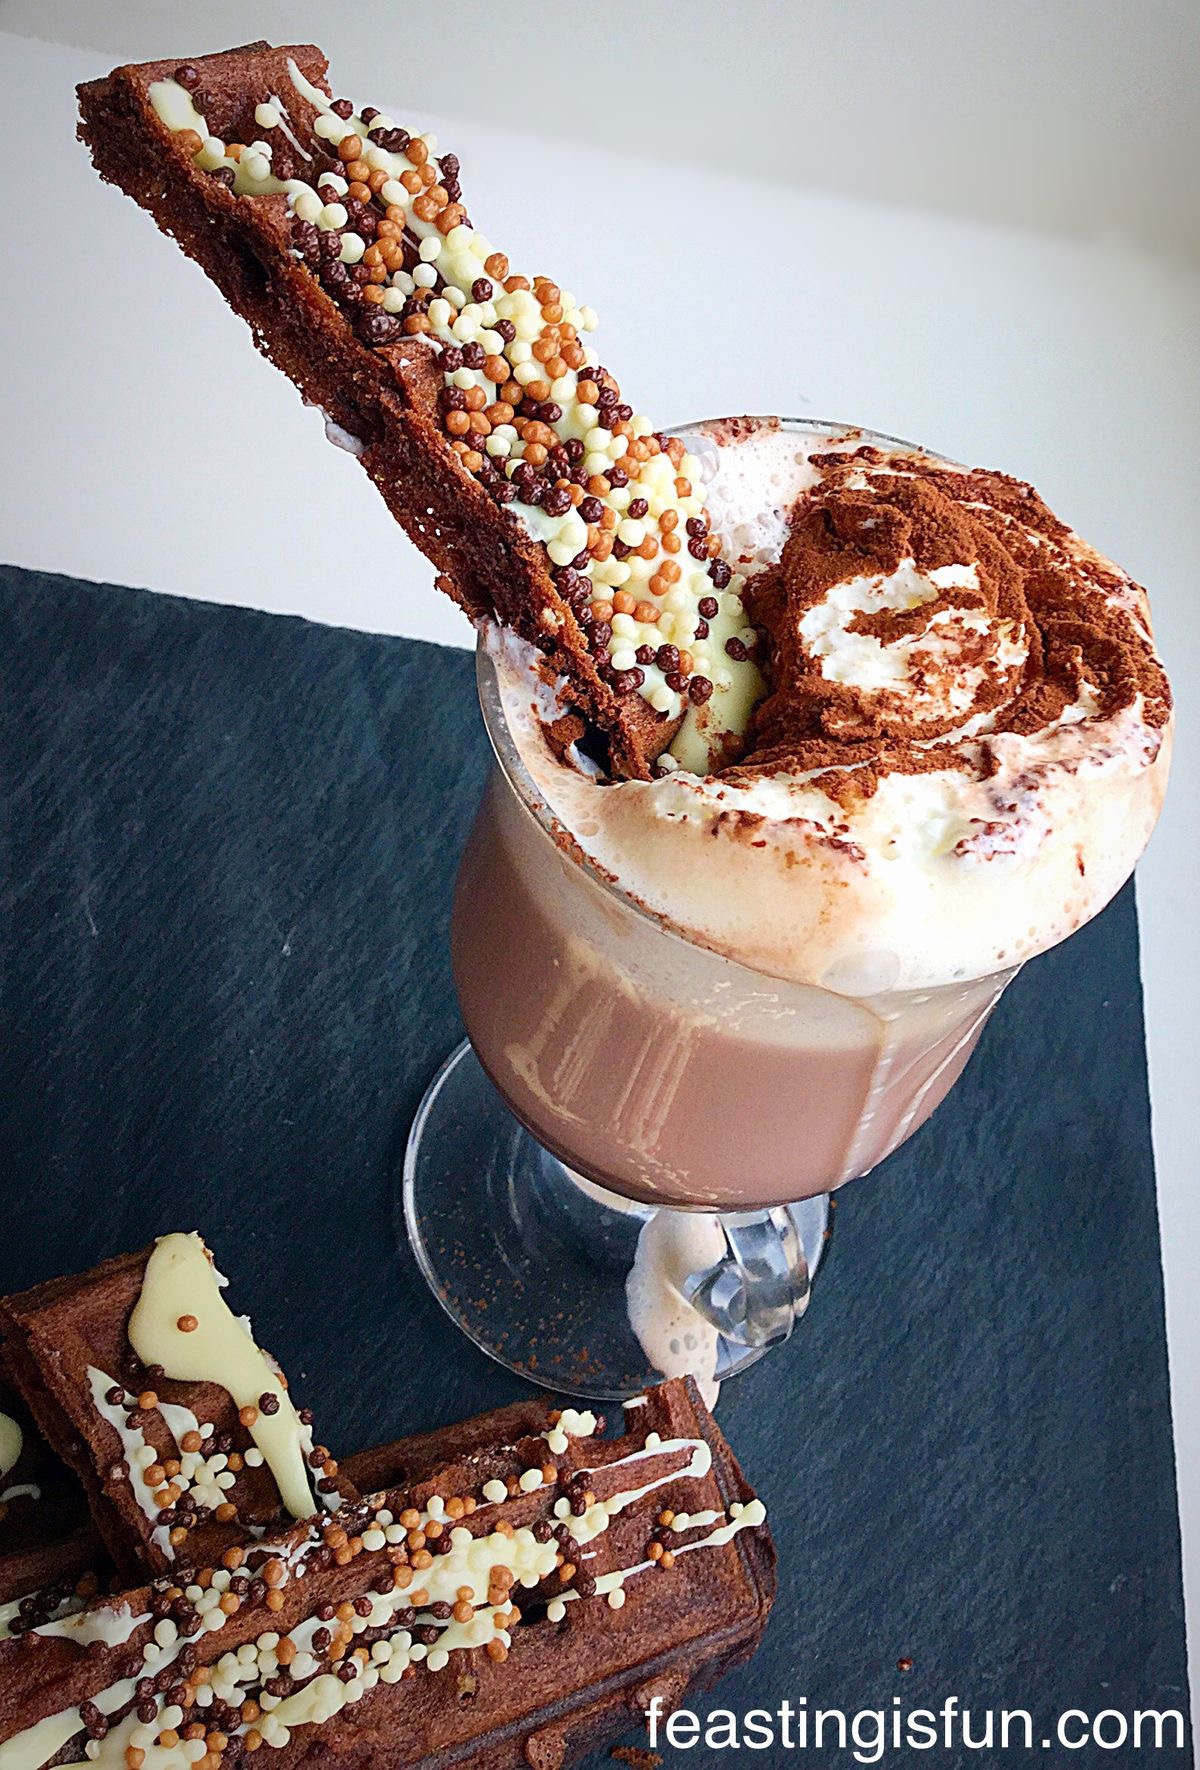
It’s still so cold even though it’s now March. Rather than shivering with cold I suggest a better way to warm up. A rich and creamy hot chocolate with Chocolate Dunking Waffles alongside.
Chocolate Dunking Waffles
On frosty, wind numbing days these Chocolate Dunking Waffles are the perfect way to give your body a warm hug!
Feasting is fun:
Food should be fun. Whether it’s licking the cake bowl out, eating the froth off your cappuccino with a spoon, always having two chocolates from the box (an absolute rule in our home).
So why not make waffles fun?
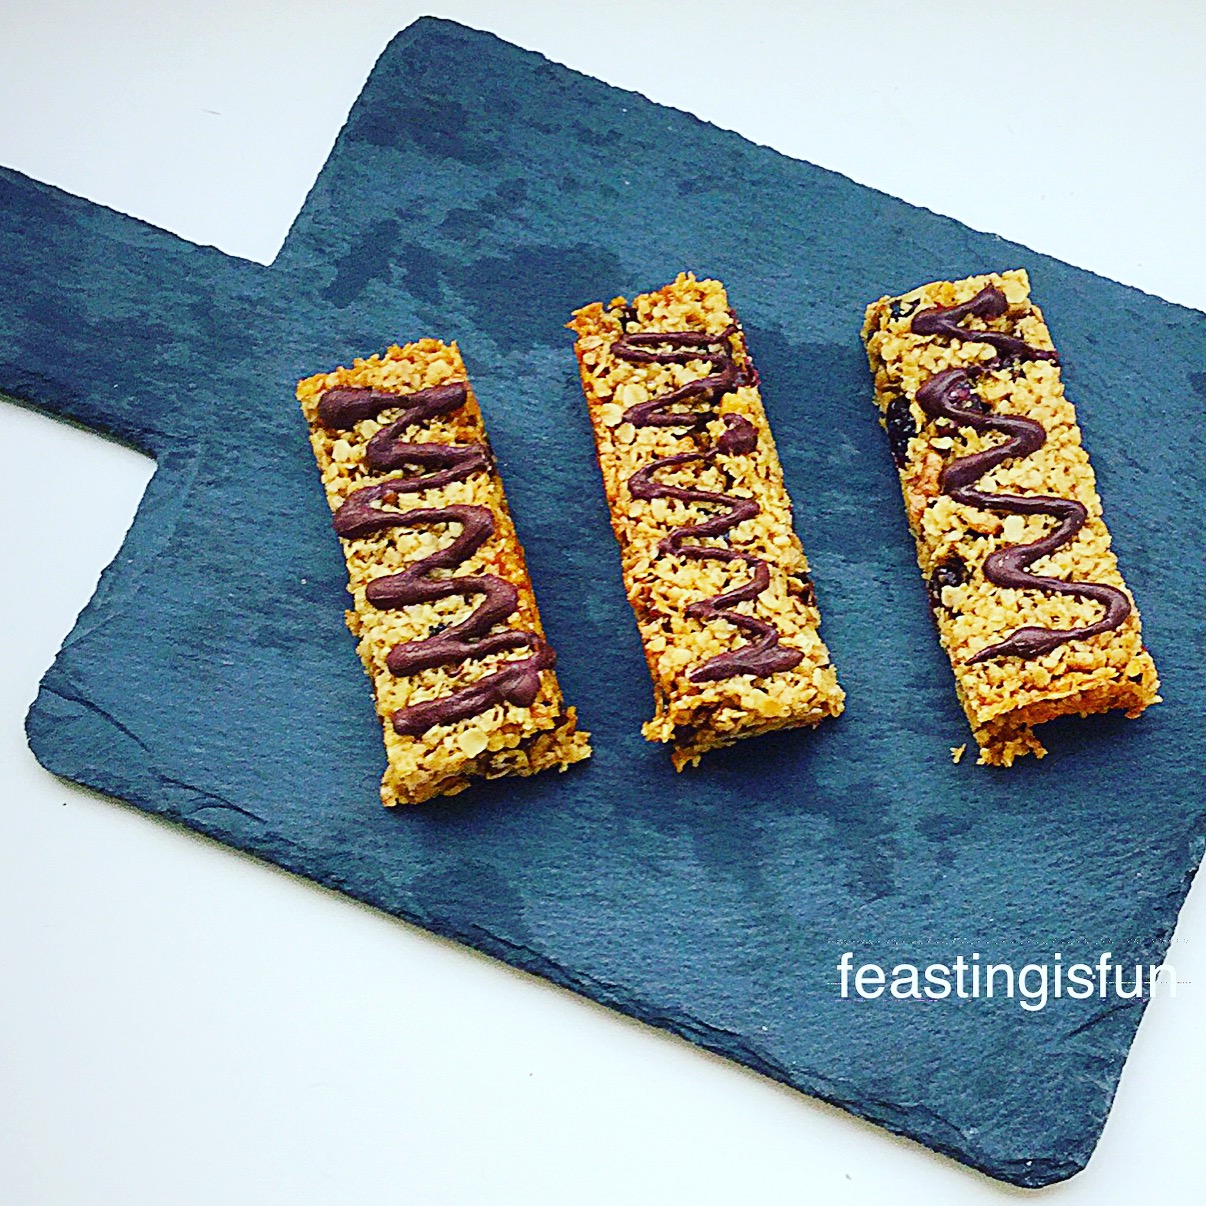
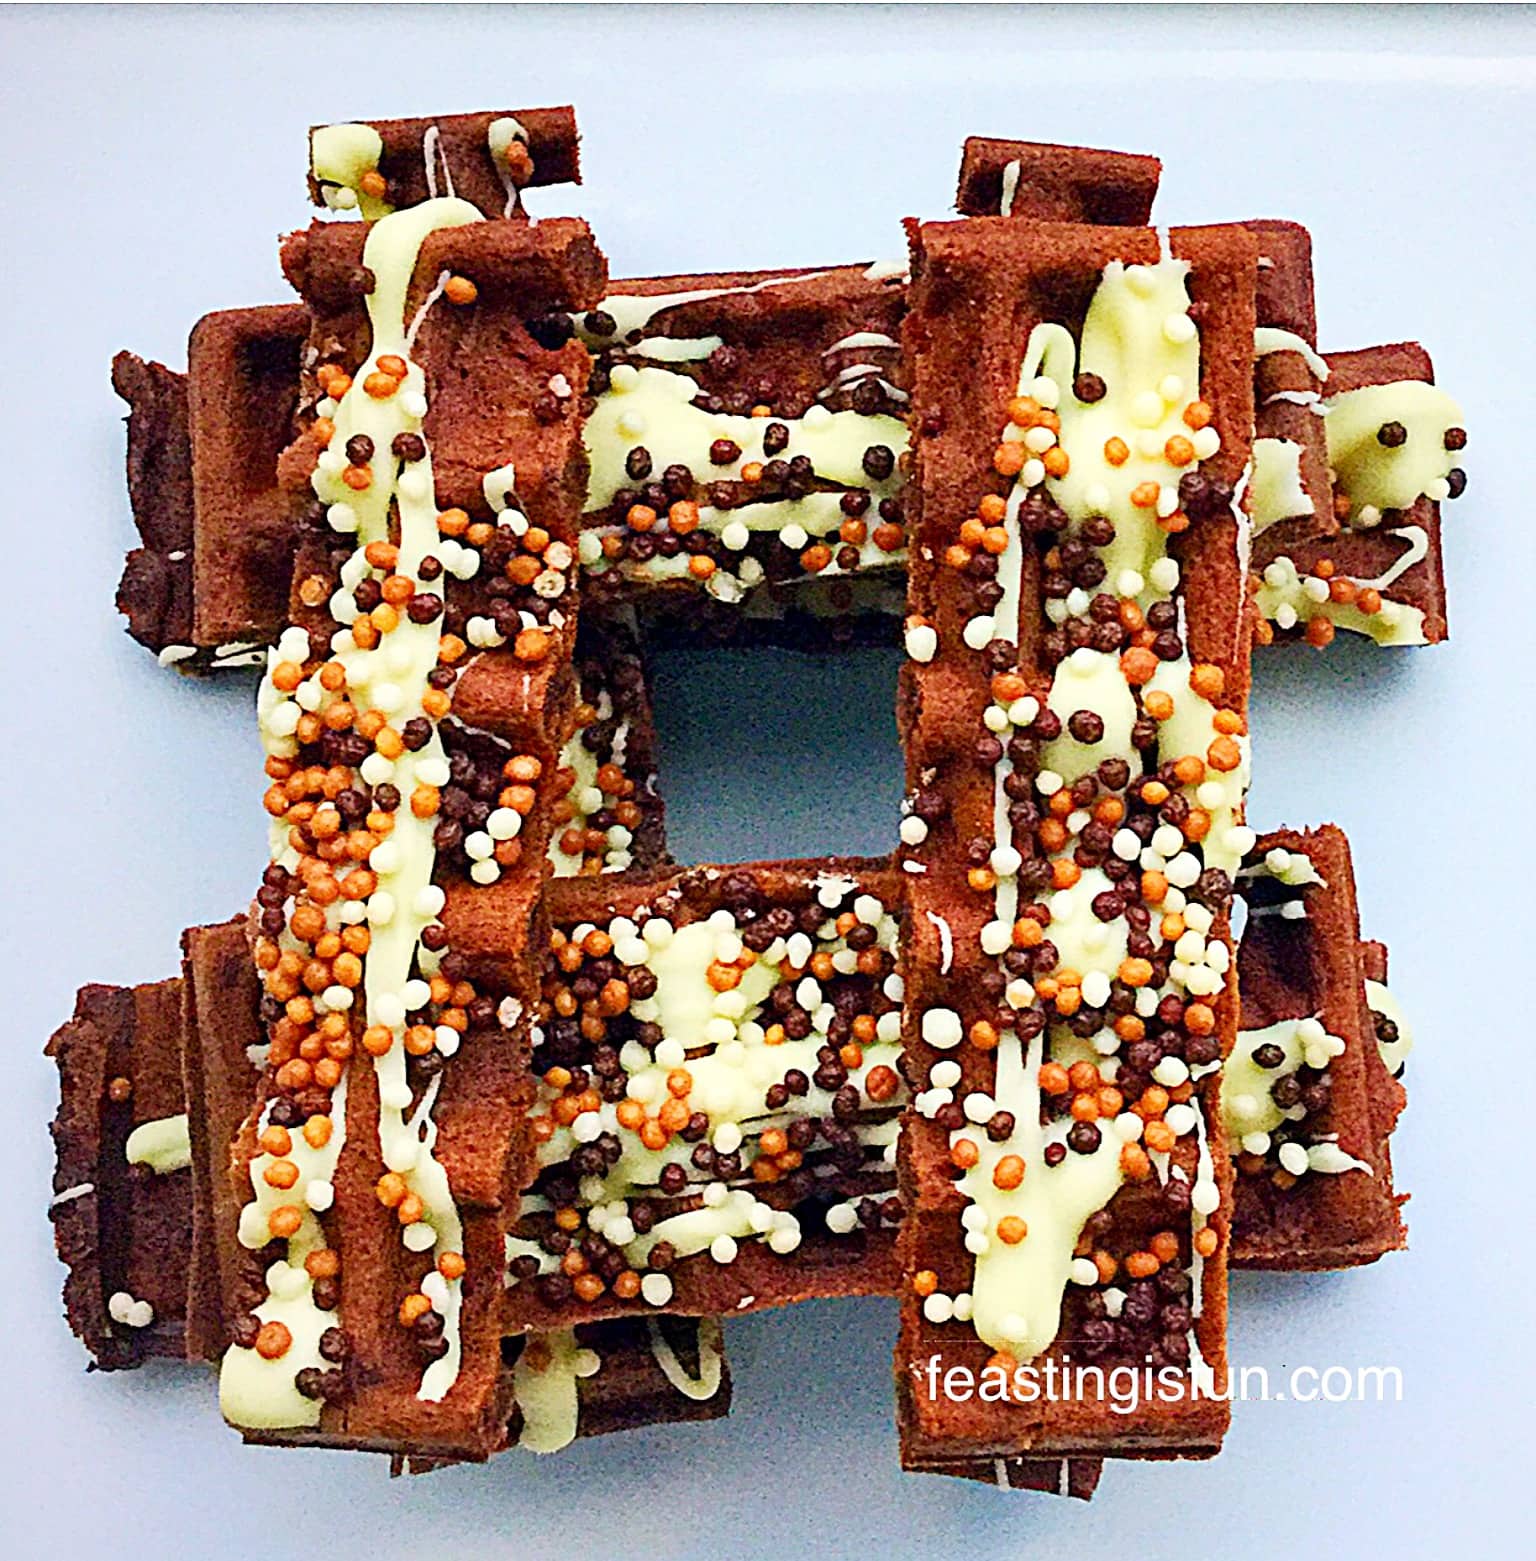
These Chocolate Dunking Waffles have a deep chocolate flavour and an almost fudgey, brownie like consistency. And they are incredibly more-ish. You don’t have to worry though, as each waffle is cut into four fingers.
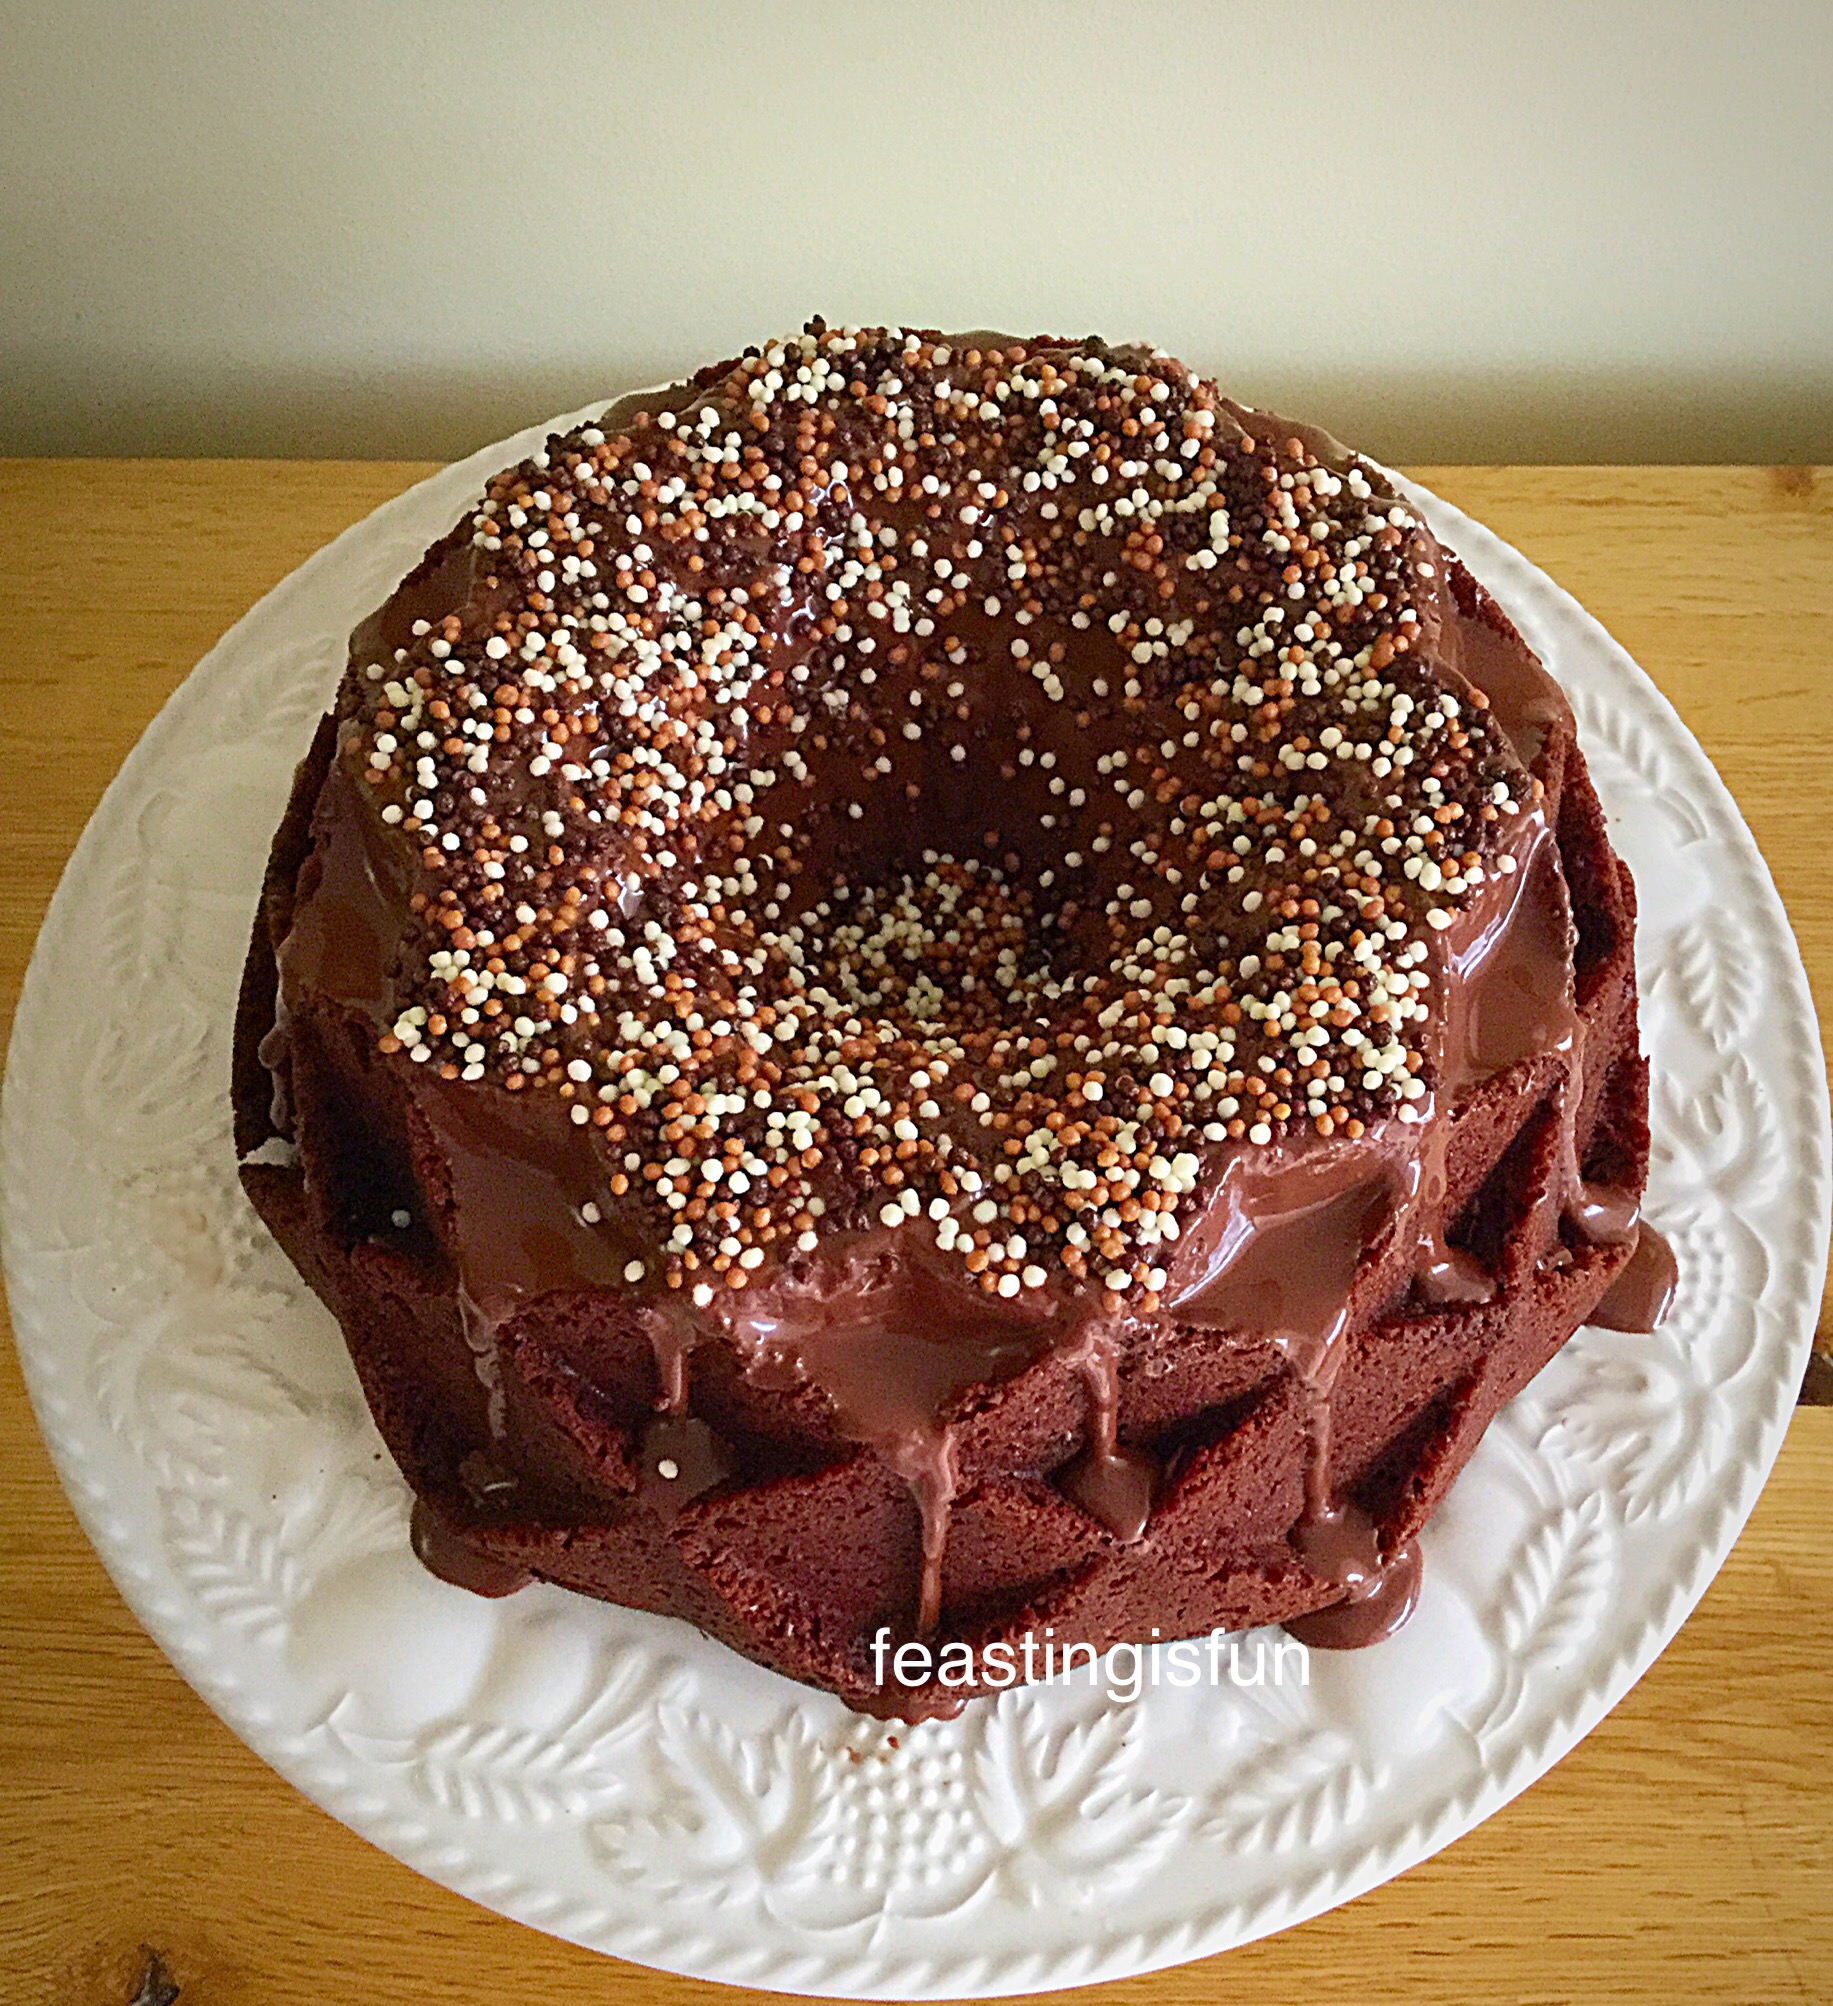
Each waffle is drizzled in best quality white chocolate and then, for crunch, sprinkled with chocolate Crispearls. Resulting in a combination that is a taste bud party waiting to happen.
As soon as they are dunked into the hot beverage of your choice, the white chocolate melts a little as the spongy waffle soaks up the hot drink. The first bite is warm and chocolatey, with vanilla flavours and then the crunch of the Crispearls.
Trust me these Chocolate Dunking Waffles are so much more than the sum of their separate parts. So, if you love chocolate, this is one taste sensation you do not want to miss out on.
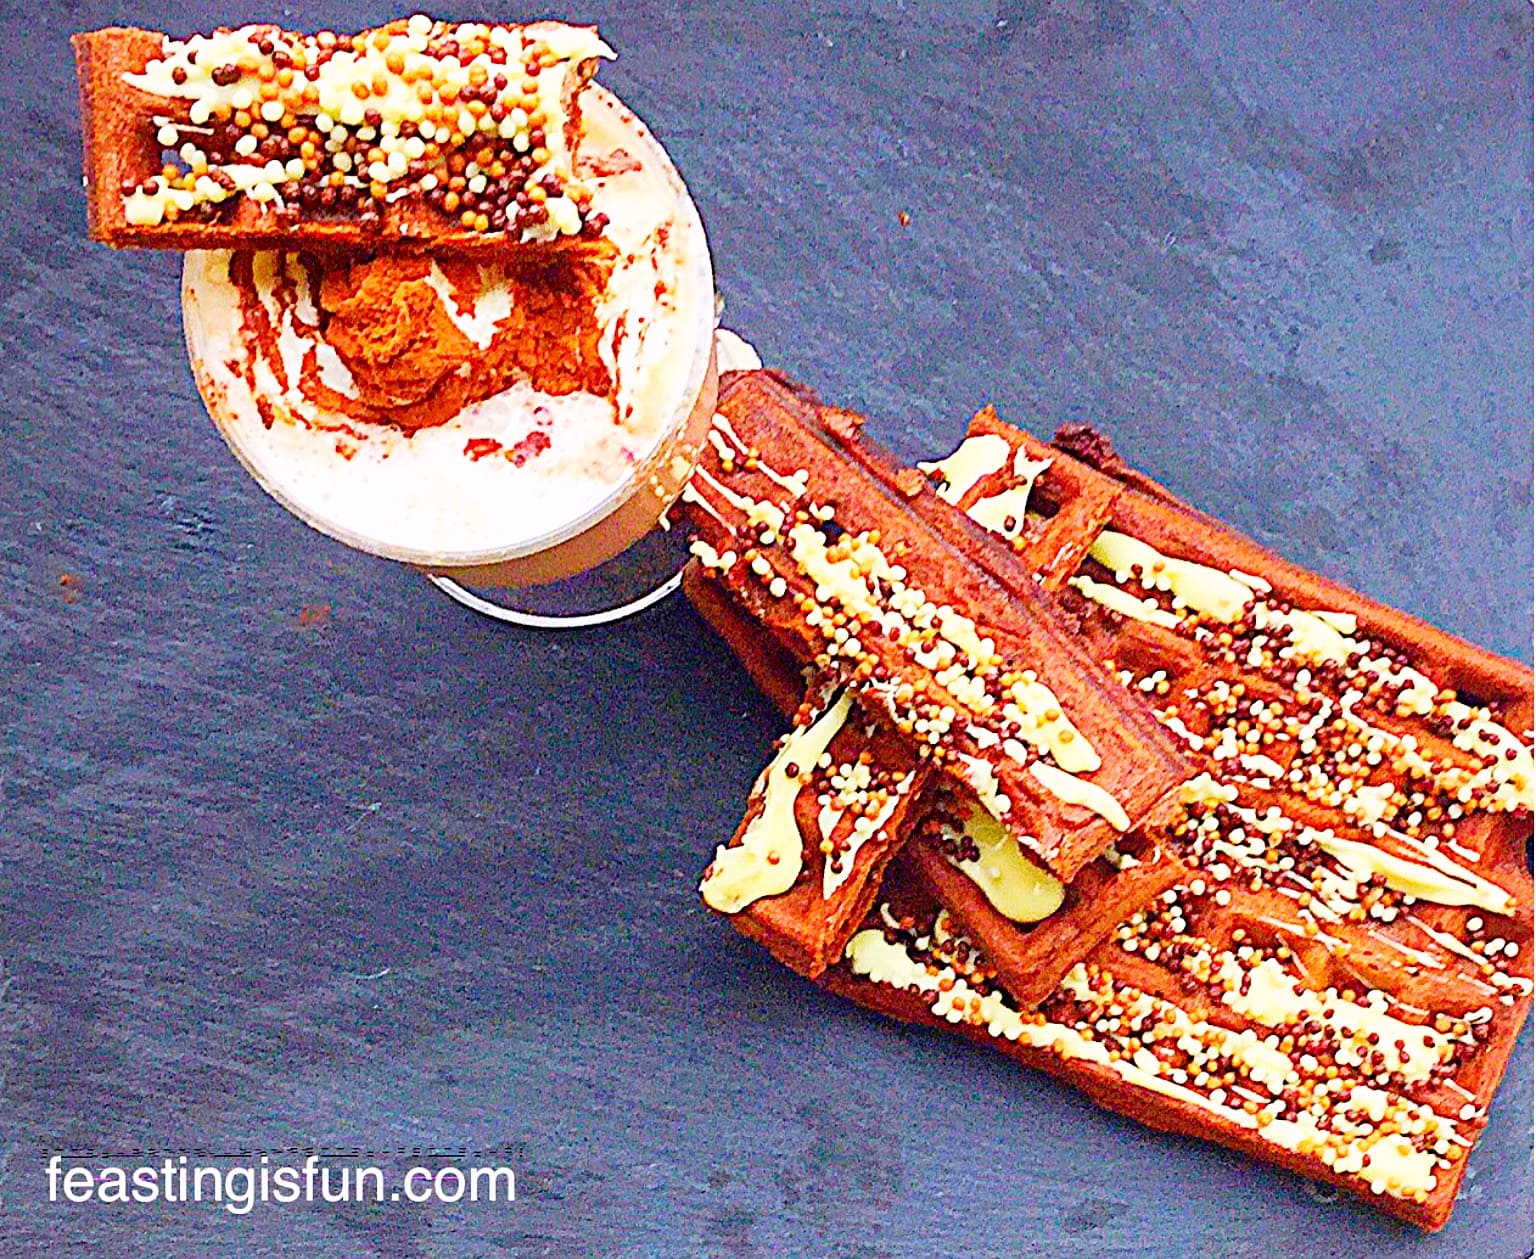
Chocolate Dunking Waffles
While I am an advocate of good table manners, however, sometimes it is fun to bend the rules a little – or even throw them right out of the window!!
Chocolate Dunking Waffles do just that. Like toast soldiers are to the perfect boiled egg, these fingers of chocolatey deliciousness are perfect for dipping and dunking into your favourite hot drink.
Also, when timing exactly how long to dunk a biscuit in a cup of tea, before it gets too wet, dunking these waffle fingers adds an extra element of fun to an already awesome combination.
Chocolate Dunking Waffles a tasty way to warm up!
Fairtrade – a fair day’s pay
As it is the start of Fairtrade Fortnight, bringing awareness to the farmers and producers who grow and harvest some of our favourite products, I choose to use Food Thoughts Cocoa in my recipe.
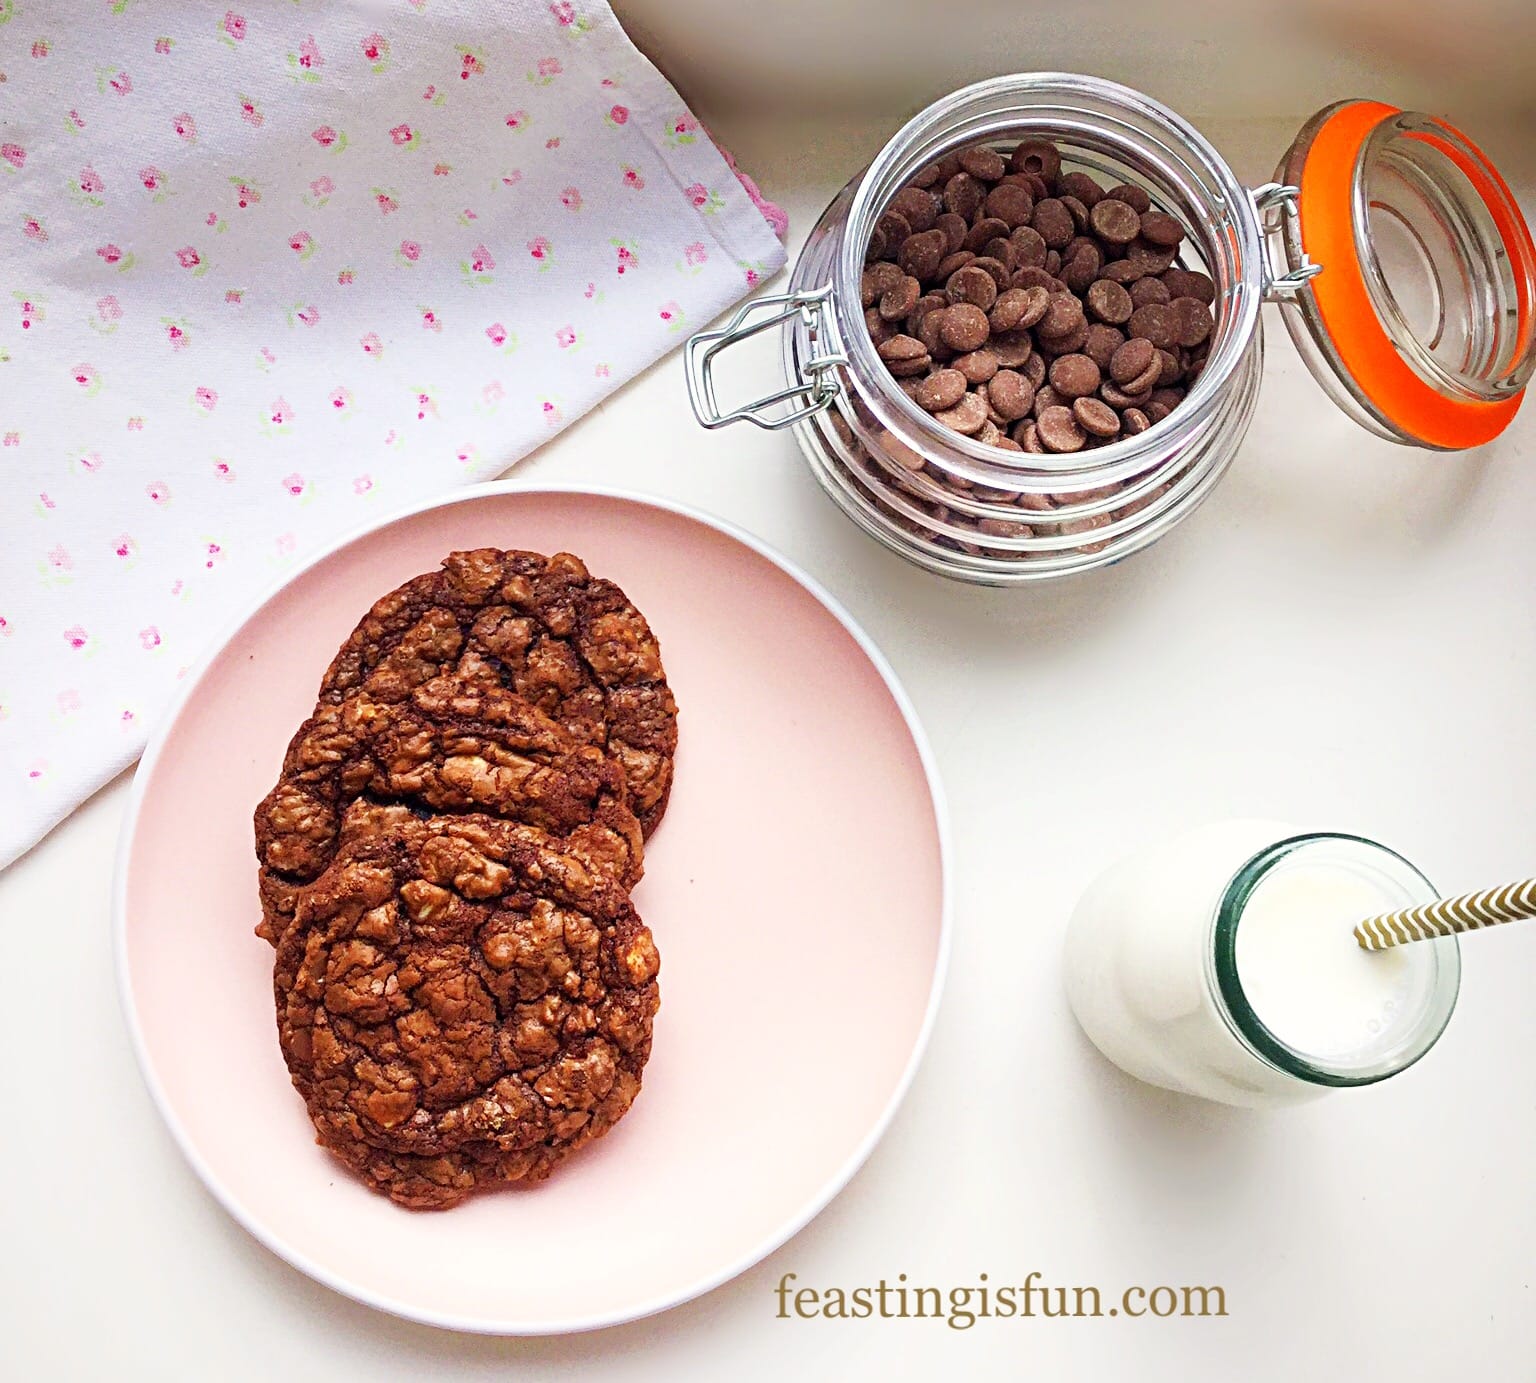
This cocoa is available from Sainsbury’sand Waitrose. It has a wonderful deep cocoa flavour, perfect for using in my Extreme Chocolate Cookies, or other recipes requiring cocoa.
Food Thoughts Cocoa perfect in these waffles and for making the hot chocolate!
Recipe: Makes 12-14 whole Chocolate Dunking Waffles
175g/7oz Unsalted Butter – melted and set aside to cool – the extra is for greasing the waffle plates
4 Large Free Range Eggs
75ml/3fl oz Whole Milk – semi skimmed may also be used
Method: Prepare your waffle maker according to the manufacturers instructions.
For the Andrew James Waffle Makereach plate it brushed with melted butter before switching on to heat up.
Making the waffle batter
While the butter is cooling crack the eggs into a large bowl. Give them a quick whisk.
Add the milk, sugar and vanilla extract to the eggs and lightly whisk to combine.
Once cooled weigh 150g of the melted butter into the egg, milk, sugar, vanilla extract mixture and whisk briefly to combine (wet ingredients).
Weigh the flour and sift along with the cocoa, baking powder and salt into the bowl containing the wet ingredients.
Gently mix both the wet and dry ingredients together until just combined – over mixing will lead to tough waffles.
Delicious Chocolate Waffle Batter
Using the waffle maker
Place 2 dessert spoons of chocolate waffle batter onto the waffle plates. This is a slightly thinner batter than you may be expecting – that is how it should be.
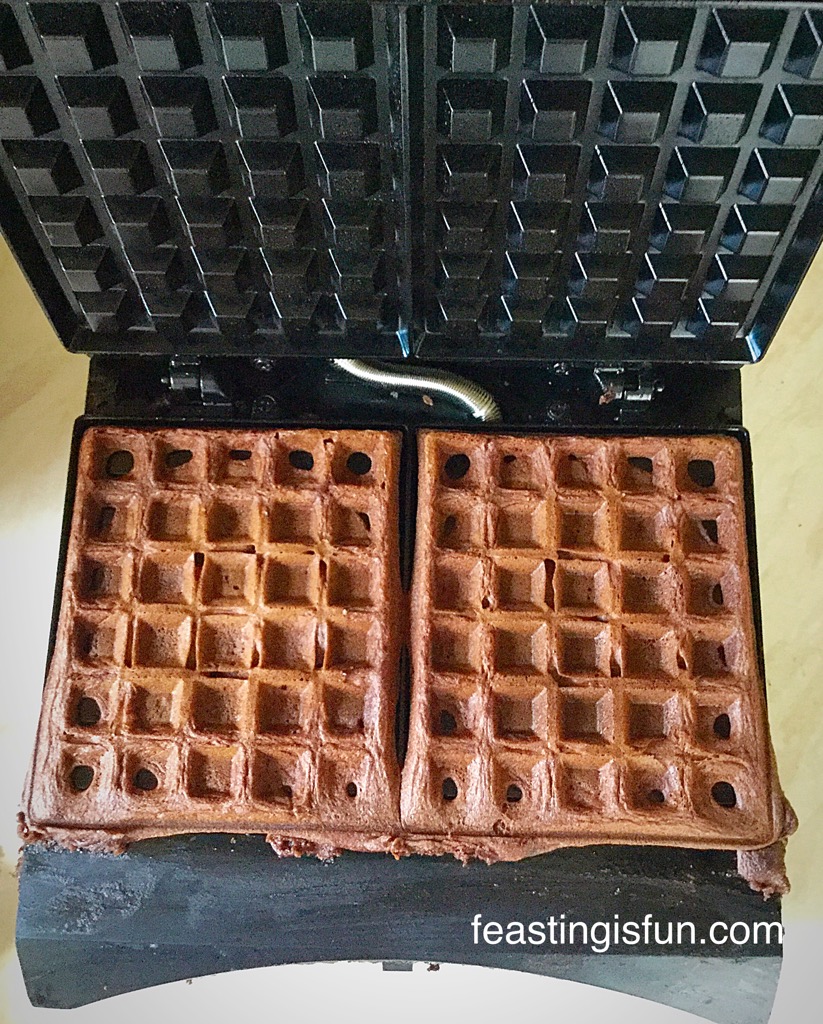
Close the lid of the waffle maker and cook for 6 minutes.
Two delicious cooked Chocolate Dunking Waffles
After 6 minutes, using oven gloves to protect your hands, press the button to open the lid of the waffle maker.
Using a wooden spatula (not metal as it may damage the non stick surface) remove the waffles from the waffle plate and place on a cooling rack or plate.
Continue as before until all of the waffles have been cooked.
A stack of Chocolate Dunking Waffles.
Place the waffles on a cooling rack or plate to cool completely before decorating.
Decorating the chocolate dunking waffles:
Break or chop the white chocolate up into small chunks and place in a heat proof, microwaveable bowl.
Zap for 20 seconds at a time, stirring after each zap.
When the chocolate has almost completely melted remove the bowl from the microwave and continue to stir. The residual heat will melt the remaining chocolate.
Layout all of the waffles on a worktop covered in baking parchment.
Use a teaspoon to drizzle the chocolate over each waffle.
Immediately sprinkle with your choice of topping.
Leave to set.
As soon as the chocolate has set cut each of the Chocolate Dunking Waffles into four fingers.
Serve with a hot drink and a smile!
Time to get dunking.
Chocolate Dunking Waffles
What would be your favourite drink to dunk these delicious beauties in?
If you make these, or any of my recipes, please pop a photo up on social media – @sammiefeasting Twitter/Instagram/Pinterest for me to see. I’m always amazed and inspired by your efforts, especially when you use one of my recipes.
If you have enjoyed these Chocolate Dunking Waffles then you may enjoy these:
While we always make the children a mug of hot chocolate during the midst of summer, when they have spent a rather long time in our rather large paddling pool, it has since become a summer tradition. And these Chocolate Dunking Waffles would be perfect, especially if the hot chocolate has a scoop of ice cream in the top! Since this site has fun in its name, I really hope that you do have fun whilst feasting on these delicious Chocolate Dunking Waffles.
So, whatever you are making, baking and creating in your kitchens, have fun preparing and sharing your feast.
Sammie xx
No part of this post may be reproduced or duplicated without the written permission of the owner. Please see my Disclosure Policy.
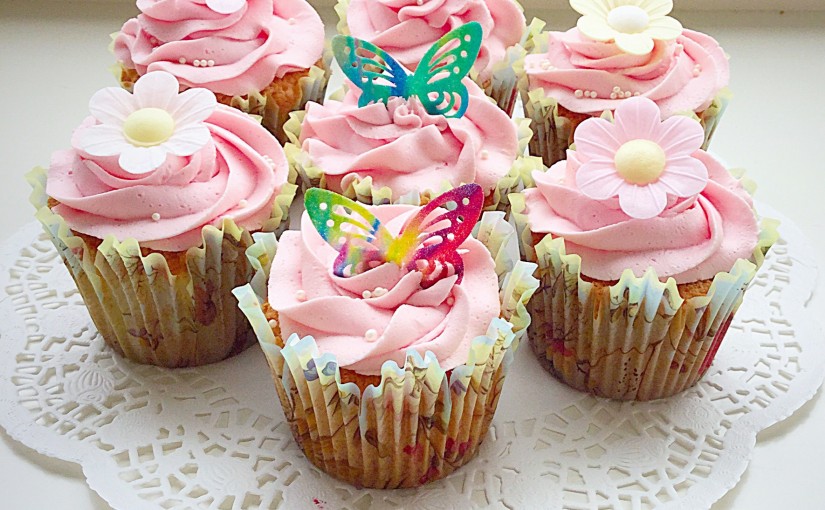
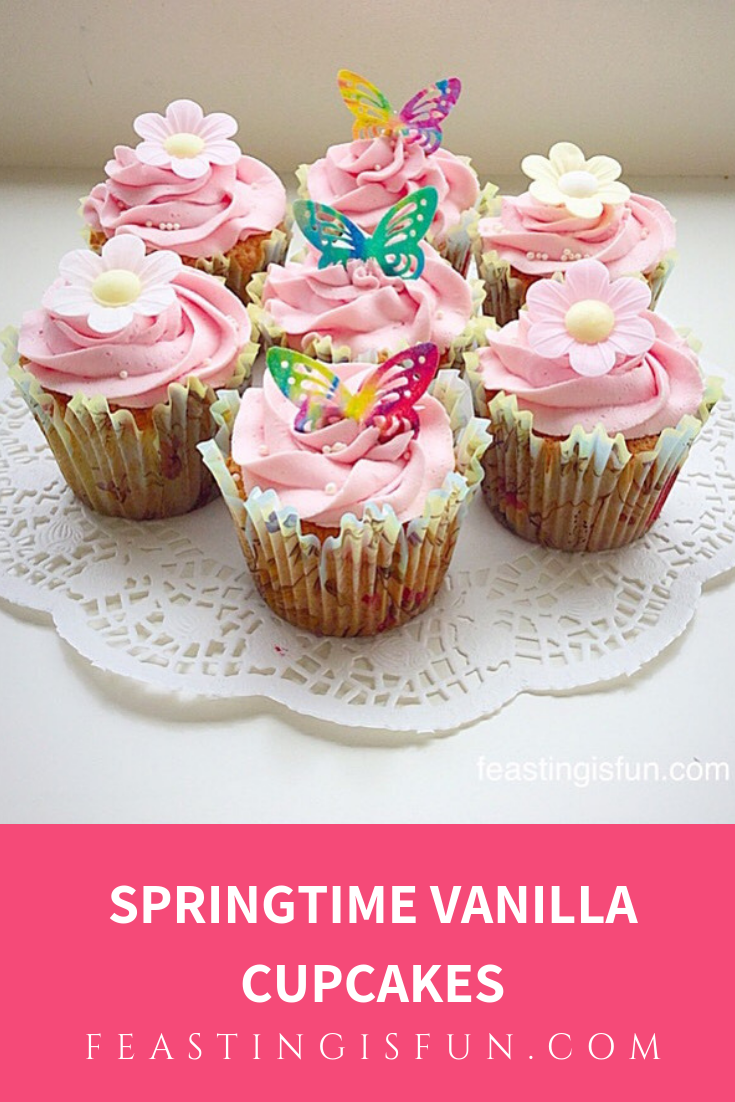
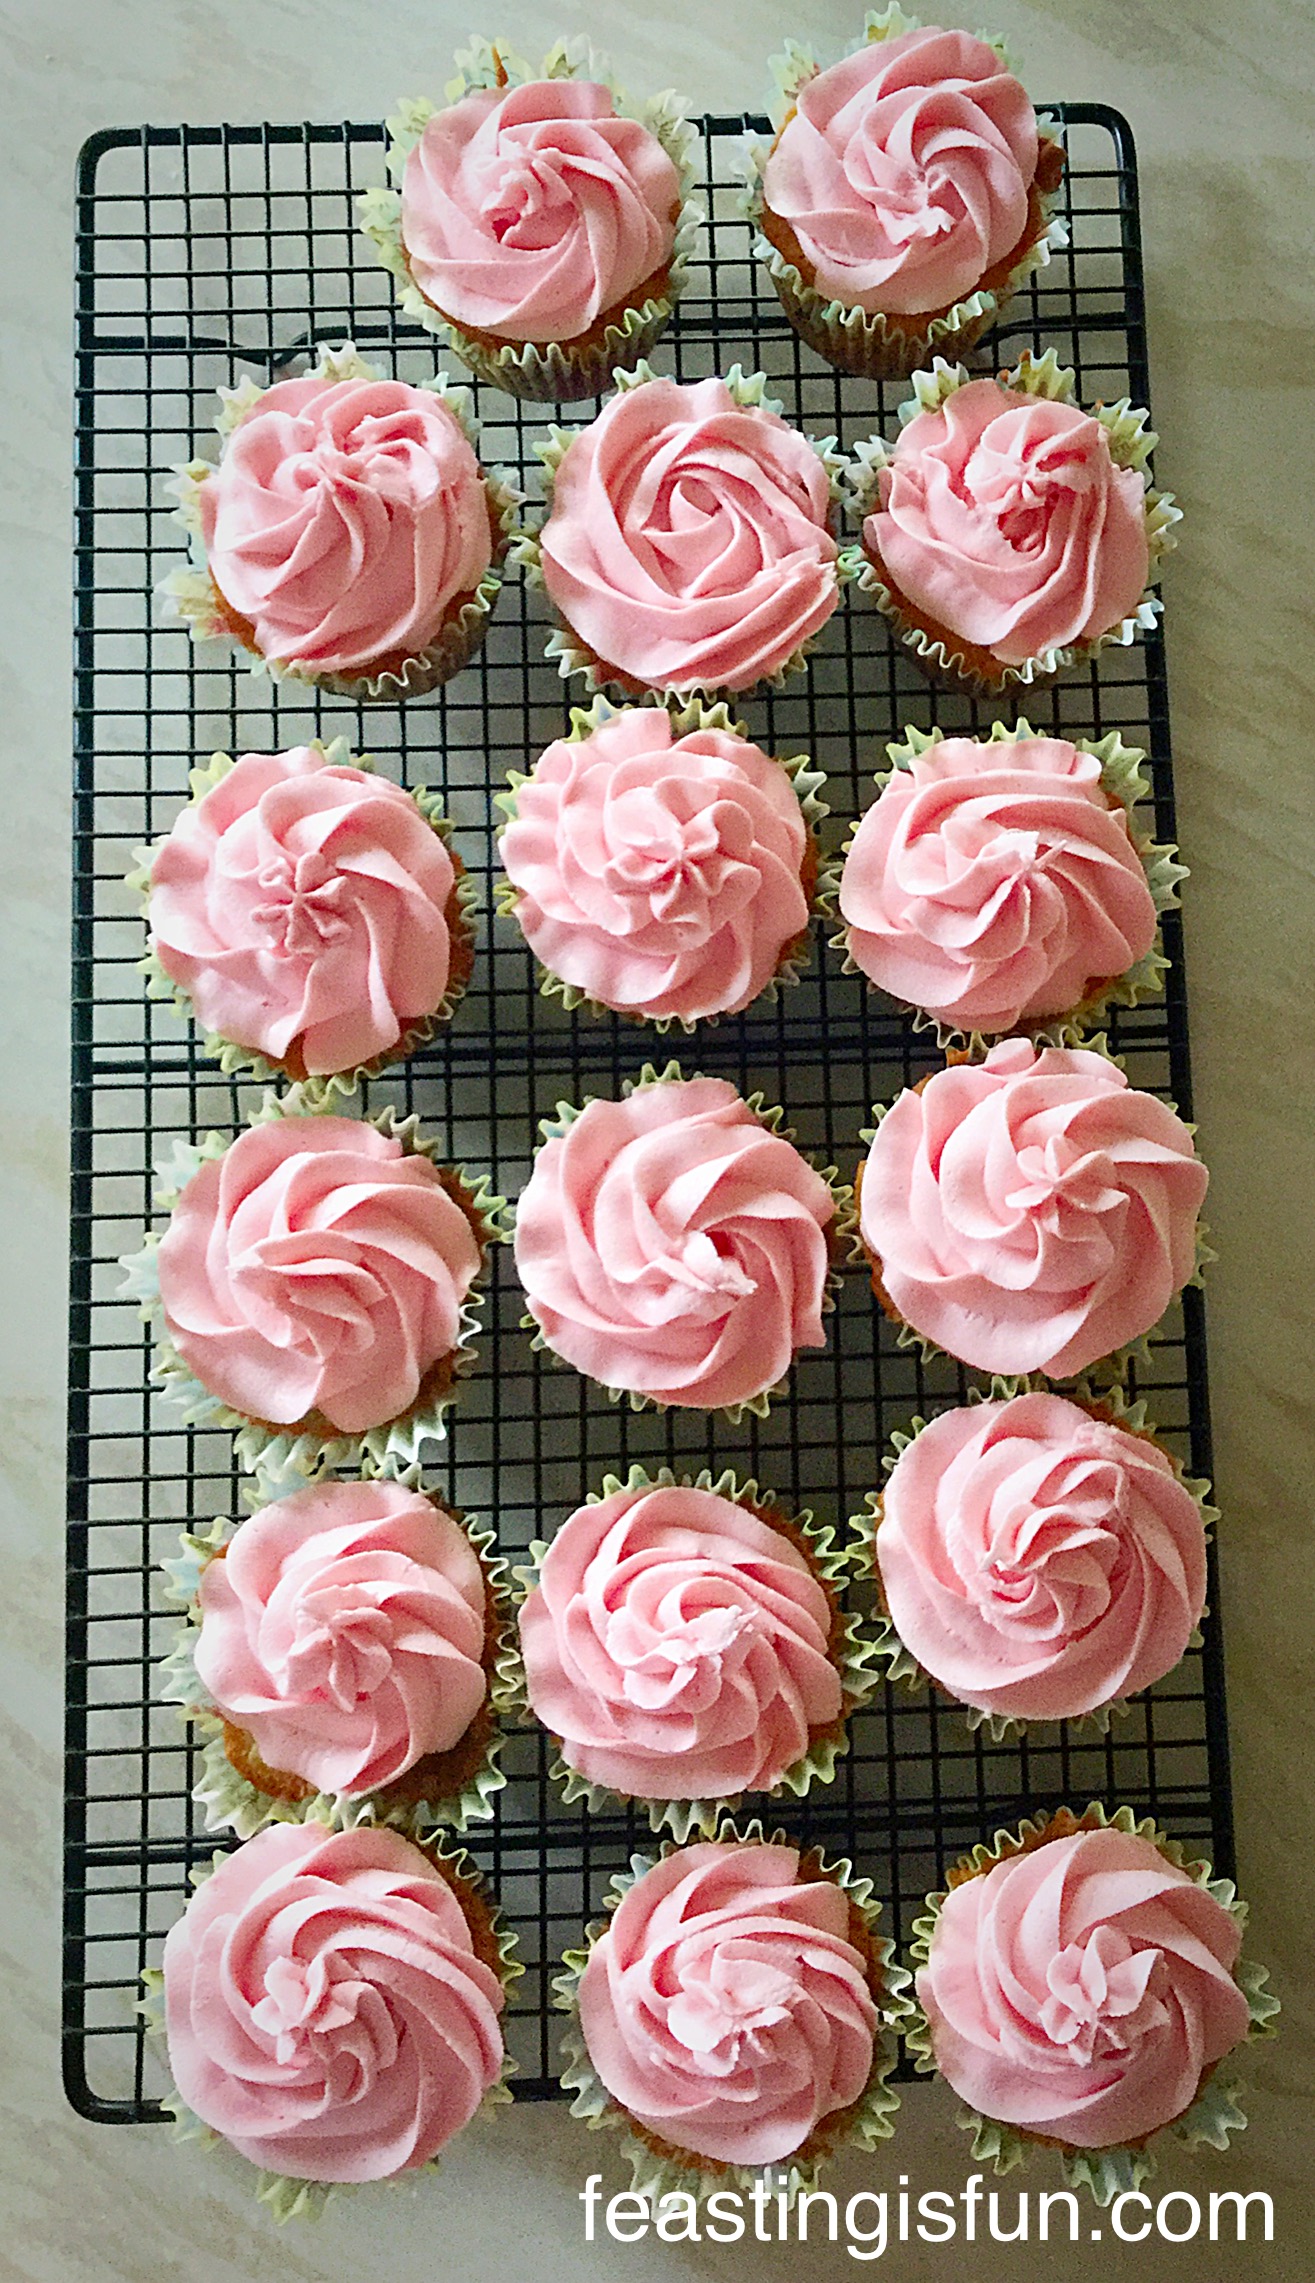
Wednesday this week was a truly dreary, dark and very cold day. All types of weather threw themselves at the ground; hail, snow, rain, sleet and it was windy too. Especially as it is March, I want to see evidence of Spring. Most of all flowers and lambs. Finally, I an attempt to cheer us all up I made these very pretty and extremely delicious Springtime Vanilla Cupcakes.
So, does the image of pink, raspberry buttercream topped cupcakes, adorned with large daisy flowers and butterflies cheer you up?
Springtime Vanilla Cupcakes
While the weather was so chilly and dreary, I was also feeling a little blue too, having just received news that a very close friend is extremely poorly. And so baking these cupcakes was therapeutic on both counts.
Do you find baking relaxing?
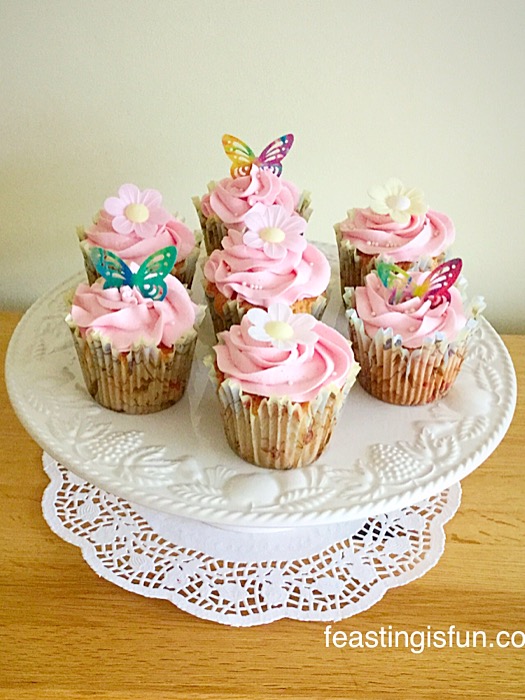
Springtime Vanilla Cupcakes
Using Naturally Flavoured Icing Sugar
Although these are called Springtime Vanilla Cupcakes, which is true, the cake part is flavoured with Nielsen – MasseyVanilla Extract, for the buttercream I have used a favourite flavoured icing sugar.
Sugar and Crumbssell an amazing range of naturally flavoured icing sugars. While making my Raspberry Ripple CupcakesI used their Raspberry Ripple flavoured icing sugar. Since the day that last cupcake was eaten, in Kylie’s own words “I just can’t get you outta my head” I have wanted more. Especially more of the delicious tasting buttercream and more cupcake to swirl it onto!!
And so these Springtime Vanilla Cupcakes were the perfect excuse to indulge my passion again.
Importantly, this time I wanted to leave the option of using flavoured buttercream as a choice. Also, if you do buy some flavoured icing sugar, you can choose to make the buttercream any flavour you want. Especially, as the vanilla sponge goes well with any flavoured frosting. Alternatively, if you want to stick with vanilla buttercream that tastes awesome as well.
Springtime Vanilla Cupcakes
Personally I think the pink icing, along with the decorations, really set these cupcakes apart. Although ‘Springtime’ was at the forefront of my mind whilst creating these beauties, with Mother’s Day being this coming Sunday, they would also make a perfect gift for any Mum.
Recipe: Makes 18 Large Springtime Vanilla Cupcakes
For the Cake:
175g/6oz Caster Sugar
175g/6oz Unsalted Butter at room temp.
1tsp Vanilla Bean Paste – or you can substitute for Vanilla Extract
350g12oz Icing Sugar – I used 250g Sugar and CrumbsRaspberry Ripple flavour and 100g/4oz Plain Icing Sugar. (Confectioners Sugar)
175g/6oz Unsalted Butter
Pink Food Colour – I used Wiltonpink food colouring gel (available from cake decorating shops, Amazon and similar from Lakeland UK)
2tbsp Very Hot Water
Dr Oetkerrice paper daisies, various sprinkles (available from most supermarkets)
Rice paper butterflies – from Amazon
Method: Preheat the oven to 170C/150C fan oven, gas mark 3, 325F
Making The Vanilla Cupcake Batter
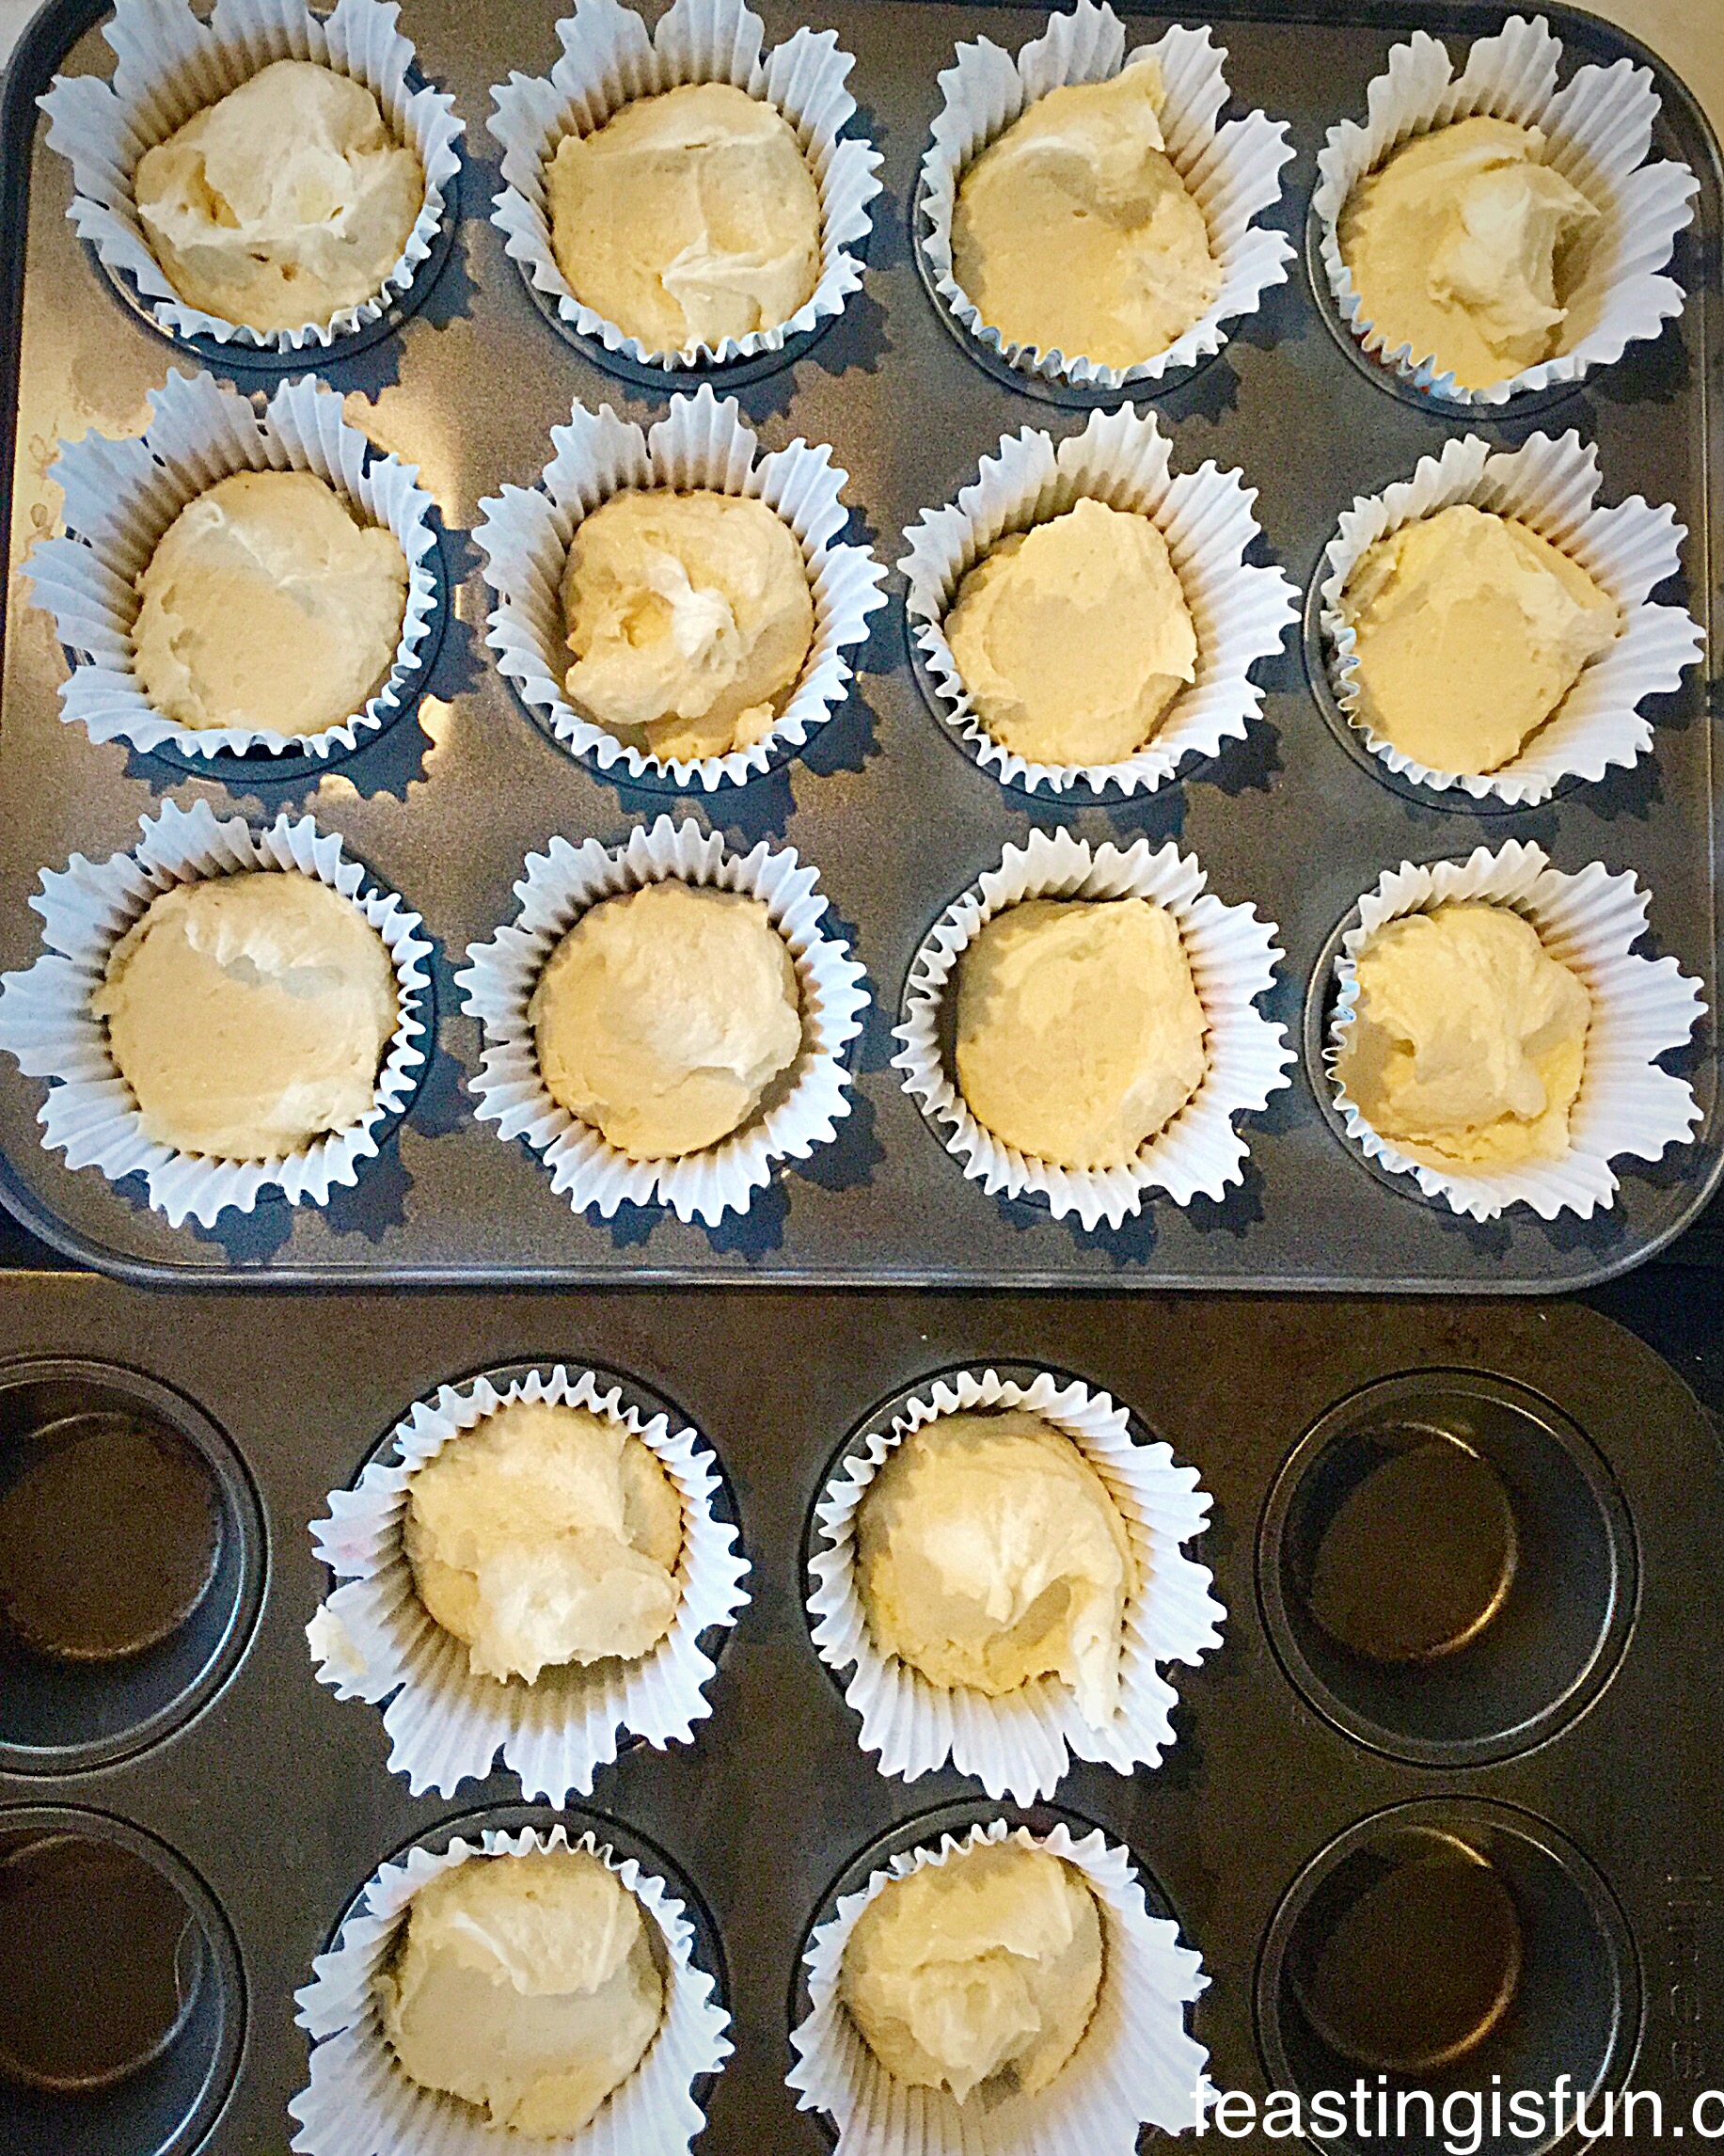
First of all, line 2 cupcake tins with 18 muffin or deep cupcake cases – the ones I used were a Christmas present from Lakeland.
Into a large bowl add your butter and sugar.
Whisk or beat until pale and creamy – approx 5 minutes.
Add 3 eggs, milk and Vanilla Bean Paste.
Sift into the bowl the flour, baking powder and salt.
Note: This is called the all-in-one method.
Whisk or beat until all of the ingredients are combined – take care not to over mix and this will make the cupcakes tough, not light and springy.
Place a heaped dessert spoonful of cake batter into each cupcake case.
Springtime Vanilla Cupcakes
Baking The Vanilla Cupcakes
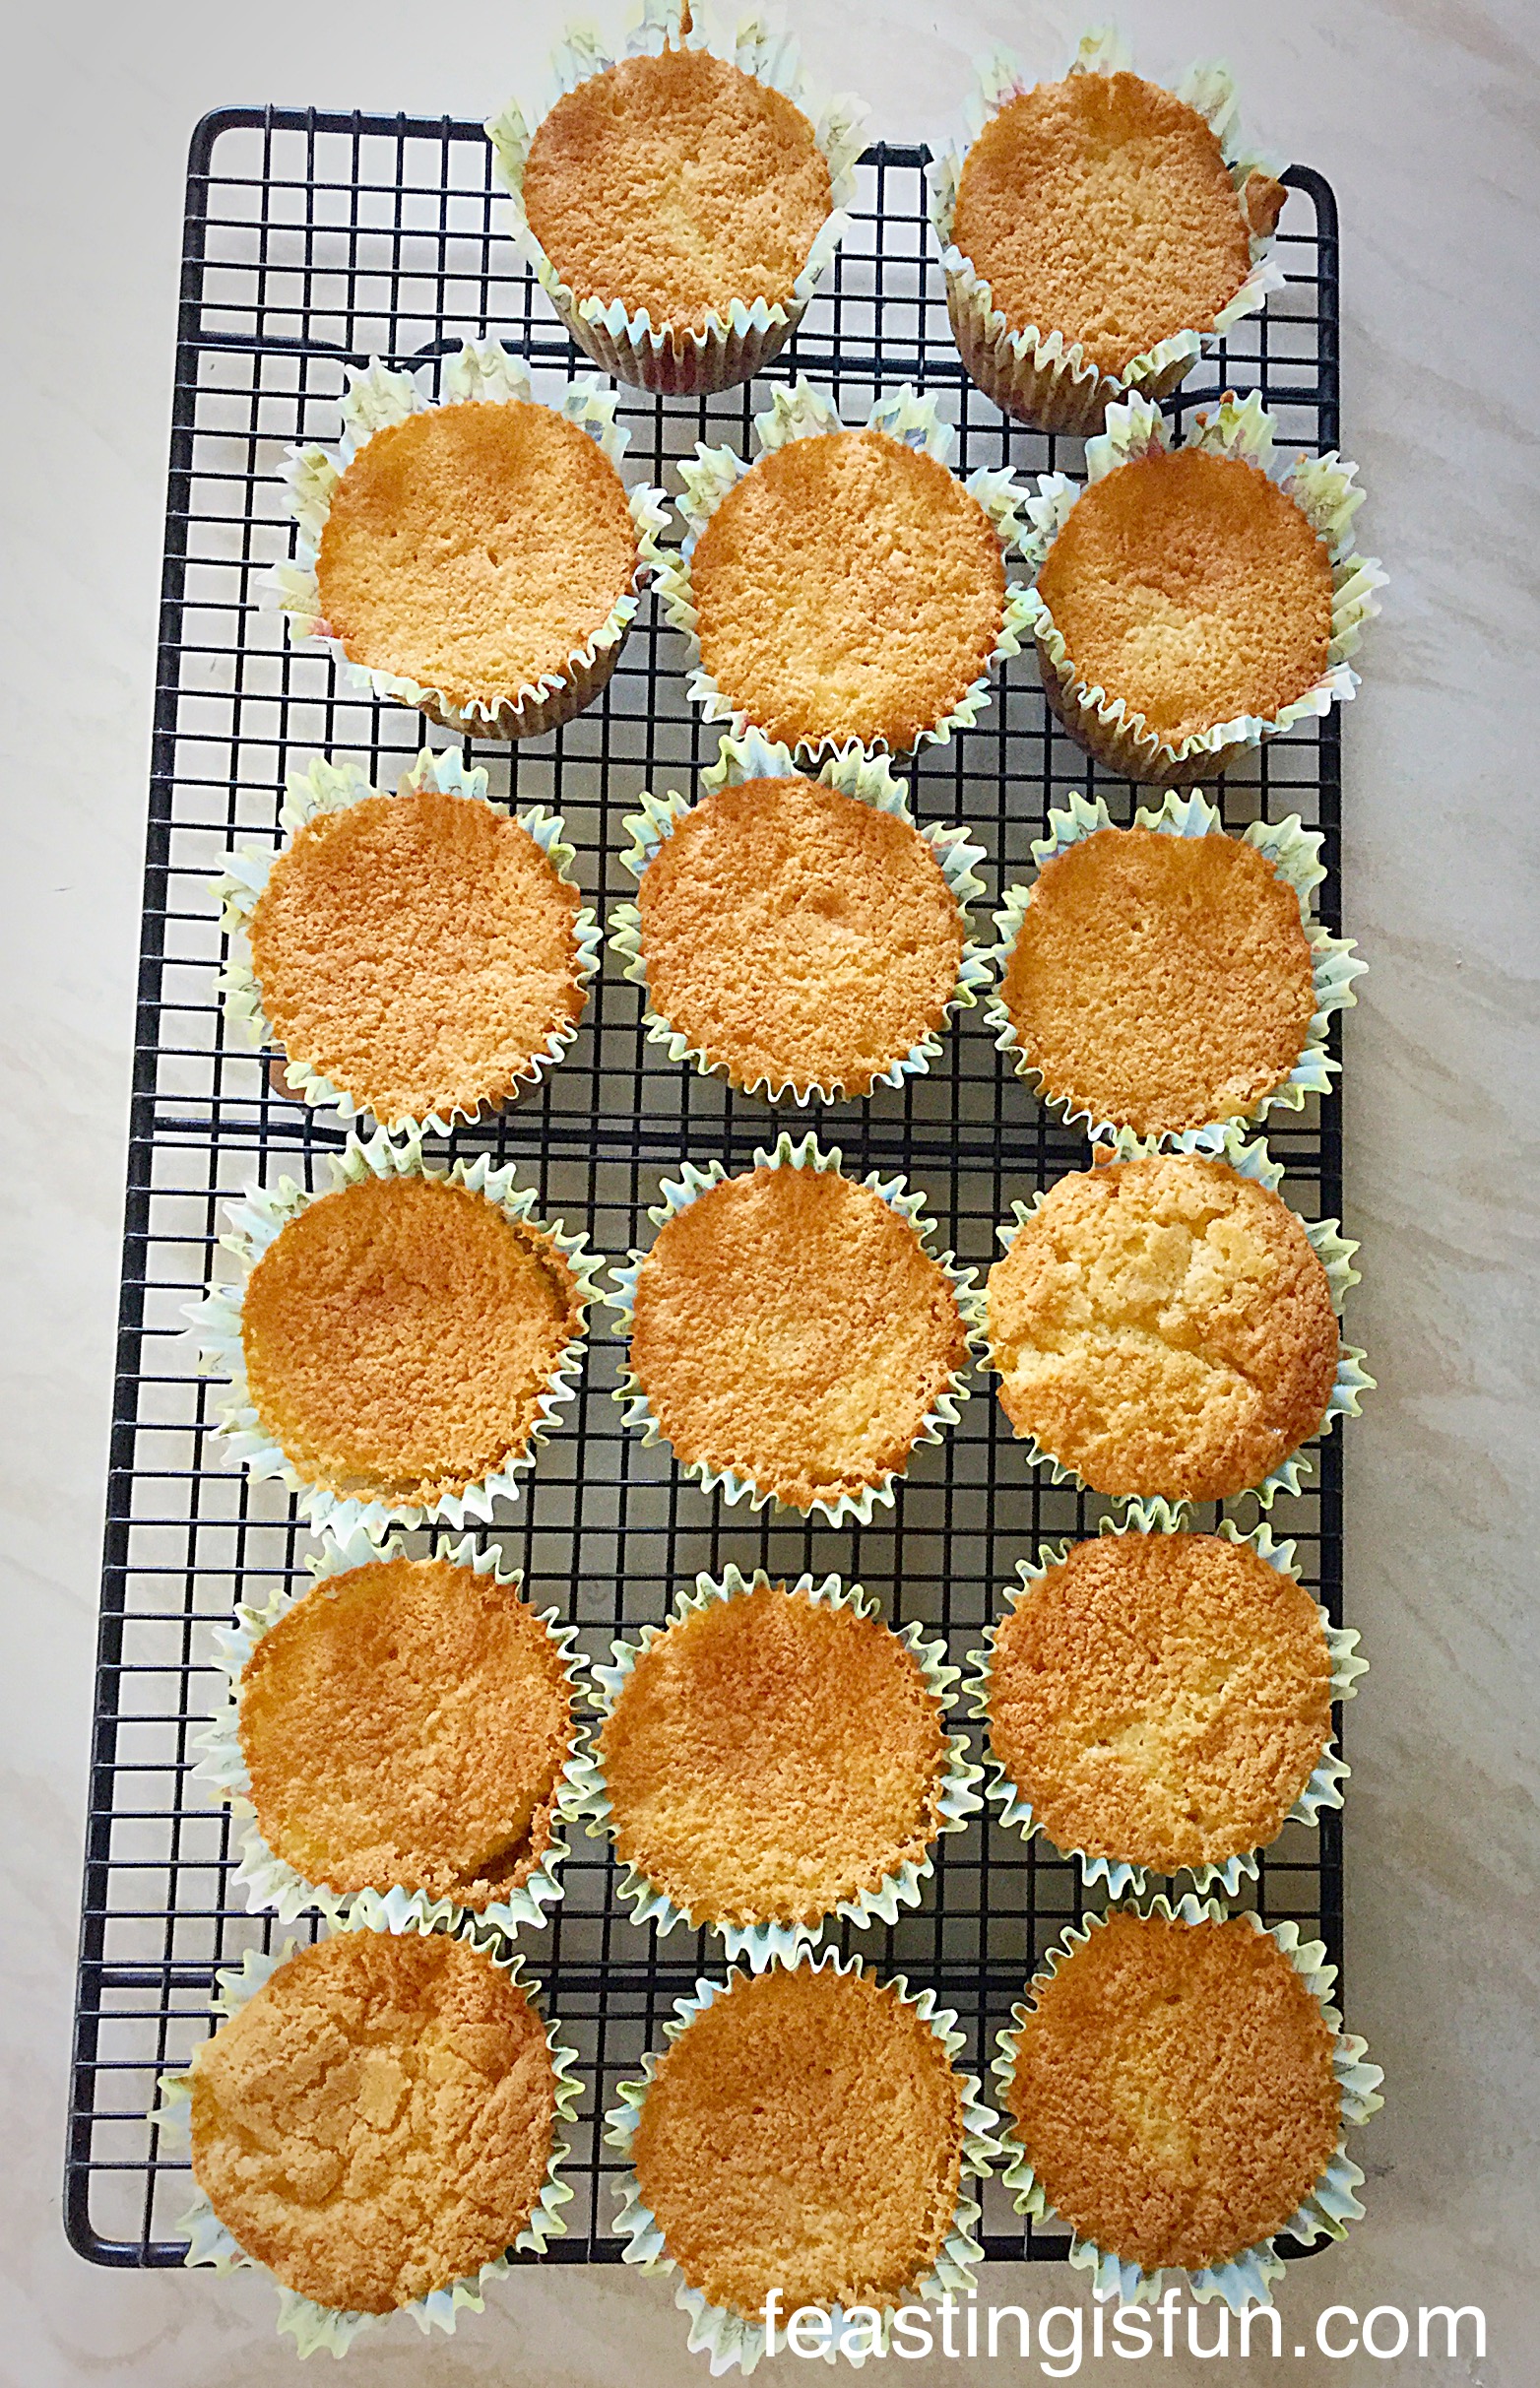
Place the cupcakes into the oven and bake for 20-30 minutes,
The cupcakes are baked when they have risen and are a golden colour. They should spring back when pressed lightly on the top.
As soon as the cupcakes are baked remove from the oven.
Allow to cool completely before icing.
Making The Pink Buttercream
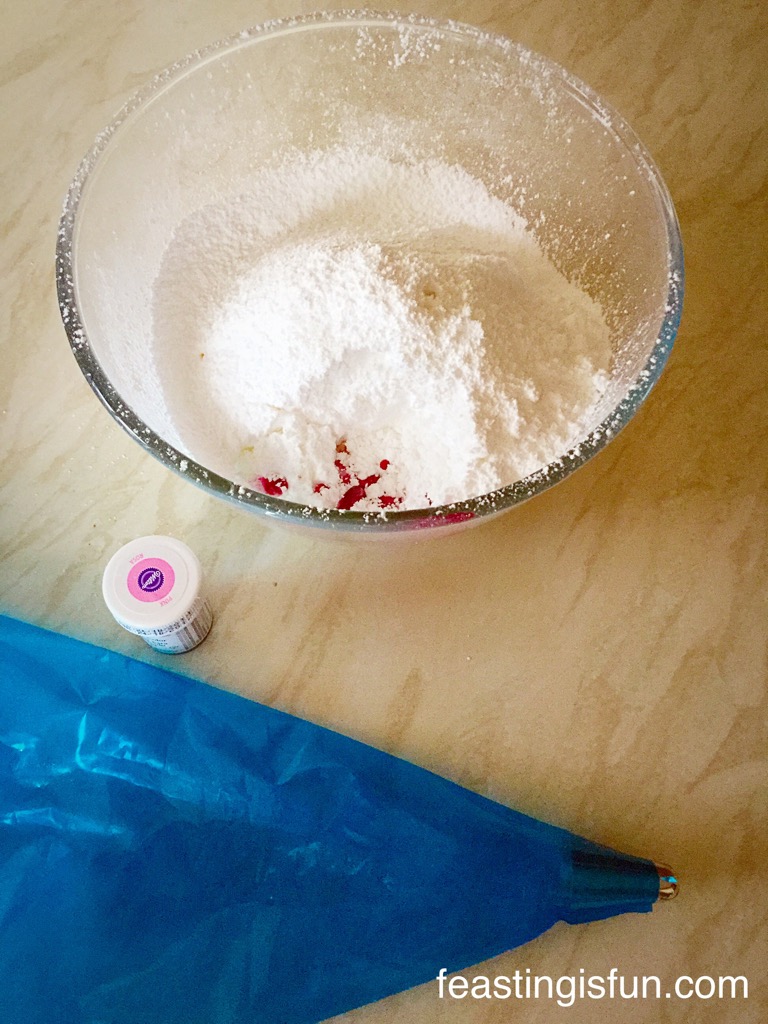
Place the softened butter into a large bowl.
Sift the icing sugar into the same bowl.
Add the 2 tablespoons of hot water.
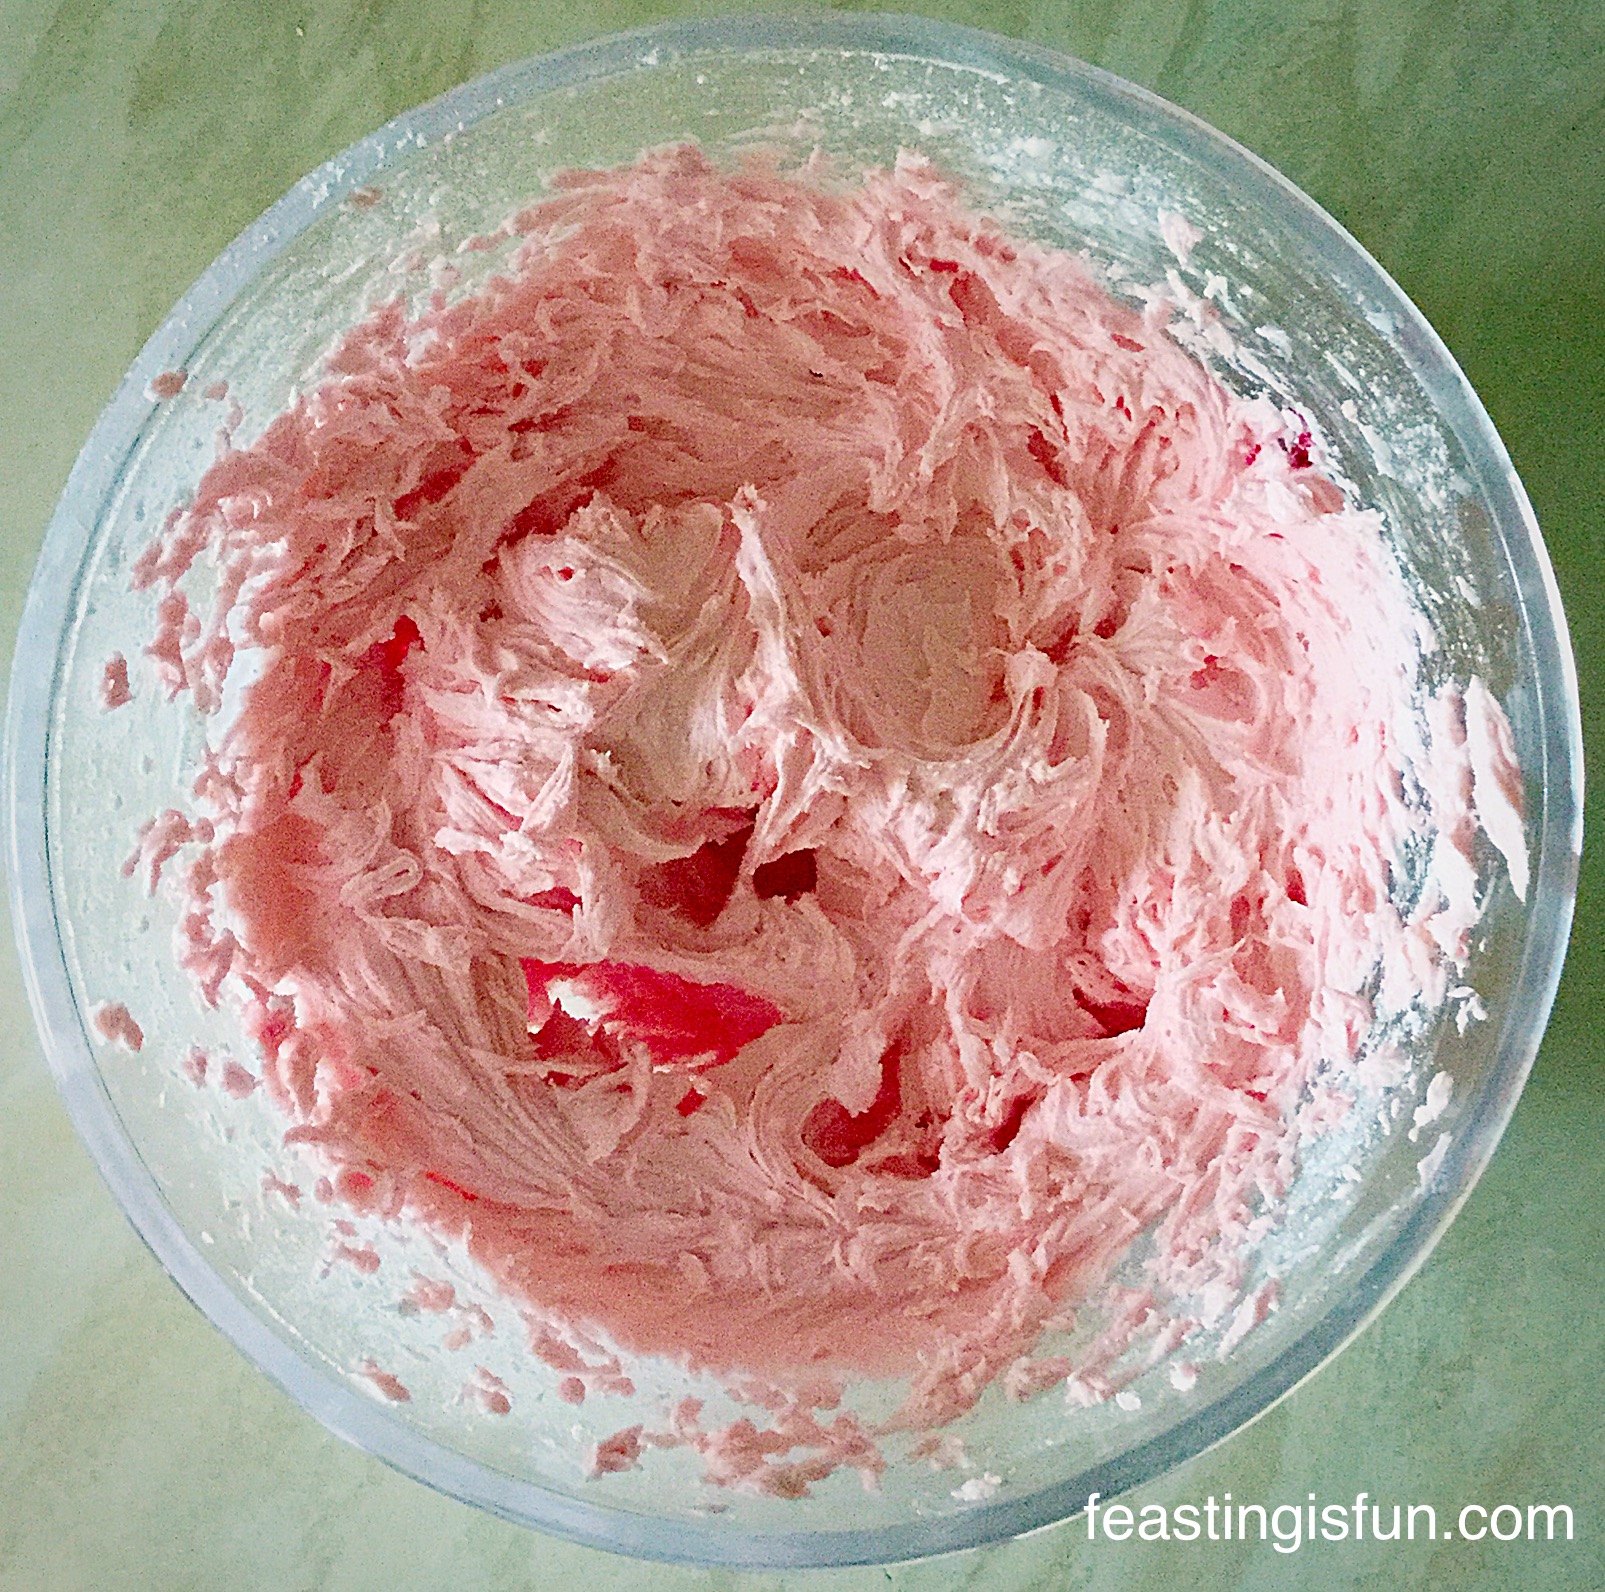
Add the food colouring, I use a cocktail stick and simply insert the tip into the food colouring gel and then add to the bowl.
Start slowly, whisking the buttercream ingredients until light, creamy and uniform in colour.
Fit a piping bag with a large star tip.
Piping Swirls Of Buttercream On To The Cupcakes
Place the icing bag into a tall sturdy container, I use a jug.
Use a spoon or spatula, fill the icing bag with all of the buttercream.
Practise on a plate, if piping for the first time.
Squeeze the bag so that all the buttercream is together.
Keep an even pressure with one hand squeezing the bag and using the other hand to guide the piping tip, pipe swirls onto the cupcakes.
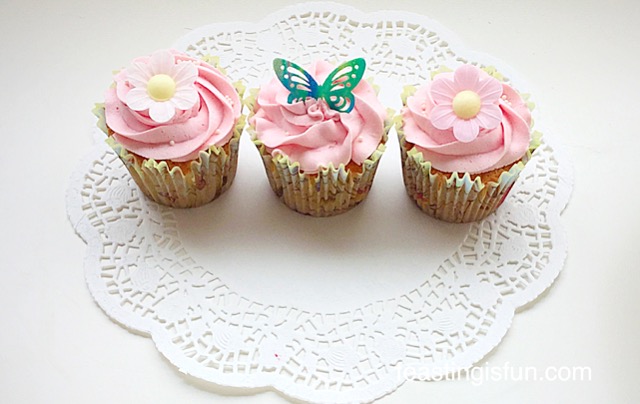
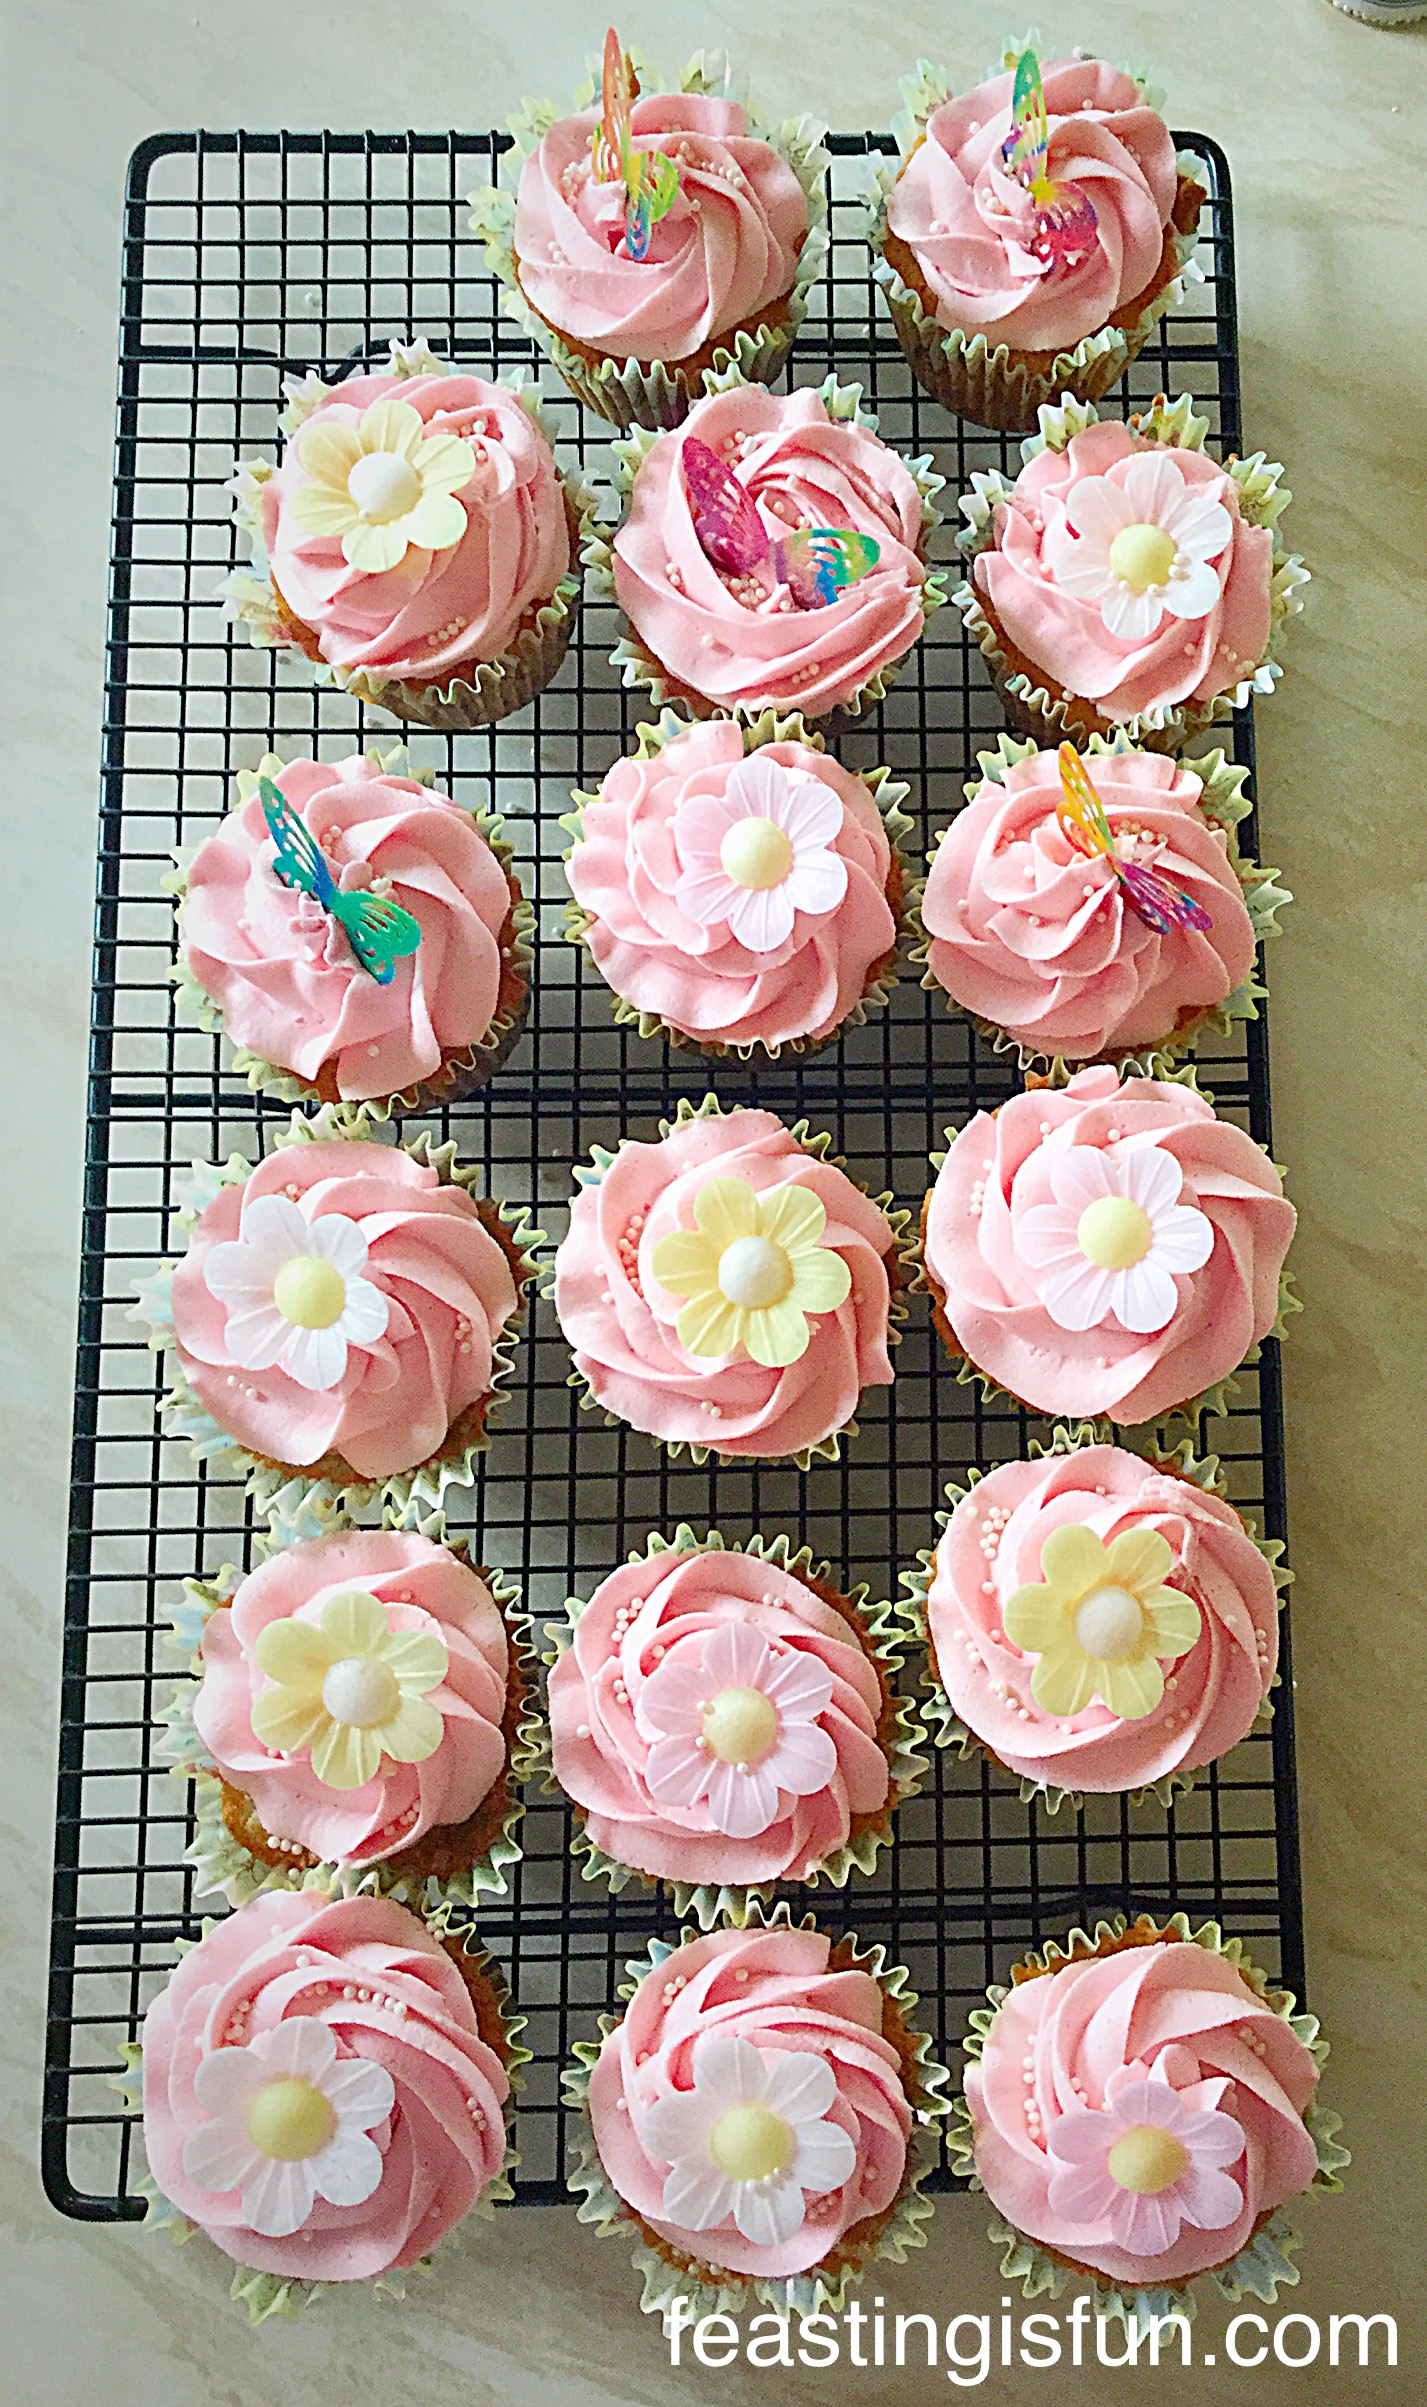
Springtime Vanilla Cupcakes
Finally add the decorations.
Springtime Vanilla Cupcakes
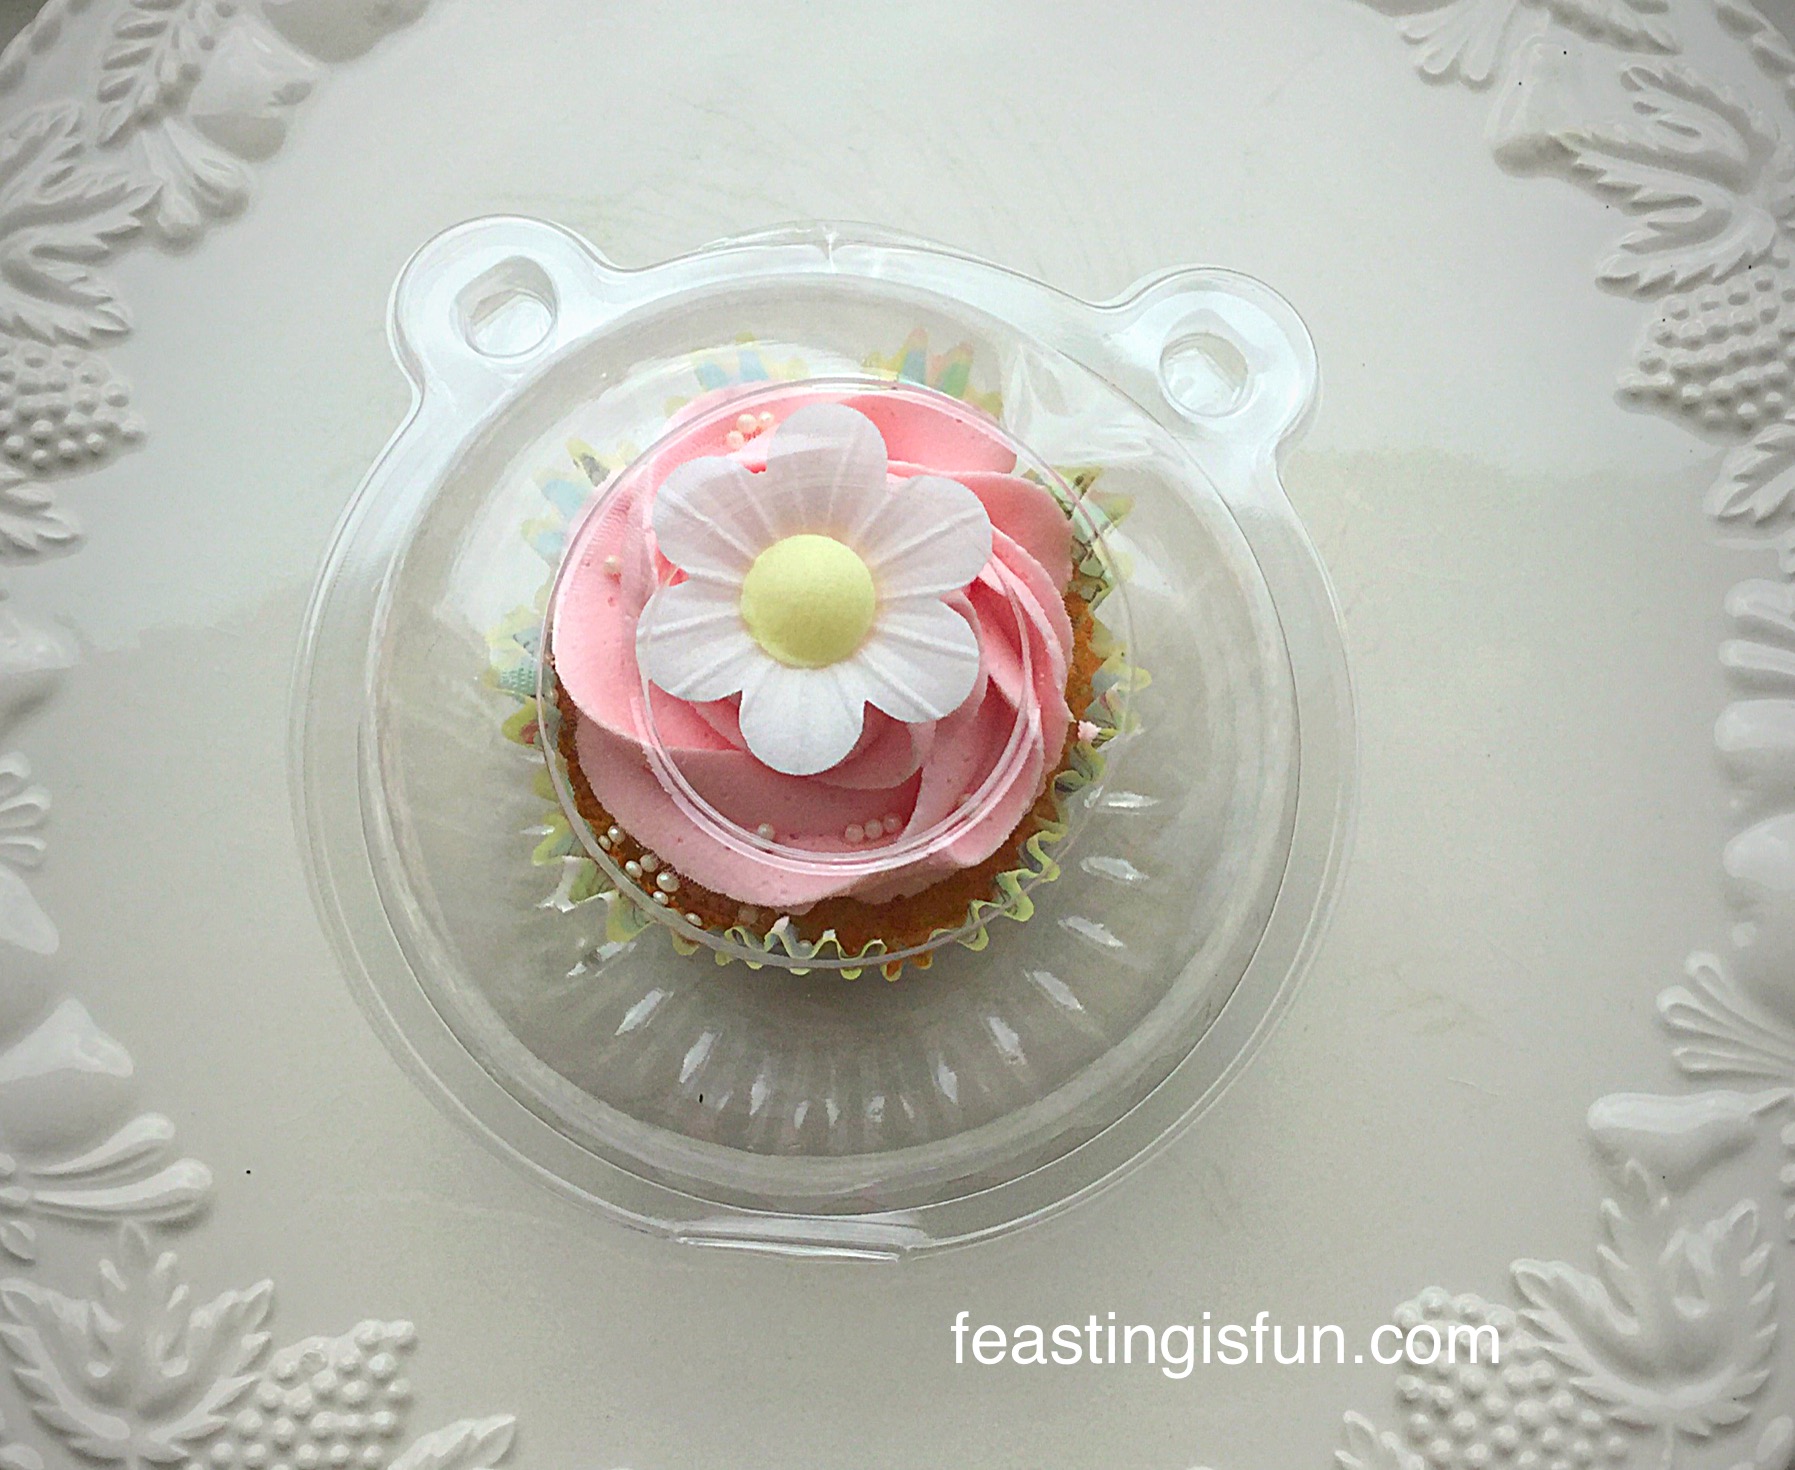
Gifting Springtime Vanilla Cupcakes
Because I like giving the food I make away, I bought some cupcake pods, little plastic containers, perfect for holding one cupcake in and a great way to give individual cupcakes away as a gift. Since they were from Amazon and work out to about 10 pence per pod. Also, they can be washed up and used again, which is great recycling and means you can share even more cupcakes with others!
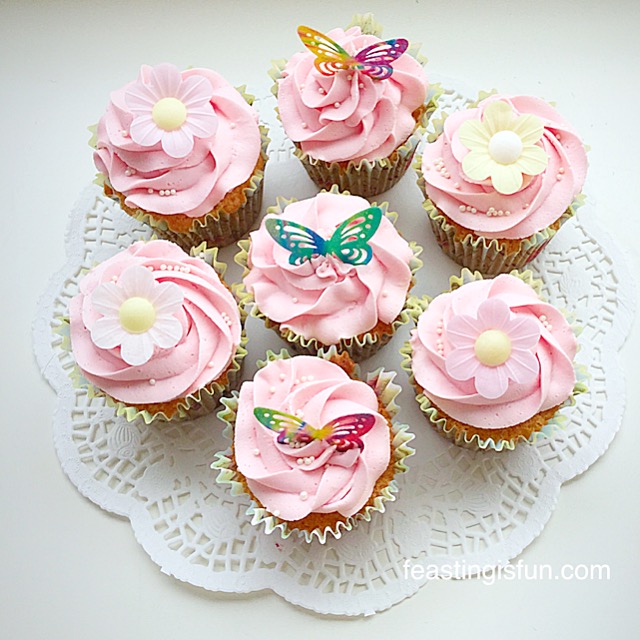
Springtime Vanilla Cupcakes
Since piping the swirls onto the cupcakes gives them a beautiful, professional finish. means use whatever cupcake toppers and sprinkles that you have to hand. The beauty of these Springtime Vanilla Cupcakes is that they are individual to your own sense of taste and style.
Springtime Vanilla Cupcakes
If you like the Springtime Vanilla Cupcakes you will love these recipes:
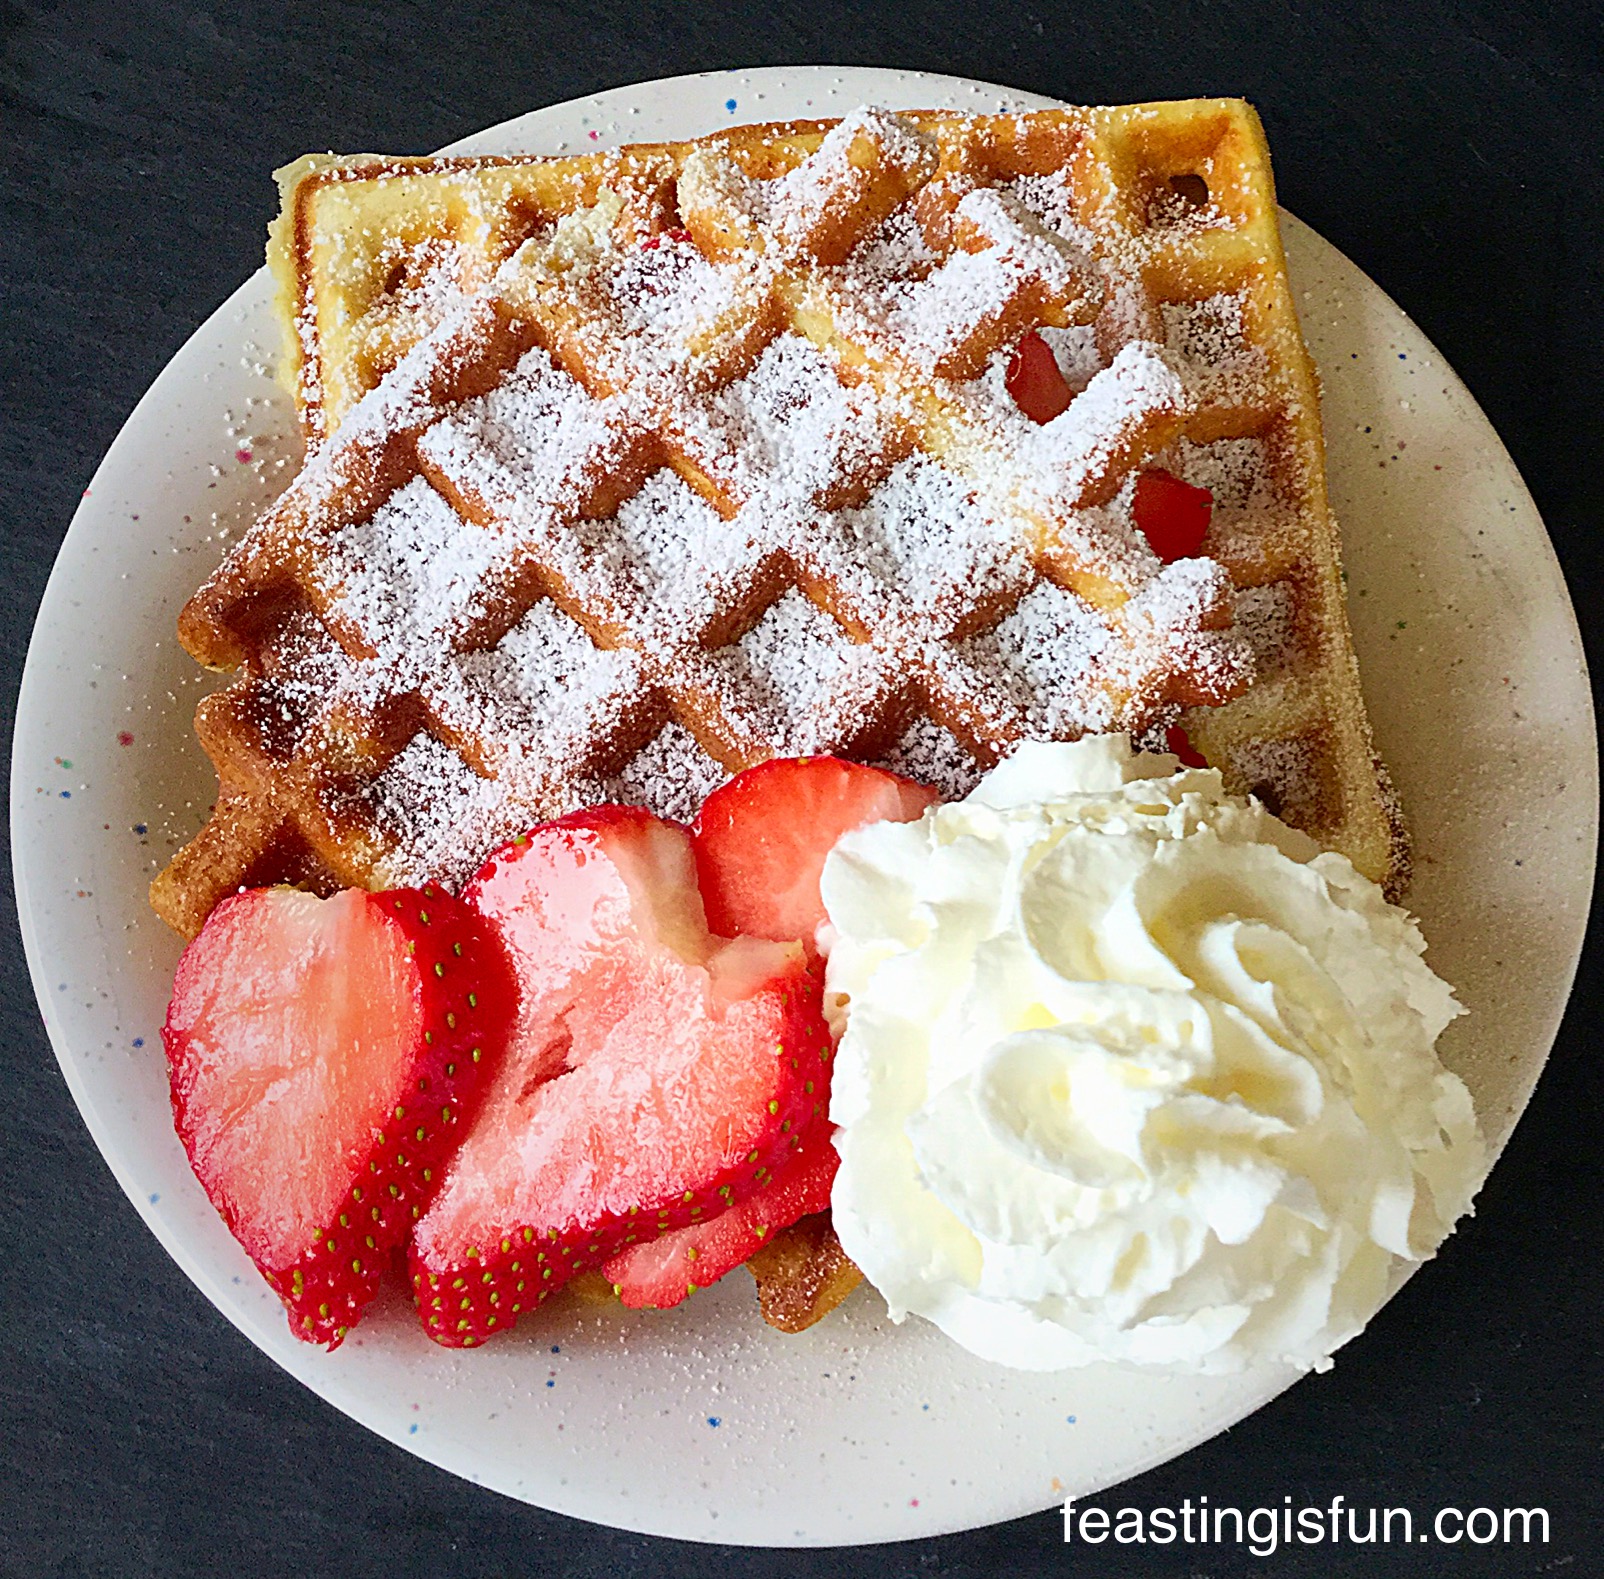
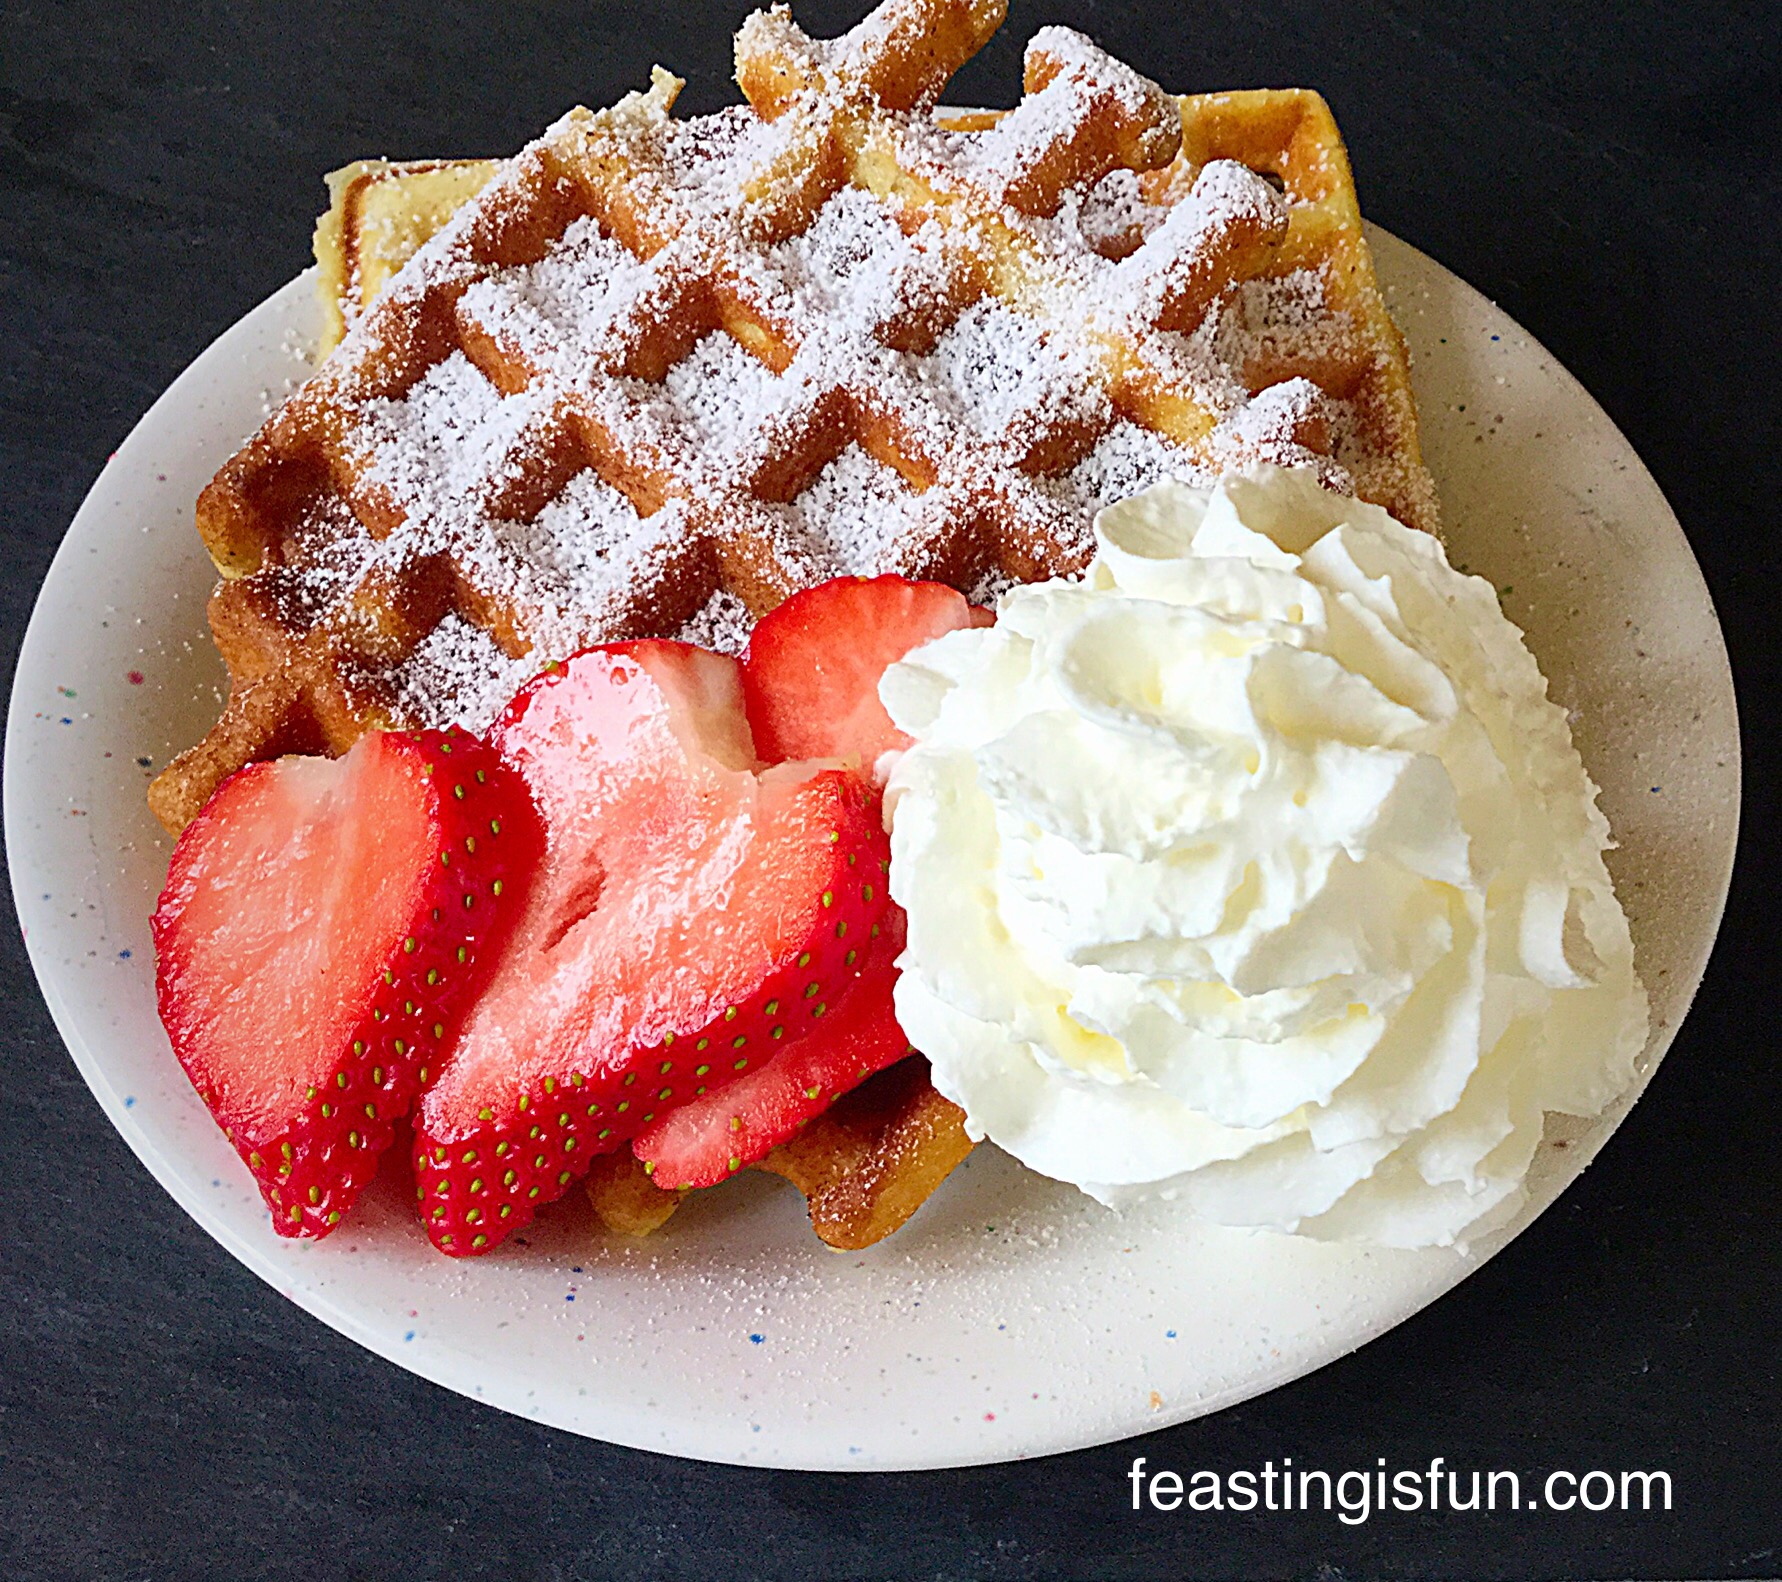
Vanilla Bean Waffles. Just think on that for a while, whilst you gawp stare graciously at this picture.
Light and fluffy inside, crispy and golden outer, these Vanilla Bean Waffles may just about be the best invention for breakfast, since sliced bread got a one-up and became toast!
Vanilla Bean Waffles
I have wanted a waffle maker for longer than I care to remember. This in itself is kind of odd, seeing as I’ve never eaten a waffle before in my life! Let alone made one. Yet after watching Diners, Drive-ins and Dives on Food Network UK, where Guy Fieri travels around the U.S. visiting various eating establishments. Since seeing all the incredible waffles sold all over the U.S.A I have been craving them. While I haven’t ever bought them pre-made from the supermarket, or even eaten them at a cafe or restaurant, I wanted to make them.
Homemade Food Tastes Better
It’s a little thing of mine, if I can buy it I want to make it. With only a couple of exceptions, don’t mention the croissants homemade always tastes better than pre-made, packaged, mass produced, supermarket produce.
Please don’t misunderstand me? I really couldn’t manage without the convenience of my weekly online grocery shop, especially as I cannot drive at the moment. Rather, it is simply that, fresh from the Waffle iron, these Vanilla Bean Waffles are a million miles away from their shop bought counterpart. Plus you can switch up what you add to them.
Vanilla Bean Waffles better than shop bought?
Fortunately our daughter has eaten (and loves) shop bought waffles. Her verdict after eating two Vanilla Bean Waffles was a firm 10 out of 10 and “so much better than any I’ve eaten before” verdict. And that response was thrilling. She can be a tough cookie and 8.5 out of 10 is usually the highest she goes! So I knew I’d struck gold with this recipe.
Served warm with a dusting of icing sugar, super fragrant strawberries and a swirl of cream to seal the deal, the plate you see above was my lunch.
Oh boy. Why have I waited so long? All these years I’ve been missing out on the absolute, utter deliciousness of homemade waffles. Plus I was pretty pleased that I’d managed to nail the recipe on my first attempt!
Back to the waffles. You must try these. Seriously, even if you’re not the worlds greatest cook, with this recipe and a trusted Andrew JamesBelgian Waffle Maker, you can’t go wrong.
Note: It is always recommended that you read through the entire recipe before proceeding. This applies to all recipes on this site and in general.
Recipe: Makes 10 Vanilla Bean Waffles
This recipe assumes that you have read the waffle maker’s instruction booklet and carried out any pre-treatment required. Mine was simple to wipe over the non stick plates with a clean, damp cloth.
First of all place the unsalted butter into a small saucepan on a low – medium heat. Allow the butter to completely melt. Remove from the heat and allow to cool.
While the butter is cooling crack the eggs into a large bowl. Give them a quick whisk.
Add the milk, sugar and vanilla bean paste to the eggs and lightly whisk to combine.
Once cooled weigh 100g of the melted butter into the egg, milk, sugar, vanilla bean paste mixture and whisk briefly to combine (wet ingredients).
Weigh the flour and sift along with the baking powder and salt into the bowl containing the wet ingredients.
Gently mix both the wet and dry ingredients together until just combined – over mixing will lead to tough waffles.
Prepping The Waffle Maker
While the Waffle Maker is switched off brush the melted butter so that it completely covers each of the waffle plates.
Close the waffle maker and switch on. For the Andrew JamesBelgian Waffle Maker it is ready to cook with when the green ‘ready’ light illuminates.
Using oven gloves, to protect your hands, as the top of the waffle make plus the waffle plates get very hot, press the button and open the waffle maker.
Use an American 1/4 cup measure (50ml – 2 heaped tablespoons).
Close the lid of the waffle maker and set a timer for 5 minutes.
Ensure the room is well ventilated as the cooking process produces steam.
I found 5 minutes to be the optimum time for cooking these Vanilla Bean Waffles in this waffle maker. Adjustments to time maybe needed if using a different brand.
Really enjoy the smell as the waffles are cooking – don’t be surprised if your neighbours line up at your front door!
After 5 minutes, wearing oven gloves, press the button to release the lid of the waffle maker.
Vanilla Bean Waffles.
Use a wooden spatula to help remove the waffles from the plates. They come away really easily. Most importantly do not use anything metallic to remove the waffles as it could scratch the non stick coating on the waffle plates.
Repeat adding 1/4 cup (50mls) as before to each plate.
Continue until all the waffle batter has been used.
As soon as the last waffle has been removed switch the waffle maker off and leave to cool.
Vanilla Bean Waffles.
What I Added To The Waffles
Enjoy your Vanilla Bean Waffles however you want.
I added sliced strawberries, a dusting of icing sugar and some whipped cream. Our children reheated their waffles in the toaster, before adding various combinations of ice cream, Nutella and strawberries! What you put on yours is up to you. Flavoured fruit or spiced butters work well. Also a drizzle of maple syrup tastes amazing on these golden beauties.
They keep for up to 2 days in an airtight container and can be reheated in the toaster or oven. To freeze, ensure the waffles are completely cold then pack into zip lock bags or containers with an airtight lid. Keep for one month in the freezer.
Vanilla Bean Waffles
For a first attempt at waffle making I am surprised and pleased with how easy it is. I would happily make these at weekends, invite some friends over for a breakfast party.
Oh wow how much fun would that be?
However you enjoy your waffles, I really hope I have inspired you to have a go and make some at home. They simply taste so unbelievably good.
Vanilla Bean Waffles perfect for feasting, sharing and having fun!
If you have enjoyed making these Vanilla Bean Waffles you may also like these recipes:
Since discovering the deliciousness and versatility of homemade waffles, weekend brunches in our house have become something we all look forward to. And while I have the waffle maker out it makes sense to double up the recipe and freeze some for another day. Also, if you prefer savoury toppings on your waffles, simply leave the vanilla bean paste out of the recipe. Alternatively you could make some plain waffles and then add some vanilla for a sweeter version. Finally, to reheat cold waffles, simply pop them in the toaster.
So, whatever you are making, baking and creating in your kitchens, have fun preparing and sharing your feast.
Sammie xx
The Andrew JamesBelgian Waffle Maker was provided for the purposes of review. All opinions, recipes and content are my own. Please see my Disclosure Policy.