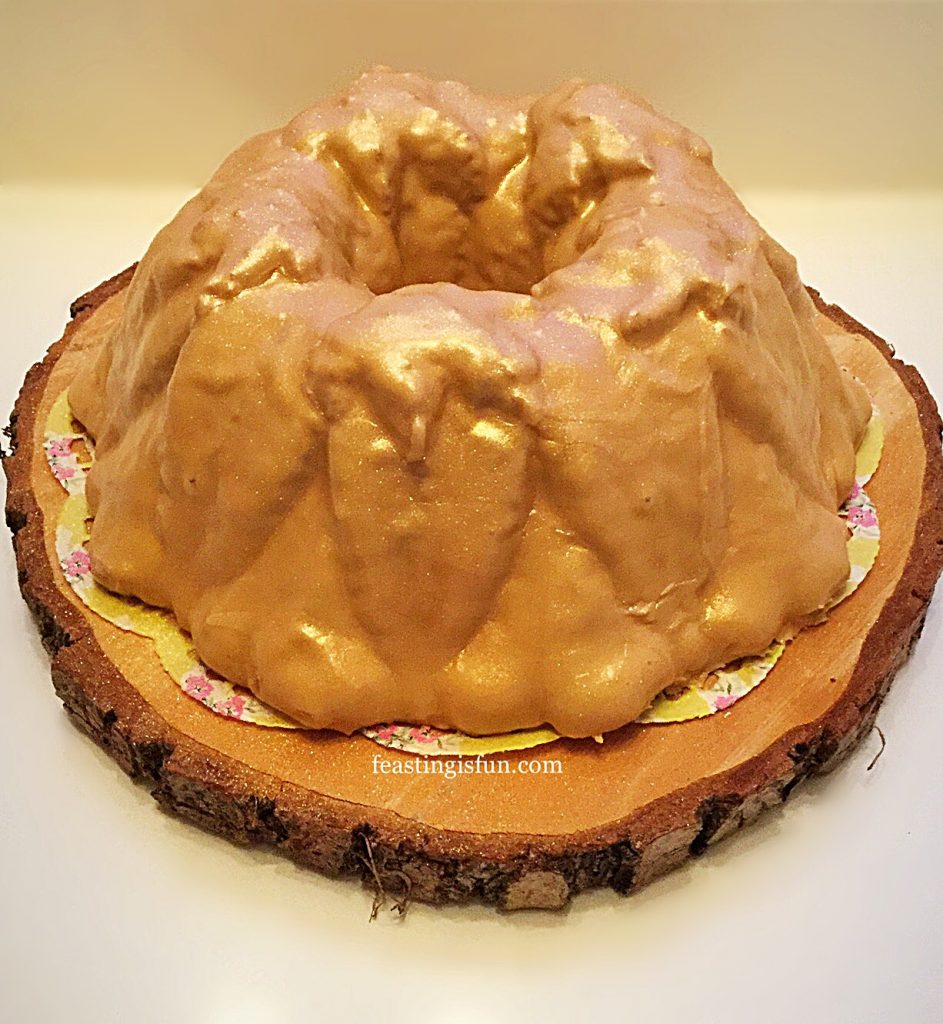
Amaretto Light Fruit Cake

So, is anybody else starting to get excited about Christmas yet? Especially as Stir up Sunday is this weekend. Stir Up Sunday has its roots in the Anglican Church Book of Common Prayer, being the last Sunday before the beginning of Advent. It reads: “Stir up, we beseech thee oh Lord, the wills of thy faithful people.” Since Victorian times home cooks have traditionally made Christmas pudding on this Sunday. Although, nowadays, the day itself is set aside to make Christmas pudding, Christmas cake and mince pies. This Amaretto Light Fruit Cake is a lighter, modern twist on a traditional Christmas cake. Most importantly, it can be made up to a few days before Christmas!
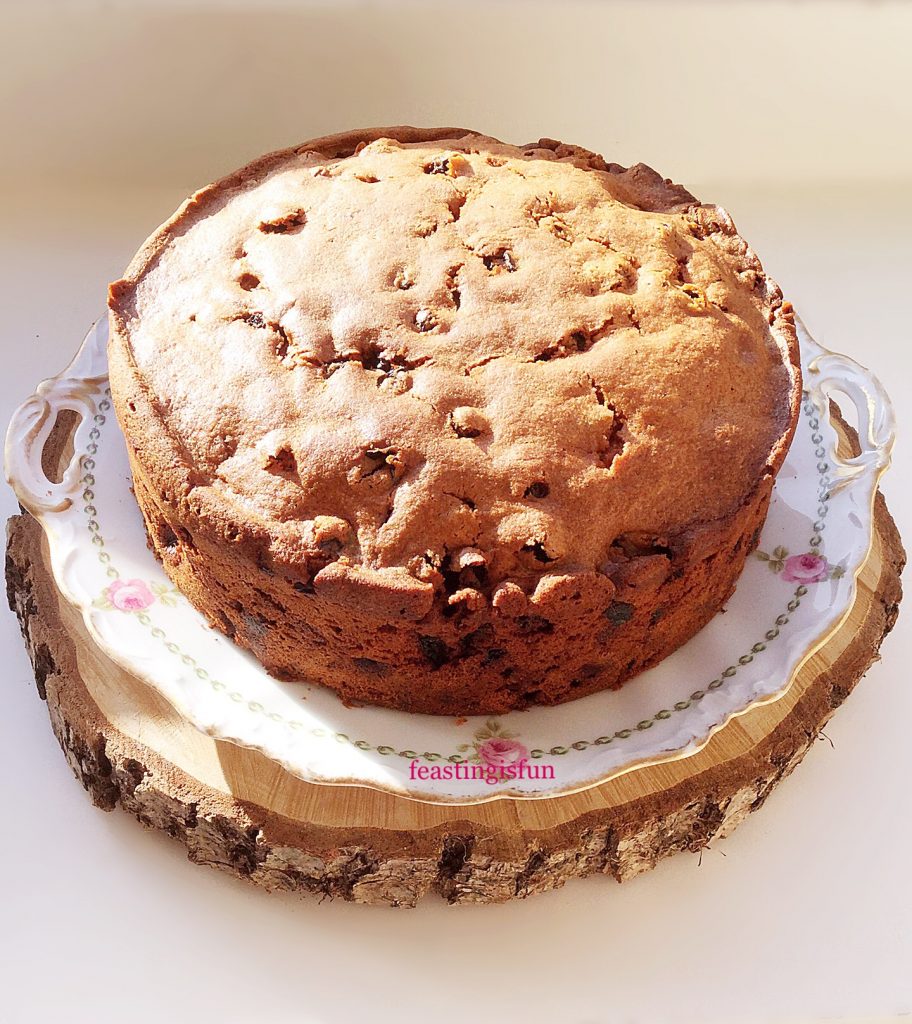
 

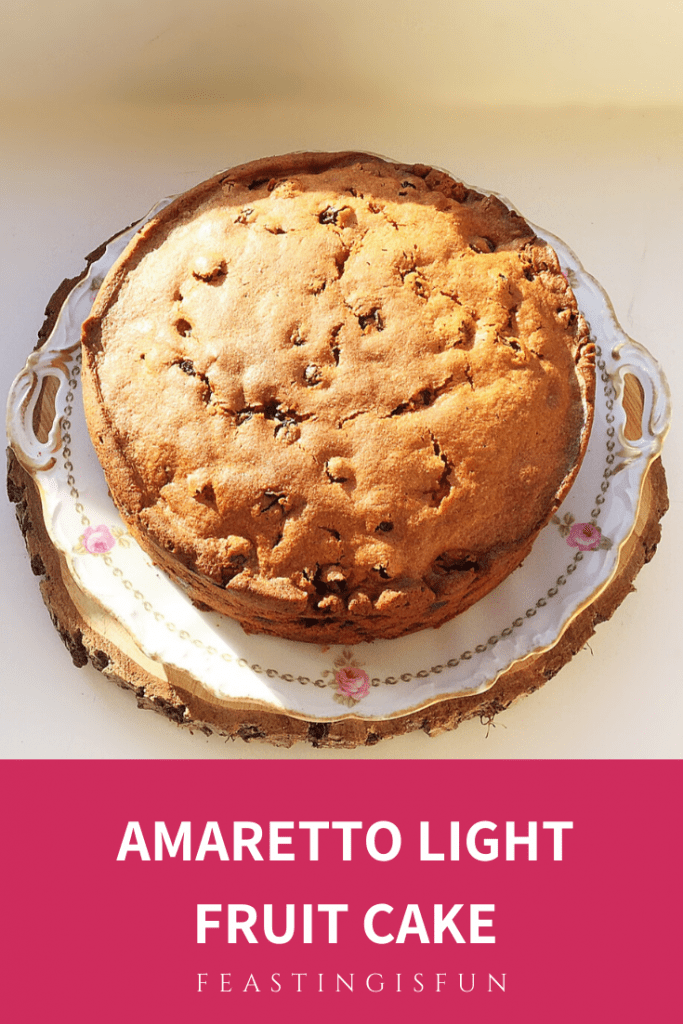
Amaretto Light Fruit Cake.

Since not everyone is a fan of the traditional, iced, spiced, dried fruit Christmas cake, creating a lighter version is not only delicious but also fun! And, because I know how time strapped the lead up to Christmas can be, as well as making this cake from scratch I have also included a super easy hack using a widely available cake mix. I really have thought of everything, so that you can enjoy baking your cake.

Amaretto Light Fruit Cake – Not Just For Christmas 

Because this cake is so tasty, making it shouldn’t only mean for Christmas. I originally made this cake for our son’s birthday in October. Since he requested Christmas Cake for his birthday celebration I compromised and made this lighter version with the addition of almond liqueur. After posting a photo of his birthday cake on Instagram I received lots of requests for the recipe. Resulting in me trialling Wright’s Baking Madeira Cake Mix with the same mix of fruit and liqueur.
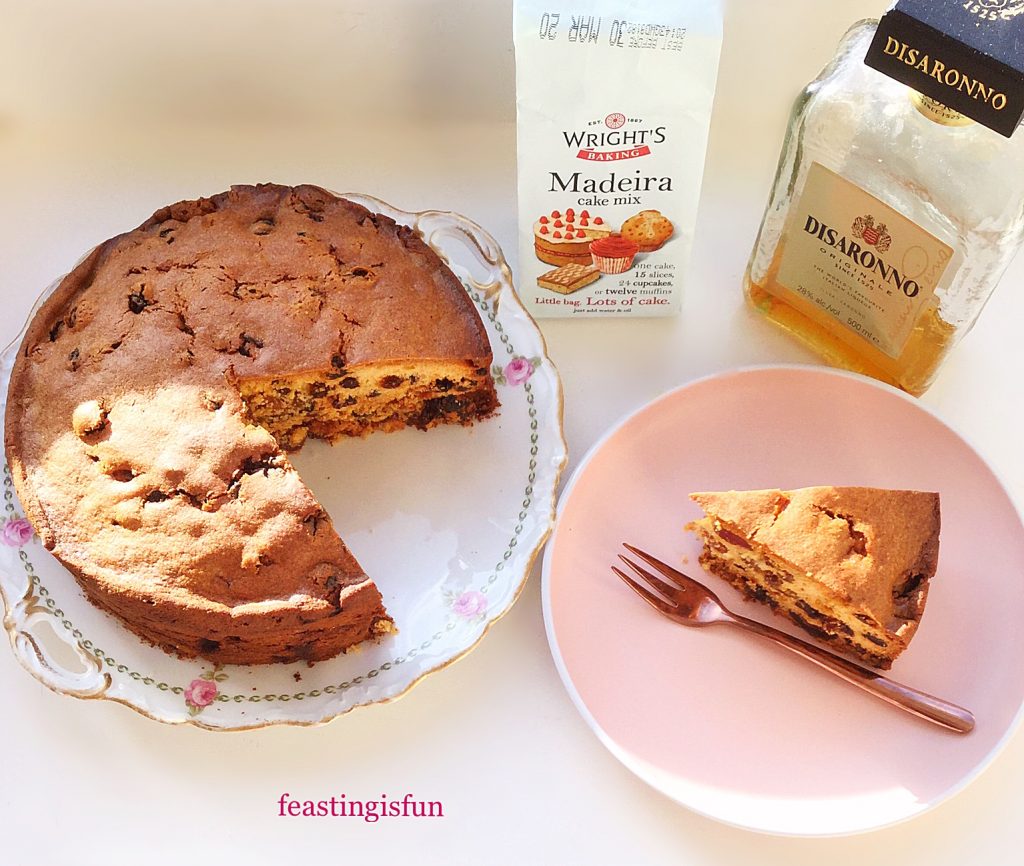
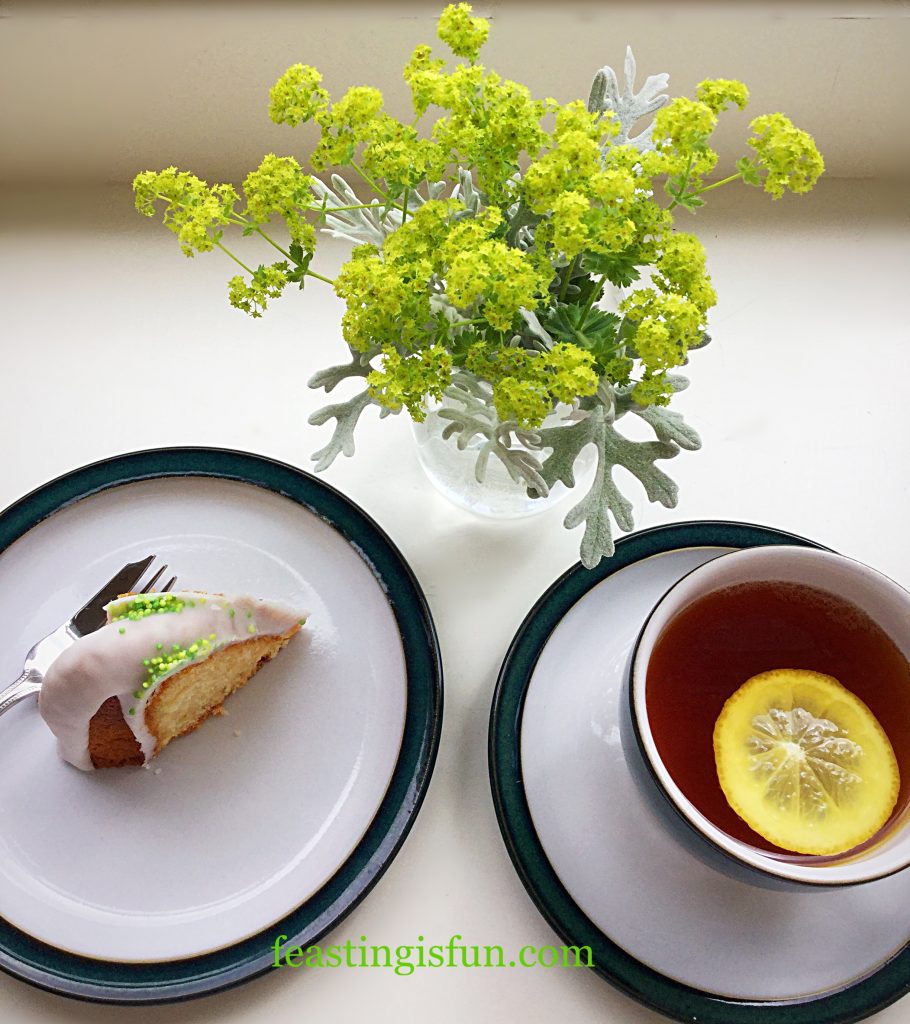
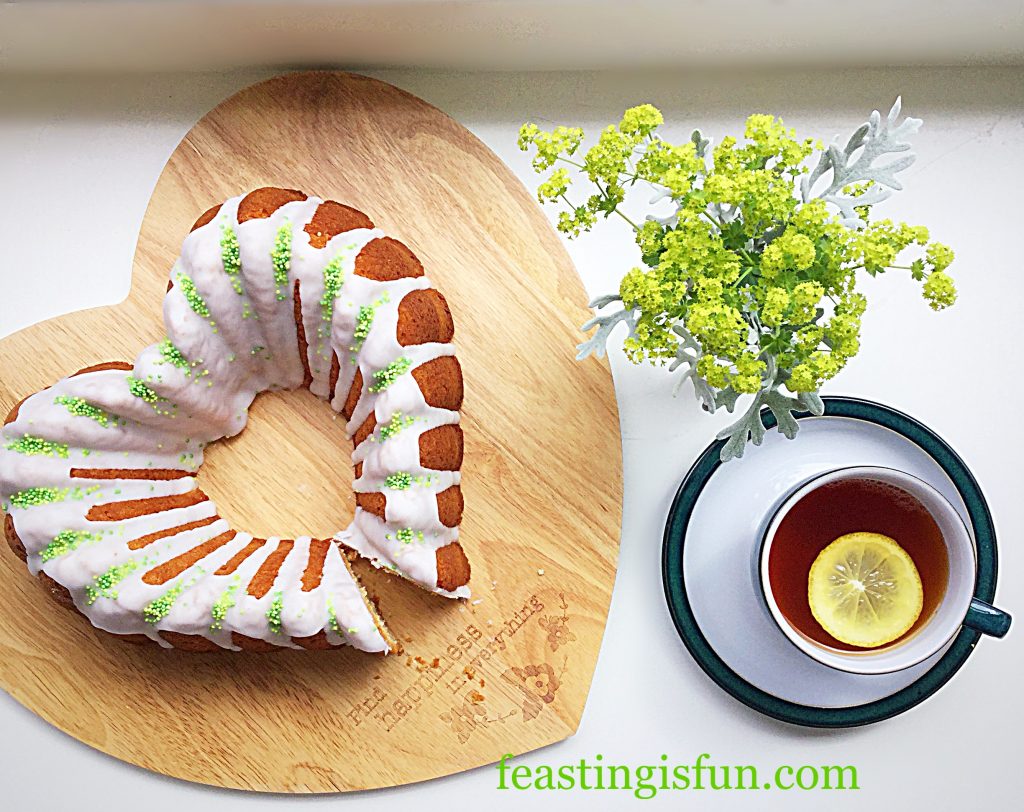
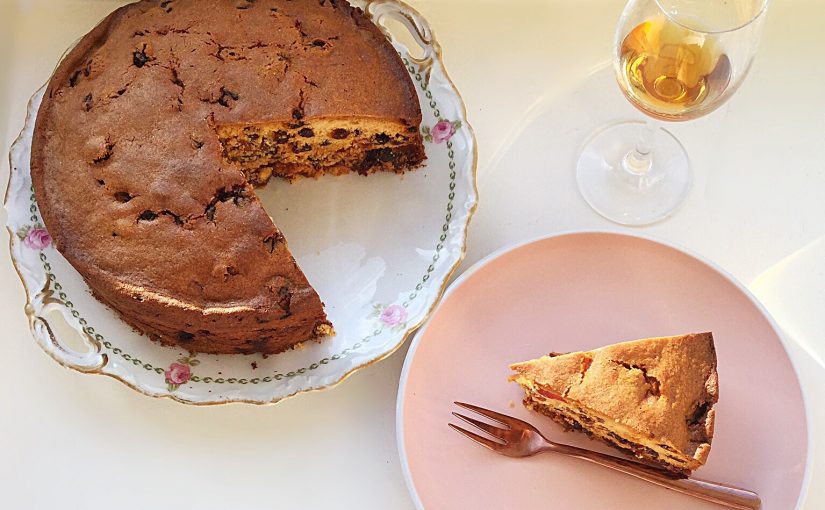
Cut amaretto light fruit cake on a cake plate with a slice of cake on a separate plate. A bottle of Disaronno liqueur and packet of cake mix.
Amaretto Light Fruit Cake using Wright’s Madeira cake mix.

Both cakes are an absolute delight. So, no matter which version of the cake you choose to make, they are both delicious. For those who would rather not add alcohol simply leave it out of the recipe. Using almond extract as an alternative, in my opinion, would totally change the cake’s flavour. And as so, is not something I would recommend.
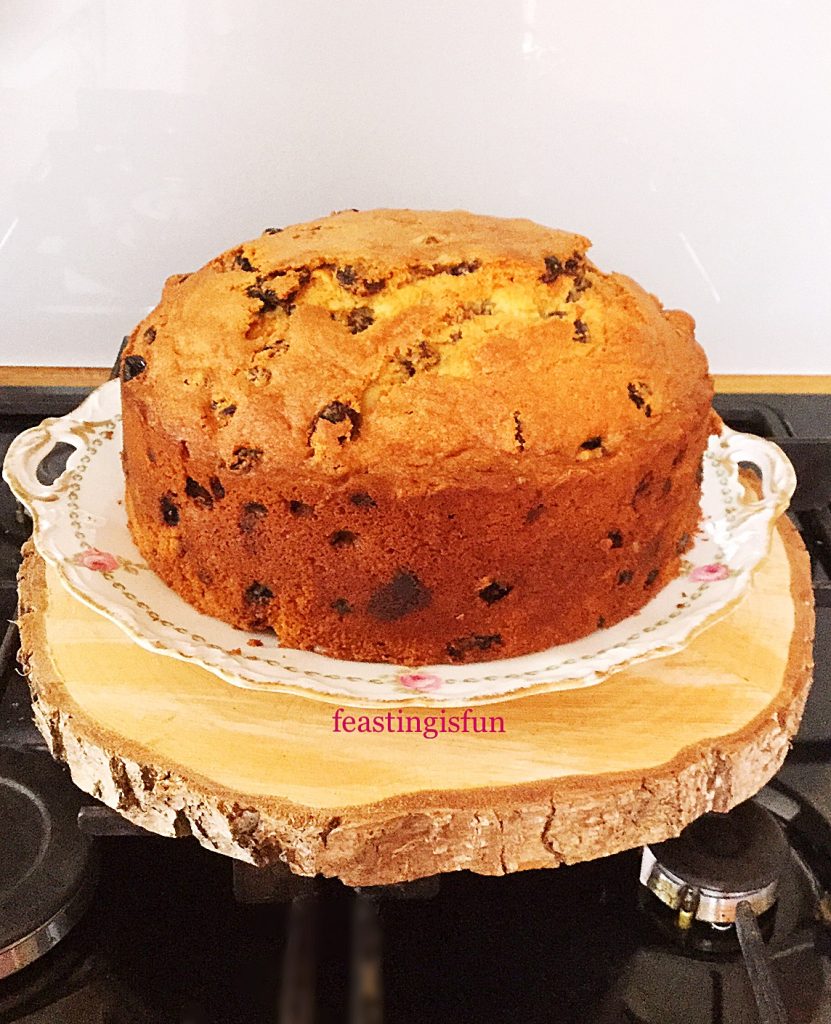
Original birthday cake version of this amaretto light fruit cake.
Baked from scratch Amaretto Light Fruit Cake.

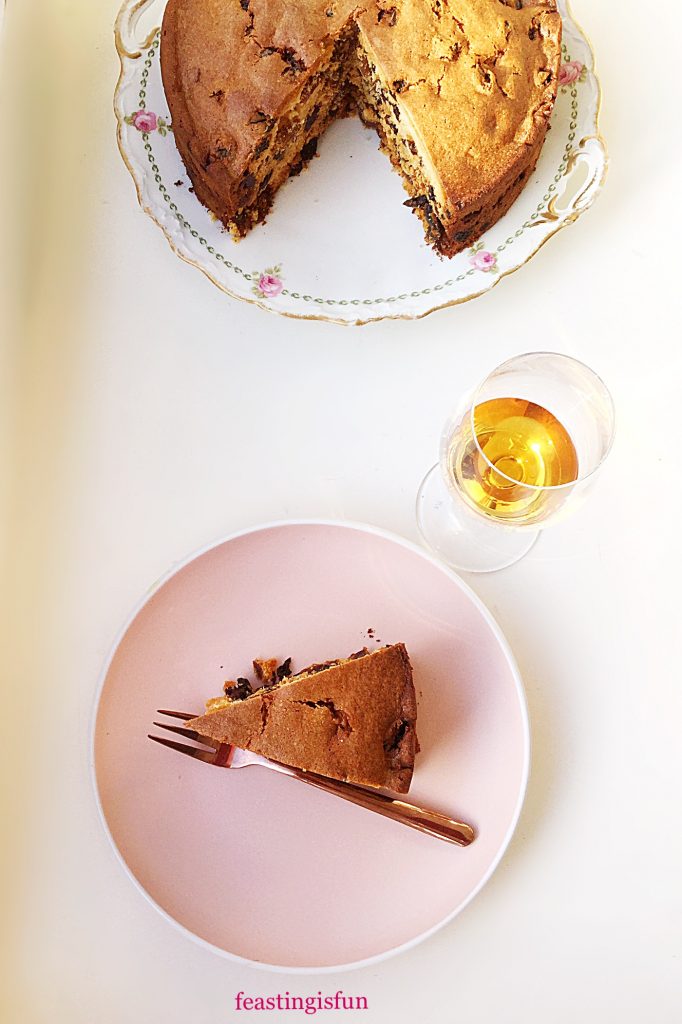
The cake’s texture is moist and light with the fruit evenly distributed throughout. Either serve with a hot cup of tea, or a glass of Amaretto. Since both compliment this cake equally well. Because this cake does contain alcohol make sure that those who are eating it are aware. Finally, adding extra liqueur to the cake will result in a very strong alcohol flavour which doesn’t evaporate during baking. I speak from experience!

Recipe: Amaretto Light Fruit Cake – serves 10-12

Cake Made From Scratch:

225g/8oz Unsalted Butter at room temperature

225g/8oz Caster Sugar

1/4tsp Sea Salt – halve if using free flowing salt

4 Large Free Range Eggs

1tsp Vanilla Extract – I use Nielsen-Massey 

75g/3oz Ground Almonds

325g/11oz Self Raising Flour – alternately use the same quantity of plain flour and add 1tbsp baking powder

400g/14oz Mixed Dried Vine Fruits – I use a mix without citrus peel

200g/7oz Glacé Cherries

60ml or 4tbsp Amaretto Almond Liqueur

Using Wright’s Baking Madeira Cake Mix:

1 x Wright’s Baking Madeira Cake Mix

60ml Flavourless Vegetable Oil – I use sunflower oil

60ml or 4tbsp Amaretto Almond Liqueur

140ml Plain Tap Water

375g/13oz Dried Vine Fruits

200g/7oz Glacé Cherries

Method:

For both cakes use an 8in x 4in (20cm x 10cm) round cake tin that is thoroughly greased with butter and line the base with baking parchment. Note – cut out two circles of baking parchment per cake. One to line the base and the second to place on the top of the cake if it browns too quickly while baking.

Making And Baking The Cake From Scratch

  • First of all, preheat the oven to 160C/140C fan, gas mark 3, 325F.
  • Place the butter, salt and sugar into a large bowl and whisk together until pale and creamy.
  • Next add one egg plus one tablespoon of flour and whisk together until just incorporated. Repeat this step three times until all four eggs have been added.
  • Now add the vanilla extract and amaretto and whisk to combine.
  • Sift the remaining flour (and baking powder) into the bowl and add the ground almonds. Stir together using a large metal spoon.
  • Finally add the dried vine fruit and glacé cherries.
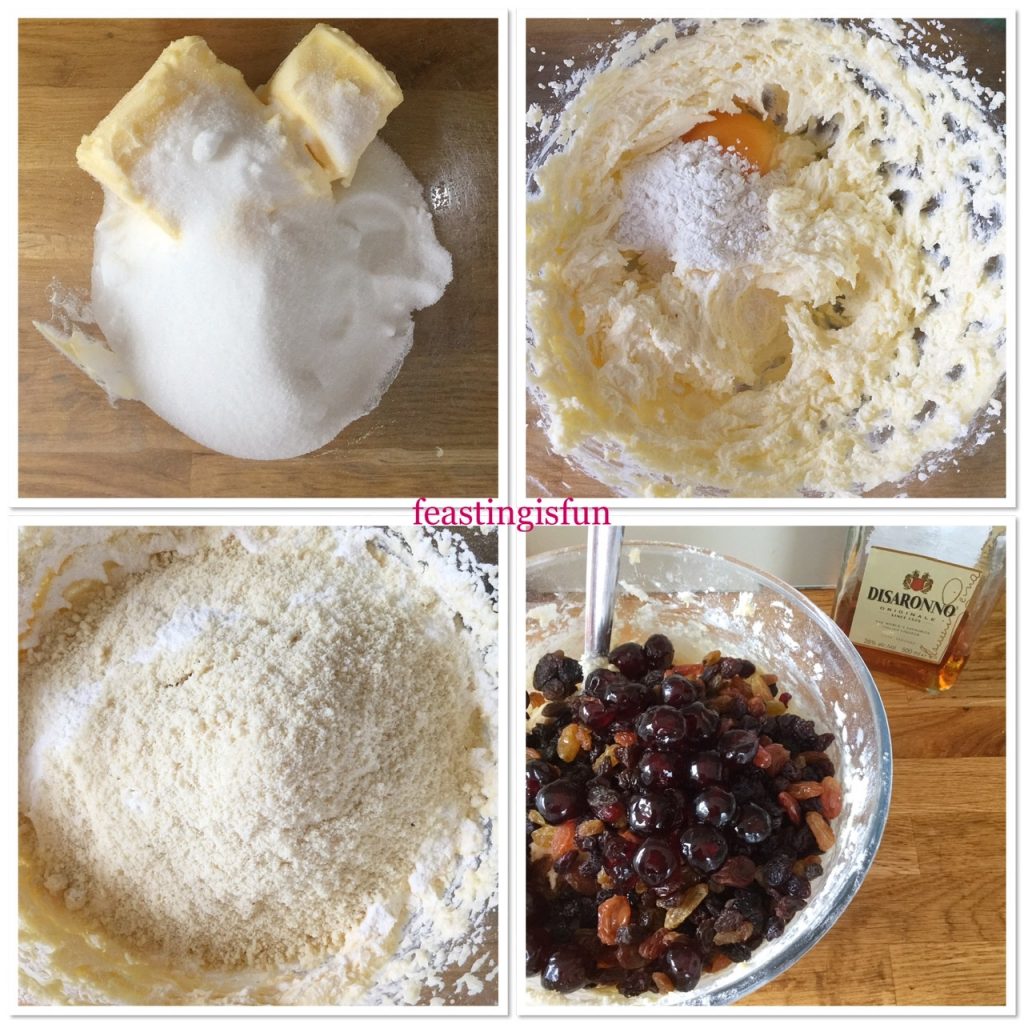
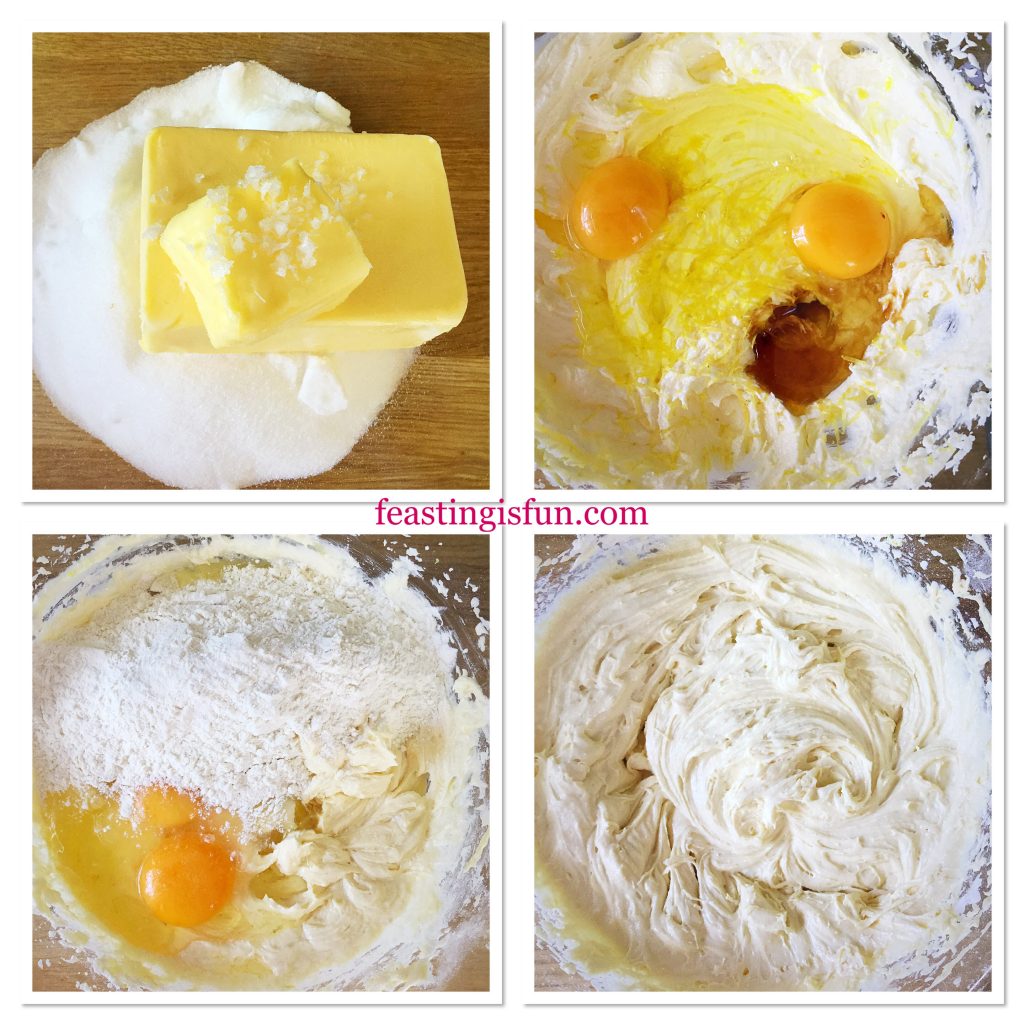
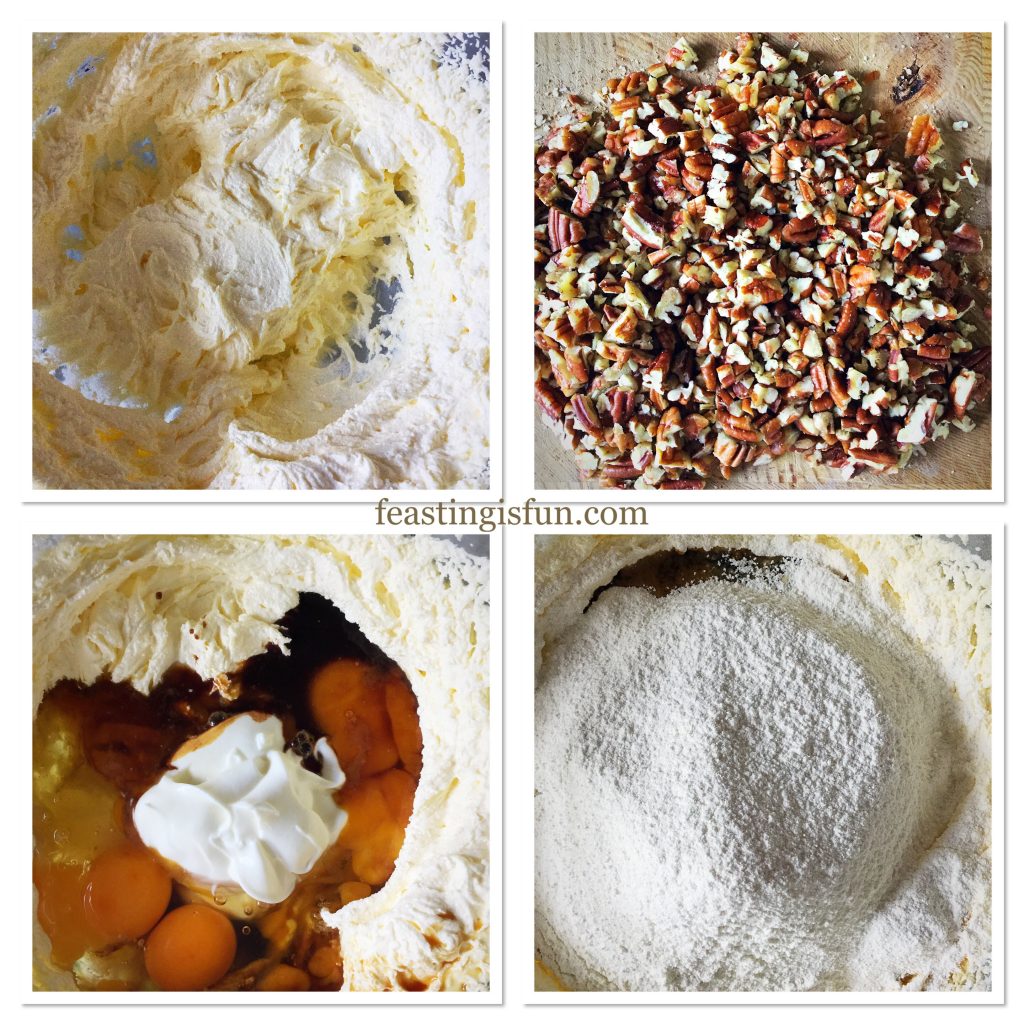
Showing the stages followed to create the fruity batter.
Creating the fruit and amaretto cake batter.
  • Mix the dried fruits into the cake batter .
  • Spoon the cake mixture into the prepared cake tin, ensuring the top of the mixture is smooth.
  • Place the cake into the centre of a preheated oven and bake for 1 1/2 – 2 hours. If the cake starts browning too quickly place the spare circle of baking parchment on top of the cake.
  • The cake is baked when an inserted skewer comes out clean. If raw cake batter clings to the skewer return cake to oven for a further 15 minutes baking then check again.
  • As soon as the cake is baked remove from the oven and leave to cool in the tin.
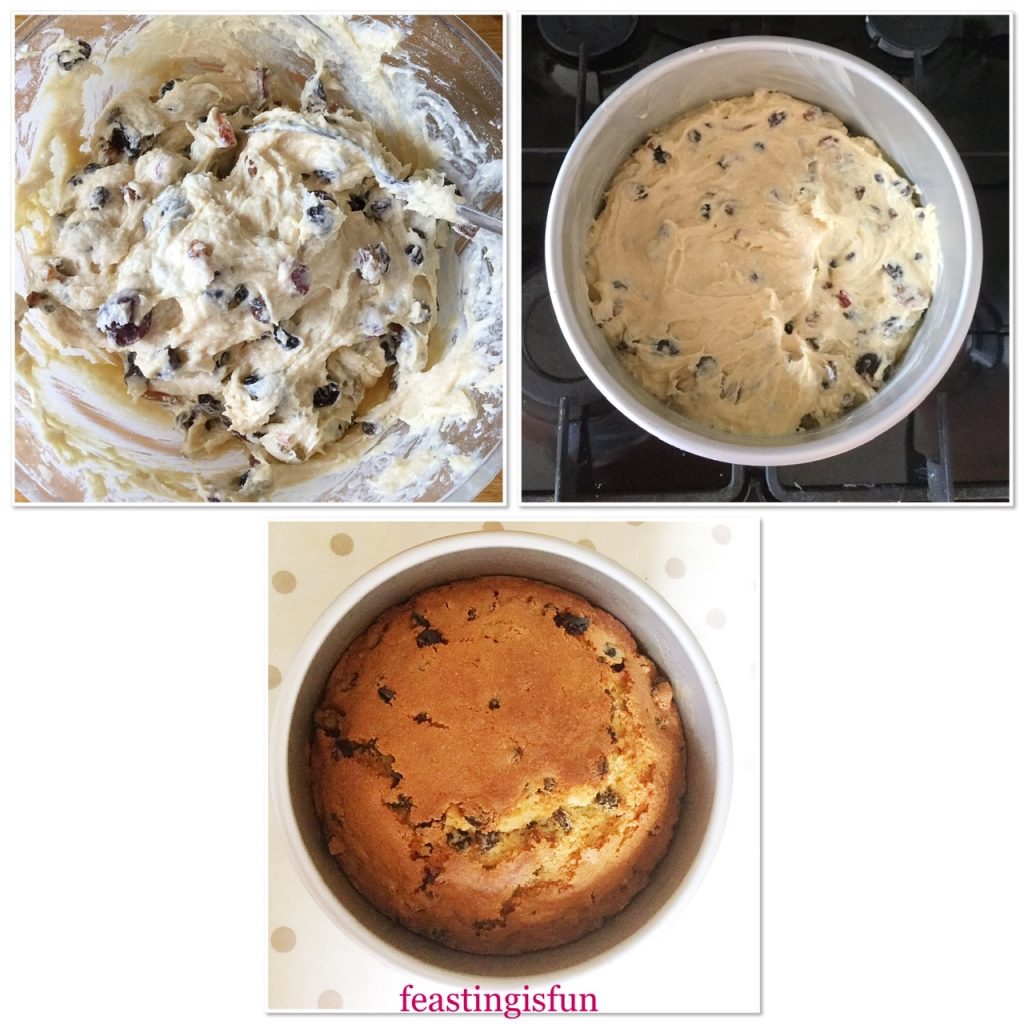
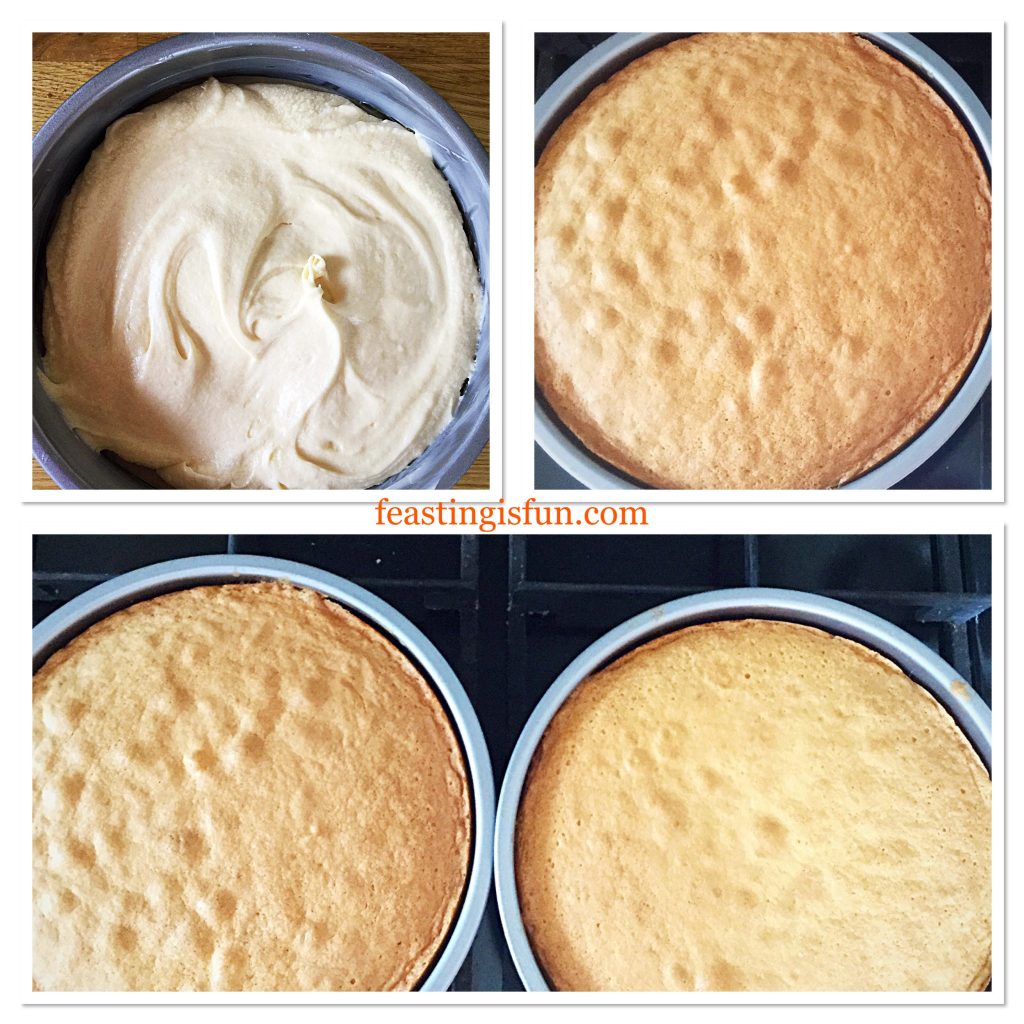
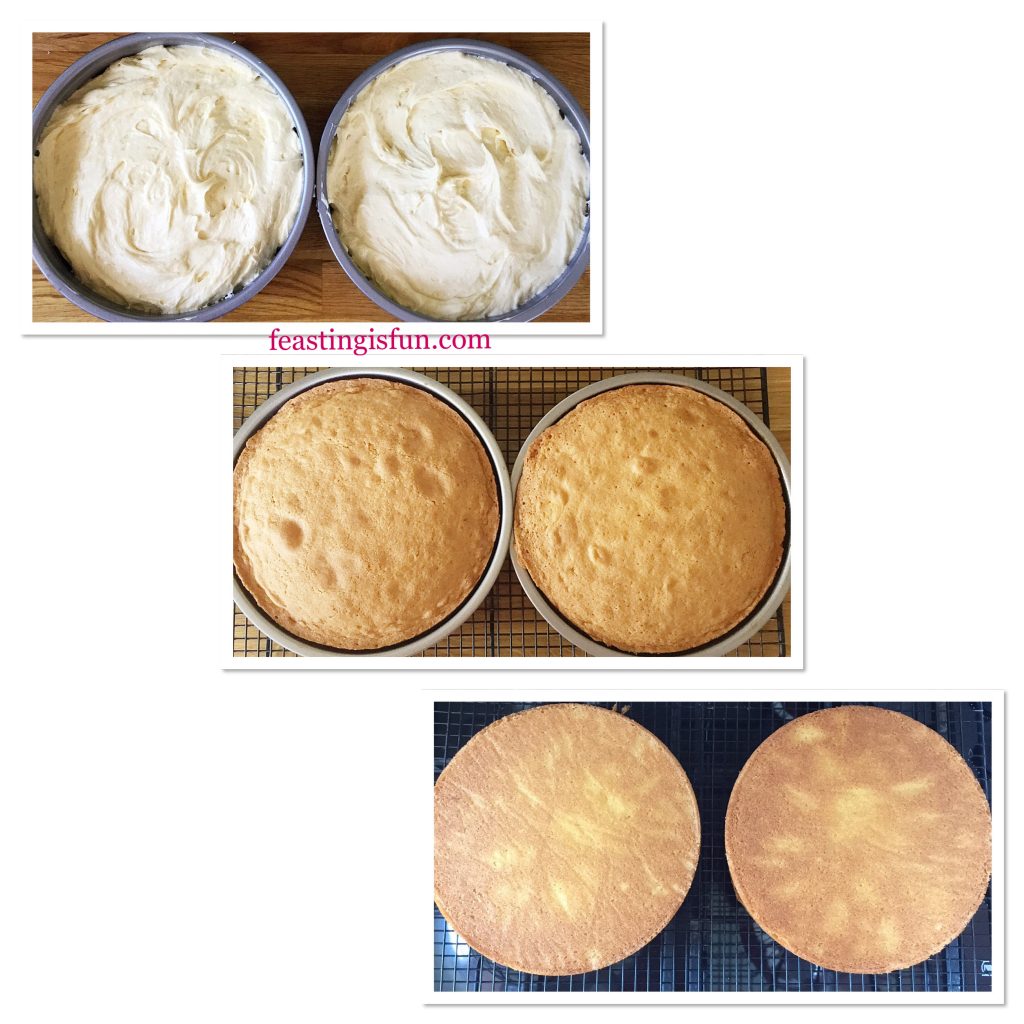
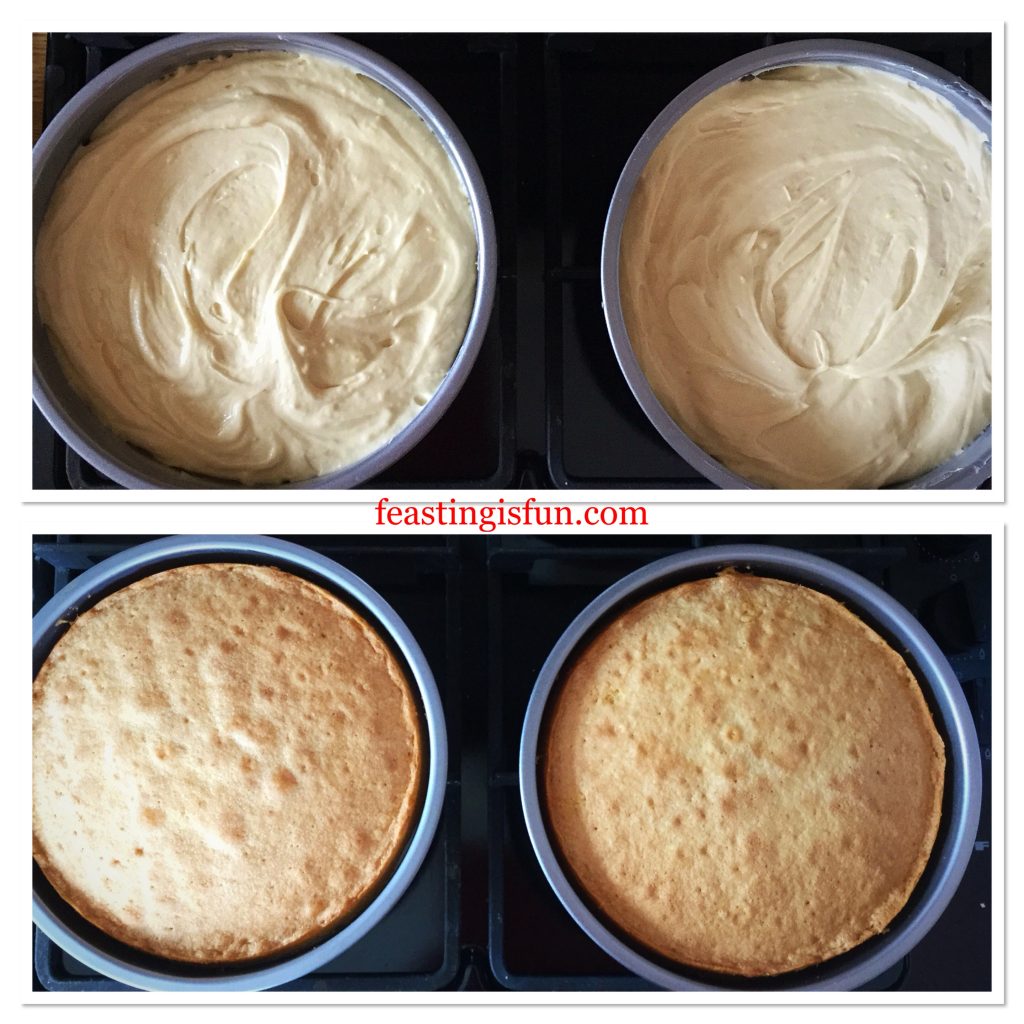
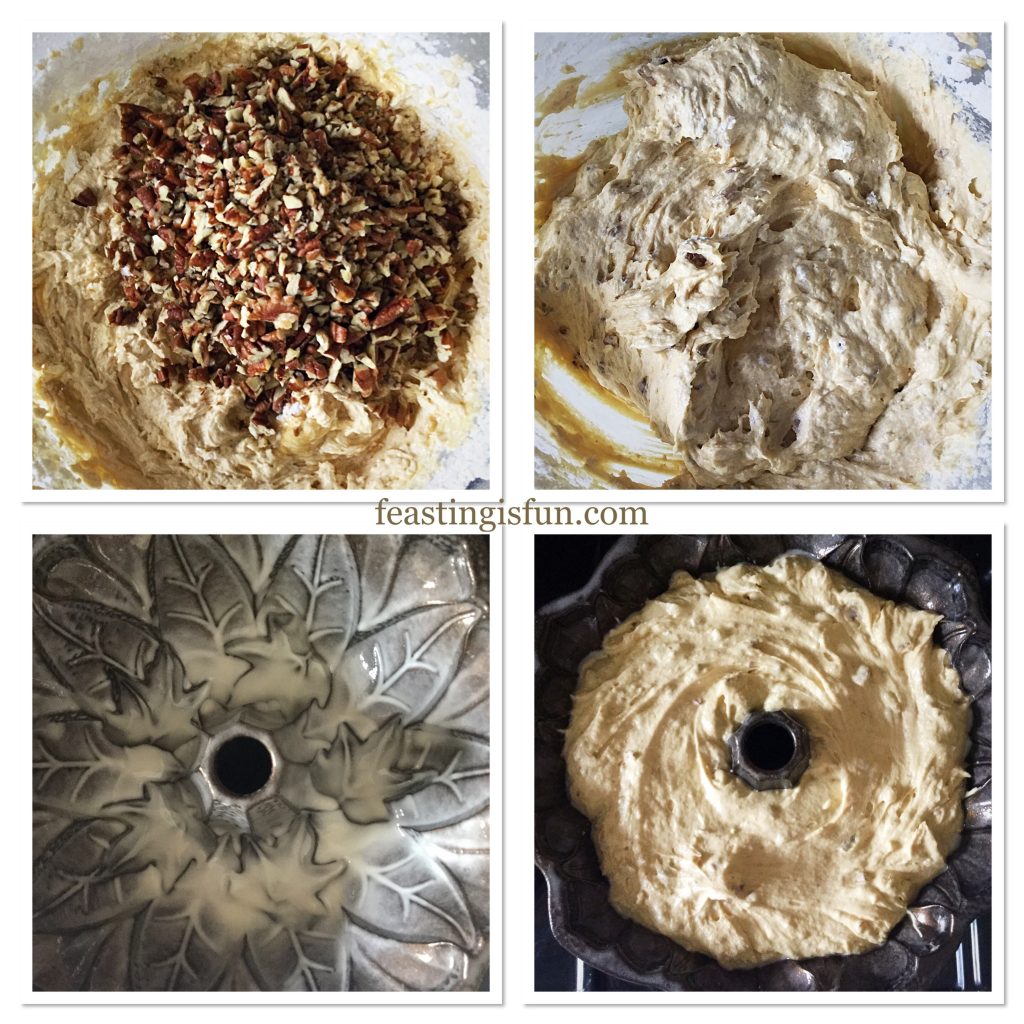
Steps showing the cake tin filled with fruity cake batter and after it is baked.
Filling the cake tin and baking the cake.

Using The Wright’s Baking Madeira Cake Mix

  • First of all preheat the oven to 160C/140C fan, gas mark 3, 325F.
  • Into a large bowl add the oil, amaretto liqueur and water. Then add the cake mix from the packet.
  • Follow the packet instructions to mix the cake batter.
  • Add the dried vine fruits and glacé cherries and mix into the batter with a large metal spoon.
  • Spoon the cake mixture into the prepared cake tin and smooth the top.
  • Place the cake into the centre of a preheated oven and bake for 1 1/2 – 2 hours. This is longer than the time given on the packet due to the addition of fruit.
  • If the cake starts browning too quickly place the spare circle of baking parchment on top of the cake.
  • The cake is baked when an inserted skewer comes out clean. If raw cake batter clings to the skewer return cake to oven for a further 15 minutes baking then check again.
  • As soon as the cake is baked remove from the oven and allow to cool in the tin.

Removing Either Cake From It’s Tin And Serving

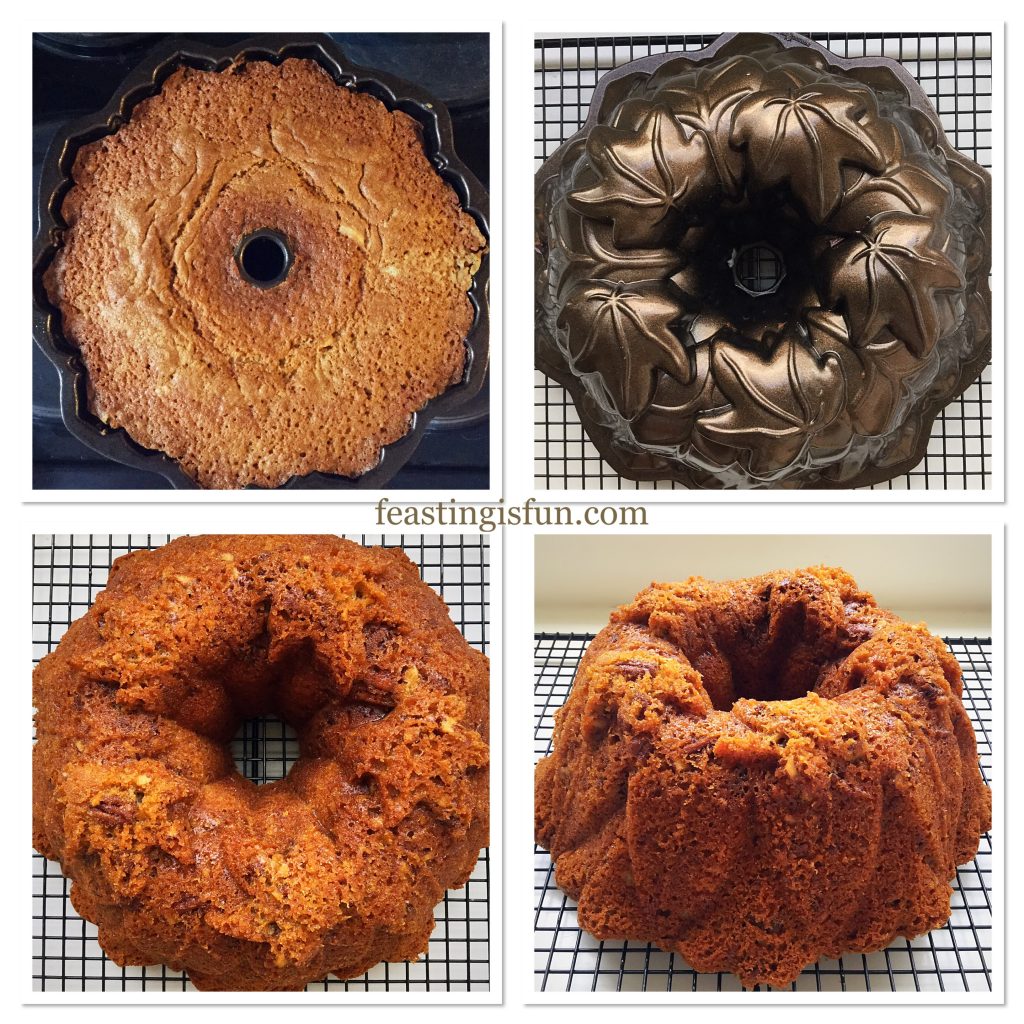
  • As soon as the cake is cooled it can be released from the tin.
  • Run a palette knife between the outside edge of the cake and inside of the tin.
  • Turn the cake out carefully.
  • Remove the baking parchment circle from the cake base.
  • Place the cake onto a cake plate, cake stand, or board.
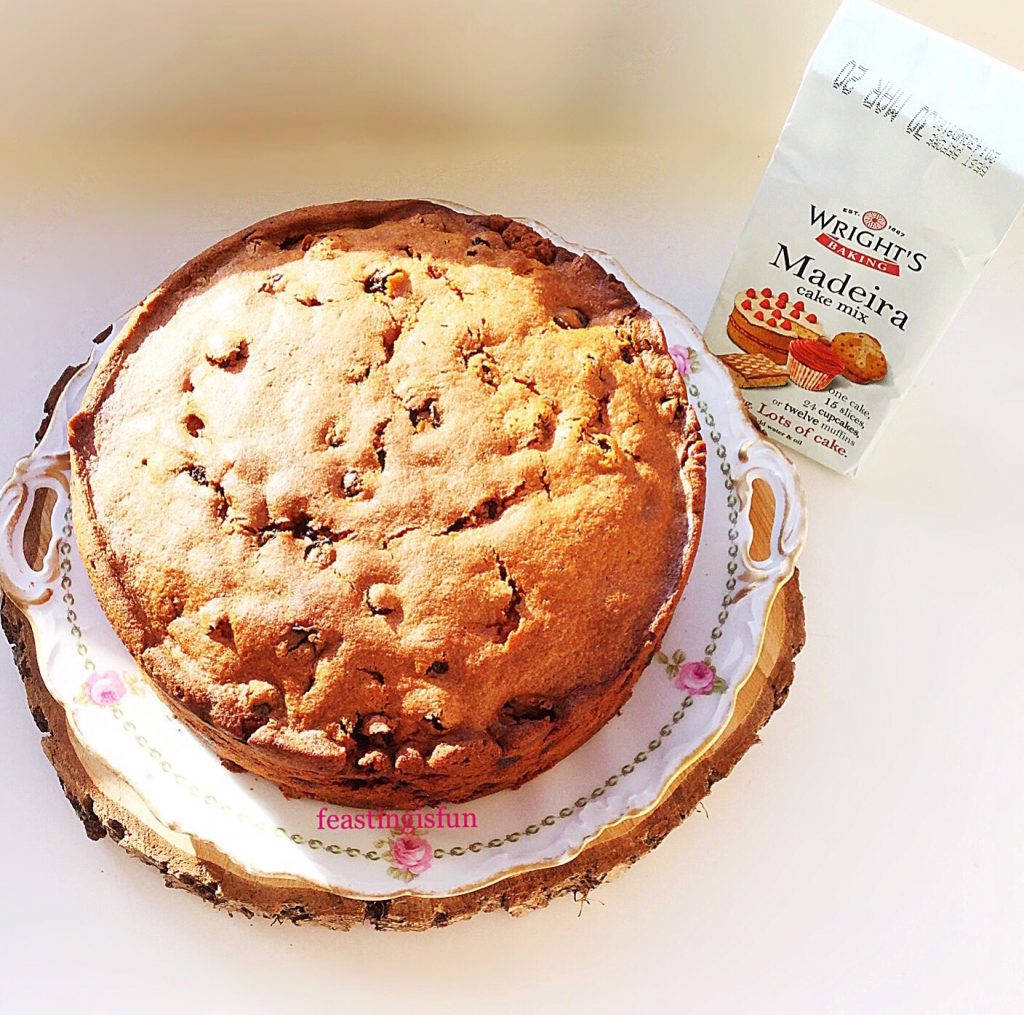
Lighter alternative to a traditional Christmas cake.
Amaretto Light Fruit Cake


Overhead image of sliced cake served with a glass of amaretto liqueur.
Amaretto Light Fruit Cake

Either cake will keep for up to a week when stored in an airtight container and kept in the fridge. Alternatively, as this cake takes minimal preparation compared to a traditional Christmas cake, it can be made and baked the evening before it is needed. For example, on Christmas Eve!

If you have enjoyed this recipe for Amaretto Light Fruit Cake you may also like these:
Dundee Fruit Celebration Cake

Dundee Fruit Cake on a white cake stand.
Dundee Fruit Celebration Cake


Chocolate Marble Celebration Cake

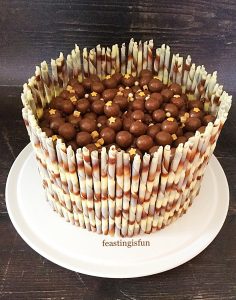
Chocolate marble celebration cake filled with Maltesers
Chocolate Marble Celebration Cake


Mixed Fruit Loaf Cake

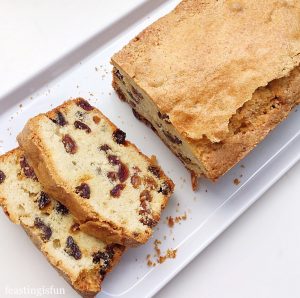
Mixed Fruit Loaf Cake


Christmas really is the time of year when we think of others. Whether family are coming to stay, friends popping by for a drink and nibbles, or others in society that do not have the home comforts we enjoy. Making an extra cake, mince pies, or cookies to give out may take little effort from us, yet mean the world to those they are gifted to. So, during Christmas, I challenge you, as I do myself, to actively give to those in need. Just as our Heavenly Father freely gave His only Son Jesus to the world that we may know Him. Emmanuel – God with us.

From our home to yours, wishing you a very Happy Christmas.

Sammie xx

No part of this post may be reproduced or duplicated without the written permission of the owner. Please see my Disclosure Policy.
Apricot White Chocolate Triple Sponge Cake

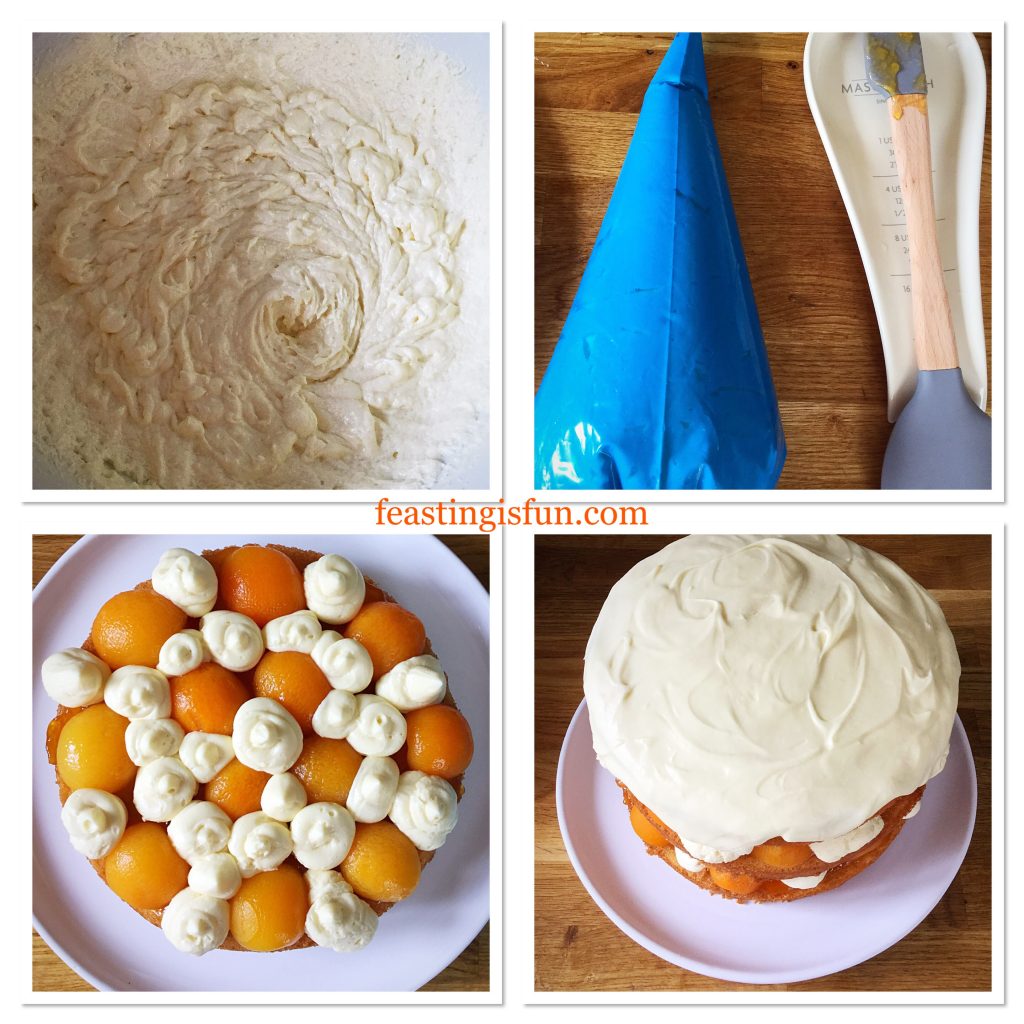
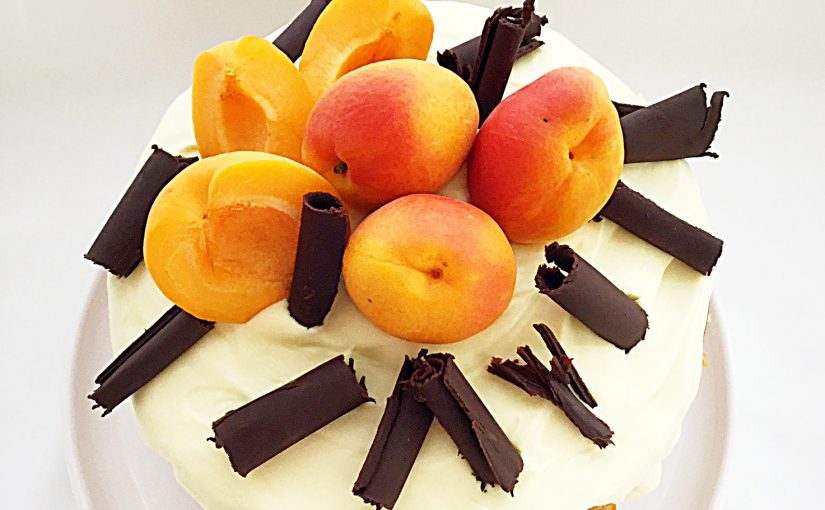
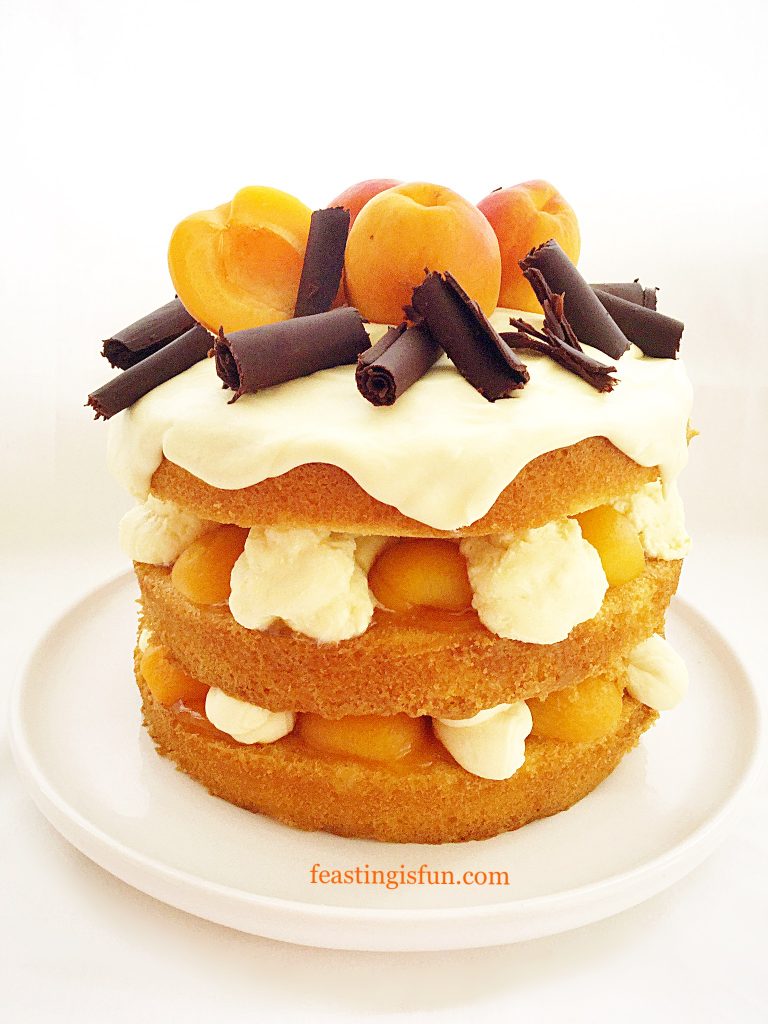
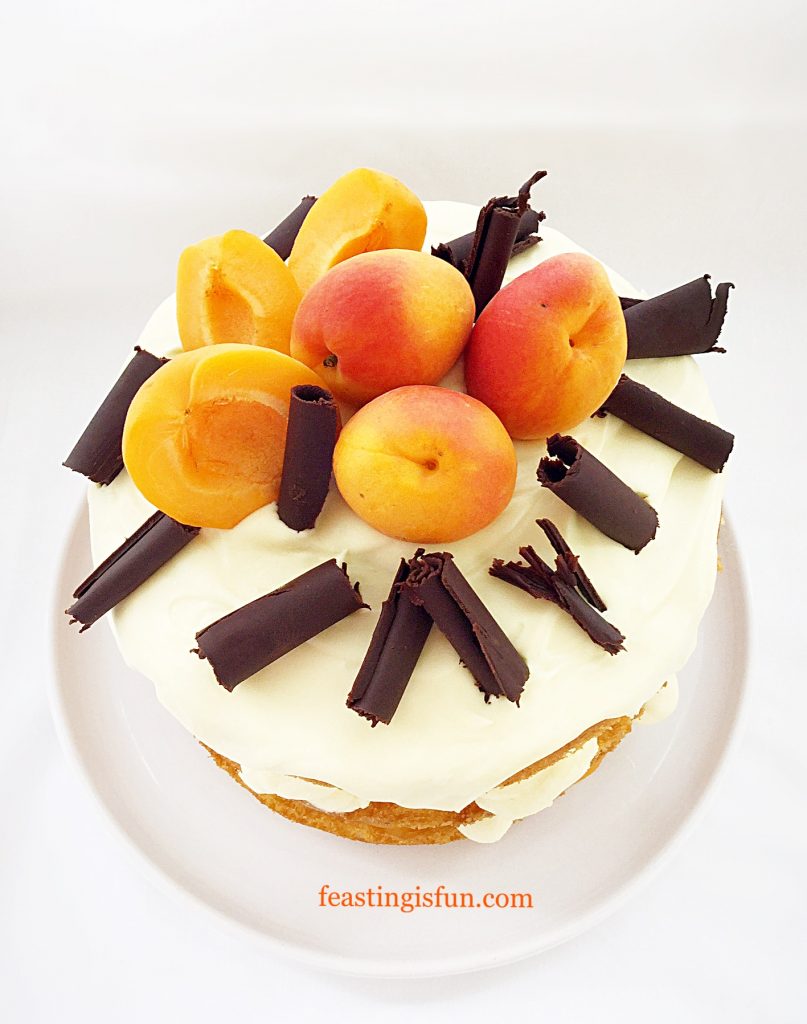
After being approached by Maha Home to create a cake using the new Innovative Range by Mason Cash that they stock, I was beyond excited. I can remember every single adult female in our family owning the iconic, beige coloured, cane bowl by the same manufacturer. Yet with this new range I was in for a double treat (I’ll explain more later). I chose to create this gluten free Apricot White Chocolate Triple Sponge Cake.

FF Apricot White Chocolate Triple Sponge Cake
Apricot White Chocolate Triple Sponge Cake

As a result of my health issues, I rely heavily on the ability to order items online. Having had mixed results from the different companies I order from I have learned who I can trust to properly package and ship things within an acceptable time frame. With Maha Home I placed my order and it arrived the following day. Every item was securely wrapped, without there being an excess of packaging. Most importantly every single item, when unwrapped, was in perfect condition. Because of the careful packaging, lowest price match promise and prompt delivery I would happily order from them in future.


FF Apricot White Chocolate Triple Sponge Cake
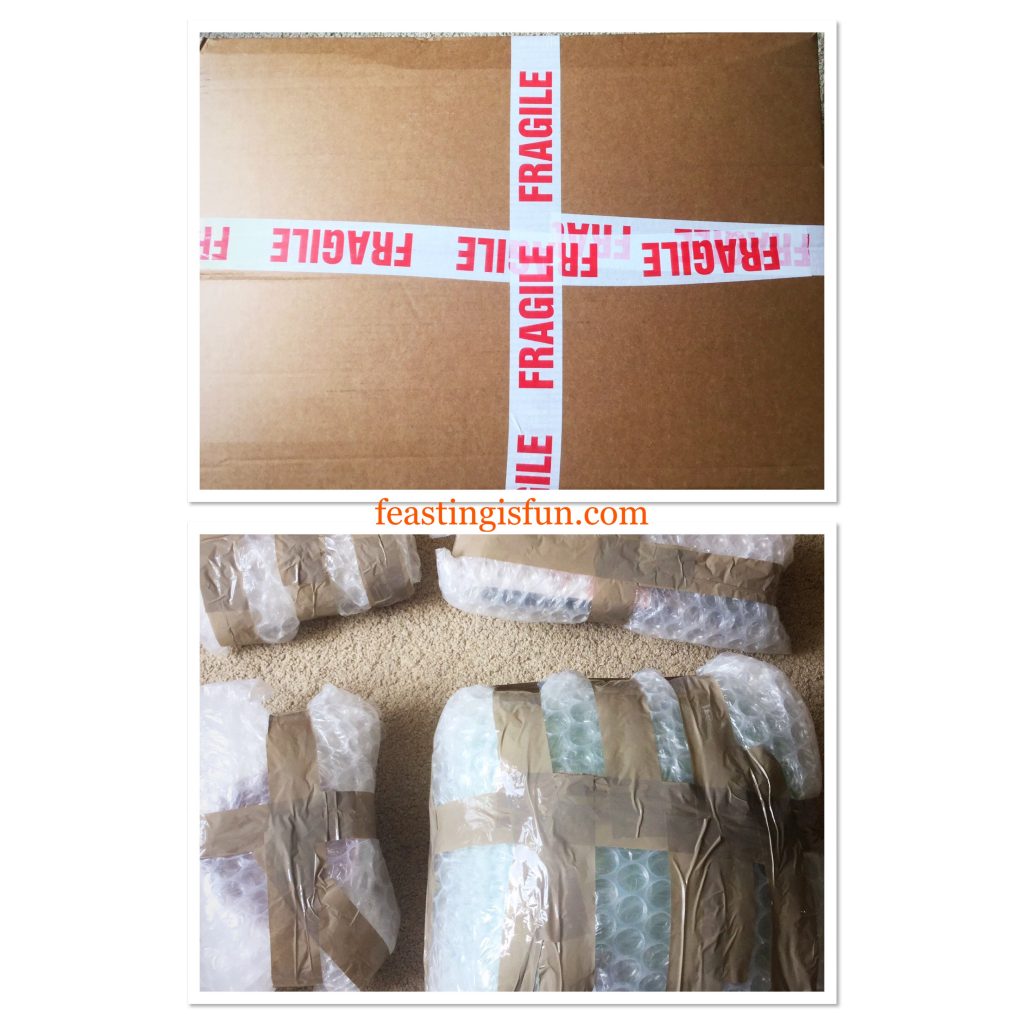
Package delivery from Maha Home

I will admit that it did take some time to complete the unwrapping!

I tested and used all of the items except the reamer and jar scraper while making the Apricot White Chocolate Triple Sponge Cake.

FF Apricot White Chocolate Triple Sponge Cake
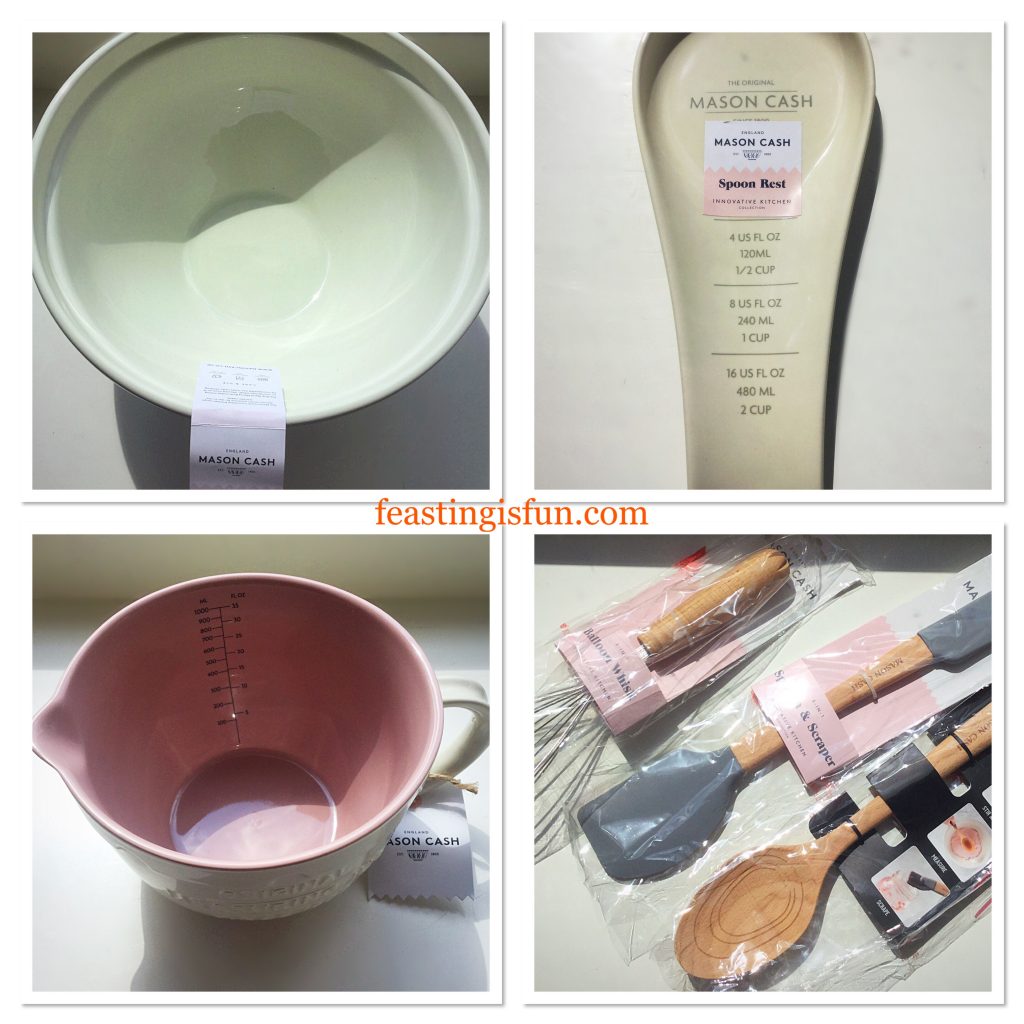
Mason Cash Innovative Kitchen items from Maha Home

Note: please visit the Mason Cash website for specific care and use of items listed.

My Thoughts On The Innovative Kitchen Kit

  • Innovative Kitchen Mixing Bowl:

I love the size of this bowl and it is beautiful to look at. It’s wide enough to get my hands in, for making bread, pastry and crumble. Using the tilt feature allows for thorough mixing. Also I would use this as a serving bowl, for example my Creamy Garlic Lemon Chicken Pasta Salad. While the bowl itself isn’t too heavy, once ingredients are added I would struggle to be able to lift this and mix in the crook of my arm. Also this bowl would make a perfect new home/wedding/birthday present for a newbie or keen baker.

  •  Innovative Kitchen Spoon Rest:

Possibly my favourite item! Although this may seem odd, as someone who frequently uses an electric whisk that always drips on to the worktop having this spoon rest is an absolute joy. Large enough to rest both beaters from my whisk, or the large solid spoon and the balloon whisk from the range, this has saved me a substantial amount of clean-up time.

  • Innovative Kitchen 1 Litre Measuring Jug

Absolutely the cutest item in the range. A really useful size jug with accurate measurements inside. For that reason it was particularly useful when creating the Apricot White Chocolate Triple Sponge Cake. Especially easy to use in the microwave and the colours match my kitchen perfectly.

  • Innovative Kitchen Whisk And Reamer

Such a comfortable balloon whisk to hold and use. I wasn’t sure at first how useful the reamer would be, however after making a batch of Homemade Chelsea Buns, with a lemon drizzle I found myself happily using both the reamer and whisk. Brilliant invention.

  • Innovative Kitchen Spatula

Fantastic large spatula at one end with a smaller spatula at the other end. Any worries I had about how comfortable it would be to hold were immediately dispelled on first use. Two for one usage, saving utensil room in the kitchen.

  • Innovative Kitchen Solid Spoon And Jar Scraper

A strong solid spoon that is comfortable to hold and use. I see a wooden spoon as one of THE most essential items in any kitchen, this spoon fits the bill and some! No longer do I have to sniff my range of wooden spoons when baking, to check for lingering curry/garlic smells. I now have a dedicated wooden spoon for baking, that also has a very handy jar scraper at the other end. Especially useful for honey and marmite, both particularly sticky and reluctant to leave the inside of a jar. Again double usage from one utensil.

FF Apricot White Chocolate Triple Sponge Cake
Apricot White Chocolate Triple Sponge Cake

Recipe: Apricot White Chocolate Triple Sponge Cake serves 10-12

For the cake sponges

225g + 112g/8oz + 4oz (337g/12oz) Unsalted Butter at room temperature – plus extra for greasing the cake tins

225g + 112g/8oz + 4oz (337g/12oz) Caster Sugar

1/4tsp + 1/8tsp Salt (3/8tsp)

2tsp + 1tsp Vanilla Extract (3tsp) – I use Nielsen-Massey 

4 + 2 (6) Large Free Range Eggs

225g + 112g/8oz + 4oz (337g/12oz) Gluten Free Plain White Flour – I use Doves Farm alternatively use regular white wheat flour

2tsp + 1tsp Baking Powder (3tsp)  – I use Waitrose as it is gluten free

Filling and decorating the cake

6tbsp Good Quality Apricot Conserve – I like Bonne Maman

2 x 240g (drained) Canned Apricot Halves

4 Fresh Apricots – if not in season there will be enough left to decorate from the canned apricots

For the white chocolate ganache

600g/1lb 5oz Good Quality White Chocolate

600ml/21fl oz Double (heavy) Cream

For the dark chocolate curls

109g/4oz Good Quality Dark Chocolate – minimum 70% Cocoa Solids

100g/4oz Unsalted Butter – cut into chunks

Method: preheat the oven to 180C/160C fan, 350F, gas mark 4

To make this Apricot White Chocolate Triple Sponge Cake

Note – you will need 3 x 20cm/8in round sandwich tins for this recipe. If, like me however, you only have 2, simply follow the first set of quantities given in the recipe. Make 2 cake sponges using the first quantity given in the recipe and bake. Once the cakes are turned out, wash up one sandwich tin and proceed to make the third cake using the second quantity given in the recipe. Alternatively if you have 3 cake tins make the cake batter using the full quality given (shown in brackets in bold), dividing the mixture equally between the three sandwich tins.

Making the triple sponge cakes

  • First of all grease with butter and line the sandwich tins with baking parchment.
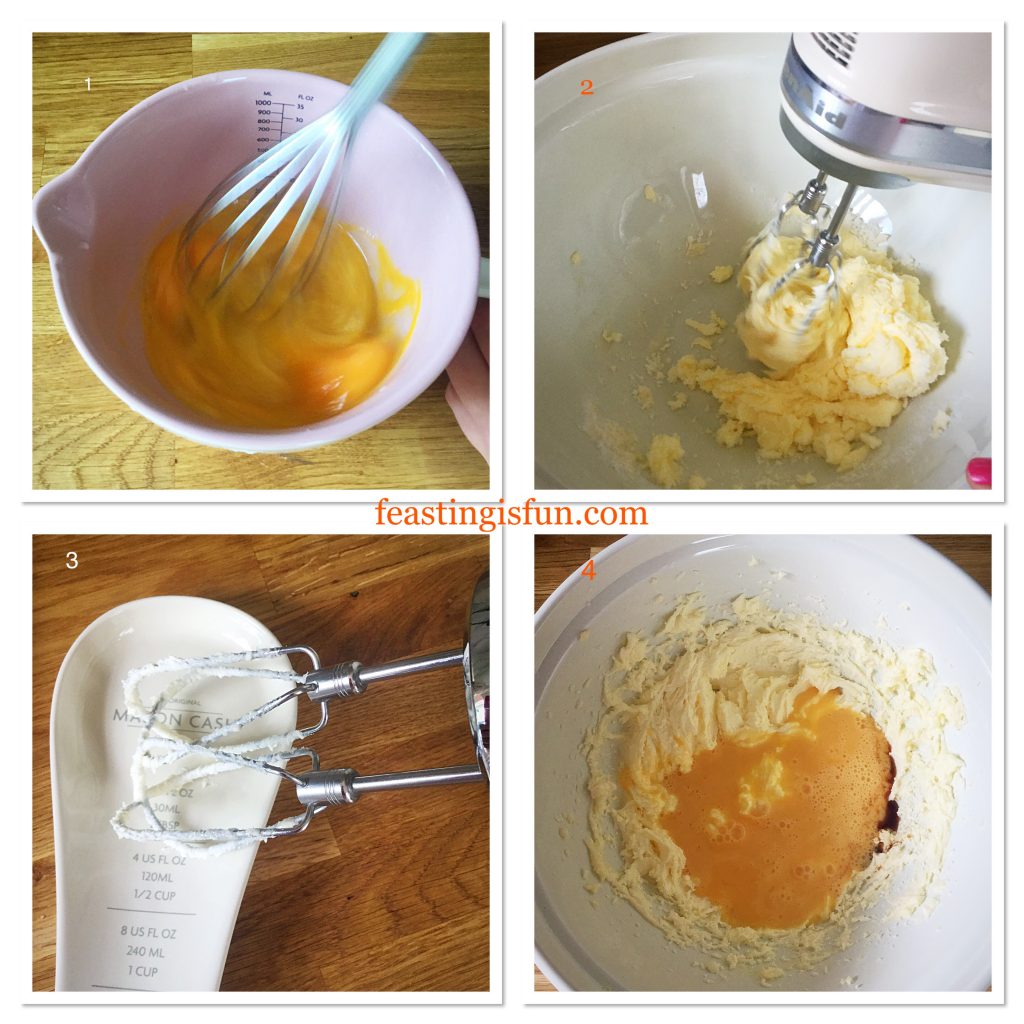
  • Next crack the eggs into the jug and whisk to combine.
  • Add the butter, sugar and salt to the large bowl and whisk together until pale and creamy.
  • Pour the eggs into the large bowl and add the vanilla extract.
FF Apricot White Chocolate Triple Sponge Cake
Beating the cream and sugar, whisking the eggs.
  • Sieve the flour and baking powder into the bowl.
  • Using a large wooden spoon mix the ingredients together until just combined. Over mixing when using wheat flour can lead to a heavy cake.
  • Divide the cake batter evenly between the sandwich tins, using the spatula to scrape the bowl clean. Ensuring nothing is wasted.
  • Smooth the top of the cakes with the spatula.
FF Apricot White Chocolate Triple Sponge Cake
Adding the dry ingredients, mixing and filling the cake tins.
  • Place the cake tins into the centre and lower part of the preheated oven.
  • Bake the cakes for 25-30 minutes.
  • The cakes are baked when golden and they spring back from a light touch in the centre.
  • As soon as the cakes are baked remove from the oven.
  • Allow the cakes to cool in the tins for 15 minutes and then turn out on to a cooling rack.
  • Proceed with making the third sponge as per the note above.
FF Apricot White Chocolate Triple Sponge Cake
Baking the three separate cake sponges

Making Dark Chocolate Curls To Use As Decoration

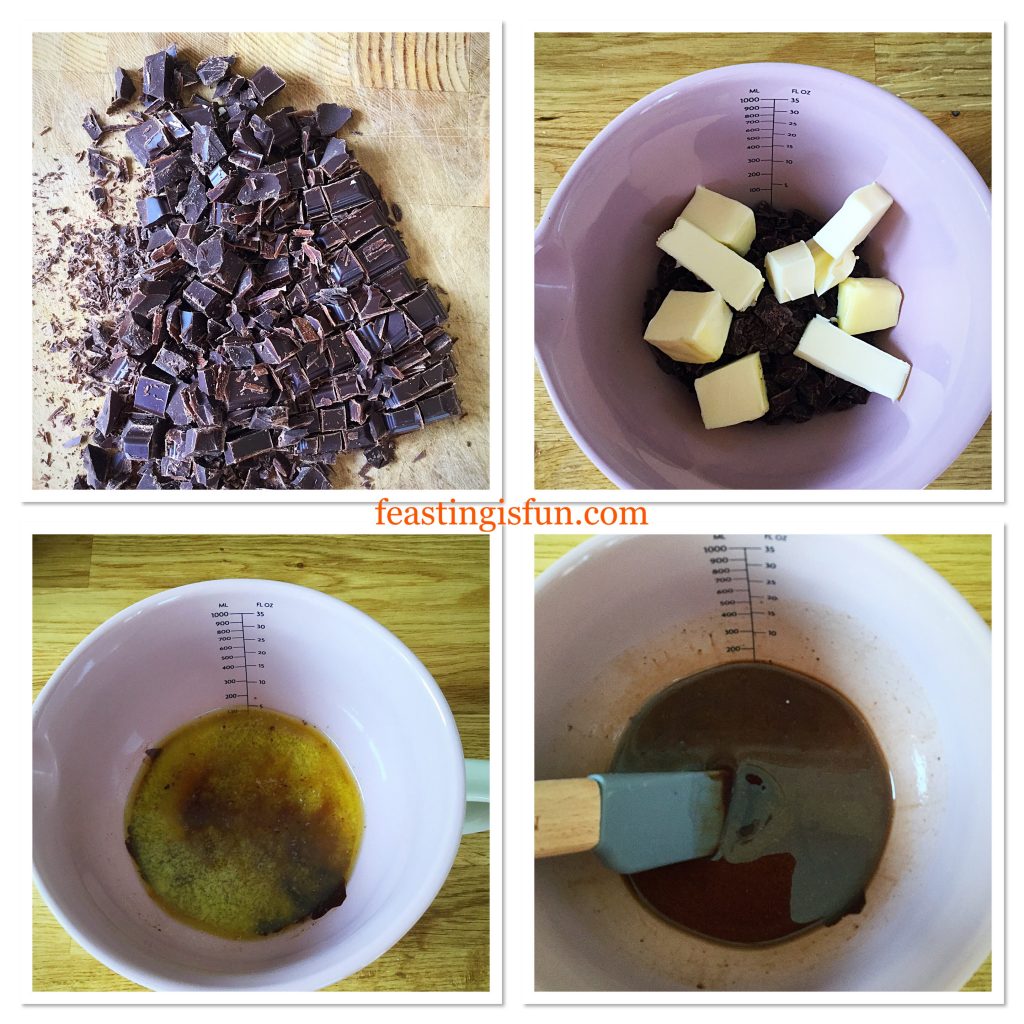
  • Chop the dark chocolate into small chunks.
  • Place the chocolate into the jug and add the butter.
  • Using a microwave heat the chocolate/butter for 30 seconds on medium power. Repeat until both chocolate and butter are melted.
  • Stir using the small spatula until the ingredients are combined and glossy.
FF Apricot White Chocolate Triple Sponge Cake
Making the dark chocolate ganache
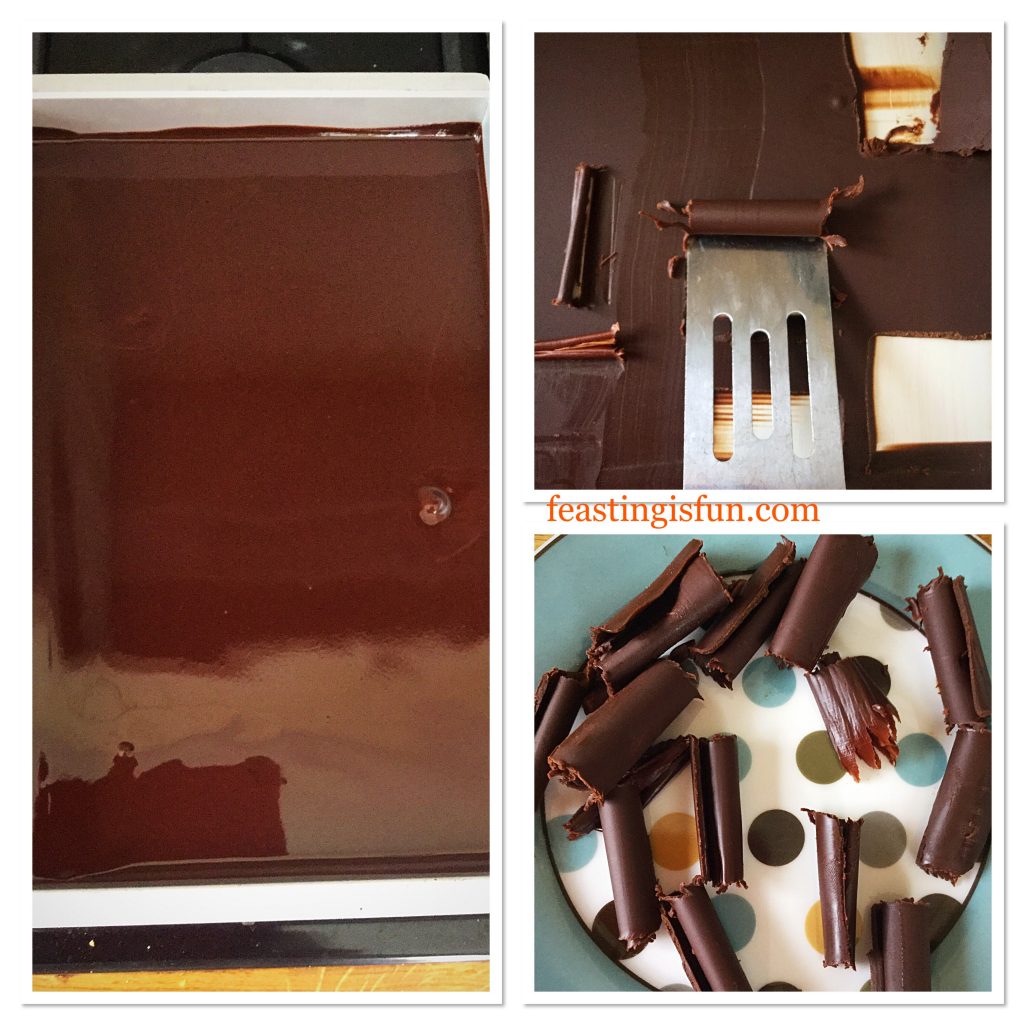
  • Pour the dark chocolate ganache into a baking tray approximately 38cm x 25cm x 3cm (15in x 10in x 1in).
  • Tilt the tray so that it is evenly covered with ganache.
  • Refrigerate the tray for 1 hour to set the ganache.
  • To make the curls, push a straight edged implement (I have used a small metal cake server, a dough cutter or something similar would also work well) into the ganache. The chocolate will form curls. Place each curl on to a cold plate. Repeat until all of the chocolate has been used. During hot weather it maybe necessary to chill the chocolate ganache in between making curls.
  • Once made, place the plate of chocolate curls into the fridge until needed. Note, the dark chocolate curls can be made the day before, Store in an airtight container in the fridge.
FF Apricot White Chocolate Triple Sponge Cake
Making the dark chocolate curls

Making the white chocolate ganache

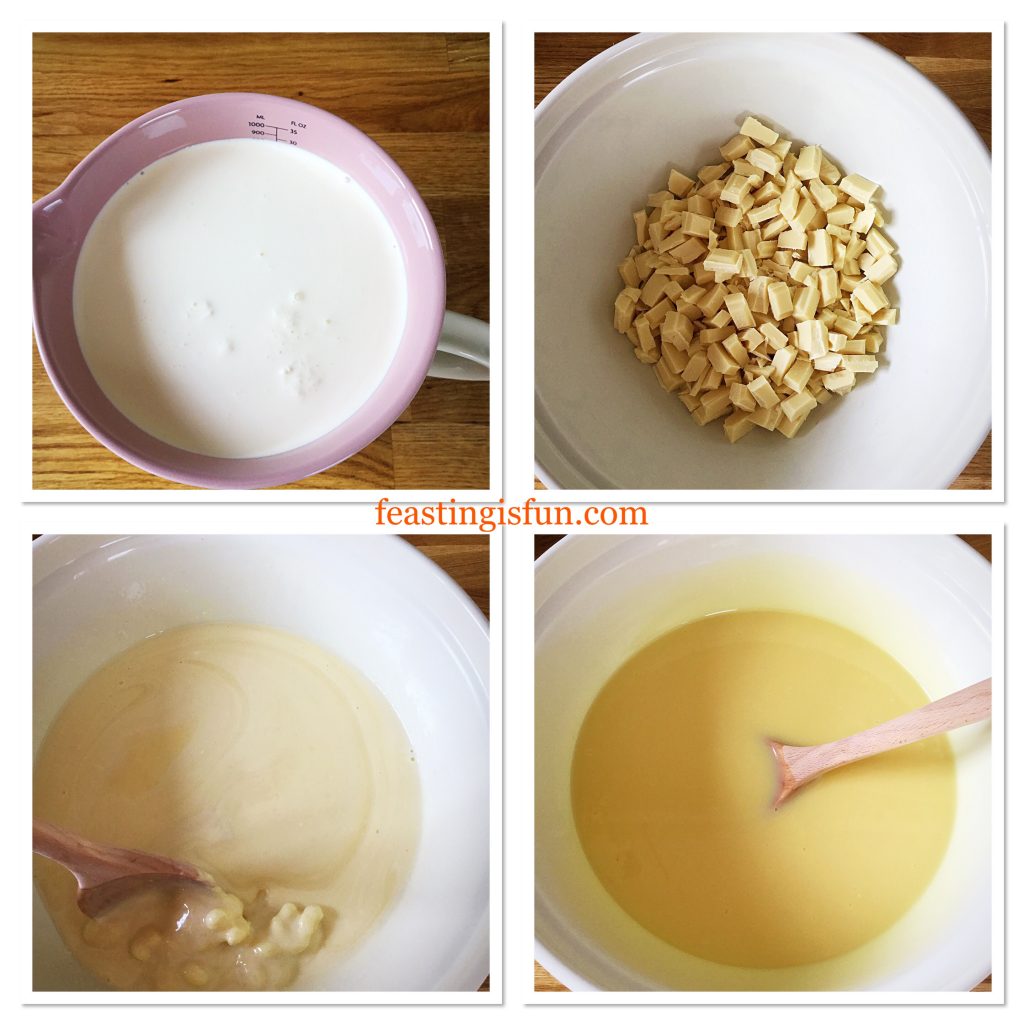
  • Measure out the cream into the jug.
  • Heat in the microwave on medium for 30 second bursts until the cream is hot – not boiling.
  • While the cream is heating chop the white chocolate into small chunks and place into the large bowl.
  • Pour the hot cream over the white chocolate chunks.
  • Stir continuously with the spoon until all of the chocolate is melted and combined with the cream. The mixture should look glossy.
FF Apricot White Chocolate Triple Sponge Cake
Making the white chocolate ganache
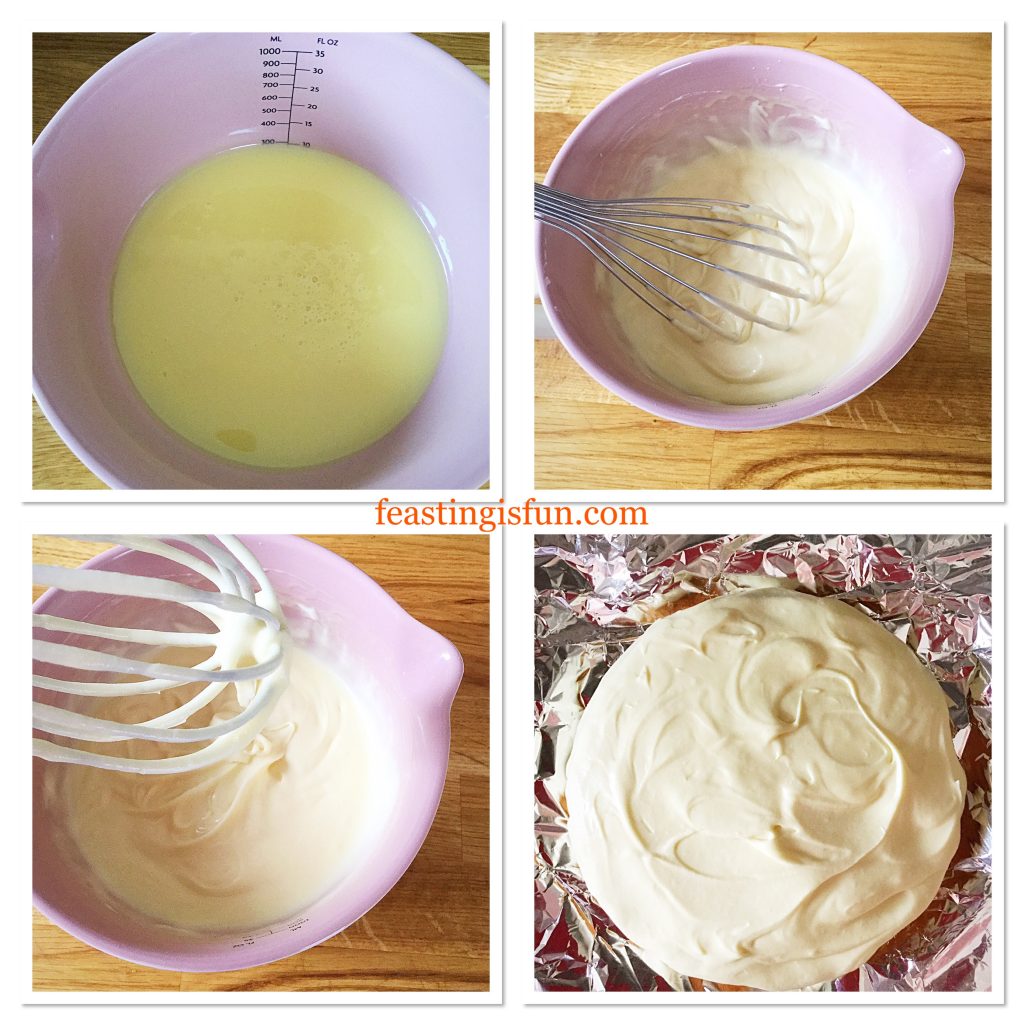
  • Pour 300ml of the liquid white chocolate ganache into the jug.
  • Place the large bowl of ganache into the fridge to cool.
  • Meanwhile, using the whisk, whip the white chocolate ganache in the jug until it just holds it’s shape (see bottom left photo below).
  • Place a cake sponge, flat side down, on to some foil on a plate.
  • Spoon the soft, yet floppy ganache on to the sponge. Spread the ganache with the small spatula to cover the sponge allowing it to naturally drape around the sides.
  • Place the sponge into the fridge to set.
FF Apricot White Chocolate Triple Sponge Cake
Covering the top sponge of the cake with whipped white chocolate ganache

Assembling the Apricot White Chocolate Triple Sponge Cake

  • First of all, drain both cans of apricot halves into a sieve.
  • Place the remaining 2 cake sponges, flat side up, on separate plates. Make sure the sponge that will be the bottom layer of the cake is on a serving plate or board.
  • Spoon 3 tablespoons of apricot conserve on to each sponge and spread to the edges using the small spatula.
  • Place 8 apricot halves evenly around the outside of each sponge and 4 in the centre.
FF Apricot White Chocolate Triple Sponge Cake
Adding the apricot jam and apricots
  • Remove the cooled ganache from the fridge and whisk until it firmly holds its shape.
  • Fill a large piping bag with the ganache.
  • Cut the end of the piping bag off to leave a 1cm opening.
  • Applying even pressure pipe swirls of ganache between the apricots on the edge of the cake working in towards the centre, until there aren’t any gaps left. Repeat for the second sponge.
  • Place both sponges into the fridge and leave to set for 30 minutes.
  • Once the ganache has set it is time to assemble your cake.
  • Place the second layer centrally on top of the bottom layer.
  • Finally, place the ganache covered sponge on top.
FF Apricot White Chocolate Triple Sponge Cake
Piping whipped ganache and assembling the cake

Decorating The Apricot White Chocolate Triple Sponge Cake

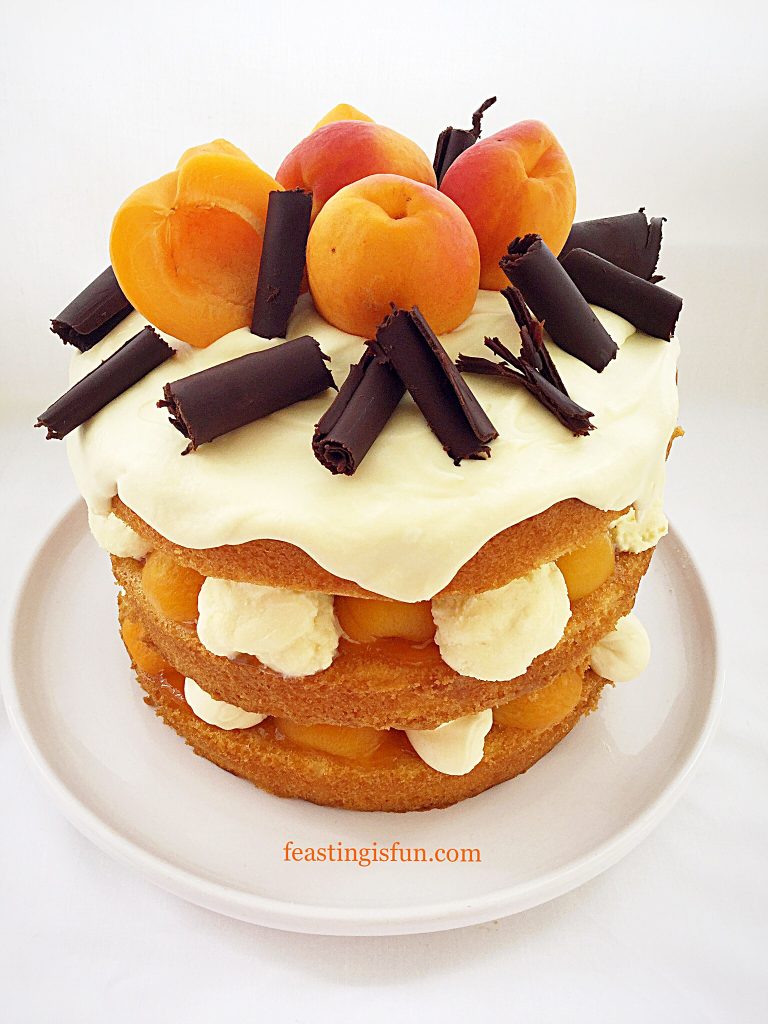
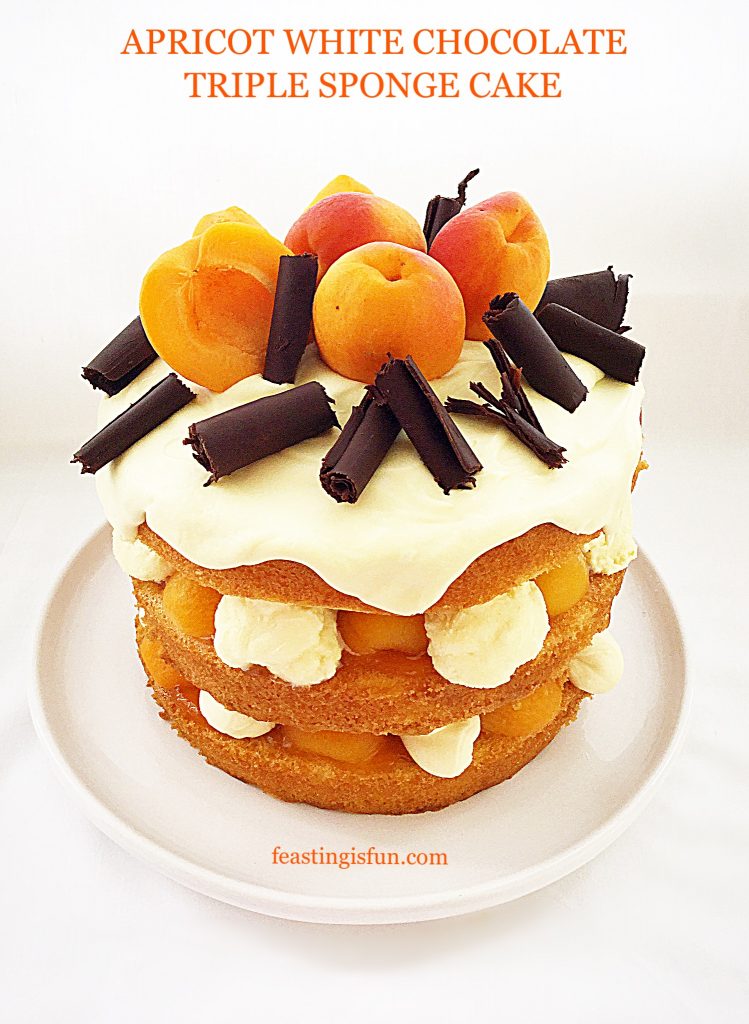
  • Arrange the fresh (or canned) apricots on top of the cake and add the dark chocolate curls.
  • Refrigerate the cake for a further 30 minutes, or until time to serve.
FF Apricot White Chocolate Triple Sponge Cake
Apricot White Chocolate Triple Sponge Cake
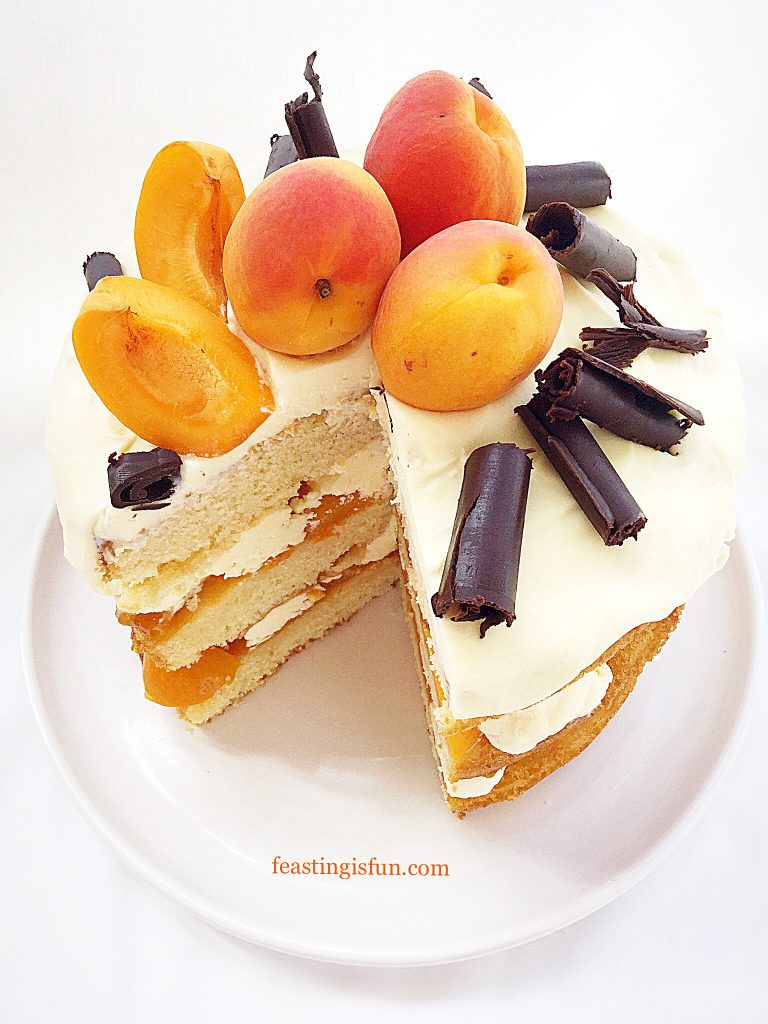
  • Remove the cake from the fridge 10 minutes prior to serving. Doing so allows for easier slicing.
FF Apricot White Chocolate Triple Sponge Cake
Apricot White Chocolate Triple Sponge Cake

I made the gluten free sponges the day before assembling the cake. They were stored in an airtight cake tin separated by sheets of baking parchment.

If you have enjoyed this recipe for Apricot White Chocolate Triple Sponge Cake you may also like these:

Summer Mixed Berry Sponge Cake

FF Apricot White Chocolate Triple Sponge Cake
Summer Mixed Berry Sponge Cake

Raspberry Lemon Celebration Layer Cake 

FF Apricot White Chocolate Celebration Layer Cake
Raspberry Lemon Celebration Layer Cake

Fluted Chocolate Lemon Marble Cake 

FF Apricot White Chocolate Triple Sponge Cake
Fluted Chocolate Lemon Marble Cake


While making this Apricot White Chocolate Triple Sponge Cake I had great fun testing out the Mason Cash Innovative Kitchen items sent to me by Maha Home. As well as creating a feast, fun has to be at the heart of what I do. Likewise, by testing new kitchenware I learn what works and what doesn’t. As a result I can offer an unbiased opinion to you my readers. Your trust in me is central to any review I undertake. Resulting in a review that is open and honest.

So, whatever you are making, baking and creating in your kitchens, have fun preparing and sharing your feast.

Sammie xx

FF Apricot White Chocolate Triple Sponge Cake
Apricot White Chocolate Triple Sponge Cake

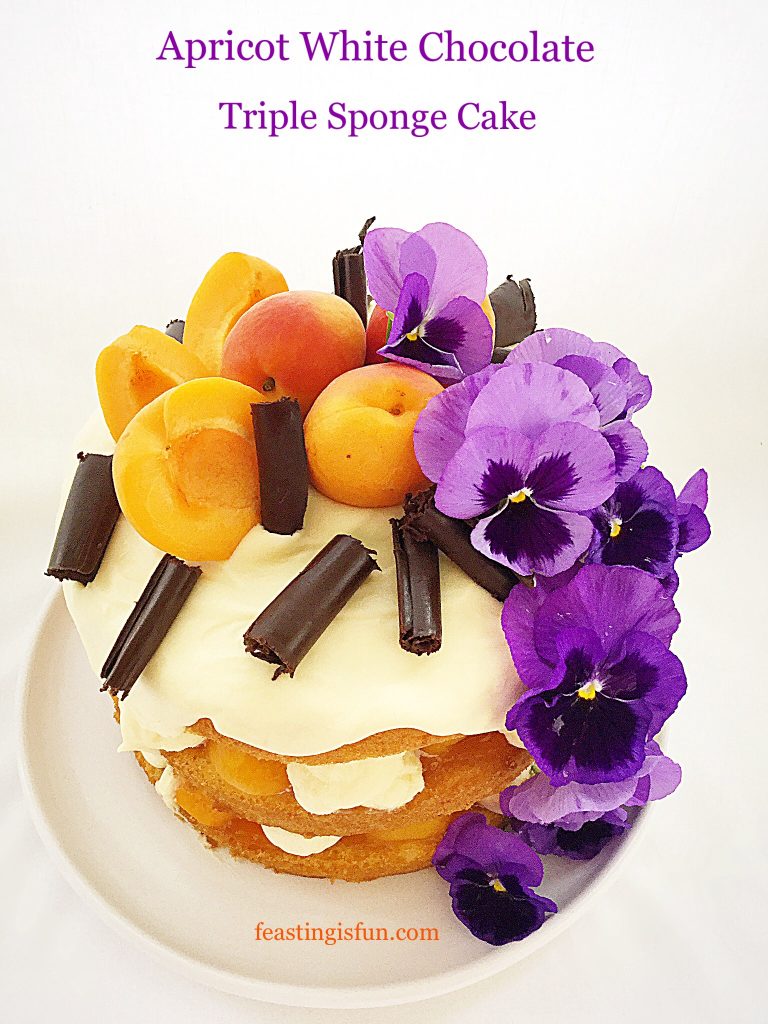
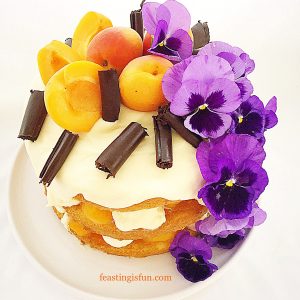
In the photograph above I added edible Pansies to create a pop of colour. When using flowers to decorate a cake, ensure they are edible and free from any chemicals.

Maha Home sent me the Innovative Kitchen items by Mason Cash for the purpose of reviewing. Please visit their website for lowest price match promise and discount code T’s & C’s. All opinions, views and content are my own. I was not paid to carry out this review. No part of this post may be reproduced or duplicated without the written permission of the owner. Please see my Disclosure Policy.
FF Apricot White Chocolate Triple Sponge Cake
Apricot White Chocolate Triple Sponge Cake


Summer Mixed Berry Sponge Cake

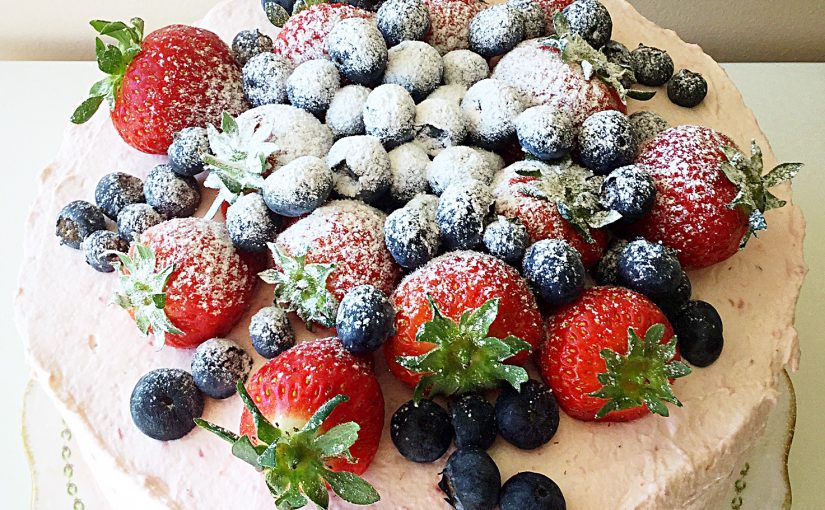
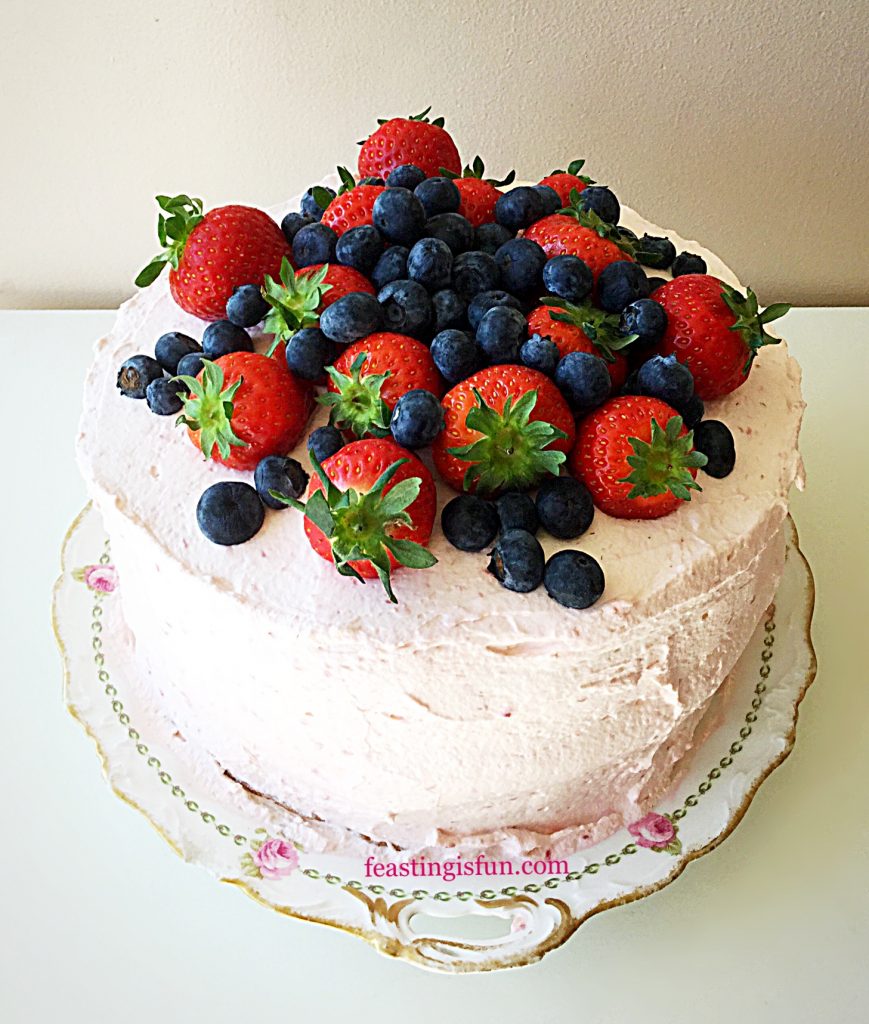
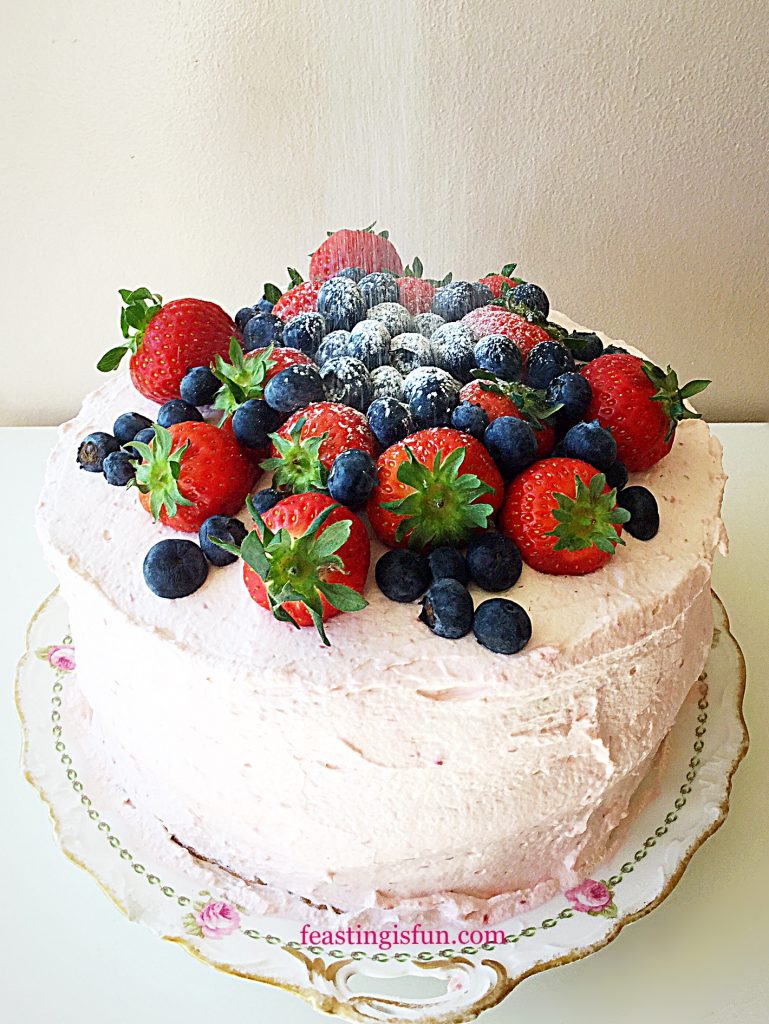
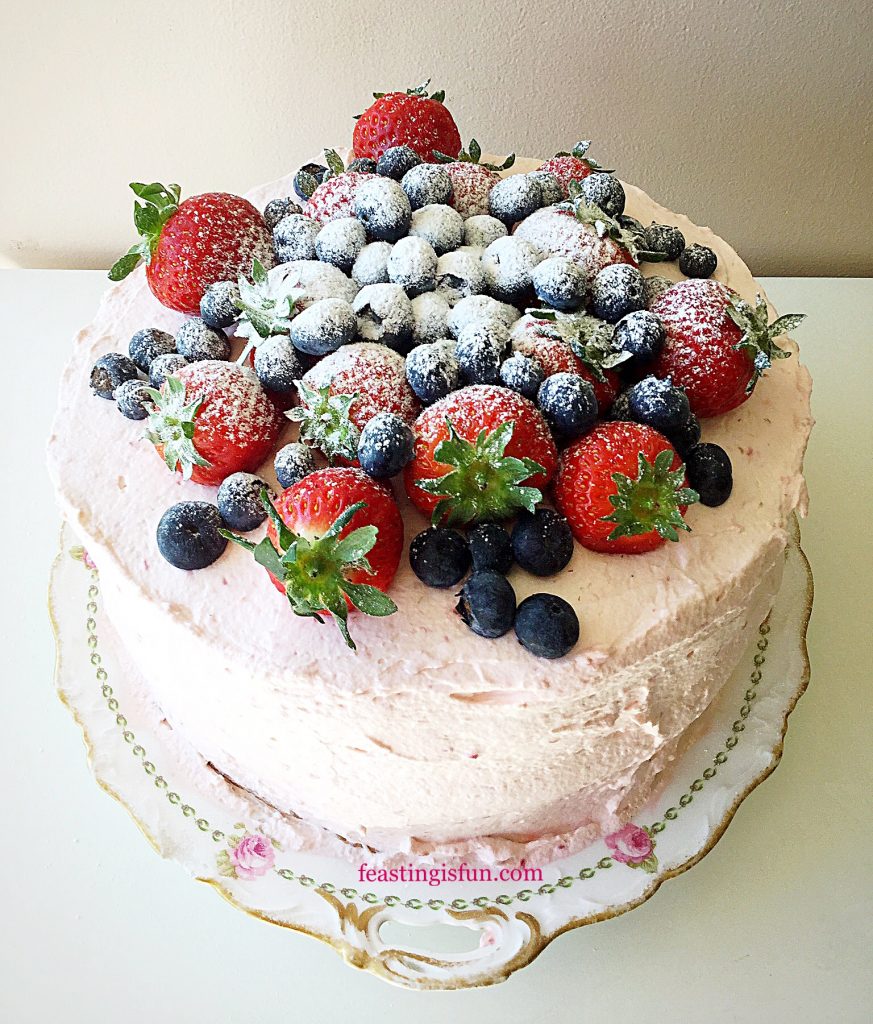
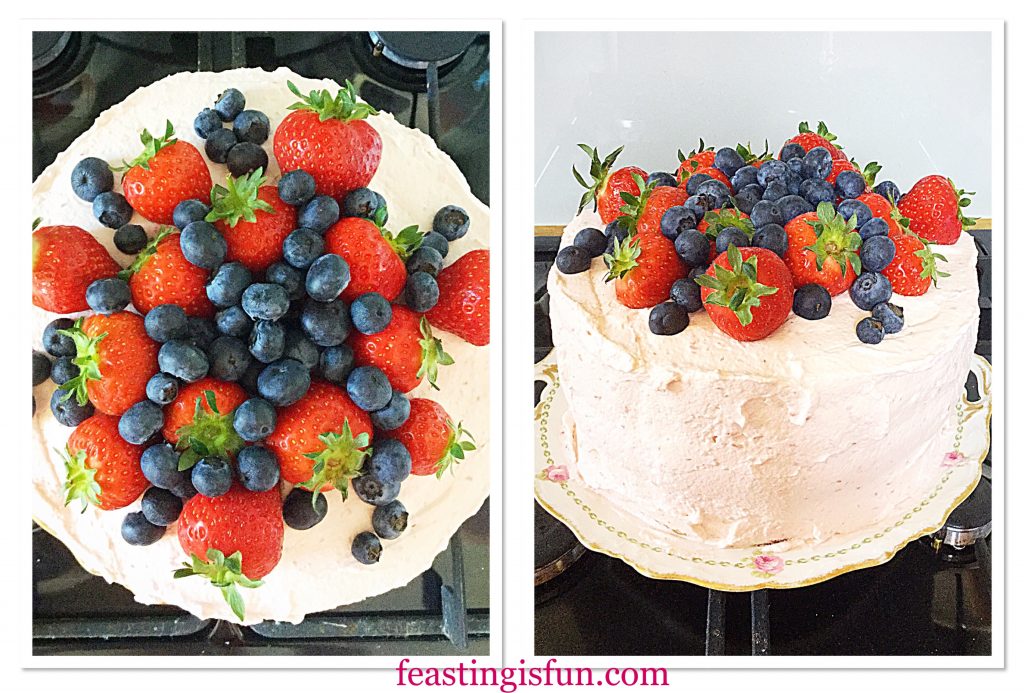
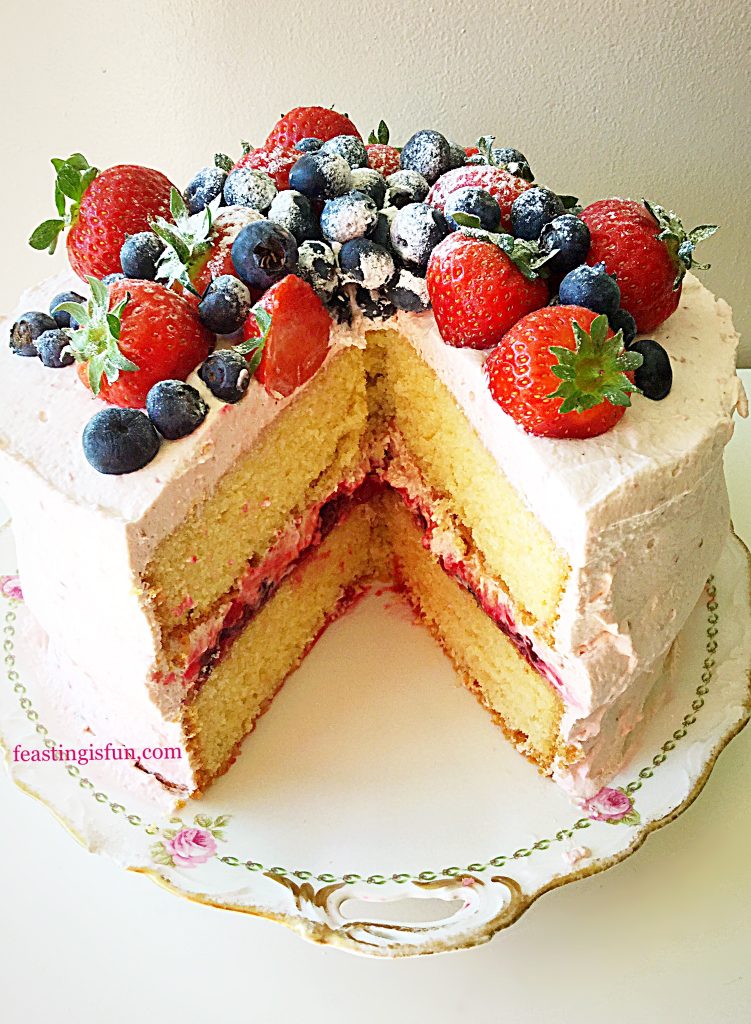
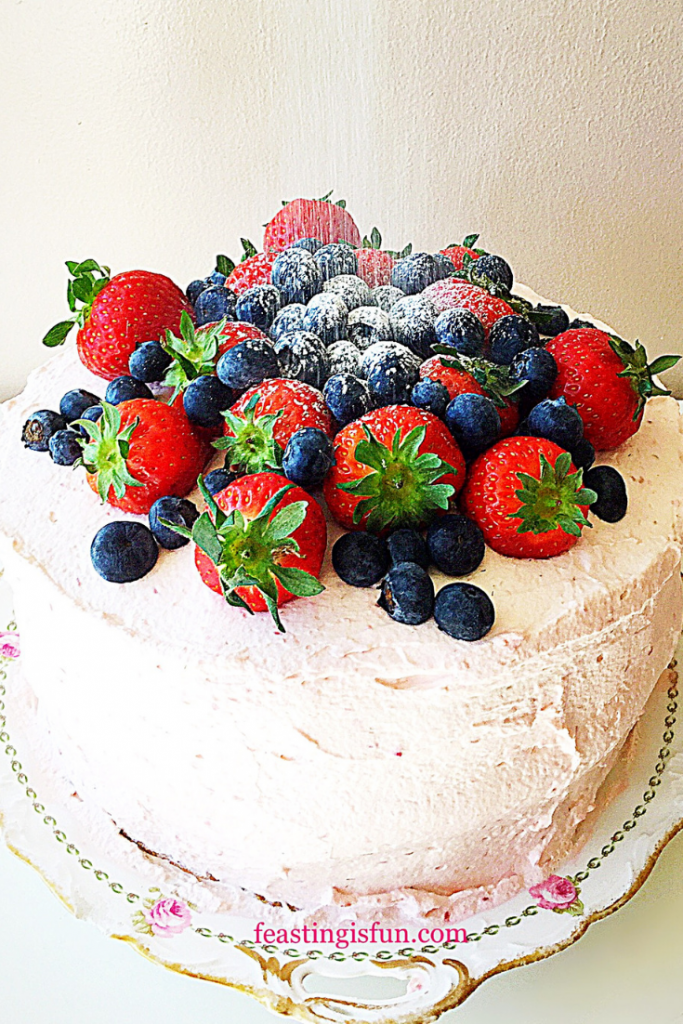
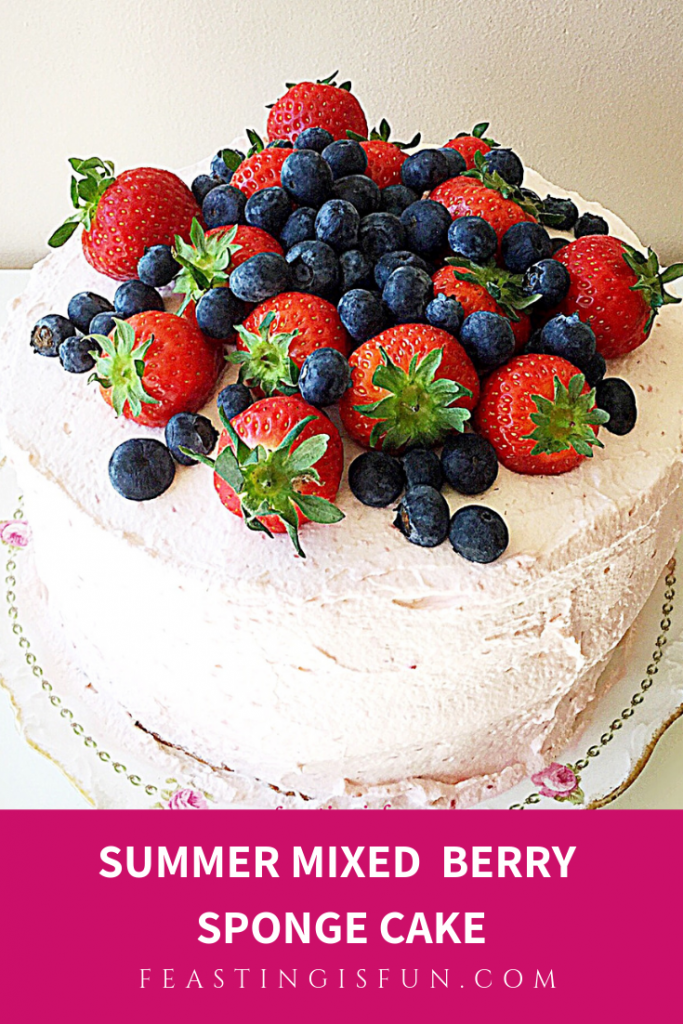
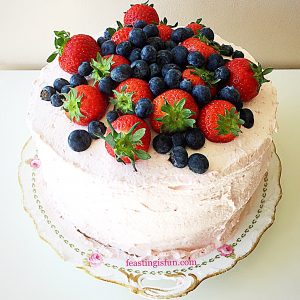
I adore the variety and abundance of fresh fruit available during the warmer months of the year. So, if I can restrain myself from simply eating them as they are I love to use them in recipes. And here in my Summer Mixed Berry Sponge Cake they are given centre stage. Freshly made raspberry and blueberry jam sandwiched between the two sponges with fresh raspberry whipped cream covering the entire cake. Finally topped with more fresh blueberries and strawberries this cake is a celebration of summer fruit.

FF Summer Mixed Berry Sponge Cake
Summer Mixed Berry Sponge Cake

Since not everyone here at Feasting headquarters is a fan of sweet frosting, I decided to use something different to cover this cake. And fresh raspberries added to whipped cream are utterly delicious. While the raspberries are tart, when whipped into the cream they lend a sweetness and very light raspberry flavour. Also, as the cream is used between the sponges and to cover the cake it adds a very pretty pink colour to the finished creation.

FF Summer Mixed Berry Sponge Cake
Summer Mixed Berry Sponge Cake

Seasonal fruits

Finally the cake it topped with a tumble of seasonal strawberries and blueberries. Alternatively switch up and swap around the fruits according to what is abundant, available and in season. Since I have blackberry, raspberry, tayberry, redcurrant, blackcurrant, strawberries AND a cherry tree in our garden I will have different choices as the season progresses. Also I am sure that strings of redcurrants dripping over the side of this cake will look really pretty.

FF Summer Mixed Berry Sponge Cake
Summer Mixed Berry Sponge Cake

A guide for changing up the fruit is to keep at least one ‘sweet’ fruit for the top. Also I would be careful about adding strawberries to the whipped cream. Since they can be quite watery and may cause it to split. If in doubt, scoop a spoonful of whipped cream on to a plate and mash in a small amount whichever fruit you want to use. And the fruit should mix easily into the cream. Alternatively, if the mixture splits try a different fruit.

Recipe: Summer Mixed Berry Sponge Cake serves 8-10

For the sponge cakes:

275g/10oz Unsalted Butter at room temperature – plus a little extra to grease the cake tins

275g/10oz Caster Sugar

1 tsp Vanilla Extract – I use Nielsen-Massey 

1/4 tsp Sea Salt Flakes – halve if using free flowing

5 Large Free Range Eggs

275g/10oz Plain White Flour

3 tsp Baking Powder

1 Large Lemon – scrubbed and finely zested

To fill and cover:

225g/8oz Fresh Fruit Jam – to make fresh raspberry jam please see the recipe on Victoria Sponge Cake substitute half of the raspberries for blueberries for the jam I used here

450ml/1 pint Double Cream (heavy cream)

100g/4oz Fresh Raspberries

25g/1oz Caster Sugar

1 tsp Vanilla Extract

To decorate:

150g/5oz Fresh Blueberries – alternatively use blackberries

225g/8oz Fresh Strawberries – alternatively use raspberries

Optional – 1 tsp Icing Sugar to dust

Method: Preheat oven to 160C/140C fan, 325F, gas mark 3.

You will need two 20cm/8in sandwich tins, buttered and the base lined with baking parchment.

Making and baking the sponge cakes

  • First of all, into a large mixing bowl add the butter, sugar and salt. Whisk everything together until pale and creamy.
  • Now add 2 eggs, vanilla extract and half of the flour. And whisk until just combined.
  • Finally add the remaining flour and baking powder, 3 eggs and the lemon zest. Whisk together until everything is just combined.  Over mixing will cause the cake to be dense.
FF Summer Mixed Berry Sponge Cake
Making the sponge cake batter
  • Divide the cake batter evenly between the sandwich tins.
  • Place into the centre of the oven and bake for 35-40 minutes.
  • The sponge cakes are baked when golden in colour and firm to a light touch. Also an inserted skewer will come out clean.
FF Summer Mixed Berry Sponge Cake
Filling the cake tins, baking and cooling the cakes
  • As soon as the cakes are baked remove from the oven and place the tins on to a cooling rack.
  • Leave the cakes to cool in the tin for 10 minutes, then turn the cake out carefully removing the baking parchment.
  • Allow the cakes to fully cool on the rack.
FF Summer Mixed Berry Sponge Cake
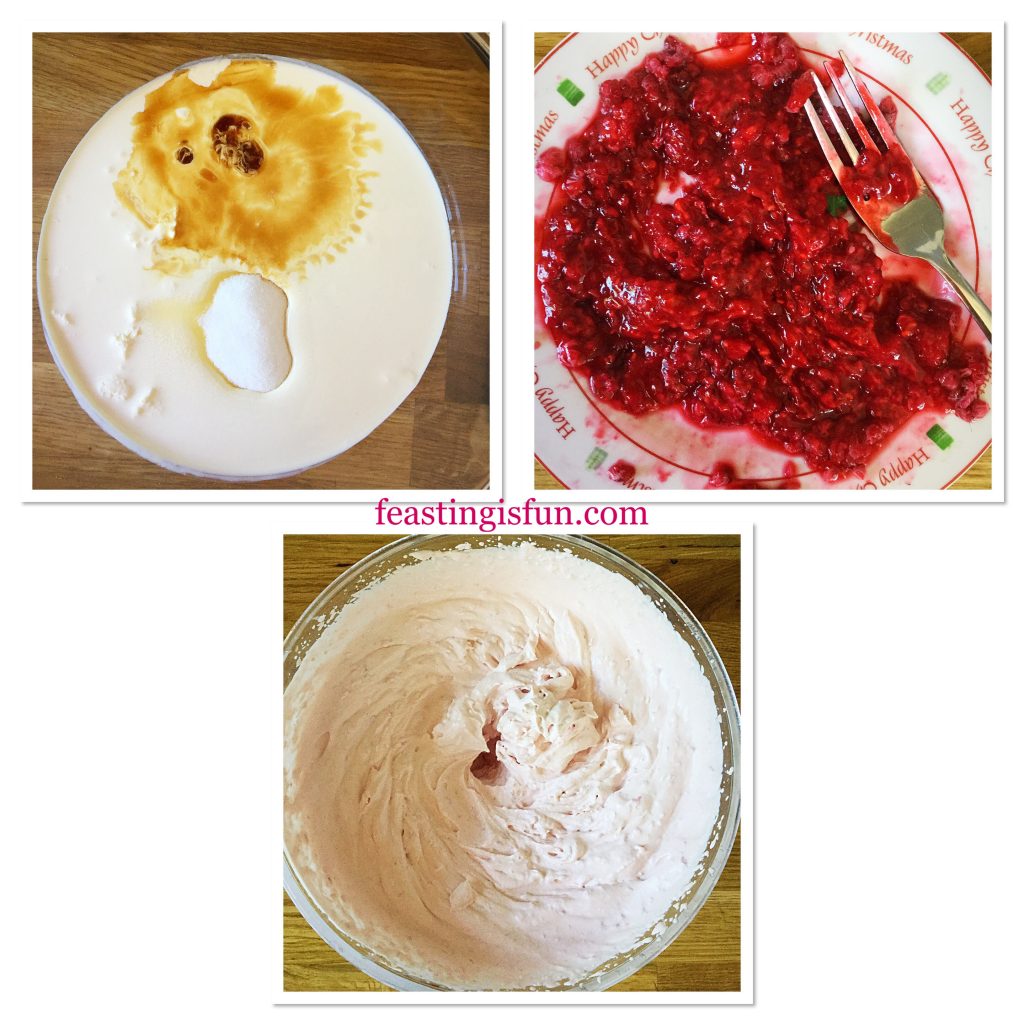
Making the raspberry whipped cream

Making the raspberry whipped cream

  • As soon as the cakes have cooled make the raspberry whipped cream.
  • Place the fresh raspberries on to a plate and mash with a fork.
  • Pour the cream, vanilla extract and sugar into a bowl and whisk until thickened but still floppy, not stiff.
  • Add the mashed raspberries to the cream and continue to whisk until the cream has thickened and holds it’s shape.
FF Summer Mixed Berry Sponge Cake
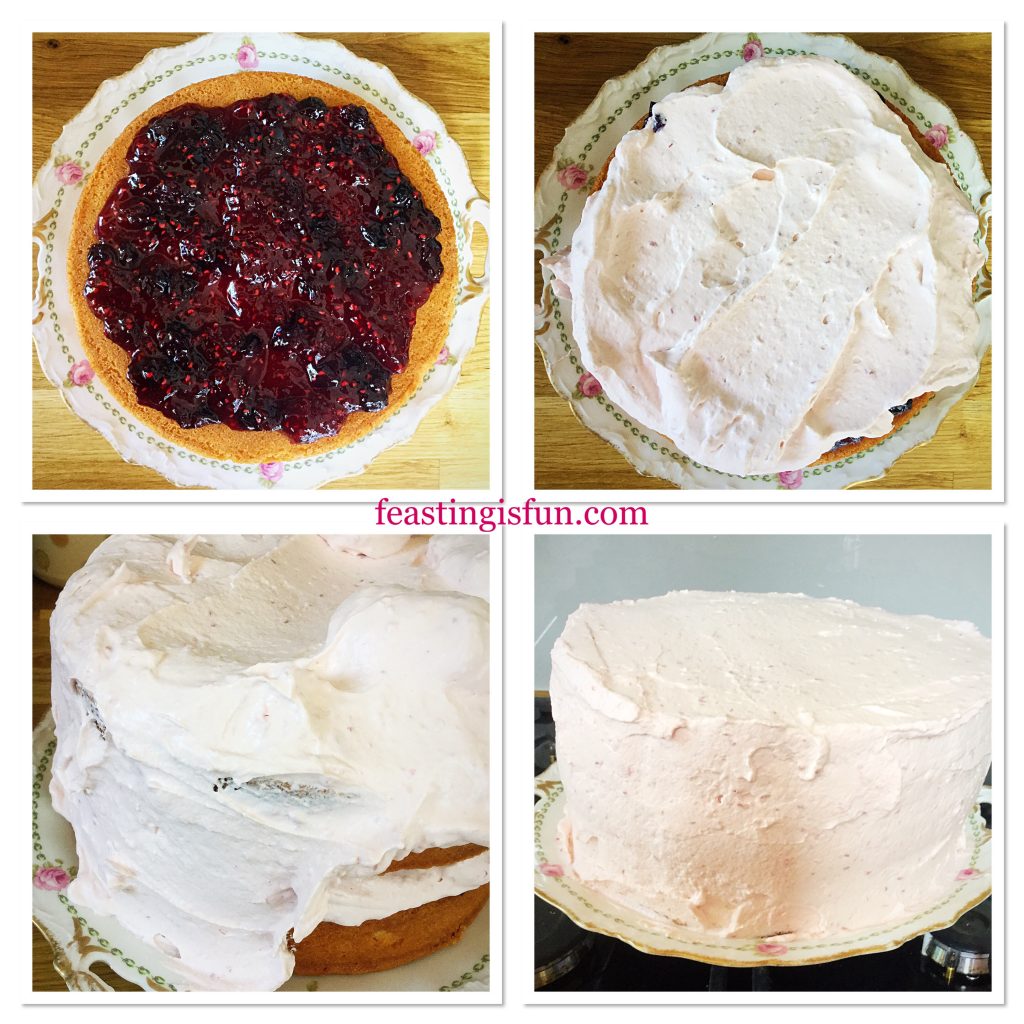
Filling and covering the cake

Filling and decorating the cake

  • Place the first sponge, flat side up on to a plate or board.
  • Spoon jam on to the sponge and spread to almost the edge. Leaving a small gap around the rim of the sponge.
  • Now spoon some of the raspberry cream on top of the jam. Spread the cream to the edge of the cake.
  • Place the other sponge, flat side down, on top of the bottom sponge.
  • Spoon plenty of raspberry cream on to the top of the cake. Using a palette knife push the cream on to the side of the cake. See photos above.
  • Once all of the cake is covered with raspberry cream smooth the top and sides using a palette knife.
  • Finally, with a clean piece of kitchen towel, wipe around the base of the cake, removing any excess cream.
FF Summer Mixed Berry Sponge Cake
Arranging the fruit on top of the Summer Mixed Berry Sponge Cake
  • To finish the cake add fruit to the top. Importantly aim for a little height in the centre.
  • Finally dust the top of the cake with icing sugar if desired.
  • Place the finished cake into the fridge to chill for one hour.
FF Summer Mixed Berry Sponge Cake
Summer Mixed Berry Sponge Cake

As soon as the cake is chilled it can be sliced and served. Also a useful tip is to wipe the cutting knife with kitchen paper after each cut. Since doing so keeps the cake slices clean.

Three layer sponge cake sandwiched together with jam and raspberry whipped cream and topped with fresh berries.
Summer Mixed Berry Sponge Cake

While the sponges can be made one day ahead and stored in an airtight container. Ideally this cake is best eaten the day it is assembled. Store leftover cake in an airtight container in the fridge and eat within 3 days.

FF Summer Mixed Berry Sponge Cake

If you have enjoyed this recipe for Summer Mixed Berry Sponge Cake you may also like these:

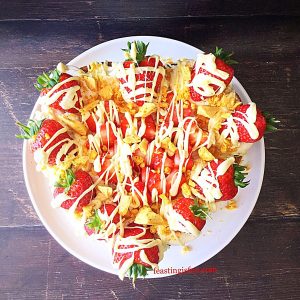
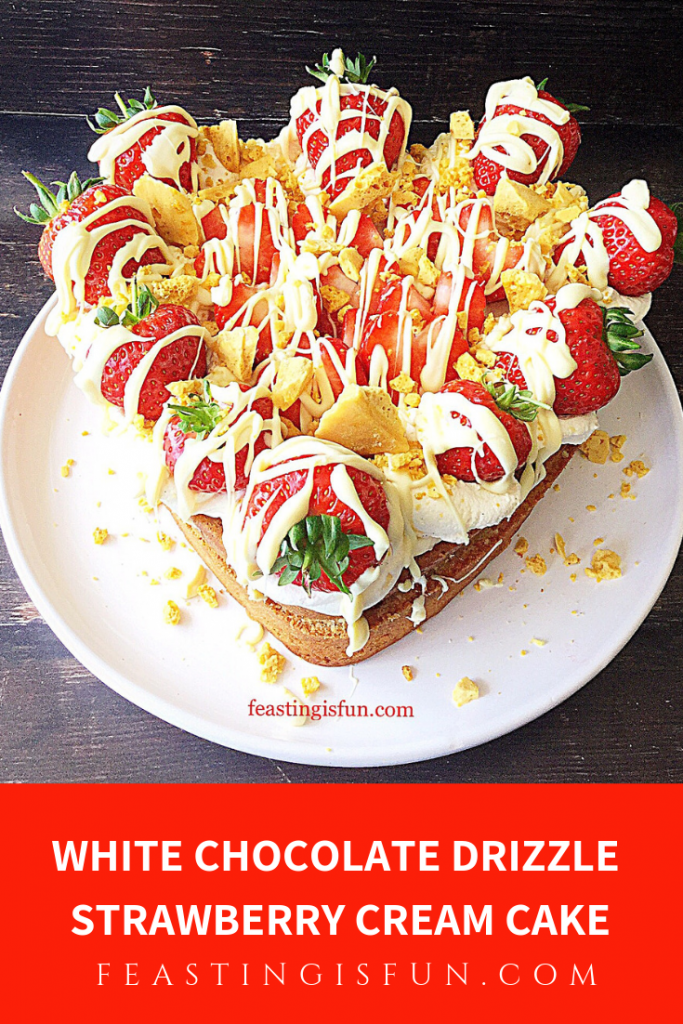
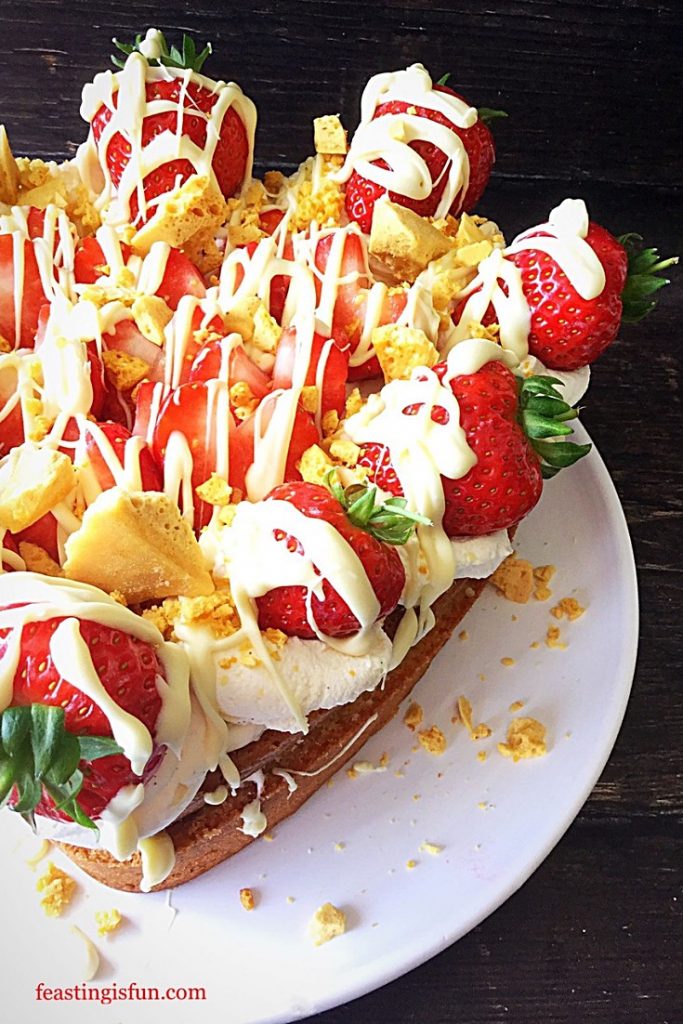
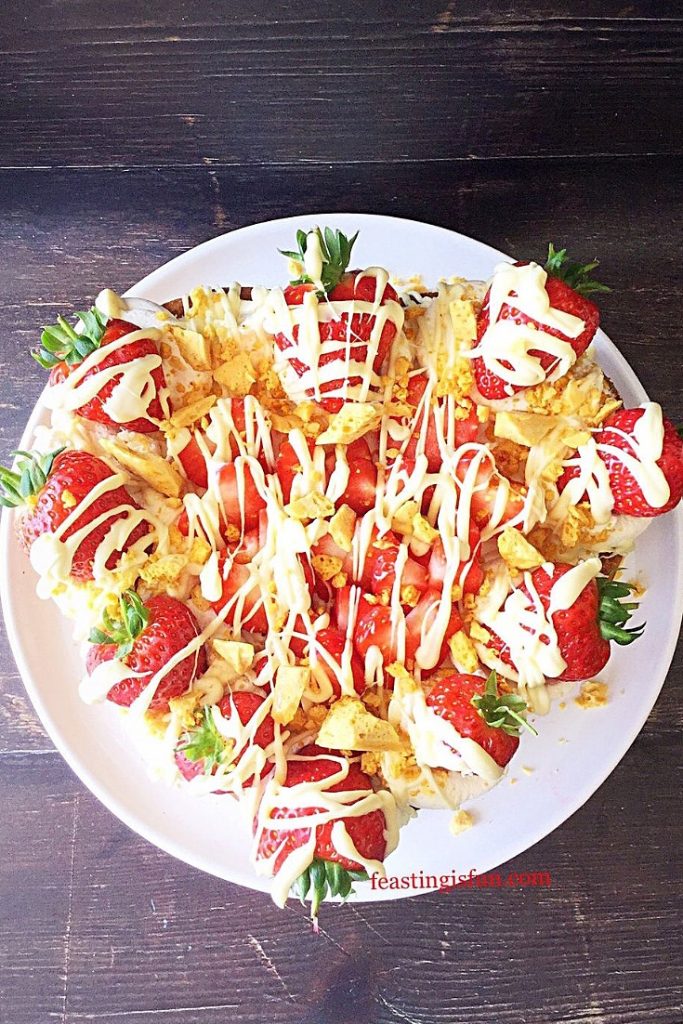
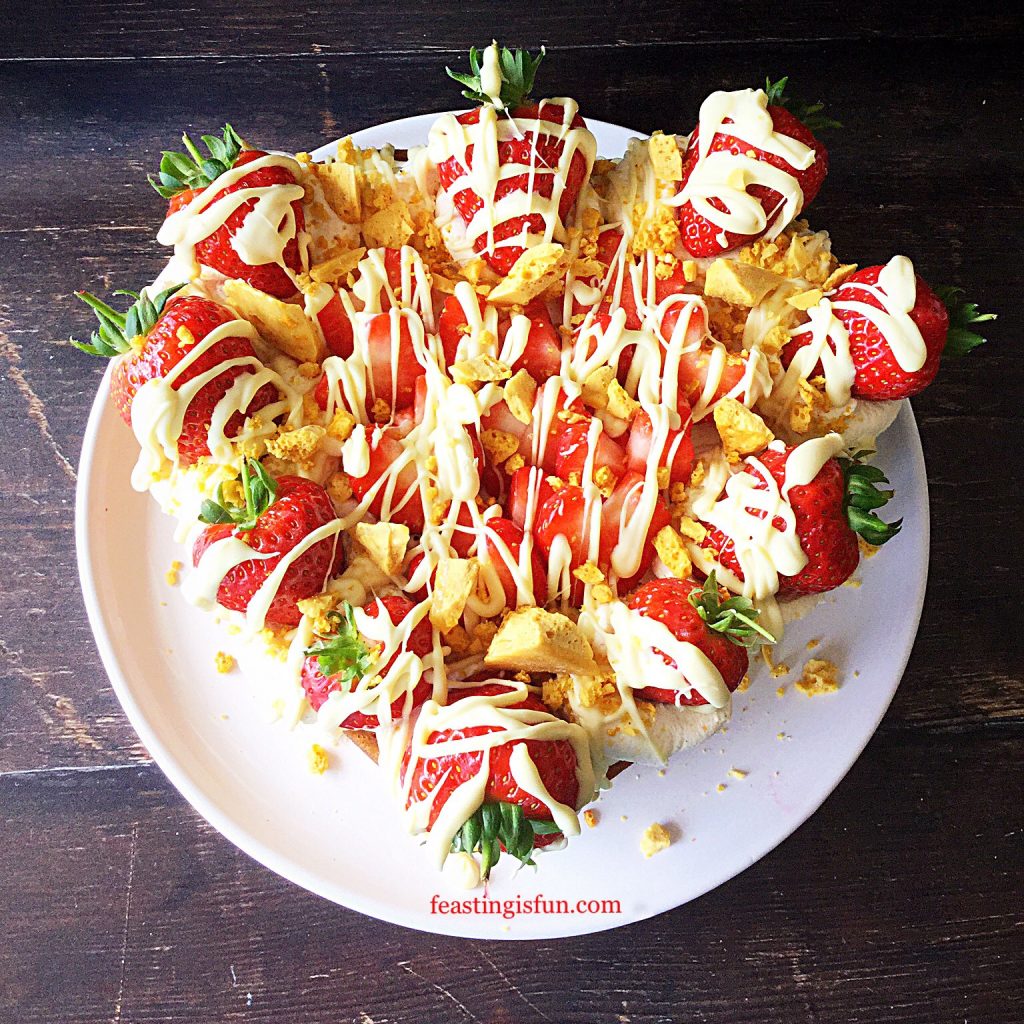
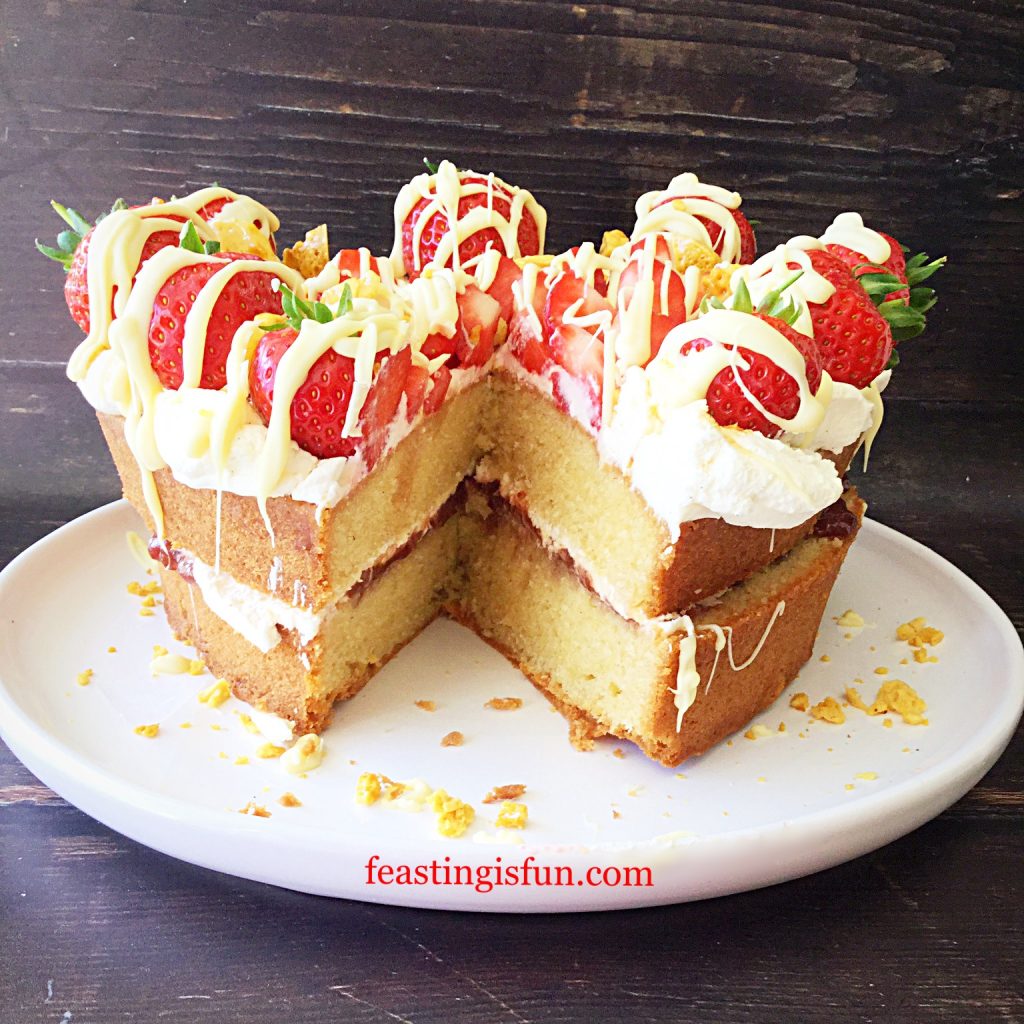
White Chocolate Drizzle Strawberry Cream Cake

Heart shaped white chocolate drizzle strawberry cream cake
White Chocolate Drizzle Strawberry Cream Cake

Fresh Raspberry Frosted Lemon Cupcakes 

Fresh Raspberry Frosted Lemon Cupcakes

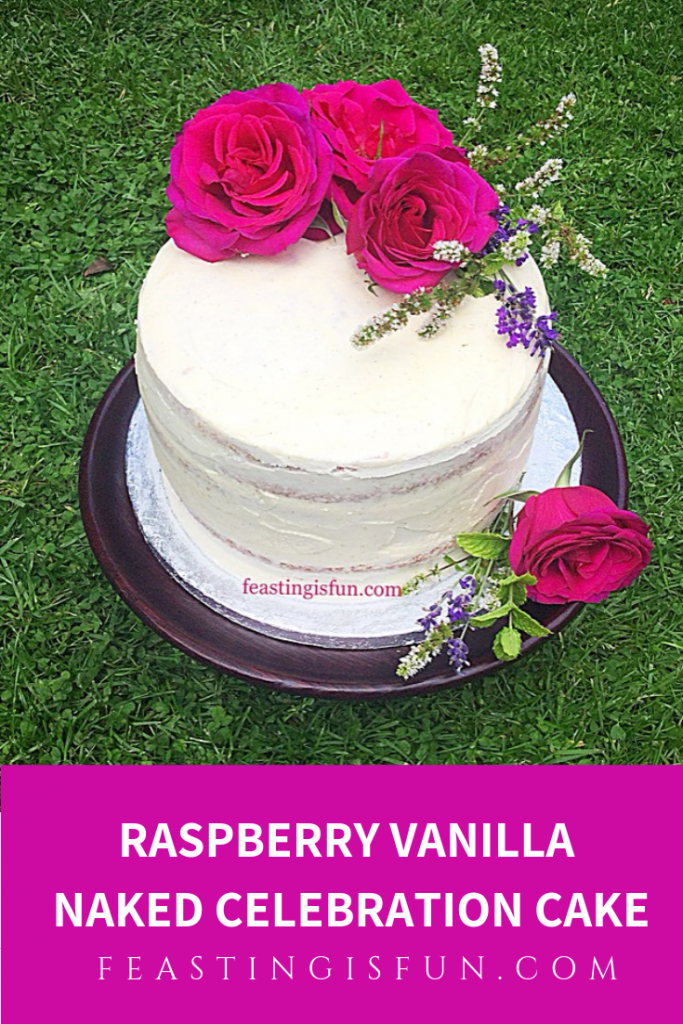
Raspberry Vanilla Naked Celebration Cake 

Raspberry Vanilla Semi Naked Cake
Raspberry Vanilla Naked Celebration Cake

Sharing this cake with friends and family gives me a real buzz. Because I do not sell anything that is made for this blog it also helps to keep our family healthy. While I can see how people may think we eat cake all of the time. We don’t! As a family cakes are treats for us too.

So, whatever you are making, baking and creating in your kitchens, I hope you have fun preparing and sharing your feast.

Sammie xx

No part of this post may be reproduced or duplicated without the written permission of the owner. Please see my Disclosure Policy.
White Chocolate Drizzle Strawberry Cream Cake

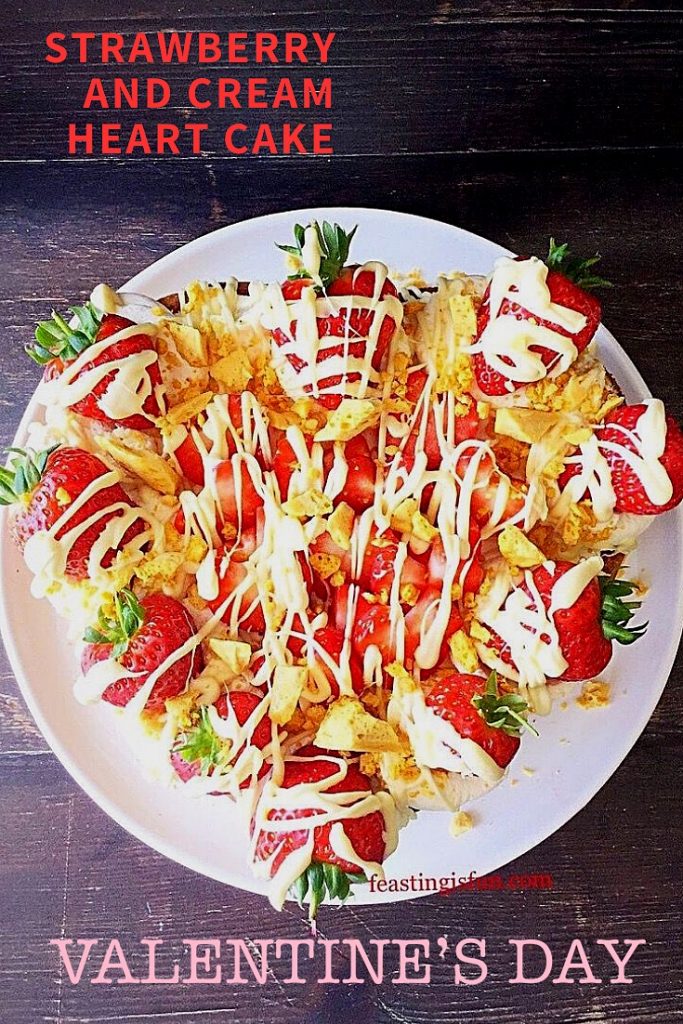
In my last post Chocolate Honeycomb Sponge Cake, I confessed my love for cream cakes. So, I decided to make another one! A delicious White Chocolate Drizzle Strawberry Cream Cake. Golden sponge sandwiched together with cream and strawberry daiquiri jam, topped with more cream, fresh strawberries a white chocolate drizzle and finally a sprinkling of honeycomb. One bite of this cake and you too will be smitten.

FF White Chocolate Drizzle Strawberry Cream Cake

Since the very earliest of our Kent strawberries are becoming available I simply couldn’t resist buying some. Together with fresh cream they make the perfect combination. However, when used to decorate this cake, with white chocolate and crushed honeycomb, these strawberries are elevated to true celebration feasting status. And the first strawberries of the season should, most definitely, be celebrated.

FF White Chocolate Drizzle Strawberry Cream Cake
White Chocolate Drizzle Strawberry Cream Cake


Using a heart shaped tin to bake this cake creates an elegant shape. Also it reflects the romantic side of my personality. If you do not have a heart cake tin then a round tin will be perfectly suitable. While removing the Strawberry husks I cut either side to create a ‘V’ shape. Resulting in sliced strawberries that look like love hearts.

FF Overhead shot of heart shaped cake.
White Chocolate Drizzle Strawberry Cream Heart Shaped Cake

Finally, using a good quality strawberry jam really adds to the finished flavour of the cake. I used a strawberry daiquiri jam with its subtle hint of white rum and lime juice. It definitely adds to the luxurious finish of this cake. Alternatively mix in a couple of teaspoons of raspberry jam. Doing so will add a hint of tartness and elevate the flavour from good to great!

Recipe: White Chocolate Drizzle Strawberry Cream Cake serves 10

275g/10oz Unsalted Butter at room temperature plus a Extra for greasing the tin

275g/10oz Caster Sugar

1/2 tsp Sea Salt – I use Maldon halve quantity if using free flowing salt

1 tbsp Vanilla Bean Paste/Vanilla Extract – I use Nielsen-Massey

6 Large Free Range Eggs

275g/10oz Plain White Flour

2 tsp Baking Powder

450ml/1 pint Double Cream (heavy cream)

1 tsp Vanilla Bean Extract/Vanilla Extract

350g-400g/12-14oz Fresh Strawberries

275g/10oz Jar Strawberry Jam – I used Strawberry Daiquiri Jam available from Hawkshead Relish

100g/4oz White Chocolate

Optional – Honeycomb – I use Art of Mallow

Method: preheat oven to 160C/140C fan, 325F, gas mark 3

Note – you will need a 22.5cm x 22.5cm/9” x 9” (approximately) heart tin that is at least 7.5cm/3” deep. I use a springform tin which allows for easy release of the cake. The tin I have is from Steamer Trading. Alternatively use a deep 22.5cm/9 inch round tin, or slightly shallower 20cm/8 inch round tin.

Making The Vanilla Cake Batter

  • First of all grease the tin with butter and line the base with baking parchment.
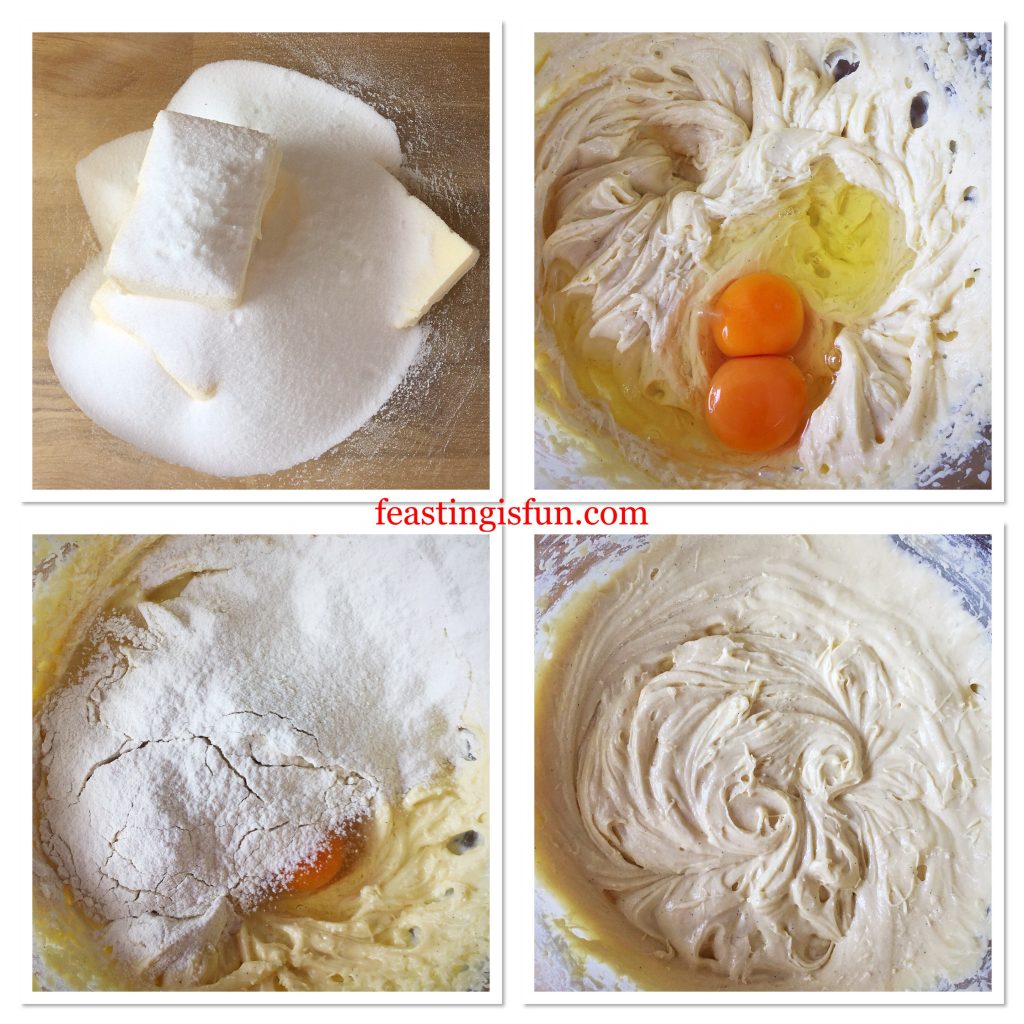
  • Add the butter, sugar and salt to a large bowl. Whisk until pale and creamy.
  • While whisking add the vanilla.
  • Next add 2 eggs and one third of the flour. Whisk until just combined.
  • Repeat the last step.
  • Add the last 2 eggs, the remaining flour and baking powder. Whisk until fully combined, taking care not to over mix as this can cause the baked cake to become tough.
FF White Chocolate Drizzle Strawberry Cream Cake
Making the cake batter.

Filling The Heart Shaped Tin And Baking The Cake

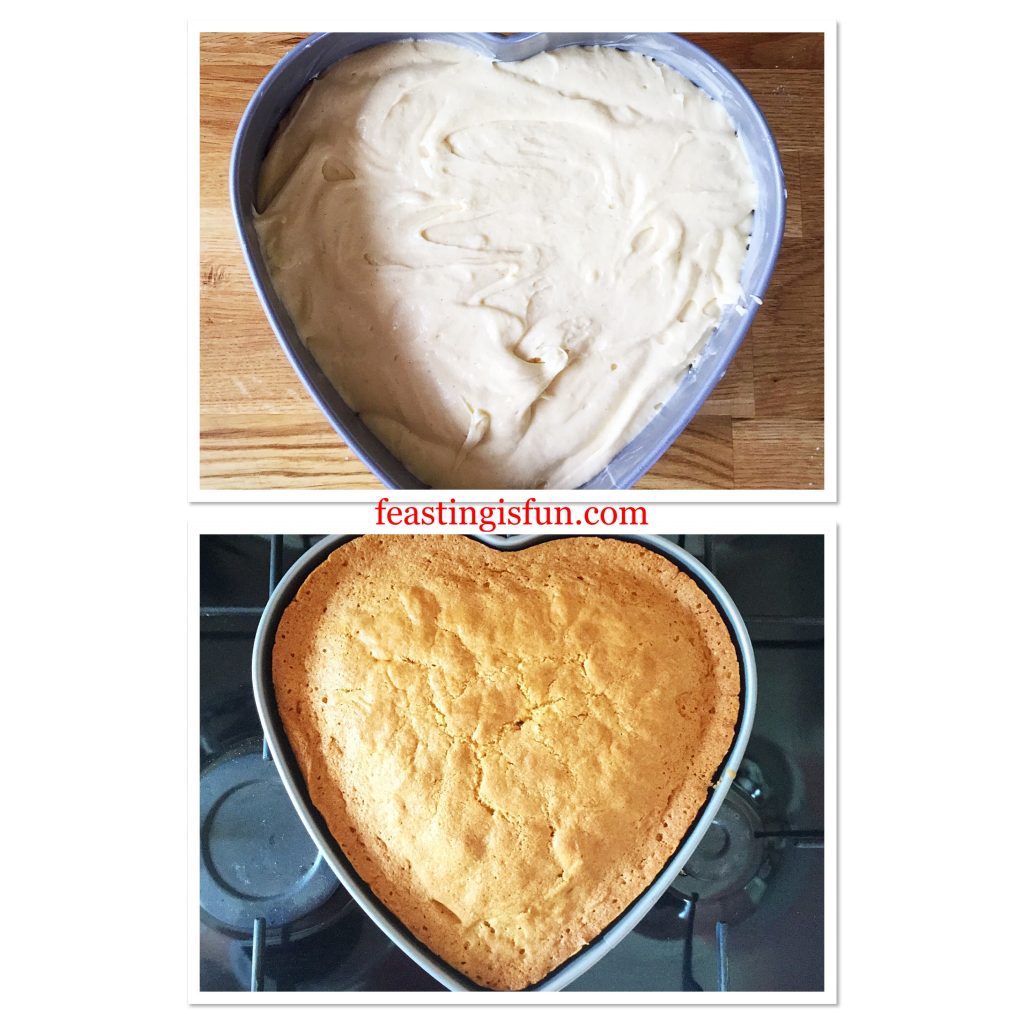
  • Spoon the cake batter into the prepared tin. Smooth the surface of the batter.
  • Place the cake tin into the centre of the oven and bake for 1 hour 20 minutes – 1 hour 40 minutes. My cake took exactly 1 hour 30 minutes, however as ovens differ start checking at the earlier time.
  • The cake is baked when it is golden brown, springs back from a light touch and an inserted skewer comes out clean.
  • As soon as the cake is baked remove from the oven and place the tin on a cooling rack.
  • Allow the cake to fully cool in the tin.
FF White Chocolate Drizzle Strawberry Cream Cake
Filling a heart shaped cake tin and baking the cake.
  • When the cake is fully cooled release from the tin.

Cutting The Cake In Half And Filling With Jam And Cream

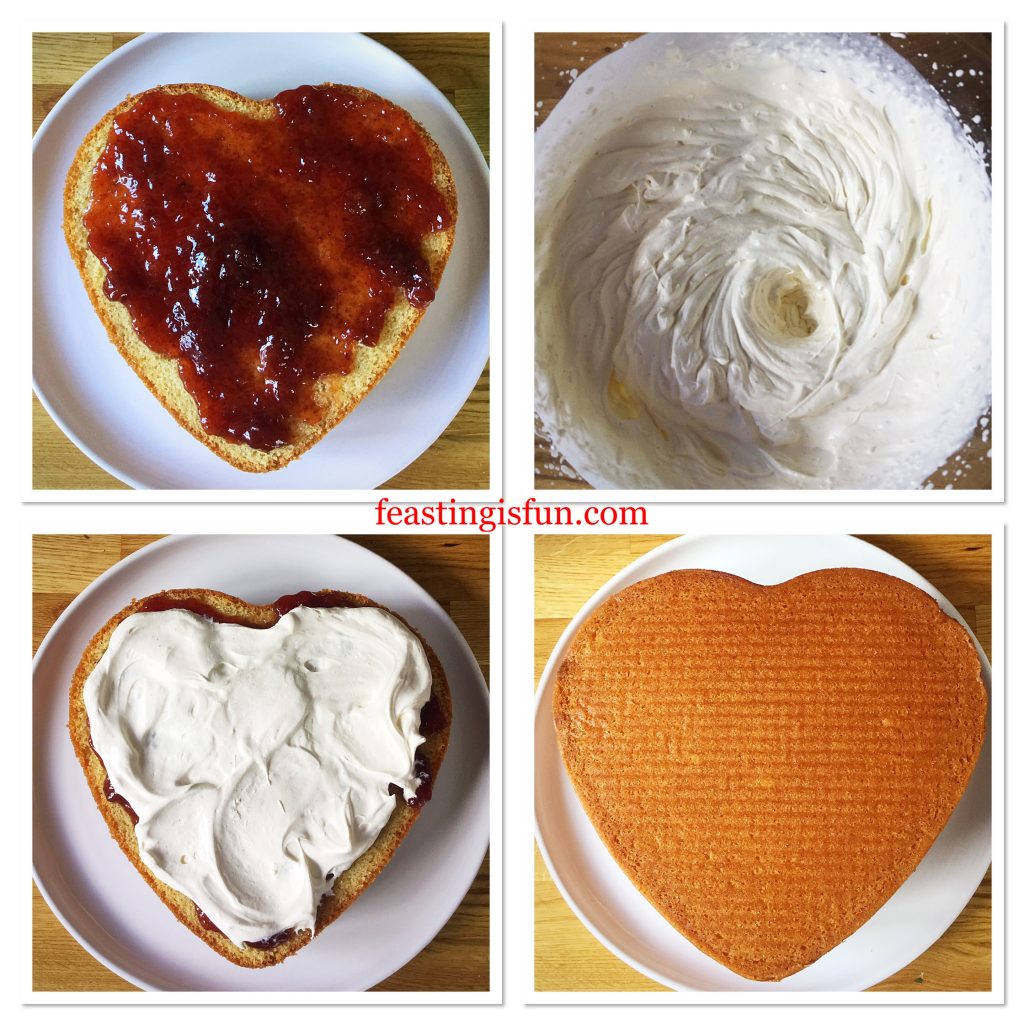
  • Use a long, serrated knife to cut through the middle of the cake, creating two layers.
  • Place the top layer of the cake face down on to a plate or board.
  • Spoon the jam on to the sponge and spread out so that it covers almost to the edges.
  • Pour the cream and vanilla into a bowl and whisk until it just holds it’s shape.
  • Spoon three large dollops of cream on top of the jam. Spread the cream out to cover the jam.
  • Place the bottom half of the cake, cut side down, on to the jam and cream covered sponge.
FF White Chocolate Drizzle Strawberry Cream Cake
Splitting in two and filling the cake.

Decorating The Heart Shaped Cake

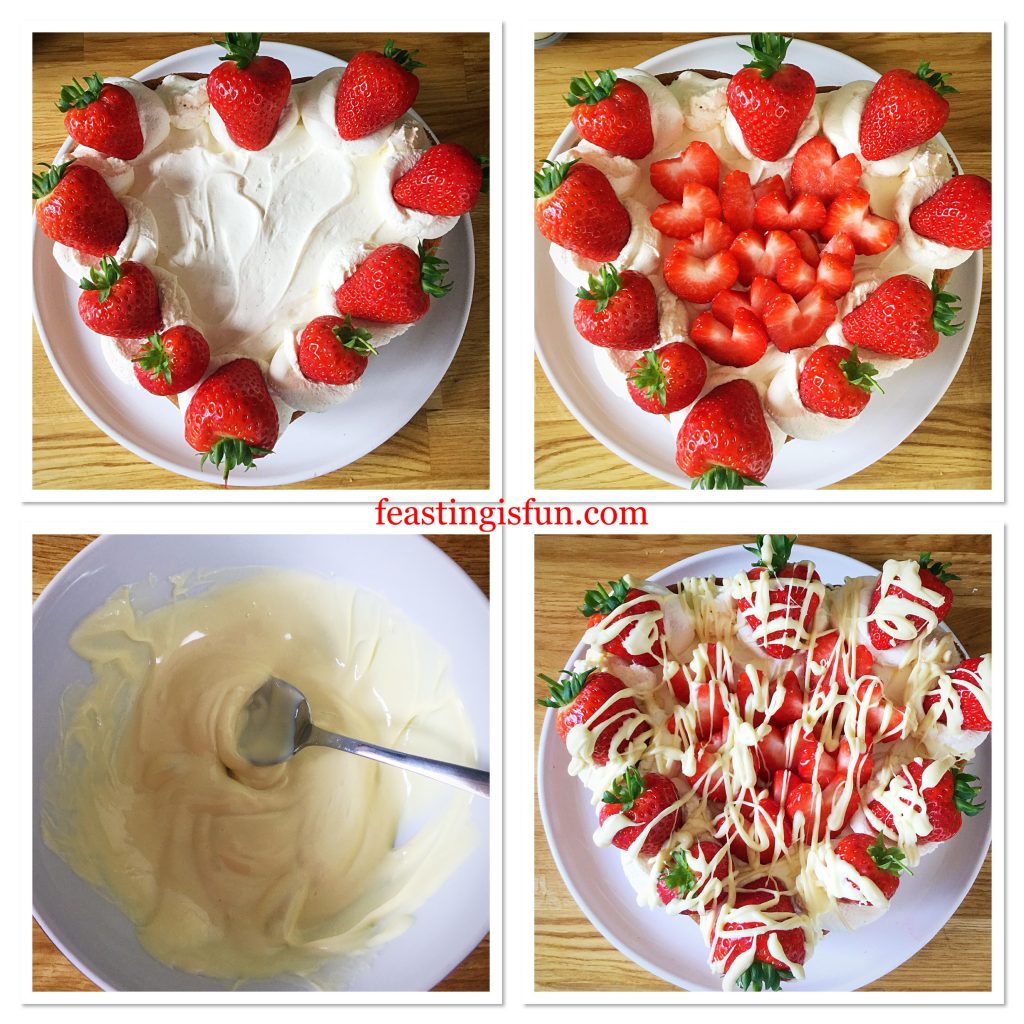
  • Fill a piping bag, without a piping tip fitted, with the remaining whipped cream.
  • If using a disposable piping bag cut the tip off to leave a 1cm opening.
  • Pipe approximately half of the cream on to the sponge.
  • Spread the cream to cover using a palette knife.
  • Pipe swirls around the outside edge of the cake.
  • Top the whipped cream swirls with a fresh strawberry.
  • Remove the green part (hull) of the remaining strawberries by cutting diagonally down either side creating a ‘V’ shape.
  • Slice each strawberry into 4-5 mini red hearts.
  • Place the strawberry hearts in the centre of the cake.
  • Break/chop up the white chocolate and place in a heatproof, microwaveable bowl. Zap for 20 seconds at a time until the chocolate just starts to melt. Remove the bowl from the microwave and stir continuously until all of the chocolate has melted.
  • Pour the melted white chocolate into a small, disposable, piping bag. Cut the very end of the tip off, leaving a small opening.
  • Pipe white chocolate over the strawberries and then over the entire cake, encouraging some chocolate to drip from the cake.
FF White Chocolate Drizzle Strawberry Cream Cake
Decorating the White Chocolate Drizzle Strawberry Cream Cake
  • Finally sprinkle over some broken up, golden honeycomb.
  • Refrigerate the cake for 30 minutes, or longer, until the white chocolate has set.
White Chocolate Drizzle Strawberry Cream Cake

Serving The Heart Shaped White Chocolate Drizzle Strawberry Crean Cake

To serve, cut the cake in half from top to bottom, this makes it easier to portion slices.

FF White Chocolate Drizzle Strawberry Cream Cake
White Chocolate Drizzle Strawberry Cream Cake

Enjoy with friends, family and loved ones. For a special occasion serve with a glass of chilled champagne.

This cake is best enjoyed the day it is decorated. The sponge can be made up to 2 days ahead. Wrap the uncut cake in cling film and store in an airtight container.

Store the finished cake in the fridge and eat within 2 days.

If you have enjoyed this recipe for White Chocolate Drizzle Strawberry Cream Cake you may also like these:

Chocolate Heart Cake

FF White Chocolate Drizzle Strawberry Cream Cake
Chocolate Heart Cake

Mascarpone Topped Carrot Cake

FF White Chocolate Drizzle Strawberry Cream Cake
Mascarpone Topped Carrot Cake

Raspberry Lemon Celebration Layer Cake

FF White Chocolate Drizzle Strawberry Cream Cake
Raspberry Lemon Celebration Layer Cake


When strawberries are in season, warmed by the sun and picked straight from the plant they need nothing else to celebrate their sweet, juicy flavour. Yet adding them to desserts such as Pavlovas, Cream Cakes and other delights, showcases their versatility and beauty. So I get very excited about the start of the strawberry season, poly tunnels and super greenhouses making local, British fruit available earlier in the year and extending the season. While they might be available in the supermarkets all year long, which does have its benefits, nothing beats homegrown or farm fresh berries.

So whatever you are making, baking and creating in your kitchens, have fun preparing and sharing your feast.

Sammie xx

No part of this post may be reproduced or duplicated without the written permission of the owner. Please see my Disclosure Policy.
Heart shape sponge cake for Valentines Day.

Raspberry Lemon Celebration Layer Cake

Today is Mothering Sunday, also known as Mother’s Day. A day set aside to give thanks and show love to those who have born and birthed us. Yet with surrogacy, adoption, step mothers, fostering and many other types of parenting, for me this day represents so much more. First of all, for me personally, the title of Mum, Mam, Mother or Mom, does not come with any accolade simply because a woman has carried and given birth to a child. It is a title earned through endless, sleep deprived nights, countless cuddles and reassurance. Most importantly though it is earned through the act of selfless love, loving so hard and still letting go. And today those are the women I celebrate and am celebrated with. So raise your glass and enjoy a slice of my Raspberry Lemon Celebration Layer Cake.

Thankful For My Family

While I am sitting here, enjoying a delicious slice of this Raspberry Lemon Celebration Layer Cake, I am also taking a moment to be thankful for being a Mum. Thankful for the laughter and fun that comes alongside the hard work and at times pain. The knowledge that I am part of a family unit, that starts with my husband and I and reaches out through our children, our siblings and what is to come. Most importantly knowing that I am unconditionally loved and accepted by my Heavenly Father, who is both mother and father to me.

FF Raspberry Lemon Celebration Layer Cake
Raspberry Lemon Celebration Layer Cake

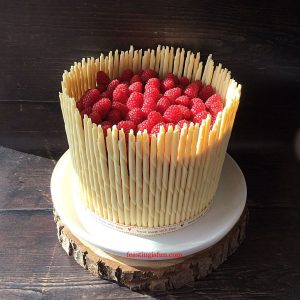
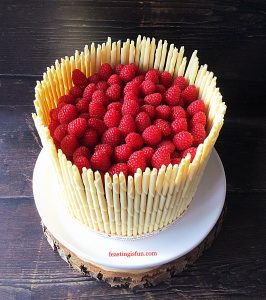
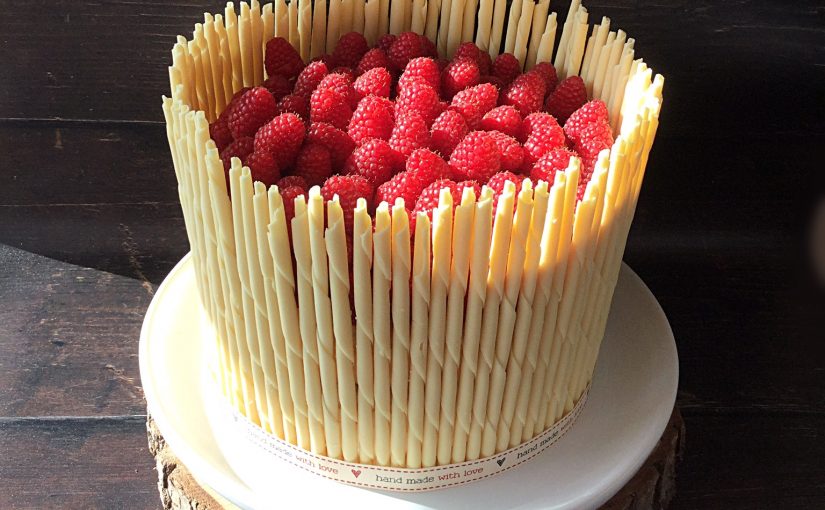
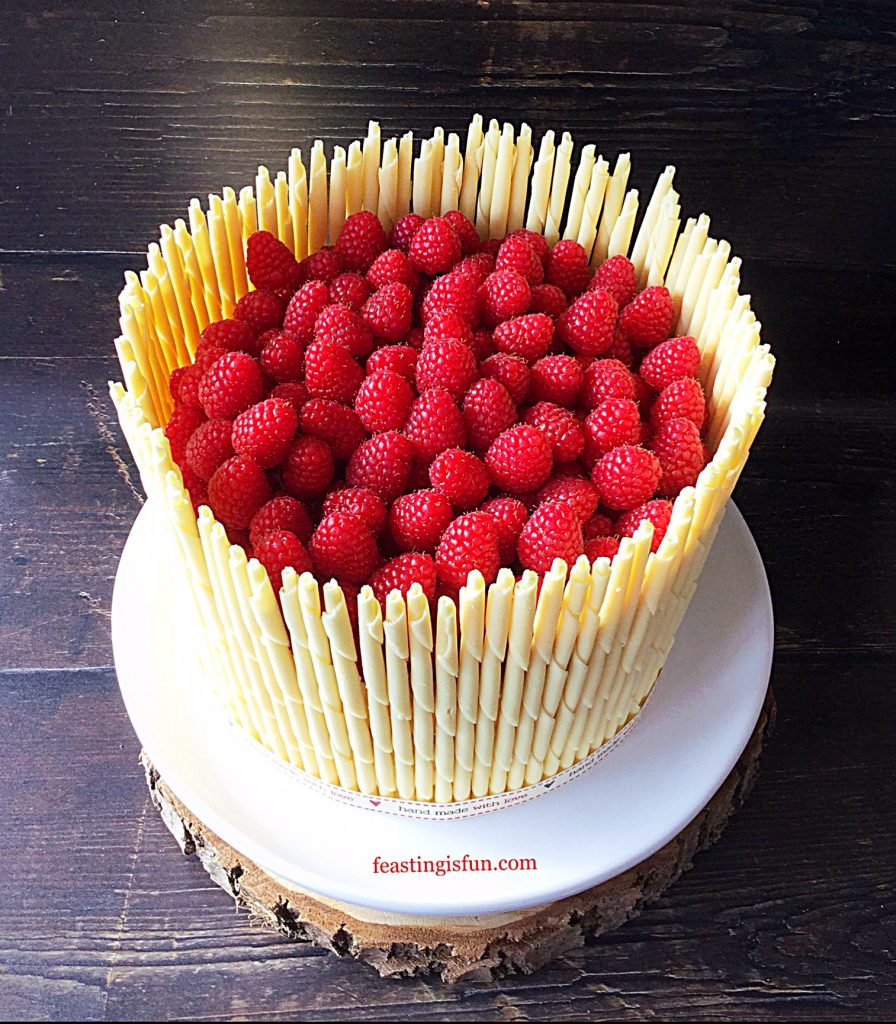
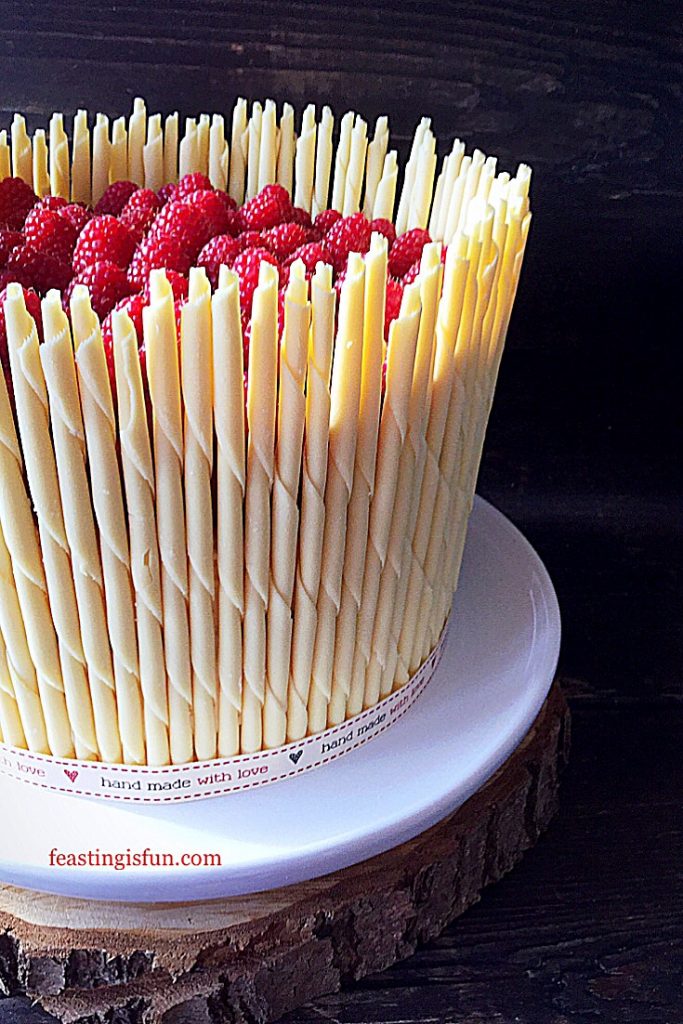
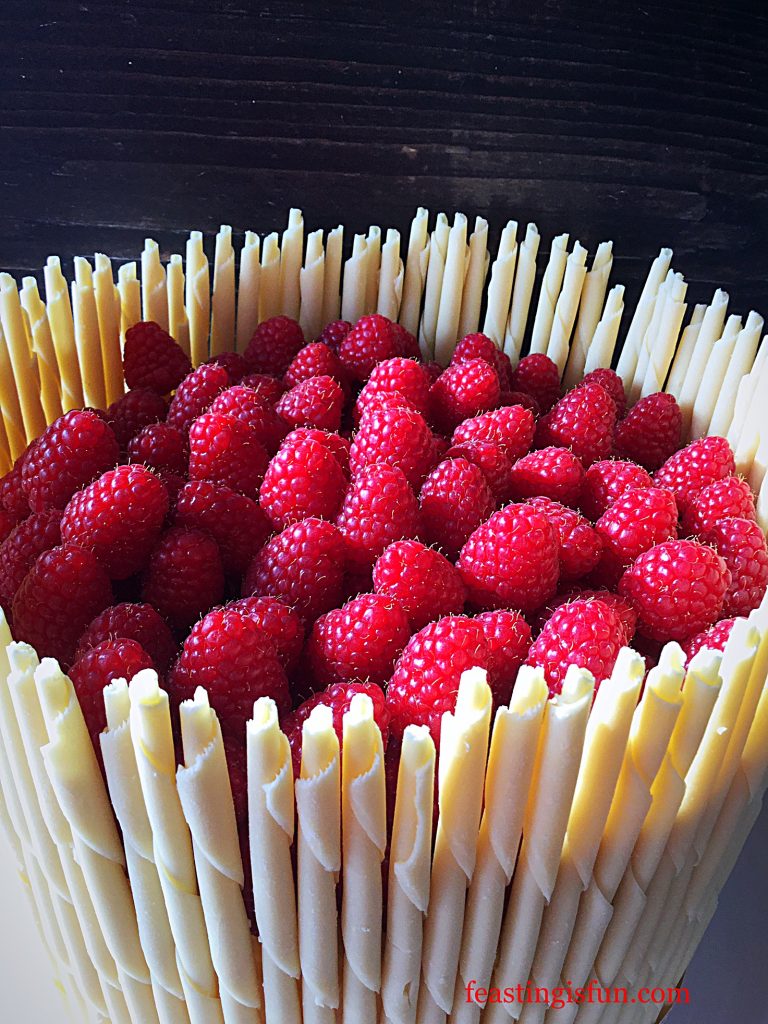
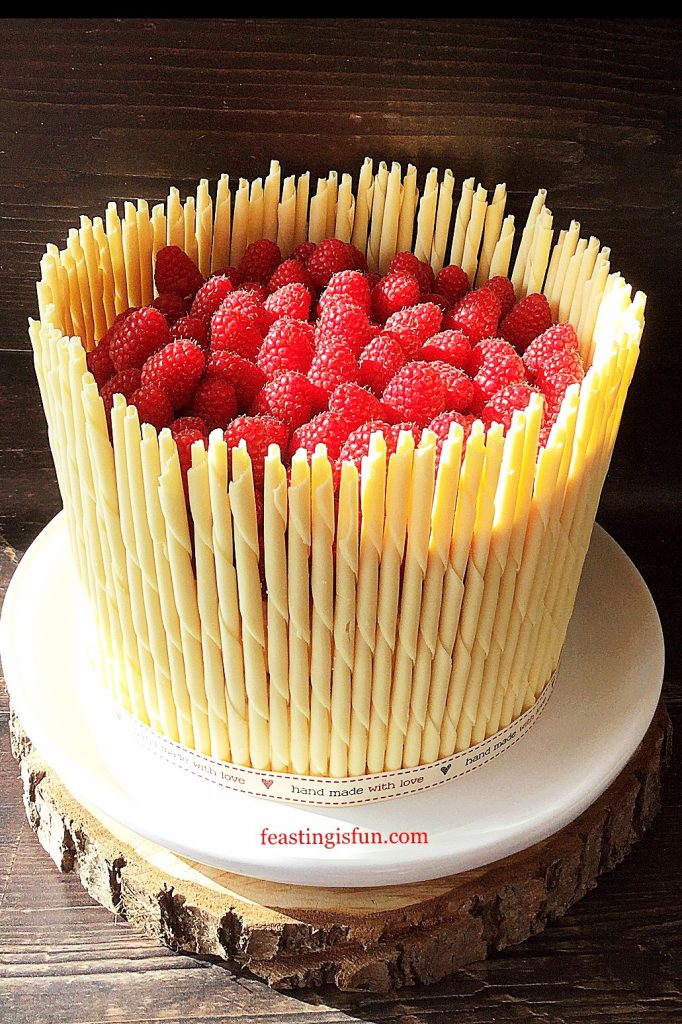
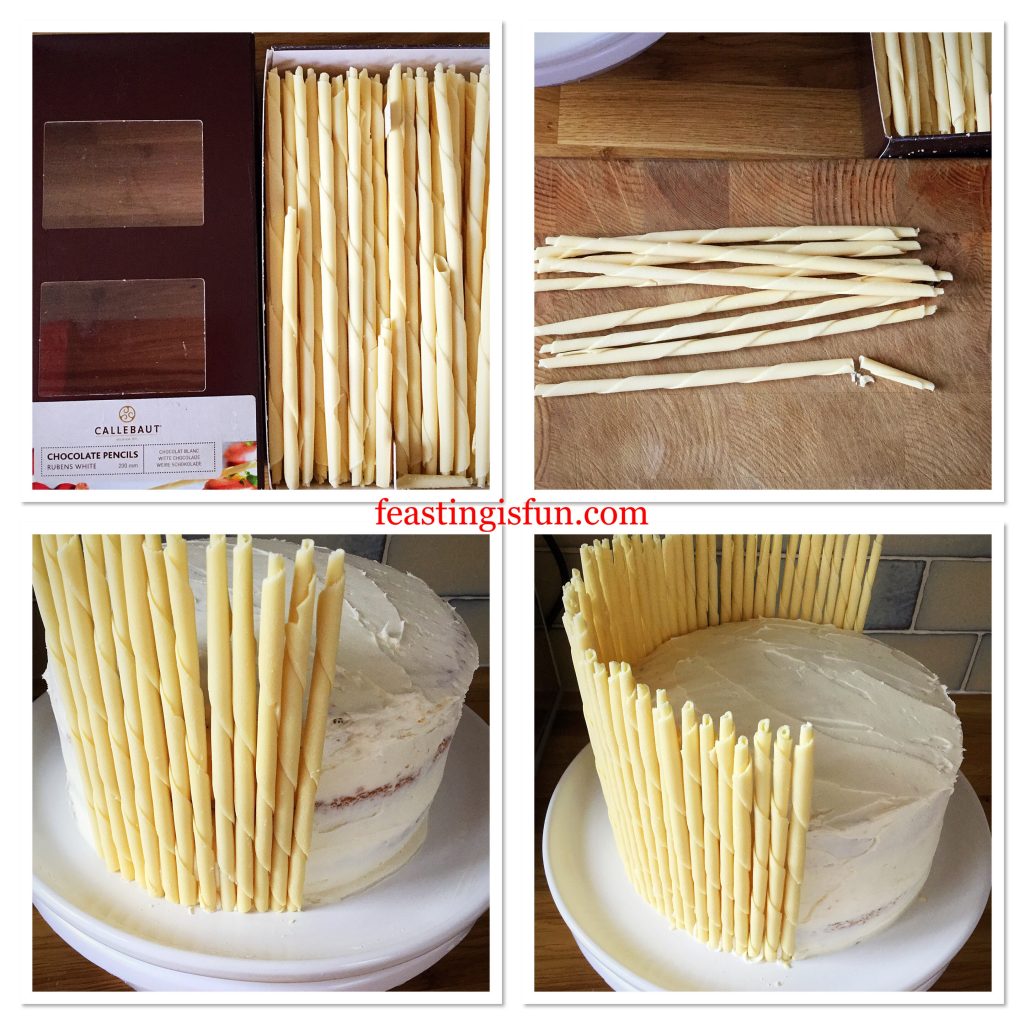
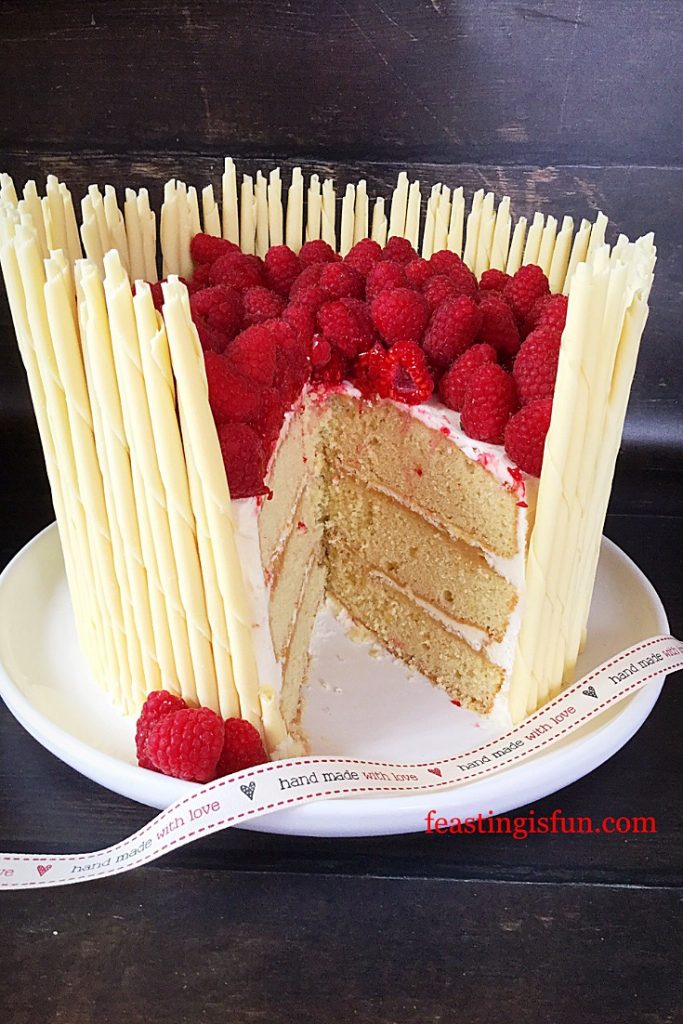
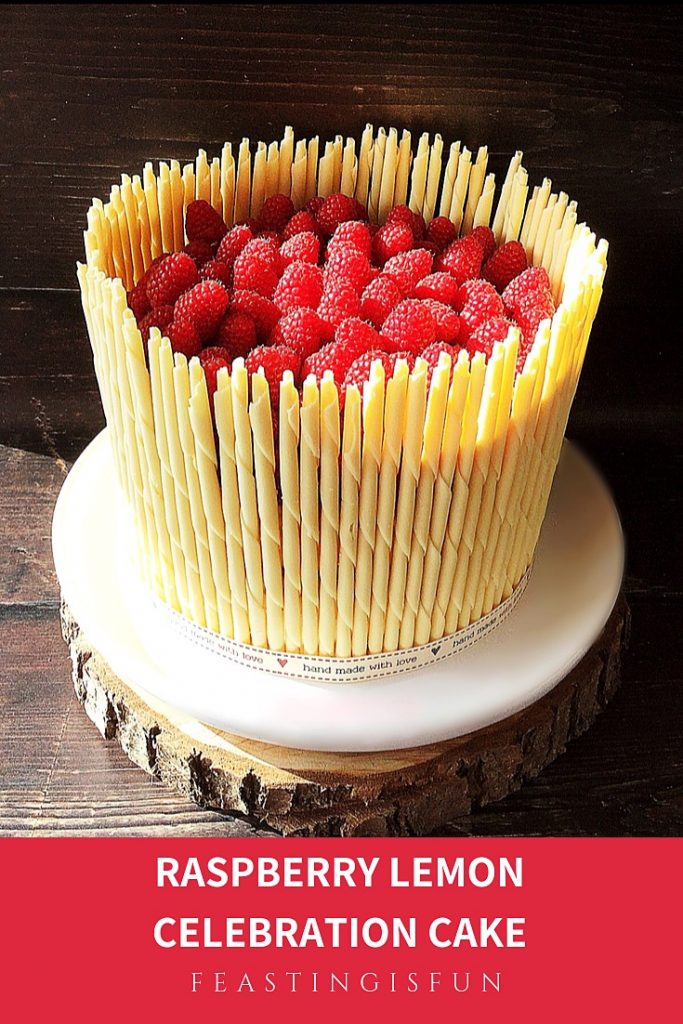
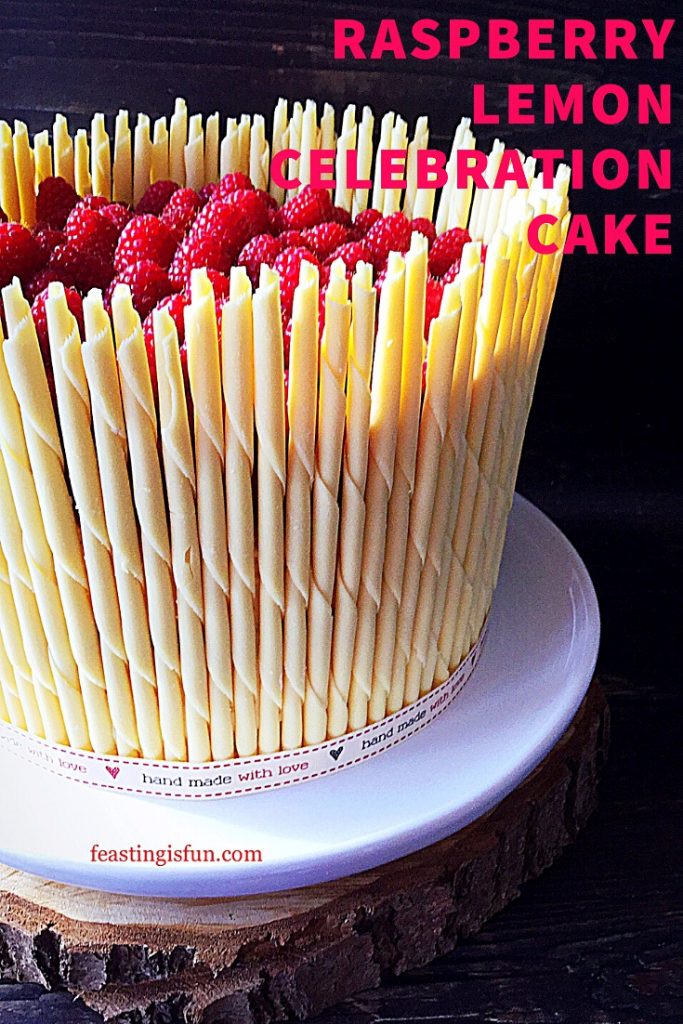
Since we are celebrating, what better occasion than to make a cake. Light lemon sponge layered with the very best lemon curd and lemon buttercream. Surrounded with swirled white chocolate pencils and topped with fresh, deep red, raspberries. The sum of this Raspberry Lemon Celebration Layer Cake is so much more that the total of it’s separate parts.

FF Raspberry Lemon Celebration Layer Cake
Raspberry Lemon Celebration Layer Cake

While magnificent to look at, do not be daunted at the prospect of making this cake. Inspired by Lorraine Pascal and a baking programme I watched, trust me when I state that if I can make this cake, you can too. Also, the very lovely Maria Whitehead who runs Hawkshead Relish with her husband and daughter, remarked that my recipes are approachable and ‘un-cheffy’! Which, I took as a compliment and also used as influence when designing this cake.

A white chocolate pencil surrounded, fresh fruit filled three sponge dessert.
Raspberry Lemon Celebration Cake

Recipe: Raspberry Lemon Celebration Layer Cake serves 12

For the cake sponges:

225g/8oz + 115g/4oz Unsalted Butter at room temperature – plus a little extra for greasing the tins

225g/8oz+ 115g/4oz Caster Sugar

1/2tsp + 1/4tsp Sea Salt (halve for free flowing) – I use Maldon

1tsp + 0.5tsp Vanilla Extract – I use Nielsen-Massey

4 + 2 Large Free Range Eggs

225g/8oz + 115g/4oz Plain Flour

2tsp + 1tsp Baking Powder

Zest of 2 Fresh Lemons

For the buttercream:

250g/9oz Unsalted Butter at room temperature

500g/1lb 2oz Icing Sugar (confectioner’s sugar)

1/4tsp Sea Salt

7tsp Freshly Squeezed Lemon Juice (approximately the juice from 1 medium lemon)

Also needed:

6-7 tbsp Good Quality Lemon Curd – I use Hawkshead Relish

1 Box White Chocolate Pencils – I use Callebaut

600g/1lb 5oz Fresh Raspberries

Method: Preheat oven to 160C/140C fan, 325F, gas mark 3

Note: The cake is baked in three separate layers. Since a 20cm (8in) sandwich tin is required for each sponge the recipe is split. The first amount given is sufficient for two layers. While the second amount is for a single layer. If you have three equal sized tins, combine the first and second amounts, dividing equally between three tins. Baking times may need to be adjusted.

Making and baking the cake layers.

  • First of all grease and line the base of each sandwich tin with baking parchment.
  • Into a large bowl add the first amount given for butter, sugar and salt. Whisk the ingredients together until pale and creamy.
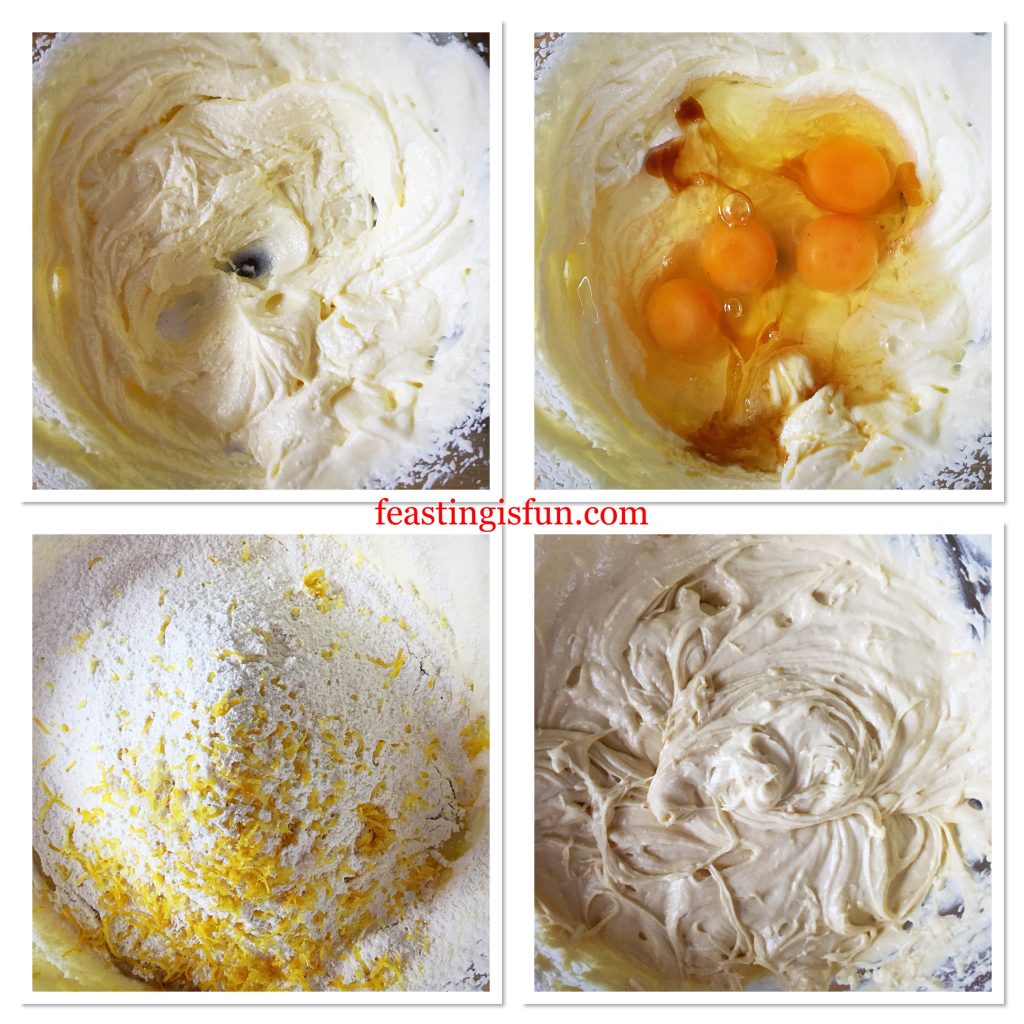
  • Next add 4 eggs and 1 teaspoon of vanilla extract. Sift the flour and baking powder on top and then add the zest of one and one third of lemon.
  • Whisk the ingredients together until just combined, yet free of lumps.
FF Raspberry Lemon Celebration Layer Cake
Making the lemon sponge cake batter.
  • Divide the cake batter evenly between the two prepared sandwich tins and smooth the tops.
  • Place both tins in the centre and lower parts of the oven and bake for 40-50 minutes.
  • The cake sponge is fully baked when golden, springs back from a light touch and an inserted skewer comes out clean.
  • As soon as the cakes are baked remove from the oven. Leave to cool in the tin for 10 minutes and then turn out, removing the baking parchment from the base of each sponge.
  • Leave to cool on a cooling rack.
  • Wash up a sandwich tin, grease and line as before. Make the batter for one sponge following the method given, using the second quantity given in the recipe. Fill the tin and bake as before.
FF Raspberry Lemon Celebration Layer Cake
Preparing and baking the cake sponges.
  • While the last sponge is cooling make the lemon buttercream.
  • Into a large bowl add butter, icing sugar, salt and lemon juice.
  • Stating on a low speed whisk the ingredients together, increasing the speed until the buttercream is light and creamy.
  • Spoon the buttercream into a large piping bag without a nozzle fitted. If using a disposable bag cut a 1cm opening at the bag’s tip.

Filling and covering the cake:

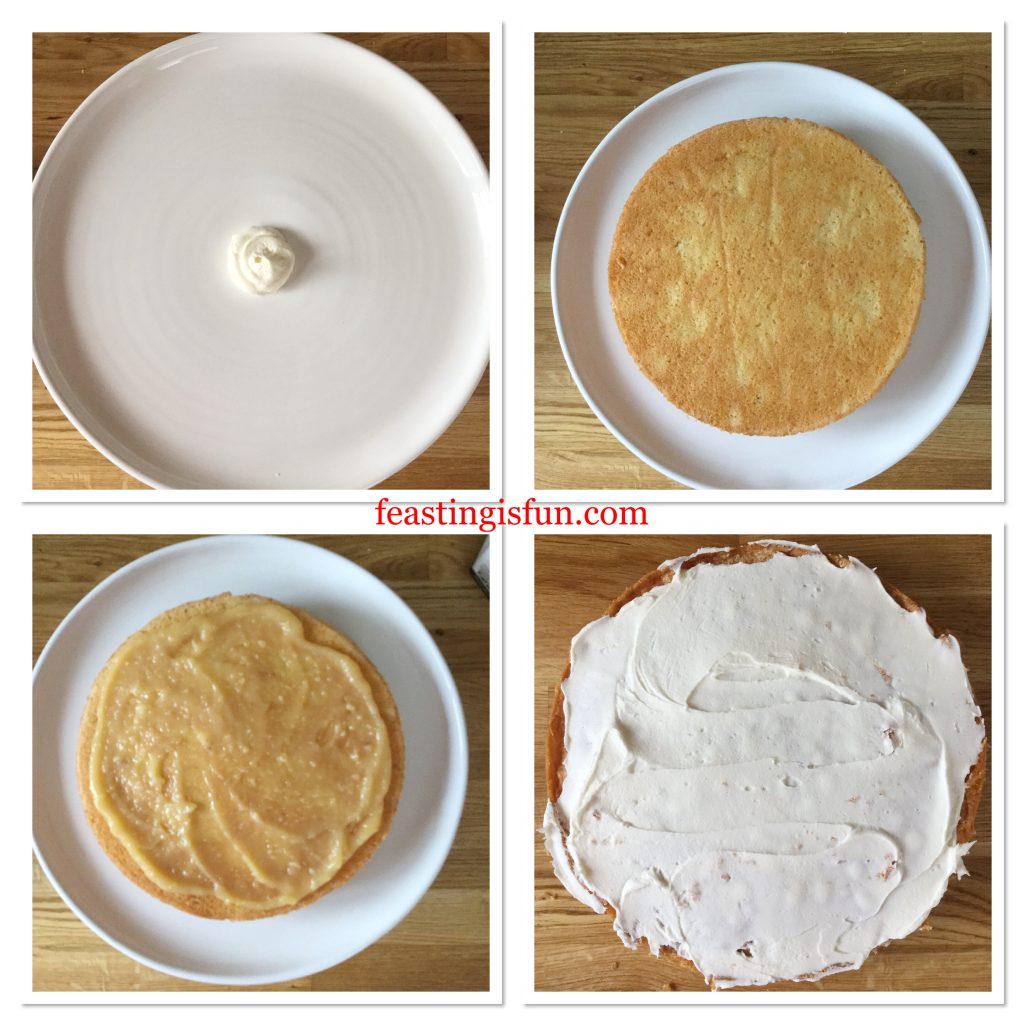
  • Pipe one tablespoon of buttercream on to the plate/board used for the cake.
  • Place one cake sponge, flat side facing up, on top of the buttercream.
  • Spoon 3 tablespoons of lemon curd on to the cake and spread to cover evenly.
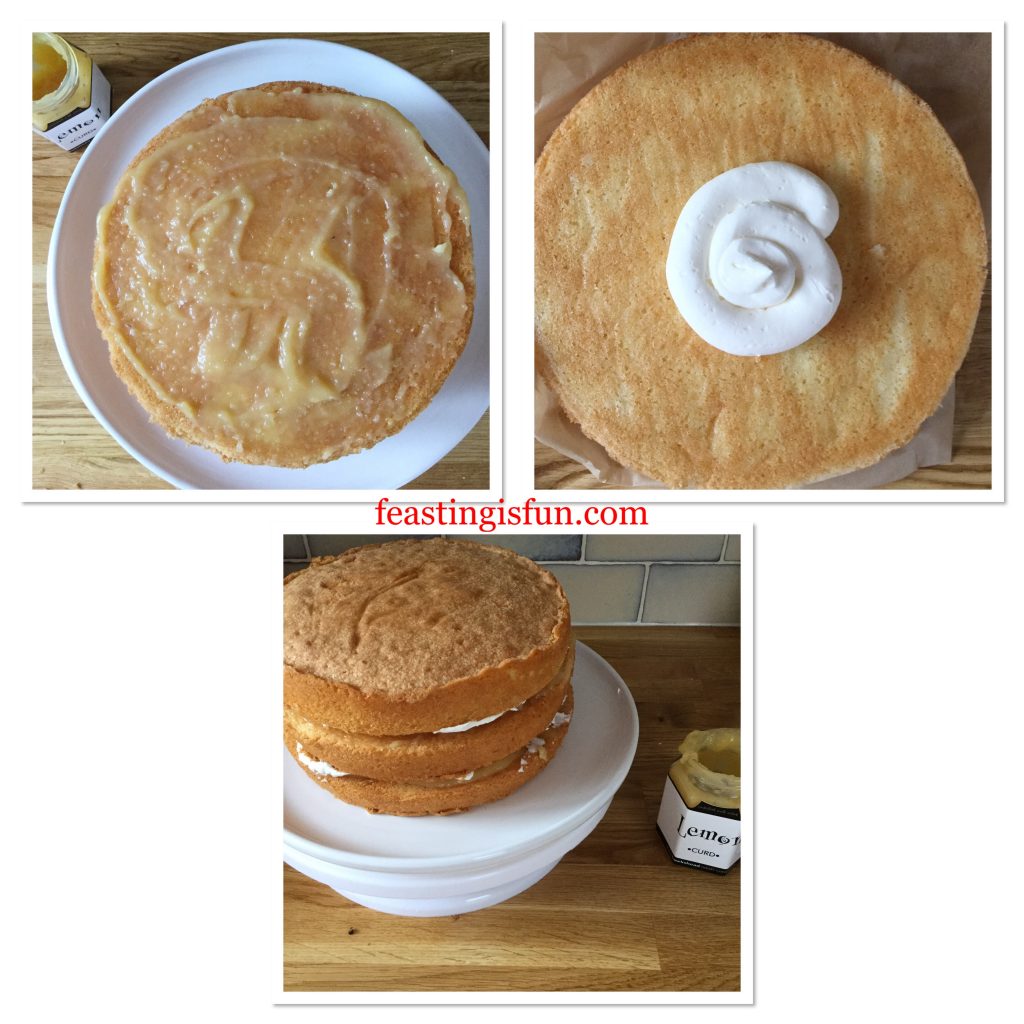
  • Pipe 3-4 tablespoons of buttercream on to the top of the next sponge. Spread to cover the sponge evenly.
  • Flip the sponge and place on top of the lemon curd covered sponge.
FF Raspberry Lemon Celebration Layer Cake
Stacking the cake layers.
  • Spoon 3 tablespoons of lemon curd on the top of the sponge, spread to cover evenly as before.
  • Pipe 3-4 tablespoons of buttercream on to the flat side of the third sponge. Again, spread to cover evenly.
  • Flip the sponge and place, flat side down, on to the second, lemon curd covered sponge.
FF Raspberry Lemon Celebration Layer Cake
Layering the cake with lemon curd and buttercream.
  • Place the cake plate/board on to a cake decorating turntable if you have one.
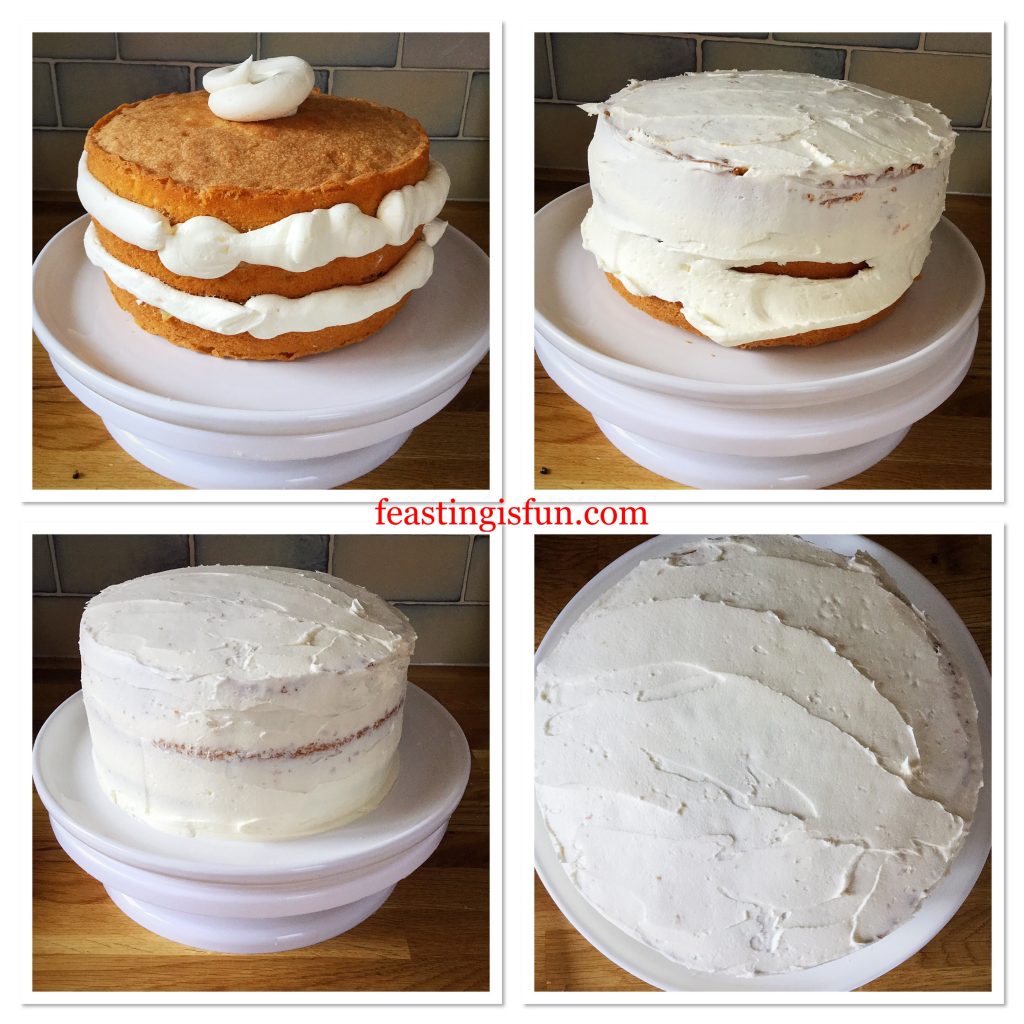
  • Pipe buttercream between each layer and on the top of the cake.
  • Use an offset palette knife to spread the buttercream evenly around and on top of the cake. Since the cake is to be covered the finish of the buttercream does NOT have to be perfect. Aim for a neat, smooth finish.
FF Raspberry Lemon Celebration Layer Cake
Covering the layered cake with buttercream.

Decorating the cake:

  • First of all take a full size pencil, measure it against the height of the cake. 10cm or 4 inches is the desired height of excess pencil from the top of the cake.
  • Trim a pencil to the length needed and measure against the cake to double check.
  • Make any adjustments and keep the pencil as a guide for cutting the remaining pencils.
  • Cut a few pencils at a time. Carefully take the first one placing vertically against the side of the cake. Gently push it into the buttercream.
  • Continue with the next pencil, placing as close as possible next to the first pencil.
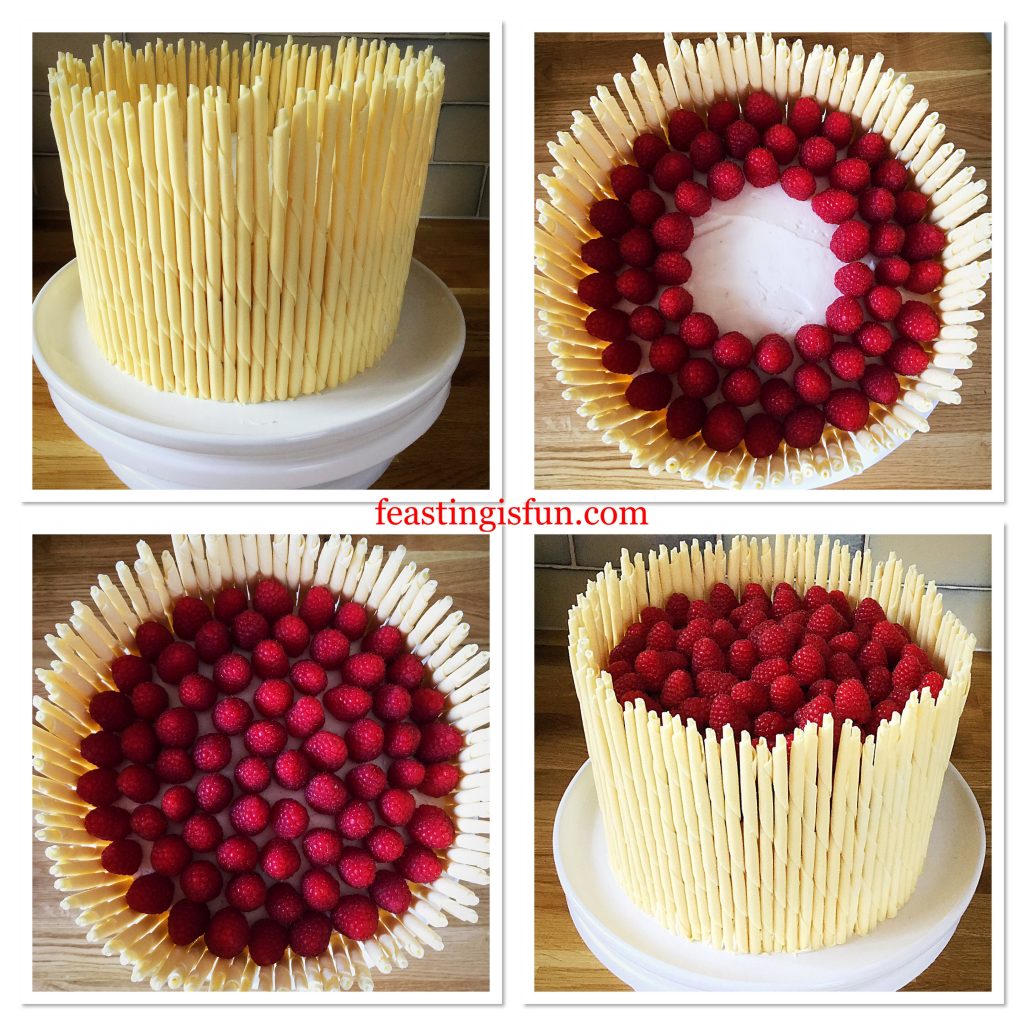
  • Work around the outside of the cake, adding pencils until the entire cake is surrounded.
FF Raspberry Lemon Celebration Layer Cake
Decorating the cake using white chocolate pencils.
  • Turn the cake, check from each angle, ensuring the pencils are uniform.
  • Starting at the outside rim, place raspberries as close together as possible.
  • Work in circles towards the cake’s centre, until the first layer of raspberries is complete.
  • Place the remaining raspberries on top, in a circular fashion, finishing at the cake’s centre.
FF Raspberry Lemon Celebration Layer Cake
Raspberry Lemon Celebration Layer Cake – topping with fresh raspberries
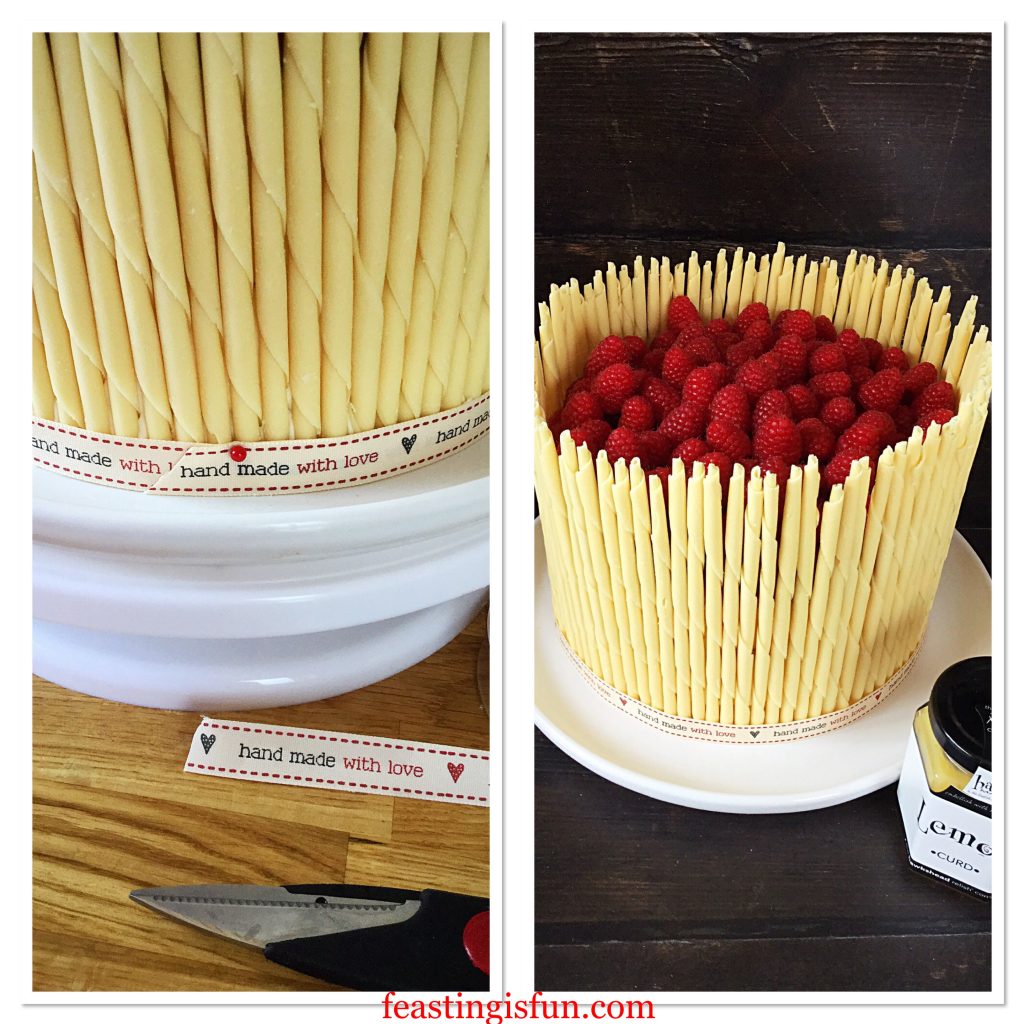
  • Finally, measure a length of ribbon around the base of the, so that it just overlaps.
  • Cut and fix the ribbon in place with a pin. Ensure the join is at the back.
FF Raspberry Lemon Celebration Layer Cake
Raspberry Lemon Celebration Layer Cake adding the finishing touches.

Chill the cake for one hour before serving. Doing so ensures that the cake is easy to slice.

Remove the ribbon before cutting.

FF Raspberry Lemon Celebration Layer Cake
Raspberry Lemon Celebration Layer Cake

Store any remaining cake in an airtight container, ideally in the fridge. Eat within 5 days of making.

If you have enjoyed this recipe for Raspberry Lemon Celebration Layer Cake you may also like these:

Raspberry Vanilla Naked Celebration Cake

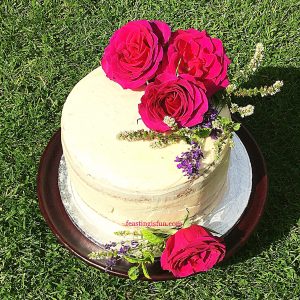
Three layer sponge filled with fresh jam and whipped vanilla buttercream and decorated with fresh roses. The dessert is set on a stand in a garden for garden parties and celebrating.
Raspberry Vanilla Naked Celebration Cake

Summer Mixed Berry Sponge Cake

Summer mixed berry sponge covered with fresh fruit whipped cream and topped with an assortment of fresh fruit.
Summer Mixed Berry Sponge Cake

Apricot White Chocolate Triple Sponge Cake

Three layer sponge filled with white chocolate ganache and apricots. Topped with fresh apricots, dark chocolate curls and vivid purple fresh pansies
Apricot White Chocolate Triple Sponge Cake

To be a Mother is to be part of a family. Above all that really is the best part for me. Loving and being loved back. Because that is what fills me with joy. Even more so laughing and having people to laugh with. Feasting and sharing with those who love and enjoy life. Finally, if you too would like to be part of a family see Important Stuff.

So, whatever er you are making, baking and creating in your kitchens, have fun preparing and sharing your feast!

Sammie xx

Hawkshead Relish supplied the lemon curd for this recipe. All content and opinions are those of the writer. No payment has been received for this post. No part of this post may reproduced or duplicated without the written permission of the owner. Please see the Disclosure Policy.

A white chocolate pencil surrounded, fresh fruit filled three sponge dessert. Ideal for parties and celebrating.
Raspberry Lemon Celebration Cake


Coffee Pecan Nut Glazed Bundt Cake

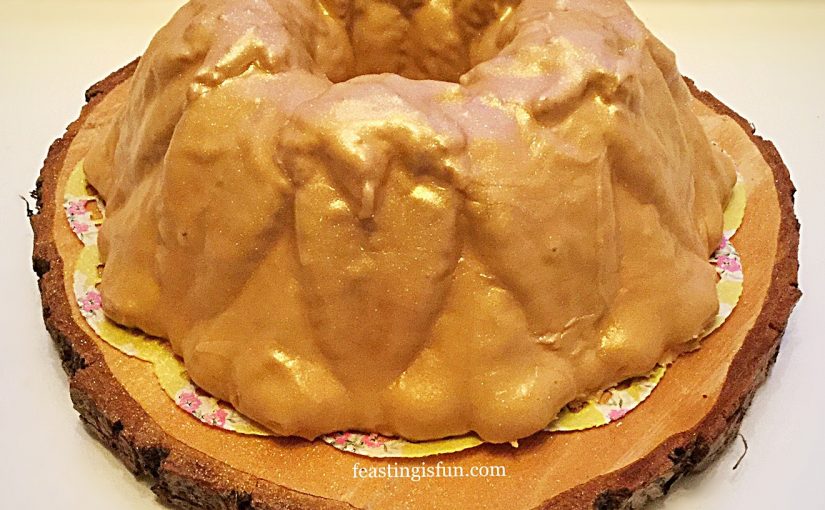
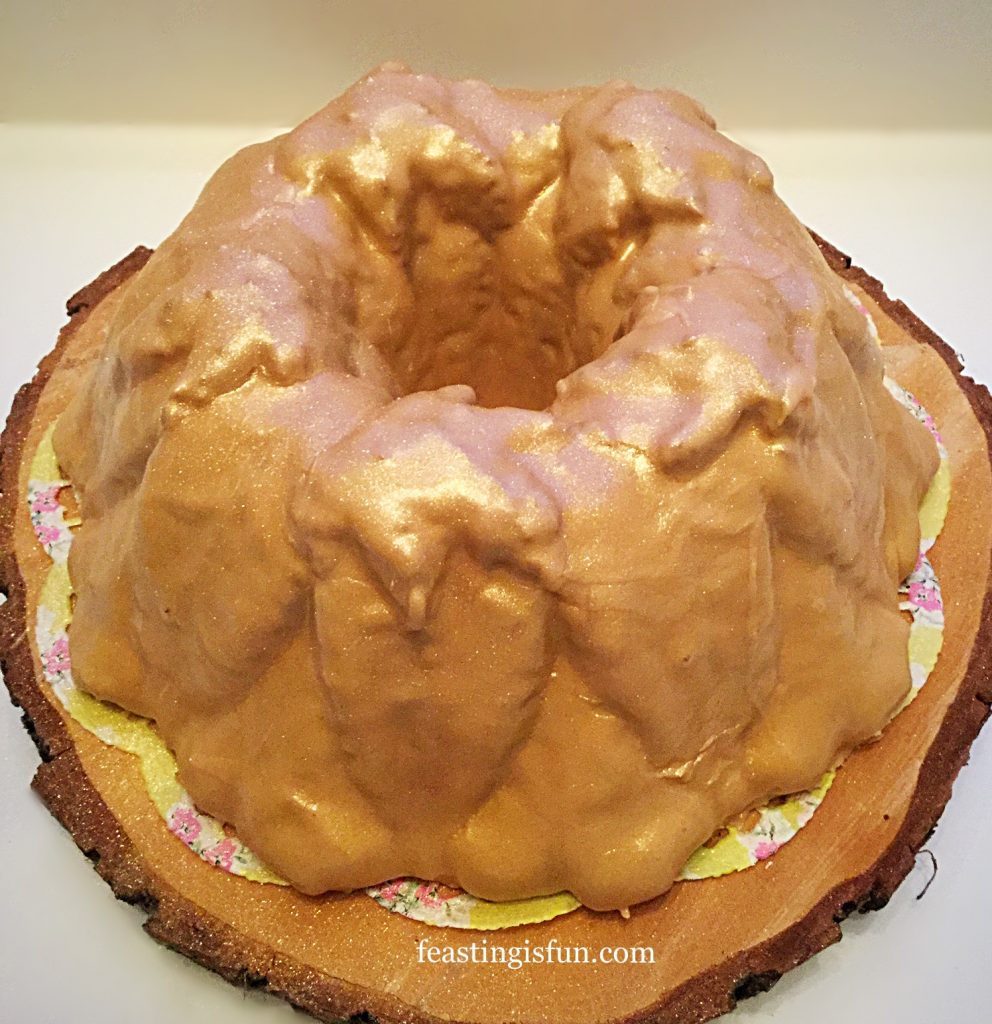
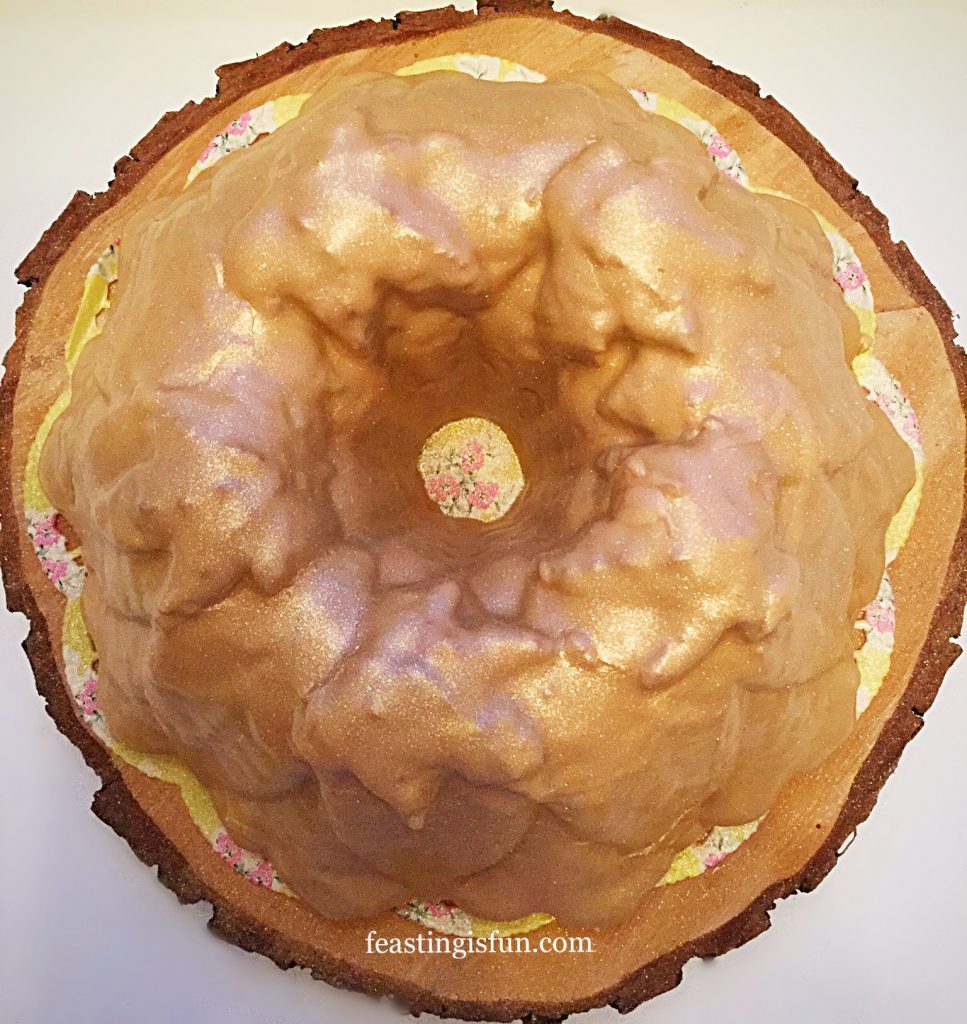
Every year I try to make my Father in law’s birthday cake. Since his favourite cake is Classic Coffee Walnut Cake, creating twists on the original are fun. So, this year I switched things up and made a Coffee Pecan Nut Glazed Bundt Cake. Baked in a beautiful Bundt pan and finished with a latte coloured coffee glaze. I am assured that this cake was a big hit.

FF Coffee Pecan Nut Glazed Bundt Cake
Coffee Pecan Nut Glazed Bundt Cake

While the nuts may have been switched up, the cake still has to deliver one hundred per cent on flavour. Using espresso powder gives an intense coffee flavour, without being overpowering or bitter. Adding chopped pecans provides crunch against the super moist crumb of the cake. Finally, a simple coffee icing glaze not only picks out the detail of the cake shape, but also provides a first, sweet, coffee bite into the cake.

FF Coffee Pecan Nut Glazed Bundt Cake
Coffee Pecan Nut Glazed Bundt Cake

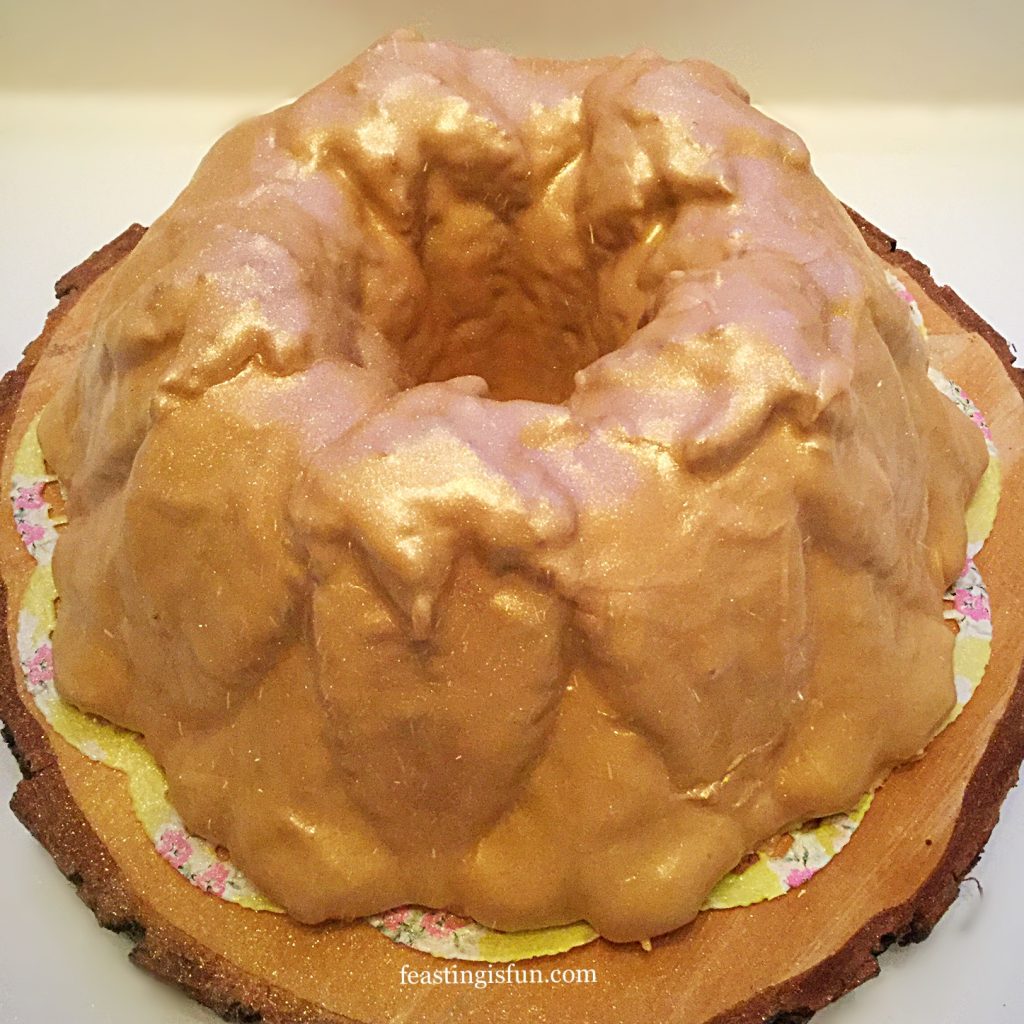
Since a birthday must be celebrated and a celebration demands a cake (or it is just a meeting), baking a beautiful cake is something I take pleasure in. As much as everyone takes pleasure in eating it! Candles, beyond a certain age, most definitely become an option. Yet, a little sparkle adds a special edge. So edible gold glitter, liberally sprayed over provides the ‘wow’ that sets this cake apart from others.

FF Coffee Pecan Nut Glazed Bundt Cake
Coffee Pecan Nut Glazed Bundt Cake

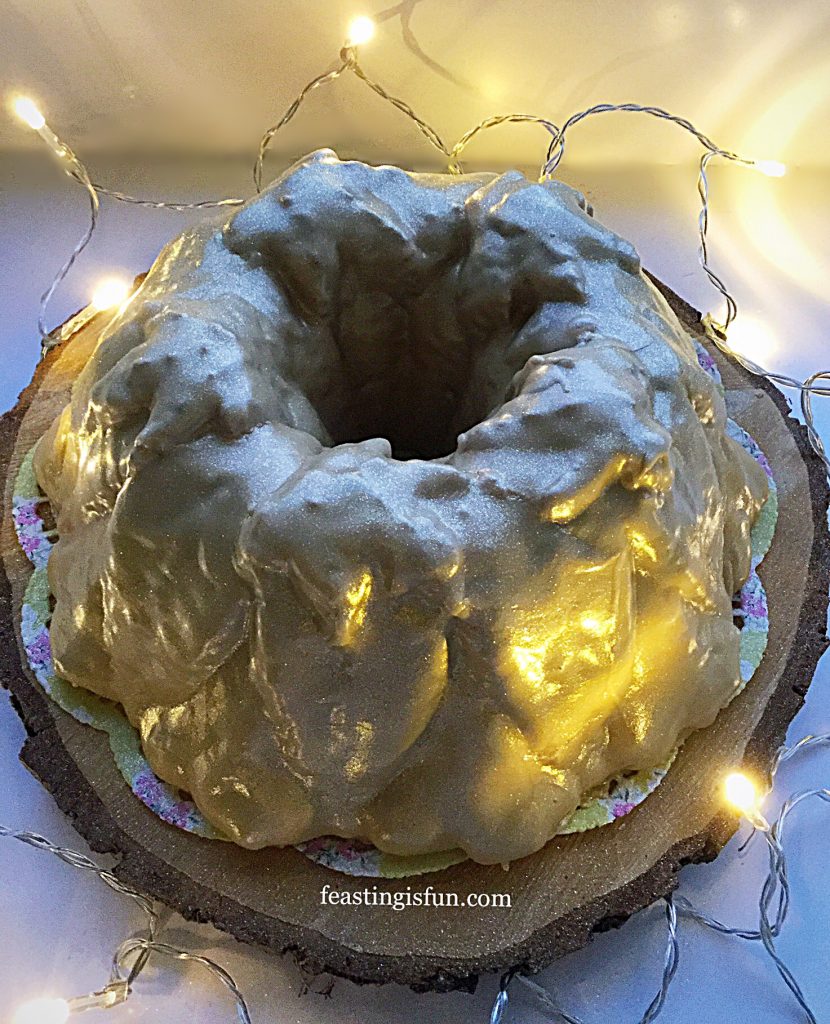
Photos were taken with artificial light, never ideal, show this cake as yellow gold. However, in natural light the glaze is a latte colour with a slight shimmer from the glitter.

Recipe: Coffee Pecan Nut Glazed Bundt Cake serves 8-10

For The Cake:

300g/11oz Unsalted Butter at room temperature

300g/11oz Caster Sugar

2tsp Espresso Coffee Powder dissolved in 1tbsp hot water and allow to cool – alternatively use 4tsp Camp Coffee

1/4tsp Salt I use Maldon

5 Large Free Range Eggs

1tsp Vanilla Extract I use Nielsen-Massey

100g/4oz Natural Full Fat Yoghurt such as Yeo Valley

150g/5oz Chopped Pecan Nuts

275g/10oz Plain White Flour

2.5tsp Baking Powder

For The Glaze:

400g/14oz Icing Sugar

1tsp Espresso Coffee Powder dissolved in 1tbsp hot water or 2tsp Camp Coffee

Optional – Edible Gold Glitter – available from My Cake Decor

Note – this recipe uses a 10 cup Harvest Leaf Bundt Pan from Nordicware. Ensure you use a 10 Cup Bundt. I recommend Wilton cake release spray (also available in a bottle, shake and brush on to the cake tin), to ensure the cake releases from the Bundt Pan.

Making The Bundt Cake Batter

Method: Preheat oven to 160C/140C fan, 325F, gas mark 3

  • First of all prepare the Bundt pan. Spray with cake release and use a pastry brush to ensure every part of the Bundt interior is completely coated.
  • Next, in a large bowl add the butter, sugar and salt. Whisk together until pale and creamy.
  • Now add the eggs, vanilla extract, espresso and yoghurt.
  • Sift the flour and baking powder into the bowl. Whisk all ingredients together until just combined.
FF Coffee Pecan Nut Glazed Bundt Cake
Making the Bundt cake batter.
  • Finally add the chopped pecans to the cake batter and fold into the mix with a spoon.
  • Now spoon the pecan studded cake batter into the prepared Bundt Pan. Push the mixture down into the pan so the every part of the intricate mould is filled.
FF Coffee Pecan Nut Glazed Bundt Cake
Preparing and filling the Bundt pan.

Baking And Turning Out The Bundt Cake

  • Place the cake into the centre of a preheated oven and bake for 60 – 70 minutes.
  • The cake is baked when it is golden in colour and an inserted skewer comes out clean.
  • Once baked remove the cake from the oven and leave to sit for 10 minutes in the pan.
  • Then turn the cake out on to a cooling rack and leave to cool completely.
FF Coffee Pecan Nut Glazed Bundt Cake
Baking and turning out the Bundt cake.

Glazing The Bundt Cake

  • As soon as the cake is cooled it is ready to decorate.
  • Sift the icing sugar into a bowl. Add the espresso liquid and enough water to create a thick glaze.
  • Place the cake, still on its cooling rack, over a clean baking tray.
  • Due to the addition of coffee in this glaze it forms a crinkle skin quickly. Work quickly, without rushing, when glazing the cake.
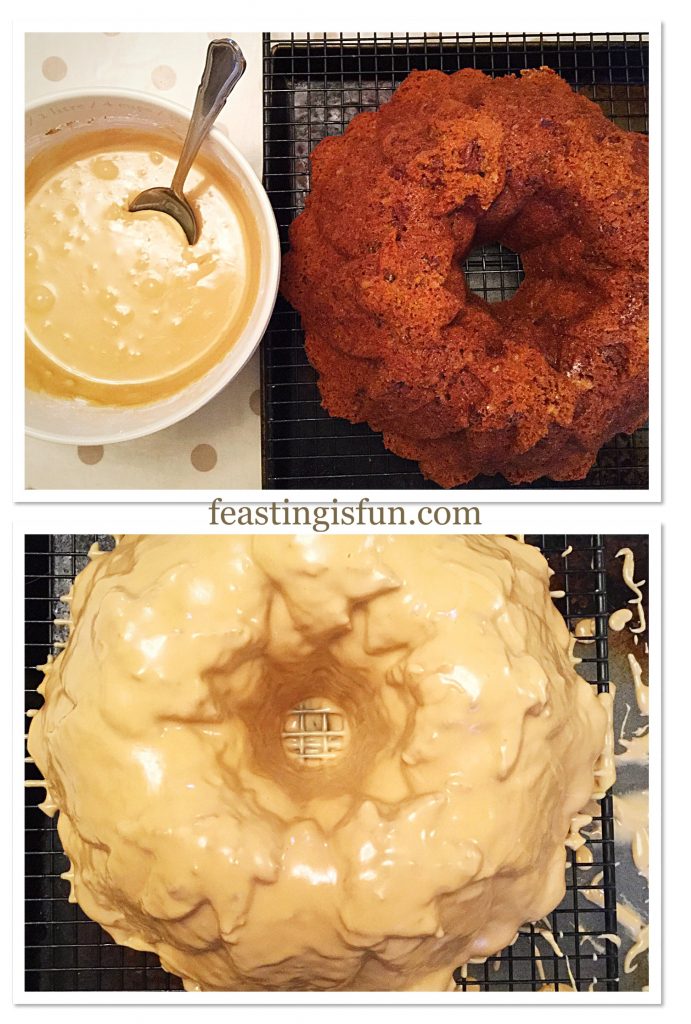
  • Starting at the top of the cake spoon over the thick glaze. Continue spooning the glaze around the cake until the entire cake is covered. If necessary spoon glaze that has dropped through to the tray over the cake, covering any holes in the glaze finish.
FF Coffee Pecan Nut Glazed Bundt Cake
Glazing the Bundt cake
  • As soon as the glaze has stopped dripping and is starting to set transfer the cake to a board or plate.
  • Dust the cake with edible gold glitter once the glaze has fully set.
FF Coffee Pecan Nut Glazed Bundt Cake
Coffee Pecan Nut Glazed Bundt Cake finished with a spritz of glitter.

I couldn’t resist a photograph with fairy lights!

FF Coffee Pecan Nut Glazed Bundt Cake
Coffee Pecan Nut Glazed Bundt Cake lit up!

Slice the cake to serve.

Store in an airtight container for up to 5 days. Refrigerate during warmer weather.

If you have enjoyed this recipe for Coffee Pecan Nut Glazed Bundt Cake you may also like these:

Chocolate Cherry Chiffon Bundt Cake

FF Coffee Pecan Nut Glazed Bundt Cake
Chocolate Cherry Chiffon Bundt Cake

Maple Syrup Iced Coffee Bundt Cake

FF Coffee Pecan Nut Glazed Bundt Cake
Maple Syrup Iced Coffee Bundt Cake

Lemon Blueberry Bundt Cake

FF Coffee Pecan Nut Glazed Bundt Cake
Lemon Blueberry Bundt Cake


Baking for others is a great way show you care and treat them at the same time. While a birthday without a cake is unthinkable in many homes, other bakes can also be made. Our youngest daughter usually prefers this Raspberry Chocolate Pavlova, for her birthday and our eldest always has two cakes. An ice cream cake and a baked one. Whatever is baked and celebrated with, it contains one thing it’s mass produced copies don’t. Love. The most important ingredient in any bake.

Whatever you are making baking and creating in your kitchens, have fun preparing your feast.

Sammie xx

Please note, no part of this post may be reproduced or duplicated without the written permission of the owner. Please see my Disclosure Policy.


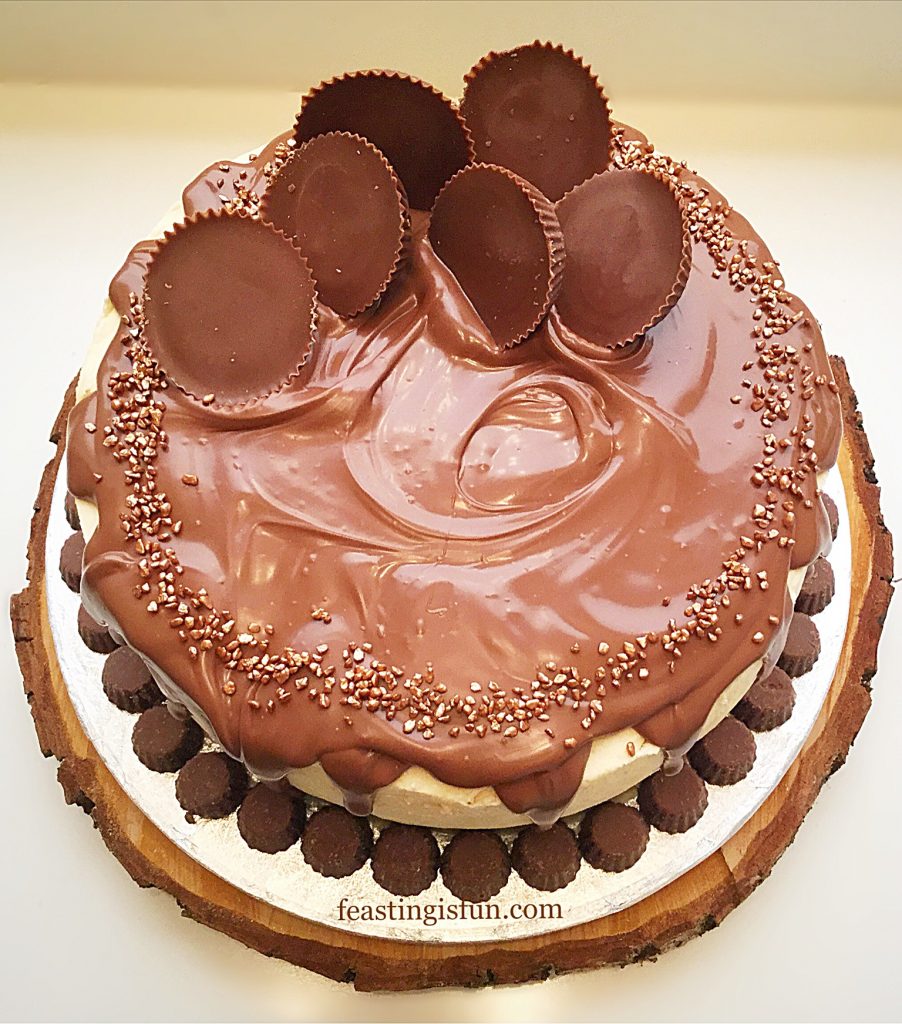
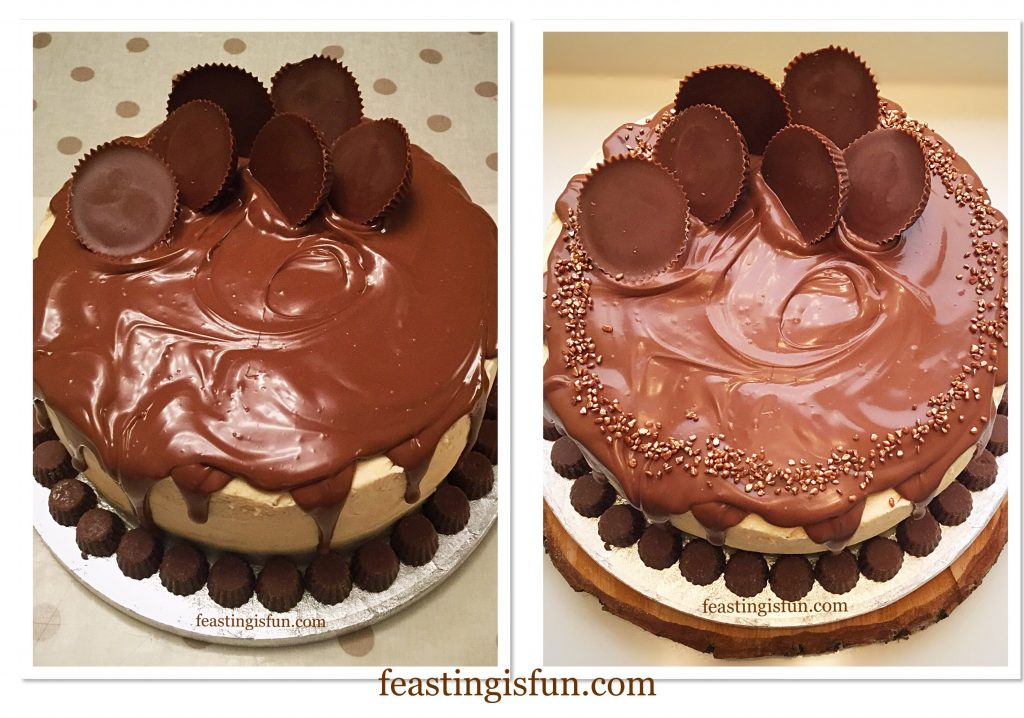
Chocolate Peanut Butter Drip Cake

The past fortnight has been a busy one here at home. Hospital appointments for me, rugby matches for our son and both of our girls working hard on their studies. Life has been hectic. Yet, during this time, we have also celebrated two special birthdays in our family. Amidst the coming and going, we made time for what is important. Spending time together. Celebrating birthdays and enjoying the company and love that we have for each other. Laughing, catching up, chatting, more laughter and sharing this delicious Chocolate Peanut Butter Drip Cake.

FF Chocolate Peanut Butter Drip Cake

Family First Support And Sharing

For me, nothing is more important than spending time with those that I love. Whether family, friends or both. Yet due to the continued frequency of seizures see here, these occasions have been few and far between over the last two years. While I was able to attend the wedding of my amazing nephew and my new niece, there have been very many missed opportunities, simply due to my health. Finally, this trend seems to be on the turn and change is afoot!

FF Chocolate Peanut Butter Drip Cake
Chocolate Peanut Butter Drip Cake

Since our son and my sister celebrate their birthday on the same day, it has become a tradition for them to see each other on their special day. While last year this event was cancelled, we more than made up for it this year! We gathered and celebrated this very special day together. Presents were unwrapped, cards opened, cuddles given. Most importantly we were a family celebrating together. Is there anything that is better?

Peanut Butter And Chocolate

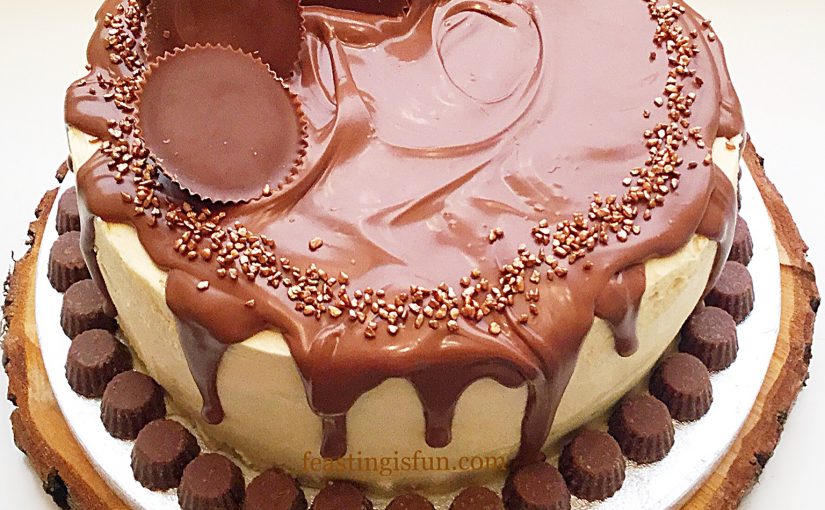
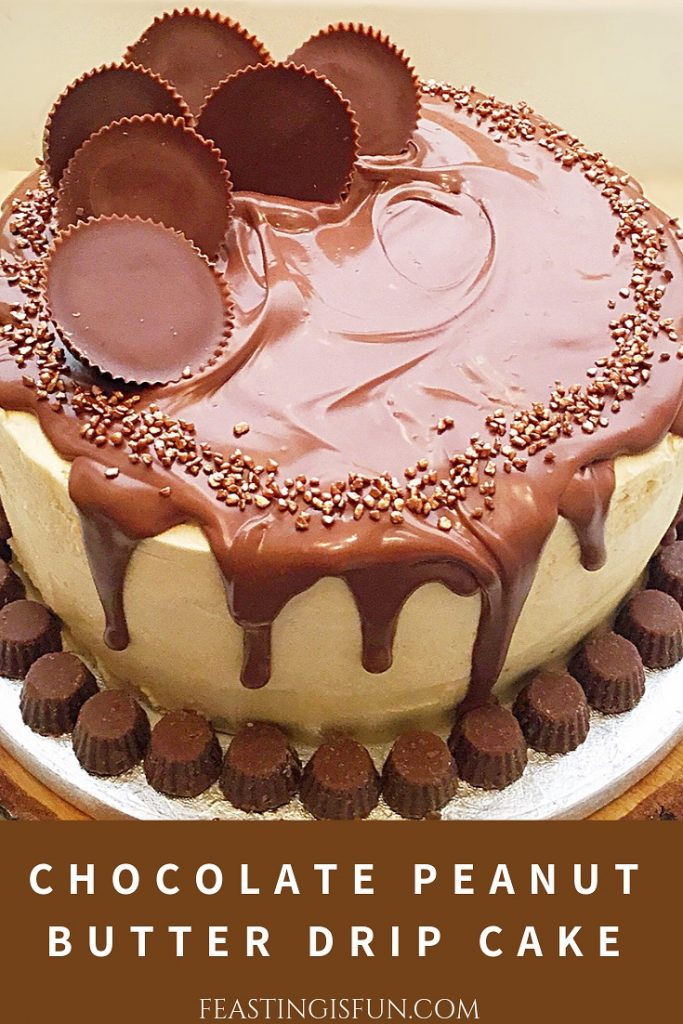
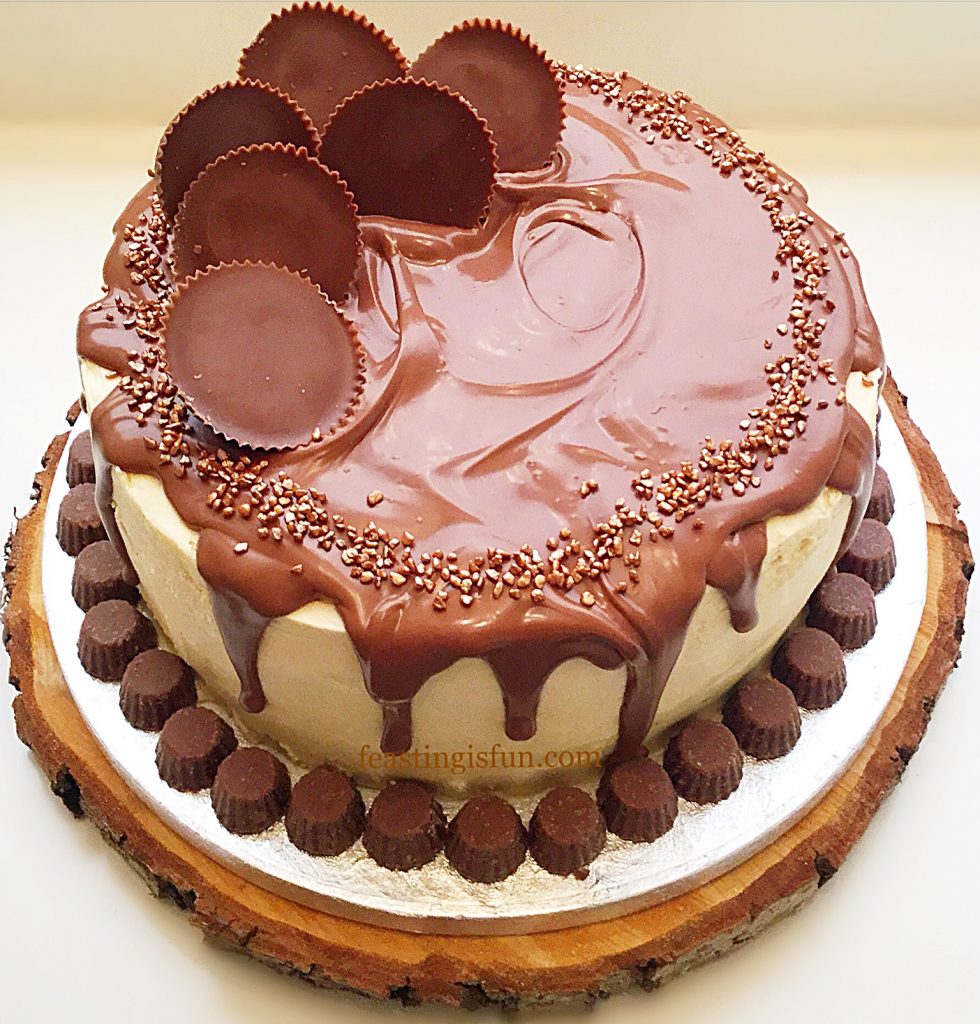
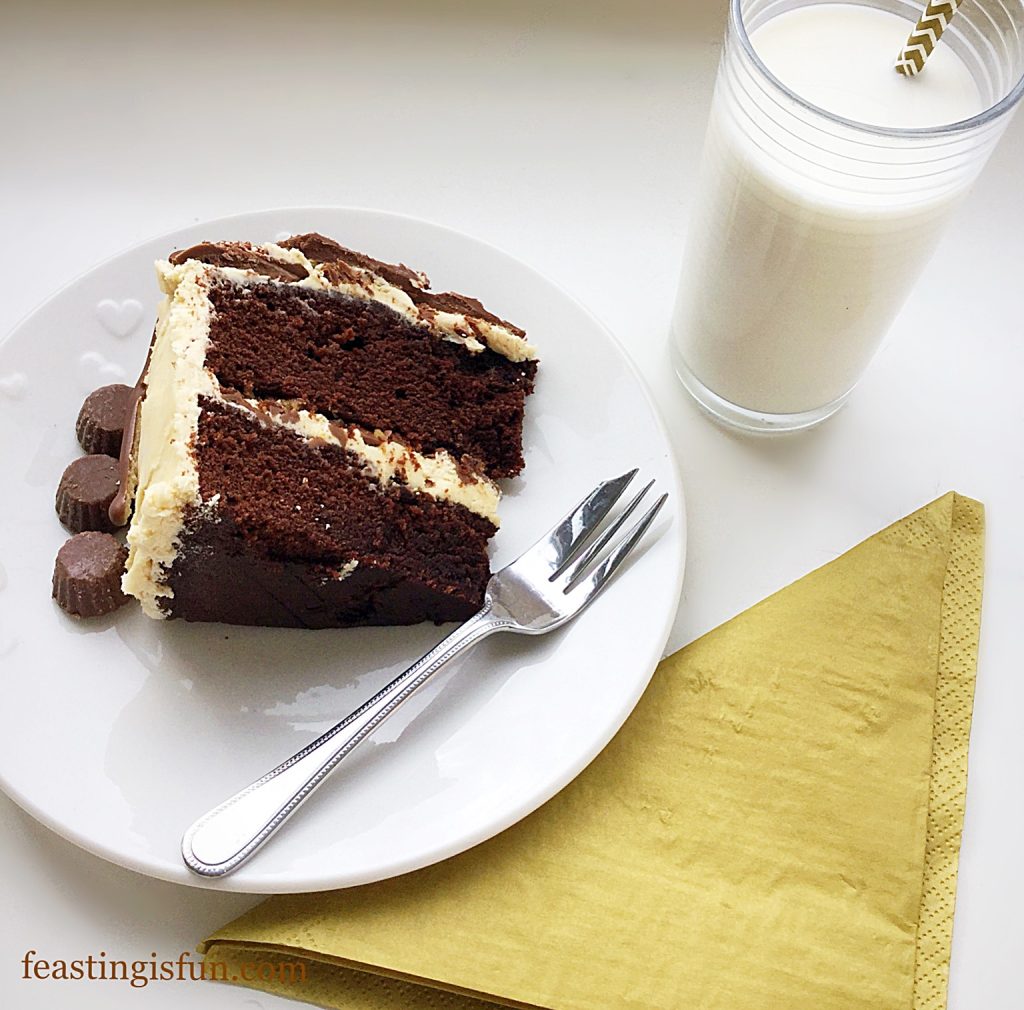
Because I  made our, not so little boy, a fruit cake for his birthday over the past couple of years, change was definitely needed! Since I know how much he loves Reeces Peanut Butter Cups I suggested a chocolate and peanut butter cake. Resulting in a huge smile and a big yes from the birthday boy. So I made light chocolate and peanut butter sponges, sandwiched together with peanut butter icing, along with hidden, chopped peanut butter cups in the centre. Frosted all over with the same icing and decorated with a milk chocolate drip and more peanut butter cups. Finally, a sprinkle of bronze crunch added elegance to the finished cake.

FF Chocolate Peanut Butter Drip Cake
Chocolate Peanut Butter Drip Cake

Above all I had made the cake of our son’s dreams. Utterly thrilled with both the look and taste of his birthday cake, oohs and aahs escaped from everyone’s lips. While delivering completely on taste, as it did looks, this cake proved to be a huge hit. Most importantly from the birthday boy himself. Resulting in a day full of happy shared memories.

FF Chocolate Peanut Butter Drip Cake
Chocolate Peanut Butter Drip Cake

Recipe: Chocolate Peanut Butter Drip Cake serves 10-12

For the cake:

275g/10oz Unsalted Butter at room temperature

275g/10oz Light Brown Sugar

50g/2oz Peanut Butter smooth – I use Reeces available from Amazon

1/4 tsp Sea Salt – I use Maldon

2 tsp Vanilla Extract – I use Nielsen-Massey

5 Large Free Range Eggs

75ml/5tbsp Whole Milk

200g/7oz Plain Flour

2 tsp Baking Powder

75g/3oz Cocoa – I use Callebaut

Frosting and Decoration:

250g/9oz Unsalted Butter softened to room temperature

75g/3oz Peanut Butter smooth

1/4 tsp Sea Salt

500g/1lb 2oz White Icing Sugar

2 tbsp Very Hot Water

1 tsp Vanilla Extract

20 Mini Reeces Peanut Butter Cups plus additional to place around the base of the cake

6 Regular Reeces Peanut Butter Cups

200g/7oz Good Quality Milk Chocolate

Bronze Crunch Sprinkles available from Waitrose

Method: Preheat oven to 160C/140C fan, 325F, gas mark 3

Making And Baking The Sponge Cakes

First of all, you will need 2 x 20cm/8″ sandwich tins that are 5cm/2″ deep. Grease thoroughly with butter and line the base with baking parchment.

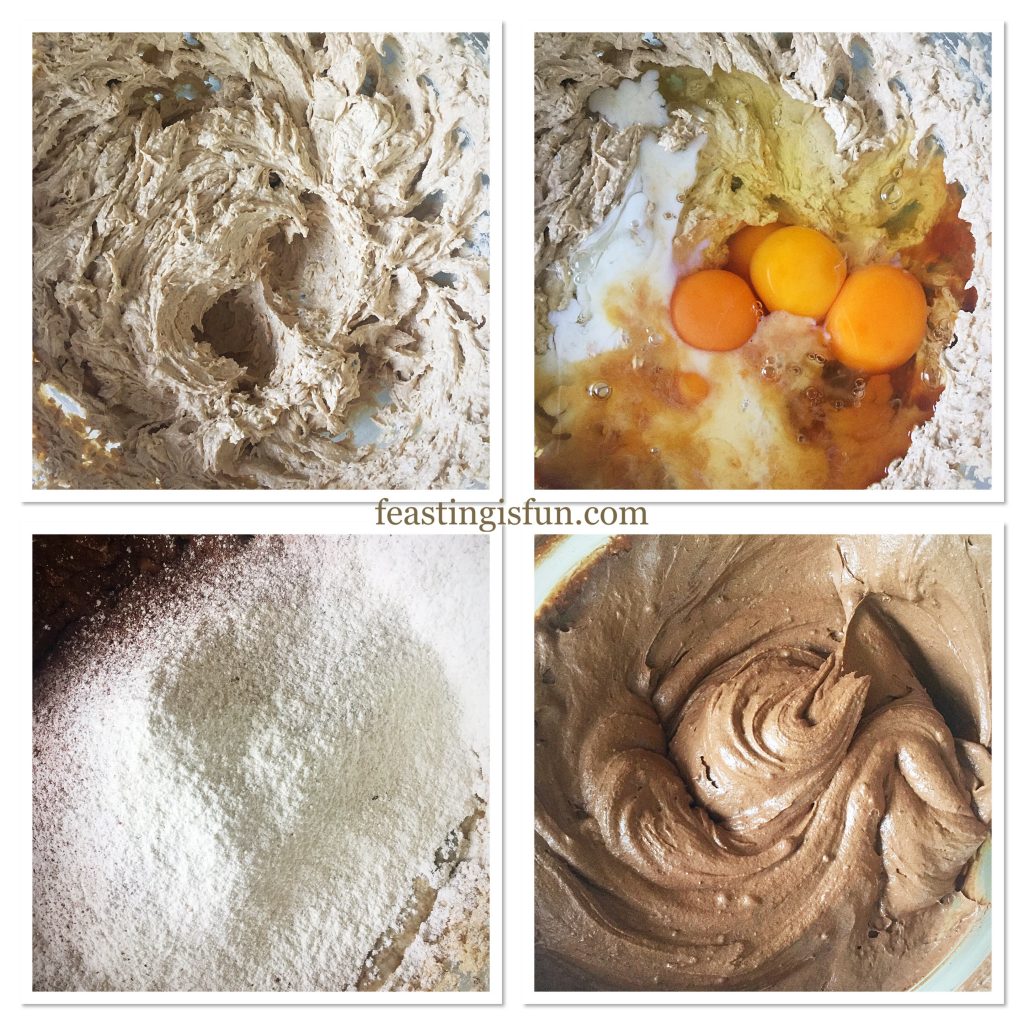
  • Into a large bowl add the butter, peanut butter,  sugar and salt. Whisk until pale and creamy, this will take around 5 minutes. Creaming the butter and sugar together properly helps create a light sponge.
  • Next add all 5 eggs, the milk and vanilla extract. Whisk briefly to break up the eggs.
  • Now sift in the dry ingredients, flour, cocoa powder and baking powder.
  • Finally, whisk or beat all of the ingredients together until they become a smooth batter. Over whisking will create a tough cake sponge.
FF Chocolate Peanut Butter Drip Cake
Making the Chocolate Peanut Butter cake batter.
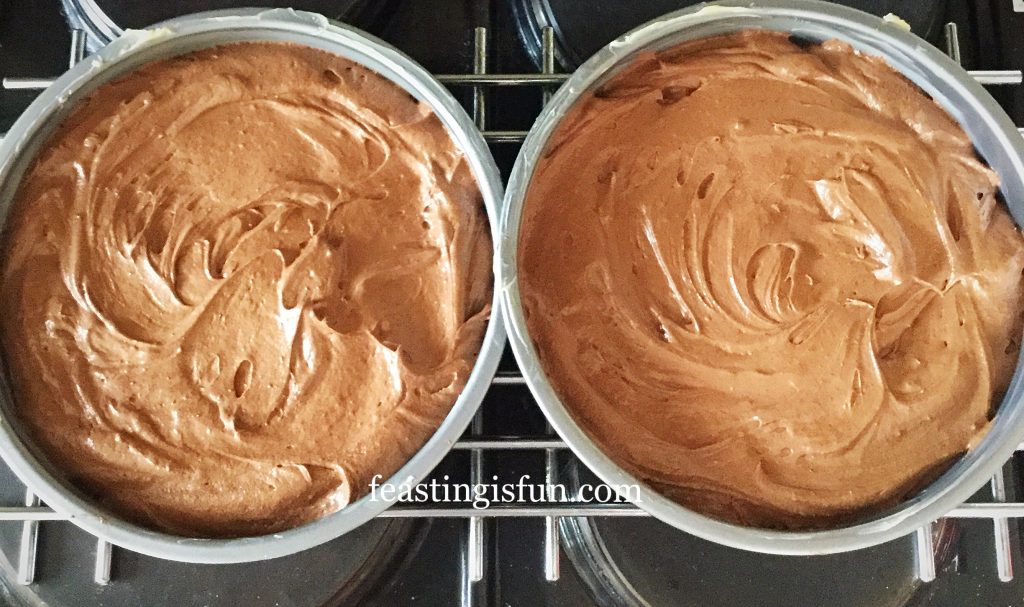
  • Divide the cake mixture evenly between the two prepared tins.
FF Chocolate Peanut Butter Drip Cake
Chocolate peanut butter cakes ready for the oven.
  • Place the cake tins evenly spaced apart, into the oven and bake for 30-40 minutes.
  • The cakes are baked when they spring back from a light touch. as soon as they are baked remove from the oven.
  • Allow the cakes to cool for 15 minutes in the tin before turning out on to a cooling rack.
FF Chocolate Peanut Butter Drip Cake
Cooling cakes.

How To Frost The Cake

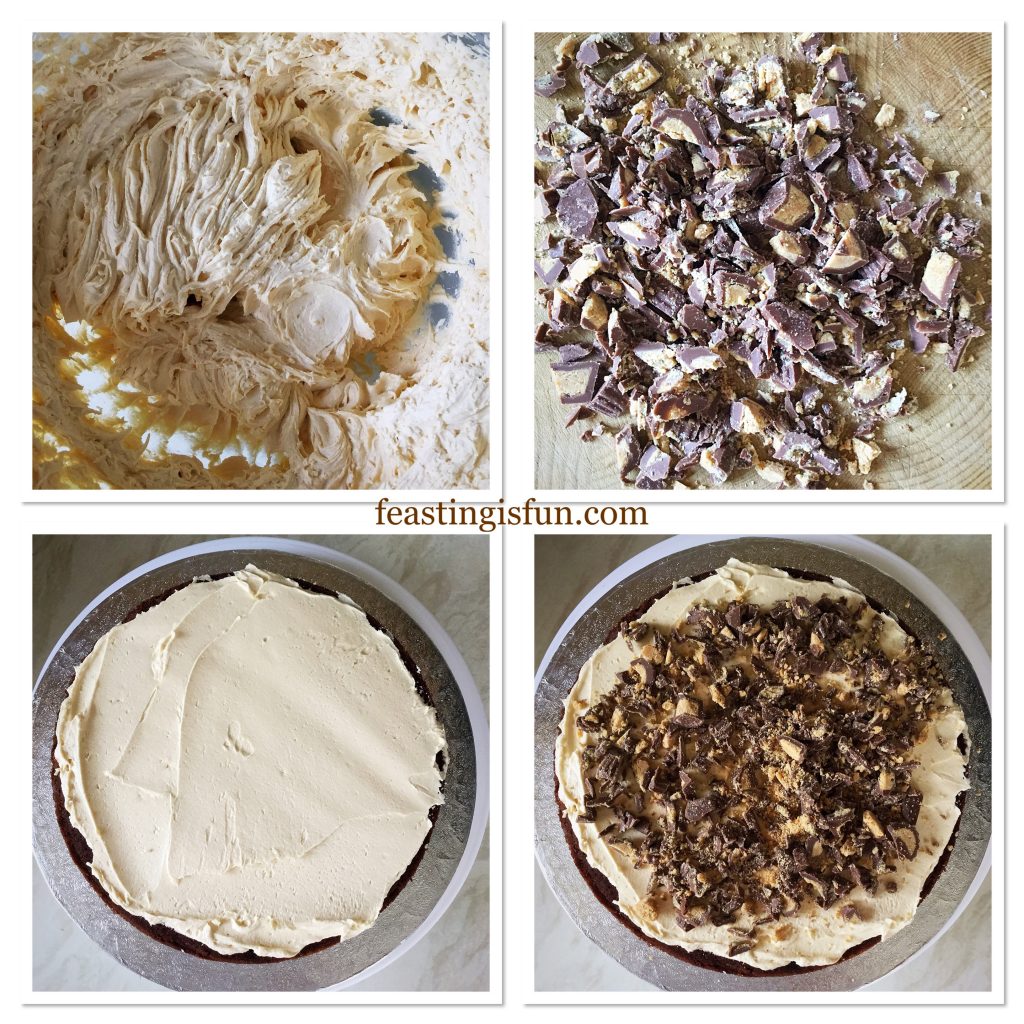
  • First of all, chop 20 mini peanut butter cups into small pieces. See the photograph below as a guide. Set to one side.
  • Into a large bowl add the butter, peanut butter, salt, vanilla extract and icing sugar. Next pour the very hot water down the inside of the bowl.
  • Starting on a slow speed whisk the ingredients together, increasing in speed as they become combined. Continue whisking until the buttercream is light and creamy in consistency, with no visible lumps.
  • Check the cake is completely cooled before frosting.
  • Place one cake sponge, flat side up, on to a cake board or plate. Spoon 3 heaped dessert spoons of frosting on to the sponge and spread evenly across the sponge with a palette knife.
  • Next, sprinkle over the choped peanut butter cups so they create an even layer across the frosted sponge.
FF Chocolate Peanut Butter Drip Cake
Making the buttercream and filling the centre of the cake.
  • If you have a turning, cake decorating stand place the cake on it. Alternatively place the cake board on to a cake stand. The cake can then be rotated on the board, making the frosting process easier.
  • Place the other cake sponge, flat side down, on top of the bottom sponge.
  • Scoop three quarters of the remaining frosting on to the top of the cake.
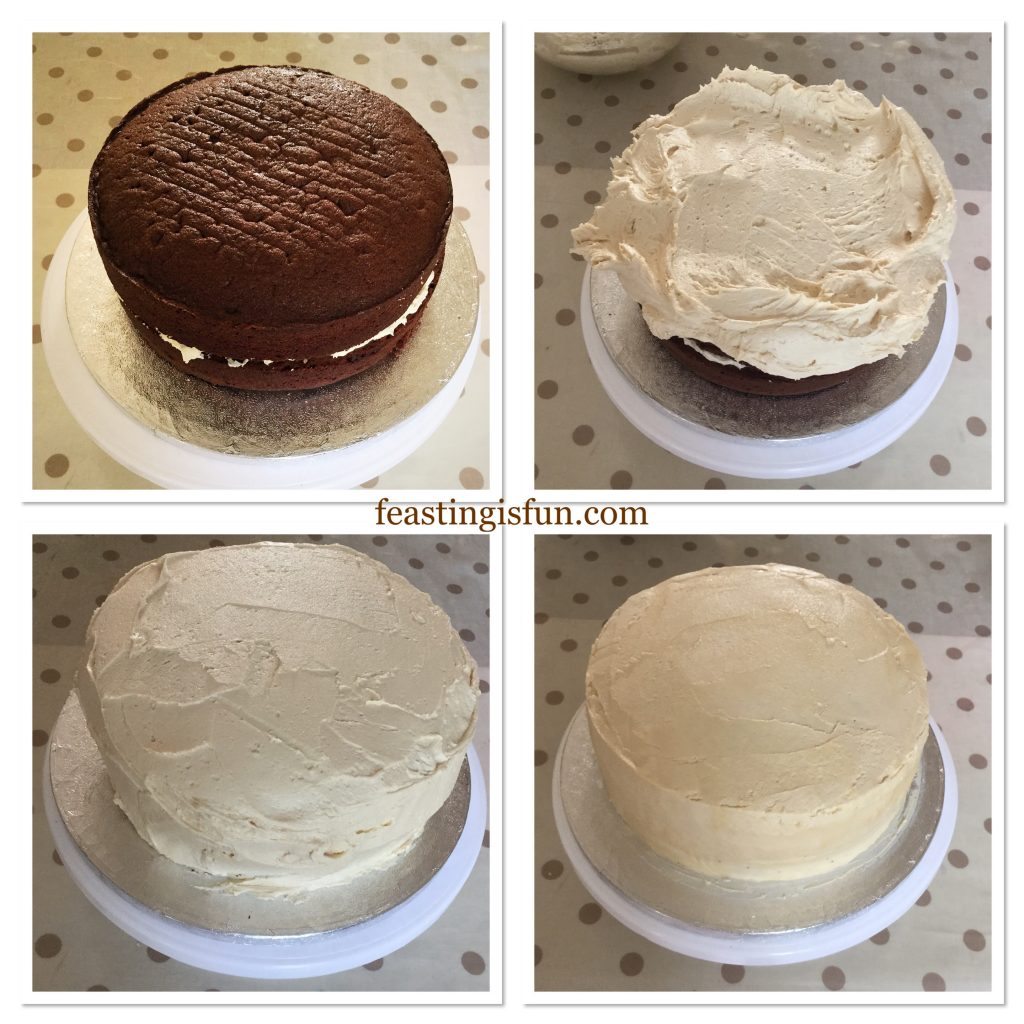
  • Using a palette knife spread the frosting across the top of the cake and over the sides. Add the remaining frosting as needed.
  • Rotate the cake, spreading the frosting, until an even finish is achieved.
  • Fill a jug with very hot water. Place a clean palette knife into the water, for a couple of seconds, remove and wipe away the water. Smooth the frosting using the hot pallet knife. Repeat this process until you have a smooth and even finish to the cake.
  • Refridgerate the cake for at least one hour. The cake may be left in the fridge overnight at this stage.
FF Chocolate Peanut Butter Drip Cake
Covering and smoothing the outside of the cake.

Creating The Chocolate Drip Effect

  • While the cake is finishing chilling, prepare the chocolate.
  • Break up, or chop the chocolate and place into a heatproof, microwaveable bowl.
  • Heat in the microwave, on medim power, for 30 second bursts. Stirring after each heating burst.
  • As soon as the chocolate starts to melt remove the bowl and continue to stir until completely melted.
FF Chocolate Peanut Butter Drip Cake
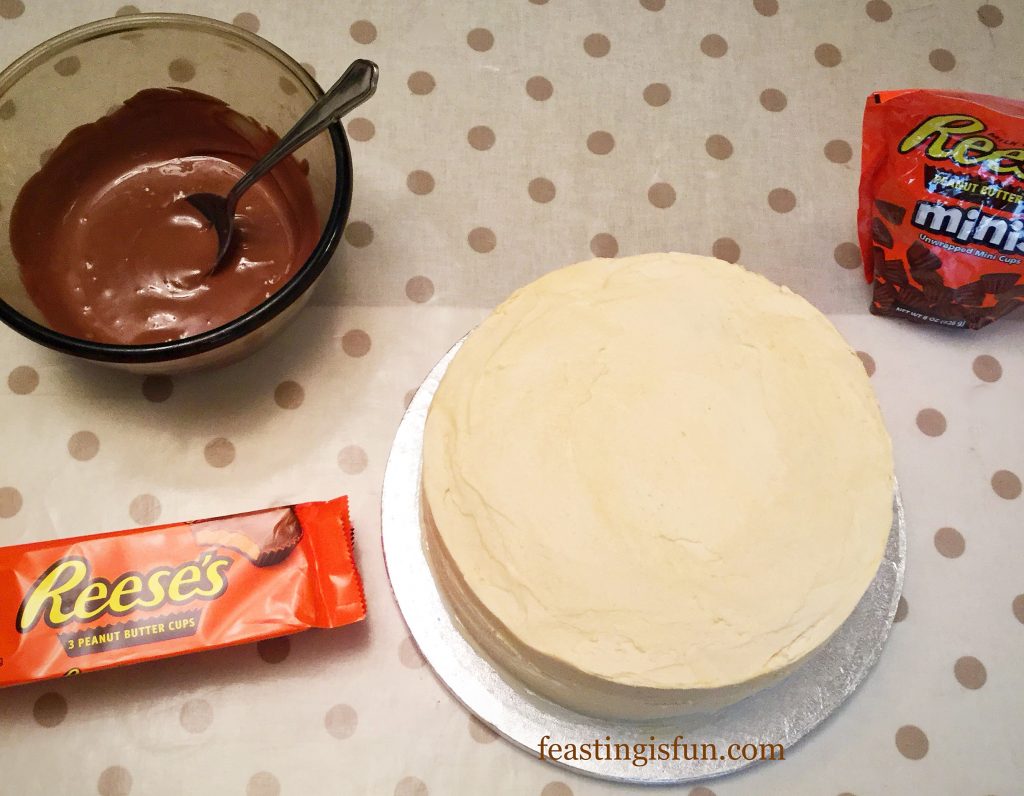
Frosted, chilled cake ready to be decorated.
  • Remove the chilled cake from the fridge and make sure that you have everything needed to hand.
  • Spoon the melted chocolate on to the middle of the top of the cake, gradually working towards the outside edge.
  • As the chocolate reaches the edge add more to encourage it to drip down the side.
  • Continue all the way around the cake until you have the desired ‘drip’ effect.
  • Place the larger peanut butter cups in a pattern and set into the still molten chocolate.
  • Follow by placing mini peanut butter cups aroung the base of the cake.
  • Finish with bronze sprinkles around the outside edge of the cake.
  • Leave the cake to set. This can be achieved more quickly by chilling in the fridge.
FF Chocolate Peanut Butter Drip Cake
Sprinkles added to finish the Chocolate Peanut Butter Drip Cake.

To serve, remove the cake from the fridge. Place a sharp knife into a jug of very hot water for a couple of seconds. Wipe the knife dry and then easily slice through the set chocolate and cake.

FF Chocolate Peanut Butter Drip Cake
Chocolate Peanut Butter Drip Cake

Store the cake in an airtight container for up to 5 days. Keep refridgerated during warmer weather.

If you have enjoyed this recipe for Chocolate Peanut Butter Drip Cake you may also like these:

Raspberry Vanilla Naked Celebration Cake

FF Chocolate Peanut Butter Drip Cake
Vanilla Naked Celebration Cake

Strawberry Chocolate Vanilla Drip Cake

FF Chocolate Peanut Butter Drip Cake
Strawberry Chocolate Vanilla Drip Cake

Chocolate Heart Cake

FF Chocolate Peanut Butter Drip Cake
Chocolate Heart Cake

Homemade cakes are so much better and far more delicious than their mass produced counterparts. Since each cake made at home is individual in both style and flavour. Knowing that someone has taken the time to create and bake a cake makes me personally feel very special and loved. That is exactly the same feeling I hope to invoke when baking for others. Seeing a big smile is my motivation and reward.

What motivates you to bake?

Whatever you are making, baking and creating in your kitchens, have fun preparing your feast.

Sammie xx

No part of this post may be copied or replicated without written permission from the owner. Please see my Disclosure Policy.
 

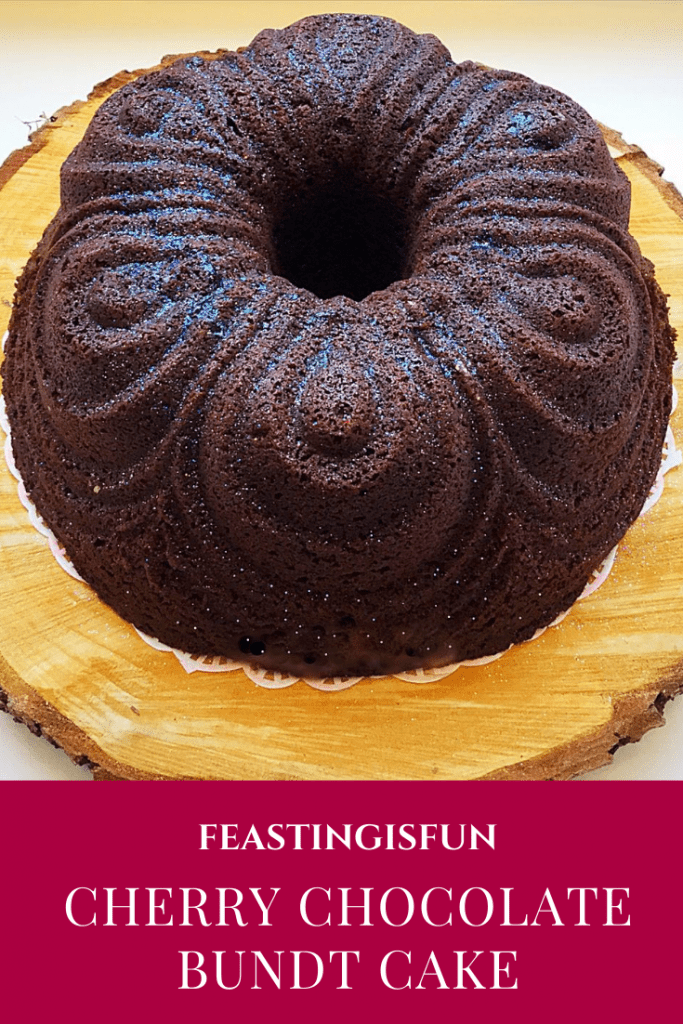
Chocolate Cherry Chiffon Bundt Cake

So, it’s another week and there’s another theme. Since #ChocolateWeek is now upon us, chocolate inspired bakes are bringing out the best cocoa creations from Twitter’s imaginative baking community. And, inspired by the theme, I created this beautiful Chocolate Cherry Chiffon Bundt Cake. Since it is always chocolate week here at home, this chocolate cherry cake fits the bill perfectly.

FF Chocolate Cherry Chiffon Bundt Cake
Chocolate Cherry Chiffon Bundt Cake

First of all, I absolutely adore Bundt pans. Since their beautiful designs and intricate moulding create the most exceptional looking cakes. While my cake decorating abilities are improving, due to regular practice, using a Bundt pan really does take away the need to decorate. Needing only a simple sprinkle of edible glitter to finish this cake. Alternatively, a light dusting of icing sugar (confectioners sugar) would also work well.

FF Chocolate Cherry Chiffon Bundt Cake
Chocolate Cherry Chiffon Bundt Cake


Chocolate And Cherry – A Flavour Match Made In Food Heaven

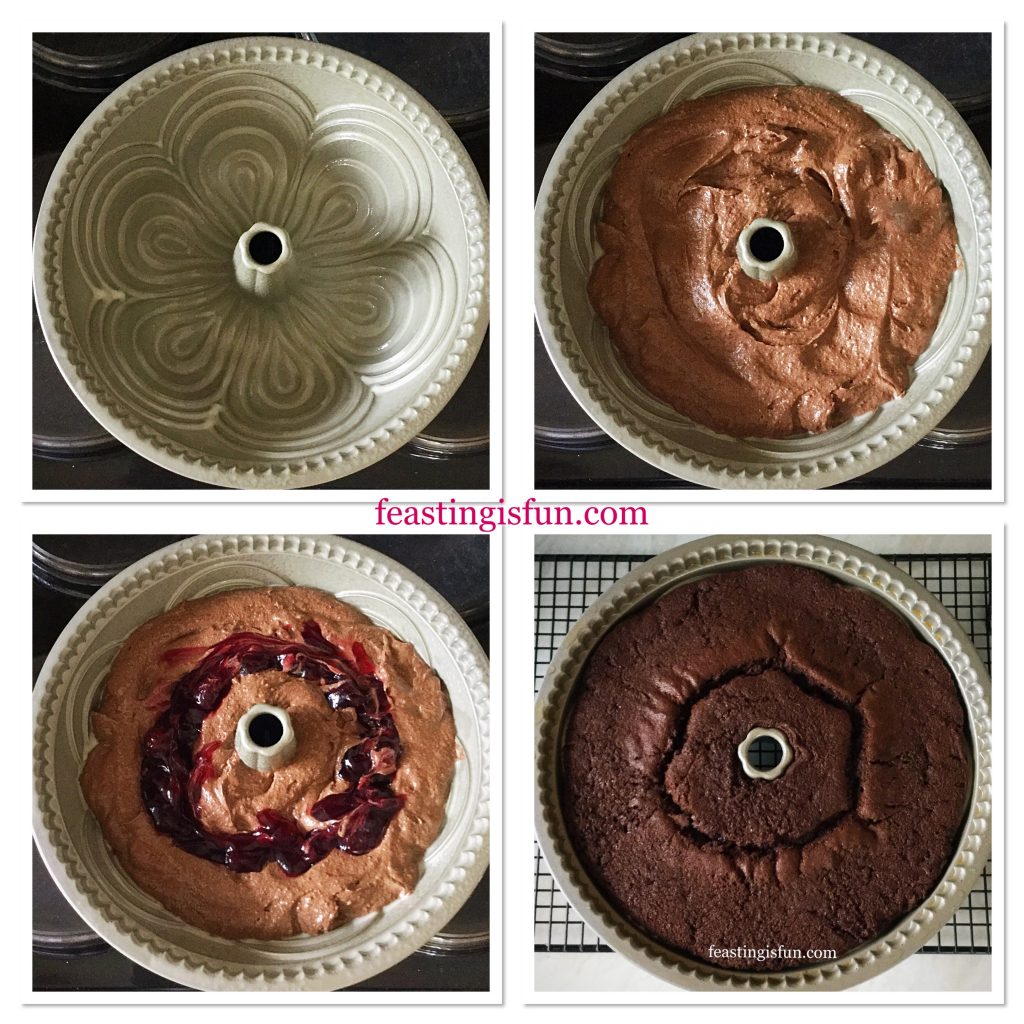
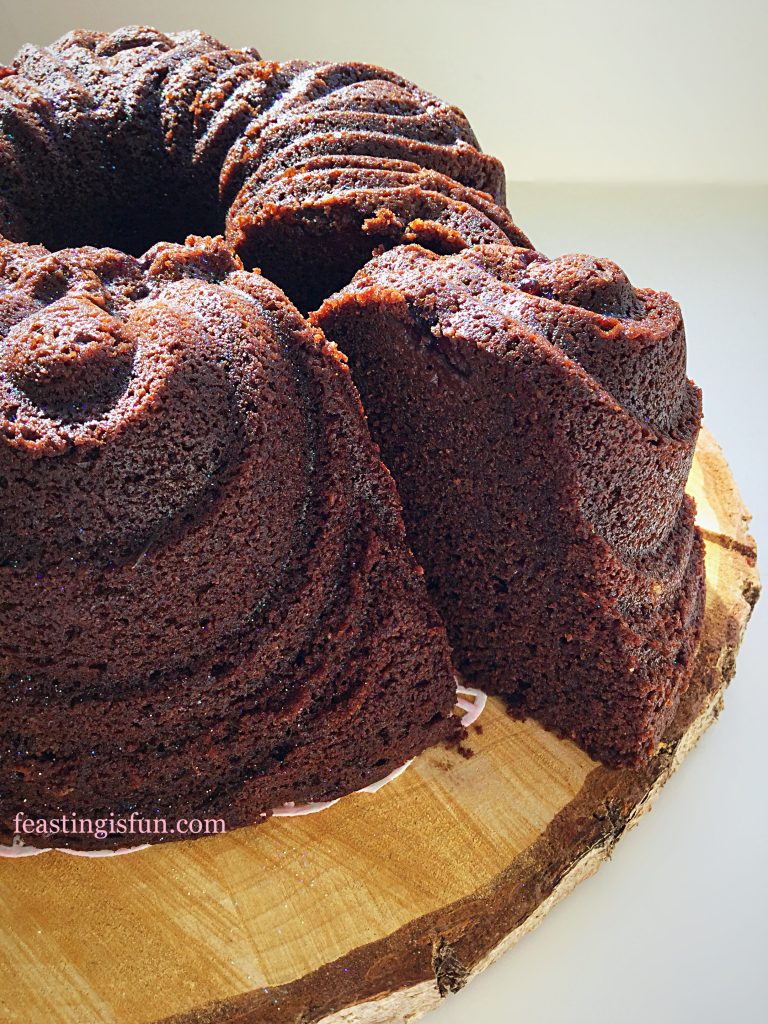
Cherry and chocolate are a delicious and classic flavour combination, which also happens to be a favourite of mine. And, using chocolate cherry naturally flavoured cocoa powder gives this cake it’s base flavour. Alternatively, a dash of kirsch (cherry liqueur) would also work well, when using plain cocoa powder. Finally, the addition of cherries and ground almonds creates a moist cake with surprise, hidden cherries inside. During baking the cherries drop to the bottom of the cake, which becomes the top of the cake after turning it out of it’s tin. Resulting in a jammy like topping inside the cake.

FF Chocolate Cherry Chiffon Bundt Cake
Chocolate Cherry Chiffon Bundt Cake up close.

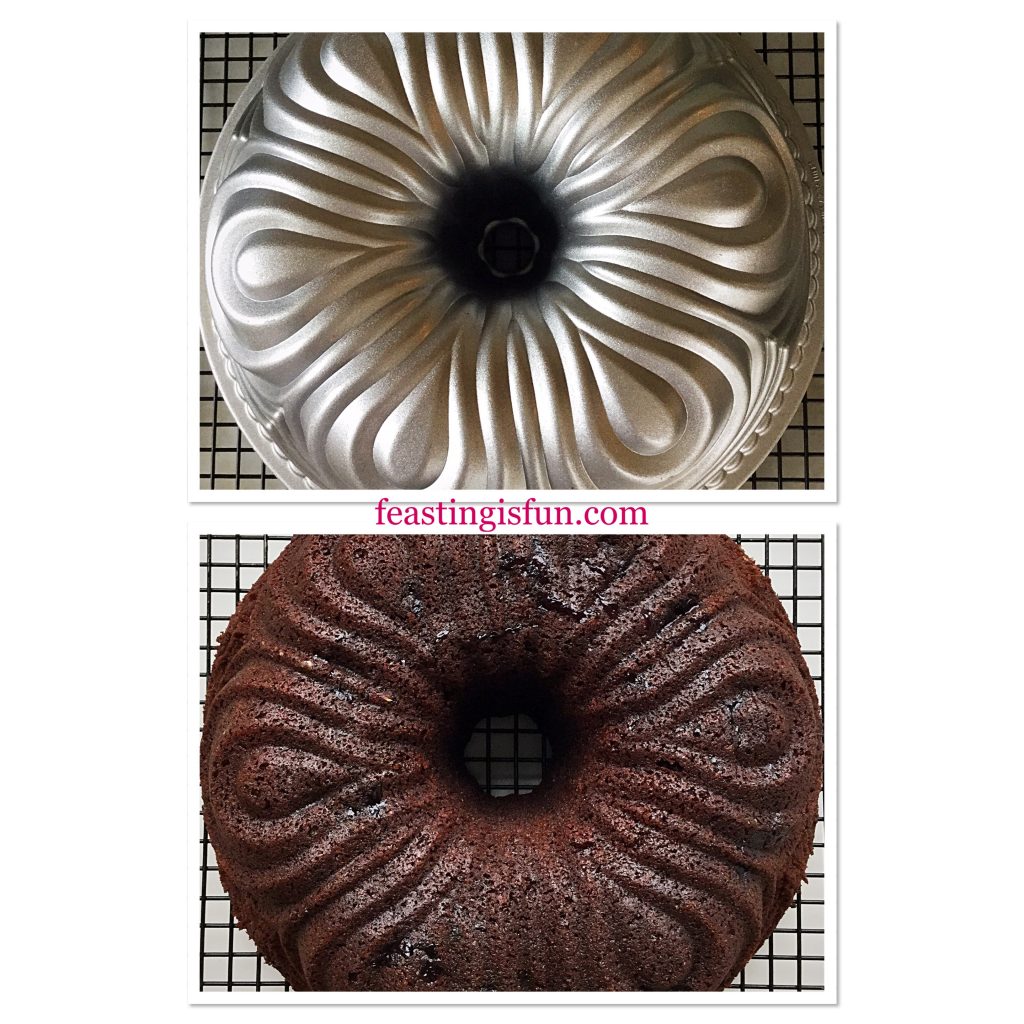
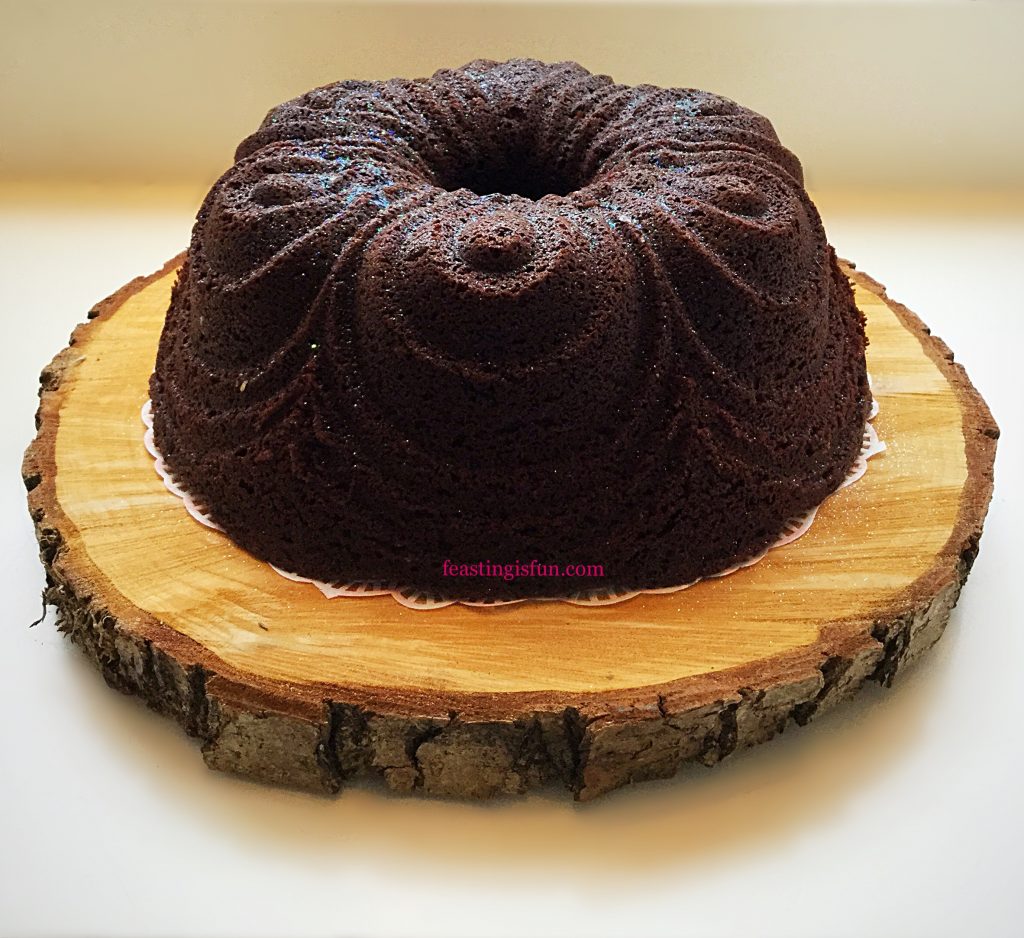
The looping, scalloped design of the Chiffon Bundt Pan is very elegant. While flickers of light from the edible glitter, sparkle and accentuate the design. Aside from covering in a very thin glaze, as done here, this cake really is best left as is. Indeed, left un-iced, dare I say this would be utterly delicious eaten with hot custard.

Recipe: Chocolate Cherry Chiffon Bundt Cake serves 10-12

275g/10oz Unsalted Butter at room temperature

275g/10oz Light Soft Brown Sugar

1/4 tsp Sea Salt – I use Maldon

2 tsp Vanilla Extract – I use Nielsen-Massey

1/2 tsp Almond Extract

5 Large Free Range Eggs

4 tbsp/60ml Whole Milk

100g/4oz Ground Almonds

75g/3oz Chocolate Cherry Cocoa Powder* – available from Sugar and Crumbs

*If you are unable to obtain chocolate cherry flavour cocoa powder, use plain cocoa and add either cherry flavouring or 3-4 tablespoons of kirsch (cherry liqueur).

125g/4.5oz Plain White Flour

2 tsp Baking Powder

Half a 400g/14oz (200g/7oz) Tin of Cherries or Cherry Pie Filling. Alternatively, use the equivalent weight of fresh, de-stoned cherries.

1/4 tsp Edible Glitter to decorate, alternatively use 1-2 teaspoon of icing sugar (confectioners sugar) to dust the finished cake.

Method: Preheat oven to 160C/140C fan, gas mark 3, 325F.

Tips on using Bundt pans:

This recipe uses a 10 cup Bundt Pan. I have used the Chiffon Bundt Pan available from Nordicware.

Most importantly, to ensure a successful release of the cake from the pan, cake release is highly recommended. Either available as a spray, or a liquid that is brushed on with a soft pastry brush. I recommend and always use Wilton
cake release.

Making And Baking The Bundt Cake

  • First of all add butter, sugar and salt to a large bowl. Whisk until the sugar is fully beaten into the butter.
  • Next add both vanilla and almond extracts. Also add 5 eggs and milk.
  • Now add ground almonds, cocoa powder, flour and baking powder.
  • Whisk everything together until fully combined. Take care not to over whisk as the resulting cake will be tough.
  • Prepare the Bundt pan, spraying, or brushing liberally with cake release.
  • Spoon the prepared cake batter into the pan, pushing the mixture into the base to avoid air pockets.
  • Finally, spoon half of tin of cherries on to the top of the cake batter, making sure that none of the liquid touches the side of the Bundt pan.
  • Place the Bundt pan into the lower middle part of a preheated oven and bake for 1 hour 20-30 minutes. Low, slow baking results in an evenly baked cake.
  • The cake is baked when it feels firm to touch, is coming away from the sides of the tin and an inserted skewer comes outs clean.
  • As soon as the cake is baked remove from the oven and place on a cooling rack.
FF Chocolate Cherry Chiffon Bundt Cake
Making and baking the Chocolate Cherry Chiffon Bundt Cake.
  • Allow the cake to cool for 10 minutes, then turn out on to a cooling rack.
FF Chocolate Cherry Chiffon Bundt Cake
Turning out the baked Chocolate Cherry Chiffon Bundt Cake.
  • Leave the cake to cool completely.
  • Finally, when cooled, place the cake on to a board or stand. Using a teaspoon, carefully sprinkle with glitter from a height.
FF Chocolate Cherry Chiffon Bundt Cake
Chocolate Cherry Chiffon Bundt Cake ready to serve.

The Finished Cake

Since this cake is so elegant, it could be used for any celebration, such as Christmas. Alternatively, if someone you know has a birthday, this cake would be a delicious surprise. And the addition of candles would simply make the cake sparkle more.

FF Chocolate Cherry Chiffon Bundt Cake
Chocolate Cherry Chiffon Bundt Cake.

Finally, to serve, slice and place on a pretty plate with a cake fork.

Store in an airtight container and eat within 5 days. Also, during warmer weather keep the cake refrigerated.

If you have enjoyed this recipe for Chocolate Cherry Chiffon Bundt Cake you may also like these:

Lemon Blueberry Bundt Cake

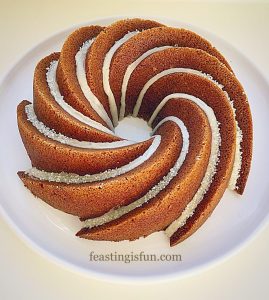
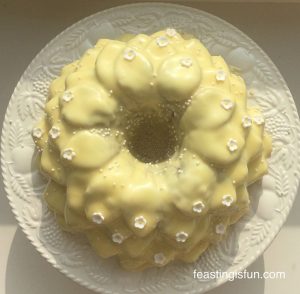
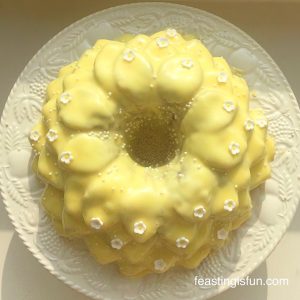
Lemon blueberry Bundt cake covered in a lemon glaze and decorated with small, white sugar flowers.
Lemon Blueberry Bundt Cake

Maple Syrup Iced Coffee Bundt Cake

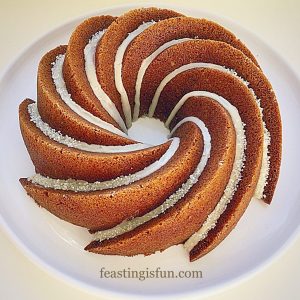
Maple syrup iced coffee Bundt cake
Maple Syrup Iced Coffee Bundt Cake

Lemon Lime Gin Heart Bundt Cake

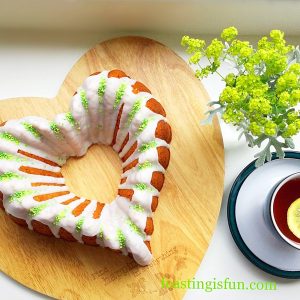
Lemon Lime Gin Heart Bundt Cake

Bundt pans are available in a wide variety of different shapes and designs. And, each pan creates a beautifully shaped cake without any extra effort required from the baker. While also allowing for creativity when decorating. Either with a simple dusting of icing sugar or glitter, or more precise icing, accentuating the features of each Bundt cake. Resulting in an exceptional, celebration worthy, unique cake every time.

So, whatever er you are making, baking and creating in your kitchens, enjoy preparing and sharing your feast.

Sammie xx

No part of this post may be reproduced or duplicated without the written consent on the owner. Please see my Disclosure Policy.
Raspberry Vanilla Naked Celebration Cake

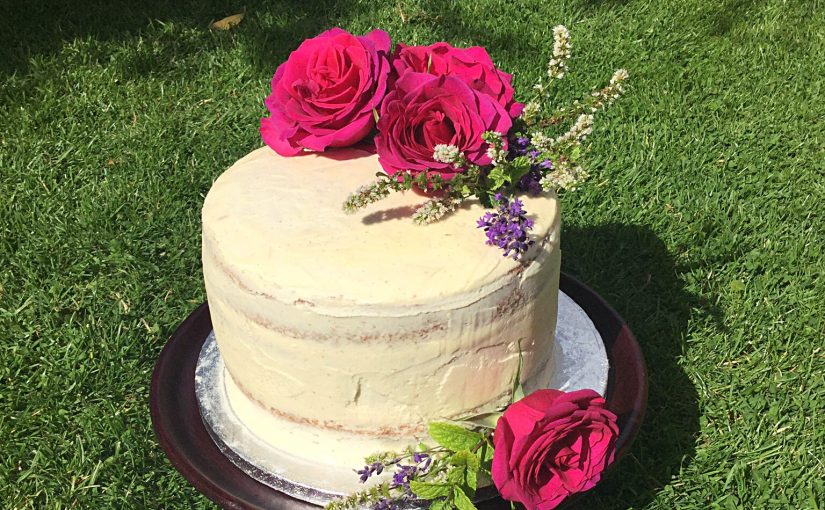
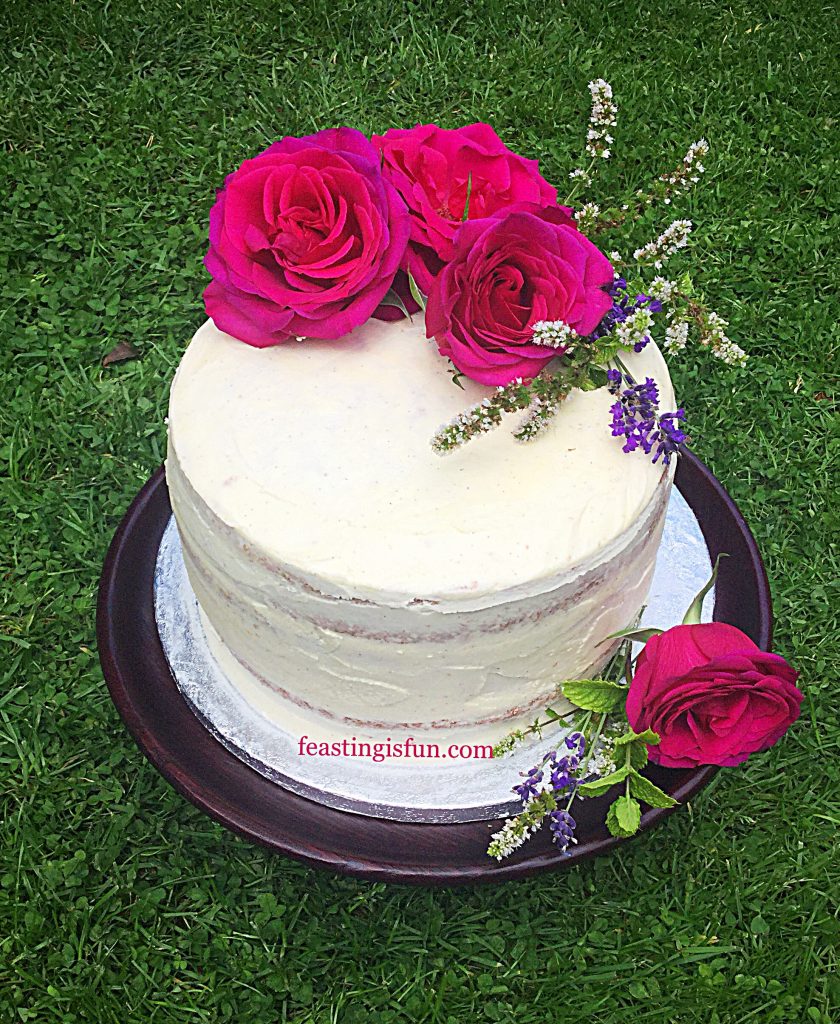
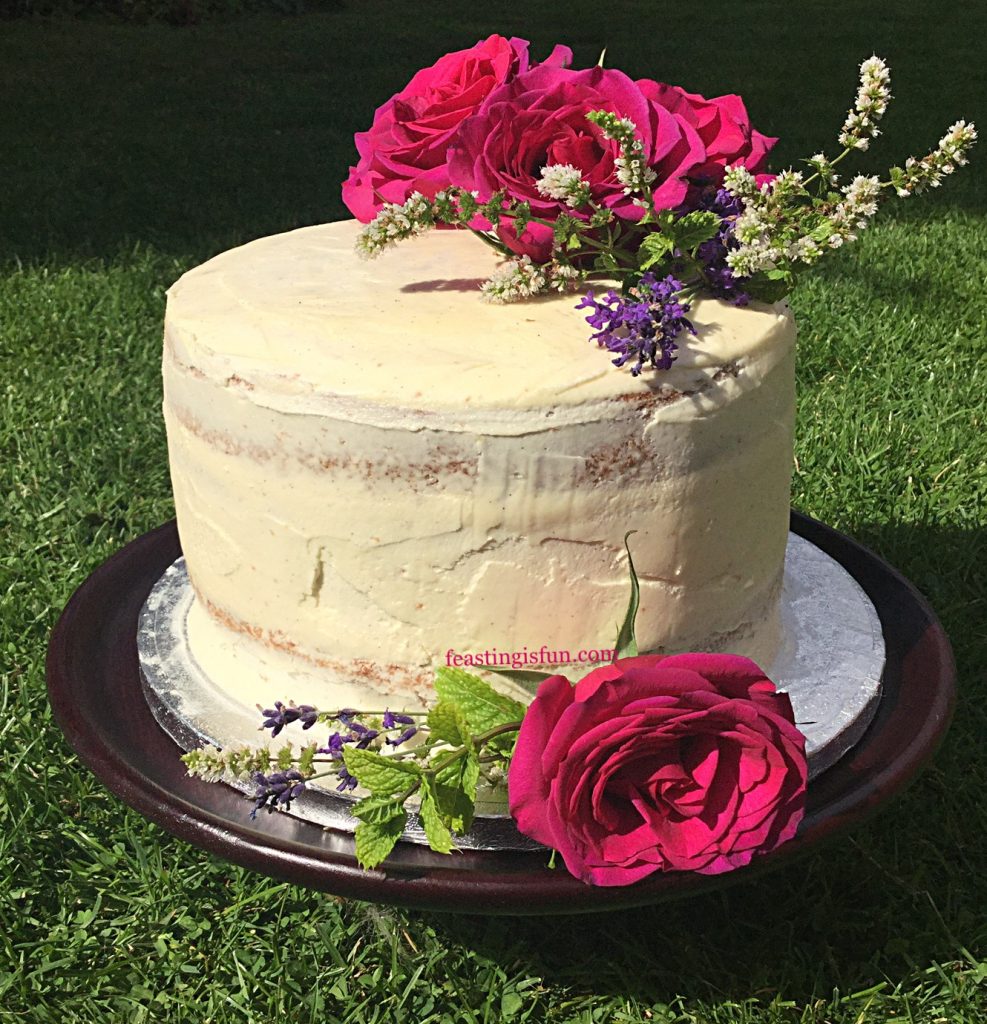
Someone once said “A celebration without cake is just a meeting.” How right they were. Whether it is birthdays, weddings, christenings, or any other form of celebration, cakes almost always feature.  Hawkshead Relish recently won Small Business Of The Year 2017. After reviewing and using their delicious jams, chutneys and more recently spreads, I am absolutely thrilled for them. To celebrate their award I offered to make a cake featuring their best selling Raspberry and Vanilla Jam. Here is the Raspberry Vanilla Naked Celebration Cake made in celebration of such an amazing achievement.

FF Raspberry Vanilla Naked Celebration Cake
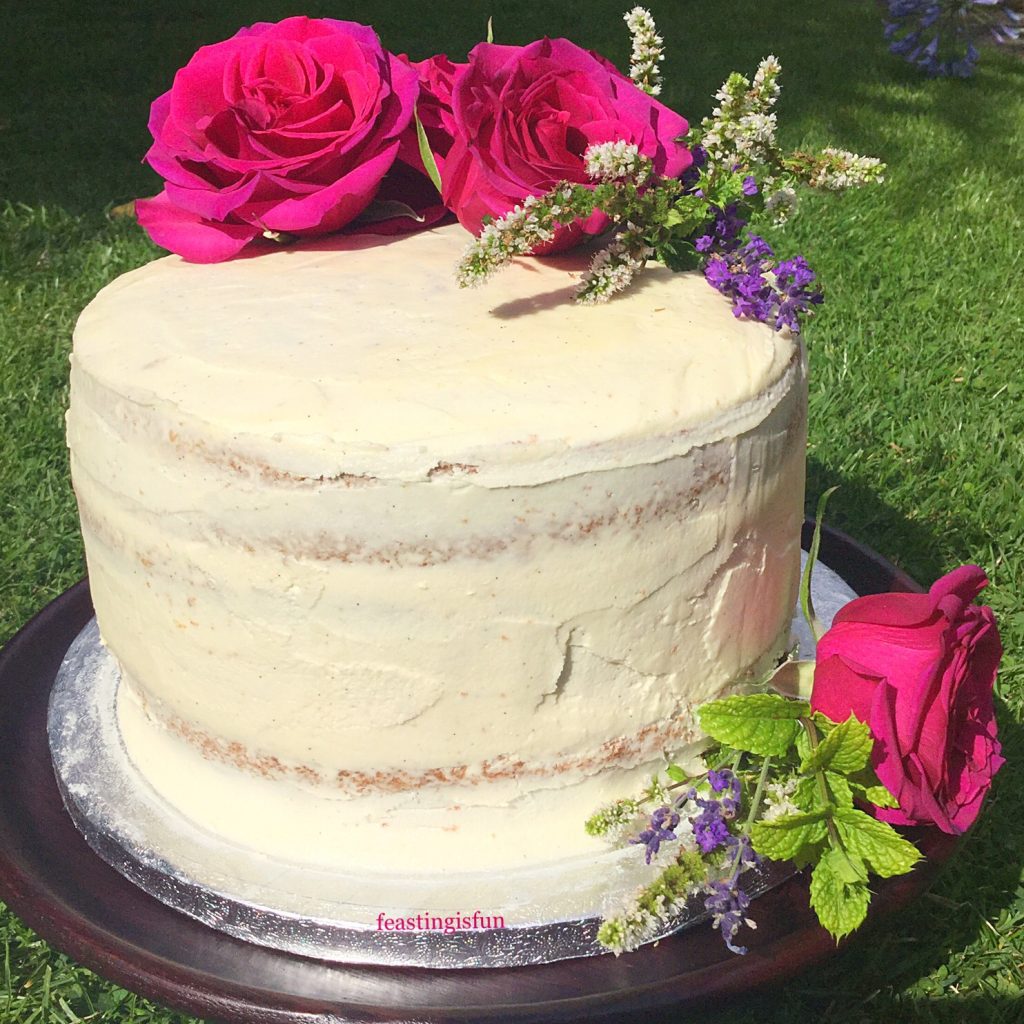
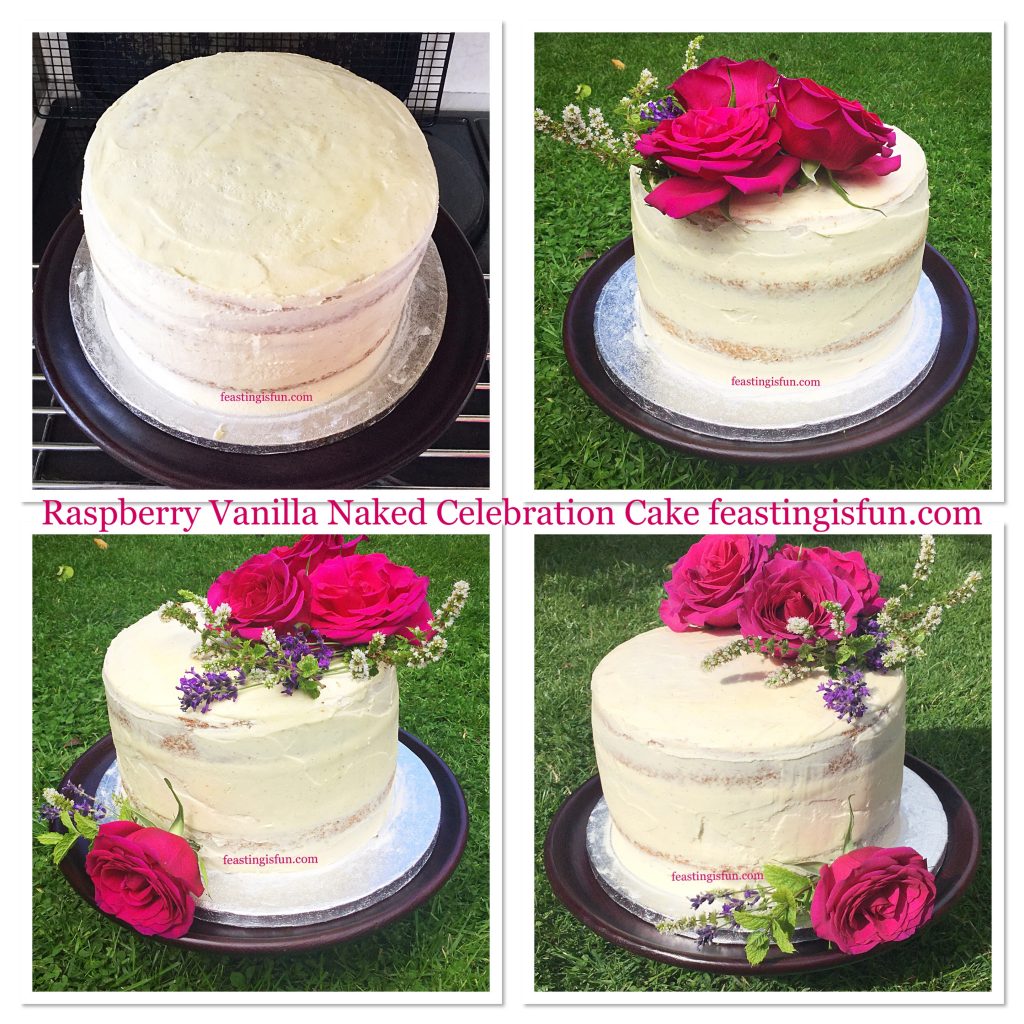
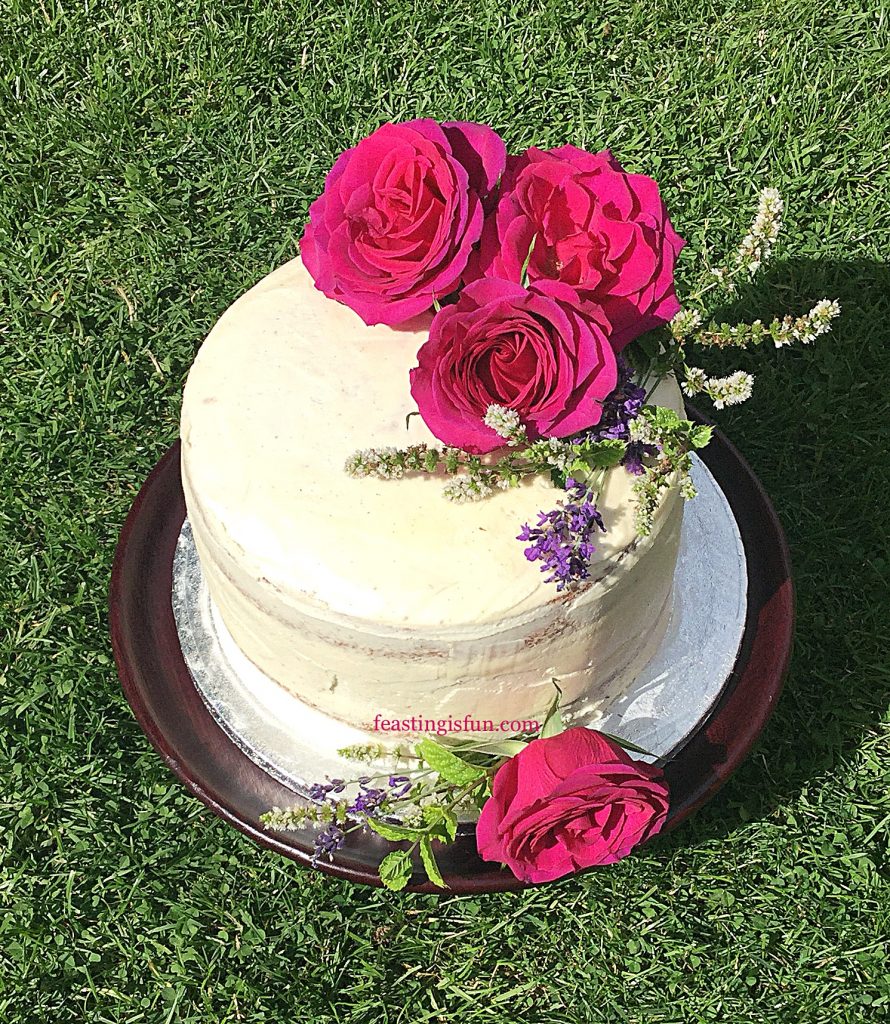
Raspberry Vanilla Naked Celebration Cake.

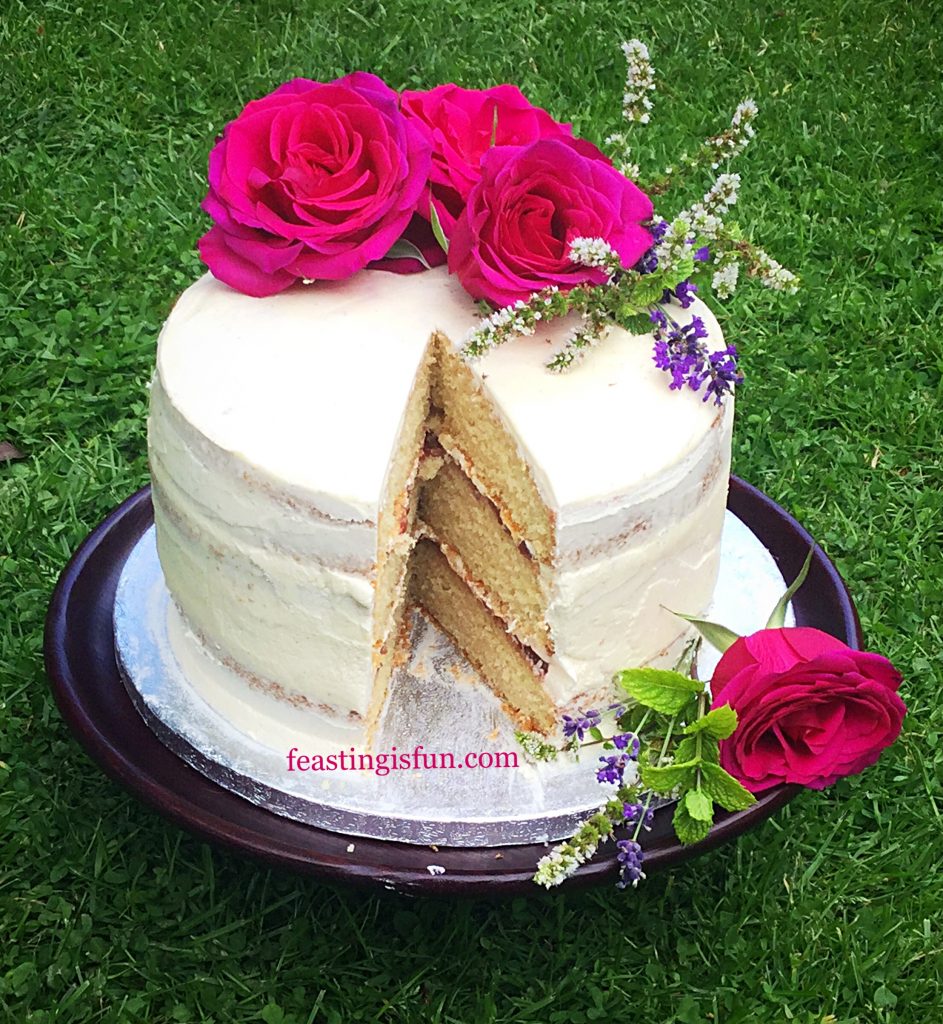
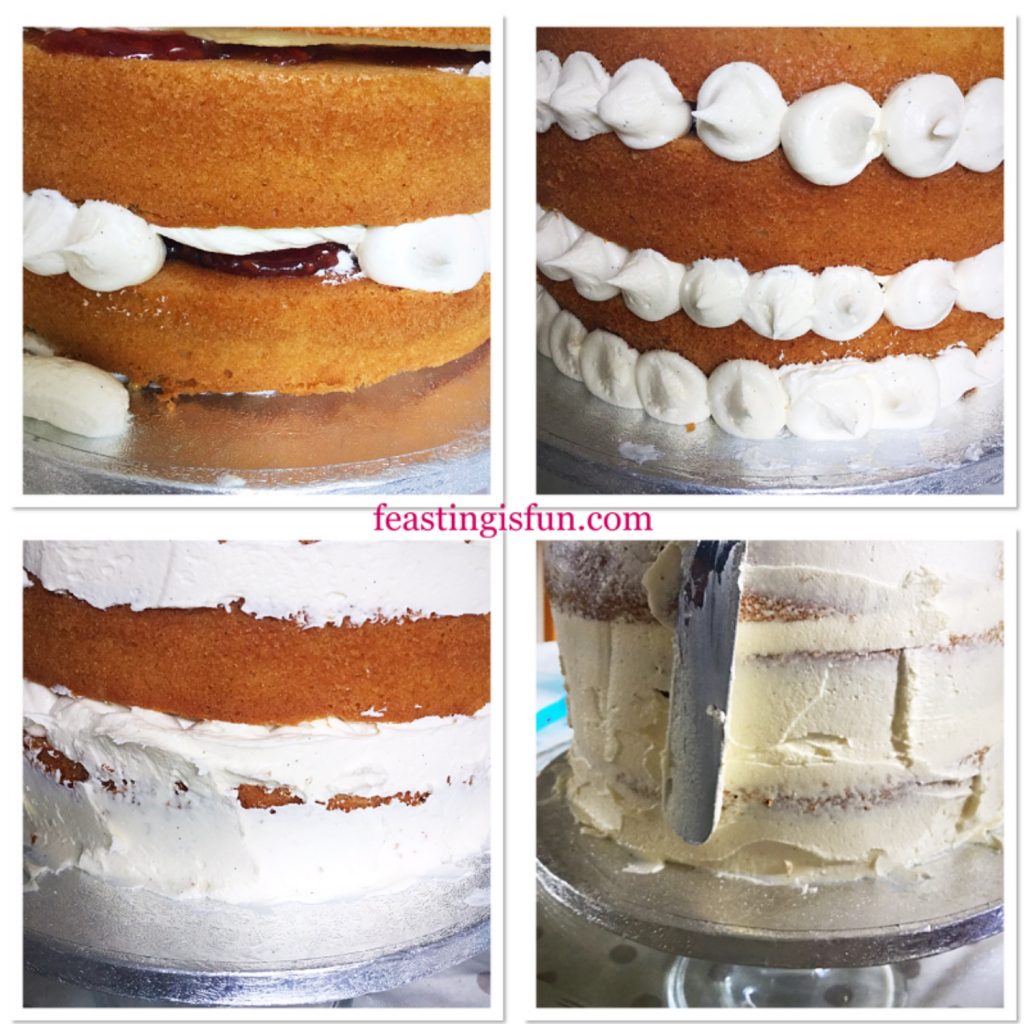
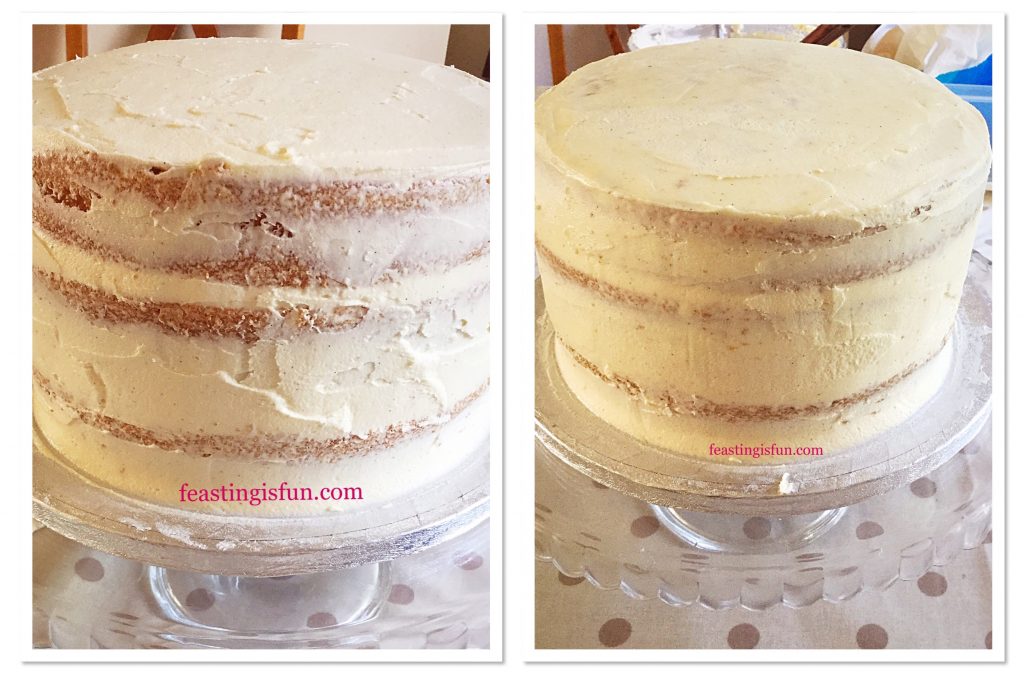
Three layers of light, vanilla sponge, sandwiched together with vanilla bean buttercream and raspberry vanilla jam. Covered lightly, yet incompletely with the same buttercream. Most of all, giving a very ‘on trend’ semi-naked finish to the cake. Finished with edible garden flowers, from my garden, that reflect the geographic location of Hawkshead Relish, situated in the historic village of Hawkshead within the English Lake District.

FF Raspberry Vanilla Naked Celebration Cake
Raspberry Vanilla Naked Celebration Cake in the sunshine.

Embellish with relish

Using locally sourced ingredients Hawkshead Relish do not use any artificial additives or preservatives. Completely free from nuts, their range is also suitable for vegetarians. Holding 50 Great Taste awards, each product is made in small batches using traditional methods. Resulting in outstanding taste and quality, from a family run business.

FF Raspberry Vanilla Naked Celebration Cake
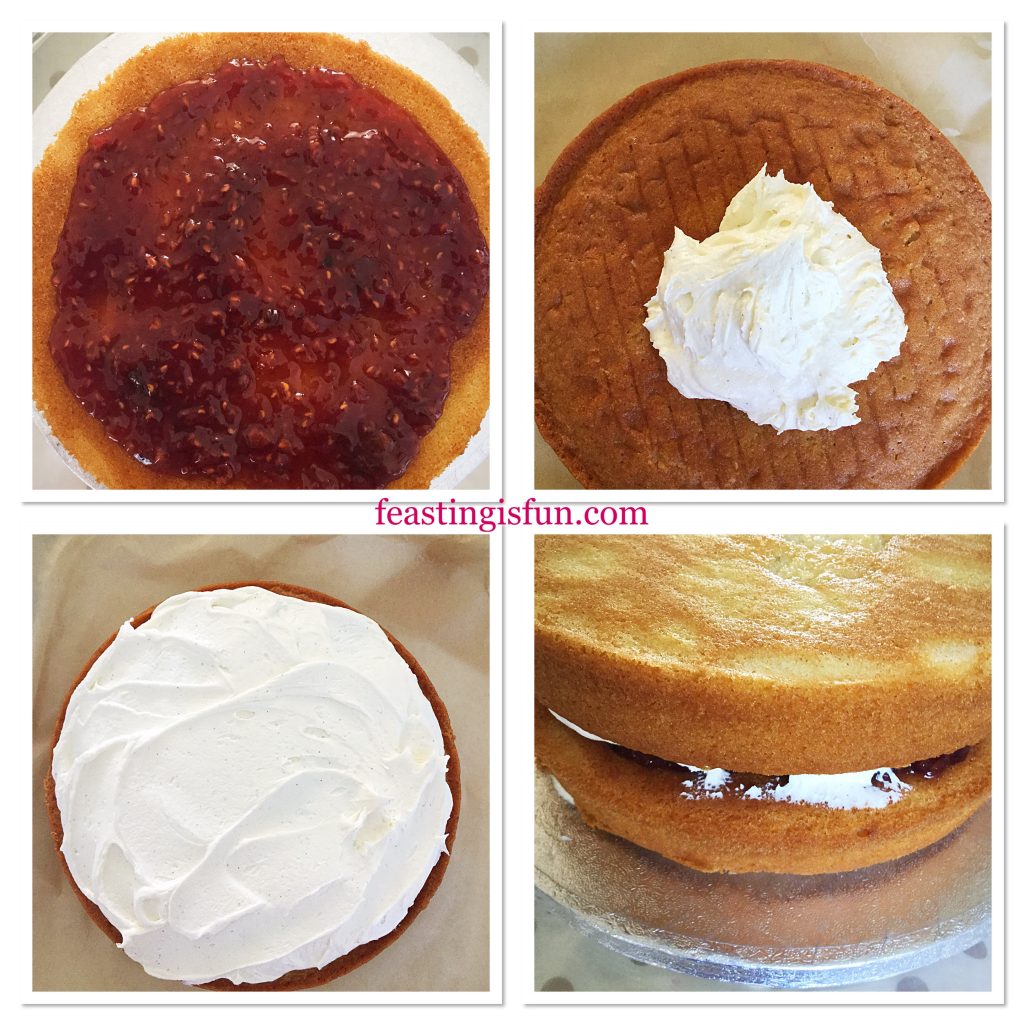
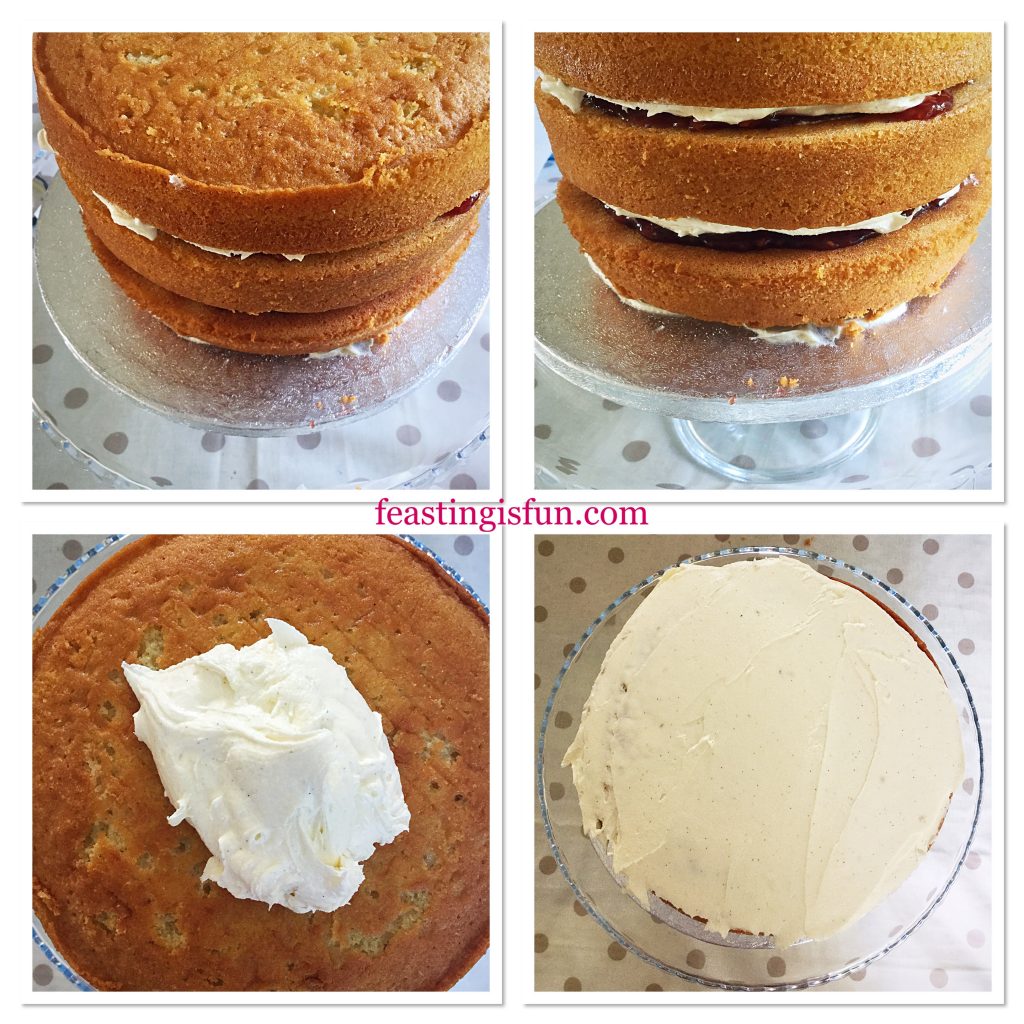
Raspberry Vanilla Naked Celebration Cake layered with buttercream and the very best jam.

Using the Hawkshead Relish motto “Embellish with Relish,” I’ve enjoyed creating recipes using their products. Especially when including them as ingredients in their own right. When creating my Red Onion Sausage Plait, using their Red Onion Marmalade is a vital to the flavour of the finished bake. So unique are the flavours of their chutneys and sauces, they deserve more than to be spooned on to the side of a plate. Since including relish within recipes, a whole world of flavour combinations became unlocked.

Recipe: Raspberry Vanilla Naked Celebration Cake serves 14-16

  • To make the 3 cake sponges:
  • 275g/10oz Unsalted Butter + 100g/4oz both at room temperature
  • 275g/10oz Caster Sugar + 100g/4oz
  • 3tsp Vanilla Extract – I use Nielsen-Massey
  • 1/4tsp + 1/8tsp Sea Salt  – I use Maldon
  • 6 Large Free Range Eggs + an additional 3
  • 275g/10oz Plain White Flour + 100g/4oz
  • 2.5tsp Baking Powder + 1tsp
  • To make the buttercream:
  • 500g/12oz Icing Sugar
  • 250g/9oz Unsalted Butter softened to room temperature
  • 2tsp Vanilla Bean Paste
  • 2  Jars Raspberry and Vanilla Jam from – Hawkshead Relish
  • 2-3tbsp Very Hot Water from a recently boiled kettle
  • To decorate the cake:
  • A selection of organic, pesticide free edible flowers. Both mint and lavender flowers were sourced from our garden.

Method: Preheat the oven to 160C/140C fan, gas mark 3, 325F

Making and baking the cake:

You will need 3 x 18cm/7″ approx 7cm/2.5″ deep, loose bottom sponge tins. Since most people own only 2 tins, this method is written with that taken into account. Therefore, two separate bakes are included. First of all, making the batter and baking two sponges. Followed by making the batter and baking one sponge. Finally, if you own and have oven space for three sponges to be made and baked together, simply follow the steps, using the total ingredients.

  • First of all, lightly butter the baking tins. Cover the base in baking parchment.
  • Into a large bowl add the first amount of sugar, butter and salt.
  • Whisk together until pale and creamy.
  • Next add 2 teaspoons of vanilla extract and 6 whole eggs.
  • Whisk everything together until combined.
  • Follow by sieving in the flour and baking powder.
  • Whisk the ingredients together until combined. Always take care not to over beat, or the resulting cake will be tough.
  • Divide the cake batter equally between 2 greased and lined tins. If using the entire mix divide between 3 tins.
  • Place the tins in the top and centre of the oven and bake for 40-45 minutes.
FF Raspberry Vanilla Naked Celebration Cake
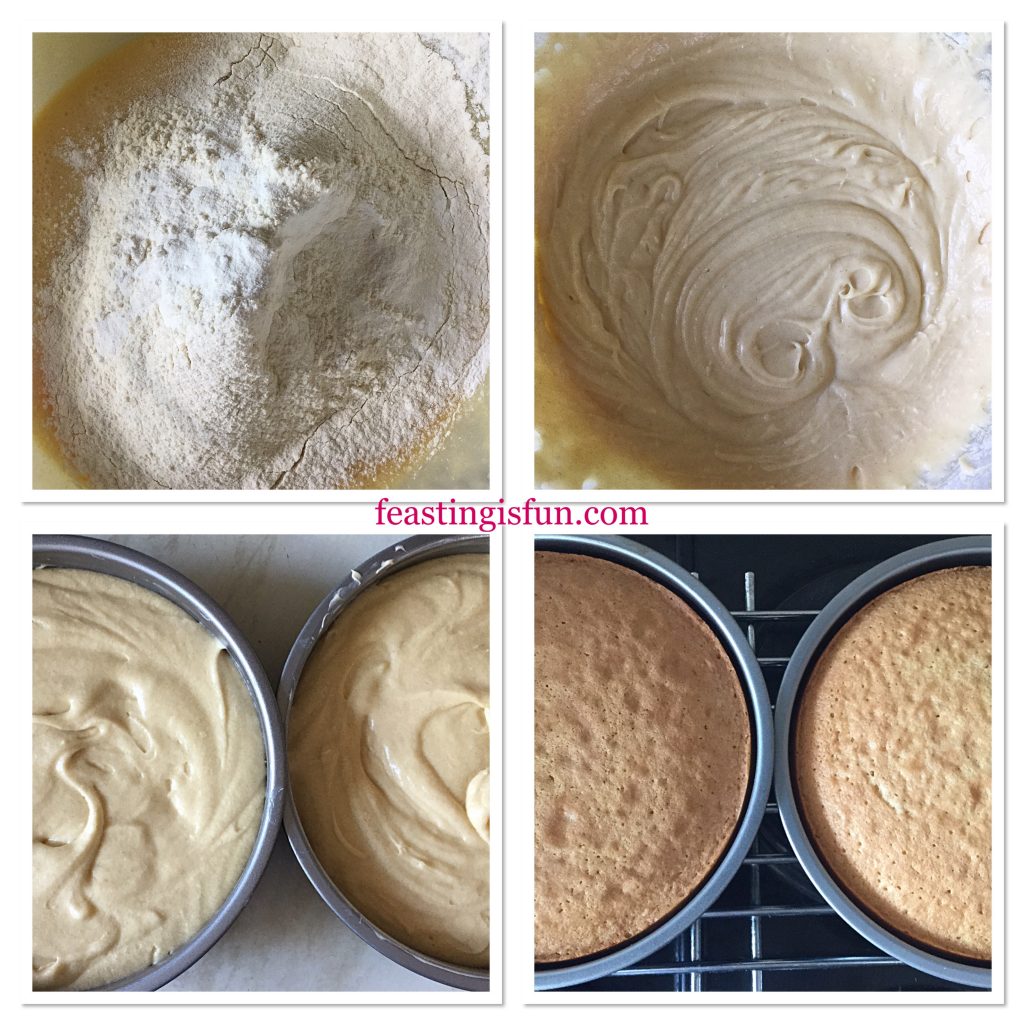
Preparing and baking the cake sponges.
  • When they have turned golden brown and spring back from a light touch the cakes are fully baked.
  • Remove from the oven, allowing each cake to cool in the tin for 10 minutes before turning out on to a cooling rack.
  • Wash up one cake tin and follow the steps given to make a single sponge cake.
  • Make and bake as before. Each of the 3 sponges must be fully cooled before icing.

Building The Raspberry Vanilla Naked Celebration Cake:

During the cake icing process, chilling of the iced cake in a fridge is required. Therefore a cake board, or flat plate is needed for transferring the cake. Also a cake decorating turntable is helpful for ensuring a smooth even finish to the buttercream. Alternatively use a cake stand large enough to accommodate the cake board/plate. A palette knife and large piping bag are also required.

Making the vanilla buttercream:

  • Into a large bowl add the softened butter and vanilla bean paste.
  • Sieve the icing sugar into the same bowl.
  • Add 2 tablespoons of very hot water from the kettle and start whisking the ingredients on a low speed.
  • Continue whisking until the buttercream has turned very pale and has a light, creamy consistency.
  • Place the cake board on to the cake stand.
  • Next, put a small dollop of buttercream on to the centre of the board. Spread the icing so that it is slightly smaller than the diameter of a cake sponge.
  • Lay the first sponge, flat side uppermost on to the board. The buttercream anchors the cake to the board, providing a stable base.
  • Spread 4 generous tablespoons of jam on to the cake. Leave a 2cm gap between the jam and the edge of the cake.
  • Next, take a separate sponge and add a generous dollop/4tbsp of buttercream to the top.
  • Using a palette knife, spread the buttercream evenly so that it covers the sponge.
  • Carefully lift and flip the sponge, placing it on top of the jam sponge, buttercream side facing down. See the photos below for guidance.
FF Raspberry Vanilla Naked Celebration Cake
Layering each sponge with jam and buttercream.
  • Repeat the last steps, with the remaining sponge. However, this time the sponge should be placed flat side down. Hence leaving the finished, stacked cake with a natural top.
FF Raspberry Vanilla Naked Celebration Cake
3 sponge cake layers stacked. Also covering the top in buttercream.

Creating a (semi) naked effect:

  • Spoon a generous amount/5tbsp of buttercream on to the top of the cake.
  • Again, using a palette knife, spread the buttercream so that it covers the top of the cake evenly.
  • Fill a large, disposable piping bag with the remaining buttercream. Snip the end of the bag to give a 1cm opening. A nozzle is not required.
Covering the side of the cake with buttercream.
  • The purpose of piping buttercream is to fill in any gaps. Similar to plastering, buttercream is added and then smoothed on to the cake sides. During this process buttercream will be added and then taken off. Resulting in a ‘naked cake’ finish.
  • Pipe the buttercream in between each layer of the cake, including the base and the cake board. Take care not to get jam mixed with the buttercream.
  • Holding a palette knife at a slight angle to the side of the cake, slowly turn the cake stand. As the buttercream spreads across the cake it will also accumulate on the palette knife. Scrape the palette knife against the side of the butter bowl to remove any excess.
  • Continue turning the cake, piping buttercream on to any bare spots, until the sides of the cake are roughly covered. See bottom left photo above.

Creating a smooth finish:

  • The next stage is creating a smooth, even finish across the entire cake.
  • Fill a jug with very hot water. Wipe any buttercream from the palette knife and then place it in the hot water. Since the heat of the knife melts buttercream, it is very helpful in creating the smoothest finish.
  • Remove the palette knife, wipe off any water and then hold it flat against the side of the cake. Rotate the cake slowly. When you start to feel a dragging sensation, turn the knife over and repeat. Creating a completely smooth cake requires a lot of repetition of these steps. Repeat until the sides of the cake are smooth.
  • Now use the same technique for smoothing the cake top. As soon as the cake top is smooth, run a hot palette knife around the outside of the top cake layer. Creating a smooth top and sides is the aim.
  • While it is tempting to keep going, there does come a point at which the cake is satisfactorily smoothed. Part of the beauty of naked cakes, is their imperfect finish.
  • Clean off any buttercream on the cake board.
FF Raspberry Vanilla Naked Celebration Cake
Raspberry Vanilla Naked Celebration Cake before and after smoothing with a hot palette knife.
  • Chill the cake, uncovered, in the fridge for an hour. Chilling sets the buttercream prior to decorating.

Decorating the cake using fresh, edible flowers:

  • If using fresh flowers it is important to decorate the cake on the day it is to be served.
  • While the cake is chilling prepare the flowers for decoration. Remove lower leaves on stalks and trim flowers so that they can sit on top, or to the side of the cake.
  • Decorate using your chosen flowers. It is important to consider the cake from every angle when adding the flowers.
FF Raspberry Vanilla Naked Celebration Cake
Roses and herbs reflect the rural and natural products made by Hawkshead Relish.

Finally the Raspberry Vanilla Naked Celebration Cake is ready to be served.

FF Raspberry Vanilla Naked Celebration Cake
Raspberry Vanilla Naked Celebration Cake.

Store any leftover cake, floral decorations removed, in an airtight container, ideally refrigerated and eat within 3 days.

FF Raspberry Vanilla Cake Decorated With Fresh Flowers

If you have enjoyed this Raspberry Vanilla Naked Celebration Cake recipe, you may also like these:

Lemon Drizzle Whipped Cream Filled Giant Doughnut

Lemon Drizzle Whipped Cream Filled Giant Doughnut

Strawberries And Cream Cake

Strawberries and cream sponge cake
Strawberries And Cream Cake

Chocolate Honeycomb Sponge Cake 

Chocolate honeycomb sponge cake decorated with milk chocolate Lindt mini eggs.
Chocolate Honeycomb Sponge Cake

Celebrating a event, such as Hawhead Relish’s achievement, with cake, marks the occasion as special. Also, other desserts such as cheesecakes and pavlova’s can make an impressive alternative. Especially as different dietary requirements may need catering for. All the Pavlova recipes created for Feasting is Fun are specifically gluten free, for that very reason. Because, including as many people as possible in a celebration is so important to me.

Whatever you are making, baking and creating in your kitchens, have fun creating your feast.

Sammie xx

Hawkhead Relish kindly gifted me the jam used in this recipe. All opinions, views, content including photography are my own. No part of this post may be reproduced without the express written permission of its owner. Please see my Disclosure Policy.
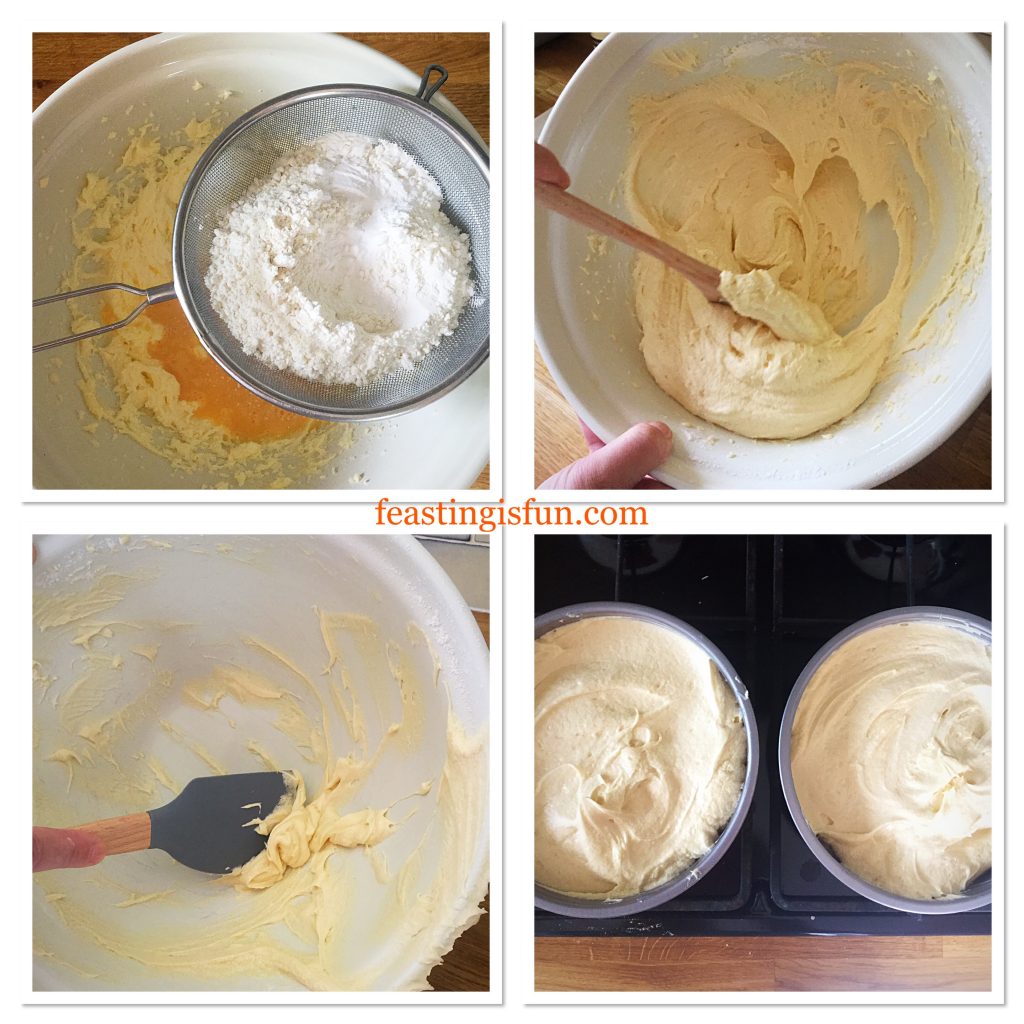
Lemon Lime Gin Heart Bundt Cake

I love Bundt Pans. Their detailed and versatile shape, moulds cakes into edible replicas of the pan. Of course, if you are still at the beginners stage of cake decorating, the finished cake needs no more than a dusting of icing sugar. Since I have baked more than a few Bundt cakes, I have become more adventurous with how they are decorated. This Lemon Lime Gin Heart Bundt Cake is glazed carefully with a thick icing and finished with sprinkles.

FF Lemon Lime Gin Heart Bundt Cake
Lemon Lime Gin Heart Bundt Cake perfect with lemon tea.

Bundt pans are available in all shapes and sizes. From small bundtlettes such as Mini Lemon Drizzzle Bundt Cakes to larger sized pans, such as Heart Engagement Bundt Cake. While solid pans are available, Bundts are generally recognised by the hole in the centre. Here in the U.K Nordic Ware own the copyright to name Bundt tin/pan. Therefore only cake’s baked in one of their pans can accurately and legally be called a Bundt cake.

FF Lemon Lime Gin Heart Bundt Cake
Lemon Lime Gin Heart Bundt Cake the icing emphasises the detail of the cake.

For this cake one whole lemon and lime are used in the recipe. The fragrant zest adds flavour and balance to the gin baked in the cake. While thick, white icing, made using the juice of the zested fruits, provides a sharp, citrus tang. Finally, green and yellow sprinkles hint at the cake’s flavour.

FF Lemon Lime Gin Heart Bundt Cake
Lemon Lime Gin Heart Bundt Cake the perfect flavour combination.

Tiger Gin has underlying orange citrus notes. Incorporating this with the lemon and lime gives this cake a unique citrus flavour. Yet it is the botanicals added in the process of making this gin that really linger on the palette.

FF Lemon Lime Gin Heart Bundt Cake
Elegant Heart Bundt Pan

Recipe: Lemon Lime Gin Heart Bundt Cake serves 10-12

200g/7oz Unsalted Butter at room temperature

200g/7oz Caster Sugar

1/4tsp Salt

30mls/2tbsp Gin plus extra for icing – I use Tiger Gin

5 Large Free Range Eggs

100g/4oz Natural Plain Yoghurt

1tsp Vanilla Extract – I use Nielsen-Massey

250g/5.5oz Plain White Flour

2tsp Baking Powder

1 Lemon – scrubbed

1 Lime – scrubbed

400g/14oz Icing Sugar

Sprinkles in coordinated colours

Method: Preheat the oven to 170C/150C fan, gas mark 3

If new, wash the Bundt Pan in hot soapy water. Do not use anything abrasive to clean it. Dry and prior to use spray with cake release. I use Wilton. ensuring the inside is completely covered.

  • Into a large bowl add the butter, sugar and salt. Whisk until pale and creamy.
  • Now add the eggs, yoghurt, gin and vanilla extract – wet ingredients.
  • On top of the wet ingredients sieve the flour and then baking powder.
  • Zest both the lime and lemon. Place the zest into the bowl.
  • This cake uses the all-in-one method. Whisk slowly until all the ingredients are just combined. Give the mixture a final mix with a spoon before carefully pouring into the prepared Bundt Pan.
  • Place the Bundt into the centre of the oven and bake for 50-60 minutes.
  • The cake is baked when it is golden and coming away from the sides of the pan. Also an inserted skewer will come out clean.
  • Remove the cake from the oven and allow to cool for 10 minutes.
FF Lemon Lime Gin Heart Bundt Cake
Preparing the cake batter, filling and baking the Lemon Lime Gin Heart Bundt Cake.
  • After 10 minutes cooling in the tin, turn the cake out on to a cooling rack.
  • Leave the cake to cool completely before decorating.
  • While the cake is cooling prepare the icing.
  • Sift the icing sugar into a medium sized bowl.
  • Next, if using gin in the icing add one tablespoon at first. Now add the juice of both the lemon and lime until it reaches a very thick, yet still drops from the spoon, consistency.
  • As soon as the cake is cooled it can be decorated.
  • Place the cooling rack over, with the cake on it, a larger baking tray. This will catch the drips from the icing.
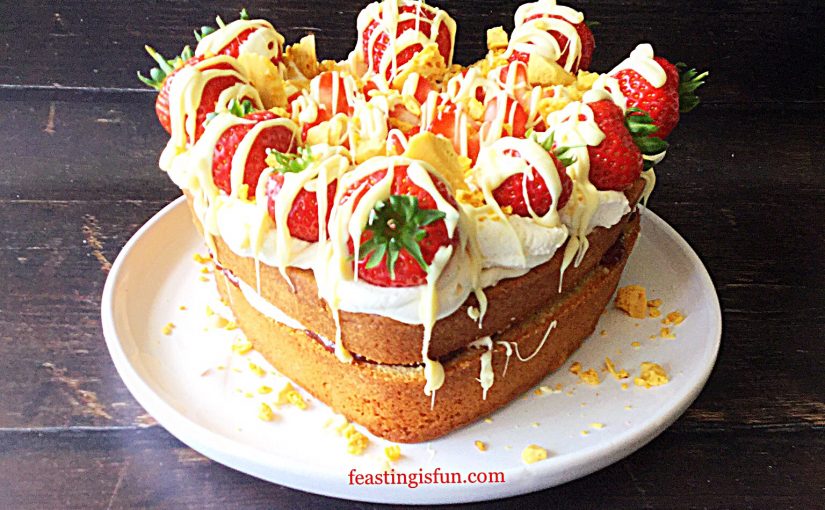
  • Spoon the icing over the top of the cake, encouraging it to drip down the sides of the cake.
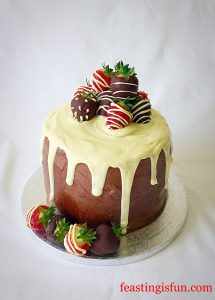
  • Continue to add icing in this way until each of the dips, in the heart pattern, have icing dripped on them.
  • Take care to completely cover the inside of the heart indentation at the top and the outside of the heart point at the bottom – see photos.
  • Carefully place sprinkles across the top of the heart. Again use the photograph for guidance.
  • Allow the cake to set for 5 minutes.
FF Lemon Lime Gin Heart Bundt Cake
Step by step photos showing how to decorate the cake.
  • Gently run a palette knife under the cake, separating any icing that may be stuck to both cake and rack.
  • Transfer the cake to a suitable plate or cake stand and leave to fully set.
FF Lemon Lime Gin Heart Bundt Cake
Lemon Lime Gin Heart Bundt Cake set and ready to serve.

Served sliced with a delicious cup of lemon tea and of course a smile!

FF Lemon Lime Gin Heart Bundt Cake
A tasty, tangy slice of Lemon Lime Gin Heart Bundt Cake.
FF Lemon Lime Gin Heart Bundt Cake
Lemon Lime Gin Heart Bundt Cake eat with your eyes first!

This cake will keep for up to four days in an airtight container. The cake was made the evening prior to icing and stored wrapped in baking parchment. In my opinion the cake is better the day after it is made.

If you have enjoyed this recipe for Lemon Lime Gin Heart Bundt Cake, then you may also like these:

Maple Syrup Iced Coffee Bundt Cake

FF Lemon Lime Gin Heart Bundt Cake
Maple Syrup Iced Coffee Bundt Cake

Chocolate Sunflower Bundt Cake

FF Lemon Lime Gin Heart Bundt Cake
Chocolate Sunflower Bundt Cake

Lemon Blueberry Bundt Cake

Lemon Lime Gin Heart Bundt Cake
Lemon Blueberry Bundt Cake

Baking is fun. Especially when you gain a little experience and confidence. Mixing flavours, experimenting with different cake tins and Bundt Pans. Creating a feast that will surprise people. Making friends, family and neighbours smile. Almost half of this cake has now gone. Slices sent on paper plates, with a pretty napkin, to unsuspecting, yet thoroughly grateful neighbours, this afternoon.

Sharing is so important at Feasting headquarters. Indeed we all believe that food tastes better when it is shared.

Sammie xx

No part of this post may be copied without my express, written permission. Please see my Disclosure Policy for details.

NOTE: If baking with alcohol, you must be at least 18 years old, here in the U.K.

I am entering this cake for Bake of the Week hosted by: Jenny and Helen at

Mummy Mishaps

Casa Costello

FF Lemon Lime Gin Heart Bundt Cake