Baileys Coffee And Walnut Cake

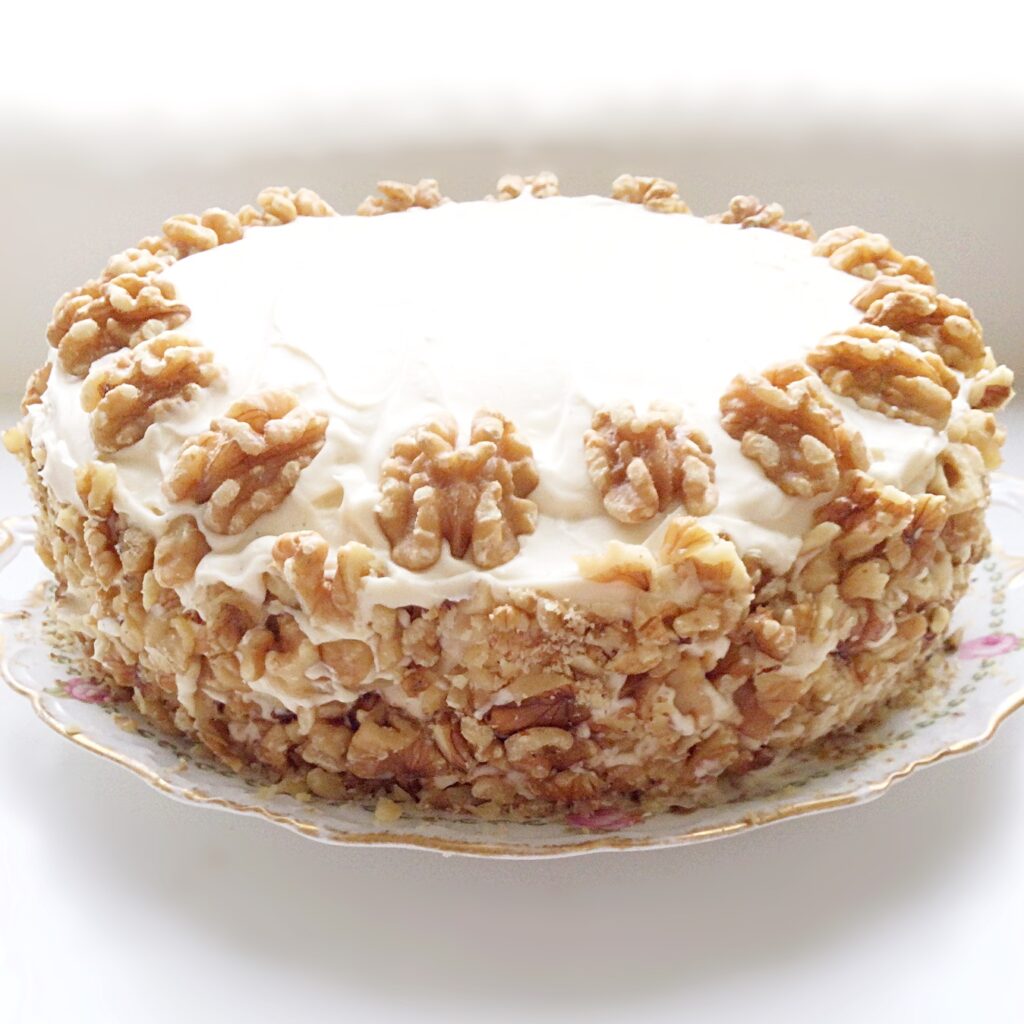
Baileys Coffee And Walnut Cake is the ultimate combination of flavours and textures combined in an exquisite and easy to make sponge cake. There is nothing low key about this cake, except how easy it is to make. Bailey’s Irish Cream is in both the sponge and mascarpone frosting and it is delicious. So delicious in fact, this is the cake you need to make if you, or someone you love are true coffee lovers.

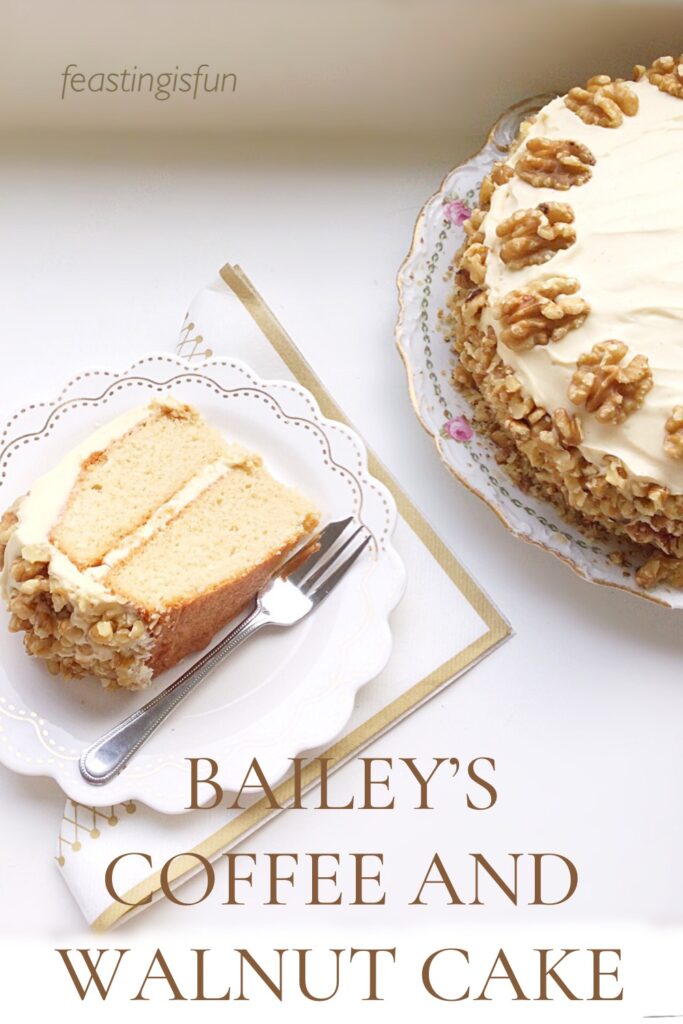
Baileys coffee cake covered in mascarpone frosting and decorated with walnuts.

For the past few years I have baked a  Coffee and Walnut Cake for my Father in law’s birthday. Since that is his favourite cake. While I have created some cakes such as Coffee Pecan Glazed Bundt Cake and Maple Syrup Iced Coffee Bundt Cake, a traditional Coffee and Walnut Cake has always been his favourite.

Sadly, this year my wonderful and much loved Father in law passed away. So, in remembrance of him, on what would have been his birthday, I wanted to bake one more cake that I hope he would have enjoyed. This delicious Baileys Coffee And Walnut Cake.

A Twist On A Classic Coffee Cake

Rather than baking my classic coffee and walnut cake, I decided to switch things up. I enjoy the challenge of creating new recipes and as we love Baileys Irish Cream Liqueur as a family, using it in a coffee cake recipe ticked all the right boxes! And my intuition proved right. Since the unmistakable flavour of Baileys comes through in both the sponge and frosting of this cake.

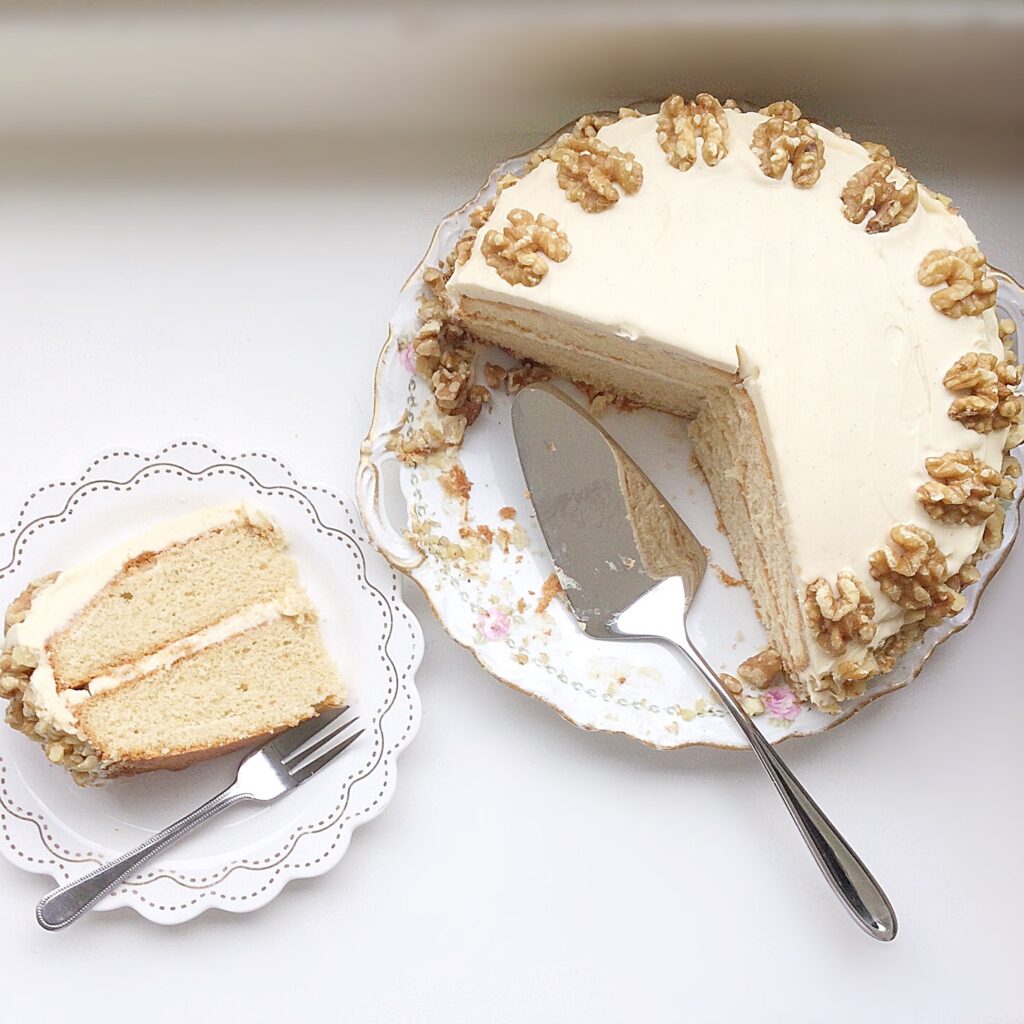
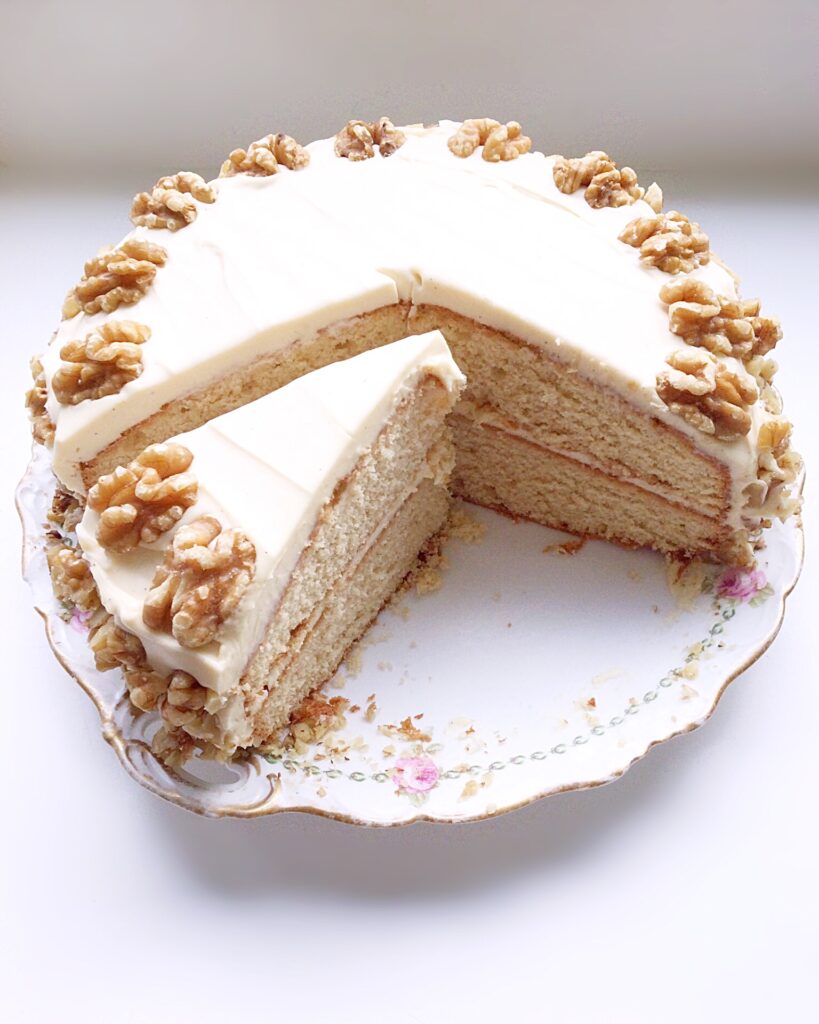
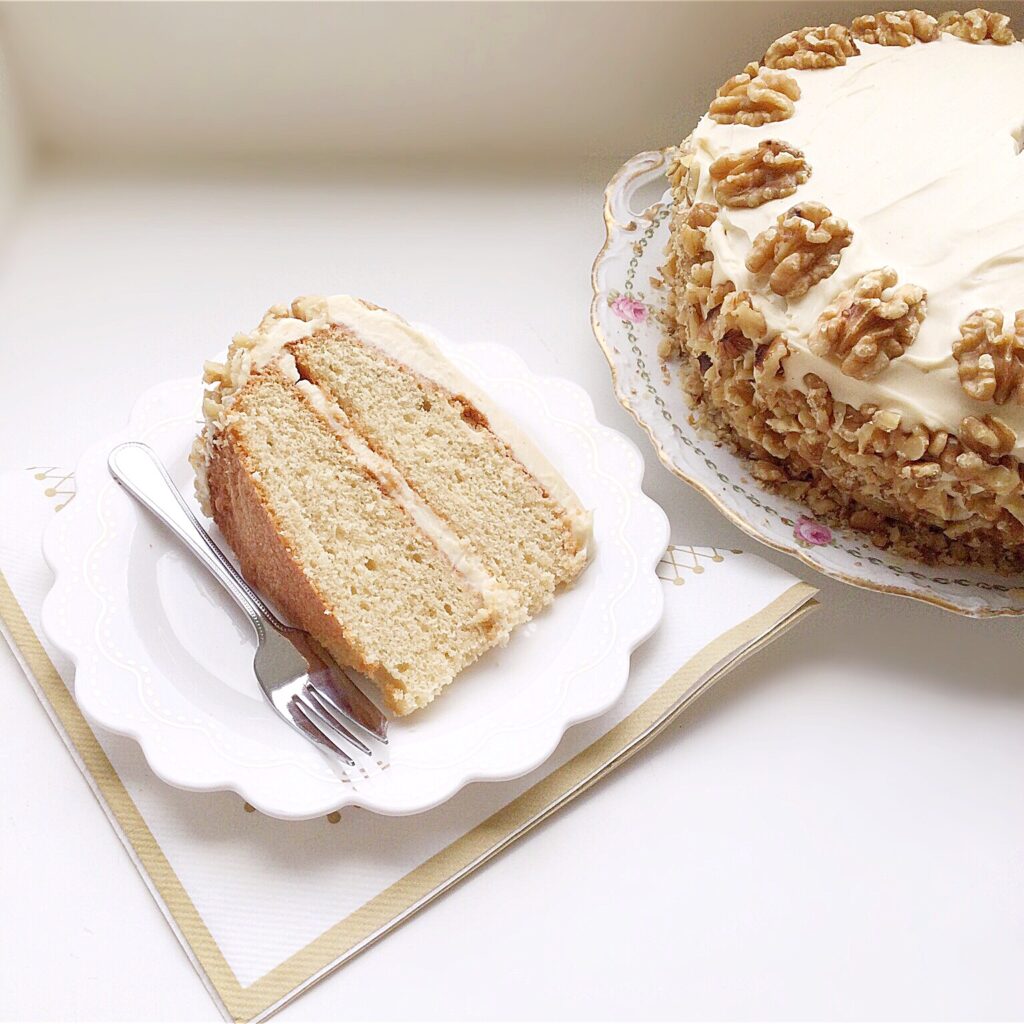
A slice of Baileys coffee cake on a pretty plate.

A deliciously flavoured coffee and Baileys light sponge cake, covered in whipped, Baileys mascarpone frosting and decorated with walnuts. While this cake is beautiful it is also easy to make. Especially as I have included step by step photos for every stage of the recipe. So, let’s get baking!

Recipe: Baileys Coffee And Walnut Cake – serves 8-10 (generously!)

For The Cake:

2 x 20cm (8inch) sandwich cake tins

225g/8oz Unsalted Butter – at room temperature

1/4tsp Salt – I use Maldon 

225g/8oz Caster Sugar

4 Large Free Range Eggs

75ml/5tbsp Bailey’s Irish Cream Liqueur

1/2tsp Instant Coffee – dissolved in 2tsp hot water

225g/8oz Plain Flour

1.5tsp Baking Powder

For The Frosting And Decoration:

500g/1lb 2oz Mascarpone Cheese

50g/2oz Icing Sugar

1tsp Vanilla Bean Paste – alternatively use vanilla extract

60ml/4tbsp Bailey’s Irish Cream Liqueur

16 Walnut Halves

150g/5oz Chopped Walnuts

To Make The Baileys Coffee Cake Sponges:

Preheat the oven to 180C/160C fan, 350F, gas mark 4
  • First of all grease both cake tins and line the base with baking parchment.
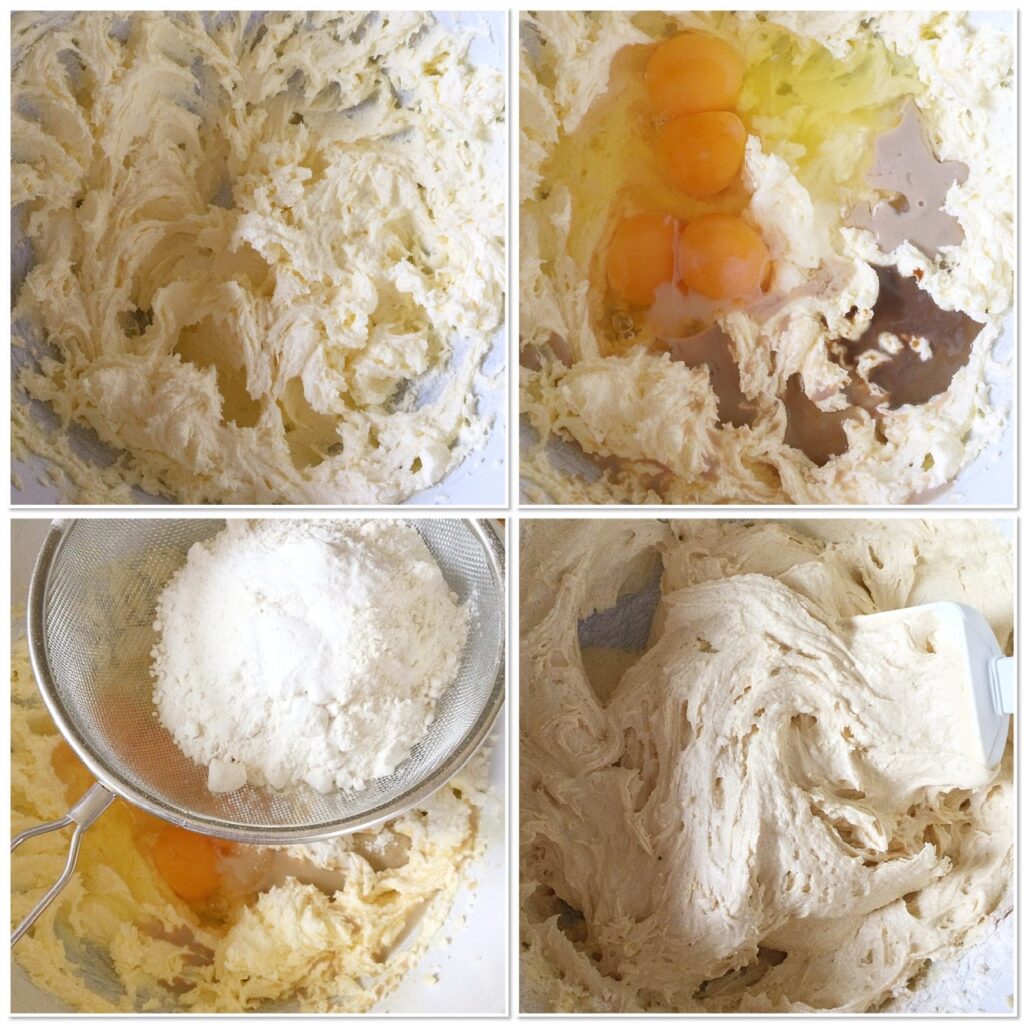
  • Add the butter, sugar and salt to a large bowl. Whisk together until light and creamy.
  • Next, add the eggs, coffee and Bailey’s to the bowl.
  • Sift the flour and baking powder into the bowl.
  • Slowly whisk all of the ingredients together until the batter mix is smooth. Take care not to over mix as this can cause the cake to become dense and heavy.

The stages of mixing up a cake batter.

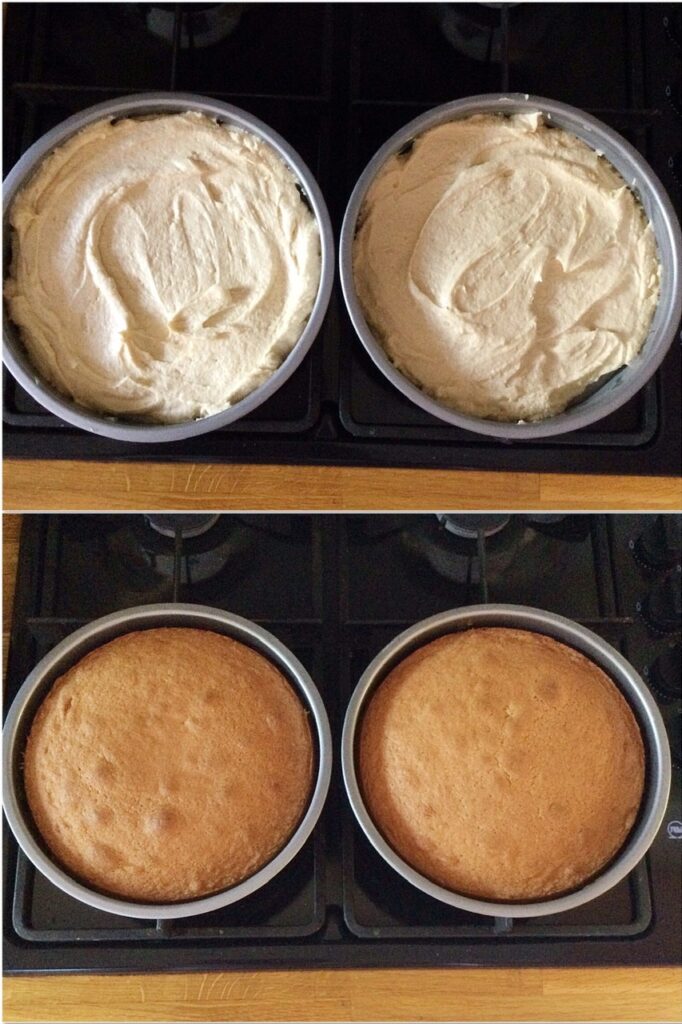
  • Spoon the cake batter into the prepared tins, dividing evenly between the two.
  • Smooth the surface of the cake batter using the back of a spoon.
  • Place the tins in the centre of a preheated oven.
  • Leave to bake for 35-40 minutes, the cakes are baked when they are golden and when lightly pressed in the centre spring back.
  • As soon as the cakes are baked remove from the oven.
  • Allow the cakes to cool for 10 minutes before turning them out and placing on a cooling rack.

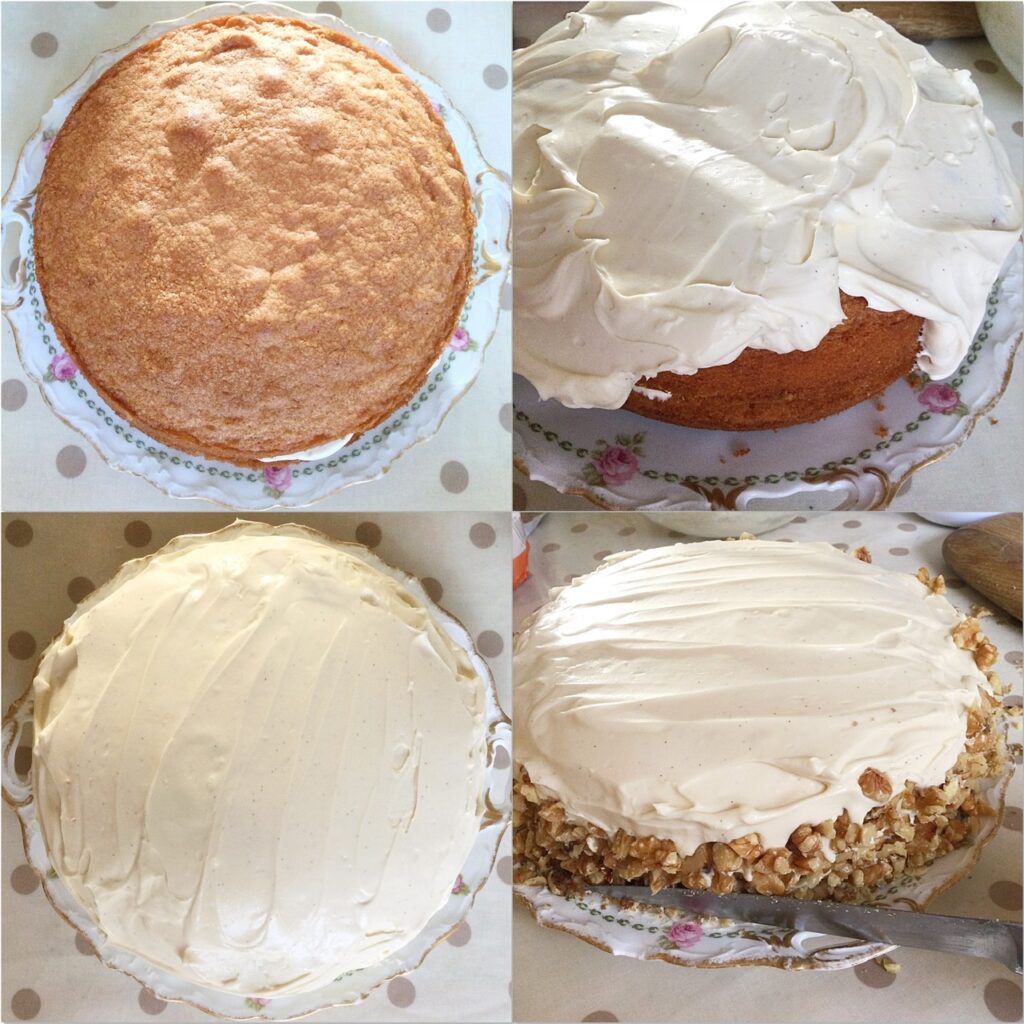
Before and after baking a coffee sponge.

Making The Baileys Mascarpone Frosting:

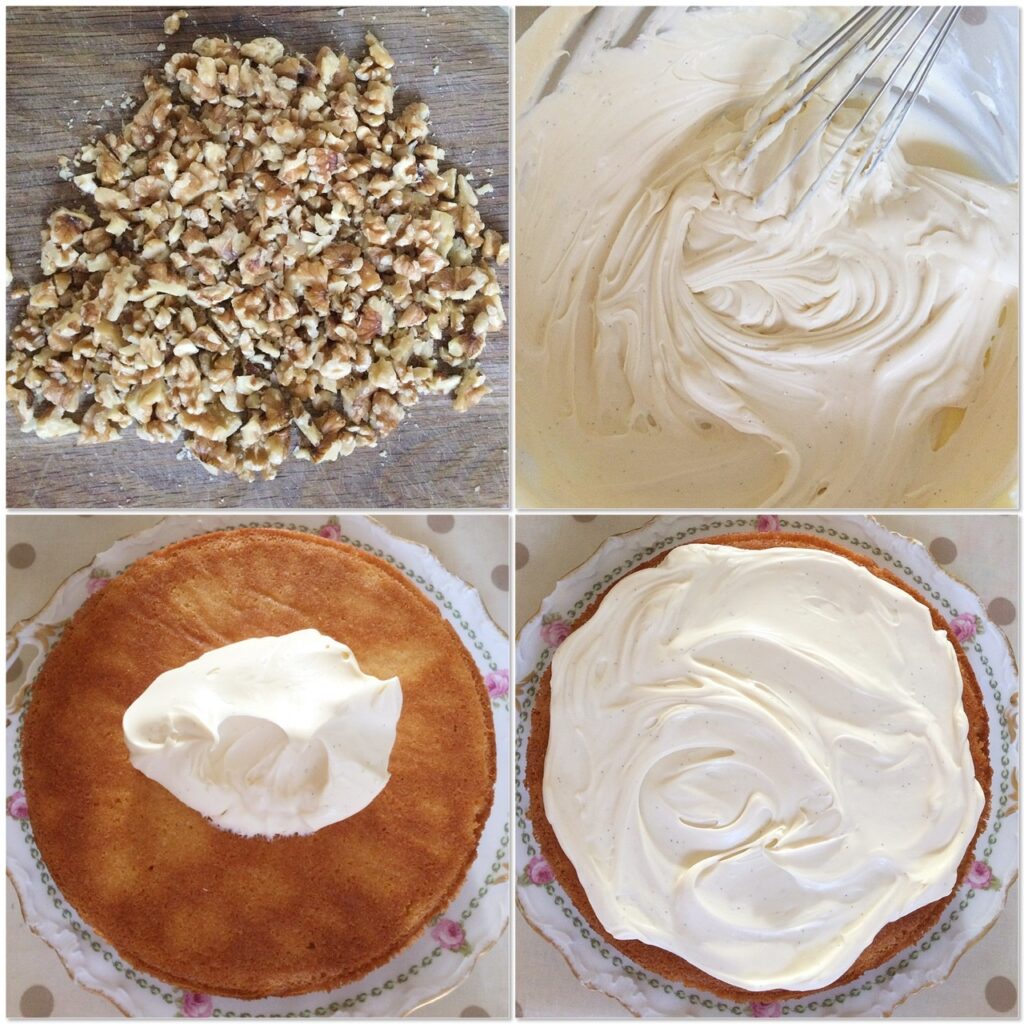
  • Into a large bowl add the mascarpone cheese, sifted icing sugar, vanilla paste and Bailey’s.
  • Whisk together until the mixture is smooth and free from lumps.

Frosting The Cake:

  • Place the base sponge flat side up onto a plate or cake board.
  • Spoon some of the mascarpone frosting onto the cake. Don’t overdo it, you can always add more!
  • Use a pallet knife to smooth the frosting evenly over the sponge, taking it almost to the edge. Otherwise, too much frosting will ooze out when the top sponge is added.

Showing how to fill and cover a cake in mascarpone frosting.

  • Place the top sponge, flat side down, evenly on to the base.
  • Spoon a generous amount of mascarpone frosting on to the top of the cake.
  • Use a pallet knife to roughly cover the cake top with frosting while also pushing the frosting over the side of the cake. See the images below for guidance.
  • Work around the cake gently easing the frosting to cover the side of the cake.
  • Once the side of the cake is roughly covered scrape the pallet knife on the top of the frosting bowl and wipe clean. I use a clean tea towel.
  • Smooth the top of the cake so that it’s smooth and even.
  • Clean the pallet knife as before and place it flat, against the side of the cake.
  • Rotate the cake plate, keeping the knife in place, so the frosting forms an even layer that completely covers the side of the cake.
  • Repeat the last step (as many times as needed), adding frosting where needed, until the side of the cake is evenly covered all the way round.

Creating a smooth finish ready to decorate with walnuts.

Decorating The Cake With Walnuts:

  • First of all place the weighed walnuts, (setting the 16 walnut halves to one side) on to a board a chop roughly so that they are about the same size. See the picture below for guidance. Set to one side.
  • Take a small handful of chopped walnuts and press them to the side of the cake. Don’t worry about nuts that fall on to the plate or small gaps, since we will use them in a bit.
  • Continue placing nuts on to the side of the cake until it is covered.
  • Place a large sharp knife under the fallen nuts. Turn the knife vertically to press the nuts into the frosting. See the image above.
  • Continue this last step, working around the cake until all of the nuts are pressed on to the cake.
  • Finally, if there are any chopped nuts left use them to plug any large gaps.
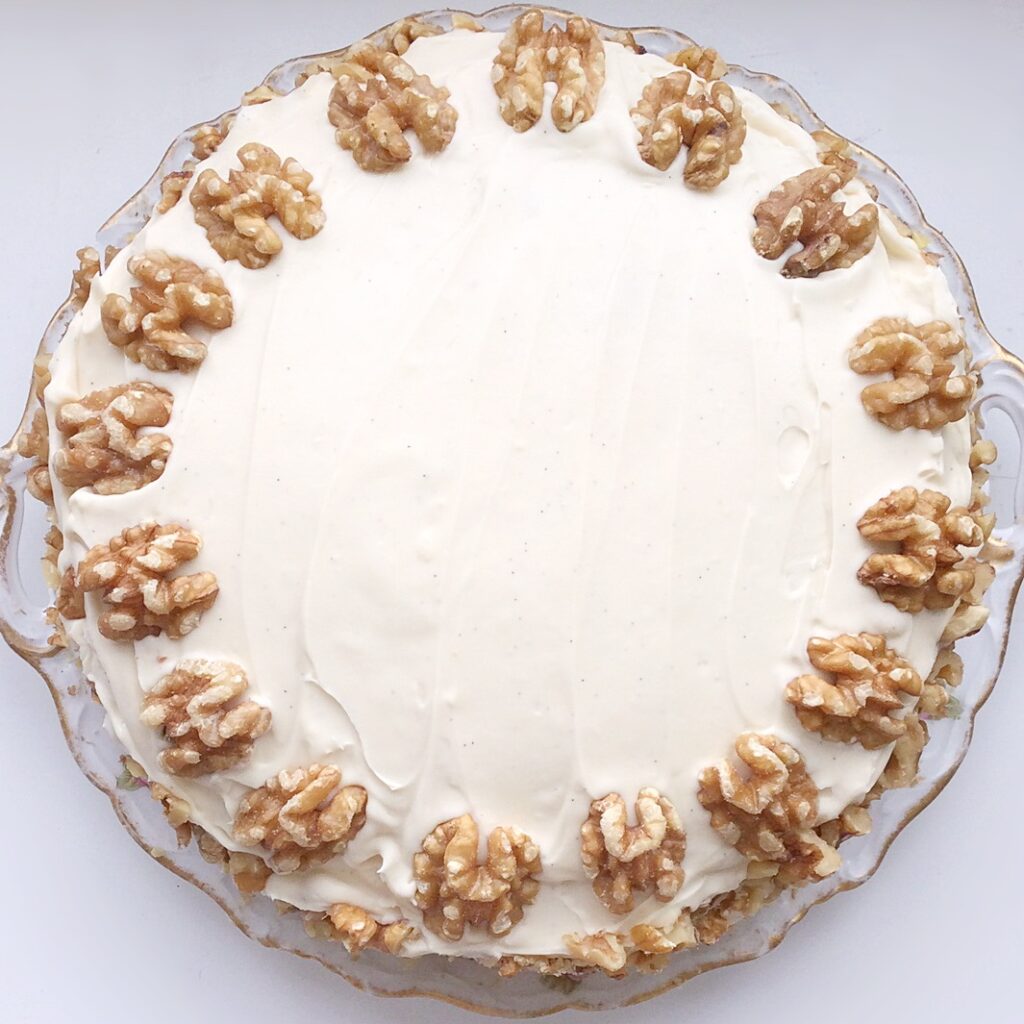
  • Place the 16 walnut halves evenly on the cake top.
  • Refrigerate the cake for at least one hour before serving. As this allows the frosting to set.

The finished baileys coffee and walnut cake.

Is this a cake or gateaux? One thing’s for sure, it is utterly delicious.

Reading back through recipe posts on this blog is almost like reading a diary. Whether I mention family events, special occasions, or the weather, it always brings back memories. And because I am quite a sentimental person, each recipe is special to me. Likewise when someone makes a recipe of mine it always brings me joy. So thank you to everyone who reads, cooks and bakes using this blog.

Whatever you are making, baking and creating in your kitchens, have fun preparing your feast.

Sammie x

No part of this post may be reproduced or duplicated without the written permission of the owner. Please see my Disclosure Policy.
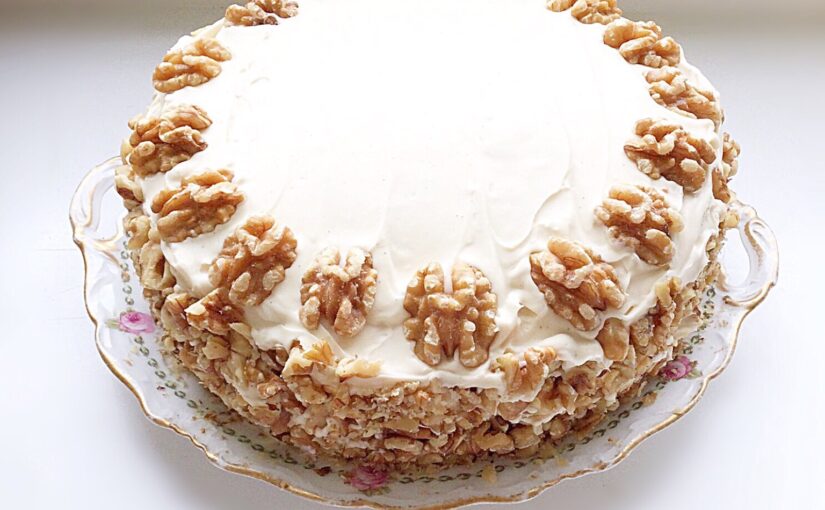
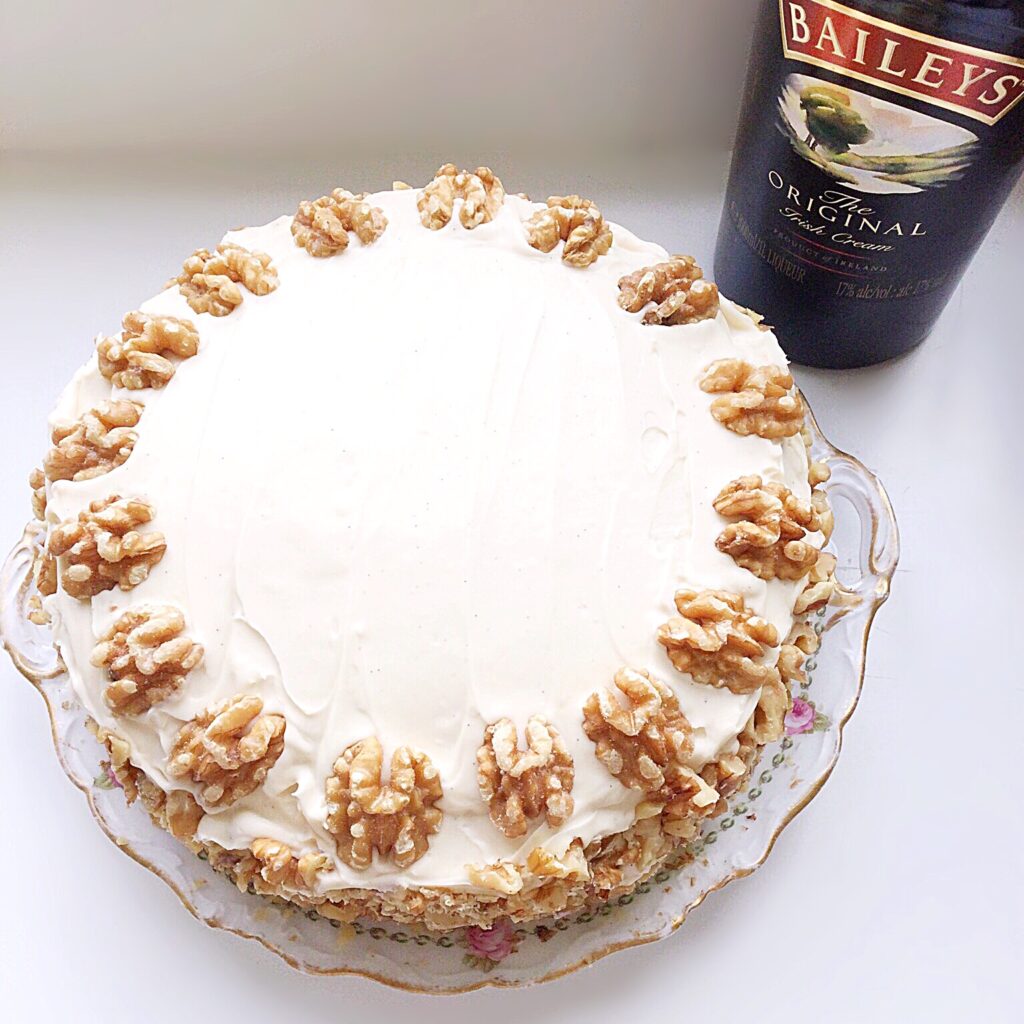


Image for Pinterest with descriptive graphics.


Raspberry White Chocolate Loaf Cake

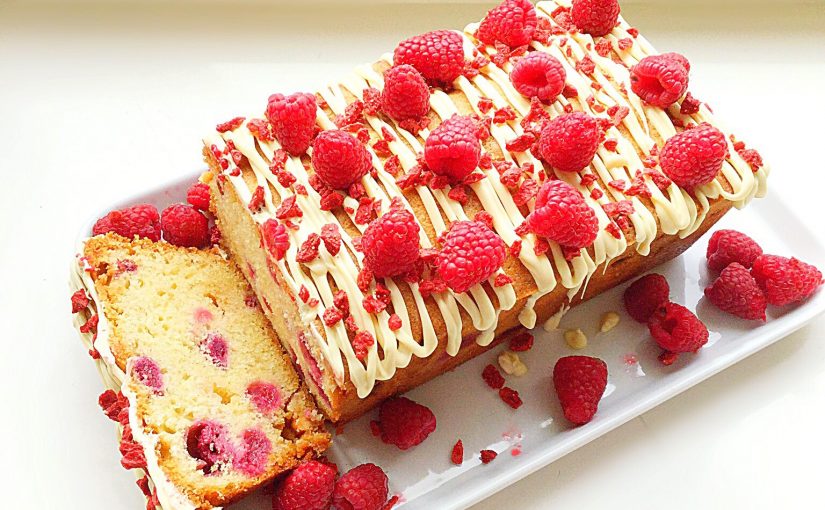
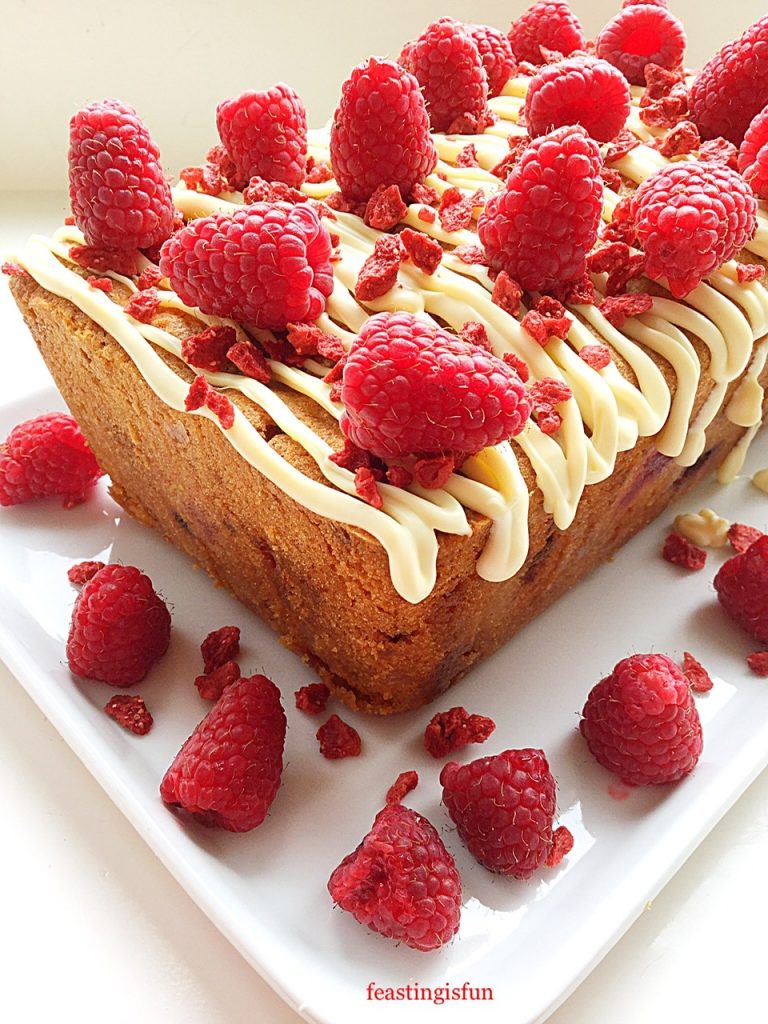
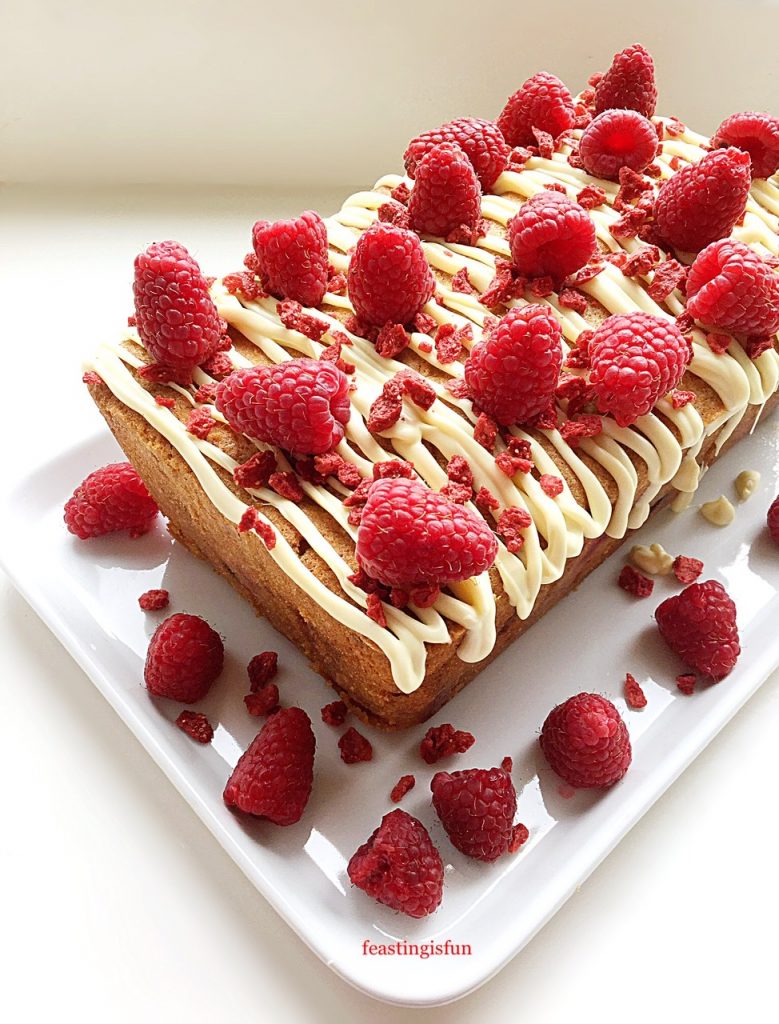
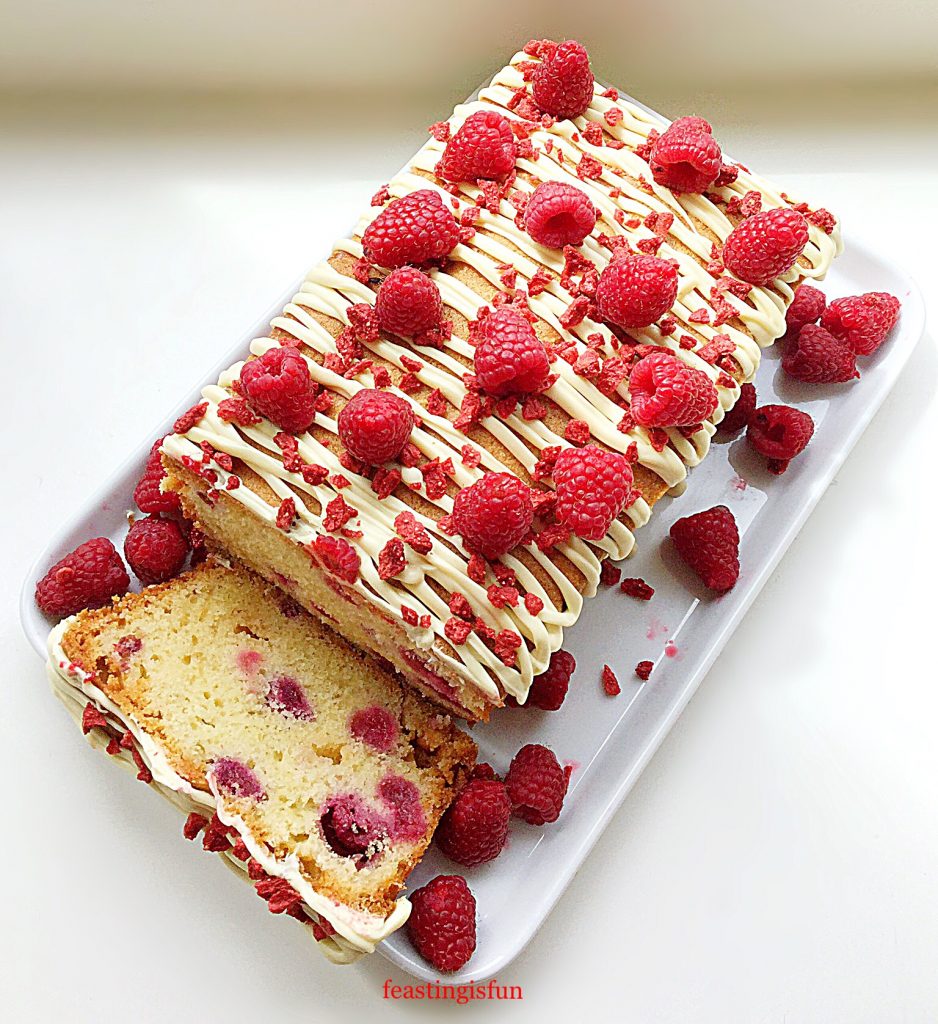
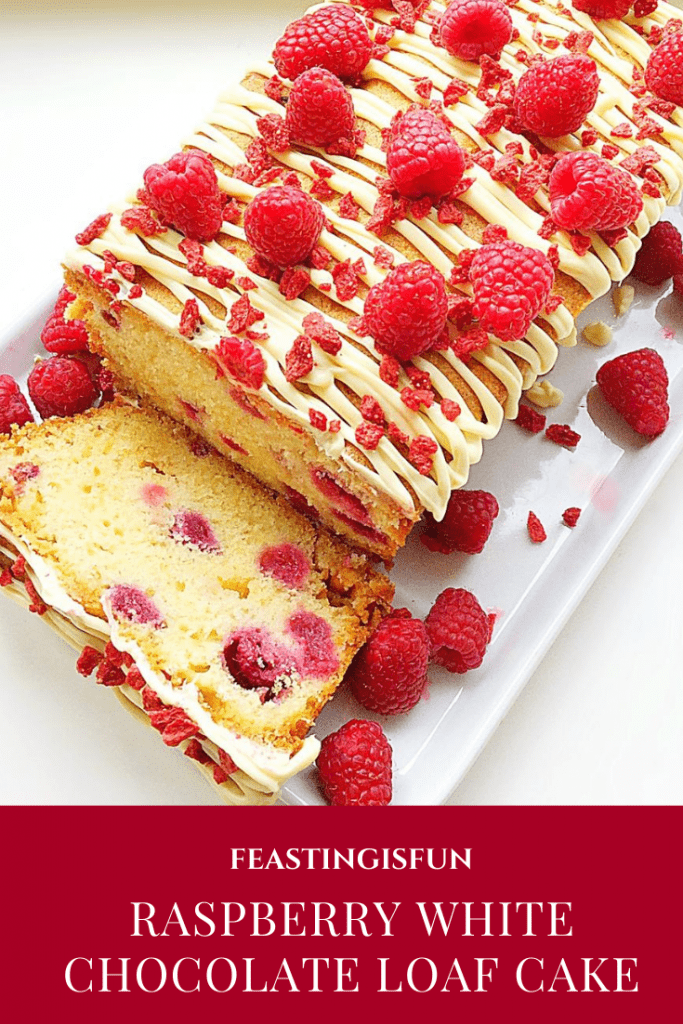
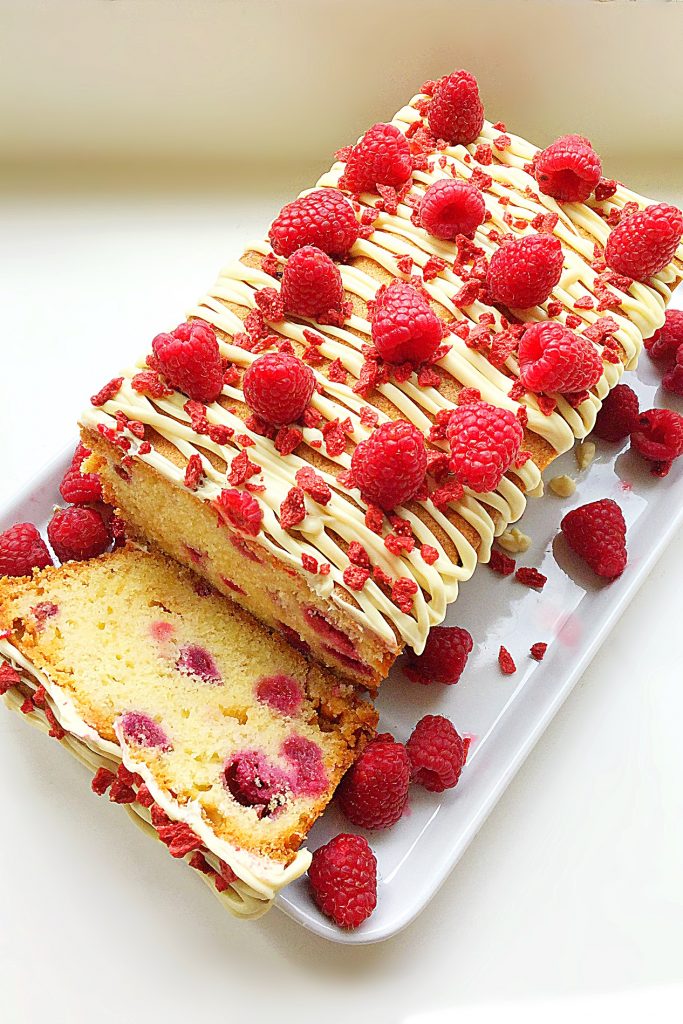
Hello lovely readers, welcome to my blog, where each recipe I create is a feast and we have fun while cooking and baking. And today’s recipe is most definitely a feast, both for the eyes and tastebuds. Welcome to my Raspberry White Chocolate Loaf Cake. A vanilla flavoured cake, studded with ruby red raspberries and topped with a white chocolate drizzle. Finally, fresh and freeze dried raspberries are sprinkled on top, creating a delicious, dessert cake.

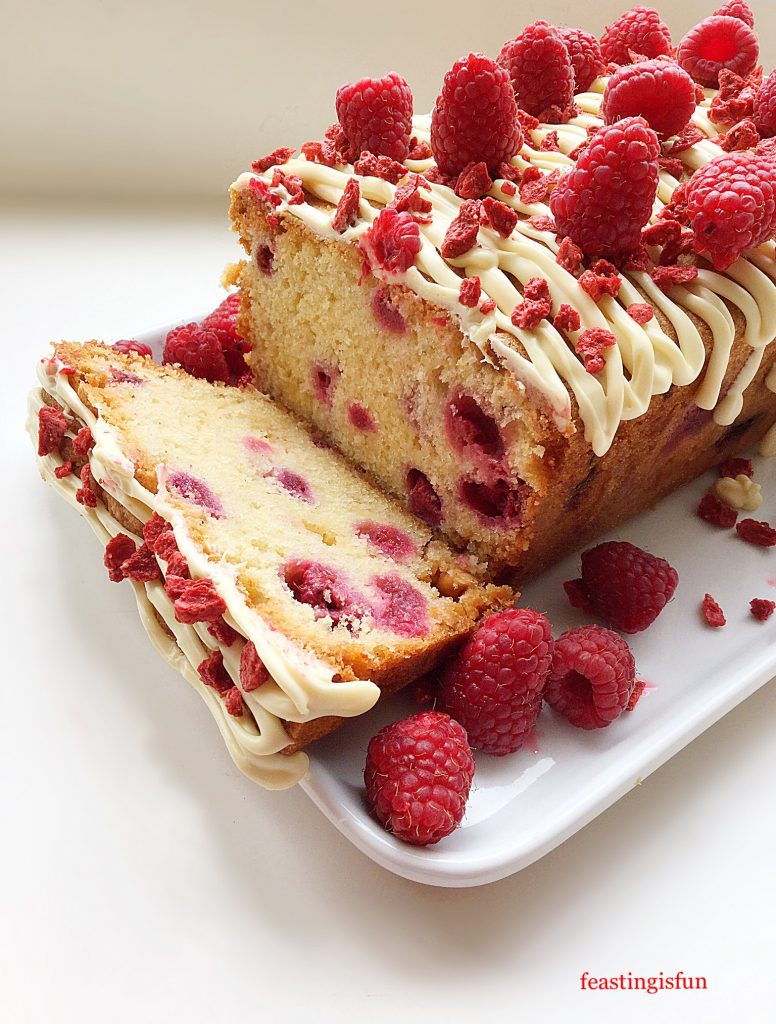
Fresh berry and vanilla sponge.
Raspberry White Chocolate Loaf Cake

Since I first thought up the idea for this cake I have wanted to bake it and share it with you. White chocolate and raspberries are a classic, flavour combination. While the vanilla flavoured chocolate melts into and flavours the cake, bursts of semi-tart, jammy raspberries create a flavour explosion in your mouth. And I get super excited every time those words “flavour explosion” are written in a sentence. Because, it means something must taste sensational. And this cake does!

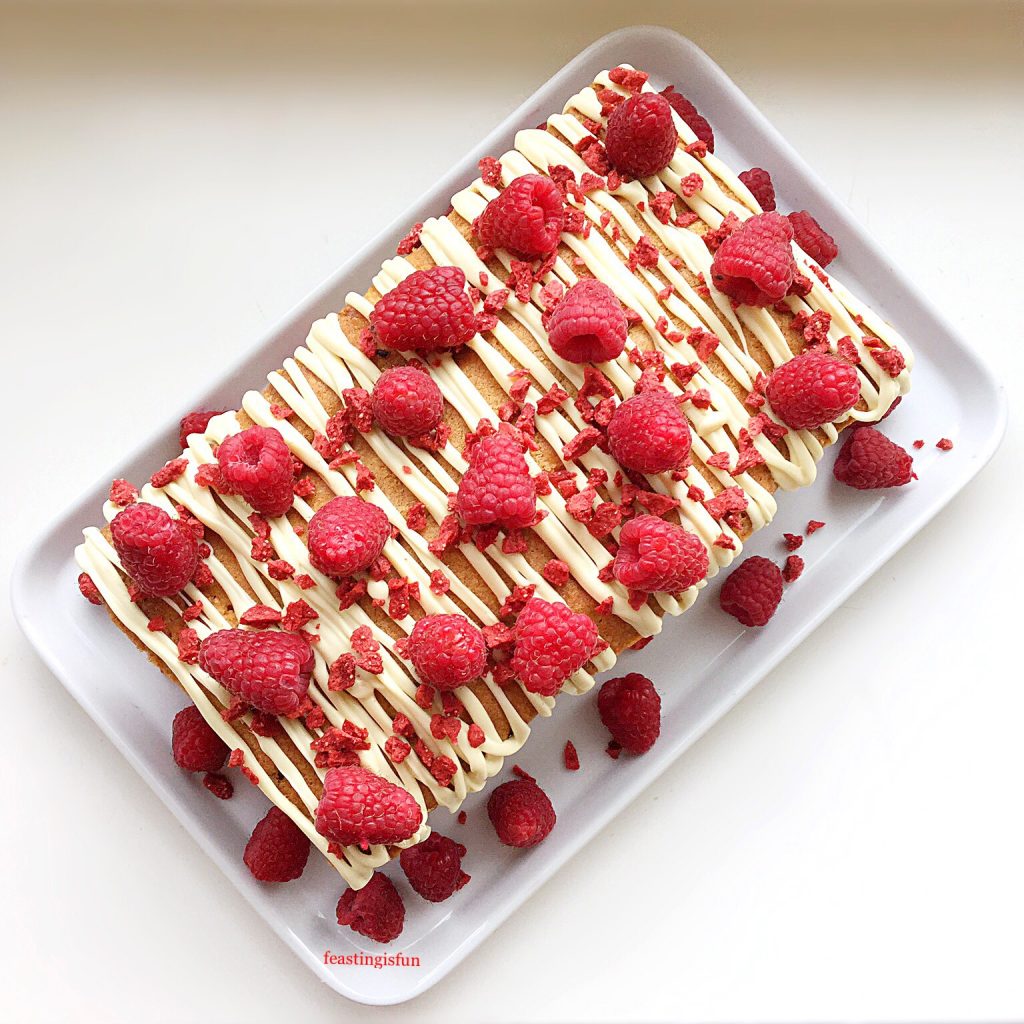
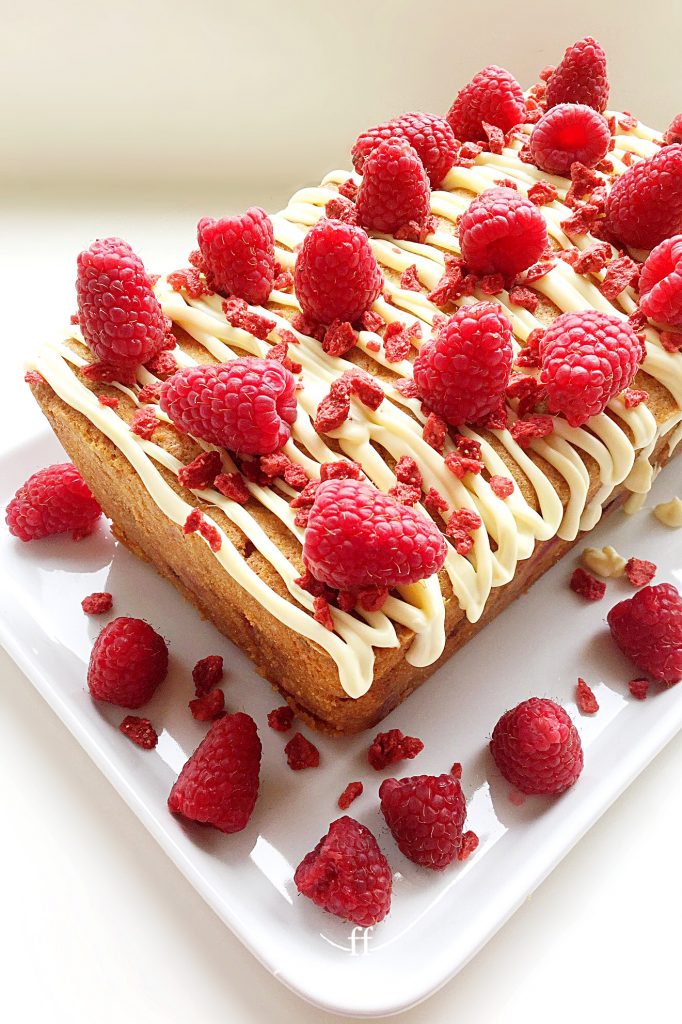
Overhead image of a fresh berry sponge, decorated with raspberries.
Raspberry White Chocolate Loaf Cake

Lockdown Ingredients

Since we are currently in lockdown, here in the U.K. due to the Coronavirus, creating new recipes requires a whole new approach. As well as coming up with new recipe ideas, other things have to also be considered now. Currently, the most important aspect is ingredient availability. And even then, that can vary from region to region. So, with this recipe I have kept to ingredients that are generally either store cupboard staples, or are fairly easy to get hold of.

Sliced raspberry and white chocolate loaf cake.

I always have a stash of berries in the freezer and a quick scout round supermarket websites showed good availability. Using frozen raspberries in this recipe may result in a longer bake time, however, they are much easier to mix into the cake batter without breaking up. And, although white chocolate is added to the batter, it melts into the cake while baking, enhancing the vanilla flavour. So don’t expect to find chunks of it in the finished cake!

Recipe: Raspberry White Chocolate Loaf Cake serves 8-10

For the cake:

225g/8oz Unsalted Butter – at room temperature.

225g/8oz Caster Sugar – regular sugar can be used see *note regarding mixing

1/4 tsp Salt – I use Maldon

2 tsp Vanilla Bean Paste – alternatively use vanilla bean extract

4 Large Free Range Eggs

275g/9.5oz Plain Flour – if using self raising flour leave out the additional baking powder

1 tsp Baking Powder

150g/5oz Frozen Raspberries – fresh raspberries can be used see ** note during baking times

100g/4oz White Chocolate cut into small chunks

For decorating the cake:

100g/4oz White Chocolate – cut into small chunks

2 tbsp Freeze Dried Raspberries – also known as GRIT available from Craic

also available from Waitrose – alternatively use some red or pink edible cake sprinkles

100g/4oz Fresh Raspberries

Making The Raspberry White Chocolate Cake Batter

Preheat the oven to 160C/140C fan, gas mark 3, 325F.

  • First of all, butter and line the base with baking parchment of a 2lb loaf tin – 24.5cm x 14.5cm x 7cm (10in x 6in x 3in).
  • Into a large bowl add the butter, sugar and salt.
  • Whisk or beat until the mixture is pale and creamy. *If using regular sugar whisk the mixture for longer to obtain the same creamy consistency.
  • Crack each of the four eggs into a jug and lightly beat with a fork to mix them. Pour the eggs into the bowl with the butter mixture.
  • Add the vanilla bean paste.
  • Sift the flour and baking powder into the same bowl.
  • Whisk all the ingredients together until smooth. Take care not to over mix, as this can cause the cake to become heavy.
  • Add the raspberries and chopped white chocolate into the bowl and fold into the cake batter. The cake batter will firm up due to the frozen raspberries, don’t worry!

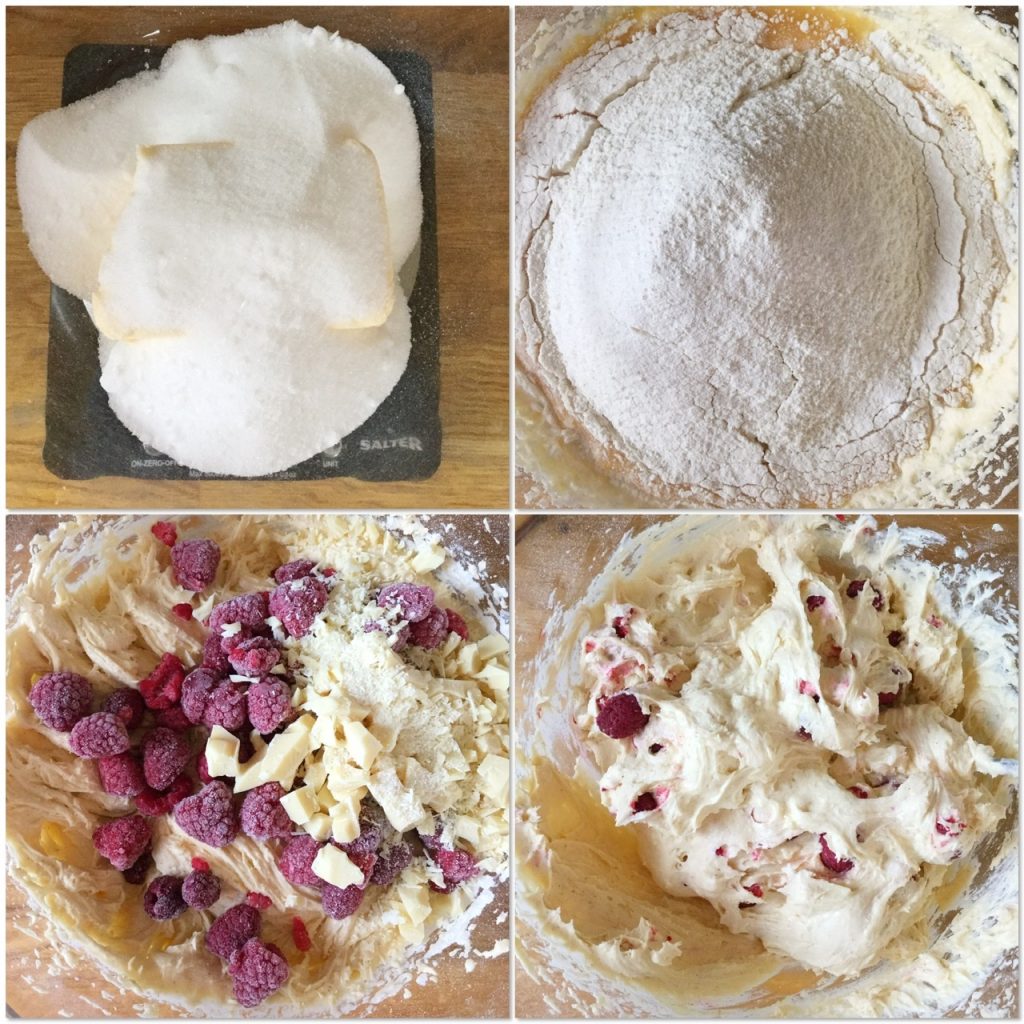
The making of a fresh berry sponge batter.

  • Spoon the cake batter into the prepared loaf tin, pressing down with the spoon to ensure there are no air gaps, due to the colder, thicker, cake batter. Smooth the top of the cake using the back of a spoon.

Baking The Cake

  • Place the cake into the centre of a preheated oven and bake for 1 hour 30-45 minutes.
  • The cake is baked when a skewer inserted into the centre of the cake comes out clean. My cake took 1 hour 40 minutes to fully bake, initially I tested at 1 hour 30 minutes. Due to the variability of ovens and in this recipe, size of the frozen fruit and also size of loaf tin used to bake the cake, it seemed more appropriate to give a range, rather than specific bake time. **Also, if using fresh raspberries the baking time will be reduced to approximately 1 hour.
  • As soon as the cake is baked remove from the oven and place the tin on a cooling rack.
  • Leave the cake to cool completely in the tin.
  • As soon as the cake is cooled it can be turned out of the tin. Run a palette knife between the cake and tin. Turn out the cake and carefully remove the baking parchment.

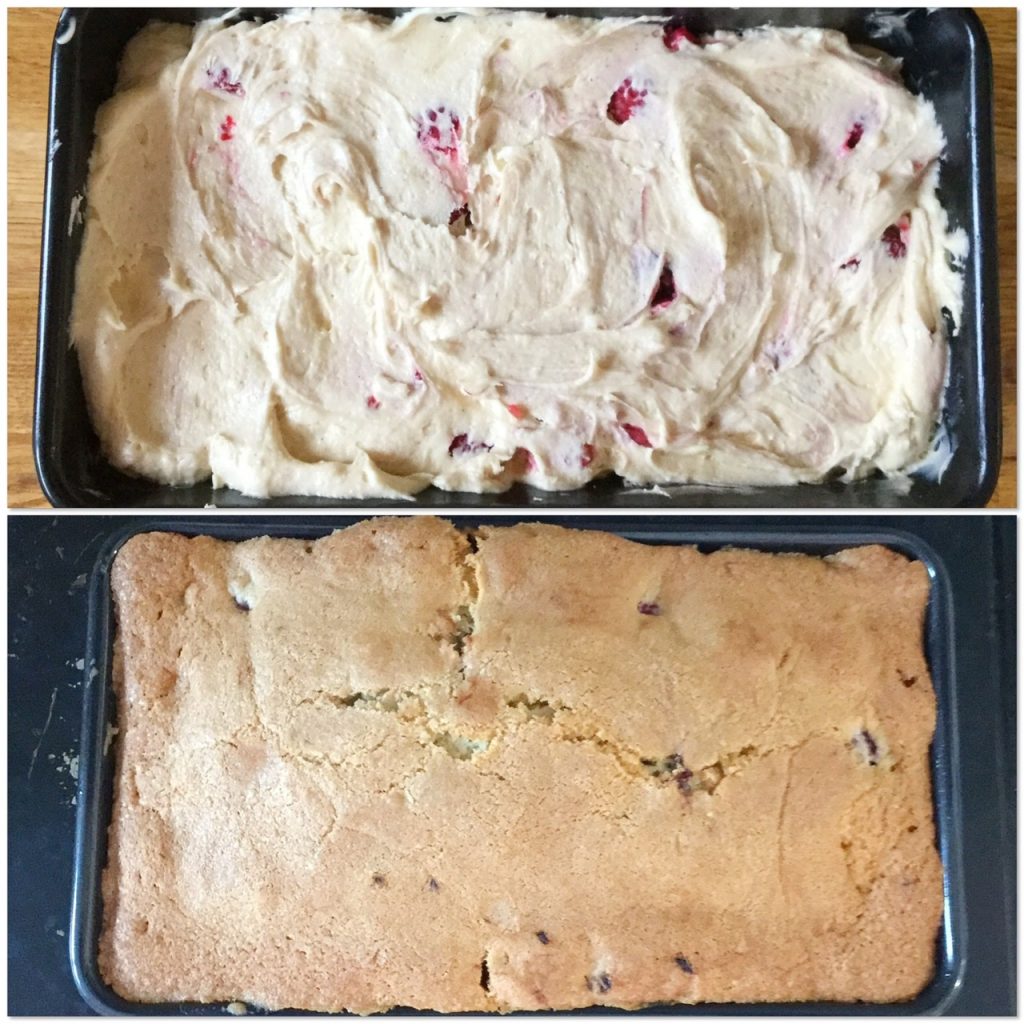
The raspberry white chocolate loaf cake before and after baking.
Decorating The Raspberry White Chocolate Loaf Cake

  • Place the cooled cake on to the plate or board used for serving.
  • Put the chopped white chocolate into a heatproof, microwaveable bowl. Zap on medium power for 20 second intervals, stirring between. As soon as the chocolate starts to melt continue stirring until fully liquid.
  • Either use a spoon or small piping bag to drizzle the melted chocolate over the cake.
  • While the chocolate is still unset sprinkle over the freeze dried raspberries.
  • Gently press fresh raspberries on to the chocolate, which acts as an edible glue and will hold them in place on top of the cake.
  • Finally, scatter fresh and freeze dried raspberries around the cake.
  • Place the cake somewhere cool to set. In warmer weather refrigerate.


The ultimate dessert cake!

Fresh and freeze dried raspberries decorate this raspberry white chocolate loaf cake

As soon as the chocolate is set the cake is ready to serve.

However you serve this cake, with morning coffee, afternoon tea, after dinner as dessert, remember to share it. Because, it really is too good to keep to yourself and why miss an opportunity to make your family and neighbours smile!

Store in an airtight container in the fridge and eat within three days.

If you have enjoyed this recipe for Raspberry White Chocolate Loaf Cake you may also like these:

Raspberry Drizzle Loaf Cake

Raspberry Drizzle Loaf Cake

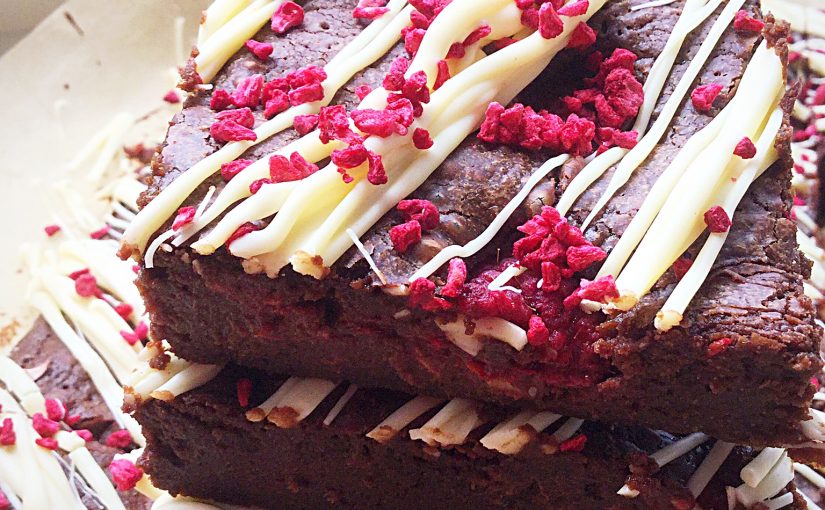
Rich Raspberry Chocolate Fudge Brownies

Rich Raspberry Chocolate Fudge Brownies

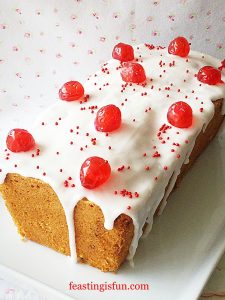
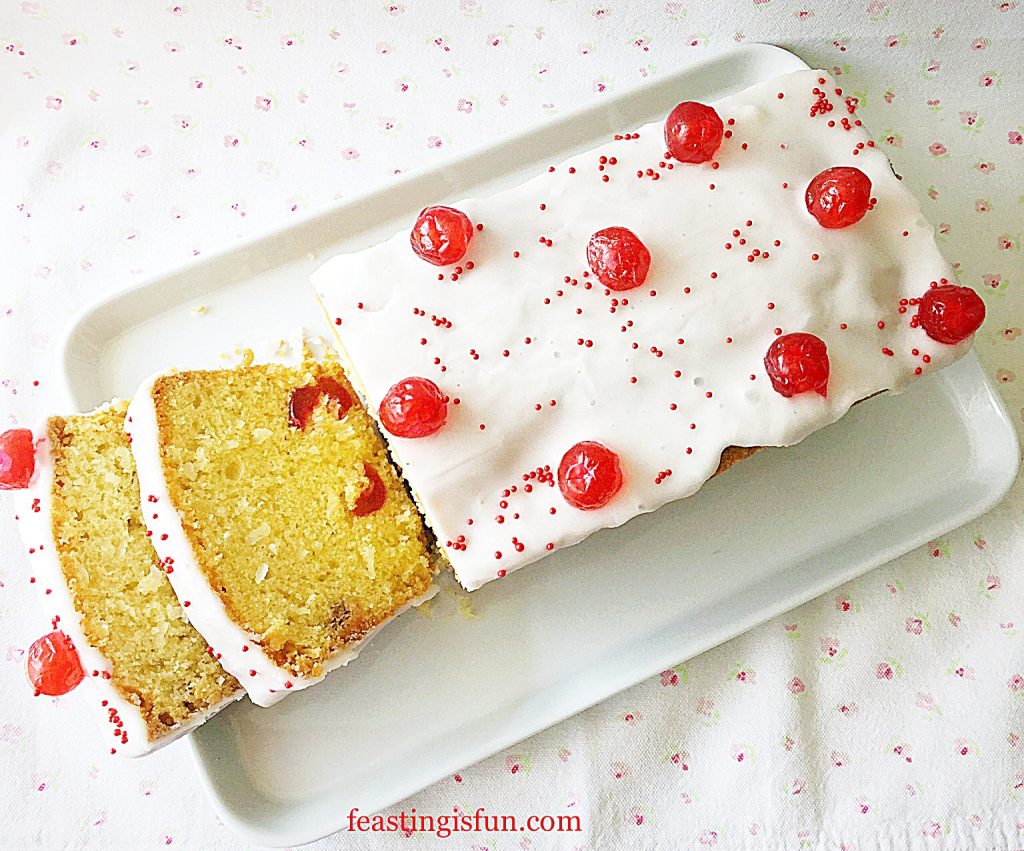
Iced Cherry Coconut Loaf Cake

Iced cherry coconut loaf cake.
Iced Cherry Coconut Loaf Cake

So far, my experience of lockdown isn’t very different to my usual daily life. Because of chronic health conditions I rarely leave our house (see here). I do, however, have wonderful relationships with our neighbours. And seeing the smile on our next door neighbour’s face as I stood two metres away and watched her pick up the cake I’d left in her porch, lit me up inside. I always feel that sharing is a completely selfish activity, because the giver gets far more out of it than the receiver.

Whatever you are making, baking and creating in your kitchens, have fun preparing and sharing your feast.

Sammie x

No part of this post may be reproduced or duplicated without the written permission of the owner. Please see my Disclosure Policy.
 

Raspberry White Chocolate Loaf Cake

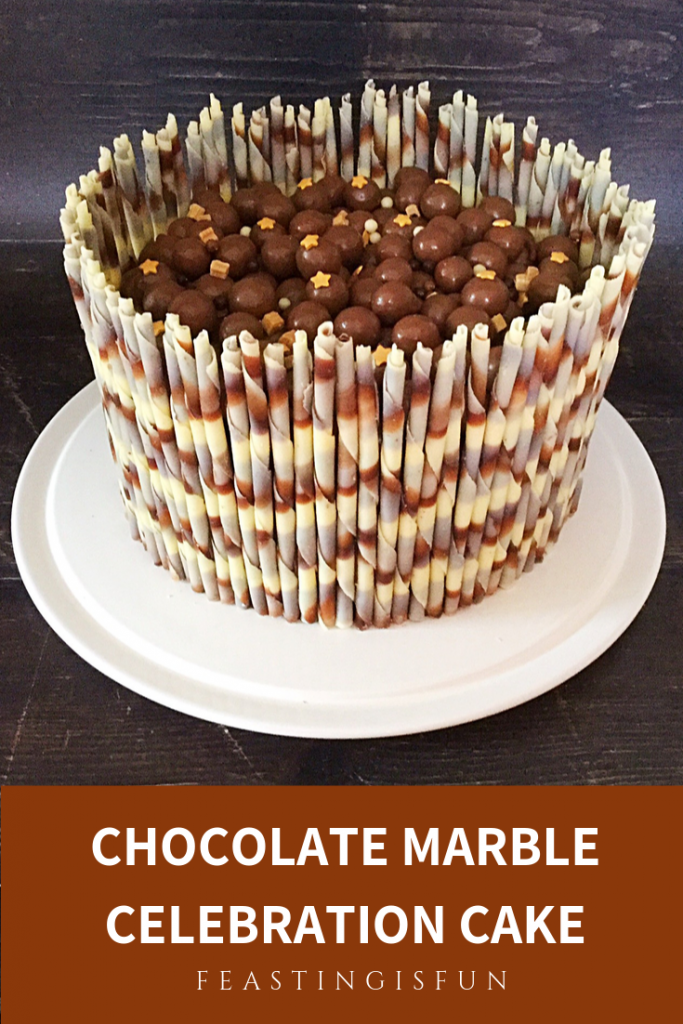
Chocolate Marble Celebration Cake

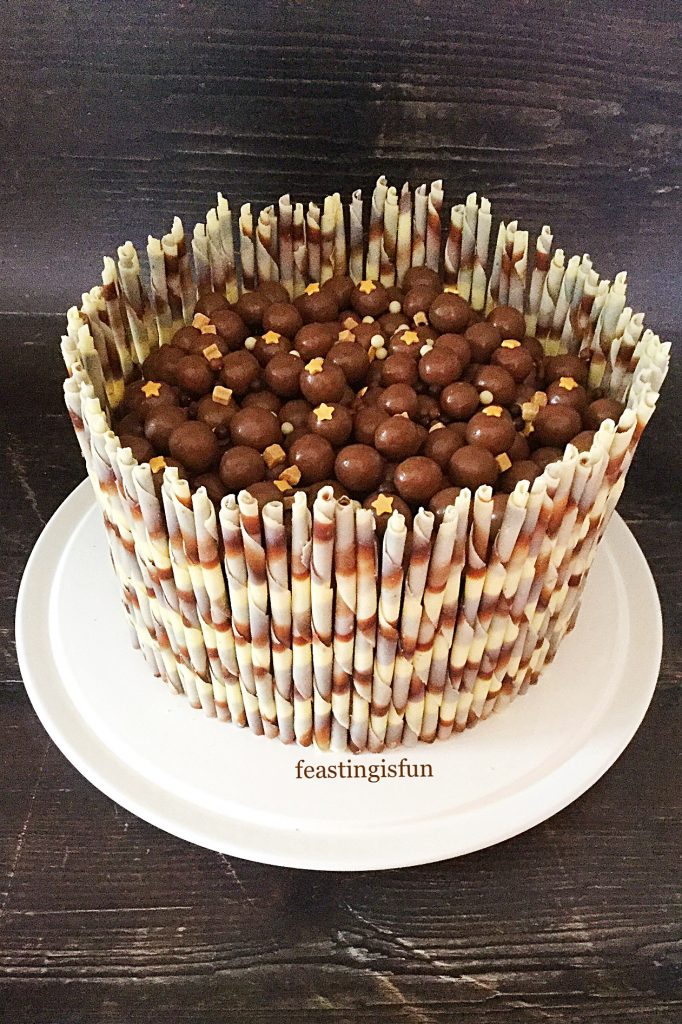
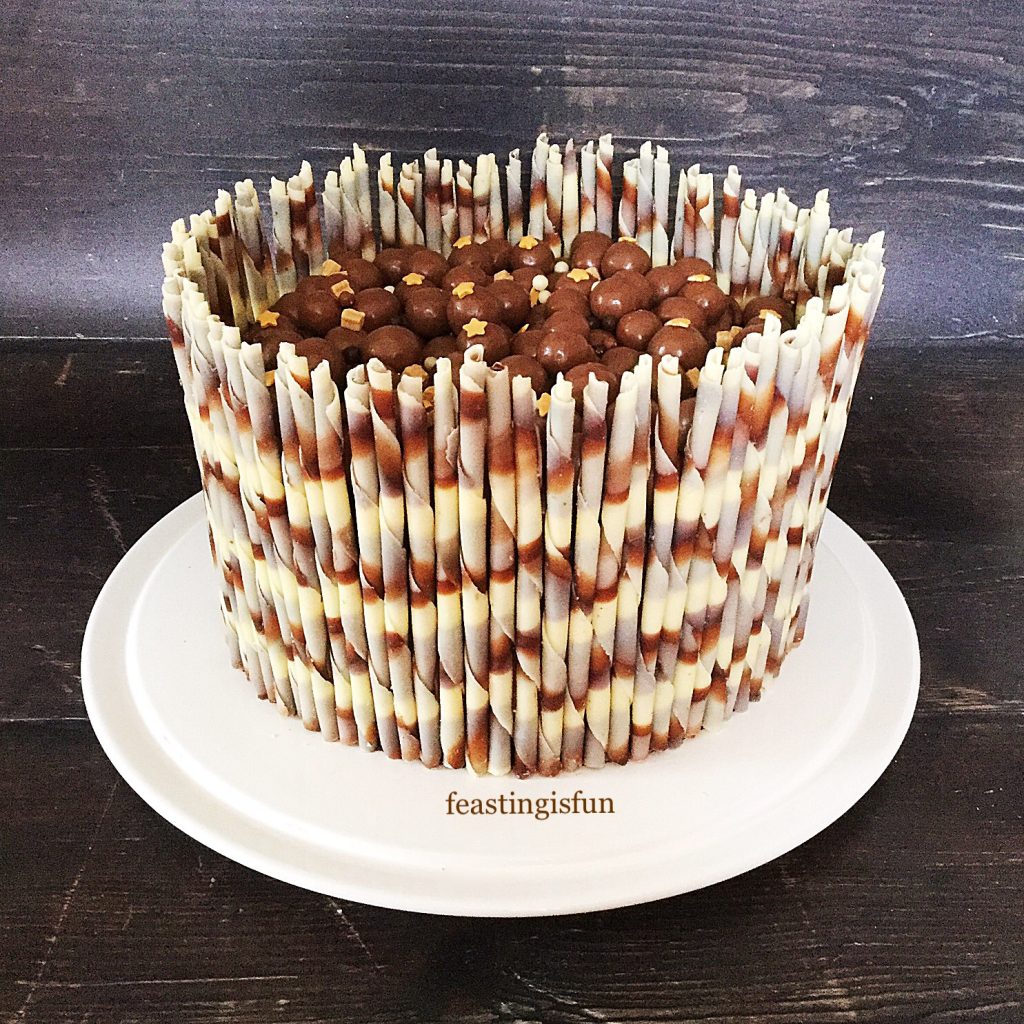
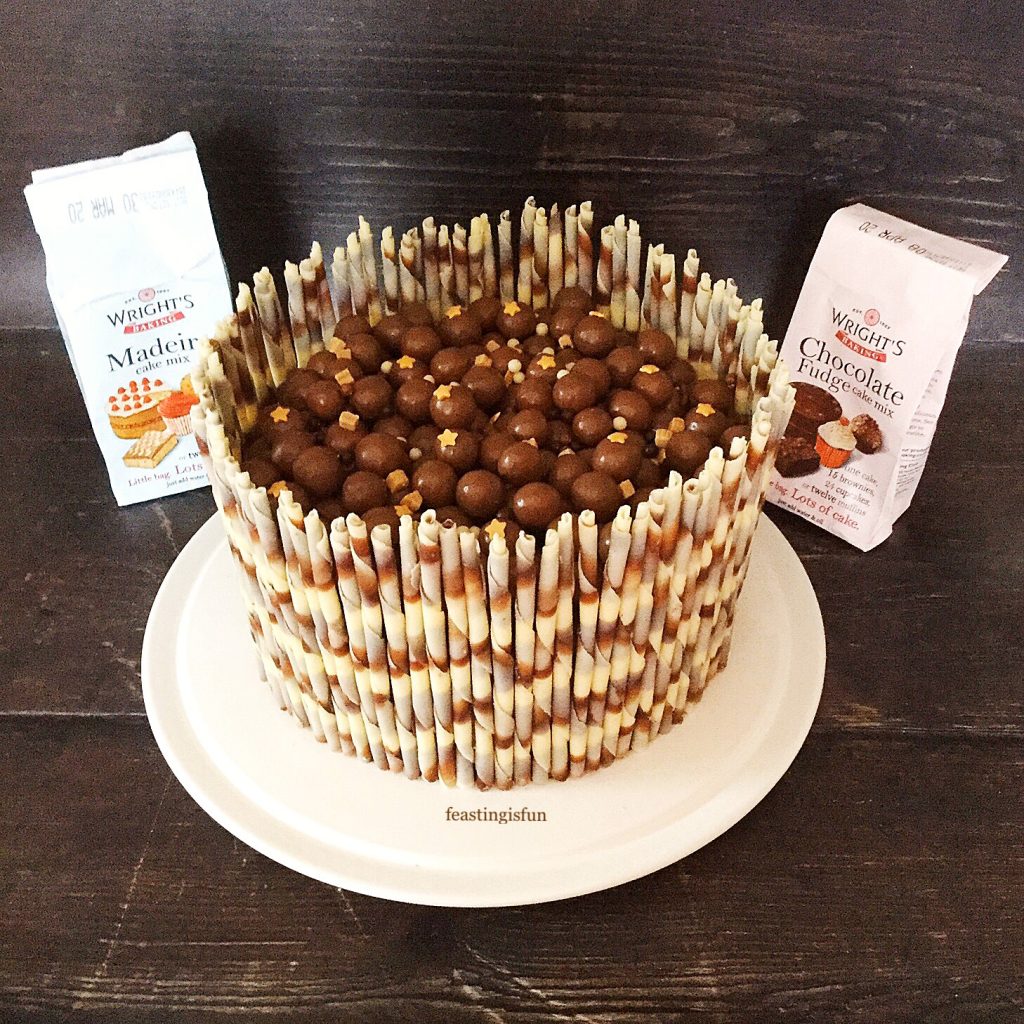
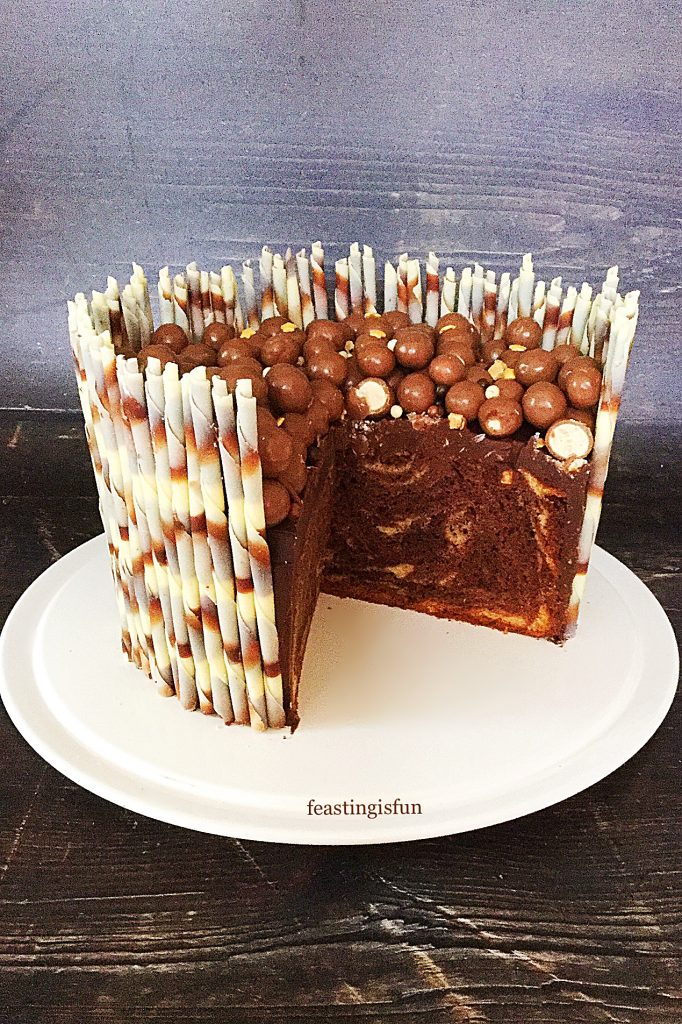
Today I have a confession to make. Although our daughter’s birthday was way back in the Summer, I made her cake last week! Truthfully, I have made and baked her cake twice before (this year), however, I wasn’t able to frost or finish the cake due to health complications. Finally, with a little help from Wright’s Baking, I made and decorated this delicious Chocolate Marble Celebration Cake for her to enjoy and share with our family. See recipe for alternative to using cake mixes.

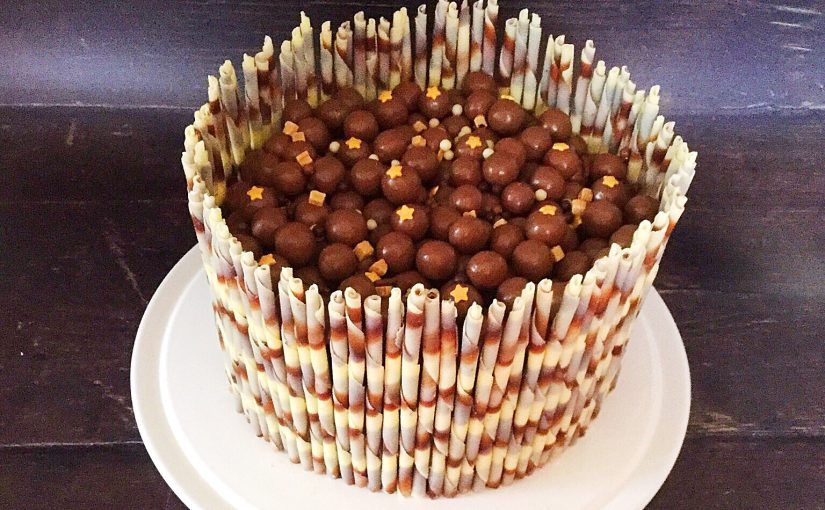
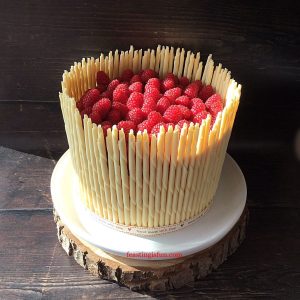
Baked swirled sponge covered in ganache and surround with edible pencils.
Chocolate Marble Celebration Cake

Every year, since her birthday is in the Summer, I usually make two cakes for our daughter’s birthday celebrations. First of all an ice cream cake, which is incredibly easy to make no matter where we are. So, when we spent her 16th birthday down on the farm with our beloved Devon family, I planned ahead and took a cake tin with me! Serving the ice cream cake in the evening, after a feast of a barbecue that afternoon, proved the perfect dessert to top off our birthday celebrations. And sharing it with friends and family who had travelled down to celebrate with us made the special day even more memorable.

Chocolate Marble Celebration Cake

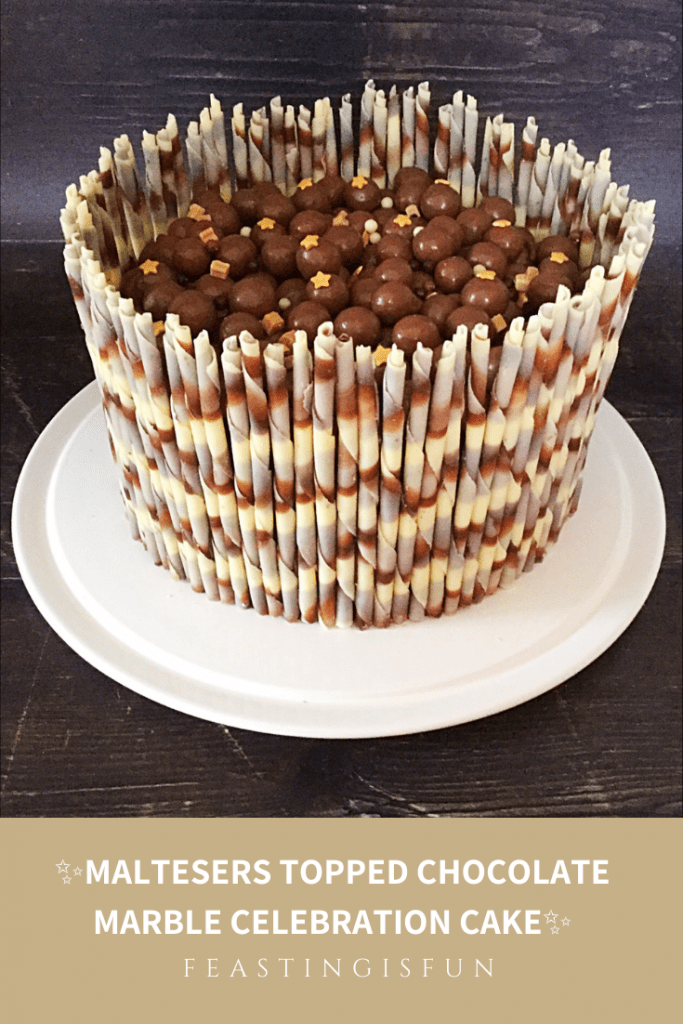
Maltesers Topped Chocolate Marble Cake – A Birthday Cake Tradition

As well as the frozen birthday cake I always bake a chocolate marble cake such as this Marbled Chocolate Bundt Cake to celebrate our daughter’s birthday. Since it is her favourite cake and she always shares it with her friends and family. So, every year I try to come up with a new design or decoration. Having made a Raspberry Lemon Celebration Layer Cake I wanted to try a similar design using marbled chocolate pencils instead. Also, she loves Maltesers, so I wanted to incorporate them in the design.

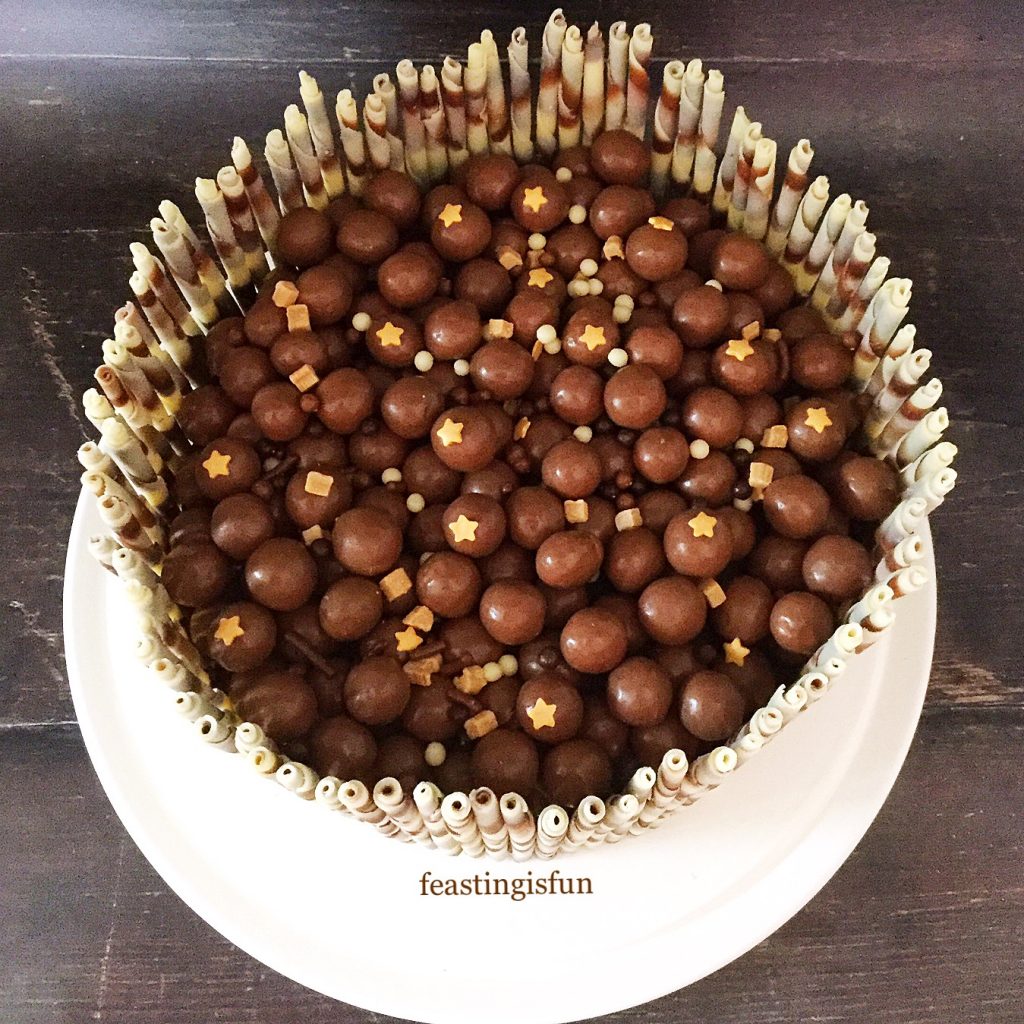
Overhead photo of a special party bake, showing Maltesers mixed with star sprinkles.
Chocolate Marble Celebration Cake

My first two attempts at baking this cake from scratch were perfect, however, due to health limitations I never managed to make or ice the cake in time. And so that’s where the lovely Deb from Wright’s Baking really helped me out. Using both their Chocolate Fudge and Madeira Cake mixes to make the marble cake took way less time and energy than baking from scratch. Resulting in me having enough energy to make the chocolate fudge icing and decorate the cake on the following days.

Celebratory bake topped with Maltesers.
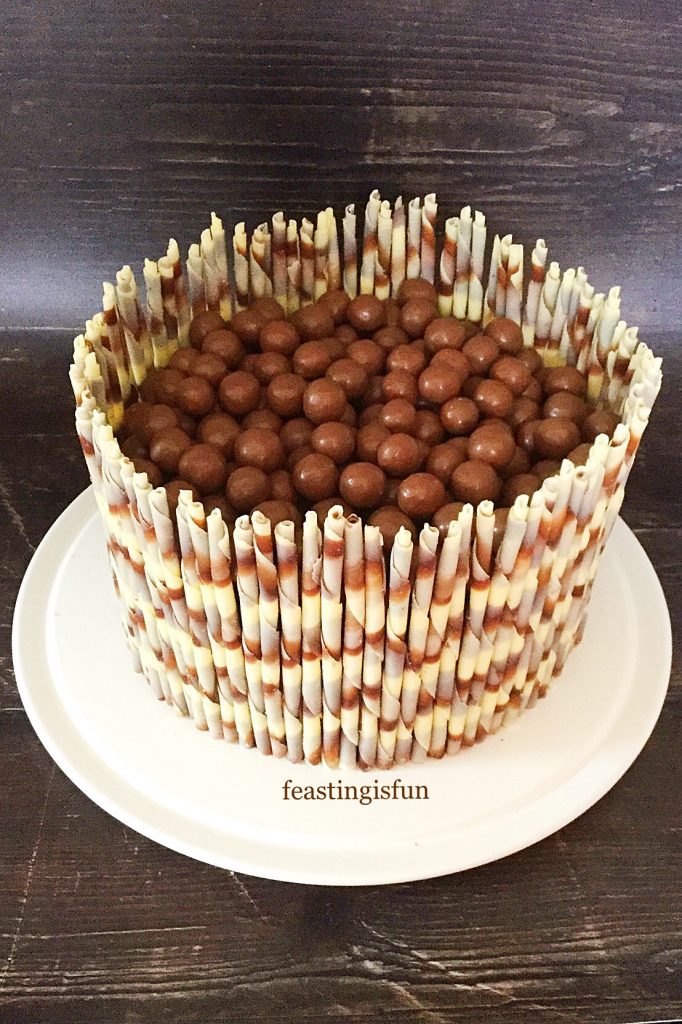
Chocolate Marble Celebration Cake using only Maltesers on top.

Our daughter thoroughly enjoyed her birthday cake, so a huge thank you to Wright’s Baking. Their cake mixes are available in most supermarkets and via their online shop.

Recipe: Chocolate Marble Celebration Cake serves 10-12

For the cakes: If you are unable to get hold of the cake mixes use this recipe Malted Marbled Chocolate Cake leaving out the powdered malted milk drink.

1 x Wright’s Baking Chocolate Fudge Cake Mix

1 x Wright’s Baking Madeira Cake Mix

2 x 200ml Tap Water

2 x 60ml Vegetable Oil (or melted butter for an extra luxurious bake!)

For the frosting: please note all quantities given can be rounded up or down to the next whole unit without it affecting the finished result.

250ml/8.4fl oz Double Cream (heavy cream)

250g/8.8oz Dark Chocolate (minimum 70% cocoa)

3 x Tubes Rolos (150.6g/5.3oz)

1tsp Vanilla Extract – I use Nielsen-Massey

Pinch of Salt (1/4tsp)

For the decorations:

1 x Box Marbled Black and White Chocolate Pencils – available from Amazon 

or Chocolate Trading Company Note – you will have some chocolate pencils leftover.

Large Box of Maltesers 310g/11oz or equivalent weight in bags.

Optional – Star sprinkles and balls

Preheat the oven to 160C/140C fan, gas 3, 325F

Making The Cake Batter And Creating The Marble Swirl Effect

Note: When cutting out the baking parchment to line the cake tin base with double up and cut an extra circle. So it can be used during baking if the cake top browns too quickly.

  • First of all grease a 20cm/8in round tin with a depth of 10cm/4in. Line the base with baking parchment.
  • Make each cake mix up separately according to the packet instructions.
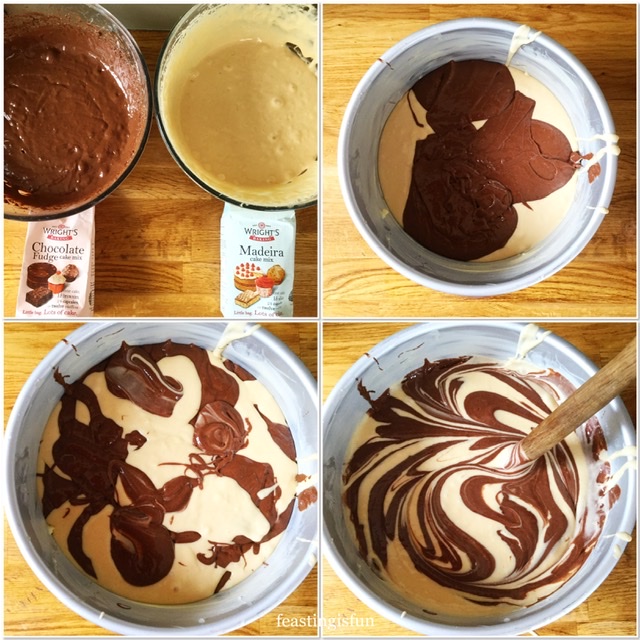
  • Use a large spoon to add 3 separate spoonfuls of chocolate fudge batter into the base of the cake tin.
  • Follow by adding 3 spoonfuls of madeira batter in between the chocolate.
  • Continue in this manner layering each spoonful of cake batter on top of the other flavour until all of the batter from both mixes is used.
  • Place the handle end of a big wooden spoon into the batter and swirl so that both batters become intermingled without being fully mixed into each other.

Making the batter and creating the swirl.

Baking, Cooling And Shaping The Marble Cake

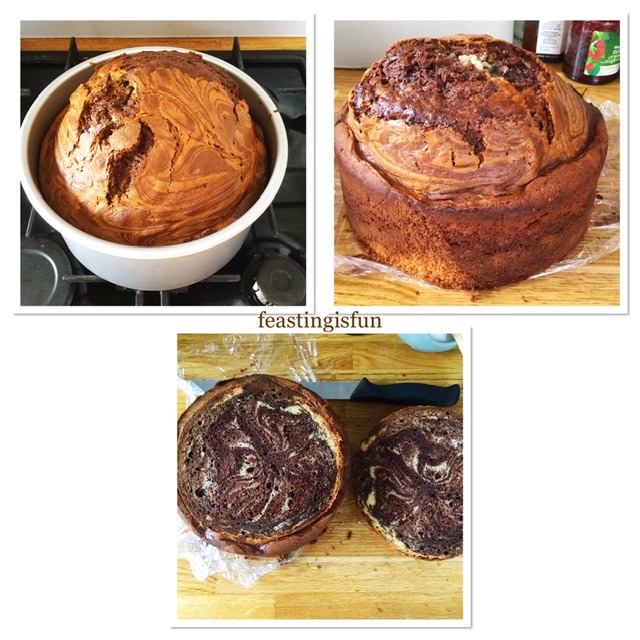
  • Place the cake tin into a preheated oven, on a shelf slightly below the middle.
  • While baking, if the cake top is browning too quickly place the spare circle of baking parchment on top. I also had to crunch up 3 balls of foil to keep the parchment in place as the oven fan kept blowing it around!
  • Bake the cake for 1 1/2 – 2 hours until an inserted skewer comes out clean. The wide variation of baking times is due to different ovens altering the speed at which a cake cooks. For example, if you know that your oven runs hot then consider lowering the baking temperature and baking for a slightly longer time.
  • As soon as the cake is baked remove it from the oven and leave to cool completely in the tin.
  • Once the cake is cooled run a palette knife inside the rim of the cake tin and then turn the cake out.
  • Using a serrated knife cut carefully across the cake to level the top. Our daughter had some of the spare cake in a bowl with hot custard! Alternatively it can be used to make cake balls or as the sponge in a chocolate trifle!

Preparing the baked sponge for decorating.

Making The Very Best Chocolate Fudge Ganache Using Rolos

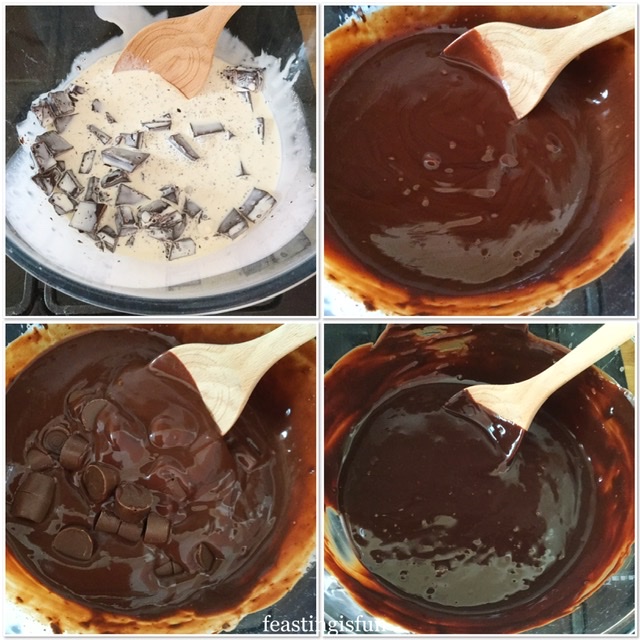
  • Place a heatproof bowl over a saucepan with an inch of simmering water in. Ensure that the base of the bowl DOES NOT touch the water.
  • Pour the cream into the bowl and add the chopped up, dark chocolate. Add the salt and vanilla extract.
  • Stir the cream, chocolate and other ingredients together until the chocolate is fully melted and glossy in appearance.
  • Add the Rolos to the chocolate ganache and continue to stir until they have completely melted and the mixture is glossy with no lumps.
  • Carefully remove the hot bowl from the saucepan and leave to one side to completely cool. I placed my bowl on a window ledge to speed up the cooling process.
  • Note – while warm the chocolate ganache can be poured. It makes a delicious topping for ice cream and also Profiteroles.
Showing each step to making the chocolate fudge ganache that will be used to cover the cake.
Creating the chocolate fudge ganache.

Covering The Cake With Chocolate Fudge Ganache

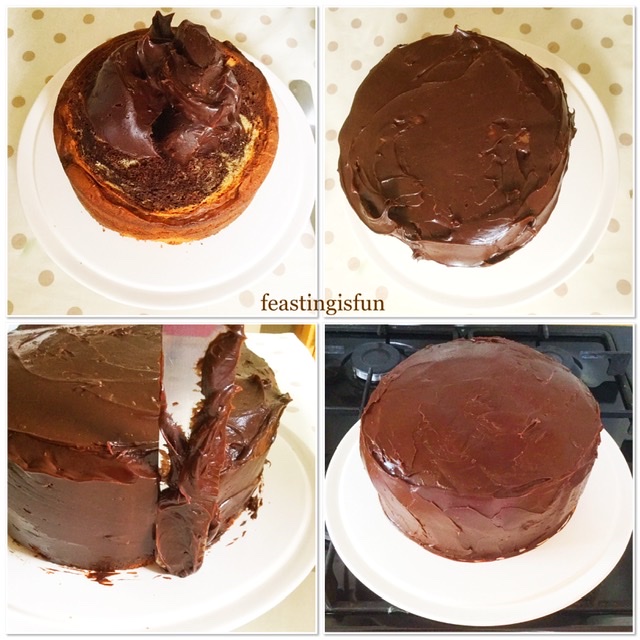
  • Place your cake on a flat plate or board that it is to be served from. And then place that onto either a spinning cake decorator, or, as I did, onto un upturned round tart tin. The plate easily moved round on top and allowed for easy decorating.
  • Spoon two thirds of the thick, cooled, chocolate fudge ganache on to the top of the cake.
  • Use a palette knife to spread the ganache over the top of the cake and then down the sides. Add more ganache as needed to ensure the entire cake has a good, thick, even covering of ganache on both the top and sides. Remember, the finish should be neat but by no means perfect as the cake will be entirely covered with decorations.

Covering the sponge bake In ganache.

Adding The Marbled Chocolate Pencils To The Birthday Cake And Finishing The Decoration

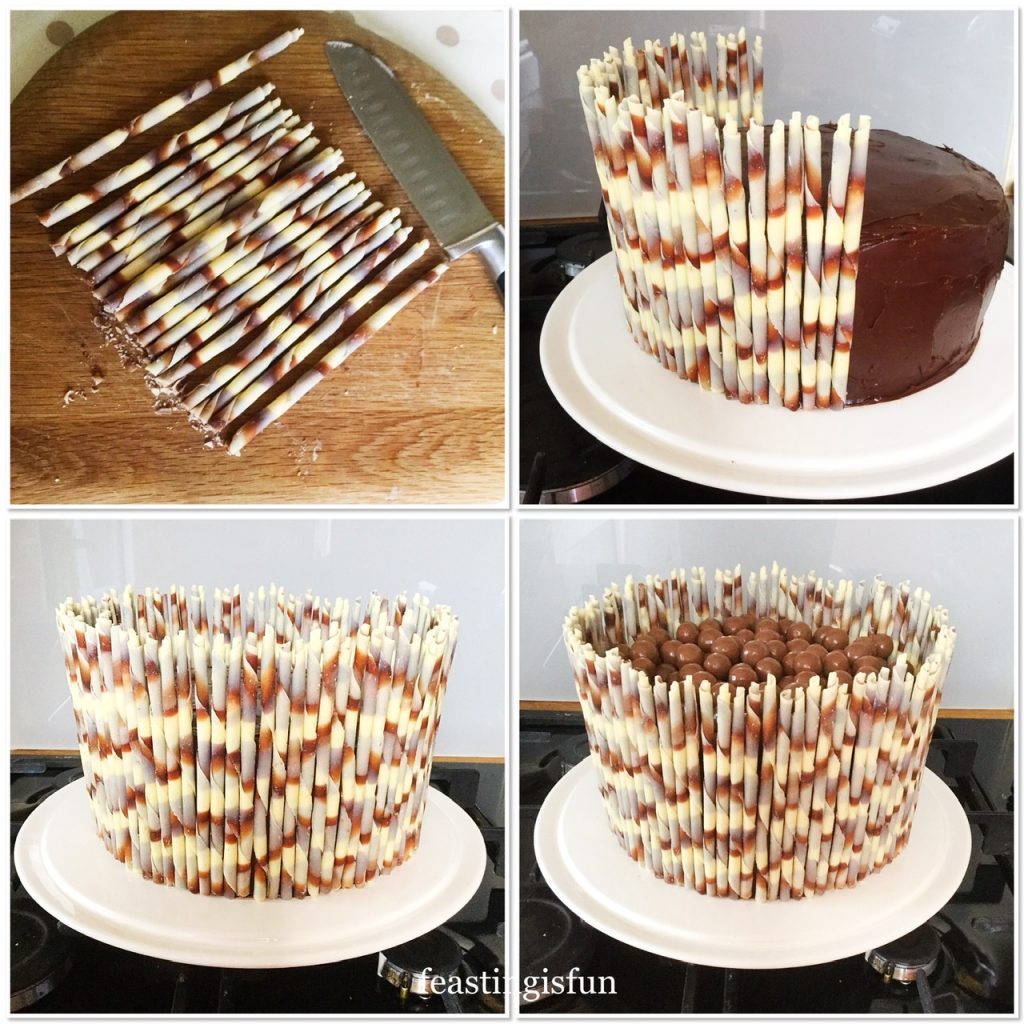
  • First of all take one pencil and measure it against the side of the cake. With a sharp knife mark the height at which the pencil will be trimmed. Cut the excess from the pencil at the base and double check against the cake to ensure you are happy with the height. Keep hold of this pencil as it is the master to which all the other pencils will be measured against.
  • Now cut 20 pencils to the correct length at the base. Place the “waste” pencil cuttings into a bag, they can be used a cupcake decorations.
  • Take one pencil and place it vertically against the side of the cake, press the pencil into the ganache so that it is secure.
  • Continue to add more pencils next to the previous one, always checking that the pencil is straight and parallel to the previous pencil.
  • As soon as the cake is completely surrounded view from above to ensure the pencils for a uniform circle around the cake.
  • Next add the Maltesers carefully to the top of the cake.

Showing how to add the Callebaut flutes to the side of the ganache covered sponge and then adding Maltesers to the top.

  • If using, now add any extra sprinkles to the top of the cake. The white crisp pearls and caramel stars used in this cake tied in with the marble colour theme and immediately added a fun, celebration element to the cake.
Chocolate marble celebration cake topped with Maltesers and surrounded by Callebaut chocolate marble pencils
Chocolate Marble Celebration Cake topped with Maltesers and fun sprinkles.

Chill the cake for a couple of hours, or overnight to allow the frosting to set. Cut between the pencils to serve. Keep any leftover cake either in an airtight container, or wrapped in cling film and refrigerated.

Chocolate marble celebration cake cut so the inner swirl is visible.
Chocolate Marble Celebration Cake

If you have enjoyed this recipe for Chocolate Marble Celebration Cake you may also like these:

Fluted Chocolate Lemon Marble Cake

Fluted Chocolate Lemon Marble Cake

Raspberry Vanilla Naked Celebration Cake

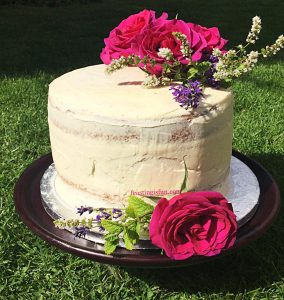
Raspberry Vanilla Celebration Cake semi covered in vanilla buttercream and decorated with fresh roses.
Raspberry Vanilla Naked Celebration Cake

Maltesers Malted Chocolate Loaf Cake

Maltesers malted chocolate loaf cake.
Maltesers Malted Chocolate Loaf Cake

Most importantly, seeing the smile on our daughter’s face made the effort to make this cake worth it! Since I am not and never really intend to be a professional cake decorator, I have learned some easy techniques that give a cake real WOW factor. And I am so thrilled that I get to pass these easy decorating ideas on to you my readers. While I know the chocolate pencils used on this cake aren’t cheap, compared to the cost of buying a handmade cake they are worth every penny!

So, whatever you are making, baking and creating in your kitchens, have fun preparing and sharing your feast.

No part of this post may be reproduced or duplicated without the written permission of the owner. Please my Disclosure Policy.


Celebratory bake sized for Pinterest with descriptive graphics.

Chocolate birthday cake topped with Maltesers and surrounded with marbled chocolate pencils.

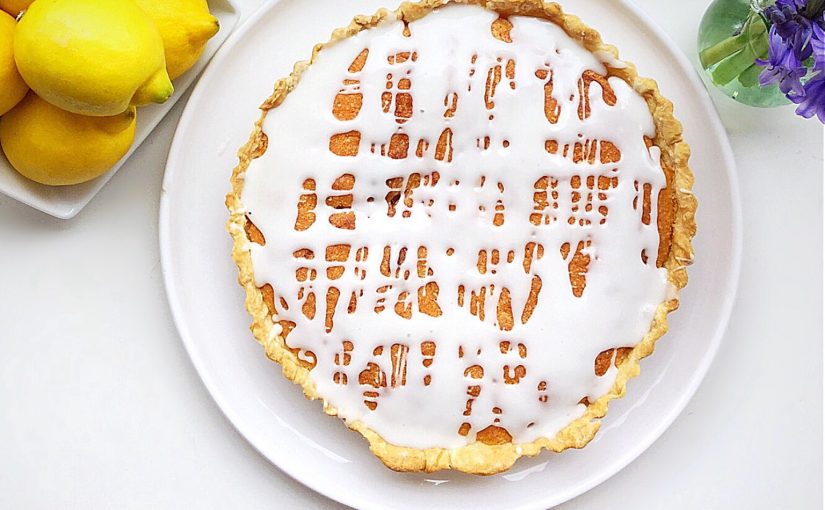
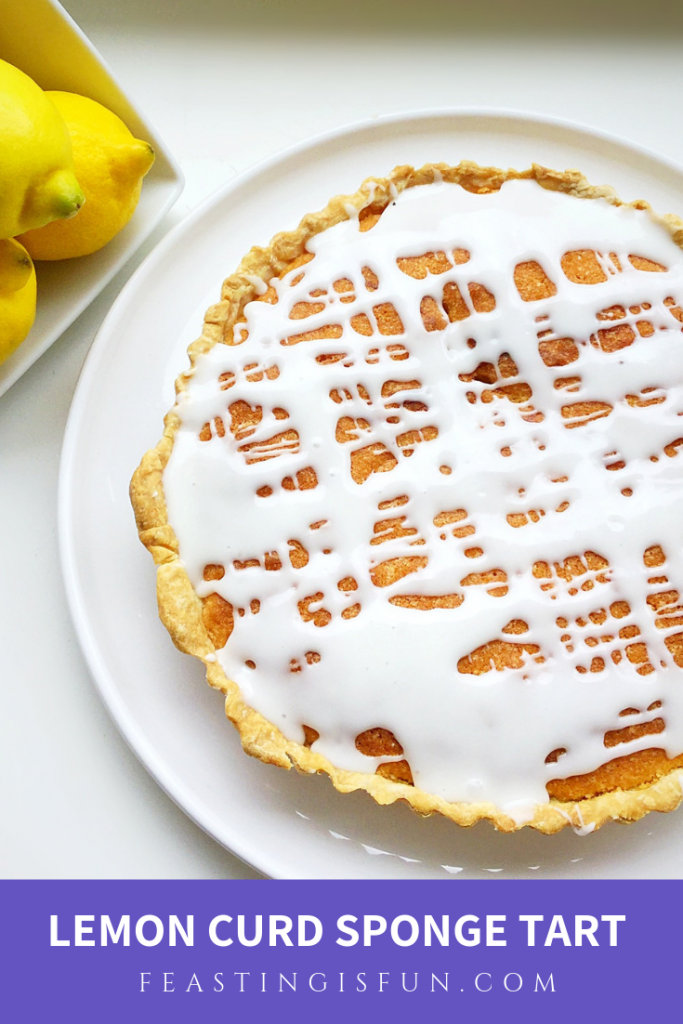
Lemon Curd Sponge Tart

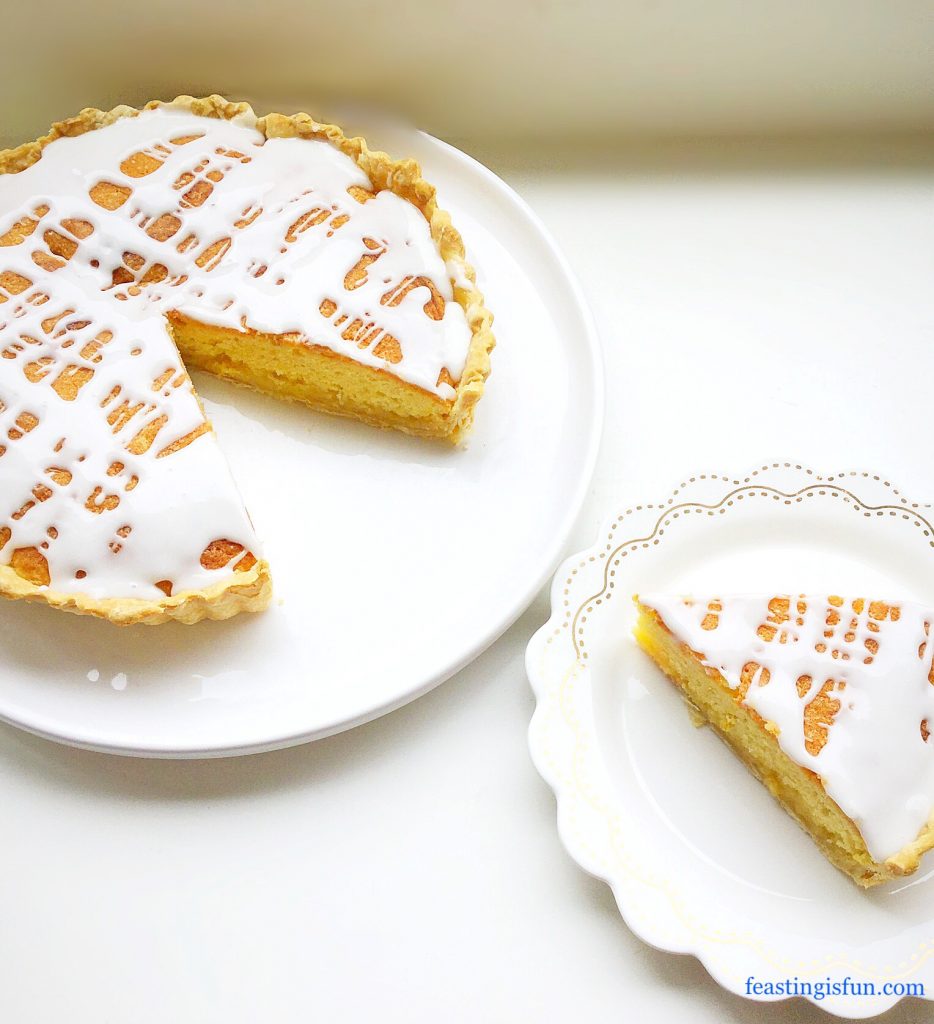
Anyone who has visited this blog before will probably have picked up on my love of lemons. Bright yellow citrus fruits that instantly transport my kitchen and my mood into a sunny day. Whether I use them I sweet or savoury recipes, their impact on flavour is the same. Fresh, juicy, tangy, this fruit knows how to treat your tastebuds to a flavour party! Today I am sharing my new recipe for Lemon Curd Sponge Tart. A sweet celebration of all things lemon.


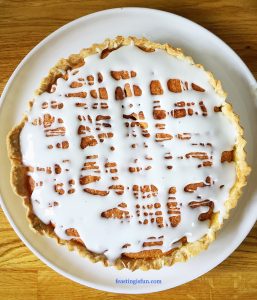
FF Lemon Curd Sponge Tart

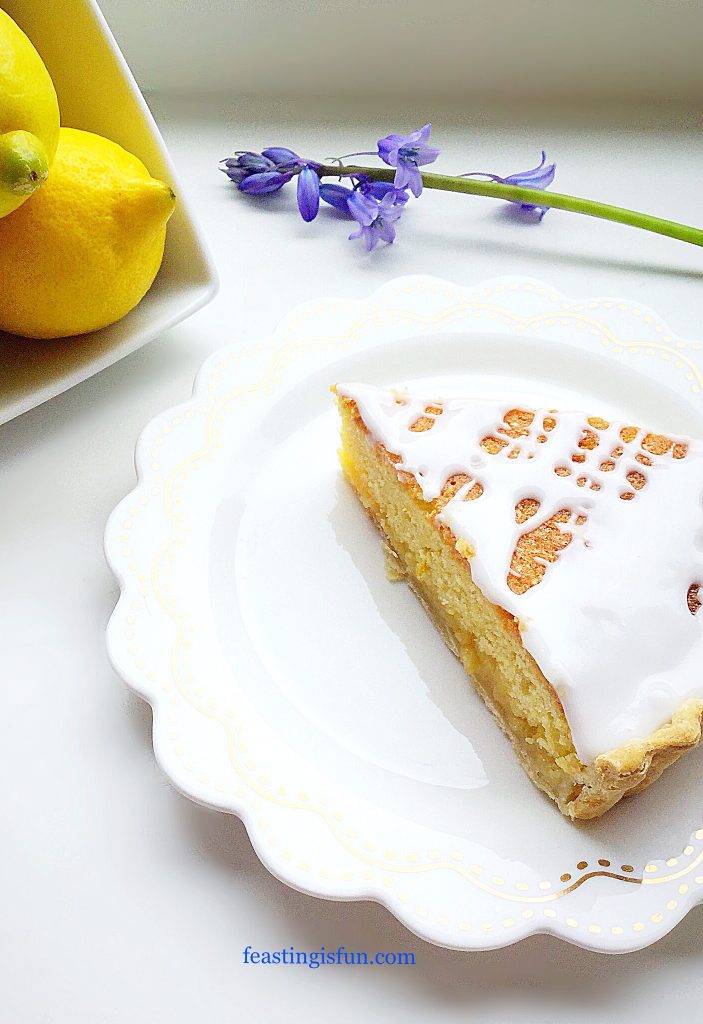
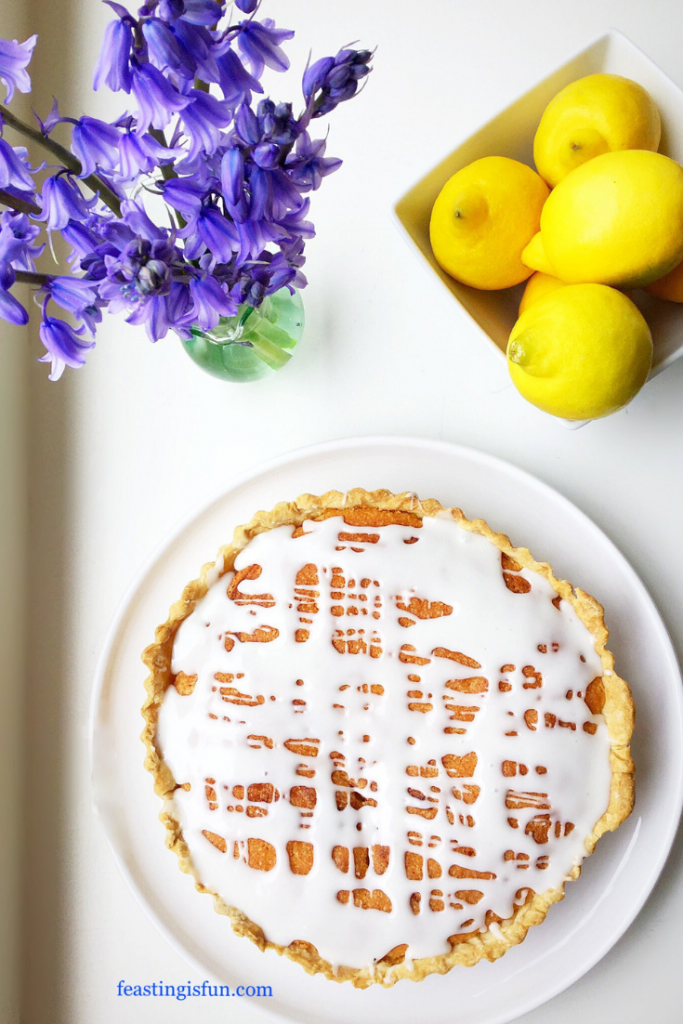
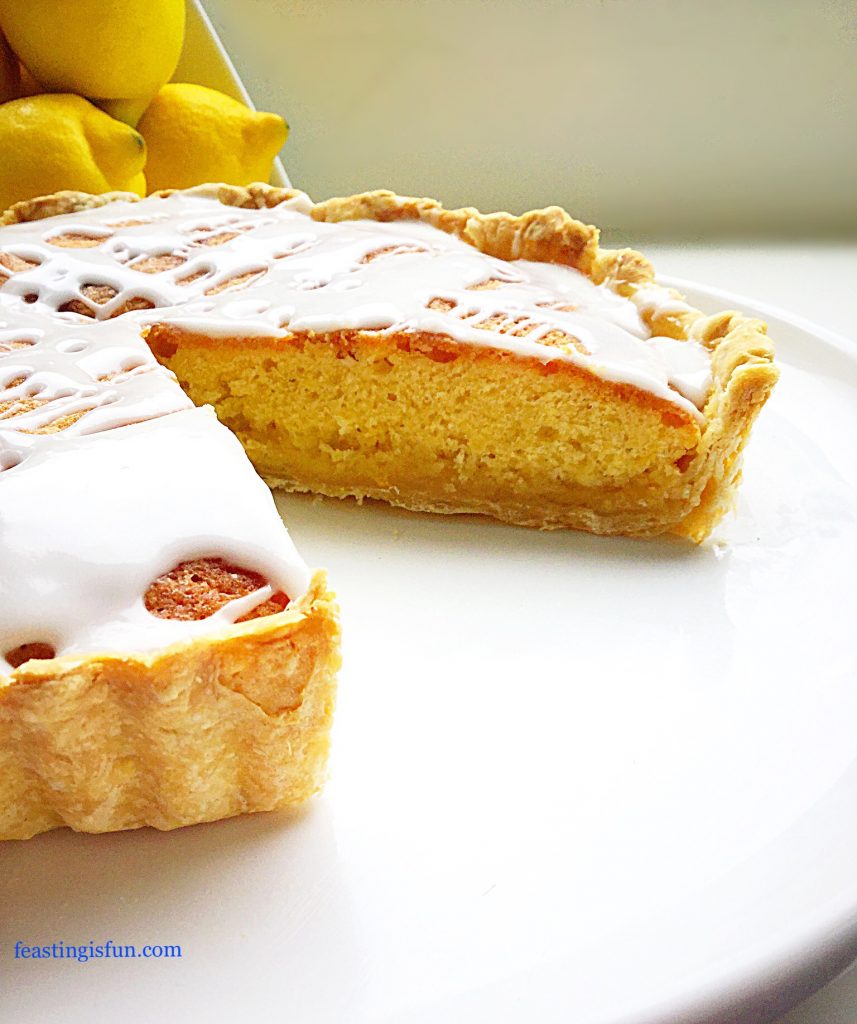
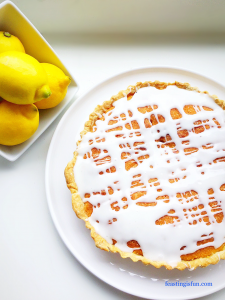
Since I love  Bakewell Tart I wanted to create a similar style dessert with lemon as the foremost flavour. And I have been completely successful. While homemade, buttery, shortcrust pastry provides a crisp base for this dessert, it really is all about the layers. So, on top of the pastry is a generous layer of tart lemon curd, followed by a light, lemony sponge and finally topped with a fresh lemon drizzle icing. The resulting tart is more than the sum of each individual layer.


Lemon Curd Sponge Tart

To Drizzle Or Not To Drizzle?

While originally I wanted to create a dessert that could be served with custard, I’m so glad I opted for the lemon drizzle instead. If you do want to serve this warm with delicious Custard that is totally possible too. Simply allow the tart to cool for at least 20 minutes after baking, leave off the drizzle, slice and serve in a bowl with lashings of creamy custard. Also as mentioned previously serving a slightly chilled slice of this tart with a hot cup of tea really allows you to experience all the separate layers as they come together in one mouthful.


Lemon Curd Sponge Tart

Although I do sometimes have to leave labels on things I’ve made, saying they need to be photographed before eating, this doesn’t guarantee that my family will play by the rules! Fortunately I had finished the photography of this Lemon Curd Sponge Tart before they descended upon it. Nothing makes me happier than to see a bake on the worktop gradually reducing in size as people help themselves to a slice. That tells me more than anything that could be said.

Recipe: Lemon Curd Sponge Tart Serves 6-8

350g/ All Butter Shortcrust Pastry – see my recipe here

4 Heaped Tablespoons Lemon Curd – I use Waitrose own label

For the sponge

100g/4oz Unsalted Butter at room temperature

100g/4oz Caster Sugar

Zest of 2 Lemons – scrub with nail brush under hot water before zesting

1/8tsp Salt

2 Large Free Range Eggs

100g/4oz Plain White Flour – I use Wright’s Baking

1tsp Baking Powder

For the drizzle 

75g/3oz Icing Sugar (confectioners sugar)

Juice of 1-2 lemons

Method: Preheat the oven to 200C/180C fan, 400F, gas mark 6.

For this tart you will need a 20cm x 5cm (8in x 2in) round, fluted tart tin with loose bottom.

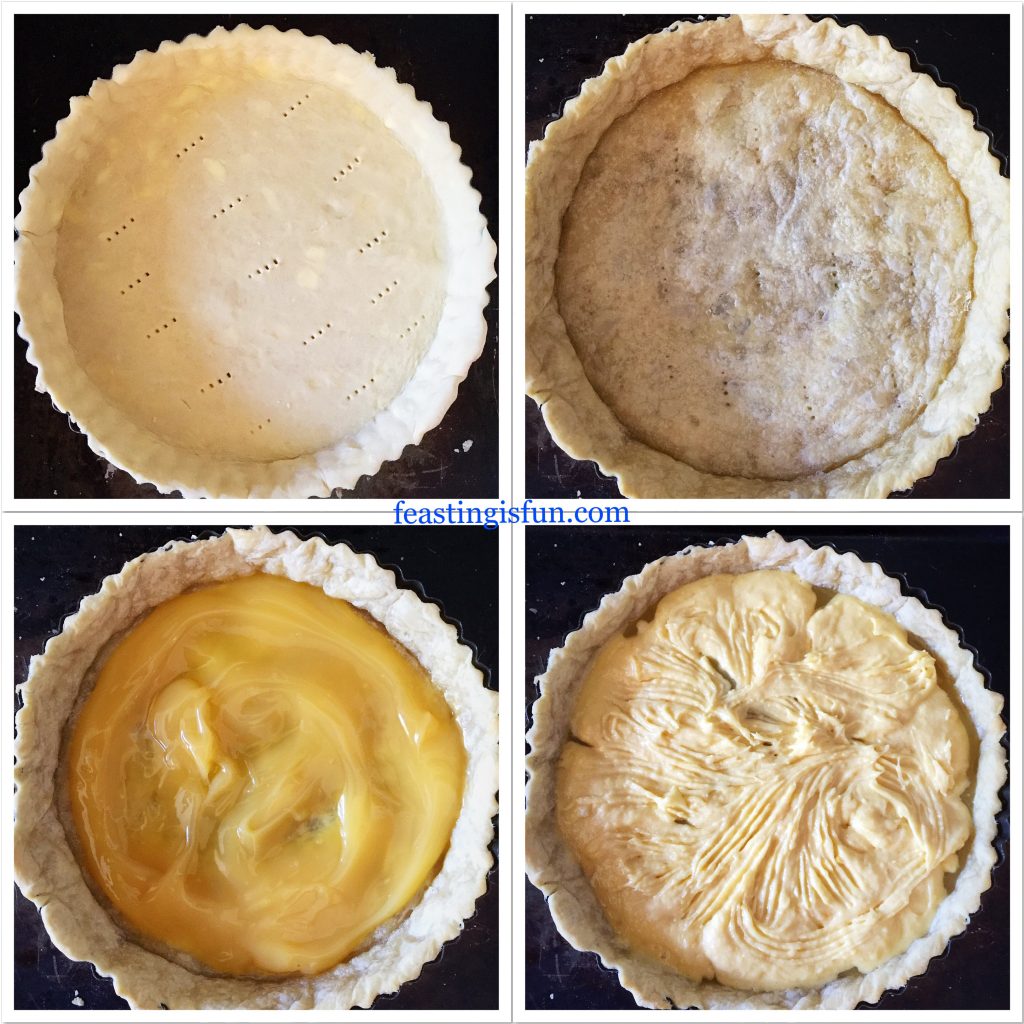
Note: For full step by step instructions with accompanying photographs for rolling out pastry, filling a tart case and blind baking, please see my recipe for Perfect Butter Shortcrust Pastry.

Making The Pastry Tart Case

  • First of all ensure that the pastry has been chilled in the fridge for at least one hour.
  • Lightly dust the worktop with flour and roll the pastry out to a circle that is slightly wider than the tart tin.
  • Loop the pastry over the rolling pin and allow it to fall gently into the tart tin.
  • Carefully press the pastry into the sides and base of the tin.
  • Trim away any excess pastry.
  • Dock the pastry base with a fork to stop it rising during baking.
  • Scrunch up some baking parchment and line the pastry case with it. And then fill with baking beans/ceramic balls.
  • Place the tin into the centre of a preheated oven and bake for 15 minutes.
  • As soon as the baking time is finished remove the tart from the oven.
  • Carefully use the baking parchment to lift the beans out of the partly baked tart shell.
  • Return the tart to the oven for a further 5 minutes.
  • And then remove the blind baked pastry from the oven and allow to cool.
  • Reduce the oven temperature to 180C/160C fan, 350F, gas mark 4.
  • While the pastry is cooling make the lemon sponge.

Making The Lemon Sponge And Filling The Tart Shell

  • Into a medium sized bowl add the butter, caster sugar and salt. Whisk the ingredients together until pale and creamy.
  • Add 2 eggs and sift in the plain flour and baking powder. Whisk until just combined.
  • Now add the zest of 2 whole lemons. Stir with a large spoon to mix.
  • Spoon the lemon curd into the cooled tart shell and spread to form an even layer.
  • Next, spoon the cake batter on top of the curd in small amounts. And then use a fork to spread the cake batter, forming an even layer.


Making the sponge filled tart case.
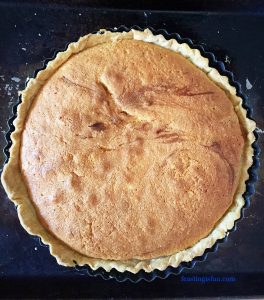
  • Place the filled tart back into the centre of the oven and bake for 35-40 minutes.
  • The sponge layer is baked when it is golden in colour and springs back when lightly pressed in the centre.
  • As soon as the tart is baked remove from the oven and leave to cool completely.
The baked Lemon Curd Sponge Tart
  • Once the tart is cool remove from the loose bottom tart tin and place on to a plate.

Making The Lemon Drizzle And Finishing The Tart

  • Sift the icing sugar into a bowl.
  • Stir as you add the lemon juice until you have a consistency that can be drizzled from a spoon.
  • Spoon the lemon drizzle over the top of the sponge, stopping at the pastry edge.
  • Leave to set. In warm weather, or to speed up the process refrigerate the tart.
FF Lemon Curd Sponge Tart
Adding the fresh lemon drizzle to the cooled tart.

Finally, slice the cooled tart and serve on a plate with a drink of your choice.

Store any leftover tart for up to 5 days in an airtight container in the fridge.

Lemon Curd Sponge Tart

Golden lemon layers set this dessert apart from anything you might buy in the supermarket.

FF Lemon Curd Sponge Tart
Lemon Curd Sponge Tart each district separate layer.

If you have enjoyed this recipe for Lemon Curd Sponge Tart you may also like these:

Lemon Blueberry Bundt Cake

FF Lemon Blueberry Bundt Cake
Lemon Blueberry Bundt Cake

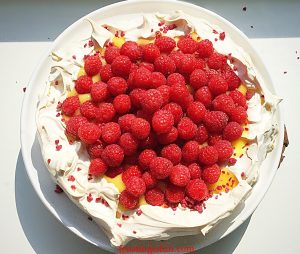
Raspberry Topped Lemon Curd Pavlova 

FF Raspberry Topped Lemon Curd Pavlova
Raspberry Topped Lemon Curd Pavlova

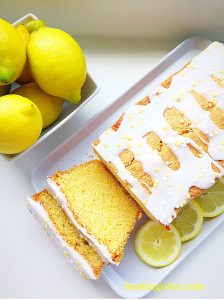
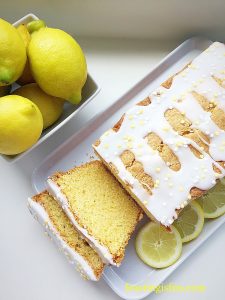
Lemon Drizzle Loaf Cake

FF Lemon Drizzle Loaf Cake
Lemon Drizzle Loaf Cake

As well as enjoying baking to feed my family, friends and neighbours, I also find the process relaxing. Even with the health constraints of my body, which can be very frustrating, I am still able to make a beautiful dessert such as this lemon creation. Since I break down the process over 2 days, making and baking the filled tart one day and then decorating and photographing it the next, I am able to still carry out an activity I enjoy and also achieve a sense of satisfaction. Both of which are important in maintaining a sense of independence and uplifting metal well being. Baking is a form of therapy for me.

Whatever you are making, baking and creating in your kitchens, have fun preparing and sharing your feast.

Sammie xx

No part of this post may be reproduced or duplicated without the written permission of the owner. Please see my Disclosure Policy.
Additionally, the bluebells featured in the photos are from our garden, yet THEY ARE NOT EDIBLE. All parts are toxic, do not use to decorate your bakes.

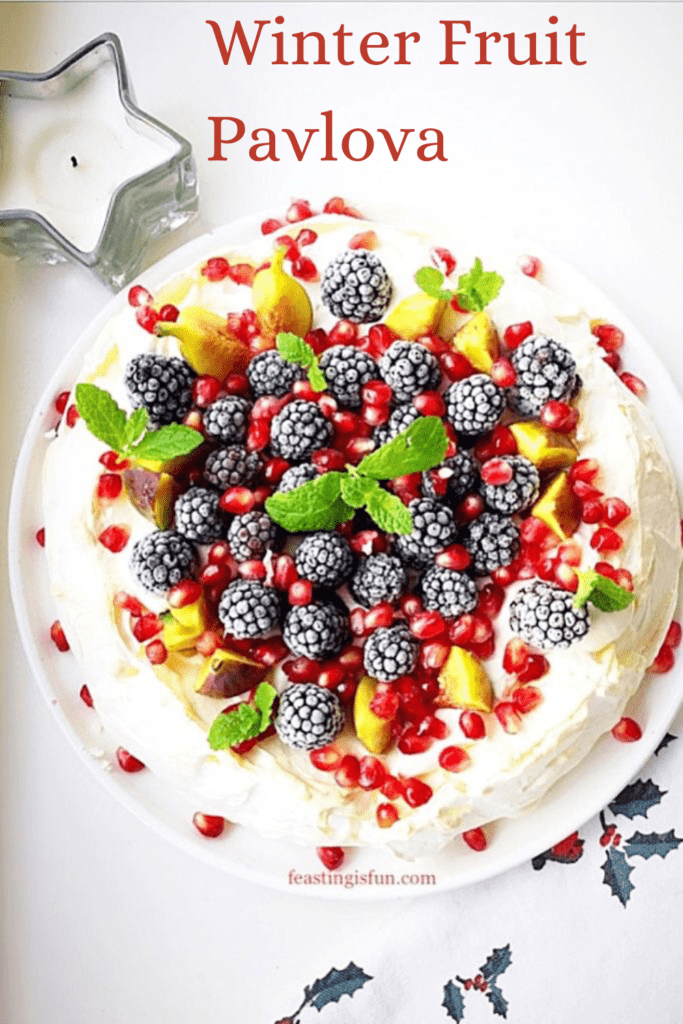
Winter Fruit Topped Pavlova

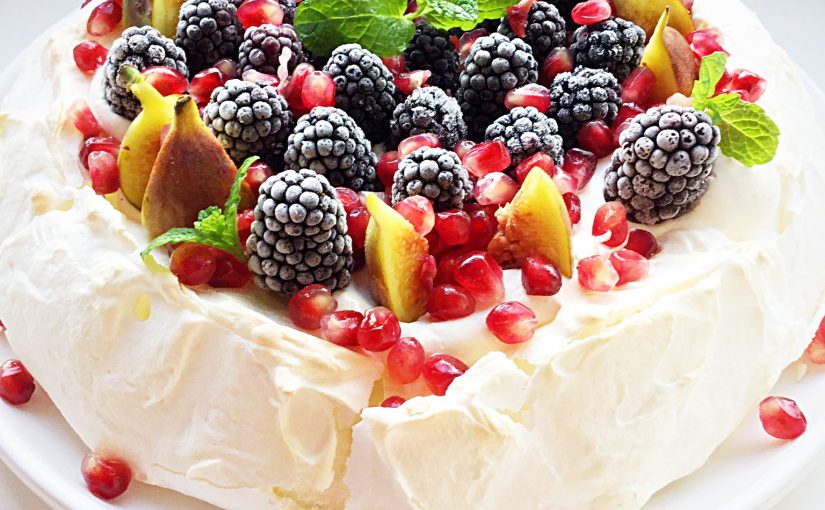
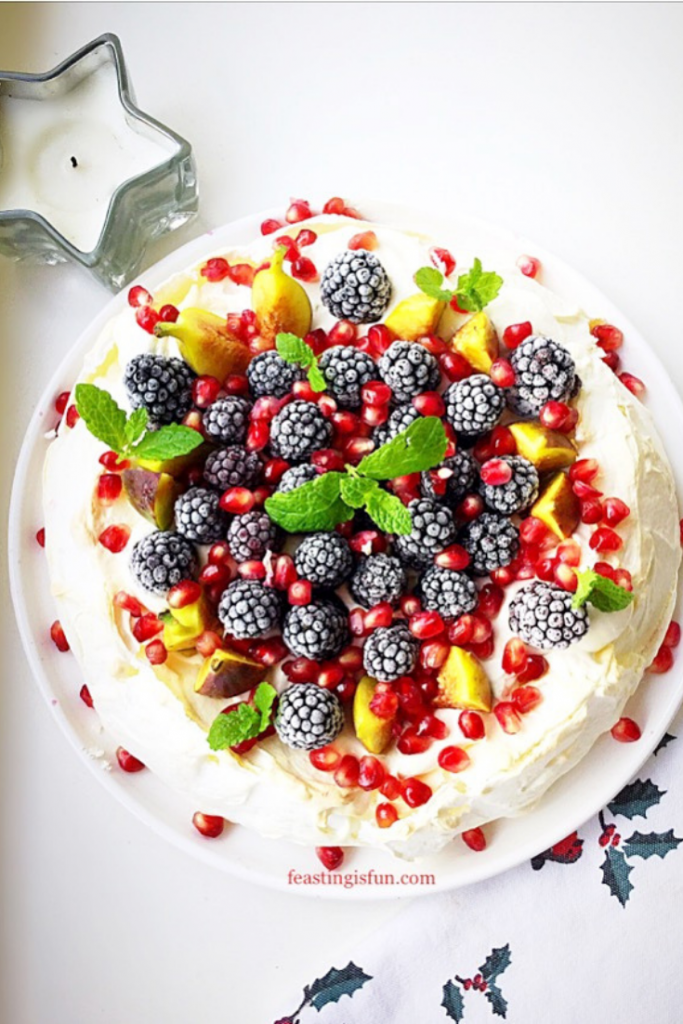
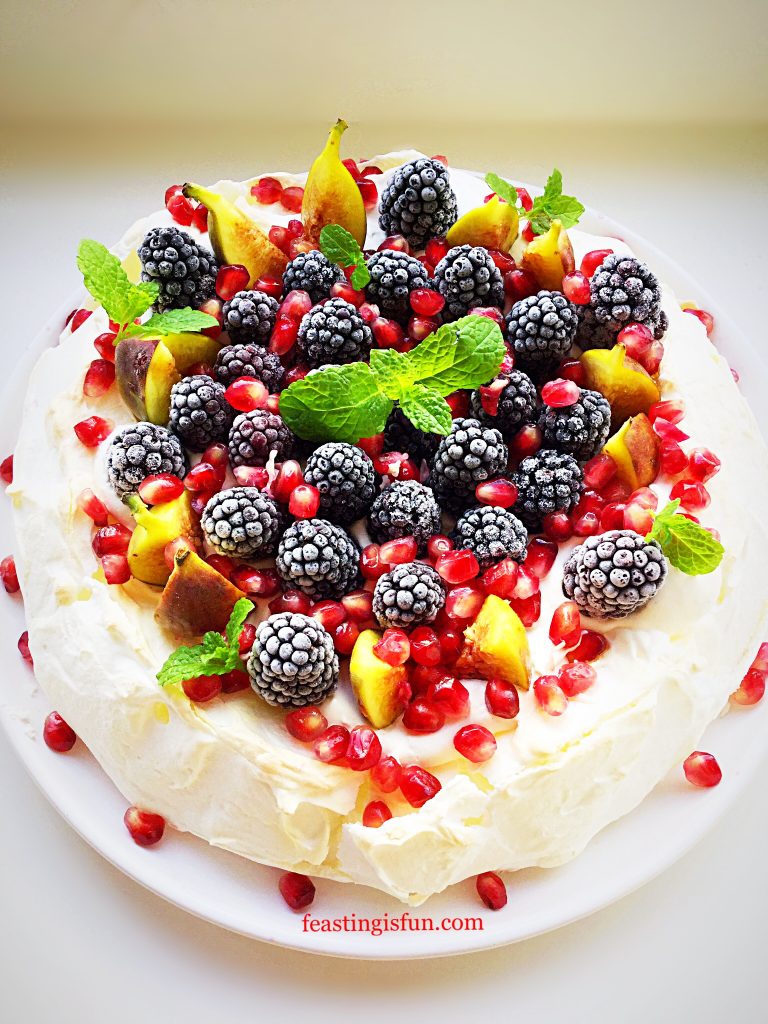
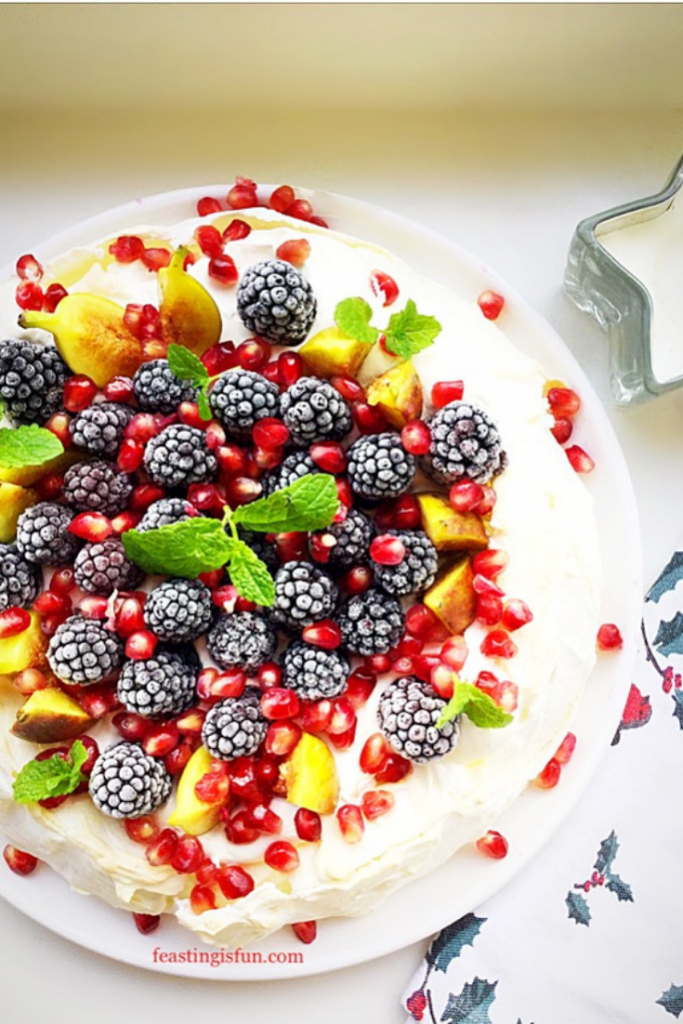
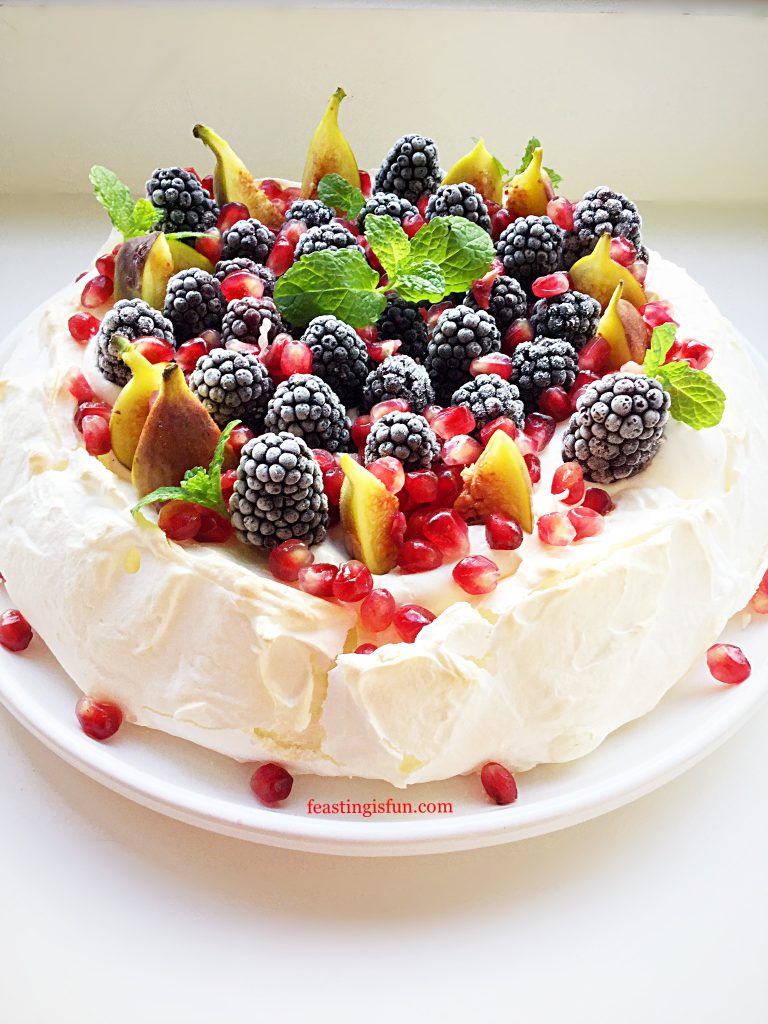
Finally December is here, heralding the start of Winter. And with it we celebrate a month of festive planning, carols by candlelight and sellotape everywhere! While, here at home, there are also two birthdays during December, the celebrating can seem never ending. Since there’s only so much cake you can eat, fear not, because this gluten free Winter Fruit Topped Pavlova is the perfect celebratory dessert.

FF Winter Fruit Topped Pavlova

Tips For The Perfect Pavlova:

For me, Pavlovas always feel like such an elegant dessert. Since they are simple to make as long as you follow a few basic rules. And they cannot, must not and should not be rushed. Either during the whisking or baking stage. While whisking, all of the sugar must be given time to dissolve in the egg white, otherwise it will leak out during cooling and the meringue will collapse. Likewise, after baking it is important to leave the Pavlova to cool slowly, preferably in the oven. Rushing this stage can cause the meringue structure to badly crack.

FF Winter Fruit Topped Pavlova
Winter Fruit Topped Pavlova

Please do not let the previous advice discourage you from making a pavlova. Rather I hope it has the opposite effect and encourages you. Because, taking an extra five minutes (that’s 5 minutes not forever!) to ensure the meringue is properly mixed will improve your bake.. Another tip is to bake the Pavlova in the evening, leaving it in the oven overnight to cool. Since this allows the meringue to cool slowly overnight without tying up the oven. Resulting in a quick assembly job the next day and easy your festive workload!

FF Winter Fruit Topped Pavlova
Winter Fruit Topped Pavlova

And if the meringue does crack, it will be covered with whipped cream and fruit. While no one ever need know!

Recipe: Winter Fruit Topped Pavlova serves 8

4 Large Free Range Egg Whites

200g/7oz Caster Sugar

Juice of half a Lemon

400ml Double Cream (Heavy Cream)

1tsp Vanilla Bean Paste – I use Nielsen-Massey 

4 Fresh Figs – cut into quarters

300g Frozen Blackberries – I buy them from Waitrose 

1-2 Fresh Pomegranates – seeds removed

Optional – Fresh Mint to garnish

Preheat the oven to 180C/160C fan, 350F, gas mark 4

Making the meringue base:

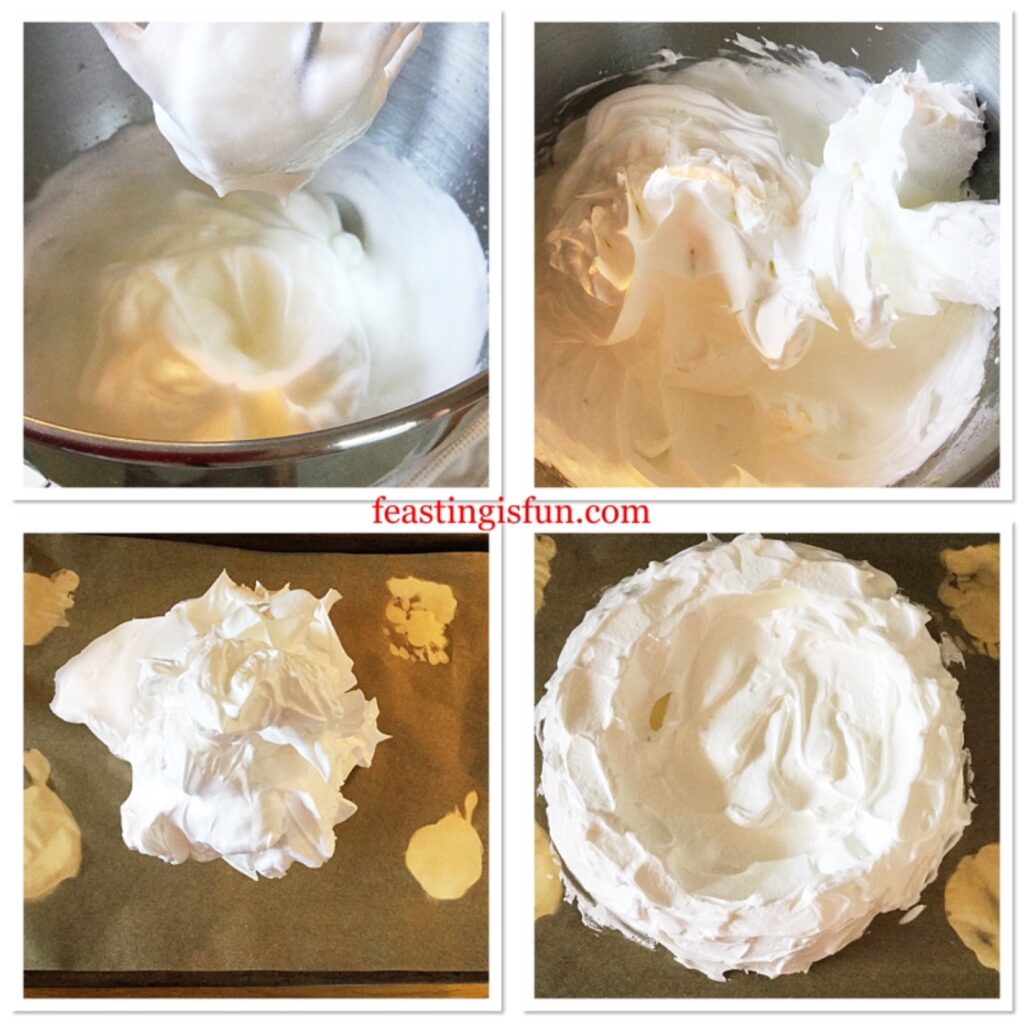
  • First of all draw an 8in/20cm circle on to a piece of baking parchment. Turn the paper over and place on to a baking tray.
  • Wipe around the inside of a very clean, large bowl with half a lemon.
  • Add four eggs white to the bowl and the juice of half a lemon.
  • Whisk the egg whites until they form a stiff peak.
  • Continue whisking on a medium speed, slowly adding one tablespoon of sugar at a time to the egg whites.
  • When all of the sugar is added the mixture should be thick and glossy. Rub a little of the meringue between your finger and thumb, if it feels gritty continue to whisk. Check again after a couple of minutes. As soon as it feels smooth and silky it is ready.
  • Remove a small amount of the meringue and use it as glue to stick the baking parchment to the baking tray.
  • Spoon the meringue mixture on to the baking parchment, inside the circle.
  • Use a palette knife to shape the meringue into a disc, building up the outside edge.

Making and shaping a meringue.

Baking the meringue:

  • Place the meringue into the centre of the oven and bake at the preheated temperature for 5 minutes.
  • Reduce the oven temperature to 120C/100C fan, 250F, gas mark 1/2 and continue to bake for 1 hour.
  • Do not open the oven during baking.
  • As soon as the baking time has elapsed turn off the oven and leave the meringue  to cool completely in the oven.
  • Once cooled remove the meringue from the oven.

Filling and decorating the Pavlova:

  • Pour the cream into a large bowl. Add the vanilla bean paste.
  • Whip the cream until it is thick but not stiff.
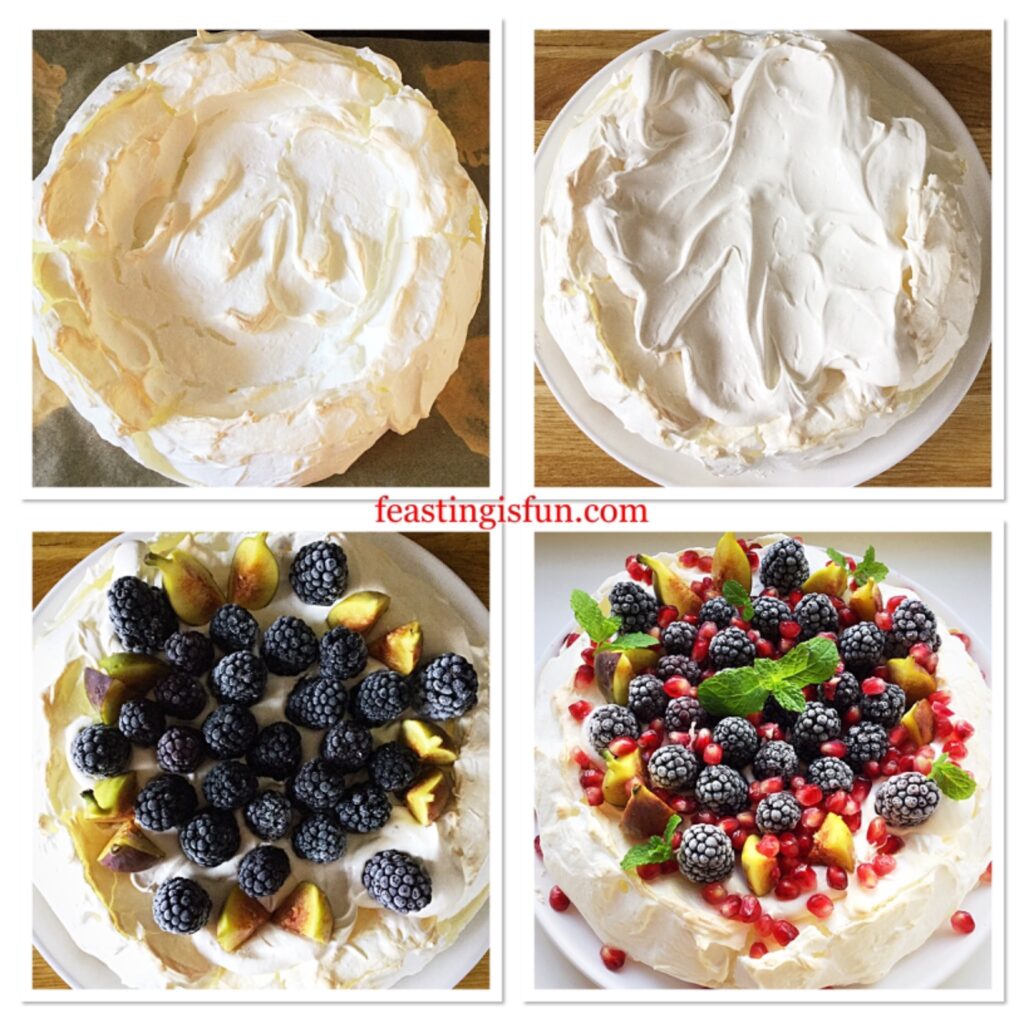
  • Carefully run a palette knife between the meringue and baking parchment.
  • Place the meringue on to a plate or cake stand.
  • Spoon the whipped cream on to the meringue.
  • Add the figs and blackberries. Finally sprinkle over with pomegranate seeds.
  • Garnish with fresh mint.
  • Alternatively, sprinkle over a dusting of icing sugar to create an extra festive feel!

Filling and decorating a baked meringue.

Fill and decorate the Pavlova 1-2 hours prior to serving. So that the blackberries have time to defrost.

FF Winter Fruit Topped Pavlova
Winter Fruit Topped Pavlova

To serve, cut the Pavlova into slices and use a cake knife to transfer to a dessert plate.

The meringue pavlova base can be made a day in advance. After filling and decorating keep the Pavlova refrigerated and away from strong smells. The Pavlova will keep for up to 2 days in the fridge.

FF Winter Fruit Topped Pavlova

If you have enjoyed this recipe for Winter Fruit Topped Pavlova you may also like these:

Raspberry Chocolate Pavlova 

FF Winter Fruit Topped Pavlova
Raspberry Chocolate Pavlova

Blackberry Nectarine Tart 

FF Winter Fruit Topped Pavlova
Blackberry Nectarine Tart

Dark Chocolate Drizzle Pear Ginger Pavlova 

FF Winter Fruit Topped Pavlova
Dark Chocolate Drizzle Pear Ginger Pavlova

With a crisp outer shell and marshmallow centre Pavlovas are a delicious dessert. Since they can be filled with many different combinations of fruit they are perfect for using seasonal or frozen fruit. While this recipe uses a whipped cream filling, see my Raspberry Topped Lemon Curd Pavlova for an alternative filling. Also, all Pavlova recipes here on Feasting is Fun are gluten free (please see individual recipes for recommendations). As a result this dessert is a festive winter feast that more people can enjoy.

So, whatever you are making, baking and creating in your kitchens at this festive time, have fun preparing and sharing your feast.

Sammie xx

No part of this post may be reproduced or duplicated without the written permission of the owner. Please see my Disclosure Policy.
Christmas meringue dessert.


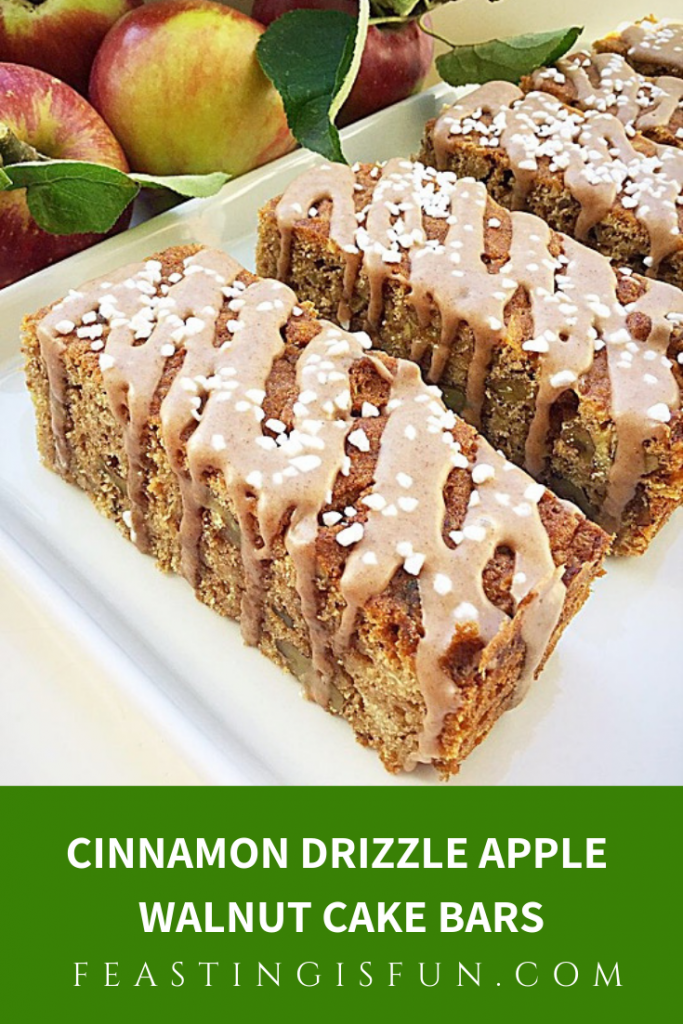
Cinnamon Drizzle Apple Walnut Cake Bars

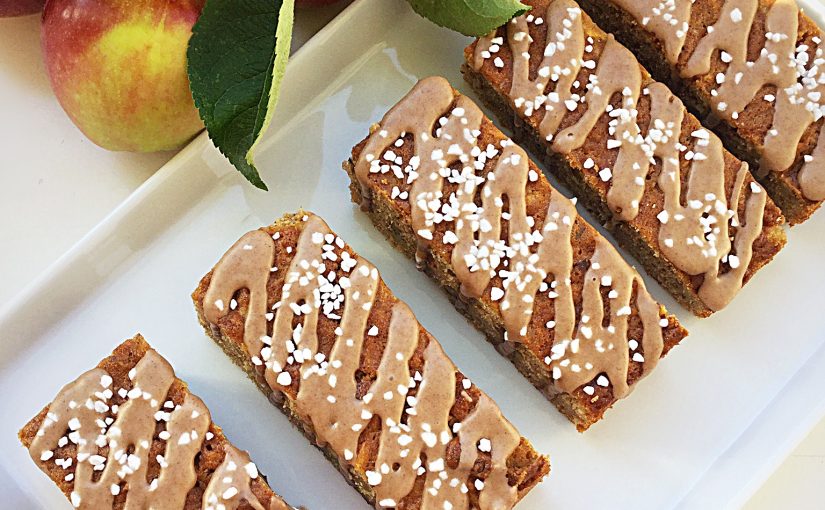
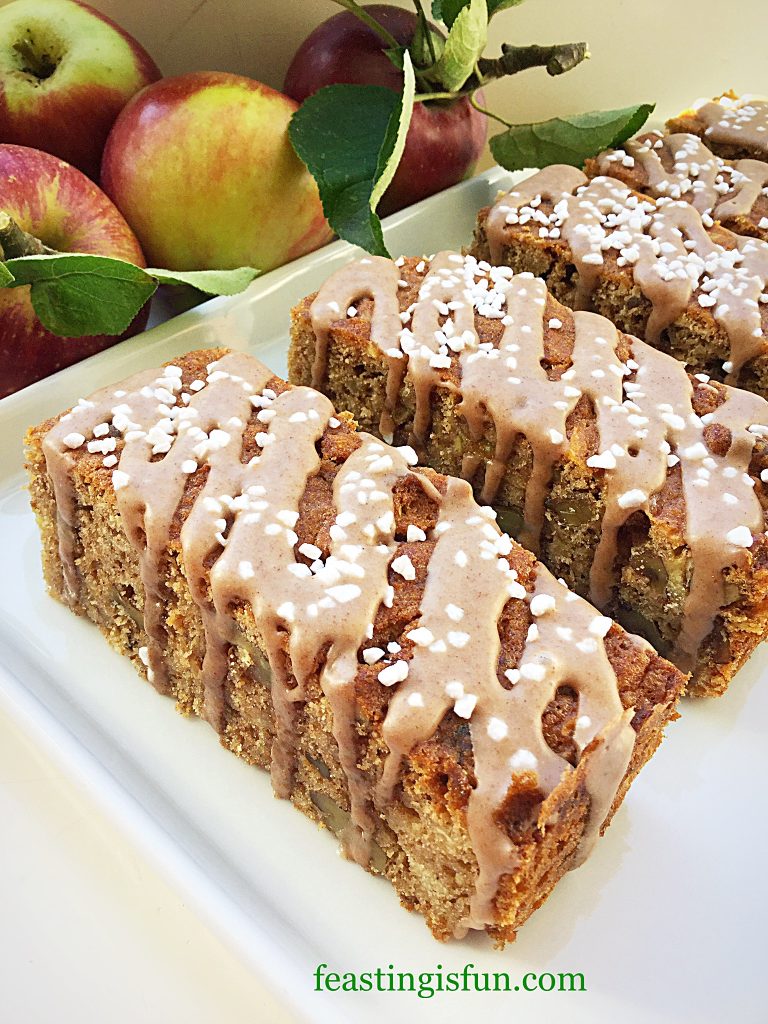
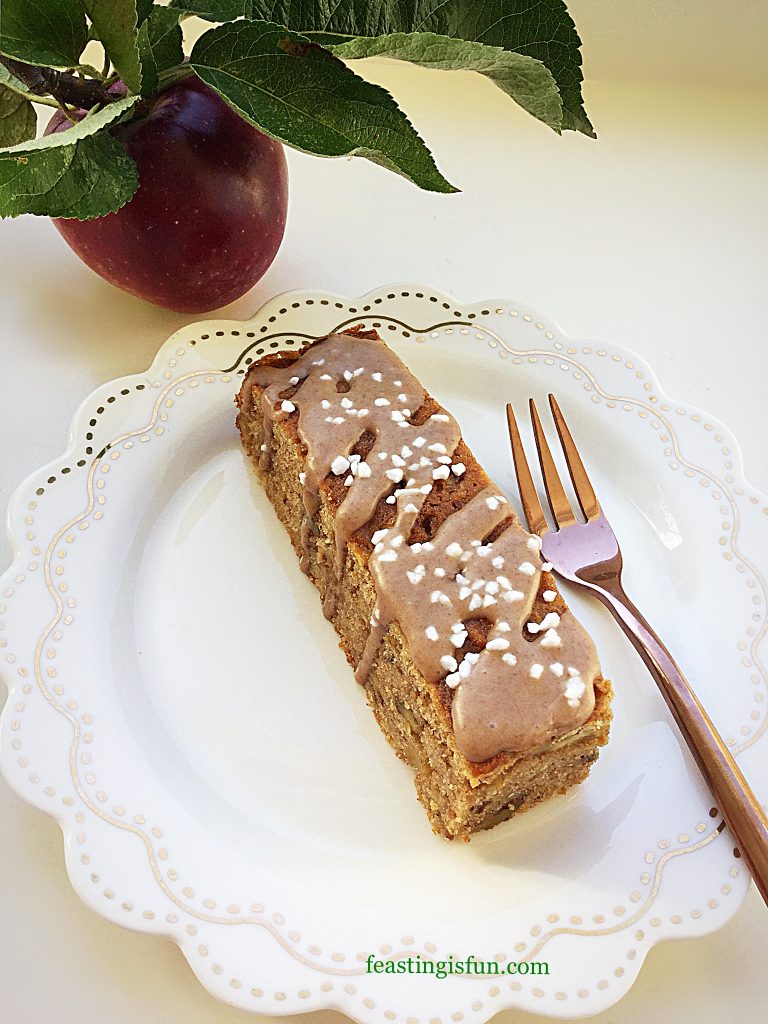
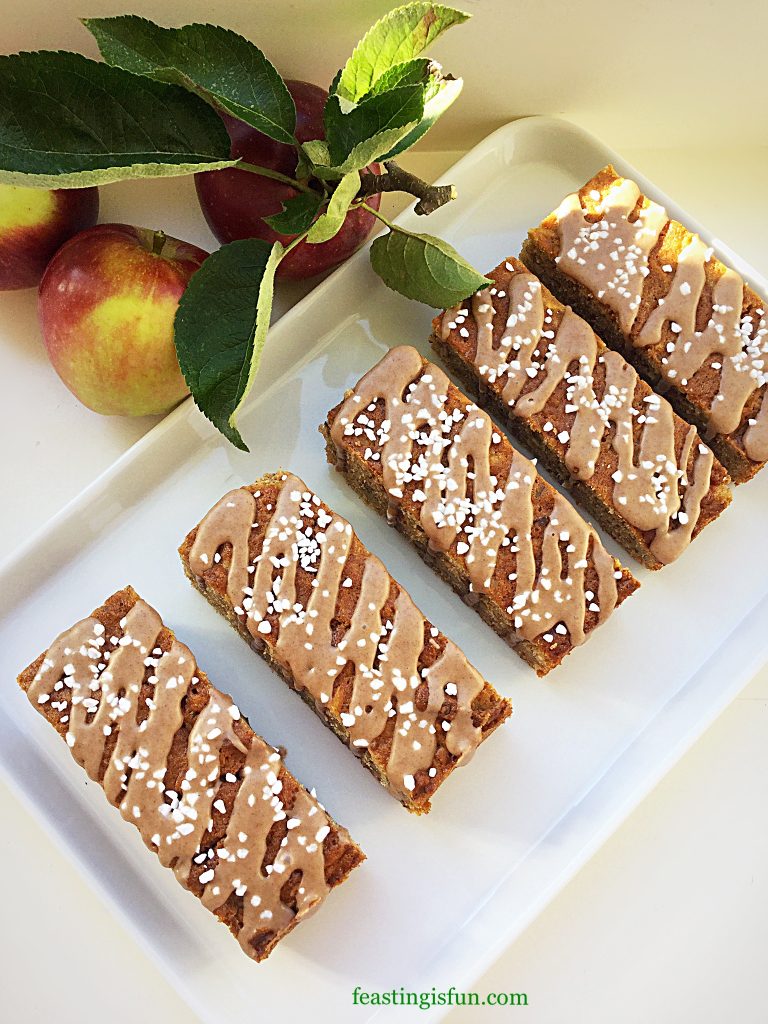
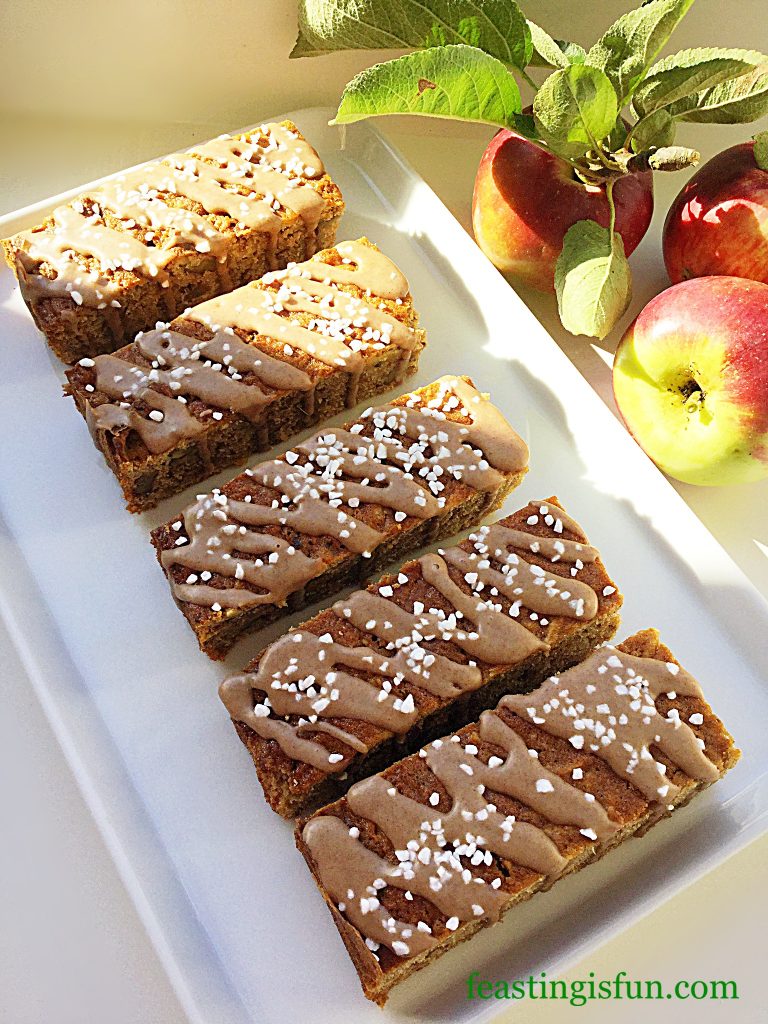
Today I have a real treat for you, my Cinnamon Drizzle Apple Walnut Cake Bars. Packed with freshly grated apple and toasted walnuts these cake bars are full of flavour. And a simple cinnamon drizzle adds just the right amount of sweetness, while the sugar nibs add extra crunch. Resulting in a simple traybake that is a treat on the tongue and the senses.

FF Cinnamon Drizzle Apple Walnut Cake Bars
Cinnamon Drizzle Apple Walnut Cake Bars

I adore Autumn. While gales and rain lash down, there are also the bright, golden sunshine filled days. Because of the variations in the weather, some days are perfect for gardening, having a tidy up, and picking fruit and windfalls. Yet when the weather rages I find comfort in the kitchen, baking delicious cakes that make the whole house smell warm and inviting. And when I can include produce from my own garden, such as the apples used in both the cake bars and photographs, I’m even happier.

FF Cinnamon Drizzle Apple Walnut Cake Bars
Cinnamon Drizzle Apple Walnut Cake Bars

Our Apple Trees

Due to the very hot summer we have had this year I wasn’t sure how well our two apple trees would fare. Because of the heat this years apples are sweeter than usual. While both our trees produce eating apples, one usually small, red and sweet, the other red and green, sharper in flavour. Similar to a Granny Smith apple’s flavour. As a result of the summer weather both varieties have a more intense apple flavour and are delicious to eat straight from the tree.

FF Cinnamon Drizzle Apple Walnut Cake Bars
Cinnamon Drizzle Apple Walnut Cake Bars

Since we have plenty of windfalls from the recent storms I have used them in the recipe. If you have access to windfall apples make the most of nature’s opportunity. Either use them to make these cake bars or perhaps my Apple Pie? Finally, a quick note, if you like puddings, then I should mention that this cake is delicious served with hot custard!

Recipe: Cinnamon Drizzle Apple Walnut Cake Bars make 16

300g/10.5oz Unsalted Butter at room temperature

300g/10.5oz Soft Light Brown Sugar

1/2tsp Sea Salt

4 Large Free Range Eggs

2tsp Vanilla Extract – I use Nielsen-Massey.

375g/13oz Plain White Flour

4tsp Ground Cinnamon

1tsp Ground Ginger

3tsp Baking Powder

200g/7oz Chopped Walnuts

350g/12oz Grated Apple (peeled and cored)

For the cinnamon drizzle

225g/8oz Icing Sugar (confectioners sugar)

3tsp Ground Cinnamon

2-3 tbsp Cold Water

Optional – Pearl or Nibbed Sugar – I use Dansukker Parlsocker available from Amazon

For this recipe you will need a 22.5cm x 30cm x 5cm (9” x 12” x 2”) tin lined with baking parchment.

Making and baking the cake:

Preheat the oven to 190C/170C fan, 375F, gas mark 5.

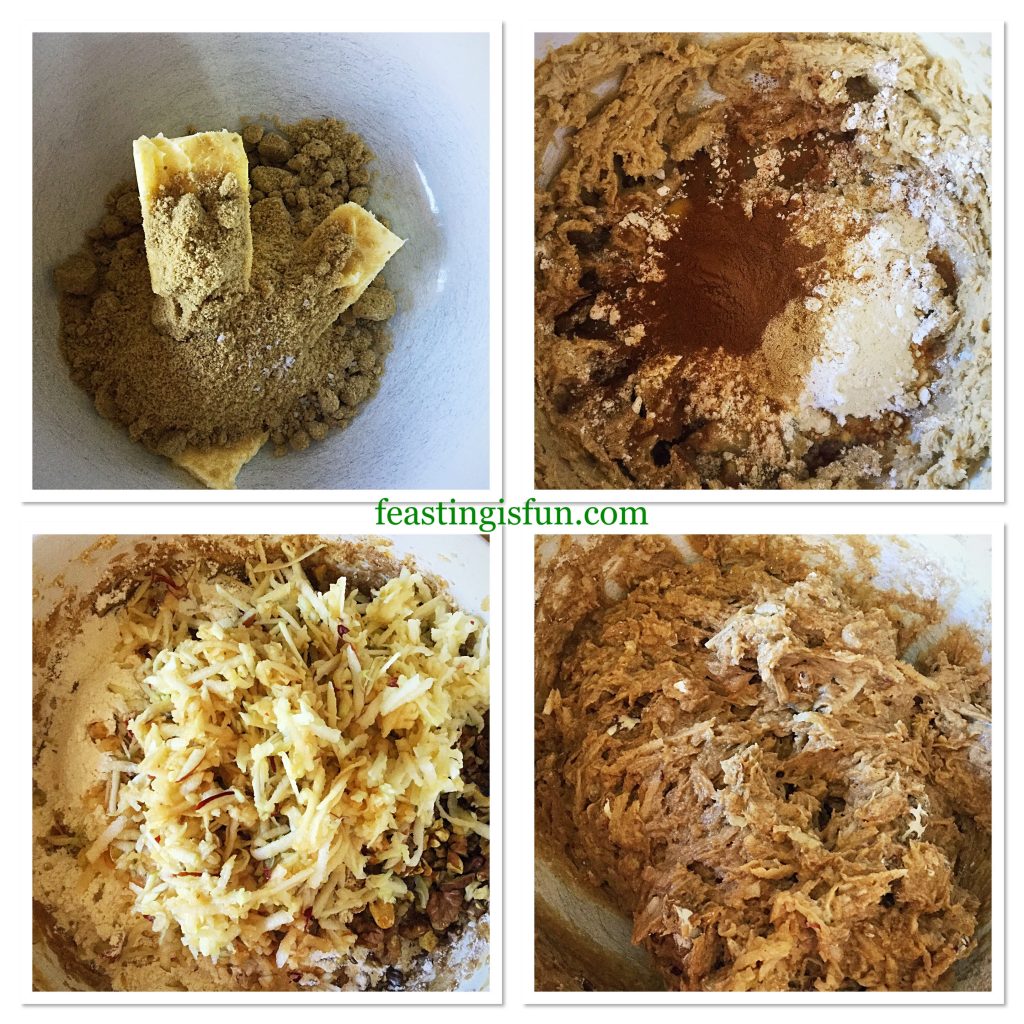
  • First of all add the butter, soft, light brown sugar and salt to a large bowl. Due to the quantity of ingredients I found a wide bowl easier to use.
  • Beat the sugar and butter together until creamy with no visible lumps.
  • Add the 4 eggs, 75g/3oz of flour and the spices to the bowl. Whisk everything together until fully combined.
  • Sieve the remaining flour and baking powder into the bowl and added the chopped walnuts.
  • Because some apples turn brown quickly once cut or grated I add them last.
  • Finally fold all of the ingredients together until they are just combined.
FF Cinnamon Drizzle Apple Walnut Cake Bars
Making the cake batter.
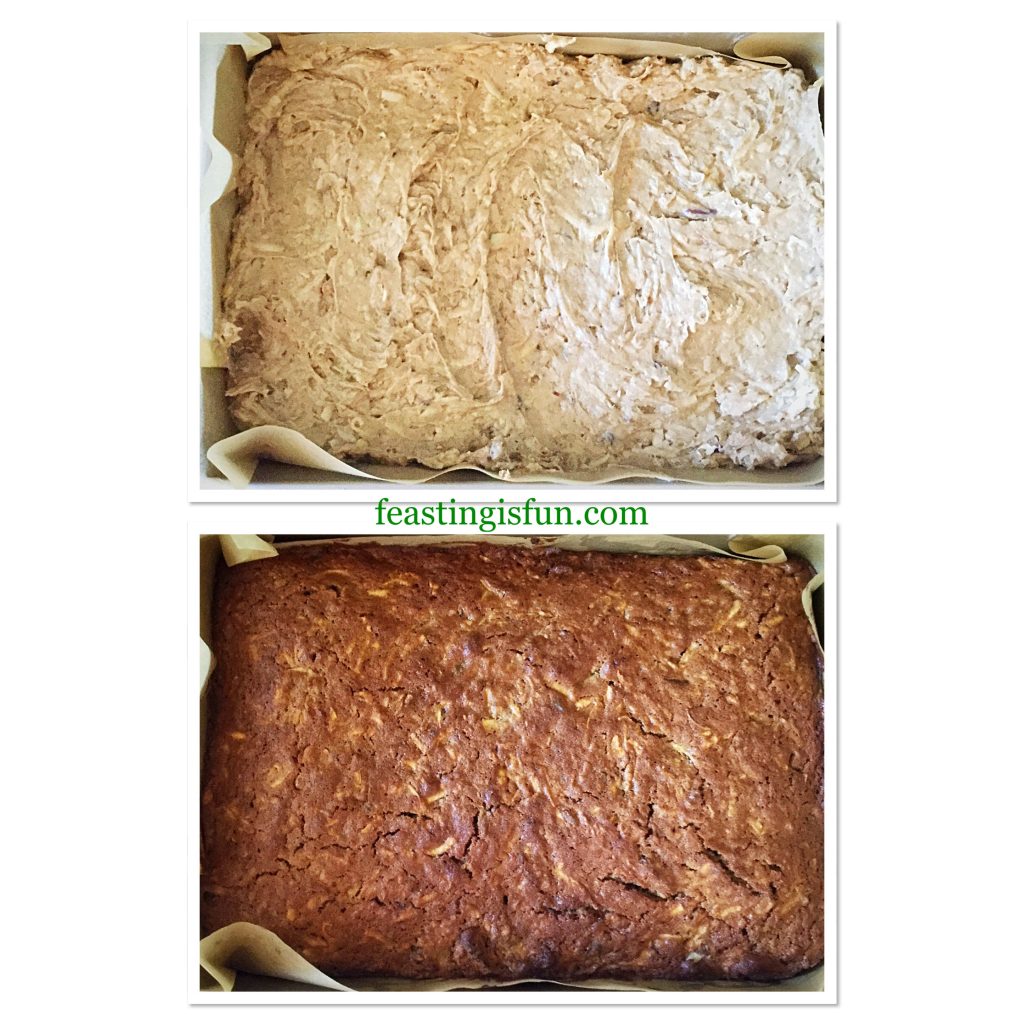
  • Spoon the cake batter into the prepared tin and ensure the batter is even and the top is smooth.
  • Place the cake tin into the centre of a preheated oven and bake for 40-45 minutes.
  • The cake is baked when it is golden in colour and firm (with only a little give) to touch in the centre.
  • As soon as the cake is baked remove from the oven and leave to cool completely in the tin.
FF Cinnamon Drizzle Apple Walnut Cake Bars
Filling the tin and baking the cake.

Portioning and decorating the cake bars:

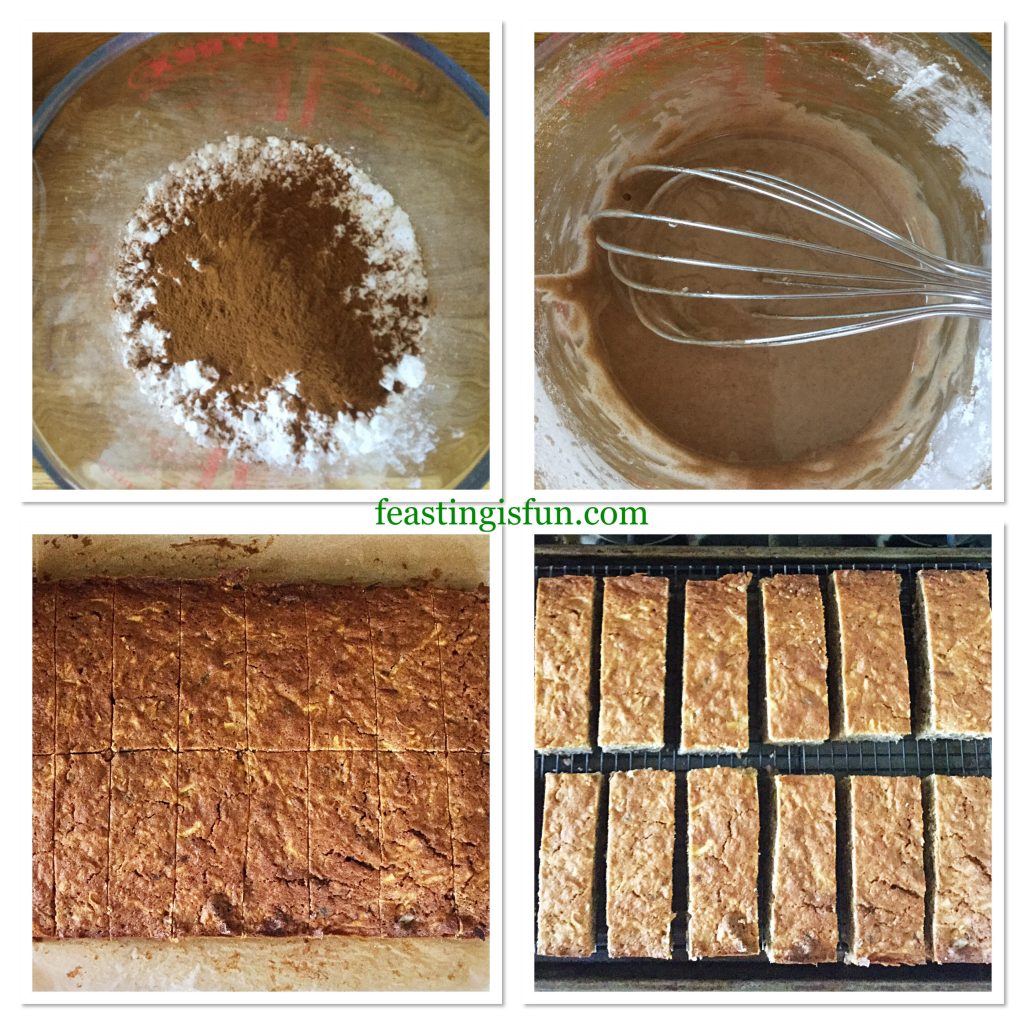
  • Add the icing sugar and cinnamon to a large jug. Using a balloon whisk, stir the two powders to combine and break up any lumps.
  • Pour 2 tablespoons of cold tap water into the jug and stir using the whisk. Add more water as needed until a thick, not runny consistency is achieved.
  • Decant the cinnamon icing into a piping bag fitted with a small round nozzle. Alternatively use a plastic sandwich bag and just prior to decorating cut a very small hole in one corner, this also applies to disposable piping bags.
  • To prepare the cake for decorating first of all cut across the width of the cake, dividing it in half. Now cut from top to bottom in the middle of the cake creating 4 quarters. Cut each quarter into 4 bars from top to bottom.
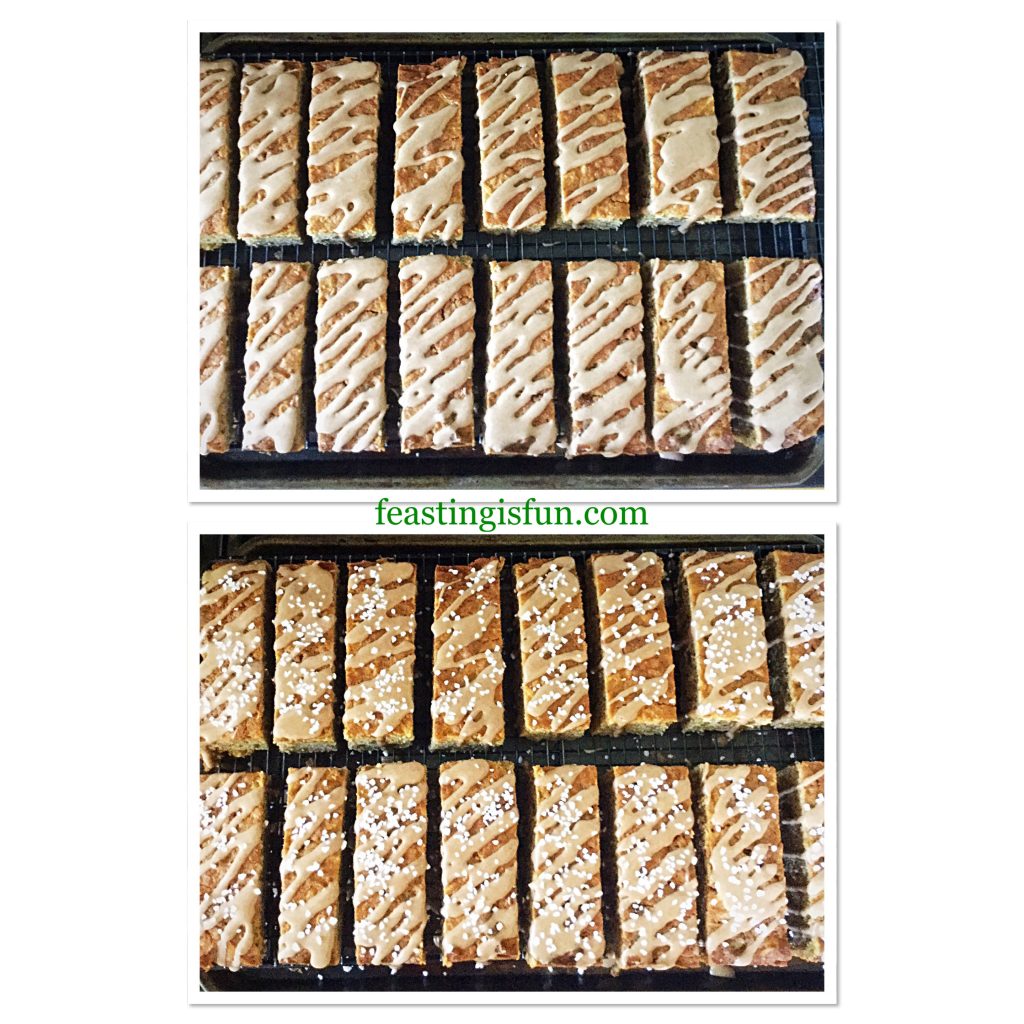
  • While you can decorate the cake as a whole, I like to see the drizzle of icing on each cake bar.
  • Separate the bars and place on to a cooling rack over a baking tray, to catch any drips.
FF Cinnamon Drizzle Apple Walnut Cake Bars
Preparing the cake bars for decorating
  • Use gentle, steady pressure to pipe diagonally across each cake bar. Continue piping until each bar is iced.
  • Sprinkle some sugar nibs over each bar while the icing is still wet.
  • Place to one side to allow the icing to set.
FF Cinnamon Drizzle Apple Walnut Cake Bars
Decorating the Cinnamon Drizzle Apple Walnut Cake Bars

Finally take a photo of your creation! Because your house will smell amazing and these cake bars will not last long.

FF Cinnamon Drizzle Apple Walnut Cake Bars
Cinnamon Drizzle Apple Walnut Cake Bars

Store the bars in an airtight container. They will keep for 5 days. Refrigerate during warmer weather.

The cake can be made a day in advance and decorated the following day.

If you have enjoyed this recipe for Cinnamon Drizzle Apple Walnut Cake Bars you may also like these:

Easy Blackberry Oat Muffin Recipe 

FF Cinnamon Drizzle Apple Walnut Cake Bars
Easy Blackberry Oat Muffin Recipe

Maple Drizzled Apple Blueberry Loaf Cake 

FF Cinnamon Drizzle Apple Walnut Cake Bars
Maple Drizzled Apple Blueberry Loaf Cake

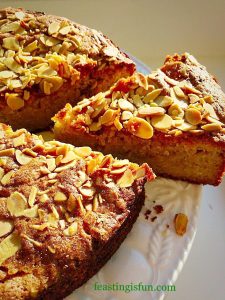
Autumn Apple Almond Cake

FF Cinnamon Drizzle Apple Walnut Cake Bars
Autumn Apple Almond Cake a gluten free bake

Traybakes are made for sharing:

With Bonfire Night, November 5th not far away these cake bars are perfect for sharing. Whether you are going to an organised event, holding a bonfire party in your back garden, or simply watching from your window, everything about these cake bars will elicit oohs and aahs! Because they are so yummy, they deserve to be made and enjoyed all year round.

Whatever you are making, baking and creating in your kitchens, have fun preparing and sharing your feast.

Sammie xx

No part of this post may be reproduced or duplicated without the written permission of the owner. Please see my Disclosure Policy for details.

FF Cinnamon Drizzle Apple Walnut Cake Bars

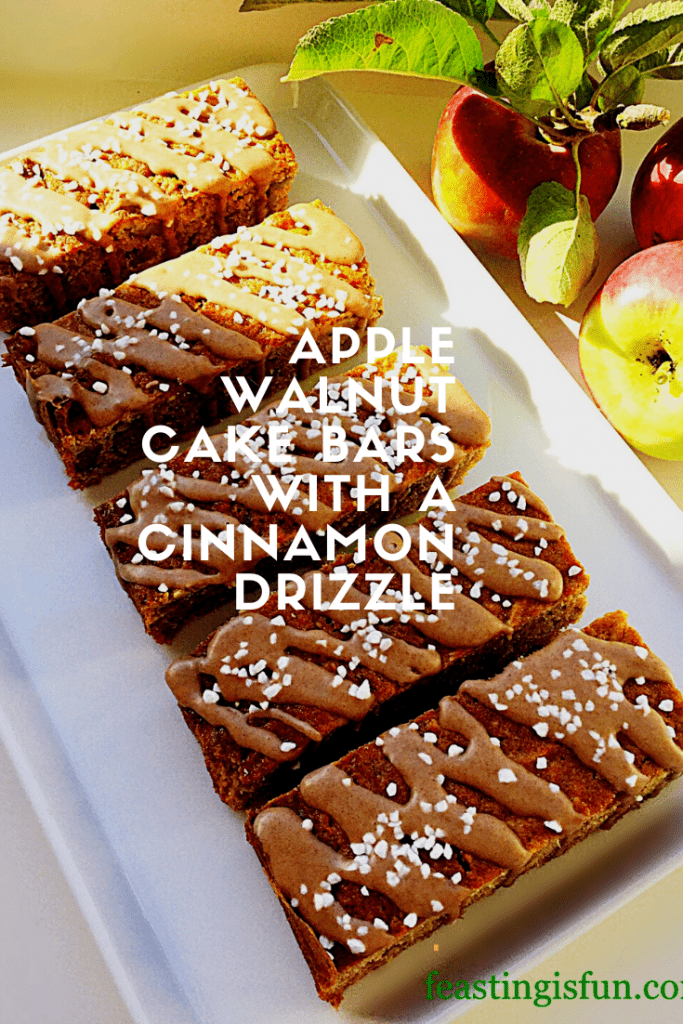
Autumnal fruit and nut traybake with spiced icing.
Apple and walnut cake bars with a cinnamon icing drizzle.

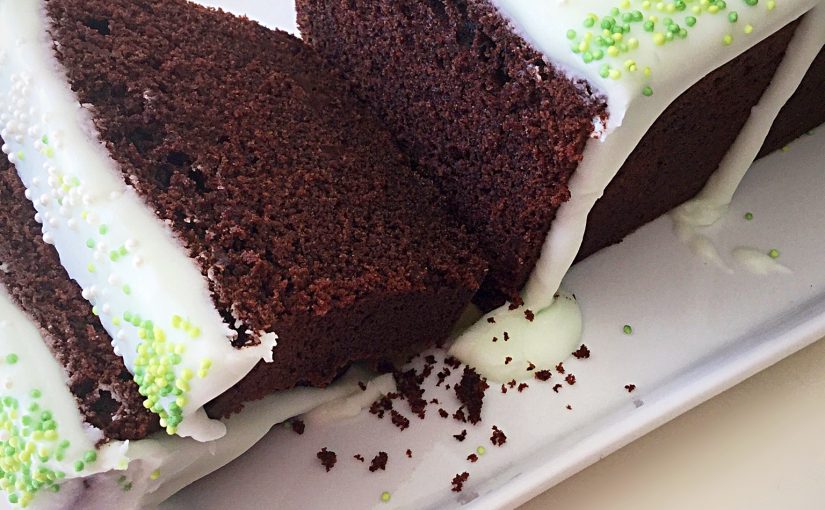
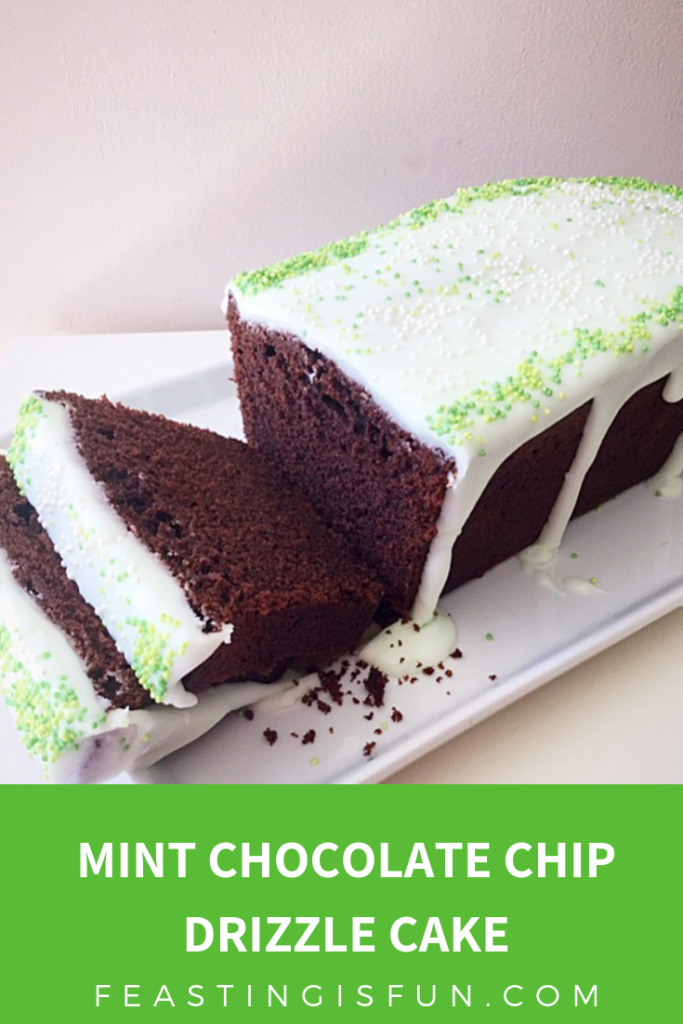
Mint Chocolate Chip Drizzle Cake

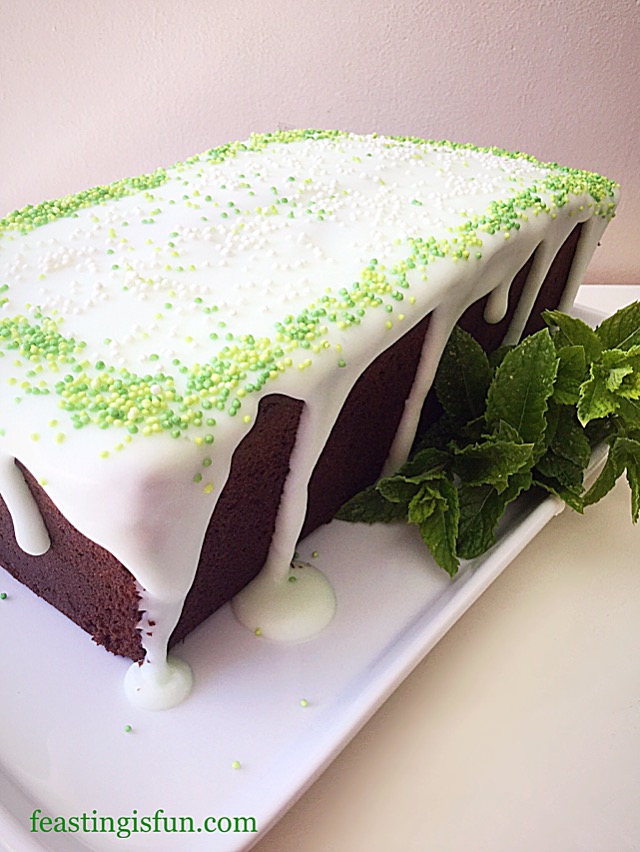
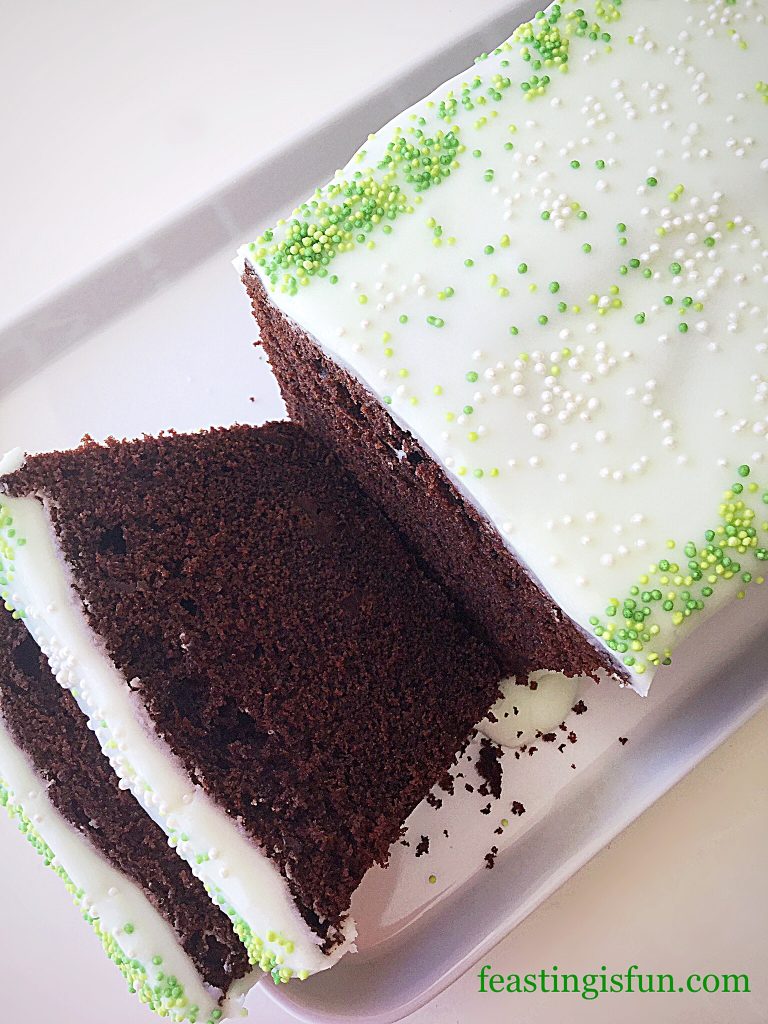
Wow this Summer has been hot so far. So when I was asked to bake a cake I wanted to create something that was not only delicious, but also refreshing. My Mint Chocolate Chip Drizzle Cake ticks both of the boxes. A rich chocolate cake that is full of mint chocolate chips finished with a peppermint drizzle icing. This cake was a big hit with all who tried it!

FF Mint Chocolate Chip Drizzle Cake

Mint Chocolate – which side are you on?

While I love the combination of mint and chocolate together, it appears that opinion is split. While there are those who wholeheartedly agree with me, there are also a group of people who really dislike the flavour combination. Since I love sharing and assume that you do too, check that those you will be sharing with enjoy fresh mint flavour with chocolate. Unless of course you want the whole cake to yourself?

FF Mint Chocolate Chip Drizzle Cake
Mint Chocolate Chip Drizzle Cake

I adore the way that mint is such a refreshing flavour. In this cake it really lifts the deep chocolate flavour of the sponge, with nuggets of mint chocolate bursting in your mouth with every bite. Also, the peppermint hit in the icing merges with the cake to create a party in your mouth. I love the flavours in this cake, especially during the heat of the summer. Because of the mint, I can literally bake my cake AND eat it!

FF Mint Chocolate Chip Drizzle Cake
Mint Chocolate Chip Drizzle Cake

While I have baked this cake in a loaf tin, I’m sure it would also look great baked in a square or round tin. For me the straightforward slicing of a loaf cake makes it easy to pack, ready sliced for picnics. Alternatively, it also is great for packed lunches.

Recipe: Mint Chocolate Chip Drizzle Cake serves 8-10

For the cake:

225g/8oz Unsalted Butter at room temperature

225g/8oz Caster Sugar

1/4tsp Salt – I use Maldon 

5 Large Free Range Eggs 

1tsp Vanilla Extract

75g/3oz cocoa

100g/4oz Dark Mint Chocolate – cut into small chunks

175g/6oz Plain White Flour

3tsp Baking Powder

For the icing:

175g/6oz Icing Sugar

3 drops Peppermint Extract – I use Nielsen-Massey 

Optional – Green Food Colouring – I use Wilton Food Colouring Gel

Green and White small sugar balls

Method: Preheat oven to 180C/160C fan for 1 hour, 350F, gas mark 4

To bake this cake you will need a 25cm x 11.5cm x 7.5cm (10” x 4.5” x 3”) 2lb loaf tin. Grease thoroughly with butter and line the base of the tin with baking parchment.

Making and baking the cake

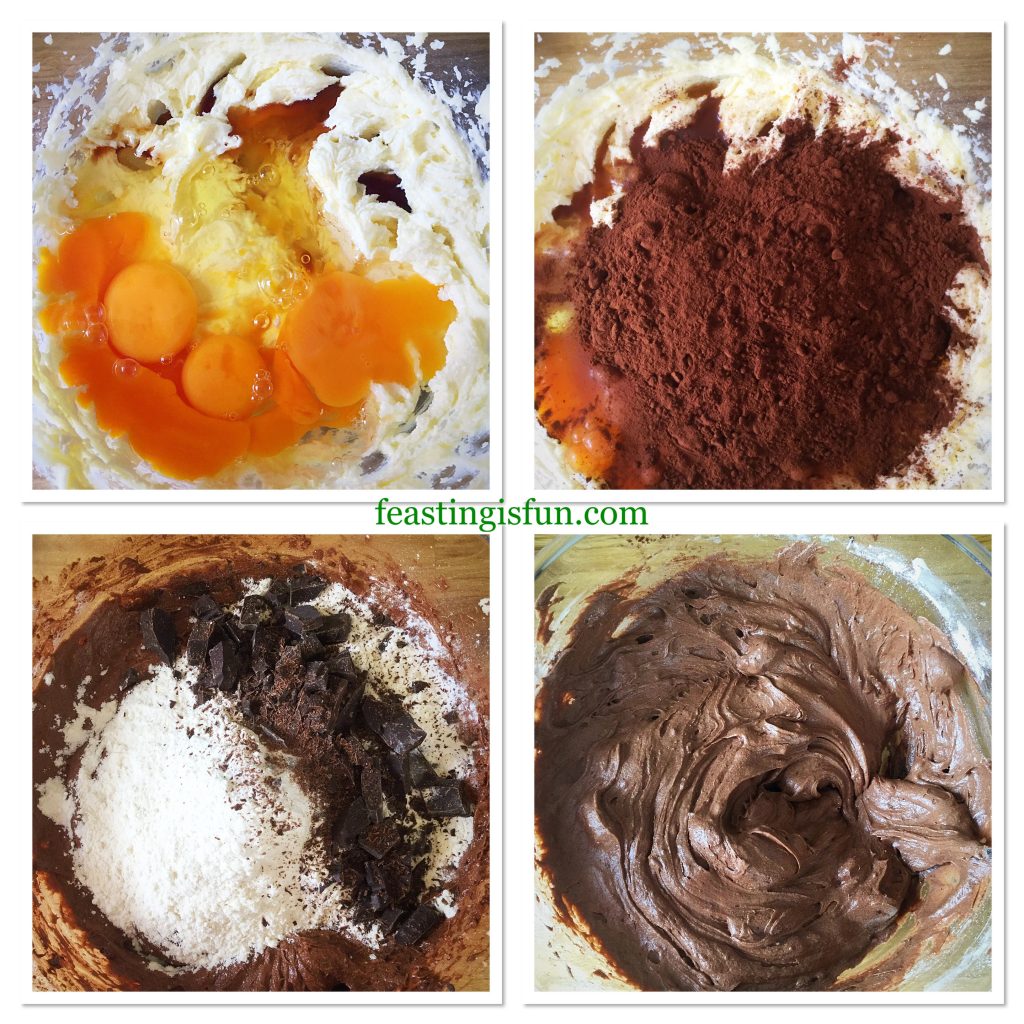
  • First of all into a large bowl add the butter, sugar and salt. Whisk until pale and creamy and thoroughly combined.
  • Add the eggs, vanilla extract and cocoa powder. Whisk again until the mixture is fully combined with no lumps.
  • Sift the flour and baking powder into the bowl and add the chopped mint chocolate.
  • Finally, using a spoon mix all of the ingredients together until they are just combined. Take care not to overmix the cake batter as this can result in a heavy cake once baked.
FF Mint Chocolate Chip Drizzle Cake
Making the cake batter.
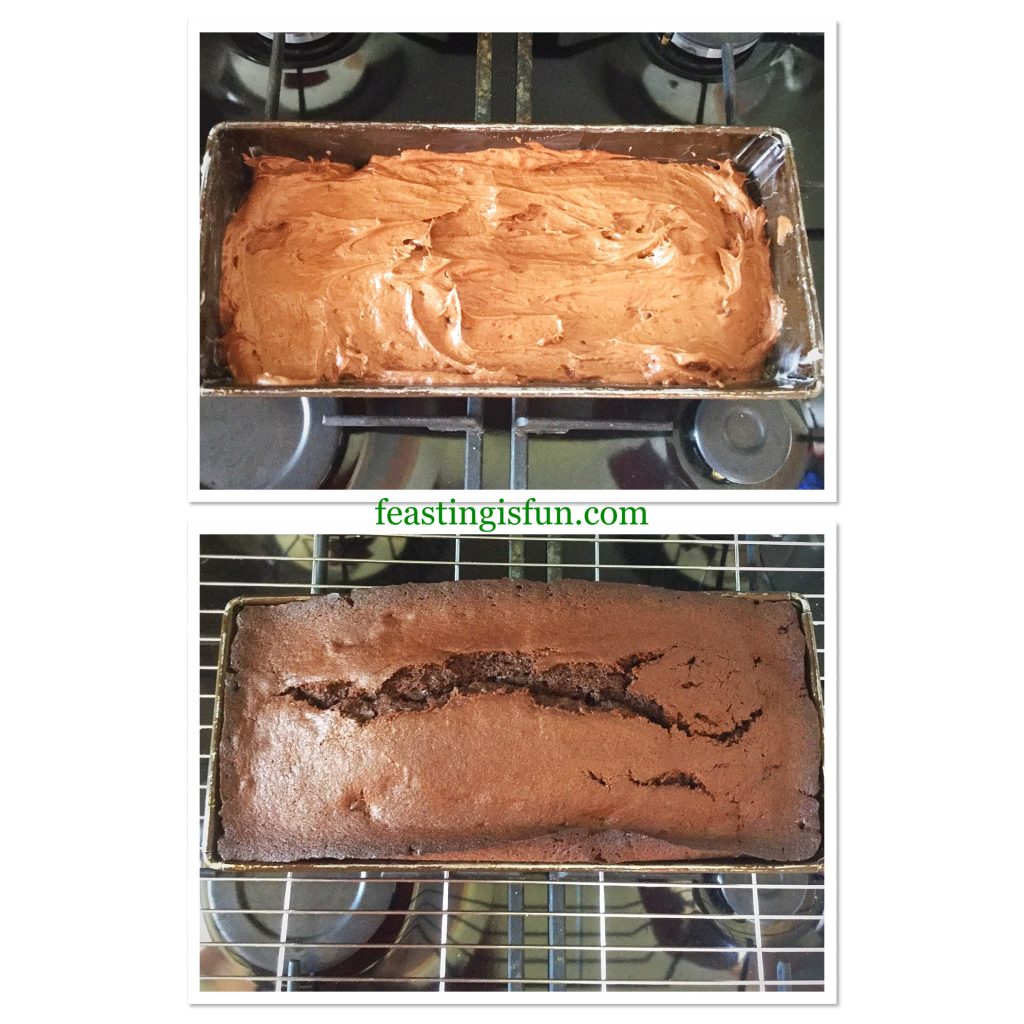
  • Spoon the cake batter into a prepared tin and smooth the surface.
  • Place the cake tin into the centre of the oven and bake for approximately 1 hour. Baking times may vary due to oven differences or using a different size tin.
  • The cake is baked when an inserted skewer comes out clean.
  • As soon as the cake is baked remove from the oven and leave the cake to fully cool in the tin.
FF Mint Chocolate Chip Drizzle Cake
Filling the loaf tin and baking the cake.
  • When the cake is cooled carefully run a palette knife between the cake and the tin.
  • Turn the cake out of it’s tin and remove the baking parchment.
  • Place the cake on to a cake or board ready to be iced.

Making the icing and decorating the cake

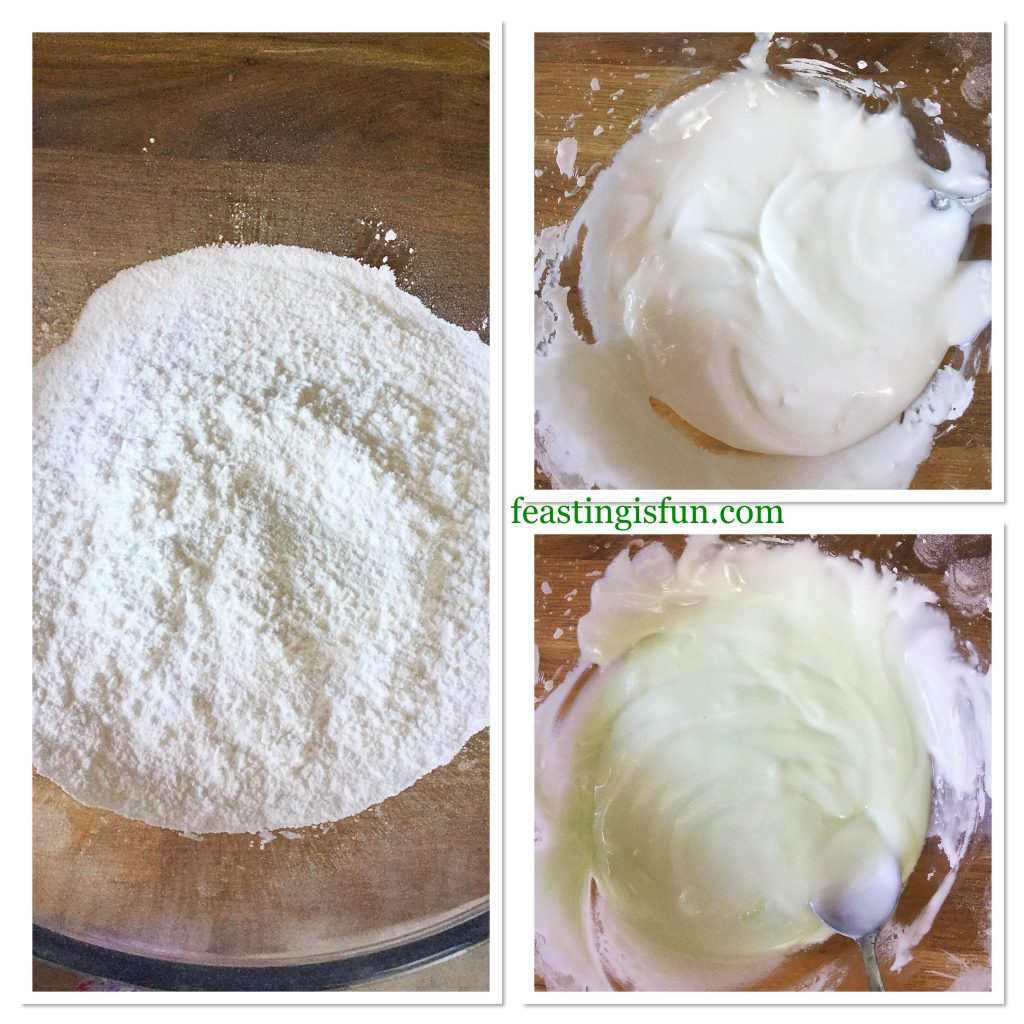
  • First of all add the icing sugar to a bowl. Gently stir with a balloon whisk to remove any lumps. I find this method much easier than sifting the sugar. Especially as sifting results in icing sugar going everywhere!
  • Add the peppermint extract and enough water to for a thick, but still slowly dripping paste.
  • Dip the tip of a cocktail stick into the food colouring gel and then swirl the stick through your icing. I opted for a very subtle mintgreen colour. Stir the icing so that the colour is even throughout.
FF Mint Chocolate Chip Drizzle Cake
Making the mint flavoured drizzle icing.
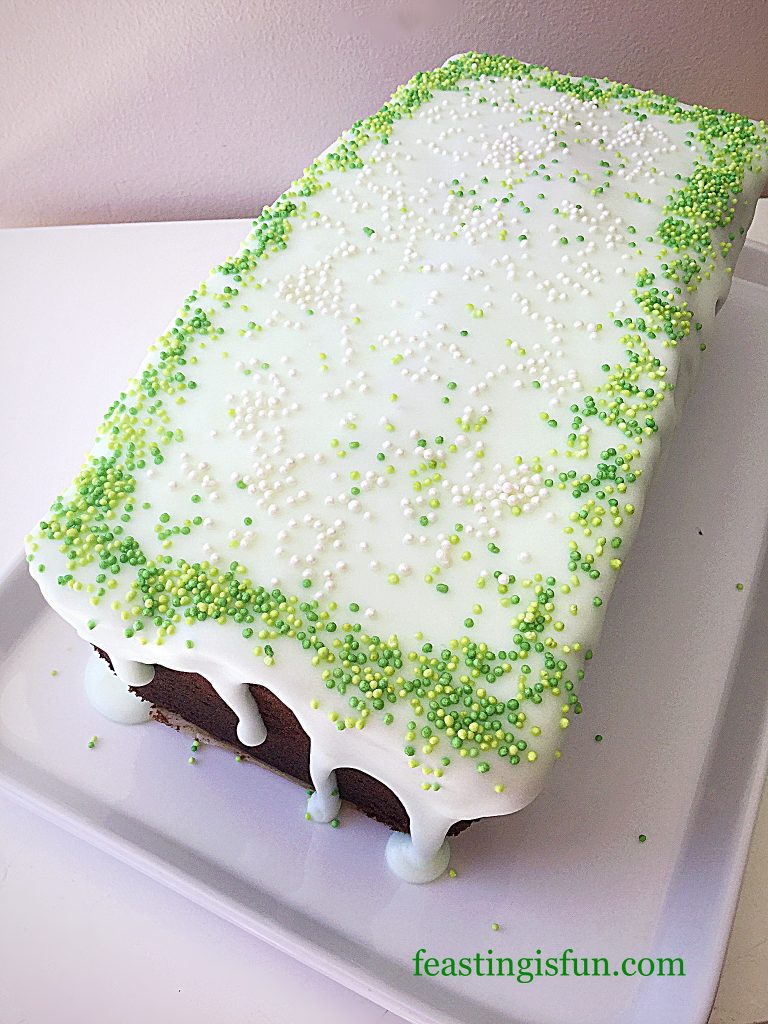
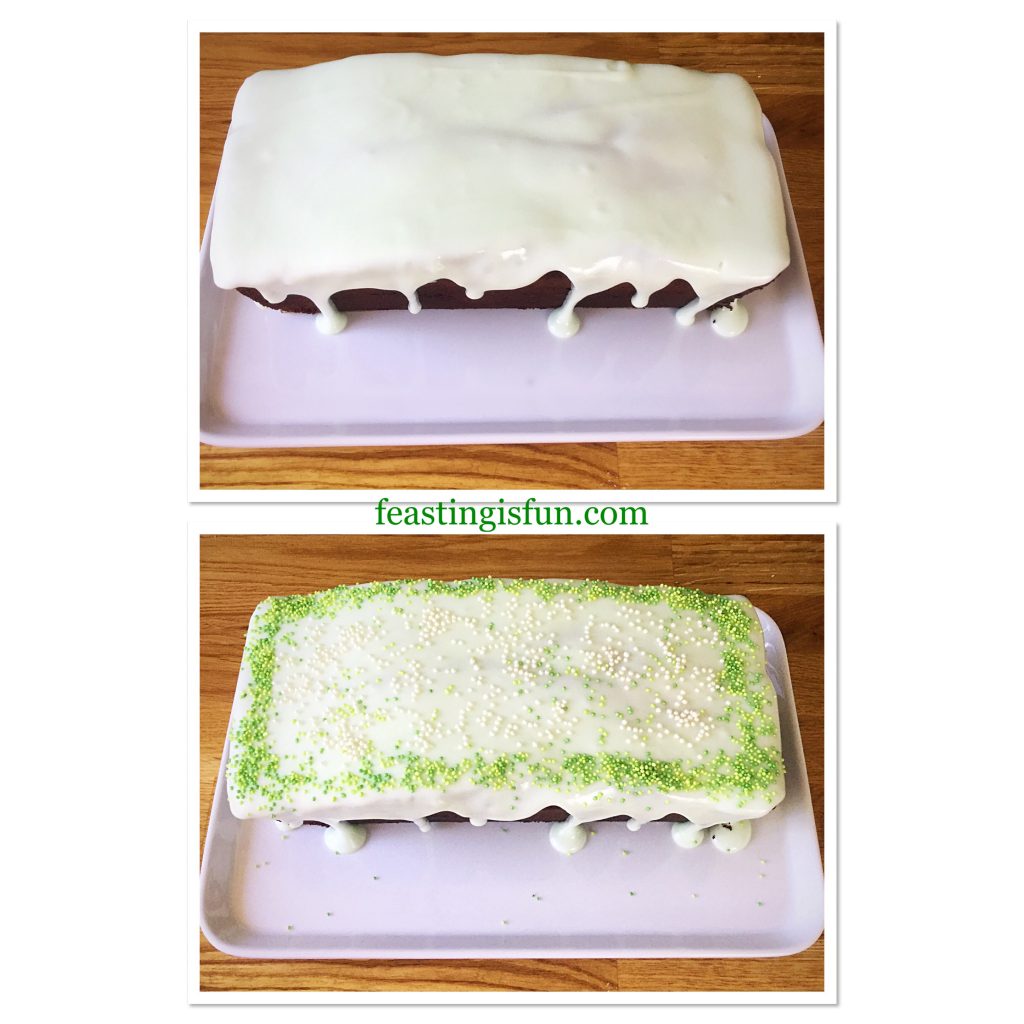
  • Spoon the icing over the cake so that the top is completely covered. Use the spoon to encourage the icing to drip around the sides.
  • Finally, sprinkle the coloured sugar balls around the outside edge of the icing before it sets. And then sprinkle the white balls inside the border.
FF Mint Chocolate Chip Drizzle Cake
Icing and decorating the Mint Chocolate Chip Drizzle Cake

Allow the icing to set before slicing the cake for serving.

FF Mint Chocolate Chip Drizzle Cake
Mint Chocolate Chip Drizzle Cake

Slice and serve with a smile.

Store any leftover cake in an airtight container or wrapped in cling film. Also during warmer weather I keep the cake refrigerated. Eat within 5 days of making.

If you have enjoyed this recipe for Mint Chocolate Chip Drizzle Cake you may also like these:

Iced Cherry Coconut Loaf Cake

FF Mint Chocolate Chip Drizzle Cake
Iced Cherry Coconut Loaf Cake

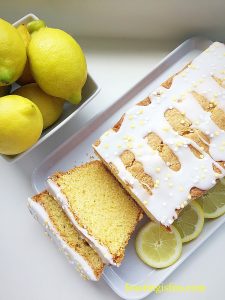
Lemon Drizzle Cake

FF Mint Chocolate Chip Drizzle Cake
Lemon Drizzle Cake

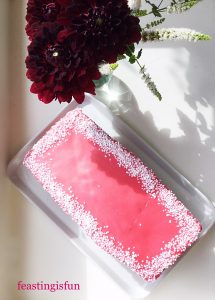
Raspberry Drizzle Loaf Cake 

Beautiful natural pink icing coloured using fresh raspberries that Is drizzled over a pink, raspberry, loaf cake.
Raspberry Drizzle Loaf Cake

While I don’t eat cake everyday, I enjoy making them. Although my preference  leans towards more savoury flavours, many of my family and especially my husband do have a sweet tooth. Sharing my bakes is important to me and loaf cakes travel well. Also, they are easy to portion, either as a whole slice or cut in half so that younger ones can have a finger of cake. Most importantly the cakes I bake are always made with love and the minimum of artificial ingredients.

Whatever you are making, baking and creating in your kitchens have fun preparing and sharing your feast.

Sammie xx

No part of this post may be reproduced or duplicated without the written permission of the owner. Please see my Disclosure Policy.
 

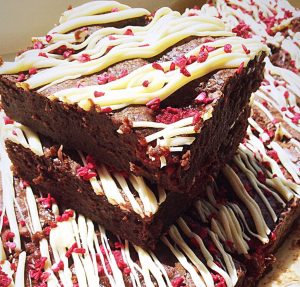
Rich Raspberry Chocolate Fudge Brownies

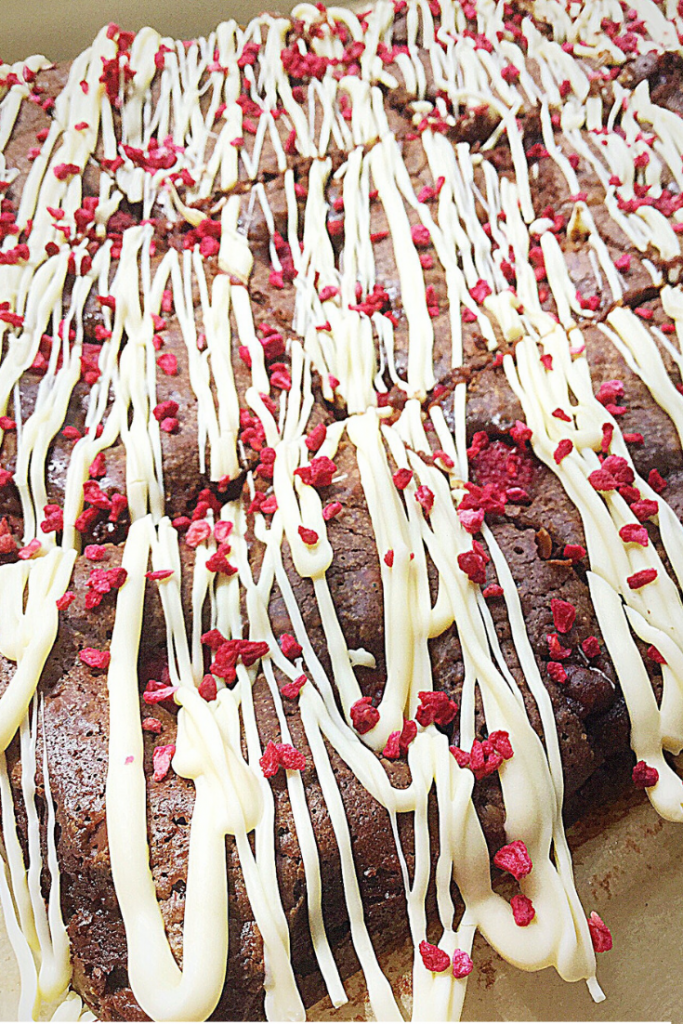
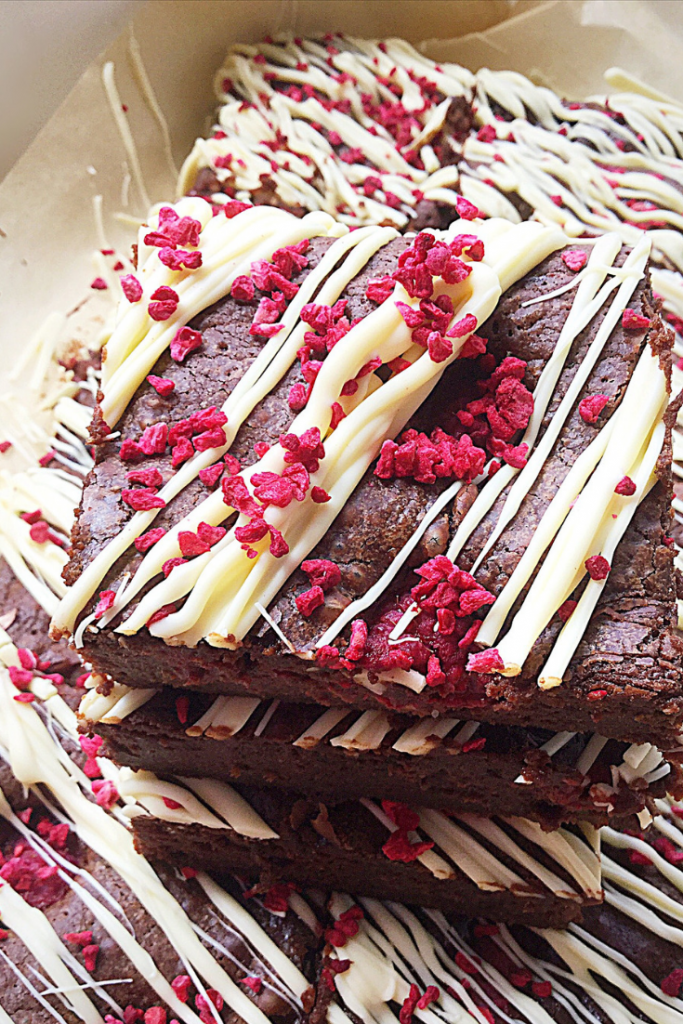
Hello everyone. I have THE most amazing recipe to share with you all today. Not only do these Rich Raspberry Chocolate Fudge Brownies taste incredible, they can also be made gluten free. Yippee! I absolutely love creating recipes that can be enjoyed by more people. Also, this brownie recipe has an added, optional boozy ingredient. Yet, the alcohol can be left out so that children and those who don’t or can’t have alcohol can also delight in these brownies.

FF Rich Raspberry Chocolate Fudge Brownies

Brownies are one of my favourite bakes. And lately I’ve been experimenting with various additions. Most importantly, the resulting brownie must deliver on both flavour and that damp, slightly squidgy texture that qualifies a true brownie. Yet I’ve found the addition of various ingredients creates a fantastic, taste bud treat, such as these Chocolate Fudge Double Hazelnut Brownies. Since I know that raspberries and chocolate are a great flavour combination I decided to try it in a brownie. Oh wow! I was totally unprepared for how scrumptious the result was.

FF Rich Raspberry Chocolate Fudge Brownies
Rich Raspberry Chocolate Fudge Brownies

Raspberry and Chocolate Alchemy

As soon as the raspberries start to bake into the brownie batter something incredible happens. While exposed to the heat of the oven the raspberry flavour intensifies. Also, the raspberries merge with the brownie so that they become as one. The addition of raspberry liqueur turns the final taste into raspberry and chocolate heaven. And, the raspberries also add to the fudgey texture, creating a ridiculously good dessert.

FF Rich Raspberry Chocolate Fudge Brownies
Rich Raspberry Chocolate Fudge Brownies

If I were to serve these brownies at a dinner party I would top with fresh raspberries and a generous scoop of the very best Vanilla Ice Cream. Also I would warm each brownie for 10 seconds in the microwave. Warming them further awakens the combination of flavours.

Recipe: Rich Raspberry Chocolate Fudge Brownies, makes 15

200g/7oz Milk Chocolate minimum 35% Cocoa solids

200g/7oz Dark Chocolate minimum 70% Cocoa solids

225g/8oz Unsalted Butter

1/4 tsp Sea Salt – Maldon  (halve if using table salt)

2 tsp Vanilla Extract – I use Nielsen-Massey

4 Large Free Range Eggs

225g/8oz Light Brown Muscavado Sugar

Optional – 2 tbsp Raspberry Liqueur, alternatively Cassis works well

75g/3oz Plain White Flour – for Gluten Free use all purpose gluten free flour – I use Doves Farm

300g/10.5oz Fresh Raspberries (frozen raspberries also work well here, use straight from the freezer, no need to defrost.) – plus extra to serve if you wish

175g/6oz White Chocolate

3 tbsp Freeze Dried Raspberries – I buy mine from Waitrose

Method: Preheat oven to 180C/160C fan, 350F, gas mark 4

You will need a 22.5cm x 30cm (9” x 12”) deep tin, lined with baking parchment or tin foil.

Making And Baking The Rich Chocolate Fudge Brownies

  • First of all break up the chocolate and place into a heatproof, microwaveable bowl with butter and salt. Microwave on medium power for 30 seconds, stirring in between, until the butter is melted and the chocolate has started to melt. Remove from the microwave and stir continuously until all of the chocolate has melted and combined with the butter. Set aside to cool.
  • Weigh the sugar into a large jug, add the eggs, vanilla extract and raspberry liqueur (if using). Using a fork stir to combine the ingredients.
  • As soon as the chocolate has cooled, pour the egg and sugar mixture in stirring constantly.
FF Rich Raspberry Chocolate Fudge Brownies
Creating the brownie base.
  • Add the flour and stir into the chocolate mix.
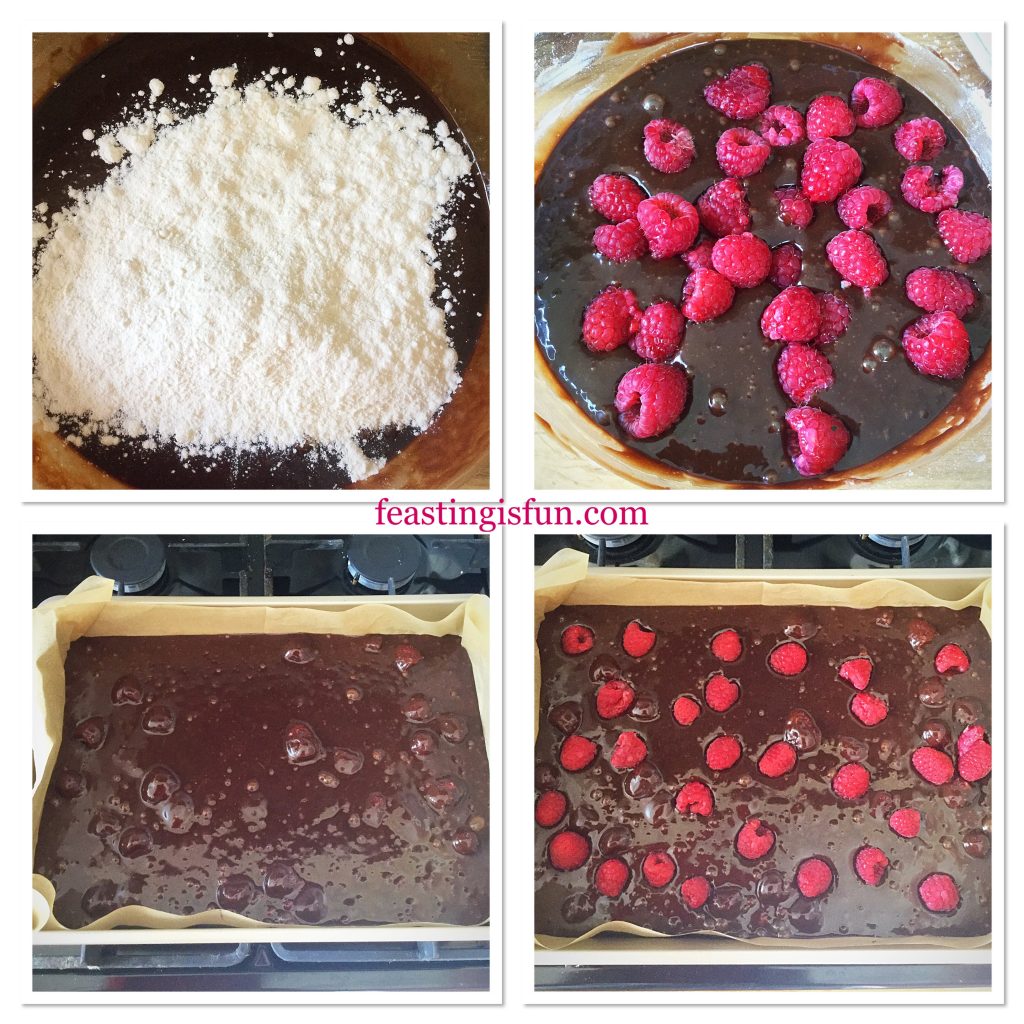
  • Finally add half of the raspberries to the brownie batter. Stir carefully to combine.
  • Pour the brownie mixture into the prepared tin.
  • Finish by adding the remaining raspberries evenly to the top of the mixture.
FF Rich Raspberry Chocolate Fudge Brownies
Adding fresh raspberries into the batter and on top of the traybake.
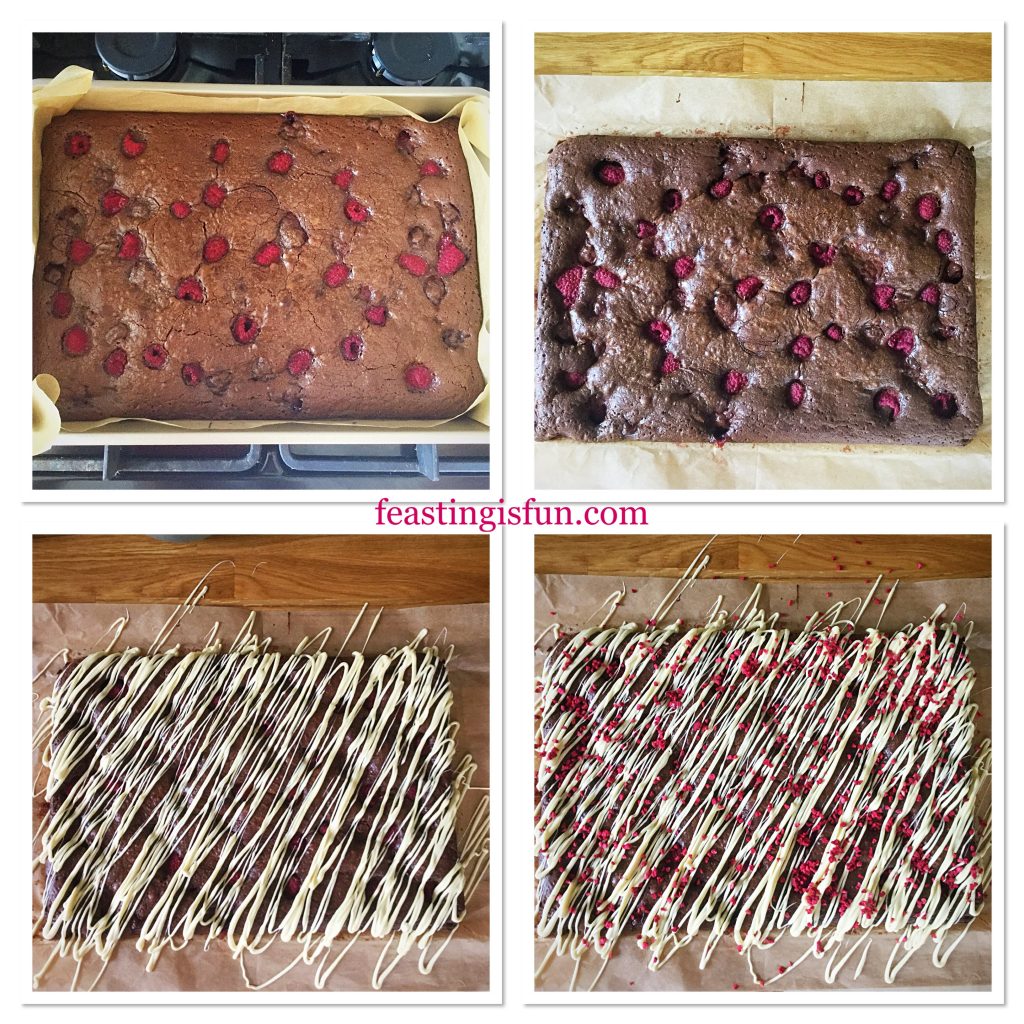
  • Place the tin into the centre of a preheated oven and bake for 25-30 minutes.
  • Halfway through the baking time open the oven and using gloves rap the brownie tin on to the shelf a couple of times. This helps to release any air bubbles formed during baking. Resulting in dense, fudgey brownies.
  • The brownies are baked when the surface is shiny, with a slightly crackled appearance. Also, there should be a very slight wobble to the centre of the bake.
  • As soon as the brownies are baked remove from the oven and leave to cool completely in the tin.
FF Rich Raspberry Chocolate Fudge Brownies
Baking, cooling and decorating the Rich Raspberry Chocolate Fudge Brownies

Drizzling and Decorating the Brownies

  • As soon as the brownies have cooled lift them out of the tin, using the baking parchment. Pull out the sides of the parchment so the paper is flat.
  • Break up the white chocolate and place in a heatproof, microwaveable bowl. Zap for 30 seconds at a time, stirring in between. As soon as the chocolate starts to melt remove from the microwave and stir continuously until it is completely liquid.
  • Pour the melted chocolate into a disposable piping bag. Snip the very end of the bag leaving a small opening.
  • Starting at a corner drizzle white chocolate in a diagonal pattern over the brownie slab.
  • Sprinkle over freeze dried raspberries so they stick to the melted chocolate.
  • Leave to set.
  • Cut across the width at 3 even intervals, wiping the knife with a cloth between each cut. Follow by cutting vertically down at 5 even intervals. Resulting in 15 brownies.
FF Raspberry Chocolate Fudge Brownies
Rich Raspberry Chocolate Fudge

Serve chilled with a glass of something sparkling. Alternatively, warm as mentioned and serve with ice cream. However you enjoy these brownies, they will taste better when shared!

Because of the fresh raspberries store in an airtight container, between layers of baking parchment, in the fridge

If you have enjoyed this recipe for Rich Raspberry Chocolate Fudge Brownies you may also like these:

Bakery Style Soft Triple Chocolate Cookies 

Bakery Style Soft Triple Chocolate Cookies

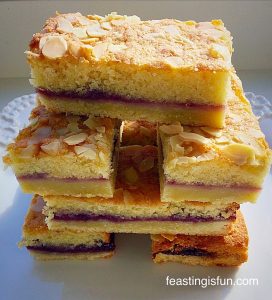
Bakewell Shortbread Bars 

Bakewell Shortbread Bars

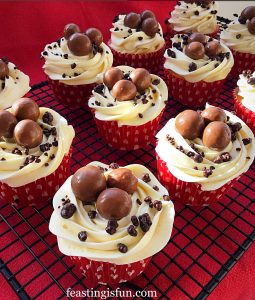
Maltesers Popping Candy Cupcakes 

Maltesers Popping Candy Cupcakes

We have experienced a very warm start to the Summer this year and I haven’t wanted to have the oven on. Yet, when I’m baking brownies, it is such a short baking time that I haven’t minded. Similarly, meringues bake at a low oven temperature, so why not try this Raspberry Chocolate Pavlova? Finally why not try one of the many ice cream recipes here on my blog? It is so much fun coming up with new and delicious flavours!

Whatever you are making, baking and creating in your kitchens, you have fun preparing and sharing your feast.

Sammie xx

No part of this post may be reproduced or duplicated without the written permission of the owner. Please see my Diclosure Policy.

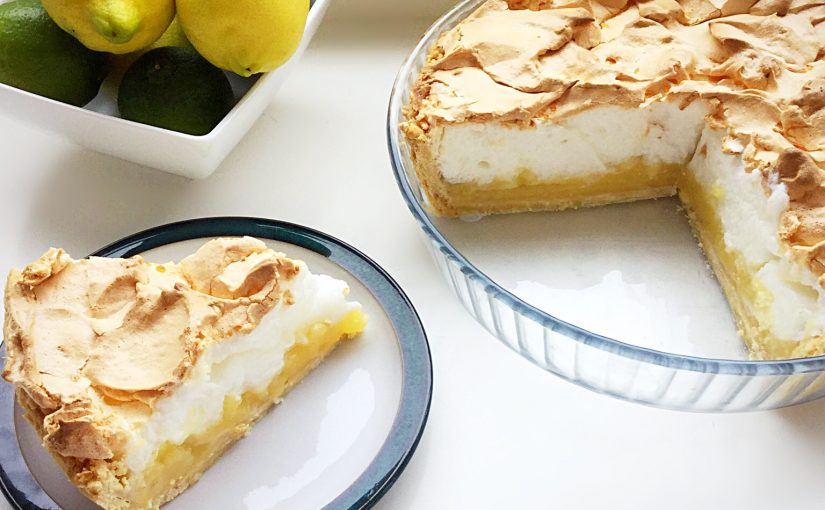
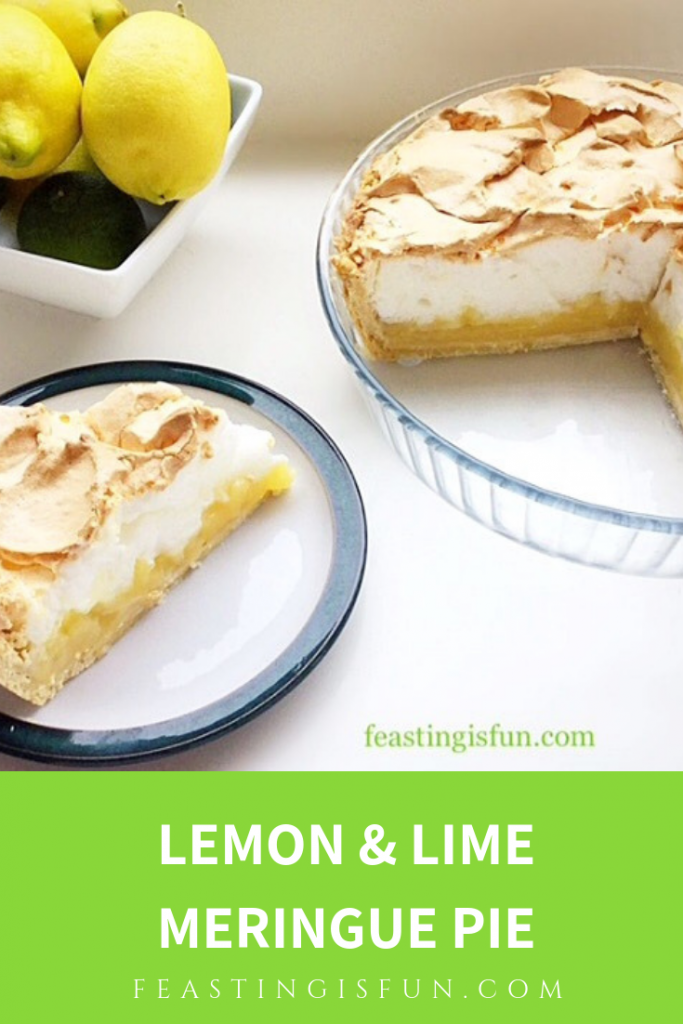
Lemon Lime Meringue Pie

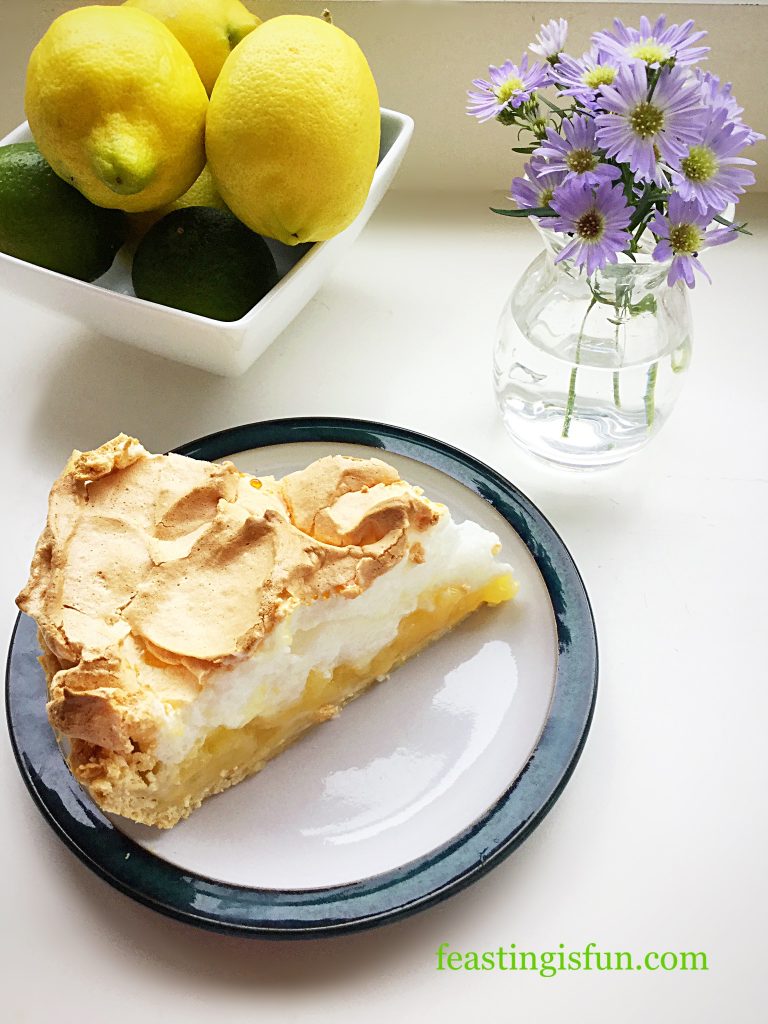
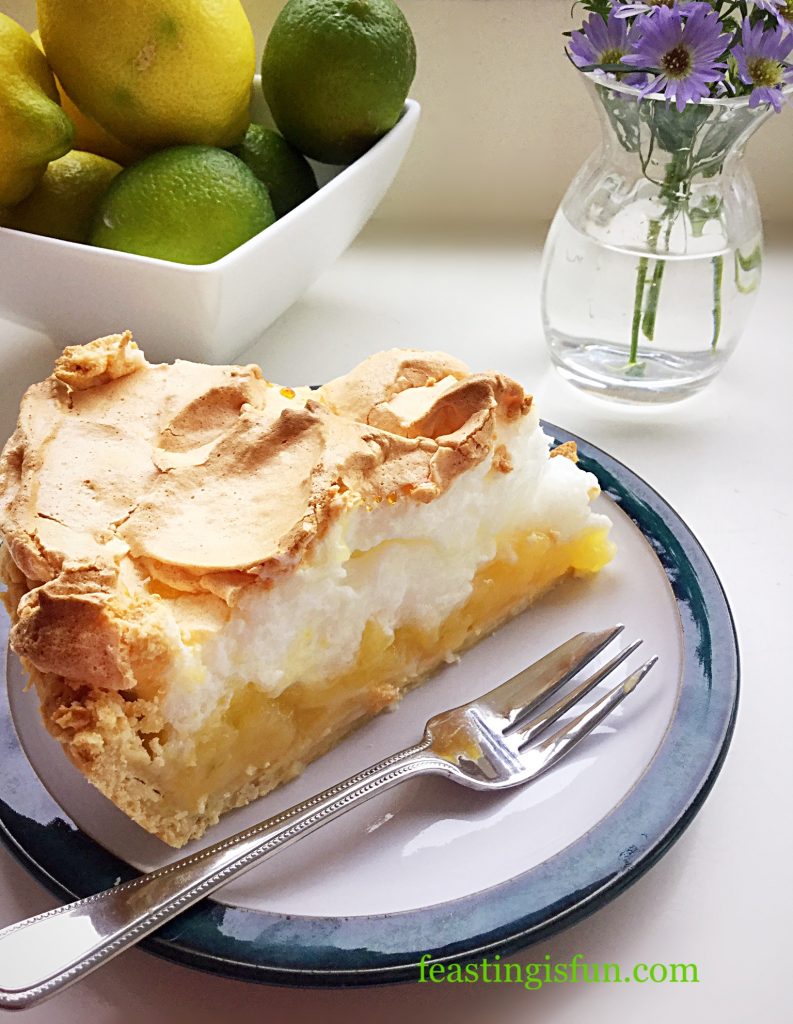
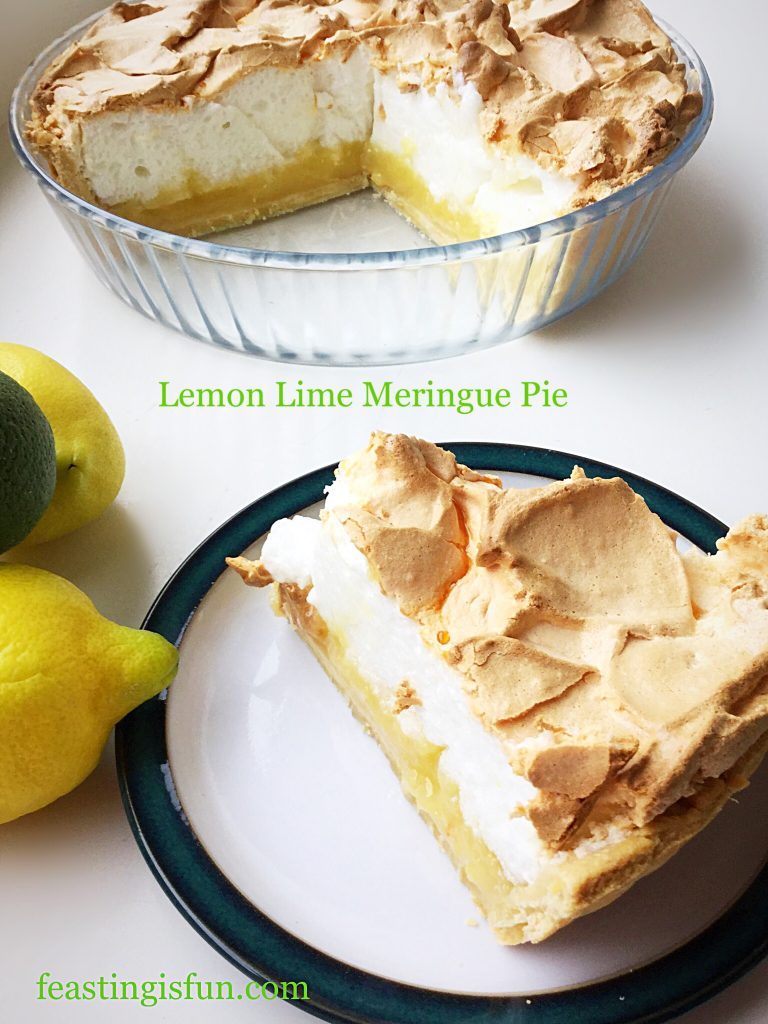
It is no secret that I love both sweet and savoury recipes that include lemon or lime. My Lemon Ripple Ice Cream is a favourite not just with me, it is also one of the most popular recipes on this blog. Lime too, with its softer and more floral flavour is also a winner, showcased here in my Lime Ripple Luxury Ice Cream. This Lemon Lime Meringue Pie combines both fruits in the curd, creating an utterly sublime dessert dish.

FF Lemon Lime Meringue Pie

FF Lemon Lime Meringue Pie
Lemon Lime Meringue Pie

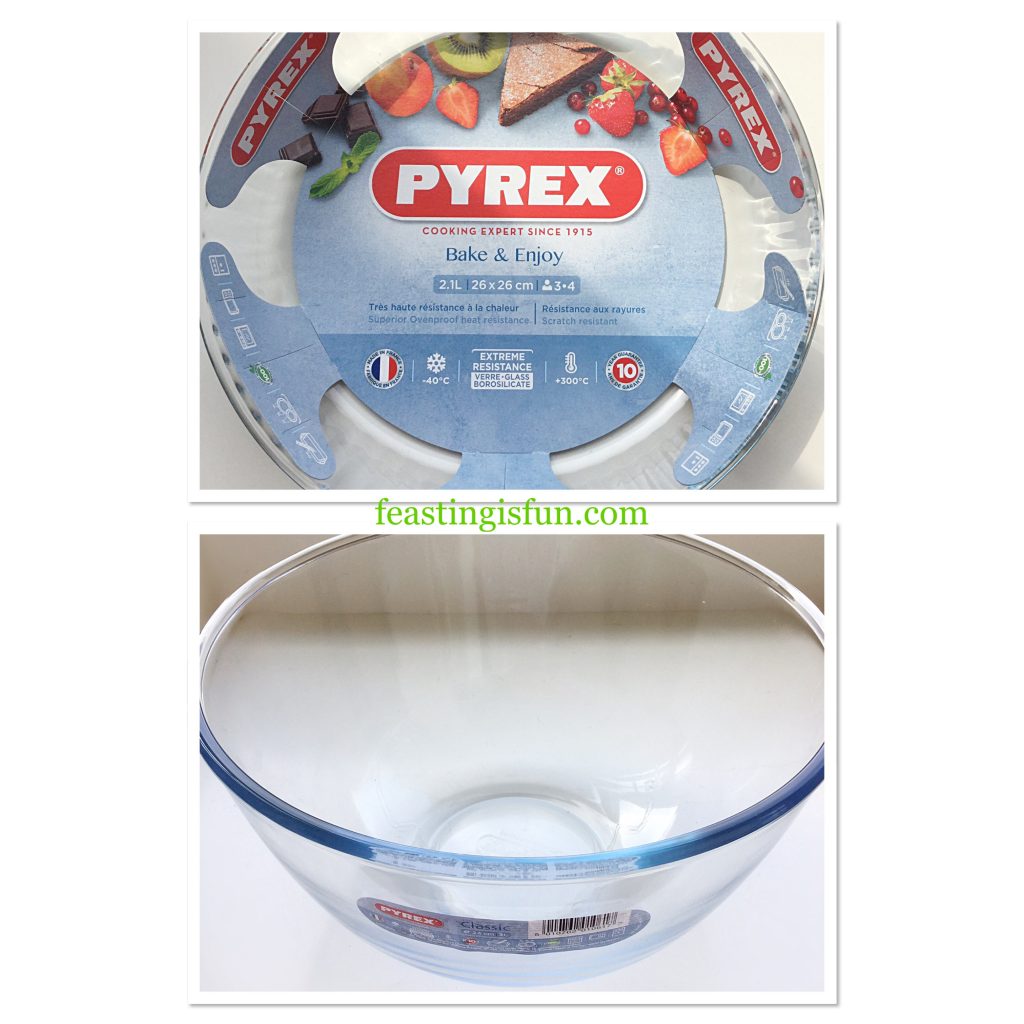
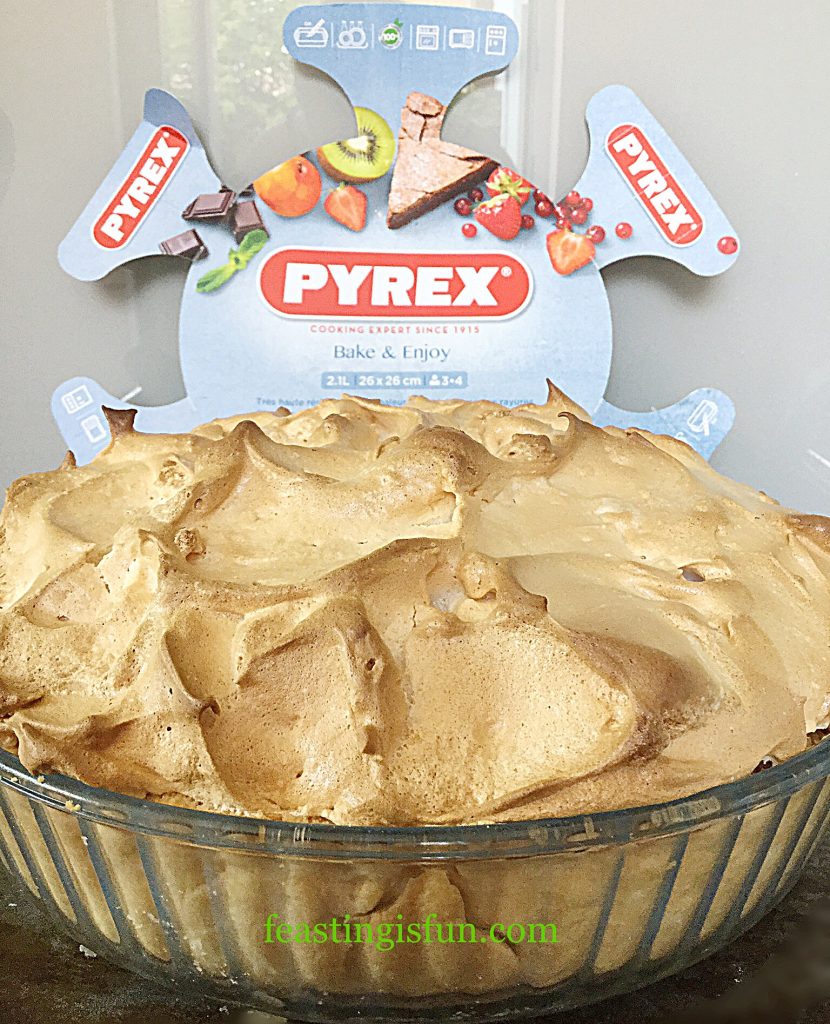
Pyrex, quality kitchenware

I was sent a Pyrex deep 26cm glass fluted flan dish and a Pyrex 3L classic glass bowl by Maha Home and I must say that both products were well packaged. When ordering online this really is of key importance to me. As soon as they were unwrapped I was keen to make a dessert that would show off both products. Pyrex have a recipe for Lemon and Lime Meringue Pie on their website and I used this as the basis for my dish. Since I naturally tweak anything I make, the recipe given is my interpretation of the original.

FF Lemon Lime Meringue Pie
Pyrex 26cm deep flan dish and 3L bowl.

Since I have been on the hunt for a deep flan dish I was particularly excited to try this out. As I have mentioned in previous posts, any new kitchen equipment has to earn it’s cupboard space in my home. Because, let’s face it, very few people have massive kitchens with tons of space! What Maha Home did not know, is that I already have and regularly use the 3L Pyrex glass bowl. I most certainly have room for 2 of these deep, hard wearing bowls in my kitchen.

FF Lemon Lime Meringue Pie
Lemon Lime Meringue Pie

Creating The Layers In A Lemon Lime Meringue Pie

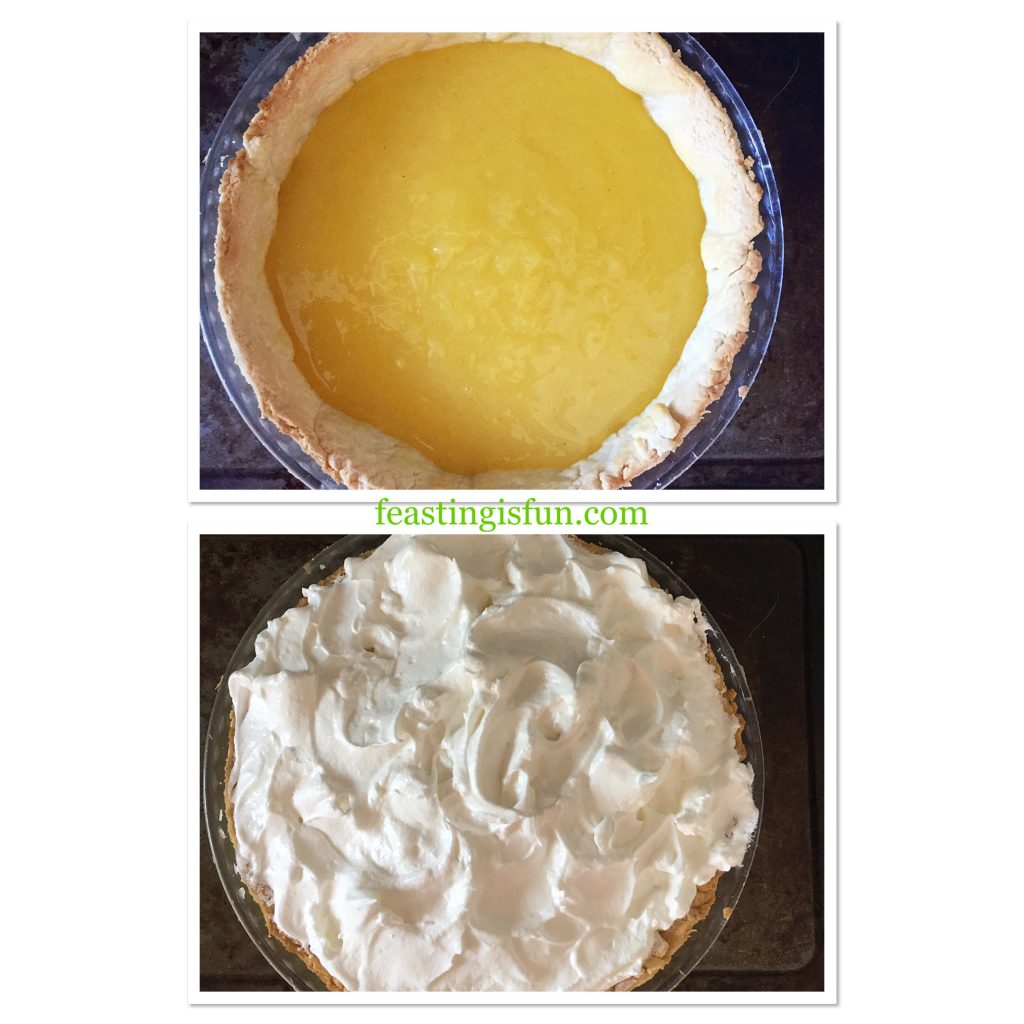
Creating the Lemon Lime Meringue Pie involves four separate stages. First of all making and baking the pie crust shell. Zesting, juicing and cooking the lemon and lime curd. Whisking up egg whites with sugar to create the light, airy, meringue topping and finally assembling and baking the pie. While there are four stages, making this pie does not feel like a chore. Since each step is relatively quick and the pie crust and curd can be made the day before, breaking the process down even further.

FF Lemon Lime Meringue Pie
Lemon Lime Meringue Pie

I made this pie on an extremely hot and humid day. In doing so I learned a thing or two. Most importantly is to make the meringue topping at the very last minute, literally just before it needs to be spooned on to the pie. Making it any earlier can cause it to lose volume. Also, once baked and cooled the pie must be refrigerated. Doing so allows the curd to set and makes for easier slicing. Finally, once chilled this pie is easy to transport, making it an ideal dessert to take to friends and family.

Recipe: Lemon Lime Meringue Pie serves 8-10

For the pie crust:

450g/1lb Shortcrust Pastry – I used my Perfect Butter Shortcrust Pastry recipe.  If buying ready made ensure it is all butter

1 tsp Vegetable Oil for greasing the flan dish – I used Rapeseed oil

For the filling:

3 Fresh Lemons – finely zested and juiced

2 Fresh Limes – finely zested and juiced

175g/6oz Caster Sugar

300ml/ 1/2 pint Water

6 tsp Cornflour (cornstarch) I use Doves Farm

4 Large Free Range Egg Yolks

For the topping:

4 Large Free Range Egg Whites I use Burford Brown Eggs from Clarence Court

150g/5oz Caster Sugar

3 tsp Cornflour (cornstarch)

Method: Preheat oven to 220C/200C fan, 425F,  gas mark 7

Making the shortcrust pie case

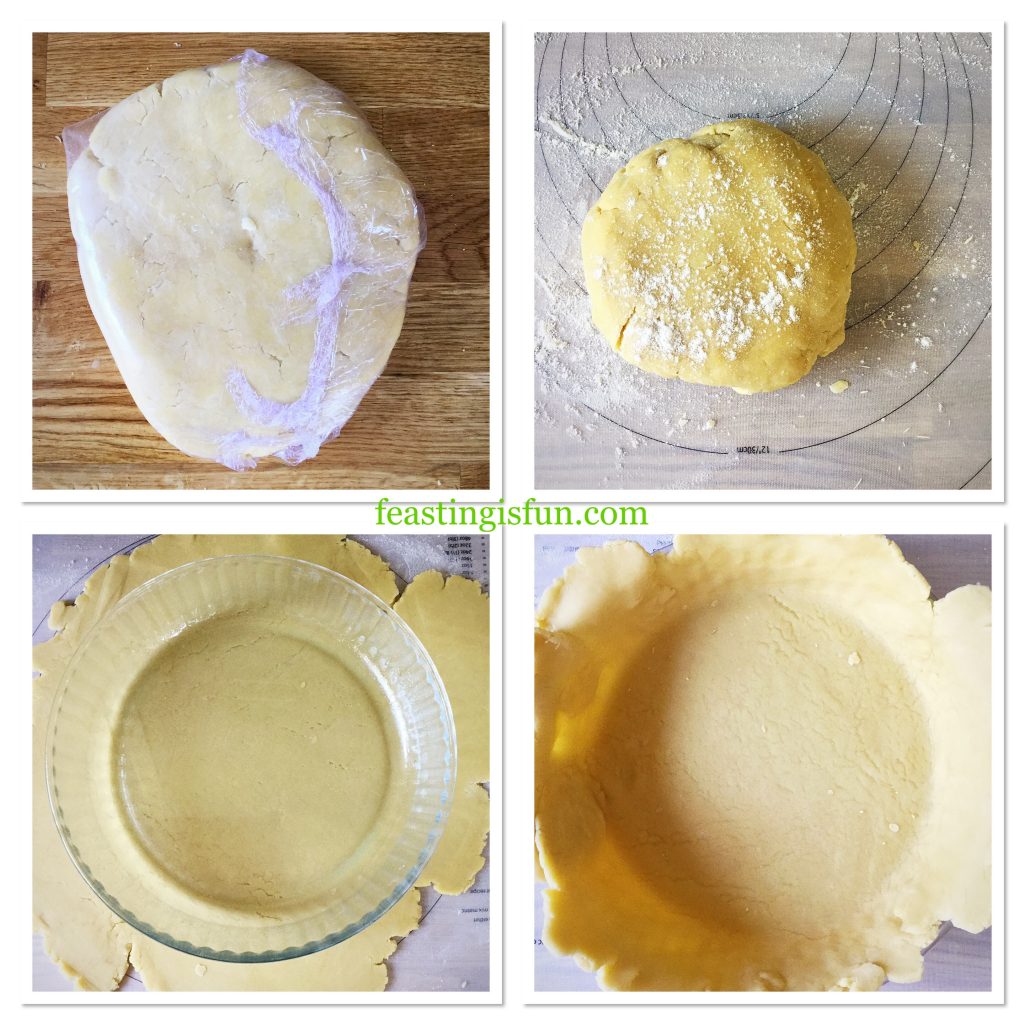
  • First of all make the pastry and place in the fridge to chill for one hour.
  • Pour one teaspoon of oil into the Pyrex flan dish. Using a clean sheet of kitchen paper ensure the inside of the dish is lightly coated in oil, taking special care around the inner rim.
  • Remove the pastry dough from the fridge and place on a lightly floured worktop.
  • Knead the dough lightly so that it becomes pliable, taking care not to overwork it as this will result in a tough pastry crust.
  • Roll out the pastry so that it is slightly bigger than the flan dish – see photo below.
  • Wrap the pastry over the rolling pin and place over the flan dish.
FF Lemon Lime Meringue Pie
Rolling out the chilled pastry to fit the flan dish.
  • Press the pastry into the flan dish taking care not to stretch it, as this will cause the pastry to shrink on baking. Also if the pastry tears, patch using a little of the leftover pastry with a tiny amount of water.
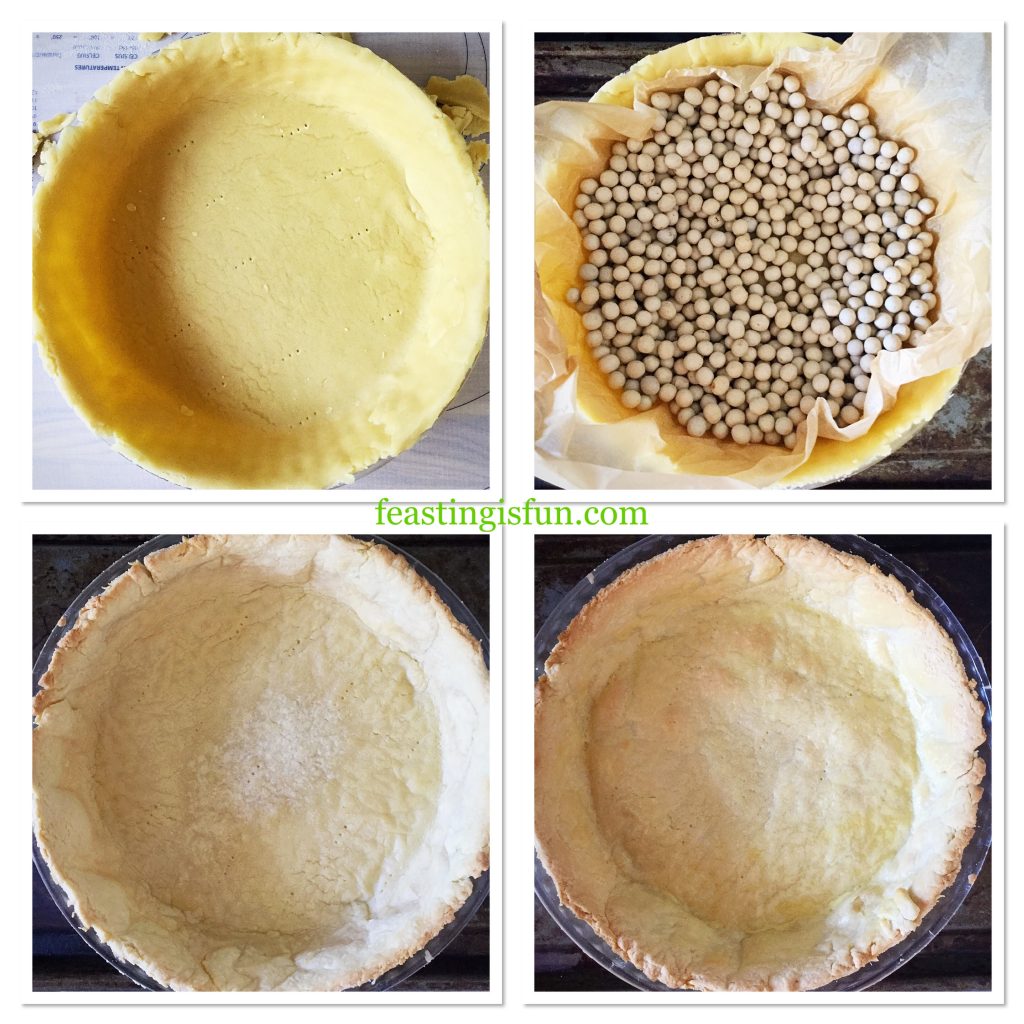
  • Trim the pastry and dock the bottom with a fork. Add baking parchment and baking beans.
  • Place on to a baking tray and into the centre of a preheated oven and bake for 15 minutes.
  • Remove the pie crust, immediately reduce the oven temperature to 200C/180C fan, 400F, gas mark 6.
  • Lift out the baking beans, taking care as they are hot.
  • If any cracks have appeared in the pastry patch, as before, using leftover pastry.
  • Return the pie crust to the cooler over and bake for a further 7 minutes.
  • As soon as the pie crust is baked remove from the oven.
FF Lemon Lime Meringue Pie
Trimming and baking the pie crust.
  • While the pie crust is baking make the curd.

Making the lemon lime curd filling

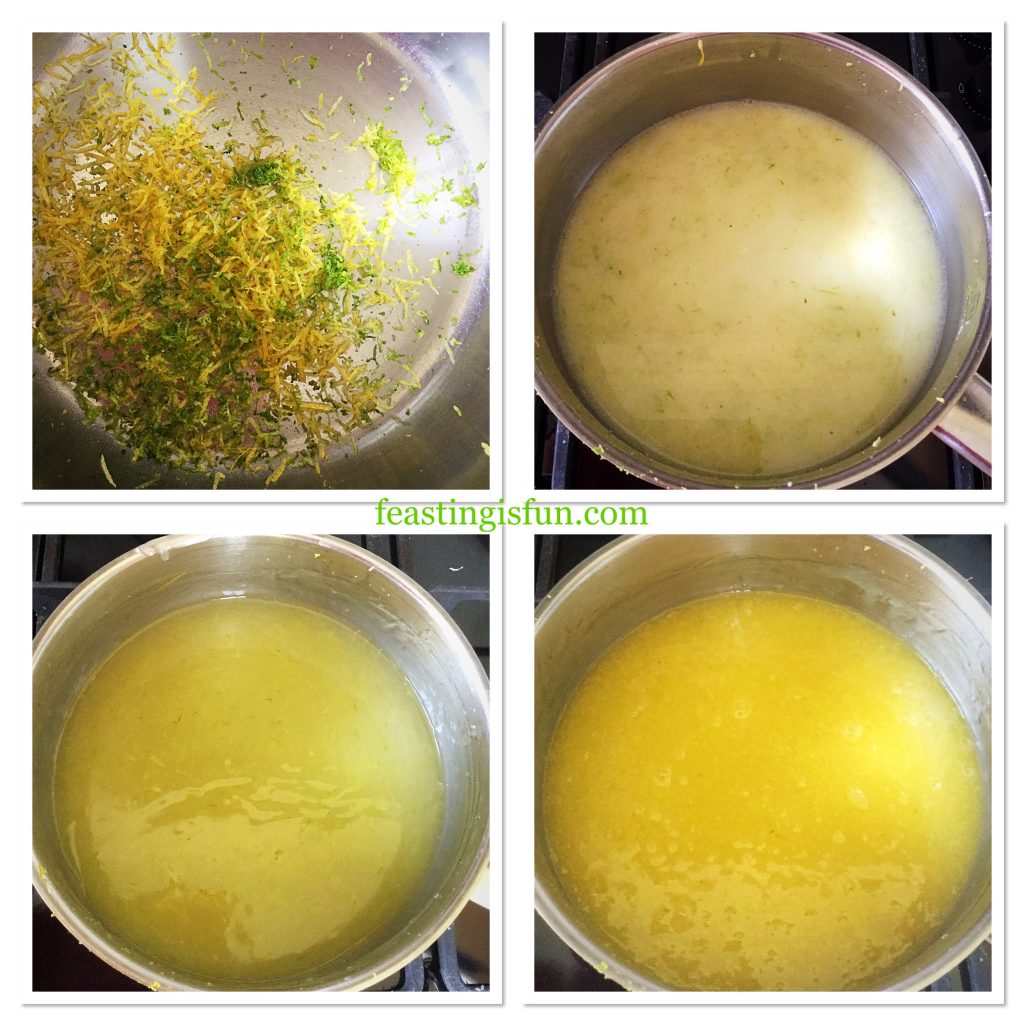
  • Into a large, heavy bottomed saucepan add the lemon and lime zest and juice. Also add the water, sugar and cornflour. Gently mix with a whisk until there are no lumps.
  • Cook the liquid over a medium heat, stirring continuously.
  • As soon as the liquid has thickened and has turned from cloudy to clear turn off the heat.
  • Leave to cool for 5 minutes and then whisking continuously add the egg yolks one at a time.
FF Lemon Lime Meringue Pie
Making the lemon and lime curd.
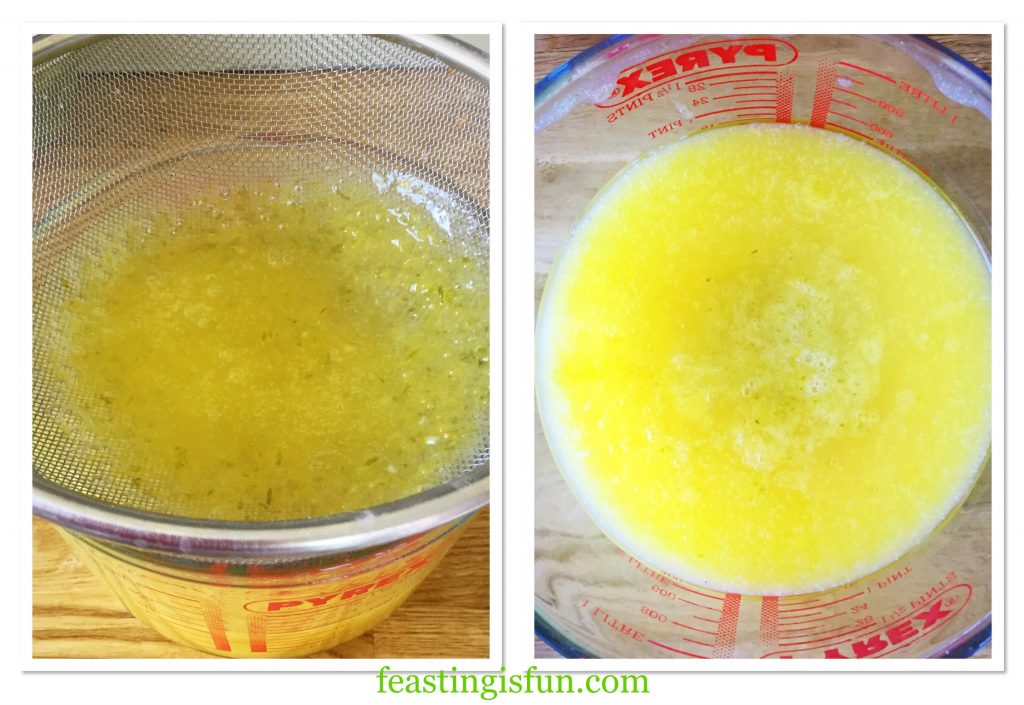
  • Pour the curd through a sieve into a wide jug. Press the liquid through using a clean spoon.
  • Place cling film directly on to the top of the curd, this will stop a skin from forming.
FF Lemon Lime Meringue Pie
Sieving the lemon and lime curd.
  • Just before you are about to assemble the pie make the meringue topping.

Whipping up the meringue topping

  • Into a large, scrupulously clean bowl add four large egg whites.
  • Whisk until the egg whites form stiff peaks.
  • Continue whisking adding a tablespoon of sugar at a time, until half of the sugar is incorporated.
  • Add the remaining sugar and one teaspoon of cornflour.
  • Using a large metal spoon fold the dry ingredients into the meringue, taking care not to deflate the air whisked into the meringue.
FF Lemon Lime Meringue Pie
Making the meringue topping
  • To assemble the pie ensure the oven is preheated to 200C/180C fan, 400F, gas mark 6.

Assembling and baking the pie

  • Remove the cling film from the curd and stir.
  • Pour the lemon and lime curd into the pie shell.
  • Spoon over the meringue so that the top of the pie is covered. Ensure the meringue touches the crust around the rim of the pie.
  • Place the pie on to a baking tray and put in the centre of the oven.
  • Bake for 25 minutes. If after 10-15 minutes the top is browning too quickly reduce the heat by 20C.
  • After the baking time has elapsed turn the oven off and leave the pie to cool in the oven for 30 minutes. This helps set the meringue and stop it from cracking.
FF Lemon Lime Meringue Pie
Assembling the Lemon Lime Meringue Pie ready to bake.
  • After the oven cooling time has elapsed remove the pie from the oven and leave to cool to room temperature.
FF Lemon Lime Meringue Pie
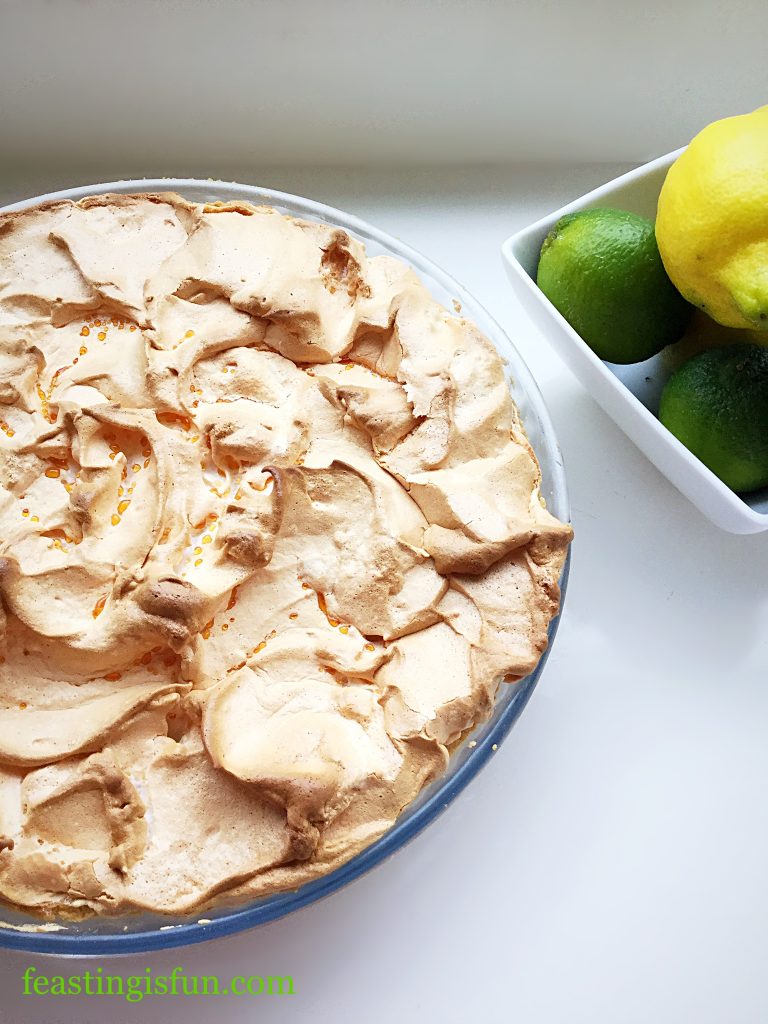
Caramel crusted Lemon Lime Meringue Pie
  • Refrigerate the cooled pie for at least 4 hours, ideally overnight before serving.
FF Lemon Lime Meringue Pie
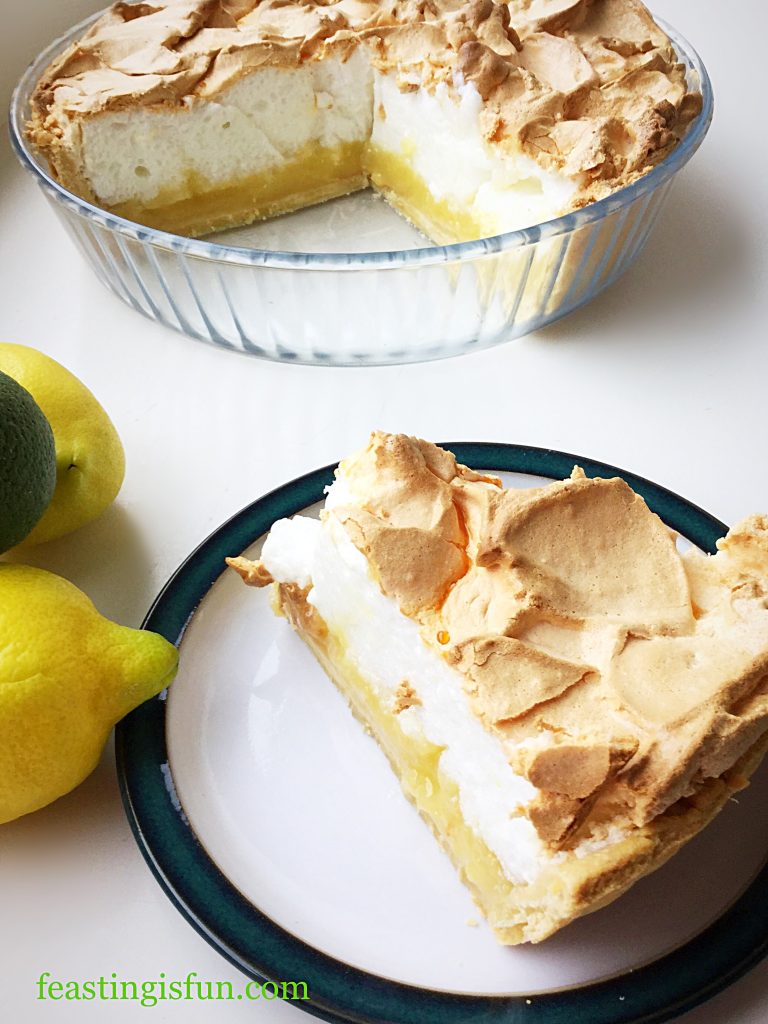
Lemon Lime Meringue Pie

Serve slices of chilled Lemon Lime Meringue Pie as a refreshing dessert, or an afternoon treat.

Both pie crust and curd can be made a day ahead. Cool both, wrap the cold pie crust in foil and place somewhere cool and dry. Cling film the top of the jug and refrigerate the curd.

If you have enjoyed this recipe for Lemon Lime Meringue Pie you may also like these:

Raspberry Topped Lemon Curd Pavlova

FF Lemon Lime Meringue Pie
Raspberry Topped Lemon Curd Pavlova

Lemon Drizzle Cake

FF Lemon Lime Meringue Pie
Lemon Drizzle Cake 

Raspberry Lemon Celebration Layer Cake

FF Lemon Lime Meringue Pie
Raspberry Lemon Celebration Layer Cake

Lemon Curd Sponge Tart

FF Lemon Curd Sponge Tart
Lemon Curd Sponge Tart

Good quality kitchenware is essential to me in my cooking and baking. While Pyrex is a well known brand, made from toughened glass, baking with this flan dish has reminded me why it is such a vital kitchen staple. Even the jug (which is my own), used to capture the sieved curd is used daily in our house. For everything from microwaving milk for hot chocolate, to making jelly for a trifle. I will definitely be using both the bowl and flan dish frequently in my kitchen. Anyone for quiche?

Whatever you are making, baking and creating in your kitchens, have fun preparing and sharing your feast.

Sammie xx

Maha Home gifted me both the Pyrex deep flan dish and 3L large bowl for the purpose of reviewing. All opinions and views are my own. I have not been paid to write this post, neither do I receive any payment following sales of product as a result of this post.

No part of this post may be reproduced or duplicated without the written permission of the owner. Please see my Disclosure Policy.
FF Lemon Lime Meringue Pie
Lemon Lime Meringue Pie


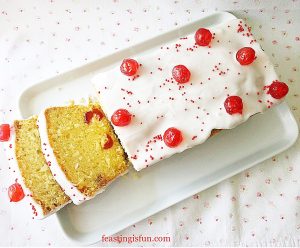
Iced Cherry Coconut Loaf Cake

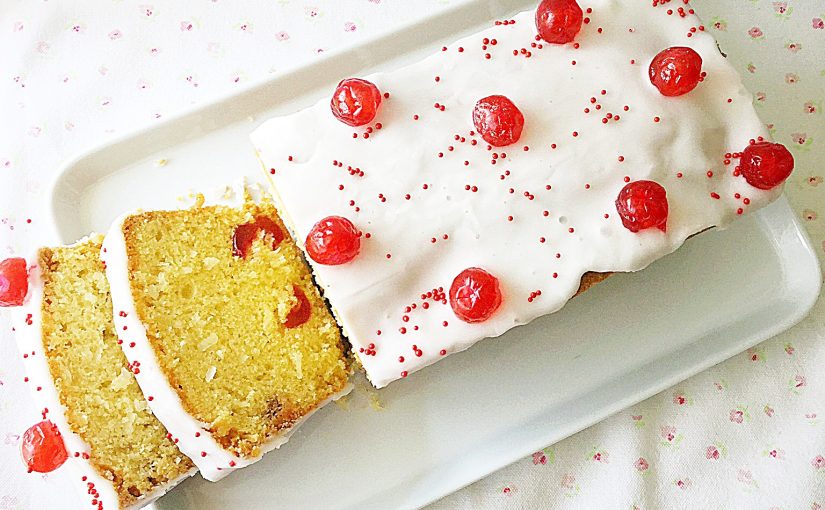
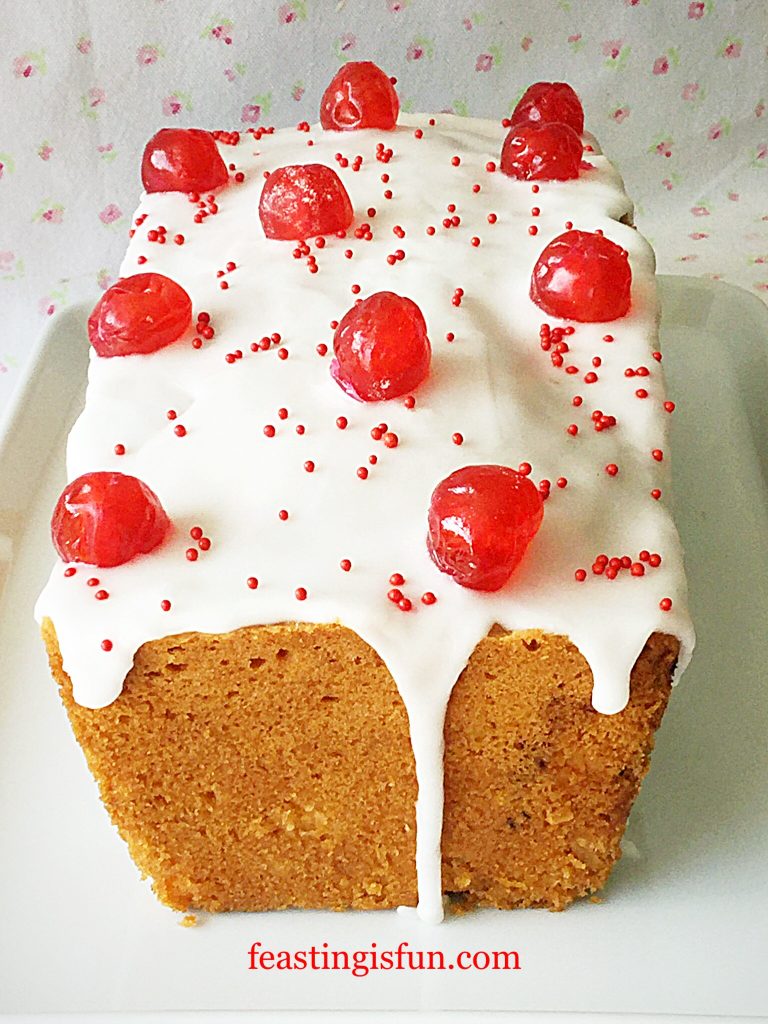
I adore pretty things. Whether it be polka dot plates, wild flowers in a jug, or brushing my hands on cow parsley while out for a walk. And given a choice my garden will always be full of old english roses and rambling honeysuckle, rather than neatly edged borders containing structural plants. Likewise, this relaxed approach is also reflected in my baking. Since a drizzle of icing here and there makes a cake not only beautiful, but shouts that it is homemade. Resulting in this Iced Cherry Coconut Loaf Cake that not only looks pretty but tastes pretty good too!

FF Uncut Iced Cherry Coconut Loaf Cake

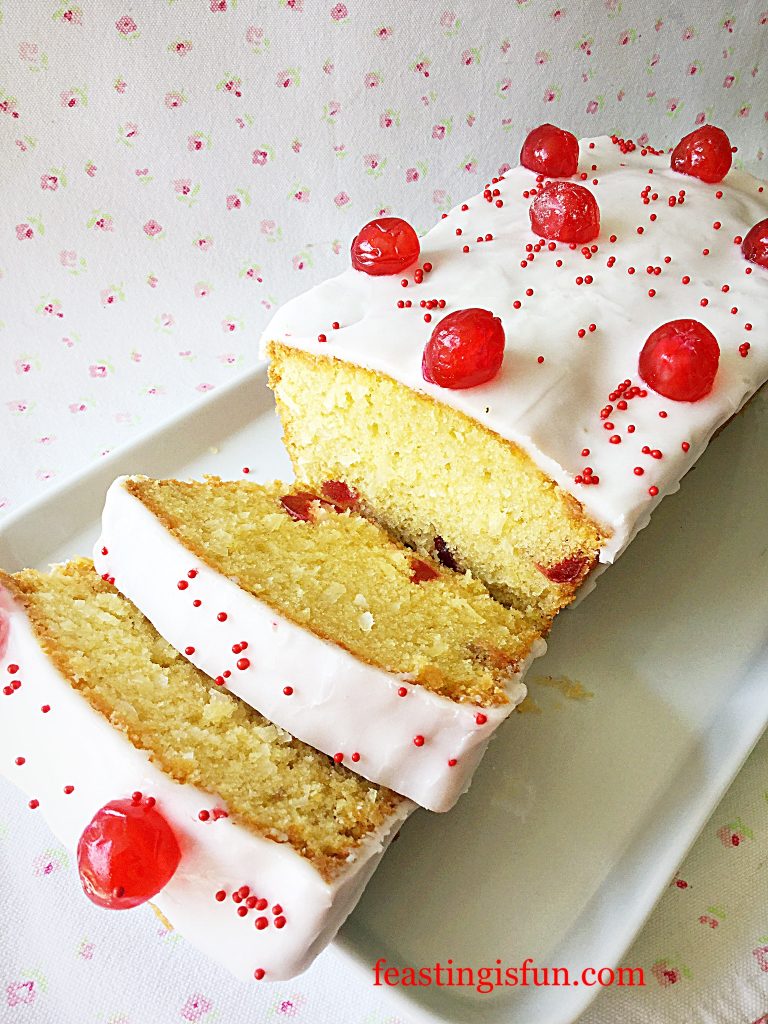
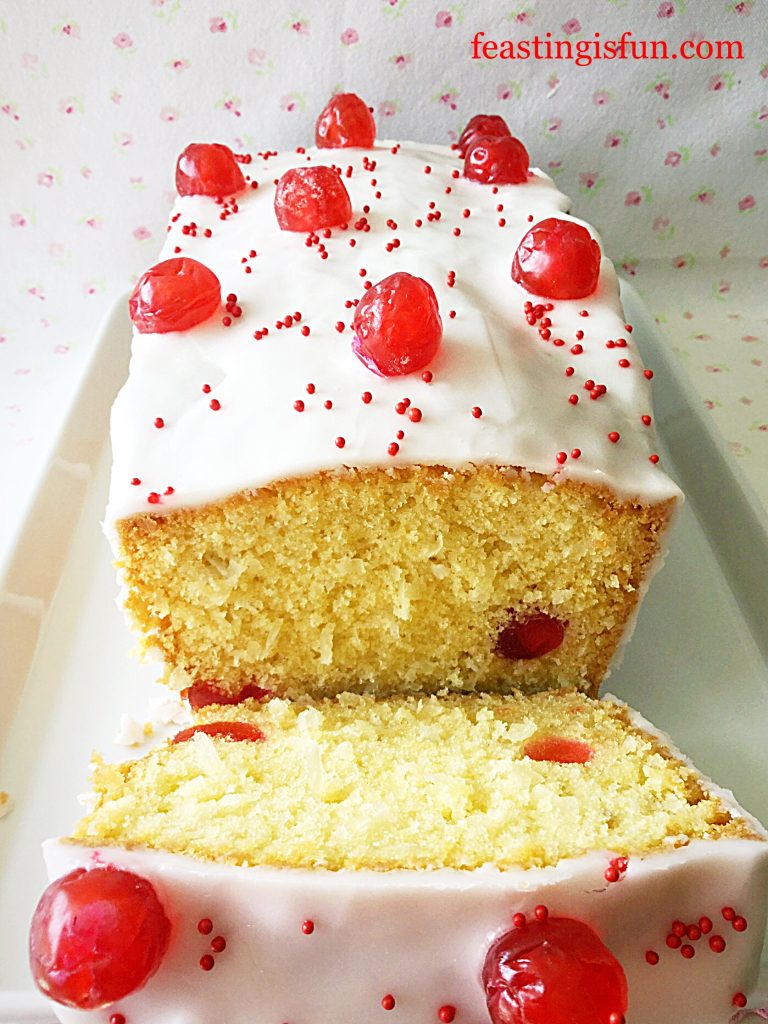
A rich buttery coconut cake, packed full of glacé cherries, simply decorated with glacé icing and more cherries. Yet it looks like an afternoon tea party. In fact this cake makes me want to get out my best china, string bunting everywhere and hold a garden party. Why? Because it is such a cheerful, pretty and delicious cake. Resulting in THE perfect cake to share.
FF Iced Cherry Coconut Loaf Cake
Iced Cherry Coconut Loaf Cake

I rather enjoy baking loaf cakes such as this Mascarpone Topped Carrot Cake. Since the loaf tin makes them easy to slice and perfect for packing up and taking on a picnic. Also, should the cake need to be shared further than anticipated, each slice can easily be cut in half. So, when I look at photographs of this Iced Cherry Coconut Loaf Cake they make me smile. And any cake that does that is a winner in my book.

FF Iced Cherry Coconut Loaf Cake
Iced Cherry Coconut Loaf Cake.

Recipe: Iced Cherry Coconut Loaf Cake serves 8

For the cake:

200g/7oz Unsalted Butter at room temperature

200g/7oz Caster Sugar

1/4 tsp Sea Salt – I use Maldon halve quantity if using free flowing

1 tsp Vanilla Extract – I use Nielsen-Massey

4 Large Free Range Eggs

125/4.5oz Sweetend Shredded Coconut – such as Bakers available from Amazon alternatively use the equivalent weight of desiccated coconut and add 3 tbsp whole milk to the cake batter

100g/4oz Glacé Cherries halved

250g/9oz Plain White Flour

2 tsp Baking Powder

To decorate:

175g/6oz White Icing Sugar (Confectioners sugar)

2 Tbsp Tap Water

10 Whole Glacé Cherries

Small Red Sugar Balls approximately 1 tsp

Method: Preheat oven to 160C/140C fan, 325F, gas mark 3

You will need approximately a 25cm x 11.5cm x 7.5cm (10” x 4.5” x 3”) 2lb loaf tin for this recipe. Grease with butter and line the base with baking parchment.

Making And Baking The Cherry Coconut Cake

  • First of all add the butter, sugar and salt to a large mixing bowl. Whisk together until the ingredients are fully combined, pale and creamy.
  • Now add 2 eggs, half the flour and vanilla extract. Whisk together until just combined.
  • Add the last 2 eggs and whisk to incorporate.
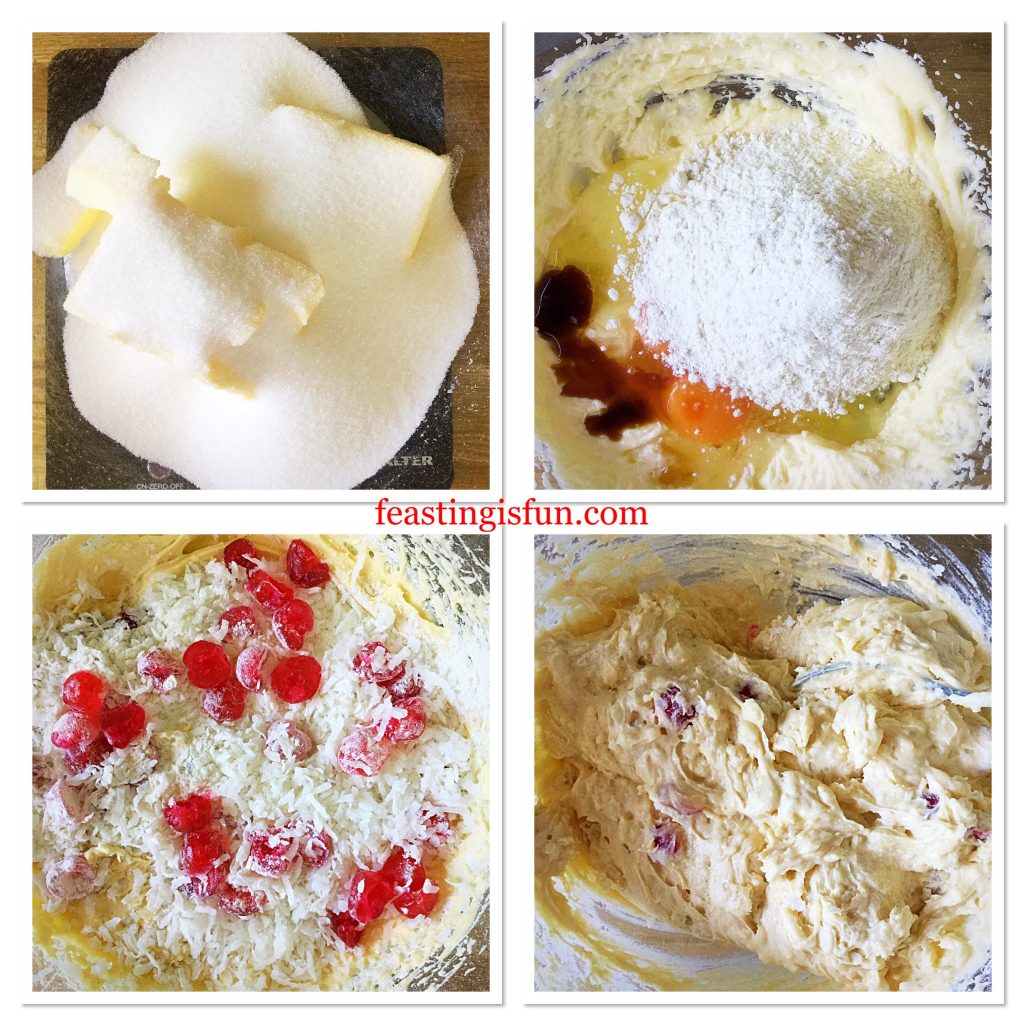
  • Finally add the remaining flour, baking powder, coconut and cherry halves. Toss the cherries in the flour, this will stop them sinking to the bottom of the cake during baking.
  • Fold all of the ingredients together (adding additional milk if using desiccated coconut) until they are combined.
FF Iced Cherry Coconut Loaf Cake
Making the cherry coconut cake batter.
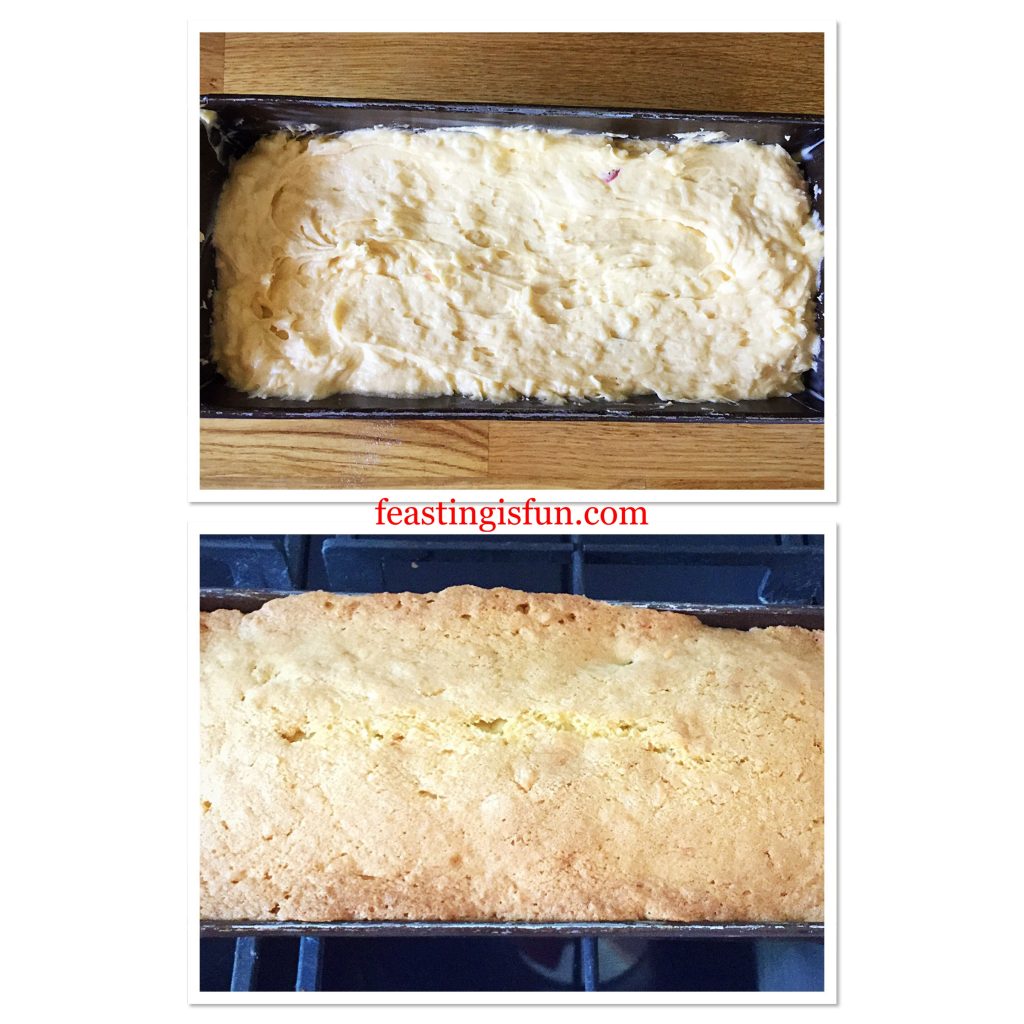
  • Spoon cake batter into the prepared tin making sure the top is level.
  • Place the cake tin into the middle of the oven and bake for 1 hour – 1 hour 15 minutes. My cake took 1 hour and 10 minutes to bake.
  • The cake is baked when golden brown and an inserted skewer comes out clean.
  • As soon as the cake is baked remove from the oven and allow to cool in the tin.
FF Iced Cherry Coconut Loaf Cake
Baking the cherry coconut loaf cake.
  • Once the cake has cooled run a palette knife around the inside of the tin. Turn out the cake, remove the baking parchment and place on a rack over a baking tray.

Decorating The Loaf Cake

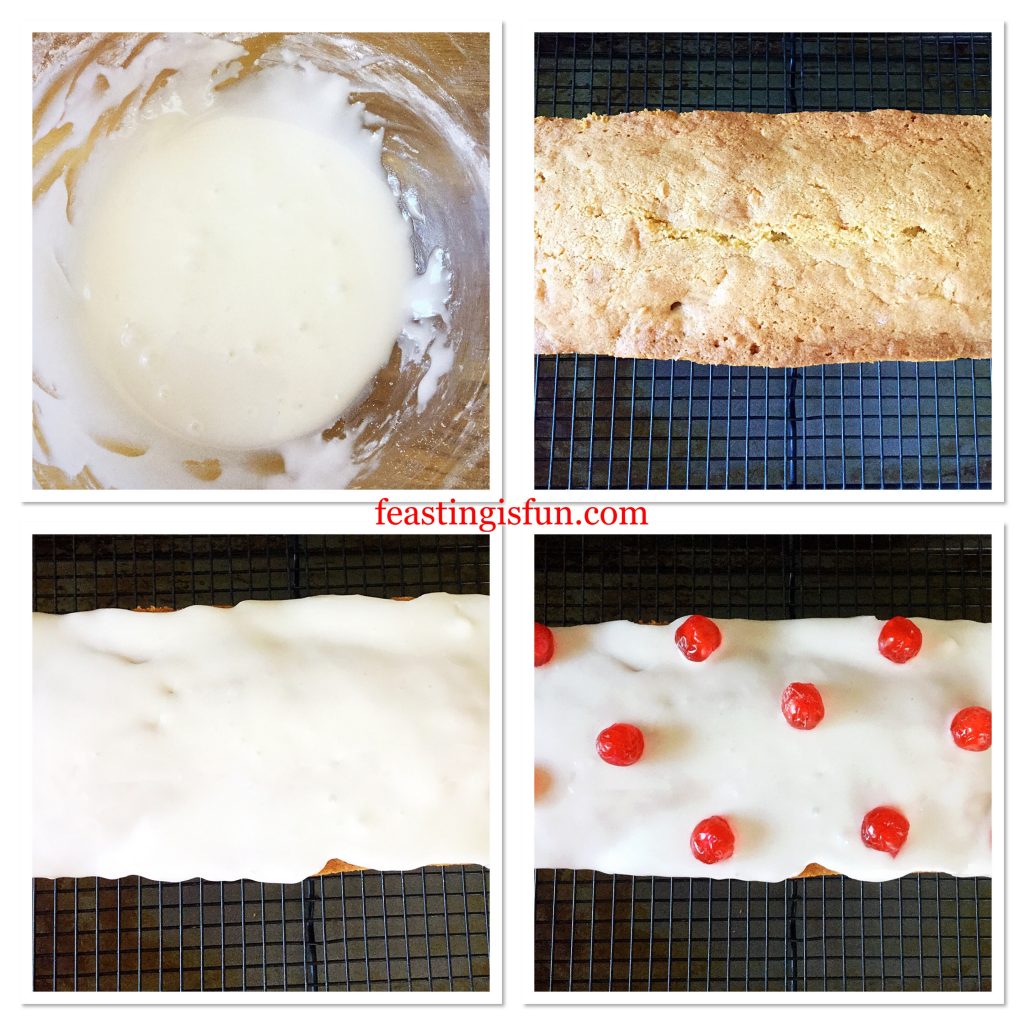
  • Use a whisk to mix the icing sugar and water.
  • Spoon the thick glacé icing on to the top of the cake.
  • Add the glacé cherries to the iced cake.
FF Iced Cherry Coconut Loaf Cake
Decorating the Iced Cherry Coconut Loaf Cake.
  • Finally sprinkle over red sugar balls before the icing sets.
FF Iced Cherry Coconut Loaf Cake
The finished Iced Cherry Coconut Loaf Cake.
  • Put the cake to one side and leave to set.
FF Iced Cherry Coconut Loaf Cake
Iced Cherry Coconut Loaf Cake

Serve sliced and placed on your very best china, along with a freshly made pot of tea.

Store in an airtight container. Eat within 5 days.

If you have enjoyed this recipe for Iced Cherry Coconut Loaf Cake you may also like these:

Black Forest Cupcakes

FF Iced Cherry Coconut Loaf Cake
Black Forest Cupcakes

Iced Bakewell Tart

FF Iced Cherry Coconut Loaf Cake
Iced Bakewell Tart.

Strawberry Sweetheart Cake

FF Iced Cherry Coconut Loaf Cake
Strawberry Sweetheart Cake

While I am not the world’s best cake decorator, I’ve developed several strategies for making the cakes I bake look presentable. Because we eat with our eyes first AND as I mentioned, I like pretty things, cakes being one of them. So, for inspiration I follow several bakers and cake decorators on Twitter and Instagram. And they are an invaluable source of tips, tricks and ideas. Likewise, Pinterest is also full of inspiration. Most importantly, nature is the greatest source of inspiration for me. None more so than my beautiful back garden.

What inspires you?

So, whatever you are making, baking and creating in your kitchens, have fun preparing and sharing your feast.

Sammie xx

No part of this post may be reproduced or duplicated without the written permission of the owner. Please see my Disclosure Policy.