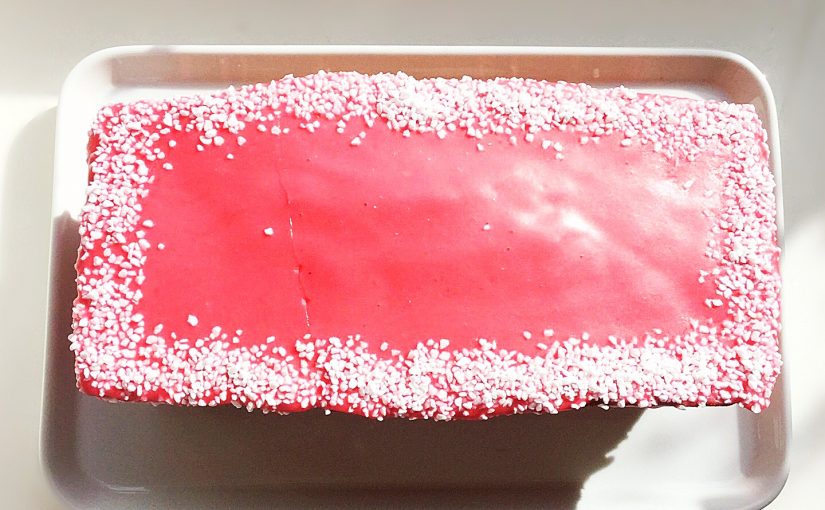
Raspberry Drizzle Loaf Cake

Summer is well and truly here and while enjoying the gorgeous sunshine, here in the Southeast of England I am also indulging myself in all of the delicious soft fruits available at this time of year. My Summer Mixed Berry Sponge Cake is always a big hit using berries in the frosting as well as to decorate. So, drawing inspiration from that cake I set about creating an easier bake. Specifically a loaf cakes as they are very popular with you, the readers of my blog.  Let me introduce my Raspberry Drizzle Loaf Cake.
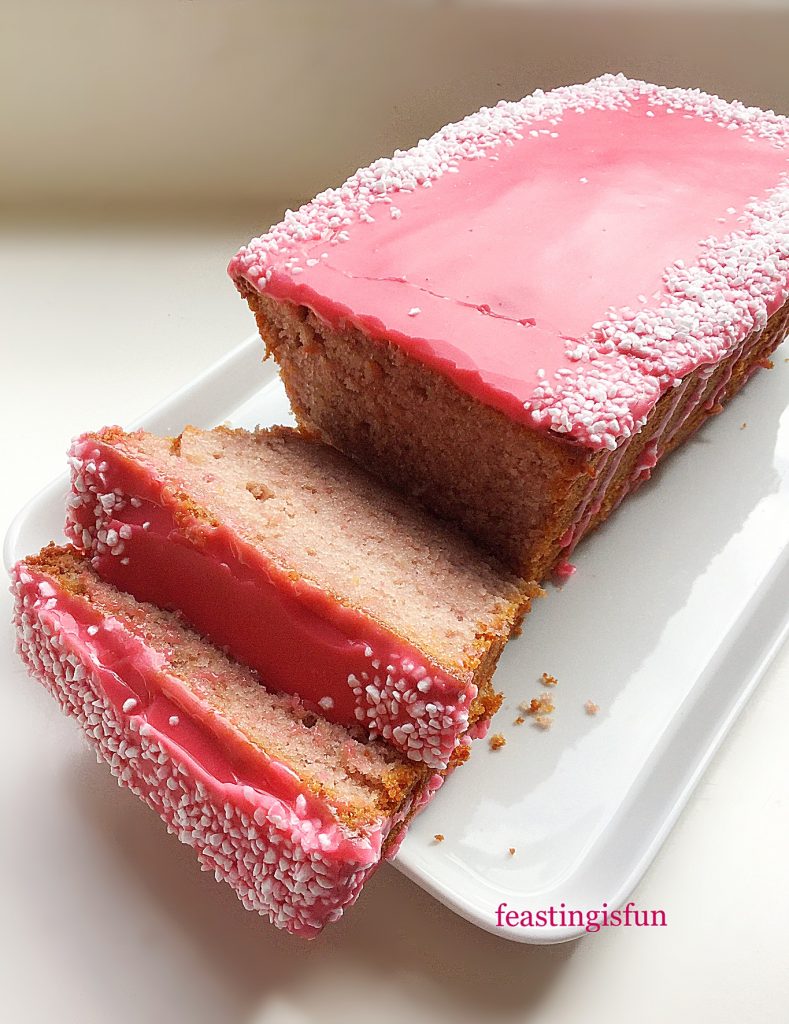
Raspberry Drizzle Loaf Cake

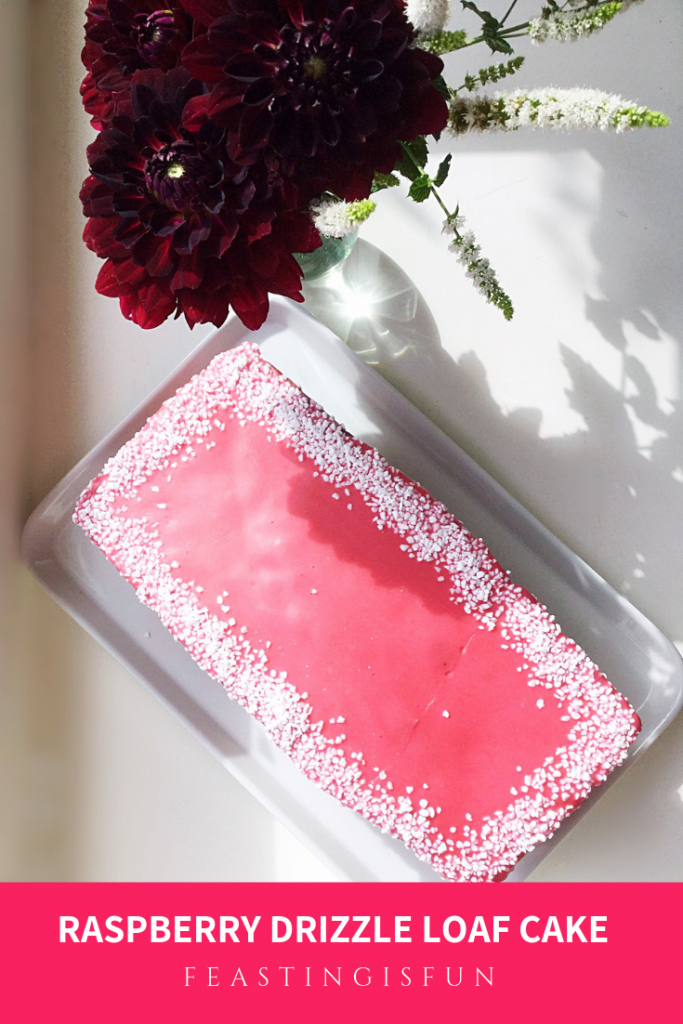
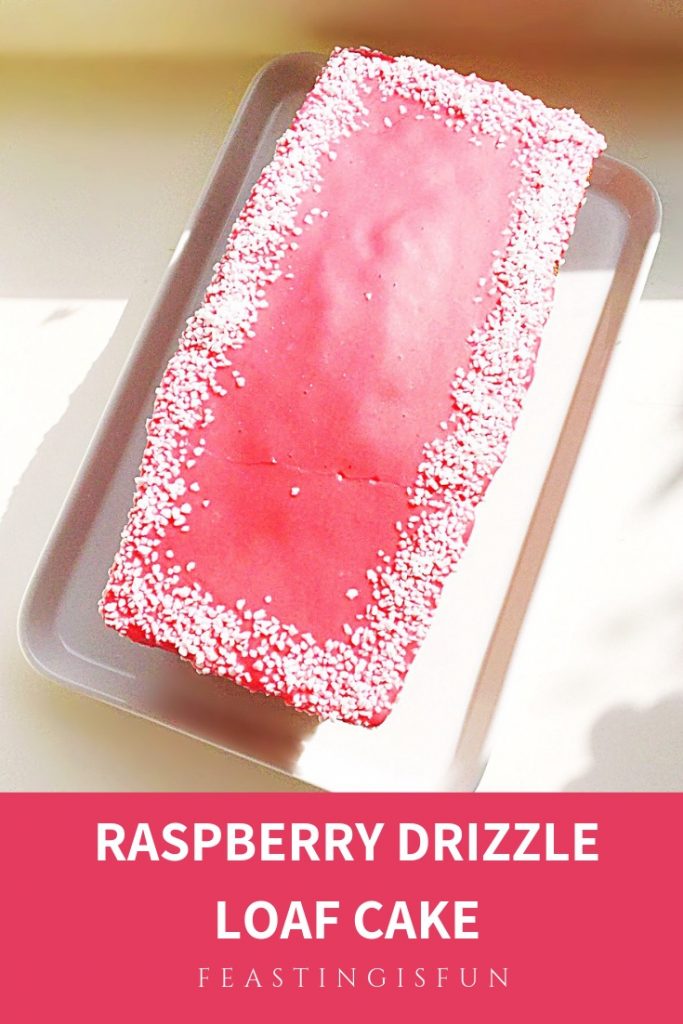
Because this cake has fresh raspberries whipped into the cake batter it naturally turns light pink, keeping the colour while baking. Likewise the coral pink icing, that I use to drizzle over the cake, gets its hue from fresh raspberry pulp. Pushing the raspberries through a sieve ensures that the icing remains silky smooth and without any pips. Sieving the raspberries doesn’t take long to do and really makes a difference to the finished cake. And although the cake has whole raspberries in it, the seeds seem to get lost in the batter, as they are hardly noticeable when eating the cake.
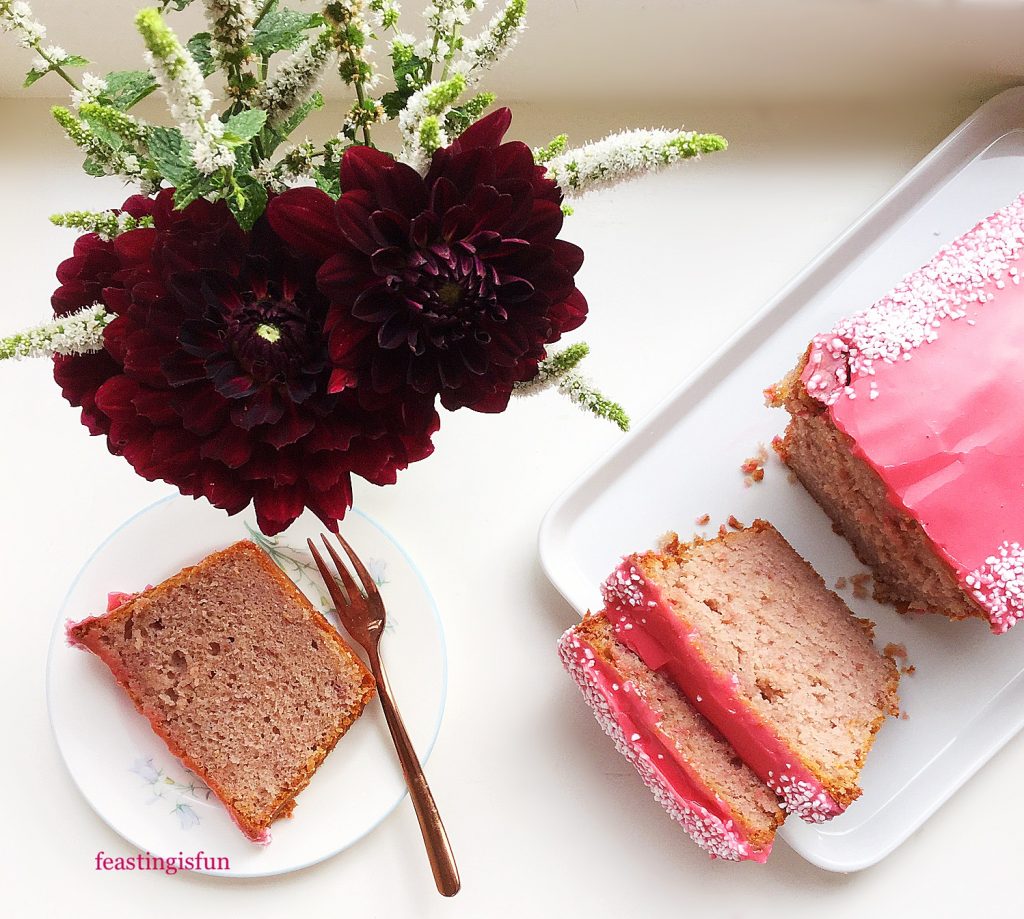
Raspberry Drizzle Loaf Cake

Fresh Raspberry Cake Baked To Share

Raspberries may well be my favourite of the summer berries, although it is hard to choose! Yet, while planning this recipe, a raspberry drizzle cake became an exciting and delicious prospect. And loaf tin bakes always result in a cake that is both easy to transport and slice, making it ideal for sharing with friends, family or colleagues. Taking a cake to anyone’s home or workplace is never a bad idea!

I always recommend reading a recipe through thoroughly before starting and especially so with this cake. Since you will find the lemon whose zest is needed for the cake is also required for its juice in the icing.

Recipe: Raspberry Drizzle Loaf Cake – serves 8-10

For the raspberry cake batter:

225g/8oz  Unsalted Butter at room temperature 

225g/8oz  Caster Sugar

1/4tsp Salt – I use Maldon 

Finely Grated Zest Of 1 Lemon – scrub the lemon under hot water and dry before zesting (the juice will be needed for the icing).

4 Large Free Range Eggs

1tsp Vanilla Extract – I use Nielsen-Massey

250g/9oz Plain White Flour

1tbsp (3tsp) Baking Powder

225g/8oz Raspberries – fresh (when making this cake during the colder months frozen berries are a perfect substitute, I buy 300g frozen punnets of raspberries from Waitrose).

For the raspberry icing:

100g/4oz Raspberries – same as for the cake

1tsp Fresh Lemon Juice

225g/8oz Icing Sugar (confectioners sugar)

2-3tbsp Sugar Nibs – alternatively use edible, small white cake decorations such as balls.

Method: Preheat the oven to 160C/140C fan, gas mark 3, 325F.

For this loaf cake you will need a 2lb loaf tin that is approximately 25cm x 11cm x 7.5cm (10in x 4.5in x 3in). Grease with butter and line the base with baking parchment.

Making And Baking The Raspberry Cake

  • First of all, add the butter, sugar and salt to a large mixing bowl.
  • Using an electric hand whisk beat all the ingredients together until pale and fluffy.
  • Next add the zest of a finely grated lemon, four large eggs and the vanilla extract.
  • Sift the flour and baking powder onto the wet mix and then add the fresh raspberries.
  • Now, using the electric hand whisk, beat all of the ingredients together until they are combined and the pink colour is uniform throughout the batter.
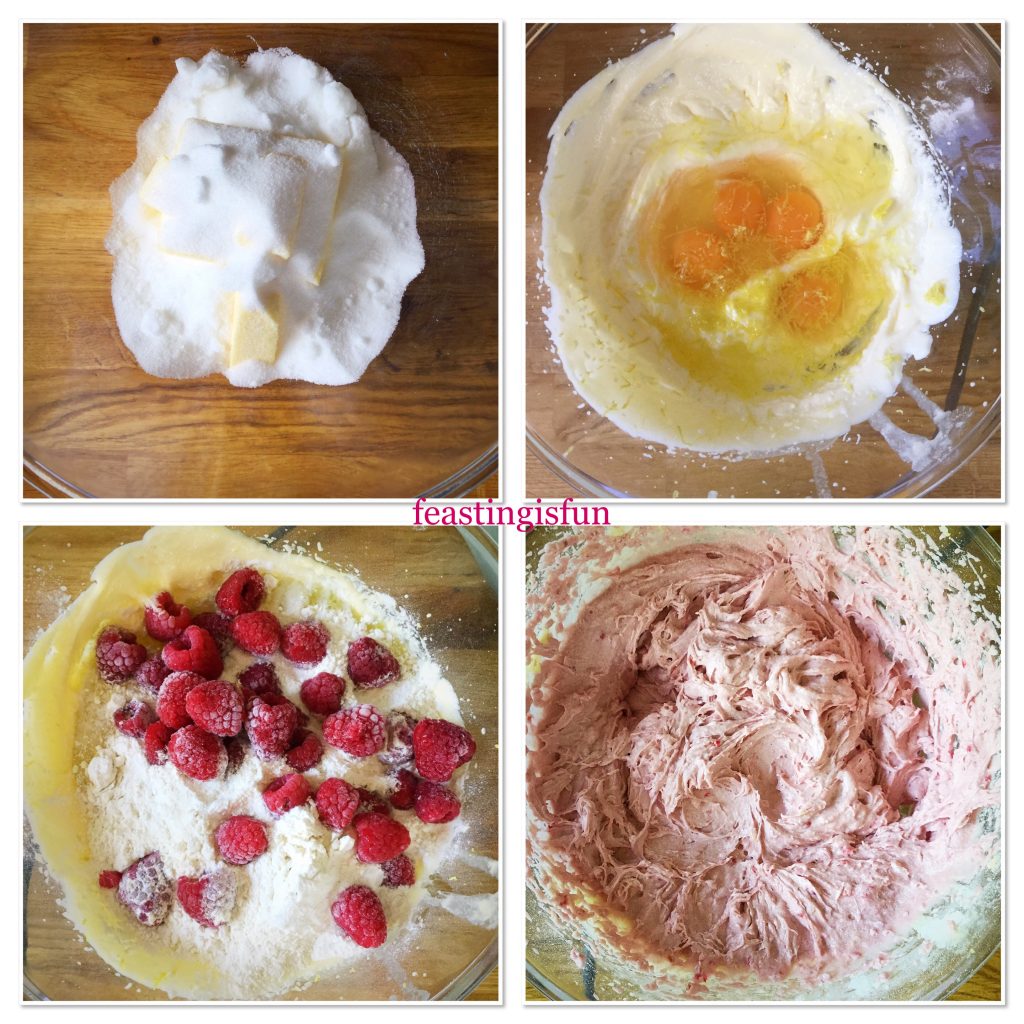
Four separate images showing each stage of making a raspberry cake batter.
Making the raspberry cake batter.
  • Spoon the pink cake batter into the prepared loaf tin and smooth the surface.
  • Place the tin into the centre of a preheated oven and bake for approximately 1 hour 30 minutes. Allow 10 minutes either side of this guide due to differences between ovens.
  • To test if the cake is baked insert a skewer (I use a metal one) into the centre of the cake. The cake is baked if the skewer is clean when removed. However, if there is cake batter on the skewer bake the cake for a further 5-10 minutes before retesting.
  • As soon as the inserted skewer comes out of the baked cake clean, remove the cake from the oven and place the cake, in its tin, onto a cooling rack. Leave the cake to cool completely in the tin.
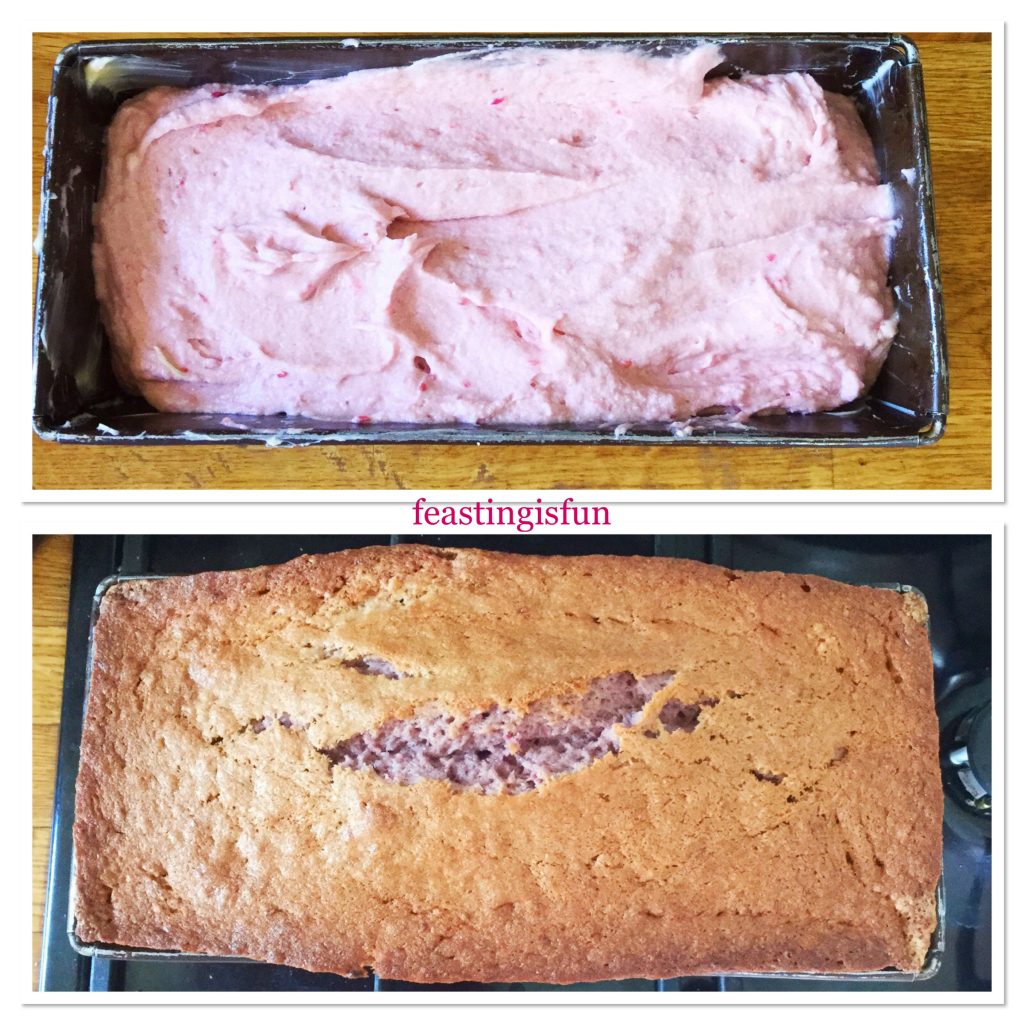
A loaf cake tin showing both the unbaked and baked cake
The unbaked and baked raspberry cake.

Making Fresh Raspberry Drizzle Icing

  • While the cake finishes cooling make the raspberry icing.
  • Place the raspberries into a fine sieve over a bowl. Note – the sieve needs to be fine enough to stop raspberry seeds from passing through.
  • Use a spoon to push the raspberries against the sieve.
  • Every few minutes, ensure that the spoon is clean, lift up the sieve and scrape the raspberry pulp from underneath into the bowl.
  • Continue until only seeds and a small amount of pulp is left in the sieve.
  • Add one teaspoon of fresh lemon juice to the raspberry pulp in the bowl.
  • Next add the icing sugar to the bowl and mix the ingredients together with a balloon whisk, ensuring the finished icing is smooth and lump free.
  • The finished icing should be thin enough to spoon over the cake and drizzle down the sides, without soaking into the cake. If the icing seems too thin add some more icing sugar.
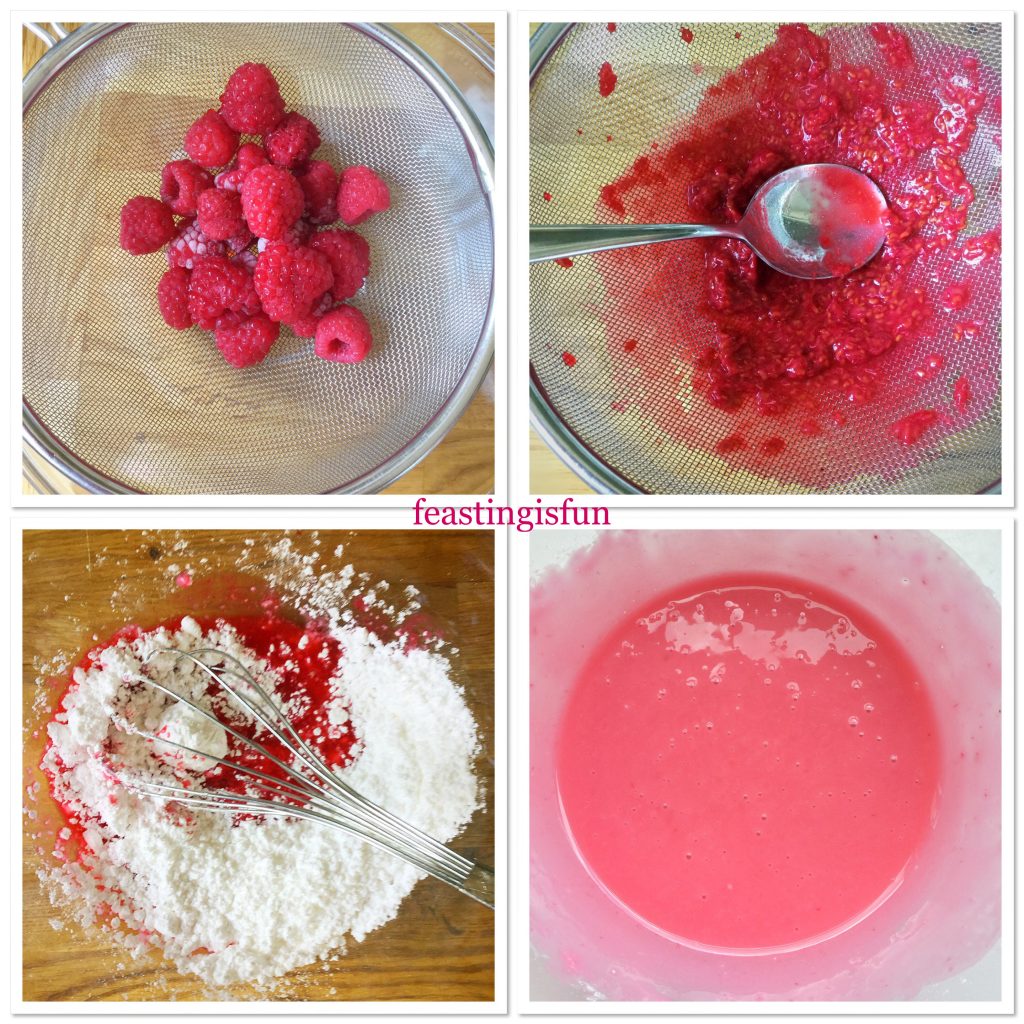
Four images showing the making of a fresh fruit icing.
Creating fresh raspberry icing.

Decorating The Cake With Raspberry Icing

  • First of all run a palette knife between the outside of the cake and inside of the tin.
  • Turn out the cake and remove any parchment paper stuck to the base.
  • Place the cake on to a cooling rack which has a baking tray underneath.
  • Spoon the icing over the top of the cake, encouraging it to drip down the sides.
  • Continue until the top of the cake is completely covered and there are drips on all four sides. Discard any excess icing.
Four separate images showing how to decorate the cake.
Decorating the Raspberry Drizzle Loaf Cake.
  • Finally, sprinkle around the outside edge of the cake with your chosen decoration. I have used small, white, sugar nibs to contrast with the pink icing.
  • Transfer the cake to a serving plate. I use a fish slice on either end to lift the cake.
  • Leave the cake to set for at least 30 minutes.
  • During very warm weather I suggest putting the cake in the fridge to set.
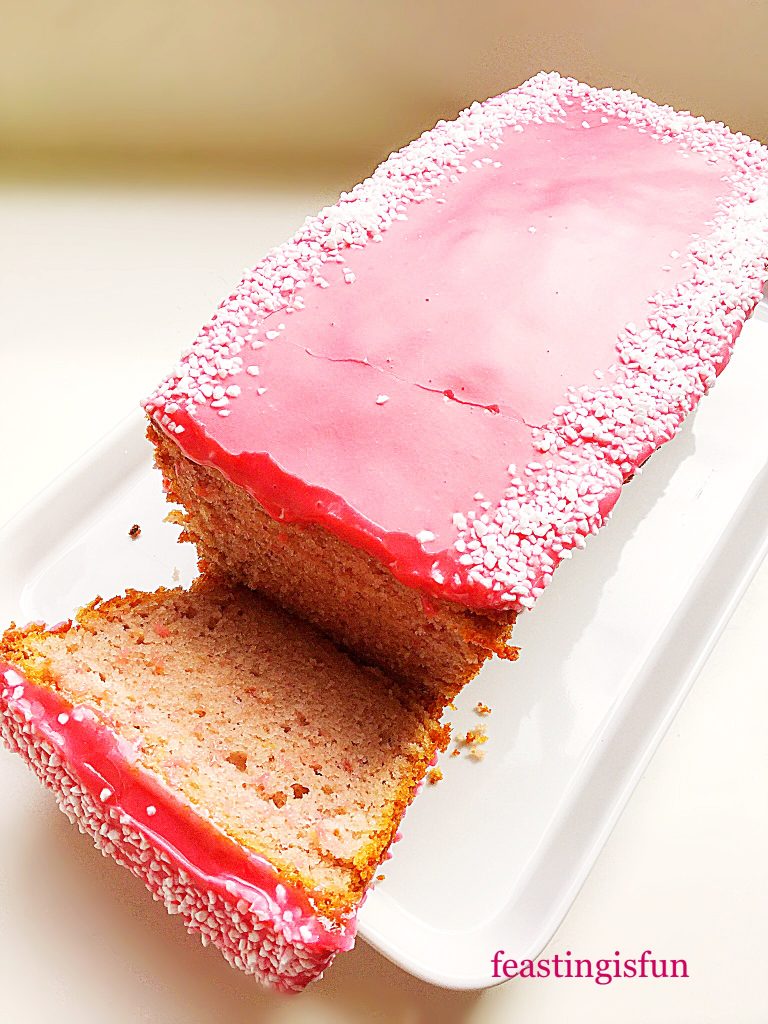
Raspberry Drizzle Loaf Cake
  • Serving before the icing is set may result in the icing dripping from where it has been cut!

For best results bake and ice this cake the day before it is needed. Likewise as the cake cools overnight in the fridge it’s overall flavour and texture improves. Once cut, place the remaining cake in an airtight container and eat within four days. Store in the fridge during warm weather.

If you have enjoyed this recipe for Raspberry Drizzle Loaf Cake you may also like these:
Lemon Drizzle Cake

Lemon Drizzle Cake
Lemon Drizzle Cake

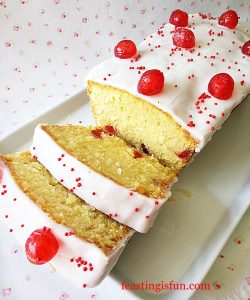
Iced Cherry Coconut Loaf Cake

Sliced iced cherry coconut loaf cake.
Iced Cherry Coconut Loaf Cake

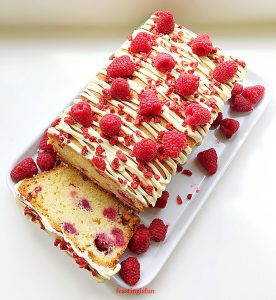
Raspberry White Chocolate Loaf Cake

Raspberry White Chocolate Loaf Cake

Since making this raspberry cake I have received very positive feedback, especially from those who normally prefer ‘chocolate’ cake! Because the fruit in this cake is fresh, tangy and not too sweet, it is fast becoming a firm favourite among friends, family and neighbours. And we know that all food tastes better when it is shared. So who will you share your cake with?

So, whatever you are making, baking and creating in your kitchens, have fun preparing and sharing your feast.

Sammie xx

No part of this post may be reproduced or duplicated without the written permission of the owner. Please see my Disclosure Policy.
 

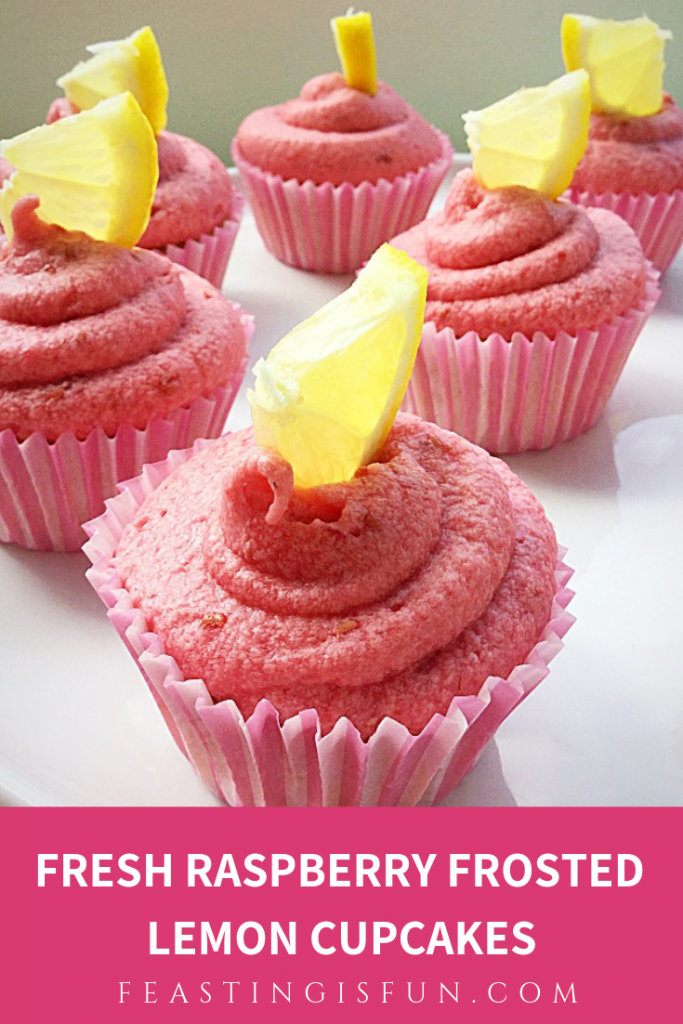
Fresh Raspberry Frosted Lemon Cupcakes

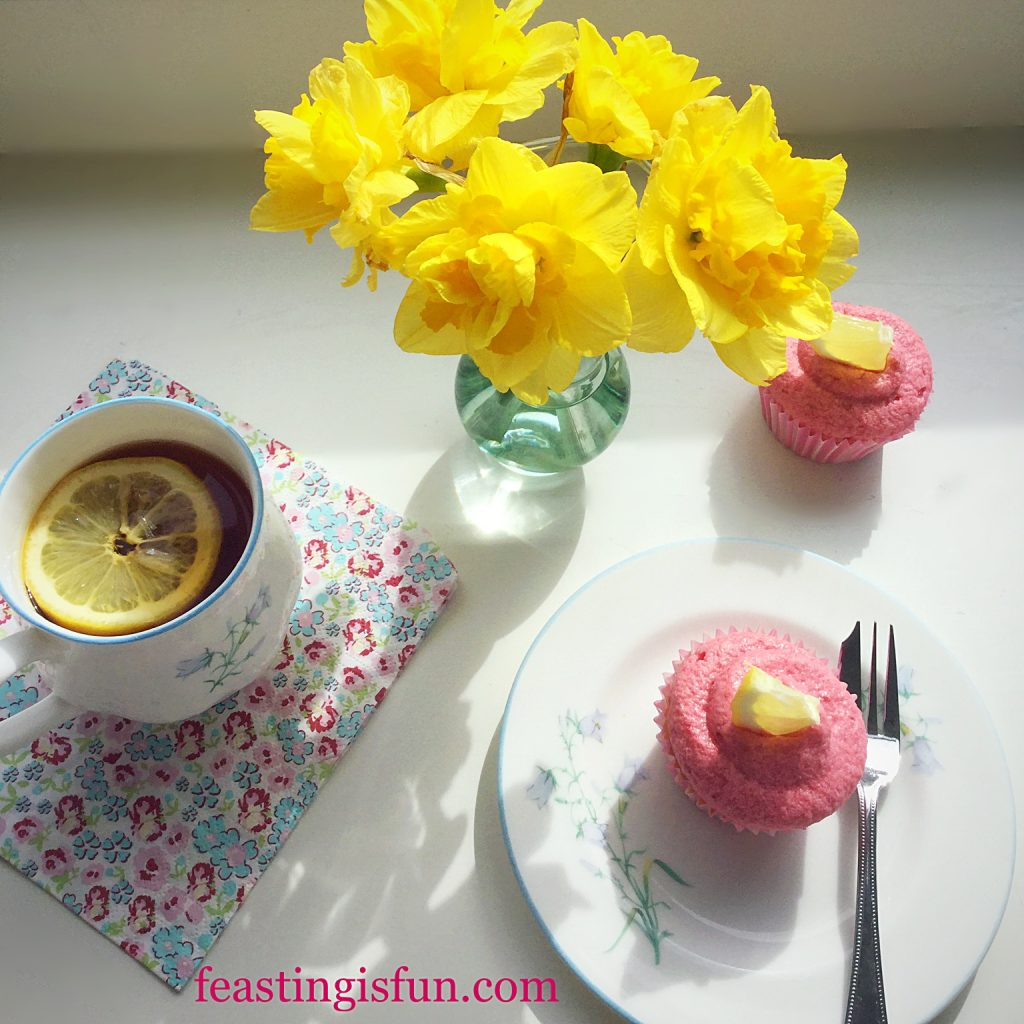
Finally Spring has finally arrived! And following what has seemed a very long, very cold and very dark Winter, daffodils are now lighting up the landscape with their cheery yellow faces.  Bird song is abundant, especially as long shut windows have now been flung open. So in celebration of this beautiful season I have created a fruit packed cupcake that will bring sunshine to your day even when the rain clouds descend. Enjoy these Fresh Raspberry Frosted Lemon Cupcakes at anytime of the year.

FF Fresh Raspberry Frosted Lemon Cupcakes
Fresh Raspberry Frosted Lemon Cupcakes

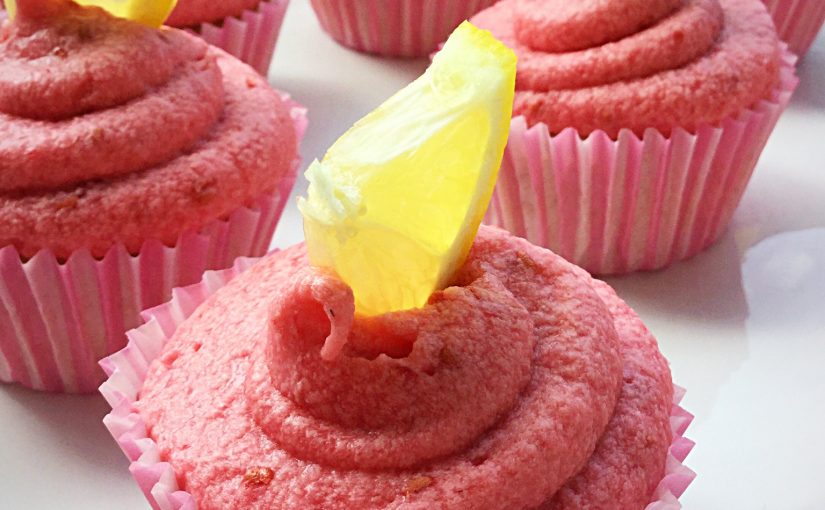
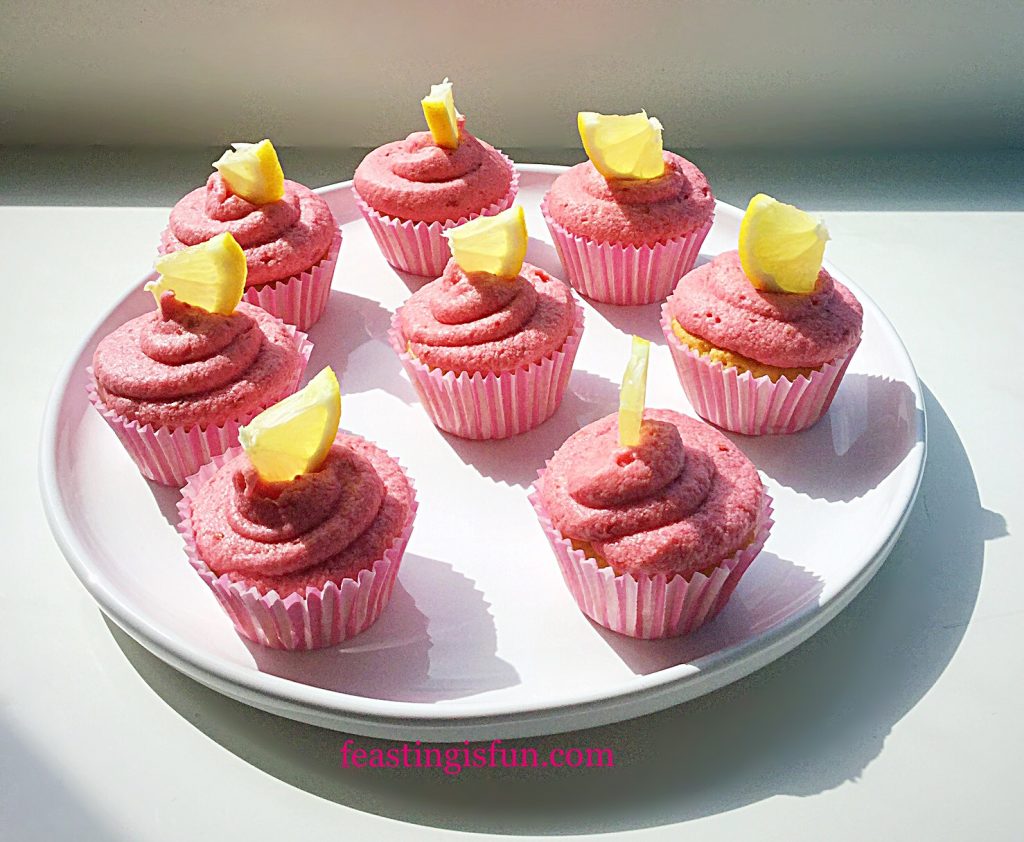
Light, lemon flavoured cupcakes topped with a fresh (frozen out of season), vibrant pink raspberry buttercream. Since both fruits used in this recipe can be tart to the palette, the combination is very refreshing. Also using fresh raspberries, as opposed to raspberry jam, results in the frosting having an almost sherbet like flavour. Resulting in a subtle, yet delicious change from a regular, sweet cupcake.

FF Fresh Raspberry Frosted Lemon Cupcakes
Fresh Raspberry Frosted Lemon Cupcakes

Simply looking at these cupcakes reminds me of sunshine. Something that has been in scant supply these past few months. So I say, when the clouds gather, you simply have to bake the sunshine into your day. While you are making these, why not double up and make some to share among neighbours, friends or work colleagues? And they are certain to cheer anyone’s day as food always tastes better when shared.

FF Fresh Raspberry Frosted Lemon Cupcakes
Fresh Raspberry Lemon Frosted Cupcakes

Note – when making the frosting don’t worry if it looks like it has curdled. It hasn’t! Rather it is the addition of fresh raspberries that give it a slightly mottled appearance.

FF Fresh Raspberry Frosted Lemon Cupcakes

Recipe: Fresh Raspberry Frosted Lemon Cupcakes – makes 12

For the cupcakes:

100g/4oz Unsalted Butter at room temperature

100g/4oz Caster Sugar

1/8 tsp Sea Salt – I use Maldon

2 Large Free Range Eggs

1/2 tsp Vanilla Extract – I use Nielsen-Massey

100g/4oz Plain White Flour

1 tsp Baking Powder

Finely Grated Zest of 1 Large Lemon – approximately 1 tsp

For the frosting:

100g/4oz Raspberries – if using frozen include defrosting juice in weight

150g/5.2oz Unsalted Butter at room temperature

300g/10.5oz White Icing Sugar (confectioners sugar)

To decorate:

3 slices of fresh lemon

Method: preheat oven to 160C/140C fan, 325F, gas mark 3

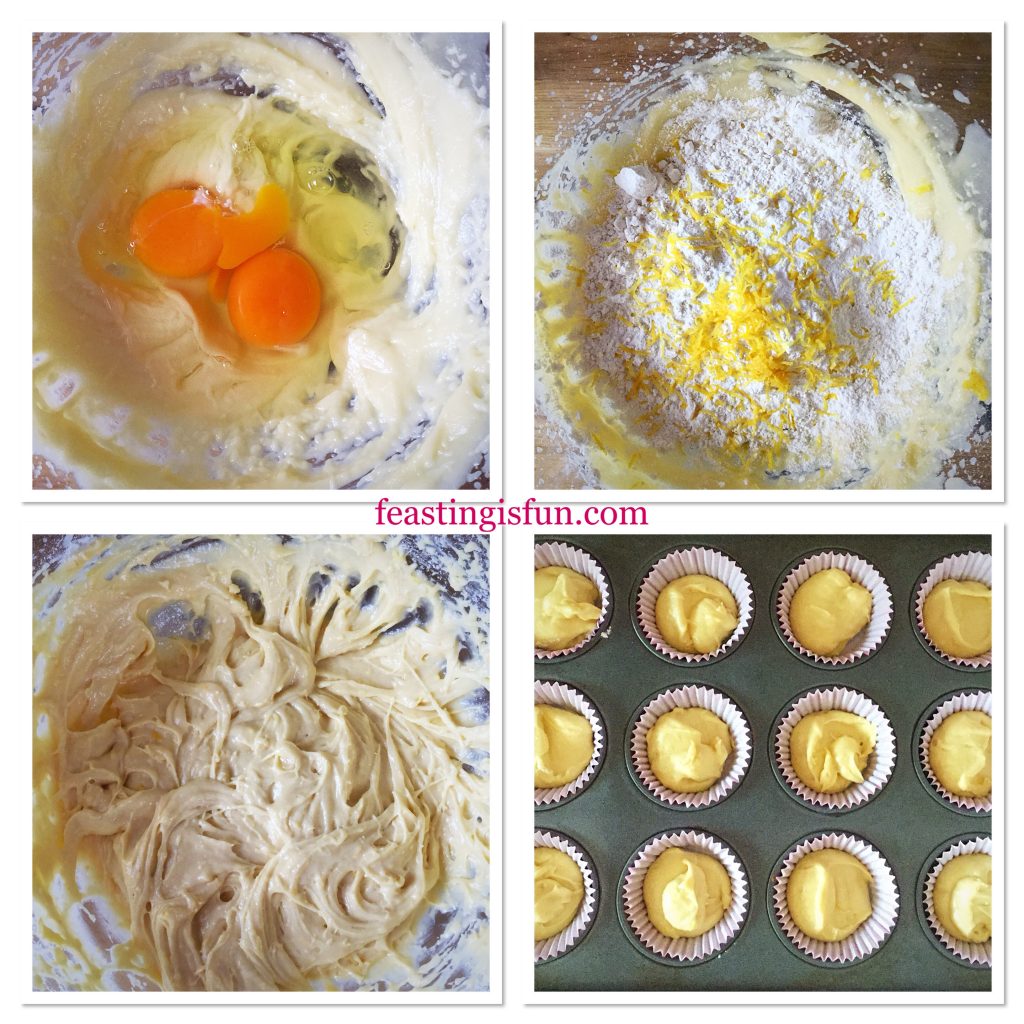
Making And Baking The Lemon Cupcakes

  • First of all line a muffin tin with 12 pretty cupcake cases.
  • Into a bowl add the butter, sugar, salt and vanilla extract. Whisk together until pale and creamy.
  • Next add the two eggs and then sift in the flour and baking powder. Finely add the finely grated zest of a lemon.
  • Whisk all the ingredients together until they are combined. Importantly, avoid over mixing as this can lead to a tough cake when baked.
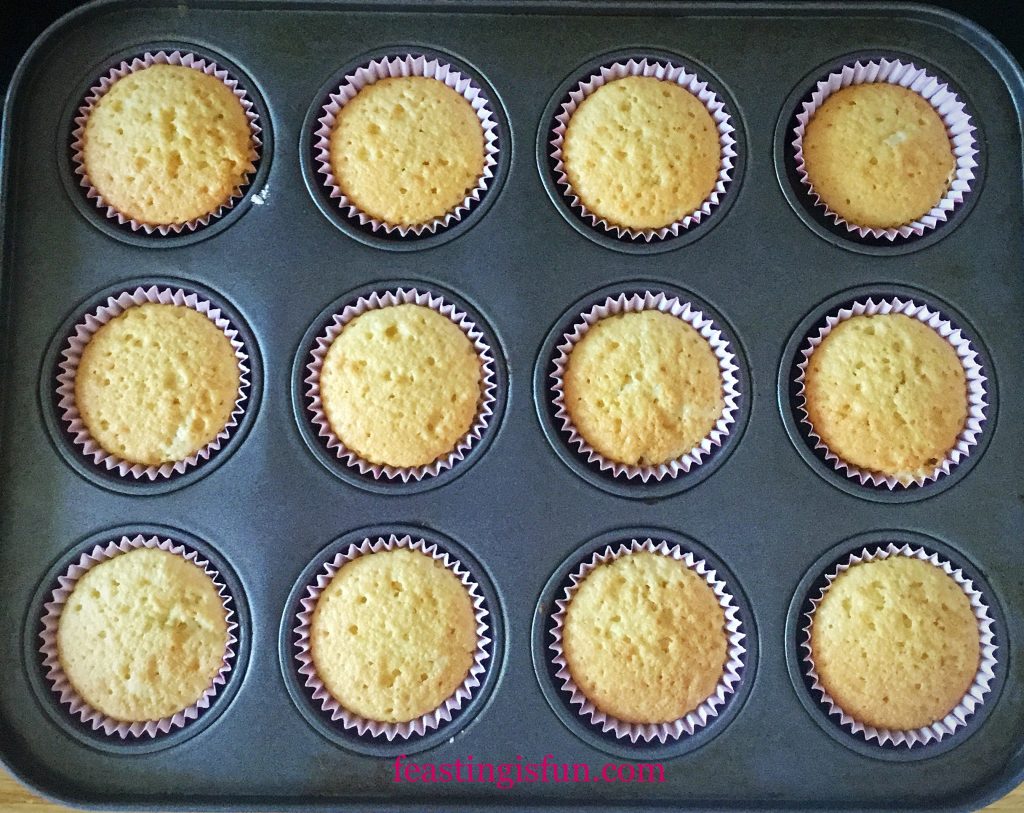
  • Divide the mixture equally between the 12 cupcake cases .
FF Fresh Raspberry Frosted Lemon Cupcakes
Making the lemon cupcake batter.
  • Place the cupcakes in the centre of the oven and bake for 30 minutes.
  • Additionaly, baking at a low temperature for a longer time results in well risen, flat topped cupcakes.
  • The cupcakes are baked when risen, golden and spring back from a light touch.
  • As soon as the cupcakes are baked remove from the oven.
FF Fresh Raspberry Frosted Lemon Cupcakes
Baked cupcakes.
  • Leave to cool in the tin for 5 minutes then remove and place the cupcakes on a cooling rack to completely cool.
  • While the cupcakes cool make the fresh raspberry frosting.

Making The Fresh Raspberry Buttercream Frosting

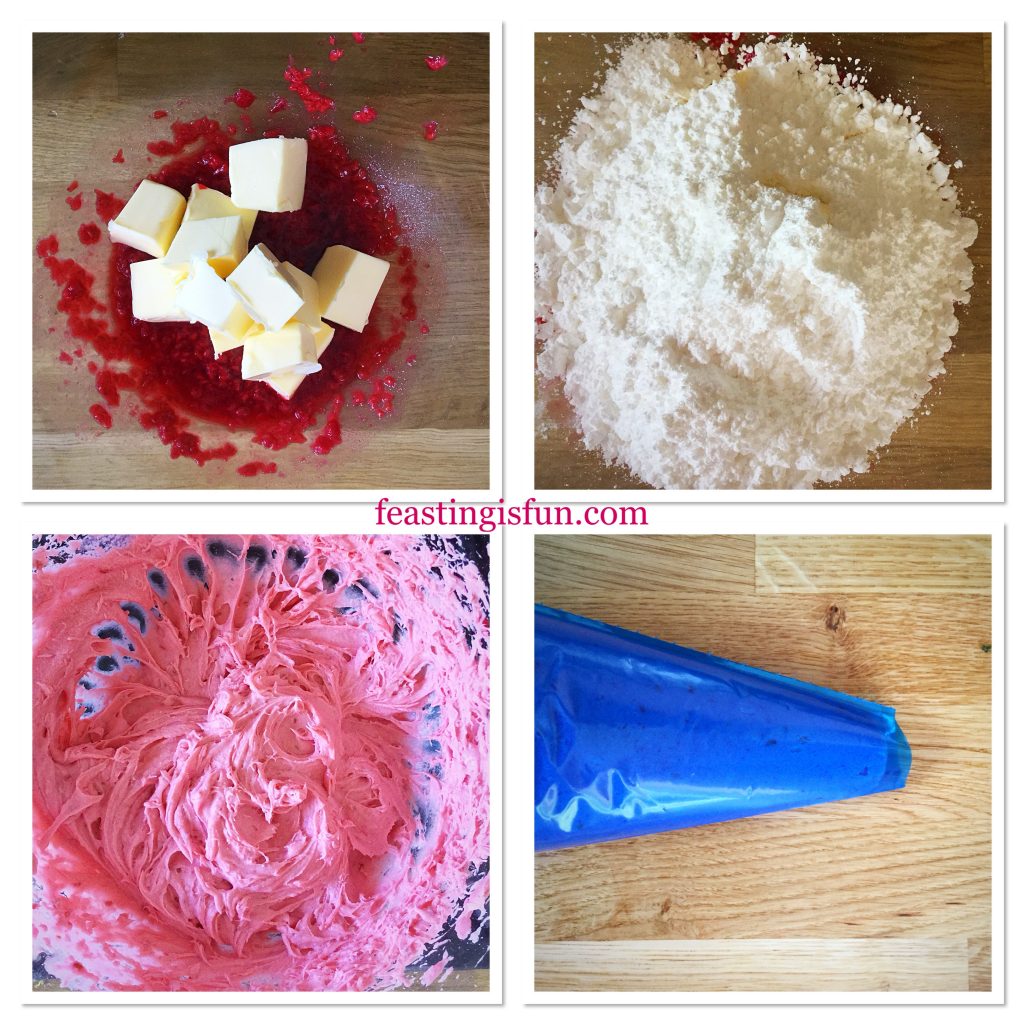
  • Place the raspberries into a bowl and mash using a fork.
  • Add the butter and icing sugar to the mashed raspberries and whisk together – approximately 5 minutes. resulting in a frosting that should be shocking pink in colour and have a light airy texture.
  • Decant the frosting into a piping bag that has not been fitted with a piping nozzle. If using a disposable bag cut the end to leave a 1cm opening.
FF Fresh Raspberry Frosted Lemon Cupcakes
Preparing the pink fresh raspberry frosting.
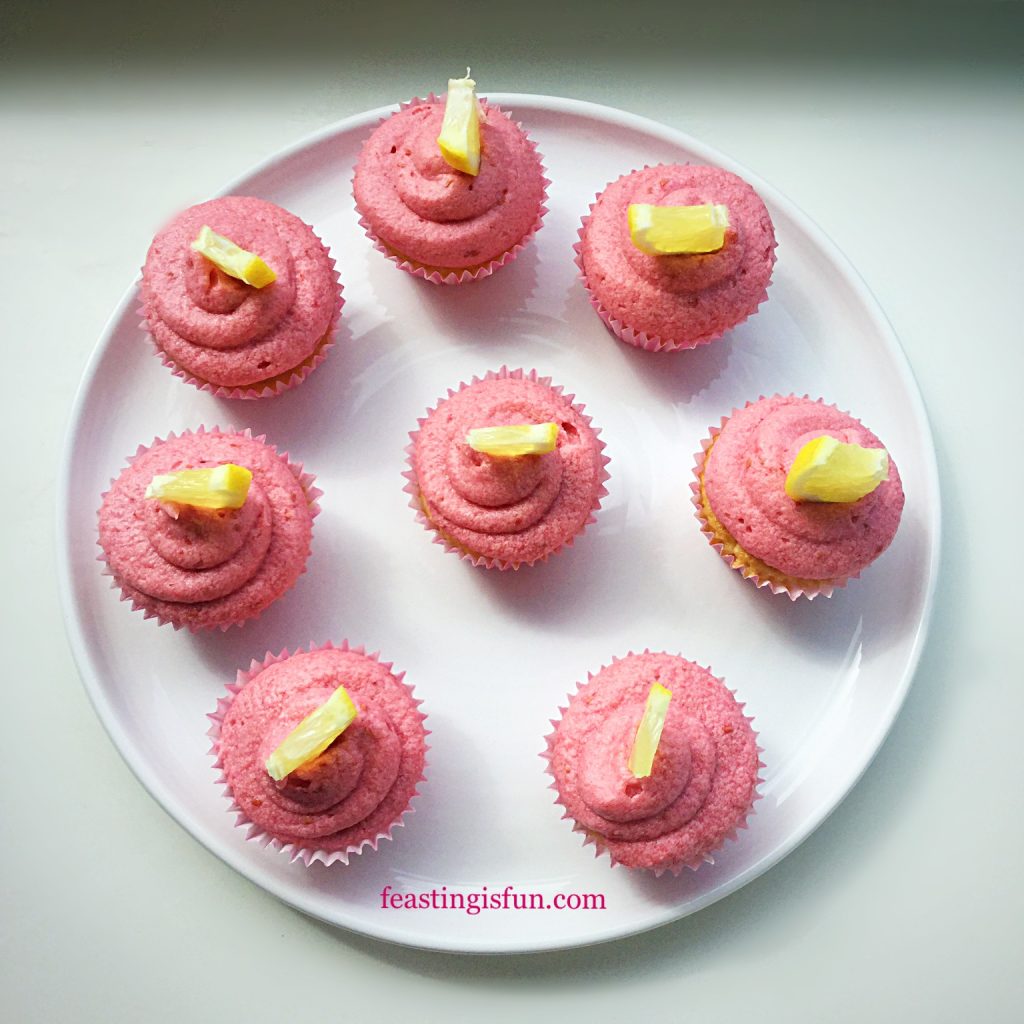
  • Before piping on to the cupcakes cut 3 slices of lemon. Cut each slice into 4 portions. Each will decorate the top of the frosted cupcakes.
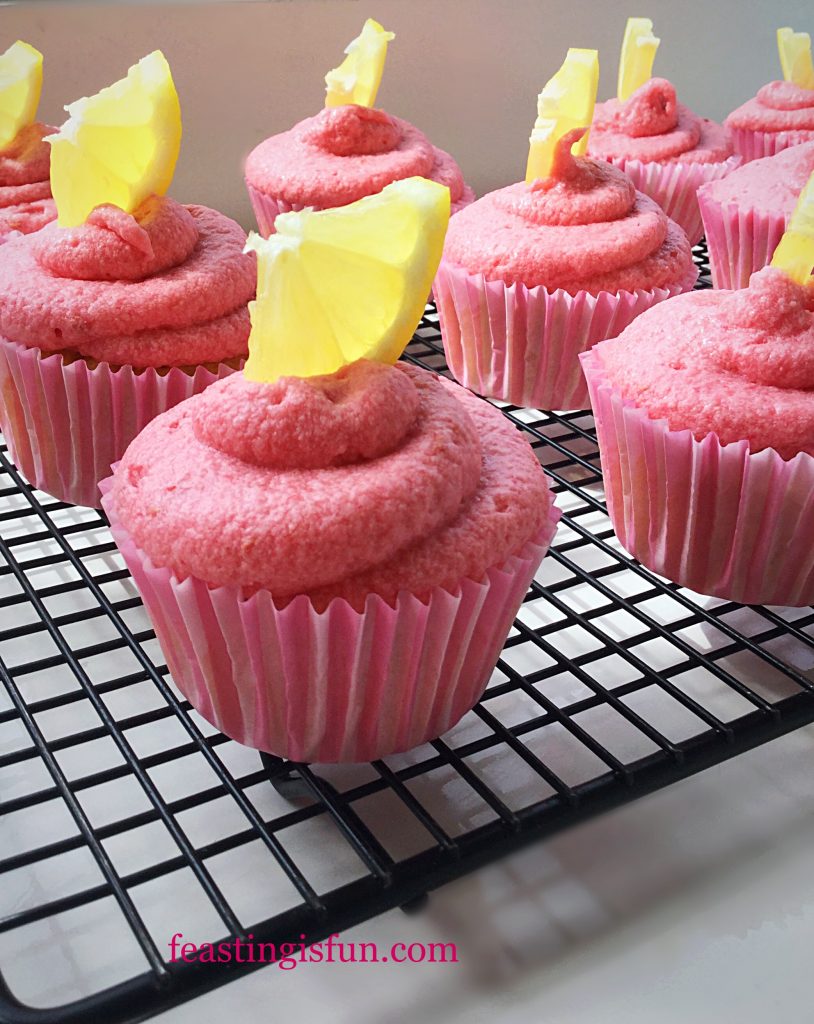
  • To pipe the swirls on to the cupcakes: start at the outside edge of the cupcake, keep an even pressure on the bag and pipe a double swirl.
  • Top each frosted cupcake with a lemon segment.
FF Fresh Raspberry Frosted Lemon Cupcakes
Fresh Raspberry Frosted Lemon Cupcakes

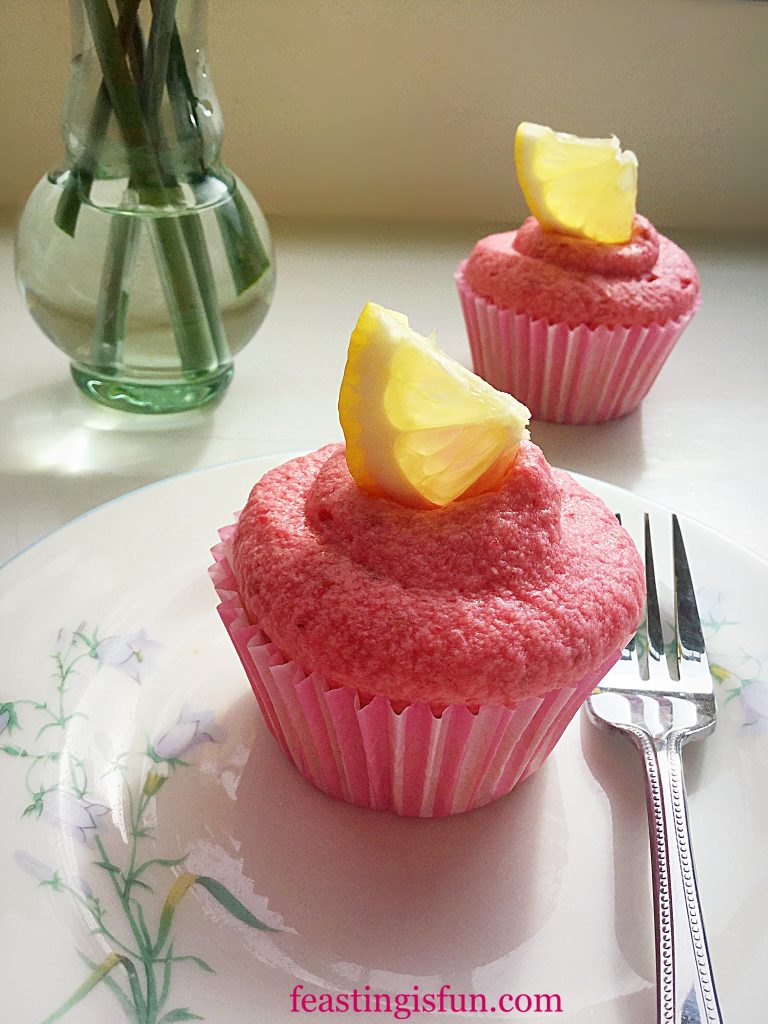
Vibrant, fresh raspberry frosting topped with a luminous lemon segment.

FF Fresh Raspberry Frosted Lemon Cupcakes
Fresh Raspberry Frosted Lemon Cupcakes

Serve with lemon tea or freshly made lemonade. And where possible, enjoy sitting outside in the garden listening to the birdsong.

If you have enjoyed this recipe for Fresh Raspberry Frosted Lemon Cupcakes you may also like these:

Marshmmallow Frosted Mango Cupcakes

FF Fresh Raspberry Frosted Lemon Cupcakes
Marshmallow Frosted Mango Cupcakes

Pink Heart Topped White Chocolate Cupcakes

FF Fresh Raspberry Frosted Lemon Cupcakes
Pink Heart Topped White Chocolate Cupcakes

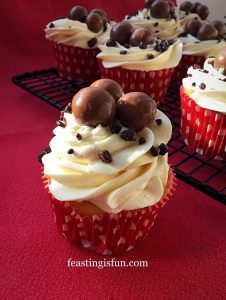
Malteser Popping Candy Cupcakes

FF Fresh Raspberry Frosted Lemon Cupcakes
Maltesers Popping Candy Cupcakes

Baking and sharing are at the very heart of Feasting is Fun. While I thoroughly enjoy creating new recipes to share with you my readers, encouraging you to share what you have made is as important. Especially as there are many lonely people in this world. Because simple gift of a cake, or meal such as this  Chicken and Four Cheese Lasagne, given with a smile can lift an entire day for a stay at home mum with young children. Just one example of how you can help.

So whatever you are making, baking and creating, have fun preparing and sharing your feast.

Sammie xx

No part of this post may be reproduced or duplicated without the written permission of the owner. Please see my Disclosure Policy.
Marshmallow Topped Rich Chocolate Brownies

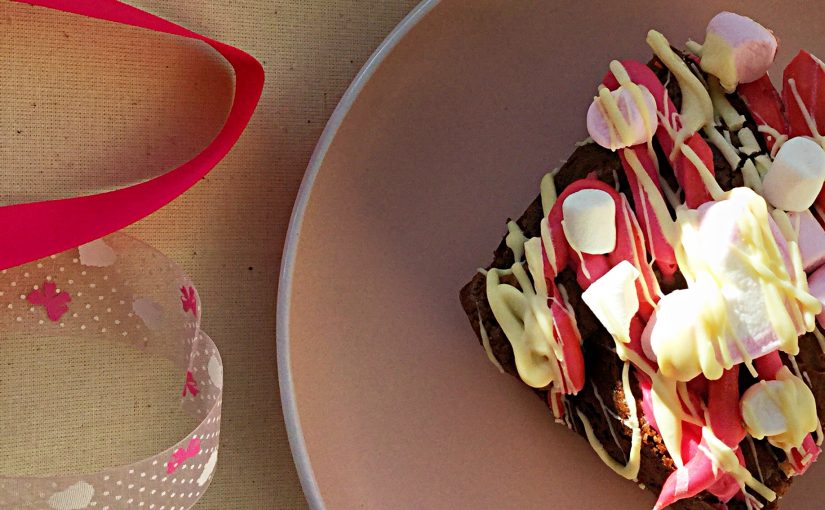
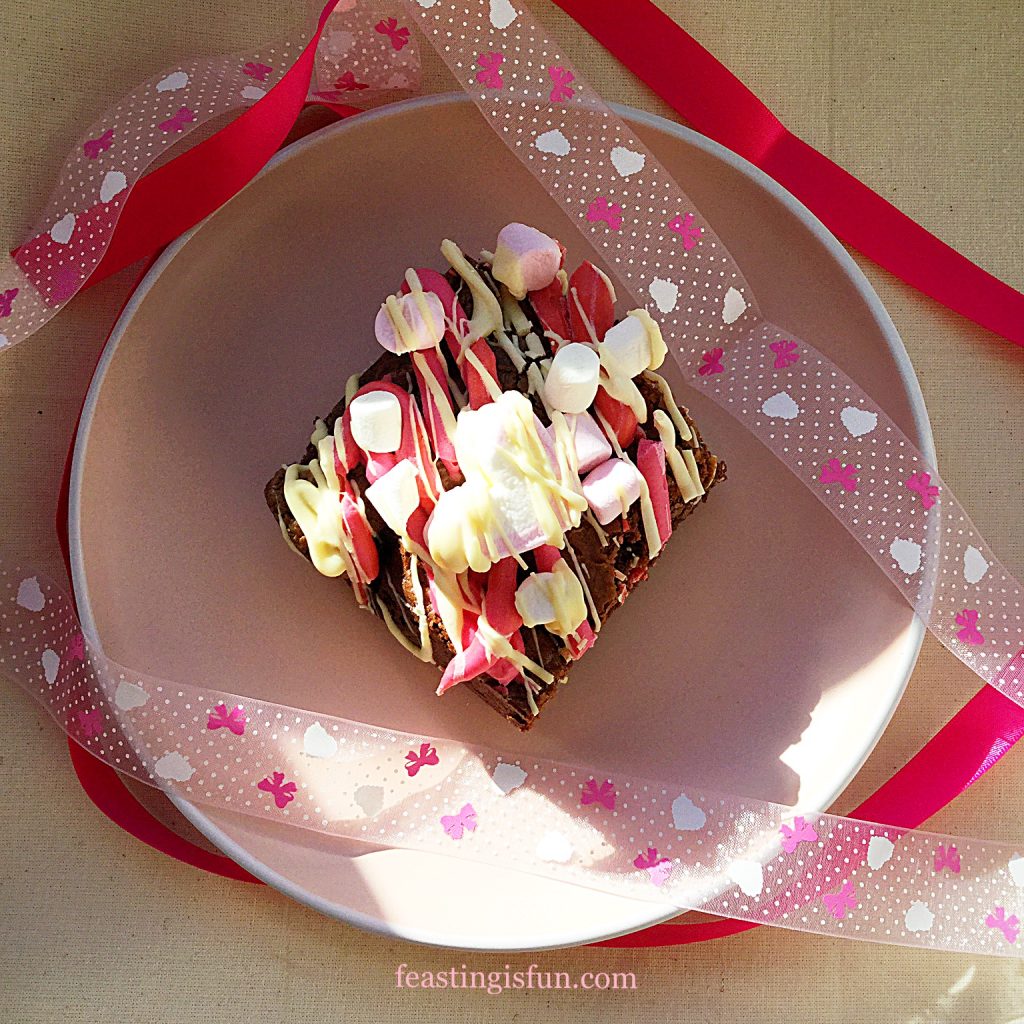
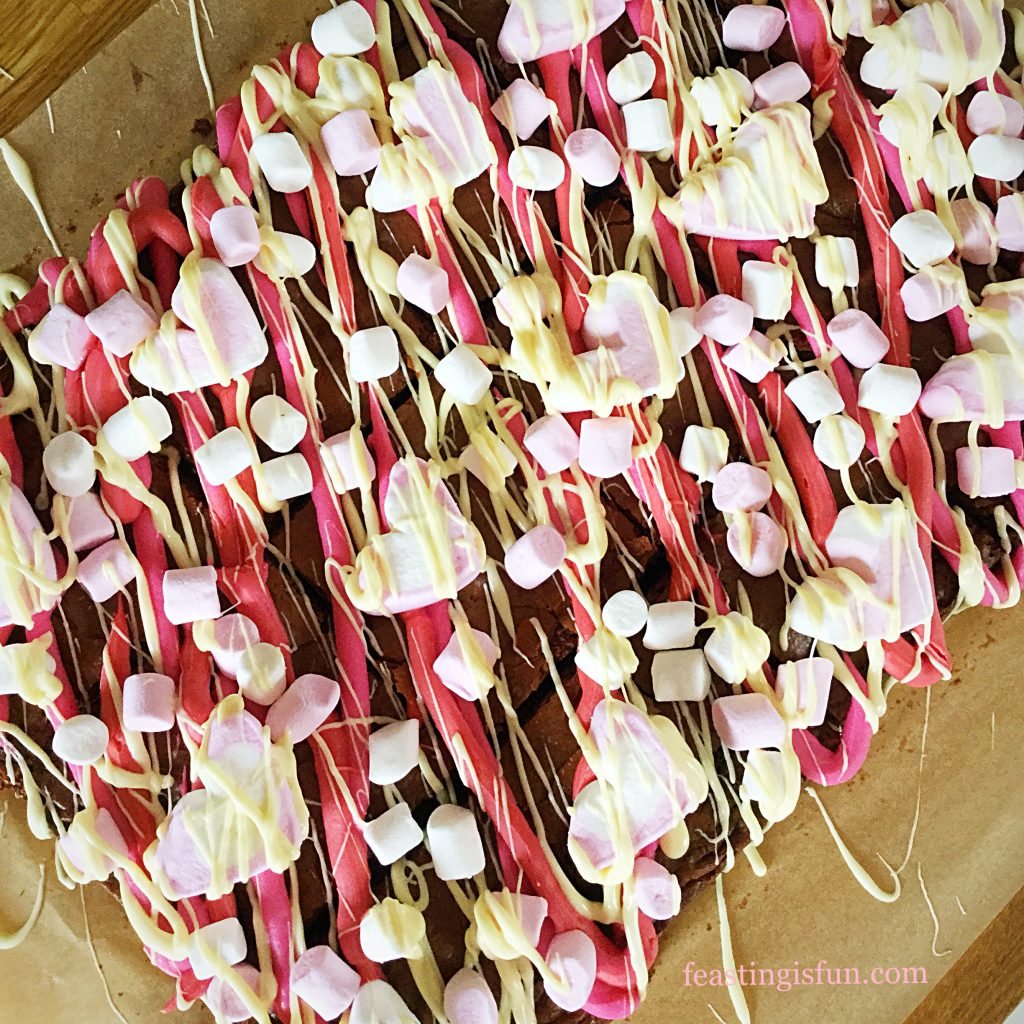
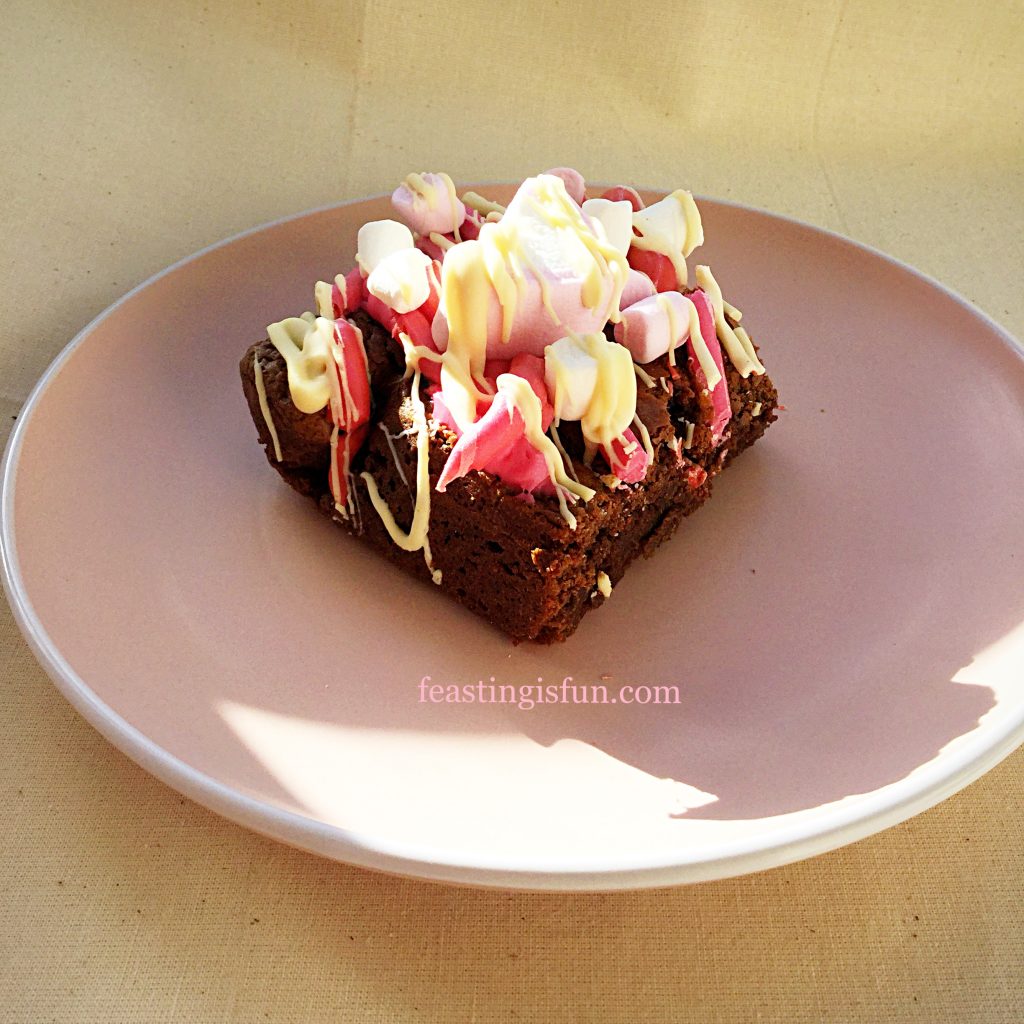
Marshmallow Topped Rich Chocolate Brownies are a perfect party portion. Decadent, fudgy, chocolate brownies splashed with edible coloured candy and scattered marshmallows. Easy to make and bake, fun to decorate and perfect for sharing with family and friends.

FF Marshmallow Topped Rich Chocolate Brownies
Marshmallow Topped Rich Chocolate Brownies

Since it is half term this week, here in England I created a bake that children can get involved in. While adult supervision may be needed for certain stages of brownie baking process, decorating is child’s play. Whether that be children in your care, or the inner child within us all. Simply looking at these brownies screams fun and that is of upmost importance to us here at Feasting is Fun!

FF Marshmallow Topped Rich Chocolate Brownies
Marshmallow Topped Rich Chocolate Brownies

While many children are happy to share, some thrive better when given their own blank canvas (or brownie in this case) to with. Because it is easy to divide the baked brownie in half, or quarters, or however many children you have helping, decorating these brownies couldn’t be more fun! Disposable piping bags are easy to get hold of, check the baking aisle of your local supermarket. However small sandwich or freezer bags can double as a great substitute. Simply cut a small hole in one corner, once the bag is filled.

FF Marshmallow Topped Rich Chocolate Brownies
Marshmallow Topped Rich Chocolate Brownies

Likewise, should very young children be taking part, icing sugar with a little water and colouring added, removes any risk from piping warm chocolate. Be prepared. If making these brownies with children of any age, including some adults, things will get messy and get eaten! Yet that is the fun of making and eating these brownies. Make sure there are plenty of paper towels to hand.

Recipe: Marshmallow Topped Rich Chocolate Brownies

For the brownies:

250g/9oz Milk Chocolate

250g/9oz Dark Chocolate

1/4 tsp Sea Salt – I use Maldon

275g/10oz Unsalted Butter – cut into squares

5 Large Free Range Eggs

2 tsp Vanilla Extract – I use Nielsen-Massey

275g/10oz Light Brown Muscavado Sugar – I use Billingtons

1/2 tsp Bicarbonate of Soda

100g/4oz Plain White Flour

For the topping:

100g/4oz White Chocolate

100g/4oz both pink and red Rainbow Dust Colour Melts available from Party Animal Online

Large and Small Marshmallows

Method: Preheat the oven to 180C/160C fan, 350F, gas mark 4

You will need a 34cm x 24cm x 5cm (13.5in x 9.5in x 2in) tin lined with baking parchment.

  • First of all break/cut both milk and dark chocolate into small pieces, approximately 1cm.
  • Place the chocolate and butter into a heatproof, microwaveable bowl.
  • Heat in the microwave on medium for 30 second bursts, stirring after each heat burst.
  • As soon as the butter is melted remove the bowl and stir continuously until all of the chocolate is melted and combined with the butter. Set aside to cool slightly.
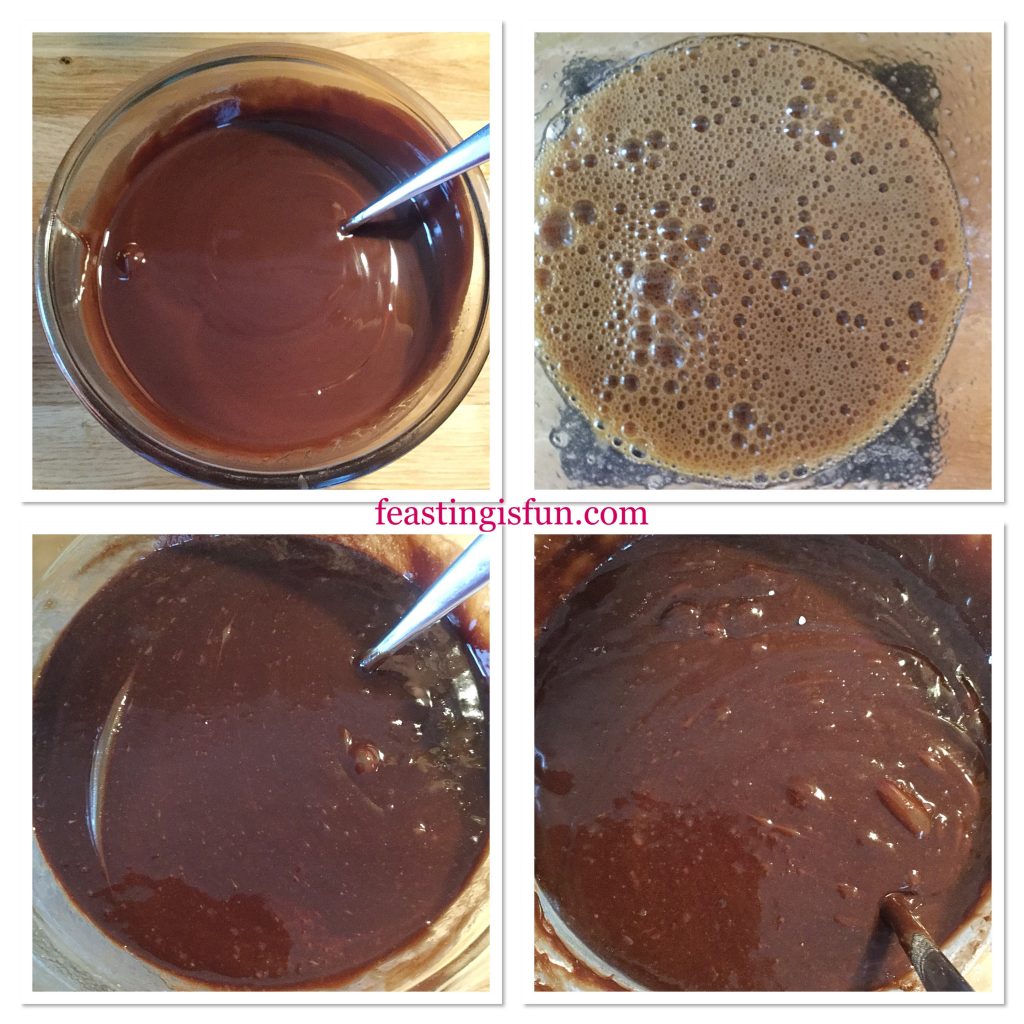
  • In a separate bowl add the eggs, salt, sugar and vanilla extract. Whisk together until fully combined.
  • Pour the cooled chocolate into the egg mixture, stirring as you pour to combine both liquids.
  • Sift the flour and bicarbonate of soda on to the chocolate mix. Fold the flour into the chocolate mixture until is just combined.
FF Marshmallow Topped Rich Chocolate Brownies
Making the rich chocolate brownie batter.
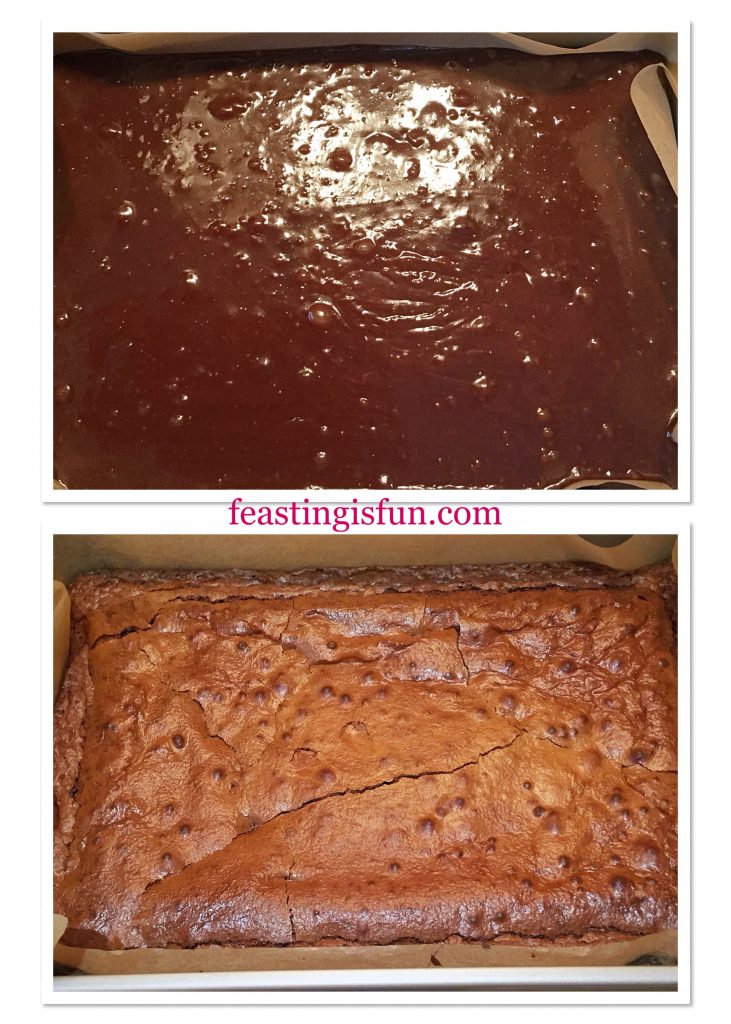
  • Pour the chocolate brownie batter into the prepared tin.
  • Rap the tin hard on the worktop twice to release any trapped bubbles.
  • Place the tin in the centre of a preheated oven and bake for 20-25 minutes. The brownies are baked when the top has set and there is a very slight wobble in the centre. Over baking the brownies will cause them to be dry, instead of rich and fudgy.
  • As soon as the brownies are baked remove from the oven and leave to cool completely in the tin. Any cracks or crackles on the surface of the finished bake will close on cooling. Also the top is to be decorated and so they will be covered!
FF Marshmallow Topped Rich Chocolate Brownies
Baking the rich chocolate brownies.
  • As soon as the brownies have cooled they are ready to be cut and decorated.
  • First of all using the baking parchment lift the brownie slab from the tin and place on a board.
  • Use a palette knife, run the flat side between the base of the brownie and the baking parchment.
  • Cut across the brownie in three equal portions. Now cut downwards five times, creating fifteen equal sized brownie squares. Alternatively cut the brownies into smaller portions.
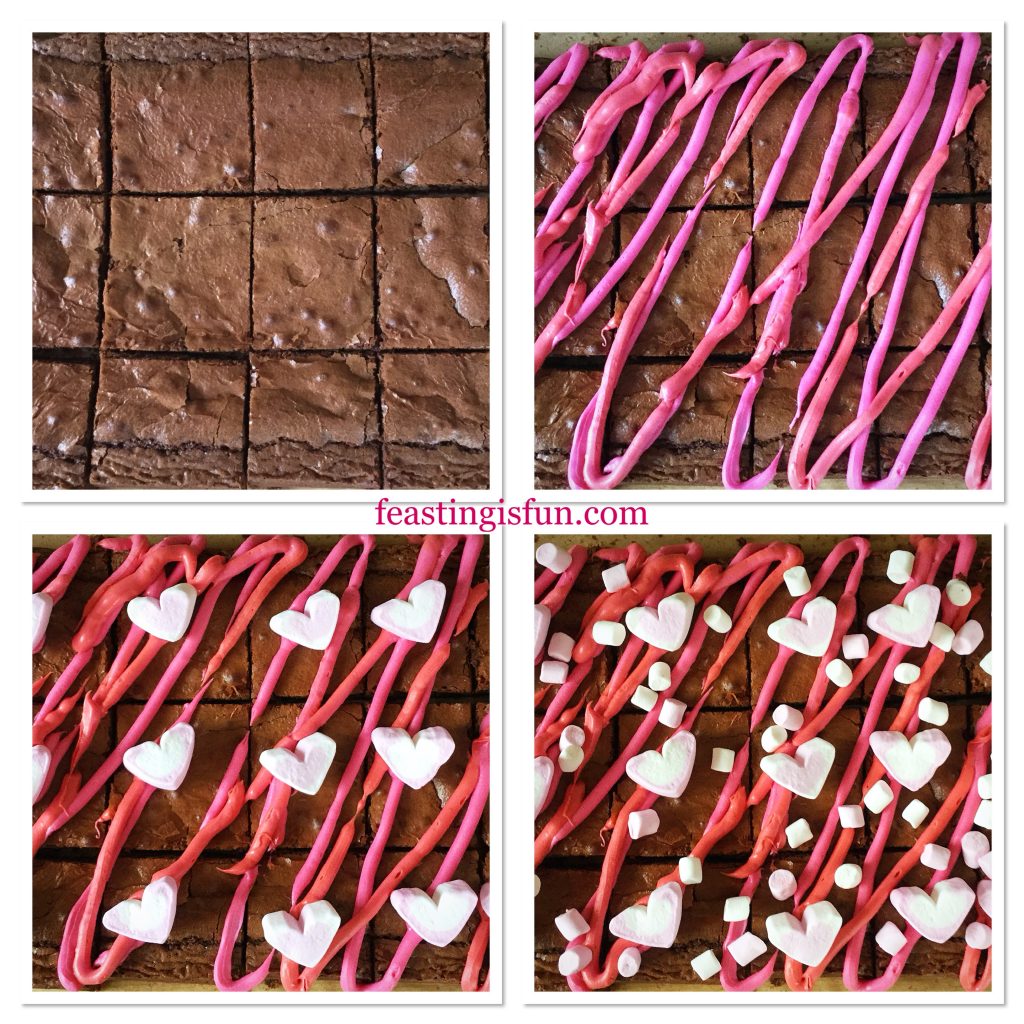
  • Into three separate, heatproof and microwaveable bowls add the coloured rainbow melts and broken up white chocolate. Since it is easy to overheat white chocolate and especially the melts, heat each bowl separately in short bursts, stirring in between. As soon as the rainbow melts, or white chocolate start to melt remove from the microwave, stirring constantly until completely melted.
  • Decant each separate colour into a small, disposable piping bag. Just prior to using cut a small opening at the tip of the bag.
  • Starting with the darkest colour first pipe across the brownies in a diagonal fashion. Continue piping with the next colour, reserving the white chocolate for last.
  • Place a large marshmallow on to each individual brownie. With Valentine’s Day nearly upon us I used marshmallow hearts. Also sprinkle over smaller, mini marshmallows.
FF Marshmallow Topped Rich Chocolate Brownies
Decorating the brownies.
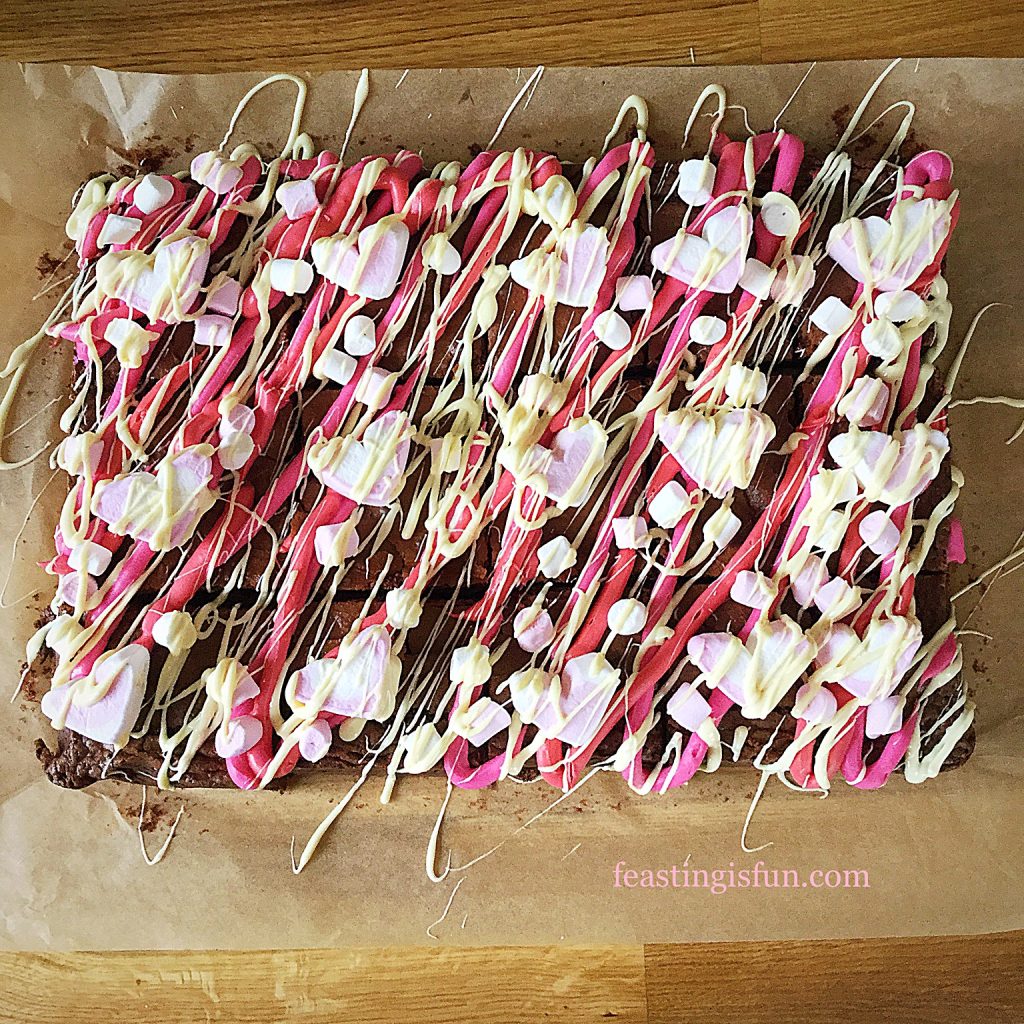
  • Next pipe the runnier white chocolate over the entire brownie, including the marshmallows.
  • Finally sprinkle over more mini marshmallows. These will stick to the melted white chocolate.
  • Set the brownies aside in a cool place to allow the chocolate to set. During warmer weather place in the fridge to set.
FF Marshmallow Topped Rich Chocolate Brownies
Fully decorated Marshmallow Topped Rich Chocolate Brownies

You can choose any colour combination you like. Even personalising the brownies by piping names or Happy Birthday. Also for special celebrations sprinkle over edible gold stars or coloured sugar balls. The simple rule to remember when decorating is to use the darkest colours first, finishing with the lightest. Resulting in a creation that really pops.

FF Marshmallow Topped Rich Chocolate Brownies
Marshmallow Topped Rich Chocolate Brownies

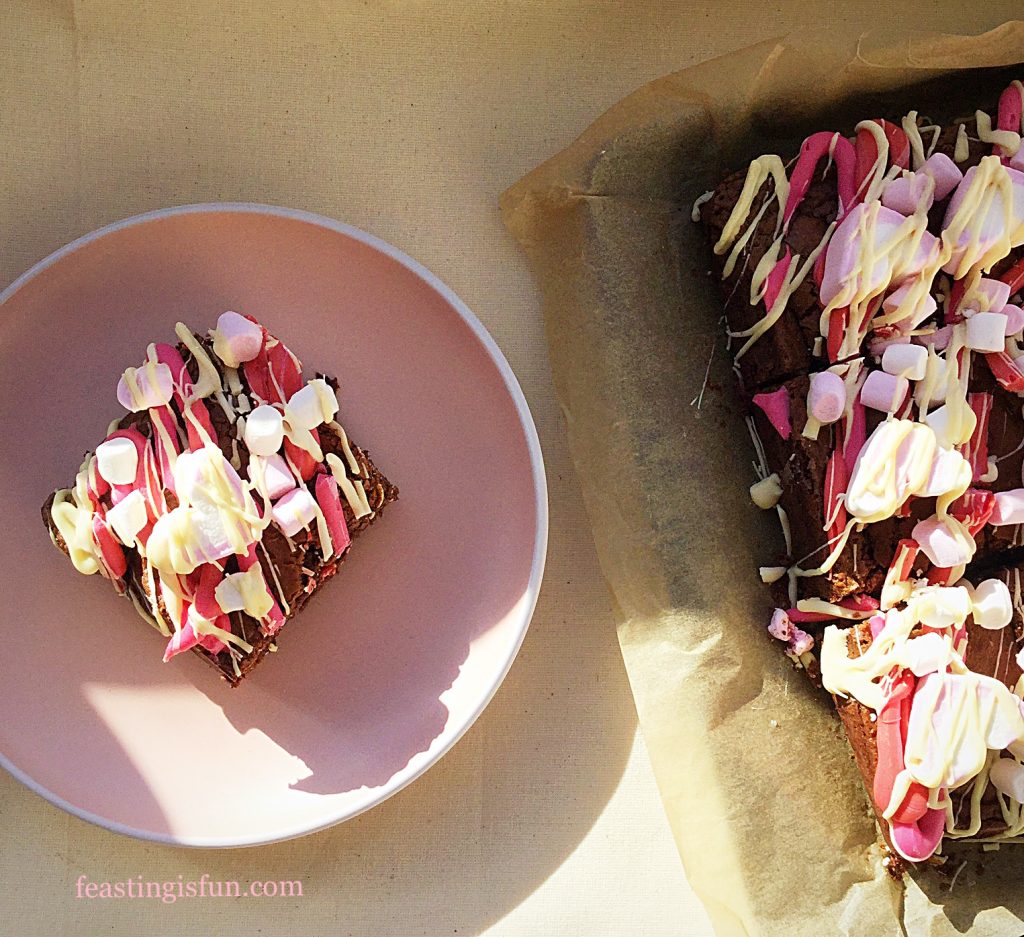
To serve the brownies cut through the chocolate and marshmallows at the same point where the individual brownies had previously been cut.

Store in an airtight container for up to 5 days. Refrigerate during warmer weather.

If you have enjoyed this recipe for Marshmallow Topped Rich Chocolate Brownies you may also like these:

Caramel Crunch Rocky Road Bars

FF Marshmallow Topped Rich Chocolate Brownies
Caramel Crunch Rocky Road Bars

Chocolate Dipped Shortbread Heart Cookies

FF Marshmallow Topped Rich Chocolate Brownies
Chocolate Dipped Shortbread Heart Cookies

Maltesers Popping Candy Cupcakes

FF Marshmallow Topped Rich Chocolate Brownies
Maltesers Popping Candy Cupcakes

While making these brownies I did not have any little people to help me. Yet when writing up this blog post and especially, choosing and editing the photographs it struck me that this is exactly the sort of fun, mess filled activity that children enjoy. And yes I completely acknowledge the inner child in me and the fun I had while decorating these brownies. If you have play dates arranged, these brownies make great gifts for them to take home.

Also, it has to be said, these brownies taste amazing!

Whatever you are making, baking and creating in your kitchens, have fun preparing and sharing your feast.

Sammie xx

No part of this post may be reproduced or duplicated without the written permission of the owner. Please see my Disclosure Policy.
 

Pink Heart Topped White Chocolate Cupcakes

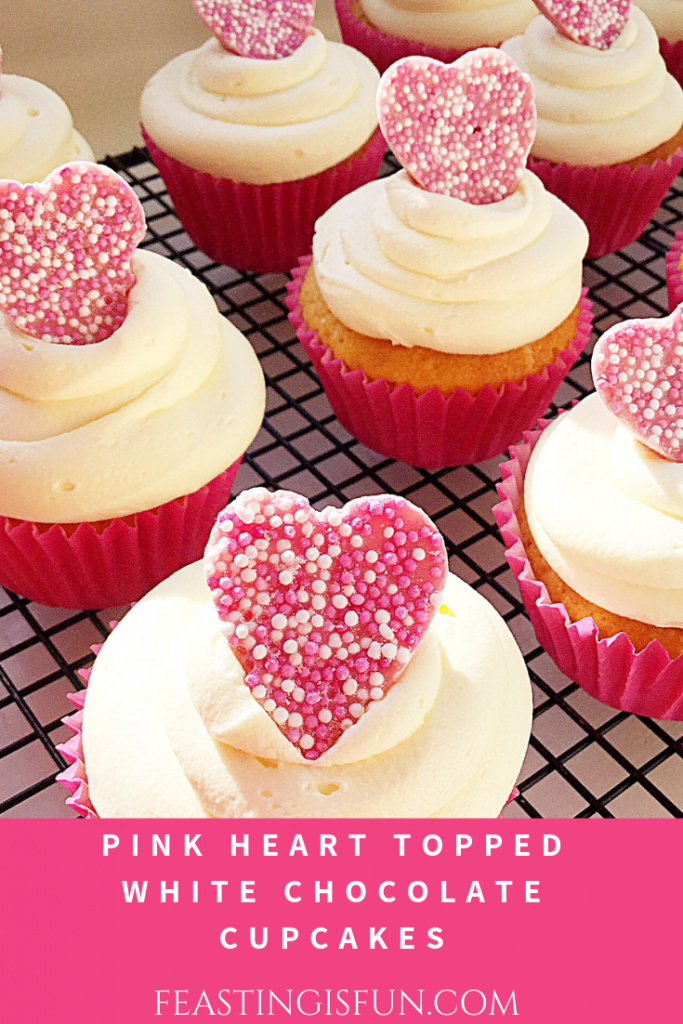
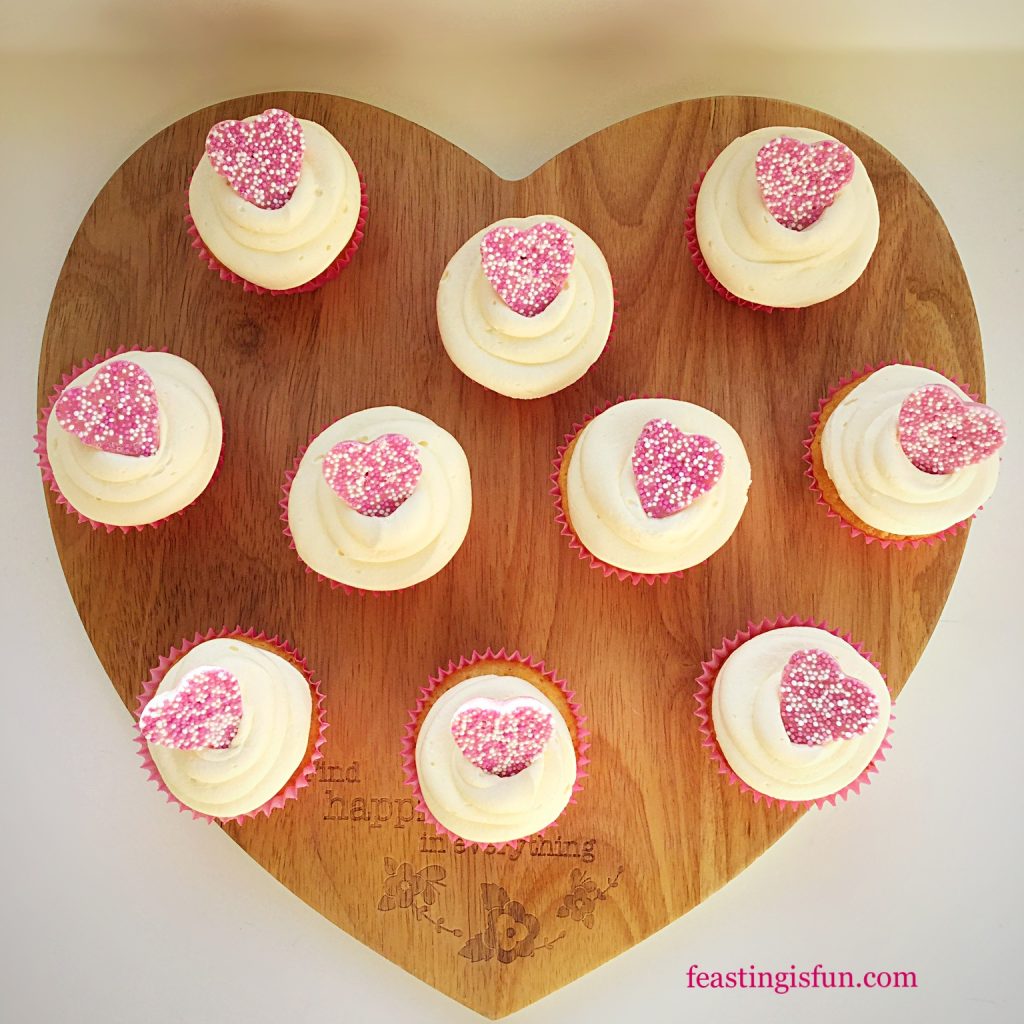
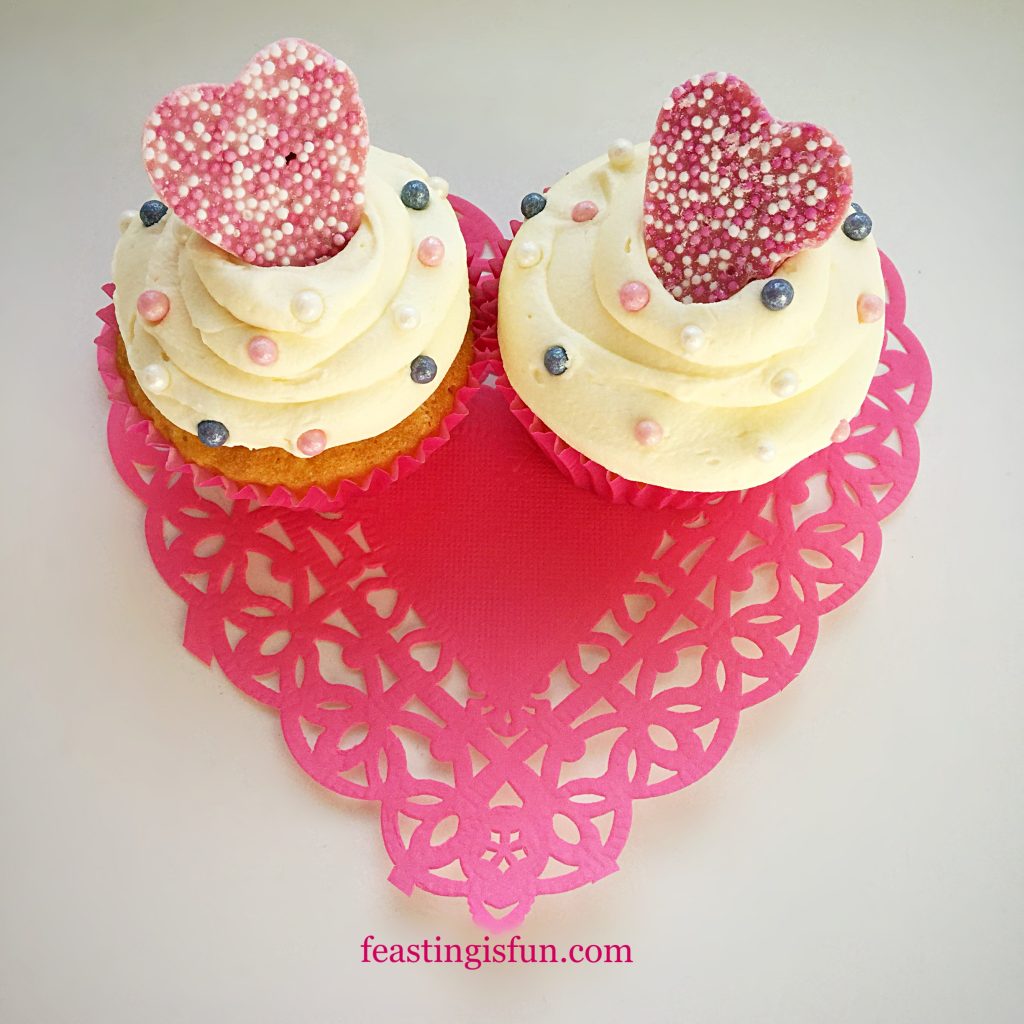
Cupcakes in themselves are moments of happiness. Since it must be impossible to be angry whilst eating a cupcake? And, imagine an entire, miniature cake all to ourselves. Cute and delicious let me share with you these Pink Heart Topped White Chocolate Cupcakes.

FF Pink Heart Topped White Chocolate Cupcakes

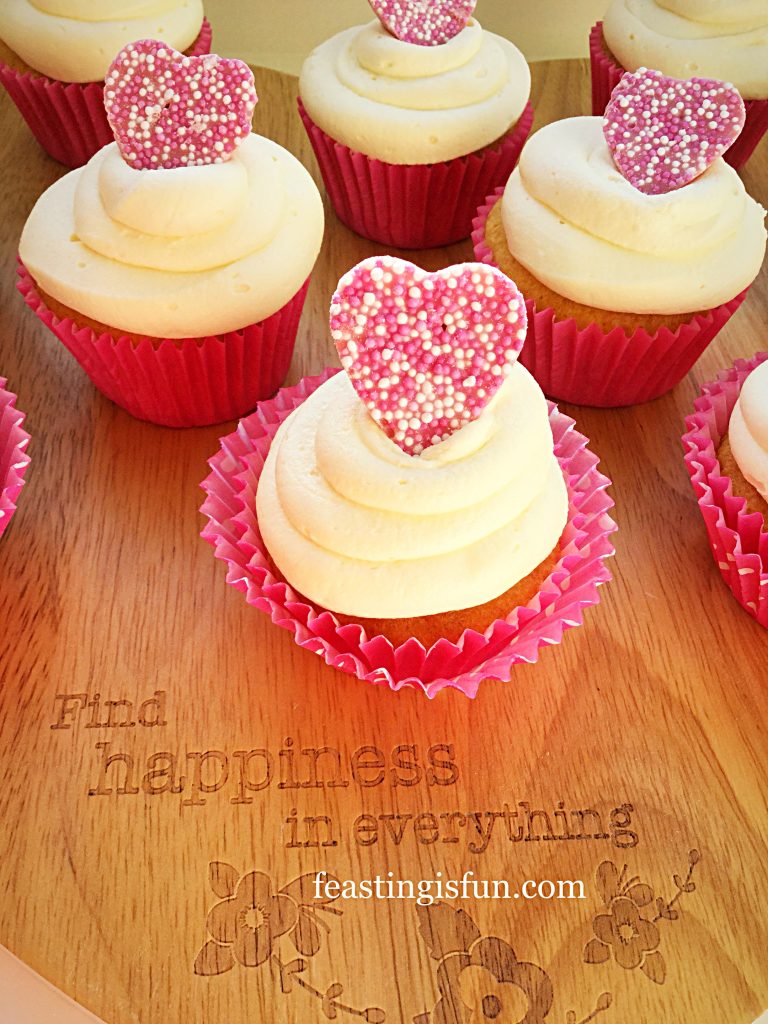
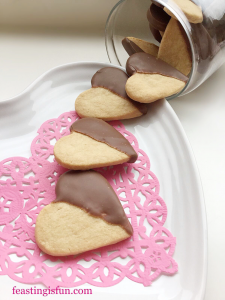
Since Valentines Day is only a few days away, creating a beautiful and tasty cupcake seemed a good idea. While I have mentioned in previous posts such as Chocolate Dipped Shortbread Heart Cookies, that every day should be an opportunity to show those we love and appreciate them, February 14th is the day of love. So to celebrate, these white chocolate chip cupcakes frosted with a velvet white chocolate buttercream, finished with a pink chocolate heart, fit the bill perfectly.

FF Pink Heart Topped White Chocolate Cupcakes
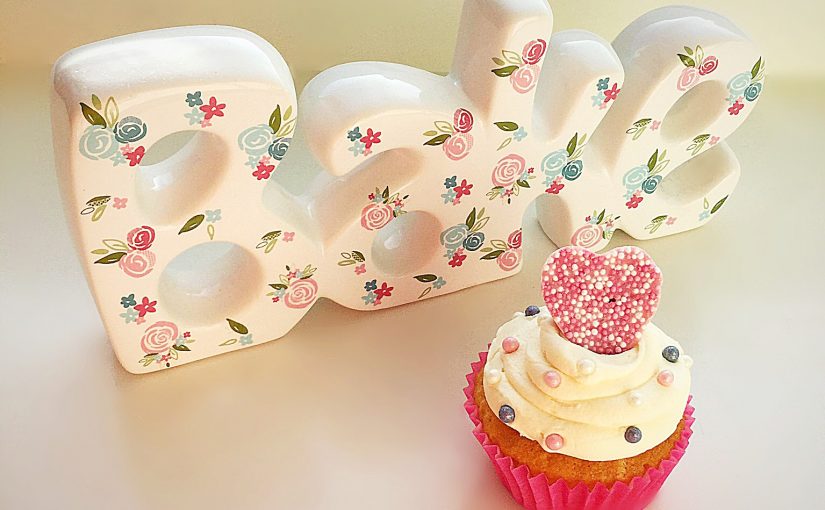
Pink Heart Topped White Chocolate Cupcakes

As these delightfully light cupcakes are so pretty they are also perfect for parties, celebrations and of course to serve at a wedding. Because who wouldn’t want to receive one of these cute cupcakes?

FF Pink Heart Topped White Chocolate Cupcakes
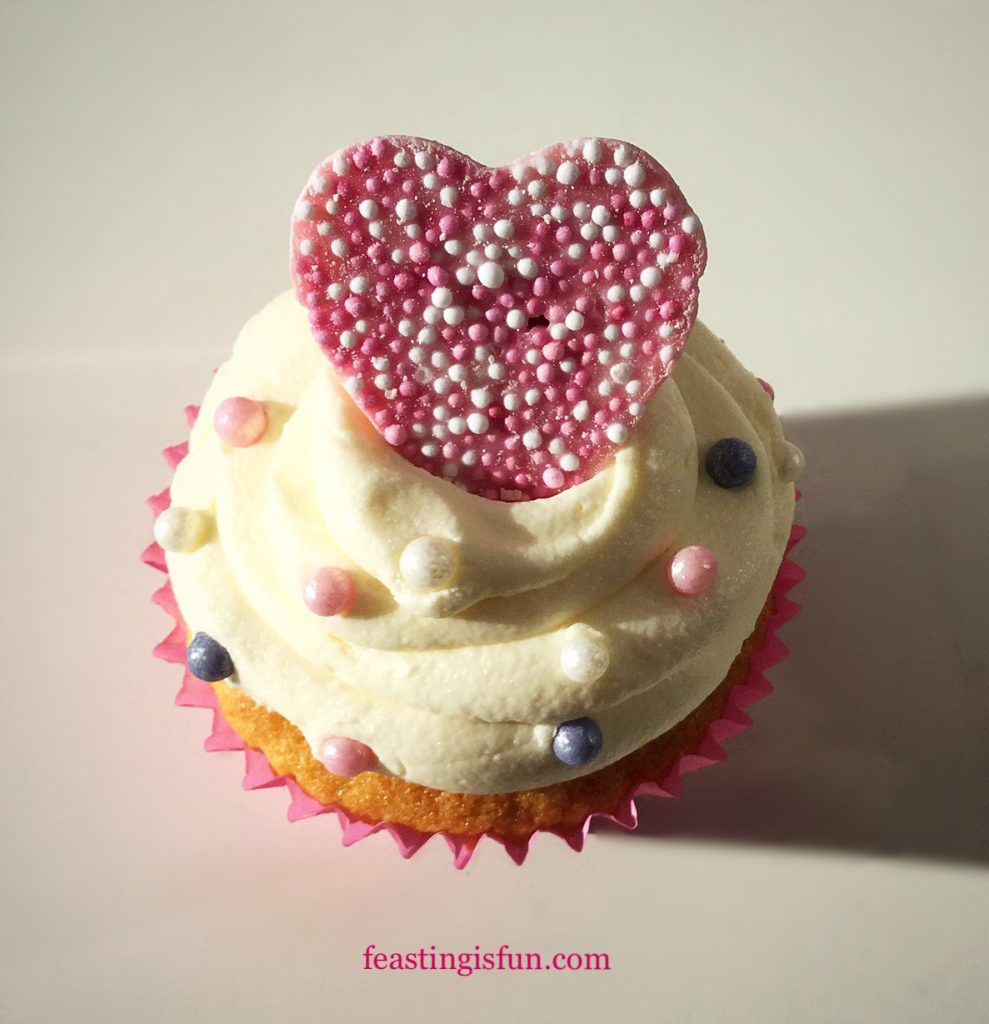
Pink Heart Topped White Chocolate Cupcakes with complimenting sugar balls.

While simple and easy to make, this recipe is designed so that novice bakers can follow and bake incredible cupcakes. Also the buttercream is piped without a nozzle, therefore deleting a need for more equipment. Since a plastic freezer bag can double as an icing bag, simply cut off one corner to leave a 1cm opening, this recipe really is for everyone.

Recipe: Pink Heart Topped White Chocolate Cupcakes makes 12

For the Cupcakes:

100g/4oz Unsalted Butter at room temperature

100g/4oz Caster Sugar

Small Pinch 1/8tsp Sea Salt – I use Maldon

2 Large Free Range Eggs

1 tsp Vanilla Extract – I use Nielsen-Massey

2 tsp Whole Milk

100g/4oz Self Raising Flour, alternately use the same quantity of Plain White Flour and add 1 tsp baking powder

50g/2oz White Chocolate Chips

For the Buttercream:

125g/4.5oz Unsalted Butter at room temperature

250g/8.5oz Icing Sugar

150g/5oz White Chocolate suitable for melting

Up to 2 tbsp Whole Milk

Pink Jazzy Hearts available from Amazon

Optional pink/white sugar balls

Method: Preheat oven to 180C/160C fan, 350F, gas mark 4

Making And Baking The Cupcakes

  • First of all, line a muffin tin wth 12 cupcake cases.
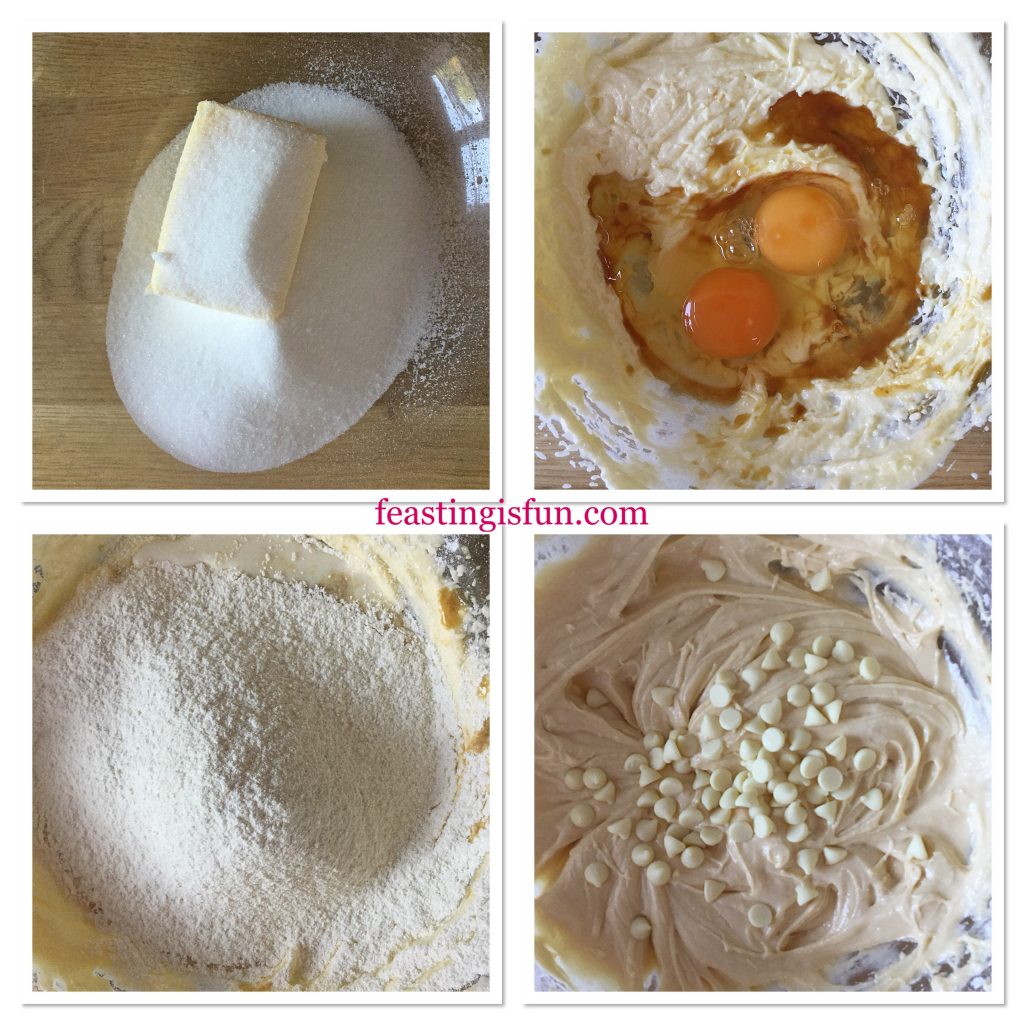
  • Place the butter, sugar and salt into a large bowl.
  • Whish together until pale and creamy.
  • Add the eggs and vanilla extract to the bowl. Also, sift the flour (and baking powder if using) into the same bowl.
  • Whisk the ingredients together adding milk as you whisk. Continue until the mixture is uniform in texture, avoid over mixing as this can cause a tough, baked cupcake.
  • Add the white chocolate chips and fold into the batter.
FF Pink Heart Topped White Chocolate Cupcakes
Making the cupcake batter.
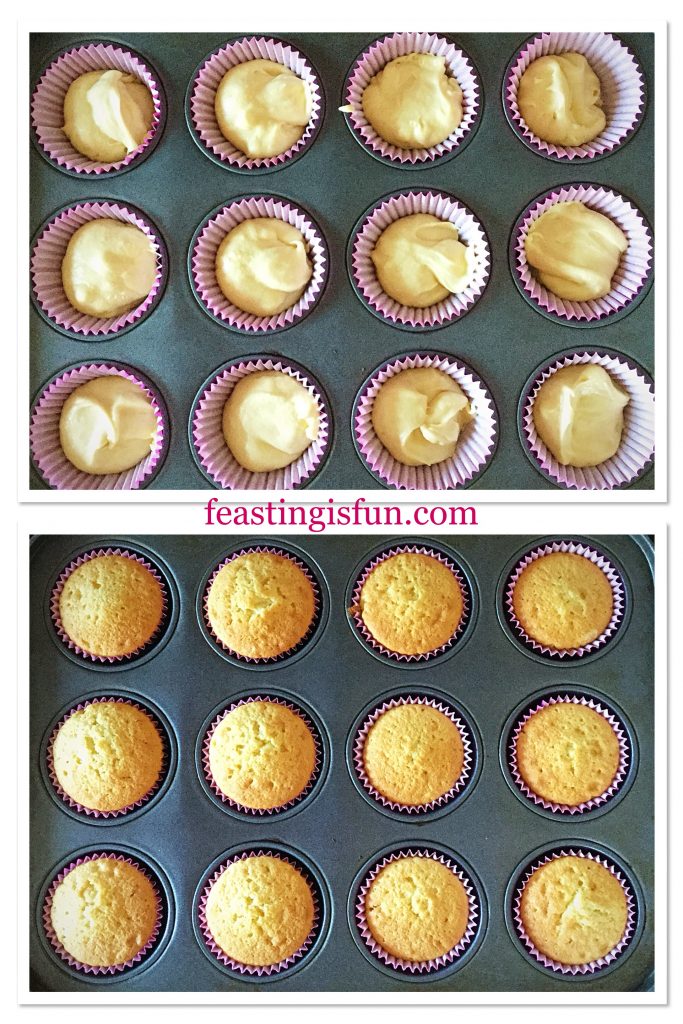
  • Spoon the cake batter into the cupcake cases, dividing it evenly between them.
  • Place the cupcakes in the centre of the preheated oven and bake for 20-30 minutes.
  • The cupcakes are baked when they have risen, are golden in colour and spring back from a light touch. An inserted skewer or tooth pick will come out clean.
FF Pink Heart Topped White Chocolate Cupcakes
Filling the cases and baking the cupcakes.
  • As soon as the cupcakes are baked remove from the oven.
  • Allow to cool for 10 minutes in the tin and then transfer them to a cooling rack.
  • While the cupcakes finish cooling make the buttercream.

Decorating The Cupcakes

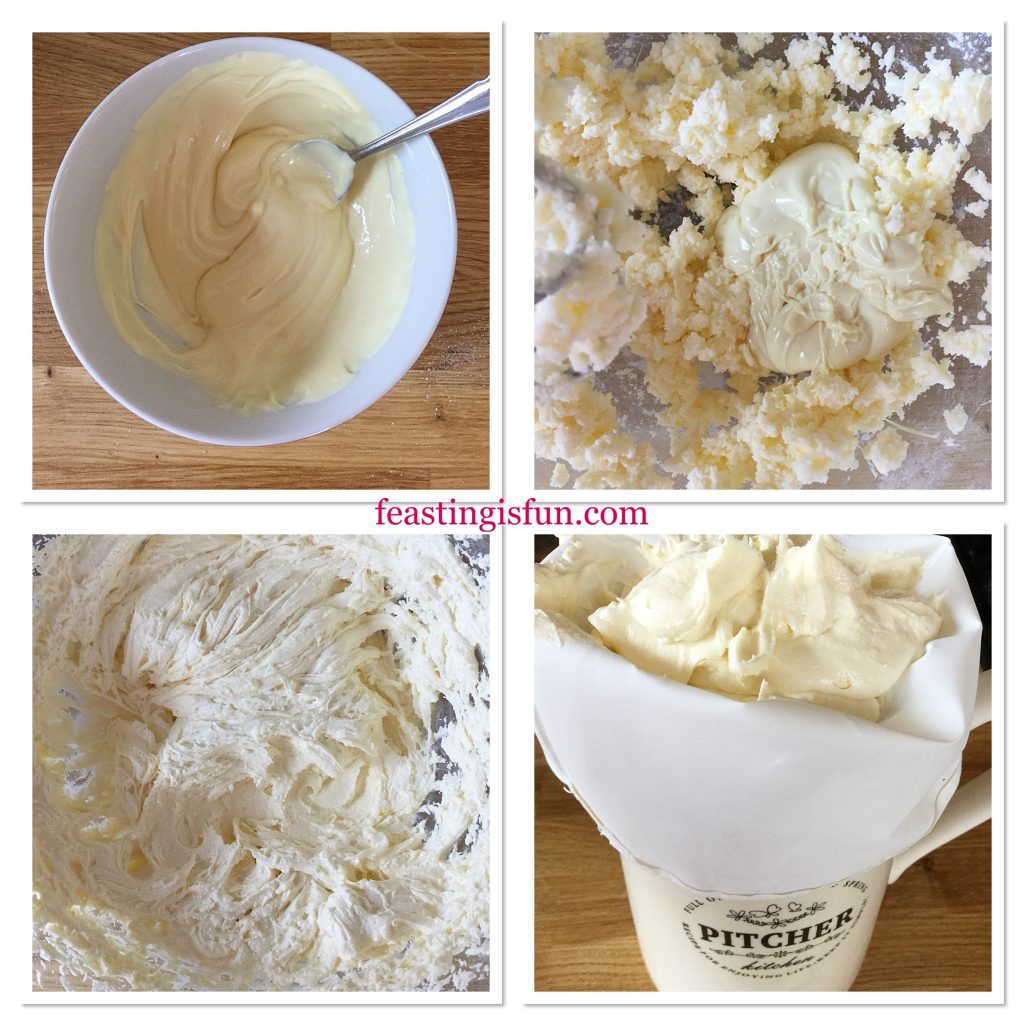
  • Break up the white chocolate and place into a heatproof, microwaveable bowl. Heat on medium for 30 second bursts, stirring after. As soon as the white chocolate starts to melt remove from the microwave. Continue stirring until all of the chocolate has melted. Set to one side to cool slightly.
  • Place the butter and icing sugar into a bowl. Whisk until just combined.
  • Pour the melted white chocolate into the bowl and continue whisking, adding milk, a little at a time, to achieve a good piping consistency.
  • Place the piping bag, without a nozzle attached, into a large jug. The piping bag should have an opening of approximately 1cm.
  • Fill the piping bag with the white chocolate buttercream.
FF Pink Heart Topped White Chocolate Cupcakes
Making the white chocolate buttercream.
  • As soon as the cupcakes are cold they can be decorated.
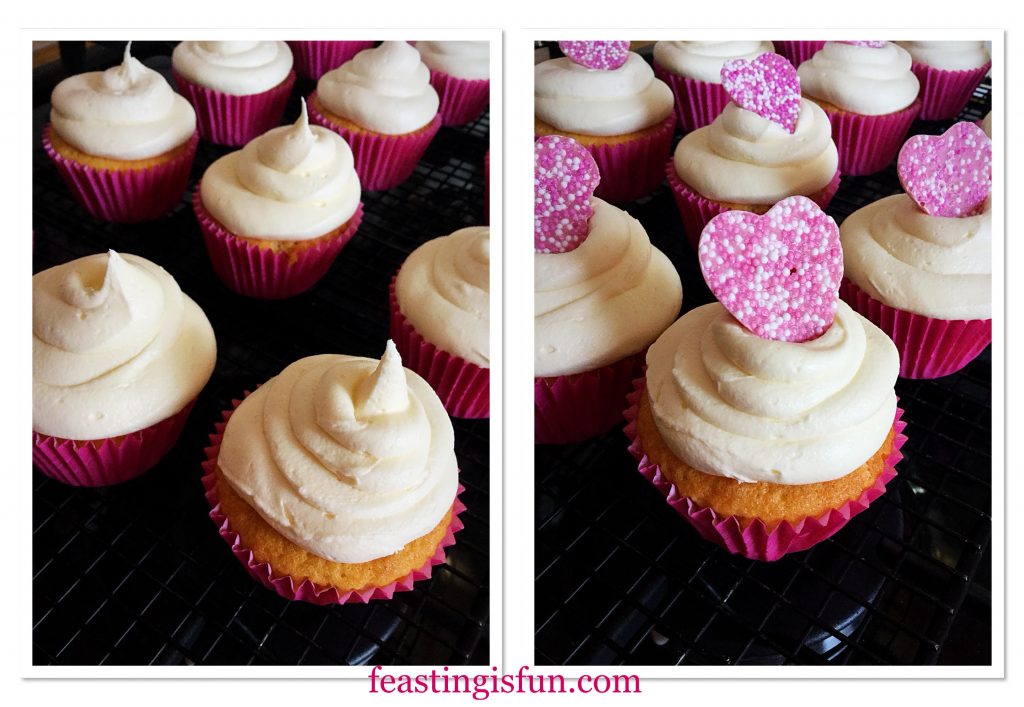
  • Keeping even pressure on the piping bag pipe a double swirl on top of each cupcake.
  • Top each cupcake with a pink heart and add sugar balls if wanted.
FF Pink Heart Topped White Chocolate Cupcakes
Piping and decorating the cupcakes.

The outside of the buttercream will set slightly. So, if you are adding sugar balls, do so immediately after frosting the cupcakes.

FF Pink Heart Topped White Chocolate Cupcakes

Happiness is found in a delicious cupcake!

FF Pink Heart Topped White Chocolate Cupcakes
Pink Heart Topped White Chocolate Cupcakes

Serve the cupcakes to those you love and care about. Also share with those people you appreciate. While photographing the cupcakes our postman came to the door, he went away with a cupcake and a smile on his face.

Store these cupcakes for up to 5 days in an airtight container. Refrigerate during warm weather.

If you have enjoyed this recipe for Pink Heart Topped White Chocolate Cupcakes then you may also like these:

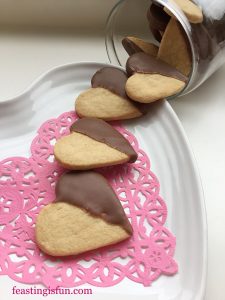
Chocolate Dipped Shortbread Heart Cookies 

FF Pink Heart Topped White Chocolate Cupcakes
Chocolate Dipped Shortbread Heart Cookies

Strawberry Sweetheart Cake

FF Pink Heart Topped White Chocolate Cupcakes
Strawberry Sweetheart Cake

Lemon Lime Gin Heart Bundt Cake 

FF Pink Heart Topped White Chocolate Cupcakes
Lemon Lime Gin Heart Bundt Cake


Most importantly these Pink Heart Topped White Chocolate Cupcakes have a simple recipe, available to all bakers regardless of skill level. Because, everyone should be able to create something beautiful and delicious to share with those they love. And, even those who are too shy to say how they feel, or write it in a card, can make a cupcake that says it all. Because, who knows, baking a cupcake could break down awkwardness between someone and their secret love. Ah the romantic in me is running away with itself!

However you spend Valentines Day, I would like to thank each and every one of you who reads, comments and supports Feasting is Fun. Because, you are all very much appreciated, every single day of the year.

So, whatever you are making, baking and creating in your kitchens, have fun creating and sharing your feast.

Sammie xx

No part of this post may be reproduced or duplicated without the written permission of the owner. Please see my Disclosure Policy.
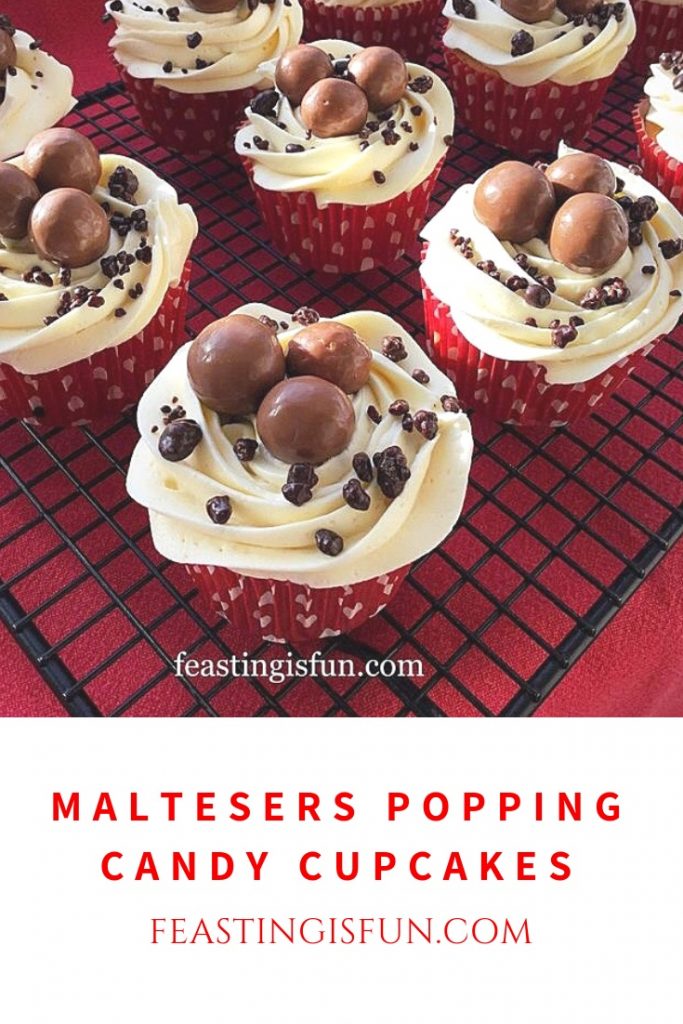
Maltesers Popping Candy Cupcakes

While thinking of what to name this blog, I wanted to express, succinctly, what cooking, baking, eating and sharing meant to me. Feasting is fun sums all of these things up perfectly. Eating a slice of toasted, homemade bread generously spread with butter, for breakfast is a feast in itself. As much as sitting around a groaning, food laden Christmas dinner table, laughing at cracker jokes with family and friends. While adding a twist to recipes that brings the unexpected. Fun! Maltesers Popping Candy Cupcakes fulfill everything Feasting is Fun stands for.

FF Maltesers Popping Candy Cupcakes

Cupcake – an entire cake to yourself

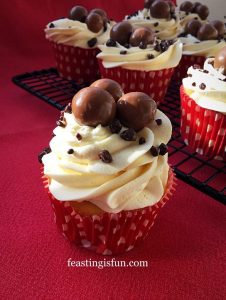
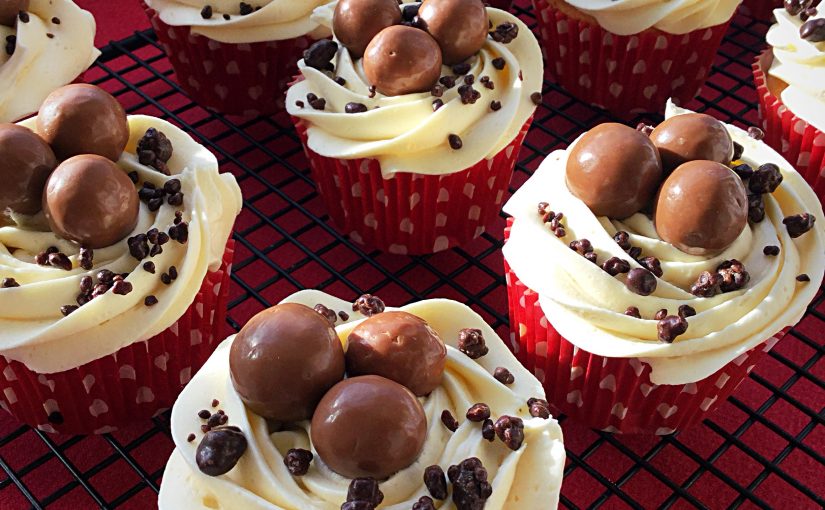
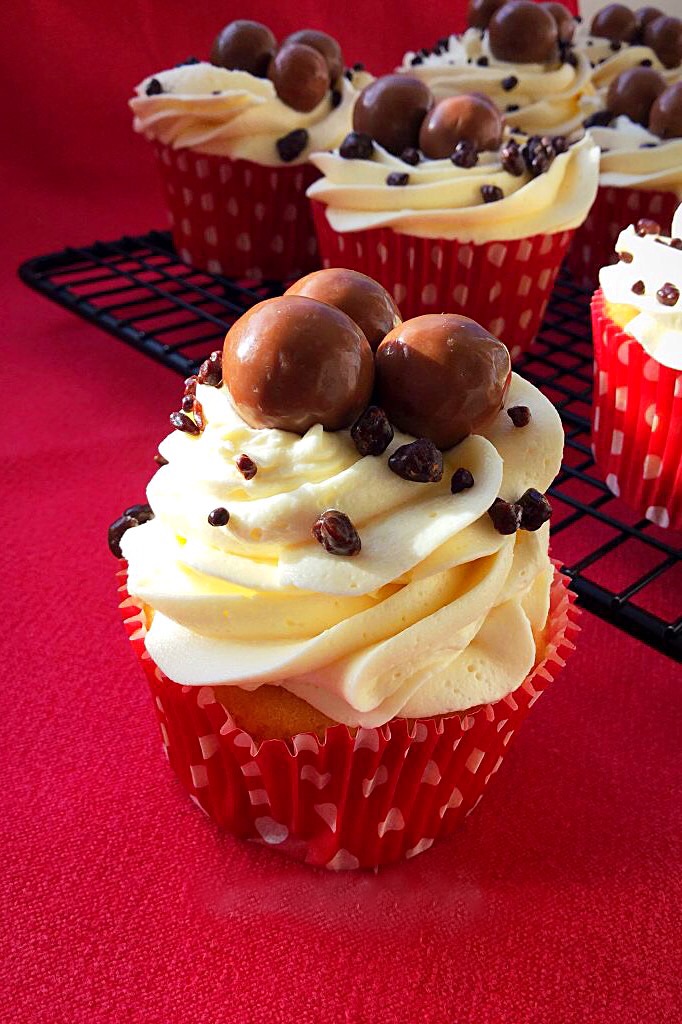
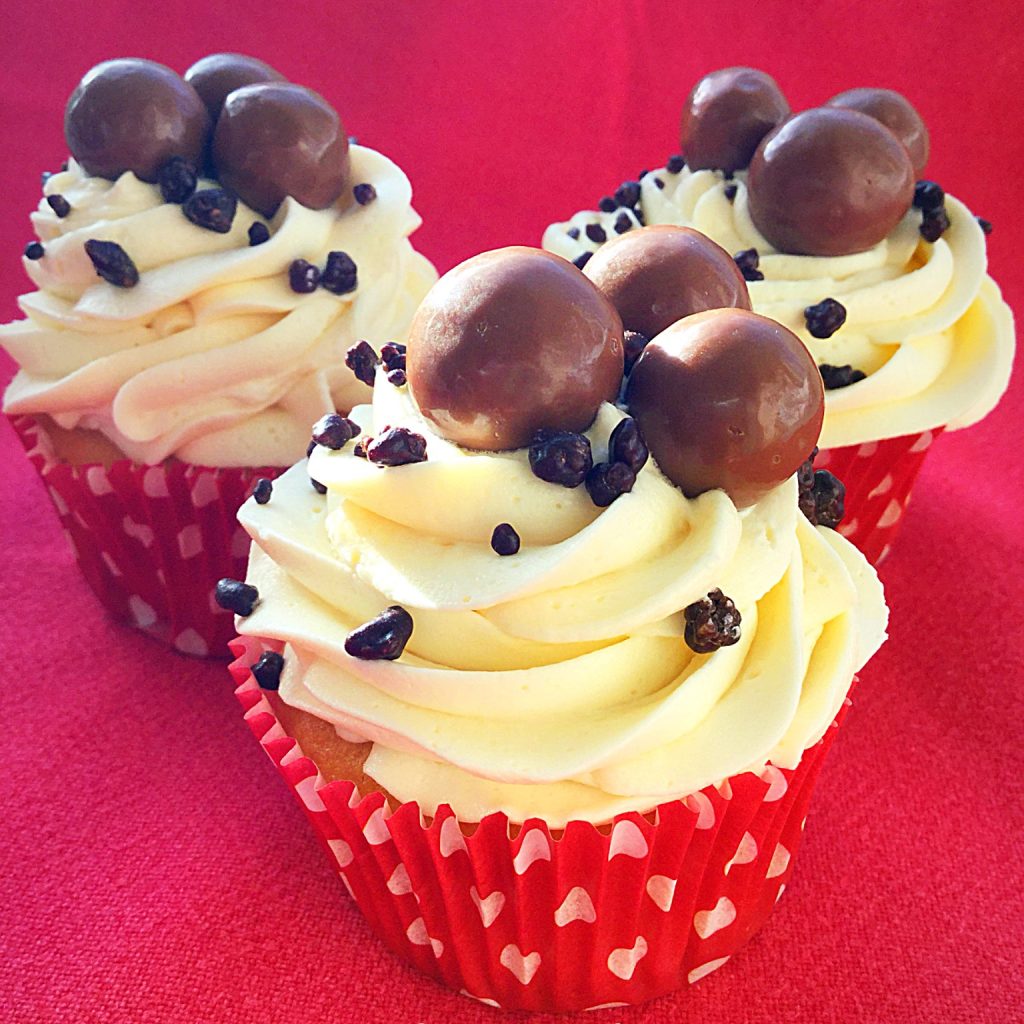
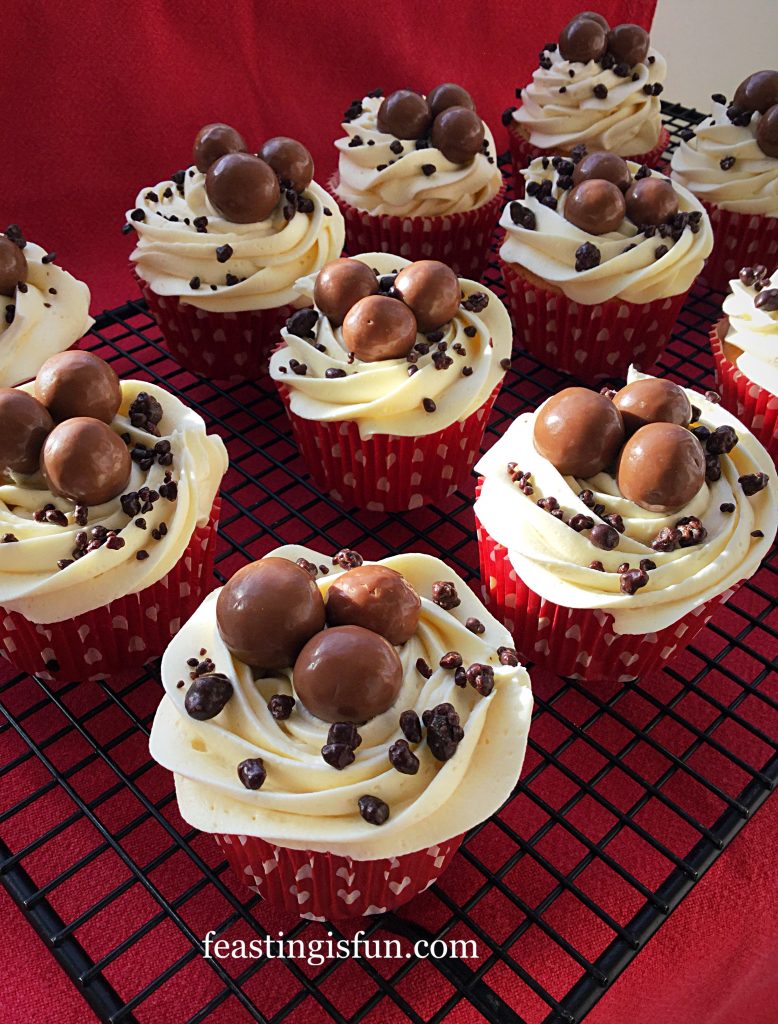
Vanilla sponge cupcakes topped with a swirl of vanilla buttercream and finished with a trio of Maltesers and a sprinkling of chocolate covered popping candy. A pretty, sweet treat that delivers a fun surprise. Popping candy is such a fun addition to any bake. Especially if you don’t warn those parting in this feast. Food that is fun is certainly the best kind.

Maltesers Popping Candy Cupcakes

Since these cupcakes are so easy to make, with no complicated techniques, they can be whipped up, literally, in moments. The recipe makes 12 cupcakes, which is perfect for a quick bake. Yet, it is easily doubled to cater for larger celebrations, such as birthday parties, or cheering up work colleagues on a Monday morning. Most of all, they are utterly delicious, with extra fun sprinkled on.

Maltesers Popping Candy Cupcakes

While the suggestion isn’t to bake and eat cupcakes everyday, I also strongly believe that a special occasion is not the only reason needed to make and eat them. Coffee mornings, the end or indeed middle of an audit at work, showing appreciation, are all good reasons to bake. Most especially bake these fun, tasty, flavour exploding cupcakes.

Recipe: Maltesers Popping Candy Cupcakes makes 12

Cupcakes:

100g/4oz Unsalted Butter softened to room temperature

100g/4oz Caster Sugar

1/8tsp Salt – I use Maldon

1tsp Vanilla Extract – I use Nielsen-Massey

3 Large Free Range Eggs

100g/4oz Plain White Flour

1tsp Baking Powder

Buttercream:

300g/12oz Icing Sugar

1tsp Vanilla Extract

175g/6oz Unsalted Butter at room temperature

1.5tbsp Very Hot Water

Maltesers and Chocolate Covered Popping Candy to decorate.

Method: Preheat oven to 160C/140C fan, 325F, gas mark 3.

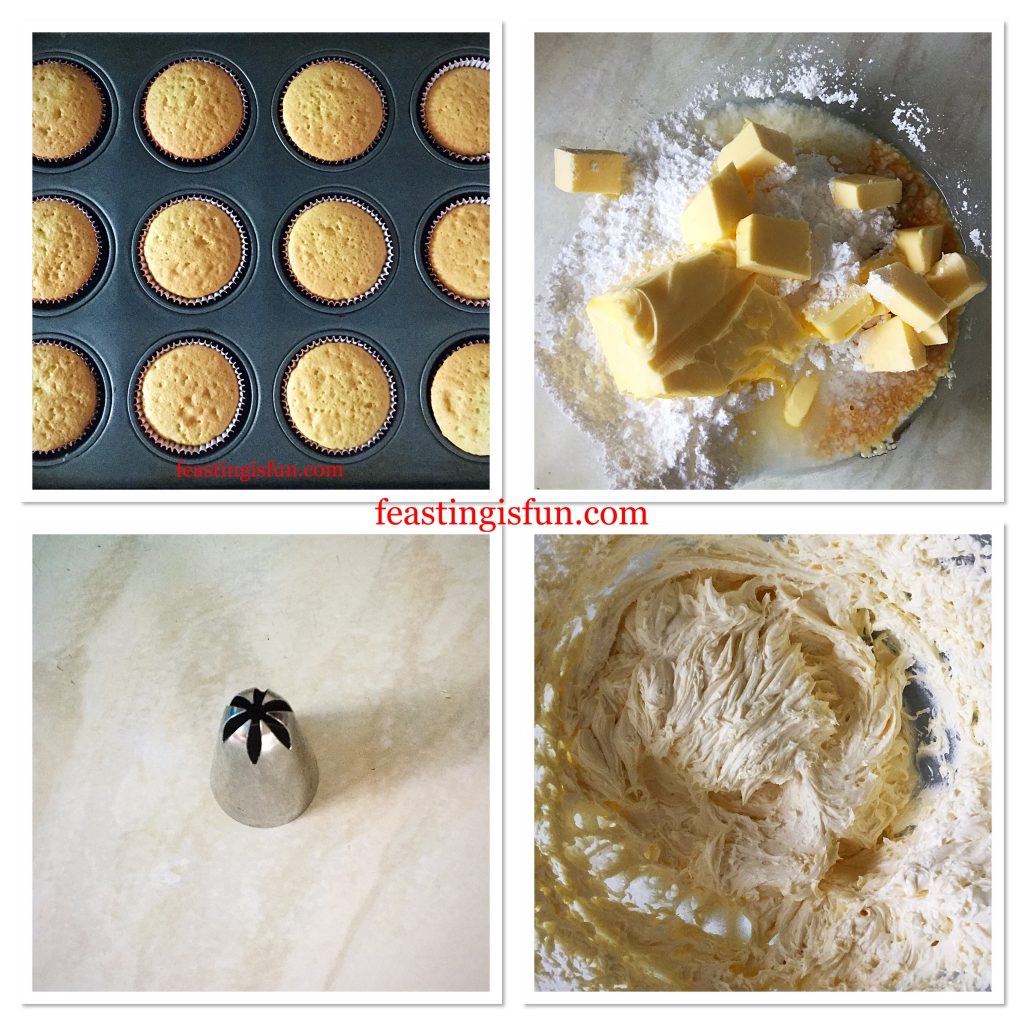
A quick note: When using coloured cupcake cases it really is worth choosing a good make. The cases used here are from a mixed set by Kitchen Craft. During the baking process they do not bleach and lose their colour. Also, I recommend a #2D drop flower decorating tip available from Wilton. This tip creates deep swirls when piping and is ideal for creating a piped rose.

Making the cupcakes

  • First of all, line a deep cupcake or muffin tin with cupcake cases.
  • Next into a large bowl add the butter, sugar and salt. Whisk until fully combined, light and creamy.
  • Add the vanilla extract and whisk thoroughly.
  • Now add the eggs, flour and baking powder. Whisk slowly until everything has come together and no lumps are present. Over whisking will create a tough cake crumb.
  • Scoop a dessert spoonful of cake batter into each cupcake case.
  • Place the cupcakes into the centre of the preheated oven and bake for 25-30 minutes.
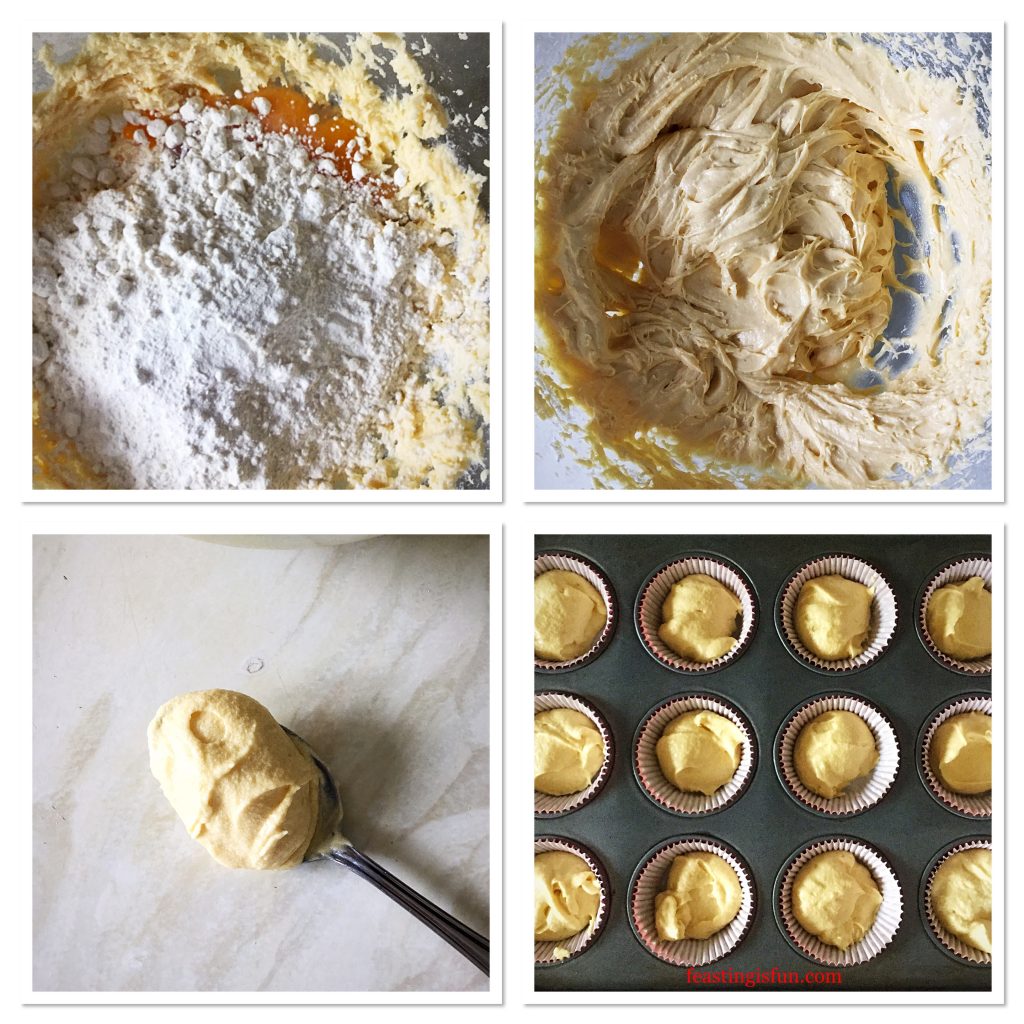
FF Maltesers Popping Candy Cupcakes
Making the vanilla cupcake batter.
  • The cupcakes are baked when they are golden in colour and spring back from a light touch.
  • As soon as they are baked remove from the oven.
  • Transfer the cupcakes to a cooling rack.
  • While the cupcakes are cooling make the buttercream frosting.

Making the frosting and decorating the cupcakes

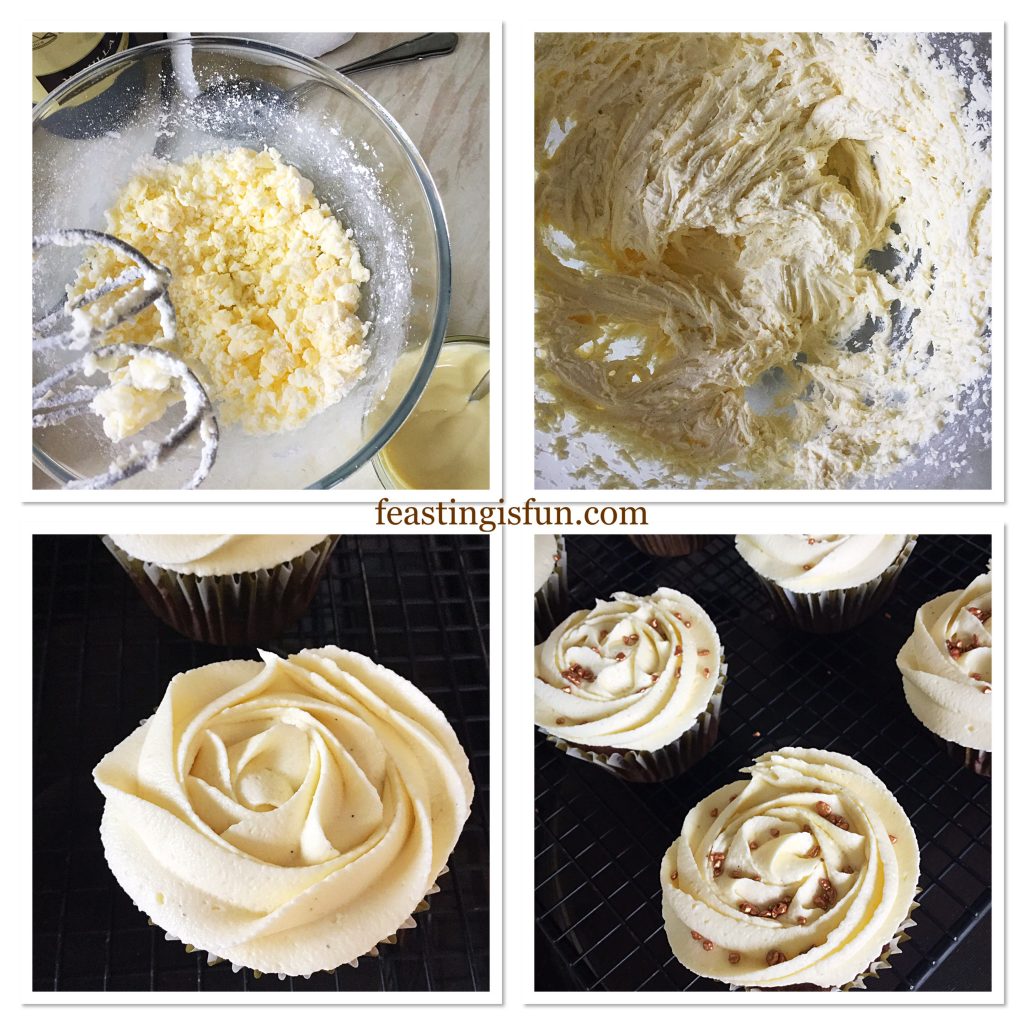
  • Into a large bowl add the icing sugar, butter, vanilla and hot water. Whisk together until very light and creamy.
  • Transfer the whipped buttercream to a piping bag fitted with a #2D Wilton piping tip.
FF Maltesers Popping Candy Cupcakes
Cupcakes baked and vanilla buttercream made.
  • As soon as the cupcakes are completely cooled they can be decorated.
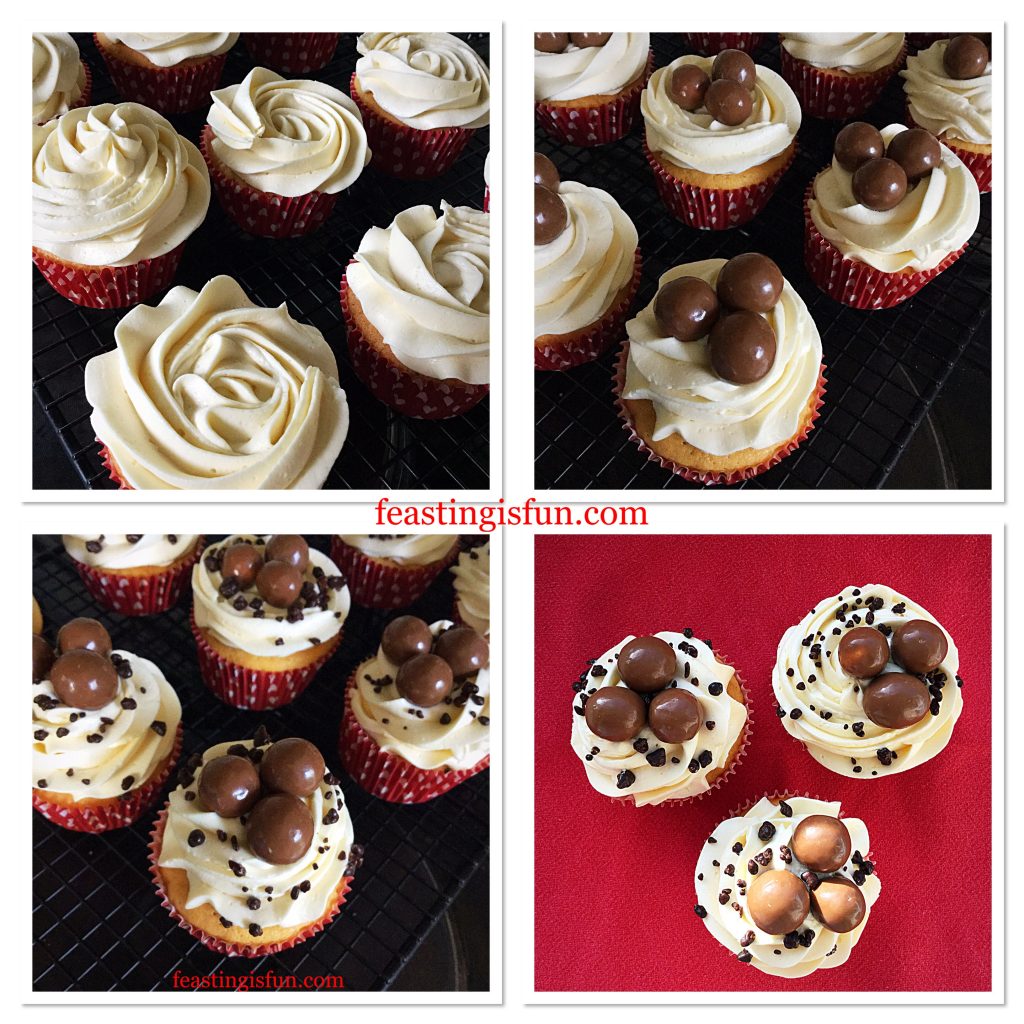
  • Starting in the centre of a cupcake pipe a swirl in the shape of an ‘e’. Continue round creating a rose. Continue piping around and up for a deeper buttercream topping.
  • Place 3 Maltesers on to each cupcake.
  • Finally, sprinkle chocolate covered popping candy over the buttercream.
FF Maltesers Popping Candy Cupcakes
Icing and decorating Maltesers Popping Candy Cupcakes

During warmer weather place the cupcakes into the fridge for an hour. Allowing the frosting to set. Especially if you plan to transport them.

FF Maltesers Popping Candy Cupcakes
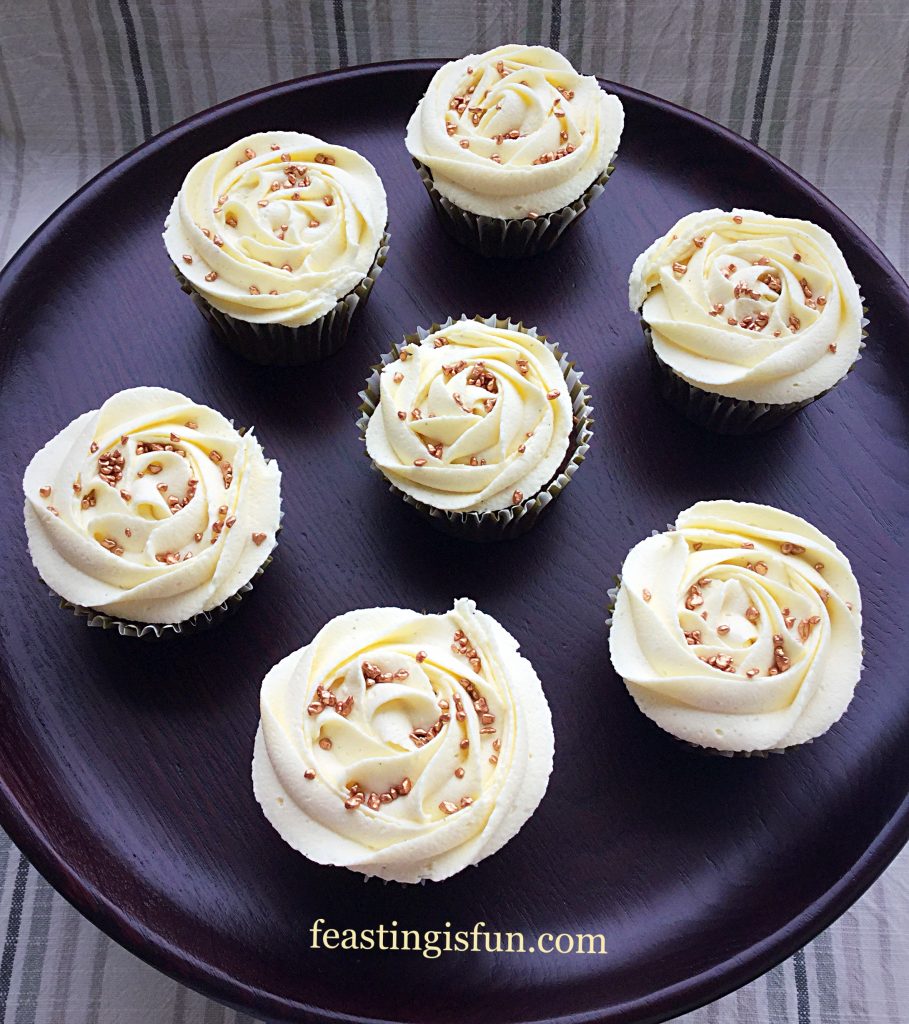
Maltesers Popping Candy Cupcakes

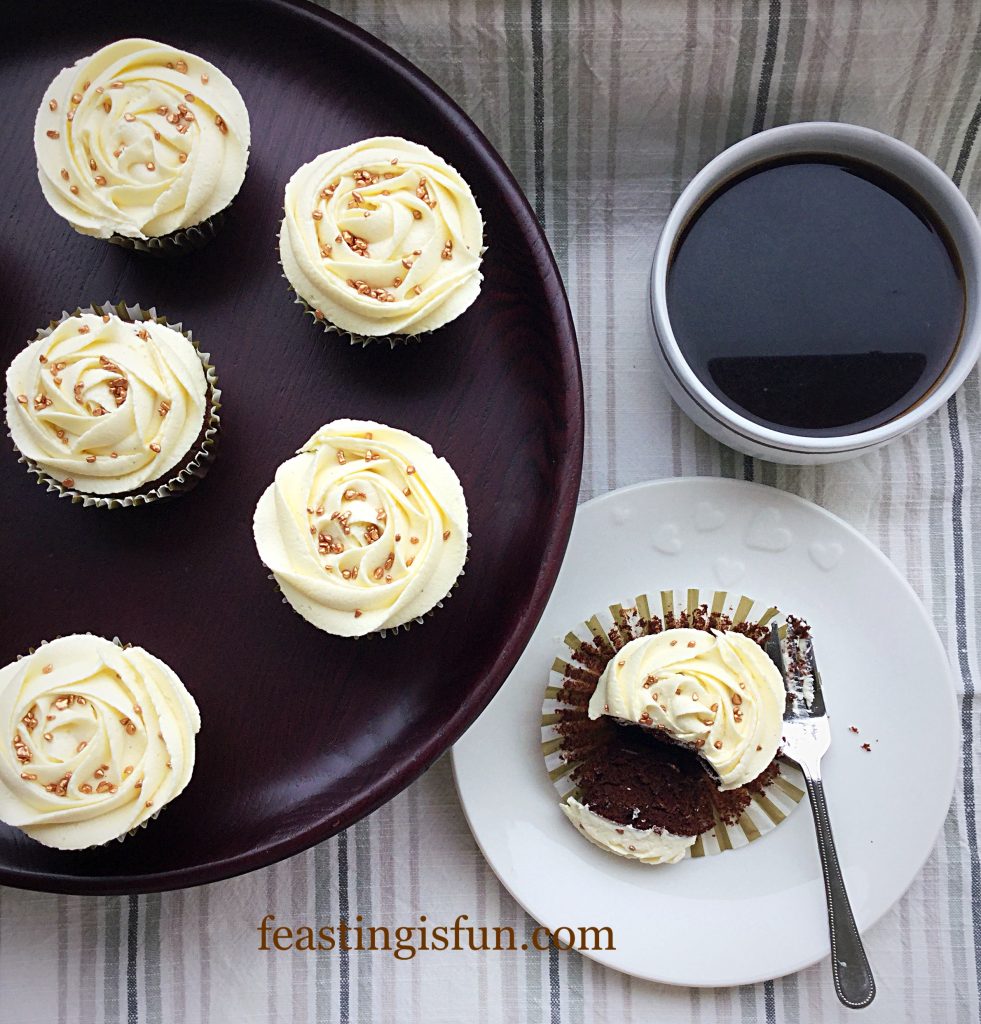
Serve as they are, with a smile.

Store in an airtight container and eat within 5 days. During warmer weather keep refrigerated.

If you have enjoyed this recipe for Maltesers Popping Candy Cupcakes you may also like these:

Caramac Frosted Chocolate Cupcakes

Caramac Frosted Chocolate Cupcakes

Coconut White Chocolate Snowball Cupcakes

Coconut White Chocolate Cupcakes
Coconut White Chocolate Snowball Cupcakes

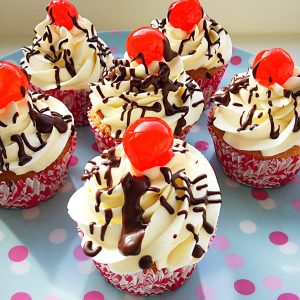
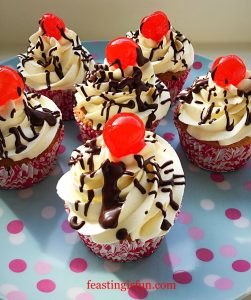
Marasachino Cherry Chocolate Drizzle Cupcakes

Maraschino Cherry Chocolate Drizzle Cupcakes

Cupcakes have withstood time and not lost their appeal. Since they are individual, whole cakes, who wouldn’t enjoy one? Available in an endless number of flavour and frosting combinations, they are perfect for sharing. Also, they are easier to handout and share, in some cases, than a large, cut cake. However you enjoy them, remember that they always taste better when shared.

Whatever you are making, baking and creating in your kitchens, have fun preparing your feast.

Sammie xx

No part of this post may be reproduced or duplicated without the written permission of the owner. Please see my Disclosure Policy.
Chocolate Peanut Butter Drip Cake

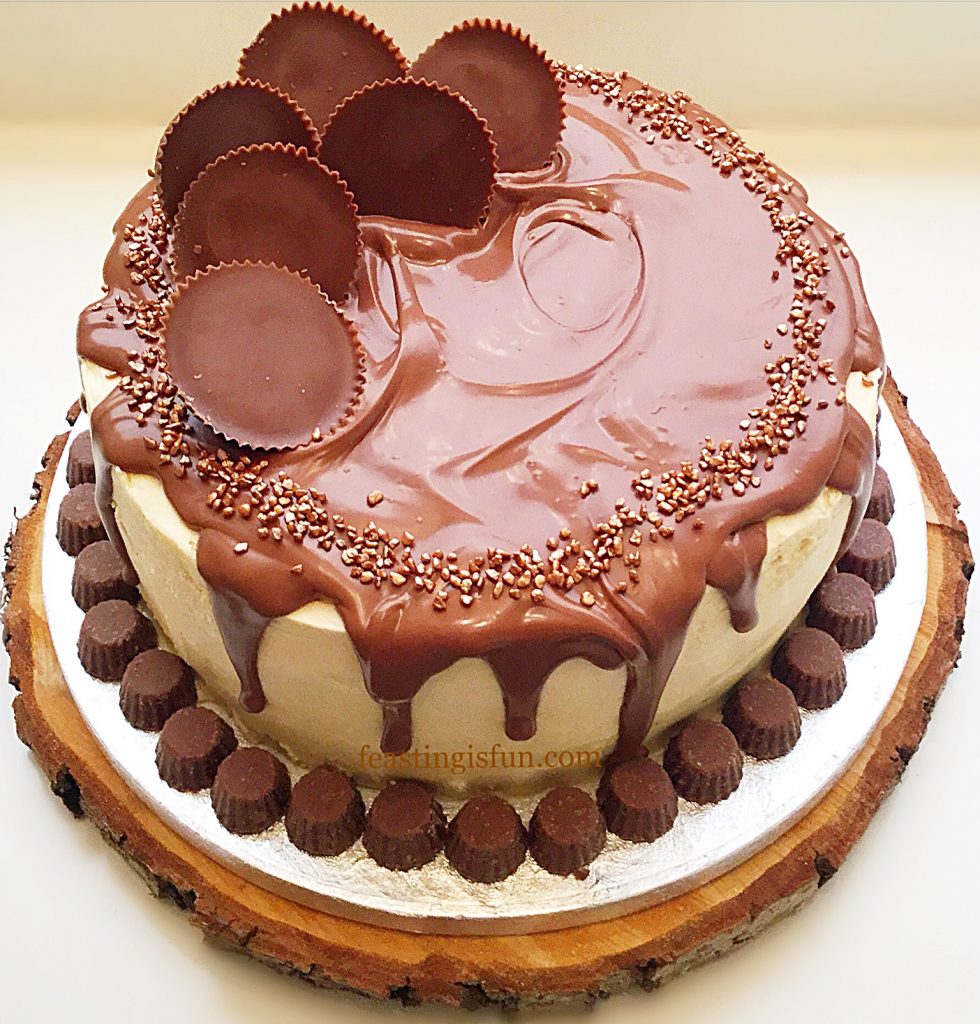
The past fortnight has been a busy one here at home. Hospital appointments for me, rugby matches for our son and both of our girls working hard on their studies. Life has been hectic. Yet, during this time, we have also celebrated two special birthdays in our family. Amidst the coming and going, we made time for what is important. Spending time together. Celebrating birthdays and enjoying the company and love that we have for each other. Laughing, catching up, chatting, more laughter and sharing this delicious Chocolate Peanut Butter Drip Cake.

FF Chocolate Peanut Butter Drip Cake

Family First Support And Sharing

For me, nothing is more important than spending time with those that I love. Whether family, friends or both. Yet due to the continued frequency of seizures see here, these occasions have been few and far between over the last two years. While I was able to attend the wedding of my amazing nephew and my new niece, there have been very many missed opportunities, simply due to my health. Finally, this trend seems to be on the turn and change is afoot!

FF Chocolate Peanut Butter Drip Cake
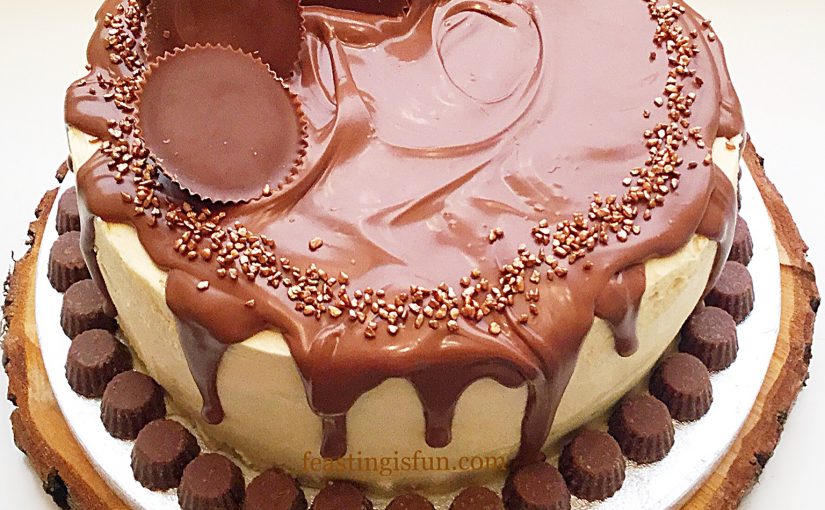
Chocolate Peanut Butter Drip Cake

Since our son and my sister celebrate their birthday on the same day, it has become a tradition for them to see each other on their special day. While last year this event was cancelled, we more than made up for it this year! We gathered and celebrated this very special day together. Presents were unwrapped, cards opened, cuddles given. Most importantly we were a family celebrating together. Is there anything that is better?

Peanut Butter And Chocolate

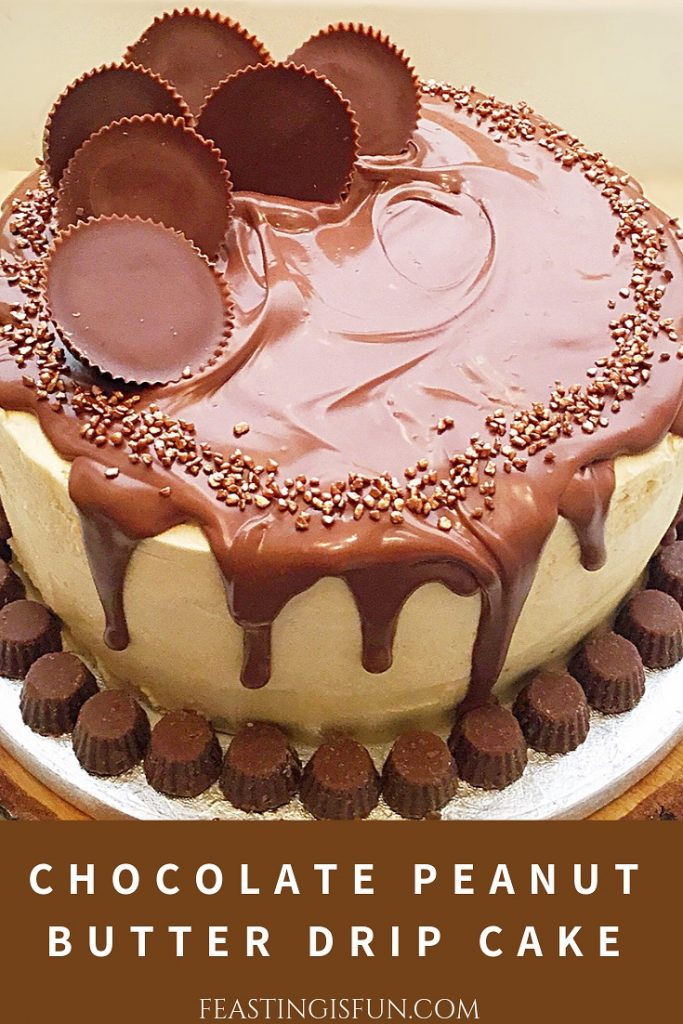
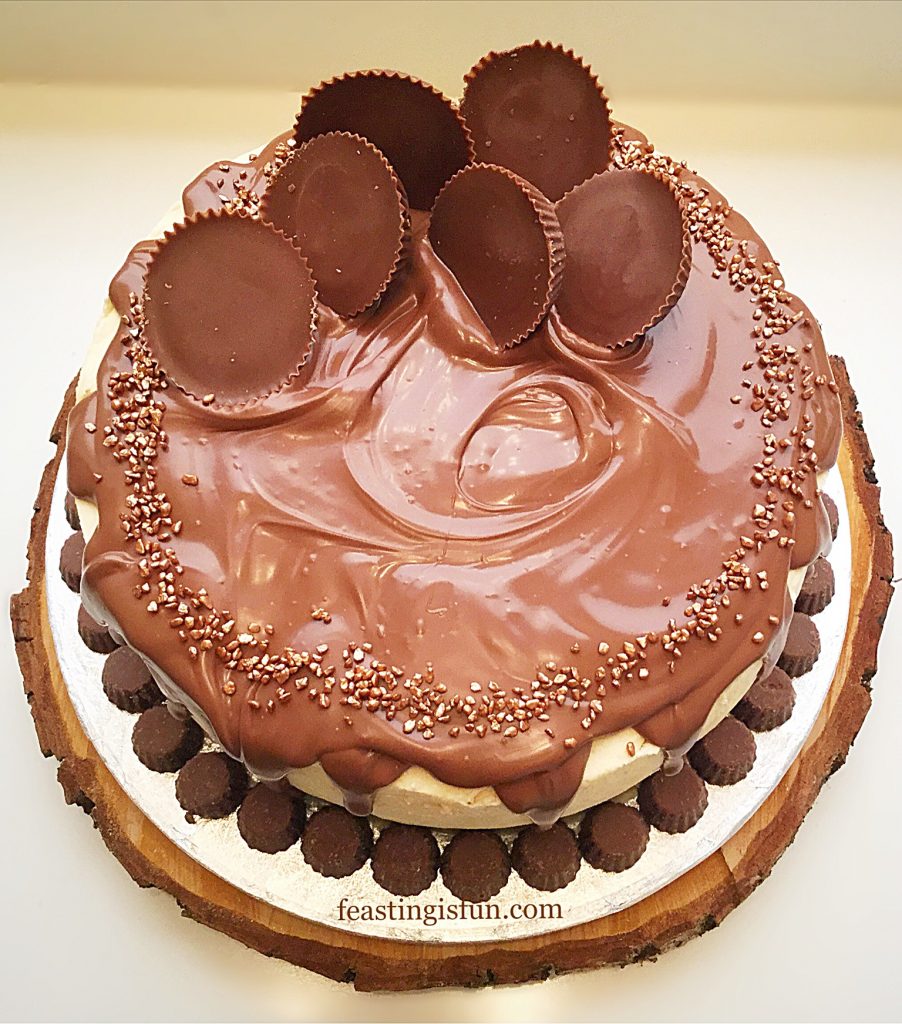
Because I  made our, not so little boy, a fruit cake for his birthday over the past couple of years, change was definitely needed! Since I know how much he loves Reeces Peanut Butter Cups I suggested a chocolate and peanut butter cake. Resulting in a huge smile and a big yes from the birthday boy. So I made light chocolate and peanut butter sponges, sandwiched together with peanut butter icing, along with hidden, chopped peanut butter cups in the centre. Frosted all over with the same icing and decorated with a milk chocolate drip and more peanut butter cups. Finally, a sprinkle of bronze crunch added elegance to the finished cake.

FF Chocolate Peanut Butter Drip Cake
Chocolate Peanut Butter Drip Cake

Above all I had made the cake of our son’s dreams. Utterly thrilled with both the look and taste of his birthday cake, oohs and aahs escaped from everyone’s lips. While delivering completely on taste, as it did looks, this cake proved to be a huge hit. Most importantly from the birthday boy himself. Resulting in a day full of happy shared memories.

FF Chocolate Peanut Butter Drip Cake
Chocolate Peanut Butter Drip Cake

Recipe: Chocolate Peanut Butter Drip Cake serves 10-12

For the cake:

275g/10oz Unsalted Butter at room temperature

275g/10oz Light Brown Sugar

50g/2oz Peanut Butter smooth – I use Reeces available from Amazon

1/4 tsp Sea Salt – I use Maldon

2 tsp Vanilla Extract – I use Nielsen-Massey

5 Large Free Range Eggs

75ml/5tbsp Whole Milk

200g/7oz Plain Flour

2 tsp Baking Powder

75g/3oz Cocoa – I use Callebaut

Frosting and Decoration:

250g/9oz Unsalted Butter softened to room temperature

75g/3oz Peanut Butter smooth

1/4 tsp Sea Salt

500g/1lb 2oz White Icing Sugar

2 tbsp Very Hot Water

1 tsp Vanilla Extract

20 Mini Reeces Peanut Butter Cups plus additional to place around the base of the cake

6 Regular Reeces Peanut Butter Cups

200g/7oz Good Quality Milk Chocolate

Bronze Crunch Sprinkles available from Waitrose

Method: Preheat oven to 160C/140C fan, 325F, gas mark 3

Making And Baking The Sponge Cakes

First of all, you will need 2 x 20cm/8″ sandwich tins that are 5cm/2″ deep. Grease thoroughly with butter and line the base with baking parchment.

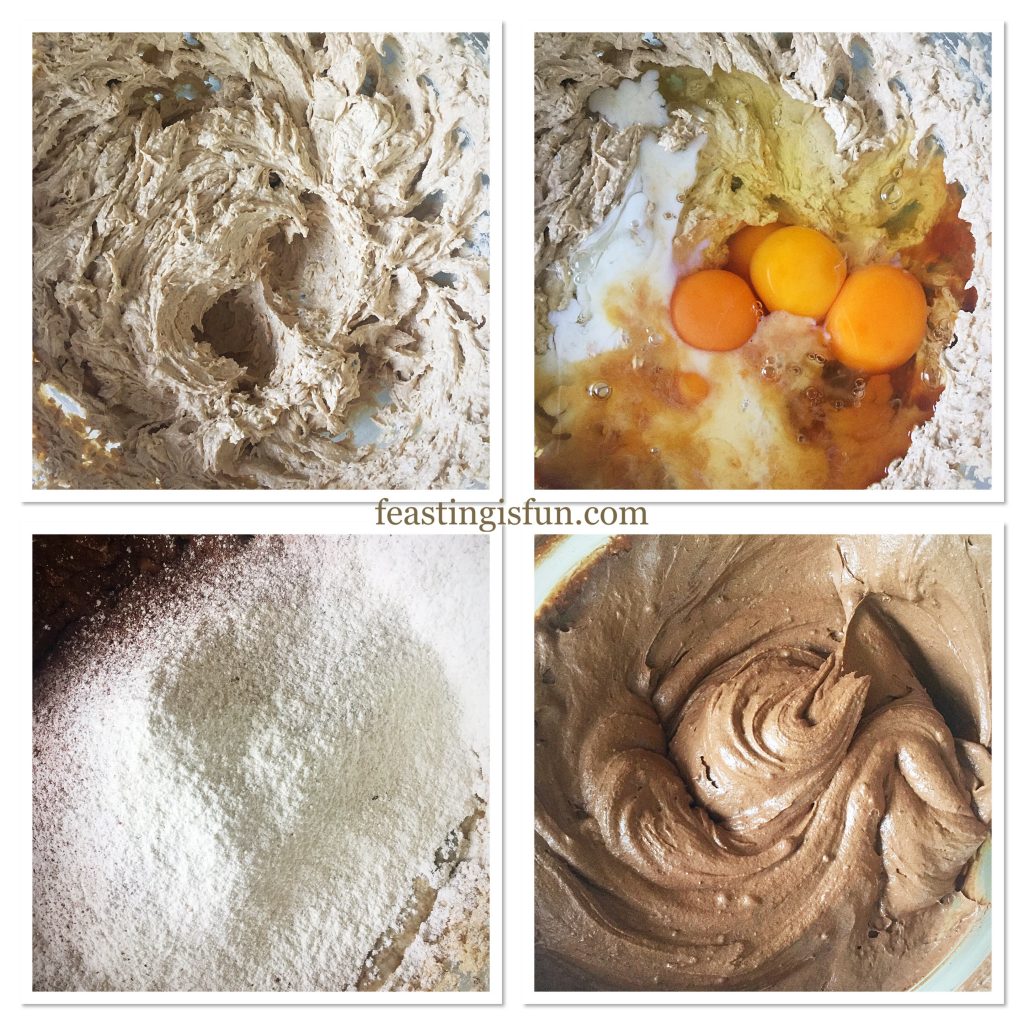
  • Into a large bowl add the butter, peanut butter,  sugar and salt. Whisk until pale and creamy, this will take around 5 minutes. Creaming the butter and sugar together properly helps create a light sponge.
  • Next add all 5 eggs, the milk and vanilla extract. Whisk briefly to break up the eggs.
  • Now sift in the dry ingredients, flour, cocoa powder and baking powder.
  • Finally, whisk or beat all of the ingredients together until they become a smooth batter. Over whisking will create a tough cake sponge.
FF Chocolate Peanut Butter Drip Cake
Making the Chocolate Peanut Butter cake batter.
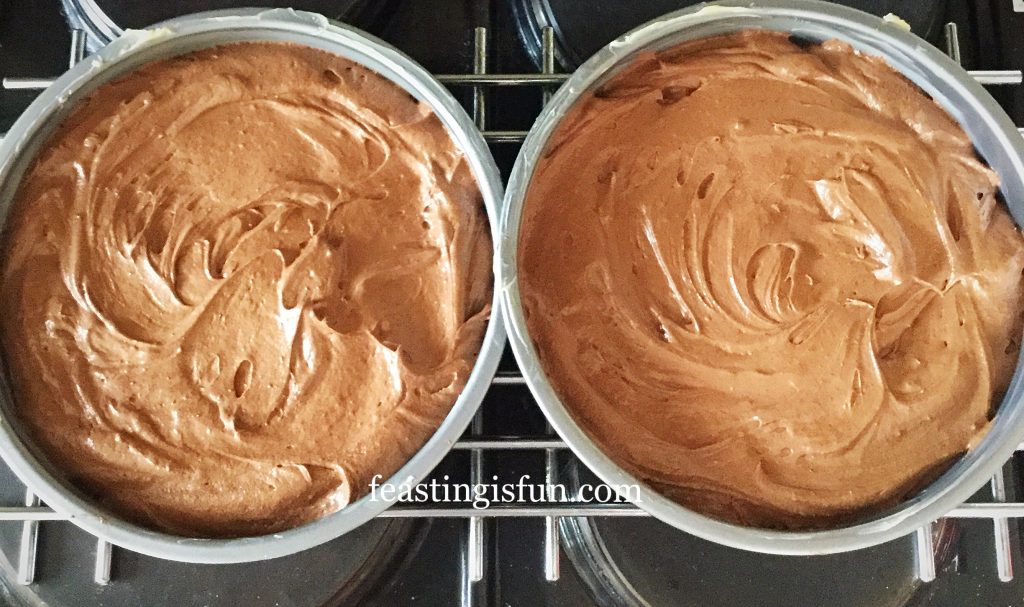
  • Divide the cake mixture evenly between the two prepared tins.
FF Chocolate Peanut Butter Drip Cake
Chocolate peanut butter cakes ready for the oven.
  • Place the cake tins evenly spaced apart, into the oven and bake for 30-40 minutes.
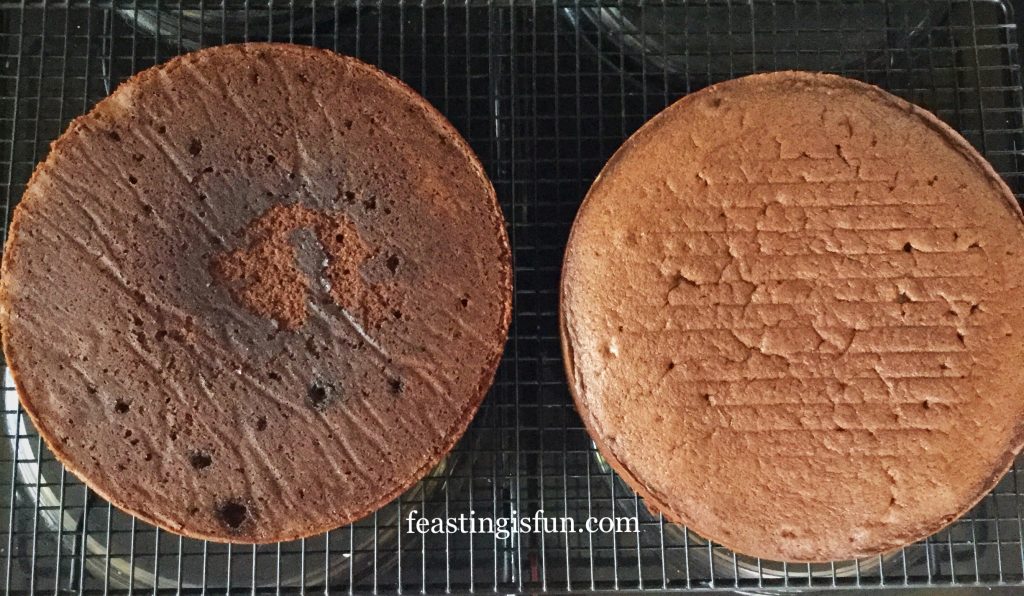
  • The cakes are baked when they spring back from a light touch. as soon as they are baked remove from the oven.
  • Allow the cakes to cool for 15 minutes in the tin before turning out on to a cooling rack.
FF Chocolate Peanut Butter Drip Cake
Cooling cakes.

How To Frost The Cake

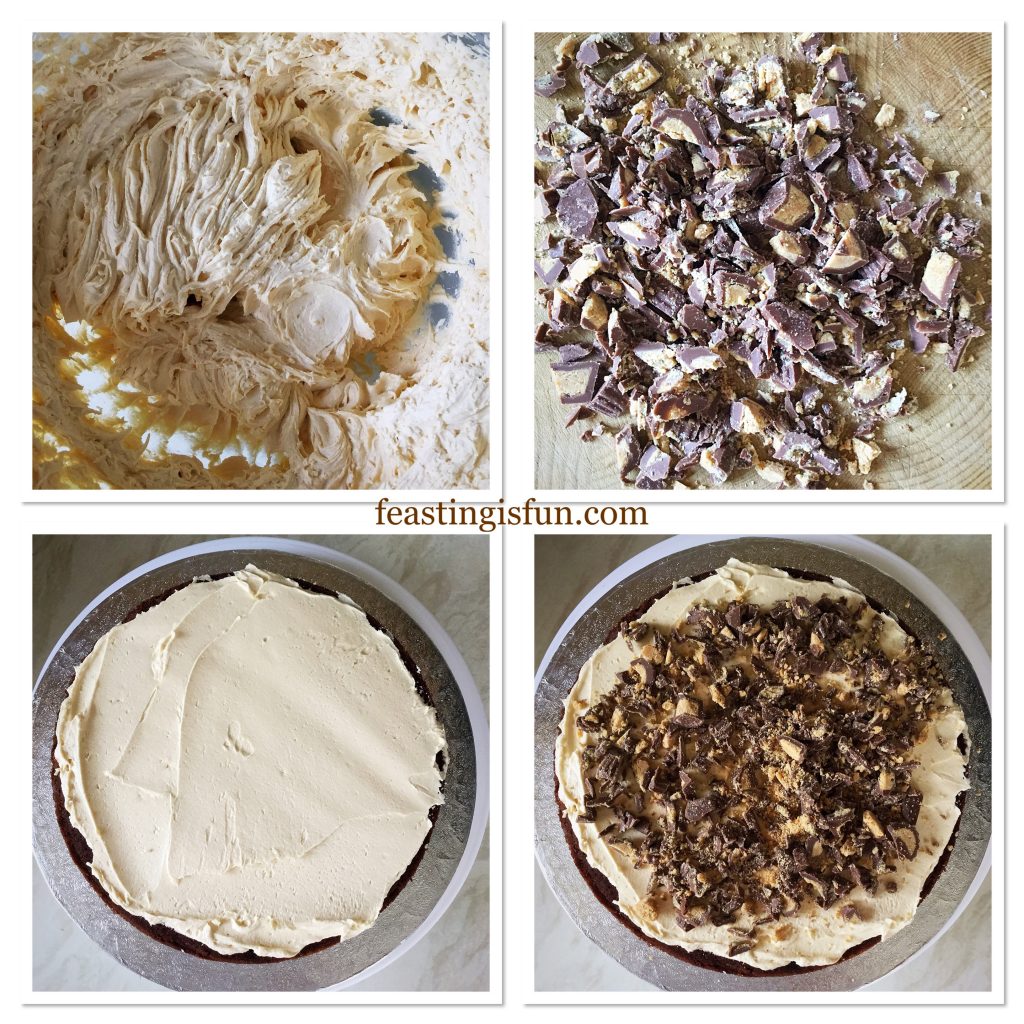
  • First of all, chop 20 mini peanut butter cups into small pieces. See the photograph below as a guide. Set to one side.
  • Into a large bowl add the butter, peanut butter, salt, vanilla extract and icing sugar. Next pour the very hot water down the inside of the bowl.
  • Starting on a slow speed whisk the ingredients together, increasing in speed as they become combined. Continue whisking until the buttercream is light and creamy in consistency, with no visible lumps.
  • Check the cake is completely cooled before frosting.
  • Place one cake sponge, flat side up, on to a cake board or plate. Spoon 3 heaped dessert spoons of frosting on to the sponge and spread evenly across the sponge with a palette knife.
  • Next, sprinkle over the choped peanut butter cups so they create an even layer across the frosted sponge.
FF Chocolate Peanut Butter Drip Cake
Making the buttercream and filling the centre of the cake.
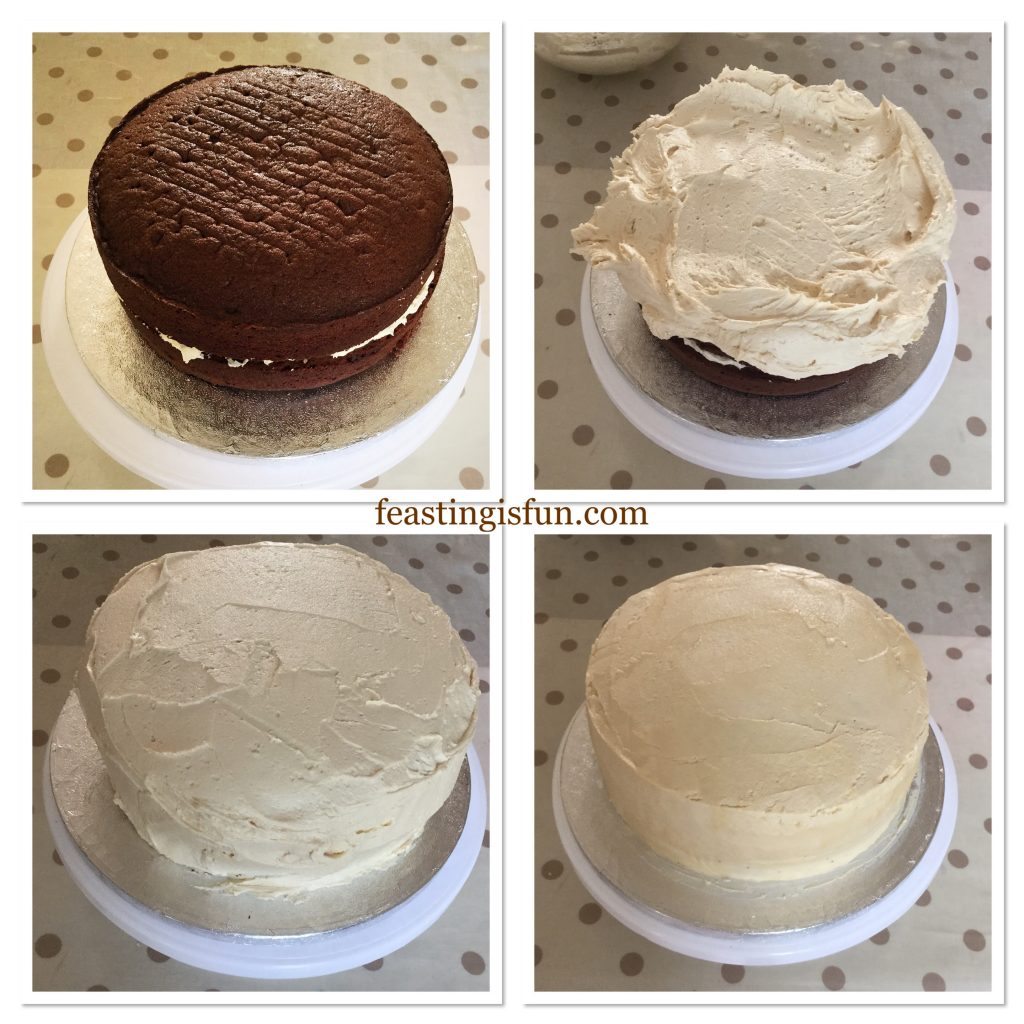
  • If you have a turning, cake decorating stand place the cake on it. Alternatively place the cake board on to a cake stand. The cake can then be rotated on the board, making the frosting process easier.
  • Place the other cake sponge, flat side down, on top of the bottom sponge.
  • Scoop three quarters of the remaining frosting on to the top of the cake.
  • Using a palette knife spread the frosting across the top of the cake and over the sides. Add the remaining frosting as needed.
  • Rotate the cake, spreading the frosting, until an even finish is achieved.
  • Fill a jug with very hot water. Place a clean palette knife into the water, for a couple of seconds, remove and wipe away the water. Smooth the frosting using the hot pallet knife. Repeat this process until you have a smooth and even finish to the cake.
  • Refridgerate the cake for at least one hour. The cake may be left in the fridge overnight at this stage.
FF Chocolate Peanut Butter Drip Cake
Covering and smoothing the outside of the cake.

Creating The Chocolate Drip Effect

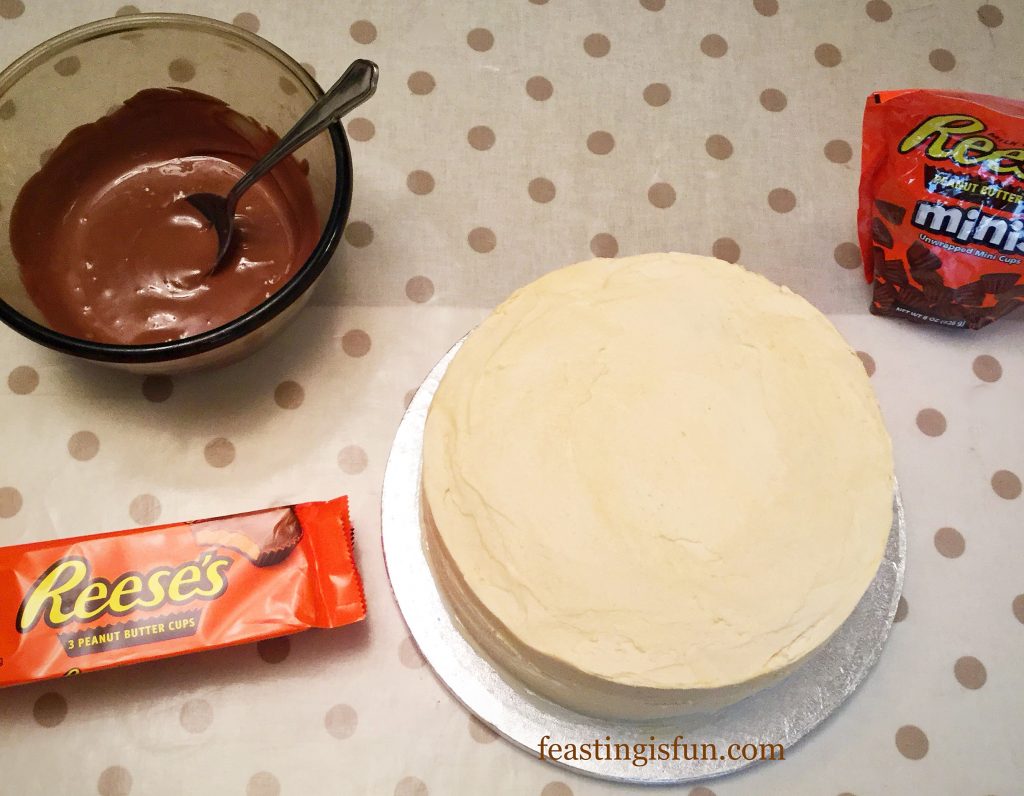
  • While the cake is finishing chilling, prepare the chocolate.
  • Break up, or chop the chocolate and place into a heatproof, microwaveable bowl.
  • Heat in the microwave, on medim power, for 30 second bursts. Stirring after each heating burst.
  • As soon as the chocolate starts to melt remove the bowl and continue to stir until completely melted.
FF Chocolate Peanut Butter Drip Cake
Frosted, chilled cake ready to be decorated.
  • Remove the chilled cake from the fridge and make sure that you have everything needed to hand.
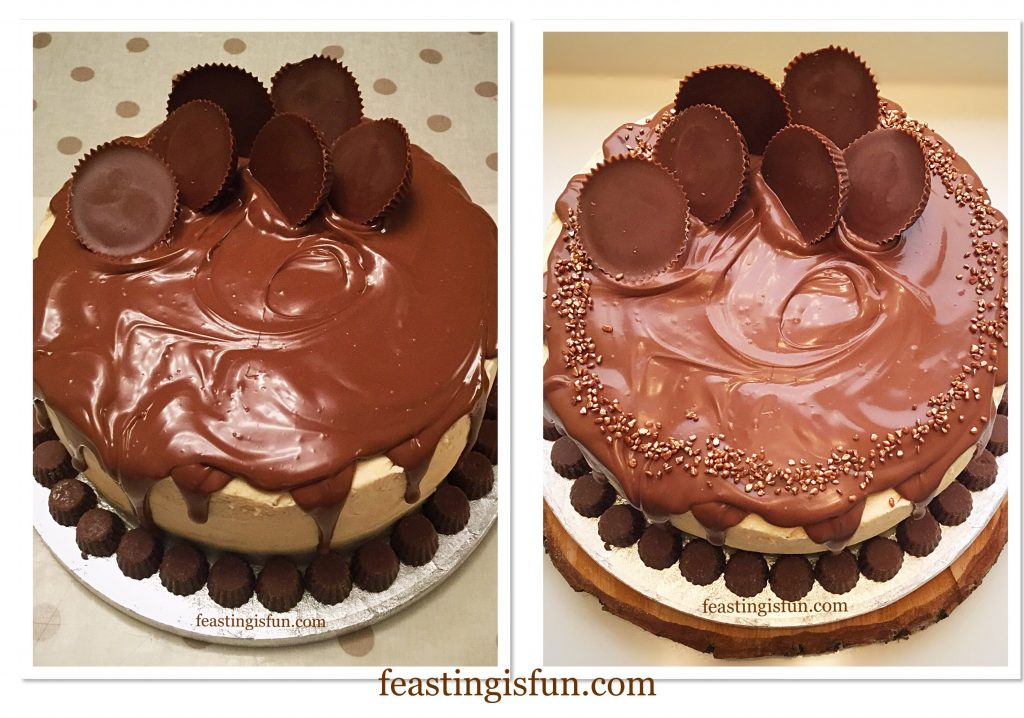
  • Spoon the melted chocolate on to the middle of the top of the cake, gradually working towards the outside edge.
  • As the chocolate reaches the edge add more to encourage it to drip down the side.
  • Continue all the way around the cake until you have the desired ‘drip’ effect.
  • Place the larger peanut butter cups in a pattern and set into the still molten chocolate.
  • Follow by placing mini peanut butter cups aroung the base of the cake.
  • Finish with bronze sprinkles around the outside edge of the cake.
  • Leave the cake to set. This can be achieved more quickly by chilling in the fridge.
FF Chocolate Peanut Butter Drip Cake
Sprinkles added to finish the Chocolate Peanut Butter Drip Cake.

To serve, remove the cake from the fridge. Place a sharp knife into a jug of very hot water for a couple of seconds. Wipe the knife dry and then easily slice through the set chocolate and cake.

FF Chocolate Peanut Butter Drip Cake
Chocolate Peanut Butter Drip Cake

Store the cake in an airtight container for up to 5 days. Keep refridgerated during warmer weather.

If you have enjoyed this recipe for Chocolate Peanut Butter Drip Cake you may also like these:

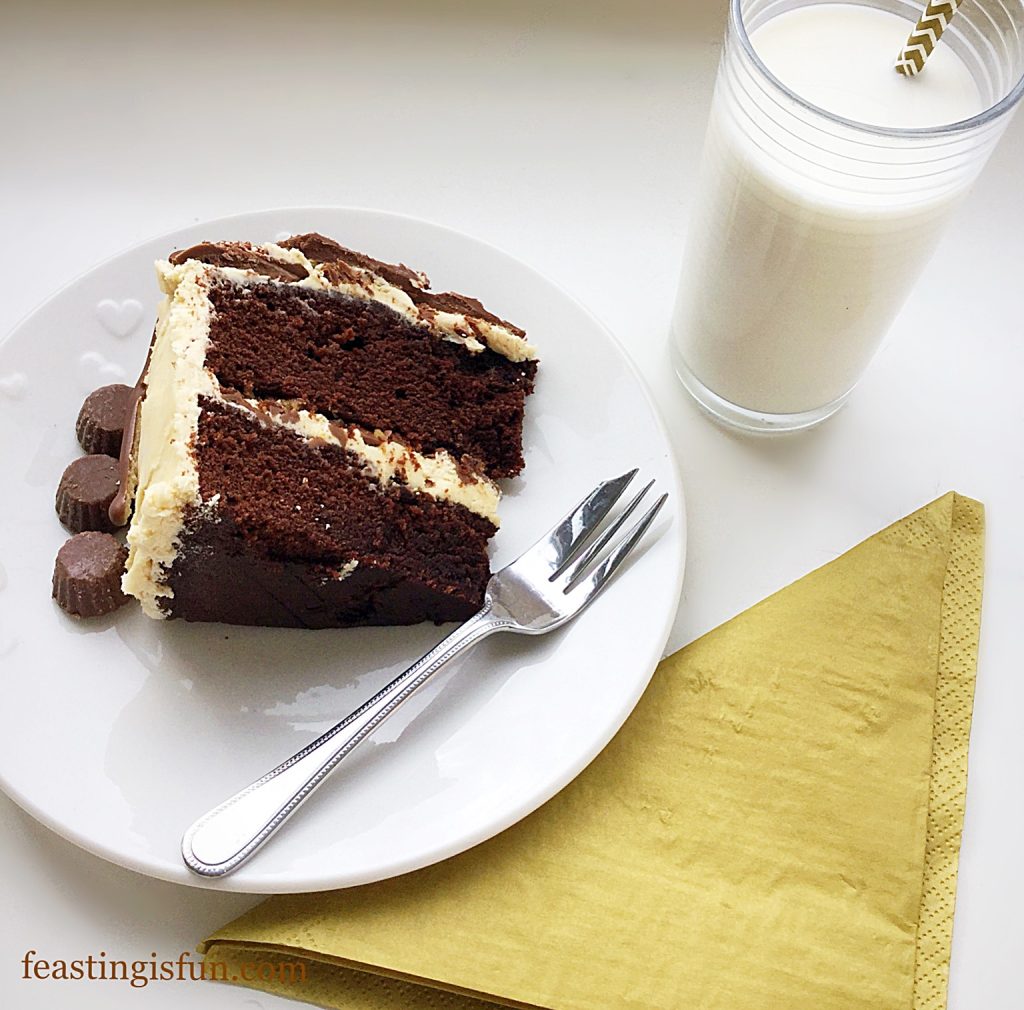
Raspberry Vanilla Naked Celebration Cake

FF Chocolate Peanut Butter Drip Cake
Vanilla Naked Celebration Cake

Strawberry Chocolate Vanilla Drip Cake

FF Chocolate Peanut Butter Drip Cake
Strawberry Chocolate Vanilla Drip Cake

Chocolate Heart Cake

FF Chocolate Peanut Butter Drip Cake
Chocolate Heart Cake

Homemade cakes are so much better and far more delicious than their mass produced counterparts. Since each cake made at home is individual in both style and flavour. Knowing that someone has taken the time to create and bake a cake makes me personally feel very special and loved. That is exactly the same feeling I hope to invoke when baking for others. Seeing a big smile is my motivation and reward.

What motivates you to bake?

Whatever you are making, baking and creating in your kitchens, have fun preparing your feast.

Sammie xx

No part of this post may be copied or replicated without written permission from the owner. Please see my Disclosure Policy.


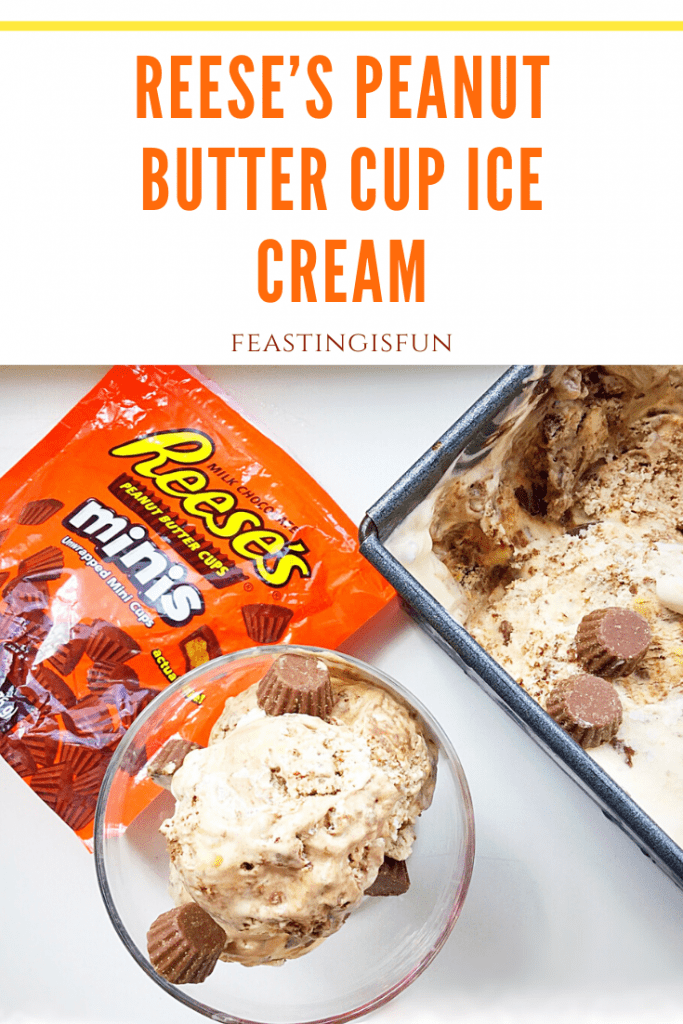
Reeses Peanut Butter Cup Ice Cream

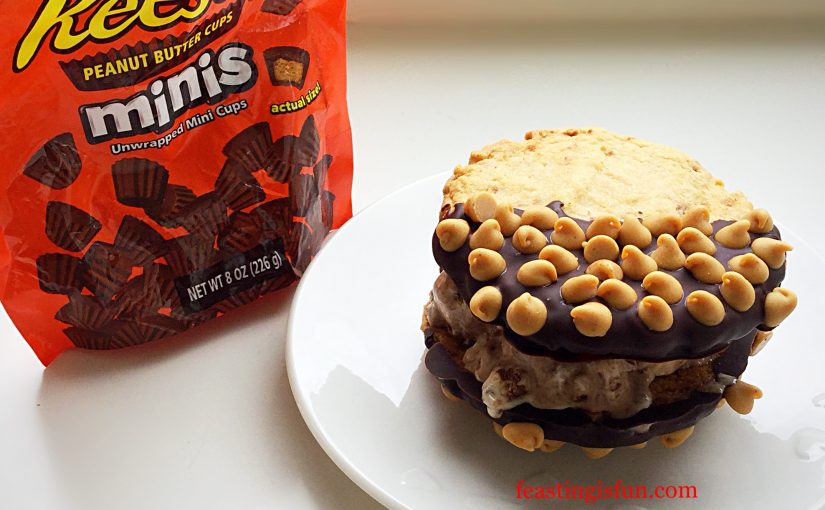
How do you improve on one of the best flavours of ice cream known to man? You squish it between two incredible, homemade cookies! And so I bring you Reeses Peanut Butter Cup Ice Cream. Because lovely people, this is the foodie equivalent of winning all the coins and one-ups in a Super Mario game and then some. So, stick with me as I take you through an incredible ice cream journey.

FF Reeces Peanut Butter Cup Ice Cream
Reeces Peanut Butter Cup Ice Cream 

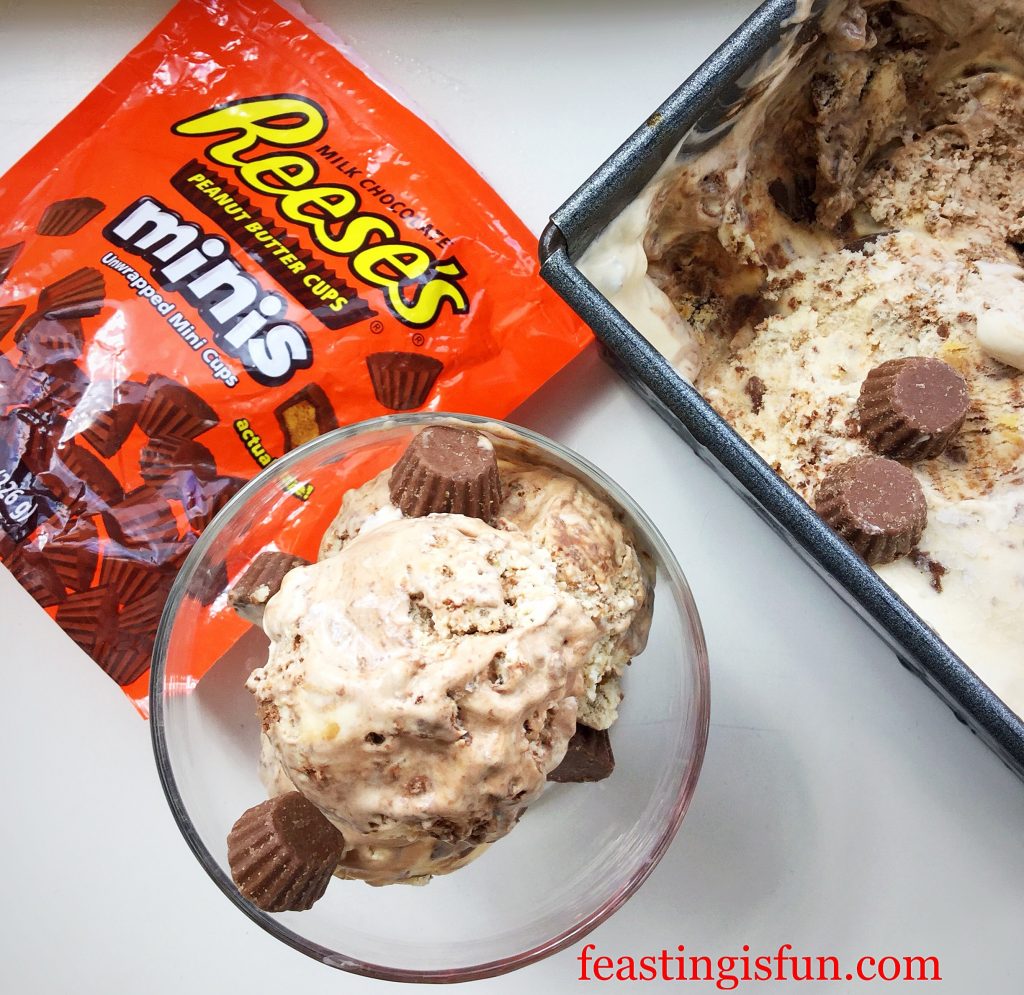
First of all there is ice cream, packed with Reeses Mini Peanut Butter Cups. While some are mini cups are left whole, others are roughly chopped. Resulting in a peanut butter cup filled ice cream base. While dark chocolate ganache ripples through the vanilla base, with a hit of pure peanut butter in every spoonful. Take a moment. Because, I undersrand if you want to think on that for a while?

Finally, complimenting such a flavour punched ice cream are my Caramac Caramel Cookies. Since a large, robust Cookie is the only way to go when sandwiching chunks of peanut butter cup ice cream. And because these cookies are double their usual size, they are perfect for creating an ice cream sandwich.

FF Reeces Peanut Butter Cup Ice Cream
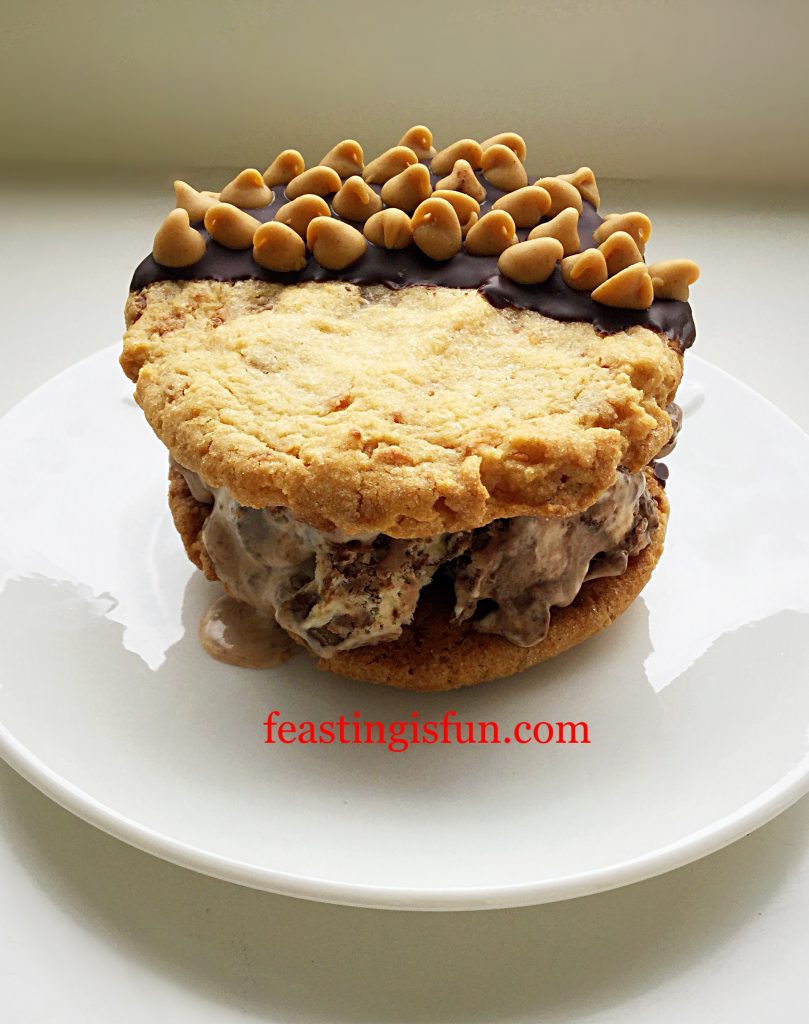
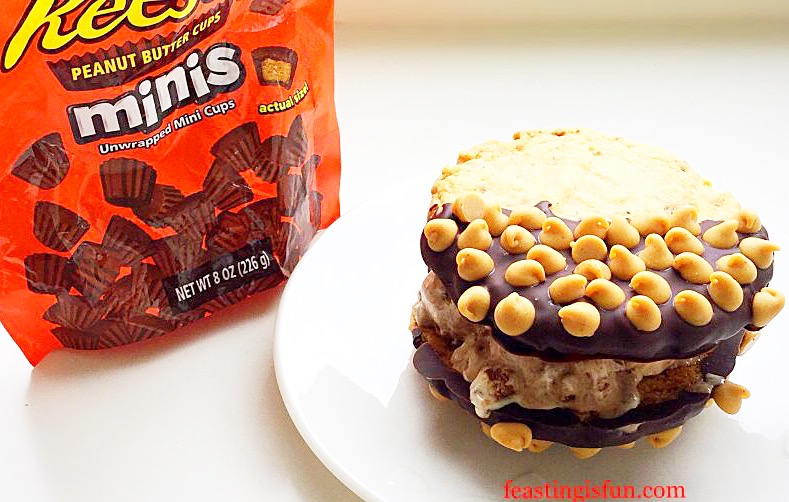
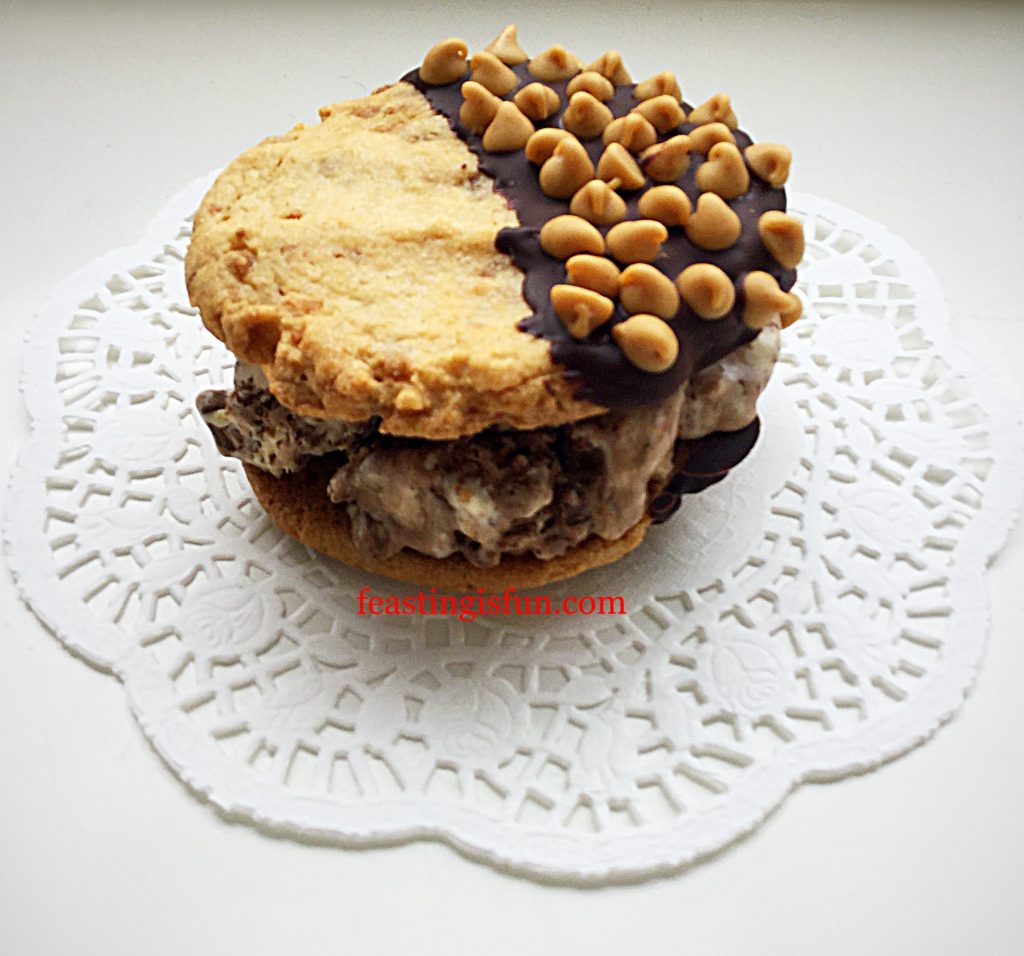
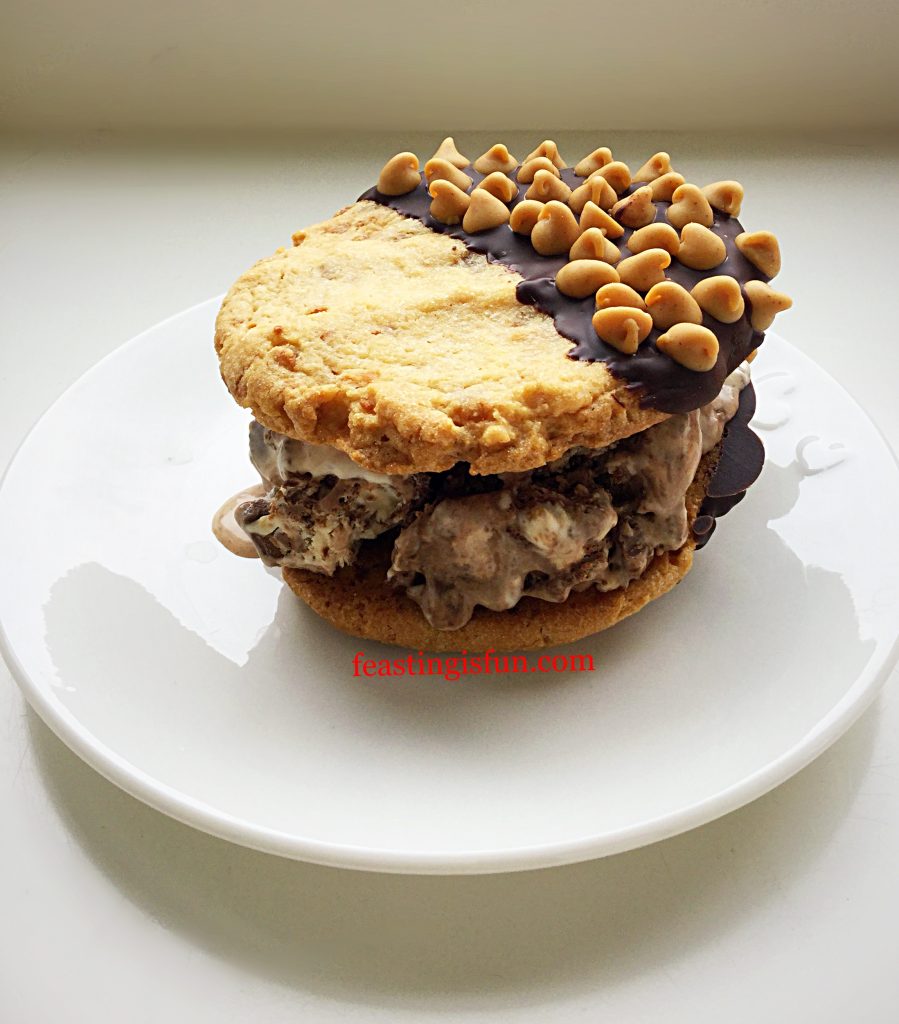
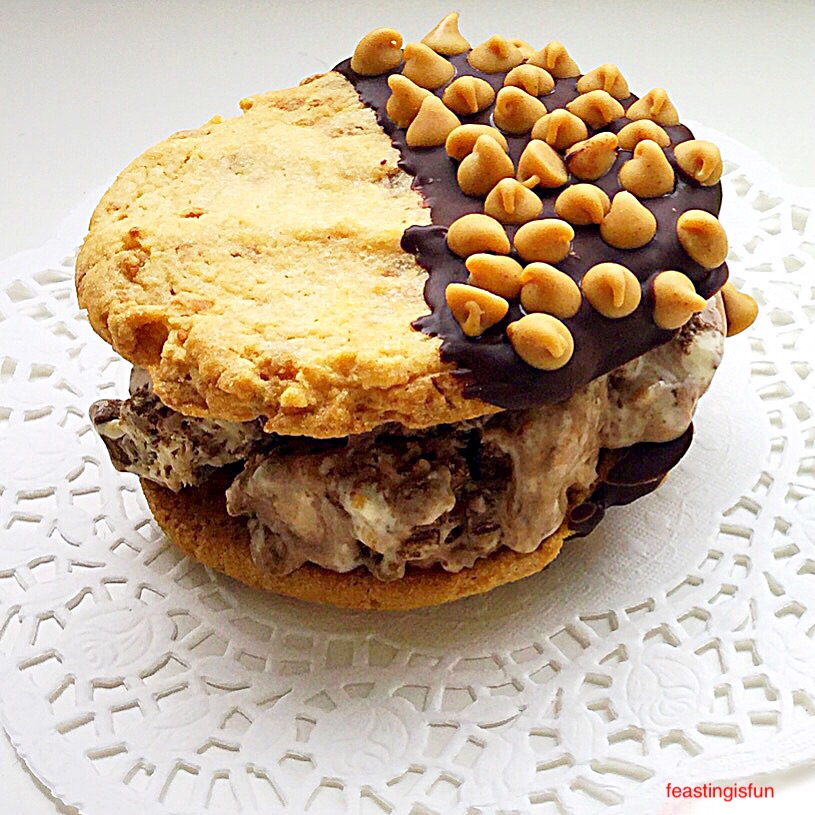
Reeces Peanut Butter Cup Ice Cream Cookie Sandwich

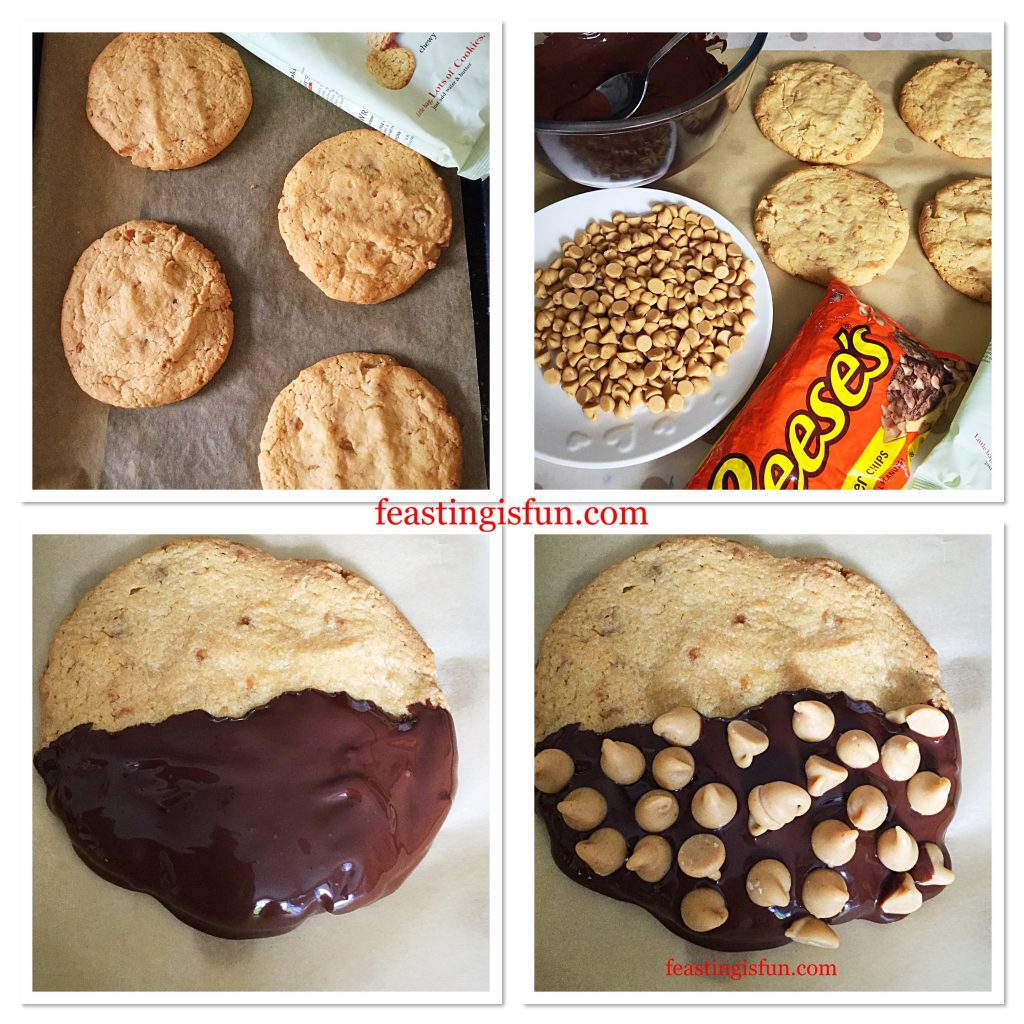
Finally, completely sending this ice cream cookie sandwich over the top, is the customisation of the mega cookies. First of all they are dipped in dark chocolate and then sprinkled with peanut butter chips, rather than contrasting, they compliment the flavours within the ice cream.

Recipe: Reeses Peanut Butter Cup Ice Cream makes 1L approx.

300mls Double Cream plus an additional 100mls for the chocolate ganache

300mls Whole Milk

6tbsp Caster Sugar

1/4 tsp Sea Salt – I use Maldon

4 Large Free Range Egg Yolks

1tsp Vanilla Extract – I use Nielsen-Massey

1tsp Cornflour

100g/4oz Dark Chocolate minimum 70% Cocoa plus an additional 100g of Dark Chocolate for dipping the cookies

50g/2oz Peanut Butter

1 x 226g/8oz Reeces Peanut Butter Cup Minis – alternatively use the equivalent weight of regular Reeces Peanut Butter Cups roughly chopped

Caramac Caramel Cookies recipe to create the cookie sandwiches.

Method: Preparing the ice cream maker.

Ensure the freezing part/bowl of the ice cream maker has been in the freezer for at least 6 hours, ideally overnight, or according to manufacturer’s instructions.

Note: For step-by-step instructions, including photographs please see here.

Making The Ice Cream Base

  • First of all, Place the milk and cream into a heavy bottom saucepan over a medium heat. Heat the cream mixture to scalding point, little bubbles appear around the rim of the saucepan before the mix reaches boiling point. As soon as scalding point is reached, remove the pan from the heat.
  • While the cream mix is heating, place the eggs, salt, sugar, cornflour and vanilla extract into a large heatproof bowl. Whisk together until the eggs have thickened.
  • With the whisk switched to slow, gently pour the hot cream mix into the bowl with the egg mix, whisking constantly. This creates the custard base for the ice cream.
  • Pour the custard base back into the saucepan, place over a medium heat and stir constantly. Cook until the custard has thicker and coats the back of a wooden spoon.
  • Remove the pan from the heat and pour the custard through a sieve, into a large heatproof bowl.
  • Place cling film directly on top of the custard to stop a skin from forming.
  • Leave the custard to cool a little before placing in the fridge to chill.

Preparing The FlavouringS And Churning The Ice Cream

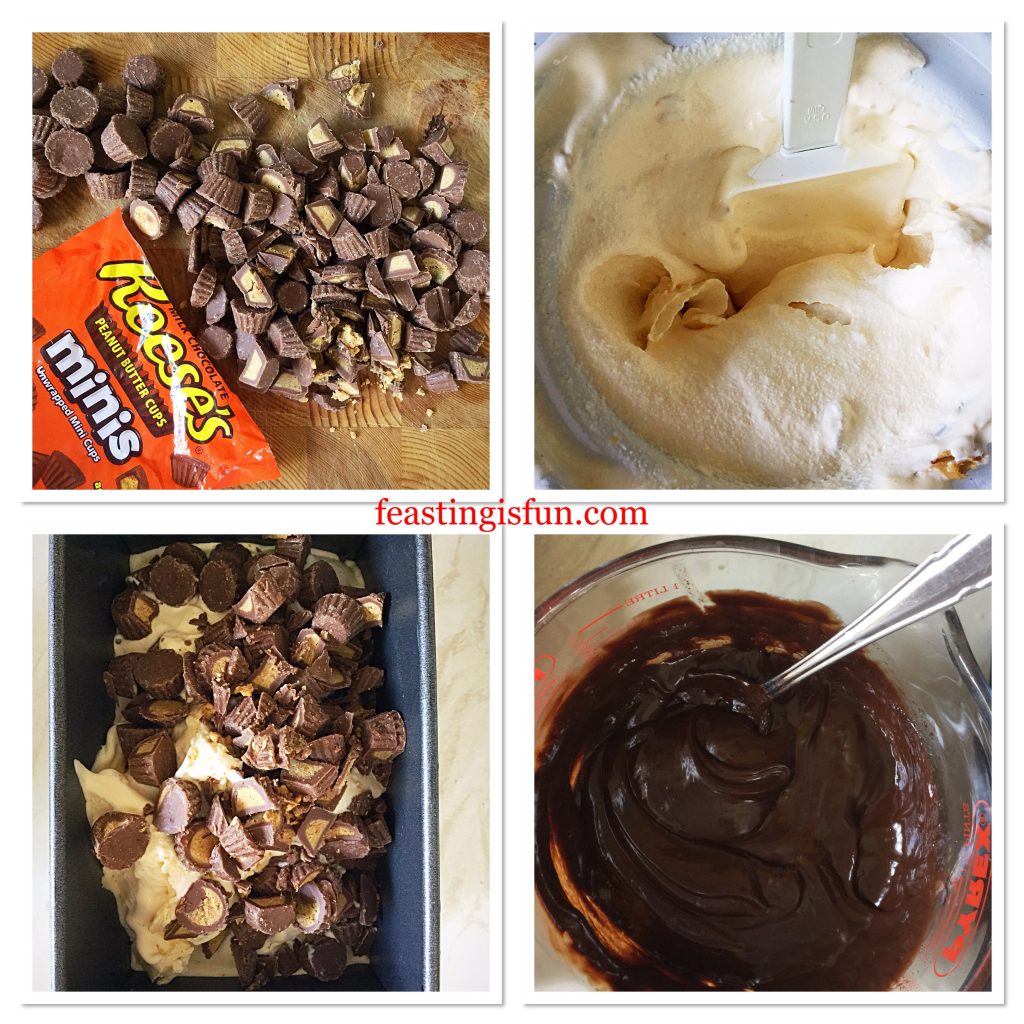
  • While the ice cream base is chilling, prepare the mini Reeces butter cups. Tip out on to a chopping board, roughly divide into two thirds which will be roughly chopped and one third, which are kept whole.
  • Also make the chocolate ganache, which will be swirled through the ice cream. Place 100g of chocolate and 100mls of double cream into a heatproof/microwaveable jug. Heat on medium for 30 second bursts, stirring after each heating session. As soon as the chocolate starts melting into the cream continue stirring until the ganache is smooth and shiny. Set to one side to cool.
  • Set the ice cream maker up as per manufacturer’s instructions.
  • Add the peanut butter to the ice cream base. Use a balloon whisk to break it up into small pieces within the ice cream base.
  • Pour the ice cream mixture into the already churning ice cream maker.
  • As soon as the ice cream is thickened and frozen stop the machine. Remove the paddle so the ice cream can be scooped out.
FF Reeces Peanut Butter Cup Ice Cream
The process of making Reeces Peanut Butter Cup Ice Cream.

Adding The Reeses Peanut Butter Cups And Chocolate Ganache To The Ice Cream

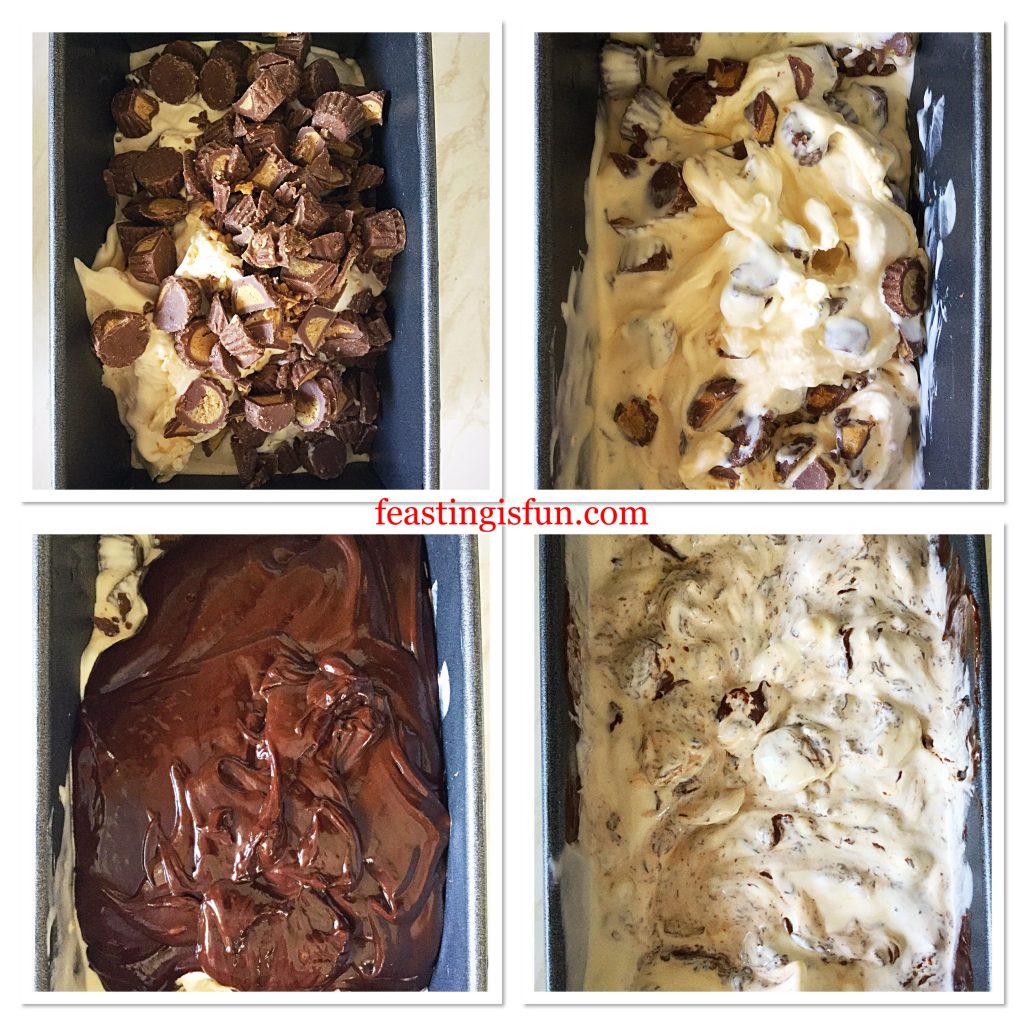
  • Scatter a few chopped Reeces Peanut Butter Cup Minis in the bottom of the freezing container.
  • Scoop half of the ice cream on top of the peanut butter cups.
  • Add one half of the remaining chopped and whole peanut butter cups. Now add the remaining ice cream.
  • Using the handle of a wooden spoon, swirl the peanut butter cups through the ice cream using a figure of eight motion.
FF Peanut Butter Cup Ice Cream
Adding the chocolate ganache swirl to the Reeces Peanut Butter Cup Ice Cream.
  • Pour the cooled, yet still liquid, chocolate ganache on top of the ice cream. Again, using the handle of a wooden spoon swirl the ganache through the ice cream.
  • Snap on an airtight lid, or double wrap in cling film and place the ice cream into the freezer to firm up.
  • Leaving the ice cream to freeze overnight ensures the chocolate ganache fully freezes within the ice cream.
FF Reeces Peanut Butter Cup Ice Cream
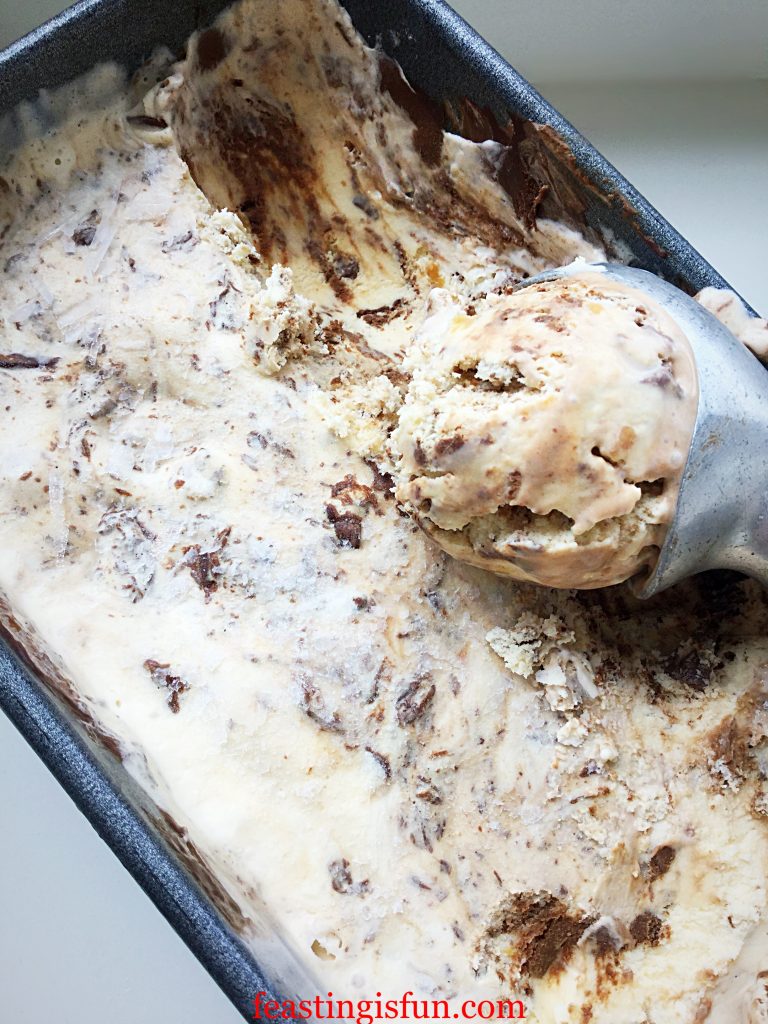
Reeces Peanut Butter Cup Ice Cream ready to serve.

Finally, to serve, remove the ice cream from the freezer 10-20 minutes prior to scooping. Allowing the ice cream to soften slightly. Scoop two balls of ice cream and place on one large cookie, top with another cookie and press gently to form the ice cream cookie sandwich. Alternatively, scoop and serve in a bowl with additional Mini Reeces Peanut Butter Cups.

FF Reeces Peanut Butter Cup Ice Cream
Reeces Peanut Butter Cup Ice Cream Cookie Sandwich using Wright’s Toffee Cookie Mix.


FF Reeces Peanut Butter Cup Ice Cream
Reeces Peanut Butter Cup Ice Cream served in a bowl.

Decorating The Cookies

  • Make the Caramac Caramel Cookies according to the Recipe.
  • Allow the cookies to cool completely on the baking tray.
  • Melt 100g of chocolate in a heatproof, microwaveable bowl, on medium setting, for 30 seconds at a time. Stir the chocolate after each heating session.
  • As soon as the chocolate is melted, dip each cookie into the chocolate, using a spoon to cover halfway across the top oven each cookie.
  • Place the chocolate covered cookies on to baking parchment and sprinkle Reece’s peanut butter chips over the chocolate covered half. Leave to set. In hot weather place in the fridge for a few minutes until set.
FF Reece's Peanut Butter Cup Ice Cream
Baking and decorating the cookies for the ice cream sandwich.


Such an incredible ice cream deserves a cookie that enhances all of its qualities.

If you have enjoyed this recipe for Reeses Peanut Butter Cup Ice Cream you may also like these:


Caramac Caramel Cookieswith Very Vanilla Ice Cream

FF Reeces Peanut Butter Cup Ice Cream
Caramac Caramel Cookies with Very Vanilla Ice Cream.

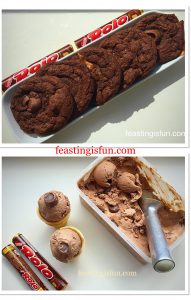
Rolo Chocolate Cookies with Chocolate Rolo Ice Cream

FF Reeces Peanut Butter Cup Ice Cream
Rolo Chocolate Cookies with Chocolate Rolo Ice Cream.

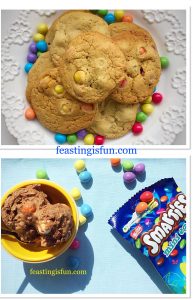
Chocolate Monster Mini Egg Cookies with Smarties Chocolate Mini Egg Ice Cream

FF Reeces Peanut Butter Cup Ice Cream
Chocolate Monster Mini Egg Cookies with Smarties Chocolate Mini Egg Ice Cream.

Since all of the recipes shown can only be made at home, this emphasises the core beliefs of Feasting is Fun. Because creating flavour combinations at home, should be fun. Resulting in each one of these examples as a feast in itself. Also, most importantly, invite your friends over to share these incredible ice cream cookie sandwiches. Finally proving that all food tastes better when shared.

So, whatever you are making, baking and creating in your kitchens, have fun preparing and sharing your feast.

Sammie xx

No part of this post may be reproduced without my specific written permission. Please see my Disclosure Policy.

Double Chocolate Exam Busting Cupcakes

If you are a parent and have children, you will know that from year 6, exams become an important part of their lives. Whether it’s SATS, GCSE’s, A Levels. College or University exams. The end game always focuses on tests or exams. Since today is the start of GCSE’s here in England these Double Chocolate Exam Busting Cupcakes, are designed to lift the spirits and fill the tummies of all students sitting their exams.

FF Double Chocolate Exam Busting Cupcakes
Double Chocolate Exam Busting Cupcakes with coffee – study fuel!

Of course these cupcakes could and should be made all year round, such is their delicious simplicity. Chocolate cake topped with the ultimate white chocolate vanilla frosting. Perfect for chocolate lovers everywhere.

FF Double Chocolate Exam Busting Cupcakes
Double Chocolate Exam Busting Cupcakes the reflect balance of flavours.

A quick bake

Since these cupcakes can be made, from start to finish in under an hour, they are also handy for short notice or unexpected guests. Likewise they can be whipped up, literally, in moments. The comforting aroma of home baking, wrapping around your weary children, like a cosy, soft blanket, when they arrive home.

FF Double Chocolate Exam Busting Cupcakes
Double Chocolate Exam Busting Cupcakes comfort at the ready.

While my hard working teens are sitting and studying for their exams, I can be found in the kitchen. Busy rustling up delicious, sustained energy food and lots of treats. The amount of energy burned up during studying is vast. Since this can be a tough time of year for them, their usual ‘healthy’ food intake is topped up with extra yummy goodies!

Recipe: Double Chocolate Exam Busting Cupcakes makes 12

100g/4oz Unsalted Butter – softened to room temperature

50g/2oz Caster Sugar

50g/2oz Light Brown Sugar

1/4tsp Salt – I use Maldon

1tsp Vanilla Extract – I use Nielsen-Massey

3 Large Free Eggs

60g Plain White Flower

1tsp Baking Powder

40g Cocoa Powder – I use Callebaut

For the frosting:

150g/5oz Icing Sugar

75g/3oz Unsalted softened to room temperature

1tsp Vanilla Bean Paste

100g/4oz White Chocolate

Sprinkles of your choice

Method: Preheat the oven to 160C/140C fan, gas mark 3

First of all line a 12 hole cupcake tin with cupcake cases.

Making the cupcakes

  • Into a medium sized bowl add the butter, both sugars and salt. Beat together until the mixture is free from lumps and smooth.
  • Now add the vanilla extract and all three eggs.
  • Sift in the flour, cocoa and baking powder.
  • Beat/whisk all of the ingredients together until fully mixed.
  • Divide the mixture between the 12 cupcake cases – approximately one dessert spoonful of mixture per case.
  • Place the cupcake tin into the centre of the preheated oven and bake for 25-30 minutes.
  • The chocolate cupcakes are baked when they spring back from a light touch.
  • When baked remove from the oven and allow to cool for 10 minutes  before transferring to a cooling rack. Allow to fully cool.
FF Double Chocolate Exam Busting Cupcakes
Making, filling and baking chocolate cupcakes

Preparing the frosting and decorating the cupcakes

  • Note – due to the high chocolate content of the frosting it is advisable to make it directly before piping, while it is soft.
  • Firstly, break up the white chocolate and place in a heatproof, microwaveable bowl. Set to one side.
  • Into a separate bowl add the icing sugar, butter and one teaspoon of very hot water, from a recently boiled kettle. Whisk until almost combined.
  • Place the bowl with the white chocolate into the microwave. Heat for 20 seconds, stirring in between, until the chocolate is liquid.
  • Pour the warm, melted chocolate in with the butter and icing sugar mixture.
  • Whisk the ingredients together immediately and then continue to whisk until the frosting is light and fluffy. During the whisking add the vanilla bean paste.
FF Double Chocolate Exam Busting Cupcakes
Making the frosting, piping and decorating the chocolate cupcakes.
  • Fit a large piping bag with a large closed star piping nozzle.
  • Fill the piping bag with the frosting and proceed to pipe rose swirls on each cupcake. Starting in the centre of the cupcake, pipe the shape of an ‘e’ then continue around until the cupcake has a complete swirl on top.
  • Finally, sprinkle over your choice of decoration.
FF Double Chocolate Exam Busting Cupcakes
Double Chocolate Exam Busting Cupcakes so good!

Serve with a hug, smile and a hot drink!

FF Double Chocolate Exam Busting Cupcakes
Double Chocolate Exam Busting Cupcakes much needed.

Store these cupcakes in an airtight container where they will last for three days.

If you have enjoyed this recipe for Double Chocolate Exam Busting Cupcakes you may also like these:

Marshmallow Frosted Mango Cupcakes

FF Double Chocolate Exam Busting Cupcakes
Gluten Free Marshmallow Frosted Mango Cupcakes

Maraschino Cherry Chocolate Drizzle Cupcakes

FF Double Chocolate Exam Busting Cupcakes
Maraschino Cherry Chocolate Drizzle Cupcakes

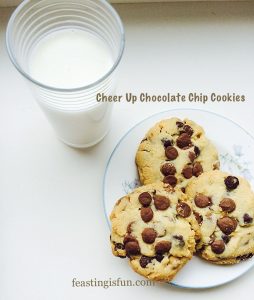
Cheer Up Chocolate Chip Cookies

FF Double Chocolate Exam Busting Cupcakes
Cheer Up Chocolate Chip Cookies

While cupcakes are delicious, the cookies are for those meltdown moments when the pressure is simply too much. Firstly, so that whoever reads this blog post realises that they aren’t on their own. Sometimes it all gets too much. Fresh air, good music and a break all help. As do hugs, talking and simply letting it all out.

Wishing anyone taking exams, all the very best. If you do your best, no one can expect more of you than that x.

Sammie xx

Cinnamon Plaited Brioche Bread

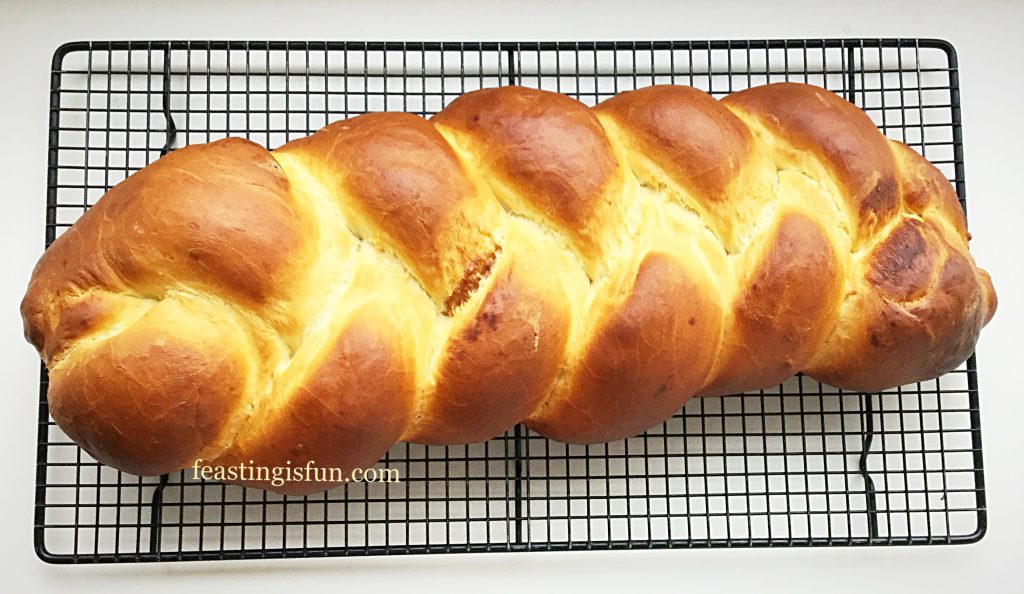
If you are a frequent visitor to this blog, you will know how much I enjoy making bread. While I am very happy to let kitchen appliances carry out the hard work, indeed for this loaf they are necessary, shaping the dough is always fun to do by hand. Since I first tried an eight strand plaited loaf last year, I have become hooked on intertwining lengths of dough and observing the final, baked result. This Cinnamon Plaited Brioche Bread is delicious and easy to make.

FF Cinnamon Plaited Brioche Bread
Cinnamon Plaited Brioche Bread a delicious breakfast.

Having re-tested the recipe and technique I have full confidence that you too can make this delicious bread. Even if you have never plaited before, the step by step photographs will show you how. Such a small amount of extra effort and you will be rewarded with a stunning loaf. While the smell of cinnamon dough, baking, will have you counting the minutes until your first slice!

FF Cinnamon Plaited Brioche Bread
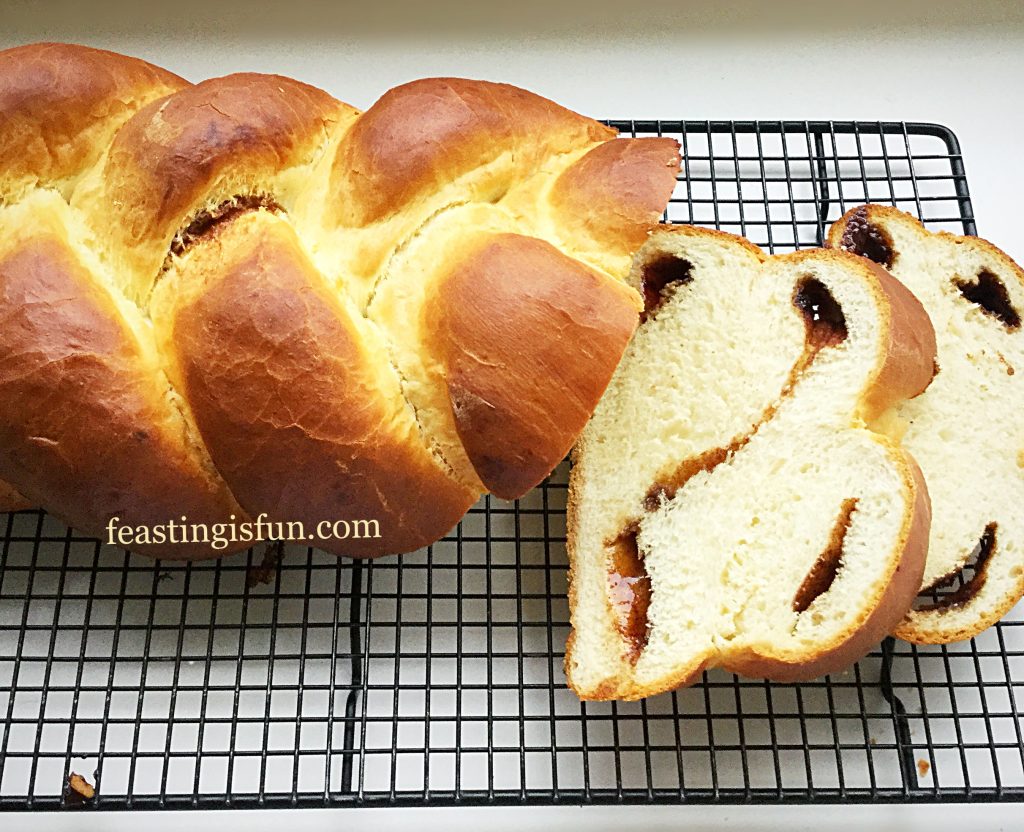
Cinnamon Plaited Brioche Bread golden and bronzed with a hidden inner.

How Ingredients Affect The Final Bake

When baking, it always pays to use the very best ingredients available. However, not everyone’s budget can stretch to premium ingredients. If you can make one change here, I strongly recommend using free range, or organic eggs. Their golden yolks are what help give this loaf its amazing colour. Both in the bread itself and the egg wash, brushed on before baking. Resulting in both the golden and bronzed baked crust.

FF Cinnamon Plaited Brioche Bread
Cinnamon Plaited Brioche Bread beautiful inside and out.

Serving this bread, sliced for breakfast or as an afternoon treat with a hot drink, is sure to brighten anyone’s day. Since it is a large loaf, why not take it to work, pre-sliced and share with your colleagues? Since all food tastes better when it is shared, that is the only way to improve this bread. Simply by sharing it.

FF Cinnamon Plaited Brioche Bread
Cinnamon Plaited Brioche Bread simply delicious.

Recipe: Cinnamon Plaited Brioche Bread 

300mls Whole Milk

2 Large Free Range Eggs

1tsp Caster Sugar

10g Dried Yeast – I use Allinson in the green tub or sachets

600g/1lb 5oz Strong White Bread Flour – I use Shipton Mill

50g/2oz Unsalted Butter

10g Salt – I use Maldon

For the cinnamon filling:

75g/3oz Light Muscavado Sugar – I use Billington’s

4tsp Cinnamon

1 free range egg plus 1tbsp milk to brush over the loaf.

Method:

The method given for making this Cinnamon Plaited Brioche Bread uses a dough hook fitted to a stand mixer. The enriched dough is very, very sticky, prior to its first prove. Using a stand mixer ensures that the dough is kneaded properly. Resulting in a light textured crumb once baked.

Making The Brioche Bread Dough

  • First of all ensure that your kitchen is warm. It will really benefit the yeast, during the dough making process.
  • Measure the milk into a jug and warm in a microwave for 20 seconds. Ideally the milk should be body temperature 37C. However, do not overheat as it may kill the yeast.
  • Pour the milk into the bowl of a stand mixer.
  • Crack 2 eggs into the jug and add these to the milk in the bowl. I always break eggs into a separate container first. If any shell escapes it can then be removed and also, extremely occasionally, should an egg be bad, it will not spoil the whole recipe.
  • Next add the sugar and yeast. Swish the liquid about with clean fingers to break up the eggs and mix lightly.
  • On top of the liquid mix add the flour.
  • Now add the butter and salt.
  • Lower the dough hook into the bowl and mix on the slowest speed for 5 minutes. Then, gradually increase the speed to medium and mix for a further 5 minutes.
  • After the mixing time has elapsed stop the mixer.

The Windowpane Test

  • Remove a small piece of dough and stretch it between your fingers. The dough is kneaded when it can be stretched so thinly that light can be seen through it. This is called the windowpane test.
  • If the dough tears before it can be fully stretched, lower the dough hook and continue mixing, checking every 3 minutes, until it passes the windowpane test.
  • Once the dough passes the windowpane test it is ready to prove. Scrape the dough from the dough hook and allow to drop into the bowl. Cover the bowl with a clean tea towel and place somewhere warm and drought free.
  • Allow the dough to prove until doubled in size – approximately 1 hour.
  • While the dough is proving grease a large baking tray with butter. Also, into a small bowl, weigh out the sugar and add the cinnamon. Stir to mix and break up any large sugar lumps using your fingers. Set to one side.

Shaping The Dough And Adding The Cinnamon Mix

  • Once doubled in size turn the dough out on to a lightly floured surface. Use your hand, or a dough scraper to remove all of the dough.
  • Shape the dough into a round and then weigh it. I use digital scales, placing the dough on to a piece of baking parchment. Make a note of the weight of the dough. Now divide that figure in 3.
  • Cut the dough into 3 pieces that are equal in weight.
  • Roll each piece of dough into a length and then flatten, using your hands or a rolling pin. Each flattened length of dough should measure 50cm/20″.
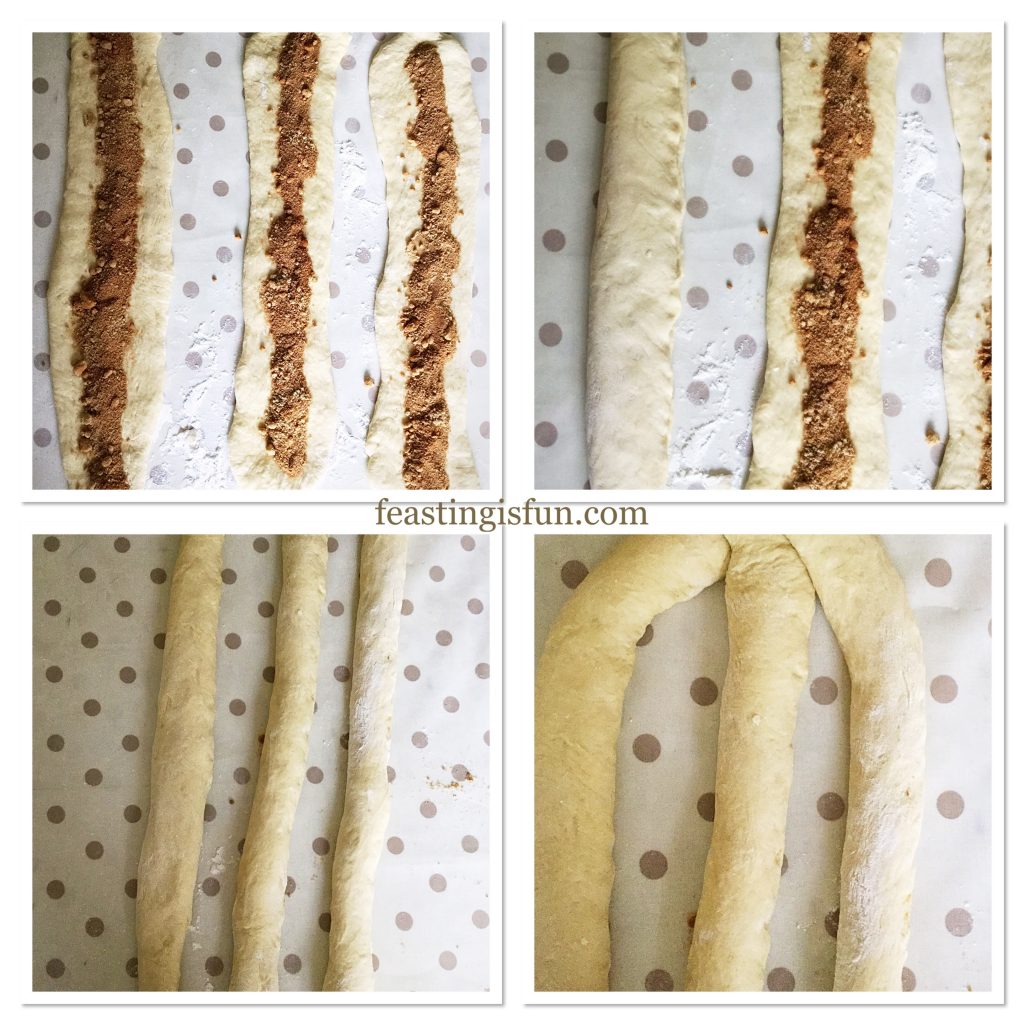
FF Cinnamon Plaited Brioche Bread
Preparing three dough strands for the cinnamon/sugar filling.
  • Sprinkle the sugar/cinnamon mixture down the middle of each piece of dough. Dividing it equally between three strands.
  • Dab a little tap water down the right side of the first strip of dough. Now bring the left side over and pinch to secure the sides together. Similar to making a sausage roll.
  • Continue until all three lengths of dough have their filling securely encased.
  • Roll each length of dough so that the join is underneath and not visible.
  • Join all three lengths of dough at the top. Place on top of each other and pinch together to secure.
FF Cinnamon Plaited Brioche Bread
Filling, securing and attaching the top of the plait.

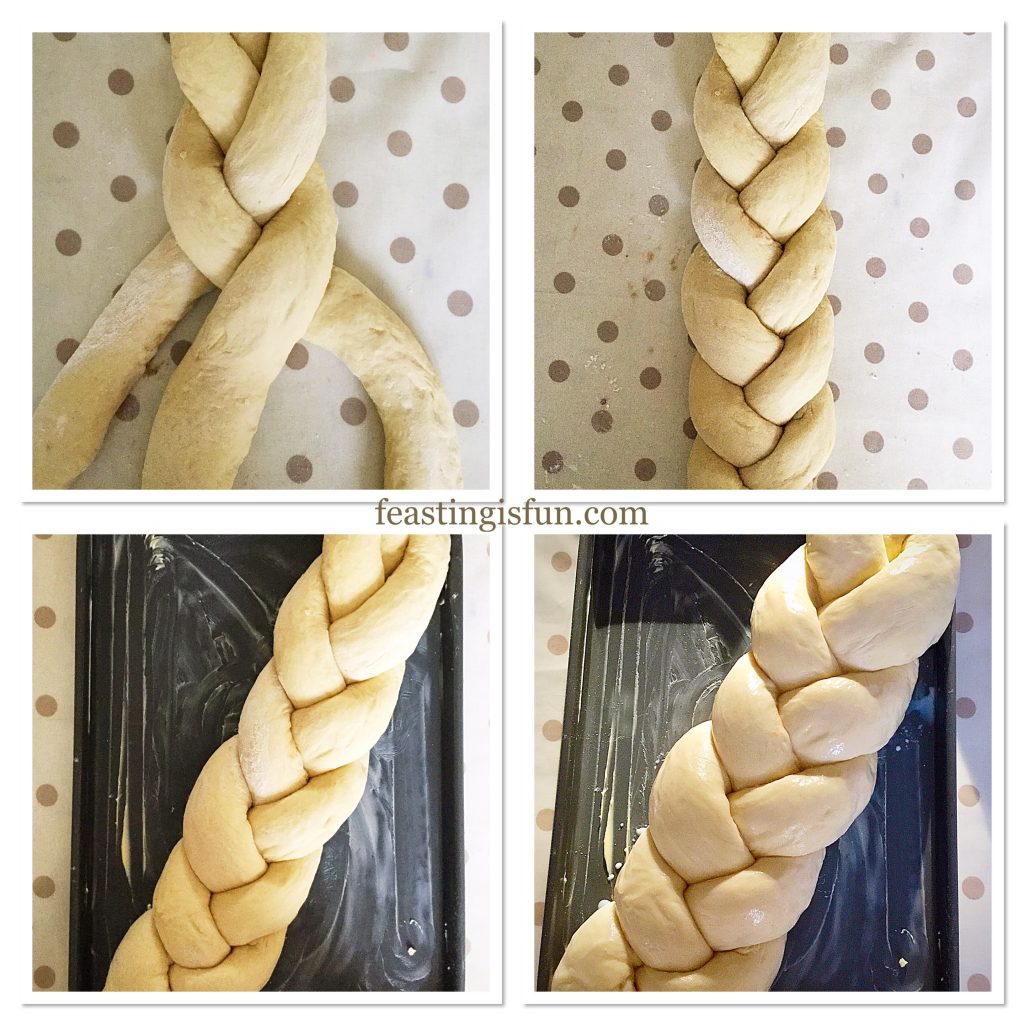
Plaiting The Cinnamon Brioche Bread

  • Starting from left to right, number the strands 1, 2 and 3. Number 1 strand will always be to the left, 2 in the middle and 3 on the right.
  • Pass strand 1 over strand 2.
  • Now pass strand 3 over strand 2. Ensure the strands are not pulled tight and there should be no gaps.
  • Repeat the past two steps until the plait is finished. (Strand 1 over 2, then strand 3 over strand 2 and repeat.)
  • Pinch the bottom 3 strands together so that they are secure and look tidy.
  • Lift the plait using both hands at either end and place diagonally on to the greased baking tray.
  • Cover with a clean tea towel and leave, as before, in a draught free place.
  • While the plaited dough is proving preheat the oven to 240C/220C gas mark 9, 475F. Break an egg into a bowl, add the tablespoon of milk and whisk with a fork to mix.
  • Once the plaited dough has doubled in size use a soft pastry brush and carefully brush the egg wash over.
FF Cinnamon Plaited Brioche Bread
Plaiting and placing the brioche on to a baking tray before the egg wash.

Baking The Cinnamon Plait

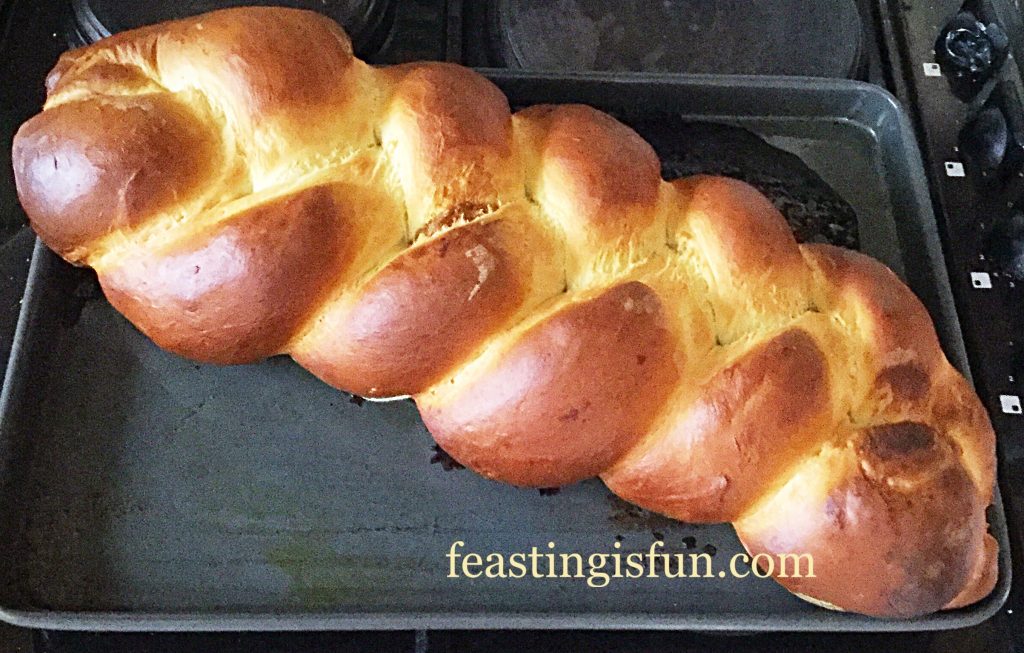
  • Place the egg washed Cinnamon Plaited Brioche Bread into the centre of the preheated oven and bake for 10 minutes. Then reduce the oven temperature to 220C/200C fan, gas mark 7, 425F. Continue to bake for a further 15-20 minutes.
  • The bread is baked when a deep, golden crust has formed and the base sounds hollow, when rapped with a knuckle.
  • Once baked remove the bread from the oven.
FF Cinnamon Plaited Brioche Bread
Beautifully baked Cinnamon Plaited Brioche Bread.
  • Slide a pallet knife under the baked bread, then carefully transfer to a cooling rack.
FF Cinnamon Plaited Brioche Bread
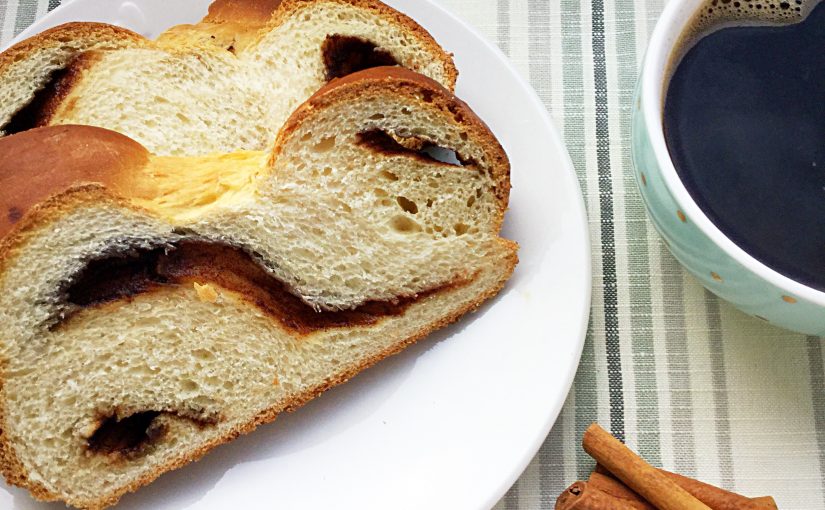
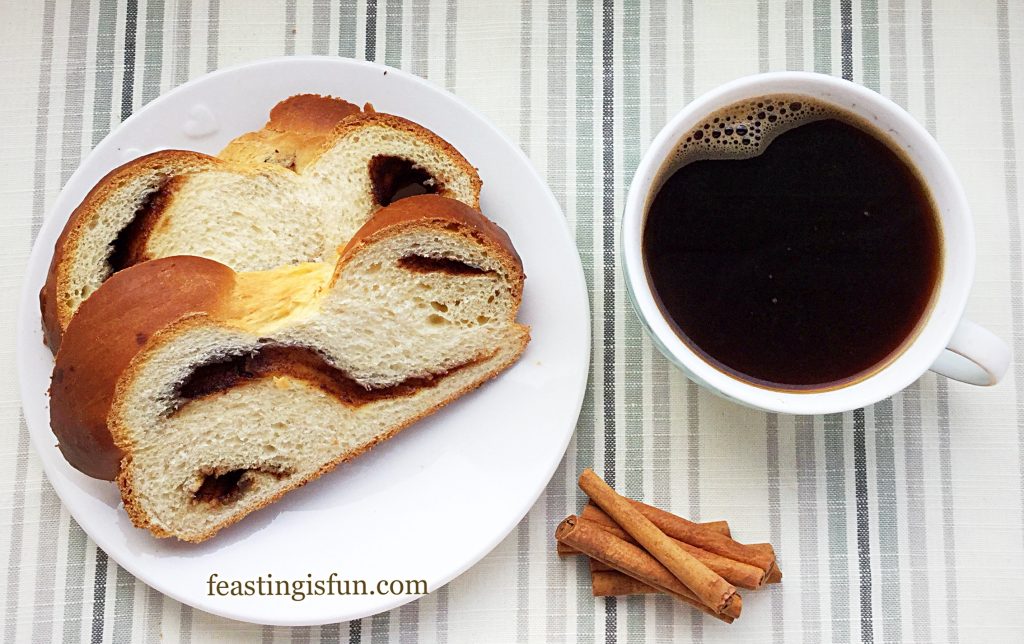
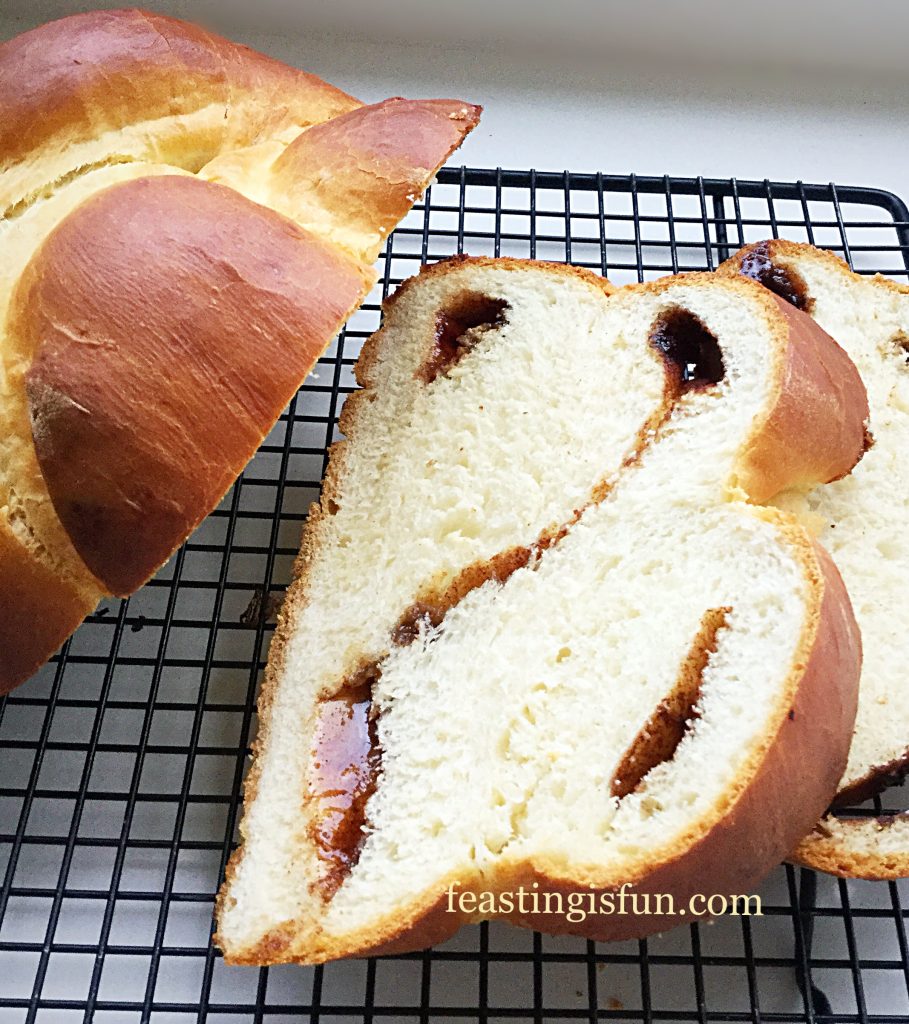
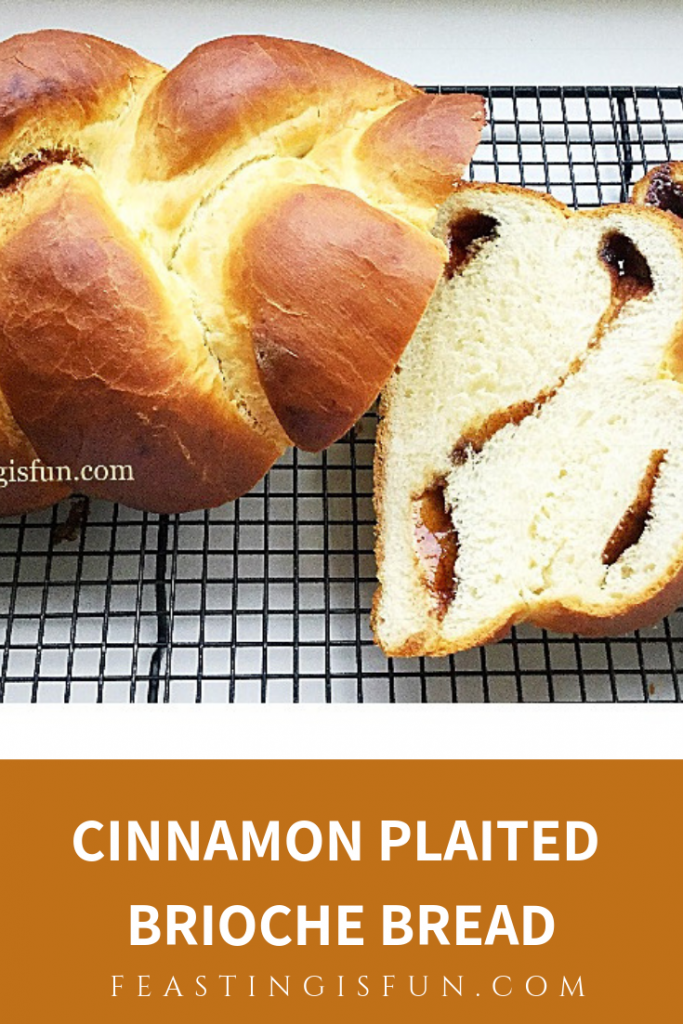
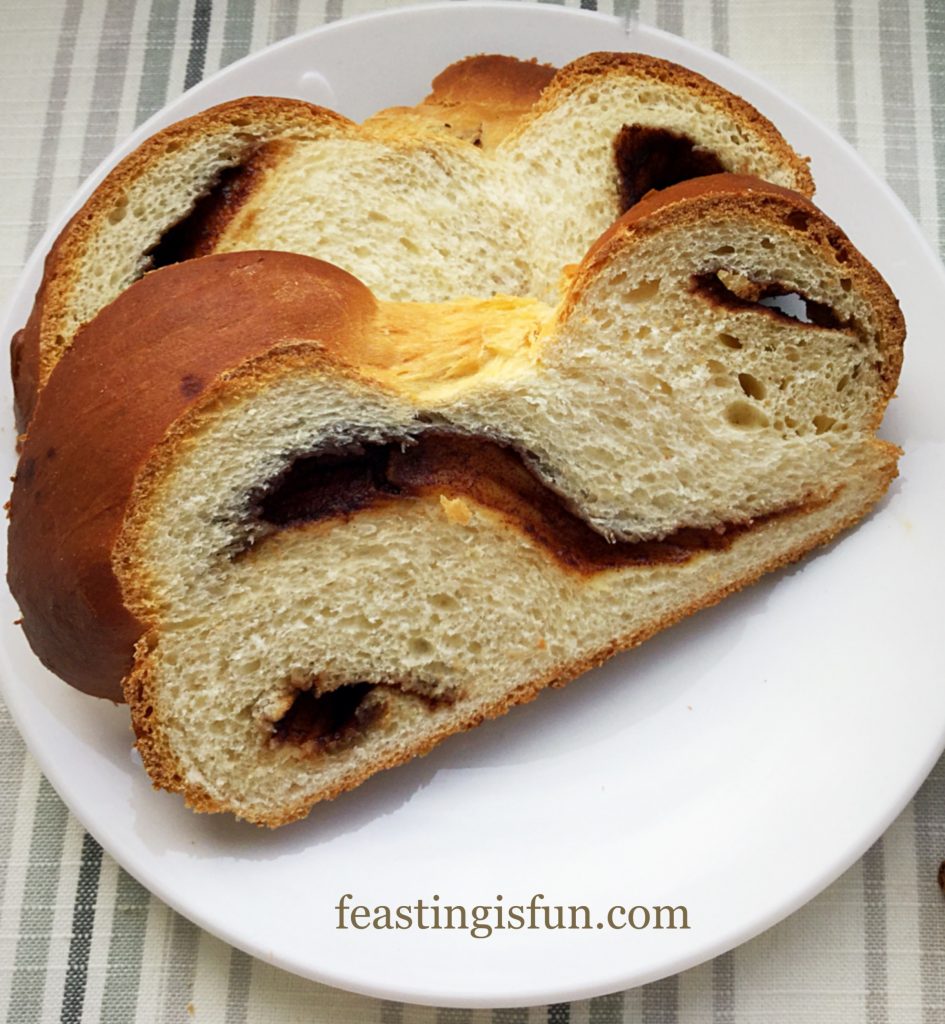
Cinnamon Plaited Brioche Bread cooled and sliced, revealing the hidden centre of each strand.

Allow the loaf to cool to body temperature before slicing. Attempting to slice while the bread is still hot will compact the bread. Also eating freshly baked, hot bread, is not good for our digestion!

Serve sliced with a smile and a complimenting drink.

FF Cinnamon Plaited Braided Brioche Bread

Placed in a bread bin, or wrapped loosely in foil, once fully cooled, this loaf will last up to three days. It can be toasted, although I’d advise not to use a toaster due to the sugar present. Under a grill, or even better, in front of a log fire, this bread makes excellent toast!

If you have enjoyed this recipe for Cinnamon Plaited Brioche Bread you may also like these:

Large White Bloomer

FF Cinnamon Plaited Brioche Bread
Large White Bloomer

Knotted Poppyseed Rolls

FF Cinnamon Plaited Brioche Bread
Knotted Poppyseed Rolls

Ginger Date Hot Cross Buns

FF Cinnamon Plaited Brioche Bread
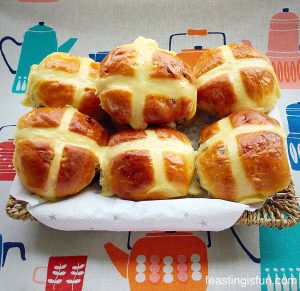
Ginger Date Hot Cross Buns

Homemade bread is the most luxurious food, for me, to bake. Enticing smells as it is baking, make our house feel like a home. Appreciative comments when a fresh loaf is on the table, to be served with dinner, or for breakfast, make me smile. Not for the accolade, or indeed achievement, from others, of having made my own loaf. Simply the fact that I am giving my family, delicious, additive free, tasty bread, is enough to keep me baking.

So, whatever you are making, baking and creating in your kitchens, have fun preparing and sharing your feast.

Sammie xx

No part of this post may be reproduced or duplicated without the written permission of the owner. Please see my Disclosure Policy.
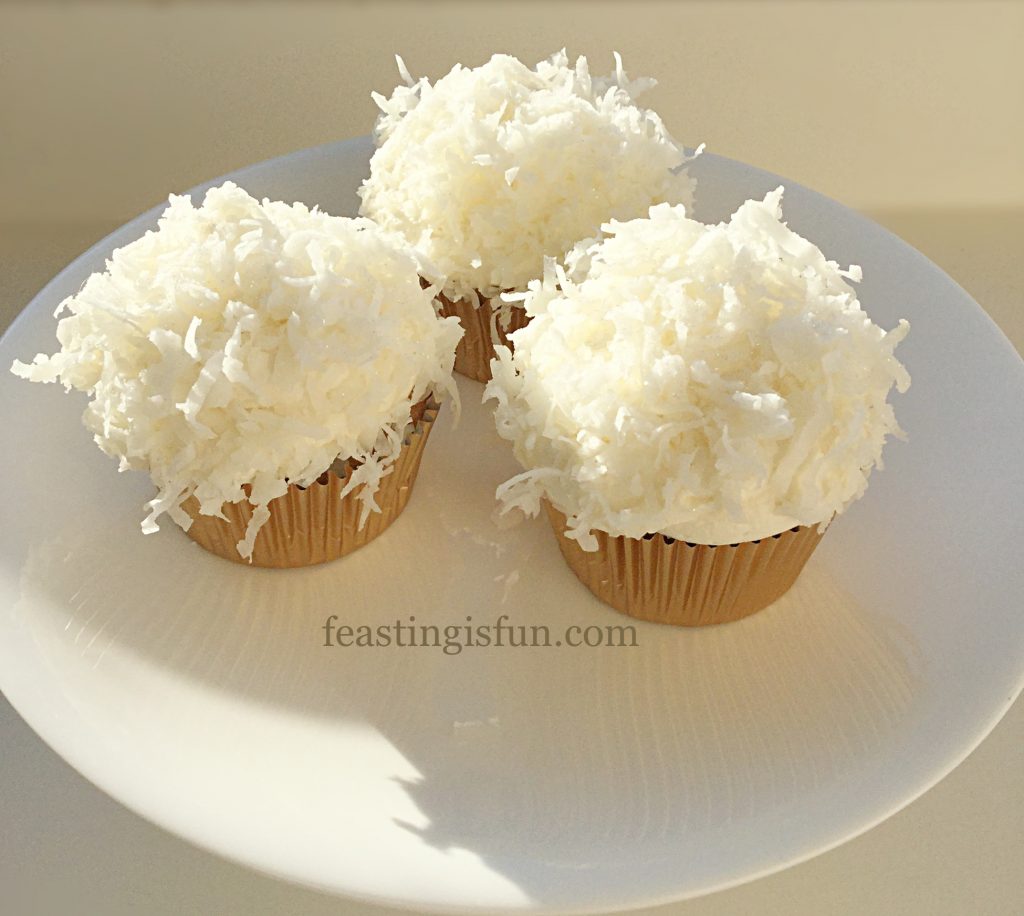
Coconut White Chocolate Snowball Cupcakes

Today is the first day of December. Visits from Jack Frost over the last few nights and Winter has well and truly arrived. Sparkling pavements and frosted windscreens add to the beauty of crystal clear, blue skies. Inspired by the frosty weather I made these Coconut White Chocolate Snowball Cupcakes. 

FF Coconut White Chocolate Snowball Cupcakes
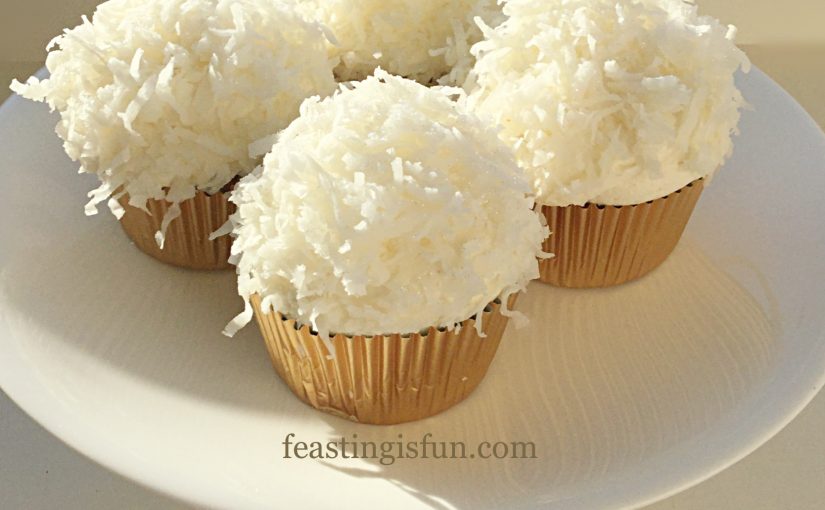
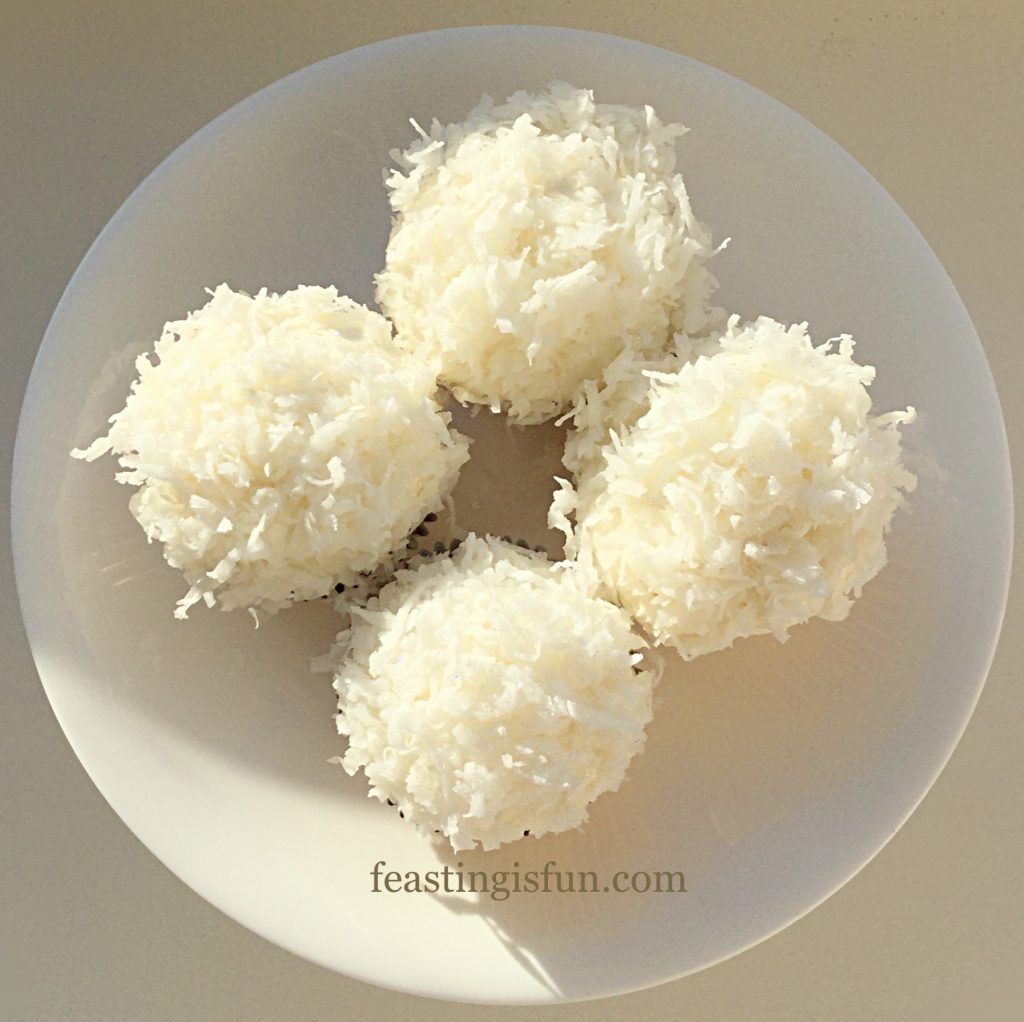
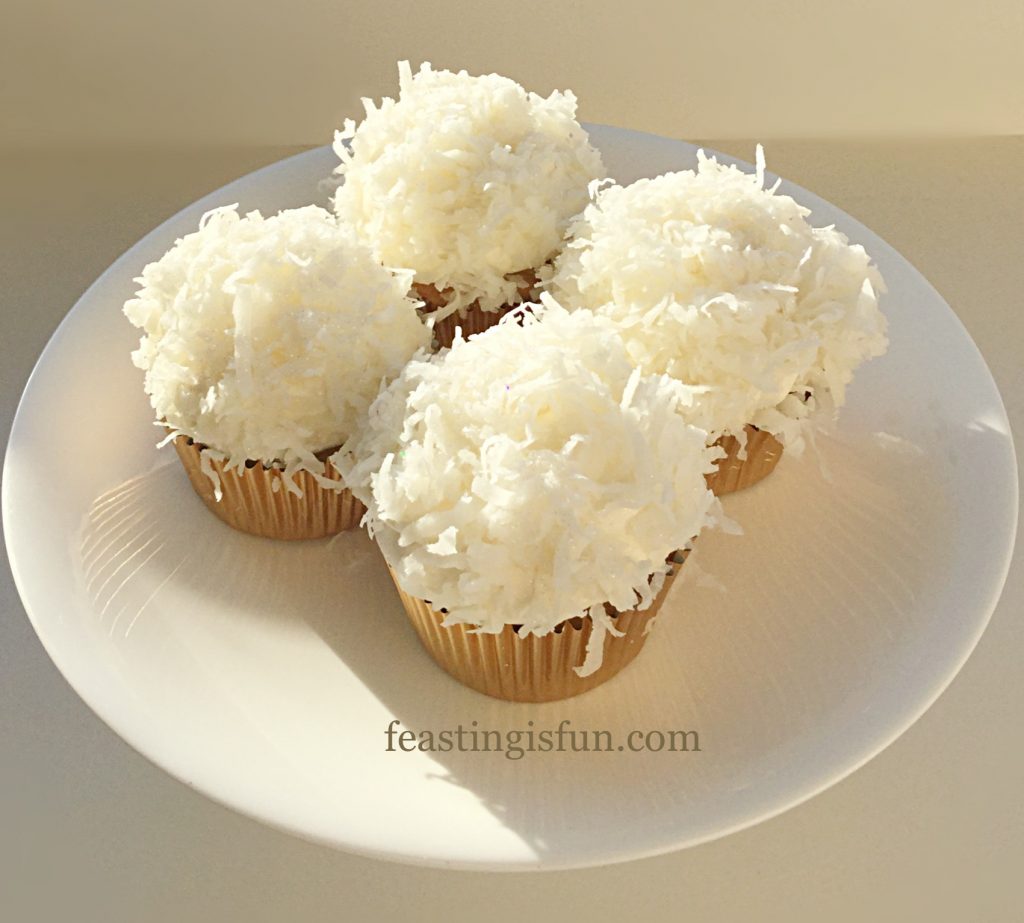
Coconut White Chocolate Snowball Cupcakes these are definitely not for throwing!

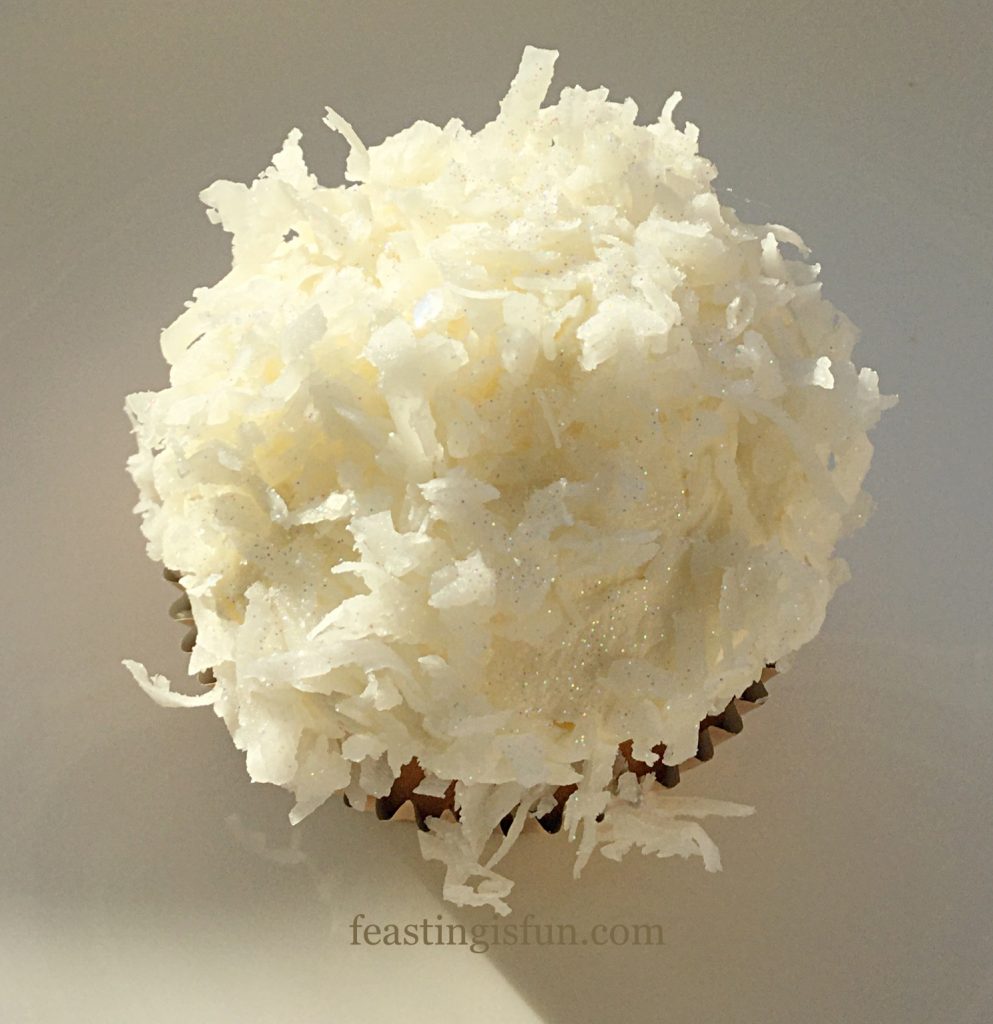
Vanilla and coconut sponge, topped with a whipped, white chocolate buttercream. Ooh that got your attention! And a complete covering of sweetened coconut and dusting of edible Magic Sparkles finishes the decoration. If you like coconut, I can guarantee you’ll love these cupcakes.

FF Coconut White Chocolate Snowball Cupcakes
Coconut White Chocolate Snowball Cupcakes full of flavour.

Using Sweetened Shredded Coconut

While there is a potential for these cupcakes to be overly sweet, I can assure you that they are not. Since the sweetened ‘Angel Flakes’ coconut is not, as one would imagine, overly sweet. Rather, the taste is predominantly that of pure coconut, with a little addition of sweetness to enhance the flavour. Resulting in a perfectly balanced, delightful cupcake.

I have been unable to source the ‘Angel Flakes’ from regular shops or supermarkets. However, it is readily available to buy online, from Amazon. Desiccated coconut is a real no no for me. In fact, I find it much sweeter than the coconut used here. Of course, if you like the flavour, then feel free to substitute it in this recipe. Likewise, if you can get hold of freshly grated coconut, that also can be used.

FF Coconut White Chocolate Snowball Cupcakes
Coconut White Chocolate Snowball Cupcakes delicious any time of the year.

These cupcakes are a delicious bake for over the festive season. So, why not bake up a batch and share them with your work colleagues or friends? I have yet to meet anyone who doesn’t enjoy a delicious, homemade cupcake. And, as Christmas is the season for sharing, wouldn’t it be wonderful if we could extend that season throughout the whole year?

Recipe: Coconut White Chocolate Snowball Cupcakes makes 12

For the cupcake sponge:

125g/4.5oz Unsalted Butter – softened

125/4.5oz Caster Sugar

Scant pinch of salt – I use Maldon

1/2tsp Vanilla Extract – I use Nielsen-Massey

3 Large Free Range Eggs

125g/4.5oz Plain White Flour

1.5 tsp Baking Powder

50g/2oz Sweetened Shredded Coconut

2-3tbsp Milk

For the frosting:

400g/14oz Icing Sugar

200g/7oz Unsalted Butter softened

1tsp Vanilla Extract

2tbsp Very Hot Water

100g/4oz White Chocolate

For the decoration:

Approximately 200g/7oz Sweetened Shredded Coconut

Edible glitter

Method: Preheat the oven to 170C/150C fan, gas mark 3.5, 325F

Making And Baking The Coconut Cupcakes

  • First of all, line a 12 hole cupcake tin with cupcake cases.
  • Next, in a large bowl add the butter, sugar and salt. Whisk until light and creamy.
  • Now add all 3 eggs and the vanilla extract. Then sift in the flour and baking powder. Next add the coconut and whisk until everything is just combined, adding 2 or 3 tablespoons of milk to achieve a soft, dropping consistency.
  • Place a dessertspoon of cake batter into each cupcake case.
  • Finally, put the cupcake tin into the centre of the preheated oven and bake for 20-30 minutes.
  • The cupcakes are baked when they are risen, golden and spring back from a light touch.
  • As soon as the cupcakes are baked, remove from the oven.
FF Coconut White Chocolate Snowball Cupcakes
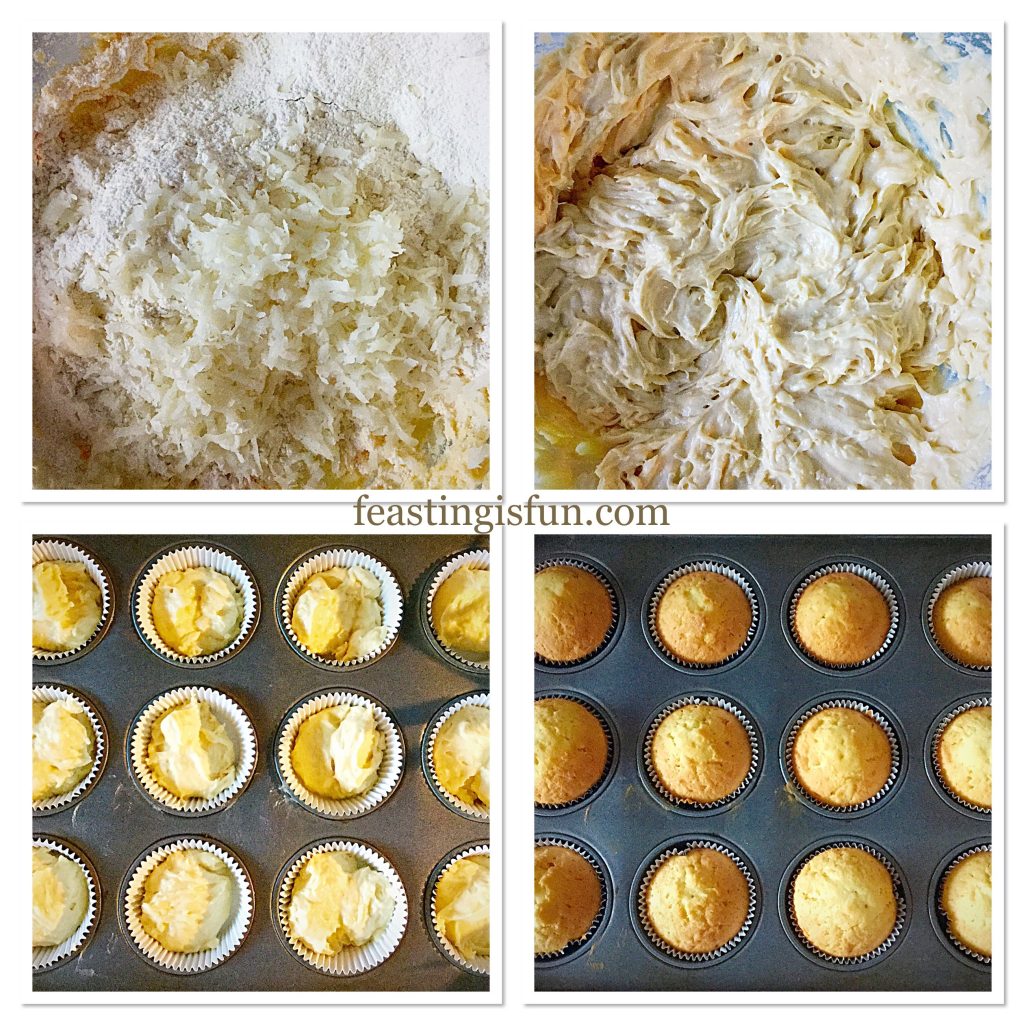
Making the cupcake batter, filling the cases and baking the cupcakes.
  • Baking the cupcakes at a slightly higher temperature results in a domed rise. This is deliberate, as it helps the shape of a snowball later when icing and covering.
  • Remove the hot cupcakes from the tin and place on to a cooling rack.

Making The White Chocolate Frosting And Piping Onto The Cupcakes

  • While the cupcakes are cooling make the buttercream icing.
  • First, place the softened butter into a large bowl and then sift in the icing sugar. Now add 2 tablespoons of very hot water from a recently boiled kettle and one teaspoon of vanilla extract.
  • Whisk, starting on a slow speed and then gradually increasing, whipping until the buttercream is light and fluffy. Set to one side.
  • Next, break up the white chocolate and place in a heatproof, microwaveable bowl. Zap for 20 seconds at a time, stirring in between, until the chocolate starts to melt. Remove the bowl from the microwave and stir continuously. The residual heat will continue to melt the remaining chocolate.
  • Once the chocolate is completely melted pour it into the buttercream.
  • Now whisk the buttercream and chocolate together, gradually increasing the speed, until the frosting is fully combined and cooled.
  • Fit a piping bag with a round piping tip approximately 12mm in diameter.
  • Fill the bag with the whipped, white chocolate, buttercream. Set to one side.
  • Remember to wait until the cupcakes are completely cooled before icing.
  • To ice the cupcakes, start in the centre and pipe a double swirl (one on top of the other), keeping an even pressure on the piping bag. Continue until all of the cupcakes have been iced.
FF Coconut White Chocolate Snowball Cupcakes
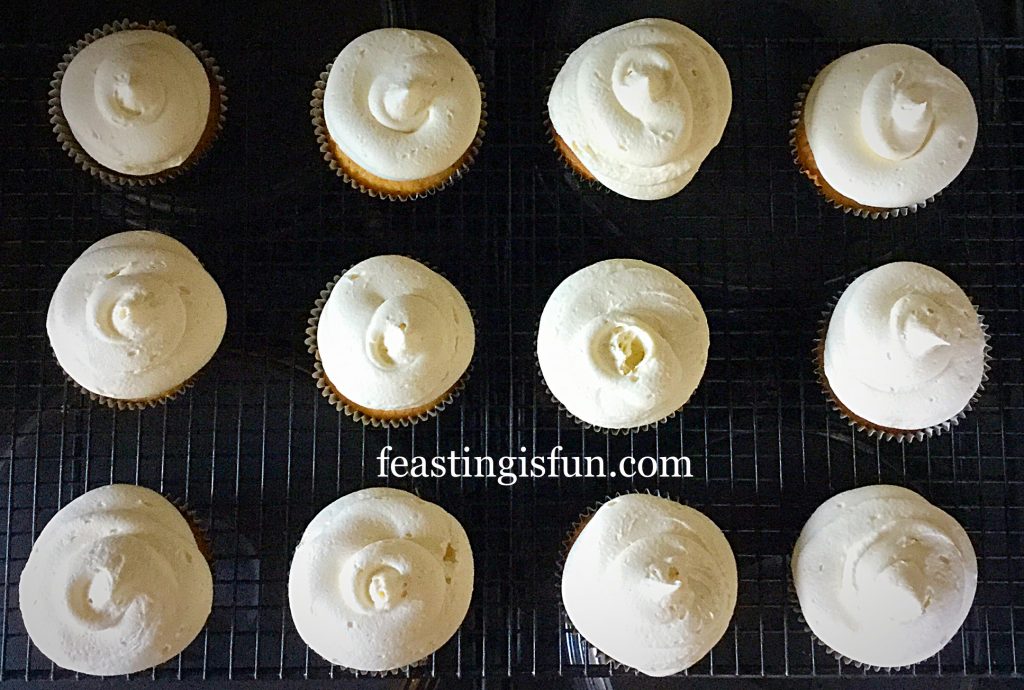
Swirled white chocolate frosting on top of each cupcake.

Decorating The Cupcakes

FF Coconut White Chocolate Snowball Cupcakes
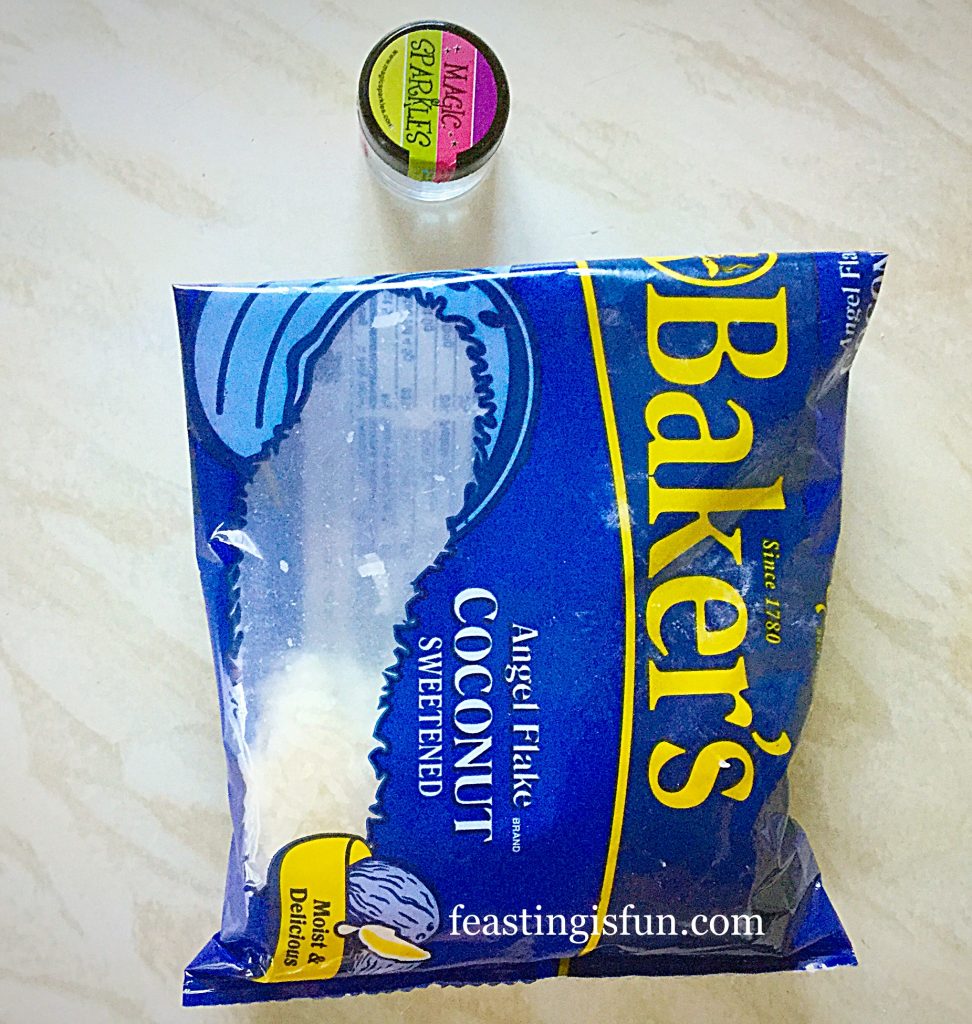
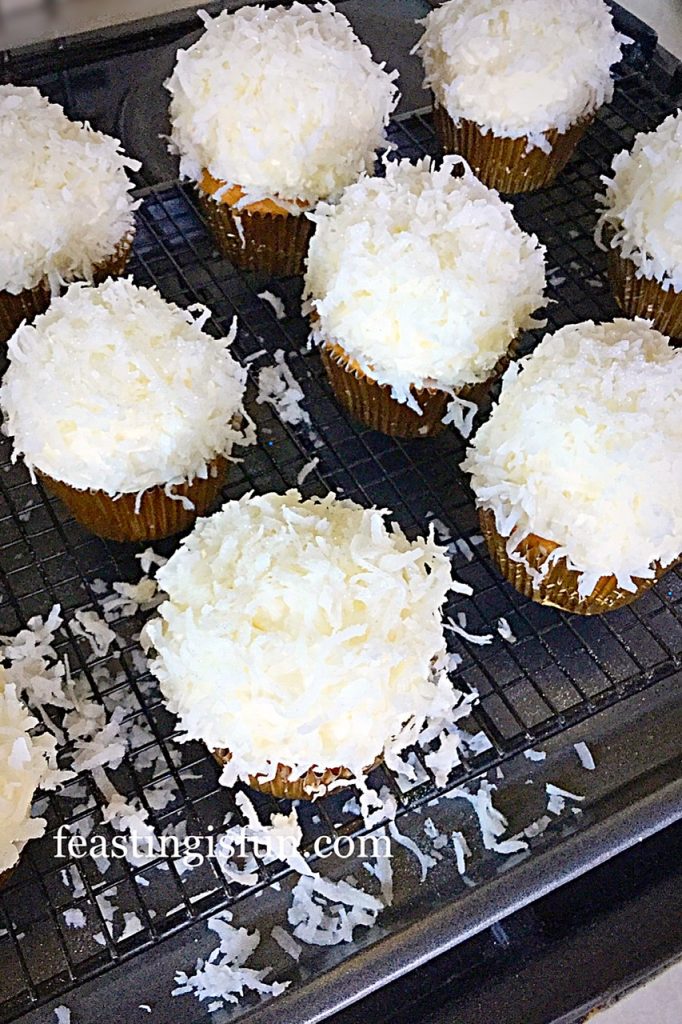
Sweetened Coconut and Magic Sparkles3 used to cover the cupcakes.
  • Next, weigh out the sweetened coconut into a bowl and break any clumps apart with your fingers.
  • To cover the first cupcake, hold it in your hand over the bowl of coconut. Use your other hand to cover the sides of the frosting with the coconut, gently pressing so that it sticks. Rotate the cupcake until the sides are covered with coconut, letting any excess drop back into the bowl. Now sprinkle a good amount over the top of the cupcake. Again pressing lightly so that it sticks to the buttercream. Continue until all of the cupcakes are covered in coconut.
  • Next, sprinkle over the edible sparkles. Add as much glitter as you like!
Coconut White Chocolate Snowball Cupcakes, decorated with a snowy, festive theme.

These delicious, fun cupcakes are ready to serve straight away. To store, place in an airtight container and eat within 4 days. Although they are at their very best eaten within the first 24 hours of making.

FF Coconut White Chocolate Snowball Cupcakes
Coconut White Chocolate Snowball Cupcakes too good to keep to yourself!

If you have enjoyed this recipe for Coconut White Chocolate Snowball Cupcakes you may also like these:

Gingerbread Frosted Ginger Christmas Cupcakes

FF Coconut White Chocolate Snowball Cupcakes
Gingerbread Frosted Ginger Christmas Cupcakes

Maple Syrup Frosted Apple Cupcakes

FF Coconut White Chocolate Snowball Cupcakes
Maple Syrup Frosted Apple Cupcakes

Marshmallow Frosted Mango Cupcakes

FF Coconut White Chocolate Snowball Cupcakes
Marshmallow Frosted Mango Cupcakes can be made gluten free.

While baking these coconut cupcakes with the festive season in mind, they would be a delicious treat at any time of the year. Because, baking to share, with love stirred in abundance, also makes a delicious treat for family, friends, or work colleagues. And food always tastes better when it is shared, these cupcakes are ideal for sharing.

So, whatever you are making, baking and creating in your kitchens, over this festive season, I hope you have lots of fun and laughter preparing and sharing your feast.

Sammie xx