Chocolate Marble Celebration Cake

Today I have a confession to make. Although our daughter’s birthday was way back in the Summer, I made her cake last week! Truthfully, I have made and baked her cake twice before (this year), however, I wasn’t able to frost or finish the cake due to health complications. Finally, with a little help from Wright’s Baking, I made and decorated this delicious Chocolate Marble Celebration Cake for her to enjoy and share with our family. See recipe for alternative to using cake mixes.
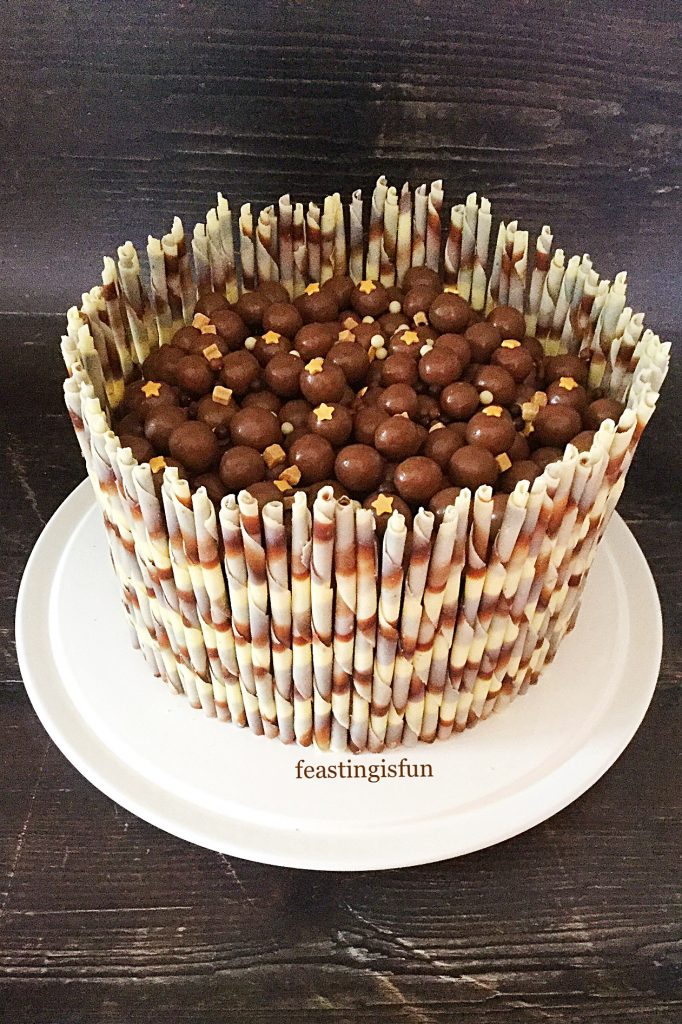
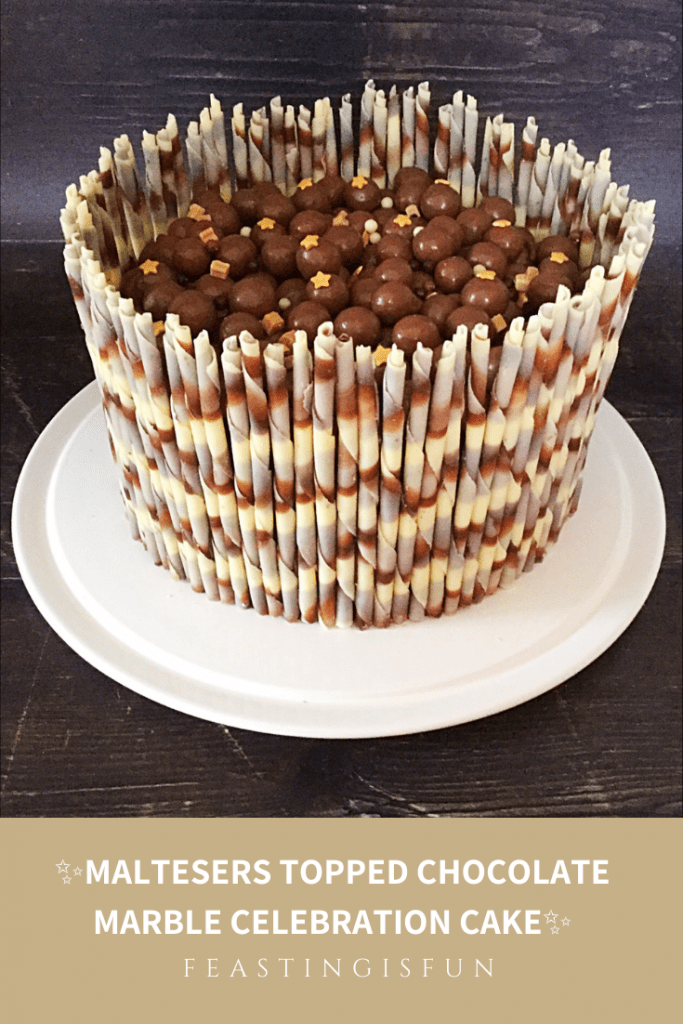
Baked swirled sponge covered in ganache and surround with edible pencils.
Chocolate Marble Celebration Cake

Every year, since her birthday is in the Summer, I usually make two cakes for our daughter’s birthday celebrations. First of all an ice cream cake, which is incredibly easy to make no matter where we are. So, when we spent her 16th birthday down on the farm with our beloved Devon family, I planned ahead and took a cake tin with me! Serving the ice cream cake in the evening, after a feast of a barbecue that afternoon, proved the perfect dessert to top off our birthday celebrations. And sharing it with friends and family who had travelled down to celebrate with us made the special day even more memorable.
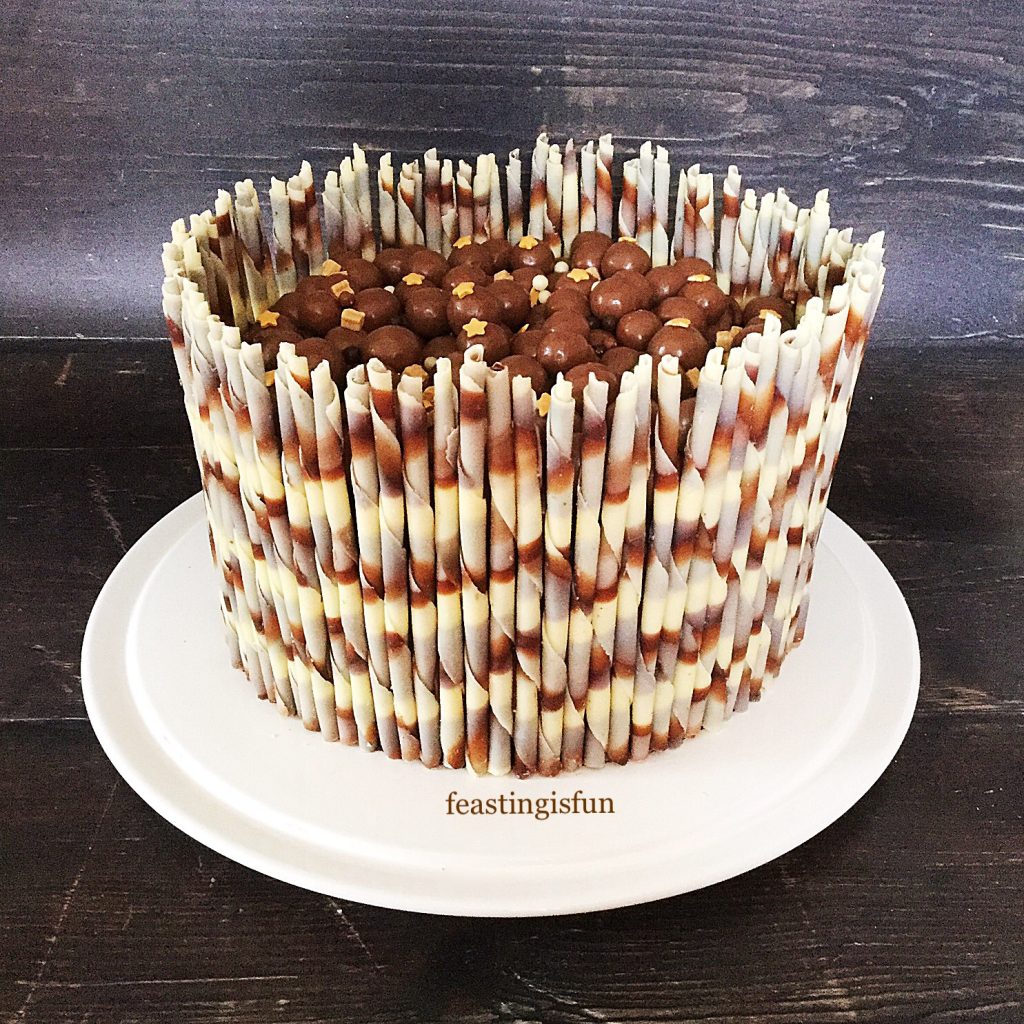
Chocolate Marble Celebration Cake

Maltesers Topped Chocolate Marble Cake – A Birthday Cake Tradition

As well as the frozen birthday cake I always bake a chocolate marble cake such as this Marbled Chocolate Bundt Cake to celebrate our daughter’s birthday. Since it is her favourite cake and she always shares it with her friends and family. So, every year I try to come up with a new design or decoration. Having made a Raspberry Lemon Celebration Layer Cake I wanted to try a similar design using marbled chocolate pencils instead. Also, she loves Maltesers, so I wanted to incorporate them in the design.
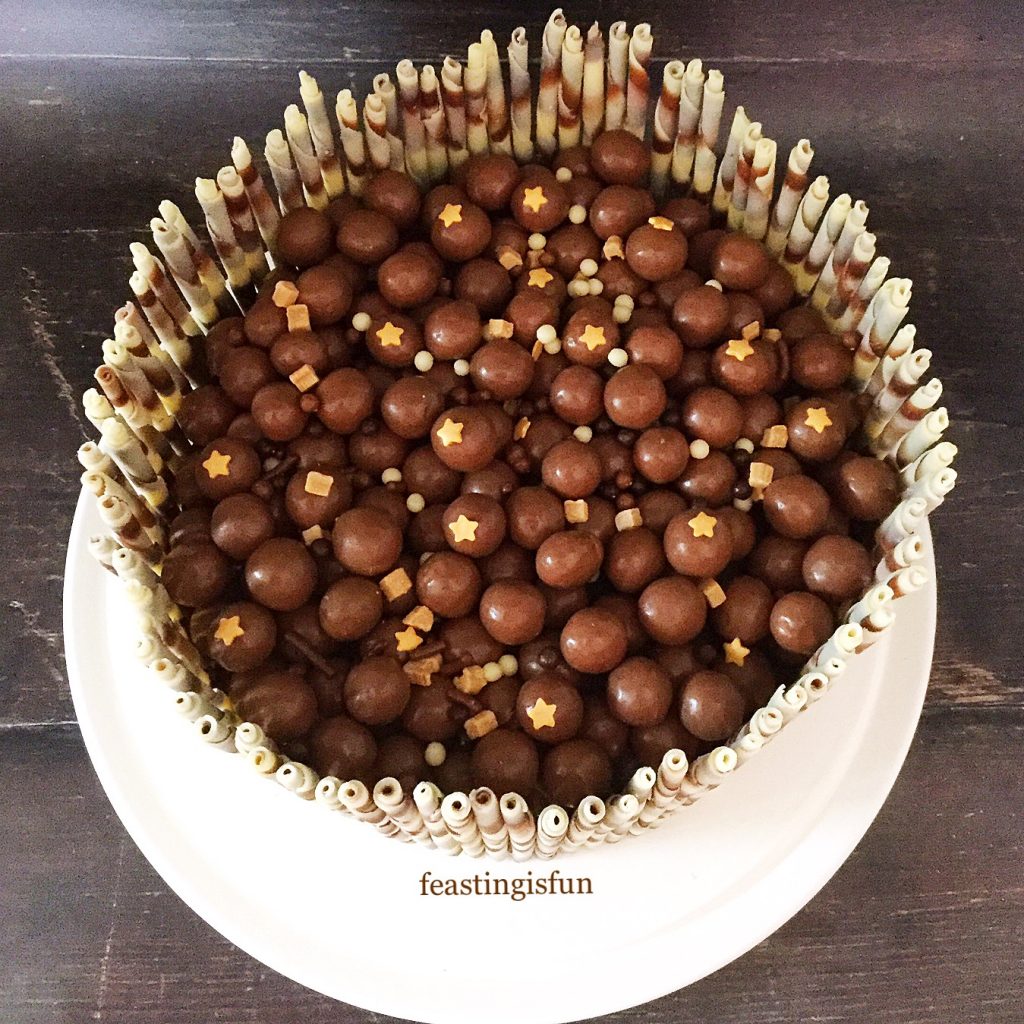
Overhead photo of a special party bake, showing Maltesers mixed with star sprinkles.
Chocolate Marble Celebration Cake

My first two attempts at baking this cake from scratch were perfect, however, due to health limitations I never managed to make or ice the cake in time. And so that’s where the lovely Deb from Wright’s Baking really helped me out. Using both their Chocolate Fudge and Madeira Cake mixes to make the marble cake took way less time and energy than baking from scratch. Resulting in me having enough energy to make the chocolate fudge icing and decorate the cake on the following days.
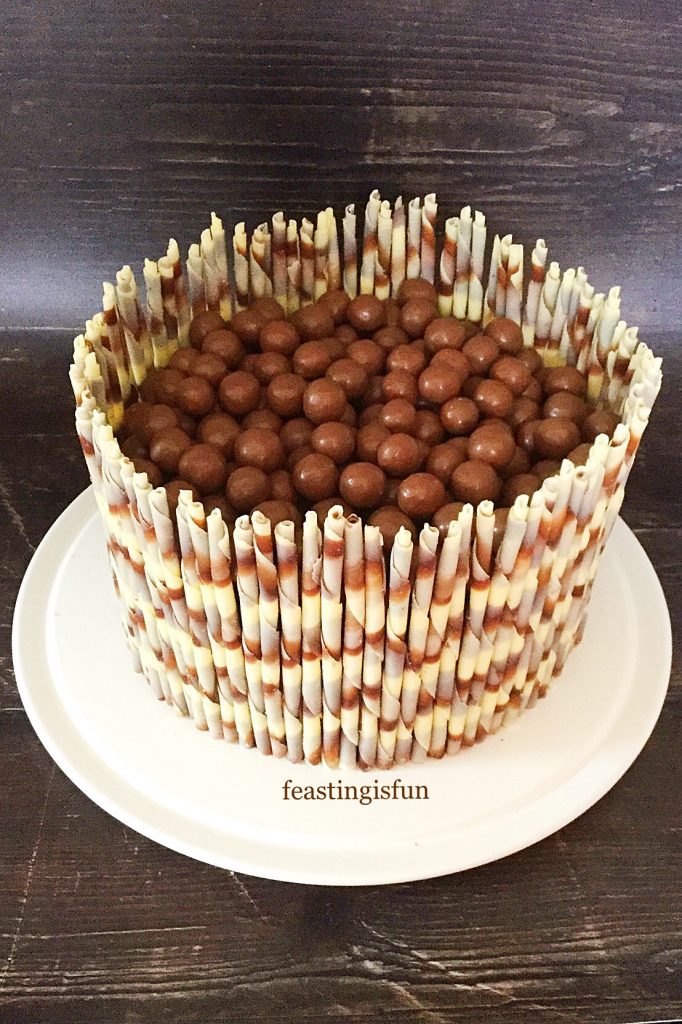
Celebratory bake topped with Maltesers.
Chocolate Marble Celebration Cake using only Maltesers on top.

Our daughter thoroughly enjoyed her birthday cake, so a huge thank you to Wright’s Baking. Their cake mixes are available in most supermarkets and via their online shop.

Recipe: Chocolate Marble Celebration Cake serves 10-12

For the cakes: If you are unable to get hold of the cake mixes use this recipe Malted Marbled Chocolate Cake leaving out the powdered malted milk drink.

1 x Wright’s Baking Chocolate Fudge Cake Mix

1 x Wright’s Baking Madeira Cake Mix

2 x 200ml Tap Water

2 x 60ml Vegetable Oil (or melted butter for an extra luxurious bake!)

For the frosting: please note all quantities given can be rounded up or down to the next whole unit without it affecting the finished result.

250ml/8.4fl oz Double Cream (heavy cream)

250g/8.8oz Dark Chocolate (minimum 70% cocoa)

3 x Tubes Rolos (150.6g/5.3oz)

1tsp Vanilla Extract – I use Nielsen-Massey

Pinch of Salt (1/4tsp)

For the decorations:

1 x Box Marbled Black and White Chocolate Pencils – available from Amazon 

or Chocolate Trading Company Note – you will have some chocolate pencils leftover.

Large Box of Maltesers 310g/11oz or equivalent weight in bags.

Optional – Star sprinkles and balls

Preheat the oven to 160C/140C fan, gas 3, 325F

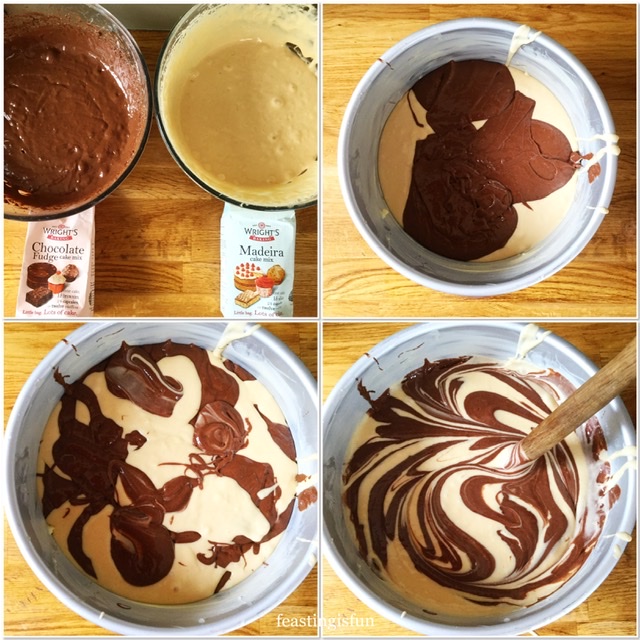
Making The Cake Batter And Creating The Marble Swirl Effect

Note: When cutting out the baking parchment to line the cake tin base with double up and cut an extra circle. So it can be used during baking if the cake top browns too quickly.

  • First of all grease a 20cm/8in round tin with a depth of 10cm/4in. Line the base with baking parchment.
  • Make each cake mix up separately according to the packet instructions.
  • Use a large spoon to add 3 separate spoonfuls of chocolate fudge batter into the base of the cake tin.
  • Follow by adding 3 spoonfuls of madeira batter in between the chocolate.
  • Continue in this manner layering each spoonful of cake batter on top of the other flavour until all of the batter from both mixes is used.
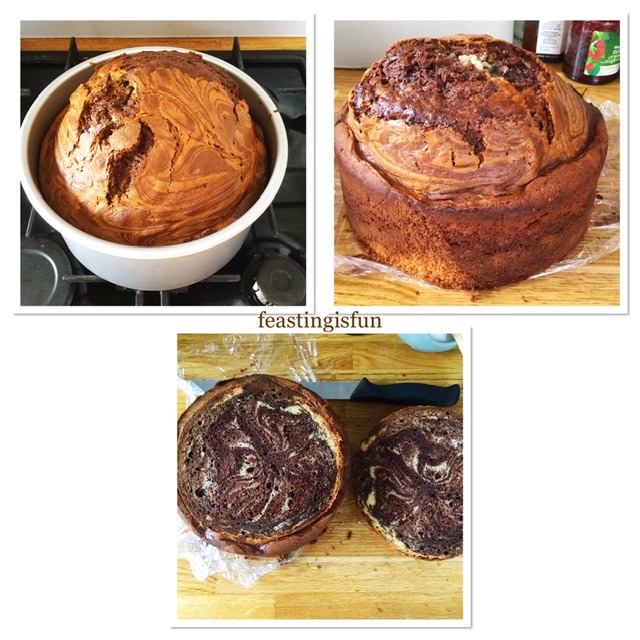
  • Place the handle end of a big wooden spoon into the batter and swirl so that both batters become intermingled without being fully mixed into each other.

Making the batter and creating the swirl.

Baking, Cooling And Shaping The Marble Cake

  • Place the cake tin into a preheated oven, on a shelf slightly below the middle.
  • While baking, if the cake top is browning too quickly place the spare circle of baking parchment on top. I also had to crunch up 3 balls of foil to keep the parchment in place as the oven fan kept blowing it around!
  • Bake the cake for 1 1/2 – 2 hours until an inserted skewer comes out clean. The wide variation of baking times is due to different ovens altering the speed at which a cake cooks. For example, if you know that your oven runs hot then consider lowering the baking temperature and baking for a slightly longer time.
  • As soon as the cake is baked remove it from the oven and leave to cool completely in the tin.
  • Once the cake is cooled run a palette knife inside the rim of the cake tin and then turn the cake out.
  • Using a serrated knife cut carefully across the cake to level the top. Our daughter had some of the spare cake in a bowl with hot custard! Alternatively it can be used to make cake balls or as the sponge in a chocolate trifle!

Preparing the baked sponge for decorating.

Making The Very Best Chocolate Fudge Ganache Using Rolos

  • Place a heatproof bowl over a saucepan with an inch of simmering water in. Ensure that the base of the bowl DOES NOT touch the water.
  • Pour the cream into the bowl and add the chopped up, dark chocolate. Add the salt and vanilla extract.
  • Stir the cream, chocolate and other ingredients together until the chocolate is fully melted and glossy in appearance.
  • Add the Rolos to the chocolate ganache and continue to stir until they have completely melted and the mixture is glossy with no lumps.
  • Carefully remove the hot bowl from the saucepan and leave to one side to completely cool. I placed my bowl on a window ledge to speed up the cooling process.
  • Note – while warm the chocolate ganache can be poured. It makes a delicious topping for ice cream and also Profiteroles.
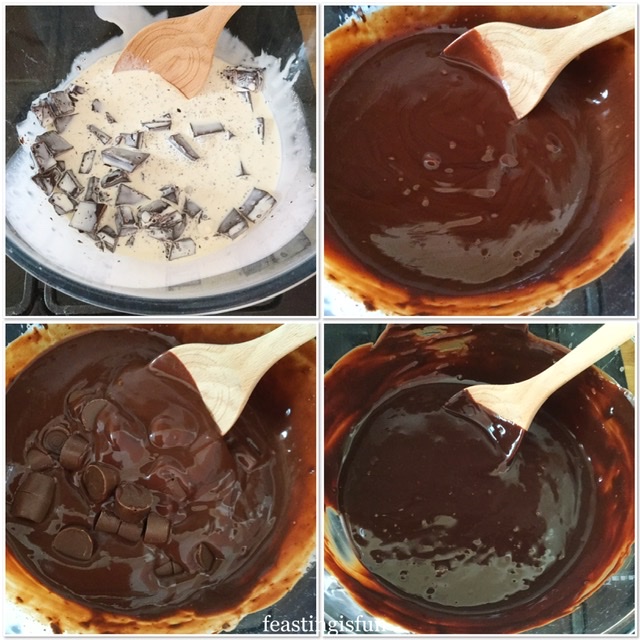
Showing each step to making the chocolate fudge ganache that will be used to cover the cake.
Creating the chocolate fudge ganache.

Covering The Cake With Chocolate Fudge Ganache

  • Place your cake on a flat plate or board that it is to be served from. And then place that onto either a spinning cake decorator, or, as I did, onto un upturned round tart tin. The plate easily moved round on top and allowed for easy decorating.
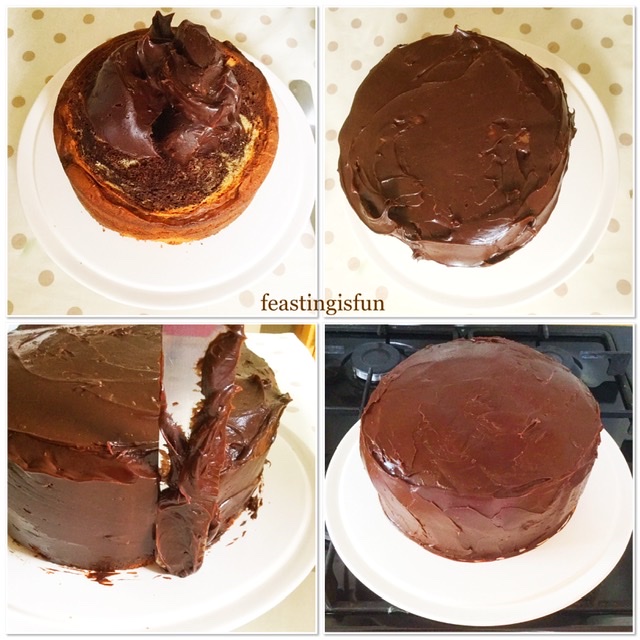
  • Spoon two thirds of the thick, cooled, chocolate fudge ganache on to the top of the cake.
  • Use a palette knife to spread the ganache over the top of the cake and then down the sides. Add more ganache as needed to ensure the entire cake has a good, thick, even covering of ganache on both the top and sides. Remember, the finish should be neat but by no means perfect as the cake will be entirely covered with decorations.

Covering the sponge bake In ganache.

Adding The Marbled Chocolate Pencils To The Birthday Cake And Finishing The Decoration

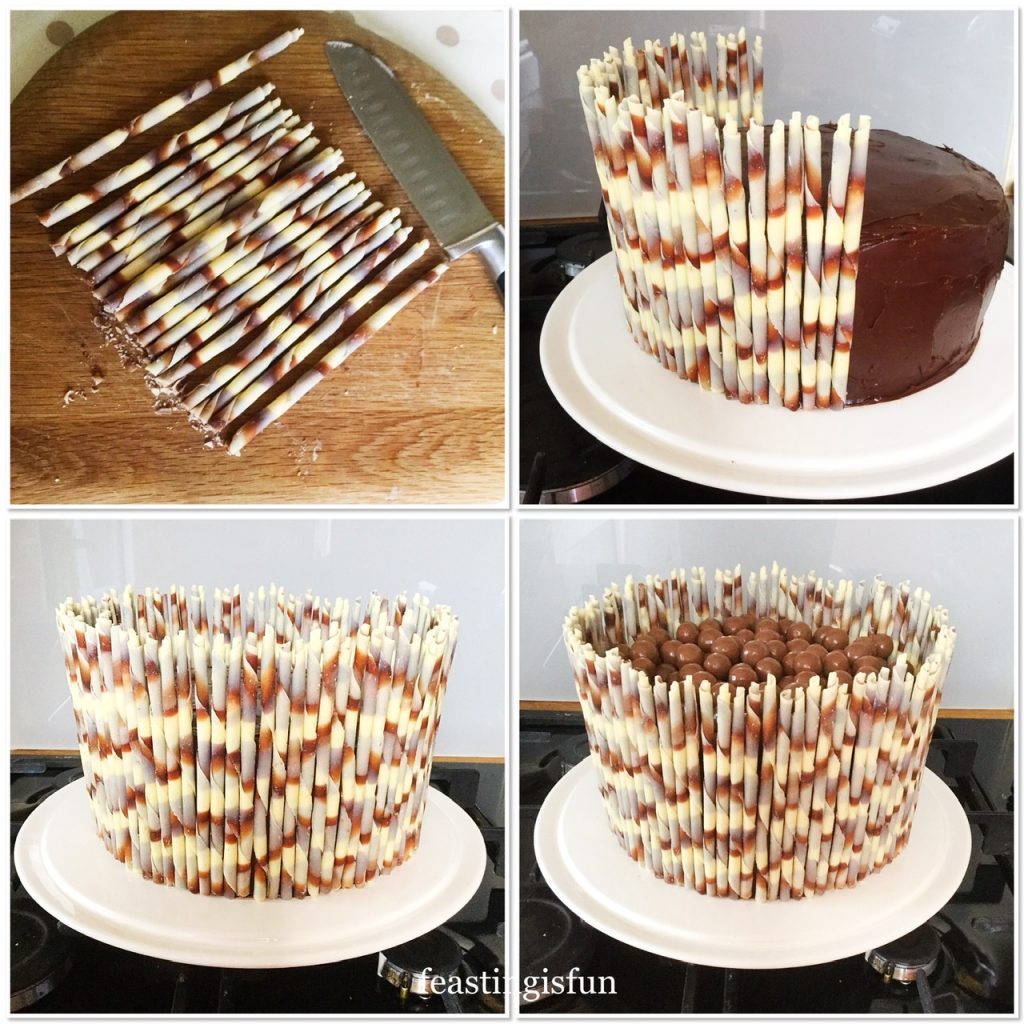
  • First of all take one pencil and measure it against the side of the cake. With a sharp knife mark the height at which the pencil will be trimmed. Cut the excess from the pencil at the base and double check against the cake to ensure you are happy with the height. Keep hold of this pencil as it is the master to which all the other pencils will be measured against.
  • Now cut 20 pencils to the correct length at the base. Place the “waste” pencil cuttings into a bag, they can be used a cupcake decorations.
  • Take one pencil and place it vertically against the side of the cake, press the pencil into the ganache so that it is secure.
  • Continue to add more pencils next to the previous one, always checking that the pencil is straight and parallel to the previous pencil.
  • As soon as the cake is completely surrounded view from above to ensure the pencils for a uniform circle around the cake.
  • Next add the Maltesers carefully to the top of the cake.

Showing how to add the Callebaut flutes to the side of the ganache covered sponge and then adding Maltesers to the top.

  • If using, now add any extra sprinkles to the top of the cake. The white crisp pearls and caramel stars used in this cake tied in with the marble colour theme and immediately added a fun, celebration element to the cake.
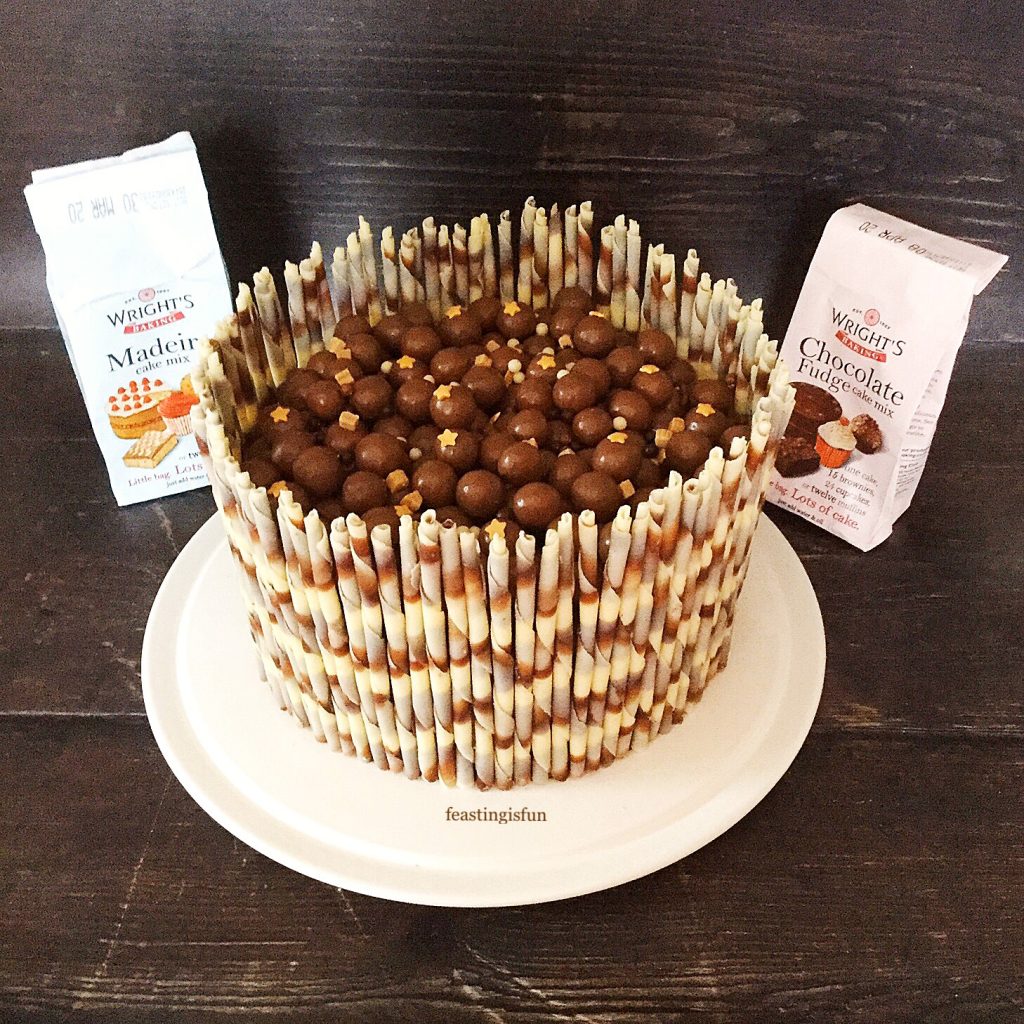
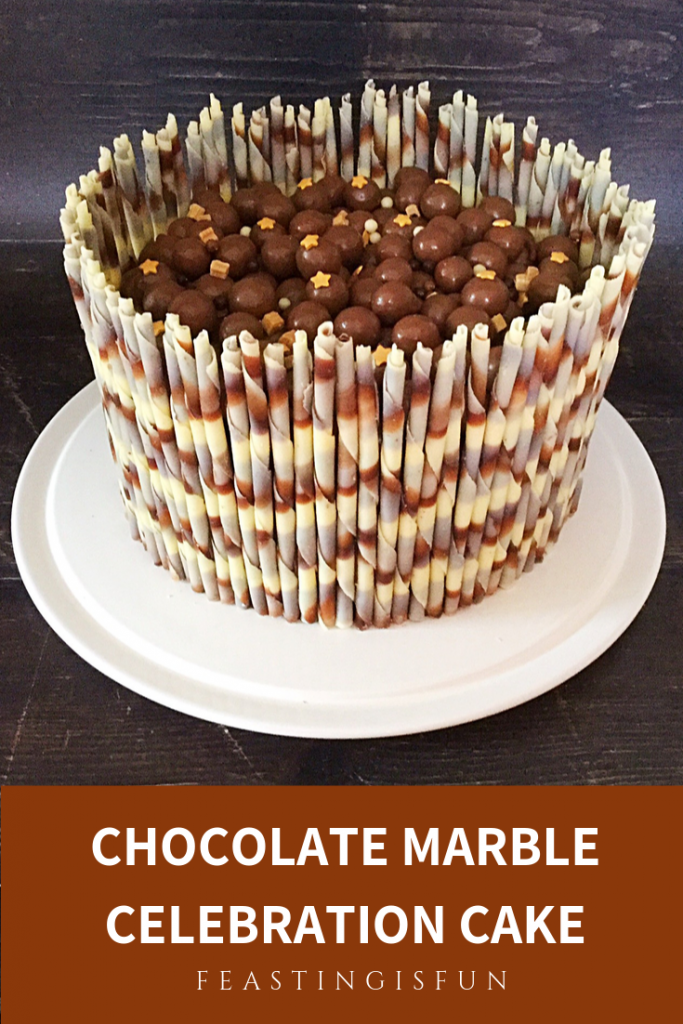
Chocolate marble celebration cake topped with Maltesers and surrounded by Callebaut chocolate marble pencils
Chocolate Marble Celebration Cake topped with Maltesers and fun sprinkles.

Chill the cake for a couple of hours, or overnight to allow the frosting to set. Cut between the pencils to serve. Keep any leftover cake either in an airtight container, or wrapped in cling film and refrigerated.
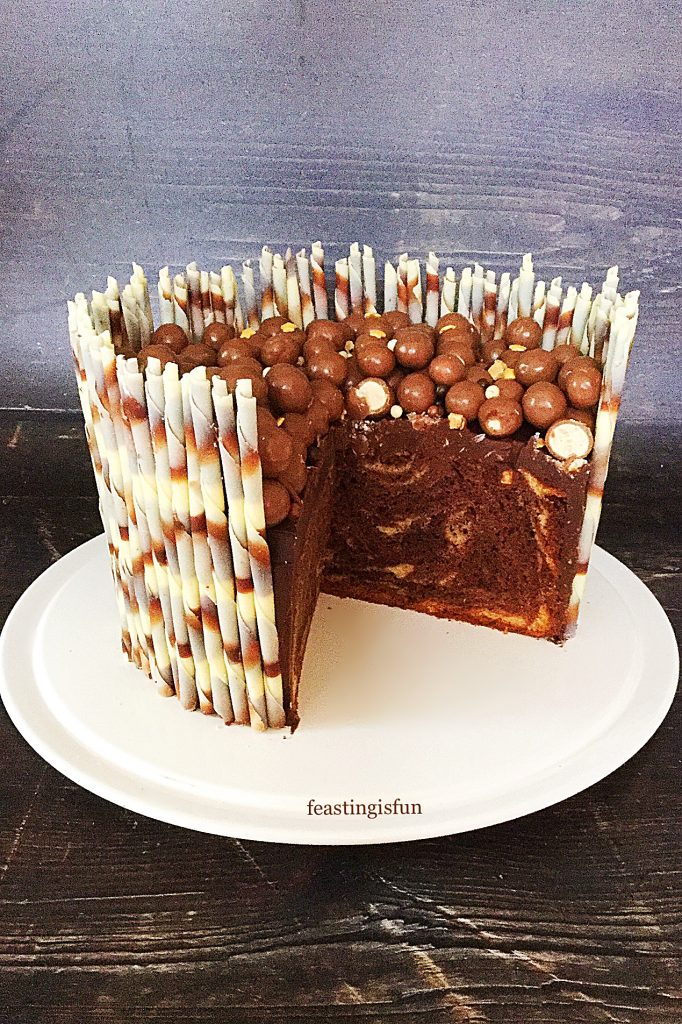
Chocolate marble celebration cake cut so the inner swirl is visible.
Chocolate Marble Celebration Cake

If you have enjoyed this recipe for Chocolate Marble Celebration Cake you may also like these:

Fluted Chocolate Lemon Marble Cake
Fluted Chocolate Lemon Marble Cake

Raspberry Vanilla Naked Celebration Cake
Raspberry Vanilla Celebration Cake semi covered in vanilla buttercream and decorated with fresh roses.
Raspberry Vanilla Naked Celebration Cake

Maltesers Malted Chocolate Loaf Cake
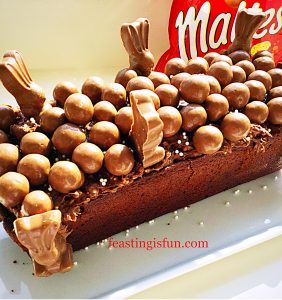
Maltesers malted chocolate loaf cake.
Maltesers Malted Chocolate Loaf Cake

Most importantly, seeing the smile on our daughter’s face made the effort to make this cake worth it! Since I am not and never really intend to be a professional cake decorator, I have learned some easy techniques that give a cake real WOW factor. And I am so thrilled that I get to pass these easy decorating ideas on to you my readers. While I know the chocolate pencils used on this cake aren’t cheap, compared to the cost of buying a handmade cake they are worth every penny!

So, whatever you are making, baking and creating in your kitchens, have fun preparing and sharing your feast.

No part of this post may be reproduced or duplicated without the written permission of the owner. Please my Disclosure Policy.
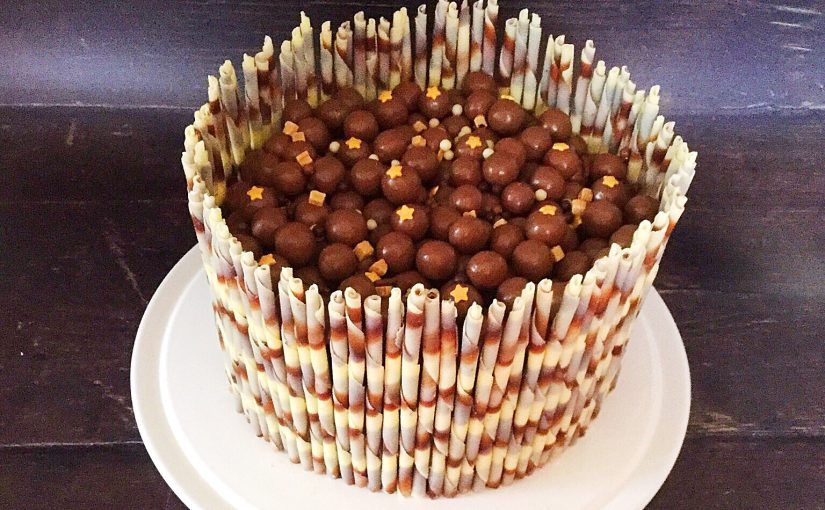
 

Celebratory bake sized for Pinterest with descriptive graphics.

Chocolate birthday cake topped with Maltesers and surrounded with marbled chocolate pencils.

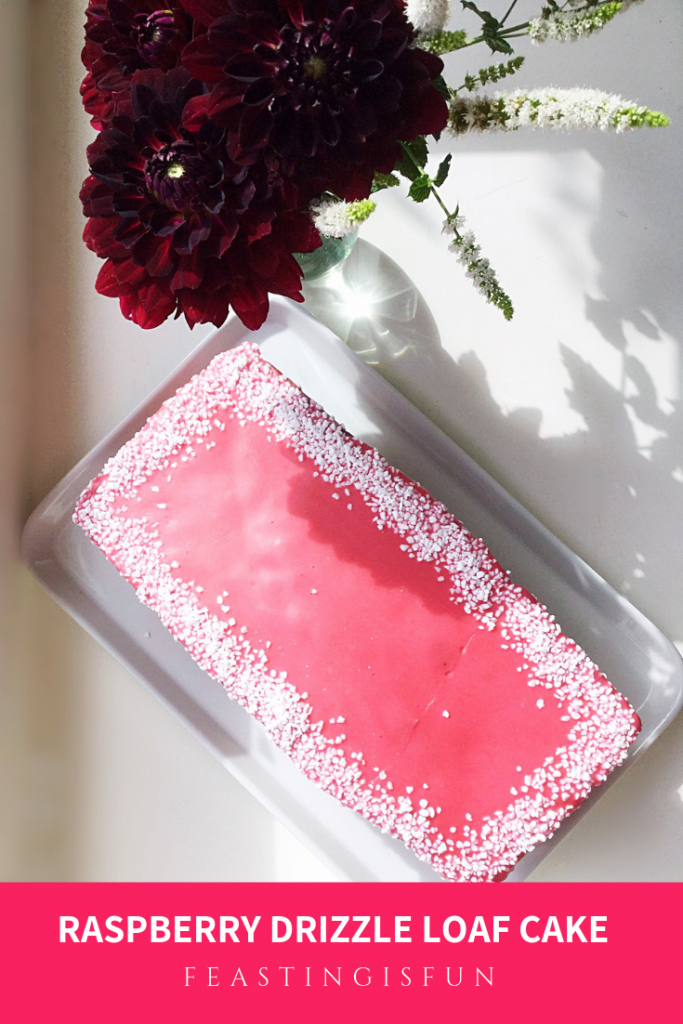
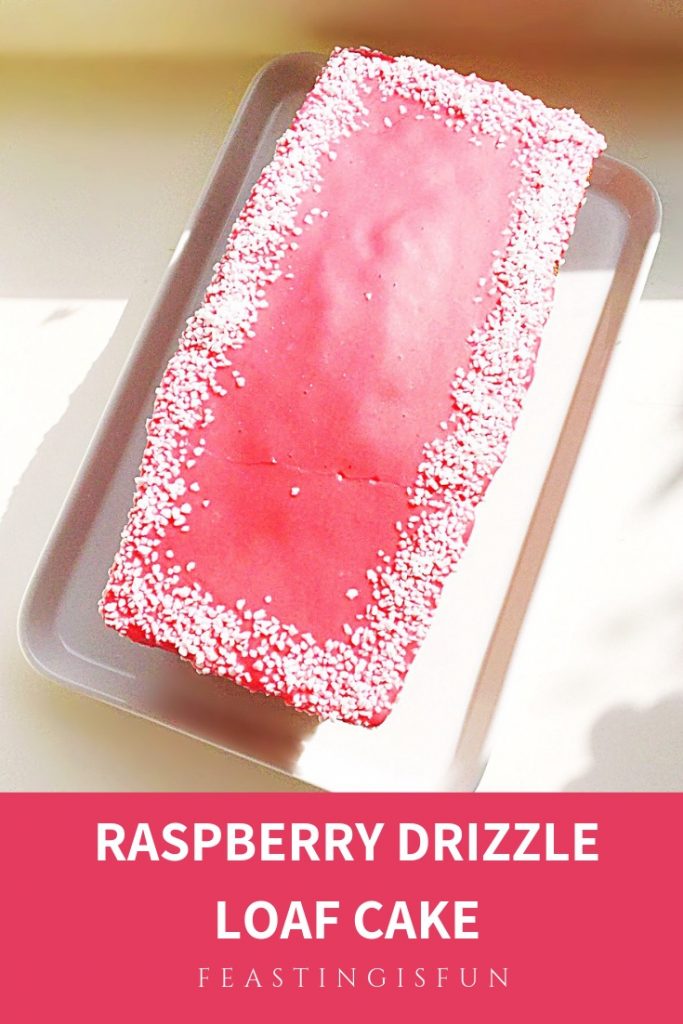
Raspberry Drizzle Loaf Cake

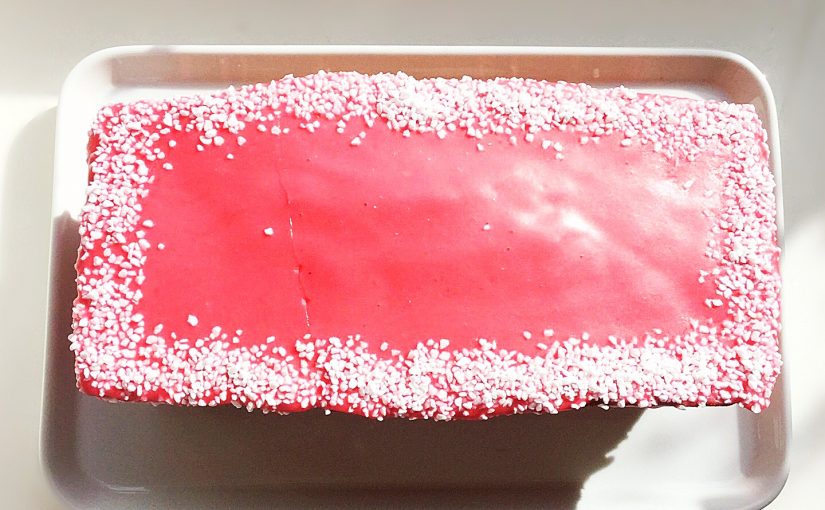
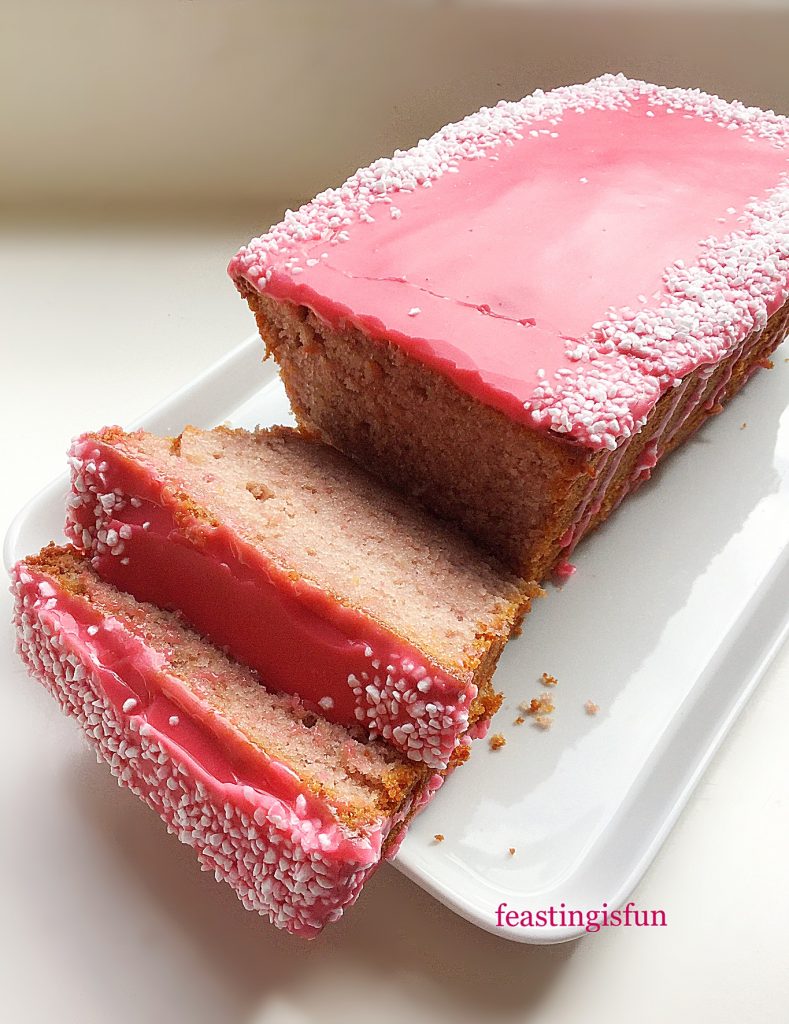
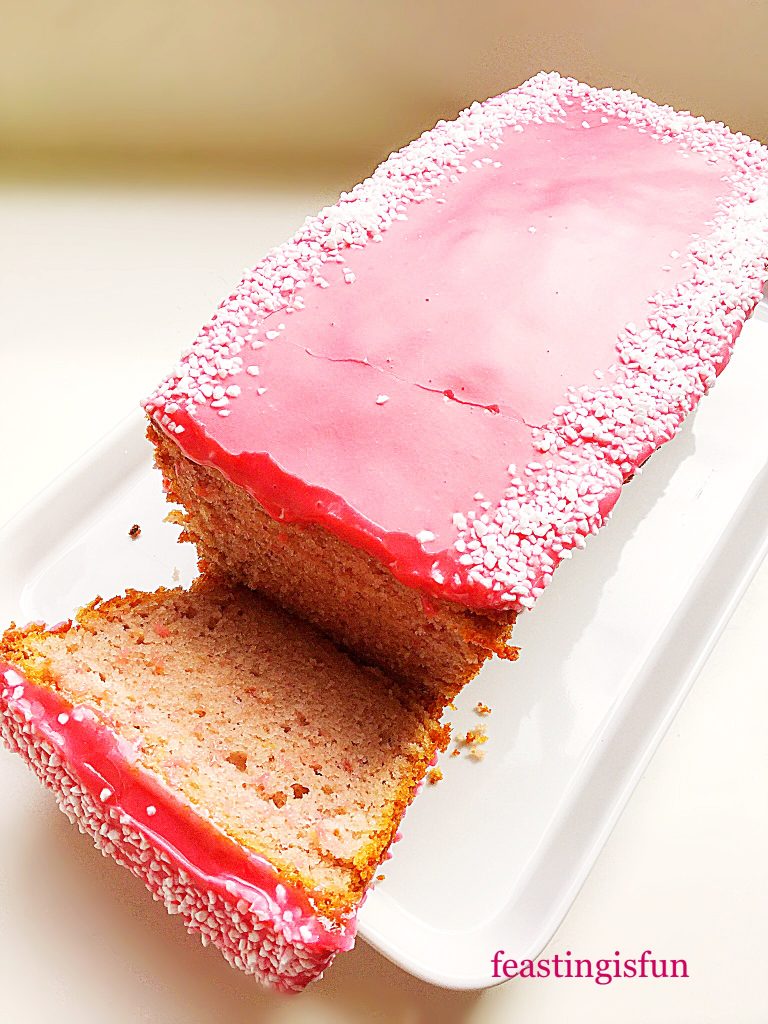
Summer is well and truly here and while enjoying the gorgeous sunshine, here in the Southeast of England I am also indulging myself in all of the delicious soft fruits available at this time of year. My Summer Mixed Berry Sponge Cake is always a big hit using berries in the frosting as well as to decorate. So, drawing inspiration from that cake I set about creating an easier bake. Specifically a loaf cakes as they are very popular with you, the readers of my blog.  Let me introduce my Raspberry Drizzle Loaf Cake.

Raspberry Drizzle Loaf Cake

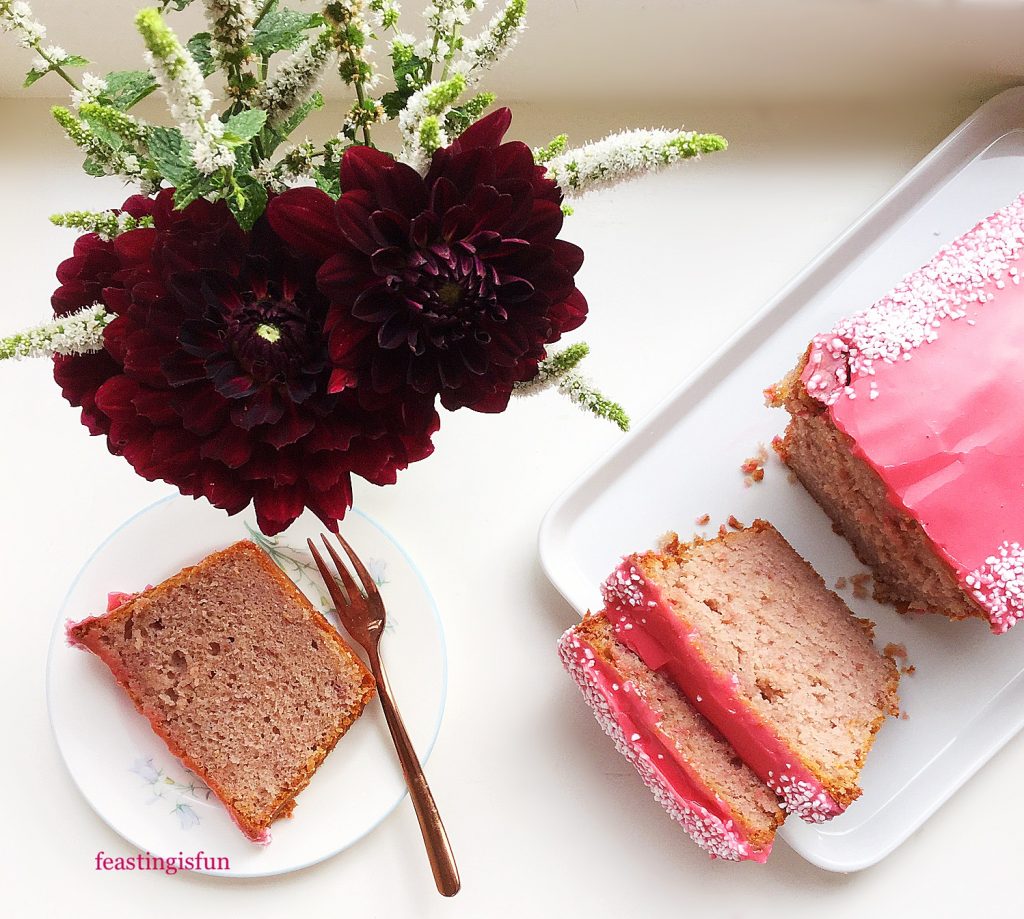
Because this cake has fresh raspberries whipped into the cake batter it naturally turns light pink, keeping the colour while baking. Likewise the coral pink icing, that I use to drizzle over the cake, gets its hue from fresh raspberry pulp. Pushing the raspberries through a sieve ensures that the icing remains silky smooth and without any pips. Sieving the raspberries doesn’t take long to do and really makes a difference to the finished cake. And although the cake has whole raspberries in it, the seeds seem to get lost in the batter, as they are hardly noticeable when eating the cake.

Raspberry Drizzle Loaf Cake

Fresh Raspberry Cake Baked To Share

Raspberries may well be my favourite of the summer berries, although it is hard to choose! Yet, while planning this recipe, a raspberry drizzle cake became an exciting and delicious prospect. And loaf tin bakes always result in a cake that is both easy to transport and slice, making it ideal for sharing with friends, family or colleagues. Taking a cake to anyone’s home or workplace is never a bad idea!

I always recommend reading a recipe through thoroughly before starting and especially so with this cake. Since you will find the lemon whose zest is needed for the cake is also required for its juice in the icing.

Recipe: Raspberry Drizzle Loaf Cake – serves 8-10

For the raspberry cake batter:

225g/8oz  Unsalted Butter at room temperature 

225g/8oz  Caster Sugar

1/4tsp Salt – I use Maldon 

Finely Grated Zest Of 1 Lemon – scrub the lemon under hot water and dry before zesting (the juice will be needed for the icing).

4 Large Free Range Eggs

1tsp Vanilla Extract – I use Nielsen-Massey

250g/9oz Plain White Flour

1tbsp (3tsp) Baking Powder

225g/8oz Raspberries – fresh (when making this cake during the colder months frozen berries are a perfect substitute, I buy 300g frozen punnets of raspberries from Waitrose).

For the raspberry icing:

100g/4oz Raspberries – same as for the cake

1tsp Fresh Lemon Juice

225g/8oz Icing Sugar (confectioners sugar)

2-3tbsp Sugar Nibs – alternatively use edible, small white cake decorations such as balls.

Method: Preheat the oven to 160C/140C fan, gas mark 3, 325F.

For this loaf cake you will need a 2lb loaf tin that is approximately 25cm x 11cm x 7.5cm (10in x 4.5in x 3in). Grease with butter and line the base with baking parchment.

Making And Baking The Raspberry Cake

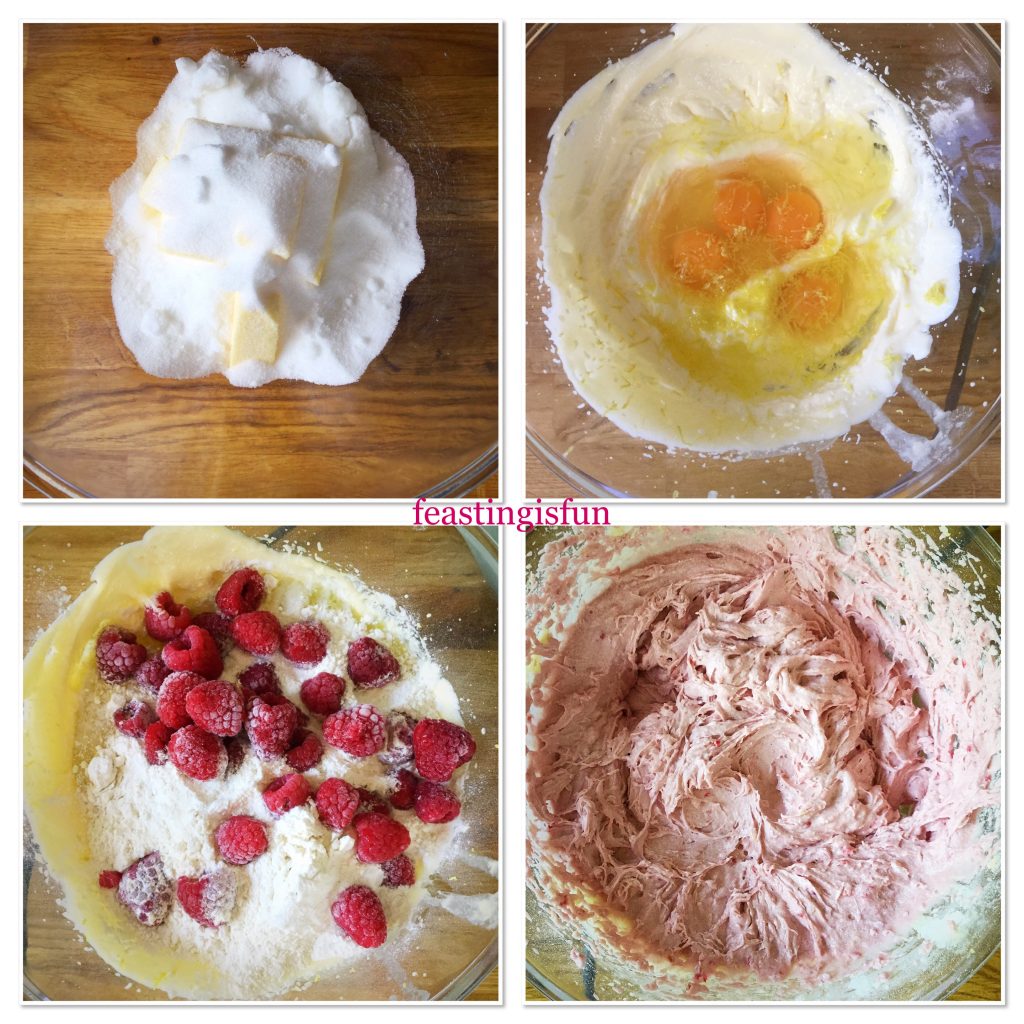
  • First of all, add the butter, sugar and salt to a large mixing bowl.
  • Using an electric hand whisk beat all the ingredients together until pale and fluffy.
  • Next add the zest of a finely grated lemon, four large eggs and the vanilla extract.
  • Sift the flour and baking powder onto the wet mix and then add the fresh raspberries.
  • Now, using the electric hand whisk, beat all of the ingredients together until they are combined and the pink colour is uniform throughout the batter.
Four separate images showing each stage of making a raspberry cake batter.
Making the raspberry cake batter.
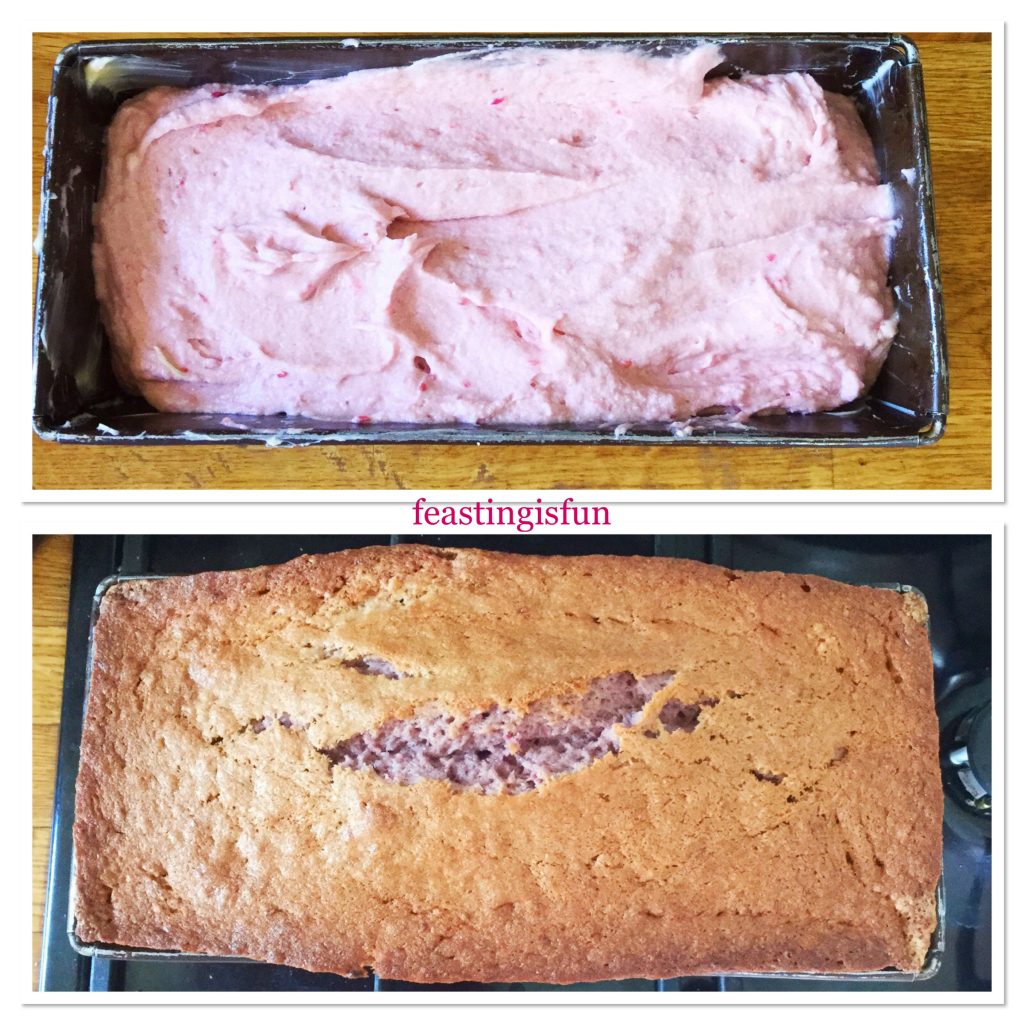
  • Spoon the pink cake batter into the prepared loaf tin and smooth the surface.
  • Place the tin into the centre of a preheated oven and bake for approximately 1 hour 30 minutes. Allow 10 minutes either side of this guide due to differences between ovens.
  • To test if the cake is baked insert a skewer (I use a metal one) into the centre of the cake. The cake is baked if the skewer is clean when removed. However, if there is cake batter on the skewer bake the cake for a further 5-10 minutes before retesting.
  • As soon as the inserted skewer comes out of the baked cake clean, remove the cake from the oven and place the cake, in its tin, onto a cooling rack. Leave the cake to cool completely in the tin.
A loaf cake tin showing both the unbaked and baked cake
The unbaked and baked raspberry cake.

Making Fresh Raspberry Drizzle Icing

  • While the cake finishes cooling make the raspberry icing.
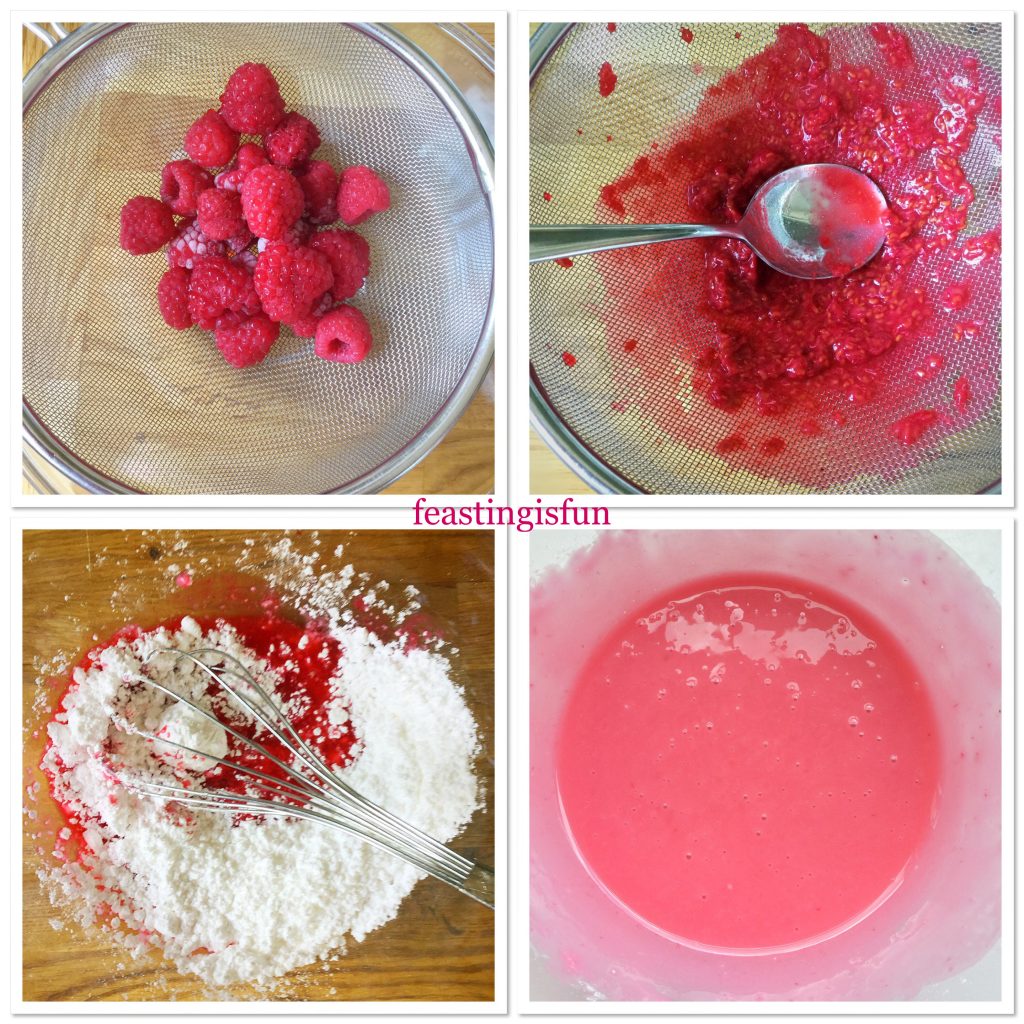
  • Place the raspberries into a fine sieve over a bowl. Note – the sieve needs to be fine enough to stop raspberry seeds from passing through.
  • Use a spoon to push the raspberries against the sieve.
  • Every few minutes, ensure that the spoon is clean, lift up the sieve and scrape the raspberry pulp from underneath into the bowl.
  • Continue until only seeds and a small amount of pulp is left in the sieve.
  • Add one teaspoon of fresh lemon juice to the raspberry pulp in the bowl.
  • Next add the icing sugar to the bowl and mix the ingredients together with a balloon whisk, ensuring the finished icing is smooth and lump free.
  • The finished icing should be thin enough to spoon over the cake and drizzle down the sides, without soaking into the cake. If the icing seems too thin add some more icing sugar.
Four images showing the making of a fresh fruit icing.
Creating fresh raspberry icing.

Decorating The Cake With Raspberry Icing

  • First of all run a palette knife between the outside of the cake and inside of the tin.
  • Turn out the cake and remove any parchment paper stuck to the base.
  • Place the cake on to a cooling rack which has a baking tray underneath.
  • Spoon the icing over the top of the cake, encouraging it to drip down the sides.
  • Continue until the top of the cake is completely covered and there are drips on all four sides. Discard any excess icing.
Four separate images showing how to decorate the cake.
Decorating the Raspberry Drizzle Loaf Cake.
  • Finally, sprinkle around the outside edge of the cake with your chosen decoration. I have used small, white, sugar nibs to contrast with the pink icing.
  • Transfer the cake to a serving plate. I use a fish slice on either end to lift the cake.
  • Leave the cake to set for at least 30 minutes.
  • During very warm weather I suggest putting the cake in the fridge to set.
Raspberry Drizzle Loaf Cake
  • Serving before the icing is set may result in the icing dripping from where it has been cut!

For best results bake and ice this cake the day before it is needed. Likewise as the cake cools overnight in the fridge it’s overall flavour and texture improves. Once cut, place the remaining cake in an airtight container and eat within four days. Store in the fridge during warm weather.

If you have enjoyed this recipe for Raspberry Drizzle Loaf Cake you may also like these:

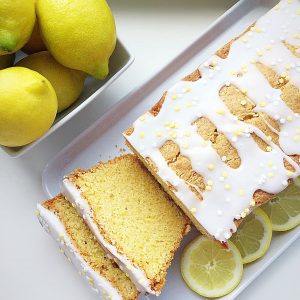
Lemon Drizzle Cake

Lemon Drizzle Cake
Lemon Drizzle Cake

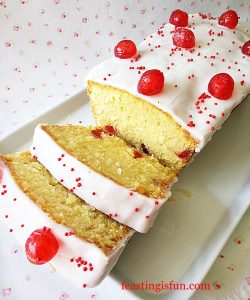
Iced Cherry Coconut Loaf Cake

Sliced iced cherry coconut loaf cake.
Iced Cherry Coconut Loaf Cake

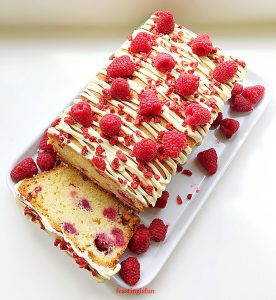
Raspberry White Chocolate Loaf Cake

Raspberry White Chocolate Loaf Cake

Since making this raspberry cake I have received very positive feedback, especially from those who normally prefer ‘chocolate’ cake! Because the fruit in this cake is fresh, tangy and not too sweet, it is fast becoming a firm favourite among friends, family and neighbours. And we know that all food tastes better when it is shared. So who will you share your cake with?

So, whatever you are making, baking and creating in your kitchens, have fun preparing and sharing your feast.

Sammie xx

No part of this post may be reproduced or duplicated without the written permission of the owner. Please see my Disclosure Policy.
 

Lemon Sultana Buttermilk Scones

Finally, summer is here and I’m so excited. Since this season also makes life easier and more fun! Windows stay open allowing plenty of fresh air to flood our homes, washing dries easily and long, sunlit days allow eating outdoors. Whether it’s an organised picnic, cup of tea in the garden or venturing to an open air concert, Summer is THE season for outdoor fun. And these Lemon Sultana Buttermilk Scones are as ideal for Afternoon Tea as they are easy to pack up for a fun picnic.


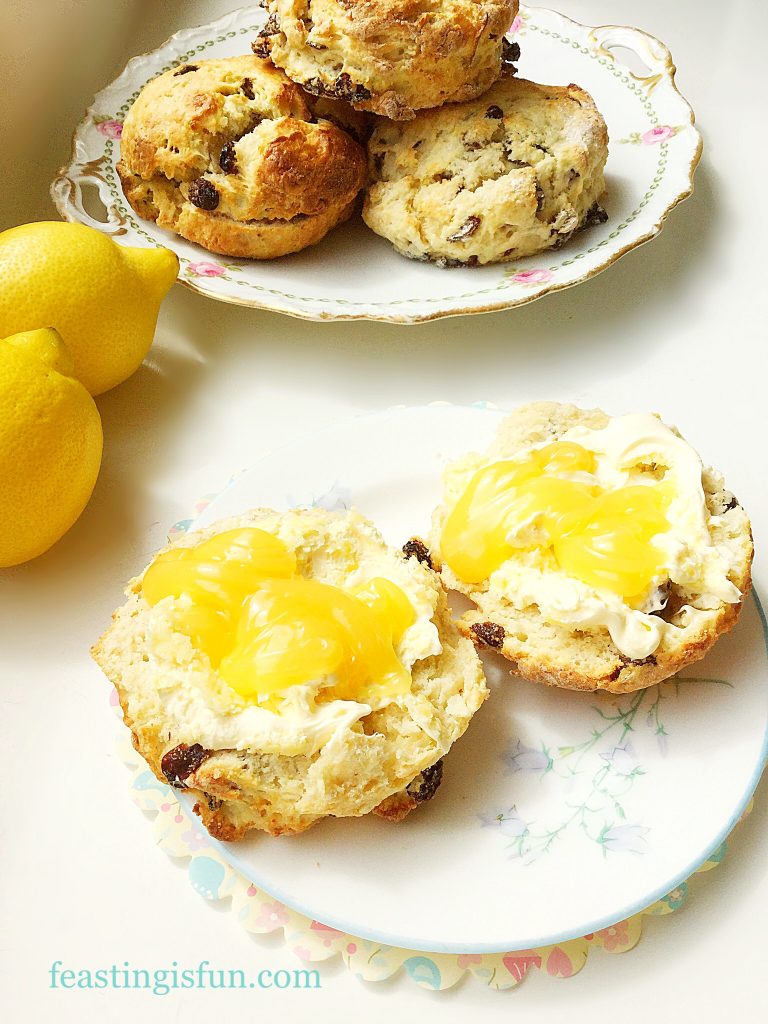
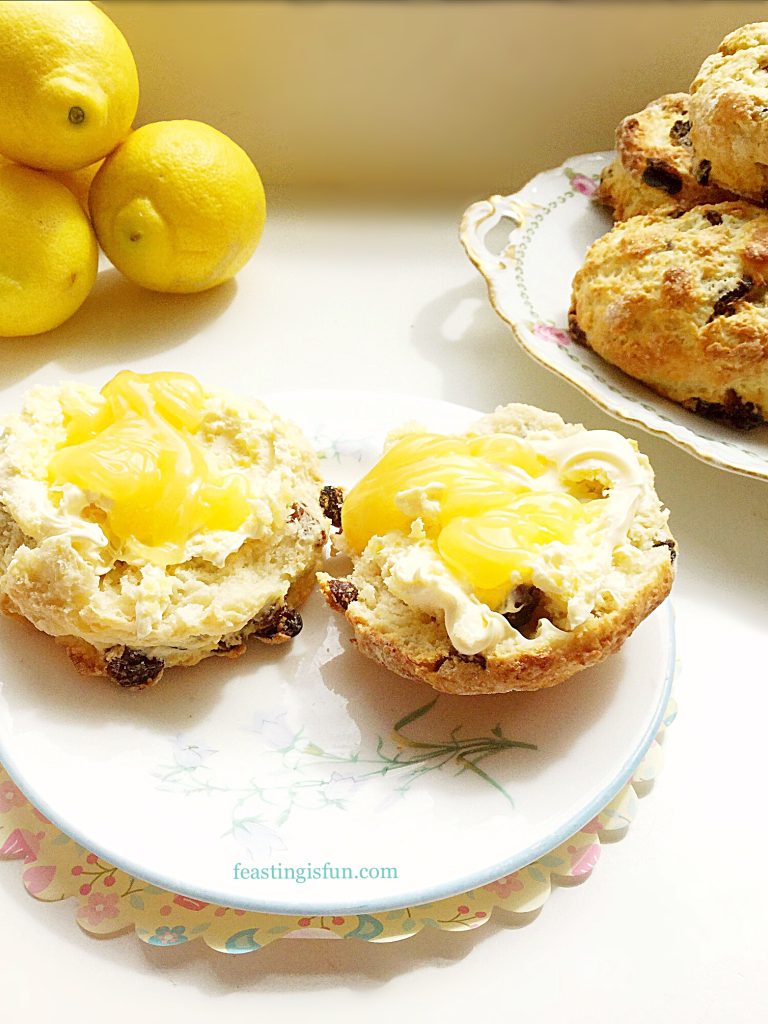
Cut scones topped with clotted cream and lemon curd on a pretty plate.
Lemon Sultana Buttermilk Scones

Picnics are a great way to gather friends and family together, for feasting and fun. Whether you choose to meet at a local park, or trek to the seaside, they are a fantastic way of getting people together without being restricted by space or cost. Also, most people are more than happy to bring food along with them, as well as drinks, blankets and games. And so it’s fun to organise everything in advance. Since delegating spreads the workload, it also ensures that everyone relaxes and has fun making new memories!


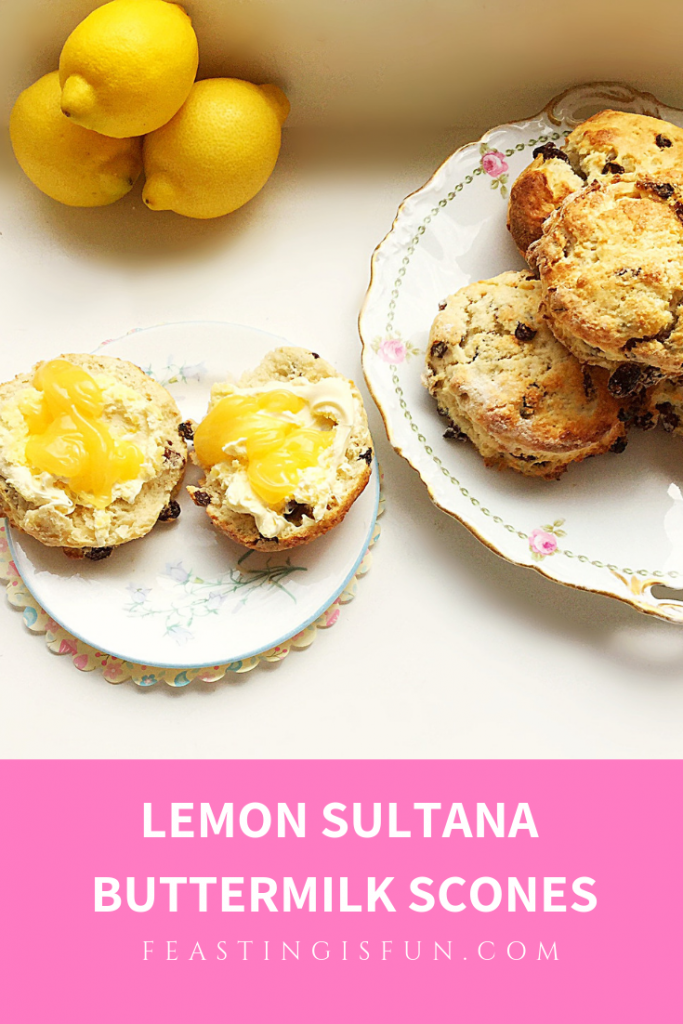
Pinterest image of Lemon Sultana Buttermilk Scones with descriptive graphics.

Scones; Such An Easy Bake

Scones are the number one recipe I advise people to try if they are new to baking. Since they are virtually foolproof and nobody minds an occasional, slightly wonky One! A successful bake builds a level of achievement and satisfaction in a newbie baker. As a result, they are more likely to continue baking, while learning new skills, attempting more complex recipes as confidence in the kitchen grows.

Lemon Sultana Buttermilk Scones

And now, back to these delicious. Truthfully, I must say these are my favourite scones to date! A positive result for someone who wouldn’t go near a scone until I started baking them myself! So, it is time for me to stop chatting and make these yummy, cream tea favourites.

Recipe: Lemon Sultana Buttermilk Milk Scones makes 8-10 large scones

450g/1lb Plain White Flour

3tsp Baking Powder

1/4tsp Sea Salt Flakes – I use Maldon

25g/1oz Vegetable Fat such as Trex

50g2oz Unsalted Butter

4tsp Caster Sugar – plus extra for sprinkling on top of the unbaked scones

Zest of 2 medium or 1 very large lemon (scrubbed and washed in hot water before zesting)

225g/8oz Sultanas

284ml/10fl oz Buttermilk – Alternatively, use the same quantity of whole or semi skimmed milk, add 2 teaspoons of fresh lemon juice or 1 teaspoon of white vinegar and stir. Leave for 5 minutes then stir again, the liquid should be thicker and slightly lumpy and is now ready to use.

3-4 Tablespoons of Semi or Whole Milk

Method: Preheat the oven to 220C/200C fan, gas mark 7, 425F

Note – you may notice an American dry cup measure in the photographs. Since we are decorating at the moment I was unable to locate my round cutters. So I improvised. Using a one cup measure worked perfectly for cutting out the scones. Also, if using a smaller cutter for smaller scones, remember to adjust the baking time.

Making The Buttermilk Scone Dough

  • First of all line a large baking tray with baking parchment.
  • Next, tip the flour, baking powder, salt and sugar into a large bowl.
  • Stir all the dry ingredients together with a balloon whisk.
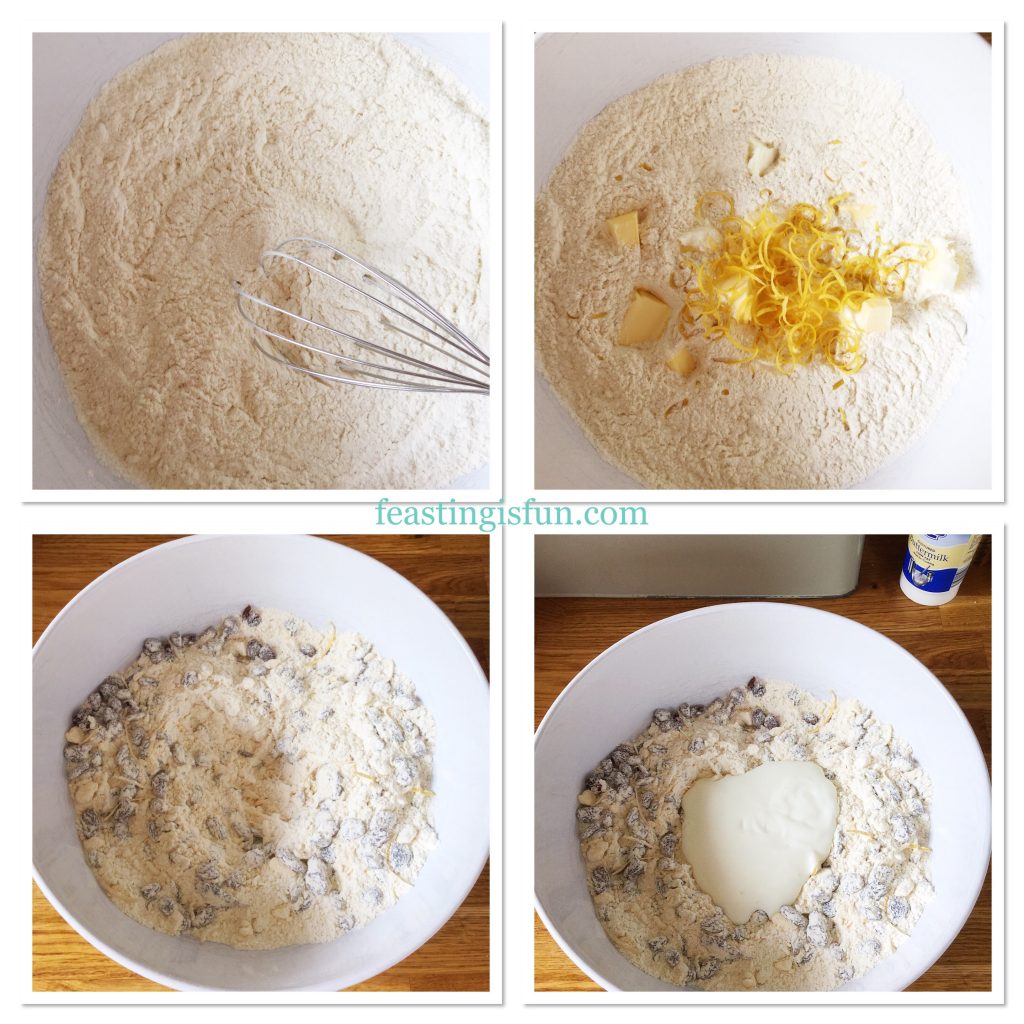
  • Add the vegetable fat and butter in small chunks, then add the lemon zest.
  • Using a pastry cutter work the fats into the flour until it resembles breadcrumbs with some pea sized chunks of fat still visible.
  • Add the sultanas and using your fingers gently lift and drop them into the bowl so they become covered in flour.
  • Make a well in the centre of the flour mix and pour in all of the buttermilk.
Four stages showing how to incorporate fats and fruit with flour for a recipe.
Making the scone dough.
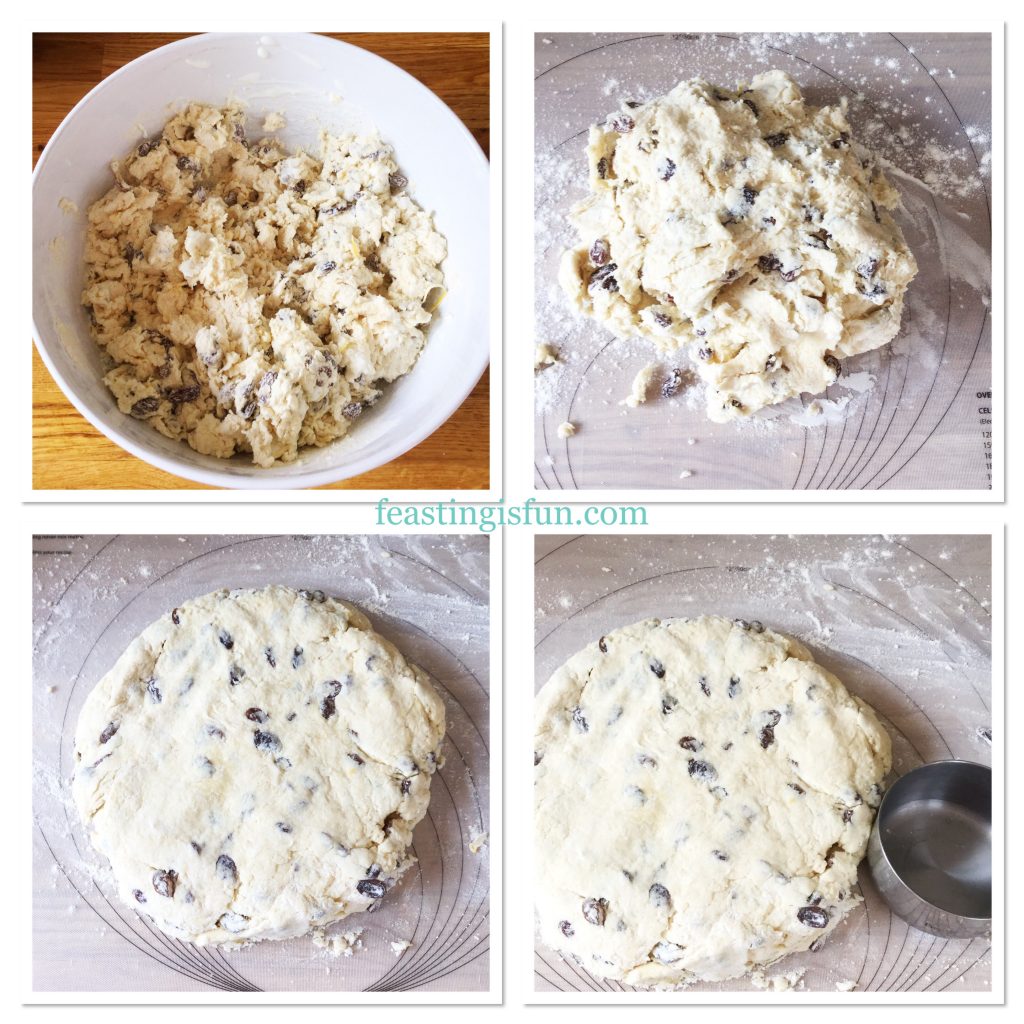
  • Using a butter knife stir all of the ingredients together until large clumps begin to form.

Turning Out And Shaping The Dough And Cutting Out Individual Scones

  • Turn the clumpy dough out onto a floured surface. And note, the dough should be quite wet and sticky.
  • Using floured fingers bring the dough together and pat out to form a round shape that is about 1 inch (2.5cm) deep.
  • Most importantly, check that the disc of dough moves freely across the surface and is not stuck.
  • Flour a round 3 inch (7.5cm) cutter that is also at least 2 inches (5cm) deep and place it on top of the dough.
  • Press the cutter straight down onto the dough taking care not to twist it.
Patting the dough out onto a pastry mat, ready to be cut.
Getting the dough ready.
  • Place each cutout scone onto the baking parchment lined baking tray.
  • Brush fresh milk onto the top of each scone using a pastry brush and then sprinkle a pinch of sugar over the top.

Baking The Lemon Sultana Buttermilk Scones

  • Place the scones into the centre of the oven and bake for 15-20 minutes. Because each oven is different and other variables such as the thickness of scone dough affect the baking time, I have given a range of times. My scones took 18 minutes to bake.
  • The scones are baked when the are risen, golden in colour and sound hollow when rapped on the base with your knuckle. Similar to bread when baked.
  • As soon as the scones are baked remove them from the oven and carefully place them on a cooling rack.
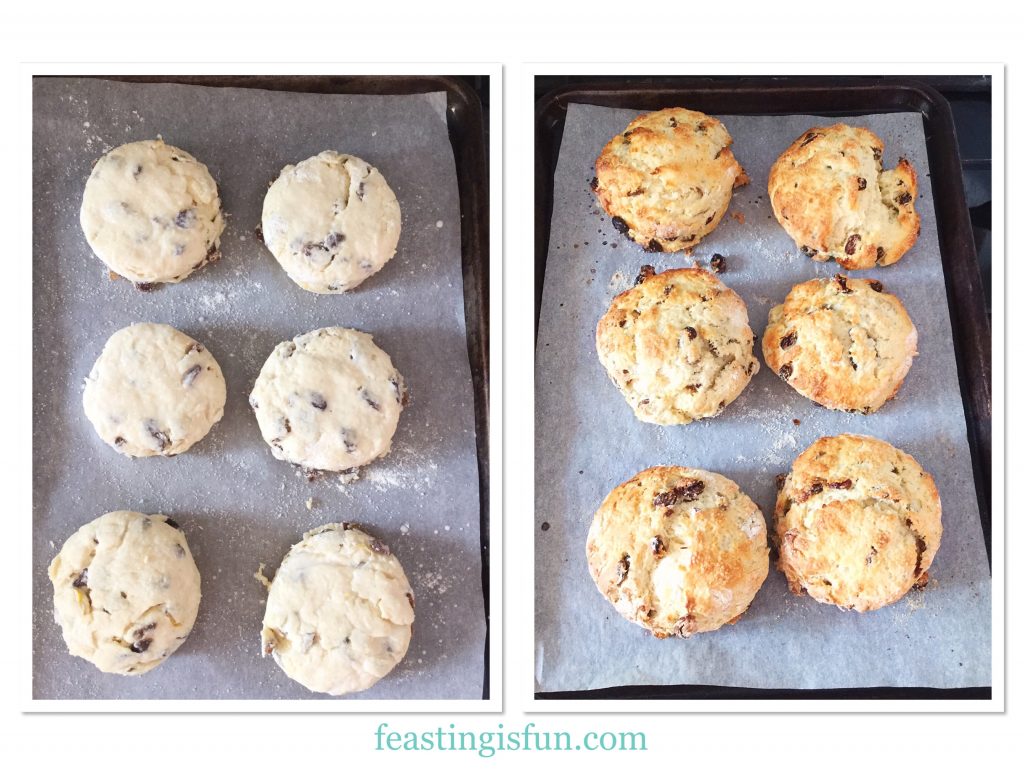
Raw and baked Lemon Sultana Buttermilk Scones
Before and after baking.

Serving And Enjoying The Scones

Eat these scones either warm or cold. Also they can be enjoyed just as they are, or split in two and topped with either clotted cream or butter.

Split scones topped with clotted cream and lemon curd on a pretty plate. Fresh whole scones and lemons are in the background.
Lemon Sultana Buttermilk Scones

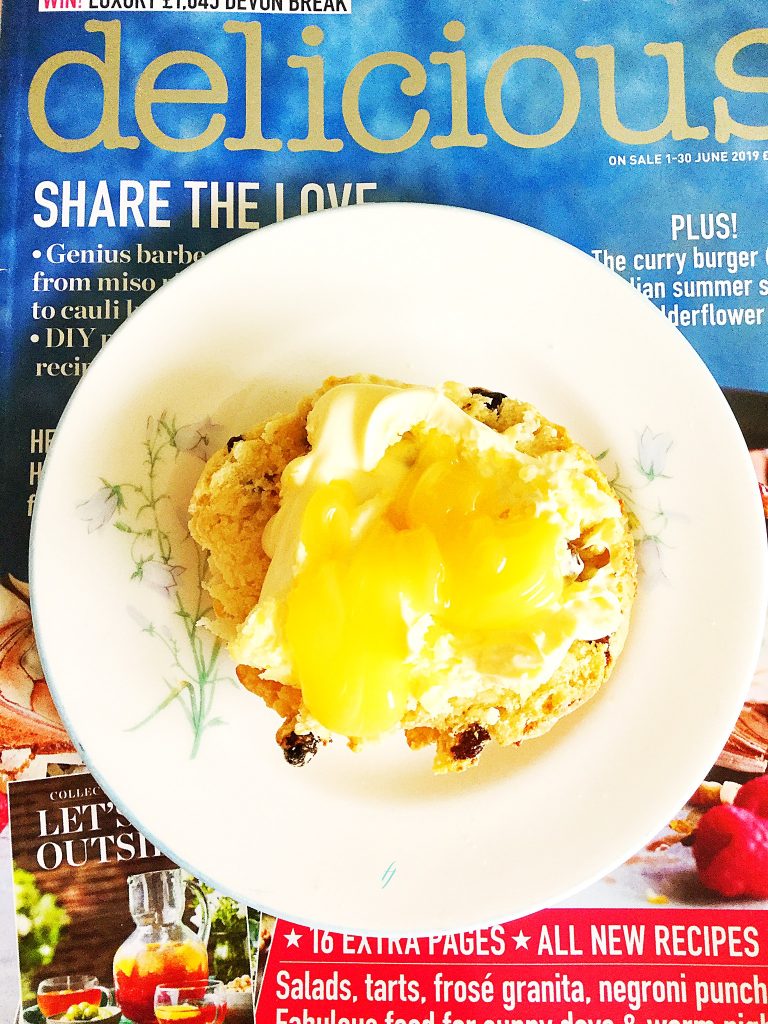
Topping a scone with clotted cream and lemon curd and sitting down with my favourite foodie magazine, a delicious cup of tea, and a relaxing afternoon.

Delicious magazine with a plate on top containing a tasty afternoon sweet treat.
Relax with a great foodie magazine and a clotted cream and lemon curd topped scone.

Homemade scones are usually best eaten on the day they are baked. Yet with this recipe they stayed moist for up to 3 days when kept in an airtight container.

If you have enjoyed this recipe for Lemon Sultana Buttermilk Scones you may also like these:

Super Light Scones

A platter set with small plain scones, fresh strawberries and clotted cream and jam in bowls.
Super Light Scones

Easy Blackberry Oat Muffin Recipe

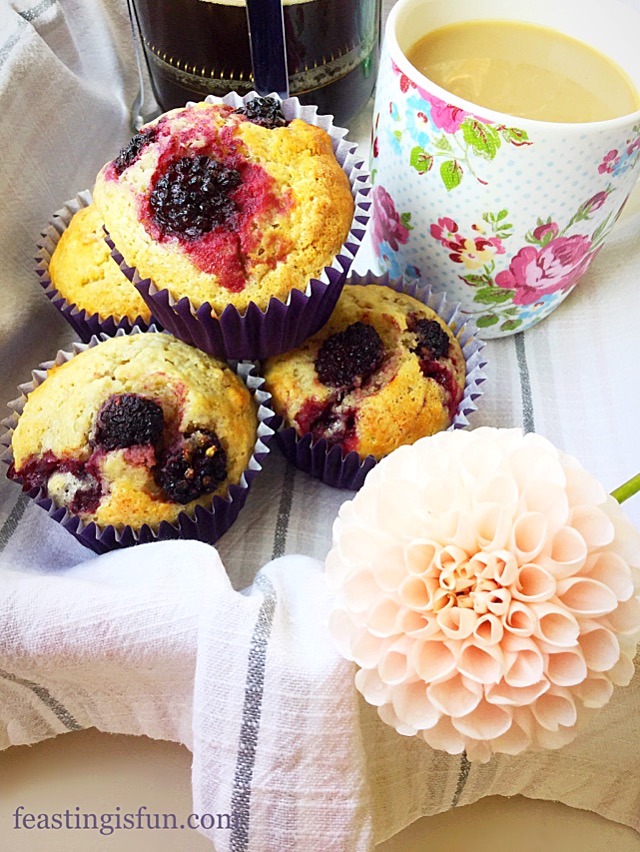
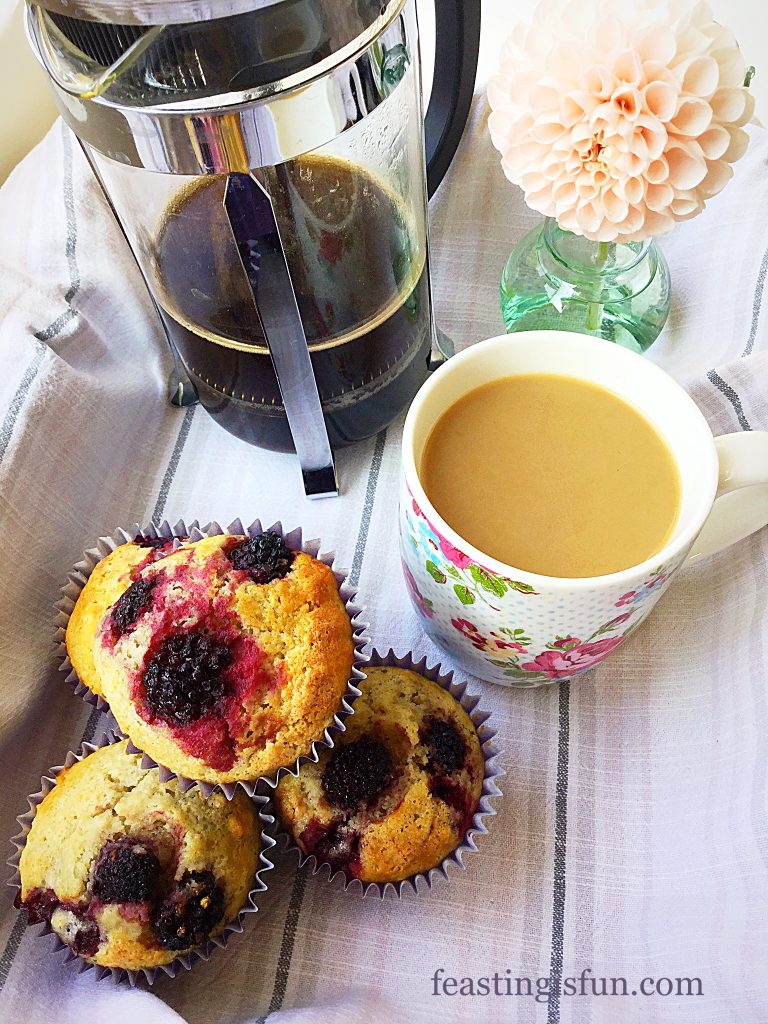
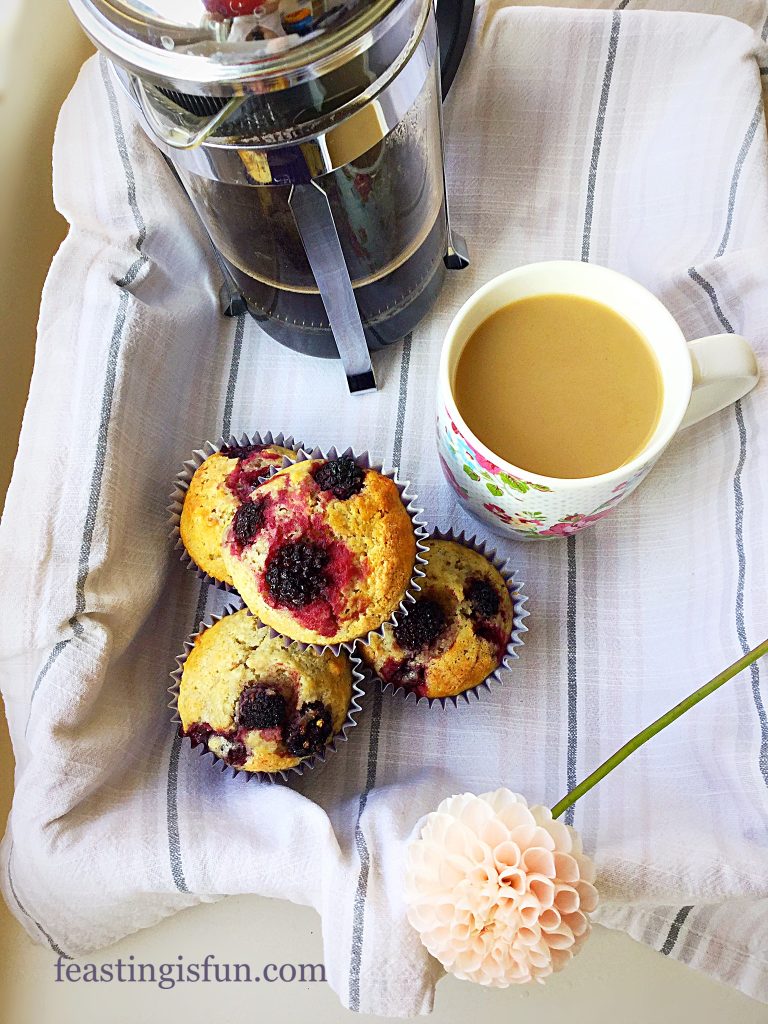
A lined breakfast tray with muffins, cafetière and mug of coffee and a blush coloured dahlia flower.
Easy Blackberry Oat Muffin Recipe

Cheddar Sun Dried Tomato Scones 

Savoury cheese scones in a lined basket with fresh tomatoes and basil and a wedge of cheddar cheese.
Cheddar Sun Dried Tomato Scones

So, is this recipe tempting you to make scones at home? Doing so is a very rewarding experience, especially when you share your bakes and receive compliments on your baking! And, aside from being a world away in taste and texture from their shop bought counterparts, you know exactly what has gone into your baking. Love cannot be bought, yet these scones were made with an extra large helping of it.

Whatever you are making, baking and creating in your kitchens, have fun preparing and sharing your feast.

Sammie x

No part of this post may be reproduced or duplicated without the written permission of the owner. This post does not contain any sponsored content. Please see my Disclosure Policy.
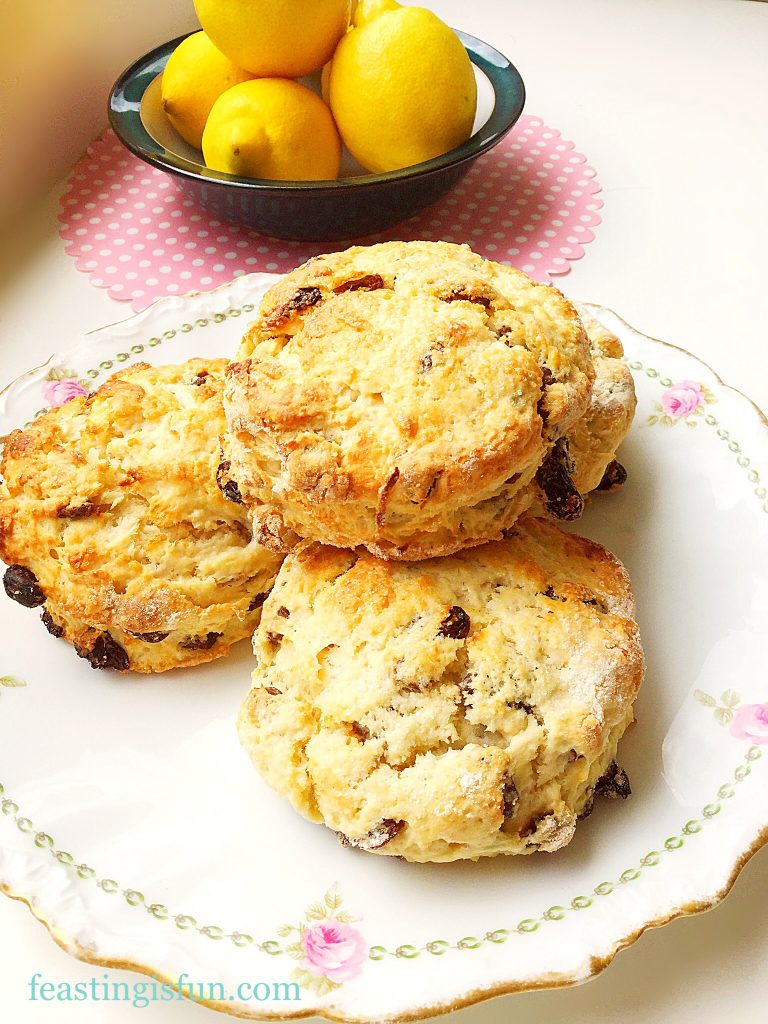
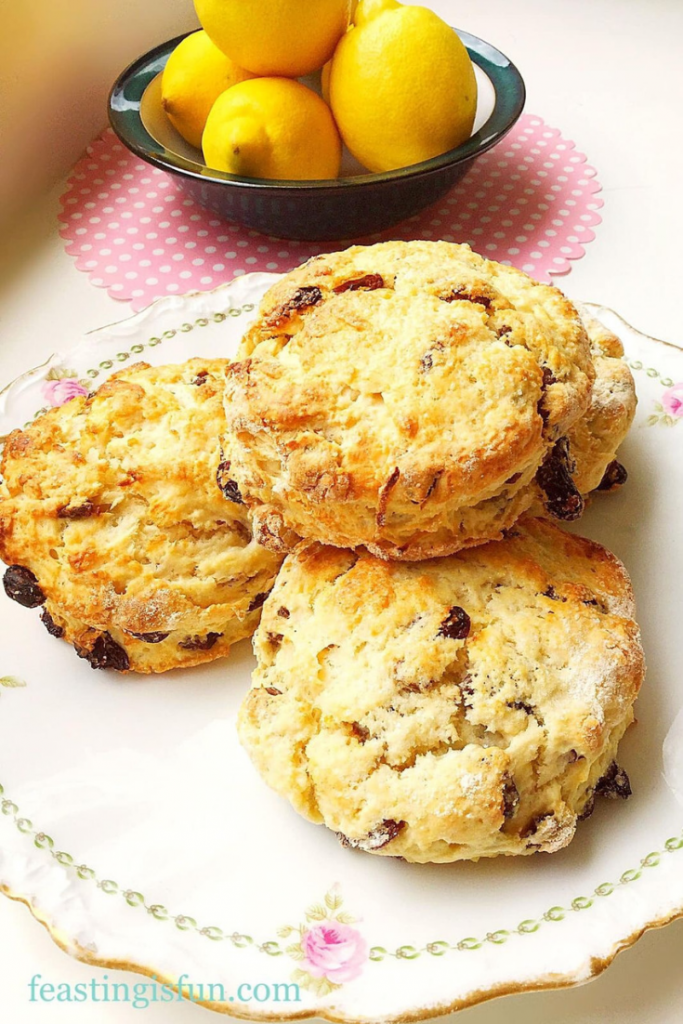
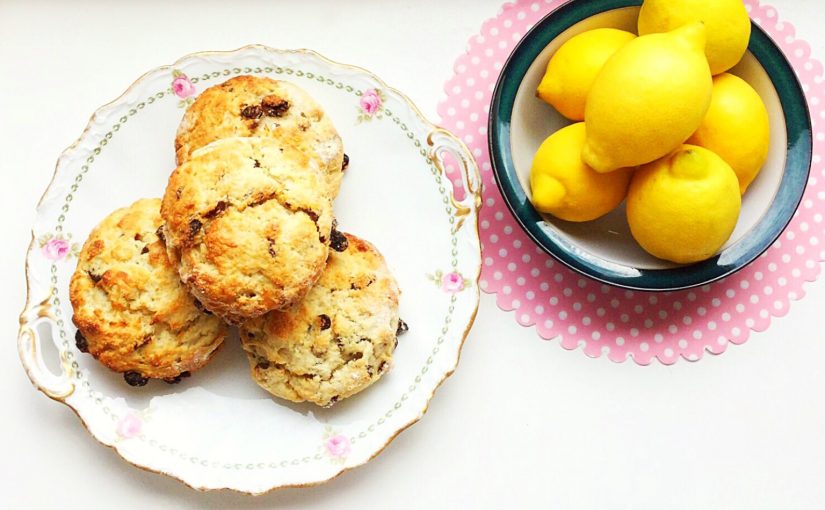
Lemon Sultana Buttermilk Scones piled on a pretty cake plate with a bowl of fresh lemons in the distance.
Lemon Sultana Buttermilk Scones perfect for Afternoon Tea.


Cherry Tomato Mozzarella Basil Focaccia

Today is the first of June and finally it is beginning to feel like Summer. And, of course my mind immediately turns to all the lovely fresh produce that this season yields. Since we are currently celebrating British Tomato Fortnight I am creating recipes that celebrate the diversity of this tasty little fruit. So with caprese salad as my inspiration let me introduce you to my Cherry Tomato Mozzarella Basil Focaccia.

Pinterest sized image of Cherry Tomato Mozzarella Basil Focaccia Bread with descriptive graphics.

Focaccia is a bread with Italian origins. At its simplest it is a flat, white, airy bread, drizzled with olive oil and having a dimpled appearance. Serve it with salad, soup, pasta or as part of antipasti, the key is in the lightness of its crumb. In comparison, this cherry tomato and mozzarella topped bread with layers of basil hidden within the bread, is almost a meal in itself.

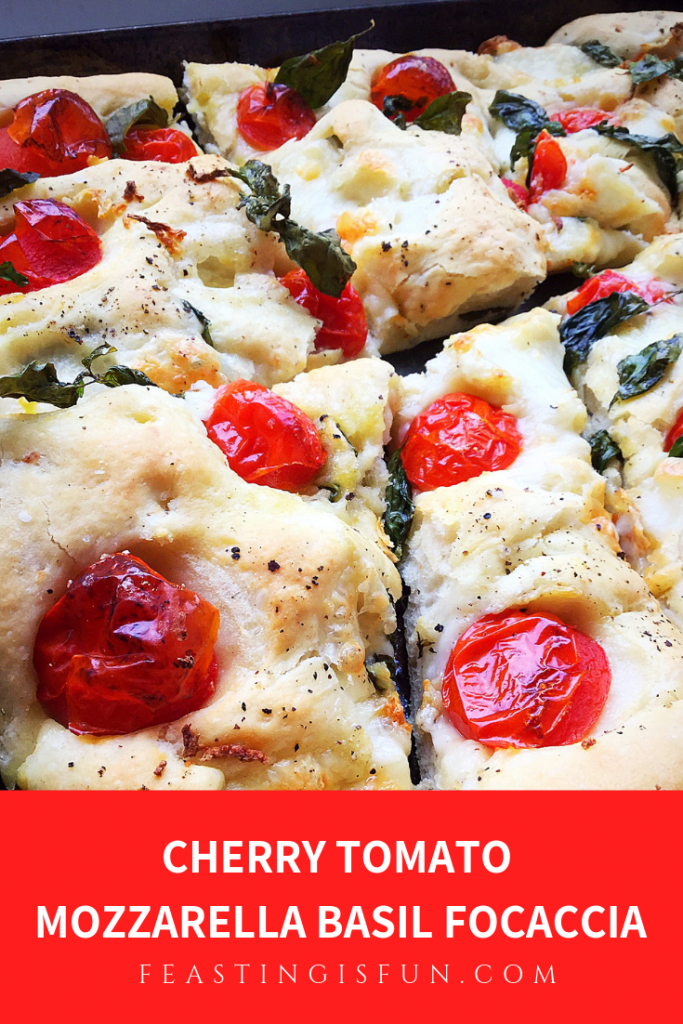
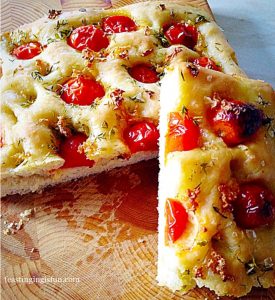
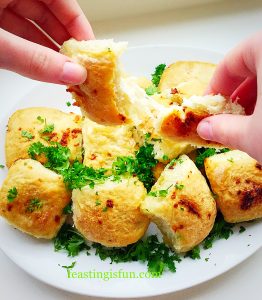
Two images of Cherry Tomato Mozzarella Basil Focaccia showing the light, airy crumb of the bread and the gooey, stringy cheese.
Cherry Tomato Mozzarella Basil Focaccia a feast that really is fun to make and eat!

As the bread bakes the fresh basil and garlic permeate throughout creating an incredible savoury flavour. Also, the fresh, vine ripened tomato flavour intensifies in the heat of the oven. Resulting in a joyfully flavoursome bread that is perfect for sharing, Italian style, around a table full of friends, family and food.

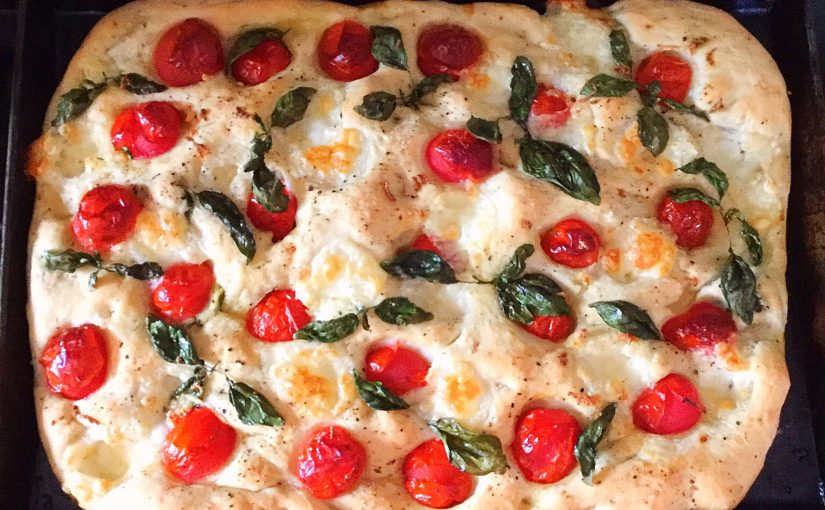
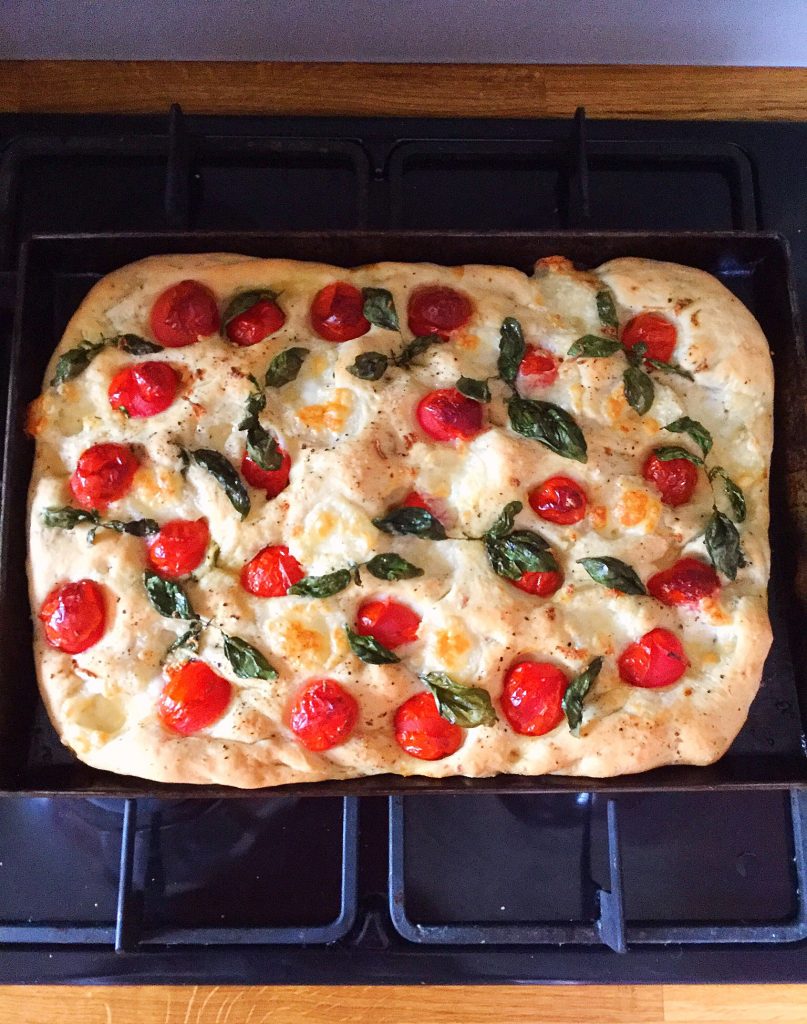
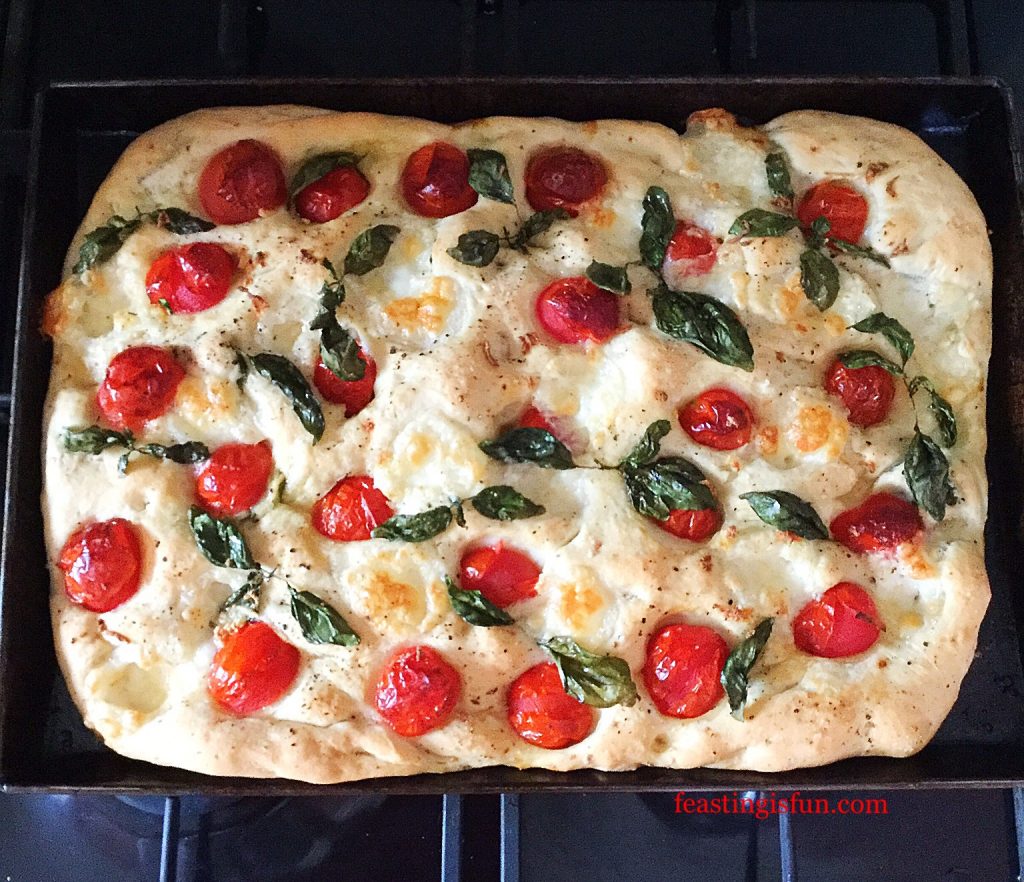
Baked Cherry Tomato Mozzarella Basil Focaccia fresh out of the oven
Cherry Tomato Mozzarella Basil Focaccia

If you haven’t made bread before, please do not worry. Because, as I am writing a recipe I always imagine the person reading it is standing next to me. Since I am a natural chatter-box, I describe each part of the process in easy to understand language and include photos for every step of the recipe. So you can be confident as you start your baking process.

Recipe: Cherry Tomato Mozzarella Basil Focaccia

For The Focaccia Dough

250ml Tap Water – at room temperature

7g Dried Yeast – I use Allinson 

1tbsp Runny Honey

350g/12oz Strong White Bread Flour – I use Wright’s 

5g Salt – I use Maldon sea salt

2 Garlic Cloves – finely minced or crushed

2tbsp Olive Oil

Filling And Topping The Focaccia 

2 Generous Handfuls Of Fresh Basil Leaves (approximately 25-30) – one handful for folding into the dough and the second for topping the focaccia

12 Mini Plum Tomatoes – cut in half. Alternatively use 24 small round cherry tomatoes

150g/5oz Approximately 20 Mini Mozzarella Balls – drained

1-2 Garlic Cloves

2tbsp Olive Oil

Pinch of sea salt and freshly ground pepper

Method:

Making The Focaccia Dough

I use a stand mixer with the dough hook attachment for the first part of mixing and proving the dough. Alternatively you can make the dough by hand. Large bowl in the instructions refers to the stand mixer bowl or the bowl used for hand mixing. Also, it is important to weigh all of the ingredients accurately to ensure a successful bake.

  • First of all add the tepid water to a large bowl and add the olive oil and then the honey. Adding the olive oil first ensures that the honey releases easily from the oiled tablespoon.
  • Next add the yeast.
  • Add the flour so that it covers all of the liquid ingredients.
  • Finally add the salt and minced garlic.
  • Fit the bowl to the stand mixer and lower the dough hook.
  • Mix on a low speed until all the ingredients are combined. Increase to a medium speed for approximately 10 minutes until the dough passes the windowpane test. To carry out the test stop mixing/kneading. Remove a small piece of dough and stretch it between your fingers. To pass the test the dough should stretch without tearing until light is visible through the dough. If the dough tears continue mixing/kneading for a further 2 minutes and test again.
  • As soon as the dough passes the windowpane test stop mixing/kneading and scrape any dough from the dough hook into the bowl.
  • Form the dough into a ball, place back into the bowl and cover with a clean tea towel.
  • Place the bowl in a draught free place and leave until the dough is doubled in size.

Knocking Back The Dough And Adding The Fresh Basil Leaves

  • As soon as the dough is doubled in size, turn it out of the bowl onto a lightly floured worktop. Most importantly, ensure the top of the risen dough is in contact with the worktop and the sticky underneath is now on top.
  • Pull out part of the dough with your hand and then tuck it into the centre of the dough.
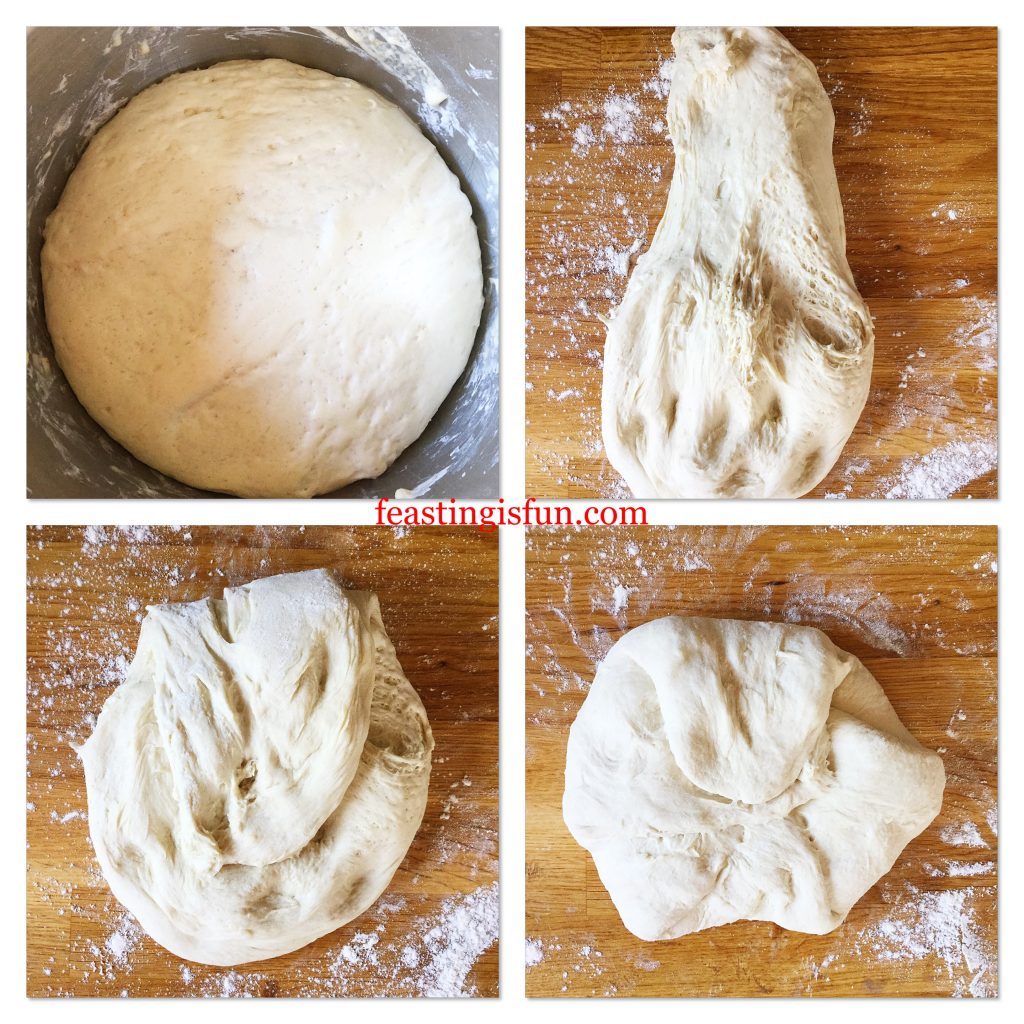
  • Turn the dough clockwise, approximately 10 minutes if it were a clock and repeat the pulling and tucking technique. Repeat this process until the dough is smooth and not sticky to touch. See bottom right photo.
Four images showing each stage of shaping bread.
Building structure within the focaccia dough.
  • Turn the dough over and press out using your fingertips until it is a roughly square shaped approximately 10”/25cm.
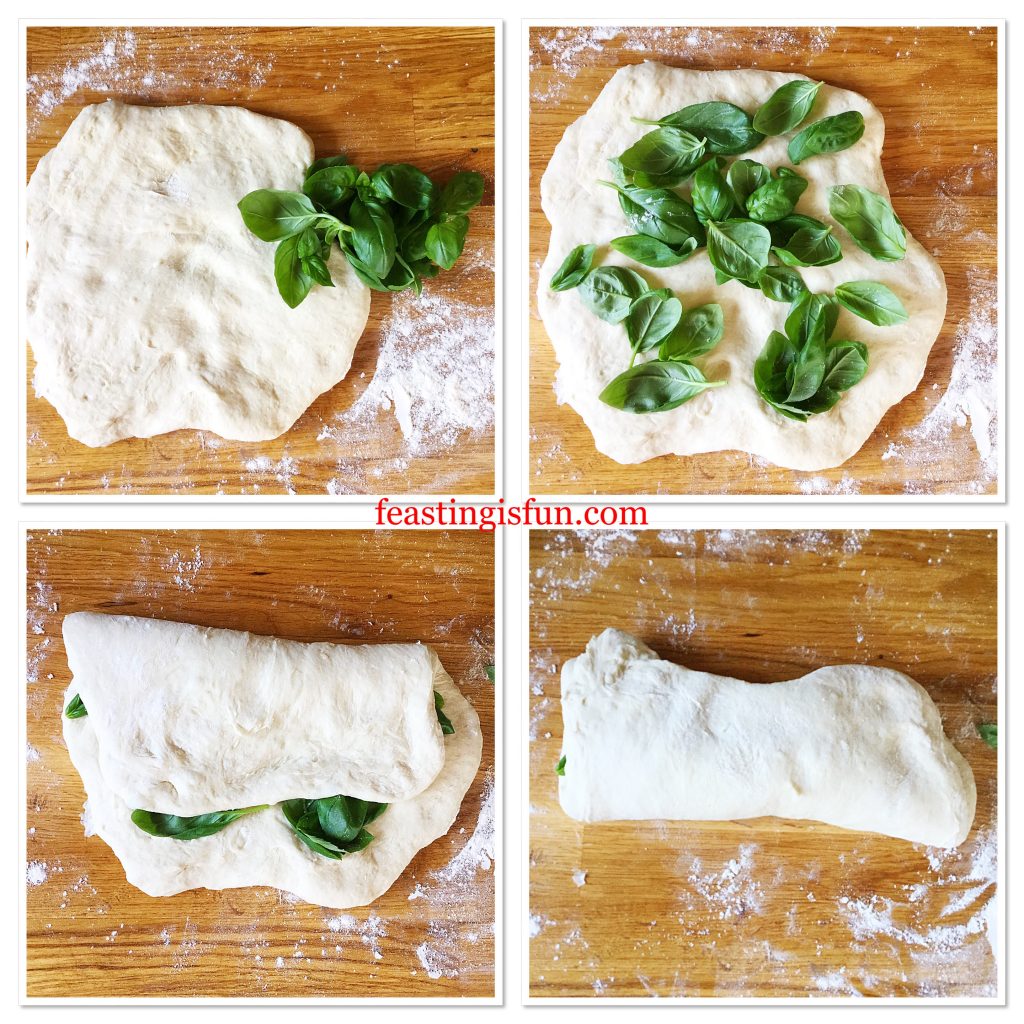
  • Lay one handful of fresh basil leaves on top of the dough.
  • Fold the top third of the dough down and then fold the bottom third of the dough up and over.
  • Turn the dough by a quarter and repeat the folding step.
Detailed images showing fresh basil being folded into bread dough
Folding fresh basil into the bread dough.

Pressing Out The Focaccia Dough And Adding The Toppings

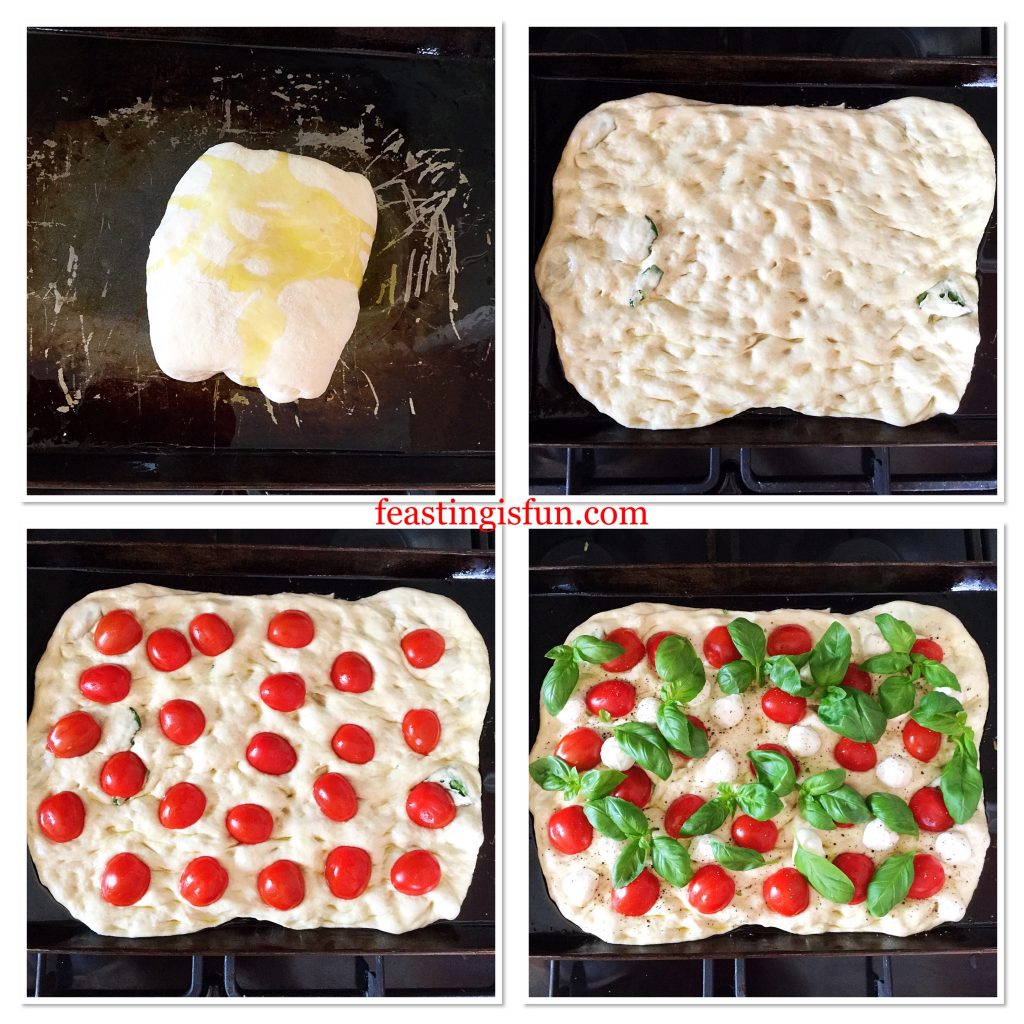
  • Turn the dough over and place onto a lightly oiled baking tray.
  • Drizzle 1 tablespoon of olive oil over the dough and use your fingers to press out the focaccia dough, taking care to keep the basil leaves within the dough.
  • Press the halved mini plum tomatoes into the dough.
  • Likewise add the mini mozzarella balls in the same manner.
  • Scatter over the minced garlic and last handful of basil leaves.
  • Finally drizzle lightly with olive oil and add a pinch of sea salt and black pepper.
  • Leave in a draught free place to rise and preheat the oven to 200C/180C fan, gas mark 6, 400F.
Four images showing the focaccia and adding the toppings
Shaping the focaccia bread and adding the toppings.

Baking The Cherry Tomato Mozzarella Focaccia

  • As soon as the focaccia has plumped up around the tomatoes and basil, while doubling in size, it is ready to be baked.
  • Place the focaccia into the centre of the oven and bake for 25-35 minutes.
  • The bread is baked when it is golden on top and underneath, use a palette knife to lift a corner.
  • And once baked remove from the oven.
Cherry Tomato Mozzarella Basil freshly baked.
  • Leave the focaccia to cool for 5-10 minutes before serving.
  • Alternatively, bake earlier in the day and reheat in a moderate oven for 10 minutes prior to serving.

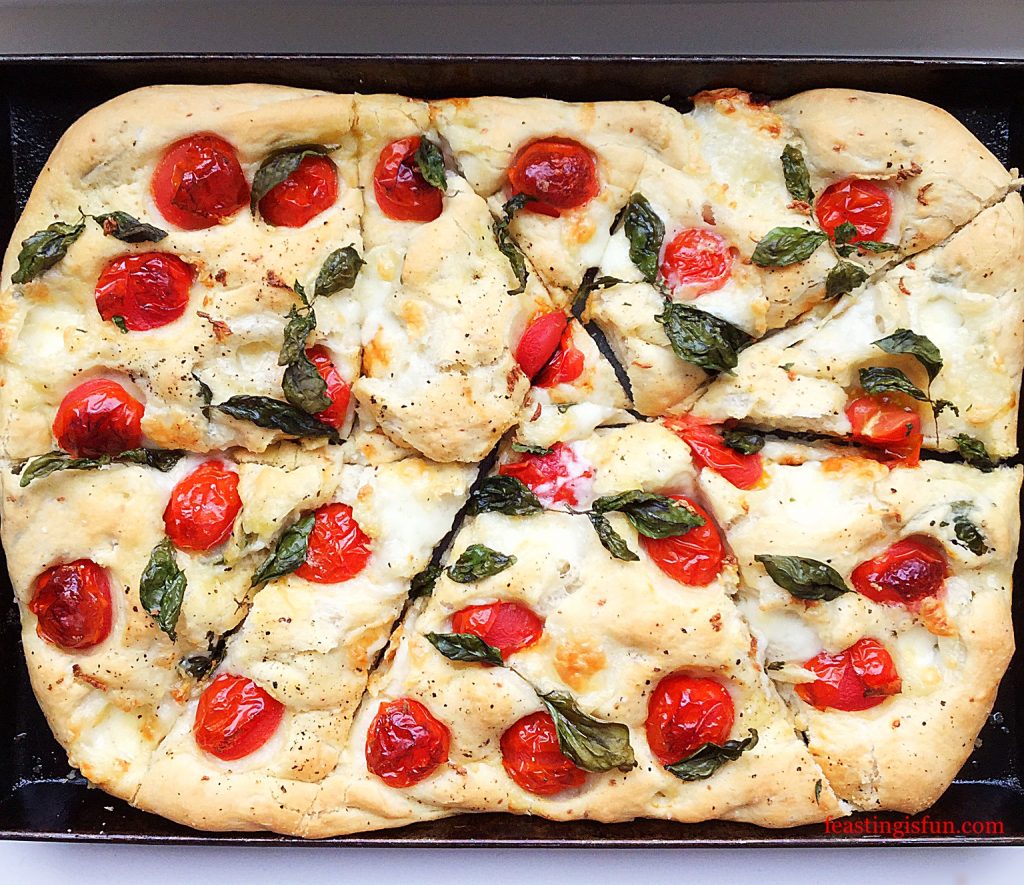
To serve this focaccia I ran a pizza wheel across it at various angles to create interesting shapes and portions.

A pizza wheel is used to divide the Italian bread into portions for serving.
Cherry Tomato Mozzarella Basil Focaccia divided into portions.

This bread can be made a day in advance, including the toppings. Cover with cling film and refrigerate. To bake, remove from the fridge, allow the dough to come up to room temperature and puff up and then bake as per the recipe.

Any leftover focaccia can be placed in an airtight container and refrigerated for one day. Also, freezing the focaccia is not recommended due to the fresh tomatoes.

If you have enjoyed this recipe for Cherry Tomato Mozzarella Basil Focaccia you may also like these:

Baked Cheese Olive Ciabatta Bread

Baked cheese olive ciabatta bread being pulled apart to show the gooey cheese.
Baked Cheese Olive Ciabatta Bread

Tomato Thyme Garlic Focaccia Bread

Tomato thyme garlic focaccia bread cut in half.
Tomato Thyme Garlic Focaccia Bread

Garlic Cheese Bombs

Garlic cheese bombs mini bread rolls filled with mozzarella image shows one being pulled apart showing the gooey cheese.
Garlic Cheese Bombs

Because, when I bake, I use the very best ingredients I can afford, this always has an impact on the final flavour. And including locally grown, British produce give me a sense of pride at how incredible our farmers are here in the U.K. Supporting British farmers and also British businesses, such as Room Forty who provide an Afternoon Tea service, is something that I am passionate about. Our country has a wealth of talented people who produce an amazing array of produce and products. While they may be a little more expensive than mass produced imports, what they have in abundance is love and care. Resulting in far higher quality produce grown and made by people who are passionate about what they do.

Do you consider where your food comes from when grocery shopping?

Whatever you are making, baking and creating in your kitchens, have fun preparing and sharing your feast.

Sammie xx

The British Tomato Association gifted me the tomatoes produced by Eric Wall to sample and taste during British Tomato Fortnight #BTF19. I have not been paid or received any financial gain for writing this blog post. All opinions, views and content are my own. No part of this post may be reproduced or duplicated without the written permission of the owner. Please see my Disclosure Policy.


Lemon Curd Sponge Tart

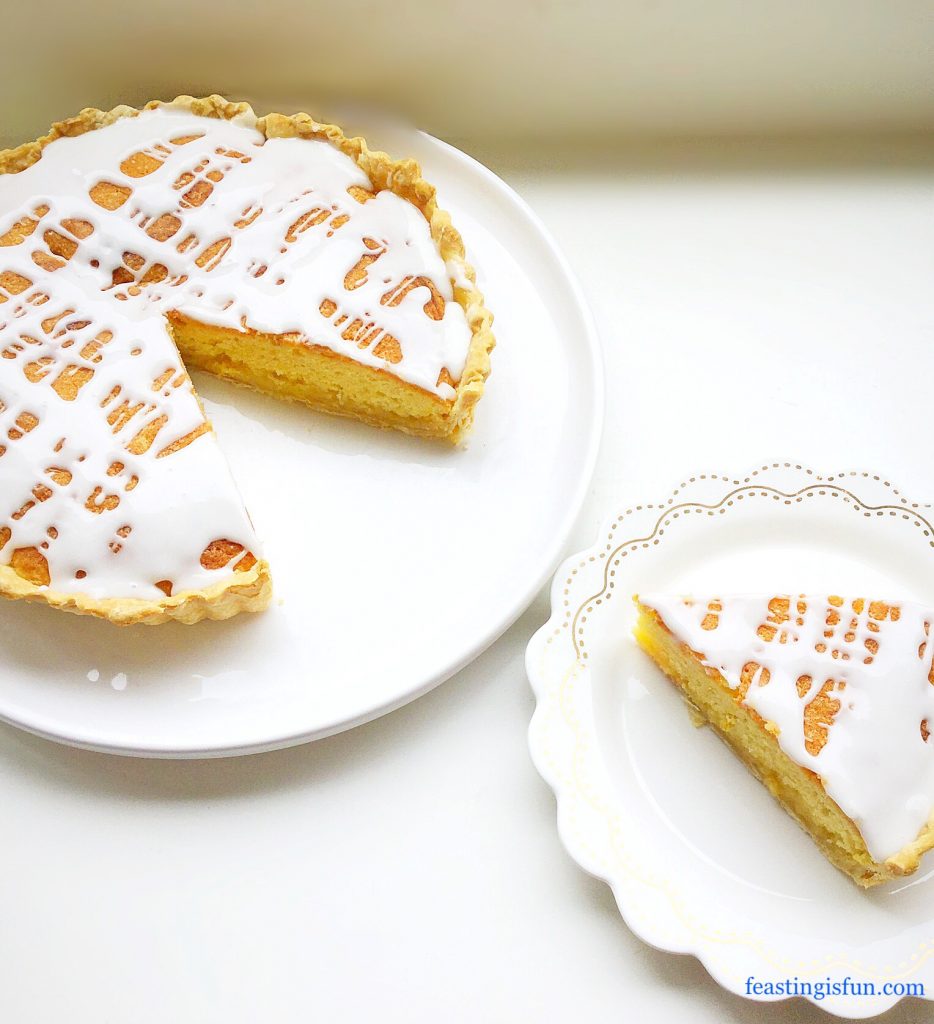
Anyone who has visited this blog before will probably have picked up on my love of lemons. Bright yellow citrus fruits that instantly transport my kitchen and my mood into a sunny day. Whether I use them I sweet or savoury recipes, their impact on flavour is the same. Fresh, juicy, tangy, this fruit knows how to treat your tastebuds to a flavour party! Today I am sharing my new recipe for Lemon Curd Sponge Tart. A sweet celebration of all things lemon.


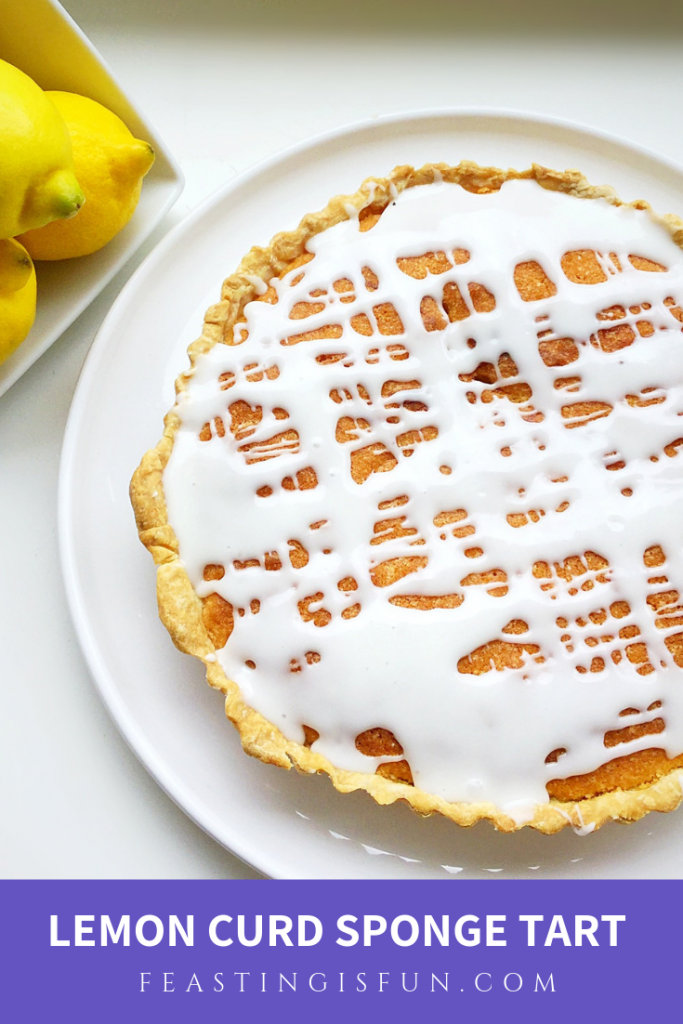
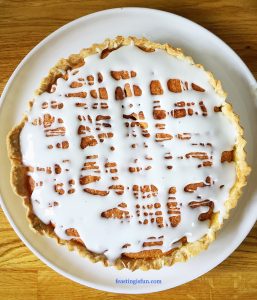
FF Lemon Curd Sponge Tart

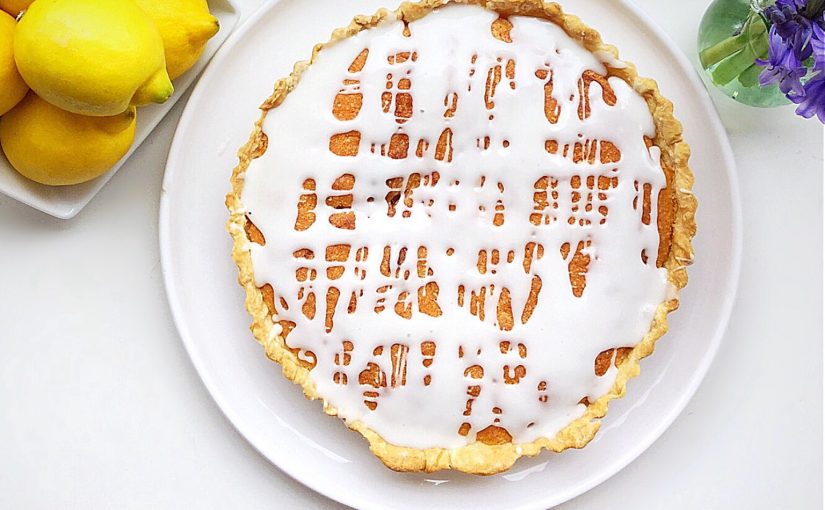
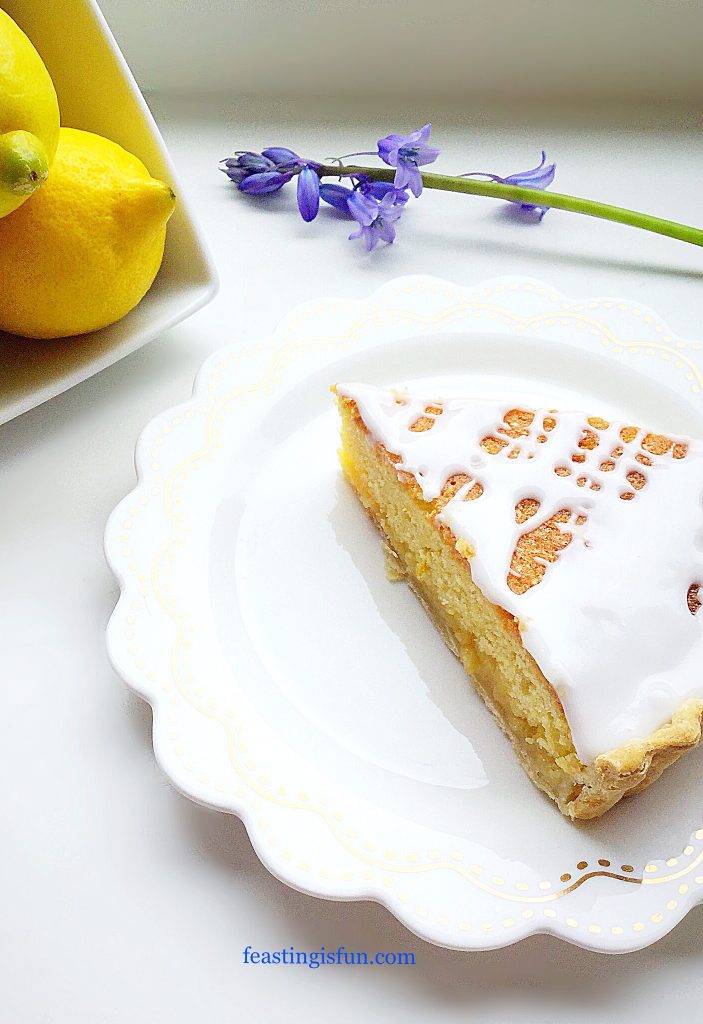
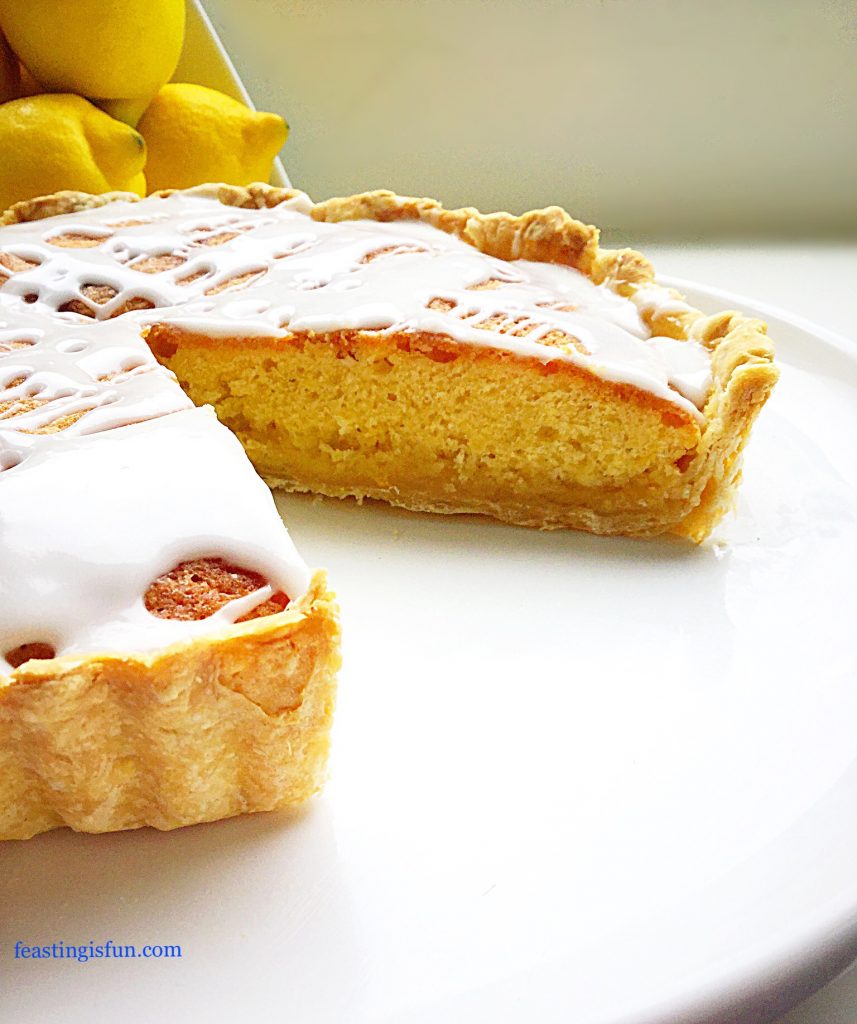
Since I love  Bakewell Tart I wanted to create a similar style dessert with lemon as the foremost flavour. And I have been completely successful. While homemade, buttery, shortcrust pastry provides a crisp base for this dessert, it really is all about the layers. So, on top of the pastry is a generous layer of tart lemon curd, followed by a light, lemony sponge and finally topped with a fresh lemon drizzle icing. The resulting tart is more than the sum of each individual layer.


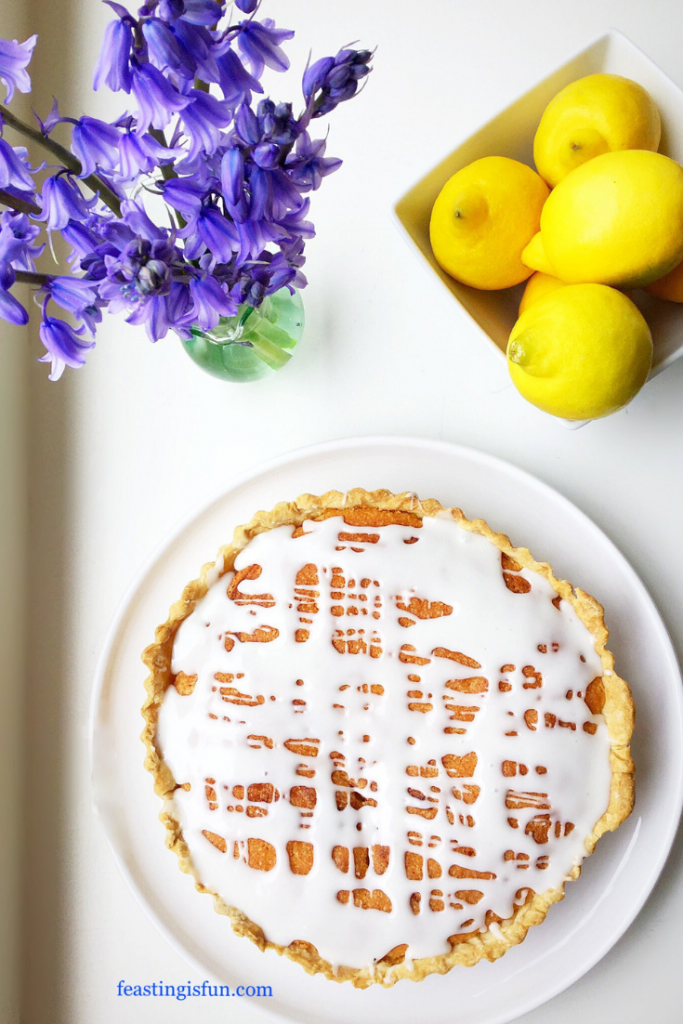
Lemon Curd Sponge Tart

To Drizzle Or Not To Drizzle?

While originally I wanted to create a dessert that could be served with custard, I’m so glad I opted for the lemon drizzle instead. If you do want to serve this warm with delicious Custard that is totally possible too. Simply allow the tart to cool for at least 20 minutes after baking, leave off the drizzle, slice and serve in a bowl with lashings of creamy custard. Also as mentioned previously serving a slightly chilled slice of this tart with a hot cup of tea really allows you to experience all the separate layers as they come together in one mouthful.


Lemon Curd Sponge Tart

Although I do sometimes have to leave labels on things I’ve made, saying they need to be photographed before eating, this doesn’t guarantee that my family will play by the rules! Fortunately I had finished the photography of this Lemon Curd Sponge Tart before they descended upon it. Nothing makes me happier than to see a bake on the worktop gradually reducing in size as people help themselves to a slice. That tells me more than anything that could be said.

Recipe: Lemon Curd Sponge Tart Serves 6-8

350g/ All Butter Shortcrust Pastry – see my recipe here

4 Heaped Tablespoons Lemon Curd – I use Waitrose own label

For the sponge

100g/4oz Unsalted Butter at room temperature

100g/4oz Caster Sugar

Zest of 2 Lemons – scrub with nail brush under hot water before zesting

1/8tsp Salt

2 Large Free Range Eggs

100g/4oz Plain White Flour – I use Wright’s Baking

1tsp Baking Powder

For the drizzle 

75g/3oz Icing Sugar (confectioners sugar)

Juice of 1-2 lemons

Method: Preheat the oven to 200C/180C fan, 400F, gas mark 6.

For this tart you will need a 20cm x 5cm (8in x 2in) round, fluted tart tin with loose bottom.

Note: For full step by step instructions with accompanying photographs for rolling out pastry, filling a tart case and blind baking, please see my recipe for Perfect Butter Shortcrust Pastry.

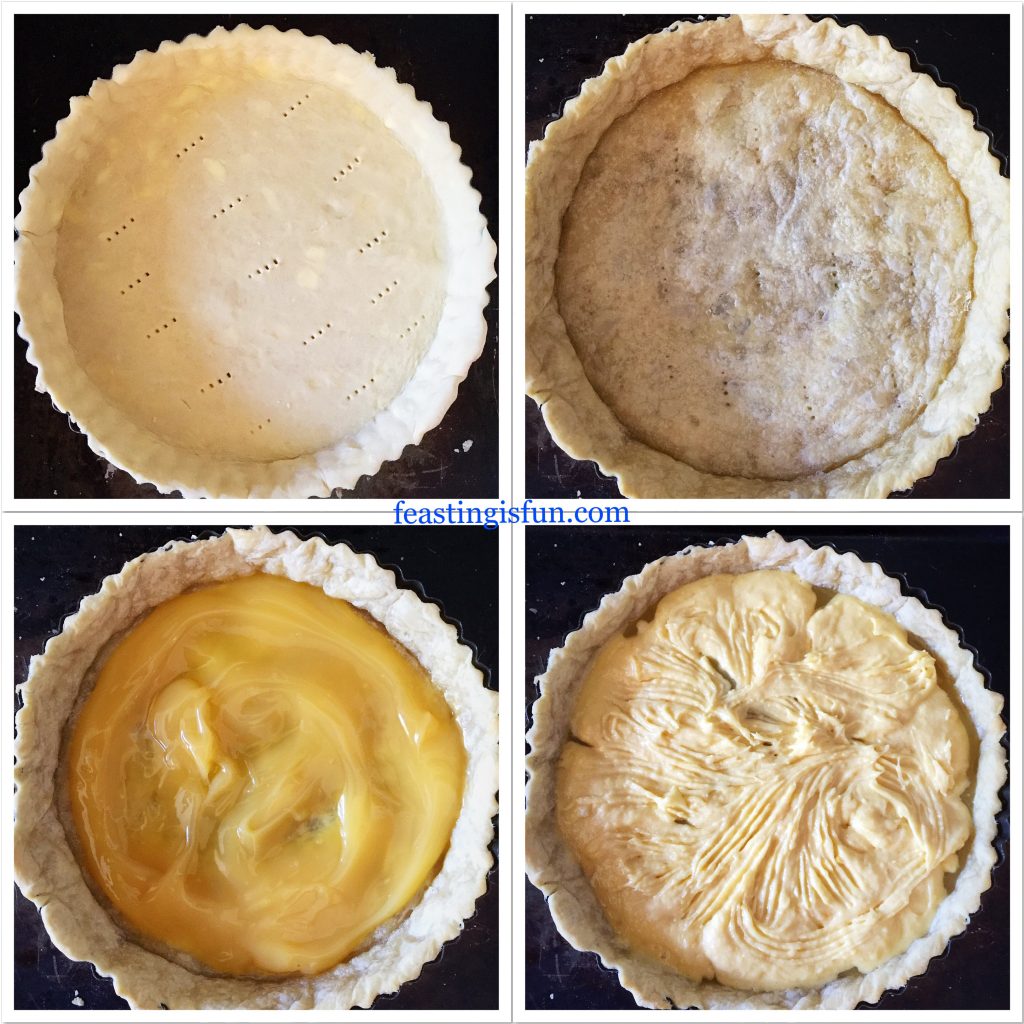
Making The Pastry Tart Case

  • First of all ensure that the pastry has been chilled in the fridge for at least one hour.
  • Lightly dust the worktop with flour and roll the pastry out to a circle that is slightly wider than the tart tin.
  • Loop the pastry over the rolling pin and allow it to fall gently into the tart tin.
  • Carefully press the pastry into the sides and base of the tin.
  • Trim away any excess pastry.
  • Dock the pastry base with a fork to stop it rising during baking.
  • Scrunch up some baking parchment and line the pastry case with it. And then fill with baking beans/ceramic balls.
  • Place the tin into the centre of a preheated oven and bake for 15 minutes.
  • As soon as the baking time is finished remove the tart from the oven.
  • Carefully use the baking parchment to lift the beans out of the partly baked tart shell.
  • Return the tart to the oven for a further 5 minutes.
  • And then remove the blind baked pastry from the oven and allow to cool.
  • Reduce the oven temperature to 180C/160C fan, 350F, gas mark 4.
  • While the pastry is cooling make the lemon sponge.

Making The Lemon Sponge And Filling The Tart Shell

  • Into a medium sized bowl add the butter, caster sugar and salt. Whisk the ingredients together until pale and creamy.
  • Add 2 eggs and sift in the plain flour and baking powder. Whisk until just combined.
  • Now add the zest of 2 whole lemons. Stir with a large spoon to mix.
  • Spoon the lemon curd into the cooled tart shell and spread to form an even layer.
  • Next, spoon the cake batter on top of the curd in small amounts. And then use a fork to spread the cake batter, forming an even layer.


Making the sponge filled tart case.
  • Place the filled tart back into the centre of the oven and bake for 35-40 minutes.
  • The sponge layer is baked when it is golden in colour and springs back when lightly pressed in the centre.
  • As soon as the tart is baked remove from the oven and leave to cool completely.
The baked Lemon Curd Sponge Tart
  • Once the tart is cool remove from the loose bottom tart tin and place on to a plate.

Making The Lemon Drizzle And Finishing The Tart

  • Sift the icing sugar into a bowl.
  • Stir as you add the lemon juice until you have a consistency that can be drizzled from a spoon.
  • Spoon the lemon drizzle over the top of the sponge, stopping at the pastry edge.
  • Leave to set. In warm weather, or to speed up the process refrigerate the tart.
FF Lemon Curd Sponge Tart
Adding the fresh lemon drizzle to the cooled tart.

Finally, slice the cooled tart and serve on a plate with a drink of your choice.

Store any leftover tart for up to 5 days in an airtight container in the fridge.

Lemon Curd Sponge Tart

Golden lemon layers set this dessert apart from anything you might buy in the supermarket.

FF Lemon Curd Sponge Tart
Lemon Curd Sponge Tart each district separate layer.

If you have enjoyed this recipe for Lemon Curd Sponge Tart you may also like these:

Lemon Blueberry Bundt Cake

FF Lemon Blueberry Bundt Cake
Lemon Blueberry Bundt Cake

Raspberry Topped Lemon Curd Pavlova 

FF Raspberry Topped Lemon Curd Pavlova
Raspberry Topped Lemon Curd Pavlova

Lemon Drizzle Loaf Cake

FF Lemon Drizzle Loaf Cake
Lemon Drizzle Loaf Cake

As well as enjoying baking to feed my family, friends and neighbours, I also find the process relaxing. Even with the health constraints of my body, which can be very frustrating, I am still able to make a beautiful dessert such as this lemon creation. Since I break down the process over 2 days, making and baking the filled tart one day and then decorating and photographing it the next, I am able to still carry out an activity I enjoy and also achieve a sense of satisfaction. Both of which are important in maintaining a sense of independence and uplifting metal well being. Baking is a form of therapy for me.

Whatever you are making, baking and creating in your kitchens, have fun preparing and sharing your feast.

Sammie xx

No part of this post may be reproduced or duplicated without the written permission of the owner. Please see my Disclosure Policy.
Additionally, the bluebells featured in the photos are from our garden, yet THEY ARE NOT EDIBLE. All parts are toxic, do not use to decorate your bakes.

Double Strawberry Cake Bars

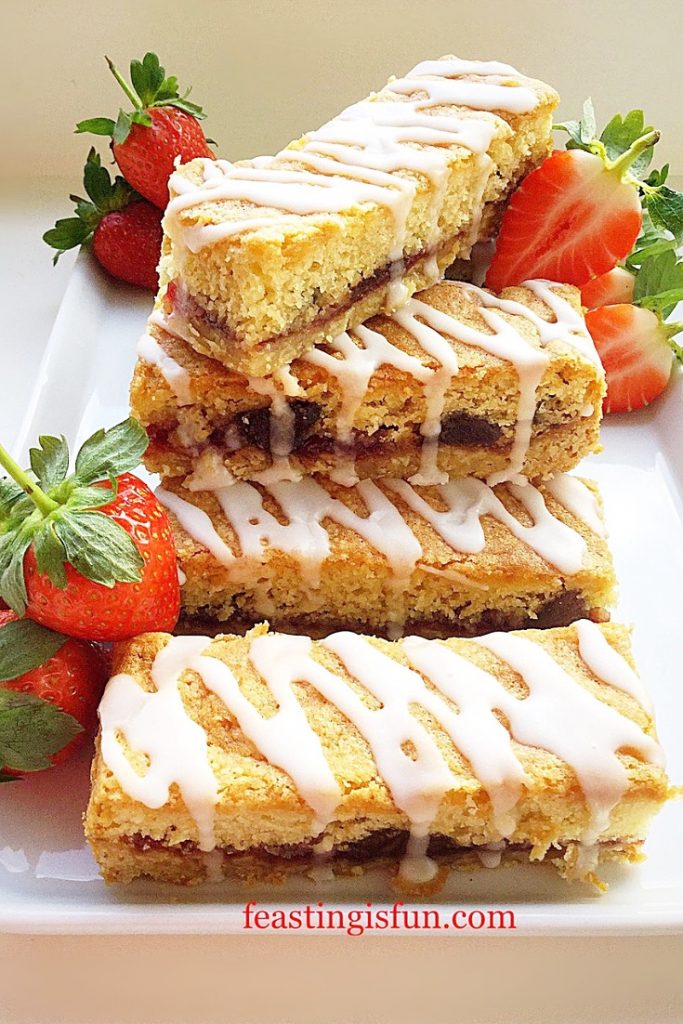
We are now in a brand new year, chances, decisions, opportunities and endless possibilities lay before us. I adore the start of January. Christmas decorations packed away and a return to ‘normality’. With this blog I want to bring you even more easy, yet delicious recipes and also add more savoury dishes to the menu. Let’s start with these Double Strawberry Cake Bars.

FF Double Strawberry Cake Bars

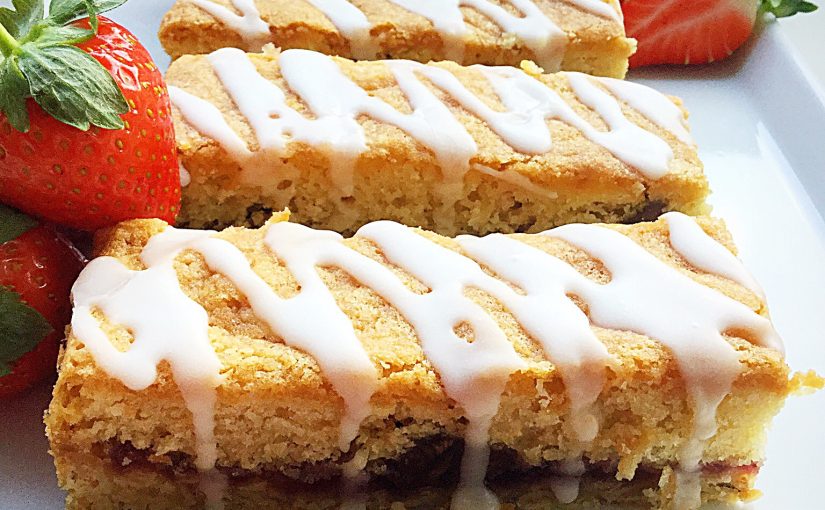
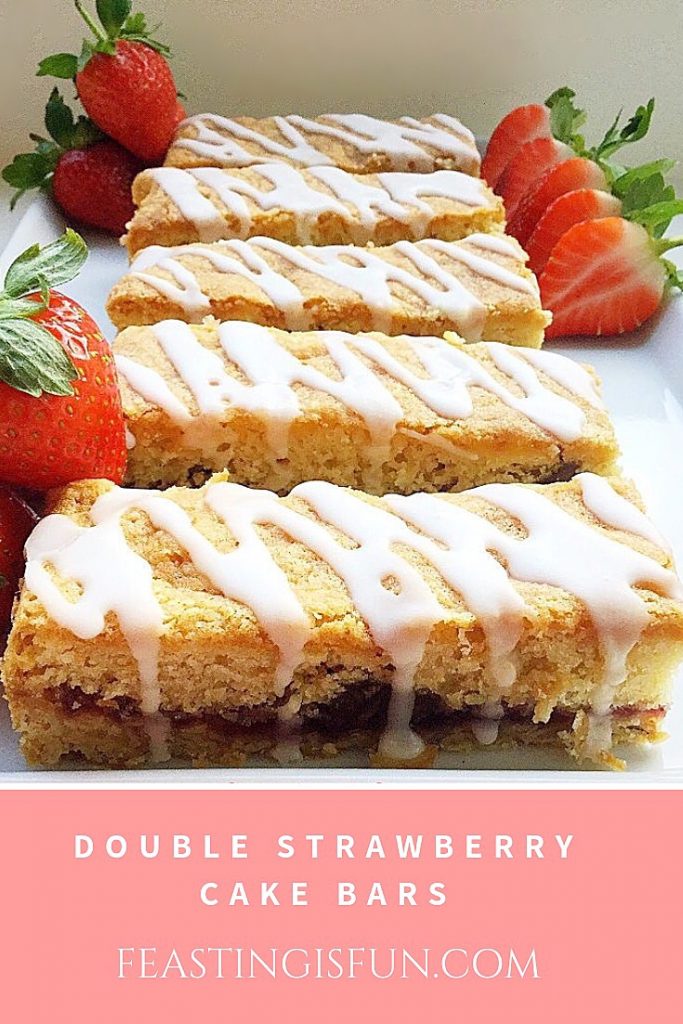
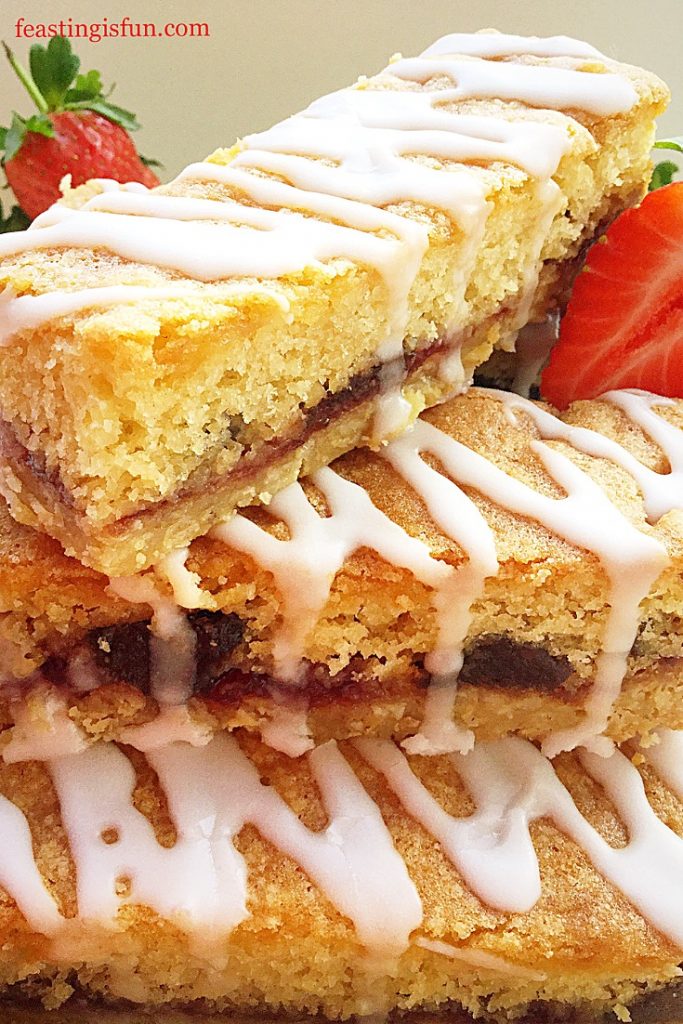
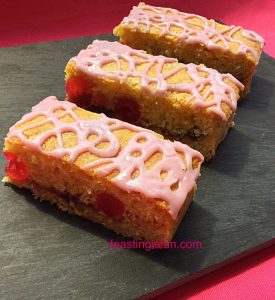
A crisp, oat biscuit base is topped with strawberry jam and then topped with a vanilla cake sponge studded with oven dried strawberries. Urban Fruits sell a range of dried fruits that I have used in previous bakes such as my Strawberry Oat Crumble Cookies. Although the strawberries are dried they are not dry. Think dried apricots. Intense fruit flavour with a chewy bite. Used in these cake bars the strawberries bring an extra depth of flavour as well as texture.

FF Double Strawberry Cake Bars
Double Strawberry Cake Bars

Portable Food

Since my hubby takes a packed lunch to work I try to come up with recipes that travel well. Because these cake bars have a solid biscuit base they are easy to wrap and pop into a lunch box. Likewise, during warmer months they are ideal for picnics. Food that travels well is always a bonus, as it is perfect for taking to friends homes, family get togethers and pot luck gatherings.

FF Double Strawberry Cake Bars
Double Strawberry Cake Bars

Also these cake bars are perfect for munching on, book in one hand, snack in the other. Sometimes I find a book that I cannot put down and happily munch away whilst reading.

Recipe – Double Strawberry Cake Bars makes 16

For the biscuit base 

225g/8oz Unsalted Butter at room temperature

150g/5oz Caster Sugar

1/4tsp Sea Salt (1/8tsp table salt)

1tsp Vanilla Extract – I use Nielsen-Massey 

1 Large Free Range Egg Yolk

150g/5oz Rolled Oats (not quick cook)

125g/4.5oz Plain White Flour

175g/6oz (Half a jar of) Strawberry Jam

For the cake layer 

175g/6oz Unsalted Butter at room temperature

175g/6oz Caster Sugar (I have used golden caster sugar as that’s what was in the cupboard!)

1/4tsp Sea Salt (1/8tsp table salt)

2tsp Vanilla Extract

3 Large Free Range Eggs

175g/6oz Plain White Flour

2tsp Baking Powder

90g/4oz Oven Dried Strawberries – I use 1 packet of Urban Fruit Smashing Strawberry

For the icing drizzle

100g/4oz Icing Sugar (Confectioners Sugar)

2-3 tbsp Fresh Lemon Juice

Method:

Making The Oat Biscuit Base

  • First of all line a 22.5cm x 30cm (9” x 12”) deep tin with baking parchment.
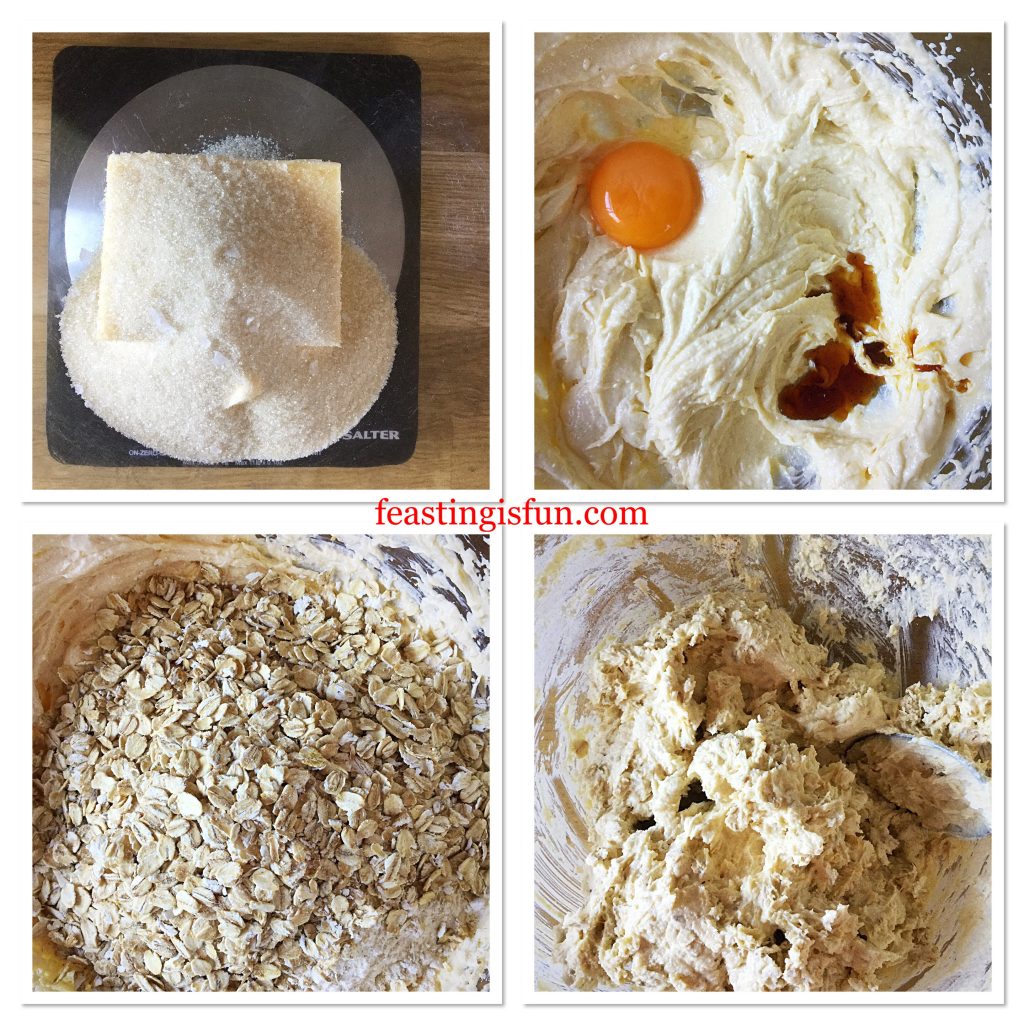
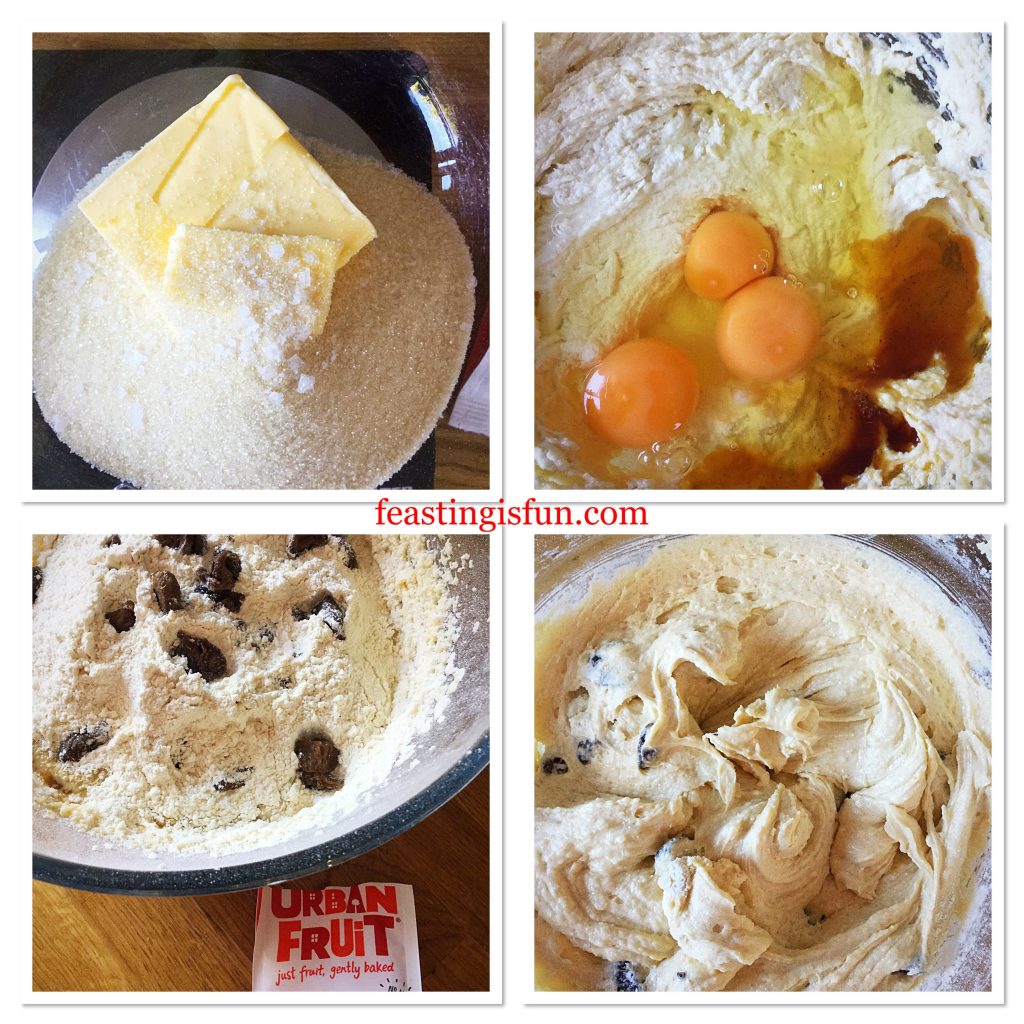
  • Into a large bowl add the butter, sugar and salt. Whisk together until pale and creamy.
  • Next add the egg yolk and vanilla extract. Whisk together until combined.
  • Sift in the flour and add the oats.
  • Using a large spoon mix the ingredients together until fully combined.


FF Double Strawberry Cake Bars
Making the oat biscuit base.
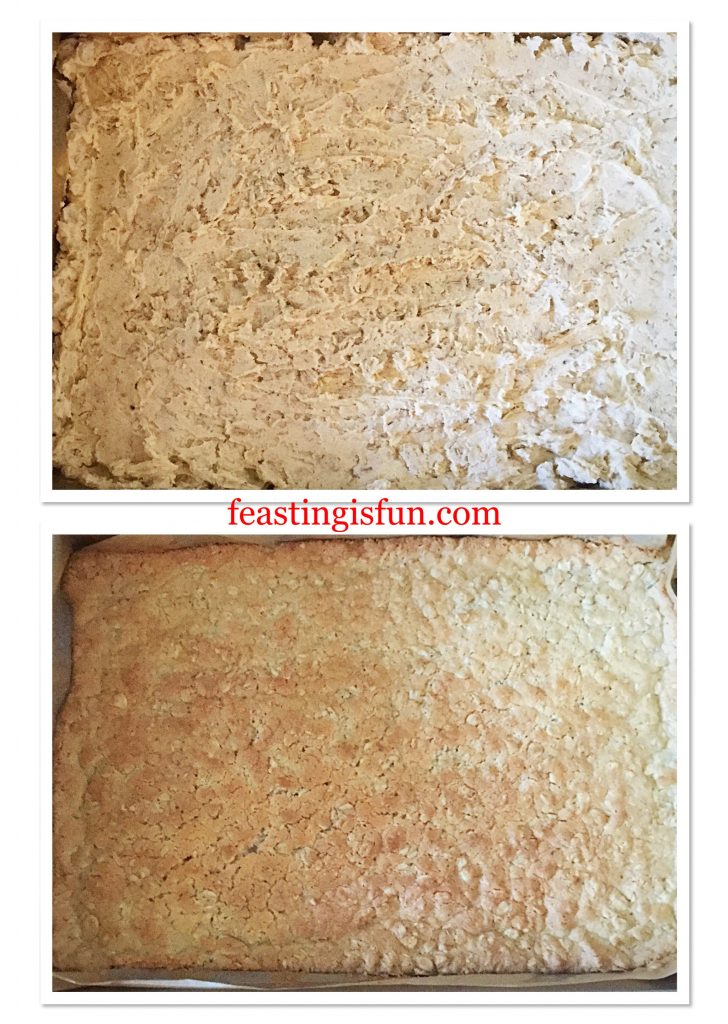
  • Spoon the oat biscuit mixture into the prepared tin. Smooth with the back of a spoon to create an even layer.
  • Place the tin into the fridge for 30 minutes.
  • While the biscuit base is firming up in the fridge preheat the oven to 180C/160C fan, 350F, gas mark 4. 
  • As soon as the base has chilled place the tin into the centre of the oven and bake for 20 minutes.
  • Remove the tin and immediately reduce the oven temperature to 160C/140C fan, 325F, gas mark 3.
FF Double Strawberry Cake Bars
Chilling and baking the oat biscuit base.
  • While the base is cooling make the cake batter.

Making And Adding The Cake Batter

  • Add the butter, sugar and salt to a large bowl and whisk until combined.
  • Next add 3 eggs and the vanilla extract. Whisk until combined.
  • Sift in the flour and baking powder then add the dried strawberries.
  • Stir with a spoon until the cake batter just comes together.


FF Double Strawberry Cake Bars
Making the cake batter.
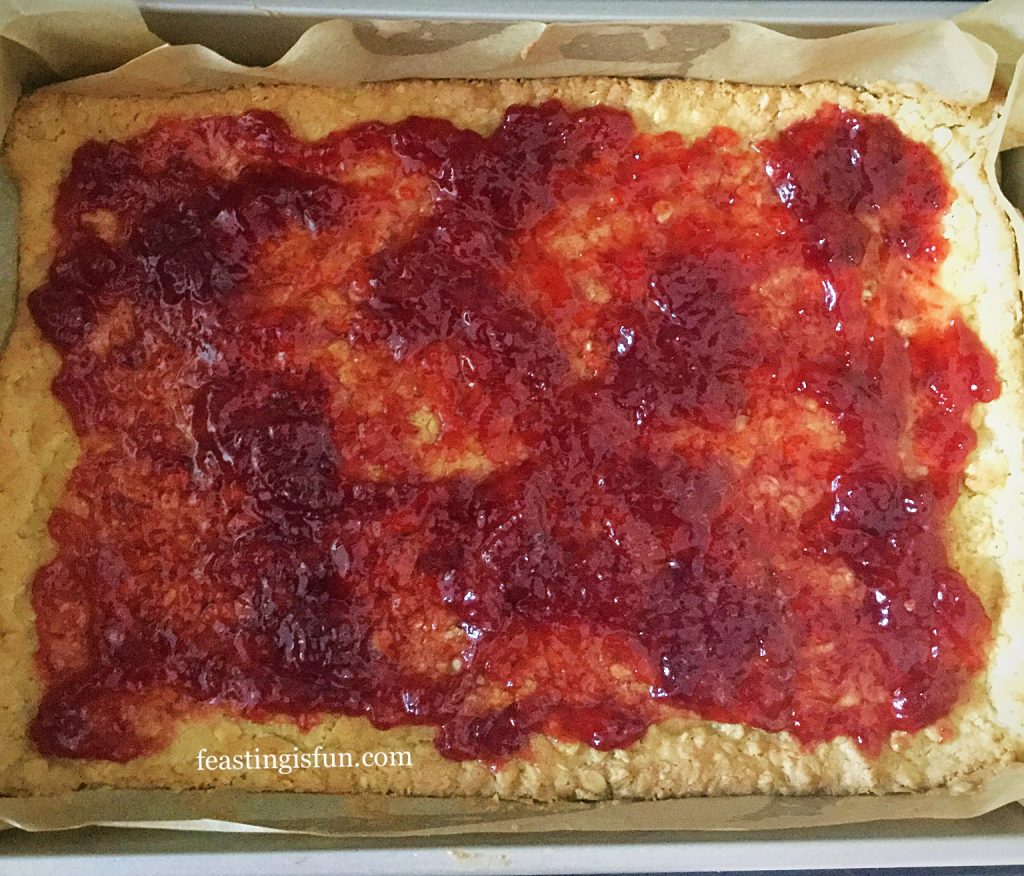
  • Spoon strawberry jam on to the biscuit base, using the back of a spoon to create an even layer that does not touch the edges.
FF Double Strawberry Cake Bars
Adding a layer of jam.
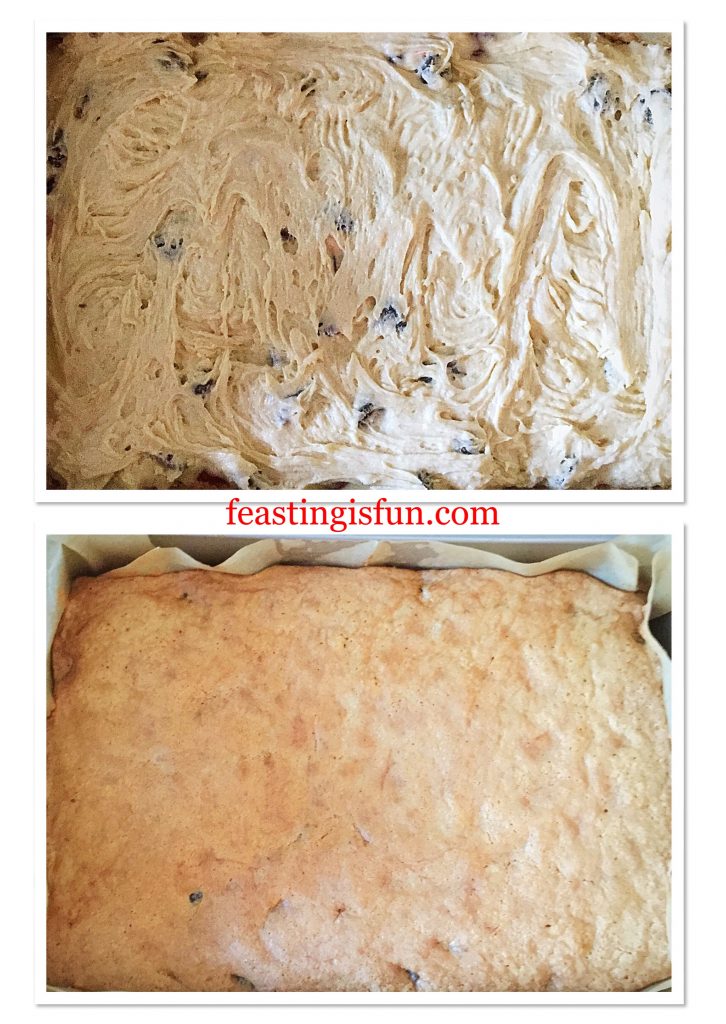
  • Cover the layer of jam with cake batter. I found it easier to create an even layer using a fork.
  • Ensure the cake batter goes right to the edge. Doing so stops the jam from leaking out.
  • Place the tin into the centre of the oven and bake for 45-50 minutes.
FF Double Strawberry Cake Bars
Adding the strawberry cake layer and baking.
  • The cake layer is fully baked when it is lightly pressed and springs back in the centre.
  • As soon as it is baked remove from the oven.
  • Leave to cool completely in the tin.
  • As soon as the cake is cooled lift it out of the tin using the baking parchment to help.

Portioning And Decorating The Cake Bars

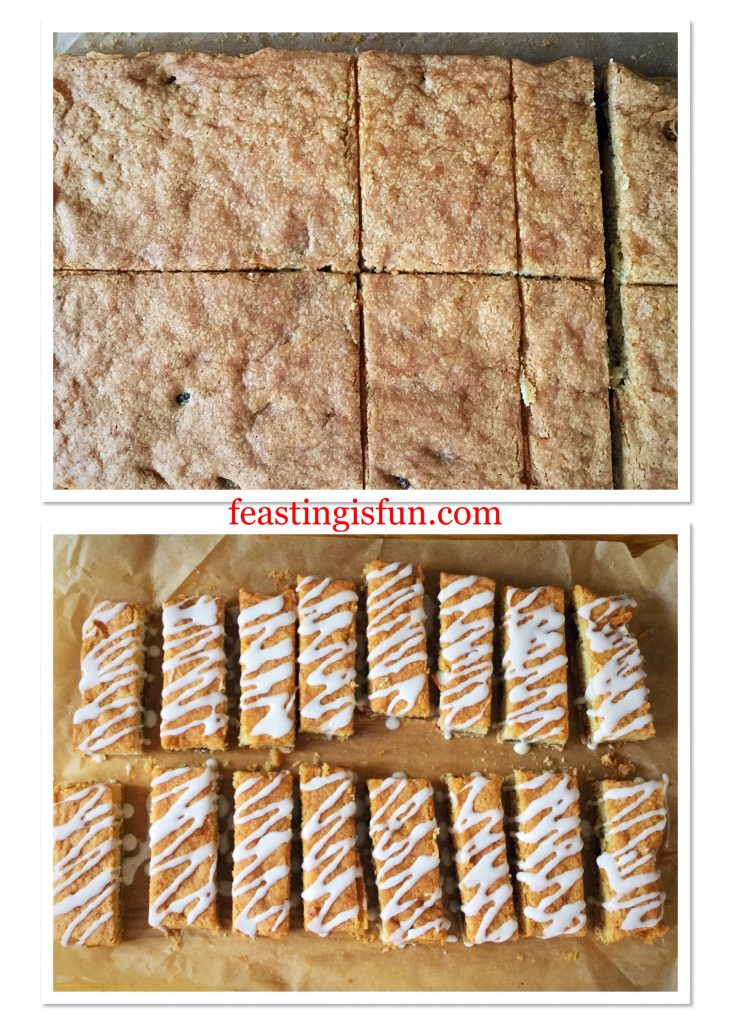
  • First of all, using a sharp knife cut halfway across the width of the bake.
  • Next cut down the centre, creating 4 quarters.
  • Cut down each quarter four times creating 4 Cake Bars per quarter.
  • Separate the cake bars to enable the icing to drip down the sides.
  • In a bowl mix the icing sugar with 2-3 tablespoons of lemon juice to create a thick yet flowing icing.
  • Using either a fork or a piping bag with a very small hole, drizzle the icing diagonally across each cake bar.
  • Leave to set.
FF Double Strawberry Cake Bars
Portioning and decorating the Double Strawberry Cake Bars.
  • As soon as the icing is set, the cake bars can be served or stored in an airtight container.
FF Double Strawberry Cake Bars
Double Strawberry Cake Bars


FF Double Strawberry Cake Bars
Double Strawberry Cake Bars

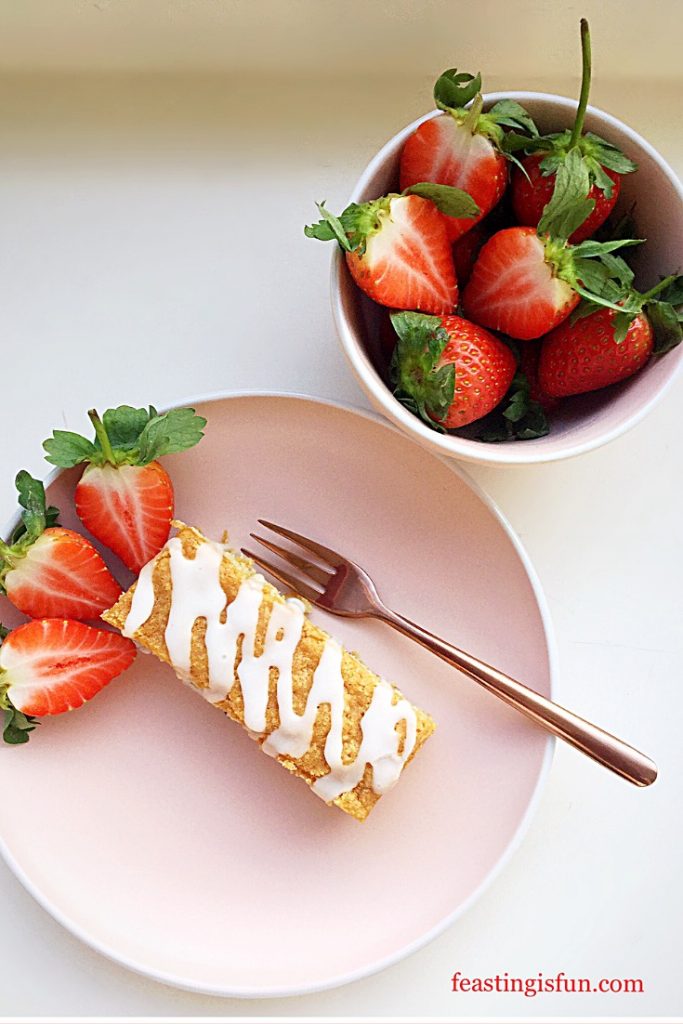
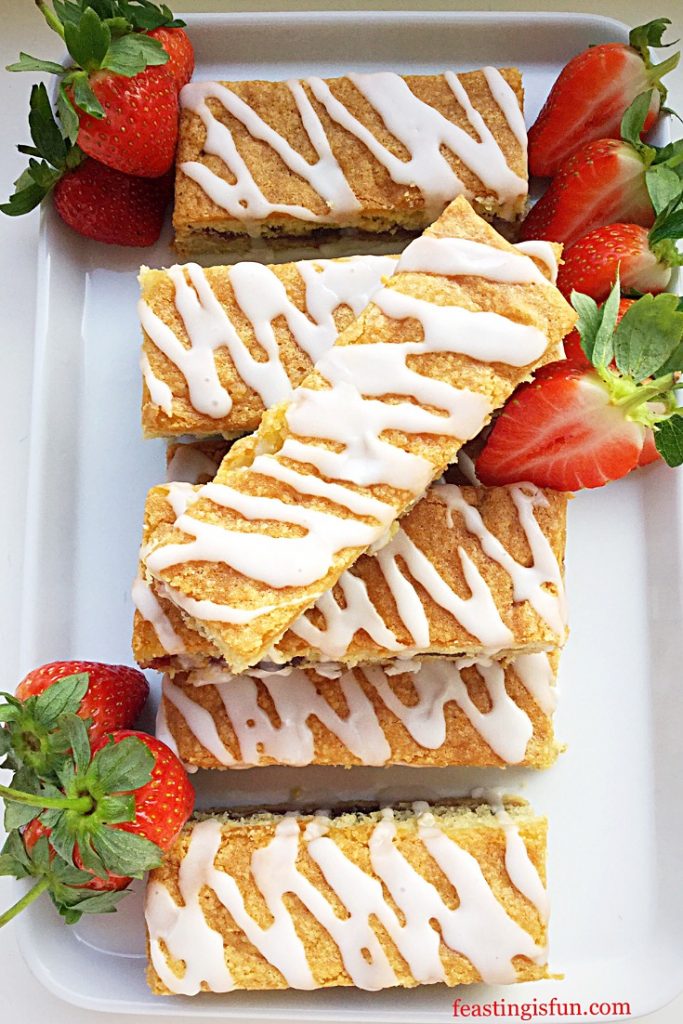
Finally, when serving, add fresh strawberries to the plate and stack the cake bars to create height.

If you have enjoyed this recipe for Double Strawberry Cake Bars you may also like these:

Cinnamon Drizzle Apple Walnut Cake Bars

FF Double Strawberry Cake Bars
Cinnamon Drizzle Apple Walnut Cake Bars

Rich Raspberry Chocolate Fudge Brownies 

FF Double Strawberry Cake Bars
Rich Raspberry Chocolate Fudge Brownies

Double Cherry Drizzle Oat Cake Bars

FF Double Strawberry Cake Bars
Double Cherry Drizzle Oat Cake Bars

Because I am practical by nature, this naturally translates in the recipes I develop. For example, when making these for a picnic or outside event it is likely that I would leave off the drizzle. Simply to avoid attracting bugs and wasps. Although the lemon in the icing really does bring out the strawberry flavour. Perhaps adding a little lemon zest to the cake? And I’m off again, my head spinning with possibilities based around this one bake!

Whatever you are making, baking and creating in your kitchens, have fun preparing sharing your feast.

Sammie xx

No part of this post may be reproduced or duplicated without the written permission of the owner. Please see my Disclosure Policy.


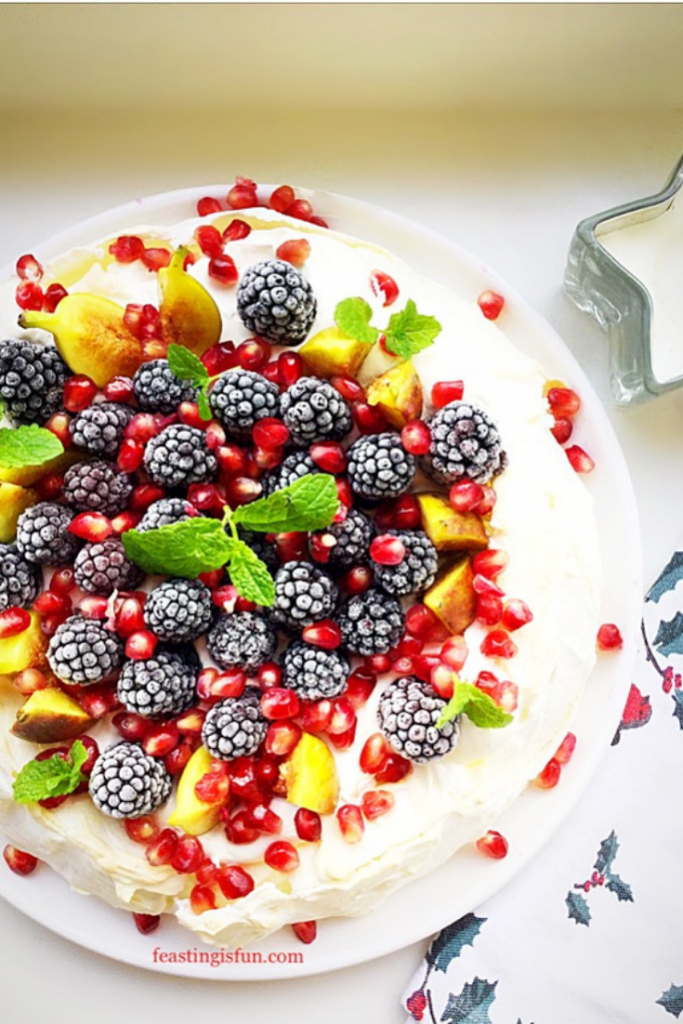
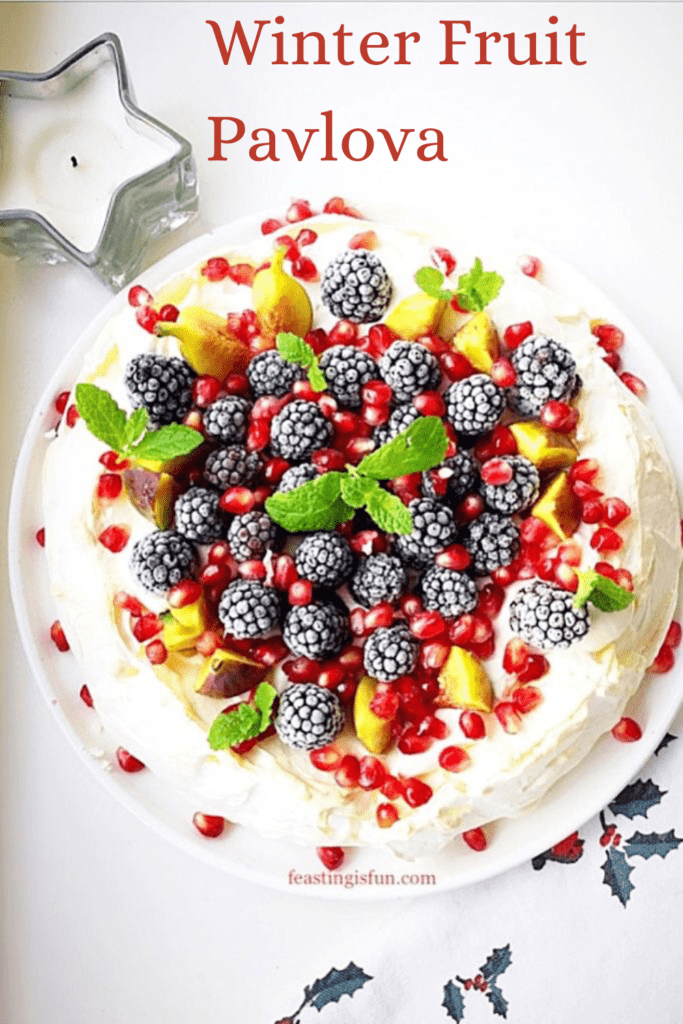
Winter Fruit Topped Pavlova

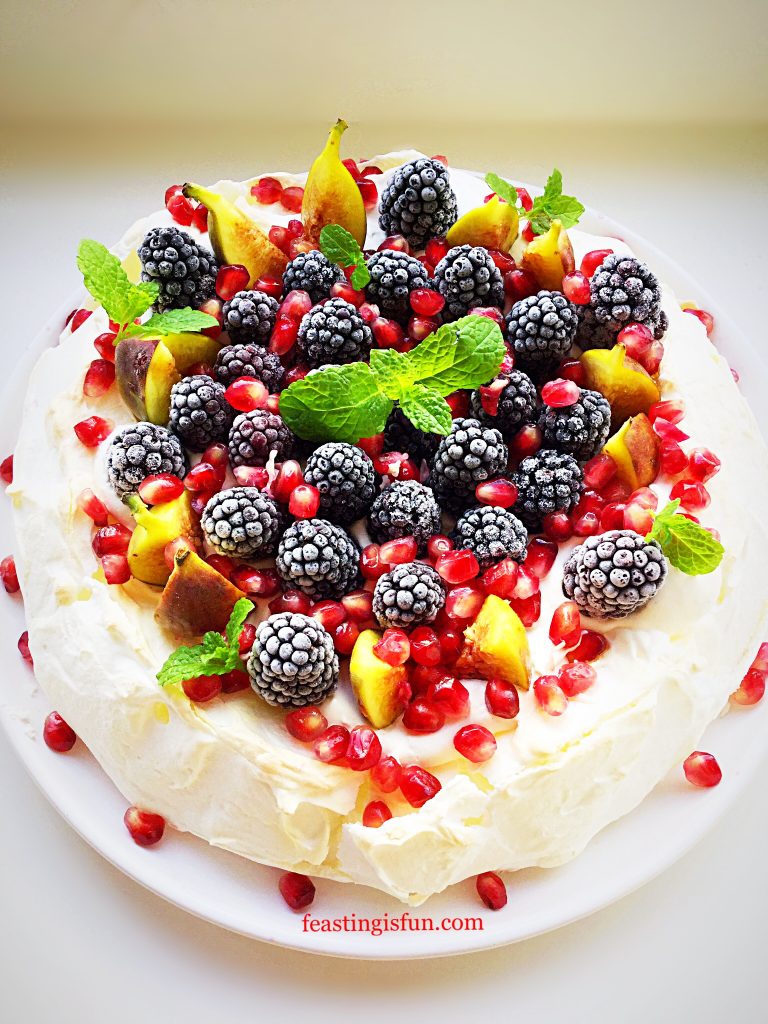
Finally December is here, heralding the start of Winter. And with it we celebrate a month of festive planning, carols by candlelight and sellotape everywhere! While, here at home, there are also two birthdays during December, the celebrating can seem never ending. Since there’s only so much cake you can eat, fear not, because this gluten free Winter Fruit Topped Pavlova is the perfect celebratory dessert.

FF Winter Fruit Topped Pavlova

Tips For The Perfect Pavlova:

For me, Pavlovas always feel like such an elegant dessert. Since they are simple to make as long as you follow a few basic rules. And they cannot, must not and should not be rushed. Either during the whisking or baking stage. While whisking, all of the sugar must be given time to dissolve in the egg white, otherwise it will leak out during cooling and the meringue will collapse. Likewise, after baking it is important to leave the Pavlova to cool slowly, preferably in the oven. Rushing this stage can cause the meringue structure to badly crack.

FF Winter Fruit Topped Pavlova
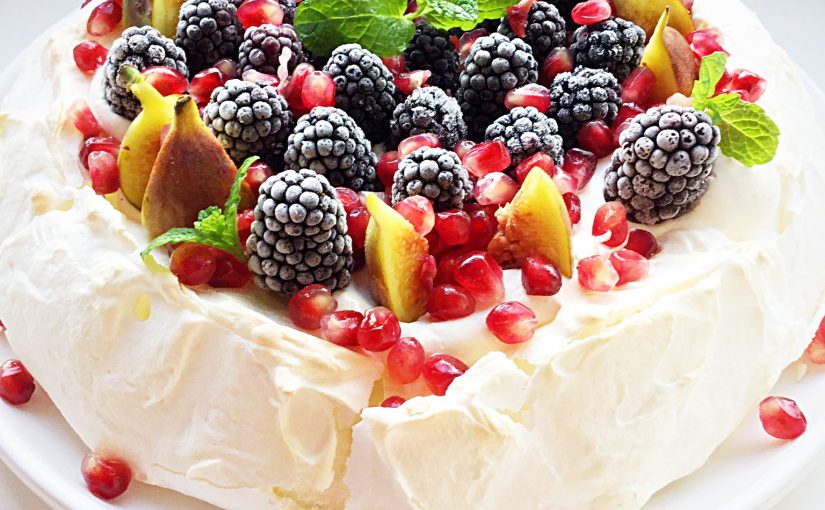
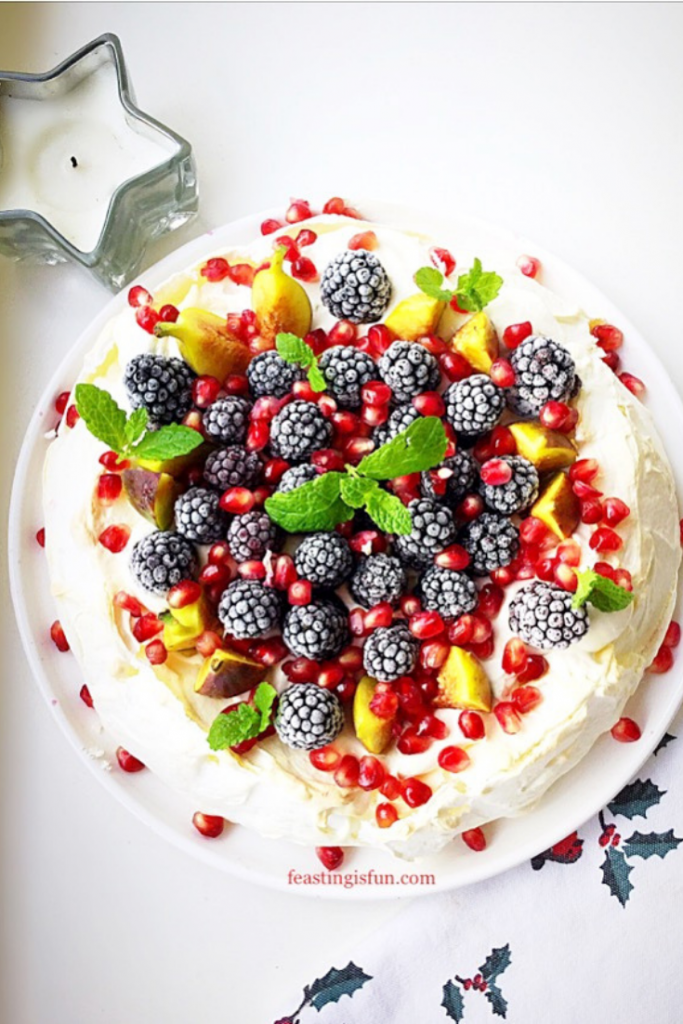
Winter Fruit Topped Pavlova

Please do not let the previous advice discourage you from making a pavlova. Rather I hope it has the opposite effect and encourages you. Because, taking an extra five minutes (that’s 5 minutes not forever!) to ensure the meringue is properly mixed will improve your bake.. Another tip is to bake the Pavlova in the evening, leaving it in the oven overnight to cool. Since this allows the meringue to cool slowly overnight without tying up the oven. Resulting in a quick assembly job the next day and easy your festive workload!

FF Winter Fruit Topped Pavlova
Winter Fruit Topped Pavlova

And if the meringue does crack, it will be covered with whipped cream and fruit. While no one ever need know!

Recipe: Winter Fruit Topped Pavlova serves 8

4 Large Free Range Egg Whites

200g/7oz Caster Sugar

Juice of half a Lemon

400ml Double Cream (Heavy Cream)

1tsp Vanilla Bean Paste – I use Nielsen-Massey 

4 Fresh Figs – cut into quarters

300g Frozen Blackberries – I buy them from Waitrose 

1-2 Fresh Pomegranates – seeds removed

Optional – Fresh Mint to garnish

Preheat the oven to 180C/160C fan, 350F, gas mark 4

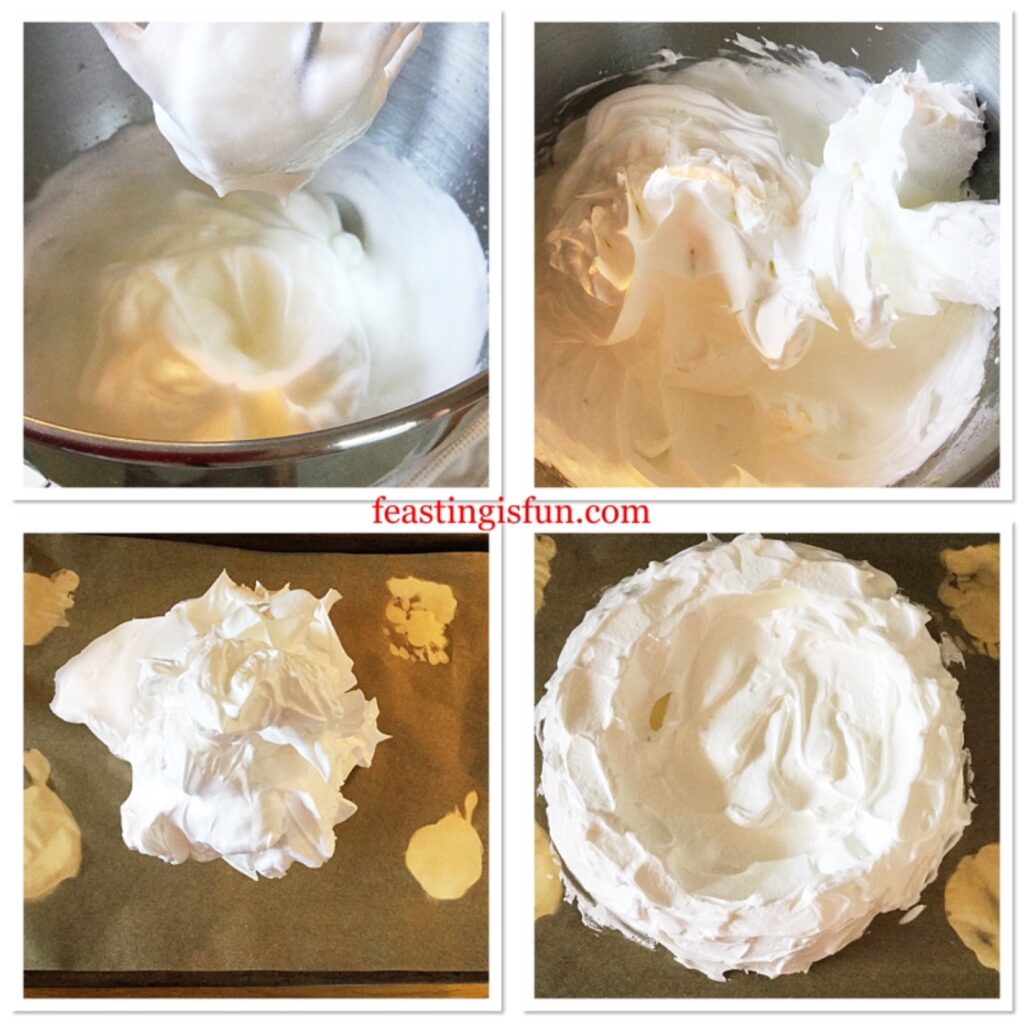
Making the meringue base:

  • First of all draw an 8in/20cm circle on to a piece of baking parchment. Turn the paper over and place on to a baking tray.
  • Wipe around the inside of a very clean, large bowl with half a lemon.
  • Add four eggs white to the bowl and the juice of half a lemon.
  • Whisk the egg whites until they form a stiff peak.
  • Continue whisking on a medium speed, slowly adding one tablespoon of sugar at a time to the egg whites.
  • When all of the sugar is added the mixture should be thick and glossy. Rub a little of the meringue between your finger and thumb, if it feels gritty continue to whisk. Check again after a couple of minutes. As soon as it feels smooth and silky it is ready.
  • Remove a small amount of the meringue and use it as glue to stick the baking parchment to the baking tray.
  • Spoon the meringue mixture on to the baking parchment, inside the circle.
  • Use a palette knife to shape the meringue into a disc, building up the outside edge.

Making and shaping a meringue.

Baking the meringue:

  • Place the meringue into the centre of the oven and bake at the preheated temperature for 5 minutes.
  • Reduce the oven temperature to 120C/100C fan, 250F, gas mark 1/2 and continue to bake for 1 hour.
  • Do not open the oven during baking.
  • As soon as the baking time has elapsed turn off the oven and leave the meringue  to cool completely in the oven.
  • Once cooled remove the meringue from the oven.

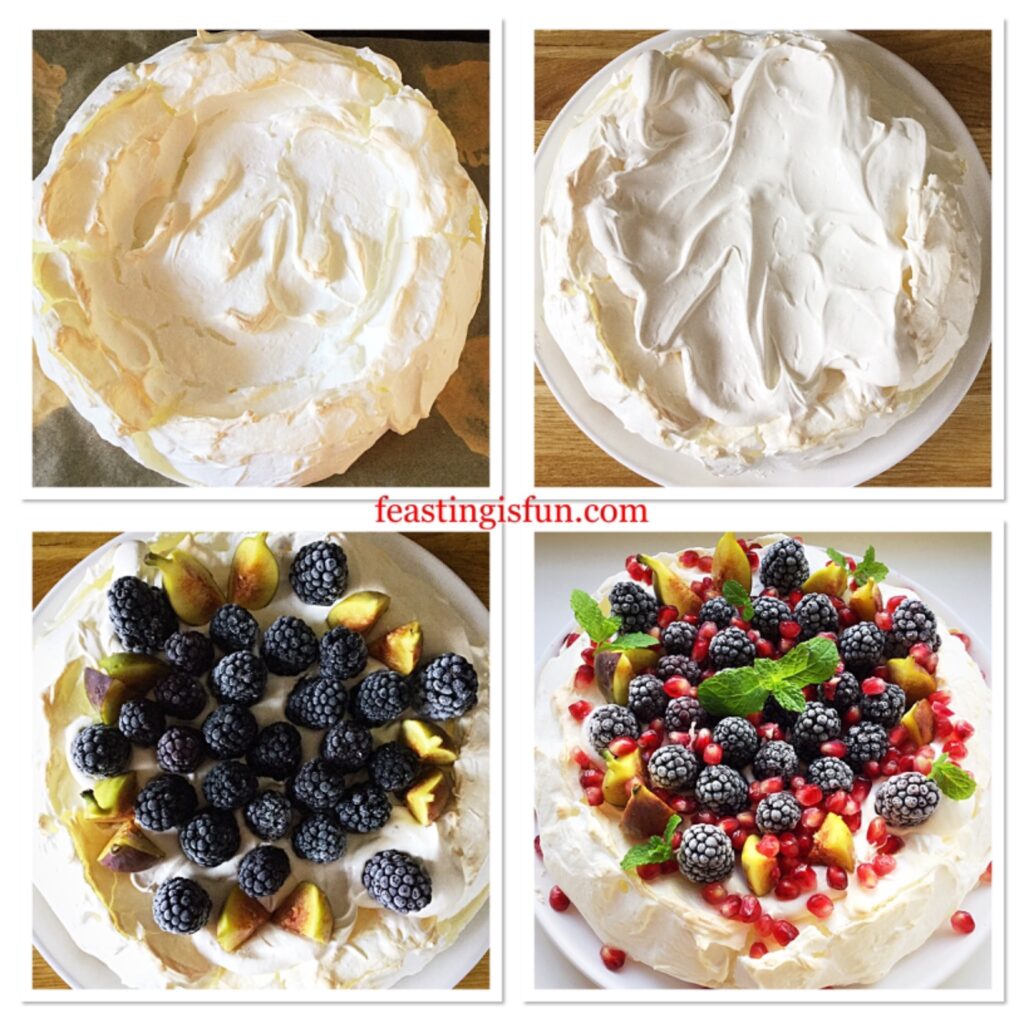
Filling and decorating the Pavlova:

  • Pour the cream into a large bowl. Add the vanilla bean paste.
  • Whip the cream until it is thick but not stiff.
  • Carefully run a palette knife between the meringue and baking parchment.
  • Place the meringue on to a plate or cake stand.
  • Spoon the whipped cream on to the meringue.
  • Add the figs and blackberries. Finally sprinkle over with pomegranate seeds.
  • Garnish with fresh mint.
  • Alternatively, sprinkle over a dusting of icing sugar to create an extra festive feel!

Filling and decorating a baked meringue.

Fill and decorate the Pavlova 1-2 hours prior to serving. So that the blackberries have time to defrost.

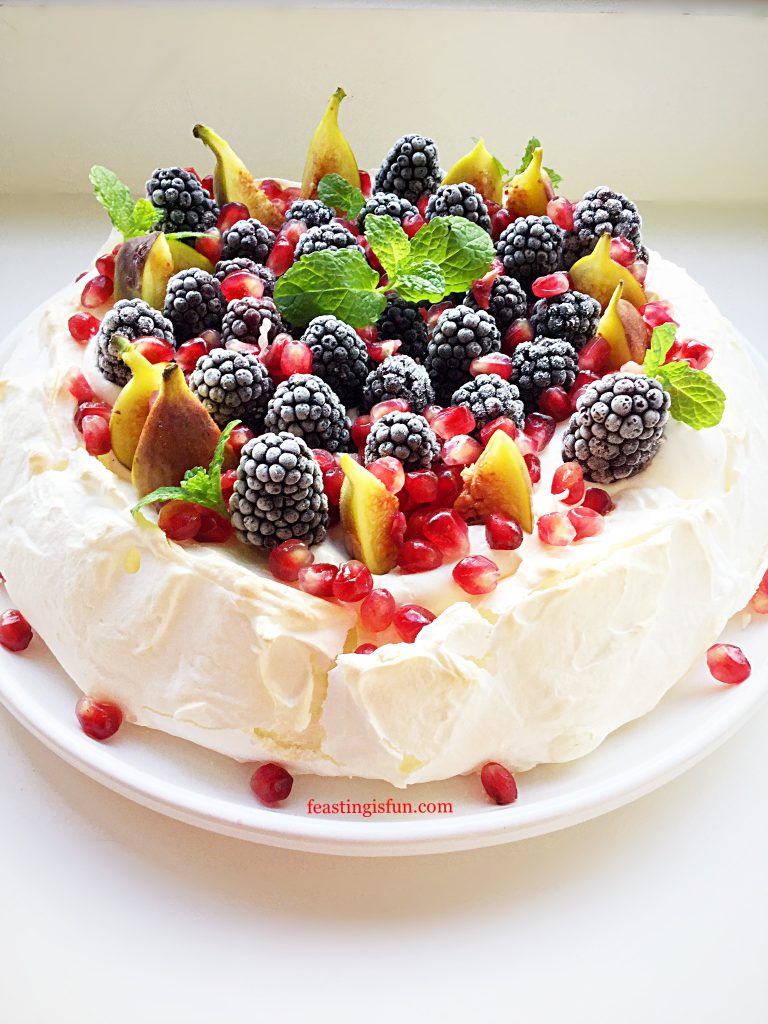
FF Winter Fruit Topped Pavlova
Winter Fruit Topped Pavlova

To serve, cut the Pavlova into slices and use a cake knife to transfer to a dessert plate.

The meringue pavlova base can be made a day in advance. After filling and decorating keep the Pavlova refrigerated and away from strong smells. The Pavlova will keep for up to 2 days in the fridge.

FF Winter Fruit Topped Pavlova

If you have enjoyed this recipe for Winter Fruit Topped Pavlova you may also like these:

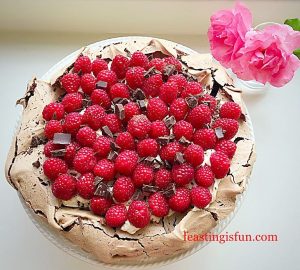
Raspberry Chocolate Pavlova 

FF Winter Fruit Topped Pavlova
Raspberry Chocolate Pavlova

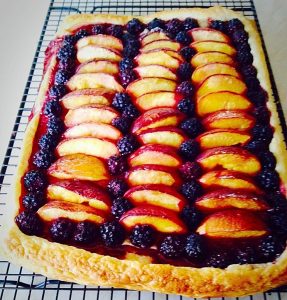
Blackberry Nectarine Tart 

FF Winter Fruit Topped Pavlova
Blackberry Nectarine Tart

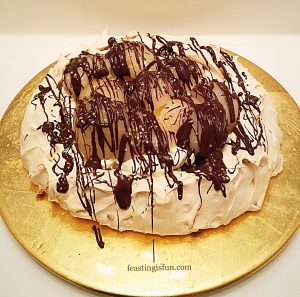
Dark Chocolate Drizzle Pear Ginger Pavlova 

FF Winter Fruit Topped Pavlova
Dark Chocolate Drizzle Pear Ginger Pavlova

With a crisp outer shell and marshmallow centre Pavlovas are a delicious dessert. Since they can be filled with many different combinations of fruit they are perfect for using seasonal or frozen fruit. While this recipe uses a whipped cream filling, see my Raspberry Topped Lemon Curd Pavlova for an alternative filling. Also, all Pavlova recipes here on Feasting is Fun are gluten free (please see individual recipes for recommendations). As a result this dessert is a festive winter feast that more people can enjoy.

So, whatever you are making, baking and creating in your kitchens at this festive time, have fun preparing and sharing your feast.

Sammie xx

No part of this post may be reproduced or duplicated without the written permission of the owner. Please see my Disclosure Policy.
Christmas meringue dessert.


Cinnamon Drizzle Apple Walnut Cake Bars

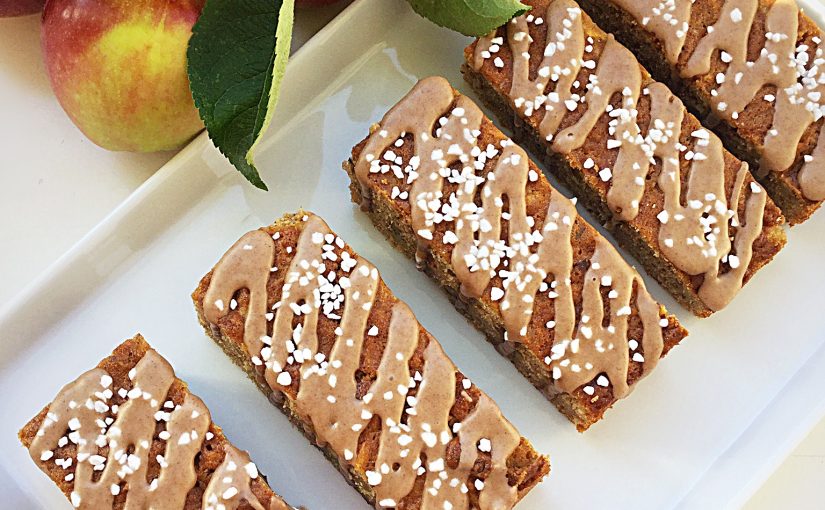
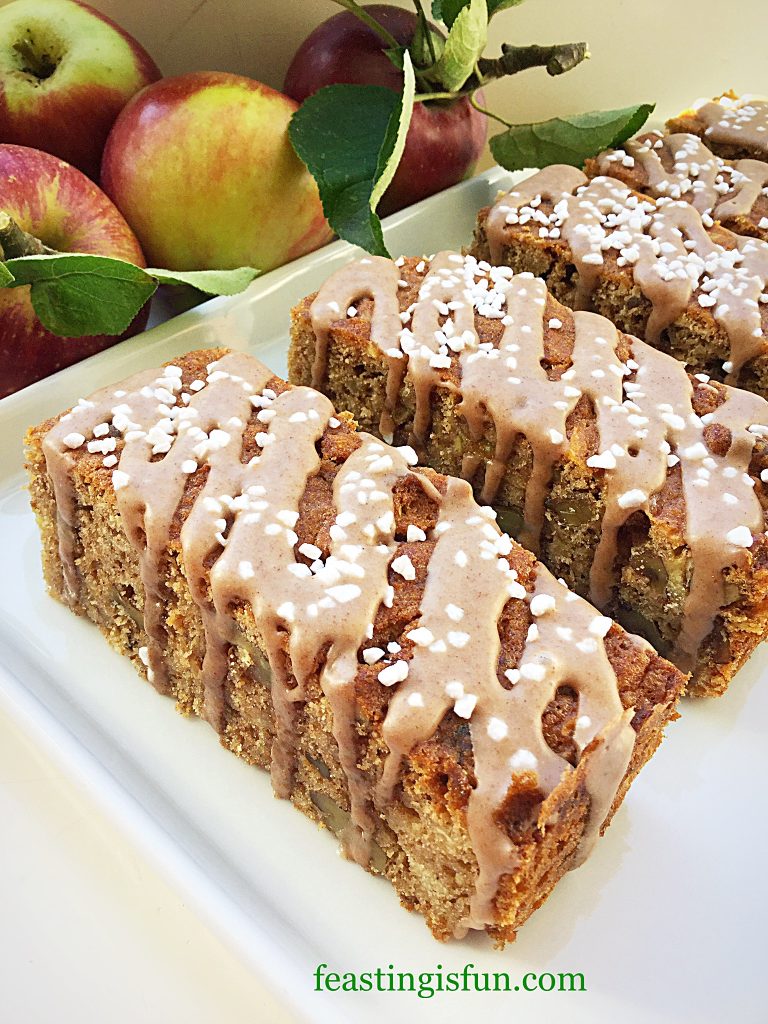
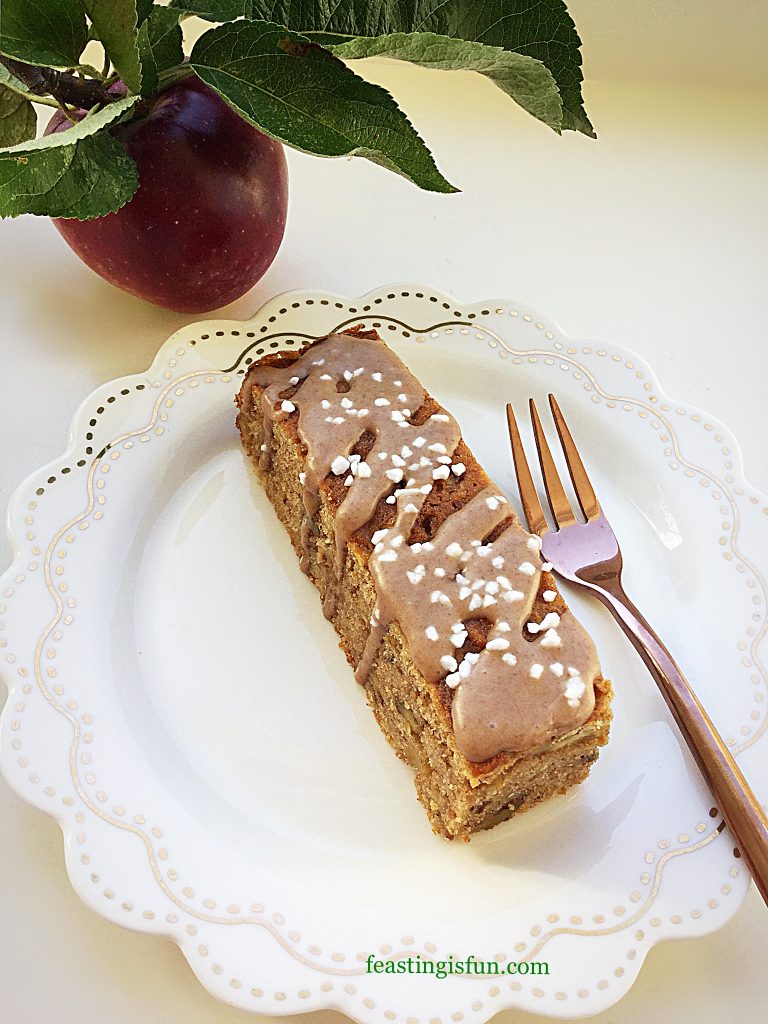
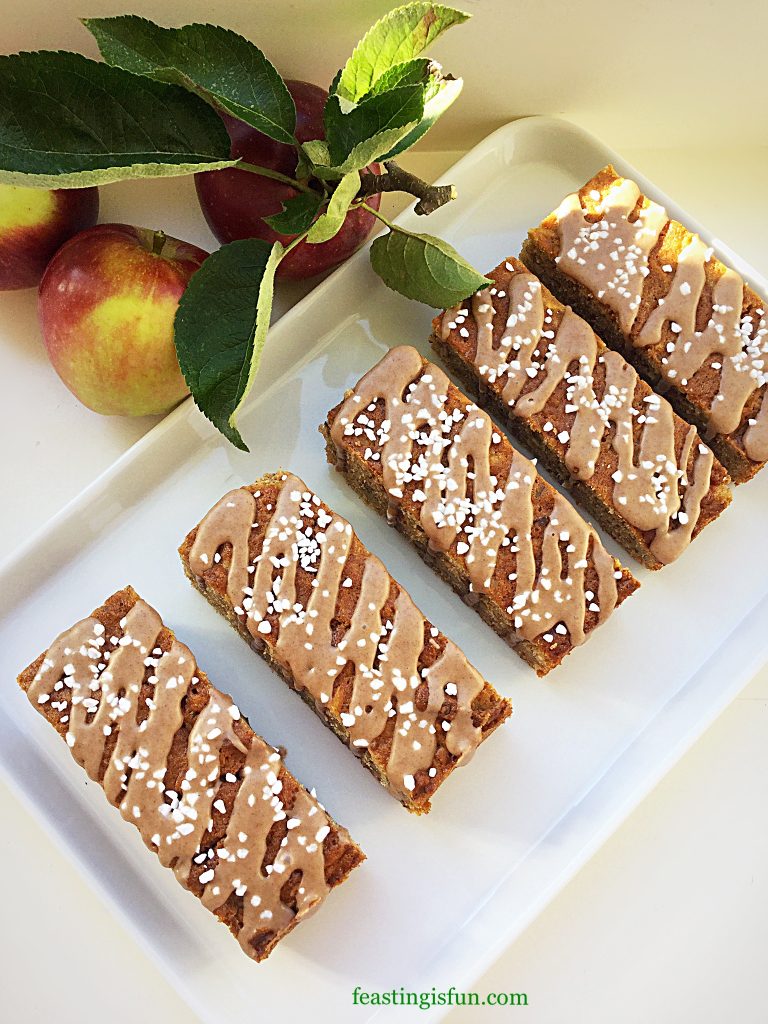
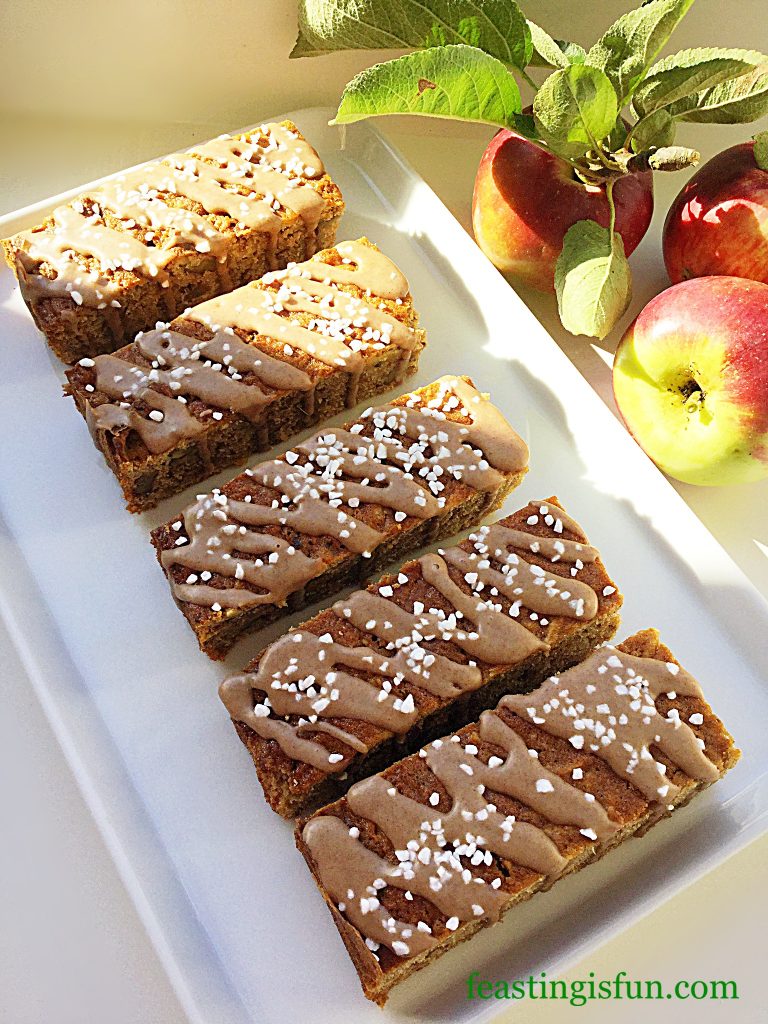
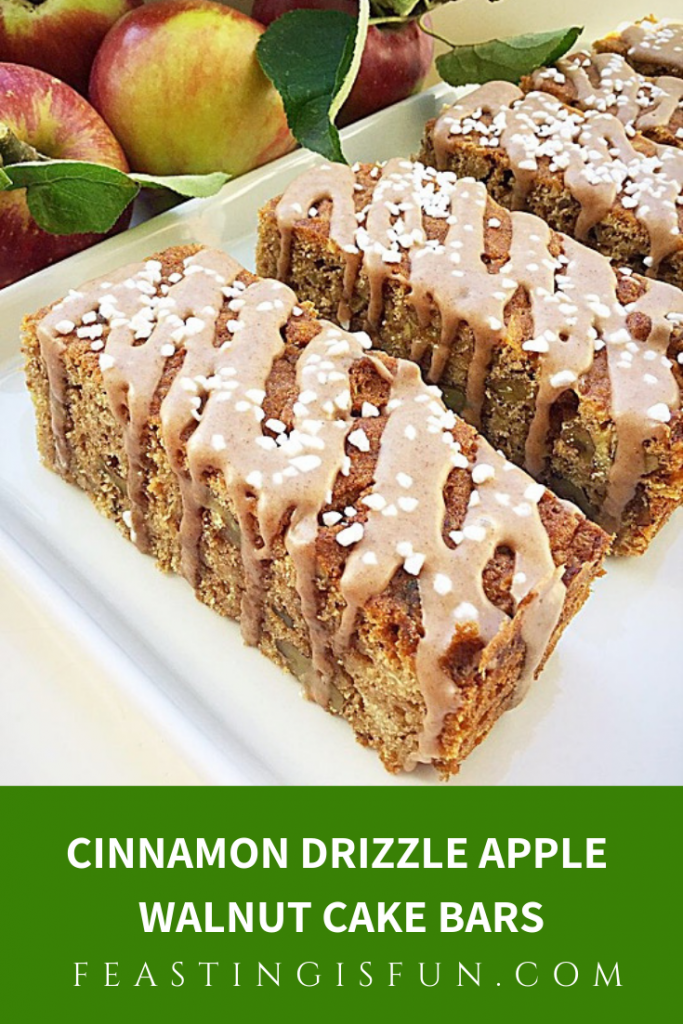
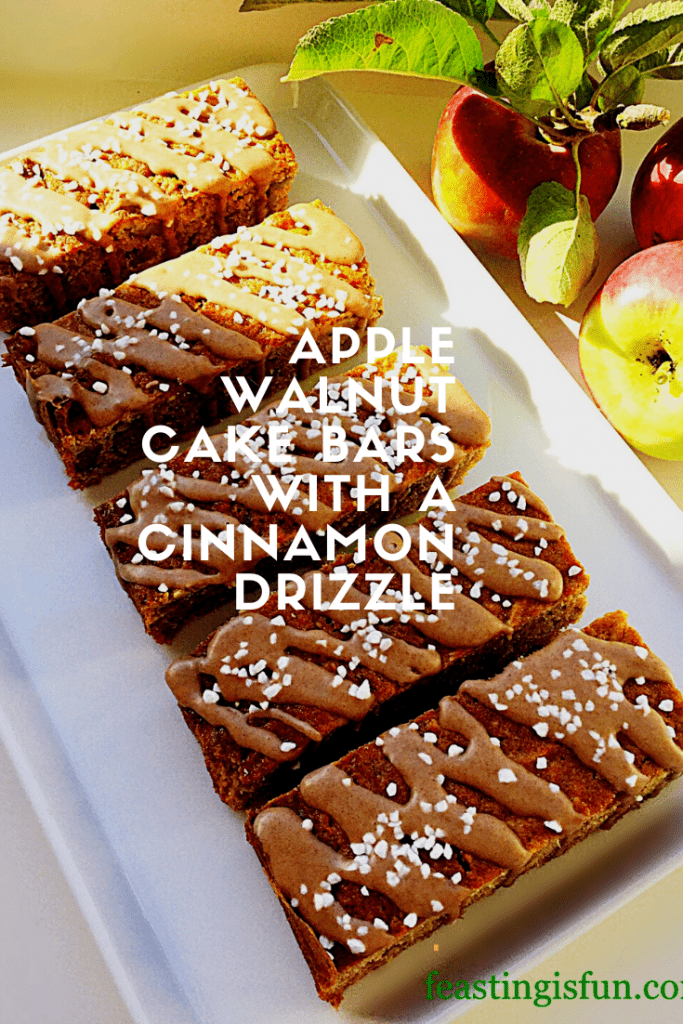
Today I have a real treat for you, my Cinnamon Drizzle Apple Walnut Cake Bars. Packed with freshly grated apple and toasted walnuts these cake bars are full of flavour. And a simple cinnamon drizzle adds just the right amount of sweetness, while the sugar nibs add extra crunch. Resulting in a simple traybake that is a treat on the tongue and the senses.

FF Cinnamon Drizzle Apple Walnut Cake Bars
Cinnamon Drizzle Apple Walnut Cake Bars

I adore Autumn. While gales and rain lash down, there are also the bright, golden sunshine filled days. Because of the variations in the weather, some days are perfect for gardening, having a tidy up, and picking fruit and windfalls. Yet when the weather rages I find comfort in the kitchen, baking delicious cakes that make the whole house smell warm and inviting. And when I can include produce from my own garden, such as the apples used in both the cake bars and photographs, I’m even happier.

FF Cinnamon Drizzle Apple Walnut Cake Bars
Cinnamon Drizzle Apple Walnut Cake Bars

Our Apple Trees

Due to the very hot summer we have had this year I wasn’t sure how well our two apple trees would fare. Because of the heat this years apples are sweeter than usual. While both our trees produce eating apples, one usually small, red and sweet, the other red and green, sharper in flavour. Similar to a Granny Smith apple’s flavour. As a result of the summer weather both varieties have a more intense apple flavour and are delicious to eat straight from the tree.

FF Cinnamon Drizzle Apple Walnut Cake Bars
Cinnamon Drizzle Apple Walnut Cake Bars

Since we have plenty of windfalls from the recent storms I have used them in the recipe. If you have access to windfall apples make the most of nature’s opportunity. Either use them to make these cake bars or perhaps my Apple Pie? Finally, a quick note, if you like puddings, then I should mention that this cake is delicious served with hot custard!

Recipe: Cinnamon Drizzle Apple Walnut Cake Bars make 16

300g/10.5oz Unsalted Butter at room temperature

300g/10.5oz Soft Light Brown Sugar

1/2tsp Sea Salt

4 Large Free Range Eggs

2tsp Vanilla Extract – I use Nielsen-Massey.

375g/13oz Plain White Flour

4tsp Ground Cinnamon

1tsp Ground Ginger

3tsp Baking Powder

200g/7oz Chopped Walnuts

350g/12oz Grated Apple (peeled and cored)

For the cinnamon drizzle

225g/8oz Icing Sugar (confectioners sugar)

3tsp Ground Cinnamon

2-3 tbsp Cold Water

Optional – Pearl or Nibbed Sugar – I use Dansukker Parlsocker available from Amazon

For this recipe you will need a 22.5cm x 30cm x 5cm (9” x 12” x 2”) tin lined with baking parchment.

Making and baking the cake:

Preheat the oven to 190C/170C fan, 375F, gas mark 5.

  • First of all add the butter, soft, light brown sugar and salt to a large bowl. Due to the quantity of ingredients I found a wide bowl easier to use.
  • Beat the sugar and butter together until creamy with no visible lumps.
  • Add the 4 eggs, 75g/3oz of flour and the spices to the bowl. Whisk everything together until fully combined.
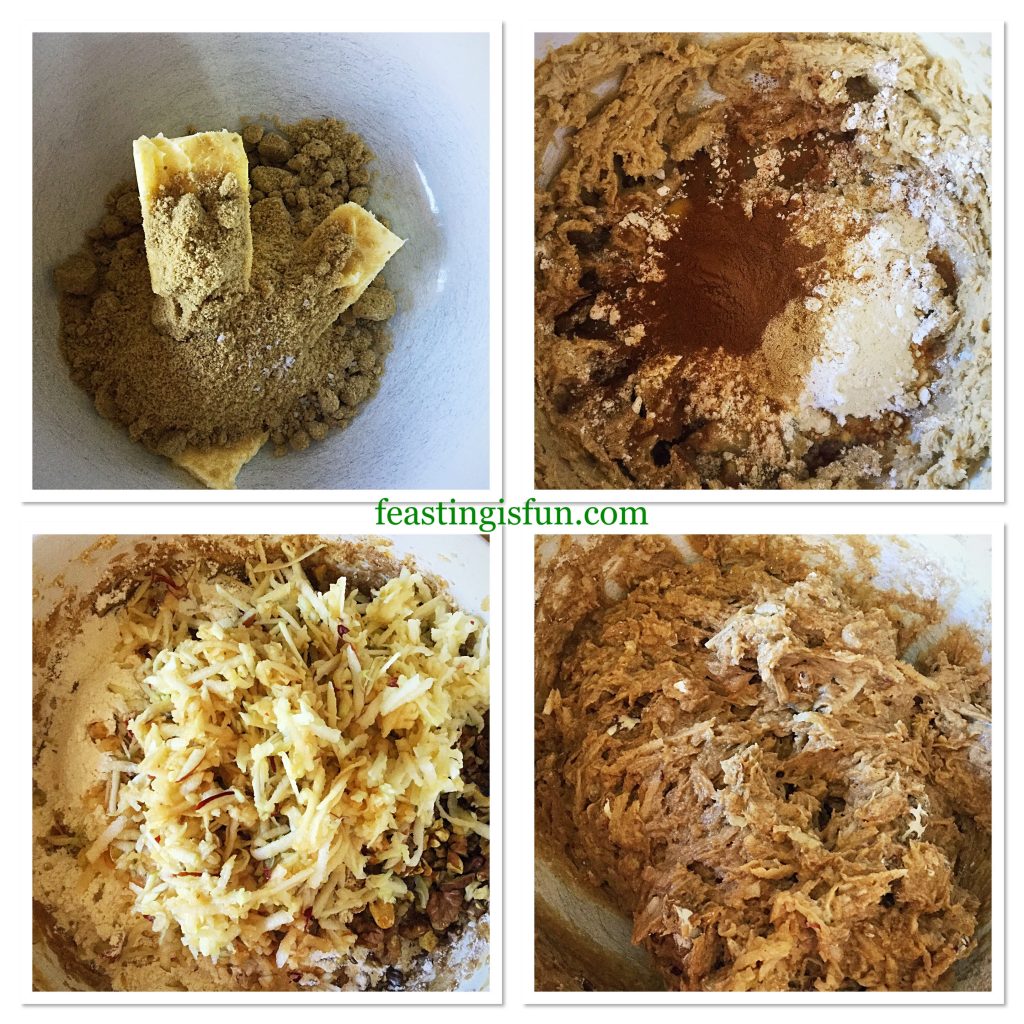
  • Sieve the remaining flour and baking powder into the bowl and added the chopped walnuts.
  • Because some apples turn brown quickly once cut or grated I add them last.
  • Finally fold all of the ingredients together until they are just combined.
FF Cinnamon Drizzle Apple Walnut Cake Bars
Making the cake batter.
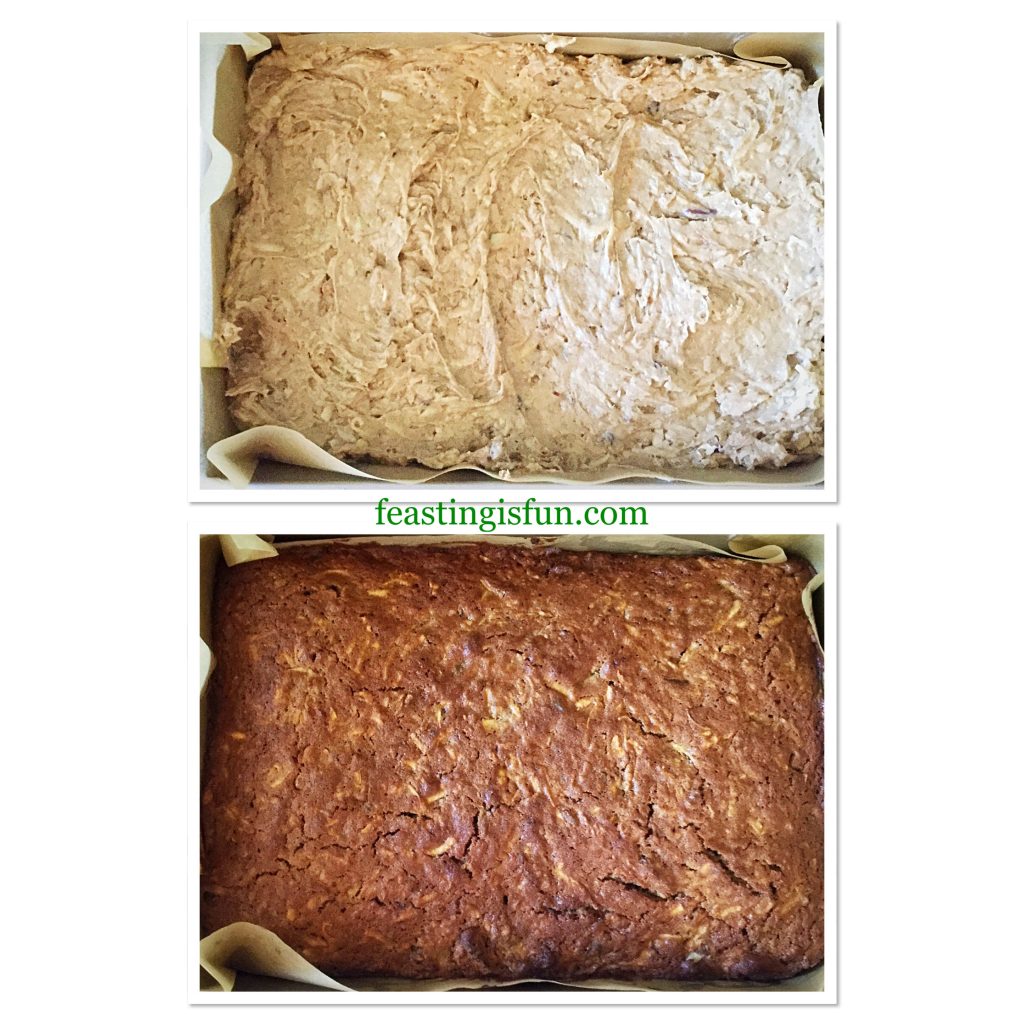
  • Spoon the cake batter into the prepared tin and ensure the batter is even and the top is smooth.
  • Place the cake tin into the centre of a preheated oven and bake for 40-45 minutes.
  • The cake is baked when it is golden in colour and firm (with only a little give) to touch in the centre.
  • As soon as the cake is baked remove from the oven and leave to cool completely in the tin.
FF Cinnamon Drizzle Apple Walnut Cake Bars
Filling the tin and baking the cake.

Portioning and decorating the cake bars:

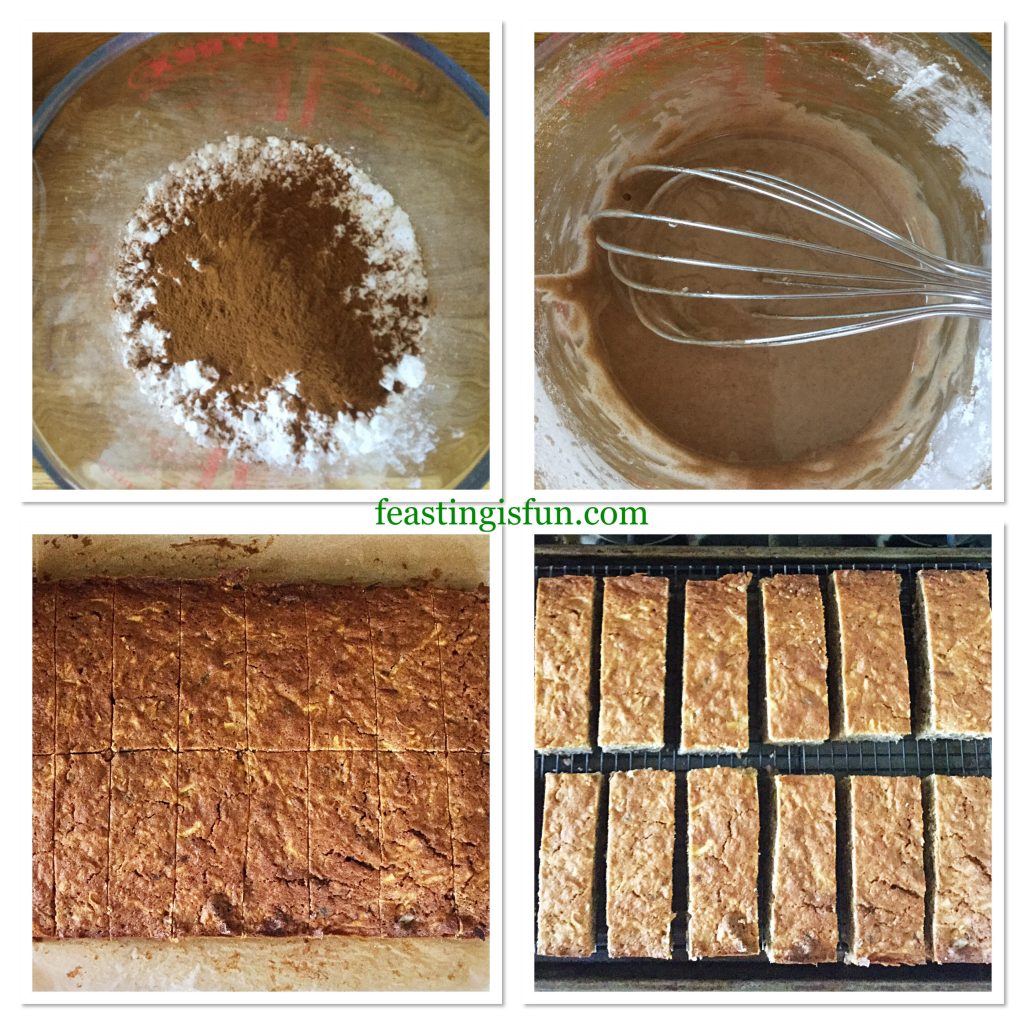
  • Add the icing sugar and cinnamon to a large jug. Using a balloon whisk, stir the two powders to combine and break up any lumps.
  • Pour 2 tablespoons of cold tap water into the jug and stir using the whisk. Add more water as needed until a thick, not runny consistency is achieved.
  • Decant the cinnamon icing into a piping bag fitted with a small round nozzle. Alternatively use a plastic sandwich bag and just prior to decorating cut a very small hole in one corner, this also applies to disposable piping bags.
  • To prepare the cake for decorating first of all cut across the width of the cake, dividing it in half. Now cut from top to bottom in the middle of the cake creating 4 quarters. Cut each quarter into 4 bars from top to bottom.
  • While you can decorate the cake as a whole, I like to see the drizzle of icing on each cake bar.
  • Separate the bars and place on to a cooling rack over a baking tray, to catch any drips.
FF Cinnamon Drizzle Apple Walnut Cake Bars
Preparing the cake bars for decorating
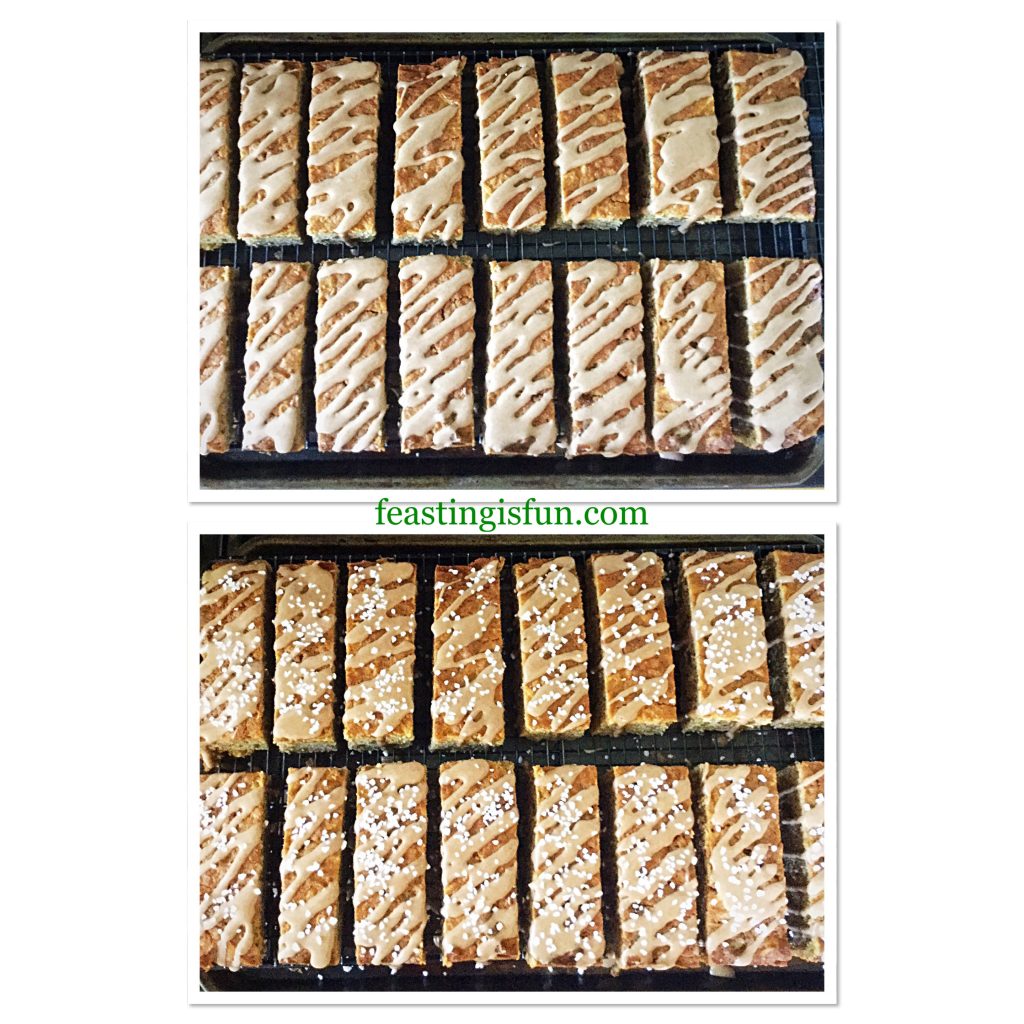
  • Use gentle, steady pressure to pipe diagonally across each cake bar. Continue piping until each bar is iced.
  • Sprinkle some sugar nibs over each bar while the icing is still wet.
  • Place to one side to allow the icing to set.
FF Cinnamon Drizzle Apple Walnut Cake Bars
Decorating the Cinnamon Drizzle Apple Walnut Cake Bars

Finally take a photo of your creation! Because your house will smell amazing and these cake bars will not last long.

FF Cinnamon Drizzle Apple Walnut Cake Bars
Cinnamon Drizzle Apple Walnut Cake Bars

Store the bars in an airtight container. They will keep for 5 days. Refrigerate during warmer weather.

The cake can be made a day in advance and decorated the following day.

If you have enjoyed this recipe for Cinnamon Drizzle Apple Walnut Cake Bars you may also like these:

Easy Blackberry Oat Muffin Recipe 

FF Cinnamon Drizzle Apple Walnut Cake Bars
Easy Blackberry Oat Muffin Recipe

Maple Drizzled Apple Blueberry Loaf Cake 

FF Cinnamon Drizzle Apple Walnut Cake Bars
Maple Drizzled Apple Blueberry Loaf Cake

Autumn Apple Almond Cake

FF Cinnamon Drizzle Apple Walnut Cake Bars
Autumn Apple Almond Cake a gluten free bake

Traybakes are made for sharing:

With Bonfire Night, November 5th not far away these cake bars are perfect for sharing. Whether you are going to an organised event, holding a bonfire party in your back garden, or simply watching from your window, everything about these cake bars will elicit oohs and aahs! Because they are so yummy, they deserve to be made and enjoyed all year round.

Whatever you are making, baking and creating in your kitchens, have fun preparing and sharing your feast.

Sammie xx

No part of this post may be reproduced or duplicated without the written permission of the owner. Please see my Disclosure Policy for details.

FF Cinnamon Drizzle Apple Walnut Cake Bars

Autumnal fruit and nut traybake with spiced icing.
Apple and walnut cake bars with a cinnamon icing drizzle.

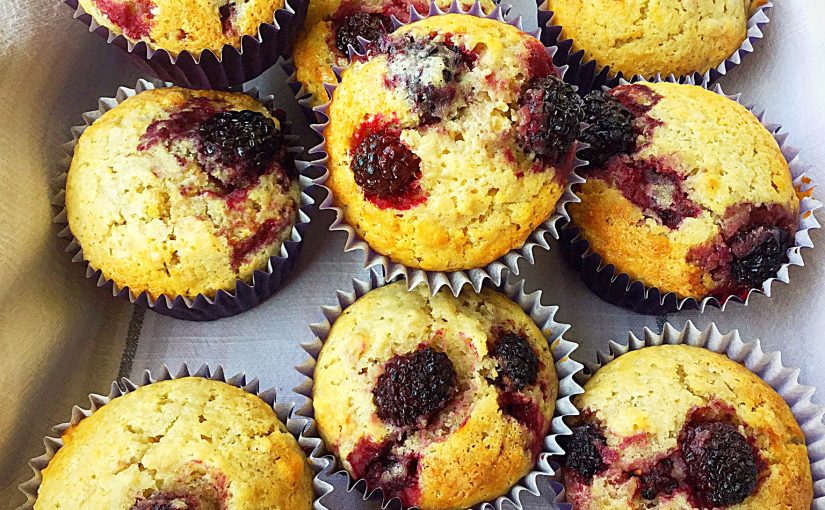
Easy Blackberry Oat Muffin Recipe

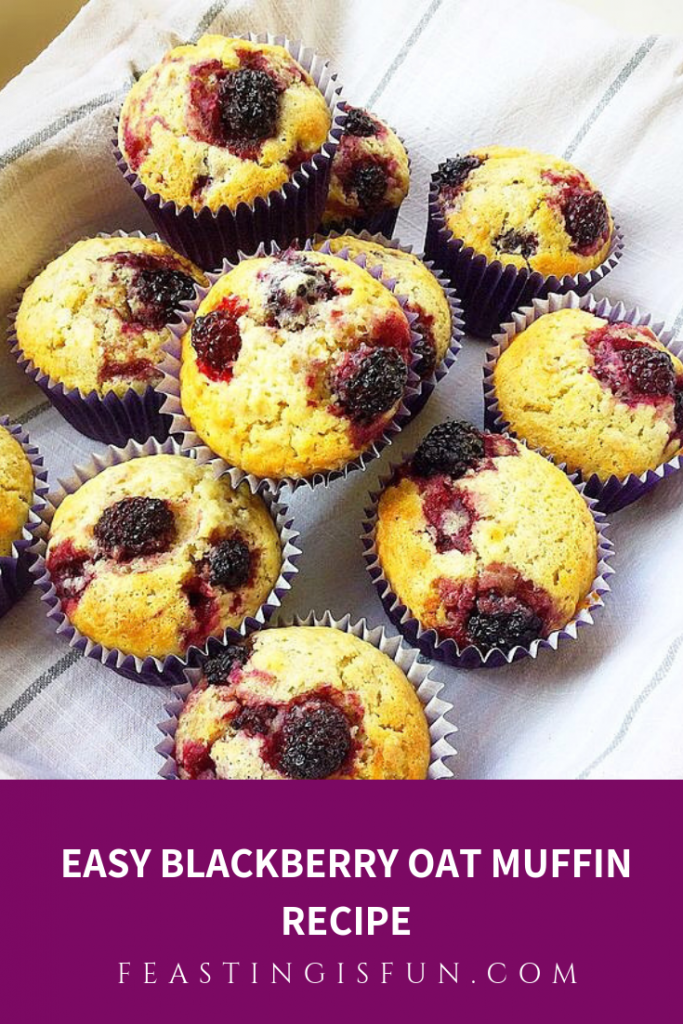
September is here and after the long, hot summer I am ready for Autumn. While walking around the garden this morning I noticed some ripe blackberries on my thornless plant. Although, to be clear, I should mention I’d forgotten to put my glasses on. Expecting a great harvest I hurried back to the kitchen to collect a modest size bowl. Also I grabbed my glasses. Five ripe blackberries. Five! So, consoling myself I plundered our freezer, where fortunately I had a stash. Finally I can now share my Easy Blackberry Oat Muffin Recipe.

FF Easy Blackberry Oat Muffin Recipe

While I find it very satisfying to use produce picked from our garden I am also a realist. Because of the very hot and dry summer some of our fruiting plants have suffered. And while our cherry tree had a bumper crop this year, we haven’t any plums and as I mentioned the blackberries are small and scant. Although I am hopeful for a reasonable apple harvest. Even if they are a little smaller this year, I’m sure they will be sweet.

FF Easy Blackberry Oat Muffins Recipe
Easy Blackberry Oat Muffins Recipe

I am glad that I had the foresight to buy punnets of British blackberries and freeze them. Especially as most berries freeze well, with the exception of strawberries. While strawberries defrost to a mushy mess, frozen blackberries, raspberries, red and blackcurrants can be used in place of fresh fruit when it is out of season. Whether you buy and freeze the fruit yourself or buy it ready frozen, it means that we need not be denied luscious berries in the depths of winter.


FF Easy Blackberry Oat Muffin Recipe
Easy Blackberry Oat Muffin Recipe

Recipe: Easy Blackberry Oat Muffin Recipe

100g/4oz Unsalted Butter – melted

200ml/6.5fl oz Whole Milk

2 Large Free Range Eggs

1tsp Vanilla Extract – I use Nielsen-Massey 

250g/9oz Plain White Flour

50g/2oz Rolled Oats (Porridge Oats – not quick cook)

2tsp Baking Powder

100g/4oz Caster Sugar

1/4tsp Sea Salt

300g/10.5oz Blackberries – fresh or frozen Waitrose sell frozen British fruits all year round – the berries can be used frozen

Preheat the oven to 200C/180C fan, 400F, gas mark 6

Making the muffin batter:

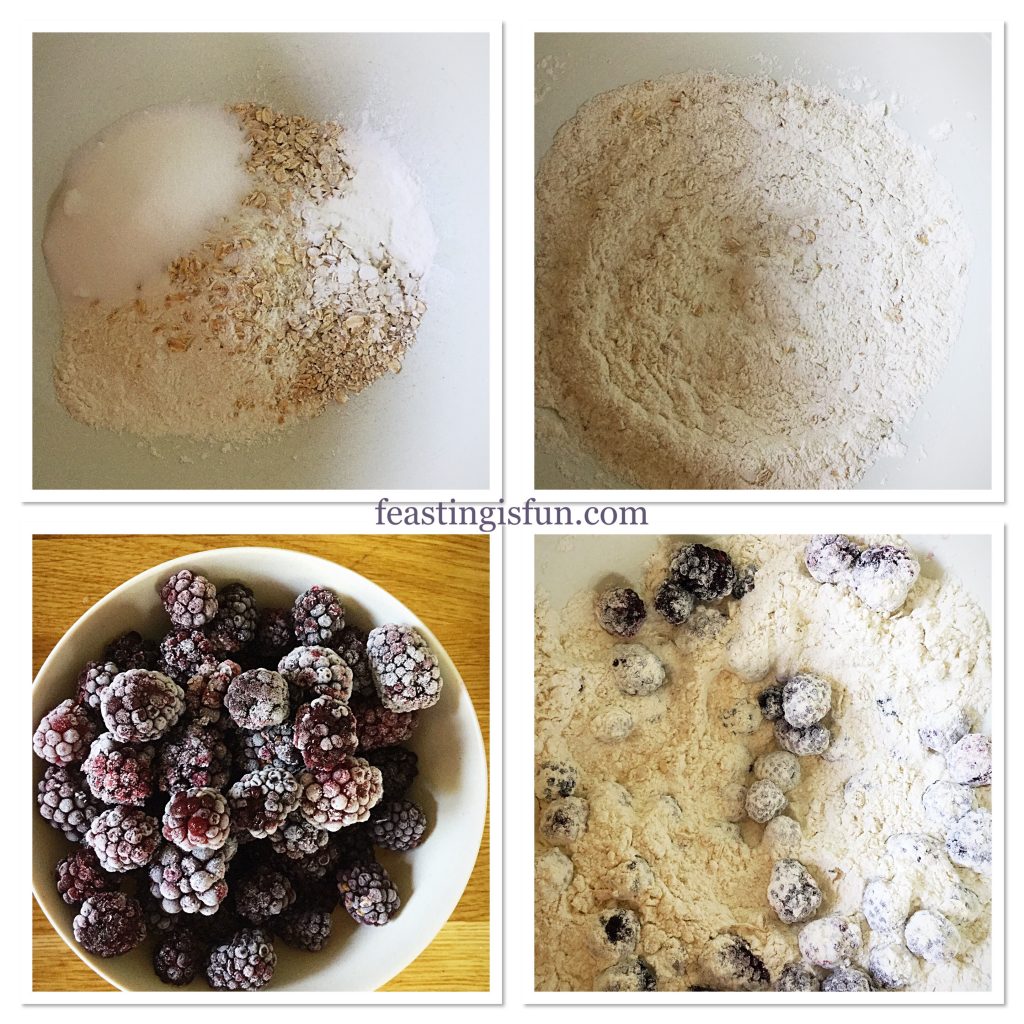
  • First of all into a large bowl add the flour, oats, sugar, baking powder and salt.
  • Usng a balloon whisk mix all of the dry ingredients together – dry mix.
  • Hold back 12 blackberries for topping the muffins and tip the remaining blackberries into the dry mix. Gently cover with the flour mixture to coat.
FF Easy Blackberry Oat Muffin Recipe
The dry part of the muffin mix.
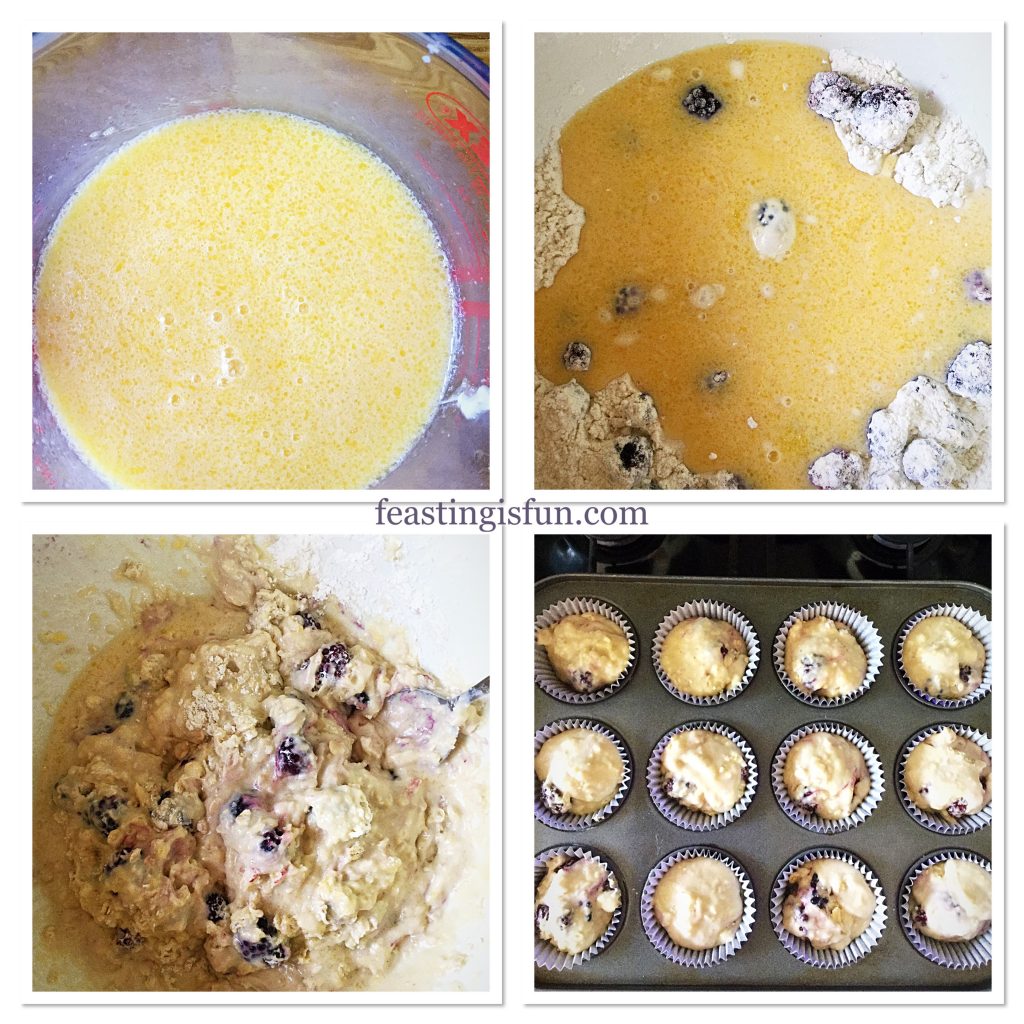
  • Into a separate jug measure out the milk.
  • Add the eggs, melted butter and vanilla extract and beat with a fork to combine – wet mix.
  • Make a well in the centre of the dry mix and pour the wet mix in.
  • Stir the mixture (approximately 10 times) with a spoon to almost combine, taking care not to break up the berries.
  • A few flour streaks are acceptable. Over mixing will almost certainly result in tough muffins.
  • Line a muffin tin with paper liners. Alternatively tulip style muffin wrappers used in my Spiced Pumpkin Walnut Muffins also can be used.
  • Use an ice cream scoop to divide the muffin mixture evenly between the 12 cases.
FF Easy Blackberry Oat Muffin Recipe
Combining the wet and dry to make the batter.
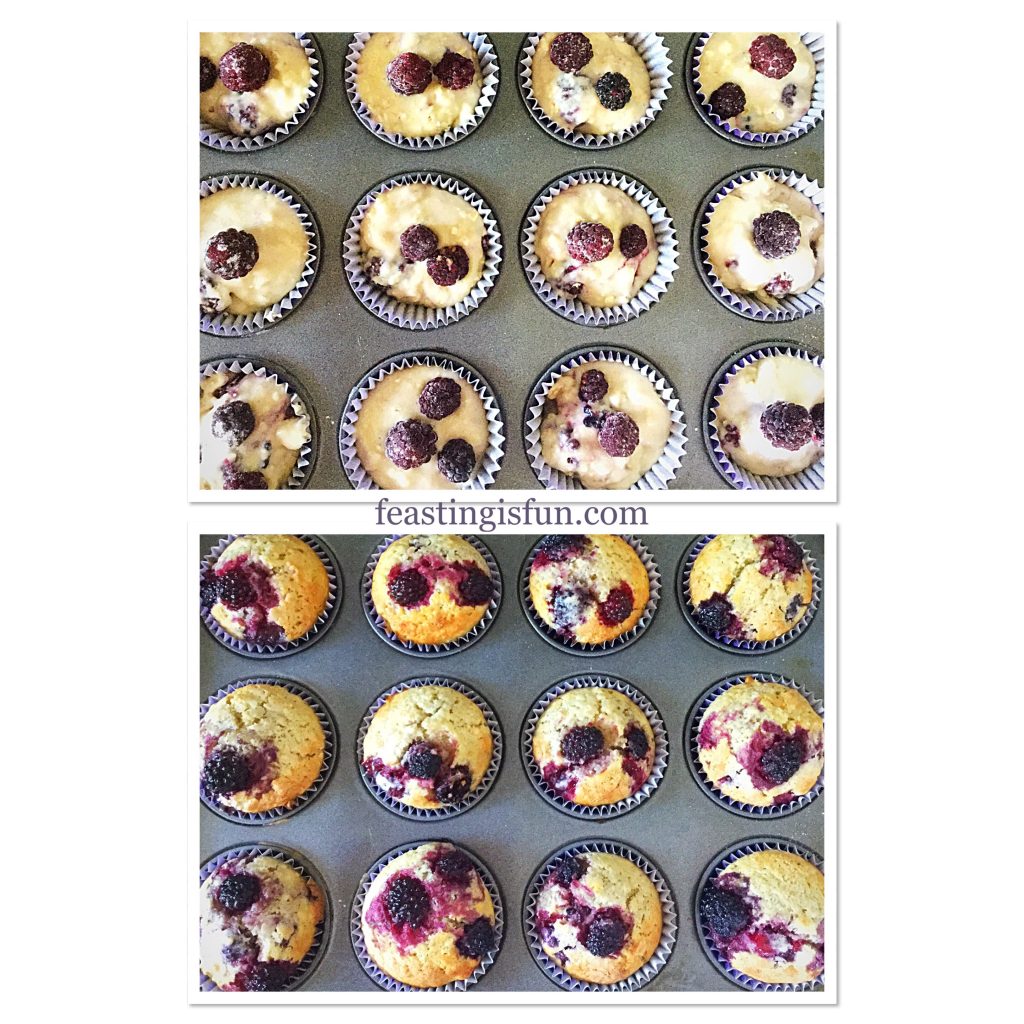
  • Place a blackberry (from those held back) on top of each muffin.
  • Finally, use a teaspoon and tap a light dusting of caster sugar on top of each muffin.
  • Place the muffin tin into the centre of a preheated oven and bake for 25-30 minutes.
FF Easy Blackberry Oat Muffin Recipe
Topping the muffins before baking.
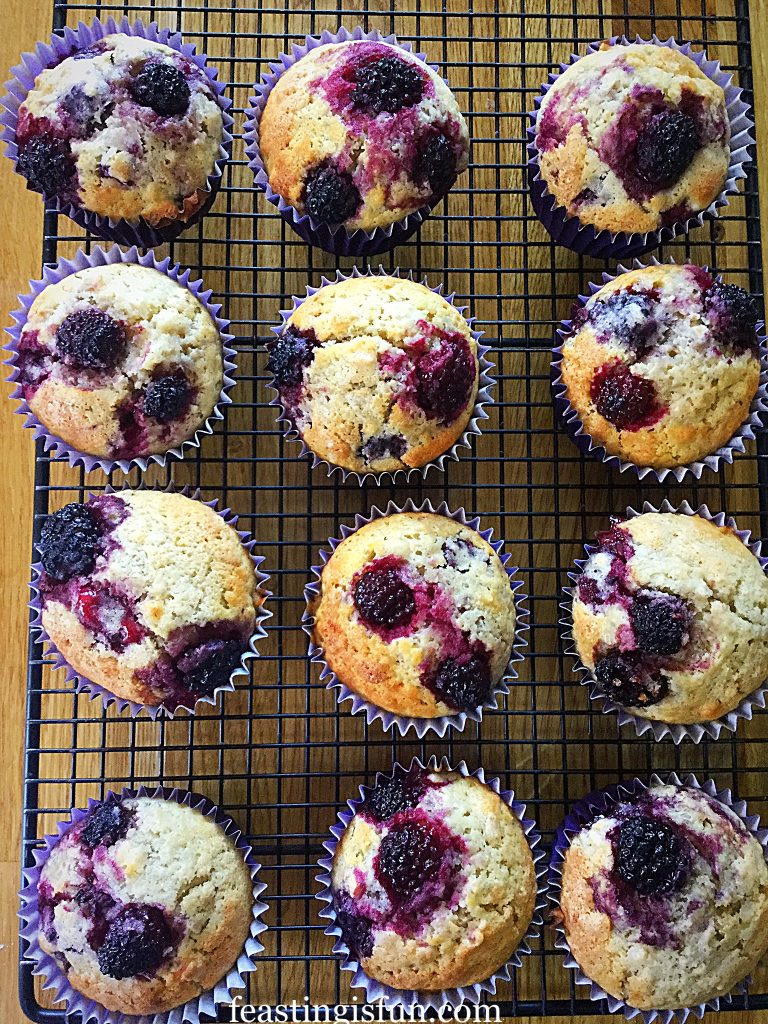
  • The muffins are baked when risen, golden and firm to touch.
  • As soon as the muffins are baked remove from the oven.
  • Immediately remove the muffins from the tin and place on to a cooling rack – take care as the muffins will be hot.


FF Easy Blackberry Oat Muffin Recipe
Easy Blackberry Oat Muffin Recipe
  • Allow the muffins to cool slightly before serving.
FF Easy Blackberry Oat Muffin Recipe
Easy Blackberry Oat Muffin Recipe


If you have enjoyed my Easy Blackberry Oat Muffin Recipe you may also like these:

Blueberry And Lemon Muffins 

FF Easy Blackberry Oat Muffin Recipe
Blueberry And Lemon Muffins

Raspberry White Chocolate Chip Muffins 

FF Easy Blackberry Oat Muffin Recipe
Raspberry White Chocolate Chip Muffins

Chocolate Madness Muffins 

FF Easy Blackberry Oat Muffin Recipe
Chocolate Madness Muffins

Freshly baked muffins are best eaten on the day they are made. Although you can store them in an airtight container for up to two days, refrigerate in warm weather and then refresh in a medium oven for 5 minutes. Especially delicious eats to start the day and also fill hunger gaps throughout the day. Since these muffins truly are delicious served warm from the oven, why not bake them with the intention to share. Neighbours, friends and family are always delighted with a surprise delivery of freshly made muffins. And it is a fact that food always tastes better when shared!

So, whatever you are making, baking and creating in your kitchens have fun preparing and sharing your feast.

Sammie xx

No part of this post may be reproduced or duplicated without the written permission of the owner. Please see my Disclosure Policy.
 

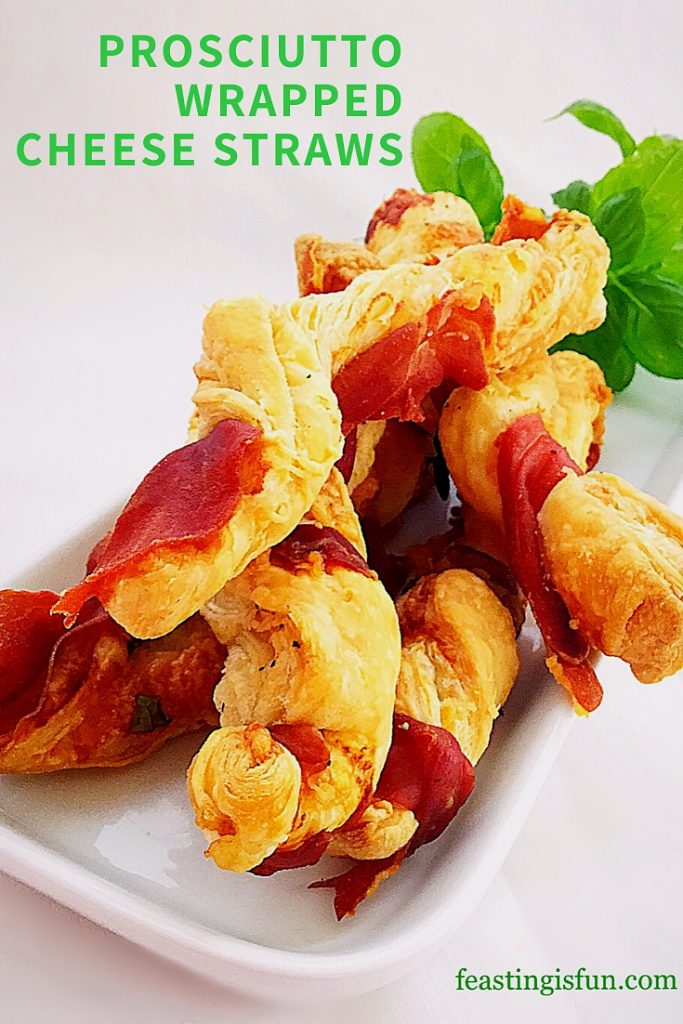
Prosciutto Wrapped Cheese Puff Pastry Straws

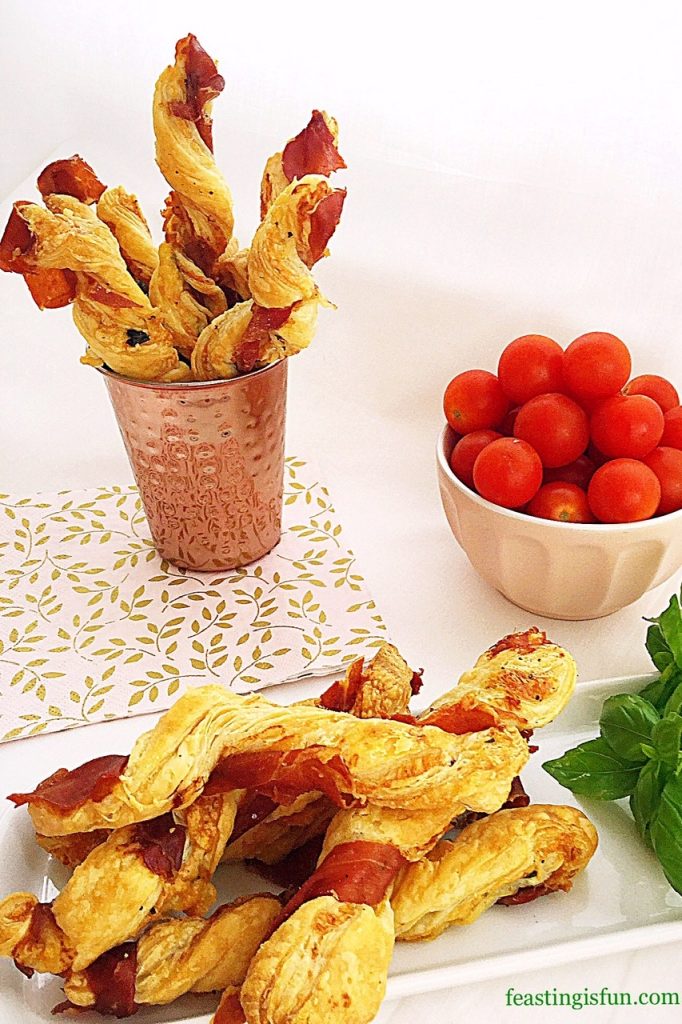
So, who is ready for a super easy, party food recipe? While there are plenty of sweet recipes here on the blog, I prefer food that is more savoury. Given a choice, I will usually choose a cheese board over dessert. While my family always pick a delicious, sweet treat. Also, at parties I much prefer something salty and savoury to compliment my glass of wine or sparkling water. My Prosciutto Wrapped Cheese Puff Pastry Straws tick all of my preferred flavour boxes. So much so, I ate three as soon as they were cool enough!
Easy Party Food Recipes:

Creating easy recipes is a top priority for me. These straws can be made ahead and kept refrigerated or frozen. Since party food can involve lots of little morsels, keeping the recipe simple reduces stress and leaves more room for fun. Because that’s what parties should be, fun! Whether it’s drinks with friends or a full on family bash, these straws are a perfect addition to any occasion.

FF Prosciutto Wrapped Cheese Puff Pastry Straws
Prosciutto Wrapped Cheese Puff Pastry Straws

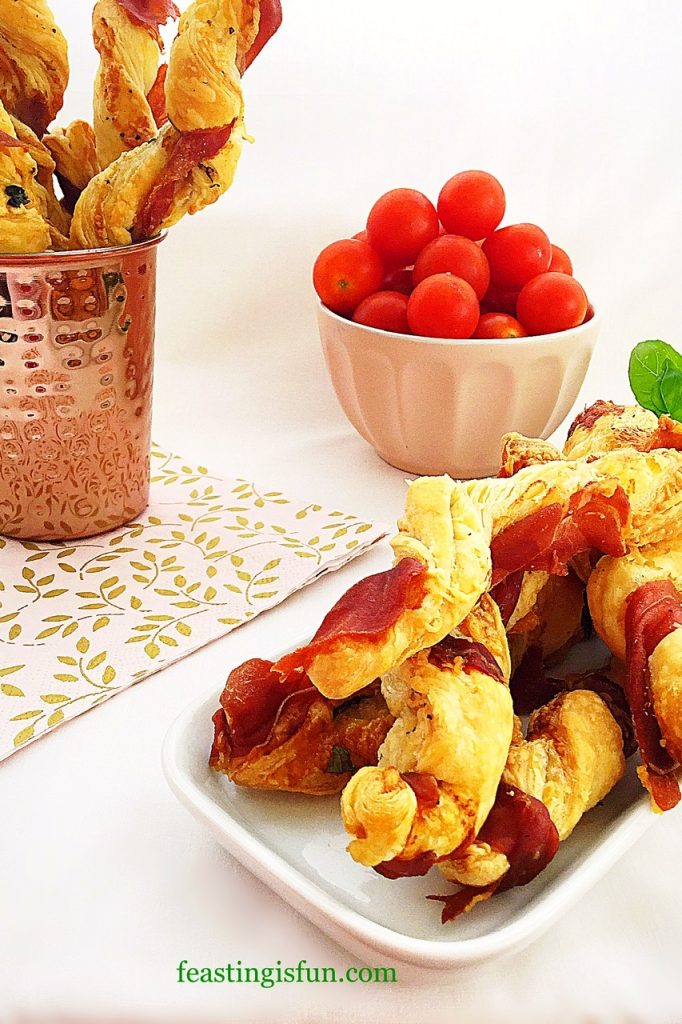
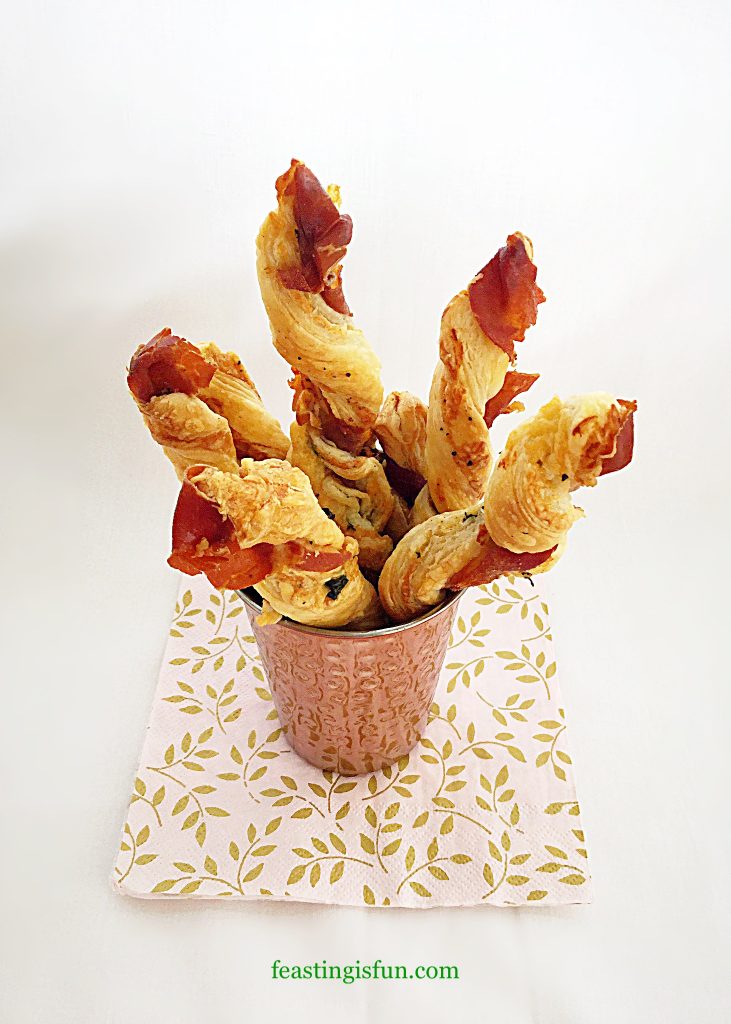
So incredibly easy to make and bake, these straws are filled with grated cheddar and fresh basil. A strip of Prosciutto ham is then twisted around the straw and then baked. As they bake the Prosciutto becomes crisp and salty on the outside with melting cheddar and fresh Basil inside.

Savoury food snacks displayed on a platter and in a copper cup.

Recipe: Prosciutto Wrapped Cheese Puff Pastry Straws – makes 24

2 x 250g/14oz All Butter Puff Pastry – I use Waitrose own brand. Alternatively use ready rolled pastry, however you may need to adjust the cheese/basil/prosciutto quantities.

100g/4oz Finely Grated Mature (Sharp) Cheddar Cheese – I use Wyke Farms

A Handful of Fresh Basil Leaves – approximately 20 leaves. Alternatively when Basil is unavailable use 1tsp finely chopped thyme or rosemary

12 Slices Prosciutto Ham

Freshly Ground Black Pepper

Making The Cheese Straws:
Preheat the oven to 200C/180C fan, 400F, gas mark 6

  • First of all line 2 large baking trays with baking parchment.
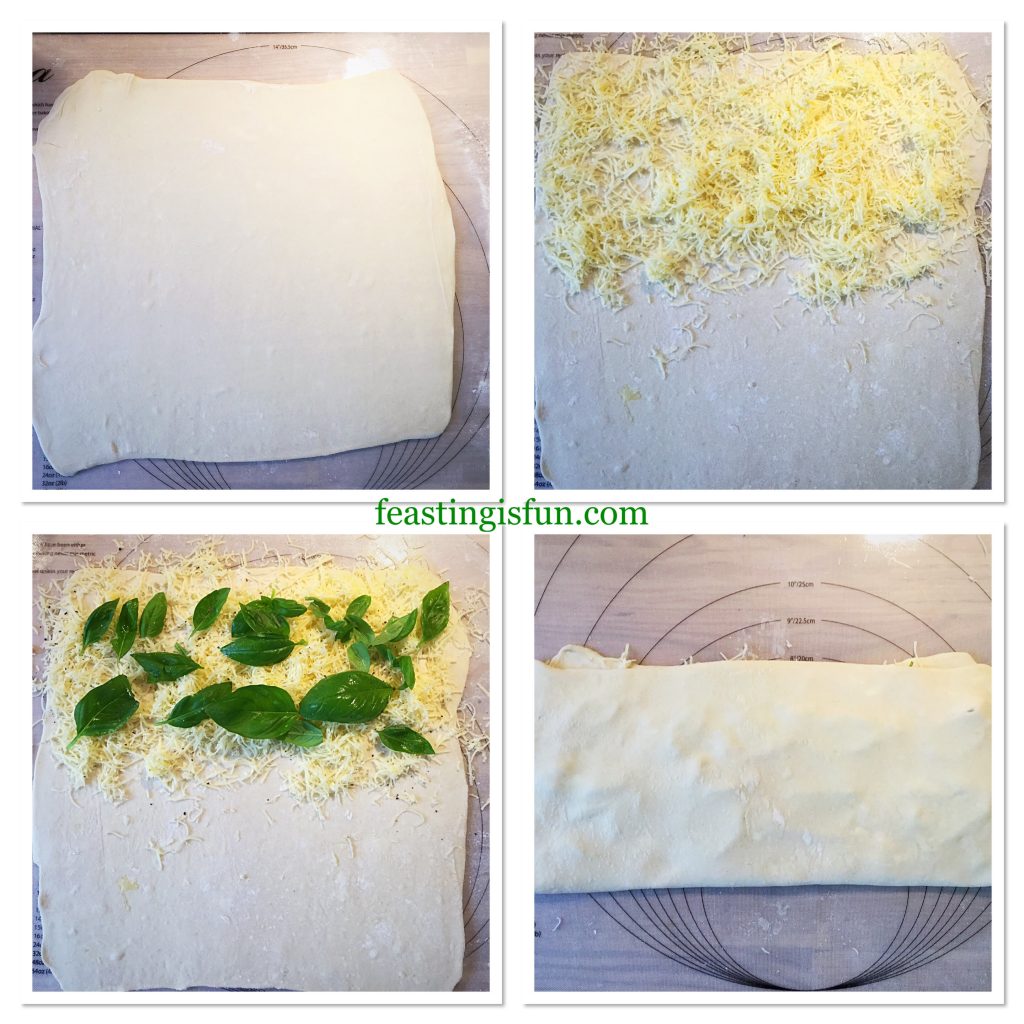
  • Roll the first block of puff pastry into a square, approximately 30cm x 30cm (12in x 12in).
  • Sprinkle half the grated cheddar over the top half of the square.
  • Place half of the fresh basil leaves on top of the cheese.
  • Add some freshly ground black pepper.
  • Fold the bottom half of the pastry up over the cheese and basil.
FF Prosciutto Wrapped Cheese Puff Pastry Straws
Filling the pastry with cheese and basil.
  • Use a rolling pin to roll the pastry so that it flattens and becomes smooth.

Portioning The Straws And Wrapping With Prosciutto:

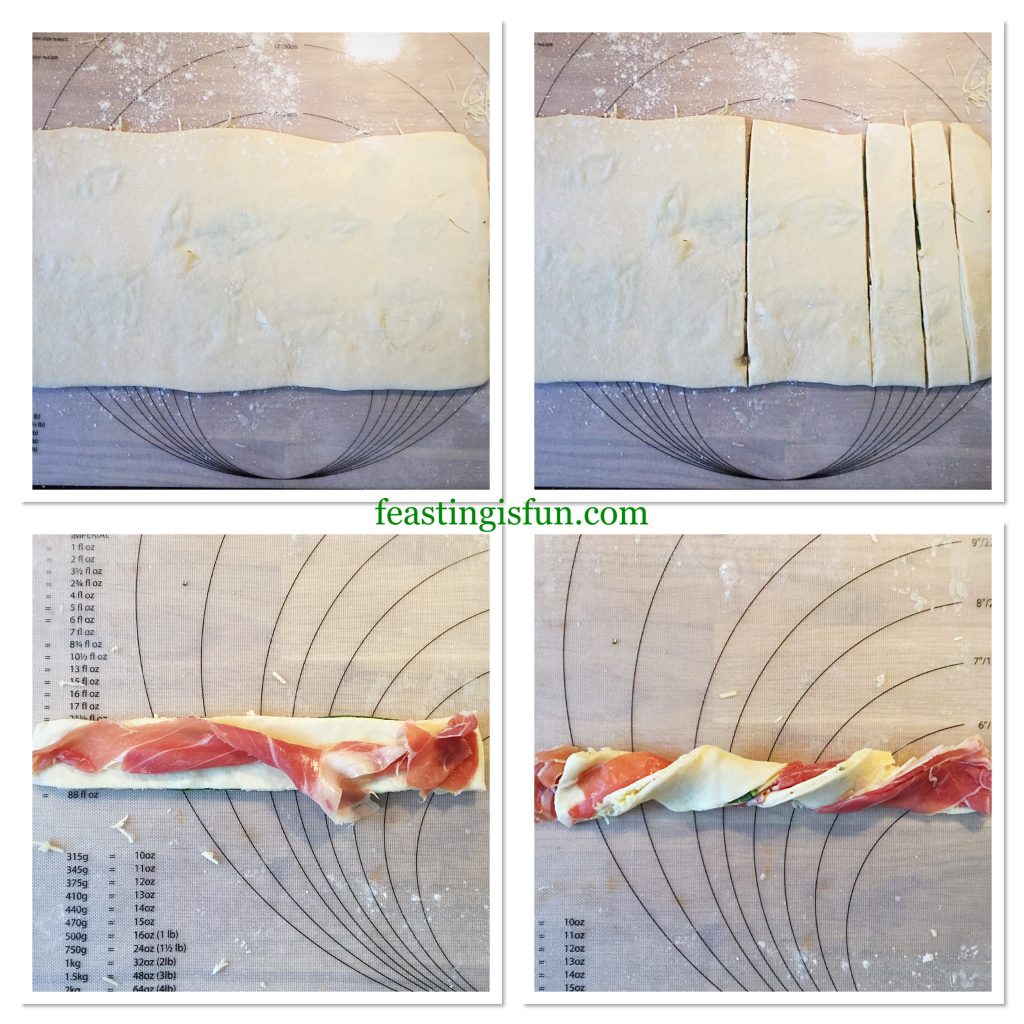
  • Divide the pastry in half using a sharp knife. Then cut each half in half again, you will have four separate pieces.
  • Cut each quarter into 3 strips. Resulting in 12 straws.
  • Tear a piece of prosciutto ham in two lengthways.
  • Place the ham on top of a straw and press at both ends so it sticks.
  • Using both hands twist the pastry so that the prosciutto wraps around.
  • Place the twisted pastry on to a baking sheet.
  • Repeat with the rest of the straws.
  • Roll out the second block of pastry and repeat the process again.
FF Prosciutto Wrapped Cheese Puff Pastry Straws
Cutting the straws and wrapping with Prosciutto.

Baking The Prosciutto Wrapped Puff Pastry Straws:

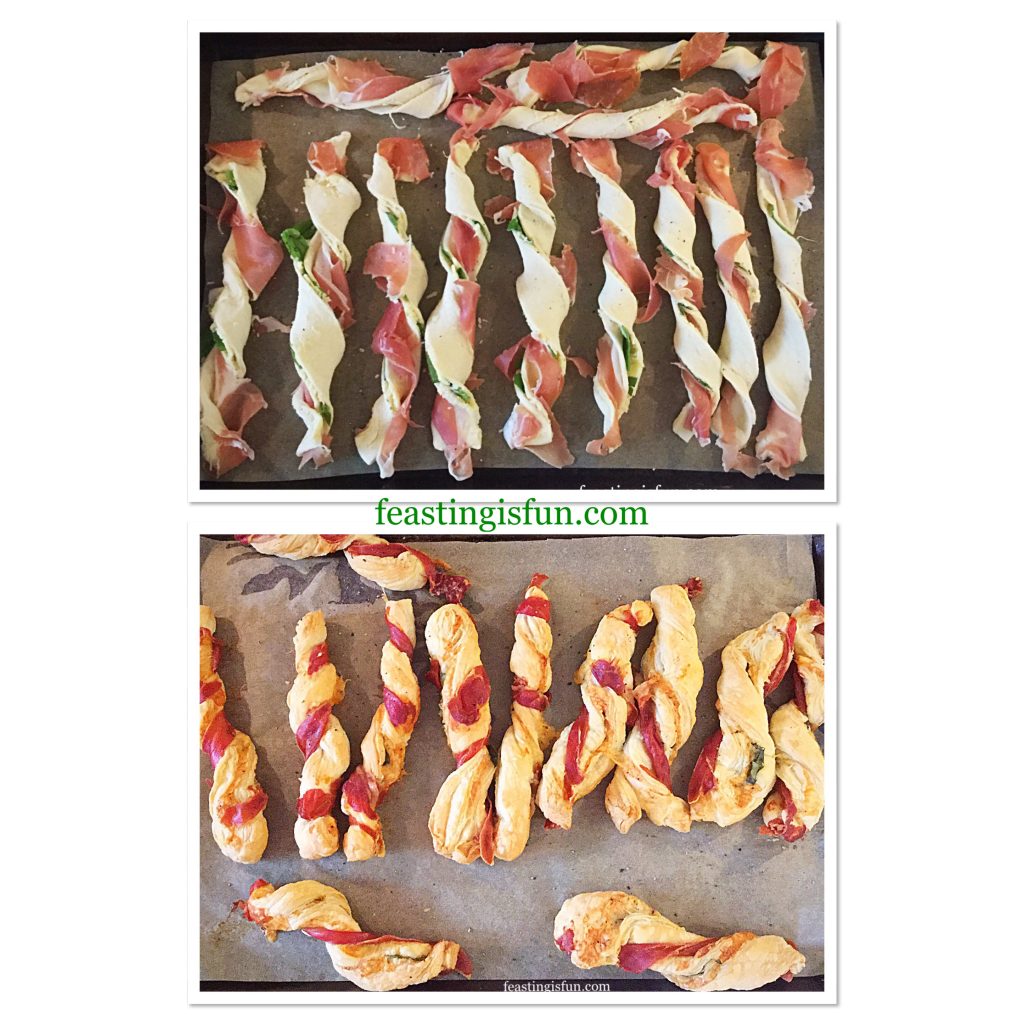
  • Place the baking trays into a preheated oven and bake for 20-25 minutes until the pastry is golden and the prosciutto is crisp.
  • As soon as the straws are baked remove from the oven and place on a serving plate.
  • Note – if you are planning to freeze the straws, remove from the oven 5 minutes early when the straws are baked, yet not golden..
FF Prosciutto Wrapped Cheese Puff Pastry Straws
Baking the Prosciutto Wrapped Cheese Puff Pastry Straws
  • Allow the straws to cool slightly before serving.

Cool, place in an airtight container and refrigerate for up to 2 days. To freeze place in freezer bags or boxes for up to 2 months. To reheat from frozen place in a medium oven for 5-10 minutes.

If you have enjoyed this recipe for Prosciutto Wrapped Cheese Puff Pastry Straws you may also like these:

Mini Sparkenhoe Red Leicester Tarts

FF Prosciutto Wrapped Cheese Puff Pastry Straws
Mini Sparkenhoe Red Leicester Tarts

Spicy Sausage Rolls

FF Prosciutto Wrapped Cheese Puff Pastry Straws
Spicy Sausage Rolls

Cheddar Tomato Basil Quiche 

FF Prosciutto Wrapped Cheese Puff Pastry Straws
Cheddar Tomato Basil Quiche

Whether I’m hosting or going out, parties are fun and a great way to catch up with friends and make new ones. Recipes that are easy and also travel well make life easier. These Prosciutto Wrapped Cheese Puff Pastry Straws are ideal for making and taking to parties. Also, as they can be frozen I plan on making a big batch prior to Christmas. Bake the frozen straws into a moderate oven for ten minutes and you have a delicious snack to share with unexpected visitors.

So, whatever you are making, baking and creating in your kitchens have fun preparing and sharing your feast.

Sammie xx

No part of this post may be reproduced or duplicated without the written permission of the owner. Please see my Disclosure Policy.