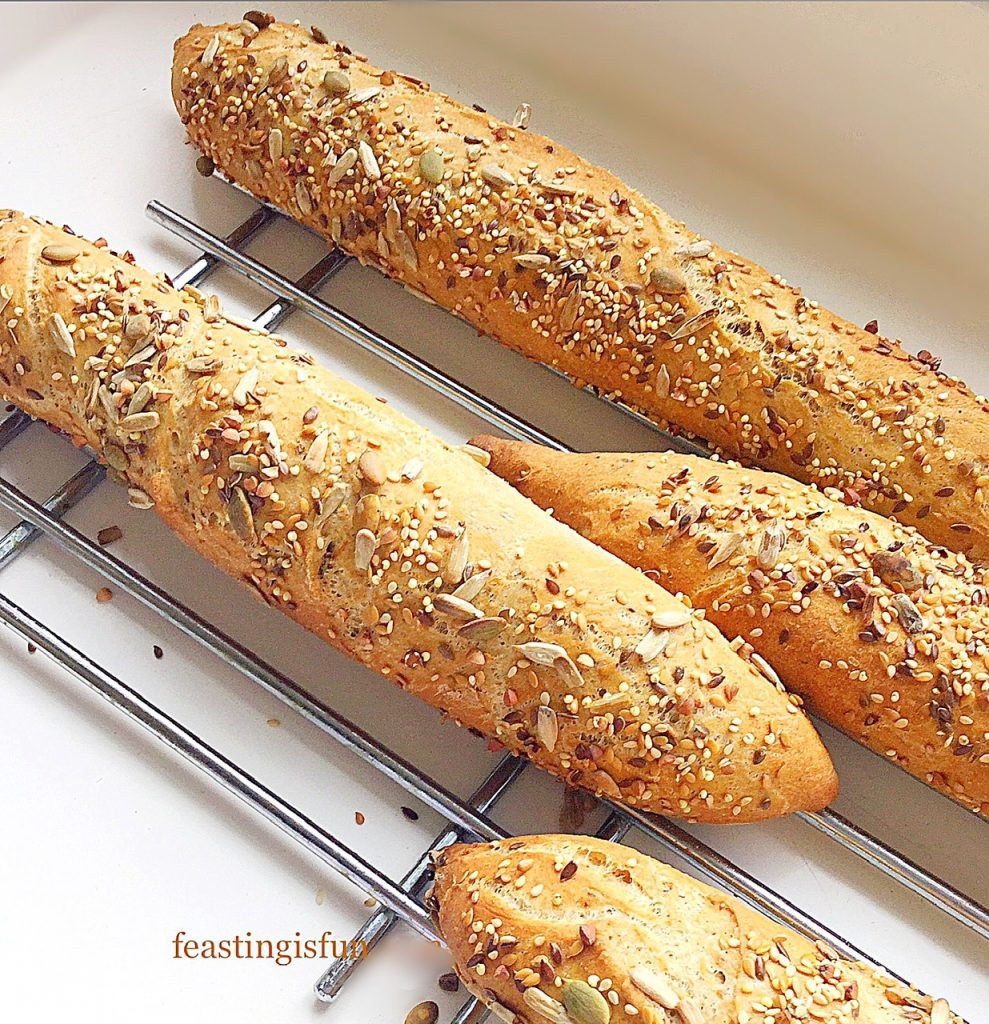
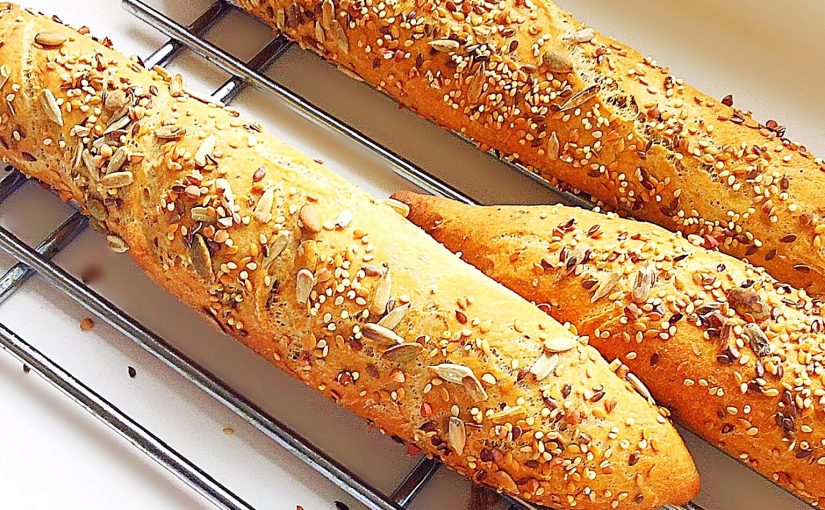
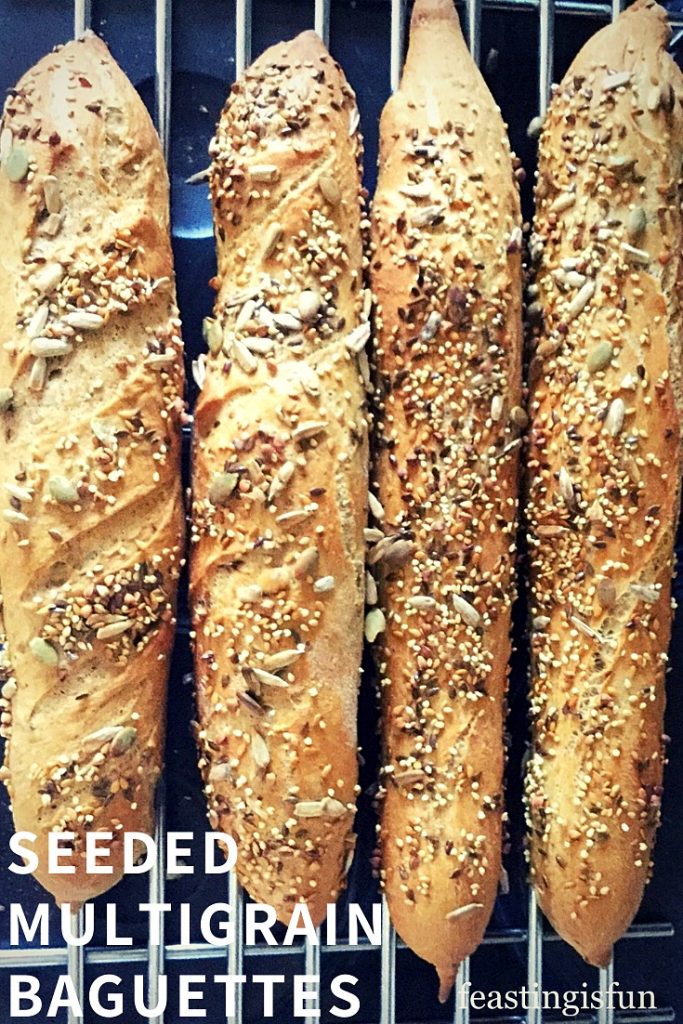
Seeded Multigrain Baguettes

I love baking and truly believe that nothing is as rewarding as homemade bread. The yeasty aroma of dough proving, followed by the smell of fresh bread baking, never grows old. These Seeded Multigrain Baguettes are crunchy and full of nutty flavour. Perfect for dunking into a big bowl of soup, or filling with mature cheddar for a satisfying lunch.
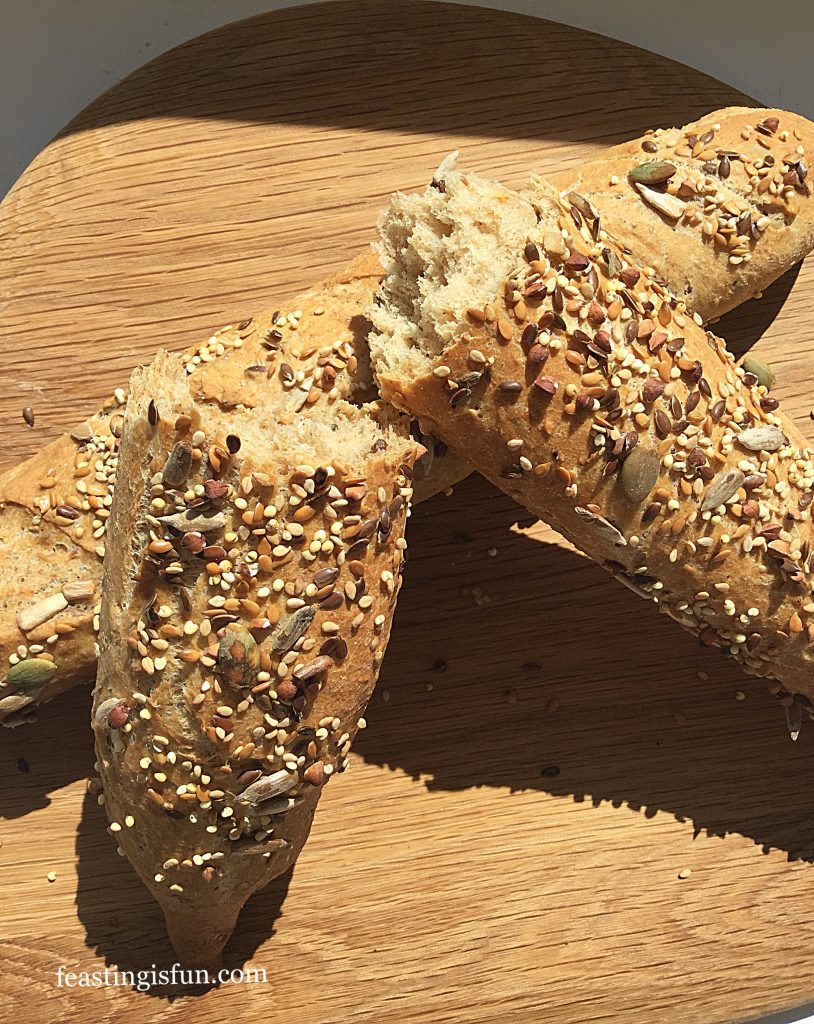
FF Seeded Multigrain Baguettes
Seeded Multigrain Baguettes

Since baking bread can be daunting for those who are new to it, here are a few tips to ensure great results. Always use great quality, fresh, bread flour. Also I throw away any opened flour that has been sitting in the cupboard for over 6 months. Likewise, the same for yeast. While fresh yeast only lasts a few days in the fridge, dried yeast lasts much longer. Although, this should also be replaced after 6 months. Finally, by baking bread regularly, ingredients are used up and naturally replaced before losing their freshness.
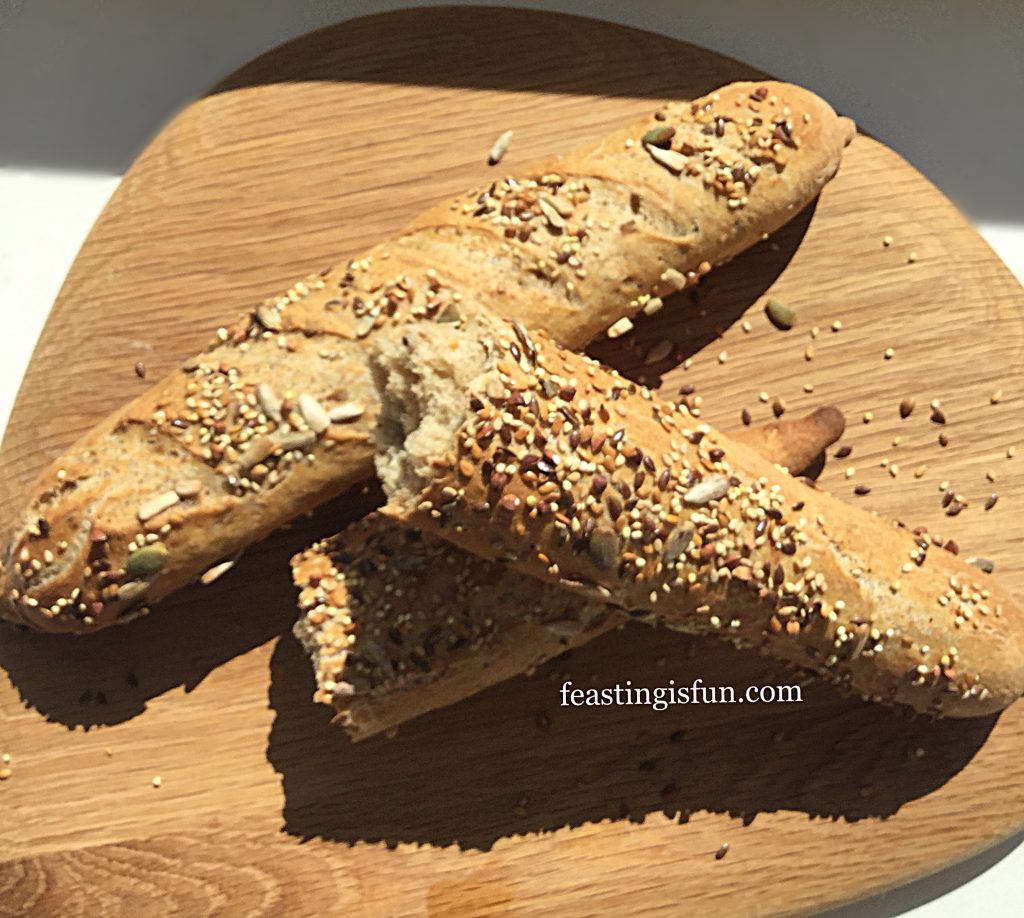
FF Seeded Multigrain Baguettes
Seeded Multigrain Baguettes delicious with soup.

With bread being so readily available in every supermarket, especially baguettes, why bake them at home? Personally, the true reason is the same for everything that is cooked and baked in our kitchen. Every single ingredient is known. No additives, flavour enhancers, mould inhibitors or such are added. Each baguette, or loaf is made when required, negating the need to ensure that it stays fresh for an entire week.
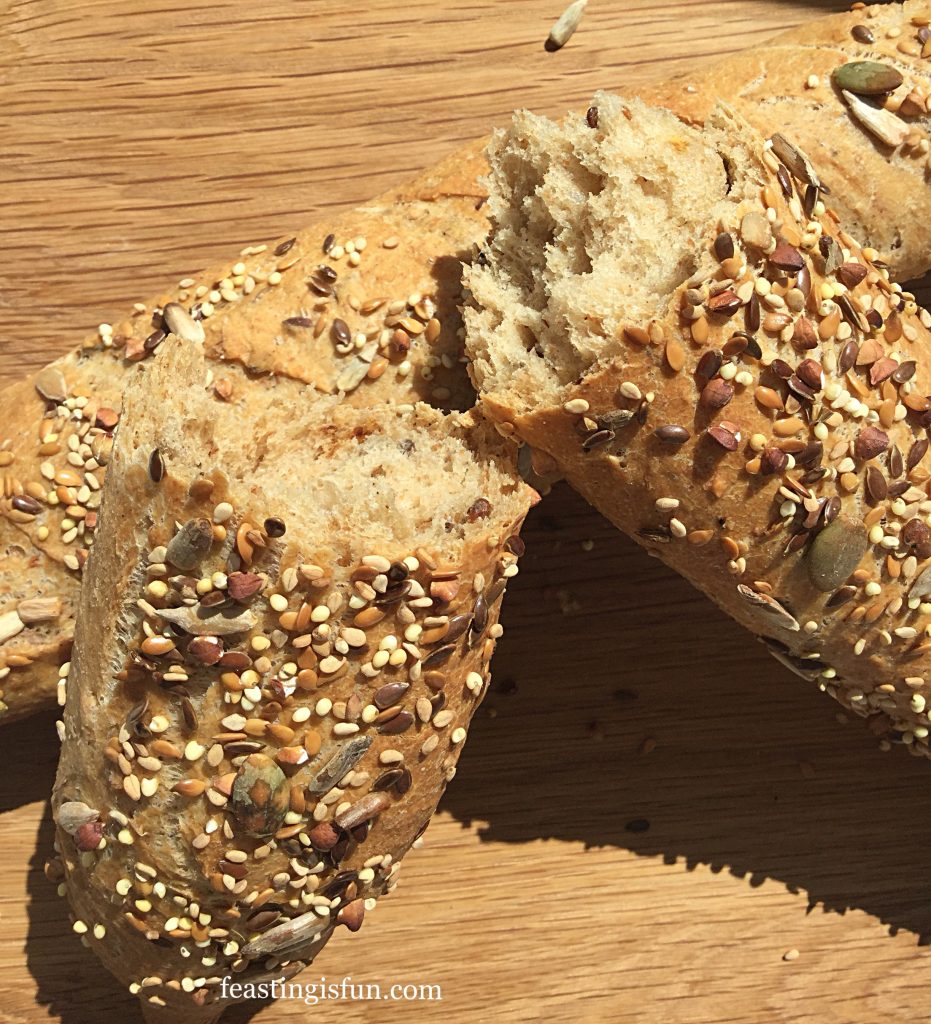
FF Seeded Multigrain Baguettes
Seeded Multigrain Baguettes

Satisfaction gained from making, shaping and baking bread dough is reward enough for me. Because superior flavour and freshness cannot be beaten. Eaten within 30 minutes of cooling, from the oven, sets homemade baguettes apart from their mass produced counterparts. Also no ‘invisible’ nasties enter the digestive system  from supposedly ‘healthy’ food.

Recipe: Seeded Multigrain Baguettes makes 4

340ml Water at room temperature

7g/Sachet Dried Yeast – I use Easy Bake Yeast (in the green tin/sachet) from Allinson 

250g/9oz Strong White Bread Flour

250g/9oz Strong Multigrain/Malted with Seeds Bread Flour – I use Shipton Mill 

7g Sea Salt – I use Maldon

25g/1oz Unsalted Butter – alternatively use 1tbsp Olive Oil

4tbsp Mixed Seeds

Method:

This method uses a stand mixer to mix and knead the dough. You may easily mix and knead by hand, following the shaping technique given.

Making The Seeded Bread Dough

  • Place the stand mixer bowl on top of digital scales. Weighing ingredients, including water is, by far, the most accurate way to bake.
  • Weigh 340g water into the bowl. One gram equals one millilitre of water.
  • Next add the yeast.
  • Add the bread flours on top of the yeasted water. Keeping the yeast and salt separate allows the yeast to work without the salt killing it.
  • Weigh the salt and butter directly on to the flour.
  • With a dough hook attached mix on a low speed for 5 minutes.
  • Increase the speed to medium and continue to mix for a further 5 minutes.
  • As soon as the mixing time has finished switch off the stand mixer. Remove a small piece of dough and stretch it. When fully kneaded the dough should stretch without tearing, so that light can been seen through it – windowpane test. Continue to mix on medium speed for a further 2 minutes, until this test is passed.
  • As soon as the dough is fully kneaded, switch off the mixer and scrape any dough from the dough hook into the bowl, using your fingers.
  • Cover the bowl with a clean tea towel and leave to prove until doubled in size, 1-2 hours.

Shaping The Multigrain Baguettes

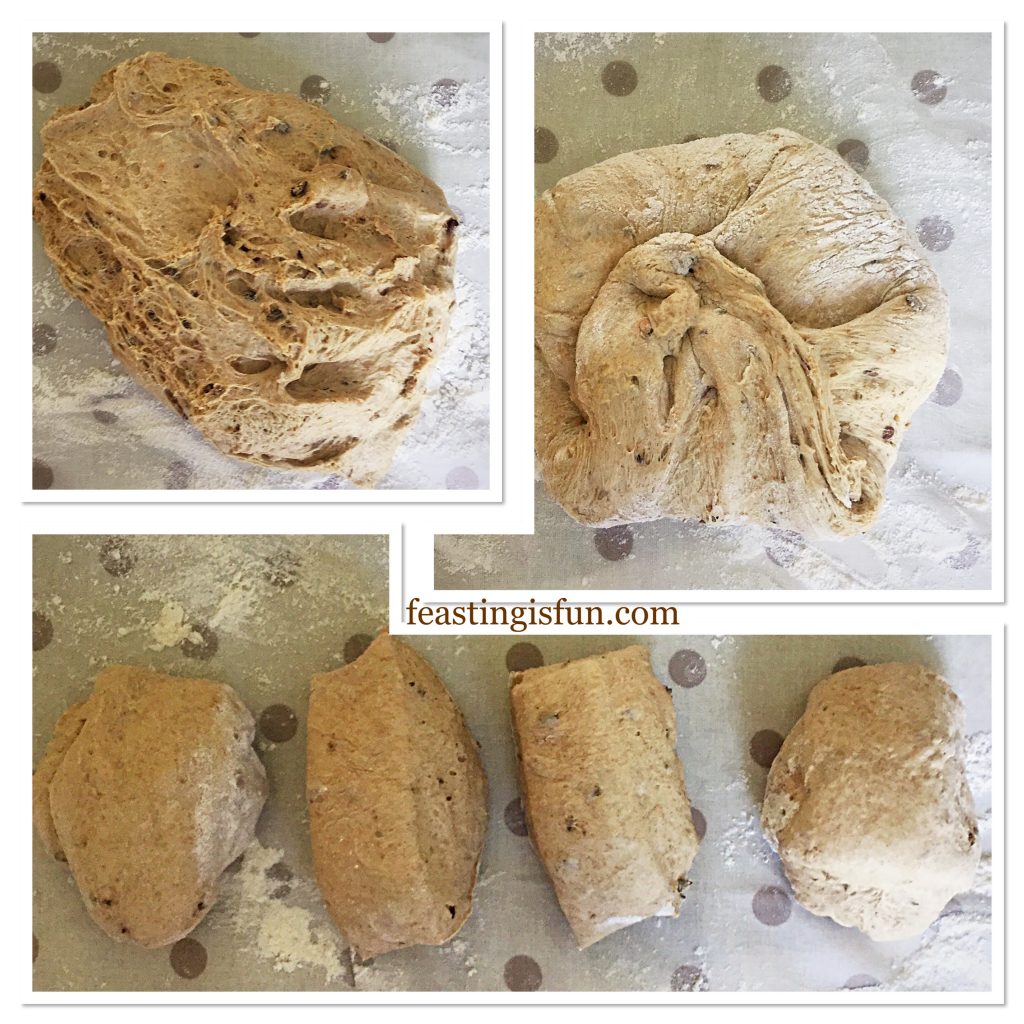
  • When the dough has doubled in size, turn out on to a lightly floured worktop. Make sure the top of the dough in the bowl is in contact with the worktop, becoming the underneath.
FF Seeded Multigrain Baguettes
Dividing the dough into four equal portions.
  • Pull out the dough 5-6 times, from the side and press into the centre of the dough ball.
  • Turn the dough over, shape into a rough log and cut into 4 even portions.
  • Take the first piece of dough, turn on its side and pull 4-5 times from around the edge. Sticking each piece of dough back into the centre as before.
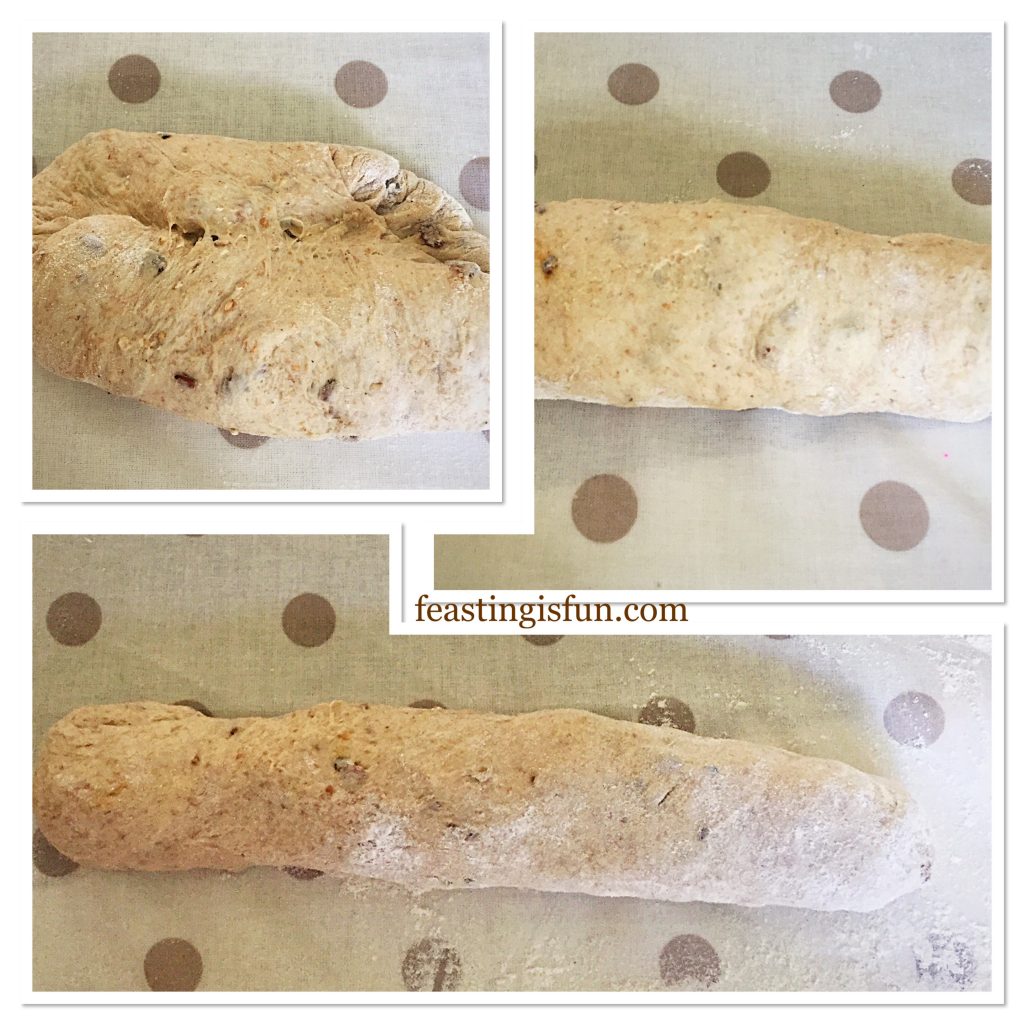
FF Seeded Multigrain Baguettes
Shaping each piece of dough into a baguette.
  • Start to roll the dough into a log shape. Beginning at the front edge, use your thumb to roll the dough, as in top left picture above.
  • With the seam underneath place your hands in the centre of the log and start to roll the dough, gently easing it from the centre.
  • Continue rolling the dough until it is 10″/25cm. Finally roll either end to a point.
  • Place on to a baking tray or a perforated baguette baking tray. Alternatively fold a couple of tea towels to support the dough and dust with flour before placing the baguettes on them.
  • Shape the remaining pieces of dough in the same way.
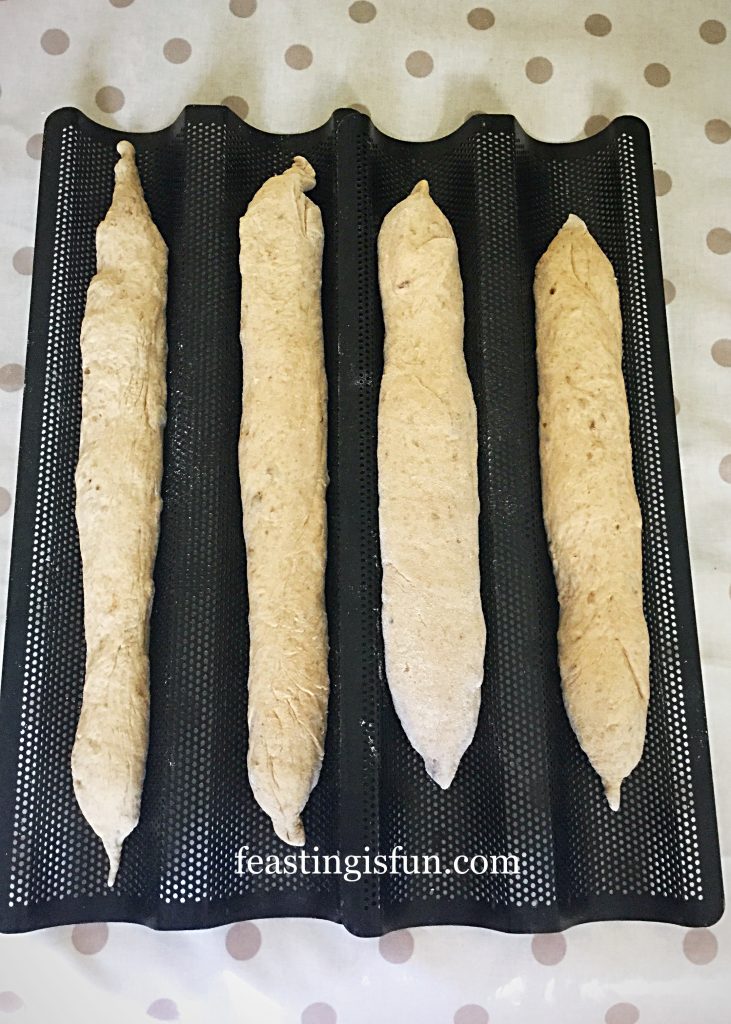
FF Seeded Multigrain Baguettes
Seeded Multigrain Baguettes proving.
  • Cover with a damp tea towel. Leave to prove until doubled in size.

Baking The Baguettes

  • While the baguettes are proving preheat the oven to its hottest setting. Place a pan of water in the base of the oven.
  • Once doubled in size spray, or lightly brush each baguettes with water. Sprinkle over the mixed seeds.
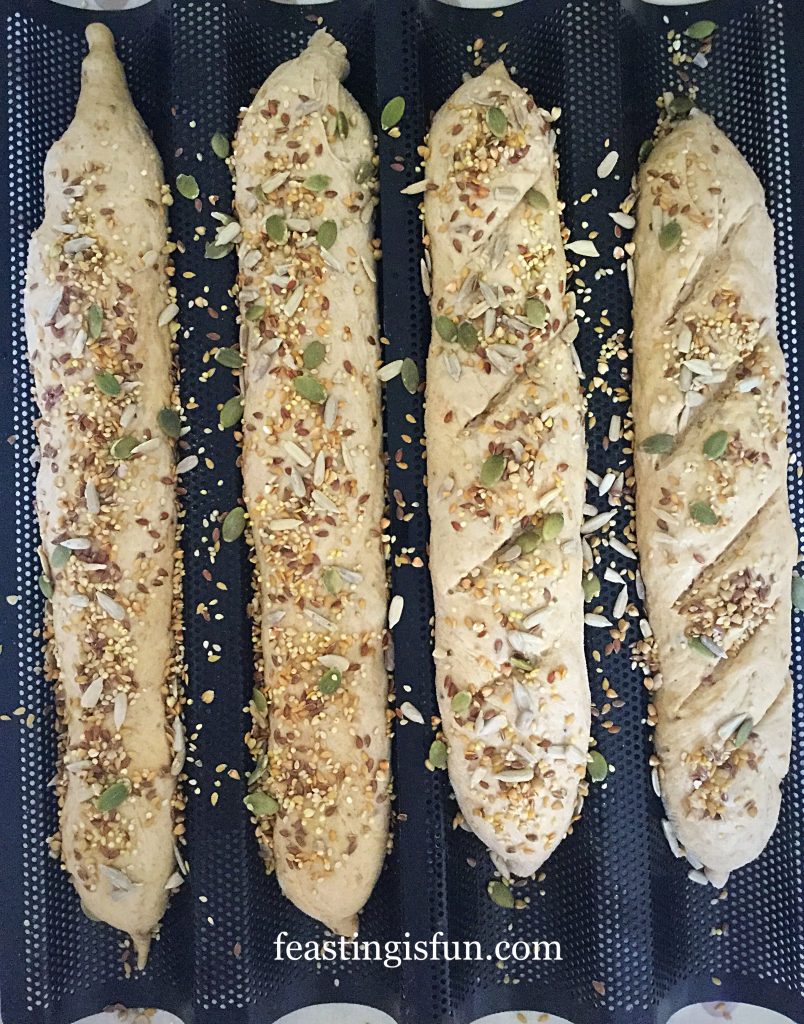
FF Seeded Multigrain Baguettes
Seeded Multigrain Baguettes ready to be baked.
  • Reduce the oven temperature to 230C/210C fan, gas mark 8, 450F, or the hottest setting.
  • Place the baguettes on their trays into the oven. The baguette baking trays fit in at an angle. If using tea towels to proof the baguettes, remove and place on a lightly oiled baking sheet.
  • Bake for 20 minutes. The baguettes will be golden and sound hollow when rapped with a knuckle when fully baked.
  • As soon as they are baked remove from the oven and carefully transfer to a cooling rack.
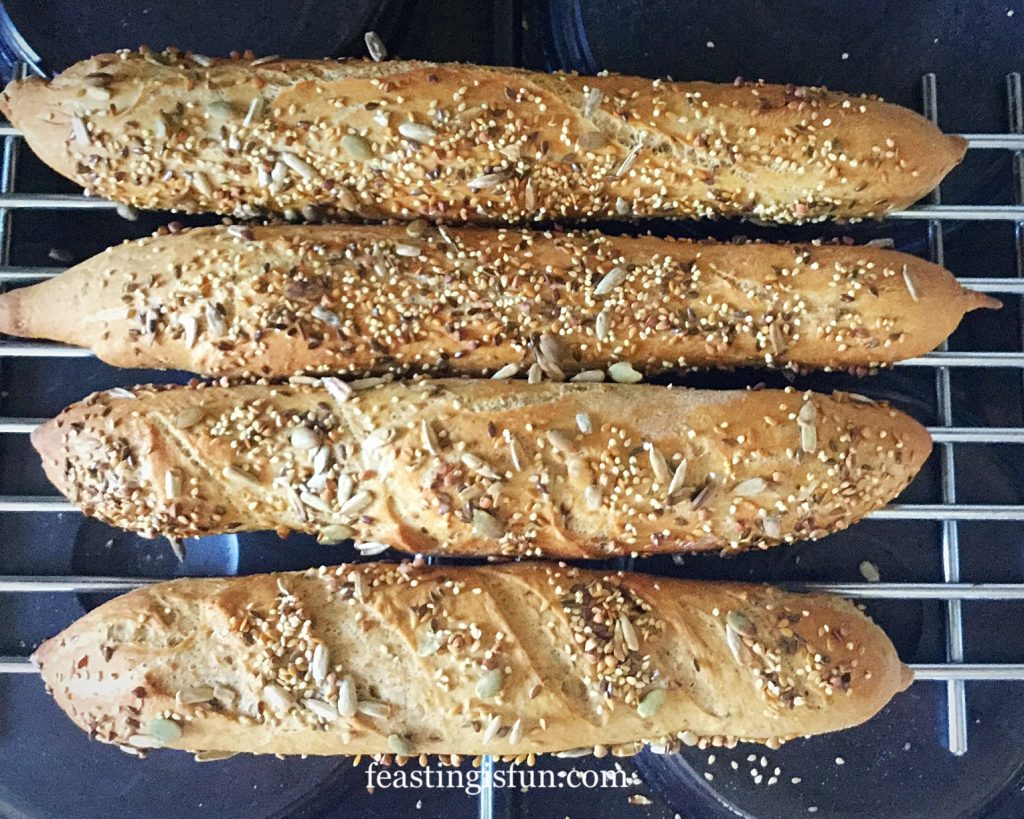
FF Seeded Multigrain Baguettes
Seeded Multigrain Baguettes Hot from the oven.
  • Leave to cool until just warm.
Seeded Multigrain Baguettes

Serve filled with your favourite sandwich fillings, or break apart and dunk in soup. Enjoy these baguettes on the day they are made, or alternatively, freeze wrapped in aluminium foil, for up to one month.

If you have enjoyed this recipe for Seeded Multigrain Baguettes you may also like these:
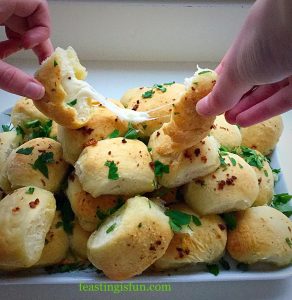
Garlic Cheese Bombs

FF Seeded Multigrain Baguettes
Garlic Cheese Bombs

Lighter Wholemeal Bread

FF Seeded Multigrain Baguettes
Lighter Wholemeal Loaf

Easy Crusty Baguettes

FF Seeded Multigrain Baguettes
Easy Crusty Baguettes

Making bread at home is so much fun. And including children in the process is not only great fun, it also helps them get hands on with making their own meal. Dough is a great medium to play with, especially with children, who, in my experience, are much more likely to eat what they have made. Pizzas are another big hit. It is amazing how a piece of green bell pepper can become a light sabre. Why not try this easy recipe for my Better Than Takeout Pizza?

Whatever you are making, baking and creating in your kitchens, have fun enjoying your feast.

Sammie xx

Please do not copy any part of this post. All content is covered by copyright laws. For further details see my Disclosure Policy.
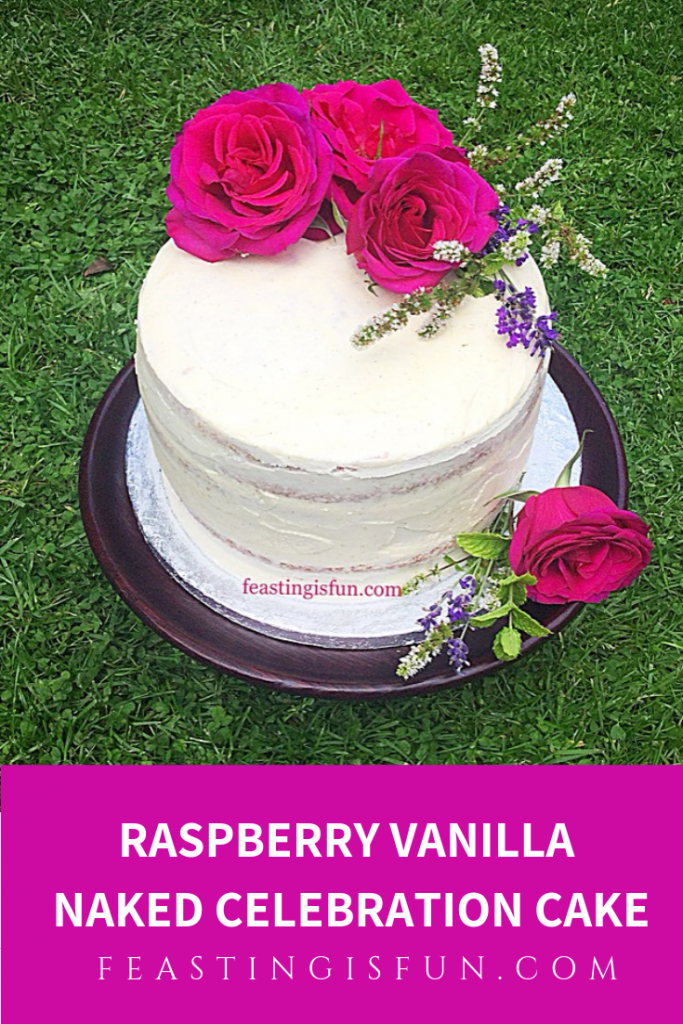
Raspberry Vanilla Naked Celebration Cake

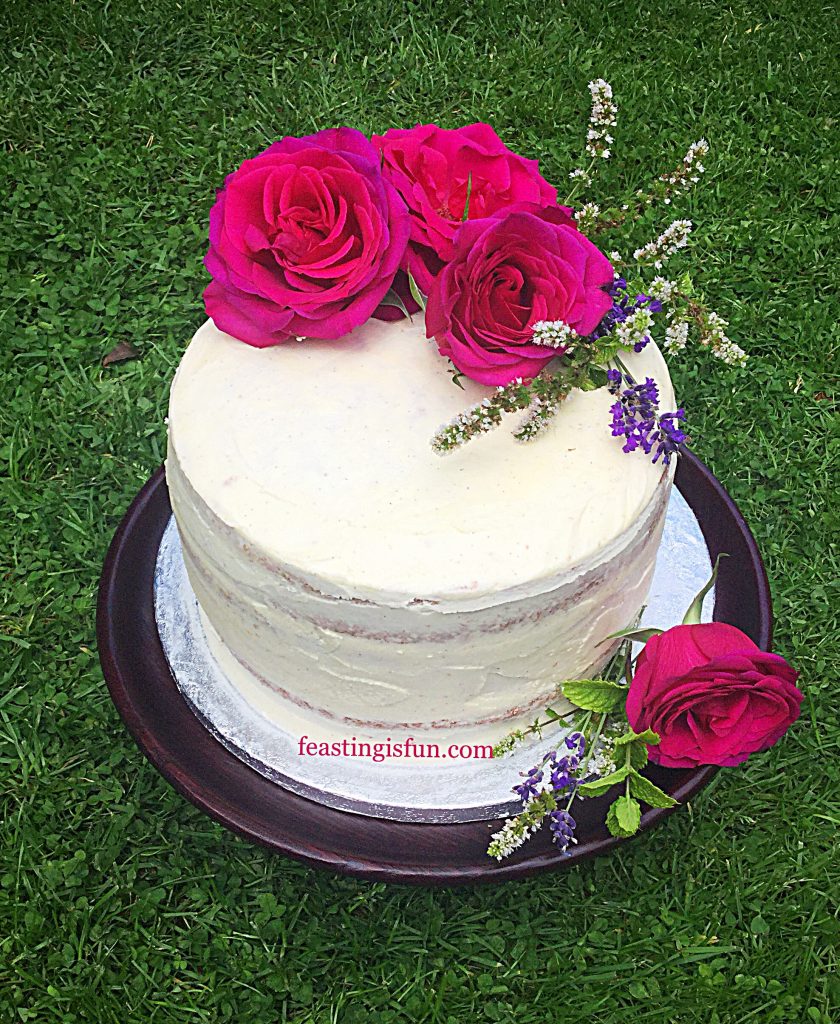
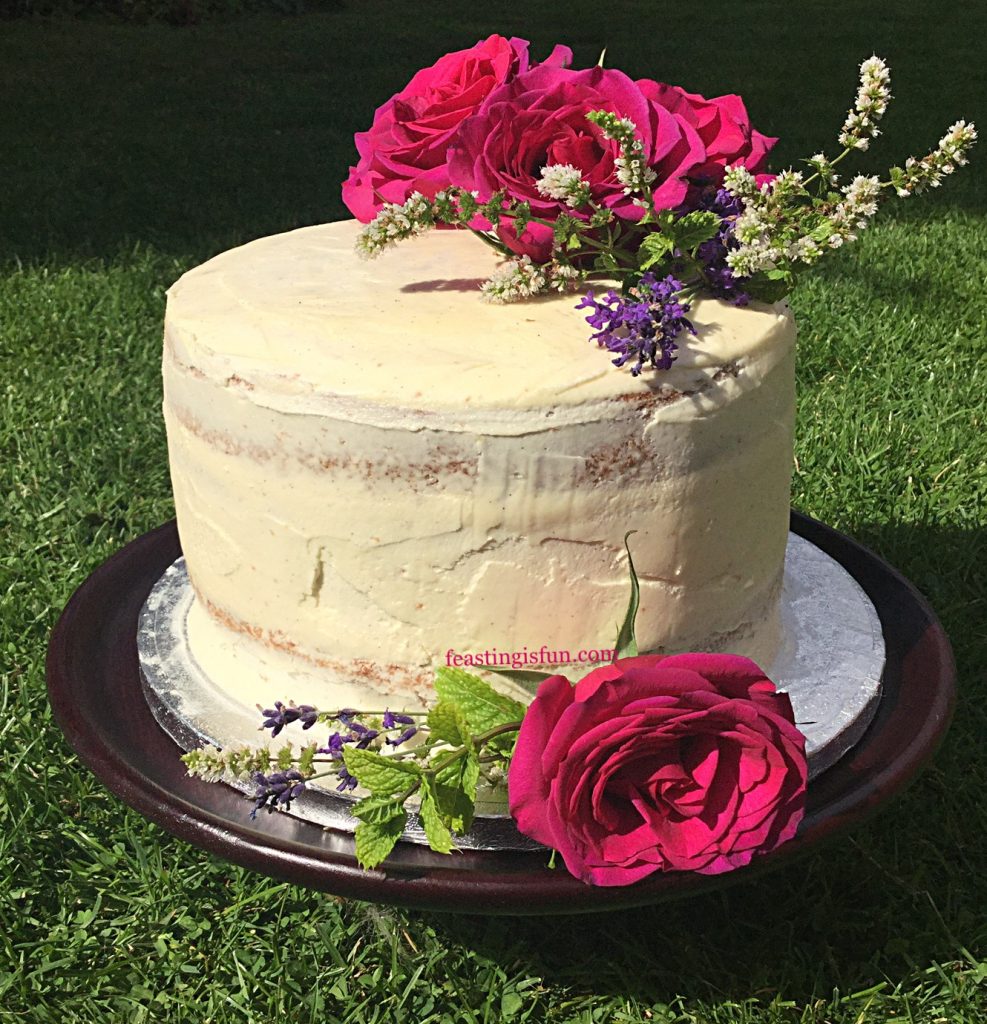
Someone once said “A celebration without cake is just a meeting.” How right they were. Whether it is birthdays, weddings, christenings, or any other form of celebration, cakes almost always feature.  Hawkshead Relish recently won Small Business Of The Year 2017. After reviewing and using their delicious jams, chutneys and more recently spreads, I am absolutely thrilled for them. To celebrate their award I offered to make a cake featuring their best selling Raspberry and Vanilla Jam. Here is the Raspberry Vanilla Naked Celebration Cake made in celebration of such an amazing achievement.

FF Raspberry Vanilla Naked Celebration Cake
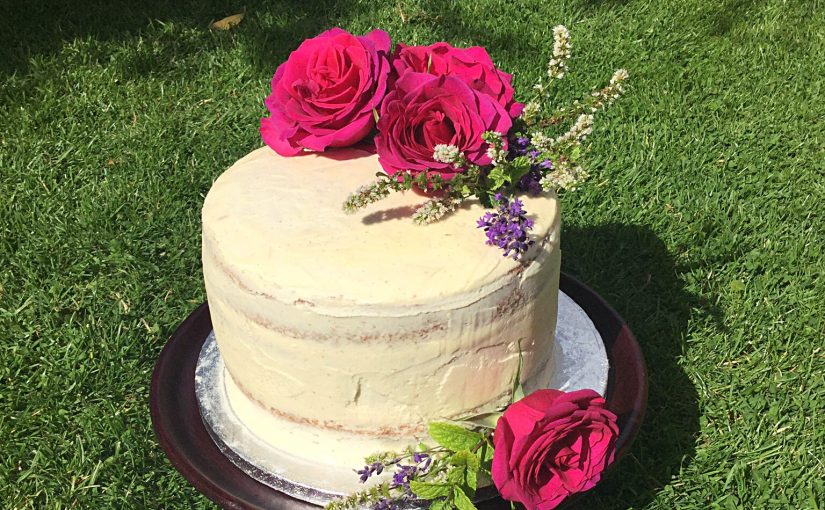
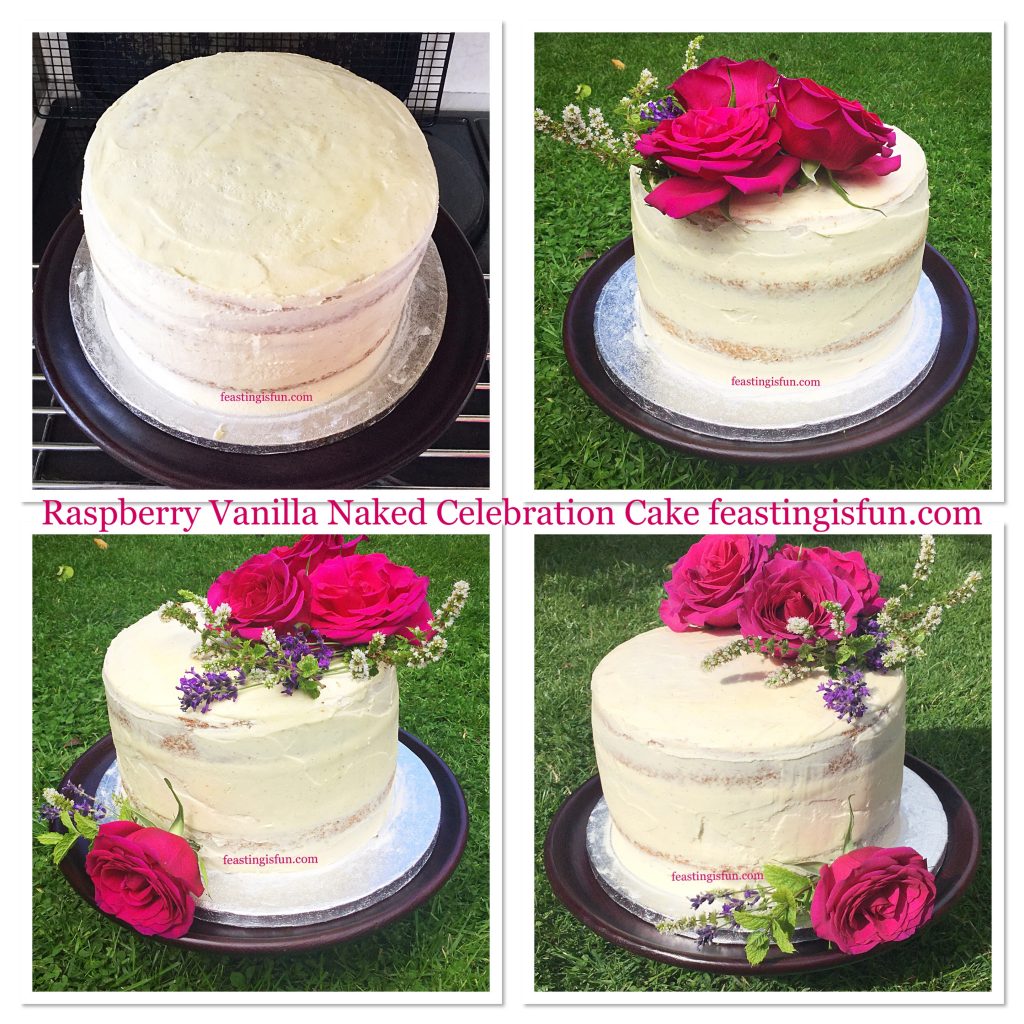
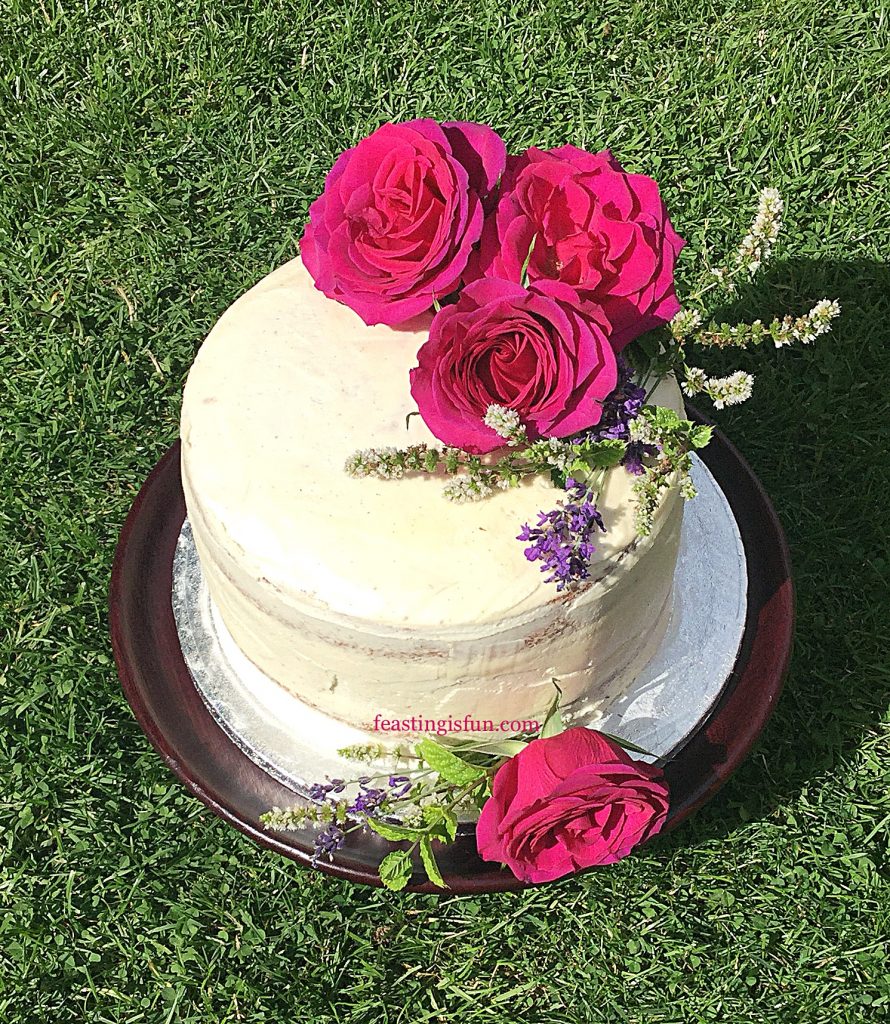
Raspberry Vanilla Naked Celebration Cake.

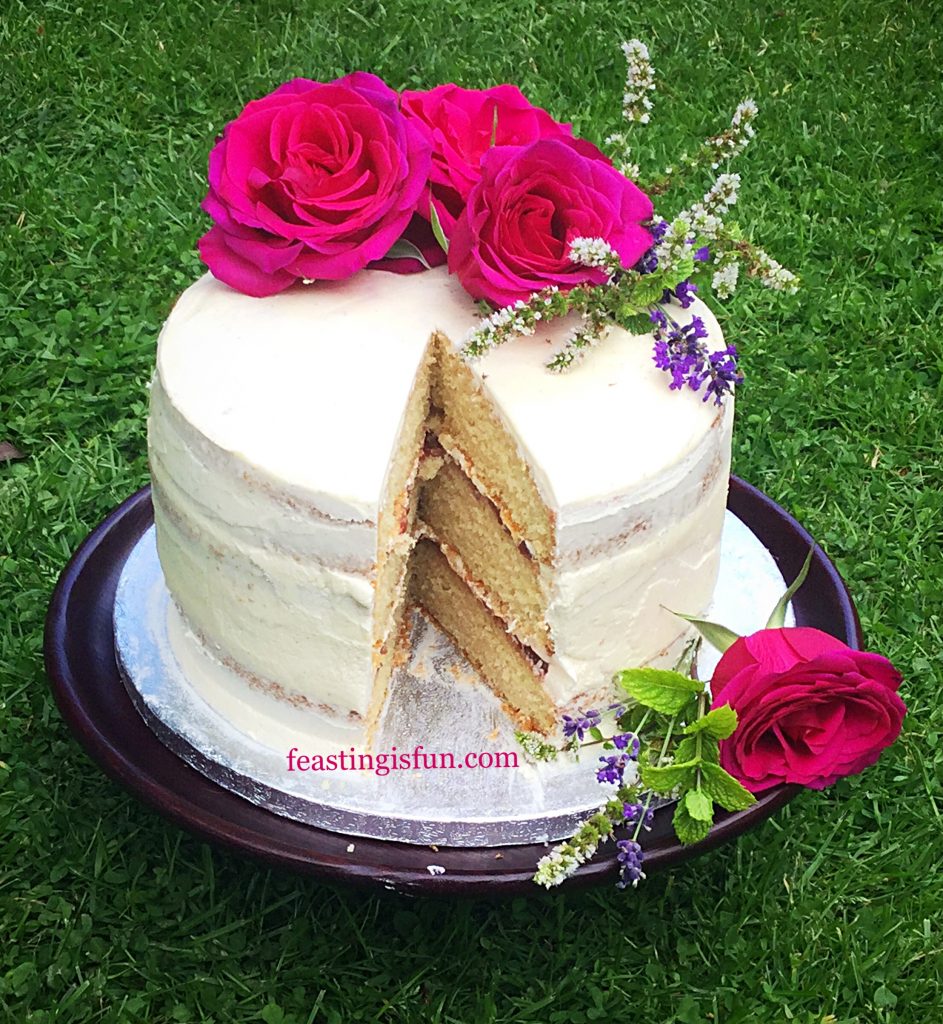
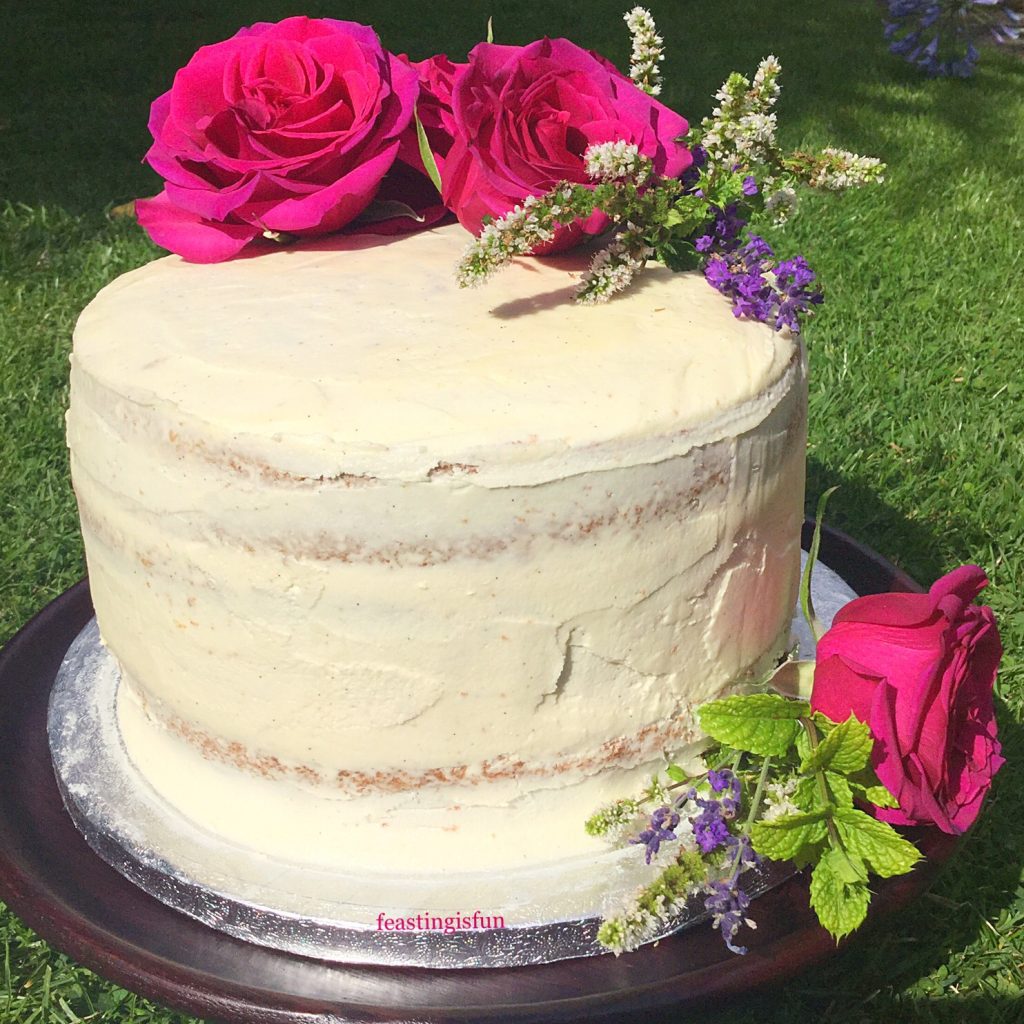
Three layers of light, vanilla sponge, sandwiched together with vanilla bean buttercream and raspberry vanilla jam. Covered lightly, yet incompletely with the same buttercream. Most of all, giving a very ‘on trend’ semi-naked finish to the cake. Finished with edible garden flowers, from my garden, that reflect the geographic location of Hawkshead Relish, situated in the historic village of Hawkshead within the English Lake District.

FF Raspberry Vanilla Naked Celebration Cake
Raspberry Vanilla Naked Celebration Cake in the sunshine.

Embellish with relish

Using locally sourced ingredients Hawkshead Relish do not use any artificial additives or preservatives. Completely free from nuts, their range is also suitable for vegetarians. Holding 50 Great Taste awards, each product is made in small batches using traditional methods. Resulting in outstanding taste and quality, from a family run business.

FF Raspberry Vanilla Naked Celebration Cake
Raspberry Vanilla Naked Celebration Cake layered with buttercream and the very best jam.

Using the Hawkshead Relish motto “Embellish with Relish,” I’ve enjoyed creating recipes using their products. Especially when including them as ingredients in their own right. When creating my Red Onion Sausage Plait, using their Red Onion Marmalade is a vital to the flavour of the finished bake. So unique are the flavours of their chutneys and sauces, they deserve more than to be spooned on to the side of a plate. Since including relish within recipes, a whole world of flavour combinations became unlocked.

Recipe: Raspberry Vanilla Naked Celebration Cake serves 14-16

  • To make the 3 cake sponges:
  • 275g/10oz Unsalted Butter + 100g/4oz both at room temperature
  • 275g/10oz Caster Sugar + 100g/4oz
  • 3tsp Vanilla Extract – I use Nielsen-Massey
  • 1/4tsp + 1/8tsp Sea Salt  – I use Maldon
  • 6 Large Free Range Eggs + an additional 3
  • 275g/10oz Plain White Flour + 100g/4oz
  • 2.5tsp Baking Powder + 1tsp
  • To make the buttercream:
  • 500g/12oz Icing Sugar
  • 250g/9oz Unsalted Butter softened to room temperature
  • 2tsp Vanilla Bean Paste
  • 2  Jars Raspberry and Vanilla Jam from – Hawkshead Relish
  • 2-3tbsp Very Hot Water from a recently boiled kettle
  • To decorate the cake:
  • A selection of organic, pesticide free edible flowers. Both mint and lavender flowers were sourced from our garden.

Method: Preheat the oven to 160C/140C fan, gas mark 3, 325F

Making and baking the cake:

You will need 3 x 18cm/7″ approx 7cm/2.5″ deep, loose bottom sponge tins. Since most people own only 2 tins, this method is written with that taken into account. Therefore, two separate bakes are included. First of all, making the batter and baking two sponges. Followed by making the batter and baking one sponge. Finally, if you own and have oven space for three sponges to be made and baked together, simply follow the steps, using the total ingredients.

  • First of all, lightly butter the baking tins. Cover the base in baking parchment.
  • Into a large bowl add the first amount of sugar, butter and salt.
  • Whisk together until pale and creamy.
  • Next add 2 teaspoons of vanilla extract and 6 whole eggs.
  • Whisk everything together until combined.
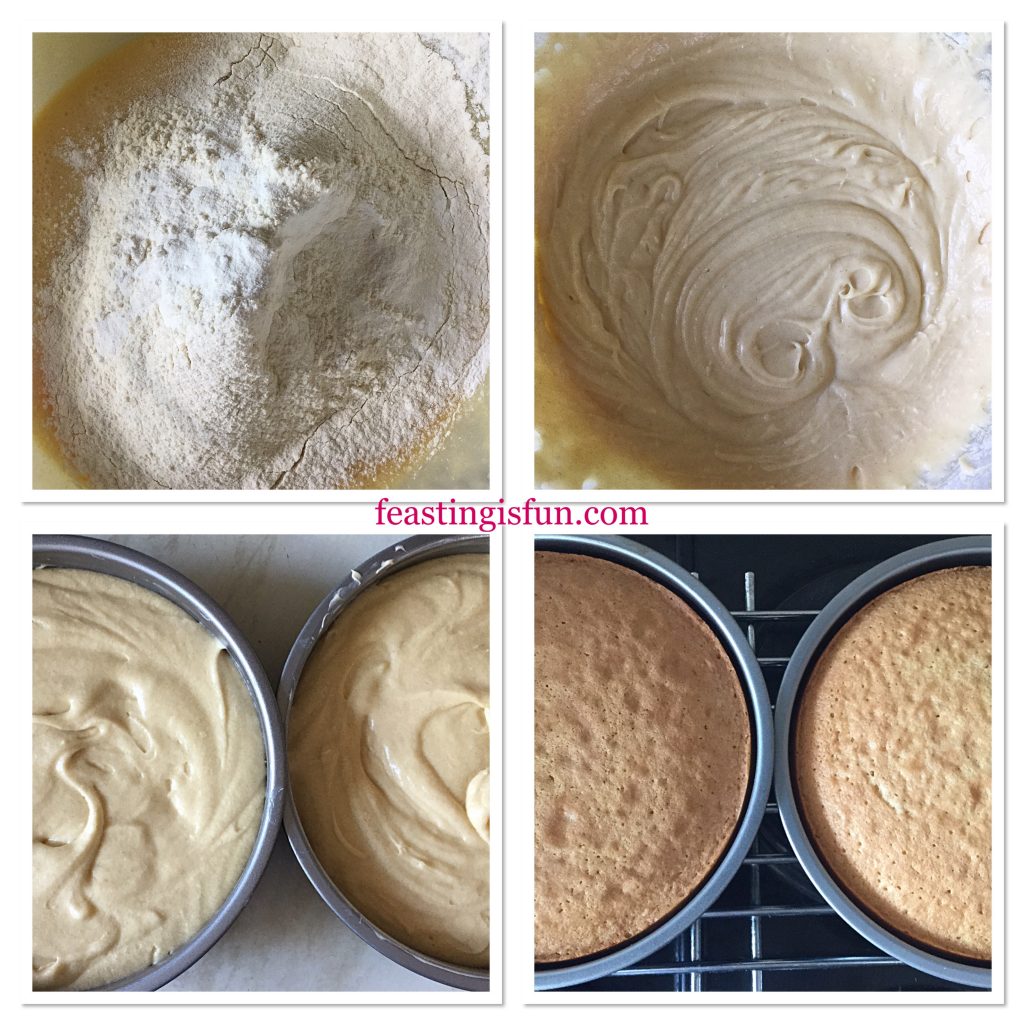
  • Follow by sieving in the flour and baking powder.
  • Whisk the ingredients together until combined. Always take care not to over beat, or the resulting cake will be tough.
  • Divide the cake batter equally between 2 greased and lined tins. If using the entire mix divide between 3 tins.
  • Place the tins in the top and centre of the oven and bake for 40-45 minutes.
FF Raspberry Vanilla Naked Celebration Cake
Preparing and baking the cake sponges.
  • When they have turned golden brown and spring back from a light touch the cakes are fully baked.
  • Remove from the oven, allowing each cake to cool in the tin for 10 minutes before turning out on to a cooling rack.
  • Wash up one cake tin and follow the steps given to make a single sponge cake.
  • Make and bake as before. Each of the 3 sponges must be fully cooled before icing.

Building The Raspberry Vanilla Naked Celebration Cake:

During the cake icing process, chilling of the iced cake in a fridge is required. Therefore a cake board, or flat plate is needed for transferring the cake. Also a cake decorating turntable is helpful for ensuring a smooth even finish to the buttercream. Alternatively use a cake stand large enough to accommodate the cake board/plate. A palette knife and large piping bag are also required.

Making the vanilla buttercream:

  • Into a large bowl add the softened butter and vanilla bean paste.
  • Sieve the icing sugar into the same bowl.
  • Add 2 tablespoons of very hot water from the kettle and start whisking the ingredients on a low speed.
  • Continue whisking until the buttercream has turned very pale and has a light, creamy consistency.
  • Place the cake board on to the cake stand.
  • Next, put a small dollop of buttercream on to the centre of the board. Spread the icing so that it is slightly smaller than the diameter of a cake sponge.
  • Lay the first sponge, flat side uppermost on to the board. The buttercream anchors the cake to the board, providing a stable base.
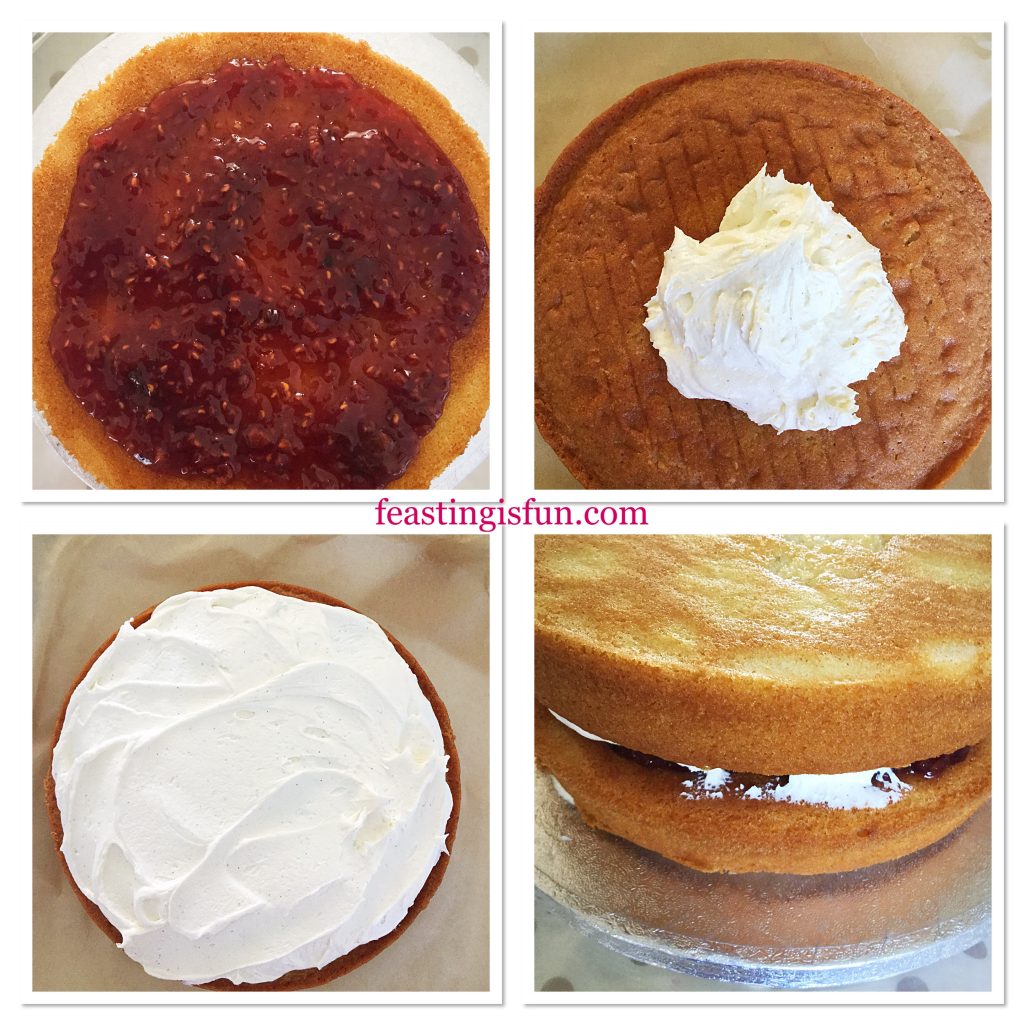
  • Spread 4 generous tablespoons of jam on to the cake. Leave a 2cm gap between the jam and the edge of the cake.
  • Next, take a separate sponge and add a generous dollop/4tbsp of buttercream to the top.
  • Using a palette knife, spread the buttercream evenly so that it covers the sponge.
  • Carefully lift and flip the sponge, placing it on top of the jam sponge, buttercream side facing down. See the photos below for guidance.
FF Raspberry Vanilla Naked Celebration Cake
Layering each sponge with jam and buttercream.
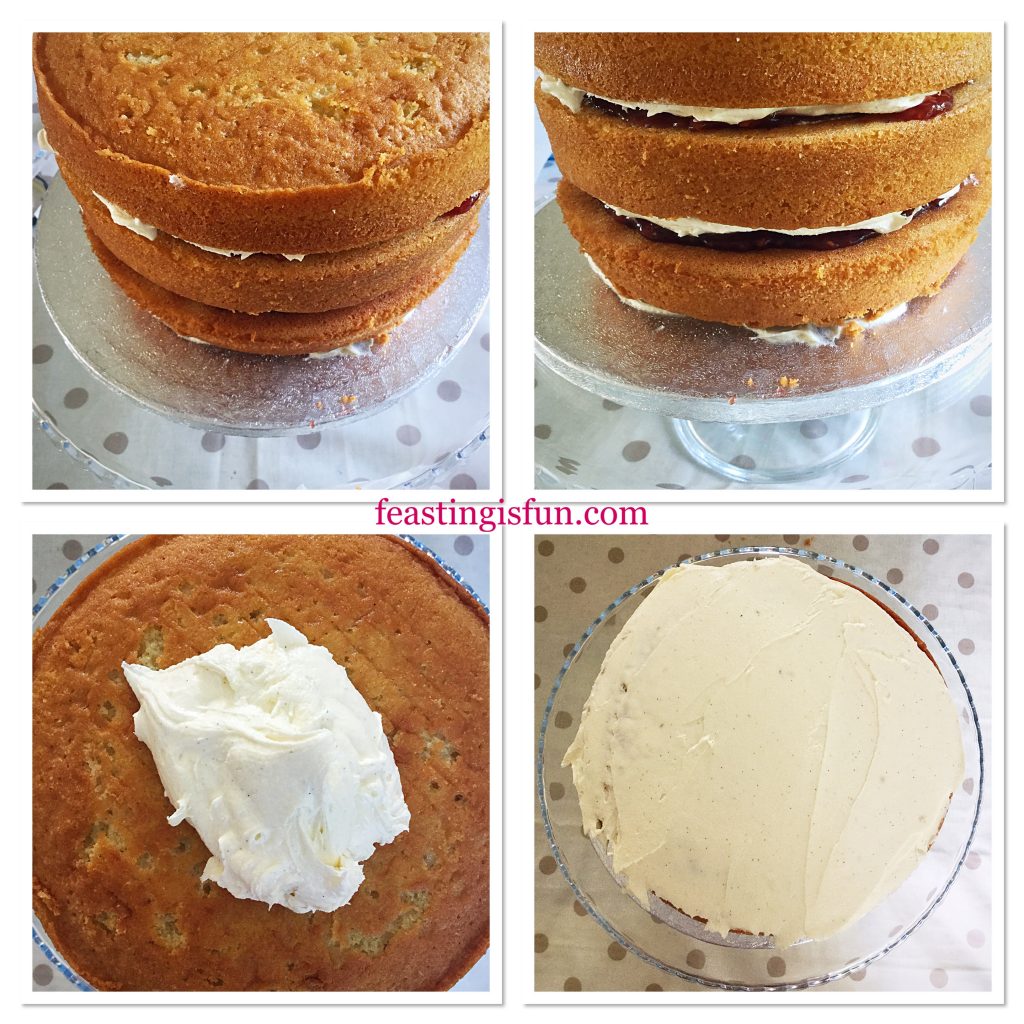
  • Repeat the last steps, with the remaining sponge. However, this time the sponge should be placed flat side down. Hence leaving the finished, stacked cake with a natural top.
FF Raspberry Vanilla Naked Celebration Cake
3 sponge cake layers stacked. Also covering the top in buttercream.

Creating a (semi) naked effect:

  • Spoon a generous amount/5tbsp of buttercream on to the top of the cake.
  • Again, using a palette knife, spread the buttercream so that it covers the top of the cake evenly.
  • Fill a large, disposable piping bag with the remaining buttercream. Snip the end of the bag to give a 1cm opening. A nozzle is not required.
Covering the side of the cake with buttercream.
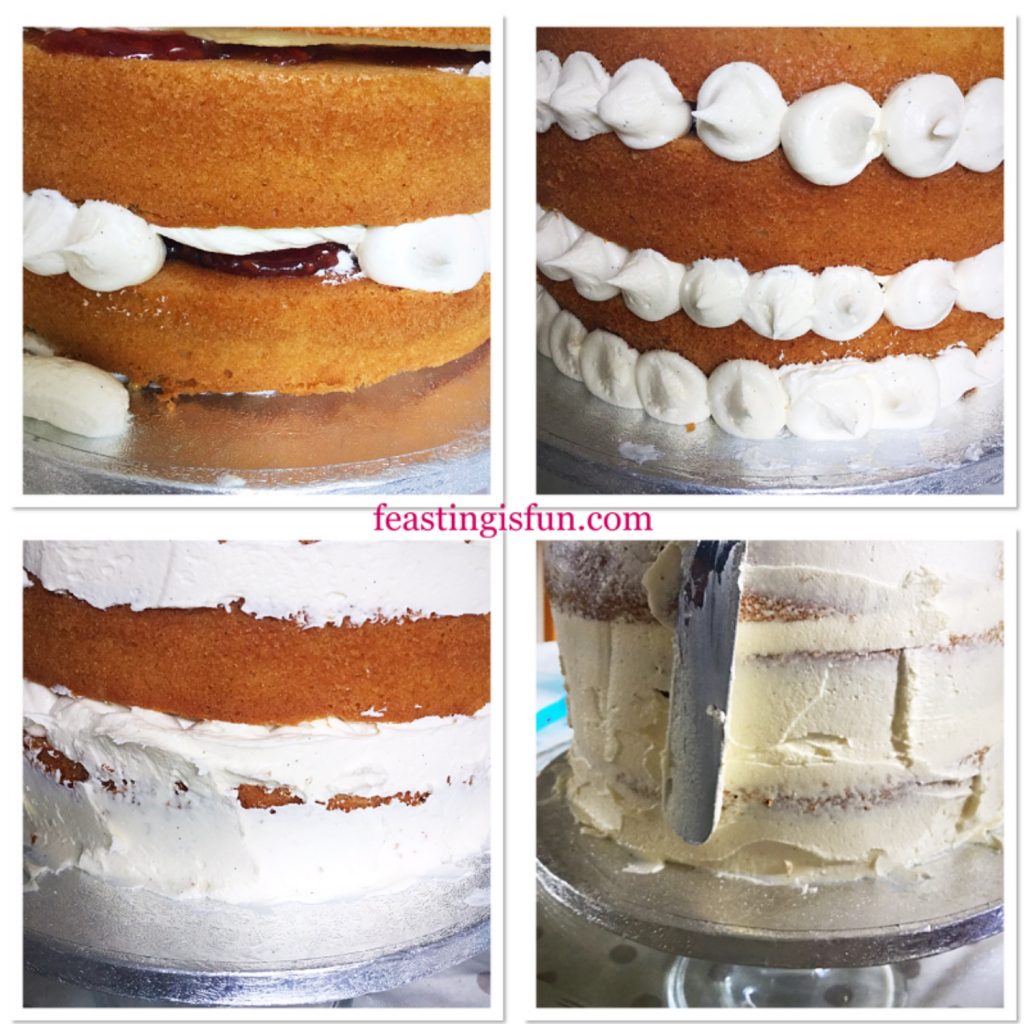
  • The purpose of piping buttercream is to fill in any gaps. Similar to plastering, buttercream is added and then smoothed on to the cake sides. During this process buttercream will be added and then taken off. Resulting in a ‘naked cake’ finish.
  • Pipe the buttercream in between each layer of the cake, including the base and the cake board. Take care not to get jam mixed with the buttercream.
  • Holding a palette knife at a slight angle to the side of the cake, slowly turn the cake stand. As the buttercream spreads across the cake it will also accumulate on the palette knife. Scrape the palette knife against the side of the butter bowl to remove any excess.
  • Continue turning the cake, piping buttercream on to any bare spots, until the sides of the cake are roughly covered. See bottom left photo above.

Creating a smooth finish:

  • The next stage is creating a smooth, even finish across the entire cake.
  • Fill a jug with very hot water. Wipe any buttercream from the palette knife and then place it in the hot water. Since the heat of the knife melts buttercream, it is very helpful in creating the smoothest finish.
  • Remove the palette knife, wipe off any water and then hold it flat against the side of the cake. Rotate the cake slowly. When you start to feel a dragging sensation, turn the knife over and repeat. Creating a completely smooth cake requires a lot of repetition of these steps. Repeat until the sides of the cake are smooth.
  • Now use the same technique for smoothing the cake top. As soon as the cake top is smooth, run a hot palette knife around the outside of the top cake layer. Creating a smooth top and sides is the aim.
  • While it is tempting to keep going, there does come a point at which the cake is satisfactorily smoothed. Part of the beauty of naked cakes, is their imperfect finish.
  • Clean off any buttercream on the cake board.
FF Raspberry Vanilla Naked Celebration Cake
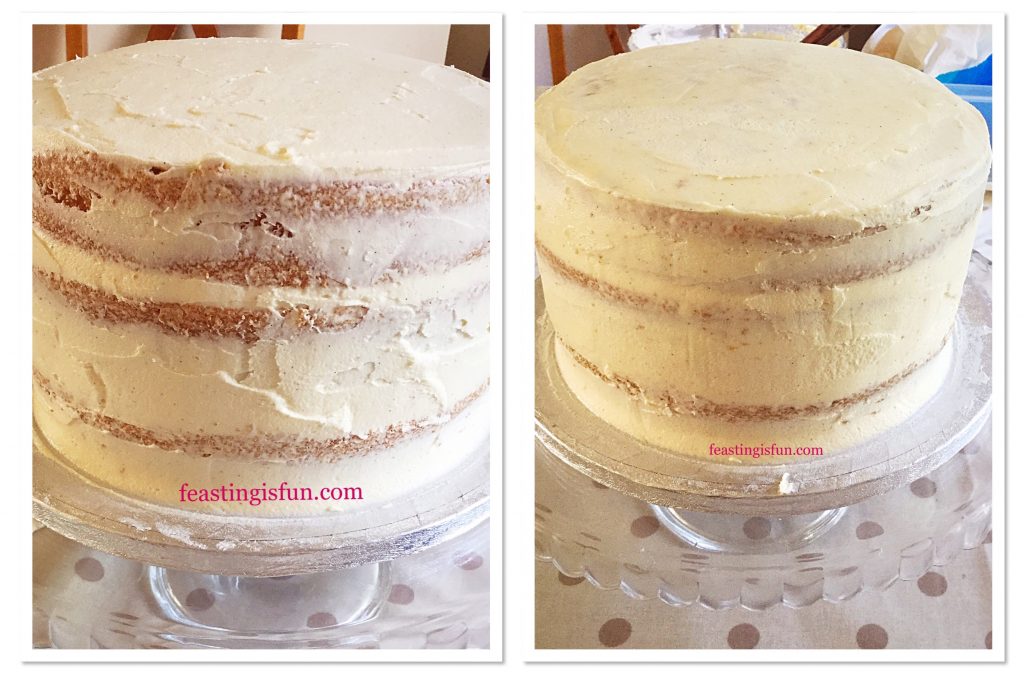
Raspberry Vanilla Naked Celebration Cake before and after smoothing with a hot palette knife.
  • Chill the cake, uncovered, in the fridge for an hour. Chilling sets the buttercream prior to decorating.

Decorating the cake using fresh, edible flowers:

  • If using fresh flowers it is important to decorate the cake on the day it is to be served.
  • While the cake is chilling prepare the flowers for decoration. Remove lower leaves on stalks and trim flowers so that they can sit on top, or to the side of the cake.
  • Decorate using your chosen flowers. It is important to consider the cake from every angle when adding the flowers.
FF Raspberry Vanilla Naked Celebration Cake
Roses and herbs reflect the rural and natural products made by Hawkshead Relish.

Finally the Raspberry Vanilla Naked Celebration Cake is ready to be served.

FF Raspberry Vanilla Naked Celebration Cake
Raspberry Vanilla Naked Celebration Cake.

Store any leftover cake, floral decorations removed, in an airtight container, ideally refrigerated and eat within 3 days.

FF Raspberry Vanilla Cake Decorated With Fresh Flowers

If you have enjoyed this Raspberry Vanilla Naked Celebration Cake recipe, you may also like these:

Lemon Drizzle Whipped Cream Filled Giant Doughnut

Lemon Drizzle Whipped Cream Filled Giant Doughnut

Strawberries And Cream Cake

Strawberries and cream sponge cake
Strawberries And Cream Cake

Chocolate Honeycomb Sponge Cake 

Chocolate honeycomb sponge cake decorated with milk chocolate Lindt mini eggs.
Chocolate Honeycomb Sponge Cake

Celebrating a event, such as Hawhead Relish’s achievement, with cake, marks the occasion as special. Also, other desserts such as cheesecakes and pavlova’s can make an impressive alternative. Especially as different dietary requirements may need catering for. All the Pavlova recipes created for Feasting is Fun are specifically gluten free, for that very reason. Because, including as many people as possible in a celebration is so important to me.

Whatever you are making, baking and creating in your kitchens, have fun creating your feast.

Sammie xx

Hawkhead Relish kindly gifted me the jam used in this recipe. All opinions, views, content including photography are my own. No part of this post may be reproduced without the express written permission of its owner. Please see my Disclosure Policy.
Reeses Peanut Butter Cup Ice Cream

How do you improve on one of the best flavours of ice cream known to man? You squish it between two incredible, homemade cookies! And so I bring you Reeses Peanut Butter Cup Ice Cream. Because lovely people, this is the foodie equivalent of winning all the coins and one-ups in a Super Mario game and then some. So, stick with me as I take you through an incredible ice cream journey.

FF Reeces Peanut Butter Cup Ice Cream
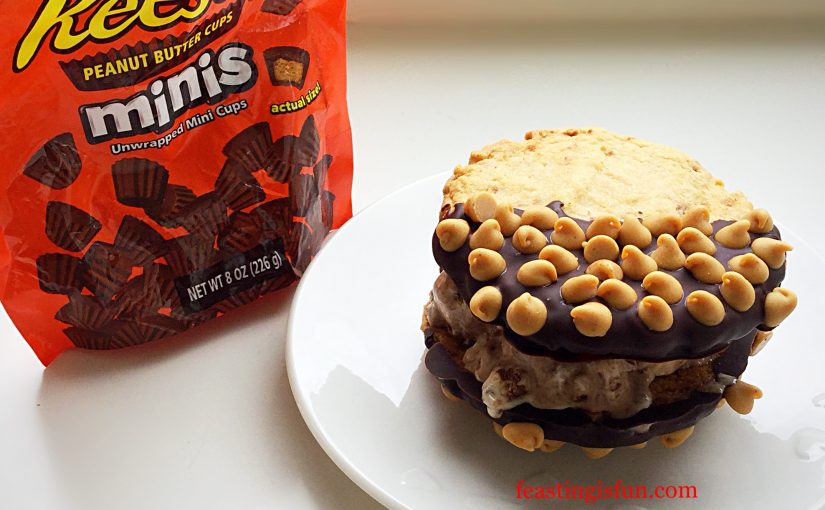
Reeces Peanut Butter Cup Ice Cream 

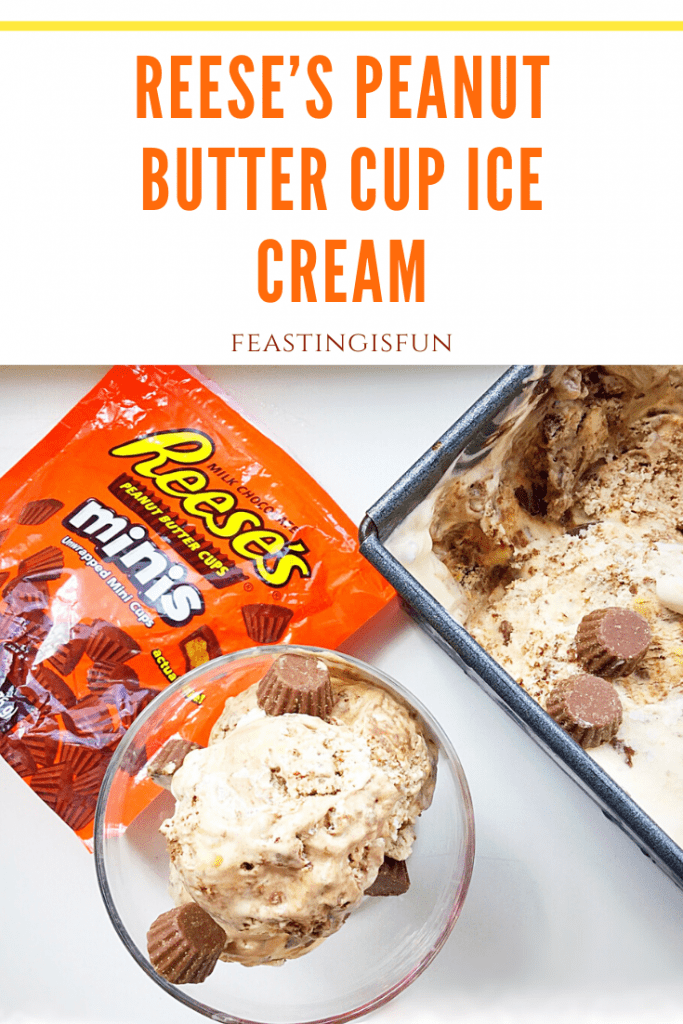
First of all there is ice cream, packed with Reeses Mini Peanut Butter Cups. While some are mini cups are left whole, others are roughly chopped. Resulting in a peanut butter cup filled ice cream base. While dark chocolate ganache ripples through the vanilla base, with a hit of pure peanut butter in every spoonful. Take a moment. Because, I undersrand if you want to think on that for a while?

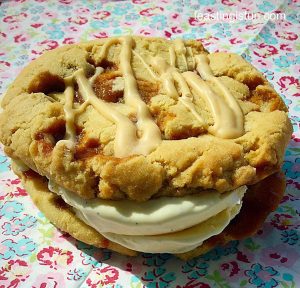
Finally, complimenting such a flavour punched ice cream are my Caramac Caramel Cookies. Since a large, robust Cookie is the only way to go when sandwiching chunks of peanut butter cup ice cream. And because these cookies are double their usual size, they are perfect for creating an ice cream sandwich.

FF Reeces Peanut Butter Cup Ice Cream
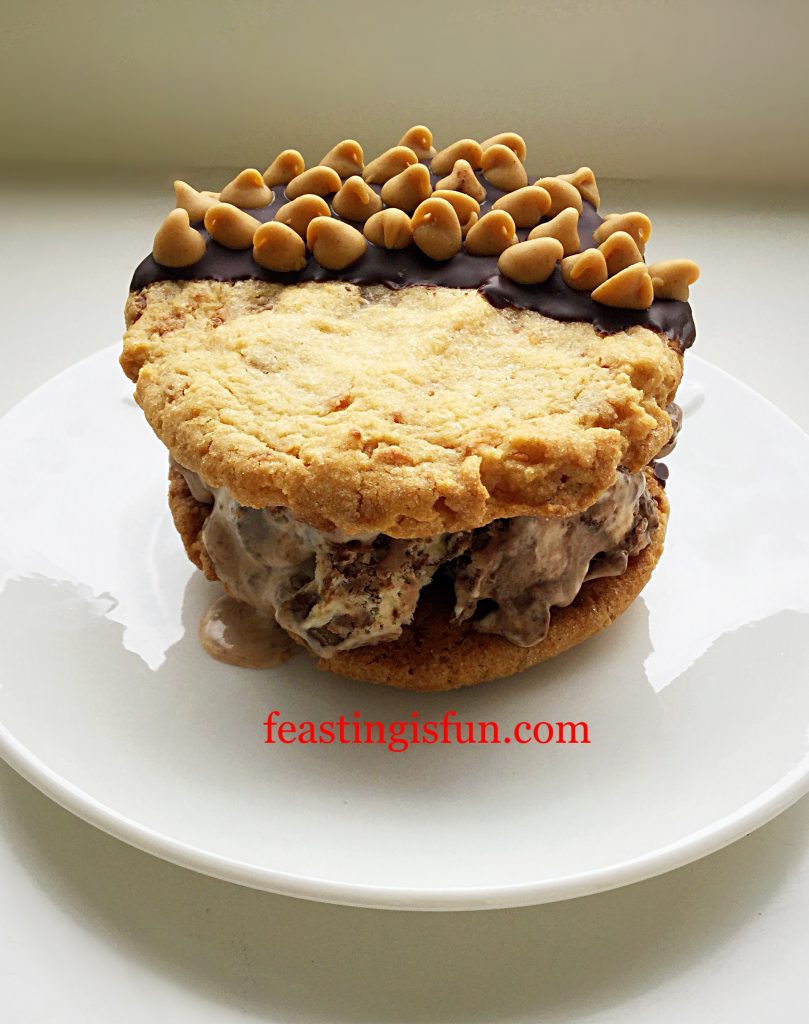
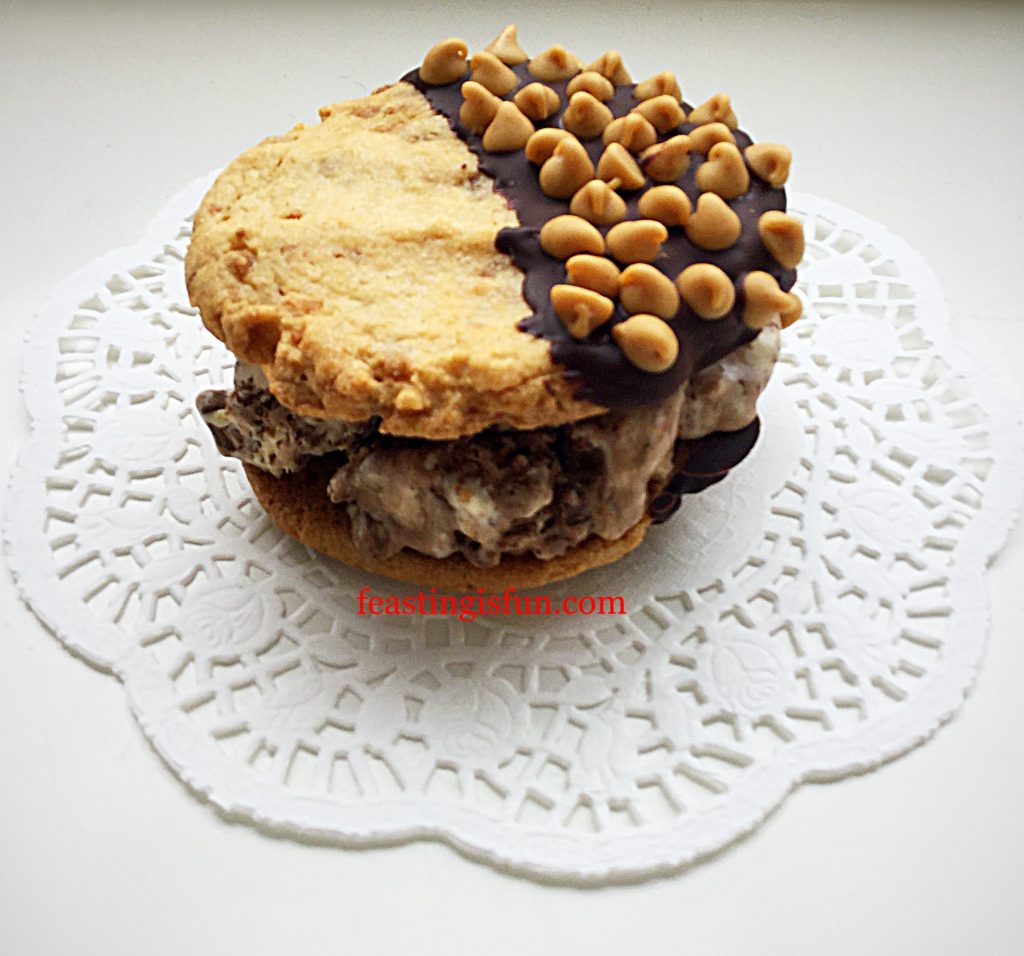
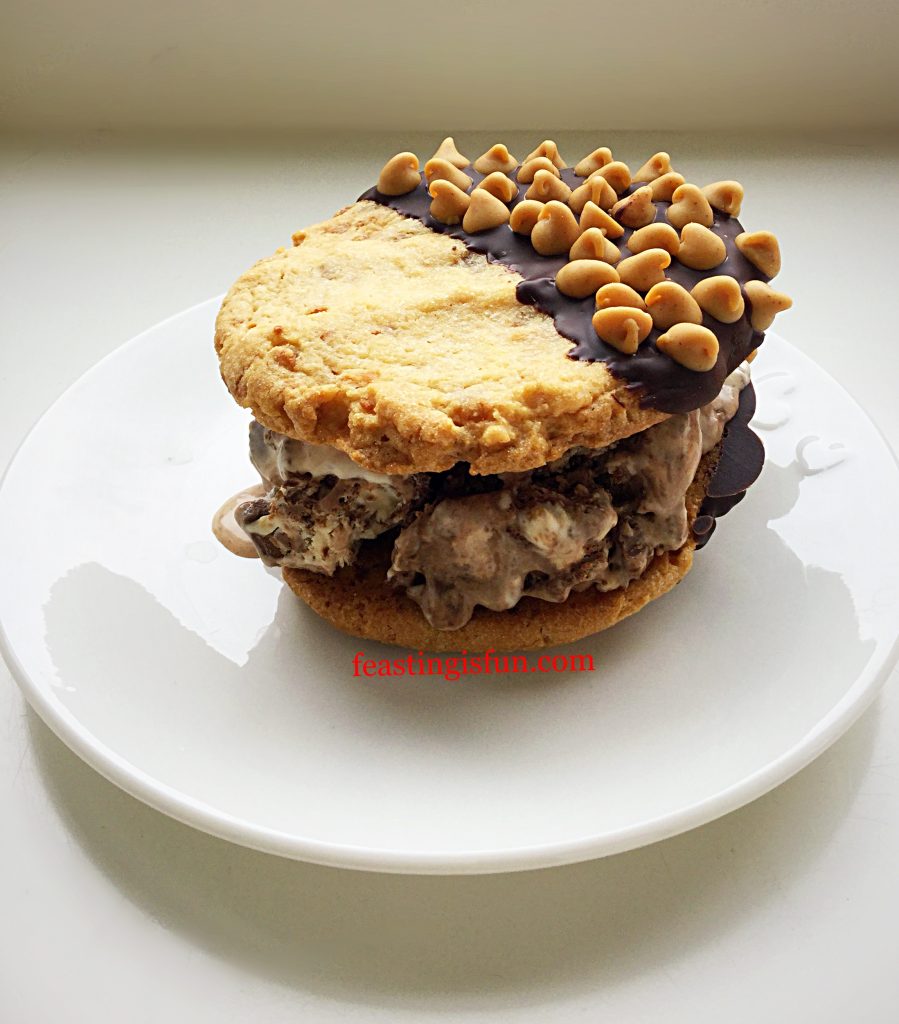
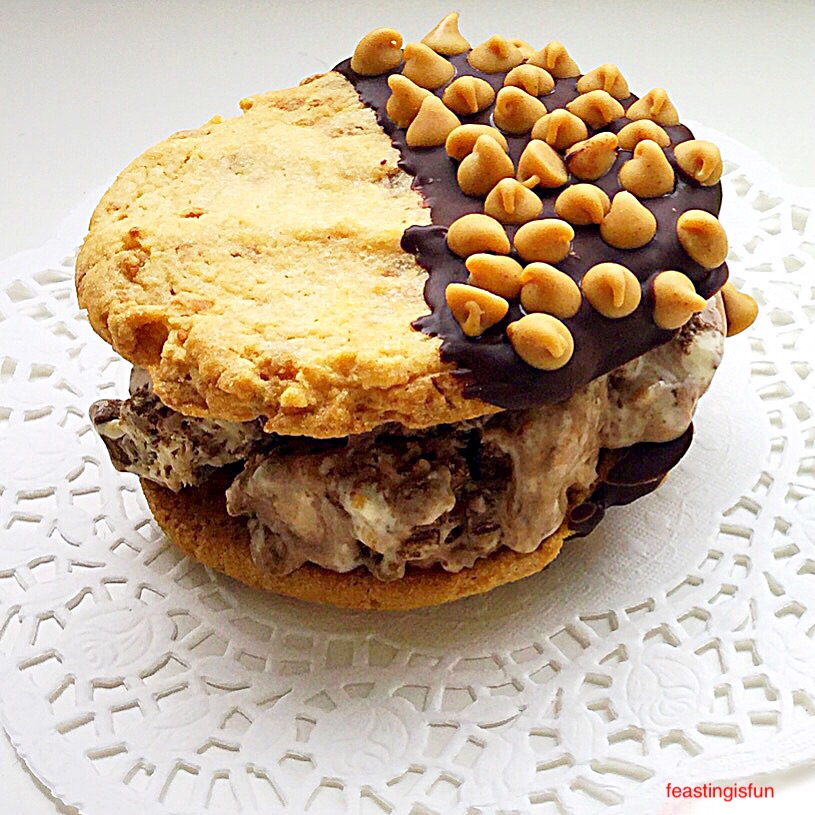
Reeces Peanut Butter Cup Ice Cream Cookie Sandwich

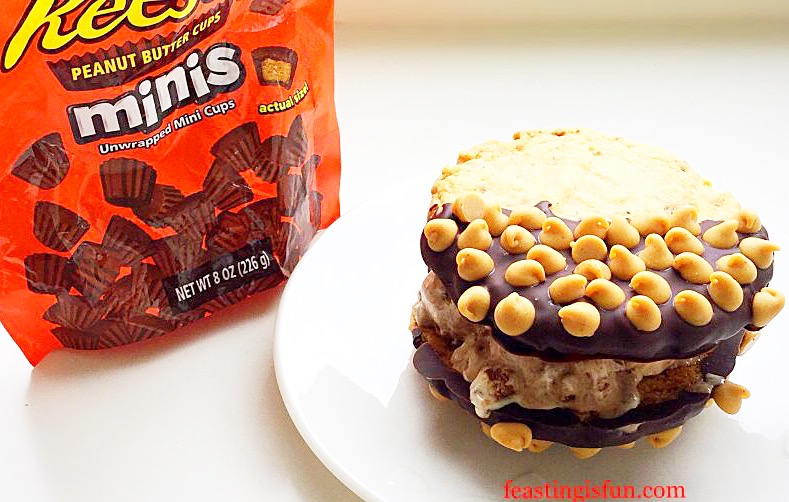
Finally, completely sending this ice cream cookie sandwich over the top, is the customisation of the mega cookies. First of all they are dipped in dark chocolate and then sprinkled with peanut butter chips, rather than contrasting, they compliment the flavours within the ice cream.

Recipe: Reeses Peanut Butter Cup Ice Cream makes 1L approx.

300mls Double Cream plus an additional 100mls for the chocolate ganache

300mls Whole Milk

6tbsp Caster Sugar

1/4 tsp Sea Salt – I use Maldon

4 Large Free Range Egg Yolks

1tsp Vanilla Extract – I use Nielsen-Massey

1tsp Cornflour

100g/4oz Dark Chocolate minimum 70% Cocoa plus an additional 100g of Dark Chocolate for dipping the cookies

50g/2oz Peanut Butter

1 x 226g/8oz Reeces Peanut Butter Cup Minis – alternatively use the equivalent weight of regular Reeces Peanut Butter Cups roughly chopped

Caramac Caramel Cookies recipe to create the cookie sandwiches.

Method: Preparing the ice cream maker.

Ensure the freezing part/bowl of the ice cream maker has been in the freezer for at least 6 hours, ideally overnight, or according to manufacturer’s instructions.

Note: For step-by-step instructions, including photographs please see here.

Making The Ice Cream Base

  • First of all, Place the milk and cream into a heavy bottom saucepan over a medium heat. Heat the cream mixture to scalding point, little bubbles appear around the rim of the saucepan before the mix reaches boiling point. As soon as scalding point is reached, remove the pan from the heat.
  • While the cream mix is heating, place the eggs, salt, sugar, cornflour and vanilla extract into a large heatproof bowl. Whisk together until the eggs have thickened.
  • With the whisk switched to slow, gently pour the hot cream mix into the bowl with the egg mix, whisking constantly. This creates the custard base for the ice cream.
  • Pour the custard base back into the saucepan, place over a medium heat and stir constantly. Cook until the custard has thicker and coats the back of a wooden spoon.
  • Remove the pan from the heat and pour the custard through a sieve, into a large heatproof bowl.
  • Place cling film directly on top of the custard to stop a skin from forming.
  • Leave the custard to cool a little before placing in the fridge to chill.

Preparing The FlavouringS And Churning The Ice Cream

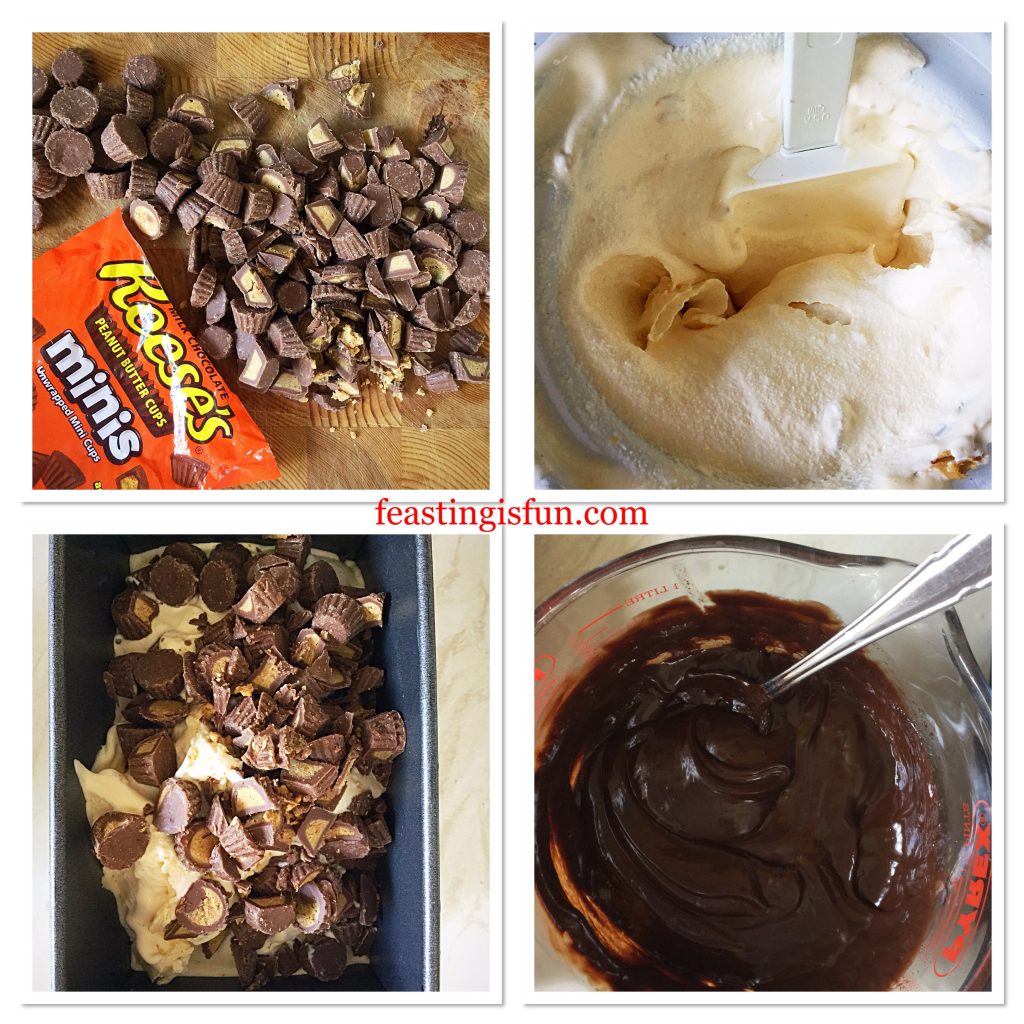
  • While the ice cream base is chilling, prepare the mini Reeces butter cups. Tip out on to a chopping board, roughly divide into two thirds which will be roughly chopped and one third, which are kept whole.
  • Also make the chocolate ganache, which will be swirled through the ice cream. Place 100g of chocolate and 100mls of double cream into a heatproof/microwaveable jug. Heat on medium for 30 second bursts, stirring after each heating session. As soon as the chocolate starts melting into the cream continue stirring until the ganache is smooth and shiny. Set to one side to cool.
  • Set the ice cream maker up as per manufacturer’s instructions.
  • Add the peanut butter to the ice cream base. Use a balloon whisk to break it up into small pieces within the ice cream base.
  • Pour the ice cream mixture into the already churning ice cream maker.
  • As soon as the ice cream is thickened and frozen stop the machine. Remove the paddle so the ice cream can be scooped out.
FF Reeces Peanut Butter Cup Ice Cream
The process of making Reeces Peanut Butter Cup Ice Cream.

Adding The Reeses Peanut Butter Cups And Chocolate Ganache To The Ice Cream

  • Scatter a few chopped Reeces Peanut Butter Cup Minis in the bottom of the freezing container.
  • Scoop half of the ice cream on top of the peanut butter cups.
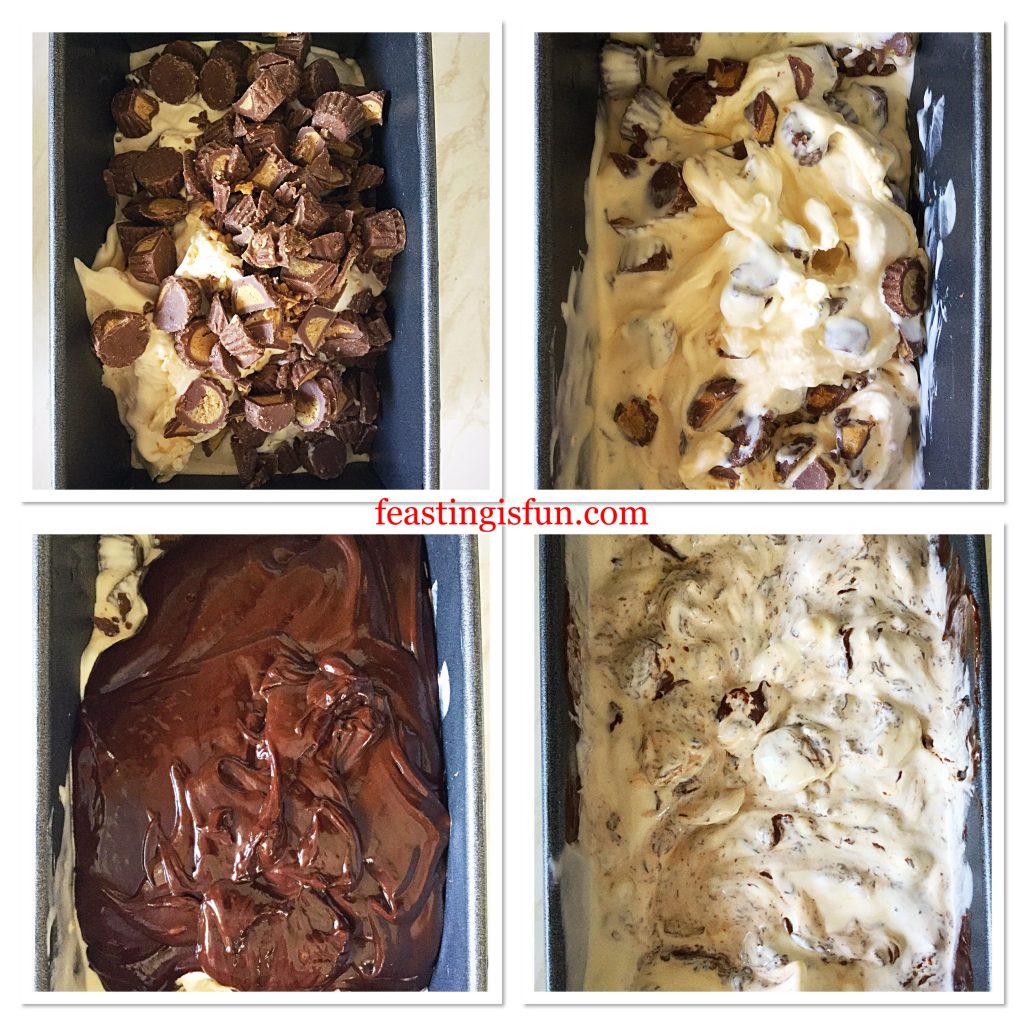
  • Add one half of the remaining chopped and whole peanut butter cups. Now add the remaining ice cream.
  • Using the handle of a wooden spoon, swirl the peanut butter cups through the ice cream using a figure of eight motion.
FF Peanut Butter Cup Ice Cream
Adding the chocolate ganache swirl to the Reeces Peanut Butter Cup Ice Cream.
  • Pour the cooled, yet still liquid, chocolate ganache on top of the ice cream. Again, using the handle of a wooden spoon swirl the ganache through the ice cream.
  • Snap on an airtight lid, or double wrap in cling film and place the ice cream into the freezer to firm up.
  • Leaving the ice cream to freeze overnight ensures the chocolate ganache fully freezes within the ice cream.
FF Reeces Peanut Butter Cup Ice Cream
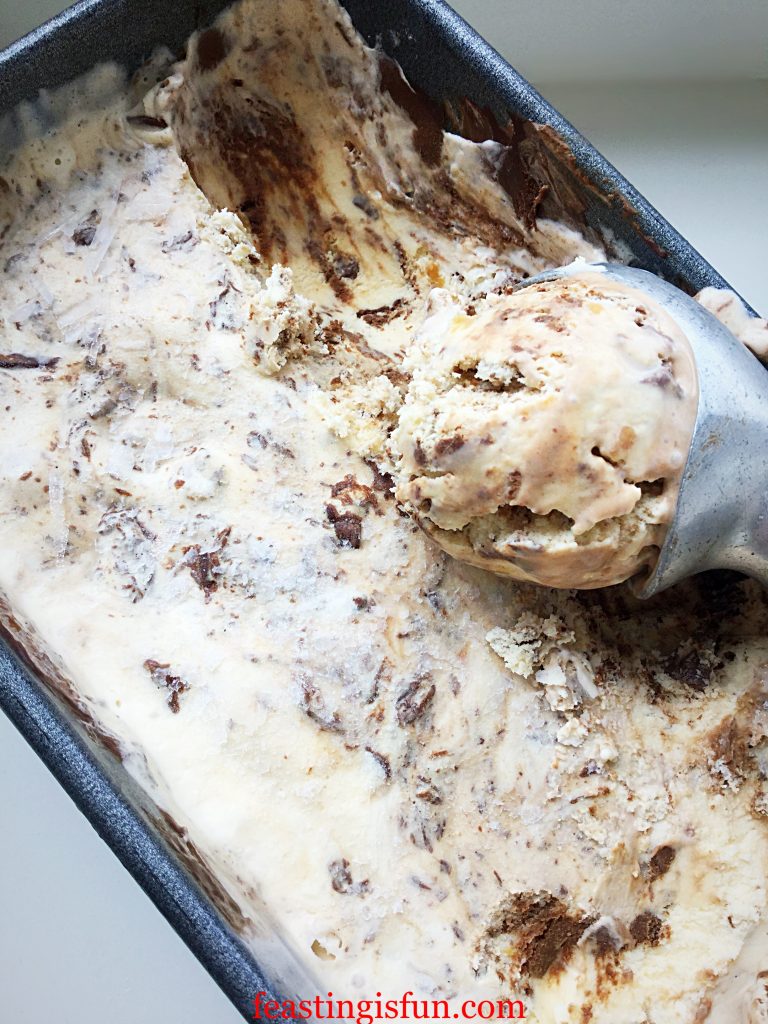
Reeces Peanut Butter Cup Ice Cream ready to serve.

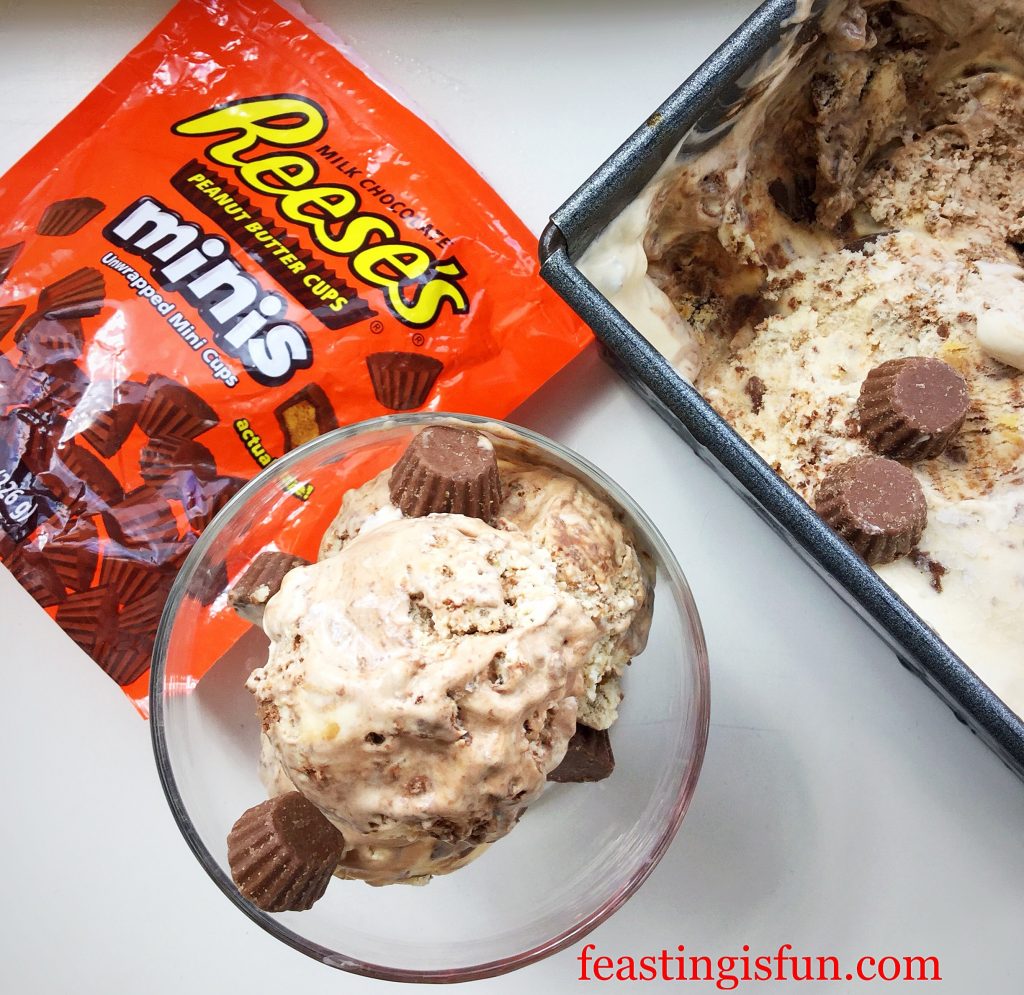
Finally, to serve, remove the ice cream from the freezer 10-20 minutes prior to scooping. Allowing the ice cream to soften slightly. Scoop two balls of ice cream and place on one large cookie, top with another cookie and press gently to form the ice cream cookie sandwich. Alternatively, scoop and serve in a bowl with additional Mini Reeces Peanut Butter Cups.

FF Reeces Peanut Butter Cup Ice Cream
Reeces Peanut Butter Cup Ice Cream Cookie Sandwich using Wright’s Toffee Cookie Mix.


FF Reeces Peanut Butter Cup Ice Cream
Reeces Peanut Butter Cup Ice Cream served in a bowl.

Decorating The Cookies

  • Make the Caramac Caramel Cookies according to the Recipe.
  • Allow the cookies to cool completely on the baking tray.
  • Melt 100g of chocolate in a heatproof, microwaveable bowl, on medium setting, for 30 seconds at a time. Stir the chocolate after each heating session.
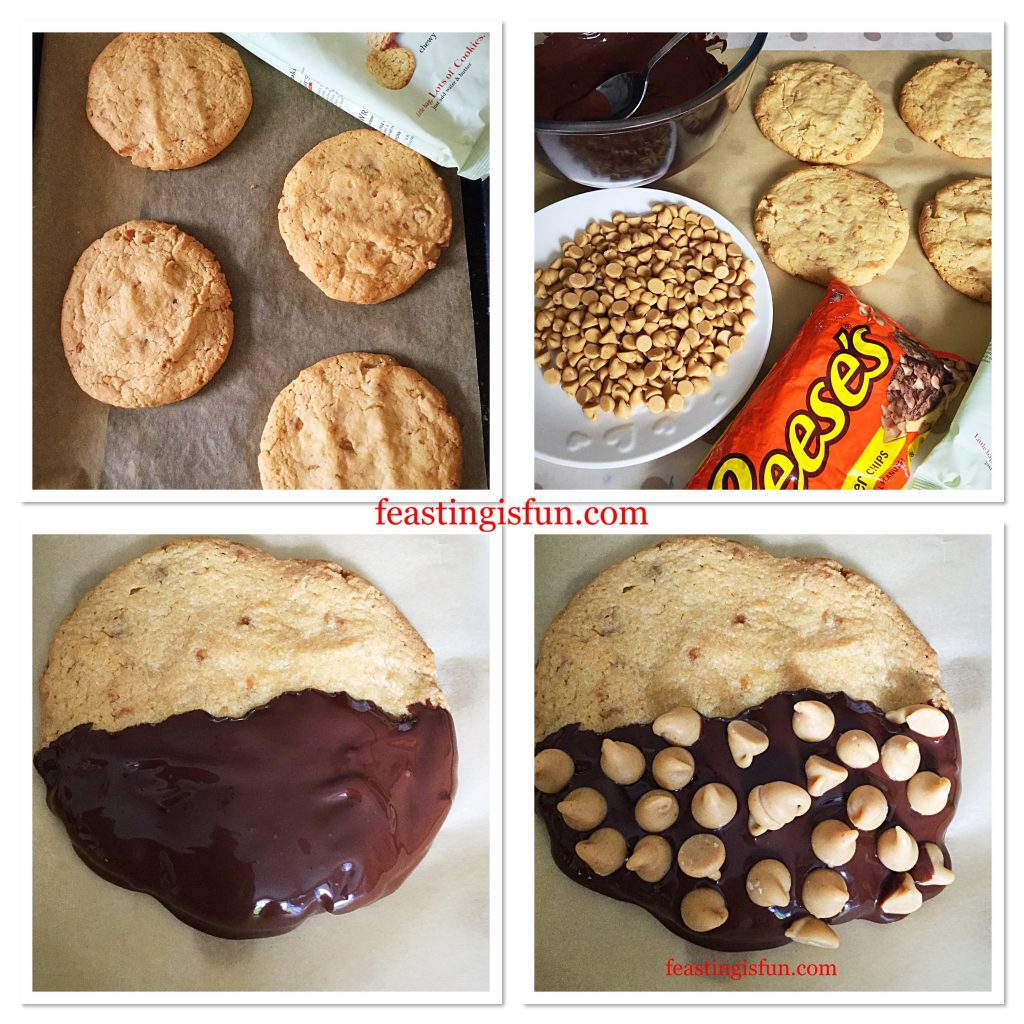
  • As soon as the chocolate is melted, dip each cookie into the chocolate, using a spoon to cover halfway across the top oven each cookie.
  • Place the chocolate covered cookies on to baking parchment and sprinkle Reece’s peanut butter chips over the chocolate covered half. Leave to set. In hot weather place in the fridge for a few minutes until set.
FF Reece's Peanut Butter Cup Ice Cream
Baking and decorating the cookies for the ice cream sandwich.


Such an incredible ice cream deserves a cookie that enhances all of its qualities.

If you have enjoyed this recipe for Reeses Peanut Butter Cup Ice Cream you may also like these:


Caramac Caramel Cookieswith Very Vanilla Ice Cream

FF Reeces Peanut Butter Cup Ice Cream
Caramac Caramel Cookies with Very Vanilla Ice Cream.

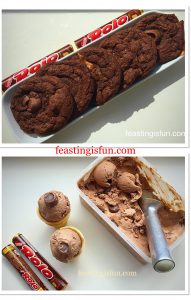
Rolo Chocolate Cookies with Chocolate Rolo Ice Cream

FF Reeces Peanut Butter Cup Ice Cream
Rolo Chocolate Cookies with Chocolate Rolo Ice Cream.

Chocolate Monster Mini Egg Cookies with Smarties Chocolate Mini Egg Ice Cream

FF Reeces Peanut Butter Cup Ice Cream
Chocolate Monster Mini Egg Cookies with Smarties Chocolate Mini Egg Ice Cream.

Since all of the recipes shown can only be made at home, this emphasises the core beliefs of Feasting is Fun. Because creating flavour combinations at home, should be fun. Resulting in each one of these examples as a feast in itself. Also, most importantly, invite your friends over to share these incredible ice cream cookie sandwiches. Finally proving that all food tastes better when shared.

So, whatever you are making, baking and creating in your kitchens, have fun preparing and sharing your feast.

Sammie xx

No part of this post may be reproduced without my specific written permission. Please see my Disclosure Policy.
Double Strawberry Almond Muffins

As you may have noticed from recent posts, I am having a full blown love affair with strawberries this Summer.  Whether it’s eating them warmed by the sun, just as they are, or, creating new recipes such as Strawberry Rose Ice Cream, I cannot seem to get enough of them. While looking for inspiring ingredients on Amazon U.K., I found some baked strawberries for sale. Imagine a more intense strawberry flavour with a chewy texture. Sourcing fresh strawberries locally, finally resulted in the creation of my Double Strawberry Almond Muffins.

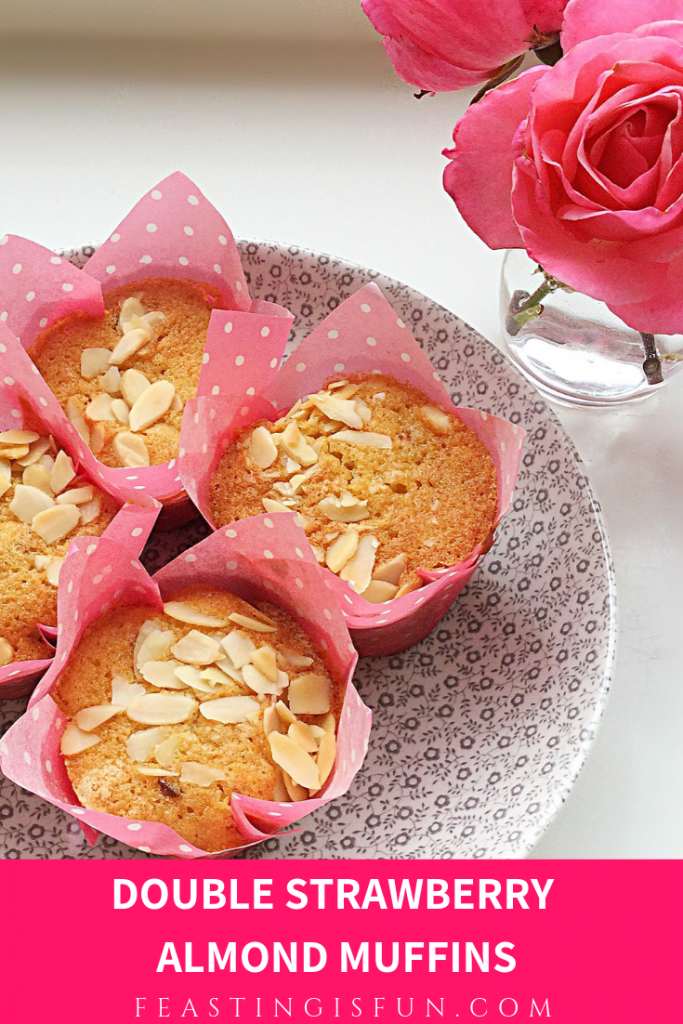
Pinterest image of strawberry muffins with descriptive graphics.

Since the name ‘baked’ strawberries seems, a little misleading, they will be referred to as dried strawberries. Not freeze dried strawberries, which are an entirely different product altogether.  Similar to dried apricots in texture, dried strawberries are chewy, rather like gummy bears, with a more intense, strawberry flavour. While also free from other added ingredients. Resulting in a perfect snack size strawberry, untainted by additives.

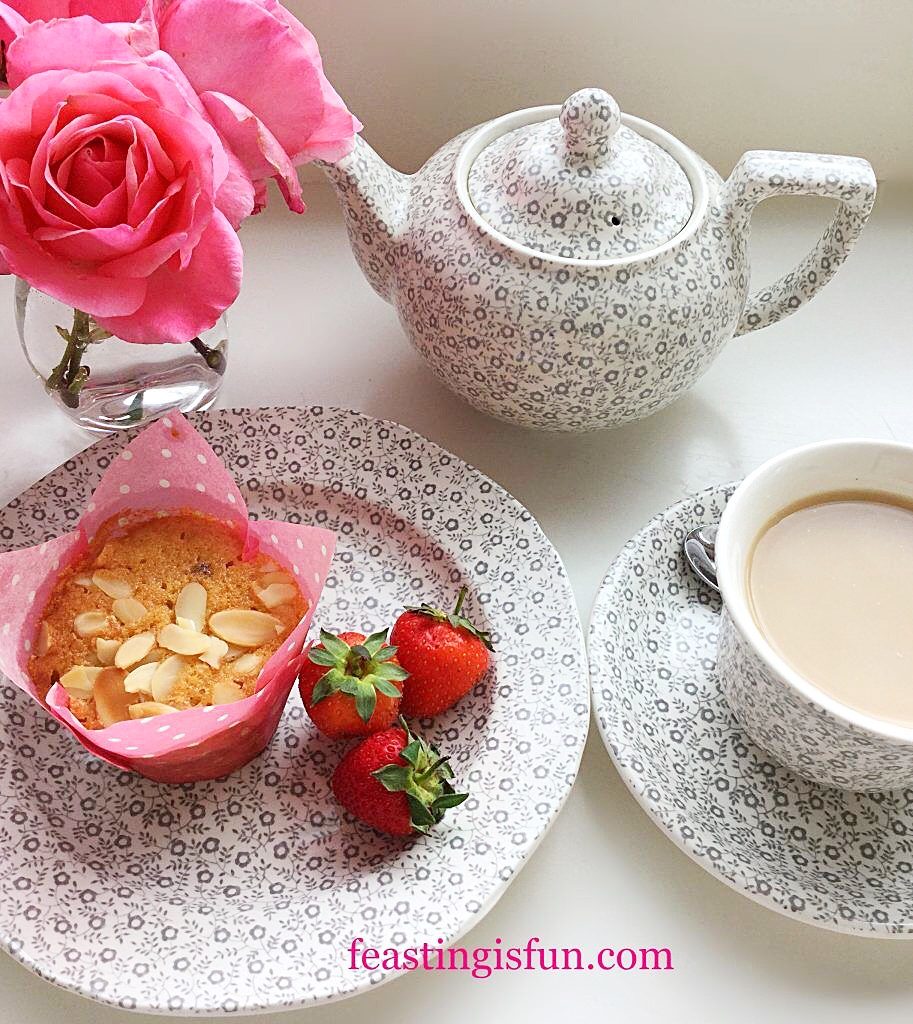
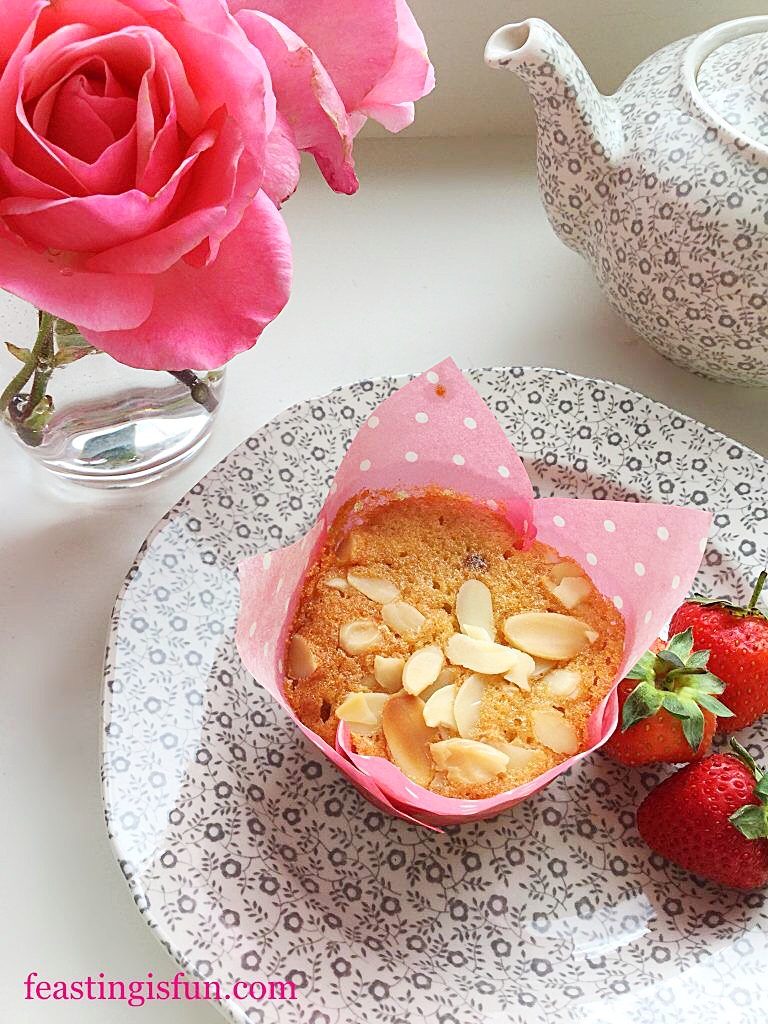
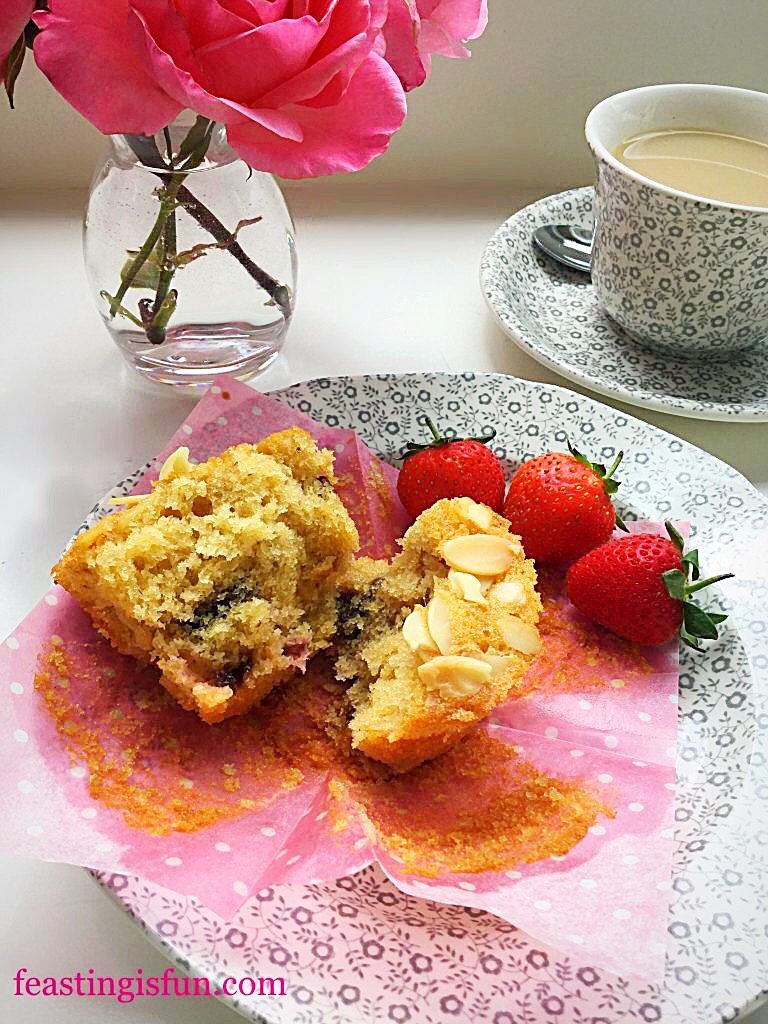
Teapot, cup of tea, muffin on a plate and pink roses in a small vase.
Double Strawberry Almond Muffins

While the muffins bake the fresh strawberries become absorbed into the batter.  Yet dried strawberries absorb moisture from the cake batter. During the baking process they lose their chewy texture. Resulting in gooey, jam like, pools of delicious strawberry within each muffin.

Muffin pulled in half to show even distribution of fruit.
Strawberries evenly distributed throughout the muffin.

A light open texture of each muffin is visible in the photo above. Having checked a few muffins, the strawberries are dispersed evenly throughout. Since previously having difficulty including fresh strawberries into a bake, I didn’t want to weigh the batter down with their water content. That said, extra chopped, dried strawberries could be added to the top, with the flaked almonds, prior to baking.

Recipe: Makes 12 Double Strawberry Almond Muffins

200g/7oz Unsalted Butter at room temperature

200g/7oz Caster Sugar

1tsp Vanilla Extract – for all extracts I use Nielsen-Massey

1/2tsp Almond Extract

4 Large Free Range Eggs

1/4tsp Sea Salt – I use Maldon

100g/4oz Ground Almonds

150g/5oz Plain White Flour

1.5tsp Baking Powder

100g/4oz Fresh Strawberries hulled and diced

50g/2oz Dried or Baked Strawberries roughly chopped – I use Urban Fruit

50g/2oz Flaked Almonds

Method: Preheat the oven to 160C/140C fan, gas mark 3, 325F.

Note: Tulip wrappers must be used in a deep muffin, or cupcake tin. When using regular cupcake cases, fill two thirds full and expect to make 18 muffins from this recipe. Also, the length of time baking will also need to be adjusted, please see guidelines in the method.

Making The Strawberry Muffin Batter

  • First of all, line a deep muffin tin with 12 tulip wrappers.
  • Whisk together the butter, sugar and salt in a large bowl, until pale and creamy.
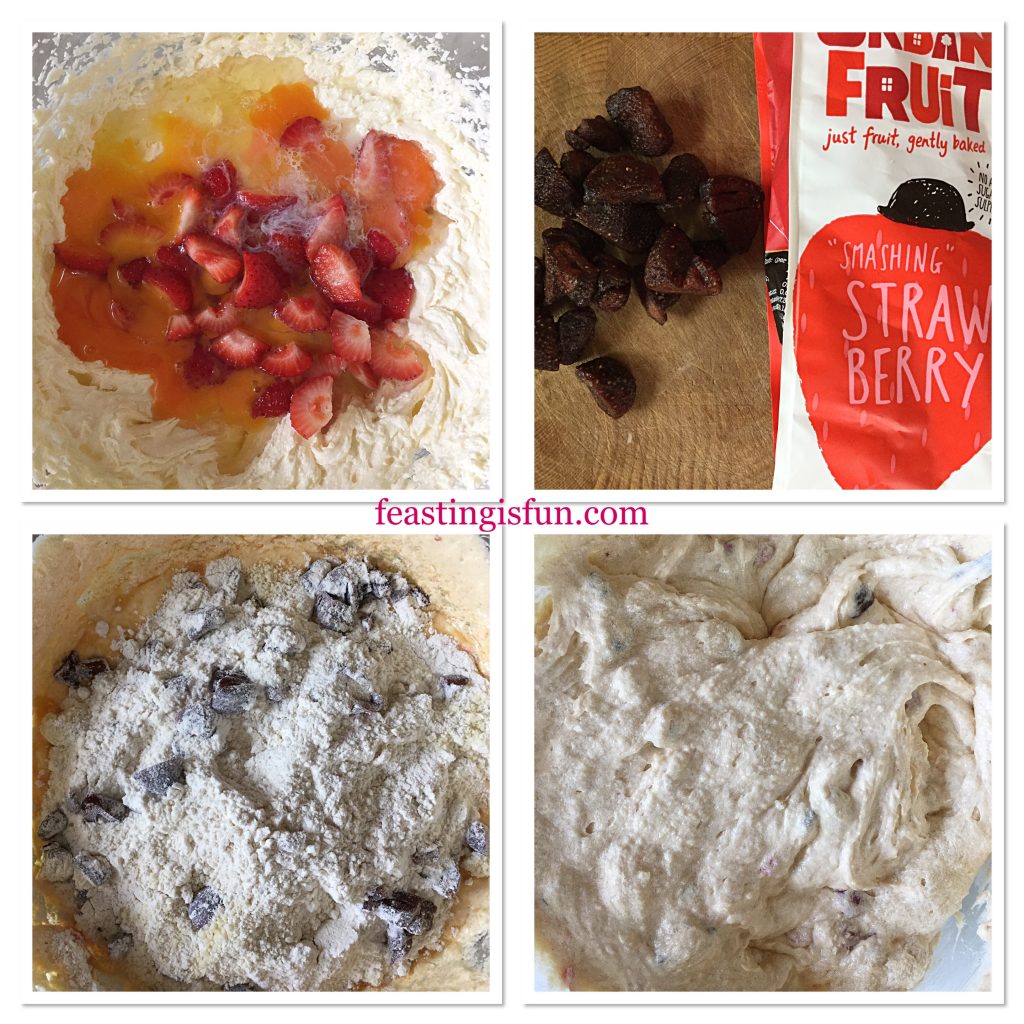
  • Add the eggs, vanilla and almond extract and the chopped fresh strawberries to the bowl. Whisk together.
  • Next add the ground almonds, flour, baking powder and chopped dried strawberries. Tossing the strawberries in the flour will help stop them from sinking to the bottom of the muffin.
  • Mix all of the ingredients together so that they are fully combined. Over mixing will cause the muffins to become tough.
FF Double Strawberry Almond Muffins
Making the muffin batter.

Filling The Tulip Muffin Cases

  • Using a large, 5cm/2″ ice cream scoop, add one scoop of batter to each tulip case. Divide any remaining batte evenly between the 12 cases.
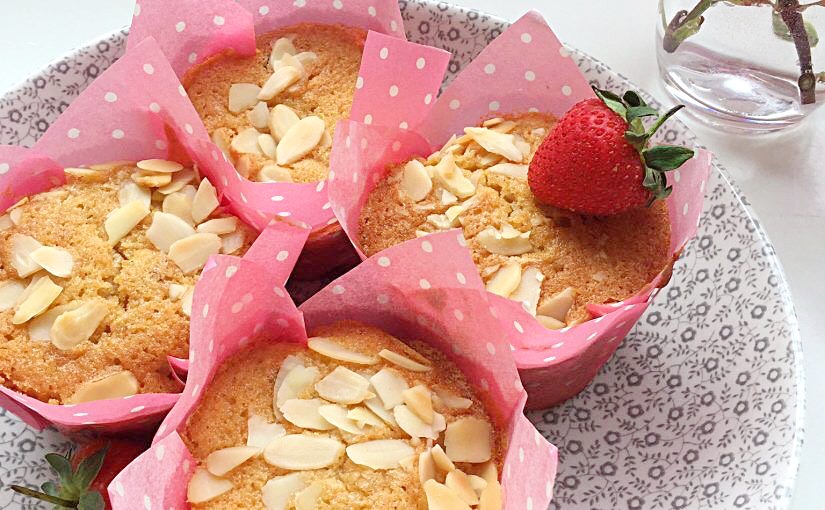
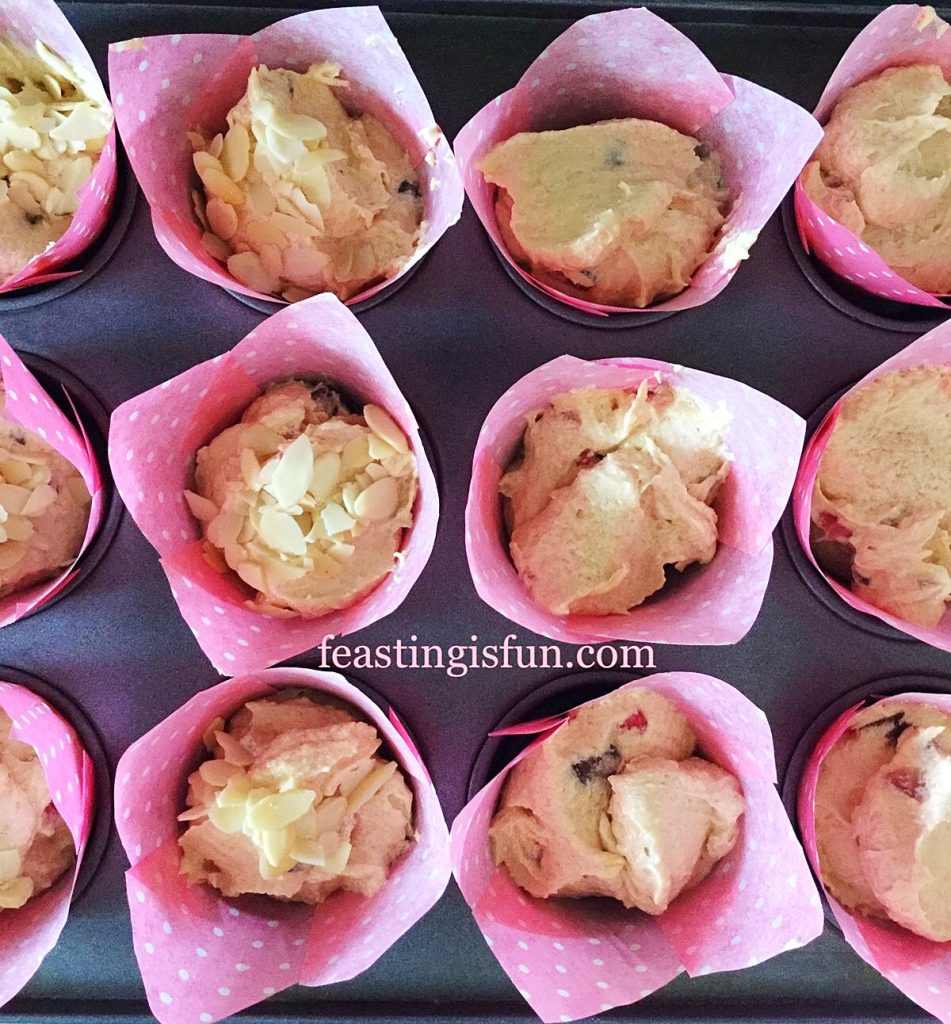
  • Sprinkle some flaked almonds on top of each unbaked muffin. Again dividing the almond flakes, so each muffin has an equal amount.
Adding flaked almonds to the top of the muffins before baking.
Adding flaked almonds to the top before baking.

Baking The Muffins

  • Place the muffin tin into the centre of the oven and bake for 40-45 minutes.
  • The muffins are baked when they turn golden brown and are firm to a light touch. Over cooked muffins will be dry so start checking at 35 minutes.
  • Note: if baking using smaller cases, the baking time will need to be reduced.
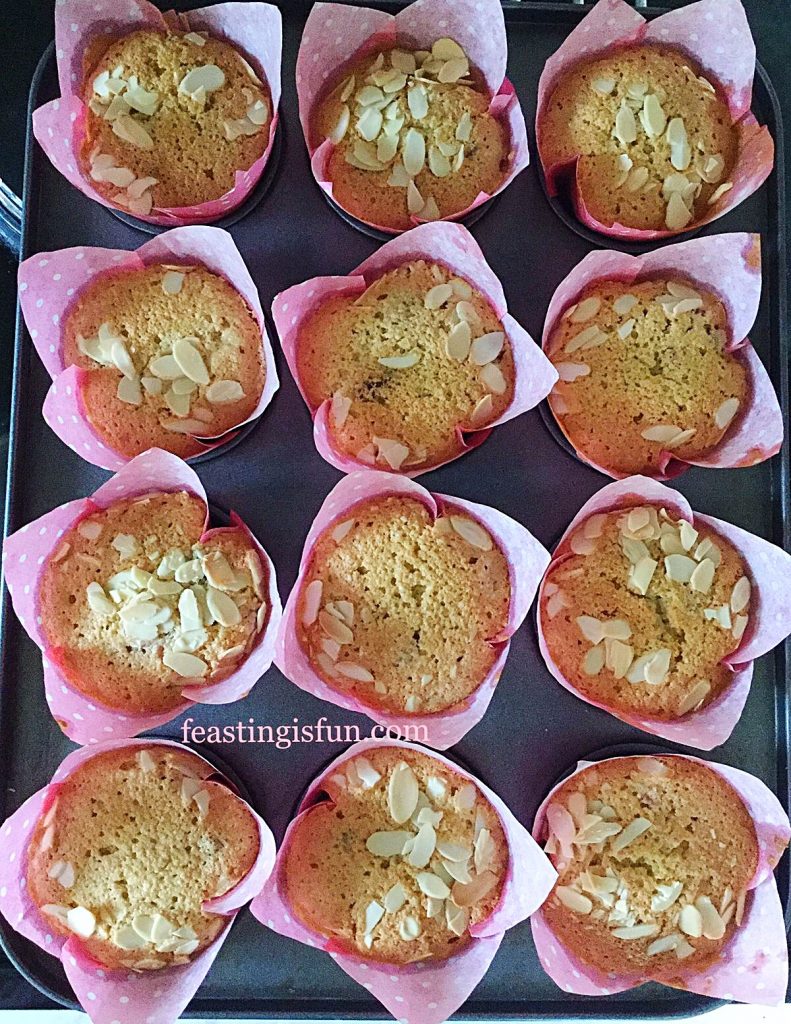
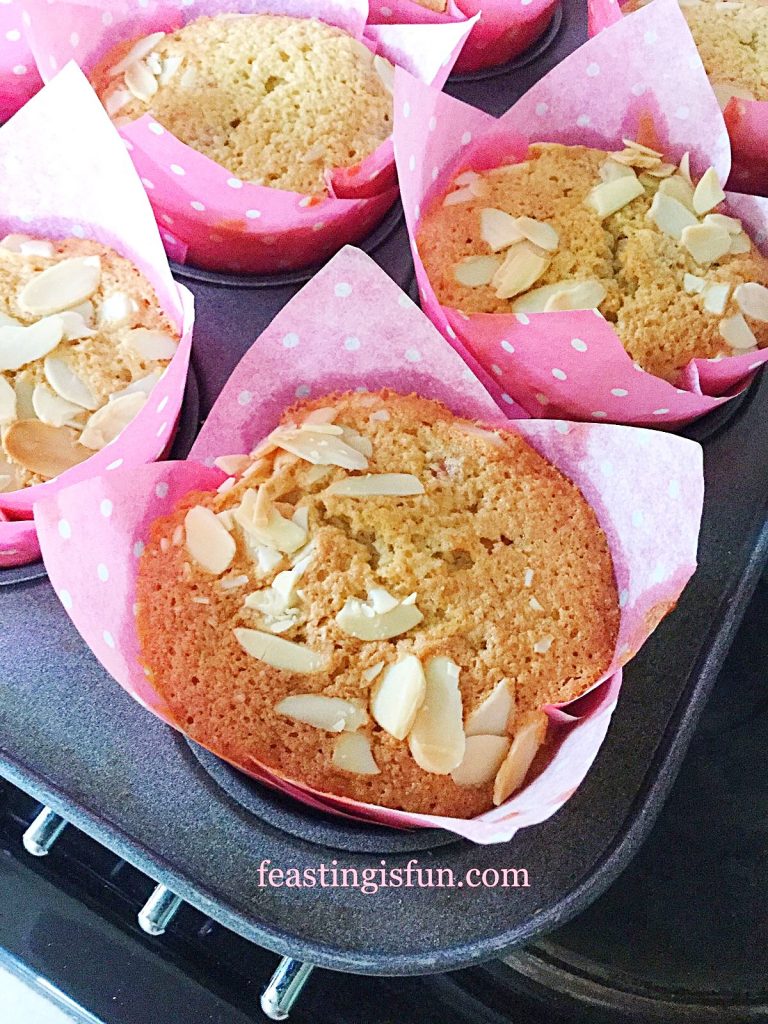
Muffins in tulip wrappers cooling in the tin.
Freshly baked muffins cooling in the tin.
  • When using tulip cases leave the muffins to cool completely in the tin. For muffin/cupcake cases, leave to cool for 10 minutes in the tin and then transfer to a cooling rack.
Muffins baked in a muffin tin.
Double Strawberry Almond Muffins

Double Strawberry Almond Muffins are best served slightly warm, or cold. Also serve with a cup of tea, or fresh fruit juice.

Muffin served with fresh strawberries.
Double Strawberry Almond Muffins

Muffins are great for breakfast, packed lunches and beating late afternoon hunger pangs.

Muffins containing fresh fruit are best eaten within 3 days of making. Store in an airtight container, placed in the fridge during hot weather.

If you have enjoyed this recipe for Double Strawberry Almond Muffins you may also like these:

Blueberry Lemon Shortbread Cake Bars

Blueberry Lemon Shortbread Cake Bars

Cheese Bacon Breakfast Muffins

Cheese Bacon Breakfast Muffins

Cherry Bakewell Cookies

Cherry Bakewell Cookies

Because these muffins take less than ten minutes to make, they really are a quick, delicious, breakfast treat. Knowing that, whilst at school, college or work, my family has good, wholesome food is important to me.

Dried strawberries are widely available from supermarkets, including Ocado, Waitrose and Amazon U.K.

So, whatever r you are making, baking and creating in your kitchens have fun preparing your feast.

Sammie xx

No part of this post may be reproduced without the explicit, written consent of the owner. For more details please see my Disclosure Policy.
 

Strawberry Rose Ice Cream

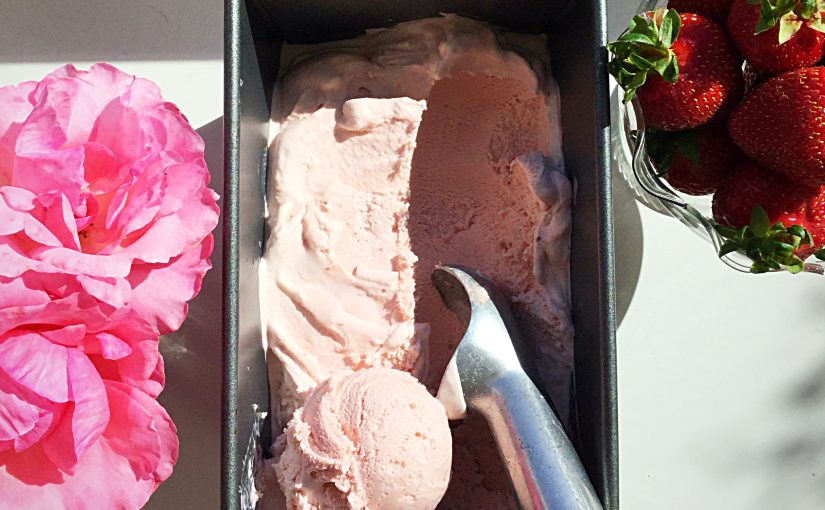
Strawberries are THE taste of Summer. While I love eating strawberries with a tiny sprinkle of sugar and splash of cream, or fresh from the plant warmed by the sun, I also wanted to make a beautiful ice cream with them. Except with a twist! Because summer, is also synonymous with roses blooming in our garden, I decided that would be the additional flavour to compliment the strawberries in this ice cream. And, the addition of rose extract elevates the final flavour to another level. One taste and you are transformed into a bygone era, where life seemed easier, simpler and slower. So, whatever you do this summer, don’t miss out on making this Strawberry Rose Ice Cream.

FF Strawberry Rose Ice Cream
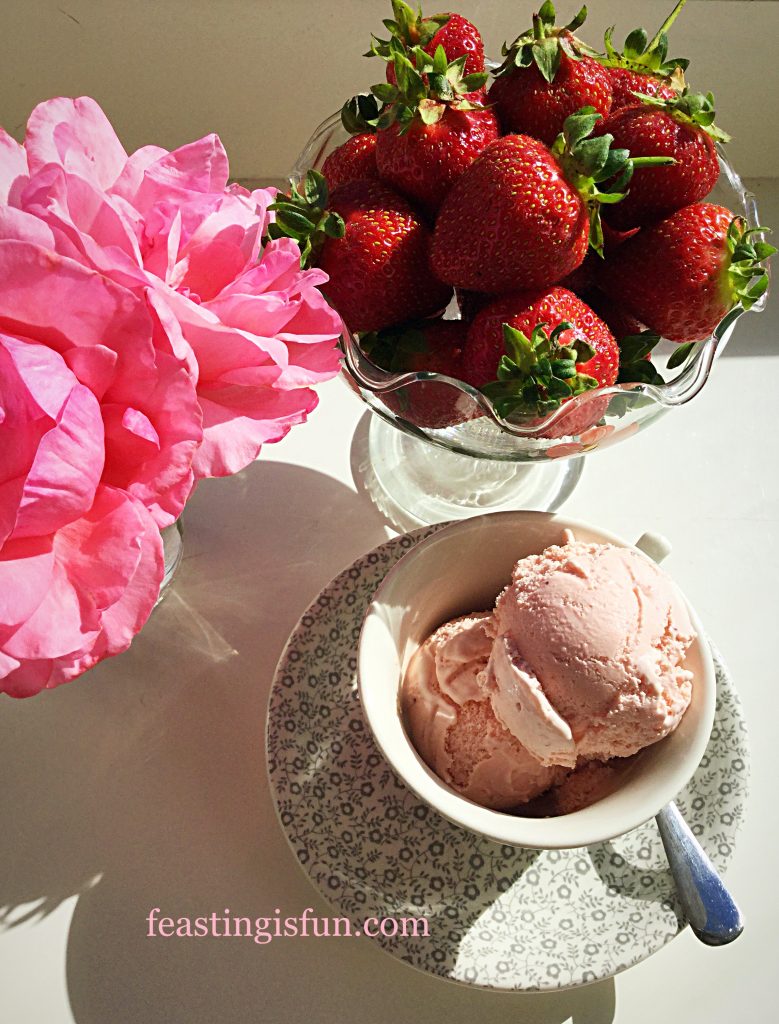
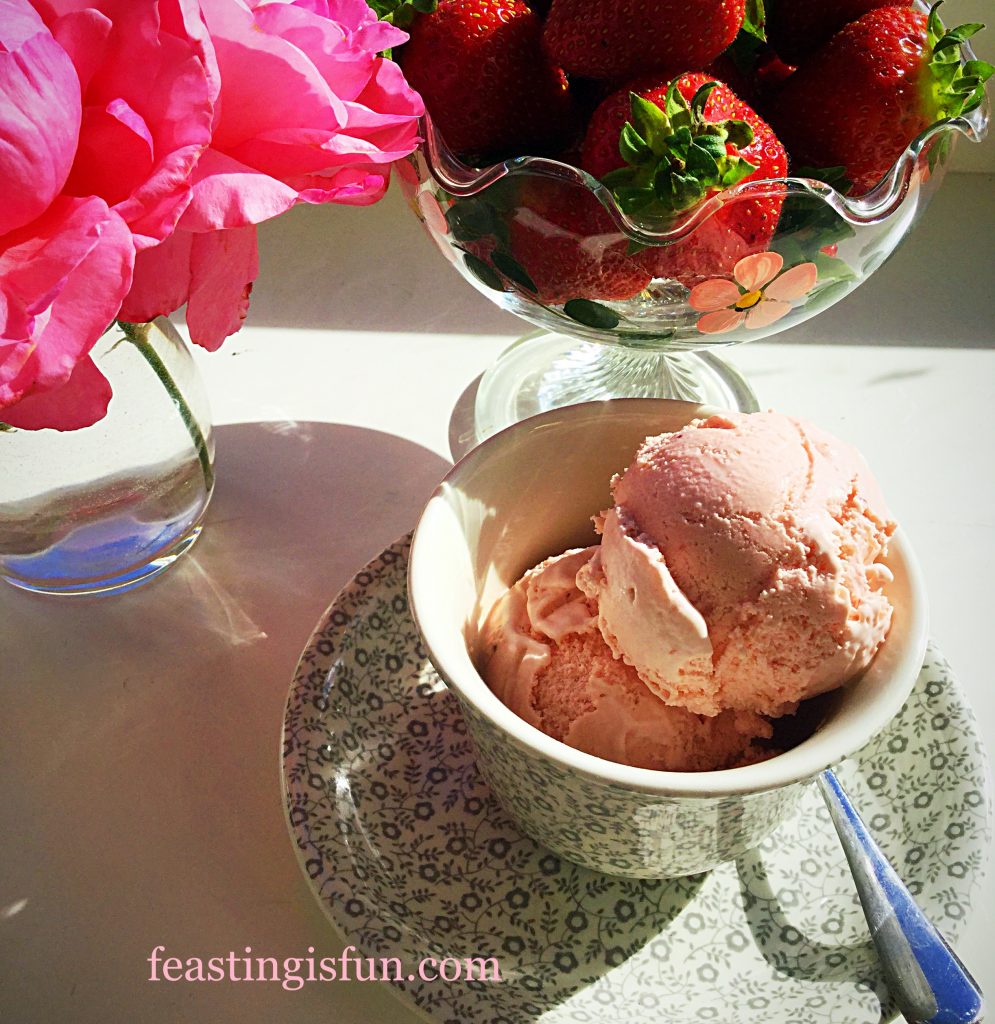
Strawberry Rose Ice Cream served in a tea cup.

A Summer Dessert Of Your Dreams

Removing all the pips are during the making of this dreamy dessert, ensures the ice cream has silky texture that lingers on the tongue. As both fresh strawberry and rose flavours meld together, they create a unique flavour experience. Likewise, this truly is a dream ice cream where the finished recipe is so much more than the addition of its component parts. Sieving the strawberries is very important in creating the smooth, finish.  And as this small, important step only takes a couple of minutes, it is worth it to ensure the final ice cream has the silky, smooth, texture.

FF Strawberry Rose Ice Cream
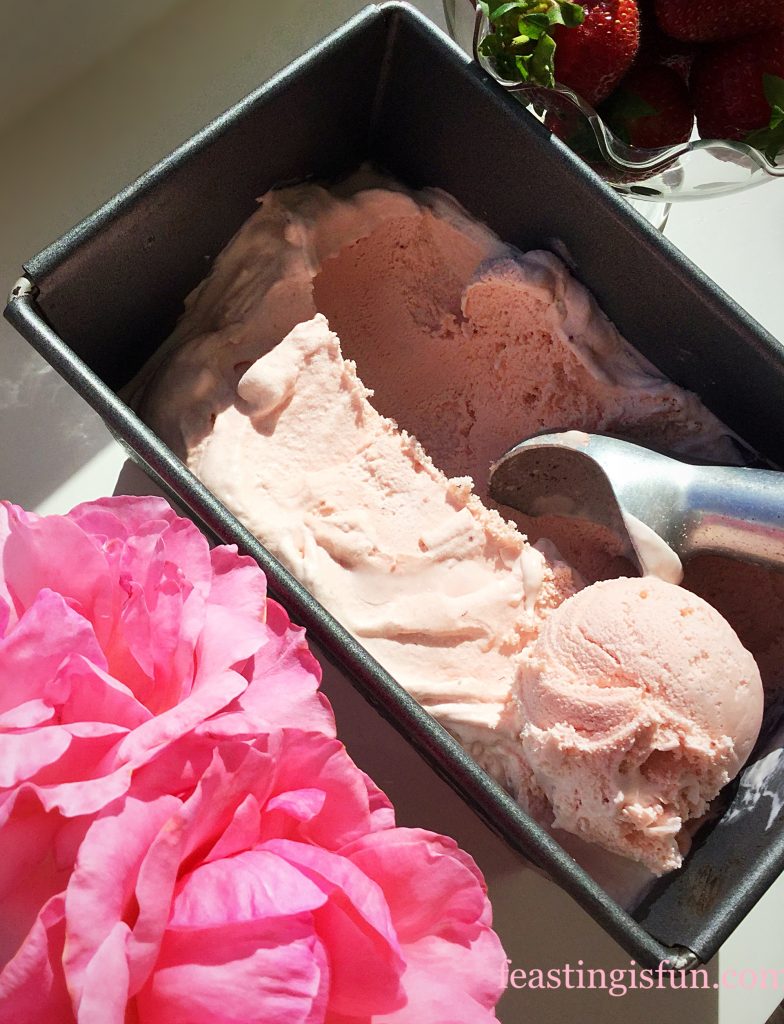
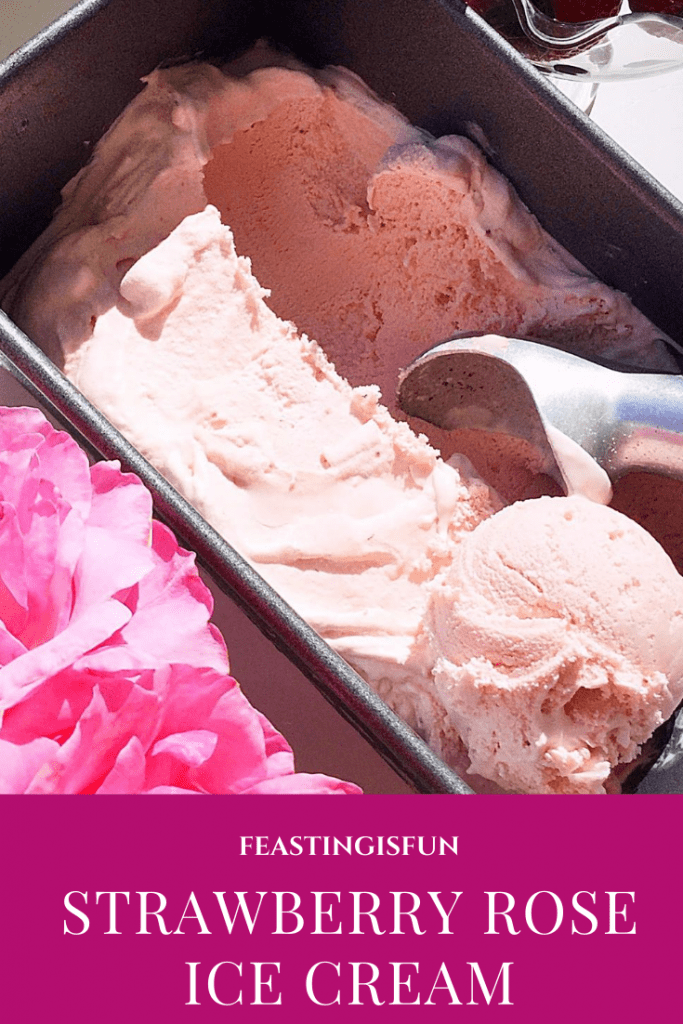
Strawberry Rose Ice Cream exceptionally easy to scoop.

Finally, this ice cream is the epitome of summer in a dessert. And as summer is the season when strawberries and roses are celebrated as being at their best, what better way to celebrate them. While all roses included in the pictures for this post, are from our own garden, I haven’t gone as far as to make my own Rose Extract. That process can safely be left in the hands of Nielsen-Massey , the professionals. Rather, the roses in the photos hint at their presence within the ice cream.

FF Strawberry Rose Ice Cream
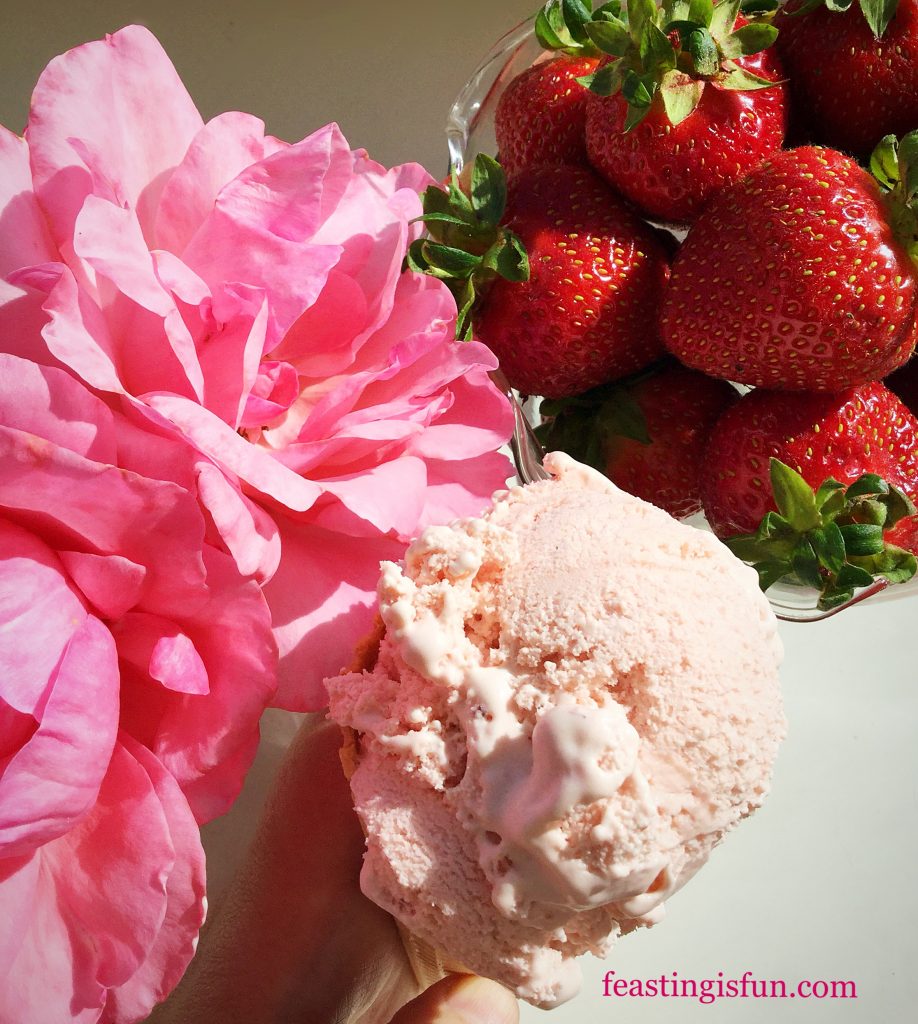
Strawberry Rose Ice Cream delicious in a cone.

Note: Prior to starting this recipe ensure that the frozen bowl of the ice cream maker is placed in the freezer overnight for at least 8 hours. Or as per manufacturer’s instructions.

Recipe: Strawberry Rose Ice Cream makes approx. 1L

400g Punnet of Strawberries hulled and larger ones cut in half

3tbsp Sugar

4tbsp Tap Water

Scant 1/4tsp Rose Extract- I use Nielsen-Massey

20-30mls Freshly Squeezed Lemon Juice

4 Large Free Range Egg Yolks

1tsp Cornflour – I use Doves Farm as this is guarenteed gluten free

5tbsp Caster Sugar

300mls Double Cream

300mls Whole Milk

1tsp Vanilla Extract

Method:

For full step by step instructions with photos on how to make the custard ice cream base, please see Very Vanilla Ice Cream.

Making The Strawberry Puree

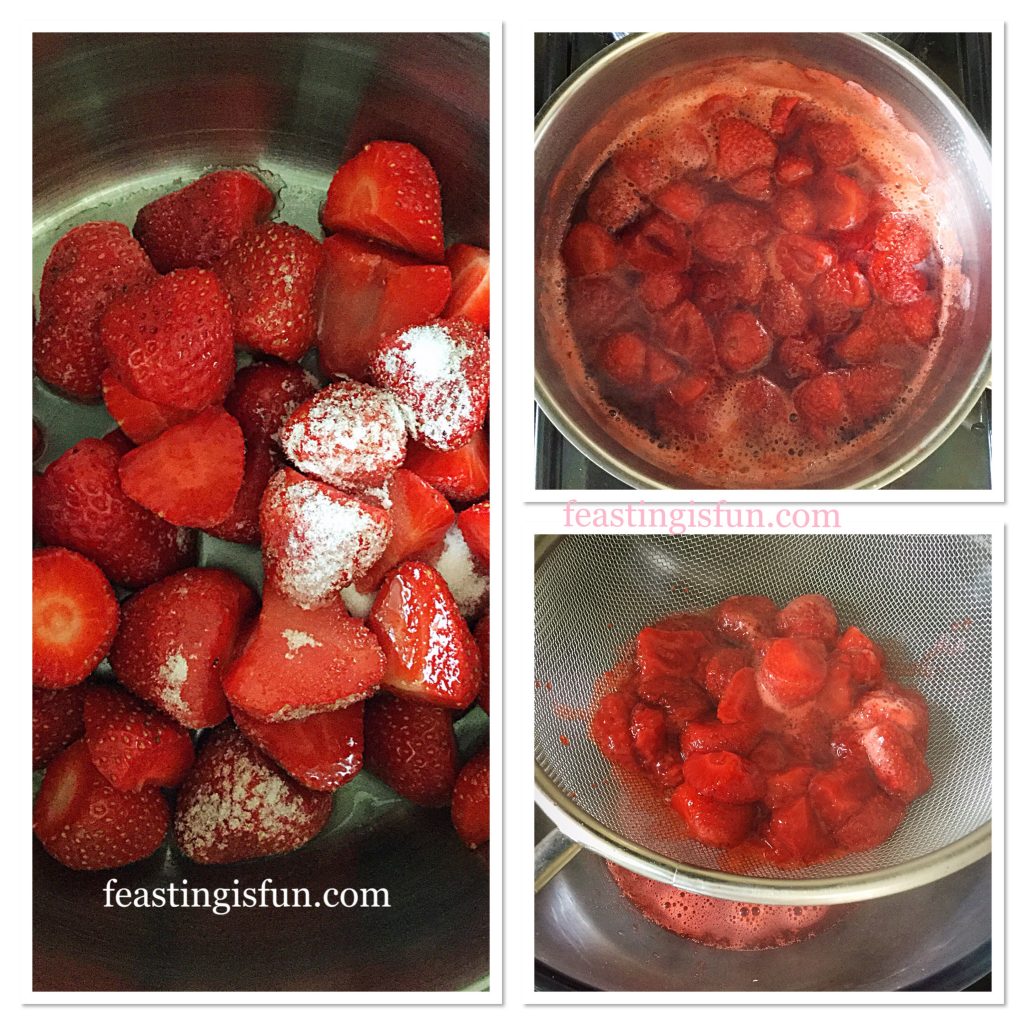
  • First of all place the prepared strawberries into a heavy bottom, medium sized saucepan. Sprinkle over 3 tablespoons of sugar and 4 tablespoons of tap water.
  • Place the pan over a medium heat and cook the strawberries until the liquid starts bubbling.
  • Swirl the pan to ensure that the sugar is dissolved and then let the strawberries cook for a further 5 minutes.
  • While the strawberries are cooking place a sieve over a heatproof bowl.
  • Once cooked pour the strawberries and liquid on to the sieve.
FF Strawberry Rose Ice Cream
Cooking and sieving the strawberries.
  • Use the back of a dessert spoon and gently press the strawberries into the sieve. The juices and flesh will pass through the sieve. Keep running the back of the spoon over the pulp until all that’s left are seeds and the remaining strawberry fibres.
  • Scrape the underneath of the sieve with a clean spoon. This ensures all of the strawberry that’s passed through the sieve goes into the bowl underneath.
  • Discard the seeds and pulp left in the sieve.
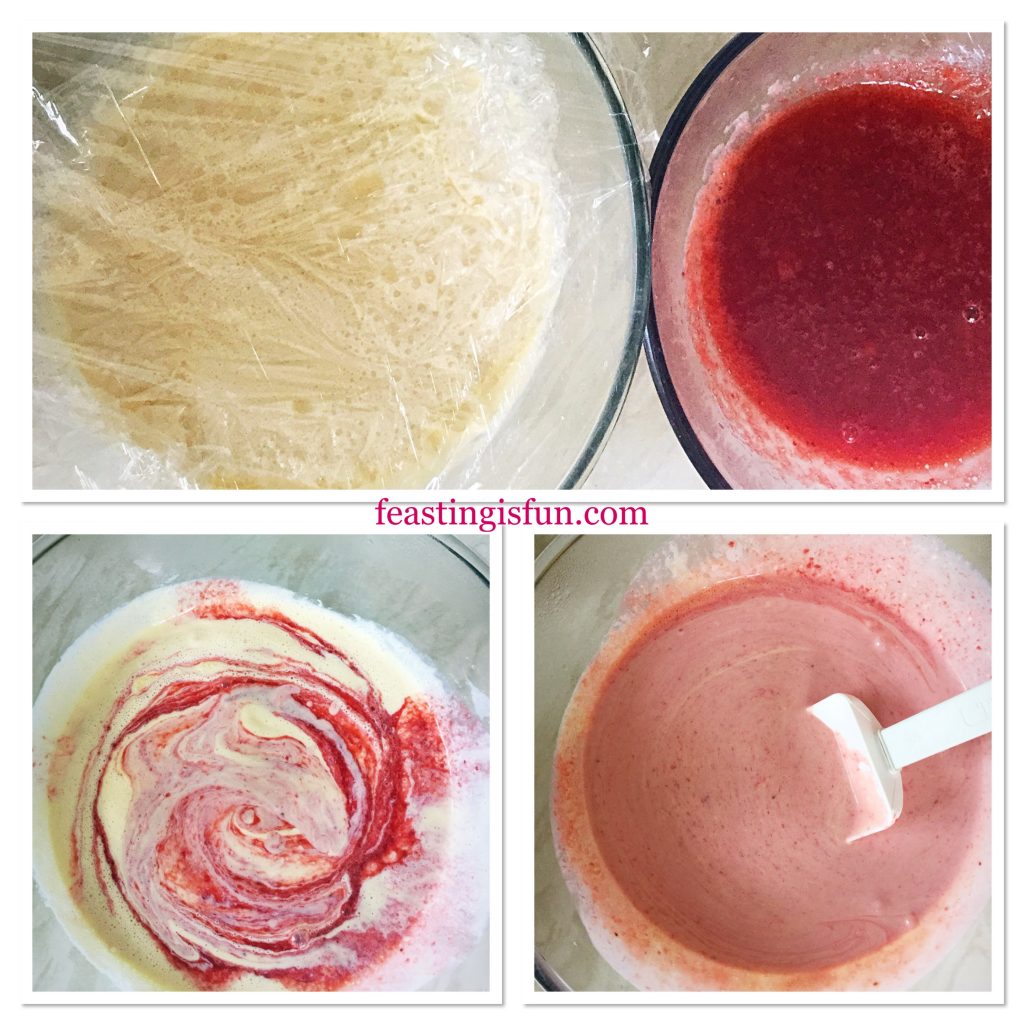
  • Cover the bowl with cling film and chill.
FF Strawberry Rose Ice Cream
Preparing the ice cream base prior to churning.

Making The Ice Cream Base

  • To make the ice cream base, first place the cream and milk into a heavy bottom saucepan over a medium heat. Heat to scalding point, where little bubbles form around the rim prior to boiling.
  • While the cream mix is heating place the egg yolks, cornflour, sugar and vanilla extract into a large heatproof bowl. Whisk together until thickened.
  • As soon as the milk and cream have reached scalding point remove from the heat.
  • With the whisk on slow gently pour the hot liquid into the egg mix, increasing the whisk speed to medium.
  • Pour the custard base back into the saucepan over a medium heat. Stir until the custard is thickened and coats the back of a wooden spoon.
  • Once cooked pour the custard through a sieve into a heatproof bowl.
  • Place cling film directly on to the custard to stop a skin from forming.
  • Leave the custard to cool before placing in the fridge to chill.
  • Once the strawberry juice has cooled add the Rose extract. Take care not to add more than the recipe indicates, as the finished result will taste soapy. Also add the juice of a small lemon 20-30mls and stir.
  • As soon as the custard base is chilled, remove the cling film and add the strawberry mix, then stir.

Churning And Freezing The Strawberry Rose Ice Cream

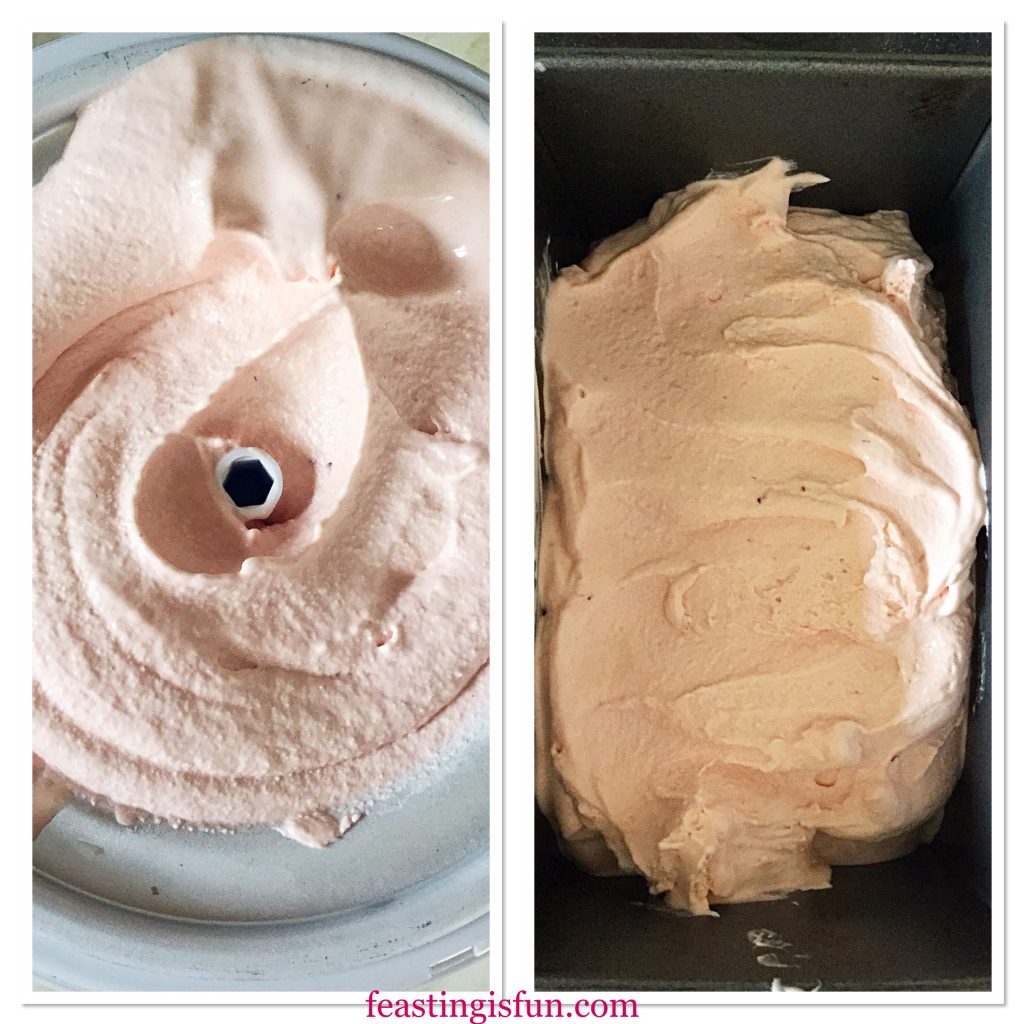
FF Strawberry Rose Ice Cream
Churning and storing the Strawberry Rose Ice Cream
  • Set up the ice cream maker as per manufacturer’s instructions.
  • With the machine switched on pour in the flavoured custard base and churn until softly frozen. Similar in consistency to whipped ice cream in a cone.
  • When the right consistency has been reached switch off the ice cream maker and dismantle.
  • Spoon the churned ice cream into a freezer proof container with an airtight lid. I used a clean loaf tin to store the ice cream. This was purely for the photos, having seen similar images on Pinterest! The tin was then double wrapped in freezer proof cling film.
  • Place the container into the freezer and leave overnight, or for at least 12 hours, to allow the ice cream to fully freeze.
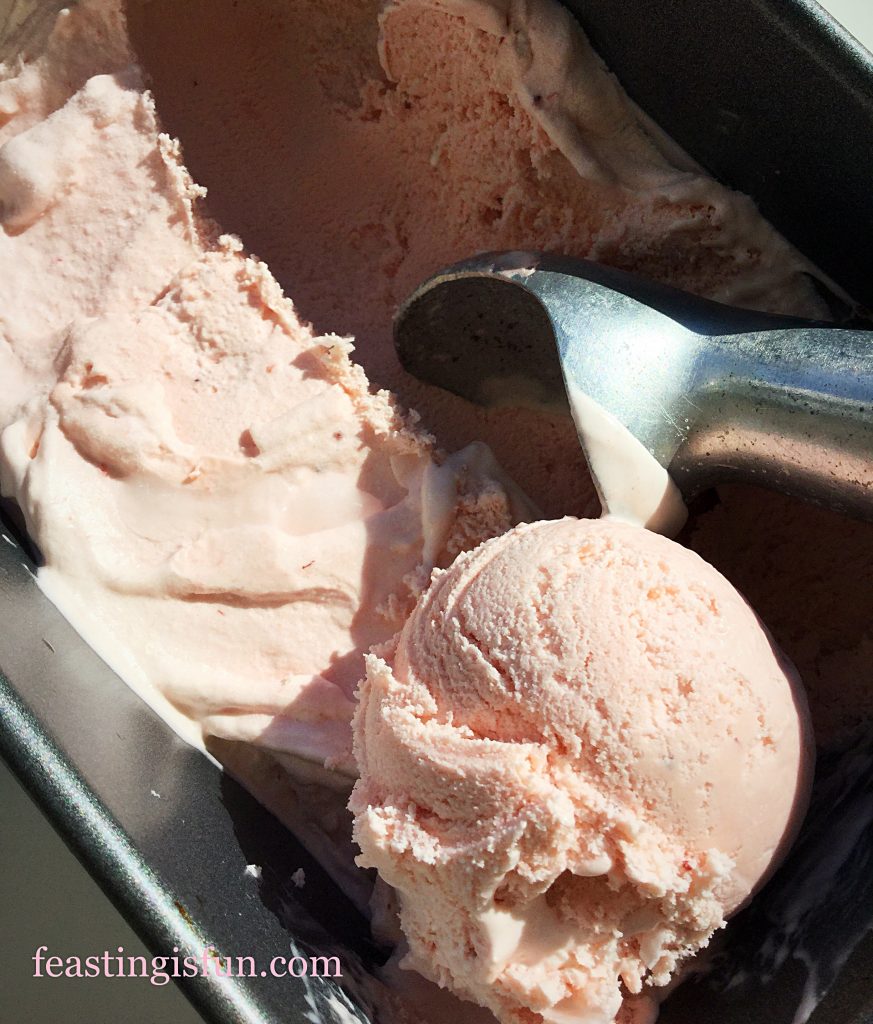
  • To serve, remove the ice cream from the freezer 10-20 minutes prior. As there are no artificial, only natural selection ingredients, this allows the ice cream to soften, so that it can be easily scooped.
FF Strawberry Rose Ice Cream
Strawberry Rose Ice Cream

So easy to scoop!

FF Strawberry Rose Ice Cream
Strawberry Rose Ice Cream served as dessert in a tea cup.

Serve in tea cups for dessert or afternoon tea. Likewise, scoop into cones for a delicious fun treat. Also, by using a certified gluten free cornflour, the ice cream is naturally gluten free.

If you have enjoyed this recipe for Strawberry Rose Ice Cream you may also like these:

Amaretto Creamy Ice Cream

Amaretto Creamy Ice Cream

Lemon Ripple Ice Cream

Lemon Ripple Ice Cream

Triple Chocolate Chunk Ice Cream

Triple Chocolate Chunk Ice Cream

Making ice cream at home, is such a creative and fun process. As you  choose flavour combinations the possibilities become endless. Also by only using certain ingredients, homemade ice cream can easily be made gluten free. Finally, I would not be without an ice cream maker now, using it to make countless different flavours.

Whatever you are making, baking and creating in your kitchens, have fun!

Sammie xx

Please note that no part of this post may be reproduced or replicated without the specific, written permission of the owner. Please see my Disclosure Policy.


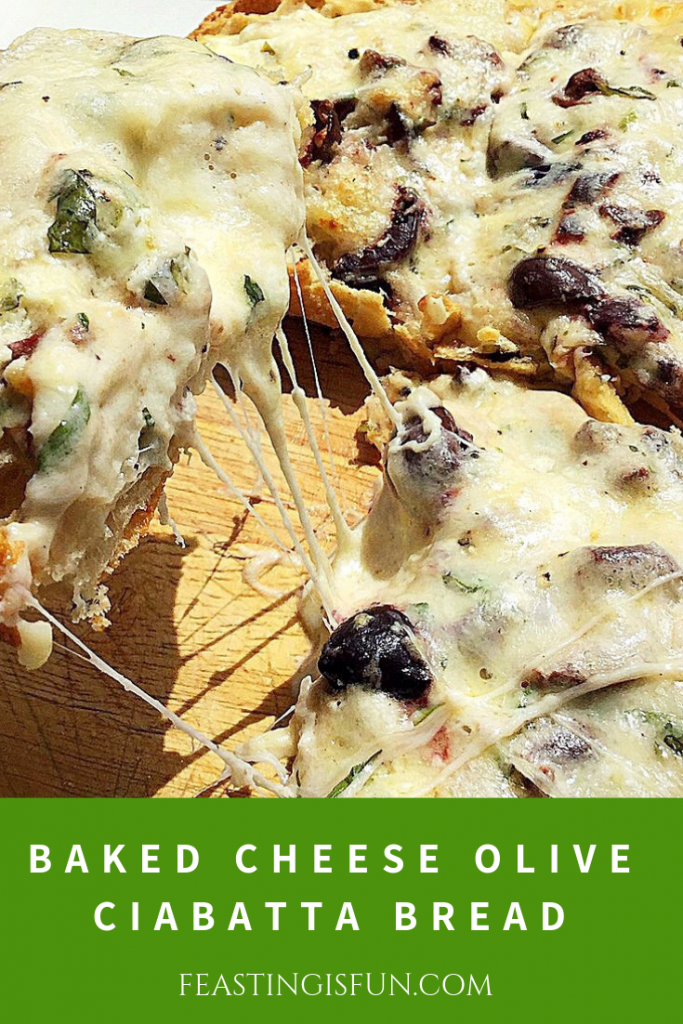
Baked Cheese Olive Ciabatta Bread

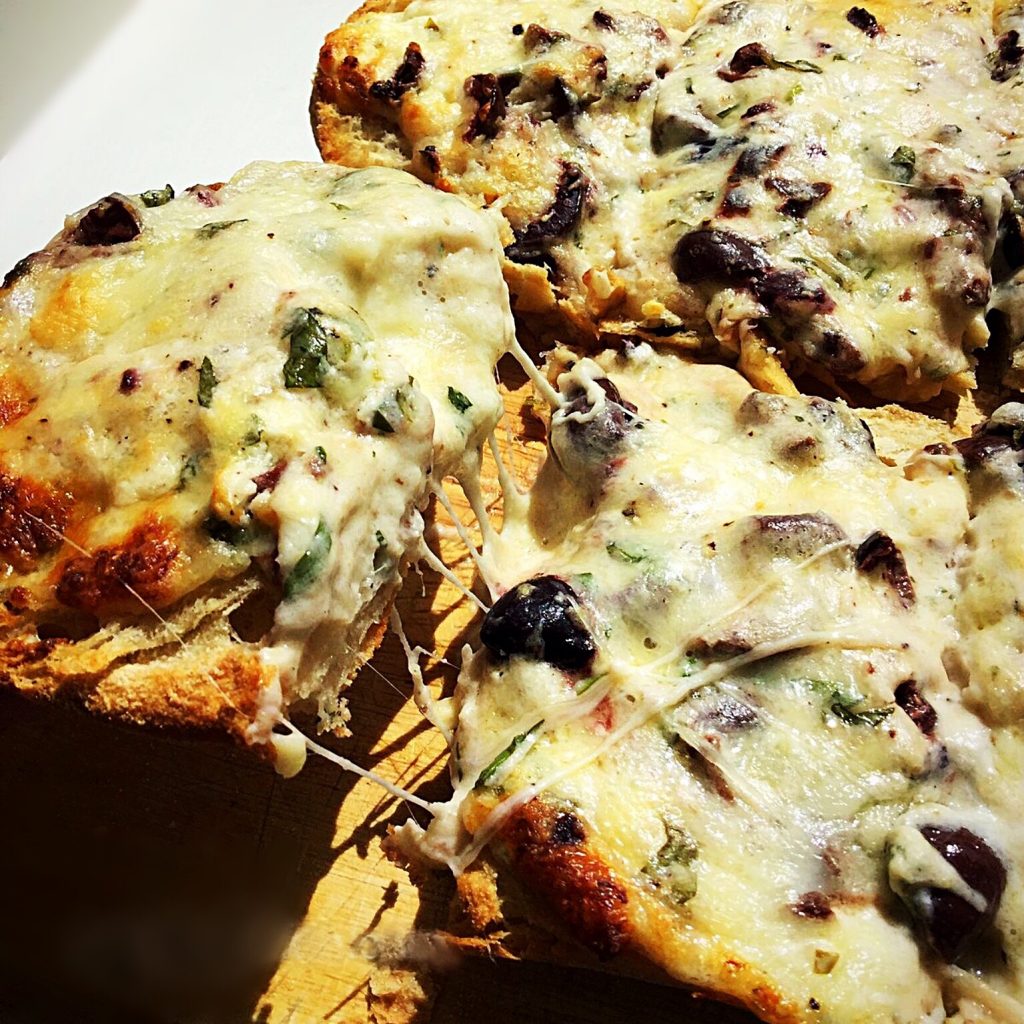
So, today I am sharing a delicious and easy cheesy bread recipe with you. Rather, this post is more of an assembly than recipe. Simply look at the photos. Because, baking ciabatta bread with the ultimate cheesy olive topping creates a flavour explosion for your tastebuds! Combining three different cheeses gives the best flavour and creamy, melting texture that compliments both the kalamata olives and fresh basil. Resulting in crisp, crusty bread with the most flavourful, salty, fresh herb spiked, cheesy covering, Baked Cheese Olive Ciabatta Bread.

FF Baked Cheese Olive Ciabatta Bread

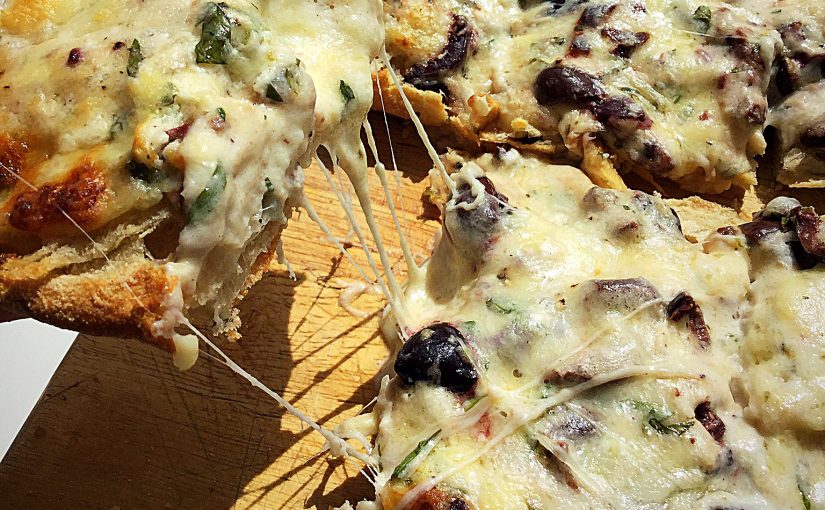
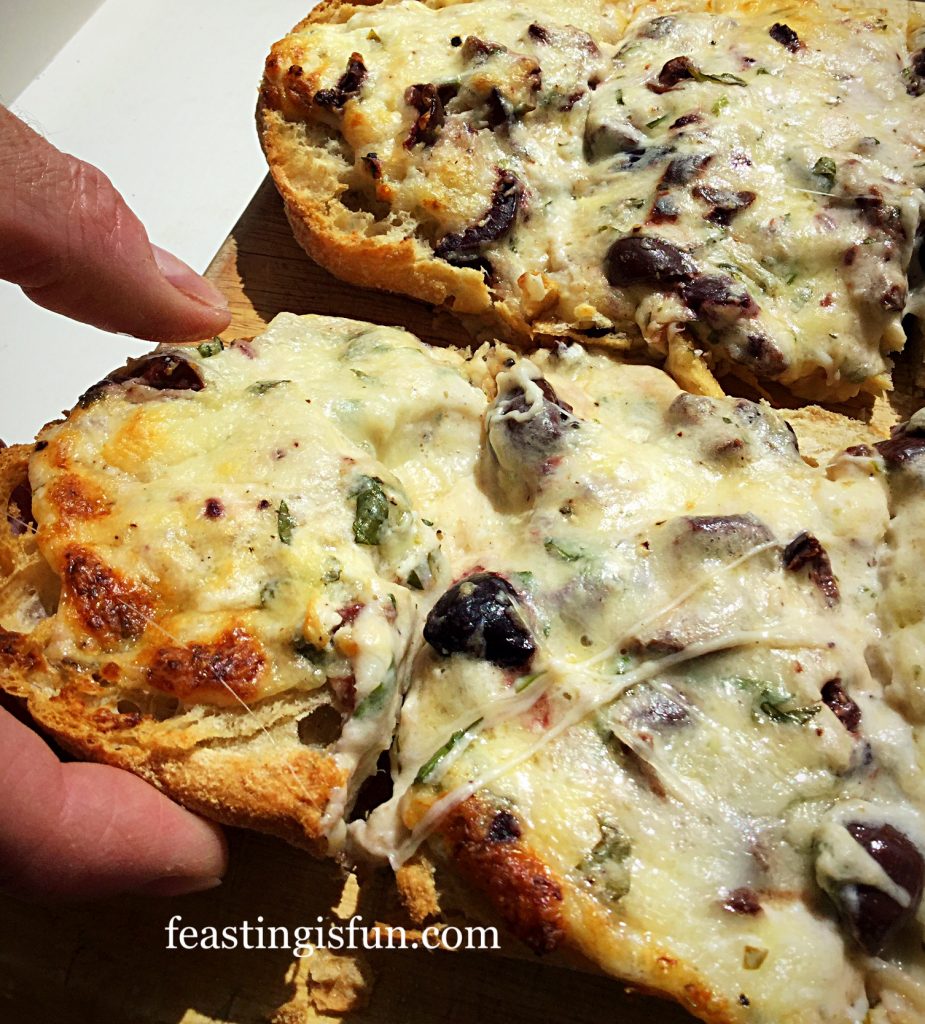
Combining Philadelphia cream cheese, mozzarella and sharp cheddar together creates the ultra cheesy topping. Resulting in a bake that is meltingly gooey with an incredible cheesy flavour. While the meaty kalamata olives and fresh basil, result in an overall herby saltiness that adds another flavour level to the cheese. Resulting in a tasty appetiser or snack that pairs well with cocktails, especially a Martini. Because the topping is overly generous, it could be split to cover two open Ciabattas. Alternatively, slice the ciabatta thinly, or cut into squares and serve as an elegant, pre-dinner canapé.

FF Baked Cheese Olive Ciabatta Bread
Baked Cheese Olive Ciabatta Bread

I love cheese and think it tastes even better when melted?

FF Baked Cheese Olive Ciabatta Bread
Baked Cheese Olive Ciabatta Bread


Recipe: Baked Cheese Olive Ciabatta Bread

1 x Regular size Ciabatta Bread – split open – I use Waitrose own make Ciabatta bread

200g/7oz Mozzarella

75g/3oz Philadelphia Cream Cheese – I find own brands too watery for this recipe

75g/3oz Grated Sharp/Mature Cheddar – I use Wyke Mature Cheddar

50g/2oz Kalamata Olives – I use olives with the stones in

1tbsp chopped fresh basil

1/4 – 1/2tsp Freshly Ground Black Pepper – to taste

Method: Preheat the oven to 220C/200C fan, gas mark 7, 425F

Making the cheese and olive topping

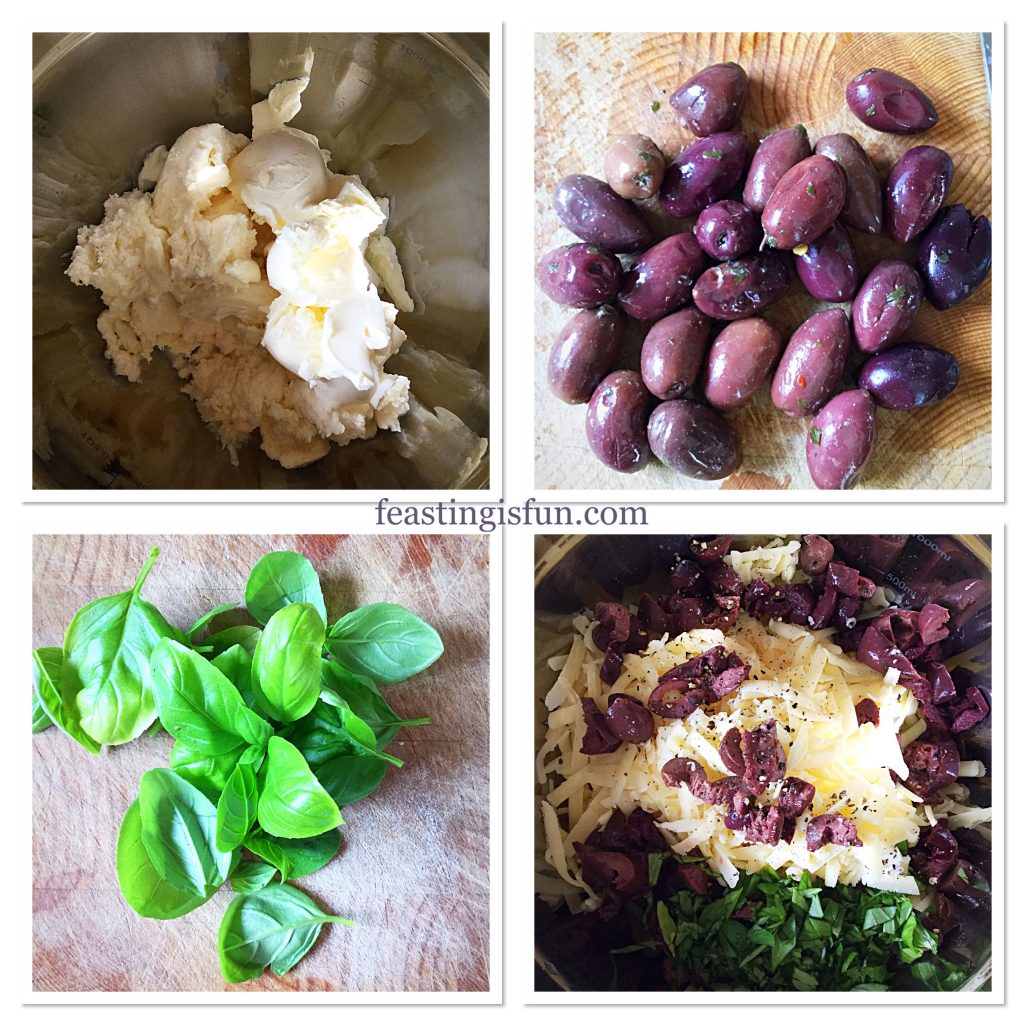
  • First of all place a medium sized bowl on to some digital scales. This will make adding ingredients much easier.
  • Spoon the Philadelphia cream cheese into the bowl and break up the drained mozzarella cheese, adding it to the cream cheese.
  • Next add the grated mature cheddar to the bowl.
  • Remove the stones from the olives. Press each olive with the flat side of the knife. Remove the stone with your fingers.
  • Chop the olives roughly, adding to the bowl until the correct weight is achieved.
  • Now chop the fresh basil fairly roughly and add to the bowl.
  • Add 1/4 teaspoon of freshly ground black pepper.
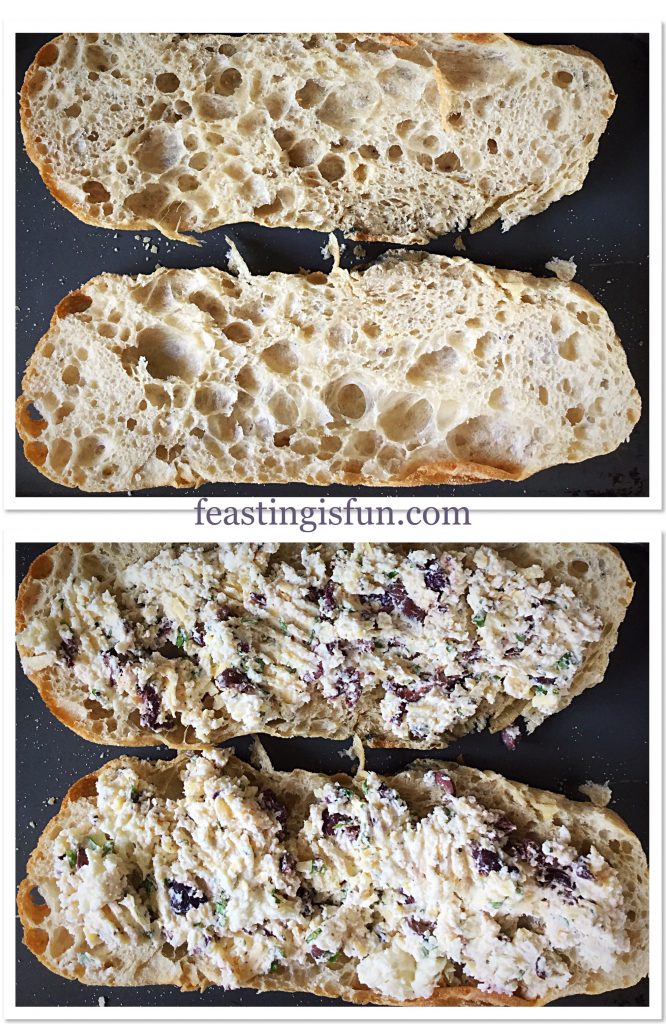
FF Baked Cheese Olive Ciabatta Bread
Preparing the cheese, olive and fresh basil topping.
  • Use a fork to mix all of the ingredients together.

Cutting and covering the ciabatta

  • Cut the Ciabatta bread in half lengthways and place on to a baking tray.
  • Divide the cheese mixture in half and cover each half of the ciabatta.
FF Baked Cheese Olive Ciabatta Bread
Preparing the ciabatta for baking.

Baking the cheese covered ciabatta

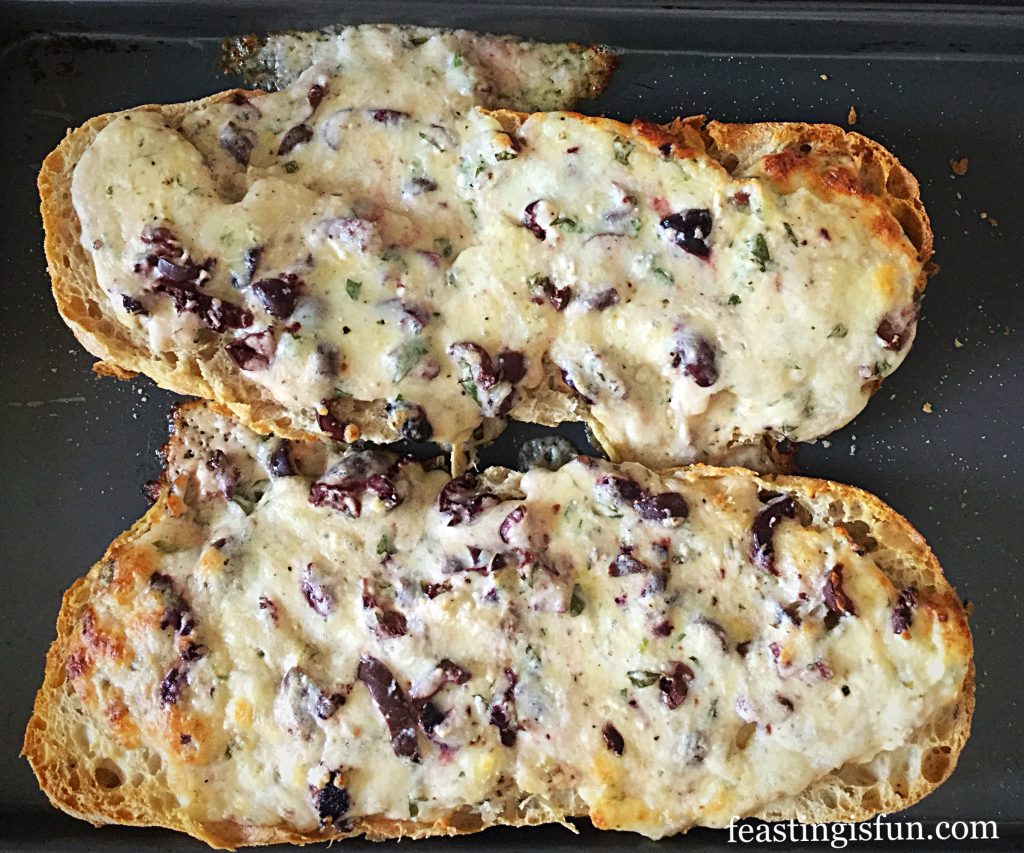
  • Place the ciabatta into the top of the preheated oven and bake for 15 – 20 minutes. When it turns golden and crusty and the cheese is meltingly bubbly on top it is done!
  • While the ciabatta is baking pour yourself a long, cool glass of your favourite drink!
  • As soon as the ciabatta is baked remove from the oven. And scoop any melted cheese that has escaped from the bread back on top.
FF Baked Cheese Olive Ciabatta Bread
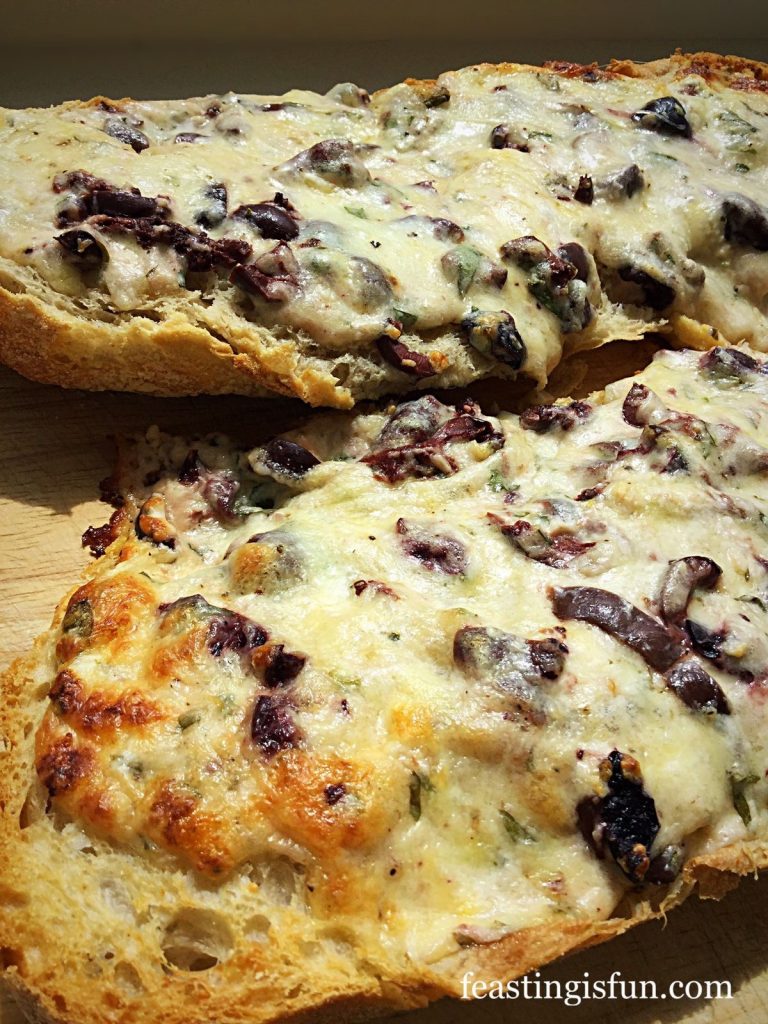
Baked Cheese Olive Ciabatta Bread fresh from the oven.

Because I love cheese, especially when it is melted, I could probably eat this everyday. I prefer savoury over sweet anyday. Especially when it has the salty kick of olives.

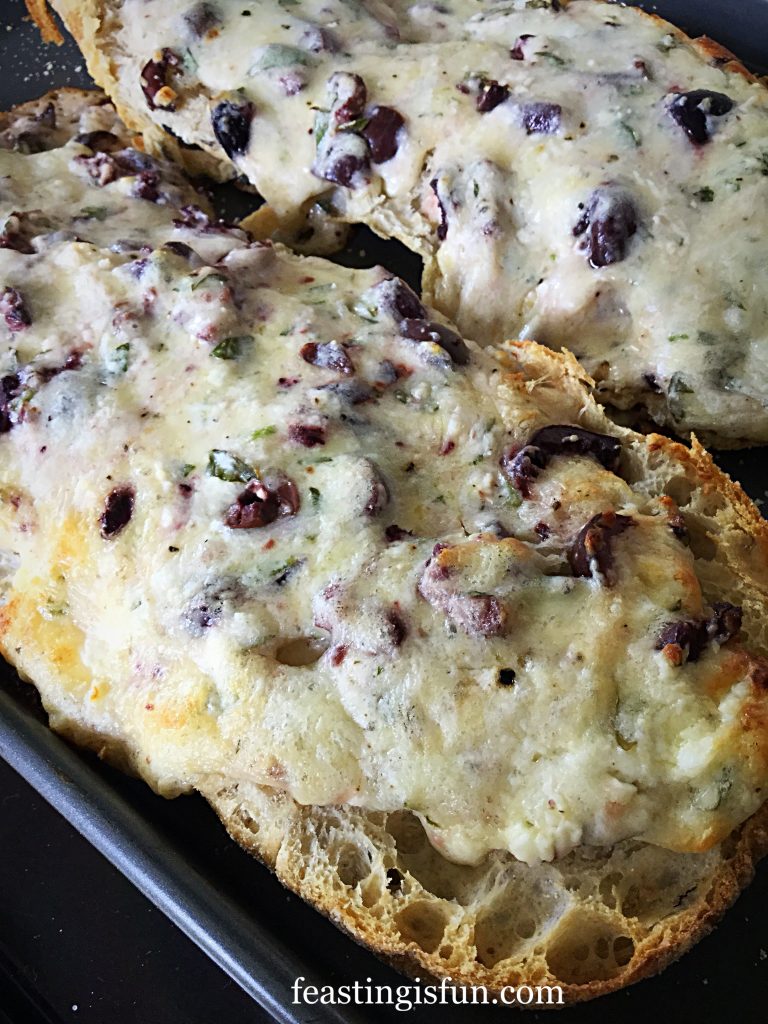
FF Baked Cheese Olive Ciabatta Bread
Crunchy and oozing with cheese.

Finally to serve, place on to a wooden board and slice the ciabatta across, dividing each half into 5 or 6 pieces. And enjoy the reaction as you pass these around to your guests.

Especially handy, you can make the topping one day ahead and keep in a sealed container in the fridge.

Also, devour this delicious, cheesy olive bread on the same day as baking it.

If you have enjoyed this recipe for Baked Cheese Olive Ciabatta Bread you may also enjoy these:

Cherry Tomato Mozzarella Basil Focaccia 

Cherry Tomato Mozzarella Basil Focaccia

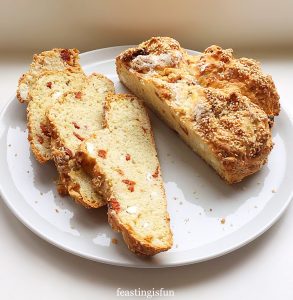
Cheddar Sun Dried Tomato Scones

FF Baked Cheese Olive Ciabatta Bread
Cheddar Sun Dried Tomato Scones

Feta Sun Dried Tomato Soda Bread 

Feta Sun Dried Tomato Soda Bread


While baking from scratch is something I enjoy, quick easy recipes are also an essential to have.. Whether we are rushing around with the busyness of life, or the opposite, too hot or tired to contemplate ‘cooking’, we all need a stash of no fail, easy recipes. After assembling and baking, we can breath a collective sigh of relief, take a deep breath and enjoy our time together.

So, whatever you are making, baking or even assembling in your kitchens, remember to have fun. Because food tastes better when shared and the hostess is relaxed!

Sammie xx

No part of this post may be copied or reproduced without the owner’s express, written permission. Please see my Disclosure Policy.
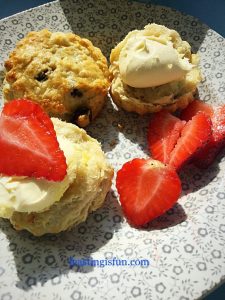
Almond Topped Cherry Scones

Almond Topped Cherry Scones plus a review of Andrew James Stainless Steel Set of 5 Bowls with Airtight Lids.

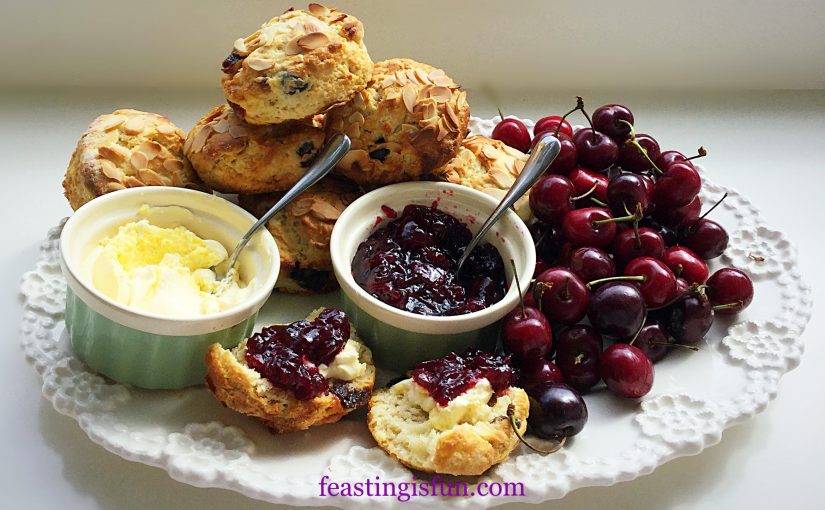
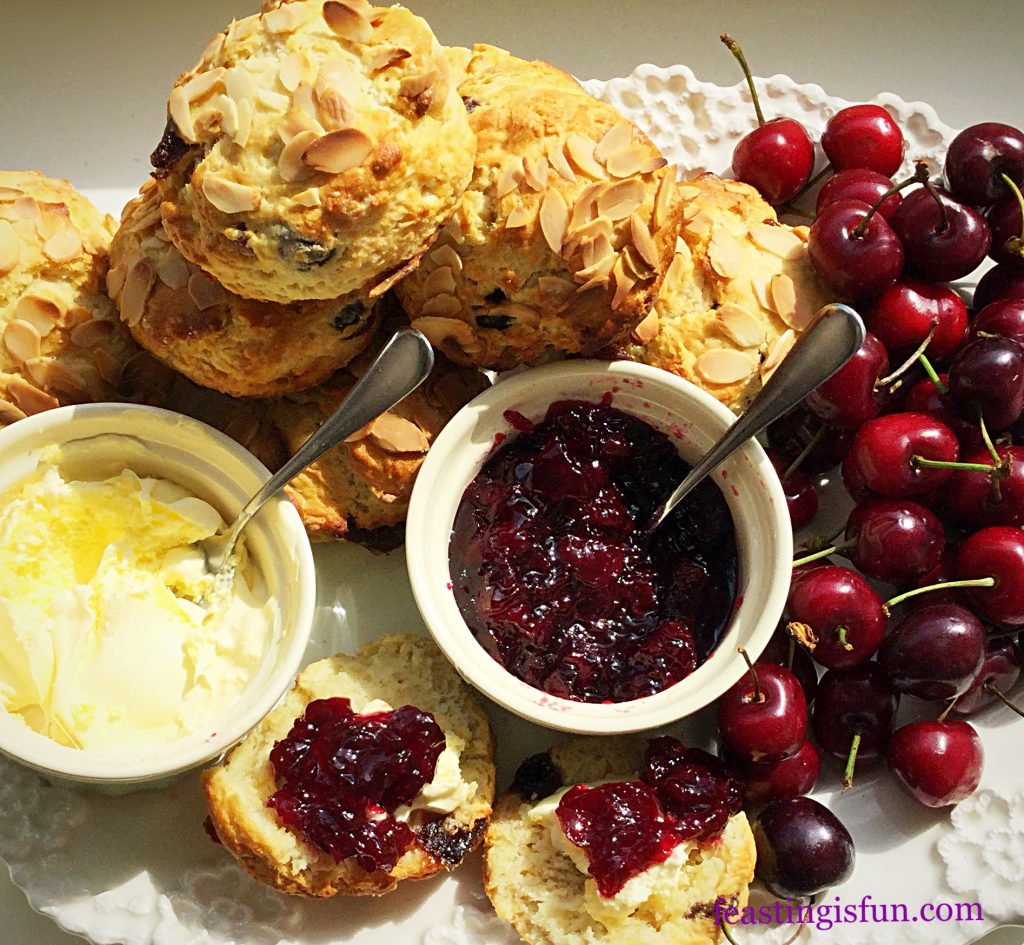
Summer is truly here. Sunshine, Wimbledon, Strawberries and Scones. Except  for today, as it is raining, a welcome relief for the garden. Today I bring you not strawberries, but another seasonal summer treat, cherries. Stunning, deep ruby red jewels, that hang like earrings from the tree. Preserved as glacé cherries meaning these Almond Topped Cherry Scones can be made any time of the year.

FF Almond Topped Cherry Scones
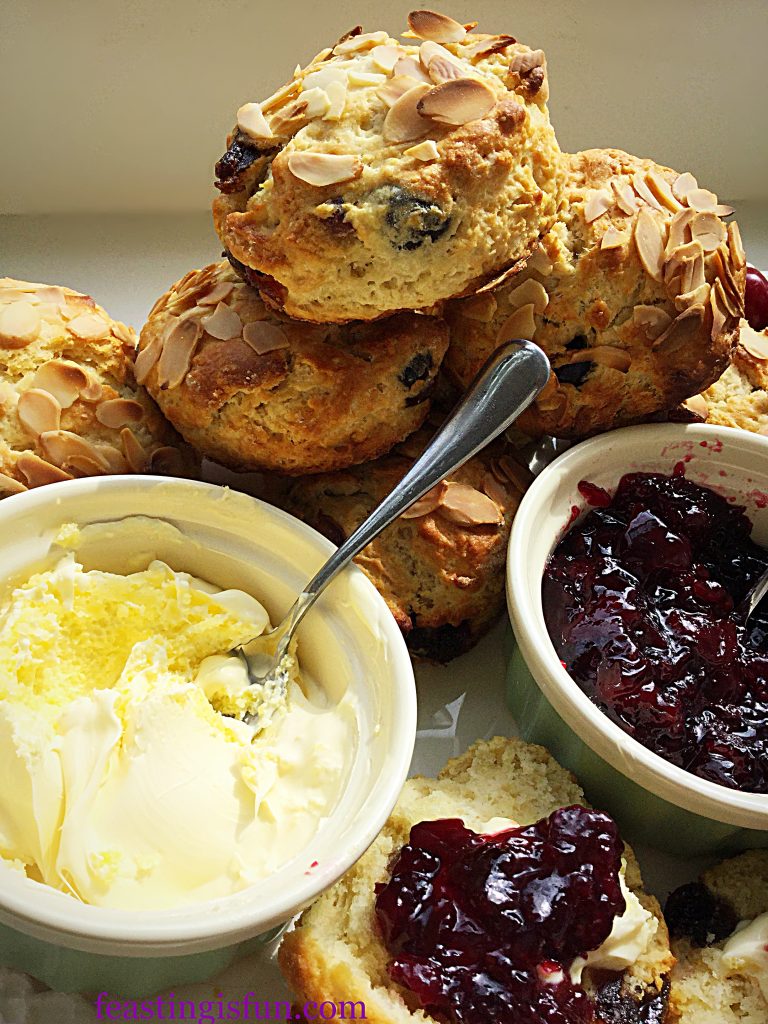
Almond Topped Cherry Scones a classic flavour pairing.

Combining the flavours of cherry and almond in these scones is, I think, game changing. Add clotted cream and dark cherry preserve and you have yourself a delicious scone that is bursting with flavour. Honestly, I wish that I had made these scones a very long time ago, such is the pleasure obtained from the experience of eating one.

FF Almond Topped Cherry Scones
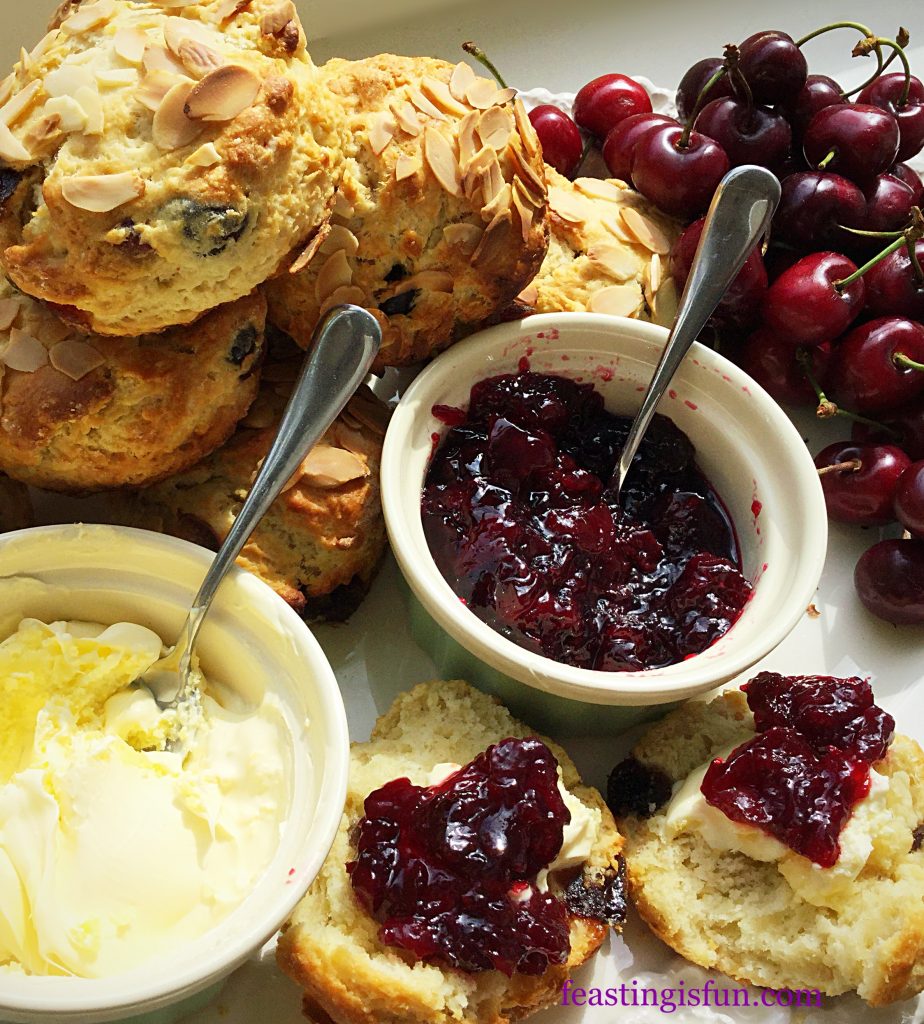
Almond Topped Cherry Scones extra special during cherry season.

Always Honest Reviews

Having been sent a nest of Stainless Steel Bowls with Airtight Lids by Andrew James, I decided to see how much damage I could do to them. Most importantly to me, when reviewing new products, they need to be put through a tough regime. As mentioned before, new or replacement equipment has to earn a place in my kitchen. Since honest reviews are the only ones you will ever read on this blog, your trust is never taken for granted.

FF Almond Topped Cherry Scones
Almond Topped Cherry Scones perfect for Afternoon Tea

Since first making shortcrust pastry in the 3500ml, the second largest bowl, then proceeding to make the scone dough in the same bowl. Again using a pastry cutter to cut the fats into the flour. I knew if anything could mess up these bowls, the pastry cutter would give them a hard time. Yet, following a full cycle in the dishwasher, the bowl came out virtually untouched.

FF Almond Topped Cherry Scones
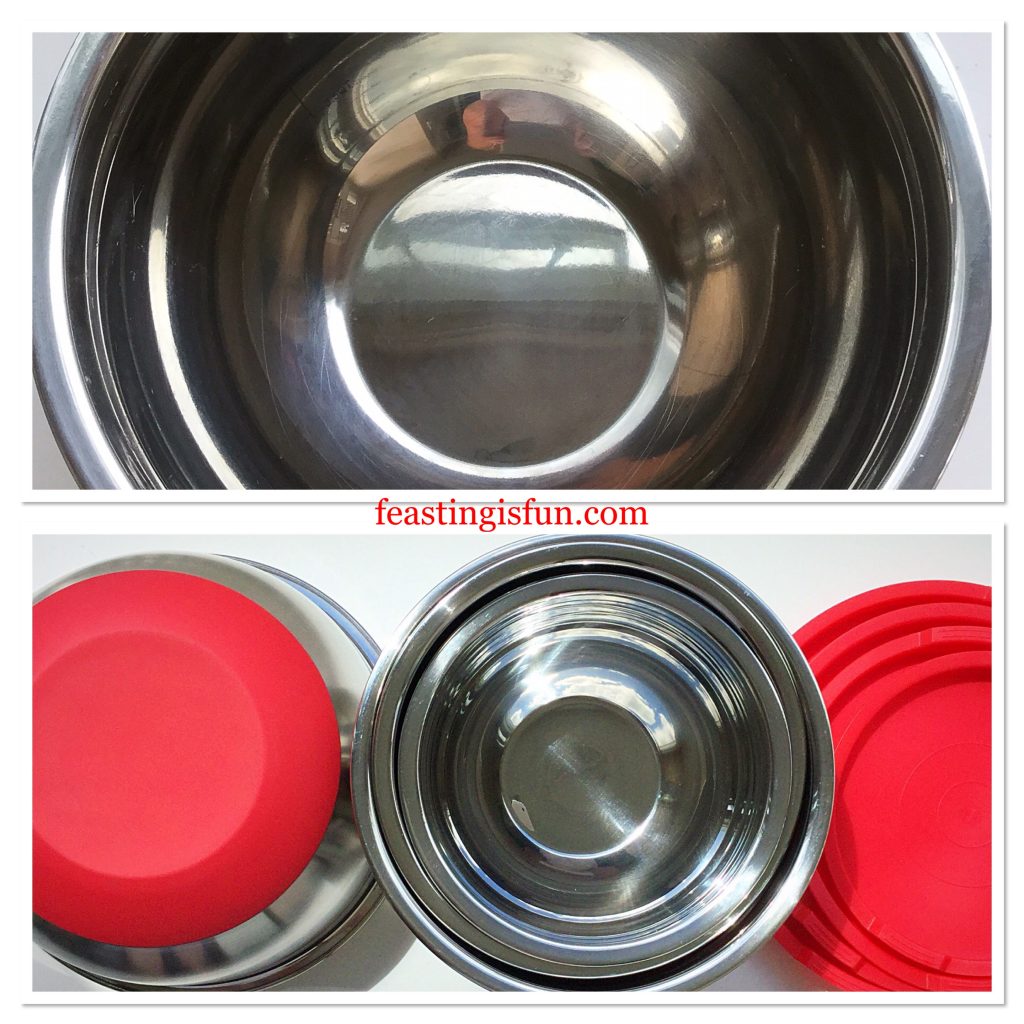
Tested bowl on top, nest of bowls bottom.

How Well Did These Stainless Steel Bowls Perform

The result of really attacking this bowl with a pastry cutter, a few scratches. In all fairness I was very heavy handed when making the pastry and scones. What I absolutely love about these bowls is the non slip base. Whether whisking up Yorkshire Puddings, Ice Cream, or pouring homemade Tomato Sauce into them, these bowls do not shift on the worktop. Each bowl comes with airtight fitted lids, with the largest bowl having a lid with a removable centre. Perfect for splash control when whisking liquids see Lime Ripple Luxury Ice Cream. Finally, the only minor downside to these bowls is that they cannot be used in the microwave. A small price to pay for the robust Stainless Steel bowl with non slip base and airtight lid.

These bowls come as a nest of 5 in the following sizes:

  • 4500ml capacity – 26cm diameter
  • 3000ml capacity – 24cm diameter
  • 2500ml capacity – 22cm diameter
  • 2000ml capacity – 20cm diameter
  • 1000ml capacity – 18cm diameter


FF Almond Topped Cherry Scones
A whole variety of uses in the kitchen.
FF Almond Topped Cherry Scones
Some of the recipes made using the stainless steel bowls.

While these bowls cannot be used in the microwave, they are versatile, robust and space saving in any kitchen. Since all of the bowls stack conveniently inside each other. They receive a firm 5 out of 5 from me. Therefore, these bowls are a welcome addition to my busy kitchen.

FF Almond Topped Cherry Scones
Almond Topped Cherry Scones

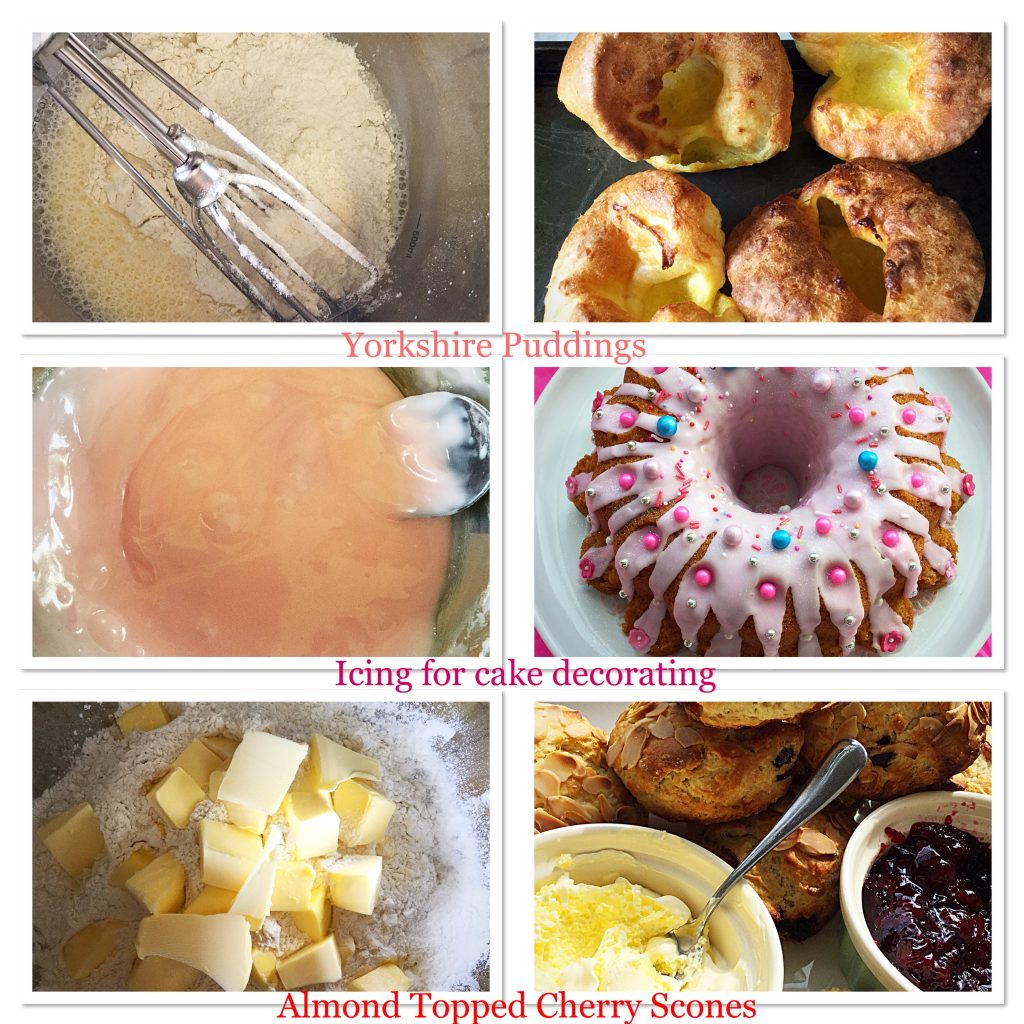
Time to make the scones!

Recipe: Almond Topped Cherry Scones makes 10

450g/1lb Plain White Flour

1/4tsp Salt – I use Maldon

40g/1.75oz Caster Sugar

3tsp Baking Powder

75g/3oz Cold Unsalted Butter cut into cubes

25g/1oz Cold Vegetable Fat – Trex

75g/3oz Natural Glacé Cherries cut into halves

250mls Whole Milk plus a little extra to brush the tops of the scones before baking

2tsp Almond Extract – I use Nielsen-Massey

2-3tbsp Flaked Almonds

Making The Scones

Preheat the oven to 220C/200C fan, gas mark 7, 425F

  • Line a large baking tray with baking parchment.
  • Sieve in the flour and baking powder, then add both of the fats.
  • Using the tips of your fingers, or a pastry cutter, work the fats into the flour until it resembles breadcrumbs with some larger, pea sized pieces of fat visible.
  • Next add the salt and sugar. Mix together using a balloon whisk.
  • Now add half of the glacé cherries. Toss them about in the mixture, this prevents them sticking together. Add the other half and do the same.
  • Make a well in the centre of the mix, pour in the milk and almond extract.
  • Use a butter knife to gently stir the milk into the flour mix. As the dough starts to come together switch to using your hand. Gently bringing the mix to a coherent dough.
  • Tip the dough on to a floured surface and gently knead to form a 5cm/2″ thick disc.
  • Using a well floured 5cm/2″ round cutter, cut out the scones, remembering to press straight down without twisting the cutter. Twisting can cause odd shaped or lopsided scones as they bake. Place each scone on to the lined baking tray.
  • Bring all the bits of scone dough together once the scones are cut, knead lightly and continue to cut out the remaining scones. Repeat the last step until all of the dough is used.
  • Once all of the scones have been cut out brush the tops with milk and sprinkle over flaked almonds.
FF Almond Topped Cherry Scones
Making the Almond Topped Cherry Scones

Baking The Almond Topped Cherry Scones

  • Place the baking tray into the centre of the preheated oven and bake for 25 – 30 minutes.
  • The Almond Topped Cherry Scones are baked when they are risen, golden brown and sound hollow when rapped on the base with a knuckle.
  • As soon as the scones are baked, remove from the oven and place immediately on to a cooling rack to cool.
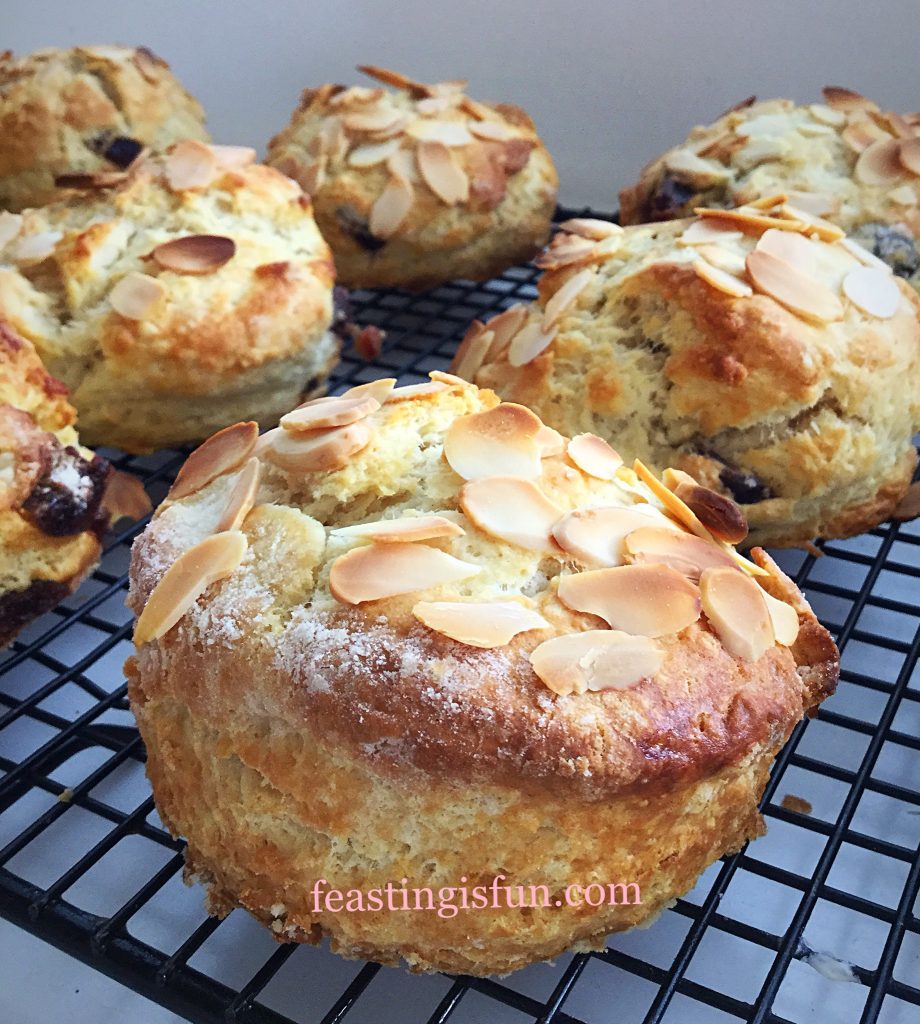
FF Almond Topped Cherry Scones
Baked Almond Topped Cherry Scones cooling on a rack.
  • When the scones are cooled, or slightly warm then they are ready to be served.
FF Almond Topped Cherry Scones
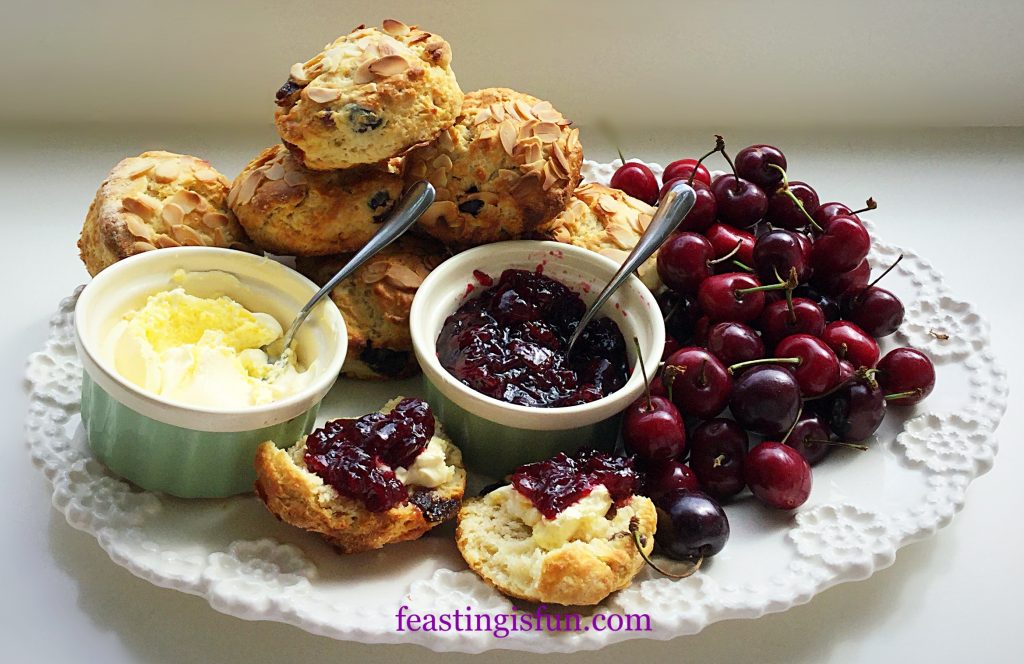
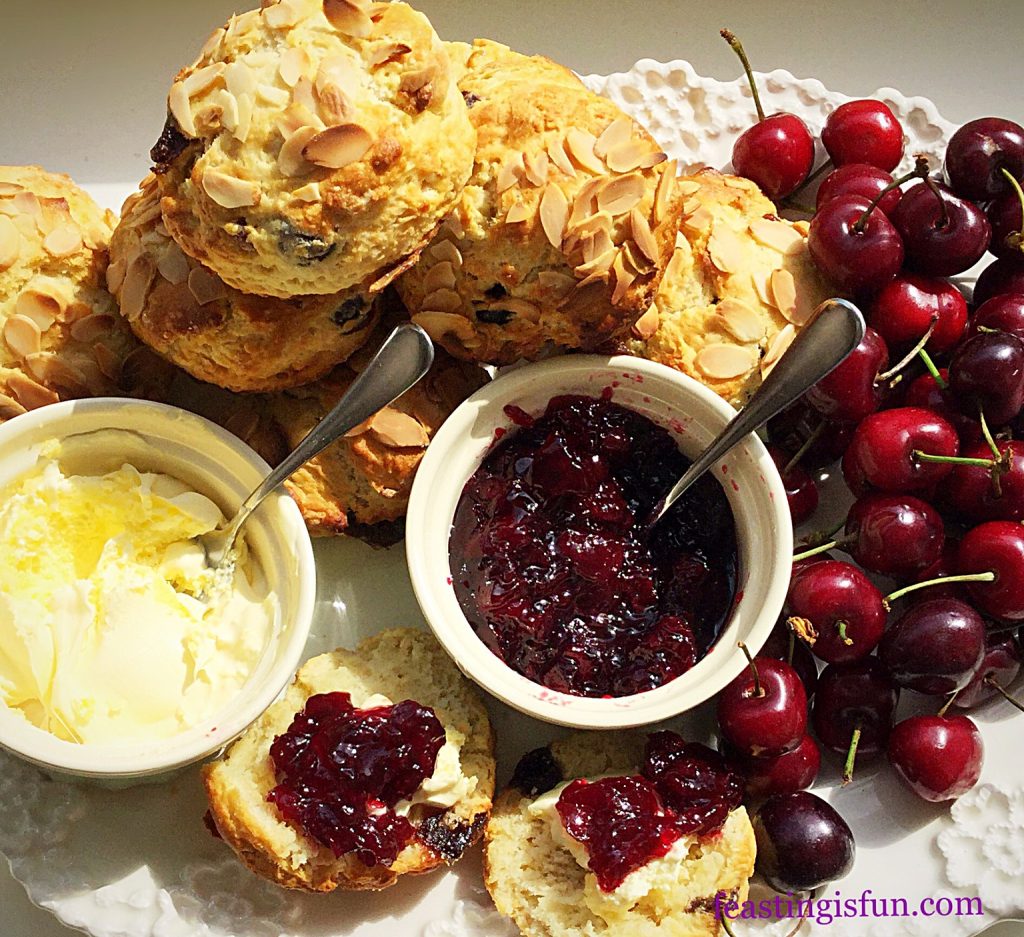
Serve the Almond Topped Cherry Scones on a platter.

I like to serve the scones on a large platter with ramekins of clotted cream and cherry preserve. Adding fresh cherries when they are in season, finishes the platter beautifully.

Serve with a large pot of tea and the best china you own!

All scones are at their best on the day they are made. If you wish to make ahead, you can do so by one day. Make the scones, cool completely and store in an airtight container, such as the large stainless steel bowls. The next day 20 minutes prior to serving, warm in a preheated oven, at baking temperature for 5-10 minutes. Cool slightly and serve. Rather like bread, the reheating simply refreshes the scones and they taste freshly baked.

If you have enjoyed this recipe for Almond Topped Cherry Scones you may also like these:

Fruit Filled Butter Scones

FF Almond Topped Cherry Scones
Fruit Filled Butter Scones

Afternoon Tea

FF Almond Topped Cherry Scones
Afternoon Tea

Super Light Scones

FF Almond Topped Cherry Scones
Super Light Scones

Homemade scones are a world away from their shop bought counterparts. In fact I never even liked scones before I made them myself. Scones are an important addition to any Afternoon Tea and are simply the easiest treat to quickly make should visitors unexpectedly arrive. Making the scone dough in the Stainless Steel bowl made the process even easier. Especially with the non slip base and dishwasher safe factors.

If you make these Almond Topped Cherry Scones please let me know? I love and really appreciate reading the comments that you take time to leave. Pop a picture on Twitter or Instagram and tag me in. I’ll be sure to give you a shoutout from @sammiefeasting.

So, whatever you are making, baking and creating in you kitchens or indeed caravans, have fun making and sharing your feast.

Sammie xx

Andrew James provided me with the nest of 5 stainless steel bowls with matching airtight lids for the purpose of review. All comments and opinions are my own and are a complete reflection of my experience in using them. I was not paid to write this post and the discount is curtesy of Andrew James. No part of this post may be reproduced in any way without my prior permission. Please see my Disclosure Policy for further details.

Note: Sadly, Andrew James Ltd is no longer trading. This post remains unaltered as a record of my review.

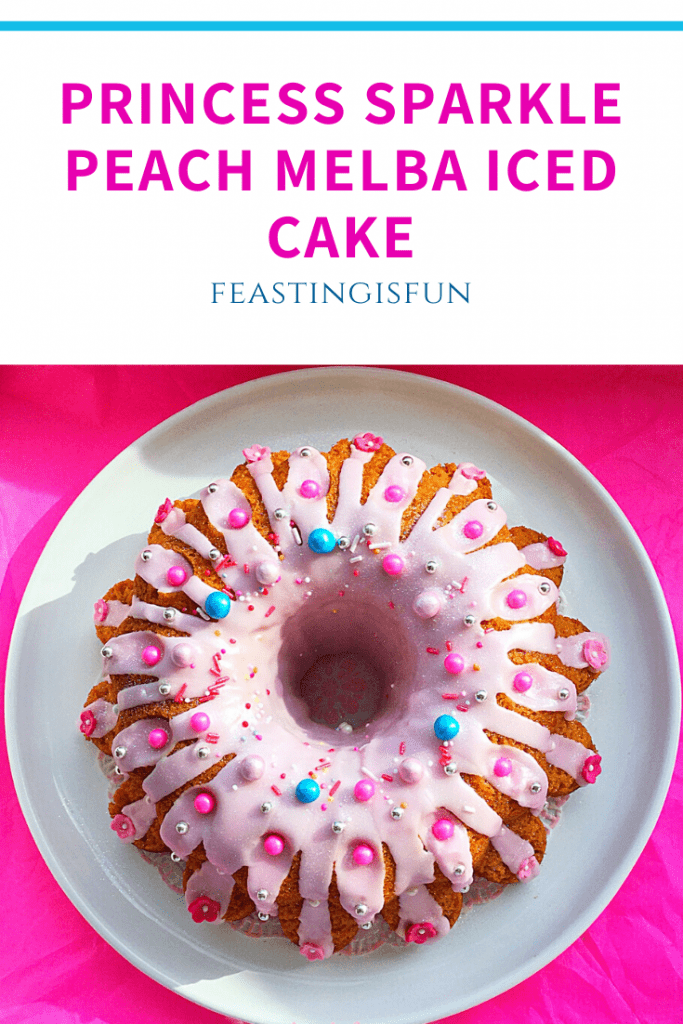
Princess Sparkle Peach Melba Iced Cake

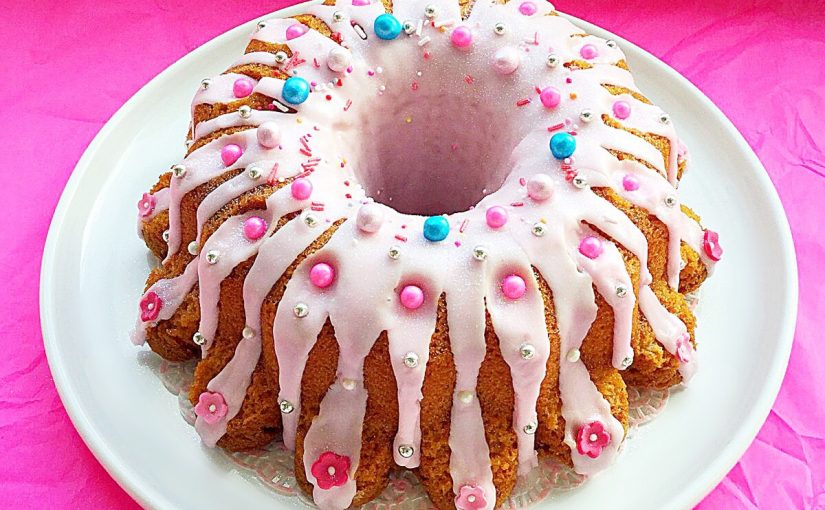
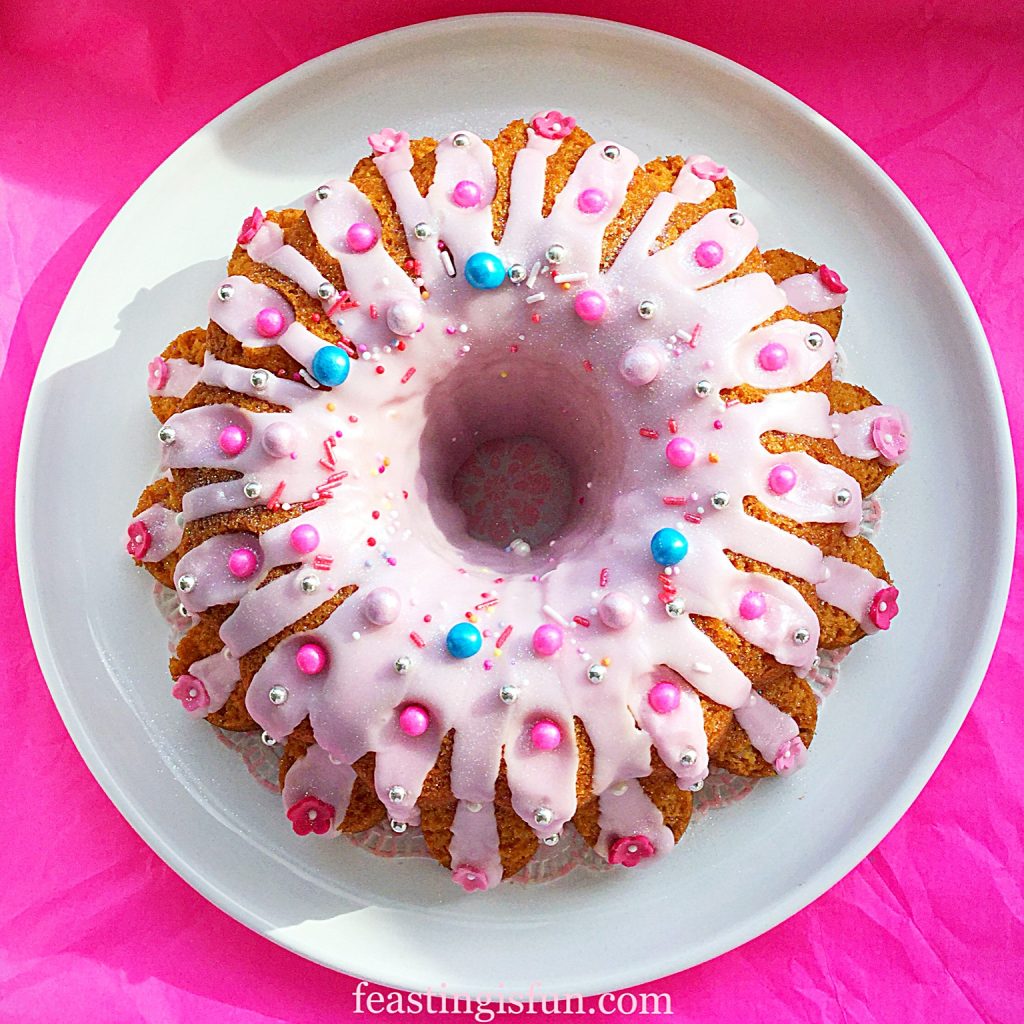
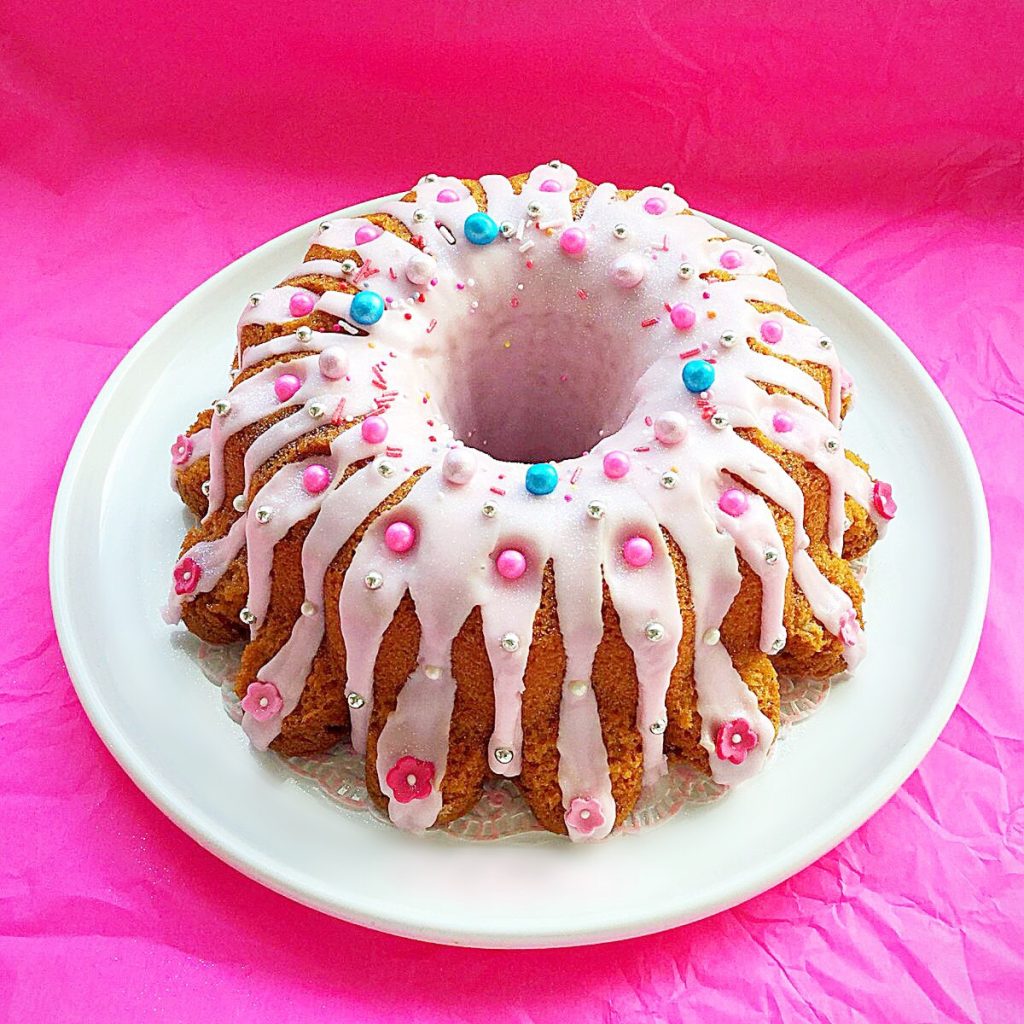
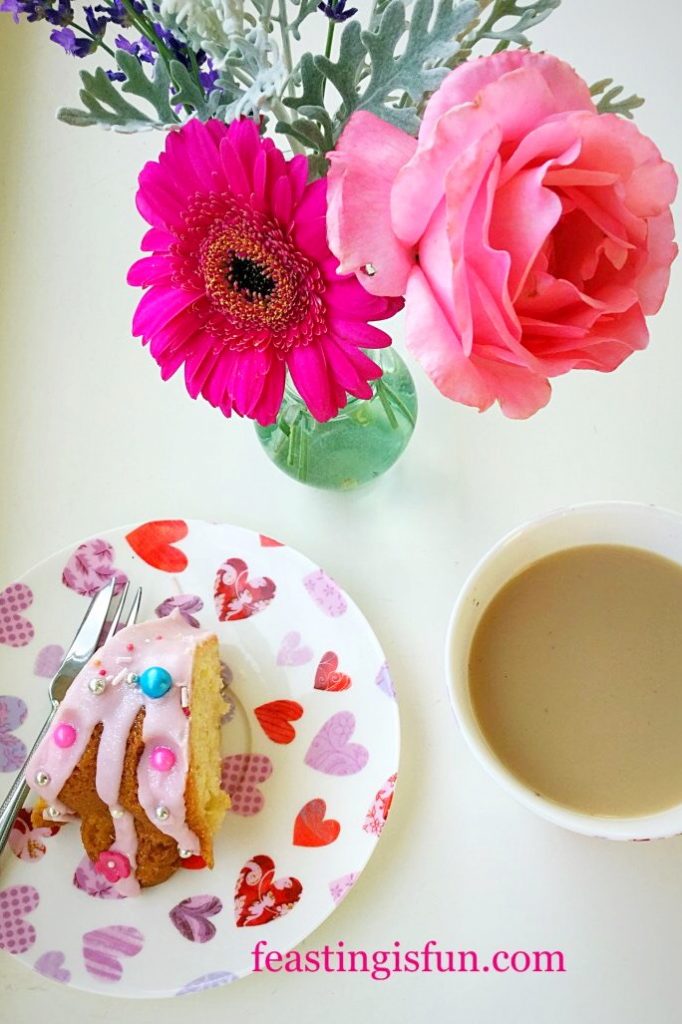
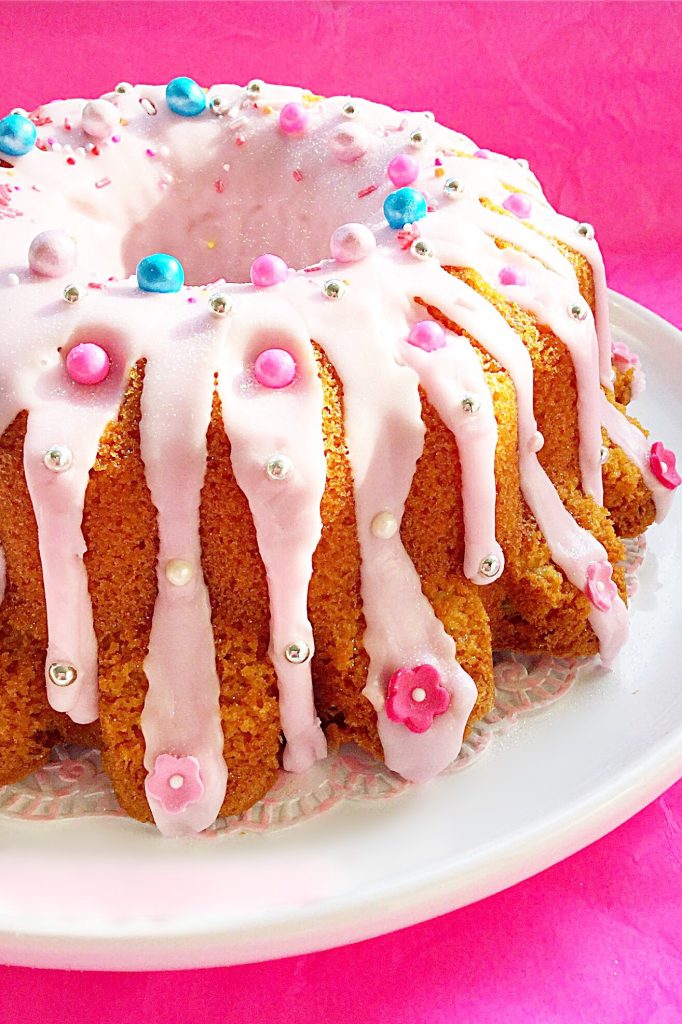
Today we celebrate National Pink Day.  It can seem as though there is a national day for just about anything. Whoever thinks these things up? Yet, as our girls have grown, passing through the ‘pink’ stage, I have grown to love the colour pink. Rather than the sickly pink birthday cakes of their toddler years this Princess Sparkle Peach Melba Iced Cake provides an elegant update. Tastefully decorated and delicious to eat.

While raspberry subtly flavours the cake itself, peach bellini icing creates the overall peach melba flavour. And, having a light,  fruity flavour, this cake really suits warm summer celebrations. Yet, you get to decide. If a fruity, glittering cake is needed, this cake fits the bill perfectly. A splash of colour and a sprinkle of sparkle may be what is needed at anytime of the year!

Princess Sparkle Peach Melba Iced Cake

Since this cake is both pretty and tasty it deserves to be shared. Fun and perfectly pretty, anyone who loves the colour pink will be thrilled with this cake. Also, this is the perfect cake for those who prefer fruity flavours, rather than chocolate ones. Or, for those of us who enjoy both, the combination of raspberry and peach is a refreshing change.

Perfect party cake.

Recipe: Princess Sparkle Peach Melba Iced Cake serves 10-12

250g/9oz Unsalted Butter

250g/9oz Caster Sugar

1/4tsp Salt – I use Maldon

1tsp Vanilla Extract – I use Nielsen-Massey

5 Large Free Range Eggs

2.5ml/ approx 1/2tsp or 50 drops of Natural Raspberry Flavour – I use Foodie Flavours natural flavouring drops

275g/10oz Plain White Flour

2tsp Baking Powder

400g Peach Bellini Flavoured icing sugar from Sugar and Crumbs

Food Colouring Gel – I used Wilton pink.

Assorted different sprinkles and dragee balls.

Preheat oven to 160C/140C fan, gas mark 3, 325F.

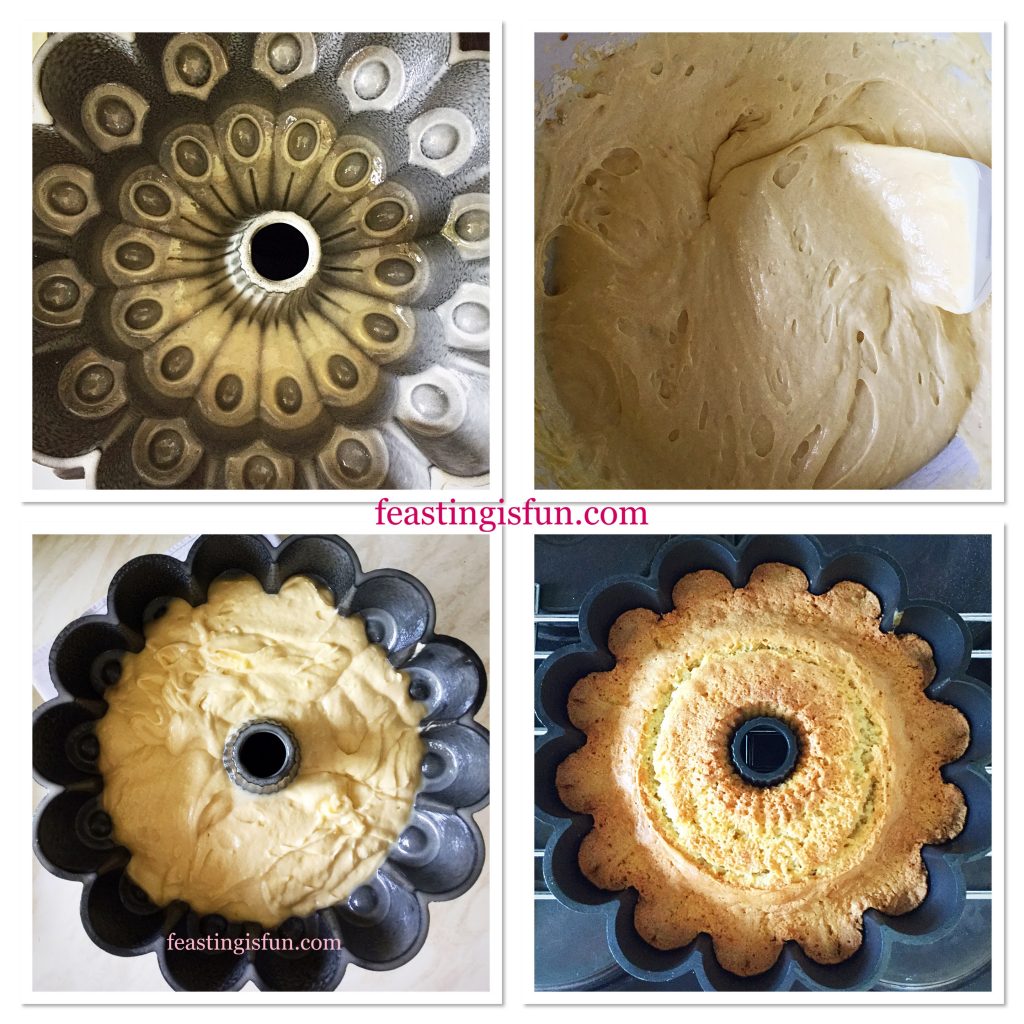
Note: This cake is baked in a 10 cup ring mould cake tin. If using a Bundt pan, a 10 cup size will also be needed.

Prepare the tin by spraying cake release spray thoroughly to the inside of the tin, using a pastry brush to ensure the cake release fully covers the inside of the tin. I recommend Wilton.

Making And Baking The Moulded Cake

  • Place the softened butter, salt and sugar into a large bowl. Whisk until pale, creamy and no grittiness can be detected, by rubbing a little of the mixture between your forefinger and thumb.
  • Next add the vanilla, raspberry flavour and all five eggs.
  • Finally sieve the flour and baking powder into the bowl.
  • Whisk slowly, until all of the ingredients have come together to form a cake batter.
  • Stir the cake batter with a spatula to fully combine.
  • Spoon the cake batter into the prepared tin. Ensure the top of the cake is level.
  • Place the cake tin into the centre of a preheated oven and bake for 55-65 minutes.
  • The cake is baked when it is a golden colour, starts to shrink away from the sides and an inserted skewer comes out clean.

FF Princess Sparkle Peach Melba Iced Cake

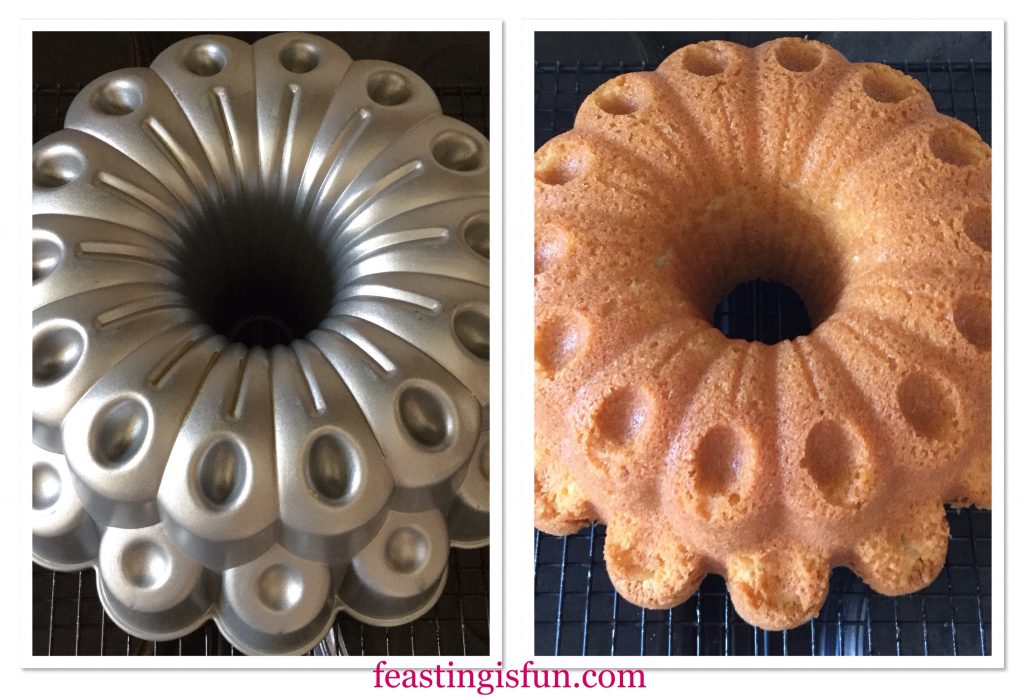
  • As soon as the cake is baked remove from the oven and leave to cool for ten minutes in the tin before turning it out.
FF Princess Sparkle Peach Melba Iced Cake
The detail of a ring mould or Bundt pan instantly gives this cake the wow factor.
  • Allow the turned out cake to fully cool before decorating.

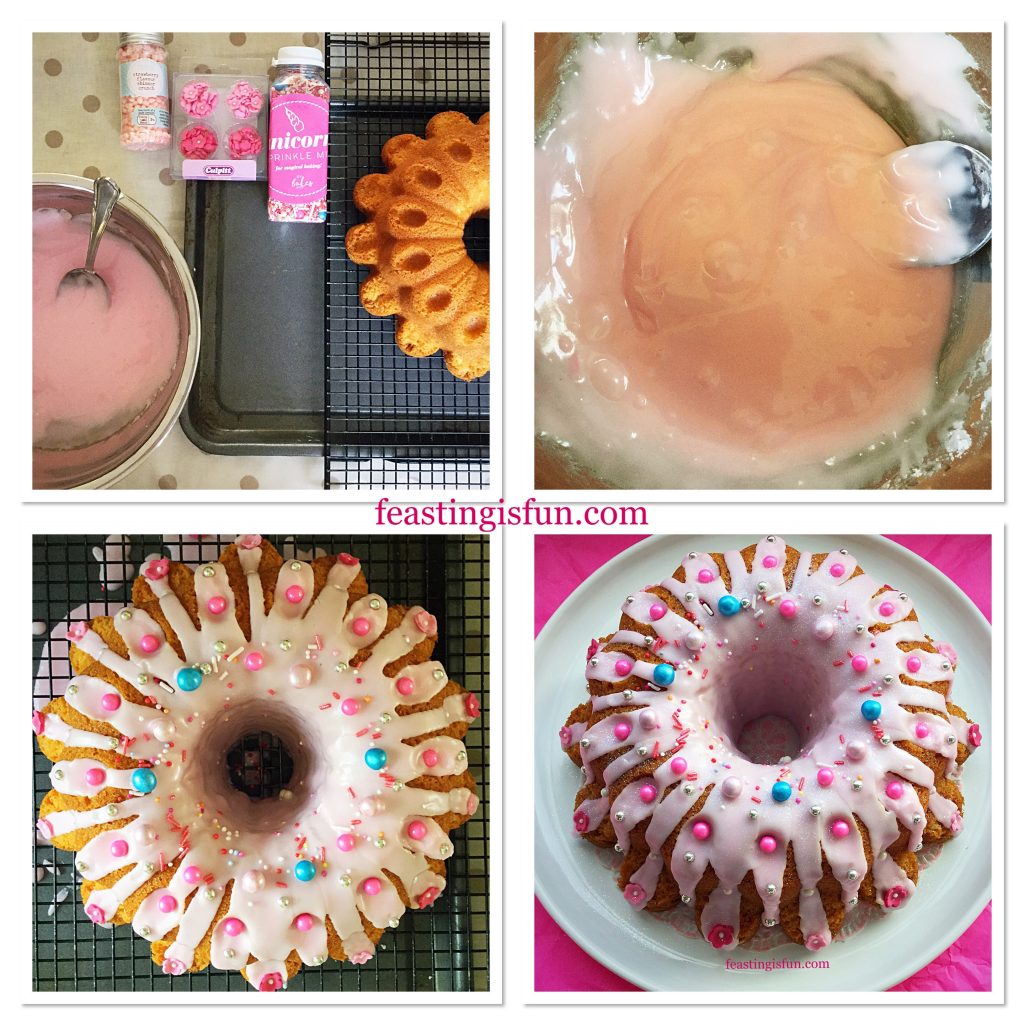
Decorating The Princess Sparkle Cake

  • While the cake cools, assemble everything needed to decorate the cake.
  • Likewise the icing can be made.
  • Sieve the flavoured icing sugar into a bowl.
  • Add a few drops of water to the bowl and then, using a cocktail stick add a little of the coloured gel.
  • Stir, adding drops of water to reach the desired thick, yet just dripping, consistency.
  • Add extra colour now if required.
  • Mix thoroughly to ensure even colouring.
  • As soon as the cake is cooled place the cooling rack across a clean, large, baking tray.
  • Starting at the top of the cake, use a spoon to drizzle the icing.
  • Work with the shape of the cake. Using the icing is to enhance, and emphasise. Also it aids the addition of sprinkles.
  • As soon as the icing is finished decorate with sprinkles. Press the larger balls and flowers into the icing as it sets.
  • Finally, place the fully decorated cake on to a plate, board or cake stand and leave to fully set.
FF Princess Sparkle Peach Melba Iced Cake
Bringing the Princess Sparkle Peach Melba Iced Cake to life.

Take a moment to look at your outstanding creation. Made by you. However the cake that you’ve designed turns out, it will be unique. Because, no other cake can impart the love and flair given while making this.

Princess Sparkle Peach Melba Iced Cake

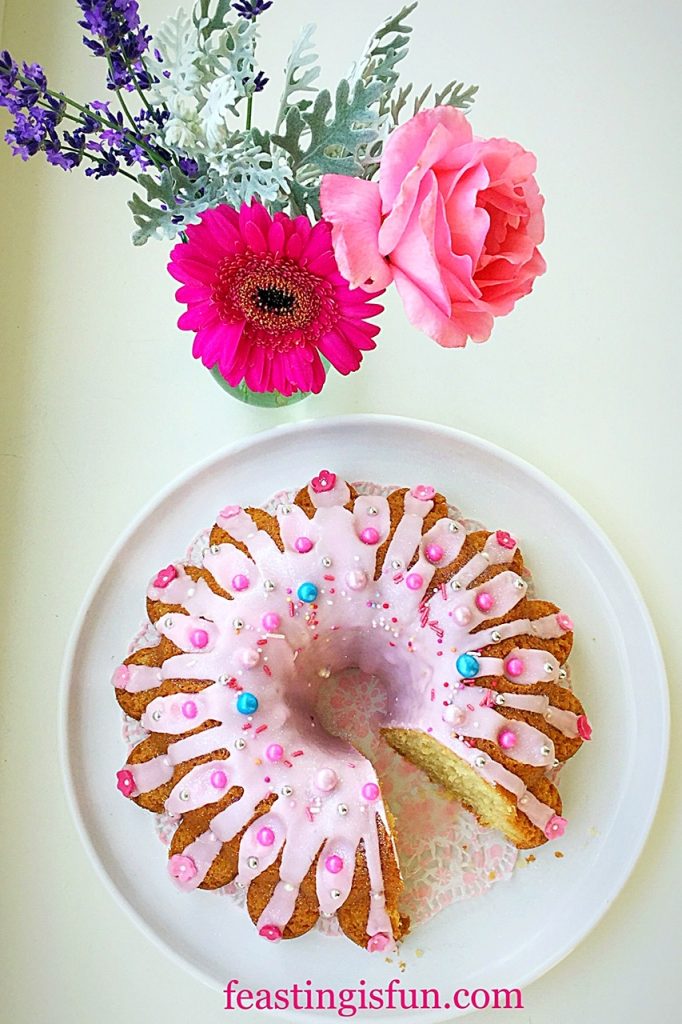
Serve this cake as party centre piece, for your princess or at a beautiful afternoon tea.

If you have enjoyed this recipe for Princess Sparkle Peach Melba Iced Cake you may also like these:

Strawberry Chocolate Vanilla Drip Cake

Strawberry Chocolate Vanilla Drip Cake

Lemon Lime Gin Heart Bundt Cake

Lemon Lime Gin Heart Bundt Cake

Chocolate Heart Topped Rose Bundt Cake

Chocolate Heart Topped Rose Bundt Cake

Finally, I highly recommend investing in a ring cake tin or a Bundt pan. Since they create a unique, baked cake canvas on which to decorate. While there are many ways to decorate a cake, the shape of moulded tins and Bundts create an instant beautiful shape. Most importantly, if you are not a confident cake decorator, they are a wise investment.

So, whatever you are making, baking and creating in your kitchen, have fun preparing and sharing your feast.

Sammie xx

No part of this post may be reproduced or duplicated without the written permission of the owner. Please see my Disclosure Policy.
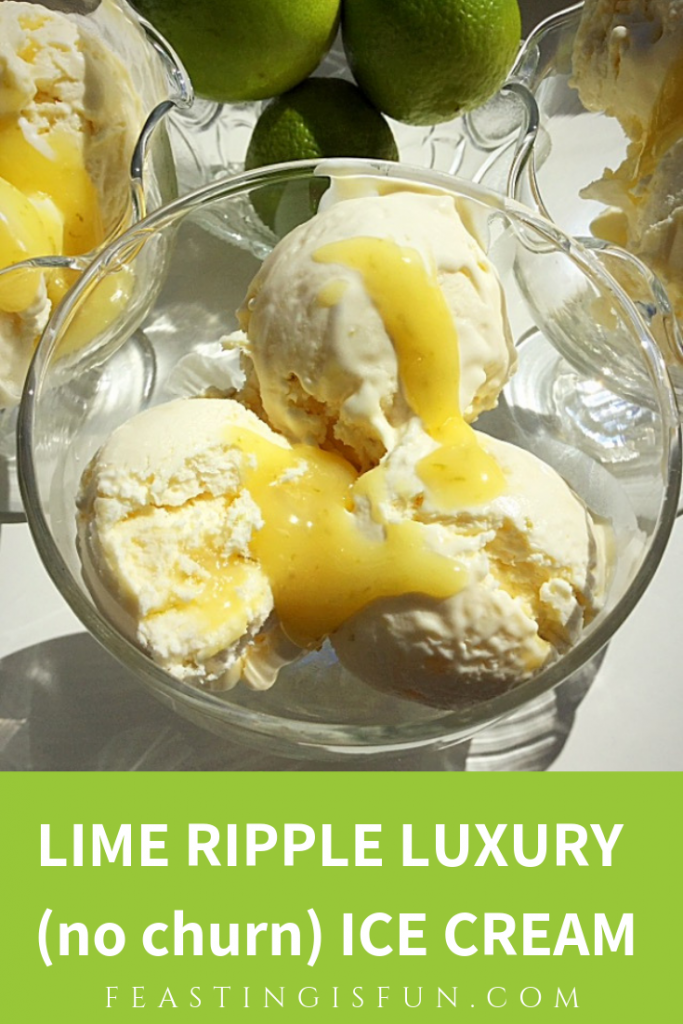
Lime Ripple Luxury Ice Cream

Hi to all my fabulous readers. Are you enjoying the current spell of warm weather here in the south of England? While it is so hot, a no churn ice cream recipe is ideal. And this Lime Ripple Luxury Ice Cream can be made in the morning, ready to enjoy by the evening.

FF Lime Ripple No Churn Ice Cream

Loving Limes

Currently I am in the middle of a full blown love affair with limes. I make no apology, because they taste so good. And having  a softer, less sour flavour than lemons, they work well in many savoury dishes such as Lime Couscous . While in sweet dishes limes add a rounder, less tart, more subtle flavour. So my kitchen is never without lemons or limes.

FF Lime Ripple Luxury Ice Cream
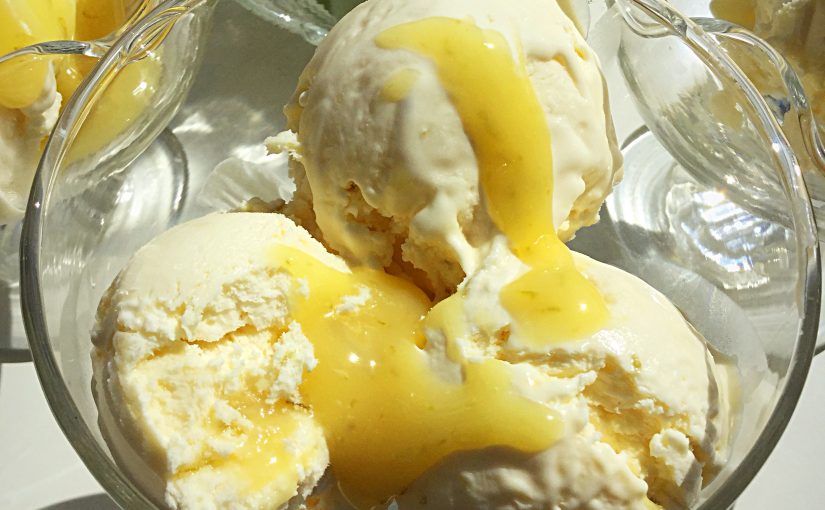
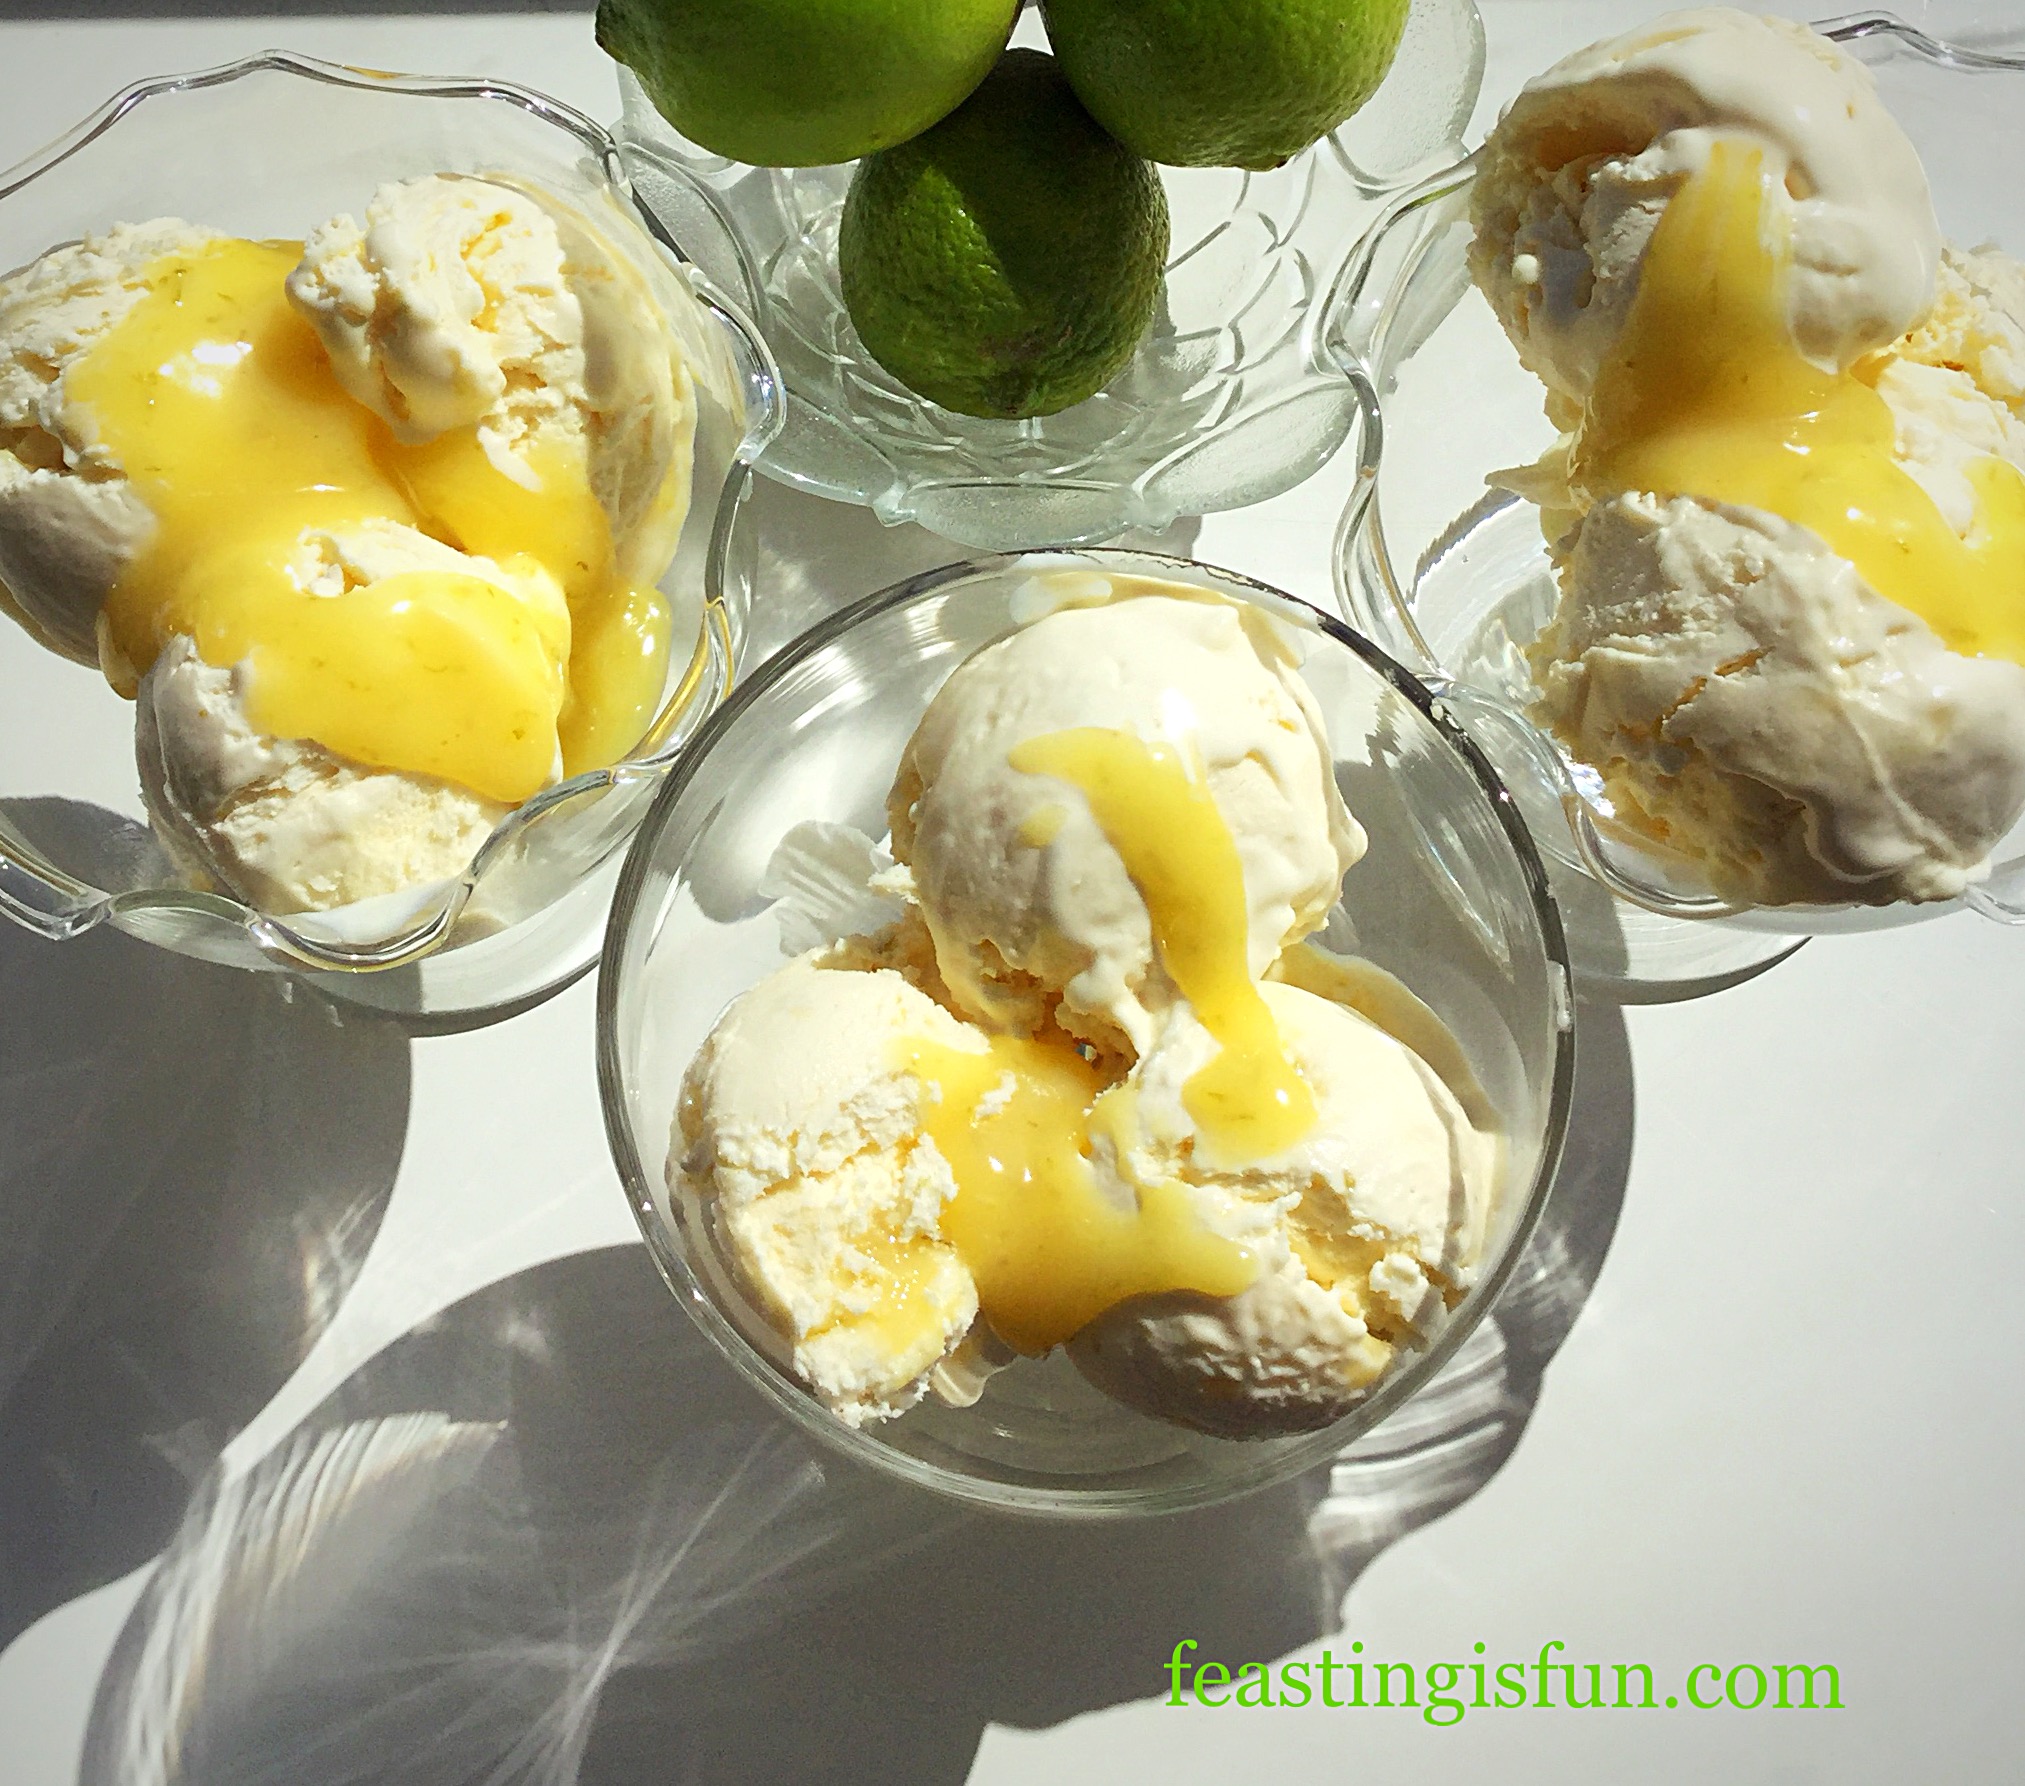
Lime Ripple Luxury Ice Cream refreshingly good.

This ice cream recipe uses homemade lime curd. Since lime curd is readily available online and in the shops, feel free to substitute. My recipe for lime curd will be posted on here in the next week or so. Importantly, as a food blogger I always double check a new recipe before sharing it. Resulting in a reliable and consistent recipe that you may then follow in confidence.

FF Lime Ripple Luxury Ice Cream
Lime Ripple Luxury Ice Cream with homemade lime curd.

Because not everyone owns an ice cream maker, this no churn recipe allows anyone to make great ice cream at home. So easily made with three main ingredients, a delightful dessert, to share with family and friends.

FF Lime Ripple Luxury Ice Cream
Lime Ripple Luxury Ice Cream quick and easy to make.

A quick note before starting. Depending on what the flavour is to be added to the base, has a direct impact on the quantity of condensed milk used. The lime curd used in this recipe is reasonably tart, as it is homemade. Shop bought curds should be similar. Yet if making, for example milk chocolate ice cream, the condensed milk should be reduced. Otherwise the result may well be an overly sweet ice cream. This is not a one size fits all recipe.

Recipe: Lime Ripple Luxury Ice Cream makes 1L approx.

600ml Double Cream

250g Condensed Milk – I use Carnation

1tsp Vanilla Extract – I use Nielsen-Massey

150g Lime Curd

Method:

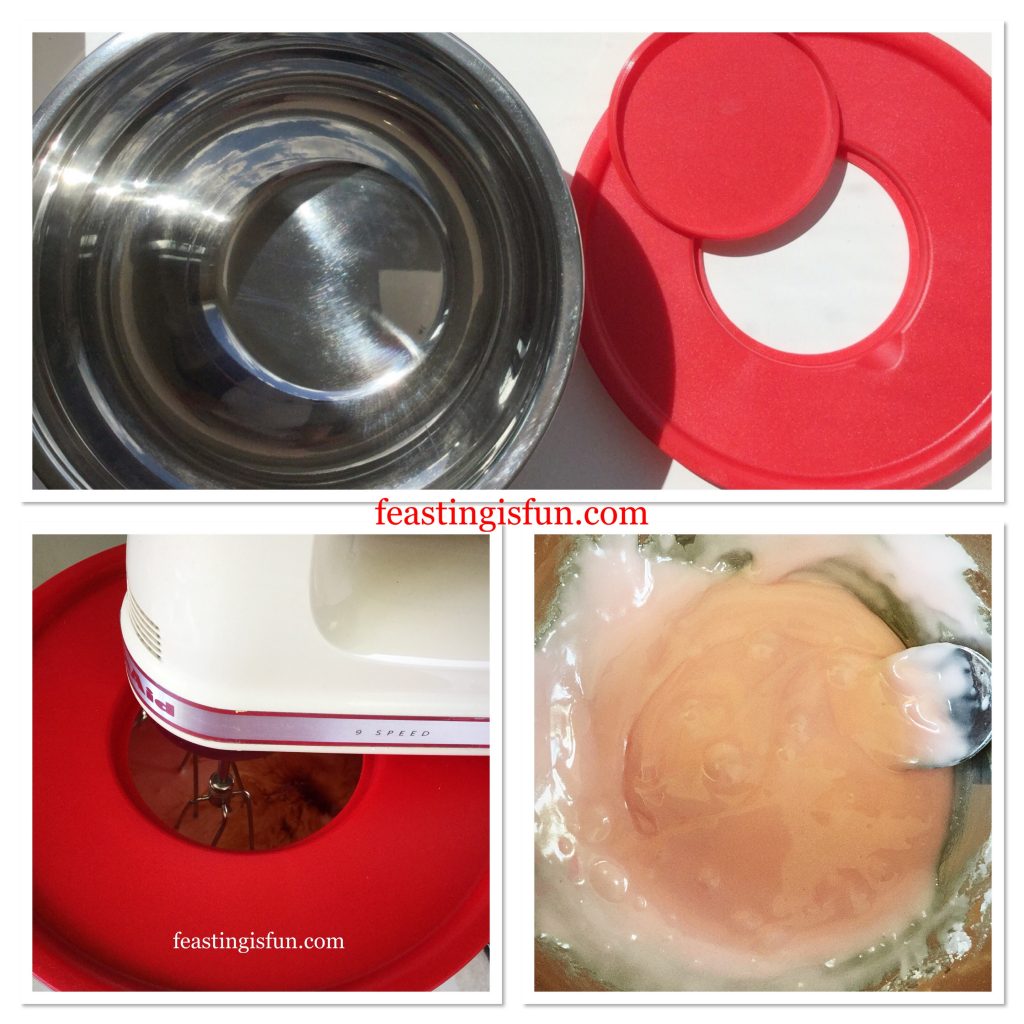
This recipe forms part of my review for Andrew James and uses their Set of Five Stainless Steel Mixing Bowls With Air Tight Lids. The largest bowl holds 4500ml and has a splatter proof lid, meaning that a handheld whisk can be placed through the central hole where part of the lid is removed. This bowl proved excellent for whisking this ice cream.

FF Lime Ripple Luxury Ice Cream
Largest of the nest of 5 bowls with splatter proof lid.

Making The No Churn Lime Ice Cream

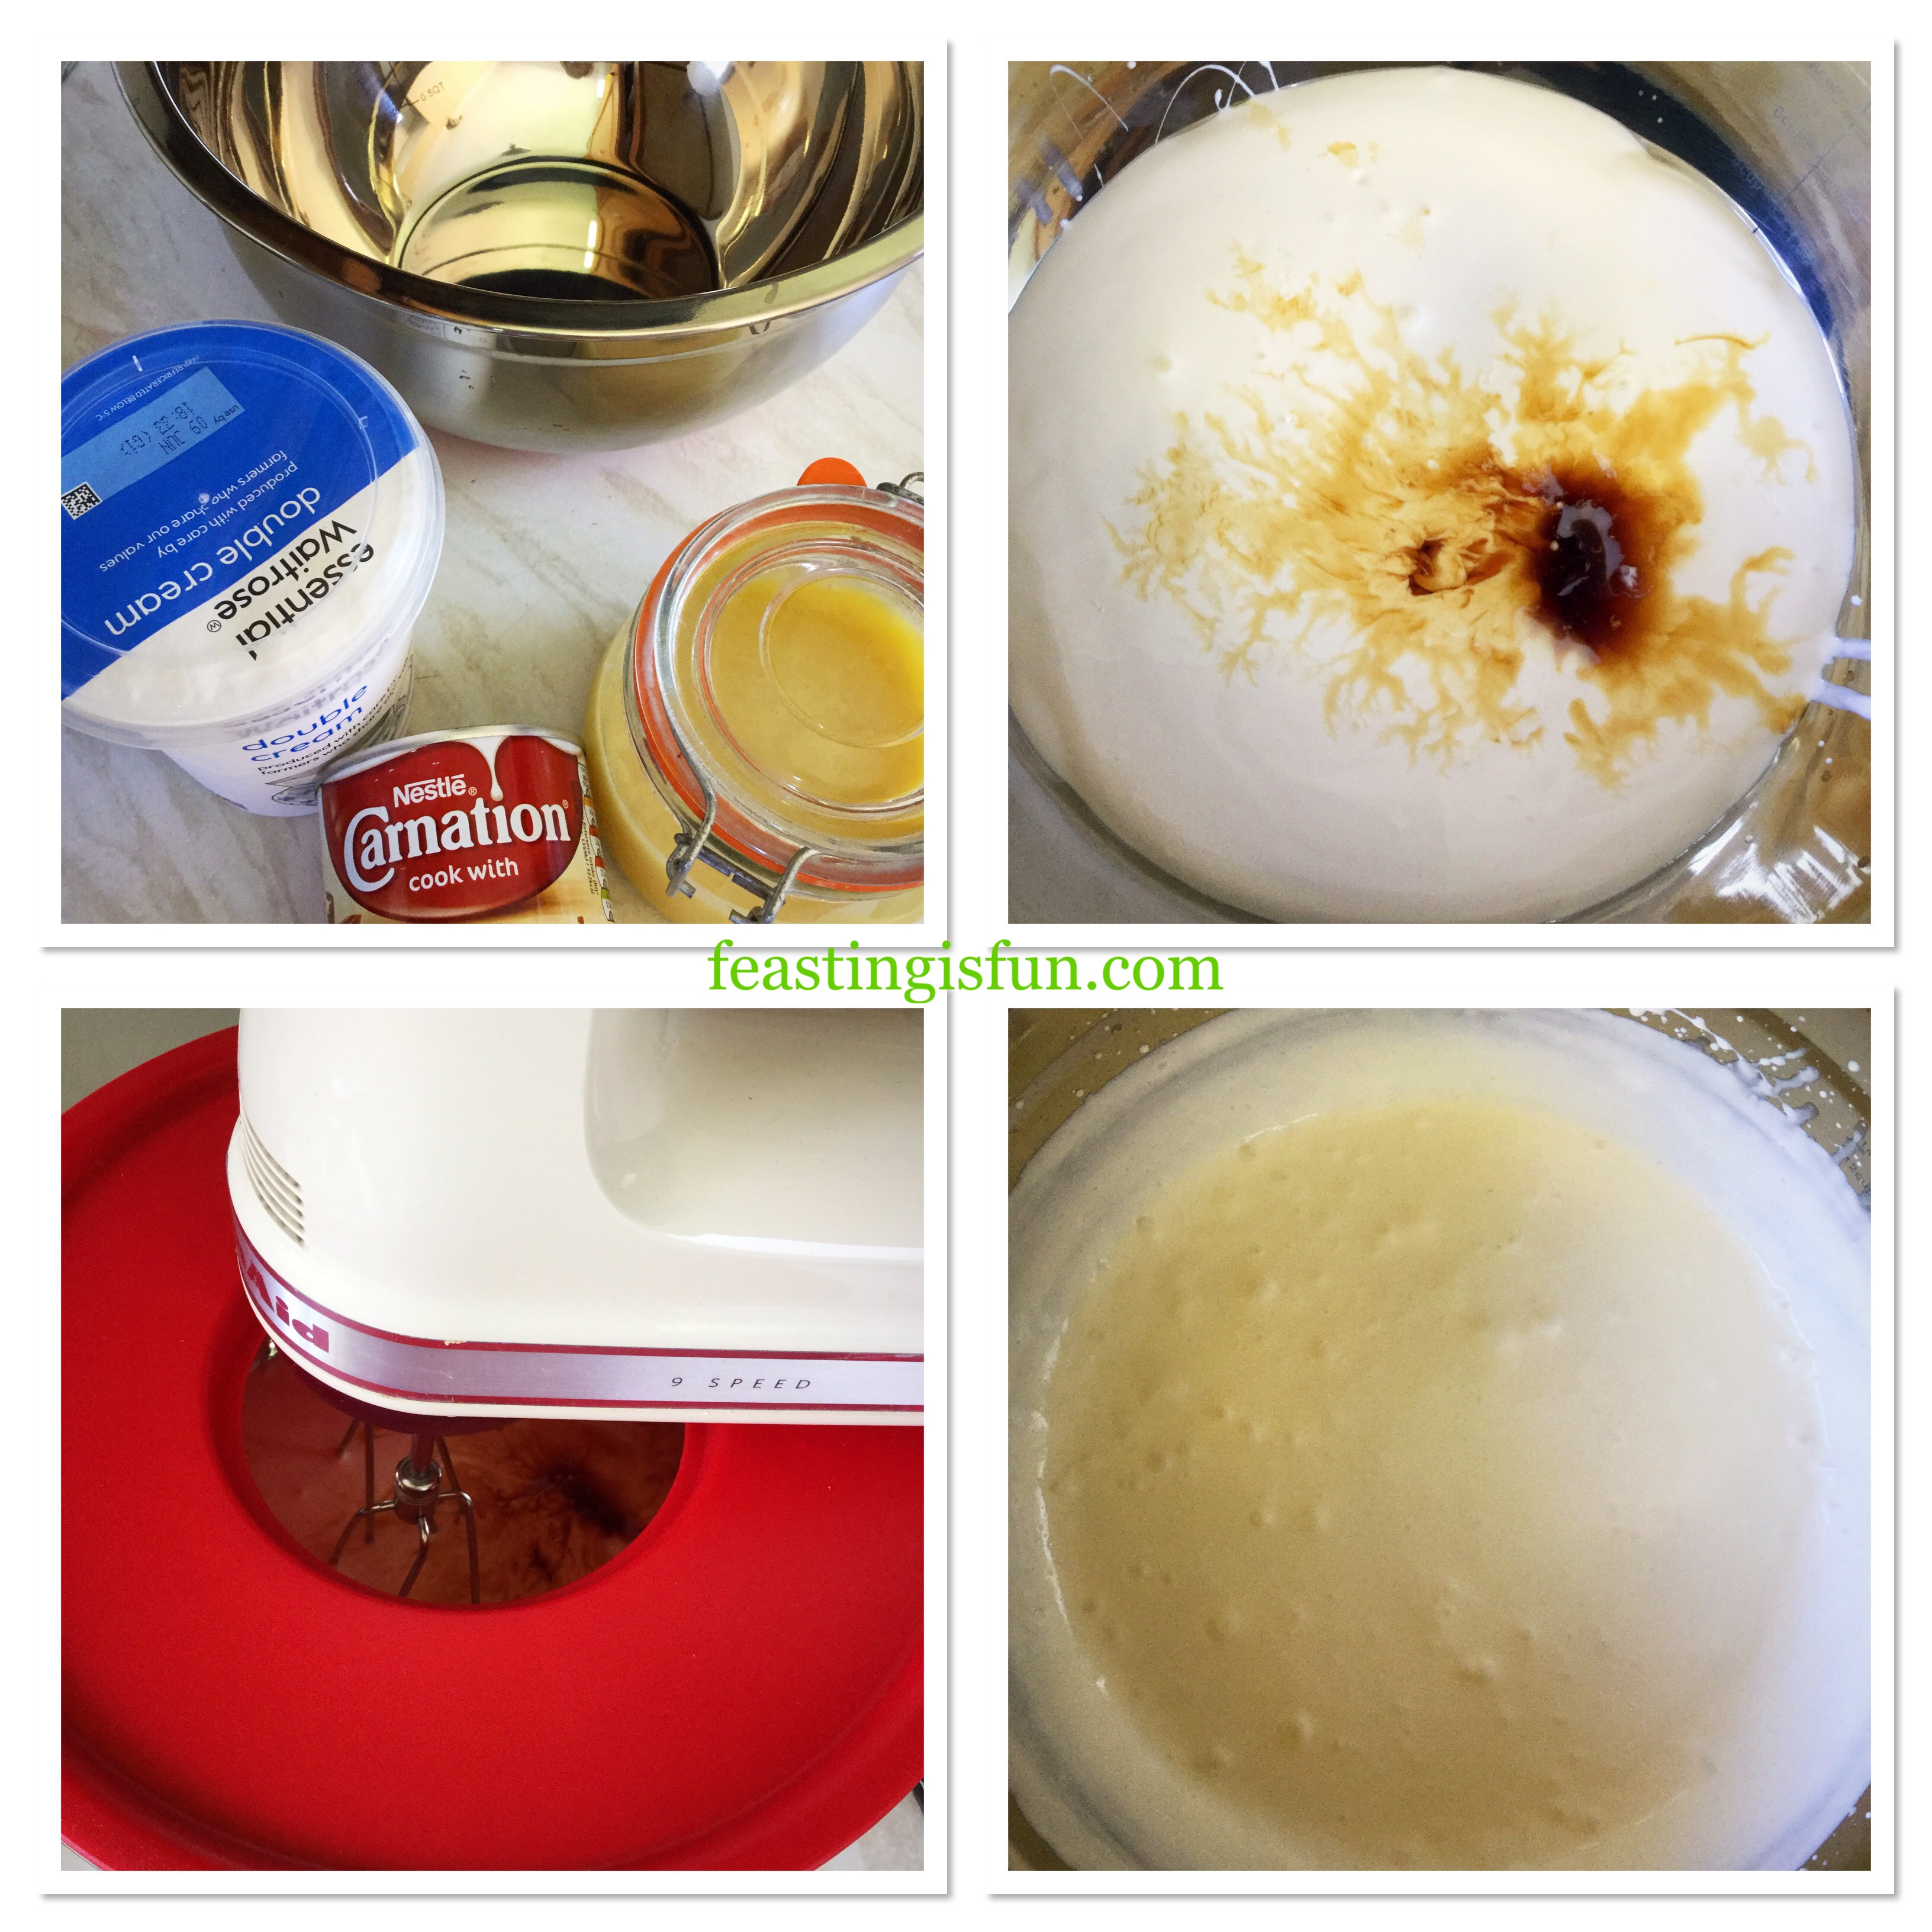
  • First of all, pour the cream into a large bowl and then weigh the condensed milk directly into the bowl. Add the vanilla extract.
  • Whisk the ingredients in the bowl. For this bowl the lid was attached with the centre removed and the ingredients were whisked until thickened. The thickness of the cream mixture should easily hold a figure of eight.
FF Lime Ripple Luxury Ice Cream
Making the no churn base for this ice cream
  • The splatter guard on this bowl only let through the tiniest spots of cream. Usually there is a massive kitchen clear up, wiping cupboards and floors! So the splatter guard is something that I find a huge bonus on this bowl
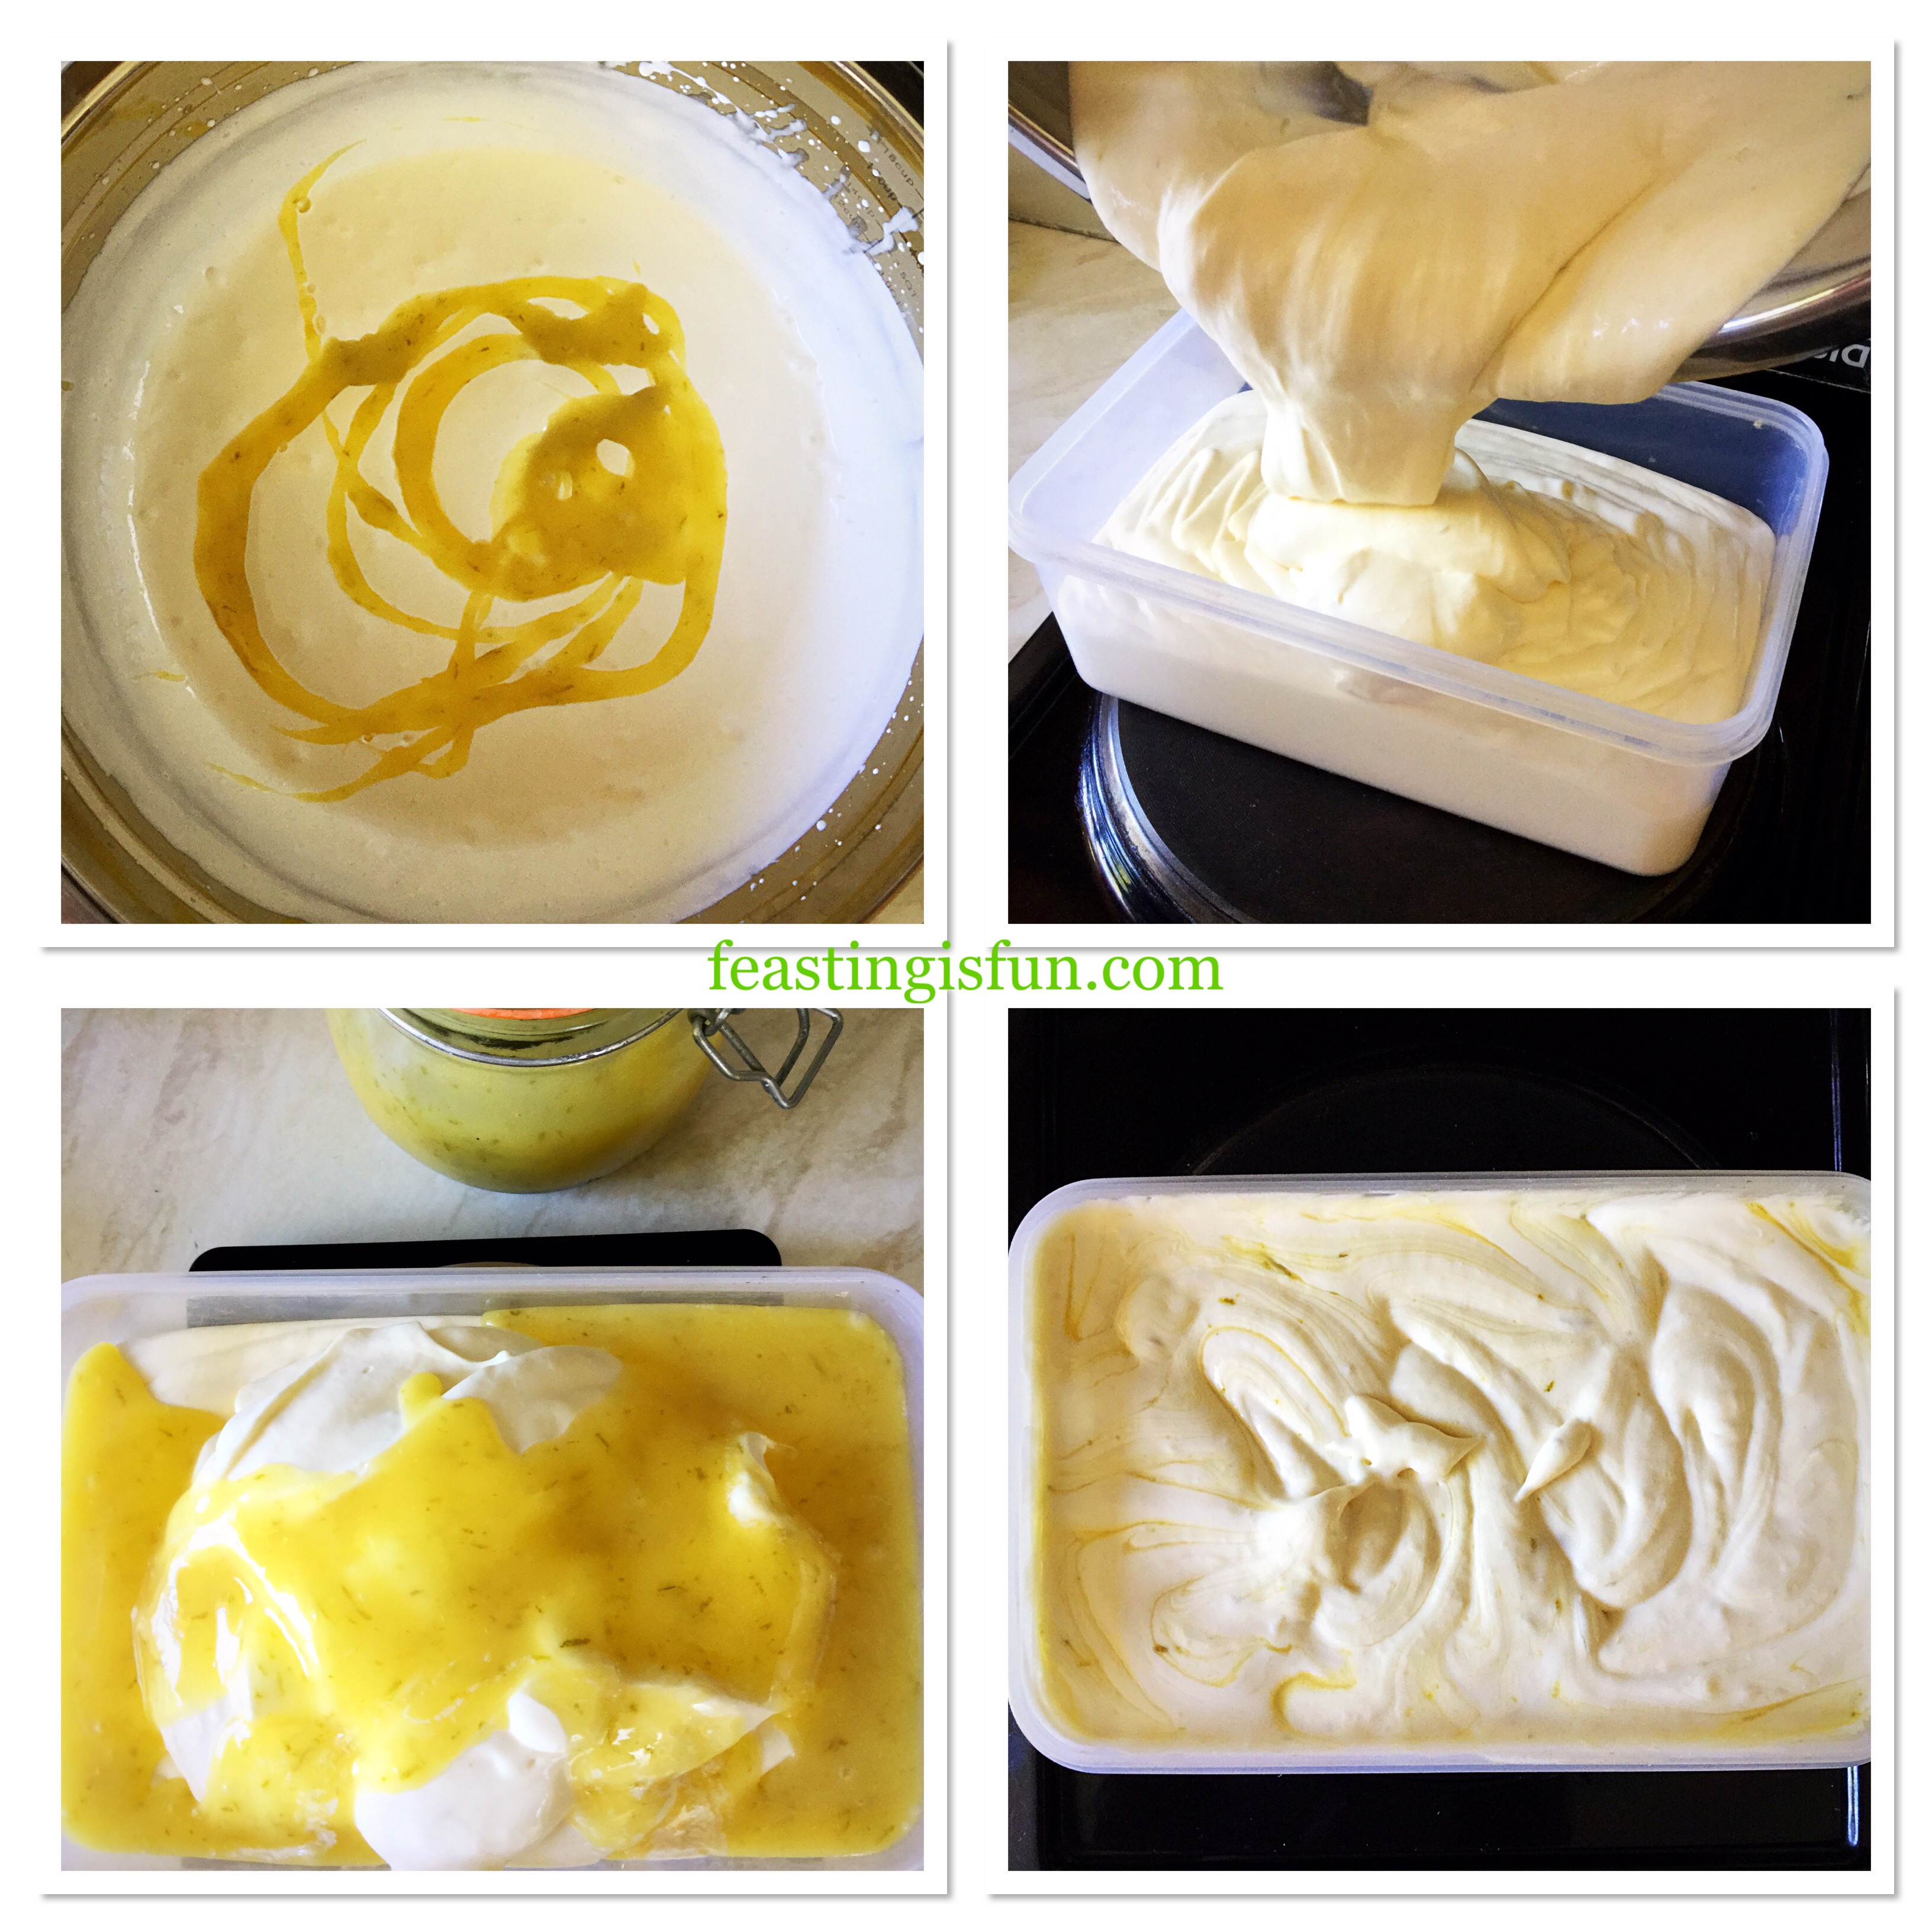
  • Next add in 50g of lime curd and give the mixture a quick mix, so that it is fully incorporated.
  • Pour the ice cream base into a freezer proof container, which has a secure fitting lid.
  • Now pour over the remaining 100g of lime curd and ripple it through the whipped cream.
  • Finally swirl the lime curd through using a wooden spoon handl
FF Lime Ripple Luxury Ice Cream
Creating the Lime Ripple Luxury Ice Cream ready for the freezer.

Freezing The Ice Cream

  • Snap the lid on to the ice cream container and place in the feeezer. If made in the morning ready for eating later in the day, switch the freezer to fast freeze mode and the ice cream should be frozen after 6 hours. The fast freeze setting is not required if freezing overnight.
FF Lime Ripple Luxury Ice Cream
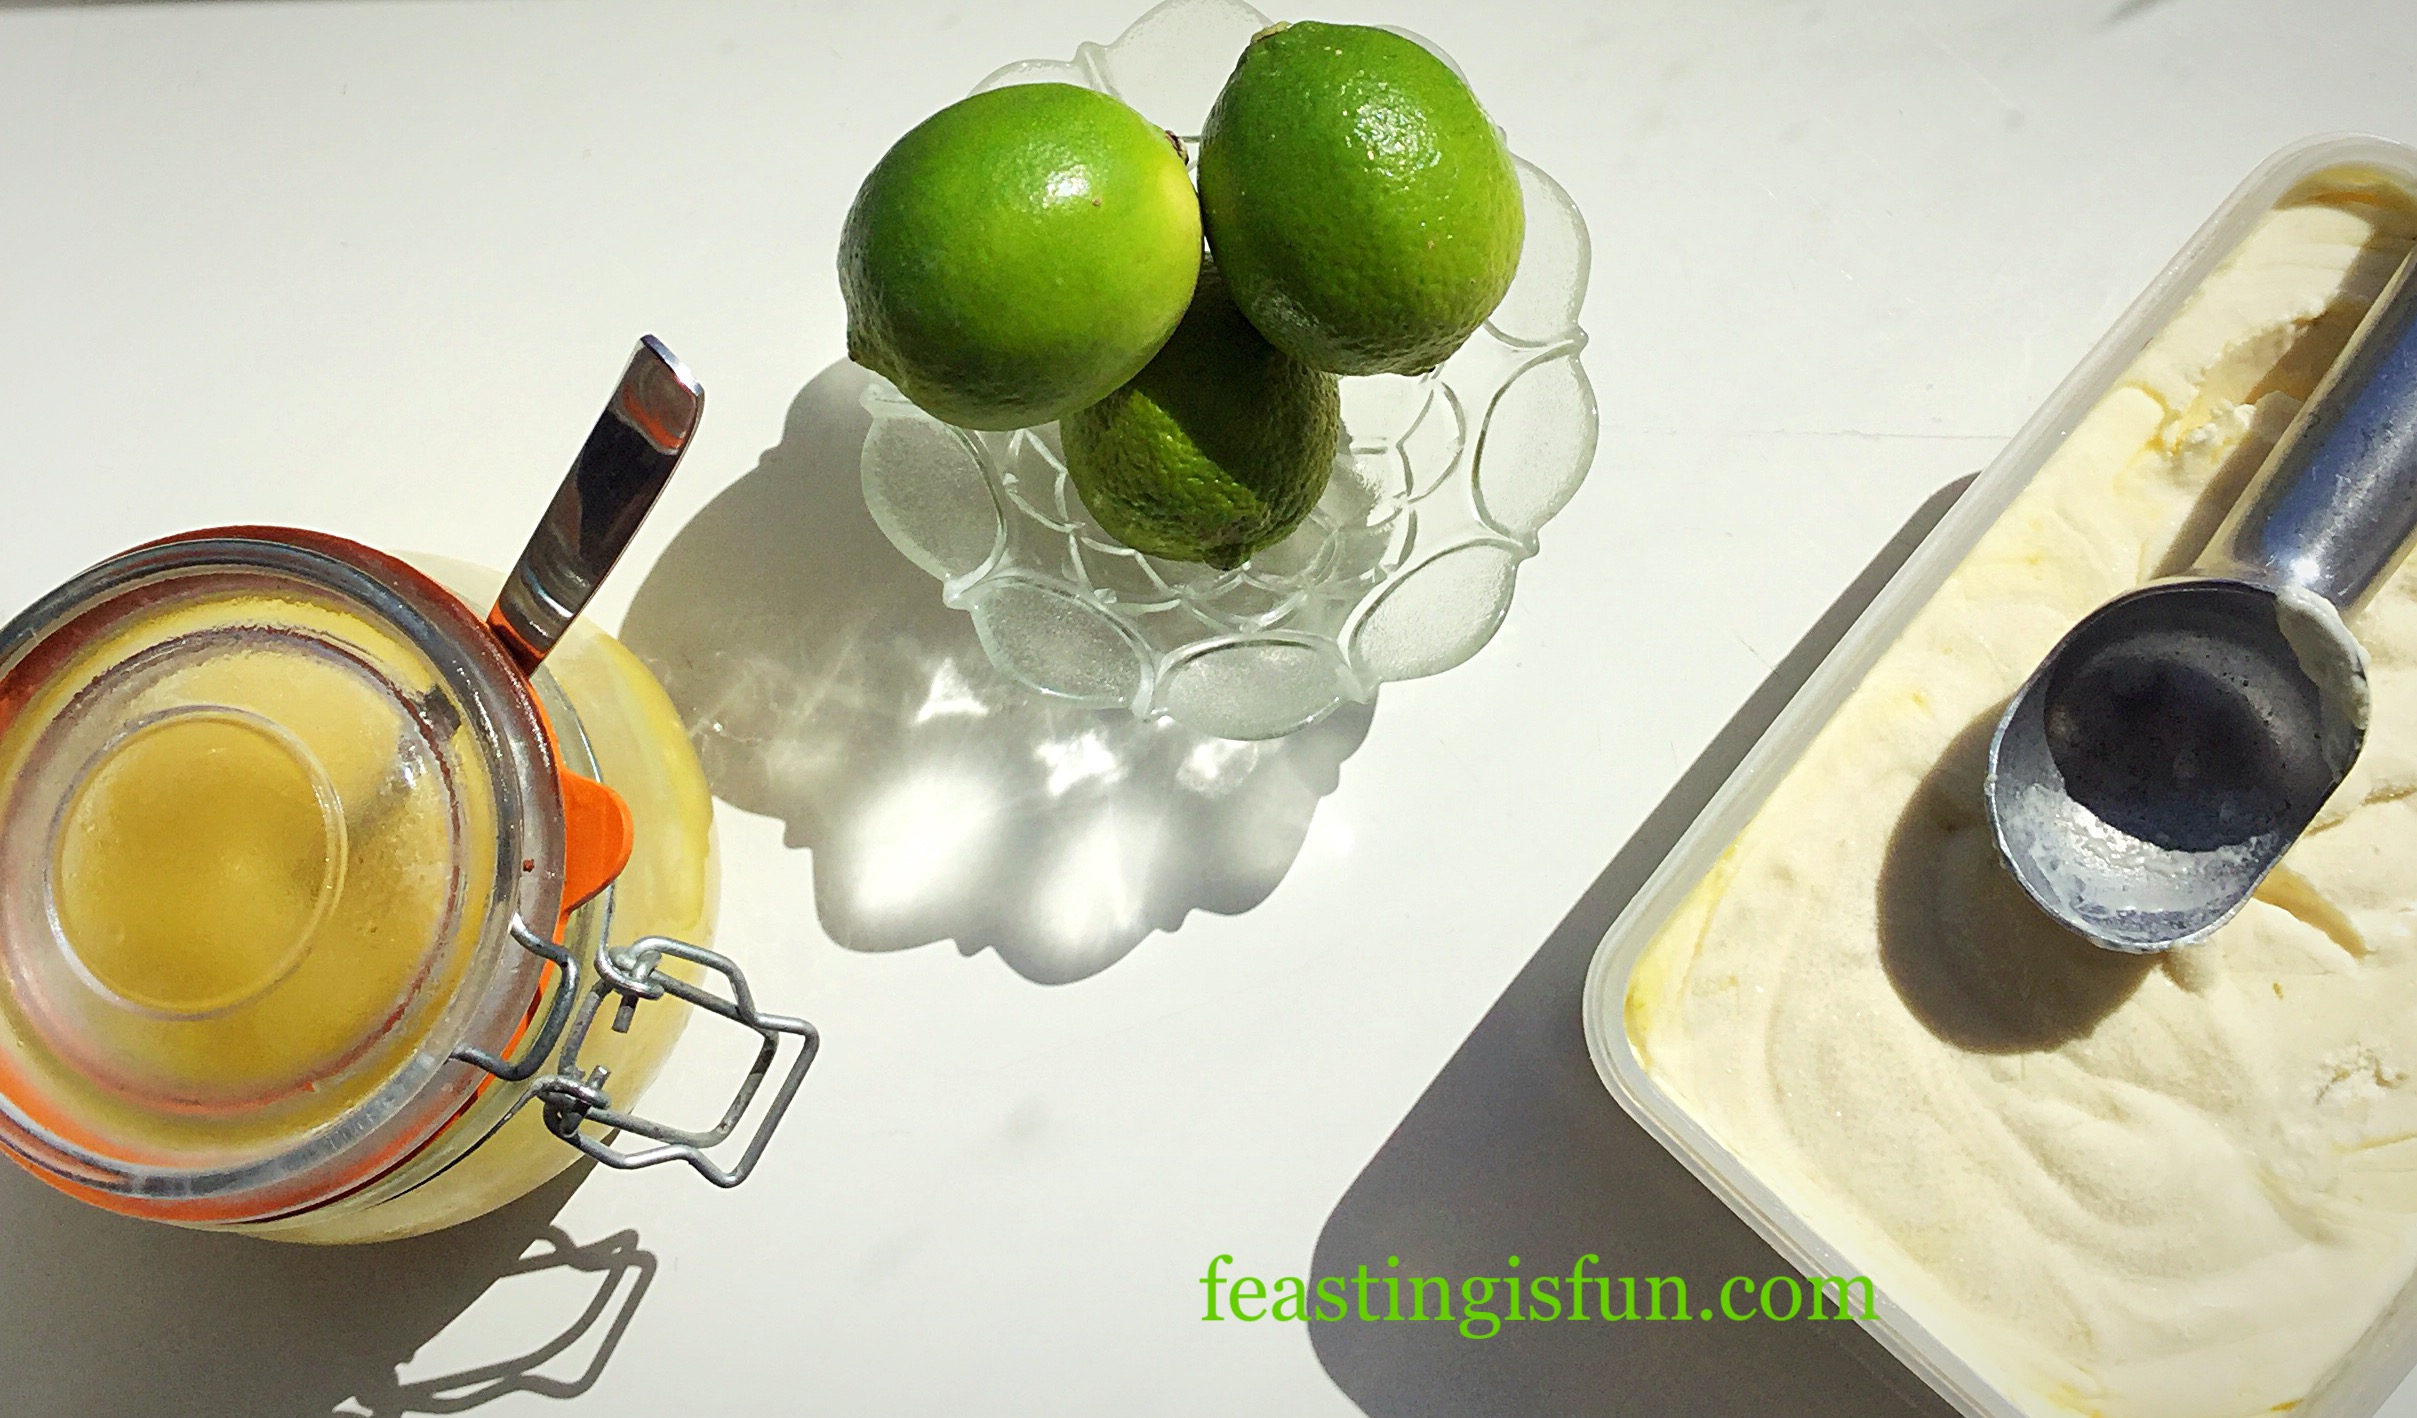
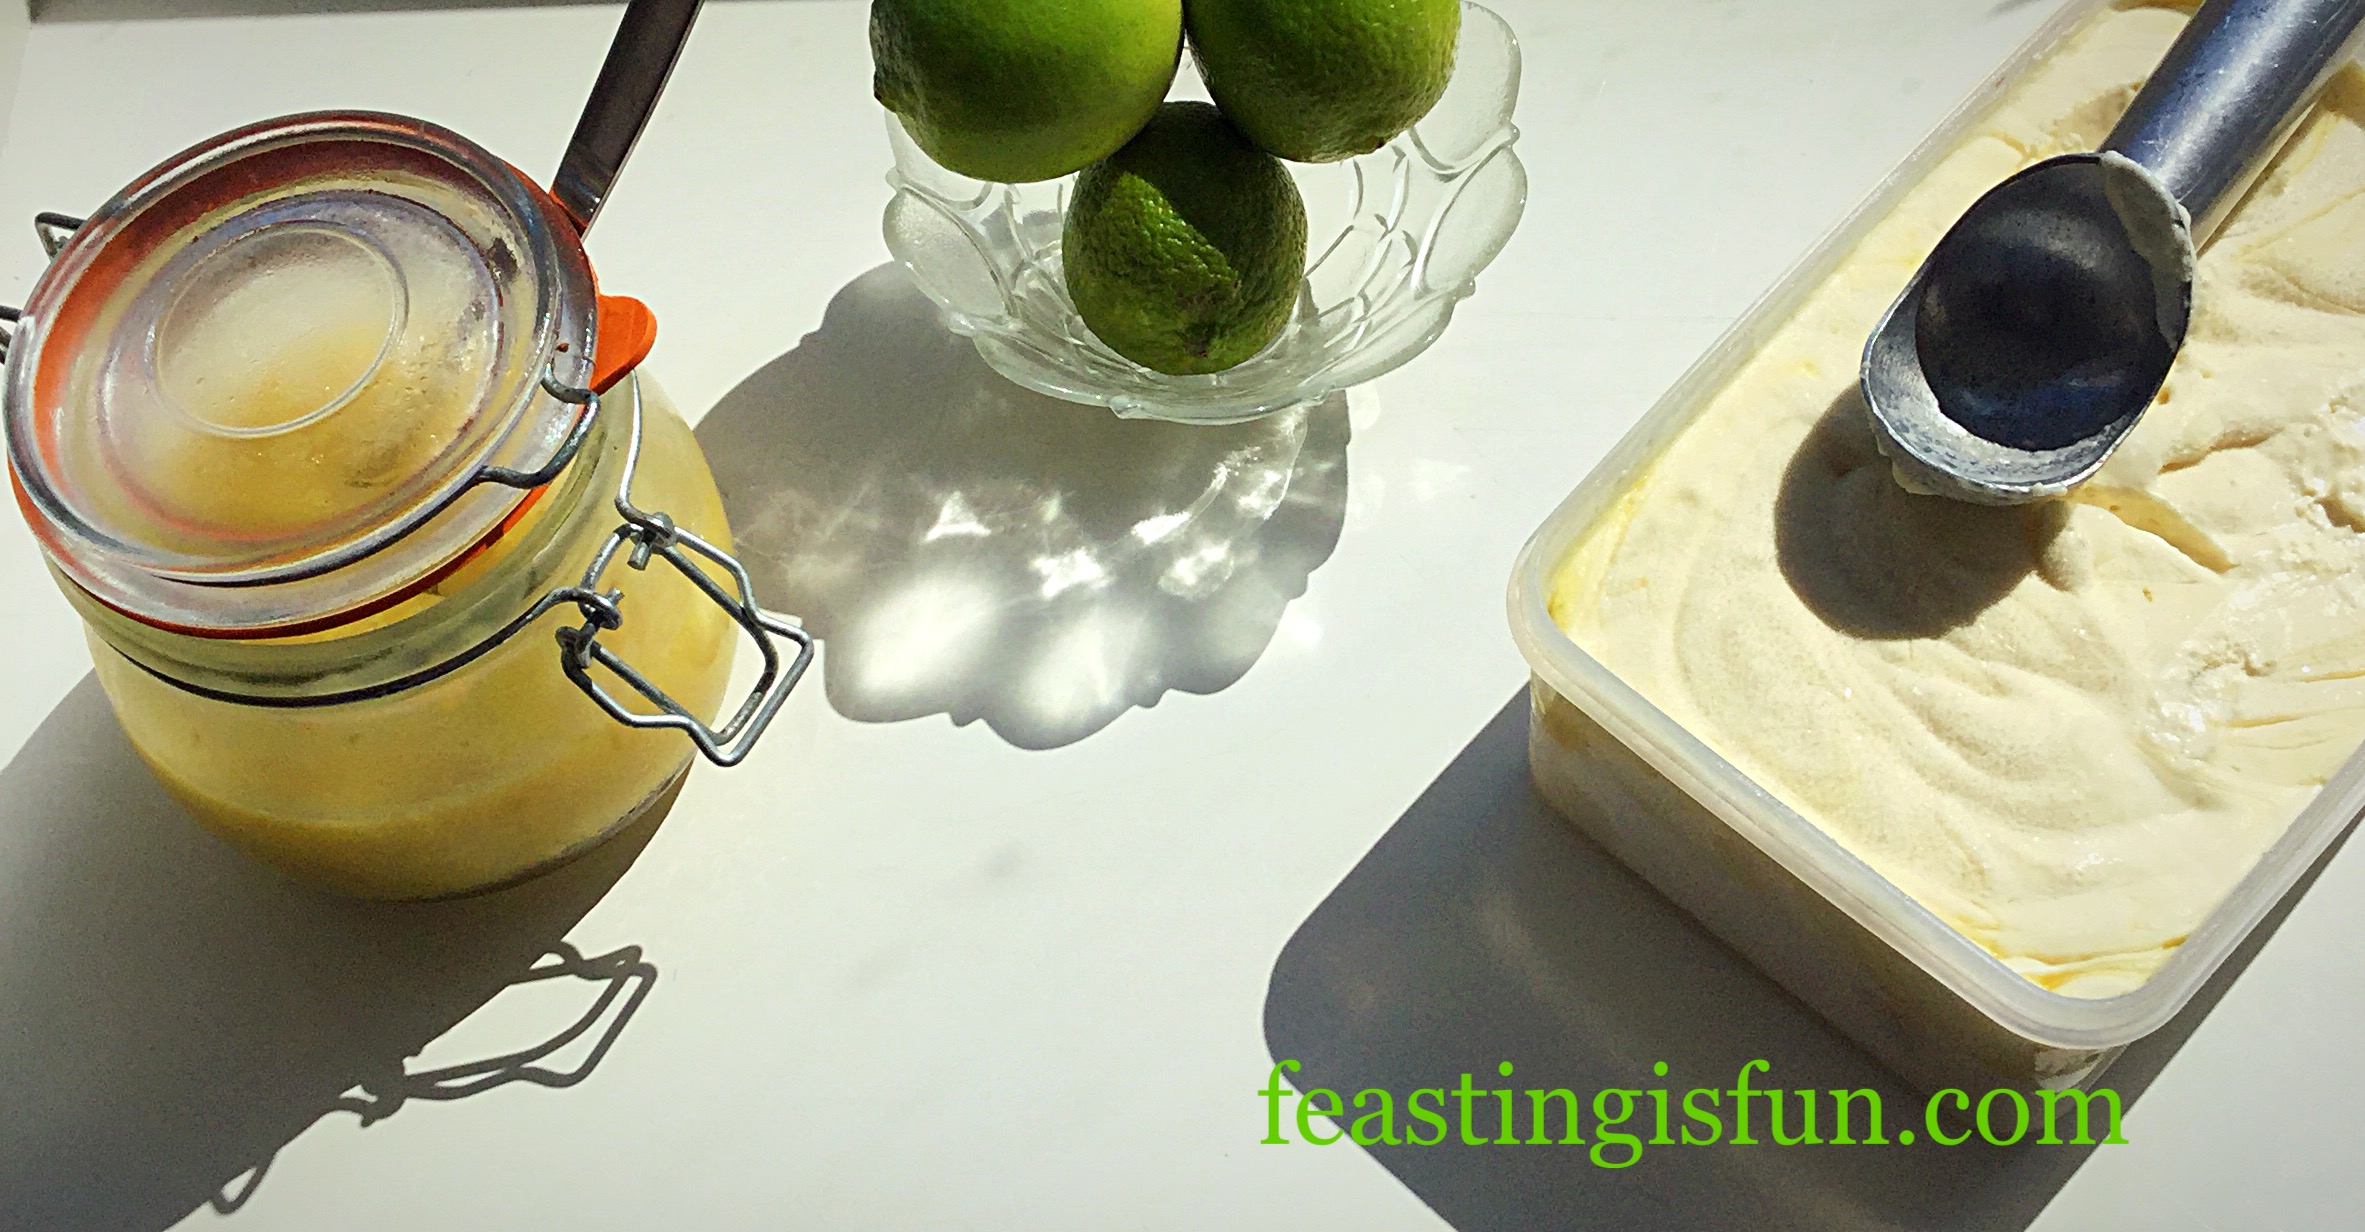
Lime Ripple Luxury Ice Cream ready to serve.

Remove from the freezer 10-20 minutes prior to serving. As there are not any preservatives or additives added, it needs a little time to soften up, before scooping.

FF Lime Ripple Luxury Ice Cream
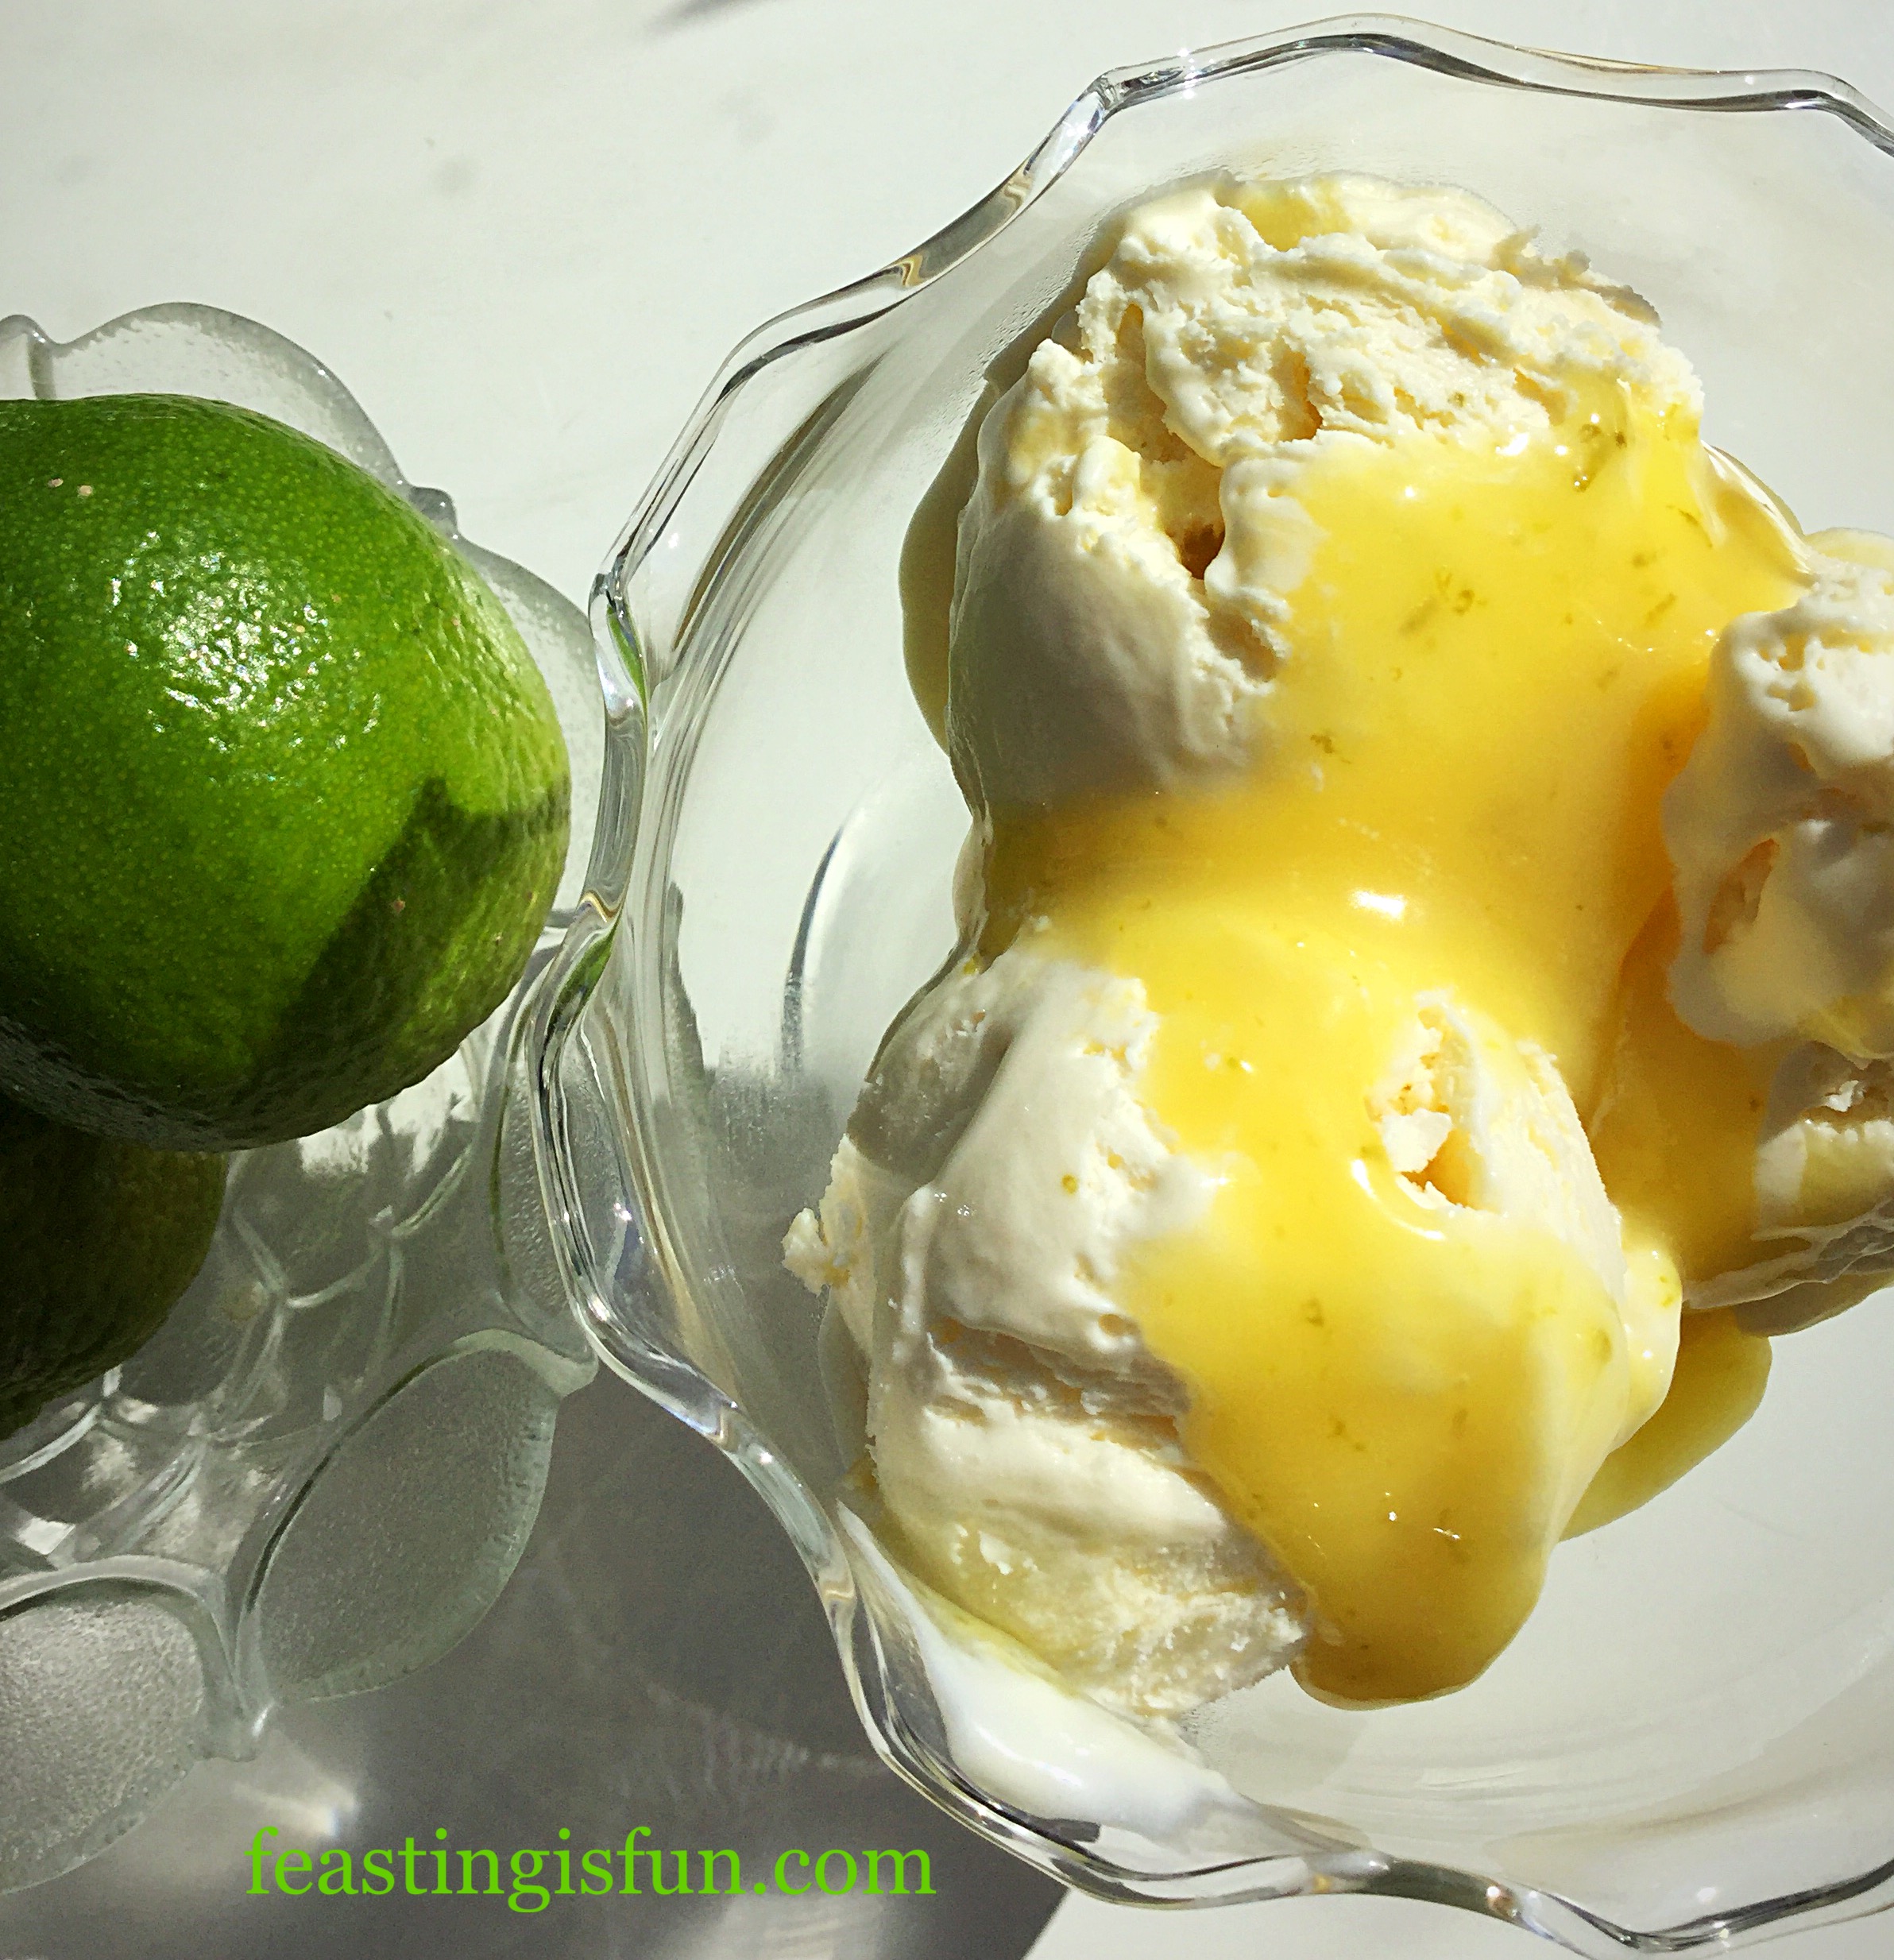
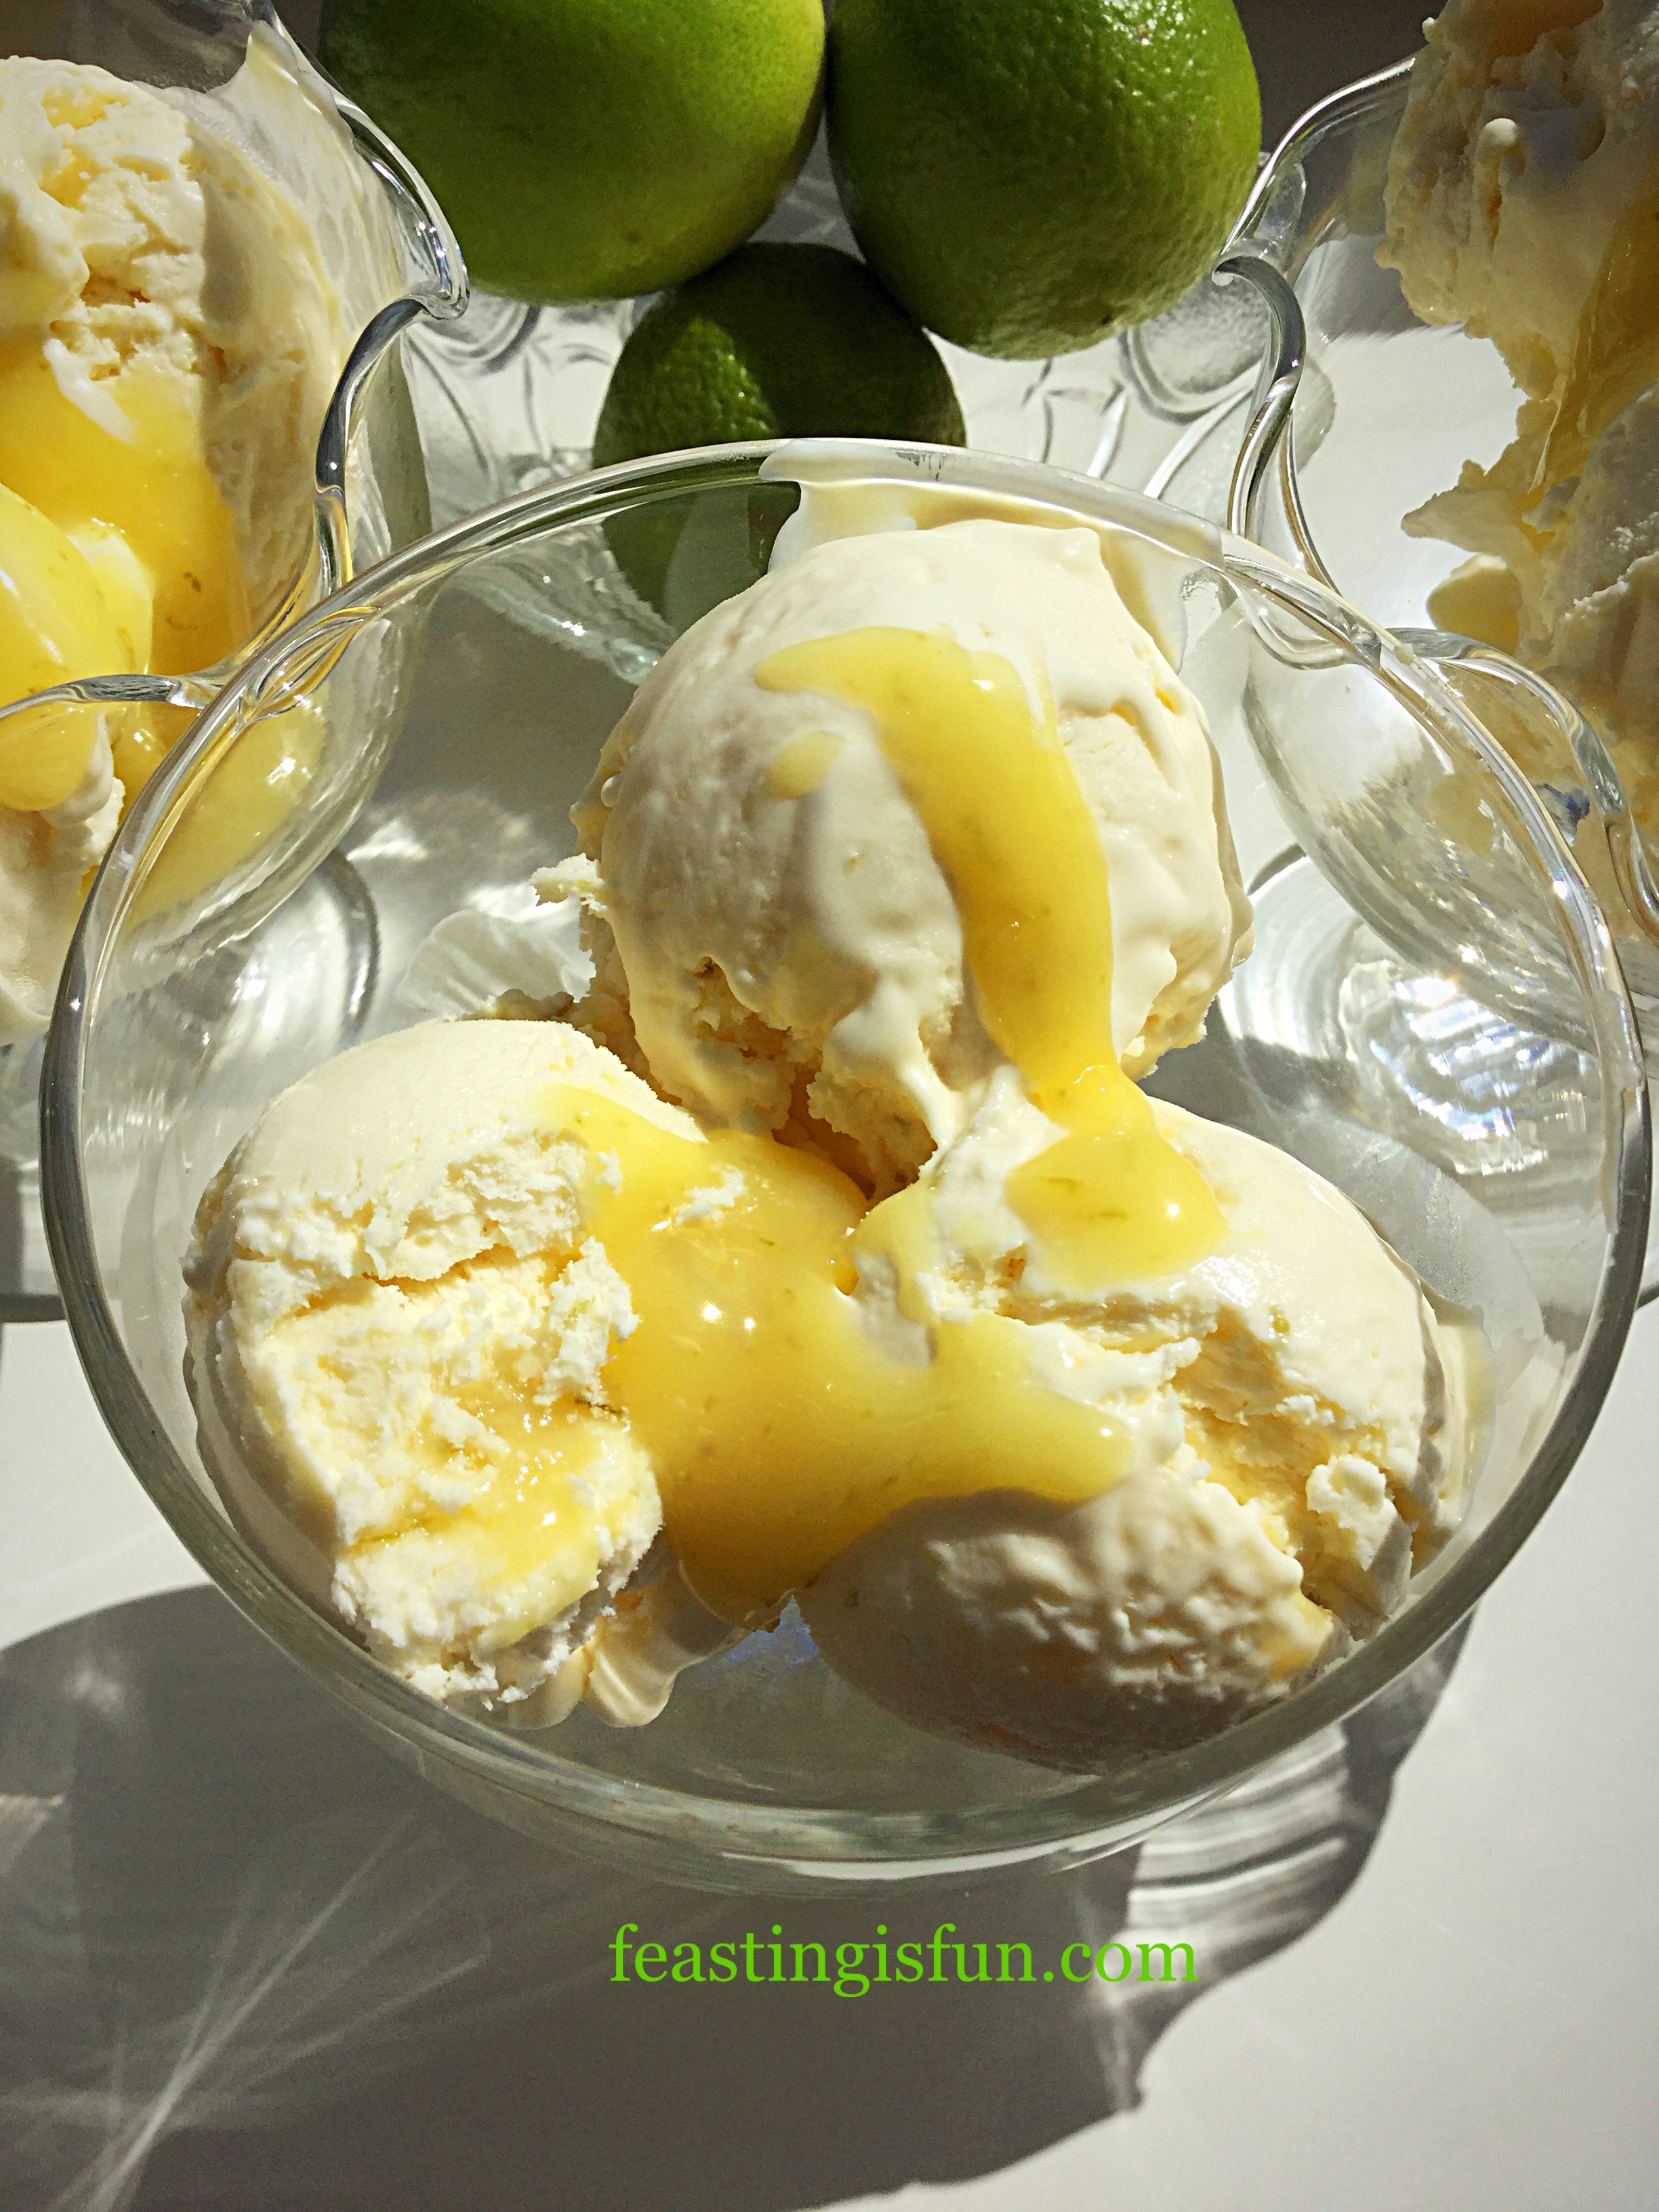
Lime Ripple Luxury Ice Cream 

Because coconut, lime chocolate, extra lime curd all compliment the lime beautifully, have fun and play around with toppings. Alternatively simply enjoy it as it is!

If you have enjoyed the recipe for Lime Ripple Luxury Ice Cream you may also like these:

Dark Chocolate Chip Vanilla Ice Cream

FF Lime Ripple Luxury Ice Cream
Dark Chocolate Chip Vanilla Ice Cream

Lemon Ripple Ice Cream

FF Lime Ripple Luxury Ice Cream
Lemon Ripple Ice Cream

Triple Chocolate Chunk Ice Cream

FF Lime Ripple Luxury Ice Cream
Triple Chocolate Chunk Ice Cream

Since creating recipes and sharing them is the heartbeat of Feasting is Fun. Therefore each recipe is always double checked. Most importantly is sharing tasty, consistent and reliable recipes that you can easily follow.

Whatever you are making, creating and baking in your kitchens, have fun creating your feast.

Sammie xx

Please do not copy any part of this post without my specific written agreement. See my Disclosure Policy

Lemon Lime Gin Heart Bundt Cake

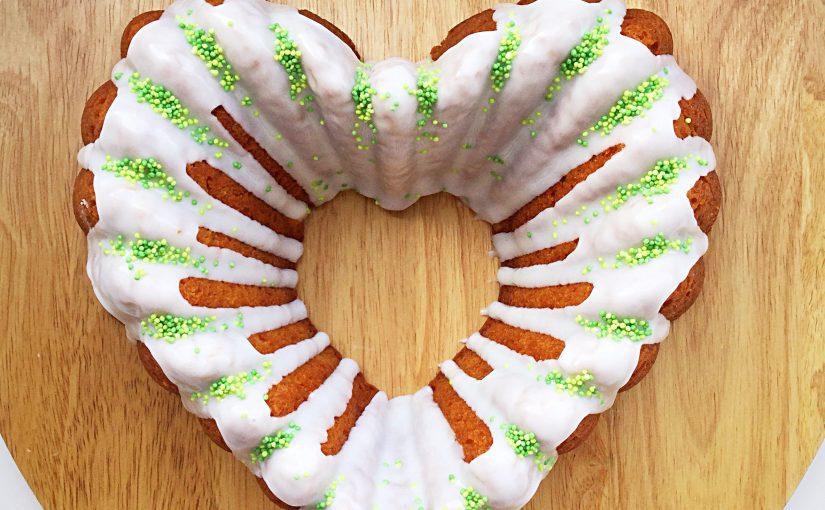
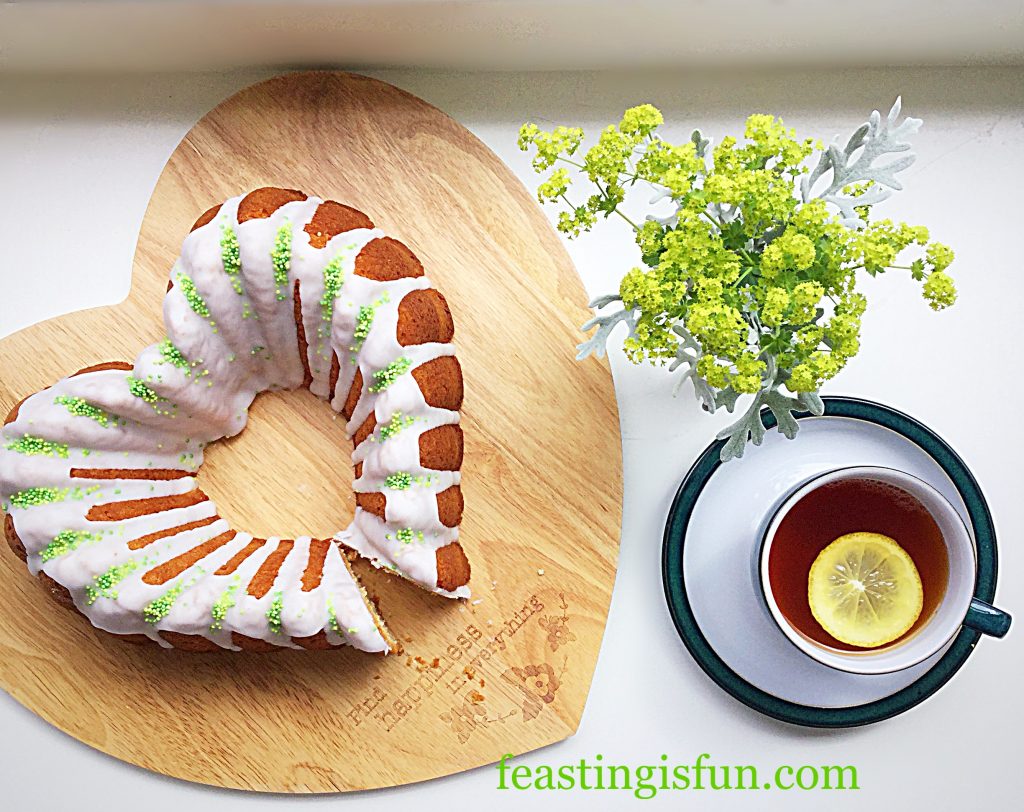
I love Bundt Pans. Their detailed and versatile shape, moulds cakes into edible replicas of the pan. Of course, if you are still at the beginners stage of cake decorating, the finished cake needs no more than a dusting of icing sugar. Since I have baked more than a few Bundt cakes, I have become more adventurous with how they are decorated. This Lemon Lime Gin Heart Bundt Cake is glazed carefully with a thick icing and finished with sprinkles.

FF Lemon Lime Gin Heart Bundt Cake
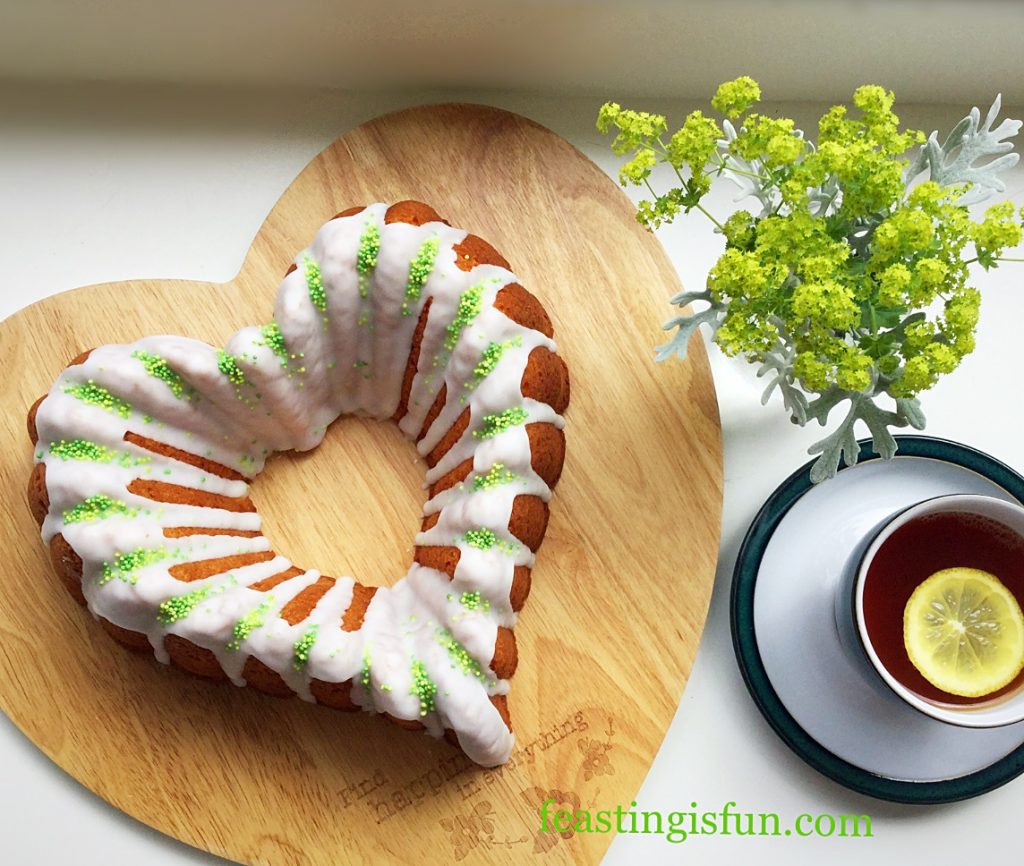
Lemon Lime Gin Heart Bundt Cake perfect with lemon tea.

Bundt pans are available in all shapes and sizes. From small bundtlettes such as Mini Lemon Drizzzle Bundt Cakes to larger sized pans, such as Heart Engagement Bundt Cake. While solid pans are available, Bundts are generally recognised by the hole in the centre. Here in the U.K Nordic Ware own the copyright to name Bundt tin/pan. Therefore only cake’s baked in one of their pans can accurately and legally be called a Bundt cake.

FF Lemon Lime Gin Heart Bundt Cake
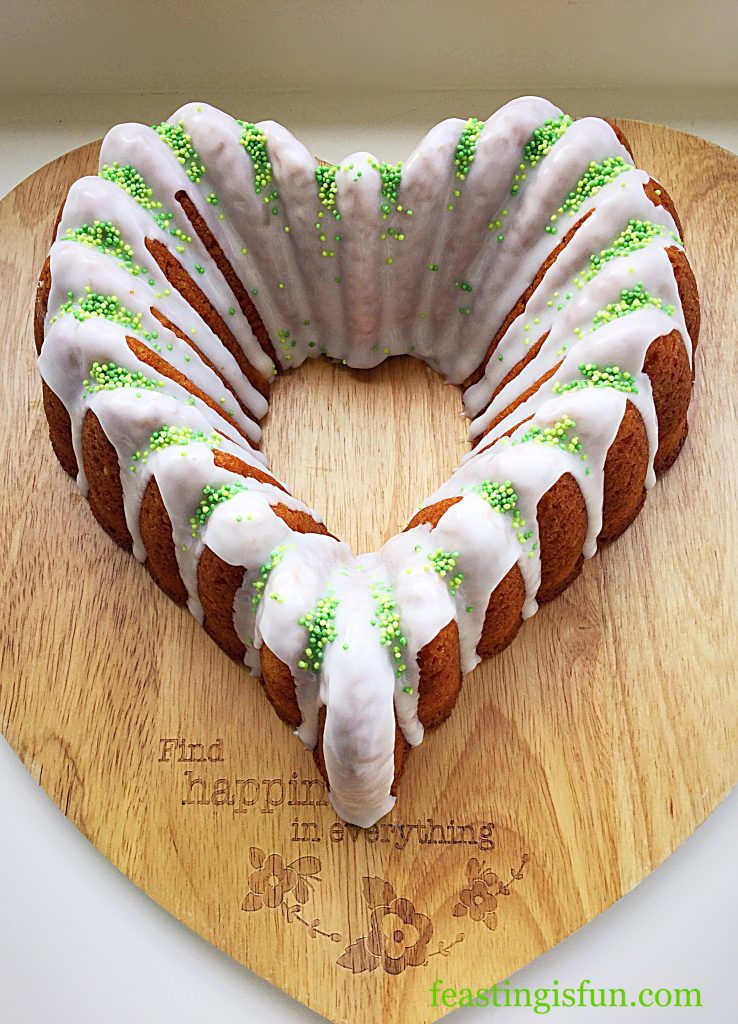
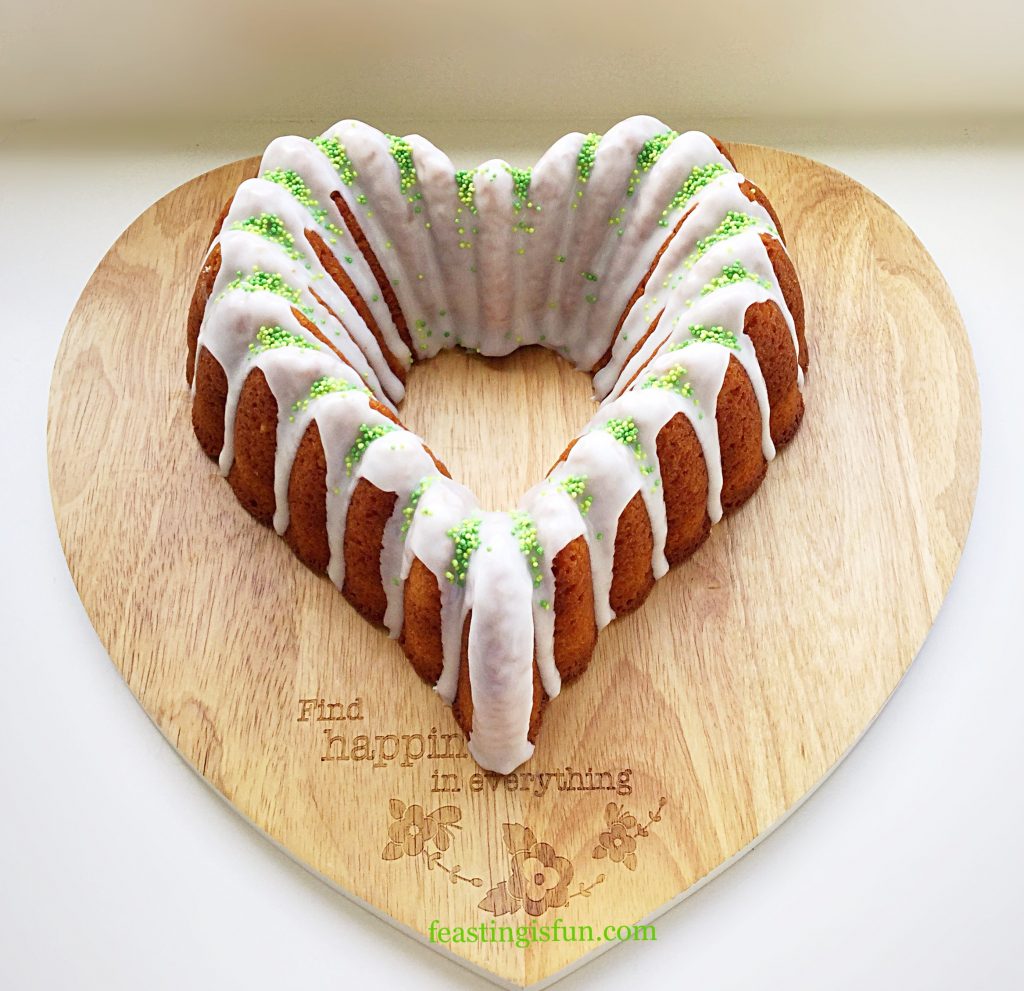
Lemon Lime Gin Heart Bundt Cake the icing emphasises the detail of the cake.

For this cake one whole lemon and lime are used in the recipe. The fragrant zest adds flavour and balance to the gin baked in the cake. While thick, white icing, made using the juice of the zested fruits, provides a sharp, citrus tang. Finally, green and yellow sprinkles hint at the cake’s flavour.

FF Lemon Lime Gin Heart Bundt Cake
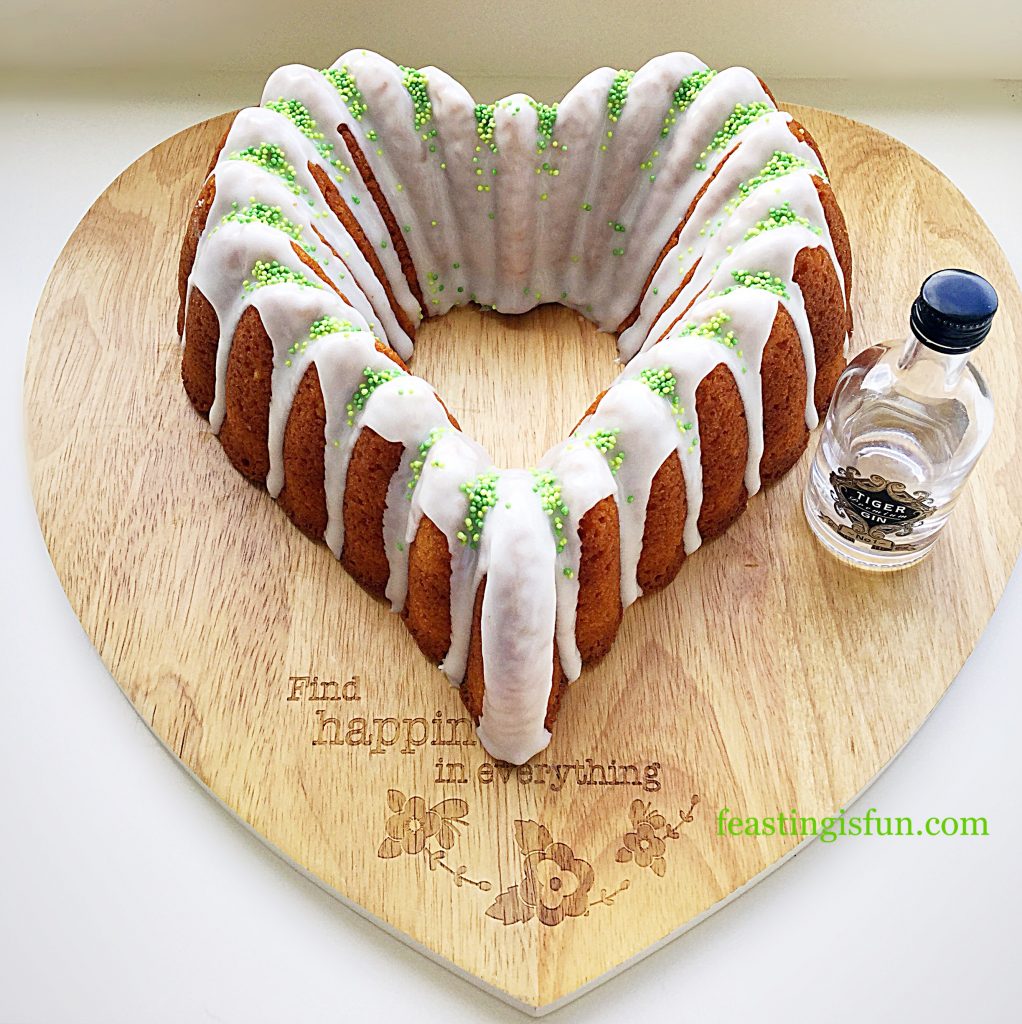
Lemon Lime Gin Heart Bundt Cake the perfect flavour combination.

Tiger Gin has underlying orange citrus notes. Incorporating this with the lemon and lime gives this cake a unique citrus flavour. Yet it is the botanicals added in the process of making this gin that really linger on the palette.

FF Lemon Lime Gin Heart Bundt Cake
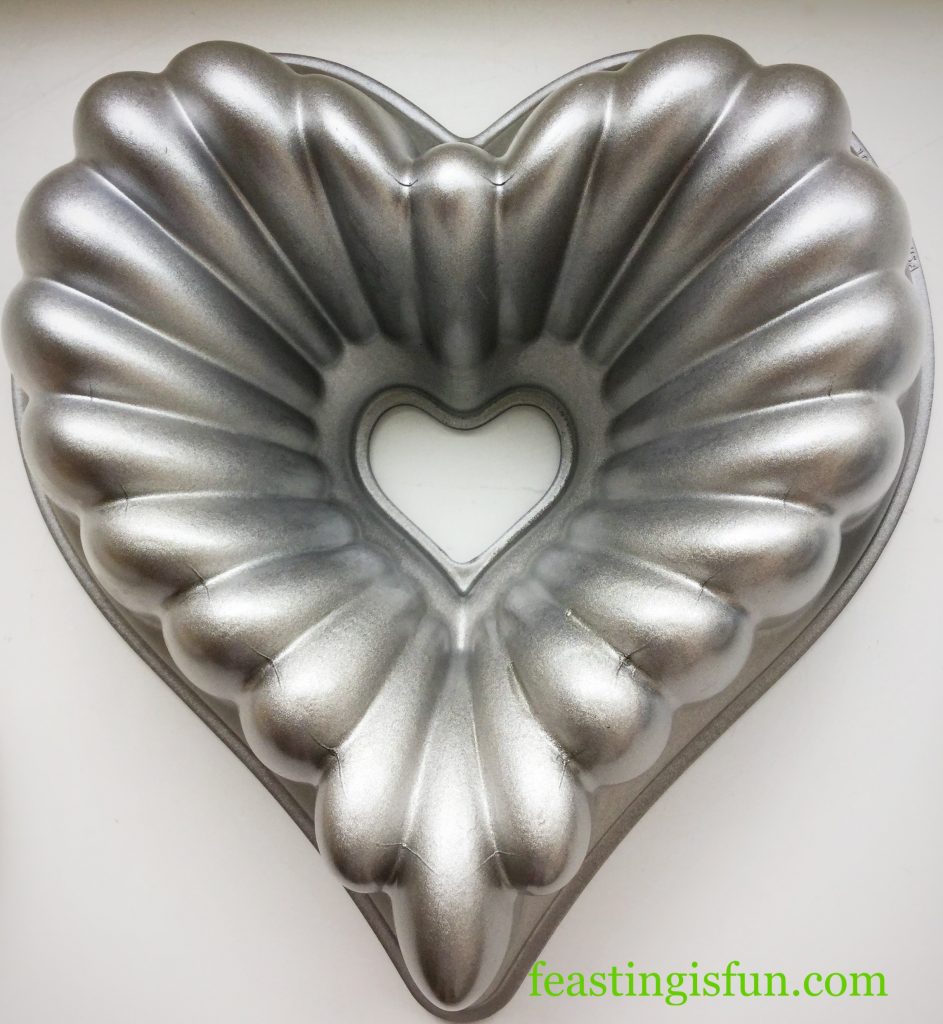
Elegant Heart Bundt Pan

Recipe: Lemon Lime Gin Heart Bundt Cake serves 10-12

200g/7oz Unsalted Butter at room temperature

200g/7oz Caster Sugar

1/4tsp Salt

30mls/2tbsp Gin plus extra for icing – I use Tiger Gin

5 Large Free Range Eggs

100g/4oz Natural Plain Yoghurt

1tsp Vanilla Extract – I use Nielsen-Massey

250g/5.5oz Plain White Flour

2tsp Baking Powder

1 Lemon – scrubbed

1 Lime – scrubbed

400g/14oz Icing Sugar

Sprinkles in coordinated colours

Method: Preheat the oven to 170C/150C fan, gas mark 3

If new, wash the Bundt Pan in hot soapy water. Do not use anything abrasive to clean it. Dry and prior to use spray with cake release. I use Wilton. ensuring the inside is completely covered.

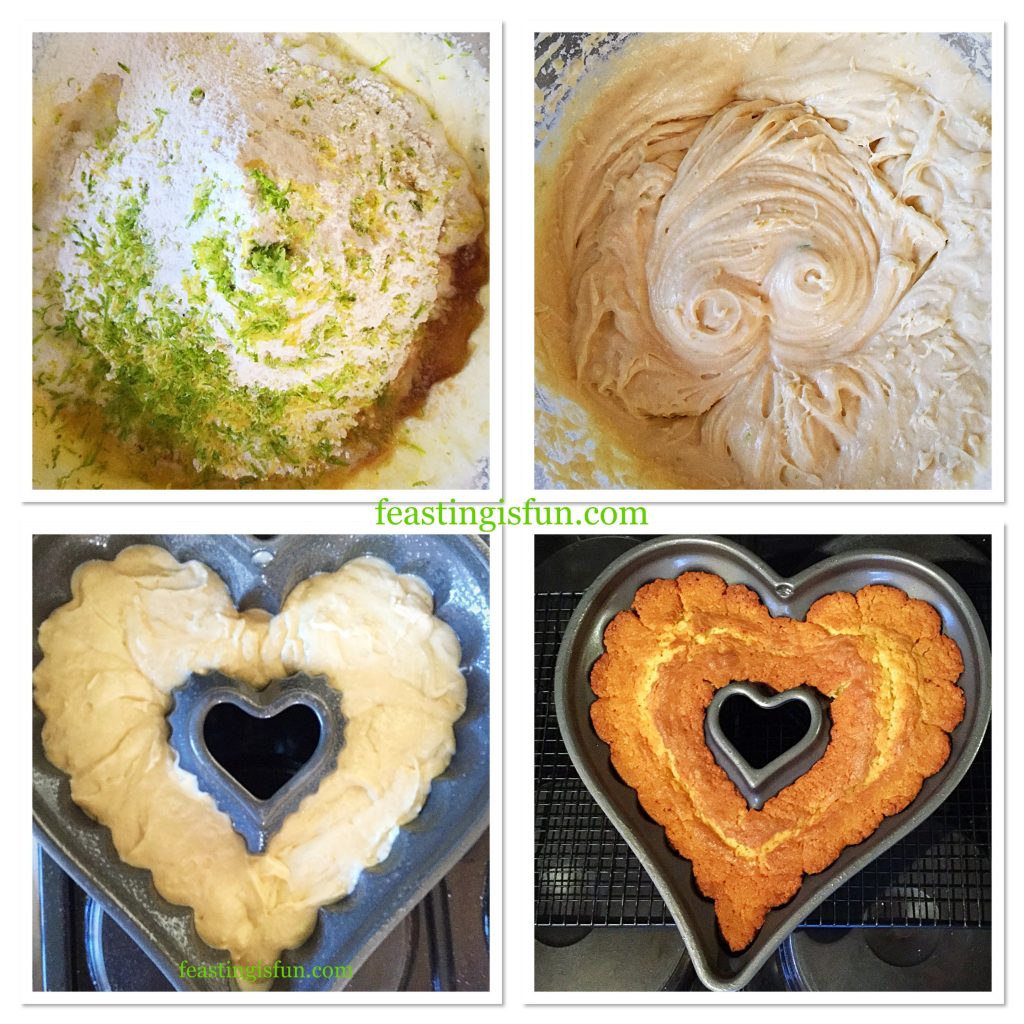
  • Into a large bowl add the butter, sugar and salt. Whisk until pale and creamy.
  • Now add the eggs, yoghurt, gin and vanilla extract – wet ingredients.
  • On top of the wet ingredients sieve the flour and then baking powder.
  • Zest both the lime and lemon. Place the zest into the bowl.
  • This cake uses the all-in-one method. Whisk slowly until all the ingredients are just combined. Give the mixture a final mix with a spoon before carefully pouring into the prepared Bundt Pan.
  • Place the Bundt into the centre of the oven and bake for 50-60 minutes.
  • The cake is baked when it is golden and coming away from the sides of the pan. Also an inserted skewer will come out clean.
  • Remove the cake from the oven and allow to cool for 10 minutes.
FF Lemon Lime Gin Heart Bundt Cake
Preparing the cake batter, filling and baking the Lemon Lime Gin Heart Bundt Cake.
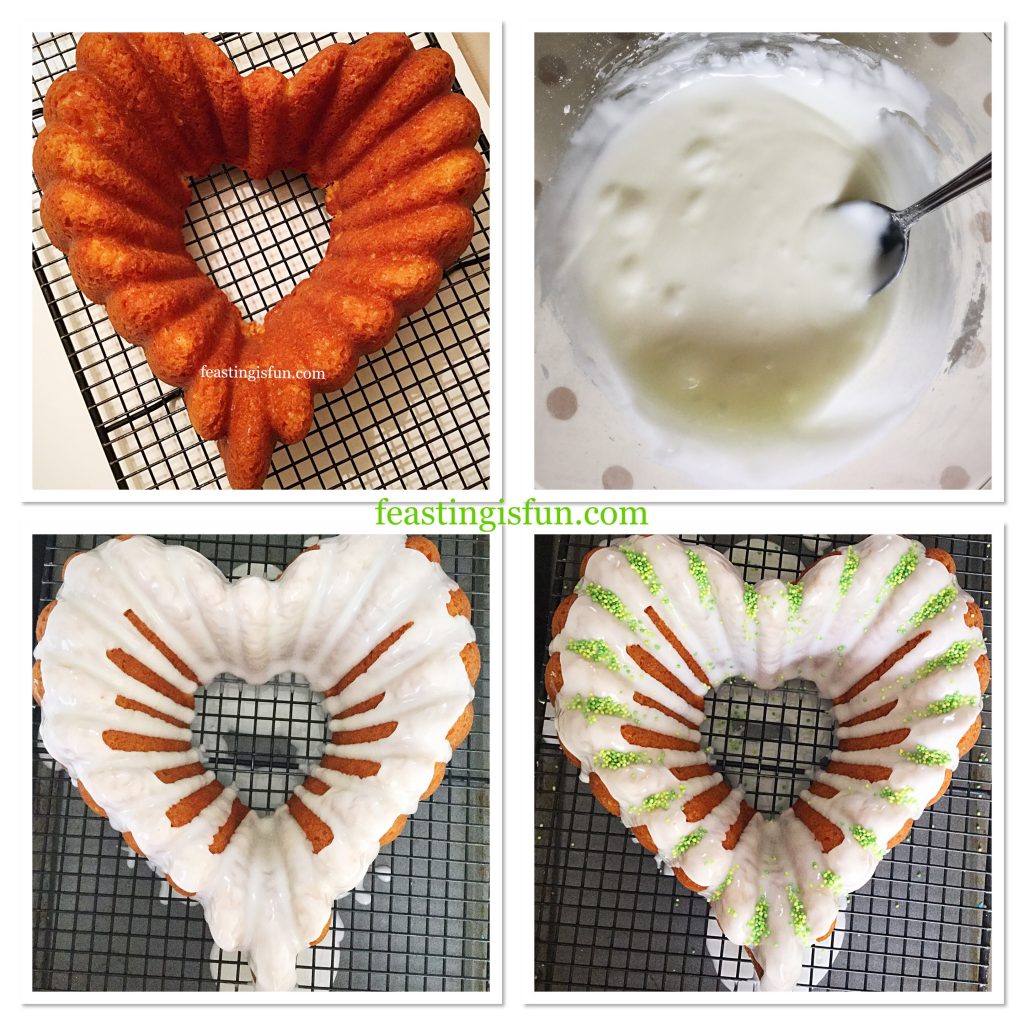
  • After 10 minutes cooling in the tin, turn the cake out on to a cooling rack.
  • Leave the cake to cool completely before decorating.
  • While the cake is cooling prepare the icing.
  • Sift the icing sugar into a medium sized bowl.
  • Next, if using gin in the icing add one tablespoon at first. Now add the juice of both the lemon and lime until it reaches a very thick, yet still drops from the spoon, consistency.
  • As soon as the cake is cooled it can be decorated.
  • Place the cooling rack over, with the cake on it, a larger baking tray. This will catch the drips from the icing.
  • Spoon the icing over the top of the cake, encouraging it to drip down the sides of the cake.
  • Continue to add icing in this way until each of the dips, in the heart pattern, have icing dripped on them.
  • Take care to completely cover the inside of the heart indentation at the top and the outside of the heart point at the bottom – see photos.
  • Carefully place sprinkles across the top of the heart. Again use the photograph for guidance.
  • Allow the cake to set for 5 minutes.
FF Lemon Lime Gin Heart Bundt Cake
Step by step photos showing how to decorate the cake.
  • Gently run a palette knife under the cake, separating any icing that may be stuck to both cake and rack.
  • Transfer the cake to a suitable plate or cake stand and leave to fully set.
FF Lemon Lime Gin Heart Bundt Cake
Lemon Lime Gin Heart Bundt Cake set and ready to serve.

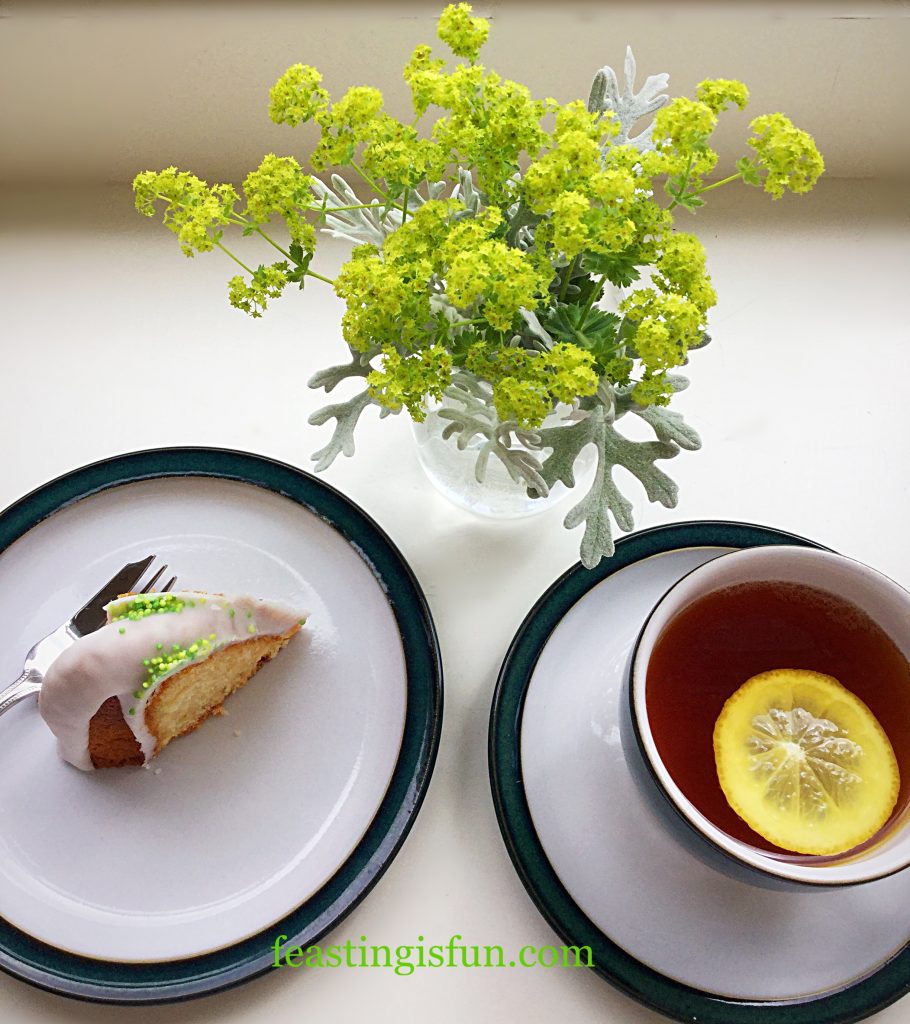
Served sliced with a delicious cup of lemon tea and of course a smile!

FF Lemon Lime Gin Heart Bundt Cake
A tasty, tangy slice of Lemon Lime Gin Heart Bundt Cake.
FF Lemon Lime Gin Heart Bundt Cake
Lemon Lime Gin Heart Bundt Cake eat with your eyes first!

This cake will keep for up to four days in an airtight container. The cake was made the evening prior to icing and stored wrapped in baking parchment. In my opinion the cake is better the day after it is made.

If you have enjoyed this recipe for Lemon Lime Gin Heart Bundt Cake, then you may also like these:

Maple Syrup Iced Coffee Bundt Cake

FF Lemon Lime Gin Heart Bundt Cake
Maple Syrup Iced Coffee Bundt Cake

Chocolate Sunflower Bundt Cake

FF Lemon Lime Gin Heart Bundt Cake
Chocolate Sunflower Bundt Cake

Lemon Blueberry Bundt Cake

Lemon Lime Gin Heart Bundt Cake
Lemon Blueberry Bundt Cake

Baking is fun. Especially when you gain a little experience and confidence. Mixing flavours, experimenting with different cake tins and Bundt Pans. Creating a feast that will surprise people. Making friends, family and neighbours smile. Almost half of this cake has now gone. Slices sent on paper plates, with a pretty napkin, to unsuspecting, yet thoroughly grateful neighbours, this afternoon.

Sharing is so important at Feasting headquarters. Indeed we all believe that food tastes better when it is shared.

Sammie xx

No part of this post may be copied without my express, written permission. Please see my Disclosure Policy for details.

NOTE: If baking with alcohol, you must be at least 18 years old, here in the U.K.

I am entering this cake for Bake of the Week hosted by: Jenny and Helen at

Mummy Mishaps

Casa Costello

FF Lemon Lime Gin Heart Bundt Cake