Chocolate Rolo Ice Cream

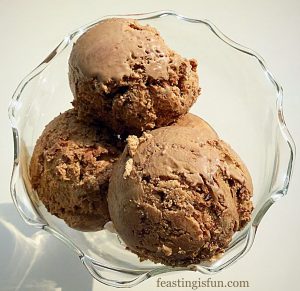
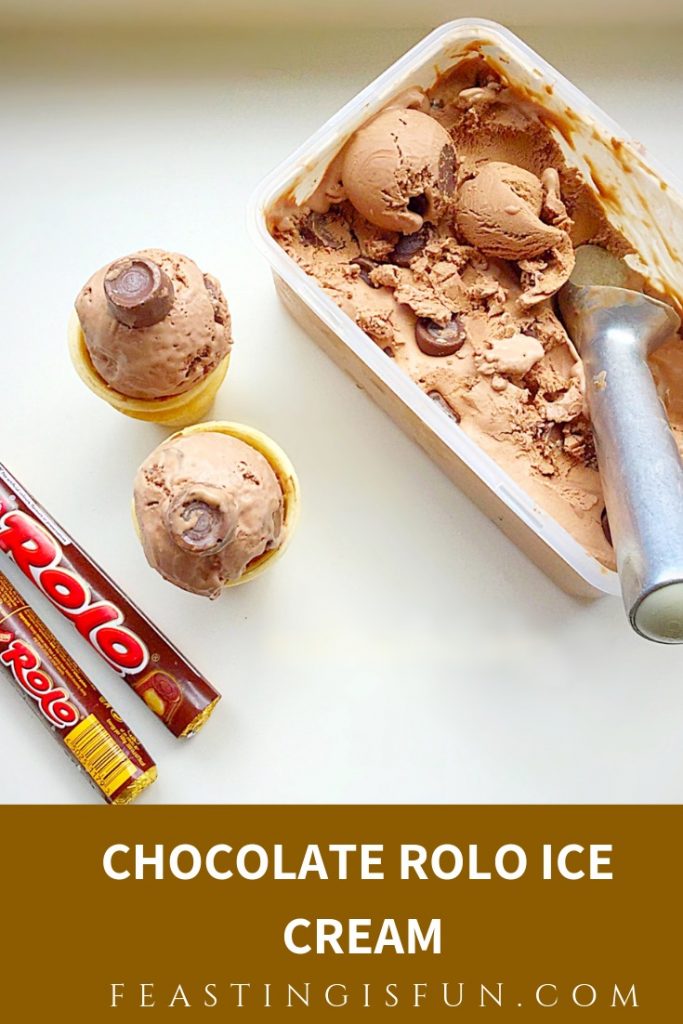
Chocolate Rolo Ice Cream. Silky, chocolate ice cream packed full of chocolate/caramel Rolos.

FF Chocolate Rolo Ice Cream

The idea for this recipe came from my friend and amazing fellow blogger Jane from  Jane’s Patisserie. While creating the most wonderful recipes, she also has just got a new puppy called Rolo. So you see I had to create something to celebrate the new puppy Rolo coming home. Chocolate Rolo Ice Cream seemed the perfect solution.

Chocolate Rolo Ice Cream

This Chocolate Rolo Ice Cream recipe is so versatile. Once you have made the chocolate ice cream base you can add whatever you like. I rather like the idea of a Mars Bar version, with big chunks swirled through the ice cream.

I am loving my Andrew James Which Best Buy Ice Cream Maker. In fact I now have a second bowl, which I can pop in the freezer. This means I can either make one big double batch of the same ice cream or split it into two different flavours.

Making ice cream at home is easy, inexpensive, you have control over what goes in AND you are only limited by your imagination as to how many flavours you come up with! Someone asked me today why they’d never had Chocolate Rolo Ice Cream before, my answer was I’d only just invented it!!

Recipe: Makes 750ml Chocolate Rolo Ice Cream

300ml Double Cream

300ml Whole or Semi Skimmed Milk

4 Large Free Range Egg Yolks – freeze the whites in a bag for up to one month

1tsp Vanilla Bean Paste/Vanilla Extract – I use Nielsen-Massey

1tsp Corn Flour – I use Doves Farm  as it is certified gluten free

5tbsp Caster Sugar

100g Dark Chocolate 70% Cocoa

4 Packets of Rolos

Method: Ensure the frozen bowl part of the ice cream maker has been in the freezer for at least 8 hours, or according to manufacturers instructions.

Note – for step by step photographs of how to make the custard base please see Very Vanilla Ice Cream

Making The Chocolate Ice Cream Base

  • Pour the milk and cream into a heavy based saucepan over a medium heat.
  • Heat until the milk is scalded – little bubbles will appear around the rim of the liquid just before it boils. Once it has reached this point remove from the heat.
  • In a large heat proof bowl add the egg yolks, vanilla paste, corn flour and sugar.
  • Whisk until pale and creamy.
  • With the whisk still running on low, slowly pour the hot cream mixture into the bowl – this creates the custard base.
  • Pour the custard base back into the saucepan, over a low-medium heat, stirring continuously.
  • When the custard has thickened and coats the back of a wooden spoon remove the pan from the heat.
  • Chop up the dark chocolate and place into a clean bowl – I quickly rinse out the original bowl used.
  • Place a sieve over the bowl and pour the hot custard through the sieve on to the chocolate.
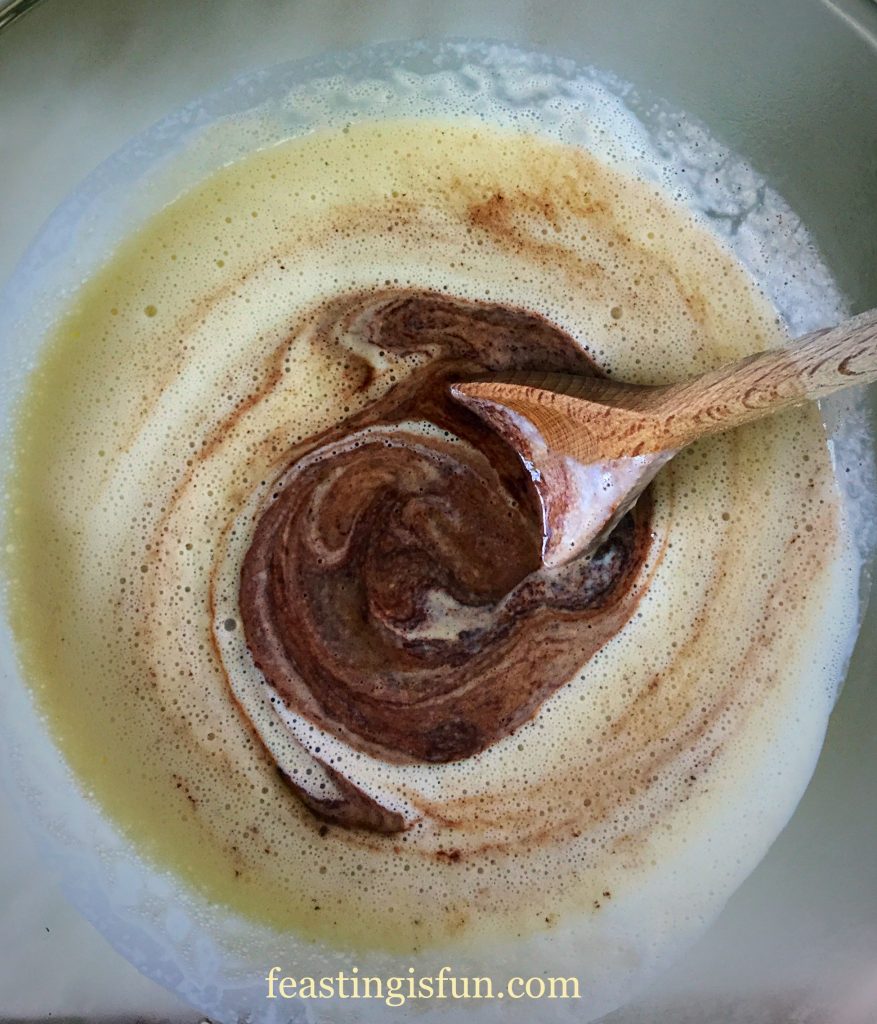
  • Stir the custard with a wooden spoon and the chocolate will melt into it.
FF Chocolate Rolo Ice Cream
Chocolate melting into the custard ice cream base.
FF Chocolate Rolo Ice Cream
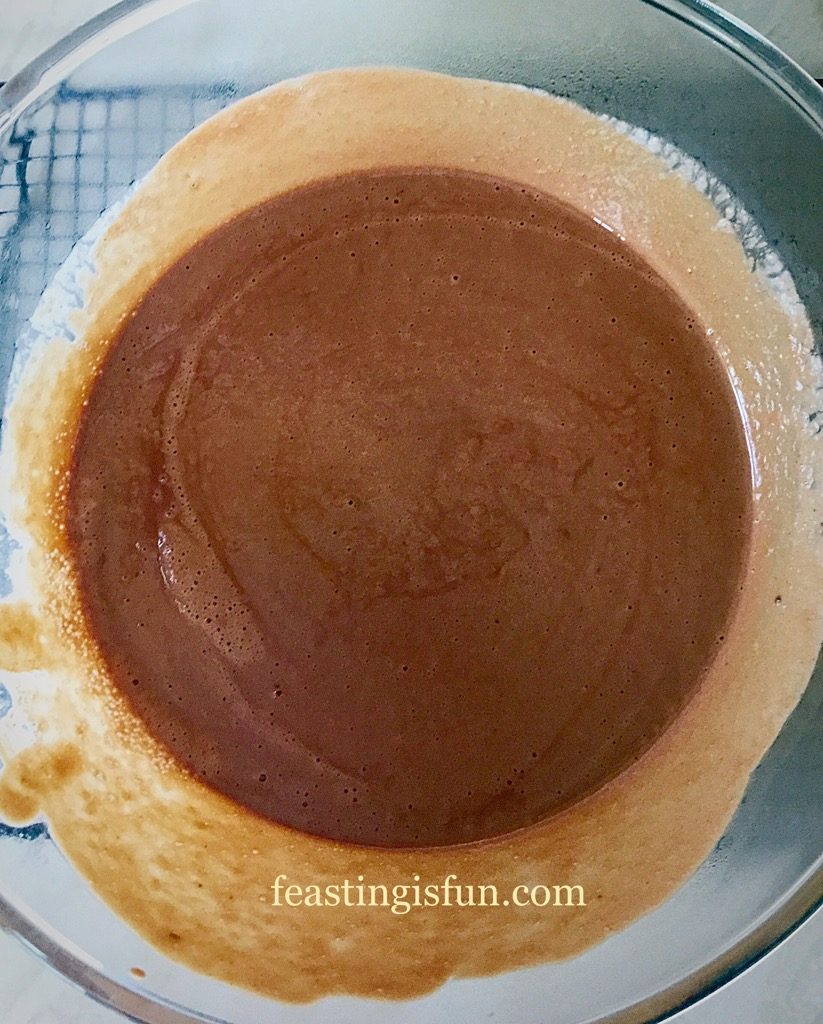
Delicious chocolate ice cream base ready to cool.
  • Cover the chocolate custard base with cling film, so the film lays directly on the surface of the custard. This will stop a skin from forming.
  • Once cooled to warm on the work top place the bowl in the fridge to chill.
  • As soon as the base is chilled it is ready to be churned.

Churning The Ice Cream

  • Set up your ice cream maker as per the manufacturers instructions.
  • Mine has to be churning, prior to adding any liquid.
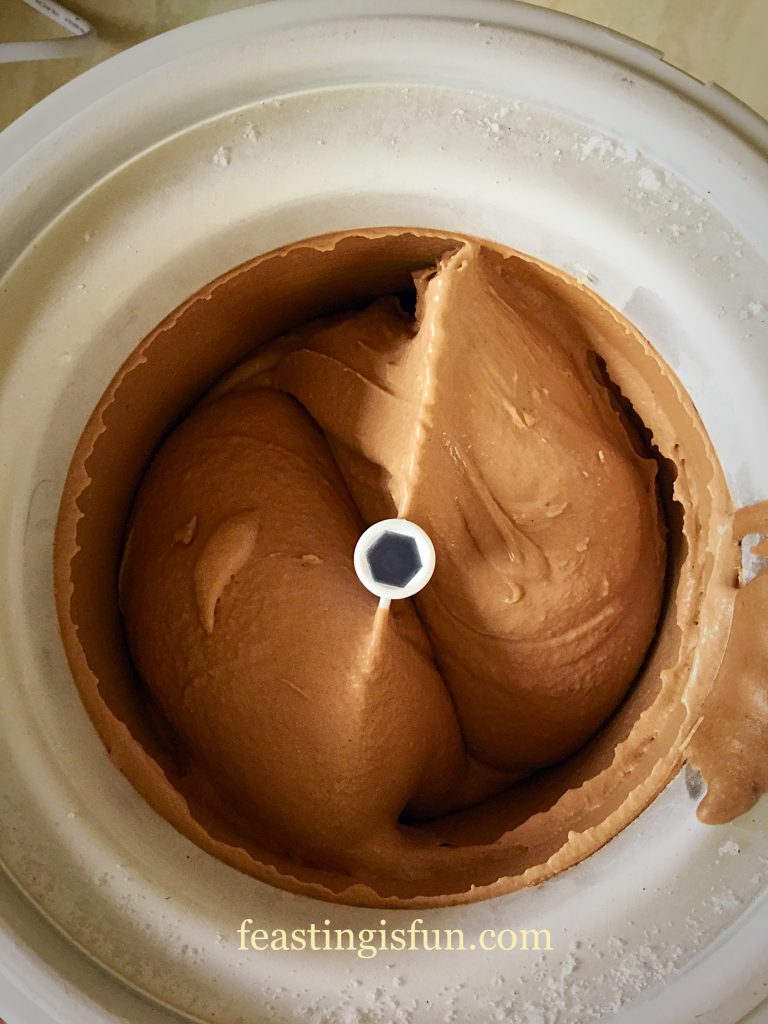
  • Pour the chocolate custard into the churning machine through the opening and leave to churn until frozen – for me that is when the ice cream is turning as one clump with the beater.
  • Switch the machine off and remove the top part of the ice cream maker.
FF Chocolate Rolo Ice Cream
Chocolate Ice Cream that needs Rolos!
  • Remove the beater, scraping off as much of the ice cream as you can. Then lick off the rest of the ice cream 😉
  • Decant the chocolate ice cream into a freezer proof tub.
  • Unwrap 3 packets of Rolos and cut each one in half.
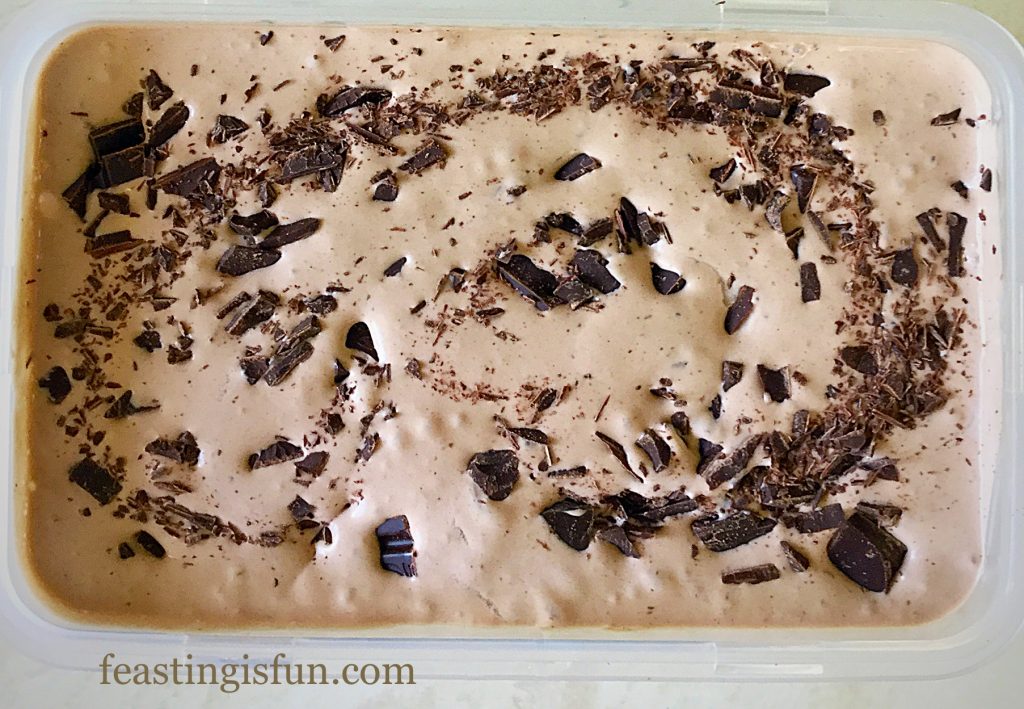
  • Add to the ice cream and swirl through using the handle of a wooden spoon.
  • Unwrap the fourth packet and place the Rolos directly on top of the ice cream.
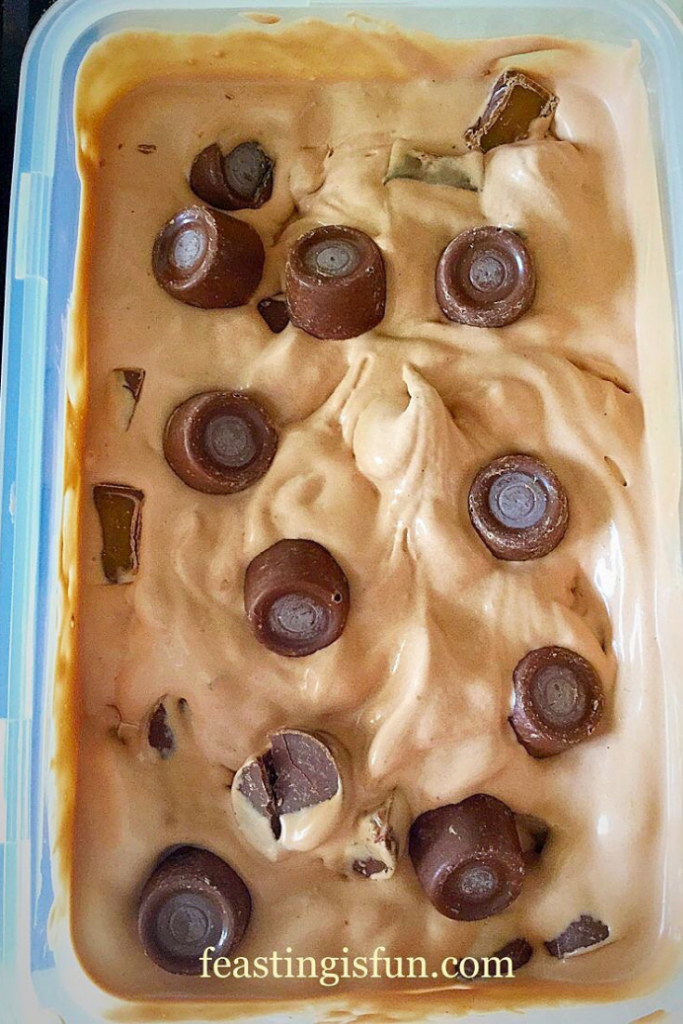
Chocolate Rolo Ice Cream ready for the freezer.
  • Pop on a tight fitting lid and place the Chocolate Rolo Ice Cream into the freezer for at least 4 hours, or until fully frozen.
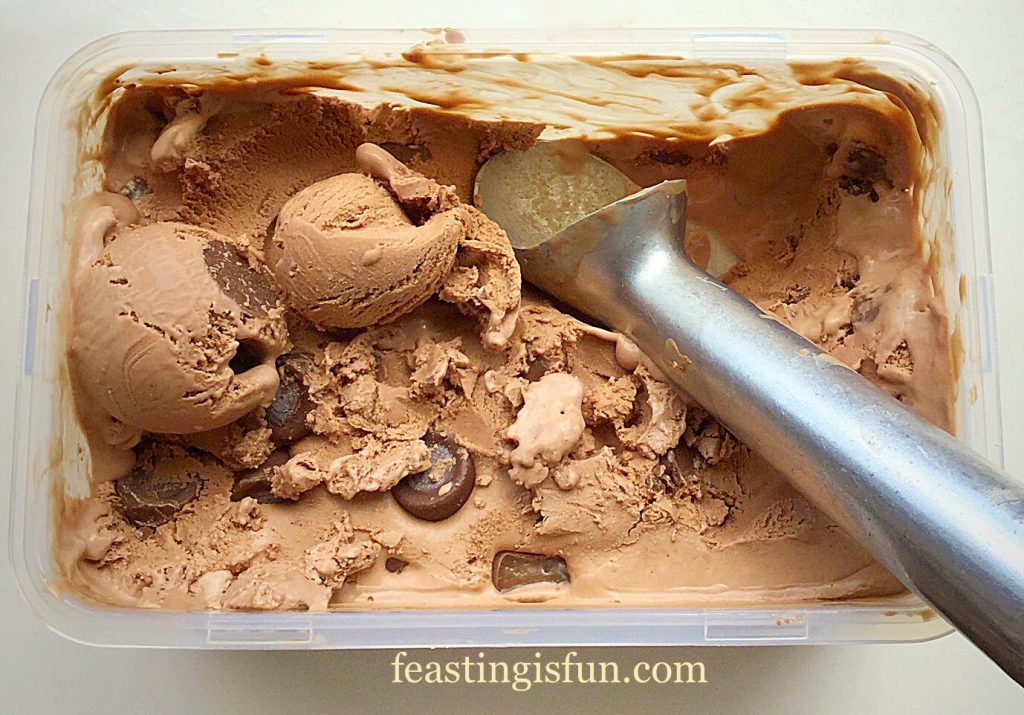
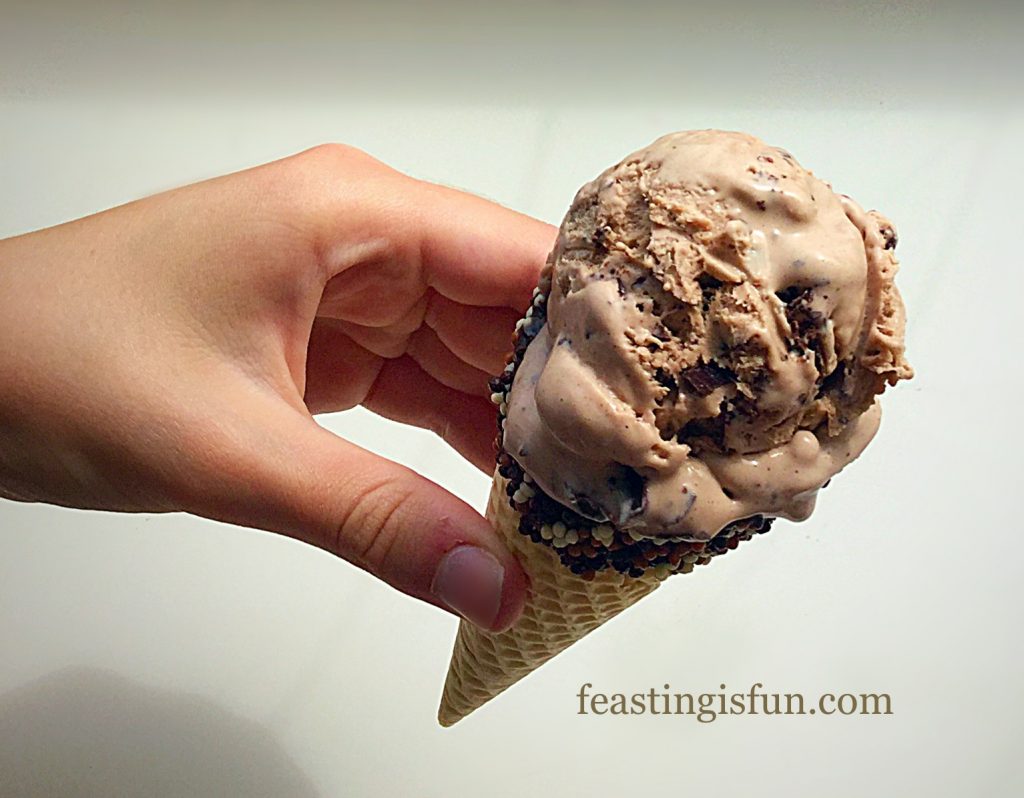
  • To serve, remove the ice cream from the freezer 15-20 before scooping. As our delicious Chocolate Rolo Ice Cream doesn’t have any artificial softener, preservatives or additives added to it, it’ll need a few minutes to soften up.
FF Chocolate Rolo Ice Cream
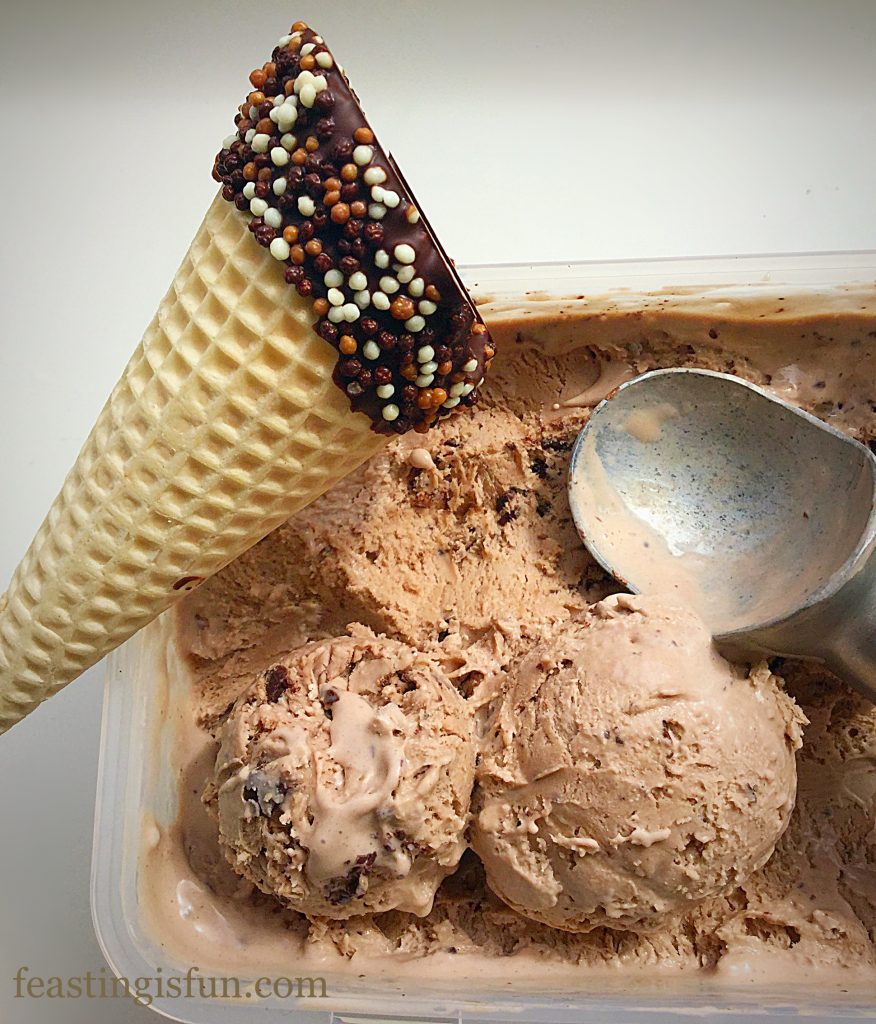
Chocolate Rolo Ice Cream softens and ready to serve.

Serve in cones, bowls or these fun cups I found.
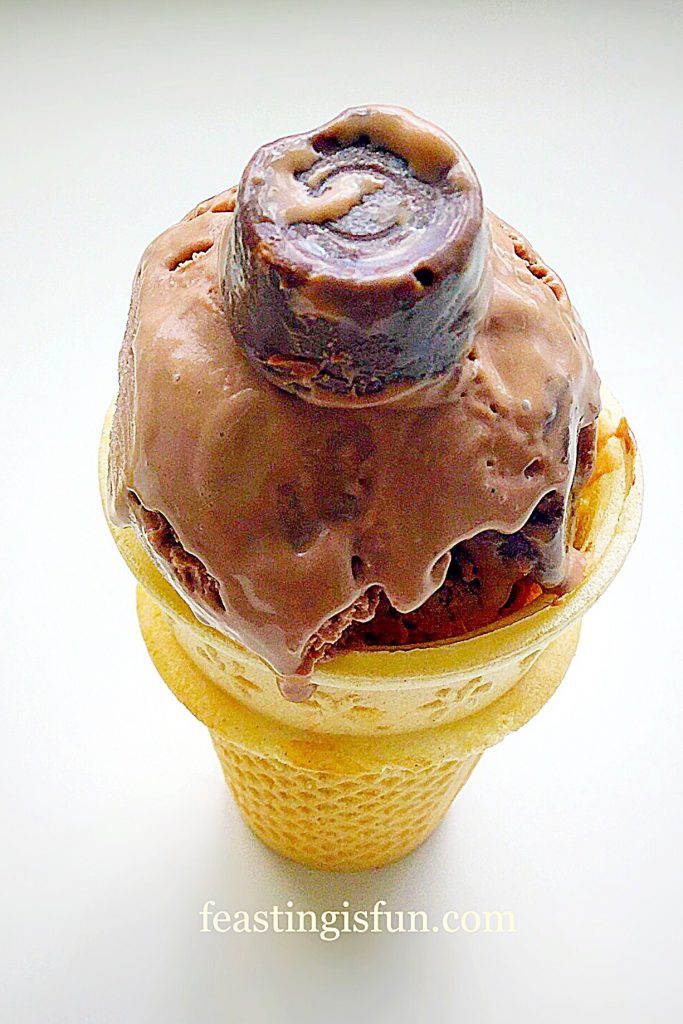
Chocolate Rolo Ice Cream

Why not have a go at making your own ice cream at home. It really is so much fun.

If you have enjoyed this Chocolate Rolo Ice Cream Recipe here are a few more you may like:
Lemon Ripple Ice Cream

FF Chocolate Rolo Ice Cream
Lemon Ripple Ice Cream incredibly refreshing.

Chocolate Honeycomb Ice Cream

FF Chocolate Rolo Ice Cream
Chocolate Honeycomb Ice Cream served in toffee cookie cups.

Blackberry Chocolate Chunk Ice Cream
FF Chocolate Rolo Ice Cream
Blackberry Chocolate Chunk Ice Cream a brilliant blend of flavours.

I hope these recipes have inspired you to make your own ice cream at home? It tastes so much better than most of the ice creams you can buy and you can create your own ice cream sundaes like my Raspberry Chocolate Ice Cream Sundae.

Whatever you are making, baking and creating in your kitchens this very warm weekend, here in the South East of England, have fun feasting with family and friends.

Sammie xx

No part of this post may be reproduced or duplicated without the written permission of the owner. Please see my Disclosure Policy.

Mr Sherick’s Milkshake Review

Who doesn’t love a thick, creamy, ice cold milkshake? I know I do! So when asked to try a few shakes made by Mr Sherick’s and maybe create a recipe or two I leapt at the chance. Enjoy my Mr Sherick’s Milkshake Review, plus a bonus GIVEAWAY!

FF Mr Sherick's Milkshake Review
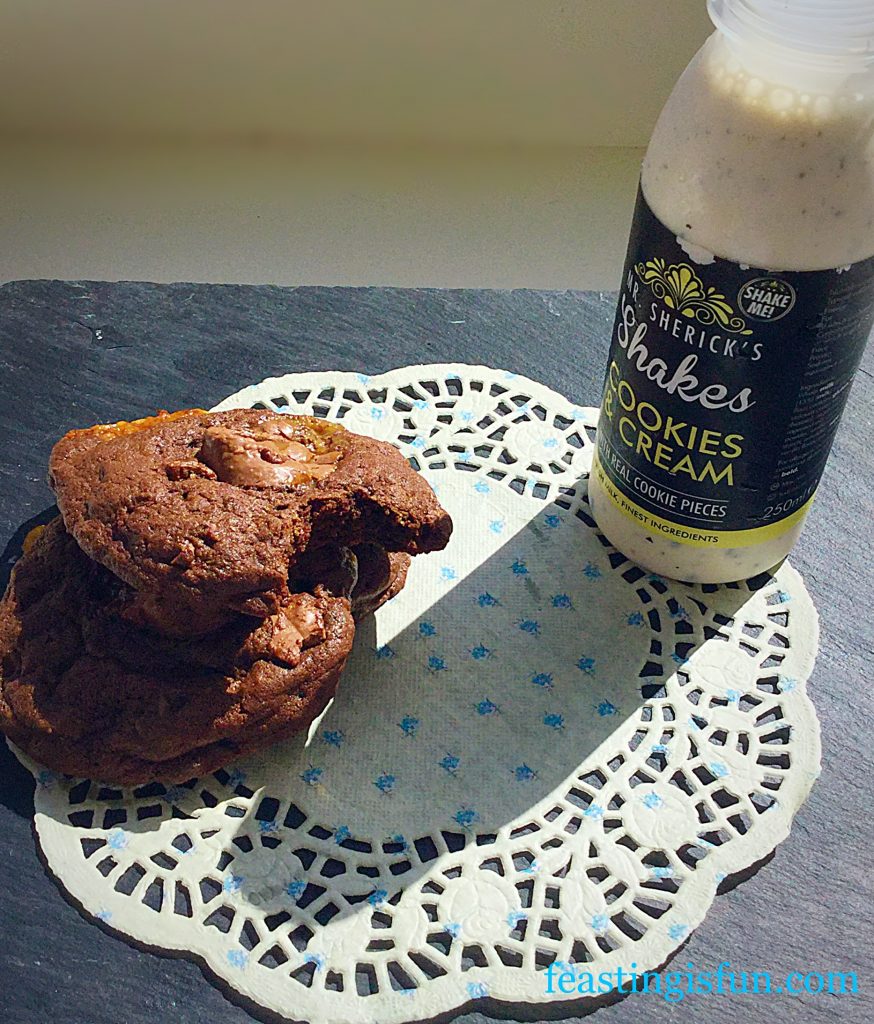
Cookies and Cream shake with cookies of course!

The very nice people at Mr Sherick’s sent me 5 different, luxury shakes to try. They were packaged well in a cool bag with an ice pack.

Cookies and Cream – A creamy, thick, luxurious vanilla shake with real pieces of cookie and belgian chocolate chips.

This was the first milkshake I tried, I also happened to have baked some Rolo Chocolate Cookies which accompanied it perfectly. Thick, creamy, vanilla shake with real pieces of cookie and chocolate in the shake. Absolutely delicious with great texture, this shake was a little rich – that didn’t stop me from finishing the bottle though 😉. A firm 9/10

FF Mr Sherick's Milkshake Review
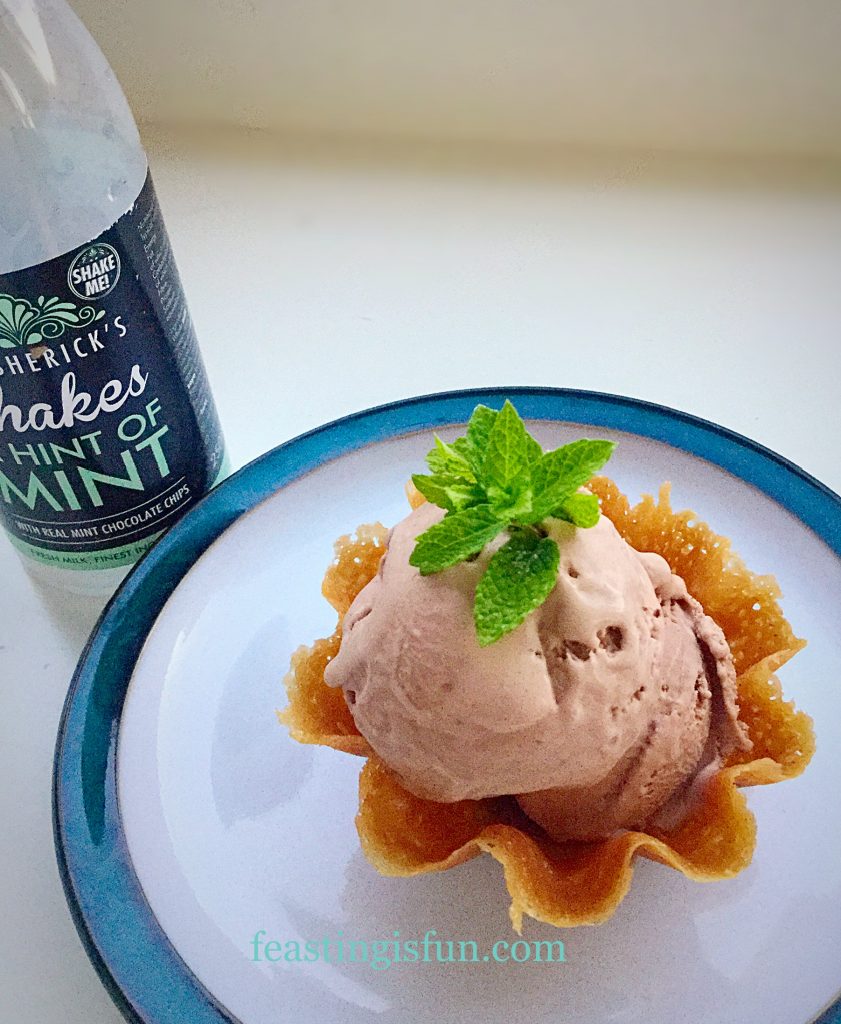
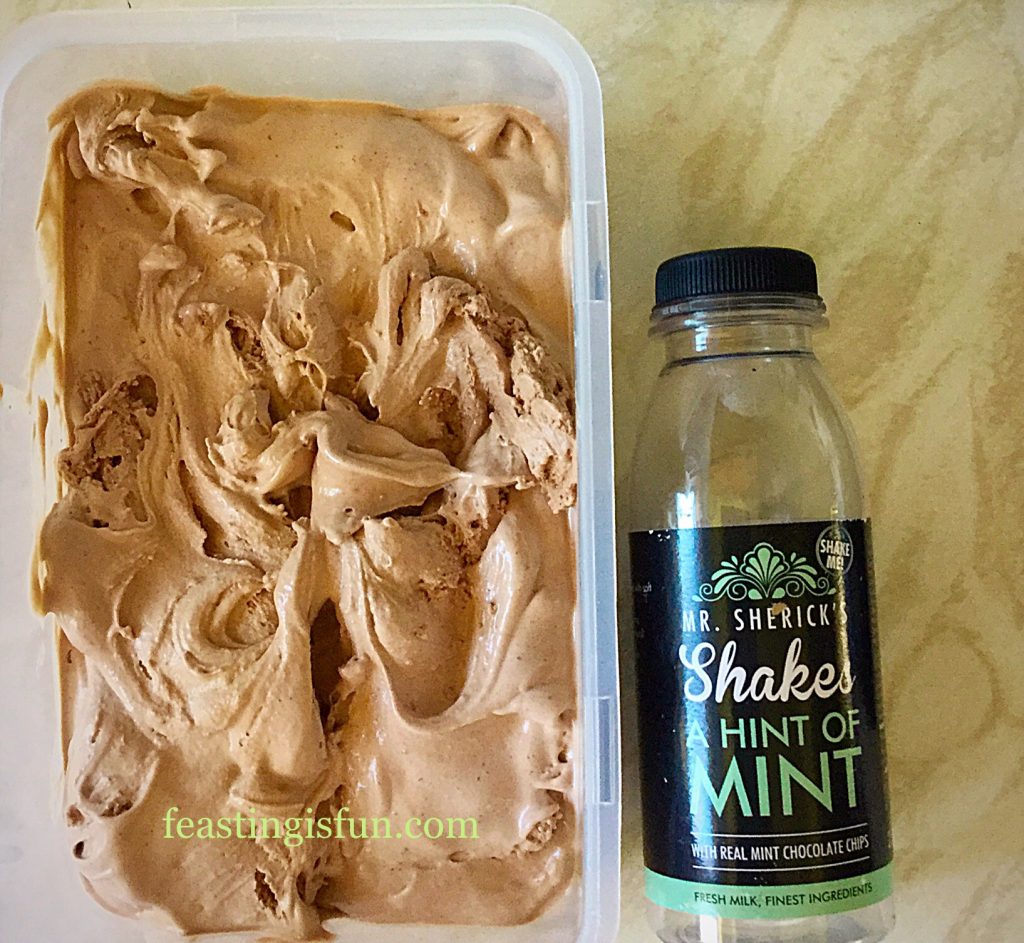
Hint of Mint Milkshake churned into ice cream!

Hint of Mint – A creamy, thick, luxurious, chocolate shake, made with real chocolate and mint choc chips added.

After a quick taste of this thick, chocolate shake with delicious pieces of mint choc chips, I knew I wanted to turn it into an ice cream. The shake has a deep chocolate flavour that allows the mint to be, as the label suggests, a hint. Very refreshing. Turning it into Mint Chocolate Milkshake Ice Cream takes it to another level, with the mint still coming through after the initial chocolate taste.

Whether drunk as a shake or turned into ice cream, Hint of Mint is my personal favourite amongst all the flavours I tried. No question a definite 10/10.

FF Mr Sherick's Milkshake Review
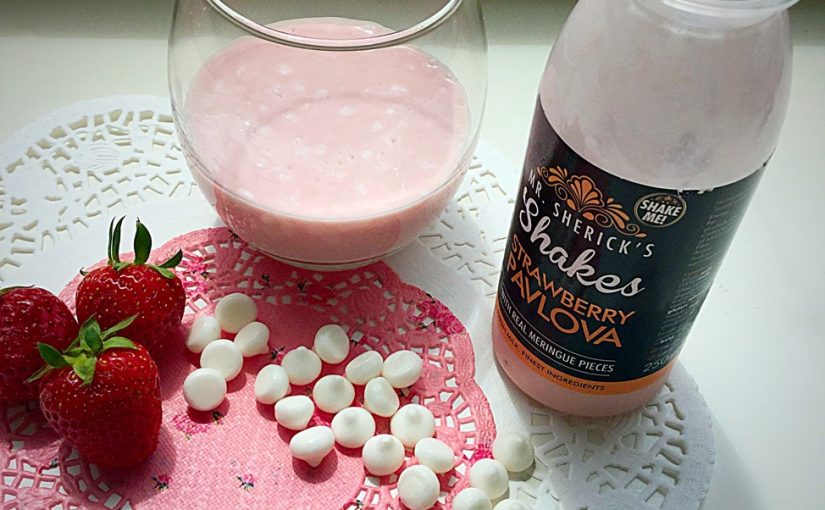
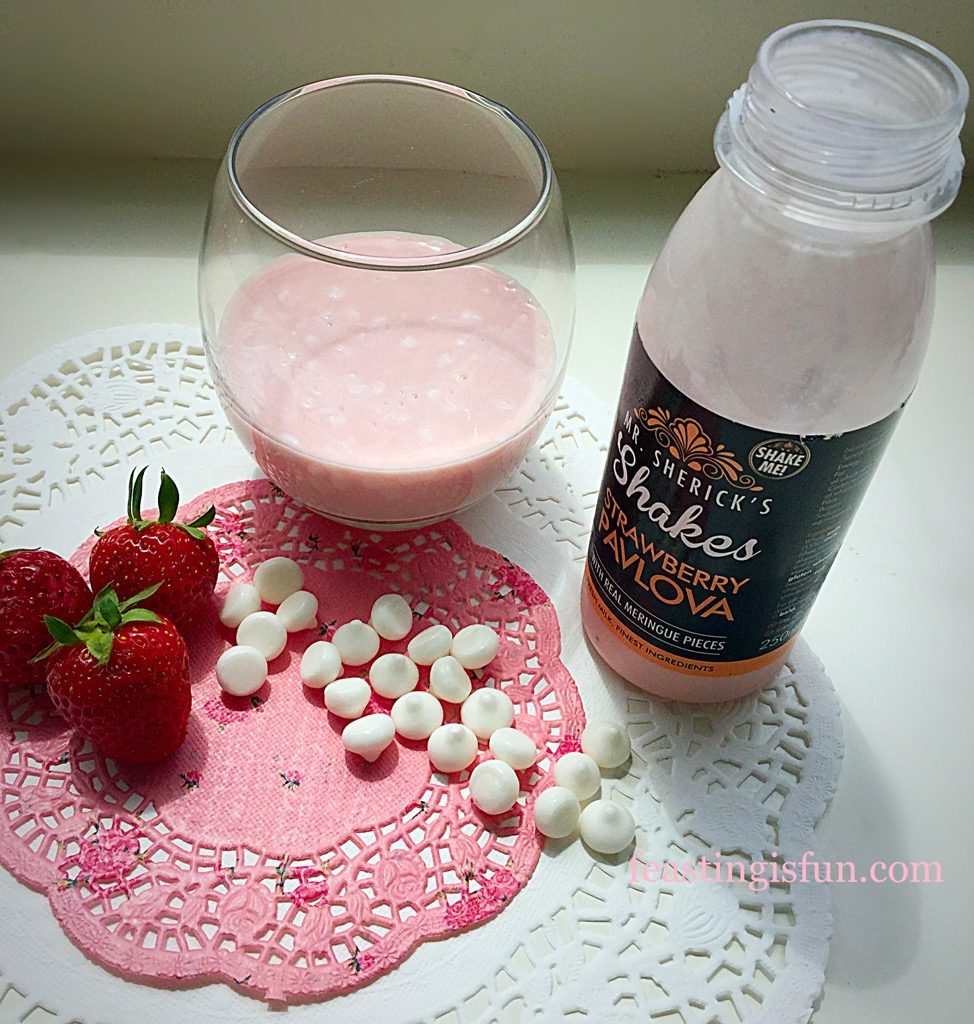
Strawberry Pavolva Milkshake with real pieces of meringue.

Strawberry Pavlova – Made with real strawberry juice and pulp this luxuriously thick, creamy shake contains real pieces of meringue.

I have to say that this Strawberry Pavlova shake is so pretty to look at. I don’t know how they do it, but if you look in the glass there really are pieces of meringue suspended throughout the entire shake. Of all the shakes, this for me was the sweetest and tasted exactly like strawberry milkshake should. Whilst I enjoyed the sensation of meringue pieces in the shake, it was, just a tiny bit too sweet for my palette. So a firm 9/10, only dropping a mark for the extra sweetness.

FF Mr Sherick's Milkshake Review
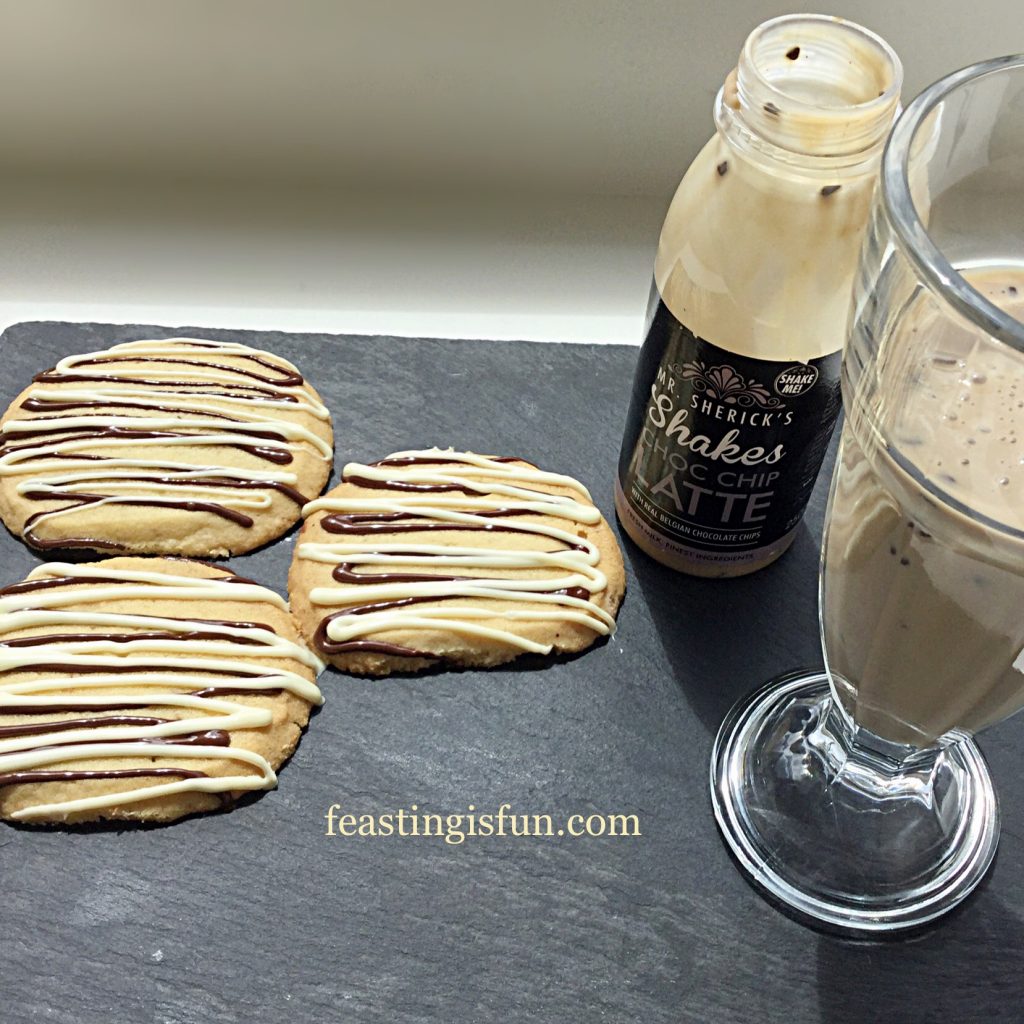
Choc Chip Latte delicious with chocolate drizzled shortbread cookies.

Choc Chip Latte – Coffee flavoured, luxurious thick, creamy shake with Belgian chocolate chips.

Ooh if you like coffee then you will love this shake. Luxuriously thick and creamy, with a strong, yet not overpowering coffee flavour, added Belgian chocolate chips simply send this shake over the top. I imagine this shake would also make a very good ice cream or gelato. No question about it a firm 10/10.

Finally as part of my Mr Sherick’s Milkshake Review I wanted to try something new. Having made a lot of ice creams this summer, all made with a custard base and churned, I decided to make a gelato. This was a huge gamble for me. I had one bottle of milkshake left, what if it didn’t work?

Read on to see what happened and how you could win a cool bag full of Mr Sherick’s utterly delicious, luxury shakes.

Pot au Choc – Luxuriously thick, creamy, deepy chocolate milkshake, made with real chocolate and added Belgian chocolate chips.

Pot au Chocolate Gelato – an incredibly creamy, rich chocolate ice cream, that’s made without using an egg custard base and does not need churning in an ice cream maker.

Recipe: Make approx 1l Pot au Chocolate Gelato

250ml Bottle Pot au Choc Milkshake made by Mr Shericks Shakes

300mls Double Cream

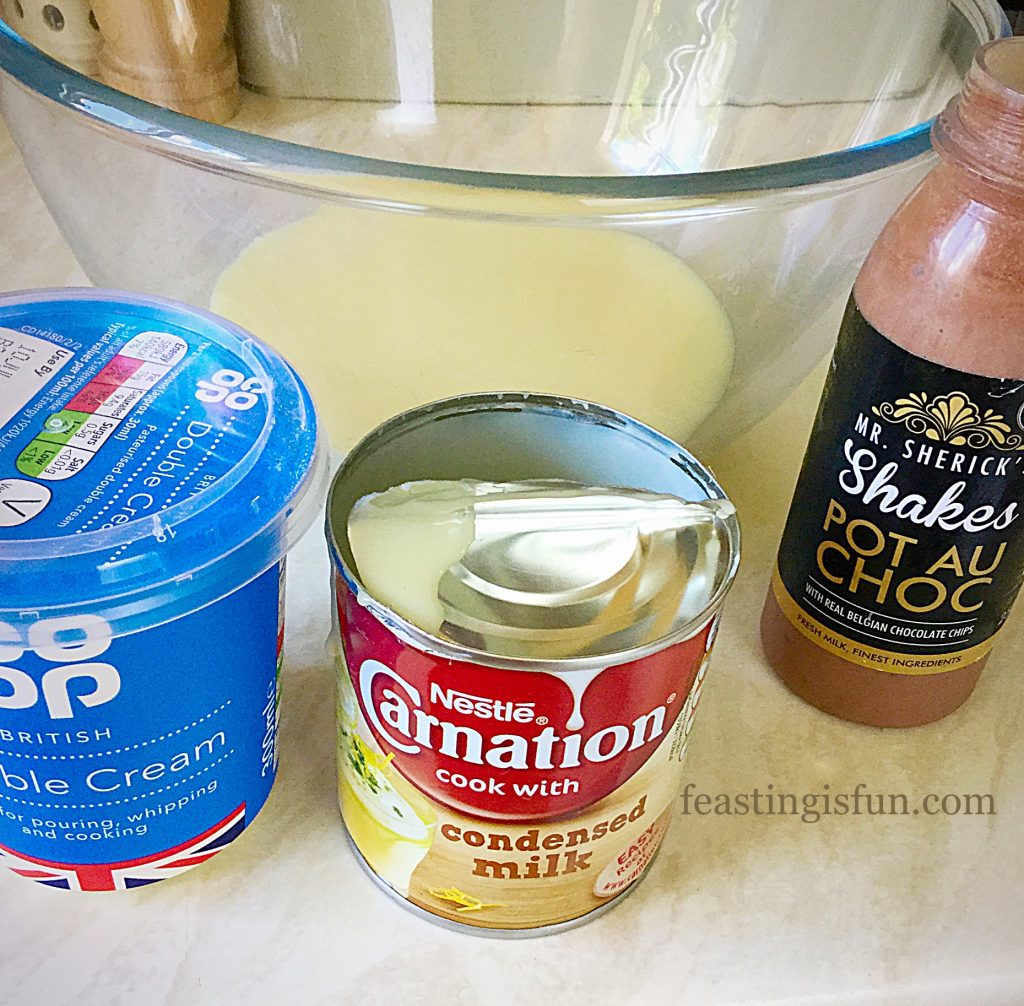
397g Tin Condensed Milk – I used Carnation

50g Dark Belgian Chocolate finely chopped

Method: You will need a 1 litre plus freezer proof tub with lid

  • Pour the condensed milk into a large bowl.
FF Mr Sherick's Milkshake Review
Mr Sherick’s Milkshake Review making the Pot au Chocolate Gelato.
  • Add the double cream and whisk until it starts to thicken.
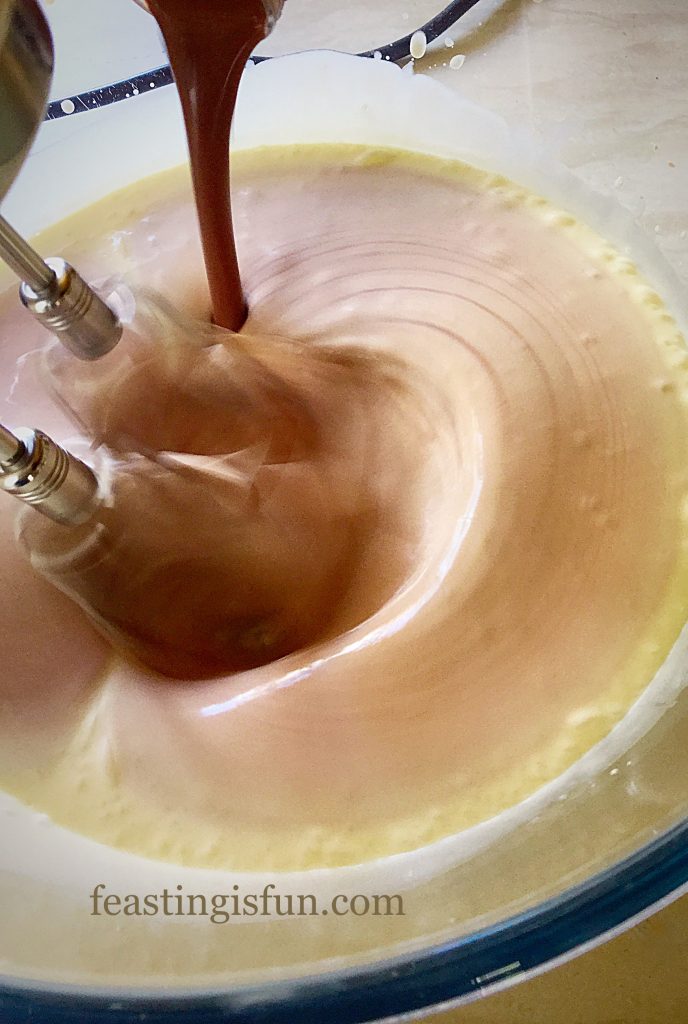
  • As it starts to thicken, with the whisk still running, slowly pour in the Mr Sherick’s Pot au Choc shake.
FF Mr Sherick's Milkshake Review
Mr Sherick’s Milkshake Review, whisking in the Pot au Choc Shake.
  • Continue whisking until the mixture can hold a figure of eight for 5 seconds. The unfrozen gelato will be thick and airy, but not as thick as whipped cream.
  • Pour the gelato mix into a freezer proof container.
  • Add two thirds of the chopped chocolate and swirl through using a wooden spoon handle. Then add the remaining chocolate to the top.
FF Mr Sherick's Milkshake Review
Mr Sherick’s Milkshake Review Pot au Chocolate Gelato ready for the freezer.
  • Pop on a tight fitting lid and place in the freezer for 24 hours.
  • 24 hours later, once the gelato is frozen, remove from the freezer and allow to sit at room temperature for 10 minutes.
  • Scoop the Pot au Chocolate Gelato into jazzed up ice cream cones. And enjoy 😉
FF Mr Sherick's Milkshake Review
Pot au Chocolate Gelato ooh so good.

Yes this gelato made with Mr Sherick’s Pot au Choc Shake is absolutely phenomenal!

FF Mr Sherick's Milkshake Review
Mr Sherick’s Milkshake Review Pot au Chocolate Gelato easy to make and easier to eat!

Having tasted the Pot au Choc shake prior to making this gelato, I found it to be rich, creamy and deeply chocolatey, with little nuggets of Belgian chocolate. It is  a firm 10/10.

My advice with this Pot au Choc or any of the shakes is to buy two bottles. One to drink straight away, as they are outstanding shakes and another to turn into ice cream or gelato at home.

Mr Sherick’s Shakes are the epitomy of milkshake luxury. Delightful, creamy flavours with added texture, they are by far the very best shakes I have ever tried.

If you have enjoyed my Mr Sherick’s Milkshake Review, especially the ice creams, here are some other recipes you may like:

Blackberry Chocolate Chunk Ice Cream

FF Mr Sherick's Milkshake Review
Blackberry Chocolate Chunk Ice Cream

Strawberry Ripple Ice Cream

FF Mr Sherick's Milkshake Review
Strawberry Ripple Ice Cream

Lemon Ripple Ice Cream

FF Mr Sherick's Milkshake Review
Lemon Ripple Ice Cream

If you could have any flavour milkshake what would it be???

Ooh this is so exciting. Mr Sherick’s are running a giveaway to win a cool bag filled with their luxurious shakes. Please read below for details and I wish all of you the very best.

Sammie xx

Mr Sherick’s  supplied me with 5 bottles of their shakes for this review. All opinions, views, content and photographs are my own. I was not paid to write this post and the giveaway is the reponsibility of Mr Sherick’s. Please see my Disclosure Policy.
Giveaway T’s & C’s

This giveaway is open to UK residents only.

For your chance to win a Mr Sherick’s cool bag filled with shakes you need to retweet the pinned giveaway posts of both @sammiefeasting and @MrShericks on Twitter.

The giveaway will run from 7pm GMT today 13/07/2016 until midnight on Sunday 17/07/2016. No retweets after the deadline will be included.

The winner will be chosen at random by Mr Sherick’s. Their decision is final and responsibility for this giveaway is theirs alone. For more information please see Mr Sherick’s website.


Beauvale Cheese Walnut Scones

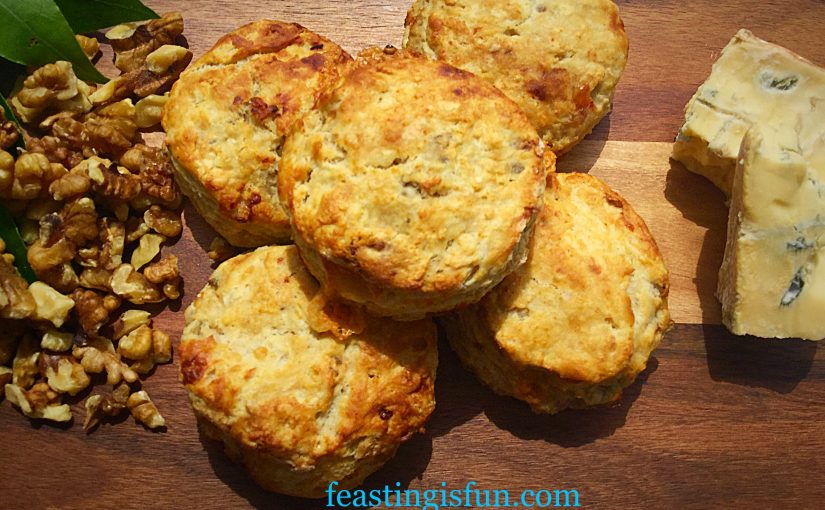
For someone who genuinely did not like scones, I have been baking rather a lot of them recently. And I have concluded that homemade, or well made bakery scones, are a million miles away from the prepackaged, heavy, scones of my past. During my recent scone bake-a-thon I adapted my Super Light Scones recipe to create an all butter version, which makes the most delicious savoury scones. Welcome my Beauvale Cheese Walnut Scones.

FF Beauvale Cheese Walnut Scones
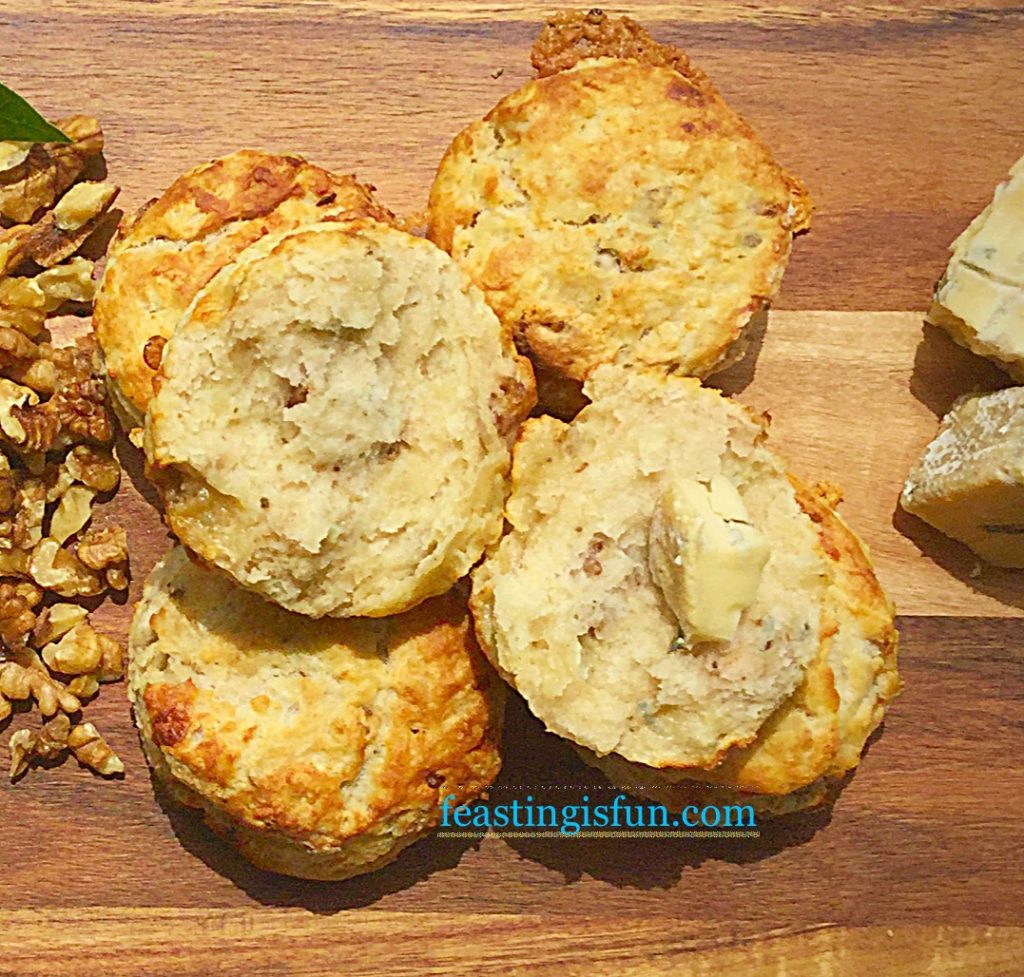
Beauvale Cheese Walnut Scones fabulous served warm.

These Beauvale Cheese Walnut Scones are incredibly tasty and two out of our three children loved them. Let me add that they would not eat blue cheese on a cracker. A massive win for me as a mum!

FF Beauvale Cheese Walnut Scones
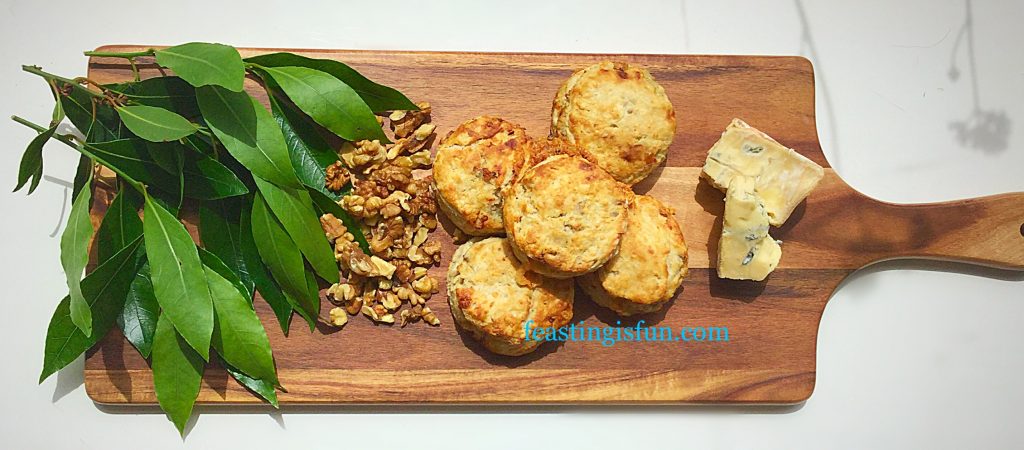
Beauvale Cheese Walnut Scones perfect for lunch, picnics or just because they are so good!

Flavour Alchemy

Truly though, their taste is a reflection of just how much delicious flavour is packed into these scones. The salty melted Beauvale Cheese, against an all butter scone, with the crunch of toasted walnuts and balanced with just a hint of honey.

And I bet you didn’t see that last ingredient coming?

Because blue cheese and honey pair beautifully together, I was going to caramelise the toasted walnuts in honey. Finally though, I decided that I wanted the sweet honey to be no more than a kiss on our tastebuds.

FF Beauvale Cheese Walnut Scones
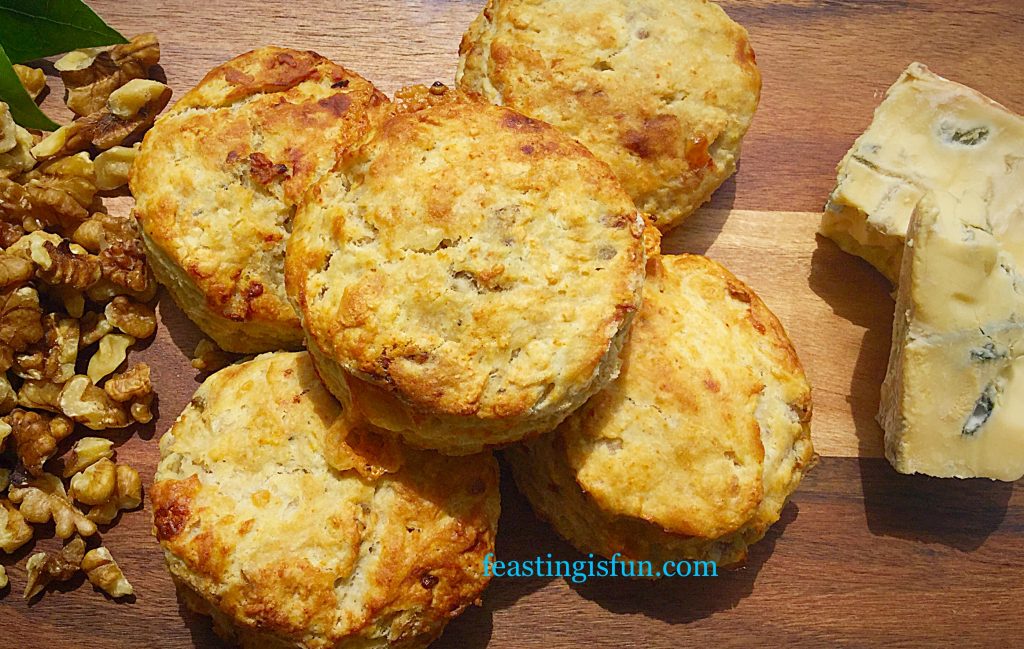
Beauvale Cheese Walnut Scones a buttery cheesy scone with added crunch.

Beauvale Cheese is a soft blue cheese, that doesn’t have the intensity of Stilton. Beautiful eaten with bread or crackers and served on a cheese board, this cheese comes alive when baked in the scones. Warm and melted, it has a rounder, salty and buttery flavour that blends nicely with the toasted walnuts and that little hint of honey.

So, I urge you to try these Beauvale Cheese Walnut Scones, they are incredibly simple to make and are perfect for using up leftover cheese.

Recipe: Makes 12-14 Beauvale Cheese Walnut Scones

50g/2oz Walnut Pieces or Halves

450g/1lb Plain White Flour

3tsp Baking Powder

75g/3oz Very Cold Unsalted Butter

125g/4.5oz Beauvale Cheese – mine was from Pong Cheese

250mls/9fl oz Milk – Whole or Semi Skimmed

3tbsp Milk for glazing the tops of the scones

3tsp Runny Honey

1/4tsp Sea Salt – I use Maldon

1/4tsp Freshly Ground Black Pepper

Method: Preheat the oven to 220C/200C fan, gas mark 7

Making The Scone Dough

  • First of all, in a dry iron skillet or frying pan add the walnut pieces and place over a medium until lightly toasted. You will just be able to start smelling the wonderful walnut oils. Remove from the heat and set to one side to cool.
  • Into a large bowl sift the flour and baking powder.
  • Add the sea salt and pepper.
  • Using the large grating side of a box grater, grate the very cold cheese straight onto the flour – I find it easier to have my bowl on digital scales.
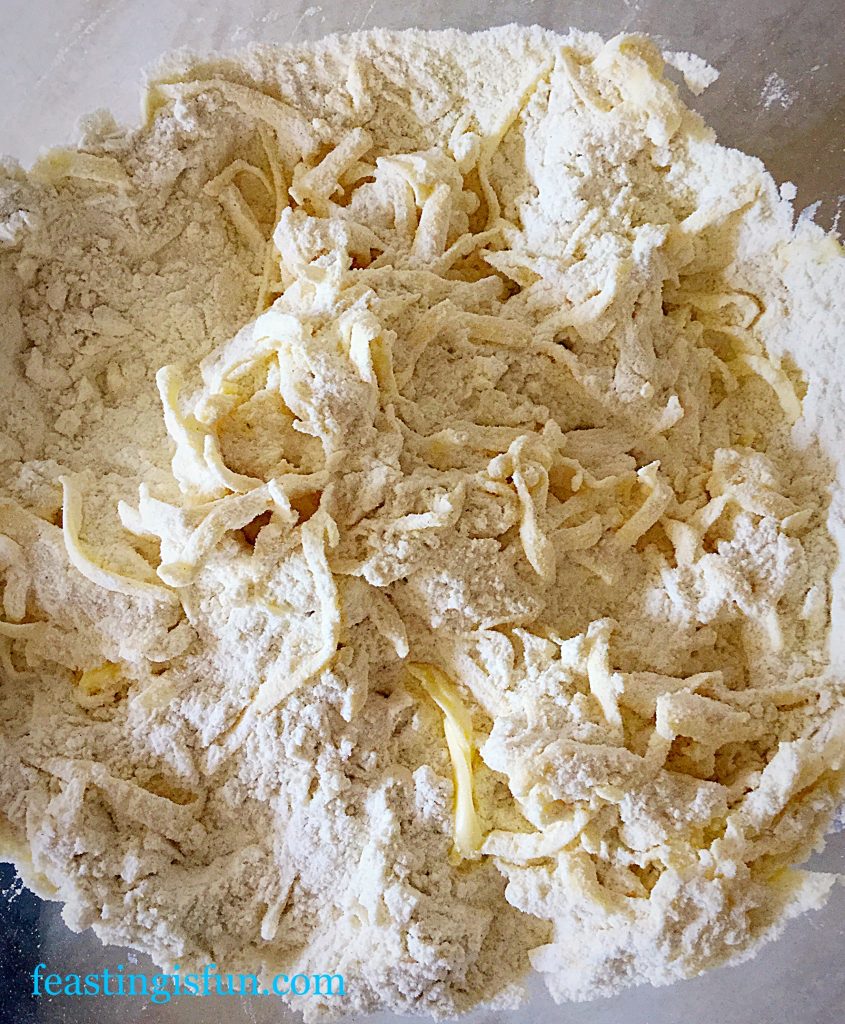
  • Cover the butter with flour, use a butter knife to separate any clumps, so that the butter is evenly distributed.
FF Beauvale Cheese Walnut Scones
Grated cold butter covered in seasoned flour.
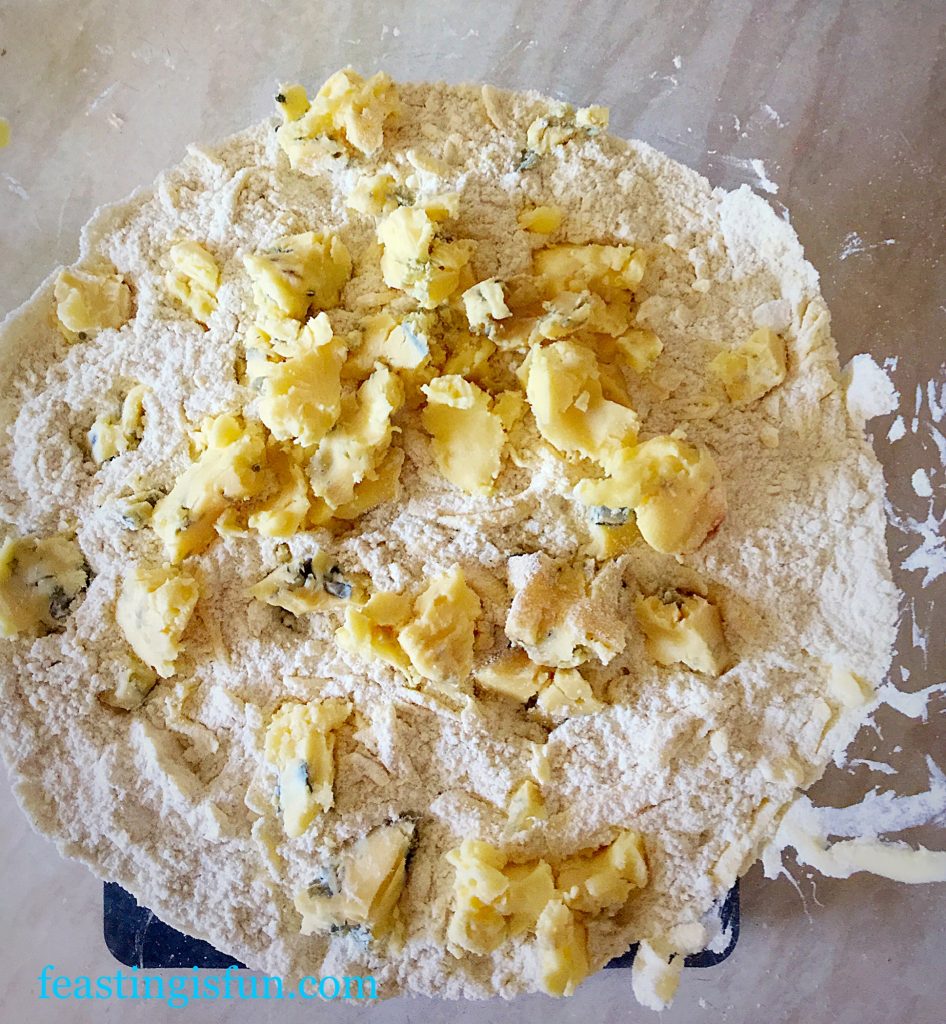
  • Next break off chunks of the Beauvale Cheese and drop them into the bowl.
FF Beauvale Cheese Scones
Golden Beauvale Cheese with a ripple of blue.
  • Using a butter knife flick the flour over the cheese so that it is covered. This will stop it from clumping together.
  • Chop the walnuts roughly and add to the bowl. Stir with the butter knife to distribute evenly.
  • In a jug add 2 teaspoons of honey to the milk. Whisk briefly to disolve the honey.
  • Make a well in the centre of the bowl and pour the milk/honey mixture in.
  • Use the butter knife to briefly stir the ingredients and then use your hand to bring them together into a rough dough.
  • The trick to creating the lightest scones is to handle them as little as possible and only very lightly flour the worktop on which you roll and cut them out.

Shaping The Dough And Portioning The Scones

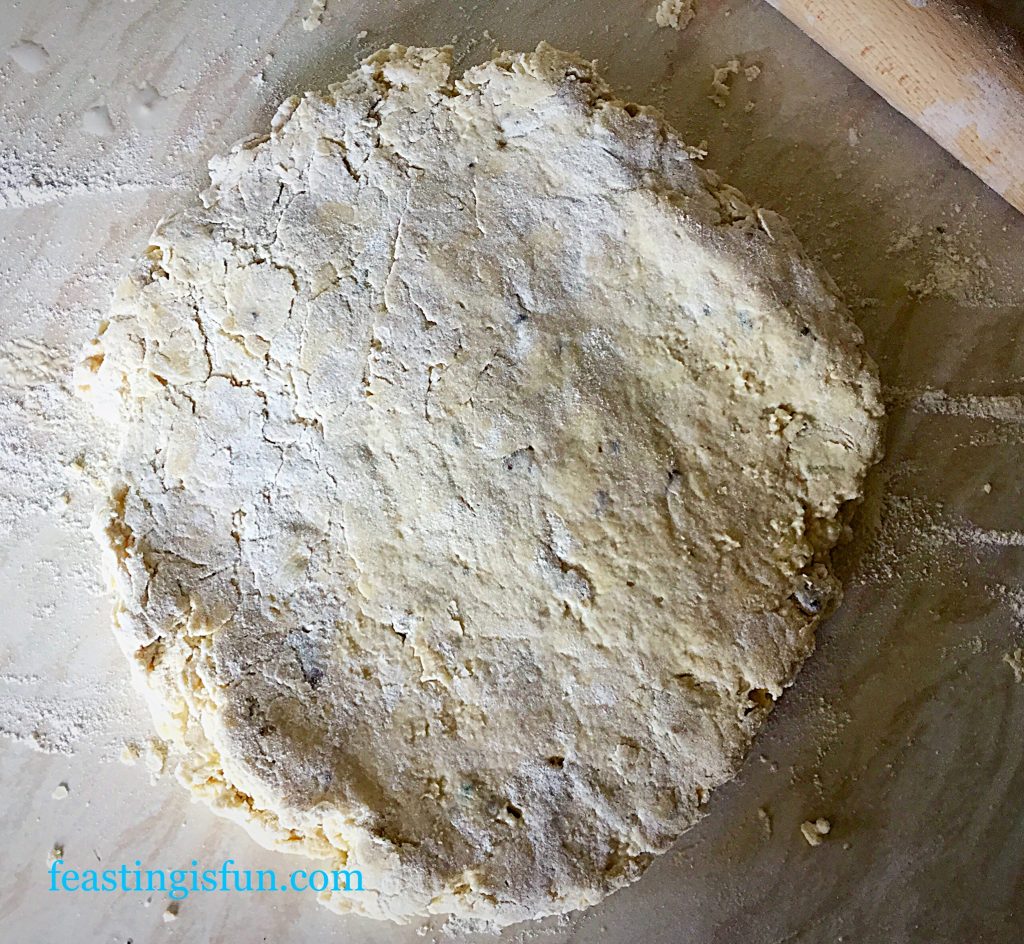
  • On a lightly flour dusted worktop tip out your scone dough and flatten with your hands so that it is 5cm/2″ deep.
  • Use a rolling pin to gently roll the dough to 2.5cm/1″ thickness.
FF Beauvale Cheese Walnut Scones
Gently roll the scone dough out.
  • Line a large baking tray with baking parchment or a silicone baking mat.
  • Using a 7cm/3″ cutter press straight down and cut out the scones. If you twist the cutter as you cut the scones it can cause uneven rising.
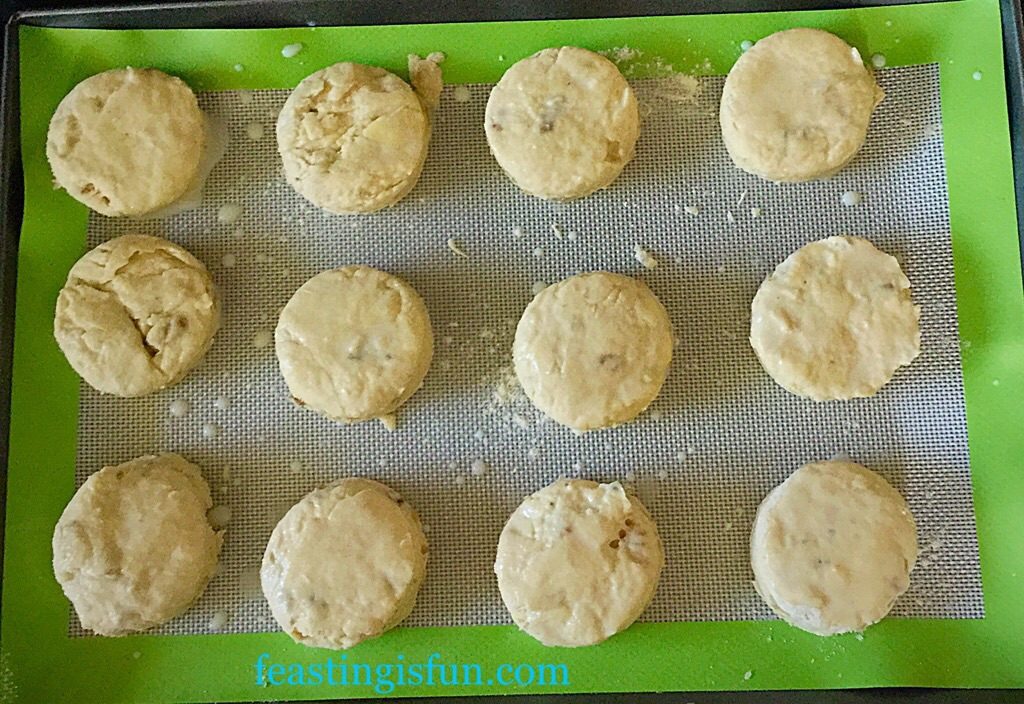
  • Add the last teaspoon of honey to the milk, stir and then brush the tops of the scones.
FF Beauvale Cheese Walnut Scones
Beauvale Cheese Walnut Scones ready to be baked.

Baking The Cheese And Nut Scones

  • Place the scones in the top of the preheated oven and bake for 20-25minutes, until they are risen and golden brown in colour.
  • As soon as the scones are baked remove from the oven and place on a cooling rack – be careful as they will be hot!
FF Beauvale Cheese Walnut Scones
Beauvale Cheese Walnut Scones inhale their wonderful aroma as they come out of the oven.

Enjoying These Beauvale Cheese Walnut Scones

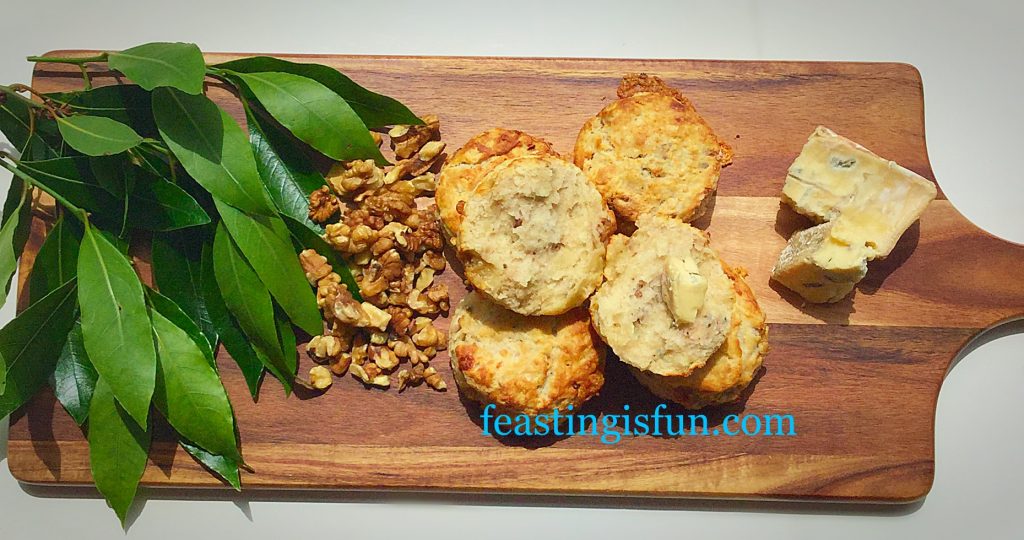
These utterly delicious Beauvale Cheese Walnut Scones are perfect served warm, split with butter, a little extra cheese (the contrast between the cold and baked cheese is delicious), or just on their own. Also they taste great cold and so are perfect for packed lunches, picnics and afternoon tea.

Since these scones have higher fat content, they will last 3-4 days in an airtight container. Also, I have successfully frozen similar scones for up to one month. To refresh, defrost and place in a warm oven for 5-10 minutes and they’ll taste as though they’ve been freshly baked.

FF Beauvale Cheese Walnut Scones
Beauvale Cheese Walnut Scones a delicious savoury treat!


If you have enjoyed this Beauvale Cheese Walnut Scones recipe here are some others you may also like:

Asparagus Proscuitto Ham Tart

FF Beauvale Cheese Walnut Scones
Asparagus Prosciutto Ham Tart with Goddess Cheese

Feta Red Onion Marmalade Quiche

FF Beauvale Cheese Walnut Scones
Feta Red Onion Marmalade Quiche

Goddess Cheese Pine Nut Muffins

FF Beauvale Cheese Walnut Scones
Goddess Cheese Pine Nut Muffins

There are so many wonderful ways of using cheese in cooking and baking. And during the next few months we will discover together, wonderful sauces, dinners, recipes and bakes.

Pong Cheese has a wonderful selection of cheeses on their website. I look forward to widening my cheese palette and creating recipes with all the different cheeses.

I hope that you will join me on this creative journey and together we can have fun discovering new ways to make and bake with cheese in our kitchens? Having fun along the way as we cook up some cracking feasts.

Sammie xx

Pong Cheese provided the cheese for this recipe. All opinions, views, content and photographs are my own. This is not a sponsored post. Please see my Disclosure Policy.
Growing Vegetables Week 2

Welcome to the second week of Bob and Sammie’s gardening adventures. Following a nasty ice skating accident a week and a half ago, Bob is now fully recovered with just a small scar on his chin. Gardening is definitely a lot safer and in Growing Vegetables Week 2, we will share our latest news.

Growing Vegetables Week 2
Growing Vegetables Week 2 lavender great at attracting pollinators and for use in baking.

Despite warm, dry and sometimes humid conditions we have had very little rain in our corner of Kent. In fact today, just as last Saturday it is very windy outside. This means that all of our container grown plants ideally need watering twice a day.

Windy weather can be far more drying on all plants, especially those grown in containers. Our Runner Beans (Painted Lady – I think!) are growing a good 10cm/4″ a day! So they need regular watering. We did add some water retaining granules to the container before planting, which should prevent any periods of drought.

FF Growing Vegetables Week 2
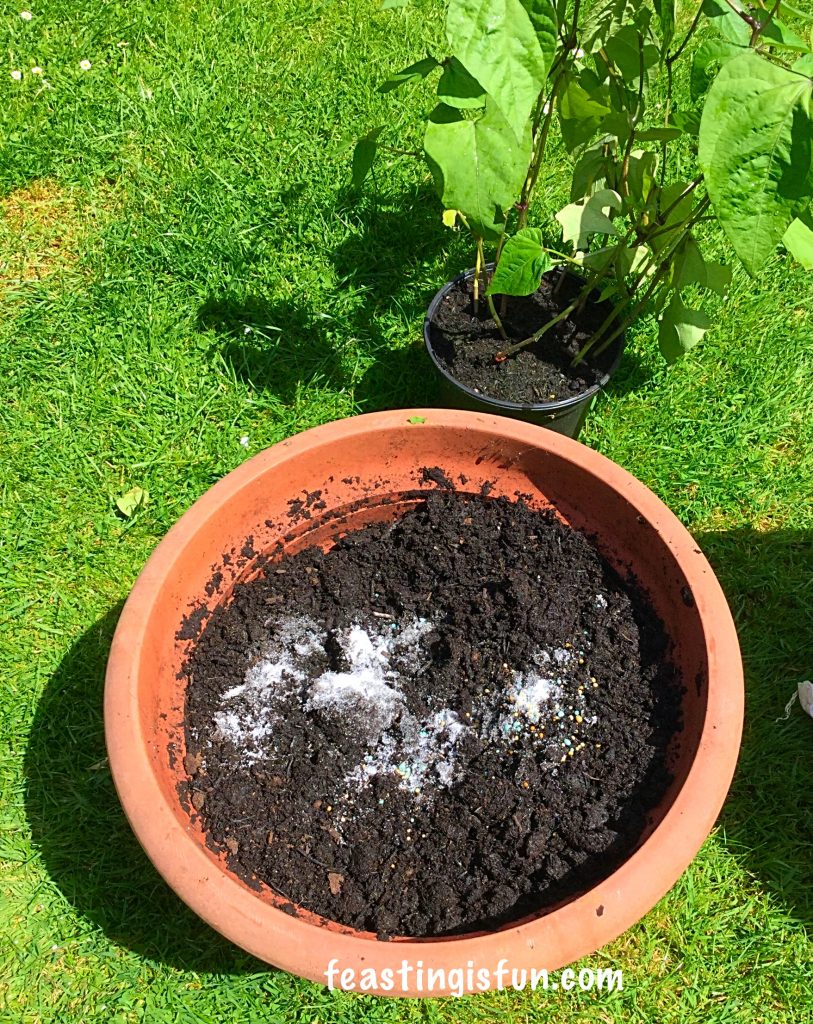
Growing Vegetables Week 2 a teaspoon of water retaining granules really helps the moisture level of the compost.

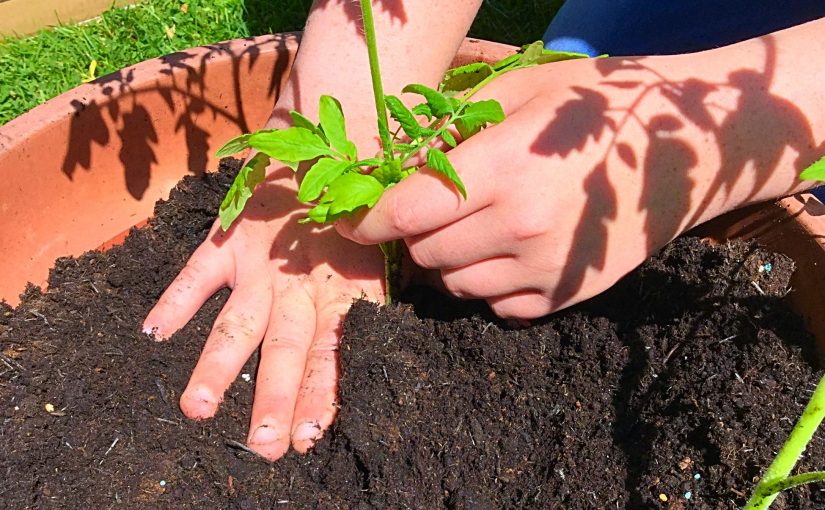
Here are the beans we potted up last week. The small scoop (about 1tsp) of water retaining granules and a few, slow release fertiliser balls were added to the compost. They were then thoroughly mixed in before the beans were planted.

Keeping container plants adequately watered is especially important for tomatoes. Uneven waterering and periods of drought can cause Blossom End Rot. Which is exactly how it sounds. The blossom end of the tomato fruit goes very dry and can start to rot. So to ensure that doesn’t happen we added water retaining granules to all of our tomato containers.

FF Growing Vegetables Week 2
Growing Vegetables Week 2 Gartenpearle Tomatoes

Ah the wind whipped tomatoes that we carefully potted up and staked last weekend are, in fact, Gartenpearle Tomatoes, grown from Groseeds seed! These are a bush variety that have cherry tomatoes tumbling over the container. In our defence it was incredibly windy when we planted them and I’m not sure they’d have survived without staking. Indeed I thought we were going to lose them for the first few days as they looked very sorry for themselves. This photo has just been taken and they seem to have come through the transplanting without any damage!

FF Growing Vegetables Week 2
Growing Vegetables Week 2 Borage and Lavender.

Due to the open, sunny, but exposed windy site of our front garden, I have delayed planting out the chilli’s. Seeing how the wind affected the tomatoes in the back garden last weekend, I have decided to wait for a quieter day, weather wise. That way they’ll stand more chance of growing on well and getting their roots deep into the soil.

The Borage planted at the back of the bed, to attract pollinators, has settled in nicely along with a couple of new lavender plants, grown from cuttings taken last year. We hope to be able to plant the chilli’s and the rest of the tomatoes in the next couple of days, because…….

FF Growing Vegetables Week 2
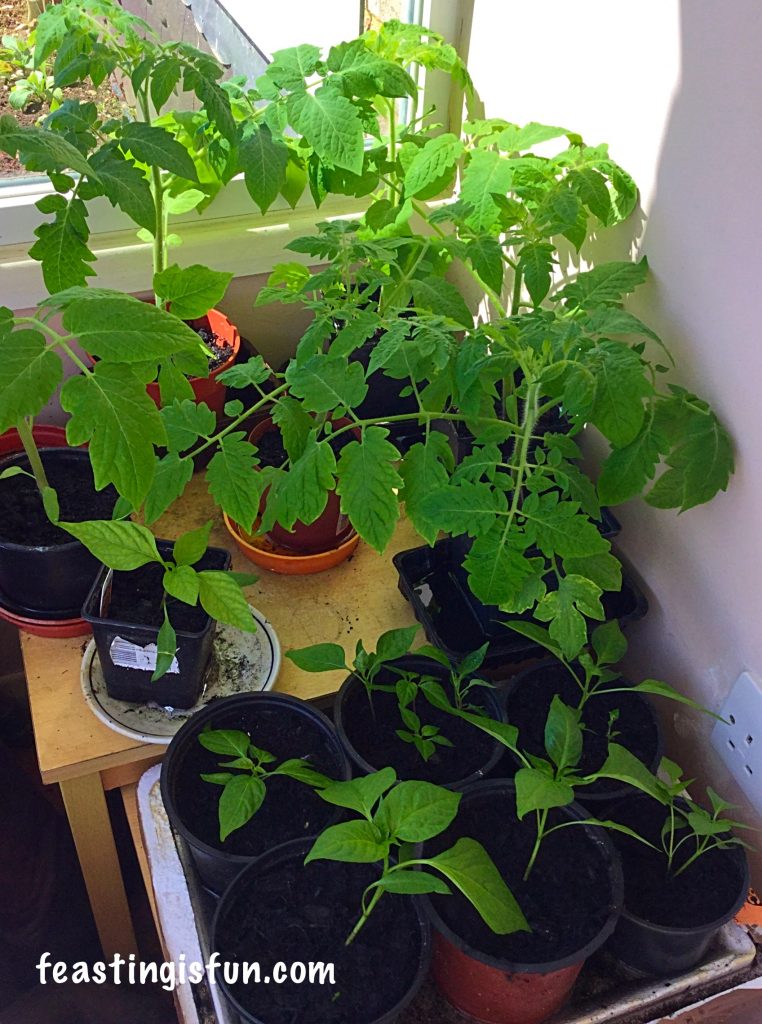
Growing Vegetables Week 2 Roma Tomatoes and chilli plants.

……they are starting to take over our porch!!!!

We are aware that we are just a wee bit behind on our planting, due to late sowing, however, when you have lovingly nurtured a plant from seed, potted it on, you want it to have the best possible chance it can. So these babies are staying put for a little while longer.

As part of our rather late and haphazard sowing, not everything got labelled. I only found out about the Gartenpearle Tomatoes as I rinsed out the pot and saw that I had indeed labelled it. Which means those in our porch are cordon Roma Tomatoes. Delicious small plum shaped tomatoes that we’ve had success with before.

FF Growing Vegetables Week 2
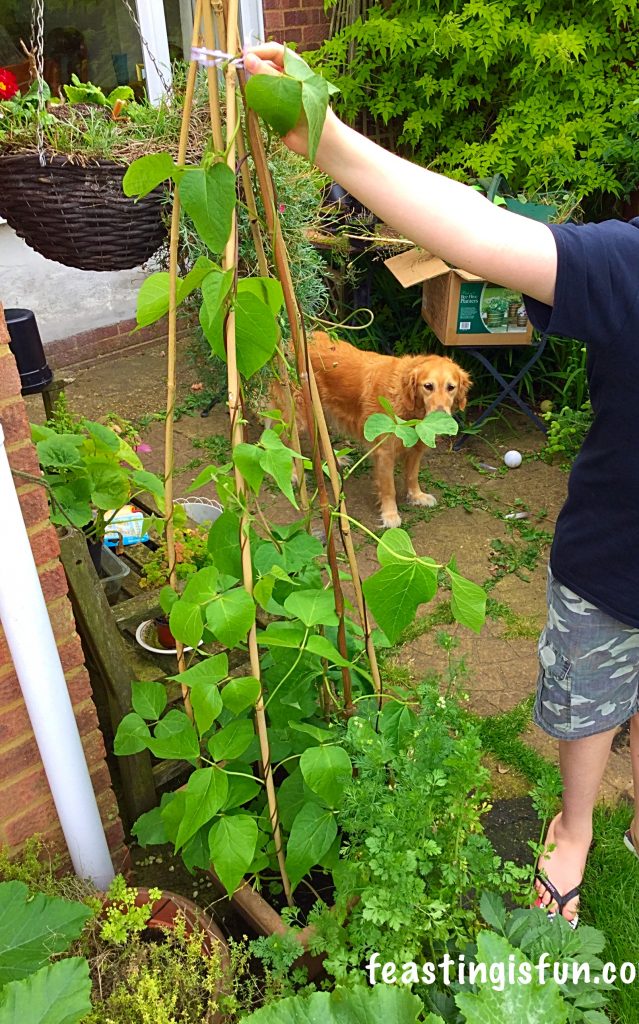
Growing Vegetables Week 2 means keeping up with our runner beans and a cheeky photo bomb by our Golden Retriever Rosebud!

To create a bamboo wigwam for the beans to climb up, insert 6 bamboo canes, thick end down, into a filled container, spaced evenly apart. I have used 2m canes as I’m 6ft and with stretched arms I’d struggle to pick higher than that! Taking care not to catch your eyes, draw all the canes together, 10cm/4″ from the top and tie them securely with string. I was able to reuse the raffia that came with the canes.

You may need to encourage the beans to spread out and climb the canes. This can be achieved by gently tying the beans to a cane. They’ll soon romp away! When the runner beans reach the top of the canes simply pinch out the tops. This will encourage side shoots to form, with more flowers, so more beans!

FF Growing Vegetables Week 2
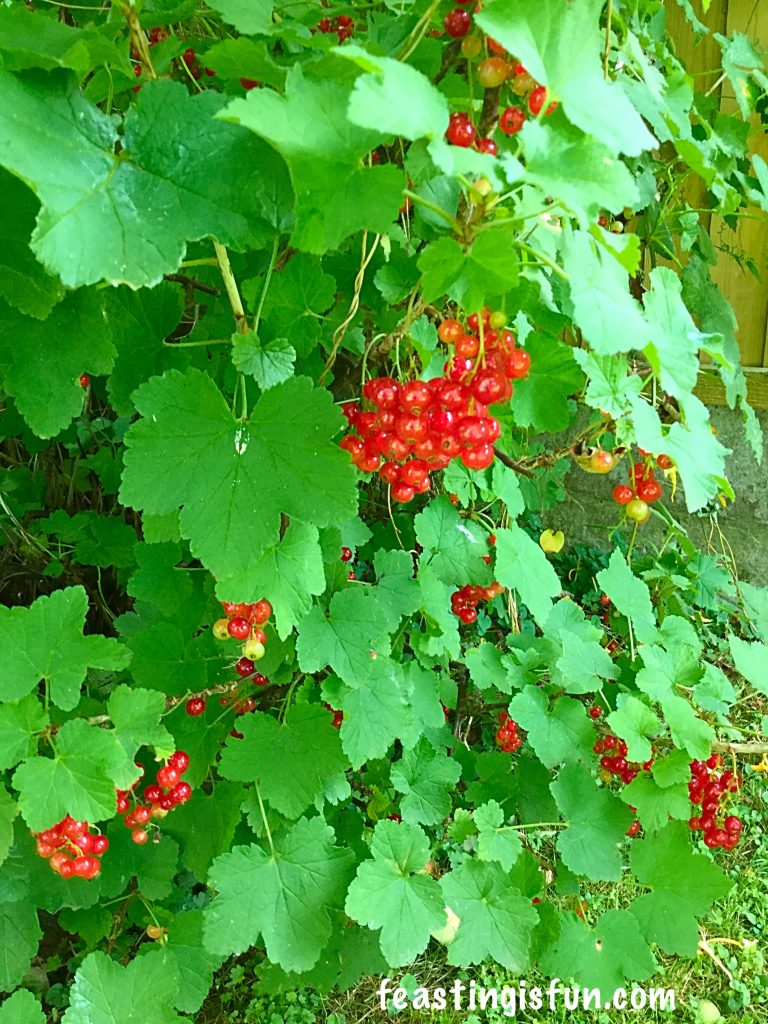
Growing Vegetables Week 2 Redcurrant jewels.

As well as enjoying rocket (arugula) and radishes in our salads this week, a quick inspection of the fruit garden revealed a good crop of redcurrants. Now currants always surprise me. Their ‘flowers’ are very plain and to be honest do not look like flowers. Yet I see bees pollinating them in mid Spring, no encouragement needed, especially considering the plants we have grown to attract pollinators in other areas of the garden! Yet the bees seem to know and we usually get a good harvest.

Bob was going to pick these today, for me to make jam. I instead decided it would be a good idea to start summer pruning the apple trees, we have two. So they will stay fresher on the bush and jam making will commence early next week.

If you have enjoyed Growing Vegetables Week 2 here are some other posts you may enjoy:

Growing Vegetables Week 1

FF Growing Vegetables Week 1
Growing Vegetables Week 1 Bob and Sammie’s journey starts.

Wilko Gardening Product Review

FF Growing Vegetables Week 2
The courgette plants are growing strongly, shouldn’t be long before they flower.


We are making progress. Not everything we wanted done has been finished, but that is gardening for you. As they say, even with all of the gardening jobs still to do, it’s important to take time to stop and smell the roses. Until next week, when hopefully our Freckles salad leaves will have germinated, happy gardening.

FF Growing Vegetables Week 2
Growing Vegetables Week 2 Dorothy Perkins Climbing Rose.

Bob and Sammie xx

Groseeds have kindly sponsored this venture by providing seeds. All views, opinions, content and photographs are my own. Any advice given is from me, Sammie an amateur gardener and is followed at your own risk. Please see my Disclosure Policy.
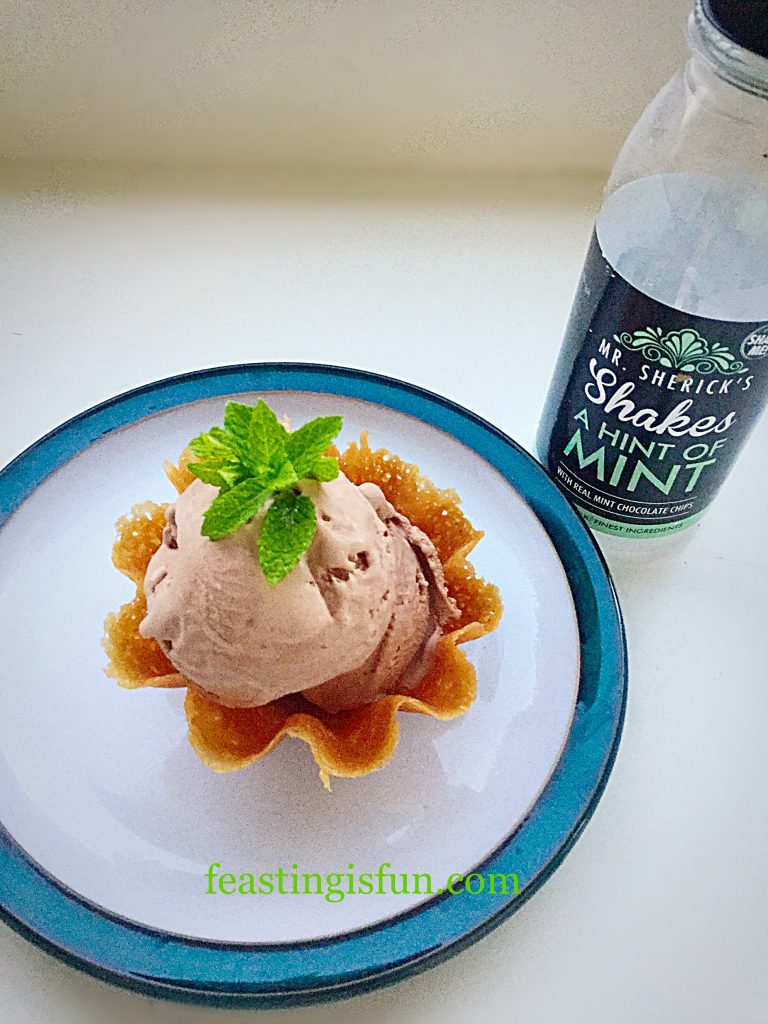
Mint Chocolate Milkshake Ice Cream

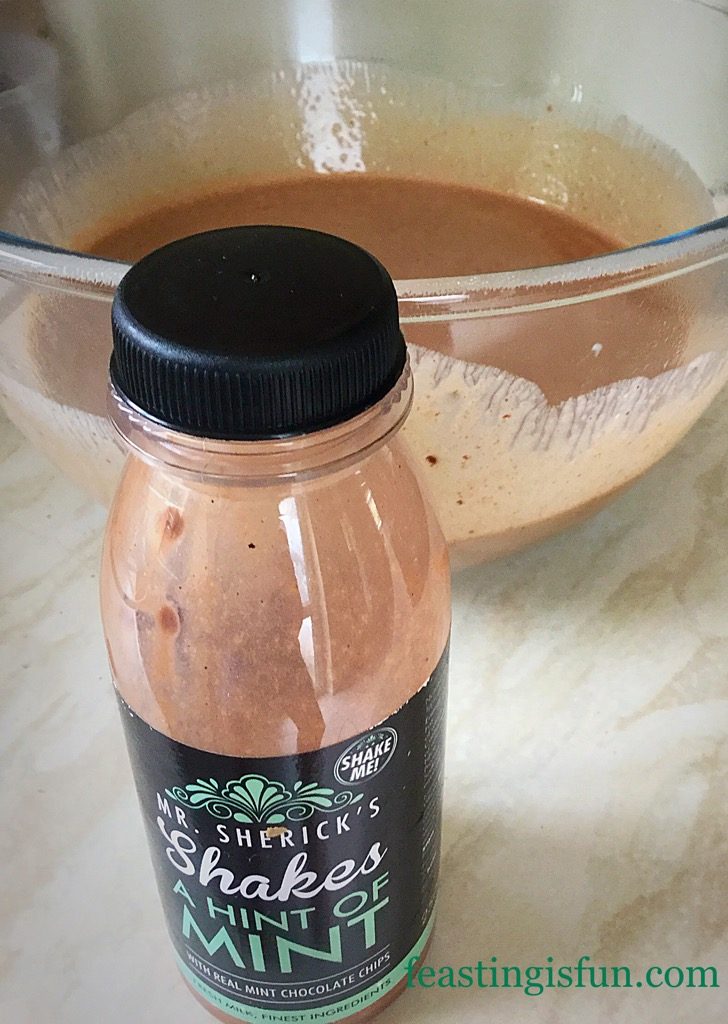
So this this summer I’m having lots of fun making different flavoured ice creams. Yet would I be able to turn a Mr Sherick’s Hint of Mint shake into one? Well, you know me, always up for a challenge. This one is not good, not great, but, awesome. A delicious creamy Mint Chocolate Milkshake Ice Cream!

FF Mint Chocolate Milkshake Ice Cream
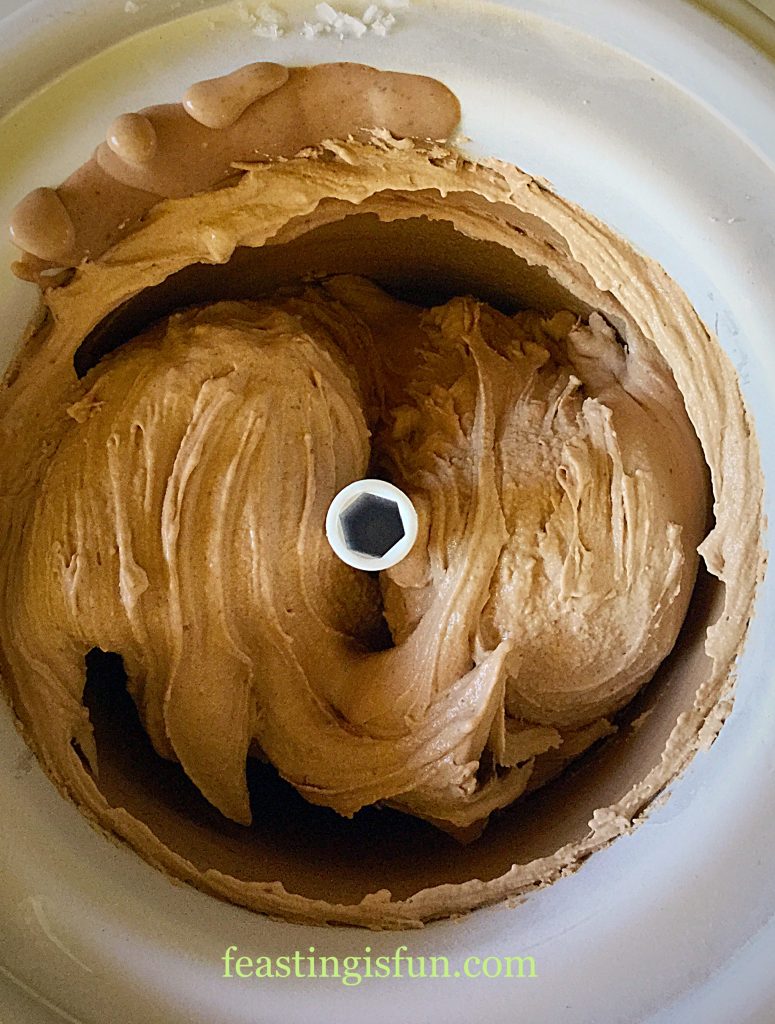
Mint Chocolate Milkshake Ice Cream churning Mr Sherick’s shakes into ice cream.

I do apologise for the poor lighting in the photographs. Once this ice cream was made, chilled, churned, frozen and served the light levels were low. If I’d have waited another day I would have had a riot at home. Everyone was desparate to see how the milkshake had turned into an ice cream!

FF Mint Chocolate Milkshake Ice Cream
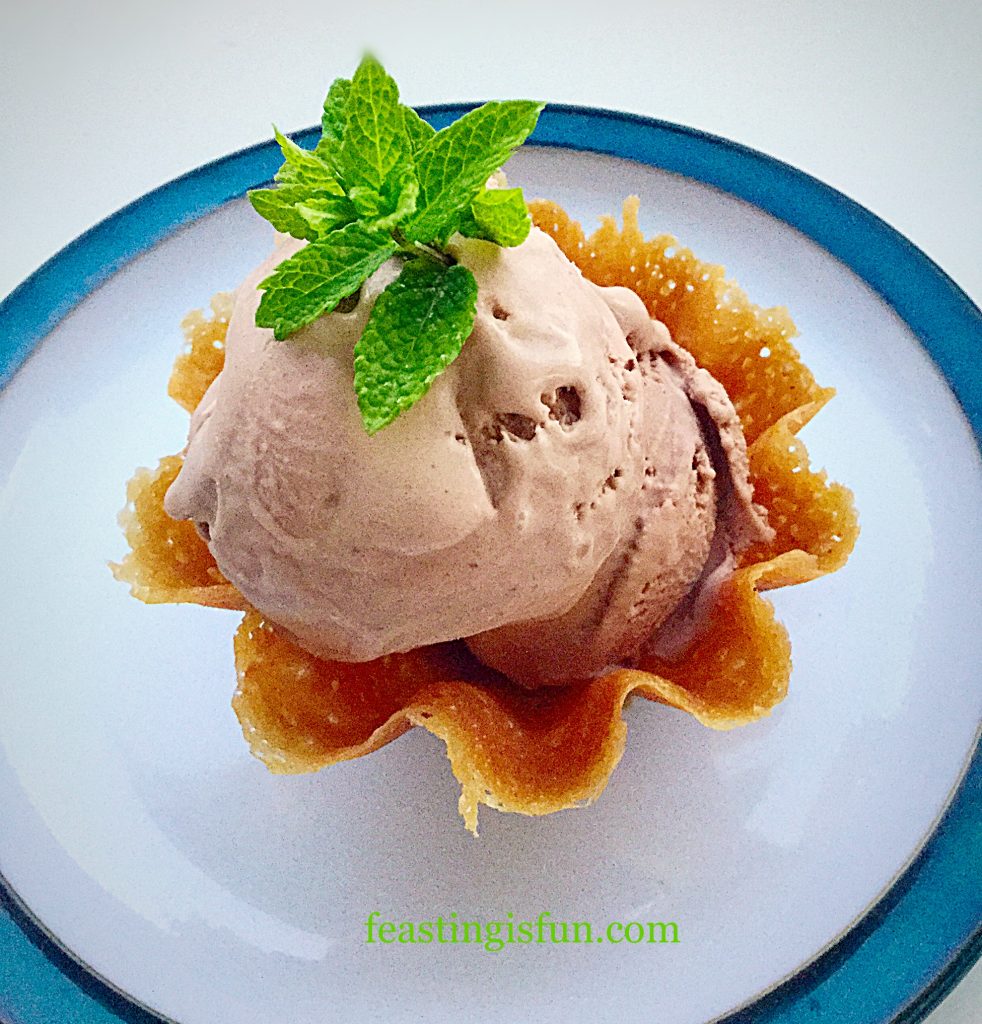
Mint Chocolate Milkshake Ice Cream a delicious twist on a milkshake.

When most people are given a milkshake or two, they tend to drink them. Oh no, not me. My brain starts whirring as to what can I make with them. I knew I wanted to try an ice cream recipe.

All of Mr Sherick’s shakes are thick, creamy and very luxurious, so I was pretty confident the ‘Hint of Mint’ shake would work well.

FF Mint Chocolate Milkshake Ice Cream
Mint Chocolate Milkshake Ice Cream soooo good!

What I was not prepared for was just how good the ice cream would turn out. Unbelievably creamy and smooth, with just the right ‘Hint of Mint’ against a light chocolate background. This Mint Chocolate Milkshake Ice Cream is seriously good. A massive hit with the whole family giving it a very firm 10/10.

As many of you who read this blog regularly will know, anything above an 8.5 is very hard to attain from our youngest daughter, so Mr Sherick’s you should be very pleased with a top score.

Whilst making the ice cream I resisted the urge to add some extra chunks of minty chocolate. I am so glad that I did. This ice cream is so smooth and dreamily creamy. Yes there is a place for mint chocolate chips in ice cream, but not in this recipe.

FF Mint Chocolate Milkshake Ice Cream

    Mint Chocolate Milkshake Ice Cream smooth and refreshing.


Recipe: Makes 750ml Mint Chocolate Milkshake Ice Cream 

1 x 250ml Hint of Mint Milkshake by Mr Sherick’s

300mls Double Cream

50ml Whole Milk

4 Large Free Range Egg Yolks

5tbsp Caster Sugar

1tsp Corn Flour – I use Waitrose

Method: For photographic step by step instructions see Very Vanilla Ice Cream.

Note: Ensure the frozen bowl part of your ice cream maker has been in the freezer for 8 hours or according to manufacturers instructions.

  • Pour the milkshake, milk and cream into a heavy based saucepan over a medium heat.
  • Bring to scalding point – a rim of small bubbles will form, just before the liquid boils.
  • As soon as the liquid has reached scalding point remove from the heat.
  • Into a large bowl add the egg yolks, sugar and corn flour.
  • Whisk until pale and creamy.
  • With the whisk on slow gently pour in the scalded cream/milkshake mixture.
  • Once combined pour the contents of the bowl back into the saucepan on a low/medium heat (custard base). Stirring continuously.
  • When the custard base has thickened and coats the back of a wooden spoon remove the saucepan from the heat.
  • Pour the custard base through a sieve into a clean bowl.
FF Mint Chocolate Milkshake Ice Cream
Mint Chocolate Milkshake Ice Cream base cooling.
  • Place cling film directly on top of the custard base to stop a skin forming.
  • Leave to cool and when just warm place in the fridge to chill until cold.
  • Once cold the custard base is ready to be churned into ice cream.
  • Set up your ice cream maker according to the instructions given by the manufacturer.
  • Switch the machine on so that it is churning and carefully pour in the custard base.
  • Churn until the ice cream is softly frozen. Stop the ice cream maker.
FF Mint Chocolate Milkshake Ice Cream
Mint Chocolate Milkshake Ice Cream softly frozen in the ice cream maker.
  • Remove the paddle from the ice cream maker and scoop all of the ice cream off into a freezer proof tub. Use a silicone spatula to scoop the remaining ice cream out and into the tub.
FF Mint Chocolate Milkshake Ice Cream
Softly frozen Mint Chocolate Milkshake Ice Cream ready for the freezer.
  • Pop a lid on the tub a place in the freezer until frozen solid, ideally overnight but you can check after 4 hours.
  • To serve your Mint Chocolate Milkshake Ice Cream, remove the tub from the freezer 15 minutes before serving.
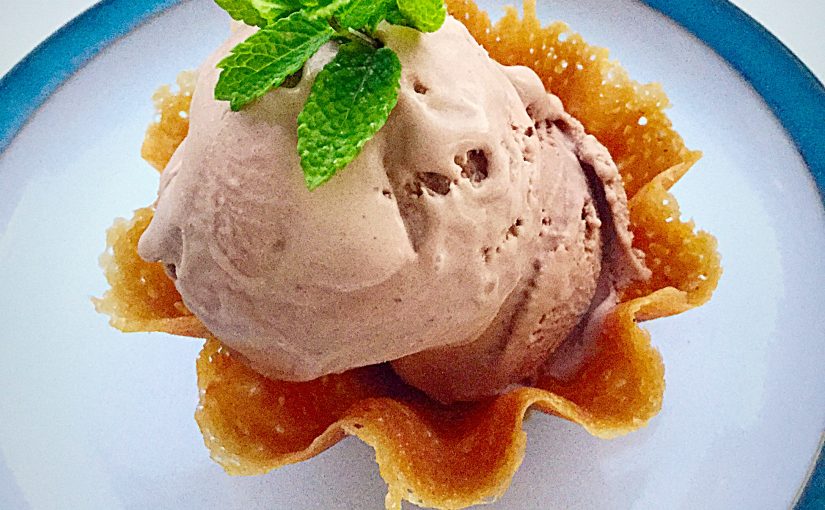
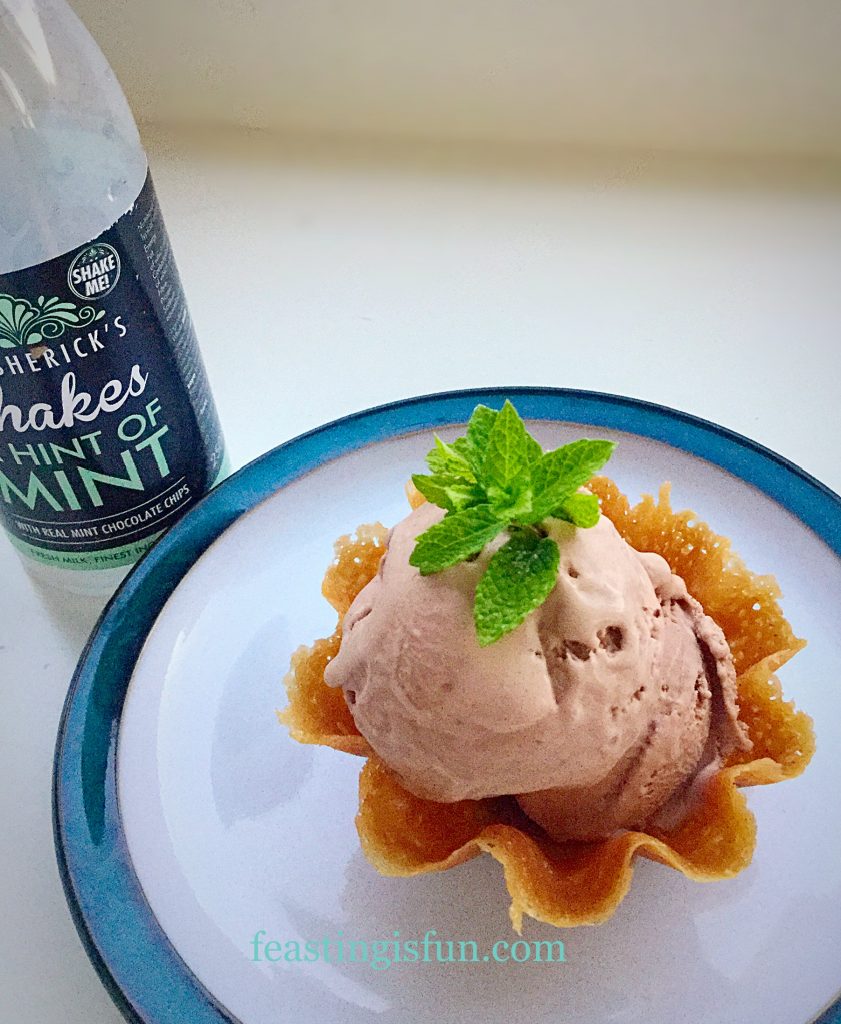
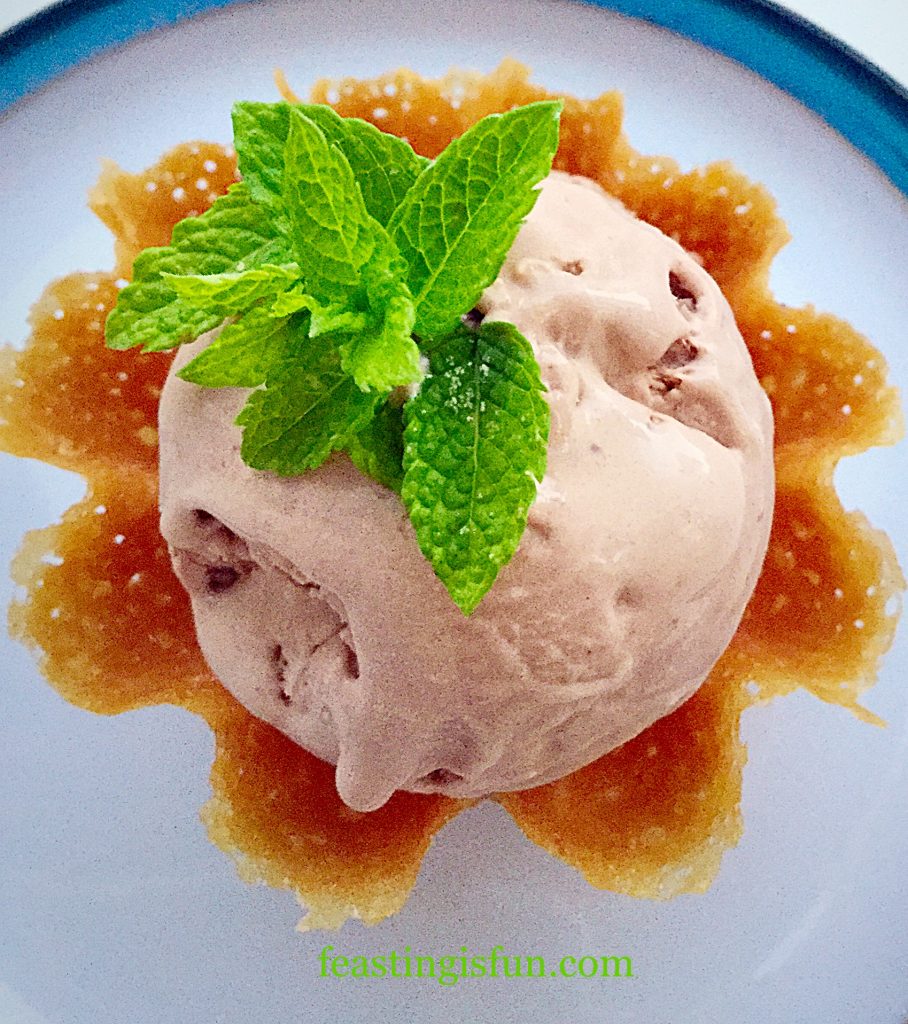
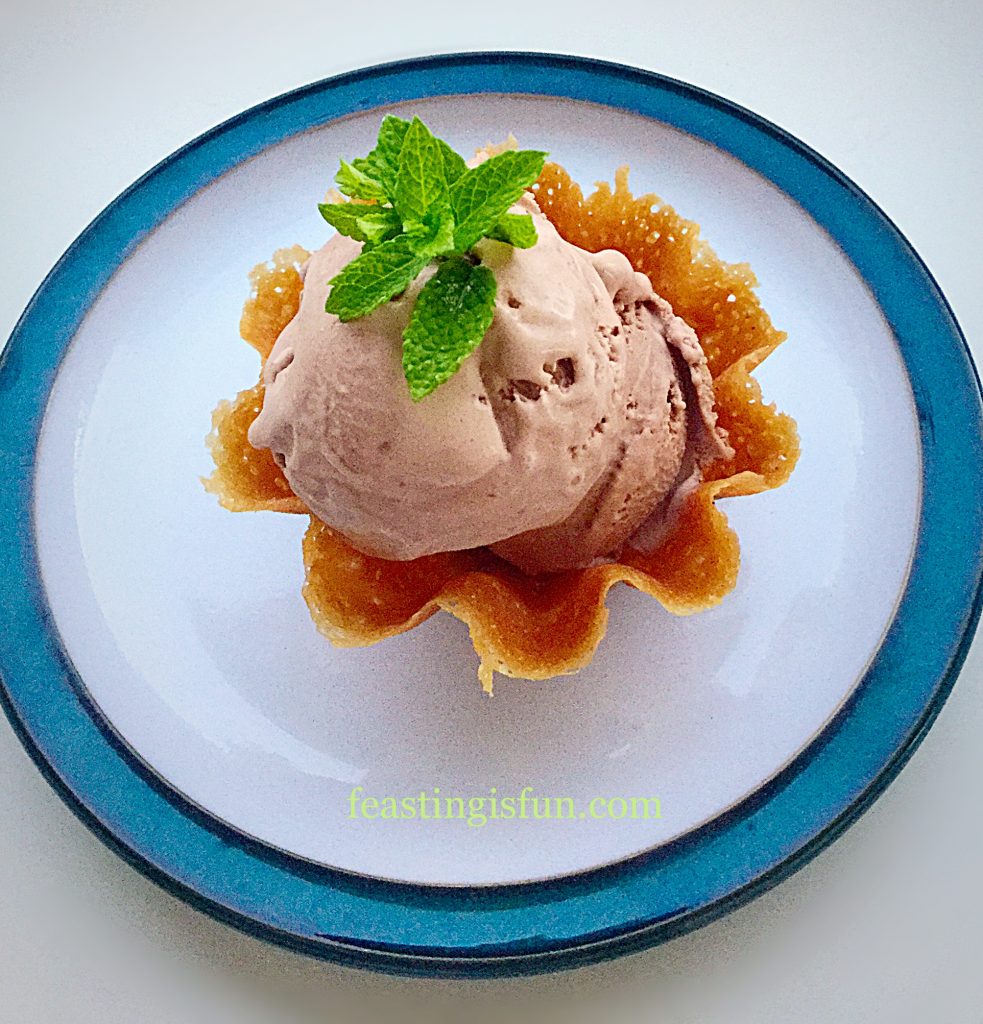
  • I scooped balls of the delicious ice cream into premade (not by me!) brandy snap baskets and garnished with a little fresh mint.
FF Mint Chocolate Milkshake Ice Cream
Mint Chocolate Milkshake Ice Cream a classy dessert.

One bottle of ‘Hint of Mint’ milkshake makes a smooth, elegant dessert for 4-6 people, depending on how generous your portions are. In our house it was split between 5 people.

I am utterly thrilled that I was not only able to turn a shake into ice cream, more so that it was a very, very good ice cream. The hint of mint was still there and this proved to be a very smooth and refreshing ice cream. Perfect after a spicey meal, or in a cone in the garden whilst enjoying the sun.

Why don’t you churn your Mr Sherick’s shakes into ice cream?

If you have enjoyed the recipe for this Mint Chocolate Milkshake Ice Cream here are some others you may like to try:

Chocolate Honeycomb Ice Cream

FF Chocolate Honeycomb Ice Cream
Chocolate Honeycomb Ice Cream delicious in these toffee cookie cups.

Lemon Ripple Ice Cream

FF Lemon Ripple Ice Cream
Lemon Ripple Ice Cream just add a spoon!

Chocolate Orange Ice Cream

FF Chocolate Orange Ice Cream
Chocolate Orange Ice Cream with a chocolate ganache ripple.

Creating new flavours using my new Andrew James Ice Cream Maker is so much fun. Using milkshakes from Mr Sherick’s to successfully create delicious ice cream is a creative achievement for me.

If you’ve been inspired to churn your shakes into ice cream please let me know? I love reading your comments and seeing your photos on Twitter and Instagram. Talking of which, keep your eyes open for a Mr Sherick’s giveaway coming very soon.

Have fun making, baking and creating in your kitchens and remember food always tastes better when it’s shared.

Sammie xx

Mr Sherick’s sent me some of their shakes to try. All opinions, views, content and photographs are my own. Please see my Disclosure Policy.
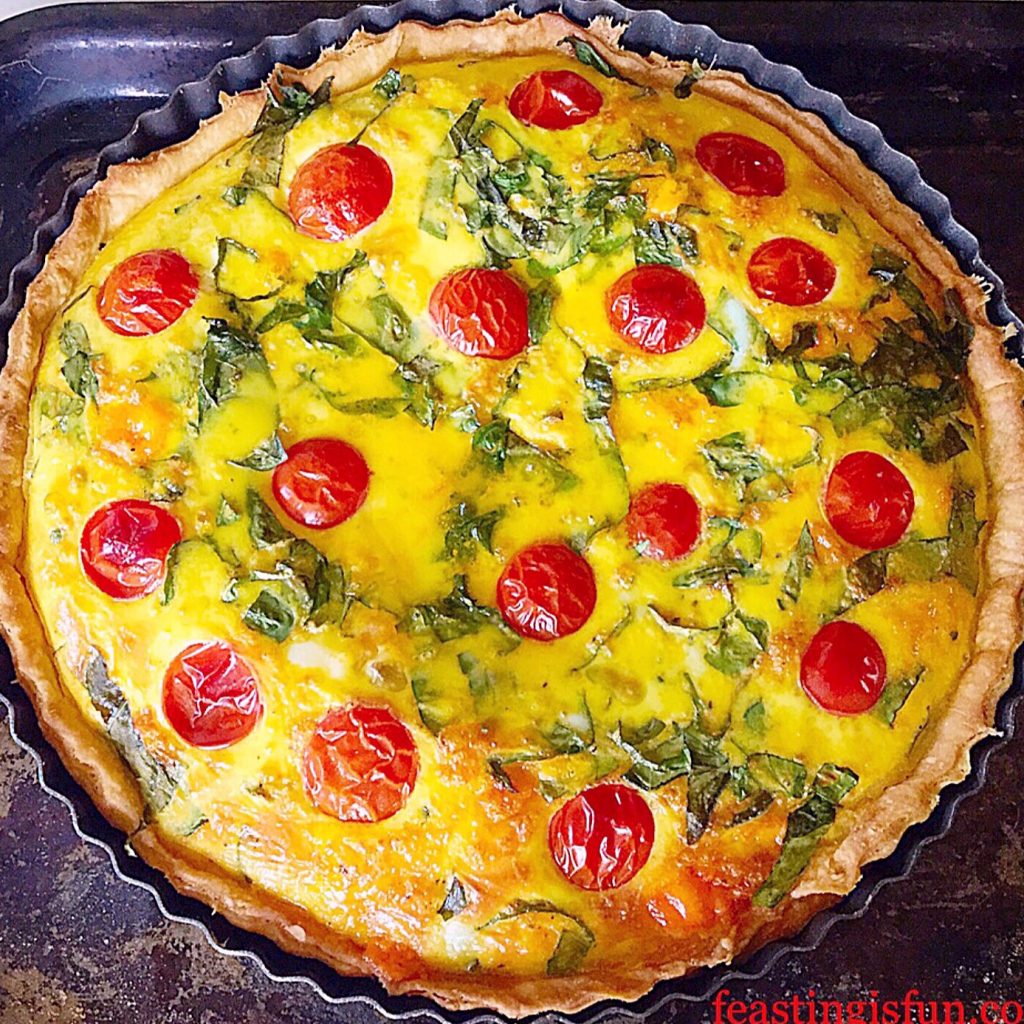
Cheddar Tomato Basil Quiche

It would seem that Monday’s have become quiche days. This was not intentional, although I haven’t been cooking Sunday roasts for the last few weeks, so that may explain it. Plus we all love quiche in our house. It’s easy to make and bake in the morning, ready for a quick reheat in the evening for dinner. So today I give you my Cheddar Tomato Basil Quiche.

Pinterest sized image of quiche with descriptive graphics.

Now if you’re a little quirky like I am, you’ll understand why quiche is one of my most favourite pastry dishes. It’s the ratio of pastry to filling that I love. Technically a tart, a quiche has no pastry top. So this Cheddar Tomato Basil Quiche has sides and a base of delicious, homemade, all butter shortcrust pastry and lots of eggy filling.

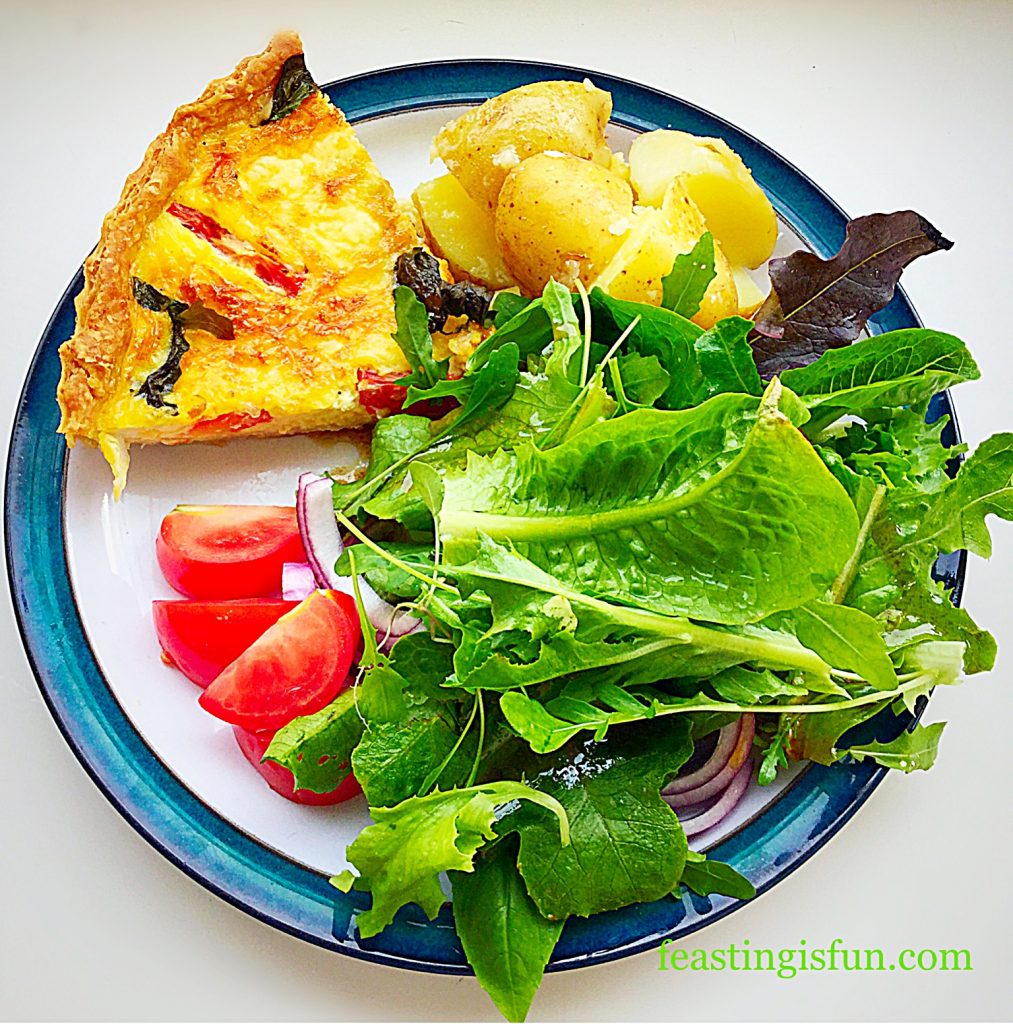
A portion of quiche served with new potatoes and salad leaves.
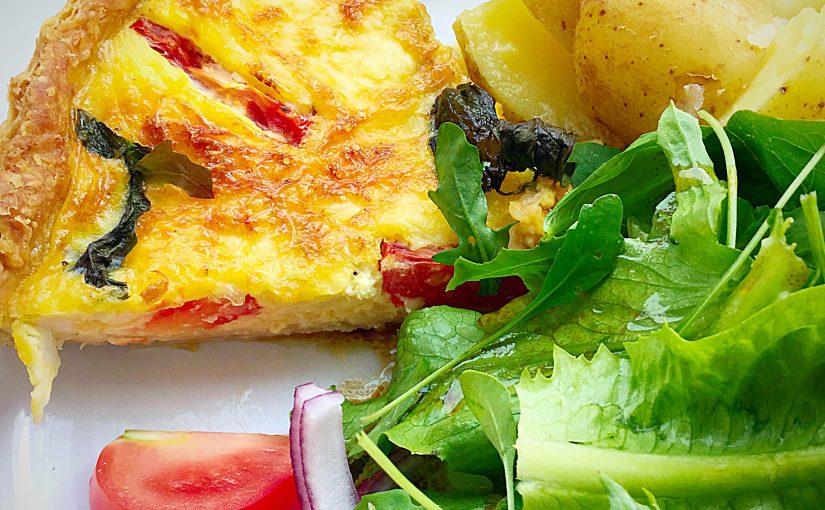
Cheddar Tomato Basil Quiche served with boiled new potatoes and homegrown salad leaves.

One quick word on eggs – I adore them and only ever buy free range or organic. They are my go to comfort food and also the one thing I can make myself eat when I’m tired or in pain. I still eat my boiled egg out of the chick covered eggcup holder I had when I was little. I love eggs in all guises but a really good dippy boiled egg, or soft fried egg are my favourites!

Quiche appreciation

Back to quiches and this Cheddar Tomato Basil Quiche in particular. I’ve made a few over recent weeks and I’ll link them at the bottom, but now I’m actively trying to make vegetarian ones. Twitter has a #MeatFreeMonday hashtag and so it fits in nicely with that for the time being. Most of my quiche recipes can be switched to veggie versions if you want to.

A dinner serving of quiche on a plate with new potatoes and salad.
Cheddar Tomato Basil Quiche

Pastry! I have written a recipe that is absolutely foolproof for making Perfect All Butter Shortcrust Pastry. Yes I totally get that we’ve all got busy lives and as yet, no I haven’t made my own puff pastry, but, my recipe is quick and simple. It’s also a lot cheaper than buying your own pastry, plus you know exactly what goes in it. So please be encouraged to try making it for this Cheddar Tomato Basil Quiche. You’ll have twice as much as you need and you can easily freeze the other half!

Recipe: Cheddar Tomato Basil Quiche

500g/1lb 2oz – 1/2 quantity of Perfect All Butter Shortcrust Pastry

Spare Plain Flour for dusting the work top and rolling pin

6 Large Free Range Eggs

2 Tablespoons Whole or Semi Skimmed Milk

2 Whole tomatoes – each cut into 6 wedges

150g/5oz Strong Cheddar Cheese Grated – I use Wyke Farms mature cheddar

Handful of Fresh Basil Leaves

Pinch of Salt – I use Maldon Sea Salt

Freshly Ground Pepper

Method: Peheat the oven to 220C/200C fan, gas mark 7, 425F

Making and pre-baking the tart case

  • Dust the work top with flour and rolling pin. Form the pastry into a ball.
  • Roll out from the centre of the pastry, in one direction until you have a circle slightly larger than your quiche tin.
  • Ensure the quiche tin is placed onto a baking tray.
  • Transfer the pastry to the tin by wrapping the rolled out pastry around the rolling pin.
  • Ensure the pastry is pushed, not stretched into position, pressing firmly against the sides of the tin.
  • Roll the rolling pin over the top of the tin. This creates a nice clean edge to the quiche.
  • Cut a piece of baking parchment slightly larger than the filled tin. Scrunch it up and then place on top of the pastry.
  • Fill with ceramic balls or baking beans and place in the top of a preheated oven for 15 minutes.
  • After 15 minutes baking time has elapsed remove the baking tray from the oven.
  • Using the parchment paper lift out the baking balls.
  • Return the pastry case to the oven and bake for a further 5-10 minutes until the pastry has just turned golden.
FF Cheddar Tomato Basil Quiche
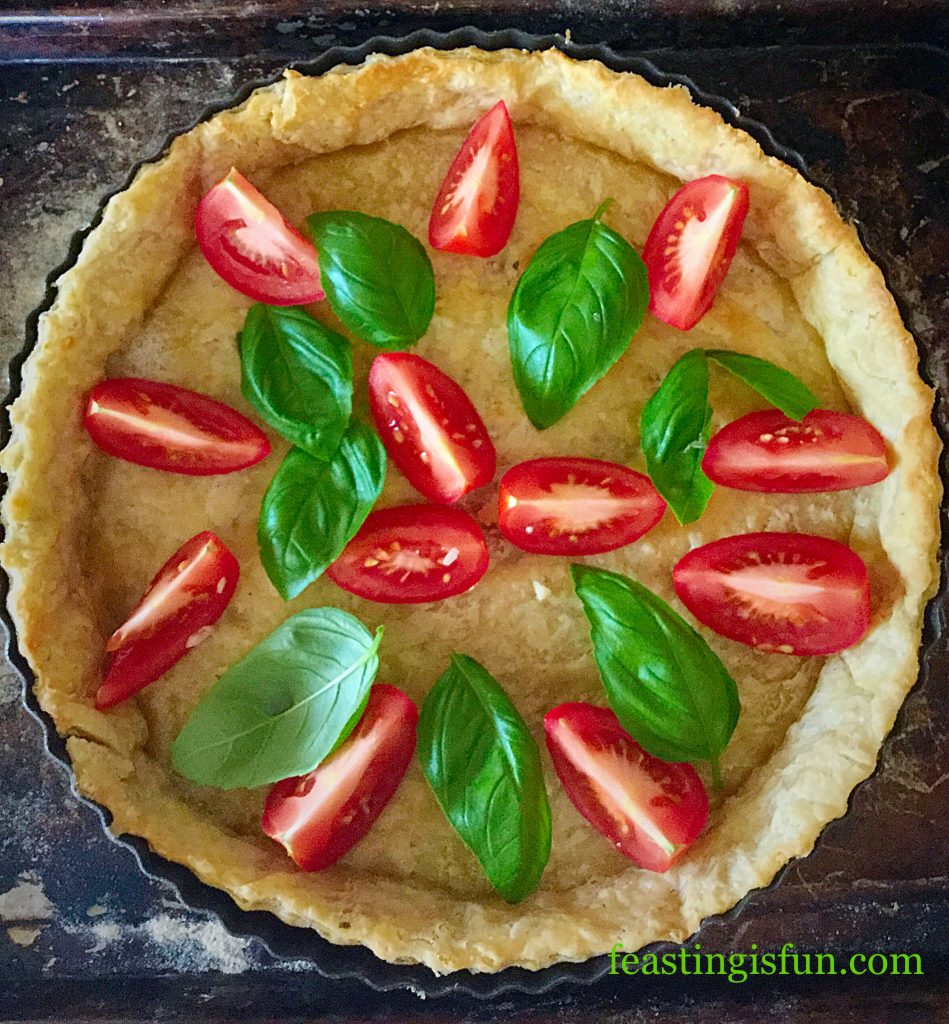
Place the tomatoes and half of the basil on the pastry base.

Filling and baking the Quiche

  • Next add the grated cheese in between the tomatoes.
  • Crack all the eggs into a large jug (I always crack mine into a separate bowl first).
  • Add the milk, salt and pepper and whisk lightly with a fork until combined.
  • Pour the egg mixture carefully over the filled quiche.
FF Cheddar Tomato Basil Quiche
Decorate the top of the quiche with the remaining basil leaves.
  • Place the quiche, still on the baking tray, into the centre of the oven and bake for 25-30 minutes.
  • The Cheddar Tomato Basil Quiche is baked when it is golden and there is no wobble to the centre of the quiche.
  • Once baked remove the quiche from the oven and allow to cool for 15 minutes.
FF Cheddar Tomato Basil Quiche
Cheddar Tomato Basil Quiche so easy to make and easy to eat.

To serve slice into 6 portions. Serve warm with salad and new potatoes for a wonderful mid week meal. Likewise this delightful quiche is delicious at room temperature and is perfect for buffets, packed lunches, picnics and food on the go.

Ensure the Cheddar Tomato Basil Quiche is cold before wrapping in cling film or foil and store in the fridge for up to 4 days.

Alternatively, why not swap Red Leicester Cheese for the cheddar and add British cherry tomatoes, for a delicious twist on this recipe!

Red Leicester and Cherry Tomato Quiche

If you have enjoyed the recipe for this Cheddar Tomato Basil Quiche here are some other recipes you may also like:

Feta Red Onion Marmalade Quiche

FF Feta Red Onion Marmalade Quiche
Feta Red Onion Marmalade Quiche delicious layers of flavour.

Smoked Bacon Asparagus Quiche

FF Smoked Bacon Asparagus Quiche
Smoked Bacon Asparagus Quiche a delightful combination of flavours.

Asparagus Proscuitto Ham Tart

FF Cheddar Tomato Basil Quiche
Asparagus Prosciutto Ham Tart made during a silicone baking mat review.


Quiches are so versatile. Layers of flavour can be built inside the egg tart. I’m particularly fond of quiches that use relish or condiments to build flavour. Likewise fresh herbs can really lift the flavour of a quiche. The basil in this Cheddar Tomato Basil Quiche turns a good quiche into a great one.

Play around with fresh herbs and good quality chutneys or relishes in your baking, especially in quiches. Their flavour can really add depth or freshness to the resulting flavour.

Whatever you are making, baking and creating in your kitchens, have fun creating your feast to share with others. Thank you for sharing photos of your amazing creations on Twitter and Instagram and for taking time to leave comments. It really makes my day to see what you come up with and how you interpret my recipes.

Sammie xx

Loveliest Lemon Curd Cake

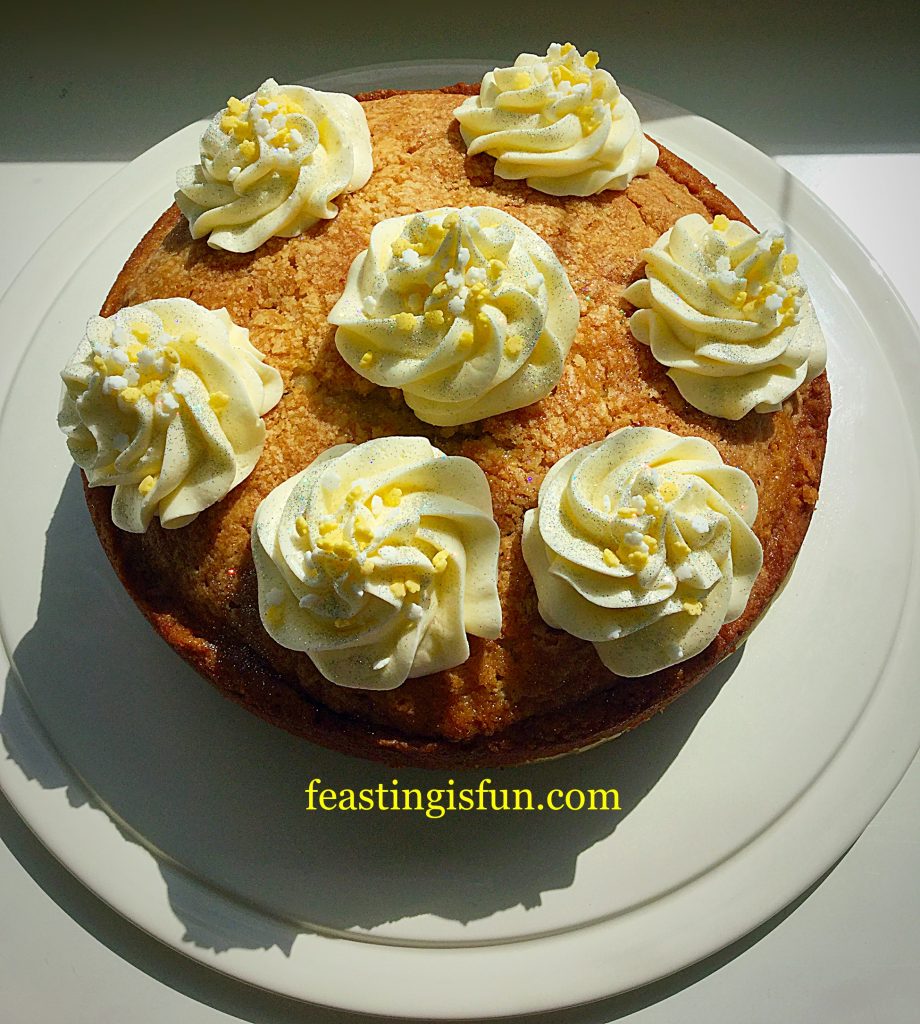
For for those of you who have visited Feasting is Fun before, you will be very aware of my love affair with lemons. I absolutely adore not only their tart, intense flavour, but also their ability to transform a sweet or savoury dish. After using lemon curd to create my Lemon Ripple Ice Cream, I decided to use it in a bake. Specifically this delightful Loveliest Lemon Curd Cake.

FF Lemon Curd Cake
Loveliest Lemon Curd Cake perfect for afternoon tea.

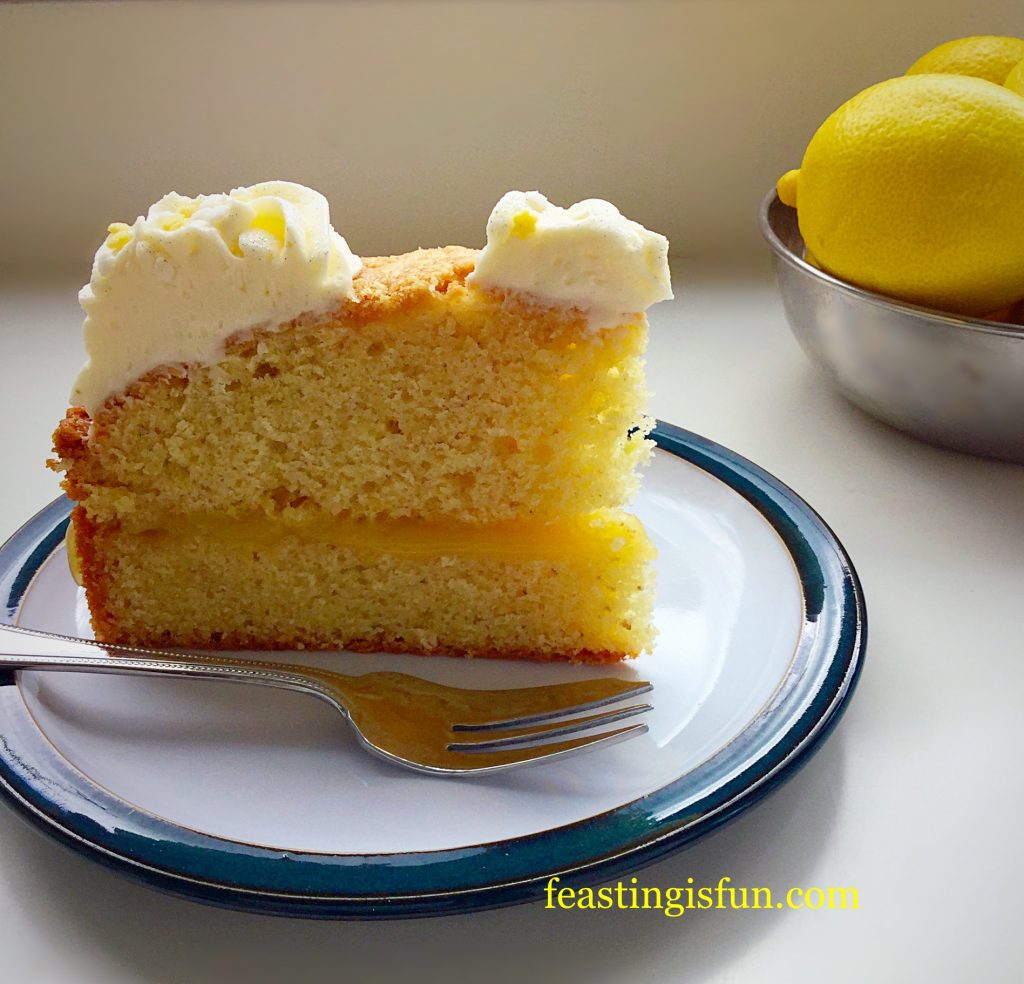
A wonderfully moist, damp cake, the lemon curd injects a wonderful tartness in the centre that is balanced by the lemon swirled buttercream on top.

If you love lemons, then I’ll guarantee this Loveliest Lemon Curd Cake will delight you!

FF Lemon Curd Cake
Loveliest Lemon Curd Cake whatever time of year brings the sunshine indoors.

Baked as a whole cake, that is then cut in two, this refreshingly flavoured cake is simple to make and decorate.

FF Lemon Curd Cake

    Loveliest Lemon Curd Cake with an added sprinkle of glitter.

I was sent a new cake tin to try out, so I decided on this Loveliest Lemon Curd Cake. The cake batter has both finely grated lemon zest and lemon extract oil in it. I’ve given an alternative for the oil in the recipe, although I do recommend buying some if you can. It brings another level of lemonyness to the cake and unlike fresh lemon juice, does not cause any curdling of the cake batter or buttercream.

FF Lemon Curd Cake
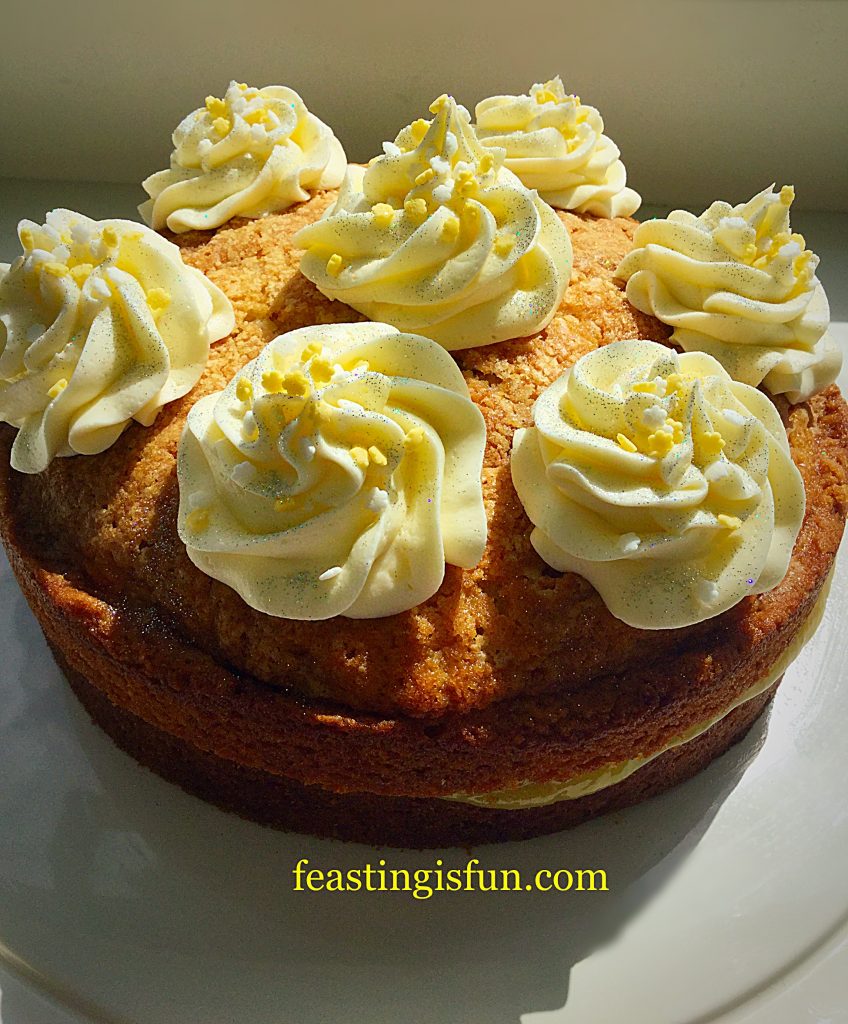
Loveliest Lemon Curd Cake look at how the light shines through the lemony yellow of the cake?

Lemons have such a sunny yellow colour that they really do bring the sunshine indoors whatever the weather!

Recipe: Loveliest Lemon Curd Cake serves 8-10

You will need an 8″/20cm diameter cake tin that is 3″/7.5cm deep

275g/10oz Unsalted Butter – plus a little extra for greasing

275g/10oz Caster Sugar

1tsp Lemon Oil – I use Nielsen-Massey

6 Large Free Range Eggs

275g/10oz Self Raising Flour (if using plain add 2tsp baking powder)

1/4tsp Salt – I use Maldon Sea Salt

Grated Zest of 1 Whole Lemon

4-5tbsp Lemon Curd – I use Waitrose luxury lemon curd – make sure you pick a tart one

For the icing:

100g/4oz Unsalted Butter

200g/7oz Sifted Icing Sugar

1/2tsp Lemon Oil – or 1tbsp Lemon Curd

2tbsp Very Hot Water from a kettle

Optional – Sprinkles and edible glitter

Method: Preheat the oven to 160C/140C fan, gas mark 3

  • Grease with butter and line the base of the cake tin with baking parchment. I was  testing a new PushPan. I still greased and lined the tin.
  • Into a large bowl add the butter, salt and sugar.
  • Whisk/beat until pale and creamy.
  • Add all 6 eggs (I crack mine into a separate bowl first) and the lemon oil/substitute with 1tbsp of lemon curd if no lemon oil is available.
  • Sift in the self raising flour.
  • Mix on a low speed until just combined.
  • Add the finely grated zest of one whole lemon.
  • Mix the cake batter until just smooth – I do this by hand using a spoon.
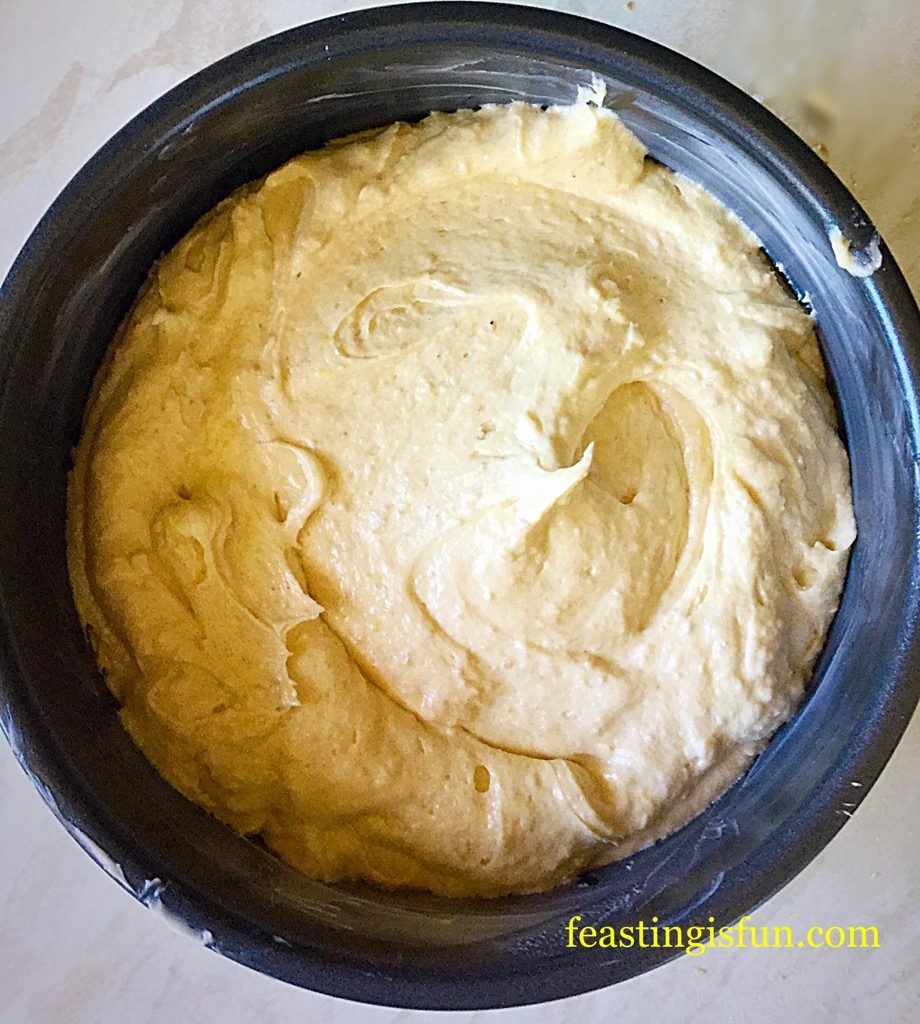
  • Spoon the Loveliest Lemon Curd Cake batter into the cake tin and smooth the top.

FF Lemon Curd Cake

    Loveliest Lemon Curd Cake ready for the oven.
  • Place the cake tin into the centre of the oven and bake for 1 hour – 1 hour 15 minutes. The cake is baked when an inserted skewer comes out clean. My cake took 1 hour 15 minutes to bake.
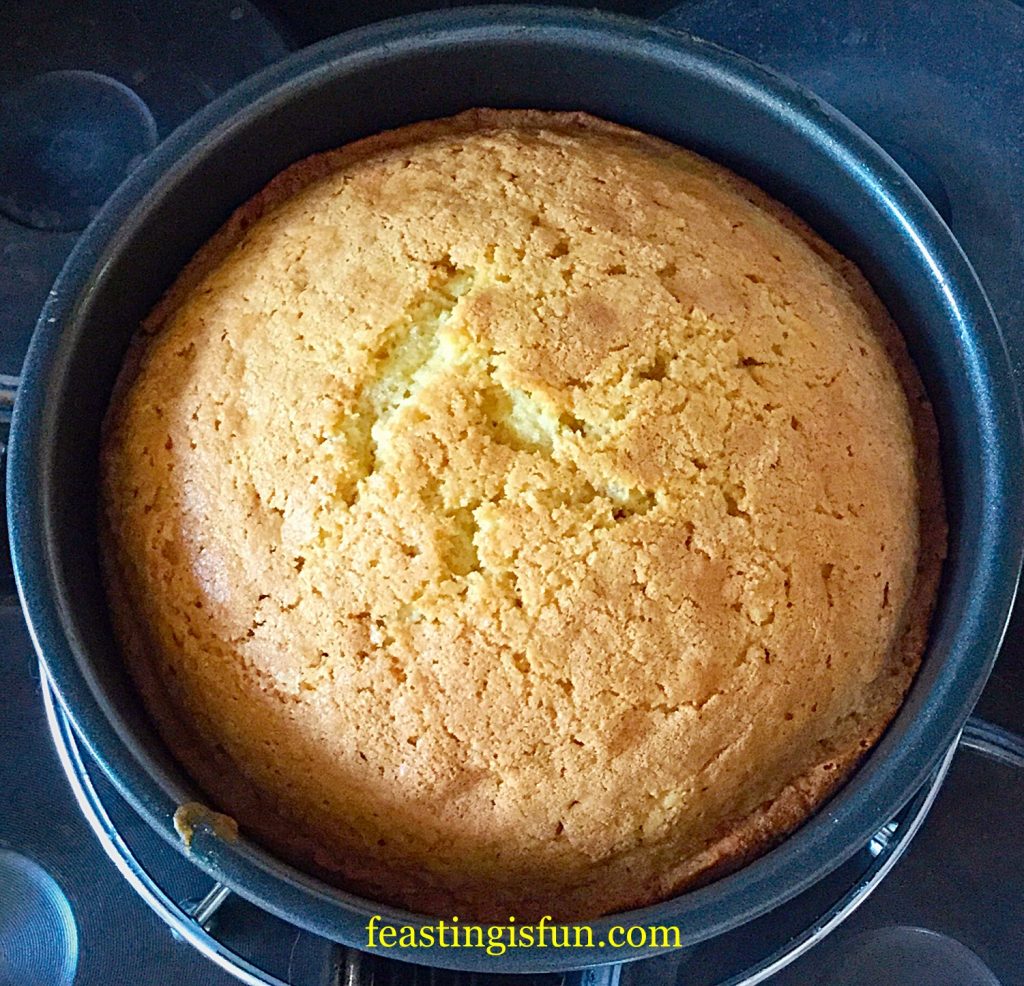
  • Once the cake is baked remove from the oven and allow to cool completely in the cake tin.
FF Lemon Curd Cake
Baked Loveliest Lemon Curd Cake cooling in the tin.
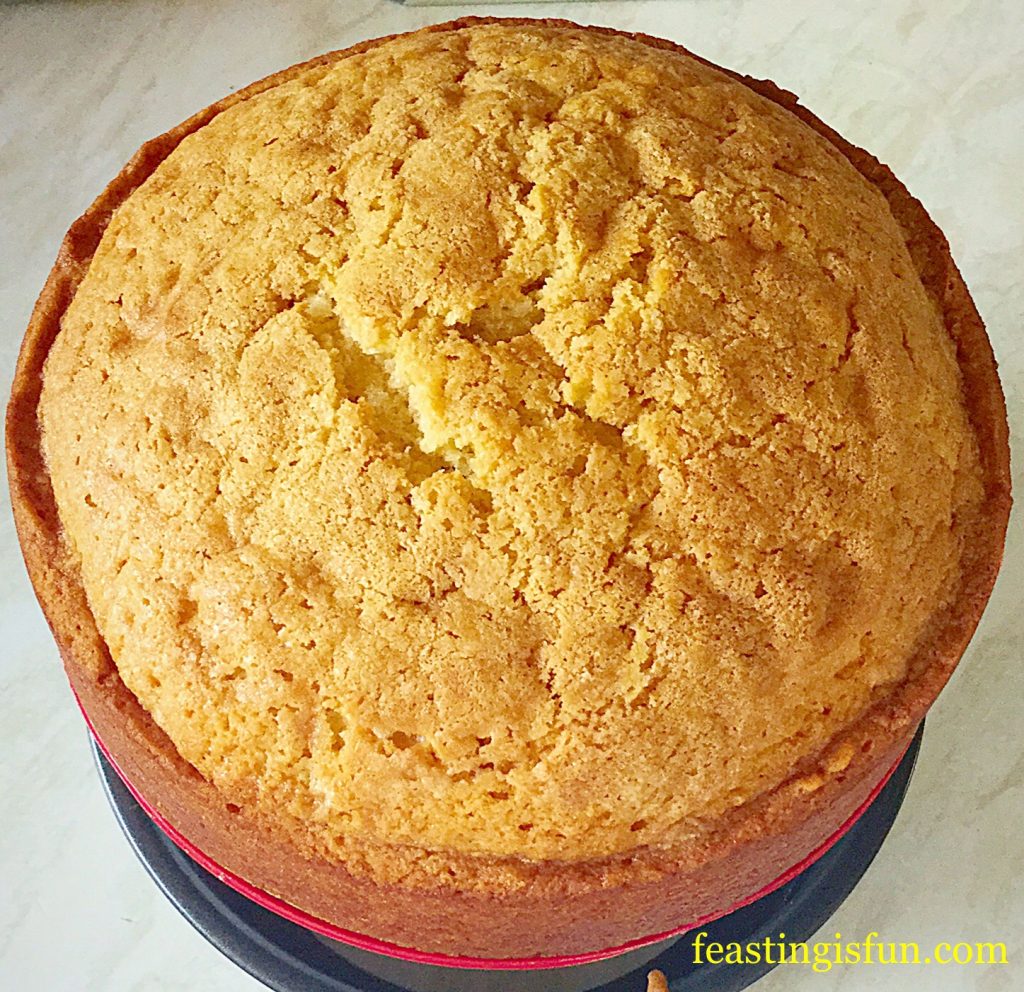
  • When the cake is cold remove from the tin.
  • With the PushPan tin I used, I simply popped the pan on to a tin of beans and pressed the sides down. The cake released from the tin very easily.
FF Lemon Curd Cake
Loveliest Lemon Curd Cake easily released from the PushPan

Making the lemon buttercream:

  • Into a large bowl add the softened butter, sifted icing sugar, lemon oil or curd and 2 tablespoons of hot water.
  • Whisk slowly at first, increasing in speed as the icing sugar is absorbed. Continue whisking on high for a couple more minutes until you have a pale, creamy, light buttercream.
  • Scoop the buttercream into a disposable piping bag fitted with a large closed star tip.
  • Carefully cut the cake in half horizontally, so that it becomes a sandwich cake.
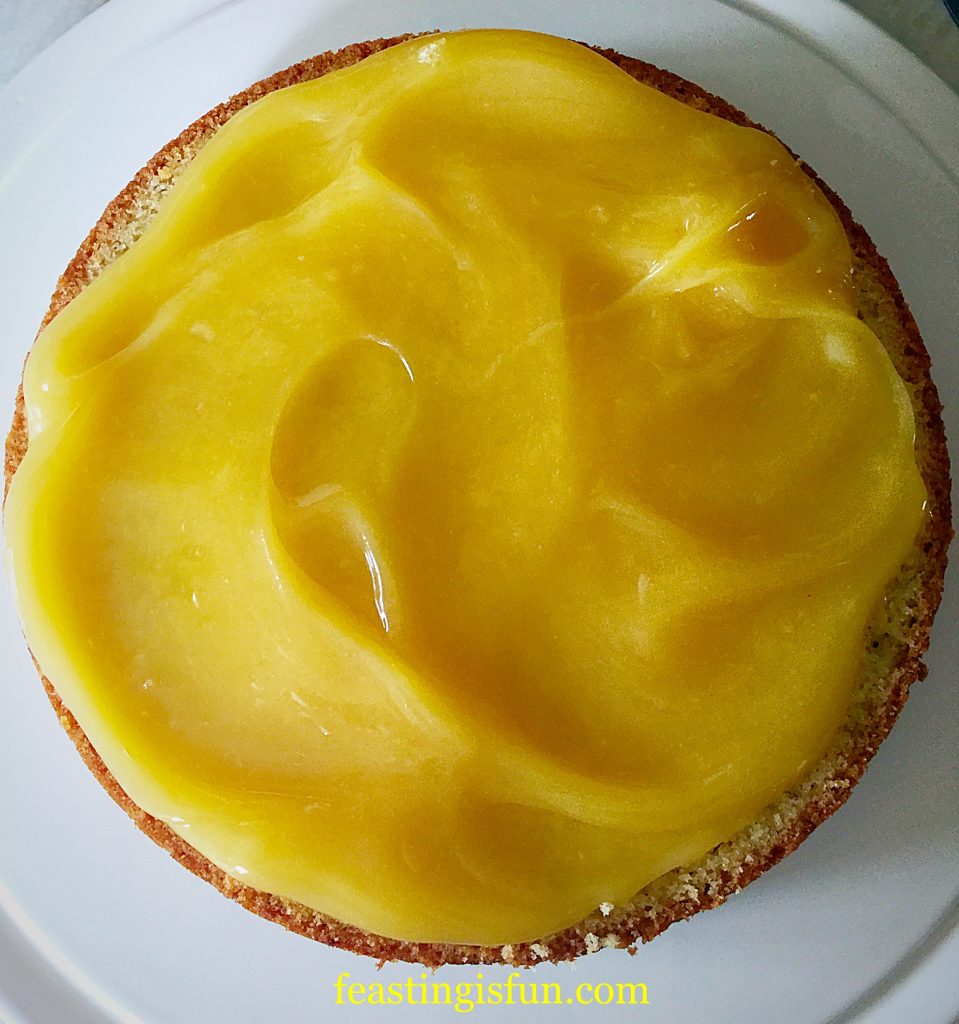
  • Spoon enough lemon curd on to the bottom layer to cover it generously.
FF Lemon Curd Cake
Add a generous layer of lemon curd.
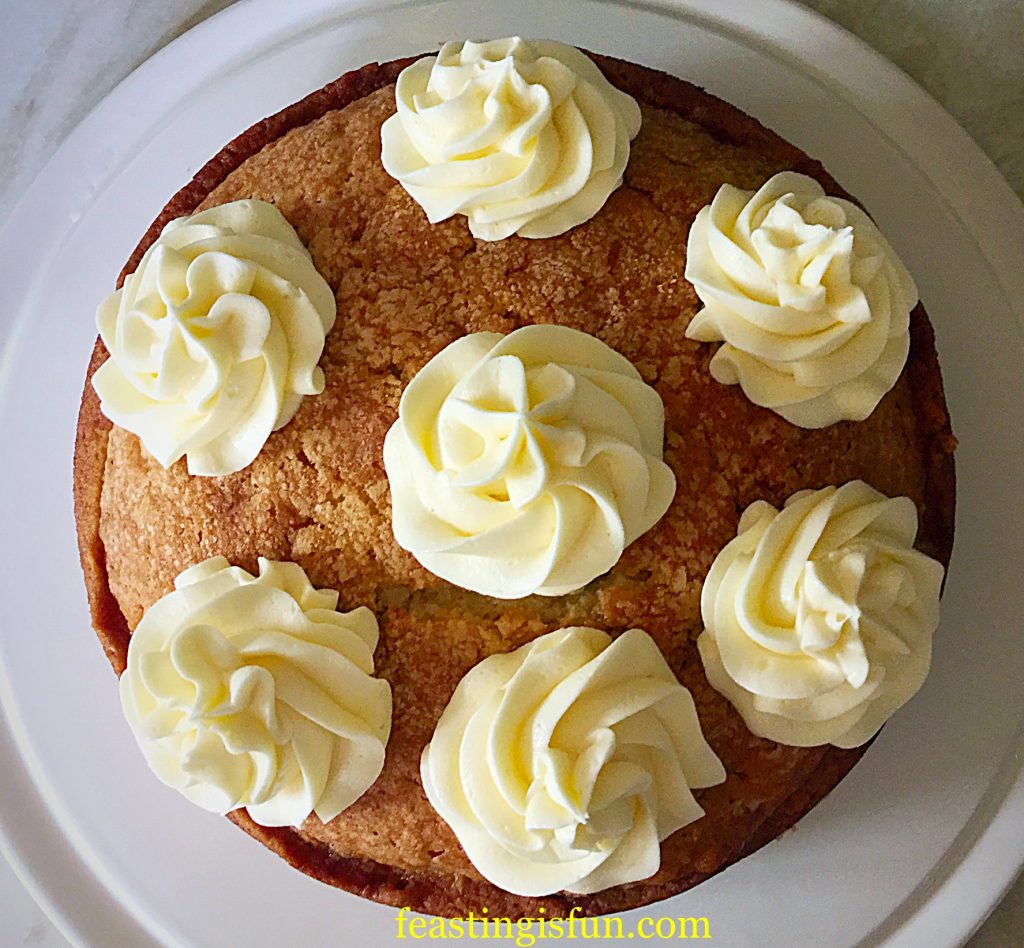
  • Place the top of the cake back on and pipe six buttercream swirls around the edge and one in the centre of the cake.
FF Lemon Curd Cake
Loveliest Lemon Curd Cake so pretty but there’s room for a finishing touch.
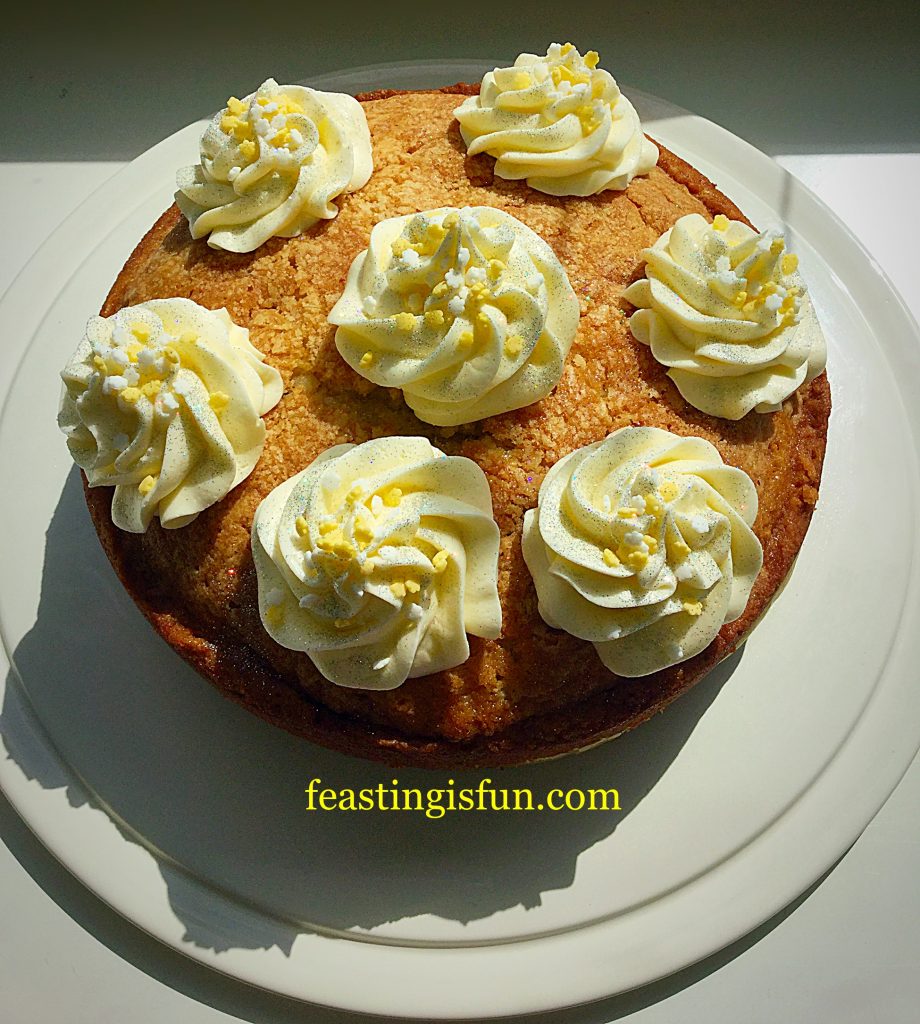
  • Add sprinkles and edible glitter (if using) and your Loveliest Lemon Curd Cake is ready to be sliced and served.
FF Lemon Curd Cake
Loveliest Lemon Curd Cake sparkling deliciousness.

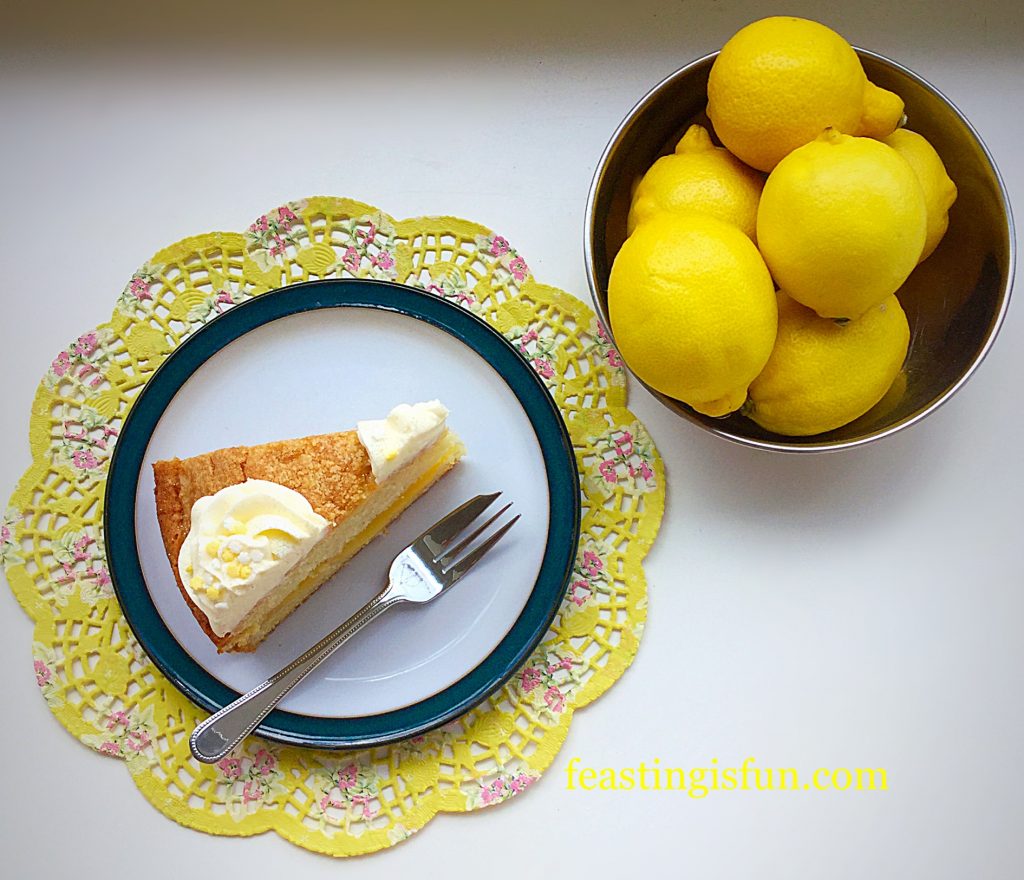
I do love a slice of cake for Sunday afternoon tea, or any day of the week afternoon tea, when the cake is this good!

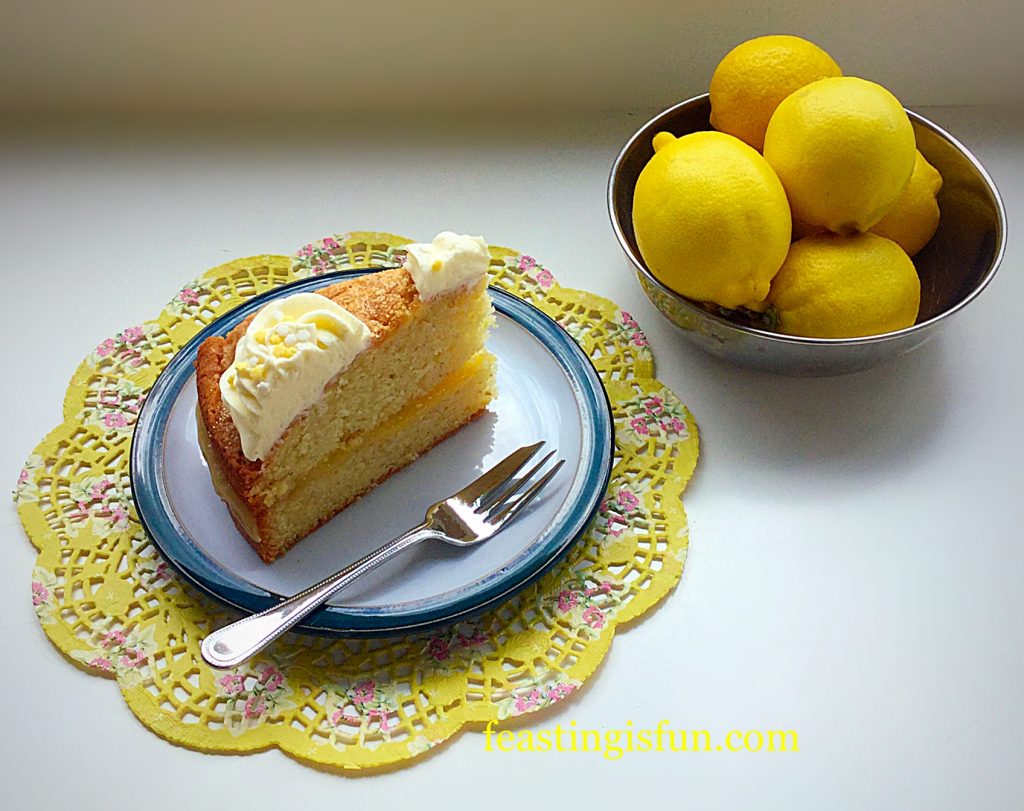
FF Lemon Curd Cake
Loveliest Lemon Curd Cake perfect for any occasion, but especially afternoon tea.

I honestly think the pictures in this post speak for themselves. This Loveliest Lemon Curd Cake bursts with lemony yellowness once cut and tastes absolutely perfect. The soft buttercream and tart lemon curd, with a deliciously moist lemon cake.

Today will not be the only time I make this cake!!

If you have enjoyed the recipe for this Loveliest Lemon Curd Cake here are some others you may also enjoy:

Glazed Lemon Bundt Cake

FF Lemon Curd Cake
Glazed Lemon Bundt Cake

Lemony Strawberry Pavlova

FF Lemon Curd Cake
Lemony Strawberry Pavlova

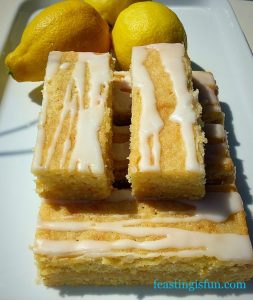
Lemon Drizzle Cake Bars


FF Lemon Curd Cake
Lemon Drizzle Cake Bars

Whilst this Loveliest Lemon Curd Cake looks pretty with the buttercream swirls, it really is the layers of lemon flavour that make this cake so enticing.

Whatever you are making and baking in your kitchen this weekend I hope that you are having fun. As I popped a couple of slices of this yummy cake over the back fence to our neighbours, almost blinded by the glitter sparkling in the sunlight, I was reminded of how much I simply enjoy sharing.

Baking for my family, friends, neighbours, postman and postlady, random delivery drivers, makes me feel good. Why?? Because it puts a smile on someones face. The heart of this blog is to share, enjoy feasting with people and have fun whilst doing so.

There is no price to making someone smile.

Who will you make smile this week?

Sammie xx

Growing Vegetables Week 1

Hi everyone, welcome to Growing Vegetables Week 1. A diary of Bob and Sammie’s (that’s me) attempt to grow some of our own fruit, vegetables and flowers at home, using mostly containers.

FF Growing Vegetables Week 1
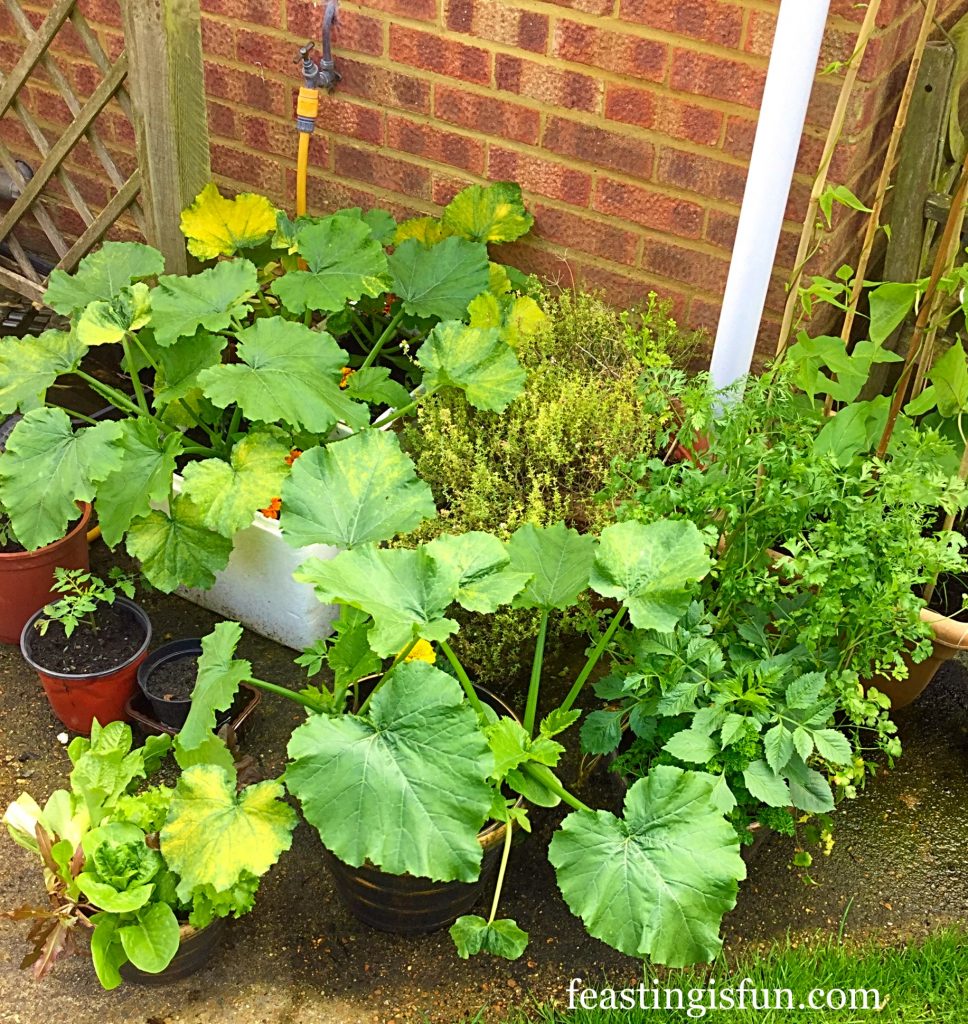
Courgettes, herbs and runner beans all growing well in containers.

You are welcome to join us as we plant and grow through the Summer, Autumn and if we’re successful maybe the Winter too!

I must apologise as this first post really should have been published a few weeks ago. However, with the exception of chilli’s and tomatoes, most of what we are growing can still be sown now for a late summer harvest!

FF Growing Vegetables Week 1
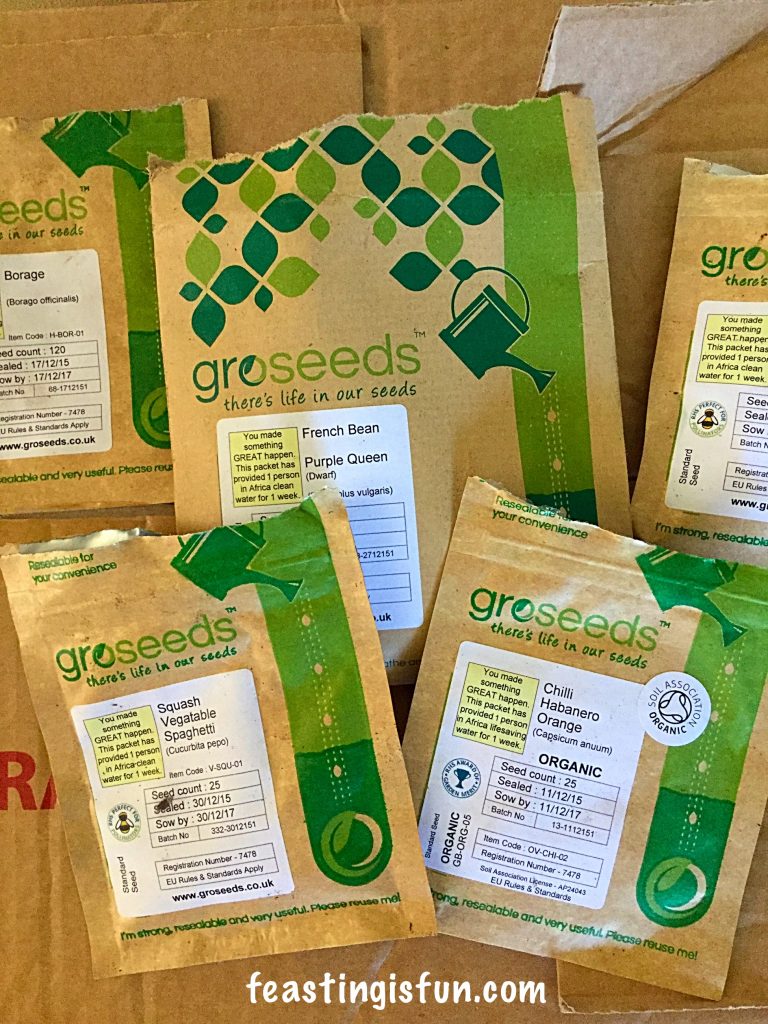
Growing Vegetables Week 1 started with seeds.

The very lovely people at Groseeds kindly donated the seeds Bob and I would need to start our gardening adventure. They are are wonderful company with a great ethos. Pop over to there website and see the difference you can make by purchasing your seeds from Groseeds.

Groseeds packets are so practical. Not only are they waterproof, protecting them from a sudden shower or misdirected hose, they are also resealable. This keeps the seeds, which are contained within a little pouch in the packet, perfectly fresh. Some seeds can last a couple of years, but I’ve tried and failed too many times to sow seed from opened, last year packets, only to be disappointed. These Groseeds seed packets get a firm 10/10 for practicality and seed protection.

With my health problems (see Living with Seizures) I knew I would need the help of Bob, that’s his nickname, if I were to successfully sow and grow vegetables and flowers to create recipes with. Bob is incredibly hands on and practical, he reminds me of his Grandad. If something is broken he sees it not as a problem, but as a puzzle to fix! He was very happy to take part in growing our own vegetables and take on the responsibility of watering, whilst at the same time I could teach him the fundamentals of gardening. We enjoy working together and he’s a strong lad!

FF Growing Vegetables Week 1
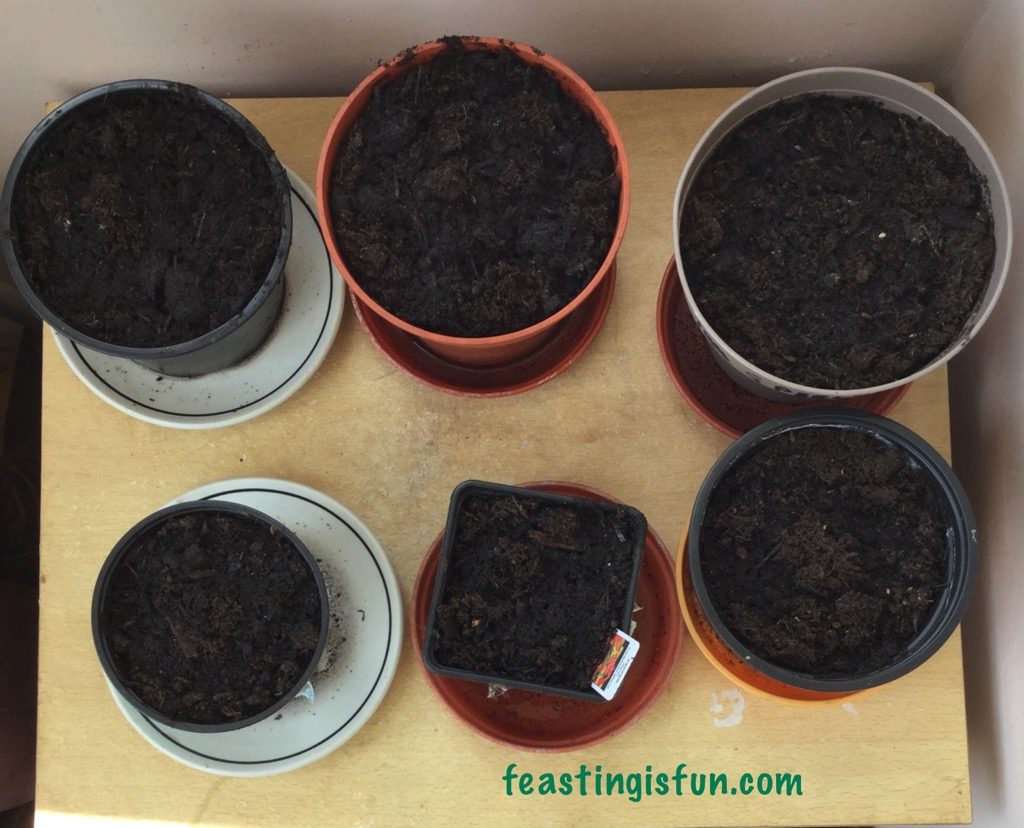
Growing Vegetables Week 1 bare compost with tomato and chilli seeds sown.

Seeds were chosen, ordered from Groseeds and received at the start of June. I knew we were a little late off the starting block with sowing certain plants. Normally I would cheat and buy a few chilli and tomato plants from the garden centre, not this year though. Despite the horrendous weather at the start of June we managed to get;

Gartenpearle – a small tumbling/bush cherry tomato that is perfect for growing in containers.

Roma – a small plum shaped tomato that I’ve grown before and seems to do well in our North facing back garden and can also be grown in a large pot.

Orange Habonero Chilli – ooh Bob and I both like a kick to our food, so we picked a hot chilli. These will be planted in our front garden, where they will benefit from the sun all day long, as it is south facing.

Borage – grown as a companion plant for the chilli’s, to attract bees and other pollinators. Also the flowers can be eaten in salad.

FF Growing Vegetables Week 1
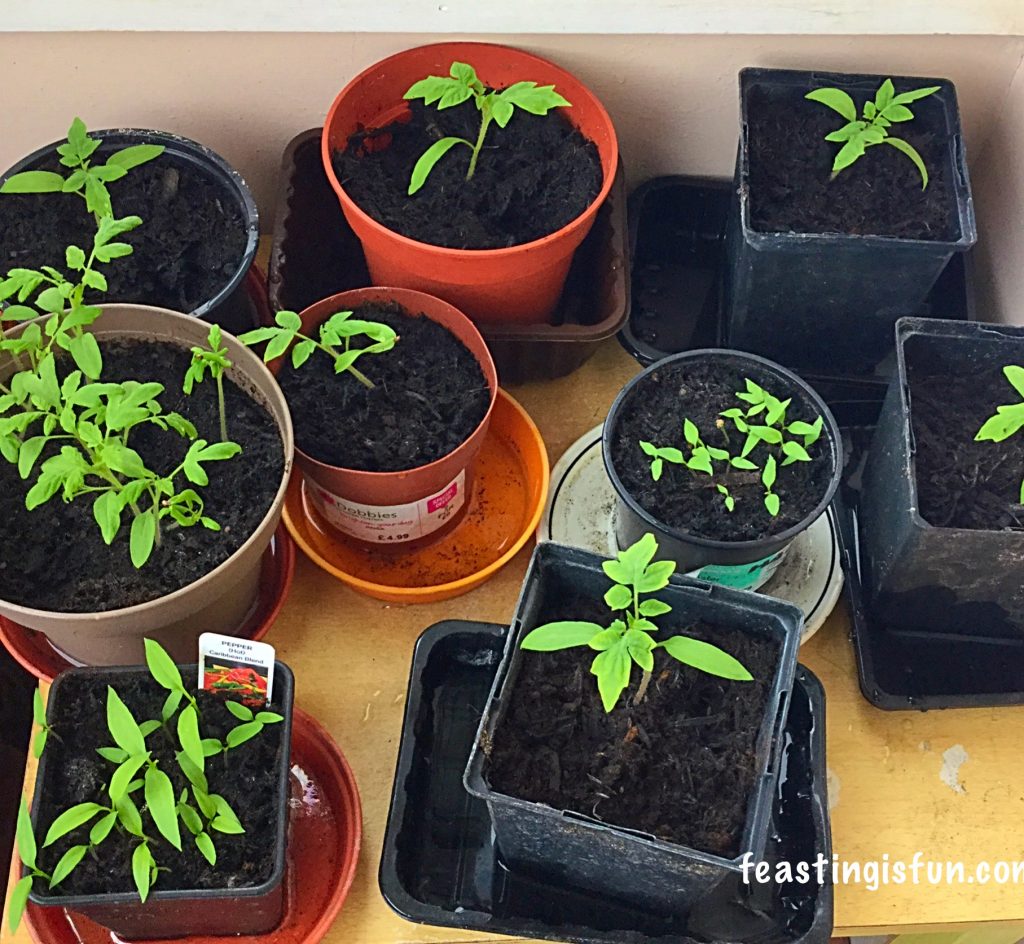
Growing Vegetables Week 1 a week after sowing we had germination.

As our porch is dual aspect and south facing, so I placed an old table in the corner and it doubled as a greenhouse. I also had a packet of mixed chilli peppers so we sowed some of those as well.

FF Growing Vegetables Week 1
Growing Vegetables Week 1 some plants we left to germinate outside.

Certain plants were sown and left outside to germinate.

Thyme and Tarragon – both herbs that I use a lot of can be seen in the flat trays on the right.

Courgettes – both Black Beauty and Goldy. One has a dark green skin and the other as you may have guessed is yellow.

Spaghetti Squash – having seen the huge interest in this squash on Pinterest I was interested to see if we could indeed grow our own veggie spaghetti!

FF Growing Vegetables Week 1
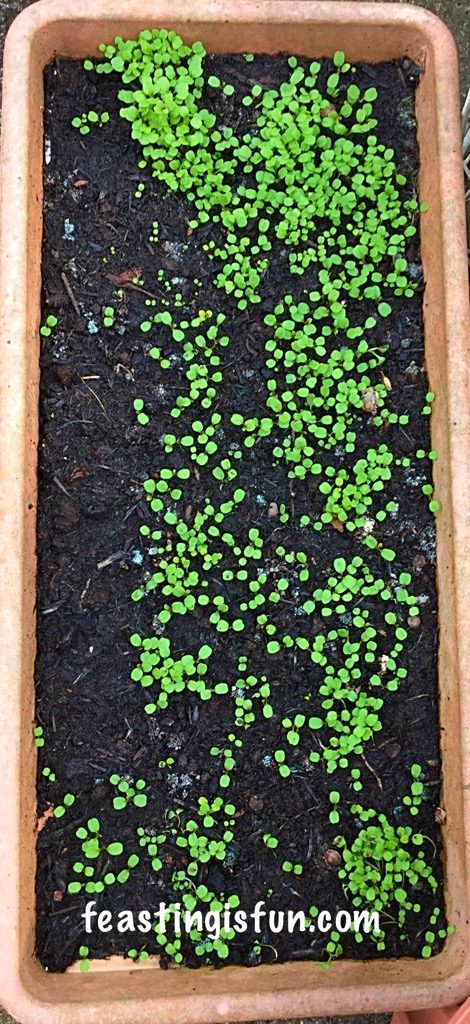
Growing Vegetables Week 1 wild rocket strictly speaking a spring and autumn salad leaf.

Wild Rocket – not a fan of heat, I took a chance sowing in June and thanks to the very wet weather it now looks like this:

FF Growing Vegetables Week 1
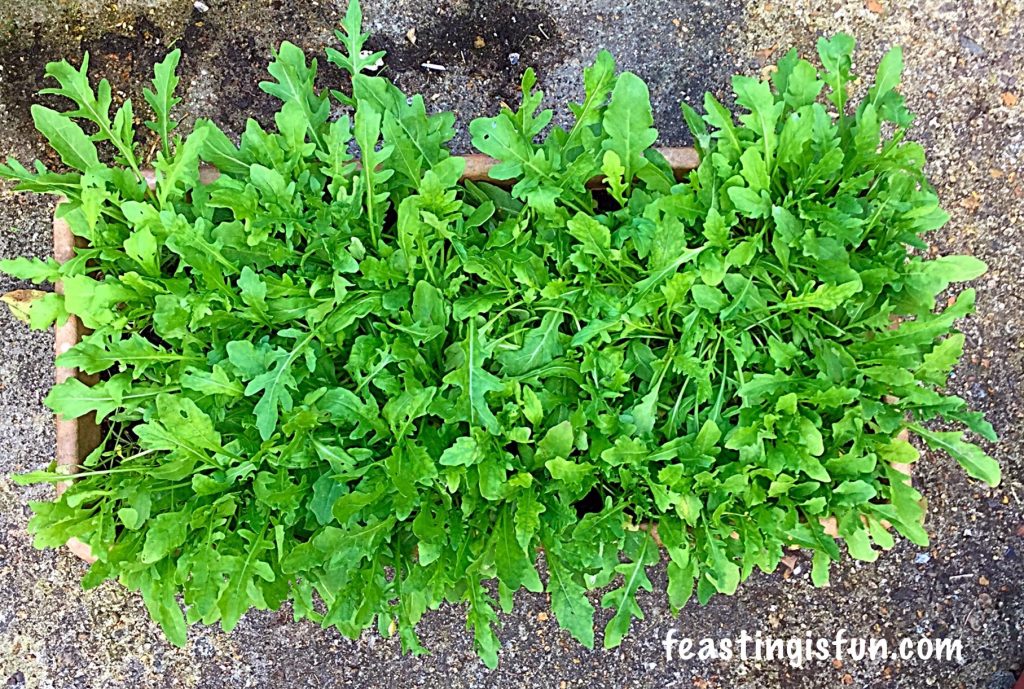
Growing Vegetables Week 1 not bad for 3 weeks growing!

This wild rocket can now be cut and used in salads, adding a wonderful peppery flavour.

So as and when I could, sometimes with Bob, more often whilst he was at school and the rain had stopped, I gradually sowed the following:

Runner Beans – Painted Lady, these grow brilliantly in containers just keep them well watered especially if the weather is windy – these also need a support to grow up, more on that next week.

Dwarf French Bean – Purple Queen a coloured bean that we wanted to try. So a new one for us.

Carrots – Rainbow, Bob liked the variation in colours & I was intrigued to see if they could be grown in a container. These were sown into the same deep pot as –

Onion – Red Baron. This is companion planting. The smell of the onion will hopefully deter the carrot fly from laying eggs and munching on our rainbow carrots.

Spring Onion – White Lisbon, one I’d grown before and also sowed a few in with the runner beans as a quick crop, however, the runner beans are growing strong so we will need to sow some more.

A variety of flowers Peach Nasturtium, the flowers are very good in salads. Limanthes, or poached egg plant to attract pollinators to the tomato plants and trailing mixed lobelia to keep the bees and other pollinators coming.

FF Growing Vegetables Week 1
Growing Vegetables Week 1 our porch today!

As you can see from the first and last photos, our Groseeds plants are growing strongly, in fact if you look through the window on the picture above, you can see the Borage already planted in the front bed.

There are plenty of veggies that can still be sown now, here’s an idea of what else we will be sowing; Fennel, mixed salad leaves, spring onions, beetroot, radishes, purple sprouting broccoli (for next Spring), hardy spring onions for next year, mustard cress and plenty more.

I hope you have enjoyed this introduction to Growing Vegetables Week 1. Our aim is to grow our plants as organically as we can. In truth the runner beans had a few slug pellets in the pot. We don’t know how great our harvest will be and we are at the mercy of the British weather.

Yet it is fun. To grow something that you are the able to eat. Today we picked our first 2 French Breakfast radishes.

FF Growing Vegetables Week 1
Growing Vegetables Week 1 our first harvest!

Crunchy with a peppery flavour, once washed these were delicious.

That’s what makes growing your own so much fun. Yes we may have to battle with snails and other critters, but hopefully, now the plants are growing on a bit they can withstand a little munch here and there.

We will not be using any insecticides on our plants. Some have had some slow release fertiliser added to the pots, to keep them growing strong through the season. This is our first proper attempt and we are bound to make mistakes along the way.

I hope you will join Bob and I again, next week for seed sowing, growing/harvesting updates and how to build a wigwam to support your runner beans.

If you’ve enjoyed Growing Vegetables Week 1 you may also like this post:

Wilko Gardening Product Review

FF Growing Vegetables Week 1
Wilko Gardening Product Review with courgettes and runner beans from Groseeds.


We hope you’ve been inspired to take a look at the Groseeds website and order a few seeds, so that you too can enjoy the pleasure of eating and feasting on what you have grown.

Sammie and Bob xx

Groseeds kindly donated the seeds for our gardening experiment. All views, opinions, photographs and content are my own. I am an amateur gardener, any advice followed is at your own risk. Please see my Disclosure Policy.
Silicone Baking Mat Review

When baking there is one disposable item that I use very frequently, baking parchment. So when  GOLDENSPOON  sent me 2 Premium Silicone Non Stick Baking Mats I was interested as to how they would perform. Also, carrying out a Silicone Baking Mat Review was going to be interesting and fun!

FF Silicone Baking Mat Review
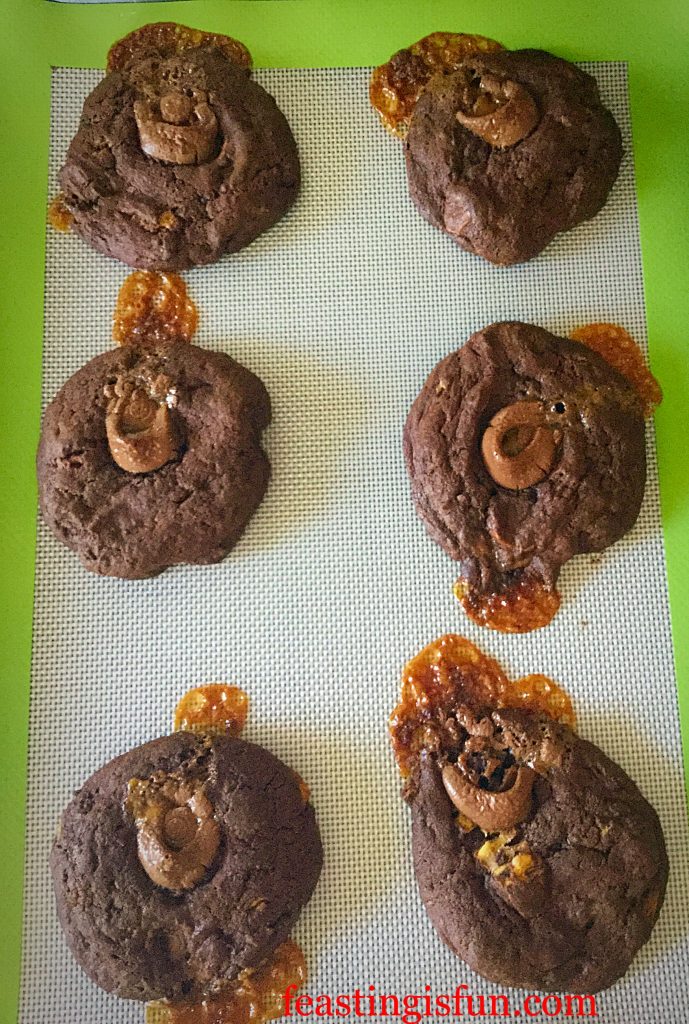
Silicone Baking Mat Review would my gooey cookies come off easily?

Setting Out The Silicone Mat Review

After some research as to how hot Silicone bakeware can be cooked at. Since they are safe to bake up to 250C, I decided to test these vibrant green edged mats in three ways.

  1. First of all, bake at a high temperature – for this I choose to bake a puff pastry tart.
  2. Also, bake my most gooey and sticky recipe – for this I choose my Rolo Chocolate Cookies.
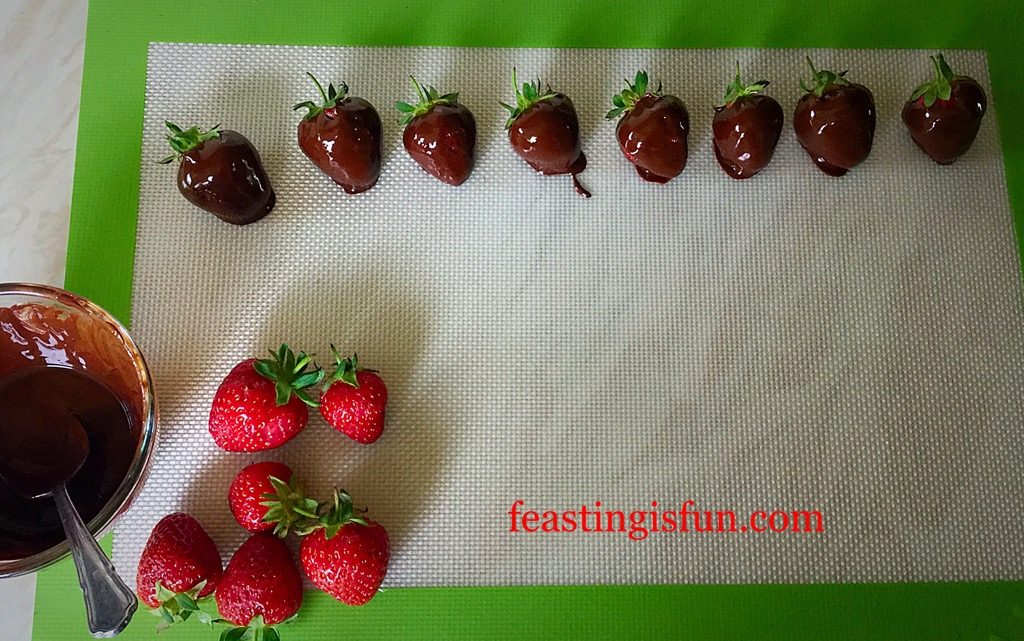
  3. And finally, use in place of baking parchment for setting messy melted chocolate – for this I covered some strawberries in chocolate to decorate a cake.
FF Silicone Baking Mat Review
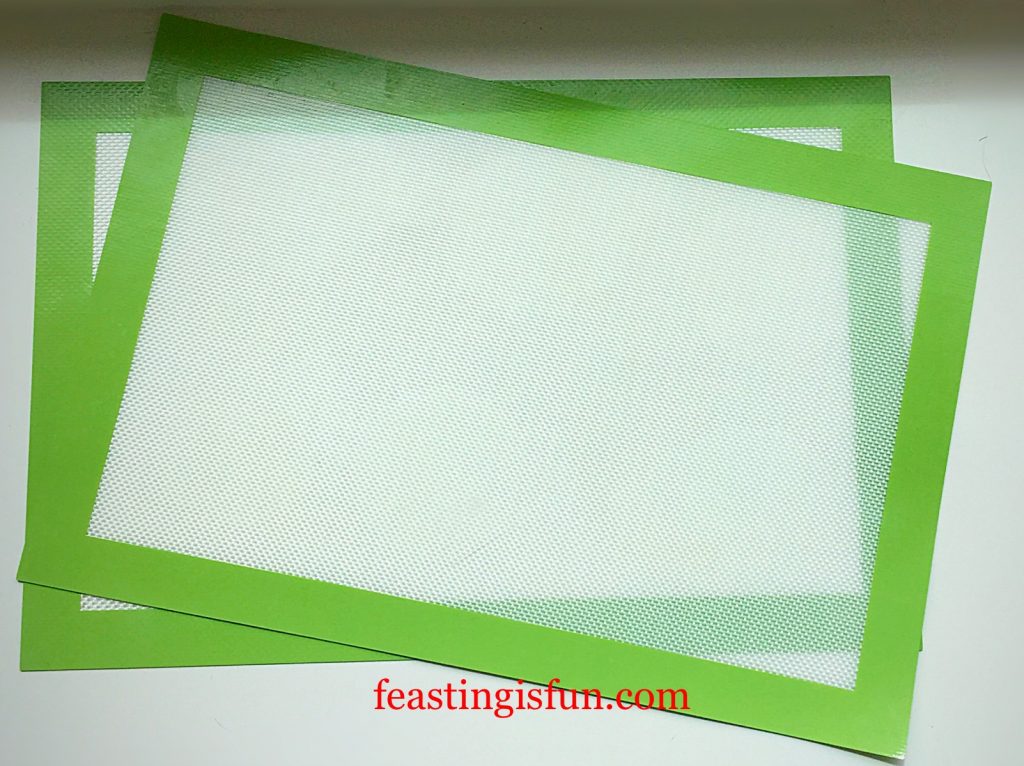
Silicone Baking Mat Review 2 mats.

I received 2 Premium Silicone Non Stick Baking Mats, dimensions 27cm x 40cm. Following a quick wash in warm, soapy water, a quick dry and they were ready to use. And I was very pleased to find that they fitted nicely inside my two biggest, most used, baking trays.

First Test – Baking The Silicone Mat In A Hot Oven

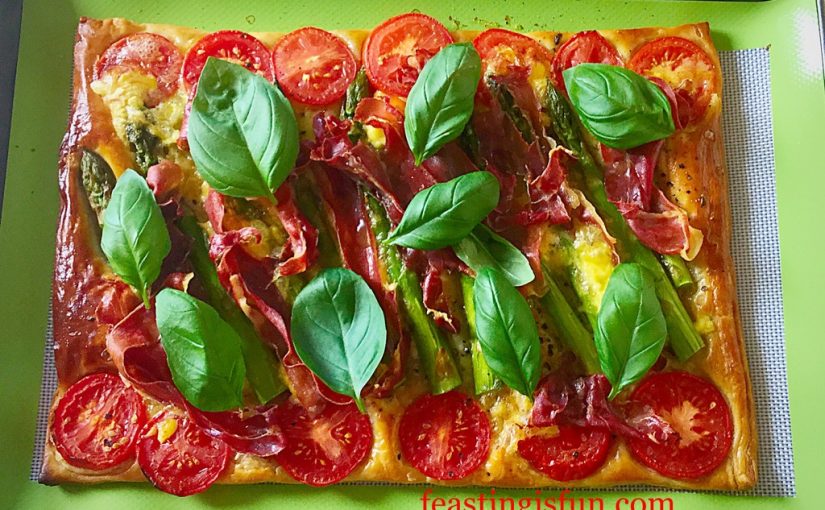
Because puff pastry is baked at a high temperature, I decided to make a quick Asparagus Prosciutto Ham Tart.

Recipe: Asparagus Prosciutto Ham Tart serves 4

320g Ready Rolled Puff Pastry

10-12 Asparagus Spears – washed and trimmed

1 Medium Egg – whisked with a teaspoon of milk fit the egg wash

3 Medium Tomatoes – sliced

6 Slices Prosciutto Ham

Approx 50g Soft Cheese – I used Goddess Cheese from Pong Cheese. Alternatively you could use Brie, or mozzarella cheese.

Sea Salt and Freshly Ground Black Pepper.

1tbsp Olive Oil

Basil leaves to garnish

Assembling and baking the tart:

First of all, preheat the oven to 220C/200C fan, gas mark 7, 425F.

Place one Premium Silicone Non Stick Baking Mat on to a baking tray.

Un roll the pastry and place directly on to the mat – removing the paper it is rolled in.

Use a pastry brush to lightly cover the pastry in egg wash.

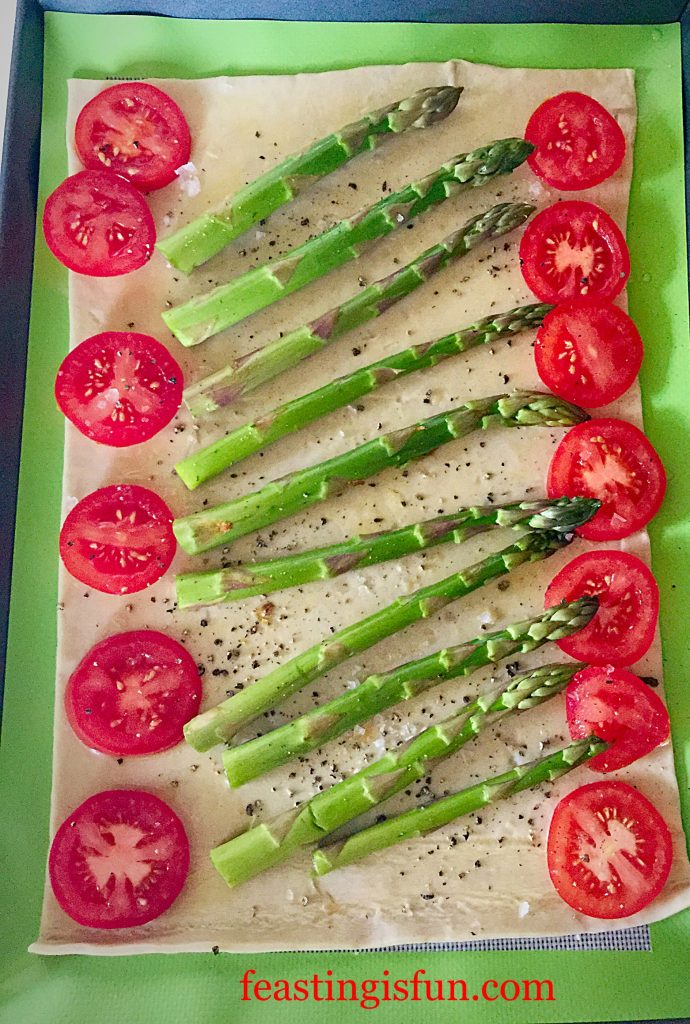
Place the asparagus and sliced tomatoes on to the pastry and season with salt and pepper.

FF Silicone Baking Mat Review
Silicone Baking Mat Review see how perfectly the pastry fits on the mat.

Place the baking tray in the top of the oven for 15 minutes.

After the baking time has elapsed remove the tray from the oven.

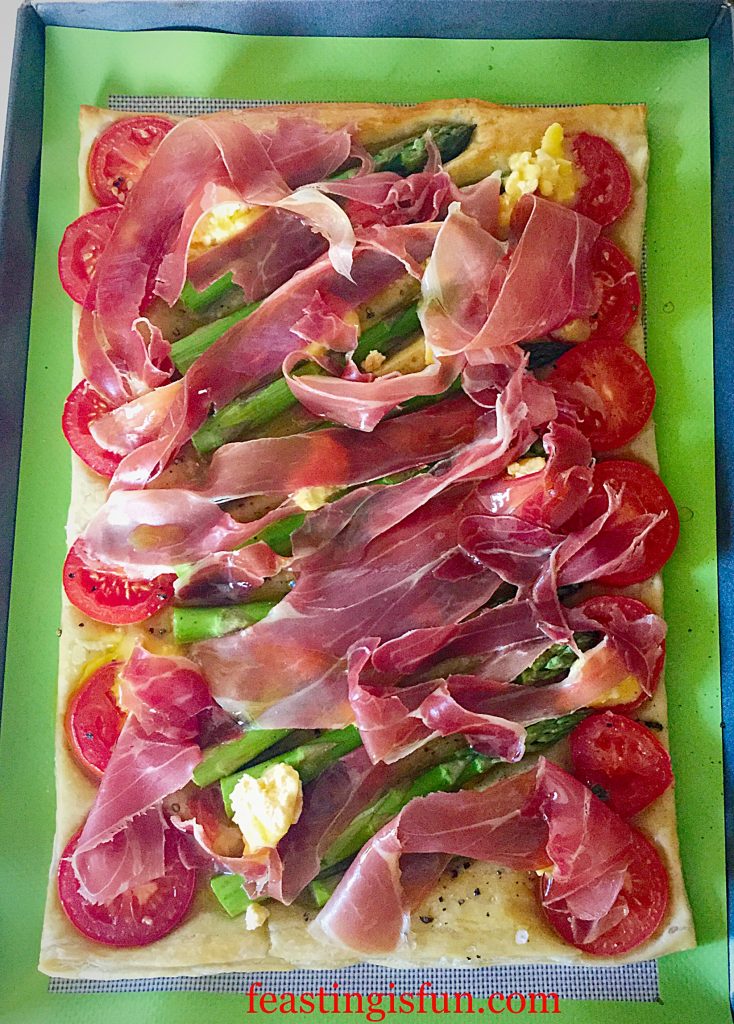
Break off small chunks of the cheese and scatter around the tart. Then lay the Prosciutto ham over the tart, in the same direction as the asparagus. Add a small drizzle of olive oil.

FF Silicone Baking Mat Review
Asparagus Prosciutto Ham Tart easily assembled on the silicone baking mat.

Place the tart back in the oven for 10 minutes to crisp the ham and finish baking.

FF Silicone Baking Mat Review
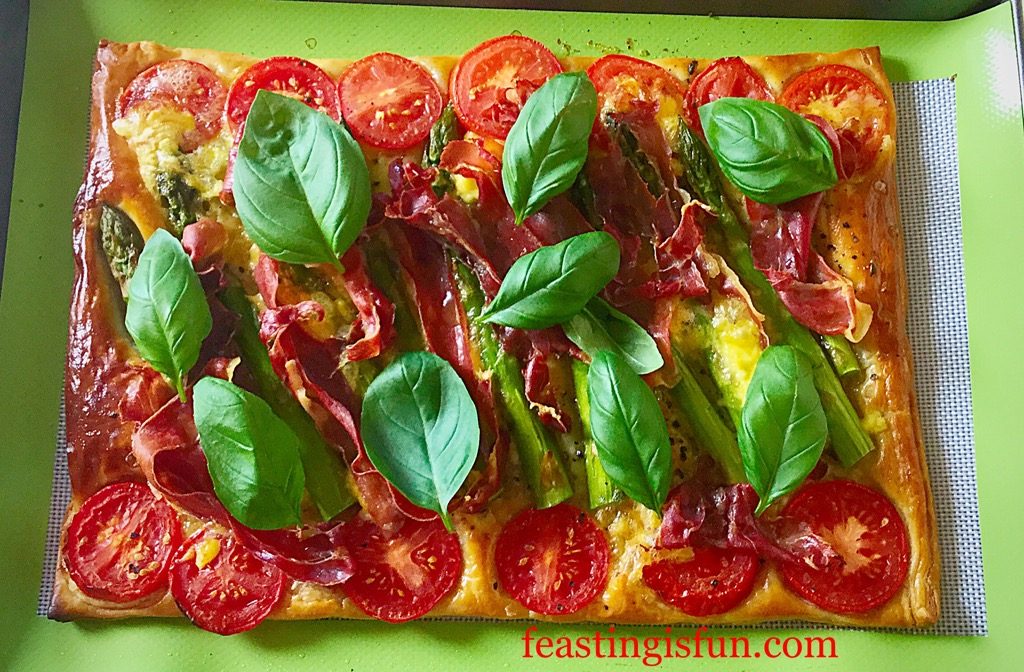
Asparagus Prosciutto Ham Tart

As soon as the tart is baked remove, from the oven and scatter over some whole basil leaves.

Remove the tart from the silicone baking mat before cutting.

The finished result is a delicious tart, that baked beautifully on the non stick silicone baking mat. It slid off the mat easily. The mat had a quick wash in warm soapy water and was as good as new.

Fantastic! These Premium Silicone Non Stick Baking Mats cook at a high temperature with no affect on taste and no change in appearance to the mat 10/10.

Baking Rolo Cookies

Next the gooey, sticky test. I used my Rolo recipe for this test. The cookies were prepared according to the recipe and baked using both mats, instead of baking parchment, as instructed.

This recipe requires the cookies to cool on the baking trays before removing.

Once cooled the cookies removed easily, with only a little of the melted caramel staying on the mat. This is usual with baking parchment too so I had expected it. A quick wash and the mats were clean and ready to use. A firm 9/10.

Finally Test As A Baking Parchment Substitute

Now for the melted chocolate test!

FF Silicone Baking Mat Review
Silicone Baking Mat Review with messy melted chocolate.

The strawberries were dipped in chocolate and left to set on the silicone baking mat. Once set they removed easily and were used to decorate a beautiful cake. Another quick wash in warm soapy water and again as good as new! A firm 10/10.

In conclusion I am thrilled with these Premium Silicone Non Stick Mats and thoroughly recommend them. Since they are so easy to use for a variety of baking and cooking purposes. Also they take up very little space, I store them flat in the bag they came in on top of some tins in a cupboard.

While also reusable and in my opinion better than baking parchment, these have to be a great choice, not only for our kitchens but also our planet!

If you have enjoyed this Silicone Baking Mat Review you may like these recipes to bake with your mats:

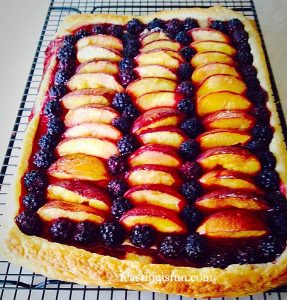
Blackberry Nectarine Tart

FF Silicone Baking Mat Review
Blackberry Nectarine Tart perfect for cooking on a silicone baking mat.

Red Onion Sausage Plait

FF Silicone Baking Mat Review
Red Onion Sausage Plait next time I bake this will be on a silicone baking mat!

Chocolate Dipped Viennese Fingers

FF Silicone Baking Mat Review
Chocolate Dipped Viennese Fingers had I used a silicone baking mat most of these would not of stuck to the cooling rack!

Strawberry Vanilla Chocolate Drip Cake

FF Silicone Baking Mat Review
Strawberry Chocolate Vanilla Drip Cake are what the chocolate covered strawberries decorated.

Having carried out this Silicone Baking Mat Review I am now a complete convert to baking with silicone. I wholeheartedly recommend every kitchen, where baking takes place, to switch to these silicone baking mats. Over time they will pay for themselves and are more environmentally friendly than using baking parchment.

So, whatever you are making, baking and creating in your kitchen, have fun preparing and sharing your feast.

Sammie xx

GOLDENSPOON provided me with the 2 Premium Silicone Non Stick Baking Mats for the purpose of a review. All views and opinions are my own, as are the recipes, photographs and content of this post. I was not paid to review this product. Please see my  Disclosure Policy.
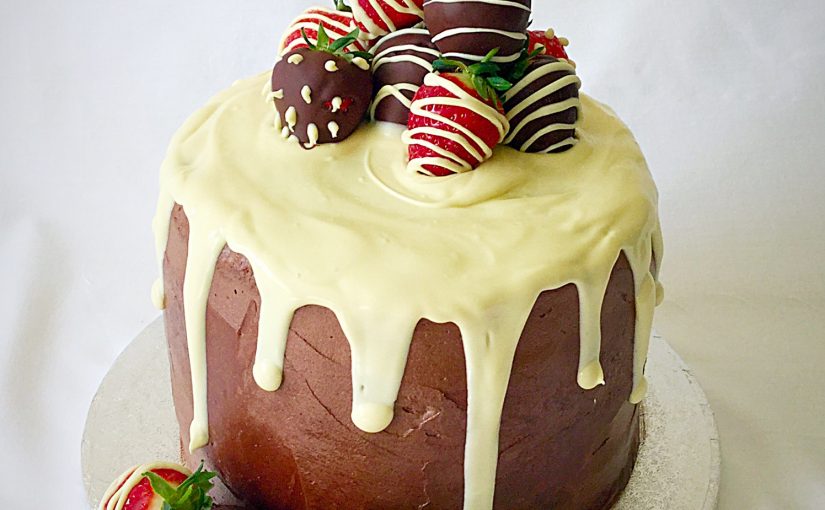
Strawberry Chocolate Vanilla Drip Cake

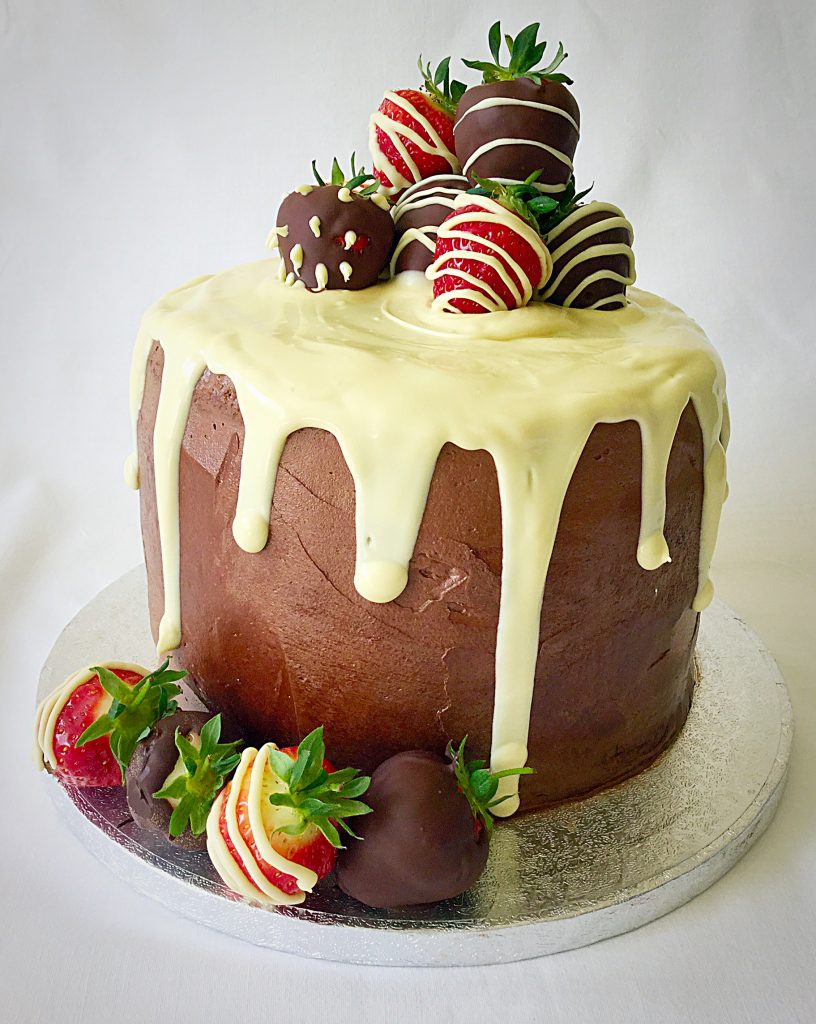
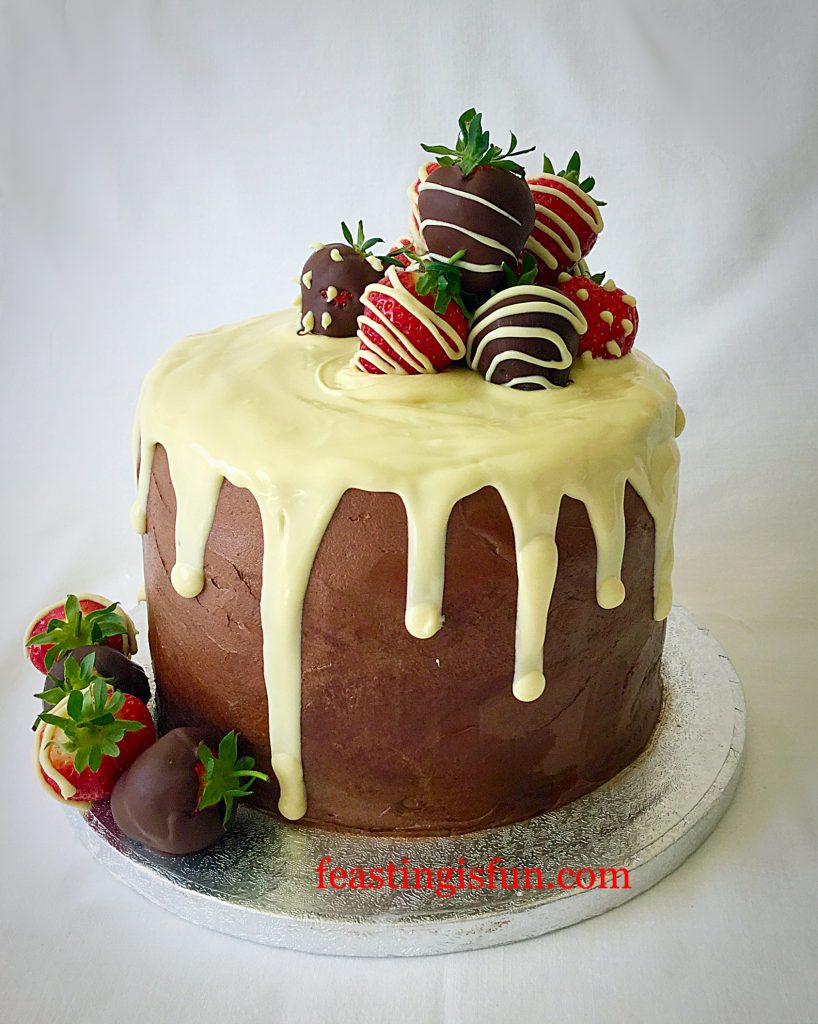
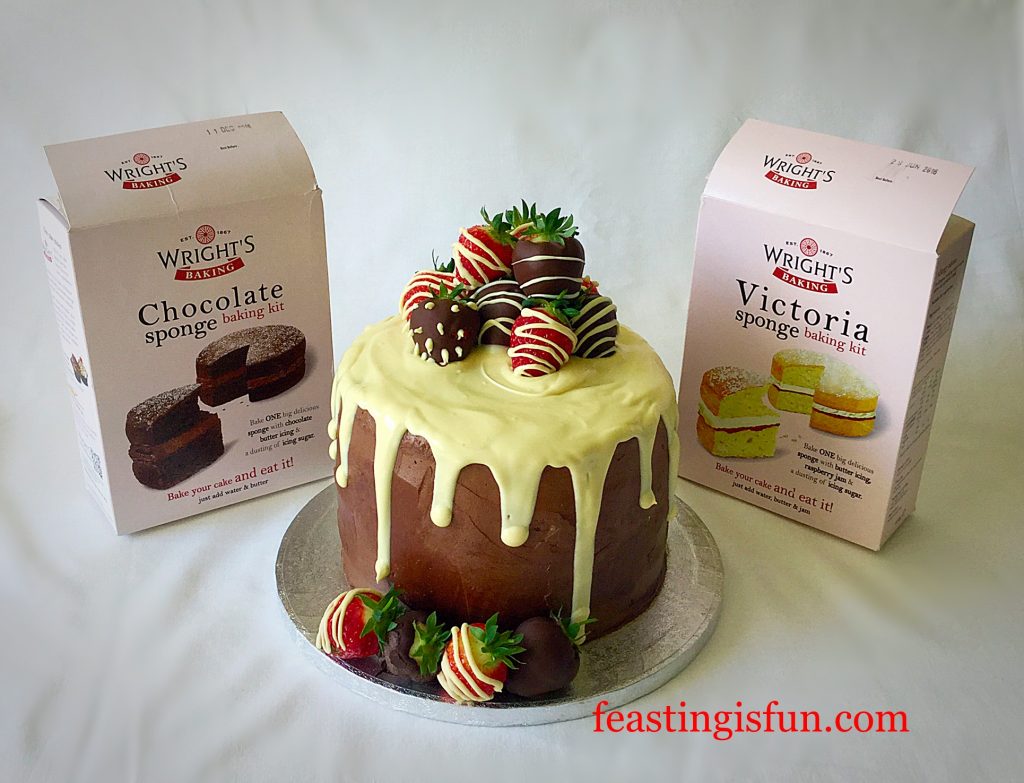
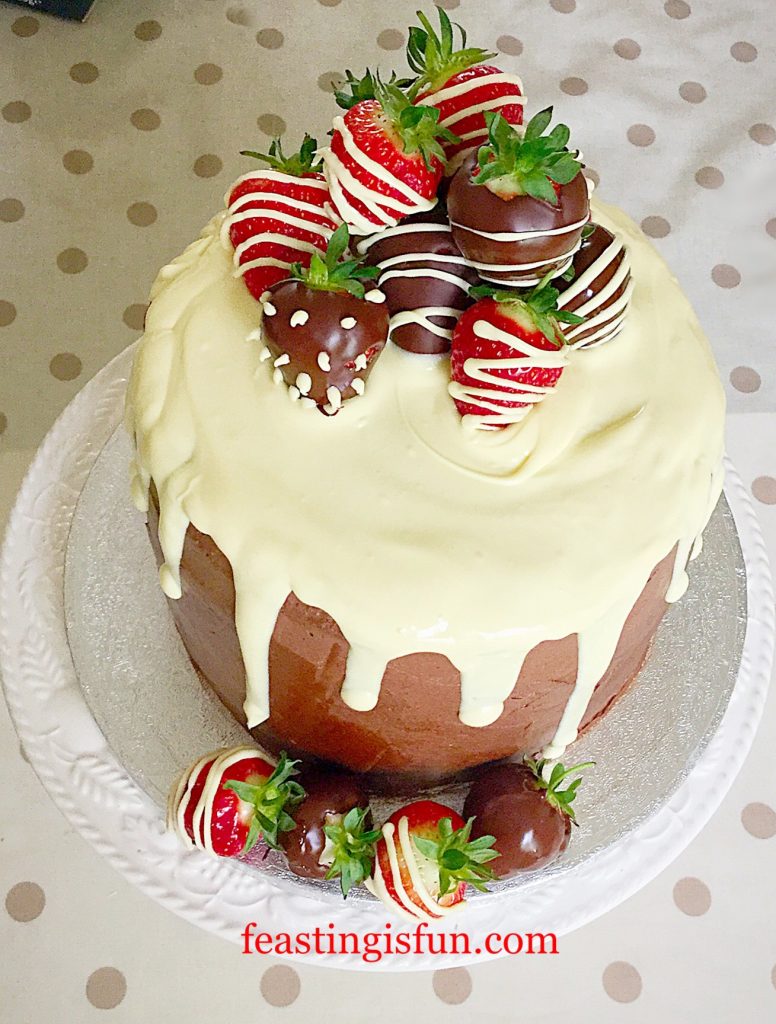
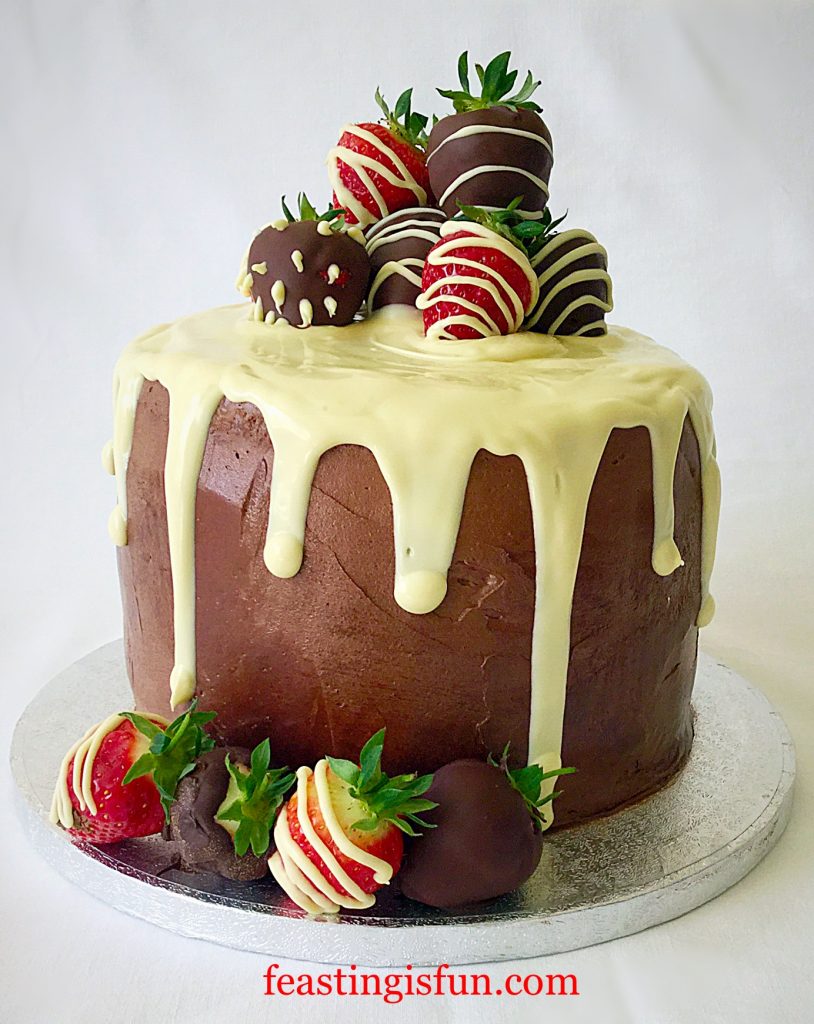
Hello, I have an exciting recipe to share today. Since I first admiring the variety of Drip Cakes on Pinterest I have wanted to make one. This past weekend with the help of 2 Wright’s Baking cake mix kits, I did it (full recipe instructions for making this cake from scratch are included).  Finally, I have now made this Strawberry Chocolate Vanilla Drip Cake.

FF Strawberry Chocolate Vanilla Drip Cake
Strawberry Chocolate Vanilla Drip Cake

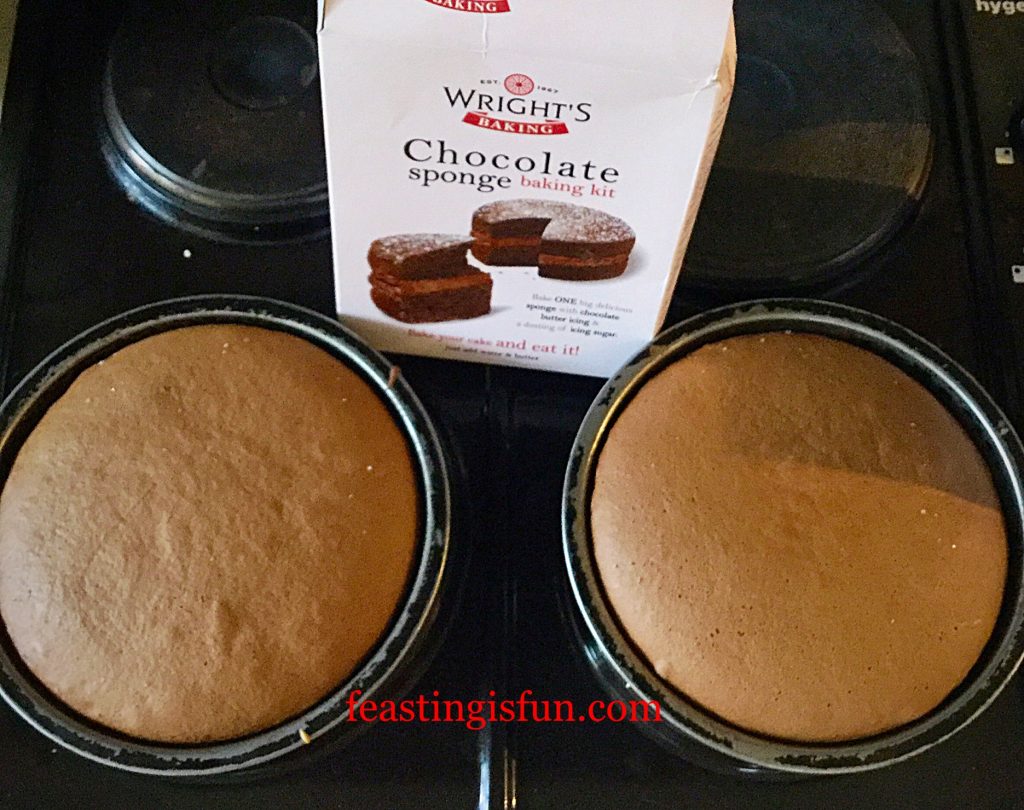
Had it not been for the cake mixes from Wright’s I honestly would not have had the energy to make this cake. Yet, I proved that with a little bit of patience and guidance anyone can make a drip cake using great packet mixes, plus some extra chocolate and strawberries.

The Chocolate and Victoria sponge mixes create cakes that are as light as clouds. I baked the cakes on Saturday and then assembled and decorated this gorgeous Strawberry Chocolate Vanilla Drip Cake on the Sunday.

FF Strawberry Chocolate Vanilla Drip Cake
Strawberry Chocolate Vanilla Drip Cake

You Too Can Make This Drip Cake :

If you have ever wanted to make a drip cake, yet been too scared or overwhelmed to try? Use the following step by step photographs and instructions to show you how. You need not be a proficient baker or cake decorator, yet you CAN make this Strawberry Chocolate Vanilla Drip Cake.

Taking you through every stage, you will learn how to achieve a stunning drip cake. Once you have learnt the basics you can create all different kinds of drip cakes. I wanted to keep my cake simple, yet elegant. The chocolate dipped strawberries add height and a pop of colour.

FF Strawberry Chocolate Vanilla Drip Cake
Strawberry Chocolate Vanilla Drip Cake

Above all, I never dreamt that my Strawberry Chocolate Vanilla Drip Cake would turn out so well.

Pushing Out Of My Cake Decorating Comfort Zone:

Because cake decorating isn’t my strongest skill, learning new techniques can be challenging. Also sometimes my hands can be really shaky, resulting fewer cake recipes making it on to the blog.

What I’m trying to say is, I’m just like you. Yes I’ve learnt to pipe roses with buttercream, but that really is the extent of my cake decorating knowledge. So my hope is to teach you how to create a show stopping cake and that, with a little patience you too can create one!

FF Strawberry Chocolate Vanilla Drip Cake
Strawberry Chocolate Vanilla Drip Cake

There’s No Shame In Using Great Quality Cake Mixes:

Starting with a good quality boxed cake mix from Wright’s meant that all my concentration could be used decorating the cake. I will be creating recipes with different flavours, colours and toppings in the future, but for my first drip cake, all I wanted to concentrate on was creating that iconic ‘drip’!

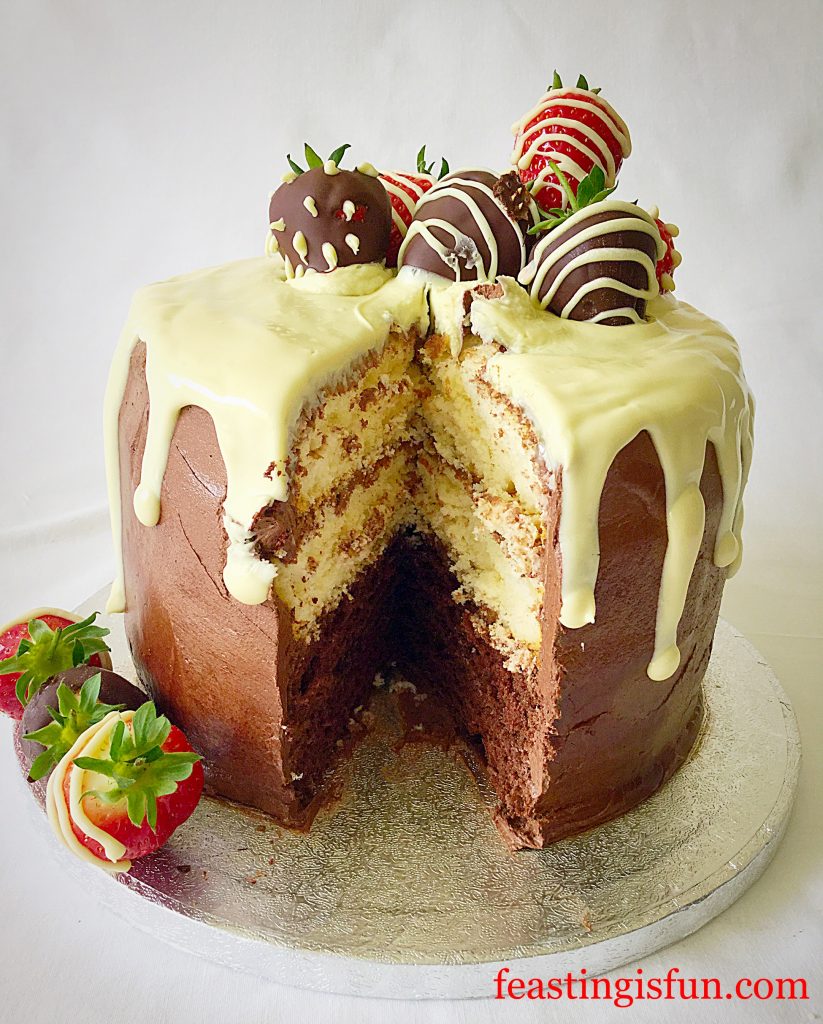
Chocolate and vanilla were chosen simply because the inside of the cake would then reflect the beautiful outside. The cake mixes are so easy to whip up and bake, plus the buttercream mixture is included in the box. All I needed to add was butter.

FF Strawberry Chocolate Vanilla Drip Cake
Strawberry Chocolate Vanilla Drip Cake

Note: in order to decorate this cake successfully you will need a large palette knife (not a small offset one – that I mention in some of my recipes). Also if making the cake using my recipes you will have ire than you need. Perhaps you could bake an extra layer?

Recipe: Strawberry Chocolate Vanilla Drip Cake serves 10-12

1 Chocolate Sponge Baking Kit – from Wright’s Baking

1 Victoria Sponge Baking Kit – also from Wright’s Baking

Alternatively use the  cake batter recipe for my Apricot White Chocolate Triple Sponge Cake

( Make the cake batter as instructed in the recipe. Use half of the vanilla batter to bake 2 plain sponges. Add 75g Cocoa powder and 2tbsp milk to the remaining batter, stir gently until the ingredients are fully incorporated. Bake the chocolate sponges as instructed.)

2tbsp Butter for greasing the sandwich cake tins

240g Unsalted Butter- softened to room temperature

200g White Chocolate – I use Waitrose Belgian white chocolate

100g Dark Chocolate minimum 70% Cocoa Solids

15 Good Quality Fresh Strawberries medium/large in size – if only very large strawberries are available you may want to use fewer.

Note: if making your own buttercream you will need 250g unsalted butter, 100g good quality cocoa powder (sifted) and 400g icing sugar (sifted), prepare as for the buttercream including the 2tbsp very hot water.

Method: Preheat the oven to 180C/160C fan, gas mark 4, 350F

Making And Baking The Sponge Cakes:

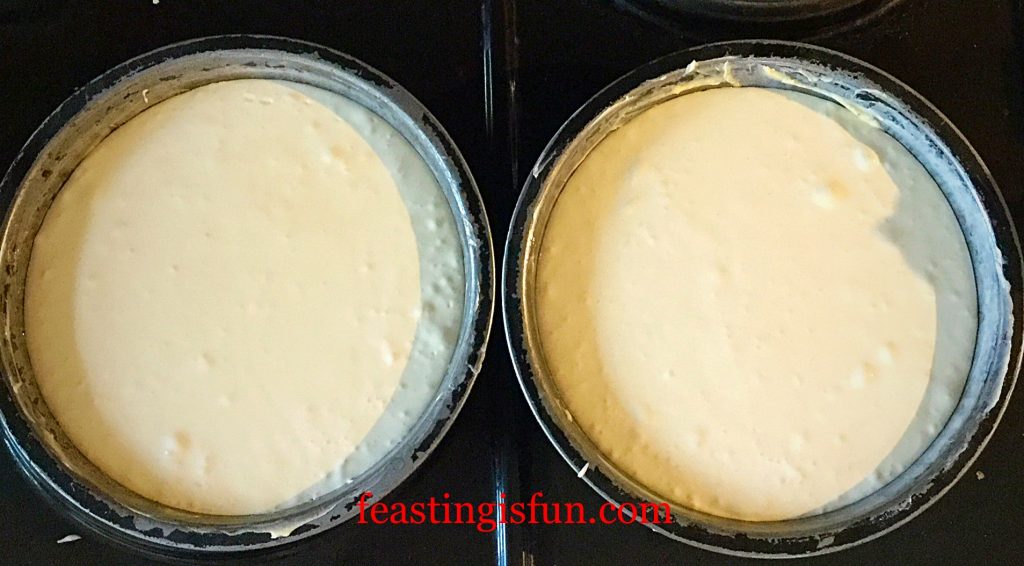
  • Grease 2 x 7″ (17.5cm) sandwich cake tins and line the base with baking parchment.
  • Make up one packet – I used the Victoria sponge mix first – according to the instructions on the box.
  • Divide the cake batter equally between the 2 tins.

FF Strawberry Chocolate Vanilla Drip Cake

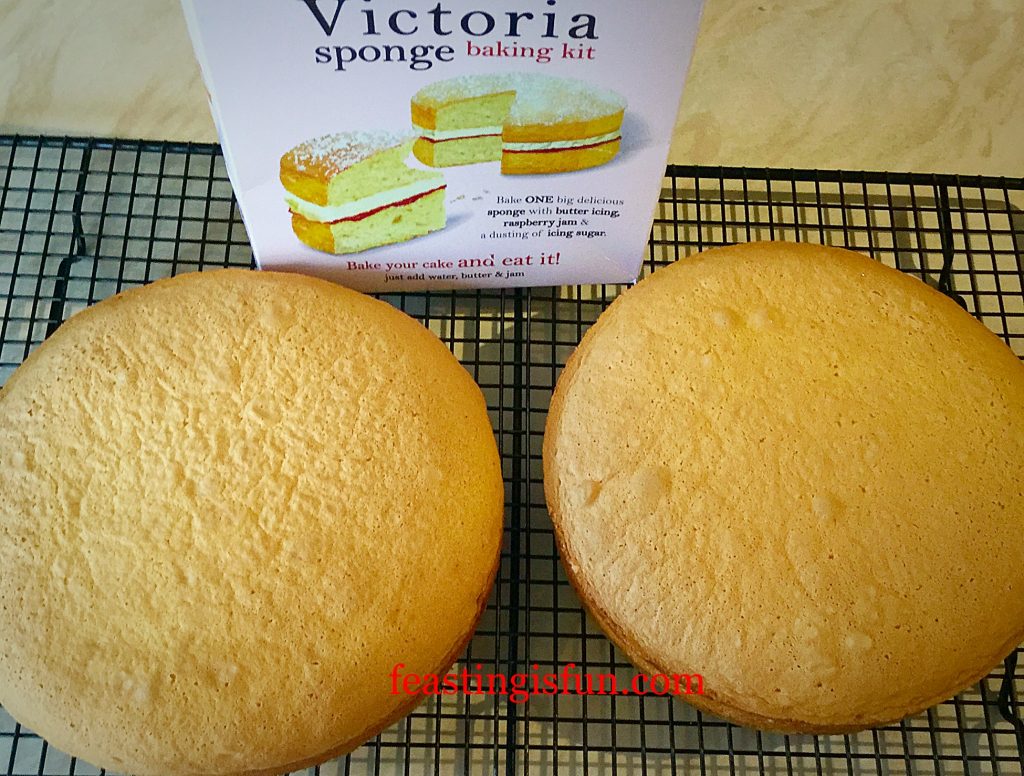
  • Place the sponge tins in the centre of the oven and bake for 15- 20 minutes. The sponges are baked when they are a golden colour and spring back from a light touch. Mine took just under 20 minutes to bake. Also, baking times may vary slightly if making from scratch*.
  • As soon as the cakes are baked remove from the oven.
  • Allow the sponges to cool for 5 minutes, then run a palette knife around the outside rim of the cake.
  • Turn the cake out gently and place right side up on a cooling rack.

FF Strawberry Chocolate Vanilla Drip Cake

  • Wash up the sponge tins in warm soapy water, dry, grease and line the bases as before.
  • Make up the chocolate sponge mix according to the packet instructions.
  • Divide the cake batter equally between the 2 tins and bake in the middle of the oven, as before for 15 – 20 minutes. Mine were baked at 15 minutes.
  • As soon as the chocolate sponges are baked remove from the oven. See note * above.

FF Strawberry Chocolate Vanilla Drip Cake

  • After 5 minutes cooling run a palette knife around the outside of the cake, turn out gently and allow to cool on a rack.
  • Once cool your cake is ready to assemble and decorate.

Making The Frosting And Assembling The Cake:

  • Gently peel the parchment paper away from the base of each sponge.
  • Whisk/beat 240g of softened butter in a large bowl.
  • Add both packets of buttercream mix – chocolate and vanilla.
  • Slowly whisk until they are incorporated into the butter.
  • OPTIONAL – I always add 1-2 tablespoons of very hot water to any buttercream that I make. I added 2 tablespoons to the buttercream mixture. I would not advise adding water if you are using stork or other margarines.
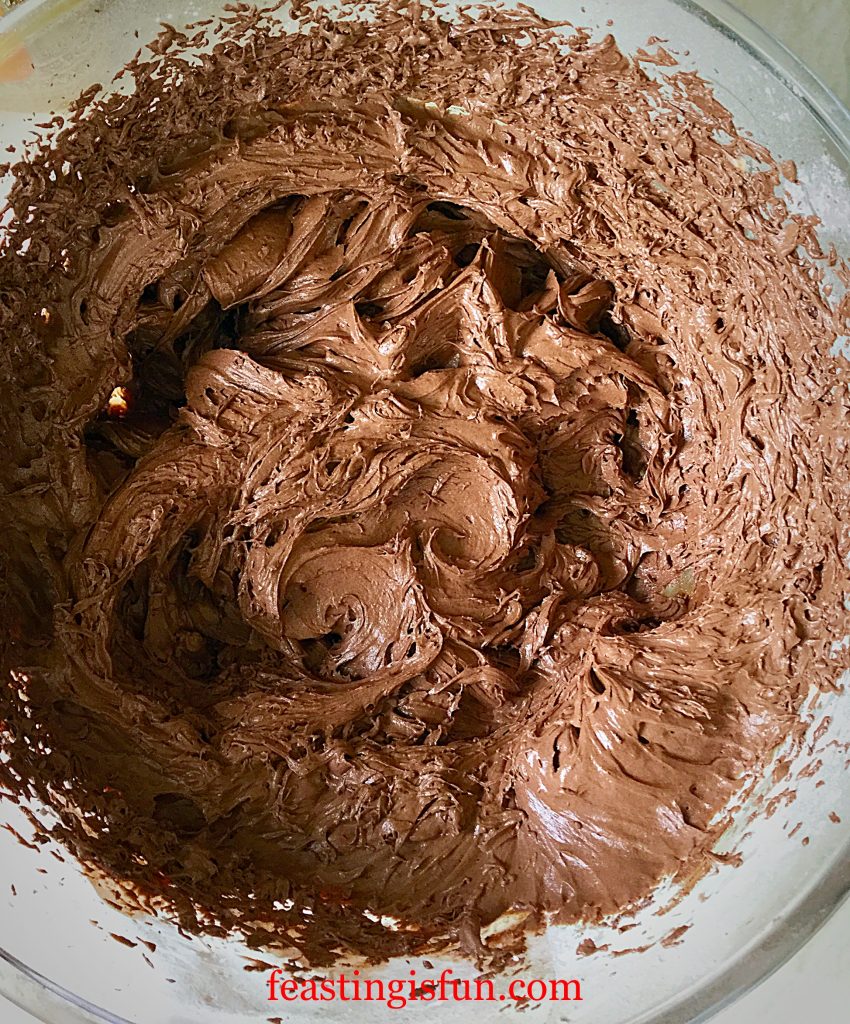
  • Continue whisking until you have a smooth, glossy, chocolate buttercream.

FF Strawberry Chocolate Vanilla Drip Cake

  • I recommend using either a cake board or a flat plate placed on a cake stand, or cake decorating turntable. I used a cake board on top of my cake stand. This is so that once covered in buttercream, the cake, will fit into the fridge to chill.
  • First of all add a generous tablespoon of buttercream to the cake board, this helps anchor the cake whilst it is being assembled and decorated.
  • Place the first sponge flat side up on the centre of the board.
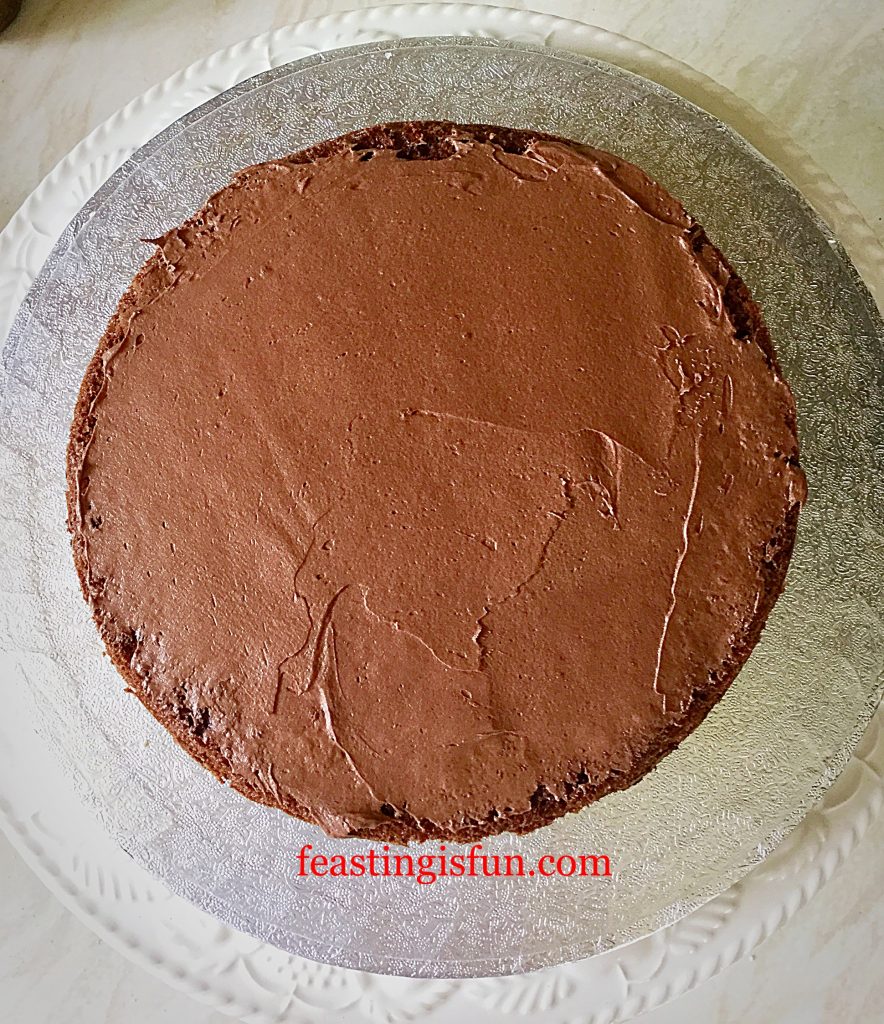
  • Using a palette knife thinly coat the upper, flat side of the sponge in buttercream.

FF Strawberry Chocolate Vanilla Drip Cake

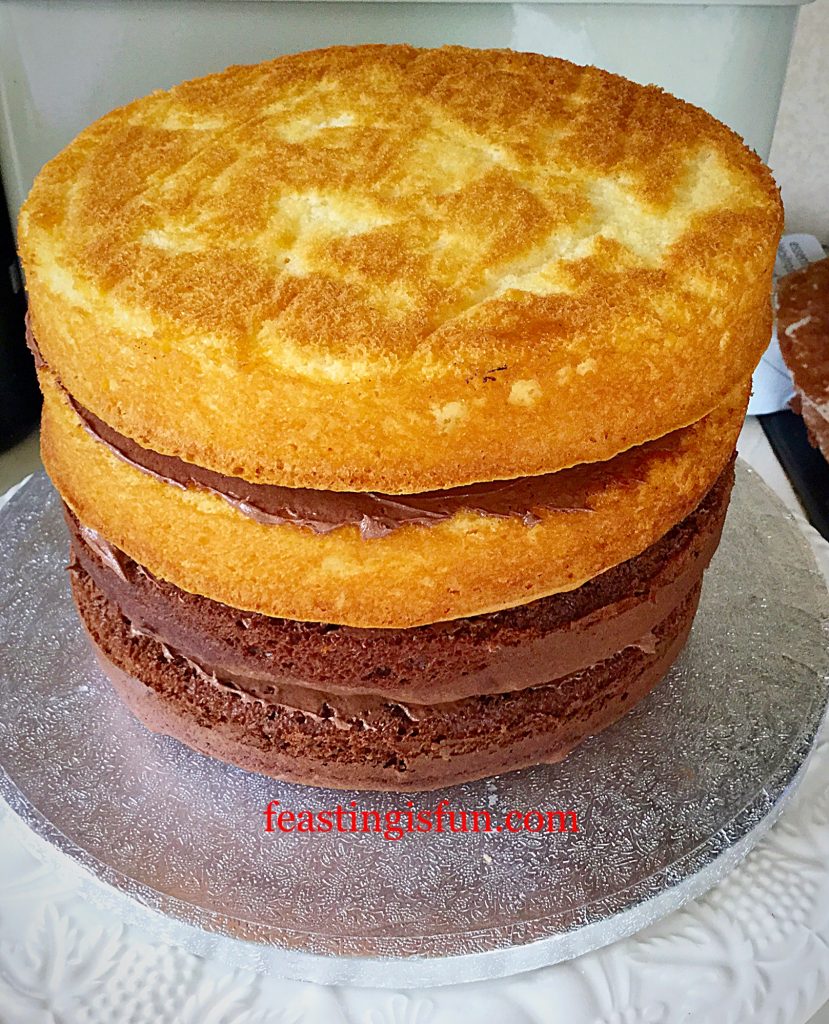
  • Next add the second chocolate sponge, again flat side up and cover with a thin layer of buttercream.
  • Continue in the same manner with the vanilla sponges, leaving the last sponge without a covering of buttercream.

FF Strawberry Chocolate Vanilla Drip Cake

Covering The Cake With Buttercream Frosting:

  • Ensure that you have plenty of space to work around the cake. I moved mine to the dining room table where I was able to sit (better for my back) and cover the cake.
  • Add enough buttercream to cover the top of the cake evenly – approximately 0.5-1cm deep. Run the palette knife across the top to roughly smooth it.
  • Next add buttercream to the side of the cake near the top. Spread it with the palette knife so that it fills in the gaps between the sponges. I started at the top and rotated the cake stand, working my way down to the bottom of the cake as each sponge layer was covered. Always aim to keep the buttercream as even and smooth as possible, using a palette knife.

FF Strawberry Chocolate Vanilla Drip Cake

  • The whole cake is now covered in buttercream with a roughly smoothed top and sides.
  • Fill a large jug with very hot water and have some pieces of kitchen paper to hand.
  • Clean the palette knife and let it sit, immersed in the hot water for a minute.
  • Remove the palette knife and wipe dry with the kitchen paper.
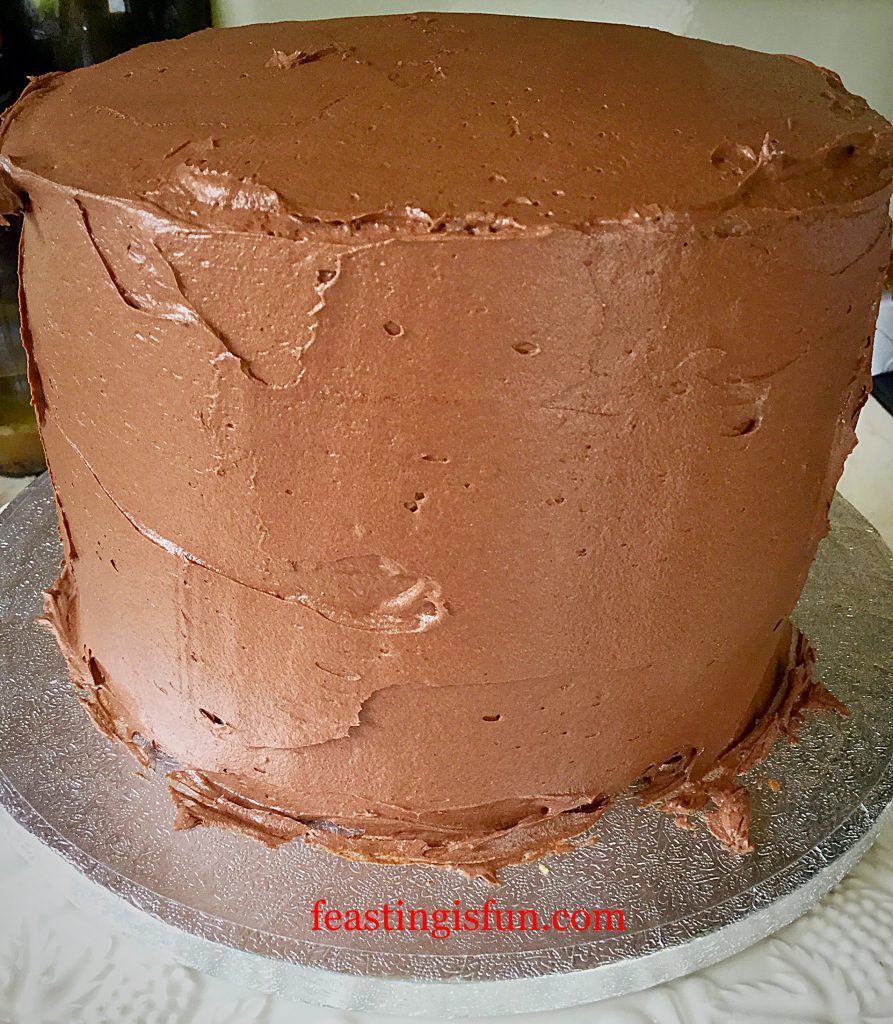
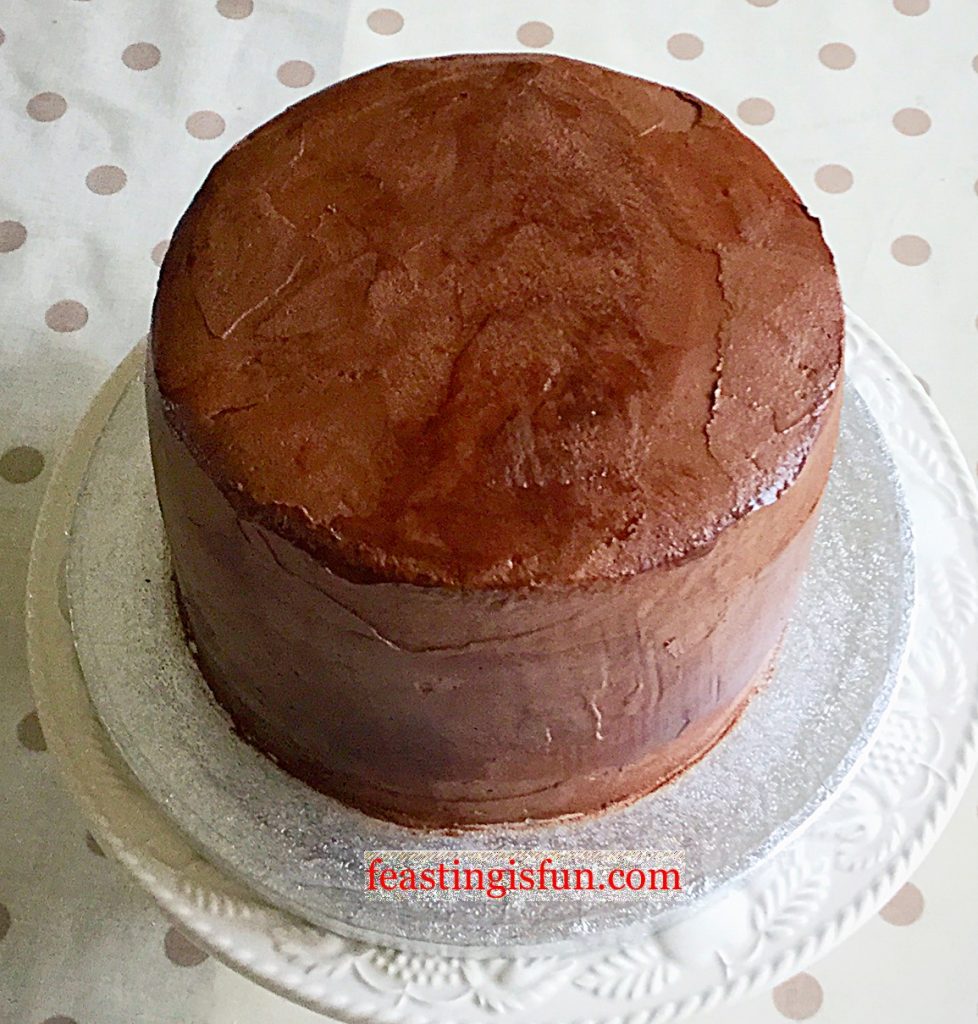
  • Hold the flat side of the palette knife to the side of the cake and smooth the buttercream. Repeat by dipping the palette knife back into the hot water, drying and smoothing, rotating the cake stand as you do so. This may take a little practice but you’ll soon get the hang of it.
  • The buttercream becomes very glossy and smooth. Continue until the sides are as smooth as you can get them.
  • Next smooth the top of the cake in exactly the same way.

FF Strawberry Chocolate Vanilla Drip Cake

  • Use kitchen paper to gently go around the base of the cake and remove excess buttercream from the board. I remove any big lumps and then hold the kitchen paper to the board as I rotate the cake, gradually getting closer and closer to the cake.
  • Place the covered cake into the fridge to chill and set for 30 minutes.
  • When it is touch dry you may start to decorate it.

Decorating The Strawberries With Chocolate:

  • Break up the white chocolate into a heatproof microwaveable bowl.
  • Zap in the microwave for 30 seconds at a time, stirring in between each heating session. When the chocolate has half melted remove the bowl from the microwave and continue stirring until all of the chocolate is melted.
  • Set to one side to cool.
  • Meanwhile break up the dark chocolate and melt in exactly the same way as for the white chocolate.
  • Dip half of the strawberries into the dark chocolate, ensuring they are completely covered with only the green showing, use a teaspoon to pour the chocolate near the top of the strawberry. Set the strawberries on to a silicone mat or some baking parchment.
  • Remove 2 tablespoons of the melted white chocolate and place in a small, disposable piping bag. Snip the very end off leaving a small hole.
  • Pipe lines across the uncovered strawberries and over the chocolate covered strawberries. You can also experiment with piping little dots on to the strawberries. Leave the strawberries to set.

Creating The Drip Effect:

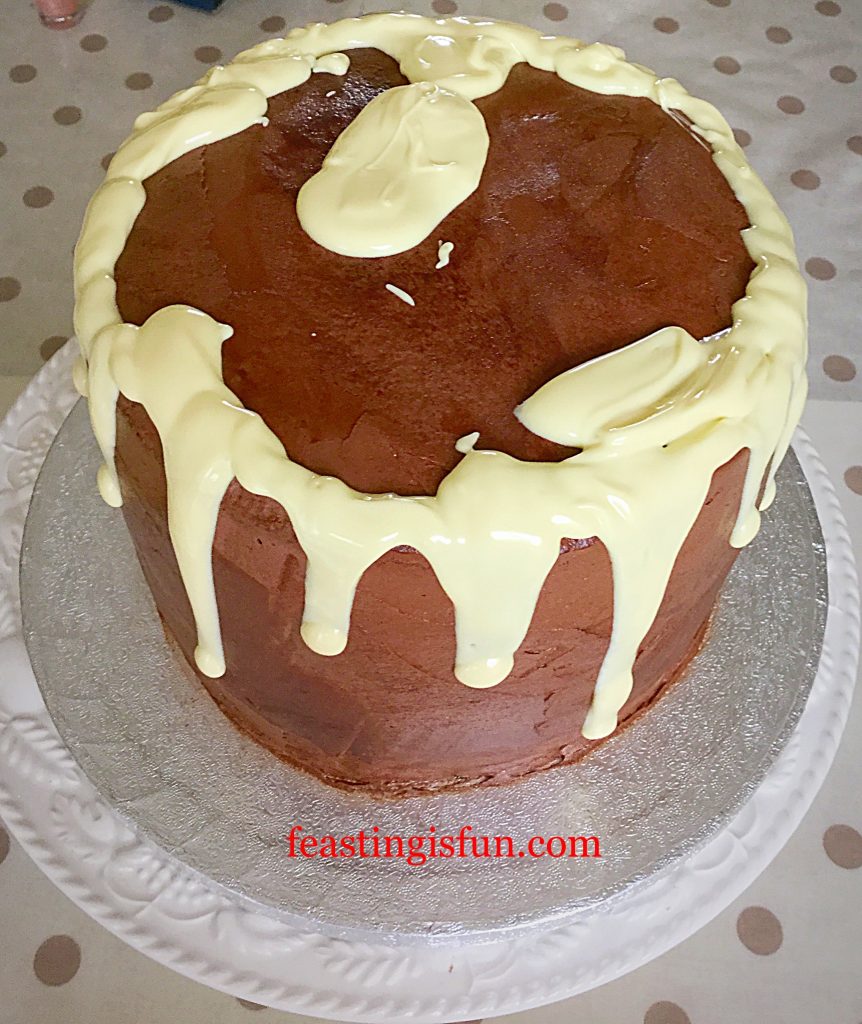
  • Finally, while the white chocolate is still pourable but cooled you can start creating your drips.

FF Strawberry Chocolate Vanilla Drip Cake

  • Using a spoon pour the cooled, melted chocolate around the edge of the cake encouraging drips to form by adding a little more chocolate in places. Aim for a variety of drip lengths around the outside of the cake.
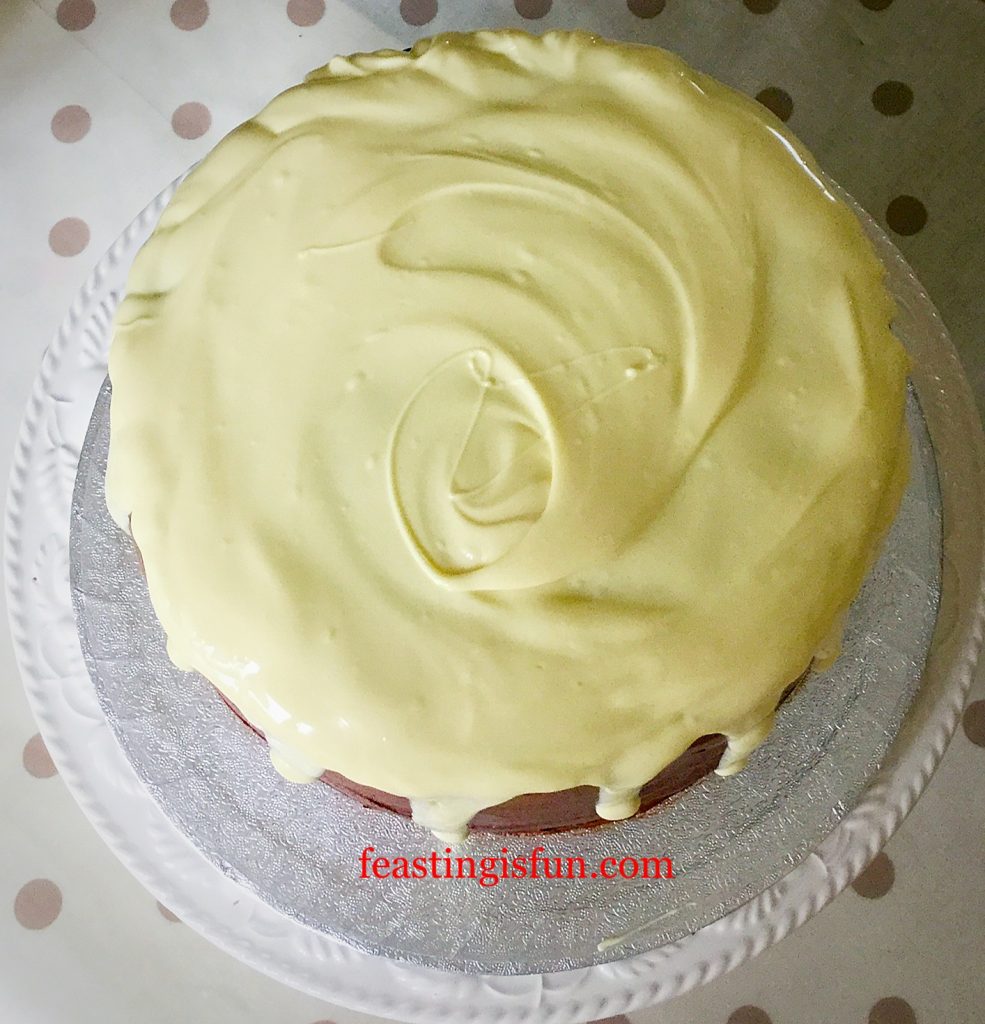
  • Next spoon the remaining white chocolate on to the centre of the top of the cake. Use the spoon to spread it to meet the rim formed by the drips and then swirl with your spoon to give an attractive finish.

FF Strawberry Chocolate Vanilla Drip Cake

Adding Chocolate Strawberries For A Spectacular Finish:

  • Gently add some strawberries to the back of the cake, building height by laying them on top of each other. Also add a few strawberries around the base to create a stunning, professional finish.
FF Strawberry Chocolate Vanilla Drip Cake
Strawberry Chocolate Vanilla Drip Cake

Place the cake back into the fridge, especially during warmer weather, until it has set.

FF Strawberry Chocolate Vanilla Drip Cake
Strawberry Chocolate Vanilla Drip Cake

Now take lots of photographs as it is great to have a visual reminder that you have accomplished something so stunning.

Importantly, keeping some of the strawberries red, with just a little piped white chocolate really makes the whole cake pop. Having a burst of colour stops the cake from being all brown and cream, which is definitely not as fun as a spot of red here and there!

If you have enjoyed the recipe and tutorial for making this Strawberry Chocolate Vanilla Drip Cake here are others you may also like:

Chocolate Peanut Butter Drip Cake

FF Strawberry Chocolate Vanilla Drip Cake
Chocolate Peanut Butter Drip Cake

Black Forest Giant Doughnut

FF Strawberry Chocolate Vanilla Drip Cake
Black Forest Giant Doughnut a stunning effect with little effort.

Fluted Chocolate Lemon Marble Cake

FF Strawberry Chocolate Vanilla Drip Cake
Fluted Chocolate Lemon Marble Cake a great cheat at making an amazing looking cake.

Finally, while not being the world’s best cake decorator means I can learn. Baking and decorating cakes should be fun. And it can be with instructions and photos to guide you through the process. Above all, cakes are made for sharing with friends, family and even the Post Lady!

Have I inspired you to try a new cake decorating technique?

Have fun decorating, making and baking your feasts.

Sammie xx

Wright’s Baking provided me with the cake mix kits to try. All content, opinions, views and photographs are my own. Please see my Disclosure Policy. I am not a professional baker or cake decorator, any advice given is purely for guidance.