Lemon Sultana Buttermilk Scones

Finally, summer is here and I’m so excited. Since this season also makes life easier and more fun! Windows stay open allowing plenty of fresh air to flood our homes, washing dries easily and long, sunlit days allow eating outdoors. Whether it’s an organised picnic, cup of tea in the garden or venturing to an open air concert, Summer is THE season for outdoor fun. And these Lemon Sultana Buttermilk Scones are as ideal for Afternoon Tea as they are easy to pack up for a fun picnic.
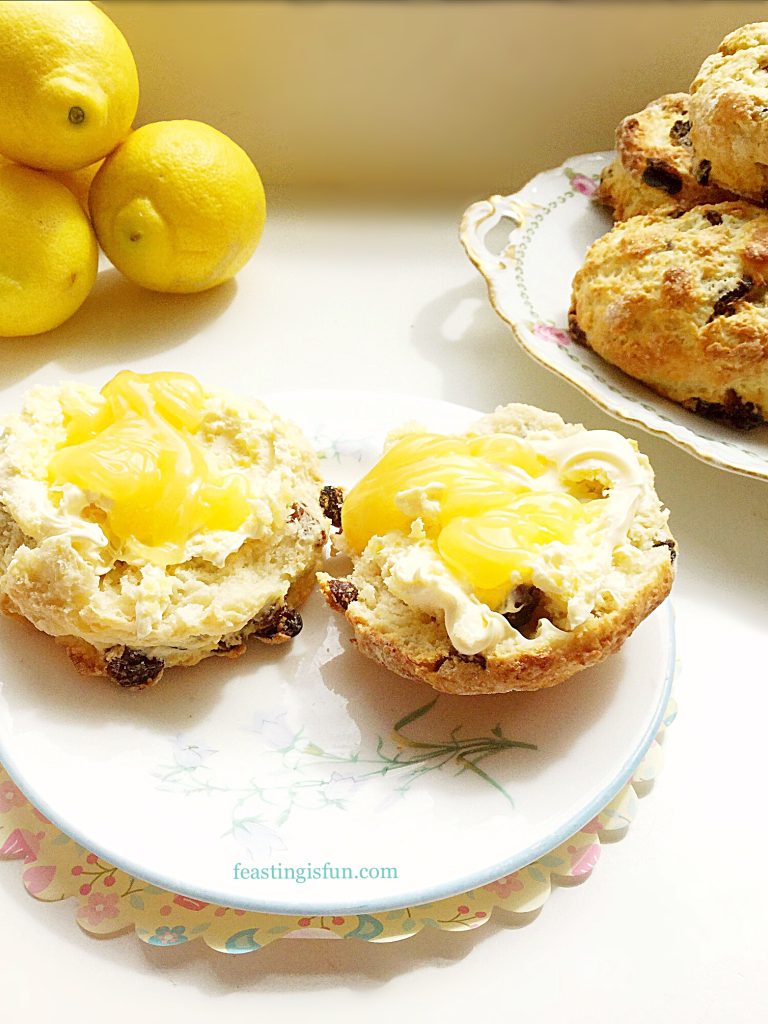
 

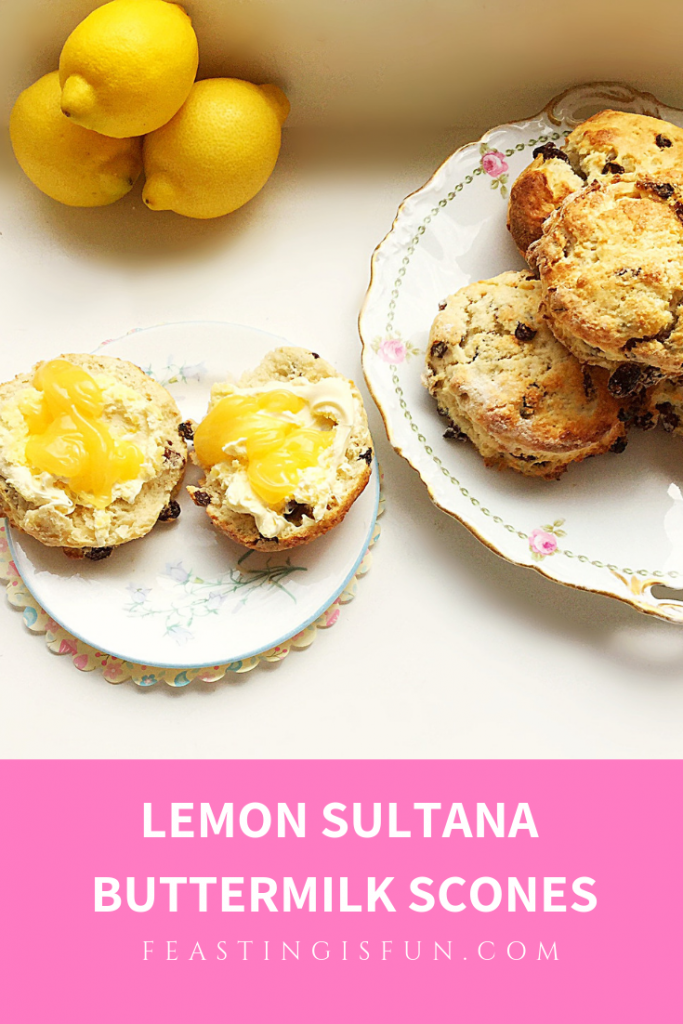
Cut scones topped with clotted cream and lemon curd on a pretty plate.
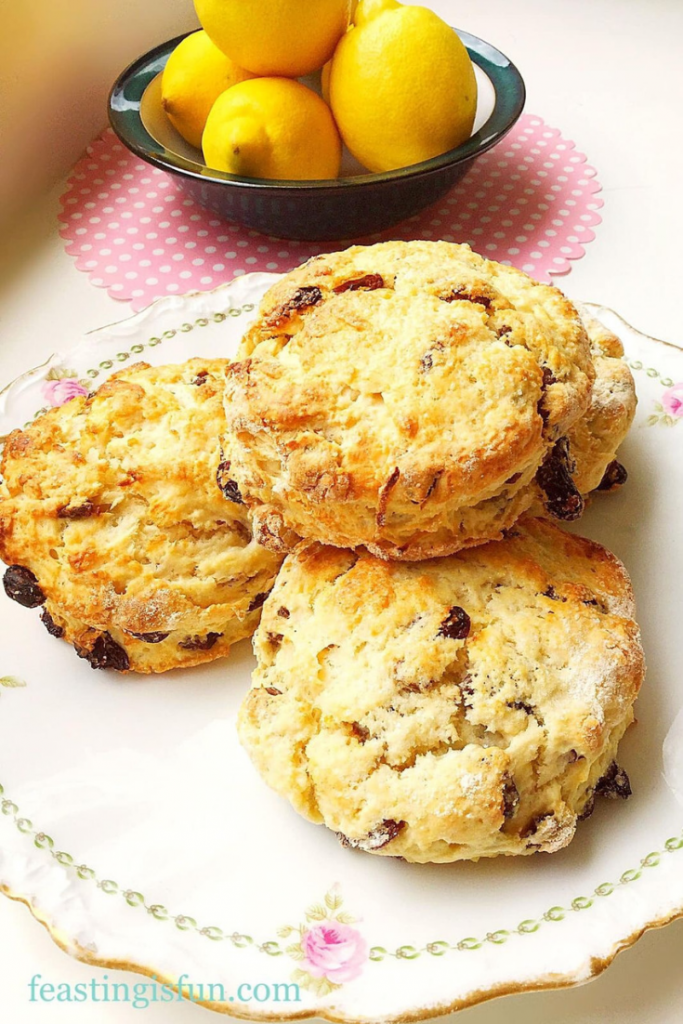
Lemon Sultana Buttermilk Scones

Picnics are a great way to gather friends and family together, for feasting and fun. Whether you choose to meet at a local park, or trek to the seaside, they are a fantastic way of getting people together without being restricted by space or cost. Also, most people are more than happy to bring food along with them, as well as drinks, blankets and games. And so it’s fun to organise everything in advance. Since delegating spreads the workload, it also ensures that everyone relaxes and has fun making new memories!


Pinterest image of Lemon Sultana Buttermilk Scones with descriptive graphics.

Scones; Such An Easy Bake

Scones are the number one recipe I advise people to try if they are new to baking. Since they are virtually foolproof and nobody minds an occasional, slightly wonky One! A successful bake builds a level of achievement and satisfaction in a newbie baker. As a result, they are more likely to continue baking, while learning new skills, attempting more complex recipes as confidence in the kitchen grows.
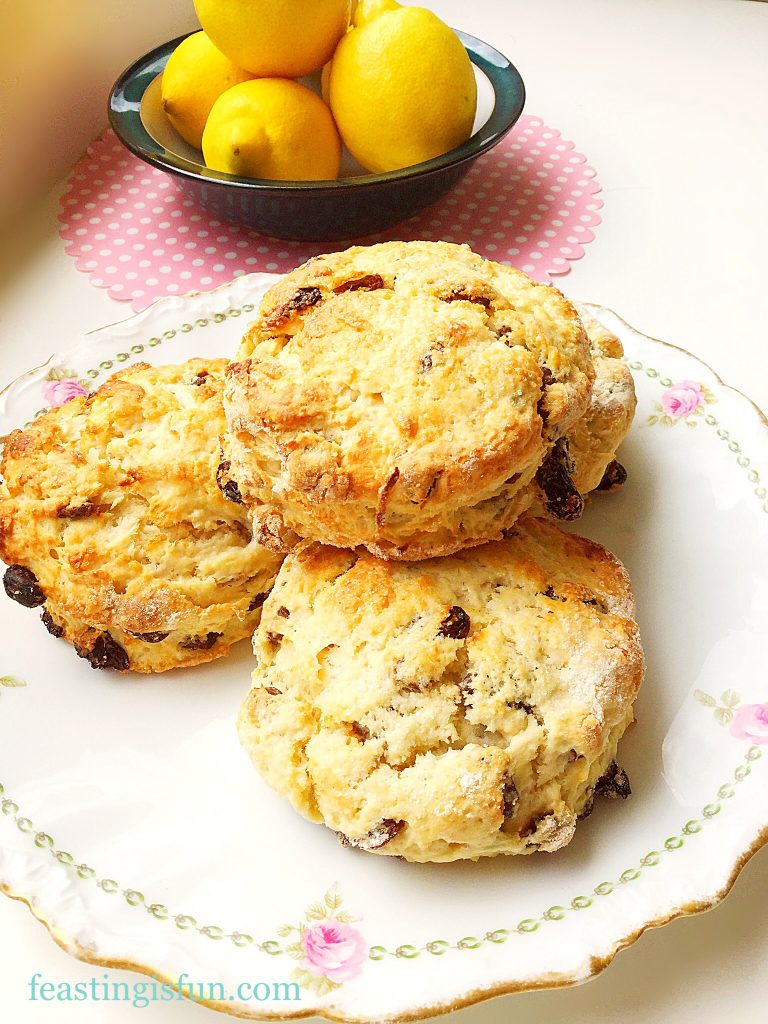
Lemon Sultana Buttermilk Scones

And now, back to these delicious. Truthfully, I must say these are my favourite scones to date! A positive result for someone who wouldn’t go near a scone until I started baking them myself! So, it is time for me to stop chatting and make these yummy, cream tea favourites.

Recipe: Lemon Sultana Buttermilk Milk Scones makes 8-10 large scones

450g/1lb Plain White Flour

3tsp Baking Powder

1/4tsp Sea Salt Flakes – I use Maldon

25g/1oz Vegetable Fat such as Trex

50g2oz Unsalted Butter

4tsp Caster Sugar – plus extra for sprinkling on top of the unbaked scones

Zest of 2 medium or 1 very large lemon (scrubbed and washed in hot water before zesting)

225g/8oz Sultanas

284ml/10fl oz Buttermilk – Alternatively, use the same quantity of whole or semi skimmed milk, add 2 teaspoons of fresh lemon juice or 1 teaspoon of white vinegar and stir. Leave for 5 minutes then stir again, the liquid should be thicker and slightly lumpy and is now ready to use.

3-4 Tablespoons of Semi or Whole Milk

Method: Preheat the oven to 220C/200C fan, gas mark 7, 425F

Note – you may notice an American dry cup measure in the photographs. Since we are decorating at the moment I was unable to locate my round cutters. So I improvised. Using a one cup measure worked perfectly for cutting out the scones. Also, if using a smaller cutter for smaller scones, remember to adjust the baking time.

Making The Buttermilk Scone Dough

  • First of all line a large baking tray with baking parchment.
  • Next, tip the flour, baking powder, salt and sugar into a large bowl.
  • Stir all the dry ingredients together with a balloon whisk.
  • Add the vegetable fat and butter in small chunks, then add the lemon zest.
  • Using a pastry cutter work the fats into the flour until it resembles breadcrumbs with some pea sized chunks of fat still visible.
  • Add the sultanas and using your fingers gently lift and drop them into the bowl so they become covered in flour.
  • Make a well in the centre of the flour mix and pour in all of the buttermilk.
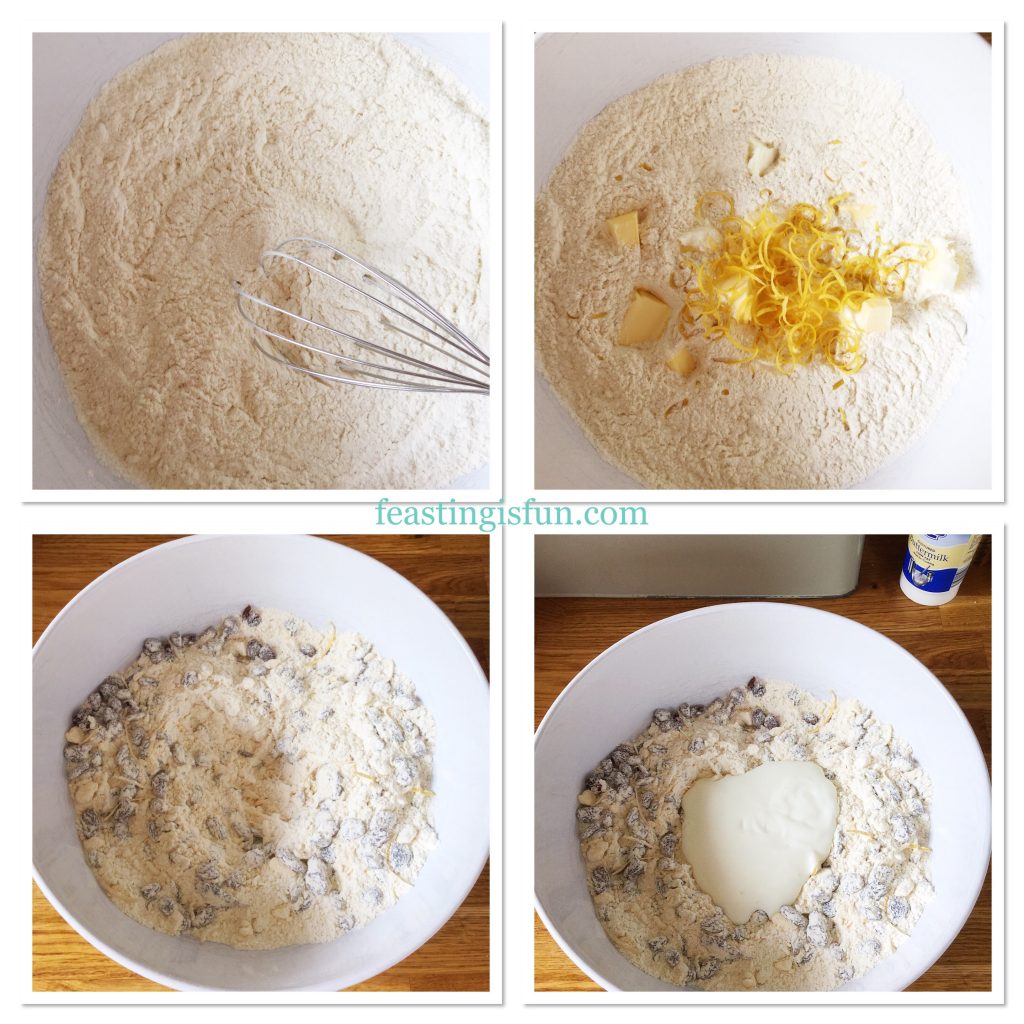
Four stages showing how to incorporate fats and fruit with flour for a recipe.
Making the scone dough.
  • Using a butter knife stir all of the ingredients together until large clumps begin to form.

Turning Out And Shaping The Dough And Cutting Out Individual Scones

  • Turn the clumpy dough out onto a floured surface. And note, the dough should be quite wet and sticky.
  • Using floured fingers bring the dough together and pat out to form a round shape that is about 1 inch (2.5cm) deep.
  • Most importantly, check that the disc of dough moves freely across the surface and is not stuck.
  • Flour a round 3 inch (7.5cm) cutter that is also at least 2 inches (5cm) deep and place it on top of the dough.
  • Press the cutter straight down onto the dough taking care not to twist it.
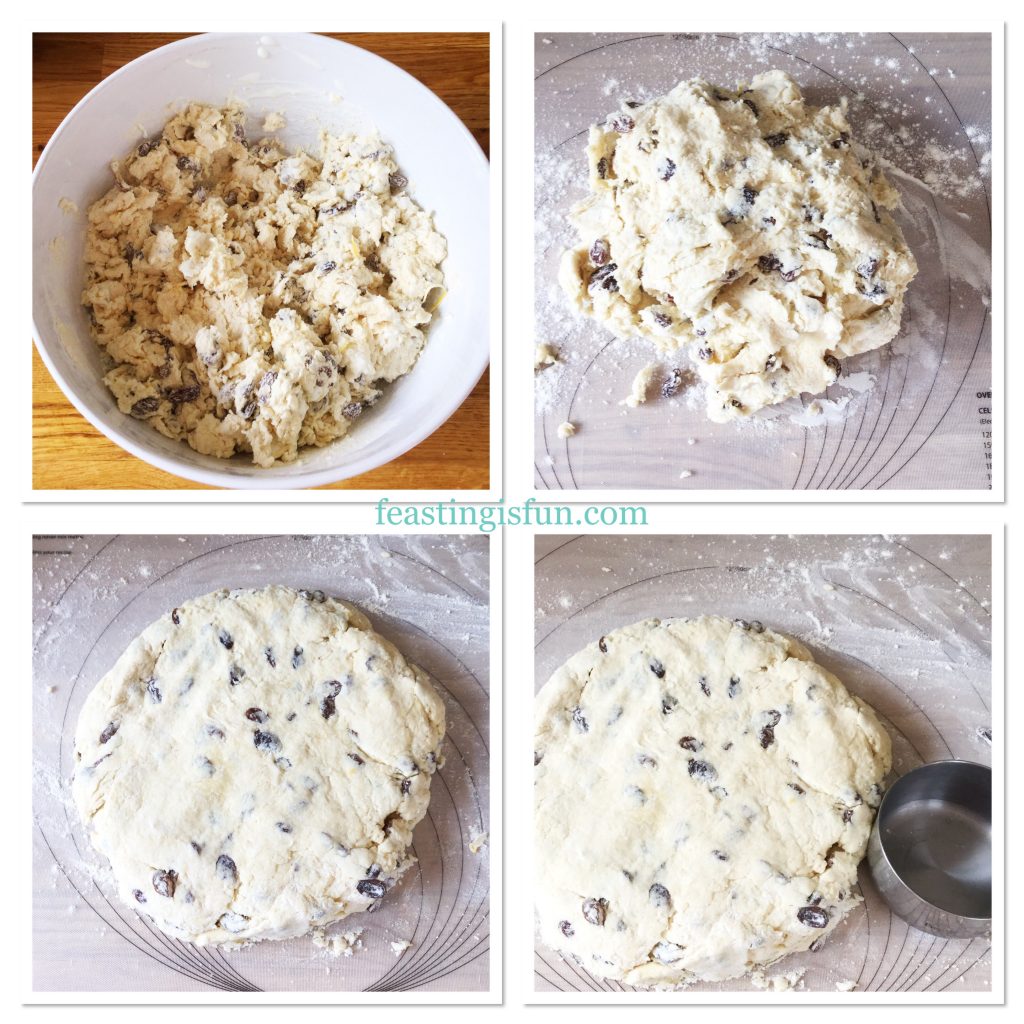
Patting the dough out onto a pastry mat, ready to be cut.
Getting the dough ready.
  • Place each cutout scone onto the baking parchment lined baking tray.
  • Brush fresh milk onto the top of each scone using a pastry brush and then sprinkle a pinch of sugar over the top.

Baking The Lemon Sultana Buttermilk Scones

  • Place the scones into the centre of the oven and bake for 15-20 minutes. Because each oven is different and other variables such as the thickness of scone dough affect the baking time, I have given a range of times. My scones took 18 minutes to bake.
  • The scones are baked when the are risen, golden in colour and sound hollow when rapped on the base with your knuckle. Similar to bread when baked.
  • As soon as the scones are baked remove them from the oven and carefully place them on a cooling rack.
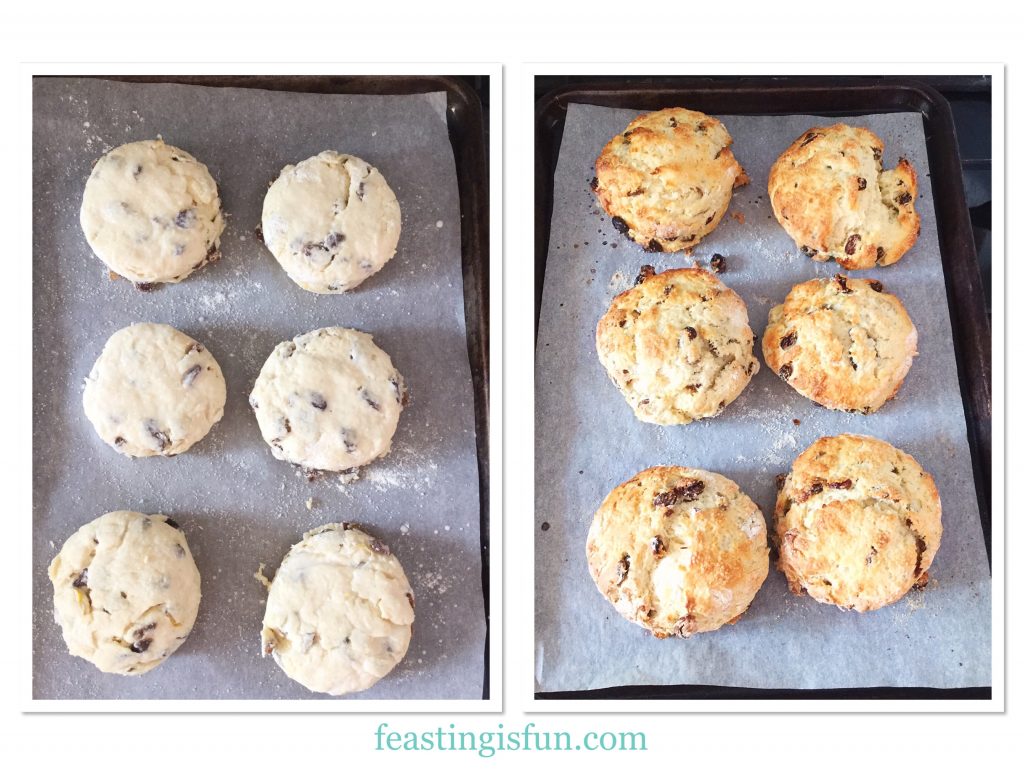
Raw and baked Lemon Sultana Buttermilk Scones
Before and after baking.

Serving And Enjoying The Scones

Eat these scones either warm or cold. Also they can be enjoyed just as they are, or split in two and topped with either clotted cream or butter.
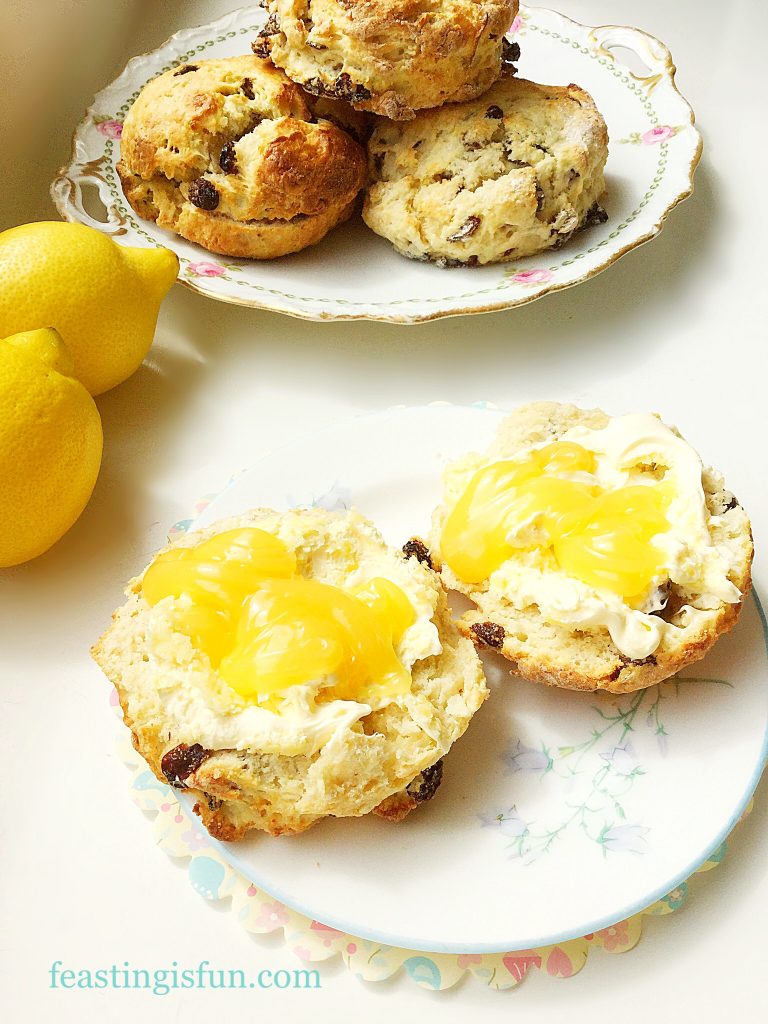
Split scones topped with clotted cream and lemon curd on a pretty plate. Fresh whole scones and lemons are in the background.
Lemon Sultana Buttermilk Scones

Topping a scone with clotted cream and lemon curd and sitting down with my favourite foodie magazine, a delicious cup of tea, and a relaxing afternoon.
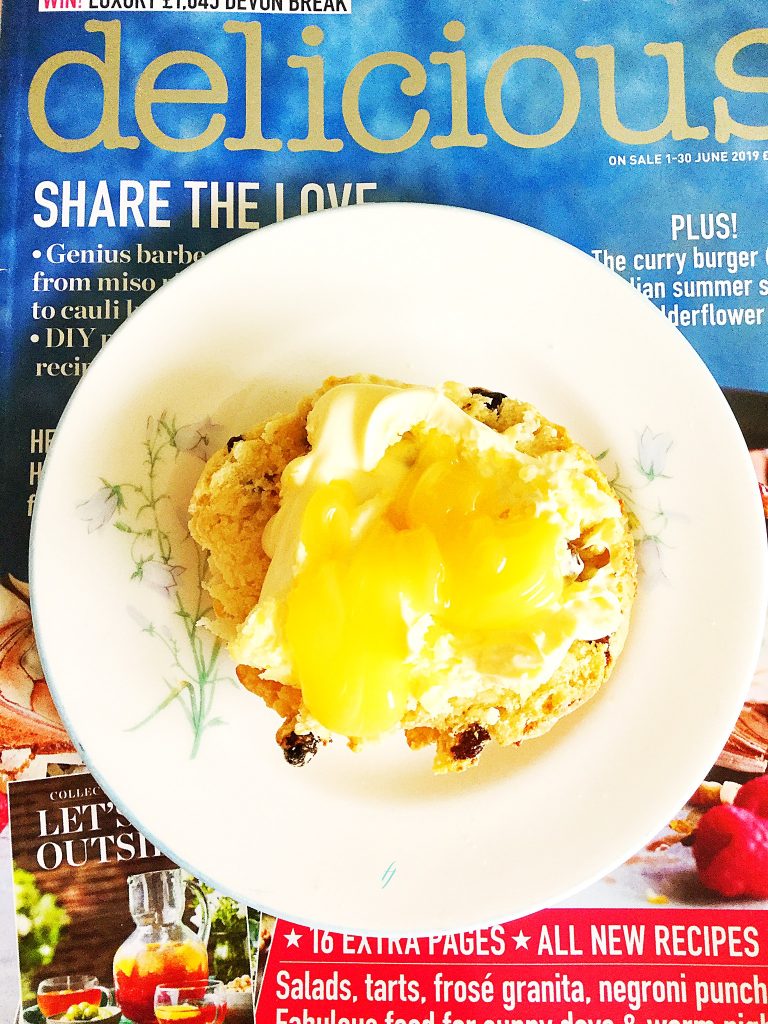
Delicious magazine with a plate on top containing a tasty afternoon sweet treat.
Relax with a great foodie magazine and a clotted cream and lemon curd topped scone.

Homemade scones are usually best eaten on the day they are baked. Yet with this recipe they stayed moist for up to 3 days when kept in an airtight container.

If you have enjoyed this recipe for Lemon Sultana Buttermilk Scones you may also like these:

Super Light Scones

A platter set with small plain scones, fresh strawberries and clotted cream and jam in bowls.
Super Light Scones

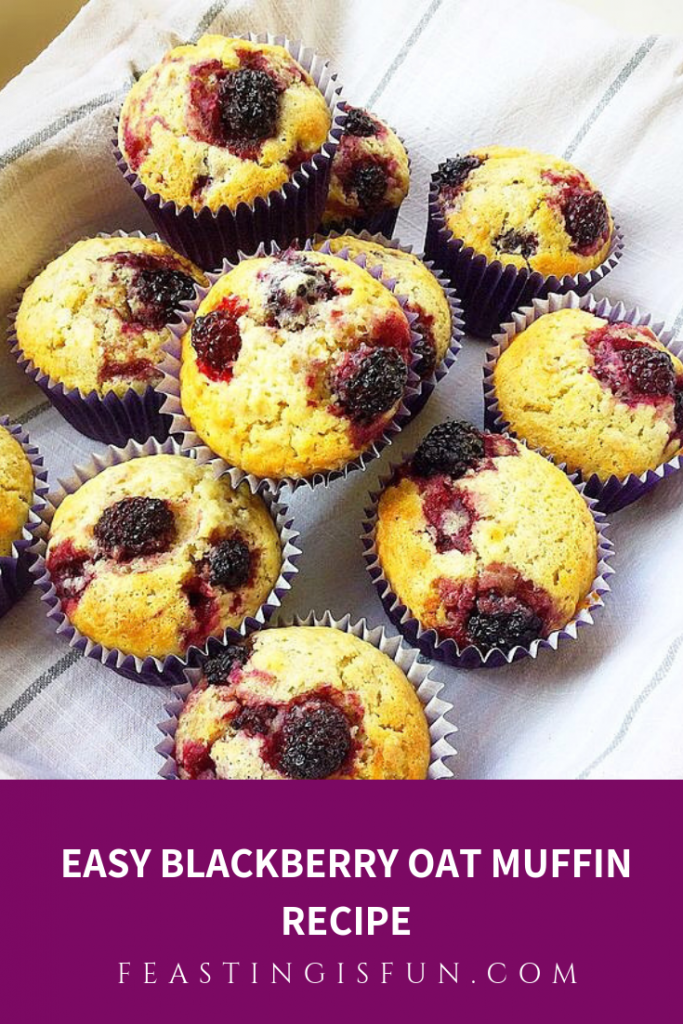
Easy Blackberry Oat Muffin Recipe

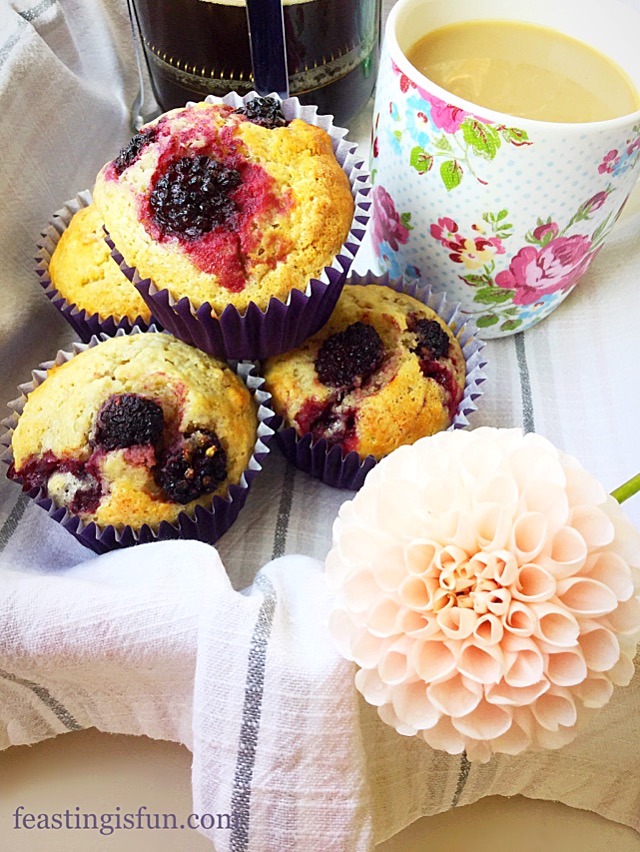
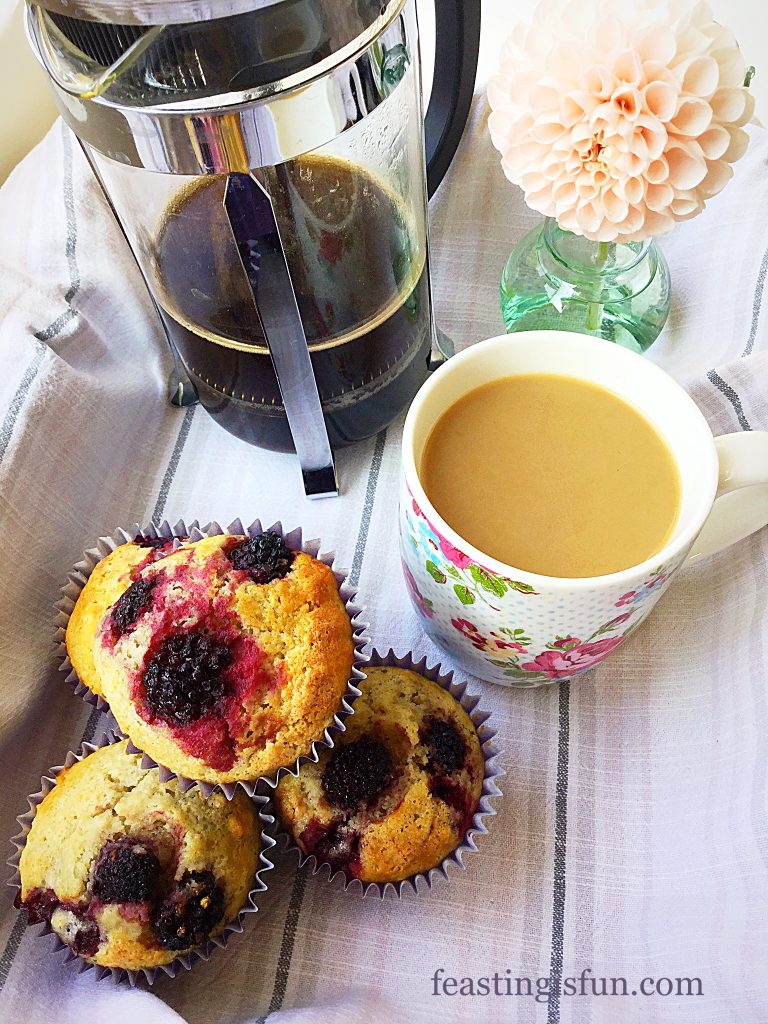
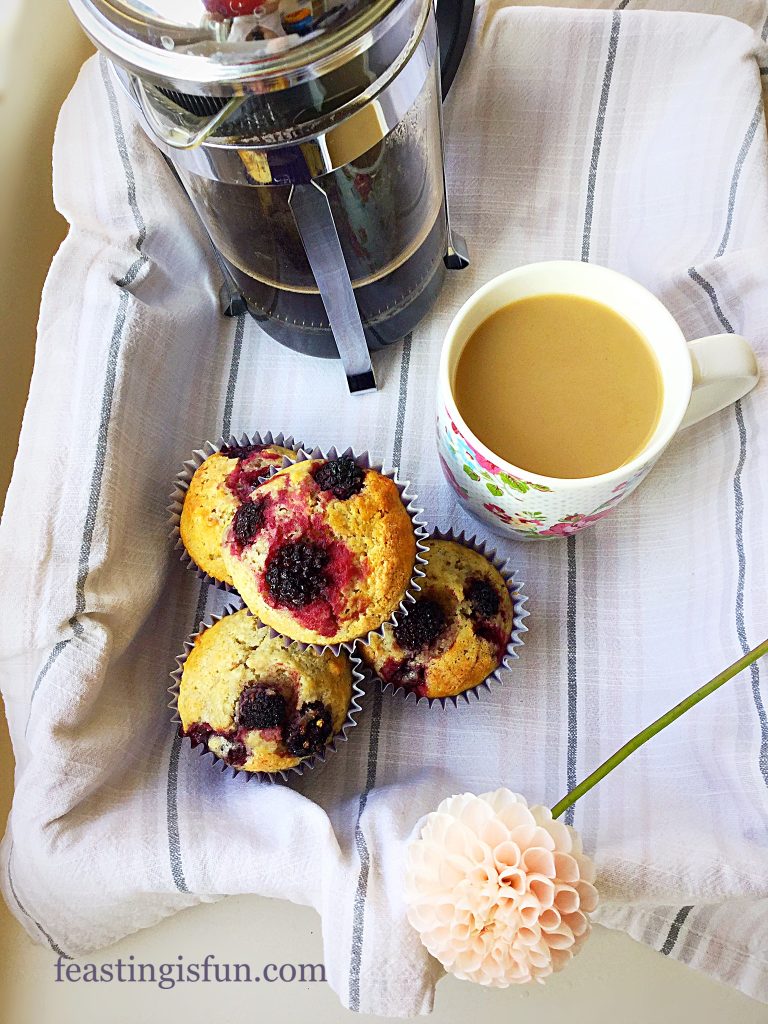
A lined breakfast tray with muffins, cafetière and mug of coffee and a blush coloured dahlia flower.
Easy Blackberry Oat Muffin Recipe

Cheddar Sun Dried Tomato Scones 

Savoury cheese scones in a lined basket with fresh tomatoes and basil and a wedge of cheddar cheese.
Cheddar Sun Dried Tomato Scones

So, is this recipe tempting you to make scones at home? Doing so is a very rewarding experience, especially when you share your bakes and receive compliments on your baking! And, aside from being a world away in taste and texture from their shop bought counterparts, you know exactly what has gone into your baking. Love cannot be bought, yet these scones were made with an extra large helping of it.

Whatever you are making, baking and creating in your kitchens, have fun preparing and sharing your feast.

Sammie x

No part of this post may be reproduced or duplicated without the written permission of the owner. This post does not contain any sponsored content. Please see my Disclosure Policy.

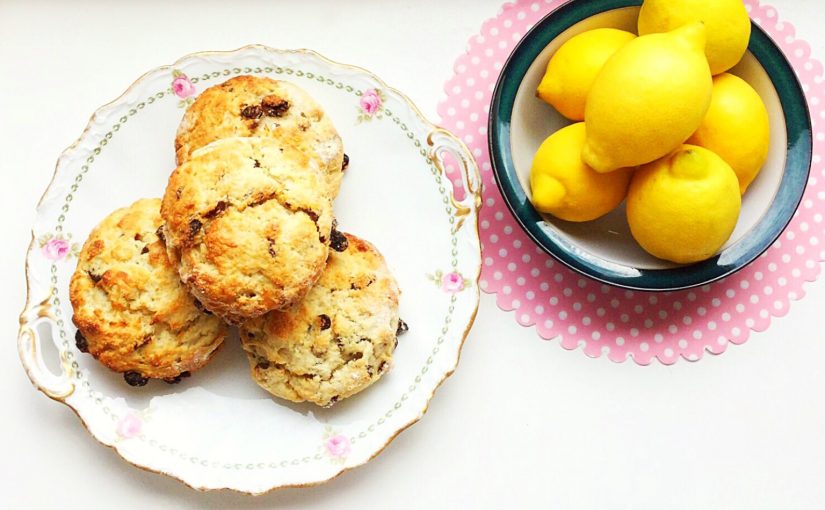
Lemon Sultana Buttermilk Scones piled on a pretty cake plate with a bowl of fresh lemons in the distance.
Lemon Sultana Buttermilk Scones perfect for Afternoon Tea.


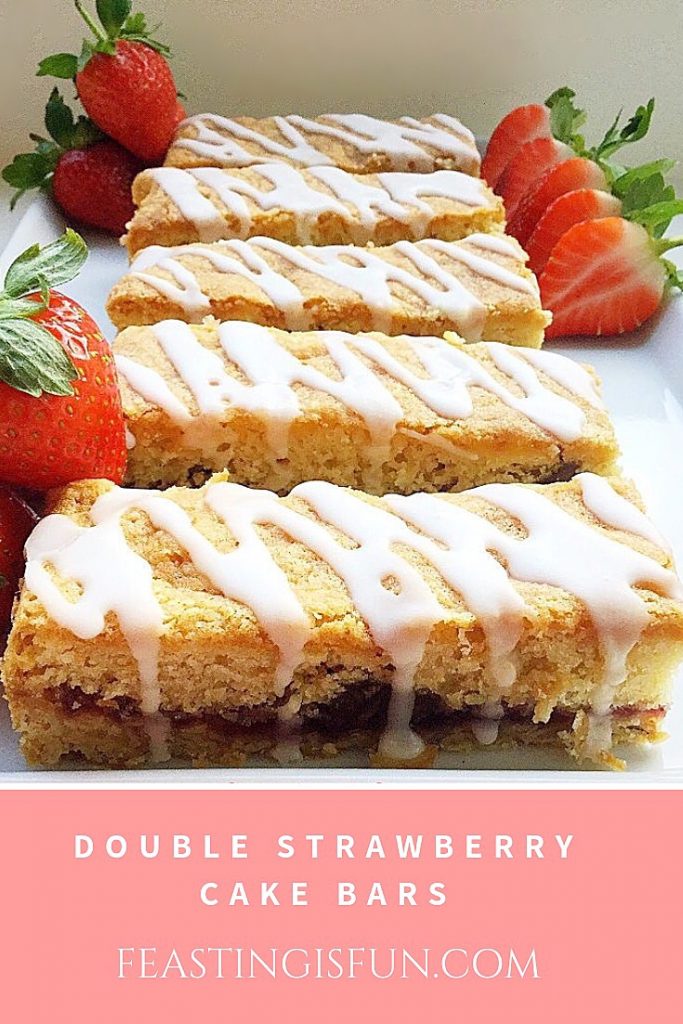
Double Strawberry Cake Bars

We are now in a brand new year, chances, decisions, opportunities and endless possibilities lay before us. I adore the start of January. Christmas decorations packed away and a return to ‘normality’. With this blog I want to bring you even more easy, yet delicious recipes and also add more savoury dishes to the menu. Let’s start with these Double Strawberry Cake Bars.

FF Double Strawberry Cake Bars

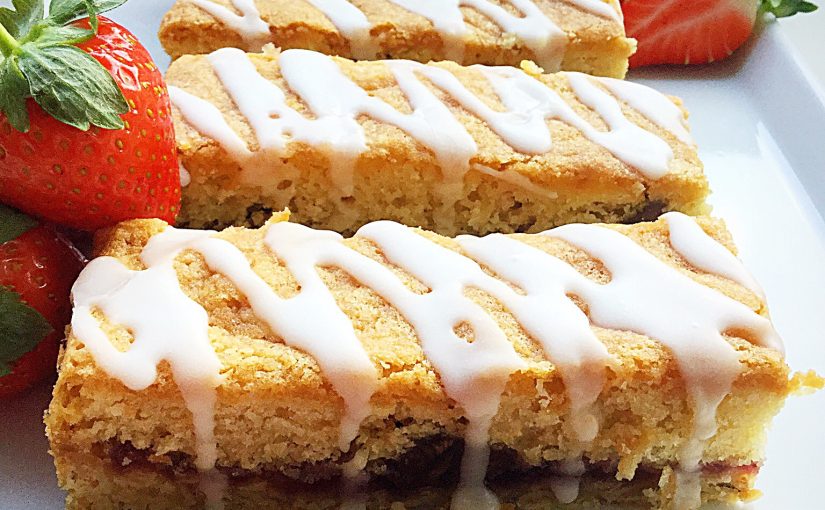
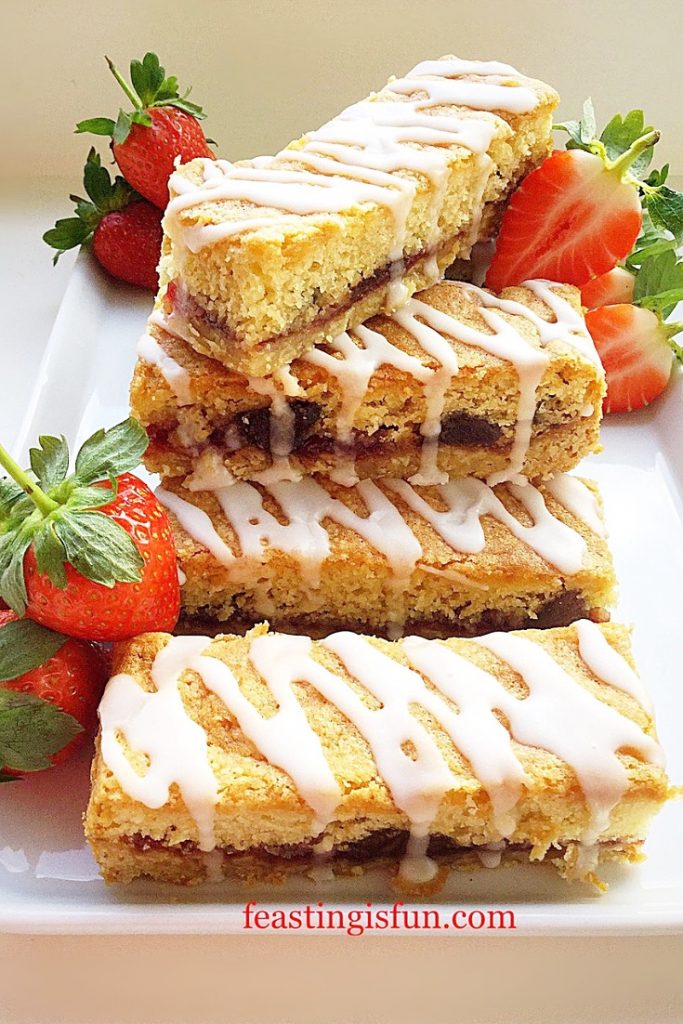
A crisp, oat biscuit base is topped with strawberry jam and then topped with a vanilla cake sponge studded with oven dried strawberries. Urban Fruits sell a range of dried fruits that I have used in previous bakes such as my Strawberry Oat Crumble Cookies. Although the strawberries are dried they are not dry. Think dried apricots. Intense fruit flavour with a chewy bite. Used in these cake bars the strawberries bring an extra depth of flavour as well as texture.

FF Double Strawberry Cake Bars
Double Strawberry Cake Bars

Portable Food

Since my hubby takes a packed lunch to work I try to come up with recipes that travel well. Because these cake bars have a solid biscuit base they are easy to wrap and pop into a lunch box. Likewise, during warmer months they are ideal for picnics. Food that travels well is always a bonus, as it is perfect for taking to friends homes, family get togethers and pot luck gatherings.

FF Double Strawberry Cake Bars
Double Strawberry Cake Bars

Also these cake bars are perfect for munching on, book in one hand, snack in the other. Sometimes I find a book that I cannot put down and happily munch away whilst reading.

Recipe – Double Strawberry Cake Bars makes 16

For the biscuit base 

225g/8oz Unsalted Butter at room temperature

150g/5oz Caster Sugar

1/4tsp Sea Salt (1/8tsp table salt)

1tsp Vanilla Extract – I use Nielsen-Massey 

1 Large Free Range Egg Yolk

150g/5oz Rolled Oats (not quick cook)

125g/4.5oz Plain White Flour

175g/6oz (Half a jar of) Strawberry Jam

For the cake layer 

175g/6oz Unsalted Butter at room temperature

175g/6oz Caster Sugar (I have used golden caster sugar as that’s what was in the cupboard!)

1/4tsp Sea Salt (1/8tsp table salt)

2tsp Vanilla Extract

3 Large Free Range Eggs

175g/6oz Plain White Flour

2tsp Baking Powder

90g/4oz Oven Dried Strawberries – I use 1 packet of Urban Fruit Smashing Strawberry

For the icing drizzle

100g/4oz Icing Sugar (Confectioners Sugar)

2-3 tbsp Fresh Lemon Juice

Method:

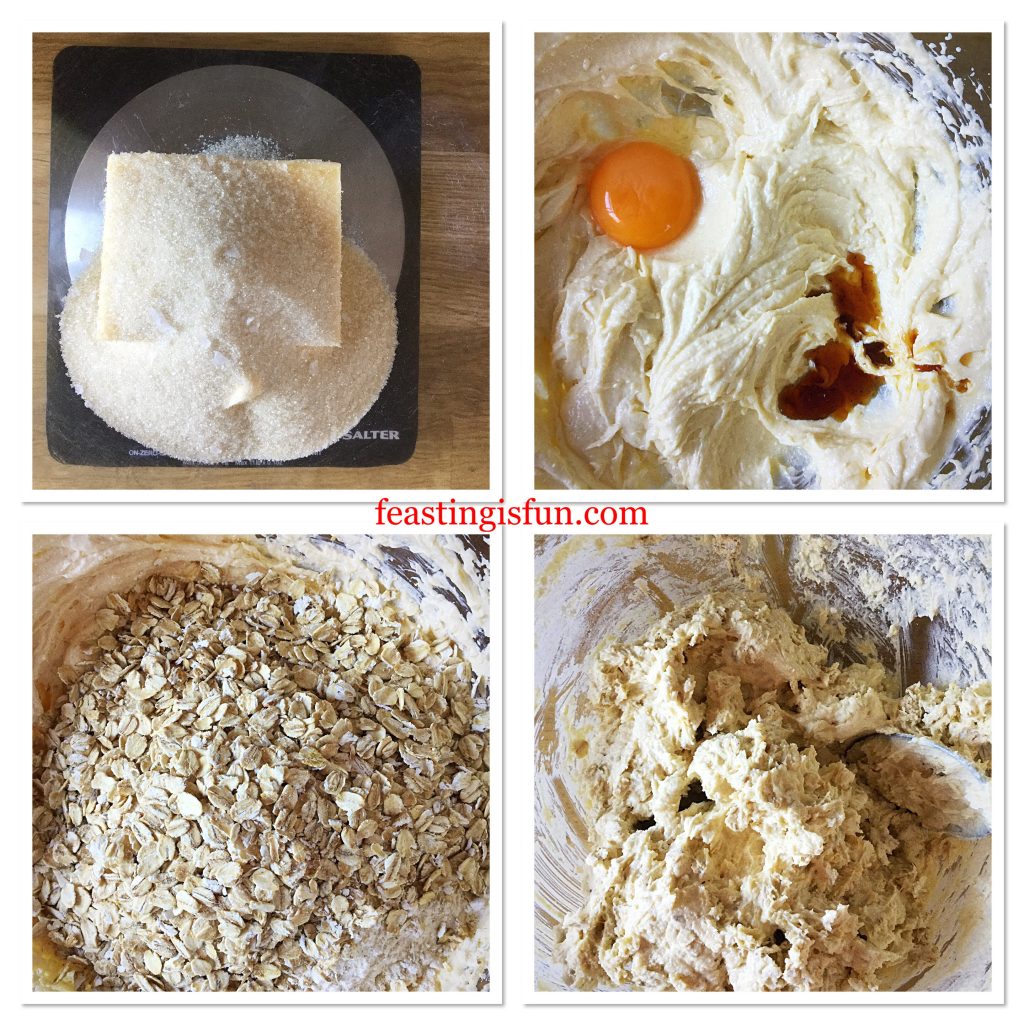
Making The Oat Biscuit Base

  • First of all line a 22.5cm x 30cm (9” x 12”) deep tin with baking parchment.
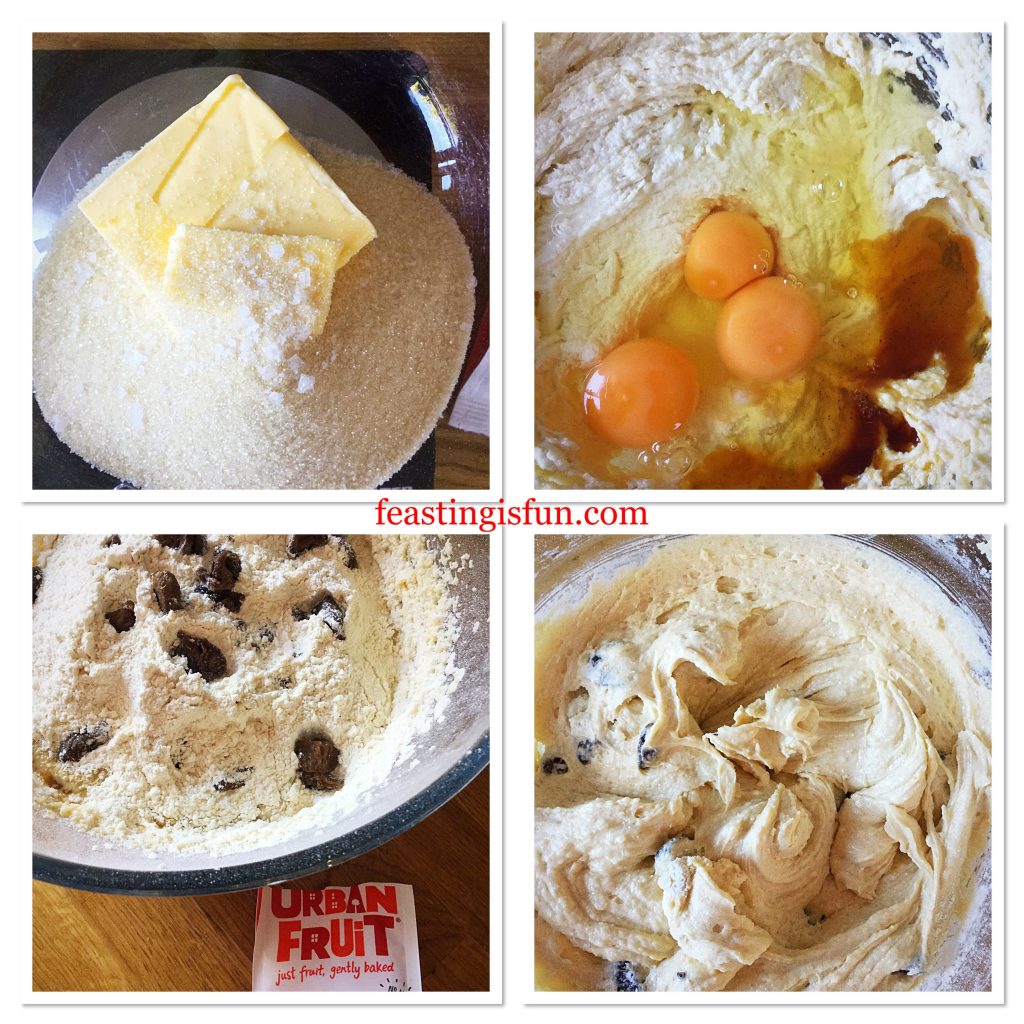
  • Into a large bowl add the butter, sugar and salt. Whisk together until pale and creamy.
  • Next add the egg yolk and vanilla extract. Whisk together until combined.
  • Sift in the flour and add the oats.
  • Using a large spoon mix the ingredients together until fully combined.


FF Double Strawberry Cake Bars
Making the oat biscuit base.
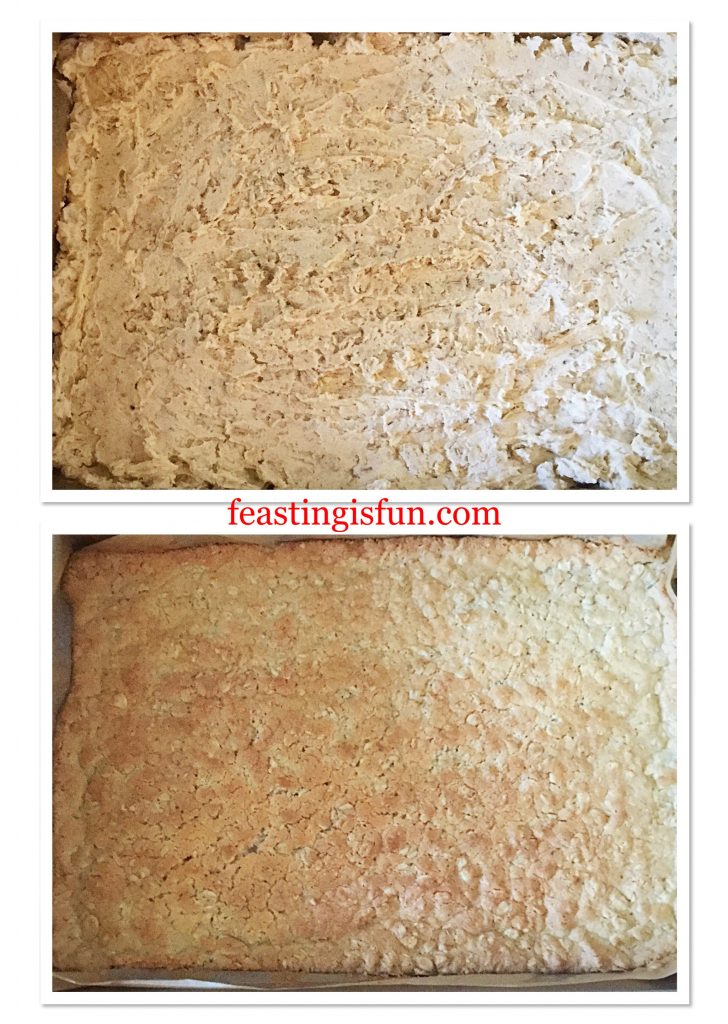
  • Spoon the oat biscuit mixture into the prepared tin. Smooth with the back of a spoon to create an even layer.
  • Place the tin into the fridge for 30 minutes.
  • While the biscuit base is firming up in the fridge preheat the oven to 180C/160C fan, 350F, gas mark 4. 
  • As soon as the base has chilled place the tin into the centre of the oven and bake for 20 minutes.
  • Remove the tin and immediately reduce the oven temperature to 160C/140C fan, 325F, gas mark 3.
FF Double Strawberry Cake Bars
Chilling and baking the oat biscuit base.
  • While the base is cooling make the cake batter.

Making And Adding The Cake Batter

  • Add the butter, sugar and salt to a large bowl and whisk until combined.
  • Next add 3 eggs and the vanilla extract. Whisk until combined.
  • Sift in the flour and baking powder then add the dried strawberries.
  • Stir with a spoon until the cake batter just comes together.


FF Double Strawberry Cake Bars
Making the cake batter.
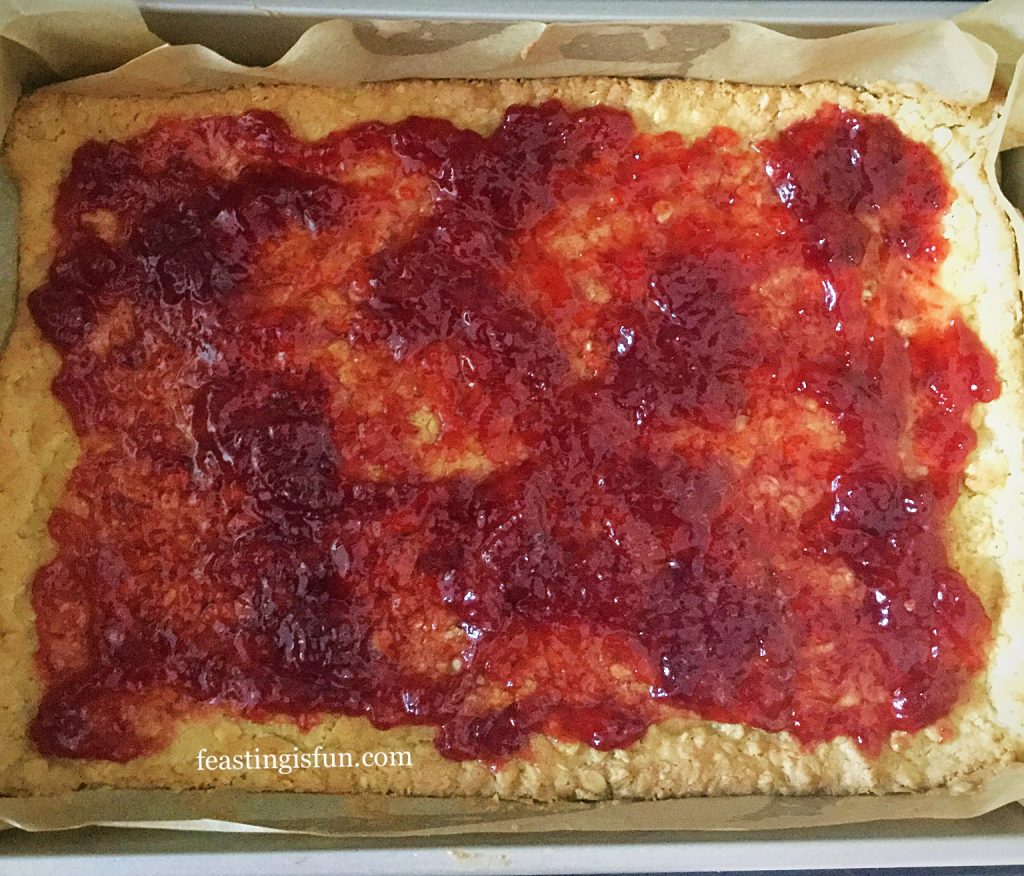
  • Spoon strawberry jam on to the biscuit base, using the back of a spoon to create an even layer that does not touch the edges.
FF Double Strawberry Cake Bars
Adding a layer of jam.
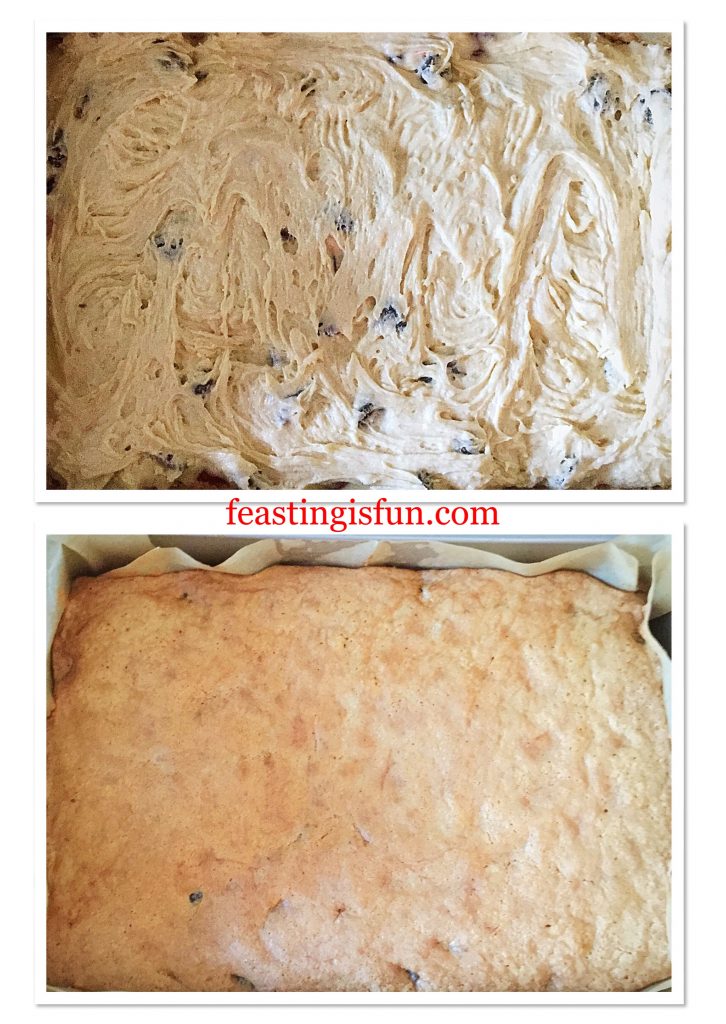
  • Cover the layer of jam with cake batter. I found it easier to create an even layer using a fork.
  • Ensure the cake batter goes right to the edge. Doing so stops the jam from leaking out.
  • Place the tin into the centre of the oven and bake for 45-50 minutes.
FF Double Strawberry Cake Bars
Adding the strawberry cake layer and baking.
  • The cake layer is fully baked when it is lightly pressed and springs back in the centre.
  • As soon as it is baked remove from the oven.
  • Leave to cool completely in the tin.
  • As soon as the cake is cooled lift it out of the tin using the baking parchment to help.

Portioning And Decorating The Cake Bars

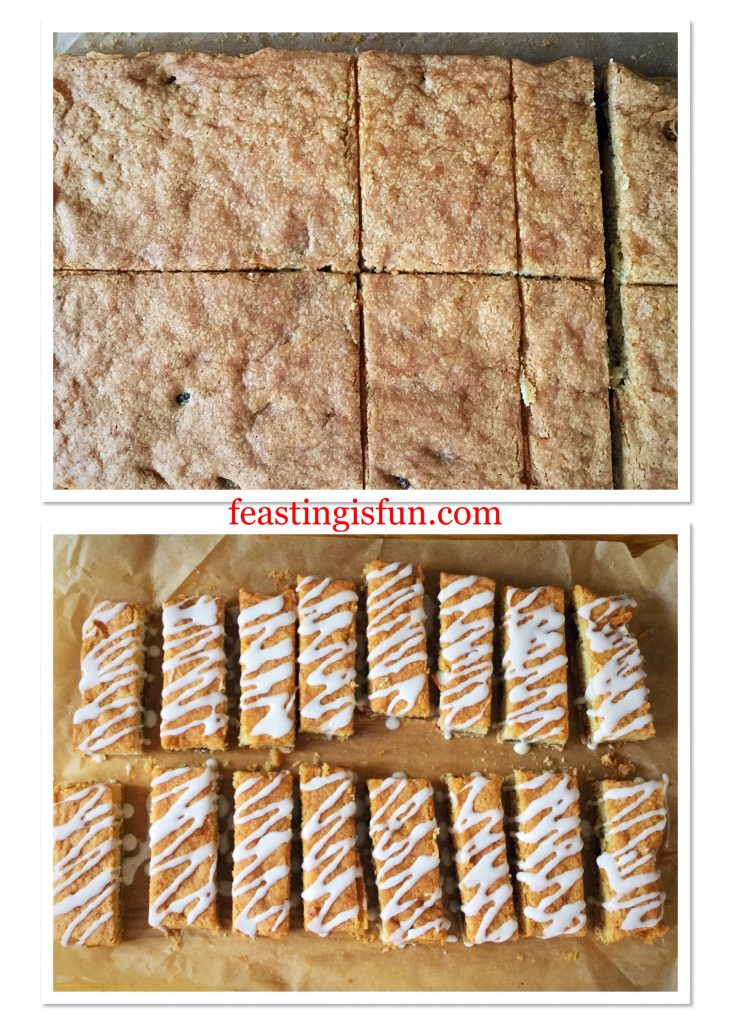
  • First of all, using a sharp knife cut halfway across the width of the bake.
  • Next cut down the centre, creating 4 quarters.
  • Cut down each quarter four times creating 4 Cake Bars per quarter.
  • Separate the cake bars to enable the icing to drip down the sides.
  • In a bowl mix the icing sugar with 2-3 tablespoons of lemon juice to create a thick yet flowing icing.
  • Using either a fork or a piping bag with a very small hole, drizzle the icing diagonally across each cake bar.
  • Leave to set.
FF Double Strawberry Cake Bars
Portioning and decorating the Double Strawberry Cake Bars.
  • As soon as the icing is set, the cake bars can be served or stored in an airtight container.
FF Double Strawberry Cake Bars
Double Strawberry Cake Bars


FF Double Strawberry Cake Bars
Double Strawberry Cake Bars

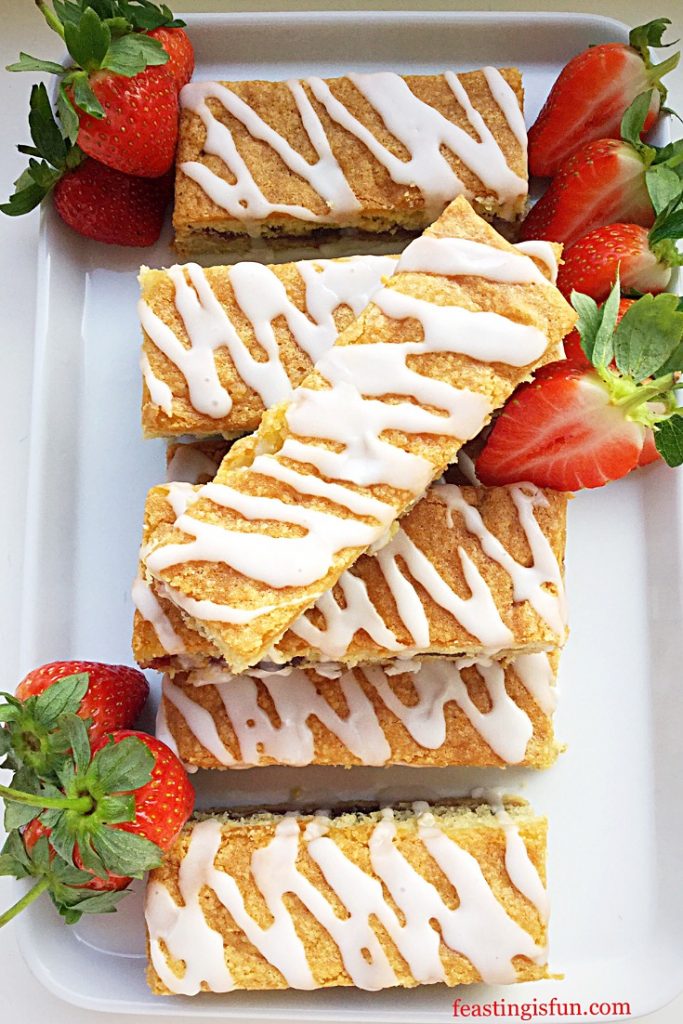
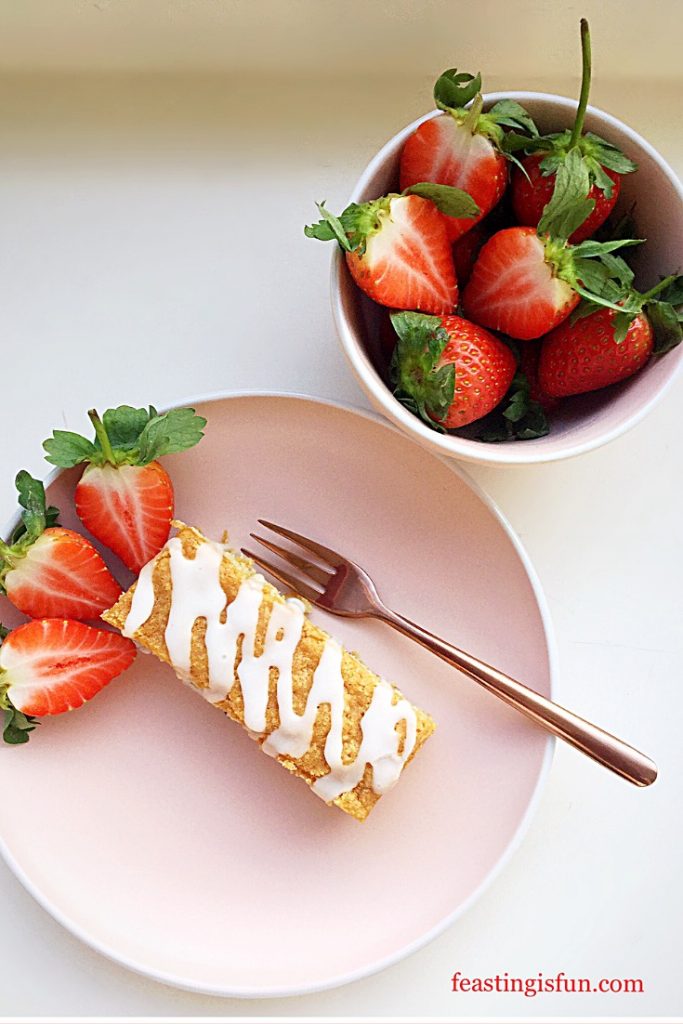
Finally, when serving, add fresh strawberries to the plate and stack the cake bars to create height.

If you have enjoyed this recipe for Double Strawberry Cake Bars you may also like these:

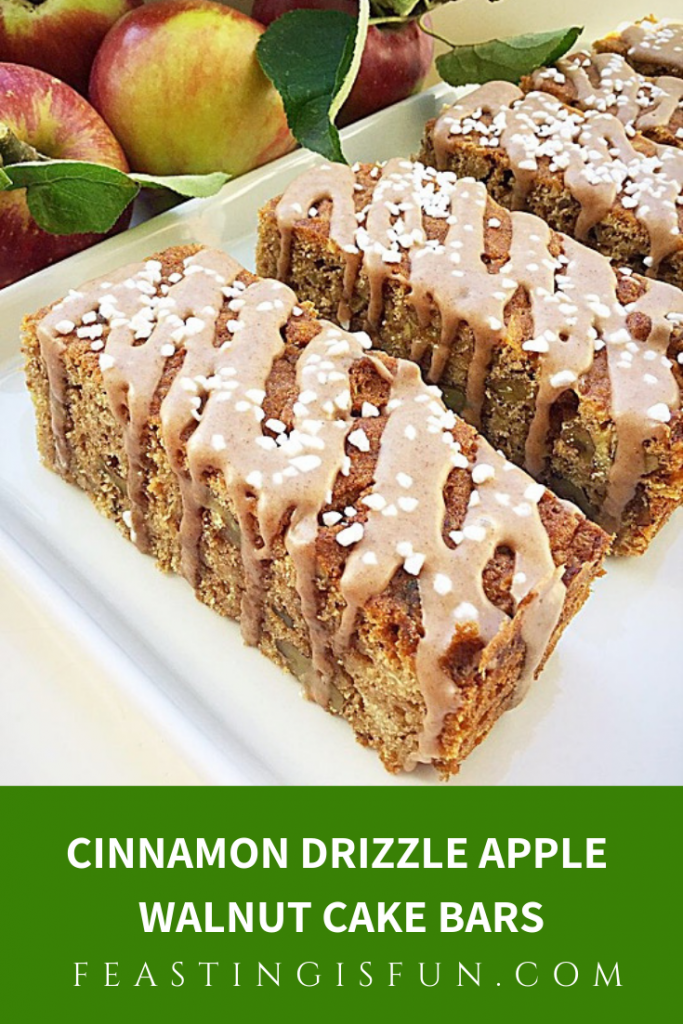
Cinnamon Drizzle Apple Walnut Cake Bars

FF Double Strawberry Cake Bars
Cinnamon Drizzle Apple Walnut Cake Bars

Rich Raspberry Chocolate Fudge Brownies 

FF Double Strawberry Cake Bars
Rich Raspberry Chocolate Fudge Brownies

Double Cherry Drizzle Oat Cake Bars

FF Double Strawberry Cake Bars
Double Cherry Drizzle Oat Cake Bars

Because I am practical by nature, this naturally translates in the recipes I develop. For example, when making these for a picnic or outside event it is likely that I would leave off the drizzle. Simply to avoid attracting bugs and wasps. Although the lemon in the icing really does bring out the strawberry flavour. Perhaps adding a little lemon zest to the cake? And I’m off again, my head spinning with possibilities based around this one bake!

Whatever you are making, baking and creating in your kitchens, have fun preparing sharing your feast.

Sammie xx

No part of this post may be reproduced or duplicated without the written permission of the owner. Please see my Disclosure Policy.


Cinnamon Drizzle Apple Walnut Cake Bars

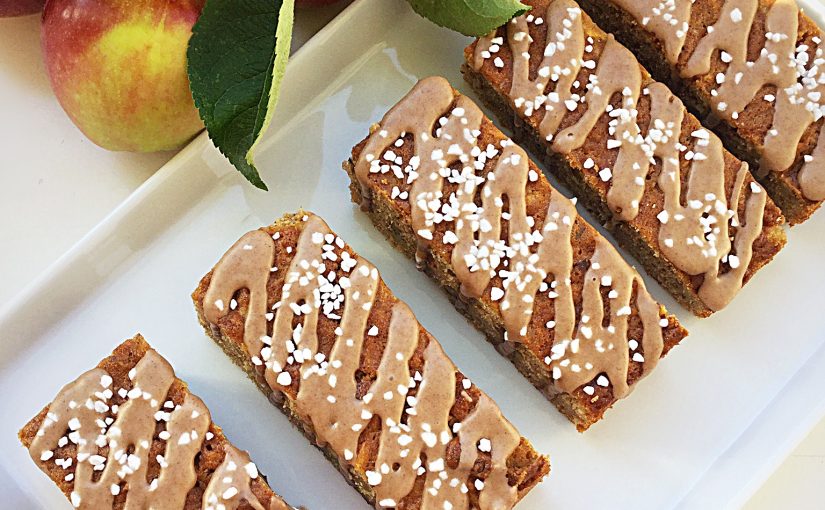
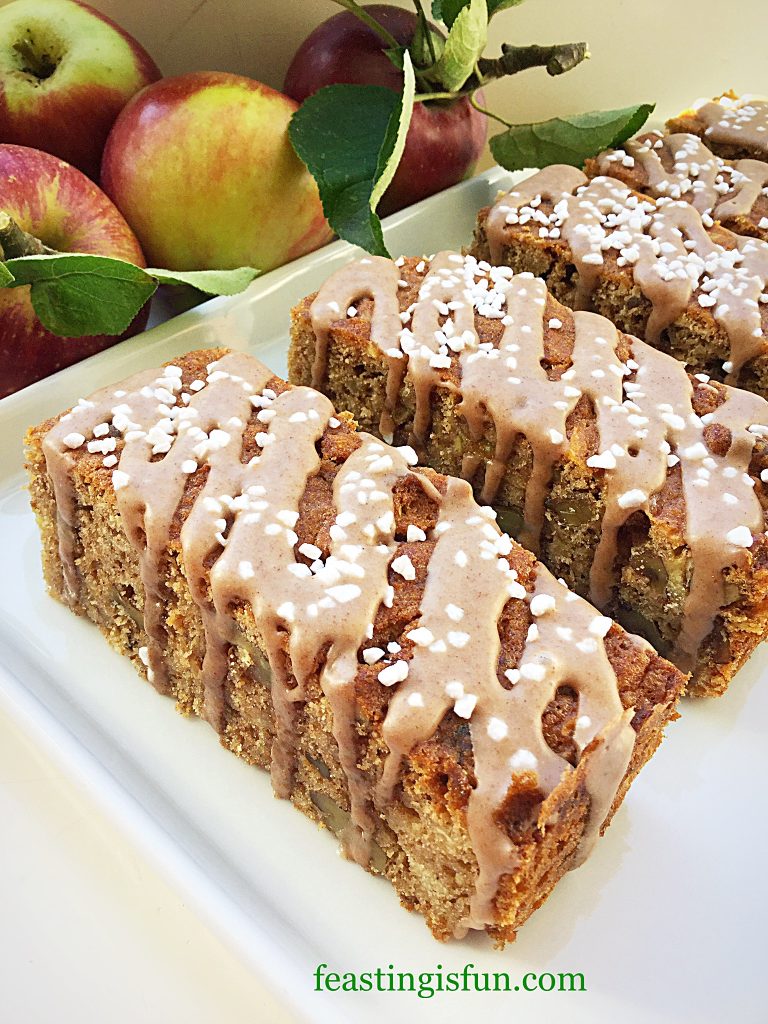
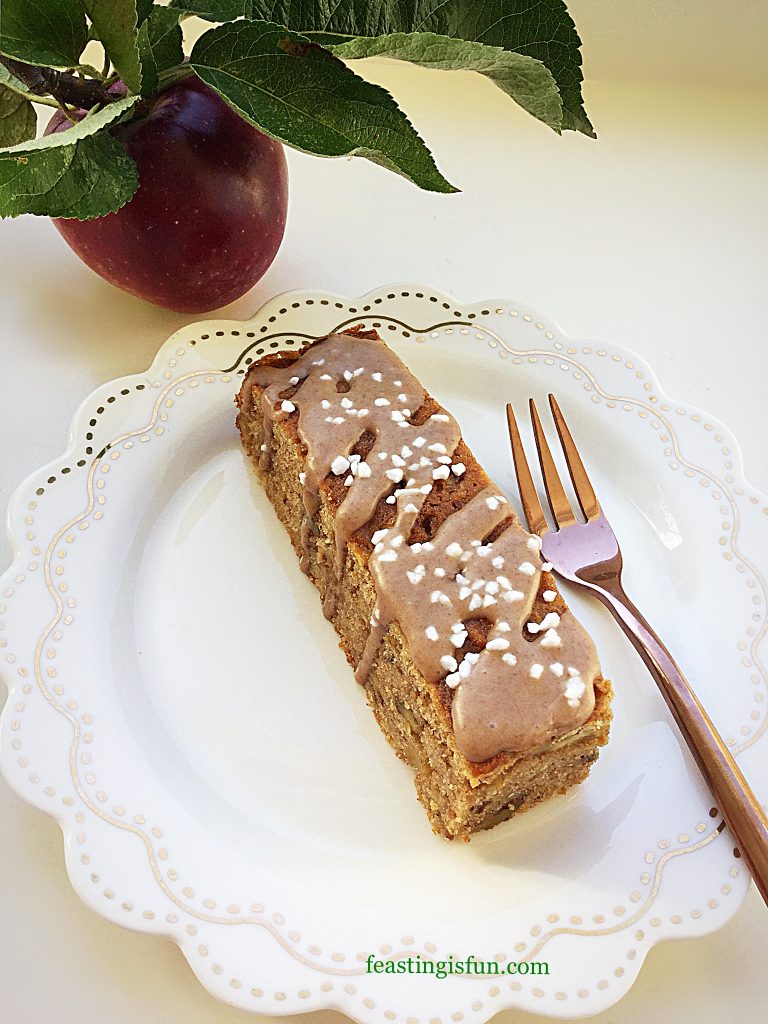
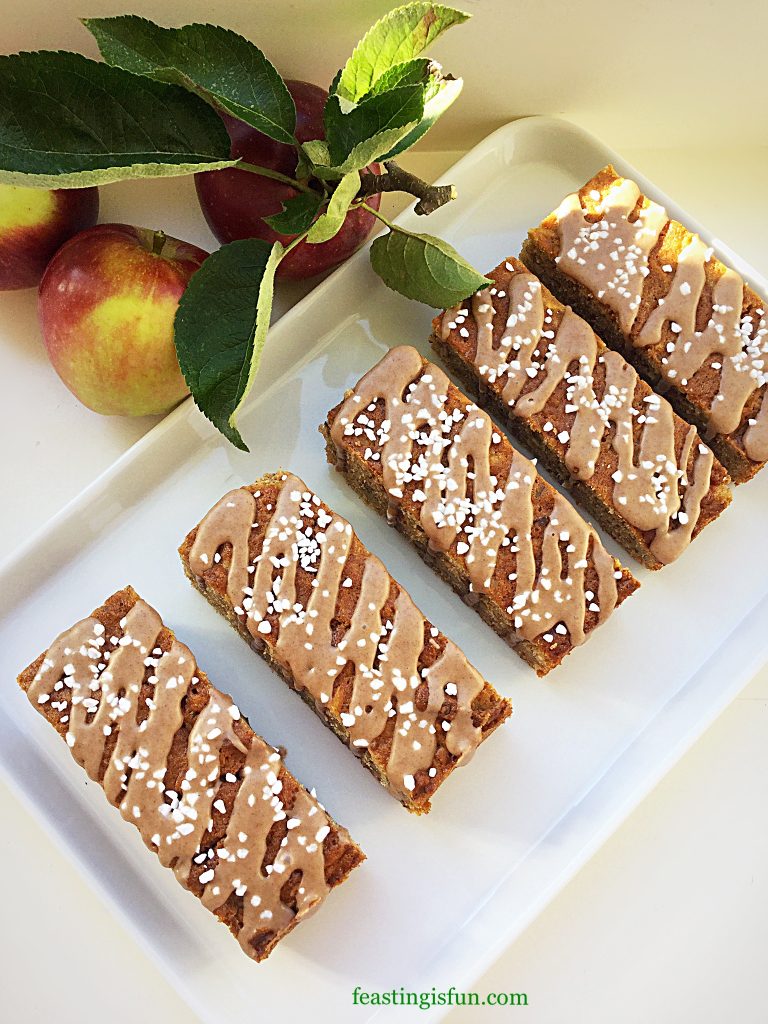
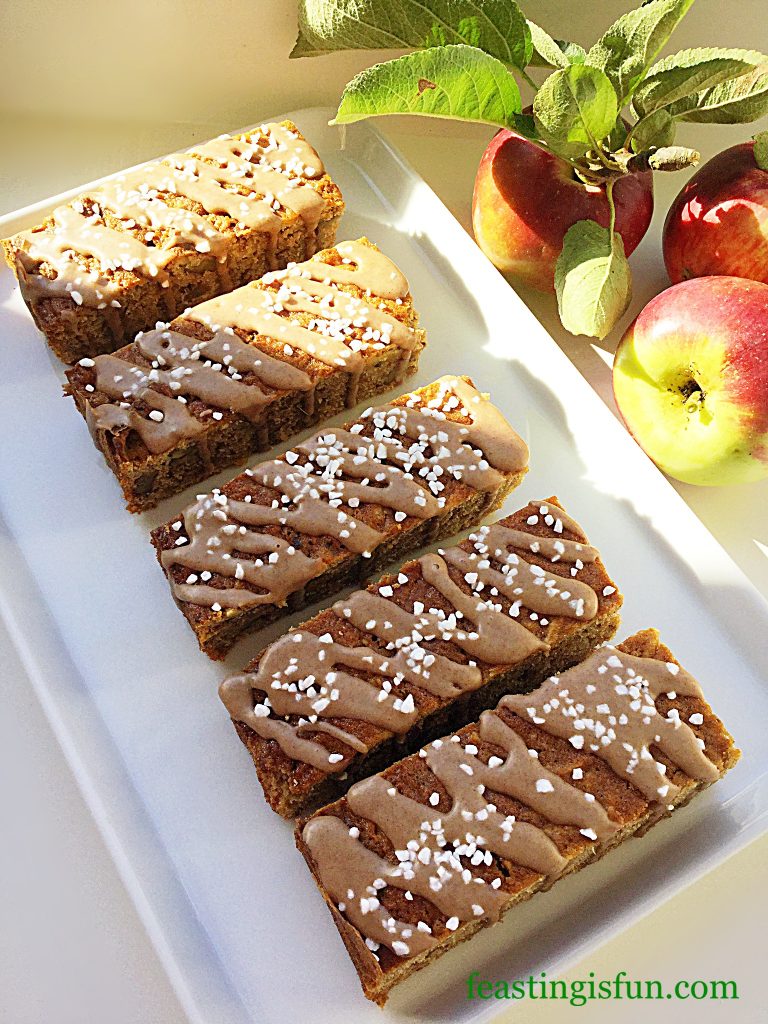
Today I have a real treat for you, my Cinnamon Drizzle Apple Walnut Cake Bars. Packed with freshly grated apple and toasted walnuts these cake bars are full of flavour. And a simple cinnamon drizzle adds just the right amount of sweetness, while the sugar nibs add extra crunch. Resulting in a simple traybake that is a treat on the tongue and the senses.

FF Cinnamon Drizzle Apple Walnut Cake Bars
Cinnamon Drizzle Apple Walnut Cake Bars

I adore Autumn. While gales and rain lash down, there are also the bright, golden sunshine filled days. Because of the variations in the weather, some days are perfect for gardening, having a tidy up, and picking fruit and windfalls. Yet when the weather rages I find comfort in the kitchen, baking delicious cakes that make the whole house smell warm and inviting. And when I can include produce from my own garden, such as the apples used in both the cake bars and photographs, I’m even happier.

FF Cinnamon Drizzle Apple Walnut Cake Bars
Cinnamon Drizzle Apple Walnut Cake Bars

Our Apple Trees

Due to the very hot summer we have had this year I wasn’t sure how well our two apple trees would fare. Because of the heat this years apples are sweeter than usual. While both our trees produce eating apples, one usually small, red and sweet, the other red and green, sharper in flavour. Similar to a Granny Smith apple’s flavour. As a result of the summer weather both varieties have a more intense apple flavour and are delicious to eat straight from the tree.

FF Cinnamon Drizzle Apple Walnut Cake Bars
Cinnamon Drizzle Apple Walnut Cake Bars

Since we have plenty of windfalls from the recent storms I have used them in the recipe. If you have access to windfall apples make the most of nature’s opportunity. Either use them to make these cake bars or perhaps my Apple Pie? Finally, a quick note, if you like puddings, then I should mention that this cake is delicious served with hot custard!

Recipe: Cinnamon Drizzle Apple Walnut Cake Bars make 16

300g/10.5oz Unsalted Butter at room temperature

300g/10.5oz Soft Light Brown Sugar

1/2tsp Sea Salt

4 Large Free Range Eggs

2tsp Vanilla Extract – I use Nielsen-Massey.

375g/13oz Plain White Flour

4tsp Ground Cinnamon

1tsp Ground Ginger

3tsp Baking Powder

200g/7oz Chopped Walnuts

350g/12oz Grated Apple (peeled and cored)

For the cinnamon drizzle

225g/8oz Icing Sugar (confectioners sugar)

3tsp Ground Cinnamon

2-3 tbsp Cold Water

Optional – Pearl or Nibbed Sugar – I use Dansukker Parlsocker available from Amazon

For this recipe you will need a 22.5cm x 30cm x 5cm (9” x 12” x 2”) tin lined with baking parchment.

Making and baking the cake:

Preheat the oven to 190C/170C fan, 375F, gas mark 5.

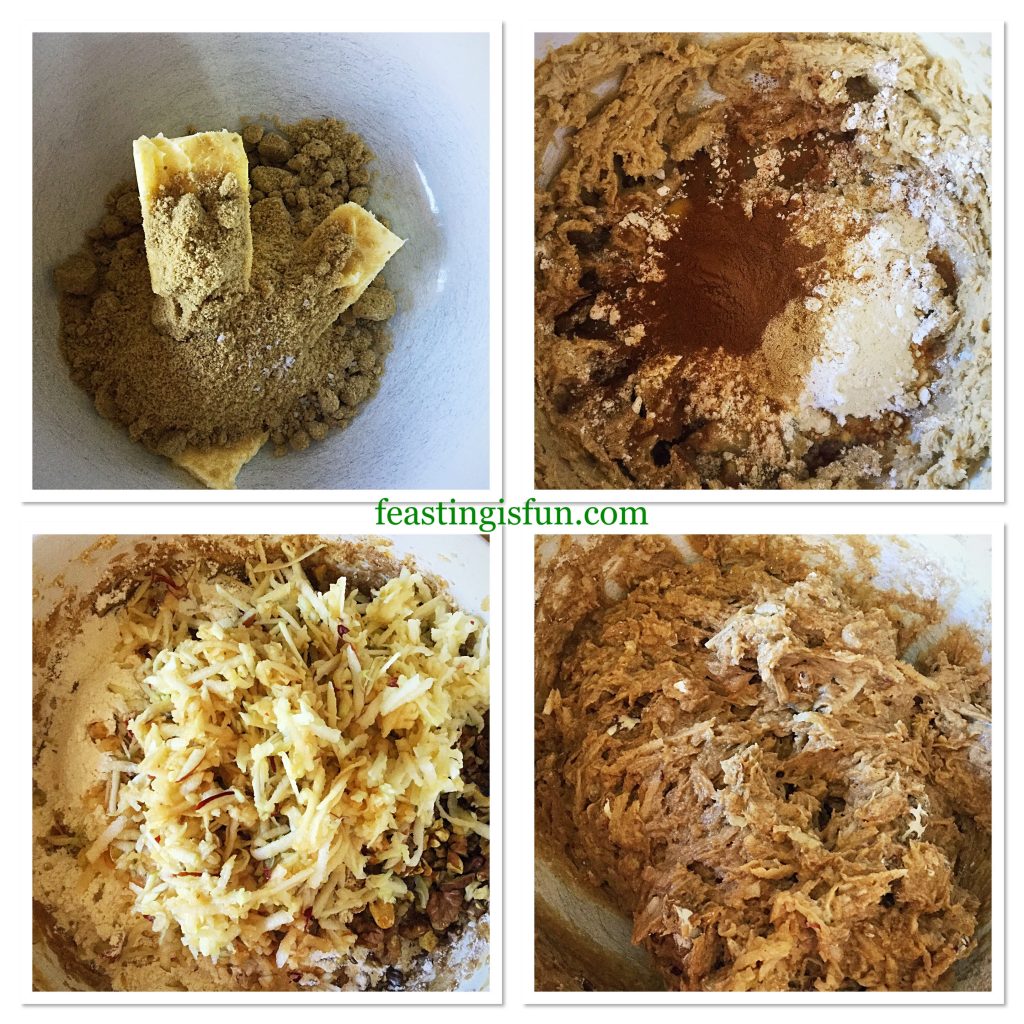
  • First of all add the butter, soft, light brown sugar and salt to a large bowl. Due to the quantity of ingredients I found a wide bowl easier to use.
  • Beat the sugar and butter together until creamy with no visible lumps.
  • Add the 4 eggs, 75g/3oz of flour and the spices to the bowl. Whisk everything together until fully combined.
  • Sieve the remaining flour and baking powder into the bowl and added the chopped walnuts.
  • Because some apples turn brown quickly once cut or grated I add them last.
  • Finally fold all of the ingredients together until they are just combined.
FF Cinnamon Drizzle Apple Walnut Cake Bars
Making the cake batter.
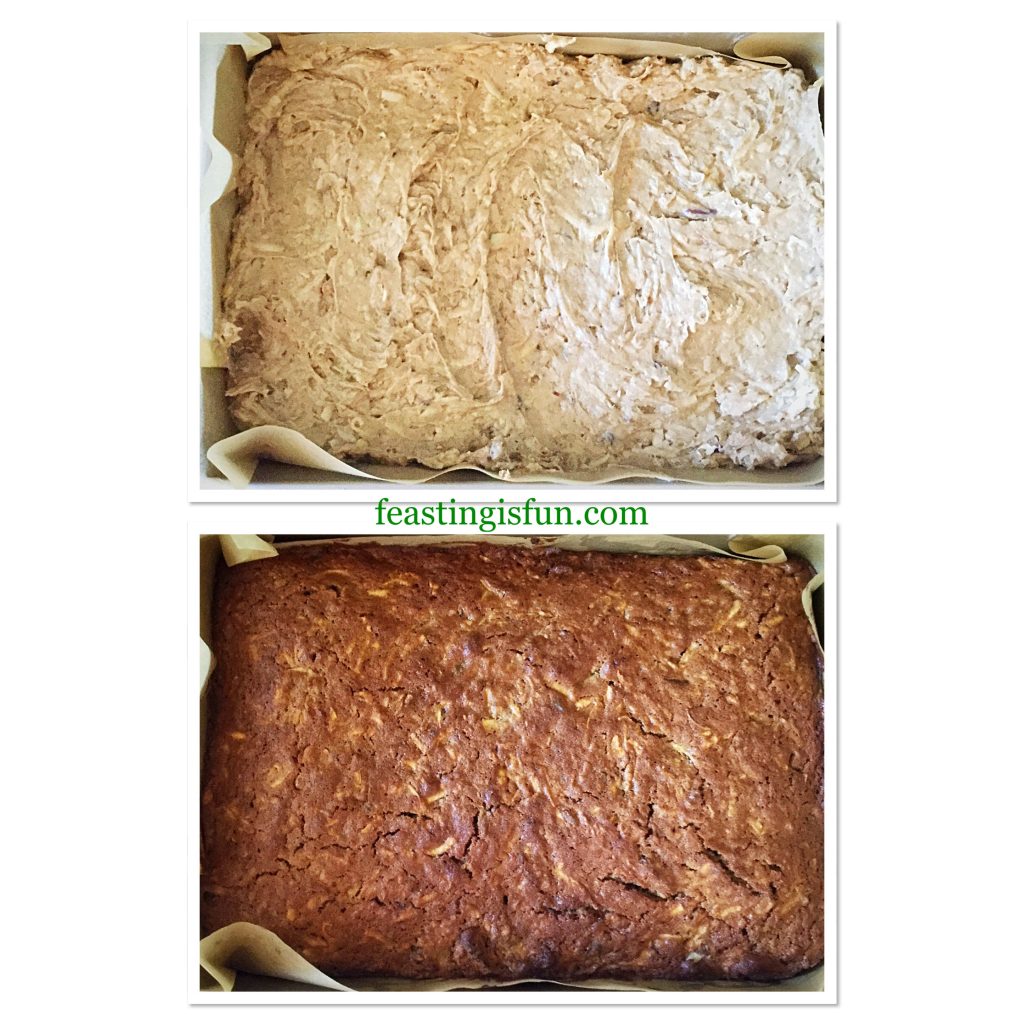
  • Spoon the cake batter into the prepared tin and ensure the batter is even and the top is smooth.
  • Place the cake tin into the centre of a preheated oven and bake for 40-45 minutes.
  • The cake is baked when it is golden in colour and firm (with only a little give) to touch in the centre.
  • As soon as the cake is baked remove from the oven and leave to cool completely in the tin.
FF Cinnamon Drizzle Apple Walnut Cake Bars
Filling the tin and baking the cake.

Portioning and decorating the cake bars:

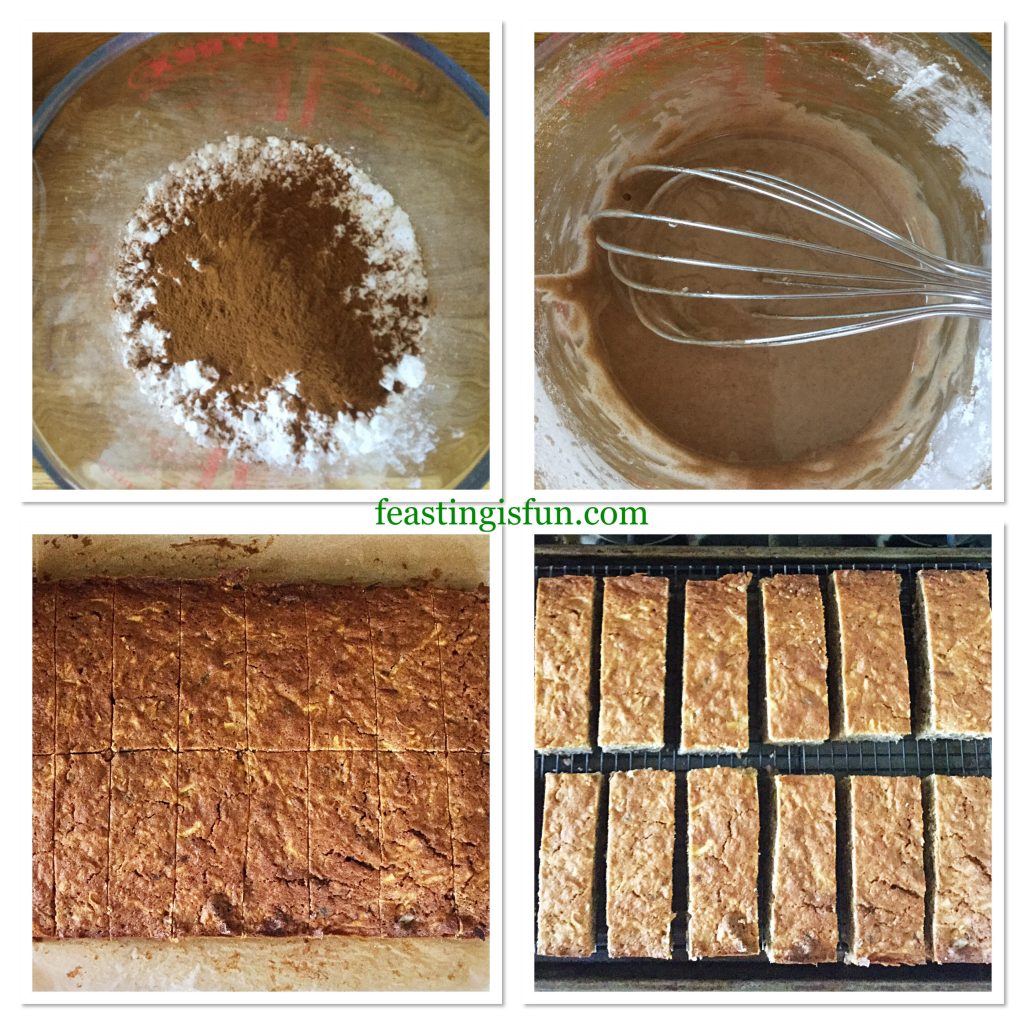
  • Add the icing sugar and cinnamon to a large jug. Using a balloon whisk, stir the two powders to combine and break up any lumps.
  • Pour 2 tablespoons of cold tap water into the jug and stir using the whisk. Add more water as needed until a thick, not runny consistency is achieved.
  • Decant the cinnamon icing into a piping bag fitted with a small round nozzle. Alternatively use a plastic sandwich bag and just prior to decorating cut a very small hole in one corner, this also applies to disposable piping bags.
  • To prepare the cake for decorating first of all cut across the width of the cake, dividing it in half. Now cut from top to bottom in the middle of the cake creating 4 quarters. Cut each quarter into 4 bars from top to bottom.
  • While you can decorate the cake as a whole, I like to see the drizzle of icing on each cake bar.
  • Separate the bars and place on to a cooling rack over a baking tray, to catch any drips.
FF Cinnamon Drizzle Apple Walnut Cake Bars
Preparing the cake bars for decorating
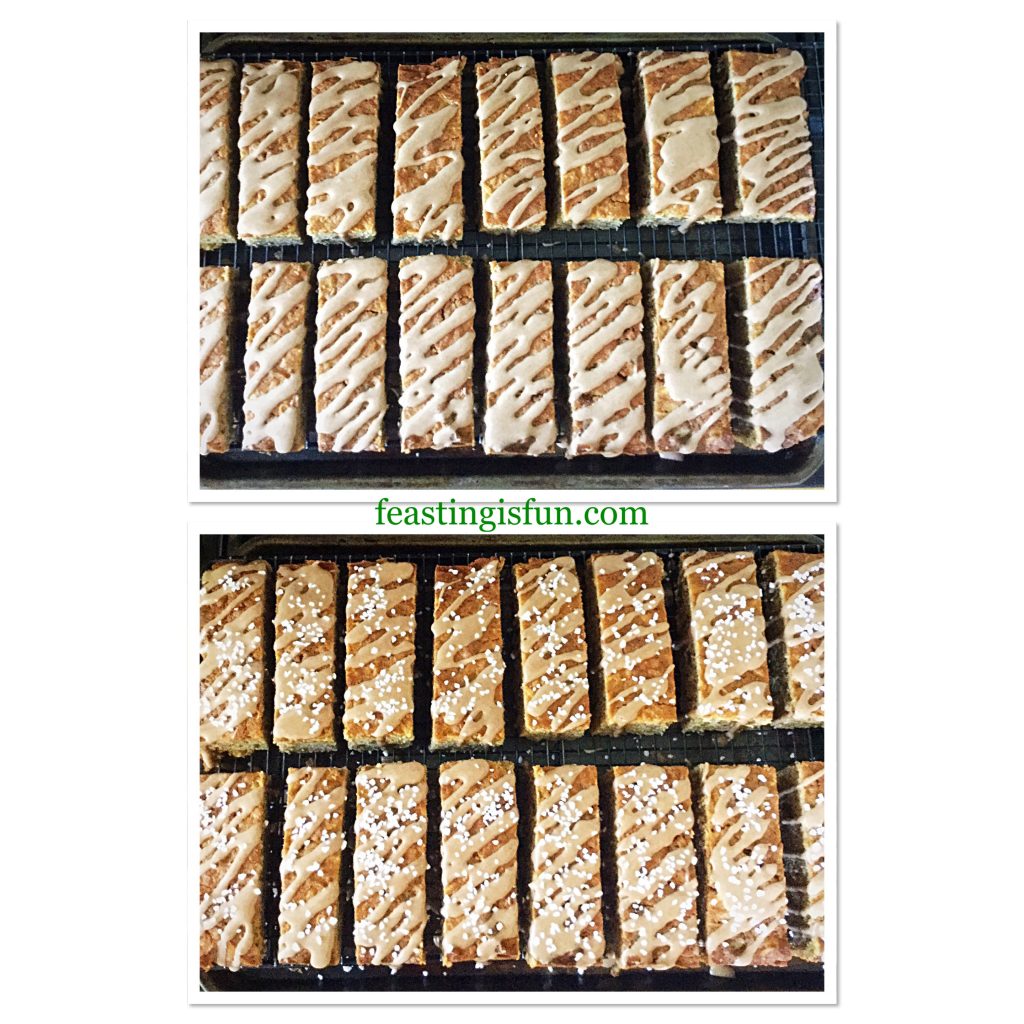
  • Use gentle, steady pressure to pipe diagonally across each cake bar. Continue piping until each bar is iced.
  • Sprinkle some sugar nibs over each bar while the icing is still wet.
  • Place to one side to allow the icing to set.
FF Cinnamon Drizzle Apple Walnut Cake Bars
Decorating the Cinnamon Drizzle Apple Walnut Cake Bars

Finally take a photo of your creation! Because your house will smell amazing and these cake bars will not last long.

FF Cinnamon Drizzle Apple Walnut Cake Bars
Cinnamon Drizzle Apple Walnut Cake Bars

Store the bars in an airtight container. They will keep for 5 days. Refrigerate during warmer weather.

The cake can be made a day in advance and decorated the following day.

If you have enjoyed this recipe for Cinnamon Drizzle Apple Walnut Cake Bars you may also like these:

Easy Blackberry Oat Muffin Recipe 
FF Cinnamon Drizzle Apple Walnut Cake Bars
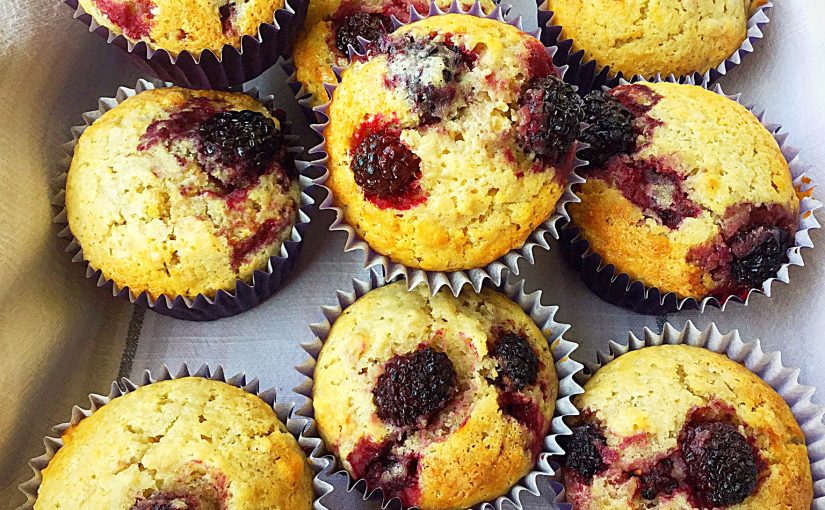
Easy Blackberry Oat Muffin Recipe

Maple Drizzled Apple Blueberry Loaf Cake 

FF Cinnamon Drizzle Apple Walnut Cake Bars
Maple Drizzled Apple Blueberry Loaf Cake

Autumn Apple Almond Cake

FF Cinnamon Drizzle Apple Walnut Cake Bars
Autumn Apple Almond Cake a gluten free bake

Traybakes are made for sharing:

With Bonfire Night, November 5th not far away these cake bars are perfect for sharing. Whether you are going to an organised event, holding a bonfire party in your back garden, or simply watching from your window, everything about these cake bars will elicit oohs and aahs! Because they are so yummy, they deserve to be made and enjoyed all year round.

Whatever you are making, baking and creating in your kitchens, have fun preparing and sharing your feast.

Sammie xx

No part of this post may be reproduced or duplicated without the written permission of the owner. Please see my Disclosure Policy for details.

FF Cinnamon Drizzle Apple Walnut Cake Bars

Autumnal fruit and nut traybake with spiced icing.
Apple and walnut cake bars with a cinnamon icing drizzle.

Easy Blackberry Oat Muffin Recipe

September is here and after the long, hot summer I am ready for Autumn. While walking around the garden this morning I noticed some ripe blackberries on my thornless plant. Although, to be clear, I should mention I’d forgotten to put my glasses on. Expecting a great harvest I hurried back to the kitchen to collect a modest size bowl. Also I grabbed my glasses. Five ripe blackberries. Five! So, consoling myself I plundered our freezer, where fortunately I had a stash. Finally I can now share my Easy Blackberry Oat Muffin Recipe.

FF Easy Blackberry Oat Muffin Recipe

While I find it very satisfying to use produce picked from our garden I am also a realist. Because of the very hot and dry summer some of our fruiting plants have suffered. And while our cherry tree had a bumper crop this year, we haven’t any plums and as I mentioned the blackberries are small and scant. Although I am hopeful for a reasonable apple harvest. Even if they are a little smaller this year, I’m sure they will be sweet.

FF Easy Blackberry Oat Muffins Recipe
Easy Blackberry Oat Muffins Recipe

I am glad that I had the foresight to buy punnets of British blackberries and freeze them. Especially as most berries freeze well, with the exception of strawberries. While strawberries defrost to a mushy mess, frozen blackberries, raspberries, red and blackcurrants can be used in place of fresh fruit when it is out of season. Whether you buy and freeze the fruit yourself or buy it ready frozen, it means that we need not be denied luscious berries in the depths of winter.


FF Easy Blackberry Oat Muffin Recipe
Easy Blackberry Oat Muffin Recipe

Recipe: Easy Blackberry Oat Muffin Recipe

100g/4oz Unsalted Butter – melted

200ml/6.5fl oz Whole Milk

2 Large Free Range Eggs

1tsp Vanilla Extract – I use Nielsen-Massey 

250g/9oz Plain White Flour

50g/2oz Rolled Oats (Porridge Oats – not quick cook)

2tsp Baking Powder

100g/4oz Caster Sugar

1/4tsp Sea Salt

300g/10.5oz Blackberries – fresh or frozen Waitrose sell frozen British fruits all year round – the berries can be used frozen

Preheat the oven to 200C/180C fan, 400F, gas mark 6

Making the muffin batter:

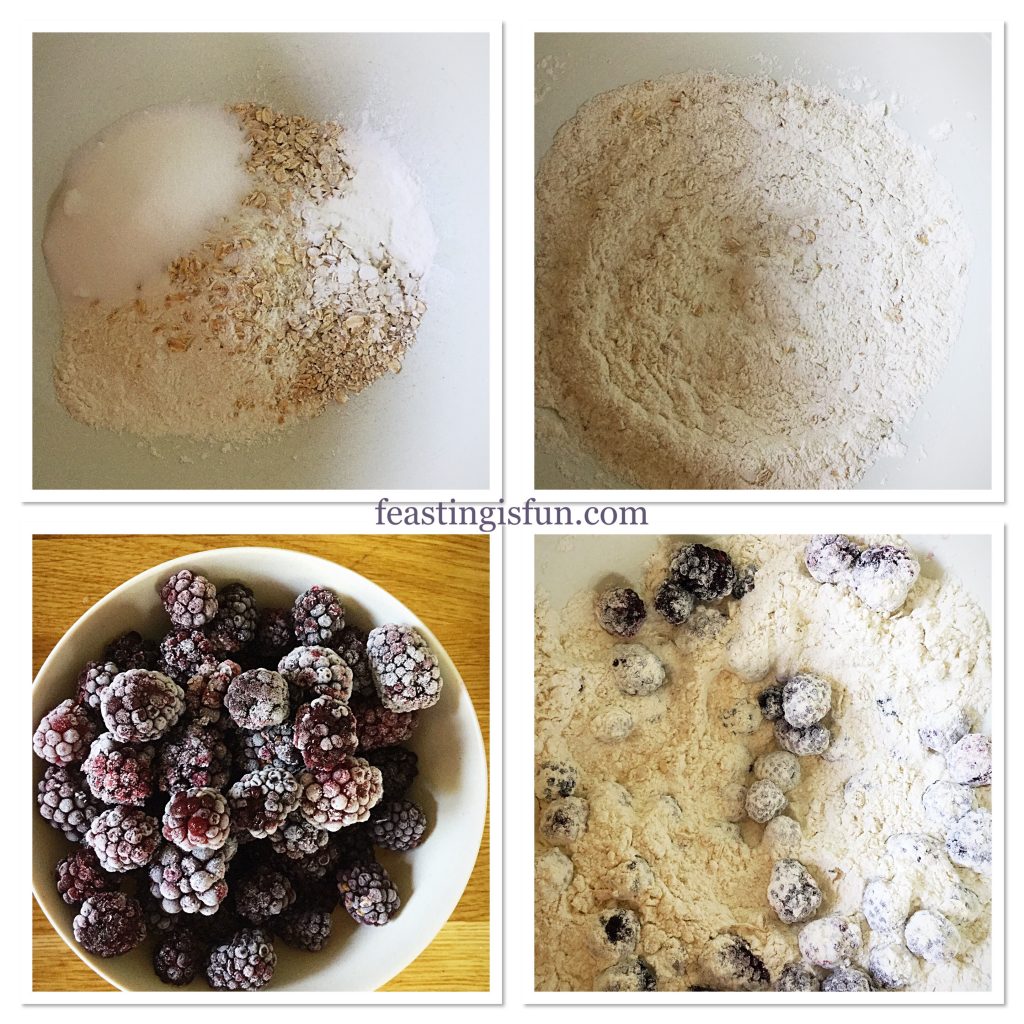
  • First of all into a large bowl add the flour, oats, sugar, baking powder and salt.
  • Usng a balloon whisk mix all of the dry ingredients together – dry mix.
  • Hold back 12 blackberries for topping the muffins and tip the remaining blackberries into the dry mix. Gently cover with the flour mixture to coat.
FF Easy Blackberry Oat Muffin Recipe
The dry part of the muffin mix.
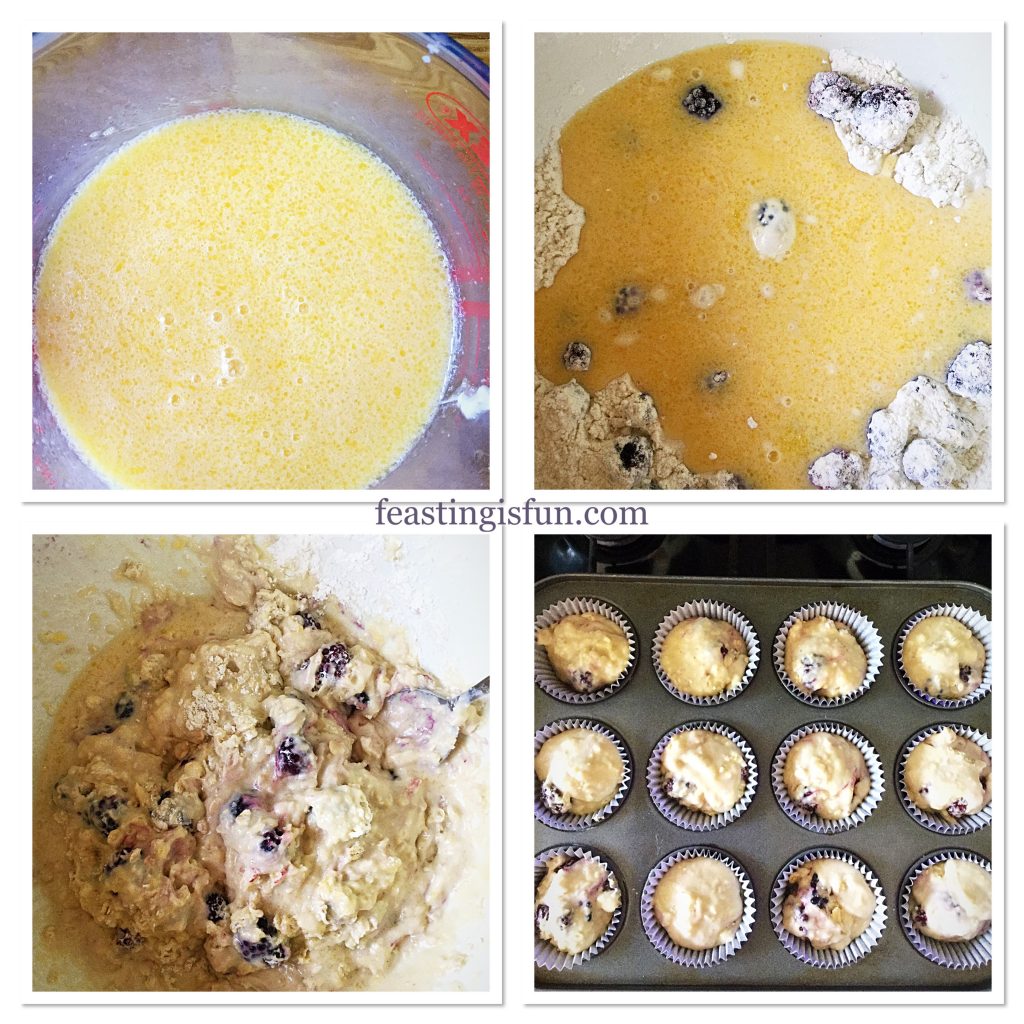
  • Into a separate jug measure out the milk.
  • Add the eggs, melted butter and vanilla extract and beat with a fork to combine – wet mix.
  • Make a well in the centre of the dry mix and pour the wet mix in.
  • Stir the mixture (approximately 10 times) with a spoon to almost combine, taking care not to break up the berries.
  • A few flour streaks are acceptable. Over mixing will almost certainly result in tough muffins.
  • Line a muffin tin with paper liners. Alternatively tulip style muffin wrappers used in my Spiced Pumpkin Walnut Muffins also can be used.
  • Use an ice cream scoop to divide the muffin mixture evenly between the 12 cases.
FF Easy Blackberry Oat Muffin Recipe
Combining the wet and dry to make the batter.
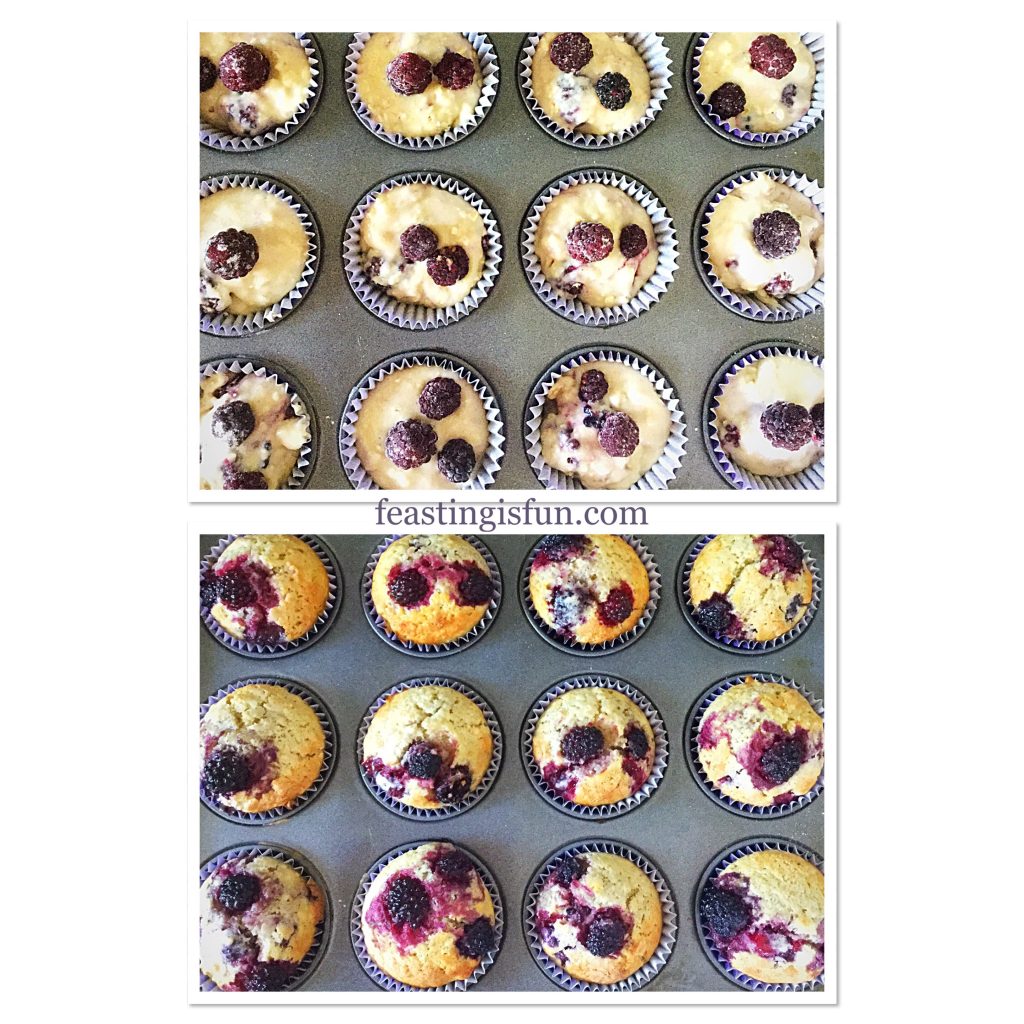
  • Place a blackberry (from those held back) on top of each muffin.
  • Finally, use a teaspoon and tap a light dusting of caster sugar on top of each muffin.
  • Place the muffin tin into the centre of a preheated oven and bake for 25-30 minutes.
FF Easy Blackberry Oat Muffin Recipe
Topping the muffins before baking.
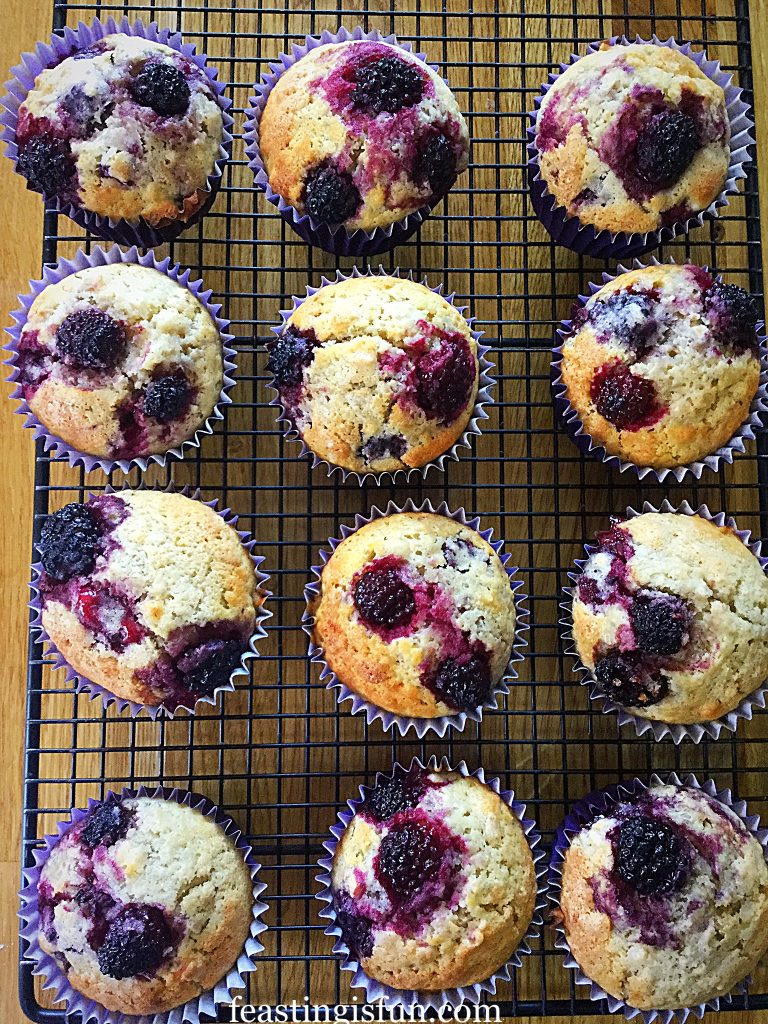
  • The muffins are baked when risen, golden and firm to touch.
  • As soon as the muffins are baked remove from the oven.
  • Immediately remove the muffins from the tin and place on to a cooling rack – take care as the muffins will be hot.


FF Easy Blackberry Oat Muffin Recipe
Easy Blackberry Oat Muffin Recipe
  • Allow the muffins to cool slightly before serving.
FF Easy Blackberry Oat Muffin Recipe
Easy Blackberry Oat Muffin Recipe


If you have enjoyed my Easy Blackberry Oat Muffin Recipe you may also like these:

Blueberry And Lemon Muffins 

FF Easy Blackberry Oat Muffin Recipe
Blueberry And Lemon Muffins

Raspberry White Chocolate Chip Muffins 

FF Easy Blackberry Oat Muffin Recipe
Raspberry White Chocolate Chip Muffins

Chocolate Madness Muffins 

FF Easy Blackberry Oat Muffin Recipe
Chocolate Madness Muffins

Freshly baked muffins are best eaten on the day they are made. Although you can store them in an airtight container for up to two days, refrigerate in warm weather and then refresh in a medium oven for 5 minutes. Especially delicious eats to start the day and also fill hunger gaps throughout the day. Since these muffins truly are delicious served warm from the oven, why not bake them with the intention to share. Neighbours, friends and family are always delighted with a surprise delivery of freshly made muffins. And it is a fact that food always tastes better when shared!

So, whatever you are making, baking and creating in your kitchens have fun preparing and sharing your feast.

Sammie xx

No part of this post may be reproduced or duplicated without the written permission of the owner. Please see my Disclosure Policy.
 

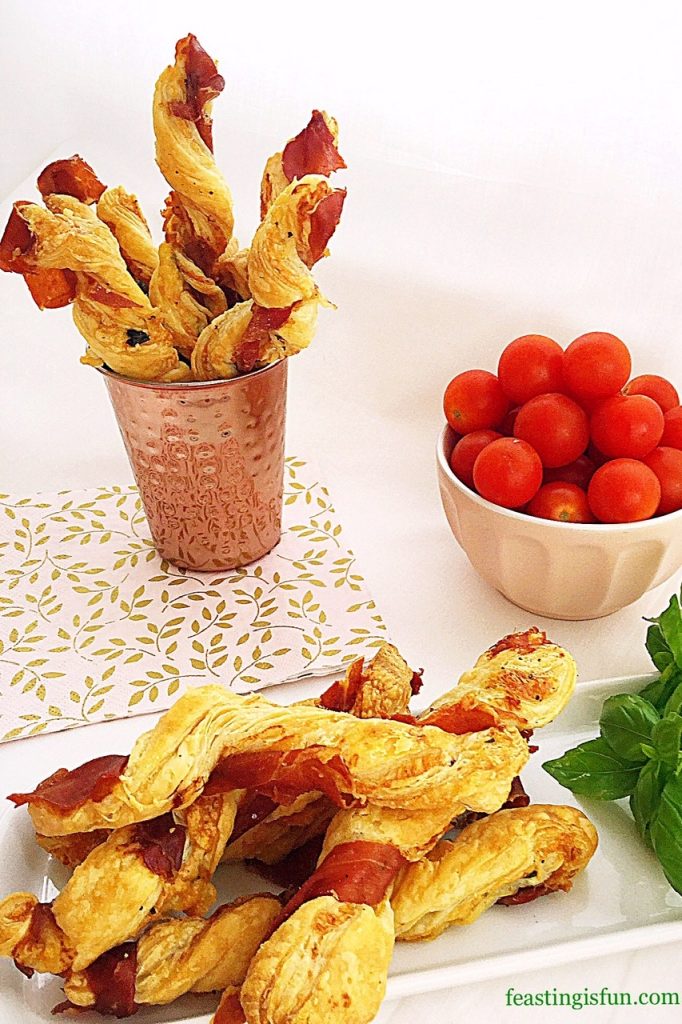
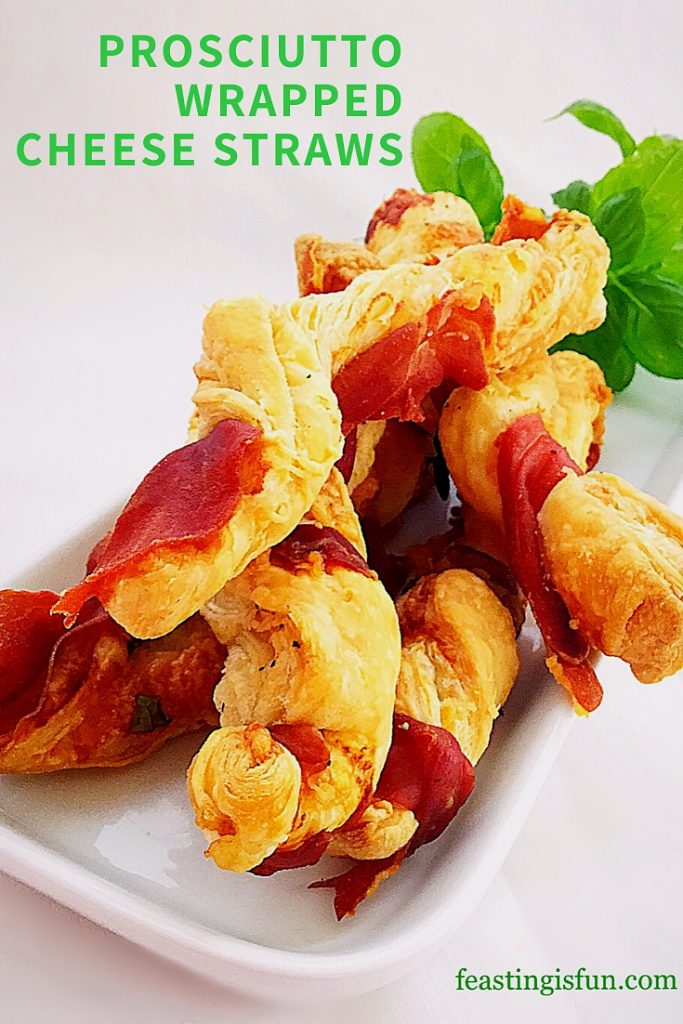
Prosciutto Wrapped Cheese Puff Pastry Straws

So, who is ready for a super easy, party food recipe? While there are plenty of sweet recipes here on the blog, I prefer food that is more savoury. Given a choice, I will usually choose a cheese board over dessert. While my family always pick a delicious, sweet treat. Also, at parties I much prefer something salty and savoury to compliment my glass of wine or sparkling water. My Prosciutto Wrapped Cheese Puff Pastry Straws tick all of my preferred flavour boxes. So much so, I ate three as soon as they were cool enough!

Easy Party Food Recipes:

Creating easy recipes is a top priority for me. These straws can be made ahead and kept refrigerated or frozen. Since party food can involve lots of little morsels, keeping the recipe simple reduces stress and leaves more room for fun. Because that’s what parties should be, fun! Whether it’s drinks with friends or a full on family bash, these straws are a perfect addition to any occasion.

FF Prosciutto Wrapped Cheese Puff Pastry Straws
Prosciutto Wrapped Cheese Puff Pastry Straws

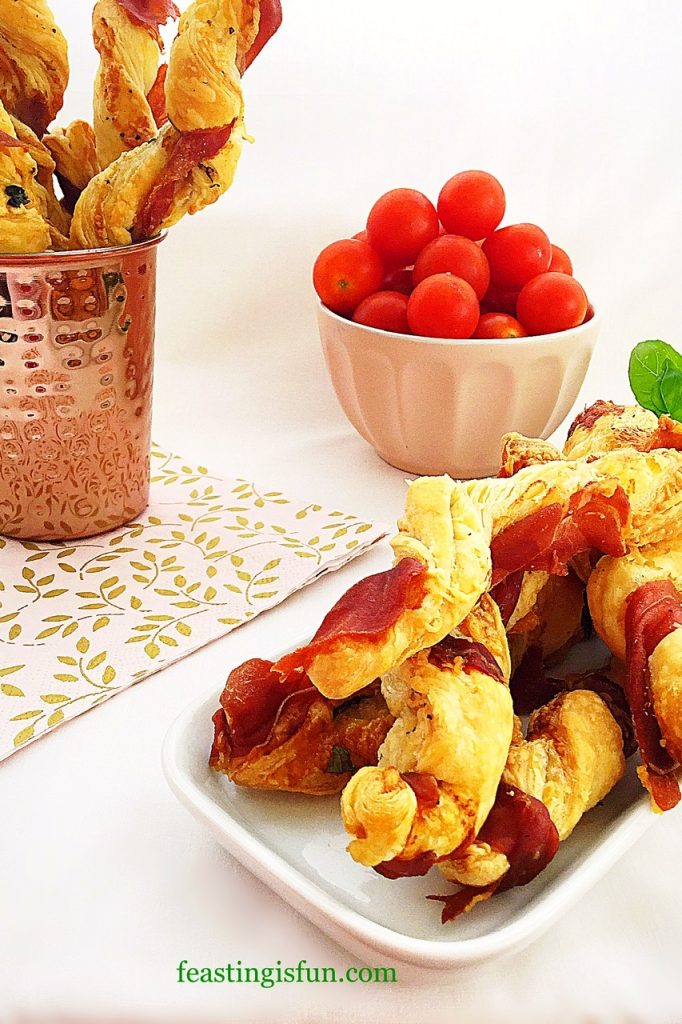
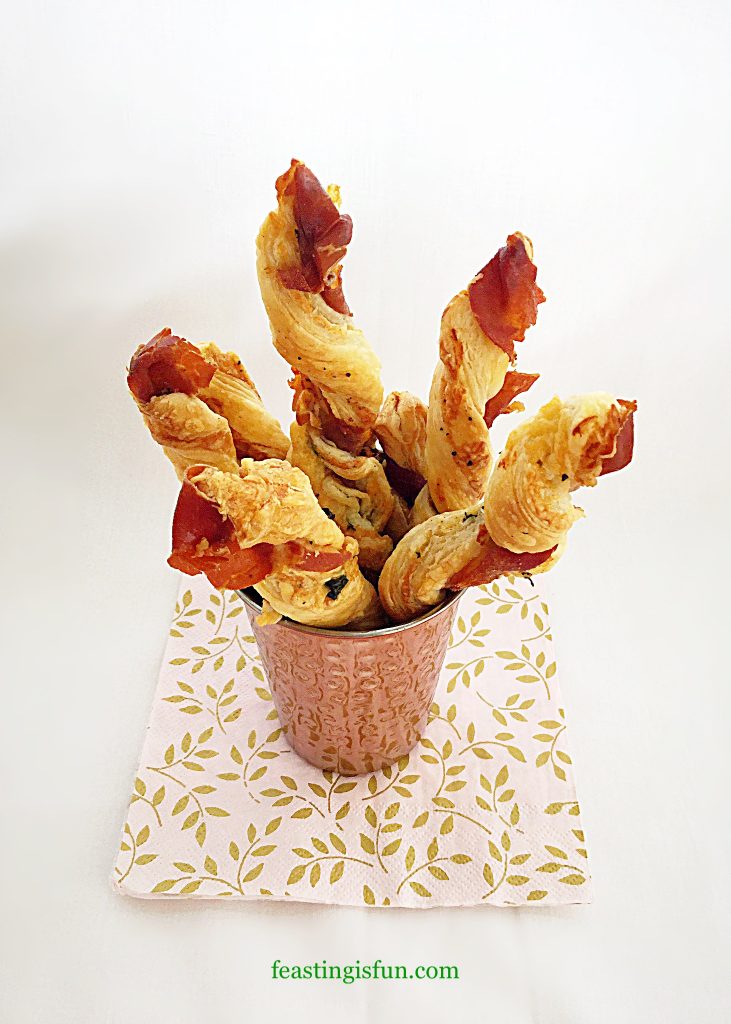
So incredibly easy to make and bake, these straws are filled with grated cheddar and fresh basil. A strip of Prosciutto ham is then twisted around the straw and then baked. As they bake the Prosciutto becomes crisp and salty on the outside with melting cheddar and fresh Basil inside.

Savoury food snacks displayed on a platter and in a copper cup.

Recipe: Prosciutto Wrapped Cheese Puff Pastry Straws – makes 24

2 x 250g/14oz All Butter Puff Pastry – I use Waitrose own brand. Alternatively use ready rolled pastry, however you may need to adjust the cheese/basil/prosciutto quantities.

100g/4oz Finely Grated Mature (Sharp) Cheddar Cheese – I use Wyke Farms

A Handful of Fresh Basil Leaves – approximately 20 leaves. Alternatively when Basil is unavailable use 1tsp finely chopped thyme or rosemary

12 Slices Prosciutto Ham

Freshly Ground Black Pepper

Making The Cheese Straws:
Preheat the oven to 200C/180C fan, 400F, gas mark 6

  • First of all line 2 large baking trays with baking parchment.
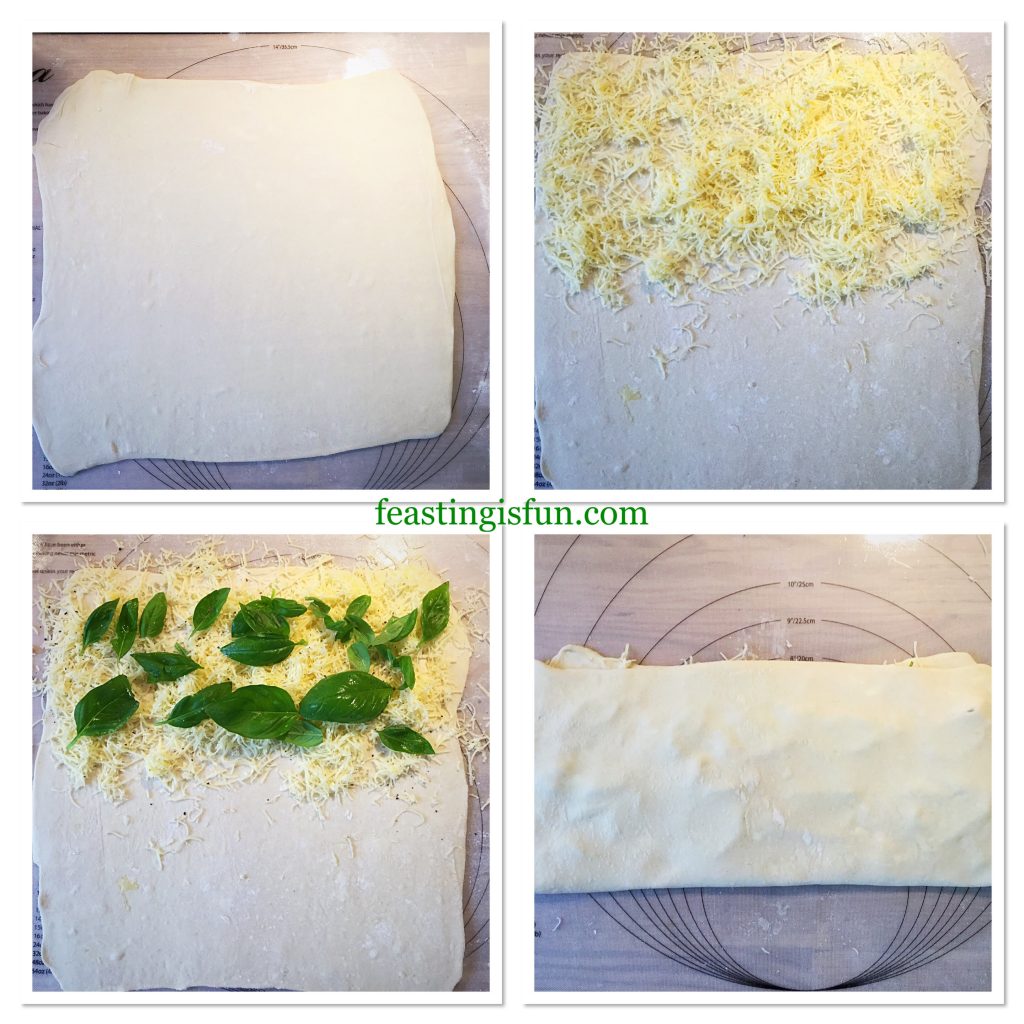
  • Roll the first block of puff pastry into a square, approximately 30cm x 30cm (12in x 12in).
  • Sprinkle half the grated cheddar over the top half of the square.
  • Place half of the fresh basil leaves on top of the cheese.
  • Add some freshly ground black pepper.
  • Fold the bottom half of the pastry up over the cheese and basil.
FF Prosciutto Wrapped Cheese Puff Pastry Straws
Filling the pastry with cheese and basil.
  • Use a rolling pin to roll the pastry so that it flattens and becomes smooth.

Portioning The Straws And Wrapping With Prosciutto:

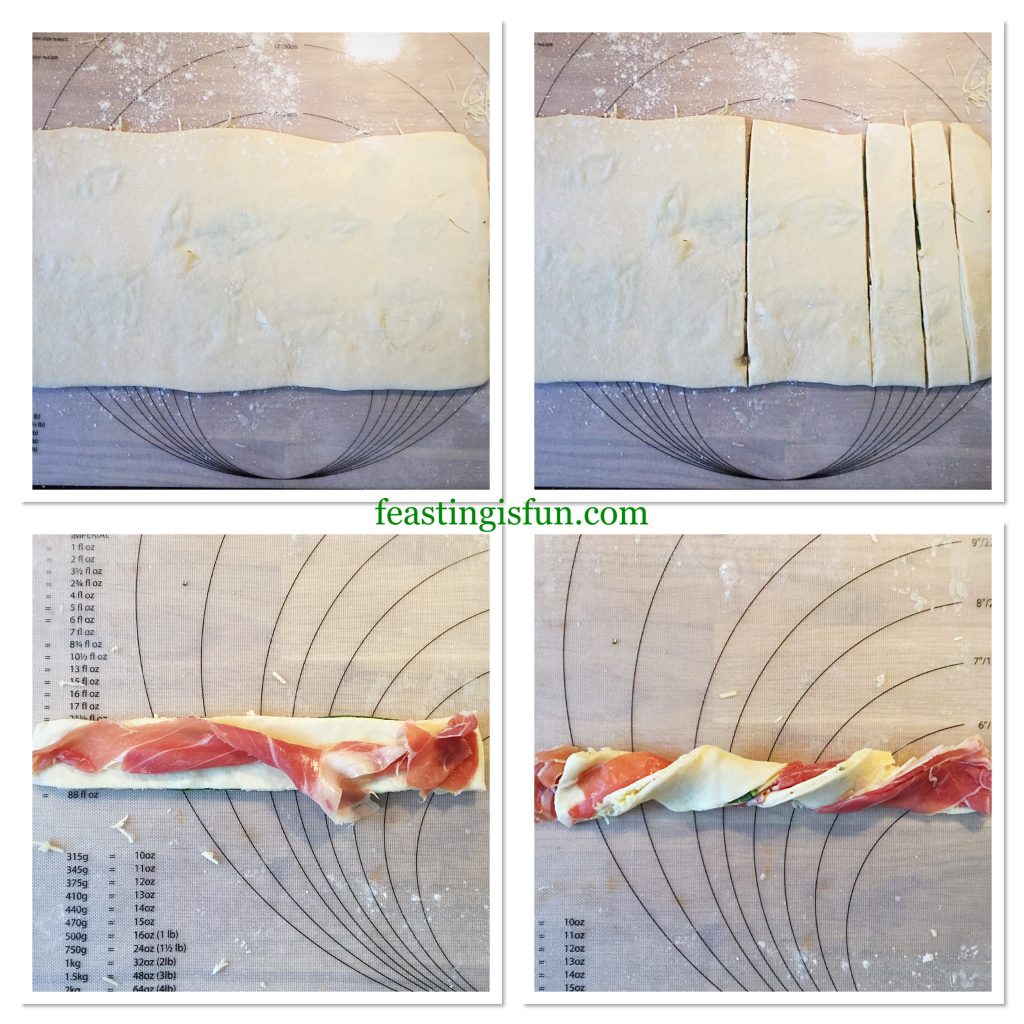
  • Divide the pastry in half using a sharp knife. Then cut each half in half again, you will have four separate pieces.
  • Cut each quarter into 3 strips. Resulting in 12 straws.
  • Tear a piece of prosciutto ham in two lengthways.
  • Place the ham on top of a straw and press at both ends so it sticks.
  • Using both hands twist the pastry so that the prosciutto wraps around.
  • Place the twisted pastry on to a baking sheet.
  • Repeat with the rest of the straws.
  • Roll out the second block of pastry and repeat the process again.
FF Prosciutto Wrapped Cheese Puff Pastry Straws
Cutting the straws and wrapping with Prosciutto.

Baking The Prosciutto Wrapped Puff Pastry Straws:

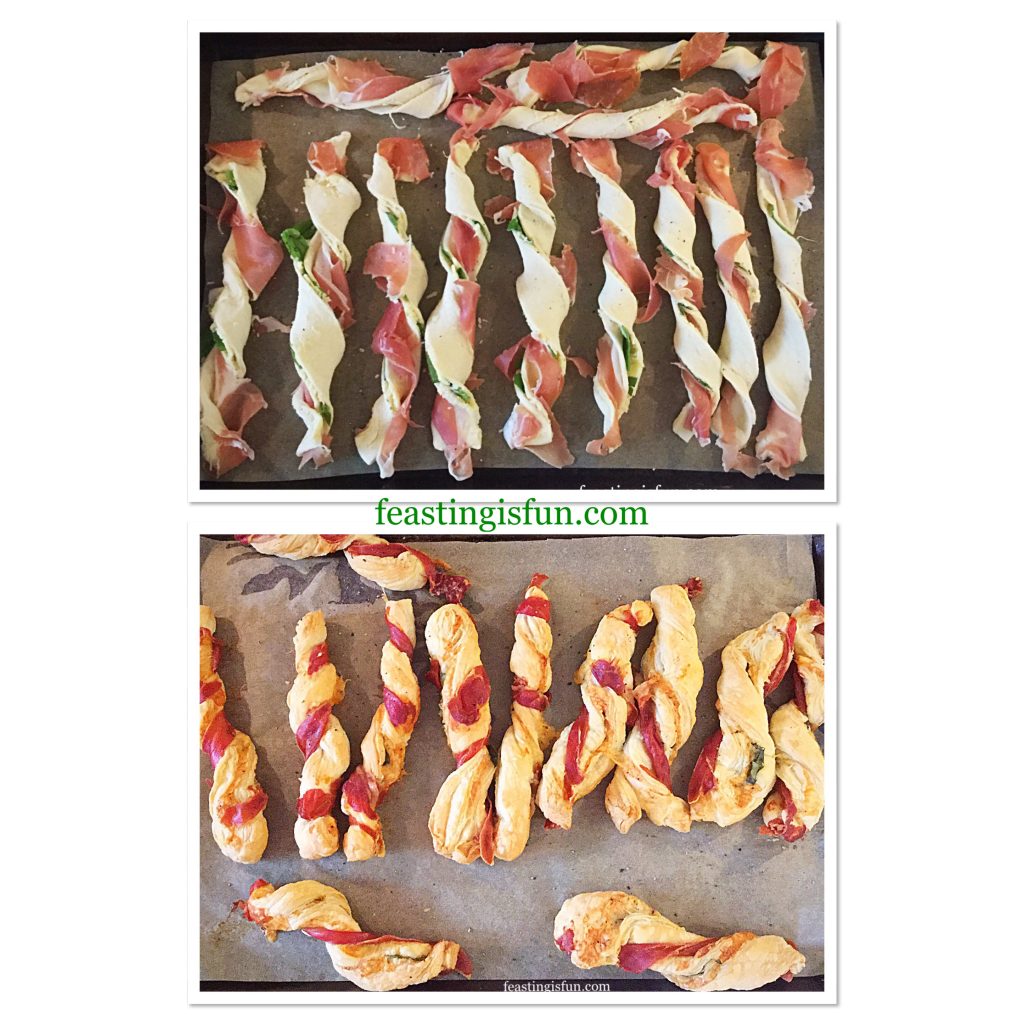
  • Place the baking trays into a preheated oven and bake for 20-25 minutes until the pastry is golden and the prosciutto is crisp.
  • As soon as the straws are baked remove from the oven and place on a serving plate.
  • Note – if you are planning to freeze the straws, remove from the oven 5 minutes early when the straws are baked, yet not golden..
FF Prosciutto Wrapped Cheese Puff Pastry Straws
Baking the Prosciutto Wrapped Cheese Puff Pastry Straws
  • Allow the straws to cool slightly before serving.

Cool, place in an airtight container and refrigerate for up to 2 days. To freeze place in freezer bags or boxes for up to 2 months. To reheat from frozen place in a medium oven for 5-10 minutes.

If you have enjoyed this recipe for Prosciutto Wrapped Cheese Puff Pastry Straws you may also like these:

Mini Sparkenhoe Red Leicester Tarts

FF Prosciutto Wrapped Cheese Puff Pastry Straws
Mini Sparkenhoe Red Leicester Tarts

Spicy Sausage Rolls

FF Prosciutto Wrapped Cheese Puff Pastry Straws
Spicy Sausage Rolls

Cheddar Tomato Basil Quiche 

FF Prosciutto Wrapped Cheese Puff Pastry Straws
Cheddar Tomato Basil Quiche

Whether I’m hosting or going out, parties are fun and a great way to catch up with friends and make new ones. Recipes that are easy and also travel well make life easier. These Prosciutto Wrapped Cheese Puff Pastry Straws are ideal for making and taking to parties. Also, as they can be frozen I plan on making a big batch prior to Christmas. Bake the frozen straws into a moderate oven for ten minutes and you have a delicious snack to share with unexpected visitors.

So, whatever you are making, baking and creating in your kitchens have fun preparing and sharing your feast.

Sammie xx

No part of this post may be reproduced or duplicated without the written permission of the owner. Please see my Disclosure Policy.
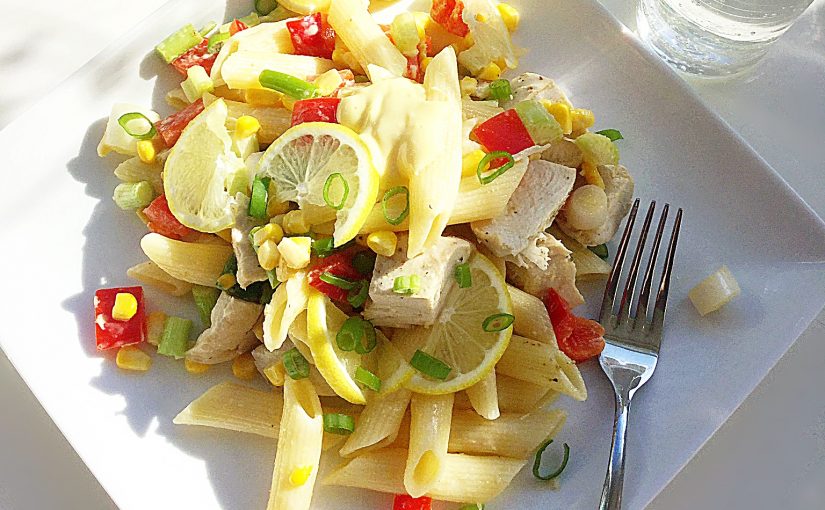
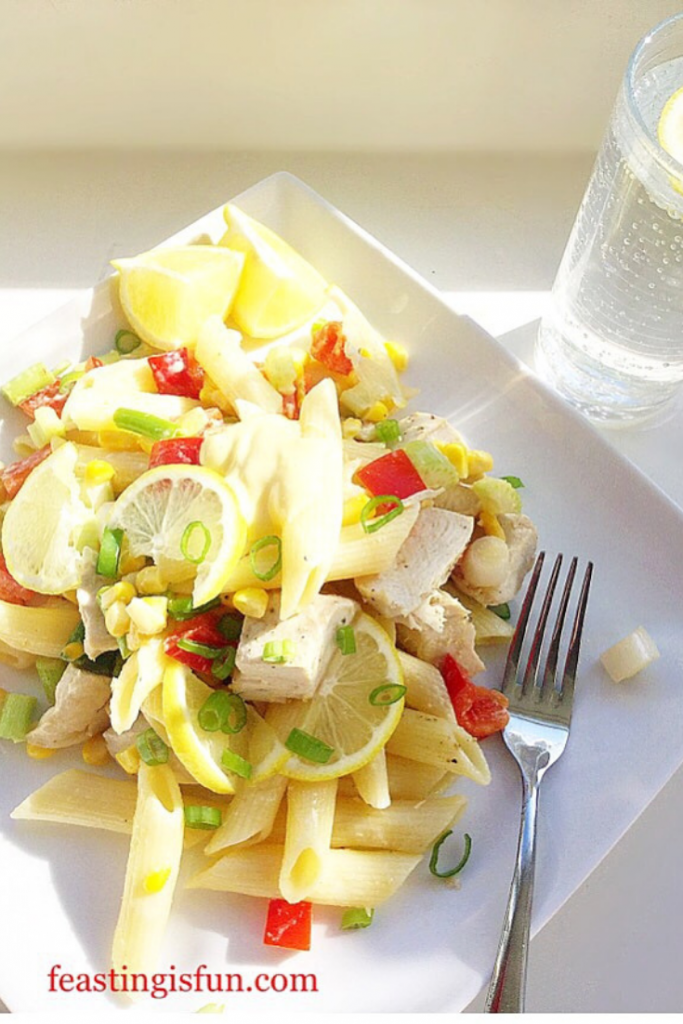
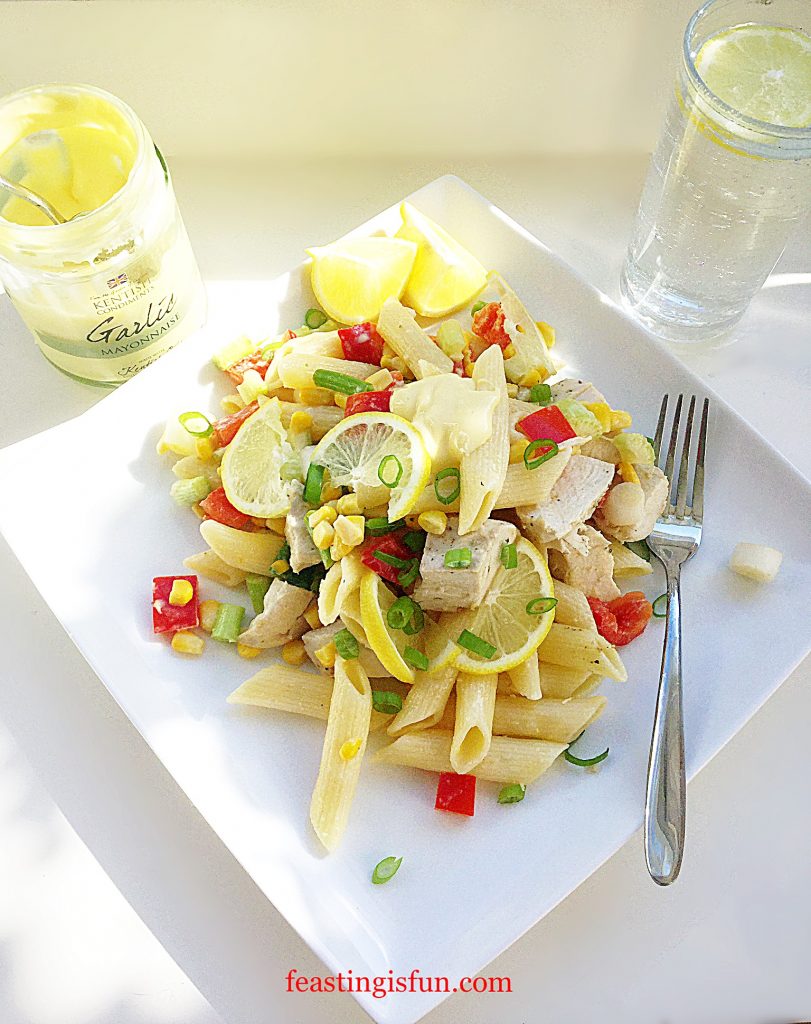
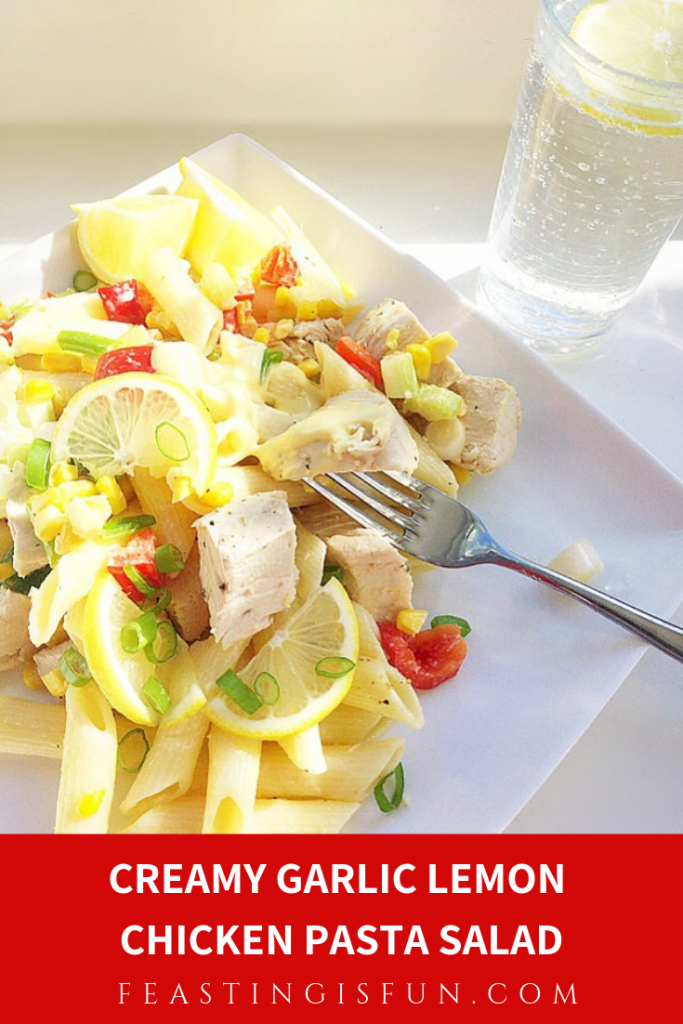
Creamy Garlic Lemon Chicken Pasta Salad

Phew this Summer has been hot, hot, hot so far. And for me that means super easy dinners that can be prepared early in the day before the heat builds. Also, as a family we are wanting cool meals in the evening. Especially meals that don’t leave a lot of washing up! Because everyone is just too hot and tired. So I created this recipe for Creamy Garlic Lemon Chicken Pasta Salad. Not only does it taste good, the bulk of washing up is done earlier in the day.

FF Creamy Garlic Lemon Chicken Pasta Salad
Creamy Garlic Lemon Chicken Pasta Salad

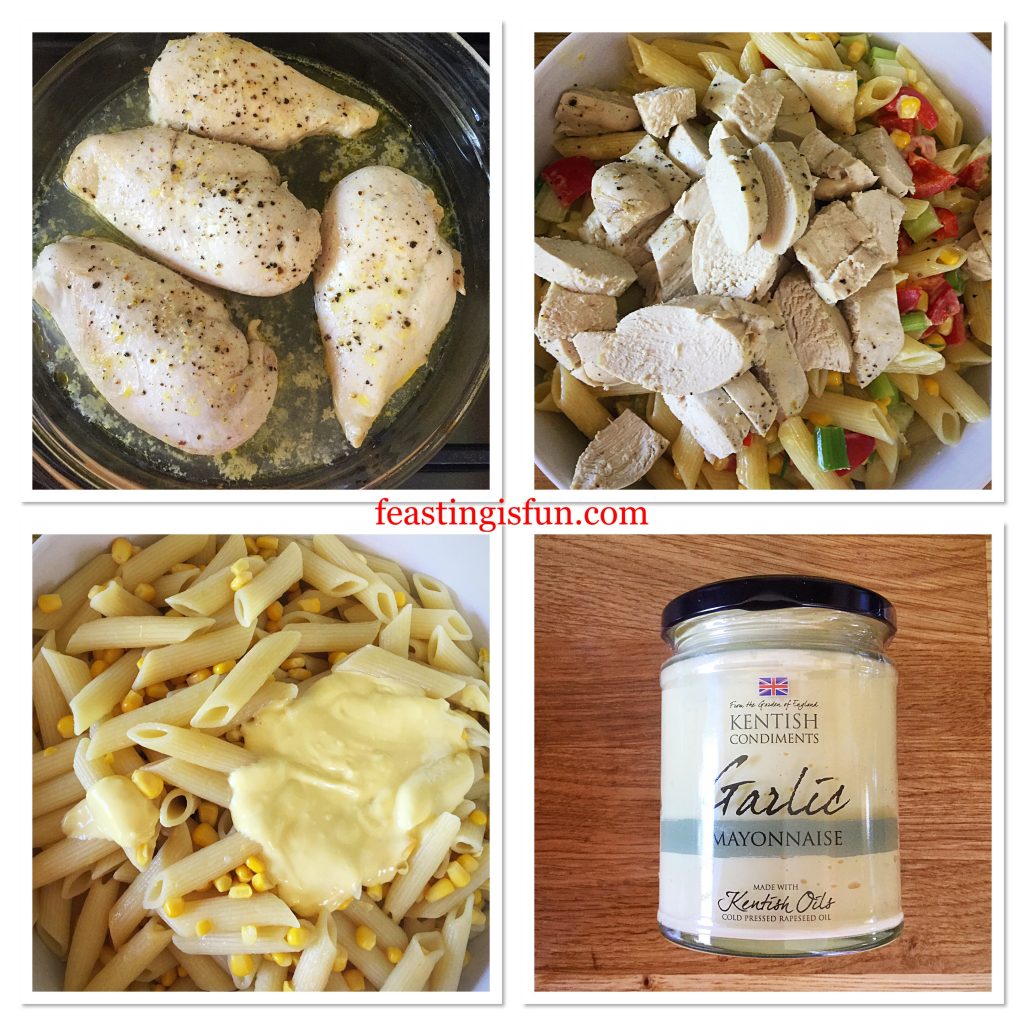
Since receiving a jar of Garlic Mayonnaise from Kentish Oils I wanted to use it almost as a sauce for a pasta dish. While sunny, daily temperatures are in excess of 30C  I decided on a cold pasta dish. Although the mayonnaise has garlic in it, it is not an overwhelming, raw, hot garlic flavour. Also it blends beautifully with the lemon chicken and crunchy vegetables in this dish.

FF Creamy Garlic Lemon Chicken Pasta Salad
Creamy Garlic Lemon Chicken Pasta Salad

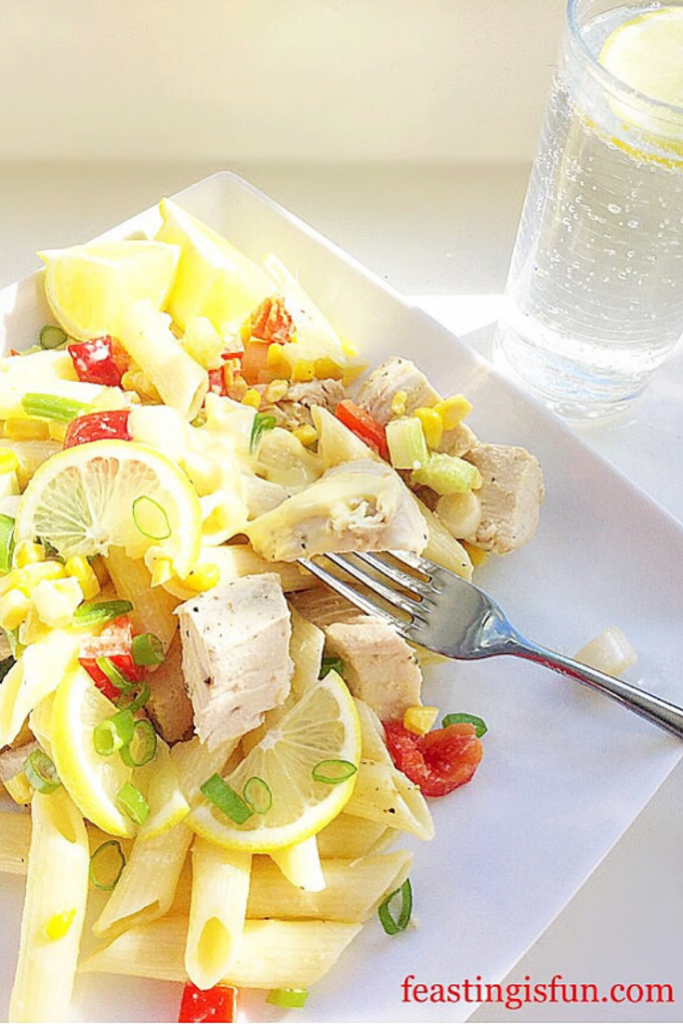
Because the chicken is baked in lemon juice it has a juicy, light lemon flavour. Also, when serving this dish I added very thinly sliced lemons. They are tangy to eat and add an extra punch to this cool, Summer meal. Likewise, an additional teaspoon of the garlic mayonnaise on top of the plated salad gives a tasty finishing touch.

FF Creamy Garlic Lemon Chicken Pasta Salad

Recipe: Creamy Garlic Lemon Chicken Pasta Salad serves 6

450g/1lb – Four Chicken Breasts skin and bone removed

3-4 Whole Lemons – washed and dried

2 Sweetcorn Cobs – approximately 275g/10oz or the equivalent tinned sweetcorn – drained

450g/1lb Pasta – I use rigatoni

8 Spring Onions (scallions)

2 Red Bell Peppers

2 Sticks of Celery

125g/4.5oz – approximately 5 tablespoons of Garlic Mayonnaise (plus extra to garnish) – I use Kentish Oils alternatively use the equivalent amount of mayonnaise and add one clove of minced/crushed garlic

Sea salt I use Maldon and freshly ground black pepper to season

Method: Preheat the oven to 180C/160C fan, 325F, gas mark 3.

Preparing the chicken

  • First of all, place the chicken breasts in an ovenproof dish. Season with sea salt, freshly ground black pepper and the juice from two whole lemons.
  • Cover the dish with aluminium foil and bake in the centre of the oven for 45 minutes.

Cooking the pasta and preparing the vegetables

  • While the chicken is cooking place a large pan of water on a high heat. As soon as the water is boiling add 1 teaspoon of sea salt and then add the pasta. Cook the pasta according to the packet instructions.
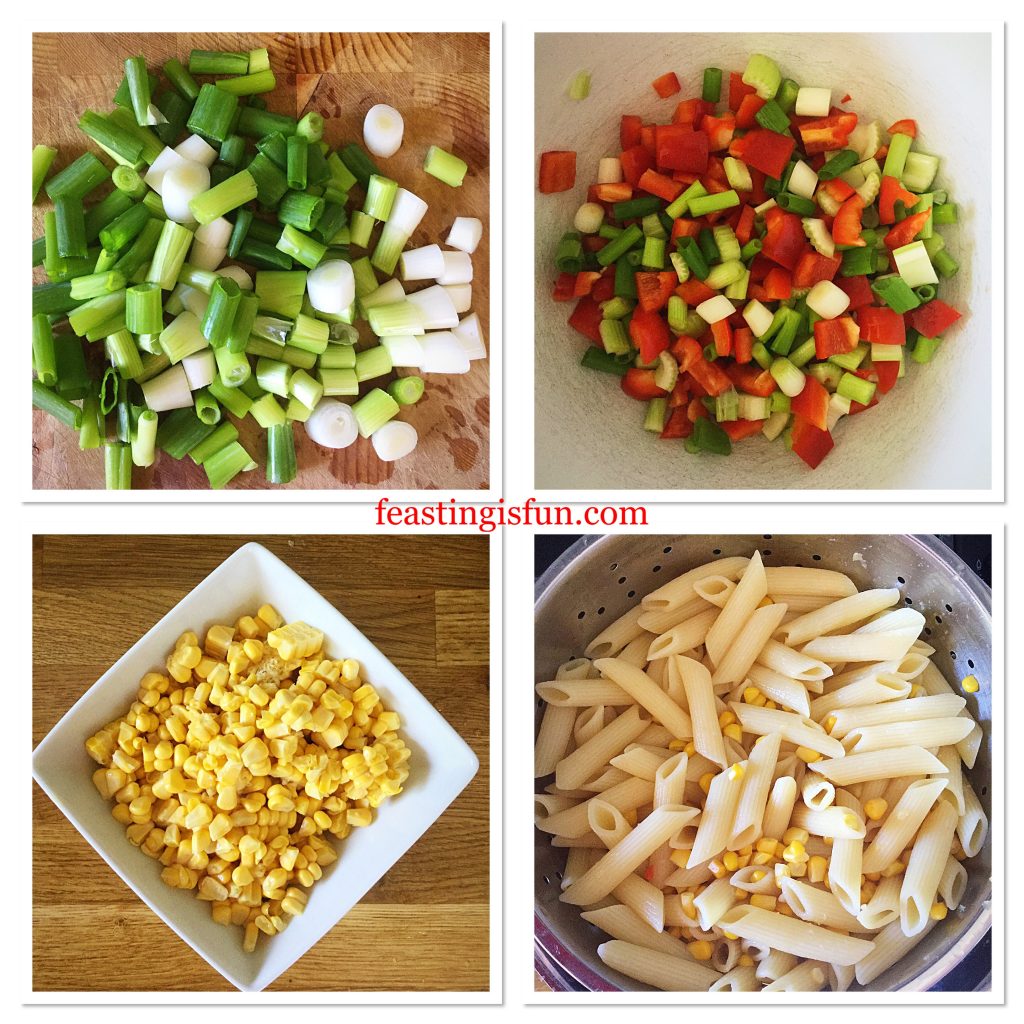
  • Chop the spring onions, red peppers and celery to about the same size and place in a large bowl. If using tinned sweetcorn add it to the bowl.
  • Stand a sweetcorn cob on one end and carefully cut down between the husk and the corn. Turn the cob and repeat until all of the corn is removed. Repeat for the second cob.
  • 3 minutes before the pasta has finished cooking add the fresh sweetcorn to the pan.
  • Once cooked drain the pasta and sweetcorn.
FF Creamy Garlic Lemon Chicken Pasta Salad
Preparing the vegetables and pasta.

Assembling the salad

  • After 45 minutes check that the chicken is thoroughly cooked. Cut through the thickest part of the biggest chicken breast, there should not be any pink colour, this shows the chicken is cooked. If there is even a hint of pink return the chicken to the oven for a further 10 minutes and check again.
  • As soon as the chicken is cooked remove from the oven and place the chicken breasts on a plate for 10 minutes to rest.
  • Cut the chicken into slices.
  • Add the cooked pasta and sweetcorn to the bowl and the add the garlic mayonnaise. Mix using a large spoon.
  • Now add the sliced chicken to the bowl and mix again.
  • Taste and check for seasoning, adjust if needed.
FF Creamy Garlic Lemon Chicken Pasta Salad
Assembling the Creamy Garlic Lemon Chicken Pasta Salad

The finished Creamy Garlic Lemon Chicken Pasta Salad.

Creamy Garlic Lemon Chicken Pasta Salad

Cover the bowl with cling film and refrigerate until ready to eat. This dish tastes best when it is fridge cold.

Serve the salad with very thin slices of lemon, extra wedges of lemon to squeeze over and a drizzle of garlic mayonnaise.

Creamy Garlic Lemon Chicken Pasta Salad

Keep any leftovers refrigerated in an airtight container and eat within two days.

If you have enjoyed this recipe for Creamy Garlic Lemon Chicken Pasta Salad you may also like these:

Roasted Summer Vegetable Orzo Salad 

FF Creamy Garlic Lemon Chicken Pasta Salad
Roasted Summer Vegetable Orzo Salad

Chicken Pasta Pesto Salad

FF Creamy Garlic Lemon Chicken Pasta Salad
Chicken Pasta Pesto Salad

Lemon Garlic Vegetable Orzo 

FF Creamy Garlic Lemon Chicken Pasta Salad
Lemon Garlic Vegetable Orzo

The versatility of pasta is why it is one of my favourite staples to have in the kitchen. Since all I need are a few crunchy vegetables and this yummy garlic mayonnaise I am set now for the heatwave! Because we all need a stash of easy, light, quick recipes for when we are busy and especially when the weather is hot. Now is not the time for slow cooked casseroles! I say cool, quick and easy saves the day.

Whatever you are making, baking and creating in your kitchens have fun preparing and sharing your feast.

Sammie xx

No part of this post may be reproduced or duplicated without the written permission of the owner. Please see my Disclosure Policy.
Kentish Oils sent me the Garlic Mayonnaise to try. All opinions and views are my own and this is NOT a sponsored post.

Cherry Tomato Mozzarella Basil Quiche

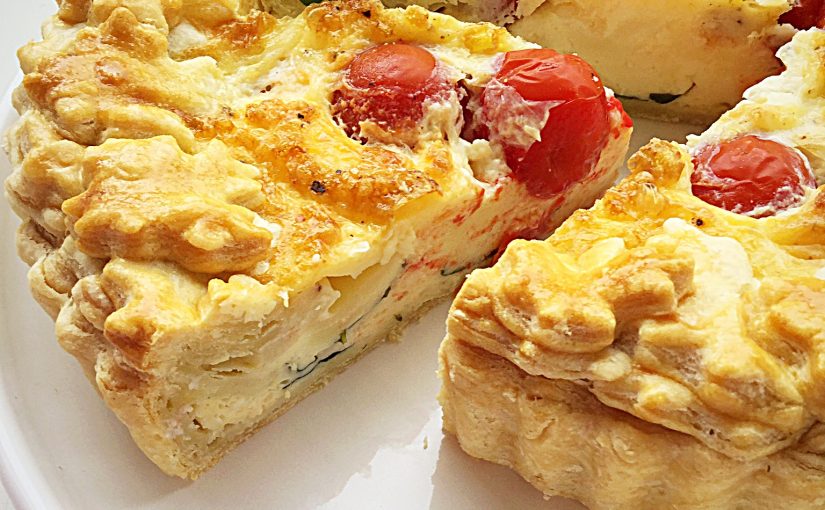
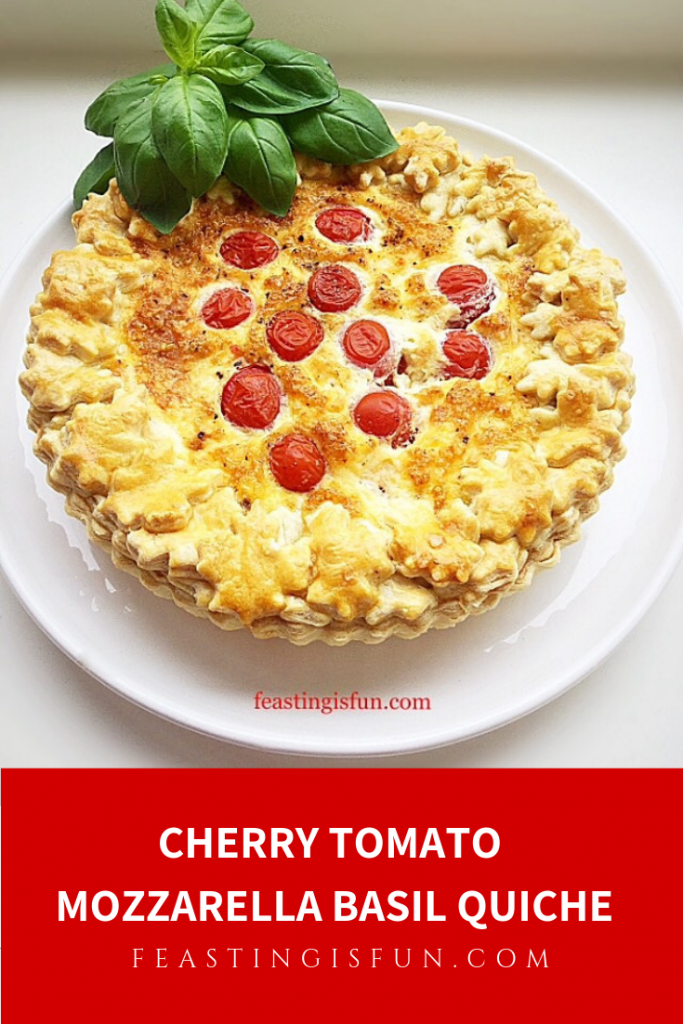
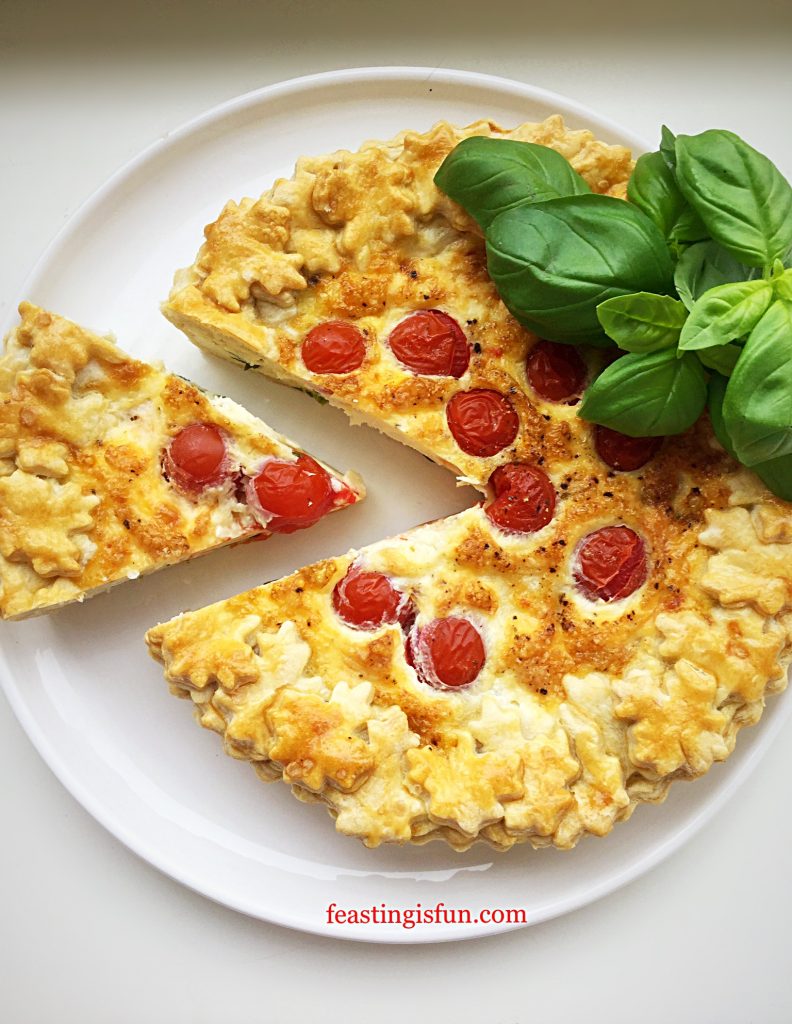
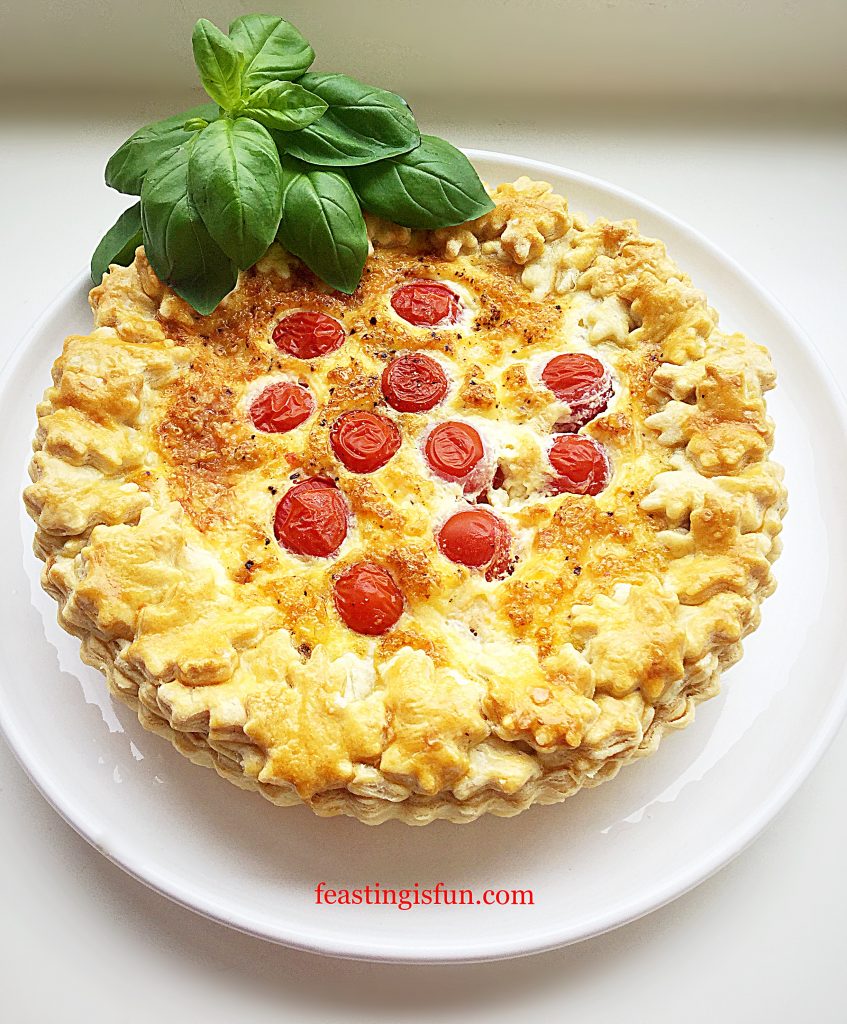
In case you missed my previous post Fresh Basil Topped Slow Roasted Tomatoes I’ll mention again that I love tomatoes. Especially locally grown, British tomatoes that are ripened on the vine and left on the worktop, not in the fridge. Sweet and savoury bursts of Summer on my tongue. Here I have baked them into a layered quiche with fresh basil and two types of cheese. So I am thrilled to bring you my Cherry Tomato Mozzarella Basil Quiche.

FF Cherry Tomato Mozzarella Basil Quiche

I was inspired by the classic caprese salad of fresh tomatoes, mozzarella cheese and fragrant basil to make this savoury tart. Since each element compliments the others so well as a salad the same can be said of this quiche. Also, layering the separate ingredients within an all butter pastry tart creates a delicious dish. Perfect for lunch, dinner, picnics, packed lunches and buffets. And that is how delicious this quiche is!

FF Cherry Tomato Mozzarella Basil Quiche
Cherry Tomato Mozzarella Basil Quiche

Choosing Local Produce

Because using local, seasonal produce is important to me, as a home cook and Food Blogger, I was delighted when I was offered a box of Sophie Jane cherry tomatoes. Locally grown by Eric Wall a local, specialist grower. The tomatoes I received are ripened on the vine and are grown without the use of pesticides. Most importantly they taste incredible. In fact just like a tomato should taste. Eaten warmed by the sun, after being left on the windowsill, they are sweet with a deeper savoury flavour. Also they weren’t very acidic as some tomatoes can be, especially tinned ones.

FF Cherry Tomato Mozzarella Basil Quiche
Cherry Tomato Mozzarella Basil Quiche

While British Tomato Fortnight has finished I firmly believe that we should all be eating flavoursome British tomatoes for as long as they are available. Because they taste so good. It really is as simple as that. I have been popping these ruby beauties into my mouth like sweeties. Eating them alongside crackers and cheese and I plan to make more recipes to share with you. All in aid of celebrating the humble tomato.

Recipe: Cherry Tomato Mozzarella Basil Quiche:

You will need a 20cm x 5cm (8” x 2”) tart tin, ideally with a loose bottom, to make this recipe.

A quick note – I successfully doubled all of the quantities and made this quiche in a deeper, wider dish. Baking times need to be adjusted, aside from the initial blind baking. The larger quiche turned out perfectly and would be ideal for feeding a crowd, or a buffet.

500g/1lb 2oz Shortcrust Pastry – I use my recipe for Perfect Butter Shortcrust Pastry freezing the leftovers

225g/8oz Mozzarella Cheese – drained and with excess water squeezed out

50g/2oz Vintage or Very Mature/Sharp Cheddar – I use Wyke Farms

6 Large Free Range Eggs

225g/8oz Fresh Cherry Tomatoes

12-14 Fresh Basil Leaves – alternatively out of season use 1/2 tsp dried Thyme

1/2 tsp Freshly Ground Black Pepper

Pinch of Sea Salt Flakes – I use Maldon

Method: Preheat oven to 220C/200C fan, 425F, gas mark 7

Making And Baking The Shortcrust Pastry Tart Case

  • First of all make the pastry, wrap in cling film and chill for one hour.
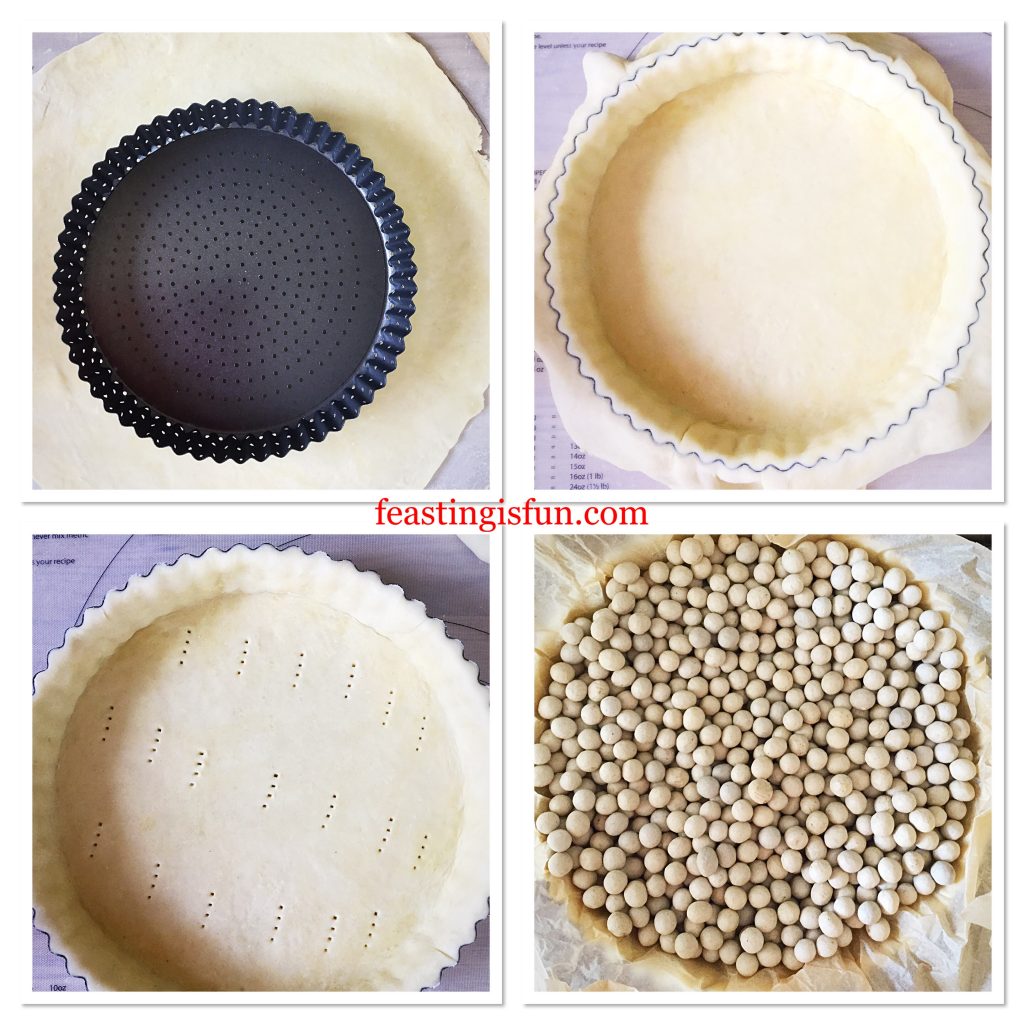
  • Remove the chilled pastry from the fridge, unwrap and roll out on a lightly floured surface, so that it will fit the tart tin. See photo top left below.
  • Fold the pastry over the rolling pin, making it easier to transfer.
  • Lower the pastry into the tin, making sure that you don’t stretch it as you do.
  • Press the pastry into the tin so that it fits securely.
  • Run your rolling pin over the tart tin, this will give a clean edge to the pastry.
  • Place the tart tin on to a baking sheet and dock the base with a fork.
  • Now scrunch up some baking parchment and line the pastry tart with it.
  • Next fill with baking beans.
FF Cherry Tomato Mozzarella Basil Quiche
Making the pastry shell for the quiche.
  • Place in the centre of a preheated oven and bake for 15 minutes.
  • Carefully lift out the baking parchment and baking beans.
  • Return the tart to the oven for 5 minutes further baking.

Layering The Quiche Ingredients

  • Remove the tart and reduce the oven temperature to 190C/170C fan, 375F, gas mark 5.
  • Line the tart base with basil leaves.
  • Place torn chunks of mozzarella directly on to the basil.
  • Sprinkle over finely grated cheddar and then top with cherry tomatoes.
  • Reserve one egg, whisk the other five adding the black pepper. Pour the eggs into the tart.
FF Cherry Tomato Mozzarella Basil Quiche
Creating layers within the Cherry Tomato Mozzarella Basil Quiche
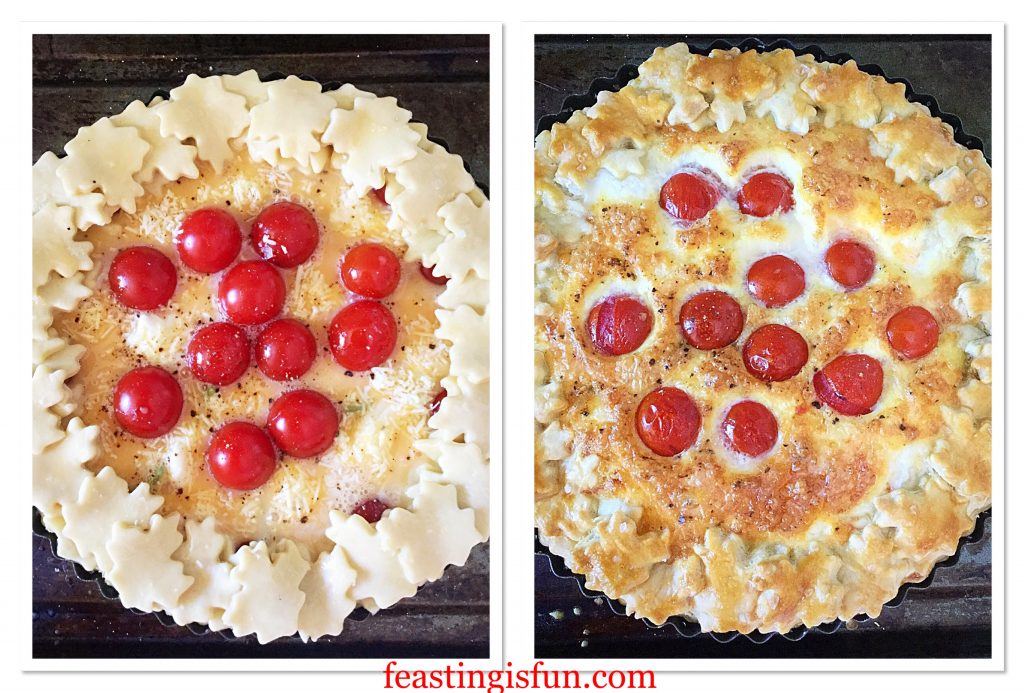
  • Roll out the remaining pastry and cut out small shapes to edge the tart. I used a oak leaf cutter which gives the edge of the quiche a frilly finish.
  • Whisk the remaining egg and brush the underside of each cutout. Stick the pastry cutouts to the edge of the pastry case. You can create a single layer or add extra cutouts to create a layered effect.
  • Brush the pastry edge with egg so that it turns golden when baked.
  • Finally sprinkle a pinch of sea salt over the top.

Baking The Cherry Tomato Mozzarella Basil Quiche

FF Cherry Tomato Mozzarella Basil Quiche
Before and after baking the Cherry Tomato Mozzarella Basil Quiche
  • Carefully place the filled quiche into the centre of the oven – remember to check that the heat has been reduced.
  • Bake for 40-45 minutes. The quiche is baked when it is a golden colour and there is no wobble in the centre.
  • As soon as the quiche is baked remove from the oven. Place on a cooling rack for at least 30 minutes before removing from the tin. Take care as the tomatoes will be very hot and juicy.
FF Cherry Tomato Mozzarella Basil Quiche
Cherry Tomato Mozzarella Basil Quiche

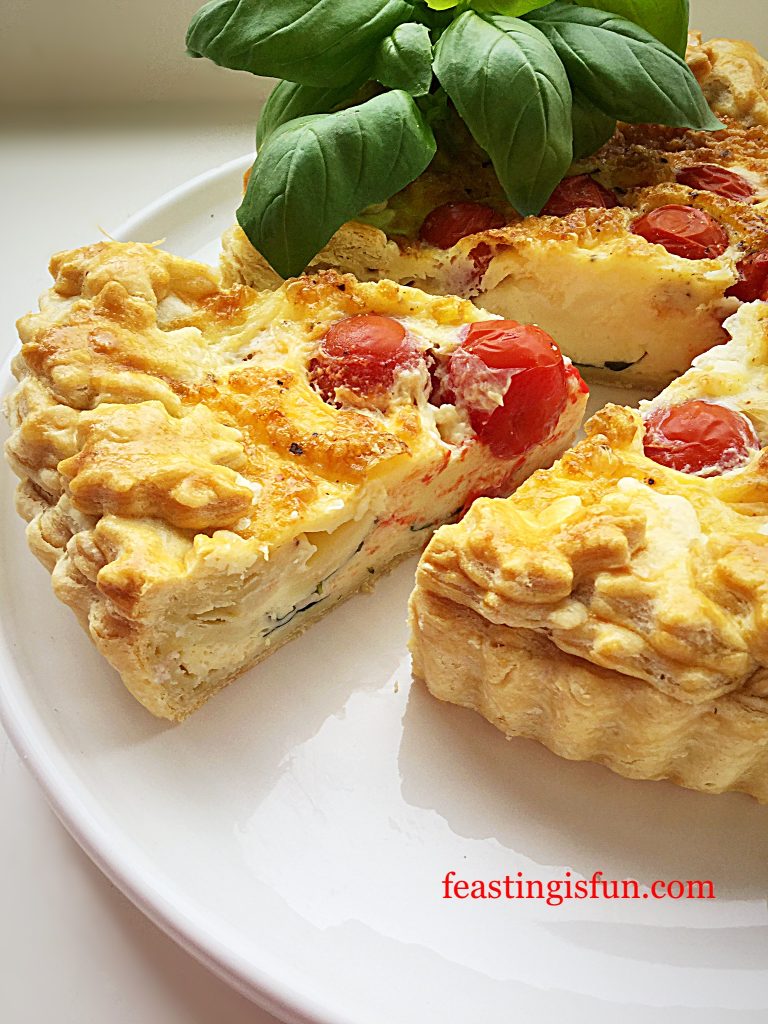
The beauty of this quiche is that it can be served warm, at room temperature or cold, straight from the fridge!

FF Cherry Tomato Mozzarella Basil Quiche
Cherry Tomato Mozzarella Basil Quiche

Because this quiche does not contain meat it is also suitable for vegetarians. Since I have made this twice it really holds it’s shape well when cold and would be perfect for taking on picnics. Most of all, when you bake this quiche make sure you share it. Especially as it is so pretty and absolutely yummy!

Make up to 2 days ahead, cool completely, double wrap in cling film and refrigerate. Due to the moisture content of the tomatoes I would not recommend freezing, unlike my Smoked Bacon Asparagus Quiche which freezes well. Although the pastry case can be made in advance and frozen.

If you have enjoyed this recipe for Cherry Tomato Mozzarella Basil Quiche you may also like these:

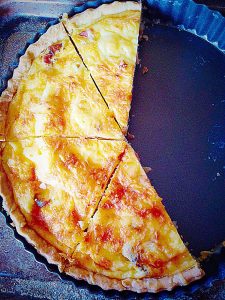
Quiche Lorraine 

FF Cherry Tomato Mozzarella Basil Quiche
Quiche Lorraine, smoked bacon and cheddar cheese savoury tart.

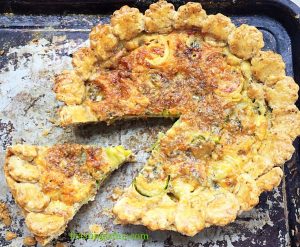
Walnut Pastry Crust Leek Stilton Tart

FF Cherry Tomato Mozzarella Basil Quiche
Walnut Pastry Crust Leek Stilton Tart

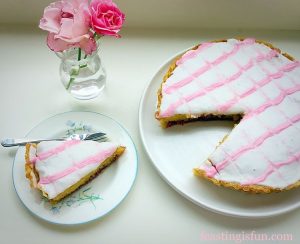
Iced Bakewell Tart

FF Cherry Tomato Mozzarella Basil Quiche
Iced Bakewell Tart

During this Summer, which I am hoping will be long and warm, I’m looking forward to creating recipes to share with you. Especially focusing on seasonal, local produce and products. Whether you live here, in Australia, Europe or the United States, I do feel that it’s important to support our local farmers. While some of you may get to visit farmers markets, if like me, it’s difficult for you to get out, take a look online. Since spending a little time researching I’ve found the equivalent of farmers markets online and they deliver! Most of all, if you remember one thing from this post – please keep your tomatoes out of the fridge, it kills their flavour!

Whatever you are making, baking and creating in your kitchens, have fun preparing you feast.

Also a huge thank you to everyone who follows me on social media and shares their creations with me.

Sammie xx

No part of this post may be reproduced or duplicated without the written permission of the owner. Please see my Disclosure Policy.
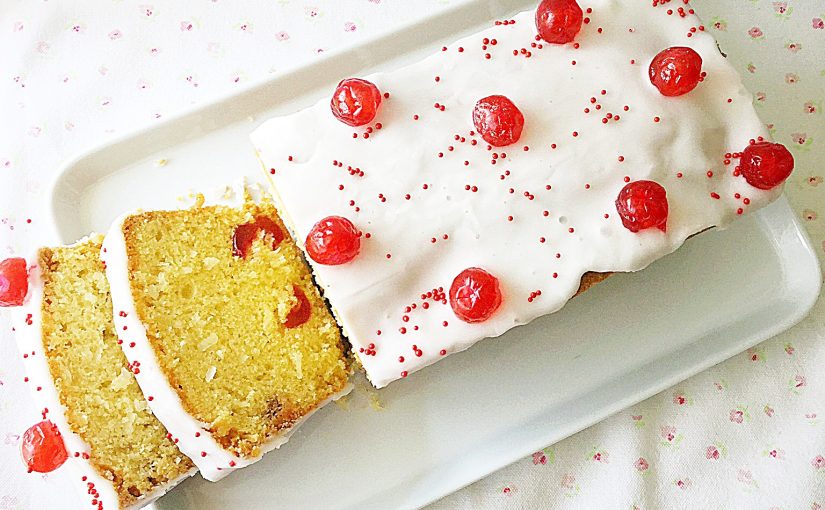
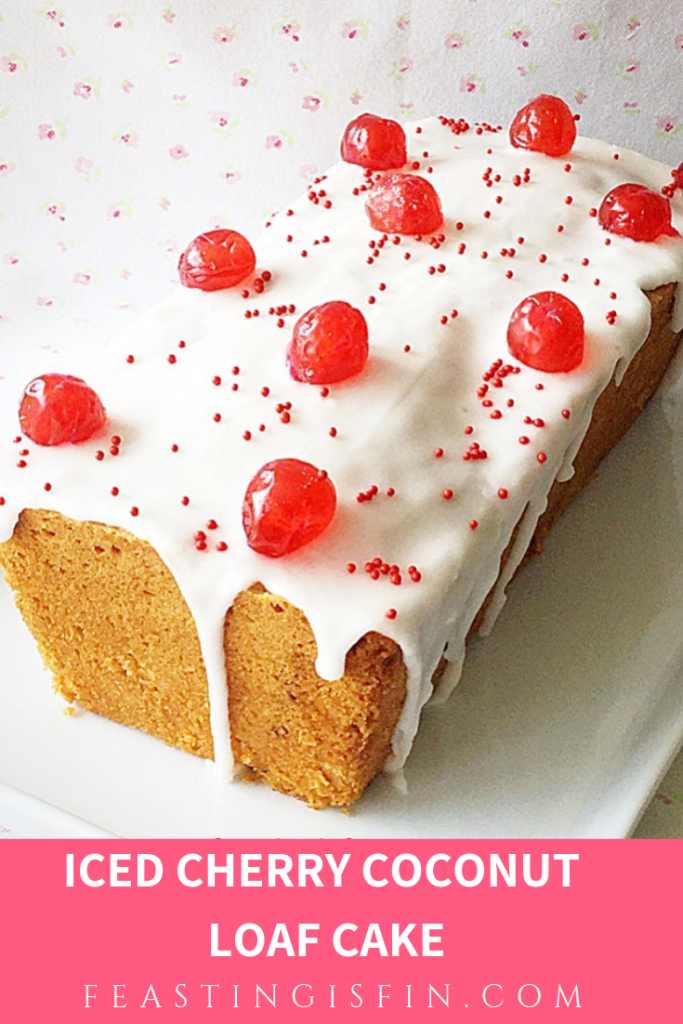
Iced Cherry Coconut Loaf Cake

I adore pretty things. Whether it be polka dot plates, wild flowers in a jug, or brushing my hands on cow parsley while out for a walk. And given a choice my garden will always be full of old english roses and rambling honeysuckle, rather than neatly edged borders containing structural plants. Likewise, this relaxed approach is also reflected in my baking. Since a drizzle of icing here and there makes a cake not only beautiful, but shouts that it is homemade. Resulting in this Iced Cherry Coconut Loaf Cake that not only looks pretty but tastes pretty good too!

FF Uncut Iced Cherry Coconut Loaf Cake

A rich buttery coconut cake, packed full of glacé cherries, simply decorated with glacé icing and more cherries. Yet it looks like an afternoon tea party. In fact this cake makes me want to get out my best china, string bunting everywhere and hold a garden party. Why? Because it is such a cheerful, pretty and delicious cake. Resulting in THE perfect cake to share.

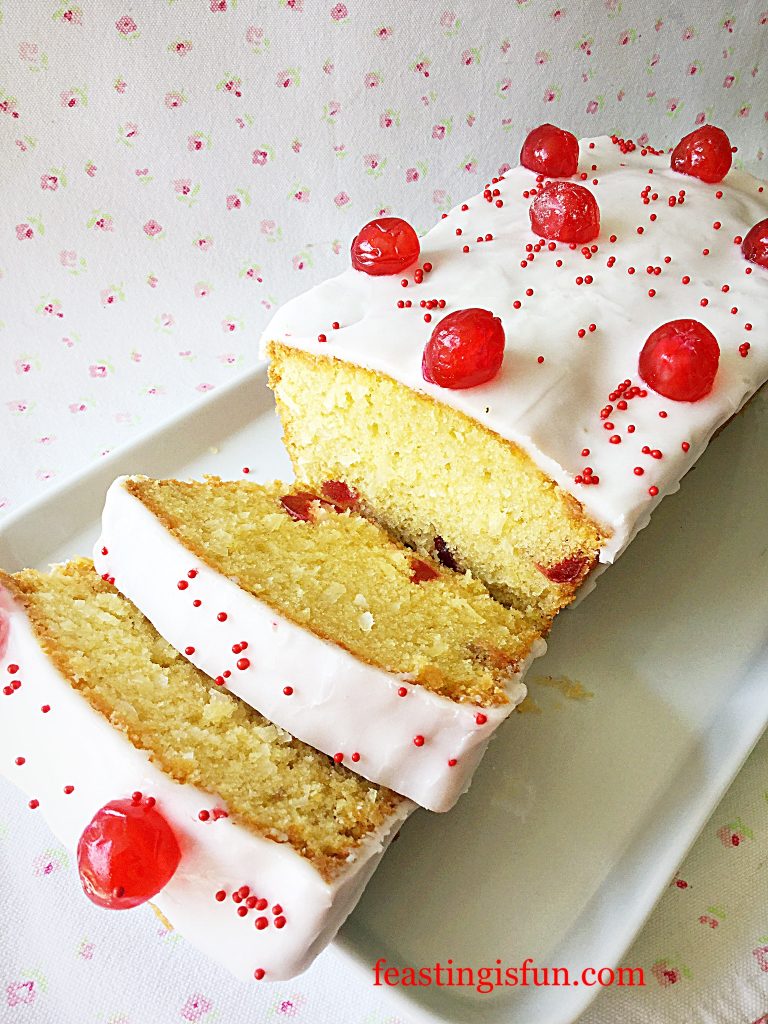
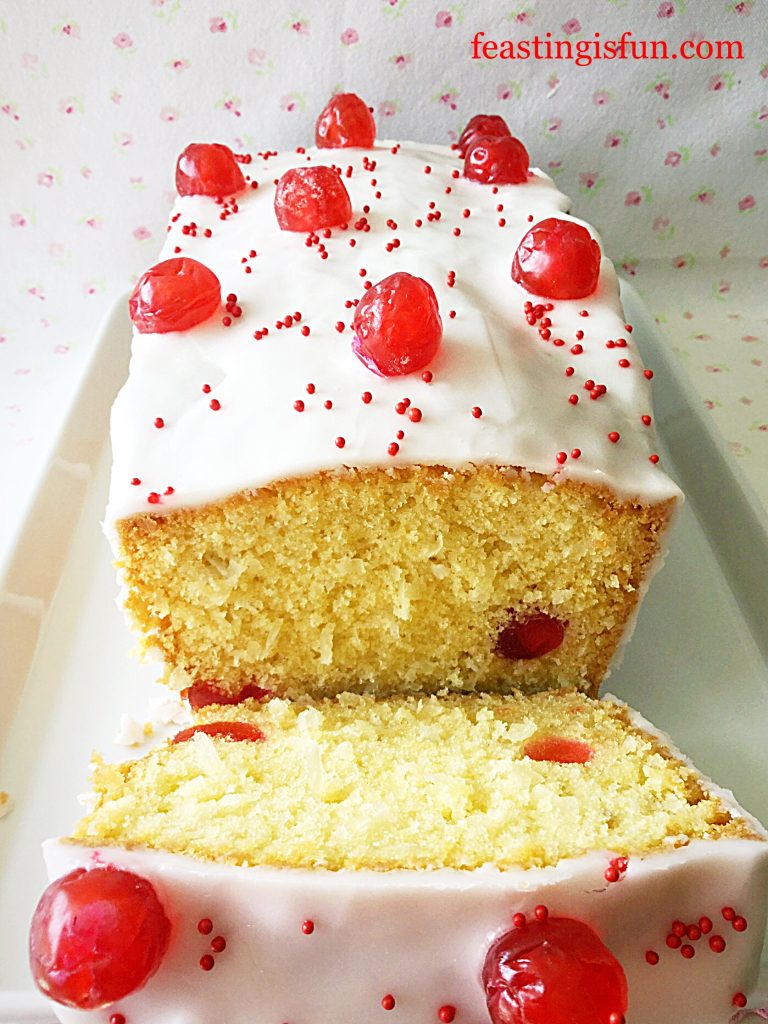
FF Iced Cherry Coconut Loaf Cake
Iced Cherry Coconut Loaf Cake

I rather enjoy baking loaf cakes such as this Mascarpone Topped Carrot Cake. Since the loaf tin makes them easy to slice and perfect for packing up and taking on a picnic. Also, should the cake need to be shared further than anticipated, each slice can easily be cut in half. So, when I look at photographs of this Iced Cherry Coconut Loaf Cake they make me smile. And any cake that does that is a winner in my book.

FF Iced Cherry Coconut Loaf Cake
Iced Cherry Coconut Loaf Cake.

Recipe: Iced Cherry Coconut Loaf Cake serves 8

For the cake:

200g/7oz Unsalted Butter at room temperature

200g/7oz Caster Sugar

1/4 tsp Sea Salt – I use Maldon halve quantity if using free flowing

1 tsp Vanilla Extract – I use Nielsen-Massey

4 Large Free Range Eggs

125/4.5oz Sweetend Shredded Coconut – such as Bakers available from Amazon alternatively use the equivalent weight of desiccated coconut and add 3 tbsp whole milk to the cake batter

100g/4oz Glacé Cherries halved

250g/9oz Plain White Flour

2 tsp Baking Powder

To decorate:

175g/6oz White Icing Sugar (Confectioners sugar)

2 Tbsp Tap Water

10 Whole Glacé Cherries

Small Red Sugar Balls approximately 1 tsp

Method: Preheat oven to 160C/140C fan, 325F, gas mark 3

You will need approximately a 25cm x 11.5cm x 7.5cm (10” x 4.5” x 3”) 2lb loaf tin for this recipe. Grease with butter and line the base with baking parchment.

Making And Baking The Cherry Coconut Cake

  • First of all add the butter, sugar and salt to a large mixing bowl. Whisk together until the ingredients are fully combined, pale and creamy.
  • Now add 2 eggs, half the flour and vanilla extract. Whisk together until just combined.
  • Add the last 2 eggs and whisk to incorporate.
  • Finally add the remaining flour, baking powder, coconut and cherry halves. Toss the cherries in the flour, this will stop them sinking to the bottom of the cake during baking.
  • Fold all of the ingredients together (adding additional milk if using desiccated coconut) until they are combined.
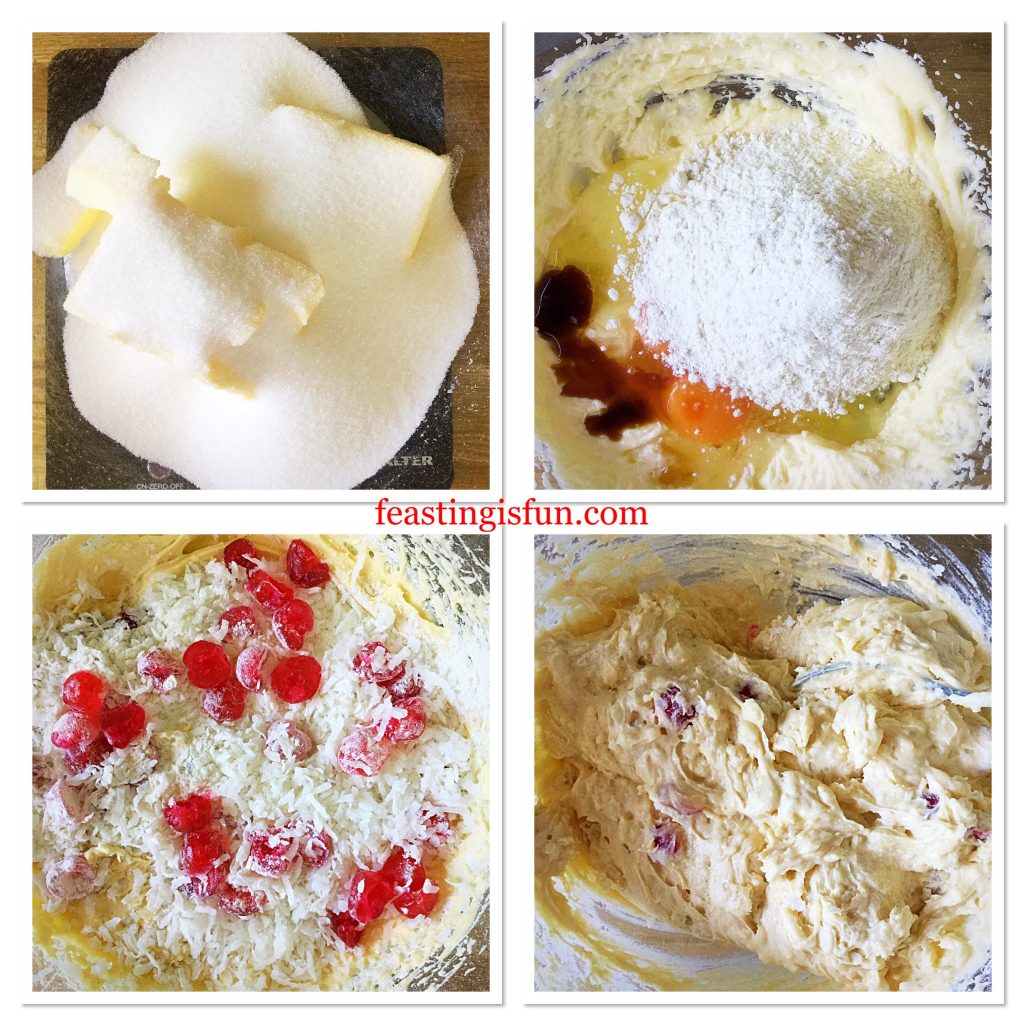
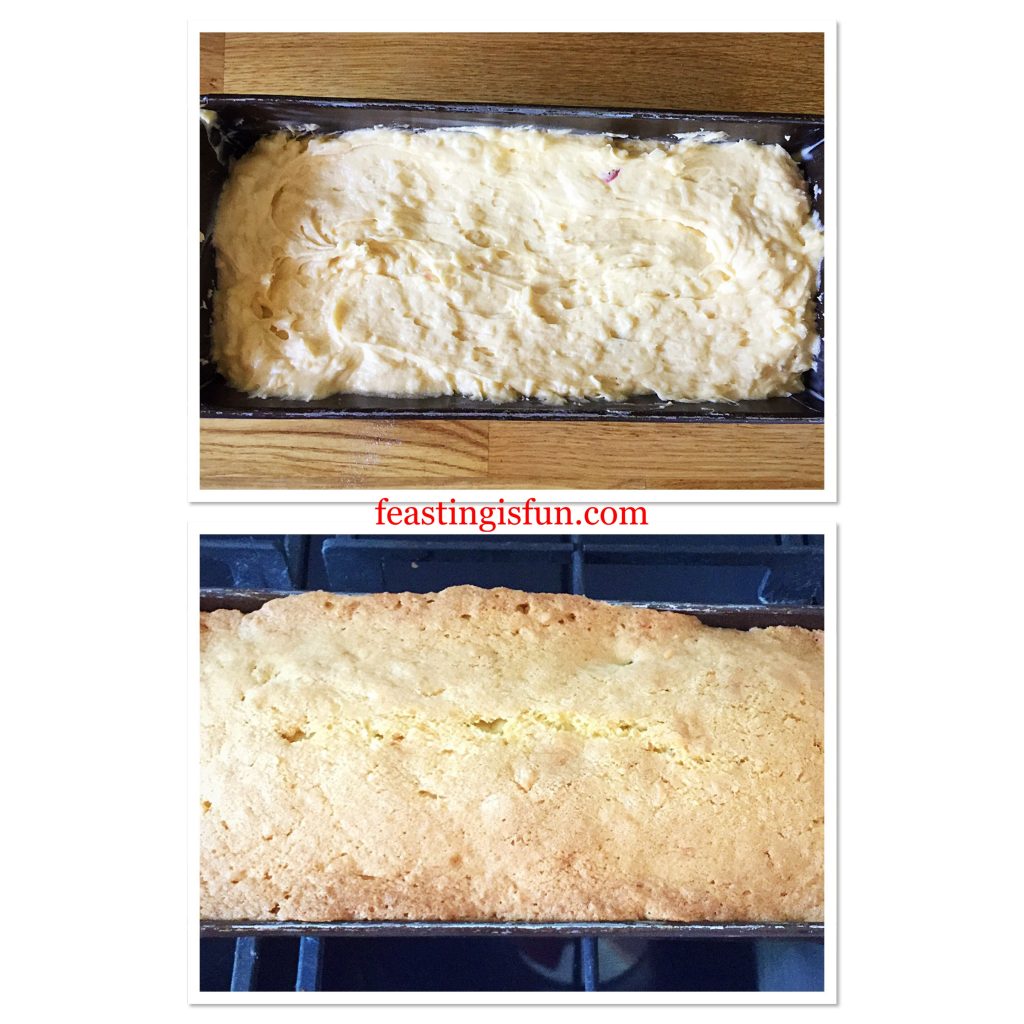
FF Iced Cherry Coconut Loaf Cake
Making the cherry coconut cake batter.
  • Spoon cake batter into the prepared tin making sure the top is level.
  • Place the cake tin into the middle of the oven and bake for 1 hour – 1 hour 15 minutes. My cake took 1 hour and 10 minutes to bake.
  • The cake is baked when golden brown and an inserted skewer comes out clean.
  • As soon as the cake is baked remove from the oven and allow to cool in the tin.
FF Iced Cherry Coconut Loaf Cake
Baking the cherry coconut loaf cake.
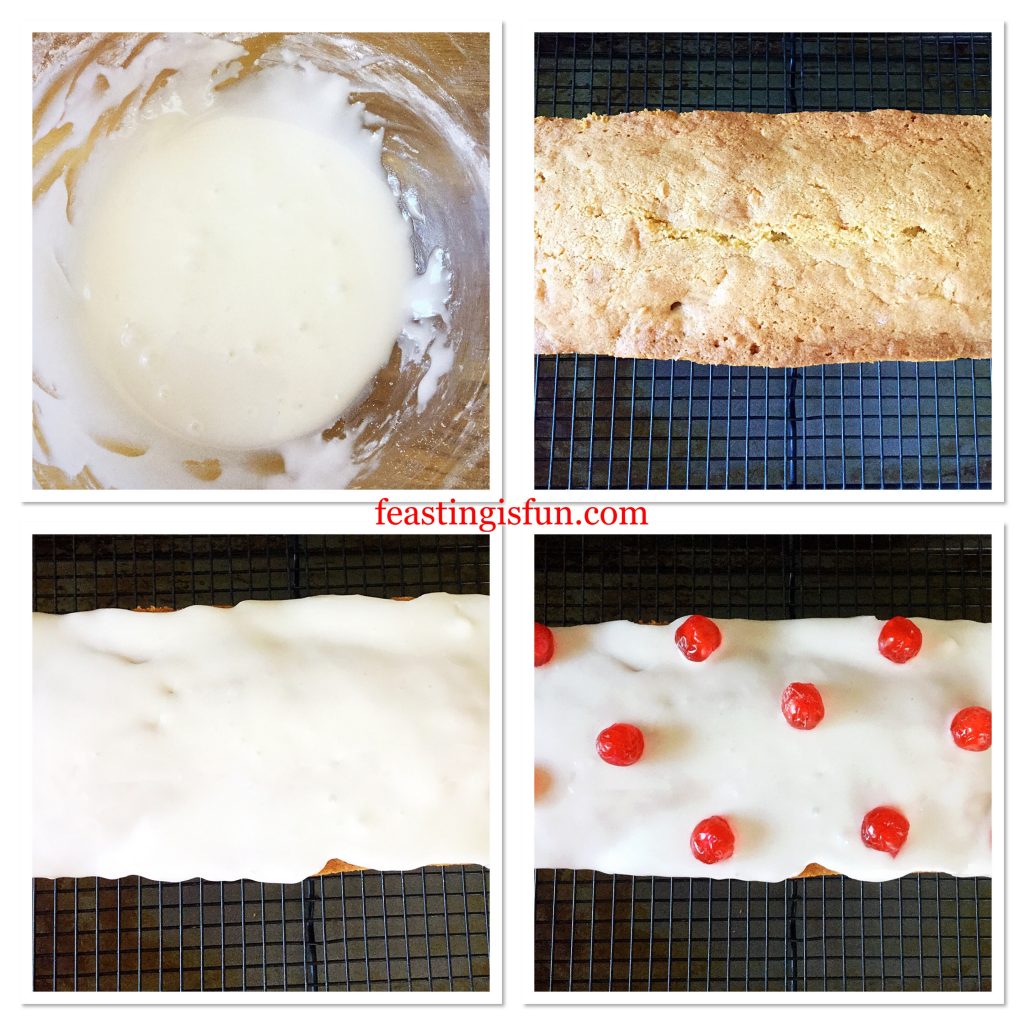
  • Once the cake has cooled run a palette knife around the inside of the tin. Turn out the cake, remove the baking parchment and place on a rack over a baking tray.

Decorating The Loaf Cake

  • Use a whisk to mix the icing sugar and water.
  • Spoon the thick glacé icing on to the top of the cake.
  • Add the glacé cherries to the iced cake.
FF Iced Cherry Coconut Loaf Cake
Decorating the Iced Cherry Coconut Loaf Cake.
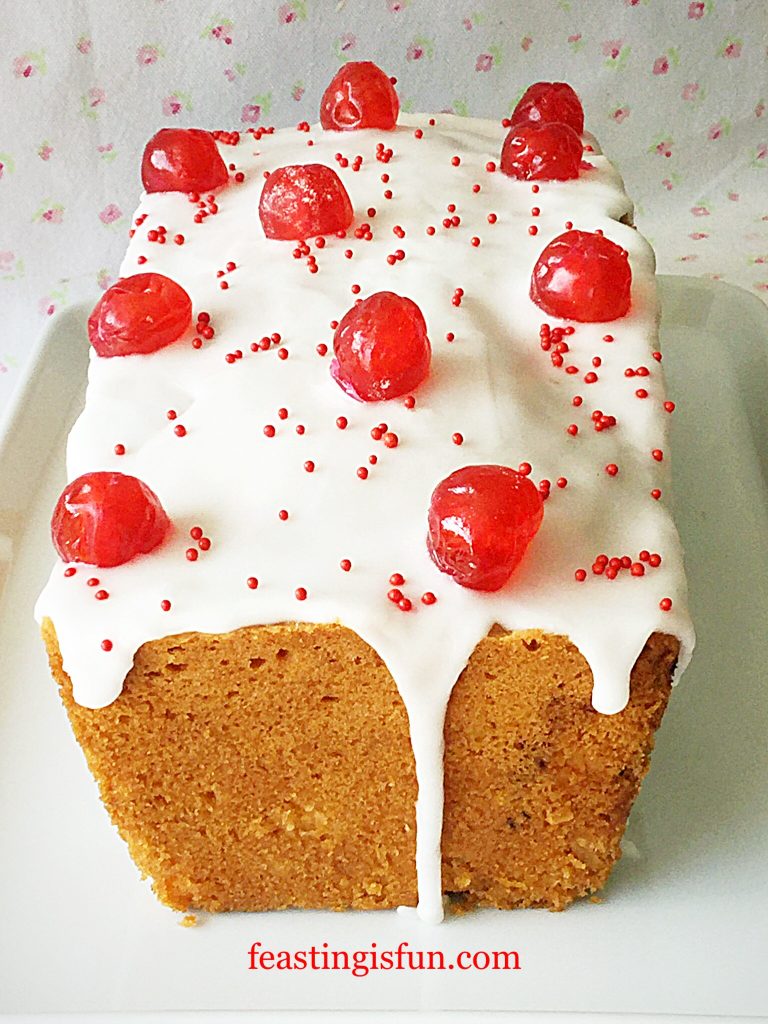
  • Finally sprinkle over red sugar balls before the icing sets.
FF Iced Cherry Coconut Loaf Cake
The finished Iced Cherry Coconut Loaf Cake.
  • Put the cake to one side and leave to set.
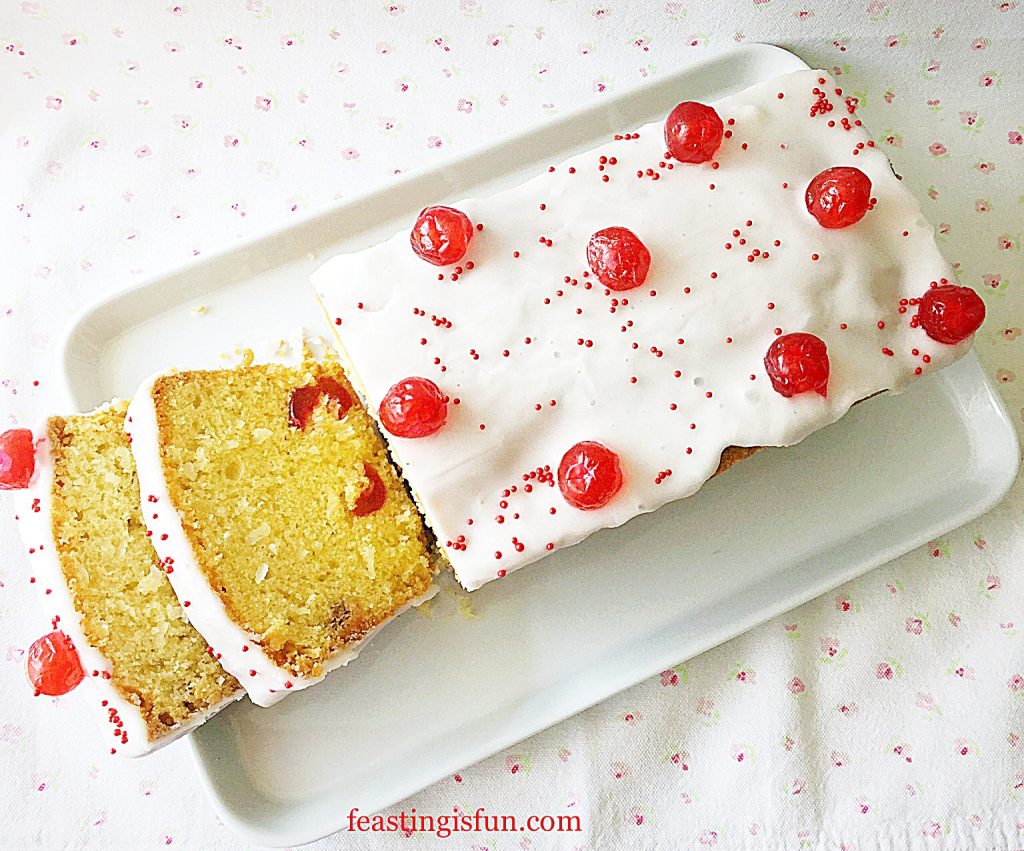
FF Iced Cherry Coconut Loaf Cake
Iced Cherry Coconut Loaf Cake

Serve sliced and placed on your very best china, along with a freshly made pot of tea.

Store in an airtight container. Eat within 5 days.

If you have enjoyed this recipe for Iced Cherry Coconut Loaf Cake you may also like these:

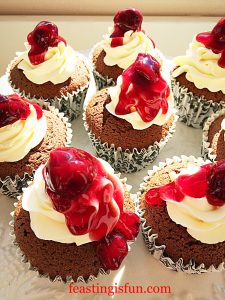
Black Forest Cupcakes

FF Iced Cherry Coconut Loaf Cake
Black Forest Cupcakes

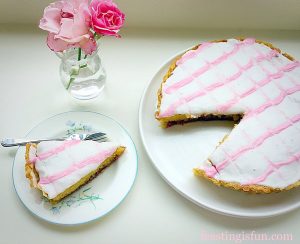
Iced Bakewell Tart

FF Iced Cherry Coconut Loaf Cake
Iced Bakewell Tart.

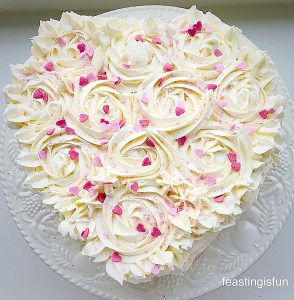
Strawberry Sweetheart Cake

FF Iced Cherry Coconut Loaf Cake
Strawberry Sweetheart Cake

While I am not the world’s best cake decorator, I’ve developed several strategies for making the cakes I bake look presentable. Because we eat with our eyes first AND as I mentioned, I like pretty things, cakes being one of them. So, for inspiration I follow several bakers and cake decorators on Twitter and Instagram. And they are an invaluable source of tips, tricks and ideas. Likewise, Pinterest is also full of inspiration. Most importantly, nature is the greatest source of inspiration for me. None more so than my beautiful back garden.

What inspires you?

So, whatever you are making, baking and creating in your kitchens, have fun preparing and sharing your feast.

Sammie xx

No part of this post may be reproduced or duplicated without the written permission of the owner. Please see my Disclosure Policy.
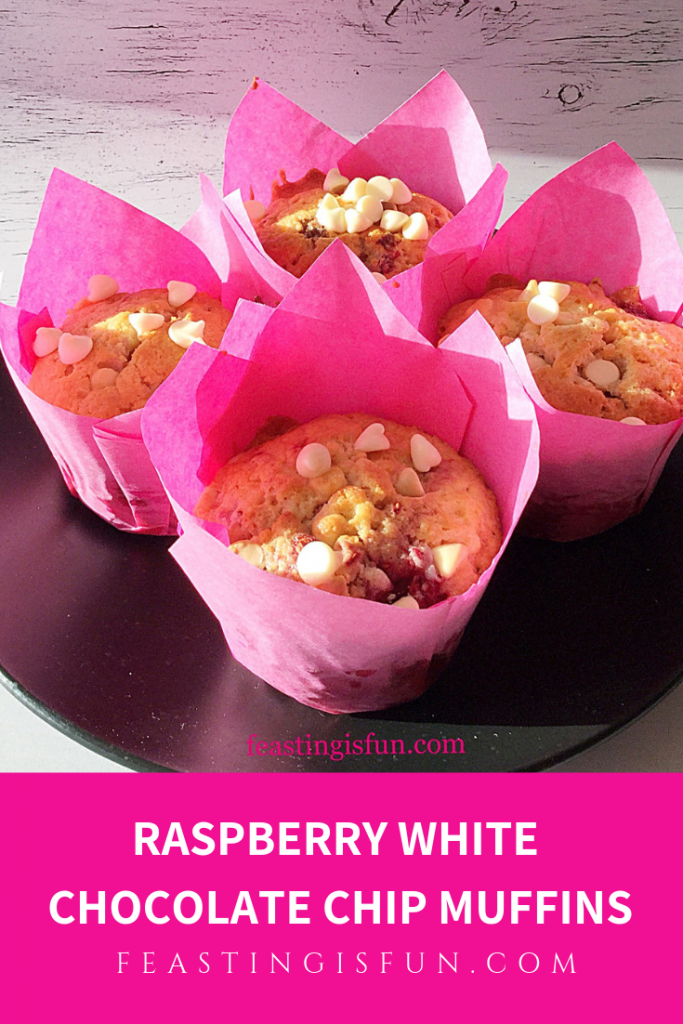
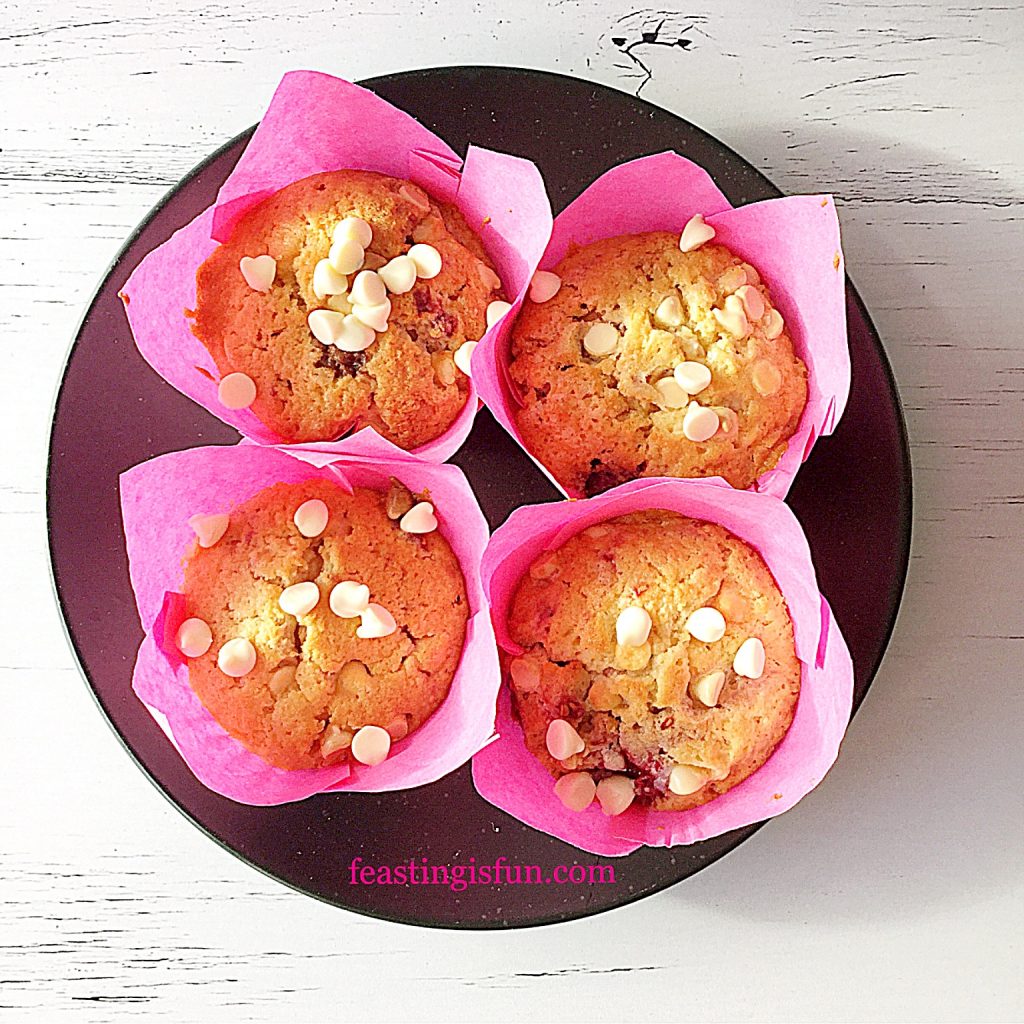
Raspberry White Chocolate Chip Muffins

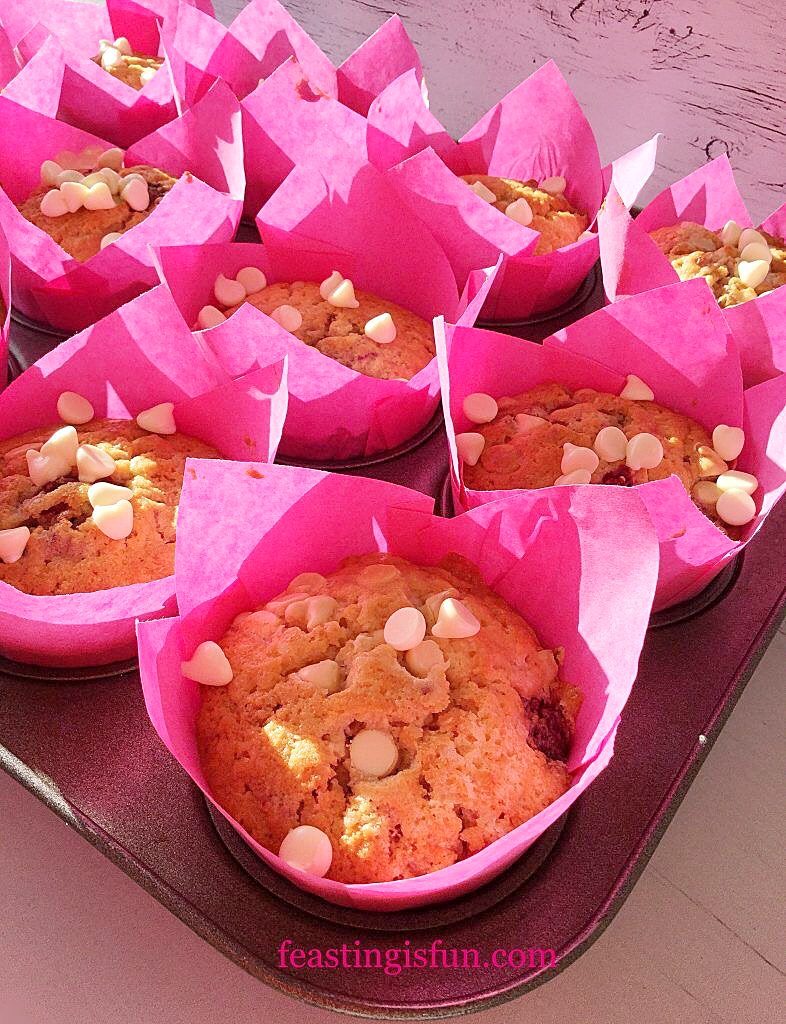
Coffee shop style muffins, it would seem, are here to stay. Big, light, tulip wrapped delights, packed full of chocolate or fruit. Why fight a trend that is clearly doing so well? Since we enjoy this style of muffin too, I have embraced everything about them and come up with my own recipes. So these Raspberry White Chocolate Chip Muffins are utterly delicious.

FF Raspberry White Chocolate Chip Muffins

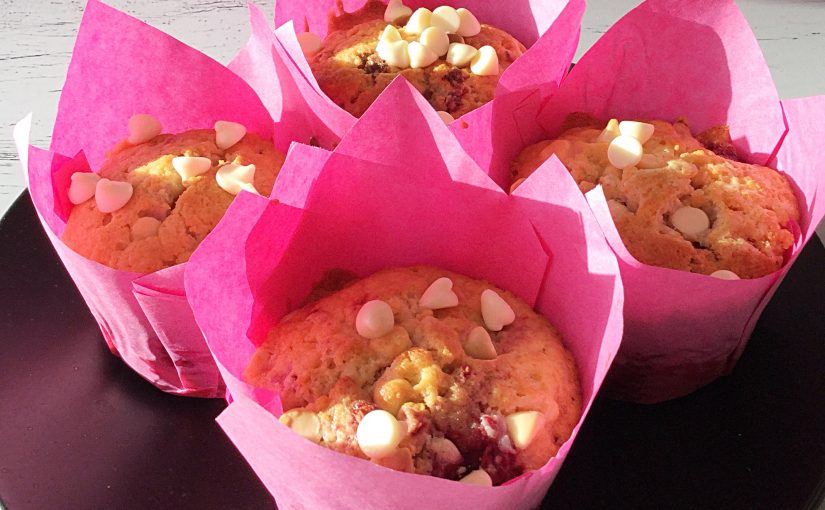
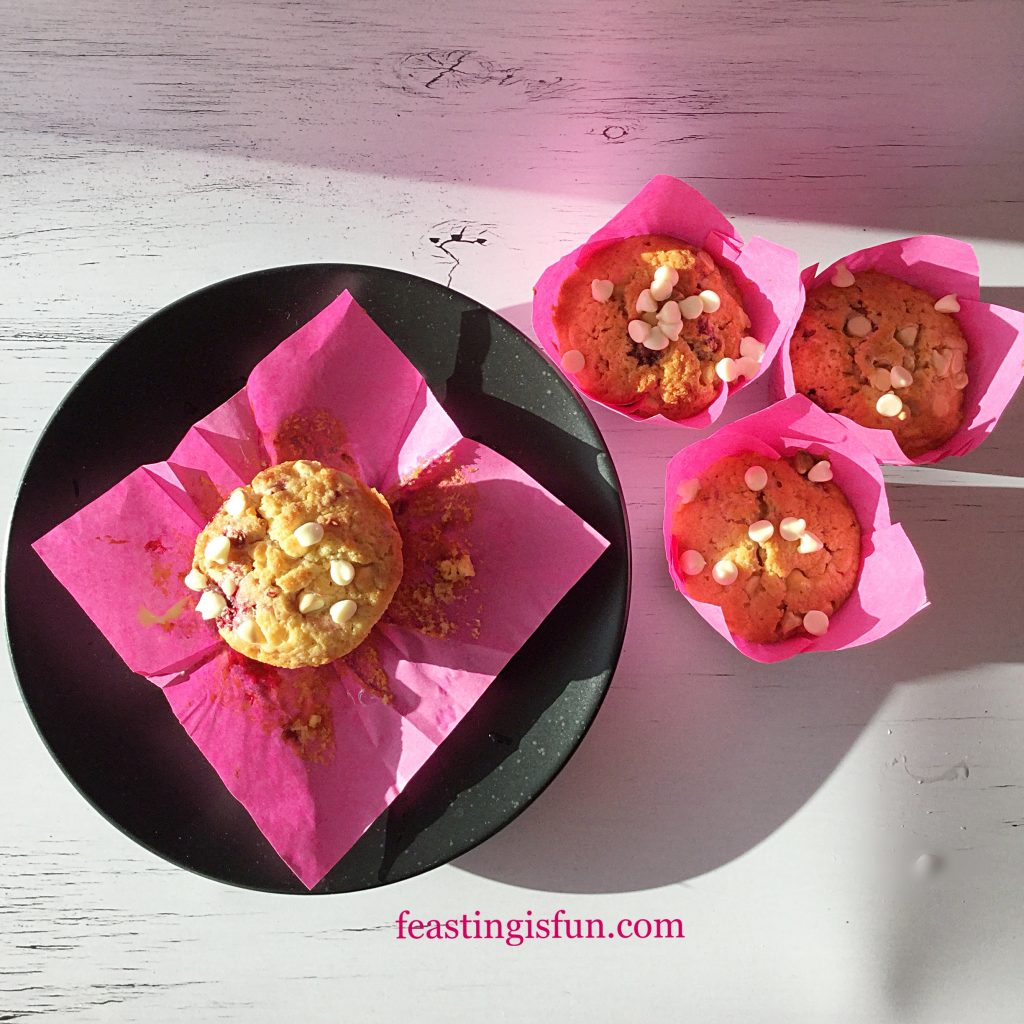
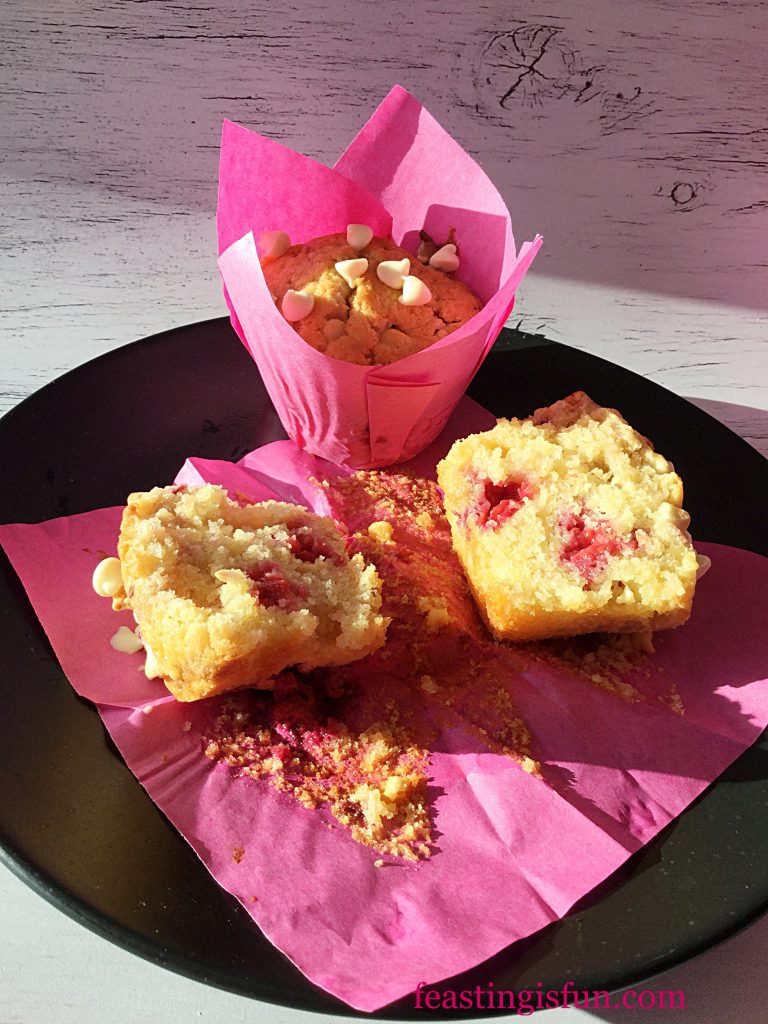
While the texture has more in common with a cake, than a true muffin such as Cheese Bacon Breakfast Muffins , there is room for both in our home. Because not everyone is keen on whipped buttercream that tops most cupcakes, these light, raspberry filled treats are a great alternative. As well as being not-too-sweet, the raspberries on baking become jammy pods within the muffin.

FF Bakery Style Muffins
Raspberry White Chocolate Chip Muffins


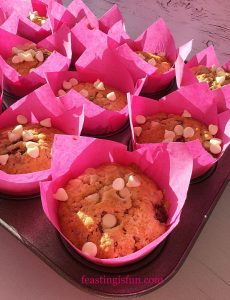
White chocolate chips within and on top of the muffin, provide small, sweet burst of vanilla chocolate flavour. While balancing the slightly tart flavour given by the raspberries. Together they create a delightful flavour pairing within the lightest of muffins. Perfect for grabbing and eating for breakfast or brunch when rushed in the morning. Likewise they also travel well in packed lunches and as part of a picnic.


FF Raspberry White Chocolate Chip Muffins
Raspberry White Chocolate Chip Muffins


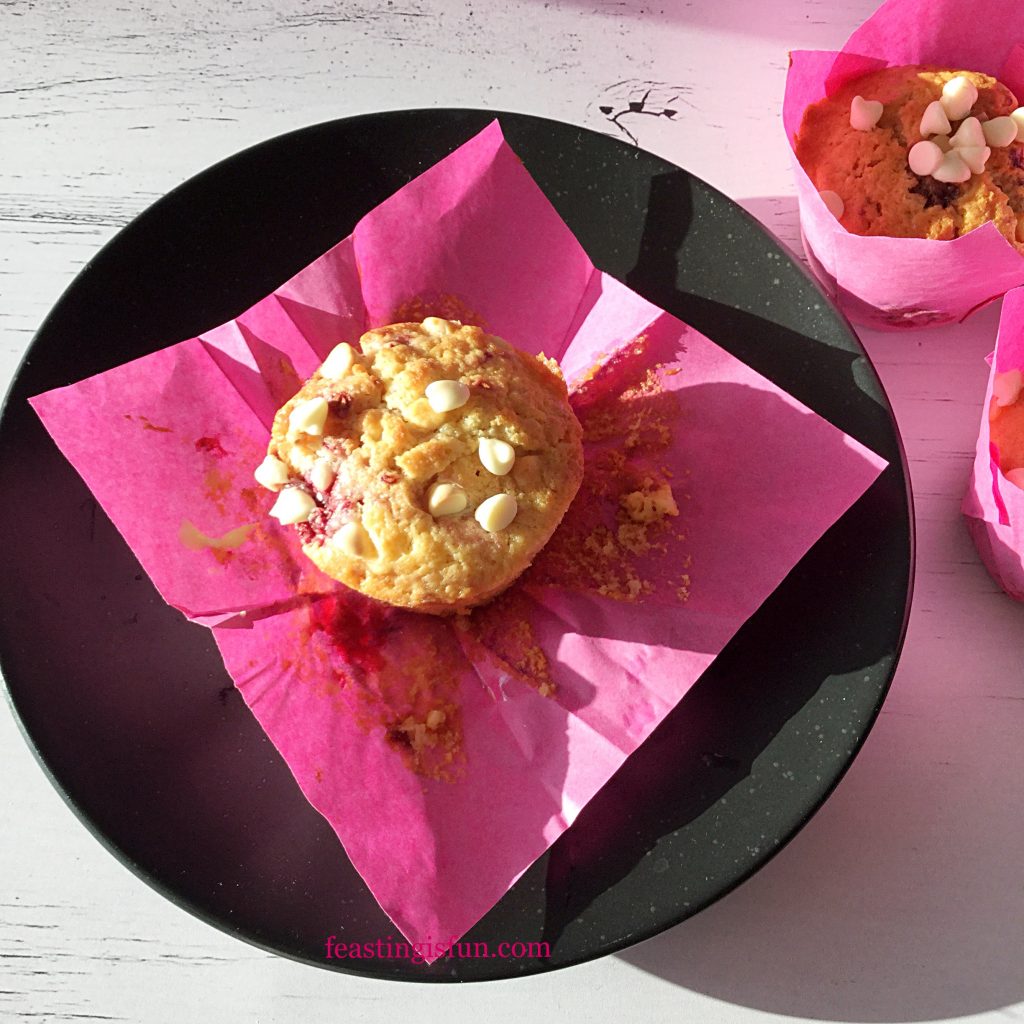
Baking the Raspberry White Chocolate Chip Muffins in tulip wrappers allows for a generously sized muffin. Also it adds to the coffee shop style of these muffins. If not using tulip wrappers to bake with, use the deepest muffin cases and fill two thirds full. As a result the baked muffins may bake over the muffin cases. If this happens, simply run a blunt butter knife between the muffin and tin to release.


FF Raspberry White Chocolate Chip Muffins
Tulip wrappers pull away easily revealing the baked muffin.

Recipe: Raspberry White Chocolate Chip Muffins makes 26-30

225g/8oz Unsalted Butter at room temperature

225g/8oz Caster Sugar

1/4tsp Sea Salt – I use Maldon

4 Large Free Range Eggs

100g/4oz Full Fat Yoghurt – I use Yeo Valley

1tsp Vanilla Extract – I use Nielsen-Massey

1.5tsp Baking Powder

275g/10oz Plain White Flour

125g/4.5oz White Chocolate Chips – I use Callebaut

150g/5oz Raspberries – I used frozen

Method: Preheat the oven to 180C/160C fan, 350F, gas mark 4

Making The Raspberry Muffin Batter

  • First of all line a 12 hole muffin tin with tulip wrappers or muffin cases.
  • Into a large bowl add the butter, sugar, salt and whisk until well combined.
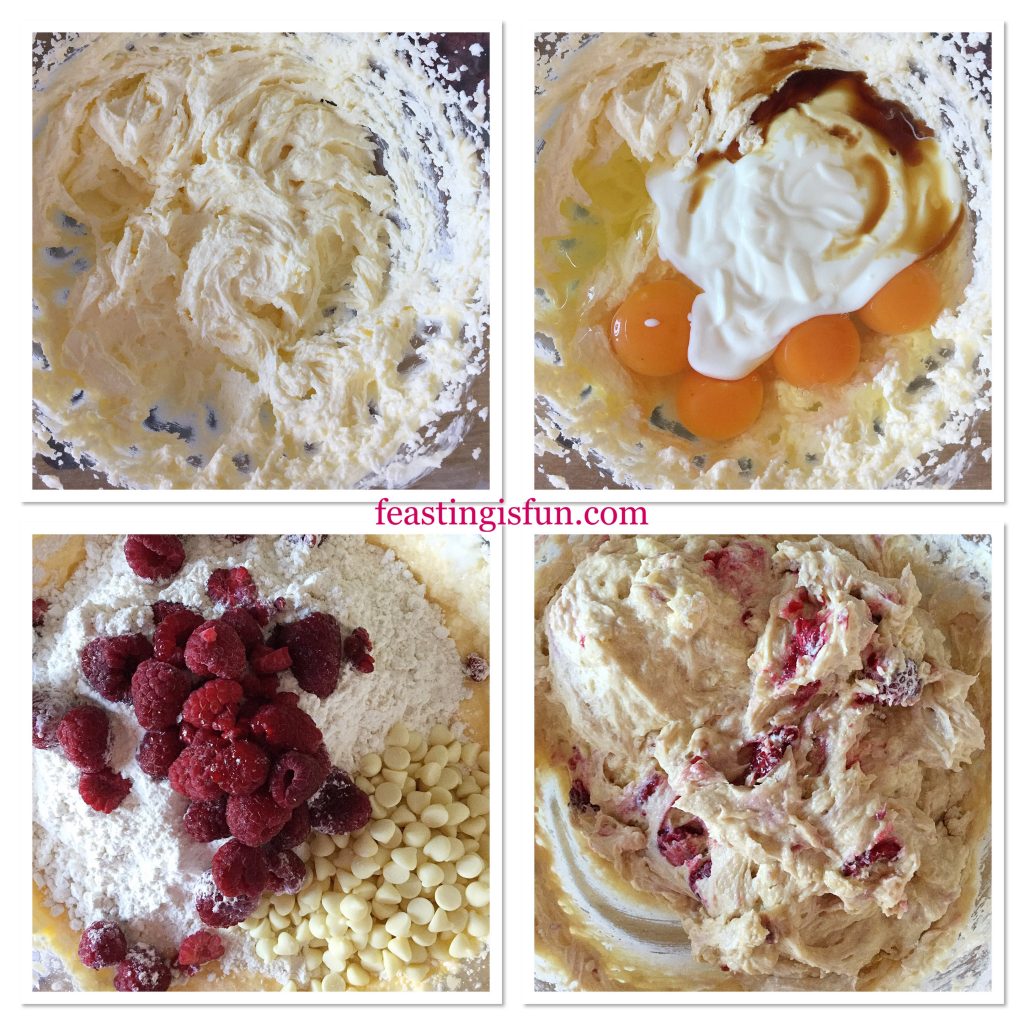
  • Then add the eggs, vanilla extract and yoghurt. On top of these wet ingredients sift in the flour and baking powder. Finally add the raspberries and 100g/4oz of the white chocolate chips.
  • Using a large spoon gently fold all of the ingredients together until just combined.  Take care not to break up the raspberries.
FF Raspberry White Chocolate Chip Muffins
Making the batter for Raspberry White Chocolate Chip Muffins
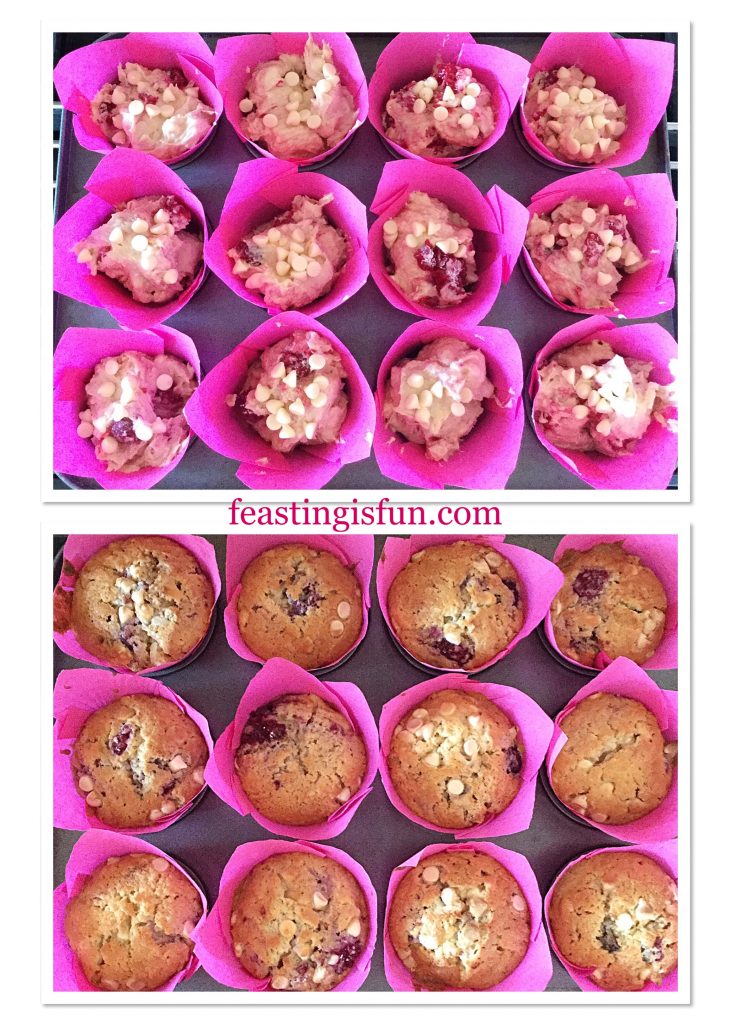
  • Spoon the batter into the wrappers, dividing equally between them.
  • Finish by sprinkling over the remaining white chocolate chips on to the surface of the un-baked muffins.

Baking The Bakery Style Muffins

  • Place the muffins into the centre of a preheated oven and bake for 25-35 minutes.
  • The muffins are baked when they are golden, just firm to touch and an inserted cocktail stick comes out clean, without any batter attached.
FF Raspberry White Chocolate Chip Muffins
Filling and baking the Raspberry White Chocolate Chip Muffins
  • As soon as the muffins are baked remove from the oven and allow to cool in the tin if using tulip wrappers. Otherwise, if using muffin cases, cool for 10 minutes in the tin then remove and place on a cooling rack to finish cooling.
FF Raspberry White Chocolate Chip Muffins
Raspberry White Chocolate Chip Muffins

I like to serve these muffins warm. While the chocolate chips are still slightly melted. Although they are fine to serve cold as well.

These muffins are best eaten within 24 hours of being made. Yet they can be stored, once cooled, in an airtight container for up to 3 days. Keep refrigerated during warm weather.


FF Raspberry White Chocolate Chip Muffins
The whole raspberries distribute evenly throughout the muffin.

Another delicious bake that uses the same flavours as these muffins is my Raspberry White Chocolate Loaf Cake. Also great for transporting to share with others

If you have enjoyed this recipe for Raspberry White Chocolate Chip Muffins you may also like these:

Double Strawberry Almond Muffins

Double Strawberry Almond Muffins

Chocolate Madness Muffins

Triple chocolate madness muffins
Chocolate Madness Muffins

Double Cherry Drizzle Oat Bars

Double Cherry Drizzle Oat Cake Bars
Double cherry drizzle oat cake bars.

Since actually making these muffins took mere moments, why not try them yourself? Making use of frozen raspberries allowed the fruit to keep its shape more easily. Yet, if fresh raspberries are in abundance or growing in the garden absolutely use those. Deep blush streaked muffins, warm from the oven taste good any day of the year!

So whatever you are making, baking and creating in your kitchens, have fun preparing and sharing your feast.

Sammie xx

No part of this post may be reproduced or duplicated without the written permission of the owner. Please see my Disclosure Policy.
 

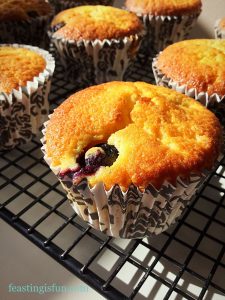
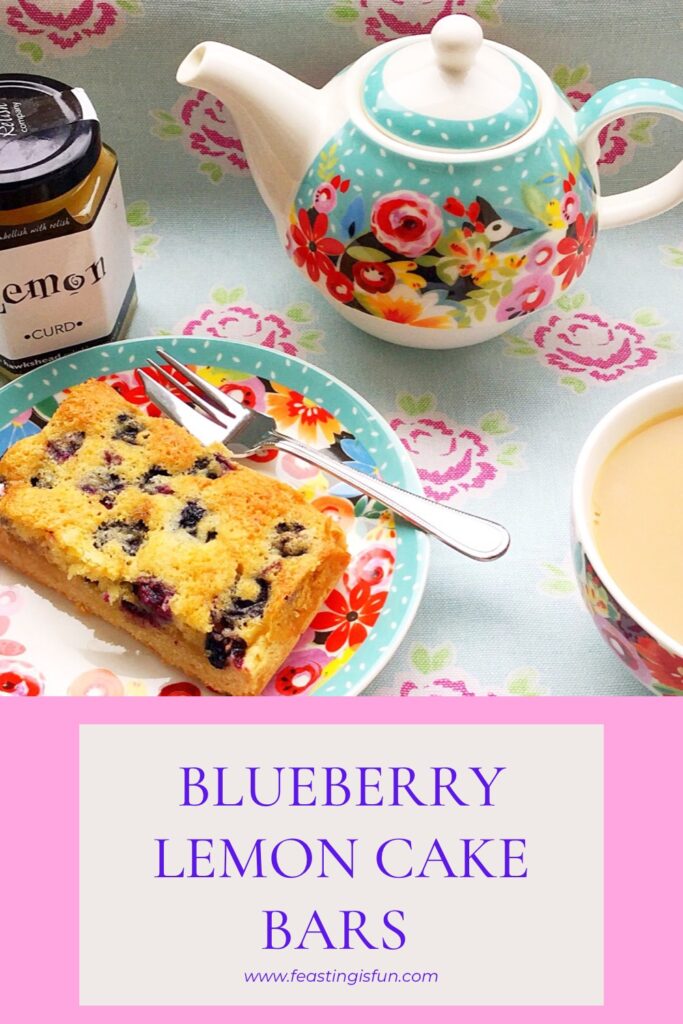
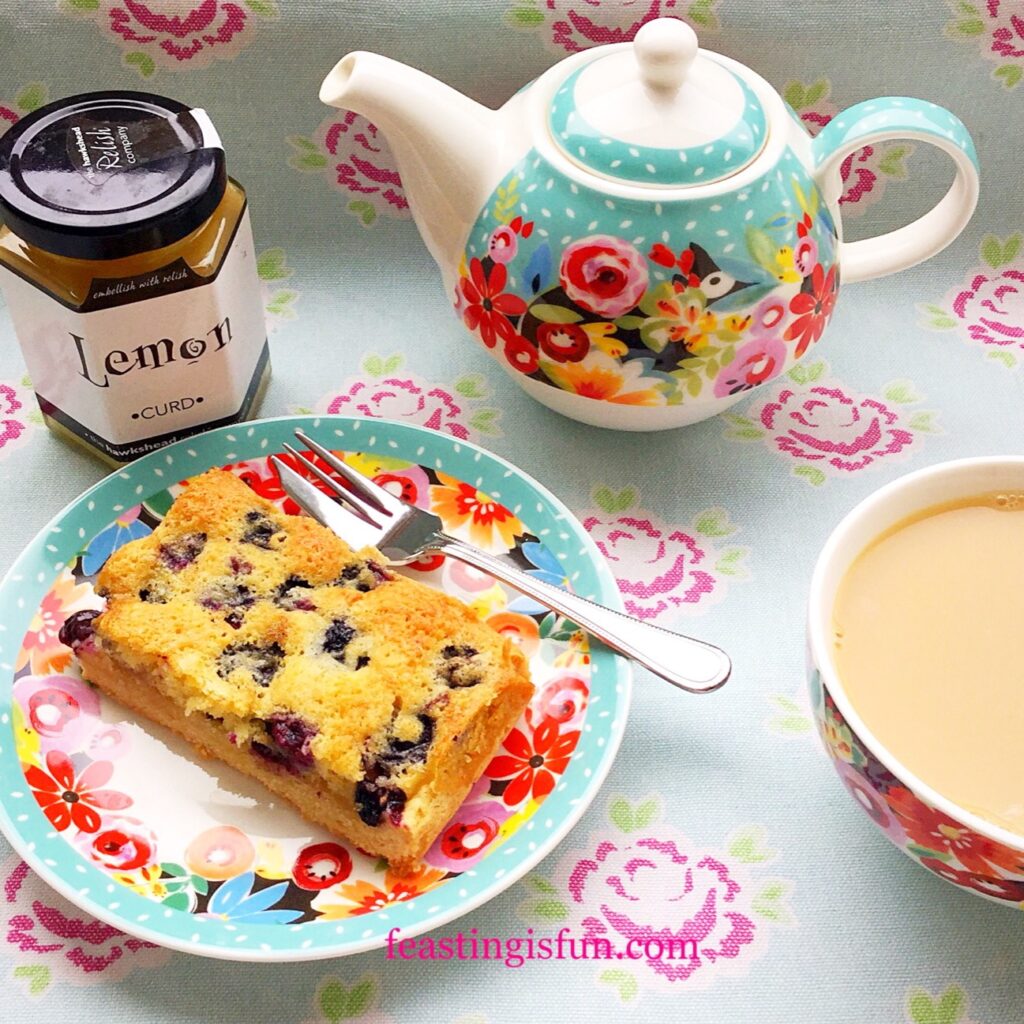
Blueberry Lemon Shortbread Cake Bars

In an ideal world, all food consumed by myself and our family would be homemade. Yet reality dictates that is not always feasible. However, certain products, made with natural ingredients make that dream, a step closer. For example, the lemon curd used in my Blueberry Lemon Shortbread Cake Bars, tastes as good, if not better than that made at home. Resulting in a delicious recipe, made one stage easier by a product already available.

Afternoon tea for one, with descriptive graphics.


Bakes That Travel Well

Creating bakes that are sturdy enough to withstand transport in a school backpack or briefcase can have its challenges. However, these shortbread base bars easily remain intact during transit. Since hubby does not always have time for a set lunch break, knowing he has something he can munch with a coffee makes me happy. And, of course, he functions better when his energy is topped up too.
There are a variety of traybakes here, on Feasting is Fun, including Lemon Drizzle Cake Bars and Macadamia Apricot Flapjacks. While some are considered more ‘healthy’ than others. With respect, anything cooked at home, using good quality ingredients and made with love, is, in my opinion far better than a mass produced product with a shelf life of months!

Biting into a bar really is a taste and texture sensation for your tongue and tastebuds. And each blueberry, when baked, turns into its own little pod of jam. Yet without the added sweetness of preserves. Finally, the cake layer, moist and light contrasts beautifully with the tang of lemon and defined shortbread base. Resulting in a complete mouthful of joy with each bite.

Recipe: Blueberry Lemon Shortbread Cake Bars makes 12

Shortbread Base

225g/8oz Unsalted Butter softened

150g/5oz Caster Sugar

1/4tsp Salt I use Maldon

275g/10z Plain White Flour

1tsp Vanilla Extract I use Nielsen-Massey

1 Large Free Range Egg Yolk

For the Sponge Topping

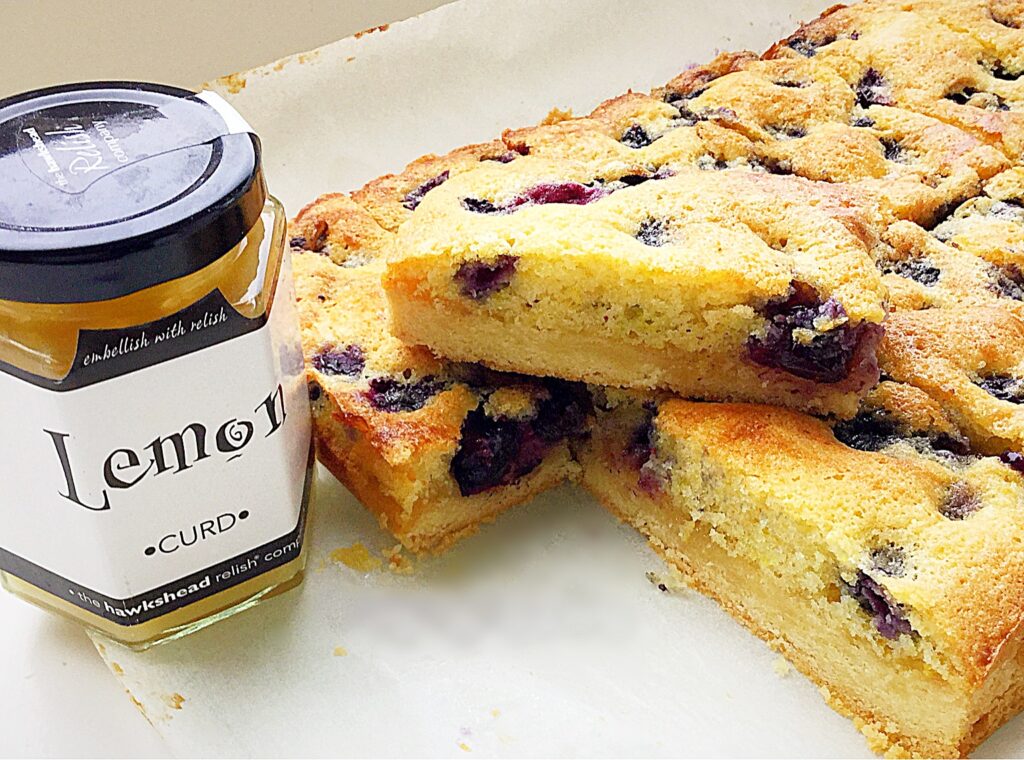
4-5 tbsp Lemon Curd I use Hawkshead Relish

100g/4oz Unsalted Butter softened

100g/4oz Caster Sugar

2 Large Free Range Eggs

100g/4oz Plain White Flour

1tsp Baking Powder

200g/7oz Fresh Blueberries

Finely Grated Zest of 1 Lemon

Method: Preheat the oven to 160C/140C fan, gas mark 3, 325F

Line a 20cm x 28cm x 5cm (8″ x 11″ x 2″) tin with baking parchment, ensuring the parchment is higher than the sides of the tin. The tin does not need to be greased first.

Making And Baking The Shortbread Base:

  • Place the softened butter, salt and sugar into a large bowl. Whisk or beat until the mixture is pale and creamy.
  • Next, add the egg yolk and vanilla extract. Continue to beat until all ingredients are completely incorporated.
  • Now sift the flour into the bowl and then, using a spoon gently mix all the ingredients until they just come together.
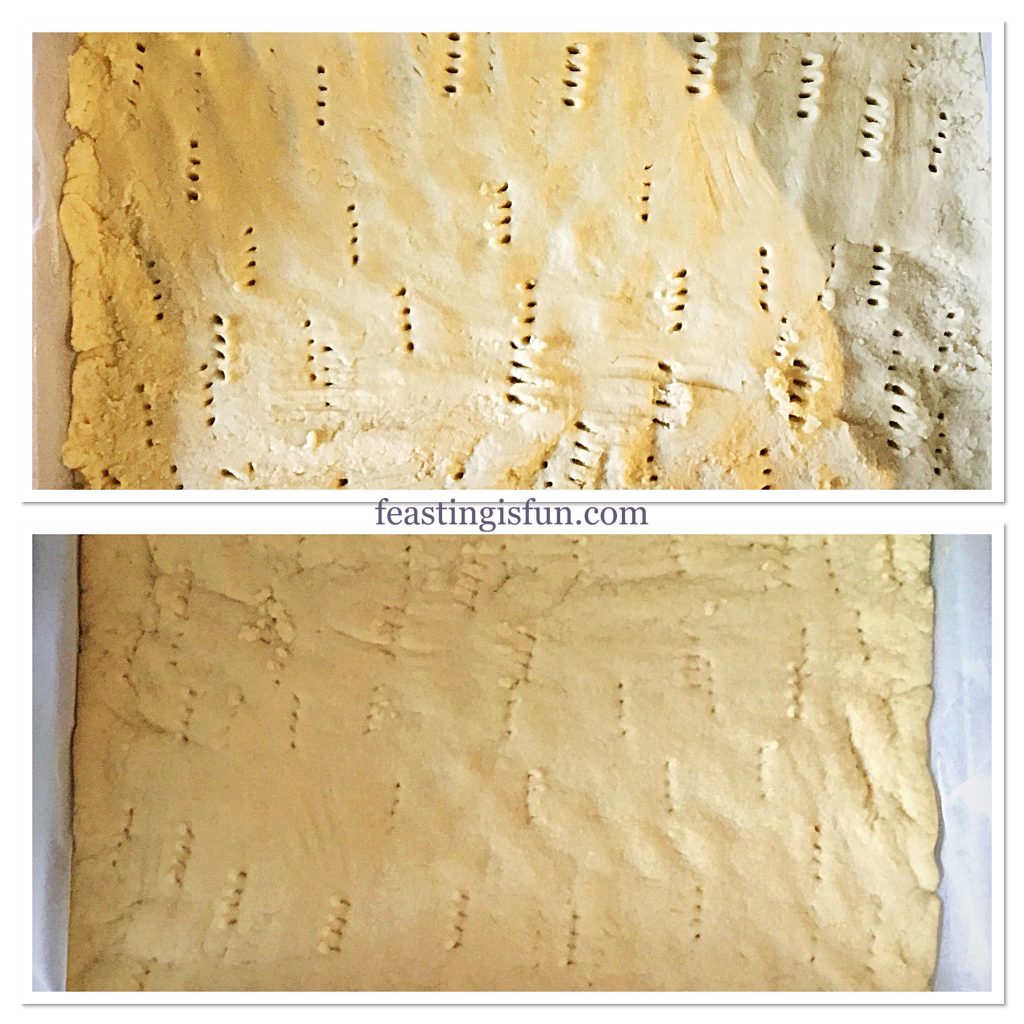
  • Spoon the shortbread mixture into the lined tin and then press into an even layer using your fingers. Use a fork to prick holes, known as docking, into the shortbread. This allows any steam to escape and create a golden base.
  • Place the tin into the centre of a preheated oven and bake for 25 minutes. Until the top is just turning golden.
  • While the shortbread is baking make the sponge topping – see below for instructions.
  • As soon as the shortbread is baked remove from the oven. It is important to note that the shortbread is not fully cooked at this point.

FF Blueberry Lemon Shortbread Cake Bars

Making the Sponge Topping

  • While the shortbread is baking the cake batter can be made.
  • Into a large bowl, as before, add the butter and sugar. Whisk/beat until pale and creamy.
  • Next add the two eggs and continue whisking until the mixture is completely combined.
  • Now sift the flour and baking powder into the same bowl. Then add the blueberries and the lemon zest.
  • Using a metal spoon, fold the ingredients together gently, to minimise breaking up the blueberries. Set to one side.

Assembling And Baking The Blueberry Lemon Shortbread Cake Bars

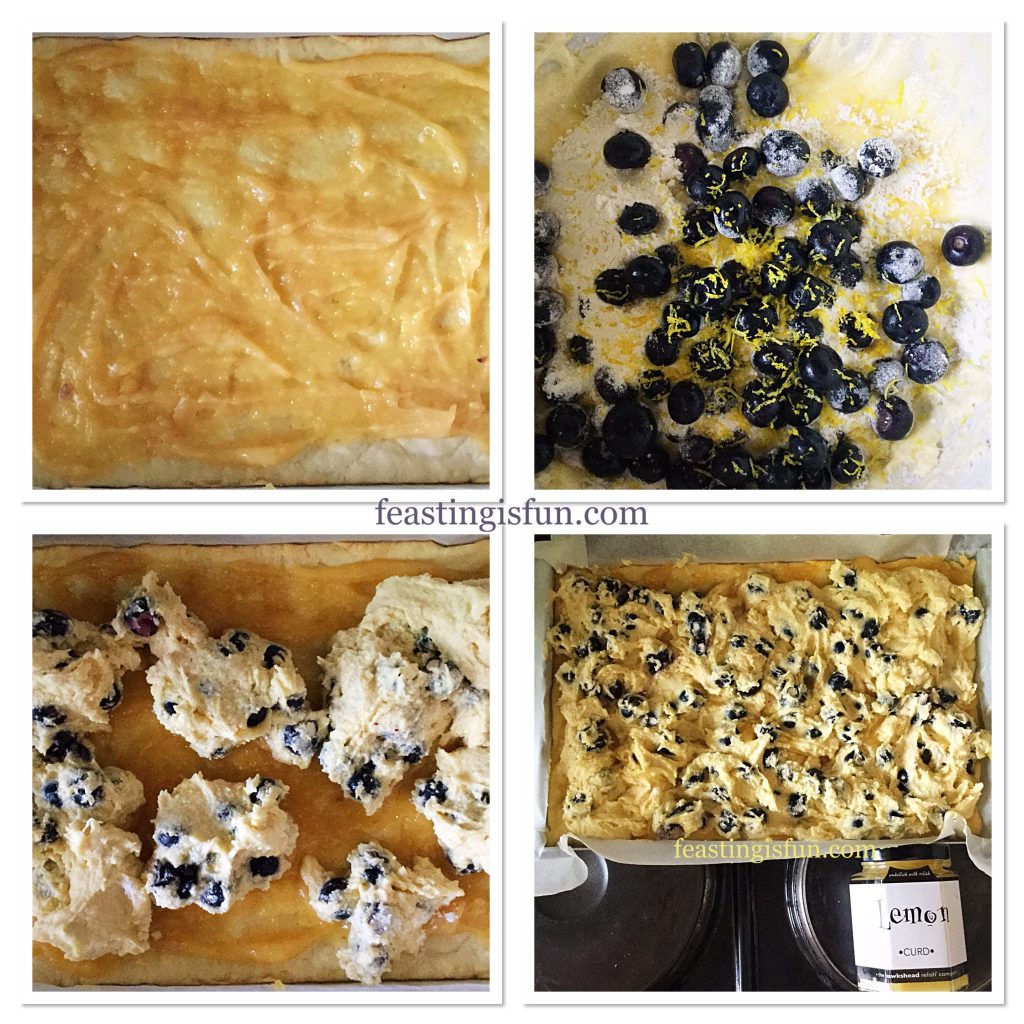
  • As soon as the shortbread base is baked allow to cool for 5 minutes. Then spoon over the lemon curd, spreading so that it covers the base, yet doesn’t quite reach the edges.
  • Spoon over the cake batter. Dolloping it fairly evenly across the base. Finally, gently spread the batter so that it covers the base. Pay particular attention to the edges. Aiming to seal in the lemon curd, by ensuring the cake batter is in contact with the shortbread around the entire edge.

FF Blueberry Lemon Shortbread Cake Bars

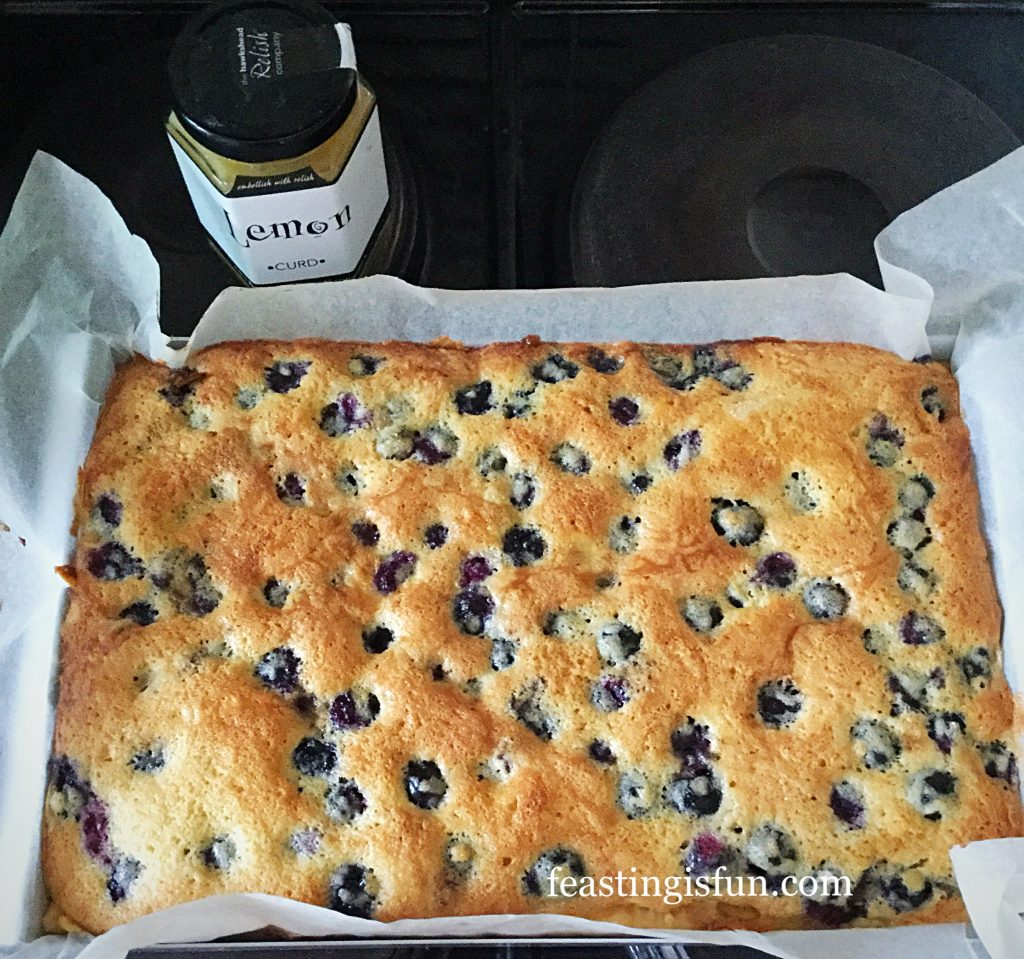
  • Place the tin back into the centre of the oven and bake for 40-50 minutes. The lower and longer baking results in an even bake with a flat surface.
  • The Blueberry Lemon Shortbread Cake Bars are baked when the top is golden in colour and is firm to touch. As soon as it is baked remove from the oven and allow to cool in the tin.
FF Blueberry Lemon Shortbread Cake Bars
The finished bake cooling

Cutting The Bars Into Individual Portions

  • When completely cooled, remove the entire traybake from the tin. A fish slice or large palette knife is useful. Ease the knife under the bake, using it to lift and support as you move the traybake to a flat surface.
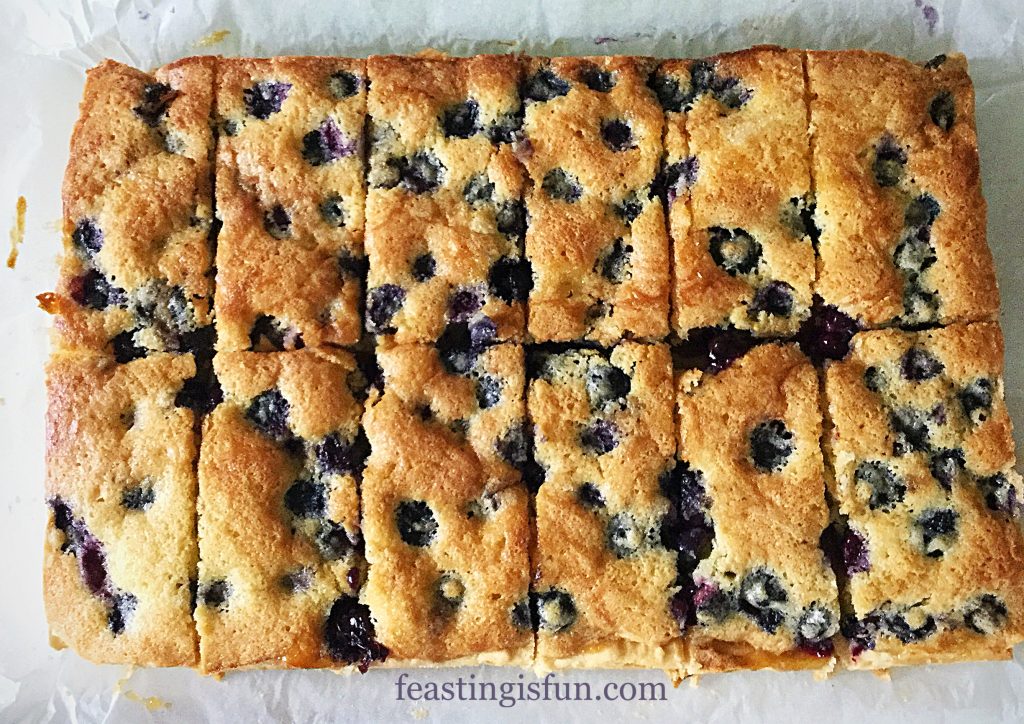
  • Using a sharp knife cut halfway through the width of the bake. Wipe the knife between each cut, this avoids spoiling the bake.
  • Following this first cut, now cut downwards, dividing the bake into four equal quarters.
  • Finally, cut each quarter into three equal sized bars.

FF Blueberry Lemon Shortbread Cake Bars

The lemon curd is perfect in these bars.

FF Close up image.
Blueberry Lemon Shortbread Cake Bars

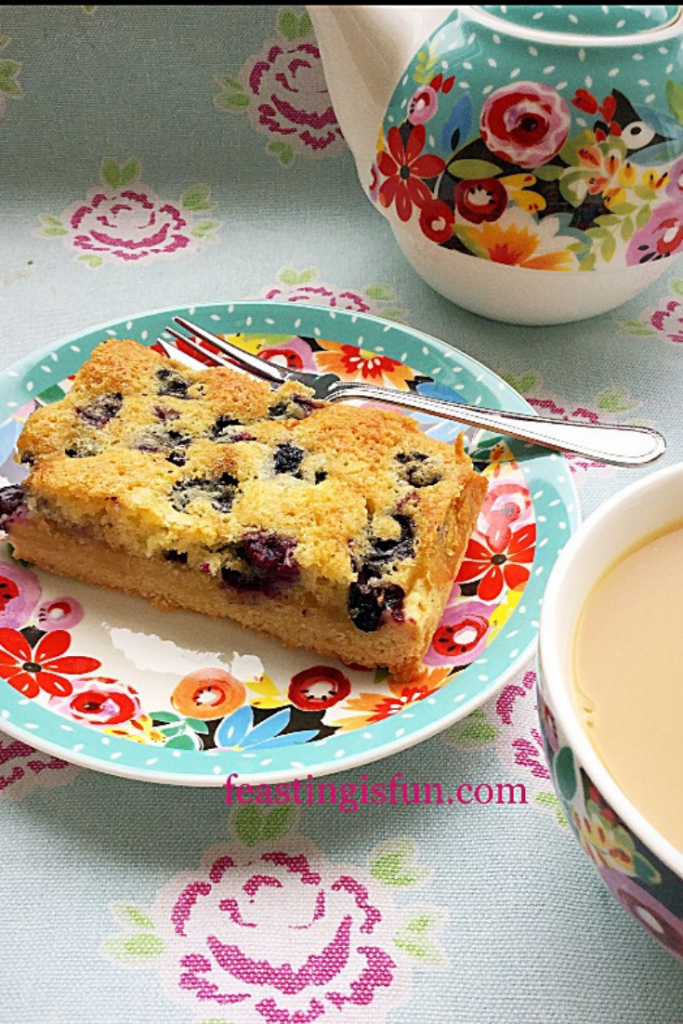
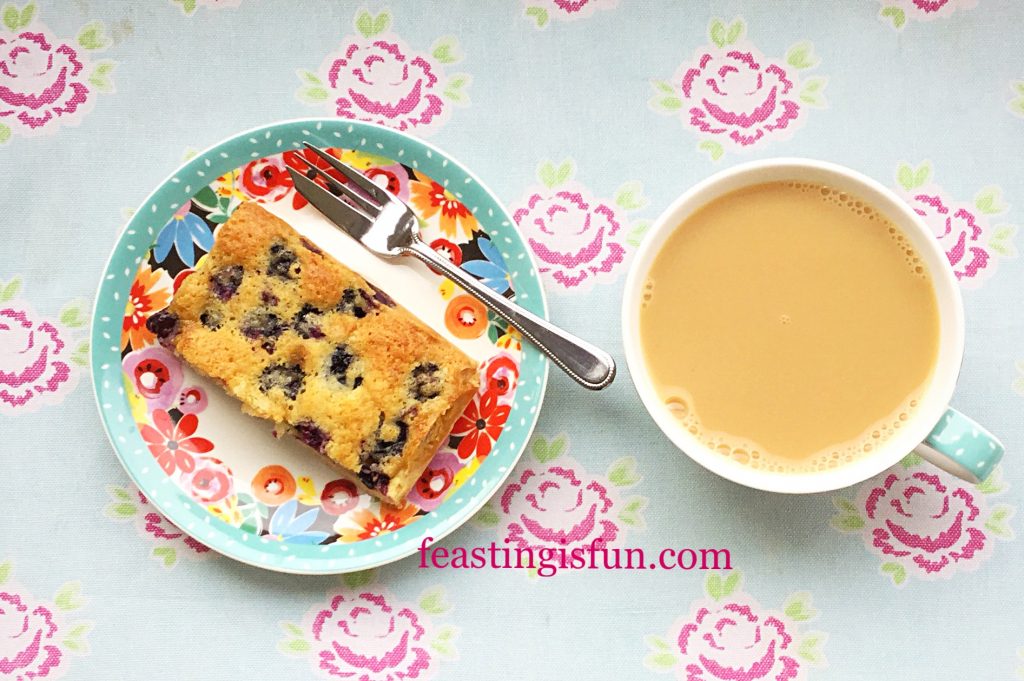
Serve the Blueberry Lemon Shortbread Cake Bars with a cup of tea, on some cheerful china, with a smile.

FF Blueberry Lemon Shortbread Cake Bars

Store in an airtight container. They will keep for 4 days. During warm weather, storing in the fridge is advised.

If you have enjoyed this recipe for Blueberry Lemon Shortbread Cake Bars you may also like these:

Cranberry Walnut Flapjacks

FF Blueberry Lemon Shortbread Cake Bars
Cranberry Walnut Flapjacks

Double Cherry Drizzle Oat Bars

FF Blueberry Lemon Shortbread Cake Bars
Double Cherry Drizzle Oat Bars

Bakewell Shortbread Bars

FF Blueberry Lemon Shortbread Cake Bars
Bakewell Shortbread Bars


Baking and cooking good, wholesome food for my family is very important to me. It truly is one of the ways that I show them my love. Knowing in the middle of a busy day that my hubby has something made with love, by me, to help him through. Well, it doesn’t get better than that when we are apart from each other. The oohs and aahs as each family member returns at the days end, to the comforting kitchen aromas, ensures they know that they are truly home.

Love, inquisitiveness and creating are the main motivational factors behind all of my cooking. What are yours?

Sammie xxx

Please see my Disclosure Policy.