Cherry Tomato Mozzarella Basil Focaccia

Today is the first of June and finally it is beginning to feel like Summer. And, of course my mind immediately turns to all the lovely fresh produce that this season yields. Since we are currently celebrating British Tomato Fortnight I am creating recipes that celebrate the diversity of this tasty little fruit. So with caprese salad as my inspiration let me introduce you to my Cherry Tomato Mozzarella Basil Focaccia.

Pinterest sized image of Cherry Tomato Mozzarella Basil Focaccia Bread with descriptive graphics.

Focaccia is a bread with Italian origins. At its simplest it is a flat, white, airy bread, drizzled with olive oil and having a dimpled appearance. Serve it with salad, soup, pasta or as part of antipasti, the key is in the lightness of its crumb. In comparison, this cherry tomato and mozzarella topped bread with layers of basil hidden within the bread, is almost a meal in itself.

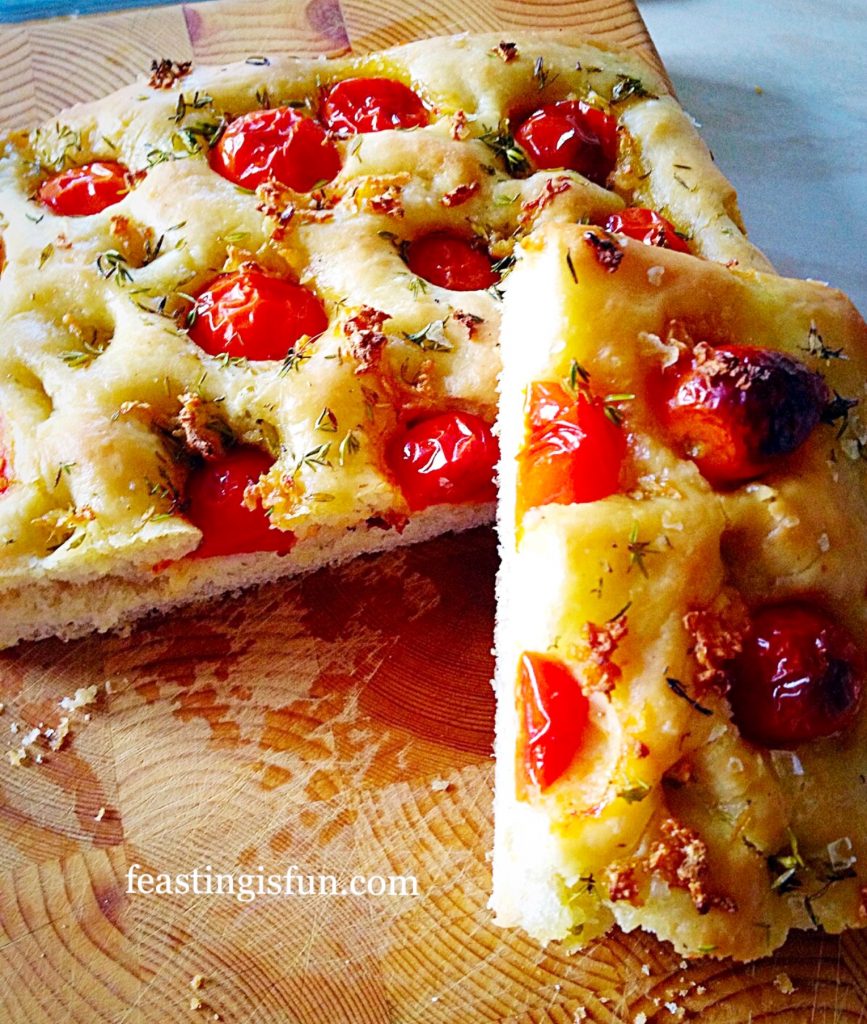
Two images of Cherry Tomato Mozzarella Basil Focaccia showing the light, airy crumb of the bread and the gooey, stringy cheese.
Cherry Tomato Mozzarella Basil Focaccia a feast that really is fun to make and eat!

As the bread bakes the fresh basil and garlic permeate throughout creating an incredible savoury flavour. Also, the fresh, vine ripened tomato flavour intensifies in the heat of the oven. Resulting in a joyfully flavoursome bread that is perfect for sharing, Italian style, around a table full of friends, family and food.

Baked Cherry Tomato Mozzarella Basil Focaccia fresh out of the oven
Cherry Tomato Mozzarella Basil Focaccia

If you haven’t made bread before, please do not worry. Because, as I am writing a recipe I always imagine the person reading it is standing next to me. Since I am a natural chatter-box, I describe each part of the process in easy to understand language and include photos for every step of the recipe. So you can be confident as you start your baking process.

Recipe: Cherry Tomato Mozzarella Basil Focaccia

For The Focaccia Dough

250ml Tap Water – at room temperature

7g Dried Yeast – I use Allinson 

1tbsp Runny Honey

350g/12oz Strong White Bread Flour – I use Wright’s 

5g Salt – I use Maldon sea salt

2 Garlic Cloves – finely minced or crushed

2tbsp Olive Oil

Filling And Topping The Focaccia 

2 Generous Handfuls Of Fresh Basil Leaves (approximately 25-30) – one handful for folding into the dough and the second for topping the focaccia

12 Mini Plum Tomatoes – cut in half. Alternatively use 24 small round cherry tomatoes

150g/5oz Approximately 20 Mini Mozzarella Balls – drained

1-2 Garlic Cloves

2tbsp Olive Oil

Pinch of sea salt and freshly ground pepper

Method:

Making The Focaccia Dough

I use a stand mixer with the dough hook attachment for the first part of mixing and proving the dough. Alternatively you can make the dough by hand. Large bowl in the instructions refers to the stand mixer bowl or the bowl used for hand mixing. Also, it is important to weigh all of the ingredients accurately to ensure a successful bake.

  • First of all add the tepid water to a large bowl and add the olive oil and then the honey. Adding the olive oil first ensures that the honey releases easily from the oiled tablespoon.
  • Next add the yeast.
  • Add the flour so that it covers all of the liquid ingredients.
  • Finally add the salt and minced garlic.
  • Fit the bowl to the stand mixer and lower the dough hook.
  • Mix on a low speed until all the ingredients are combined. Increase to a medium speed for approximately 10 minutes until the dough passes the windowpane test. To carry out the test stop mixing/kneading. Remove a small piece of dough and stretch it between your fingers. To pass the test the dough should stretch without tearing until light is visible through the dough. If the dough tears continue mixing/kneading for a further 2 minutes and test again.
  • As soon as the dough passes the windowpane test stop mixing/kneading and scrape any dough from the dough hook into the bowl.
  • Form the dough into a ball, place back into the bowl and cover with a clean tea towel.
  • Place the bowl in a draught free place and leave until the dough is doubled in size.

Knocking Back The Dough And Adding The Fresh Basil Leaves

  • As soon as the dough is doubled in size, turn it out of the bowl onto a lightly floured worktop. Most importantly, ensure the top of the risen dough is in contact with the worktop and the sticky underneath is now on top.
  • Pull out part of the dough with your hand and then tuck it into the centre of the dough.
  • Turn the dough clockwise, approximately 10 minutes if it were a clock and repeat the pulling and tucking technique. Repeat this process until the dough is smooth and not sticky to touch. See bottom right photo.
Four images showing each stage of shaping bread.
Building structure within the focaccia dough.
  • Turn the dough over and press out using your fingertips until it is a roughly square shaped approximately 10”/25cm.
  • Lay one handful of fresh basil leaves on top of the dough.
  • Fold the top third of the dough down and then fold the bottom third of the dough up and over.
  • Turn the dough by a quarter and repeat the folding step.
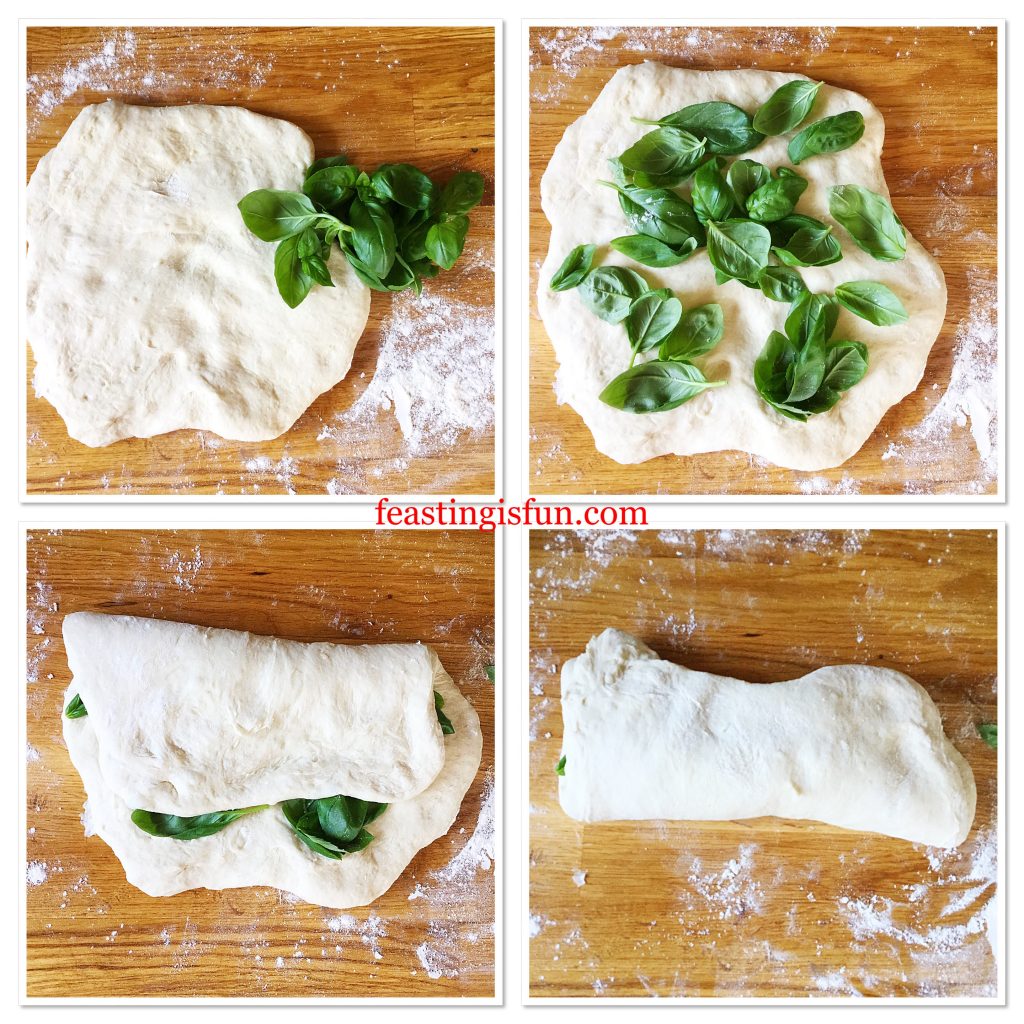
Detailed images showing fresh basil being folded into bread dough
Folding fresh basil into the bread dough.

Pressing Out The Focaccia Dough And Adding The Toppings

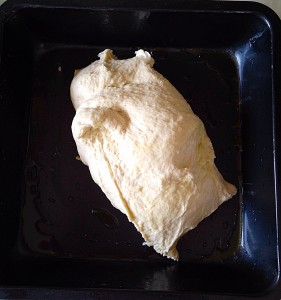
  • Turn the dough over and place onto a lightly oiled baking tray.
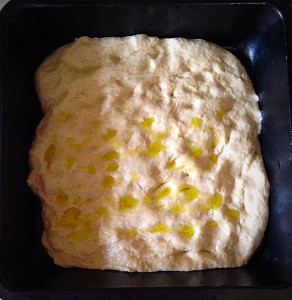
  • Drizzle 1 tablespoon of olive oil over the dough and use your fingers to press out the focaccia dough, taking care to keep the basil leaves within the dough.
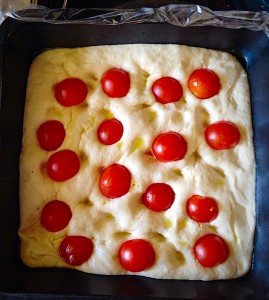
  • Press the halved mini plum tomatoes into the dough.
  • Likewise add the mini mozzarella balls in the same manner.
  • Scatter over the minced garlic and last handful of basil leaves.
  • Finally drizzle lightly with olive oil and add a pinch of sea salt and black pepper.
  • Leave in a draught free place to rise and preheat the oven to 200C/180C fan, gas mark 6, 400F.
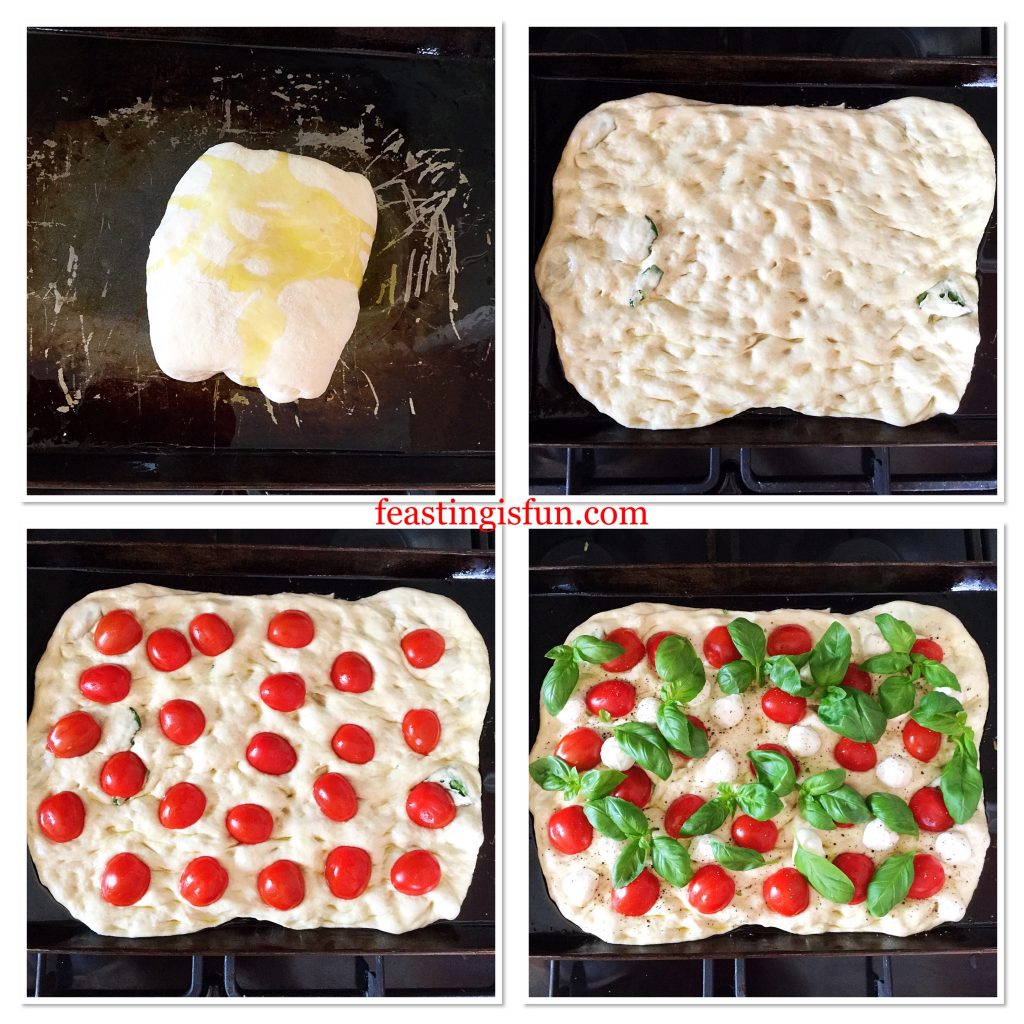
Four images showing the focaccia and adding the toppings
Shaping the focaccia bread and adding the toppings.

Baking The Cherry Tomato Mozzarella Focaccia

  • As soon as the focaccia has plumped up around the tomatoes and basil, while doubling in size, it is ready to be baked.
  • Place the focaccia into the centre of the oven and bake for 25-35 minutes.
  • The bread is baked when it is golden on top and underneath, use a palette knife to lift a corner.
  • And once baked remove from the oven.
Cherry Tomato Mozzarella Basil freshly baked.
  • Leave the focaccia to cool for 5-10 minutes before serving.
  • Alternatively, bake earlier in the day and reheat in a moderate oven for 10 minutes prior to serving.

To serve this focaccia I ran a pizza wheel across it at various angles to create interesting shapes and portions.
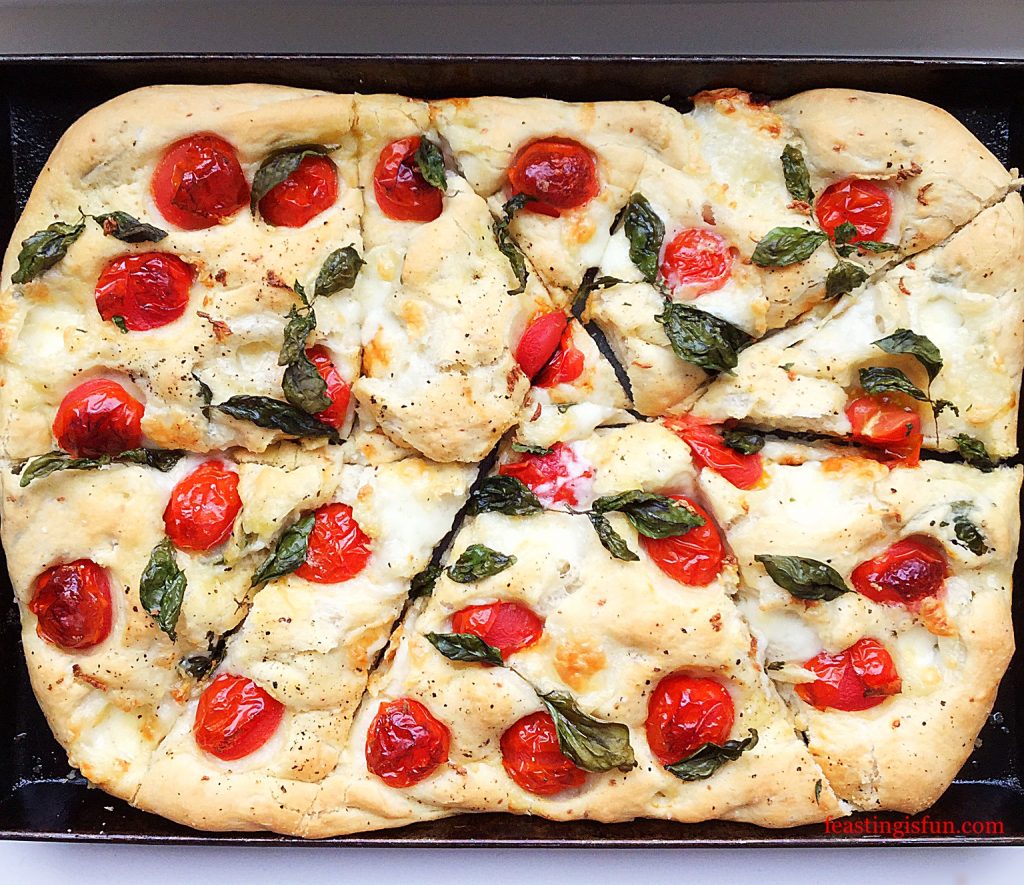
A pizza wheel is used to divide the Italian bread into portions for serving.
Cherry Tomato Mozzarella Basil Focaccia divided into portions.

This bread can be made a day in advance, including the toppings. Cover with cling film and refrigerate. To bake, remove from the fridge, allow the dough to come up to room temperature and puff up and then bake as per the recipe.

Any leftover focaccia can be placed in an airtight container and refrigerated for one day. Also, freezing the focaccia is not recommended due to the fresh tomatoes.

If you have enjoyed this recipe for Cherry Tomato Mozzarella Basil Focaccia you may also like these:

Baked Cheese Olive Ciabatta Bread

Baked cheese olive ciabatta bread being pulled apart to show the gooey cheese.
Baked Cheese Olive Ciabatta Bread

Tomato Thyme Garlic Focaccia Bread
Tomato thyme garlic focaccia bread cut in half.
Tomato Thyme Garlic Focaccia Bread

Garlic Cheese Bombs

Garlic cheese bombs mini bread rolls filled with mozzarella image shows one being pulled apart showing the gooey cheese.
Garlic Cheese Bombs

Because, when I bake, I use the very best ingredients I can afford, this always has an impact on the final flavour. And including locally grown, British produce give me a sense of pride at how incredible our farmers are here in the U.K. Supporting British farmers and also British businesses, such as Room Forty who provide an Afternoon Tea service, is something that I am passionate about. Our country has a wealth of talented people who produce an amazing array of produce and products. While they may be a little more expensive than mass produced imports, what they have in abundance is love and care. Resulting in far higher quality produce grown and made by people who are passionate about what they do.

Do you consider where your food comes from when grocery shopping?

Whatever you are making, baking and creating in your kitchens, have fun preparing and sharing your feast.

Sammie xx

The British Tomato Association gifted me the tomatoes produced by Eric Wall to sample and taste during British Tomato Fortnight #BTF19. I have not been paid or received any financial gain for writing this blog post. All opinions, views and content are my own. No part of this post may be reproduced or duplicated without the written permission of the owner. Please see my Disclosure Policy.


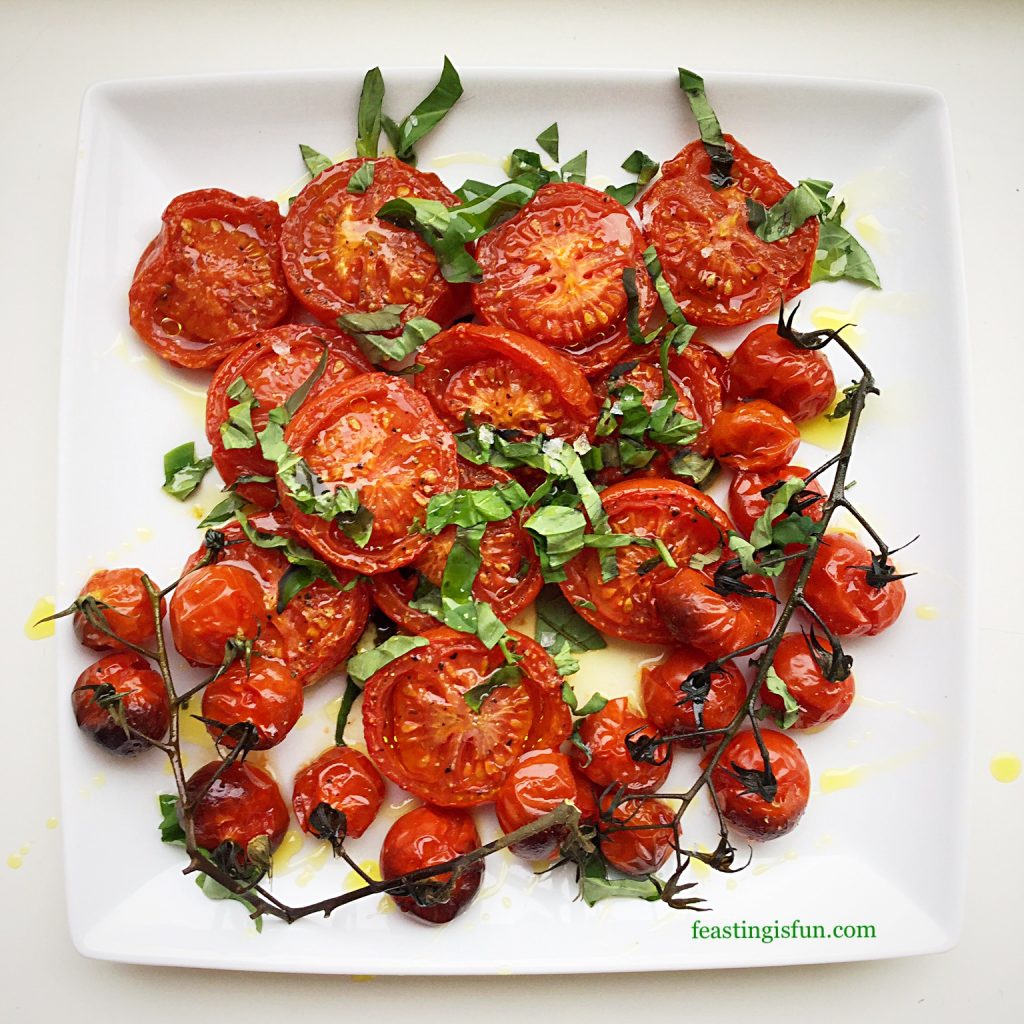
Fresh Basil Topped Slow Roasted Tomatoes

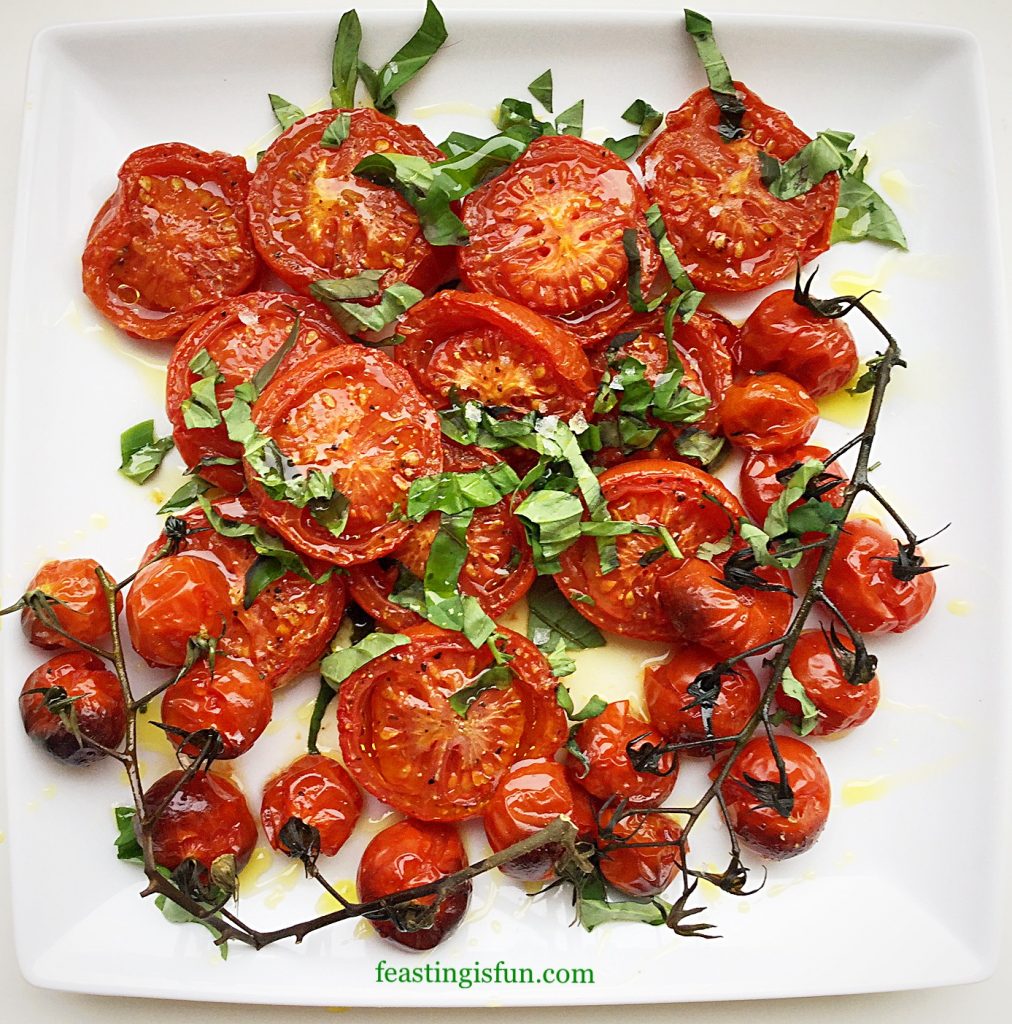
I love tomatoes. Big beefsteak tomatoes, tiny cherry tomatoes and regular slicing tomatoes, I absolutely could not be without them in my kitchen. As well as popping sweet, vine ripened cherry tomatoes in my mouth while pottering around my kitchen, tomatoes are one of the most versatile ingredients. Here, in these Fresh Basil Topped Slow Roasted Tomatoes their flavour is intensified by roasting slowly and enhanced with the addition of basil. Simple yet mouth wateringly good!

FF Fresh Basil Topped Slow Roasted Tomatoes
Fresh Basil Topped Slow Roasted Tomatoes

Beautiful British Tomatoes

Since British tomatoes are just coming into season, I want to use them as much as possible in my recipes. While I have successfully grown tomatoes of our own, blight has been a problem over the last few years, so I have stopped. Instead relying on our local farm shop and Waitrose, who stock British tomatoes for a good part of the year. Also I should add a quick thank you to all of the farmers who grow tomatoes and mange to extend the season using poly tunnels.

FF Fresh Basil Topped Slow Roasted Tomatoes
Fresh Basil Topped Slow Roasted Tomatoes

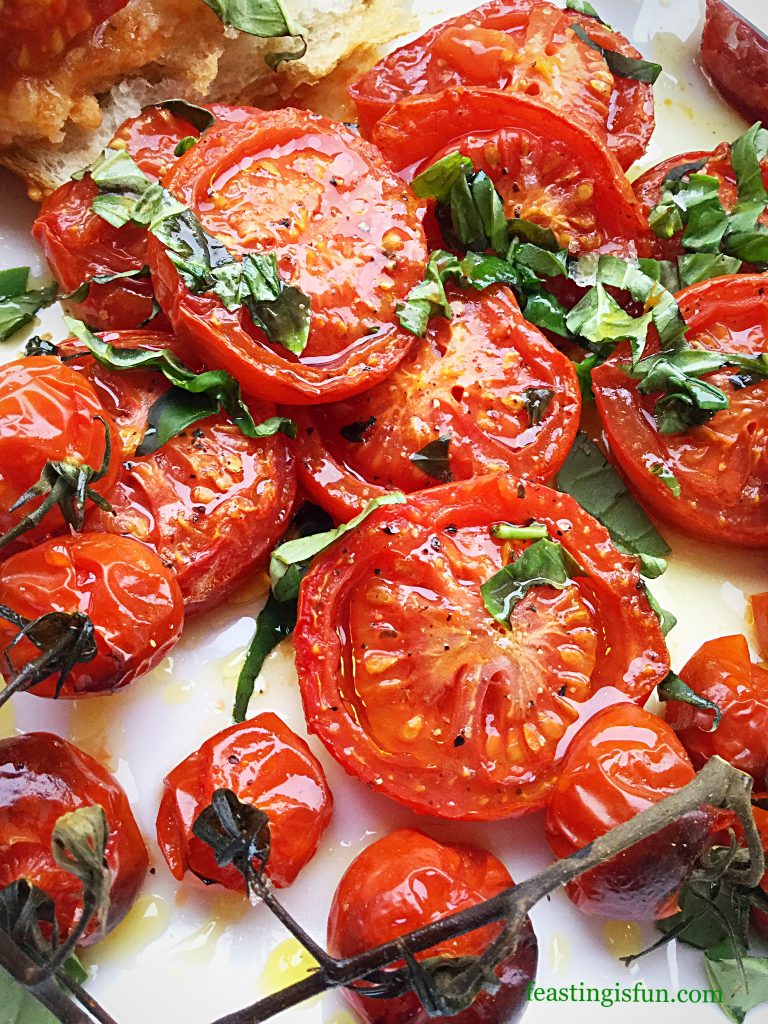
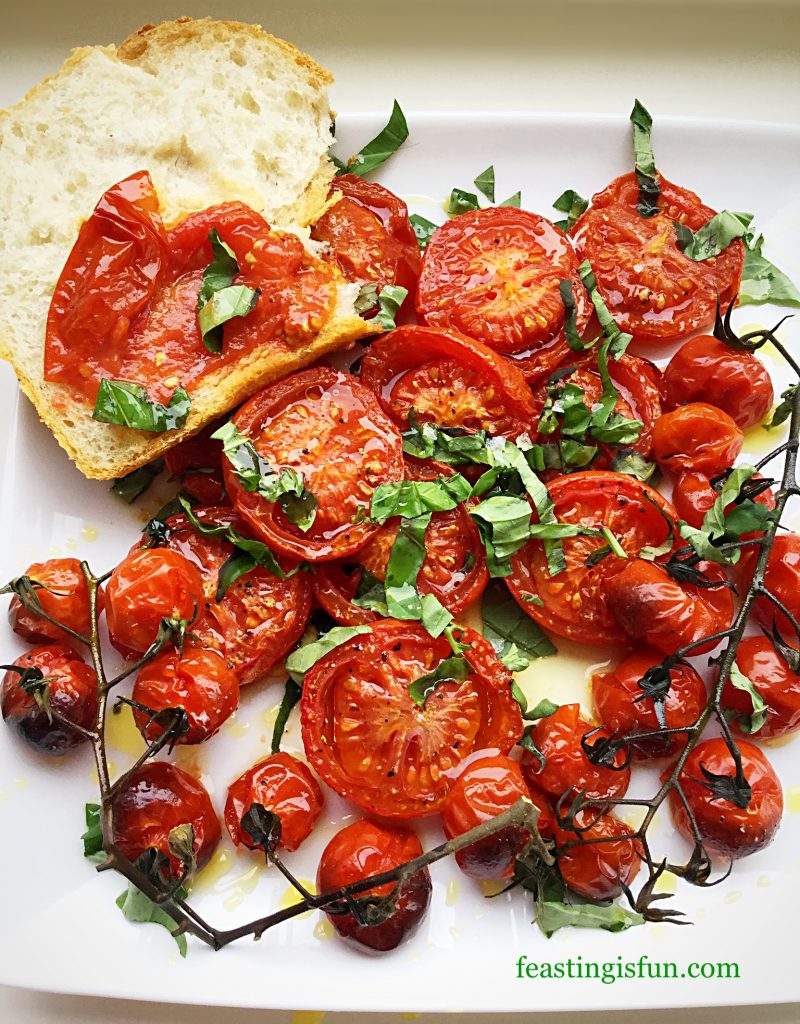
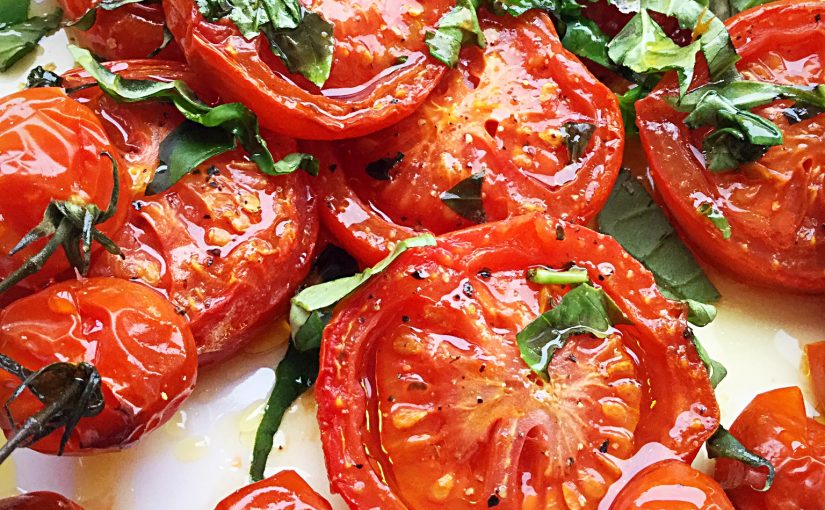
While tomatoes roast in the oven their flavour intensifies. As the heat starts to dehydrate them, so the flavours become less diluted. Given nothing more than a sprinkle of salt and pepper and a drizzle of oil, the resulting flavour is both sweet and savoury. As well as being a fantastic side dish to fish and chicken, I also enjoy  spreading warm tomatoes on to fresh bread and eating just as it is.

FF Fresh Basil Topped Slow Roasted Tomatoes
Fresh Basil Topped Slow Roasted Tomatoes

Using Local Products And Produce

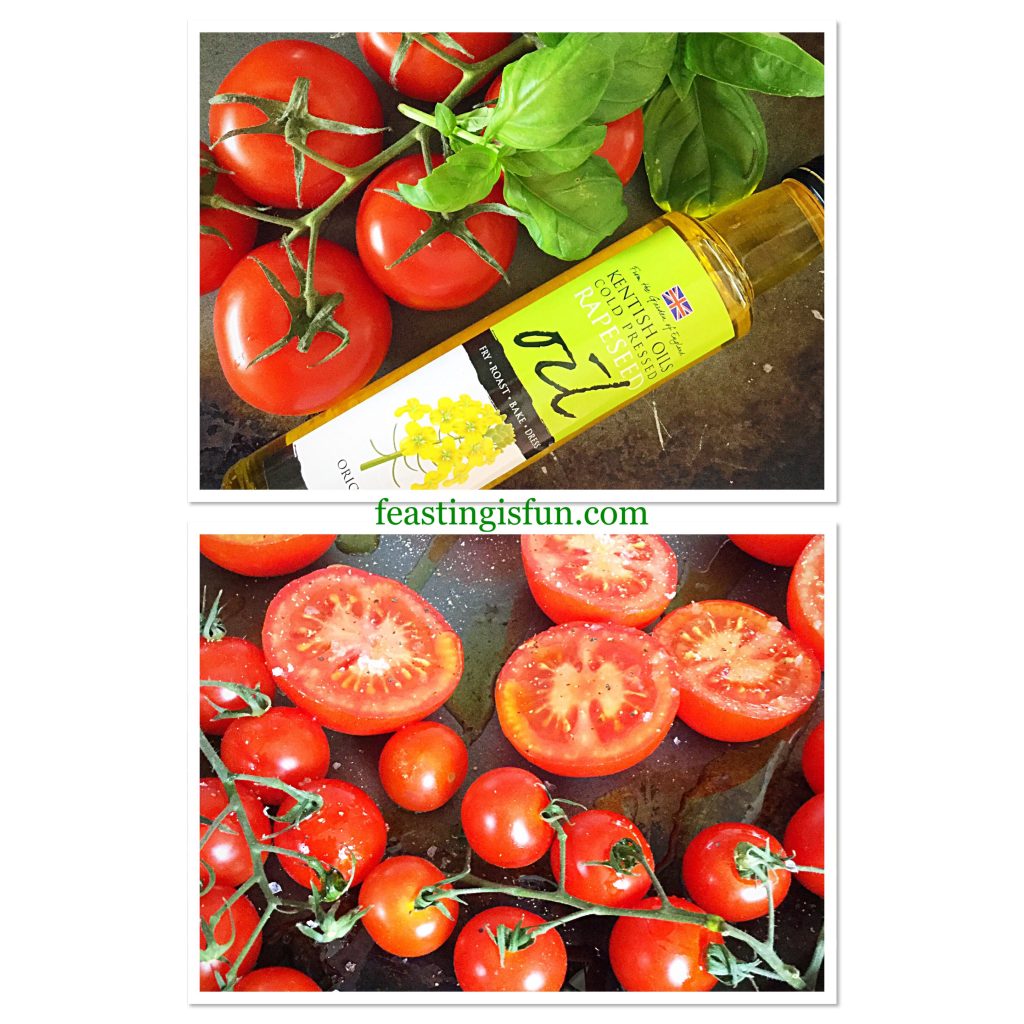
One thing I should mention is that I have used cold pressed Rapeseed oil. Made locally by Kentish Oils, it is golden yellow in colour and has a soft, slightly nutty flavour. It really compliments the tomato and basil flavours, rather than competing with them. Perfect for roasting and dressing the tomatoes.

Recipe: Fresh Basil Topped Slow Roasted Tomatoes

Amounts given per 450g/1lb Fresh Tomatoes

1 tbsp Cold Pressed Rapeseed/Canola Oil plus extra for drizzling after roasting – I use Kentish Oils 

1/2tsp Sea Salt Flakes – I use Maldon

1/4tsp Freshly Ground Black Pepper

Small Handful Fresh Basil Leaves – approximately 10 leaves

Prepping And Roasting Tomatoes

Preheat oven to 180C/160C fan, 350F, gas mark 4

You will need a large baking tray for this recipe.

  • First of all wash and dry the tomatoes.
  • Cut large tomatoes in half and leaver smaller ones on the vine.
  • Place the tomatoes on to a baking tray and drizzle over the oil.
  • Sprinkle over with sea salt and freshly ground black pepper.
  • Place in the centre of the oven and roast for 45 minutes.
FF Fresh Basil Topped Slow Roasted Tomatoes
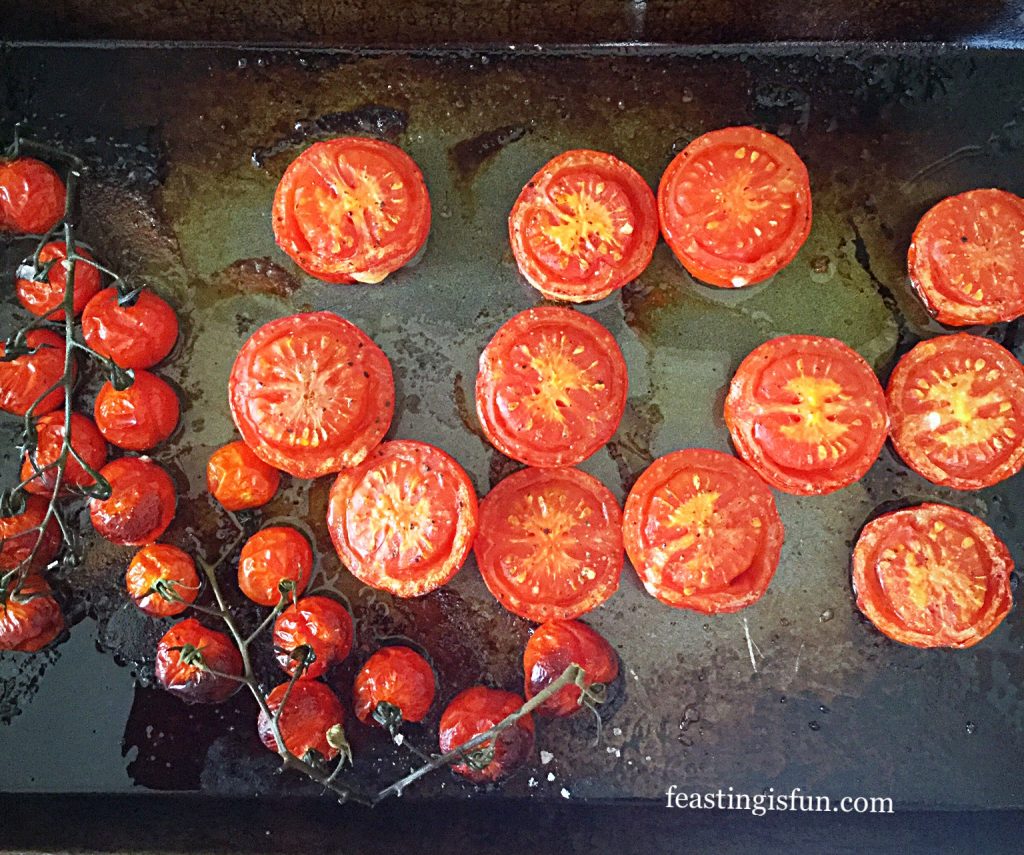
Preparing the tomatoes for roasting.
  • As soon as the tomatoes are cooked remove from the oven.
FF Fresh Basil Topped Slow Roasted Tomatoes
Slow Roasted Tomatoes ready to be topped with fresh Basil.
  • Using a fish slice or slotted spoon carefully transfer the roasted tomatoes to a serving plate.
  • Roughly chop the basil leaves and scatter over the tomatoes.
  • Finally drizzle a little oil over the tomatoes and leave until warm, not hot, before serving.
FF Fresh Basil Topped Slow Roasted Tomatoes
Fresh Basil Topped Slow Roasted Tomatoes

Because hot tomatoes will burn your mouth, it is best to leave these to cool until just warm before eating. Doing so ensures that you get the maximum flavour that these beauties have to offer. Also these tomatoes taste delicious when cold.

Any leftover tomatoes can be kept in an airtight container and refrigerated for up to 2 days.

If you have enjoyed this recipe for Fresh Basil Topped Slow Roasted Tomatoes you may also like these:

Tomato Thyme Garlic Focaccia Bread 

FF Fresh Basil Topped Slow Roasted Tomatoes
Tomato Thyme Garlic Focaccia Bread

Creamy Tomato Spinach Chicken Pasta

FF Fresh Basil Topped Slow Roasted Tomatoes
Creamy Tomato Spinach Chicken Pasta

Cheddar Sun Dried Tomato Scones

FF Fresh Basil Topped Slow Roasted Tomatoes
Cheddar Sun Dried Tomato Scones

While I happily use tinned tomatoes in my pasta dishes, such as this Cheesy Vegetable Pasta Bake, I plan to actively create more recipes with fresh tomatoes this Summer. Since we tend to eat lighter meals during the warmer months I am looking forward to the challenge. Especially as I am aware that this blog most definitely needs more savoury recipes!

So, whateverr you are making, baking and creating in your kitchens, have fun preparing and sharing your feast.

Sammie xx

Kentish Oils sent me a small bottle of cold pressed Rapeseed oil to try. All opinions and content are my own, for which I have not received any payment.

No part of this post may be reproduced or duplicated without the written permission of the owner. Please see my Disclosure Policy.


Roasted Summer Vegetable Orzo Salad

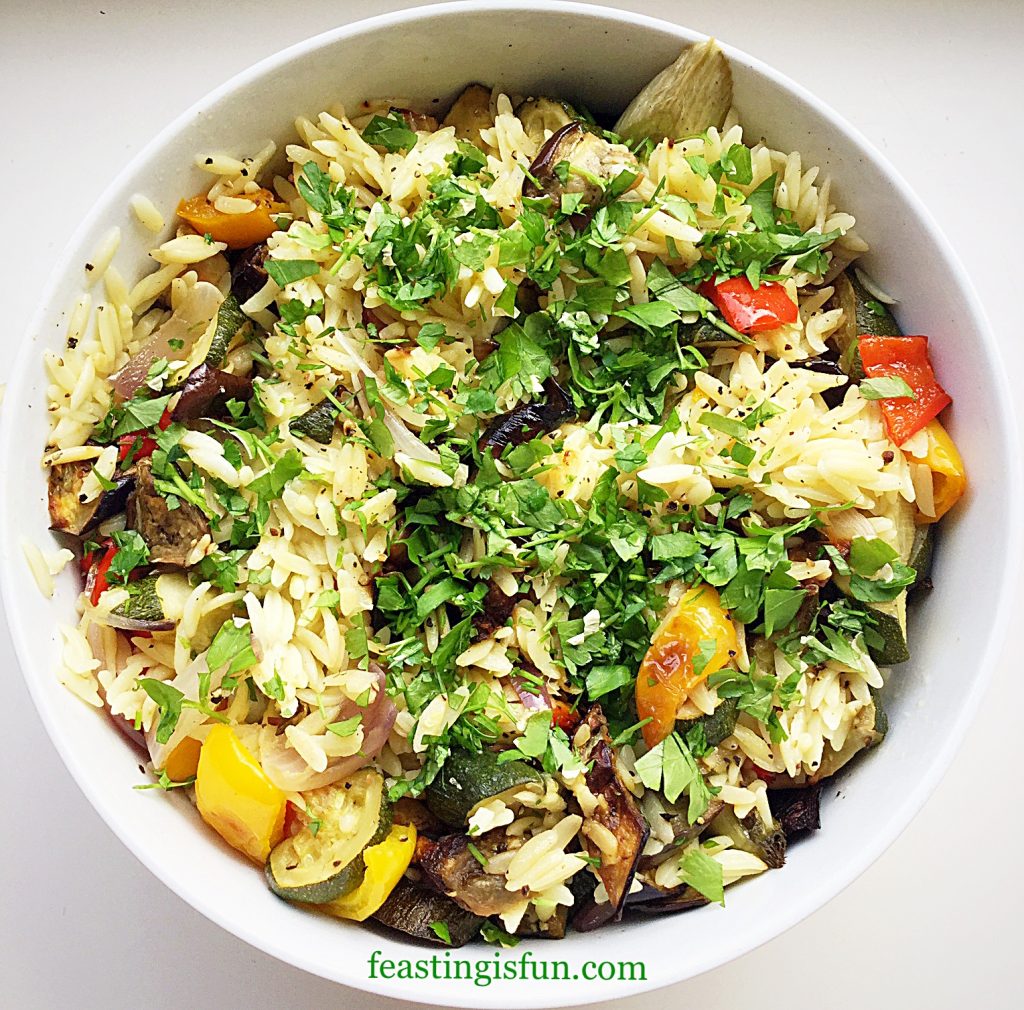
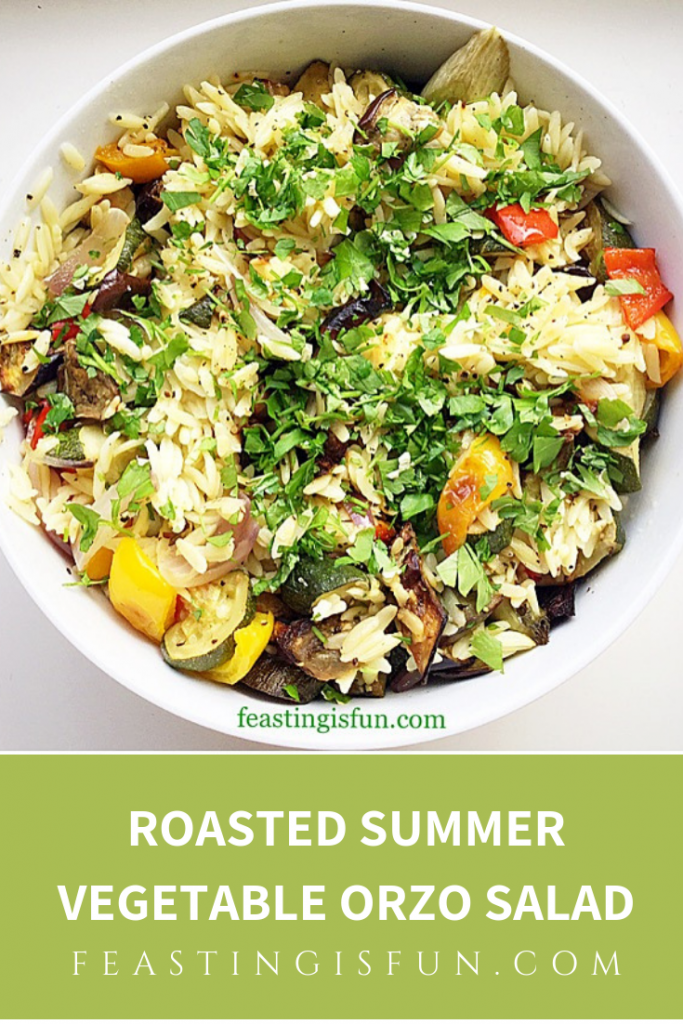
So, as we continue to enjoy our British Summer, I am celebrating the abundance of seasonal vegetables available at this time of the year. And as birds chirp early in the morning of long, sunny, warm summer days, the variety of vegetables, bought or home grown, really allows me, as a home cook to get creative in the kitchen.  Resulting in my Roasted Summer Vegetable Orzo Salad, a tasty celebration of easy summer cooking, making the most of seasonal vegetables.

FF Roasted Summer Vegetable Orzo Salad
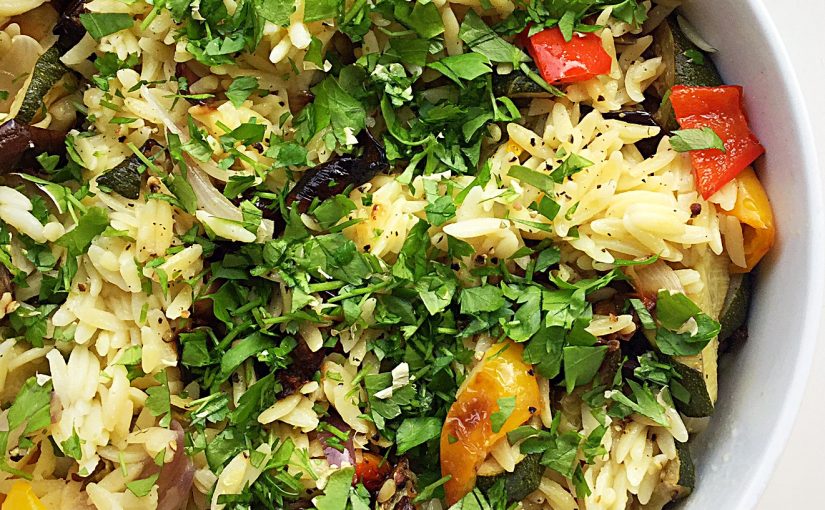
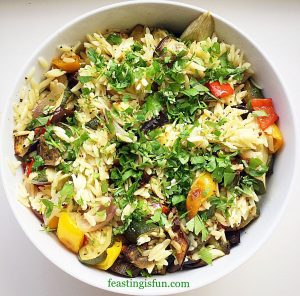
Roasted Summer Vegetable Orzo Salad.

A Make Ahead Marvel

While packed full of roasted veggies in a lemon vinaigrette, this dish can either be served on its own, or as a colourful side dish. Since it can be served warm, it is a perfect barbecue or buffet dish. Especially, when made in advance and left to sit for a few hours, the flavours develop, enhancing the overall deliciousness. So easy to prepare and make ahead!

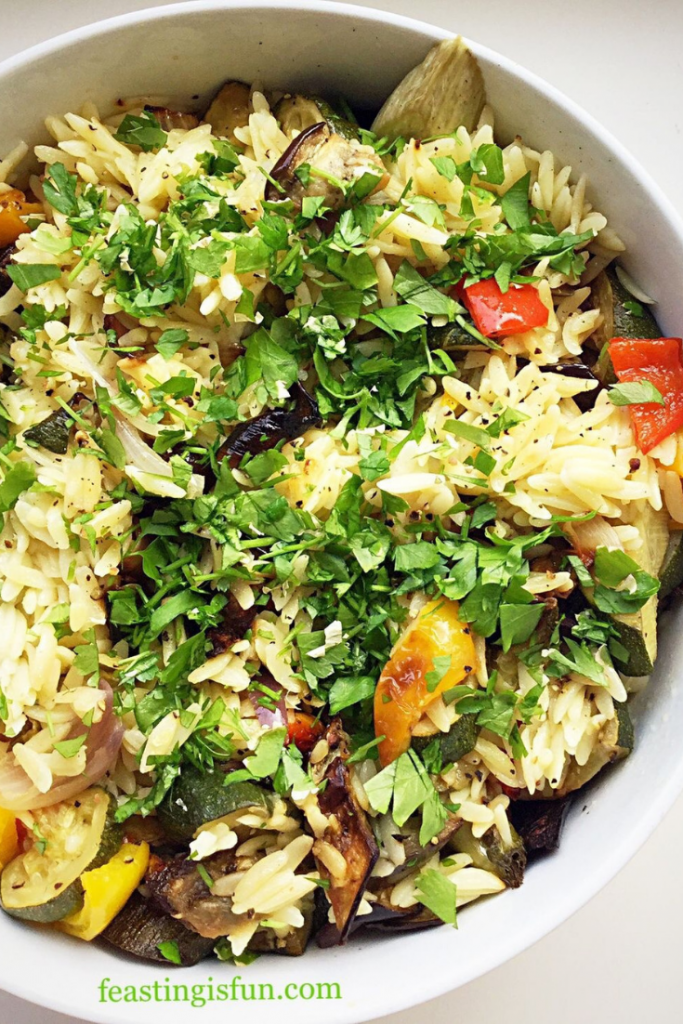
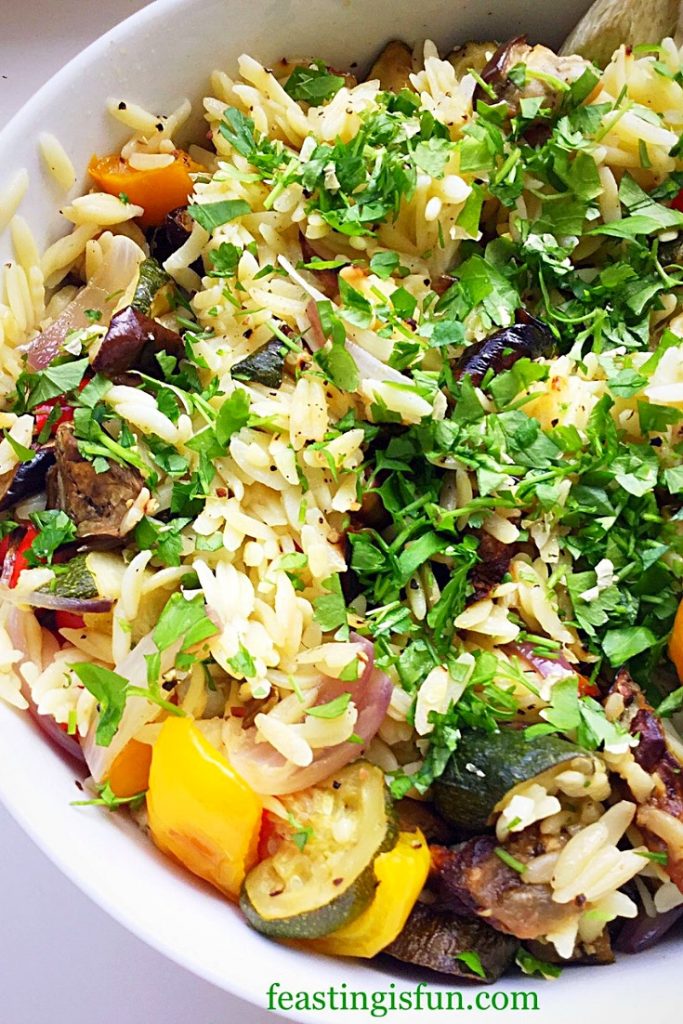
A bowl containing roasted vegetable pasta salad topped with chopped parsley.
Roasted Summer Vegetable Orzo Salad

Although I enjoy a crunchy pasta salad, there is something very comforting in the softened, roasted vegetables here. While roasting they become slightly sweet, with a mere hint of caramelisation. And their flavour is enhanced by the fresh lemon juice in the vinaigrette. Also orzo provides the perfect bite, complimenting the vegetables. Resulting in a dish that lets the vegetable flavours shine, without being overly bulked out with pasta.

Recipe: Roasted Summer Vegetable Orzo Salad serves 6

1 Aubergine

2 Courgettes

2 Bell Peppers – deseeded

1 Red Onion – skin removed

1 Large Fennel Bulb – or 2 small

400g Dried Orzo (ensure you use vegan pasta if making for Vegans) – I use Waitrose  own brand

20ml Olive Oil

1 Large Lemon – 20ml of juice

40ml Extra Virgin Olive Oil – I use Filippo Berio

1/2tsp Sea Salt plus 1tbsp for cooking the pasta –  I use Maldon

1/2tsp Freshly Ground Black Pepper

Handful of Fresh Parsley – flat or curly

Note: individual vegetables may be substituted according to preference.

Method: Preheat oven to 200C/180C fan, gas mark 6, 400F

Preparing And Roasting The Vegetables

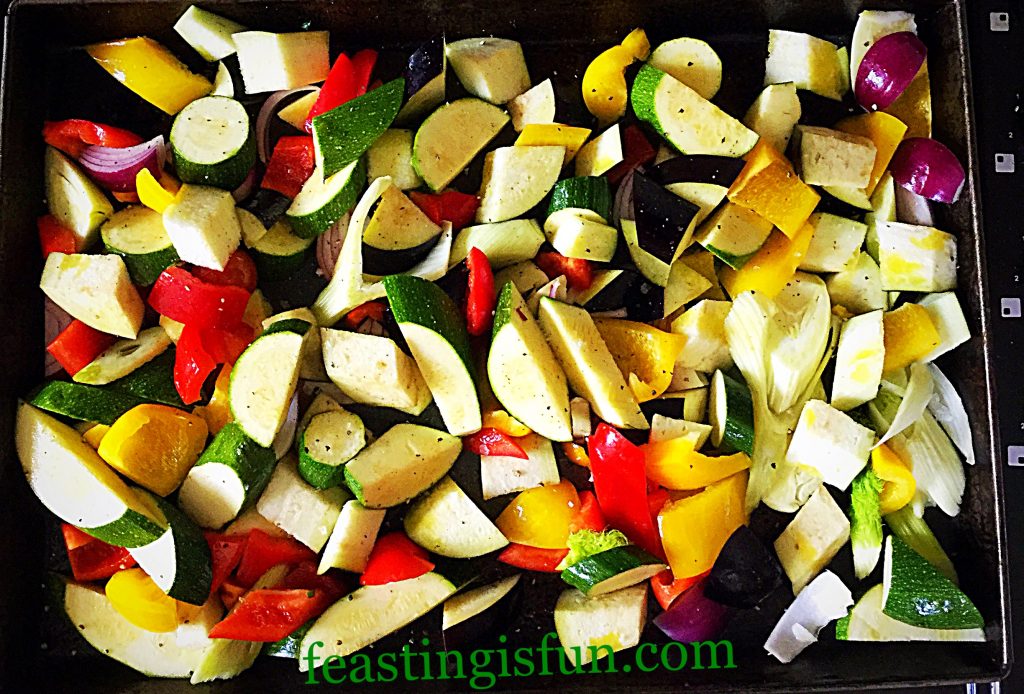
  • First of all, wash and thoroughly dry the vegetables. Follow by chopping into equal 1″/2.5cm pieces.
  • Transfer to a large baking tray.
  • Drizzle over a generous tablespoon of olive oil and one quarter of a teaspoon of sea salt and freshly ground black pepper.
  • Using clean hands, toss the vegetables in the seasoned oil, taking care to cover each piece.
  • Spread the vegetables out on the tray. During the cooking process they will reduce slightly in size.
FF Roasted Summer Vegetable Orzo Salad
Prepared vegetables ready for roasting.
  • Place the baking tray into the centre of a preheated oven and roast for 30-40 minutes, turning the vegetables halfway through the roasting time.
  • While the vegetables are roasting cook the orzo and make the lemon vinaigrette.

Bringing All The Ingredients Together In One Tasty Dish

  • Place a large pan of cold water on the hob and bring to a boil. When boiling add 1 tablespoon of sea salt and then add the orzo.
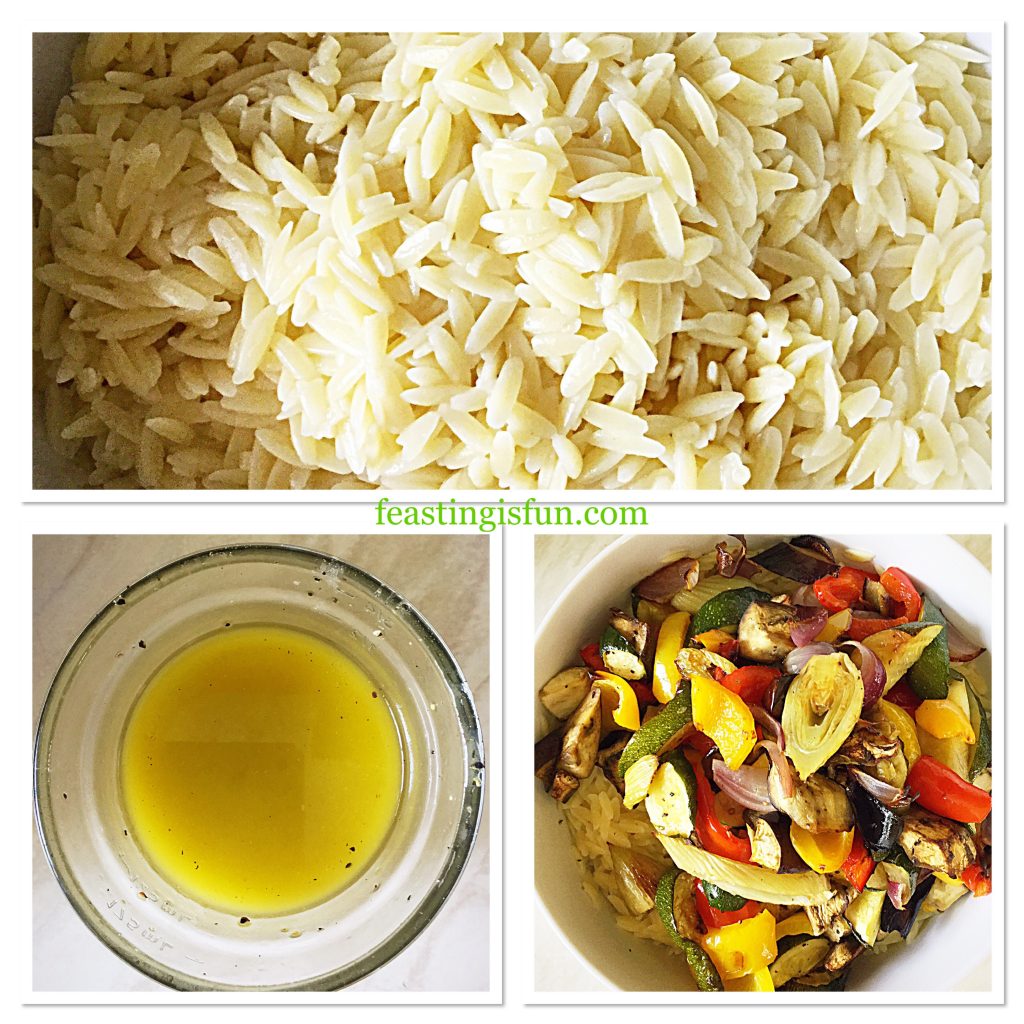
  • Squeeze the fresh lemon juice into a small, clean jar that has a fitted lid. Add the extra virgin olive oil, 1/4 teaspoon of sea salt and freshly ground pepper. Place the lid securely on to the jar and shake vigorously to combine.
  • Cook the orzo according to packet instructions, removing from the heat and draining 2 minutes before the finished cooking time.
  • Place the drained orzo into a bowl and pour over the lemon vinaigrette. Fork through the orzo to ensure the vinaigrette covers each small piece, stopping the pasta from forming clumps.
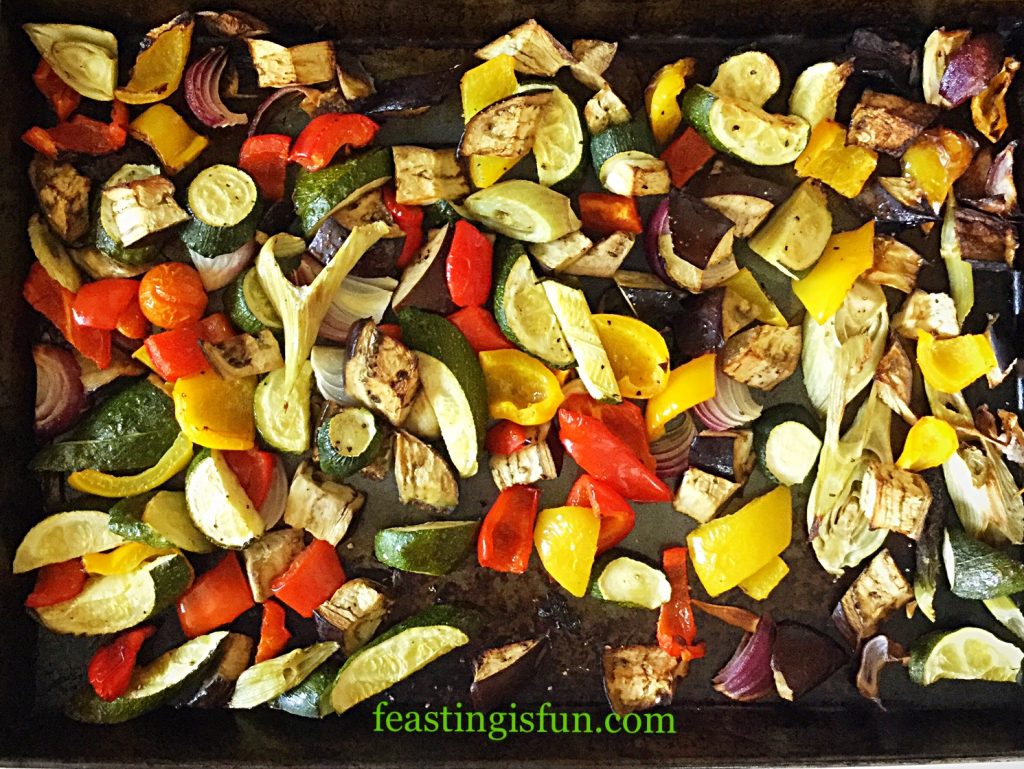
  • When cooked the vegetables will be softened, allowing a fork to easily pierce. In addition, some pieces may be slightly charred at the edges.
FF Roasted Summer Vegetable Orzo Salad
Roasted summer vegetables.
  • Spoon or tip the roasted vegetables on top of the orzo.
FF Roasted Summer Vegetable Orzo Salad
Making Roasted Summer Vegetable Orzo Salad.
  • Gently, use two forks to mix the roasted vegetables into the Orzo.
  • Finally, roughly chop a handful of fresh parsley, discarding the stalks and scatter over the salad.
Roasted Summer Vegetable Orzo Salad

If making the same day as eating, cover with cling film and leave on the work top. Alternatively, when making the day before, leave out the parsley, cool, cover and store in the fridge. Finally, to serve, allow to sit at room temperature for one hour and garnish with freshly chopped parsley.

Since this salad is so versatile, it can be served alongside grilled chicken, salmon, or burgers and ribs at a barbecue. Likewise, it can also be served on its own as a tasty vegetarian or vegan meal.

If you have enjoyed this recipe for Roasted Summer Vegetable Orzo Salad you may also like these:

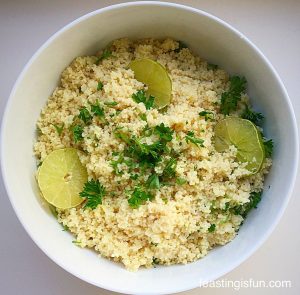
Lime Couscous

Lime Couscous
Lime Couscous

Roasted Pale Ale Jelly Tomatoes

Roasted Pale Ale Jelly Tomatoes

Lemon Garlic Vegetable Orzo

Lemon Garlic Vegetable Orzo

So, to sum up, when shopping in large supermarkets it’s easy to become disconnected with seasonal vegetables. Because of transportation most ‘summer’ vegetables can be easily obtained throughout the year. Since large, super greenhouses have cropped up across the country, most notably in Thanet, Kent, the effect on home grown produce has been to lengthen its season. Consequently, allowing the British public to buy British produce, rather than imported. Something I fully encourage and strongly support.

Yet, even with this consideration, there is little to rival the fun of blackberry picking in August and September. Most importantly, connecting us all to nature and the natural season of harvest.

So, whatever you are making, baking and creating in your kitchens, have fun preparing our feast.

Sammie xx

No part of this post may be reproduced without the written consent of the owner. Please see my Disclosure Policy.

FF Roasted Summer Vegetable Orzo Salad

Homemade Cauliflower Cheese

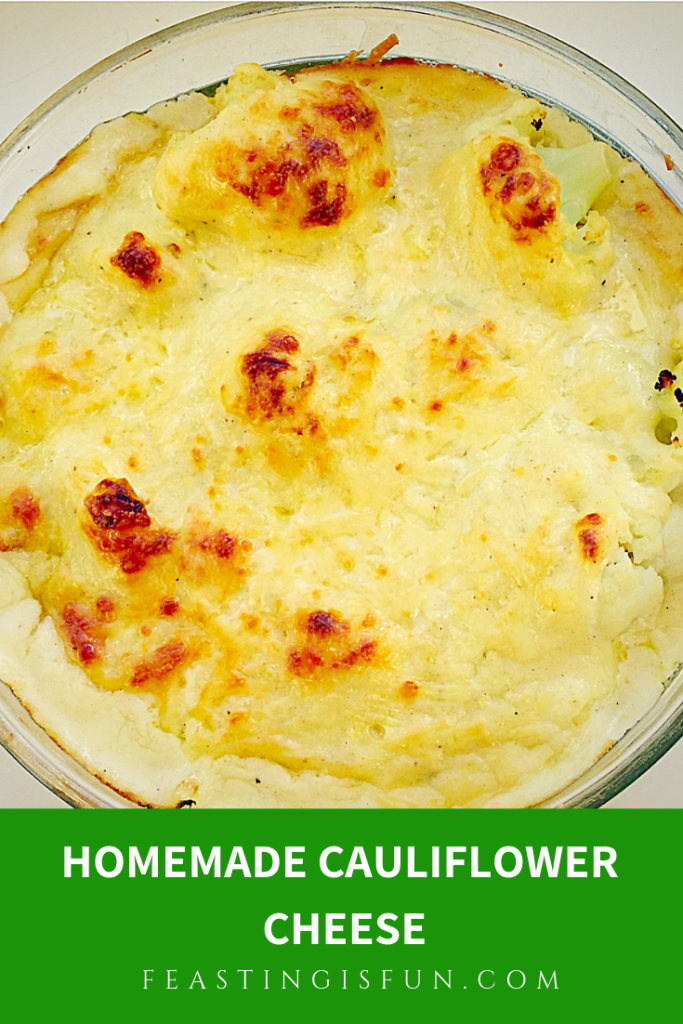
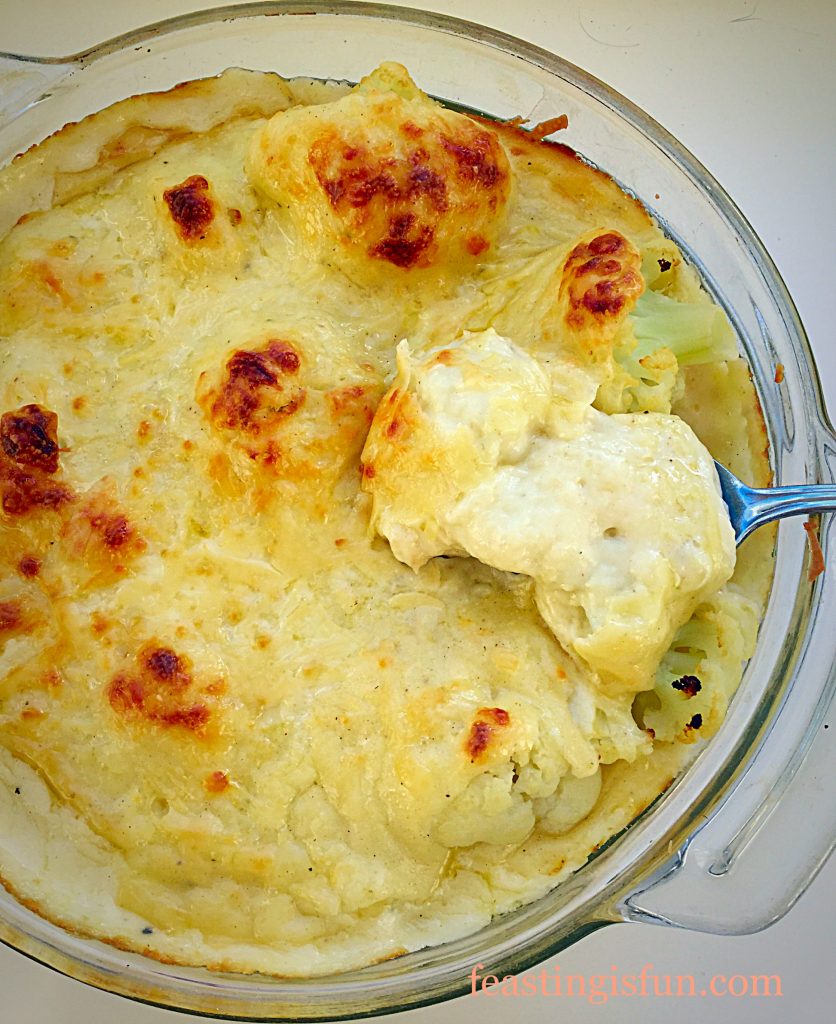
Homemade Cauliflower Cheese has to be right up there on the list of all time comfort foods. Am I right? Because this is such an easy dish to prepare it makes it even more comforting. Rather than stressing in the kitchen using a gazillion ingredients with a complex recipe, you can relax while slowly steaming cauliflower and stirring the cheese sauce. Resulting in a dish that is as good on it’s own or as a side dish.

Homemade Cauliflower Cheese

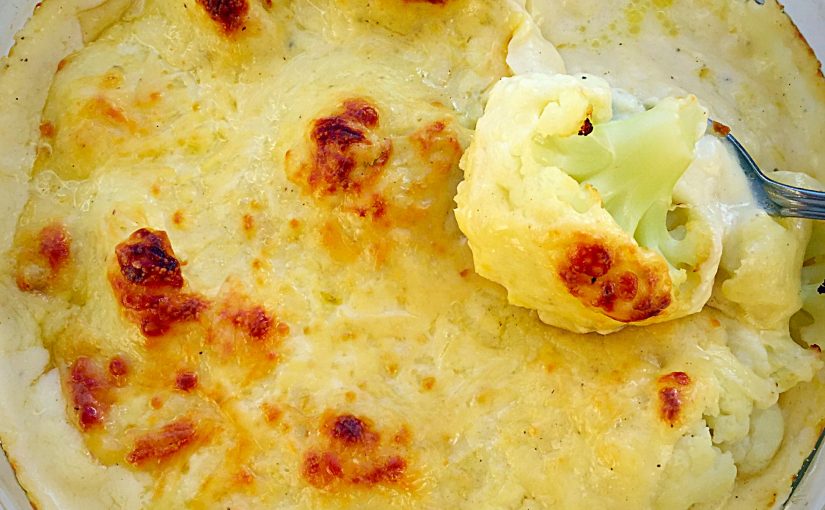
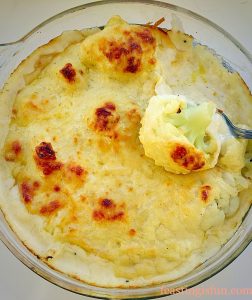
Fresh, creamy white florets of seasonal cauliflower, lightly steamed and smothered in a thick, nutmeg scented, cheese sauce. And like a fluffy duvet, or wood burning fire, it wraps you in its warm embrace and brings you home.

Friends and family recall that Homemade Cauliflower Cheese reminds them of comfort food from their childhood. Perhaps back to a time when life seemed simpler? And while it isn’t something I make, or eat that often, when the gooey cheese sauce spreads slowly over my plate I am in comfort food heaven.

FF Homemade Cauliflower Cheese
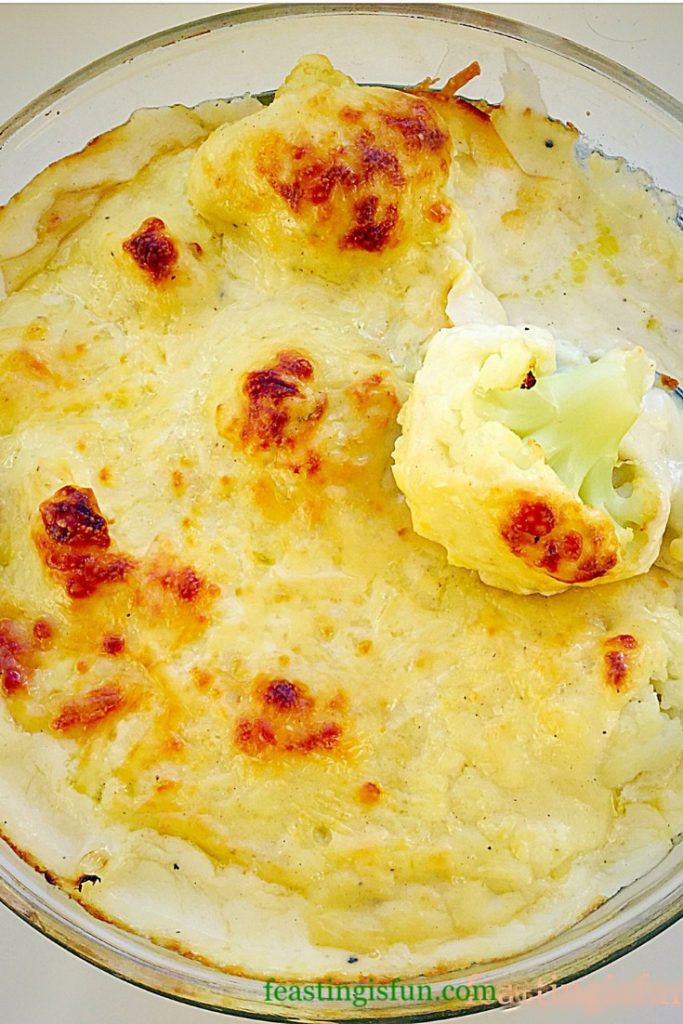
Homemade Cauliflower Cheese golden and bubbling comfort food.

The World Has Gone Crazy For Cauliflower

Since the humble cauliflower has been discovered as a carbohydrate substitute it is now used as a replacement for rice, pizza base, potato salad and other culinary substitutes. A quick look on Pinterest yields a variety of recipes. My Homemade Cauliflower Cheese recipe celebrates the humble cauliflower rather than trying to disguise it!

Tender, baked cauliflower, covered in a homemade cheese sauce, is for me one of the best ways to eat this delicious vegetable. While part of the brassica family, where cabbages, broccoli and brussel sprouts are its cousins, cauliflower has a slightly sweet flavour, not dissimilar to the thick leaves of white cabbage. And, cooked properly its texture is dense and meaty, making it a filling vegetarian dish when serving on its own.

FF Homemade Cauliflower Cheese
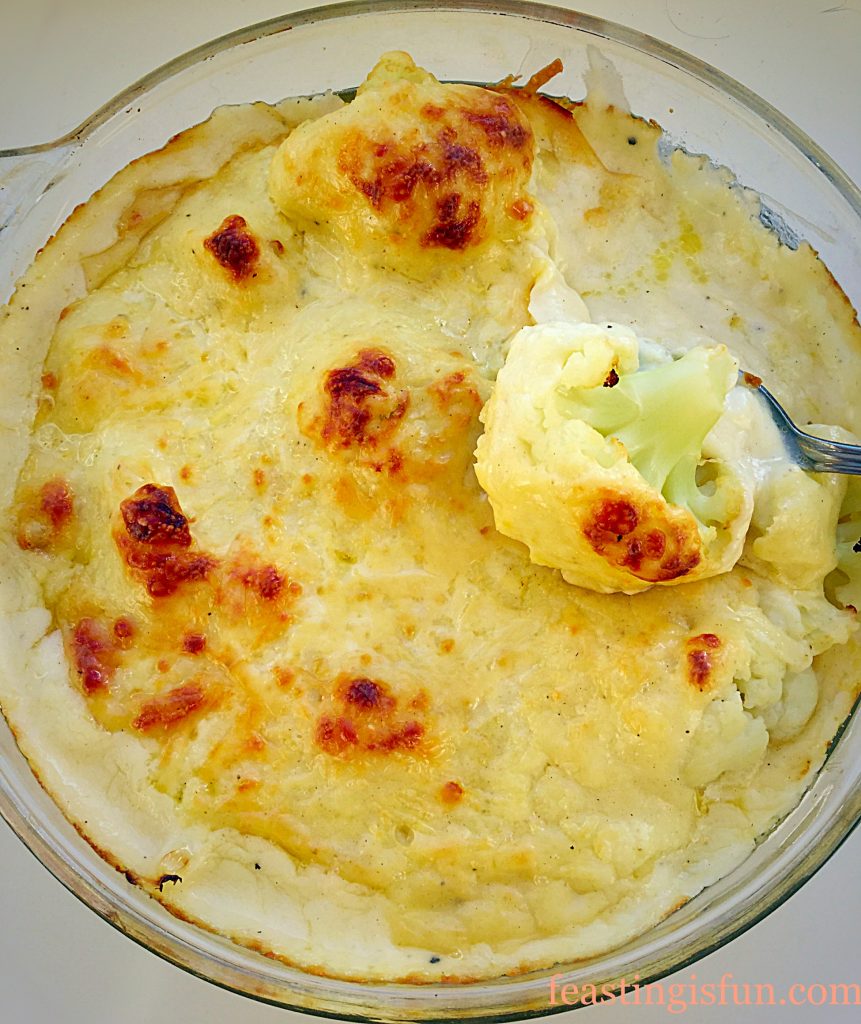
Homemade Cauliflower Cheese so temptingly delicious.

I enjoy eating Homemade Cauliflower Cheese with a roast dinner, or sausage and mash. While the bubbling cheese sauce goes so well with proper gravy dinners, it is also unbelievably good with Yorkshire puddings. Likewise, it pairs extremely well when served alongside thick slices of home cooked gammon.

Recipe: Homemade Cauliflower Cheese serves 4-6 as a side dish

1 large head of Cauliflower or 2 smaller ones

75g/3oz Unsalted Butter

75g/3oz Plain White Flour

150g/5.5oz Mature Cheddar Cheese – grated – hold back 2 tablespoons from adding to the sauce, for sprinkling over the assembled dish – I use Wyke Farms

500ml Milk Whole or Semi Skimmed

1/4tsp Freshly Grated Nutmeg – I buy Barts whole nutmegs and grate them myself on the coarse side of a box grater. Freshly grated nutmeg lifts the cheese sauce, subtly adding another level of flavour.

1/2tsp Freshly Ground Black Pepper

Method:

Making The Cheese Sauce

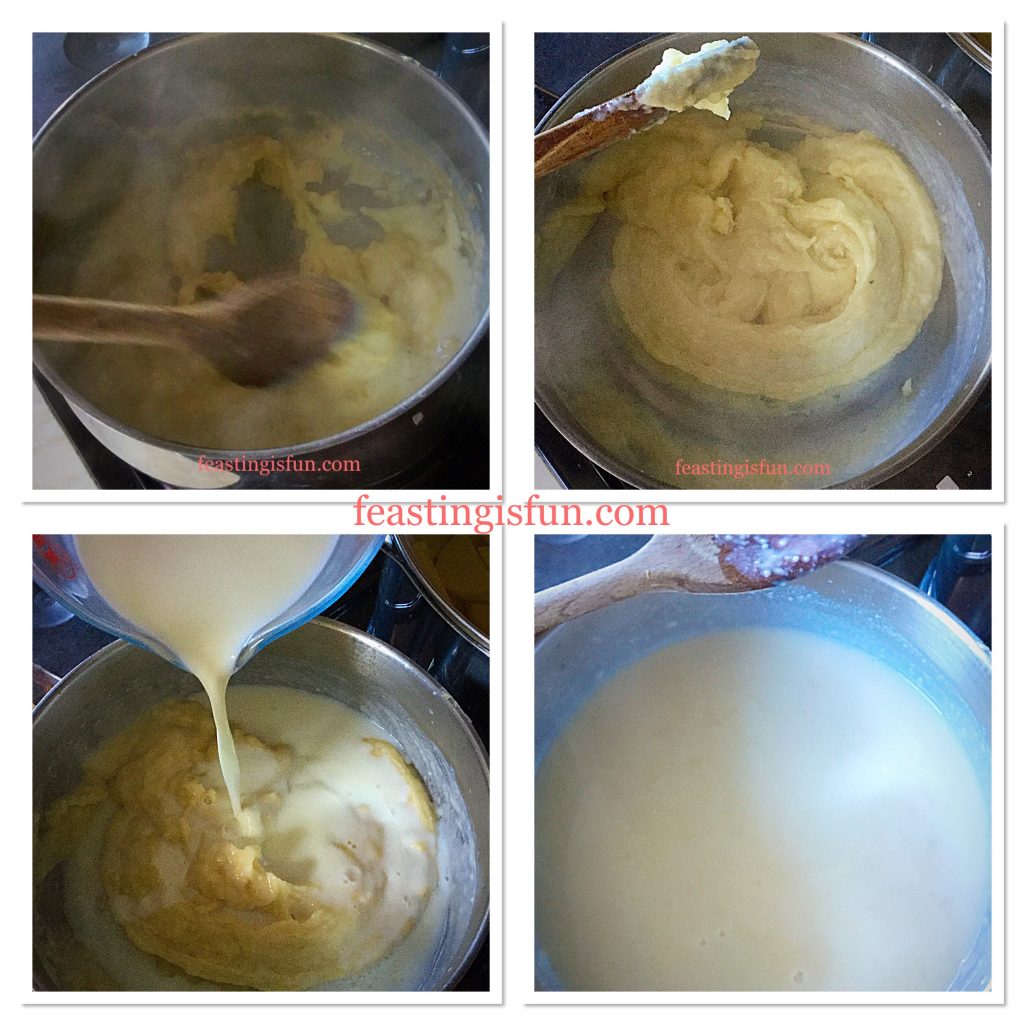
  • First of all place the butter into a heavy bottomed saucepan and melt over a medium heat.
  • Add in all the flour, stir for a couple of minutes so that the flour and butter become a bubbling paste (roux).
  • Pour in roughly 100ml of the milk and stir vigorously. The flour, butter and milk will come together to form a thick clump.
  • Add another 100mls of milk and keep stirring until all the milk is incorporated.
  • Continue as before, adding the milk in 100ml quantities, stirring thoroughly. If you are worried that some lumps will not disappear simple switch to a balloon whisk.
  • After adding all the milk, you will have a smooth, thick-ish white sauce.
FF Homemade Cauliflower Cheese
Showing the stages of making the white sauce.
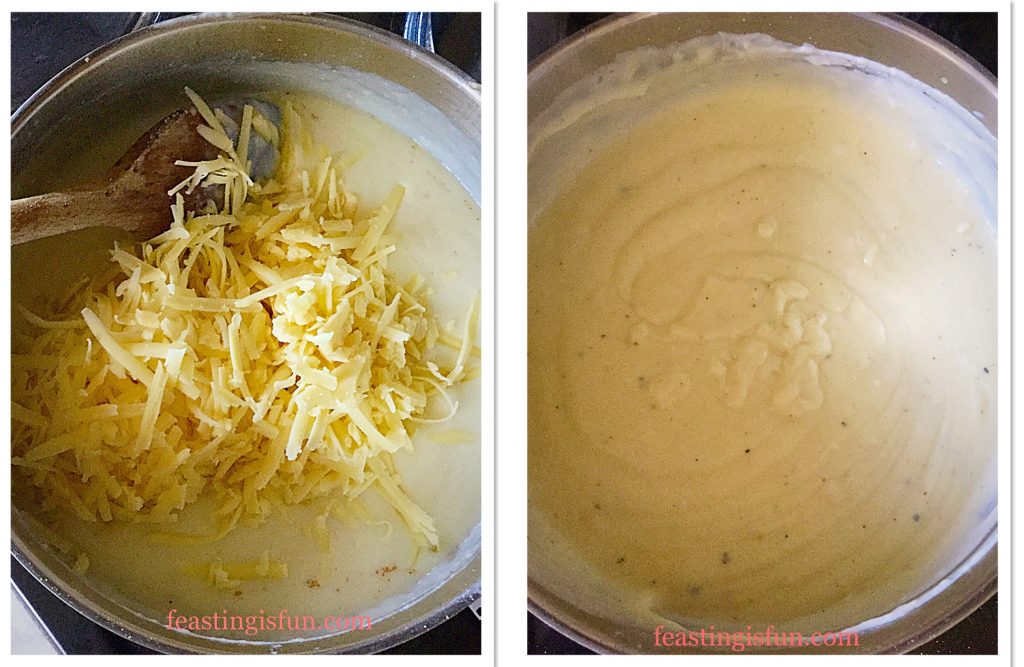
  • Add the pepper and nutmeg to the bechemel (white sauce) and stir thoroughly. I generally don’t add salt as the cheese tends to lend its saltiness to the final flavour, however, a quick taste check once the cheese has melted will allow you to adjust the seasonings.
  • Take the saucepan off the heat and tip in the grated cheese. Stir until it is melted and you have a smooth cheese sauce.
FF Homemade Cauliflower Cheese
Delicious Cheese Sauce ready for pouring over Cauliflower and baking.

Preparing The Cauliflower And Assembling The Dish For Baking

  • Prepare the cauliflower by cutting off most of the green leaves, breaking into florets, rinsing under a tap a and then steaming for no longer than 5 minutes.
  • Place the steamed cauliflower florets into an oven proof dish and pour over the cheese sauce.
  • Sprinkle over the reserved cheese, this gives the topping extra colour and gooey cheese!
FF Homemade Cauliflower Cheese
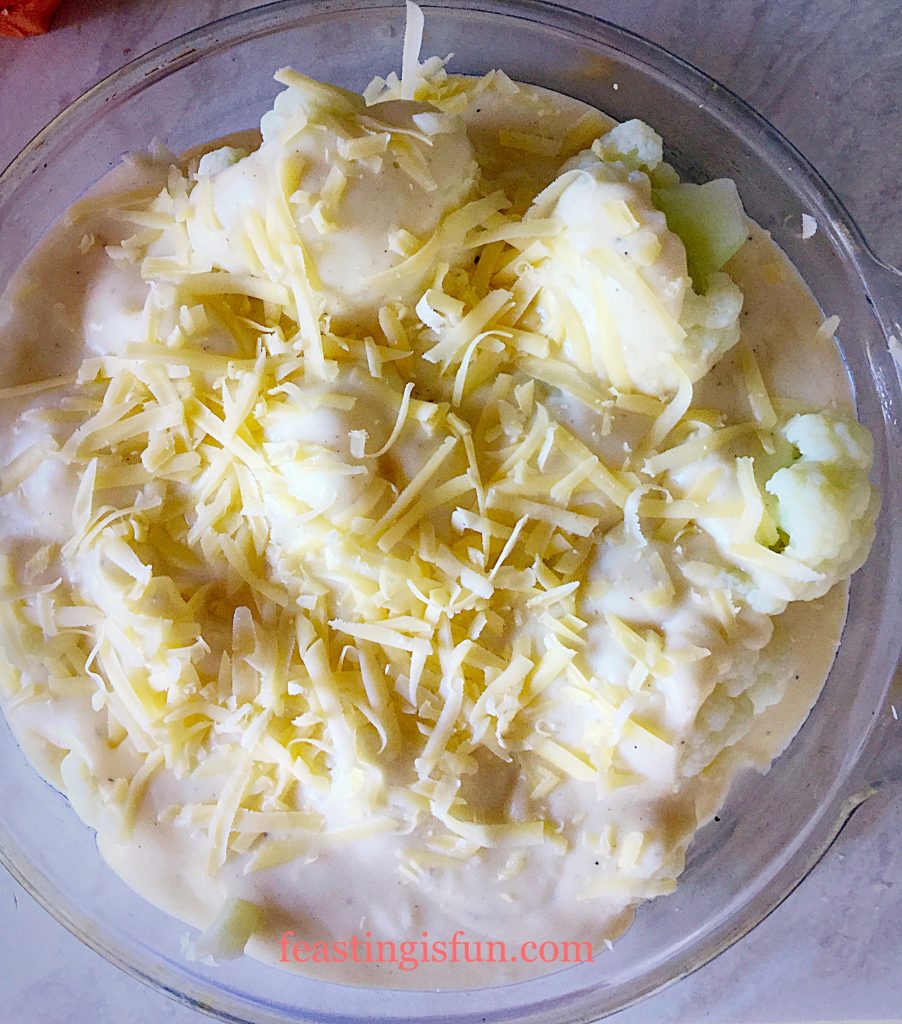
Homemade Cauliflower Cheese ready for the oven.
  • When making ahead, allow to cool, cover in tented foil, so that the topping doesn’t stick to it. The dish can be left on the side for a couple of hours. Alternatively place in the fridge, where it will keep for up to 2 days.
  • Bake the Homemade Cauliflower Cheese in an oven, preheated to 200C/180C fan, gas mark 6, 400F, for 30-40 minutes. When the top is golden and bubbling and a fork can pierce the base of a cauliflower floret the dish is baked.
  • Once baked, remove from the oven and serve.
Homemade Cauliflower Cheese

Homemade Cauliflower Cheese also goes well with fish dishes, such as smoked haddock, or any firm, white fish, especially when served with mashed potatoes!

If you have enjoyed this recipe for Homemade Cauliflower Cheese you may also like these:

Leek Colcannon

FF Homemade Cauliflower Cheese
Leek Colcannon.

Perfectly Mashed Potatoes

FF Homemade Cauliflower Cheese
Perfectly Mashed Potatoes

Garlic Rosemary Roast Potatoes

FF Homemade Cauliflower Cheese
Garlic Rosemary Roast Potatoes

As the nights draw in, I find comfort in warming, hearty food. That isn’t to say I don’t believe in balance, I absolutely do. So, on a day when we indulge in Homemade Cauliflower Cheese, we wouldn’t have dessert. That said we rarely do eat pudding, except perhaps on a Sunday, something I am working on! When it’s hot in the summer, my body craves salads and cold food. Yet as soon as the annual September chill hits the air I long for warming meals like Steak Leek and Ale Pie or Chunky Chilli.

So, whatever you are making, baking and creating in the kitchen, enjoy preparing and sharing your feast.

Sammie xx

No part of this post may be reproduced or duplicated without the written permission of the owner. Please see my Disclosure Policy.

Perfectly Mashed Potatoes

Thank you for stopping by to read this post and find out how to make Perfectly Mashed Potatoes. If you are curious as to why I should post such an easy recipe here’s my answer. Because everyone has to learn the basics. Including me. Since I wasn’t born with the knowledge of how to cook a roast, boil an egg or mash potatoes. I learnt, mostly, from watching my Grandma, whilst I was growing up.

FF Perfectly Mashed Potatoes
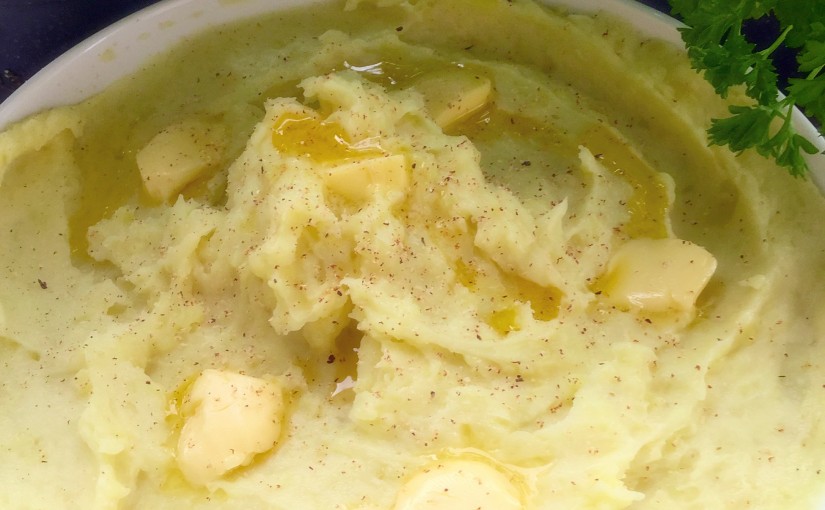
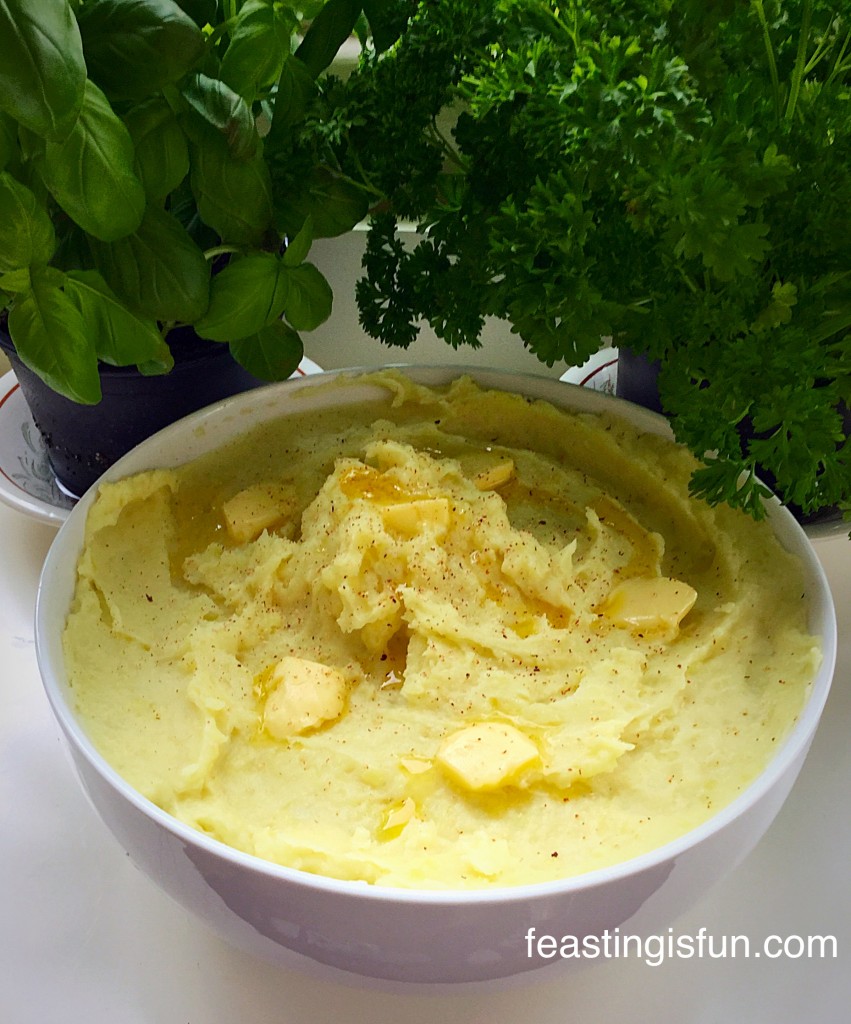
Perfectly Mashed Potatoes no fancy equipment needed!

Always an inquisitive child, I literally hung around her apron strings and learnt how to cook, bake, make preserves, prove bread and much more. My earliest memory is standing on a stall, shucking peas that my Grandad had freshly picked from the garden.

So a love of cooking, indeed, more being in the kitchen and making something, was present from a very early age. At home, I recall asking if I could peel some potatoes. I was given a bowl, full of cold water, to wash off the dirt, potatoes didn’t come pre-washed in the 1970’s and a small vegetable peeler. While a whole hour had passed and I still hadn’t finished! That didn’t matter, I was learning.

FF Perfectly Mashed Potatoes
Perfectly Mashed Potatoes creamy and delicious.

Especially in today’s world of convenience food and £1 packets of ready mashed potatoes available from the supermarket, learning how to cook basic recipes, isn’t always taught at home, in the way that I learned. So yes a recipe for Perfectly Mashed Potatoes, is here, because who doesn’t love mash???

Usually kitchens will have a potato masher utensil in them, if not they can be picked up, fairly cheaply, from any shop that sells kitchenware. I will not be using a potato ricer, hand whisk, kitchen stand mixer or any other contraption to make these Perfectly Mashed Potatoes, simply a potato masher. Because it is what most people have to hand and in my opinion, produces the best mashed potatoes!

So the only equipment you will need to make your mash is:

  • A sharp knife
  • Saucepan
  • Colinder
  • Potato Masher
  • Optional – vegetable peeler

Most kitchens will be equipped with this equipment, if not, each item can be bought inexpensively as mentioned above.

Recipe: Perfectly Mashed Potatoes serves 6-8 adults

2.5kg/5lbs Potatoes suitable for mashing – I used Albert Bartlett Elfe Potatoes – these have a particularly creamy texture and buttery taste, Rooster potatoes are also good for mashing. Any potato that is described as floury, suitable for mash can be used. However for the best mash I’ve tried I do recommend Elfe potatoes.

75g/3oz Butter

100mls/4fl ozs Whole Milk

Sea salt and freshly ground pepper to taste

1/4 tsp Ground Nutmeg – freshly grated is even better.

Method: Half fill a large saucepan with cold water

  • Using a vegetable peeler or small paring knife peel the potatoes.
  • Cut them into 5cm/2″ chunks as you go and immediately place in the pan of cold water.
  • NOTE: If peeled potatoes are left out of water they will start to turn brown.
  • Once all of the potatoes have been peeled and cut up, top up the pan with cold water, so that the potatoes are just covered.
FF Perfectly Mashed Potatoes
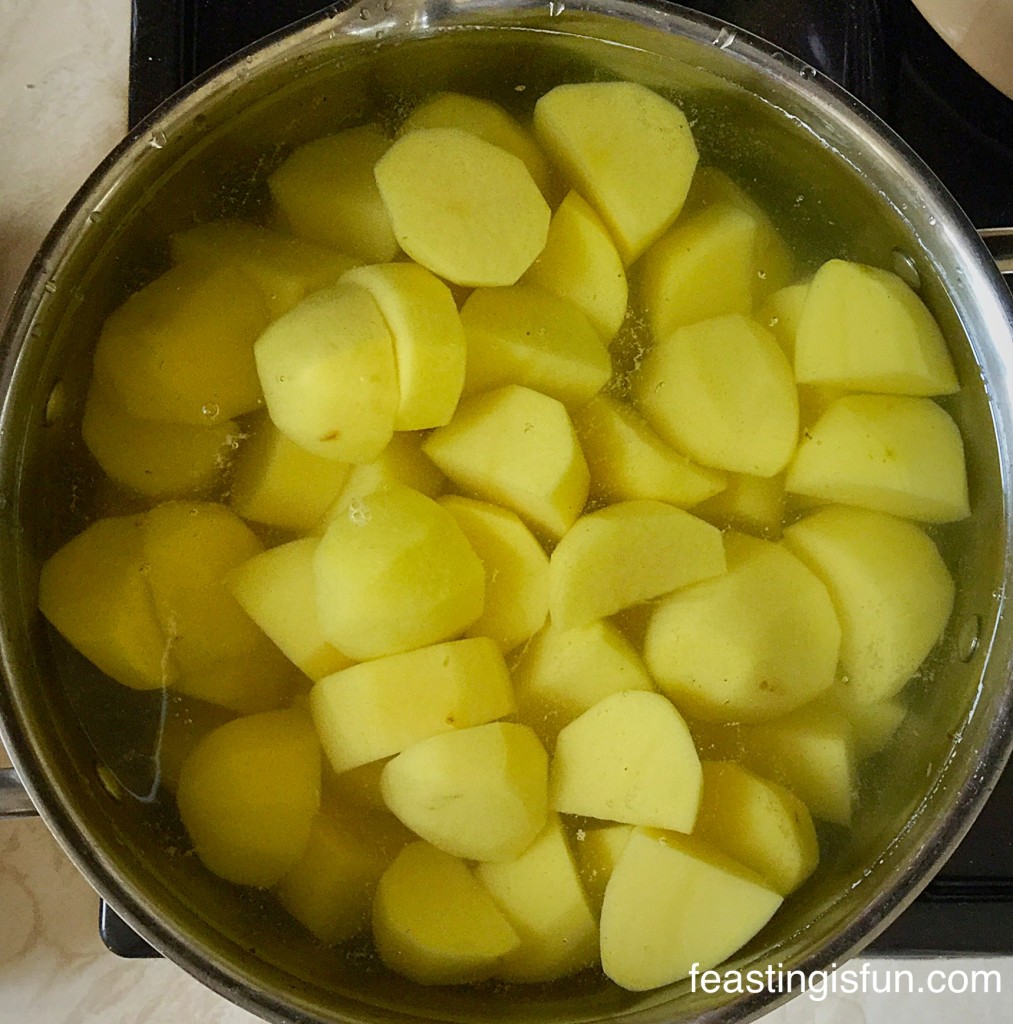
The potatoes are prepared and ready for cooking.
  • Turn the heat onto high on the hob and bring the potatoes up to a boil.
  • As soon as they are boiling turn the heat down and let the potatoes simmer for 15 minutes.
  • To test if the potatoes are cooked, insert a sharp knife into a couple of chunks, there shouldn’t be any resistance and the potato chunk may well break in half.
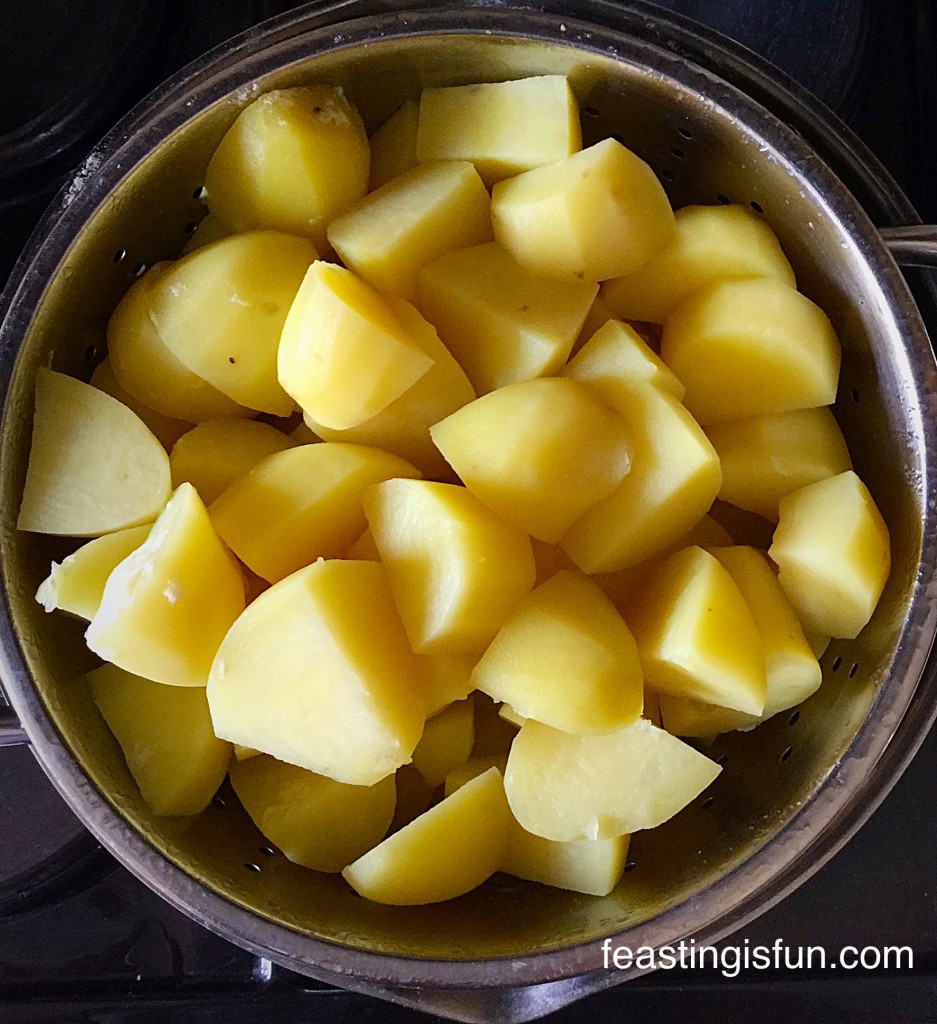
  • Once cooked drain the potatoes in a colinder and allow to steam dry for 5 minutes.
FF Perfectly Mashed Potatoes
Allowing the potatoes to steam dry makes better mash!
  • Empty any water from the saucepan the potatoes were cooked in.
  • Add the butter and milk to the pan and heat until the butter is melted.
  • I add 1/2tsp of sea salt, a good grinding of black pepper and the ground nutmeg to the milk/butter at this stage.
  • Take the pan off of the heat and add the cooked potatoes.
FF Perfectly Mashed Potatoes
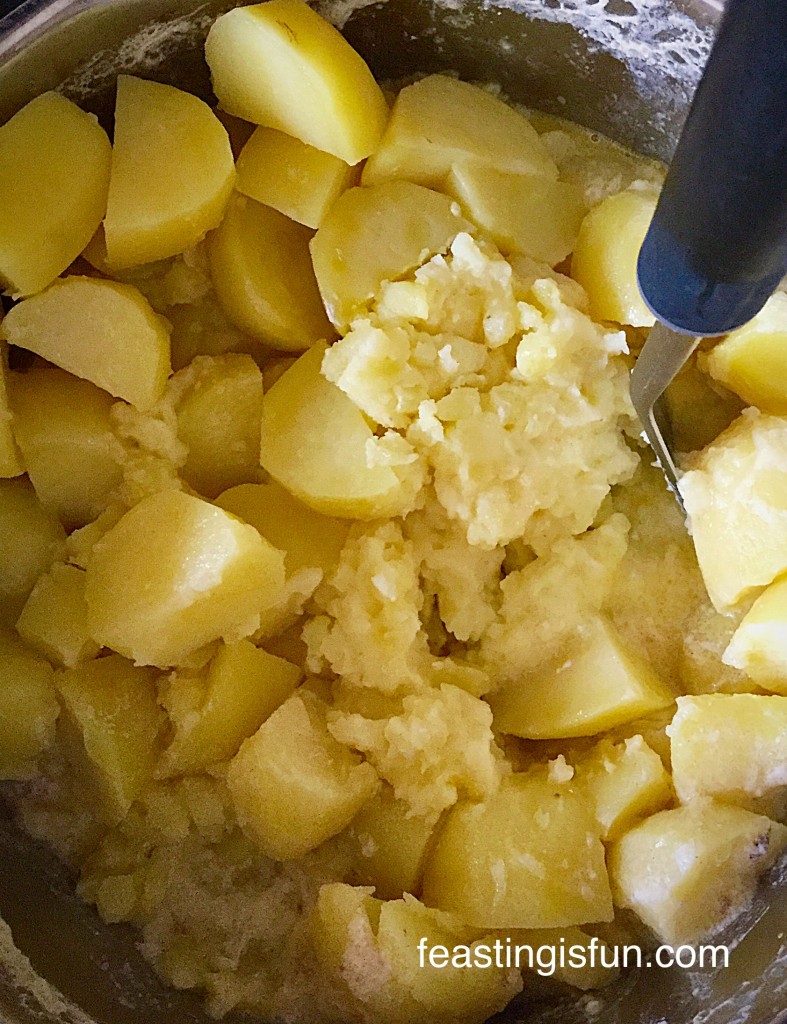
Time to get mashing!
  • The next step is simply to plunge in with the potato masher and keep mashing until all the potatoes have broken down and you have smooth, creamy, Perfectly Mashed Potatoes.
  • I quite often get the children to mash our potatoes and yes, it does require a bit of elbow grease and effort (which with my back I’m not able to apply).
  • The potatoes are so beautifully soft and creamy, that they break down easily.
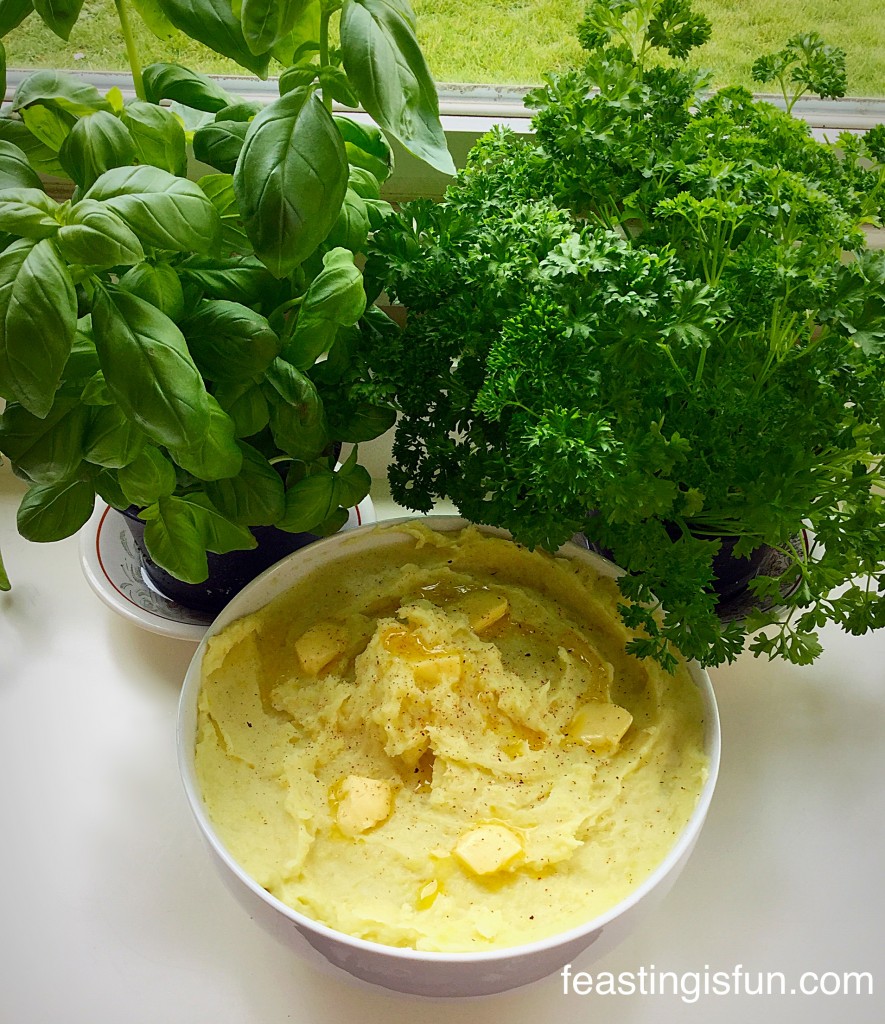
  • Serve the potatoes straight away onto dinner plates, or for special occasions, pile into a serving bowl, dot with a little extra butter and a light sprinkle of nutmeg.

Yes it really is that simple!

FF Perfectly Mashed Potatoes
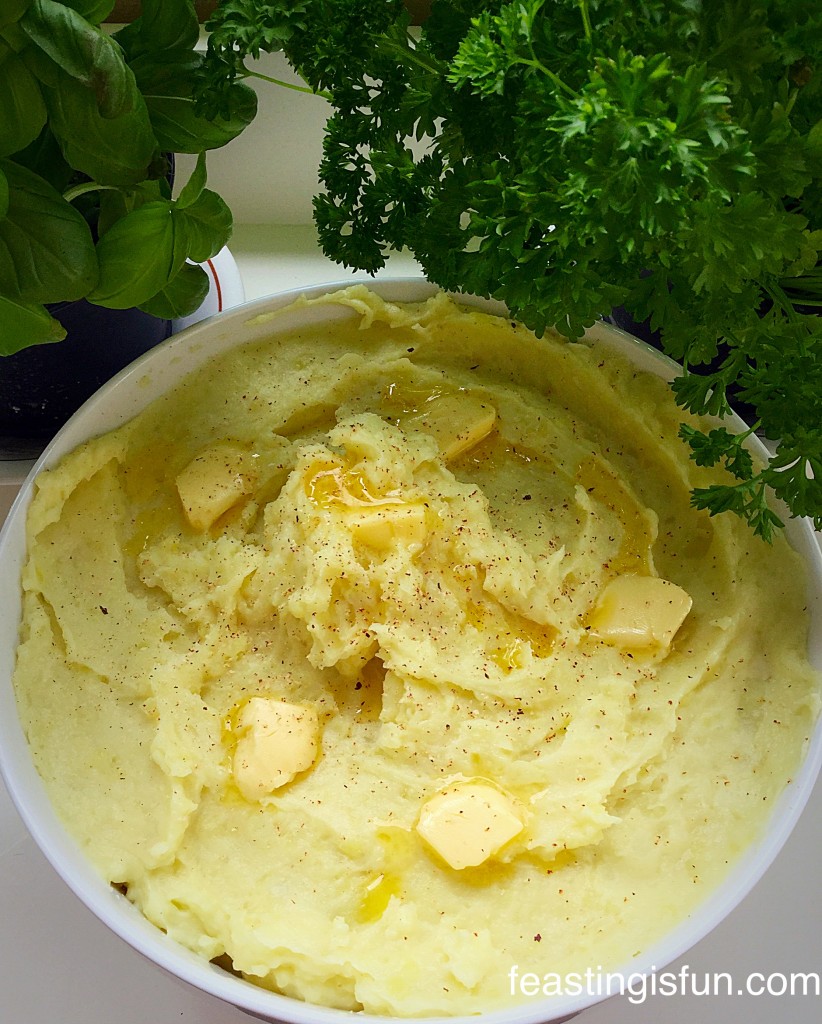
Utterly delicious Perfectly Mashed Potatoes every single time.

Perfectly Mashed Potatoes are the perfect accompaniment to so many meals, made well they are delicious just on their own, perhaps with a little grated, sharp cheddar to top!

If you have enjoyed this recipe for Perfectly Mashed Potatoes, here are some other potato recipes you also may like:

Leek Colcannon

FF Leek Colcannon
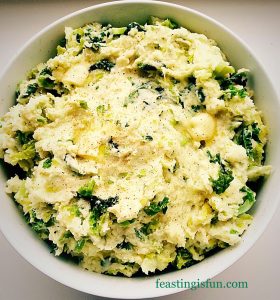
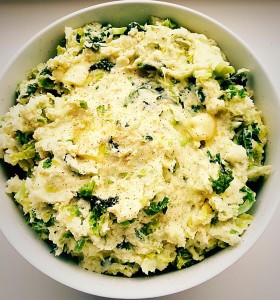
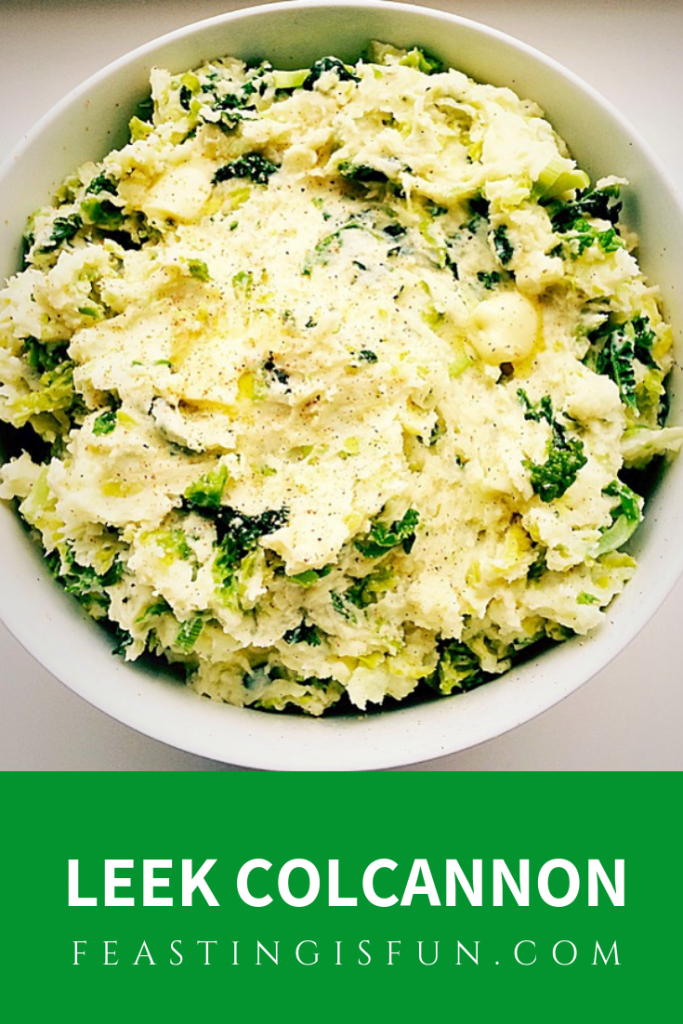
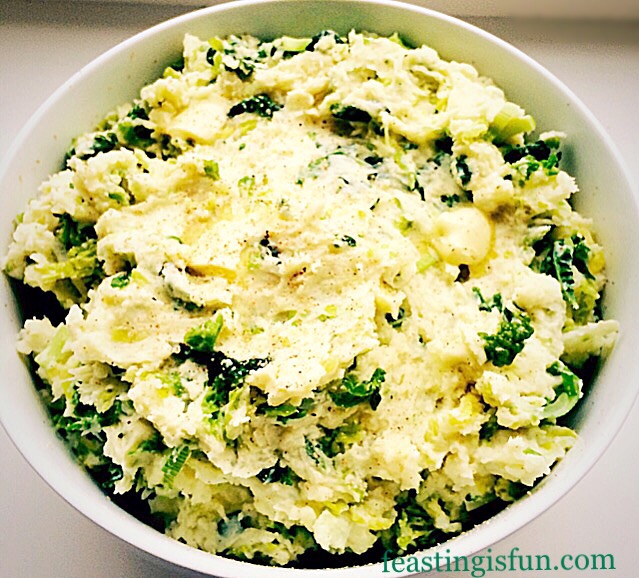
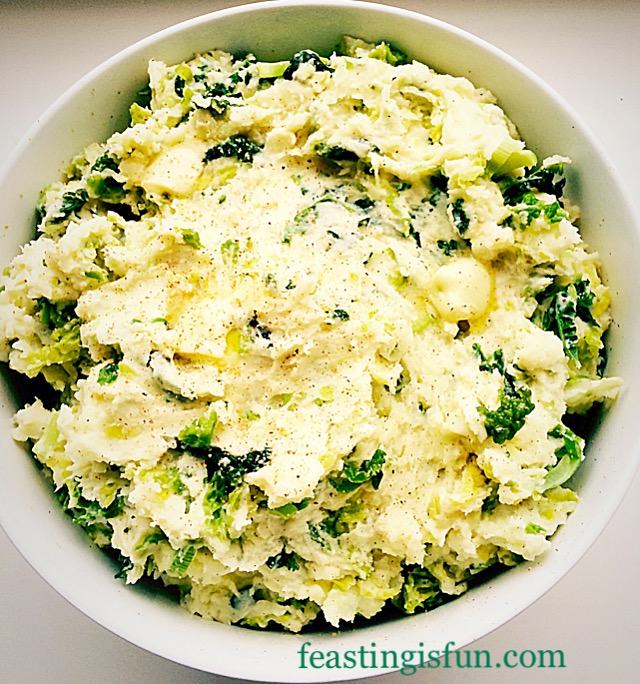
Sautéed leeks and savoy cabbage mixed with mashed potatoes.

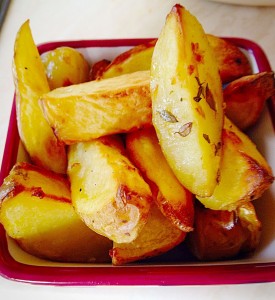
Baked Garlic Herb Potato Wedges

FF Baked Garlic Herb Potato Wedges
Baked Garlic Herb Potato Wedges

Tangy Lemon Potato Salad

FF Tangy Lemon Potato Salad
Tangy Lemon Potato Salad

Were you taught to cook at home, or are you just learning?

Thank you for all of you lovely comments, I get such a thrill knowing you have baked and enjoyed one of my recipes, please keep them coming.

Also it is great seeing all the pictures of your makes and bakes on Twitter and Instagram. Please keep them coming, tag me in and I’ll be sure to give you a shoutout or retweet.

Are there any other basic recipes that you would like to see on Feasting is Fun? Let me know and if I can, I will post them for you.

I always try to remember that everyone has to start at the beginning. Most of all the fun is in the journey and we are all here to support each other as we learn.

Sammie xx

@sammiefeasting Twitter/Instagram/Pinterest

The Albert Bartlett Elfe potatoes were won in a competition. All opinions and views are my own, as is the content of this post. Please see my Disclosure Policy


Lime Couscous

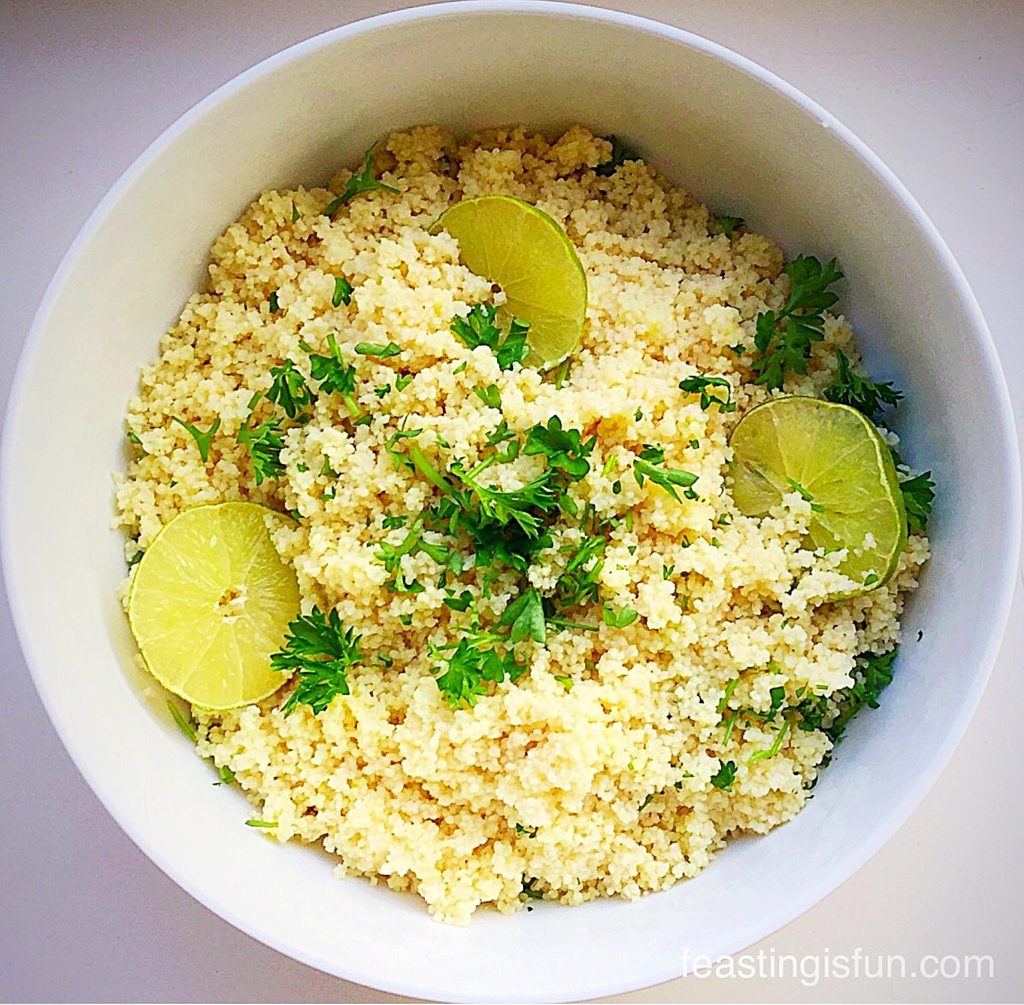
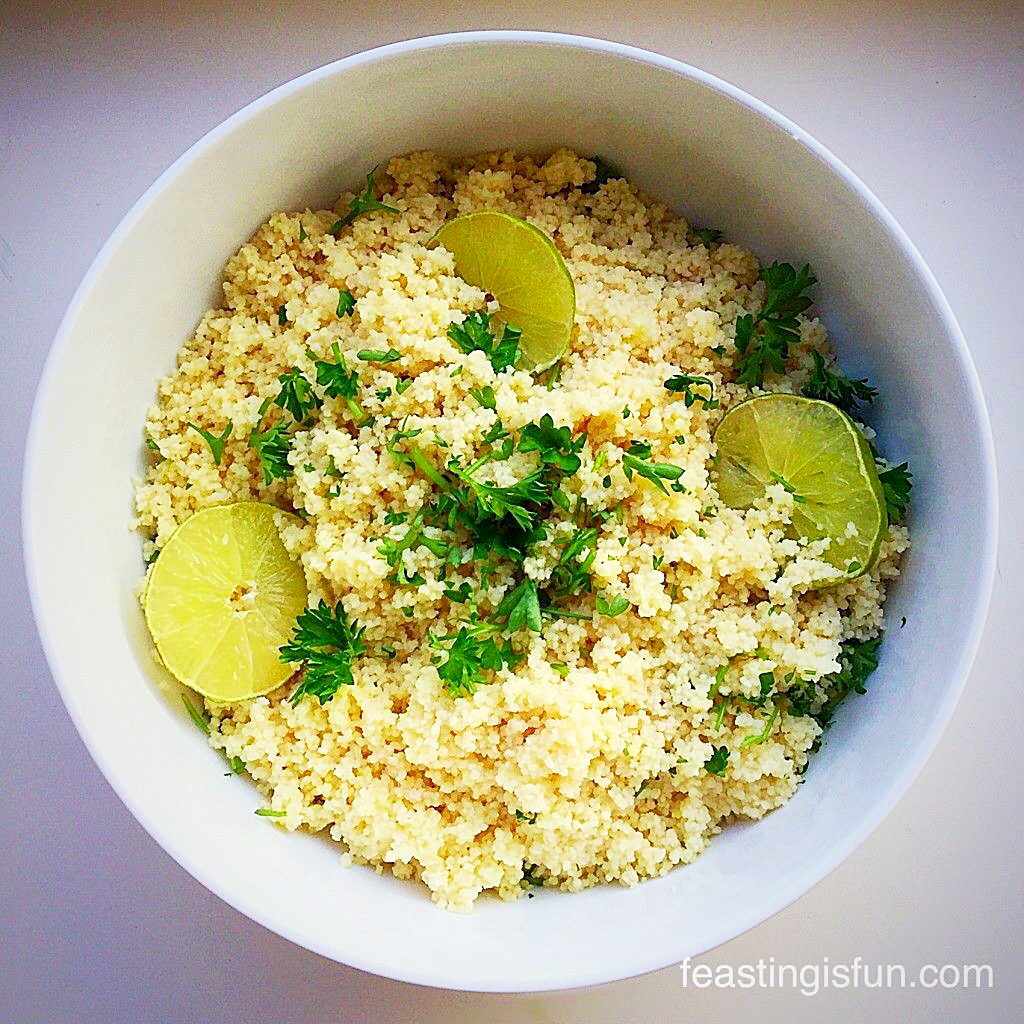
Today I have the easiest, most delicious and versatile side dish for you, my Lime Couscous.

FF Lime Couscous

So, for those of you who haven’t tried couscous yet, I’ll explain what it is. Couscous is small, crushed durum wheat semolina that requires steaming or soaking in boiling water to cook. And it is traditionally served with stew, much like my Moroccan Lamb Stew. Because couscous is made from durum wheat it IS NOT gluten free.

FF Moroccan Lamb Stew
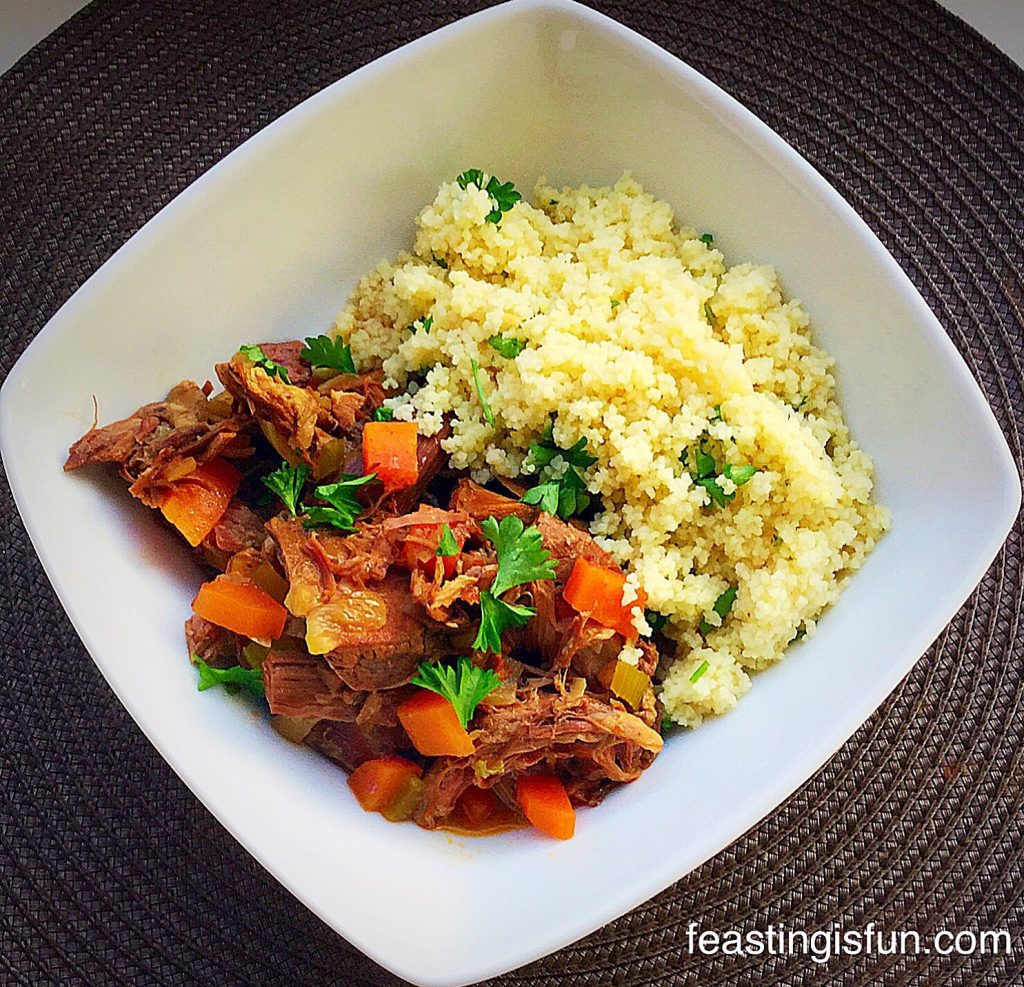
Moroccan Lamb Stew served with Lime Couscous.

Since this couscous is full of fresh lime flavour and so easy to make, it will soon become part of your repertoire.

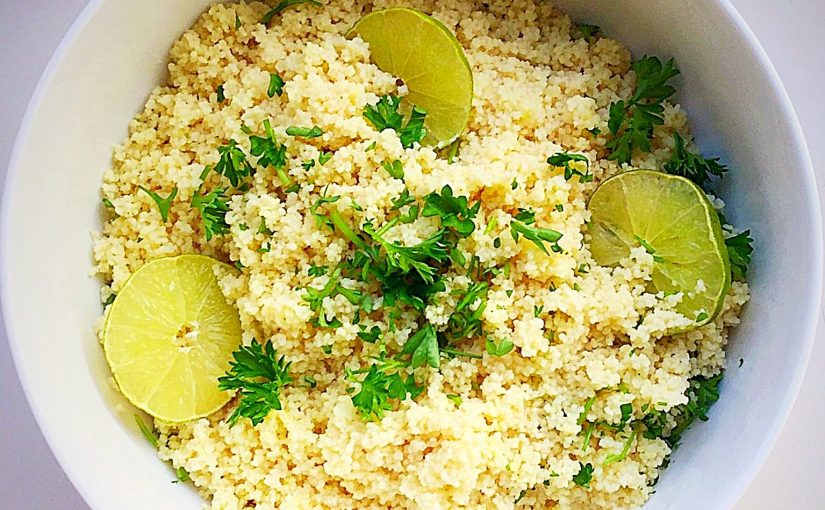
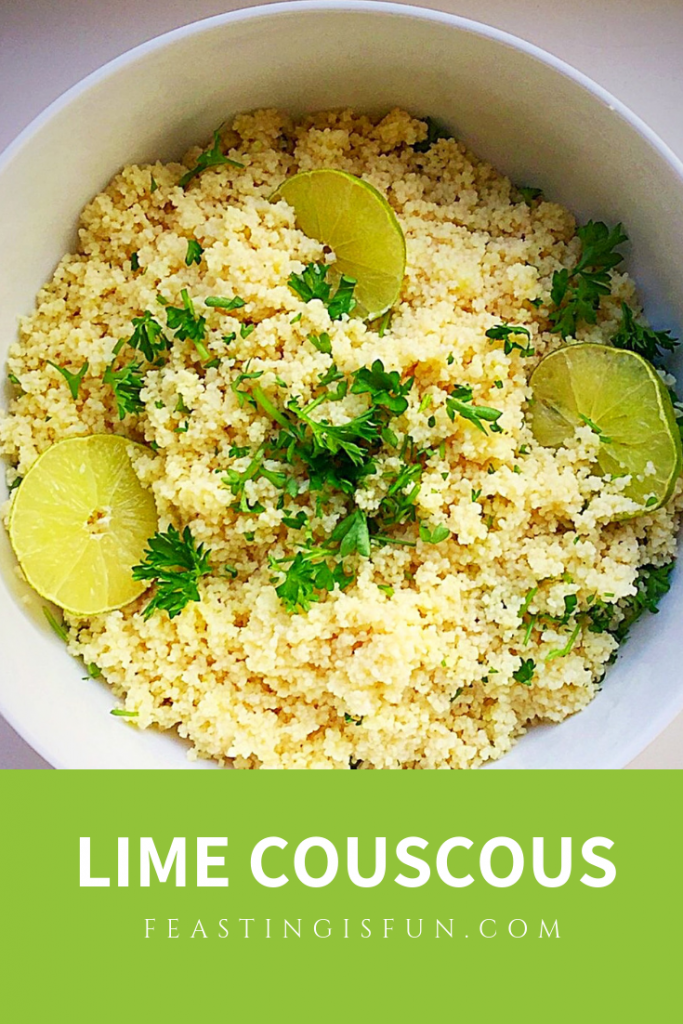
A sprinkle of fresh parsley and slices of lime give this dish the finishing touch.

And as the grains are so small it doesn’t even need cooking. Rather, it simply needs rehydrating with hot liquid.

How easy is that ?

Lime Couscous

I developed this recipe for Lime Couscous to specifically partner my Morrocan Lamb Stew. It is absolutely delicious with the stew. As it balances the fruity, spicey sauce, with its own tangy, citrus flavour.

Since couscous can be served at room temperature it is absolutely perfect for buffets and barbecues. While it’s fresh lime flavour pairs really well with fish, chicken, lamb kebabs – really the possibilities are endless. I cannot wait to try it with my Chunky Chilli.

Recipe: Lime Couscous serves 6 people.

300g/11oz Dried Couscous – allow 50g/2oz per person

2 Limes

1 Vegetable Stock Cube – I use Knorr’s

Boiling Water

Sea salt and freshly ground black pepper to taste

Method – Making The Couscous 

Note – Do not stir the Couscous at any point.

First of all, weigh out the couscous into a large, heatproof bowl.

Dissolve the stock cube in a jug of boiling water, approx 450mls/1 pint.

Squeeze the juice of one and a half limes and add this to the couscous.

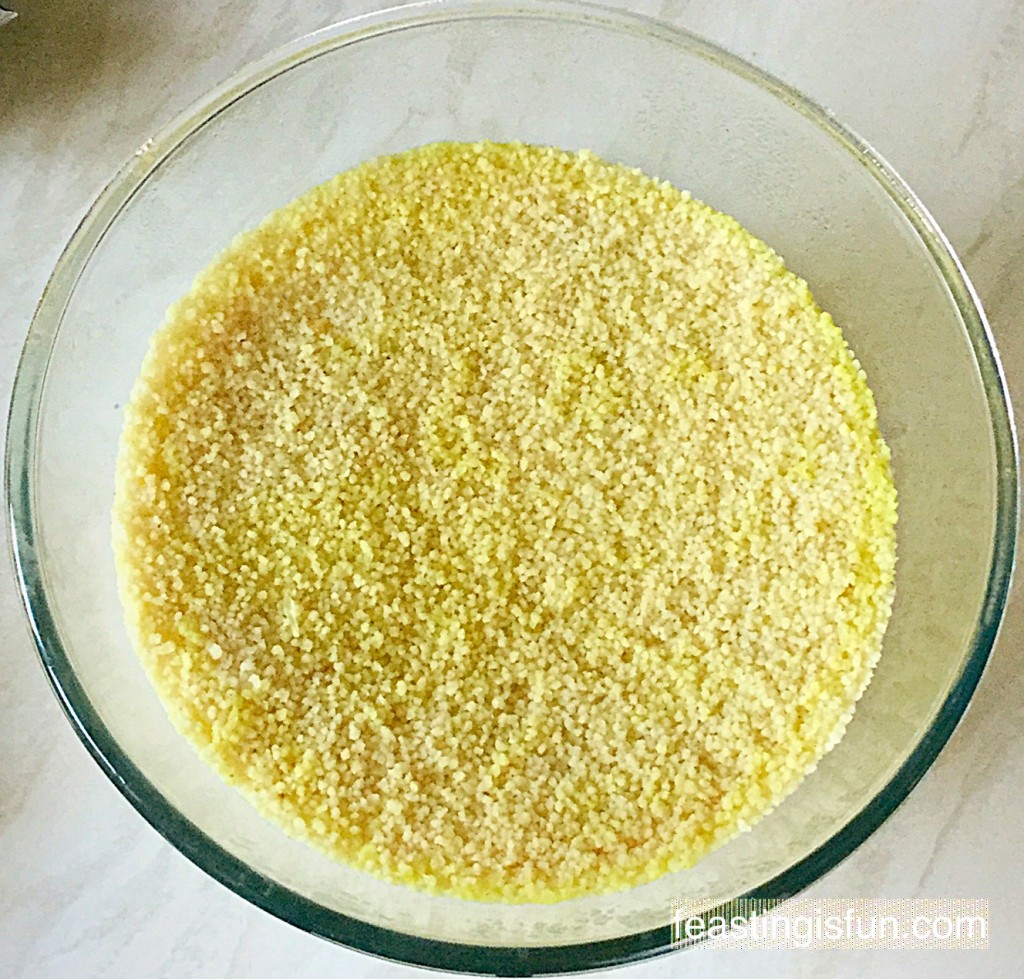
Pour the stock over the couscous and top up with boiling water so that the liquid comes 2.5cm/1″ above the top of the couscous.

Cover the bowl with cling film, or I used a plate and leave for 15 minutes.

After this time the couscous will have absorbed all of the hot liquid.

MD Lime Couscous
The couscous has absorbed all of the stock and lime juice.

Remove the cling film/ plate.

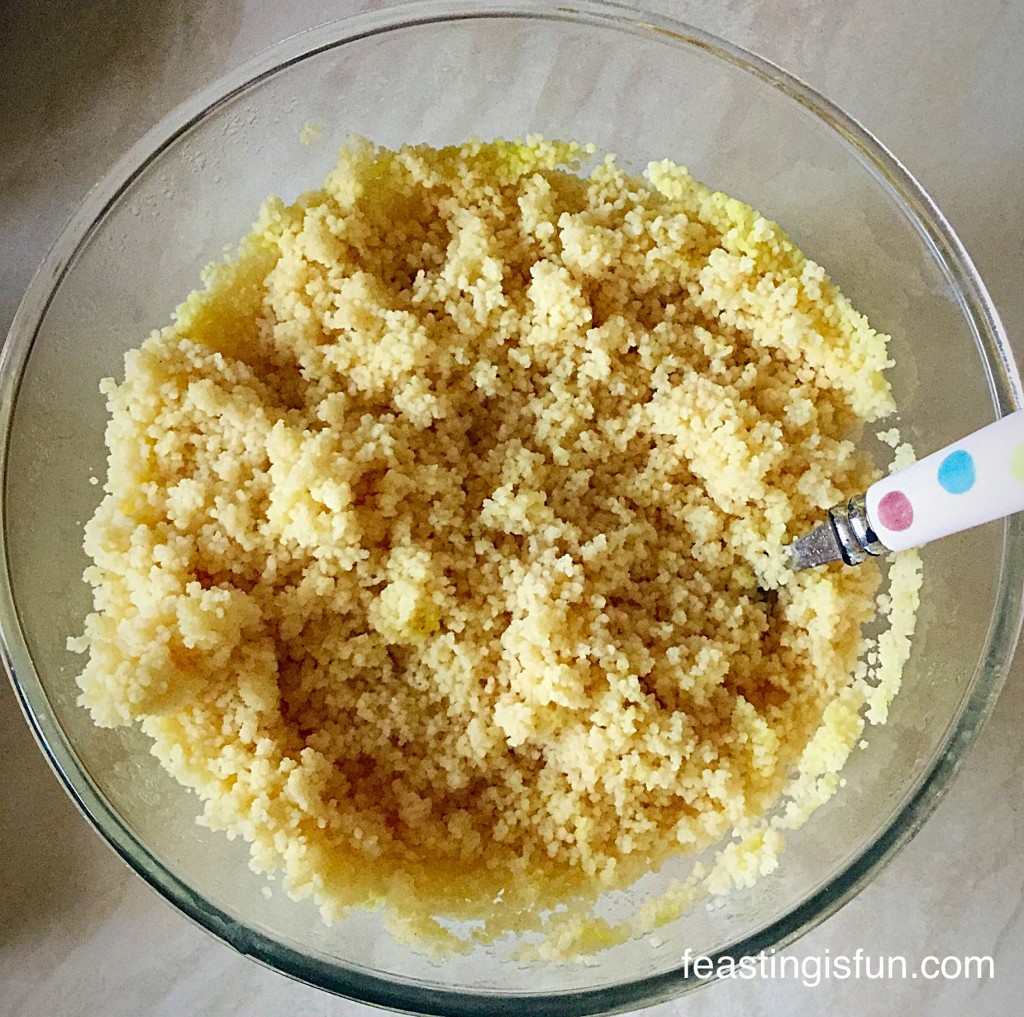
Using a fork, fluff up the couscous, like you would with rice,

MD Lime Couscous
Fluff the couscous with a fork.

Importantly, taste the Lime Couscous and check for seasoning, adjust as necessary.

Finally, roughly chop a large handful of parsley leaves. Add these to the couscous and transfer to a serving dish.

Add a final touch by popping a few slices of lime to the couscous and a final sprinkle of parsley leaves on the top.

Lime Couscous

It really is that simple to make this dish!

Since Spring is now here and the promise of warmer days beckoning, this Lime Couscous is the perfect dish to serve, as it can sit at room temperature, not taking up fridge or oven space.

However you serve this Lime Couscous, it will be enjoyed and feasted on,  because it tastes so delicious.

If you have enjoyed this Lime Couscous, here are some other recipes that you might like to try:

Leek Colcannon

GF Leek Colcannon
Leek Colcannon

Lemon Garlic Vegetable Orzo

MD Lemon Garlic Vegetable Orzo
Lemon Garlic Vegetable Orzo

Baked Garlic Herb Potato Wedges

MD Garlic Herb Potato Wedges
Garlic Herb Potato Wedges

Since couscous is so easy to prepare, the possibilities are endless. Also, although it is perfectly fine eaten hot, I much prefer it slightly warm. It is also great for packed lunches. Simply add some chopped bell peppers, spring onions and cherry tomatoes and pack into an airtight container. And there you have it, packed lunch to go.

So, whatever you are making, baking and creating  in your kitchens, have fun preparing and sharing your feast.

Sammie xx

No part of this post may be reproduced or duplicated without the written permission of the owner. Please see my Disclosure Policy.


Leek Colcannon

Hello to all my lovely readers. Since it is now officially Spring I’d hoped to be outside gardening. Instead it is wet and windy, so I am staying indoors. Retreating to the earth of our kitchen and making a big bowl of Leek Colcannon.

FF Leek Colcannon

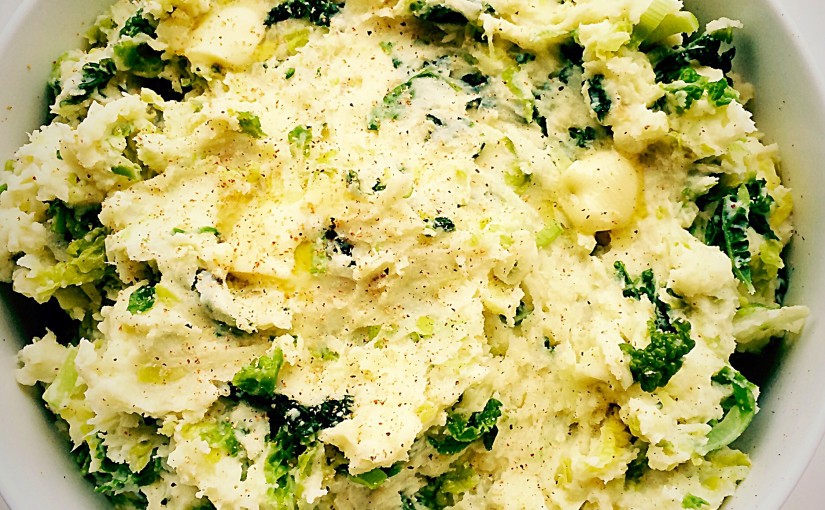
An incredible side dish made with ultra creamy, mashed potatoes that are mixed with gorgeously green, savoy cabbage. Finally the addition sautéed leeks creates a flavour filled side dish.

This has fast become a family favourite. Since it is so versatile, an ideal accompaniment to sausages, homemade pie, chops, roast chicken. Alternatively serve on its own topped with an egg. Ultimately you have endless possibilities as to what you could pair this dish with.

FF Leek Colcannon
Leek Colcannon

Celebrating The Humble Leek

Did you know that the beginning of November heralds the start of the British leek growing season? Nope neither did I!!

I absolutely love leeks, with their delicate onion flavour and that is exactly what makes them perfect in this dish.

Colcannon is a traditional Irish dish made using mashed potatoes and cabbage or kale. While I challenged myself to come up with some recipes to celebrate the British leek, I knew it’s delicate flavour would perfectly compliment the traditional Colcannon dish.

Also using seasonal fruit and vegetables in my cooking is important to me and savoy cabbage is in season now, so my choice of brassica was decided.

Nutmeg also pairs beautifully with leeks and so I knew I had to incorporate that into the dish – thus the Leek Colcannon idea was born. Whoops there I go, having ideas again – fortunately this one turned out to be absolutely delicious.

Recipe : Serves 6 generous portions of Leek Colcannon

1.75kg/4lb Pre-peeled weight Desiree Red or potatoes suitable for mashing.

50g/2oz Butter plus 1Tbsp extra

300ml/10fl Double Cream or whole milk

1/4tsp Freshly Grated Nutmeg

Salt and Pepper to taste

1 Medium Savoy Cabbage

1 Large Leek

Method : Important please read through the whole method before starting.

Preparing And Making The Mashed Potatoes

  • First of all, peel and dice the potatoes into 1″/2.5cm chunks and place in a large pan, cover with water. If you wish to add salt to the water that’s fine, I left the seasoning to the end.
  • Bring the potatoes to the boil and the simmer until a fork easily pierces the potato chunks – it’s worth checking a couple.
  • Drain the potatoes and place back into the saucepan. Allow to steam dry for a couple of minutes.
  • Add the butter, 250mls of the cream, salt, pepper and nutmeg.

Nutmeg is the secret to delicious tasting mashed potatoes www.feastingisfun.com

  • Nutmeg adds a subtle flavour that adds to the Leek Colcannon’s flavour.

Mash the potatoes, cream and butter until completely smooth.

  • Mash the potatoes, cream and butter together until completely smooth.
  • Add the rest of the cream if needed – the potatoes should be creamy, not dry. Check for seasoning and adjust as necessary.

Preparing And Cooking The Savoy Cabbage

  • While the potatoes are cooking you can prepare the cabbage and leeks.

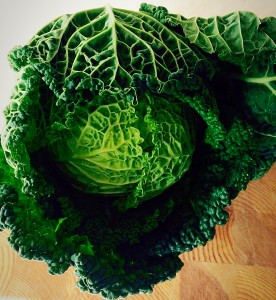
Look how gorgeously green this beautiful Savoy cabbage is.

  • Vibrant, deep green leaves from the cabbage.

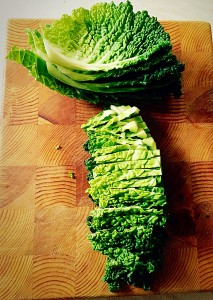
Remove 5 leaves from the cabbage and stack them.

  • Remove five leaves from the cabbage and stack them on top of each other.

Slice the leaves in half and then finely shred each half.

  • Slice the leaves in half and then finally shred each half.
  • Continue peeling off the leaves, stacking and shredding. I used almost all of the savoy cabbage. I left the very few inner, yellow leaves. If you have a large cabbage cut in half and use one half.
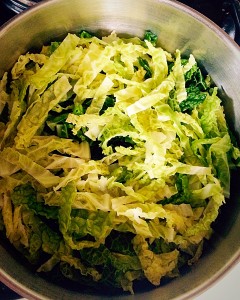
  • Place the shredded cabbage into a large saucepan, pour over an inch of boiling water from the kettle, clamp on the lid and cook on a high heat for no longer than 5 minutes.

Drain the cooked cabbage.

  • Drain the cooked cabbage.
  • Place the cabbage back into its pan and allow to steam dry for a couple of minutes.

Preparing And Cooking The Leeks

  • First of all trim the tough dark green top from the leek and also the root end.
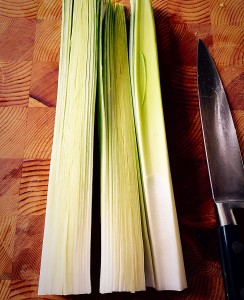
  • Make a slit cutting almost through from the top of the leek to two thirds down.
  • Wash the leek under running cold water ensuring any dirt, trapped between the leaves is washed away.
  • Shake the leek over the sink to remove any excess water.

Tip : I wash my leeks, shake them and leave them upside down on the draining board to drain, before prepping other vegetables.

Cut the washed leek in half.

  • Cut the washed leek in half.

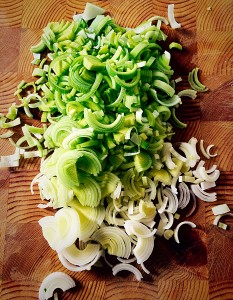
Finely shred the leek.


  • Finely shred the leek.
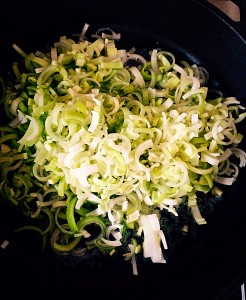
  • Place a tablespoon of butter into a shallow pan and gently saute the leeks until tender, over a medium heat.

Sauté the shredded leek for 5 minutes until tender and cooked.

  • Sauté the shredded leek for 5 minutes until tender and cooked.

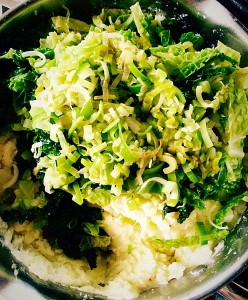
Add the cabbage and leek to the mashed potato.

  • Add both cabbage and leek to the mashed potato.

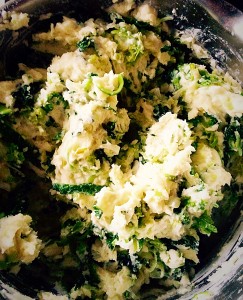
Stir all the ingredients together until well combined.

  • Stir all the ingredients together until combined.
FF Leek Colcannon
Leek Colcannon
  • Finally, decant the leek colcannon into a heatproof dish. Adding dots of butter and a final grating of nutmeg.

The Leek Comes was served with Steak Leek And Ale PieSteak Leek And Ale Pie alongside steamed carrots. Fortunately there was enough left over to make bubble and squeak patties for lunch the next day!

If you have enjoyed this recipe for Leek Colcannon you may also like these:

Walnut Pastry Crust Leek Stilton Tart 

FF Leek Colcannon
Walnut Pastry Crust Leek Stilton Tart

Homemade Cauliflower Cheese 

FF Leek Colcannon
Homemade Cauliflower Cheese

Roasted Summer Vegetable Orzo Salad 

FF Leek Colcannon
Roasted Summer Vegetable Orzo Salad

I do hope that I’ve inspired you to try this delightful dish. Although I used double cream – well we were celebrating the start of the British leek growing season – milk is a perfectly fine substitute. Switching up the greens to Kale or Spring Greens through the growing season will be fine, just make sure they are cooked until just tender – I haven’t found a fan of overcooked, soggy cabbage yet!

Sammie x

The British Leek Association provided me with some of the ingredients for this recipe. All content and opinions are my own. I did not receive payment for creating this recipe. Please see my Disclosure Policy.

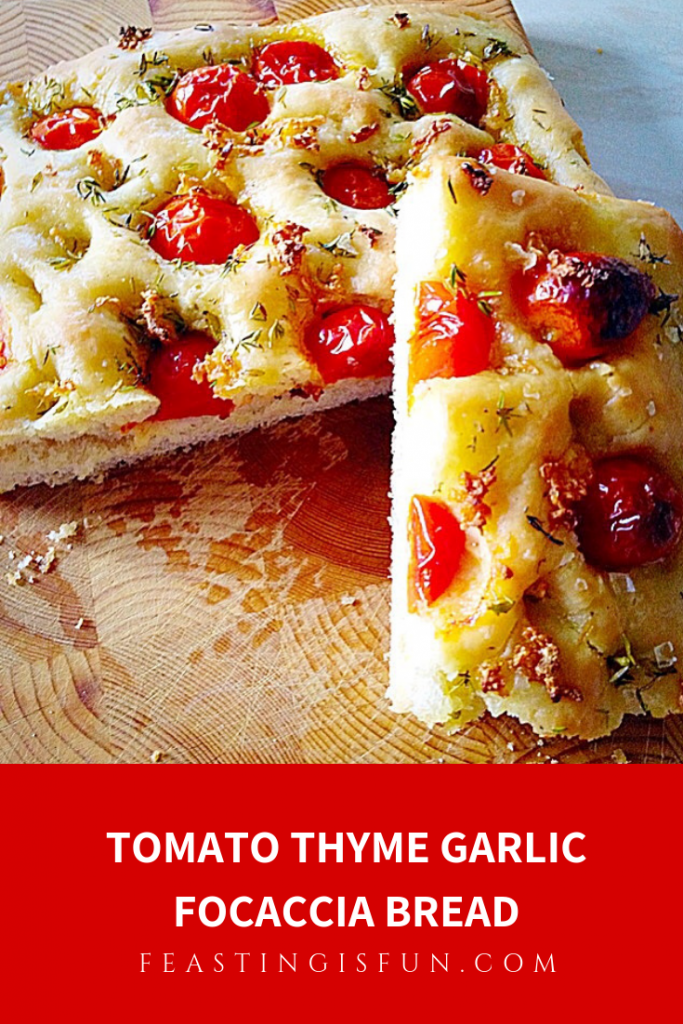
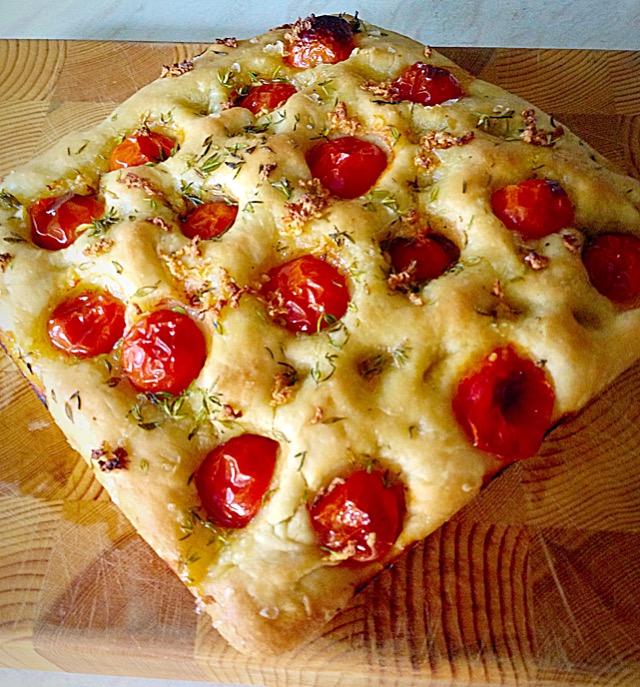
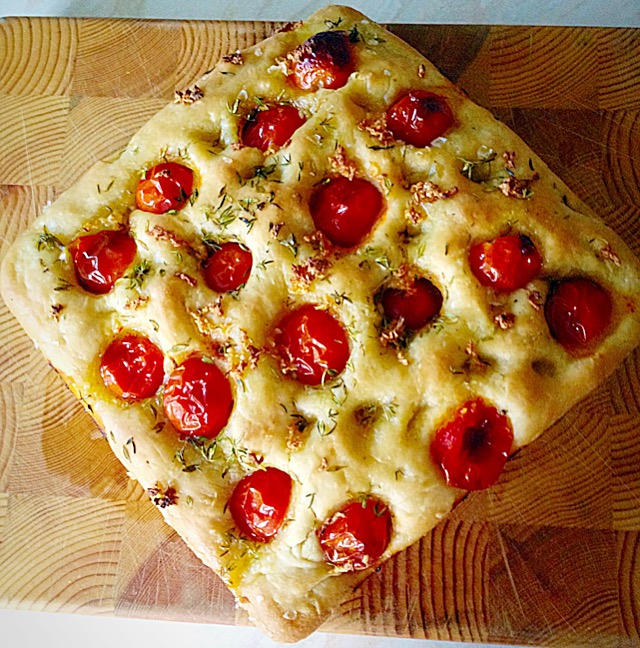
Tomato Thyme Garlic Focaccia Bread

It is no secret, to those of you who have visited here before, that I love baking bread. Whether it’s a crusty loaf for sandwiches and toast, or Knotted Poppyseed Roll the flavour and quality of homemade bread wins every time I make it. Since I do not live near an artisan bakery, I now make pretty much all of our own bread, here at home. Today I have something very special to share  my Tomato Thyme Garlic Focaccia Bread.

FF Tomato Thyme Garlic Focaccia Bread


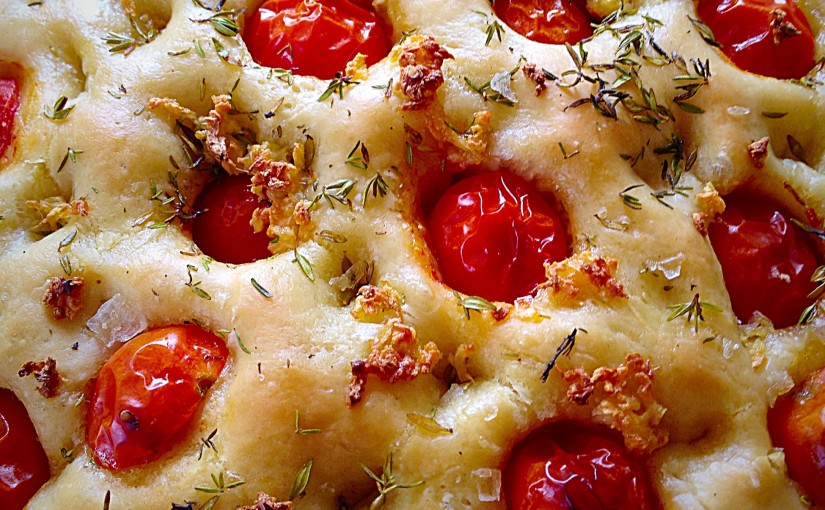
I honestly can’t begin to tell you just how yummy this bread is. It truly is proof that the sum of the parts is greater than the whole. Tomato Thyme Garlic Focaccia Bread is taking bites of bread and then experiencing your taste buds explode with all the flavours,  in your mouth.

FF Tomato Thyme Garlic Focaccia Bread
Tomato Thyme Garlic Focaccia Bread

This Focaccia is perfect with pasta (we had it with Lasagne, perfect for mopping up tomato and cheese sauce). I also think it would be great to take on a picnic, served with some good cheddar and a glass of something cold!

Bake Once Eat Twice

I made enough for 2 loaves, so just halve the recipe if only one Focaccia is needed – as the tomatoes won’t freeze well. Alternatively make two and leave the tomatoes off of the loaf you intend to freeze. Double wrap in cling film and the bread will last 3 months in the freezer!

FF Tomato Thyme Garlic Focaccia Bread
Tomato Thyme Garlic Focaccia Bread


We love any kind of bread with our meals, especially if it has garlic added. This hit the spot big time and Snugs, who can be a little but careful when it comes to ‘different foods’ loved this!! I guess you could even add some shards of sharp cheddar before baking? Might have to try that!!!!

Recipe : Tomato Thyme Garlic Focaccia Bread makes 2

NOTE: Halve the ingredients for one focaccia

500g/1lb 2oz Strong White Bread Flour

10g Fast Action Dried Yeast – I use Allinson 

7g Sea Salt – I use Maldon

2tbsp Extra Virgin Olive Oil, plus extra for drizzling – I use Filippo Berio 

Approx 300-350ml lukewarm water

16-20 Cherry Tomatoes – halved

2tbsp Fresh Thyme Leaves – halve if using dried thyme

4 Cloves of Garlic

Method : Using bread maker or stand mixer with dough hook attached.

Making The Focaccia Dough

Place 300ml of water into the bowl of your mixer.

Add the yeast and then the flour.

Add 2tbsp Extra Virgin Olive Oil

Now add the salt.

Set the bread maker to the mix/prove cycle.

If the dough seems dry add extra water 20mls at a time until the dough has a smooth elasticity, while being mixed. If the dough is too dry either machine will be clunking!

With a stand mixer mix on medium speed until the dough is soft and elastic. Using Olive oil on your hands to stop the dough sticking, roll the dough into a tight ball, place back into the mixer bowl, cover with cling film and leave to double in size.

Shaping The Focaccia Dough

Using either method, once the first proof is finished, knock back, restarting the mixing on the bread machine and removing the cling and mix for a further 10 minutes.

Oil 2 x 20cmx20cm (8″ x 8″) square tins.

Tip the knocked back dough into one of the oiled pans.
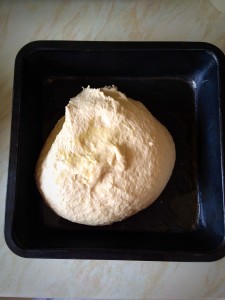
Place half the dough into each pan.
Using your fingers spread the Focaccia dough so it covers the base of the pan evenly. Drizzle a little Olive oil over.
Add the cherry tomato halves.
Sprinkle the thyme and garlic over the top and give your dough a final drizzle with Olive oil.

Cover and leave to double in size.

Baking The Tomato Thyme Garlic Focaccia Bread

While the bread is proving, preheat your oven to 220C/200C fan oven, gas mark 7, 425F.

As soon as your dough is doubled in size place in the centre of a preheated oven for 25-30 minutes.

Breathe deeply. Mmm, that smell coming out of the oven is your Tomato Thyme Garlic Focaccia Bread. Enjoy, it smells and tastes amazing!


Remove your Tomato Thyme Garlic Focaccia Bread from the oven when it is golden all over.
Remove the Tomato Thyme Garlic Focaccia Bread from the pan and cool on a rack, if not eating straight away!!

Allow the focaccia to cool so that it is just warm before serving. Cut into squares to serve.

Tomato Thyme Garlic Focaccia Bread

If you have enjoyed this recipe for Tomato Garlic Focaccia Bread you may also like these:

Garlic Rosemary Focaccia Bread

FF Tomato Thyme Garlic Focaccia Bread
Garlic Rosemary Focaccia Bread

Sundried Tomato Olive Focaccia Bread

FF Tomato Thyme Garlic Focaccia Bread
Sundried Tomato Olive Focaccia Bread

Baked Cheese Olive Ciabatta Bread

FF Tomato Thyme Garlic Focaccia Bread
Baked Cheese Olive Ciabatta Bread

I almost always use a stand mixer and dough hook to knead any dough that I’m making. While I really love the feel of dough in my hands the combination of a bad back and now arthritis in my thumbs joints means it’s painful. Yet by using the mixer I can still make fresh bread for us as a family and I get to shape it by hand. Resulting in a happy me, as I can still bake bread and a happy family who really enjoy fresh, home baked bread.

Whatever you are making, baking and creating in your kitchens, have fun preparing and sharing your feast.

Sammie x

No part of this post may be reproduced or duplicated without the written permission of the owner. Please see my Disclosure Policy.


Tangy Lemon Potato Salad

When the sun is shining and the temperature gauge keeps going up, cool, refreshing food is what we need. So my Tangy Lemon Potato Salad is perfect, cool and refreshing with a hint of crunch. Also this is the perfect side dish to, well, just about anything! We’re having this with fish tonight.

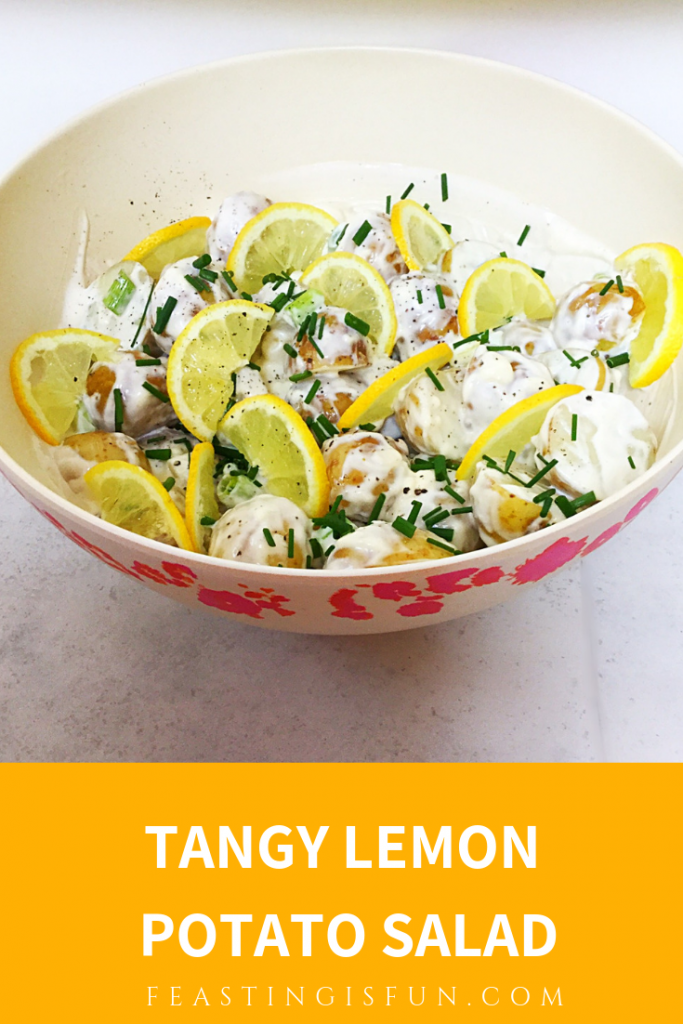
Pinterest image with descriptive graphics


While my Tangy Lemon Potato Salad does have mayonnaise in the sauce, you can easily substitute a light/lower fat mayo. The mayonnaise is thinned down with the juice of a whole lemon. And it’s this zesty juice that permeates the warm potatoes so that once chilled they take on a tongue tingling tang. Also at the same time it stops the mayonnaise from becoming gloopy.

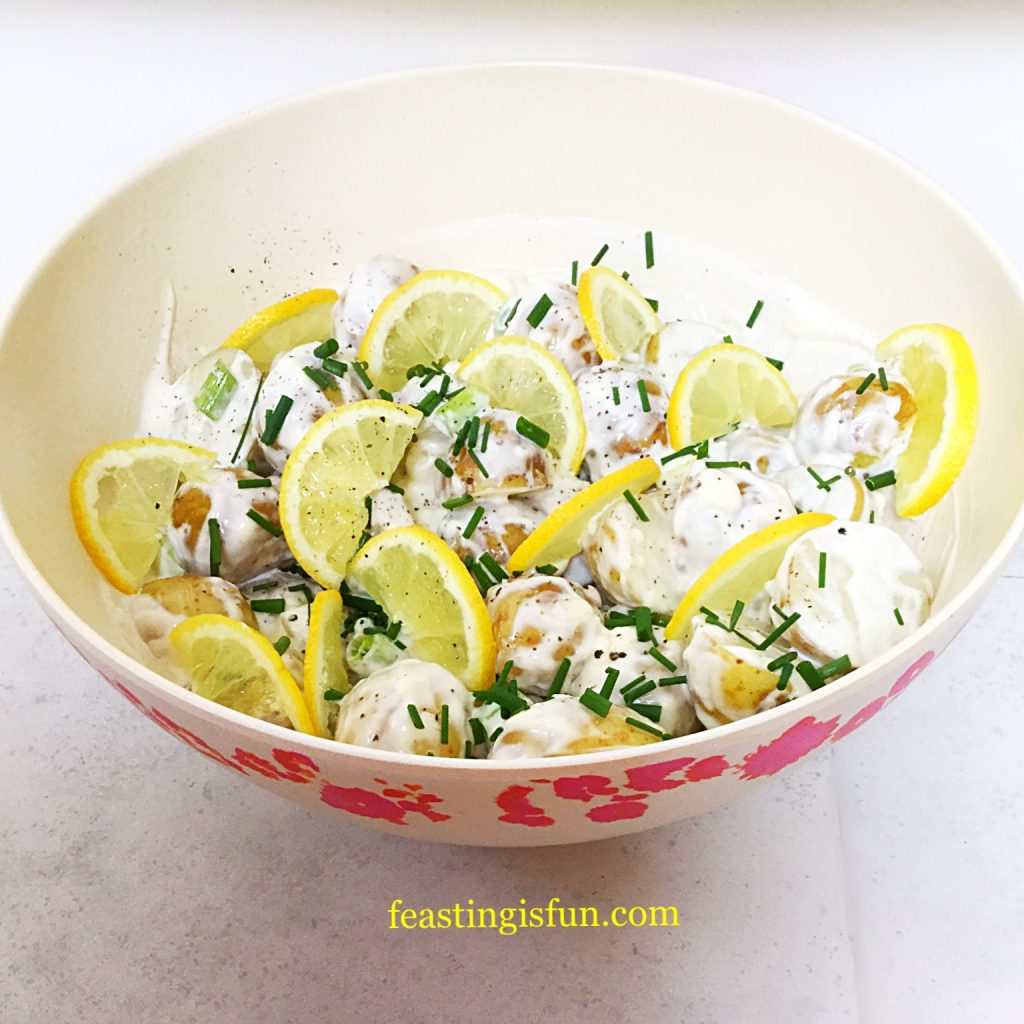
Overhead image of freshly made potato salad with lemon slices and chopped chives.
Tangy Lemon Potato Salad

If, like me you’re organised, cooking the potatoes and getting this salad made first thing in the morning, or even the night before, not only allows all the flavours to merge together, but you are also guaranteed a cold salad. Resulting in a side dish that works well with hot fish, quiche and any number of dishes including barbecues. Also it is ideal as part of a cold meal, buffet and picnic.

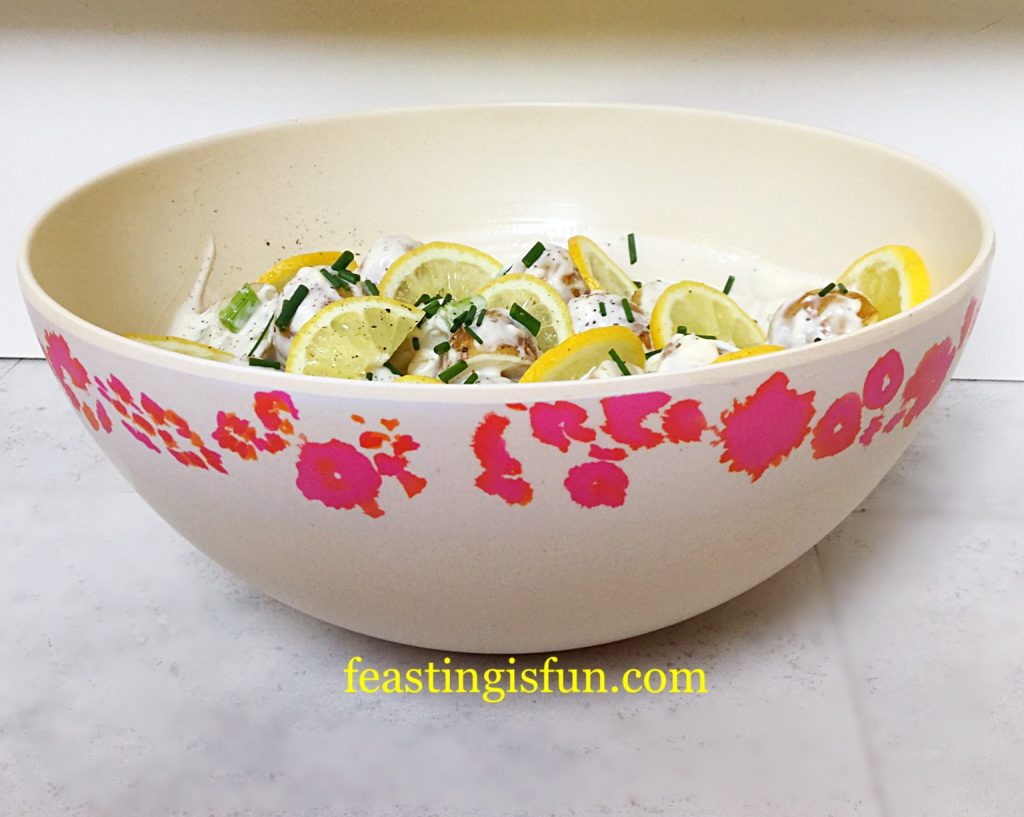
Close up of the pretty bowl, which has flowers around the outside rim.
Tangy Lemon Potato Salad

So I can guarantee that once you have made this Tangy Lemon Potato Salad you will want to keep making it. Especially if you take it to friends and family to share. Easy to make and perfectly portable!

Recipe : Tangy Lemon Potato Salad, serves 6 as a side dish.

1kg/2.2lb Baby New Potatoes I like Charlotte as they are available all year roundfrom most supermarkets including Waitrose and Sainsbury’s

Juice of 1 Whole Lemon

1 Lemon – for slicing

4 Heaped Tablespoons Mayonnaise

1/2tsp Sea Salt – I use Maldon, halve the quantity if using free flowing

1/2tsp Ground Black Pepper

2 Celery Sticks

3 Spring Onions

2 tbsp Chives

Making The Potato Salad

First of all, scub the potatoes to remove any dirt. Cut any larger potatoes in half so that all the potatoes are roughly the same size.

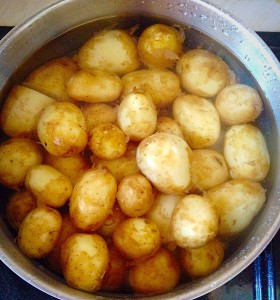
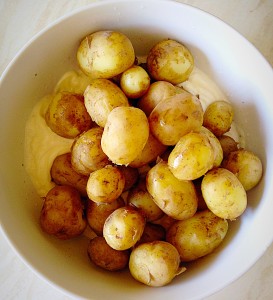
Place the potatoes in a saucepan, cover with water and bring to the boil.

Simmer the potatoes until just tender, drain, return to the pan and leave with the lid on, to finish steaming for 20-30mins.

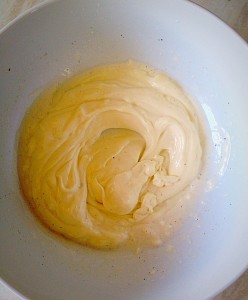
In a bowl add the juice of one lemon, mayonnaise, salt and pepper.

Stir until thoroughly combined.

Drain the potatoes and leave to steam dry in a colander for 5 minutes.

Add the potatoes to the bowl.

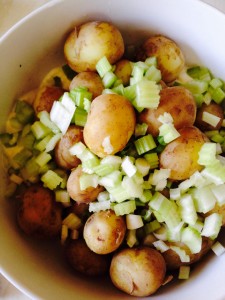
Chop the spring onions and celery into small dice.

Add the chopped celery and spring onions to the bowl.
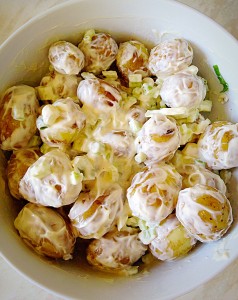
Give everything a gentle mix.
Snip the fresh chives over the top of your Tangy Potato Salad.
Snip the fresh chives over the top, taste and adjust the seasoning as necessary.

Finally, if you prefer you can serve the Tangy Lemon Potato Salad as it is. Although I like to jazz it up with a few, very finely sliced lemon halves. Because they are perfectly edible (although if you just want to use them for garnish that’s fine) and taste delicious. Also the sliced lemon let’s people know that there is lemon juice in the potato salad.

Salad bowl from Emilie OConnor Home Store.

Make this Tangy Lemon Potato Salad up to a day ahead. Store in a bowl wrapped in cling film and keep refrigerated. Eat within 3 days.

If you like the bowl featured in this post, it is available from Emilie OConnor  home store. It is made using bamboo fibre and comes with a fitted chopping board lid and inset salad servers. I was very fortunate to win this eco-friendly bowl in a competition on Instagram. Check out her website, as her items are practical, beautiful and kind to the environment.

If you have enjoyed this recipe for Tangy Lemon Potato Salad then you may also like these:

Lemon Garlic Roast Chicken

FF Tangy Lemon Potato Salad
Lemon Garlic Vegetable Orzo

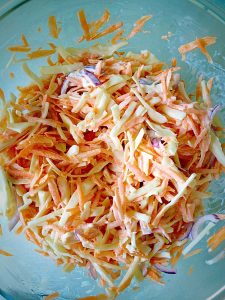
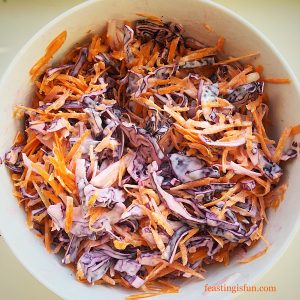
Crunchy Homemade Coleslaw

FF Tangy Lemon Potato Salad
Crunchy Homemade Coleslaw

Lime Couscous

FF Tangy Lemon Potato Salad
Lime Couscous

Lemons give a fresh, zesty, citrus burst to any dish they are used in, whether sweet or savoury. And a particular favourite of ours, here at home is Lemon Thyme Roast Chicken followed by Lemon Ripple Ice Cream for dessert. Sharing a feast around the table as a family is an important part of our lives.

So, whatever you are making, baking and creating in your kitchens, have fun preparing and sharing your feast.

Sammie xx

No part of this post may be reproduced or duplicated without the written permission of the owner. Please see my Disclosure Policy.
 

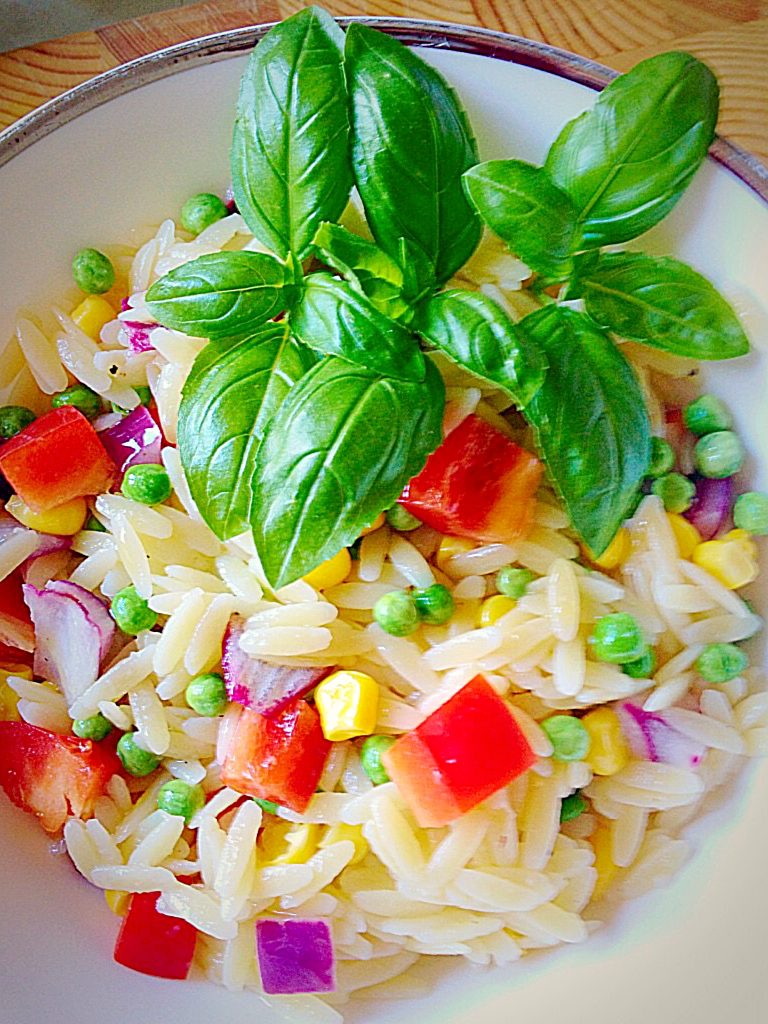
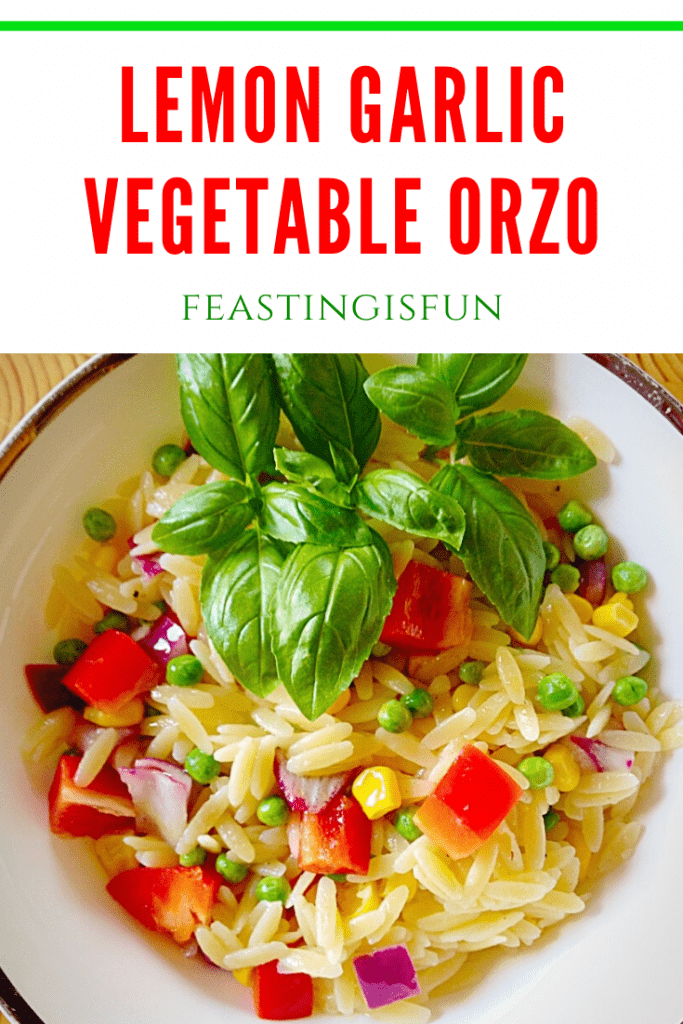
Lemon Garlic Vegetable Orzo

Hi, have I got the easiest, tastiest, make ahead side dish for you? Oh yes I have! Lemon Garlic Vegetable Orzo. Also, this dish does not disappoint as it is delicious.

Lemon Garlic Vegetable Orzo

While I’ve said this is a side dish, it’s also vegetarian and makes a fabulous light lunch. Likewise, adding a few shavings of Parmesan would add extra oomph for lunch, served alongside some crusty, crunchy bread.

I’m getting hungry!

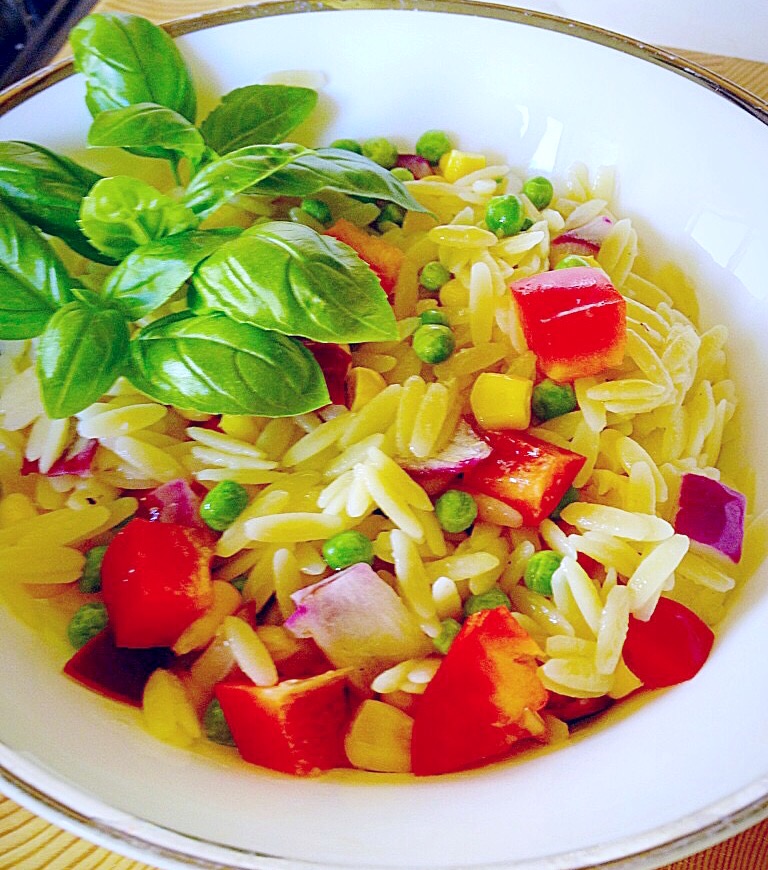
Lemon Garlic Vegetable Orzo

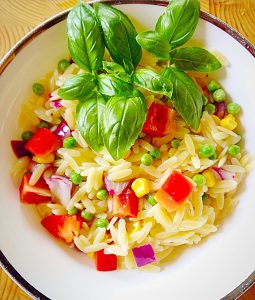
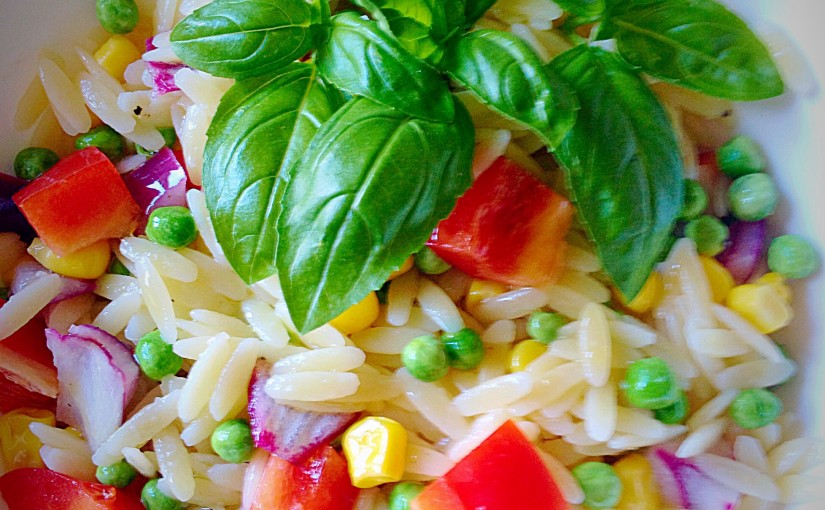
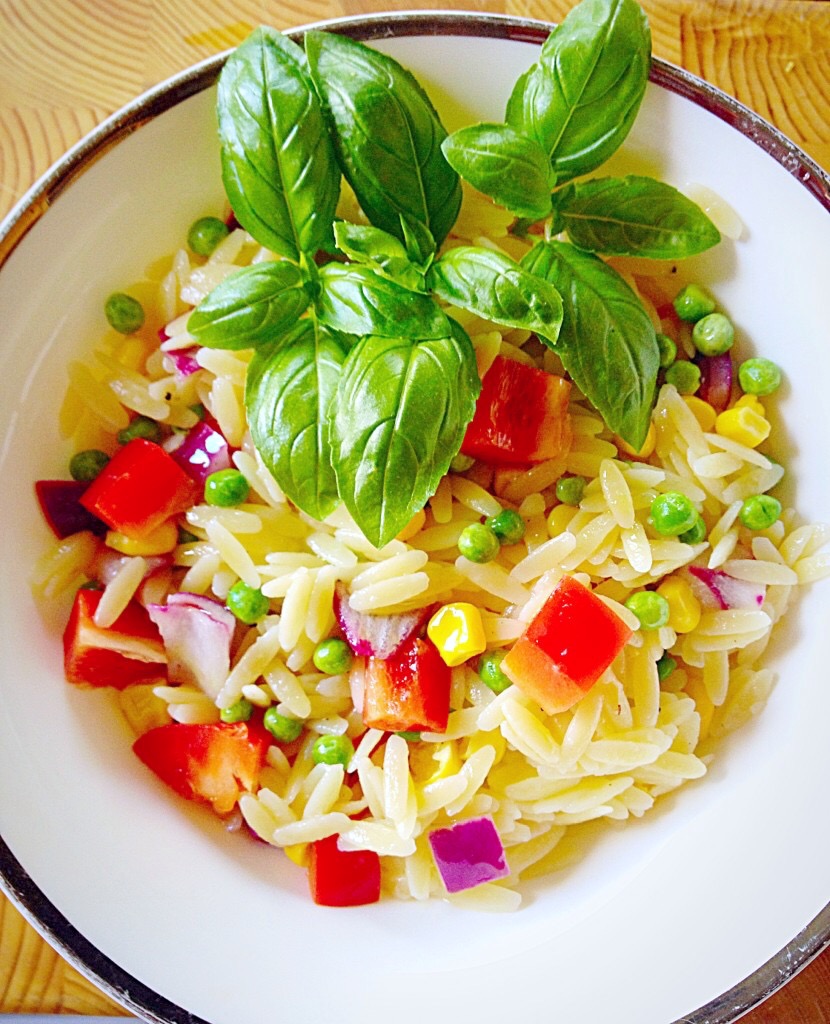
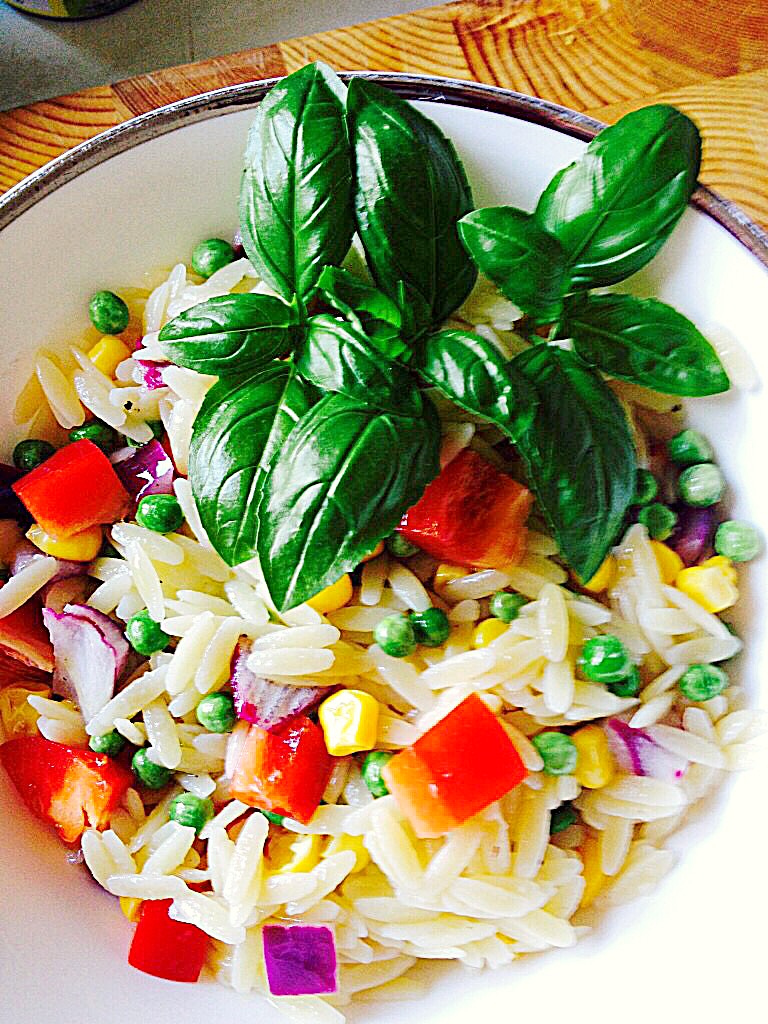
While I’ve used red onion, peas, sweetcorn and red bell pepper in this dish – but feel free to switch up the veggies (celery is also good) with whatever you have on hand. Most importantly, I would say that this Lemon Garlic Vegetable Orzo is best served at room temp, or even warmed – BUT NOT COLD! Because, no matter how much lemon/oil you add, when served fridge cold the Orzo clumps together and not in a good way! So there you go, an easy recipe that doesn’t take up any room in your fridge, or require any last minute fiddling. Yay!! Because, we like easy!


Orzo with vegetables and a lemon and garlic dressing.
Lemon Garlic Vegetable Orzo


Recipe : Lemon Garlic Vegetable Orzo serves 6-8 as a side dish.

500g/1lb Packet Dried Orzo – available from most supermarkets I buy mine from Waitrose 

Juice of 1 Large Lemon

1 x Small Red Onion

150ml/5fl oz Extra Virgin Olive Oil

2 x Garlic Cloves – crushed

200g/7oz Frozen Peas

Medium Can Sweetcorn

Fresh Basil

Sea Salt – I use Maldon and freshly ground Black Pepper to taste

Making The Vegetarian Orzo Dish

First of all put a large pan of water on to heat up for the Orzo.

Place the lemon juice and finely diced red onion into a large bowl. Add a pinch of salt and mix together. Also leaving the onion in the lemon juice will remove the acrid taste!

As soon as the water in the pan is boiling add salt and then the Orzo. Cook according to the packet instructions, taking care not to overcook or the Orzo will simply clump together!

While the Orzo is cooking gently heat the Olive Oil and garlic together, for approximately 2 minutes on a medium heat. This allows the garlic to infuse the oil. And also the garlic is lightly cooked. Pour the garlicky oil over the onions and lemon juice.

Lemon Garlic Onions and Oil - add salt and pepper.
Lemon Garlic Onions and Oil – add salt and pepper.


Drain the Orzo as soon as it is cooked and pour straight into the bowl. Using a large slotted spoon immediately toss the Orzo in the oil/lemon juice, this will stop the Orzo from sticking together.

Place the frozen peas (I used petit pois) in the bowl and mix in with the hot Orzo.

Add the sweetcorn (drained) and the diced, red, bell pepper. And mix together with a fork, then taste for seasoning.  Add salt and freshly ground pepper as necessary.
Take a handful of Basil leaves, roughly chop and sprinkle over.
Finally, cover with cling film and serve at room temperature.
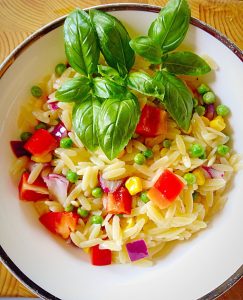
Lemon Garlic Vegetable Orzo


This side goes fabulously with fish – Salmon especially, Chicken and Pork. Likewise, it makes a fab alternative to roast potatoes and hot veggies for a Summer roast, Also, it completely seals the deal as part of a buffet or served at a barbecue. And with very little effort needed!

If you have enjoyed this recipe for Lemon Garlic Vegetable Orzo you may also like these:

Tangy Lemon Potato Salad

FF Lemon Garlic Vegetable Orzo
Tangy Lemon Potato Salad

Crunchy Homemade Coleslaw

FF Lemon Garlic Vegetable Orzo
Crunchy Homemade Coleslaw

Roasted Summer Vegetable Orzo Salad 

FF Lemon Garlic Vegetable Orzo
Roasted Summer Vegetable Orzo Salad

Enjoy feasting on this scrumptious dish and may we have many sunny days ahead to spend with friends and family, having fun round the BBQ!

Also, making sure there are hidden ‘Super-Soakers’ primed for action if it gets too hot – or boring!!!!

So, whatever you are making, baking and creating in your kitchens, have fun preparing and sharing your feast.

Sammie x

No part of this post may be reproduced or duplicated without the written permission of the owner. Please see my Disclosure Policy.