Creamy Tomato Spinach Chicken Pasta

I love easy, quick to make, healthy meal recipes. How about you? Pasta is quick to cook, versatile, economical and tasty, ticking all of these boxes. With so many varieties of pasta, there’s also an endless number of different sauce possibilities to suit any diet. I cannot imagine my kitchen without it! My culinary creativity would be far less fun and frankly, boring! So, thank you Italy, you may have invaded Britain, however it’s time to let things go, as you have given us pasta. More specifically the fusilli bronze die pasta used in this Creamy Tomato Spinach Chicken Pasta.

FF Creamy Tomato Spinach Chicken Pasta

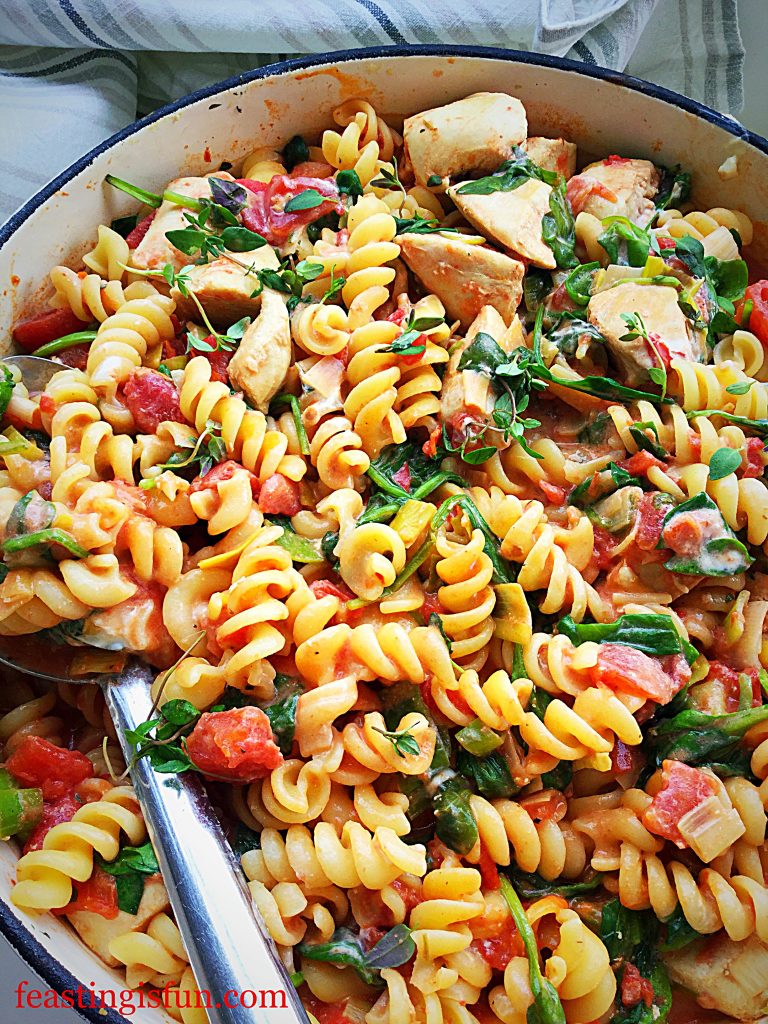
So, next time you think of tossing a jar of pesto into pasta for dinner, think again. As this dish only takes 30 minutes to make, barely more than the time it takes to cook pasta. Not only do you get a balanced healthy meal, it is filling, like all proper meals should be. Tender, bite sized pieces of succulent chicken breast, fresh baby spinach wilted into the tomato and cream cheese sauce that wraps itself around the fusilli pasta.
FF Creamy Tomato Spinach Chicken Pasta
Creamy Tomato Spinach Chicken Pasta

Feasting Food

If you are cutting down on carbs you may wish to skip this paragraph. Which is, to serve this tasty bowl of goodness with a chunk of baguette, or any of my homemade focaccia bread  recipes. While this dish not swimming in sauce, there is always some pooled on your plate or bowl. And this is where the bread is important. To dunk with! Using the bread to absorb every last drop of the luscious, creamy sauce. Also, keeping with the low fat theme, why not leave the bread unbuttered. As well as reducing calories, the bread is more absorbent without butter.
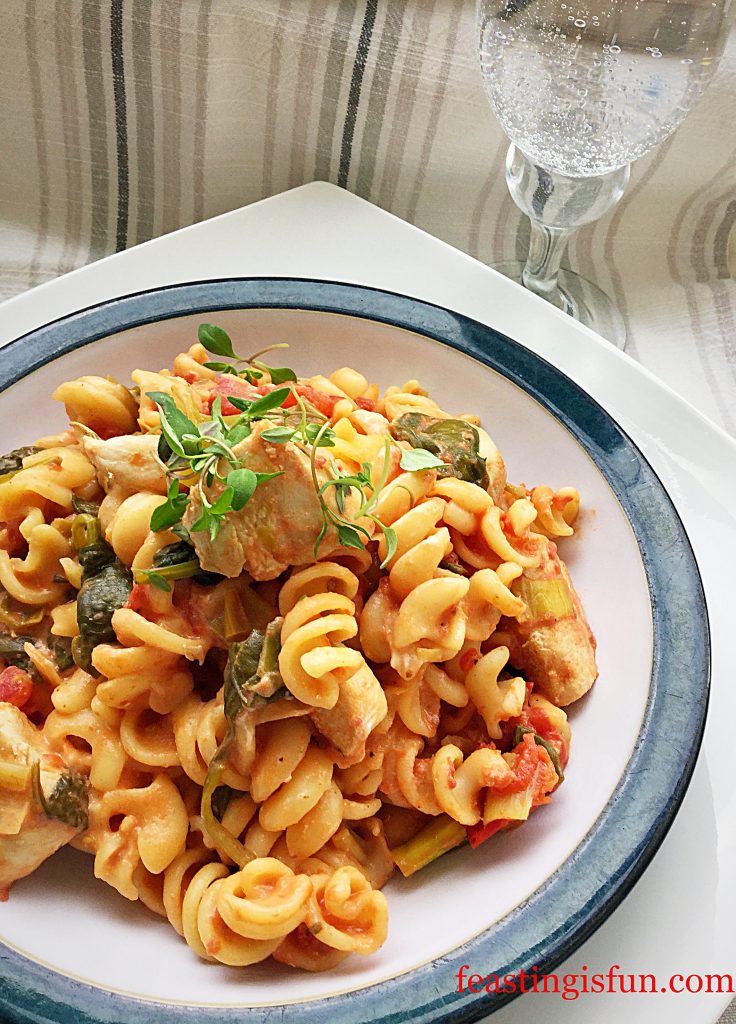
FF Creamy Tomato Spinach Chicken Pasta
Creamy Tomato Spinach Chicken Pasta

Eating should be an enjoyable experience. Indeed it should be a feast. It should feed more than our tummies, it should feed our soul. Giving thanks before eating is a custom here at home. Yet stopping for a moment to look and smell the food in front of you is also important. Too much food is literally shoved down throats while watching television. I wonder too if the taste and texture, even has time to register with the brain. Eating with family and friends, sitting at a table, not only slows down the rate at which we eat, it can also regulate how much we eat. Resulting in an altogether, more pleasurable experience. My opinion is that all food tastes better when it is shared.

In addition, if you live on your own and cook for yourself, as I did for many years, being mindful while eating is still beneficial. Taking time to really enjoy the experience of eating, really is one of life’s simplest pleasures.

Time to make this delicious dish.

Recipe: Creamy Tomato Spinach Chicken Pasta serves 4-6 people

500g Diced Chicken Breast skin off and cut into bite size pieces – I use Graig Farm

1tbsp Olive Oil – I use Filippo Berio

1 Large Leek – washed and cut into small dice

2 x 400g Chopped Tin Tomatoes plus 1 tin of pasta cooking water. Alternatively use the same weight of chopped, fresh tomatoes and approximately 400mls of pasta cooking water.

200g Washed Baby Spinach – use frozen if out of season

1tbsp Fresh Thyme finely chopped – plus additional Thyme for garnishing the finished dish

140g Philadelphia Cream Cheese – use the full fat version

1tsp Sea Salt  – I use Maldon

Good Grinding of Fresh Black Pepper to taste

450g Fusilli Pasta – bronze die pasta has rougher edges and so absorbs more sauce

Method: Making the Creamy Tomato Spinach Chicken Pasta

  • First of all, place a heavy bottomed pan on to the hob over a medium heat. Add the olive oil and allow to heat.
  • At the same time place a large pan of water on a high heat, ready to cook the pasta. When the water is boiling add a teaspoon of sea salt and then the pasta and cook for 8 minutes.
  • Into the other pan add the chopped chicken breast and cook until lightly browned.
  • Remove the cooked chicken to a plate and then add the chopped leek to the pan.
  • Saute the leek until it is softened and then add the cooked chicken back to the pan.
  • Immediately add the 2 tins of chopped tomatoes and use a wooden spatula to scrape the base of the pan clean. Follow by adding the chopped fresh thyme.
  • Now tip the baby spinach into the pan. Don’t worry if it is piled high it will wilt down.
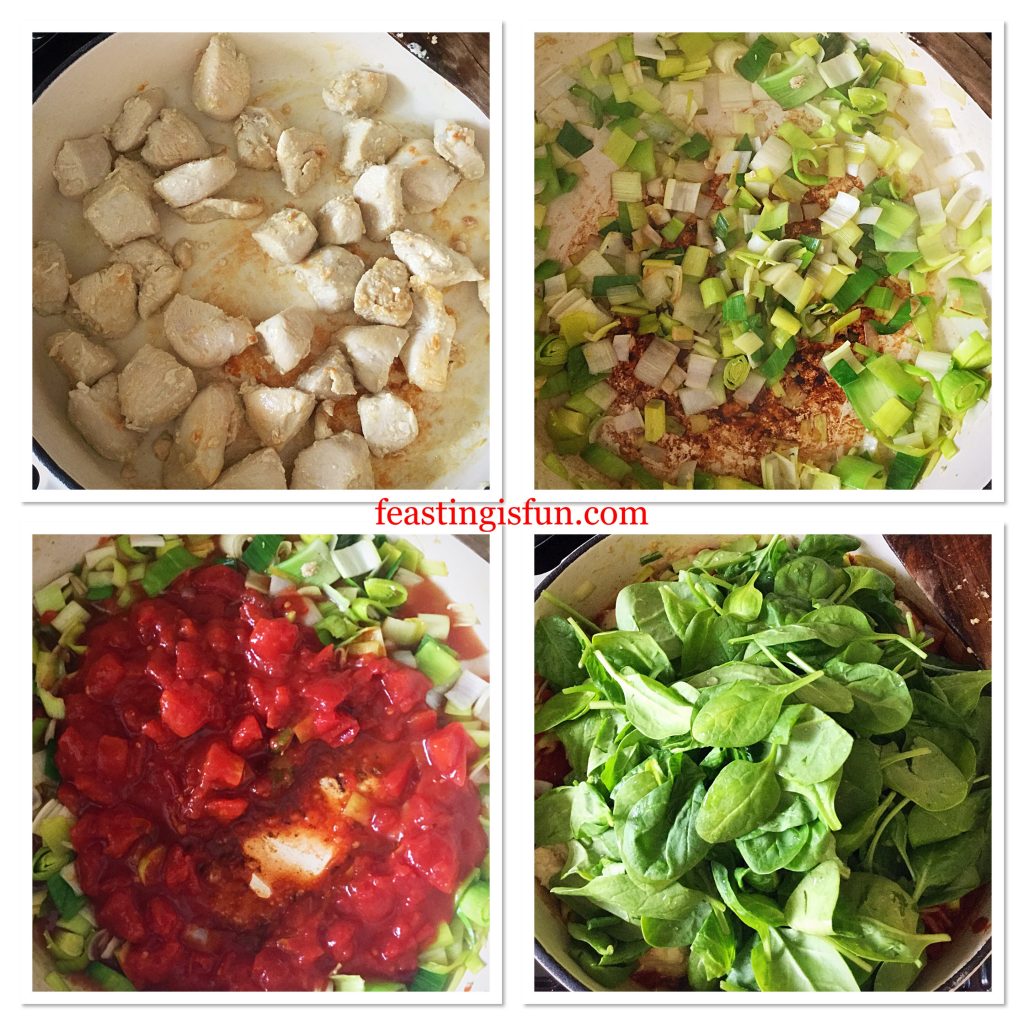
FF Creamy Tomato Spinach Chicken Pasta
Creamy Tomato Spinach Chicken Pasta
  • Remove a can full/2-3 ladles (approximately 400ml) of hot pasta water and pour on to the spinach. Take extra care as it will be hot.
  • Drain the pasta and tip on to the spinach. Allow the spinach to wilt down, it will release it’s water and make the sauce thinner.
  • Next add the cream cheese to the pan and stir so that it melts into the sauce.
  • Most importantly, taste the sauce. Add a good grinding of fresh black pepper to taste. Additional salt shouldn’t be needed, but do check and adjust the seasoning as necessary.
  • Sprinkle over fresh Thyme and the dish is ready to be served.
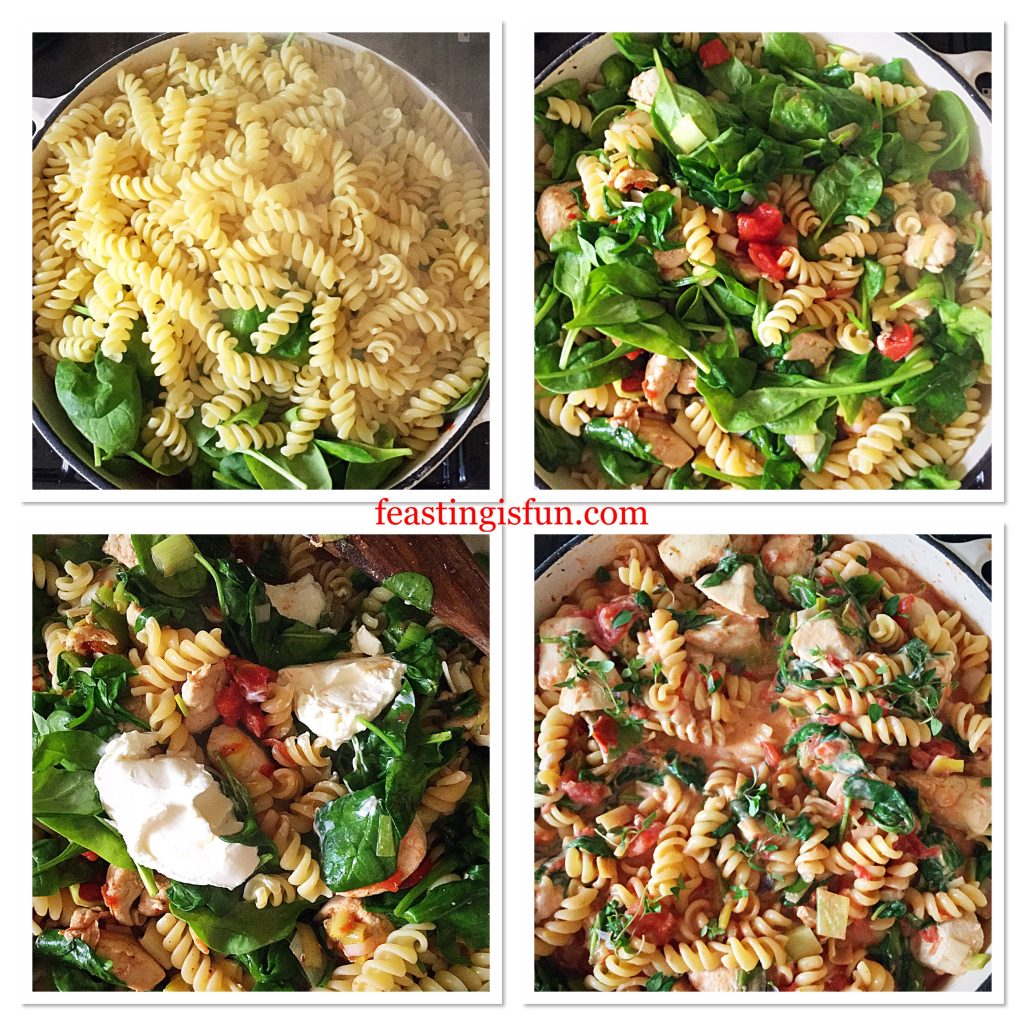
FF Creamy Tomato Spinach Chicken Pasta
Creamy Tomato Spinach Chicken Pasta

Time to eat

Serve this delicious Creamy Tomato Spinach Chicken Pasta in bowls.
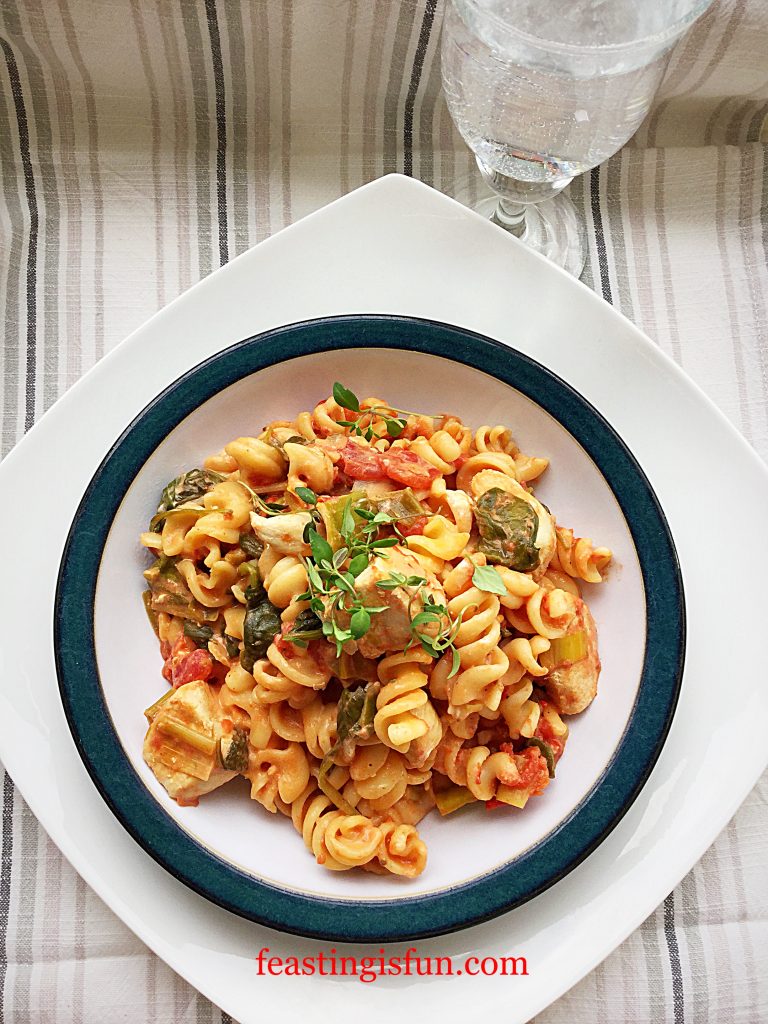
FF Creamy Tomato Spinach Chicken Pasta
Creamy Tomato Spinach Chicken Pasta

Not only is this recipe perfect for making ahead, it’s also easy to transport. Which makes it an easy dish to gift to a new family, friend who is unwell, or anyone who really needs a break from cooking. Resulting in a great meal that is as perfect to share outside the home, as well as with family and friends around the dinner table.

To freeze leftovers, cool completely and then spoon the cold pasta into freezer bags, or freezer proof containers, removing as much air as possible. Label, including the date and freeze for up to 3 months. Remove from the freezer, place on a plate or bowl and defrost in the fridge overnight. Reheat until piping hot, serve as previously suggested and enjoy!

If you have enjoyed this recipe for Creamy Tomato Spinach Chicken Pasta then you may also like these:
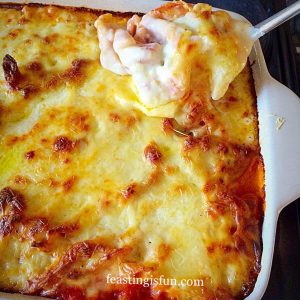

Cheesy Vegetable Pasta Bake

Cheesy Vegetable Pasta Bake

Lemon Garlic Vegetable Orzo

Lemon garlic vegetable orzo.
Lemon Garlic Vegetable Orzo

Roasted Summer Vegetable Orzo Salad

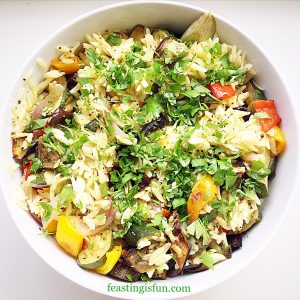
Roasted summer vegetable orzo pasta salad served in a white bowl and garnished with fresh, flat leaf parsley.
Roasted Summer Vegetable Orzo Salad.

Pasta is one of the most important ingredients in my kitchen. A go-to staple when I need to whip up something super tasty, super quick. Another bonus it that after cooking and cooling, it can usually be frozen, such as this Creamy Tomato Spinach Chicken Pasta, Chicken Four Cheese Lasagne and Cheesy Vegetable Pasta Bake all can be. Serving with bread and salad enables this dish to feed more people, ideal when last minute dinner guests appear (a necessity when a house full of teenagers and their friends lose track of time!). Although cooking pasta from scratch takes barely more than 10 minutes and even though there are countless ready made sauces to available to buy, homemade pasta dishes can be just as quick and easy. And here at home, easy meals are a busy household’s must.

So, whatever you are making, baking and creating in your kitchens, have fun preparing and sharing your feast.

Sammie xx

No part of this post may be reproduced or duplicated without the written permission of the owner. See my Disclosure Policy for full details.
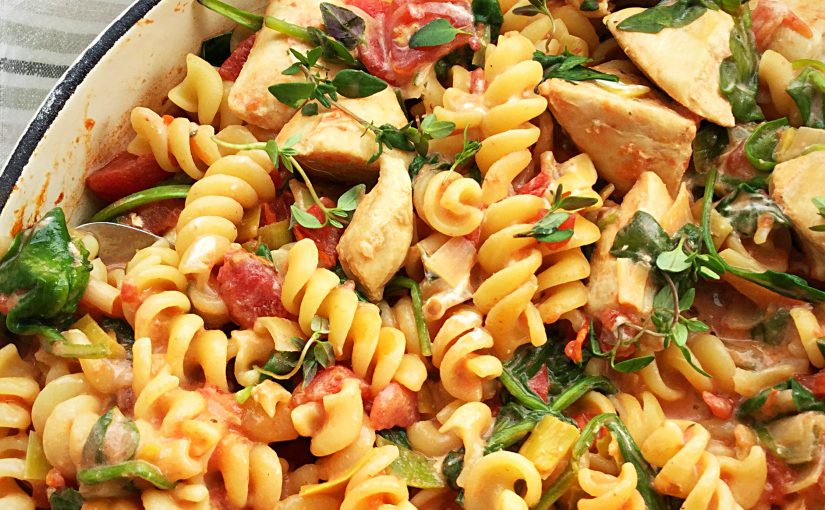

Cheddar Sun Dried Tomato Scones

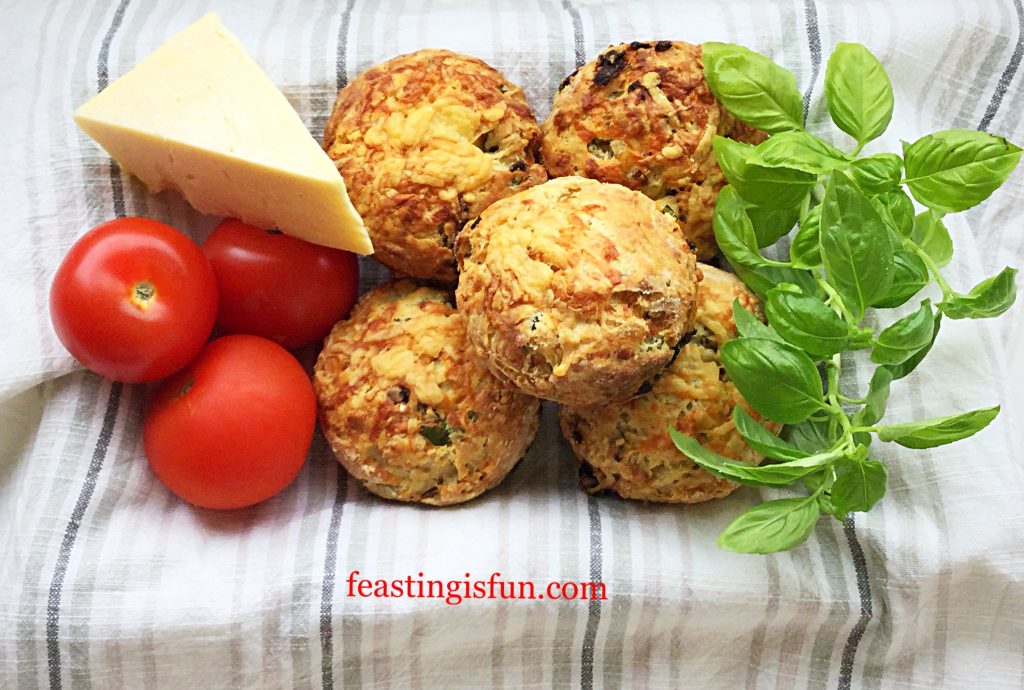
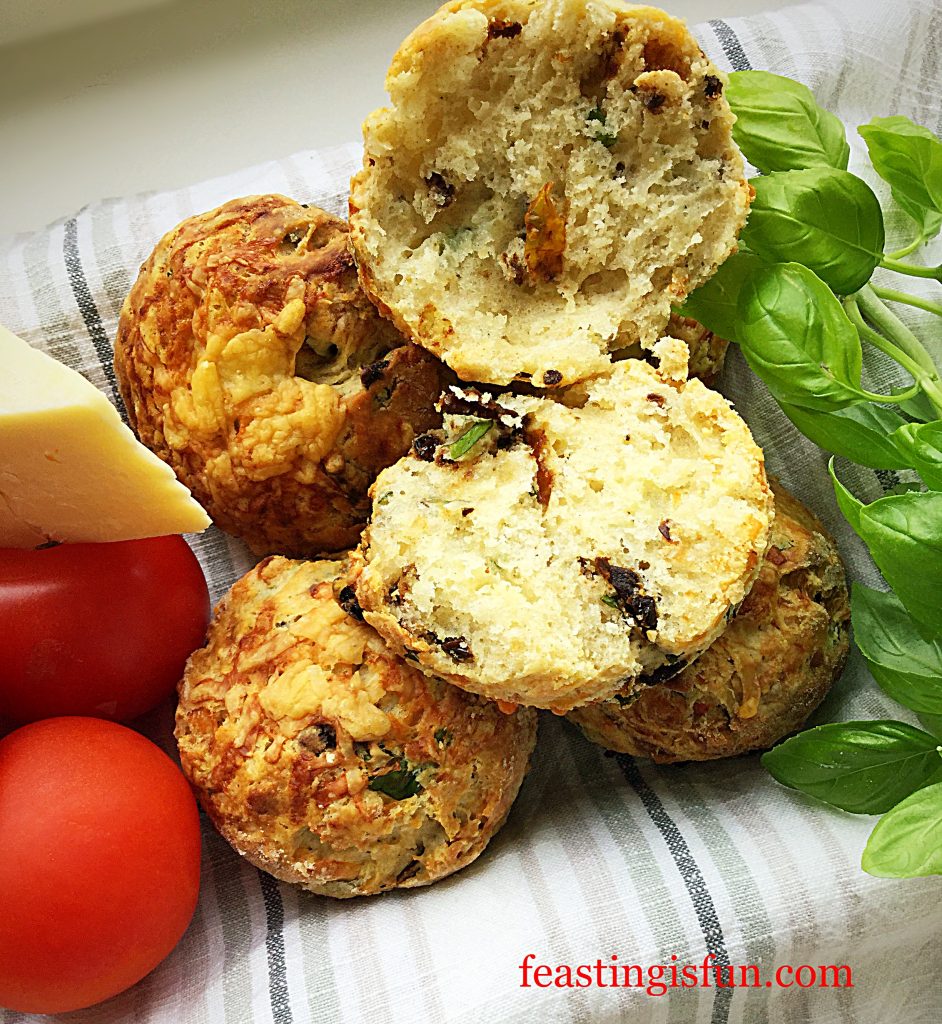
Cheddar Sun Dried Tomato Scones are the best savoury scones made at Feasting headquarters so far. Sharp, mature cheddar pairs beautifully with the sun dried tomatoes and the addition of fresh basil completes the final flavour. These scones need no addition as they are moist and light.

FF Cheddar Sun Dried Tomato Scones

Two things are really important when making these scones. First of all, use great ingredients. That doesn’t mean everything has to be top of the range, but buy the best mature cheddar you can afford. While the final flavour is not overpowering, using a mild cheddar results in a bland tasting scone. Also keeping your hands light, while making the scone dough will result in a light scone. Because if you work the dough too much the baked scones will be heavy.

FF Cheddar Sun Dried Tomato Scones
Cheddar Sun Dried Tomato Scones it’s hard to stop at one!

Since the sun dried tomatoes add a depth of savoury flavour to the finished scone, they are crucial to the recipe. Dry packaged are best, however if they are only available in oil that’s okay. Simply remove slightly more than the recipe calls for and drain them thoroughly using kitchen towels. While their deep, unique flavour and texture will still work in this recipe.
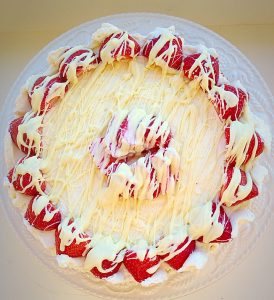
FF Cheddar Sun Dried Tomato Scones
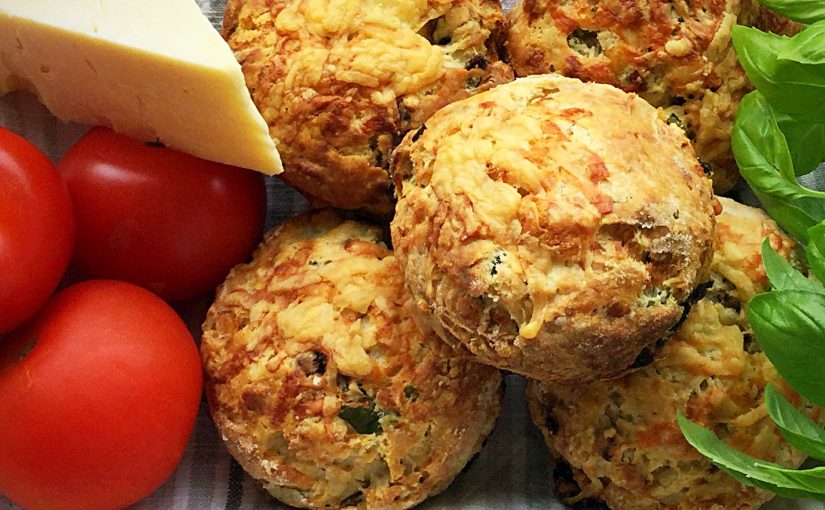
Cheddar Sun Dried Tomato Scones the cheese melts into the scone, yet the basil and tomatoes are still visible.

Time to get baking!

Recipe: Cheddar Sun Dried Tomato Scones makes 10-12

450g/1lb Plain White Flour

3tsp Baking Powder

25g/1oz Trex – solid vegetable fat kept very cold

50g/2oz Unsalted Butter kept very cold

250mls Whole Milk straight from the fridge – plus a little extra for brushing the tops of the scones

150g/5oz Freshly Grated Mature/Sharp Cheddar – I used Wyke Farm mature cheddar

50g/2oz Sun Dried Tomatoes preferably not in oil

Handful of Fresh Basil Leaves – approx. 10 large leaves.
1/4tsp Sea Salt Flakes – I use Maldon

Good grinding of Black Pepper to taste

Method: Preheat oven to 220C/200C fan, 425F, gas mark 7,

You will need two large baking trays lined with baking parchment and a 5cm/2″ plain round cutter.
Making The Cheddar Scone Dough

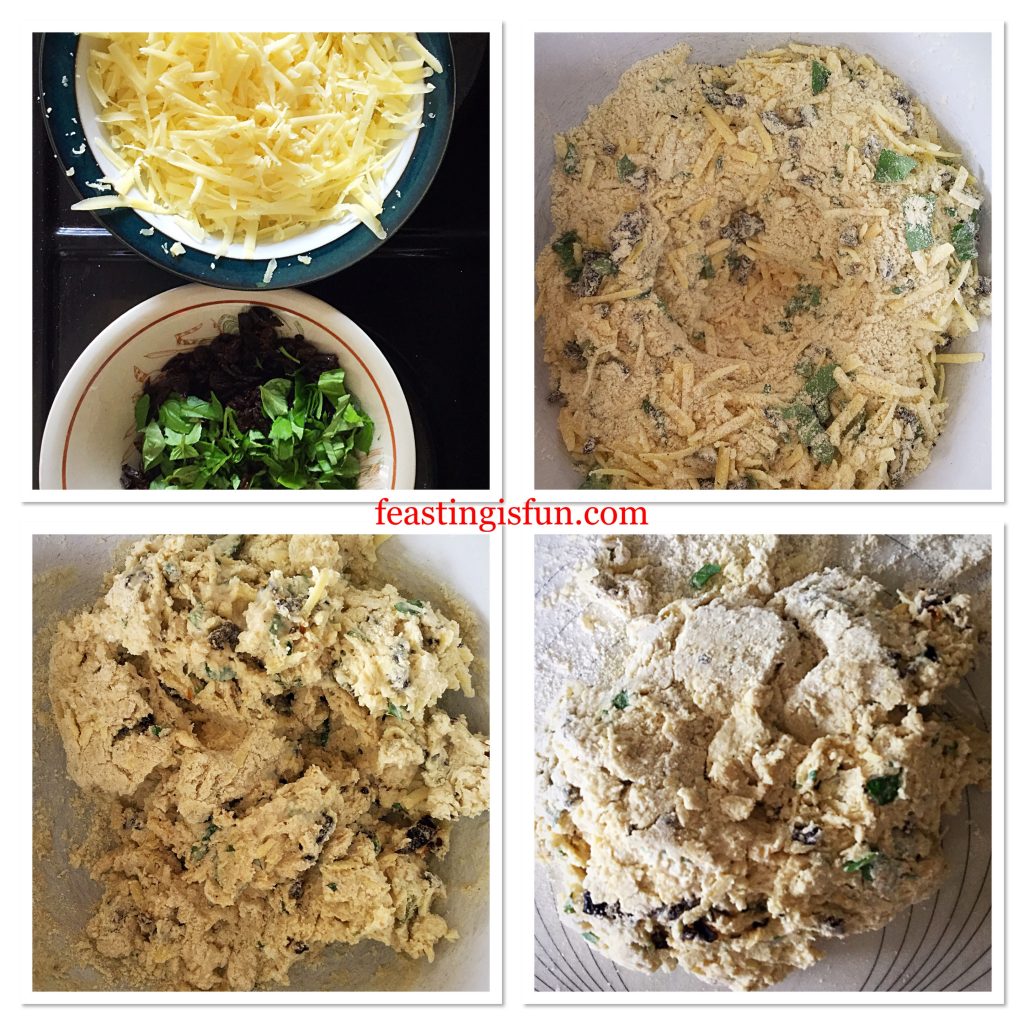
  • First of all prepare the ingredients. Grate the cheese and chop, or snip the sun dried tomatoes and basil into similar sized pieces – see photo.
  • Add your flour, baking powder, salt and a good grinding of black pepper to a large bowl. Use a balloon whisk to blend the ingredients together.
  • Next add both the fats and blend them into the flour using a pastry cutter. Alternatively rub the fat into the flour using your fingers. Finally the flour should have a breadcrumb appearance with some larger, pea sized, pieces of fat visible.
  • Add one third of the grated cheese to the bowl. Use your fingers to toss the cheese in the flour. This coats the cheese and stops it from clumping. Repeat with half of the remaining cheese. Set the unused cheese to one side.
  • Now do the same with the sun dried tomatoes and fresh basil, tossing them in the flour to coat them.
  • Make a well in the centre of the bowl and pour in the cold milk.
  • Stir the ingredients together with a dinner knife, until they form a rough dough.
  • Use your hand, shaped like a claw to pull all the ingredients together.
  • Tip the scone dough on to a lightly floured work top.
FF Cheddar Sun Dried Tomato Scones
Making the Cheddar Sun Dried Tomato Scones dough.

Shaping The Dough And Cutting Out The Scones

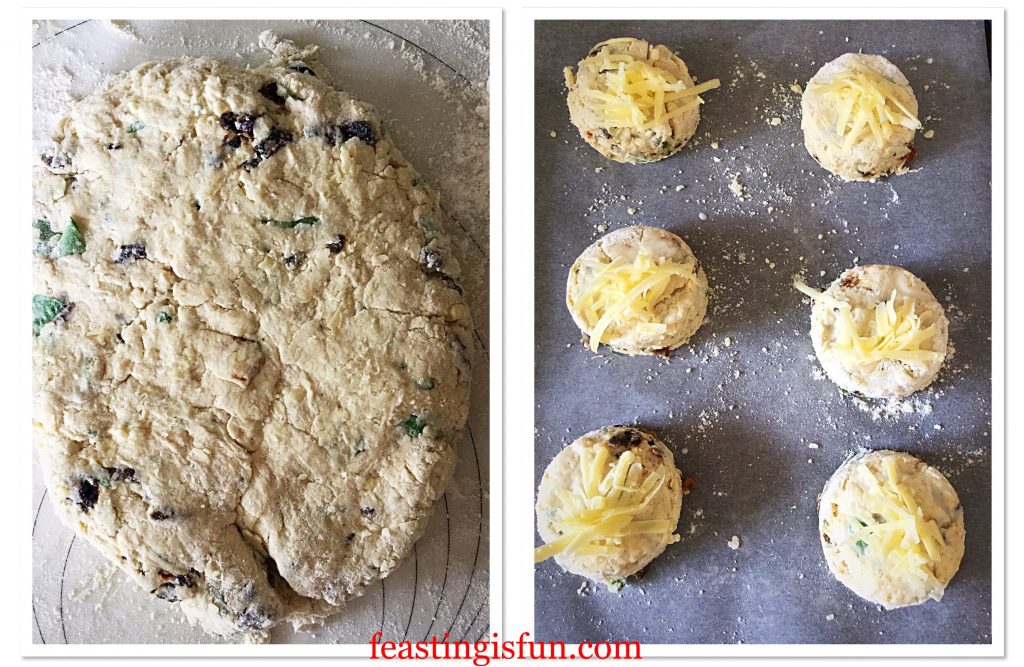
  • Bring the dough together with your hands and pat into a rough circle approximately 1 inch/2.5cm deep.
  • Thoroughly flour the round cutter and cut out the scones. NOTE: Do not twist the cutter as you push through the dough as this will result in uneven/lopsided final bakes. Place the scones on to the lined baking trays.
  • Brush the top of each scone with milk and add a little of the remaining cheese.
FF Cheddar Sun Dried Tomato Scones
Shaping the dough and cutting out the scones.

Baking The Cheddar Sun Dried Tomato Scones

  • Place the baking trays into the preheated oven and bake for 20-25 minutes.
  • The scones are baked when they are a golden colour and similar to bread sound hollow when rapped on the base with a knuckle.
  • As soon as they are baked remove the scones from the oven.
  • Immediately place the scones on to a cooling rack, using a clean tea towel to transfer them as they will be very hot.
FF Cheddar Sun Dried Tomato Scones
Cheddar Sun Dried Tomato Scones cooling on a rack.

Since these scones are at their absolute best when still slightly warm, there is no need to wait for them to completely cool before tasting!

FF Cheddar Sun Dried Tomato Scones
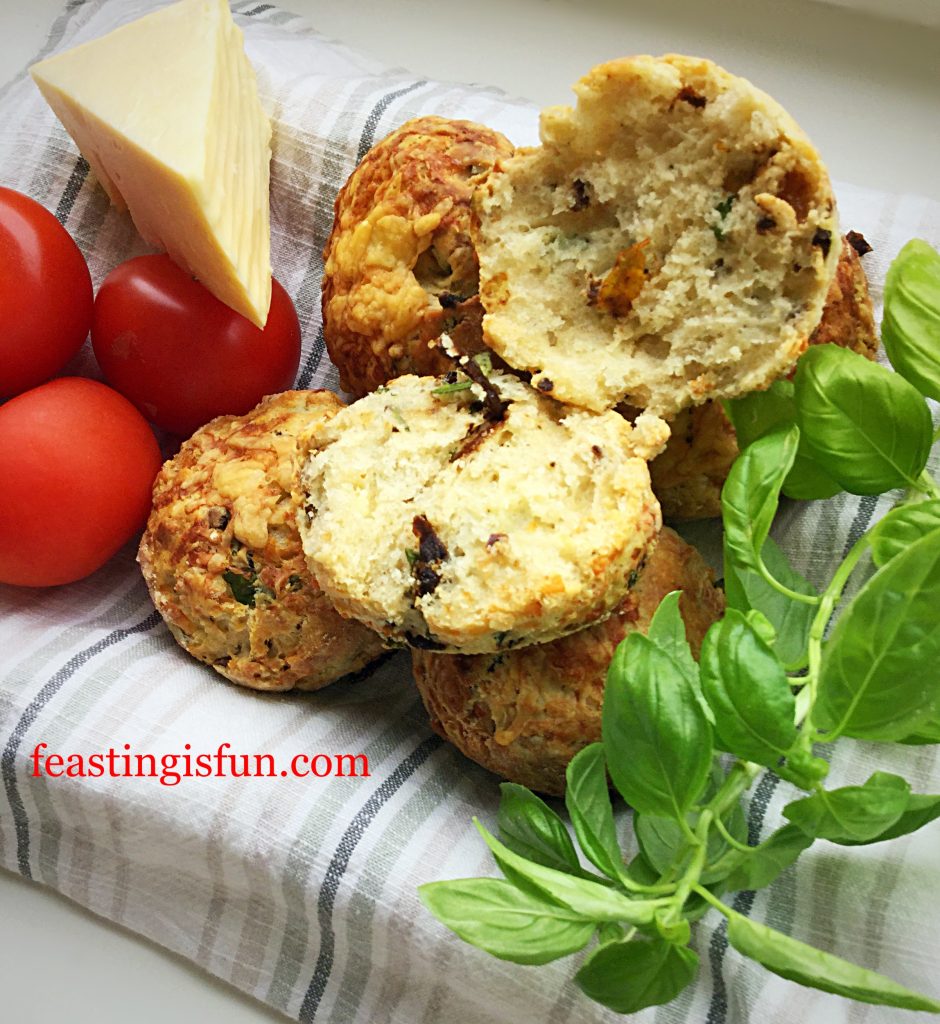
Cheddar Sun Dried Tomato Scones delicious split with a little butter!

While delicious eaten warm, cool completely before packing into an airtight container to store.

Also the scones can be made ahead, cooled and packed into freezer bags. They will keep for up to one month in the deep freeze. Ideal for making ahead.

If you have enjoyed this recipe for Cheddar Sun Dried Tomato Scones you may also like these:

Beauvale Cheese Walnut Scones

FF Cheddar Sun Dried Tomato Scones
Beauvale Cheese Walnut Scones.

Super Light Scones

FF Cheddar Sun Dried Tomato Scones
Super Light Scones

Goddess Cheese Pine Nut Muffins

FF Cheddar Sun Dried Tomato Scones
Goddess Cheese Pine Nut Muffins

Cheddar Sun Dried Tomato Scones, such a delicious combination of flavours and texture. Also perfect for making ahead and freezing, ready to pop in the oven on a low heat when unexpected guests arrive. Make ahead recipes are my all time favourites. Especially as I never know from one day to the next how my body will be. Fortunately it’s always nice to know that there is good, homemade food in the house.

So, whatever you are making, baking and creating in your kitchens, have fun preparing and sharing your feast.

Sammie xx

No part of this post may be copied. Please see my Disclosure Policy.

Cherry Chocolate Ice Cream

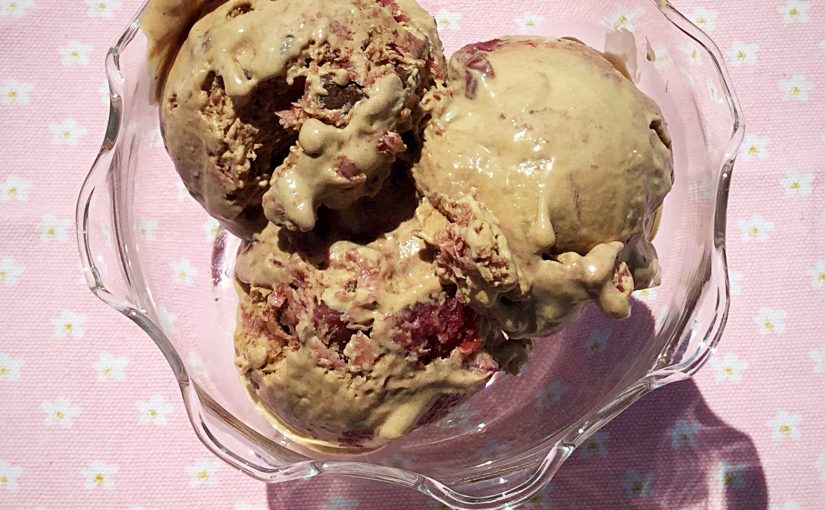
Are you a fan of ice cream? I am and I absolutely love making it myself. The reason for that is, firstly I own an awesome ice cream maker from Andrew James and secondly any flavour combination is possible.The only limit is your own imagination. So welcome to my Cherry Chocolate Ice Cream.

Pinterest sized image with descriptive graphics.

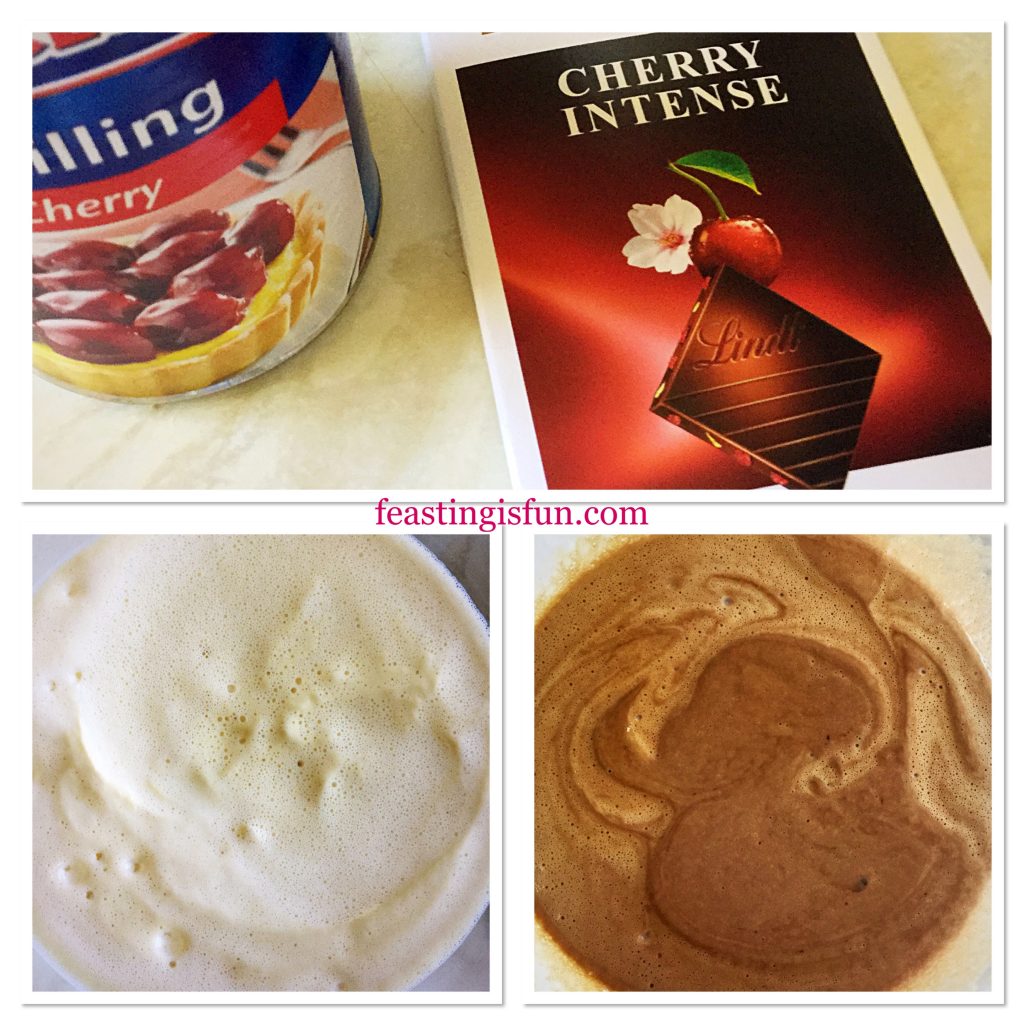
So, yesterday I was going to make a batch of Strawberry Ripple Ice Cream. Yet while foraging around in the cupboard for ingredients I came across a bar of Lindt Cherry Chocolate. And an idea started to form. Further rummaging and the second ingredient was found. A can of tinned cherries. Not sure if they would make it to the final recipe I hooked them out anyway. So it was time to start experimenting!

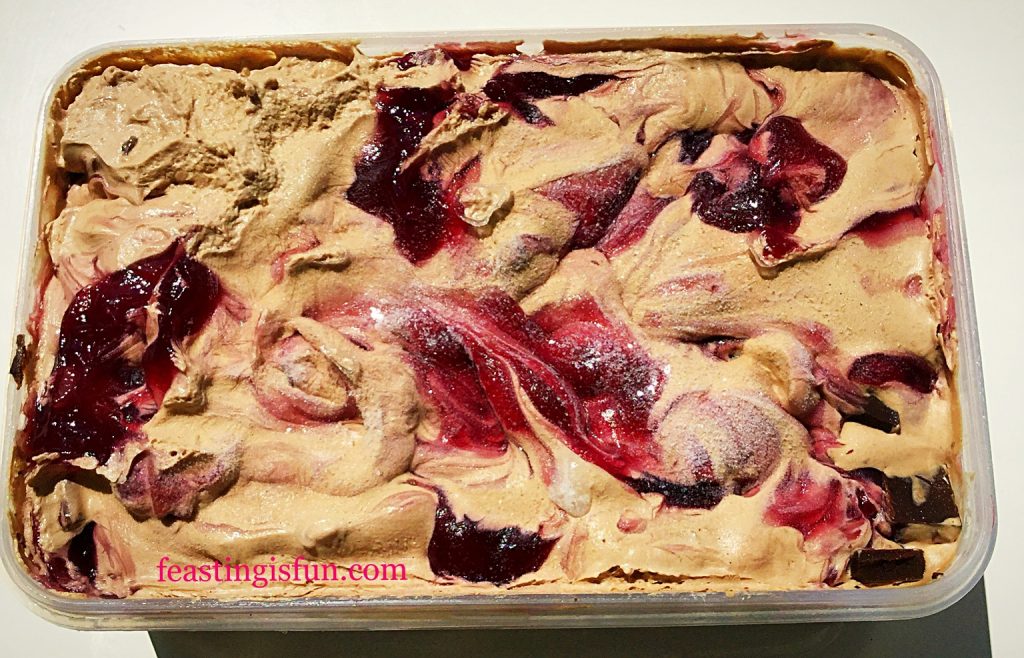
A tub of frozen swirled ice cream.
A tub of frozen Cherry Chocolate Ice Cream.

Flavours That Compliment Each Other

Cherry and chocolate are a classic combination. In truth, during cherry season I may try this recipe with gorgeous, glossy fresh cherries. Especially as we have a cherry tree in our garden. Instead their flavour is imparted firstly through the cherry chocolate bar. Resulting in a pleasantly mild flavour. However, once frozen the flavours dull. Resulting in the decision to use a full can of cherry pie filling (please don’t hate me) with the additional dark chocolate chunks added as well.

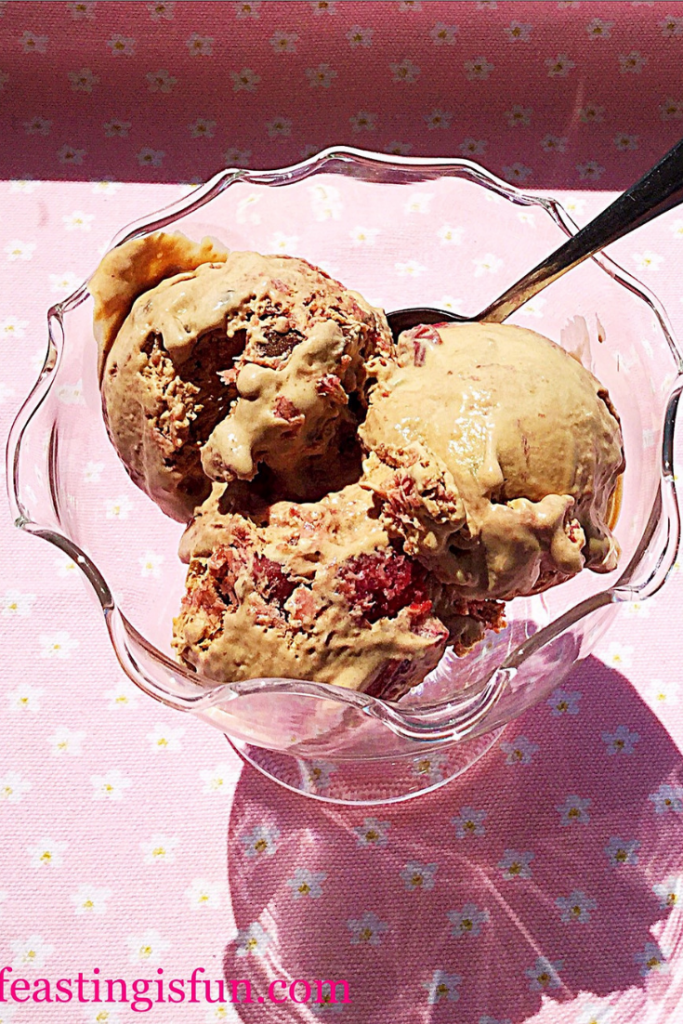
Scoops of flavoured ice cream in a bowl with a spoon.
Cherry Chocolate Ice Cream

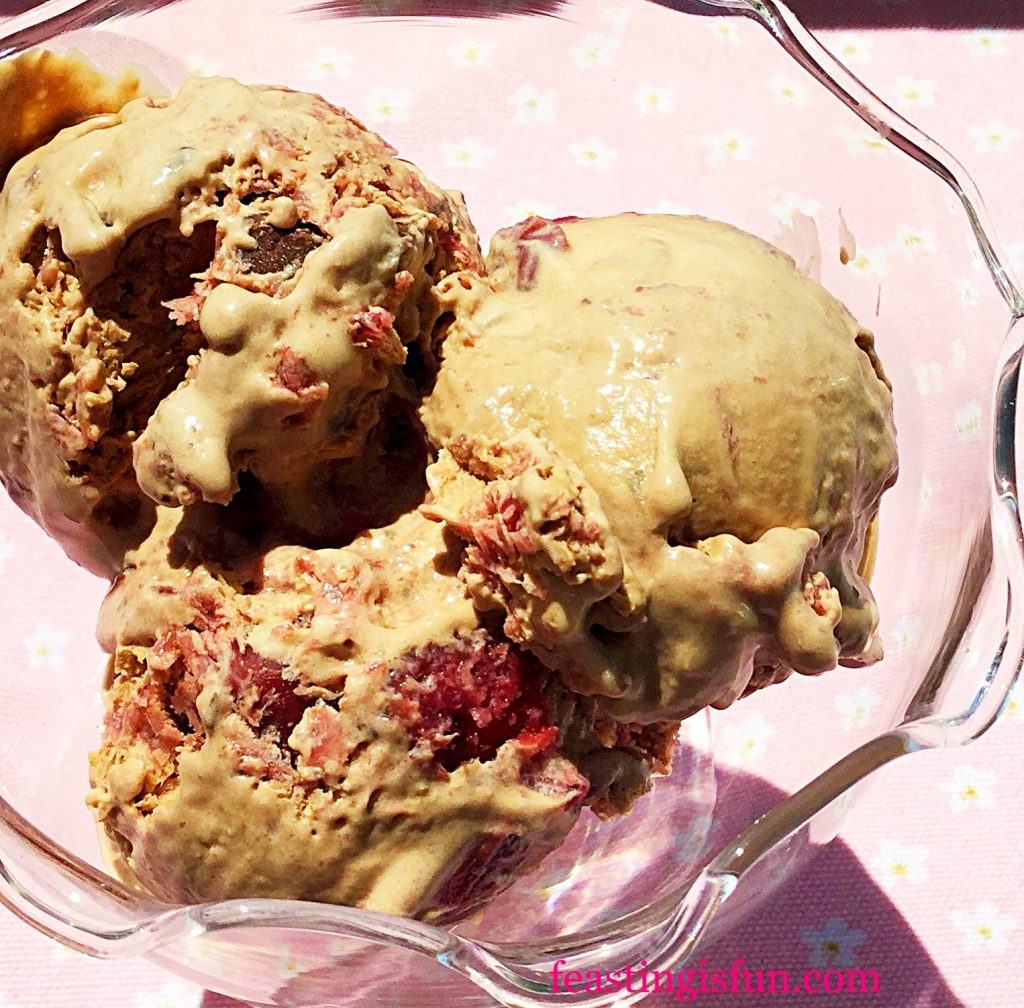
Taste is an important part of developing a recipe, is key. As soon as the ice cream is churned, frequent tastings are made and more cherries are added. It’s a hard life! Eventually the balance was perfect using the entire can. Dark chocolate chunks transform any ice cream, with both flavour and texture. Here they provide deep chocolate flavour within the silky, mild chocolate ice cream. Resulting in this incredible Cherry Chocolate Ice Cream, my hubby’s all time favourite.

Scoops of ice cream in a glass bowl.
Cherry Chocolate Ice Cream

Recipe: Cherry Chocolate Ice Cream makes approx. 1L

300ml Double Cream

300ml Whole Milk

1tsp Vanilla Extract – I use Nielsen-Massey

4 Large Free Range Egg Yolks – the whites can be frozen for up to 1 month

1tsp Corn Flour – I use Dove’s Farm as it is certified gluten free

4tbsp Caster Sugar

100g Bar Lindt Cherry Chocolate

1 x 410g Can Cherry Pie Filling – check that the pie filling is gluten free. Alternatively use frozen, pitted cherries available from most supermarkets.

100g Dark Chocolate Chunks/Bar

Method:  Place the bowl of the ice cream maker in the freezer at least 8 hours/overnight or follow the manufacturer’s instructions, prior to making this ice cream.

For step by step instructions and photos please see Very Vanilla Ice Cream .

Making The Custard Base

  • First of all pour the cream and milk into a heavy based saucepan placed over a medium heat.
  • While the cream is heating place the egg yolks, sugar, vanilla extract and corn flour into a large heatproof bowl.
  • Whisk the ingredients together until pale and frothy, keeping an eye on the heating cream.
  • Heat the cream and milk to scalding point, when a ring of bubbles appear around the rim of the saucepan, just prior to the liquid boiling. Remove from the heat once scalding point has been reached.
  • With the whisk on slow, gently pour in the heated cream, increasing the speed once it is all added.
  • Pour the custard mixture back into the pan and place over a medium heat. Stir to ensure that the base doesn’t burn. Continue until the custard is thickened and coats the back of a wooden spoon. Remove from heat.

Turning The Vanilla Custard Into A Cherry Chocolate Base

  • Break up the cherry chocolate bar and place into a heatproof bowl. Place a sieve over the bowl.
  • Next, pour the thickened custard through the sieve into the bowl.
  • Stir the custard until all of the chocolate has melted. Cover the custard with cling film placed directly on to the top of the hot, thick liquid, this will stop a skin from forming.
  • Set the hot, flavoured custard to one side and allow to cool.
FF Cherry Chocolate Ice Cream
Churning The Ice Cream And Adding Cherries And Chocolate Chunks 
  • When the ice cream base has cooled place in the fridge to chill.
  • While the ice cream base is chilling prepare the chocolate chunks. If using a bar chop into pieces.
  • Set up the ice cream maker once the ice cream base is cold.
  • Pour the base into the ice cream maker and churn until softly frozen.
  • Decant the ice cream into a freezer proof container with a tight fitting lid.
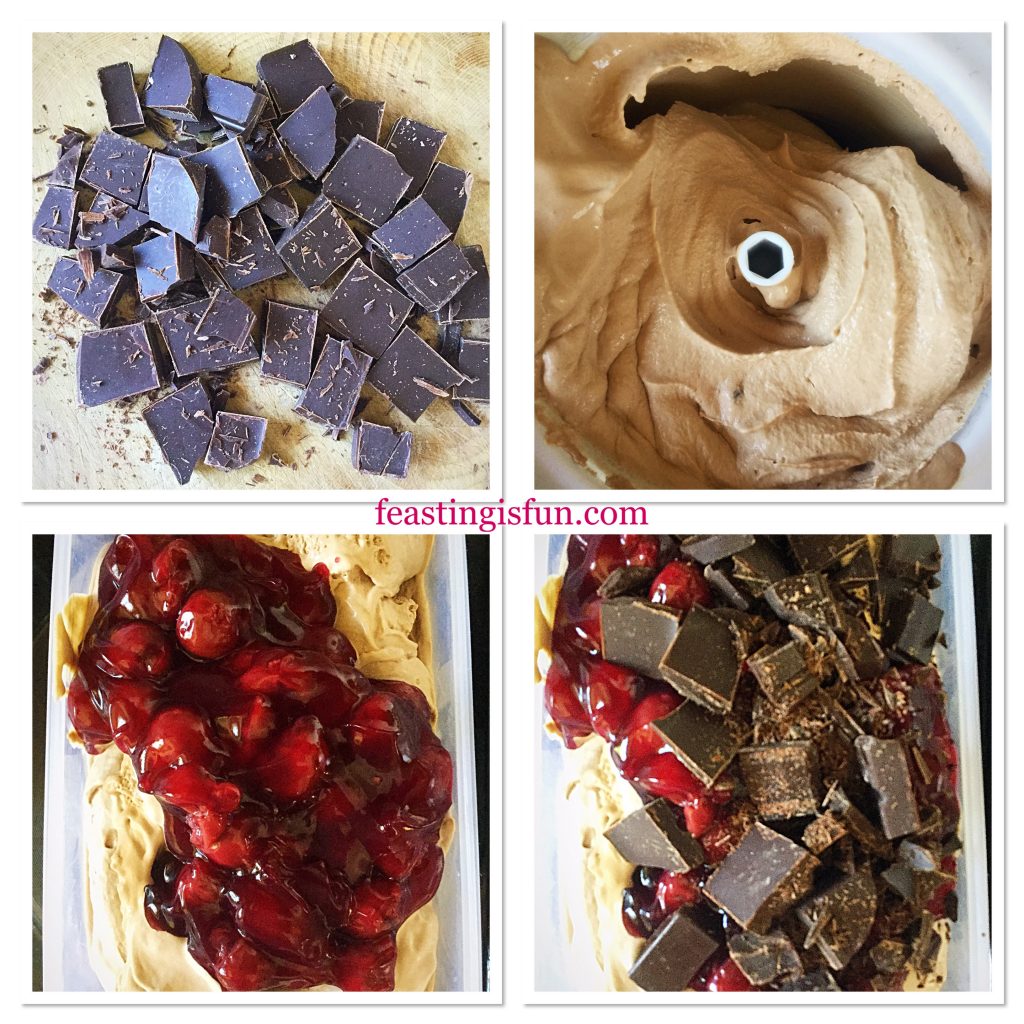
  • Add the cherries and chopped chocolate.
FF Cherry Chocolate Ice Cream
Creating the Cherry Chocolate Ice Cream
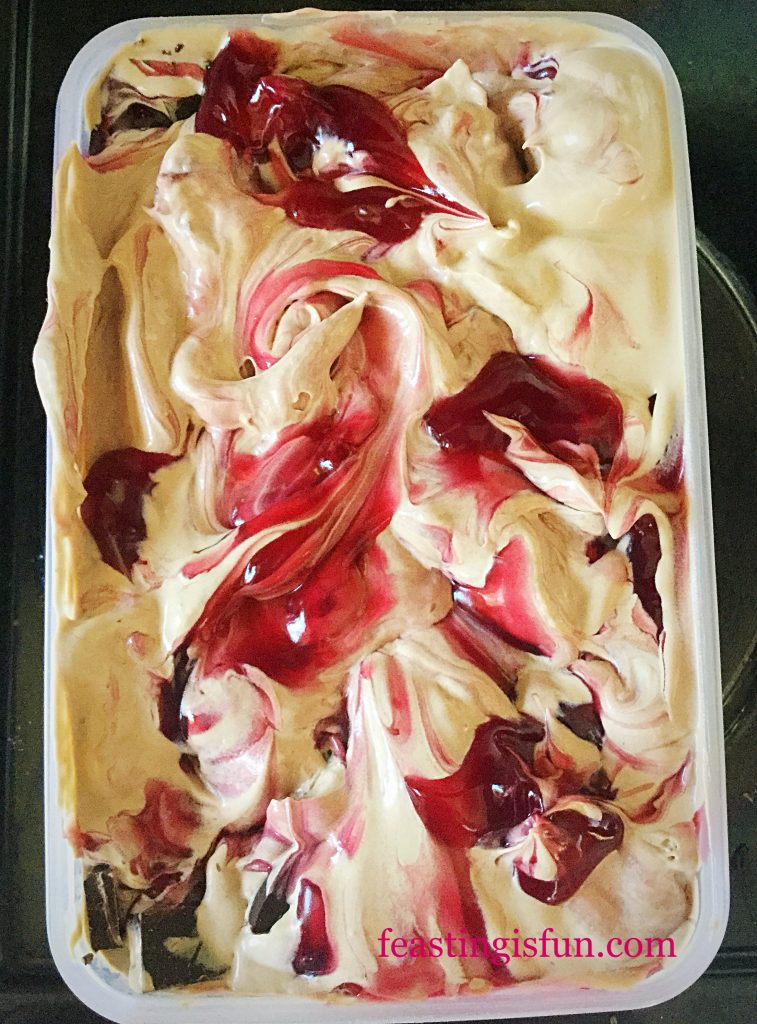
  • Using the handle of a wooden spoon swirl the ingredients together.
FF Cherry Chocolate Ice Cream
Cherry Chocolate Ice Cream swirled together and ready for the freezer.
  • Clip on a tight fitting lid and place in the freezer for 6 hours or ideally overnight.
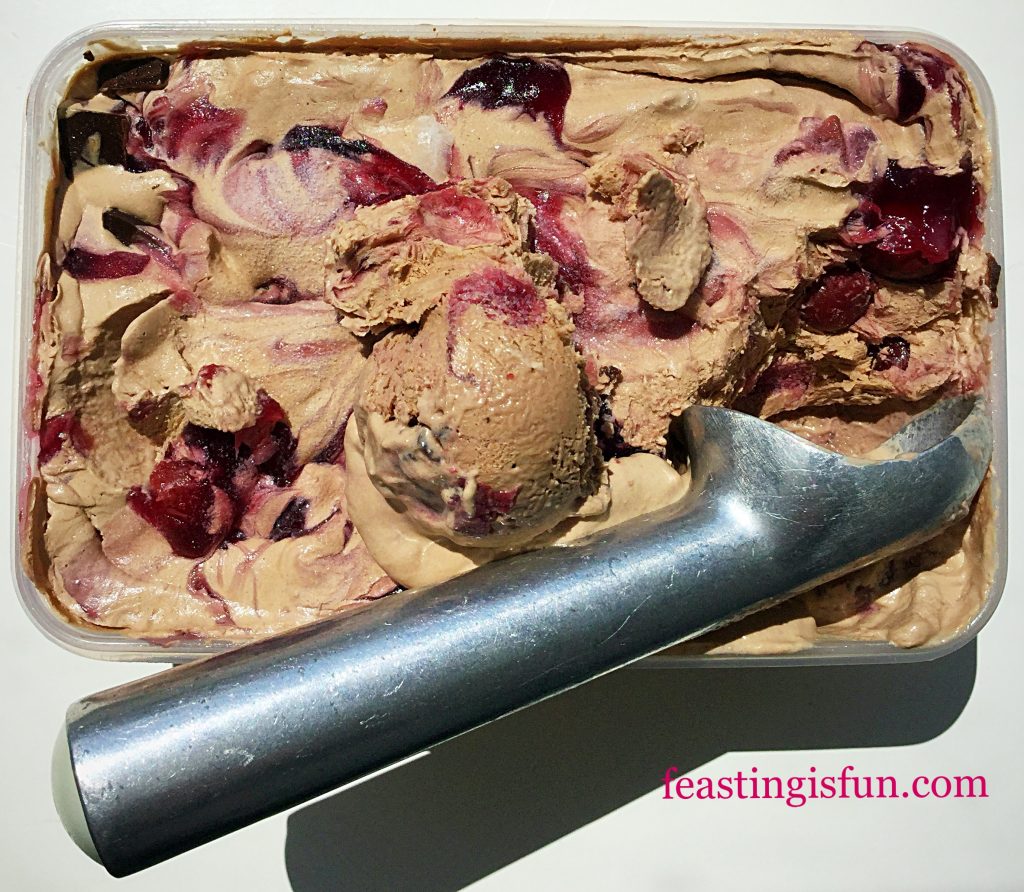
  • Remove the ice cream 10-20 minutes prior to serving to allow it to soften, which will allow easy scooping.
FF Cherry Chocolate Ice Cream
Cherry Chocolate Ice Cream ready to serve

Serve generous scoops of this utterly scrumptious ice cream in bowls or cones. And watch the smiles on faces as they discover whole cherries, nuggets of dark chocolate and enjoy feasting.

FF Cherry Chocolate Ice Cream
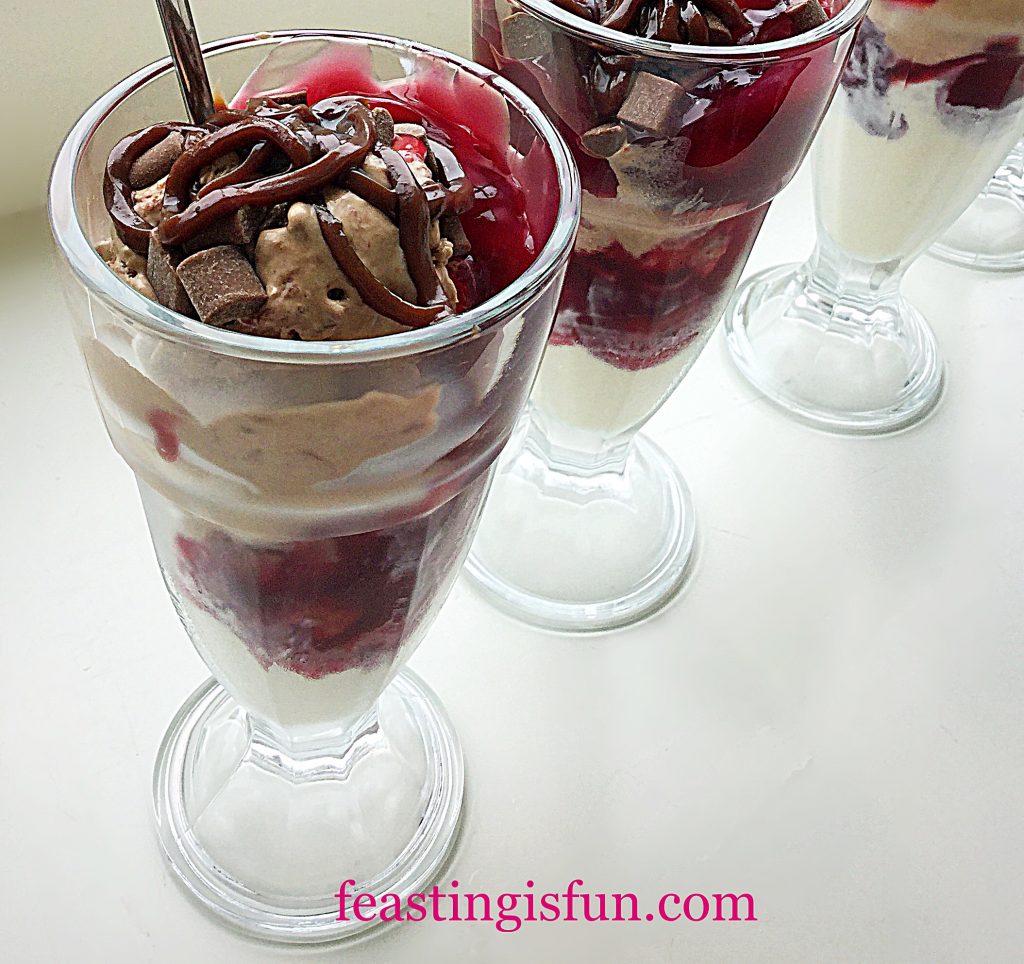
Cherry Chocolate Ice Cream Sundae

Why not turn this delicious ice cream into a Cherry Chocolate Ice Cream Sundae?

If you have enjoyed this recipe for Cherry Chocolate Ice Cream there are many other ice cream recipes on Feasting is Fun, here are a few:

Triple Chocolate Chunk Ice Cream

FF Cherry Chocolate Ice Cream
Triple Chocolate Chunk Ice Cream

Lemon Ripple Ice Cream

Lemon Ripple Ice Cream scoops in a bowl.
Lemon Ripple Ice Cream

Chocolate Rolo Ice Cream

FF Cherry Chocolate Ice Cream
Chocolate Rolo Ice Cream

Nothing beats homemade ice cream, especially on a hot, sunny day. And the flavour combinations are limitless. Since you are in control you can simply make flavours that aren’t available in the shops. I could not be parted from my ice cream maker. So the bowl has a permanent place in our freezer, ready for whenever the need for ice cream arises. And yes sometimes it is a need!

So, whatever you are making, baking and creating this weekend have fun.

Sammie xx

No part of this post may be copied without my specific written agreement. Please see my Disclosure Policy.


Toffee Cookie Base Chocolate Cheesecake

If you are a pudding or dessert lover, with a sweet tooth, this Toffee Cookie Base Chocolate Cheesecake will absolutely hit the spot. Easy to make, using great products, this is the perfect end to any meal. Or, as happened this morning, a great breakfast!

FF Toffee Cookie Base Chocolate Cheesecake
Toffee Cookie Base Chocolate Cheesecake easy to make using great ingredients.

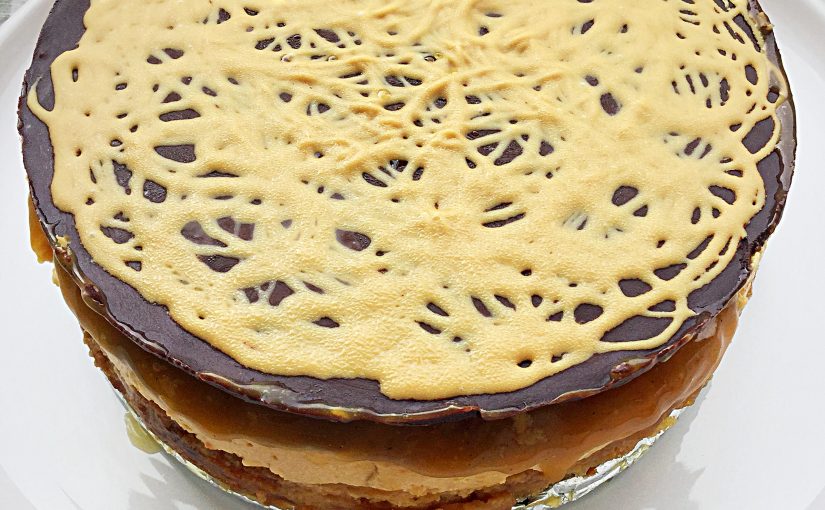
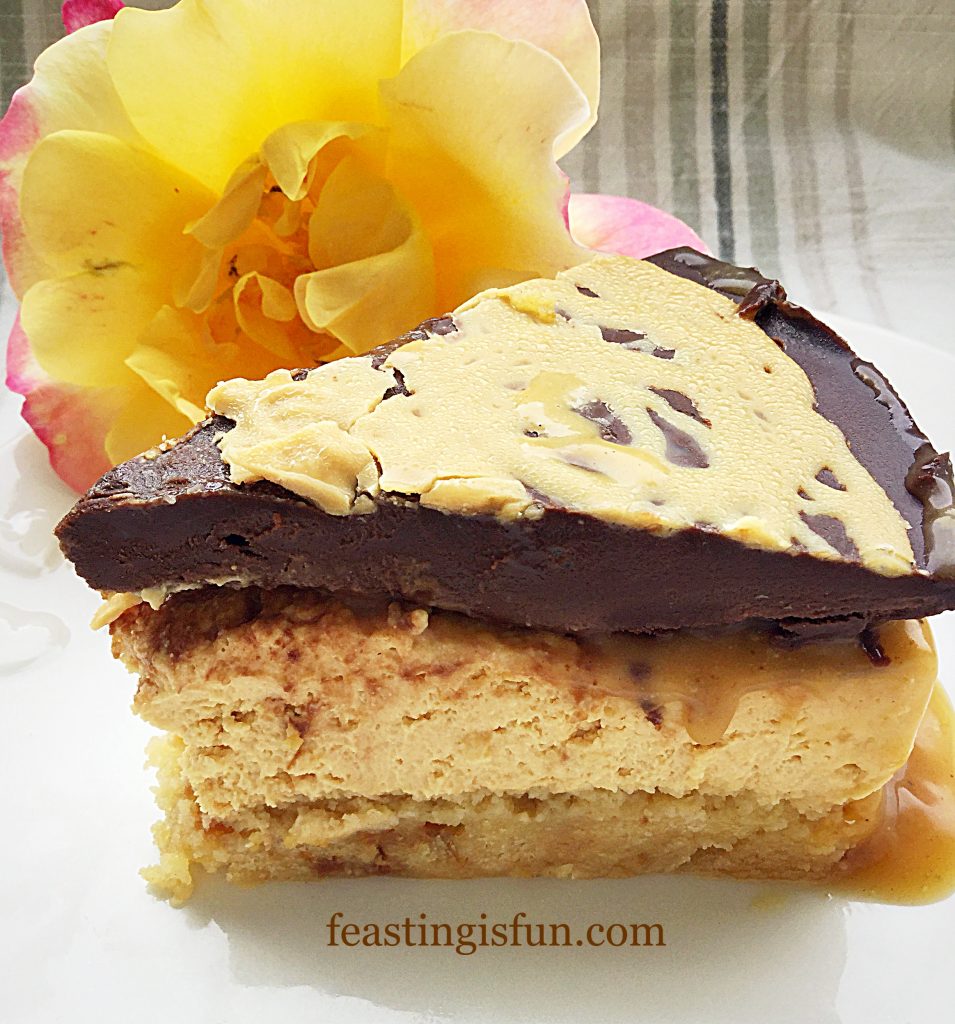
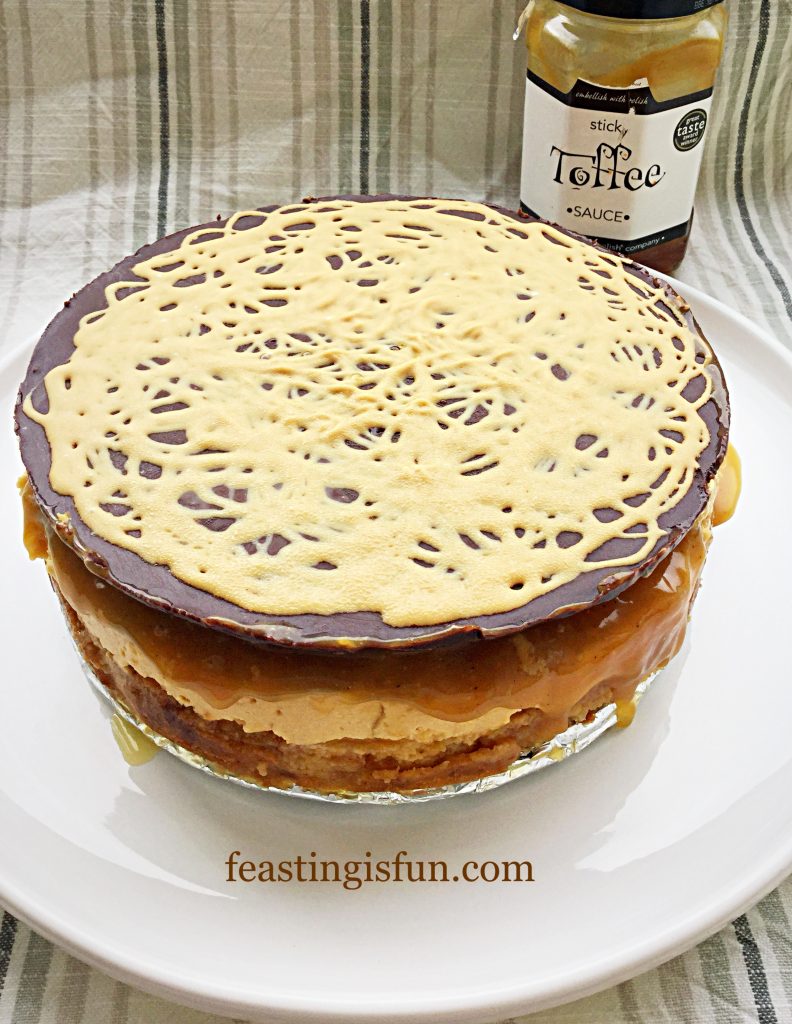
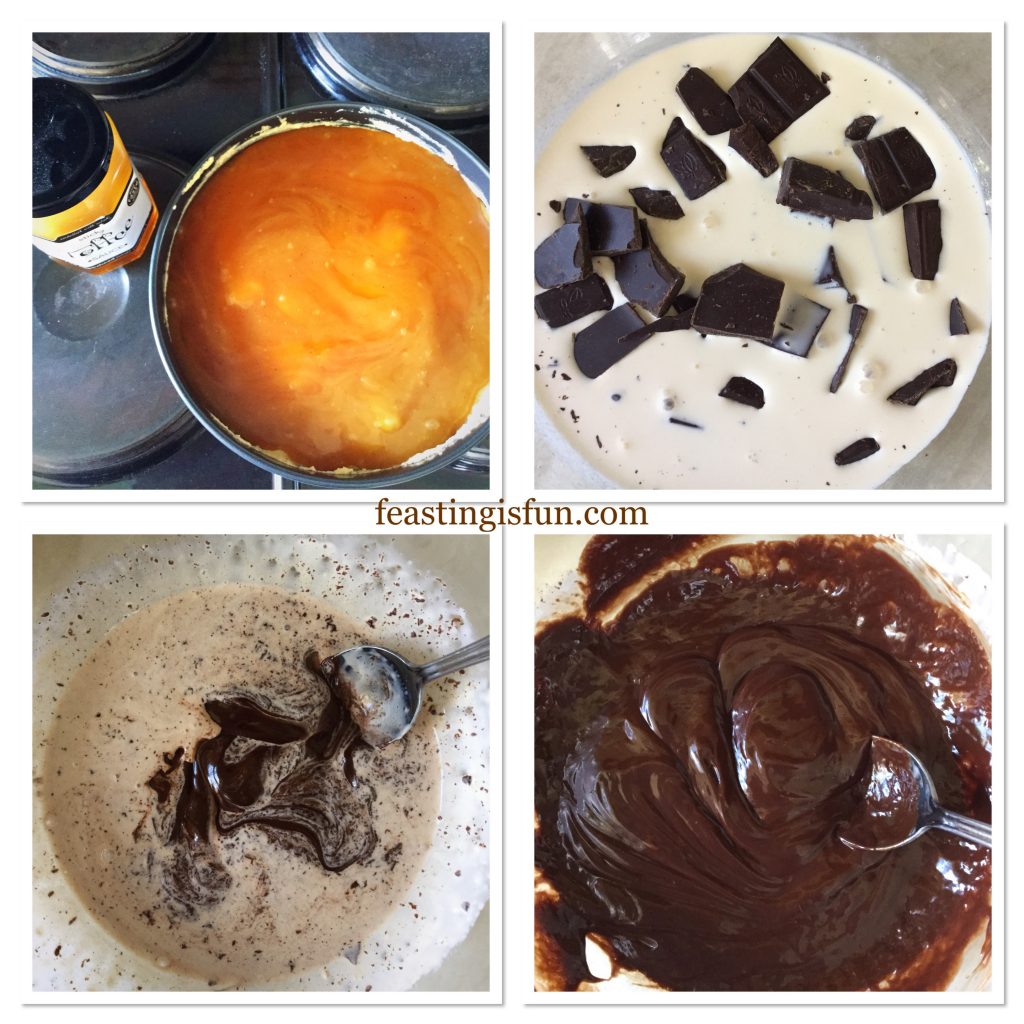
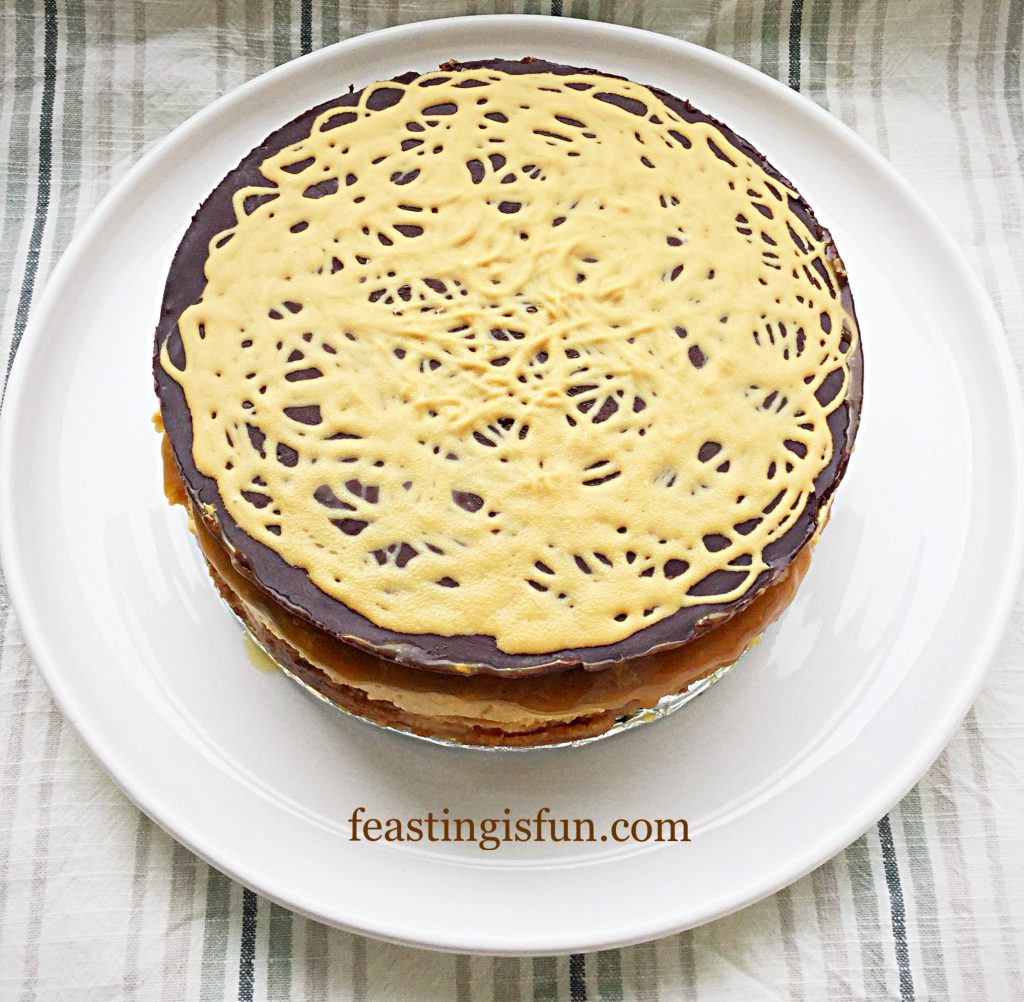
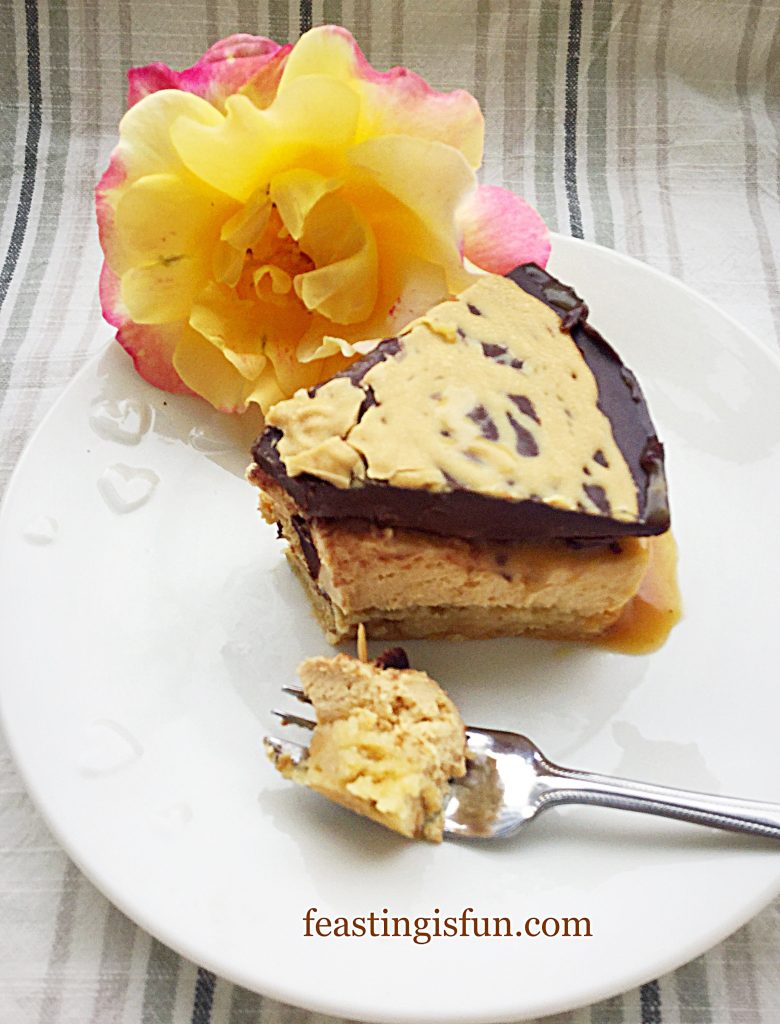
Starting at the bottom, the toffee cookie base provides a soft, chewy, toffee flavoured biscuit. Butterscotch cheesecake sits on top, then covered with a thick toffee sauce. Once set after being chilled in the fridge a dark chocolate ganache floods the top of the toffee covered cheesecake. Finally, it is finished with swirls of caramel Caramac, creating an overall balance of flavours and texture.

FF Toffee Cookie Base Chocolate Cheesecake
Toffee Cookie Base Chocolate Cheesecake a delightful dessert.

While this is a rich dessert, it isn’t overwhelming sweet. Cutting down through a slice, so every layer is tasted together, definitely enhances the eating experience.

FF Toffee Cookie Base Chocolate Cheesecake
Toffee Cookie Base Chocolate Cheesecake decadent and delicious.

To make this cheesecake you will need a 15cm/6″ diameter, springform, removable base cake tin.

Recipe: Toffee Cookie Base Chocolate Cheesecake serves 6-8

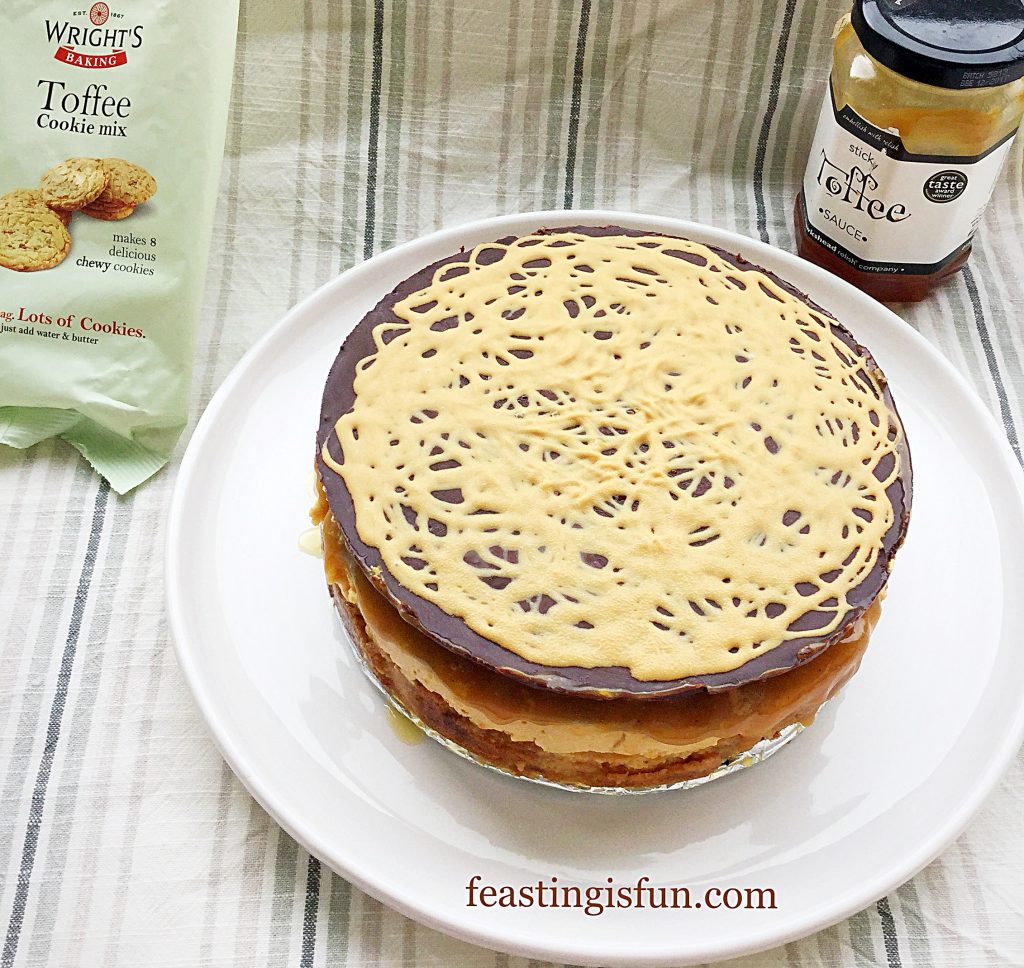
Toffee Cookie Mix – available from Wright’s Baking

25g Unsalted Butter – plus a little extra for greasing the tin

1 Packet Butterscotch Angel Delight easily available from Asda and some other supermarkets

200mls Single Cream

280g Tub Philiadelphia Cream Cheese

3/4 Jar Toffee Sauce – available from Hawkshead Relish if using a different make ensure that it is semi solid so that it will set in the fridge

200g Dark Chocolate

200mls Double Cream

50g Caramac or White Chocolate as an alternative

Recipe notes – use 200g of toffee biscuits, bashed to crumbs in a bag. Tip into a bowl then add 100g melted butter if you are unable to obtain the cookie mix. Press the sandy biscuit/butter mixture into the base of the tin and chill for an hour.

Method: Preheat oven 180C/160C fan, gas mark 5

Preparing the base:

  • First of all, line the base of the tin with aluminium foil – this protects the cake tin base from knife marks and allows the cheesecake to be removed easily from the base.
  • Then very lightly grease the base with butter.
  • Make up the Toffee Cookie Mix according to the packet instructions. Butter is better to use than oil as it will give a firmer cookie base once baked and chilled.
  • Place the tin into the middle of the preheated oven and bake for 25-30 minutes.
  • The cookie base is baked when it is golden brown on top. It will not feel firm, however it will set as the base cools.

  • Place the tin on to a cooling rack and leave to cool completely. DO NOT REMOVE FROM THE TIN.
FF Toffee Cookie Base Chocolate Cheesecake
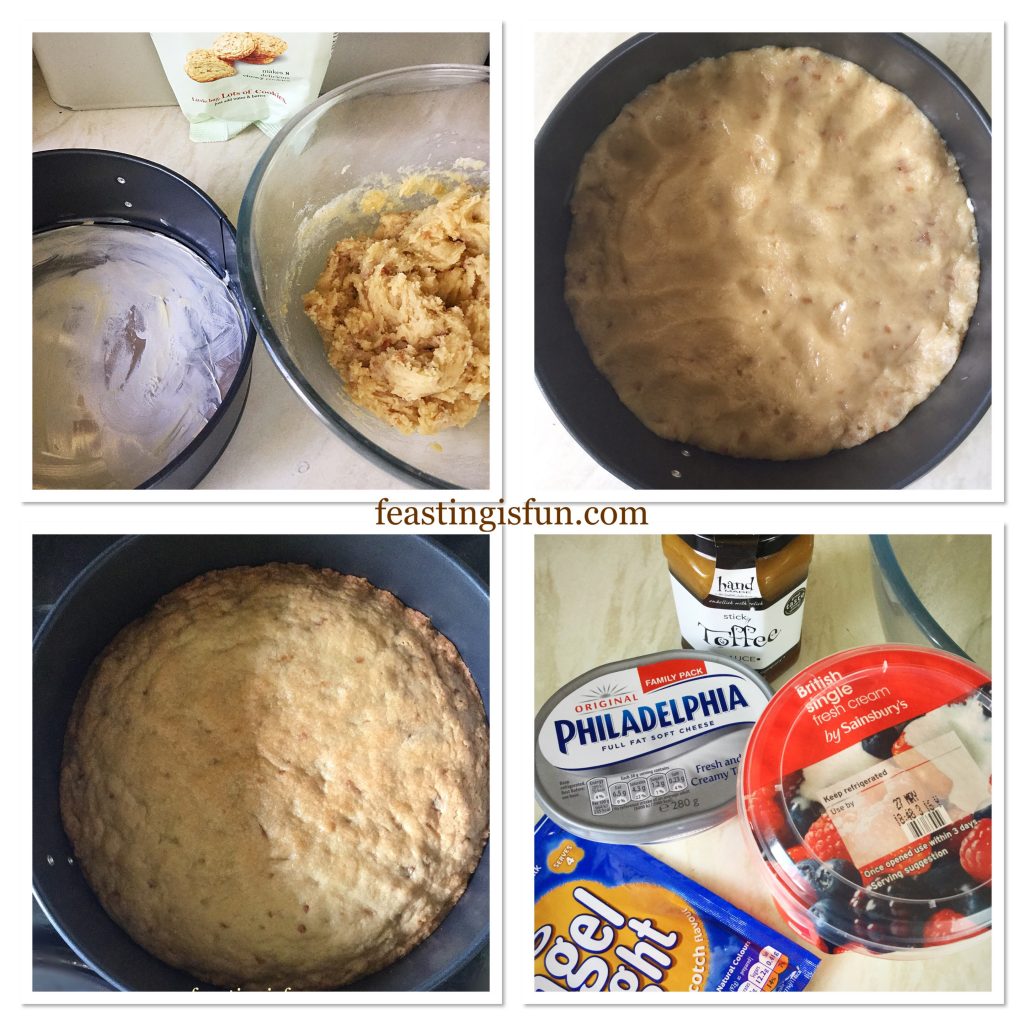
Making and baking the cookie base and ingredients for the next stage.

Building the cheesecake:

  • To make the next layer of the cheesecake, place the cream cheese and single cream into a bowl.
  • Whisk together until there is a smooth consistency.
  • Now add the packet of angel delight. Whisk until the mixture becomes very thick.
  • Spoon the butterscotch cheesecake on to the cold cookie base. Smooth with the back of a spoon, ensuring the top is level.
  • Place the cheesecake into the fridge to chill and set for 30 minutes.
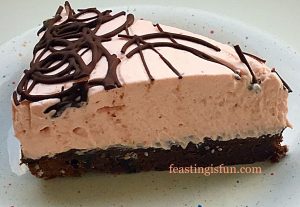
FF Toffee Cookie Base Chocolate Cheesecake
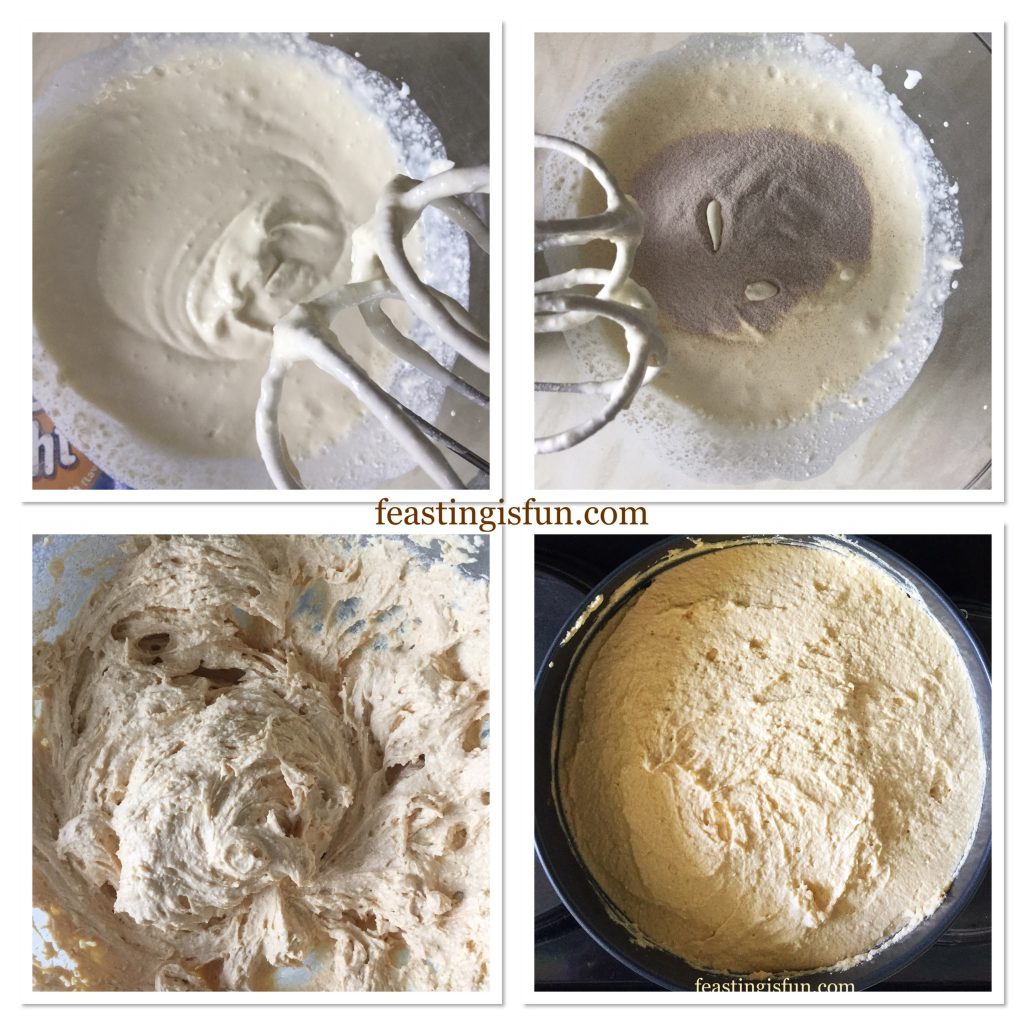
Making the butterscotch cheesecake layer.
  • While the cheesecake is chilling in the fridge check the toffee sauce.
  • If the sauce has set in the jar, it simply needs to be warmed so that it can be poured over the cheesecake layer. Pour some warm-ish water into a jug and then place the jar in the jug. The sauce will become less cloudy as it warms up. Remove the jar from the water and stir thoroughly with a spoon.
  • Take the cheesecake from the fridge and pour over the toffee sauce. It should cover the entire top of the cheesecake. Then return the cheesecake to the fridge, to allow the toffee to set.
  • While the toffee is setting make the dark chocolate ganache.
  • Break or chop the dark chocolate and place into a heatproof,microwaveable bowl. Pour over the double cream.
  • Place the bowl into the microwave and heat on medium for 30 second bursts, stirring after each heating.
  • When the chocolate is melting and the cream has warmed, remove from the microwave and continue stirring until the ganache is thick and glossy.
  • Leave the ganache to cool slightly, without setting, so that it doesn’t heat up the toffee layer.
FF Toffee Cookie Base Chocolate Cheesecake
The toffee covering and making the chocolate ganache.
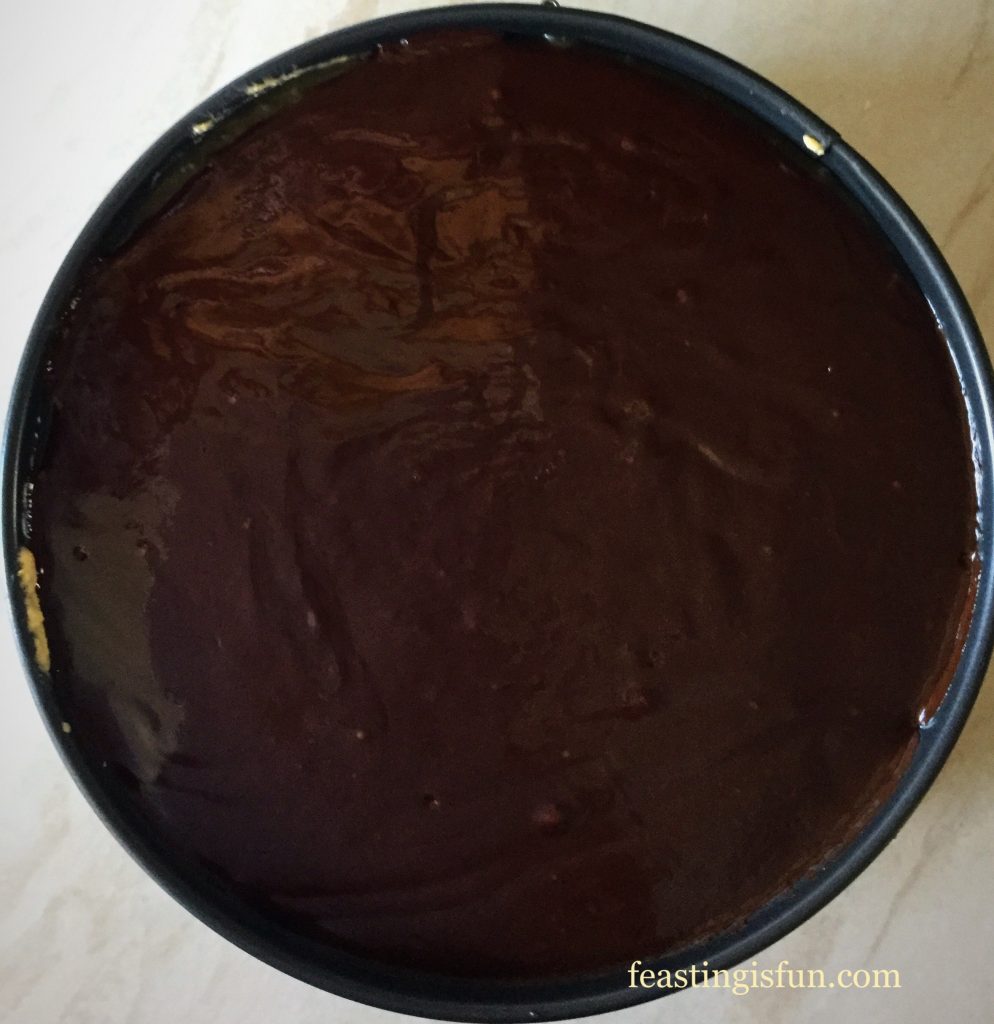
  • While the ganache is still liquid, but cooled, pour it over the entire top of the chilled toffee sauce layer.
FF Toffee Cookie Base Chocolate Cheesecake
Toffee Cookie Base Chocolate Cheesecake with a smooth ganache topping.
  • Place the cheesecake back into the fridge to chill and set.
  • Meanwhile place the Caramac into a small heatproof, microwaveable bowl and heat in short 20 second bursts, stirring in between until completely melted.
  • Pour the melted Caramac into a small disposable piping bag.
  • Remove the cheesecake from the fridge. Cut the very end of the piping bag off.
  • Pipe squiggles, or whatever pattern you like on to the chocolate ganache.
  • Place the uncovered cheesecake back into the fridge to completely set.
  • Due to the different layers in this cheesecake, it should be chilled for 4 hours, after the last stage, or ideally overnight.
FF Toffee Cookie Base Chocolate Cheesecake
Toffee Cookie Base Chocolate Cheesecake ready to serve.

To serve, remove from the fridge, run a sharp knife around the edge of the cheesecake to ensure it releases easily. Place the tin on to a large jar/tin and release the springform clip. Ease the side of the tin down, away from the cheesecake. Put the cheesecake on to a flat plate or cake stand.

Enjoy with friends and a drink of your choice. My preference would be strong coffee!

FF Toffee Cookie Base Chocolate Cheesecake
Toffee Cookie Base Chocolate Cheesecake

Treat your friends and family, indeed yourself, to this amazing dessert.

This cheesecake is best eaten within 48 hours of making.

If you have enjoyed this recipe for Toffee Cookie Base Chocolate Cheesecake then you may also like these:

No Bake White Chocolate Strawberry Cheesecake

FF Toffee Cookie Base Chocolate Cheesecake
No Bake White Chocolate Strawberry Cheesecake

Raspberry Chocolate Pavlova

FF Toffee Cookie Base Chocolate Cheesecake
Raspberry Chocolate Pavlova

Chocolate Brownie Raspberry Cheesecake

FF Toffee Cookie Base Chocolate Cheesecake
Chocolate Brownie Raspberry Cheesecake

Dessert is a real treat here at home. Yet it can be the crowning glory to any meal. I have friends who will choose dessert before their main when we are out for a meal. I think that is awesome. But then I have awesome friends 😉.

Whatever you are making, baking and creating in your kitchens, have fun preparing your feast.

Sammie xx

Wright’s Bakingprovided me with the cookie mix and Hawkshead Relish provided me with a curtesy jar of their toffee sauce. All content, including views and opinions are my own. i was not paid to create this recipe. Please see my Disclosure Policy for complete copyright and intellectual property laws that cover this website. No content may be copied or linked to without my consent.

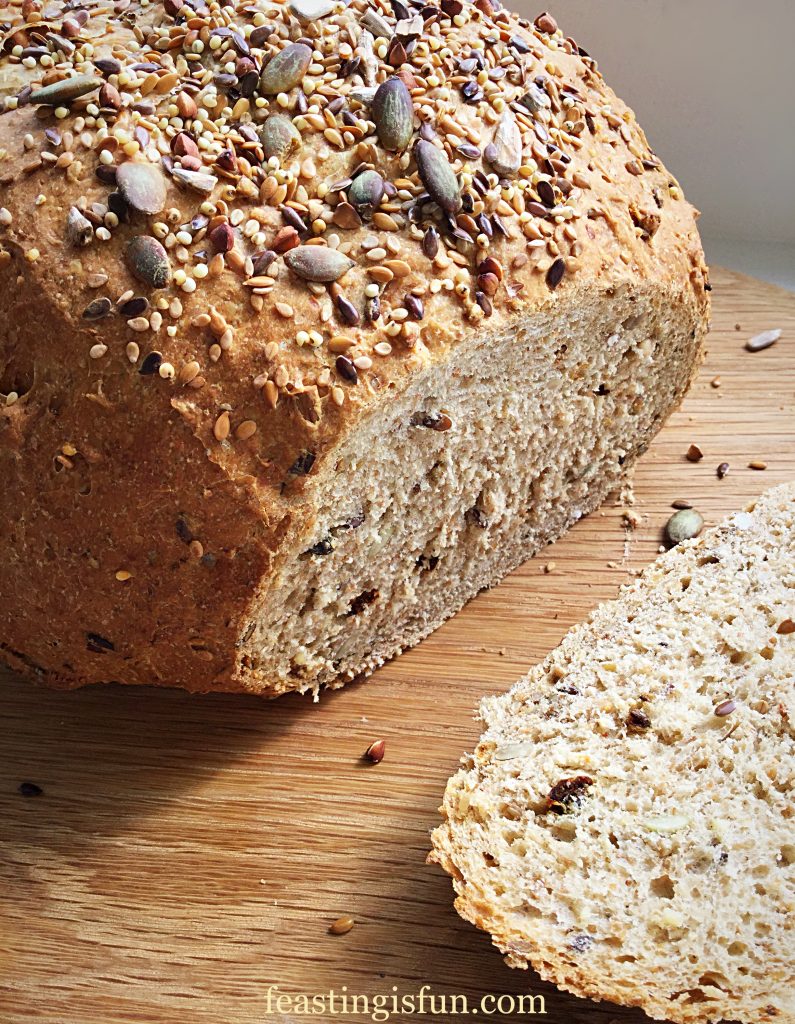
Seeded Cob Loaf

Bread is an everyday essential for most people in the Western world. And is available in different shapes, sizes and varieties. With the most popular bread, judging by the number of loaves sold each year, being sliced, predominantly white, plastic wrapped loaves. Yet what do offer in terms of flavour? In my opinion very little! Rather they are a carrier of flavours. Whether ham and mustard, egg and cress or the numerous filling combinations, the bread itself adds little to the taste or nutrition value of a sandwich. So, when you make this Seeded Cob Loaf, your world and tastebuds will open to the real flavour and texture of good, homemade bread.

FF Seeded Cob Loaf
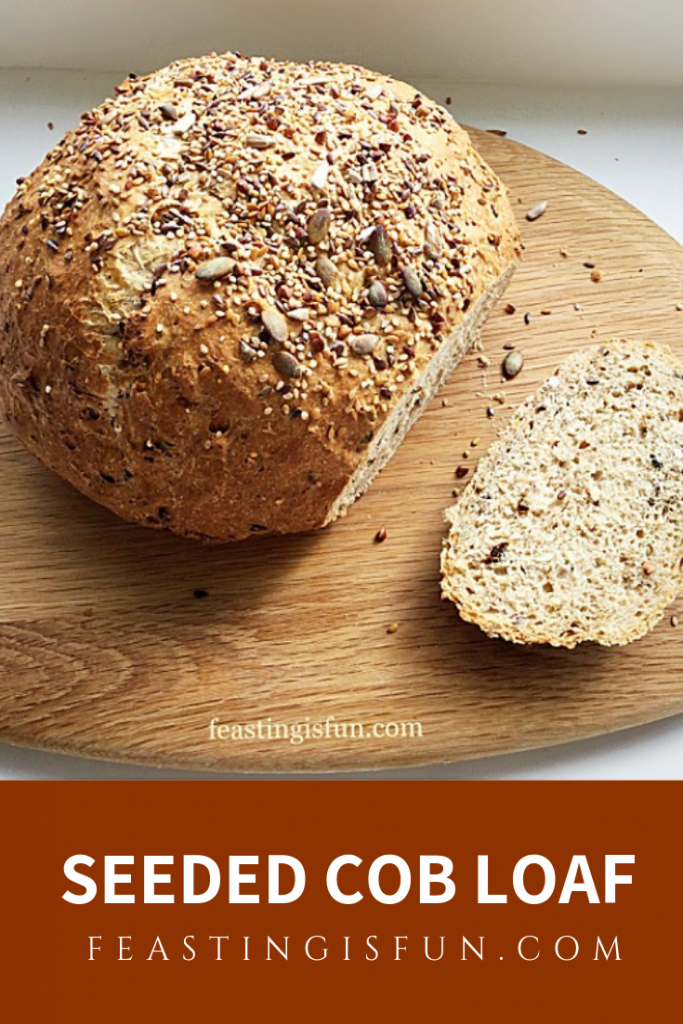
Seeded Cob Loaf full of flavour.

Seriously, this could be called ‘Change Your Life Seeded Cob Loaf.’ Because, as soon as you make it, with your own hands, bake and then try it, you will find it hard to go back to your usual loaf. Since it not only does it have incredible flavour, it’s cheaper, far healthier and more rewarding than plastic wrapped loaves.

FF Seeded Cob Loaf
Seeded Cob Loaf baked in a standard fan oven.

The Benefits Of Homemade Bread

Also, an important benefit from making bread at home, is that you, the baker, know exactly what goes into your bread. Flour, yeast, water, salt and a little unsalted butter. No preservatives, additives, flour improvers or any other number of E numbers found in mass produced bread. Simply a great tasting homemade loaf.

FF Seeded Cob Loaf
Sliced Seeded Cob Loaf.

Personally, this is one of the very best loaves I have made. Most importantly, I check my recipe twice, baking on two different days, to check consistency. Since tasting the first slice, lightly buttered, I have been eager to share this with you. Such is the depth of flavour and ease of shaping. Credit goes to Jack at Bake With Jack . Because watching his vlogs will improve both your knowledge and technique, when making bread at home.

Recipe: Makes 1 Seeded Cob Loaf

400g Wholemeal Seeded Bread Flour I use 3  Malts Sunflower from Shipton Mill – alternatively use half Wholemeal Bread Flour and half Strong White Bread Flour (250g + 250g = 500g total flour weight)

100g White Bread Flour (do not add if making your own flour mix – see above)

7g Fast Action Dried Yeast – I use Allinson’s

340mls Room Temperature Water

50g Mixed Seeds – plus a small handful for sprinkling on the loaf

30g Softened Unsalted Butter

7g Salt – I use Maldon

Method: I use a stand mixer fitted with a dough hook, alternately this bread can be made by hand.

Note: For complete accuracy the use of digital scales is advised. Even for weighing water, 1ml is equivalent 1g.

Making The Seeded Cob Loaf Dough Using A Stand Mixer

  • Into the bowl of the stand mixer weigh the water and yeast.
  • Next, add both flours and the additional 50g of seeds, even if you are using seeded flour.
  • On top of the flour add the salt and cubed butter.
  • Lower the dough hook and mix on slow for 5 minutes, then increase the speed and mix for a further 5-10 minutes on medium. The dough is ready when it can be stretched without tearing and light can be seen through the stretched dough. This is known as the windowpane test.
  • Use clean hands to scrape any dough stuck to the dough hook back into the bowl.
  • Cover the bowl with a clean tea towel and place on a surface that is draught free.
  • Leave the dough to prove until doubled in size. This may take between 1-2 hours, depending on the room temperature.
  • While the bread is proving, grease a large baking tray with a little butter.

Knocking Back And Shaping The Dough

  • After proving scatter a very small amount of flour on to the work top.
  • Turn out the dough ensuring the domed top becomes the bottom and the sticky underneath is uppermost.

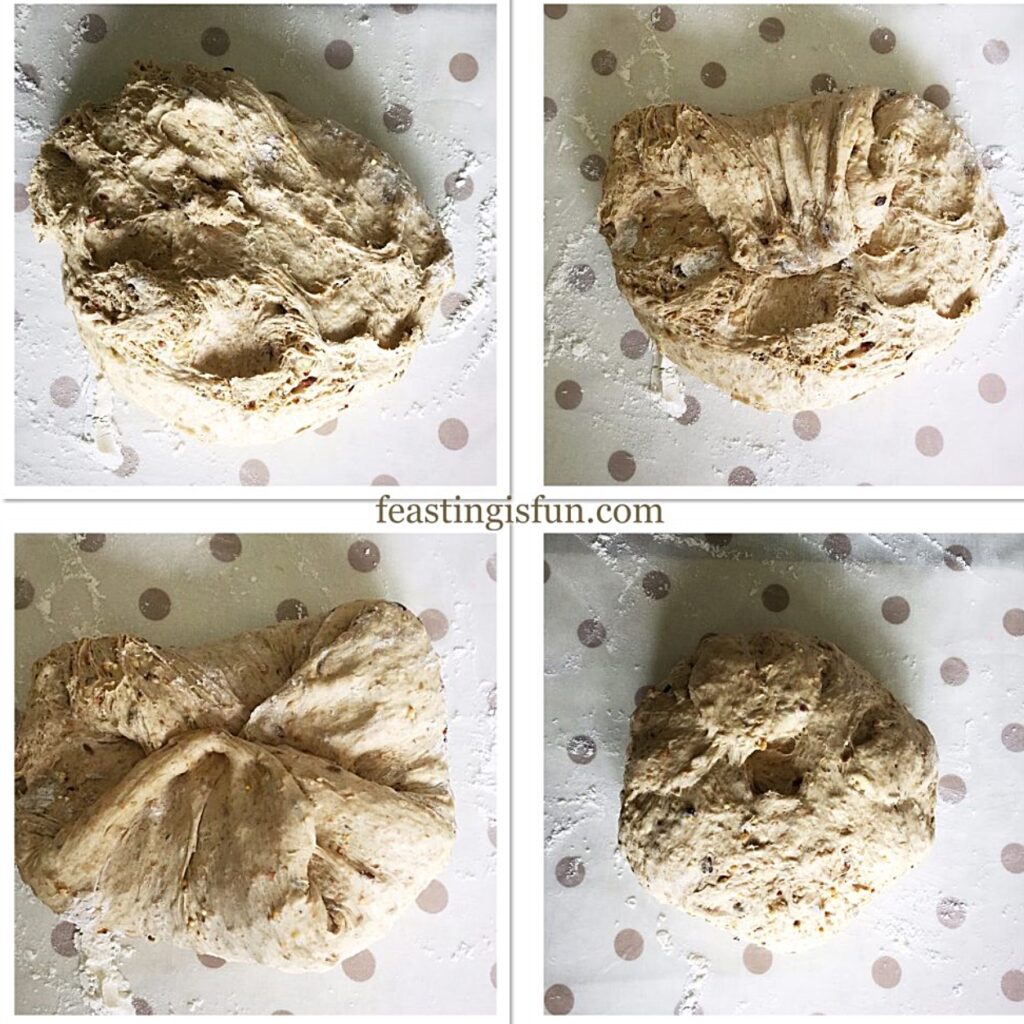
Shaping bread dough into a round.

  • Following the pictures above, shape the dough. First pull the edge of the dough and press it down into the sticky centre. Continue, working around the edge of the dough, pulling out and pressing in. While doing this, tension is being built across the top of the loaf, (the underneath of the dough), this helps ensure a tight ball shape that doesn’t collapse whilst proving or baking.
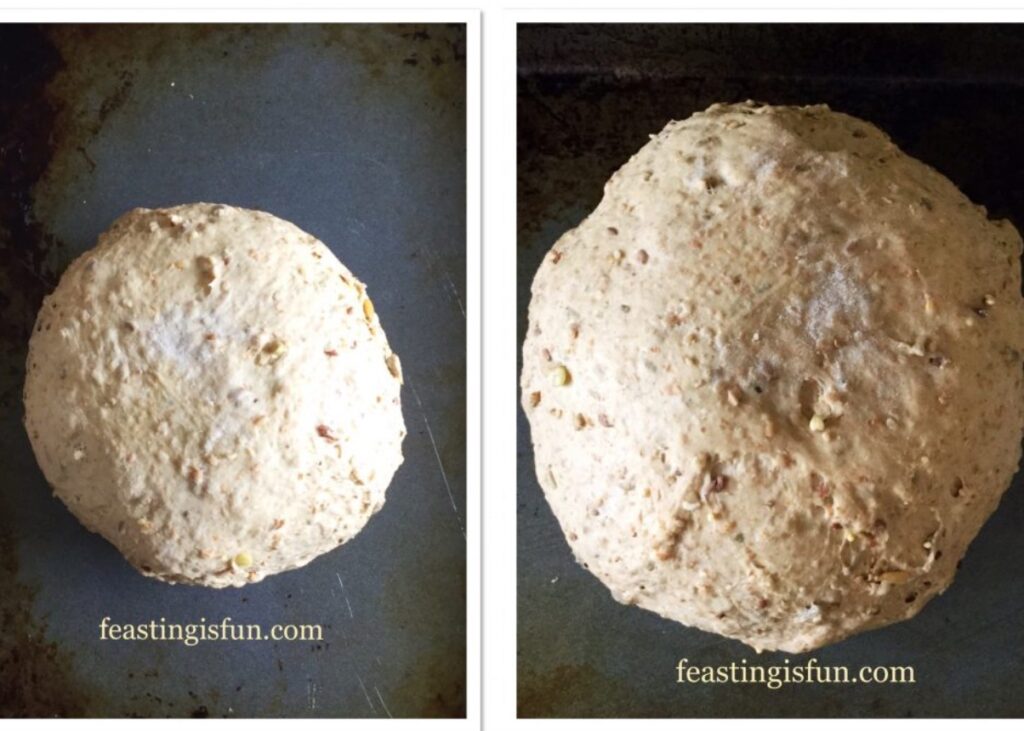
  • Keep working around the edge of the dough until you achieve a tight ball, as seen in the left of the photo below.

Dough before and after the second prove.

  • Cover the dough ball with the tea towel and leave until doubled in size. See photo above on the right.

Baking The Cob Loaf

  • While the dough is undergoing its second prove Preheat the oven to its hottest setting. Add a tray of water to the bottom of the oven. Since adding water provides steam which helps the dough to rise (oven spring) before forming a crust.
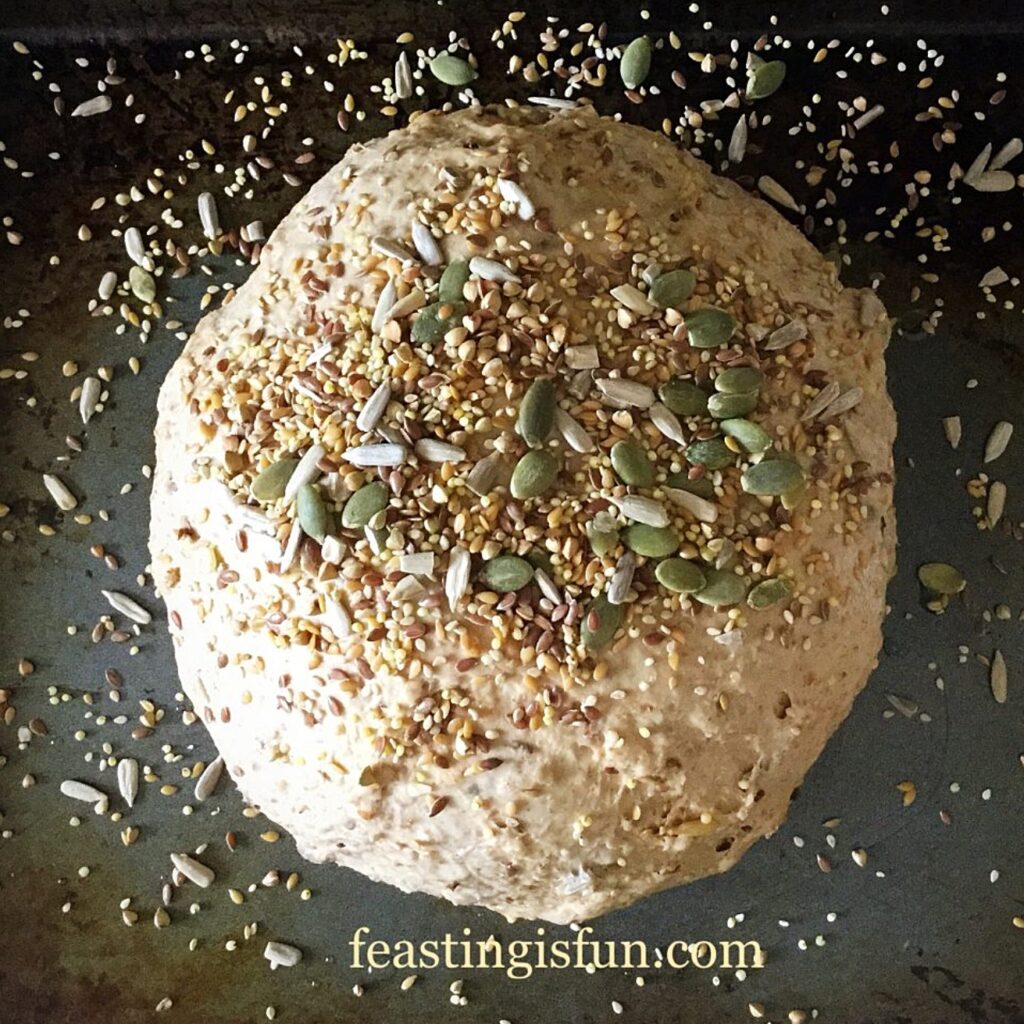
  • As soon as the dough has doubled in size, it is ready to bake. Remove the tea towel and brush the top of the dough with water. Then sprinkle over the remaining seeds.
Round bread dough ready to be baked.
Seeded Cob Loaf ready for the oven.
  • Place the seed covered loaf into the middle of the oven.
  • Immediately reduce the temperature of the oven to 220C/200C fan, gas mark 7, 425F . Note – the reduction in heat stops the seeds from burning.
  • Bake for 45 minutes, remove from the oven. Take the loaf off of the baking tray and place back in the oven, directly on to the oven shelf. Continue baking for 10-20 minutes, depending on how crusty you want your bread.
  • As soon as the bread is done, remove it from the oven and place on a cooling rack.
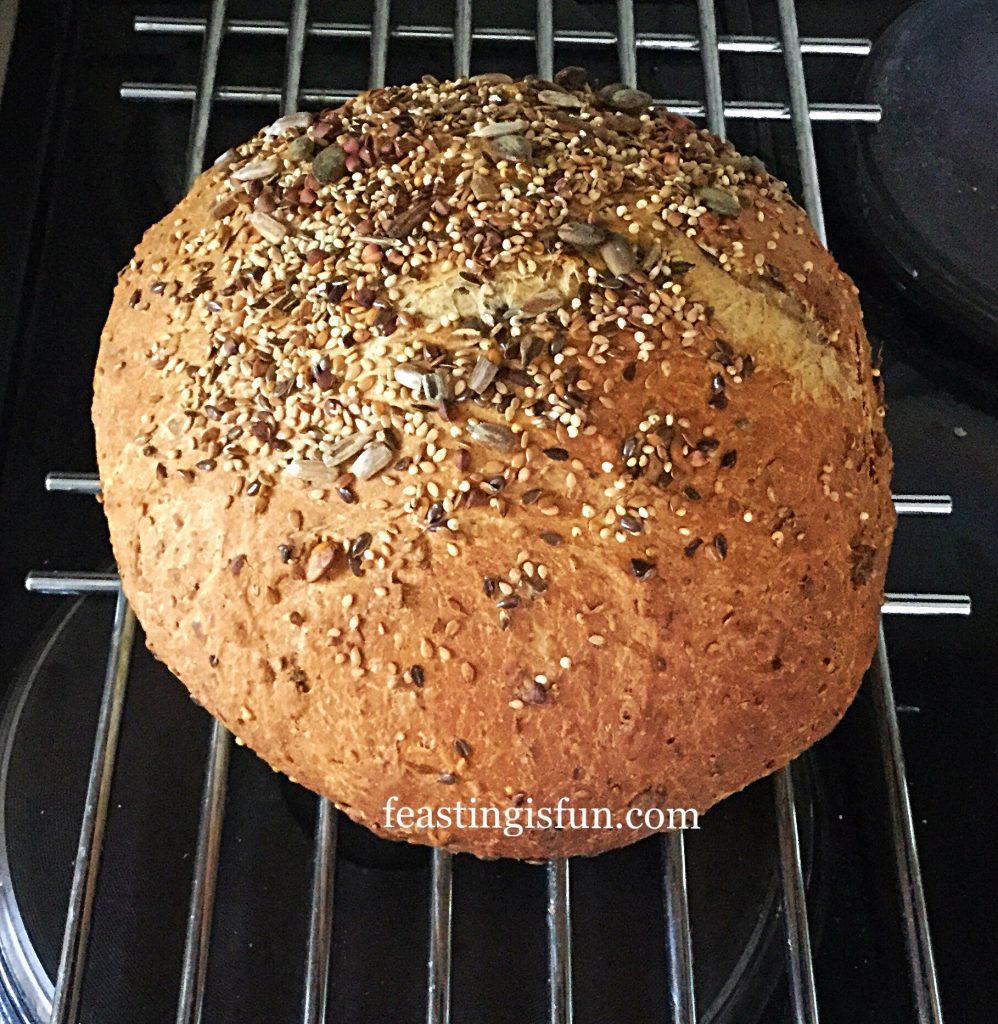
FF Seeded Cob Loaf
Seeded Cob Loaf cooling on a rack.
  • Ensure the loaf is completely cooled before slicing.

FF Seeded Cob Loaf

Perfect for slicing, packing up with an assortment of fillings and taking on a picnic. Alternatively simply tear into chunks and dunk in warming bowls of soup.

FF Seeded Cob Loaf

If you have enjoyed this recipe for Seeded Cob Loaf then you may also like these:

Farmhouse White Loaf

Farmhouse White Bread
Farmhouse White Loaf


Large White Bloomer

Crusty White Bloomer Bread
Large White Bloomer

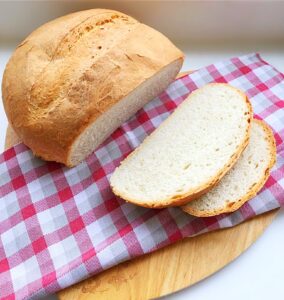
Easy White Cob Loaf

Easy White Cob Loaf sliced on a wooden board
Easy white Cob Loaf

I find baking at home an immensely fulfilling experience. Especially the tempting aroma as a beautiful bread in baking in the oven. And if your first loaf isn’t the perfect shape, it’s taste will more than make up for its appearance. So, keep practicing and your technique will improve! Finally, baking bread at home will give you a delicious loaf and a sense of accomplishment.

Have fun, making, creating and baking in your kitchens.

Sammie xx

Please see my Disclosure Policy regarding copyright and intellectual property laws, before reproducing any copy from this blog.

Double Chocolate Exam Busting Cupcakes

If you are a parent and have children, you will know that from year 6, exams become an important part of their lives. Whether it’s SATS, GCSE’s, A Levels. College or University exams. The end game always focuses on tests or exams. Since today is the start of GCSE’s here in England these Double Chocolate Exam Busting Cupcakes, are designed to lift the spirits and fill the tummies of all students sitting their exams.

FF Double Chocolate Exam Busting Cupcakes
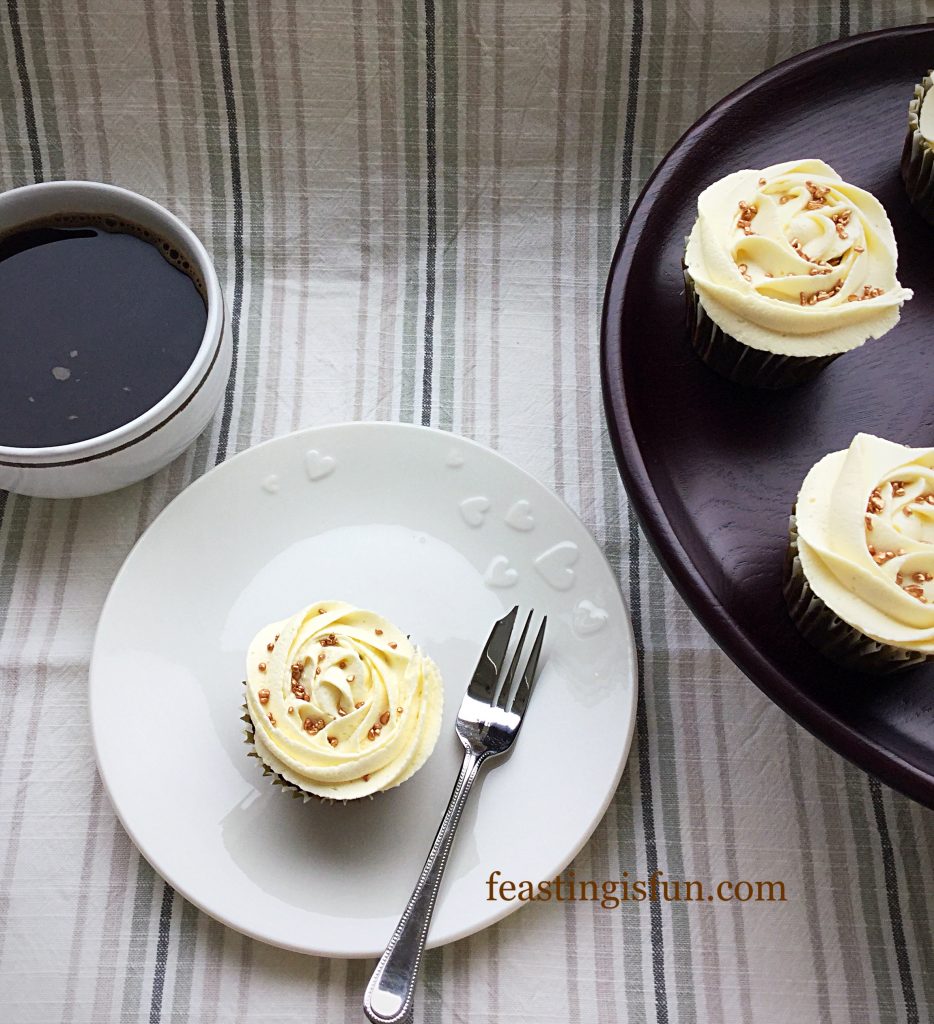
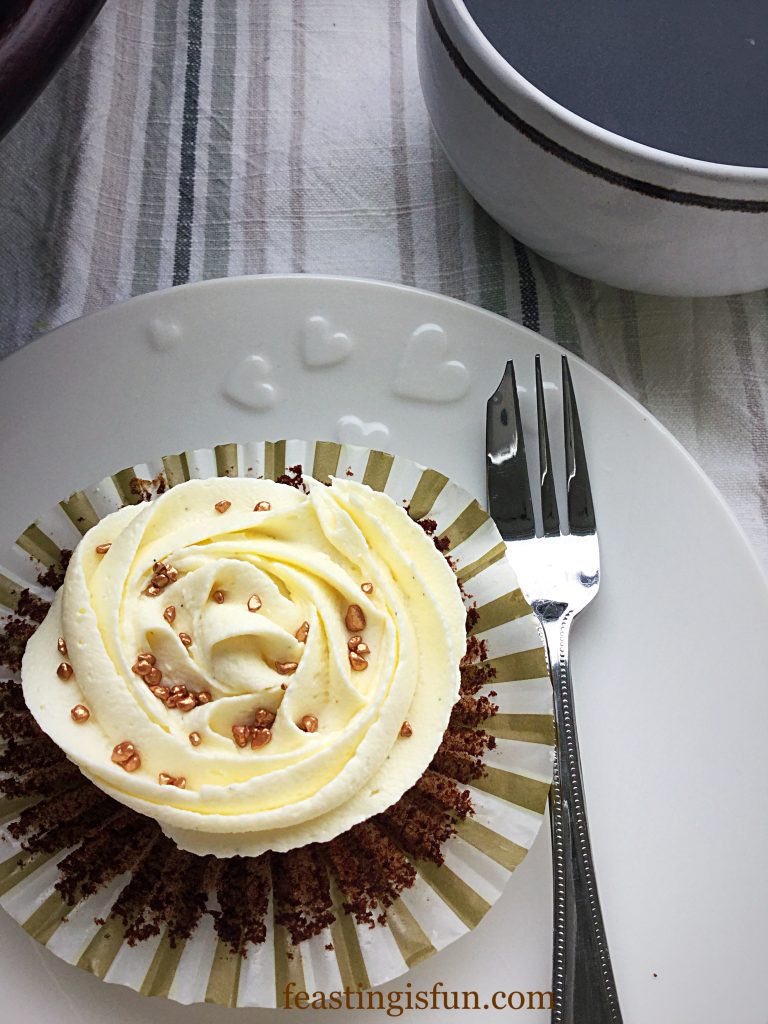
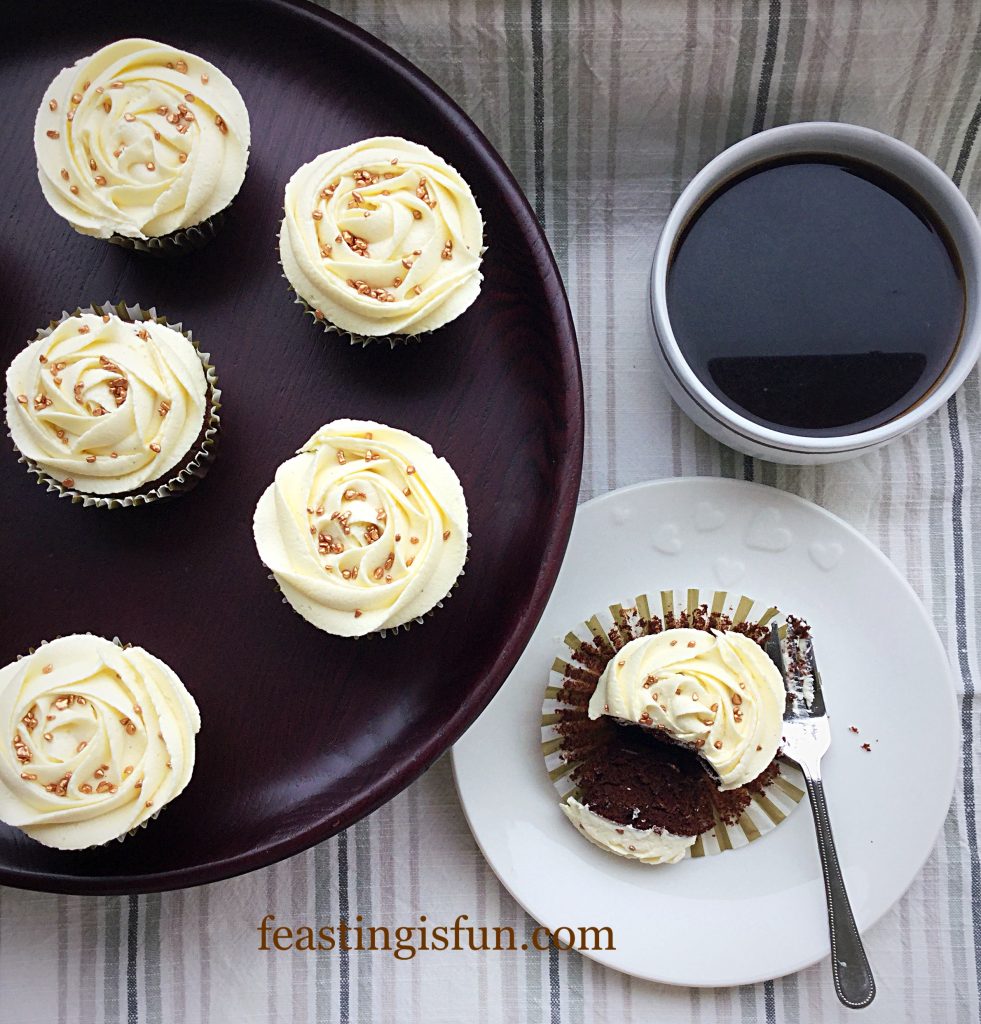
Double Chocolate Exam Busting Cupcakes with coffee – study fuel!

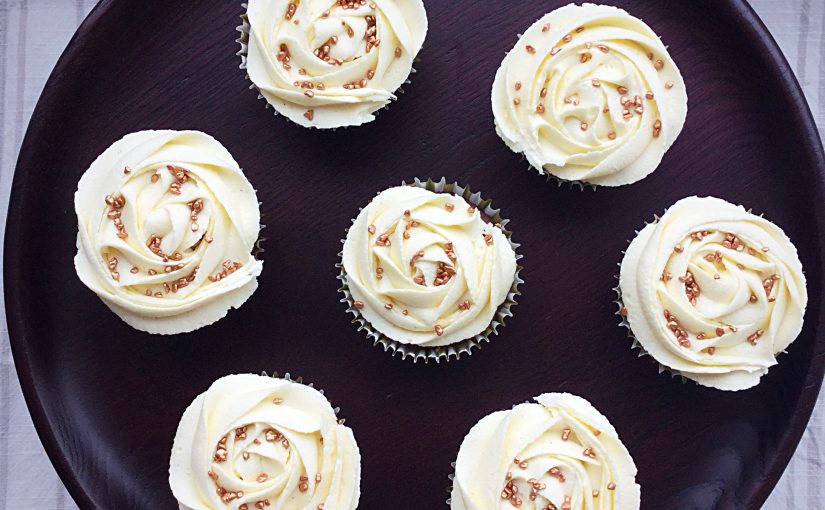
Of course these cupcakes could and should be made all year round, such is their delicious simplicity. Chocolate cake topped with the ultimate white chocolate vanilla frosting. Perfect for chocolate lovers everywhere.

FF Double Chocolate Exam Busting Cupcakes
Double Chocolate Exam Busting Cupcakes the reflect balance of flavours.

A quick bake

Since these cupcakes can be made, from start to finish in under an hour, they are also handy for short notice or unexpected guests. Likewise they can be whipped up, literally, in moments. The comforting aroma of home baking, wrapping around your weary children, like a cosy, soft blanket, when they arrive home.

FF Double Chocolate Exam Busting Cupcakes
Double Chocolate Exam Busting Cupcakes comfort at the ready.

While my hard working teens are sitting and studying for their exams, I can be found in the kitchen. Busy rustling up delicious, sustained energy food and lots of treats. The amount of energy burned up during studying is vast. Since this can be a tough time of year for them, their usual ‘healthy’ food intake is topped up with extra yummy goodies!

Recipe: Double Chocolate Exam Busting Cupcakes makes 12

100g/4oz Unsalted Butter – softened to room temperature

50g/2oz Caster Sugar

50g/2oz Light Brown Sugar

1/4tsp Salt – I use Maldon

1tsp Vanilla Extract – I use Nielsen-Massey

3 Large Free Eggs

60g Plain White Flower

1tsp Baking Powder

40g Cocoa Powder – I use Callebaut

For the frosting:

150g/5oz Icing Sugar

75g/3oz Unsalted softened to room temperature

1tsp Vanilla Bean Paste

100g/4oz White Chocolate

Sprinkles of your choice

Method: Preheat the oven to 160C/140C fan, gas mark 3

First of all line a 12 hole cupcake tin with cupcake cases.

Making the cupcakes

  • Into a medium sized bowl add the butter, both sugars and salt. Beat together until the mixture is free from lumps and smooth.
  • Now add the vanilla extract and all three eggs.
  • Sift in the flour, cocoa and baking powder.
  • Beat/whisk all of the ingredients together until fully mixed.
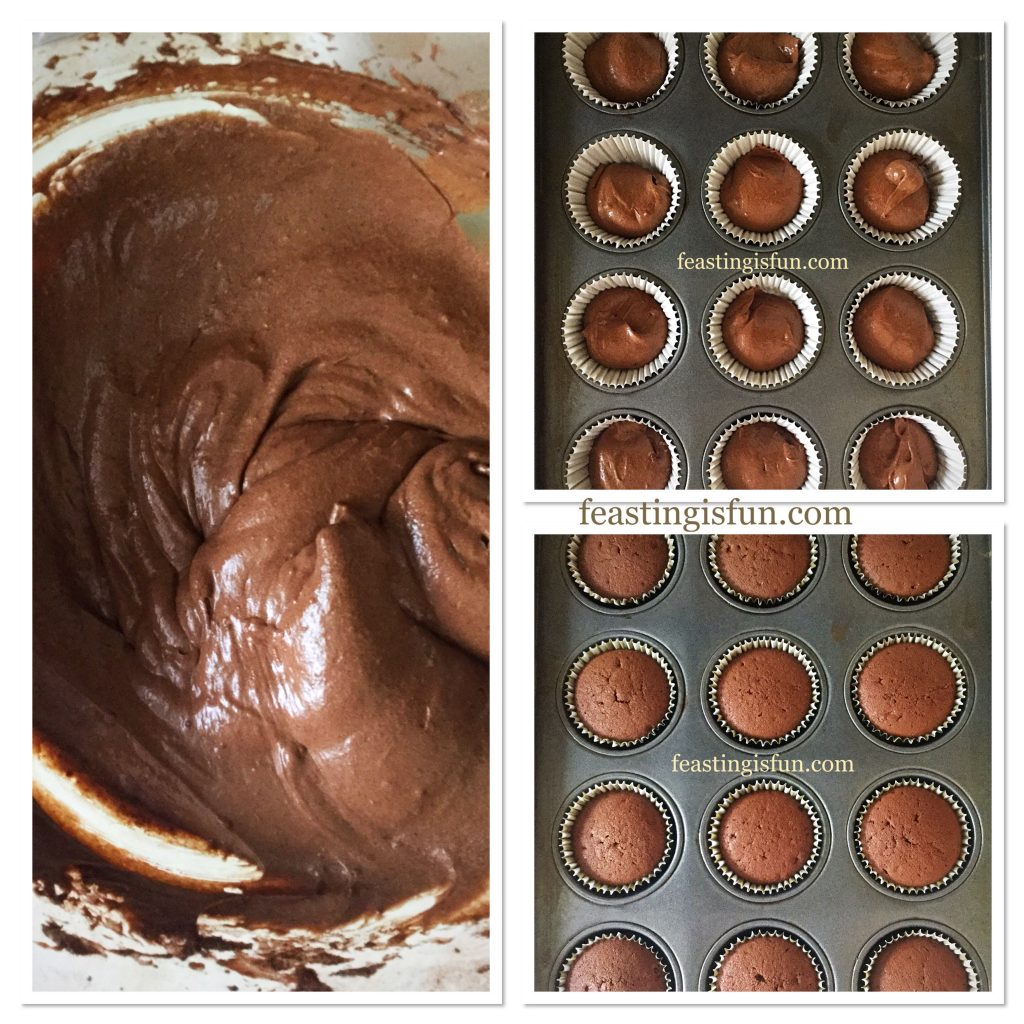
  • Divide the mixture between the 12 cupcake cases – approximately one dessert spoonful of mixture per case.
  • Place the cupcake tin into the centre of the preheated oven and bake for 25-30 minutes.
  • The chocolate cupcakes are baked when they spring back from a light touch.
  • When baked remove from the oven and allow to cool for 10 minutes  before transferring to a cooling rack. Allow to fully cool.
FF Double Chocolate Exam Busting Cupcakes
Making, filling and baking chocolate cupcakes

Preparing the frosting and decorating the cupcakes

  • Note – due to the high chocolate content of the frosting it is advisable to make it directly before piping, while it is soft.
  • Firstly, break up the white chocolate and place in a heatproof, microwaveable bowl. Set to one side.
  • Into a separate bowl add the icing sugar, butter and one teaspoon of very hot water, from a recently boiled kettle. Whisk until almost combined.
  • Place the bowl with the white chocolate into the microwave. Heat for 20 seconds, stirring in between, until the chocolate is liquid.
  • Pour the warm, melted chocolate in with the butter and icing sugar mixture.
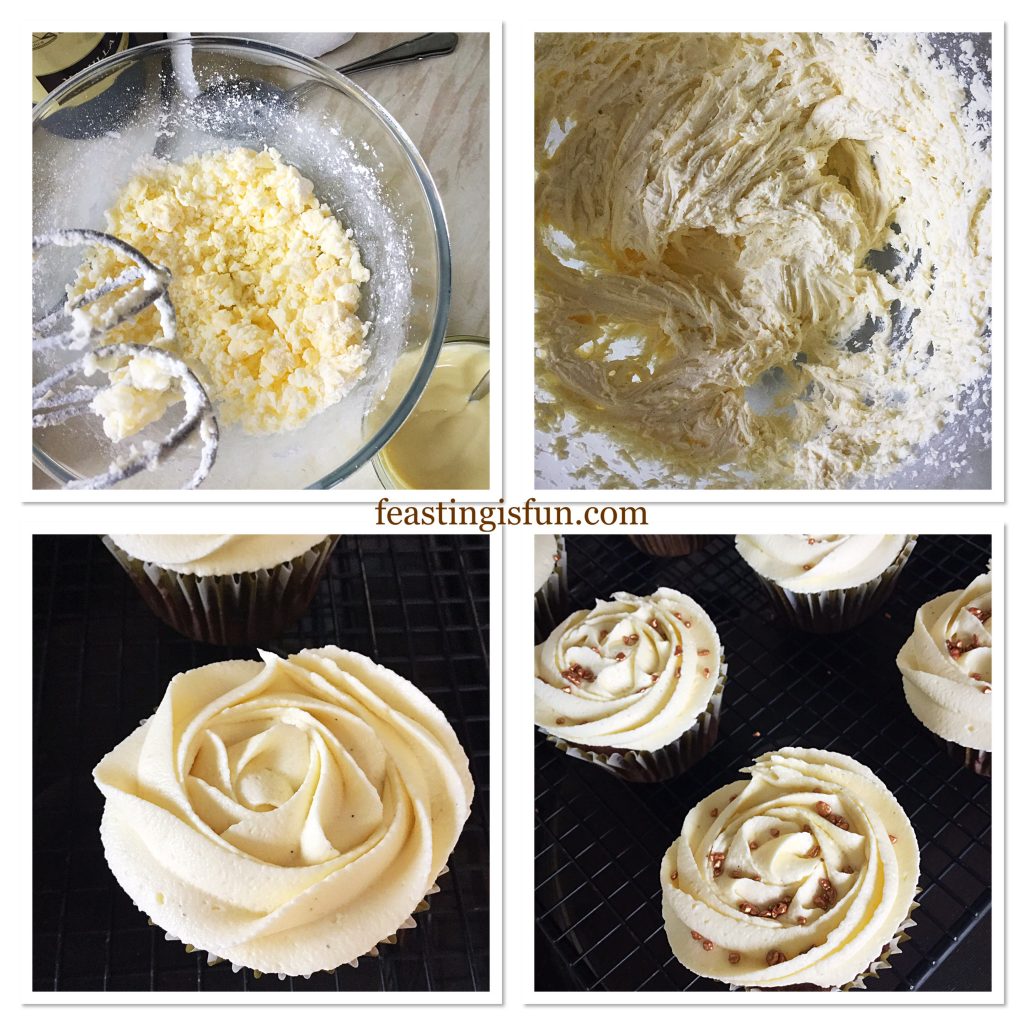
  • Whisk the ingredients together immediately and then continue to whisk until the frosting is light and fluffy. During the whisking add the vanilla bean paste.
FF Double Chocolate Exam Busting Cupcakes
Making the frosting, piping and decorating the chocolate cupcakes.
  • Fit a large piping bag with a large closed star piping nozzle.
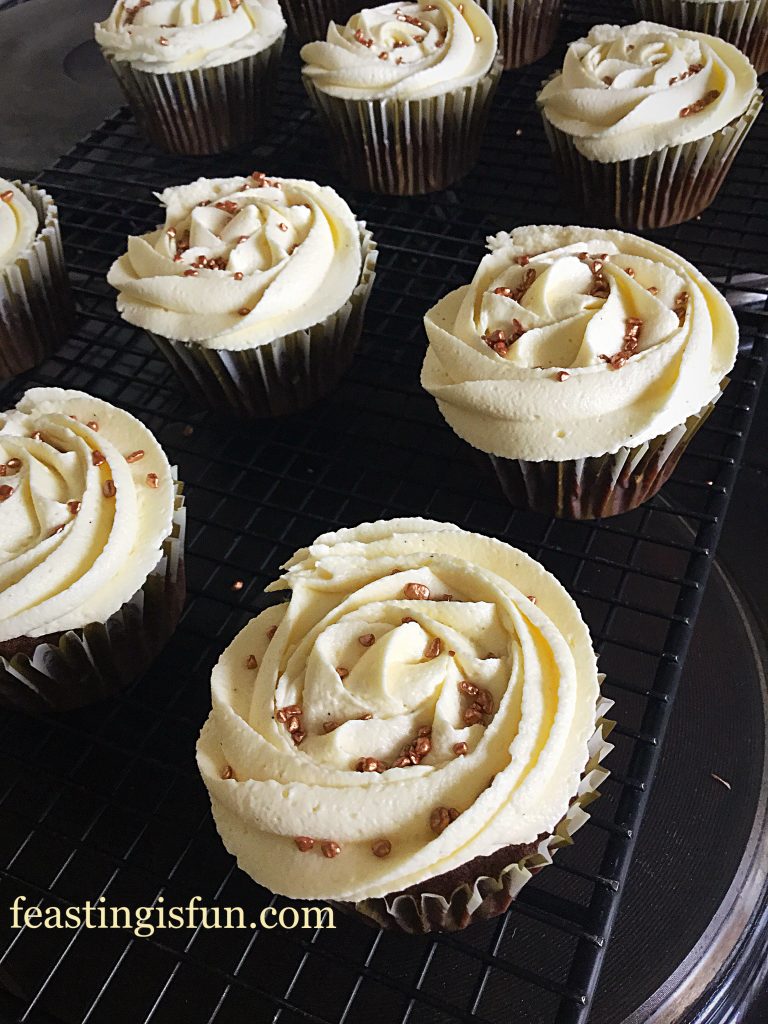
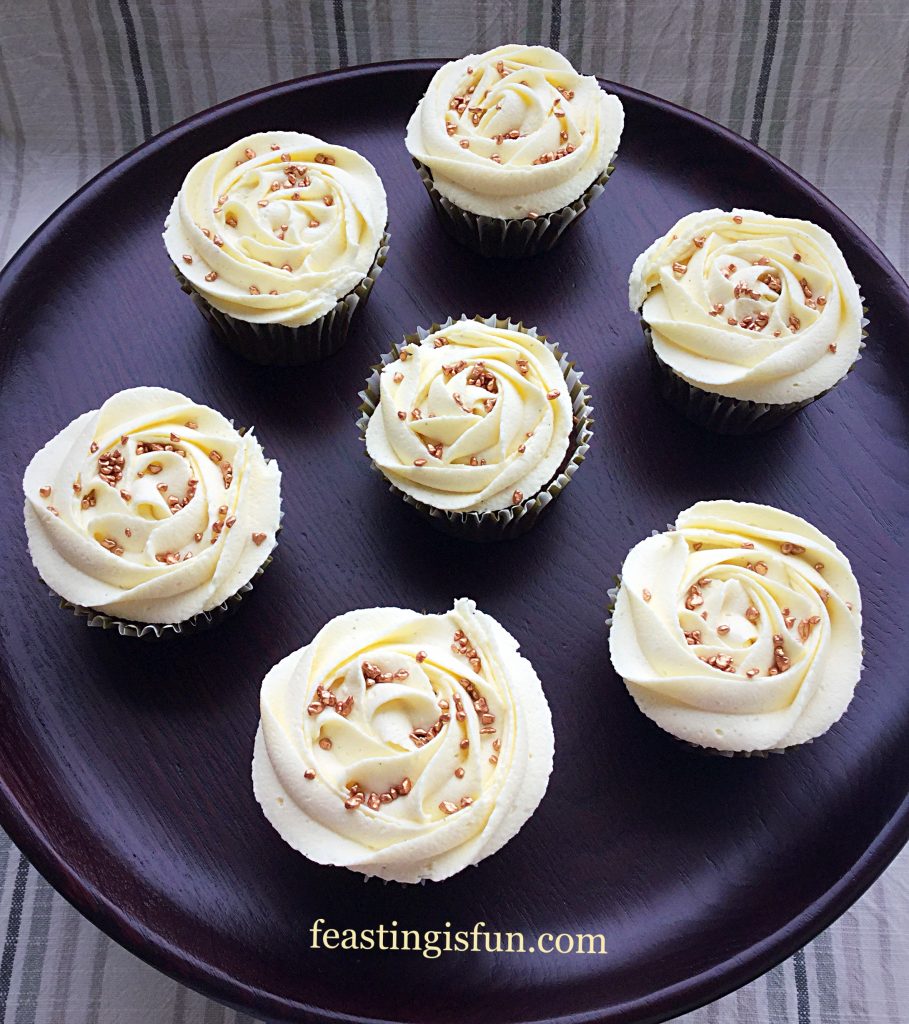
  • Fill the piping bag with the frosting and proceed to pipe rose swirls on each cupcake. Starting in the centre of the cupcake, pipe the shape of an ‘e’ then continue around until the cupcake has a complete swirl on top.
  • Finally, sprinkle over your choice of decoration.
FF Double Chocolate Exam Busting Cupcakes
Double Chocolate Exam Busting Cupcakes so good!

Serve with a hug, smile and a hot drink!

FF Double Chocolate Exam Busting Cupcakes
Double Chocolate Exam Busting Cupcakes much needed.

Store these cupcakes in an airtight container where they will last for three days.

If you have enjoyed this recipe for Double Chocolate Exam Busting Cupcakes you may also like these:

Marshmallow Frosted Mango Cupcakes

FF Double Chocolate Exam Busting Cupcakes
Gluten Free Marshmallow Frosted Mango Cupcakes

Maraschino Cherry Chocolate Drizzle Cupcakes

FF Double Chocolate Exam Busting Cupcakes
Maraschino Cherry Chocolate Drizzle Cupcakes

Cheer Up Chocolate Chip Cookies

FF Double Chocolate Exam Busting Cupcakes
Cheer Up Chocolate Chip Cookies

While cupcakes are delicious, the cookies are for those meltdown moments when the pressure is simply too much. Firstly, so that whoever reads this blog post realises that they aren’t on their own. Sometimes it all gets too much. Fresh air, good music and a break all help. As do hugs, talking and simply letting it all out.

Wishing anyone taking exams, all the very best. If you do your best, no one can expect more of you than that x.

Sammie xx

Lemon Drizzle Whipped Cream Filled Giant Doughnut

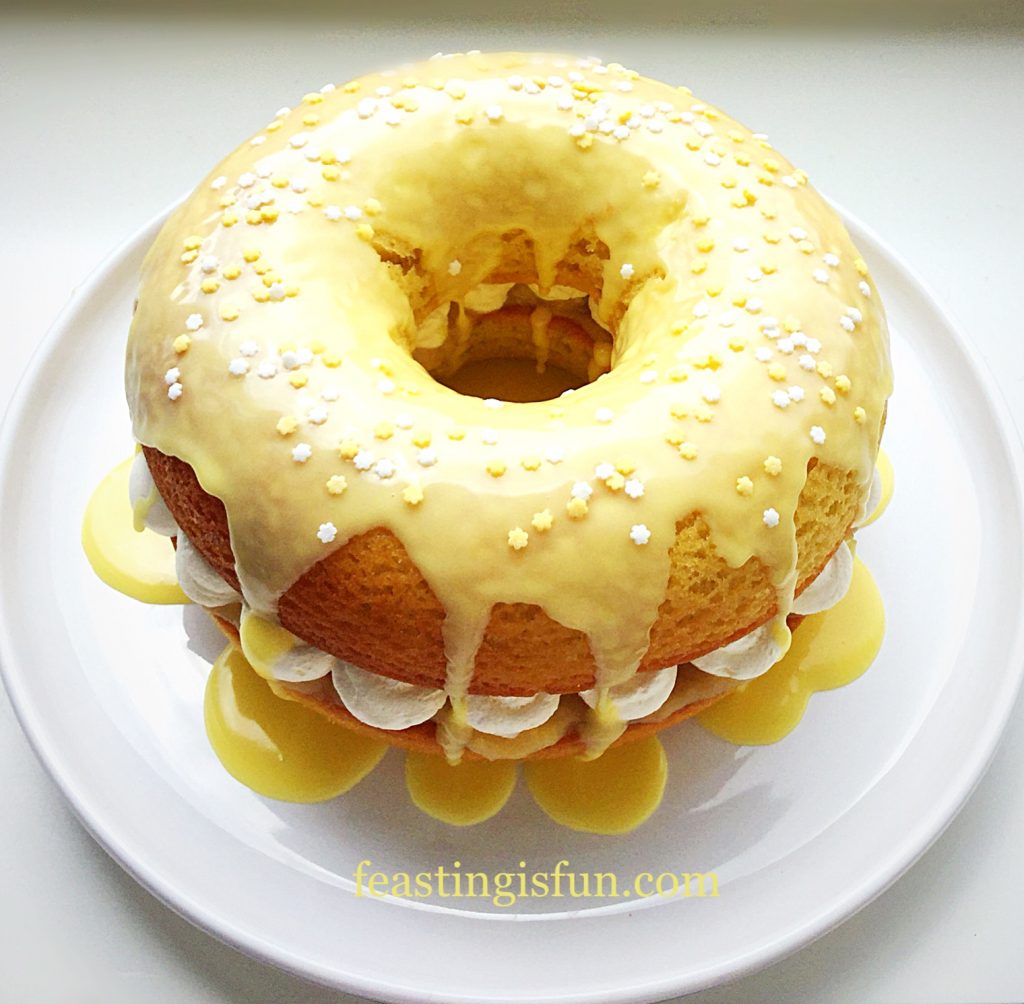
Lemon Drizzle Whipped Cream Filled Giant Doughnut, perfect any time of the year. Most especially when shared with friends and a great cup of tea. Recently having seen a list of the most popular cakes depending on season, there wasn’t any surprise when Lemon Drizzle made all four lists.

FF Lemon Drizzle Giant Doughnut

Lemon Drizzle A National Favourite

Since this week is National Doughnut Week, a baked giant doughnut was the desired way to celebrate in our home. Honestly though, it’s never difficult eating a doughnut! Still this had to be a celebratory doughnut. As mentioned before, lemon drizzle is not only the Nation’s favourite, it is ours too, here at home.

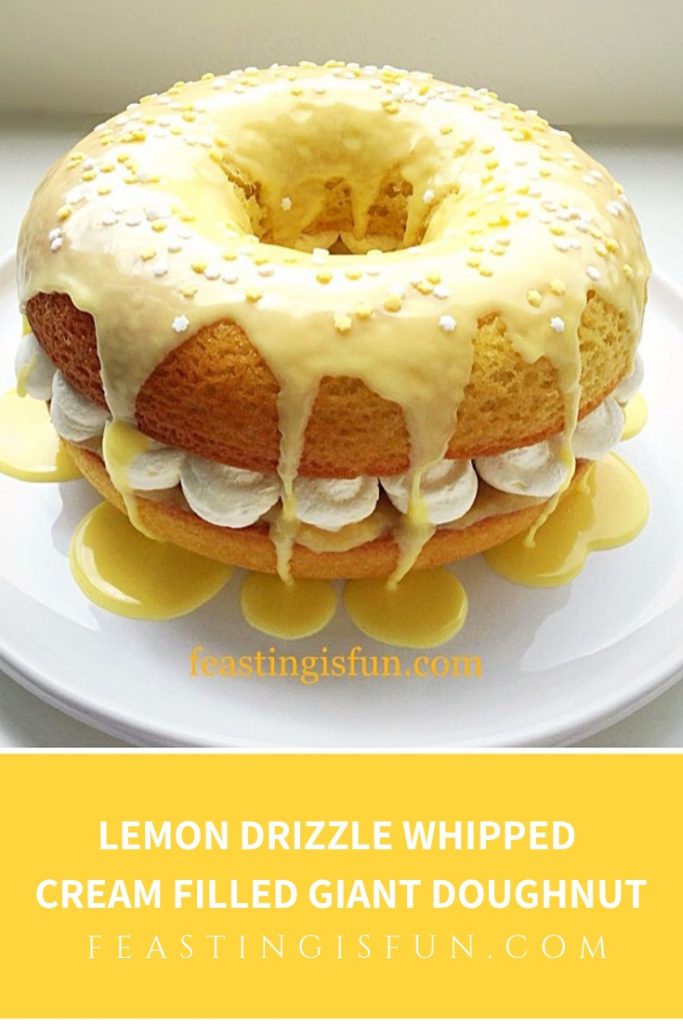
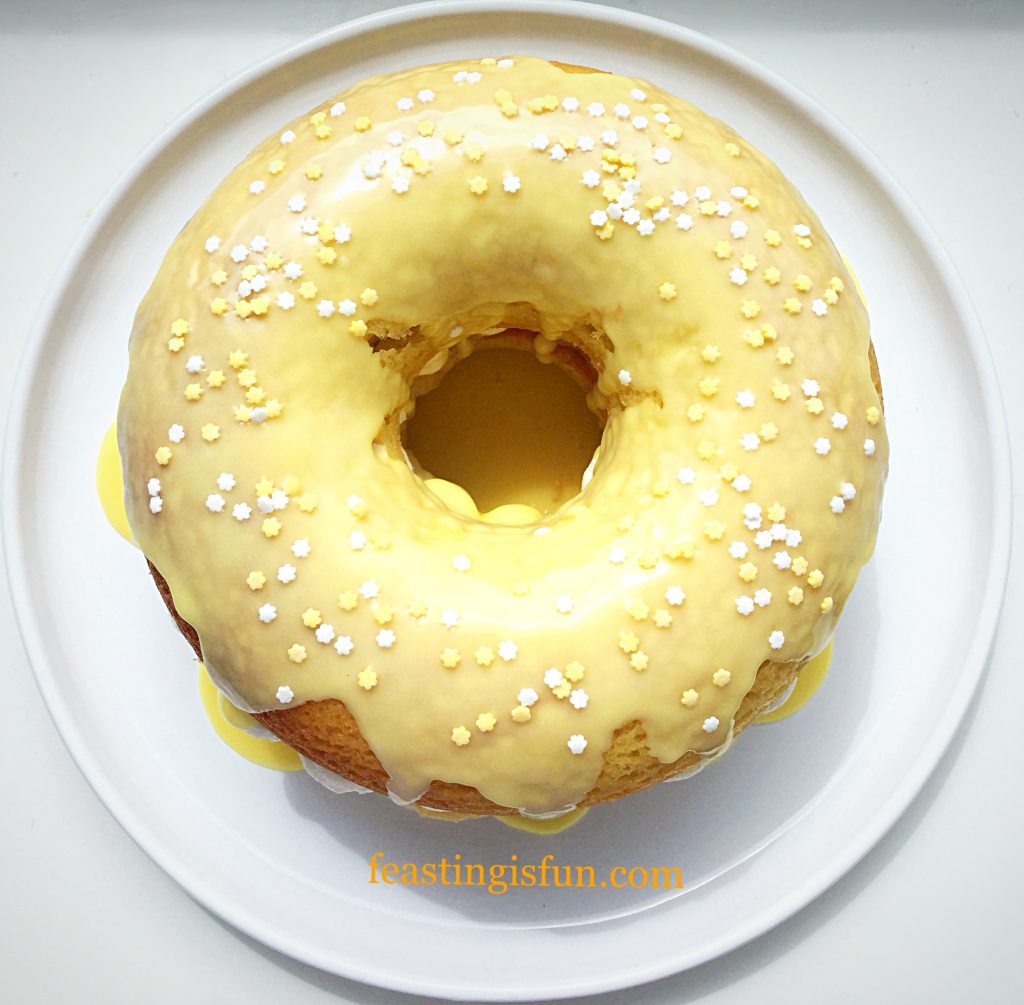
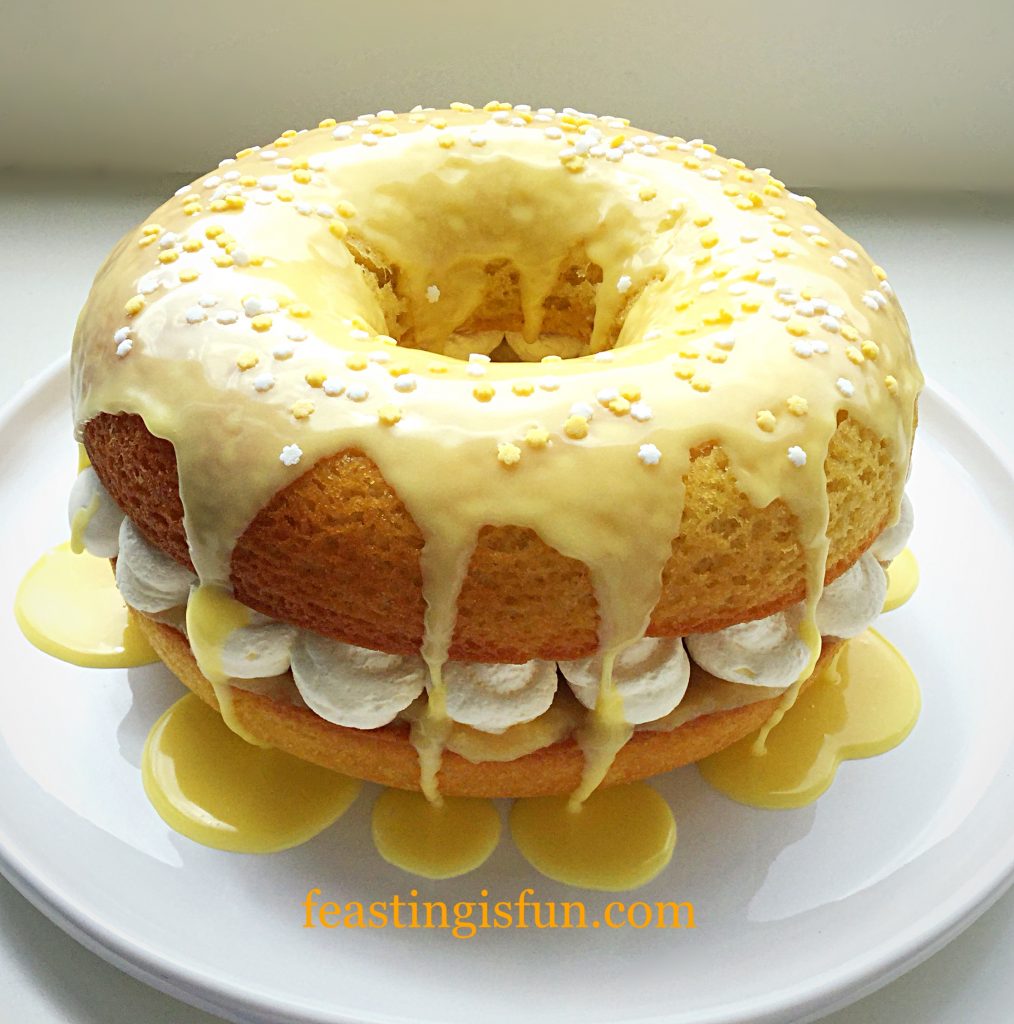
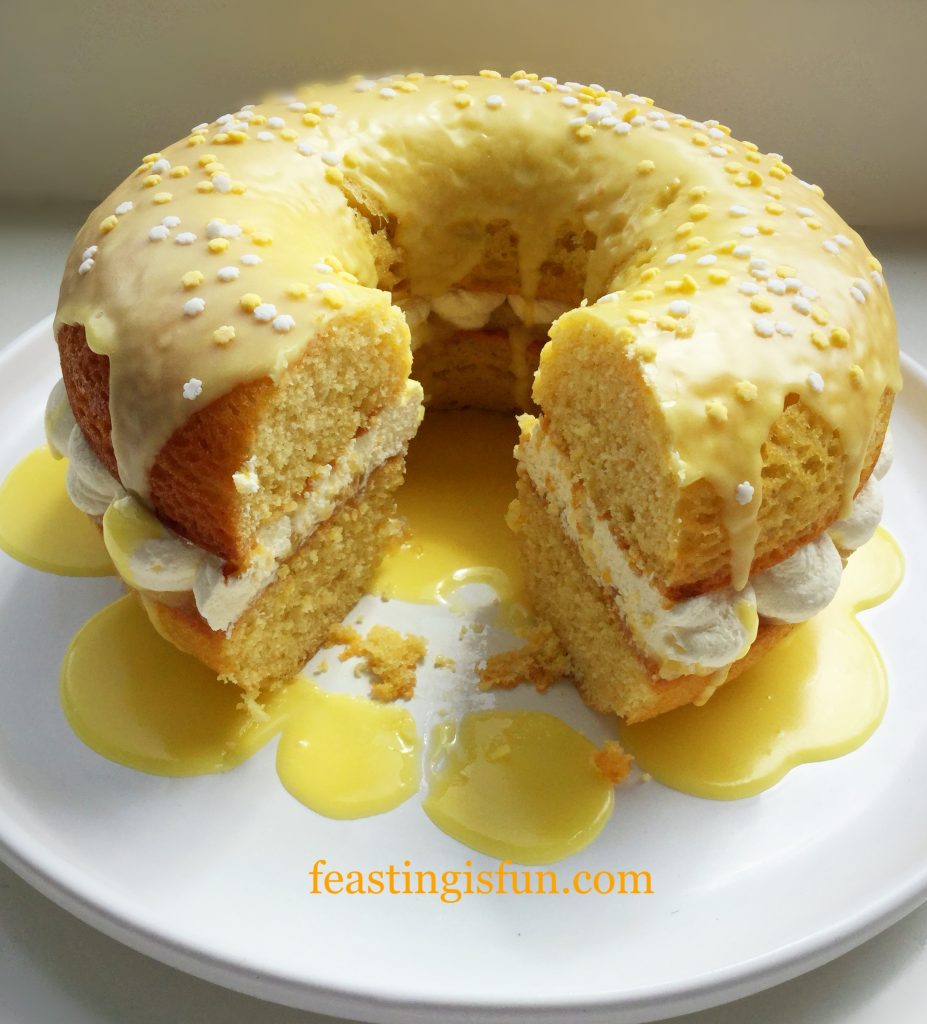
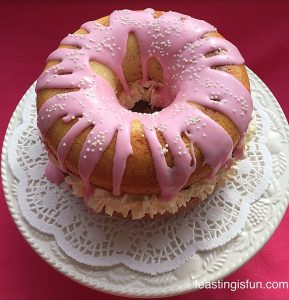
Large baked lemon doughnut filled with whipped cream and topped with a lemon drizzle icing.
Lemon Drizzle Whipped Cream Filled Giant Doughnut

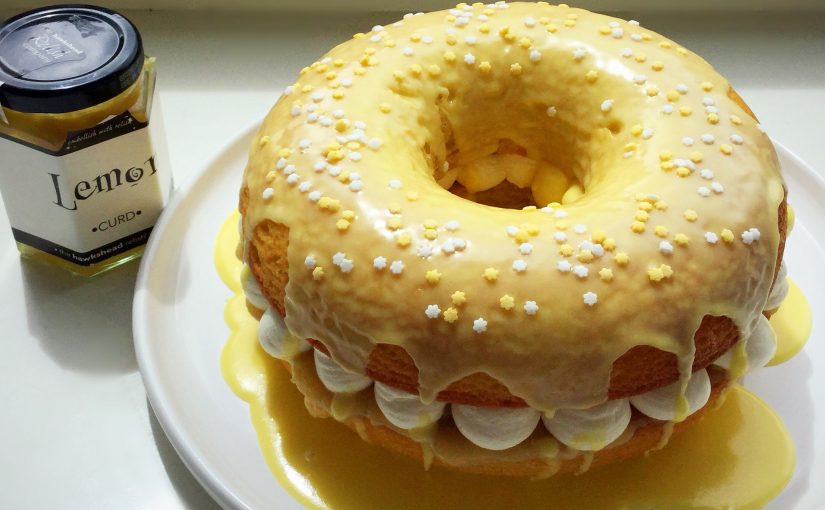
Light, lemon sponge, filled with the best lemon curd from Hawkshead Relish piped, whipped cream. Topped with another deliciously lemon sponge and then drizzled in fresh lemon icing. Finally, finished with colour co-ordinating sprinkles, for fun and added crunch.

FF Lemon Drizzle Whipped Cream Filled Giant Doughnut
The whipped cream cuts through the delicious tart lemon flavours.

Giant Doughnut Or Sandwich Cake?

The silicone moulds needed to bake this giant doughnut are available online, Amazon or from Lakeland. Inexpensive and easy to use, I can guarantee you will not regret buying. Alternatively, this doughnut can also be baked in two 7-8″ sandwich, cake tins. Perhaps add the moulds to a birthday or Christmas list?

FF Lemon Drizzle Whipped Cream Filled Giant Doughnut
Lemon Drizzle Whipped Cream Filled Giant Doughnut dessert anyone?

Due to the flavour and presentation of this bake, it is perfect to serve for dessert, or any time you have friends or family pop round.

Recipe: Lemon Drizzle Whipped Cream Filled Giant Doughnut serves 8-10

200g/7oz Unsalted Butter softened to room temperature – plus a little extra to grease the moulds

200g/7oz White Caster Sugar

1/8th tsp Salt – I use Maldon

5 Large Free Range Eggs

1tsp Vanilla Extract – I use Nielsen-Masey

200g/7oz Plain White Flour

2tsp Baking Powder – note Waitrose is gluten free

1 Large Lemon scrubbed clean – zest of whole lemon and juice of half used in the Sponge batter

Filling and Icing:

3-4 tbsp Lemon Curd – I use Hawkshead Relish

1/2 juiced lemon – see above

200g/7oz Icing Sugar

Optional – Yellow Gel Food Colouring – I use Wilton

300ml Double/Heavy Cream

Sprinkles of your choice

Method: Preheat the oven to 160C/140C fan, gas mark 3, 325F

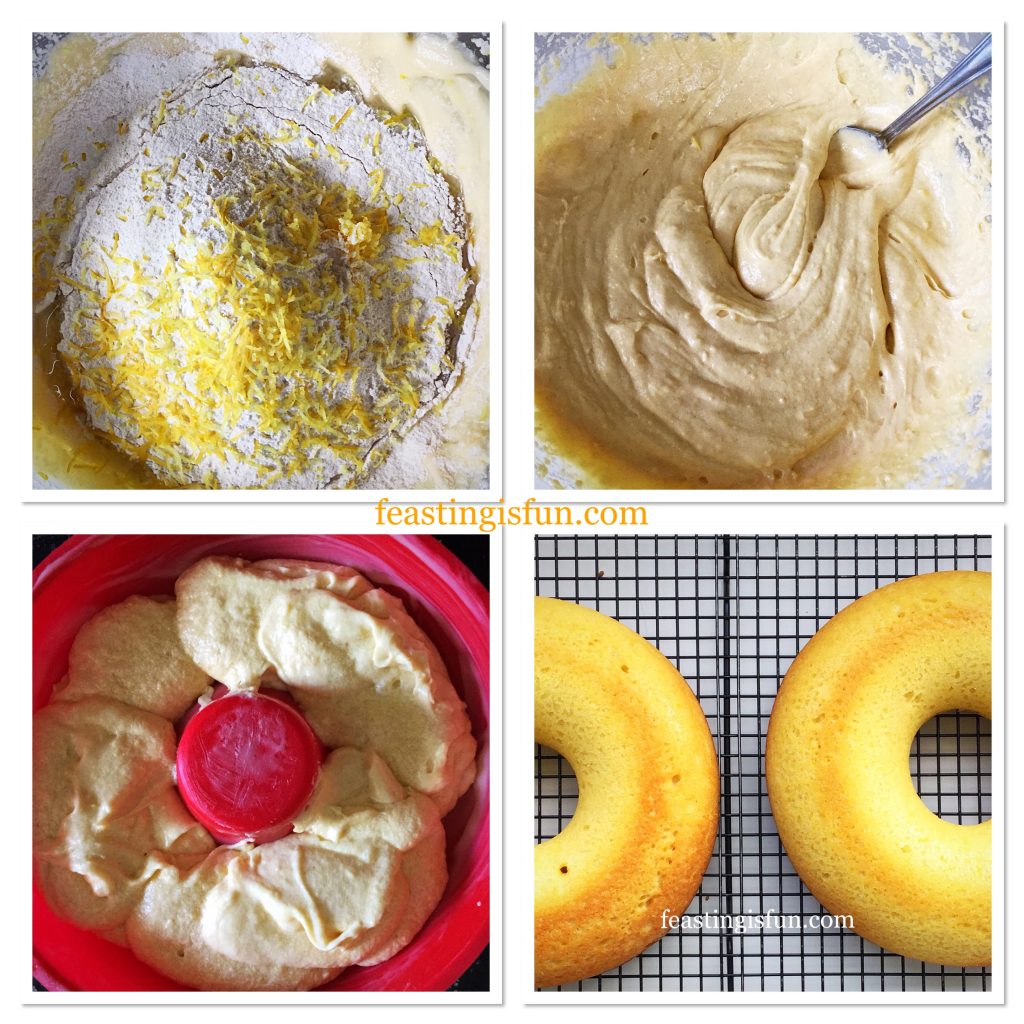
Making And Baking The Lemon Doughnut Halves

  • First of all, grease the silicone moulds well, with softened butter.
  • Now into a large bowl add the caster sugar, butter and salt. Whisk/beat until very pale and fluffy.
  • Next, add the vanilla extract, lemon juice and sift in the flour and baking powder. Lastly add the lemon zest.
  • Finally mix all of the ingredients on slow, or by hand. This is called the all-in-one method and works particularly well with this recipe.
  • Divide the mixture between the two moulds and place them on separate baking trays.
  • Place the baking trays, evenly spaced in the preheated oven.
  • The doughnut sponge will take between 30 and 40 minutes to bake.
  • The sponge is baked when golden in colour and springs back from a light touch.
  • Once baked remove the moulds from the oven. Allow to cool for 5 minutes and then turn out the doughnut sponge halves onto a cooling rack.
  • While the sponges are cooling, the lemon drizzle icing can be made.
FF Lemon Drizzle Whipped Cream Filled Giant Doughnut
Creating, making and baking the giant doughnut.

Decorating The Lemon Drizzle Whipped Cream Filled Giant Doughnut

  • Weigh the icing sugar into a bowl containing the juice of half a lemon.
  • If desired add the tip of a cocktail stick, which has been dipped in yellow gel food colouring.
  • Stir vigorously, ensuring a uniform colour. If the icing seems too thick to drizzle add a drop more lemon juice or cold tap water.
  • Cover the icing with cling film placed directly in contact with the top of the yellow icing. Doing so stops the icing from drying out.
  • For the whipped cream, pour 300mls of cold cream into a bowl. Whisk lightly until the cream just holds a stiff peak.
  • Place the whipped cream into a piping bag fitted with a round piping nozzle, approximately 1cm diameter. Place the piping bag into the fridge until needed.
  • When the sponges are completely cool, decide which one will be the top and the bottom of the doughnut.
  • Place the bottom doughnut sponge, flat side up on a serving plate.
  • Spoon the lemon curd on top and spread with a knife so that it covers evenly.
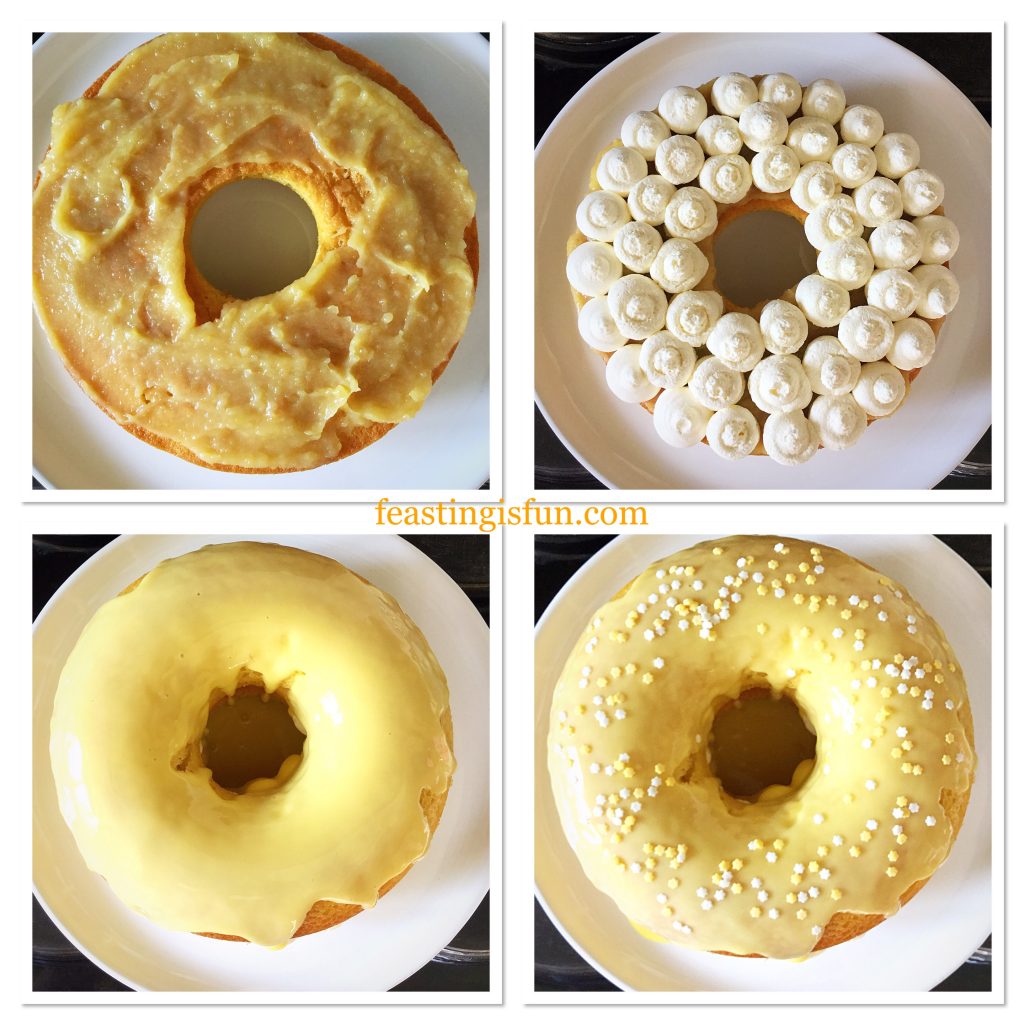
  • To pipe the whipped cream, firstly see the picture below. Start just inside the outside edge, piping single ‘blobs’ around the outside. Continue with two more rows of piped cream, until the base is prettily covered.
  • Now place the top of the doughnut evenly on to the base.
  • Spoon the lemon drizzle on to the top sponge, leaving any drips as they add to the finished look.
  • Scatter sprinkles over the drizzle icing while it is still wet.
FF Lemon Drizzle Whipped Cream Filled Giant Doughnut
Building and decorating the Lemon Drizzle Whipped Cream Filled Giant Doughnut.
  • Serve this delicious doughnut chilled and with a smile.
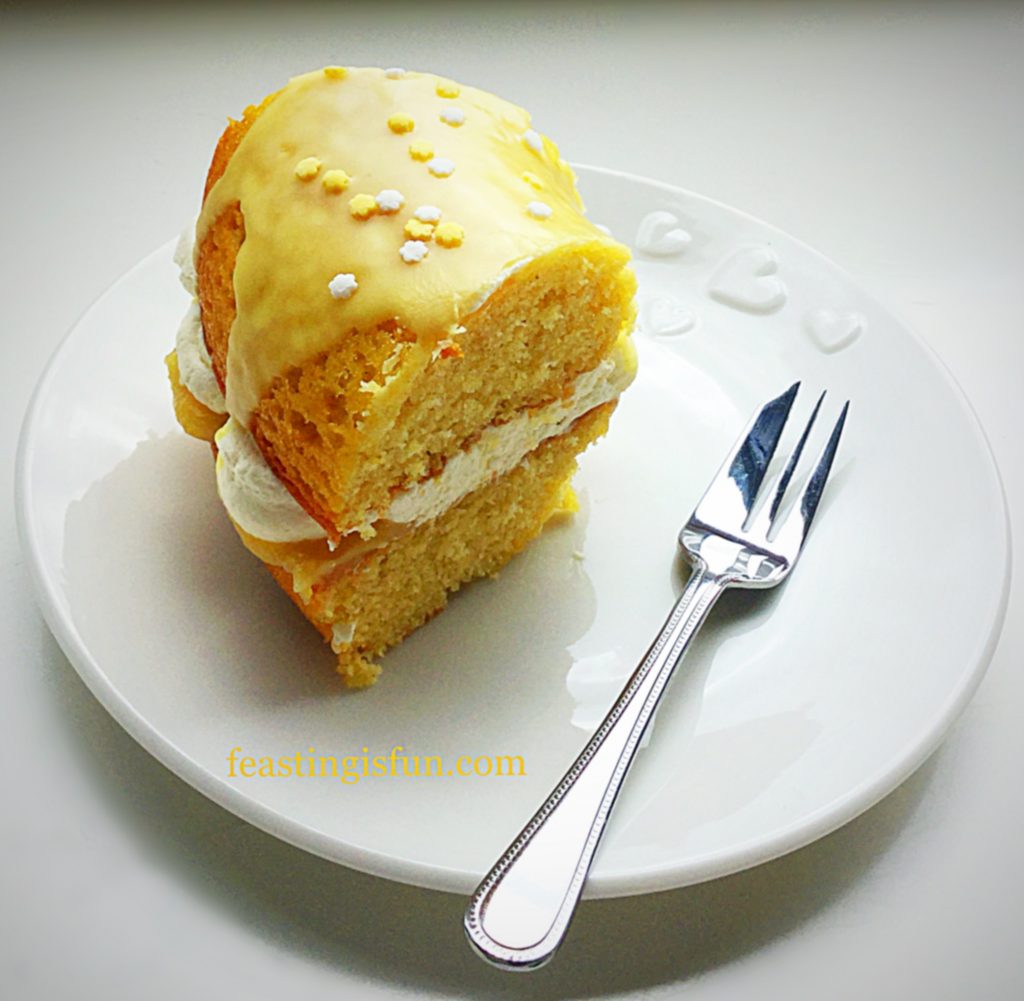
FF Lemon Drizzle Whipped Cream Filled Giant Doughnut
A generous slice of Lemon Drizzle Whipped Cream Filled Giant Doughnut.
FF Lemon Drizzle Whipped Cream Filled Giant Doughnut
Lemon Drizzle Whipped Cream Filled Giant Doughnut

If you have enjoyed this recipe for a Lemon Drizzle Whipped Cream Filled Giant Doughnut then you may also like these:

Strawberry Whipped Cream Giant Doughnut

FF Lemon Drizzle Whipped Cream Filled Giant Doughnut
Strawberry Whipped Cream Giant Doughnut comes with a Gluten Free recipe included.

Chocolate Hazelnut Baked Giant Doughnut

FF Lemon Drizzle Whipped Cream Filled Giant Doughnut
Chocolate Hazelnut Baked Giant Doughnut.

Raspberries and Cream Giant Doughnut

FF Lemon Drizzle Whipped Cream Filled Giant Doughnut
Raspberries Cream Giant Doughnut.

I hope these delicious recipes have shown how versatile the silicone doughnut moulds can be?

The gluten free recipe for the Strawberry Doughnut, also works well for both the Raspberry and Lemon Drizzle doughnuts. Please ensure that any decorations, baking powder are certified gluten free. I am sure that anyone on a restricted diet, would be thrilled with a giant doughnut as a birthday cake!

So, whatever you are making, baking and creating in your kitchens, have fun preparing and sharing your feast.

Sammie xx

No part of this post may be reproduced or duplicated without the written permission of the owner. Pleased see my Disclosure Policy.

National Doughnut Week is 11-18 May 2019. And proceeds from doughnuts sold during this week are donated to The Children’s Trust, which supports children with brain injury. Why not bake some doughnuts and take them to work, selling slices to colleagues and donating the proceeds?


Maltesers Malted Chocolate Loaf Cake

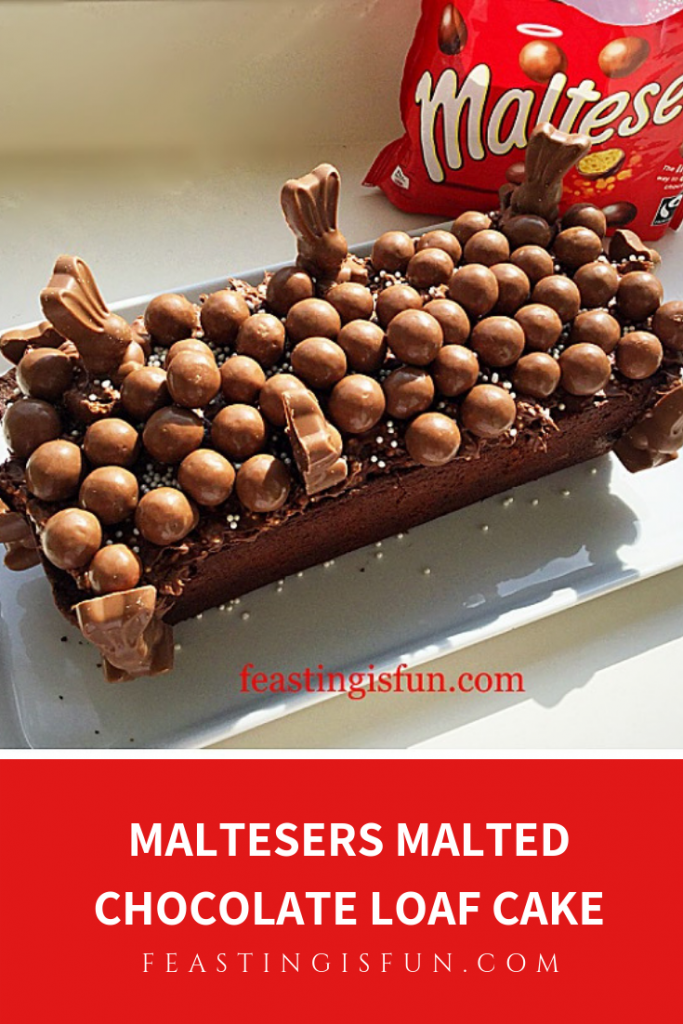
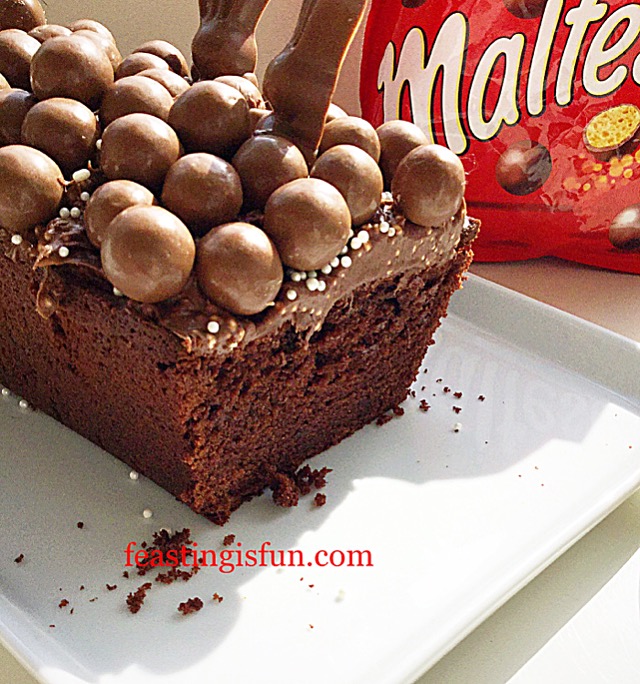
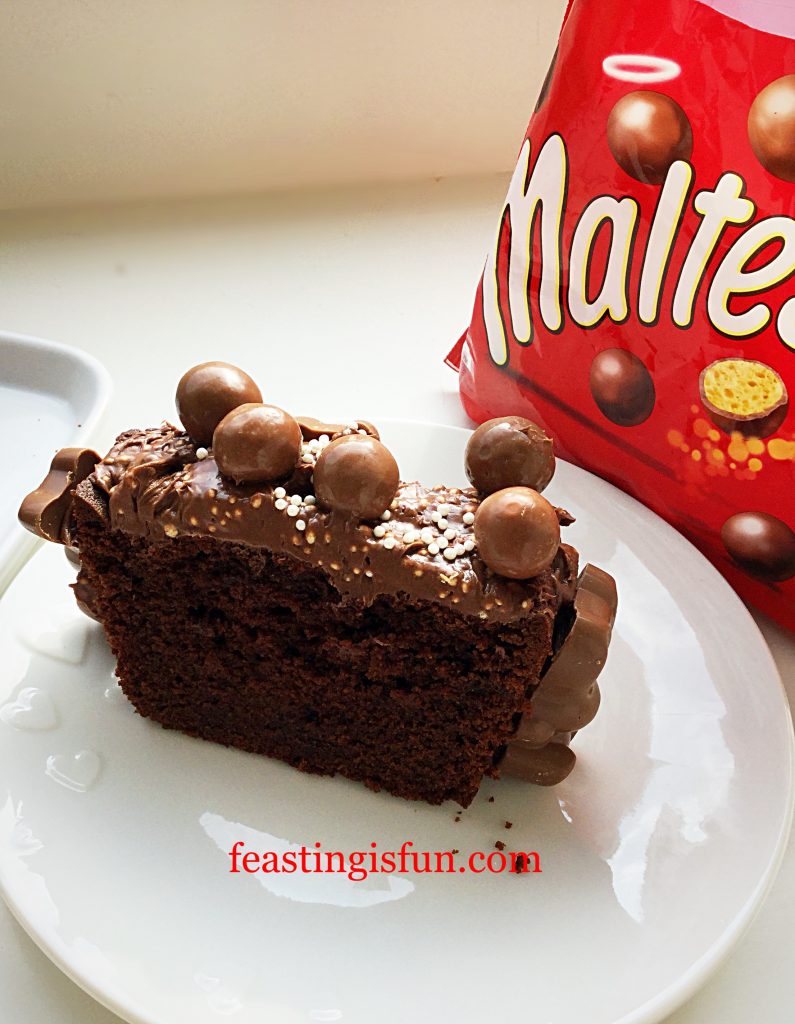
Easter was only a couple of weeks ago. Time flies. Yet fortunately, Maltesers bunnies don’t! Since I had these cute, chocolate bunnies leftover from Easter, I decided to bake a loaf cake and use them to decorate. While also having a large bag of Maltesers and a whole jar of Maltesers spread, the resulting Maltesers Malted Chocolate Loaf Cake is for Maltesers lovers everywhere.

FF Maltesers Malted Chocolate Loaf Cake


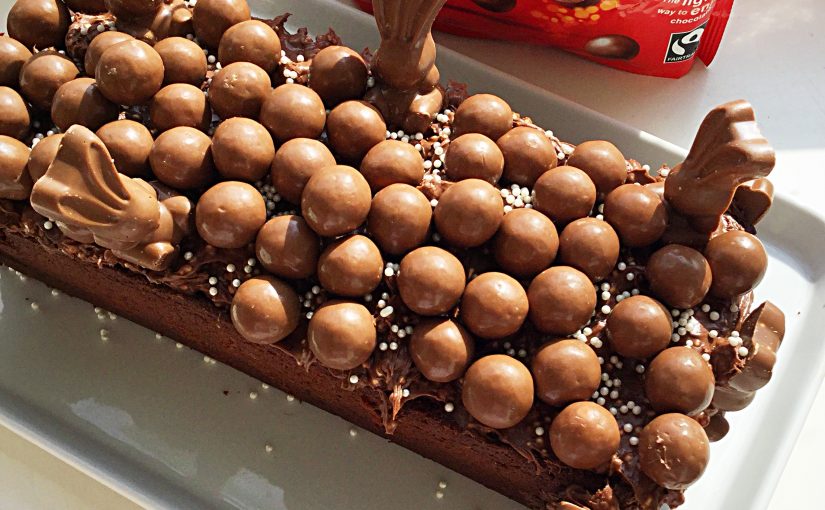
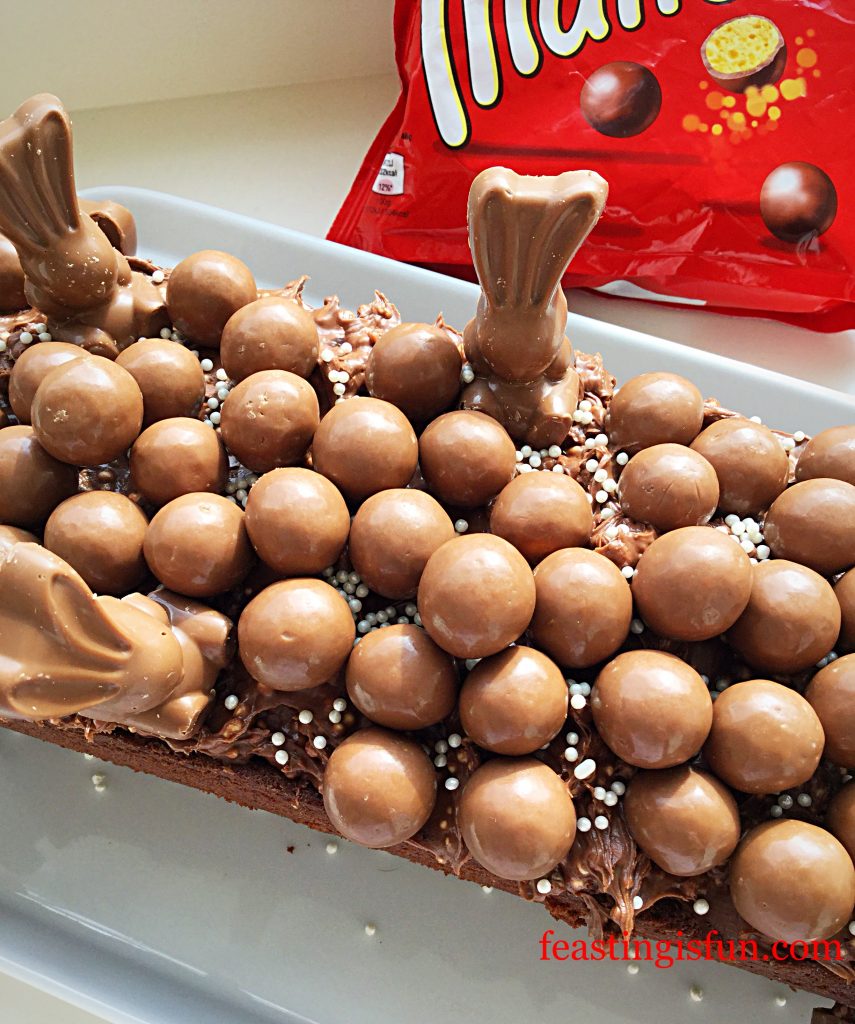
Since my Double Chocolate Chip Loaf Cake recipe is very reliable, that is where this recipe started. Although a few ingredients were changed to suit the flavour of this cake. While still wonderfully moist, malt powder adds another level of flavour to the chocolate. And Maltesers spread, topping the cake in a thick layer, is all the ‘icing’ that’s needed. Finishing with crunchy, Maltesers adds taste, texture and fun. Resulting in a cake that tastes of Maltesers all the way through.

FF Malteser Malted Chocolate Loaf Cake
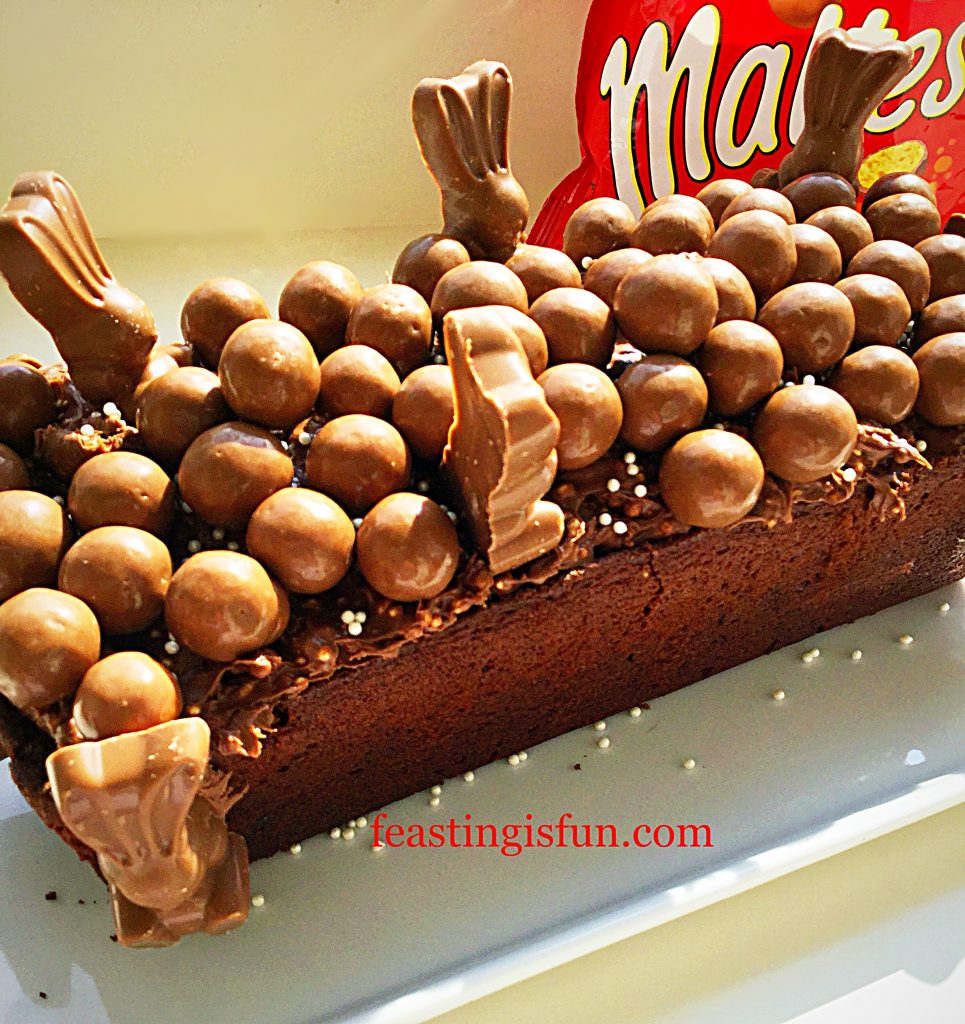
Maltesers Malted Chocolate Loaf Cake with added chocolate bunnies for Easter.

Finally, the addition tiny, white pearls echo the Maltesers crunch that is in the chocolate spread, on top of the cake.

FF Maltesers Malted Chocolate Loaf Cake
Maltesers Malted Chocolate Loaf Cake

Recipe: Maltesers Malted Chocolate Loaf Cake serves 8-10

For the cake

175g/6oz Unsalted Butter softened

175g/6oz Light Brown Sugar

1/4tsp Salt –  I use Maldon

3 Large Free Range Eggs

1tsp Vanilla Extract – I use  Nielsen-Massey

100g/4oz Full Fat Yoghurt

50g/2oz Cocoa Powder

2tbsp Malted Drink Powder – I use Horlicks

125g/5oz Plain White Flour

2tsp Baking Powder

To decorate

I jar Malteaser Chocolate Spread. Alternatively use your favourite chocolate spread

1 Large Family Bag or Box of Maltesers – if you are particularly partial to Maltesers add an extra bag!

Small pearl or silver edible balls

Optional – Packets of Maltesers Chocolate Bunnies, as many as needed – only available at certain times of the year.

Method: Preheat the oven to 160C/140C fan, gas mark 3, 325F

Making And Baking The Malted Chocolate Cake

For this bake you will need a 2lb loaf tin. Grease thoroughly with butter and line the base with baking parchment.

  • First of all sift the flour, cocoa powder and baking powder together in a bowl. Then add the two tablespoons of malt powder. This is the dry mix.
  • Into a large bowl add the butter, sugar and salt. Beat until the mixture is fully combined and has very few lumps.
  • Next add the three eggs to the bowl, the vanilla extract and also the yoghurt. Beat for one minute to break up the eggs.
  • Gently tip in the dry ingredients and beat slowly until all the ingredients have combined. Switch to a large spoon and stir, ensuring the entire cake batter is fully combined.
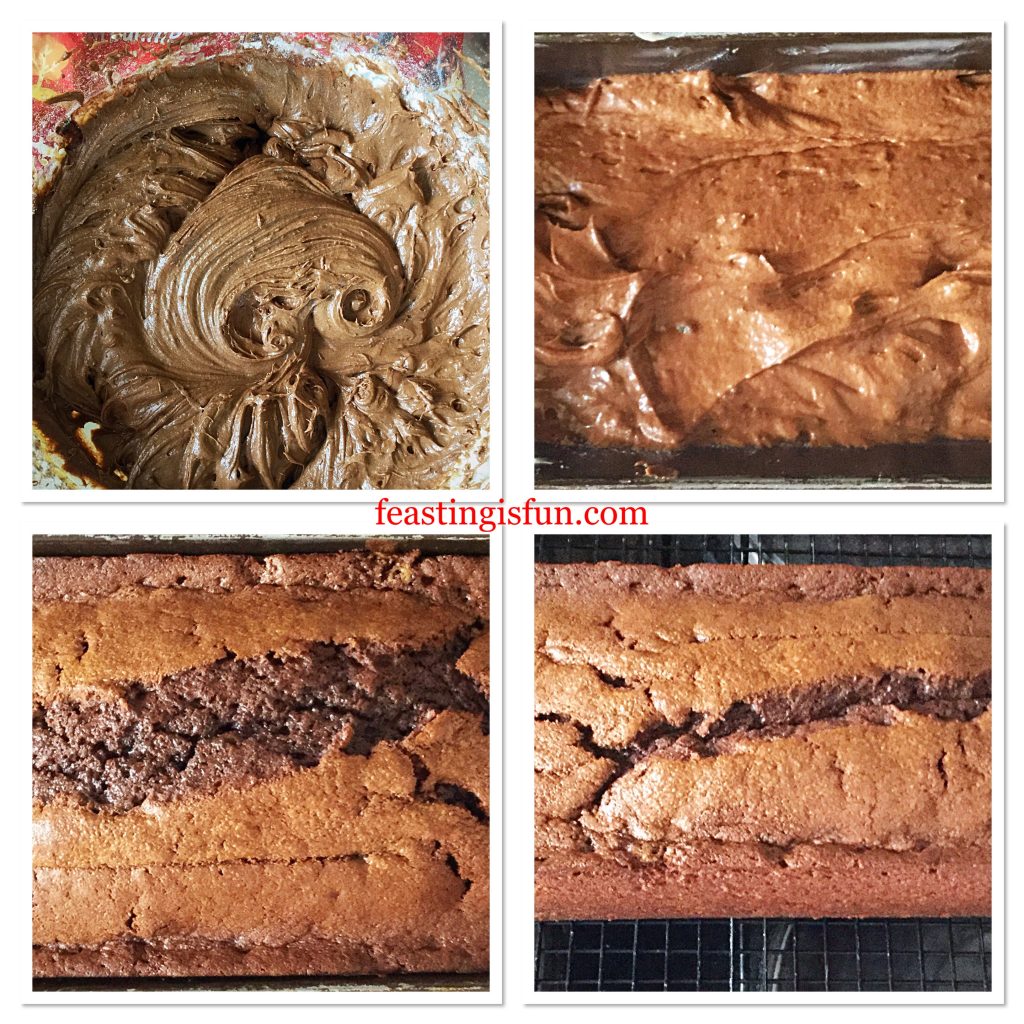
  • Since the batter is quite thick, spoon it carefully into the loaf tin, smoothing the top, for an even bake.
  • Place the tin into the centre of the oven and bake for 45-55 minutes.
  • The cake is baked when it is firm to touch and an inserted skewer comes out clean.
  • As soon as the cake is baked remove the cake from the oven and allow to cool fully in the tin.
  • When cooled, carefully turn the cake out of the tin, removing the baking parchment from the base.
FF Malteser Malted Chocolate Loaf Cake
Making the cake batter, filling the tin and the finished, baked cake.

Decorating The Loaf Cake

  • When ready to decorate, place the loaf cake on a plate or stand.
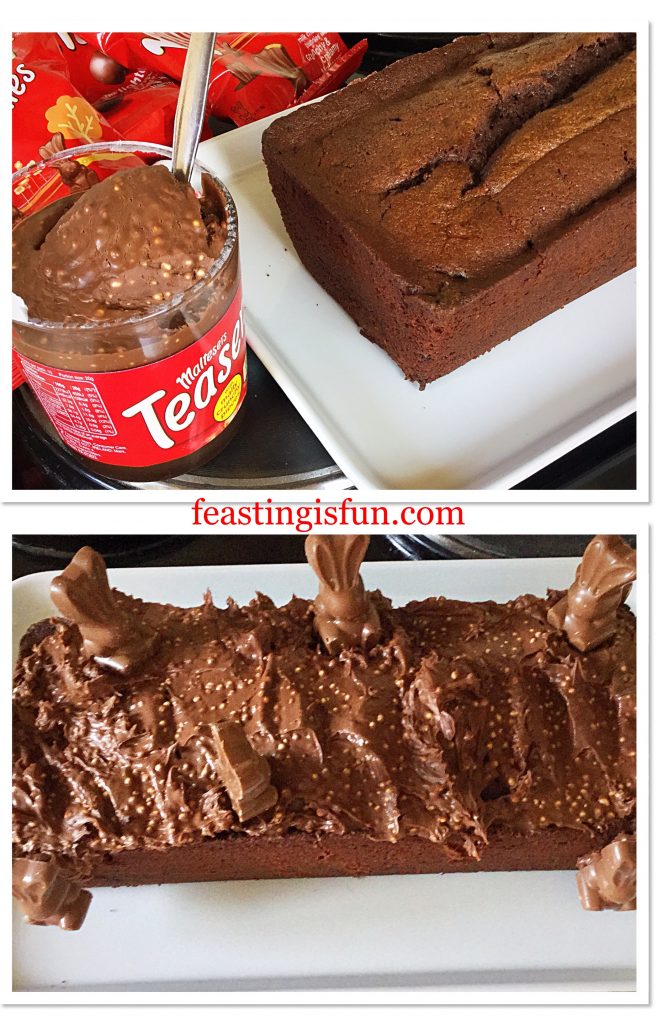
  • Using a palette knife, spread the entire contents of the Maltesers jar on top of the cake.
  • If using bunnies, these can be attached to the side of the cake using some of the spread.
  • Cover the top of the cake with Maltesers. Add as many as you can fit on.
  • Finally sprinkle over the tiny pearl/silver balls.
FF Malteser Malted Chocolate Loaf Cake
Decorating the cake.

And, the finished cake!

FF Malteser Malted Chocolate Loaf Cake
Maltesers Malted Chocolate Loaf Cake ready to share.

To serve slice and serve with a smile.

FF Malteser Malted Chocolate Loaf Cake
A slice of Maltesers Malted Chocolate Loaf Cake

Finally, this cake will keep for up to 5 days in an airtight container, on a planet where nobody lives.

Since it only lasted 2 days here at home!

If you have enjoyed this recipe for Maltesers Malted Chocolate Loaf Cake you may also like these:

Chocolate Marble Celebration Cake 

Chocolate Marble Celebration Cake

Golden Egg Chocolate Sponge Cake

Golden Egg Chocolate Sponge Cake

Chocolate Monster Mini Egg Cookies

Chocolate Monster Mini Egg Cookies

Because Easter is celebrated once a year, these recipes are all designed to be adaptable. While Maltesers are easy to obtain, in the other bakes Smarties, M & M’s, or any other chocolate can be used. Yet, due to the liquid content of caramel, or creme eggs, it is advisable to freeze these, prior to using them in a bake. As a result any frozen substitutes will bake beautifully.

So, I hope that you had an enjoyable Easter and wish you all the very best with your making, baking and creating.

Sammie xx

No part of this post may be reproduced or duplicated without the written permission of the owner. Please see my Disclosure Policy.


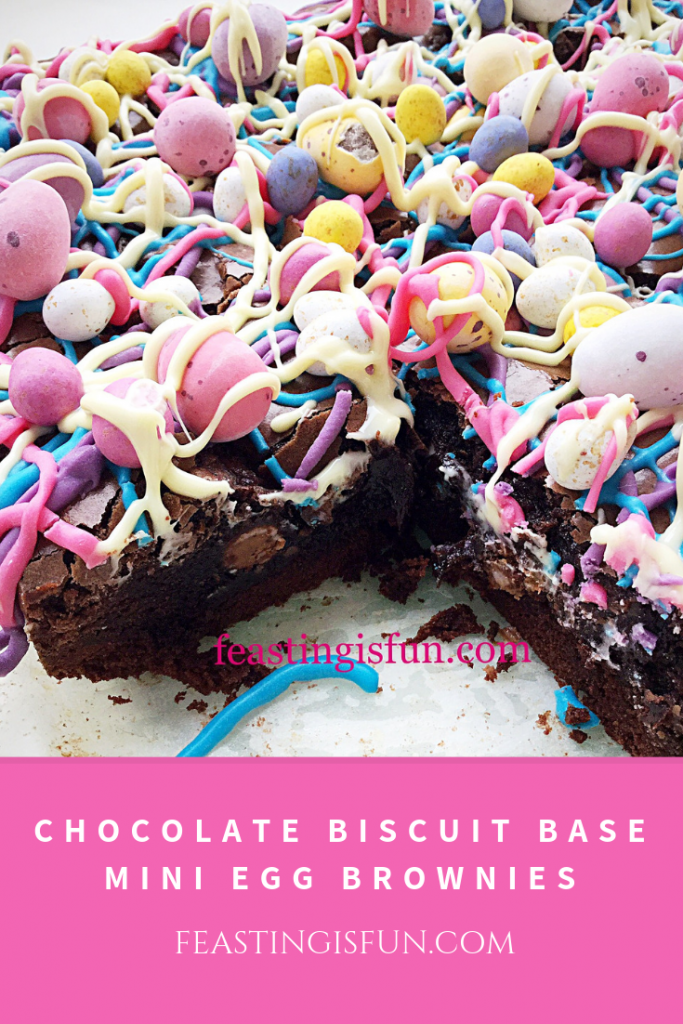
Chocolate Biscuit Base Mini Egg Brownies

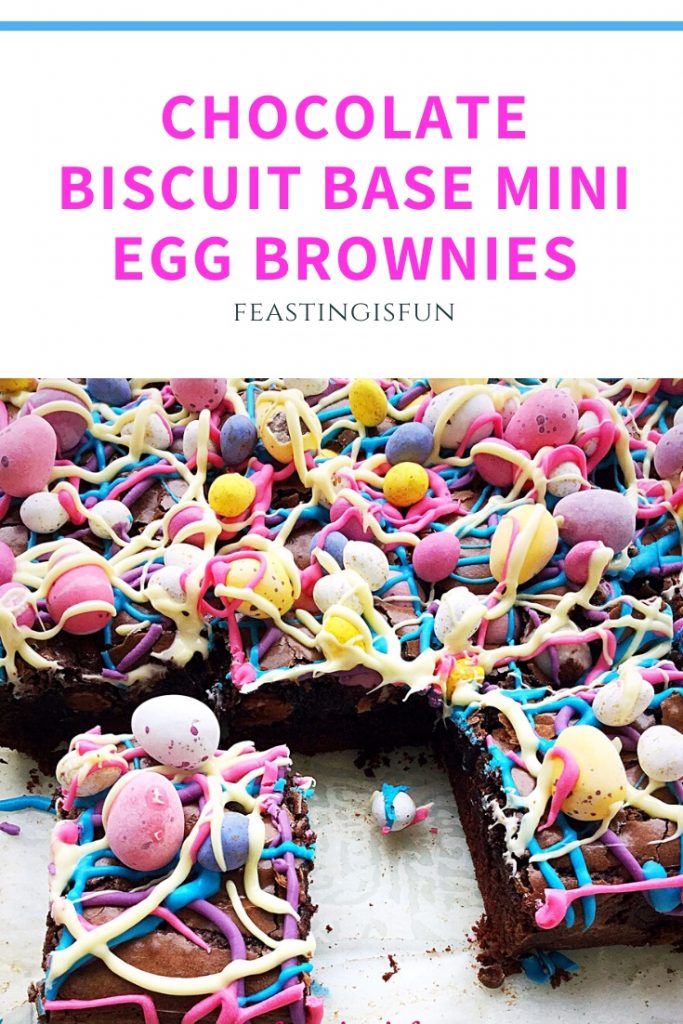
Easter weekend is finally here. Four days holiday for most people. Enjoying the good weather, lawns are mowed, kitchens prepare treats for the weekend, while teenagers prepare for upcoming exams. Whatever you and your family are doing my  Chocolate Biscuit Base Mini Egg Brownies Easter bake is sure to bring about a smile.

FF Chocolate Biscuit Base Mini Egg Brownies

The base of these brownies is a chocolate biscuit. Rather like a slightly harder version of the soft, squidgy brownie on top. So the advantage is that with a firmer base these brownies are easier to pick up and hold. While developing this recipe my thoughts were directed by practicality.

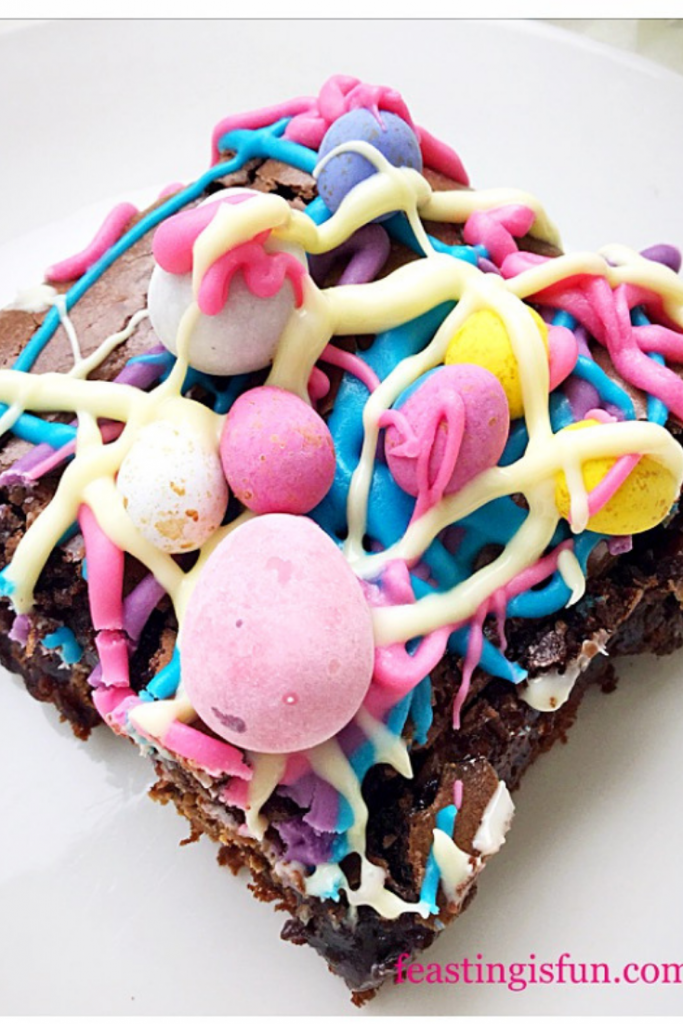
Single Easter Mini Egg Brownie
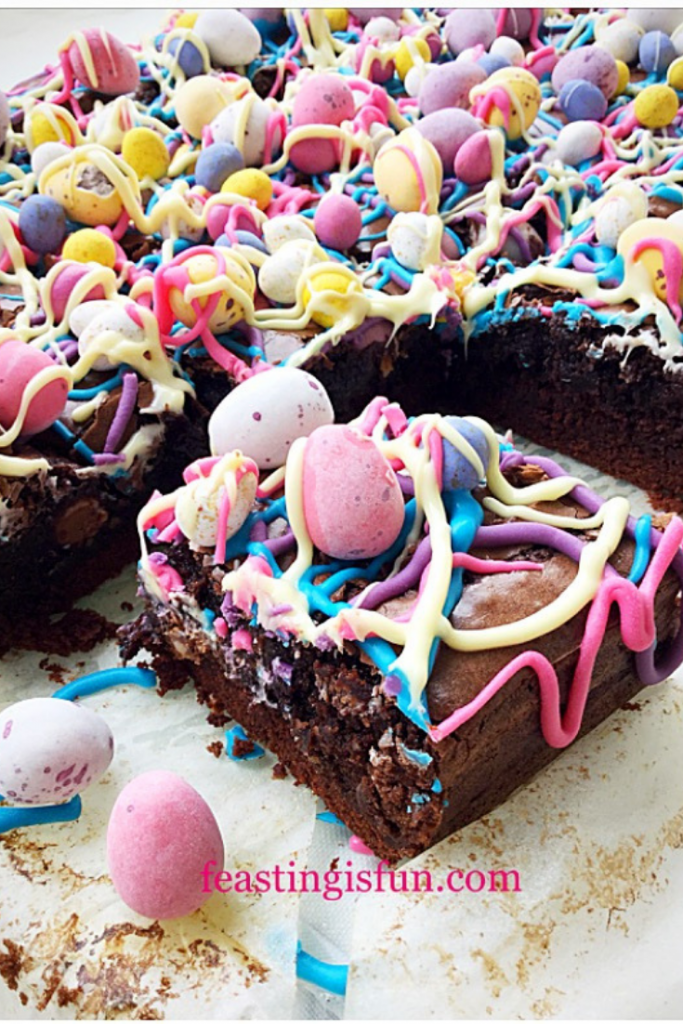
Easter Chocolate Biscuit Base Mini Egg Brownies

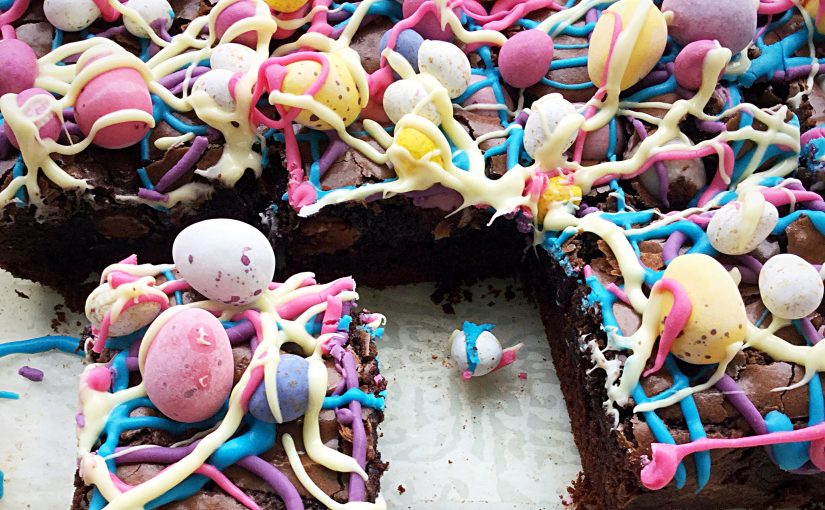
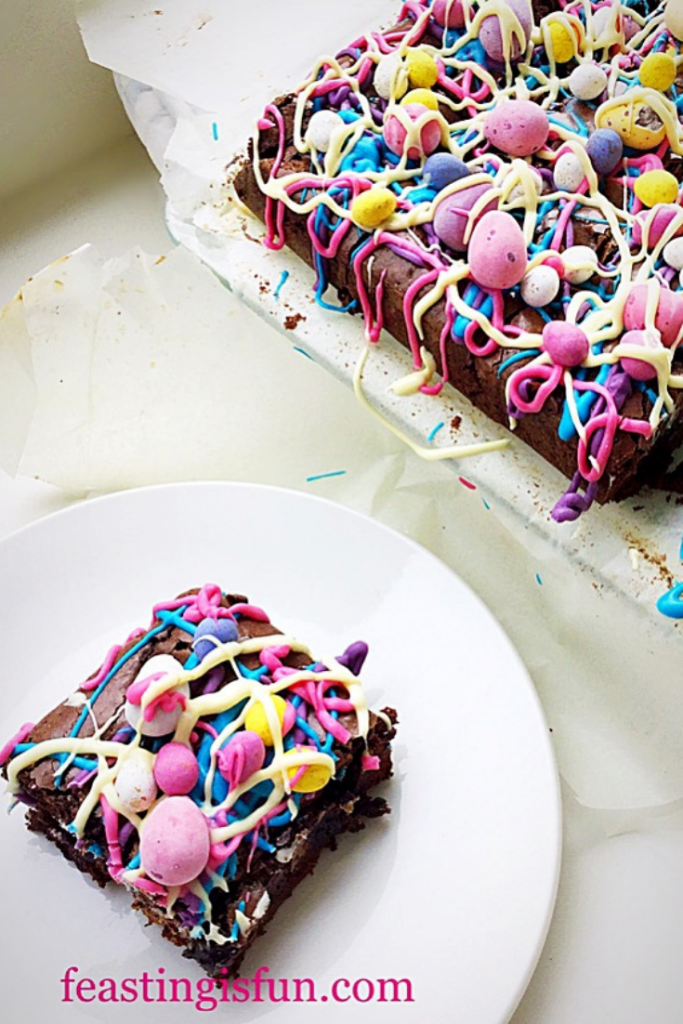
No matter how practical these brownies are, they absolutely had to be fun, as well as tasty. Since the addition of pretty, pastel Cadbury’s mini eggs was a necessity. So also were the party streamer, piped coloured chocolate drizzles. Resulting in a beautiful, yet fun, Easter treat.

FF Colourful Easter Brownies
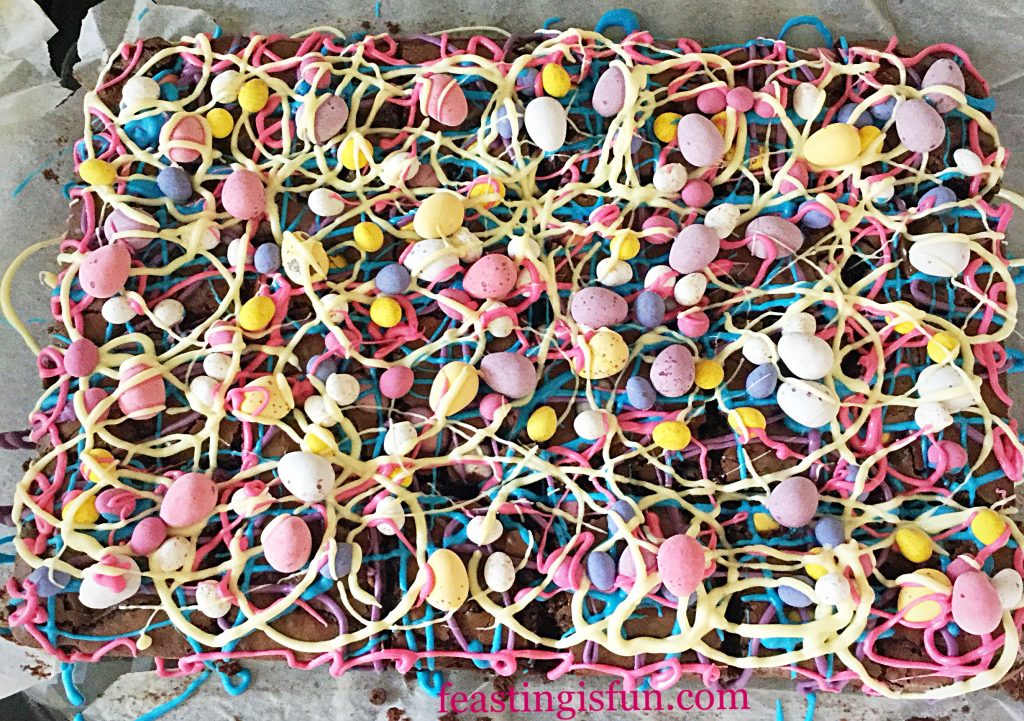
Colourful Easter Chocolate Biscuit Base Mini Egg Brownies

An Edible Easter Mini Egg Work Of Art

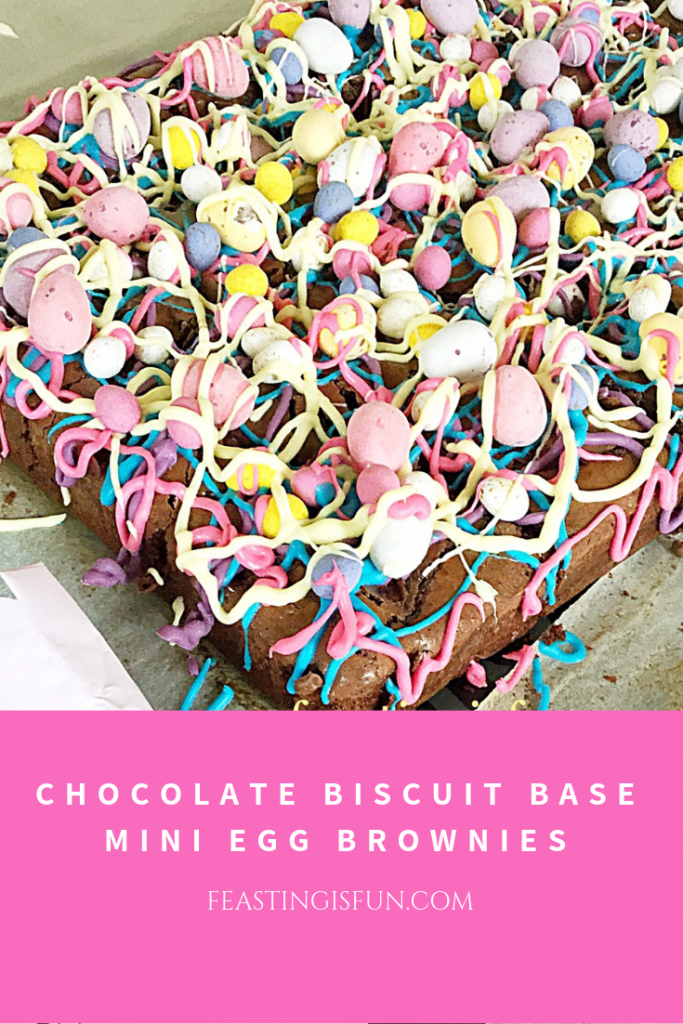
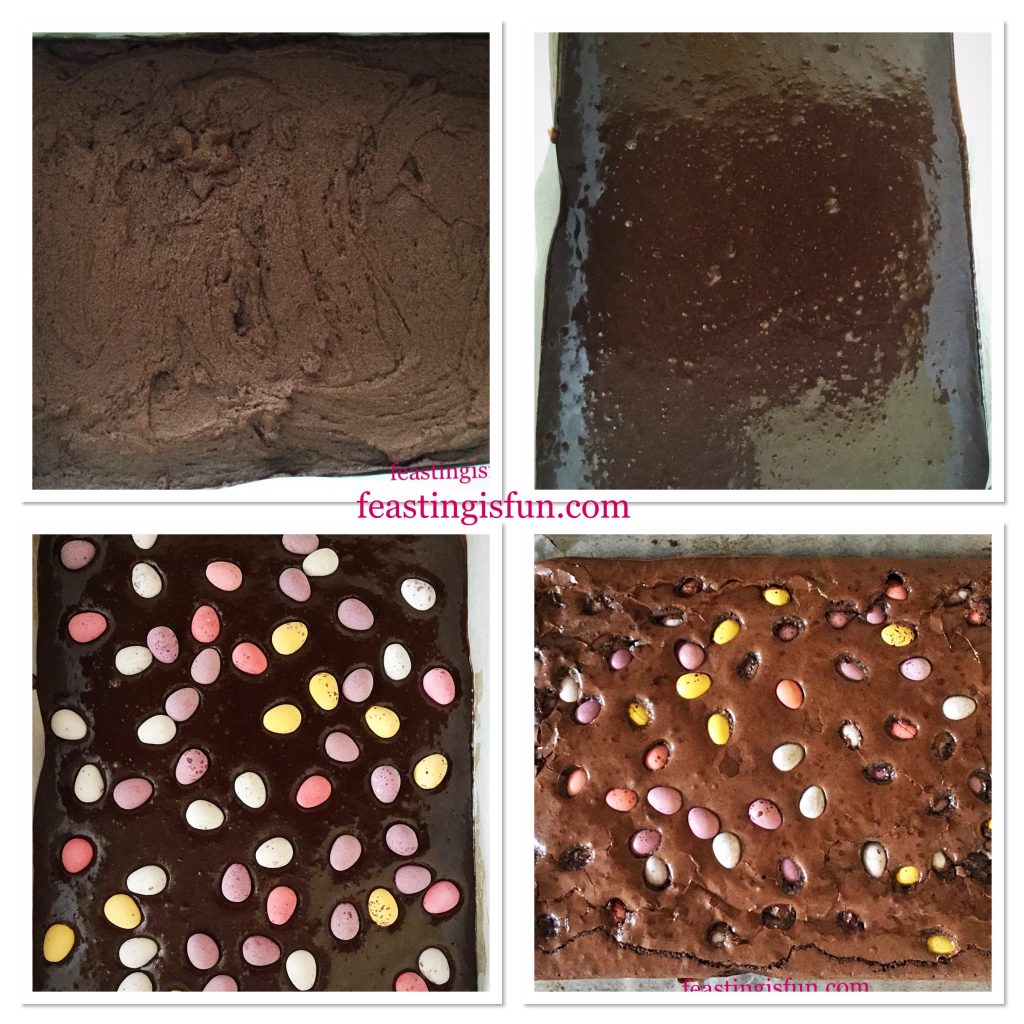
While this may look like a complicated bake, it absolutely isn’t. First of all the biscuit base is made, then baked. Once cooled the brownie topping, is poured over. Followed by a generous sprinkle of chocolate mini eggs, another quick bake. Finally after cooling you can let your creativity run wild, decorating your bake.

FF Chocolate Biscuit Base Mini Egg Brownies

A quick note: This bake will look and taste just as good if you’d prefer not to use coloured Candy Melts. Since this is your bake, feel free to add coloured sprinkles, chocolates or whatever you like. Most importantly, have fun!!!

Recipe: Chocolate Biscuit Base Mini Egg Brownies makes 24

For the Biscuit Base

225g/8oz Unsalted Butter

150g/5oz Light Brown Sugar

1 Large Free Range Egg

1tsp Vanilla Extract – I use Nielsen-Massey

75g/3oz Cocoa Powder – I use Callebaut

200g/7oz Plain White Flour

For the Brownies

200g/7oz Plain Chocolate – minimum 70% Cocoa solids

200g/7oz Milk Chocolate – minimum 35% Cocoa solids

225g/8oz Unsalted Butter

4 Large Free Range Eggs

225g/8oz Dark Brown Sugar

1tsp Vanilla Extract

1/4tsp Salt

75g/3oz Plain White Flour

1/2tsp Bicarbonate of Soda

Decoration:

1 x Family Pack (326g) of Cadbury’s Mini Eggs or the rough equivalent weight in smaller bags/tubes

75g/3oz of each of the following :

White Chocolate, Wilton or PME Candy Melts – Pink/Blue/Purple Candy Melts -available from Amazon

Any additional decorations that you like – I found a bag of really small mini eggs from Sainsbury’s.

Method: Preheat the oven to 180C/160C fan, gas mark 4, 350F.

Making The Chocolate Biscuit Base

First of all grease a 33cm x 23cm x 5cm (13″ x 9″ x 2″) tin with a little butter. Line the base and sides with baking parchment.

  • Starting with the biscuit base, add the butter, salt and sugar to a large bowl. Beat until fully combined and free from lumps.
  • Next add the egg and vanilla, continue mixing until smooth.
  • Sieve the flour and cocoa powder into the same bowl. Starting at a slow speed mix the ingredients until combined.
  • Finally tip the biscuit base dough into the baking tin. Spread the dough, using the back of a spoon until it evenly covers the base of the tin.
  • Place the tin into the middle of the preheated oven and bake for 20-25 minutes.
  • While the base is baking, make the Brownie topping.

Making The Brownie Topping

  • Break up the chocolate (or chop) into individual squares, dice the butter and place both into a heat proof bowl.Place the bowl over a simering pan of water (a double boiler) ensuring the bottom of the bowl doesn’t touch the water.
  • Stir continuously until both the chocolate and butter are two thirds melted.
  • Carefully remove the bowl from the pan and continue stirring until the contents are completely melted.
  • Into another large bowl add the eggs, vanilla and sugar.
  • Mix together to combine.
  • While still slowly mixing pour the cooled chocolate mixture into the larger bowl.
  • Mix until completely combined – try not to incorporate too much air whilst mixing.
  • Sift the flour, bicarb. and salt into the bowl.
  • Using a large metal spoon, fold all the ingredients together.
FF Chocolate Biscuit Base Mini Egg Brownies
Creating and baking the layers of the Chocolate Biscuit Base Mini Egg Brownies
  • The biscuit base, once baked may still be a little soft to touch, however it will be darker than the uncooked dough.
  • Remove the tin from the oven and allow to cool for 5 minutes.

Adding The Brownie Batter Topping

  • Pour the brownie batter over the biscuit base. Tilt the tin to ensure even coverage.
  • Follow by sprinkling 200g of mini eggs on to the brownie batter.
  • Place the tin back in the oven and bake for a further 20-25 minutes.
  • The brownie batter is baked when it has a sheen and does not wobble in the centre.
  • Remove the tin from the oven and allow to cool completely.
  • As soon as it is completely cooled remove the entire bake from the tin and place on a solid surface.
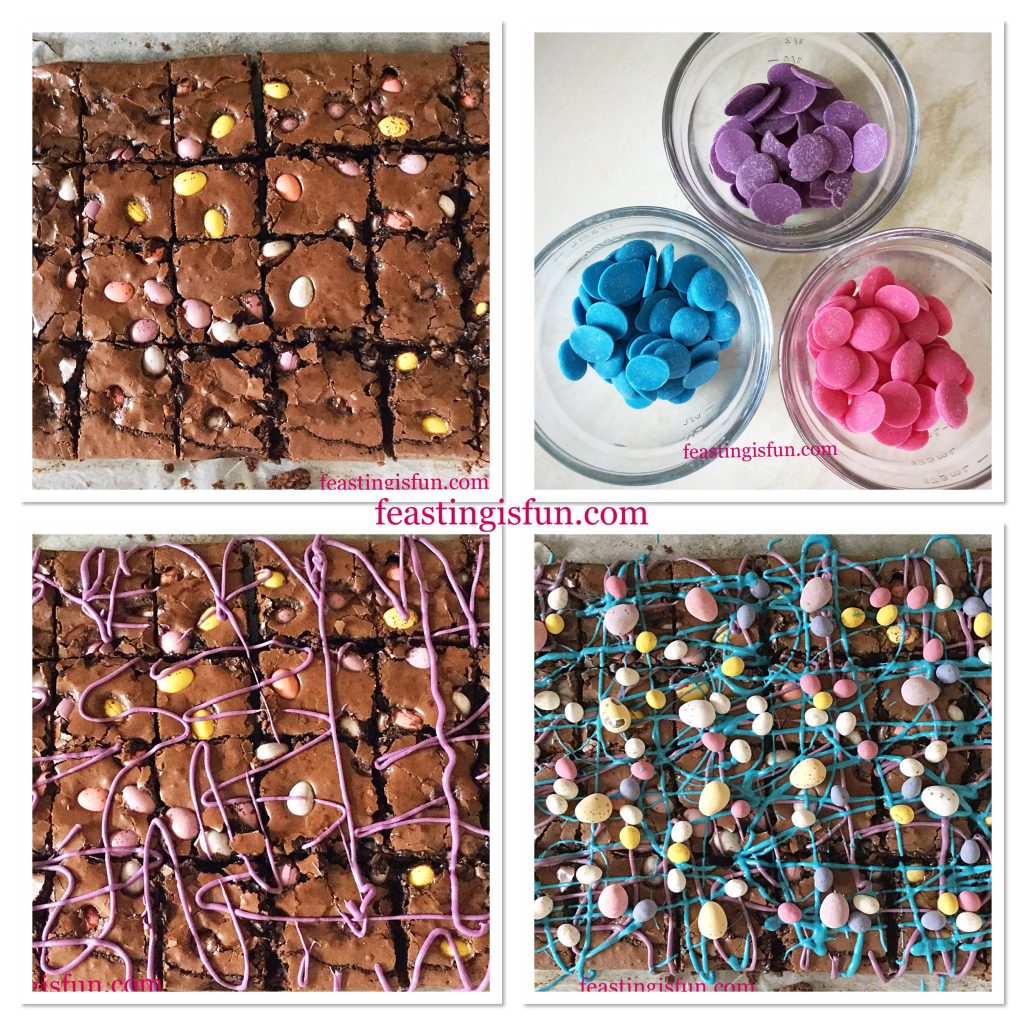
  • Cut centrally through the length and width with a sharp knife. Now cut each half into 12 even sized portions.
FF Chocolate Biscuit Base Mini Egg Brownies
Portioning and decorating the Chocolate Biscuit Base Mini Egg Brownies

Decorating The Chocolate Biscuit Base Mini Egg Brownies

  • Place 75g of each coloured Candy Melt or chocolate into a separate heatproof, microwaveable bowl.
  • Heat the first bowl for 20 seconds at a time, stirring in between until the chocolate is fluid.
  • Spoon the liquid into a small, disposable, piping bag. Be careful, it will be very warm.
  • Snip the very end of the bag off and pipe whatever pattern you wish over the top of the bake.
  • Continue, in exactly the same way with the second colour.
  • Follow this by adding extra mini eggs or decorations, hold a few back.
  • Prepare and pipe the third colour, allowing some to cover the newly added eggs.
  • Finally finish with white chocolate, piped all over the bake and sprinkle any remaining decorations.
FF Chocolate Biscuit Base Mini Egg Brownies
Happy Easter!

Place to one side to allow the chocolate to set.

Easter Mini Egg Brownie Bake
Chocolate Biscuit Base Mini Egg Brownies


Serve with a big smile and my preference, a glass of cold milk.

If you have enjoyed this Easter recipe for Chocolate Biscuit Base Mini Egg Brownies you may also like these:

Golden Egg Chocolate Sponge Cake

FF Chocolate Biscuit Base Mini Egg Brownies
Golden Egg Chocolate Sponge Cake.

Chocolate Monster Mini Egg Cookies

FF Chocolate Biscuit Base Mini Egg Brownies
Chocolate Monster Mini Egg Cookies

Mini Vanilla Egg Nest Cupcakes 

FF Chocolate Biscuit Base Mini Egg Brownies
Mini Vanilla Egg Nest Cupcakes


Since most of these recipes are designed specifically for Easter and for using left over chocolate, I hope that you will make them throughout the year. Although, that may not be a good thing for our bodies? Maybe the fun is in making them only during the Easter Holidays.

I wish everyone who reads this a very Happy Easter, please see Important Stuff.

Sammie xx

No party of this post may be reproduced or duplicated without the written permission of the owner. Please see my Disclosure Policy.

This month I am linking up with Stuart at Cakey Boi  and Kat at The Baking Explorer  who is hosting this month’s Treat Petite .

FF Chocolate Biscuit Base Mini Egg Brownies


Smarties Chocolate Mini Egg Ice Cream

Easter is just over a week away. Will the sunshine break though as it has today, or not? The reason I ask is directly related to this Smarties Chocolate Mini Egg Ice Cream. Will a cold wet day force us to enjoy it inside, or better still, will we sit outside, in the warmth of the sun, munching on ice cream filled cones? I know where I’d rather be!

FF Smarties Chocolate Mini Egg Ice Cream
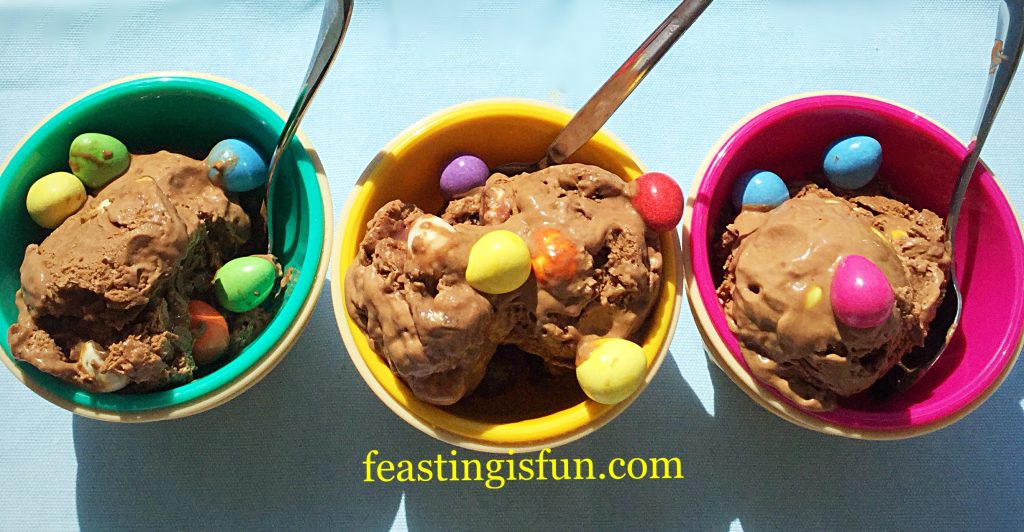
Smarties Chocolate Mini Egg Ice Cream in colourful ice cream bowls.

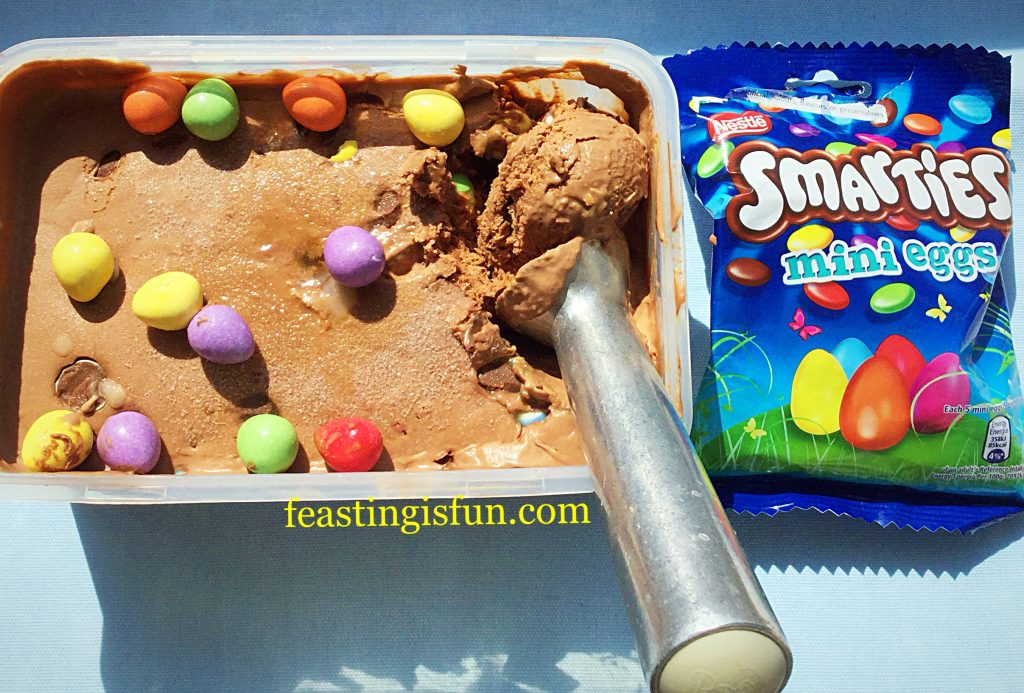
As Smarties mini eggs are not available all year round, yet this ice cream deserves to be made more often than Easter, here’s a solution. Simply use the same weight of regular Smarties. Since they don’t need to be chopped, making the ice cream will be even easier. Although, it isn’t a difficult recipe to make at all.

FF Smarties Chocolate Mini Egg Ice Cream
Smarties Chocolate Mini Egg Ice Cream a bigger batch, so more to share.

Suitable for both adults and children, a larger batch means that there is more to go around. Extra mini eggs on top of each serving show what is in the frozen treat and add to the fun. Since Easter is a time for celebrating, what better time to make this ice cream. Finally an ice cream maker makes the whole process simple and easy. I recommend Andrew James ice cream maker.

FF Smarties Chocolate Mini Egg Ice Cream
Smarties Chocolate Mini Egg Ice Cream a refreshing dessert.

Recipe: Smarties Chocolate Mini Egg Ice Cream makes approx. 1L

400ml Double Cream

400ml Whole Milk

2 tsp Vanilla Bean Paste – I use Nielsen-Massey

6 Large Free Range Egg Yolks

1.5 tsp Corn Flour – I use Doves Farm

6 tbsp Caster Sugar

150g Dark Chocolate

2 x 100g Packs of Smarties Mini Eggs

Method:

Ensure the frozen part of your ice cream maker has been in the freezer for a minimum of 24 hours, or according to manufacturer’s instructions.

Detailed step by step photographs can be found here Very Vanilla Ice Cream

  • First of all, Place the milk and cream into a heavy bottomed saucepan, over a medium heat.
  • Now add the egg yolks, vanilla bean paste, corn flour and sugar into a large, heatproof bowl. Whisk the egg yolks with the other ingredients, starting slowly and increasing in speed, until thoroughly combined.
  • As small bubbles appear around the rim of the hot liquids in the saucepan remove the pan from the heat. This is called the scalding point.
  • With the whisk on low, pour the hot liquid into the egg mixture slowly. Continue whisking until thoroughly combined. Pour the egg custard mixture back into the saucepan, placed over a low heat.
  • While the custard is heating stir with a wooden spoon and quickly wash up the bowl
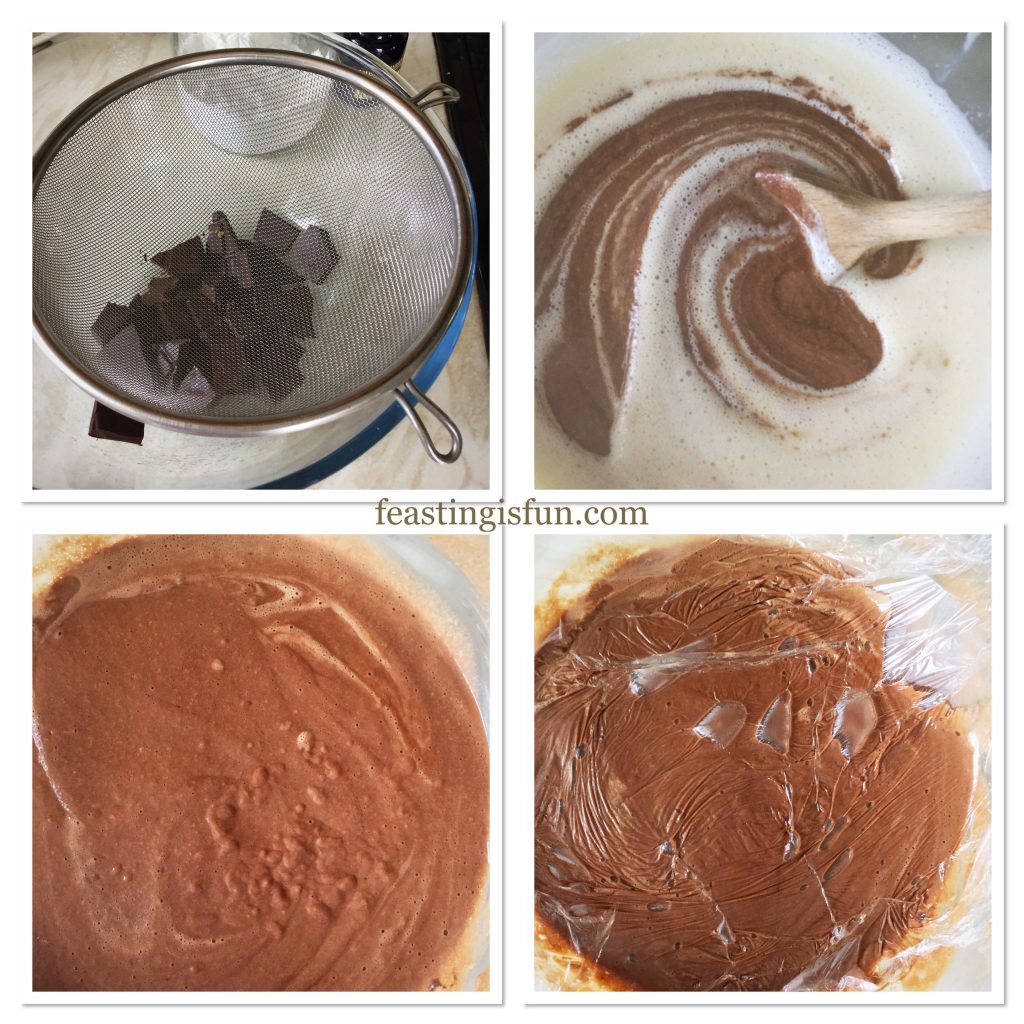
  • Place the chocolate into the base of the bowl. While stirring the custard also place a sieve over the bowl.
  • When the custard starts to bubble and coats the back of a wooden spoon it is cooked. Remove at once and pour through the sieve, on to the chocolate in the bowl.
FF Smarties Chocolate Mini Egg Ice Cream
Making the chocolate ice cream base.
  • As the custard base moves through the sieve, any lumps are filtered out.
  • Remove the sieve and stir the hot custard. As the custard melts the chocolate it will become visible. Continue stirring until all of the chocolate has melted.
  • Place cling film directly on top of the hot custard. This will stop any skiing from forming.
  • Move the bowl to a cool place. Once cooled to warm, place the bowl in the fridge.
  • While the chocolate custard is chilling the Smarties can be prepared.
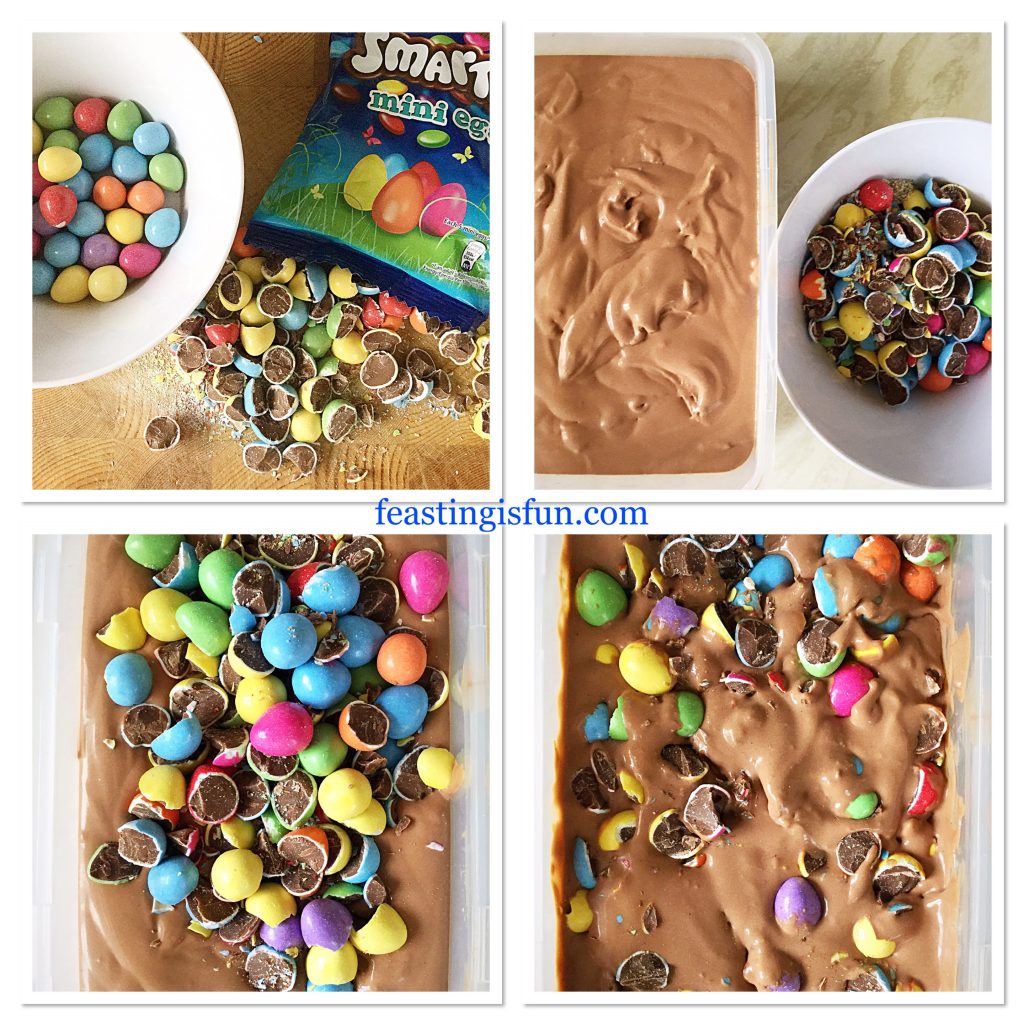
  • Carefully chop one whole packet of mini eggs in half and tip them into s bowl containing a packet of whole smarties mini eggs.
  • When the chocolate custard is cold, set up the ice cream machine according to manufacturer’s instructions.
  • Pour the chocolate custard through the specific whole in the covering. For my machine, the paddle needs to be turning first.
  • Allow the ice cream to churn until it is softly set. Similar consistency to whipped ice cream.
  • Once this point has been reached, turn the machine off and remove the paddle.
  • Transfer the chocolate ice cream into a freezer proof tub with an air tight lid.
  • Now add all of the mini eggs, both chopped and whole. Gently stir to mix in the mini eggs. Then clamp on the lid and place into the freezer, where it will freeze completely.
FF Smarties Chocolate Mini Egg Ice Cream
Preparing the eggs and ice cream ready for the freezer.
  • Leave the ice cream to freeze solid. Overnight is ideal.
  • To serve, remove the ice cream from the freezer 20-30 minutes prior to scooping. As this ice cream doesn’t have any additives to keep it soft, leaving it on the side prior to serving allows it to soften.
  • Scoop the ice cream into cones or bowls. Also, sprinkle over a few extra mini eggs or Smarties.
FF Smarties Chocolate Mini Egg Ice Cream
Smarties Chocolate Mini Egg Ice Cream crunchy, creamy, chocolate Fun.

These bowls of ice cream are bound to produce lots of smiles.

Store in the freezer for one month.

If you have enjoyed the recipe for Smarties Chocolate Mini Egg Ice Cream then you may also like these:

Chocolate Rolo Ice Cream

FF Smarties Chocolate Mini Egg Ice Cream
Chocolate Rolo Ice Cream

Lemon Ripple Ice Cream

FF Smarties Chocolate Mini Egg Ice Cream
Lemon Ripple Ice Cream

Chocolate Honeycomb Ice Cream

FF Smarties Chocolate Mini Egg Ice Cream
Chocolate Honeycomb Ice Cream

Homemade ice cream is unique. Since you can change the flavours to whichever you prefer. Also, the convenience of having an ice cream maker allows you to make ice cream whenever you want.

Whatever you do this Easter, I hope that you take a moment to pause and remember it’s true meaning. Please see Important Stuff

Sammie xx

Please note: The chocolate ice cream by itself is gluten free, providing gluten free corn flour is used. However, the min smarties eggs do contain gluten.