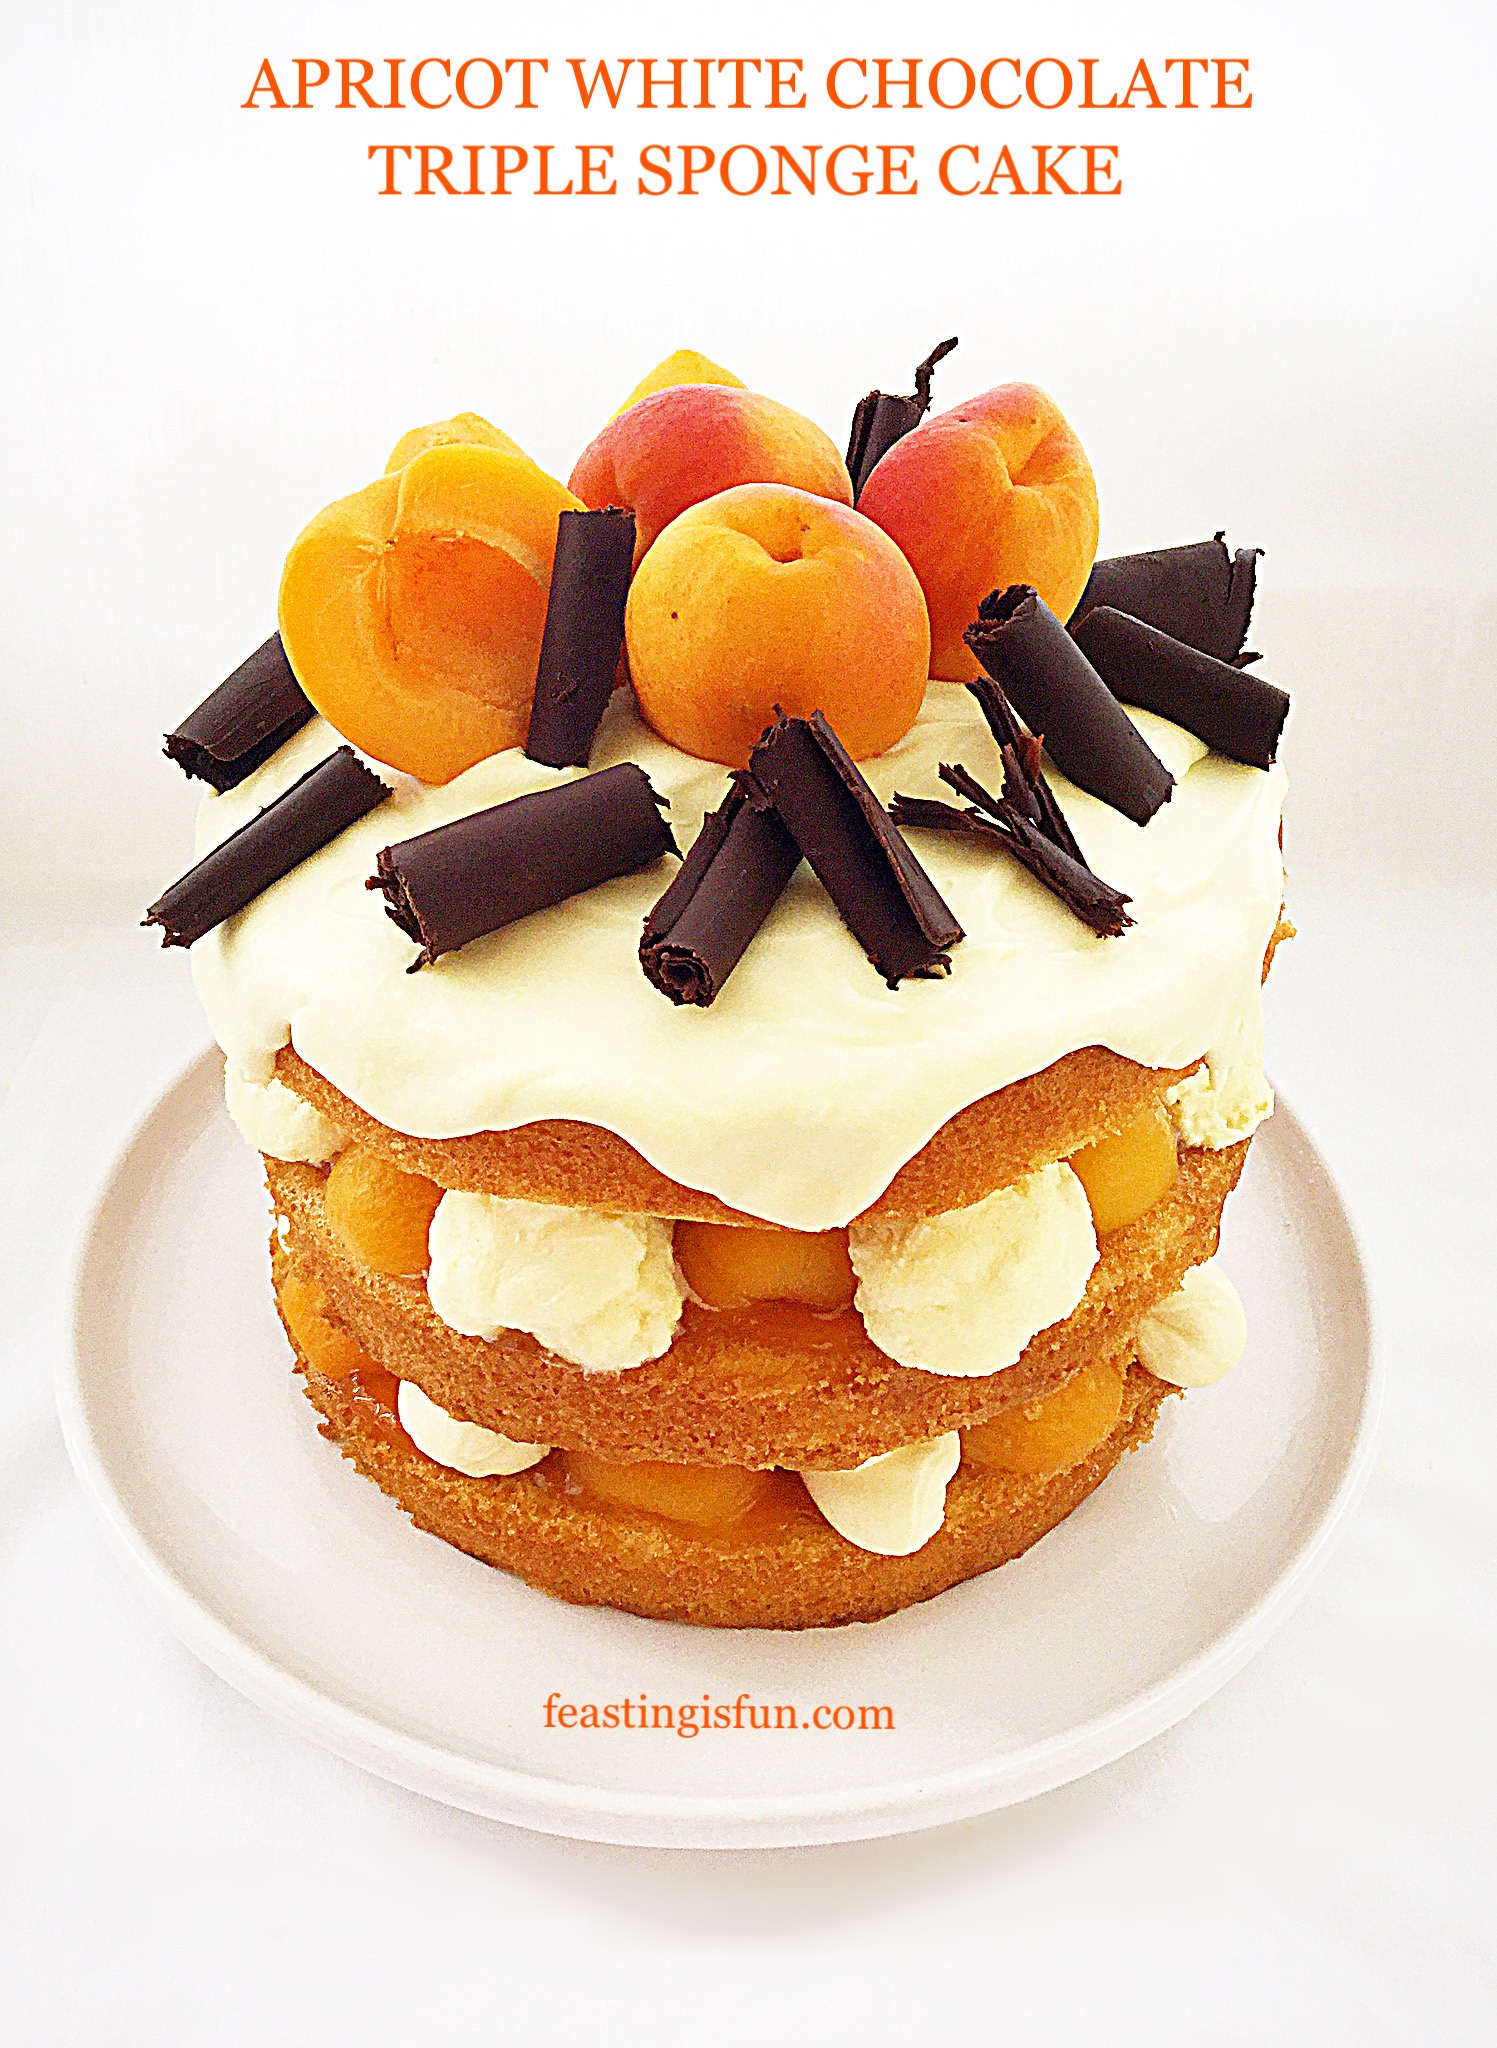
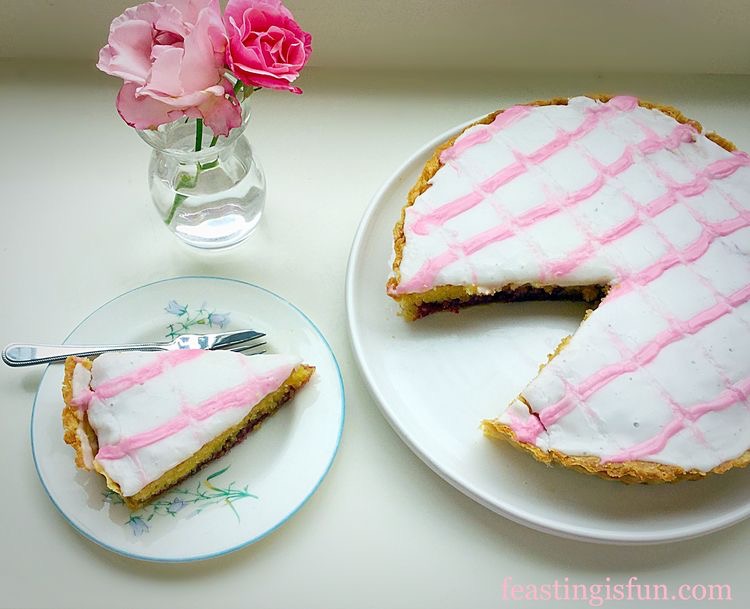
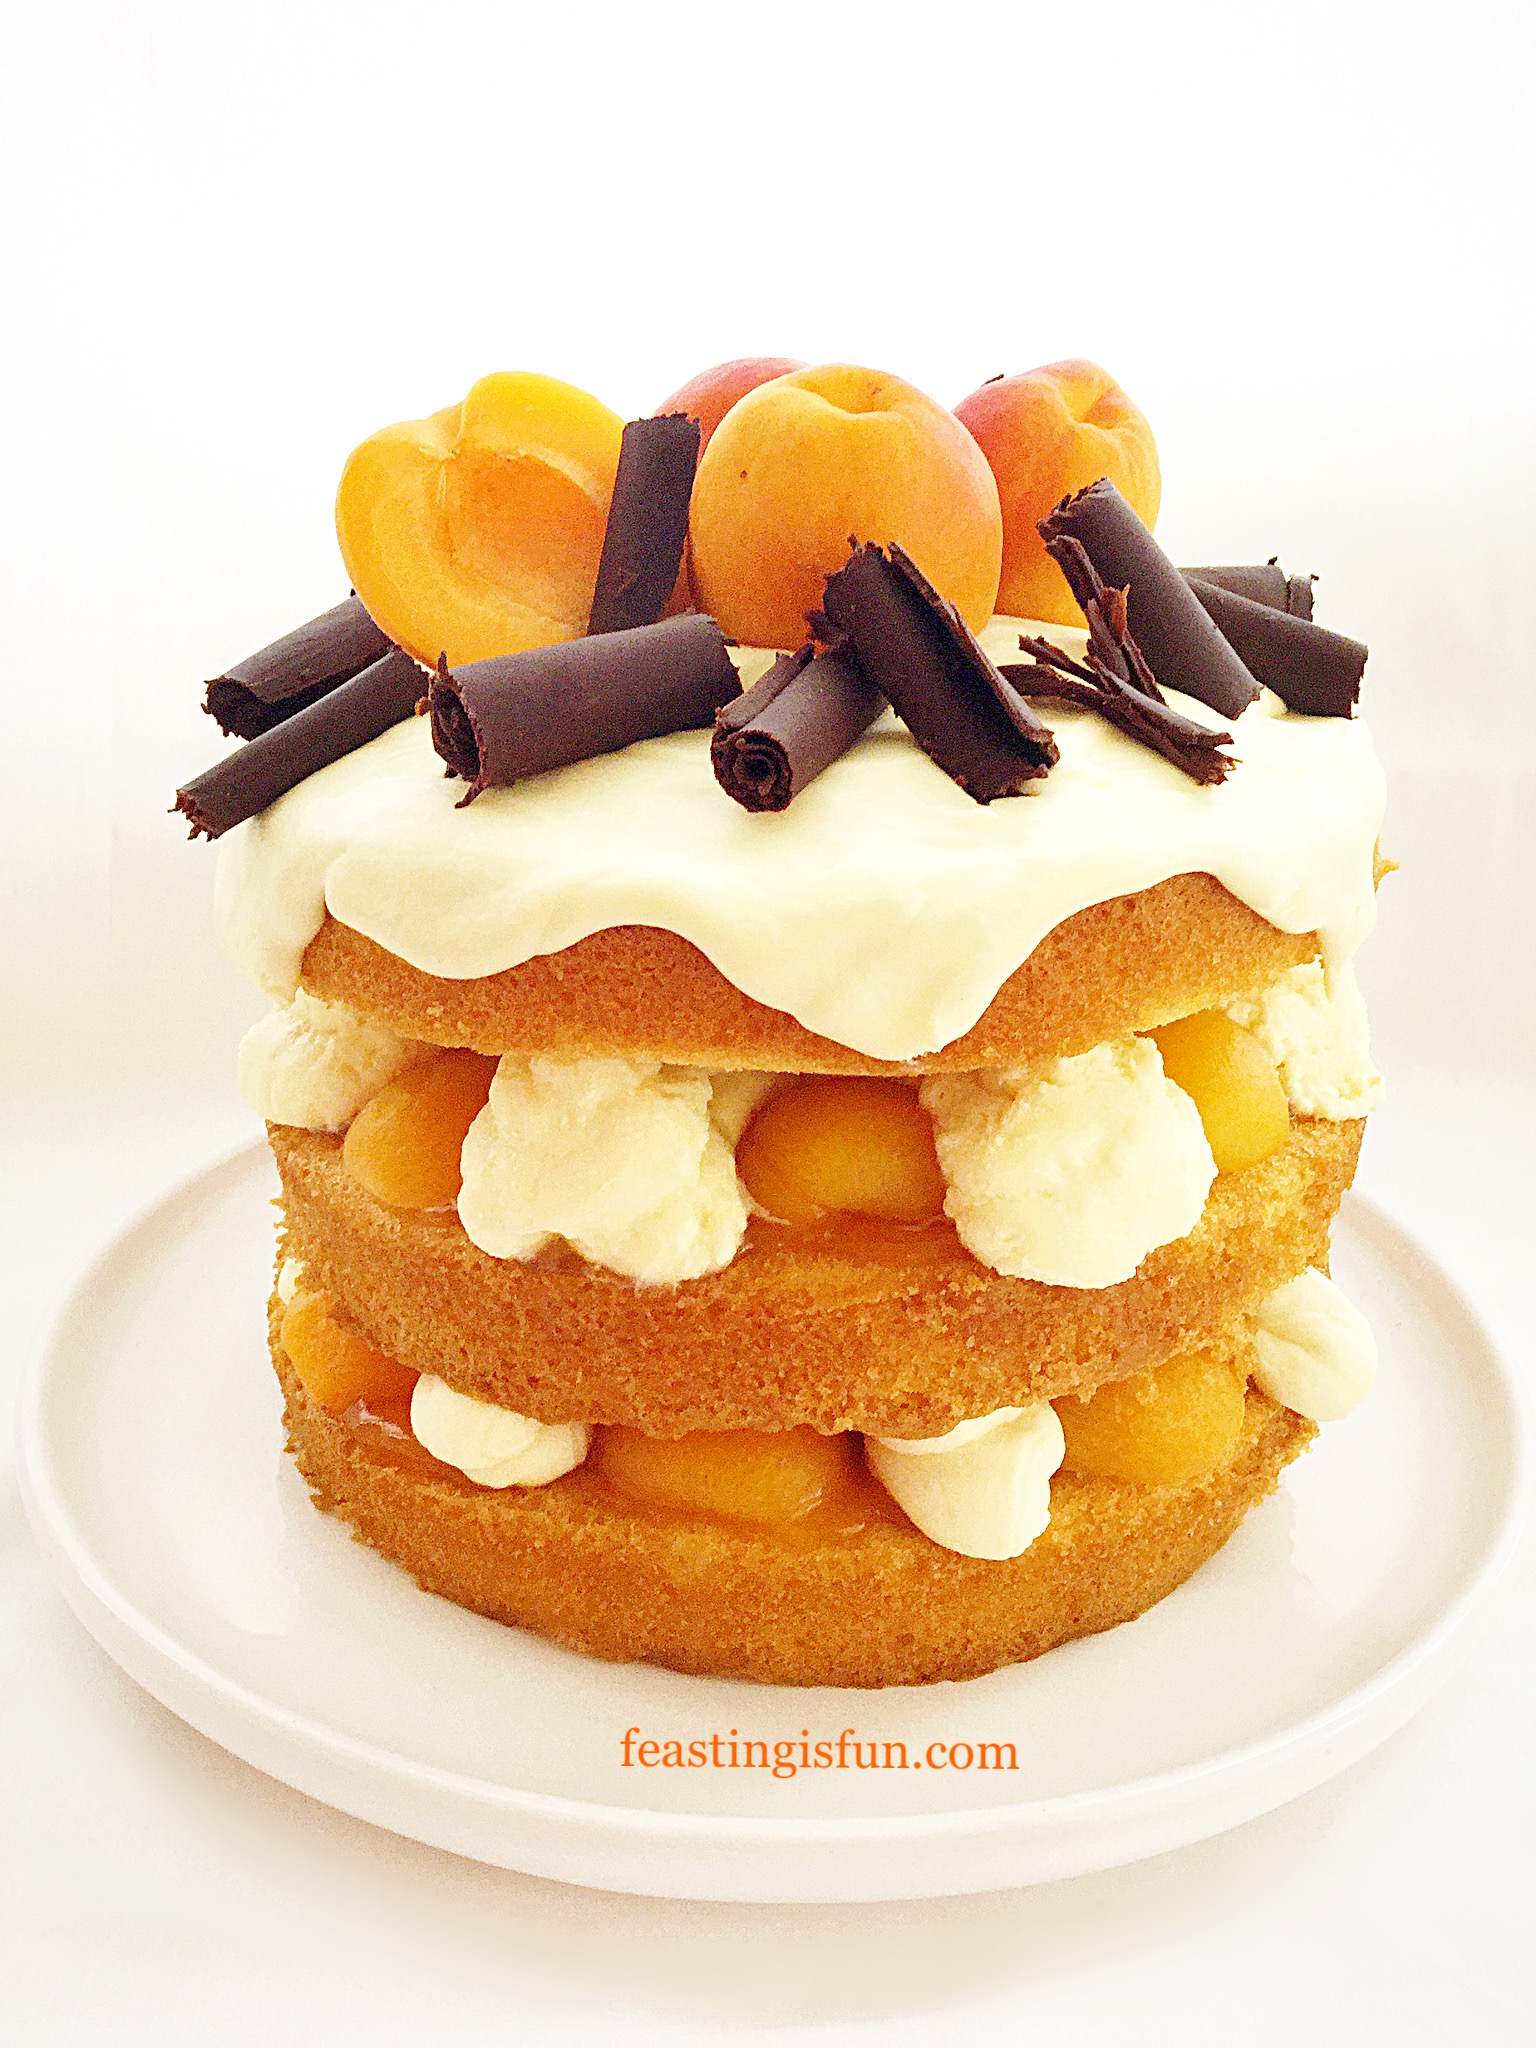
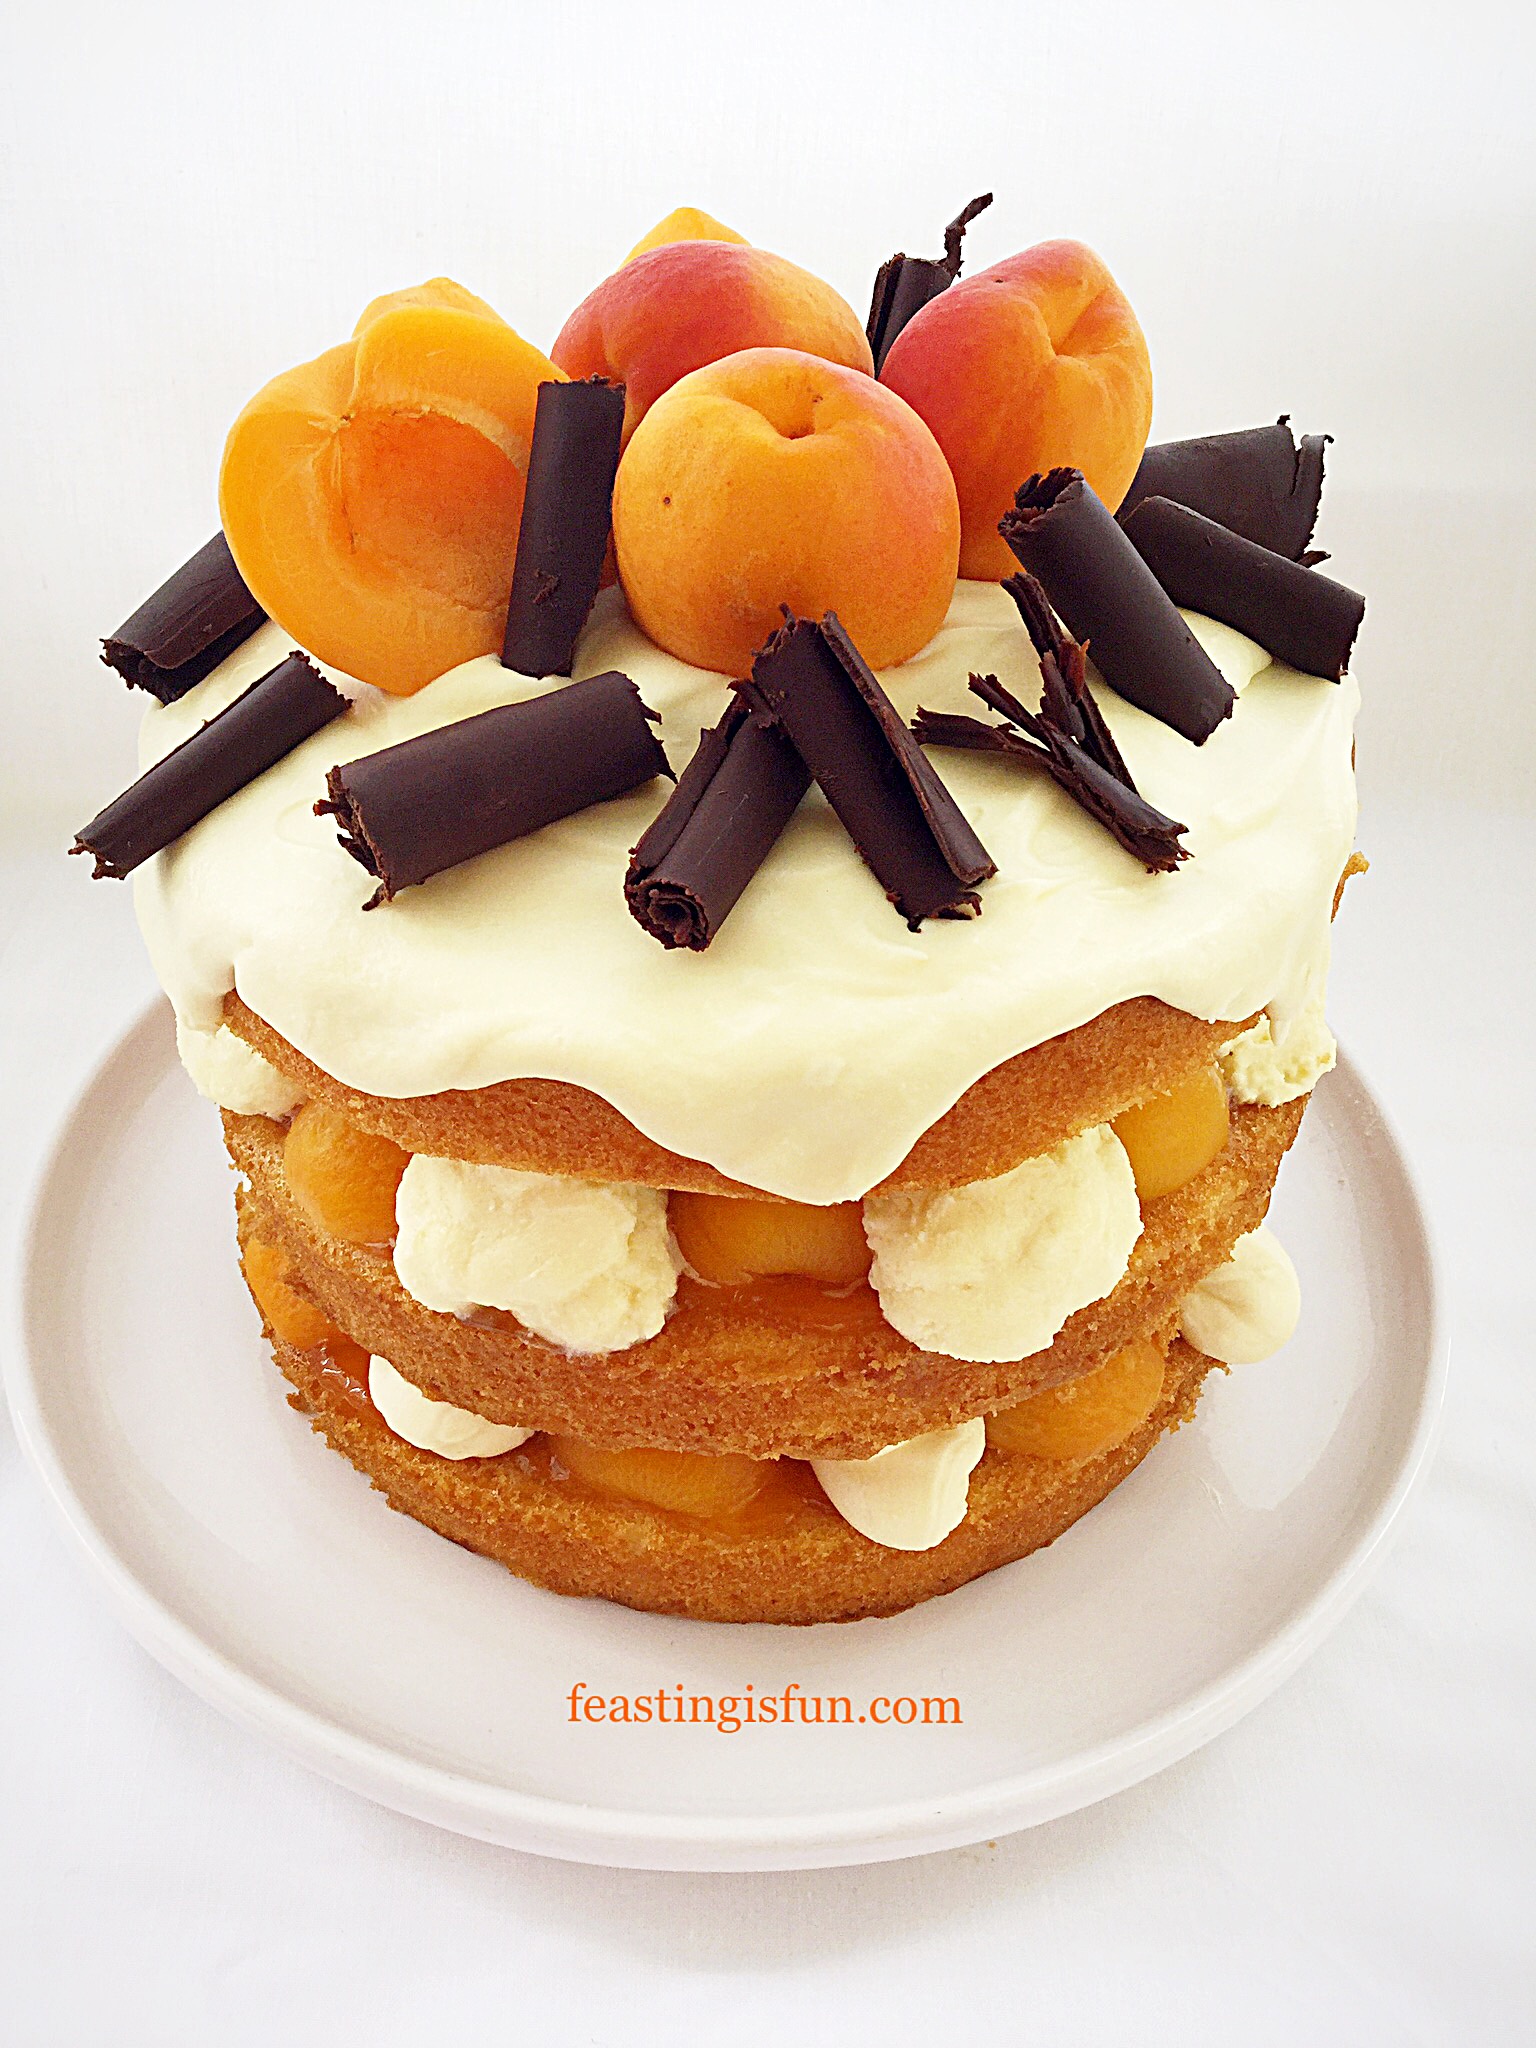
After being approached by Maha Home to create a cake using the new Innovative Range by Mason Cash that they stock, I was beyond excited. I can remember every single adult female in our family owning the iconic, beige coloured, cane bowl by the same manufacturer. Yet with this new range I was in for a double treat (I’ll explain more later). I chose to create this gluten free Apricot White Chocolate Triple Sponge Cake.
As a result of my health issues, I rely heavily on the ability to order items online. Having had mixed results from the different companies I order from I have learned who I can trust to properly package and ship things within an acceptable time frame. With Maha Home I placed my order and it arrived the following day. Every item was securely wrapped, without there being an excess of packaging. Most importantly every single item, when unwrapped, was in perfect condition. Because of the careful packaging, lowest price match promise and prompt delivery I would happily order from them in future.
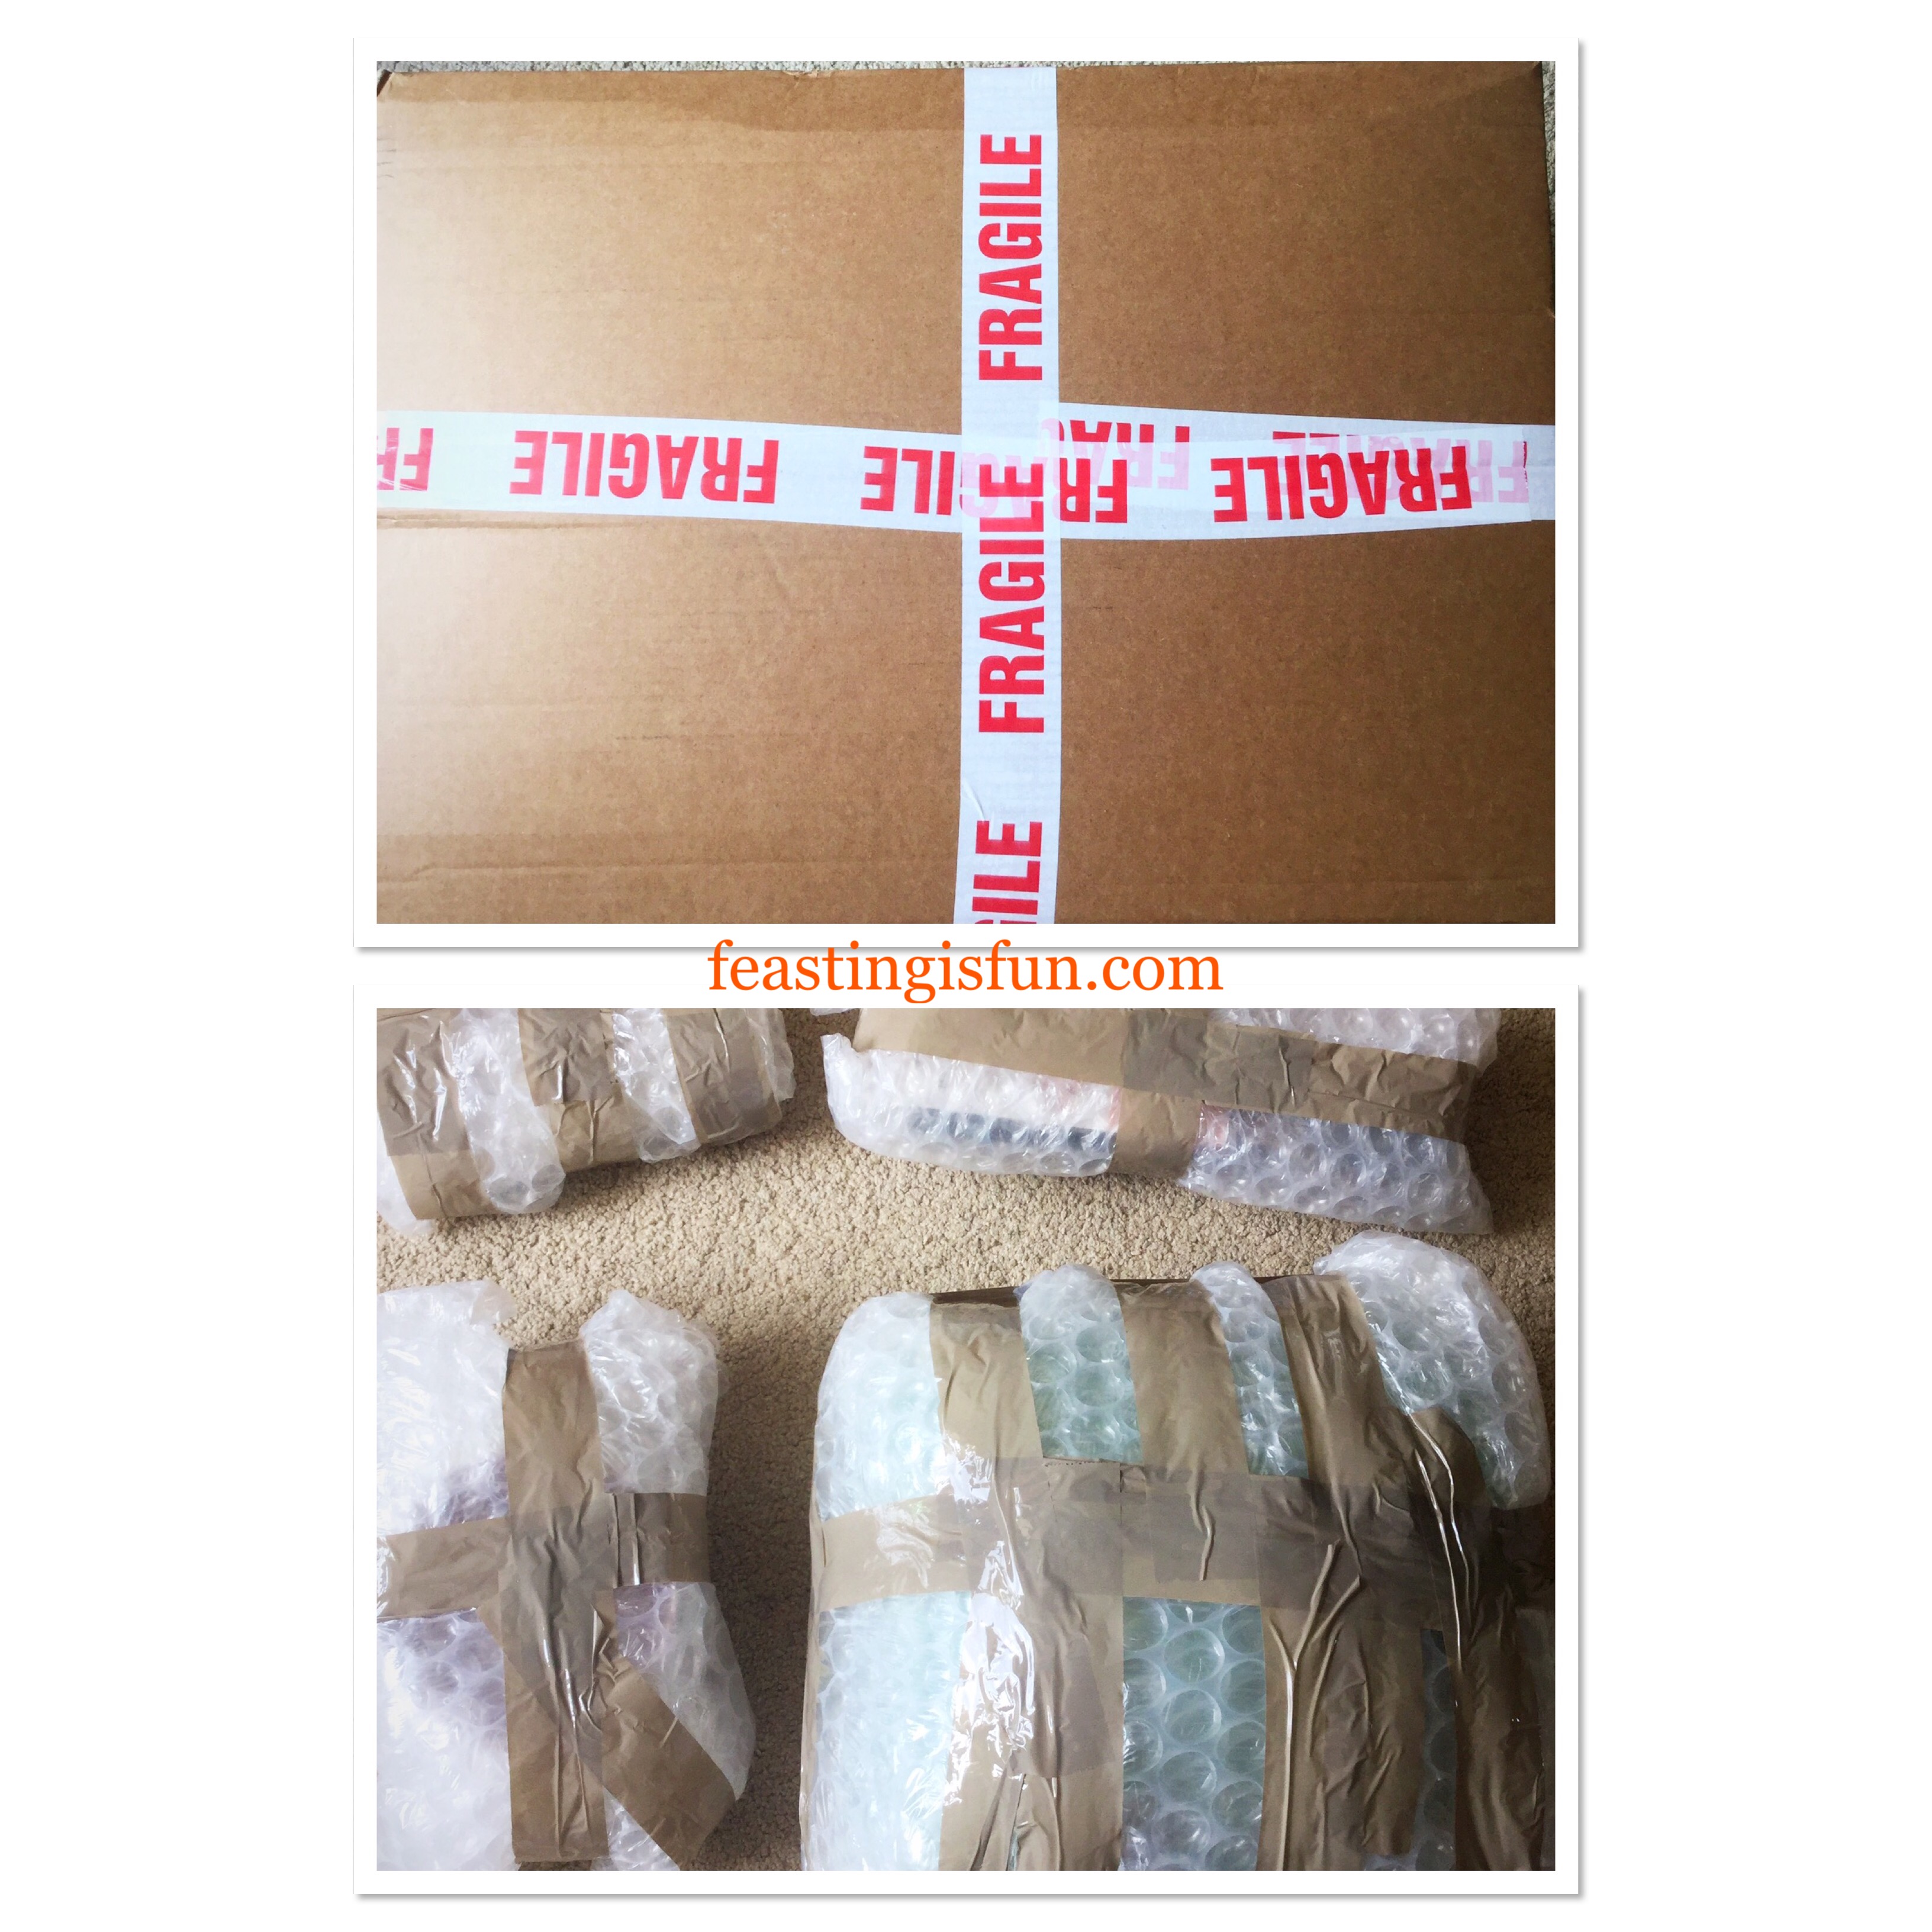
I will admit that it did take some time to complete the unwrapping!
I tested and used all of the items except the reamer and jar scraper while making the Apricot White Chocolate Triple Sponge Cake.
Note: please visit the Mason Cash website for specific care and use of items listed.
My Thoughts On The Innovative Kitchen Kit
-
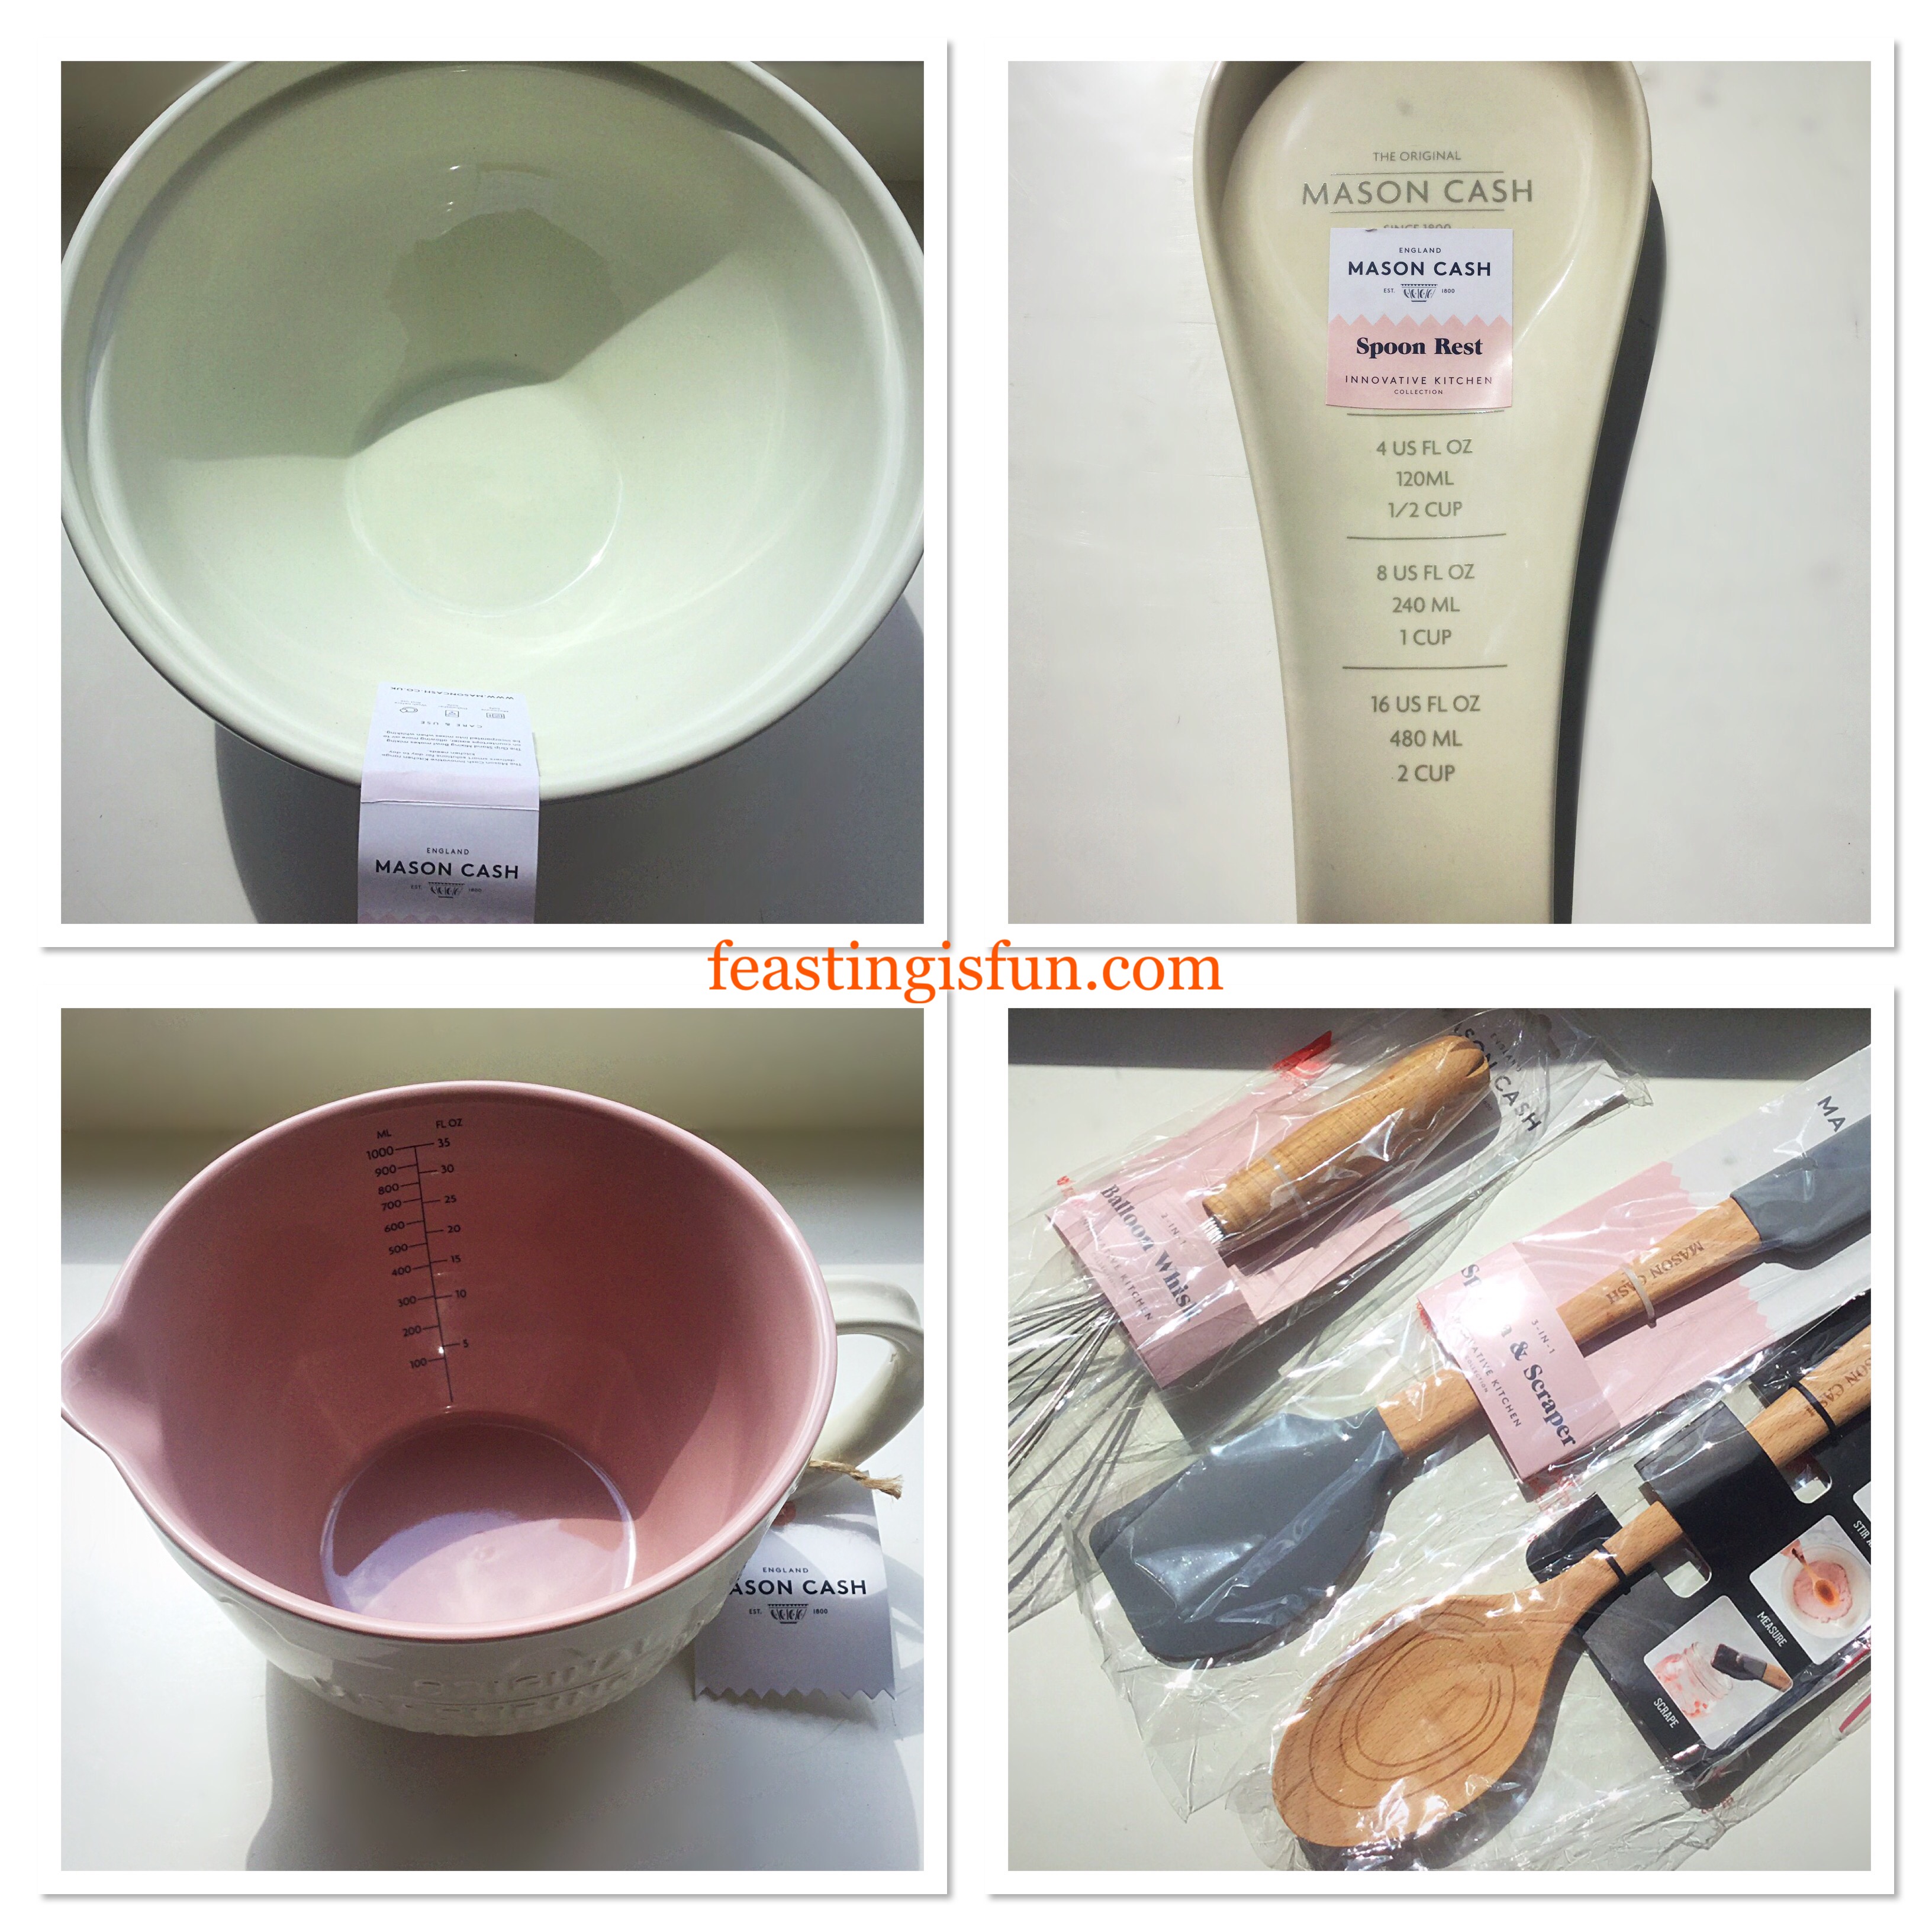
Innovative Kitchen Mixing Bowl:
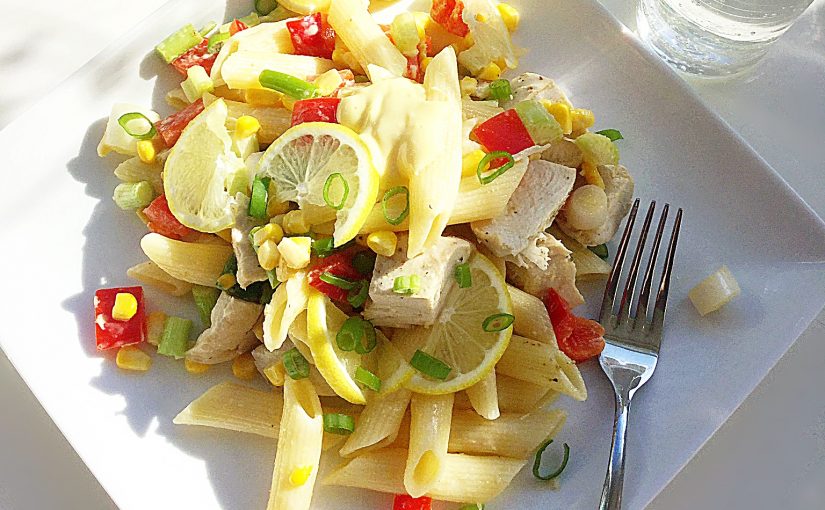
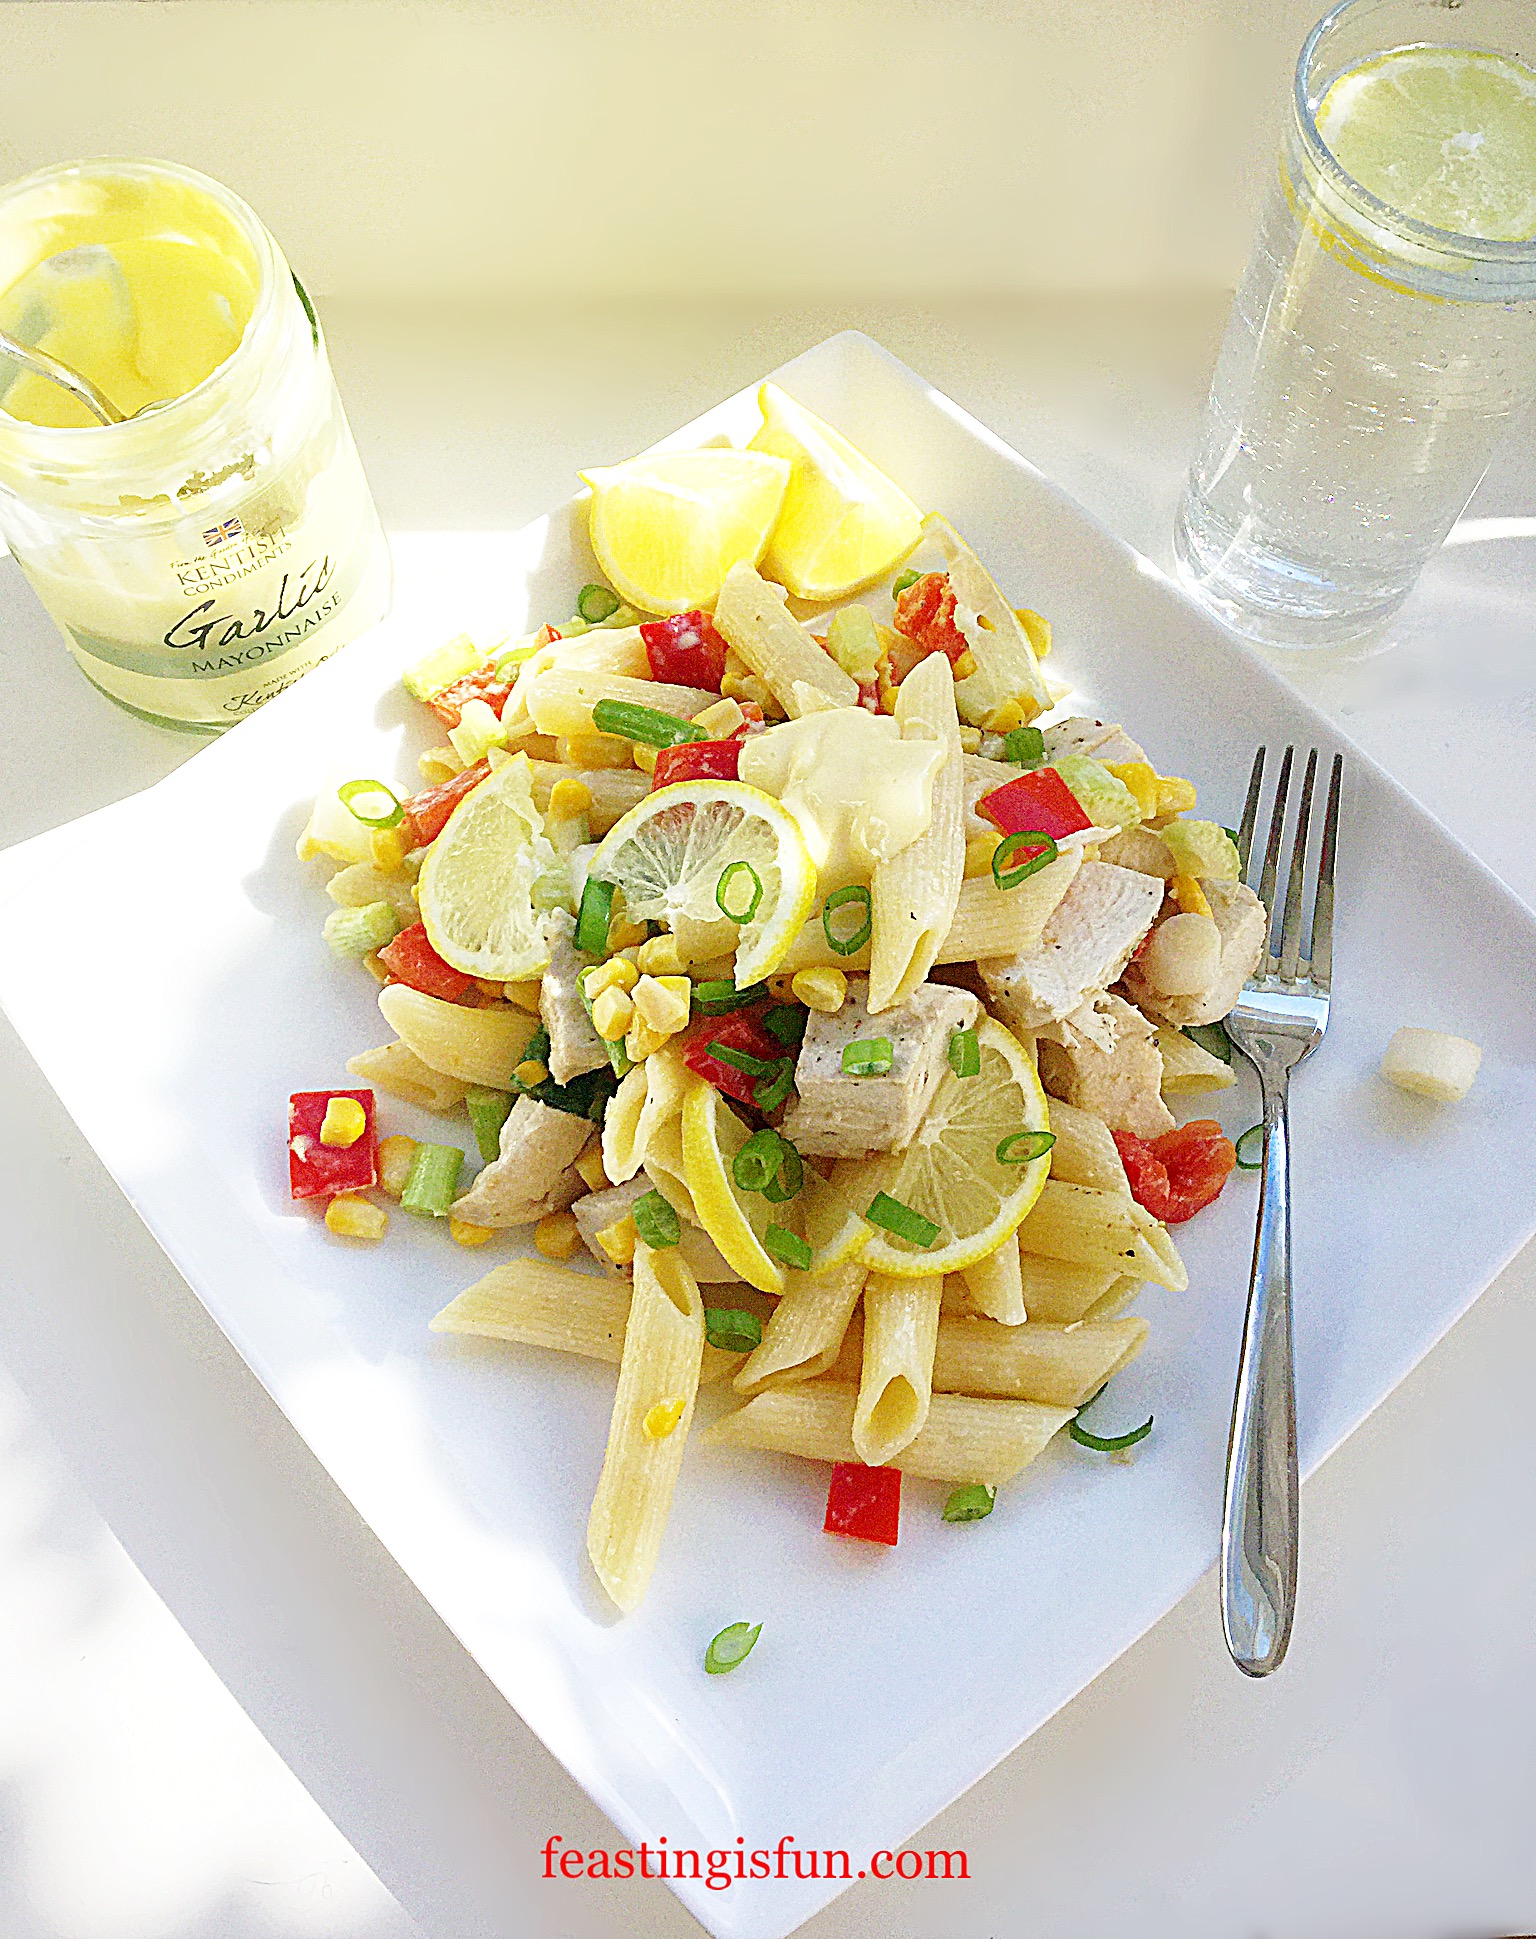
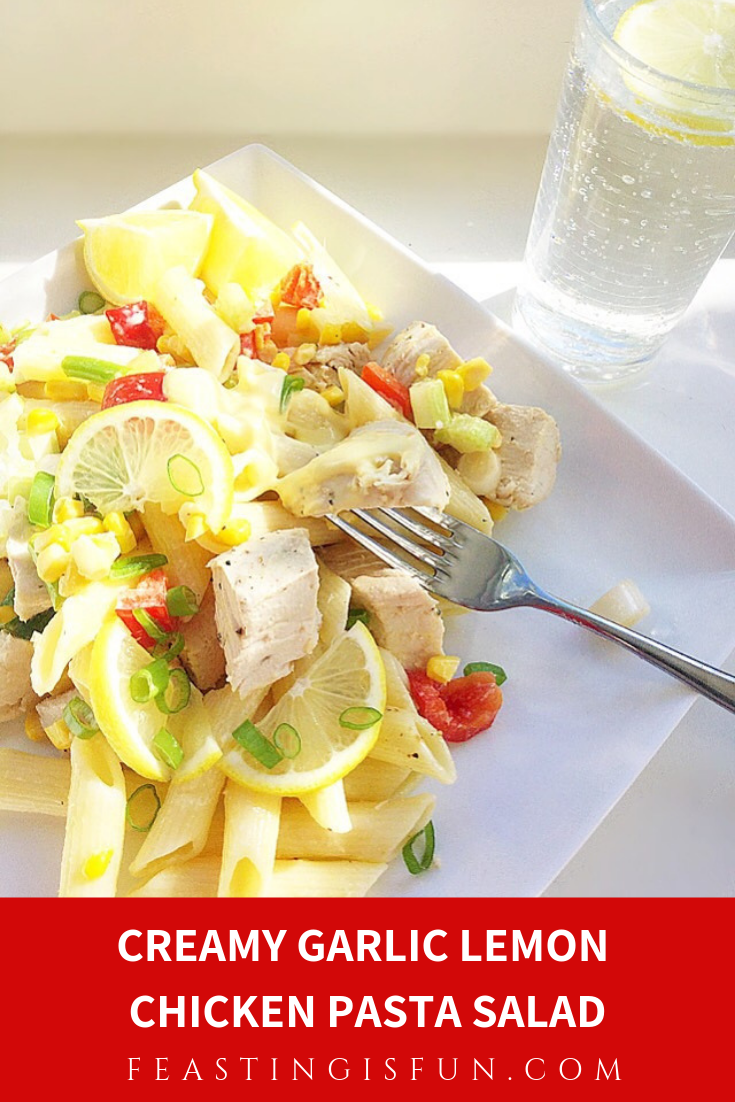
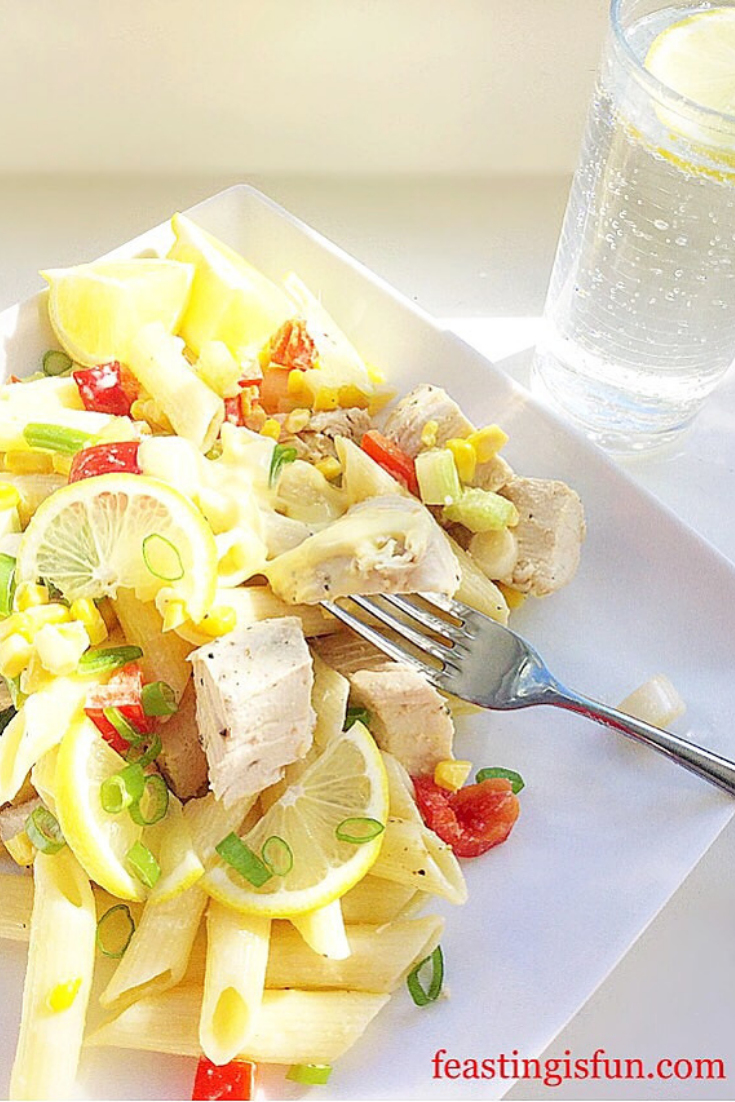
I love the size of this bowl and it is beautiful to look at. It’s wide enough to get my hands in, for making bread, pastry and crumble. Using the tilt feature allows for thorough mixing. Also I would use this as a serving bowl, for example my Creamy Garlic Lemon Chicken Pasta Salad. While the bowl itself isn’t too heavy, once ingredients are added I would struggle to be able to lift this and mix in the crook of my arm. Also this bowl would make a perfect new home/wedding/birthday present for a newbie or keen baker.
-
Innovative Kitchen Spoon Rest:
Possibly my favourite item! Although this may seem odd, as someone who frequently uses an electric whisk that always drips on to the worktop having this spoon rest is an absolute joy. Large enough to rest both beaters from my whisk, or the large solid spoon and the balloon whisk from the range, this has saved me a substantial amount of clean-up time.
-
Innovative Kitchen 1 Litre Measuring Jug
Absolutely the cutest item in the range. A really useful size jug with accurate measurements inside. For that reason it was particularly useful when creating the Apricot White Chocolate Triple Sponge Cake. Especially easy to use in the microwave and the colours match my kitchen perfectly.
-
Innovative Kitchen Whisk And Reamer
Such a comfortable balloon whisk to hold and use. I wasn’t sure at first how useful the reamer would be, however after making a batch of Homemade Chelsea Buns, with a lemon drizzle I found myself happily using both the reamer and whisk. Brilliant invention.
-
Innovative Kitchen Spatula
Fantastic large spatula at one end with a smaller spatula at the other end. Any worries I had about how comfortable it would be to hold were immediately dispelled on first use. Two for one usage, saving utensil room in the kitchen.
-
Innovative Kitchen Solid Spoon And Jar Scraper
A strong solid spoon that is comfortable to hold and use. I see a wooden spoon as one of THE most essential items in any kitchen, this spoon fits the bill and some! No longer do I have to sniff my range of wooden spoons when baking, to check for lingering curry/garlic smells. I now have a dedicated wooden spoon for baking, that also has a very handy jar scraper at the other end. Especially useful for honey and marmite, both particularly sticky and reluctant to leave the inside of a jar. Again double usage from one utensil.

Recipe: Apricot White Chocolate Triple Sponge Cake serves 10-12
For the cake sponges
225g + 112g/8oz + 4oz (337g/12oz) Unsalted Butter at room temperature – plus extra for greasing the cake tins
225g + 112g/8oz + 4oz (337g/12oz) Caster Sugar
1/4tsp + 1/8tsp Salt (3/8tsp)
2tsp + 1tsp Vanilla Extract (3tsp) – I use Nielsen-Massey
4 + 2 (6) Large Free Range Eggs
225g + 112g/8oz + 4oz (337g/12oz) Gluten Free Plain White Flour – I use Doves Farm alternatively use regular white wheat flour
2tsp + 1tsp Baking Powder (3tsp) – I use Waitrose as it is gluten free
Filling and decorating the cake
6tbsp Good Quality Apricot Conserve – I like Bonne Maman
2 x 240g (drained) Canned Apricot Halves
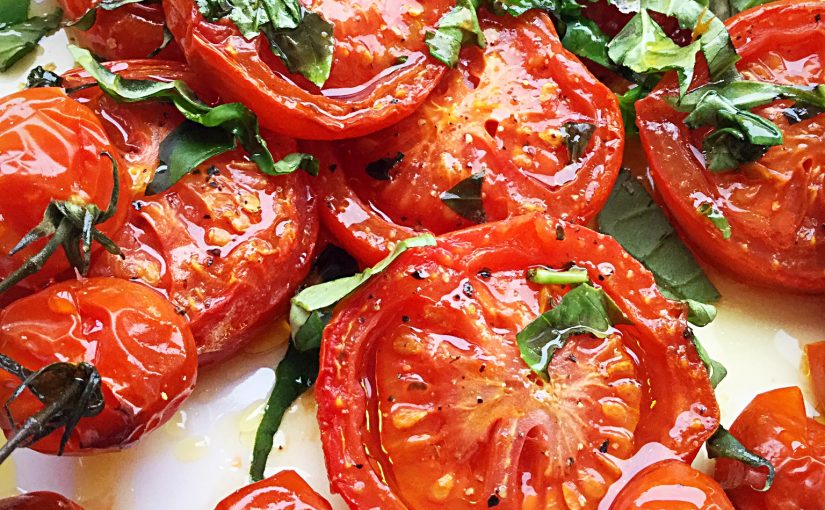
4 Fresh Apricots – if not in season there will be enough left to decorate from the canned apricots
For the white chocolate ganache
600g/1lb 5oz Good Quality White Chocolate
600ml/21fl oz Double (heavy) Cream
For the dark chocolate curls
109g/4oz Good Quality Dark Chocolate – minimum 70% Cocoa Solids
100g/4oz Unsalted Butter – cut into chunks
Method: preheat the oven to 180C/160C fan, 350F, gas mark 4
To make this Apricot White Chocolate Triple Sponge Cake
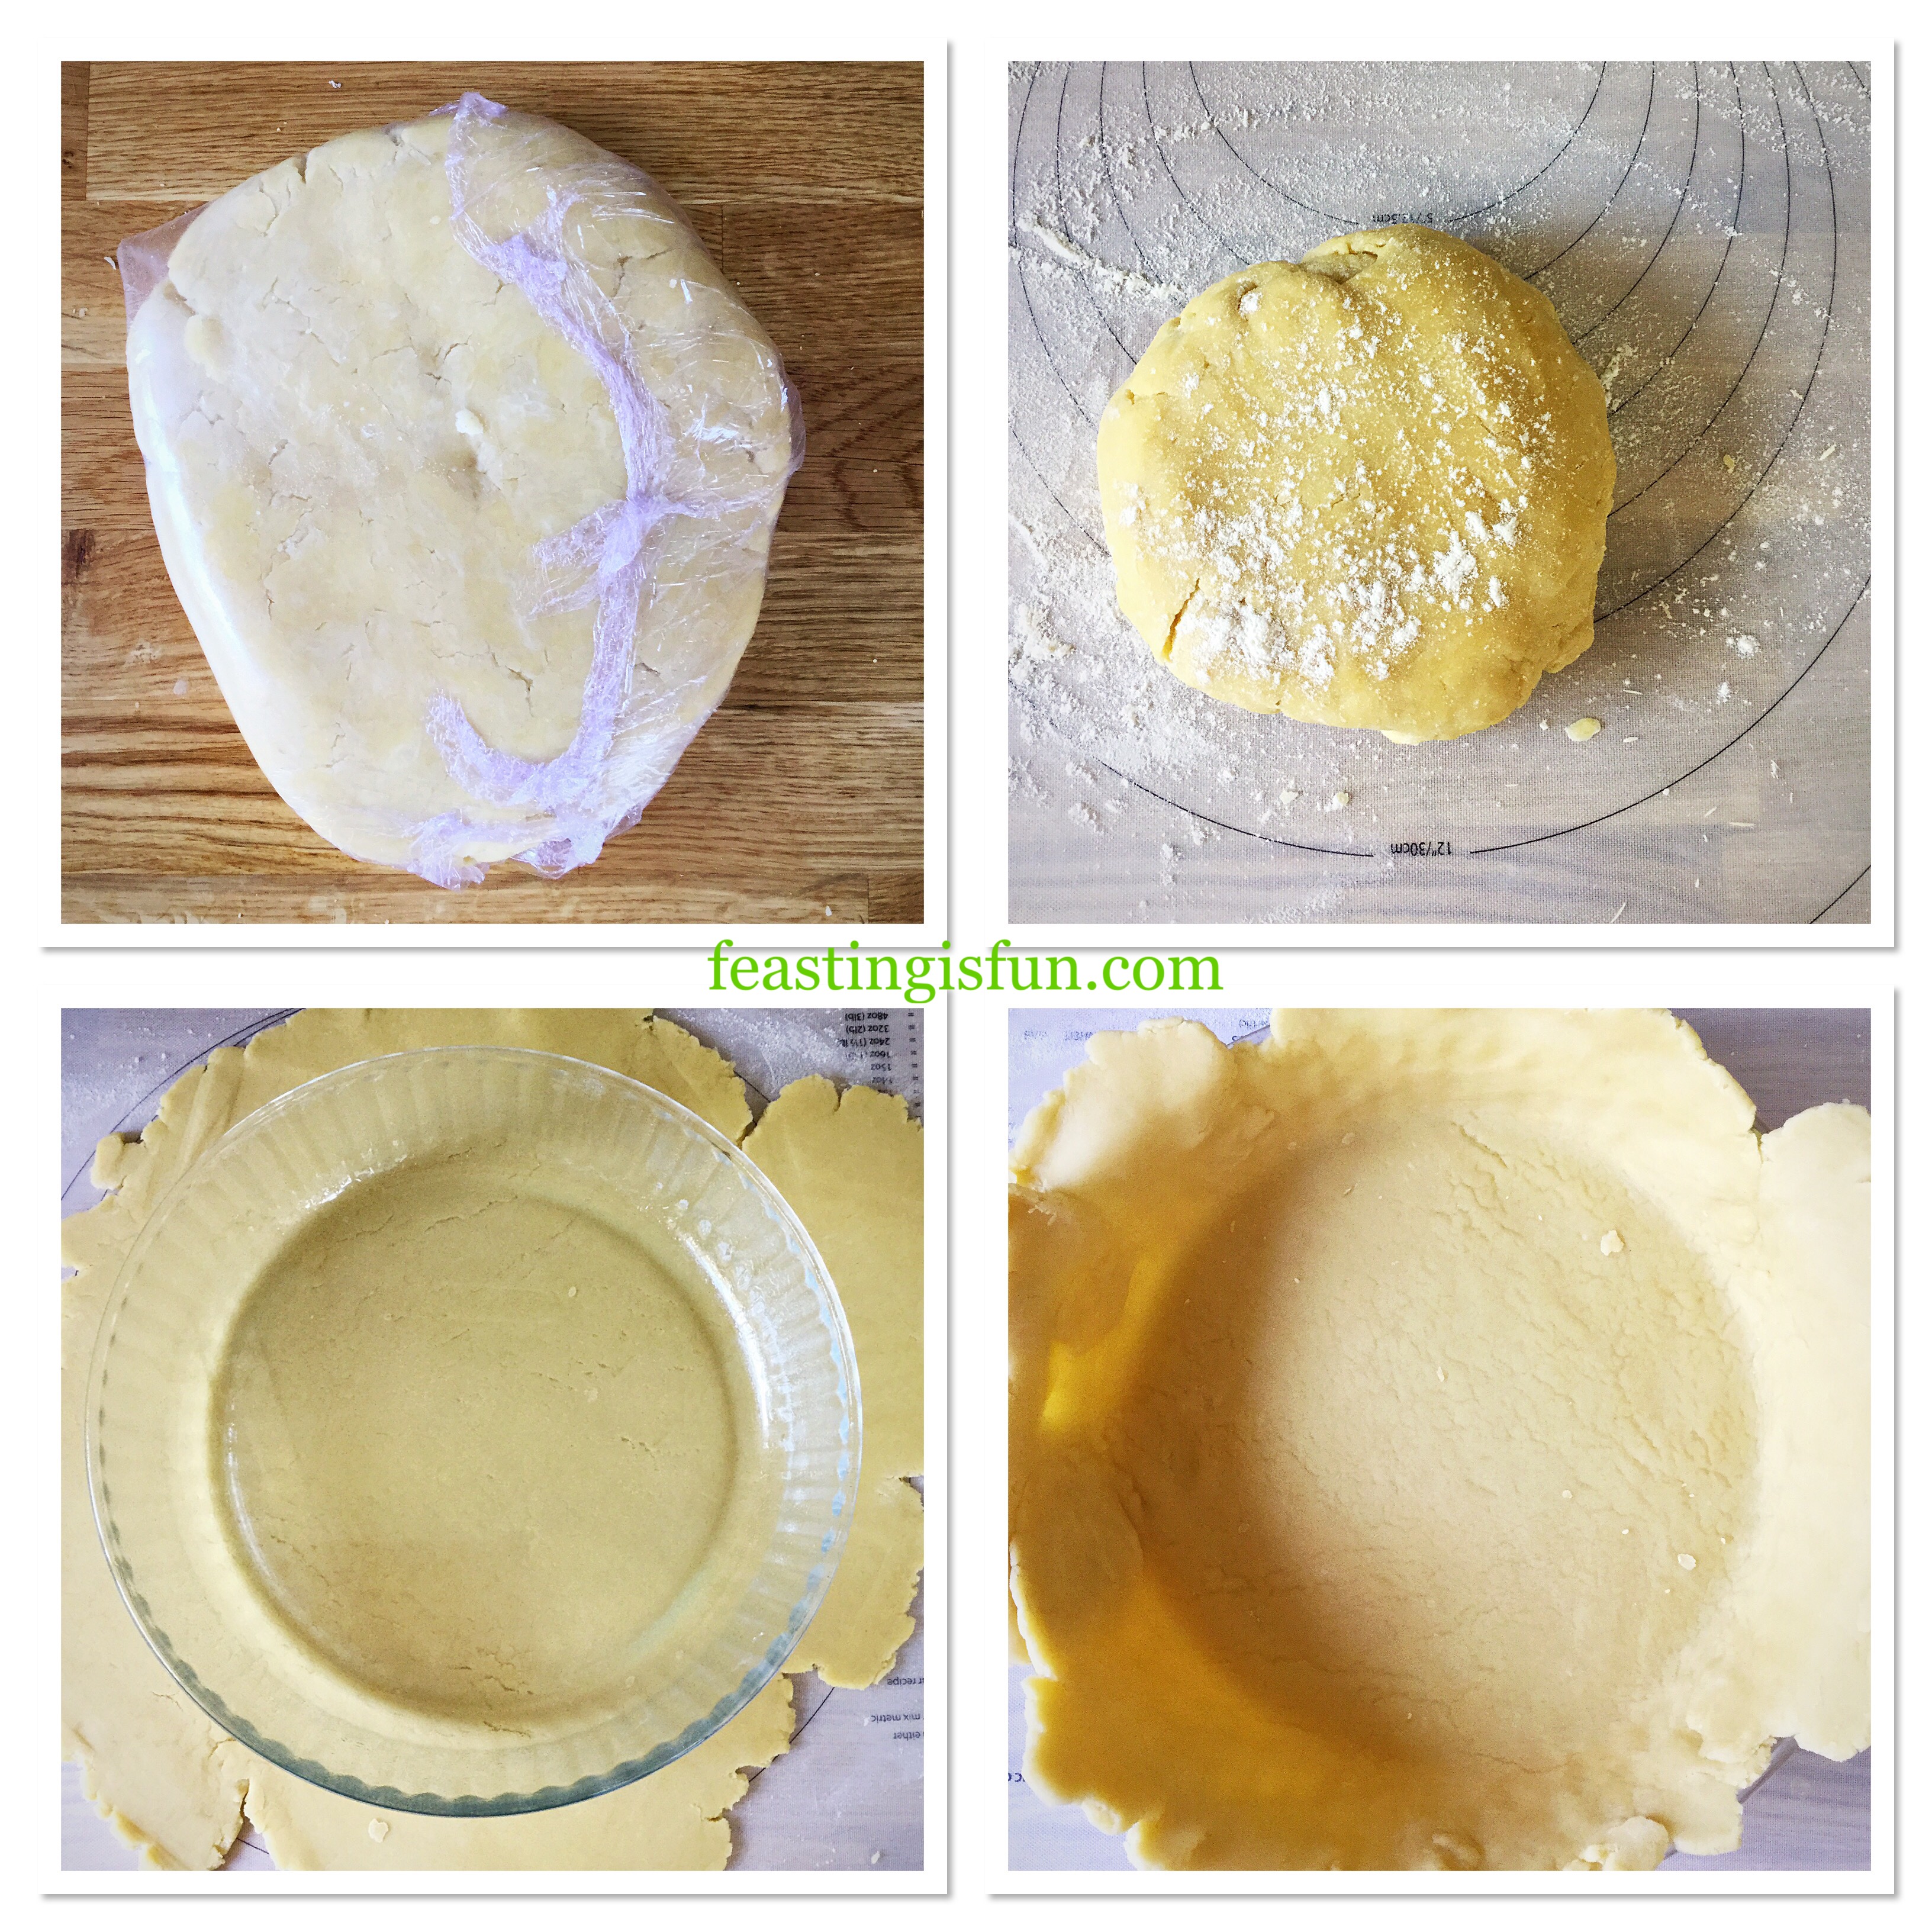
Note – you will need 3 x 20cm/8in round sandwich tins for this recipe. If, like me however, you only have 2, simply follow the first set of quantities given in the recipe. Make 2 cake sponges using the first quantity given in the recipe and bake. Once the cakes are turned out, wash up one sandwich tin and proceed to make the third cake using the second quantity given in the recipe. Alternatively if you have 3 cake tins make the cake batter using the full quality given (shown in brackets in bold), dividing the mixture equally between the three sandwich tins.
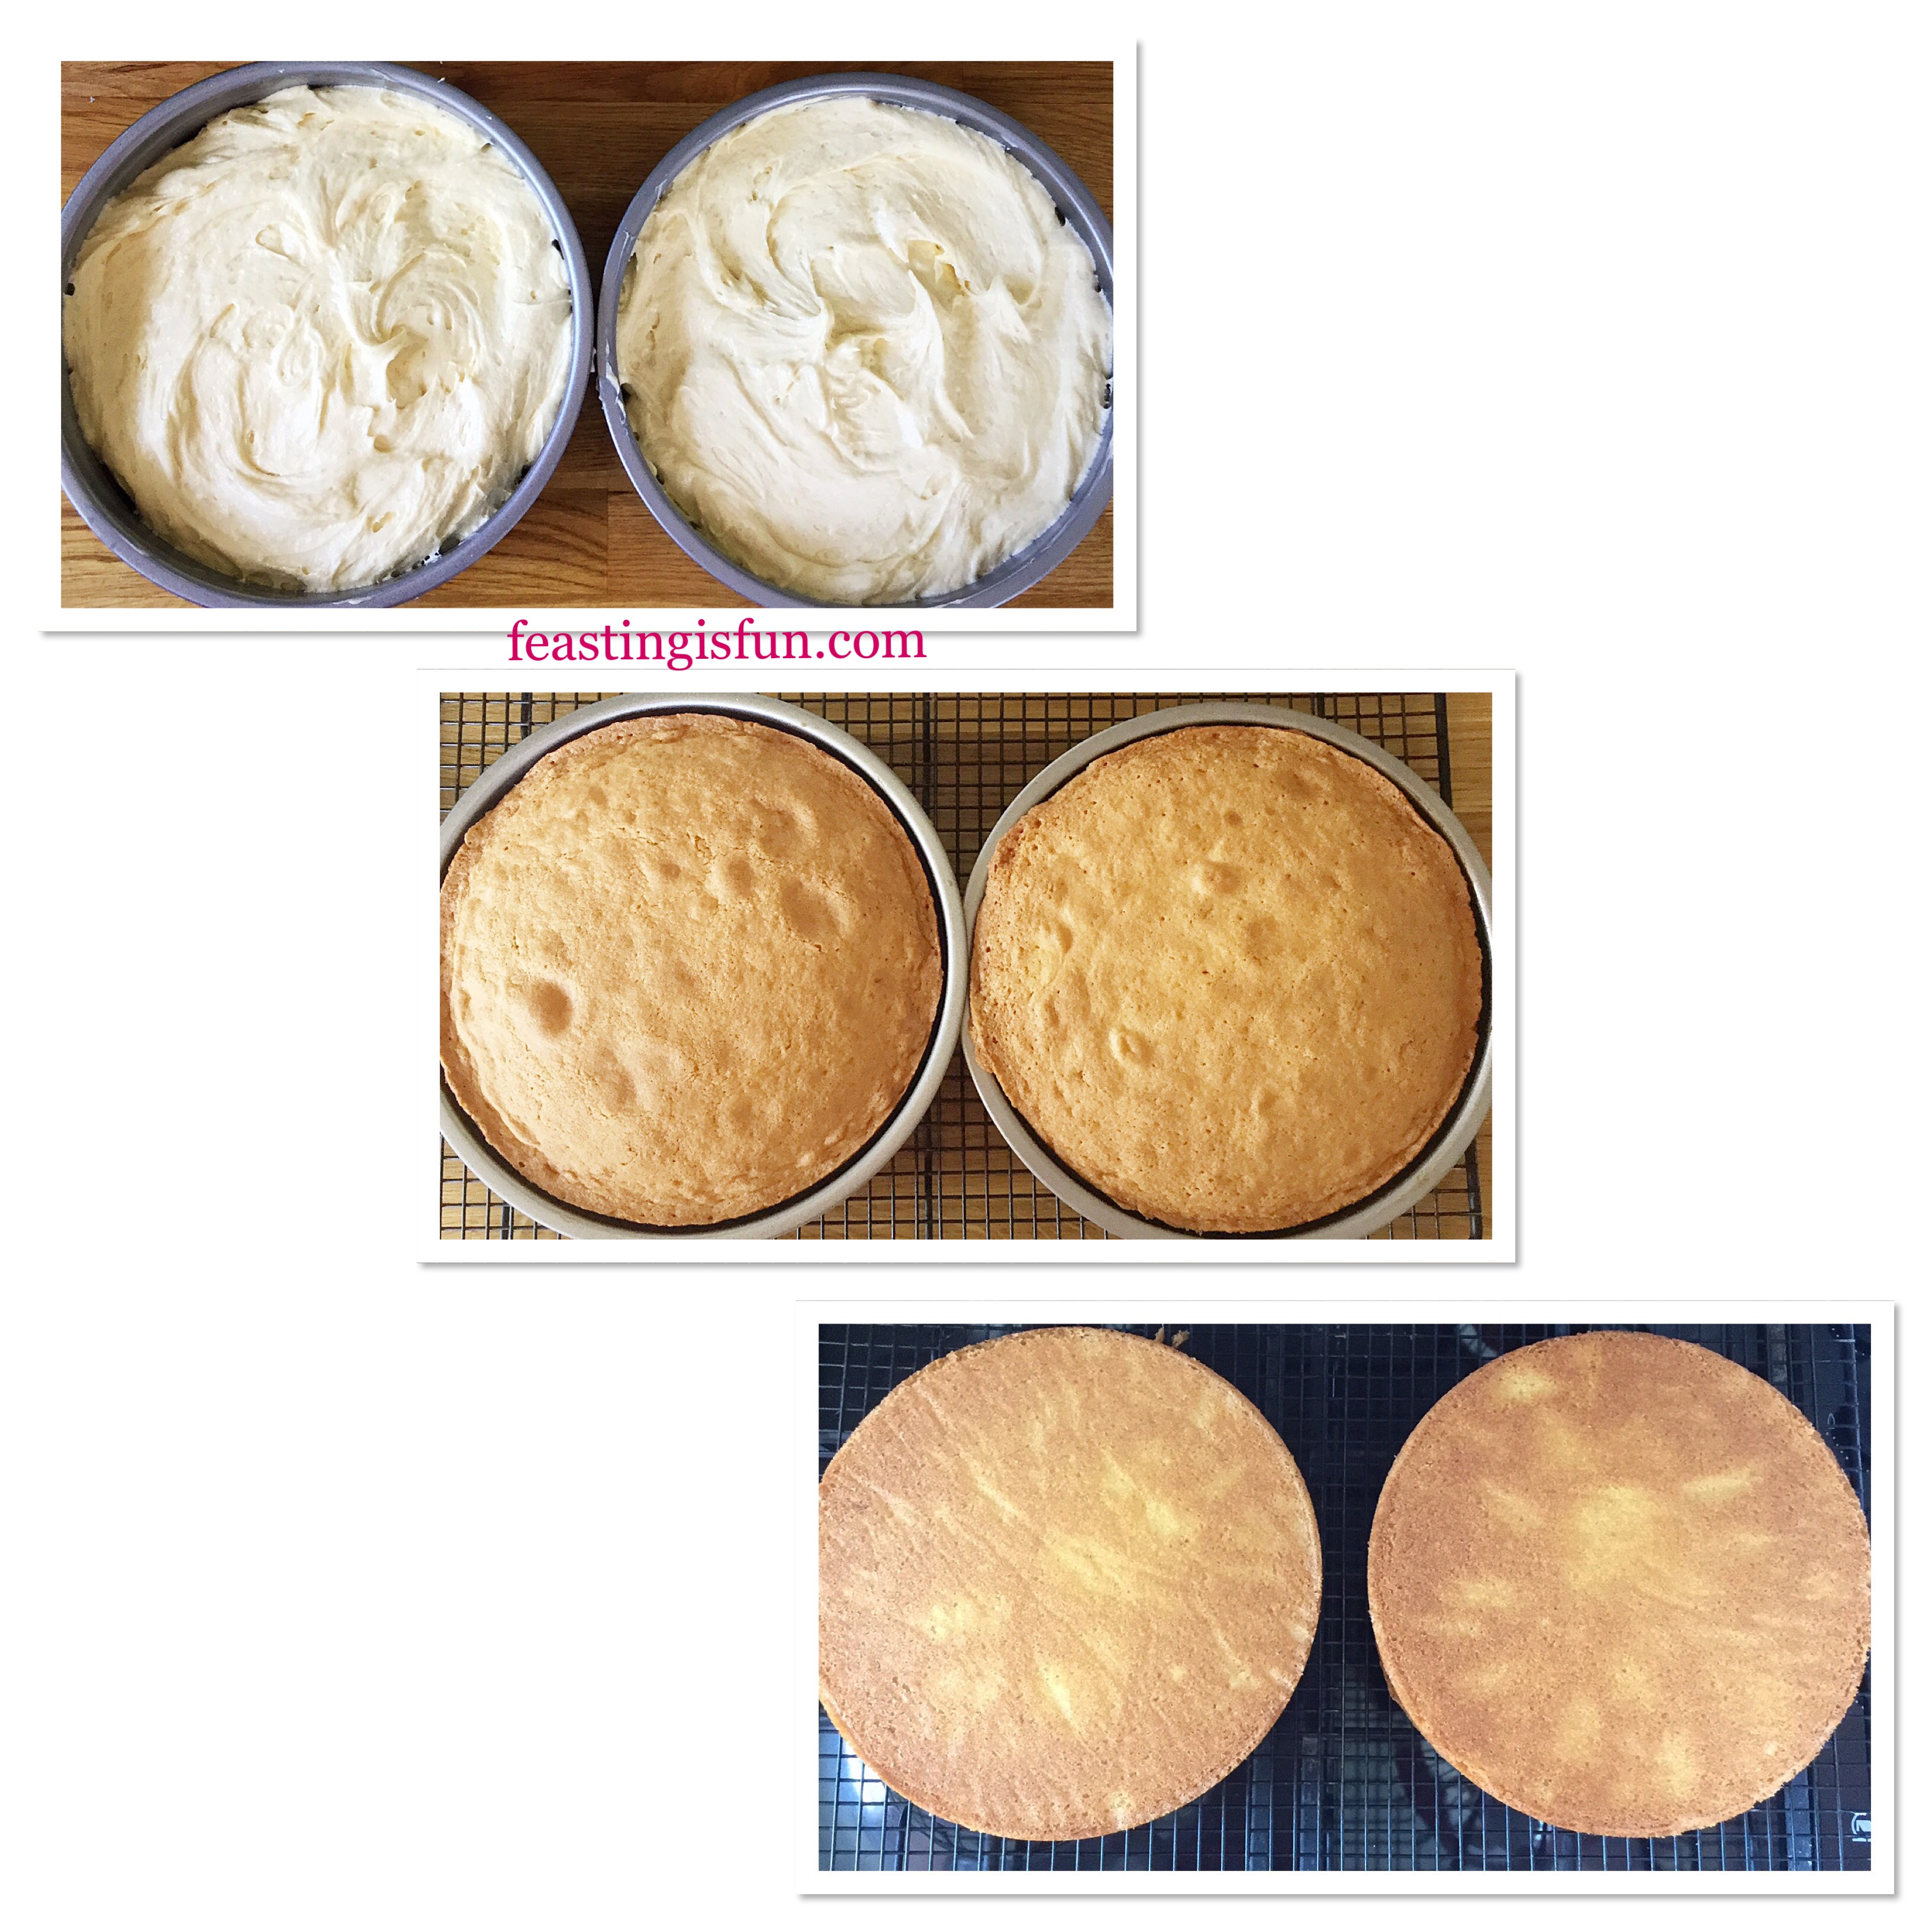
Making the triple sponge cakes
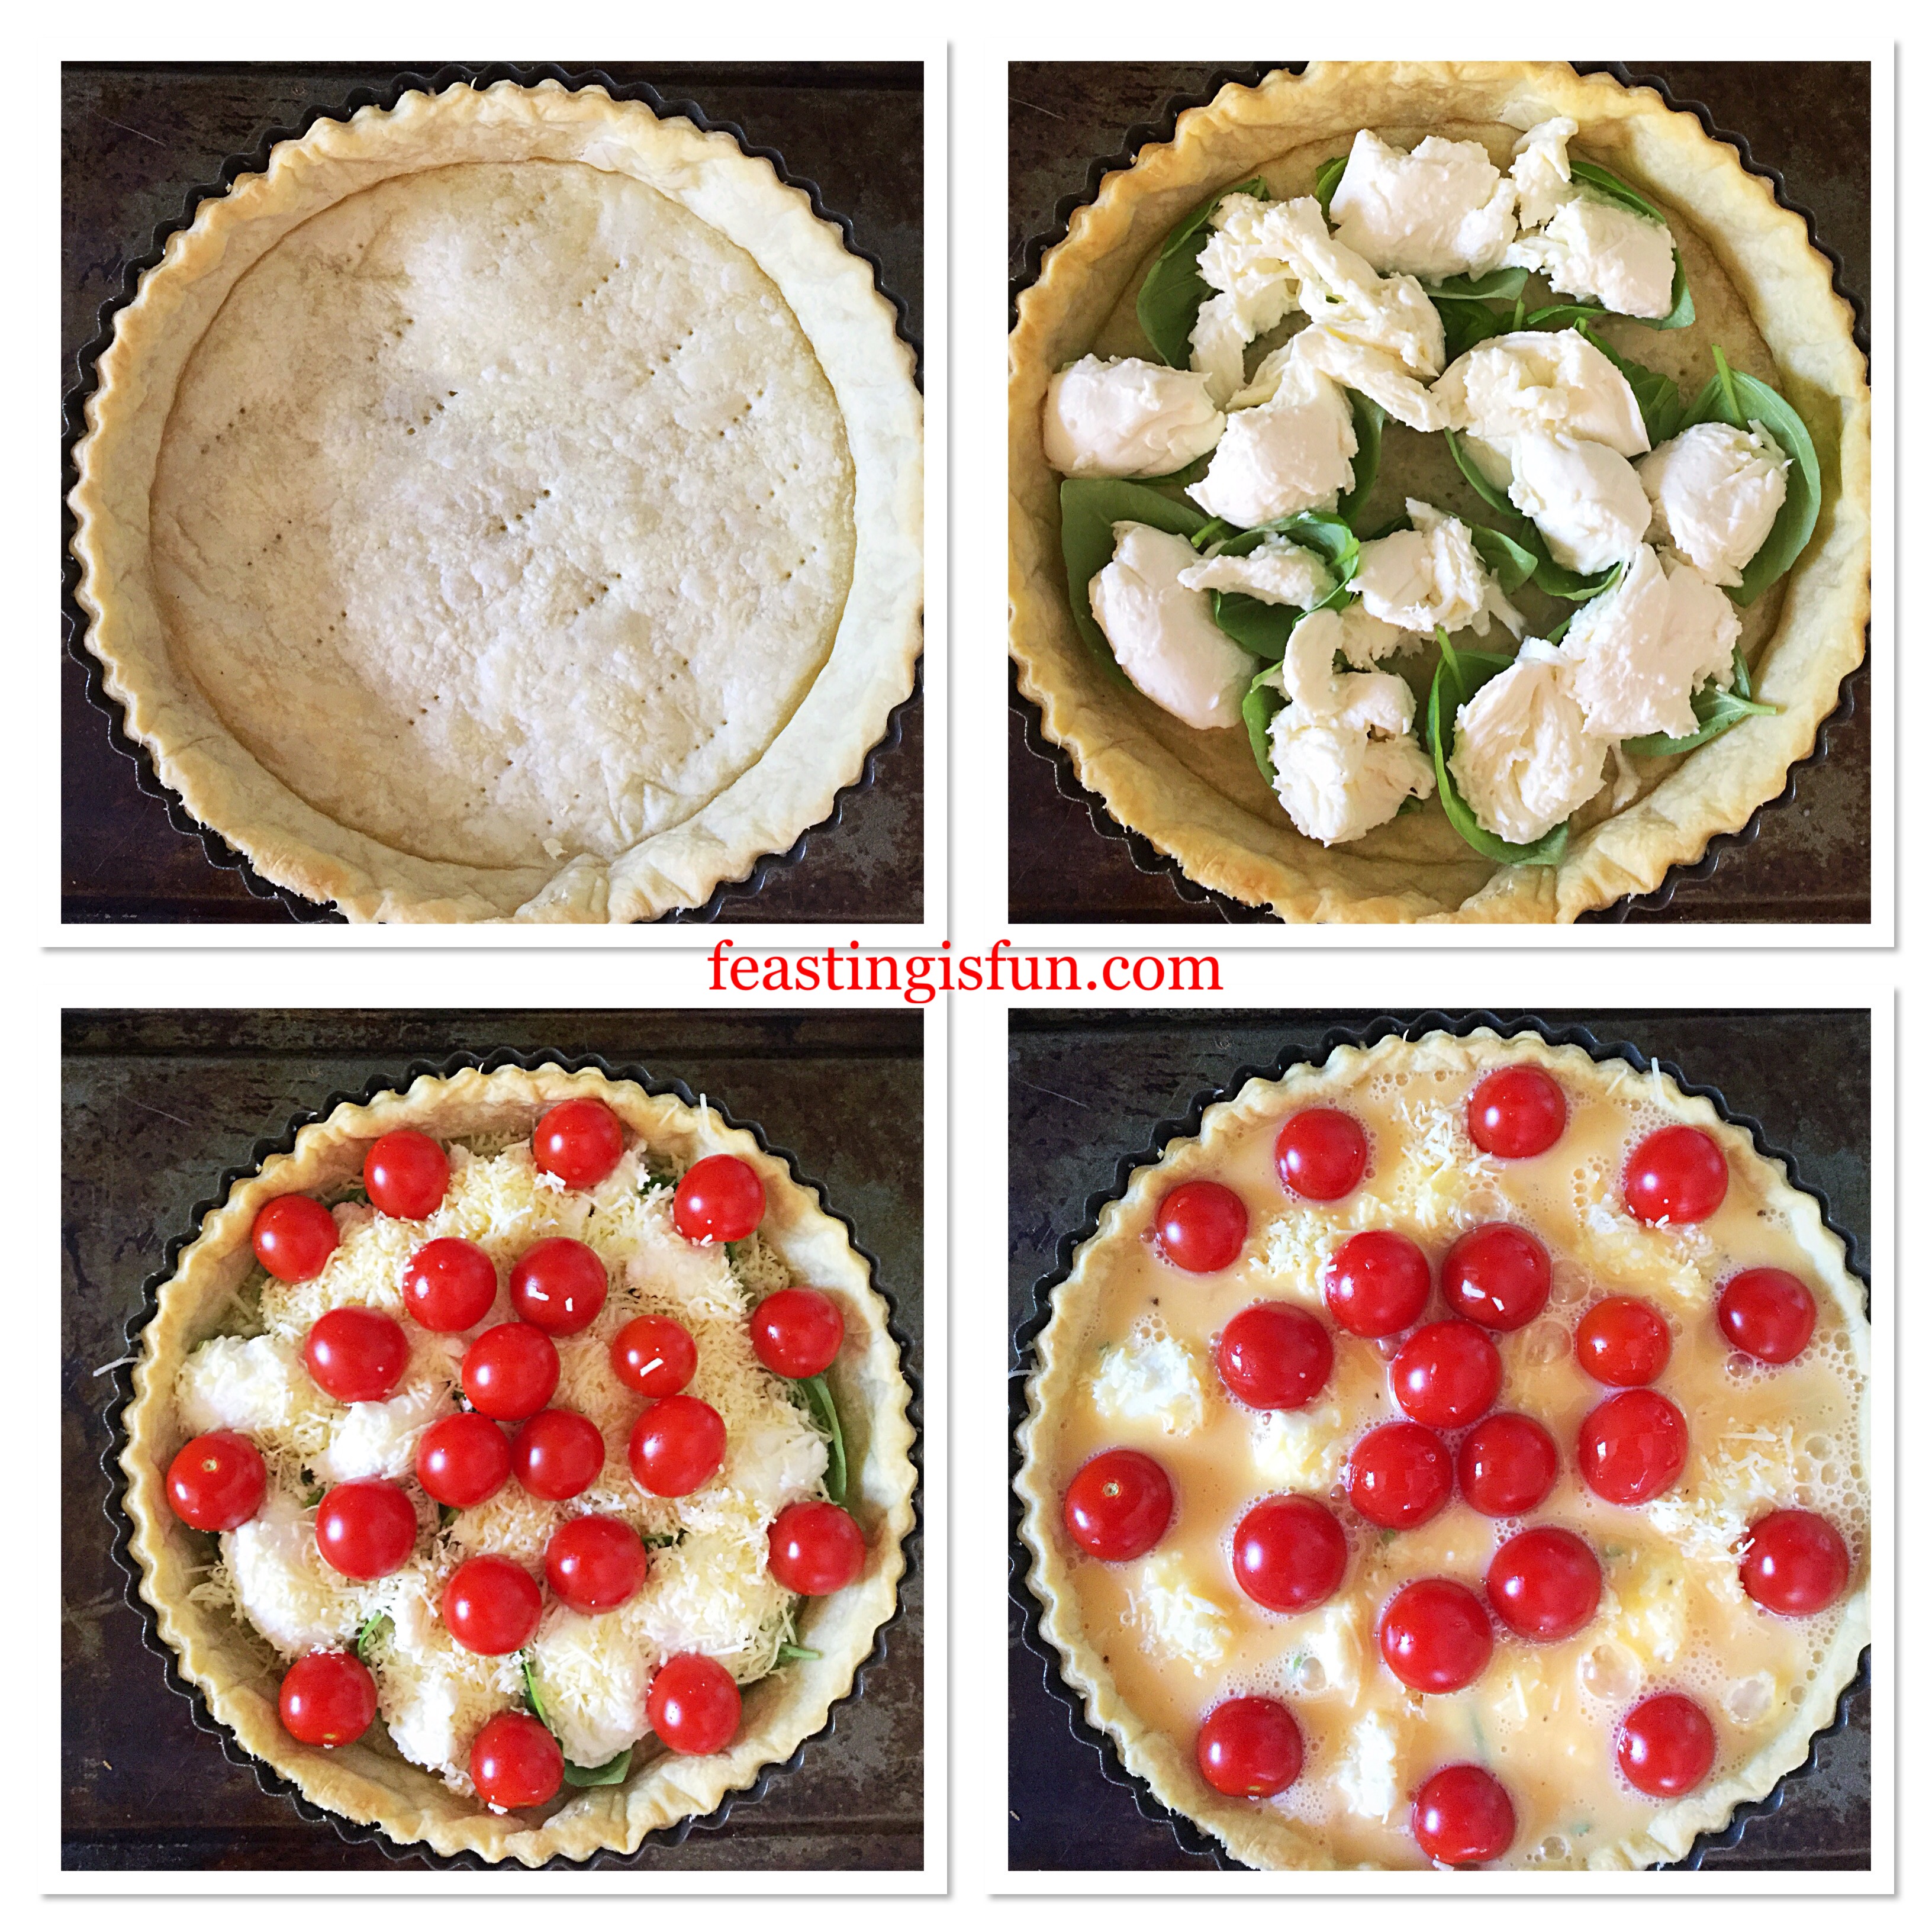
- First of all grease with butter and line the sandwich tins with baking parchment.
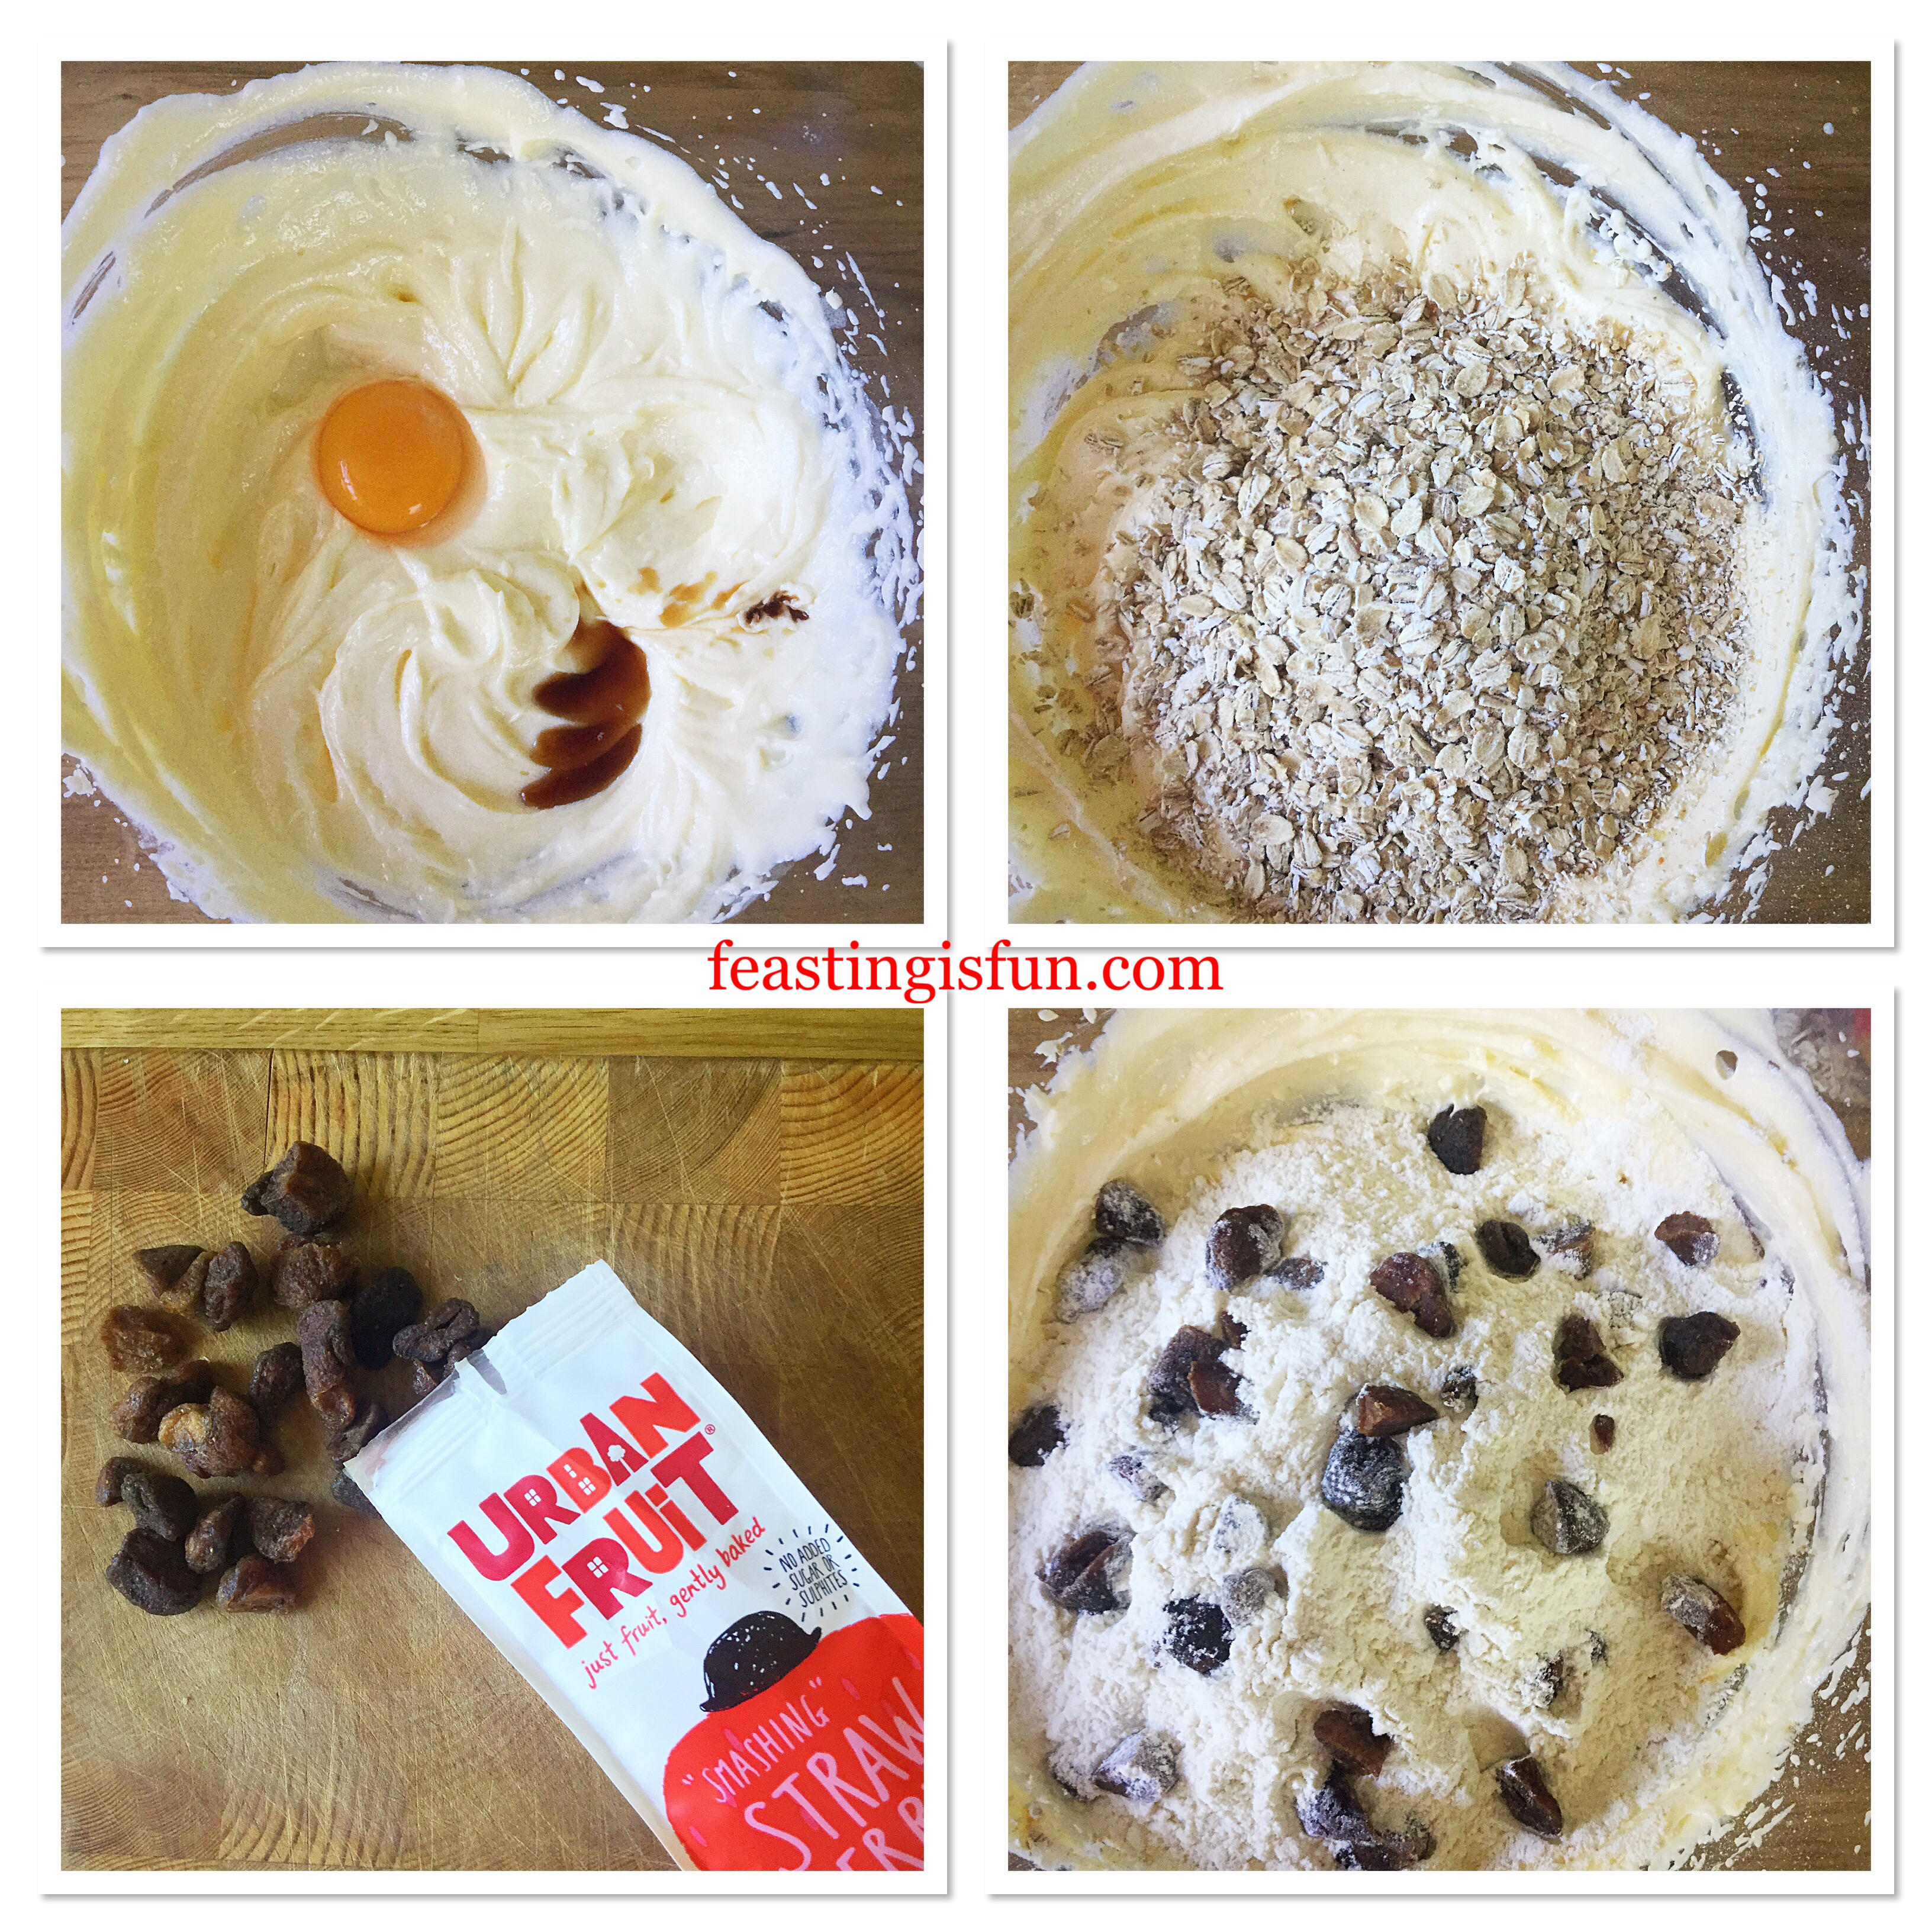
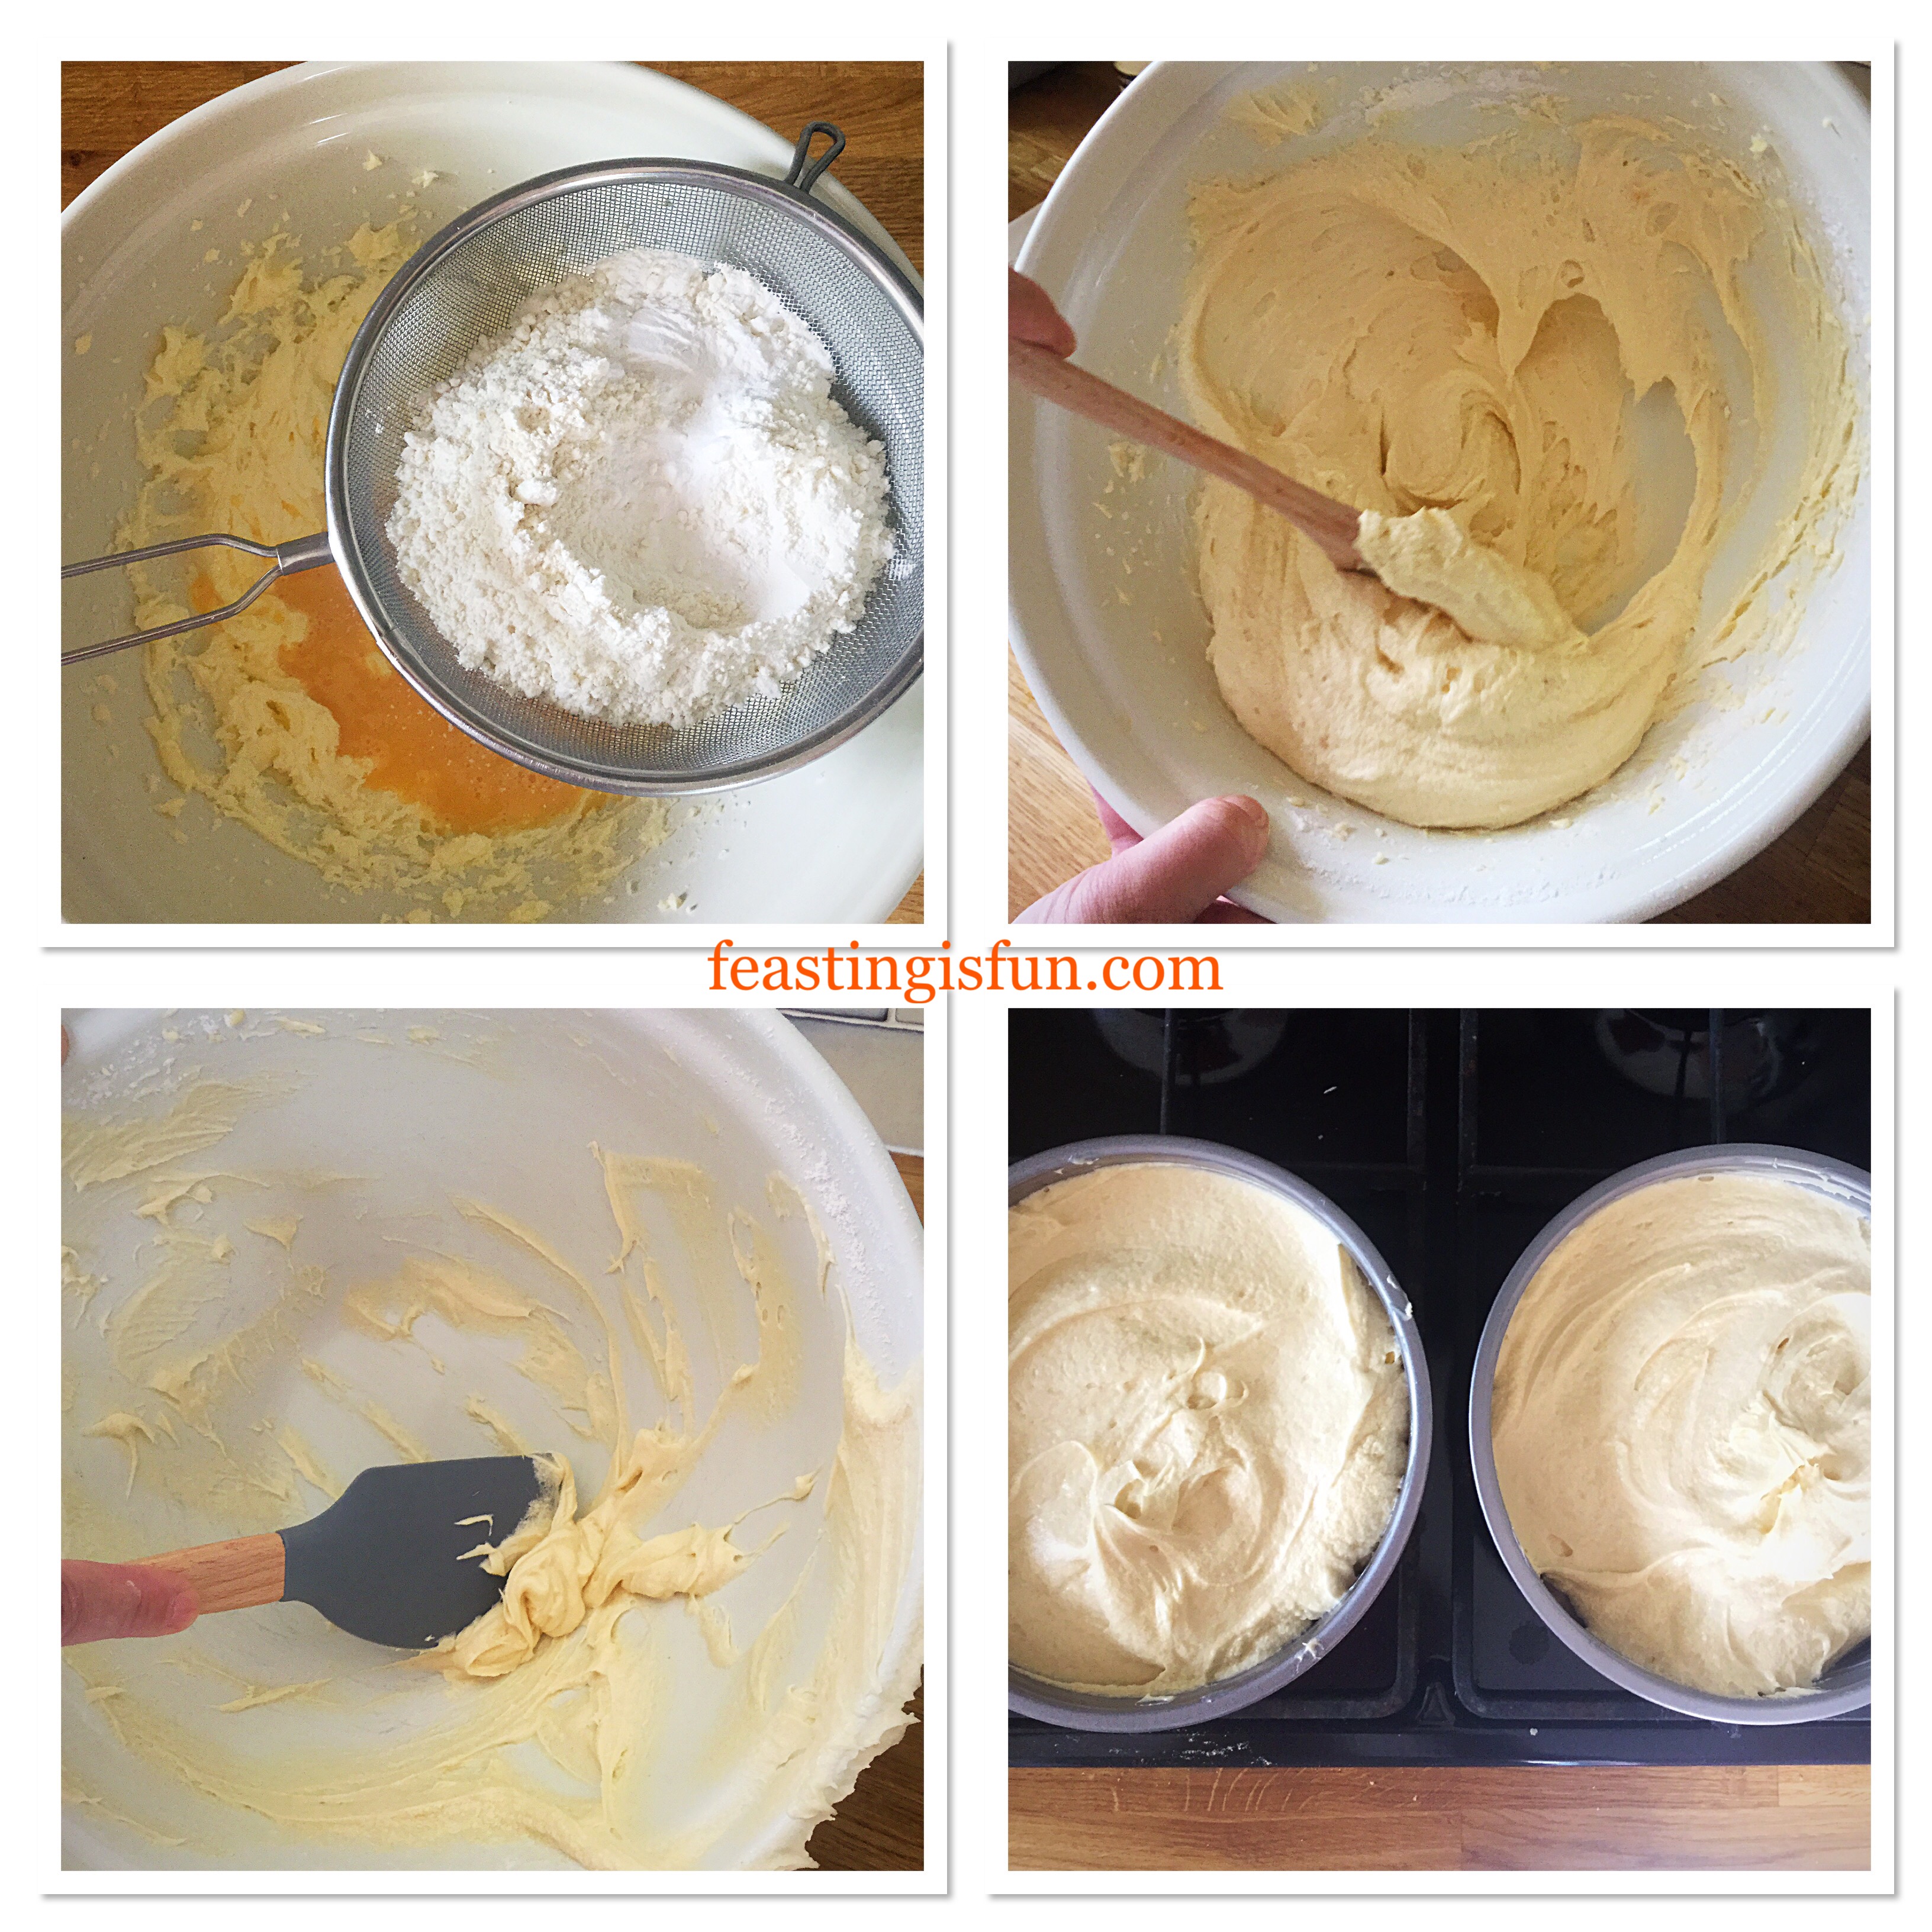
- Next crack the eggs into the jug and whisk to combine.
- Add the butter, sugar and salt to the large bowl and whisk together until pale and creamy.
- Pour the eggs into the large bowl and add the vanilla extract.

- Sieve the flour and baking powder into the bowl.
- Using a large wooden spoon mix the ingredients together until just combined. Over mixing when using wheat flour can lead to a heavy cake.
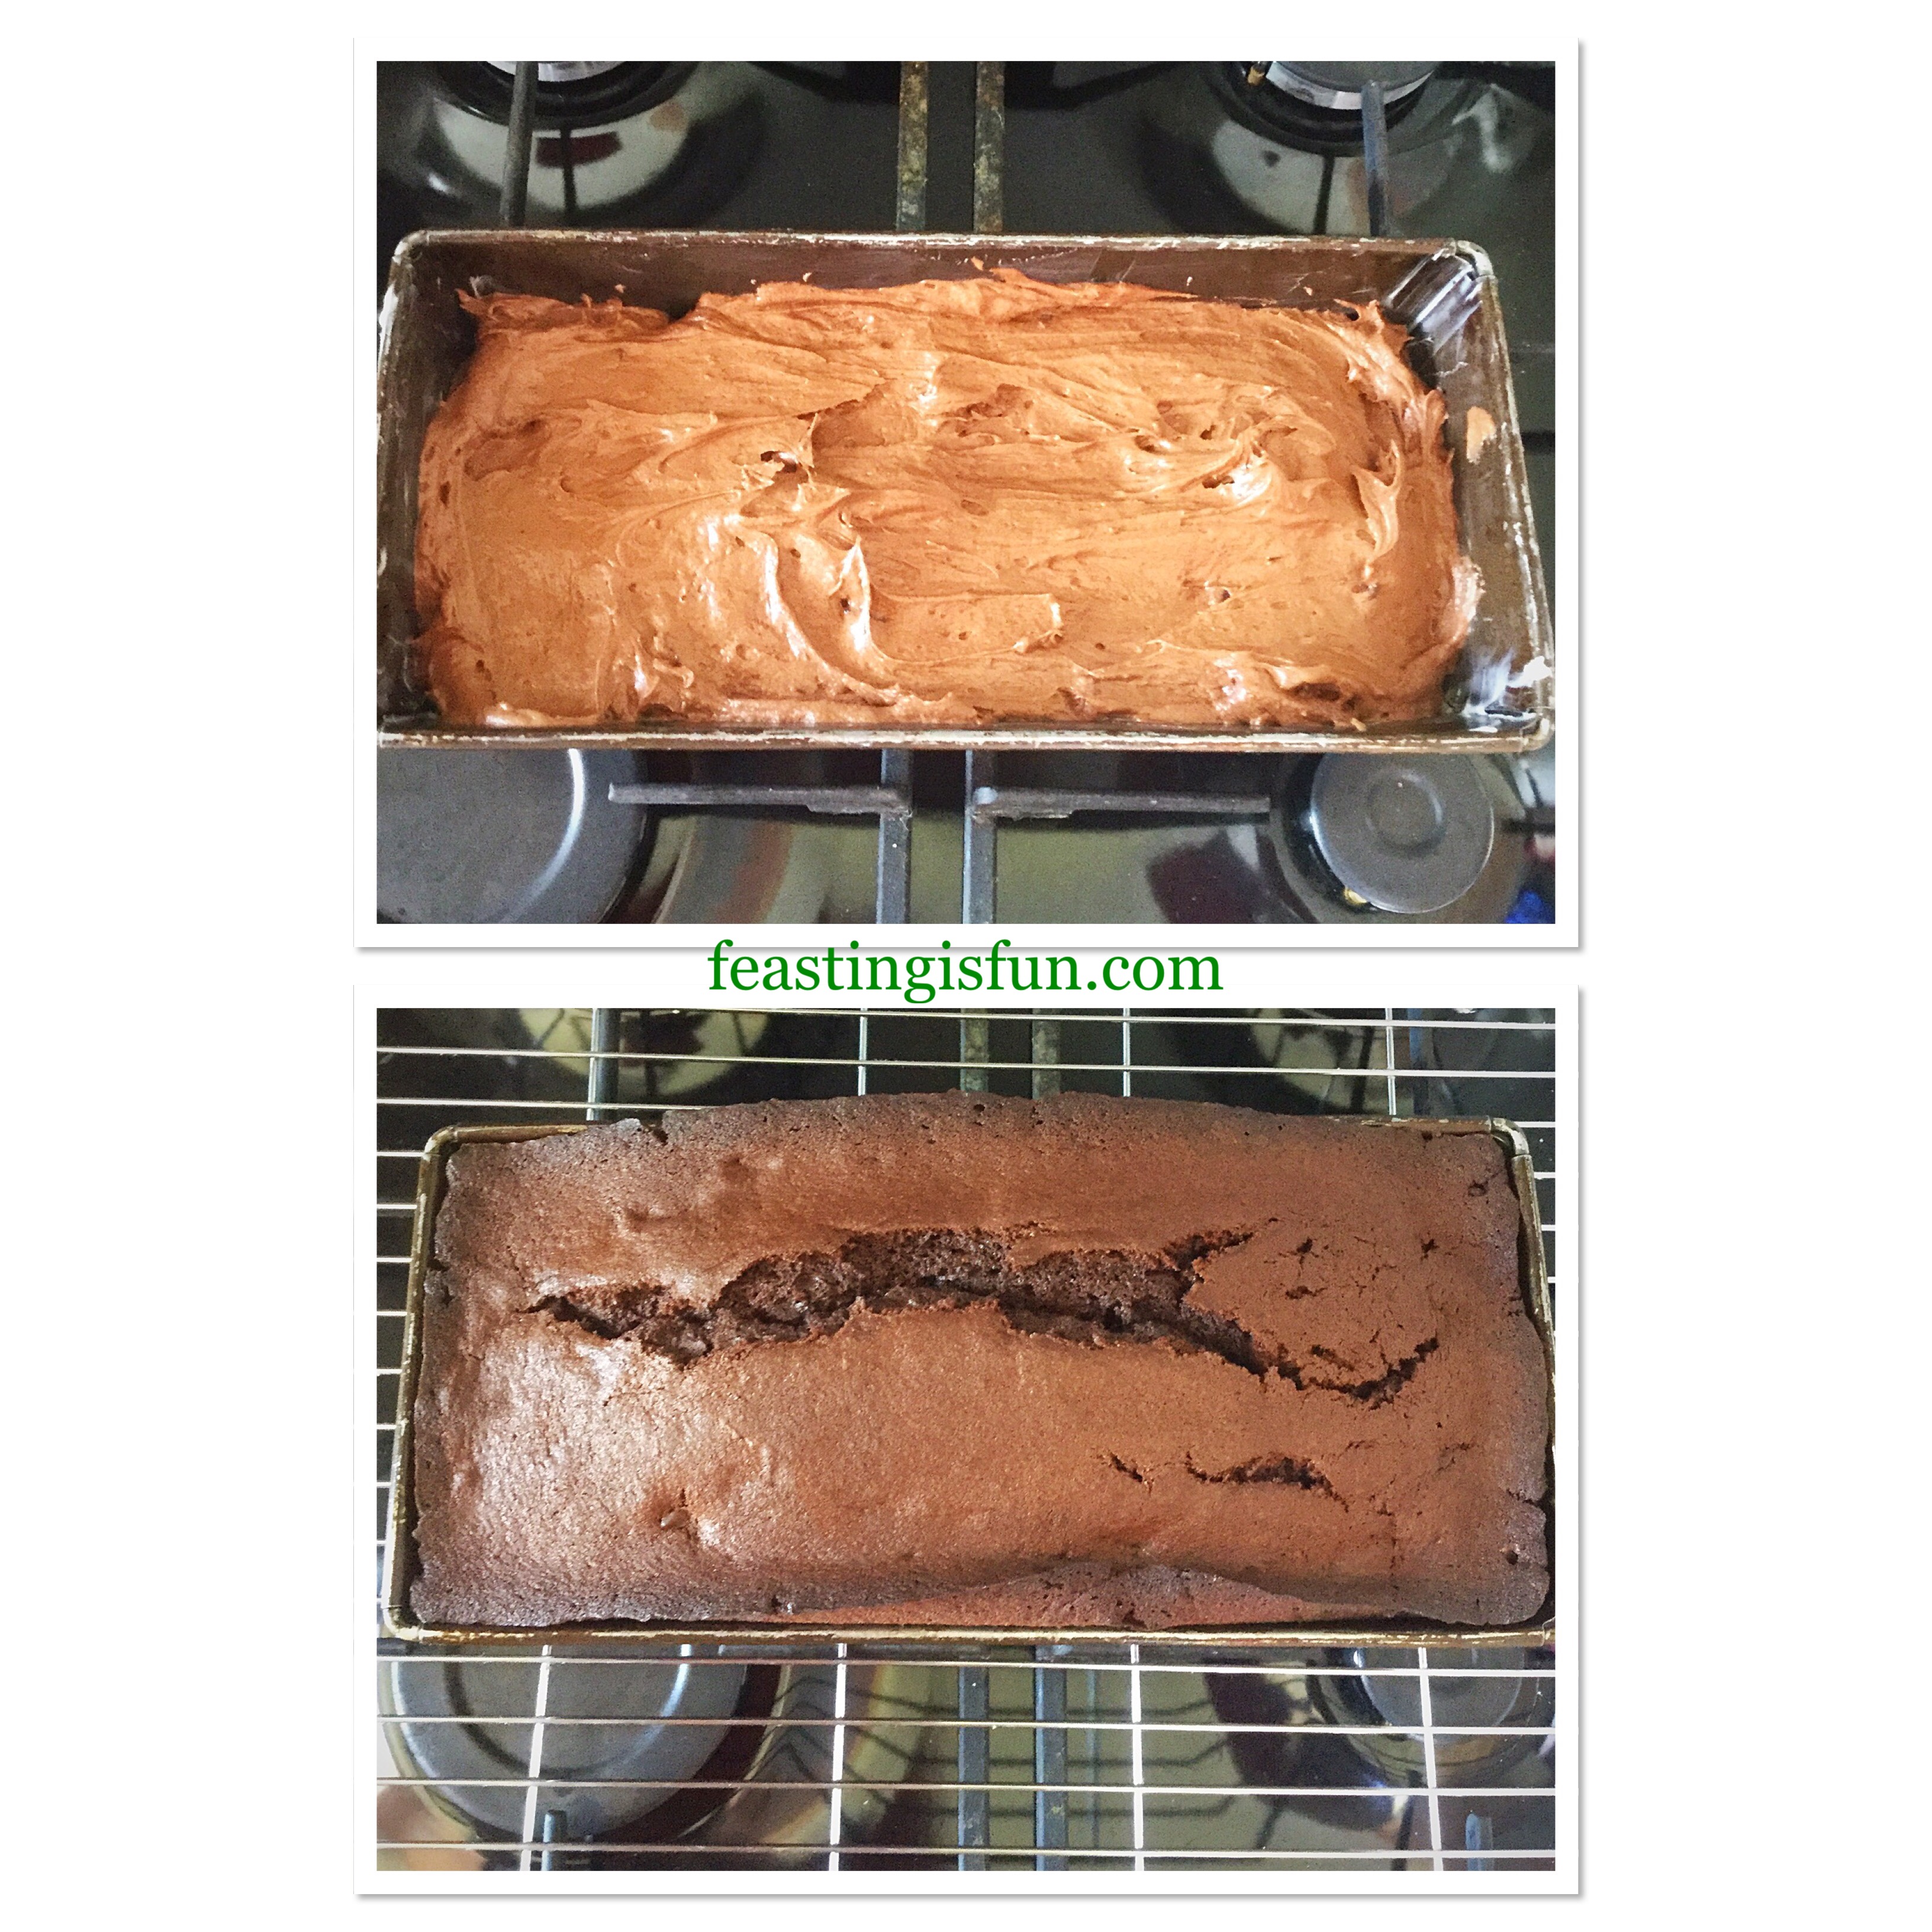
- Divide the cake batter evenly between the sandwich tins, using the spatula to scrape the bowl clean. Ensuring nothing is wasted.
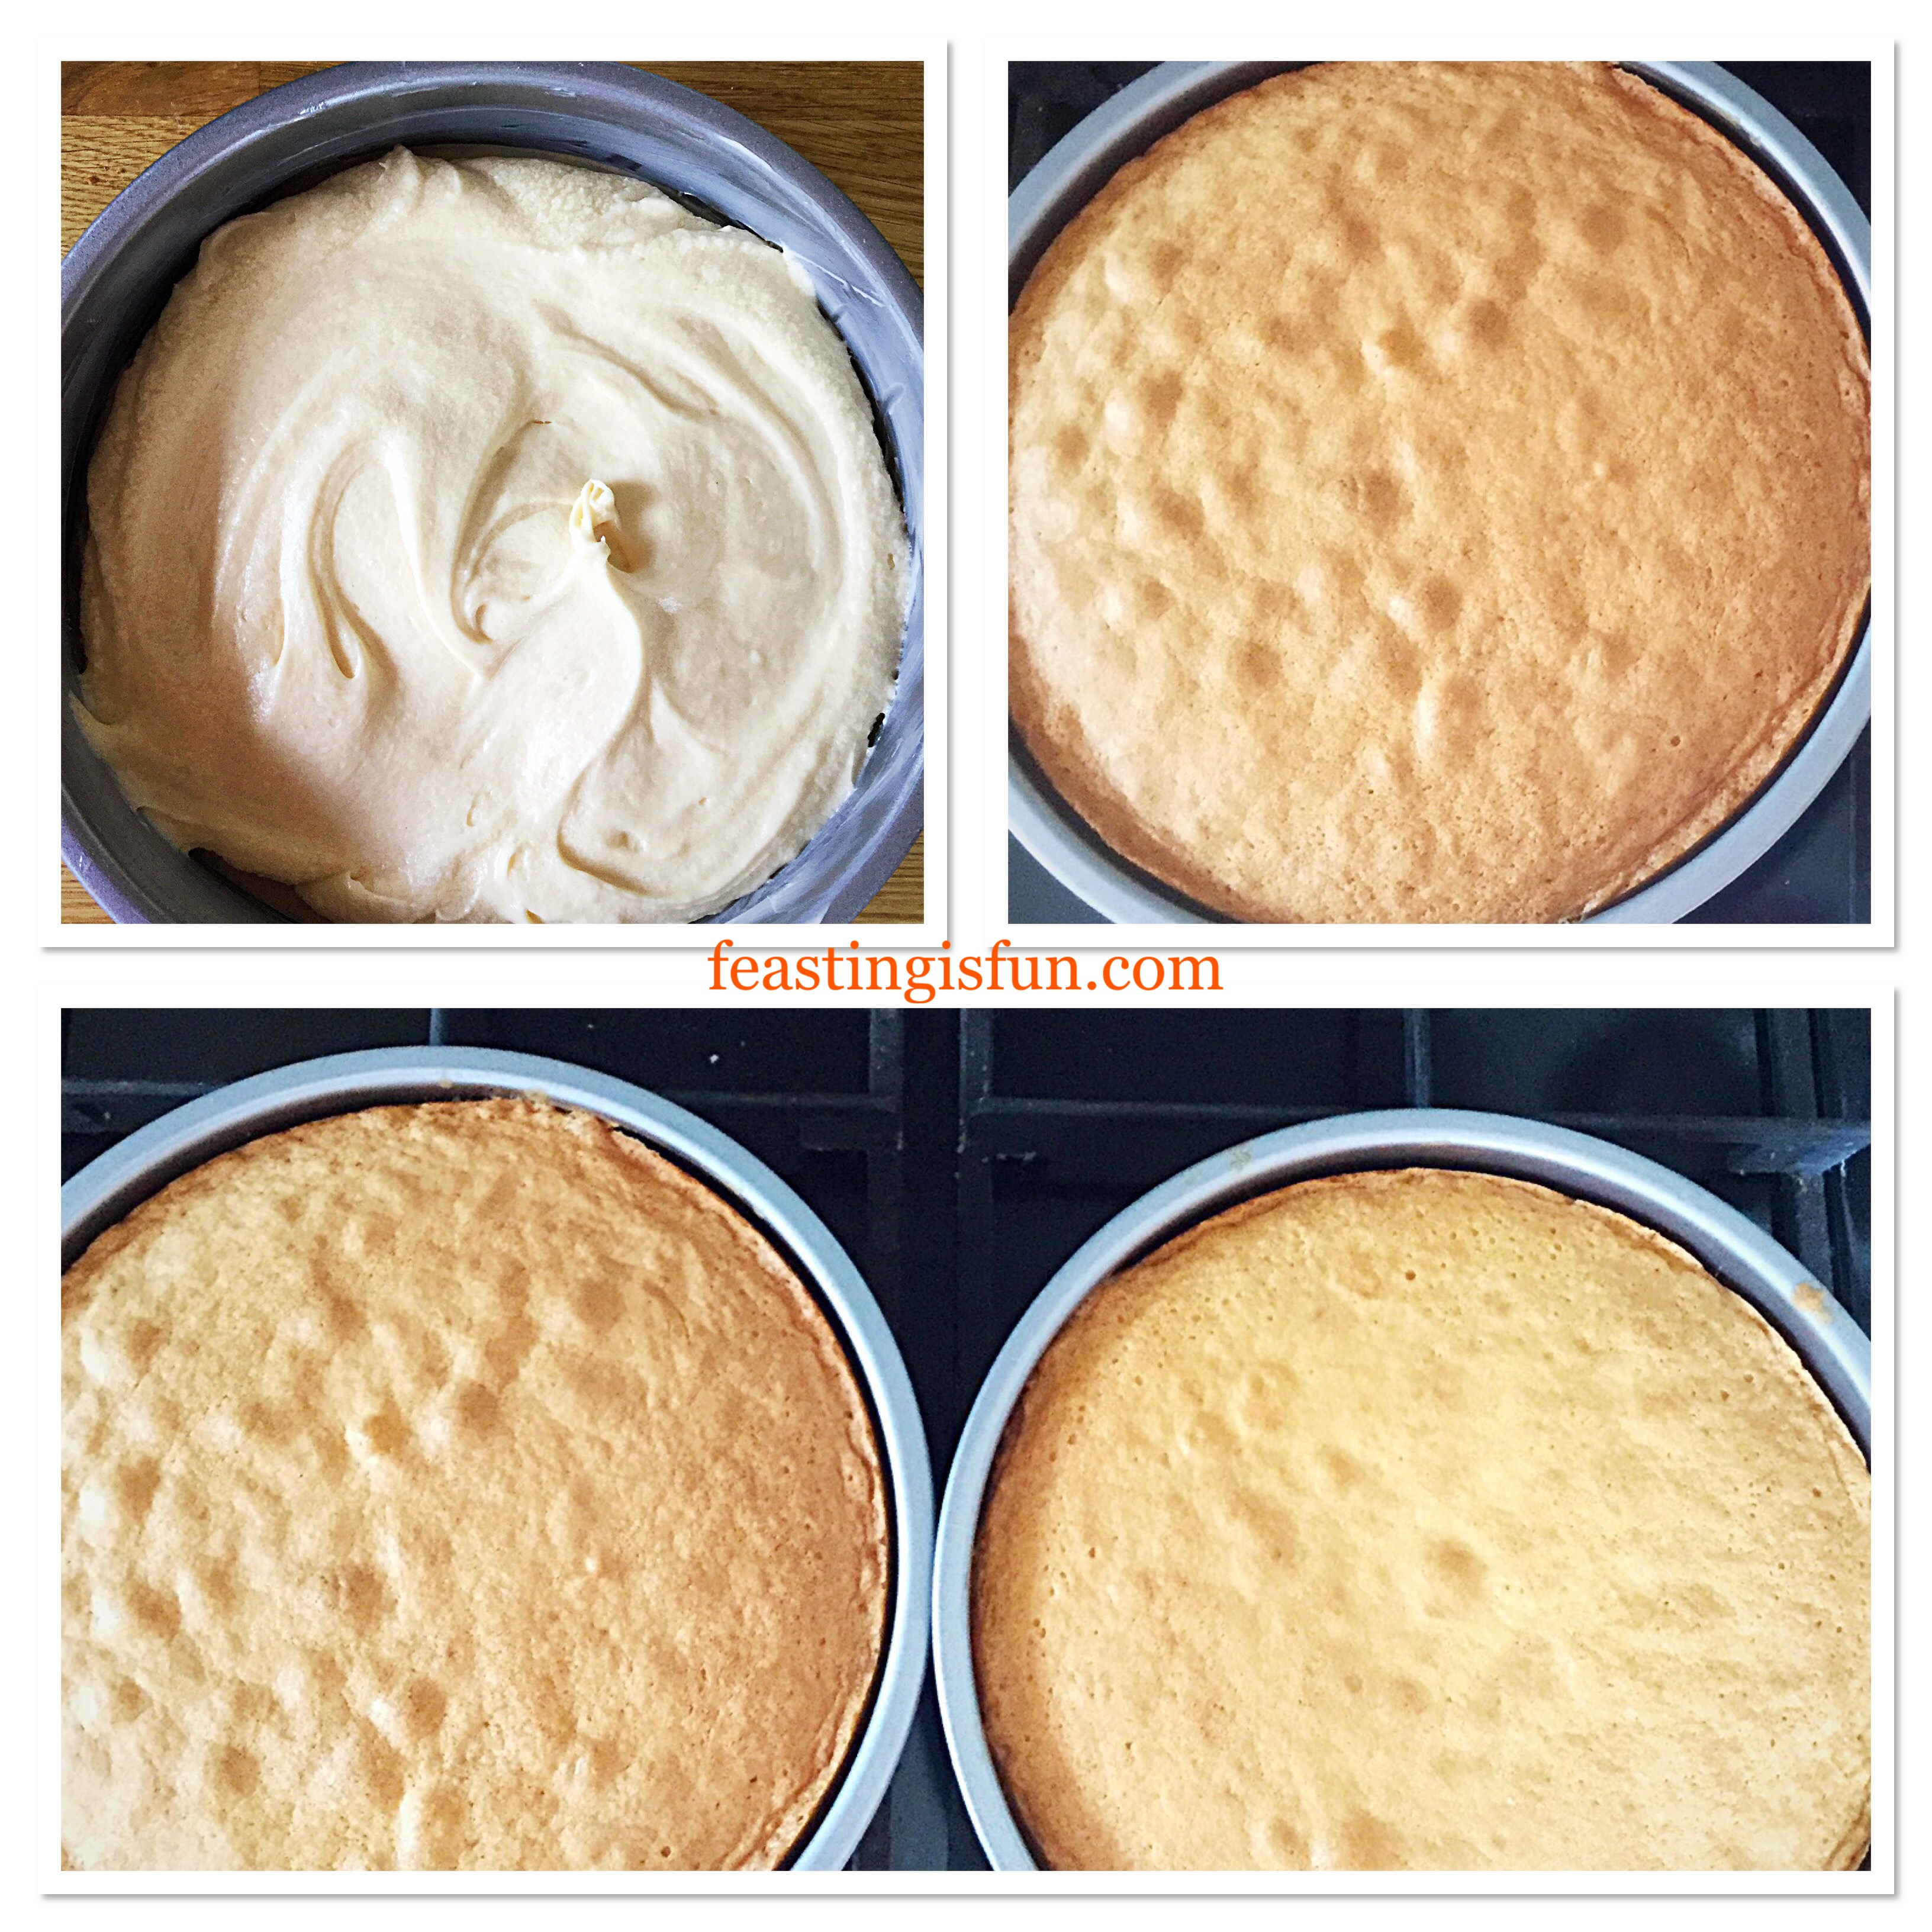
- Smooth the top of the cakes with the spatula.
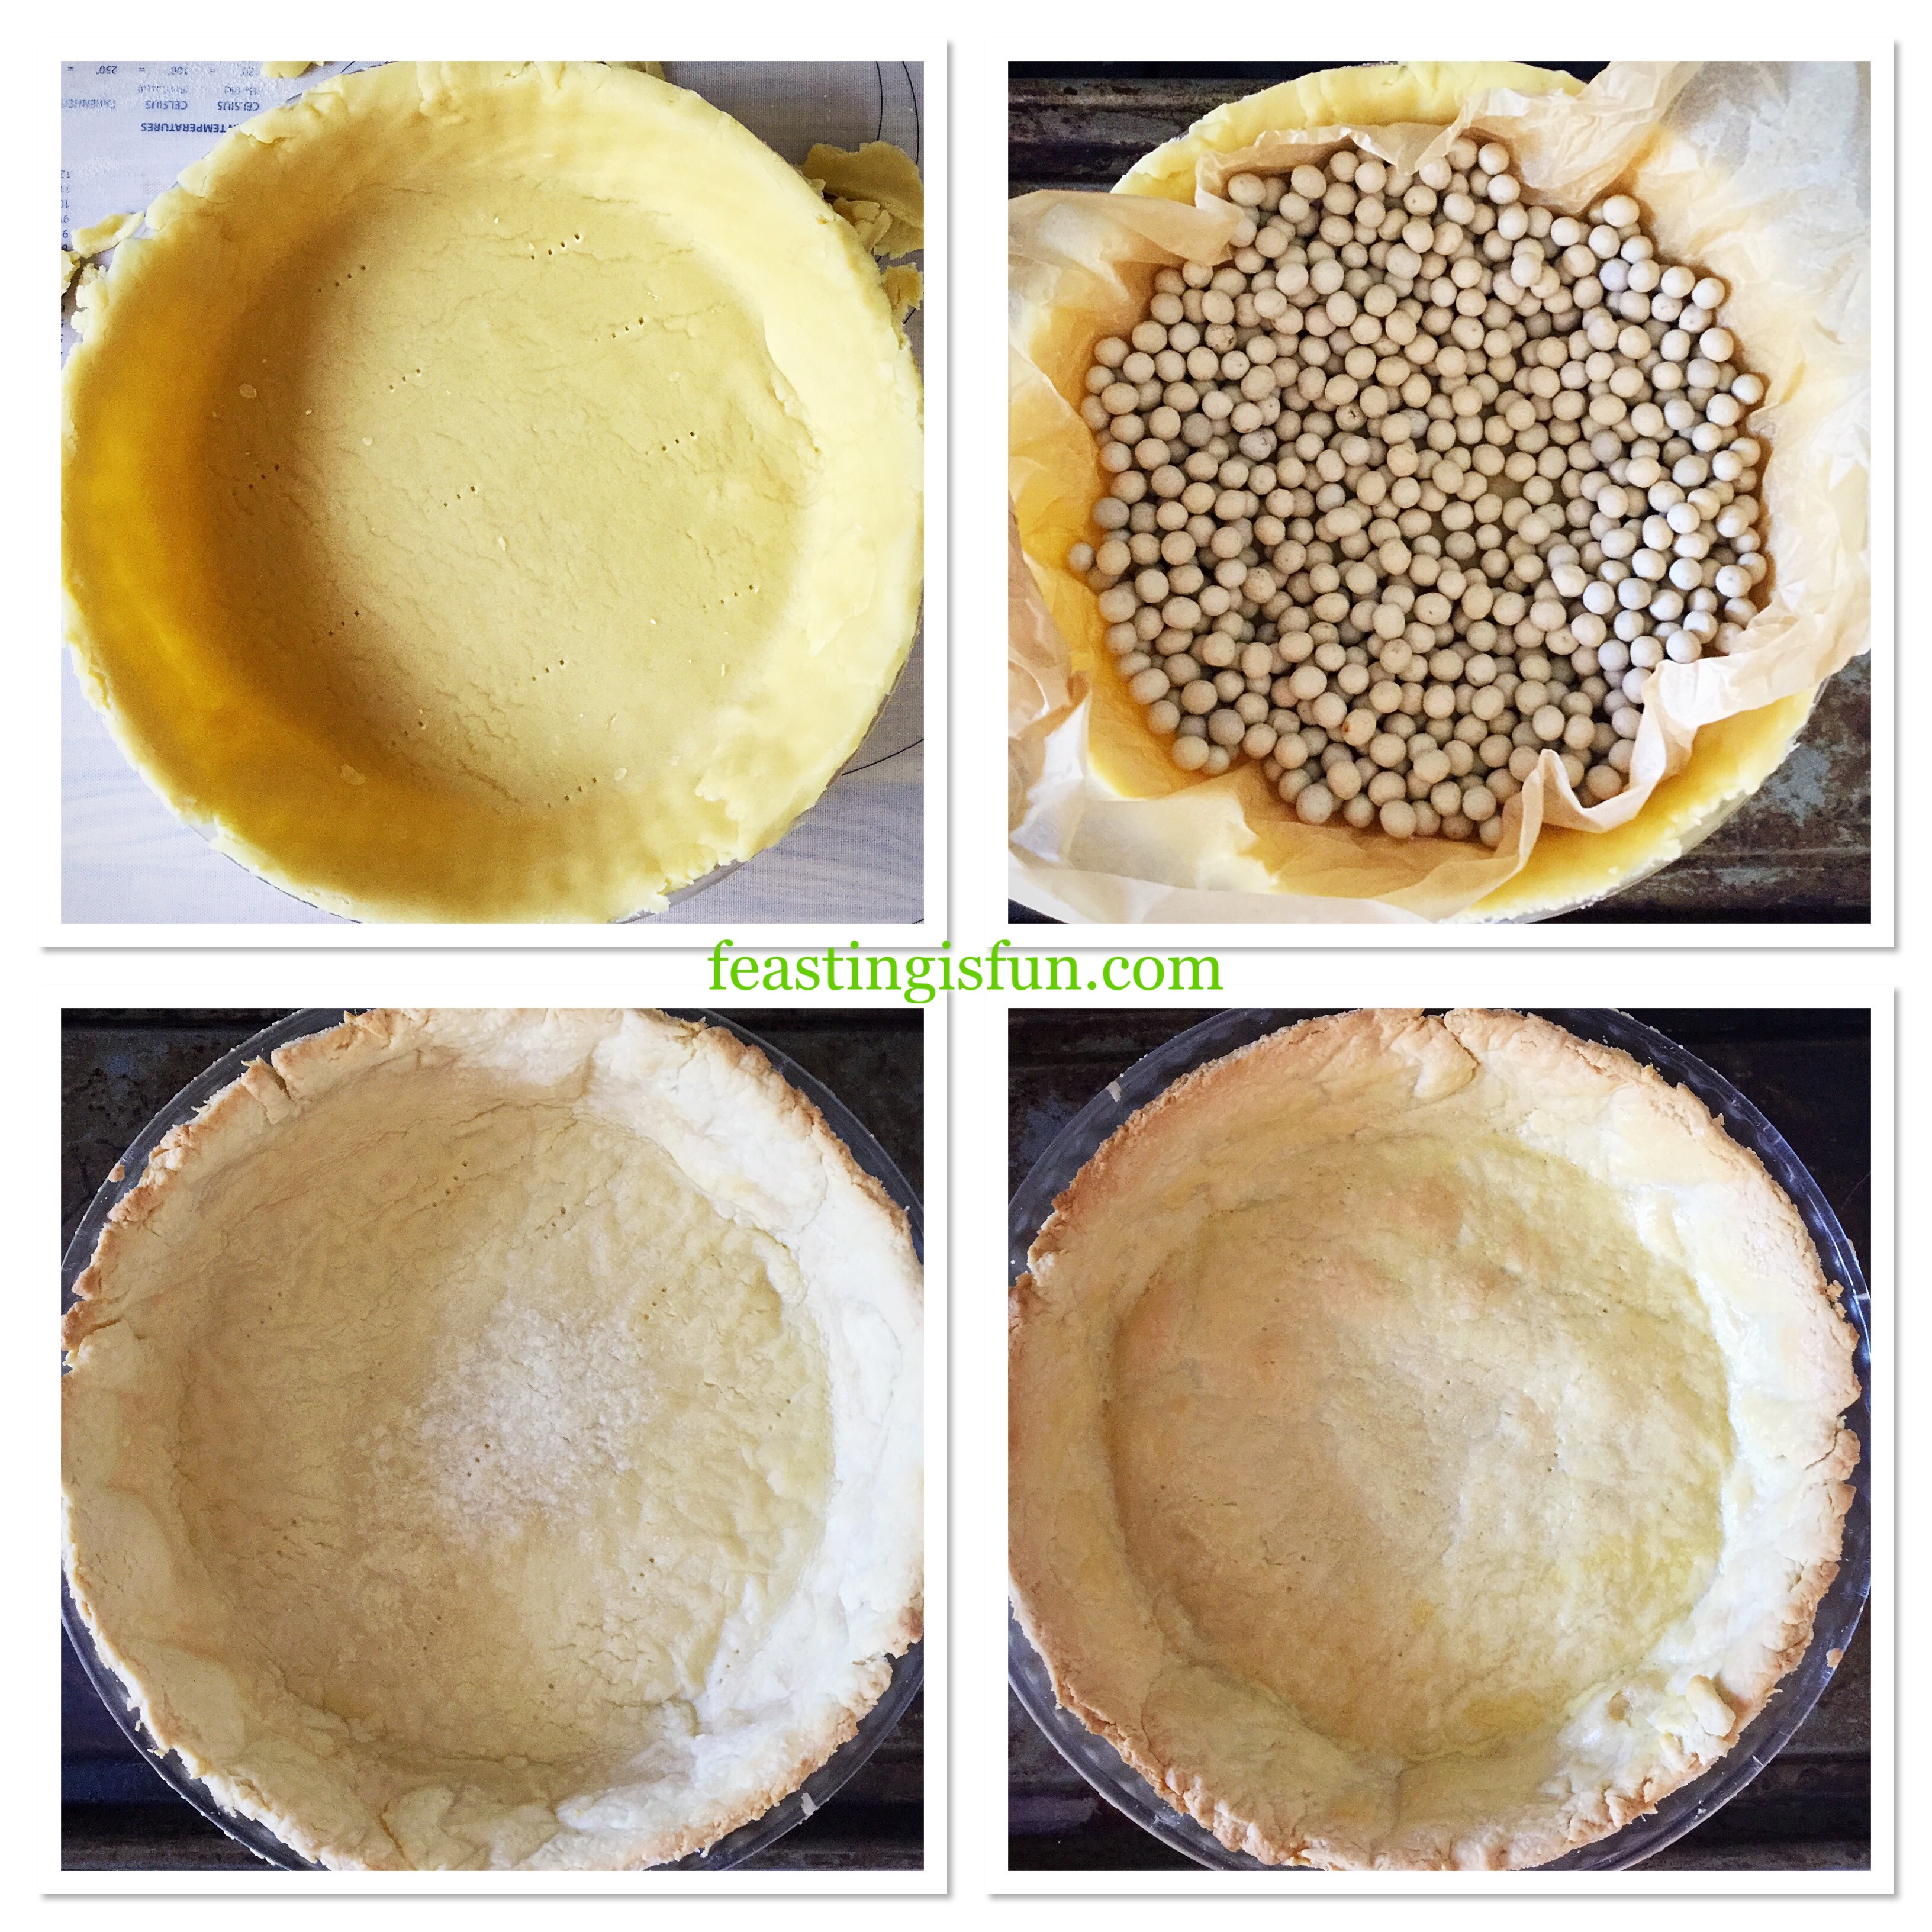
- Place the cake tins into the centre and lower part of the preheated oven.
- Bake the cakes for 25-30 minutes.
- The cakes are baked when golden and they spring back from a light touch in the centre.
- As soon as the cakes are baked remove from the oven.
- Allow the cakes to cool in the tins for 15 minutes and then turn out on to a cooling rack.
- Proceed with making the third sponge as per the note above.
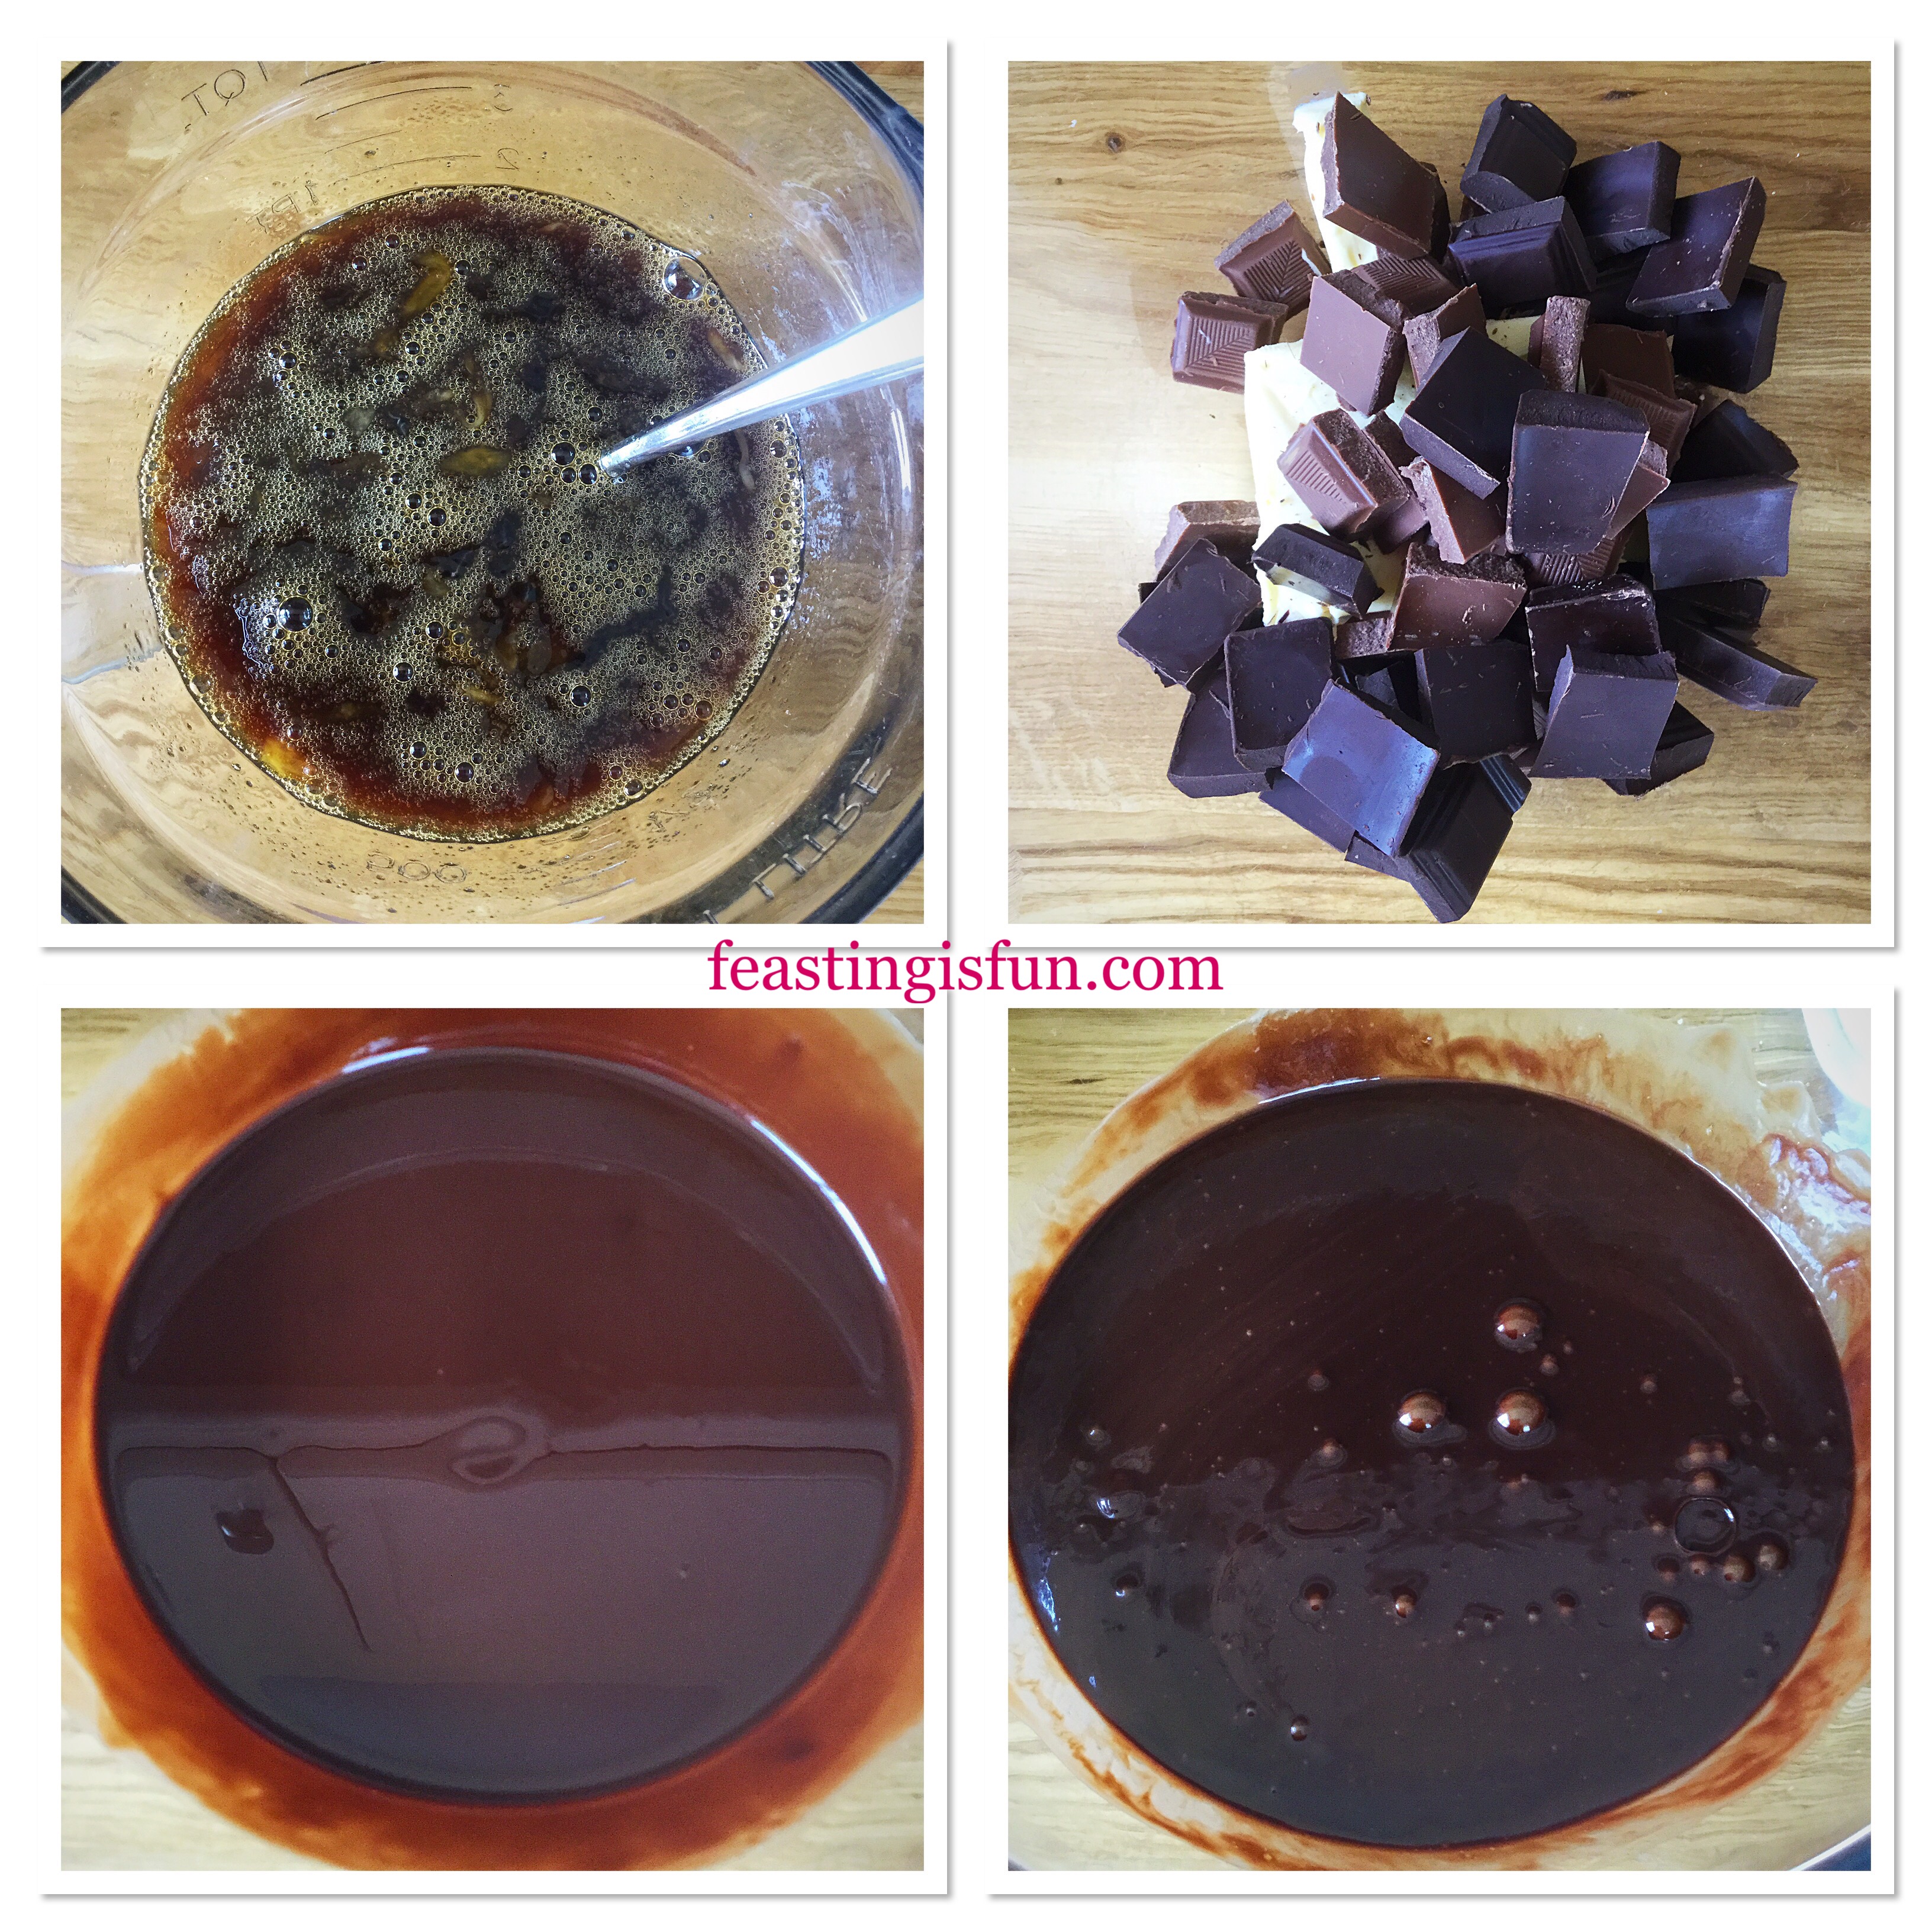
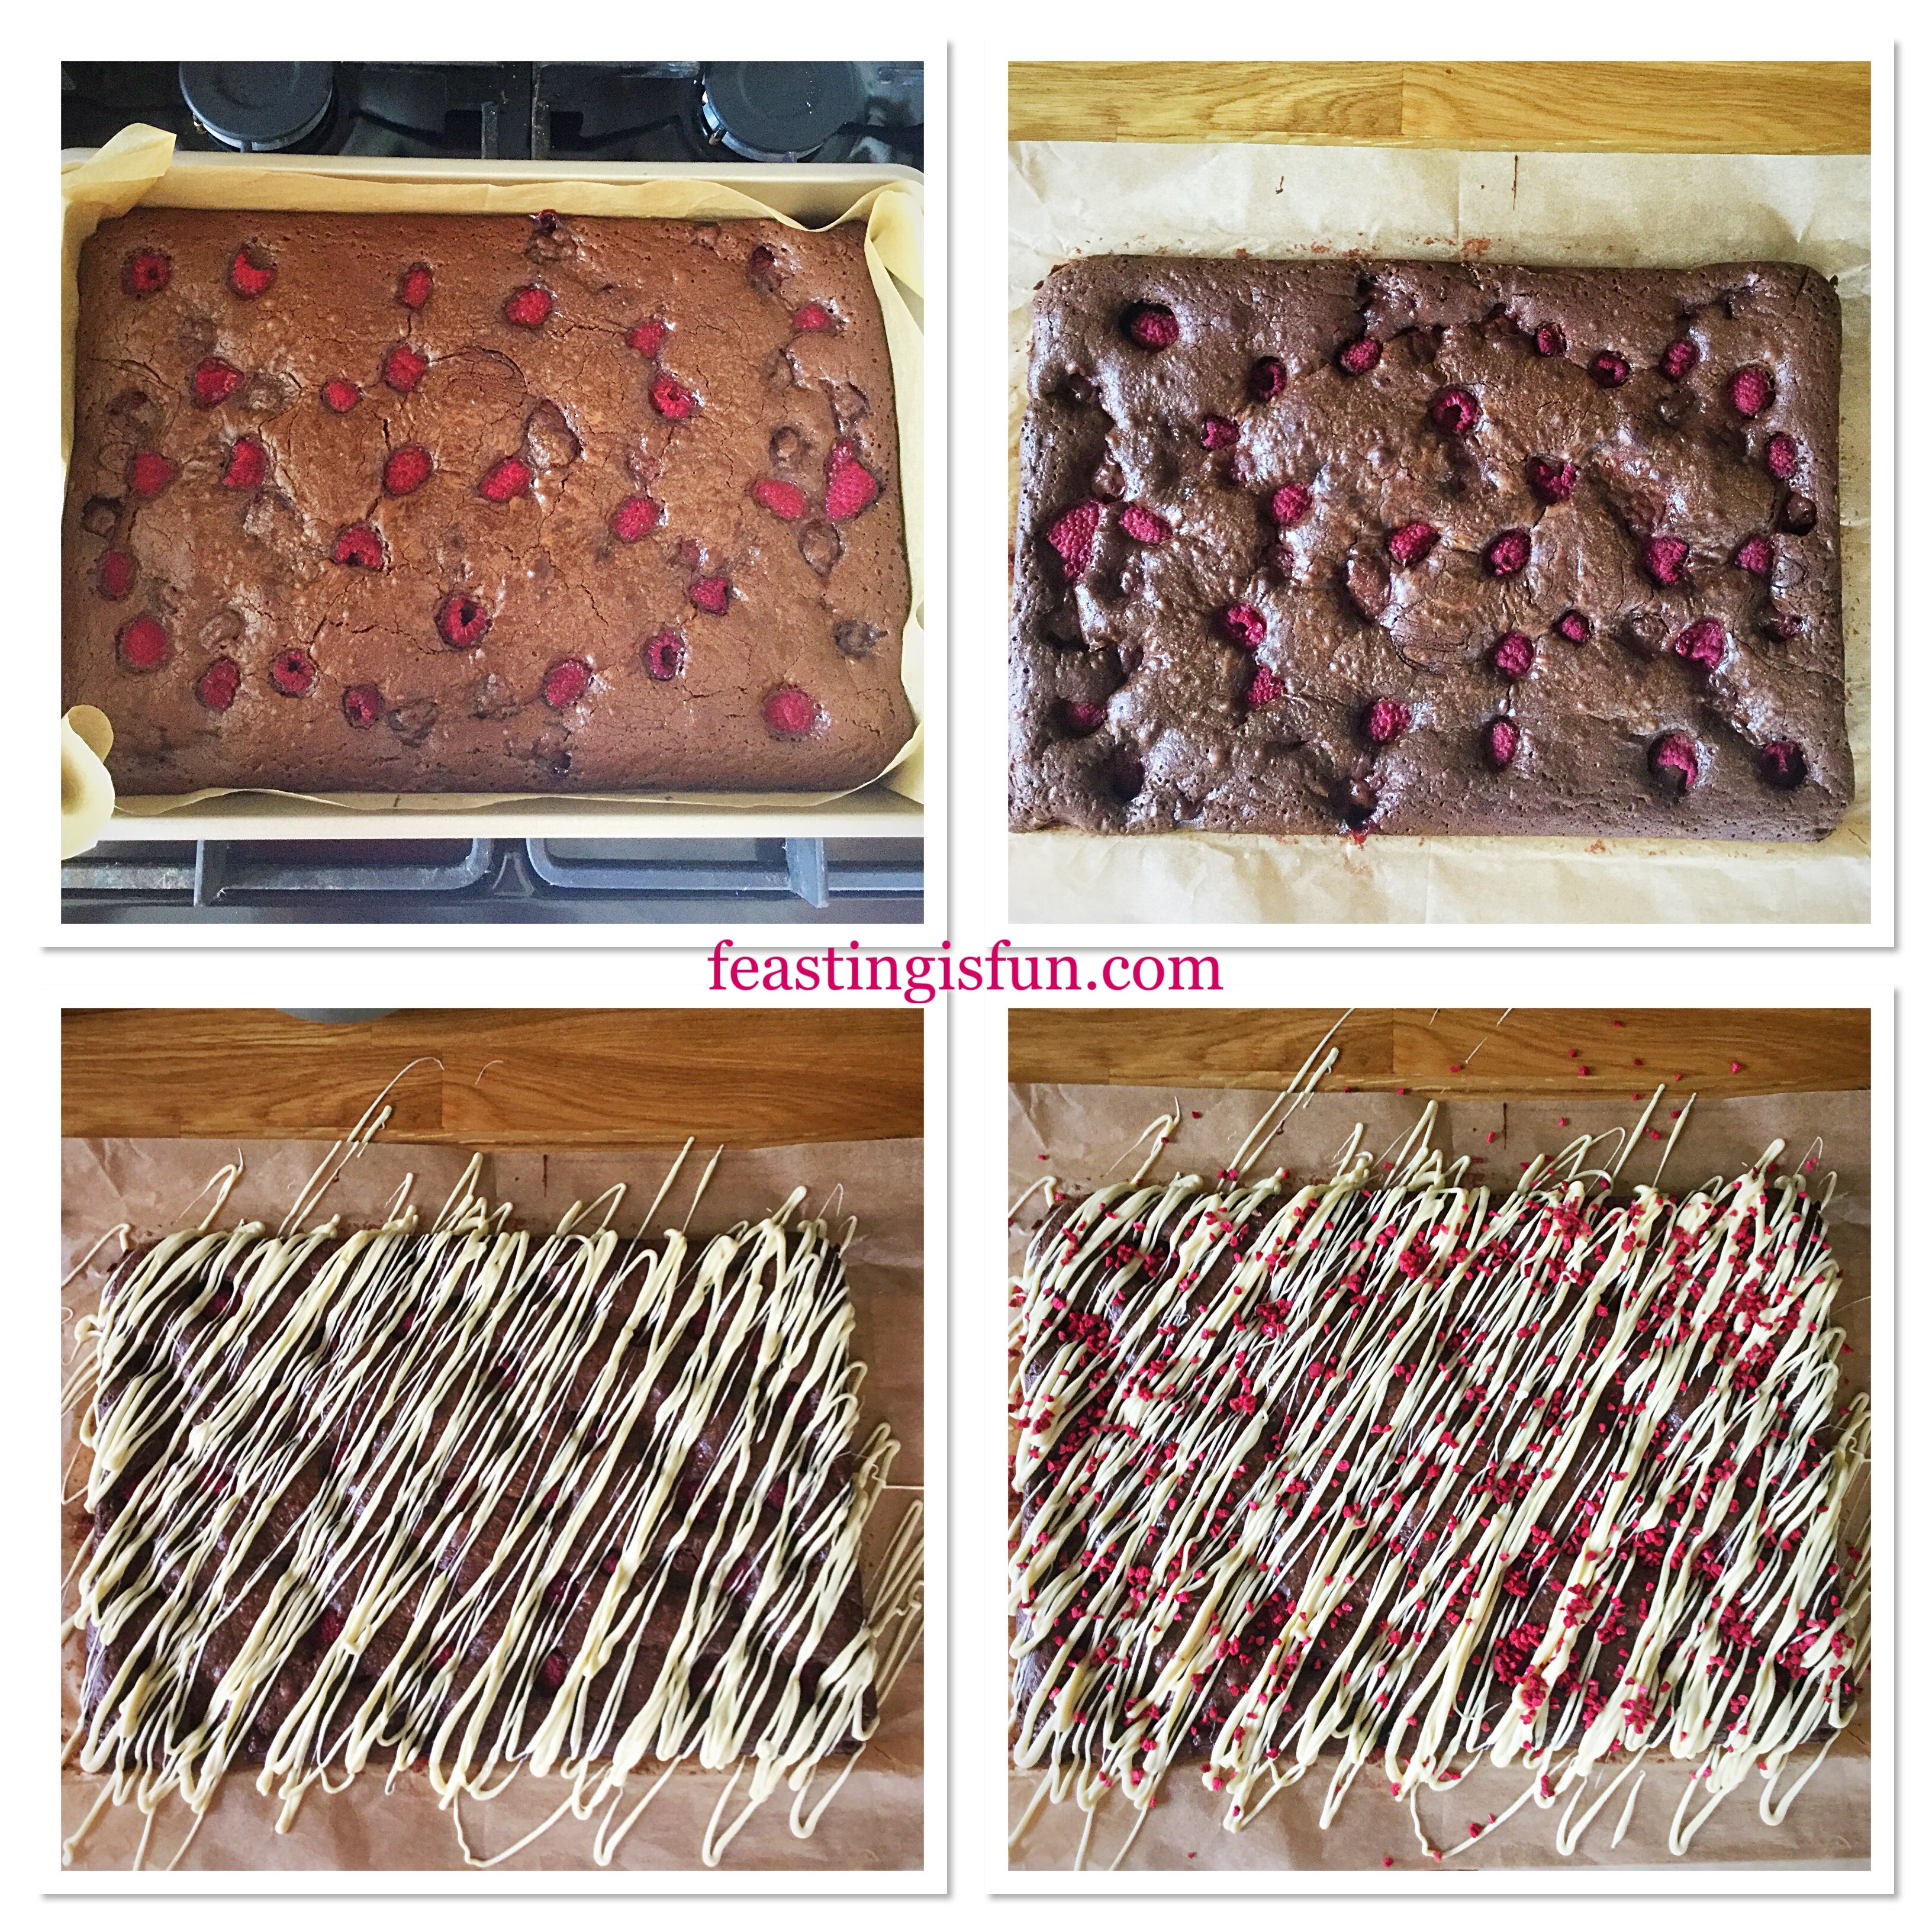
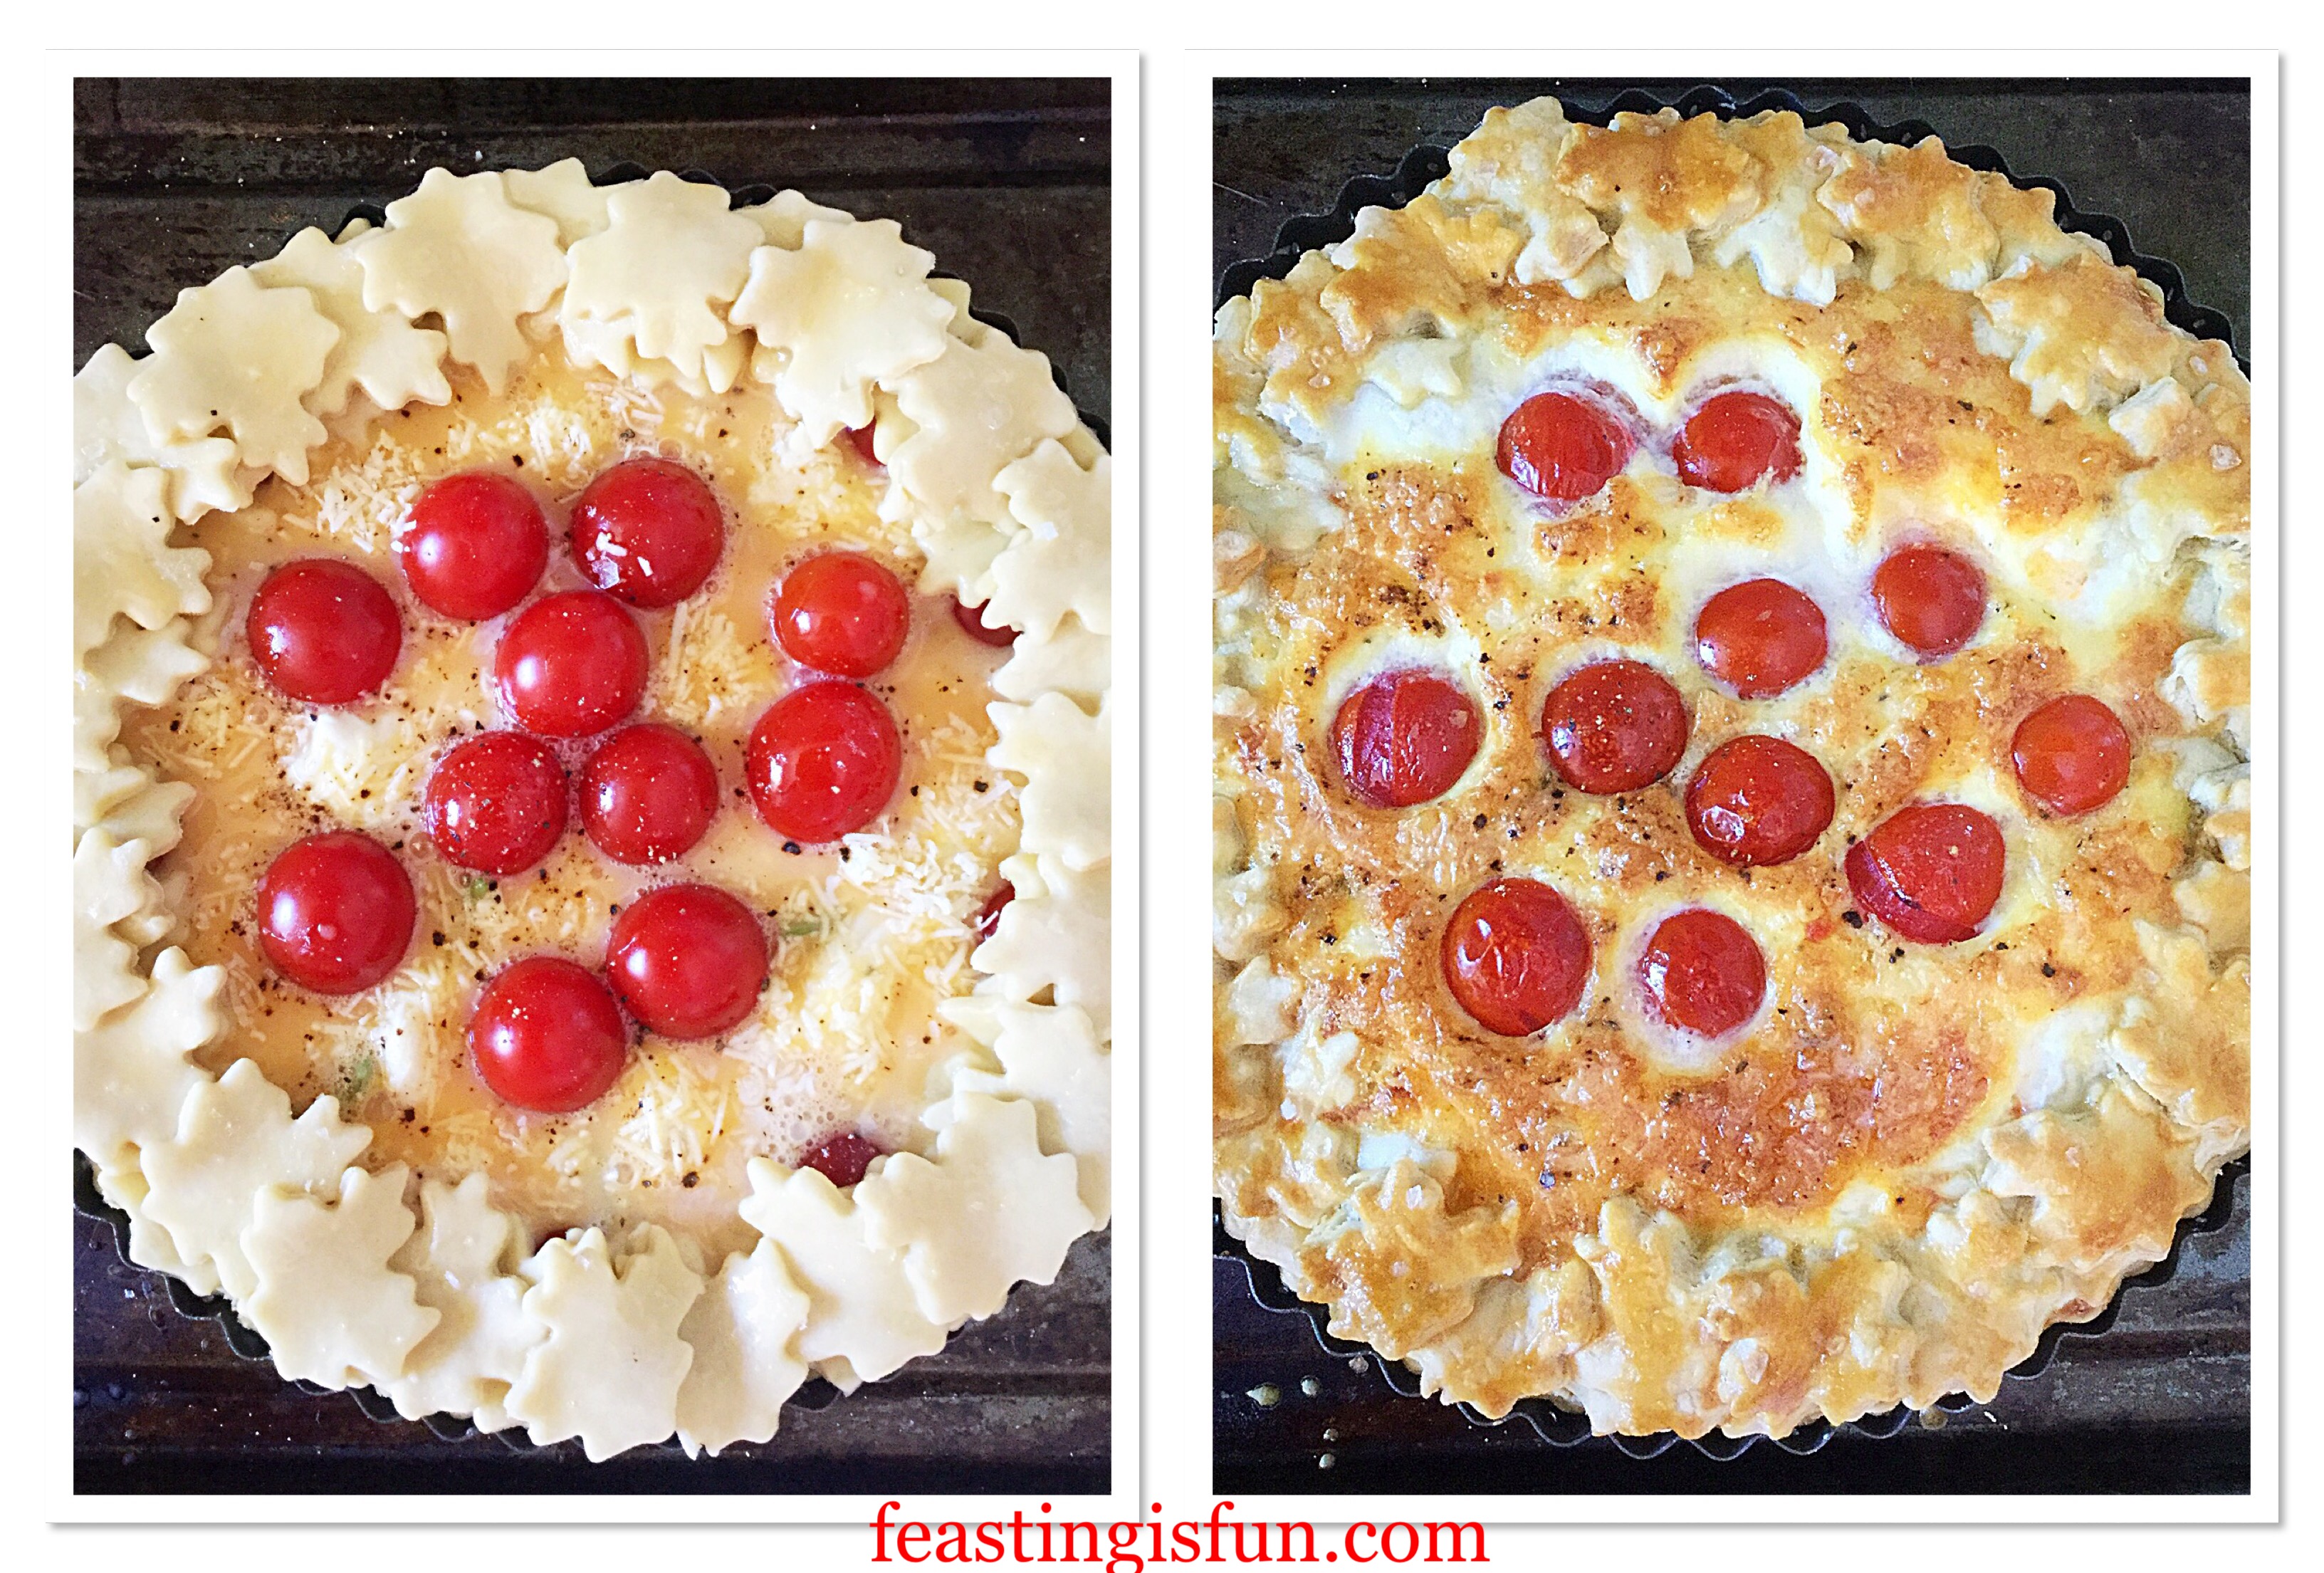
Making Dark Chocolate Curls To Use As Decoration
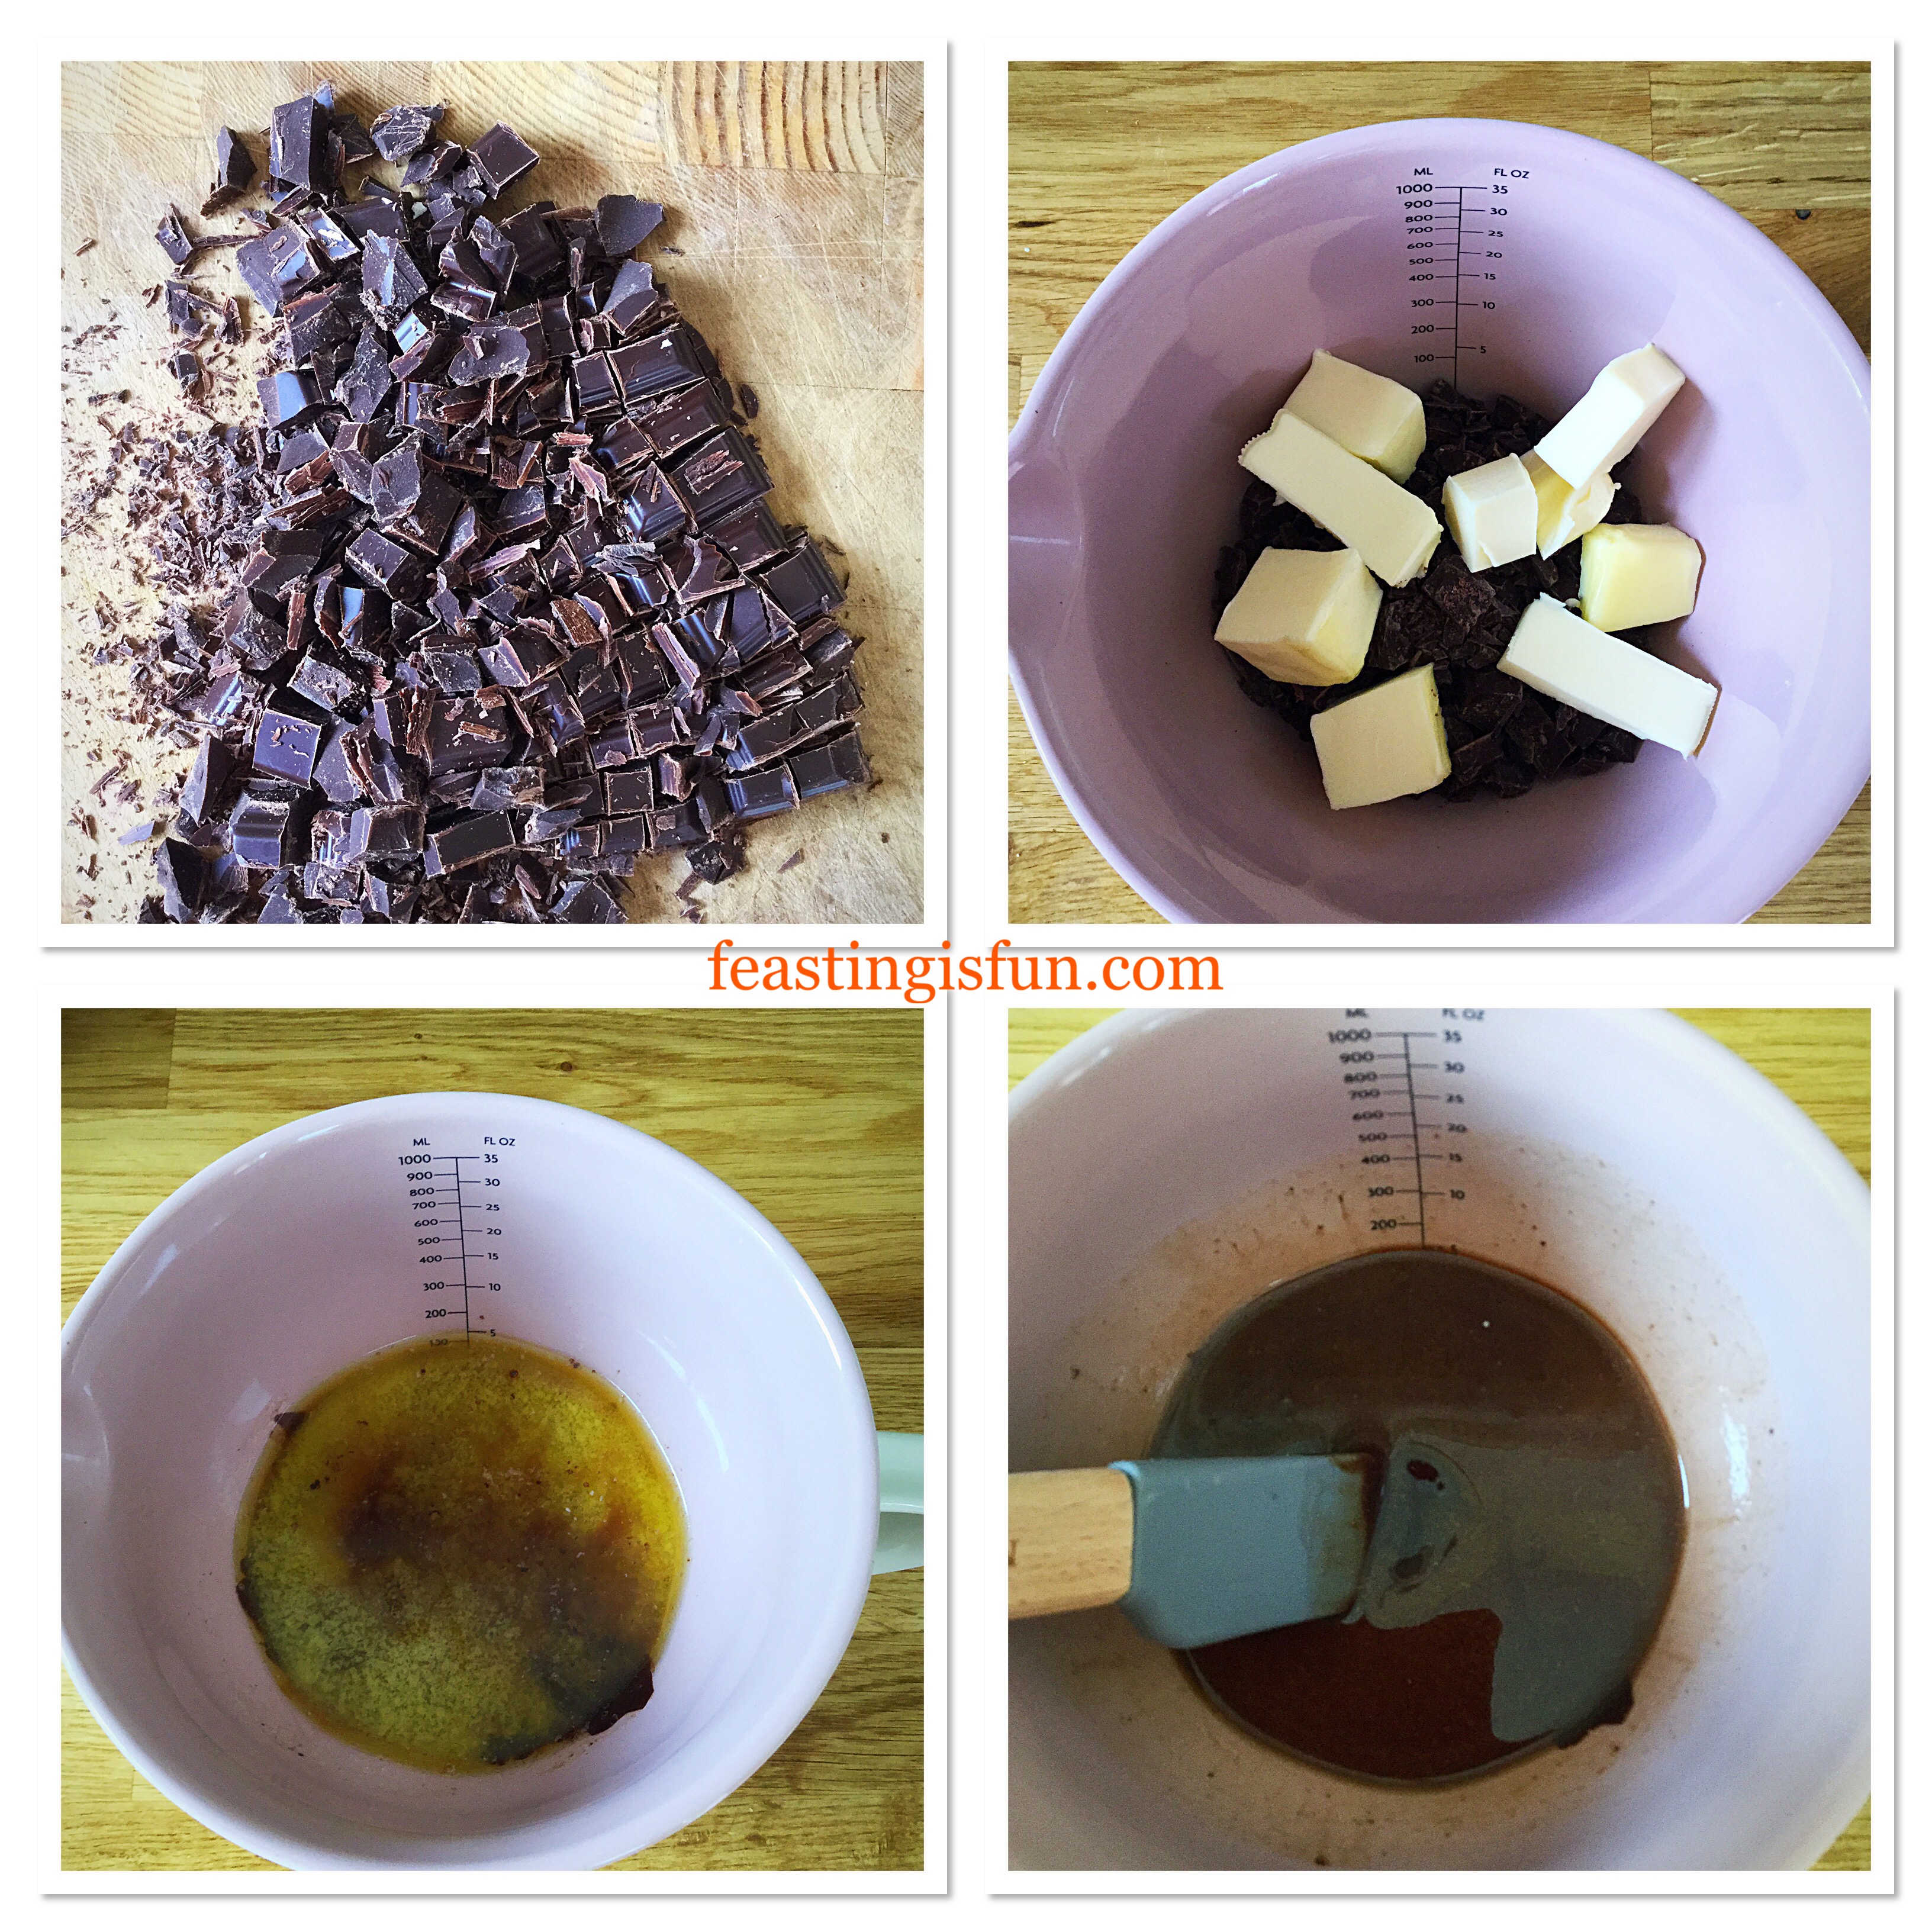
- Chop the dark chocolate into small chunks.
- Place the chocolate into the jug and add the butter.
- Using a microwave heat the chocolate/butter for 30 seconds on medium power. Repeat until both chocolate and butter are melted.
- Stir using the small spatula until the ingredients are combined and glossy.
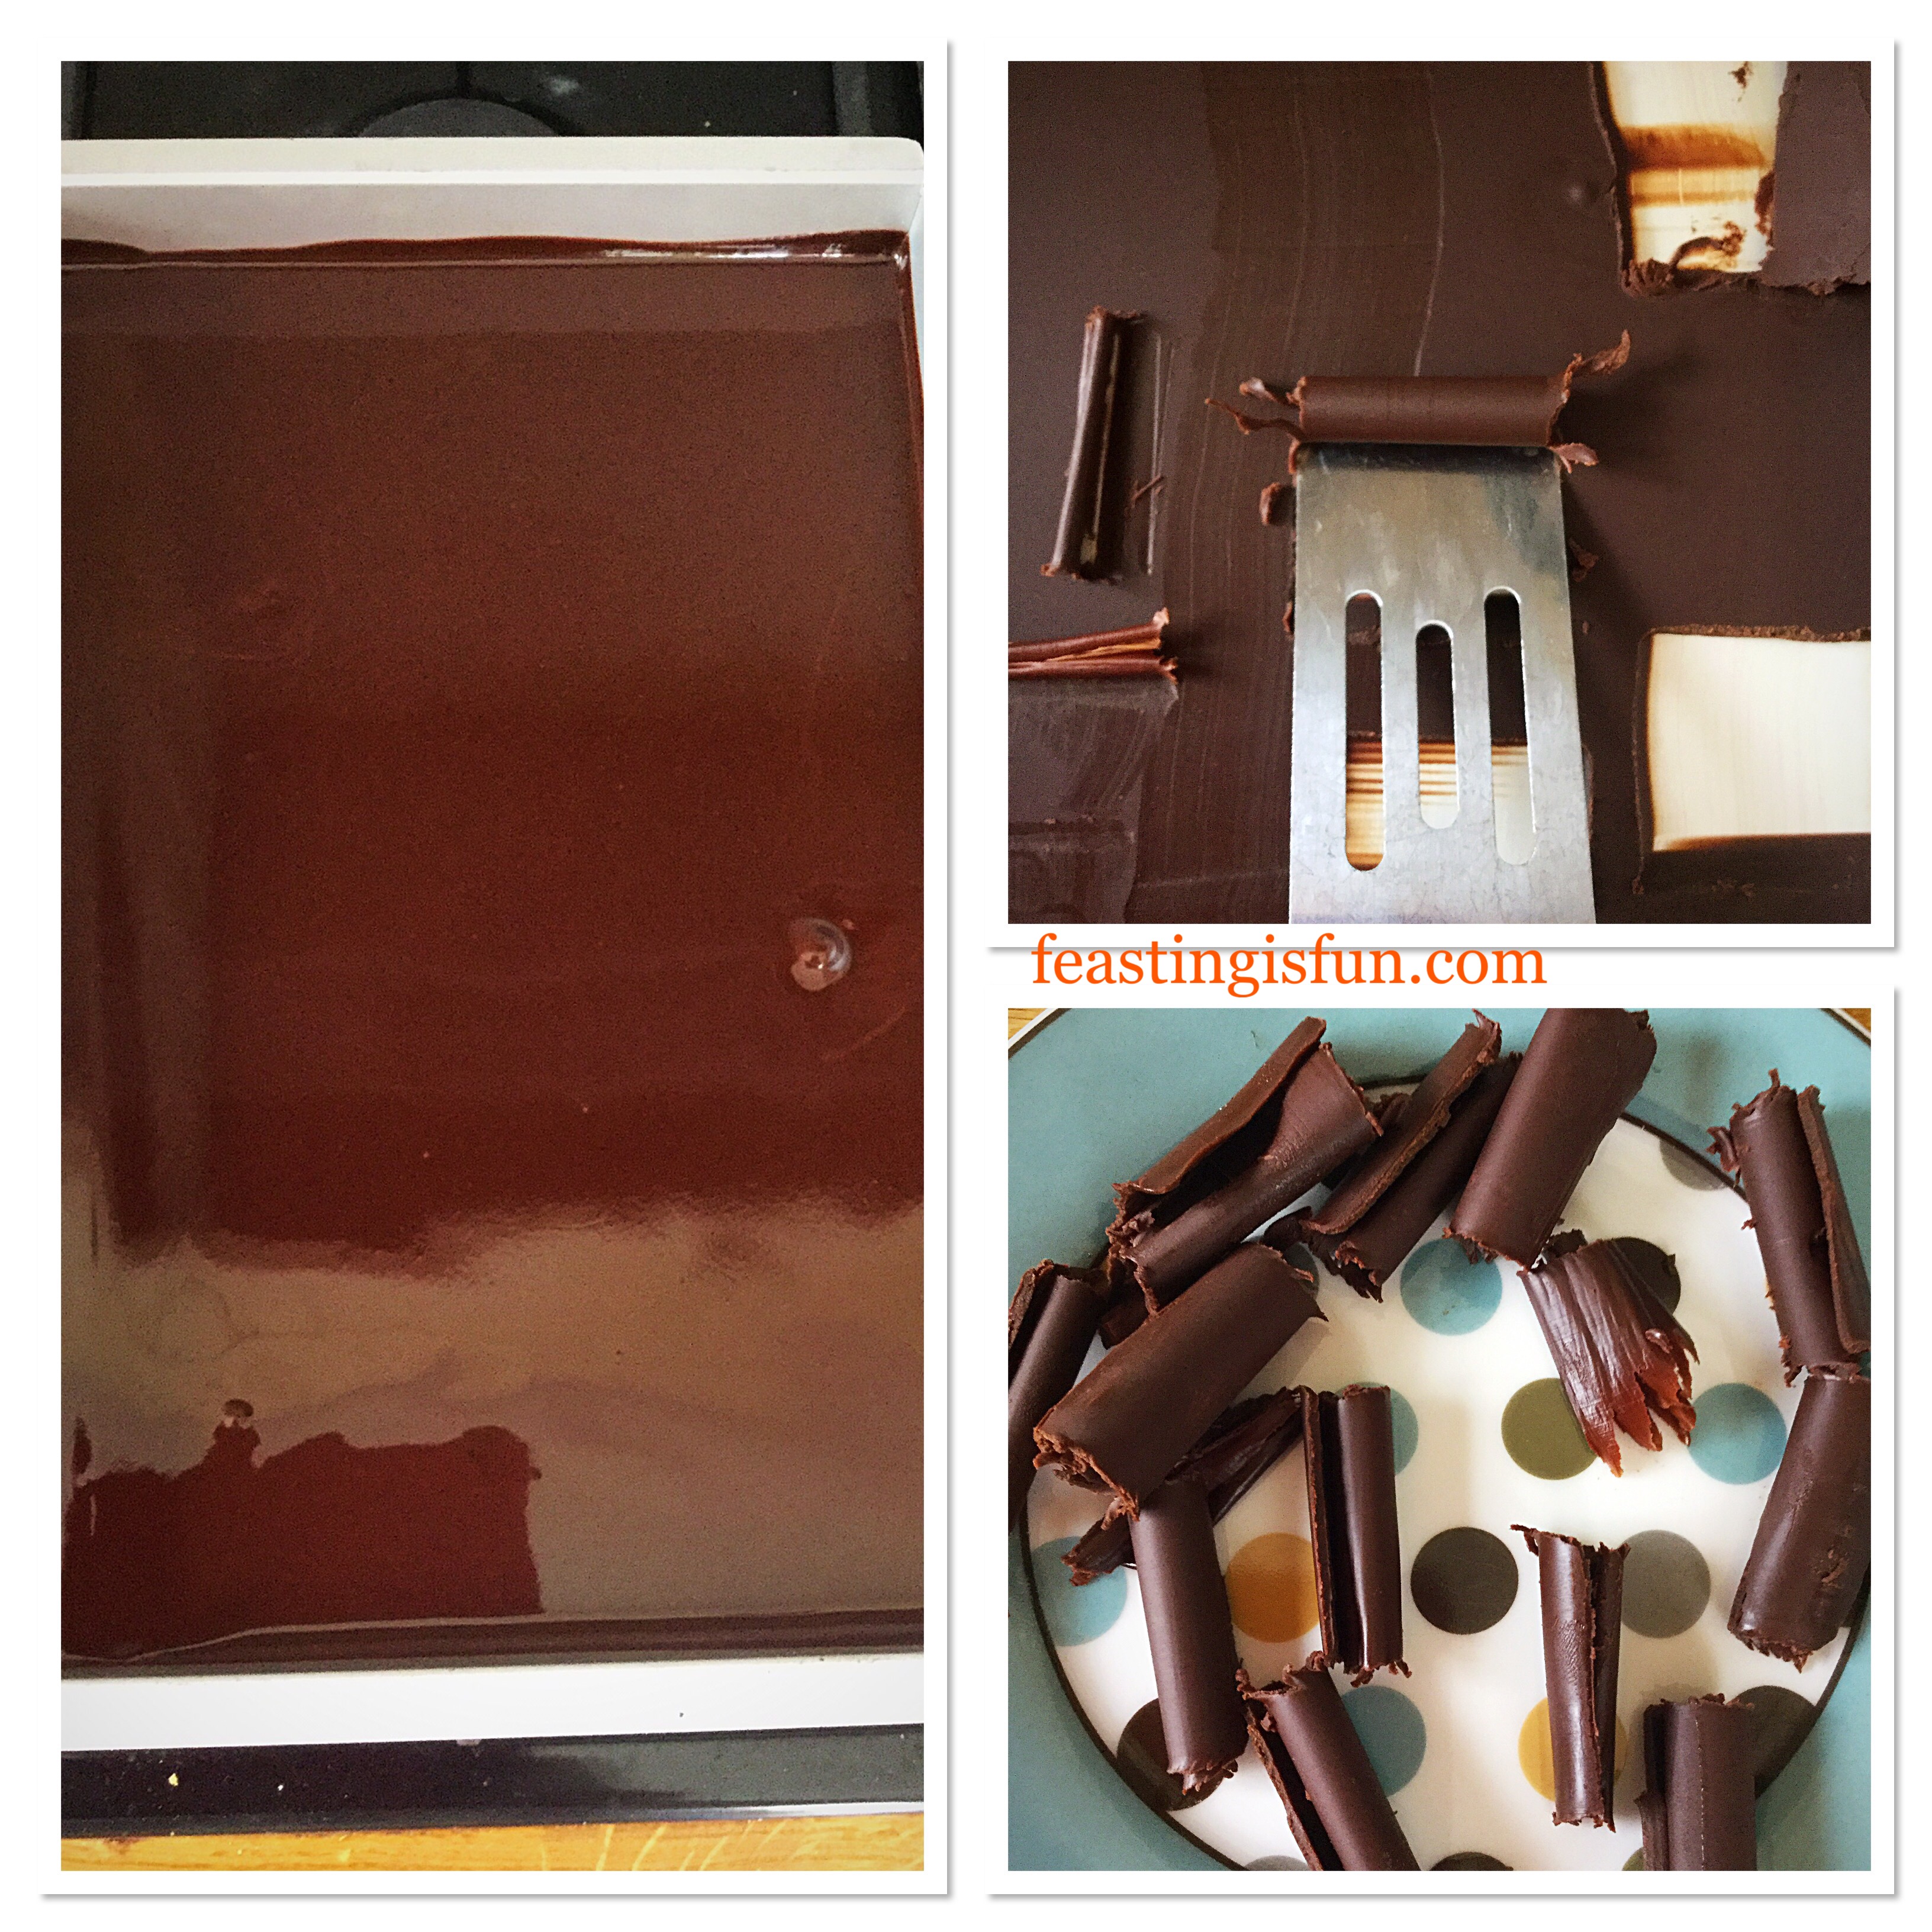
- Pour the dark chocolate ganache into a baking tray approximately 38cm x 25cm x 3cm (15in x 10in x 1in).
- Tilt the tray so that it is evenly covered with ganache.
- Refrigerate the tray for 1 hour to set the ganache.
- To make the curls, push a straight edged implement (I have used a small metal cake server, a dough cutter or something similar would also work well) into the ganache. The chocolate will form curls. Place each curl on to a cold plate. Repeat until all of the chocolate has been used. During hot weather it maybe necessary to chill the chocolate ganache in between making curls.
- Once made, place the plate of chocolate curls into the fridge until needed. Note, the dark chocolate curls can be made the day before, Store in an airtight container in the fridge.
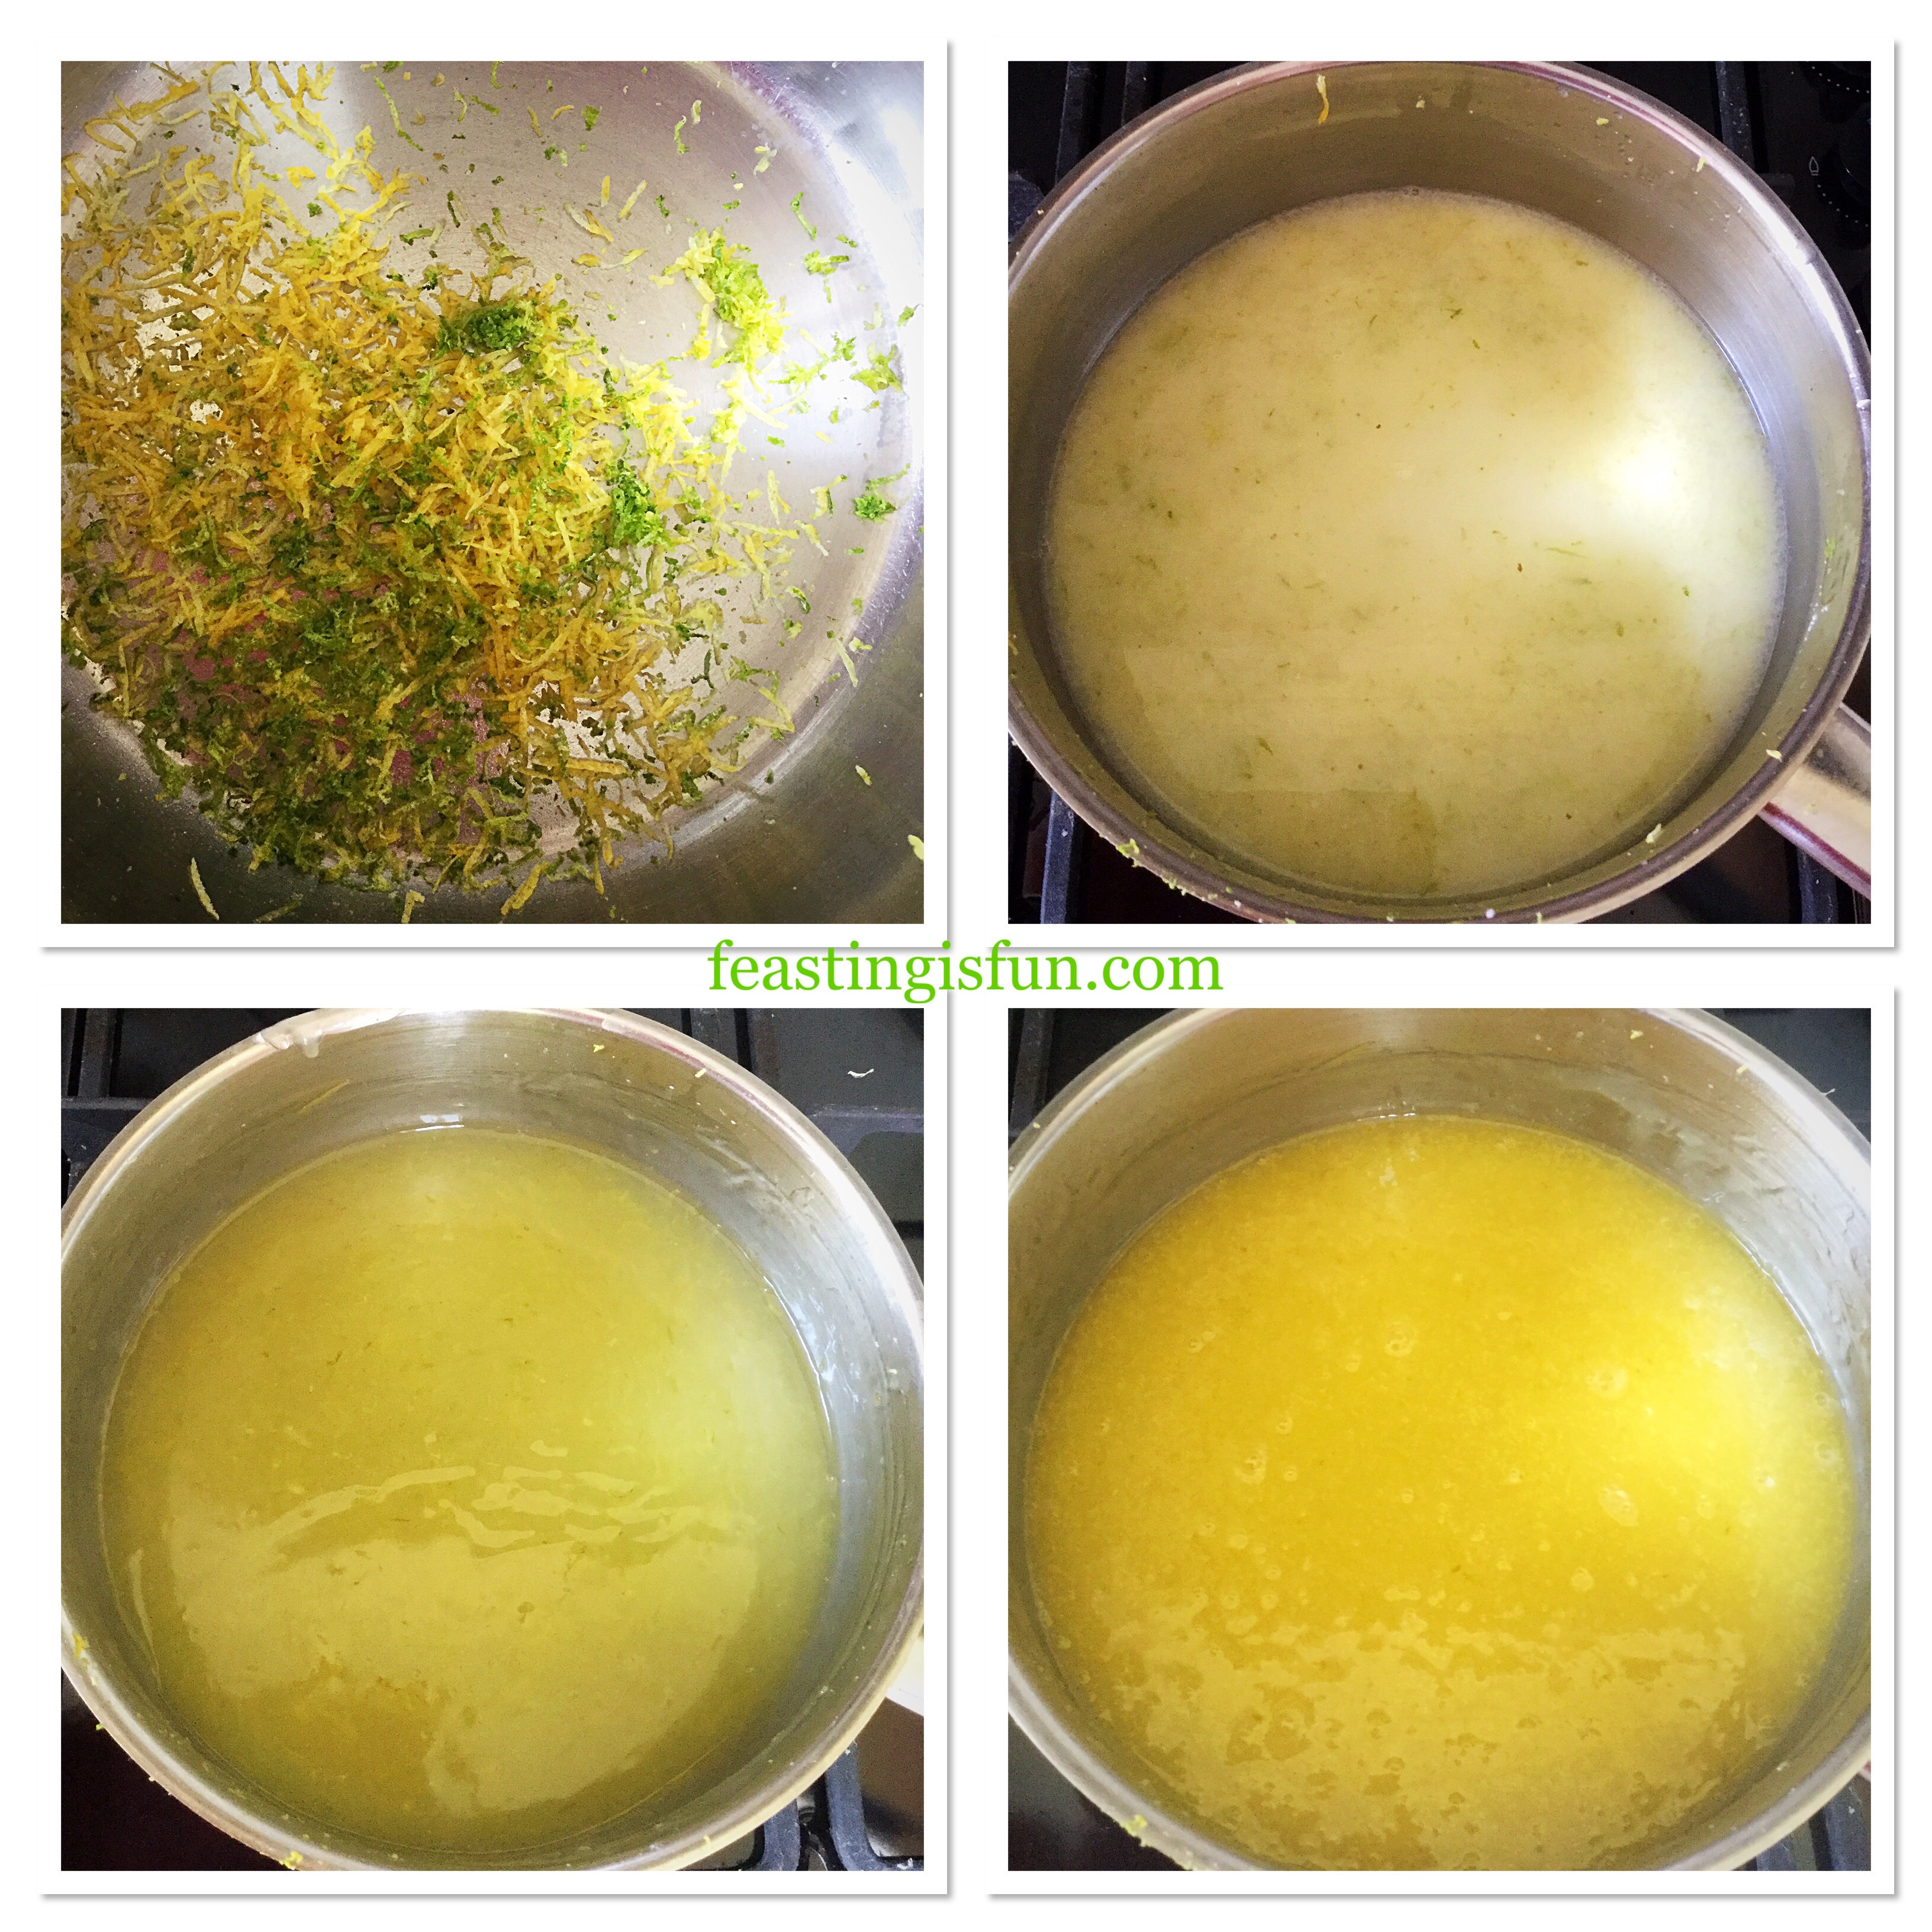
Making the white chocolate ganache
- Measure out the cream into the jug.
- Heat in the microwave on medium for 30 second bursts until the cream is hot – not boiling.
- While the cream is heating chop the white chocolate into small chunks and place into the large bowl.
- Pour the hot cream over the white chocolate chunks.
- Stir continuously with the spoon until all of the chocolate is melted and combined with the cream. The mixture should look glossy.
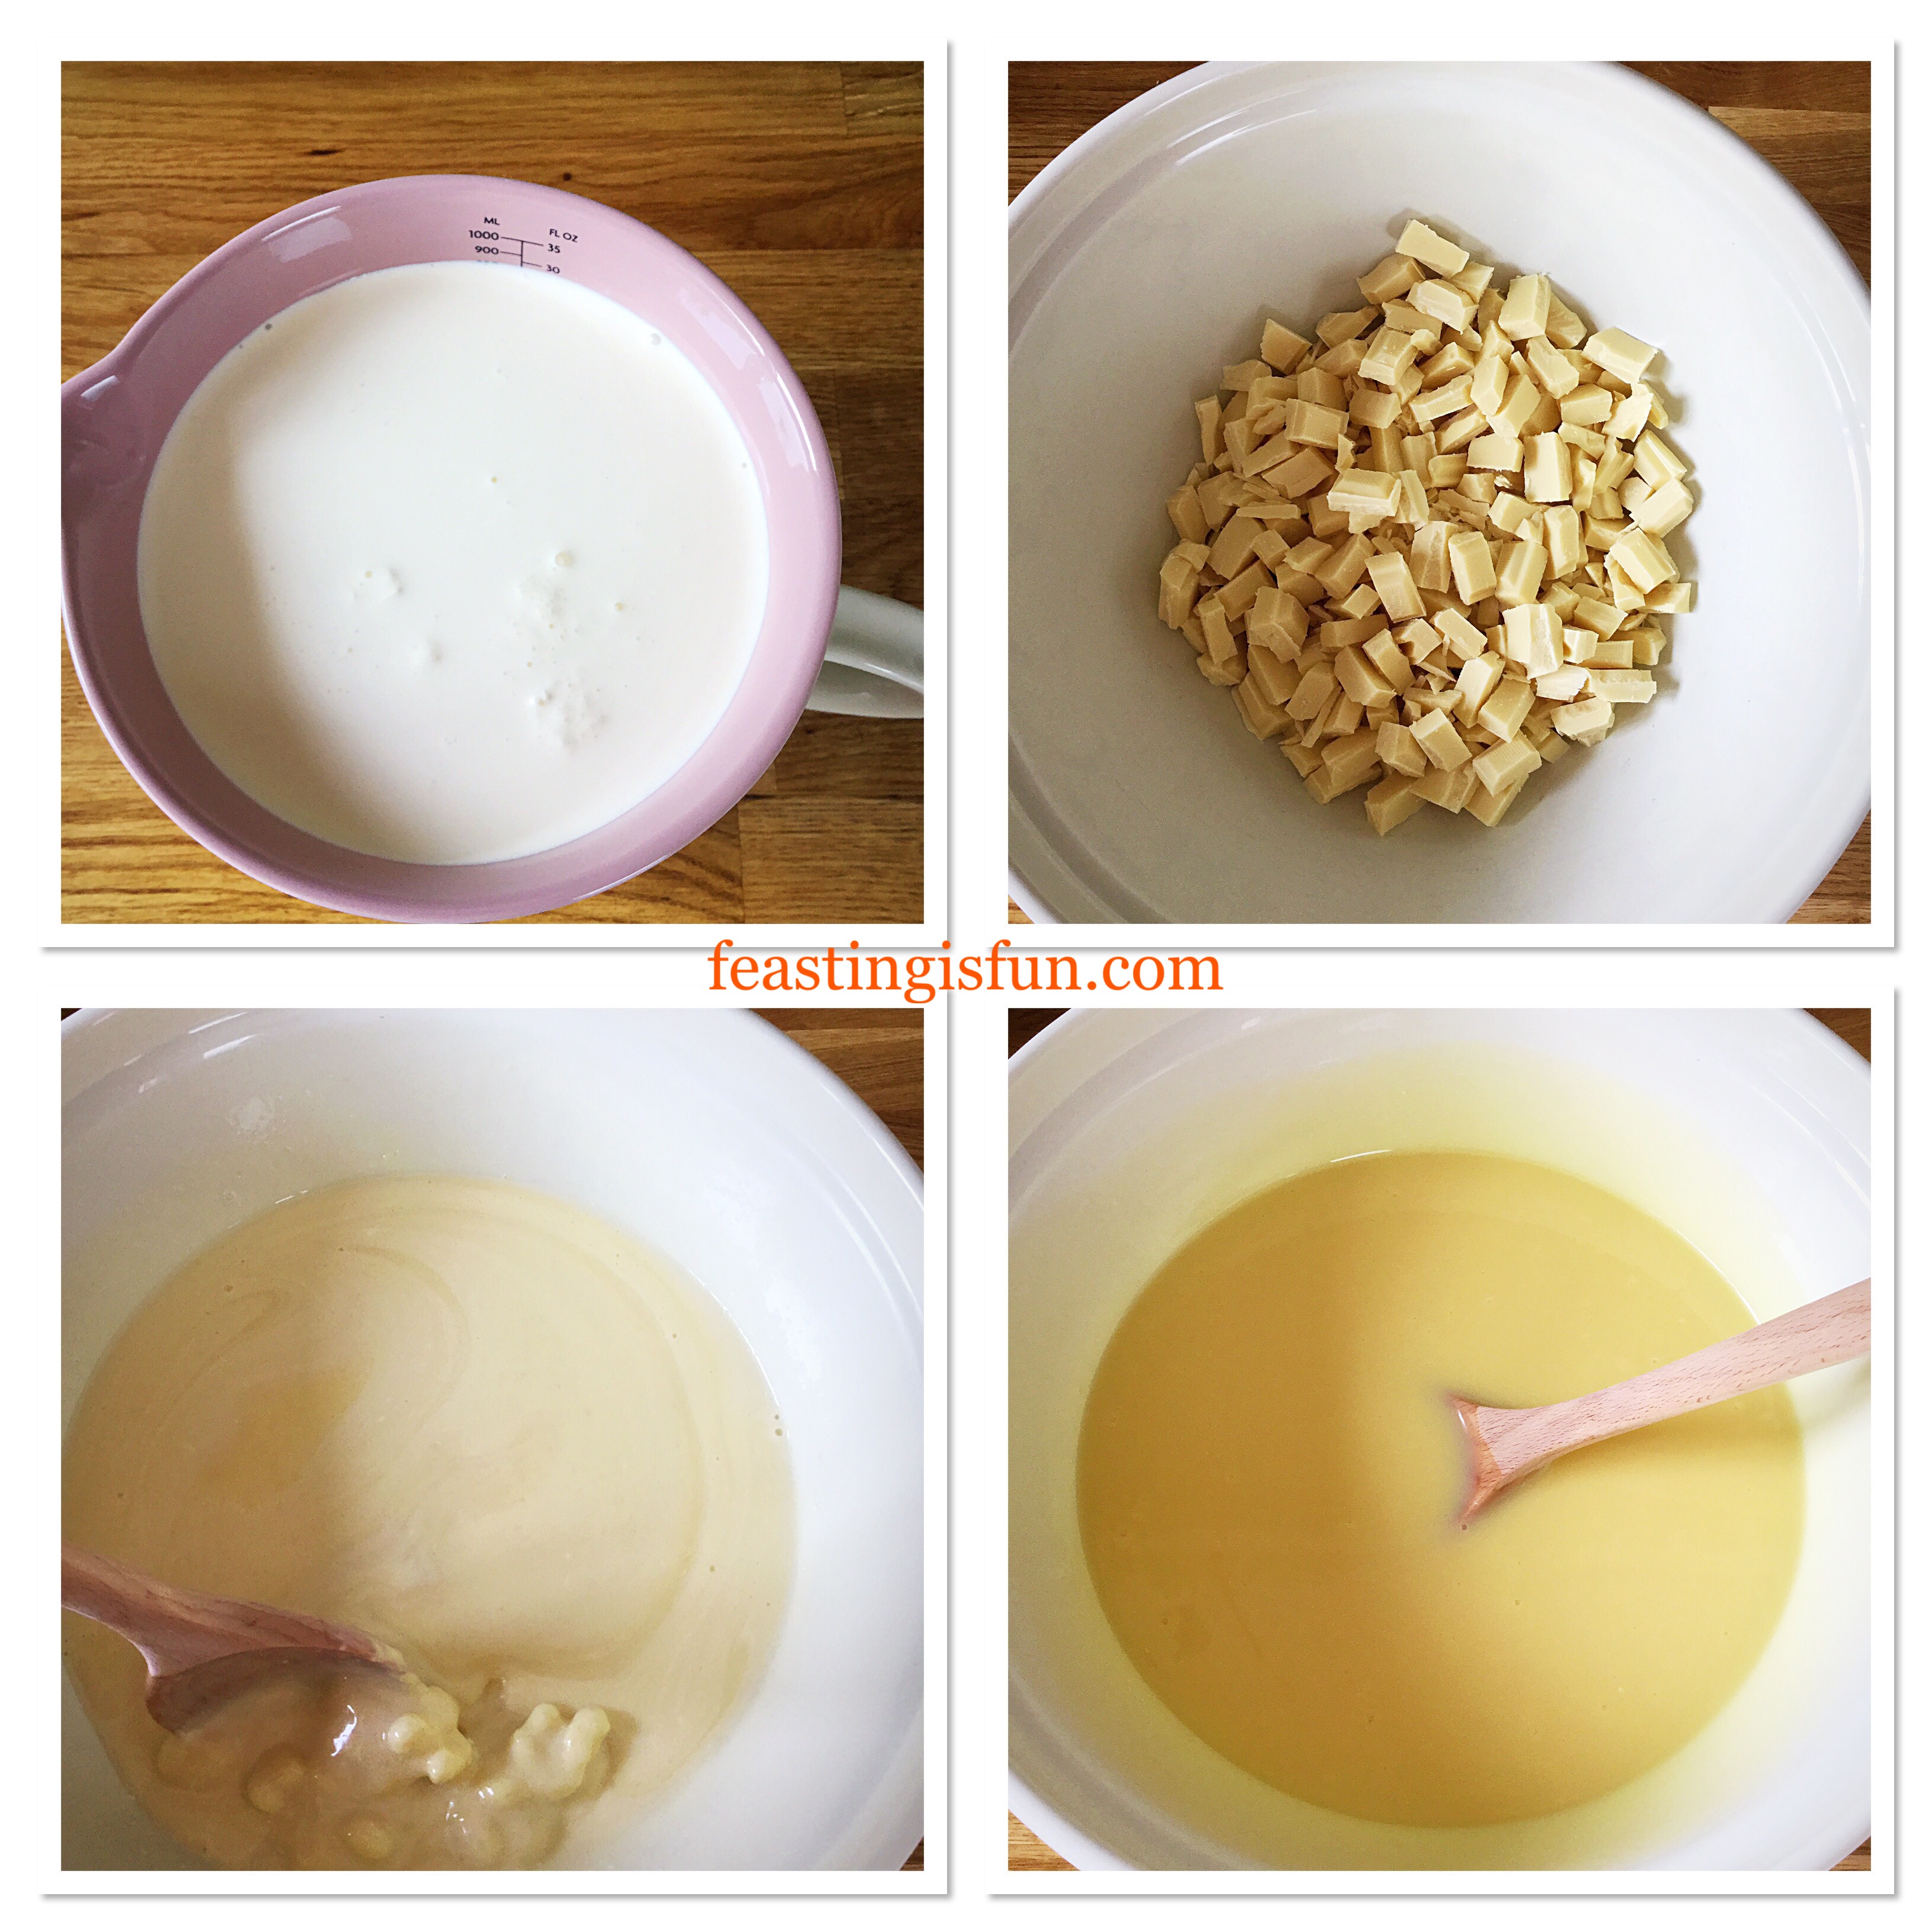
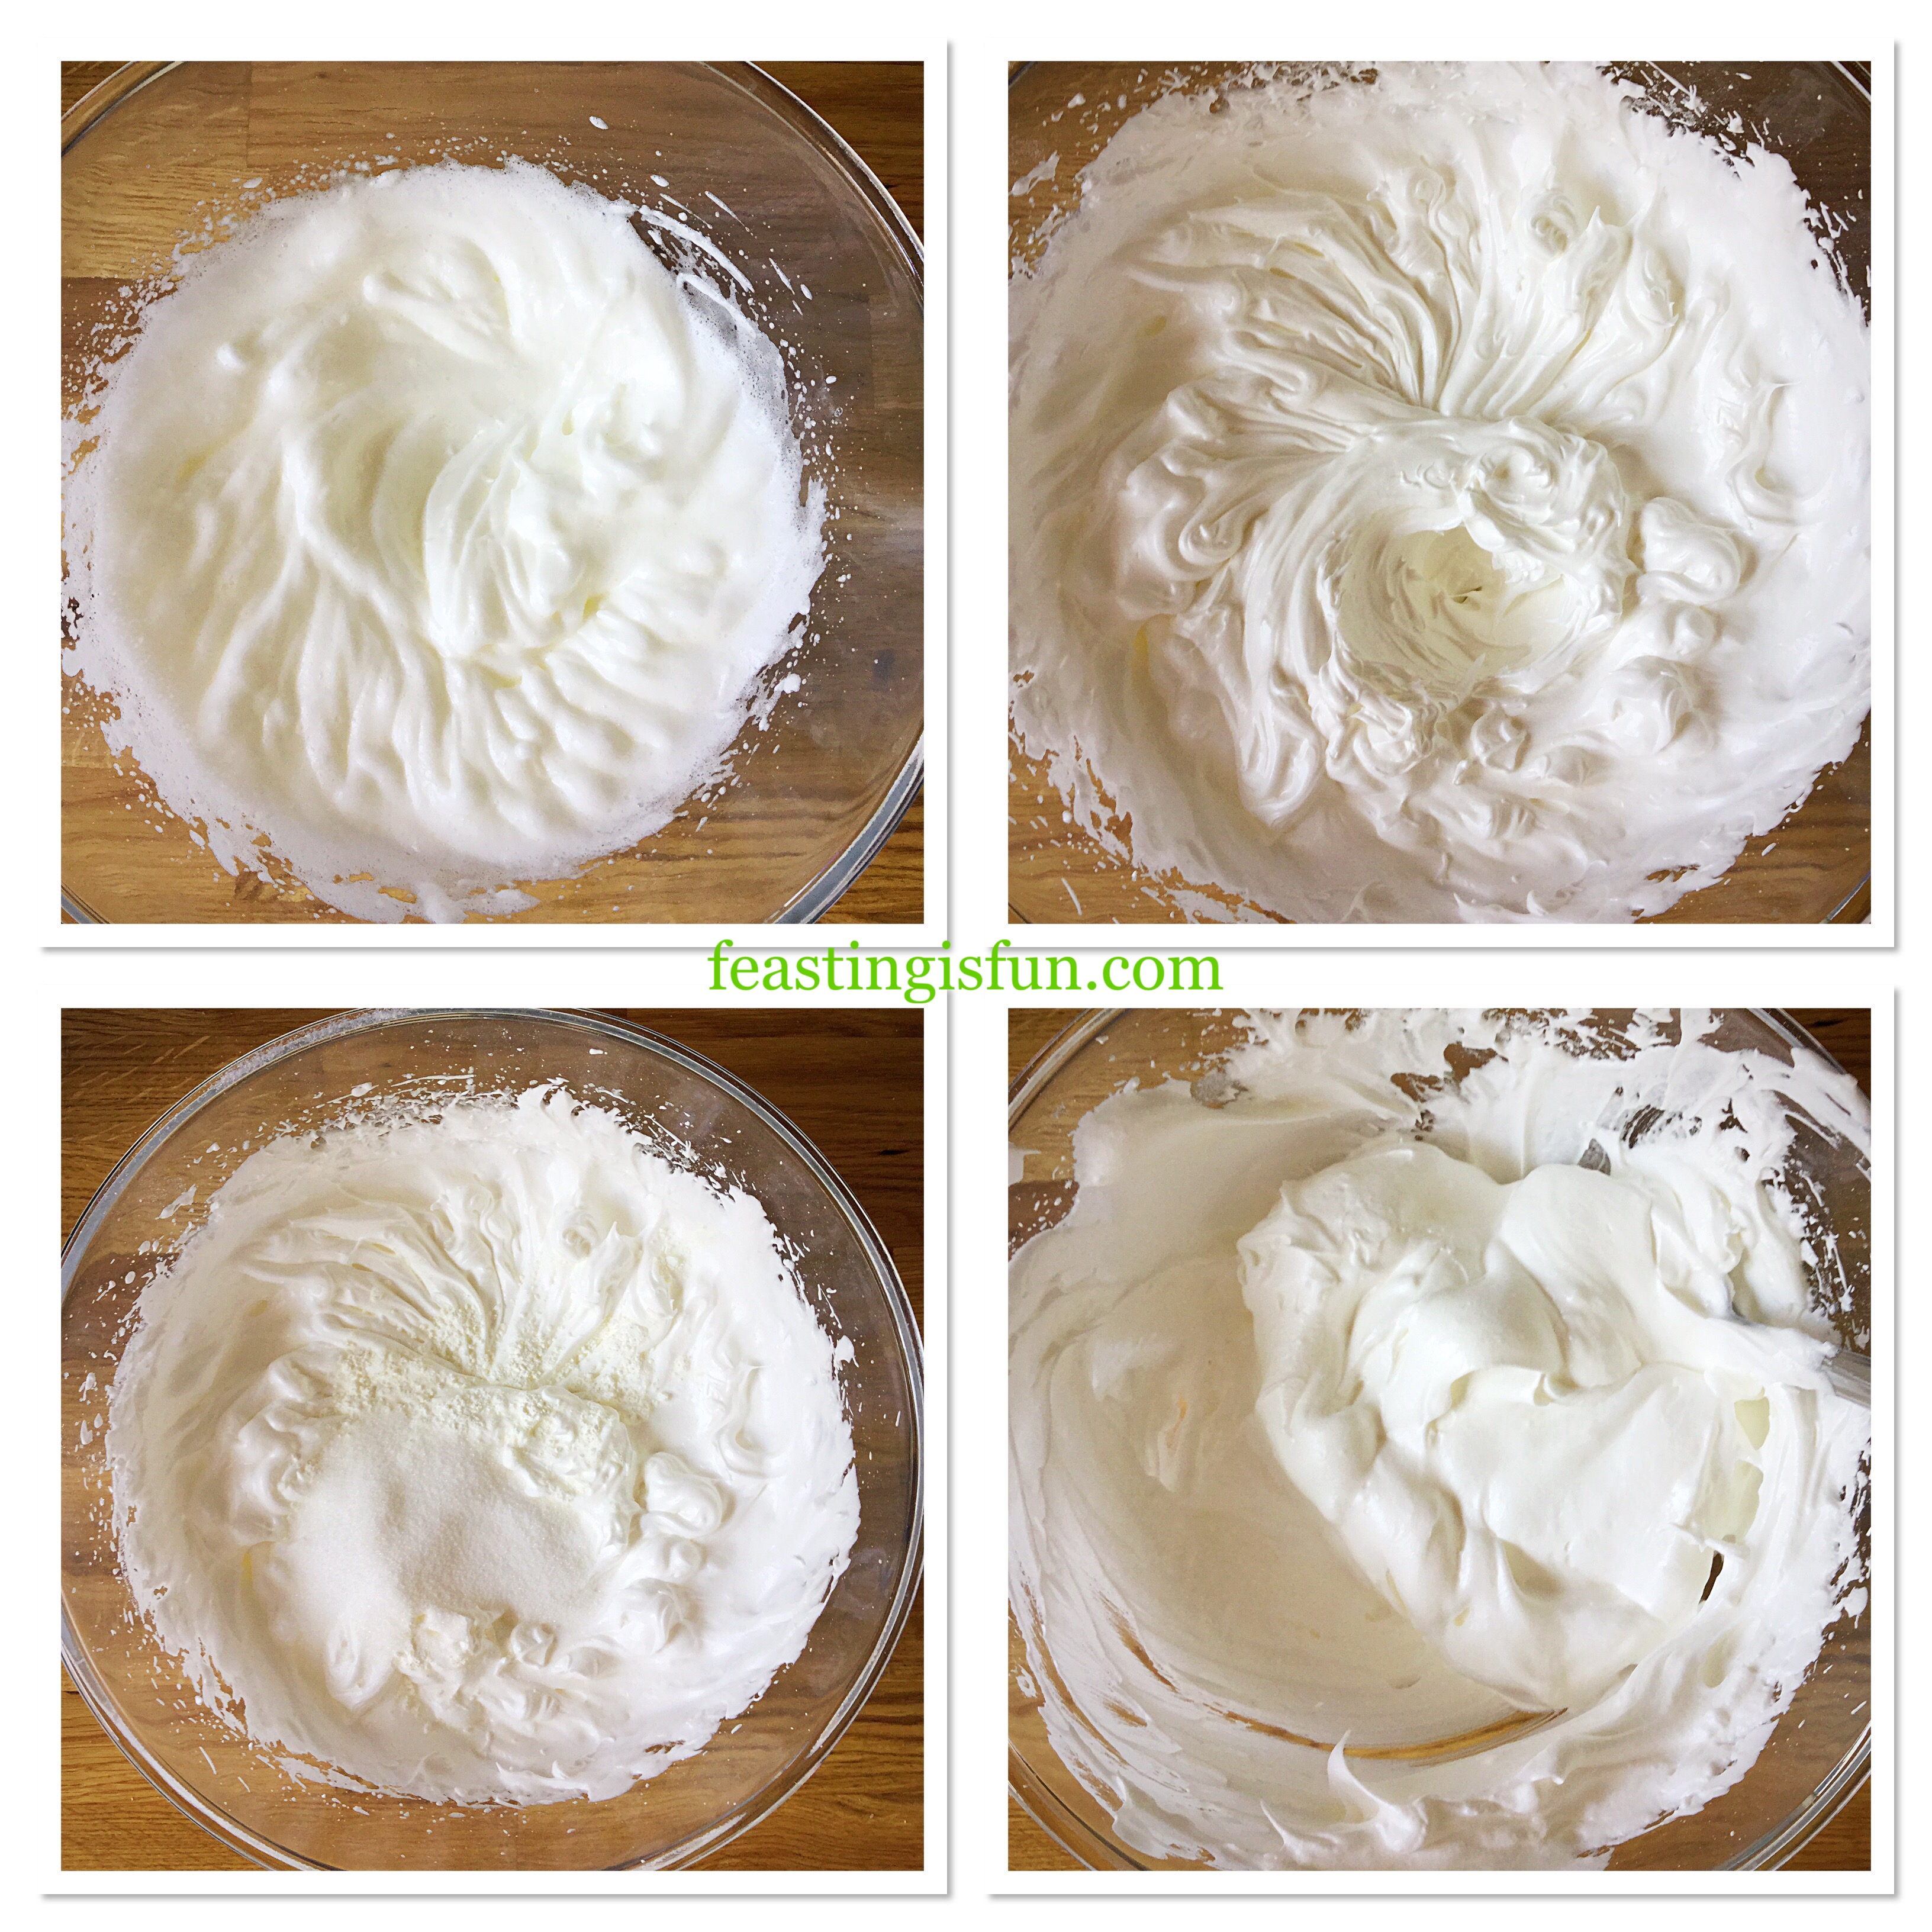
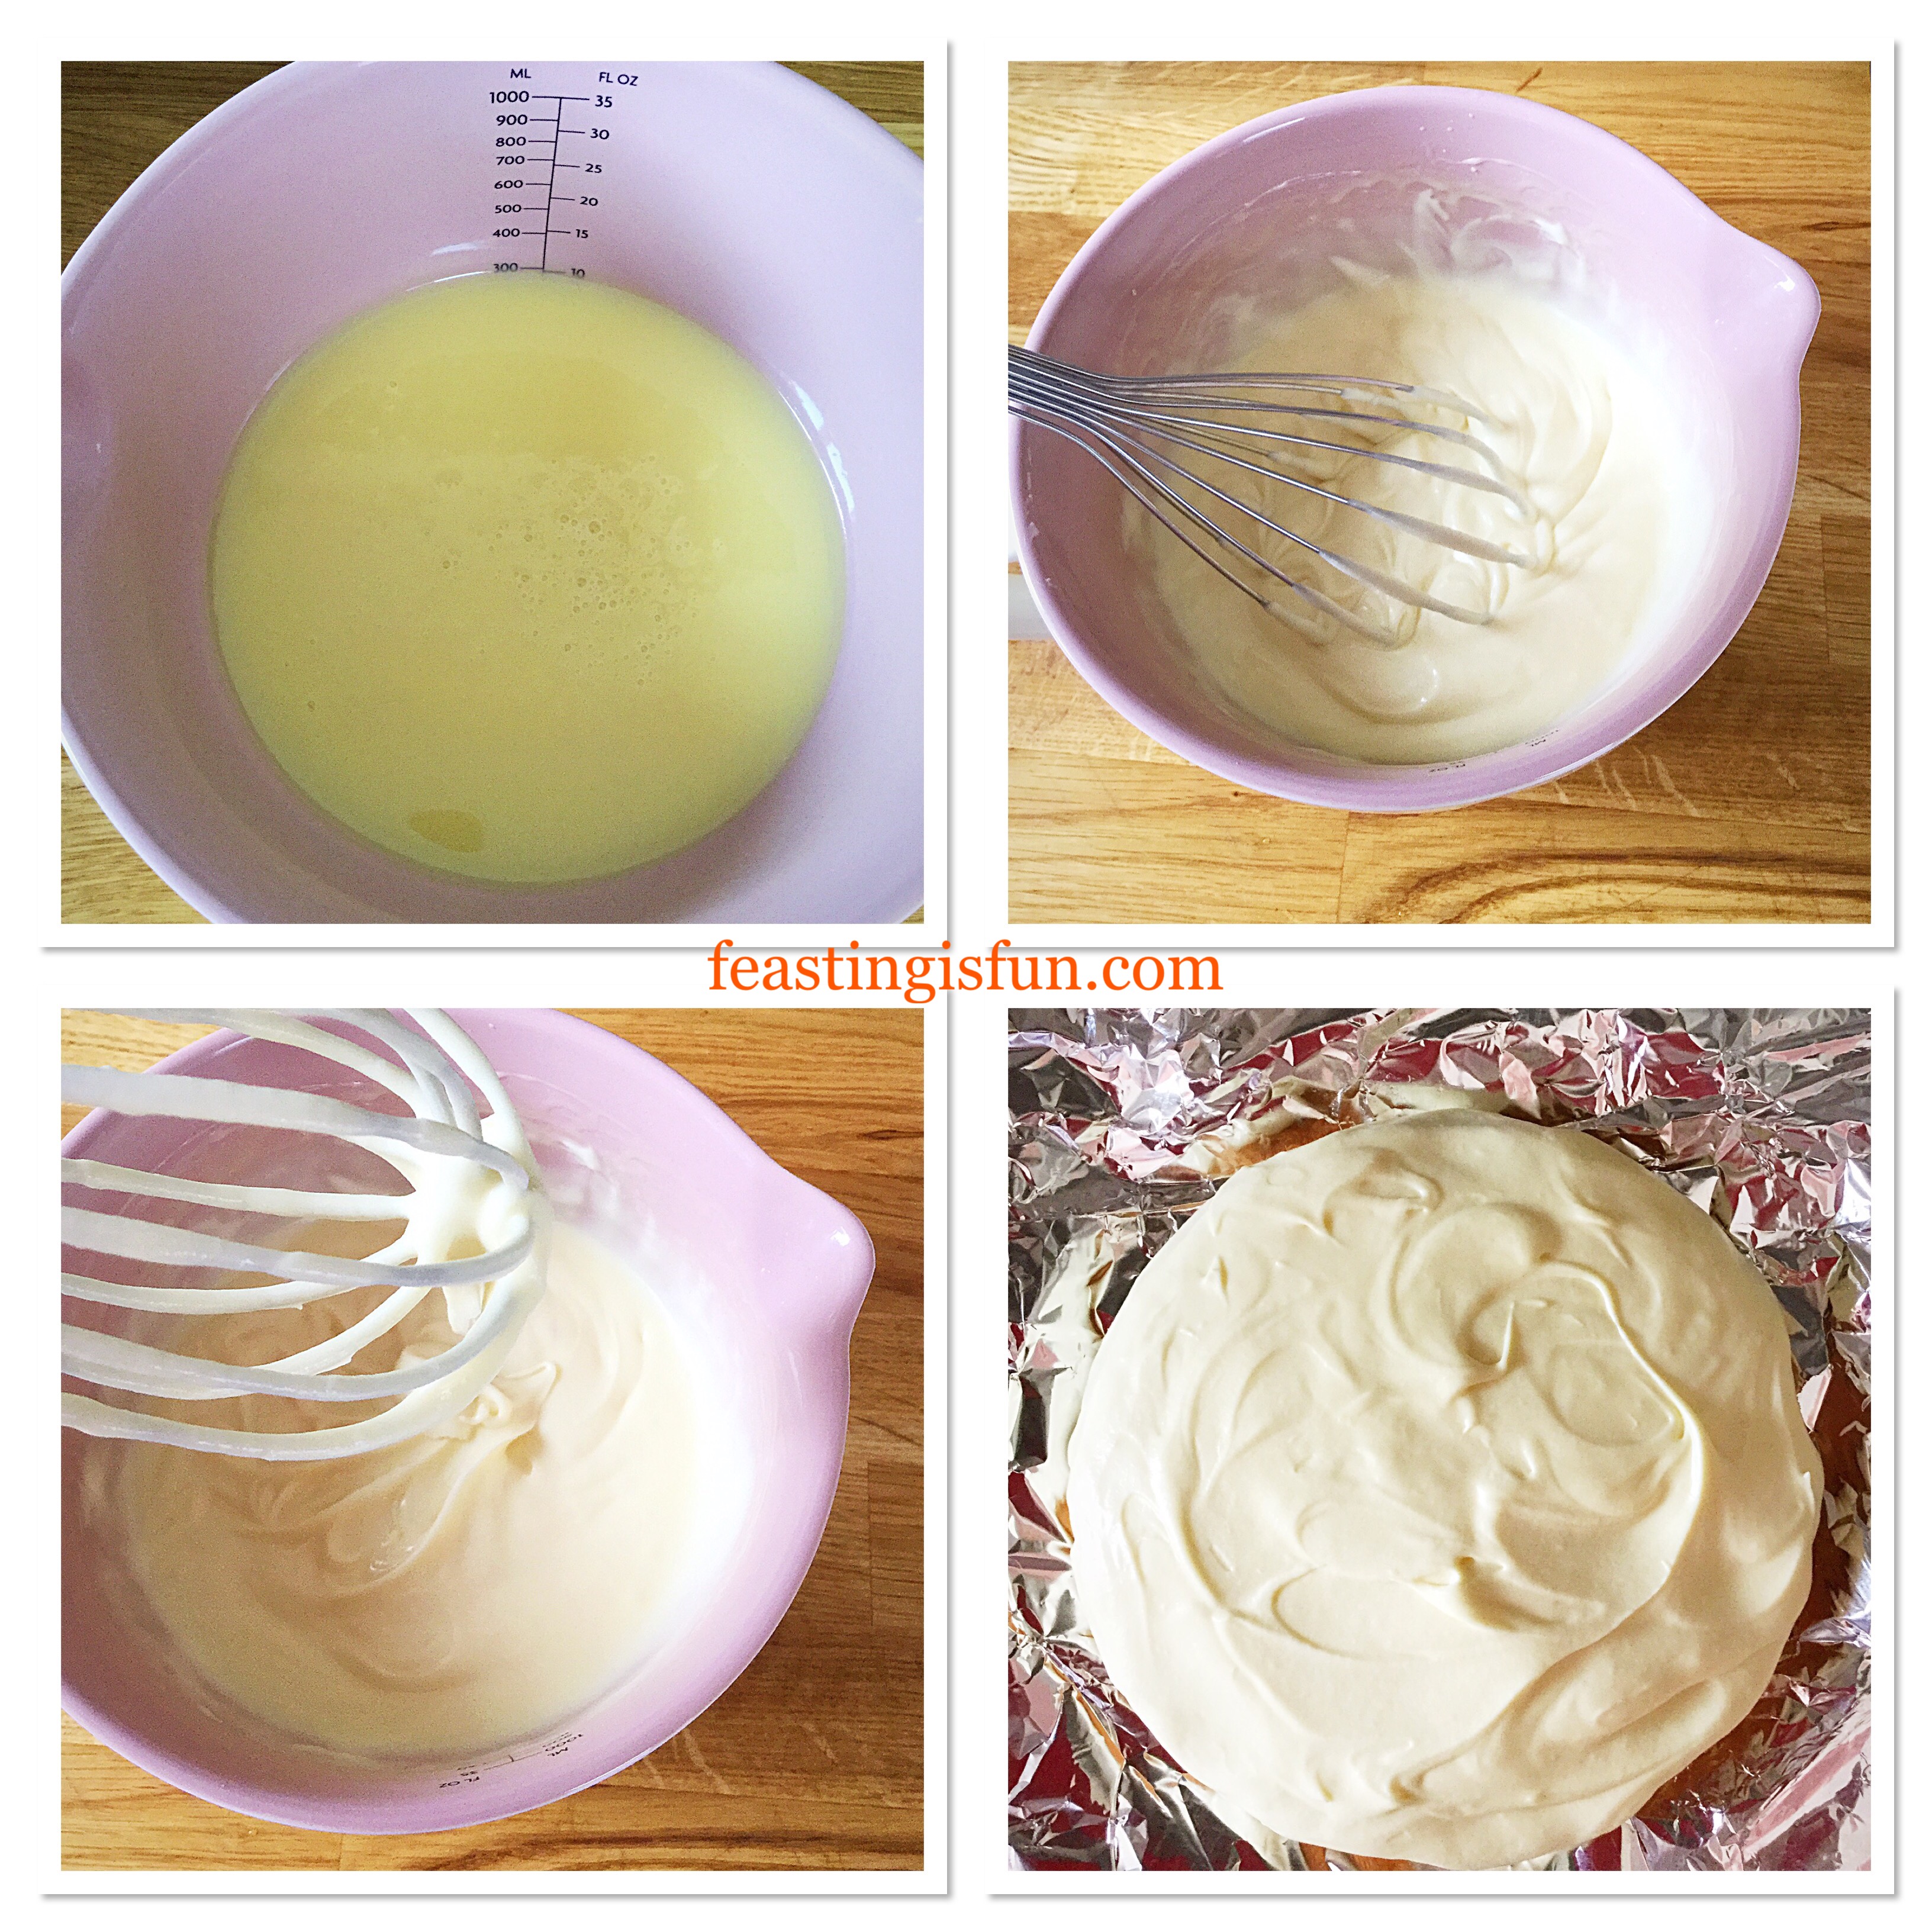
- Pour 300ml of the liquid white chocolate ganache into the jug.
- Place the large bowl of ganache into the fridge to cool.
- Meanwhile, using the whisk, whip the white chocolate ganache in the jug until it just holds it’s shape (see bottom left photo below).
- Place a cake sponge, flat side down, on to some foil on a plate.
- Spoon the soft, yet floppy ganache on to the sponge. Spread the ganache with the small spatula to cover the sponge allowing it to naturally drape around the sides.
- Place the sponge into the fridge to set.
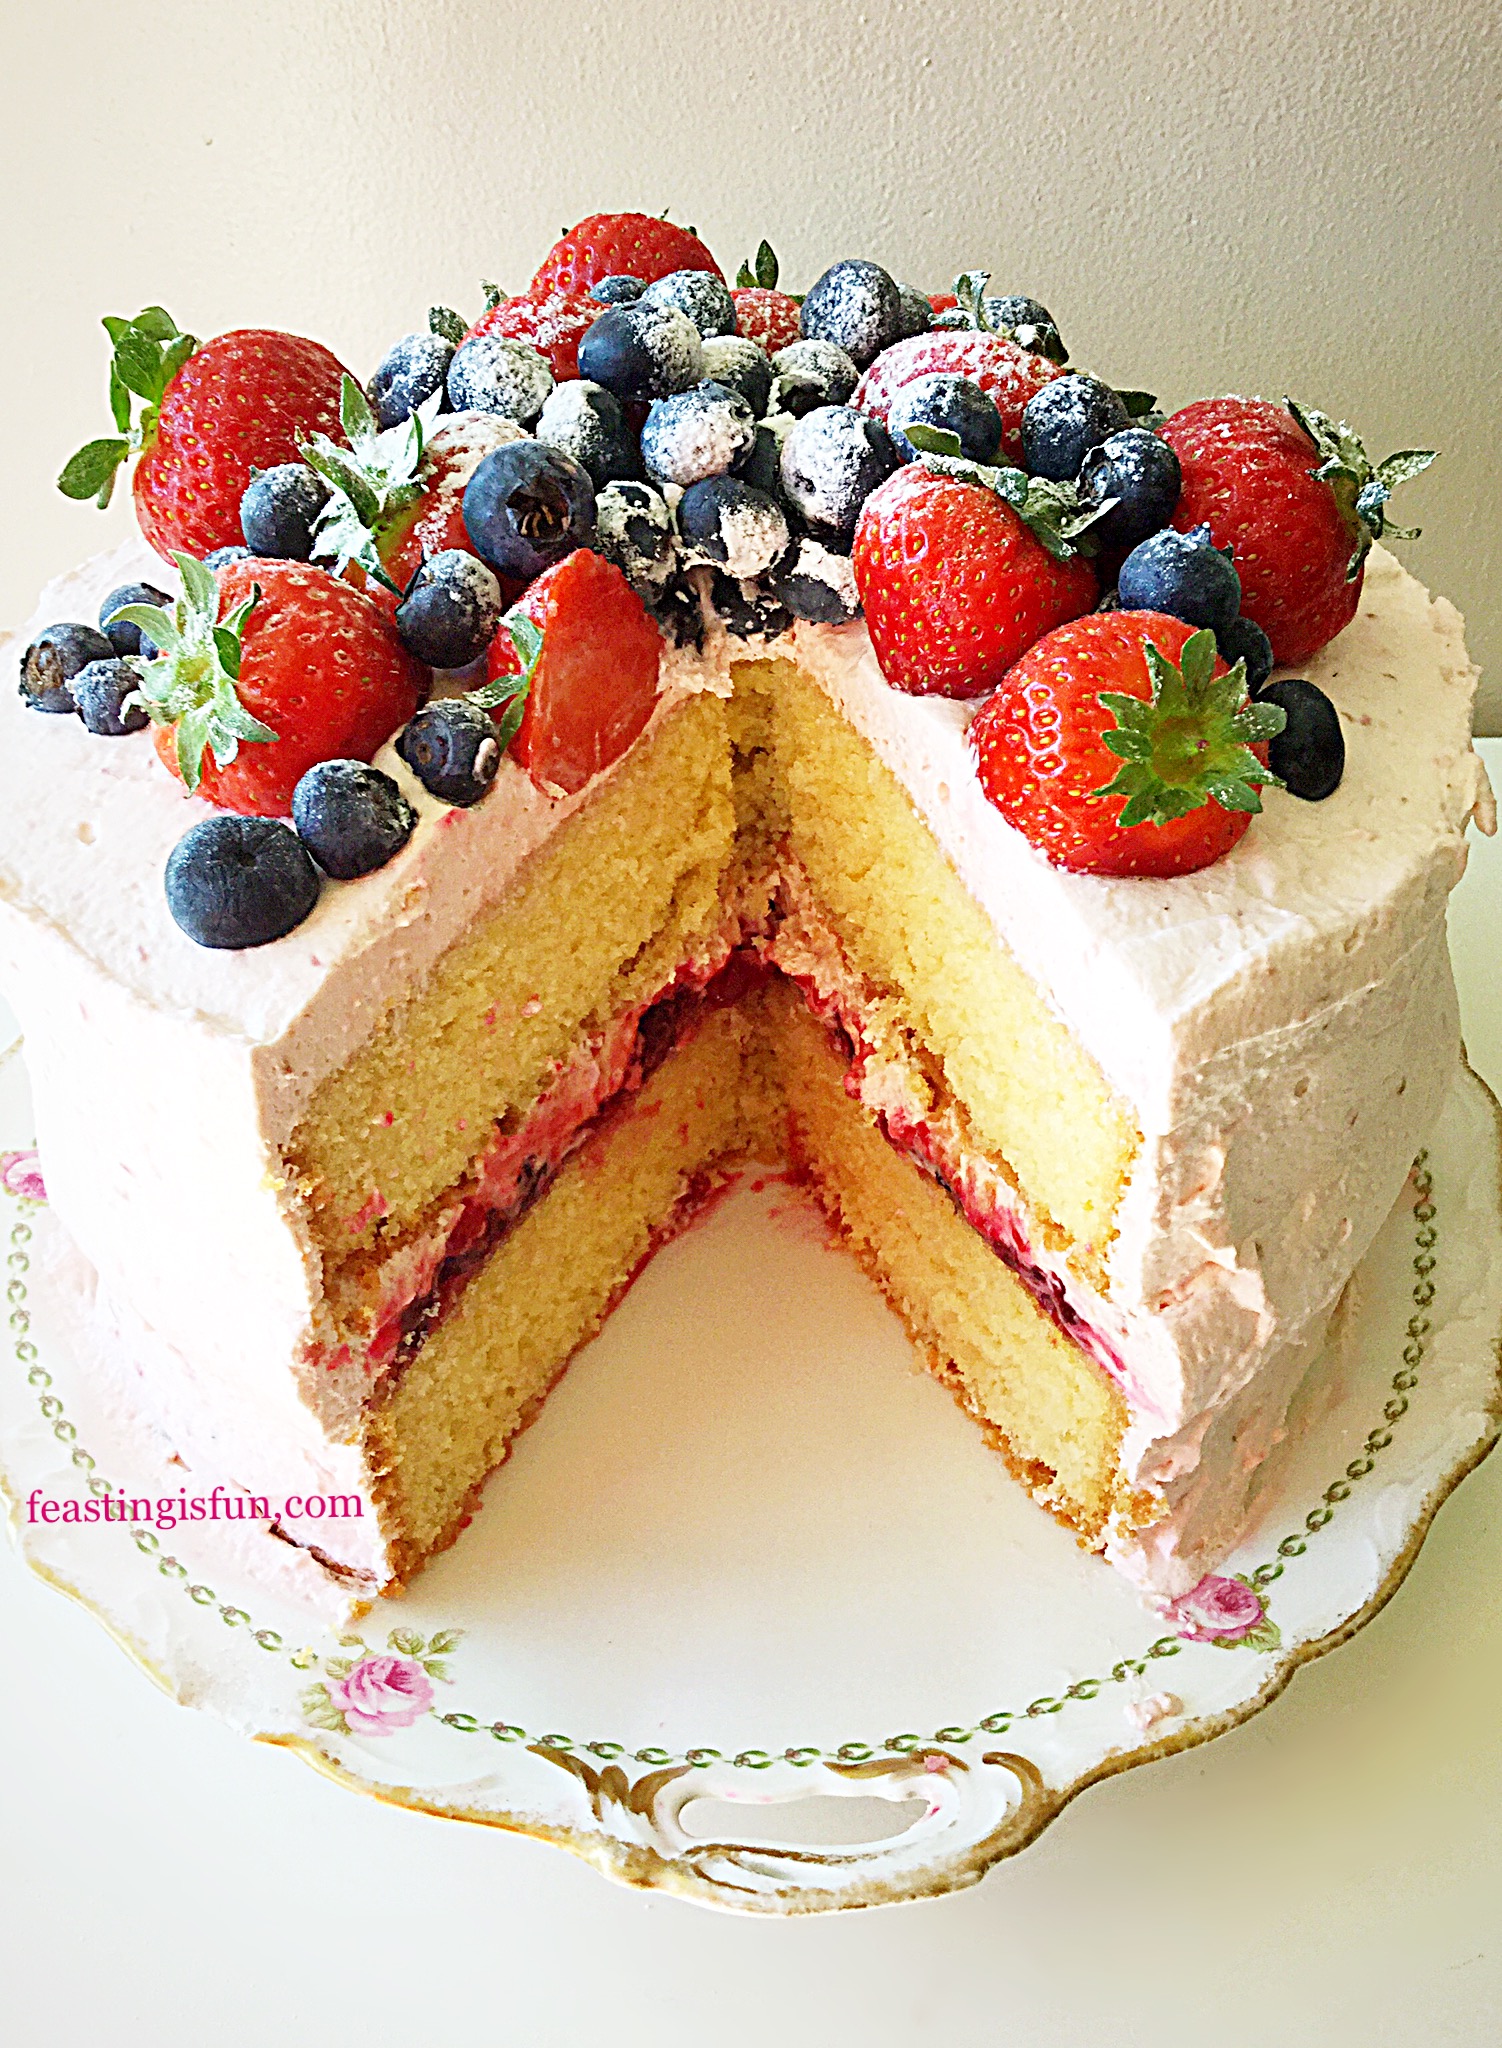
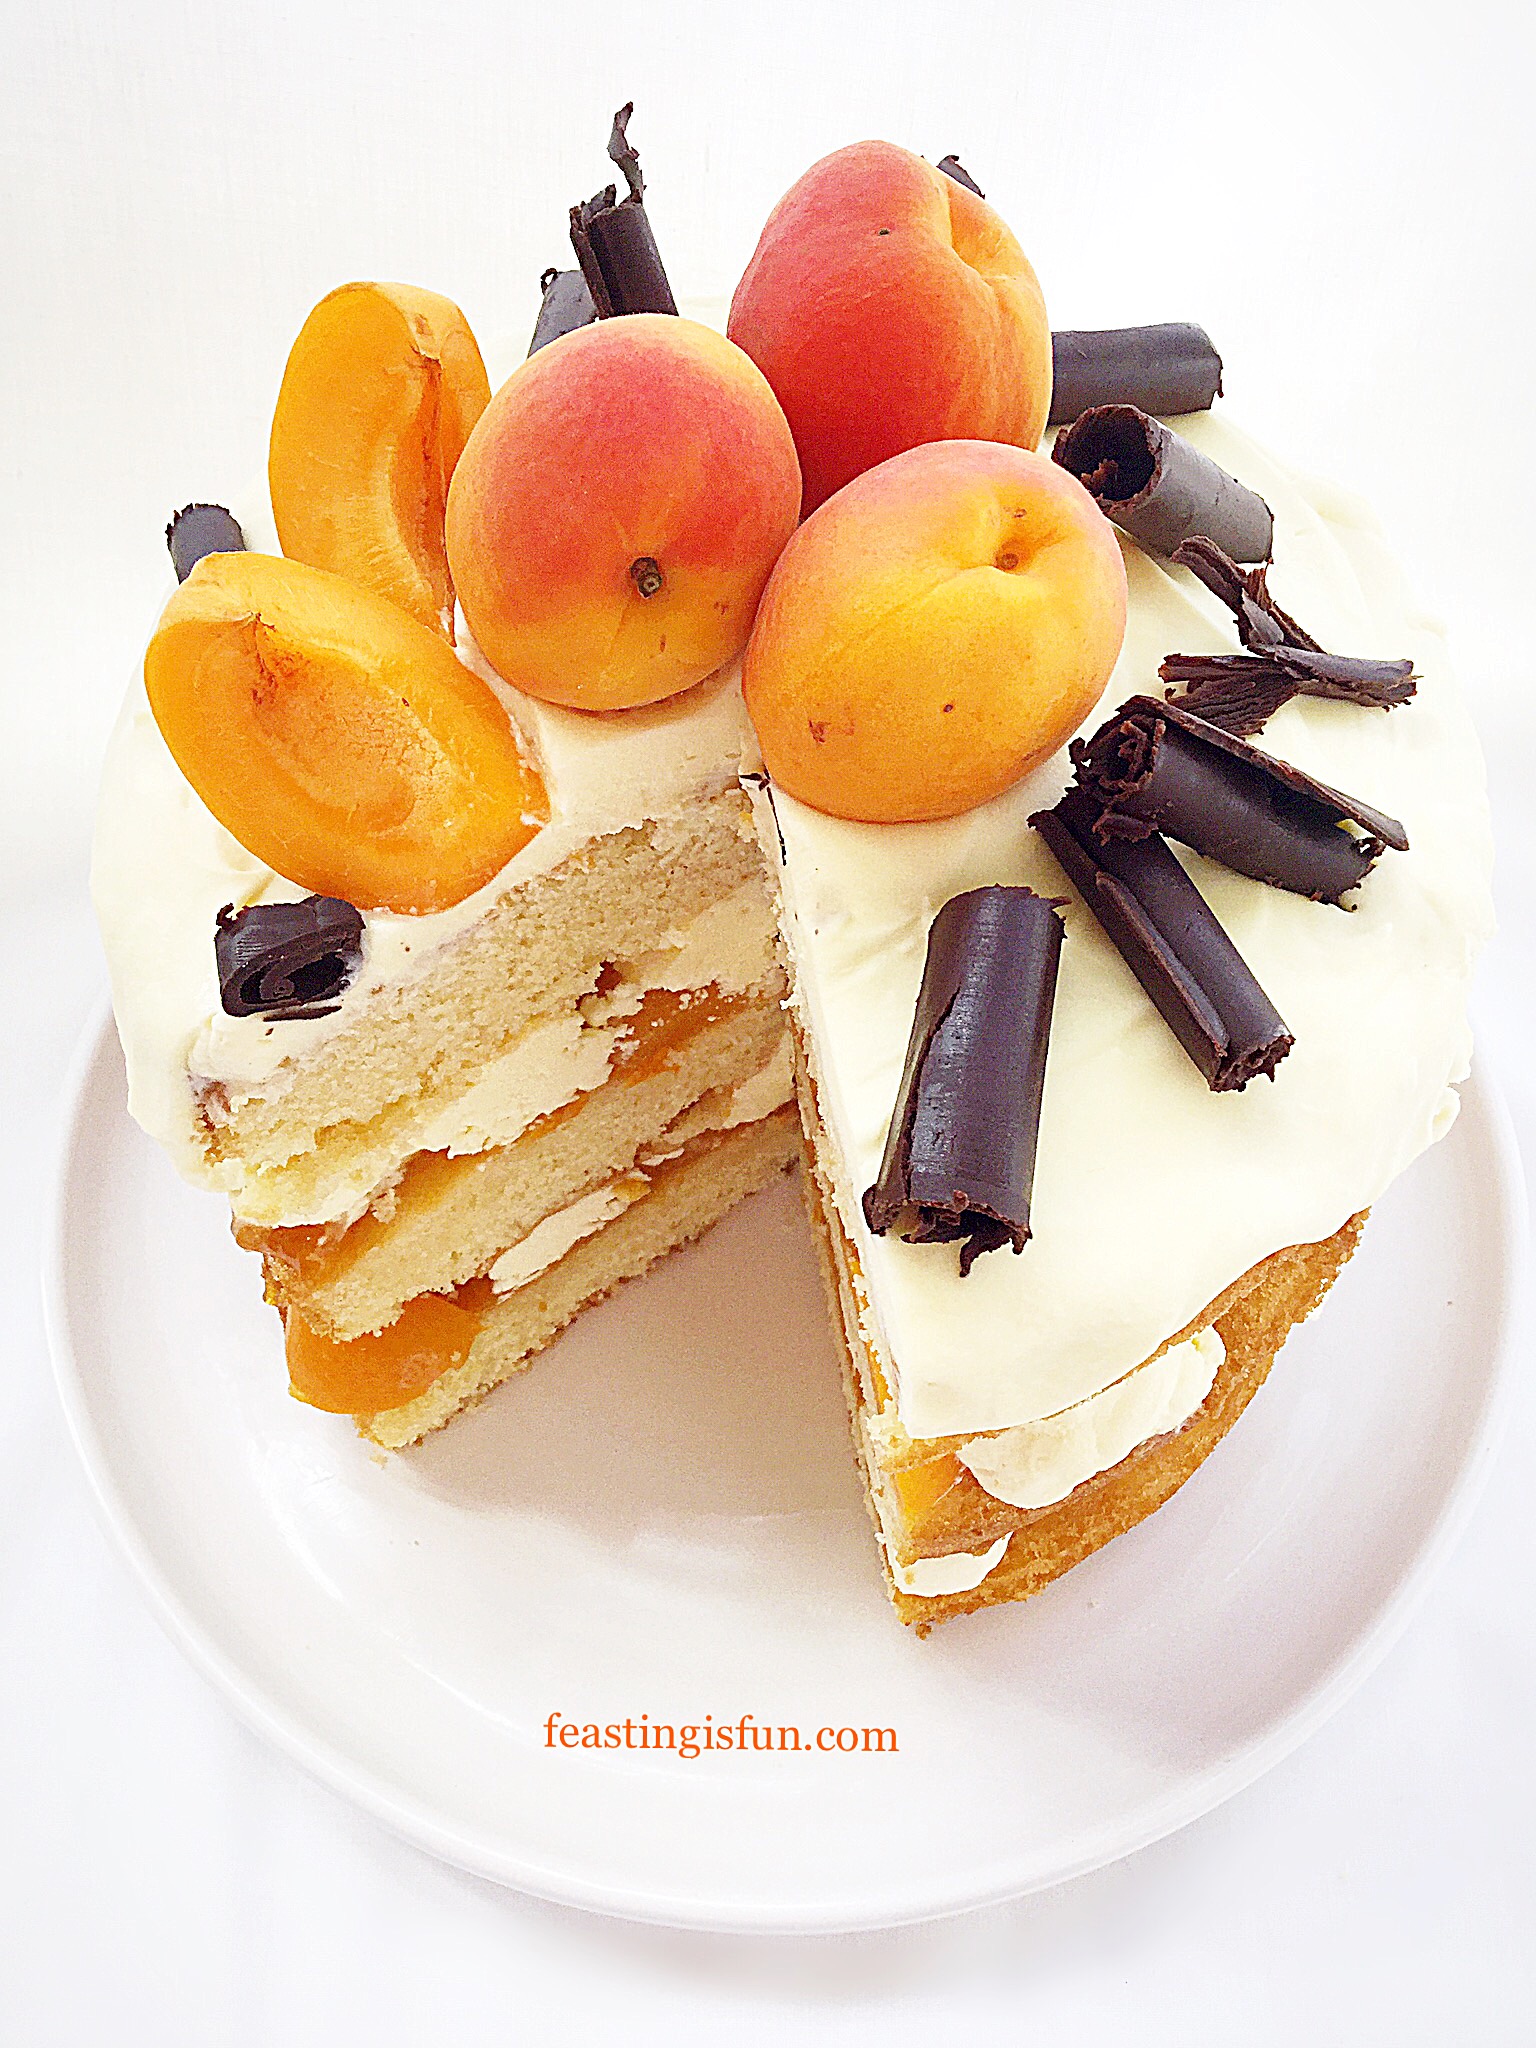
Assembling the Apricot White Chocolate Triple Sponge Cake
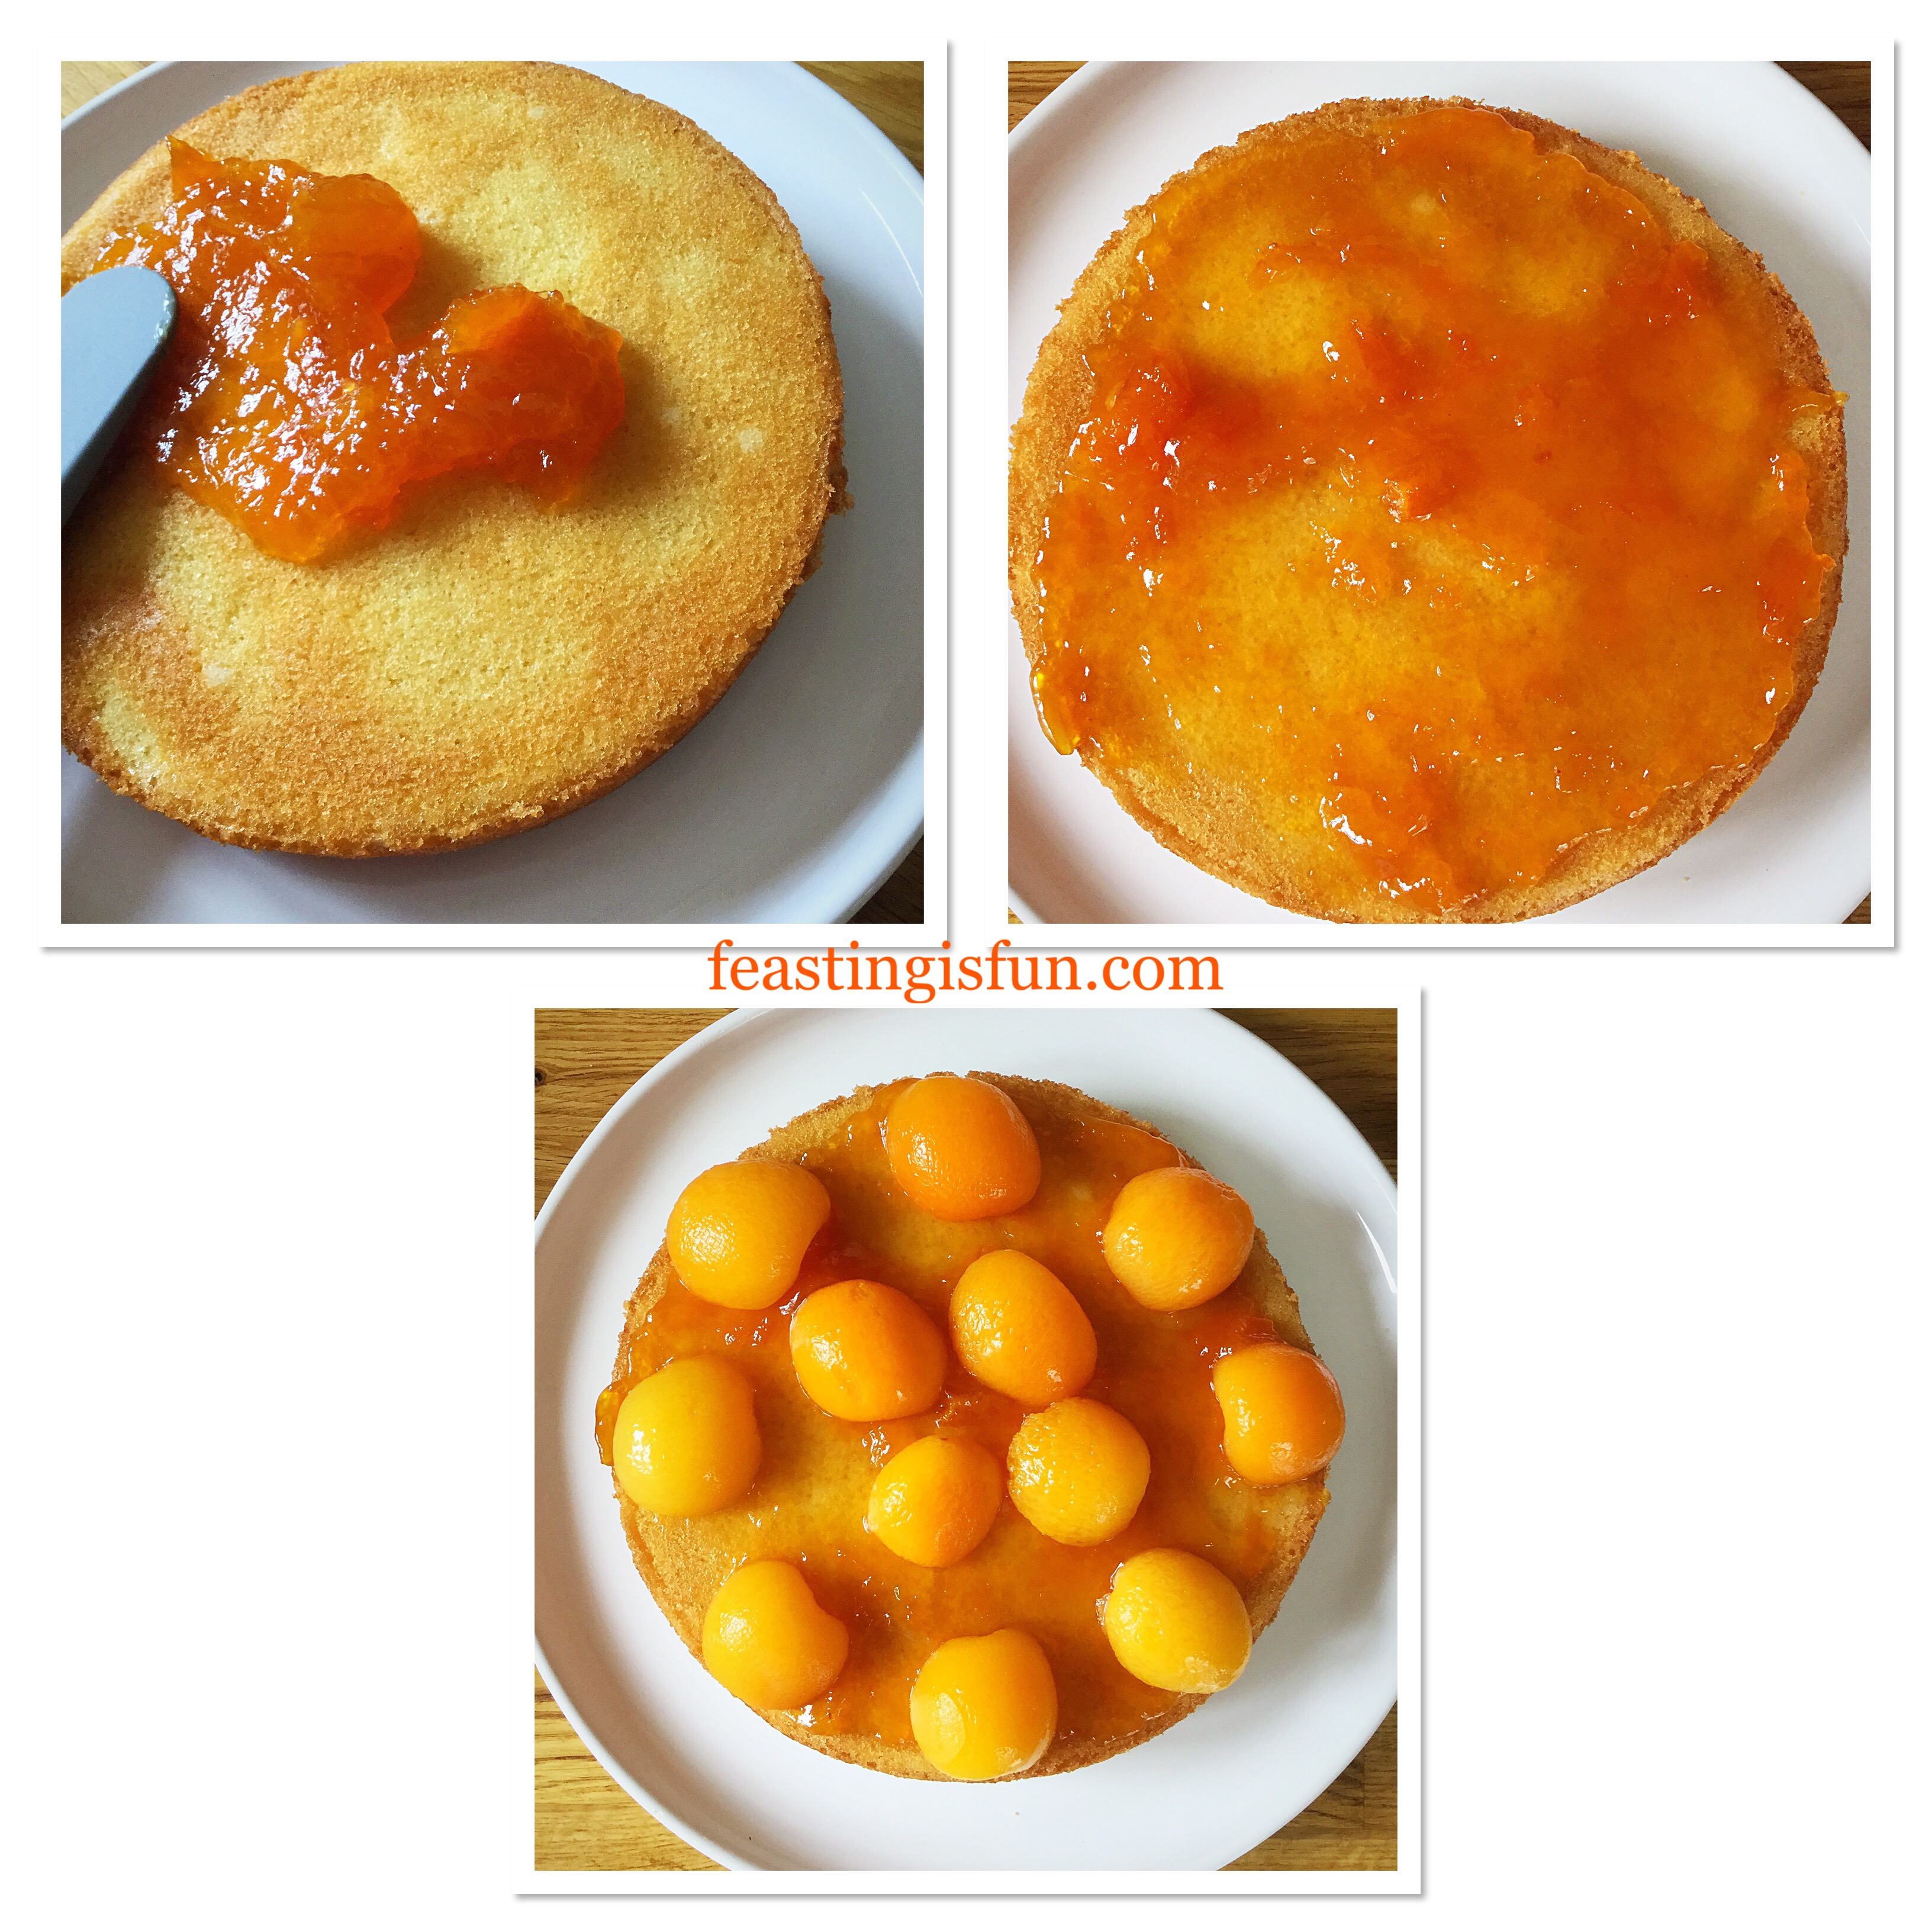
- First of all, drain both cans of apricot halves into a sieve.
- Place the remaining 2 cake sponges, flat side up, on separate plates. Make sure the sponge that will be the bottom layer of the cake is on a serving plate or board.
- Spoon 3 tablespoons of apricot conserve on to each sponge and spread to the edges using the small spatula.
- Place 8 apricot halves evenly around the outside of each sponge and 4 in the centre.
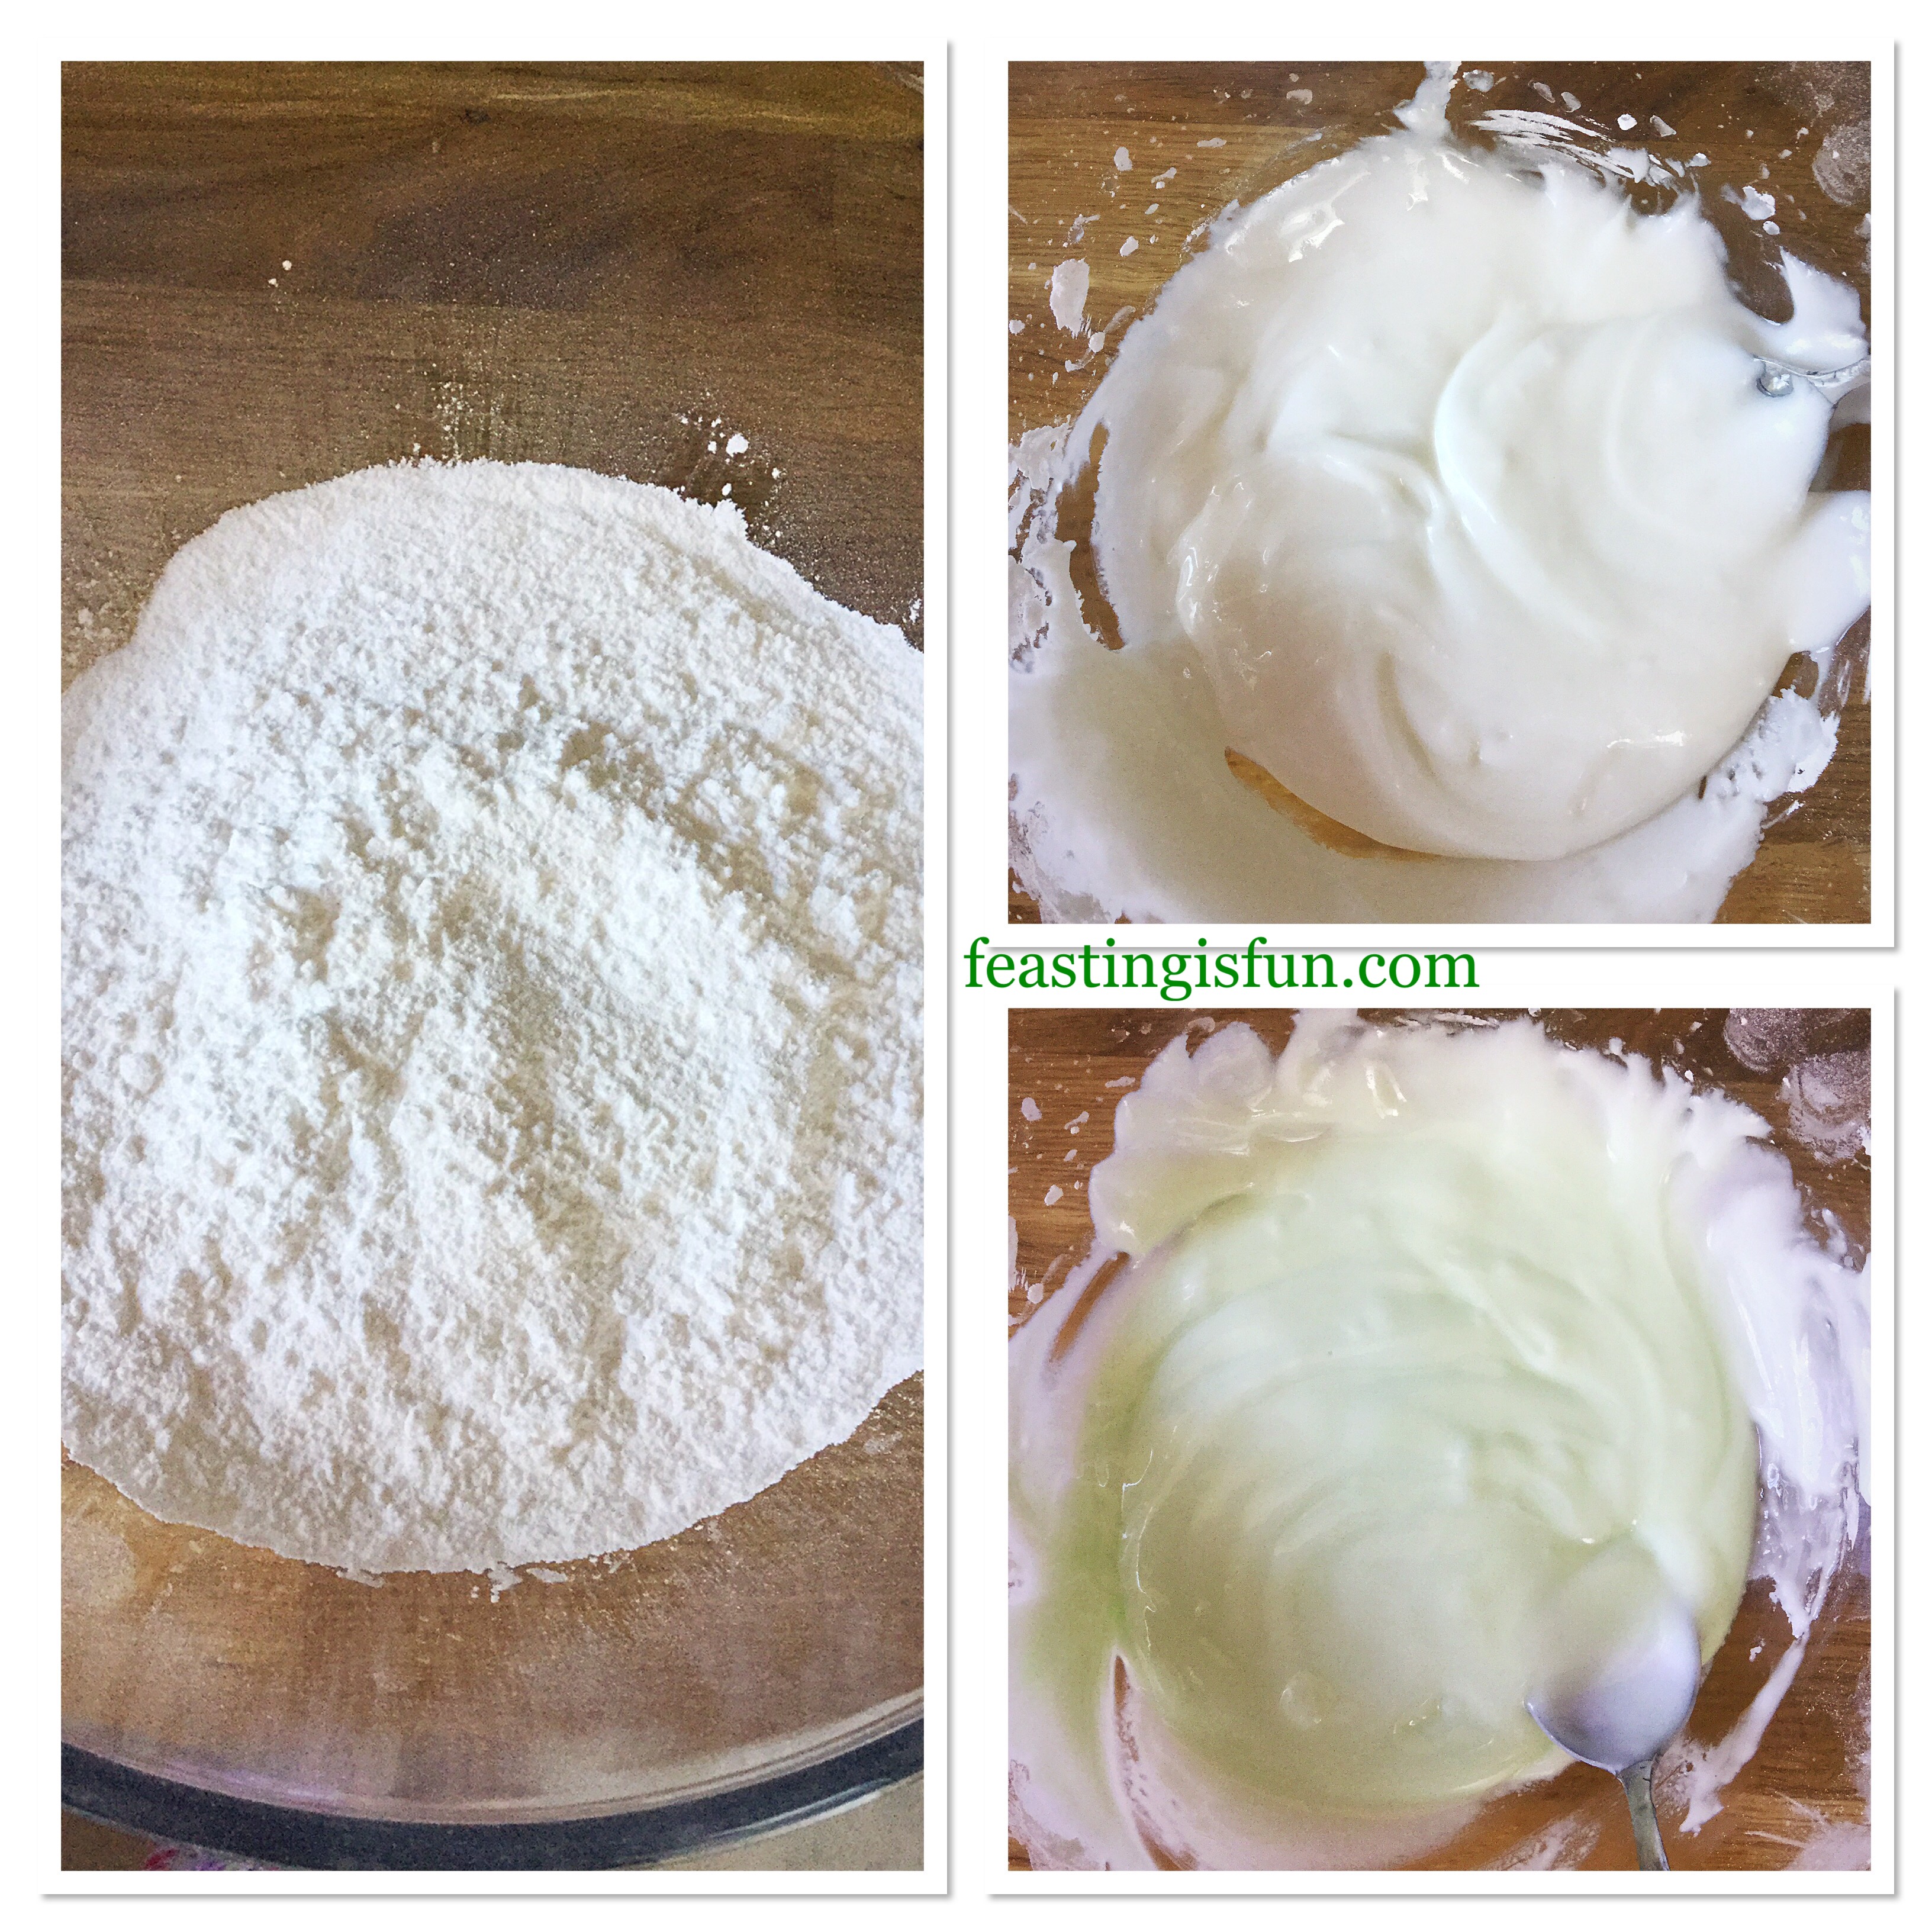
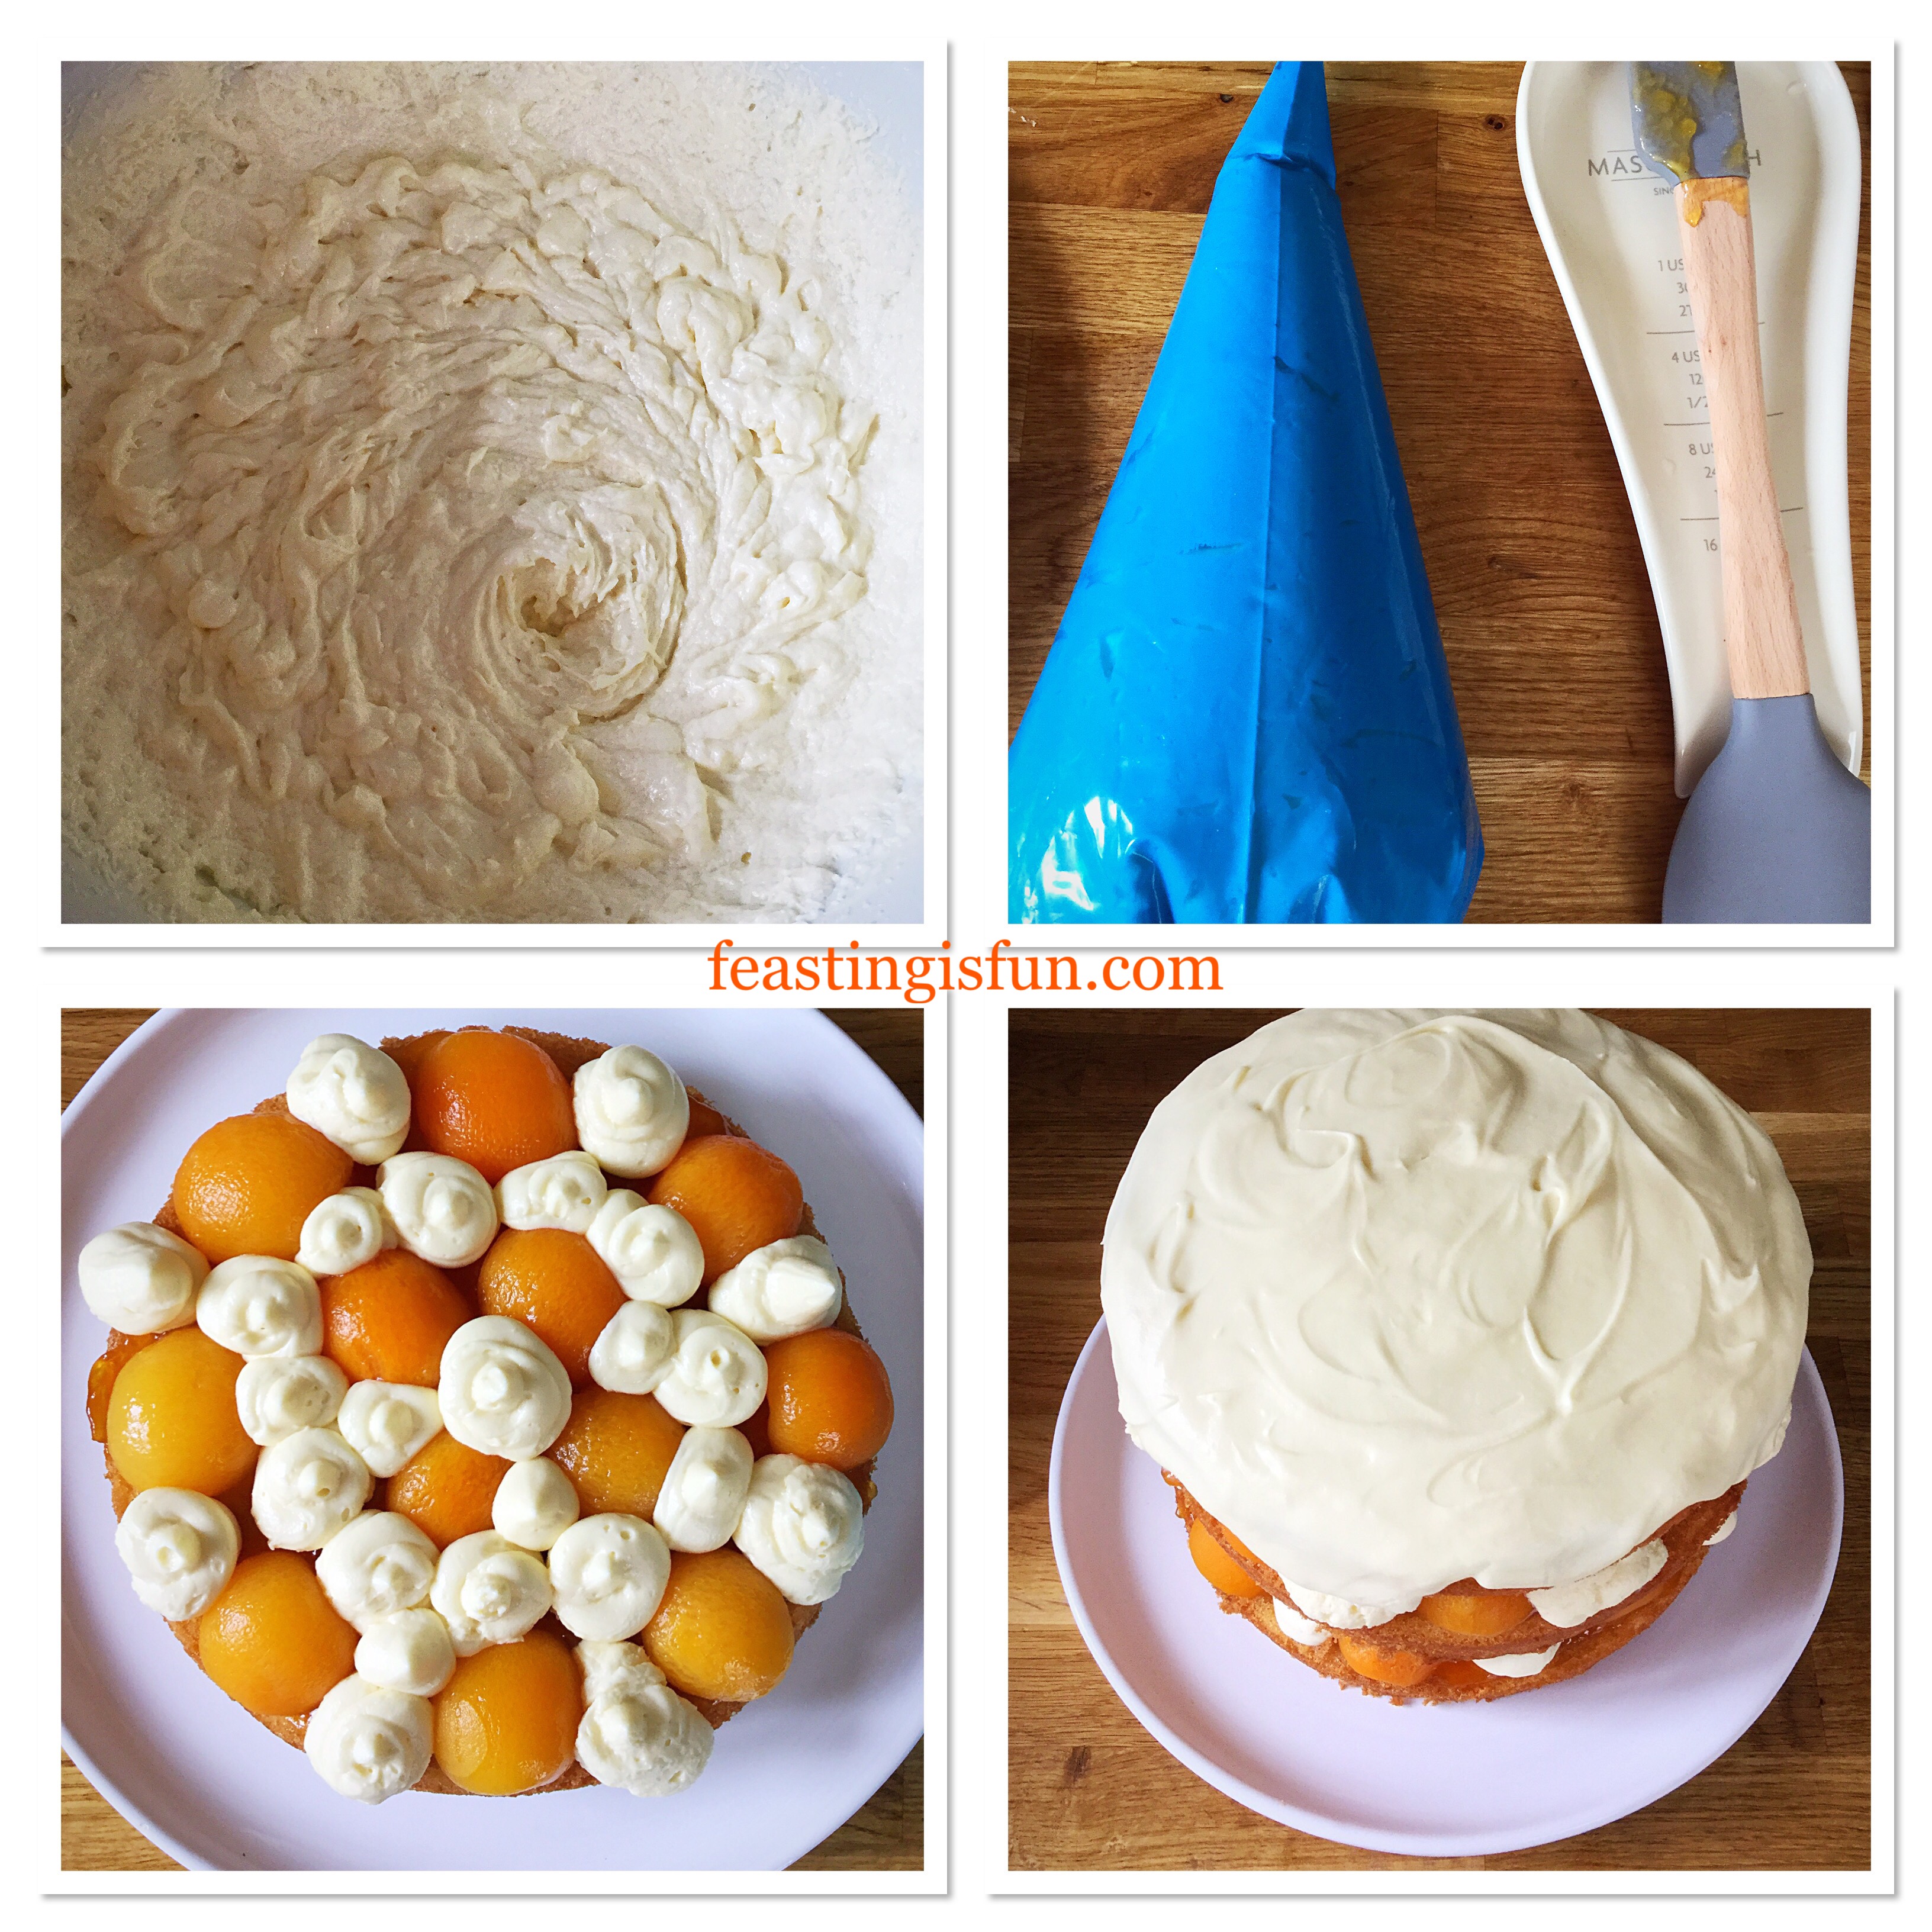
- Remove the cooled ganache from the fridge and whisk until it firmly holds its shape.
- Fill a large piping bag with the ganache.
- Cut the end of the piping bag off to leave a 1cm opening.
- Applying even pressure pipe swirls of ganache between the apricots on the edge of the cake working in towards the centre, until there aren’t any gaps left. Repeat for the second sponge.
- Place both sponges into the fridge and leave to set for 30 minutes.
- Once the ganache has set it is time to assemble your cake.
- Place the second layer centrally on top of the bottom layer.
- Finally, place the ganache covered sponge on top.
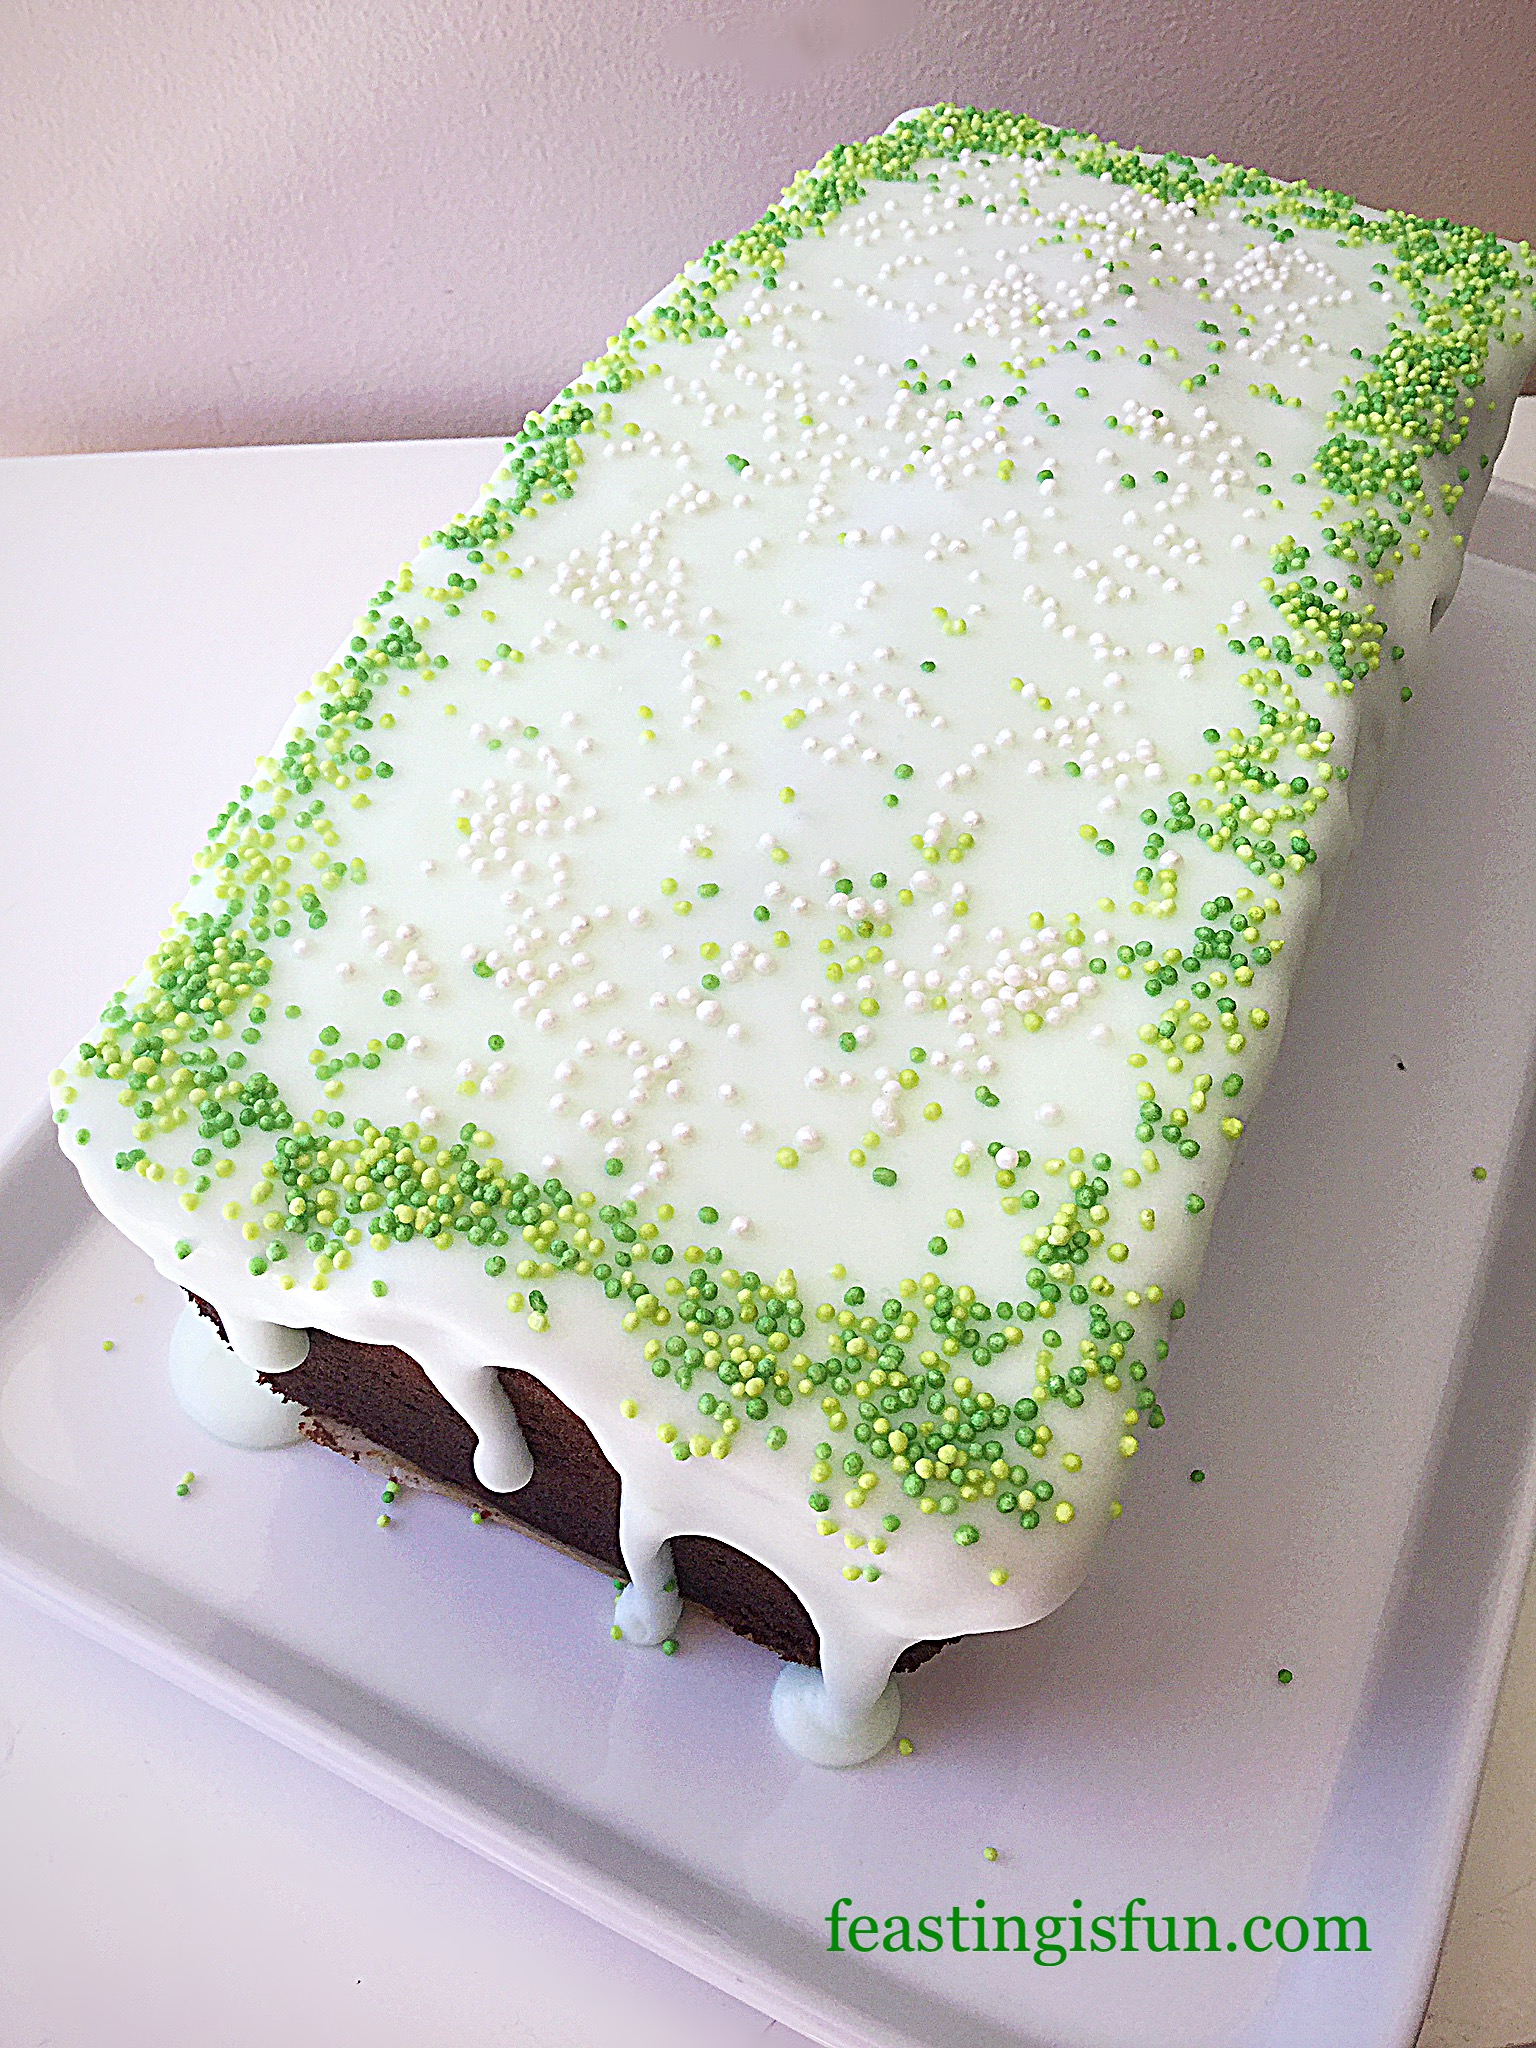
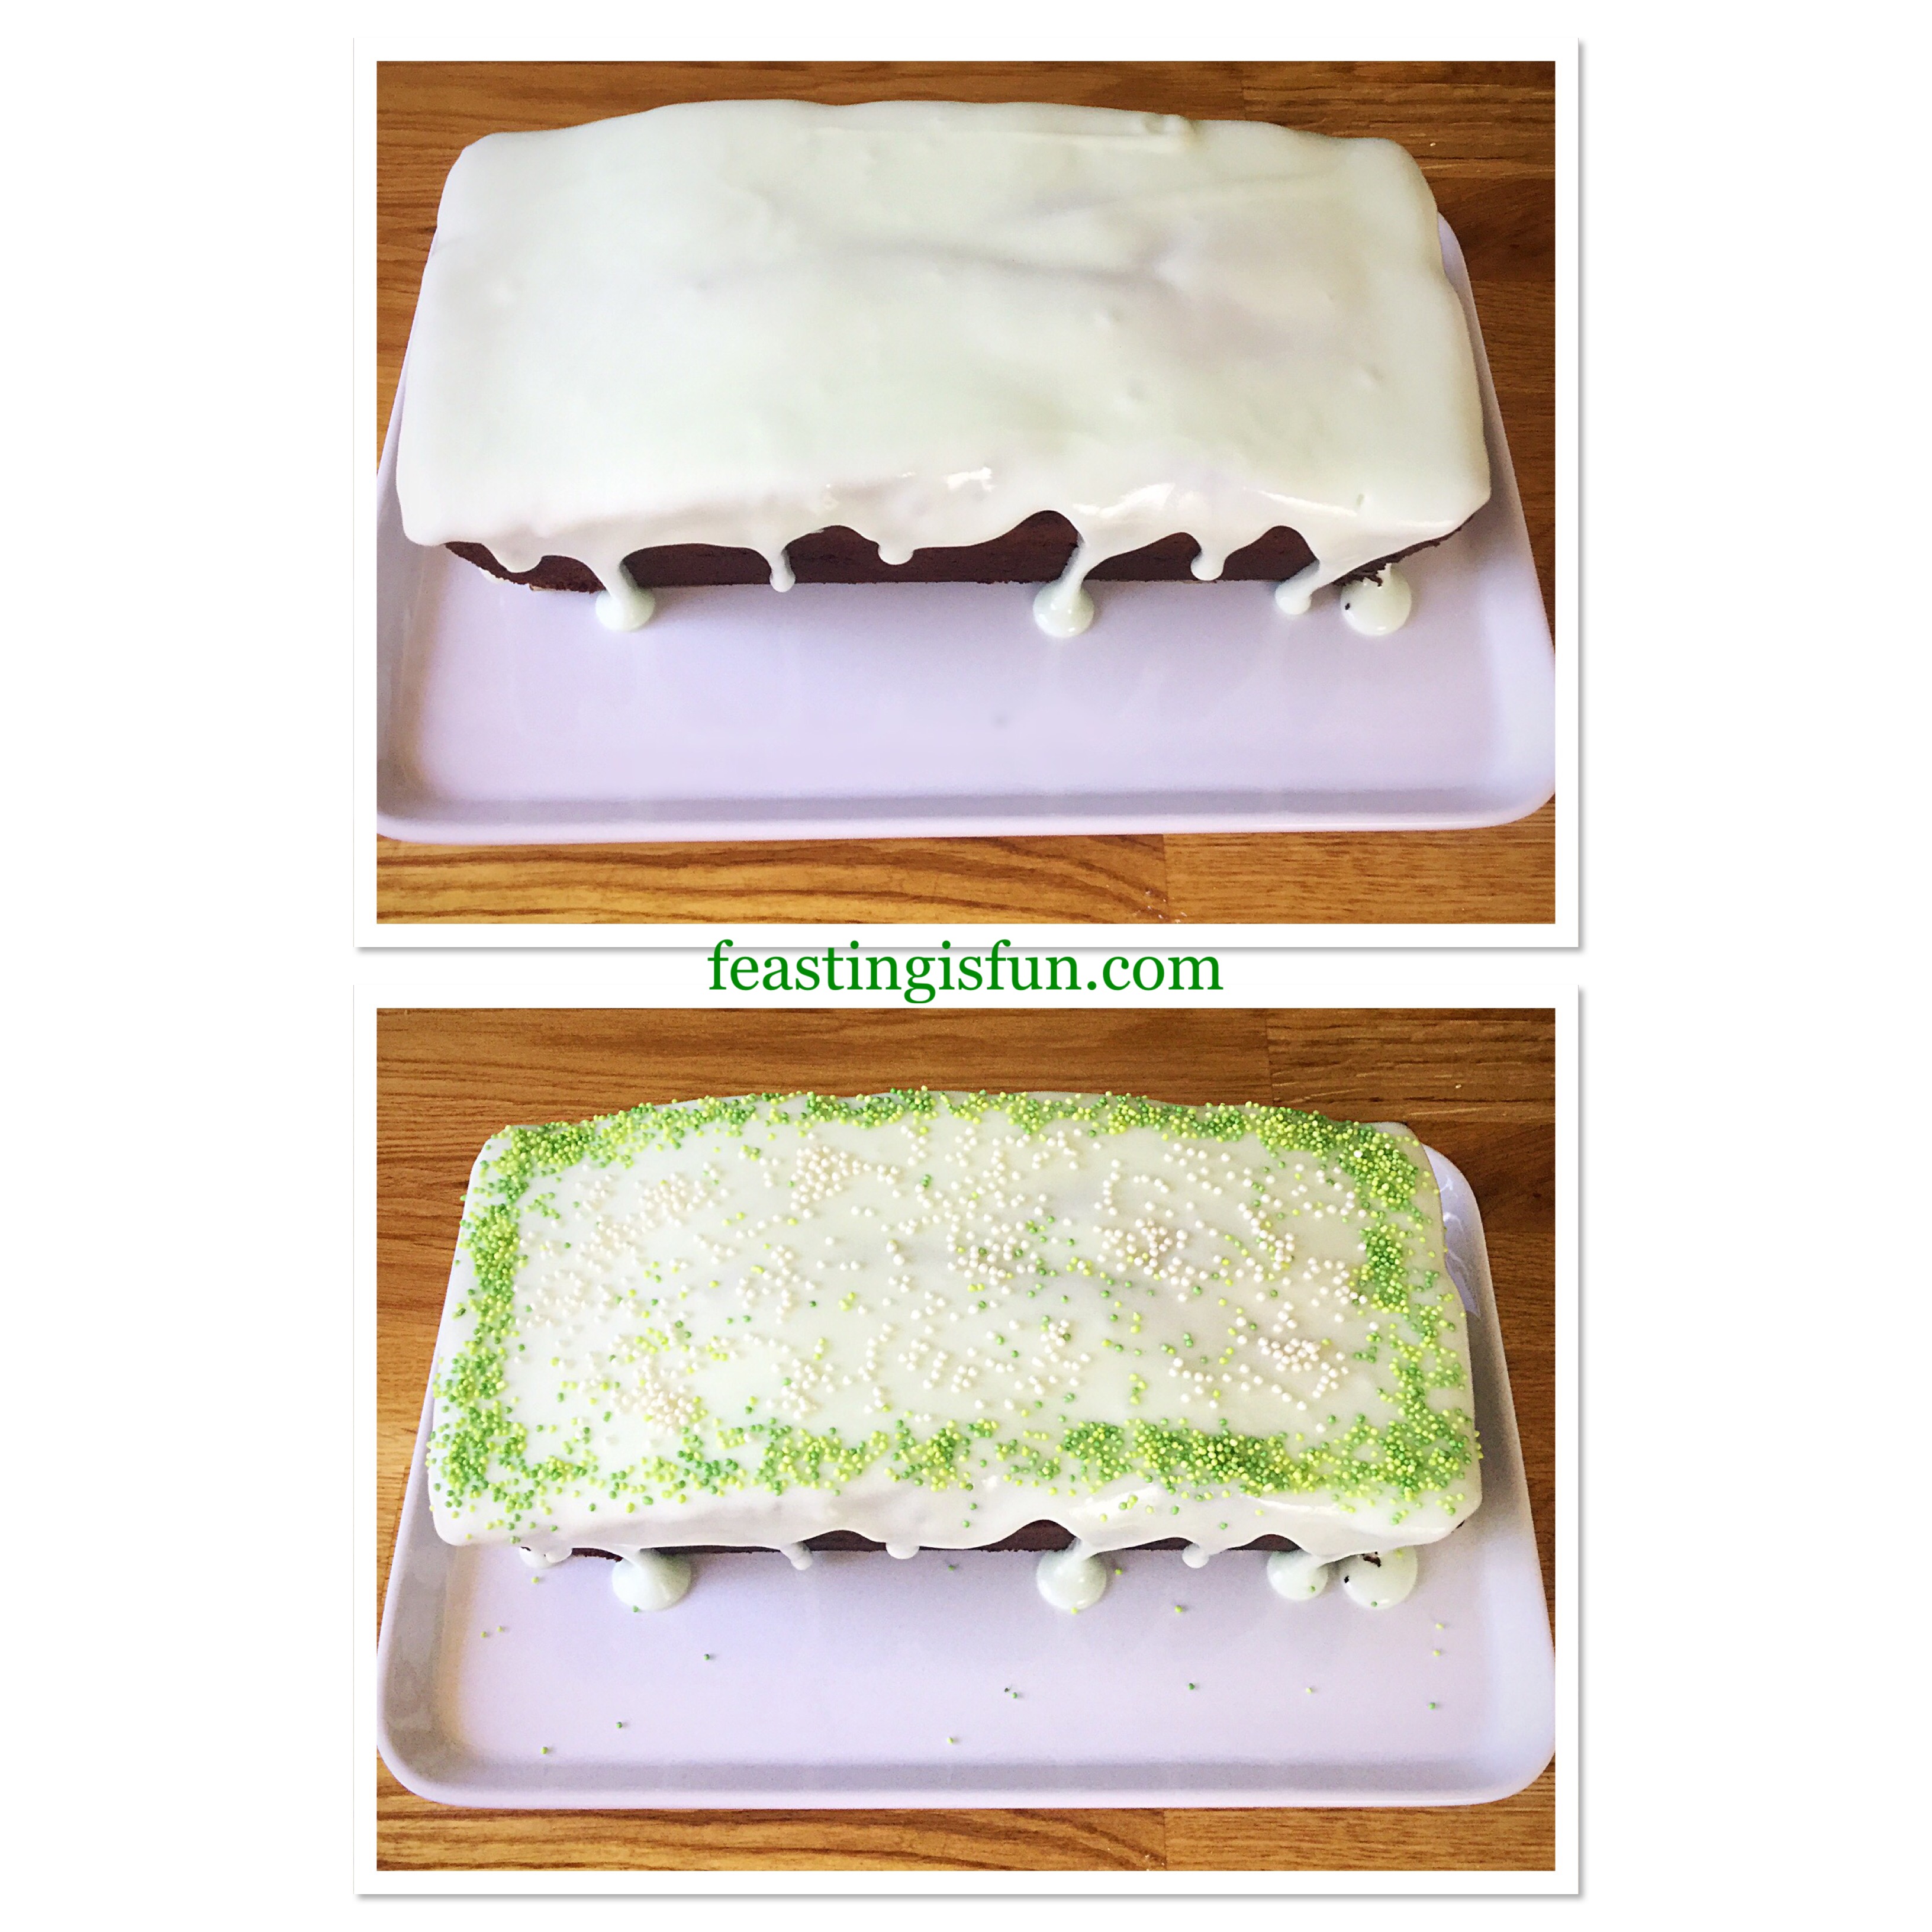
Decorating The Apricot White Chocolate Triple Sponge Cake
- Arrange the fresh (or canned) apricots on top of the cake and add the dark chocolate curls.
- Refrigerate the cake for a further 30 minutes, or until time to serve.
- Remove the cake from the fridge 10 minutes prior to serving. Doing so allows for easier slicing.
I made the gluten free sponges the day before assembling the cake. They were stored in an airtight cake tin separated by sheets of baking parchment.
If you have enjoyed this recipe for Apricot White Chocolate Triple Sponge Cake you may also like these:
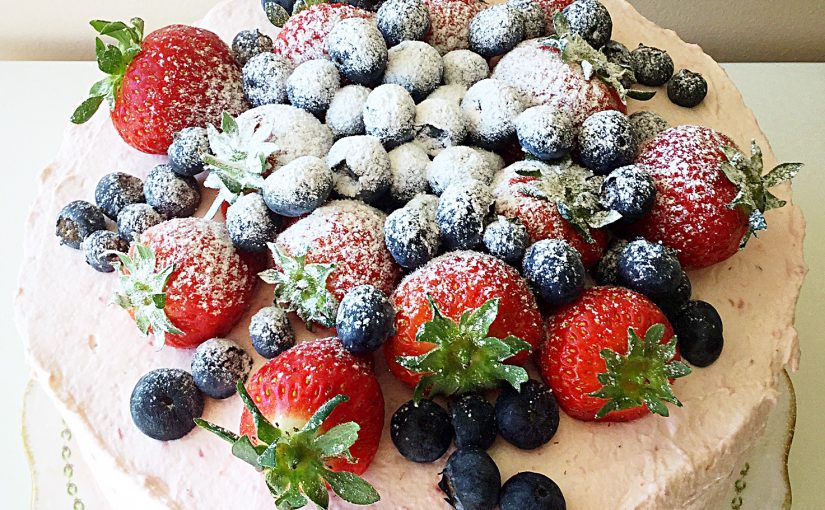
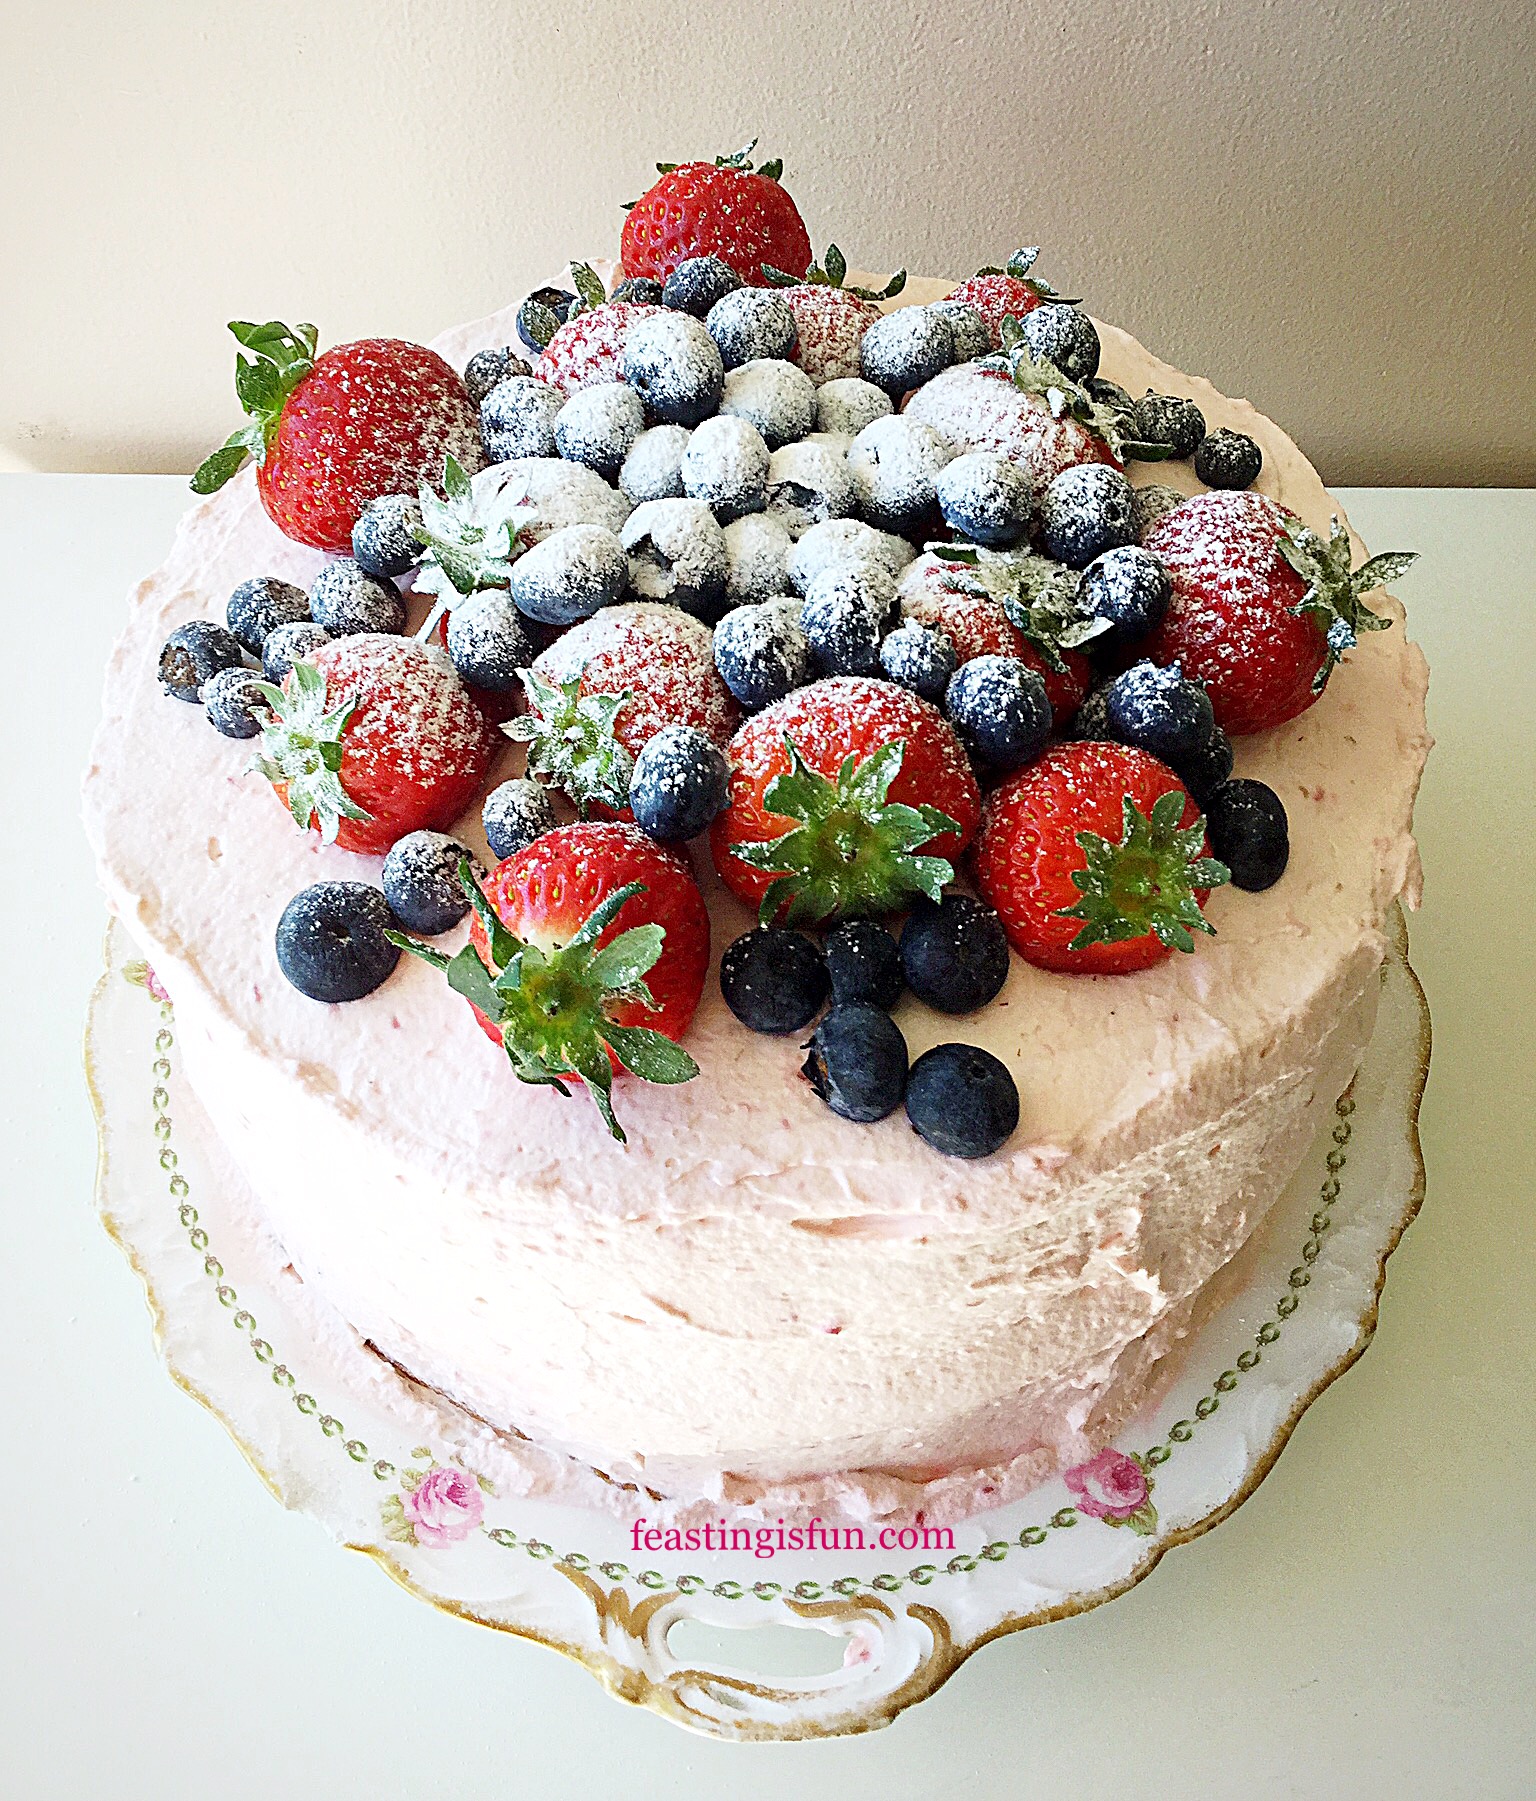
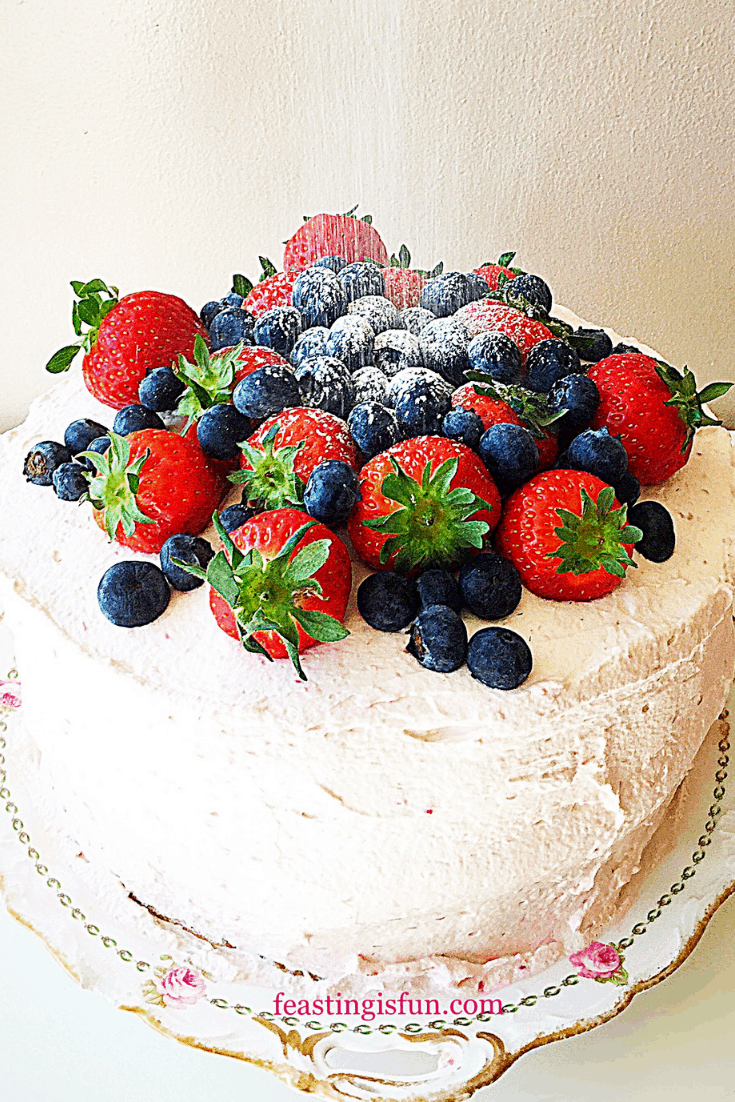
Summer Mixed Berry Sponge Cake
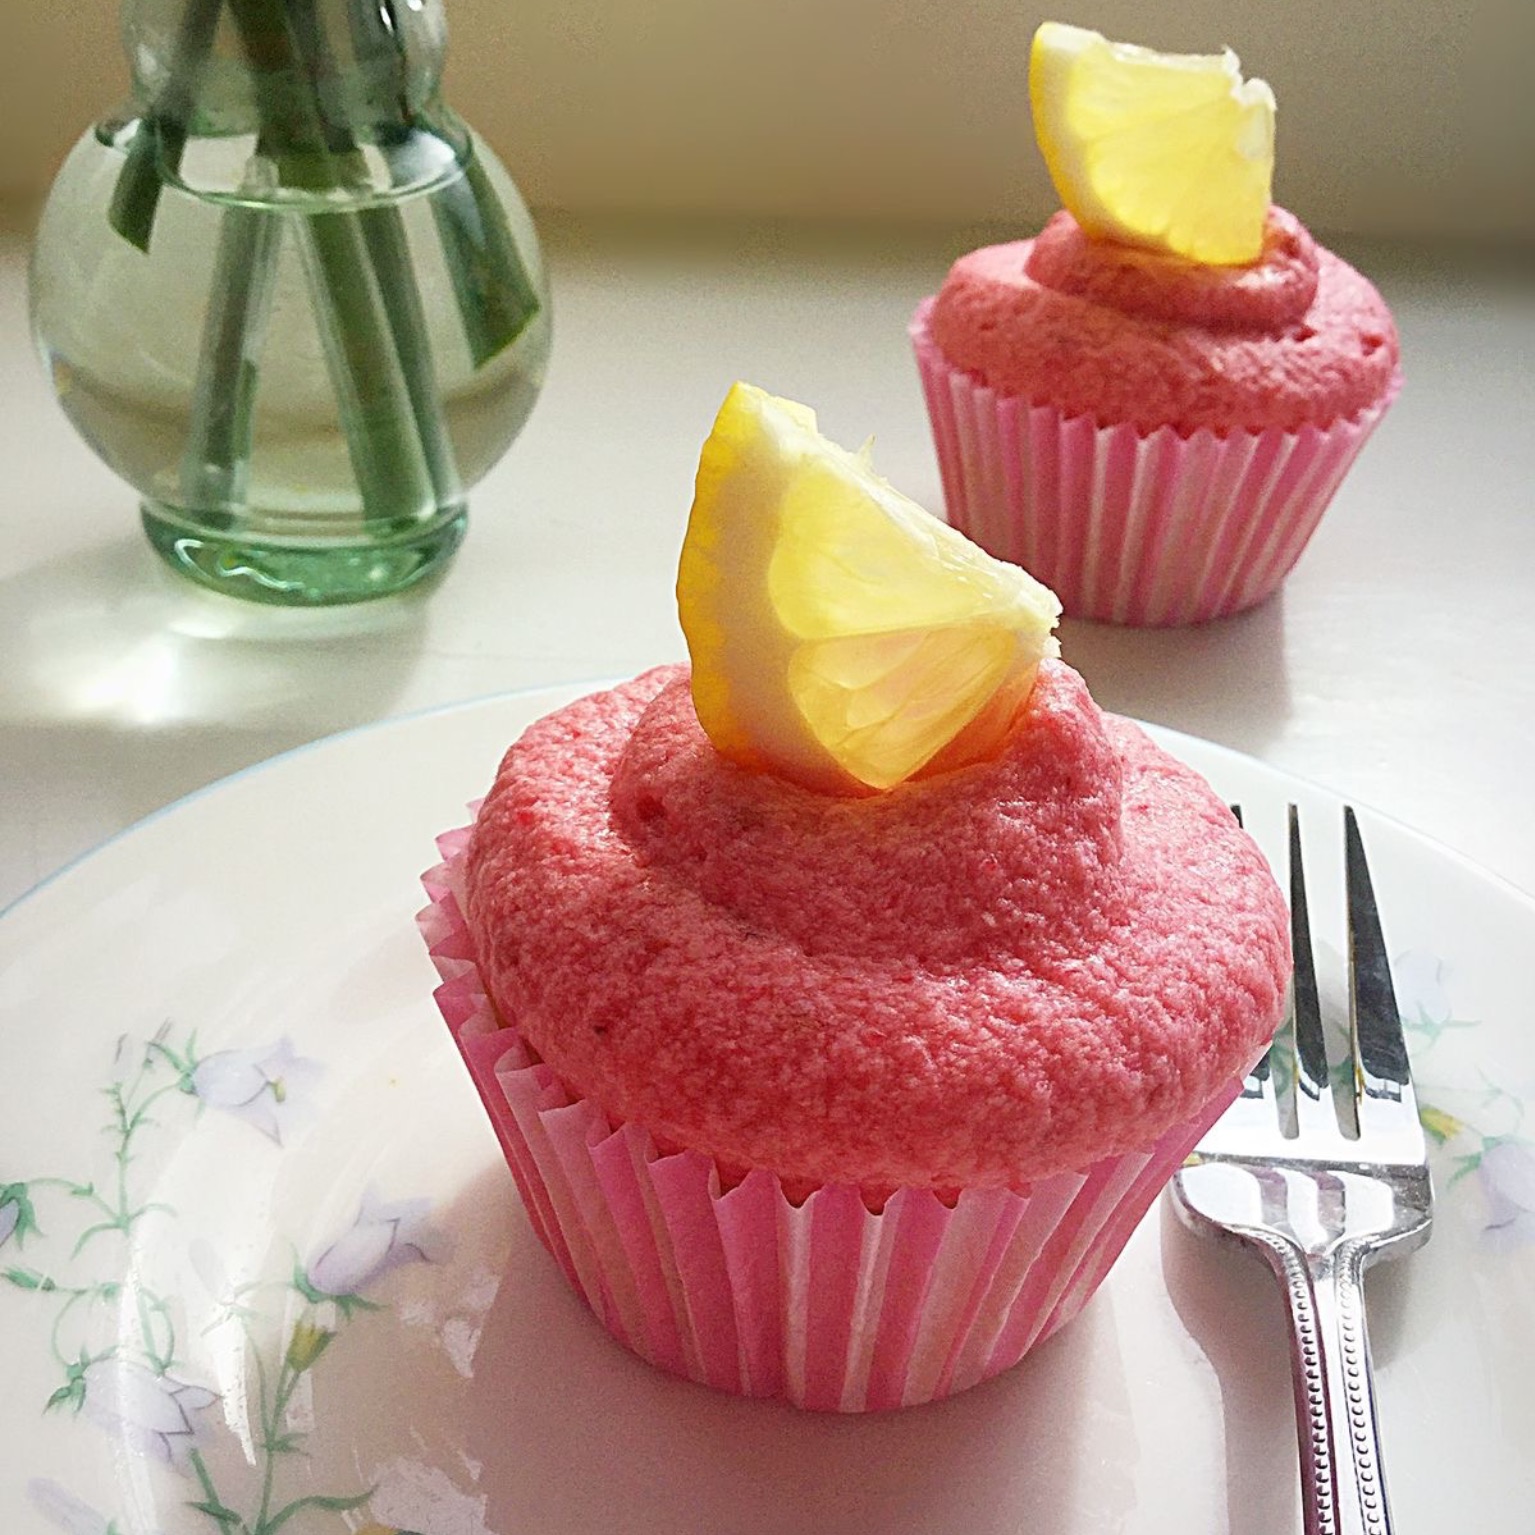
Raspberry Lemon Celebration Layer Cake
Fluted Chocolate Lemon Marble Cake

While making this Apricot White Chocolate Triple Sponge Cake I had great fun testing out the Mason Cash Innovative Kitchen items sent to me by Maha Home. As well as creating a feast, fun has to be at the heart of what I do. Likewise, by testing new kitchenware I learn what works and what doesn’t. As a result I can offer an unbiased opinion to you my readers. Your trust in me is central to any review I undertake. Resulting in a review that is open and honest.
So, whatever you are making, baking and creating in your kitchens, have fun preparing and sharing your feast.
Sammie xx
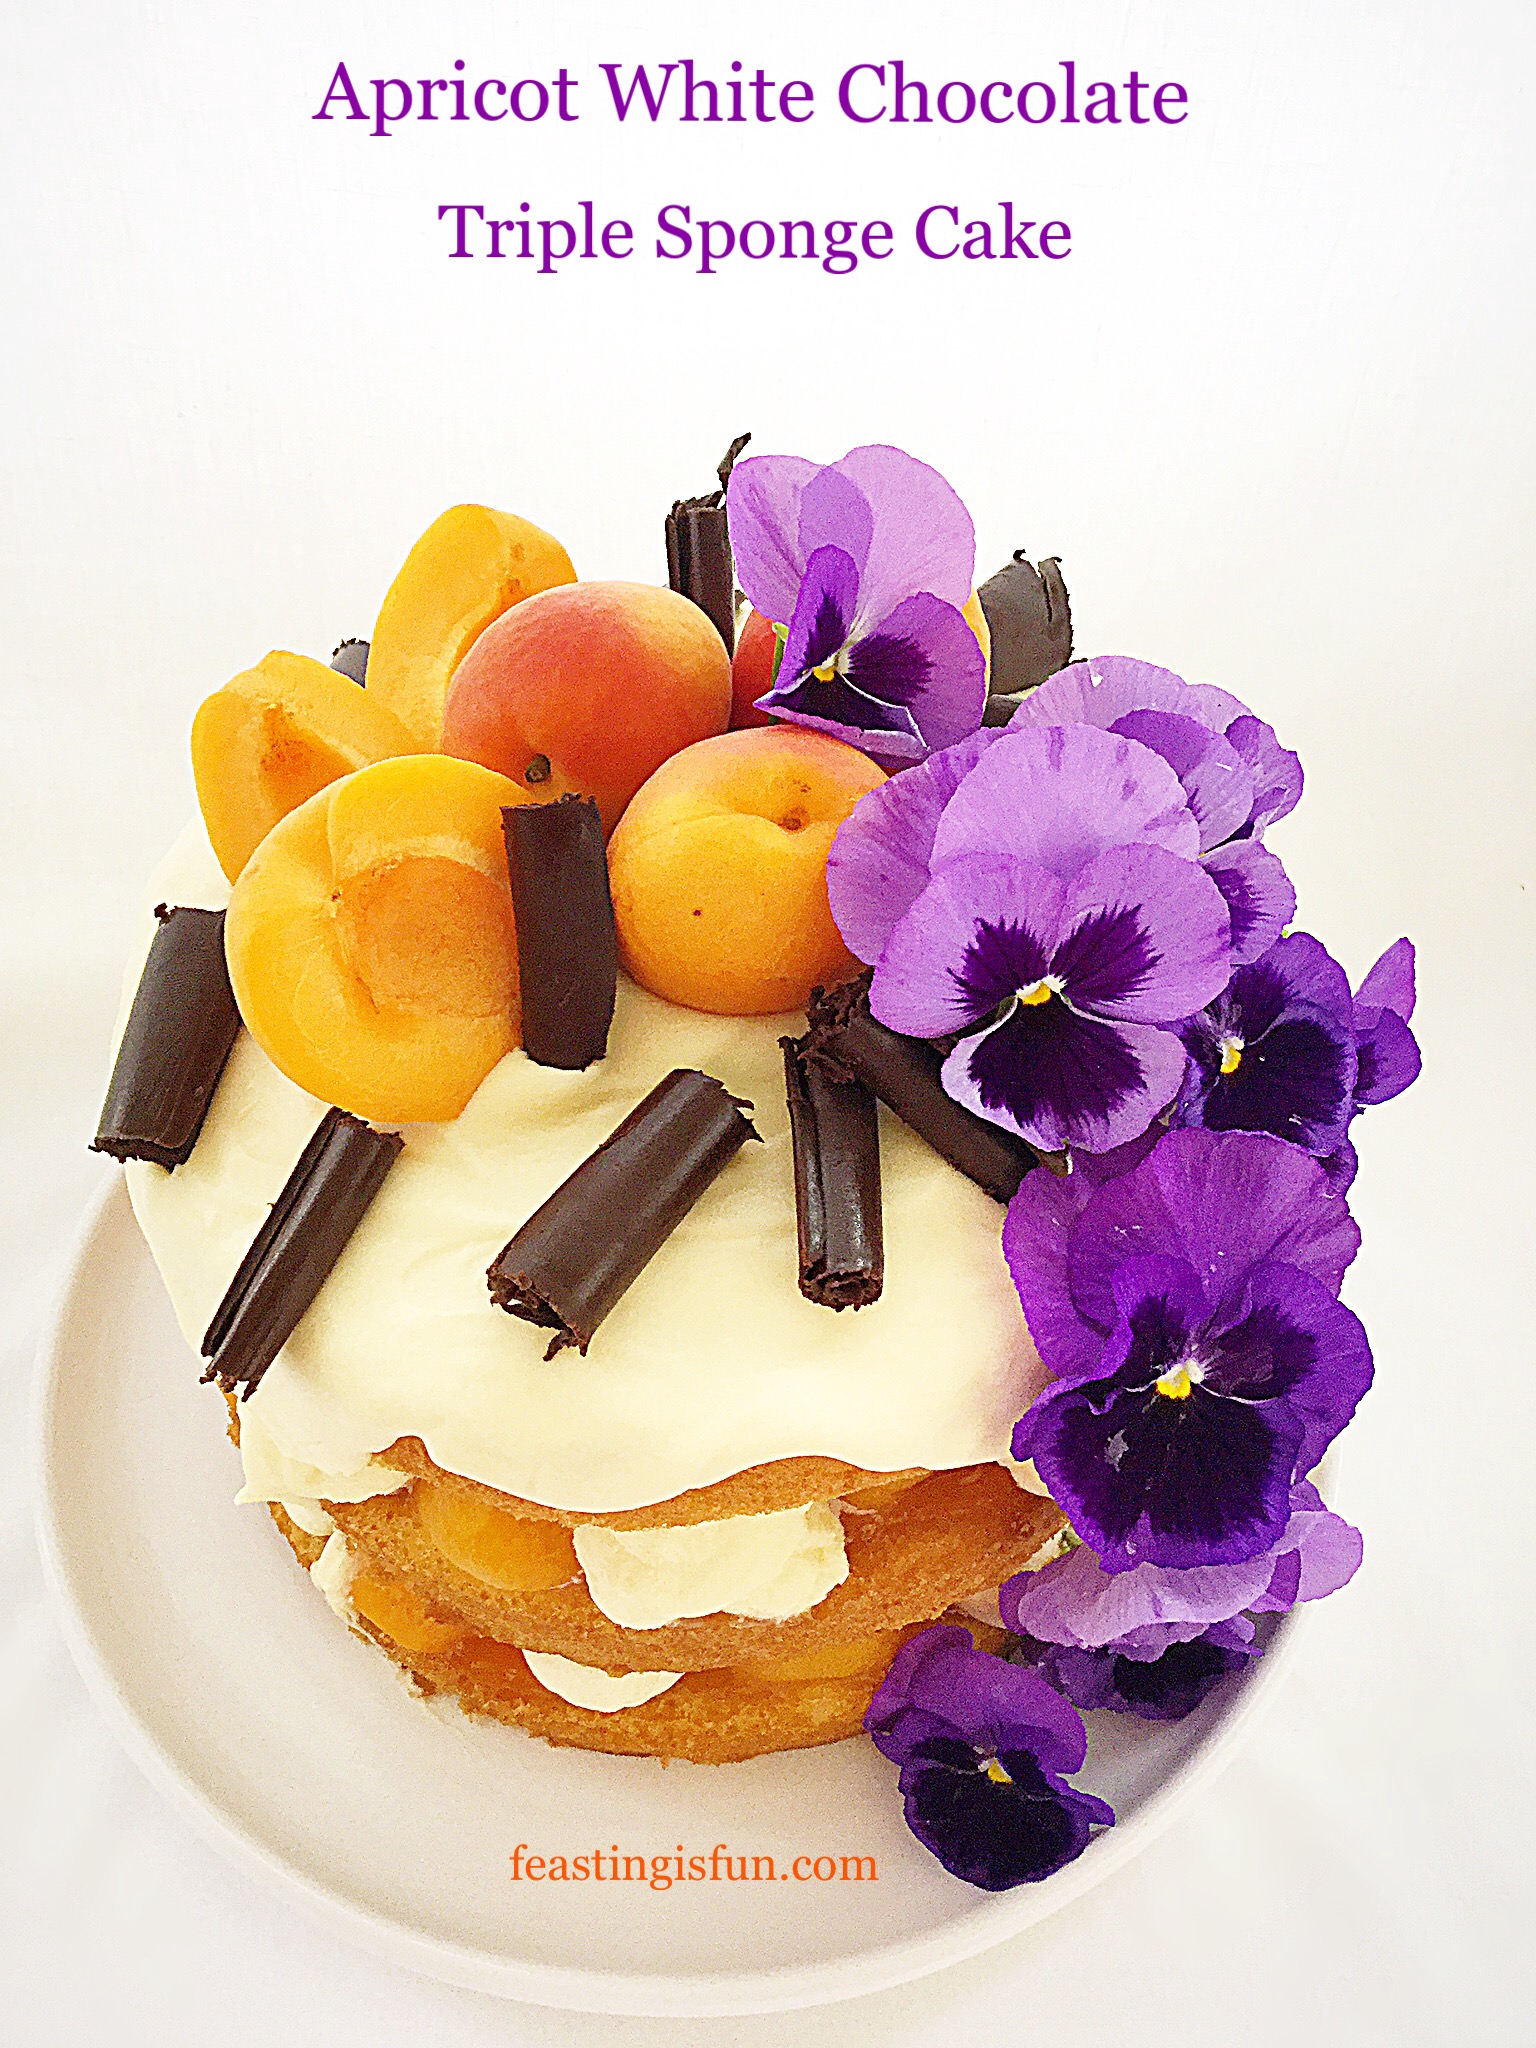
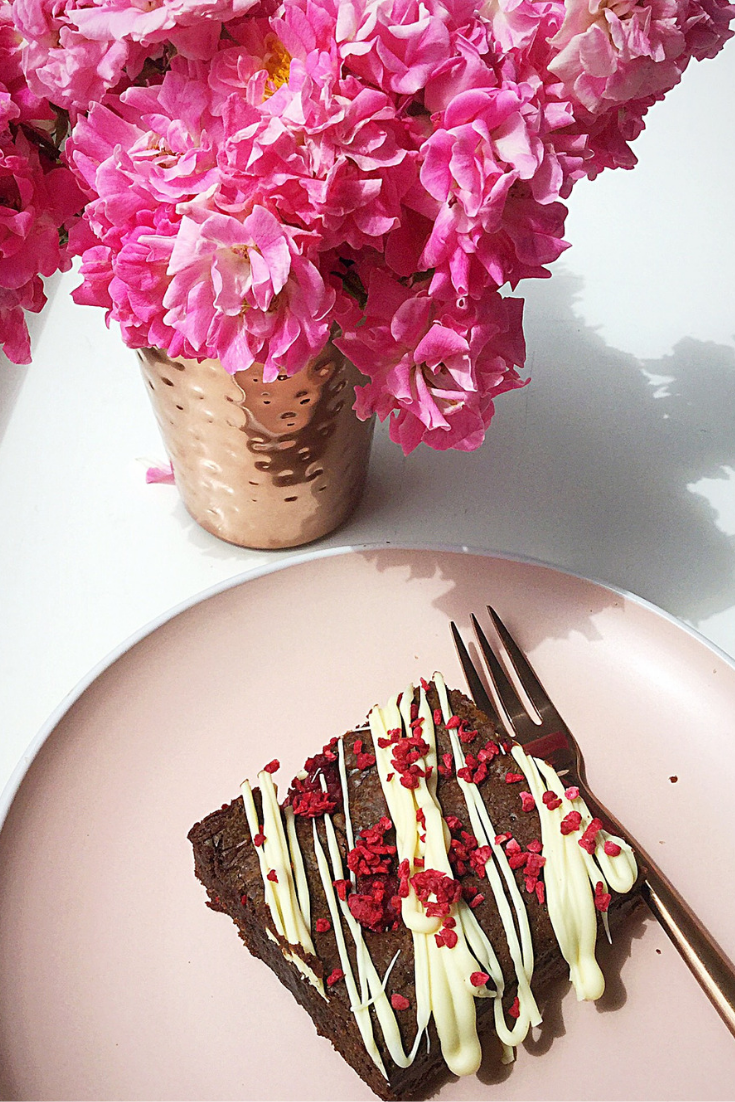
In the photograph above I added edible Pansies to create a pop of colour. When using flowers to decorate a cake, ensure they are edible and free from any chemicals.
Maha Home sent me the Innovative Kitchen items by Mason Cash for the purpose of reviewing. Please visit their website for lowest price match promise and discount code T’s & C’s. All opinions, views and content are my own. I was not paid to carry out this review. No part of this post may be reproduced or duplicated without the written permission of the owner. Please see my Disclosure Policy.