Sunflower Seed Heart Cob Loaf

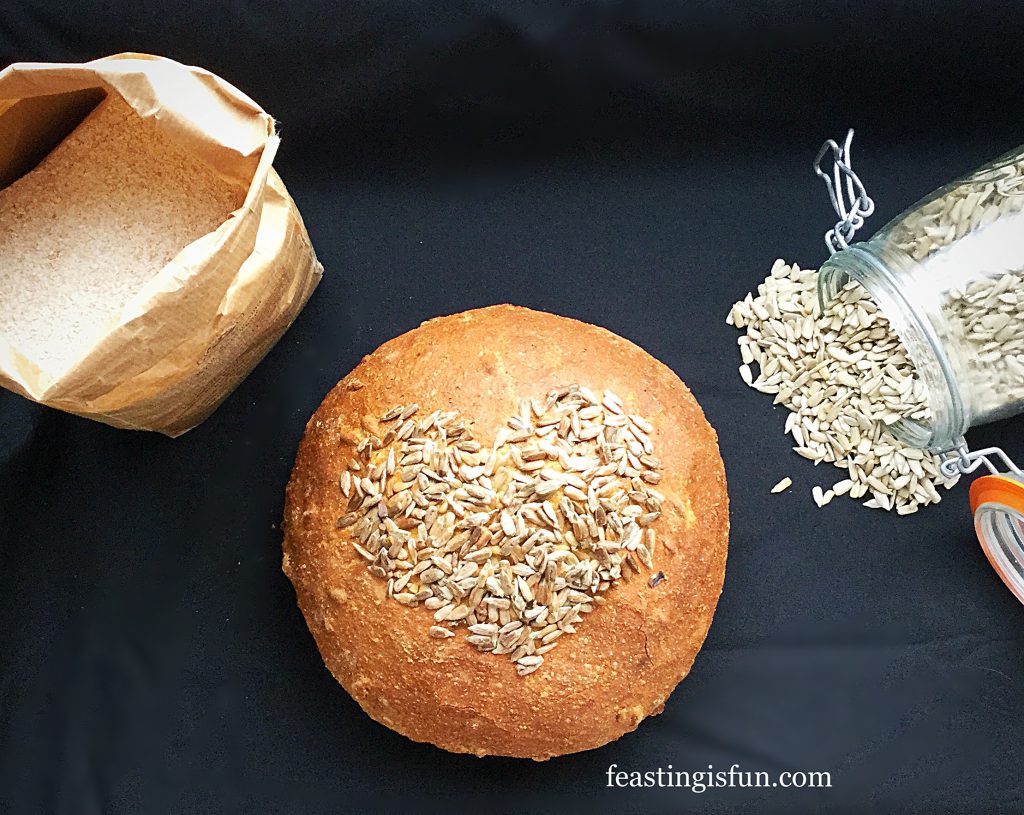
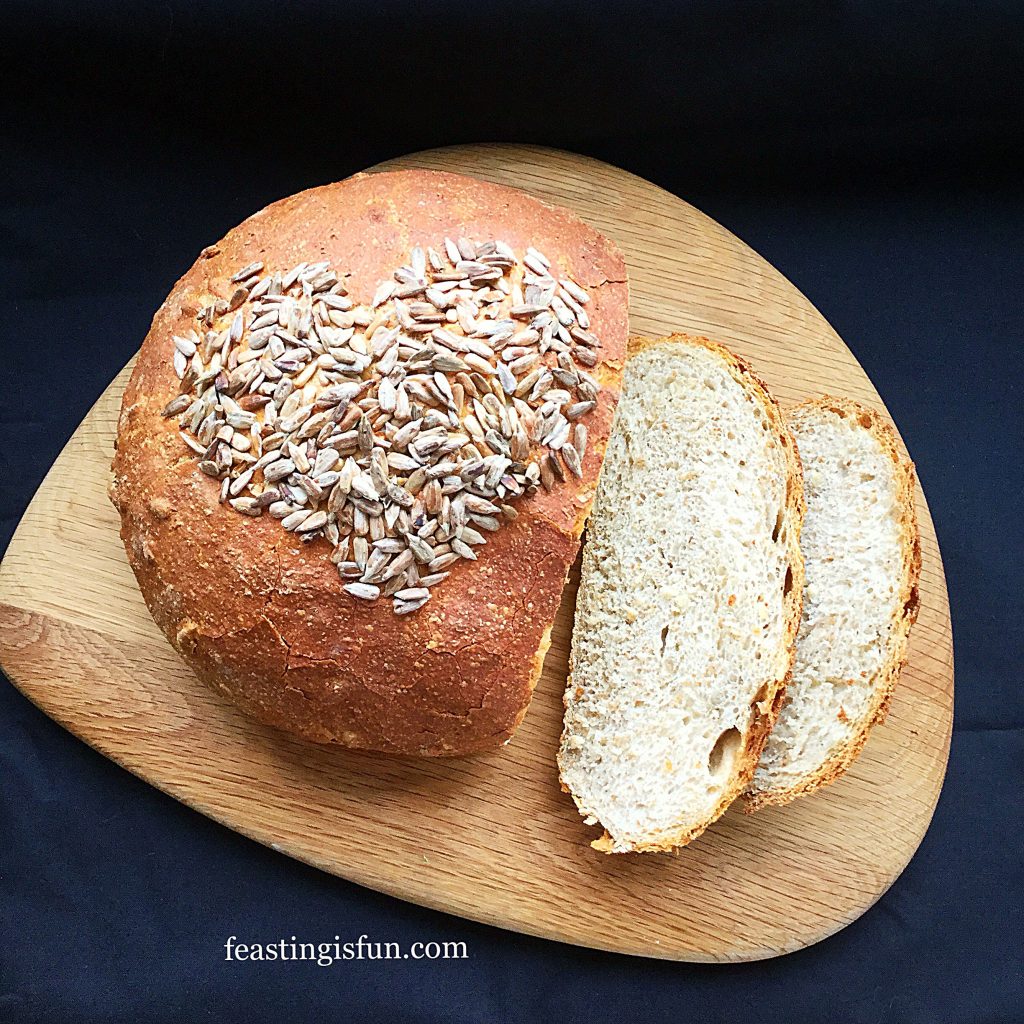
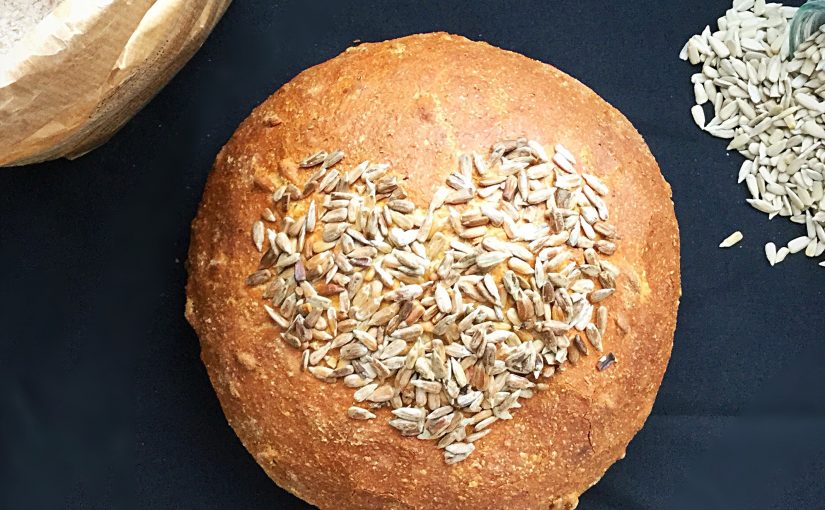
Today is Valentine’s Day and I have baked bread. While there is nothing unusual in that, I have baked bread with a bit of a difference. Since hearts abound on this day, more than most, I toyed with the idea of baking a heart shaped loaf. Practicality got the better of me. It always does! Unsure of how the finished loaf would be sliced I decided instead to create a heart pattern on a cob loaf. I share with you my Sunflower Seed Heart Cob Loaf.
FF Sunflower Seed Heart Cob Loaf
Sunflower Seed Heart Cob Loaf

A lighter wholemeal style bread packed full of sunflower seeds, this loaf is as tasty as it is pretty. Since this loaf is baked without the use of steam. Usually a bowl or tray of water is placed in the base of the oven, allowing maximum oven spring before the crust sets. Yet in this case, as the dough is brushed with water prior to being baked, it expanded well, without any cracking. Resulting in a really crusty finish.
FF Sunflower Seed Heart Cob Loaf
Sunflower Seed Heart Cob Loaf

While on the theme of hearts, this bread is ‘Heart healthy’ too. Since the addition of one third wholemeal flour provides added fibre. Also sunflower seeds are high in polyunsturated oil and contain Vitamin E known for it’s anti inflammatory properties. Most of all for those who do not like the density of one hundred percent wholemeal loaves, this bread provides a healthy alternative.

Recipe: Sunflower Seed Heart Cob Loaf

350ml/12 floz Tap Water at room temperature

7g Dried Yeast – I use the green tin/sachets from Allinson

2 tsp Runny Honey

150g/5oz Strong Wholemeal Bread Flour

350g/12oz Strong White Bread Flour

1 tbsp Rapeseed Oil – cold pressed I use Borderfields

7g Sea Salt – I use Maldon

50g/2oz Sunflower Seeds plus extra for creating the heart

Method:

The method given uses a stand mixer to mix and knead the dough prior to proving. You may of course make the dough by hand.

Making The Bread Dough

  • First of all weigh the water into a bowl (of a stand mixer with dough hook attachment).
  • Add the dried yeast and honey to the water.
  • Next add both wholemeal and white bread flour.
  • Now add the salt and oil.
  • Lower the dough hook and mix on low speed for five minutes.
  • Add the sunflower seeds to the dough while mixing.
  • Increasing the speed for a further 5-10 minutes. To check if the dough is ready perform the windowpane test; stop the mixer, remove a small piece of dough and stretch it between your fingers. When fully kneaded/mixed the dough will not tear and you will be able to see through it.
  • As soon as the dough is fully kneaded stop the mixer and lift up the dough hook. Scrape any dough from the hook into the bowl. Cover with a clean tea towel and leave in a draught free place to prove until doubled in size.

Shaping The Cob Loaf

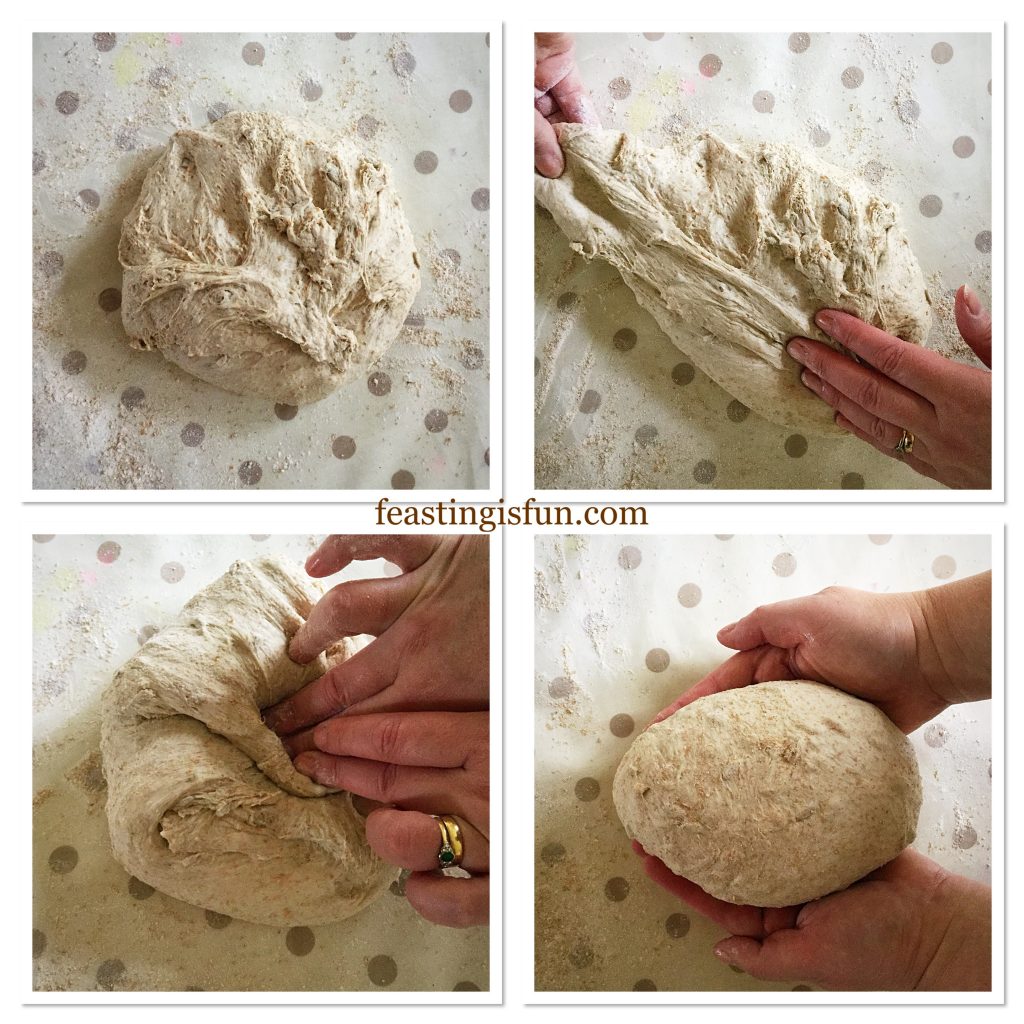
  • Turn the dough out of the bowl on to a lightly floured worktop, the top of the dough should be at the bottom. So that it is in contact with the wotktop. Working around the outside, pull out the dough and then press into the centre. Continue 5-6 times pulling out and pressing in until you have a neat and tidy lump of dough. This process creates tension across the top (bottom at this point) of the dough.
  • Flip the dough over and use both hands to cup and shape the dough, turning it as you do so. Resulting in a round cob shaped loaf.
FF Sunflower Seed Heart Cob Loaf
Shaping the dough.
  • Place the shaped dough on to a lightly oiled baking sheet. Cover with a clean tea towel and leave to double in size in a draught free place.
  • Preheat the oven to 220C/200C fan, 425F, gas mark 7.
  • While the dough is undergoing it’s second prove make a heart stencil.

Creating The Sunflower Seed Heart Pattern

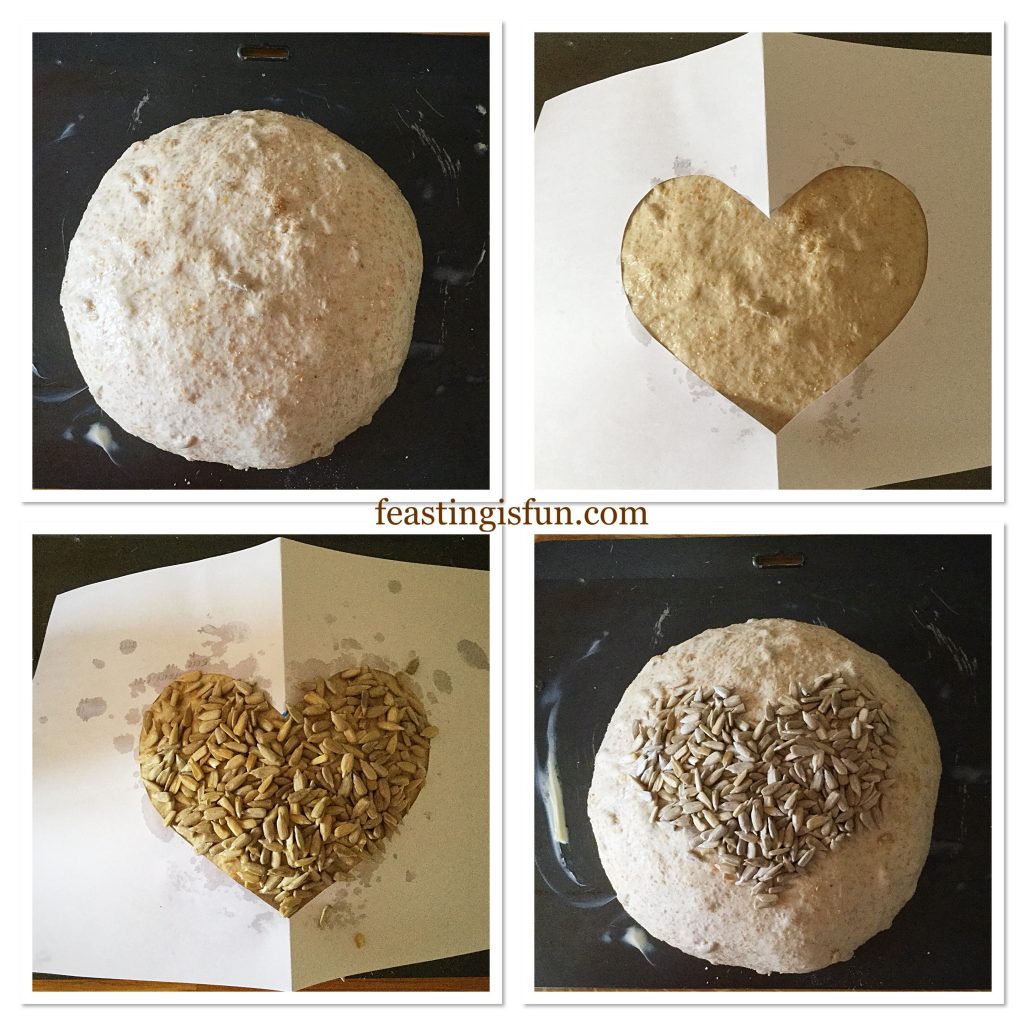
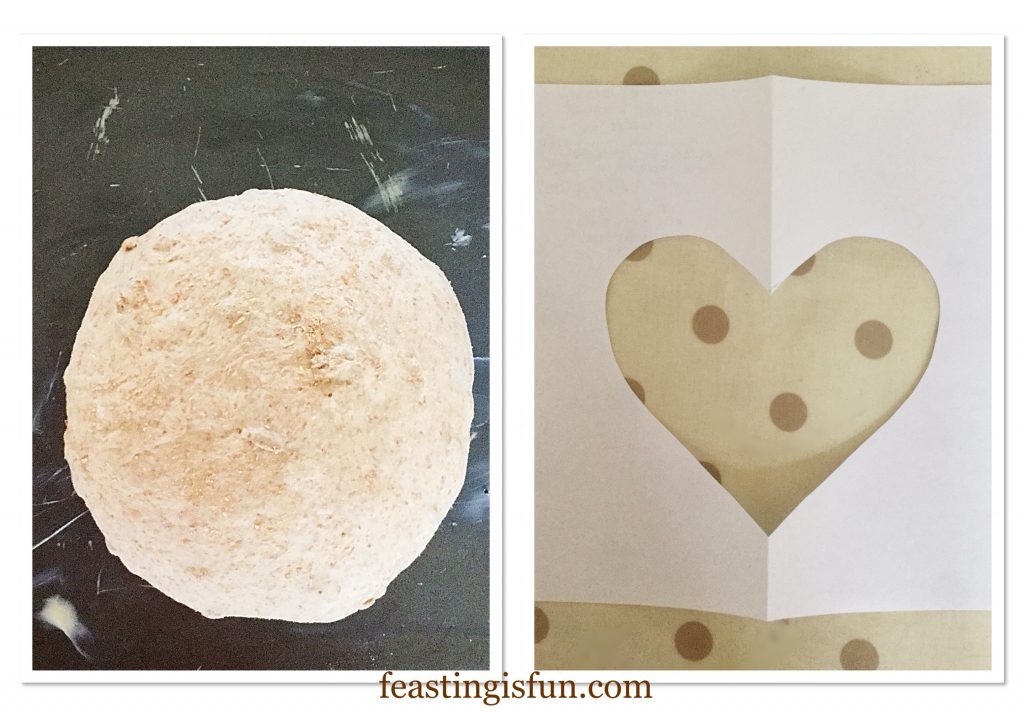
  • Fold a piece of A4 paper in half. Using scissors cut out half of a heart.
FF Sunflower Seed Heart Cob Loaf
The finished shaped cob loaf and heart stencil.
  • As soon as the dough has doubled in size brush the entire loaf with warm water.
  • Place the heart stencil over the dough.
  • Sprinkle sunflower seeds inside of the stencil and then lightly dab them with water using a pastry brush.
  • Remove the stencil.
FF Sunflower Seed Heart Cob Loaf
Creating the sunflower seed heart on the proved cob dough.

Baking The Sunflower Seed Cob Loaf

  • Place the baking sheet into the centre of a preheated oven and bake for 40-50 minutes.
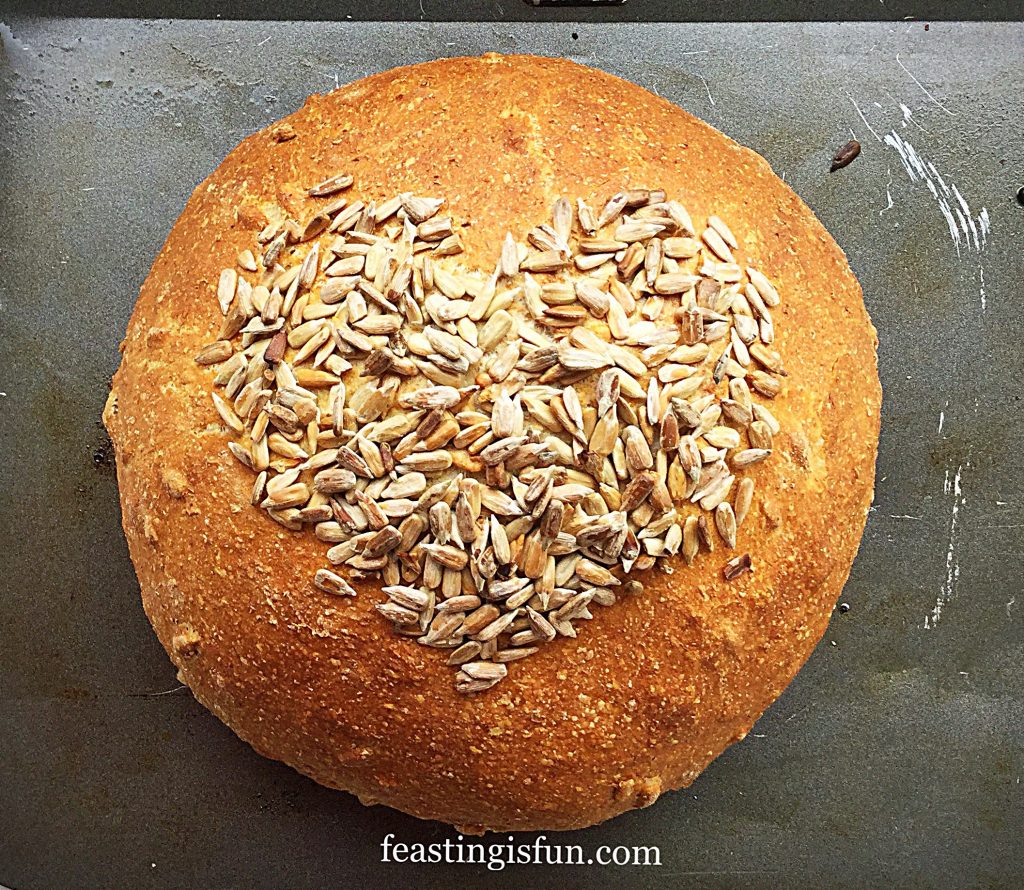
  • The bread is baked when it has a deep, golden crust and sounds hollow when tapped.
  • As soon as the bread is baked remove from the oven and carefully (it will be very hot) place the cob loaf on to a cooling rack.
FF Sunflower Seed Heart Cob Loaf
Sunflower Seed Heart Cob Loaf

Delicious, crusty, nutty flavoured bread.
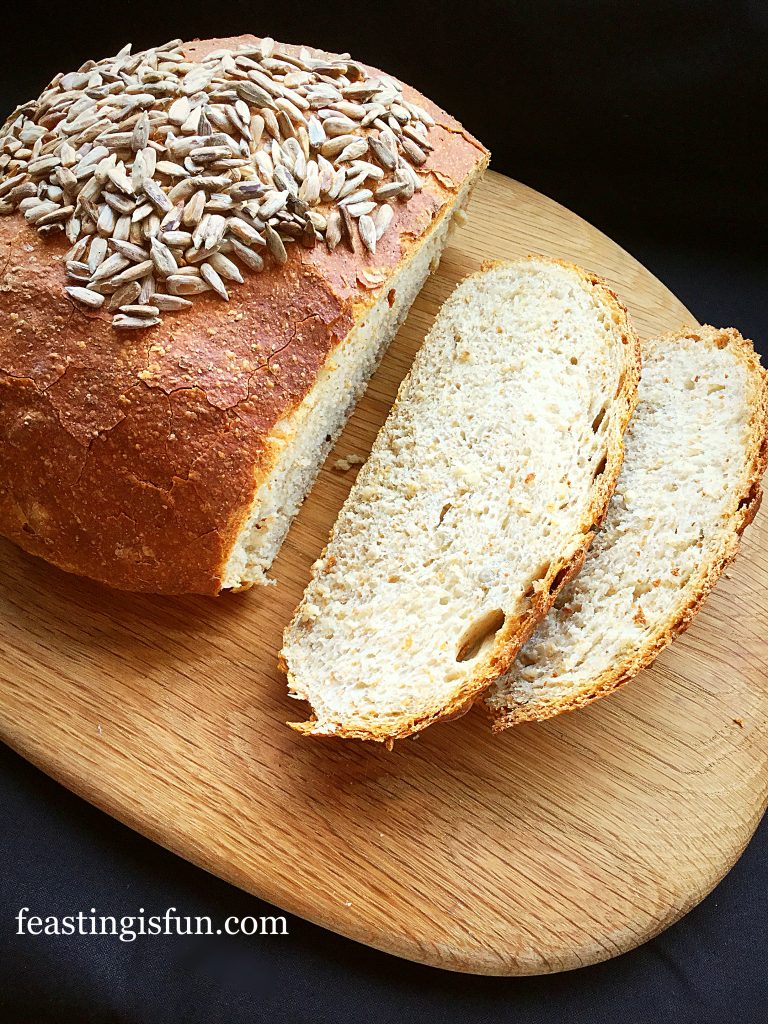
FF Sunflower Seed Heart Cob Loaf
Sunflower Seed Heart Cob Loaf

Allow the bread to cool prior to slicing and serving.

Ideally store the cooled bread in a bread bin. Plastic wrap or cling film may cause the bread to sweat and it will lose it’s crunchy crust and become soft.

If you have enjoyed this recipe for Sunflower Seed Heart Cob Loaf you may also like these:

Plaited Seeded Top Wholegrain Spelt Bread
FF Sunflower Seed Heart Cob Loaf
Plaited Seeded Top Wholegrain Spelt Bread
Easy Homemade Cottage Loaf

FF Sunflower Seed Heart Cob Loaf
Easy Homemade Cottage Loaf

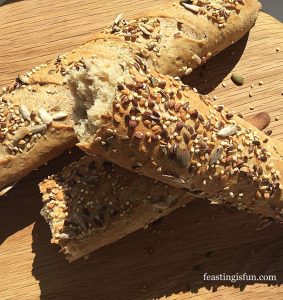
Seeded Multigrain Baguettes

FF Sunflower Seed Heart Cob Loaf
Seeded Multigrain Baguettes

Bread baking is a passion that I have. Creating a tasty loaf that has flavour in it’s own right and is not simply a carrier of flavours makes the little effort it takes worthwhile. Our home is filled with the smell of freshly baked bread on an almost daily basis. If I could only bake one thing it would be bread. Wholesome, hearty, crusty and nutty this loaf ticked every single box. Bread truly is at the heart of any feast.

Whatever you are making, baking and creating in your kitchens, have fun preparing and sharing your feast.

Sammie xx

No part of this post may be reproduced or duplicated without the written permission of the owner. Please see my Disclosure Policy.
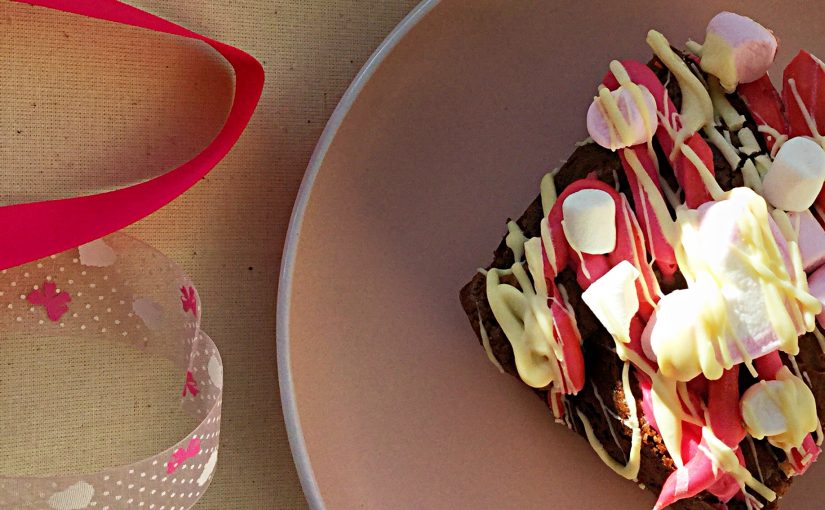
 

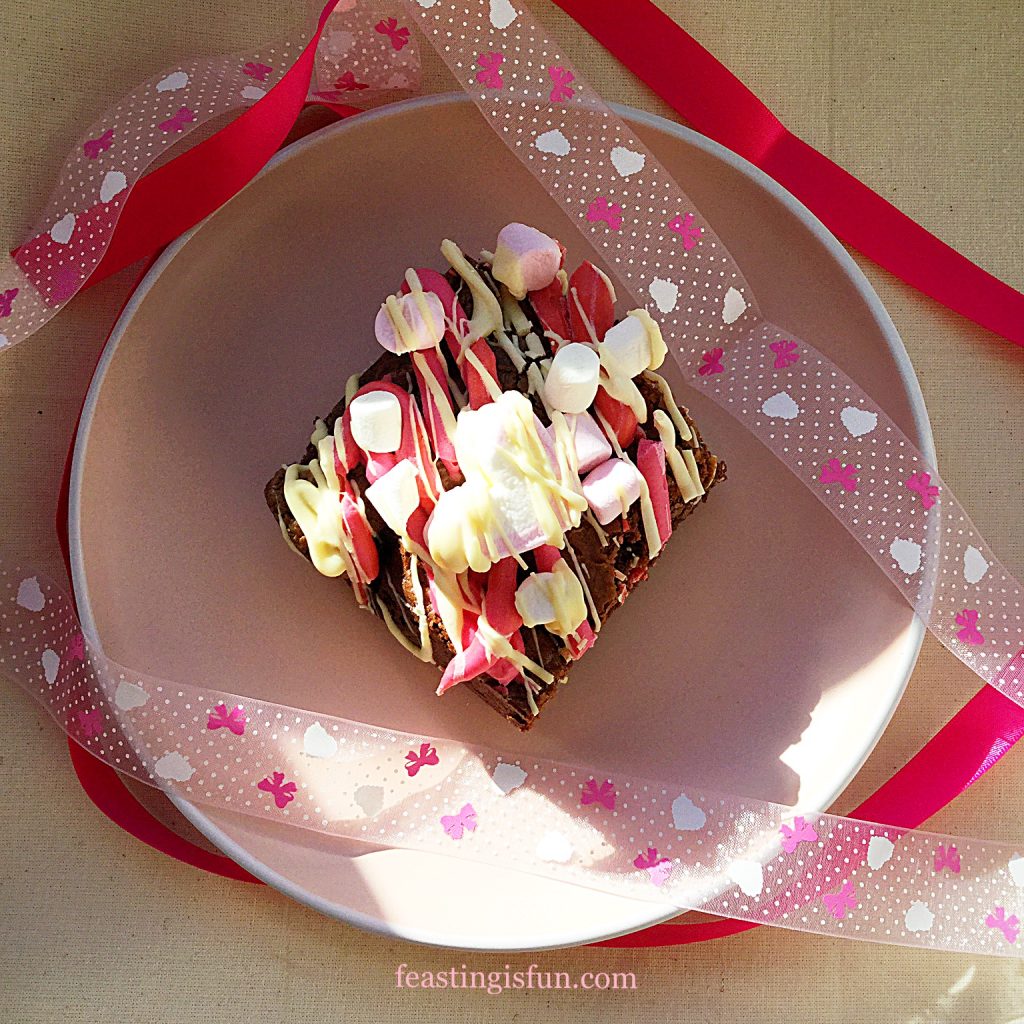
Marshmallow Topped Rich Chocolate Brownies

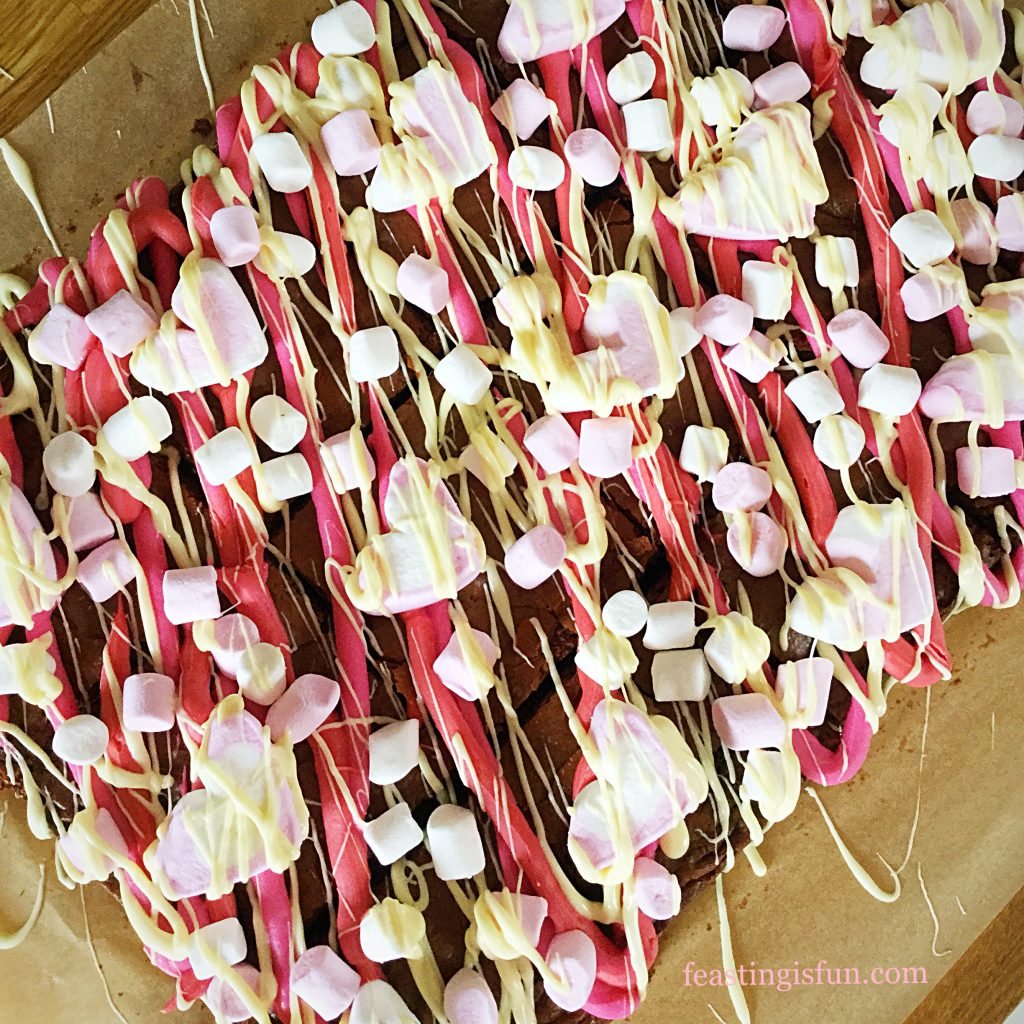
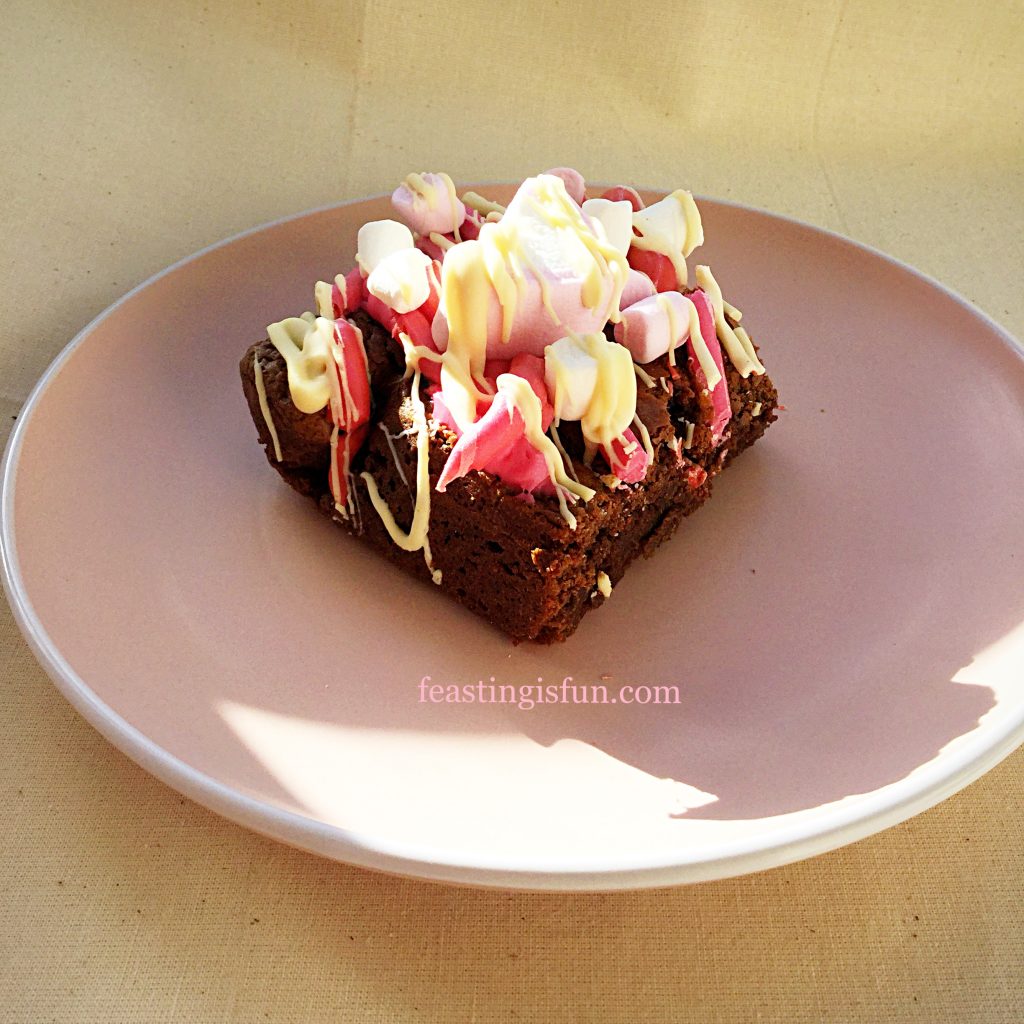
Marshmallow Topped Rich Chocolate Brownies are a perfect party portion. Decadent, fudgy, chocolate brownies splashed with edible coloured candy and scattered marshmallows. Easy to make and bake, fun to decorate and perfect for sharing with family and friends.

FF Marshmallow Topped Rich Chocolate Brownies
Marshmallow Topped Rich Chocolate Brownies

Since it is half term this week, here in England I created a bake that children can get involved in. While adult supervision may be needed for certain stages of brownie baking process, decorating is child’s play. Whether that be children in your care, or the inner child within us all. Simply looking at these brownies screams fun and that is of upmost importance to us here at Feasting is Fun!

FF Marshmallow Topped Rich Chocolate Brownies
Marshmallow Topped Rich Chocolate Brownies

While many children are happy to share, some thrive better when given their own blank canvas (or brownie in this case) to with. Because it is easy to divide the baked brownie in half, or quarters, or however many children you have helping, decorating these brownies couldn’t be more fun! Disposable piping bags are easy to get hold of, check the baking aisle of your local supermarket. However small sandwich or freezer bags can double as a great substitute. Simply cut a small hole in one corner, once the bag is filled.

FF Marshmallow Topped Rich Chocolate Brownies
Marshmallow Topped Rich Chocolate Brownies

Likewise, should very young children be taking part, icing sugar with a little water and colouring added, removes any risk from piping warm chocolate. Be prepared. If making these brownies with children of any age, including some adults, things will get messy and get eaten! Yet that is the fun of making and eating these brownies. Make sure there are plenty of paper towels to hand.

Recipe: Marshmallow Topped Rich Chocolate Brownies

For the brownies:

250g/9oz Milk Chocolate

250g/9oz Dark Chocolate

1/4 tsp Sea Salt – I use Maldon

275g/10oz Unsalted Butter – cut into squares

5 Large Free Range Eggs

2 tsp Vanilla Extract – I use Nielsen-Massey

275g/10oz Light Brown Muscavado Sugar – I use Billingtons

1/2 tsp Bicarbonate of Soda

100g/4oz Plain White Flour

For the topping:

100g/4oz White Chocolate

100g/4oz both pink and red Rainbow Dust Colour Melts available from Party Animal Online

Large and Small Marshmallows

Method: Preheat the oven to 180C/160C fan, 350F, gas mark 4

You will need a 34cm x 24cm x 5cm (13.5in x 9.5in x 2in) tin lined with baking parchment.

  • First of all break/cut both milk and dark chocolate into small pieces, approximately 1cm.
  • Place the chocolate and butter into a heatproof, microwaveable bowl.
  • Heat in the microwave on medium for 30 second bursts, stirring after each heat burst.
  • As soon as the butter is melted remove the bowl and stir continuously until all of the chocolate is melted and combined with the butter. Set aside to cool slightly.
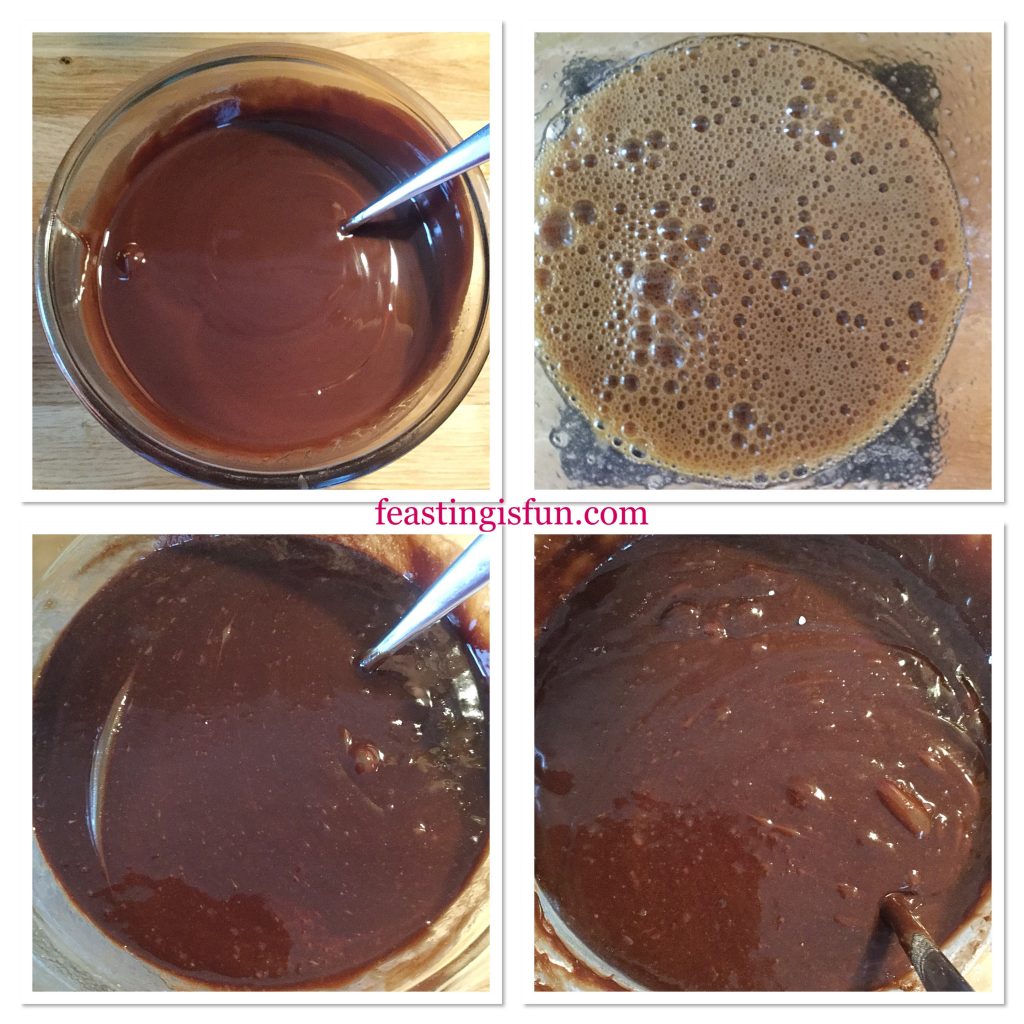
  • In a separate bowl add the eggs, salt, sugar and vanilla extract. Whisk together until fully combined.
  • Pour the cooled chocolate into the egg mixture, stirring as you pour to combine both liquids.
  • Sift the flour and bicarbonate of soda on to the chocolate mix. Fold the flour into the chocolate mixture until is just combined.
FF Marshmallow Topped Rich Chocolate Brownies
Making the rich chocolate brownie batter.
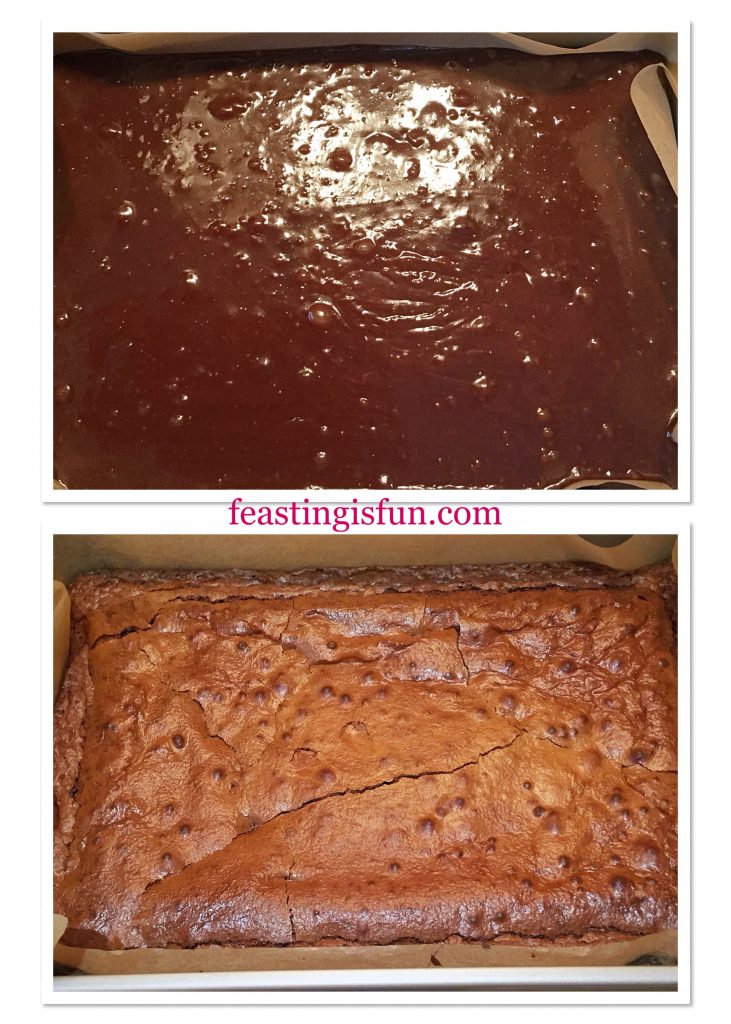
  • Pour the chocolate brownie batter into the prepared tin.
  • Rap the tin hard on the worktop twice to release any trapped bubbles.
  • Place the tin in the centre of a preheated oven and bake for 20-25 minutes. The brownies are baked when the top has set and there is a very slight wobble in the centre. Over baking the brownies will cause them to be dry, instead of rich and fudgy.
  • As soon as the brownies are baked remove from the oven and leave to cool completely in the tin. Any cracks or crackles on the surface of the finished bake will close on cooling. Also the top is to be decorated and so they will be covered!
FF Marshmallow Topped Rich Chocolate Brownies
Baking the rich chocolate brownies.
  • As soon as the brownies have cooled they are ready to be cut and decorated.
  • First of all using the baking parchment lift the brownie slab from the tin and place on a board.
  • Use a palette knife, run the flat side between the base of the brownie and the baking parchment.
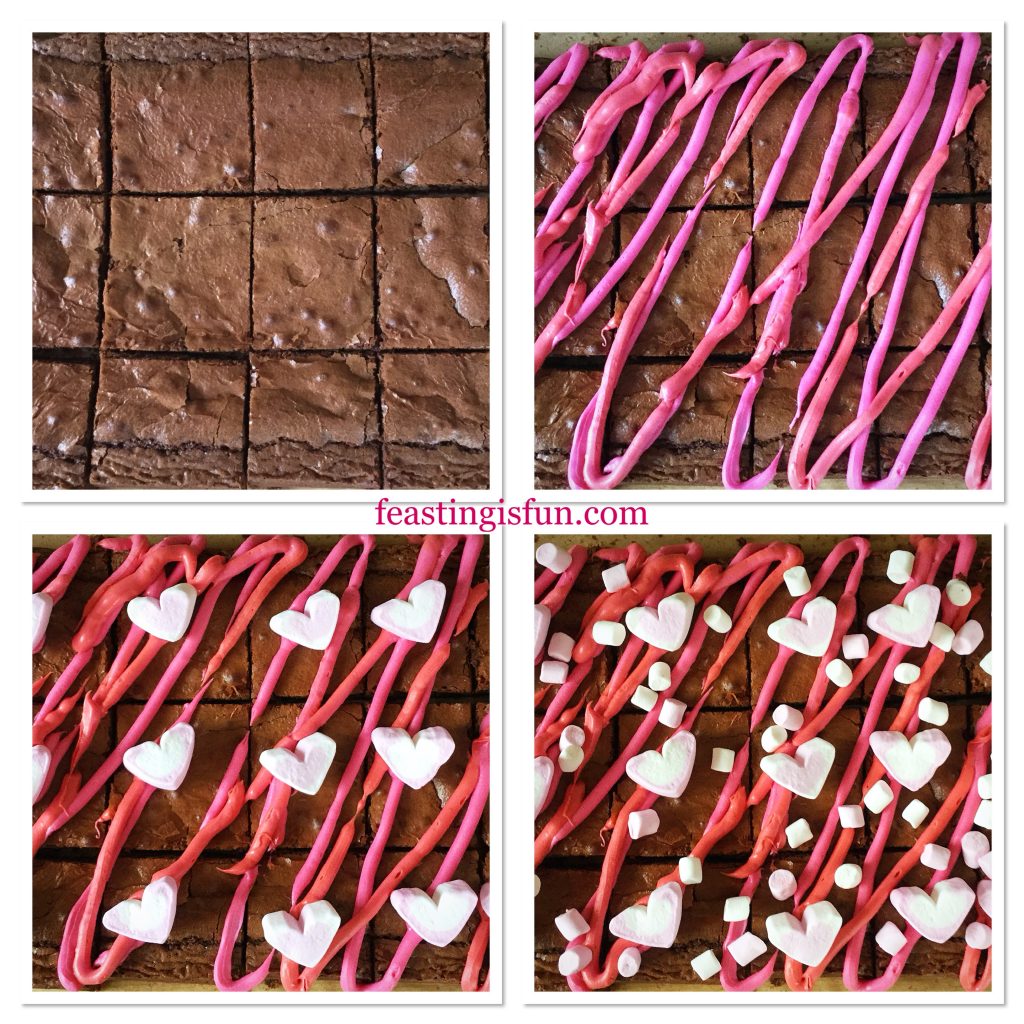
  • Cut across the brownie in three equal portions. Now cut downwards five times, creating fifteen equal sized brownie squares. Alternatively cut the brownies into smaller portions.
  • Into three separate, heatproof and microwaveable bowls add the coloured rainbow melts and broken up white chocolate. Since it is easy to overheat white chocolate and especially the melts, heat each bowl separately in short bursts, stirring in between. As soon as the rainbow melts, or white chocolate start to melt remove from the microwave, stirring constantly until completely melted.
  • Decant each separate colour into a small, disposable piping bag. Just prior to using cut a small opening at the tip of the bag.
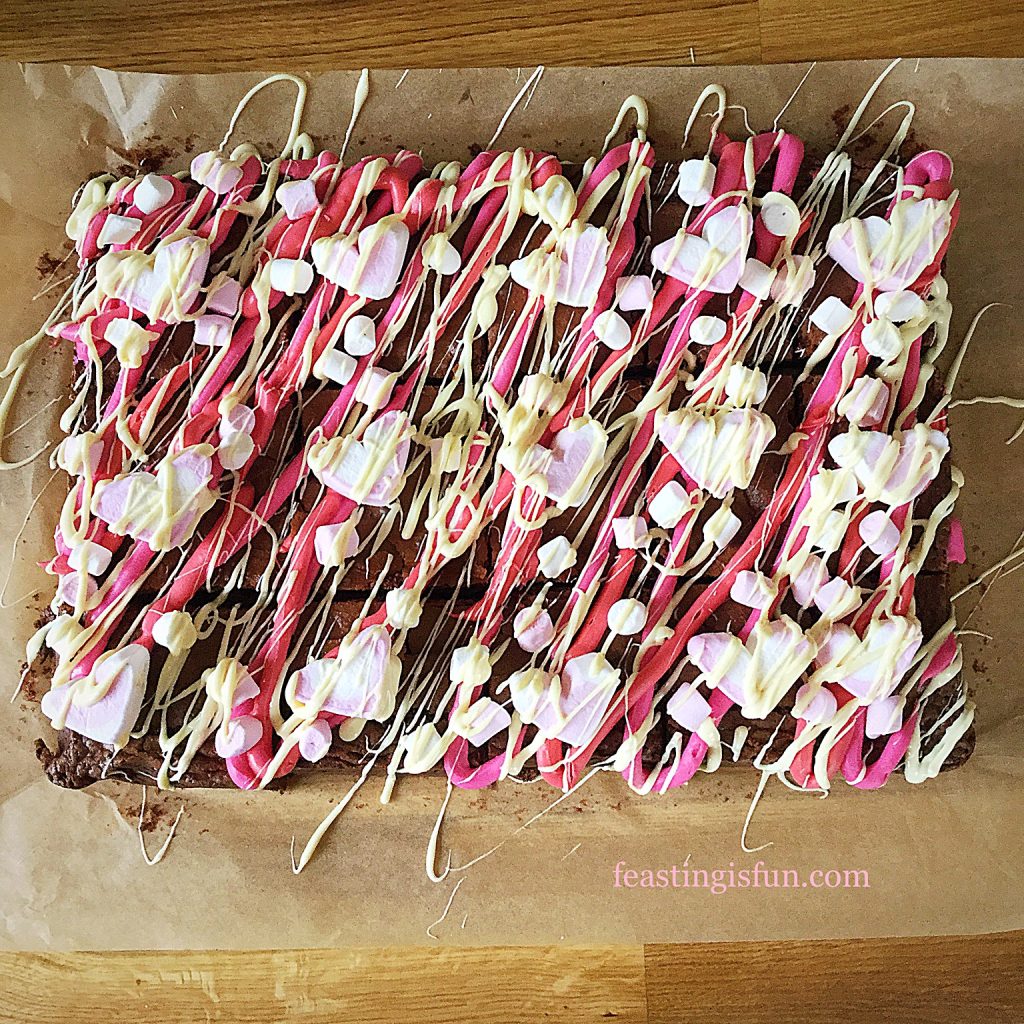
  • Starting with the darkest colour first pipe across the brownies in a diagonal fashion. Continue piping with the next colour, reserving the white chocolate for last.
  • Place a large marshmallow on to each individual brownie. With Valentine’s Day nearly upon us I used marshmallow hearts. Also sprinkle over smaller, mini marshmallows.
FF Marshmallow Topped Rich Chocolate Brownies
Decorating the brownies.
  • Next pipe the runnier white chocolate over the entire brownie, including the marshmallows.
  • Finally sprinkle over more mini marshmallows. These will stick to the melted white chocolate.
  • Set the brownies aside in a cool place to allow the chocolate to set. During warmer weather place in the fridge to set.
FF Marshmallow Topped Rich Chocolate Brownies
Fully decorated Marshmallow Topped Rich Chocolate Brownies

You can choose any colour combination you like. Even personalising the brownies by piping names or Happy Birthday. Also for special celebrations sprinkle over edible gold stars or coloured sugar balls. The simple rule to remember when decorating is to use the darkest colours first, finishing with the lightest. Resulting in a creation that really pops.

FF Marshmallow Topped Rich Chocolate Brownies
Marshmallow Topped Rich Chocolate Brownies

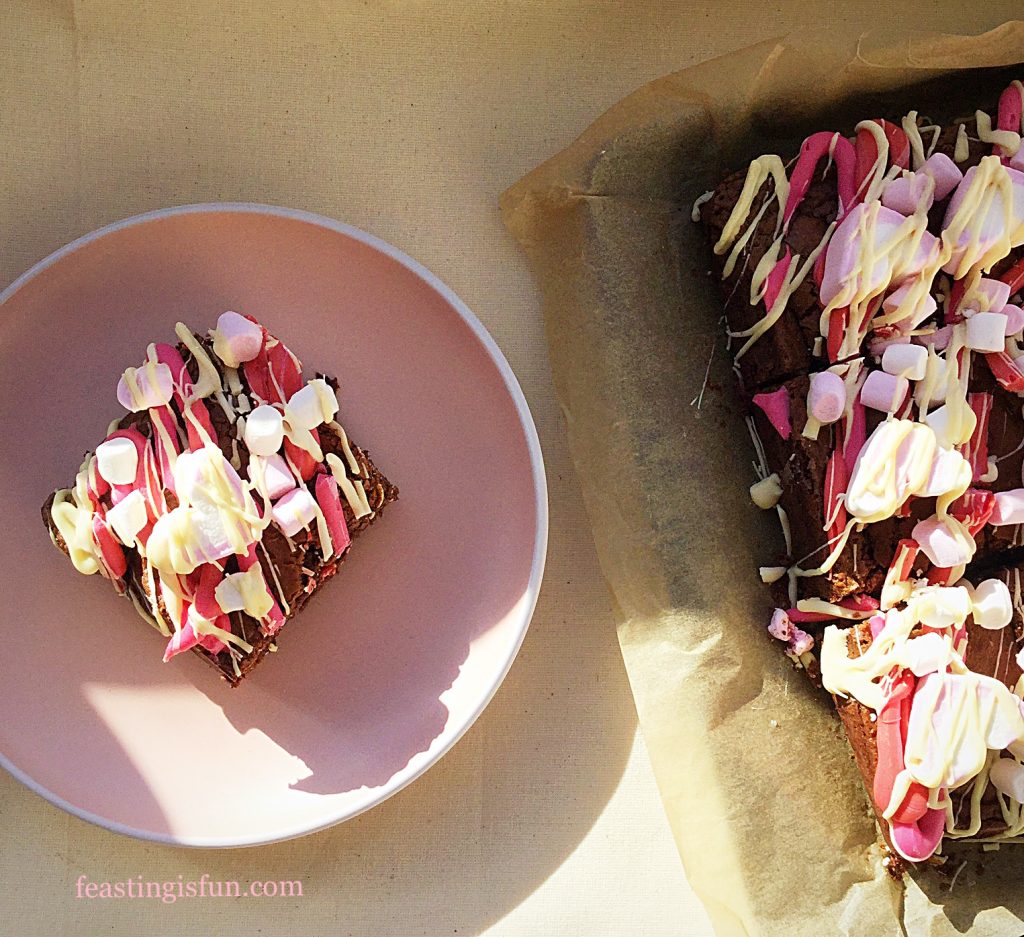
To serve the brownies cut through the chocolate and marshmallows at the same point where the individual brownies had previously been cut.

Store in an airtight container for up to 5 days. Refrigerate during warmer weather.

If you have enjoyed this recipe for Marshmallow Topped Rich Chocolate Brownies you may also like these:

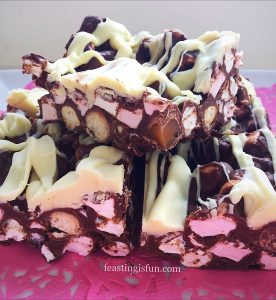
Caramel Crunch Rocky Road Bars

FF Marshmallow Topped Rich Chocolate Brownies
Caramel Crunch Rocky Road Bars

Chocolate Dipped Shortbread Heart Cookies

FF Marshmallow Topped Rich Chocolate Brownies
Chocolate Dipped Shortbread Heart Cookies

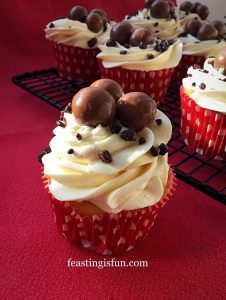
Maltesers Popping Candy Cupcakes

FF Marshmallow Topped Rich Chocolate Brownies
Maltesers Popping Candy Cupcakes

While making these brownies I did not have any little people to help me. Yet when writing up this blog post and especially, choosing and editing the photographs it struck me that this is exactly the sort of fun, mess filled activity that children enjoy. And yes I completely acknowledge the inner child in me and the fun I had while decorating these brownies. If you have play dates arranged, these brownies make great gifts for them to take home.

Also, it has to be said, these brownies taste amazing!

Whatever you are making, baking and creating in your kitchens, have fun preparing and sharing your feast.

Sammie xx

No part of this post may be reproduced or duplicated without the written permission of the owner. Please see my Disclosure Policy.
 

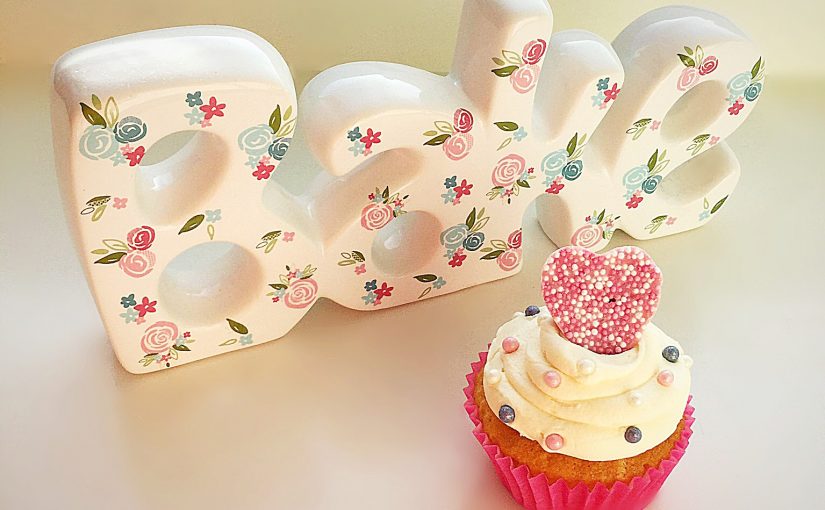
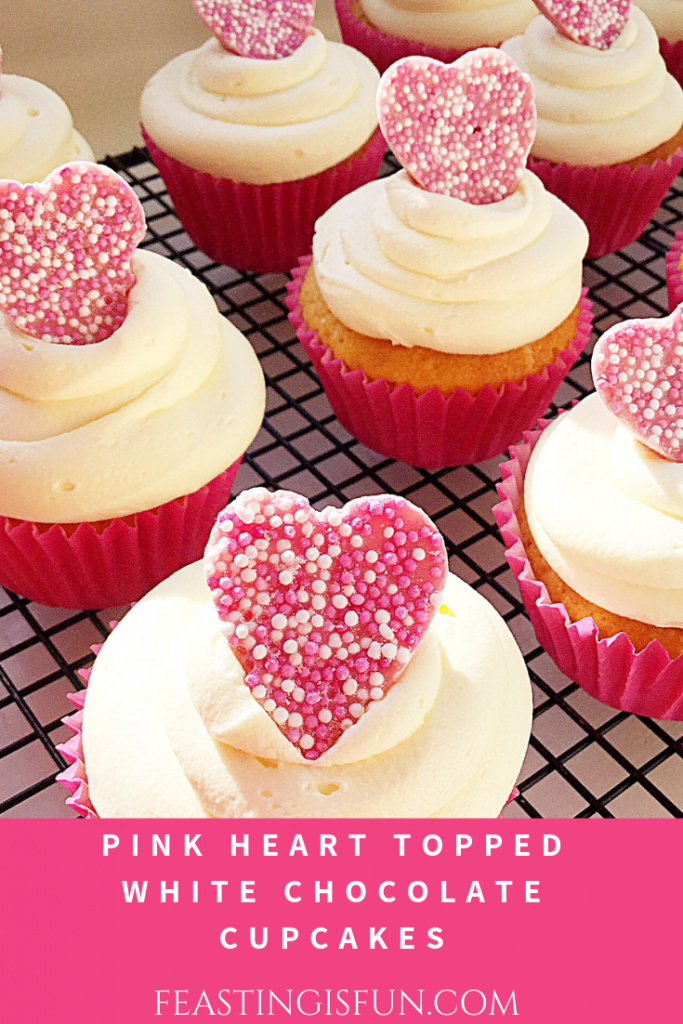
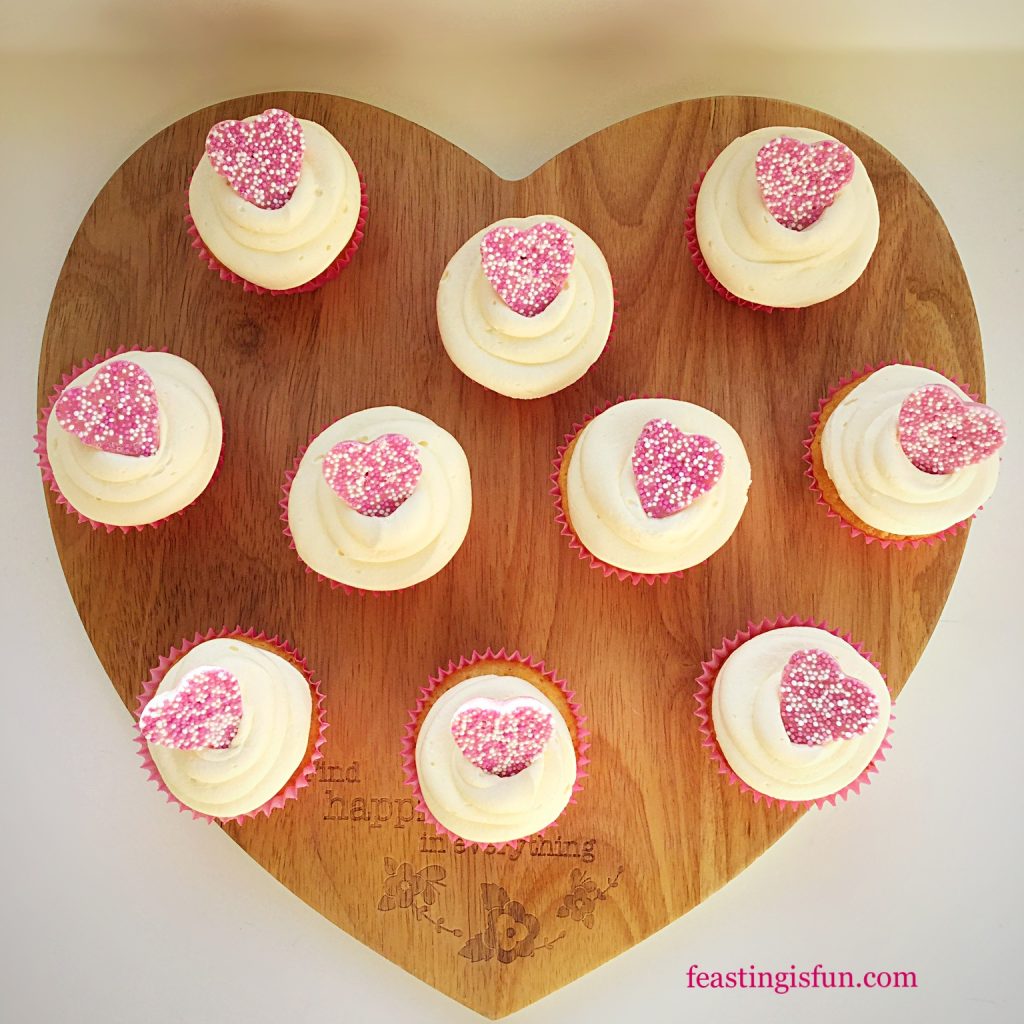
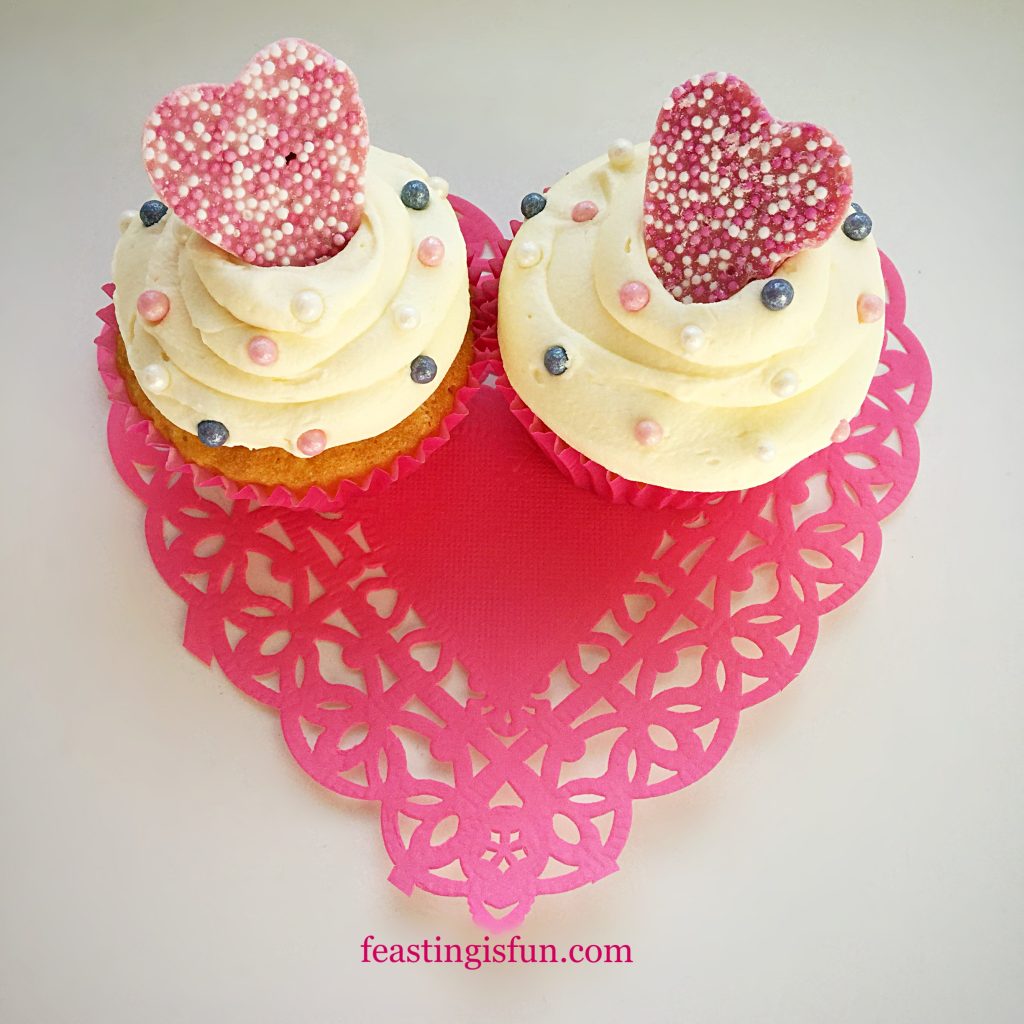
Pink Heart Topped White Chocolate Cupcakes

Cupcakes in themselves are moments of happiness. Since it must be impossible to be angry whilst eating a cupcake? And, imagine an entire, miniature cake all to ourselves. Cute and delicious let me share with you these Pink Heart Topped White Chocolate Cupcakes.

FF Pink Heart Topped White Chocolate Cupcakes

Since Valentines Day is only a few days away, creating a beautiful and tasty cupcake seemed a good idea. While I have mentioned in previous posts such as Chocolate Dipped Shortbread Heart Cookies, that every day should be an opportunity to show those we love and appreciate them, February 14th is the day of love. So to celebrate, these white chocolate chip cupcakes frosted with a velvet white chocolate buttercream, finished with a pink chocolate heart, fit the bill perfectly.

FF Pink Heart Topped White Chocolate Cupcakes
Pink Heart Topped White Chocolate Cupcakes

As these delightfully light cupcakes are so pretty they are also perfect for parties, celebrations and of course to serve at a wedding. Because who wouldn’t want to receive one of these cute cupcakes?

FF Pink Heart Topped White Chocolate Cupcakes
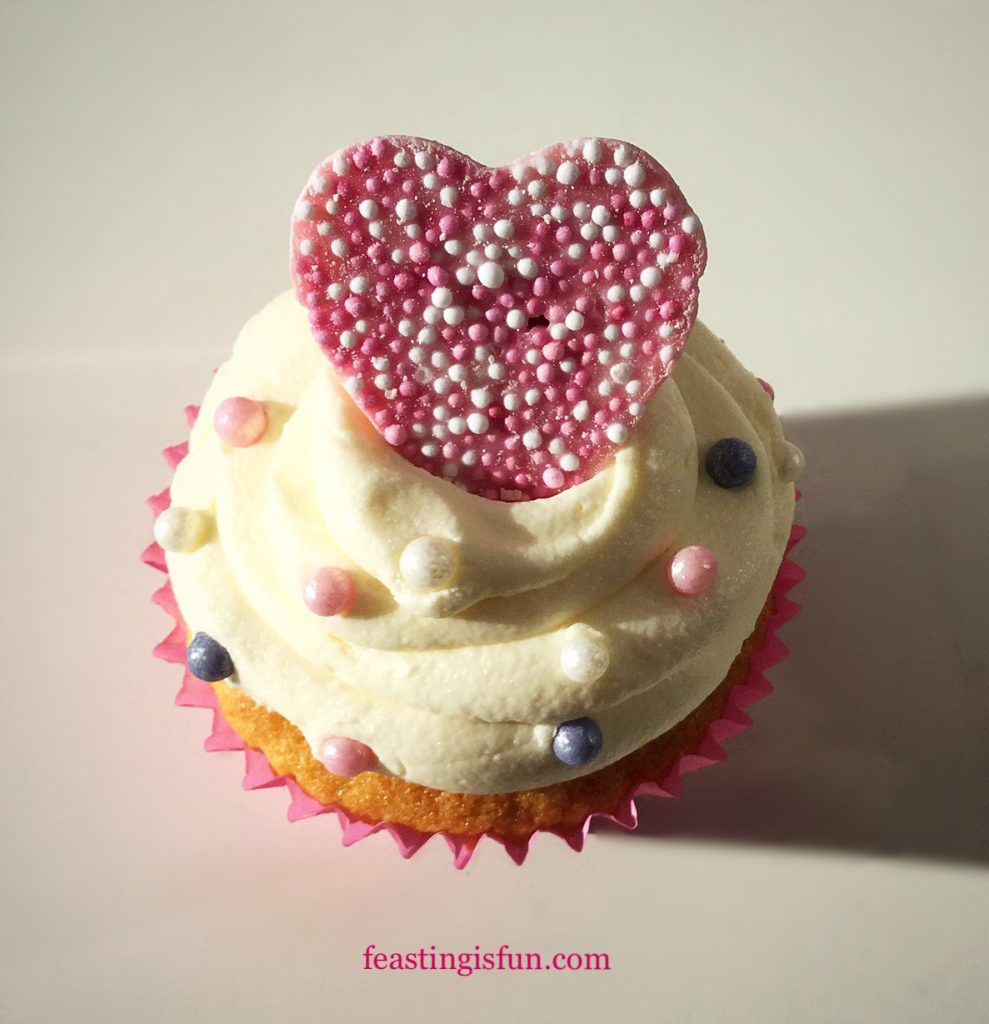
Pink Heart Topped White Chocolate Cupcakes with complimenting sugar balls.

While simple and easy to make, this recipe is designed so that novice bakers can follow and bake incredible cupcakes. Also the buttercream is piped without a nozzle, therefore deleting a need for more equipment. Since a plastic freezer bag can double as an icing bag, simply cut off one corner to leave a 1cm opening, this recipe really is for everyone.

Recipe: Pink Heart Topped White Chocolate Cupcakes makes 12

For the Cupcakes:

100g/4oz Unsalted Butter at room temperature

100g/4oz Caster Sugar

Small Pinch 1/8tsp Sea Salt – I use Maldon

2 Large Free Range Eggs

1 tsp Vanilla Extract – I use Nielsen-Massey

2 tsp Whole Milk

100g/4oz Self Raising Flour, alternately use the same quantity of Plain White Flour and add 1 tsp baking powder

50g/2oz White Chocolate Chips

For the Buttercream:

125g/4.5oz Unsalted Butter at room temperature

250g/8.5oz Icing Sugar

150g/5oz White Chocolate suitable for melting

Up to 2 tbsp Whole Milk

Pink Jazzy Hearts available from Amazon

Optional pink/white sugar balls

Method: Preheat oven to 180C/160C fan, 350F, gas mark 4

Making And Baking The Cupcakes

  • First of all, line a muffin tin wth 12 cupcake cases.
  • Place the butter, sugar and salt into a large bowl.
  • Whish together until pale and creamy.
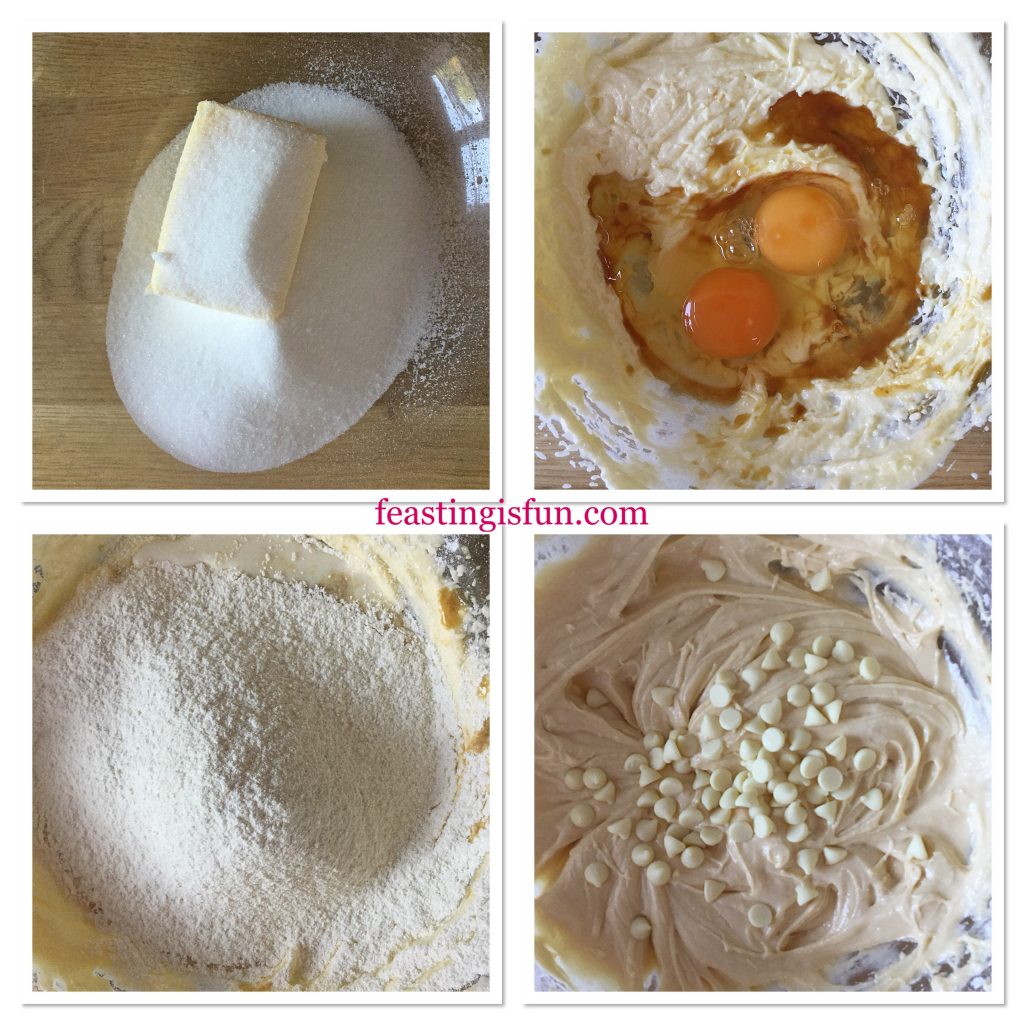
  • Add the eggs and vanilla extract to the bowl. Also, sift the flour (and baking powder if using) into the same bowl.
  • Whisk the ingredients together adding milk as you whisk. Continue until the mixture is uniform in texture, avoid over mixing as this can cause a tough, baked cupcake.
  • Add the white chocolate chips and fold into the batter.
FF Pink Heart Topped White Chocolate Cupcakes
Making the cupcake batter.
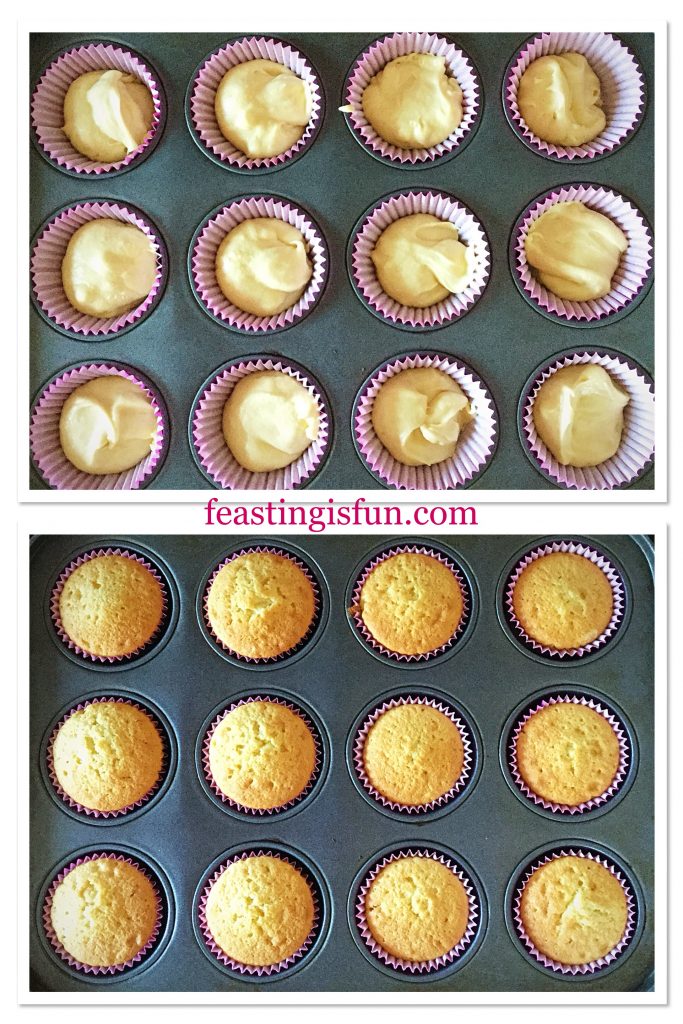
  • Spoon the cake batter into the cupcake cases, dividing it evenly between them.
  • Place the cupcakes in the centre of the preheated oven and bake for 20-30 minutes.
  • The cupcakes are baked when they have risen, are golden in colour and spring back from a light touch. An inserted skewer or tooth pick will come out clean.
FF Pink Heart Topped White Chocolate Cupcakes
Filling the cases and baking the cupcakes.
  • As soon as the cupcakes are baked remove from the oven.
  • Allow to cool for 10 minutes in the tin and then transfer them to a cooling rack.
  • While the cupcakes finish cooling make the buttercream.

Decorating The Cupcakes

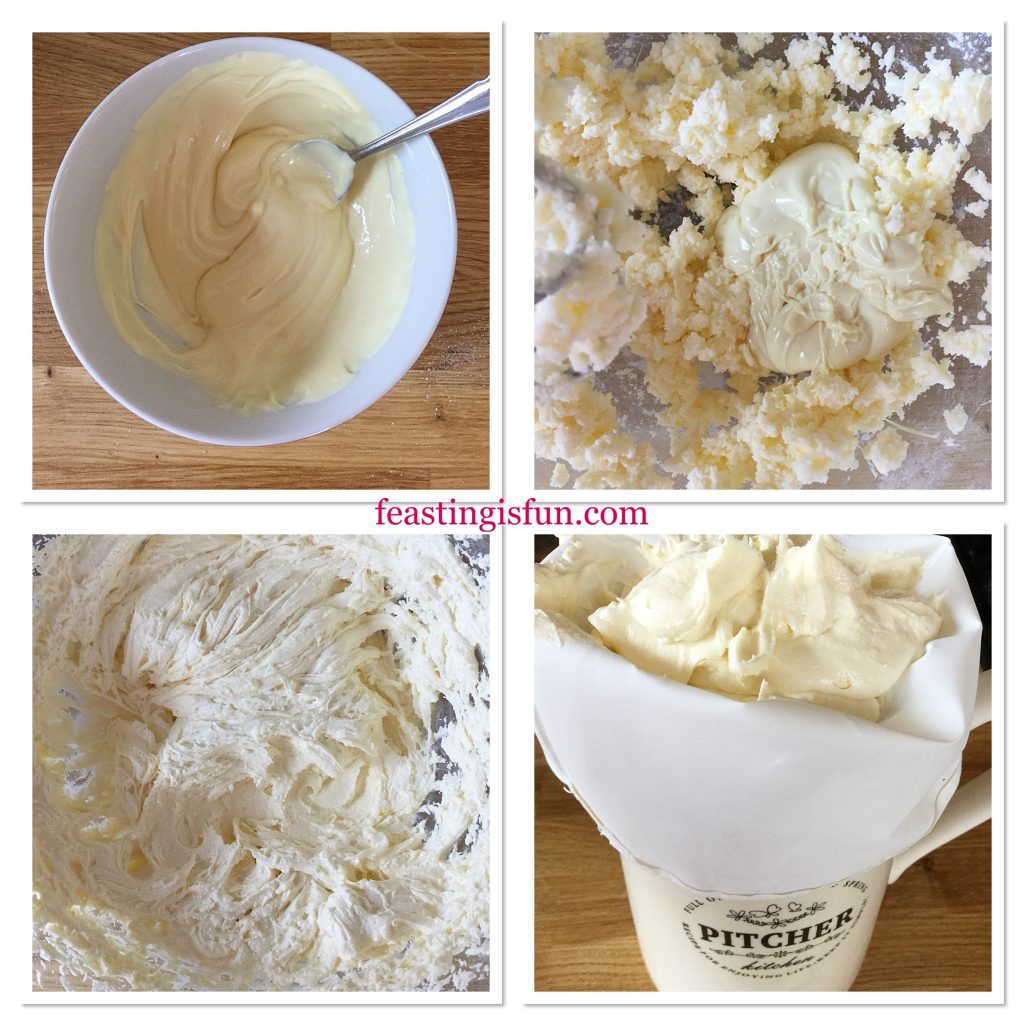
  • Break up the white chocolate and place into a heatproof, microwaveable bowl. Heat on medium for 30 second bursts, stirring after. As soon as the white chocolate starts to melt remove from the microwave. Continue stirring until all of the chocolate has melted. Set to one side to cool slightly.
  • Place the butter and icing sugar into a bowl. Whisk until just combined.
  • Pour the melted white chocolate into the bowl and continue whisking, adding milk, a little at a time, to achieve a good piping consistency.
  • Place the piping bag, without a nozzle attached, into a large jug. The piping bag should have an opening of approximately 1cm.
  • Fill the piping bag with the white chocolate buttercream.
FF Pink Heart Topped White Chocolate Cupcakes
Making the white chocolate buttercream.
  • As soon as the cupcakes are cold they can be decorated.
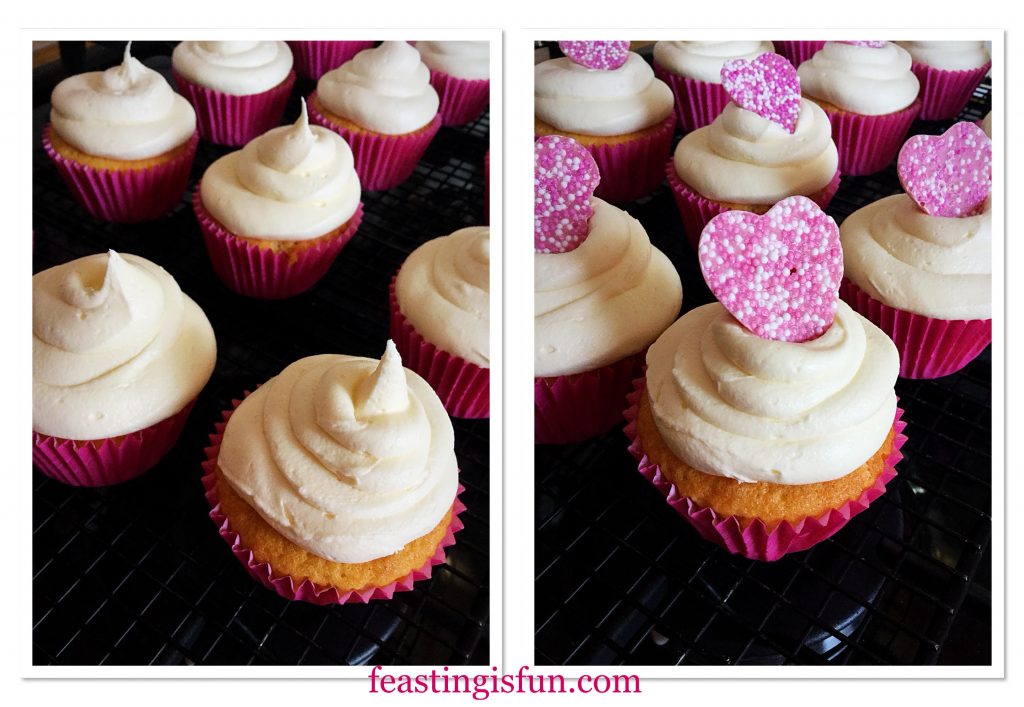
  • Keeping even pressure on the piping bag pipe a double swirl on top of each cupcake.
  • Top each cupcake with a pink heart and add sugar balls if wanted.
FF Pink Heart Topped White Chocolate Cupcakes
Piping and decorating the cupcakes.

The outside of the buttercream will set slightly. So, if you are adding sugar balls, do so immediately after frosting the cupcakes.

FF Pink Heart Topped White Chocolate Cupcakes

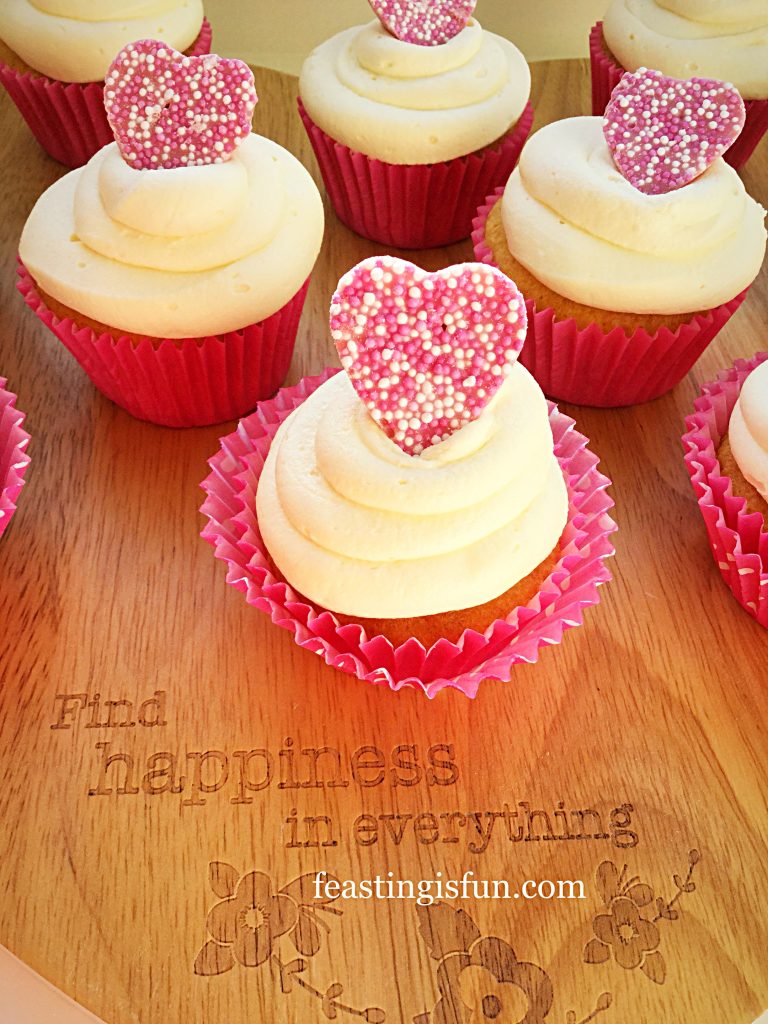
Happiness is found in a delicious cupcake!

FF Pink Heart Topped White Chocolate Cupcakes
Pink Heart Topped White Chocolate Cupcakes

Serve the cupcakes to those you love and care about. Also share with those people you appreciate. While photographing the cupcakes our postman came to the door, he went away with a cupcake and a smile on his face.

Store these cupcakes for up to 5 days in an airtight container. Refrigerate during warm weather.

If you have enjoyed this recipe for Pink Heart Topped White Chocolate Cupcakes then you may also like these:

Chocolate Dipped Shortbread Heart Cookies 

FF Pink Heart Topped White Chocolate Cupcakes
Chocolate Dipped Shortbread Heart Cookies

Strawberry Sweetheart Cake

FF Pink Heart Topped White Chocolate Cupcakes
Strawberry Sweetheart Cake

Lemon Lime Gin Heart Bundt Cake 

FF Pink Heart Topped White Chocolate Cupcakes
Lemon Lime Gin Heart Bundt Cake


Most importantly these Pink Heart Topped White Chocolate Cupcakes have a simple recipe, available to all bakers regardless of skill level. Because, everyone should be able to create something beautiful and delicious to share with those they love. And, even those who are too shy to say how they feel, or write it in a card, can make a cupcake that says it all. Because, who knows, baking a cupcake could break down awkwardness between someone and their secret love. Ah the romantic in me is running away with itself!

However you spend Valentines Day, I would like to thank each and every one of you who reads, comments and supports Feasting is Fun. Because, you are all very much appreciated, every single day of the year.

So, whatever you are making, baking and creating in your kitchens, have fun creating and sharing your feast.

Sammie xx

No part of this post may be reproduced or duplicated without the written permission of the owner. Please see my Disclosure Policy.
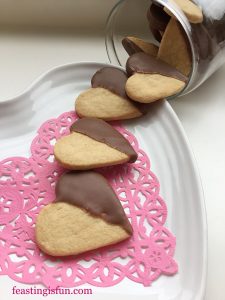
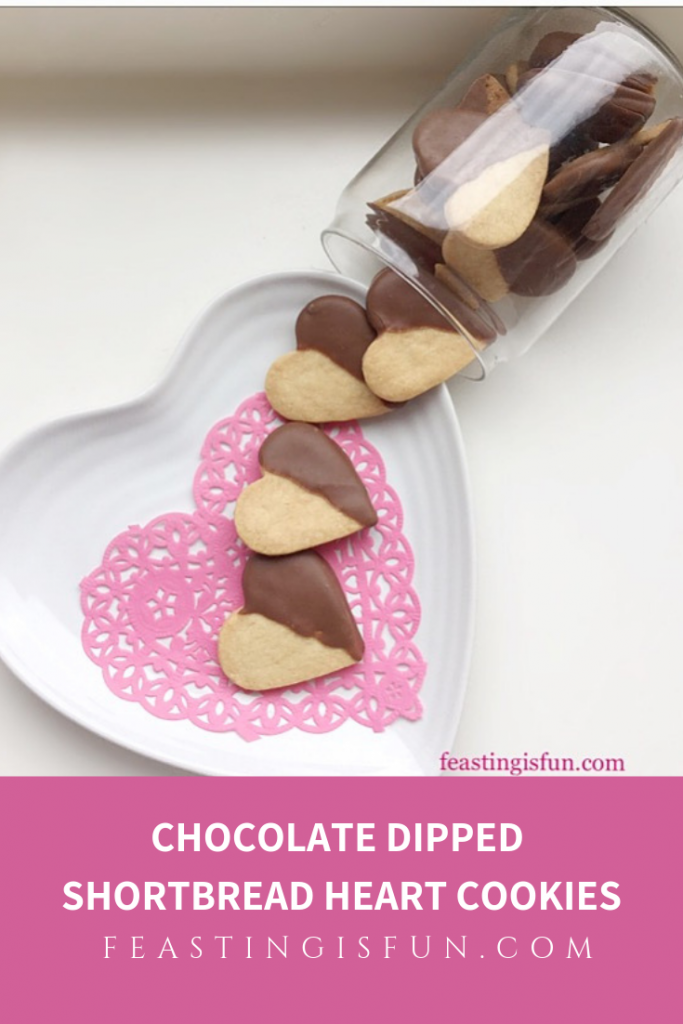
Chocolate Dipped Shortbread Heart Cookies

Valentines Day is only couple of weeks away. Yet, although it is nice to take one day out of the year to tell those you care about how much they mean to you, I don’t believe that should be kept for just one day. Showing people that we love and appreciate them should be an everyday occurrence. Not the insincere gushing of some, who say the word love too easily and yet have not the slightest comprehension of what real love truly is. No, showing love in a quiet, sincere way. A gentle loving way, so as not to embarrass those we care about. A few encouraging words, a hug, or a small token, such as these Chocolate Dipped Shortbread Heart Cookies.

FF Chocolate Dipped Shortbread Heart Cookies

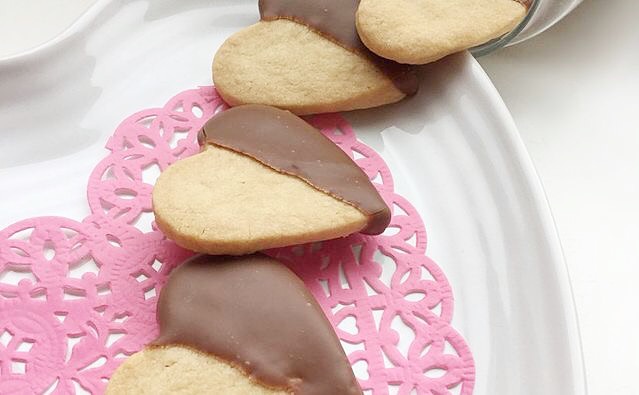
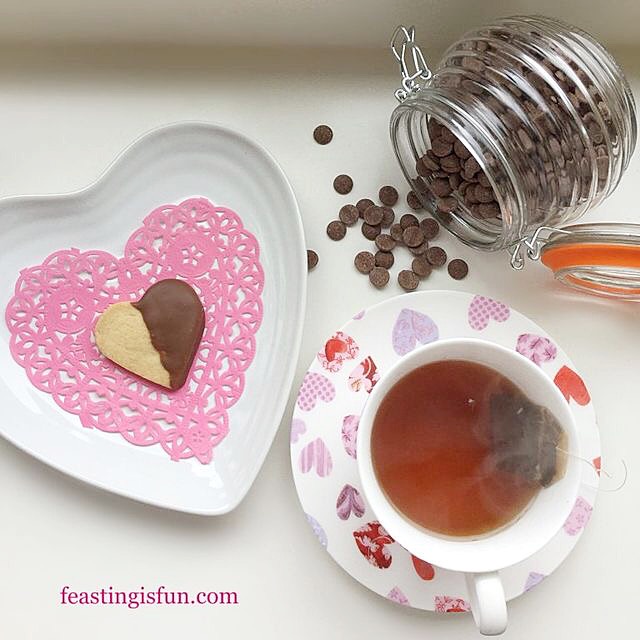
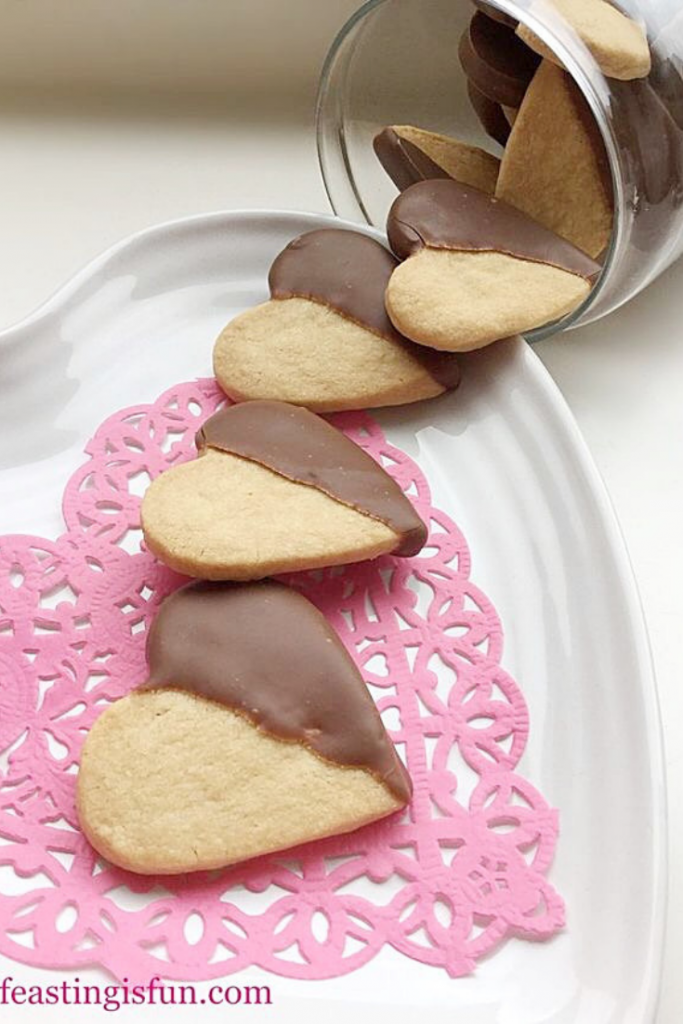
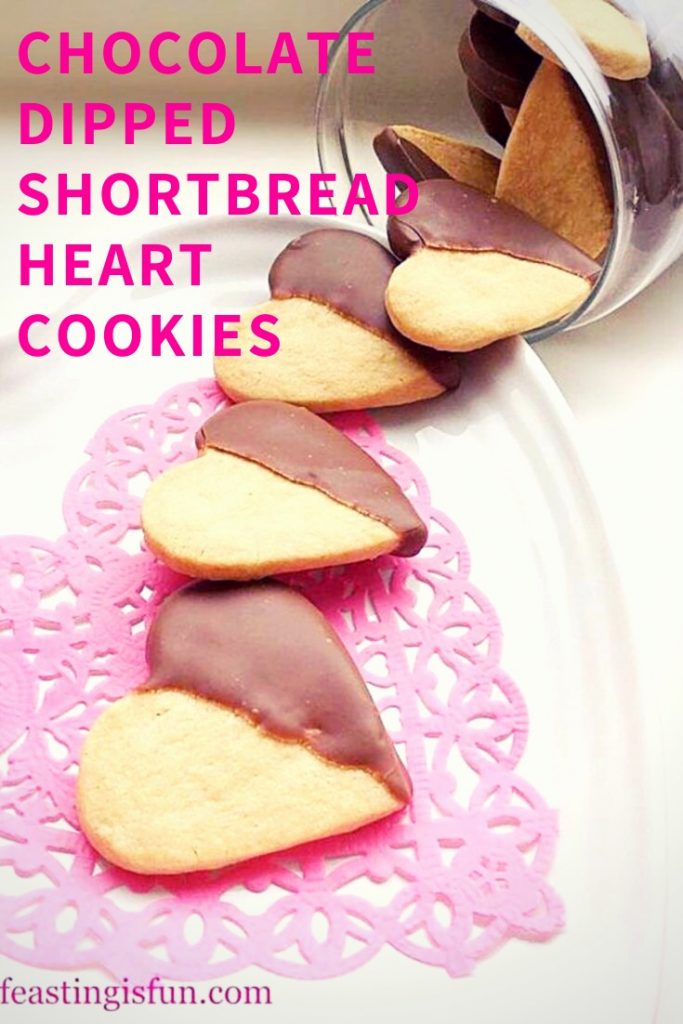
Since we are talking about love, did I mention how much everyone here at Feasting headquarters loves these cookies? Oh they do. Rich, buttery shortbread with thick, milk chocolate on one half. While these cookies are solid enough to be dunked in a hot drink, they also crumble beautifully on the tongue. Not just a Valentines Day bake!

FF Chocolate Dipped Shortbread Heart Cookies
Chocolate Dipped Shortbread Heart Cookies

Since I couldn’t find my collection of different size heart cookie cutters, my dear, late friend Pat, was here to help me. Amongst the baking items I had been given by her family was a perfect sized heart. Smaller than I had initially wanted for this recipe, it turned out to be the perfect size. Each cookie being exactly the right size.

FF Chocolate Dipped Shortbread Heart Cookies
Chocolate Dipped Shortbread Heart Cookies

Use whatever size cutter available to you. The recipe yielded 40 cookies using a 5cm x 5cm heart shape cookie cutter.

Recipe: Chocolate Dipped Shortbread Heart Cookies

100g/4oz Caster Sugar

200g/7oz Unsalted Butter at room temperature

1/4 tsp Sea Salt – I use Maldon

1 tsp Vanilla Extract – I use Nielsen-Massey

50g/2oz Corn Flour (also known as corn starch)

250g/9oz Plain White Flour – I use cake and pastry flour from Shipton Mill

300g/10.5g Milk Chocolate – I use 34% milk chocolate callets from Callebaut

Method: Preheat the oven to 180C/160C fan, 350F, gas mark 4

Making The Shortbread Dough

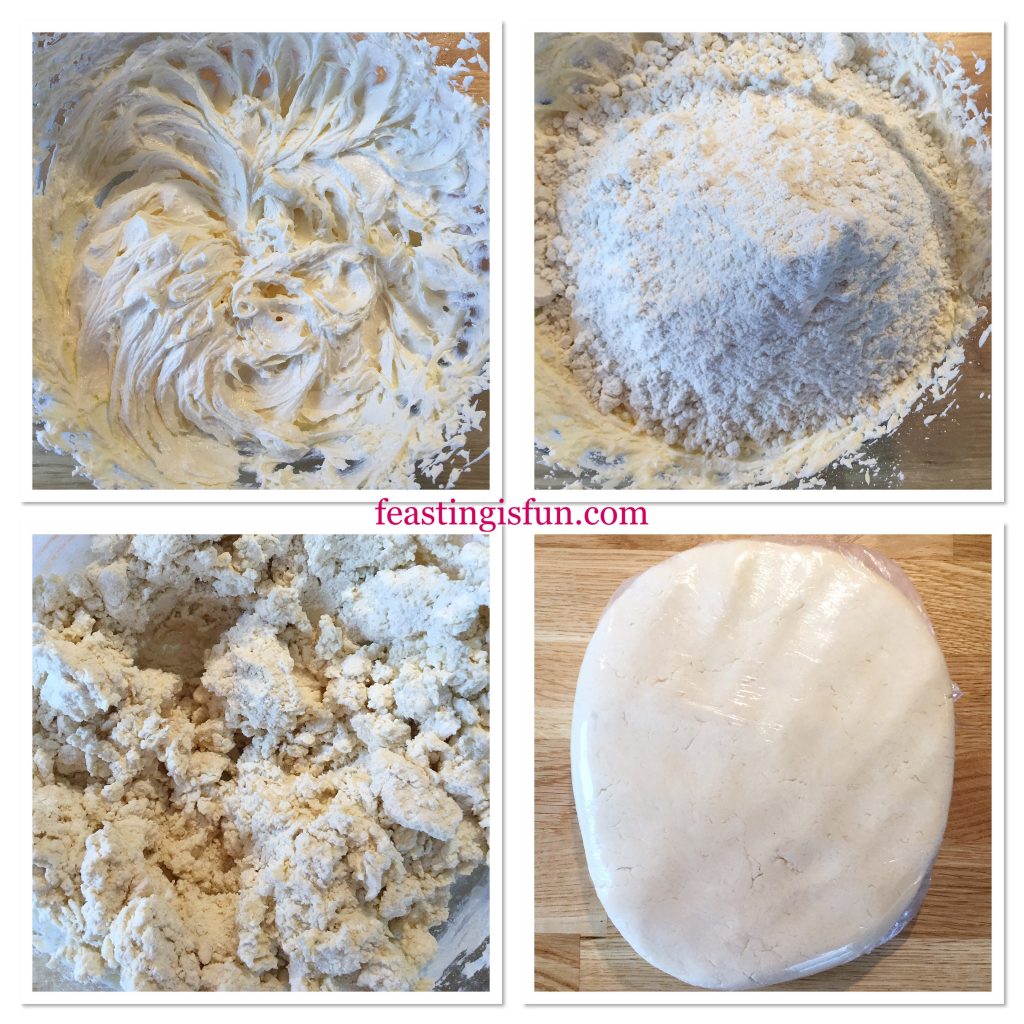
  • First of all add the butter, caster sugar and salt to a large bowl.
  • Whisk together until fully combined, pale and creamy in appearance.
  • Add the vanilla extract and whisk again until combined.
  • Sift the plain flour and corn flour into the bowl together.
  • Using a spoon gently mix the ingredients until it comes together in clumps.
  • Wipe the worktop with a damp cloth and lay a large piece of cling film on to the damp surface; it will stick to the worktop.
  • With clean hands bring the dough together into a ball.
  • Place the shortbread dough on to the cling film and wrap into a disc shape.
  • Chill the dough in the fridge for at least 30 minutes.
  • While the dough is chilling line 2 large baking trays with baking parchment paper.
FF Chocolate Dipped Shortbread Heart Cookies
Preparing the shortbread dough.

Cutting Out Abd Baking The Shortbread Hearts

  • As soon as the dough is chilled remove from the fridge.
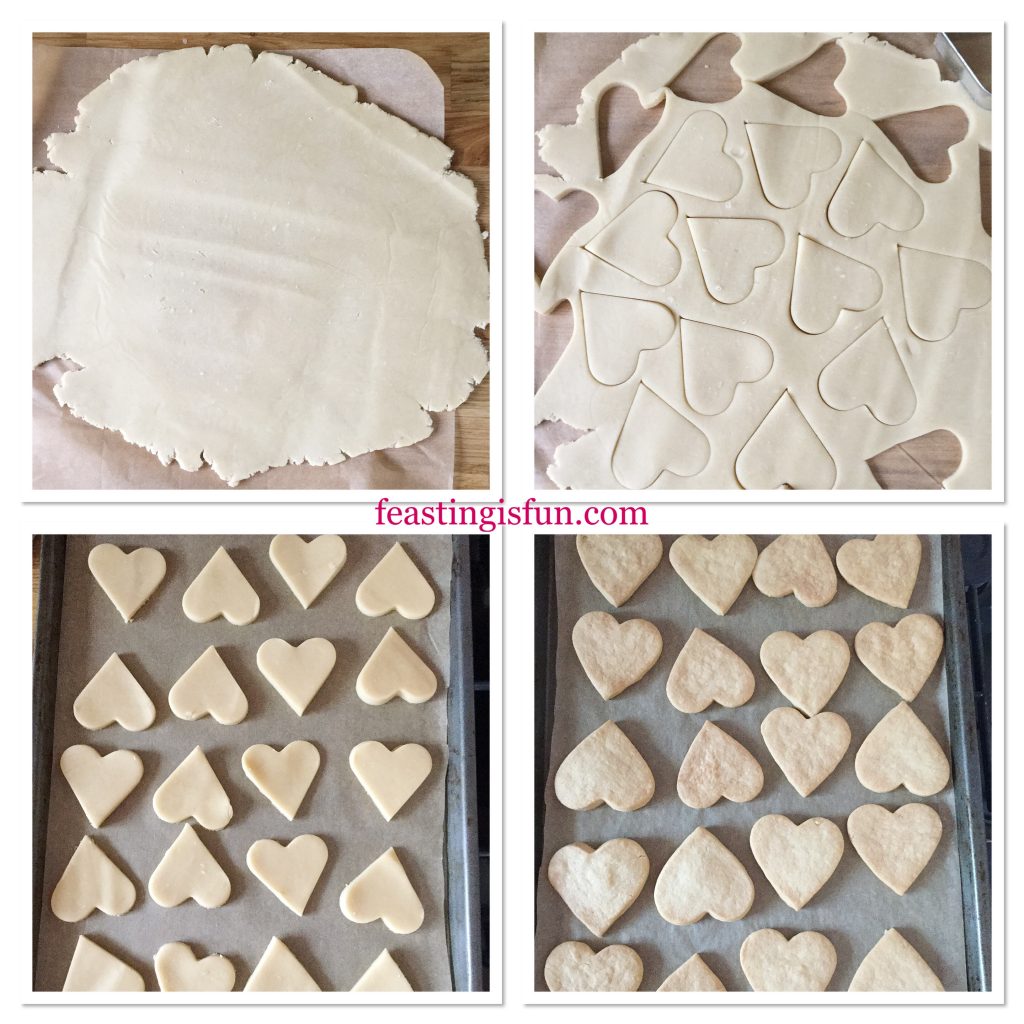
  • Knead lightly and then roll out the dough between 2 pieces of parchment paper. Roll to a thickness of 5mm.
  • Using a heart cookie cutter cut out the first batch of cookies. Placing them carefully on to the baking tray.
  • Because the dough is cold the cookies do not spread on baking, so they can be placed close together on the baking tray.
  • As soon as the baking trays are full place them into the middle and lower shelves of a preheated oven.
  • Bake for 20-25 minutes until they are a pale golden brown. Baking time will depend on the size and thickness of the cookies.
  • While the shortbread is baking gather together any remaining dough, wrap in cling film and chill.
  • Once baked remove from the oven, allow to cool for 5 minutes on the tray and then transfer the shortbread hearts to a cooling rack.
  • Allow the baking trays to cool completely.
  • Flip over the baking parchment on each tray and using the chilled dough proceed to roll out and cut out the cookies as before. Laying them on the baking trays and baking as before.
FF Chocolate Dipped Shortbread Heart Cookies
Cutting out the shortbread hearts.
  • Cool the shortbread hearts completely before the next step.

Dipping The Cooked Shortbread Hearts In Chocolate

  • Chop up the chocolate and place into a microwaveable, heatproof bowl.
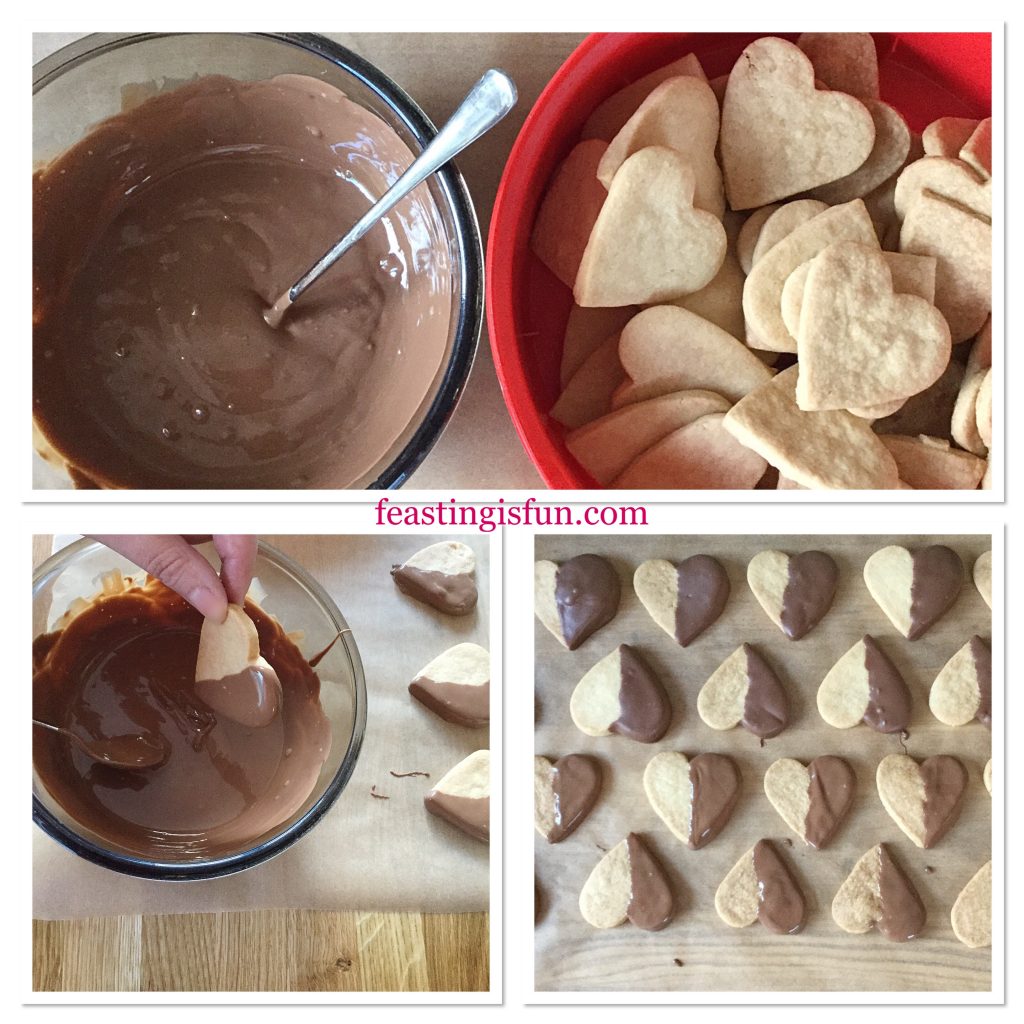
  • Place in the microwave and heat on medium power for 30 seconds at a time, stirring after each burst. As soon as the chocolate starts to melt remove the bowl and stir continuously until all of the chocolate has melted. An extra burst of heat in the microwave may be needed to ensure the chocolate is completely smooth.
FF Chocolate Dipped Shortbread Heart Cookies
Dipping the shortbread hearts in melted chocolate.
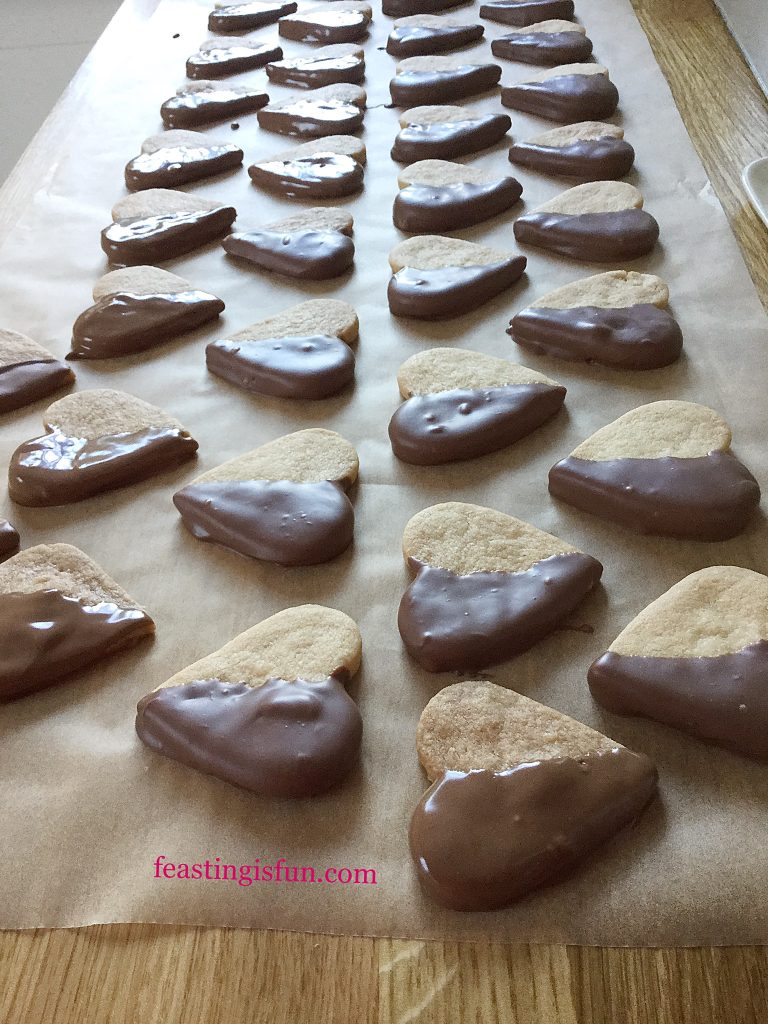
  • Lay a long strip of baking parchment on to the worktop.
  • Take one shortbread heart at a time and hold on the opposite side that is to be dipped.
  • Carefully dip the shortbread into the melted chocolate, using a spoon (a long handled sundae spoon is ideal) to help cover one half of the cookie completely in chocolate.
  • Allow any excess chocolate to drip back into the bowl, then place the chocolate dipped heart on to the baking parchment.
  • Continue this process until all of the cookies have one half completely dipped in chocolate. If necessary, halfway through the process, place the chocolate back into the microwave for a 20 second heating burst, to ensure the chocolate remains fluid enough to easily work with.
  • Once finished leave the chocolate to set completely on the cookies.
FF Chocolate Dipped Shortbread Heart Cookies
Chocolate Dipped Shortbread Heart Cookies.
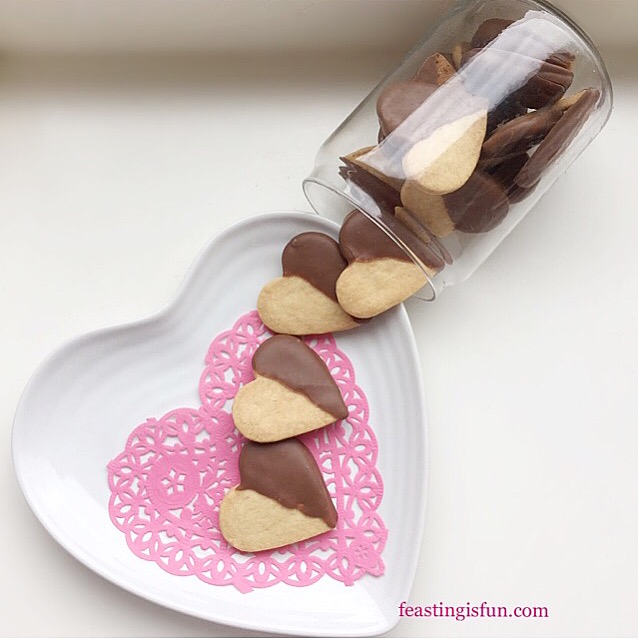
  • Store the finished shortbread hearts in an airtight container.
Chocolate Dipped Shortbread Heart Cookies

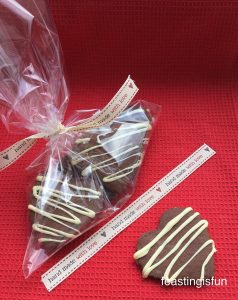
Share these cookies with those you love. Package a few in a small cellophane bag, tied with pretty ribbon and give as gifts.

Eat within 5 days, if they last that long!

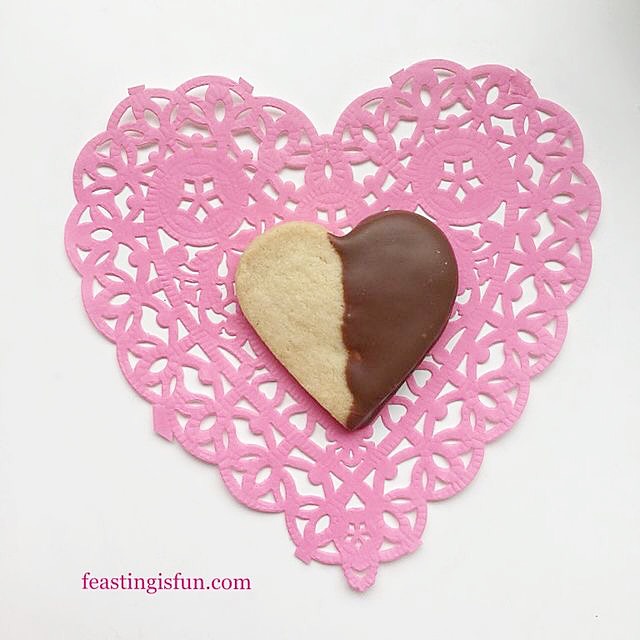
FF Single Shortbread Heart Cookie
Chocolate Dipped Shortbread Heart Cookies

If you have enjoyed this recipe for Chocolate Dipped Shortbread Heart Cookies you may also like these:

Chocolate Fudge Brownie Bites

FF Chocolate Dipped Shortbread Heart Cookies
Chocolate Fudge Brownie Bites.

Strawberry Topped Chocolate Heart Pavlova

FF Chocolate Dipped Shortbread Heart Cookies
Strawberry Topped Chocolate Heart Pavlova

Chocolate Heart Cookies

FF Chocolate Dipped Shortbread Heart Cookies
Chocolate Heart Cookies


Showing appreciation and love in a way suited to the recipient is a gift in itself. Either a small thank you, a handwritten note, even a text, sent in love is how we share our feelings with others. While not done for our benefit, it is good for us too. Even when the emotion felt is gratitude, not love, it is good to express thanks. Surely the gift of love is the best gift ever? See Important Stuff.

Whatever you are making, baking and creating in your kitchens, have fun creating your feast.

Sammie xx

No part of this post may be reproduced or duplicated without the written permission of the owner. Please see my Disclosure Policy.
Cheddar Cheese Thyme Soft Breadsticks

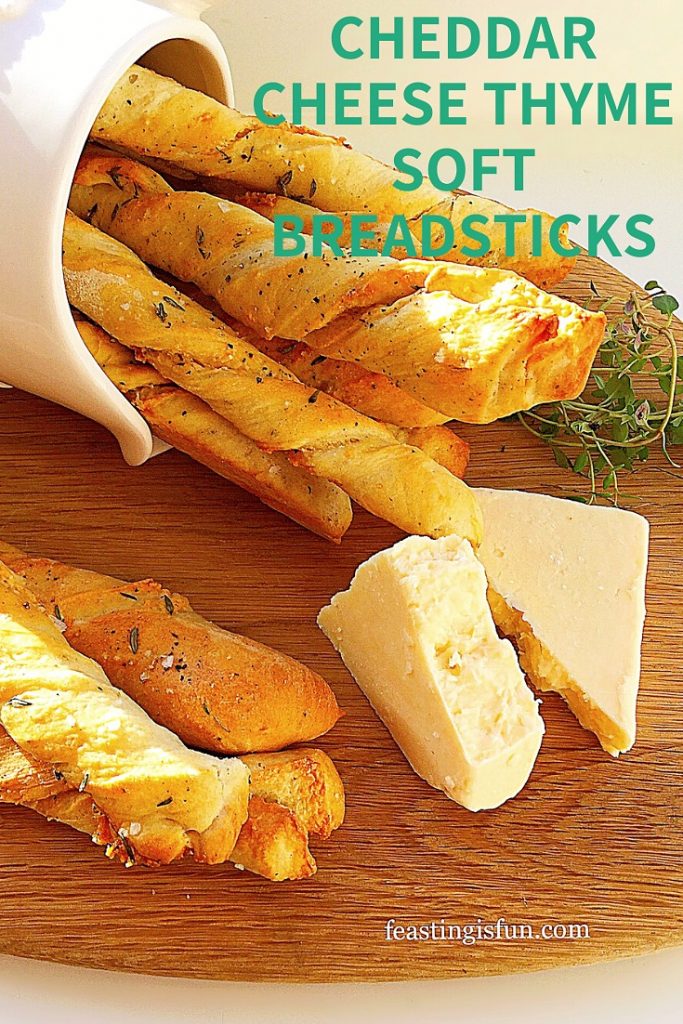
Cheddar cheese is loved by so many, me included and is such a versatile ingredient. Something magical happens to the flavour when it is heated. Becoming more savoury, salty and intense on the palette. Even when eaten with crackers it benefits vastly when left out of the fridge to come up to room temperature. Since winning some Vintage Cheddar in a Twitter competition I wanted to create a new, delicious snack recipe. These Cheddar Cheese Thyme Soft Breadsticks tick every, single, box.

FF Cheddar Cheese Thyme Soft Breadsticks

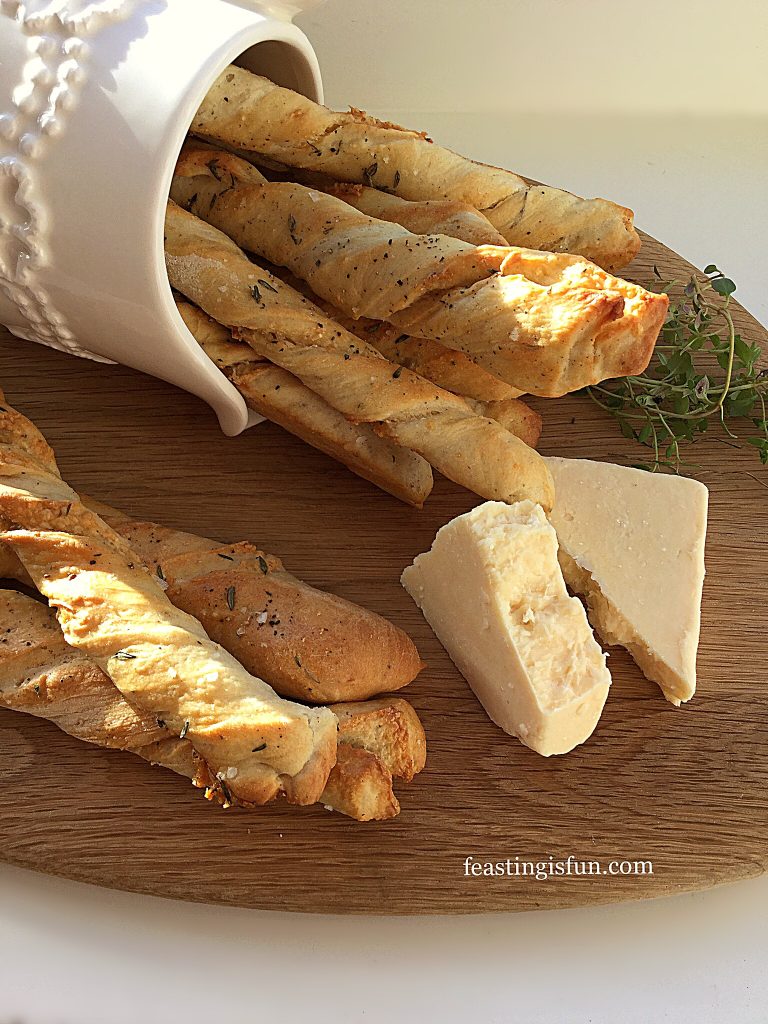
Cheesy Breadsticks – Delicious And Versatile

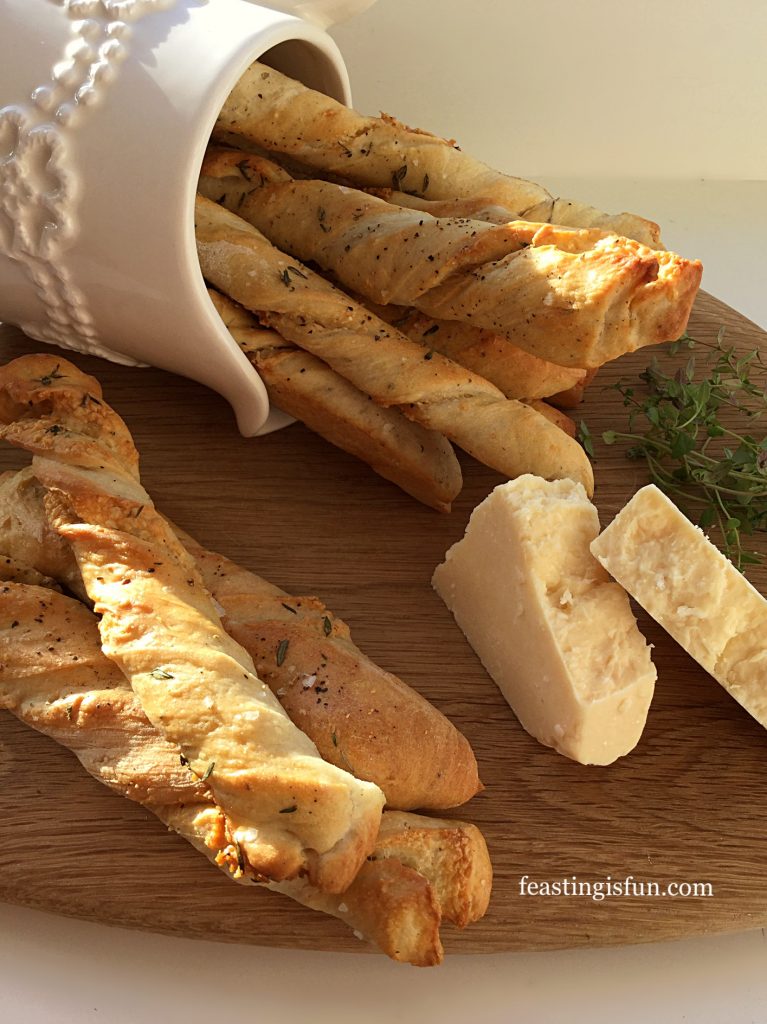
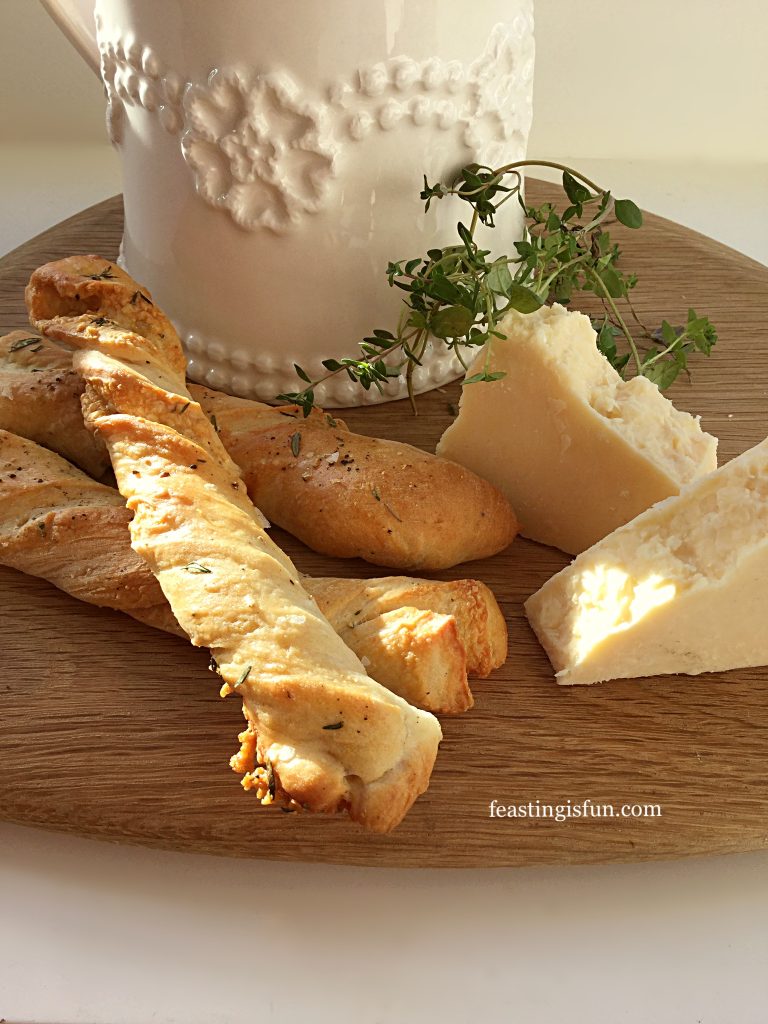
The combination of good quality mature, or vintage cheddar with fresh thyme gives a distinctly savoury flavour to these breadsticks. Also, the addition of Parmesan cheese to the bread dough enhances and reaffirms their cheesy flavour. While pastry cheese straws can be oily at times, that is not the case here. No greasy fingers whilst munching on these!

FF Cheddar Cheese Thyme Soft Breadsticks
Cheddar Cheese Thyme Soft Breadsticks

As well as tasting delicious on their own, these cheesy breadsticks also make a perfect accompaniment to soup, such as Hearty Minestrone Soup. While sounding an unlikely combination, we ate these with a simple beef casserole that had been bubbling away on the hob all day. Not so surprising when Cheddar is often used in the pastry of beef pies.

FF Cheddar Cheese Thyme Soft Breadsticks
Cheddar Cheese Thyme Soft Breadsticks

Recipe: Cheddar Cheese Thyme Soft Breadsticks makes 32

320ml Tap Water at room temperature

7g Dried Yeast – I use Allinson easy bake yeast action

500g Strong White Bread Flour

2 tbsp Olive Oil plus extra for oiling the baking trays

7g Sea Salt plus extra for sprinkling – I use Maldon

50g Parmesan Cheese finely grated

3 tsp Fresh Thyme Leaves plus an add 2 tsp for sprinkling – halve the amount if using dried

1/2 tsp Freshly Ground Black Pepper plus extra for sprinkling on to breadsticks

50g plus an additional 75g Mature Cheddar Cheese – I used Vintage Cheddar from Wyke Farms

1 Free Range Egg beaten with 2 tsp cold water to use as an egg wash

Method:

The method given uses a stand mixer with dough hook attachment to make the dough. Of course this may be made by hand.

Making The Breadstick Dough

  • First of all, weigh the water into the bowl of the stand mixer.
  • Add the dried yeast and flour.
  • Next add the olive oil and salt.
  • Lower the dough hook and mix on low speed for 10 minutes, increasing to medium speed for a further 3 minutes.
  • While the dough is mixing lightly oil 4 large baking trays. Also preheat the oven to 200C/180C fan, 400F, gas mark 6.
  • Stop mixing and check the dough. It should be able to stretch so that light can be seen through it. This is called the windowpane test. If the dough does not pass this test lower the dough hook and continue to mix on medium, stopping and checking every two minutes until it finally passes the test.
  • As soon as the dough is ready stop mixing. Add both the finely grated Parmesan cheese and 50g of the cheddar. Also add 2 teaspoons of fresh Thyme leaves and half a teaspoon of freshly ground black pepper.
  • Lower the dough hook and mix on a low speed for two minutes.
  • Stop the mixer, scrape any dough from the dough hook into the bowl, cover with a cloth and leave in a draft free place until doubled in size.

Flavouring And Shaping The Cheedar Cheese Thyme Breadsticks:

  • Lightly flour the worktop and tip out the dough, so that the top of the risen dough is in contact with the worktop.
FF Cheddar Cheese Thyme Soft Breadsticks
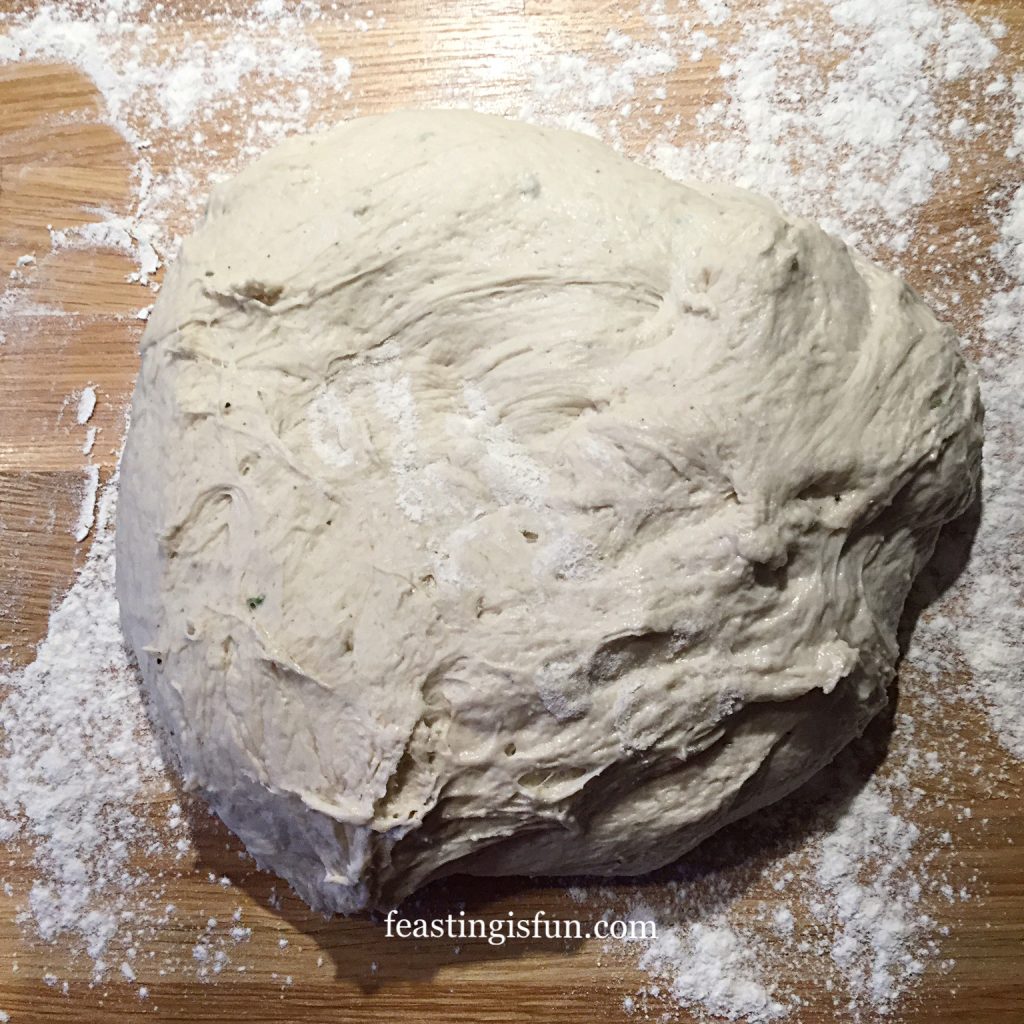
The Cheddar Cheese Thyme Soft Breadsticks Dough
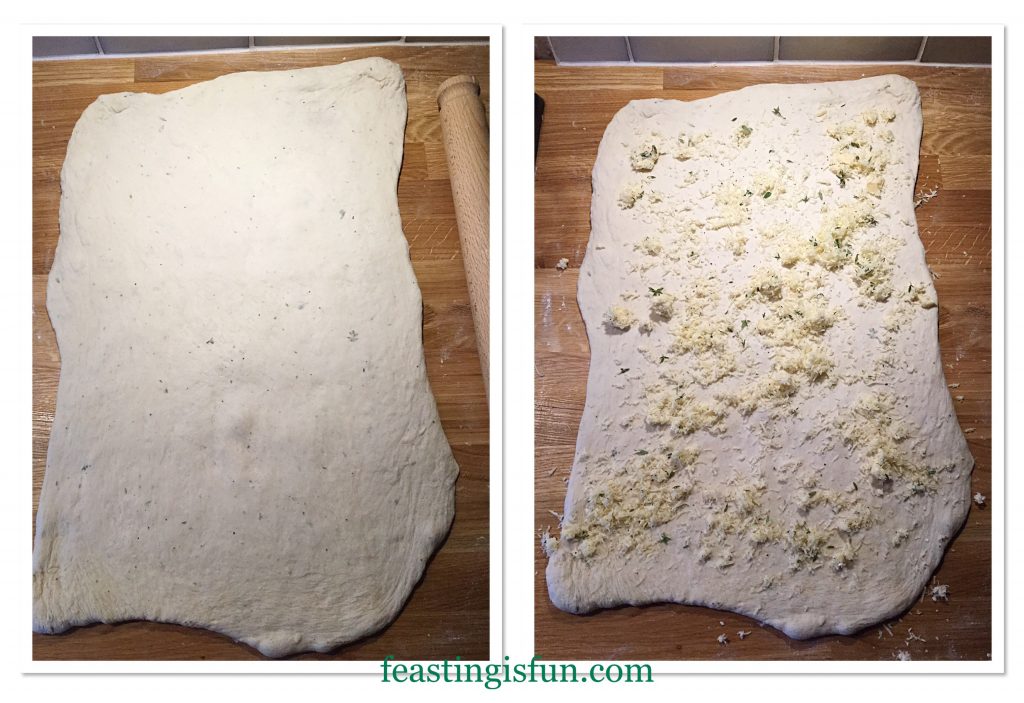
  • Dust the dough with flour and roll out to 50cm x 30cm (20in x 12in).
FF Cheddar Cheese Thyme Soft Breadsticks
Preparing the dough to become breadsticks.
  • Sprinkle over the rolled out dough, 75g finely grated cheddar and 1 teaspoon of fresh thyme leaves.
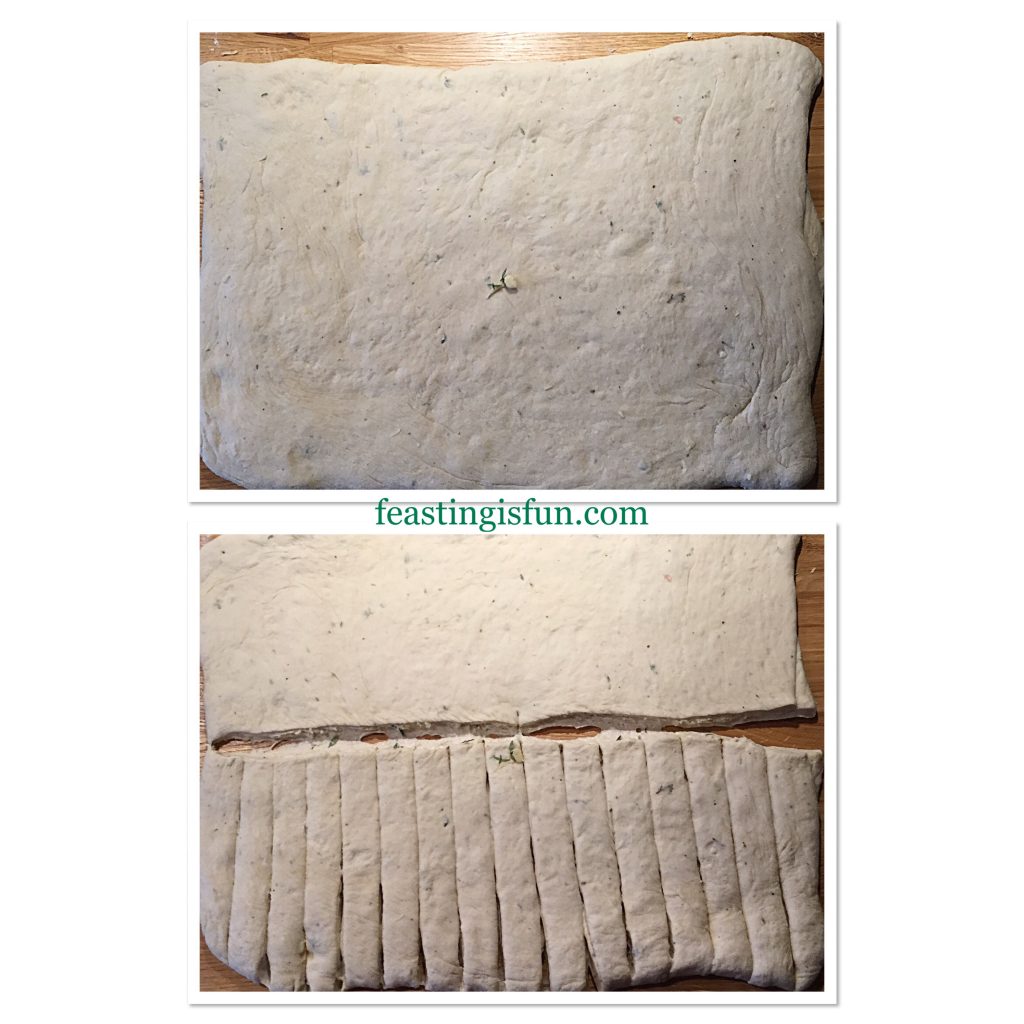
  • Fold the dough in half.
FF Cheddar Cheese Thyme Soft Breadsticks
Folding and cutting the dough into breadsticks.
  • Gently roll over the folded dough with a rolling pin, sealing the cheese inside.
  • Cut the dough in half across the middle. Next cut 1cm (1/2in) strips in the dough.
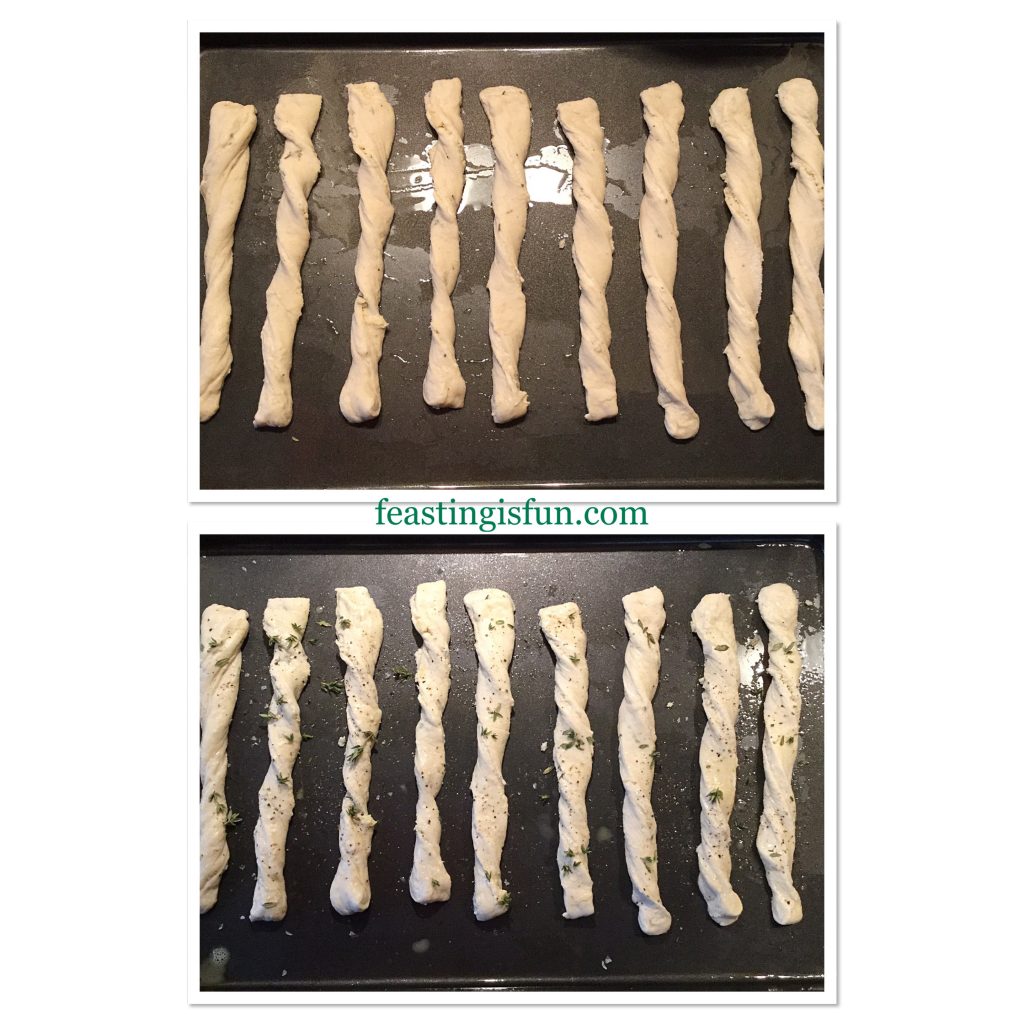
FF Cheddar Cheese Thyme Soft Breadsticks
Preparing the breadsticks for baking.
  • Remove one dough strip at a time, stretch and twist it before placing on a prepared baking tray. Press the dough on to the tray to stick, this will hold the twist in place. Place eight breadsticks on each tray.
  • Brush each breadstick lightly with egg wash and sprinkle over 1/2 teaspoon of thyme (for each eight breadsticks). Also grind black pepper and sprinkle a pinch of sea salt over the tray.
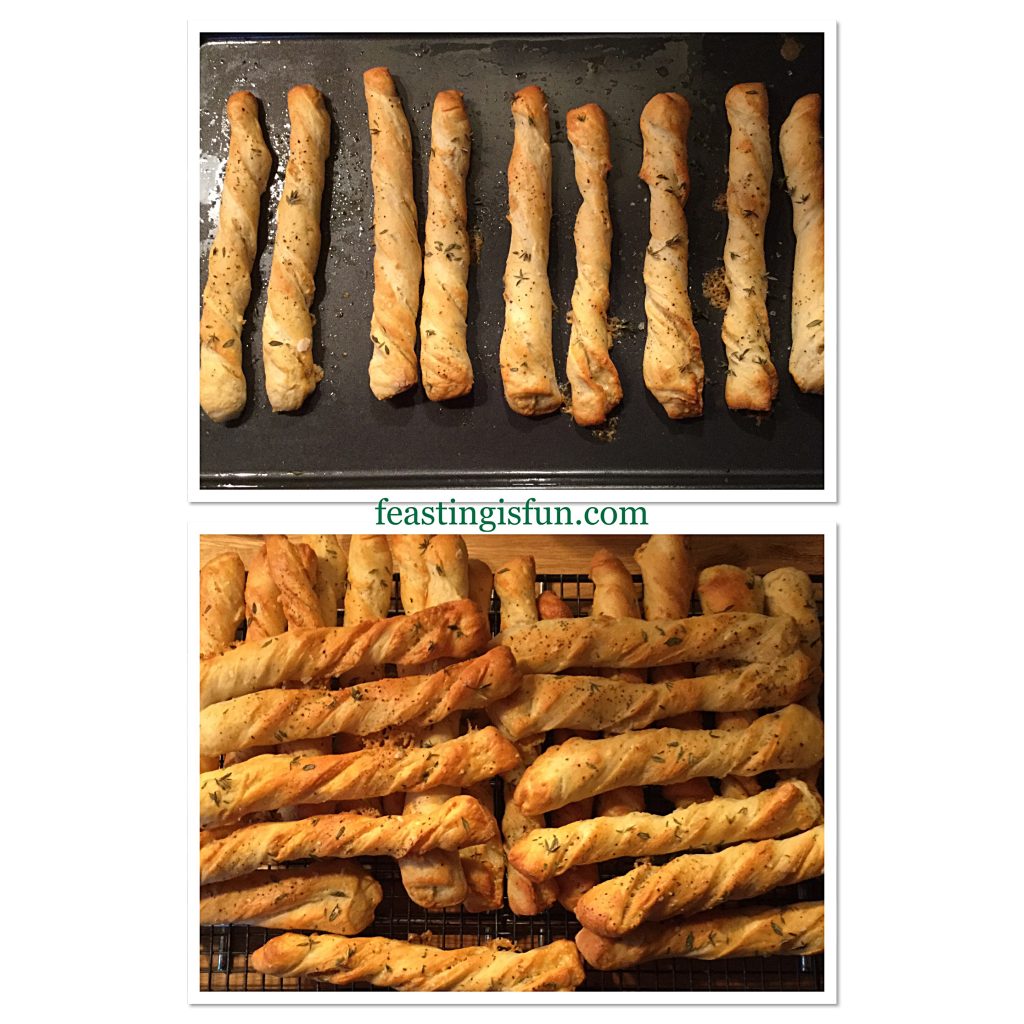
  • Place two baking sheets in the preheated oven on separate shelves and bake for 15-20 minutes.
FF Cheddar Cheese Thyme Soft Breadsticks
Freshly baked, golden, Cheddar Cheese Thyme Soft Breadsticks
  • The breadsticks are baked when they are a light golden brown.
  • As soon as the breadsticks are baked remove from the oven and place on a cooling rack.
  • Continue with the other half of the dough, cutting, twisting, egg washing and sprinkling and finally baking as before.
FF Cheddar Cheese Thyme Soft Breadsticks
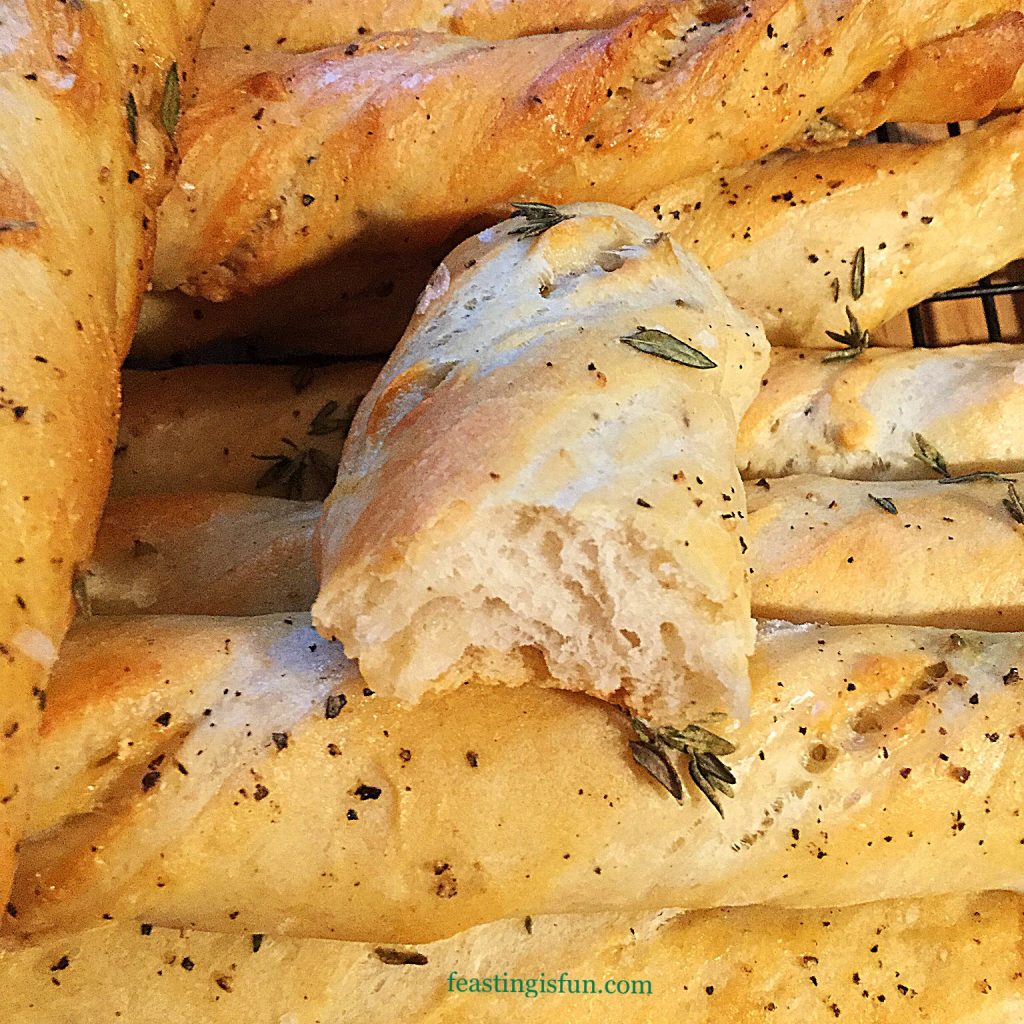
The soft inner crumb of these Cheddar Cheese Thyme Soft Breadsticks.
  • Wait until slightly cooled before biting into one of these deliciously cheesy breadsticks, with its soft, fluffy inner.
FF Cheddar Cheese Thyme Soft Breadsticks
Cheddar Cheese Thyme Soft Breadsticks

Serving And Storing The Breadsticks

Serve slightly warm to allow for the best possible taste experience. At there best enjoyed on the day these are made.

Since this recipe makes a big batch of Cheddar Cheese Thyme Soft Breadsticks, they can be enjoyed at larger gatherings and are ideal for adding to a buffet table.

To make ahead, bake as usual, cool and freeze for up to two weeks. Remove from the freezer when needed, place on a baking tray in a warm oven for 10 minutes to defrost and warm through.

If you have enjoyed this recipe for Cheddar Cheese Thyme Soft Breadsticks you may also like these:

Seeded Multigrain Baguettes

FF Cheddar Cheese Thyme Soft Breadsticks
Seeded Multigrain Baguettes

Baked Cheese Olive Ciabatta Bread

FF Cheddar Cheese Thyme Soft Breadsticks
Baked Cheese Olive Ciabatta Bread

Cheddar Sun Dried Tomato Scones

FF Cheddar Cheese Thyme Soft Breadsticks
Cheddar Sun Dried Tomato Scones

Creating recipes using ingredients that compliment and enhance each other is at the heart of Feasting is Fun. As well as encouraging people to share their bakes. Baking extra to give away, to an elderly neighbour or new family, is easy. Especially when you are in the kitchen already, whipping up a batch of breadsticks, cookies or cupcakes.

Who will you share with?

Whatever you are making, baking or creating in your kitchens, enable fun preparing your feast.

Sammie xx

No part of this post may be reproduced or duplicated without the written permission of the owner. Please see my Disclosure Policy.
 

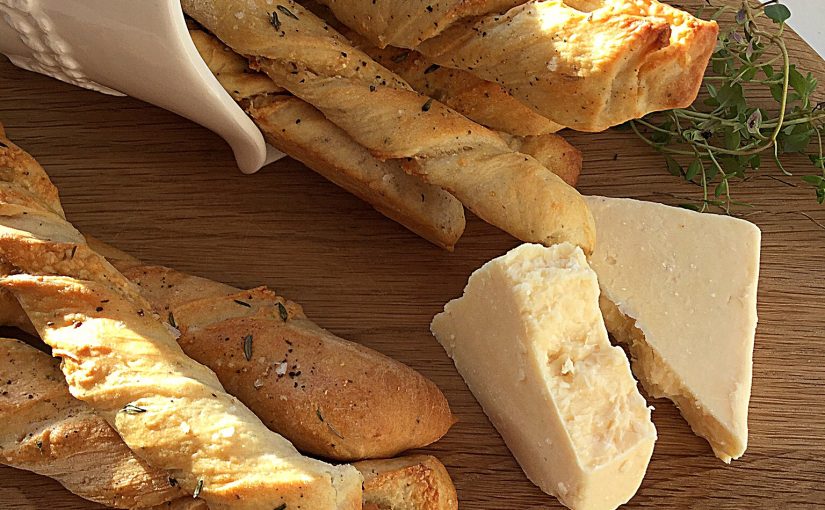
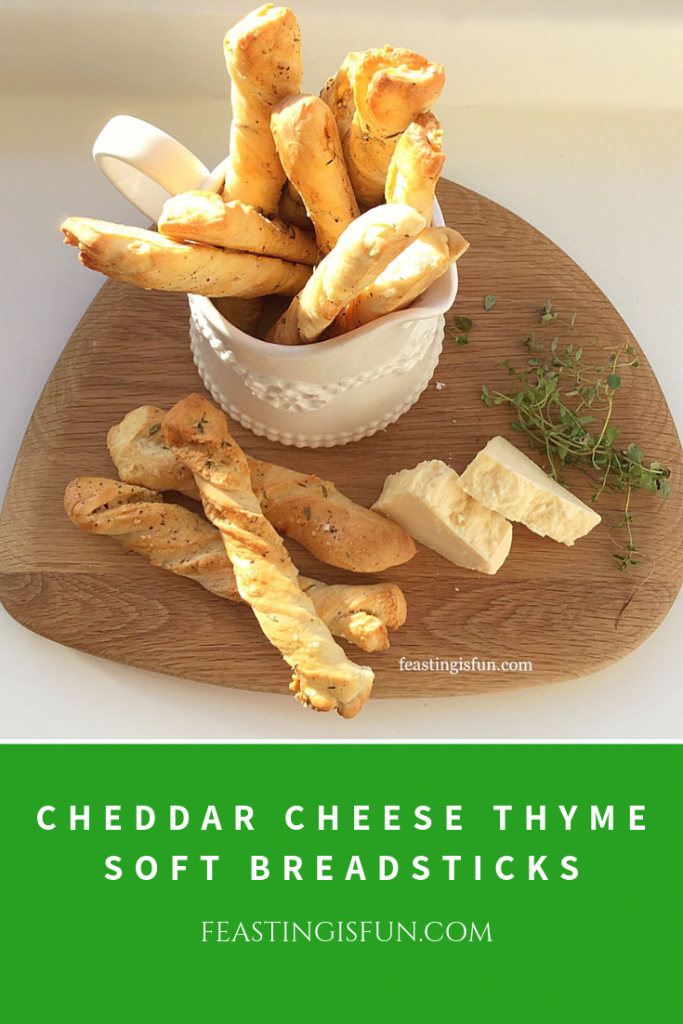
Cheddar and fresh thyme on a wooden board with breadsticks in a cream jug. Sized for Pinterest with descriptive graphics.
Cheddar Cheese Thyme Soft Breadsticks.

Raspberry White Chocolate Chip Muffins

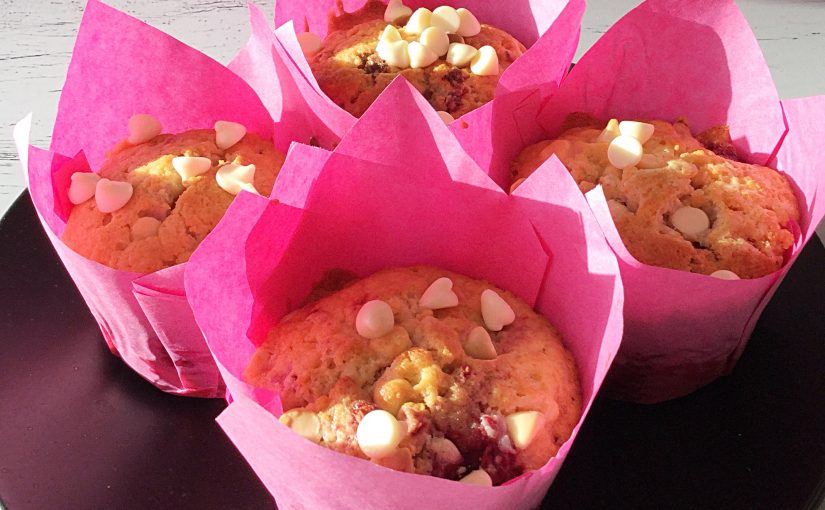
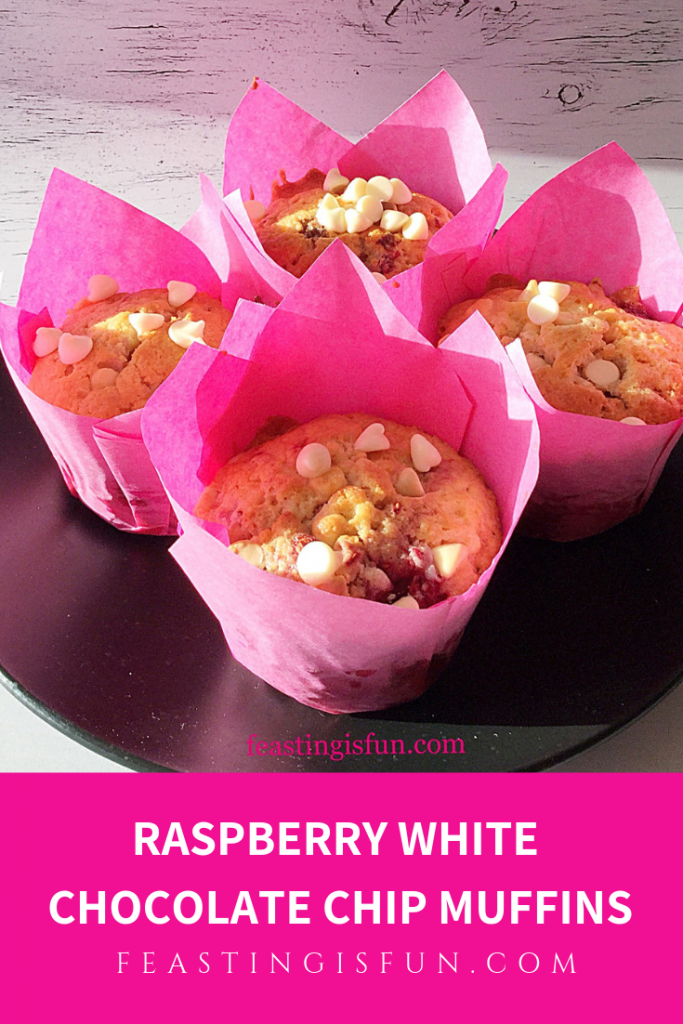
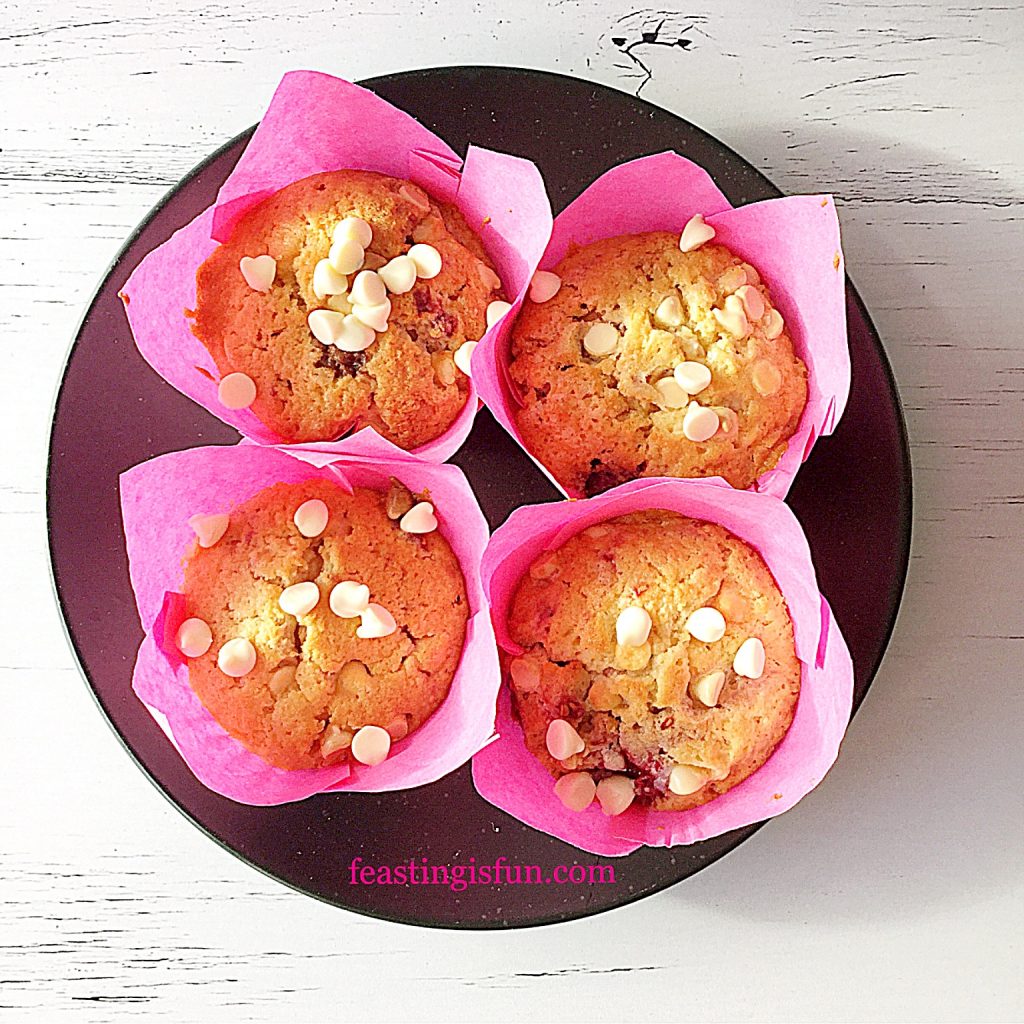
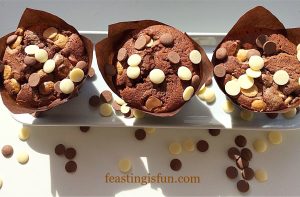
Coffee shop style muffins, it would seem, are here to stay. Big, light, tulip wrapped delights, packed full of chocolate or fruit. Why fight a trend that is clearly doing so well? Since we enjoy this style of muffin too, I have embraced everything about them and come up with my own recipes. So these Raspberry White Chocolate Chip Muffins are utterly delicious.

FF Raspberry White Chocolate Chip Muffins

While the texture has more in common with a cake, than a true muffin such as Cheese Bacon Breakfast Muffins , there is room for both in our home. Because not everyone is keen on whipped buttercream that tops most cupcakes, these light, raspberry filled treats are a great alternative. As well as being not-too-sweet, the raspberries on baking become jammy pods within the muffin.

FF Bakery Style Muffins
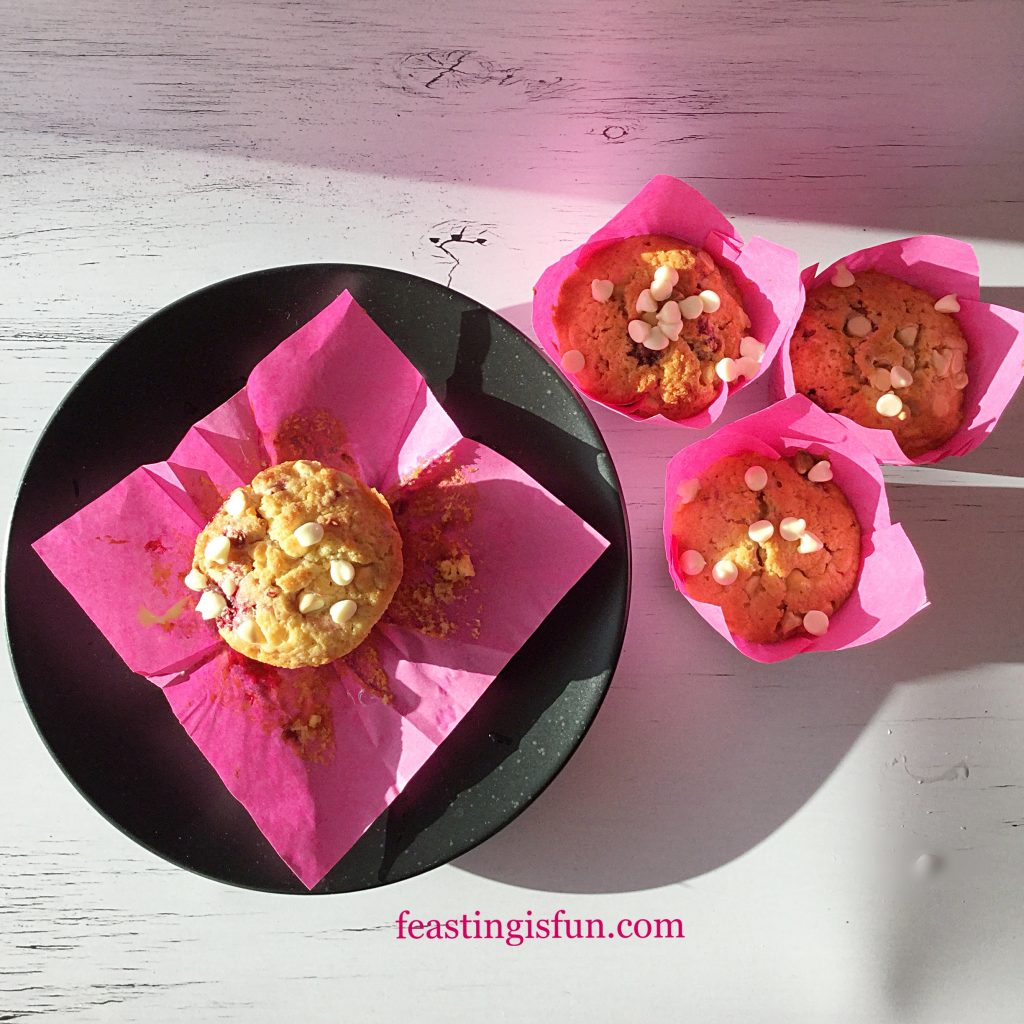
Raspberry White Chocolate Chip Muffins


White chocolate chips within and on top of the muffin, provide small, sweet burst of vanilla chocolate flavour. While balancing the slightly tart flavour given by the raspberries. Together they create a delightful flavour pairing within the lightest of muffins. Perfect for grabbing and eating for breakfast or brunch when rushed in the morning. Likewise they also travel well in packed lunches and as part of a picnic.


FF Raspberry White Chocolate Chip Muffins
Raspberry White Chocolate Chip Muffins


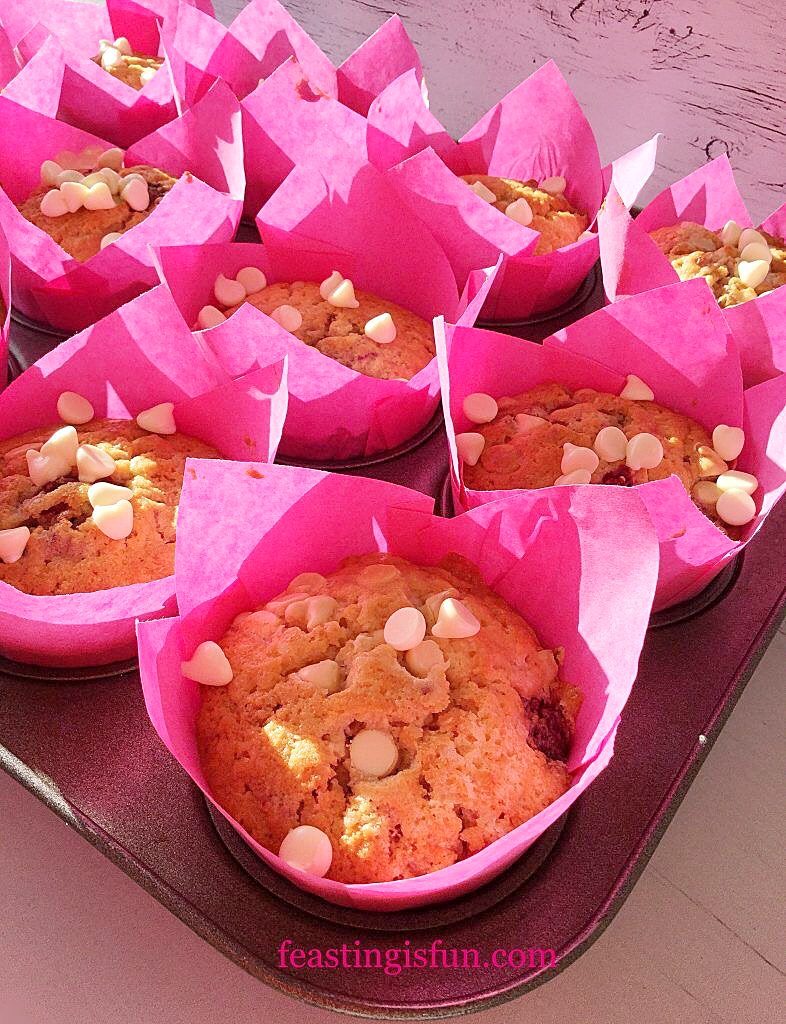
Baking the Raspberry White Chocolate Chip Muffins in tulip wrappers allows for a generously sized muffin. Also it adds to the coffee shop style of these muffins. If not using tulip wrappers to bake with, use the deepest muffin cases and fill two thirds full. As a result the baked muffins may bake over the muffin cases. If this happens, simply run a blunt butter knife between the muffin and tin to release.


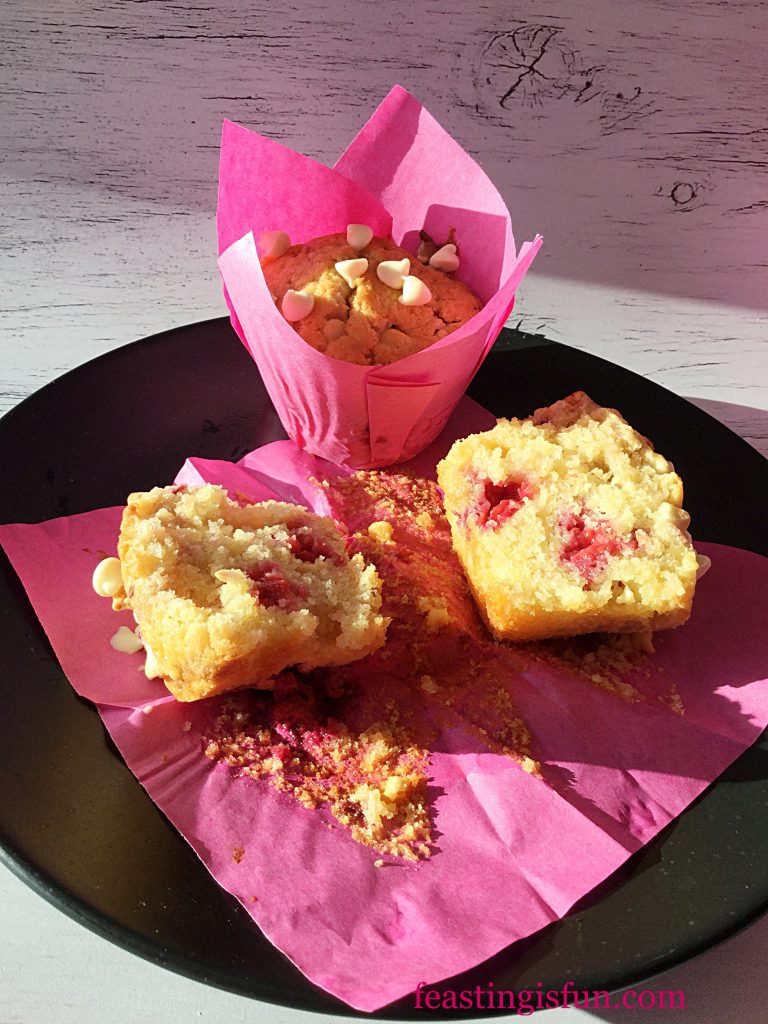
FF Raspberry White Chocolate Chip Muffins
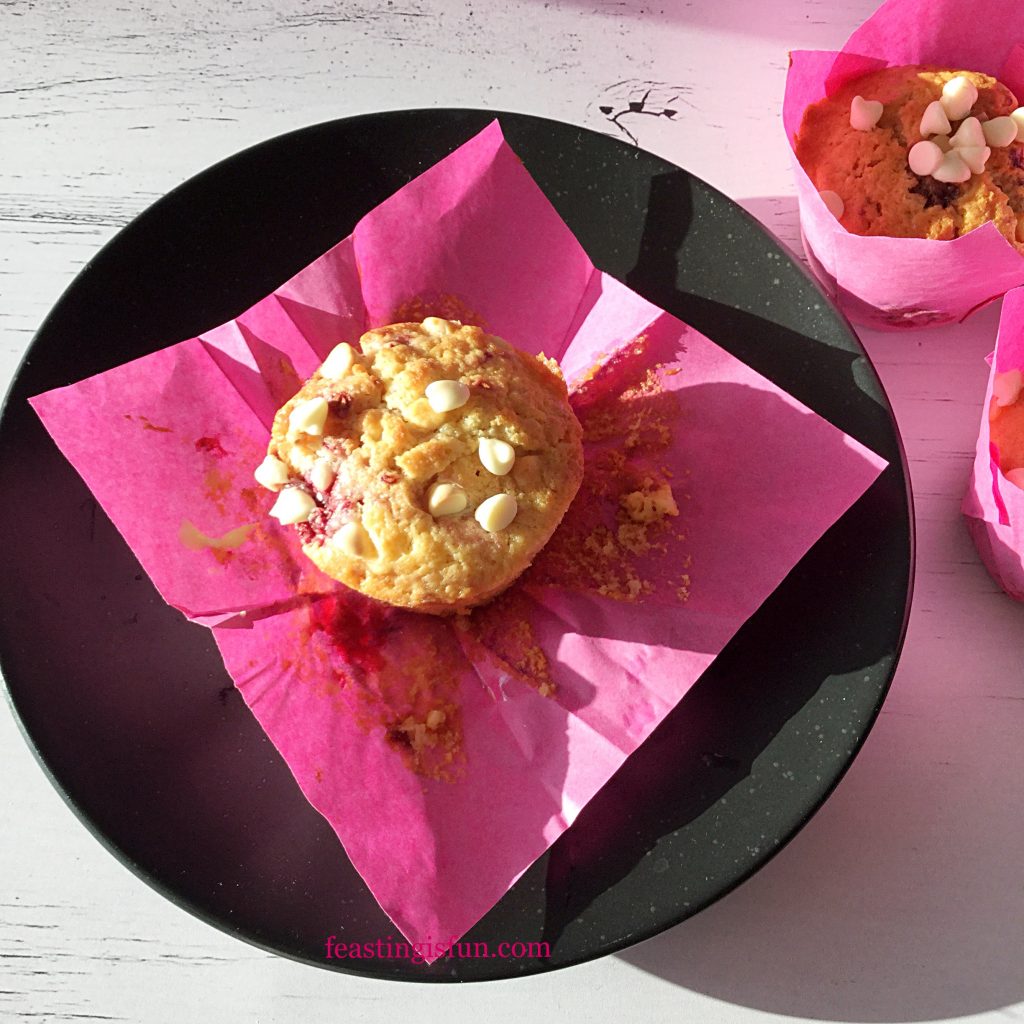
Tulip wrappers pull away easily revealing the baked muffin.

Recipe: Raspberry White Chocolate Chip Muffins makes 26-30

225g/8oz Unsalted Butter at room temperature

225g/8oz Caster Sugar

1/4tsp Sea Salt – I use Maldon

4 Large Free Range Eggs

100g/4oz Full Fat Yoghurt – I use Yeo Valley

1tsp Vanilla Extract – I use Nielsen-Massey

1.5tsp Baking Powder

275g/10oz Plain White Flour

125g/4.5oz White Chocolate Chips – I use Callebaut

150g/5oz Raspberries – I used frozen

Method: Preheat the oven to 180C/160C fan, 350F, gas mark 4

Making The Raspberry Muffin Batter

  • First of all line a 12 hole muffin tin with tulip wrappers or muffin cases.
  • Into a large bowl add the butter, sugar, salt and whisk until well combined.
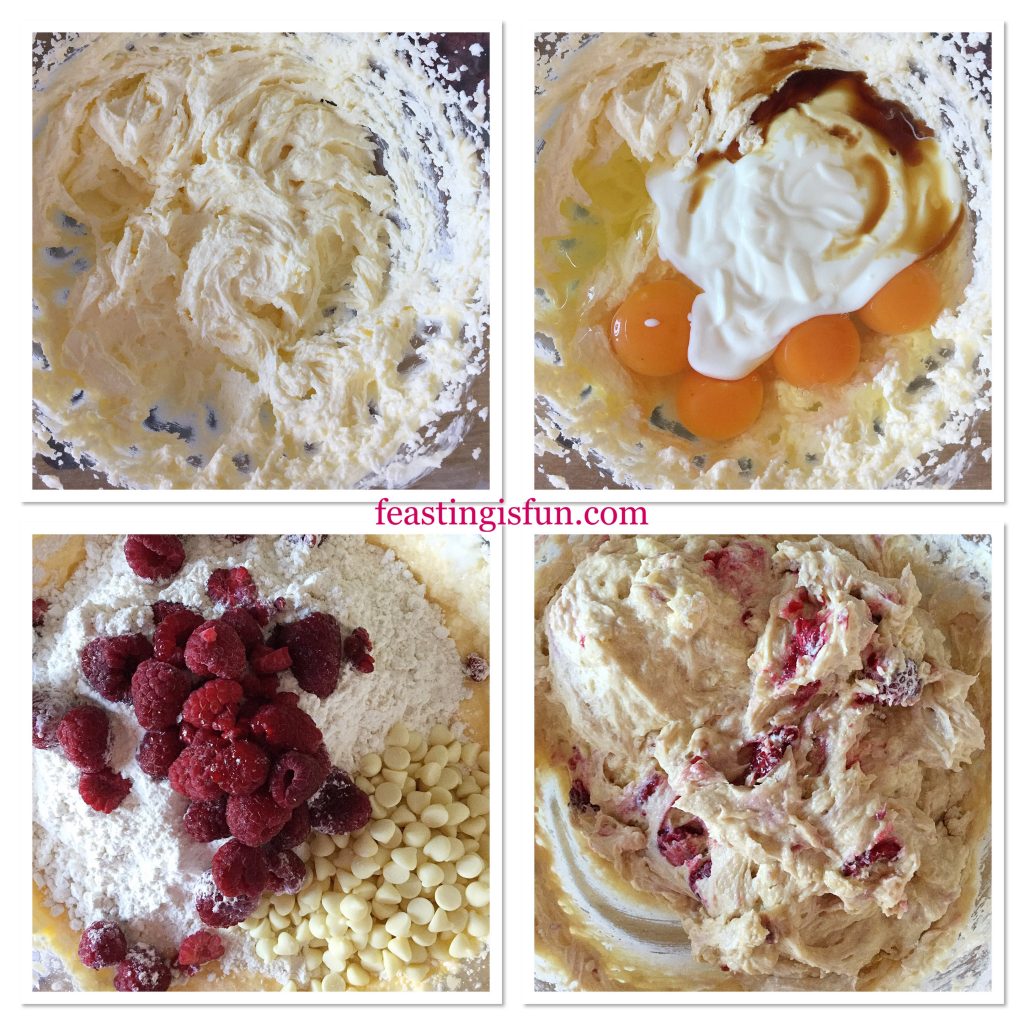
  • Then add the eggs, vanilla extract and yoghurt. On top of these wet ingredients sift in the flour and baking powder. Finally add the raspberries and 100g/4oz of the white chocolate chips.
  • Using a large spoon gently fold all of the ingredients together until just combined.  Take care not to break up the raspberries.
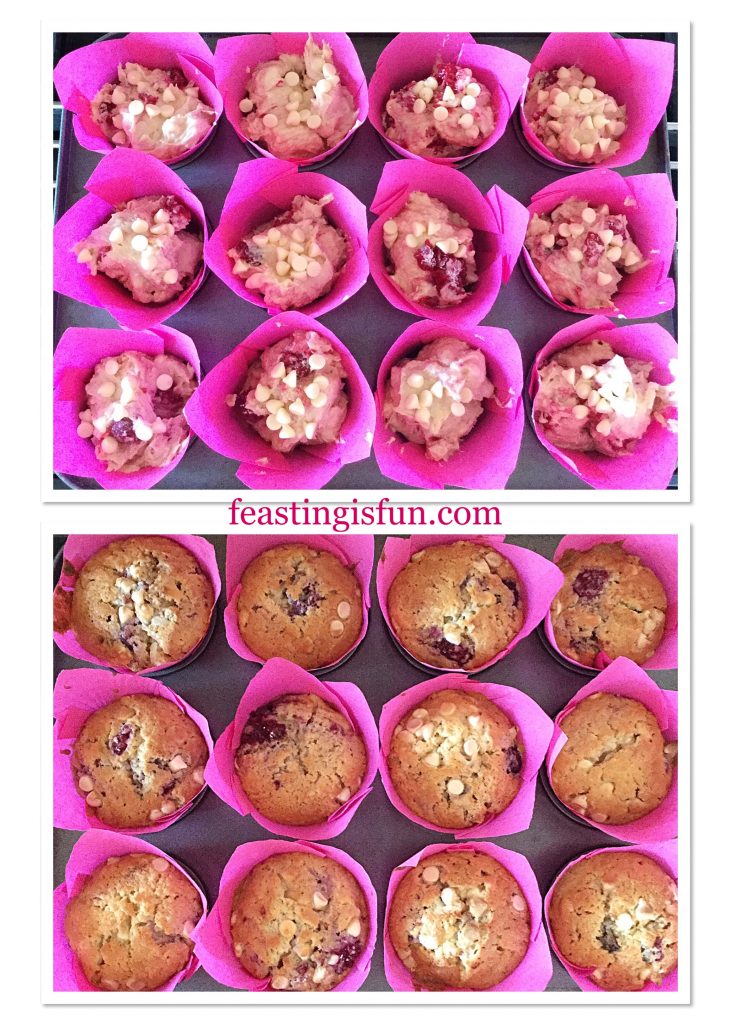
FF Raspberry White Chocolate Chip Muffins
Making the batter for Raspberry White Chocolate Chip Muffins
  • Spoon the batter into the wrappers, dividing equally between them.
  • Finish by sprinkling over the remaining white chocolate chips on to the surface of the un-baked muffins.

Baking The Bakery Style Muffins

  • Place the muffins into the centre of a preheated oven and bake for 25-35 minutes.
  • The muffins are baked when they are golden, just firm to touch and an inserted cocktail stick comes out clean, without any batter attached.
FF Raspberry White Chocolate Chip Muffins
Filling and baking the Raspberry White Chocolate Chip Muffins
  • As soon as the muffins are baked remove from the oven and allow to cool in the tin if using tulip wrappers. Otherwise, if using muffin cases, cool for 10 minutes in the tin then remove and place on a cooling rack to finish cooling.
FF Raspberry White Chocolate Chip Muffins
Raspberry White Chocolate Chip Muffins

I like to serve these muffins warm. While the chocolate chips are still slightly melted. Although they are fine to serve cold as well.

These muffins are best eaten within 24 hours of being made. Yet they can be stored, once cooled, in an airtight container for up to 3 days. Keep refrigerated during warm weather.


FF Raspberry White Chocolate Chip Muffins
The whole raspberries distribute evenly throughout the muffin.

Another delicious bake that uses the same flavours as these muffins is my Raspberry White Chocolate Loaf Cake. Also great for transporting to share with others

If you have enjoyed this recipe for Raspberry White Chocolate Chip Muffins you may also like these:

Double Strawberry Almond Muffins

Double Strawberry Almond Muffins

Chocolate Madness Muffins

Triple chocolate madness muffins
Chocolate Madness Muffins

Double Cherry Drizzle Oat Bars

Double Cherry Drizzle Oat Cake Bars
Double cherry drizzle oat cake bars.

Since actually making these muffins took mere moments, why not try them yourself? Making use of frozen raspberries allowed the fruit to keep its shape more easily. Yet, if fresh raspberries are in abundance or growing in the garden absolutely use those. Deep blush streaked muffins, warm from the oven taste good any day of the year!

So whatever you are making, baking and creating in your kitchens, have fun preparing and sharing your feast.

Sammie xx

No part of this post may be reproduced or duplicated without the written permission of the owner. Please see my Disclosure Policy.
 

Elizabeth Harris Perfect Cupcake Decorating Kit

Here on Feasting is Fun we encourage sharing. Whether it be bakes freshly made in our kitchens, or inviting friends and neighbours round for a cup of tea and a natter. As part of this I get asked by different companies to review products or produce. Resulting in me getting to share with you, my lovely readers, great products that really do earn their place in the kitchen. Today I share with you the Elizabeth Harris Perfect Cupcake Decorating Kit Review.

FF Elizabeth Harris Perfect Cupcake Decorating Kit
Elizabeth Harris Perfect Cupcake Decorating Kit Review

Elizabeth Harris learned to bake when she was young, in her Mum’s kitchen. Her love and passion deveolped over the years and she is now renowned for making bespoke cakes for every occasion. Developing her own product range, including the Perfect Cupcake Decorating Kit, is a step further to equipping and teaching others how they too can create stunning cakes.

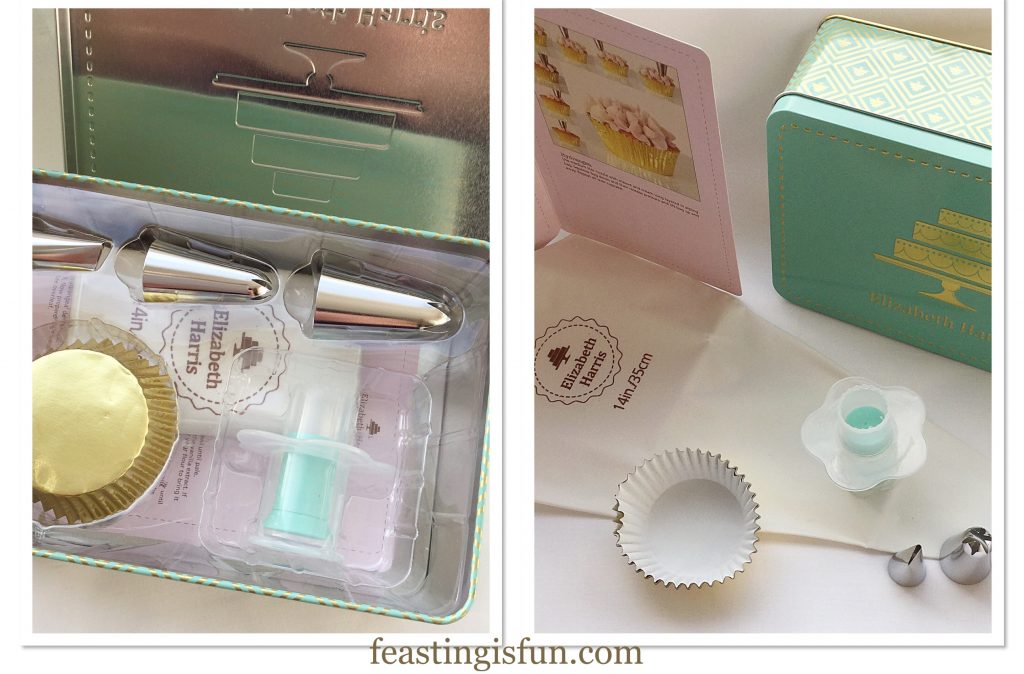
Few people have the luxury of large kitchens with empty cupboards waiting to be filled. Items that take up valuable storage space need to earn their place. Everything needed, except for ingredients, to decorate a cupcake is contained within the sturdy, neat tin. First impression when handling the tin and it’s contents is of quality as well as a beautiful design.

Elizabeth Harris Perfect Cupcake Decorating Kit
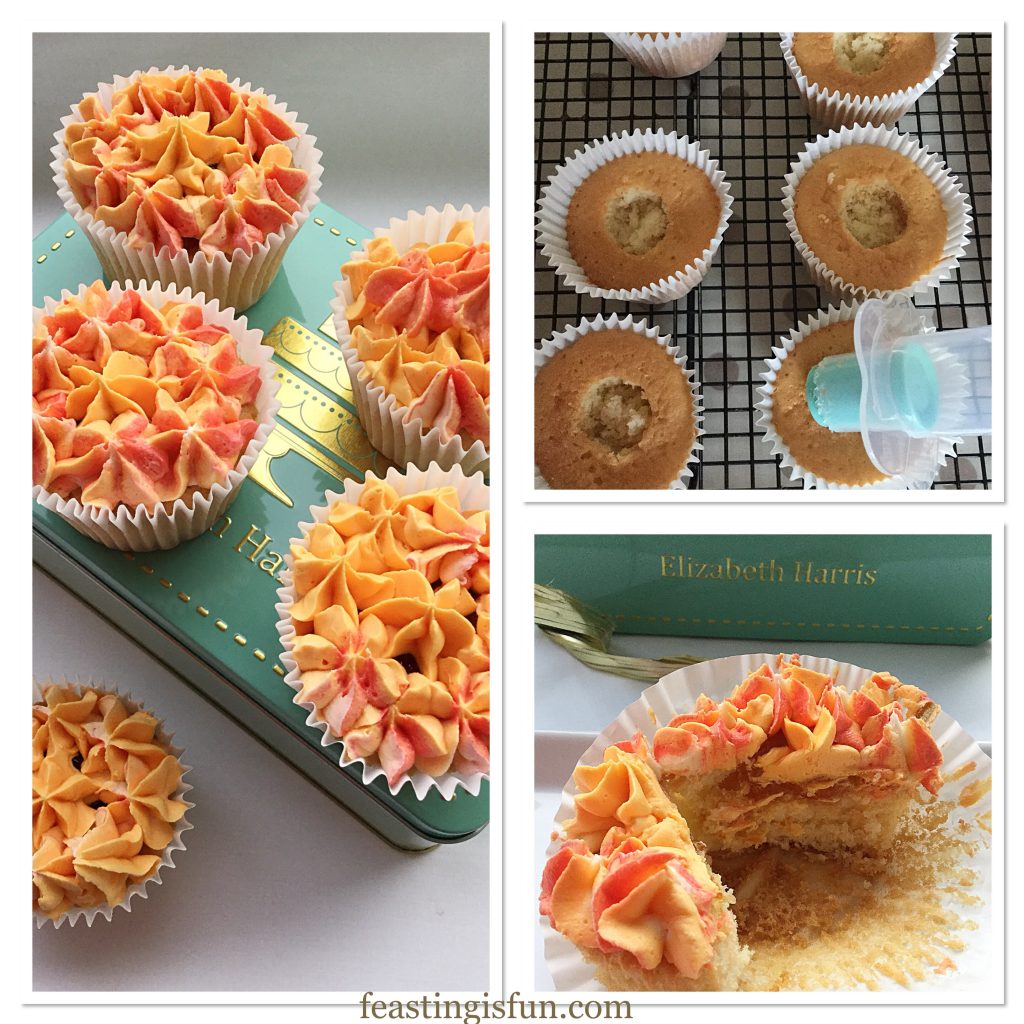
Elizabeth Harris Perfect Decorating Cupcake Kit tin and contents.

Neatly packaged within the tin are the following items:

  • 12 cupcake cases.
  • 3 piping nozzles of different sizes and shapes.
  • Cupcake corer, used to remove the centre of a cupcake so that it can be filled.
  • Sturdy 14in/35cm reusable piping bag.
  • Splatter proof, fully comprehensive instruction guide, including basic cupcake and buttercream recipe. Also step-by-step photographs showing how to achieve 3 different cupcake decorations.
FF Elizabeth Harris Perfect Cupcake Decorating Kit
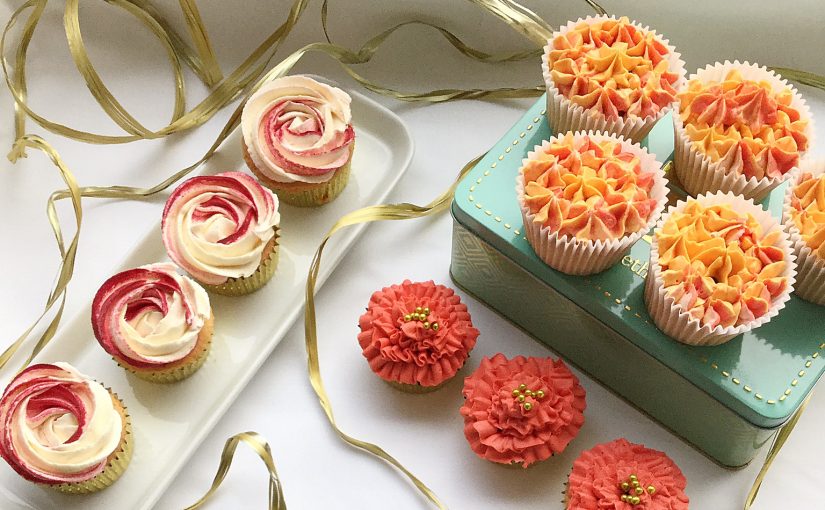
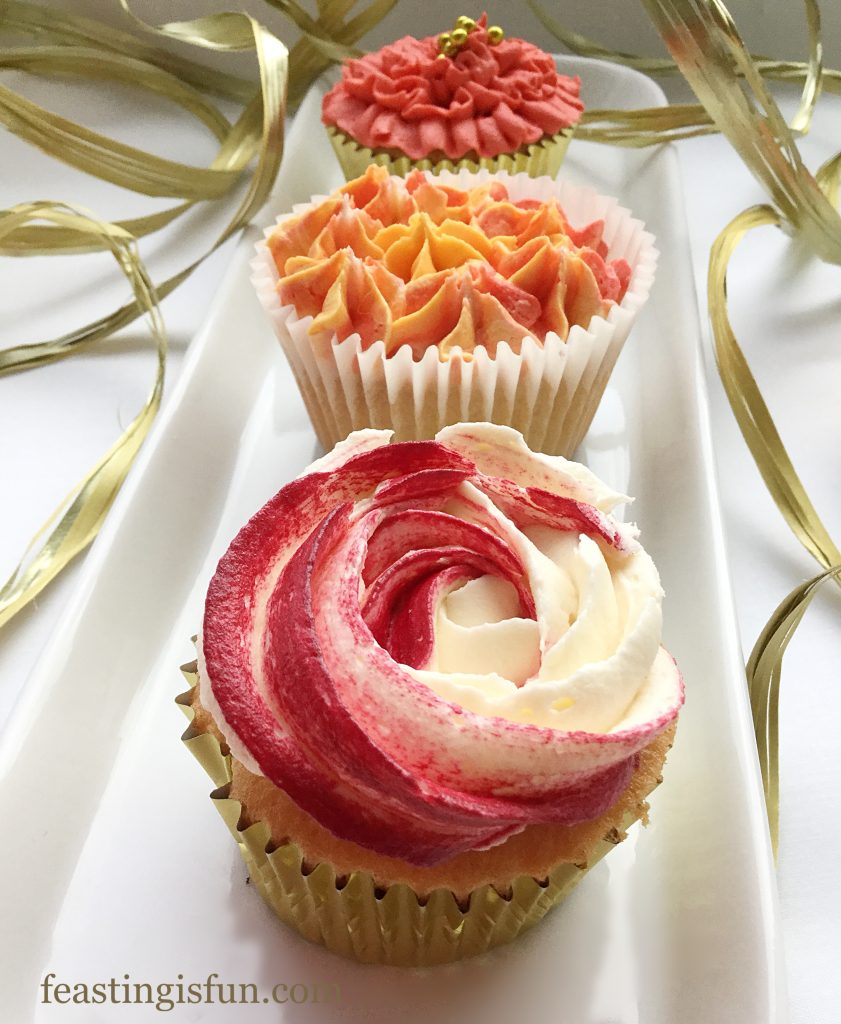
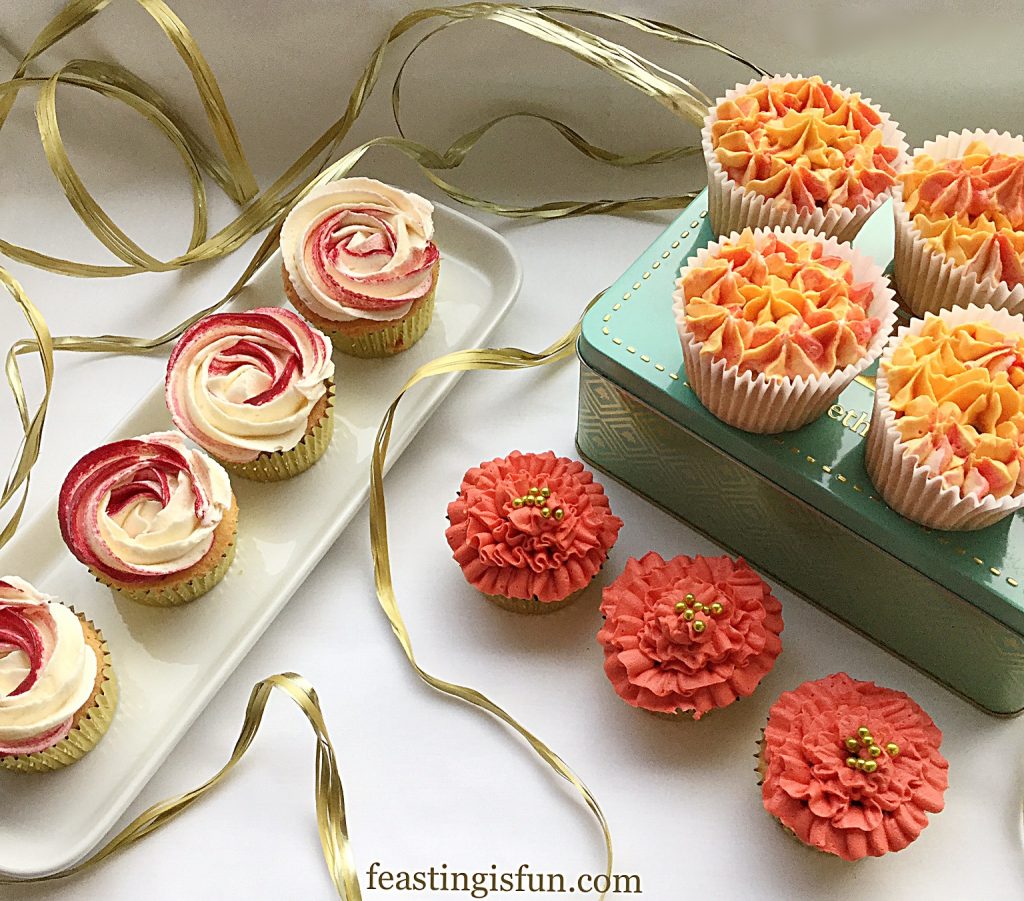
Three of the many designs that can be made using the Elizabeth Harris Perfect Cupcake Decorating Kit

Since the instruction guide provides a reliable cupcake and buttercream recipe, it is ideal for those who are just learning to bake. Likewise, the quality of the nozzles and variety of decorating designs is perfect for both the inexperienced and more proficient cake decorator. A washable reusable piping bag not only helps the environment, but also saves money on buying their disposable counterparts. Finally the addition of a cupcake corer allows the baker to fill the cupcake with a sweet surprise.

While reviewing the kit, the basic cupcake recipe included in the instruction guide was used. Three different flavoured cupcakes were made. Vanilla, rose and lemon and peach with an apricot jam filling. Flavour extracts were used for the cake batter and food colours for the buttercream. The recommended buttercream recipe was also used.

FF Elizabeth Harris Perfect Cupcake Decorating Kit
Using the Elizabeth Harris Perfect Decorating Cupcake Kit to create 3 differently decorated cupcakes.

Recipe used from the instruction leaflet. Makes 12 cupcakes.

  • 110g/4oz Butter softened at room temperature
  • 110g/4oz Caster Sugar
  • 1/8tsp Salt – added as unsalted butter was used
  • 2 Free Range Eggs – I use large – lightly beaten
  • 1tsp Vanilla Extract – I use Nielsen-Massey
  • 110g/4oz Self Raising Flour
  • 1-2tbsp Milk
  • Optional 1/4tsp each Lemon and Rose extract. Also available from Nielsen-Massey
  • Optional 15 drops Peach flavouring available from – Foodie Flavours. Apricot Jam for the hidden filling.
  • Gold Sugar Balls

Method: followed from the instructions given.

Preheat oven to 180C/160C fan, 350F, gas mark 4.

  • Line a muffin tin with 12 cupcake cases.
  • Cream together the butter, salt and sugar in a bowl, until pale.
  • Add 1tbsp of flour, vanilla extract and slowly beat in the eggs to the mixture.
  • If using flavourings add and beat into the mix.
  • Gently fold in the remaining flour, adding 1-2tbsp milk until the cake batter just drops from a spoon (dropping consistency).
  • Spoon the cake batter to half fill each cupcake case.
  • Place the muffin tin in the centre of the oven and bake for 10-15 minutes.
  • The cupcakes are baked when they are golden in colour and an inserted cocktail stick comes out clean. As soon as the cupcakes are baked remove from the oven.
FF Elizabeth Harris Perfect Cupcake Decorating Kit
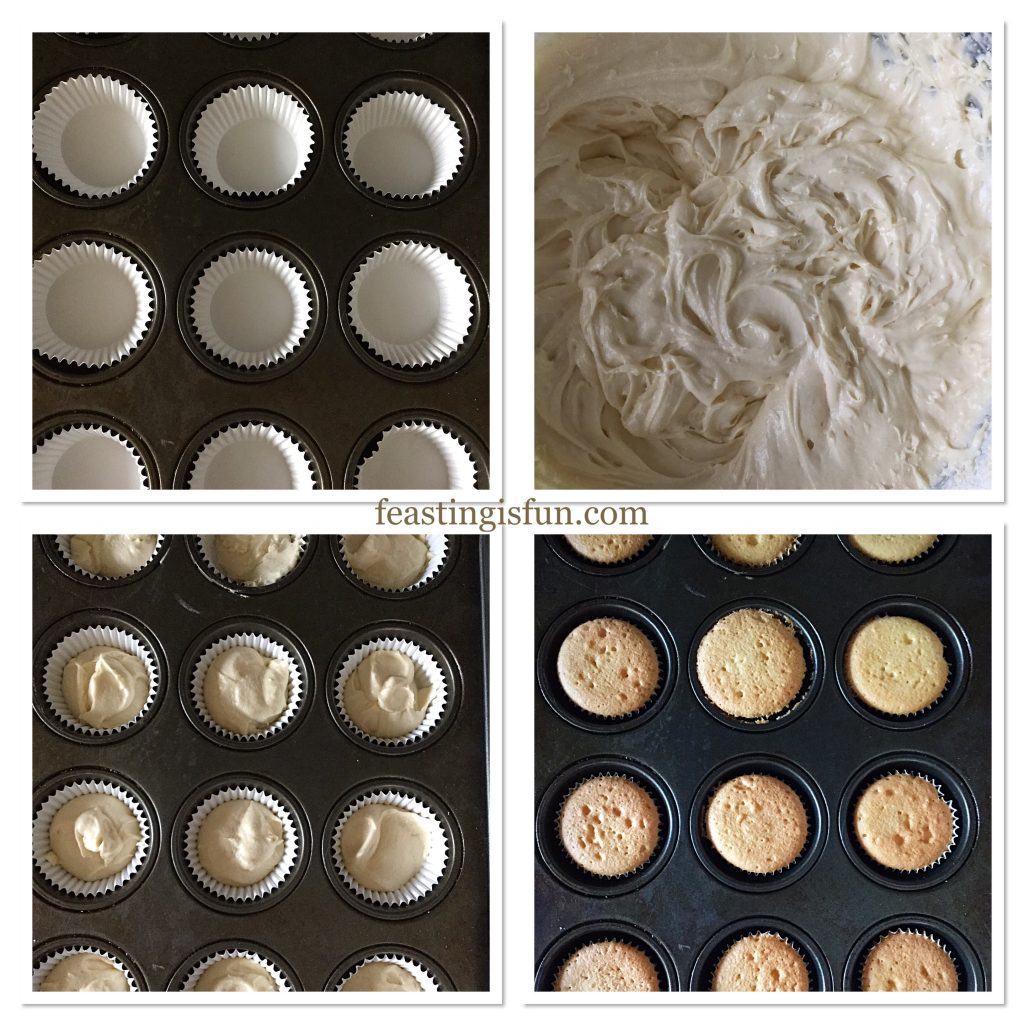
Making and baking the cupcakes.
  • Allow the cupcakes to cool for 10 minutes in the tin then remove and place on a cooling rack to completely cool.
  • For apricot jam filled peach cupcakes, once cool, place the cupcake corer on to the centre of the cupcake. Twist until the corer touches the top of cupcake. Remove and add 1/2tsp of jam. Press the top of the corer and the cake plug will be released. Place on top of the jam filled cupcake. Continue until each cupcake is filled.
  • Proceed to pipe a hydrangea pattern, using the medium star nozzle, as detailed in the instructions. See below for buttercream recipe.
FF Elizabeth Harris Perfect Cupcake Decorating Kit
Apricot jam filled peach cupcakes with hydrangea piped buttercream.

Making the buttercream:

  • 140g/5oz Butter softened
  • 280g/10oz White Icing Sugar
  • 1-2tbsp Milk
  • Food Colouring – I used gel colours available from Wilton

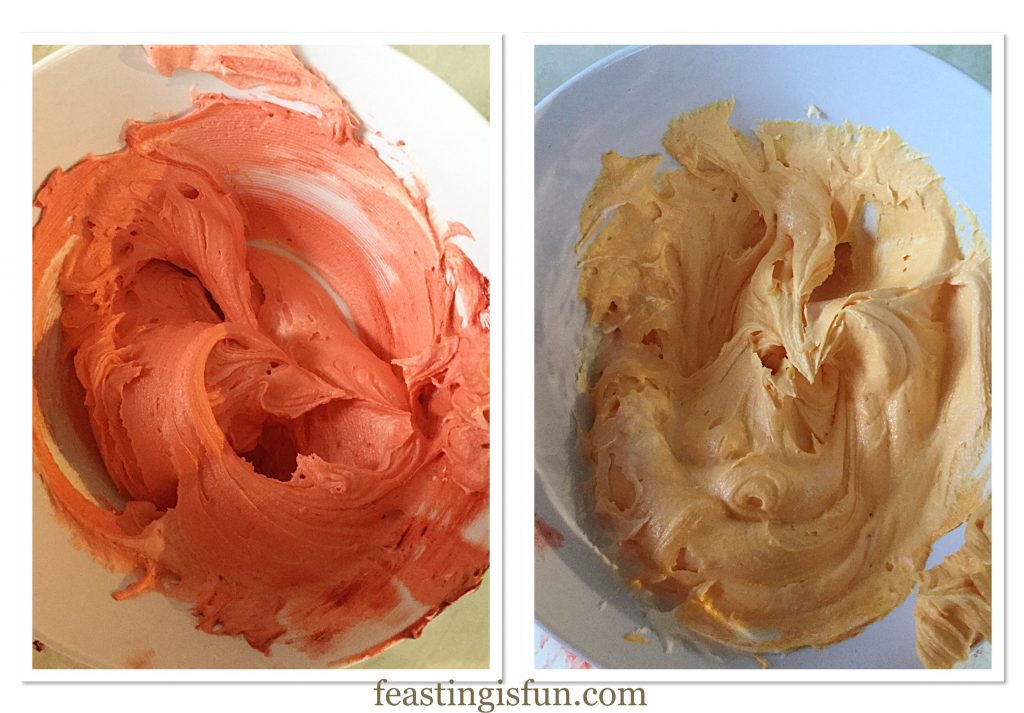
Whisk the butter in a bowl until softened. Add the icing sugar and whisk slowly to start, increasing in speed. Add milk if the mixture is too stiff. Continue whisking until the buttercream is pale and fluffy. Divide the buttercream into separate bowls and colour as desired. A cocktail stick dipped into gel colouring allows control of depth of colour. While carrying out the review I created a light and dark orange. Finishing the frill and hydrangea cupcakes with these colours.

FF Elizabeth Harris Perfect Cupcake Decorating Kit
Two different coloured icings.

While simply spooning alternate colours into a piping bag gave the hydrangea cupcakes a pretty, range of colours. Just like on a real flower.

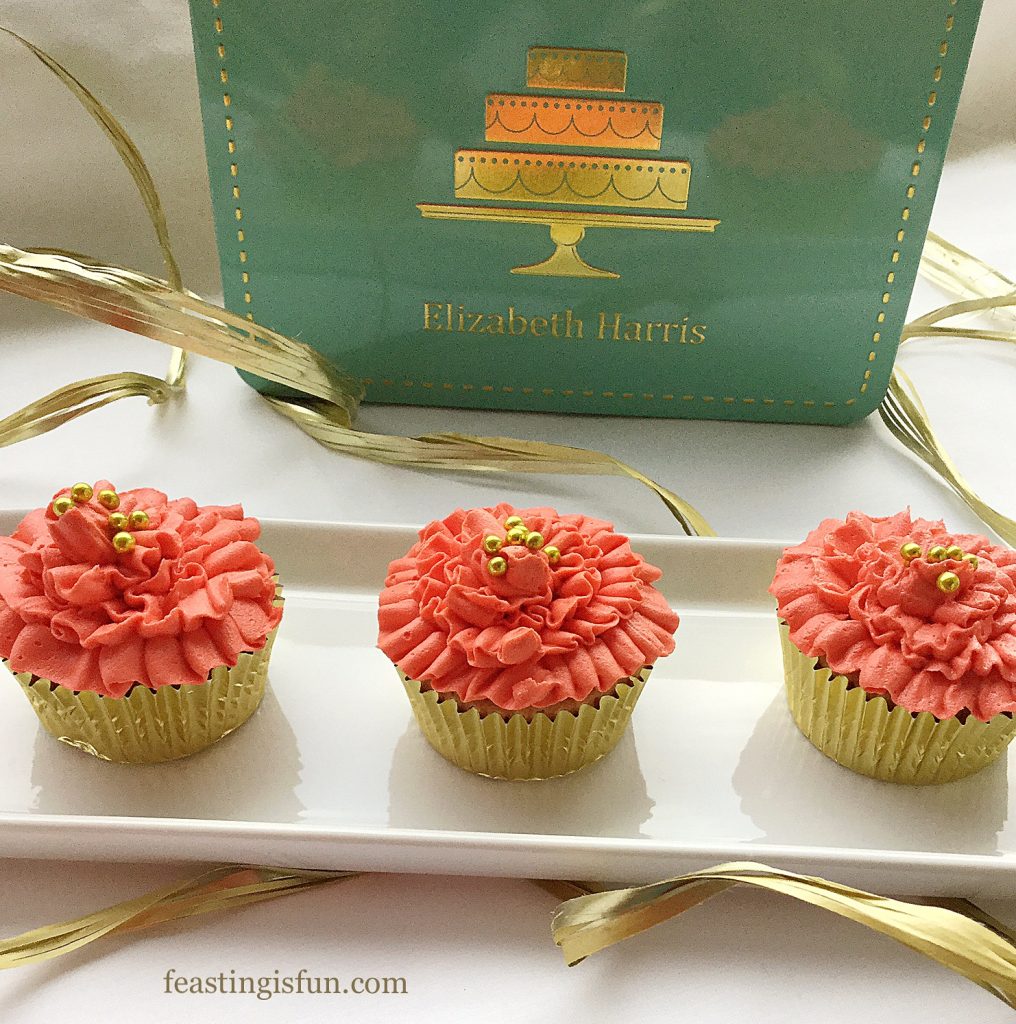
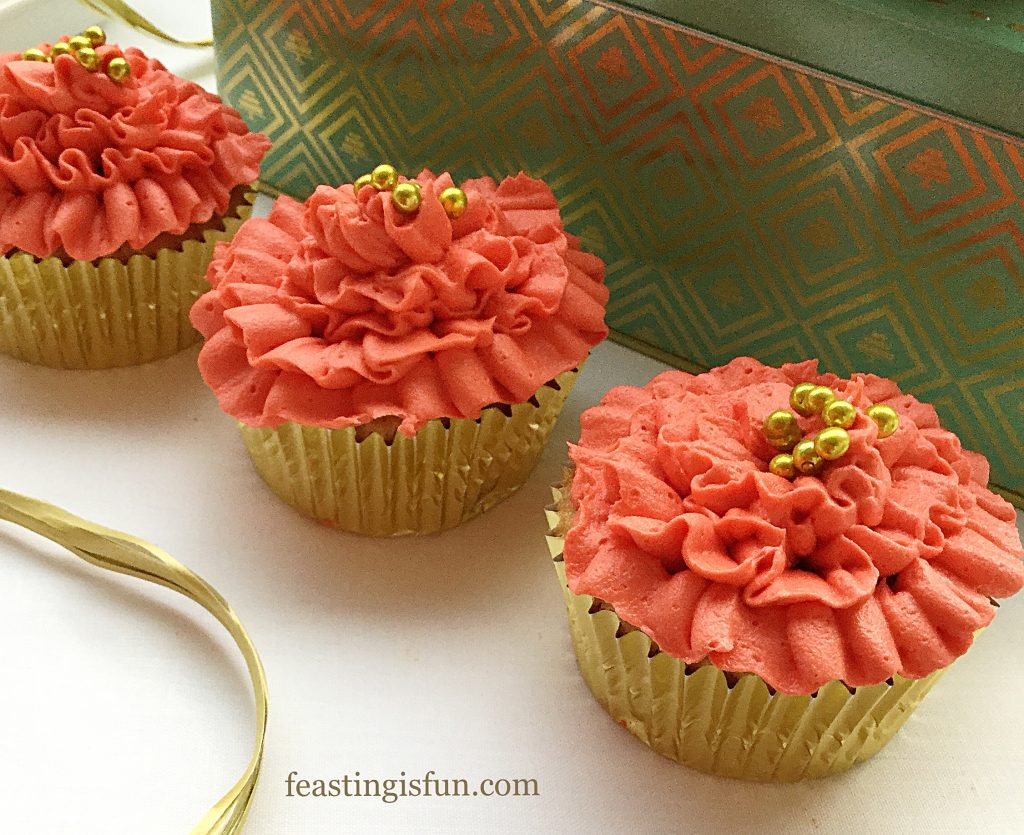
Using deep orange buttercream with the flat nozzle fitted to the piping bag, the frilled cupcakes were decorated. Since the nozzle was the wrong way round each frill faced downwards creating a ballerina tutu effect. Gold sugar balls topped off these vanilla cupcakes.

FF Elizabeth Harris Perfect Cupcake Decorating Kit
Gold topped ruffle decorated vanilla cupcakes using the Elizabeth Harris Perfect Cupcake Decorating Kit.

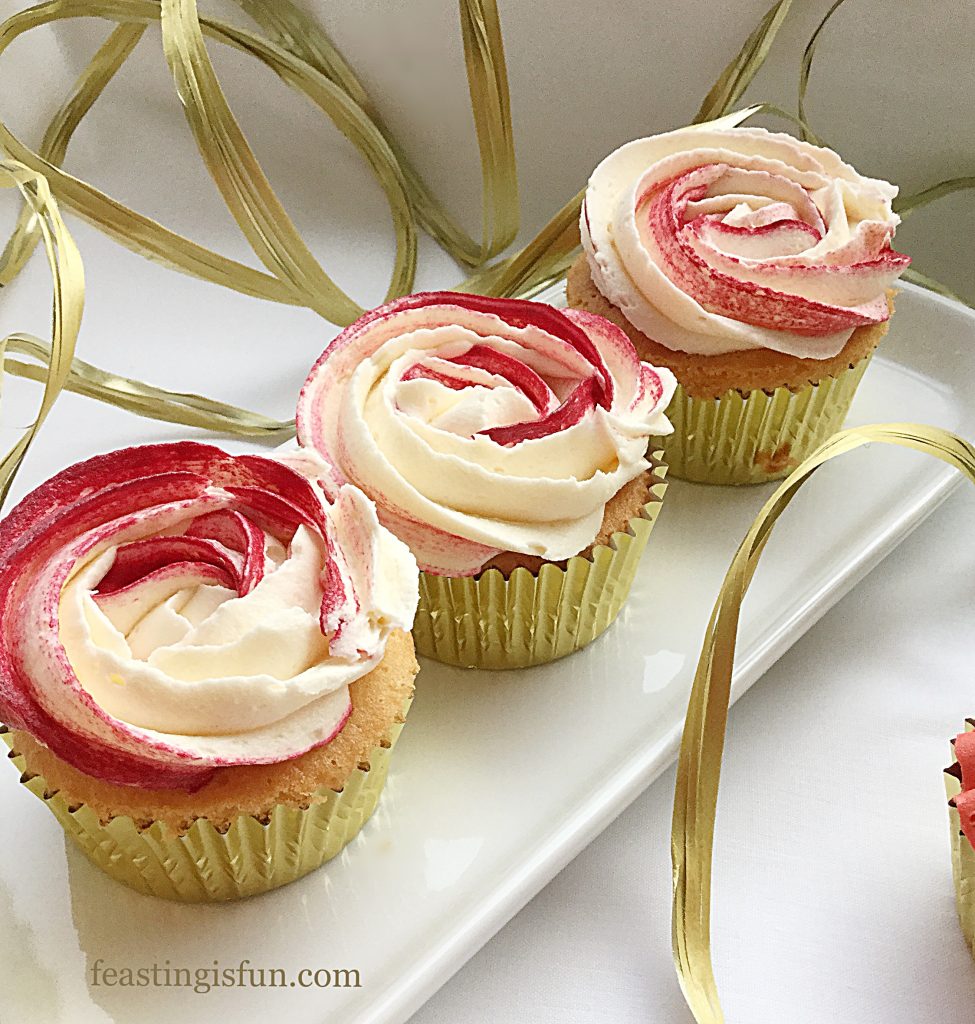
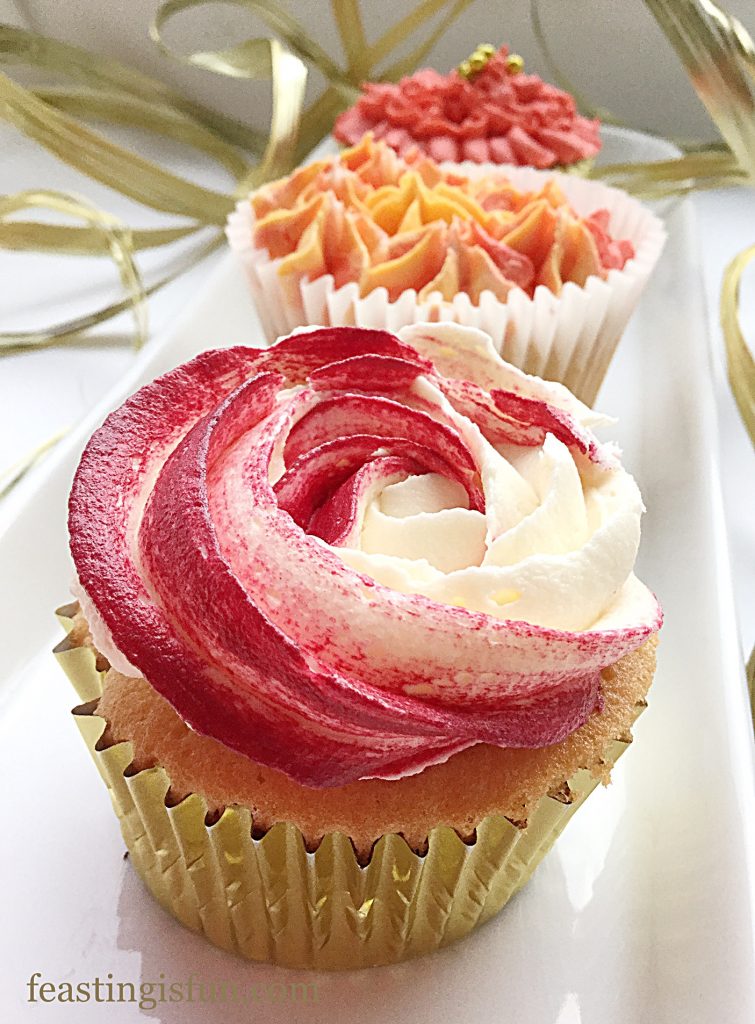
Finally the rose and lemon cupcakes, topped with a deep red edged cream frosting. A technique that is easier than it looks. Since, as suggested in the instructions dual coloured icings can be spooned either side of the piping bag, fitted with the large star nozzle, giving a pretty coloured rose when piped. Yet a different effect can also be achieved by dipping the blunt end of a wooden barbecue skewer into your chosen colour food colour. Place the gel end of the skewer into the empty piping bag, nozzle attached and wipe the gel up once side of the bag. Repeat on the other side. Fill the bag with uncoloured buttercream.

To decorate, squeeze out some buttercream into a bowl until the colour starts to show. Spoon  back into the piping bag. Starting in the centre of a cupcake, keep an even pressure and pipe a swirl as detailed in the instructions. As each cupcake is frosted the intense colour will pale in colour. Finally giving variation, similar to real roses.

FF Elizabeth Harris Perfect Cupcake Decorating Kit
Rose Topped rose and lemon flavoured cupcakes using Elizabeth Harris Perfect Cupcake Decorating Kit.

After washing, drying, reusing and storing every part of the Elizabeth Harris Perfect Cupcake Decorating Kit, I am thoroughly impressed. The instructions are clear and easy to wipe down for the messy baker! Each piece of equipment feels strong and sturdy. Three decorating ideas are given, each with great photos and easily understood. More ideas are available on Elizabeth’s YouTube channel here.

Elizabeth Harris Perfect Cupcake Decorating Kit is available to buy from larger Home Bargains stores nationwide. An ideal present for a beginner baker, or someone who bakes but wants to learn decorating techniques. Finally a warning, cake decorating can become addictive. Elizabeth Harris has a beautifully designed range of cake decorating equipment, bakeware and items for the kitchen, simply visit her website.

FF Elizabeth Harris Cupcake Decorating Kit.
Learn how to create beautiful cupcakes with the Elizabeth Harris Perfect Cupcake Decorating Kit.

If you have enjoyed this review of the Elizabeth Harris Perfect Cupcake Decorating Kit you may also enjoy these cupcake recipes to use with your kit:

Maltesers Popping Candy Cupcakes

FF Elizabeth Harris Perfect Cupcake Decorating Kit
Maltesers Popping Candy Cupcakes

Raspberry Ripple Almond Cupcakes

FF Elizabeth Harris Perfect Cupcake Decorating Kit
Raspberry Ripple Almond Cupcakes

Maraschino Cherry Chocolate Drizzle Cupcakes

FF Elizabeth Harris Perfect Cupcake Decorating Kit
Maraschino Cherry Chocolate Drizzle Cupcakes

Carrying out reviews allows access to products that I may not normally come across. Creating cupcakes with this Perfect Cupcake Decorating Kit taught me new decorating techniques. Also, developing new cupcake recipes is always a bonus. Quite often I give away reviewed products. Not so with this kit. It has found a permanent home in my newly decorated kitchen. It will be bought and given as gifts.

Whatever you are making, baking and creating in your kitchen, have fun preparing your feast.

Elizabeth Harris sent me the Perfect Cupcake Decorating Kit to review. I was not paid for carrying out this review or writing this blog post. All opinions, observations, product/ingredient recommendations are mine alone. No part of this blog post may be copied or reproduced without the written permission of the owner. Please see my Disclosure Policy.

Pomegranate Lemon Drizzle Bundt Cake

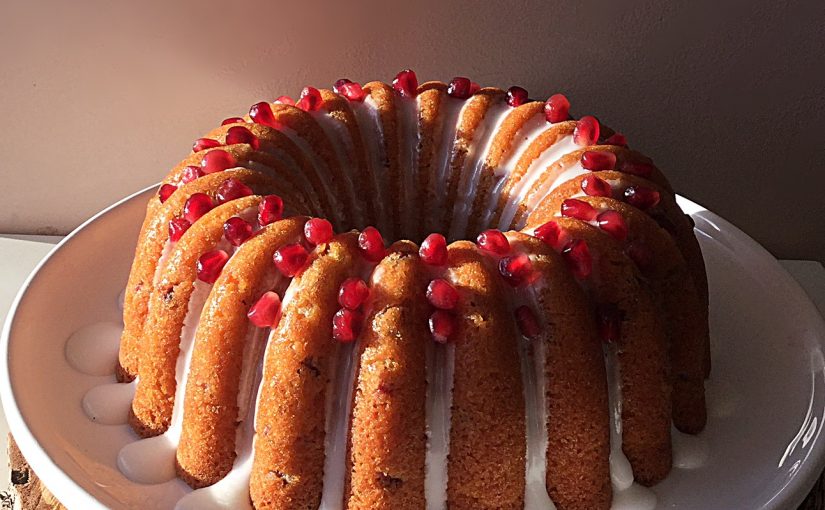
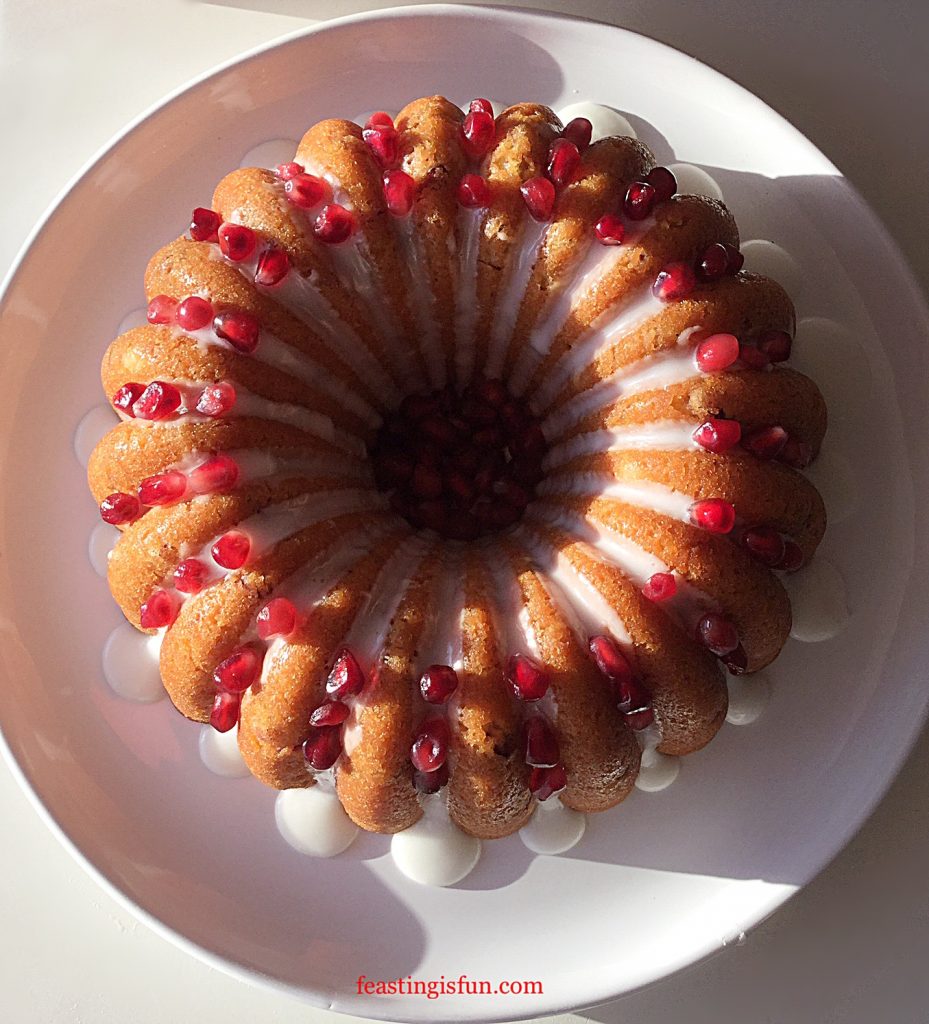
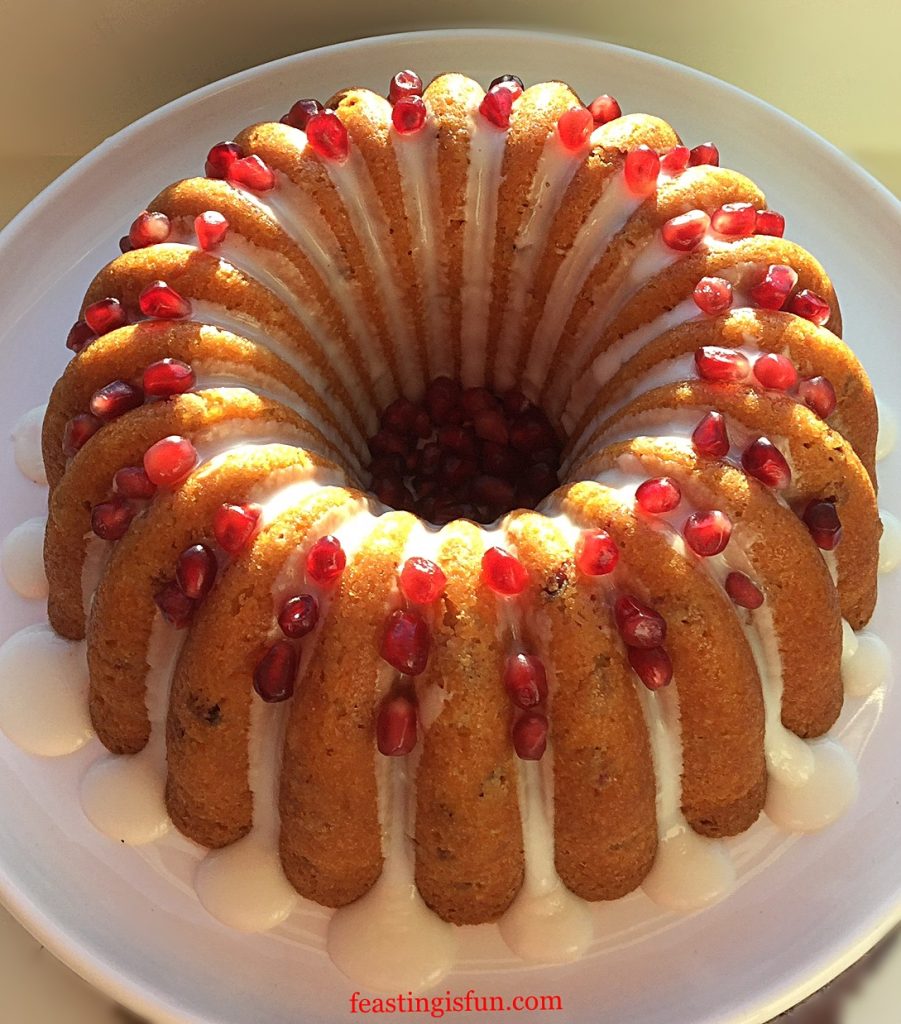
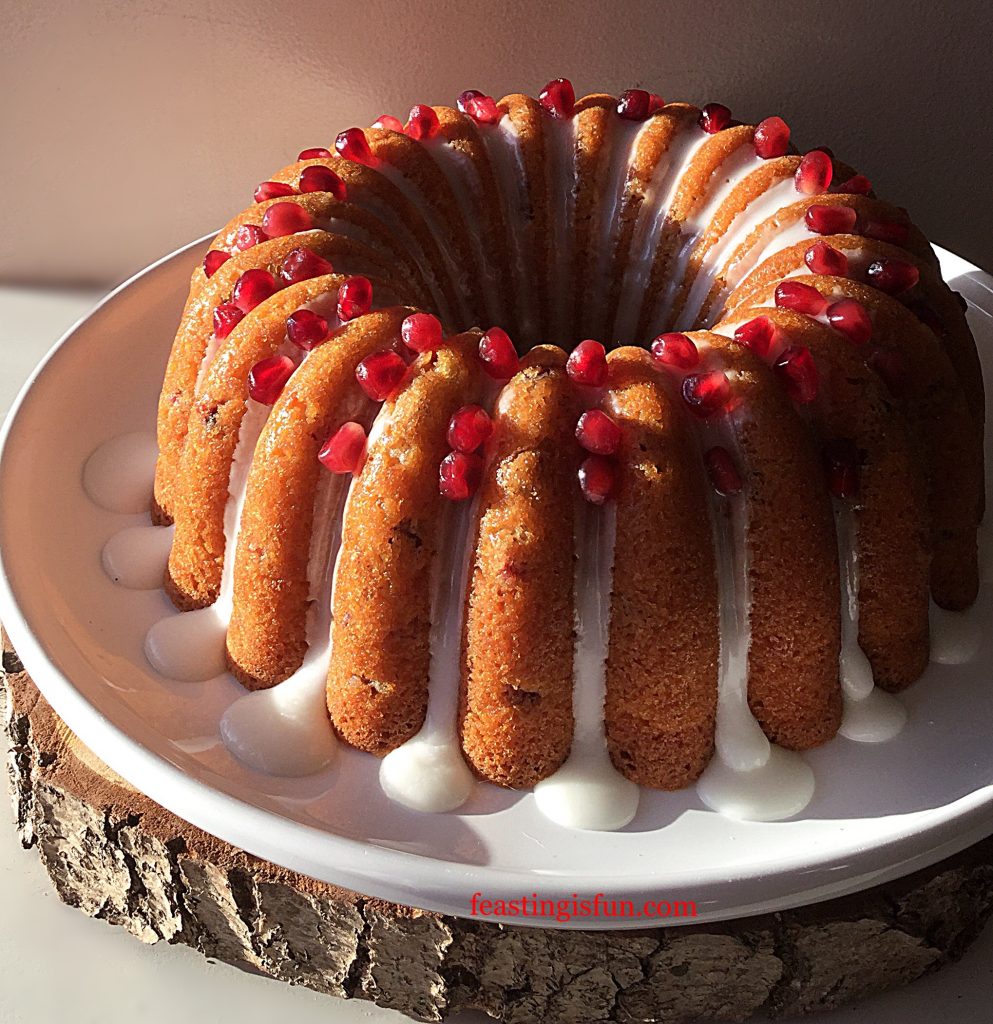
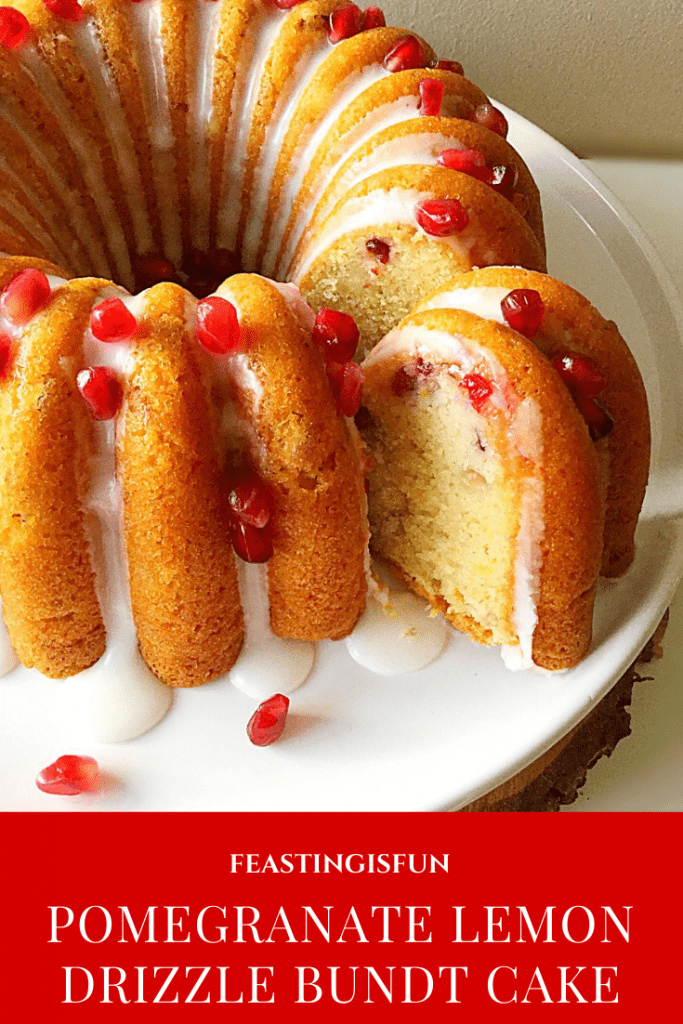
Hello and welcome to a New Year, where I look forward to sharing a whole host of new recipes and product reviews, here on Feasting is Fun. So, as we ease into 2018 I have created a simple, yet stunning and delicious bake, my Pomegranate Lemon Drizzle Bundt Cake. Especially created to make the most of seasonal pomegranates which are readily available in most larger shops at this time of year. Also added is a healthy dose of lemon, helping our bodies fight off any nasty bugs. We are almost making a health food here!


FF Pomegranate Lemon Drizzle Bundt Cake
Pomegranate Lemon Drizzle Bundt Cake

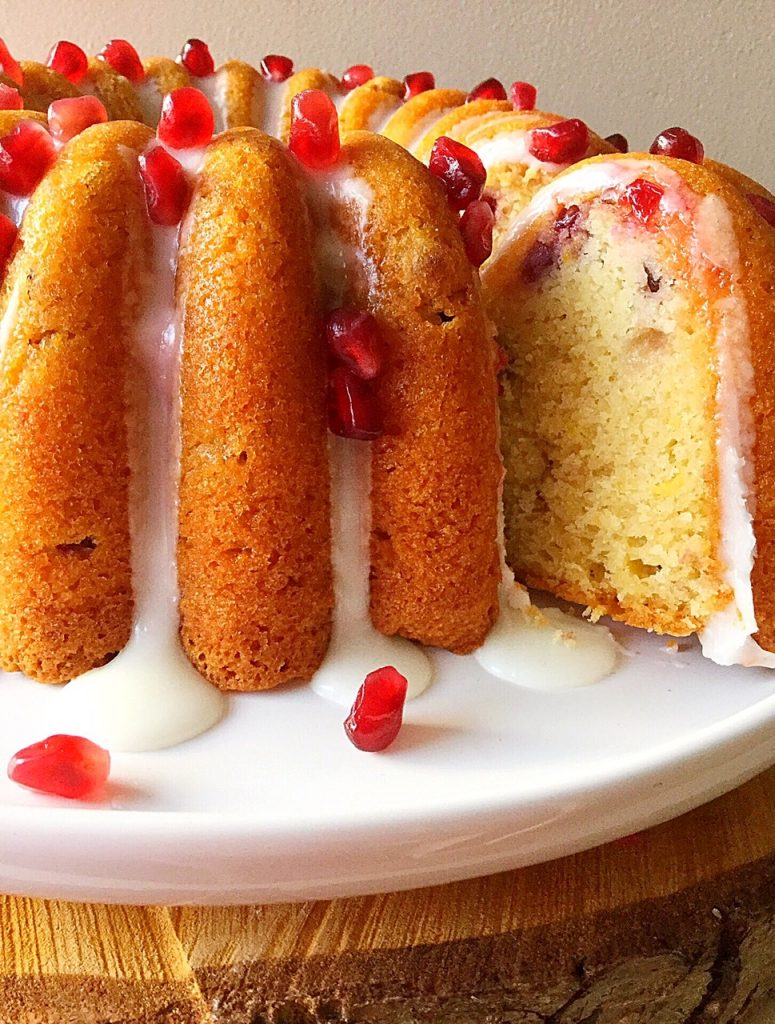
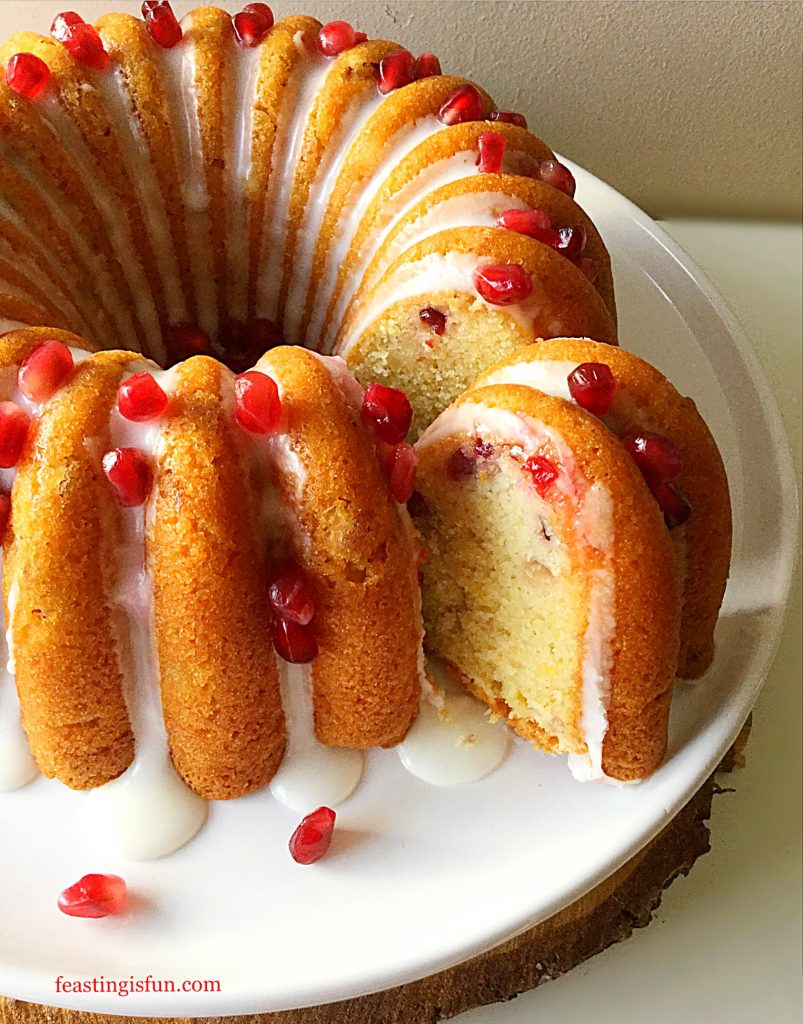
Since this cake has such a light texture the additional crunch from the pomegranate seeds provides added texture and flavour. While they bake inside the cake their juices release, complimenting the lemon zest. Also, the garnet seeds, used for decoration, provide an unexpected fresh burst of juice. Meanwhile the lemon drizzle lends an intense, lemon tang on the tongue.

FF Pomegranate Lemon Drizzle Bundt Cake
Pomegranate Lemon Drizzle Bundt Cake

The beauty of Bundt pans

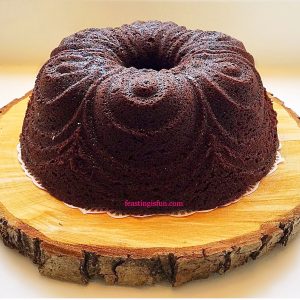
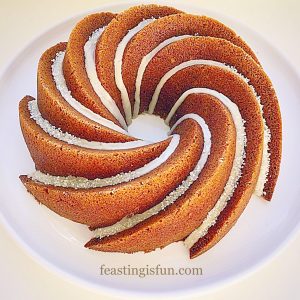
Each bundt pan is different. Yet some share similar moulding, creating a range of pans. Lemon Lime Gin Heart Bundt Cake uses the elegant heart pan which has the same deep grooves as the elegant party Bundt used here. Deep, regular grooves define the entire shape of the baked cake. Indeed a light dusting of icing sugar would enhance, in a much simpler way, the outline of this bundt cake. Especially useful, should the drizzle icing be a step too far!

FF Pomegranate Lemon Drizzle Bundt Cake
Pomegranate Lemon Drizzle Bundt Cake

Recipe: Pomegranate Lemon Drizzle Bundt Cake serves 10-12

For The Cake:

225g/8oz Unsalted Butter – softened to room temperature

225g/8oz Caster Sugar

1/4tsp Sea Salt – I use Maldon

4 Large Free Range Eggs

3tbsp Sour Cream

1tsp Vanilla Extract – I use Nielsen-Massey

225g/8oz Plain White Flour

2tsp Baking Powder

2 Whole Lemons – finely zested

125g/4.5oz Pomegranate Seeds – *I bought 2 packs 125g each from Waitrose

Glaze and decoration:

200g/7oz Icing Sugar – sifted

Juice of 1 Lemon

Pomegranate Seeds please see * above

Helpful Tips

You will need a 10 cup Bundt Pan (tin) for this recipe. Most importantly, when using a smaller tin, ensure that it is not filled more than two thirds full. Also, for guaranteed release of the cake once baked I highly recommend using Wilton cake release. Spray or brush on to the inside of the bundt pan, most importantly take care to cover every part of the pan.

Making the Bundt Cake

Preheat the oven to 160C/140C fan, gas mark 3, 325F

  • First of all prepare the Bundt pan as detailed above.
  • Place the butter, sugar and salt into a large bowl. Whisk together until pale and creamy.
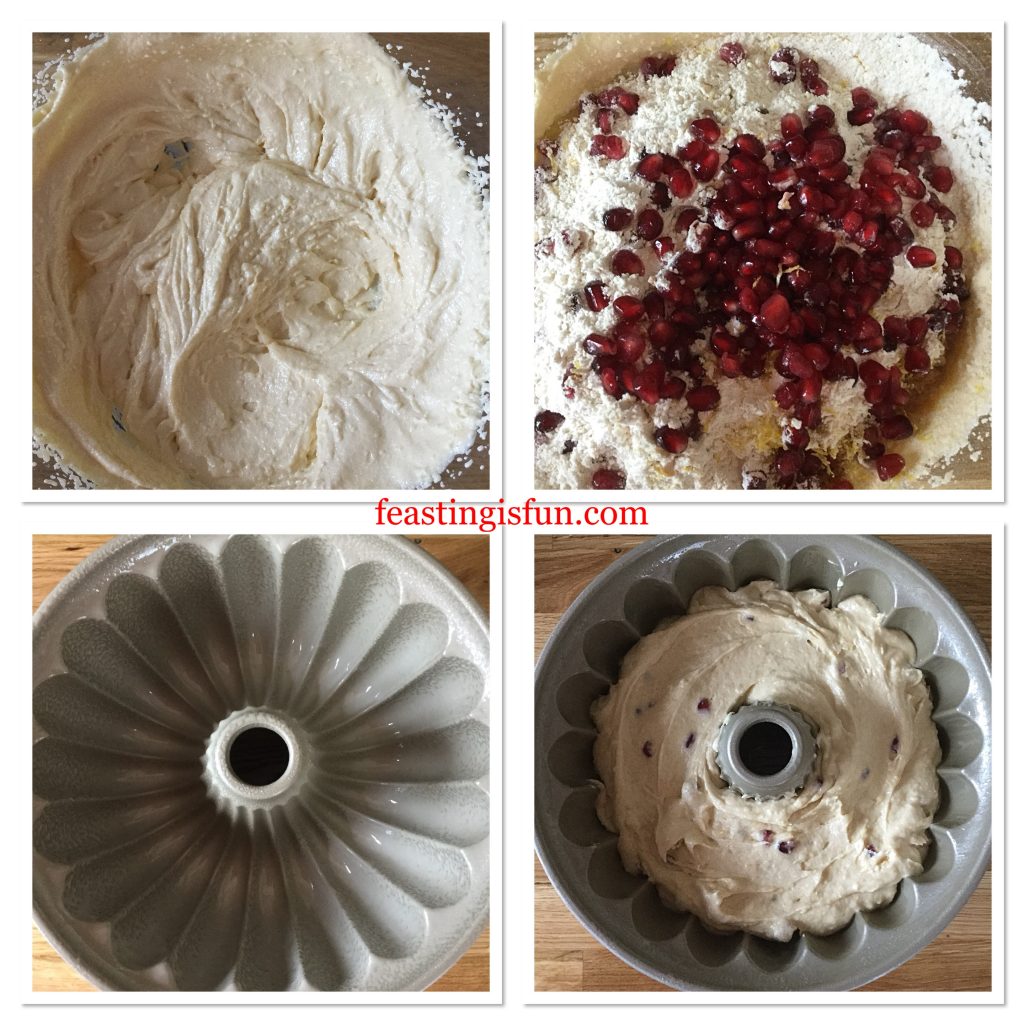
  • Next add all 4 eggs, sour cream and vanilla extract. Sift the flour and baking powder on top of the wet ingredients. Finally add the finely grated zest of two lemons and 125g of pomegranate seeds.
  • Carefully fold the ingredients together until fully combined.
  • Spoon the cake batter into the prepared Bundt pan. Smooth the top for an even finish.
FF Pomegranate Lemon Drizzle Bundt Cake
Making the cake batter.
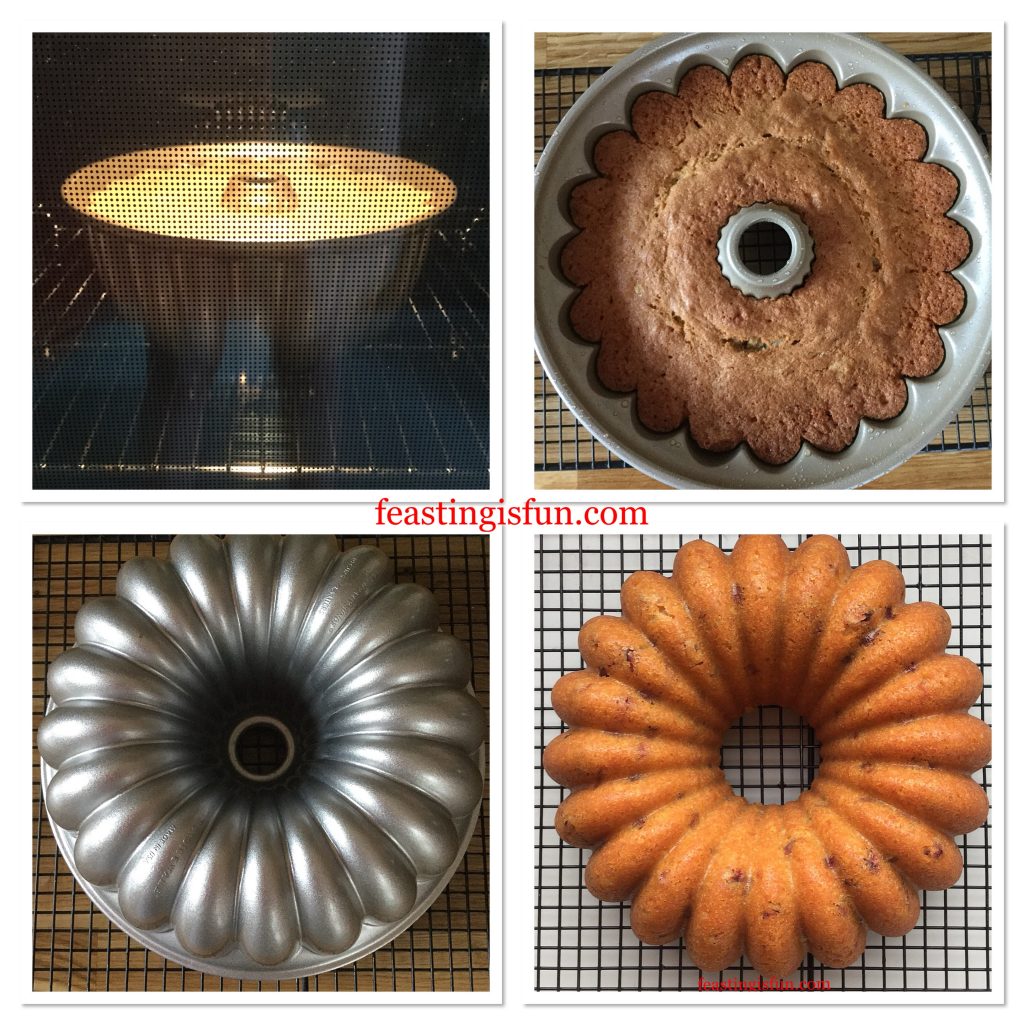
  • Place the cake into the centre of a preheated oven and bake for 1 hour 15 minutes – 1 hour 30 minutes.
  • The cake is baked when it is golden in colour, shrinking away from the sides of the tin and an inserted skewer comes out clean.
  • As soon as the cake is baked remove the oven and allow to cool in the tin for 10 minutes.
  • After the initial cooling time has passed turn out the cake on to a cooling rack.
  • Leave to cool completely before decorating.
FF Pomegranate Lemon Drizzle Bundt Cake
Baking and turning out the bundt cake.
  • While the cake is finishing cooling prepare the lemon drizzle.
  • Into a bowl containing the sifted icing sugar add the juice of one lemon. Stir until thoroughly combined and free from any lumps.
  • As soon as the cake is cool it can be decorated.

Decorating the Bundt Cake

  • Place the cake on to a plate or board.
  • To decorate, use a teaspoon to pour approximately 1/2 a tsp of lemon drizzle on to each groove of the cake. Start at the top of the cake and work around until each groove has icing reaching the base both on the inside and outside.
  • Top each indent on the cake with a pomegranate seed, adding an additional two seeds, or more, to each groove.
Pomegranate Lemon Drizzle Bundt Cake

Serve the cake sliced with a complimentary drink (lemon tea goes well, as does chilled limoncello) and a smile.

Store the cake covered securely in cling film, or alternatively in an airtight container and eat within 5 days. During warmer weather it is advisible to refrigerate this cake.

If you have enjoyed this recipe for Pomegranate Lemon Drizzle Bundt Cake you may also like these:

Chocolate Cherry Chiffon Bundt Cake

Chocolate Cherry Bundt Cake

Maple Syrup Iced Coffee Bundt Cake

Maple Syrup Iced Coffee Bundt Cake

Lemon Blueberry Bundt Cake

Lemon Blueberry Bundt Cake

Bundt Cakes are a real favourite of mine. Although the pans may be on the pricey side, look on eBay for special offers, they produce outstandingly beautiful cakes with very little effort required from the baker. While further decoration isn’t  actually needed for a Bundt cake, it can be fun to play around with icing and additional decorations, as seen in the examples above. Finally, when baking a Bundt cake, a show stopping cake is guaranteed every, single, time.

So, whatever you are making, baking and creating in your kitchen, have fun preparing your feast.

Sammie xx

No part of this blog post may be reproduced or replicated without the written permission of the own. Please see my Disclosure Policy  for full details.

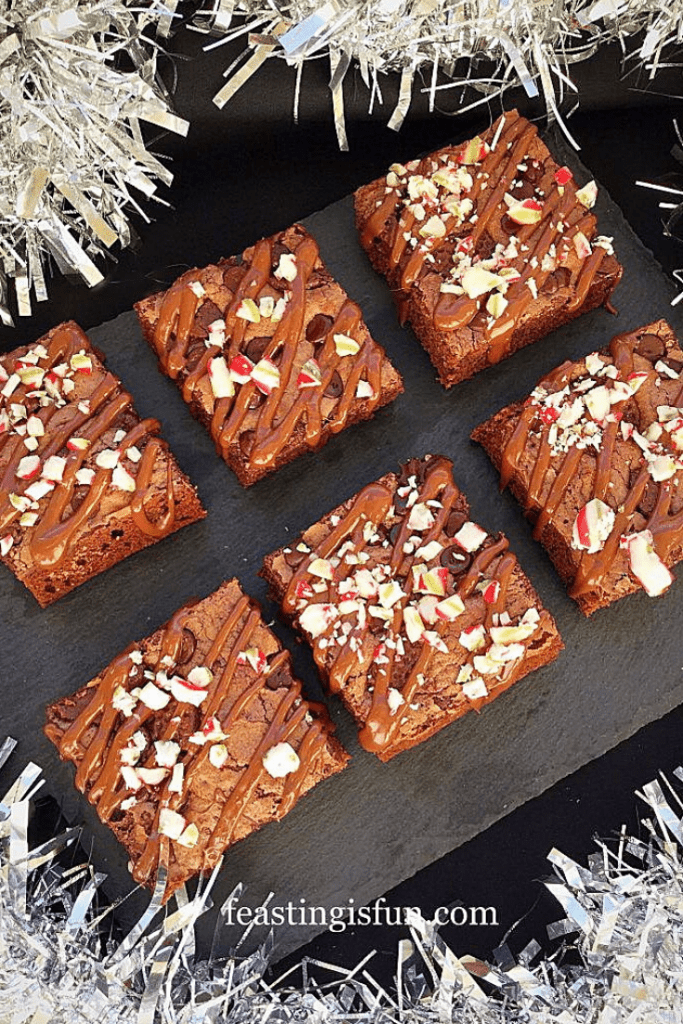
Peppermint Candy Cane Topped Brownies

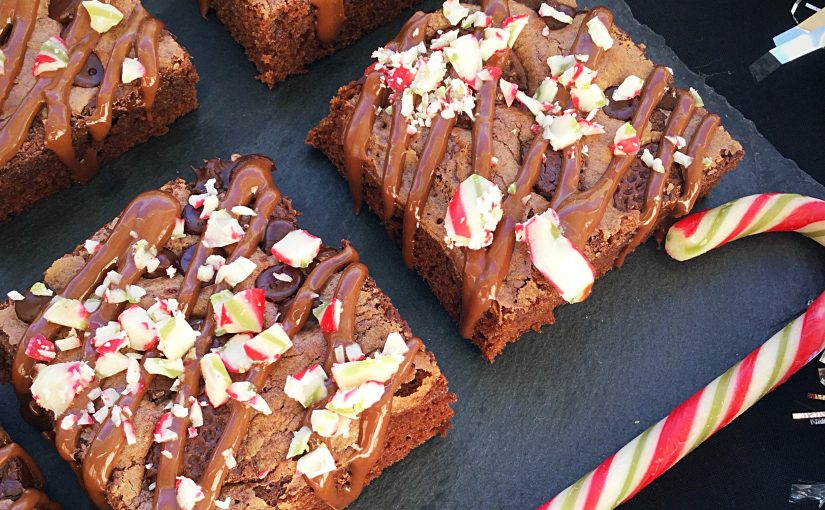
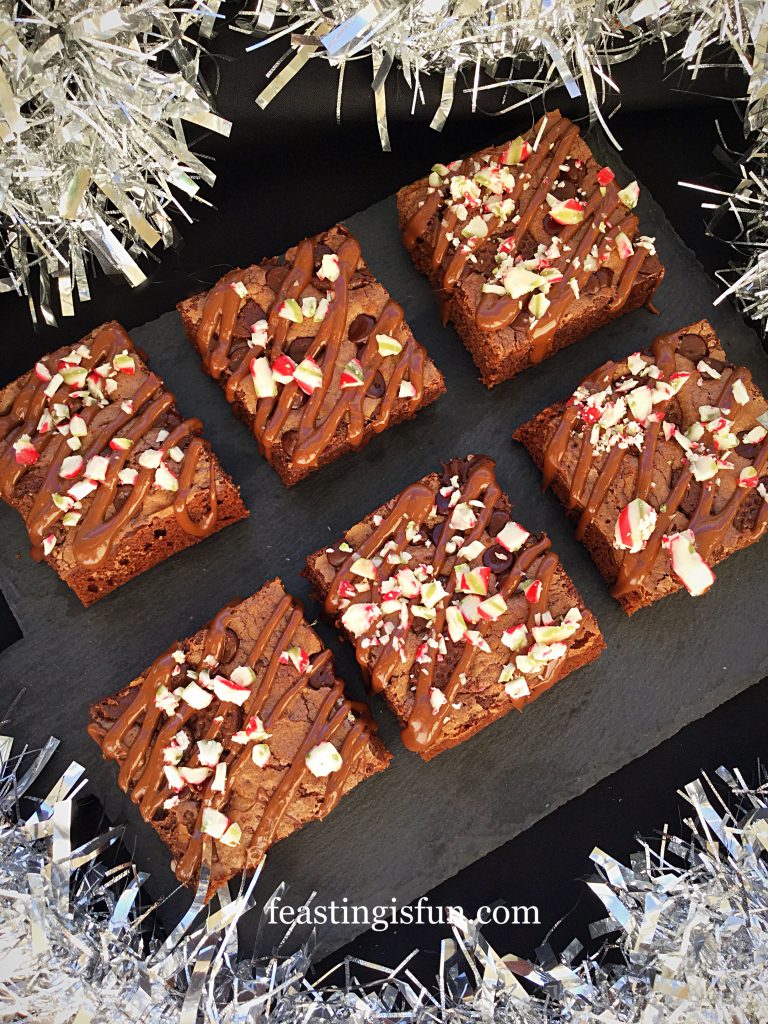
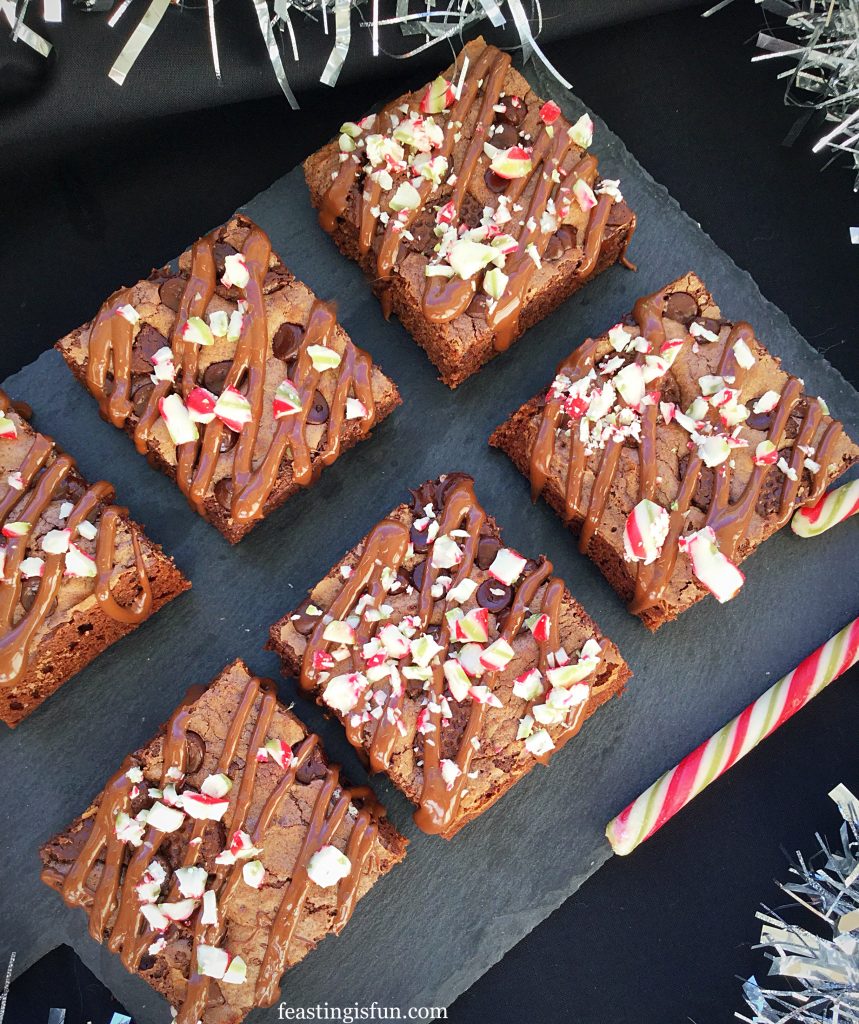
Chocolate and Christmas go together like strawberries and cream in summer. Add in traditional candy canes and you have an incredible combination.  So using a fantastic Classic Brownie Kit makes baking these Peppermint Candy Cane Topped Brownies easy and a super delicious Christmas treat.  And don’t worry if you can’t get hold of the kit, there’s a link before the recipe to help you make them from scratch.

FF Peppermint Candy Cane Topped Brownies
Peppermint Candy Cane Topped Brownies

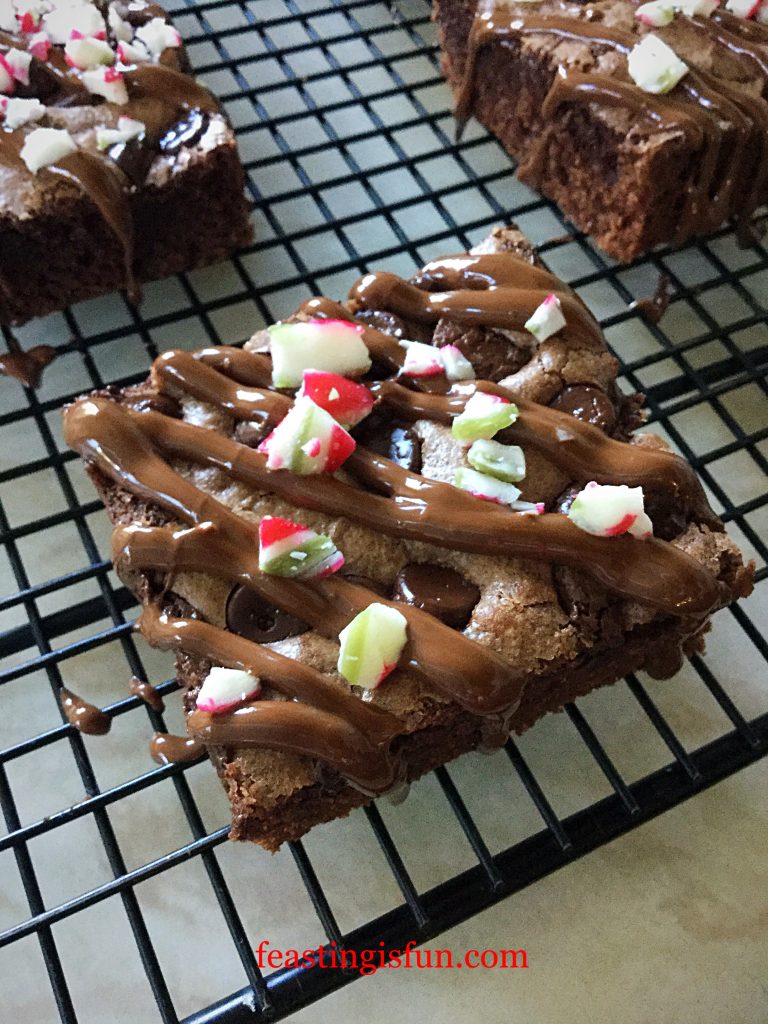
While I enjoy baking from scratch, I am not averse to keeping good quality mixes and baking kits in the kitchen.  Using the Classic Brownie Kit to whip up a batch of Brownies, makes the house smell amazing. Also, adding extra mint chocolate chunks and a topping of crushed candy cane turns these into a festive treat. Especially handy during the busy Christmas holiday season.

FF Peppermint Candy Cane Topped Brownies
Peppermint Candy Cane Topped Brownies

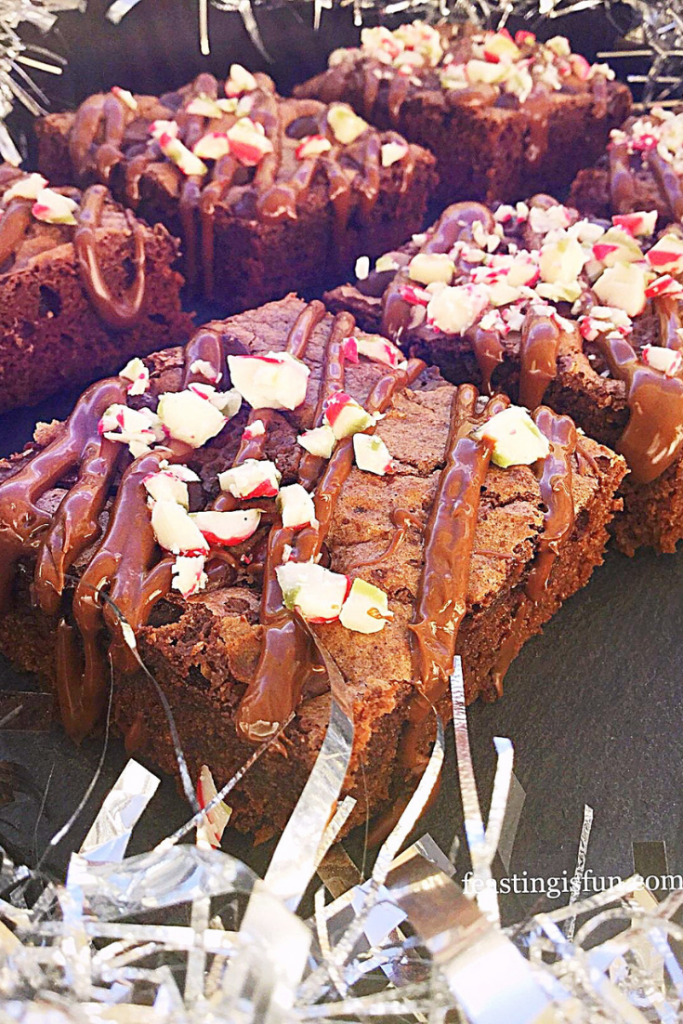
As soon as you bite into these rich chocolate brownies a range of textures hits your mouth.  Soft fudgey chocolate brownie, crisp mint chocolate chunks, chewy crushed candy cane all blend together to create a flavour sensation.  Perfect for a quick bake when unexpected guests arrive.  Welcoming them in with the aroma of baking chocolate. Is there anything better?

Close up of broken candy cane on top of a chocolate drizzled brownie.
Peppermint Candy Cane Topped Brownies

Everything you need to bake delicious Brownies is included in the kit.  Yet, if you are unable to get hold of the Classic Brownie Kit then please use the recipe for Chocolate Fudge Brownie Bites.  Either halve the recipe, or double the quantity of candy canes, chocolate drizzle and mint chocolate.

Recipe: Peppermint Candy Cane Topped Brownies makes 9

Classic Brownie Kit available from If I Knew You Were Comingalternatively use the brownie recipe for my Chocolate Fudge Brownie Bites *follow the ingredient list and tin size for * recipe. You will make more brownies

2 Large Free Range Eggs

115g/4.5oz Unsalted Butter softened at room temperature

50g/2oz Dark Mint Chocolate chopped into chunks – I use                                                                          Elizabeth Shaw Dark Mint Chocolates

100g/4oz Milk Chocolate

2 Peppermint Candy Canes

Method: Preheat oven to 200C/180C fan, gas mark 6, 400F.

Making The Brownie Batter

  • First of all set out the baking tin included in the kit and place on to a baking tray.  Alternatively line a 9” x 9” square tin with aluminium foil.
  • Place the chocolate and butter in a heatproof microwaveable bowl and heat on medium powder until just melted. Stir until completely liquid and set to one side to cool.
  • Whisk the eggs and sugar together until fully combined.
  • Pour the eggs slowly into the cooled chocolate mixture and stir to incorporate.
  • Sieve the cocoa and flour into the chocolate/egg mix and fold in until just combined.
FF Peppermint Candy Cane Topped Brownies
Making the Brownie batter.
  • Pour the thick, chocolate, brownie batter into the prepared baking tin.
  • Scatter over the chocolate chips from the kit and the mint chocolate chunks.

Baking The Peppermint Brownies

  • Place the Brownies into the centre of the preheated oven and bake for 15 – 20 minutes.
  • The Brownies are baked when the top is set and shiny with a slight crackle. There should be a very slight jiggle in the centre.
  • Once baked remove from the oven and allow to cool completely.
  • As soon as the Brownies are cooled peel away the foil.  Cut into 9 even sized squares and place on a cooling rack, spaced well apart.
FF Peppermint Candy Cane Topped Brownies
Making, baking and cutting the brownies.

Decorating The Candy Cane Brownies

  • Melt the milk chocolate for drizzling in the microwave and transfer to a small, disposable piping bag.  Alternatively use a plastic zip lock bag and cut one corner off, leaving a small hole.
  • Take the candy canes and place in a small plastic bag.  Place on to a solid surface and use a rolling pin to break the canes into small pieces.
  • Drizzle melted chocolate over each individual brownie, then sprinkle over some crushed candy cane.
FF Peppermint Candy Cane Topped Brownies
Finishing the Peppermint Candy Cane Topped Brownies

Serve straight away, while the chocolate drizzle is still gooey.  Leave to set before storing in an airtight container.  Eat within 5 days.

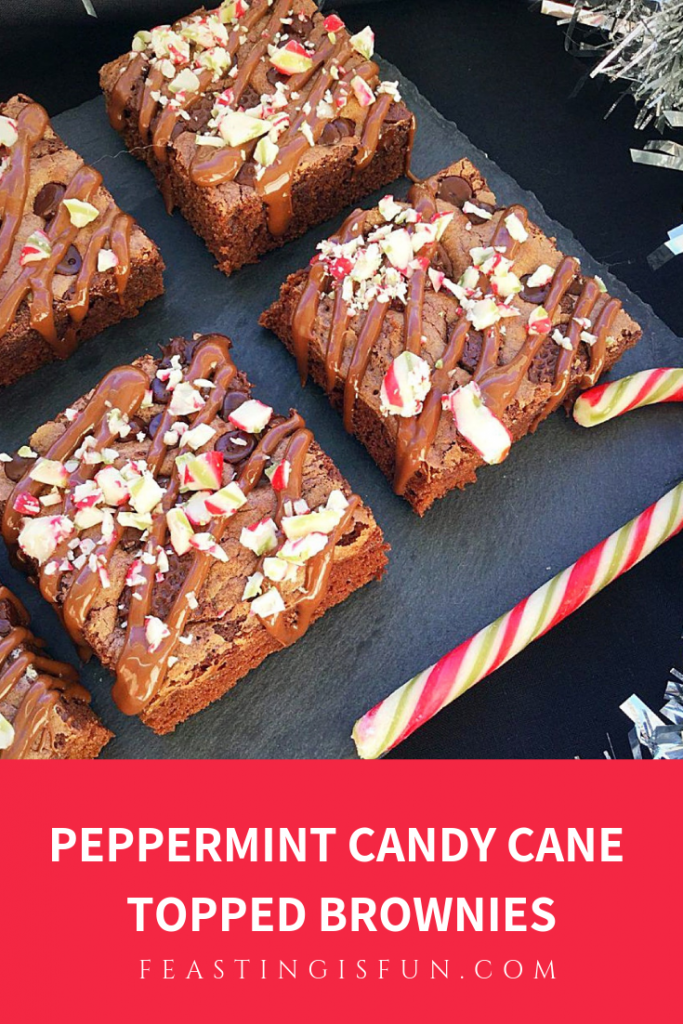
Brownie Pinterest image with descriptive graphs.

If you have enjoyed this recipe for Peppermint Candy Cane Topped Brownies then you may also like these:

Dark Chocolate Ginger Brownies

FF Peppermint Candy Cane Topped Brownies
Dark Chocolate Ginger Brownies

Peppermint Sparkling Snowflake Cookies

FF Peppermint Candy Cane Topped Brownies
Peppermint Sparkling Snowflake Cookies

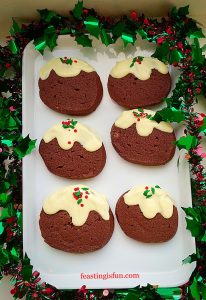
Chocolate Christmas Pudding Cupcakes

FF Peppermint Candy Cane Topped Brownies
Chocolate Christmas Pudding Cookies

Baking should be fun and not stressful. So having some reliable mixes and baking kits in the kitchen cupboard, especially during extra busy times of the year such as Christmas, simply makes sense. Also they make great presents for those who are just learning to bake. As well as being reliable the Complete Brownie Kit is also versatile see my recipe for Chocolate Brownie Raspberry Cheesecake.

So, whatever you are making, baking and creating in your kitchens, have fun preparing your feast.

Sammie xx

If I Knew You Were Coming provided the Complete Brownie Kit for me to make this recipe. I have not been paid to write this post. All content, opinions and photography are my own. No part of this post may be reproduced or duplicated without the written permission of the owner. Please see my Disclosure Policy.
Festive mint chocolate baked squares on a slate platter surrounded with silver tinsel
Peppermint Candy Cane Topped Brownies

Double Chocolate Chip Iced Buns

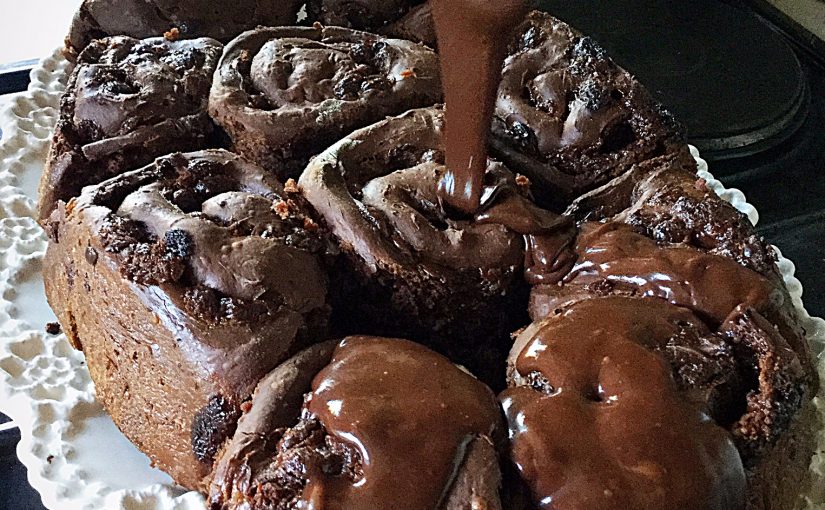
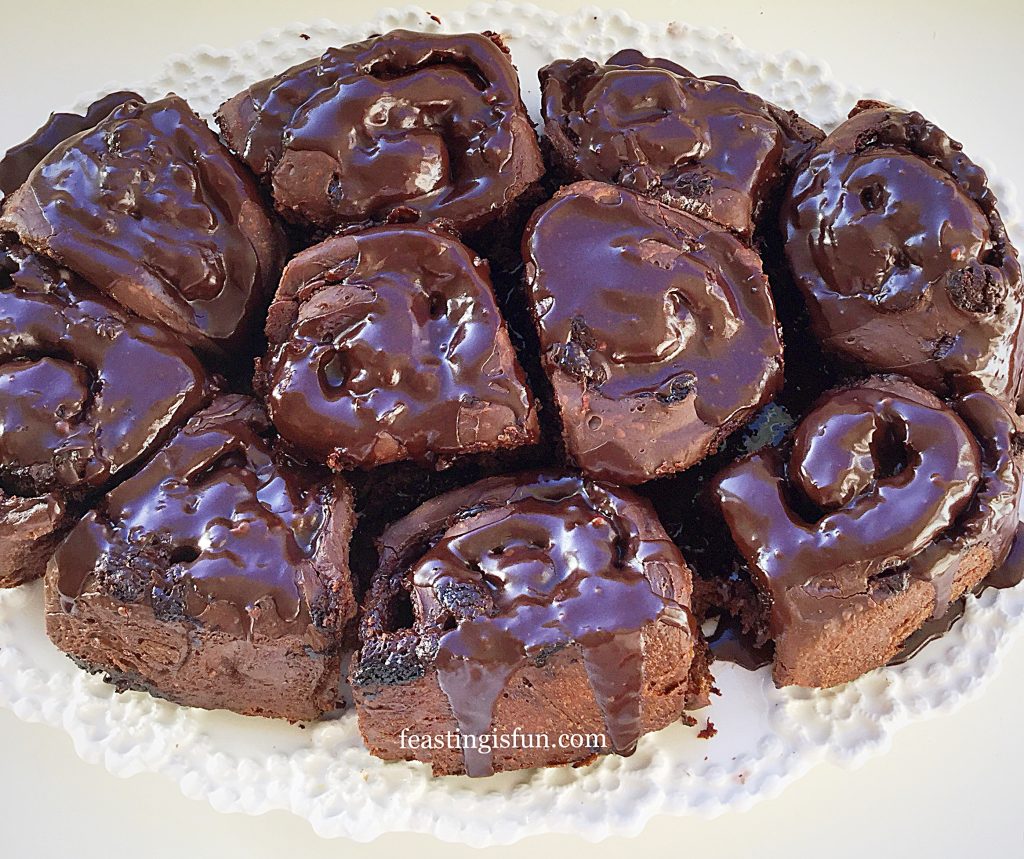
Christmas will soon be upon us and among the festive food chocolate plays a prominent role.  Whether in advent calendars, selection packs, gold coins or the many foil wrapped, boxed and displayed chocolate treats, it is central to celebration feasting.  Therefore these Double Chocolate Chip Iced Buns are the perfect treat to share and enjoy over the holiday season, or any special occasion.

FF Double Chocolate Chip Iced Buns
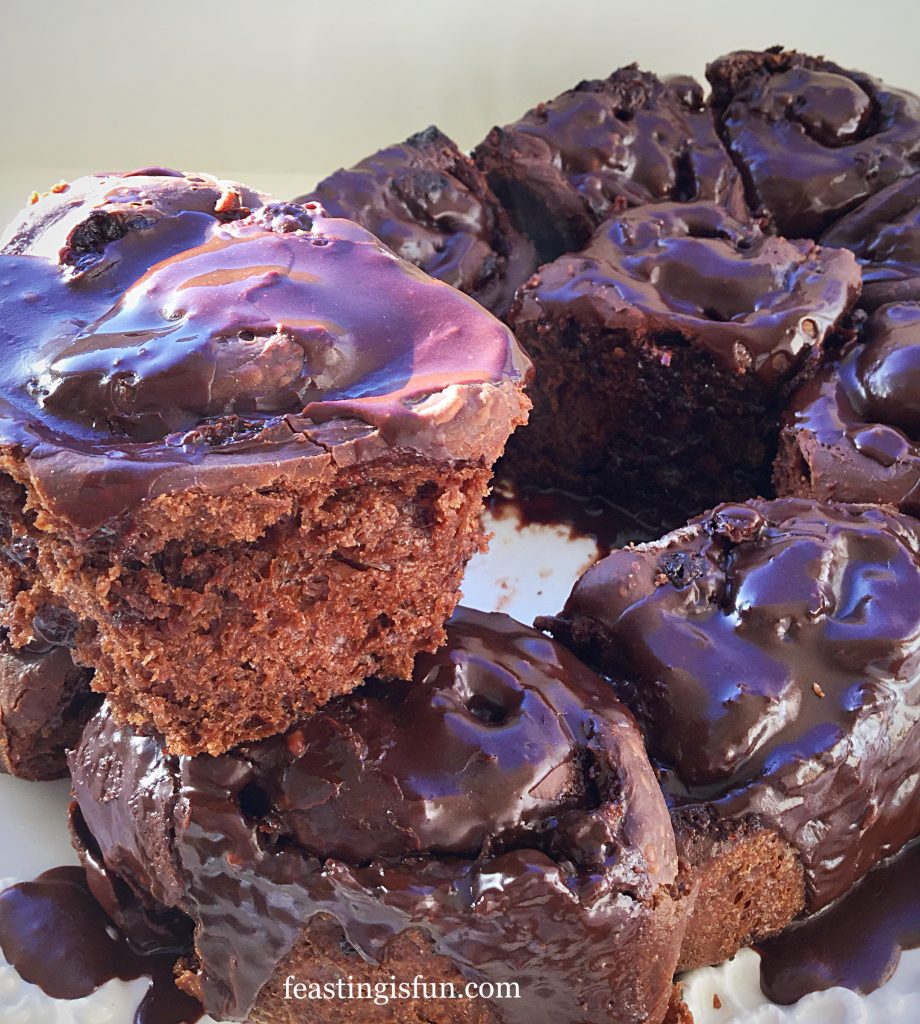
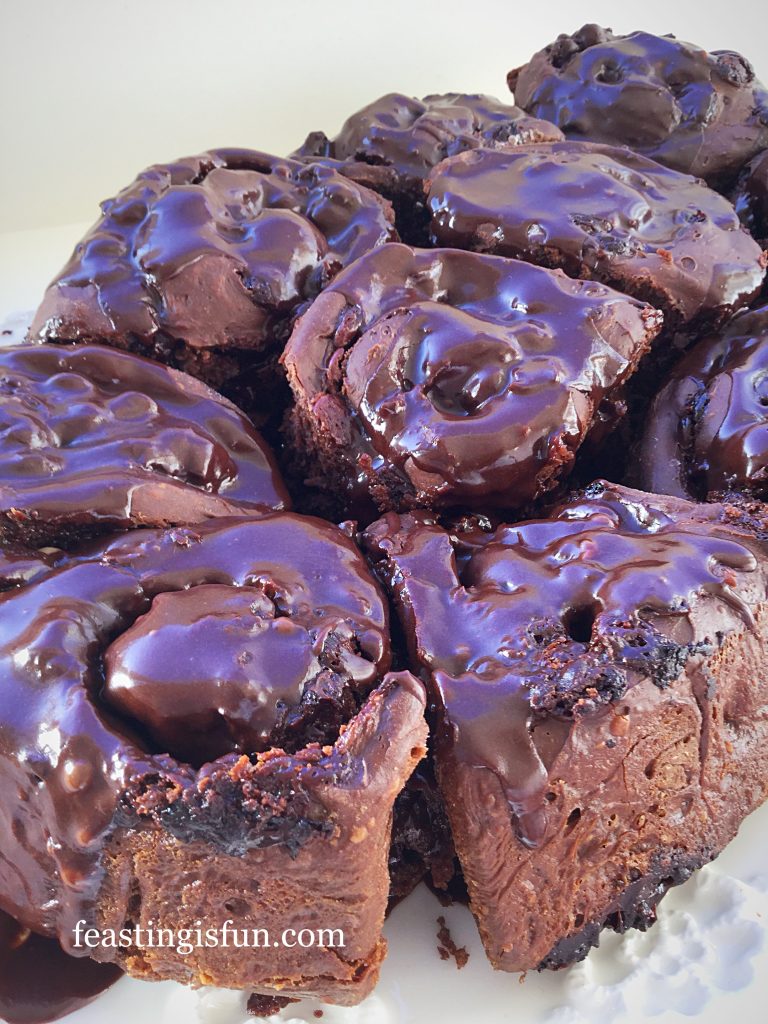
Double Chocolate Chip Iced Buns

Since, if you’re going to make a chocolate bun it really should be THE BEST tasting chocolate bun ever.  While light and fluffy these buns are packed with chocolate chips and finished with a thick chocolate icing.  Also these buns tick every box , not too sweet, not too rich, simply the perfect balance of flavour and texture baked into the very best tasting breakfast bun.  Alternatively eaten with coffee as an afternoon treat, these buns need no excuse to be eaten!

FF Double Chocolate Chip Iced Buns
Double Chocolate Chip Iced Buns

Chocolate Buns – the ultimate breakfast – dessert

While these incredible tasting, chocolate packed buns were made with Christmas in mind, there really is no reason at all to stop you baking them at other times.  Any chocolate lover would appreciate a birthday breakfast of Double Chocolate Chip Iced Buns.  Especially if you have friends staying, sleepovers, special occasions, all the perfect excuse to bake.  Finally, they are made and left to prove overnight, so all that’s left to do is bake and glaze in the morning.  Easy.
FF Double Chocolate Chip Iced Buns
Double Chocolate Chip Iced Buns

As soon as my chief taste testers, here at Feasting headquarters had tasted these buns, success was proclaimed.  Even from the harshest of my critics.  Yummy, mmm are there more, escaped from messy chocolate mouths.  As for me, the harshest judge of all, well, I am impressed.  All of the attempts at making the perfect chocolate swirl bread have paid off.  Flavour and texture in perfect chocolate swirled harmony.
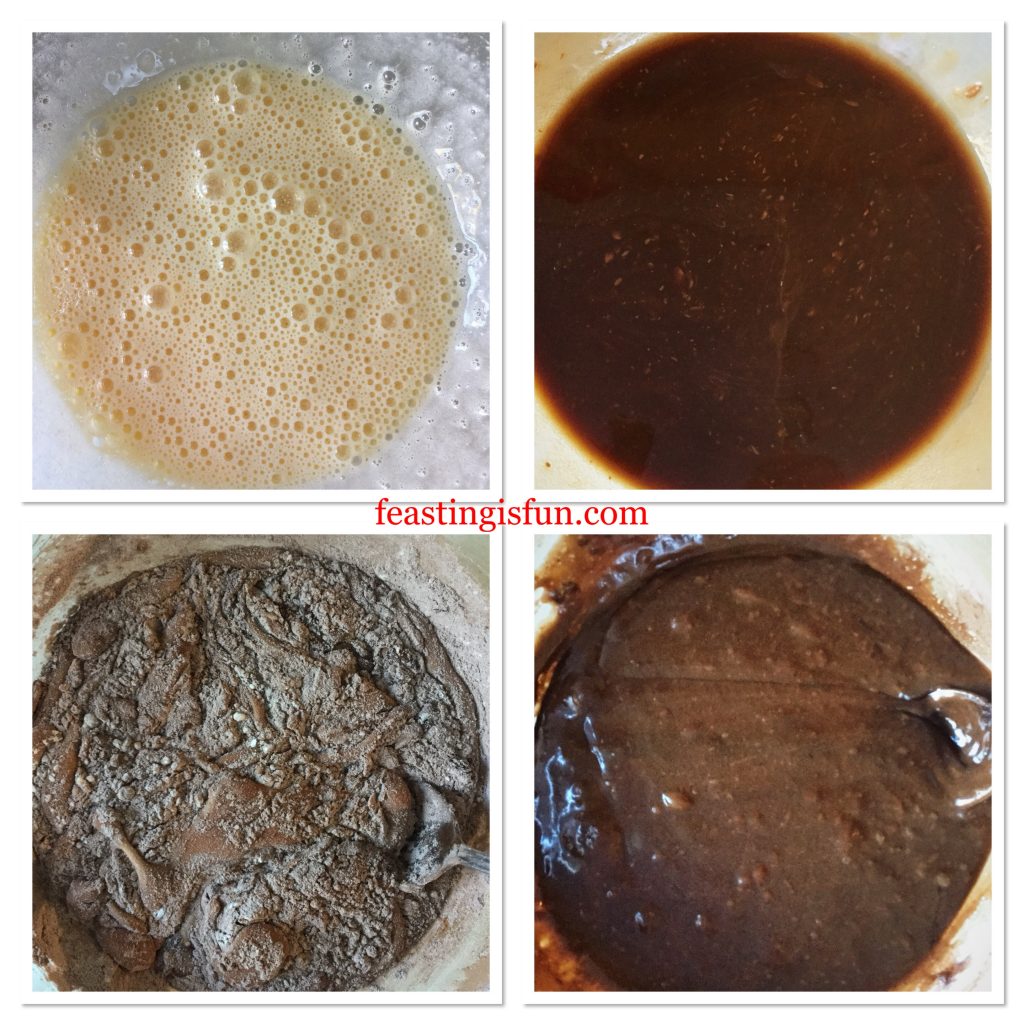
FF Double Chocolate Chip Iced Buns

Recipe: Double Chocolate Iced Buns makes 10

300ml/10.5fl oz Whole Milk

75g/3oz Unsalted Butter

7g Dried Yeast

2tsp Vanilla Extract – I use Nielsen-Massey

1tsp Caster Sugar

2 Large Free Range Eggs

50g/2oz Cocoa Powder – I use Callebaut

500g/1lb 2oz Strong White Flour

7g Salt – I use Maldon

250g/9oz Milk Chocolate Chips or chopped chocolate – do not use stabilised chocolate chips, as you would for chocolate chip cookies, the chocolate should melt when baked.
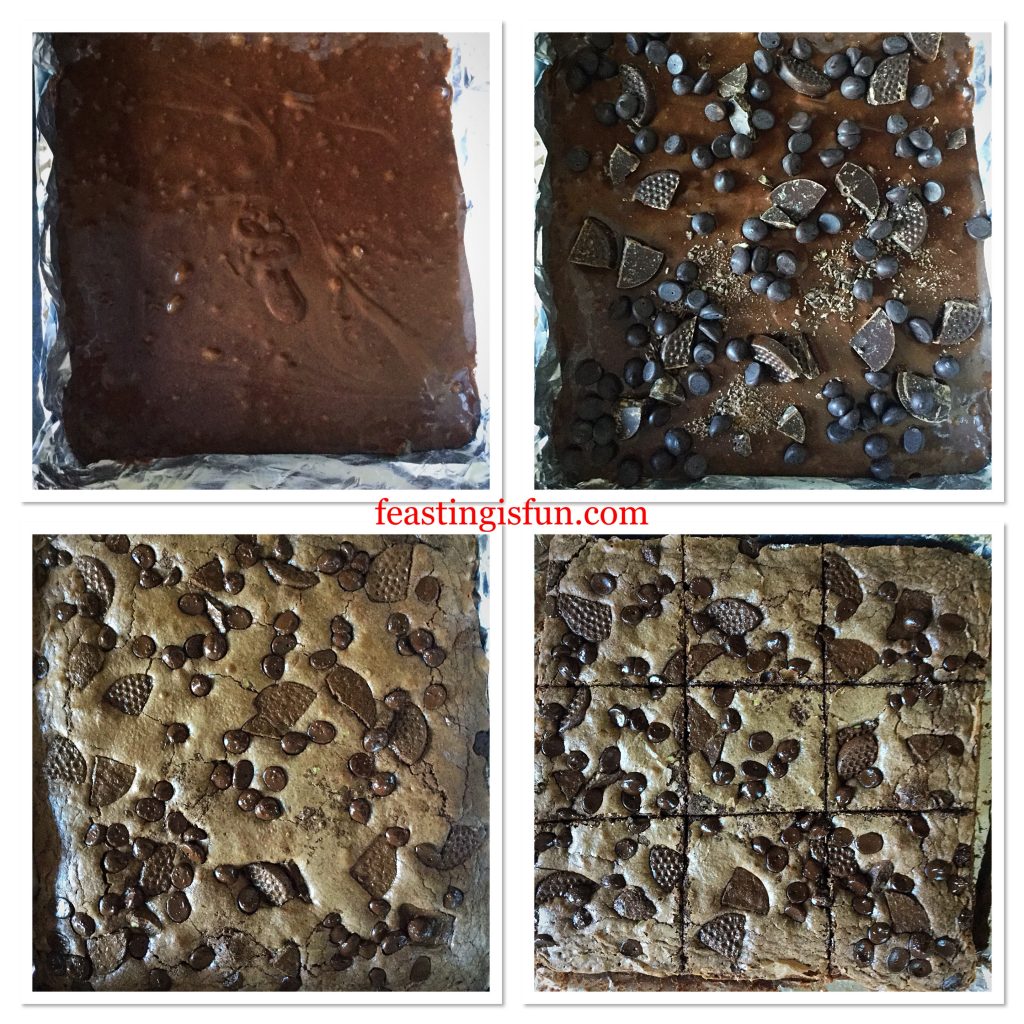
Glaze:

250g/9oz Icing Sugar

50g/2oz Cocoa Powder

Method:

Note: I strongly recommend using a stand mixer with dough hook attachment for mixing the dough.  The chocolate dough has a high butter content and is extremely sticky.  Using a stand mixer ensures thorough mixing of the dough.

Making the chocolate brioche dough

  • Measure the milk into a microwaveable jug and then add the butter broken into small pieces.  Zap in the microwave until the milk is slightly warmed.  It should feel the same as body temperature.  Also the butter will soften and start to melt.
  • Pour the warmed milk/butter into the bowl of the stand mixer.
  • Add the yeast, sugar, vanilla extract and both eggs to the bowl.
  • Next add the flour, cocoa powder and salt.
  • With the dough hook attached mix slowly until the ingredients are combined into a dough.  Continue mixing on medium speed for a further 20 minutes.
  • Stop the mixer, lift the dough hook and scrape any dough back into the bowl. Cover the bowl with cling film and leave in a draft free place until doubled in size.  This first prove may take up to 2 hours.

Shaping the chocolate dough into rolls

  • As soon as the dough is ready, turn out on to a lightly floured worktop.  A plastic scraper will help release all of the dough from the bowl.
  • Using the technique shown in Easy Homemade Cottage Loaf, pull out the dough and press into the centre. Continue around the edge until the dough is neat and smooth.
  • Roll the dough out until it is 30.5cm D x 35.5cm W (12” x 14”) rectangle.
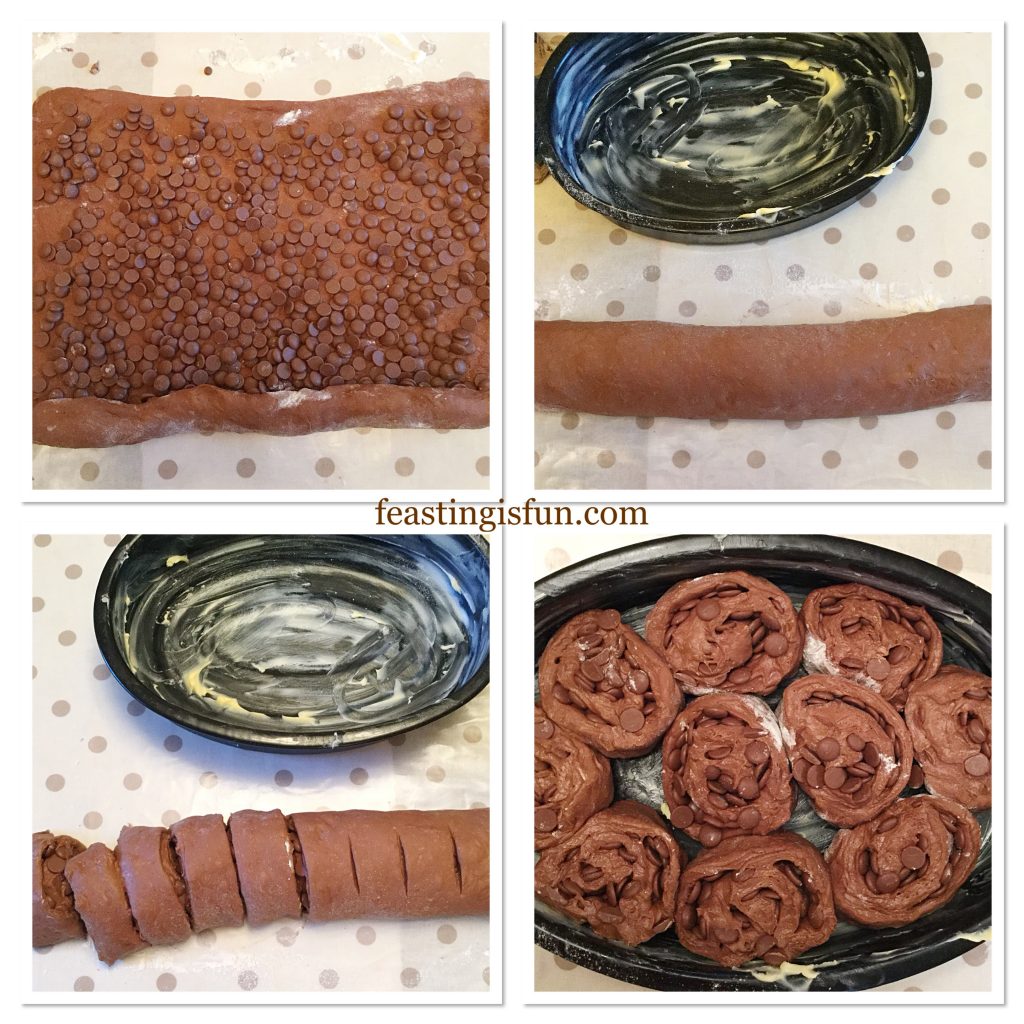
  • Sprinkle the chocolate chips/chopped chocolate evenly over the dough.
FF Double Chocolate Chip Iced Buns
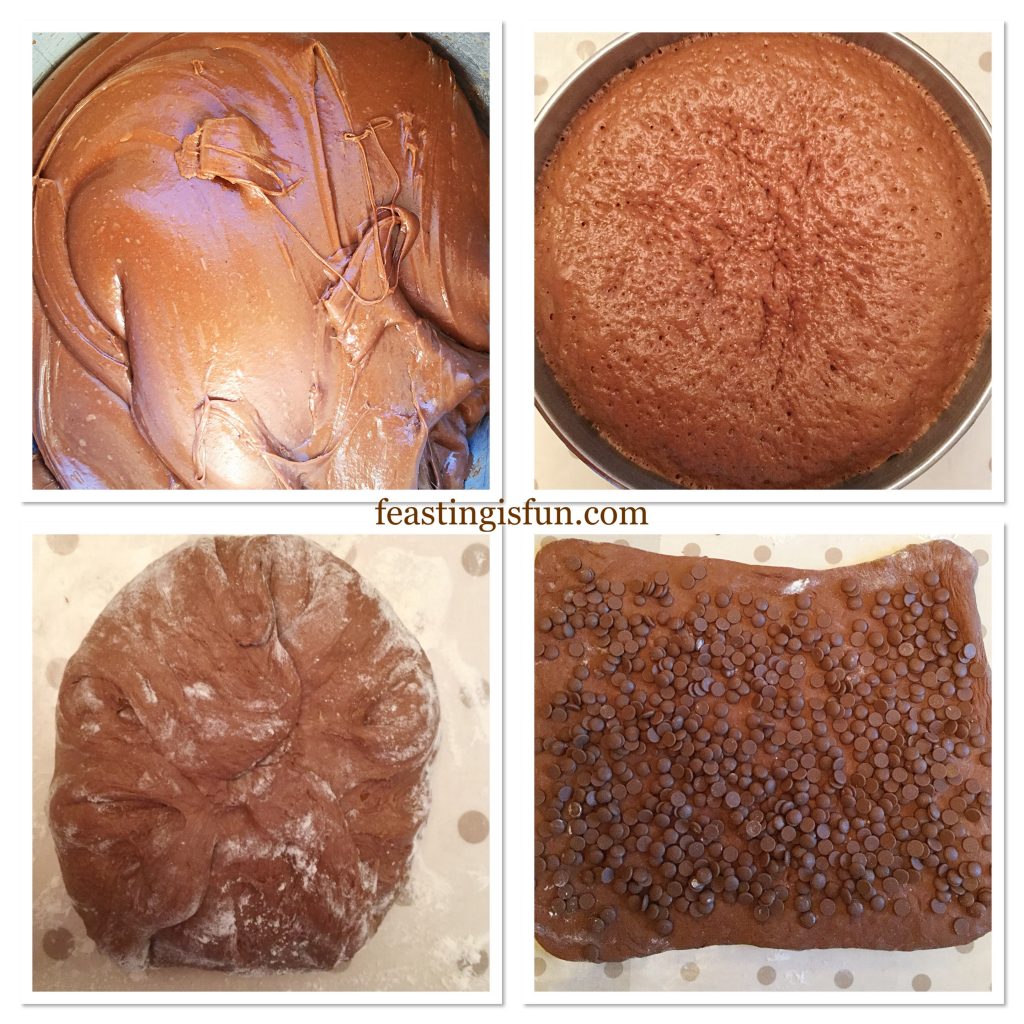
Making the dough and preparing the chocolate buns.
  • Rolling from the wide side of the dough, take the front edge, starting at one side, roll and tuck the chocolate and dough.  Continue across the front edge of the dough until you have formed the beginning of a roll.  Evenly roll the entire dough, tucking and ensuring it is even.  Finish with the seam underneath the finished roll.
  • Using a sharp knife cut off the uneven sides.  Divide the roll in half and then cut 5 even potions from each half.  Saw through the dough, using the blade to cut through.
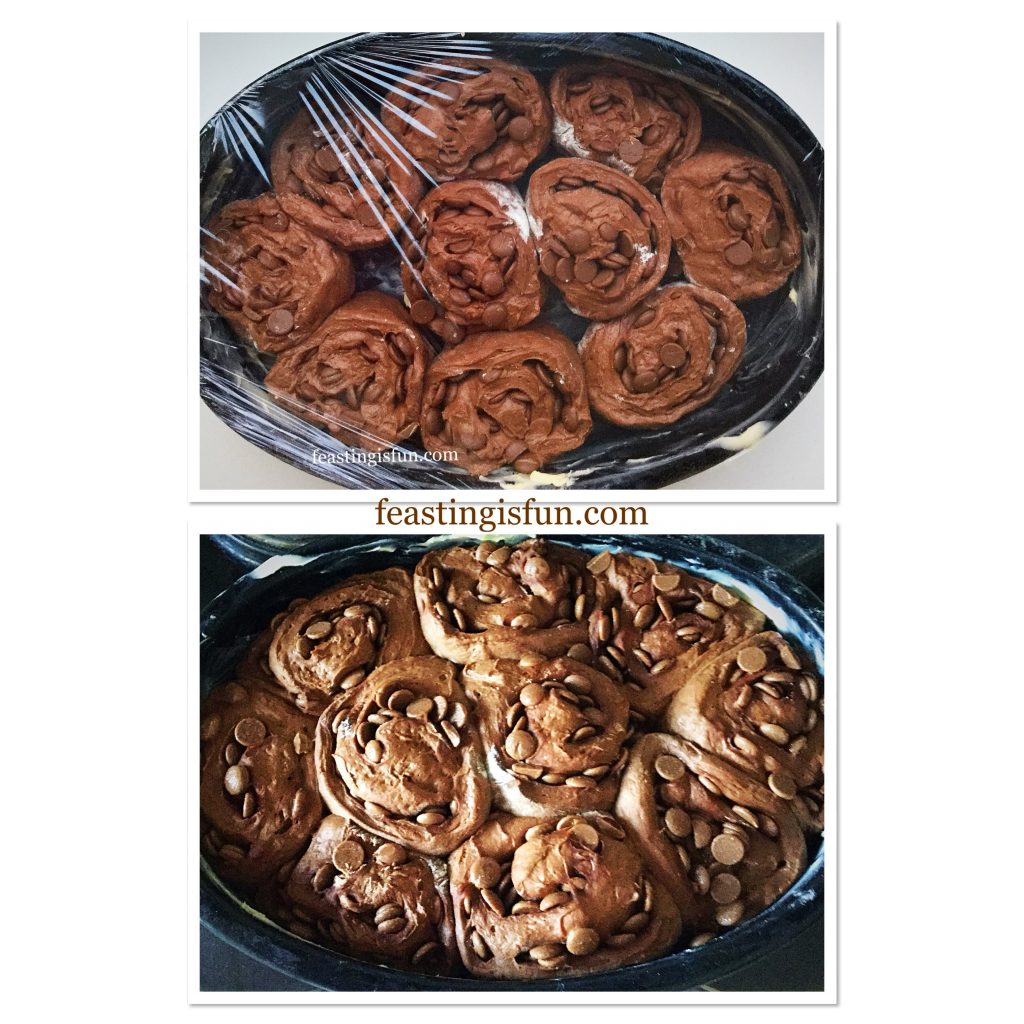
  • Place the buns into a large, well buttered baking tin with deep sides. Alternatively  butter 2 deep 8 inch cake tins and place 5 chocolate buns into each.  Cover with cling film and refrigerate overnight.  The dough will prove very slowly in the cold fridge.
Creating the perfect chocolate swirl.

Baking The Double Chocolate Chip Buns

  • The next morning remove the chocolate buns from the fridge and allow to come up to room temperature, approximately 30 minutes.
  • While the buns are warming preheat the oven 200C/180C fan, 400F, gas mark 6.
FF Double Chocolate Chip Iced Buns
Double Chocolate Chip Iced Buns before and after an overnight prove.
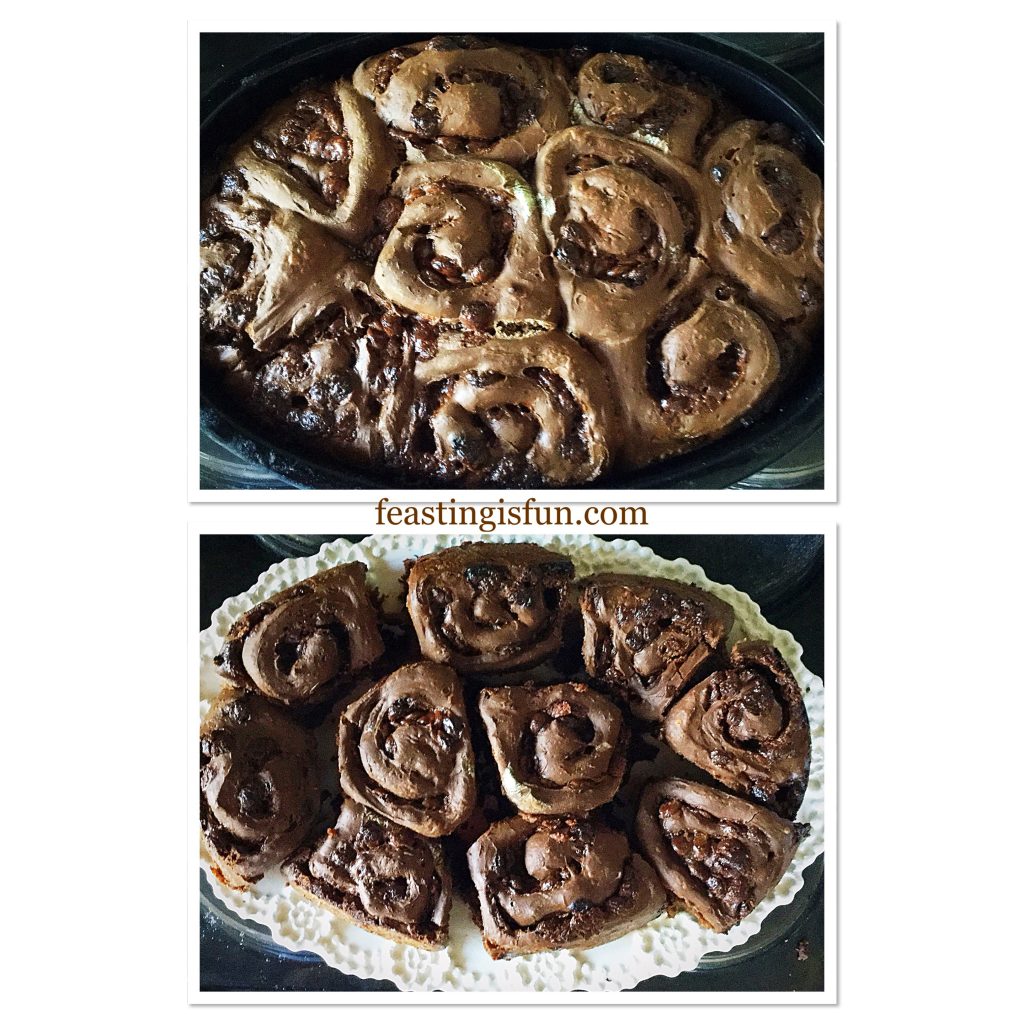
  • As soon as the buns have warmed place in to the centre of the oven and bake for 30-35 minutes.
  • While the buns are baking make the chocolate icing glaze.  Weigh the icing sugar and cocoa into a large jug.  Add approximately 6 tablespoons of hot water and stir to mix. The icing should be thick yet still able to pour.  If needed add extra hot water one tablespoon at a time.  Note – the icing will thicken on cooling.
  • Check the buns after 30 minutes.  They are baked when the top of the buns are firm and sounds hollow when tapped.
  • Once baked remove from the oven.
  • Run a palette knife around the outside edge of the buns, carefully lifting the edge of the buns as you do so.
  • Place a large board, (I use a chopping board) over the top of the baking tin. Using oven gloves to protect from the heat turn the buns out of the tin.
  • Again place a serving dish over the board flip over and the chocolate buns will be right side up, ready to be glazed.
  • Use a knife to gently cut through where each bun joins the next.  Move the buns so there is a small gap between them, this ensures the glaze can drip down the sides.
FF Double Chocolate Chip Iced Buns
Baking and turning out the buns.

Pouring on the icing

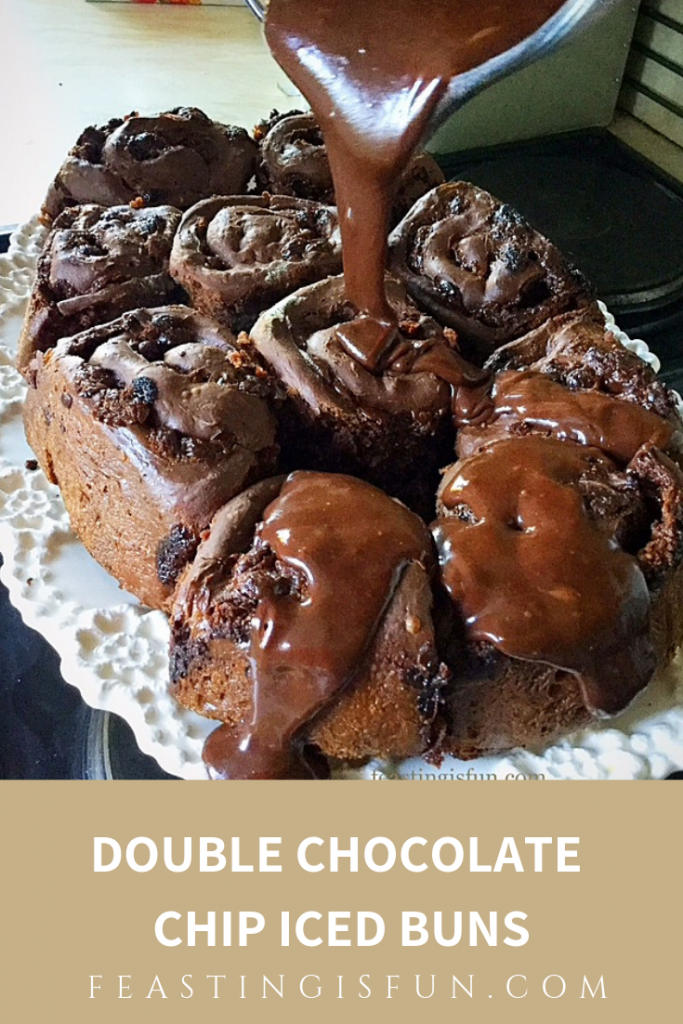
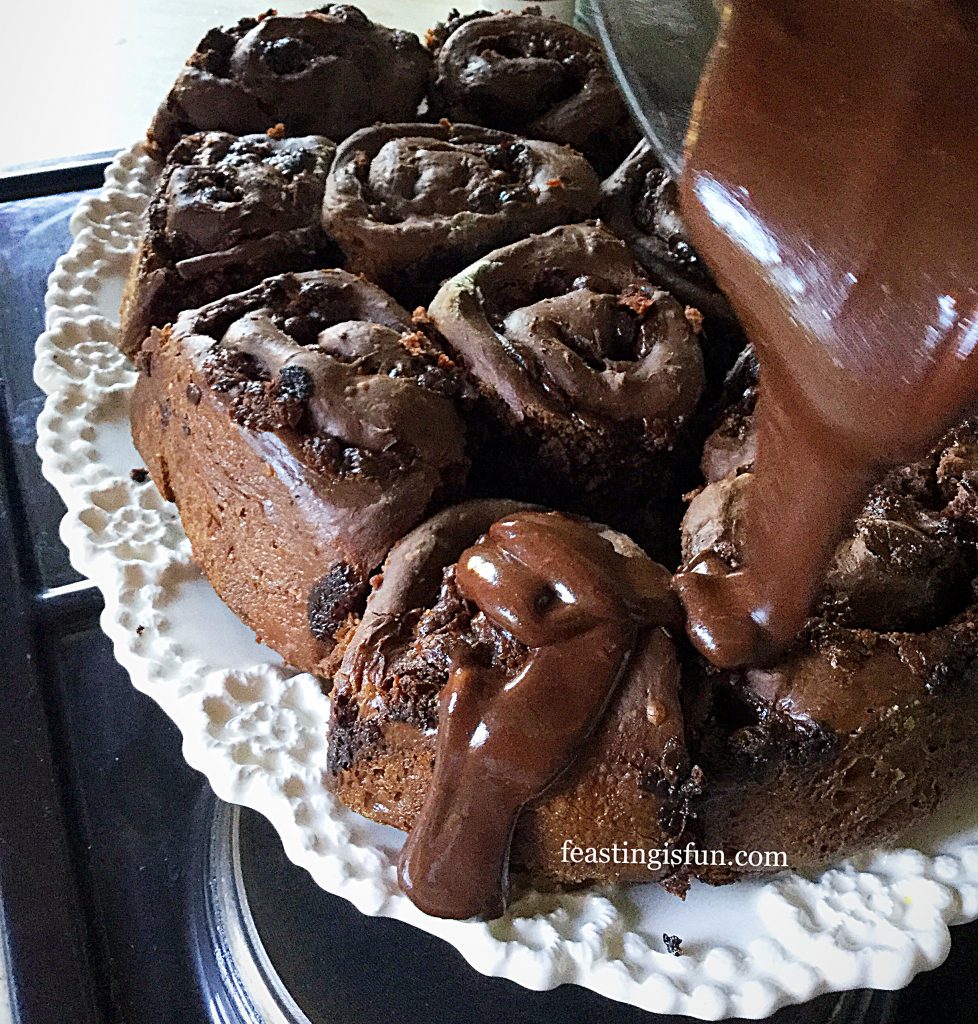
  • While the buns are still hot pour over the thick, glossy, chocolate icing.
FF Double Chocolate Chip Iced Buns
Glazing the Double Chocolate Chip Iced Buns

Serve the buns warm for breakfast as an extra special treat.  While these buns are best eaten on the day they are baked they will keep for 2 days in an airtight container.  A quick 10 second zap in the microwave warms cold buns ready to eat.

If you have enjoyed this recipe for Double Chocolate Chip Iced Buns you may also like these:

Homemade Chelsea Buns

FF Homemade Chelsea Buns
Homemade Chelsea Buns

Cinnamon Plaited Brioche Bread

FF Double Chocolate Chip Iced Buns
Cinnamon Plaited Brioche Bread

Christmas Spiced Fruit Loaf

FF Double Chocolate Chip Iced Buns
Christmas Spiced Fruit Loaf

Make ahead recipes  are a great way to enjoy incredible feasts without having to get up early or spend all day in the kitchen. Because spending time with family and friends enjoying food together is always more important than being stuck in the kitchen, away from the fun. While it is fun to bake and cook together, not everyone has large, open plan kitchens that make this possible. Therefore having this recipe enables you to serve freshly baked buns with minimal effort.

Would you like more make ahead recipes, here on Feasting is Fun?

Whatever you are making, baking and creating in your kitchens, have fun preparing your feast

Sammie xx

No part of this post may be reproduced or duplicated without the written permission of the owner. Please see my Disclosure Policy.