Homemade Yorkshire Puddings

Share
Facebooktwitterpinterestlinkedintumblr

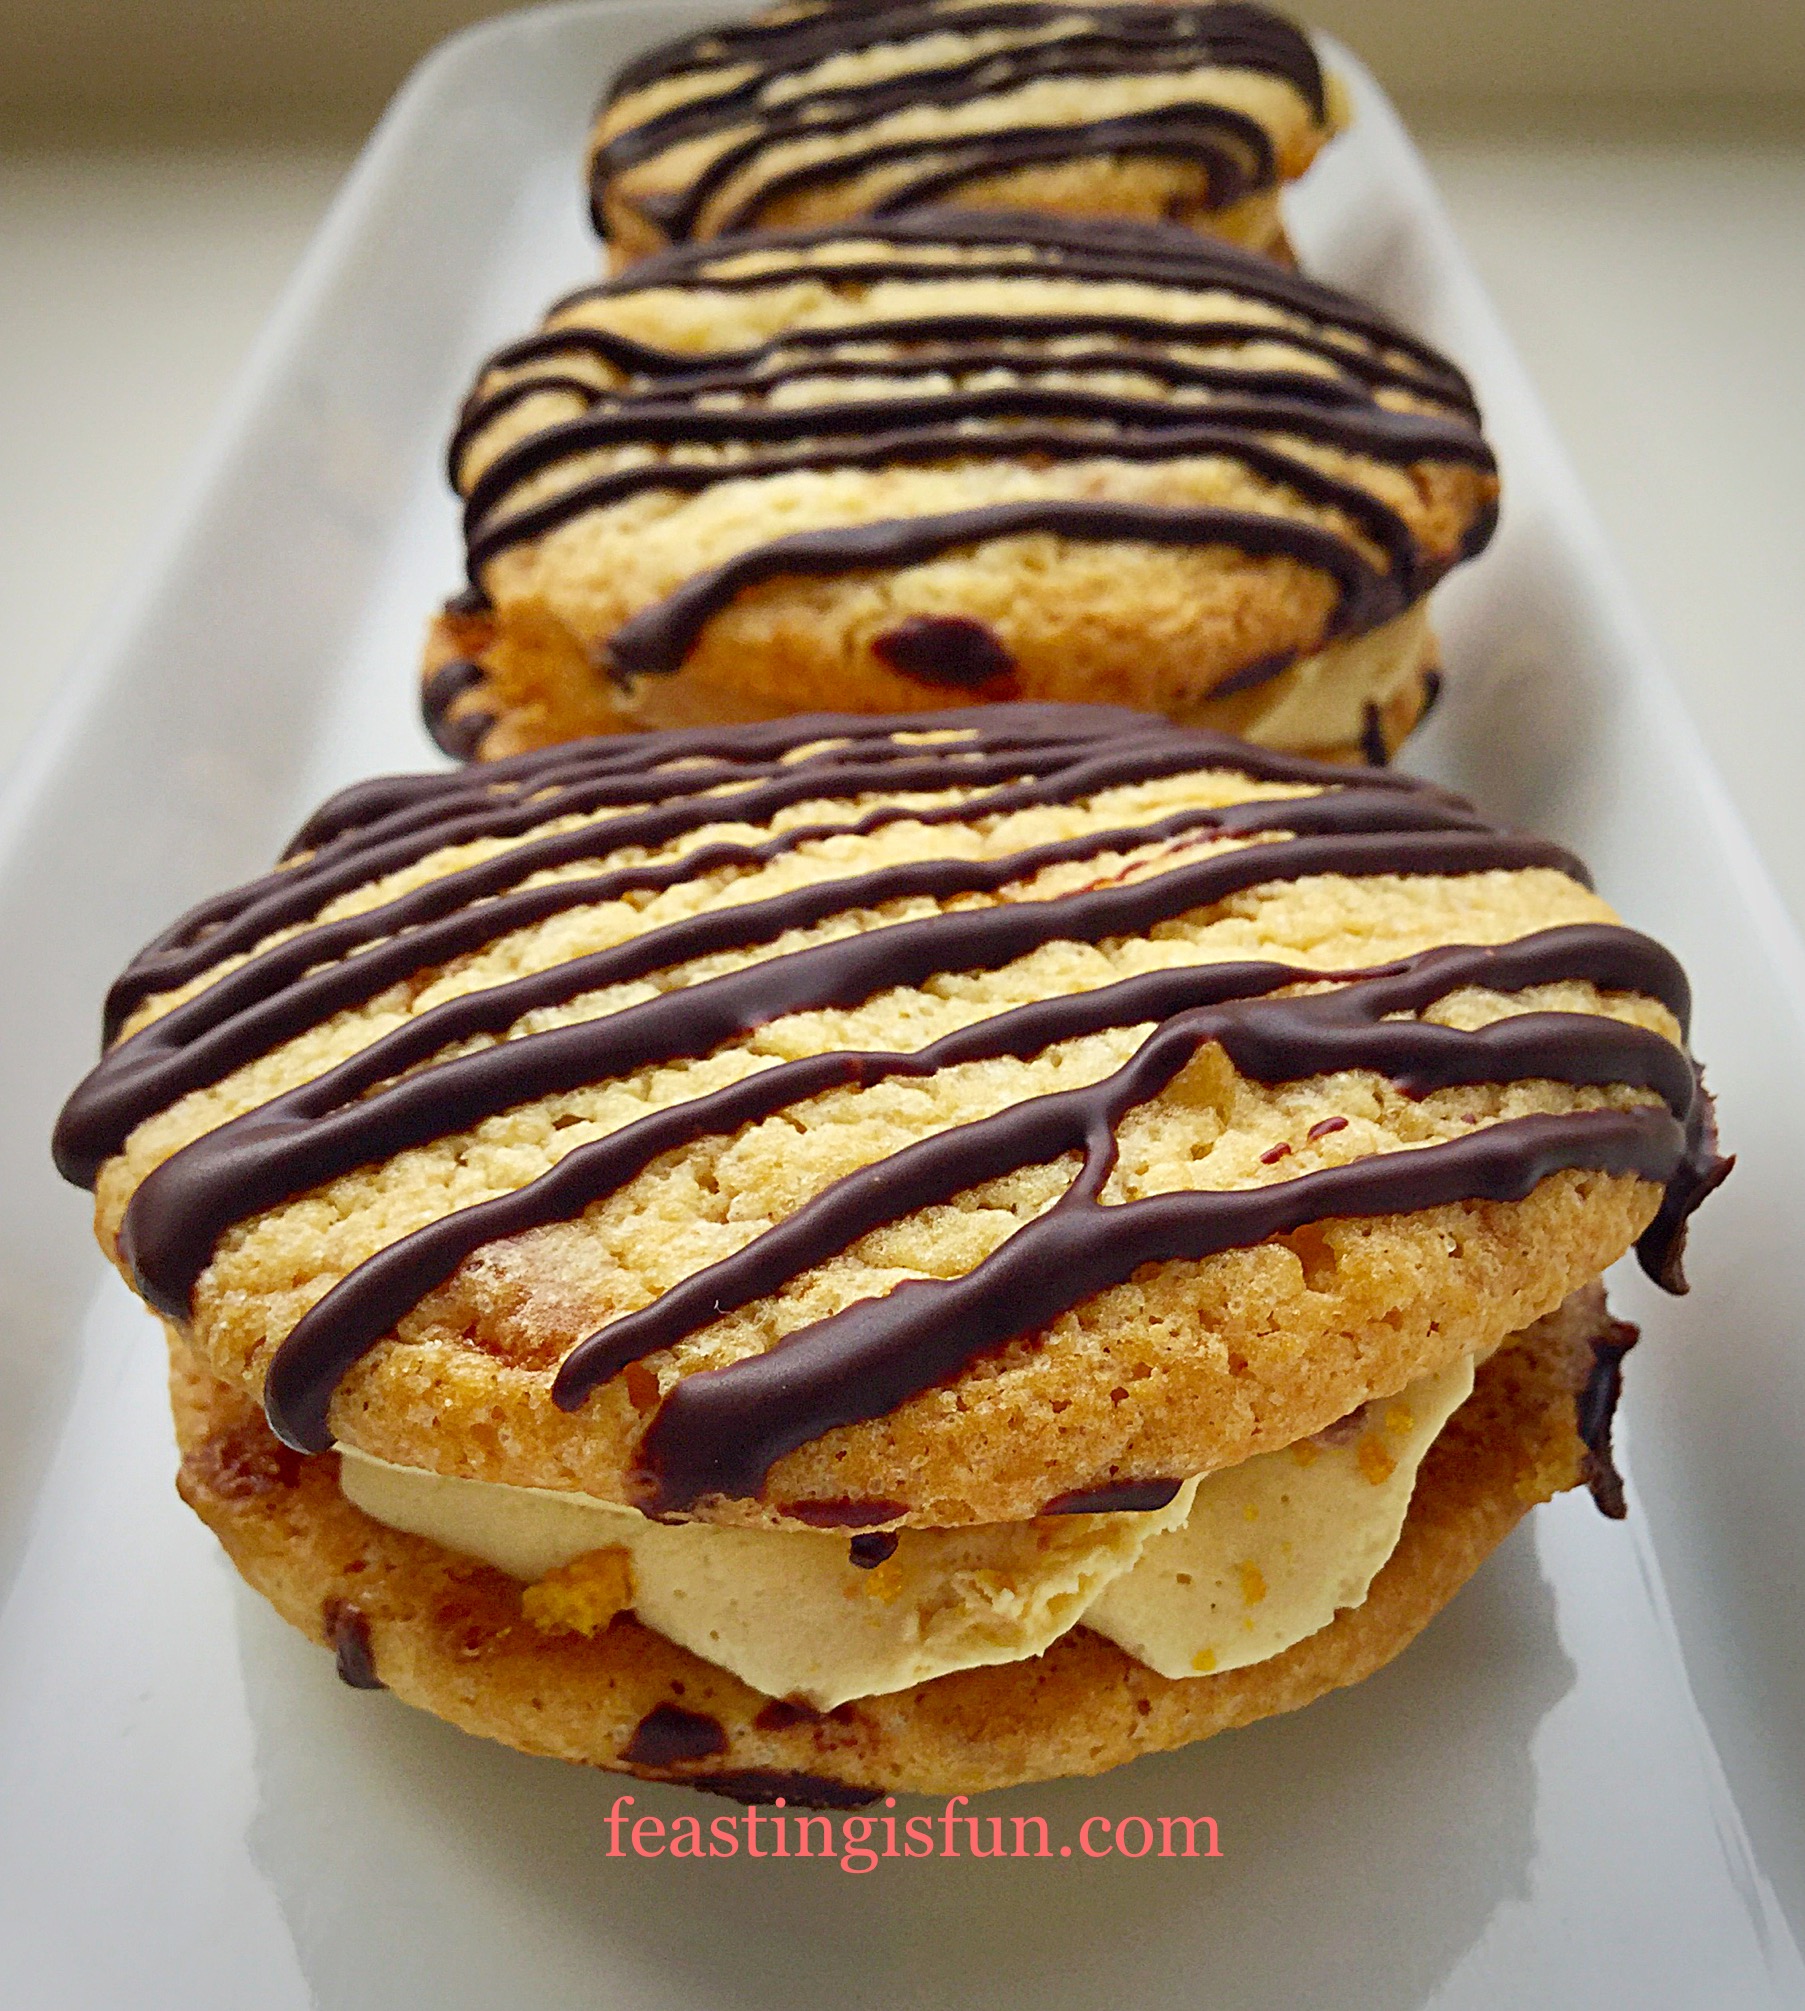
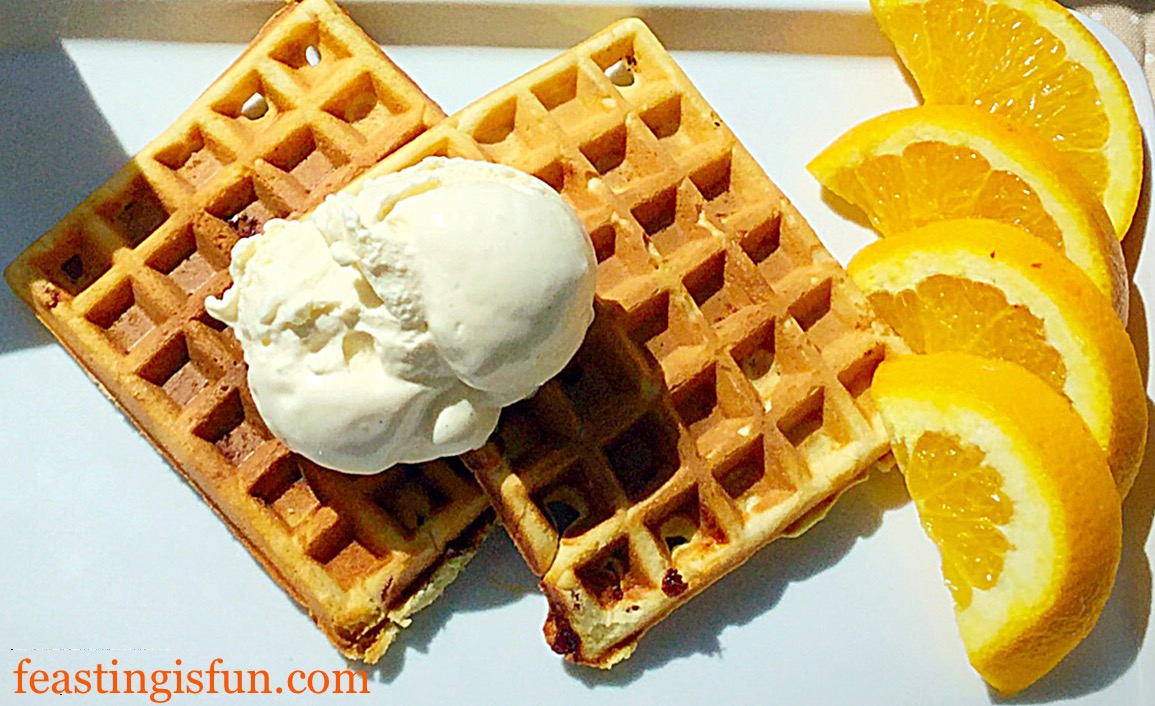
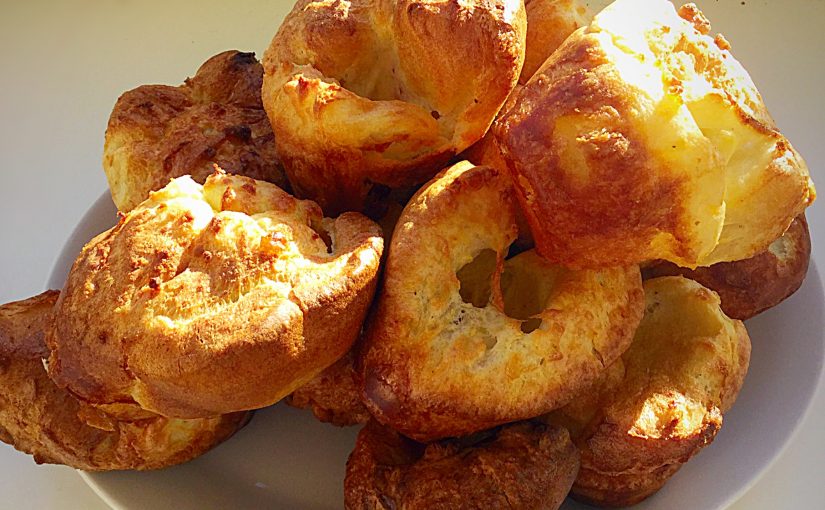
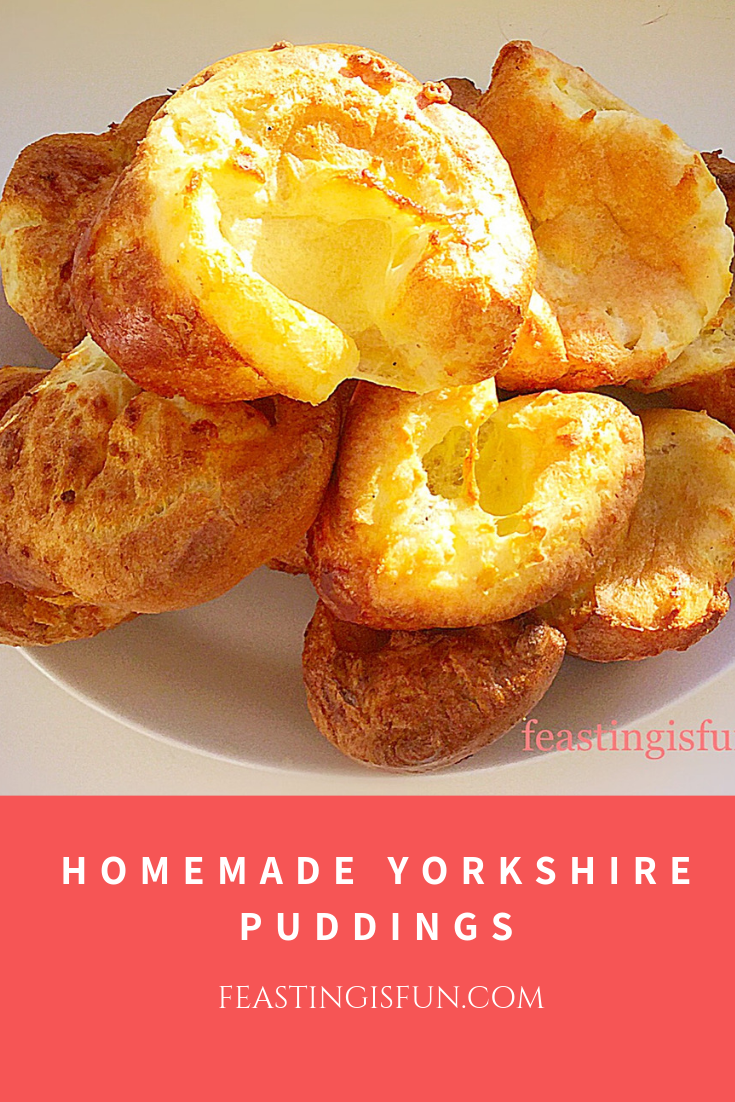
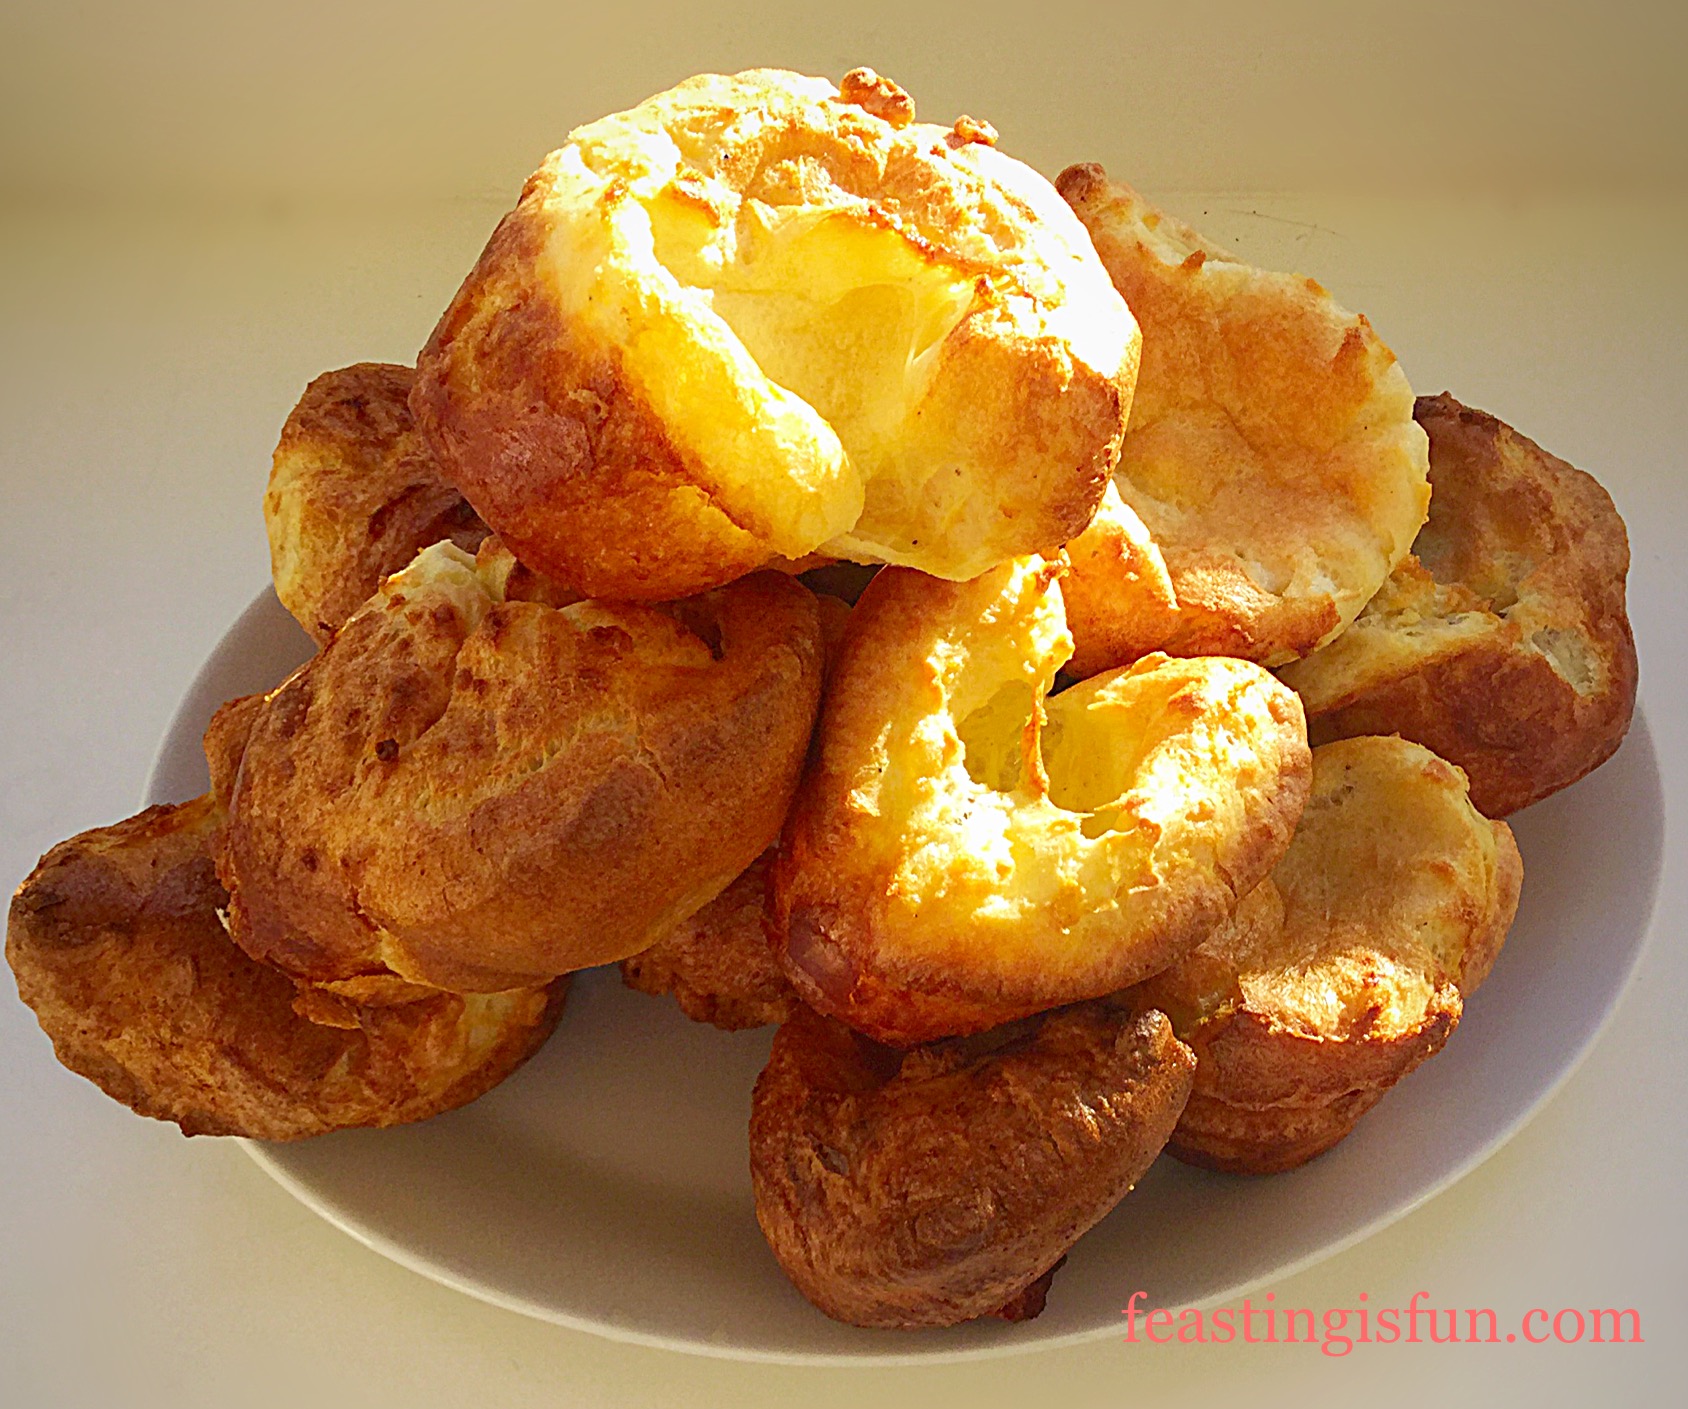
Homemade Yorkshire Puddings are golden, crisp, well risen, individual bakes of pure, indulgent, comfort food.

FF Homemade Yorkshire Puddings

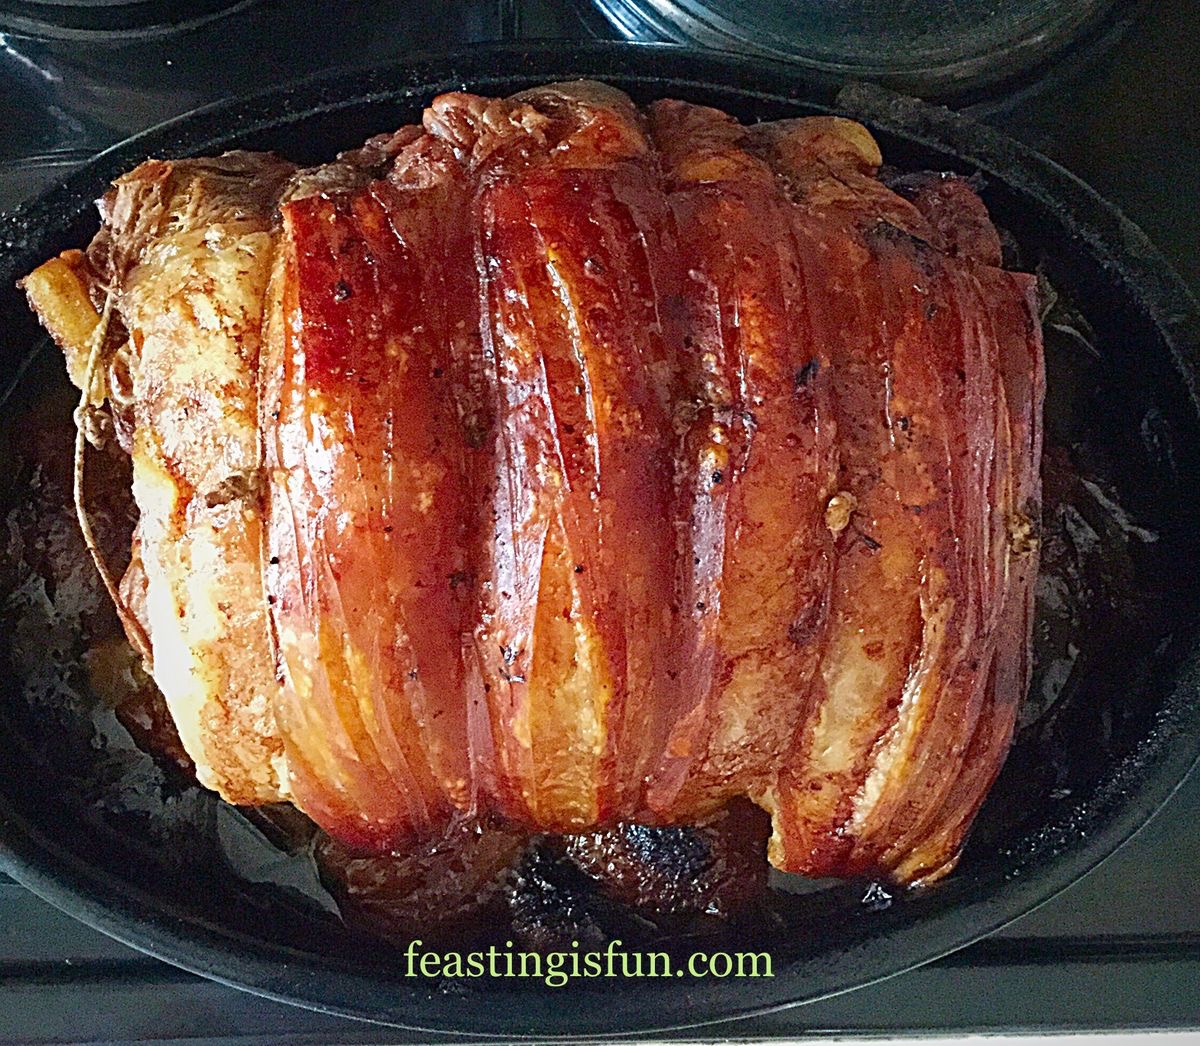
While no meal HAS to have Homemade Yorkshire Puddings, what they add, to a roast, bangers and mash, or cooked with the sausages as ‘Toad in the Hole’, is immeasurable. Ultimately, eating them with roast beef is the traditional accompaniment here in England. Rather like stuffing with chicken or turkey.

Actually, for me, Homemade Yorkshire Puddings me shouldn’t be uniformly perfect. Because part of their charm is the craggy appearance, some with a hole, others billowing  like cumulus clouds. Ready to soak up rich, meaty gravy.

FF Homemade Yorkshire Puddings
Homemade Yorkshire Puddings little effort for big reward.

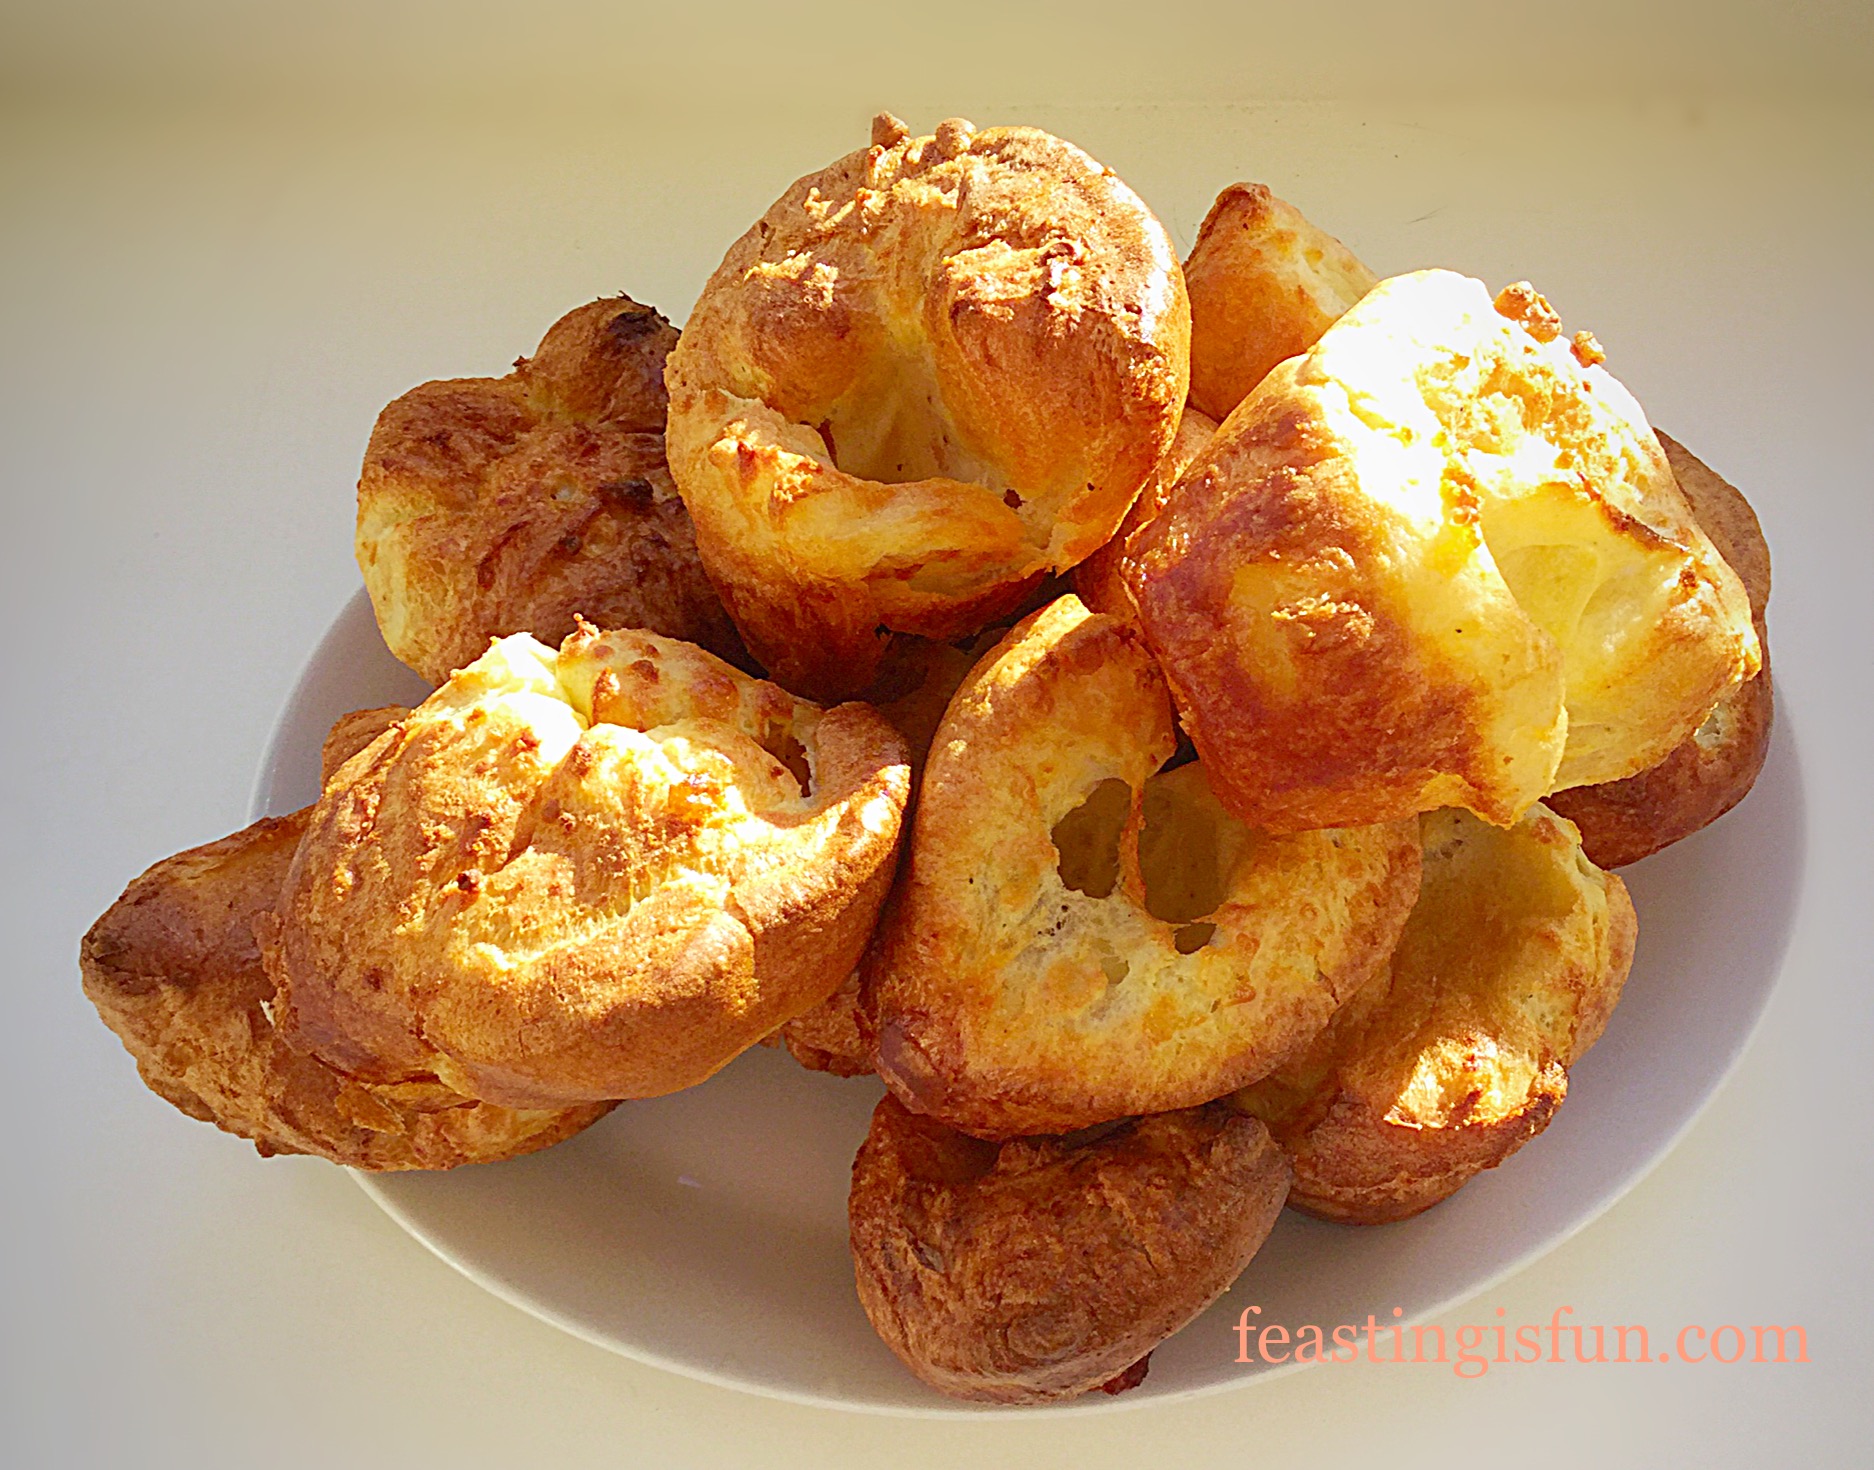
Yet in the U.S.A. our beloved Yorkie Puds, are called ‘Popovers’. A fantastic name that I think describes them perfectly. Since they literally popover the top of the muffin tin whilst they bake.

Since childhood I enjoy happily watching these incredible bakes, laying prostrate, in front of the oven, in awe at the ‘magic’ as they rise.

FF Homemade Yorkshire Puddings
Homemade Yorkshire Puddings just add meat and gravy.

Made from a simple batter, these gravity defying delights enhance any dinner plate they grace.

Various methods as well as recipes exist claiming to be the ‘best way’ of making a Yorkie Puds. While my method is tried and tested over the years. I have found no difference in the final result, whether I rest or use the batter immediately. Finally, what I am sure of, is that this recipe consistently works for me.

Furthermore, a real bonus to making these is that they can be made ahead and even frozen. What’s not to love about these savoury wonders?

Recipe: Makes 12 Large Homemade Yorkshire Puddings 

Vegetable oil or Lard for greasing the muffin tin

3 Large Free Range Eggs

250ml Milk -Whole or Semi Skimmed

200g Plain White Flour

1/8th tsp Salt – I use Maldon

1/8th tsp Freshly Ground Black Pepper

Pinch of Sugar

Method: Preheat the oven to 220C/200C fan, gas mark 7, 425F

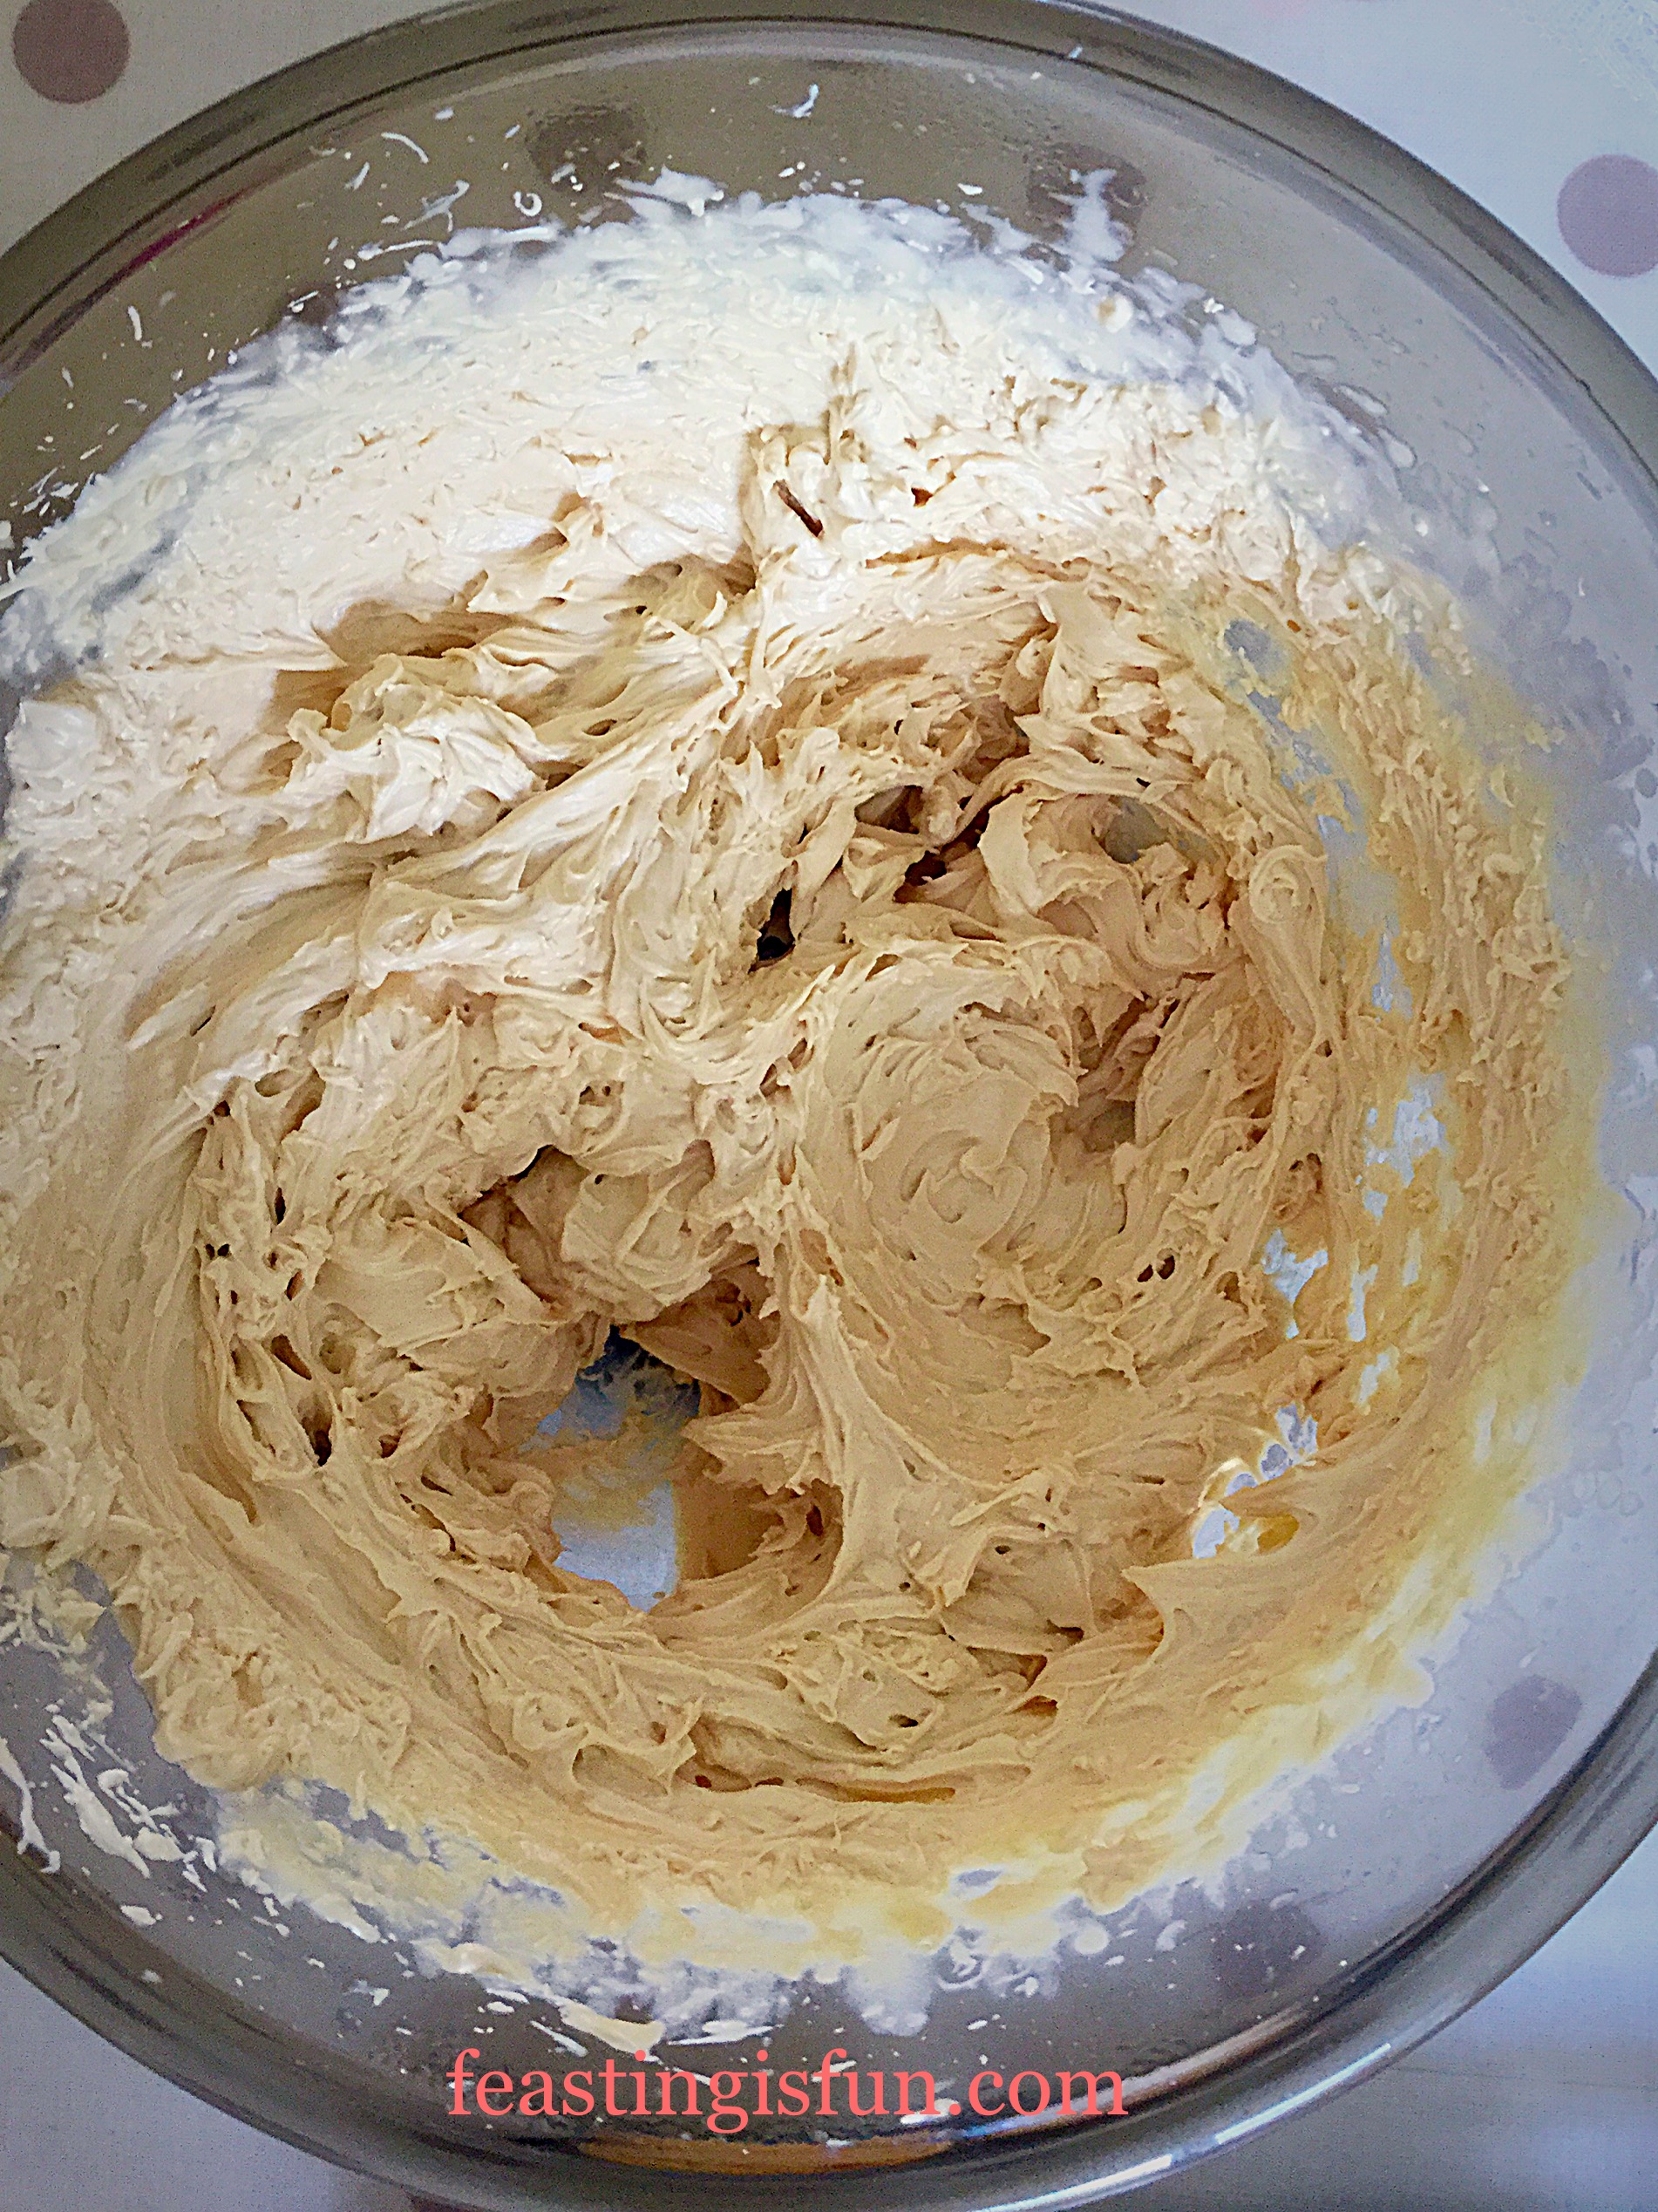
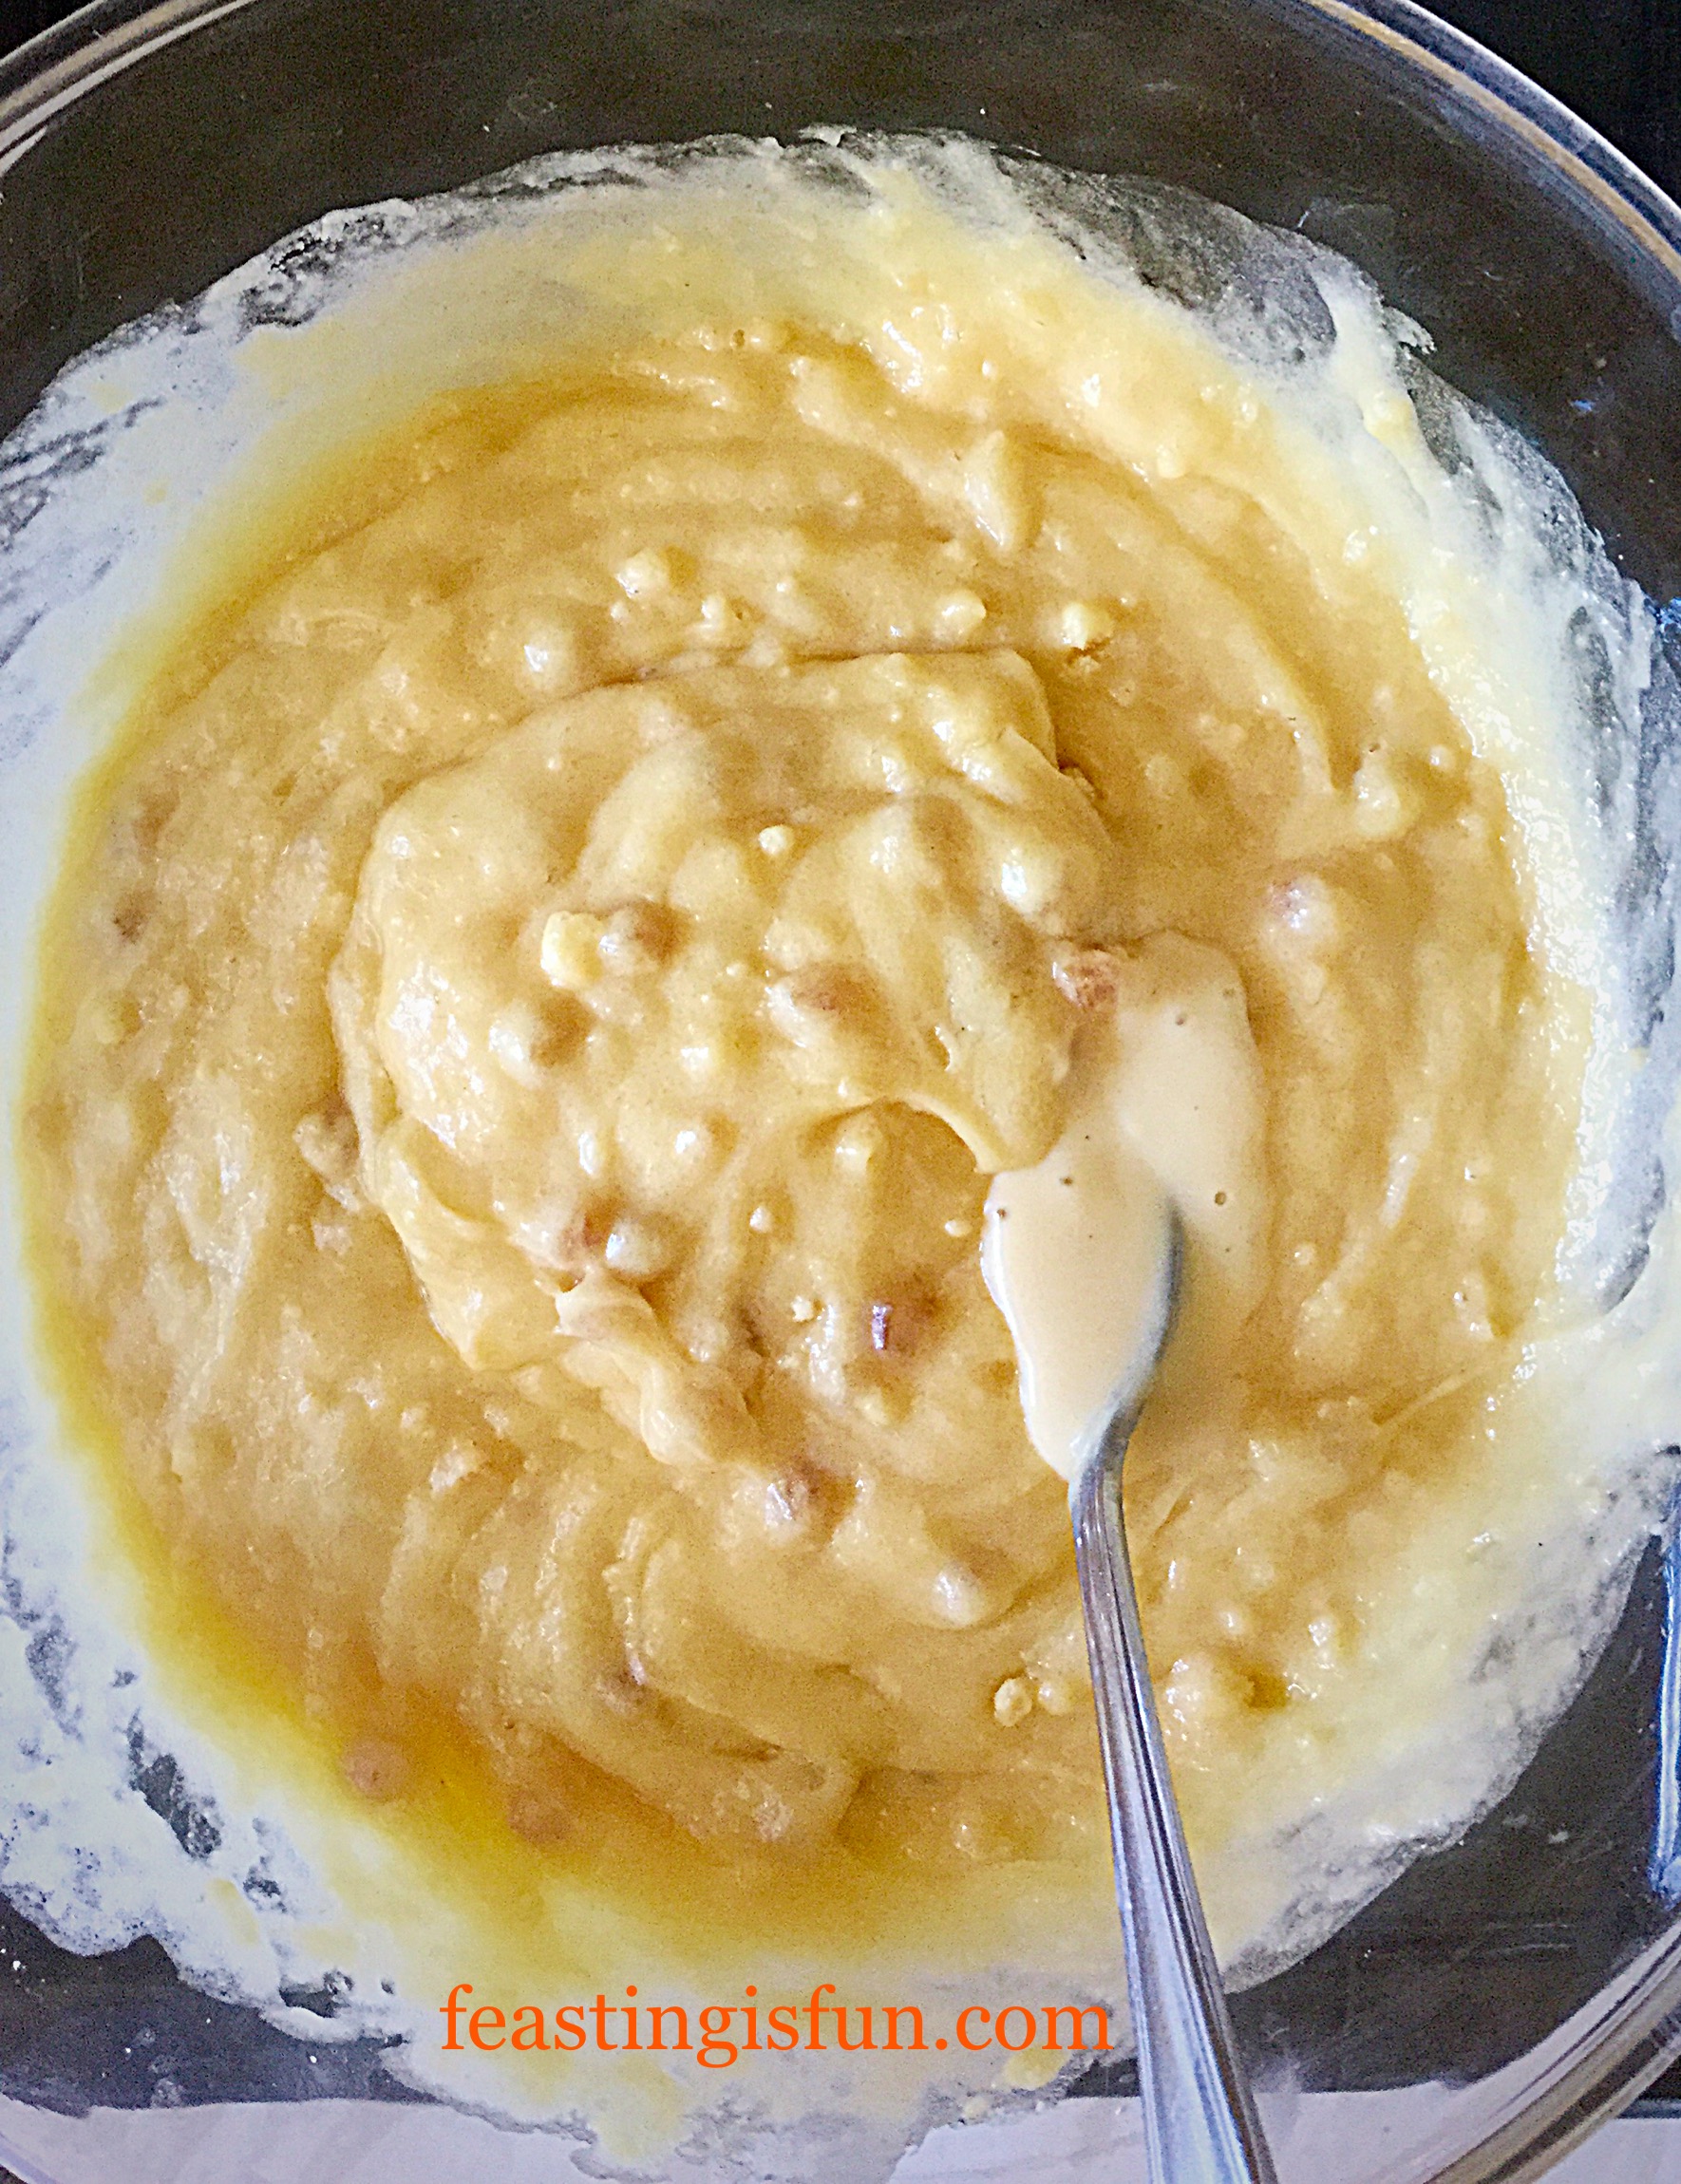
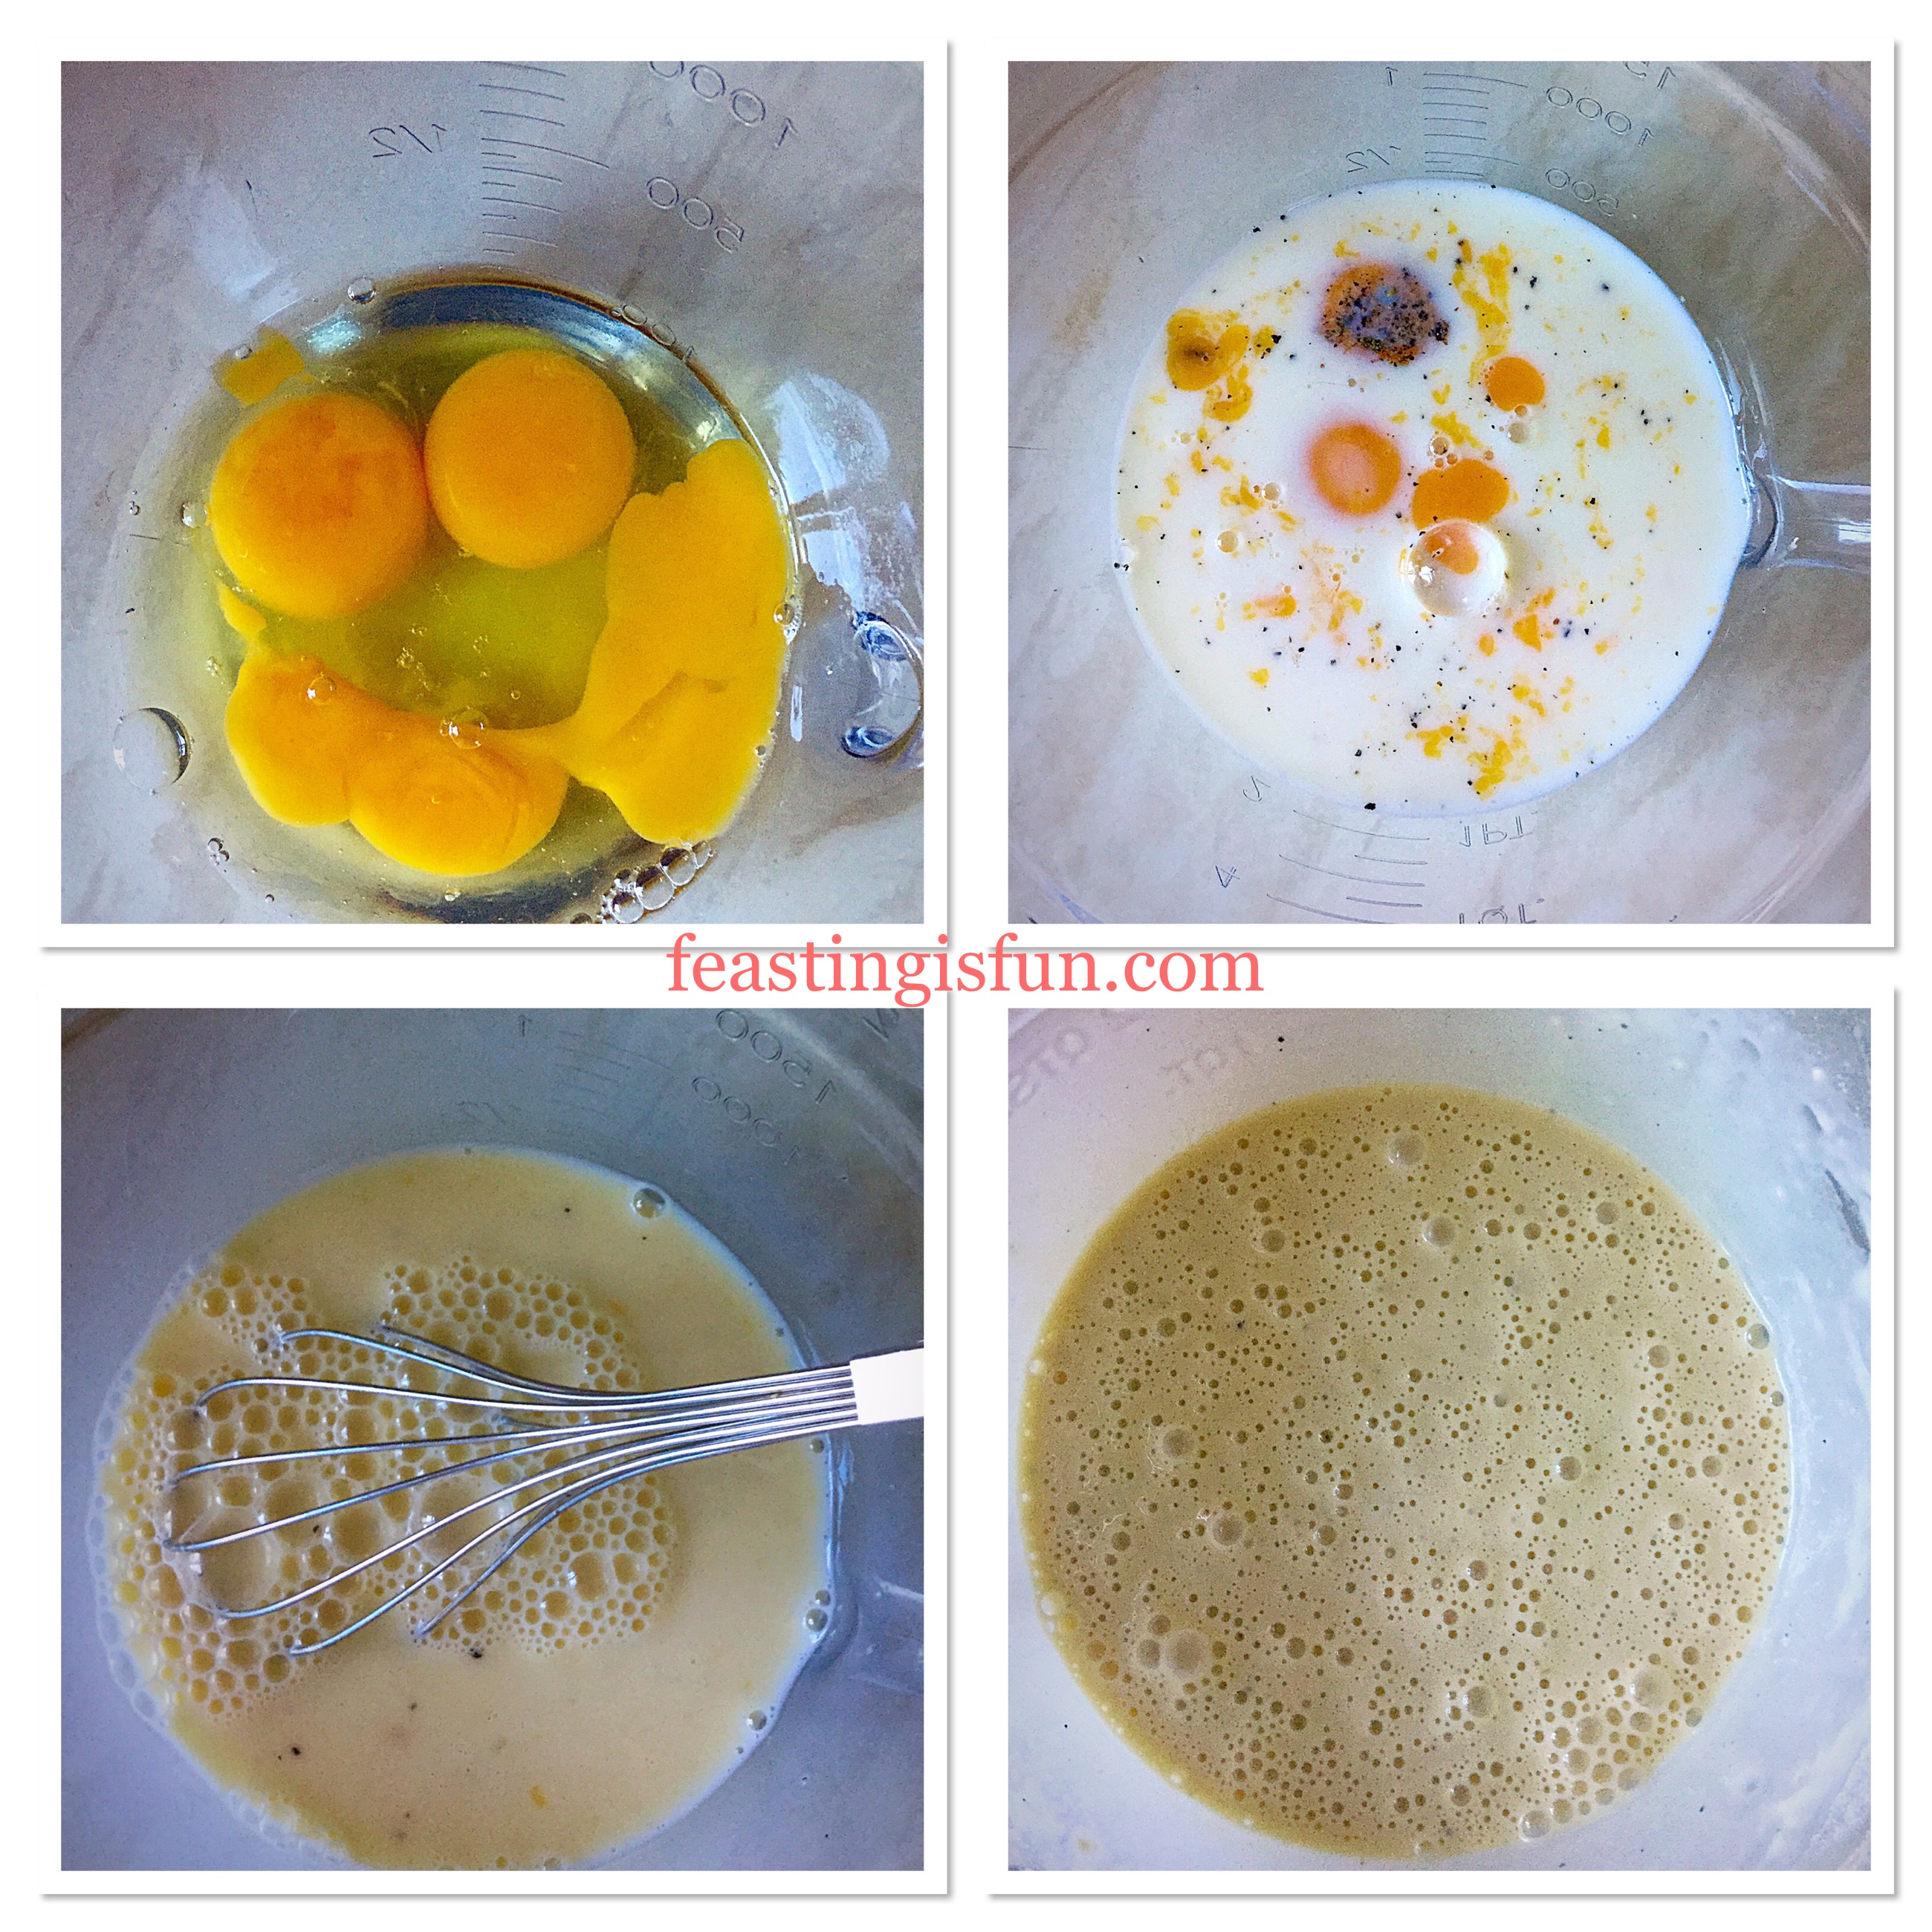
Making The Yorkshire Pudding Batter

  • In a large jug add the eggs.
  • Next add the milk, salt, black pepper and sugar. Whisk using a balloon whisk until the egg and milk are thoroughly combined and there are lots of bubbles.
  • Now add the plain white flour, sugar and salt and pepper. Continue to whisk, by hand, for a couple of minutes. The batter should be completely lump free. Cover and set to one side.
FF Homemade Yorkshire Puddings
Steps showing the batter making process.

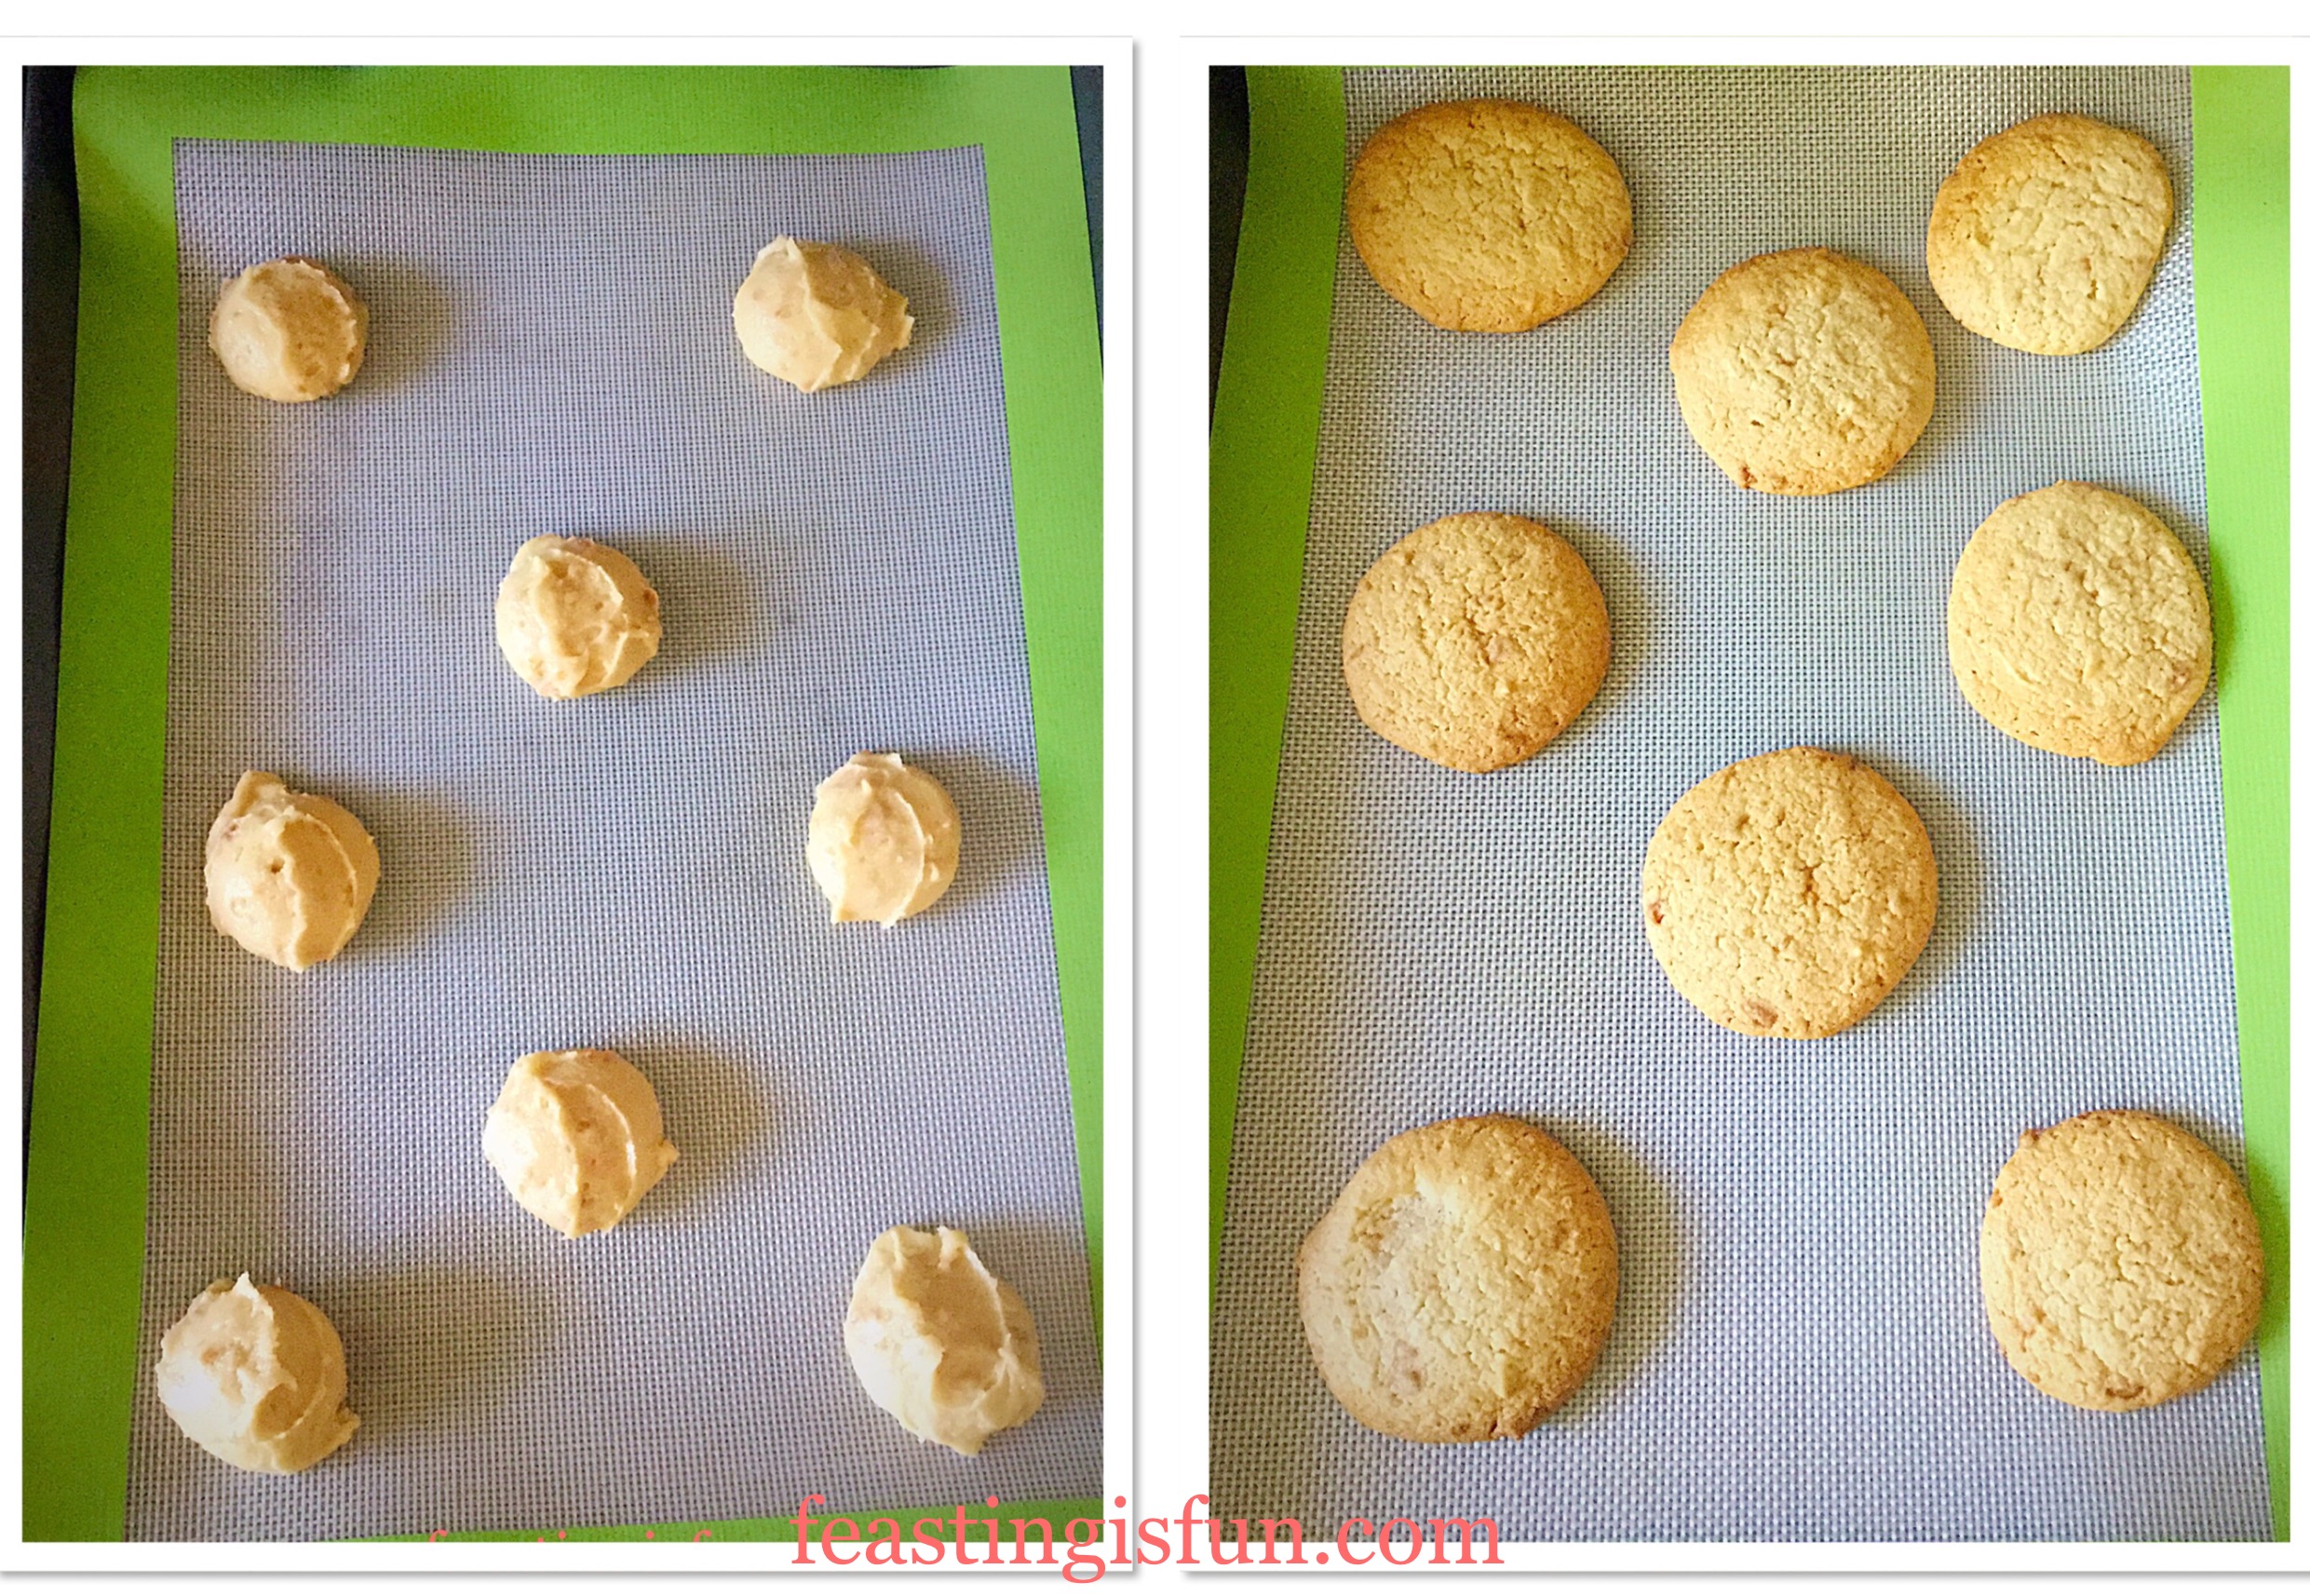
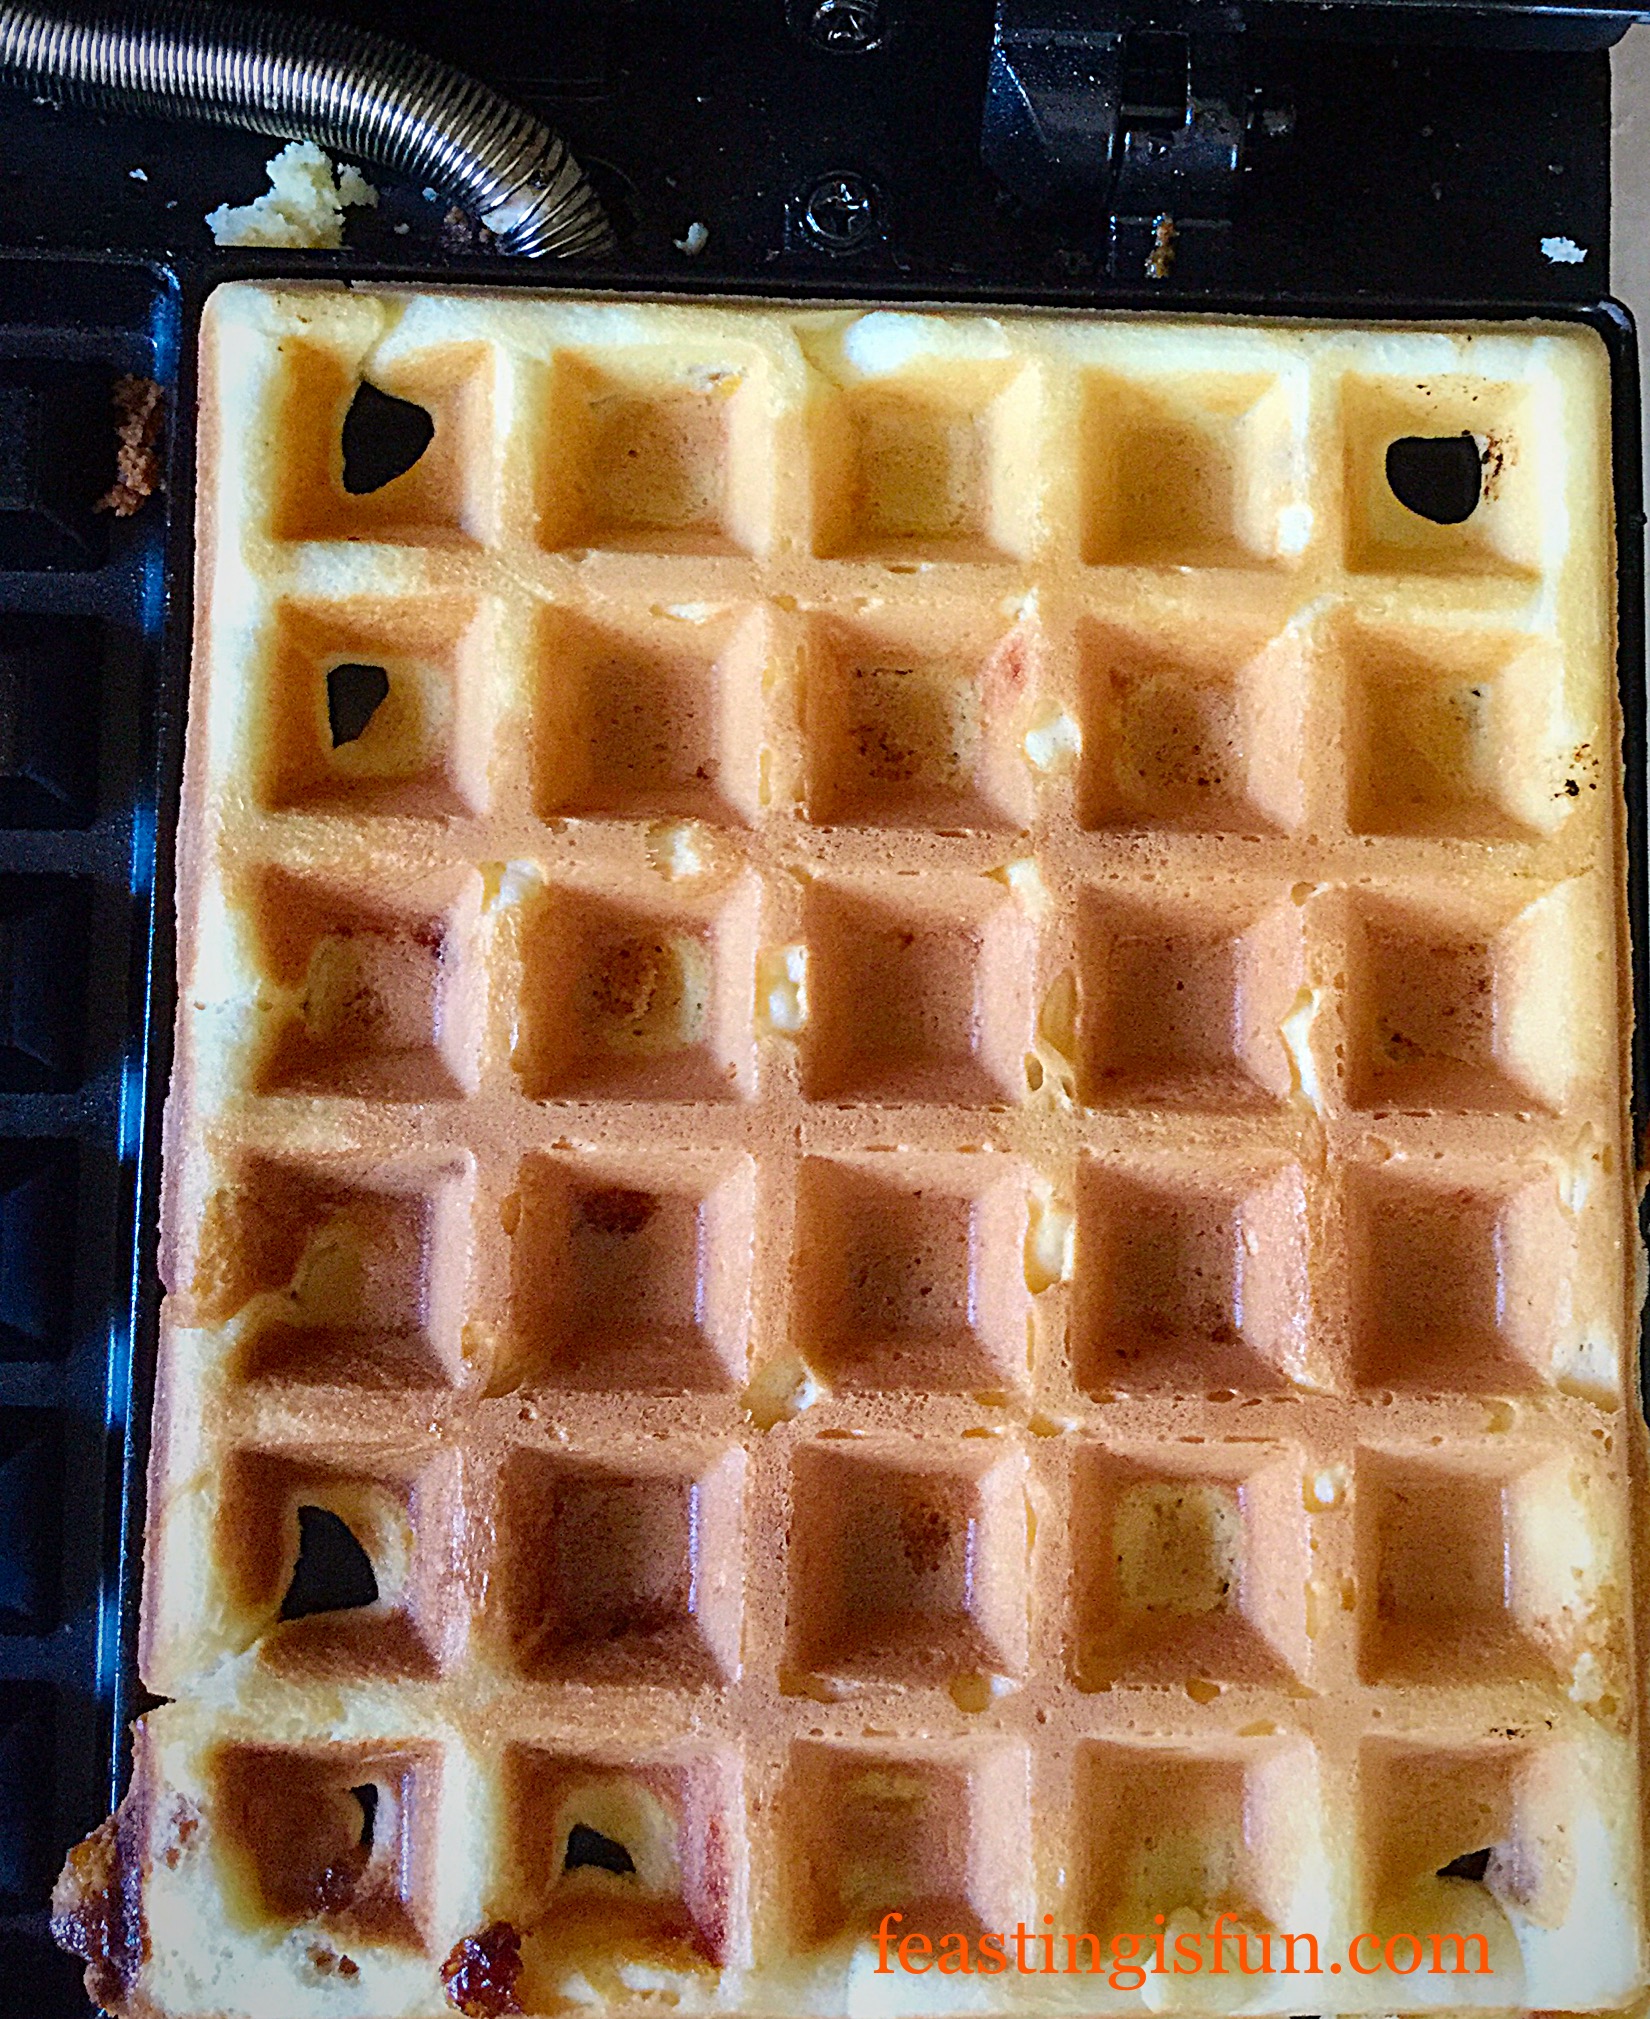
Baking The Homemade Yorkshire Puddings

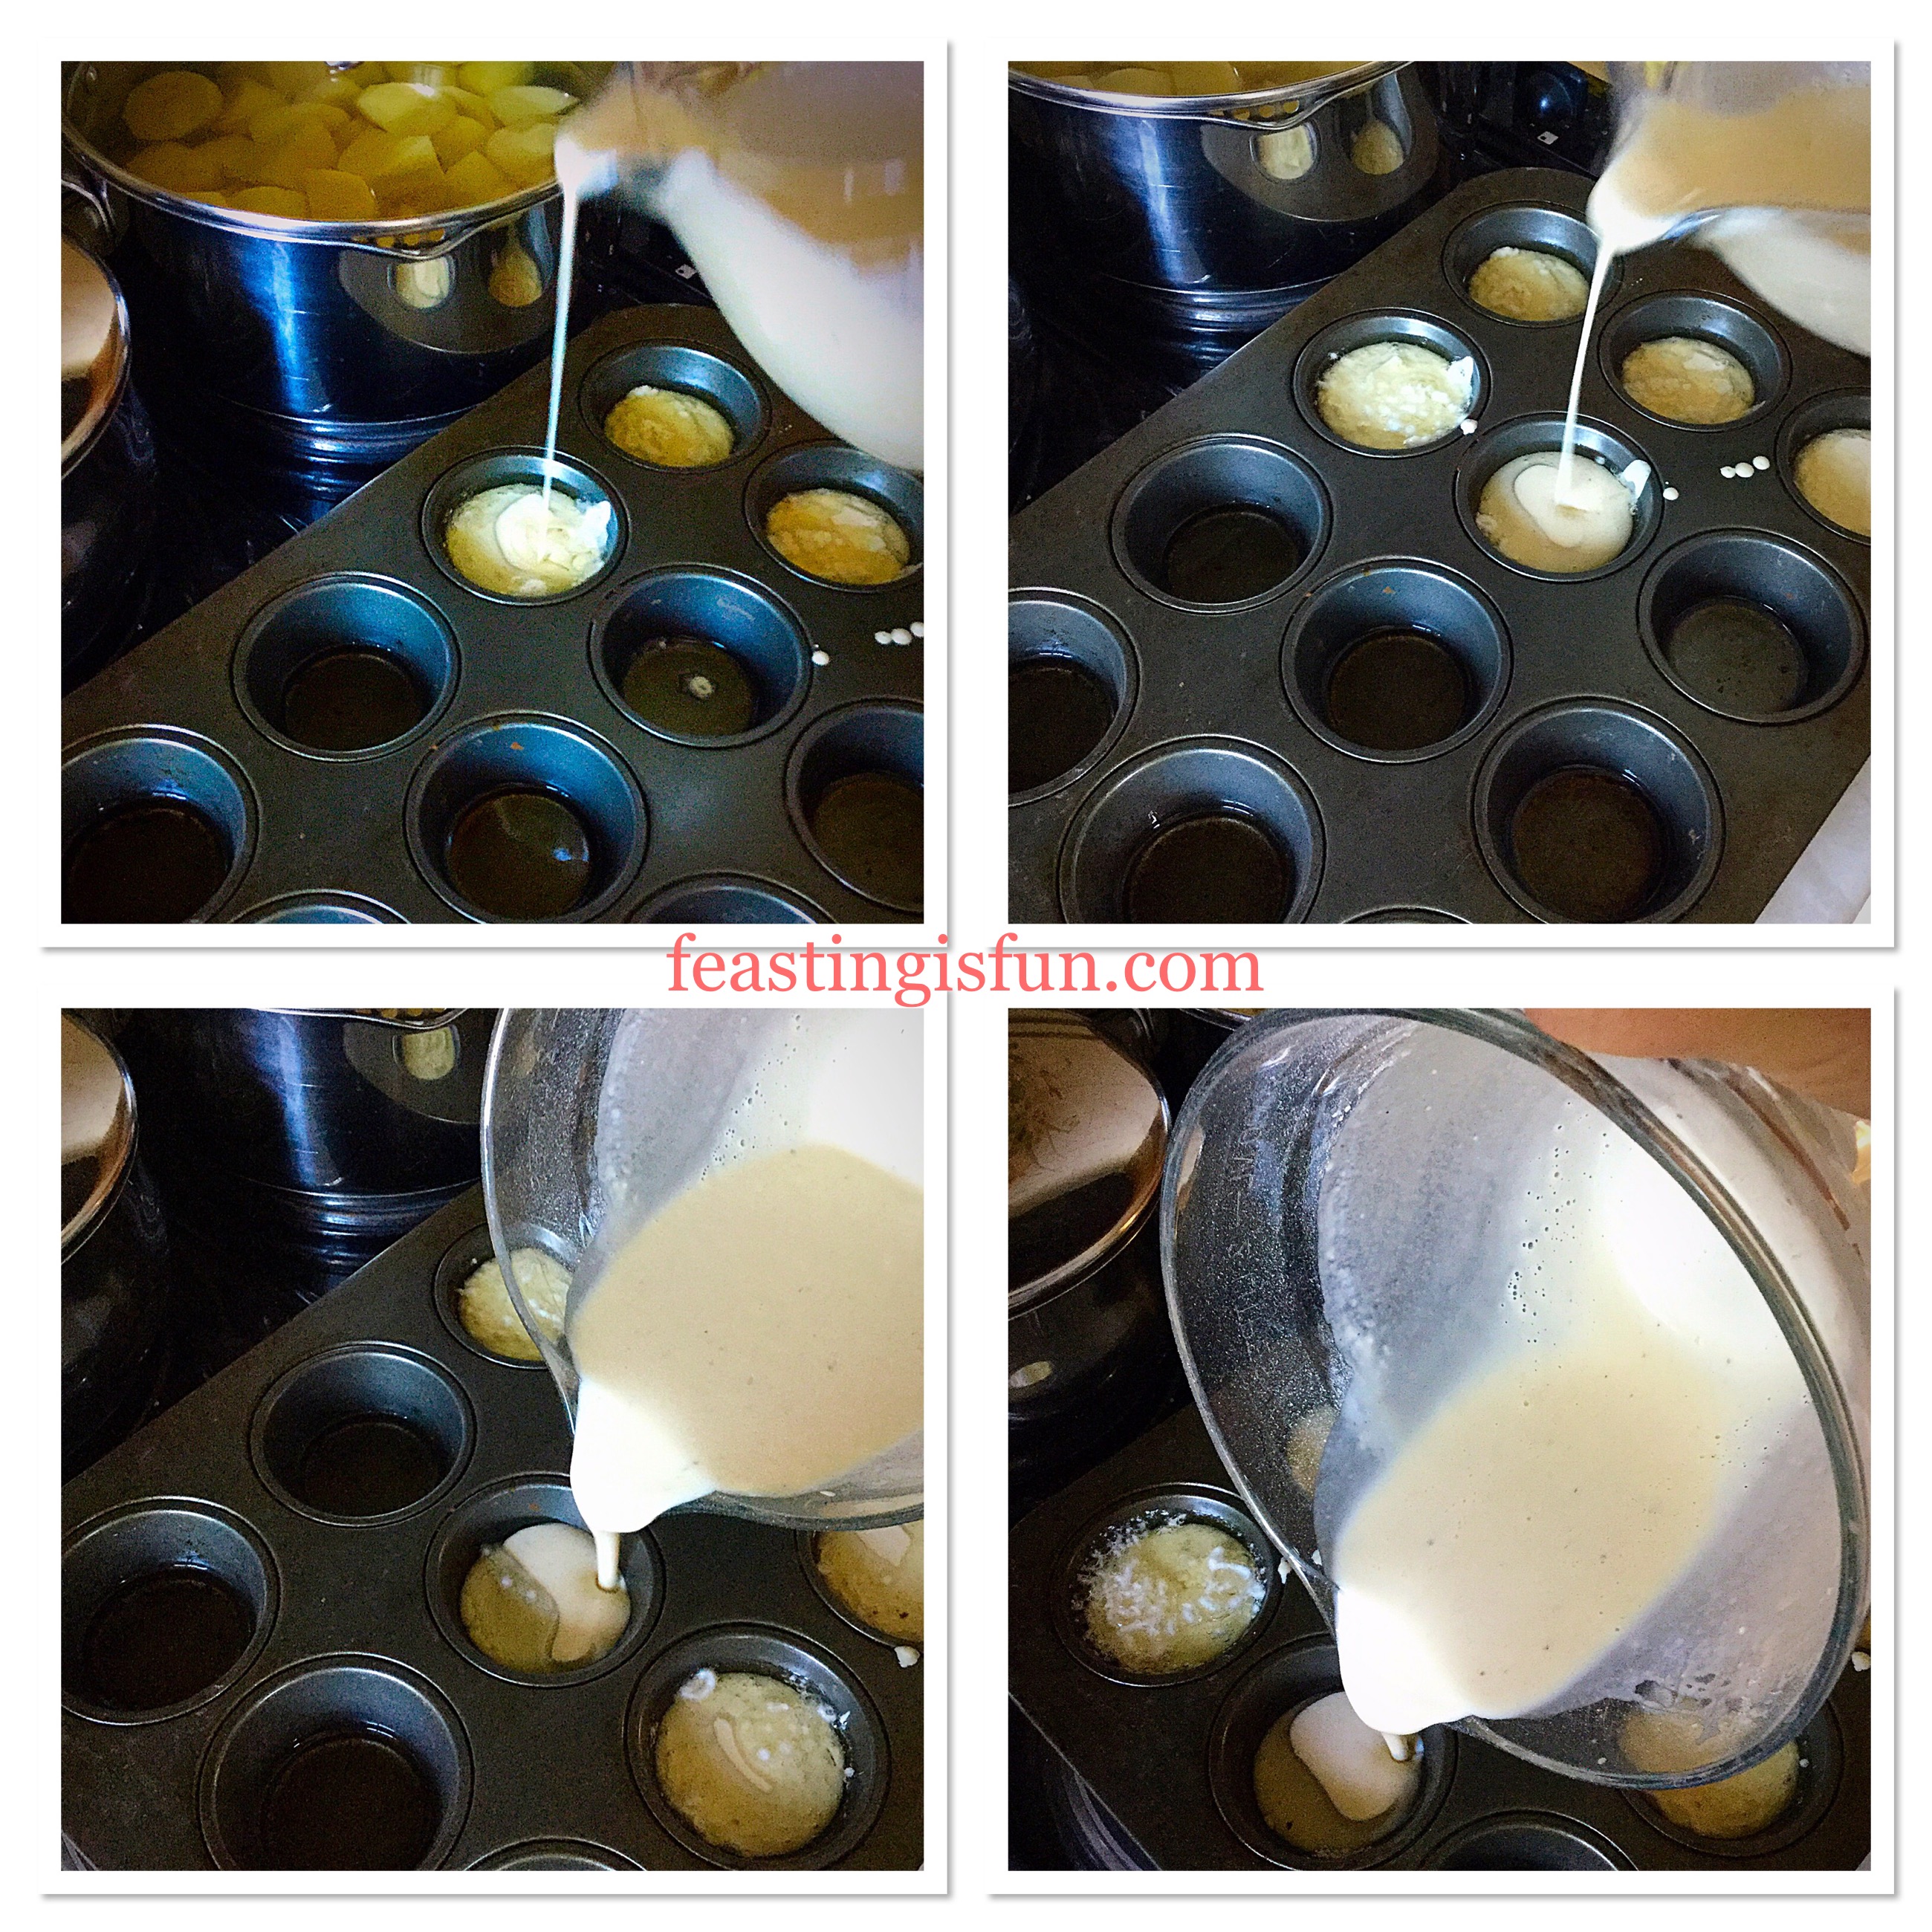
  • Place a teaspoon of vegetable oil, or lard into a 12 hole muffin tin (or popover tin).
  • Put the muffin tin in the oven for 10 minutes until it is smoking hot.
  • Just prior to removing the tin from the oven, give the batter a quick whisk, in case it has settled.
  • Working quickly, yet safely, remove the hot muffin tin from the oven and pour the batter mix into each hole. The batter should fill each muffin hole by half.
  • Return the muffin tin back into the top of the hot oven and bake for 20-25 minutes.
FF Homemade Yorkshire Puddings
Filling the muffin tin with batter.
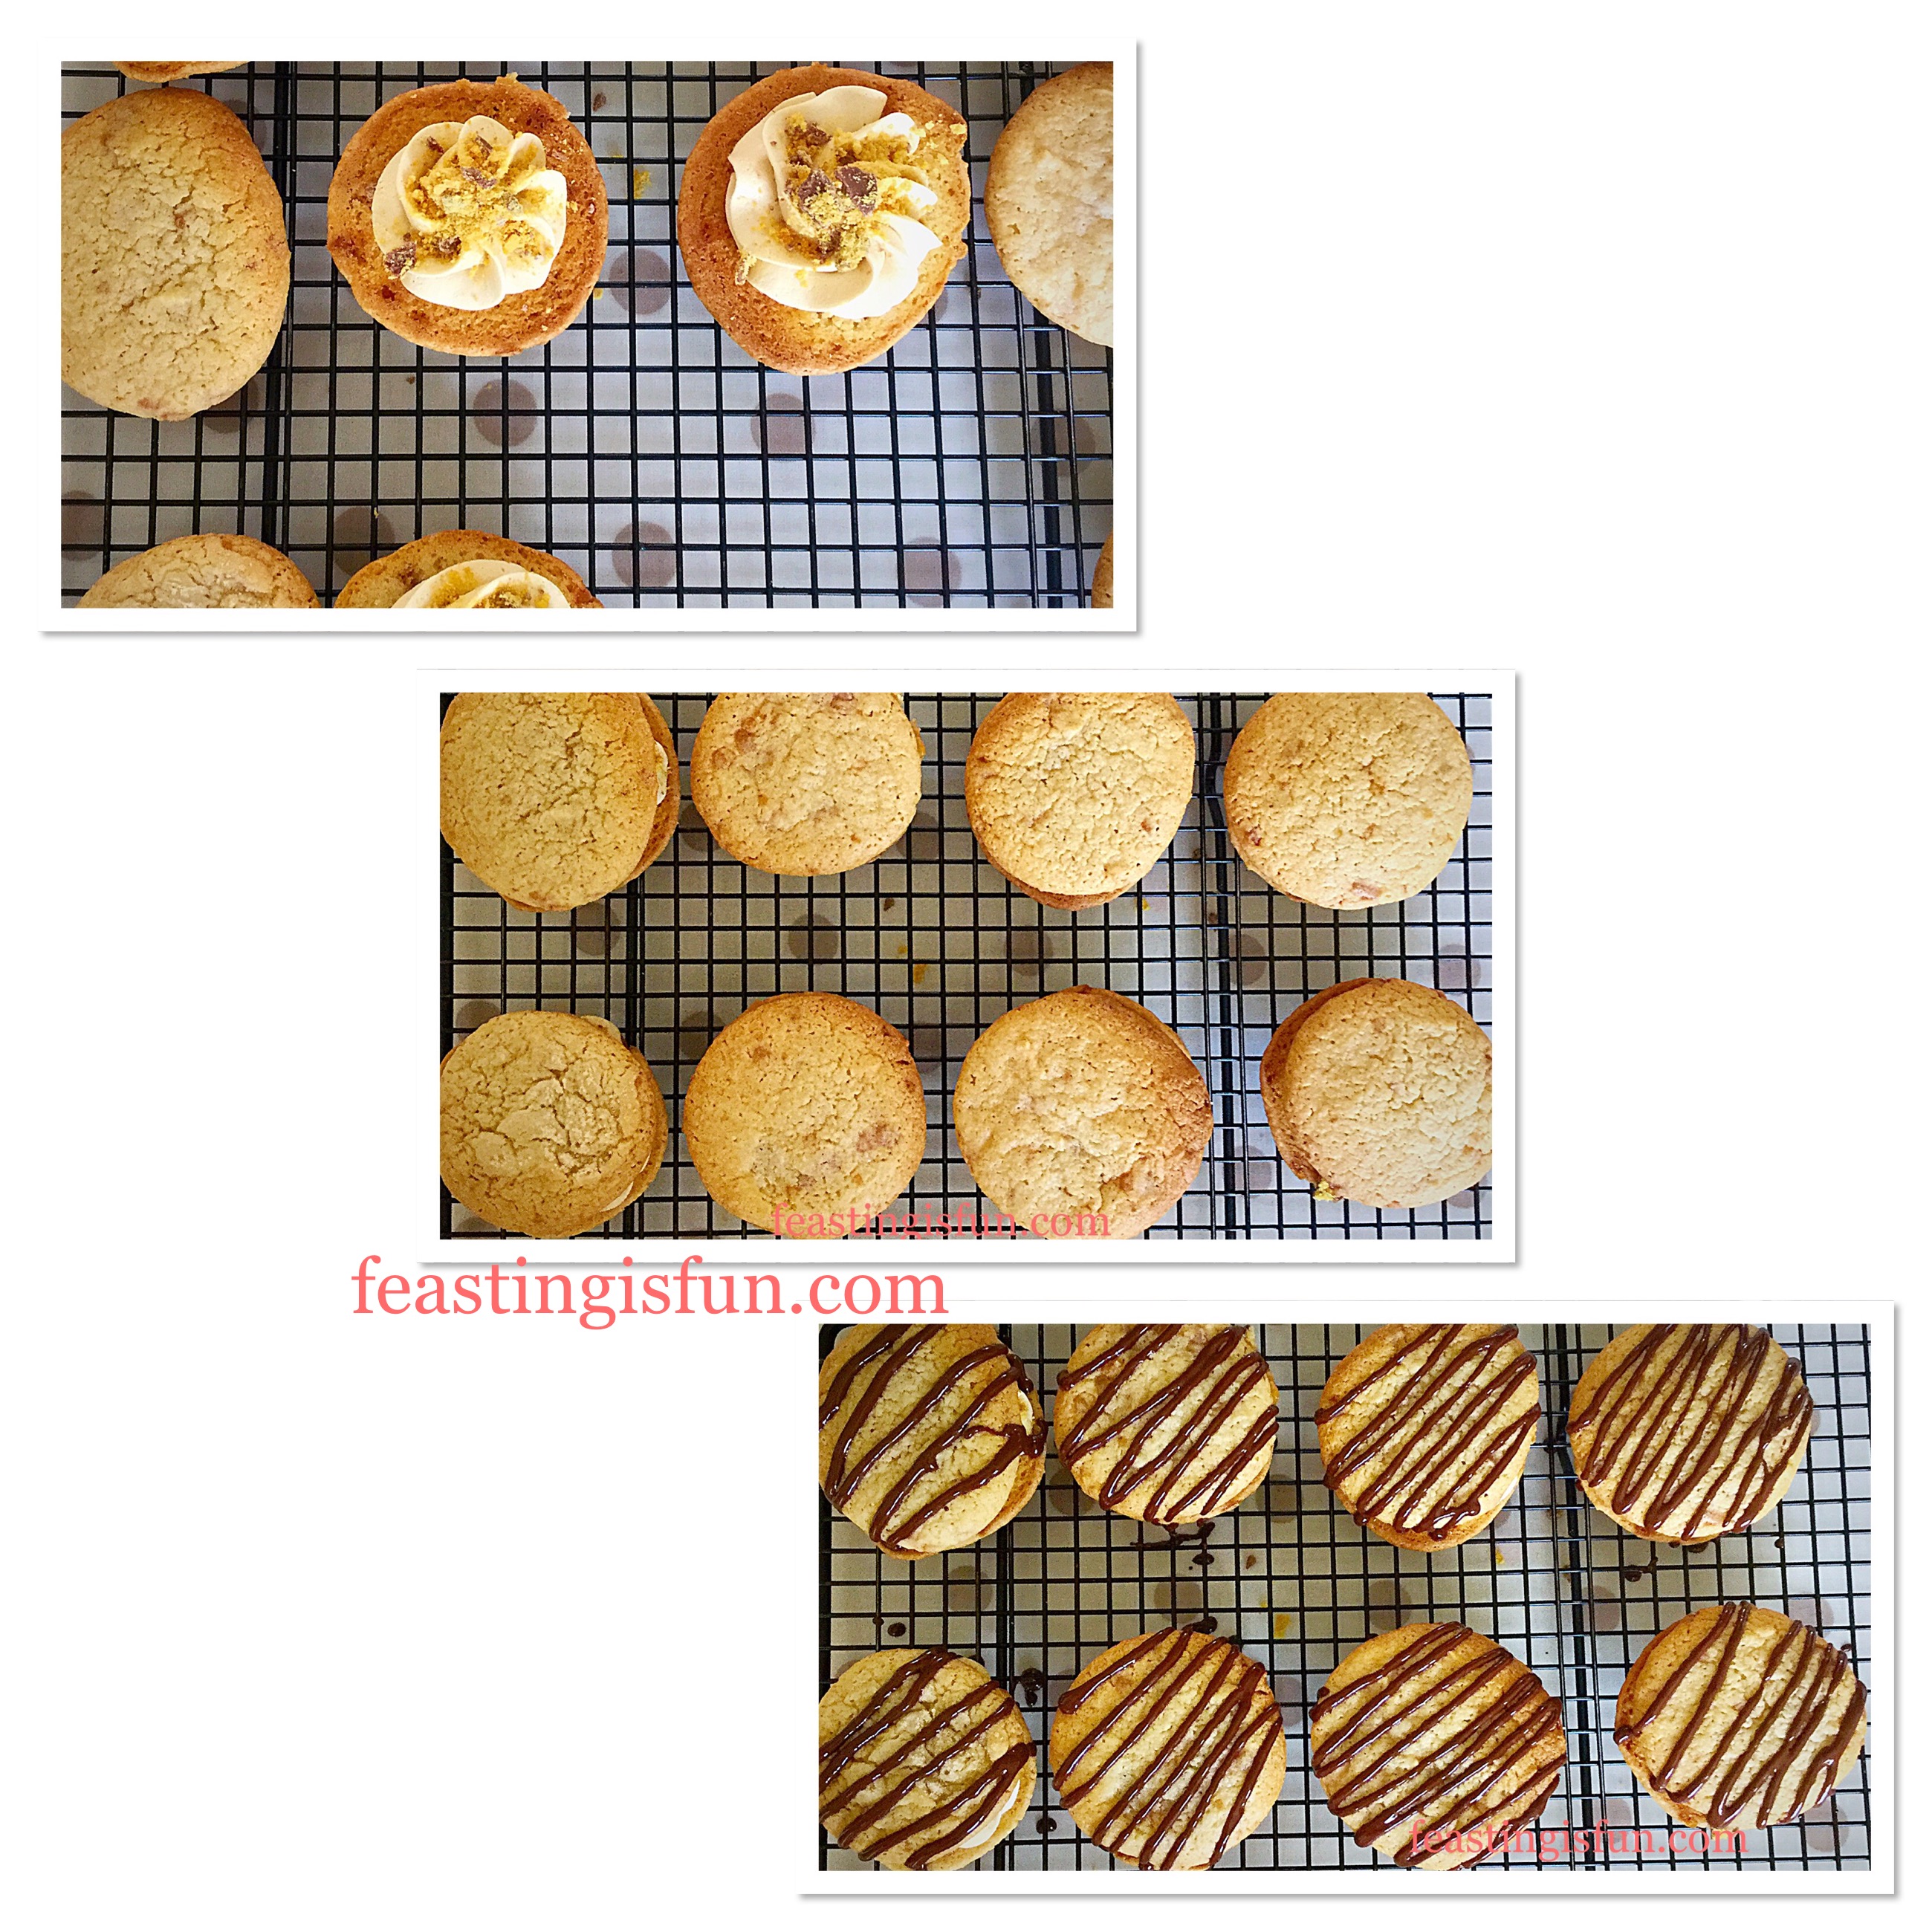
  • As soon as the Yorkshire Puddings are well risen, golden and crispy remove from the oven.
FF Homemade Yorkshire Puddings
Homemade Yorkshire Puddings they simply cannot be beaten.

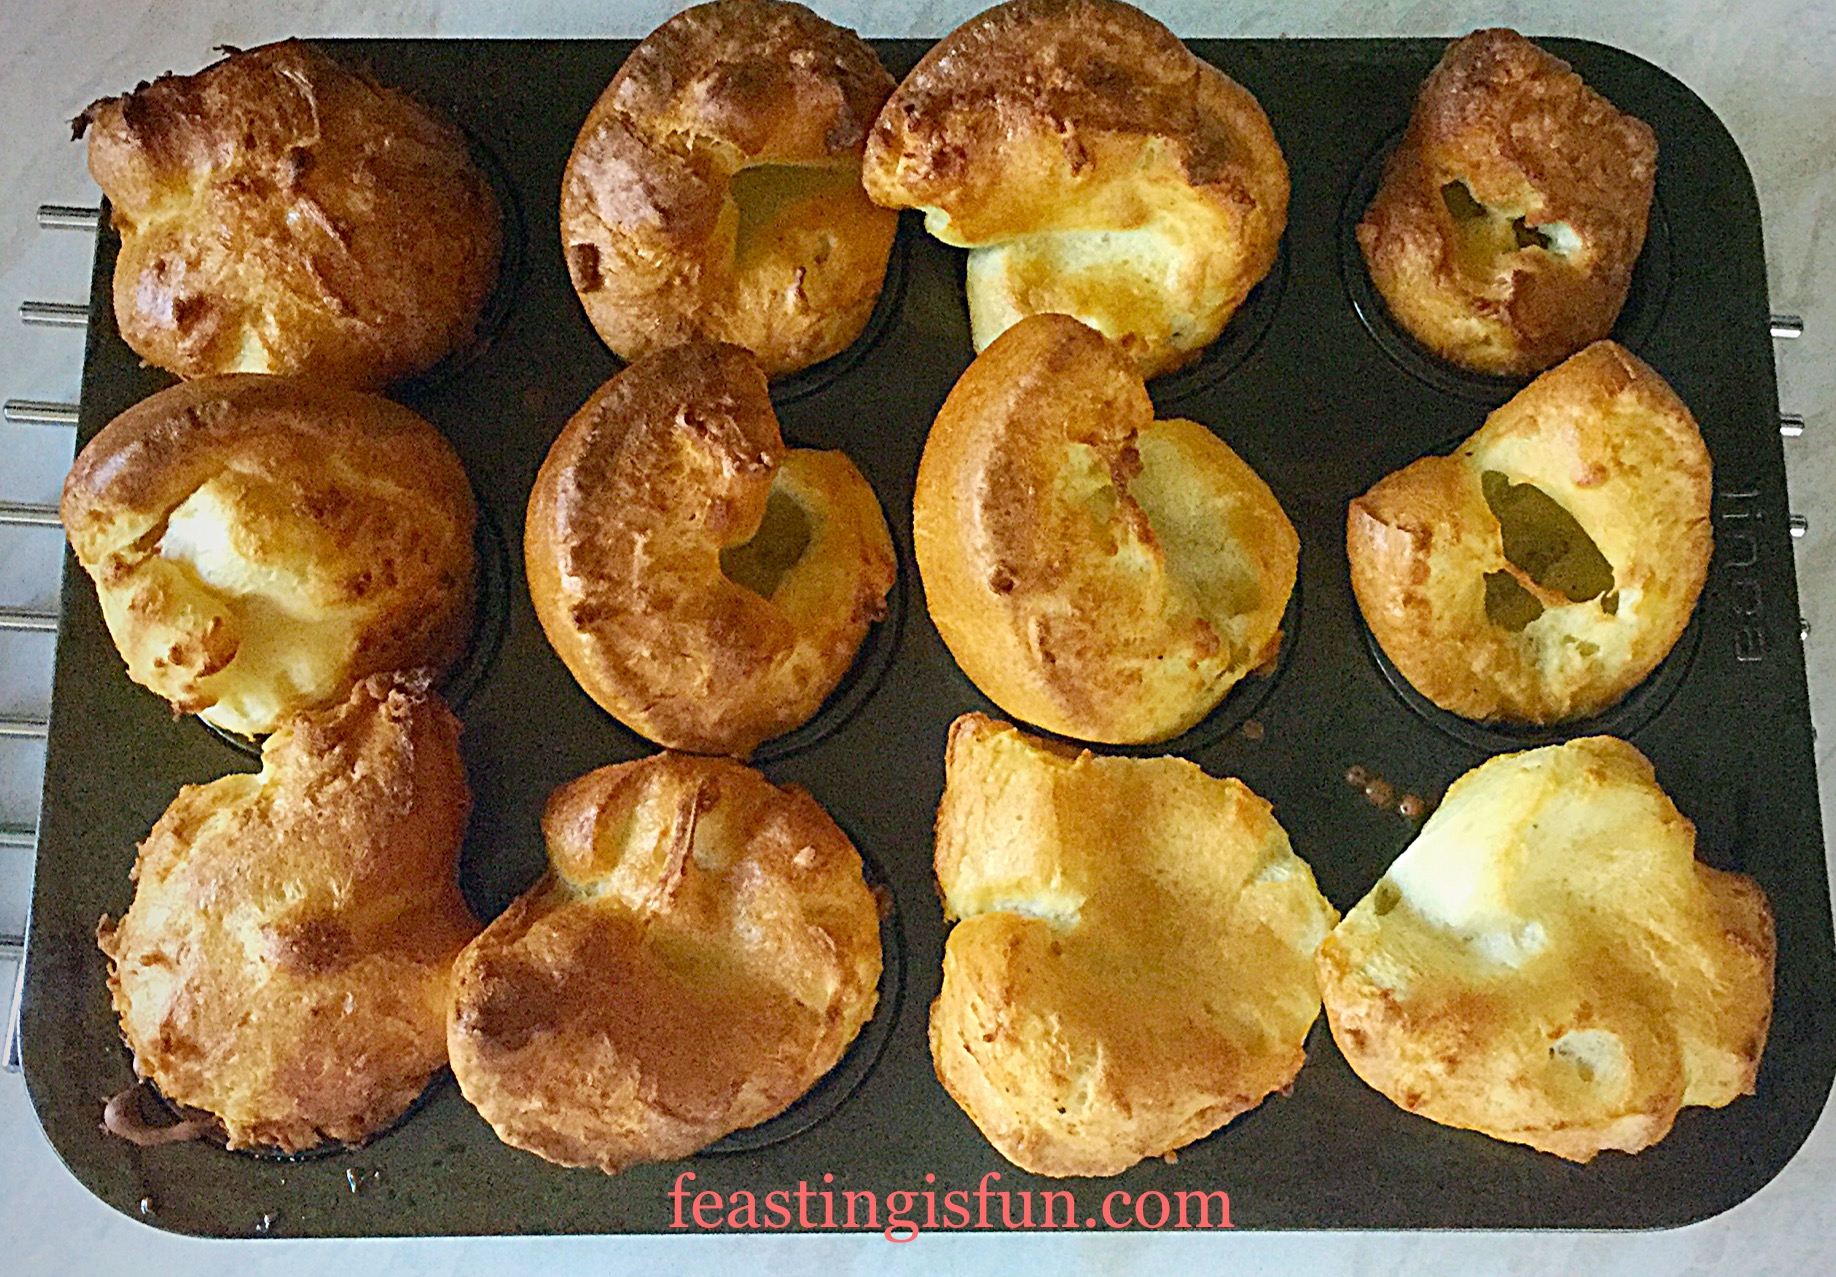
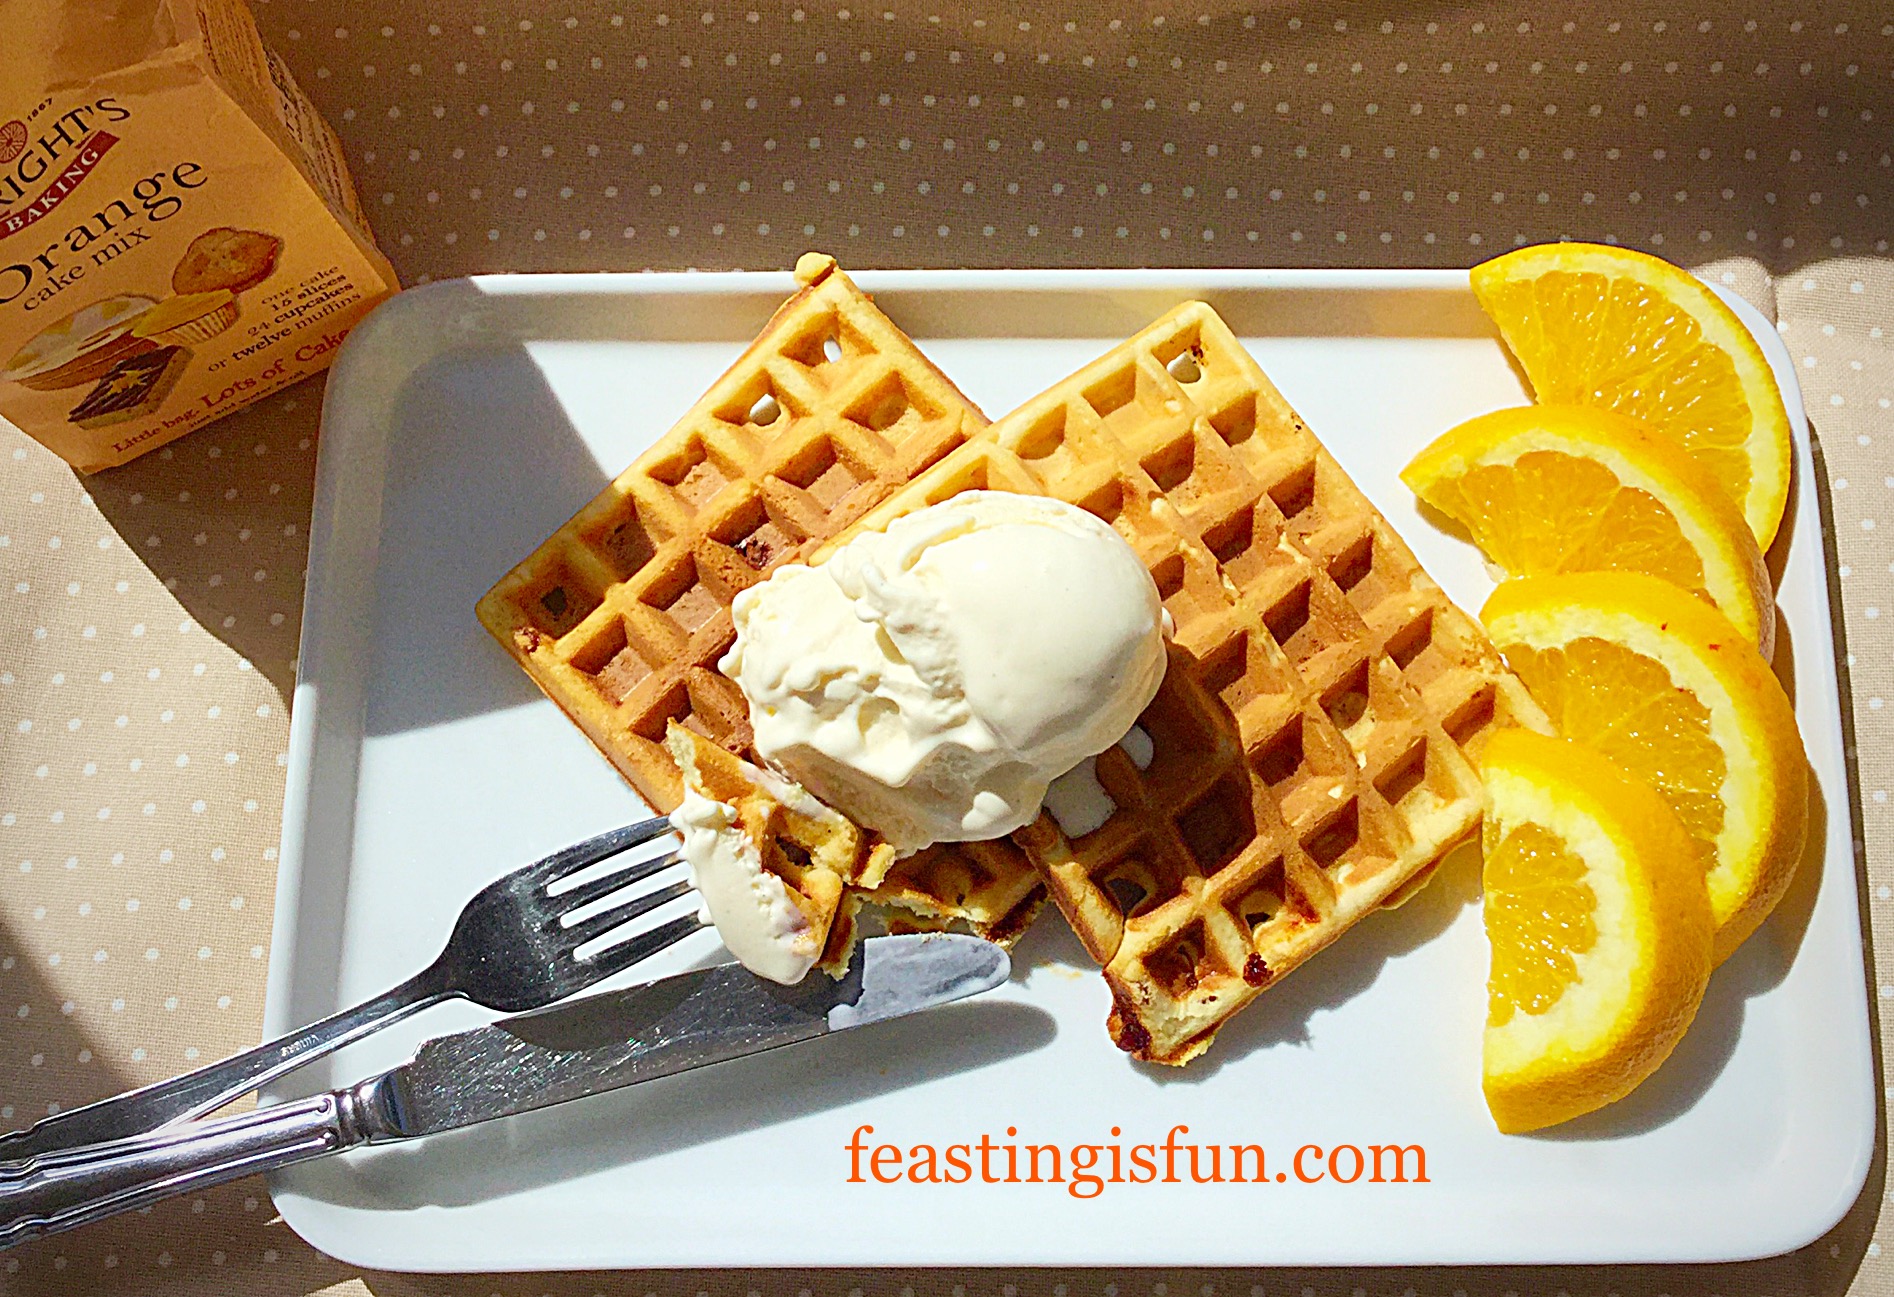
To remove the Yorkshire Puddings simply lift them out from the muffin tin. If any have slightly stuck run a butter knife between the tin and the pudding and it should release easily.

Serve straight away, or as I frequently do, place on a baking tray to cool. While  dishing up the roast potatoes, pop the Homemade Yorkshire Puddings back into a hot oven to reheat.

FF Homemade Yorkshire Puddings
Homemade Yorkshire Puddings gloriously golden.

Make Ahead And Storage Instructions

Although our kitchen isn’t small, it does lack workspace. Yet being able to make these in advance, really is a huge help, especially if we have guests joining us for dinner.

To freeze, cool thoroughly, place in a freezer proof bag and keep in the freezer for up to one month. To reheat from frozen, place on a baking tray in a hot oven for 5 minutes. Once they are reheated they will taste as if you have just made them. No one will will ever know! Actually, I always make our Christmas Yorkshire Puddings ahead of the big day and freeze them. While I love cooking, I also want to have fun and enjoy myself too.

If you have enjoyed this recipe for Homemade Yorkshire Puddings you may also like these.

Slow Roasted Cider Pork

FF Homemade Yorkshire Puddings
Slow Roasted Cider Pork. Look at that crackling?

Garlic Rosemary Roast Potatoes

FF Homemade Yorkshire Puddings
Garlic Rosemary Roast Potatoes.

Homemade Cauliflower Cheese

FF Homemade Yorkshire Puddings
Homemade Cauliflower Cheese

Because this is such a simple recipe, im always surprised that shop bought Yorkshire Puddings so popular. Since I like the slightly softer centre that comes with Homemade Yorkshire Puddings. For such a simple recipe I am amazed at the extra ingredients needed for their pre made, shop bought counterparts.

Baking and cooking from scratch will always be my priority. I hope that you too choose to try these?

Sammie xx

No part of this post may be reproduced or duplicated without the written permission of the owner. Please see my Disclosure Policy.


Share
Facebooktwitterpinterestlinkedintumblr

Camp Coffee Ice Cream

Share
Facebooktwitterpinterestlinkedintumblr

Camp Coffee Ice Cream with crunchy chocolate coffee beans.

It is mid September and here in the south of the U.K. the weather is still relatively warm. Not that you need it to be warm outside to enjoy my Camp Coffee Ice Cream.

FF Camp Coffee Ice Cream

Yes, ice cream is great to have during the hot, Summer months, but I happily eat it all year round. This particular ice cream with its inviting coffee flavour (without the caffeine) would be so good scooped on top of a warm chocolate brownie.

FF Camp Coffee Ice Cream
Camp Coffee Ice Cream great all year round.

Chocolate and coffee are a classic combination, which is why I decided to add a good measure of chocolate coffee beans to this ice cream.

The delicious chocolate/coffee crunch against the smooth, silky, coffee flavoured ice cream, keeps this interesting on the palette.

Camp Coffee Ice Cream with chocolate coffee beans.

Making your own ice cream at home gives you complete control over the intensity of flavours. This Camp Coffee Ice Cream is how I’d drink my coffee, medium strength. You, however, can put as much, or as little Camp coffee as you like!

Churning this ice cream, in an ice cream maker, ensures it is silky smooth. If you like your ice cream just like that, leave out the chocolate coffee beans. Again, what you add is completely in your control.

So let’s show you how to make this delicious dessert, or fun treat.

Recipe: Makes 750ml Camp Coffee Ice Cream

300ml/ 1/2pt Double Cream

300ml/ 1/2pt Milk – Whole or Semi Skimmed

2tsp Camp Coffee – widely available in stores and online

4 Large Free Range Egg Yolks – the whites can be frozen for a month

1tsp Vanilla Extract – I use Nielsen-Massey

1tsp Corn Flour – I use Doves Farm as it is certified gluten free

5tbsp Caster Sugar

100g/4oz Chocolate Coffee Beans – mine were from Waitrose

Method: Ensure the ‘Frozen’ container part of your ice cream maker has been in the freezer for 8 hours, overnight, or according to the manufacturer’s instructions.

Note: For a step by step guide, with photographs, on making ice cream please see Very Vanilla Ice Cream.

Making the ice cream base

  • Pour the cream and milk into a large, heavy bottomed saucepan and place over a medium heat.
  • Heat the liquid until scalding point is reached – a rim of small bubbles will appear around the outside edge of the liquid – remove from the heat.
  • Whilst the liquid is heating place the egg yolks, corn flour, sugar and vanilla extract into a large, heatproof bowl. Whisk until the eggs are pale and have increased in volume.
  • With the whisk still running on low, slowly add the scalded cream mixture to the eggs, continually whisking.
  • Whisk thoroughly until all the ingredients are combined.
  • Tip the custard ice cream base back into the saucepan and place back over a medium heat, stirring constantly.
  • Before putting the pan back on the heat I quickly wash and dry the original bowl used.
  • When the custard has thickened and coats the back of a spoon remove from the heat.
  • Pour the custard through a wire sieve into the large heatproof bowl.
  • Add the Camp coffee and stir thoroughly.
  • Place cling film directly on top of the ice cream base, to prevent a skin from forming.
  • Allow the custard to cool slightly before placing in the fridge to chill thoroughly.

Churning the ice cream

  • Once chilled, set up your ice cream maker according to its manufacturer’s instructions.
  • Remove the cling film, stir the ice cream base and taste. If you wish to have a stronger coffee flavour add more Camp coffee, stirring and tasting until the desired strength is reached.
  • With the ice cream machine switched on and churning, pour the ice cream base through the opening into the bowl.
  • Churn for 15-20 minutes until the ice cream is thick, but not frozen solid.
  • Switch off the machine and remove the top and the paddle.
FF Camp Coffee Ice Cream.
Deliciously softly frozen Camp Coffee Ice Cream
  • Scrape as much ice cream as possible from the paddle (and then lick the rest off 😉).
  • Using a deep silicone spatula transfer the rest of the ice cream to a freezer proof tub.
  • Add the chocolate coffee beans and swirl through the ice cream using the handle of a wooden spoon.
FF Camp Coffee Ice Cream
The chocolate coffee beans add a final crunch to the Camp Coffee Ice Cream.
  • Clip on a tight fitting lid and place the Camp Coffee Ice Cream into the freezer for at least 4 hours, longer if it is very hot weather, so that the ice cream completely freezes.

To serve, remove the ice cream from the freezer 15-20 minutes before scooping. As your ice cream is homemade and therefore does not contain any artificial softeners, preservatives or additives, it will take a little while to soften.

FF Camp Coffee Ice Cream
Camp Coffee Ice Cream a delicious dessert.

I like to serve Camp Coffee Ice Cream in a pretty bowl for dessert, or in a cone if we are eating in the garden and enjoying the sun. It’s not unheard of to be handing cones full of ice cream, over the fence to our neighbours either!

It’s definitely more fun to share.

If you have enjoyed this recipe for Camp Coffee Ice Cream you may also like these:

Blackberry Chocolate Chunk Ice Cream

FF Camp Coffee Ice Cream
Blackberry Chocolate Chunk Ice Cream

Chocolate Orange Ice Cream

FF Camp Coffee Ice Cream
Chocolate Orange Ice Cream

Strawberry Ripple Ice Cream

FF Camp Coffee Ice Cream
Strawberry Ripple Ice Cream

I have a thing for hot and cold food together. So my Vanilla Fudge Chocolate Brownies with a scoop or two of Camp Coffee Ice Cream and hot custard poured over, would be my idea of pudding heaven!

That is exactly why I enjoy cooking and baking so much at home. The flavours and combinations are limitless, plus it’s usually a lot cheaper to make it yourself and tastes a lot better. Why? Because you can make it exactly how you want it to taste.

Whatever to are making, baking and creating in your kitchens, have fun creating you feast. Also if you have the means to share some of your bakes, it is so rewarding. Seeing someone smile as you hand them a slice of cake, knowing they have not been forgotten about, simply because the can’t get out and about. We live in communities. Let’s make someone’s day with a surprise treat?

Sammie xx

Camp Coffee Club  provided me with the Camp coffee to make this recipe. All opinions, views, content and photography are my own. Please see my Disclosure Policy.

Share
Facebooktwitterpinterestlinkedintumblr

Mini Chocolate Fudge Bundt Cakes

Share
Facebooktwitterpinterestlinkedintumblr

Do you ever get the craving for chocolate cake? Well I did yesterday. So I whipped up these beautifully perfect, Mini Chocolate Fudge Bundt Cakes. Exact replicas of a large Bundt cake, in single portion size!

FF Mini Chocolate Fudge Bundt Cakes
Mini Chocolate Fudge Bundt Cakes pretty delicious!

How cool is it that you get to eat a whole mini Bundt cake to yourself?

Yep, that’s what I thought.

FF Mini Chocolate Fudge Bundt Cakes
Mini Chocolate Fudge Bundt Cakes with their crown of fudge.

These beautiful cakes are baked in Nordic Ware’s 65th Anniversary Bundlette Pan. The correct term for these perfect, mini Bundt cakes is Bundtlette.

Bundt cakes have started to become very popular in this country, in part to celebrity chef endorsement and following bakes seen on the television programme The Great British Bake Off. However, only those baked in Nordic Ware Bundt/Bundtlette pans can be called Bundt cakes in this country, as Nordic Ware own the copywrite to the word Bundt.

You may see other tins, silicone moulds available, but please beware of cheap imitations. I have got on fine with some silicone ‘Bundt style’ ring moulds and created a lovely swirl ice cream cake for our daughter’s birthday. While the genuine, heavy duty, Nordic Ware tins may be more expensive, they will last you a lifetime, if properly looked after.

FF Mini Chocolate Fudge Undt Cakes
Mini Chocolate Fudge Bundt Cakes – yes I used a cake mix!

I have made no secret of my belief, that every good kitchen should have a couple of great cake mixes stashed away in the cupboard, for those times when, for whatever reason, you are unable to bake from scratch.

Yesterday was one of those days for me. It’s been a difficult couple of weeks see here and yet I wanted to bake. Wright’s Baking came to the rescue with ther excellent Chocolate Fudge Cake Mix. I baked six Mini Chocolate Fudge Bundt Cakes and some cupcakes, however, the mix should yield between 12-15 Bundtlettes. Just ensure the Bundlette pan is cooled, washed, dried and re greased between batches.

FF Mini Chocolate Fudge Bundt Cakes
Mini Chocolate Fudge Bundt Cakes couldn’t you just pick one up and take a bite right now 😉

While one of these cakes perfectly hit the spot yesterday, with a nice, hot cup of tea, I can’t help thinking that they’d make a great dessert. Hot, chocolate custard poured over, so the central hole is filled. Yes I am definitely going to try that!

Cute little Bundlettes make a pretty and interesting change from cupcakes. Don’t get me wrong I love cupcakes, with their myriad of frostings, these mini Bundts simply make an elegant change.

Change is good, right?

For those who are unable to get hold of the cake mix, use the recipe from here Chocolate Heart Cake.

Recipe: Mini Chocolate Fudge Bundt Cakes – makes 12-15

1 Packet Chocolate Fudge Cake Mix by Wright’s Baking – available from most major supermarkets and via Wright’s online shop

60ml Vegetable Oil

200ml Water

200g Milk Chocolate

Mini Fudge Pieces – mine came from Asda

Method: Preheat the oven to 170C/150C fan, gas mark 3.5

Note:

I use Wilton cake release for all my Bundt bakes (ensure the inside of each Bundt is covered with cake release, using a pastry brush), alternatively melt butter and brush the inside of the Bundlette tin, remembering the central pole and then lightly dust with flour, tipping out any excess.

  • Measure the oil and water into a large mixing bowl, add the contents of the cake mix and proceed according to the instructions on the packet.
  • Spoon the mixture into each mould in the Bundtlette pan, so that it fills if by half. Continue until all 6 moulds have equal amounts of cake batter in them.
  • Wipe any spilt batter from the top of the Bundlette pan.
  • Place the Bundlette pan in the middle of the oven and bake for 25-30 minutes. The mini Bundts are baked when they spring bake from a light touch and a visibly coming away from the sides of the moulds.
  • Once baked remove the pan from the oven and allow the cakes to cool for 10 minutes in the pan.
FF Mini Chocolate Fudge Bundt Cakes
Before and after baking.
  • After 10 minutes cooling, turn the Bundlettes out on to a cooling rack.
  • Allow the cakes to cool completely before decorating.
FF Mini Chocolate Fudge Bundt Cakes
Mini Chocolate Fudge Bundt Cakes ready to decorate.
  • Break or chop up the chocolate and place in a heatproof, microwaveable bowl.
  • Zap on medium for 1 minute in the microwave, stir and then continue heating, for 30 seconds at a a time, until when stirred, the chocolate has completely melted.
  • Pour the melted chocolate into a disposable piping bag and snip off the very end leaving a small piping hole.
  • Pipe vertically, starting at the top of each cake and following the lines down to the bottom. You can be exact or as free form as you choose. I was very tired when I piped these cakes, so some, the ones in the final photos, turned out neater than others.
  • Once all the cakes have been piped with chocolate, top with mini pieces of fudge.
FF Mini Chocolate Fudge Bundt Cakes
Piping the chocolate on to the cakes and then topping with chocolate.
  • Leave the cakes so that the chocolate sets and then they are ready to serve!
FF Mini Chocolate Fudge Bundt Cakes
Mini Chocolate Fudge Bundt Cakes perfect for Afternoon Tea.

Serve your cakes on a pretty plate, with a hot drink and shared with good company.

I actually think these would be perfect for someone’s birthday, maybe at work, who doesn’t want a ‘big cake’ and lots of fuss. They are pretty and unique enough to let someone know they are special, without going over the top!

If you have enjoyed the recipe for these Mini Chocolate Fudge Bundt Cakes you may also like these:

Mini Lemon Drizzle Bundt Cakes

FF Mini Chocolate Fudge Bundt Cakes
Mini Lemon Drizzle Bundt Cakes

Chocolate Chunk Cupcakes

FF Mini Chocolate Fudge Bundt Cakes
Chocolate Chunk Cupcakes

Marshmallow Frosted Mango Cupcakes

FF Mini Chocolate Fudge Bundt Cakes
Marshmallow Frosted Mango Cupcakes – Gluten Free

While it is great to bake cakes for someone’s birthday, or a special celebration, sometimes it’s nice to bake them just because it’s Friday, or Monday and everyone at work could do with a boost to get them motivated.

Baking for others is something I absolutely love. Seeing the smile on their faces, knowing that you’ve thought about them, remembered that they’ve got ‘stuff’ going on. Although a mini Bundt cake, cupcake, or even great big grand gesture cake won’t make their problems disappear, it shows people that they’re loved and supported, no matter what.

I firmly believe a cake, baked for someone with love, when given, can say more than a thousand words.

Sammie xx

 Wright’s Baking provided me with the cake mix to create this recipe. All content, photographs, options and view are my own. Please see my Disclosure Policy.

Share
Facebooktwitterpinterestlinkedintumblr

Crunchy Vanilla Shortbread

Share
Facebooktwitterpinterestlinkedintumblr

Well, we certainly have our ‘Indian Summer’. It is a gloriously sunny day, with a gentle breeze blowing, stopping the late summer air turning stuffy. Windows are open and I can only imagine how many days like today we have left, this year. In celebration of the beautiful weather I decided to make some Crunchy Vanilla Shortbread, to have, sitting in the sun, with a cup of tea.

FF Crunchy Vanilla Shortbread
Crunchy Vanilla Shortbread perfect with a cup of tea.

I love the month of September, as summer’s hold loosens and hazy, low sunlight filters through the trees. Sitting in the garden, simply listening to the birds, or watching the bees and butterflies busily go about their way. It really is the month where it’s warm enough to still enjoy being outside, without piling on the layers.

FF Crunch Vanilla Shortbread
Crunchy Vanilla Shortbread perfect picnic food!

Of course this delicious Crunchy Vanilla Shortbread can and should be enjoyed anytime of the year. It just feels very luxurious to sit outside, mid September, with the sun warming my face and my cup of tea not getting cold!!

FF Crunchy Vanilla Shortbread
Crunchy Vanilla Shortbread perfect to make and take to work.

Traditional Shortbread

Whilst I have other shortbread recipes here and here, my Crunchy Vanilla Shortbread is a traditional version. By that I mean it follows the 3-2-1 rule. 3 parts flour, 2 parts butter and 1 part sugar. However, I have added a tiny pinch of salt and some vanilla bean extract. I adore the flavour of vanilla and in this shortbread it tempers the sweetness of the demerera sugar and balances the caramel flavours.

FF Crunchy Vanilla Shortbread
Crunchy Vanilla Shortbread a delightful treat.

For ease, this shortbread is baked in a tin, where it is simply pressed in and baked. No rolling out, chilling or cutting out required. It took less than 10 minutes to prepare and a further 30 minutes to bake. If you have visitors turn up, out of the blue, you could easily have this baking in the oven, by the time your guests have been settled and the kettle put on!

Sometimes it’s nice to have a simple recipe to hand, for when the occasion arises.

Recipe: Makes Crunchy Vanilla Shortbread

185g/6oz Unsalted Butter – plus a little extra for greasing the tin

75g/3oz Demerera Sugar – plus 1tsp for sprinkling on top

1tsp Vanilla Bean Paste – I use Nielsen-Massey

1/8th tsp Salt – I use Maldon

270g/9oz Plain White Flour

Making The Shortbread Dough

Method: Preheat the oven to 190C/170C fan, gas mark 5, 375F

  • Add the sugar, butter, salt and vanilla extract to a bowl.
  • Beat until the butter is pale and creamy.
  • Add the flour and mix with a spoon until you have a dough.
  • Line a lightly buttered, 20cm x 28cm x 5cm (8″ x 11″ x 2″) swiss roll tin with baking parchment.
  • Tip the shortbread dough into the tin and press gently with your fingers until the dough completely covers the tin base evenly.
FF Crunchy Vanilla Shortbread
Crunchy Vanilla Shortbread dough ready to be docked and sprinkled with sugar before baking.
  • Dock the shortbread dough with a fork – this will prevent it from rising too much during baking.
  • Sprinkle over the reserved teaspoon of sugar. This really does make the shortbread sparkle once baked.

Baking The Shortbread

  • Place the tin in the middle of the oven and bake for 30 minutes, or until the shortbread is golden and has a set crumb.
  • Once baked remove the shortbread from the oven.
  • Score a line halfway through the length of the cooked shortbread, then score 7 strips – creating 14 Crunchy Vanilla Shortbread fingers.
  • Allow the shortbread to cool in the tin.
FF Crunch Vanilla Shortbread
Golden Crunchy Vanilla Shortbread scored and cooling.
  • Scoring the shortbread whilst it is hot makes it much easier to break into fingers once cooled. I’ll be honest I did have a couple of shortbread fingers break, they were my testers 😉.
  • Once cooled lift the shortbread out of the tin, using the baking parchment and break into individual fingers.

Store the shortbread in an airtight tin for up to 5 days, if it lasts that long!

FF Crunchy Vanilla Shortbread
Crunchy Vanilla Shortbread see how it sparkles in the sunlight.

Serve this deliciously Crunchy Vanilla Shortbread with a good cup of tea or coffee. That said, these shortbread fingers would also pair very nicely with my Very Vanilla Ice Cream.

If you have enjoyed the recipe for Crunchy Vanilla Shortbread you make also like these:

Vanilla Fudge Chocolate Brownies

FF Crunchy Vanilla Shortbread
Vanilla Fudge Chocolate Brownies.

Cherry Bakewell Cookies

FF Crunch Vanilla Shortbread
Cherry Bakewell Cookies

Chocolate Heart Cookies

FF Crunchy Vanilla Shortbread
Chocolate Heart Cookies.

I hope you are enjoying the last of the summer wherever you are.

I shall remember to look back at these photographs, in the midst of winter, to remind me of the warmth of the sun in summer.

Whatever you are making, baking and creating in your kitchens, have fun preparing your feast. Why not check on elderly neighbours, just pop in to make sure they have enough to drink and maybe stay for a cuppa and a natter? You could always take some home baked treats round?

Food always tastes better when it is shared.

Sammie xx

No part of this post may be reproduced or duplicated without the written permission of the owner. Please see my Disclosure Policy.


Share
Facebooktwitterpinterestlinkedintumblr

Salted Caramac Centre Toffee Cookies

Share
Facebooktwitterpinterestlinkedintumblr

Hello, I have a super, special treat for you today, my Salted Caramac Centre Toffee Cookies.

Salted Caramac Centre Toffee Cookies are so easy to make and such a treat to eat. Whipped, light, salted Caramac ganache, with a sprinkle of honeycomb dust, sandwiched between two toffee cookies. Oh and then finished with a dark chocolate drizzle. A complete flavour festival ready for you to bite into!

FF Salted Caramac Centre Toffee Cookies

    Salted Caramac Centre Toffee Cookies a flavour party in your mouth!

Sandwich Cookies Double The Pleasure

I love eating these sandwich cookies and that comes from someone who, until now, did not have a single salted caramel recipe on here. I didn’t jump on the bandwagon, I barely like caramel, why would I add salt to it?

FF Salted Caramac Centre Toffee Cookies
Salted Caramac Centre Toffee Cookies perfect with Afternoon tea or morning coffee.

So there’s a toffee cookie base with swirled, salted Caramac ganache on top, a sprinkle of honeycomb dust, topped with another toffee cookie and finished with a chocolate drizzle. That’s how these cookies stack up and believe me, they are a beautifully light, indulgent treat!

FF Salted Caramac Centre Toffee Cookies
Salted Caramac Centre Toffee Cookies with Wright’s Baking.

More like sandwich biscuits, these Salted Caramac Centre Toffee Cookies are perfect on their own, or with a relaxing cup of tea or coffee.

Each packet makes 8-10 good sized cookies, as can be seen below. I dipped each cookie in dark chocolate, so that one half was completely encased. Then I added delicious mini pieces of fudge (which I bought from Asda – in the baking aisle).

FF Salted Caramac Centre Toffee Cookies
Chocolate Dipped Fudge Topped Toffee Cookies delicious.

As you can see there are different ways to bake using the Toffee Cookie Mix.

For the smaller sandwich cookies I baked them a little longer as I wanted them to be crisper, more like a biscuit and able to hold the delicious salted Caramac ganache in the centre.

Recipe: Makes 8 Salted Caramac Centre Toffee Cookies

1 Packet Toffee Cookie Mix – available online from Wright’s Baking alternatively use my Caramac Caramel Cookies recipe

25g Unsalted Butter – I melt mine and allow it to cool

30mls Water as specified on the packet although I used 40mls

1 Cadbury’s Crunchie Bar

50g/2oz Caramac Buttons

50ml Double Cream

Very small pinch 1/8tsp Sea Salt – I use Maldon

50g Dark Chocolate

Method: Preheat the oven to 180C/160C fan, gas mark 3, 350F

Making And Baking The Toffee Cookies

  • Line 2 large baking trays with non stick silicone mats, or baking parchment.
  • Make the cookie mix up according to the packet instructions, including the extra water.
  • Using a small, truffle sized scoop, or a teaspoon, scoop 16 equal mounds of cookie dough, placing them spaced well apart on the baking trays.
  • Place them in the preheated oven and bake for 15 minutes. This allows them to bake into firmer biscuits, perfect for holding the delicious centre.
  • Rotate the baking trays halfway through the bake time to give an even bake.
  • Remove the cookies after 15 minutes of baking and allow to cool completely on the baking tray.
FF Salted Caramac Centre Toffee Cookies
Toffee Cookies before and after baking.
  • While the cookies are cooling, make the ganache.

Making The Salted Caramac Filling And Assembling The Cookies

  • Place the Caramac buttons and double cream in a heatproof, microwaveable bowl. Heat on medium for 1 minute in the microwave, remove stir and heat for 30 seconds more, or until the Caramac when stirred, fully melts and mixes with the cream. Cover the bowl in cling film and place in the fridge to chill.
  • Once the cookies are cooled remove, using a palette knife and place on a cooling rack.
  • Pair the cookies up with similar size/shape partners. Line them up and turn one cookie over so that it is flat side up.
  • Using a rolling pin bash the Crunchie bar inside its packet so that the honeycomb comes away from the chocolate. You want golden dust not chunks! Open the packet and tip the contents into a bowl.
  • When the ganache is cold, but still liquid add the salt. Whisk the liquid ganache until pale, fluffy and able to hold its shape.
FF Salted Caramac Centre Toffee Cookies
Whipped Salted Caramac Ganache.
  • Fit a piping bag with a large star tip – I use Wilton #1M and fill the bag with the whipped ganache.
  • Pipe swirls of salted Caramac ganache on 8 of the upturned cookies and then sprinkle with golden honeycomb dust from the Crunchie bar – the chocolate and honeycomb that’s left is great sprinkled on a whipped cream topped hot chocolate 😉.
FF Salted Caramac Centre Toffee Cookies
Salted Caramac Centre Toffee Cookies piped, tops and drizzled with dark chocolate.
  • Pop the other toffee cookie on top.

Adding The Dark Chocolate Drizzle

  • Break the dark chocolate up, heat in a microwaveable bowl until melted.
  • You can either drizzle the chocolate over the cookies with a spoon, or for a cleaner finish, pour the melted chocolate into a small, disposable piping bag. Snip off the very end a pipe zig zag lines across the top of the Salted Caramac Centre Toffee Cookies.
  • Allow the chocolate to set.
FF Salted Caramac Centre Toffee Cookies
Salted Caramac Centre Toffee Cookies these won’t last long!

I chilled these delightful cookies in the fridge before serving. It allows the ganache to firm up and then, when eaten, the centre really does taste like ice cream!

To store, should you have any left over, keep in an airtight container, in the fridge.

In fact I am certainly going to make a double batch of these next time. There are 5 of us here at home and sharing is important. It’ll only take a few extra minutes to make 16 Salted Caramac Centre Toffee Cookies 😉.

If you have enjoyed these Salted Caramac Centre Toffee Cookies, here are some other recipes you may also like:

Toffee Cookie Cups

FF Salted Caramac Centre Toffee Cookies
Toffee Cookie Cups using the same Wright’ Baking mix.

Caramac Caramel Cookies

FF Salted Caramac Centre Toffee Cookies
Caramac Caramel Cookies so good!

Chocolate Vanilla Viennese Finger Biscuits

FF Salted Caramac Centre Toffee Cookies
Chocolate Vanilla Viennese Finger Biscuits with a white chocolate ganache filling.

This week has been #BiscuitWeek on Twitter, I’m not sure where else, as it’s always biscuit week here at Feasting is Fun!

I hope I’ve inspired you to be creative with your cookies, or biscuits. In my mind there isn’t a difference, however, I’m happy to be proven wrong.

Whatever you are baking, making and creating in your kitchens, I hope you have fun. Enjoy feasting with family and friends as we bid a sad farewell to the Summer, here in the South East of England and welcome Autumn The Most Beautiful Season.

Sammie xx

Wright’s Baking provided the mix for this recipe, all opinions, views, content and photography are my own. Please see my Disclosure Policy.

Share
Facebooktwitterpinterestlinkedintumblr

Fruity Orange Waffles

Share
Facebooktwitterpinterestlinkedintumblr

Today is National Waffle Day – as if we need a special day to eat delicious waffles – right 😉? So in the true spirit of Feasting is Fun, I decided to test Wright’s Baking new Orange Cake Mix out in my waffle maker. Oh boy are you going to be glad I did. These Fruity Orange Waffles are simply amazing!

FF Fruity Orange Waffles
Fruity Orange Waffles delicious with ice cream.

Not only are they an absolute whizz to make – literally 2 minutes and you’ve got Fruity Orange Waffles batter ready to go, they cook beautifully in the waffle maker.

FF Fruity Orange Waffles
Fruity Orange Waffles an easy, delicious treat!

We had these for brunch this morning and I was so pleased I didn’t have to cook. Ok I switched the waffle maker on see Andrew James Waffle Maker Review, but it didn’t take long to cook 9 waffles from one packet of mx. Plenty for the four of us, oh and with a tub of homemade Very Vanilla Ice Cream, fresh oranges and strawberries. We had a Feast!

FF Fruity Orange Waffles
Fruity Orange Waffles perfect any time of the year.

It is now 30C outside – at least!

We may well be having waffles for dinner if the house gets any hotter!!

Recipe: Fruity Orange Waffles makes 8-10

1 Orange Cake Mix Packet from Wright’s Baking

100g Melted Unsalted Butter – cooled

200mls Tap Water

Method: Prepare your waffle maker according to it’s manufacturer’s instructions.

  • With my waffle maker I brush the cold waffle plates with cooled, melted butter, prior to heating, hence the additional butter in the recipe.
  • Switch the waffle maker on and allow to fully heat, until the ready light comes on.
  • Whilst the waffle maker is heating up, in a medium bowl add 200mls of water and 60mls of melted butter.
  • Next add the Orange Cake Mix and stir until the batter appears smooth – note, the cake batter has pieces of fruit in it so there will be small lumps, that is normal.
FF Fruity Orange Waffles
This is how the waffle/cake batter will look.
  • When the waffle maker is ready, remembering to protect your hands with oven gloves, open it and spoon a dessert spoon (like the spoon in the picture above) in the centre of each waffle plate.
  • Close the waffle maker and cook for exactly 4 minutes. It really is worth setting a timer, especially if in four minutes you get little jobs done in the kitchen! Just sayin’ I’ve not burnt a waffle yet – for a reason 😉.
  • After 4 minutes open the waffle maker (again protect yourself with gloves). The waffles will be fully cooked but not hard.
FF Fruity Orange Waffles
Fully cooked Fruity Orange Waffles ready to be removed from the waffle maker.
  • I use a wooden spatula to gently lift the waffle from the waffle maker. The Fruity Orange Waffles harden slightly on cooling and can easily be picked up by hand – just in case you want to try it dunked in your coffee/hot chocolate 😉.
  • Repeat the process of spooning batter on to the waffle plates until it is all used up.
  • Top Tip: I would much rather have a waffle with slightly frilled edges, where not quite enough batter has been added, than a perfectly square one with waffle batter oozing out of the side of the waffle maker. I got lucky with the waffles I made, cleaning gooey, stuck waffle batter is no fun!
FF Fruity Orange Waffles
Fruity Orange Waffles add ice cream, fresh fruit and your imagination!

These delicious Fruity Orange Waffles can be served warm or cold. They will keep for up to 3 days in an airtight container and can be popped in the toaster to warm up.

I like to serve these with cold vanilla ice cream and plenty of fresh fruit. You choose how to serve yours. They are deliciously light with delightful pieces of fruit that lend texture and extra flavour. If you like waffles you will love these.

If you have enjoyed the recipe for Fruity Orange Waffles you may also like these:

Toffee Banoffee Waffles

FF Fruity Orange Waffles
Toffee Banoffee Waffles also made using Wright’s Toffee Cake Mix.

Chocolate Dunking Waffles

FF Fruity Orange Waffles
Chocolate Dunking Waffles everyone should try these at least once in their lives.

Vanilla Bean Waffles

FF Fruity Orange Waffles
Vanilla Bean Waffles so delicious and versatile.

Waffles are such an amazingly fun food. They can be sweet or savoury and topped with a myriad of different things. Let your imagination run wild and make waffles. Not just because it is National Waffle Day, but because they are so much fun and so tasty!!

Sammie xx

Wright’s Baking  provided me with the cake mix to make these waffles. All opinions, views, content and photography are my own. I was not paid to write this post please see my Disclosure Policy.

Share
Facebooktwitterpinterestlinkedintumblr

Dreamy Chocolate Fudge Cake

Share
Facebooktwitterpinterestlinkedintumblr

Dreamy Chocolate Fudge Cake, the softest chocolate fudge cake, draped in a chocolate fudge icing and adorned with chocolate caramel biscuit balls.

Do you ever dream of chocolate? I do! While making and then tasting this recipe there was only one name that fitted the incredible flavour, taste and texture experience, that is this Dreamy Chocolate Fudge Cake.

FF Dreamy Chocolate Fudge Cake
Dreamy Chocolate Fudge Cake every bit as good as it looks.

So, this incredibly tasty cake was made using  Wright’s Baking Chocolate Fudge Cake Mix. Alternatively, there’s a link in the recipe below for a great chocolate cake made from scratch.

Also, I love to have a few Wright’s Baking Mixes on hand, especially for days like today.

FF Dreamy Chocolate Fudge Cake
Dreamy Chocolate Fudge Cake

Getting Back To Baking

Having just spent 2 whole days, floored by the monster of all migraines, today I was able to get up. So, if you too suffer with migraines, you may find this helpful Migraine Not Always Sunshine And Roses.

My therapy, comfort and pleasure is to bake and cook. Yet baking a cake, from scratch today was beyond me. So instead I used my trustworthy packet mix to create this Dreamy Chocolate Fudge Cake.

And yes, you may thinks I’m nuts, wanting to bake after spending the weekend in pain, in bed, with the curtains closed. For me though, being in the kitchen is freeing. Since my creativity is allowed to run wild. And for the record I had absolutely no idea if I could pull off the icing, yet that’s part of the thrill. If it hadn’t of worked I’d have switched to plan B.

FF Dreamy Chocolate Fudge Cake
Dreamy Chocolate Fudge Cake

A Dreamy Chocolate Cake

Ooh this cake is good.

Really, really good.

So, if you have a boyfriend/girlfriend and you want to impress them, I mean I’m not guaranteeing a marriage proposal, but, this is the cake you need to make them, or anyone you know who loves really good chocolate cake, that you simply want to treat.

And as I have said it before and I’ll say it again the Wright’s Baking Mixes that I’ve used taste like homemade. In fact I’m already wondering how I can make a cake this delicious from scratch, because at the moment I don’t have a recipe to match this. Probably the closest recipe, would be my Chocolate Fudge Bundt Cake.

FF Dreamy Chocolate Fudge Cake
What you’ll need for this Dreamy Chocolate Fudge Cake.

So I found these new McVities Digestive Caramel Nibbles and they work perfectly on the cake. The contrast between soft fudgey cake/icing and crunchy biscuit balls is fabulous, however, if you can’t get hold of them I’d suggest Malteser’s or Minstrel’s. Since both would work well with the flavour of the cake and give that additional crunch!

Recipe: Dreamy Chocolate Fudge Cake serves 8-10

Oil or melted butter to grease the tin -approx 2 tablespoons – I used melted butter

1 Packet Chocolate Fudge Cake Mix from Wright’s Baking  – alternatively use this recipe for Chocolate Fudge Bundt Cake

60ml Melted Butter or Vegetable Oil – I use melted unsalted butter

200ml Water

For the Chocolate Fudge Icing:

4 Packets of Rolo’s

100g Dark Chocolate

100ml Double Cream

To Decorate:

1 Packet Digestive Caramel Biscuit Balls from McVities 

Alternatively use Maltesers, chocolate sprinkles, or whatever you fancy!

Method: Preheat the oven to 160C/140C fan gas mark 3, 325F

Making The Cake Batter

I use a silicone Bundt style mould, you can use a standard 20cm/8″ round cake tin.

  • First of all, grease your mould/tin well. I prefer to use melted butter and apply it with a pastry brush.
  • Place the silicone mould on to a baking tray for stability.
  • In a large bowl add the water, oil and cake mix and whisk according to the packet instructions.
  • Pour the smooth, chocolate cake batter into the prepared mould/tin, wiping away any splashes or spills.
FF Dreamy Chocolate Fudge Cake
Dreamy Chocolate Fudge Cake ready for the oven.

Baking The Chocolate Cake

  • Place the cake into the middle of the oven and bake for 50-60 minutes.
  • Check the cake at 45 minutes. The cake is baked when an inserted skewer comes out clean. My cake took 50 minutes to bake.
  • As soon as the cake is baked remove from the oven an allow to cool in the mould/tin for 10 minutes.
  • Turn the cake out onto a cooling rack and allow to cool completely.
FF Dreamy Chocolate Fudge Cake.
Dreamy Chocolate Fudge Cake cooled and ready to be iced.

To make the Chocolate Fudge Icing:

  • Place a small saucepan with an inch of water in the bottom over a medium heat.
  • Place a heatproof, I use Pyrex, bowl on top of the saucepan ensuring that the bottom of the bowl doesn’t touch the water.
  • Add the Rolo’s, chocolate and cream to the bowl.
  • Stir until you have a melted, glossy chocolate fudge icing.
FF Dreamy Chocolate Fudge Cake
Steps showing the chocolate fudge icing being made and then covering the cake.

Covering The Cake In Icing

  • Place the cake on a rack that fits over a clean baking tray. The idea being that as the icing drips through to the tray it can be scooped up with a spoon and poured back over the cake.
  • Start at the centre of the cake, evenly spooning the thick, fudgey icing around the middle and gradually turning the cake to ensure little air holes, that appear, are covered.
  • Continue spooning the icing around the cake – I actually turn the whole tray/rack around so that I can get a clear view.
  • When all the icing from the bowl has been used the cake should be 3/4 covered.
  • Scoop the remaining icing from the tray underneath the cake – you should be able to slide the cooling rack along the tray – spooning the remaining icing over the last remaining parts of exposed cake.
  • Allow the cake, once covered to sit on the rack for 10 minutes, you’ll be surprised how the definition of the swirls become visible again.

Decorating The Cake

  • Use 2 flat implements, for example a fish slice and palette knife, to transfer the cake to a plate or cake board.
  • Again, starting in the centre and take care to keep to the symmetry of the mould, add the caramel biscuit balls. Since I prefer to complete the centre then decorate each swirl.
FF Dreamy Chocolate Fudge Cake
Dreamy Chocolate Fudge Cake beautiful and delicious.

Finally, the cake is ready to serve straight away, although it can also be chilled for a thicker, denser ganache finish. Although I wasn’t prepared to wait! While the only thing this cake needs is a good cup of tea to accompany it, ooh and preferably the love of your life, or family and friends to share it with.

Unless you’ve had a really, really bad day!

FF Dreamy Chocolate Fudge Cake
Dreamy Chocolate Fudge Cake, who will you share it with?

If you have enjoyed this recipe for Dreamy Chocolate Fudge Cake then you may like these:

Swirl Lime Drizzle Cake

FF Dreamy Chocolate Fudge Cake
Swirl Lime Drizzle Cake

White Chocolate Swirl Fudge Cake

FF Dreamy Chocolate Fudge Cake
White Chocolate Swirl Fudge Cake

Black Forest Giant Doughnut

FF Dreamy Chocolate Fudge Cake
Black Forest Giant Doughnut

I love how making a cake feels like a feast. Because it always feels like a celebration, even if you are having it for Afternoon Tea on a Sunday.

Whatever you are making, baking and creating in your kitchens, have fun and remember food always tastes better when it is shared!

Sammie xx

Wright’s Baking provided me with the mix to make this cake. All content, views, opinions, photographs and recipes are my own. I was not paid to write this post. Please see my Disclosure Policy.

Share
Facebooktwitterpinterestlinkedintumblr

Vanilla Fudge Chocolate Brownies

Share
Facebooktwitterpinterestlinkedintumblr

Who doesn’t love a delicious brownie? I know I do. So, when I received a small selection of fudge to try out, I knew where the vanilla version was heading, straight into these very tasty Vanilla Fudge Chocolate Brownies.

FF Vanilla Fudge Chocolate Brownies
Vanilla Fudge Chocolate Brownies dots of gold fudge throughout the brownie.

The Vanilla Fudge from Fudge Angels, is creamy with a definite vanilla taste, not just sweetened sugar and cream. So I kept with a deeply chocolate brownie recipe, allowing the fudge to ‘sing’ as it hits your tastebuds.

Also, I received a delicious Strawberry Pavlova Fudge, which was very popular with our eldest daughter, in truth a little too sweet for me, although it did leave a delightful strawberry flavour in my mouth. In contrast, the Smooth Ginger Fudge was delicious. So, if you love ginger, which I do, then you will enjoy this fudge. I can imagine using it in some ginger cookies, if I don’t snaffle it all beforehand!

FF Vanilla Fudge Chocolate Brownies
Vanilla Fudge Chocolate Brownies topped with the perfect complimentary ice cream.

These Vanilla Fudge Chocolate Brownies are perfectly delicious on their own.

However, here at Feasting is Fun, I wanted to turn them into a fantastic dessert.

Brownies And Ice Cream – A Great Dessert Combo

What goes better with brownies than ice cream. And not any ice cream, one created to perfectly compliment the flavours found within these Vanilla Fudge Brownies, Dark Chocolate Chip Vanilla Ice Cream.

See how good I am to you!

While they are both perfectly delicious on their own, bring them together and we have a taste bud party starting baby 😉

FF Vanilla Fudge Chocolate Brownies
Vanilla Fudge Chocolate Brownies – how will you eat one 😉

Such an easy traybake, turned into a jaw dropping, beautiful dessert!

Finally, a drizzle of white chocolate on top of the brownies echoes the flavours of the vanilla fudge within. So you can be assured, if you have no desire to make your own ice cream, that the brownies are still, one hundred per cent, top class.

Our youngest daughter gave these a 10!

I wish there was a way of putting that in BIG FLASHING LIGHTS. Because she rarely awards a 10 for my efforts. I am literally cock-a-hoop with joy.

Did I mention the 10?

Ok I’ll leave it for now.

TEN OUT OF TEN – yup I’m done 😉

Vanilla Fudge Chocolate Brownies

Also, something else I should tell you before you make these, is that all the preparation, mixing etc. is carried out in a saucepan. And (I know your not supposed to start sentences with and – but I got a 10!!!), you line the swiss roll tin with foil, so there is very little clean up.

You’re welcome xx.

Recipe: Makes 15 Vanilla Fudge Chocolate Brownies

275g/10oz Dark Brown Muscavado Sugar

150g/5oz Unsalted Butter

50g/2oz Cocoa Powder

150g/5oz Plain White Flour

1tsp Bicarbonate of Soda

1/4tsp Salt – I use Maldon

1tsp Vanilla Bean Extract or Vanilla Extract – I use Nielsen-Massey

4 Large Free Range Eggs

100g/4oz Vanilla Fudge – from Fudge Angels

50g/2oz White Chocolate for drizzling over the top

Making The Vanilla Fudge Chocolate Brownies

Preheat the oven to 180C/160C fan, gas mark 4, 350F.

  • First of all, line a 28cm x 20cm x 5 cm (12″ x  8″ x 2″) swiss roll tin with aluminium foil.
  • Place the butter, sugar and salt into a large heavy bottomed saucepan, over a medium heat.
  • Gently melt the butter and sugar together, stirring constantly with a wooden spoon until melted.
  • Move the saucepan from the heat and add the cocoa powder. Stir in immediately and the cocoa will combine easily with the melted sugar and butter.
  • Add the flour and bicarb and mix in.
  • Crack the eggs into a jug and add the vanilla bean paste. Beat lightly with a fork to combine.
  • Pour the egg mixture into the warm chocolate mix in the saucepan stirring constantly. Don’t worry everything will come together into a smooth batter.
  • Tip the brownie batter into the foil lined swiss roll tin.
  • Lift the tin and rap it hard against the worktop a couple of times. This brings any bubbles within the batter to the surface – remember brownies aren’t cake, so we want to encourage density in the bake.
  • Break off small pieces of the vanilla fudge and dot them on to the top of the uncooked brownie.
FF Vanilla Fudge Chocolate Brownies
Vanilla Fudge Chocolate Brownies ready for the oven.

Baking The Brownies

  • Place the brownies in the centre of the oven and bake for 20-25 minutes.
  • Halfway through the cooking time, open the oven and rap the tin against the oven shelf. Again this stops the brownies from rising and becoming cake like.
  • The brownies are cooked when the surface has a sugary sheen and has a very slight wobble in the centre.
  • As soon as they are baked remove the Vanilla Fudge Chocolate Brownies from the oven.
FF Vanilla Fudge Chocolate Brownies
Vanilla Fudge Chocolate Brownies you can see where the fudge has baked through brownie.
  • Allow the brownie to completely cool in the tin. I actually left this brownie, once cooled, wrapped in foil for 2 days post baking, due to illness and it kept beautifully.
  • As soon as they are cooled remove the big slab of brownie from the tin and place on to a board.
  • Meanwhile, melt the white chocolate in the microwave, taking care not to overheat it.
  • Pour the melted chocolate into a small, disposable piping bag. Snip the very end off to create a small hole.
  • Drizzle or pipe the top of the brownie slab, however you like, with the melted chocolate.
  • Finally, place the brownie to one side to set. In very warm weather pop the bake into the fridge to allow the chocolate to set.
FF Vanilla Fudge Chocolate Brownies
Once set cut the brownies into 15 squares.

To serve, use a pallet knife to slide beneath the base of the brownies and the foil. This ensures that any fudge at the bottom of the brownies sticks to the brownies, not the foil!

Serve the brownies as they are or with a delicious scoop of ice cream on top.

FF Vanilla Fudge Chocolate Brownies.
Vanilla Fudge Chocolate Brownies deliciously topped with homemade ice cream.

An easy traybake transformed into an elegant dessert.

If you have enjoyed this recipe for Vanilla Fudge Chocolate Brownies you may also like these:

Blackberry Nectarine Tart

FF Vanilla Fudge Chocolate Brownies
Blackberry Nectarine Tart topped with vanilla ice cream.

Chocolate Fudge Brownie Bites

FF Vanilla Fudge Chocolate Brownies
Chocolate Fudge Brownie Bites

Almond Blackberry Pear Crumble

FF Vanilla Fudge Chocolate Brownies
Almond Blackberry Pear Crumble gluten free

I love dual purpose bakes. For example, creating these delicious brownies and then turning them into a fabulous dessert. And with the weather looking good for a few days, why not have a go at making your own ice cream? So, you too can adorn your delicious bakes with homemade ice cream too. Because Feasting really is Fun!

So, whatever you are making, baking and creating in your kitchens, have fun preparing and sharing your feast.

Sammie xx

Fudge Angels sent me 3 different types of flavoured fudge to try. All opinions, views, content and photographs are my own. Please see my Disclosure Policy.

Share
Facebooktwitterpinterestlinkedintumblr

Easy Butterscotch Dip With Toffee Cookies

Share
Facebooktwitterpinterestlinkedintumblr

It’s the summer holidays and I’m in the mood for fun! This Easy Butterscotch Dip With Toffee Cookies is just what it says. Quick and easy to make, this is a fun, sweet treat. Perfect for feasting and sharing.

FF Easy Butterscotch Dip With Toffee Cookies
Easy Butterscotch Dip With Toffee Cookies so easy and so good!

As much as I adore cooking and baking, my priority during the summer holidays is to spend time with our teenage children. I am well aware there are not that many summer holidays left where they’ll want to hang around as a family, so they come first.

That said, when we are all home, it can seem as if a swarm of locusts have gleaned the kitchen of anything edible in just a few days!!! Parents of teenagers will completely understand!

FF Easy Butterscotch Dip With Toffee Cookies
Easy Butterscotch Dip With Toffee Cookies these don’t hang around long here.

What I love when everyone is at home, is that we throw all the rules out of the window, for the whole summer. We all lay in, stay up late, the atmosphere is very chilled. Yes each person still has their ‘jobs’ to do for the day, so these get done first thing (that can be 11.30am – but they get done), so the rest of the day is free.

Friends drop by, we all go out together, or our three go out. So this recipe for Easy Butterscotch Dip With Toffee Cookies is perfect anytime, but especially now. It is so easy to make whilst you chat to unexpected visitors.

FF Easy Butterscotch Dip With Toffee Cookies
Easy Butterscotch Dip With Toffee Cookies once you start dunking it’s hard to stop!

I pulled this whole dish together in less than 20 minutes!

Yep you heard right – 20 minutes!

Have I got your attention now???

The cookies are made using Wright’s Baking new Toffee Cookie Mix, except that I made the cookies smaller so we had 15 cookies instead of 8. If you haven’t tried this new mix it is a dream to make. 5 minutes prep. time, 10 minutes in the oven and you’ll have the whole neighbourhood wondering where the delicious baked Toffee Cookie smell is coming from.

Shut the windows if you don’t want a queue at the front door 😉

FF Easy Butterscotch Dip With Toffee Cookies
Easy Butterscotch Dip With Toffee Cookies ooh this dip is so good.

The dip takes 7 minutes. I kid you not.

Who remembers Angel Delight?

Oh yes, that is the Easy Butterscotch Dip my friends. With a few white chocolate curls decorating the top.

Told you it was easy!

That is why I love this Easy Butterscotch Dip With Toffee Cookies, it is a simple, straightforward, snack. That also tastes so good. I had two cookies for breakfast this morning, after the photo shoot. I had to literally move away from the Butterscotch Dip and avoid any spoons, else I’d have hidden down the bottom of the garden and scoffed the lot.

Angel Delight was and is popular for a reason. It tastes so utterly I-can’t-stop-myself good.

Recipe: Easy Butterscotch Dip With Toffee Cookies 

1 packet Toffee Cookie Mix – from Wright’s Baking

25g Unsalted Butter plus water – see directions on the packet

1 packet Butterscotch Angel Delight

300ml Cold Milk – Whole or Semi Skimmed

Small bar of white chocolate

Method: Preheat the oven to 180C/160C fan gas mark 4

  • Line a large baking tray with a non stick silicone mat or baking parchment.
  • Make up the Toffee Cookies according to the packet instructions.
  • Form 15 smaller cookies (the mix calls for 8) from the cookie dough and place on the lined baking tray.
FF Easy Butterscotch Dip With Toffee Cookies
15 Toffee Cookies made from the Wright’s Baking mix.
  • Place the baking tray into the preheated oven and bake the Toffee Cookies for 10-12 minutes.
  • The Toffee Cookies are baked when they are golden in colour and have a shiny, wrinkled surface.
  • As soon as the cookies are baked remove from the oven and allow to cool completely on the tray. They will harden as they cool.
FF Easy Butterscotch Dip With Toffee Cookies
Perfect Toffee Cookies for Dunking in the Butterscotch Dip!
  • Whilst the Toffee Cookies are cooking it’s easy to whip up the Angel Delight – literally.
  • Add the milk to a bowl, add the Butterscotch Angel Delight and whisk according to the packet instructions.
  • Pour the Butterscotch Angel Delight into a wide bowl and using a vegetable peeler, shave curls of white chocolate over the dip to make it look pretty!
  • Place the Butterscotch Dip bowl in the centre of a large plate and surround with golden Toffee Cookies. Easy, see?

Serve immediately, or place the Butterscotch Dip in the fridge covered in cling and the cooled Toffee Cookies into an airtight container to store.

FF Easy Butterscotch Dip With Toffee Cookies
Easy Butterscotch Dip With Toffee Cookies dunking is so much fun!

What a fantastic change from savoury dips!

Feasting really can be fun.

Thank you Deb for suggesting the idea. Deb the bread is Wright’s Baking point of contact. If you have questions about their mixes she is the lady to ask.

If you’ve enjoyed this fun Easy Butterscotch Dip With Toffee Cookies you may also like these:

Toffee Cookie Cups

FF Easy Butterscotch Dip With Toffee Cookies
Toffee Cookie Cups perfect for filling with ice cream.

Toffee Banoffee Waffles

FF Easy Butterscotch Dip With Toffee Cookies
Toffee Banoffee Waffles perfect any time of the day.

Twisted Fruity Jam Tarts

FF Easy Butterscotch Dip With Toffee Cookies
Twisted Fruity Jam Tarts delicious for breakfast.


Even if you do not have children, I find summertime to be the season when people seem to be more carefree. Lunch breaks turn into impromptu picnics, glasses clinking in pub gardens across the land, salad eaten with a cool glass of white wine in the evening out in the garden.

I love our changing seasons here in England and by the end of one I am ready for the next. This summer I intend to have as much fun as I can!

Sammie xx

Wright’s Baking provided the toffee cookie mix for this post. All opinions, views, content and photographs are my own. I never get paid to write posts. Please see my Disclosure Policy.

Share
Facebooktwitterpinterestlinkedintumblr

Mini Sparkenhoe Red Leicester Tarts

Share
Facebooktwitterpinterestlinkedintumblr

Mini Sparkenhoe Red Leicester Tarts, delicious morsels of light, flaky, puff pastry, filled with onion marmalade and topped with vibrant, melted Sparkenhoe Red Leicester cheese. Resulting in the perfect party canapé.

FF Mini Red Leicester Tarts
Mini Sparkenhoe Red Leicester Tarts perfect canapés.

While tasting this cheese, it has a nutty, almost grassy flavour that sets it apart from any similar cheese I have tried before. And a gorgeous golden wedge of unpasteurised cheese coloured using Annatto, a natural plant based dye that imparts it’s characteristic colour. Also, it makes a dramatic addition to any cheese board.

FF Mini Red Leicester Tarts
Sparkenhoe Red Leicester gorgeously golden and full of flavour.

Since this cheese has a firm texture is perfect for slicing and finely grating. Encased in an all butter puff pastry, the grated cheese melts into the onion marmalade and creates the most delightful mini bites.

FF Mini Red Leicester Tarts
Mini Sparkenhoe Red Leicester Tarts oozing melted cheese.

Topped with chives, that both echo the mild onion marmalade and grassy flavours found in the cheese, these little tarts are perfect to serve as canapés, party food, at a buffet or just for snacking on, warm from the oven with a glass of your favourite wine.

FF Mini Red Leicester Tarts
Mini Sparkenhoe Red Leicester Tarts so easy to make.

Made in minutes, these tarts are easy to make, bake in minutes and then  ready to serve.

Recipe: Makes 28-32 Mini Sparkenhoe Red Leicester Tarts 

Note: Sparkenhoe Red Leicester Cheese is UNPASTEURISED

320g Puff Pastry – I used ready rolled puff pastry from JustRol

100g/4oz Sparkenhoe Red Leicester Cheese – available from Pong Cheese

4tbsp Good Quality Onion Marmalade – I recommend Hawkshead Relish Red Onion Marmalade

3tbsp Chives – finely chopped

Method: Preheat the oven to 220C/200C fan, gas mark 7, 425F

You will need a mini muffin tin to make these Mini Sparkenhoe Red Leicester Tarts. Alternatively, use a larger tin to make larger tarts!

Making the puff pastry tarts:

  • First of all, if frozen remove the pastry from the freezer and allow to thaw in the fridge overnight.
  • Cut the rind from the cheese and finely grate.
  • Unroll the pastry and cut into 5cm/2″ squares. I actually used a ruler to measure out the squares.
FF Mini Red Leicester Tarts
5cm puff pastry squares cut with a sharp knife.
  • If your mini muffin tin is not non stick then spray with a little oil.
  • Place one pastry square on to each mini muffin hole and press gently so that it dips in and forms a cup.
  • NOTE – I overlapped two of the smaller pastry strips, squeezing them together, from the edge to create more tarts.
  • Add 1/4 teaspoon of onion marmalade to each pastry square.
FF Mini Red Leicester Tarts
Each pastry square forms a little tart shape.
  • Place 1 teaspoon of finely grated cheese on top of the onion marmalade.
  • Snip over a sprinkle of fresh chives.

FF Mini Red Leicester Tarts

Baking the cheesy tarts:

  • Place the tin in the middle of the preheated oven and bake the tarts for 10-12 minutes. They are baked when they are risen, golden and full of bubbling, melted cheese.
  • As soon as the tarts are baked remove from the oven.

FF Mini Red Leicester Tarts

  • Finally, remove the tarts from the tin and place on to a serving platter, if serving immediately, or on to a cooling rack for serving later.
FF Mini Red Leicester Tarts
Mini Sparkenhoe Red Leicester Tarts delicious mouthfuls of flavour heaven.

I served these tarts with a few extra chives snipped over for an extra pop of colour.

Served warm these Mini Sparkenhoe Red Leicester Tarts are at their best. Especially as the mild onion flavours pair beautifully with the warm, nutty cheese. Also to make ahead, store in an airtight container for up to three days in the fridge. Refresh by popping on to a baking sheet and into a medium, preheated oven for 5 minutes.

If you have enjoyed this recipe for Mini Sparkenhoe Red Leicester Tarts here are some others you may also like:

Goddess Cheese Pine Nut Muffins

FF Mini Red Leicester Tarts
Goddess Cheese Pine Nut Muffins.

Asparagus Prosciutto Ham Tart

FF Mini Red Leicester Tarts
Asparagus Prosciutto Ham Tart using Goddess Cheese.

Beauvale Cheese Walnut Scones

FF Mini Red Leicester Tarts
Beauvale Cheese Walnut Scones

Cheese comes in such a variety of textures and flavours. I am thoroughly enjoying experimenting with and using them as  ingredients to create different recipes.

I hope I have inspired you to both make and try different cheeses?

So, whatever er you are making, baking and creating in your kitchens, have fun preparing and sharing your feast.

Sammie xx

Pong Cheese provided me with the cheese for this recipe. All opinions, views, content and photography are my own. Please see my Disclosure Policy.

Share
Facebooktwitterpinterestlinkedintumblr