Farmhouse White Loaf

Share
Facebooktwitterpinterestlinkedintumblr

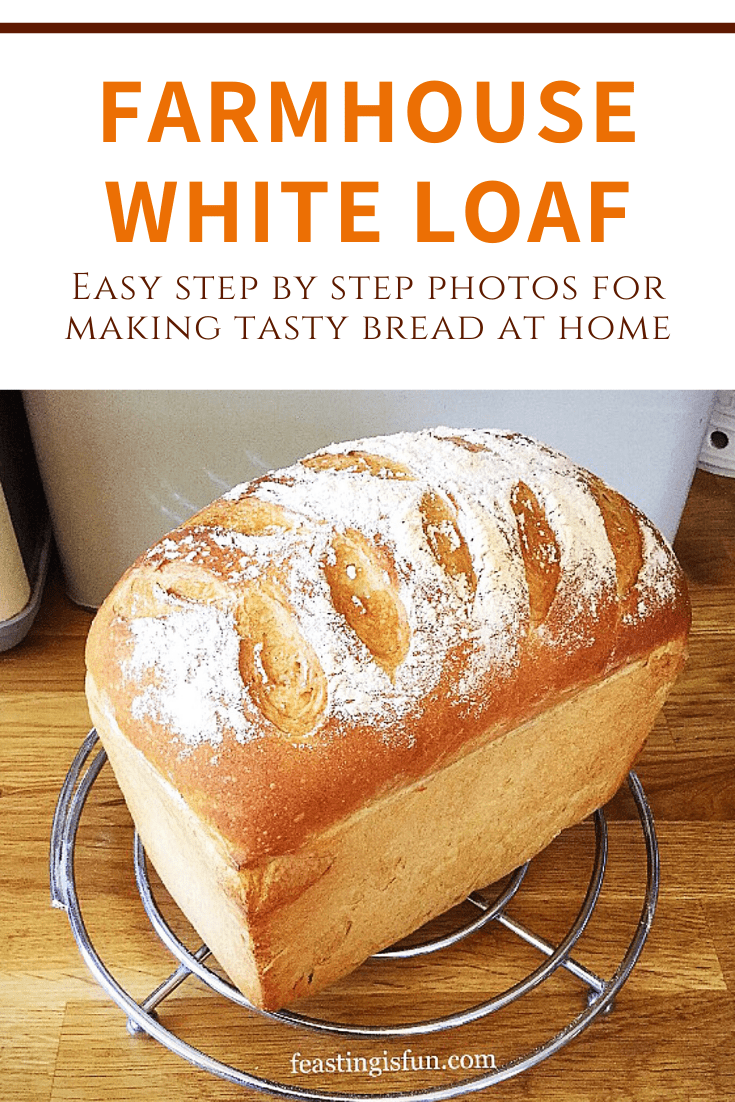
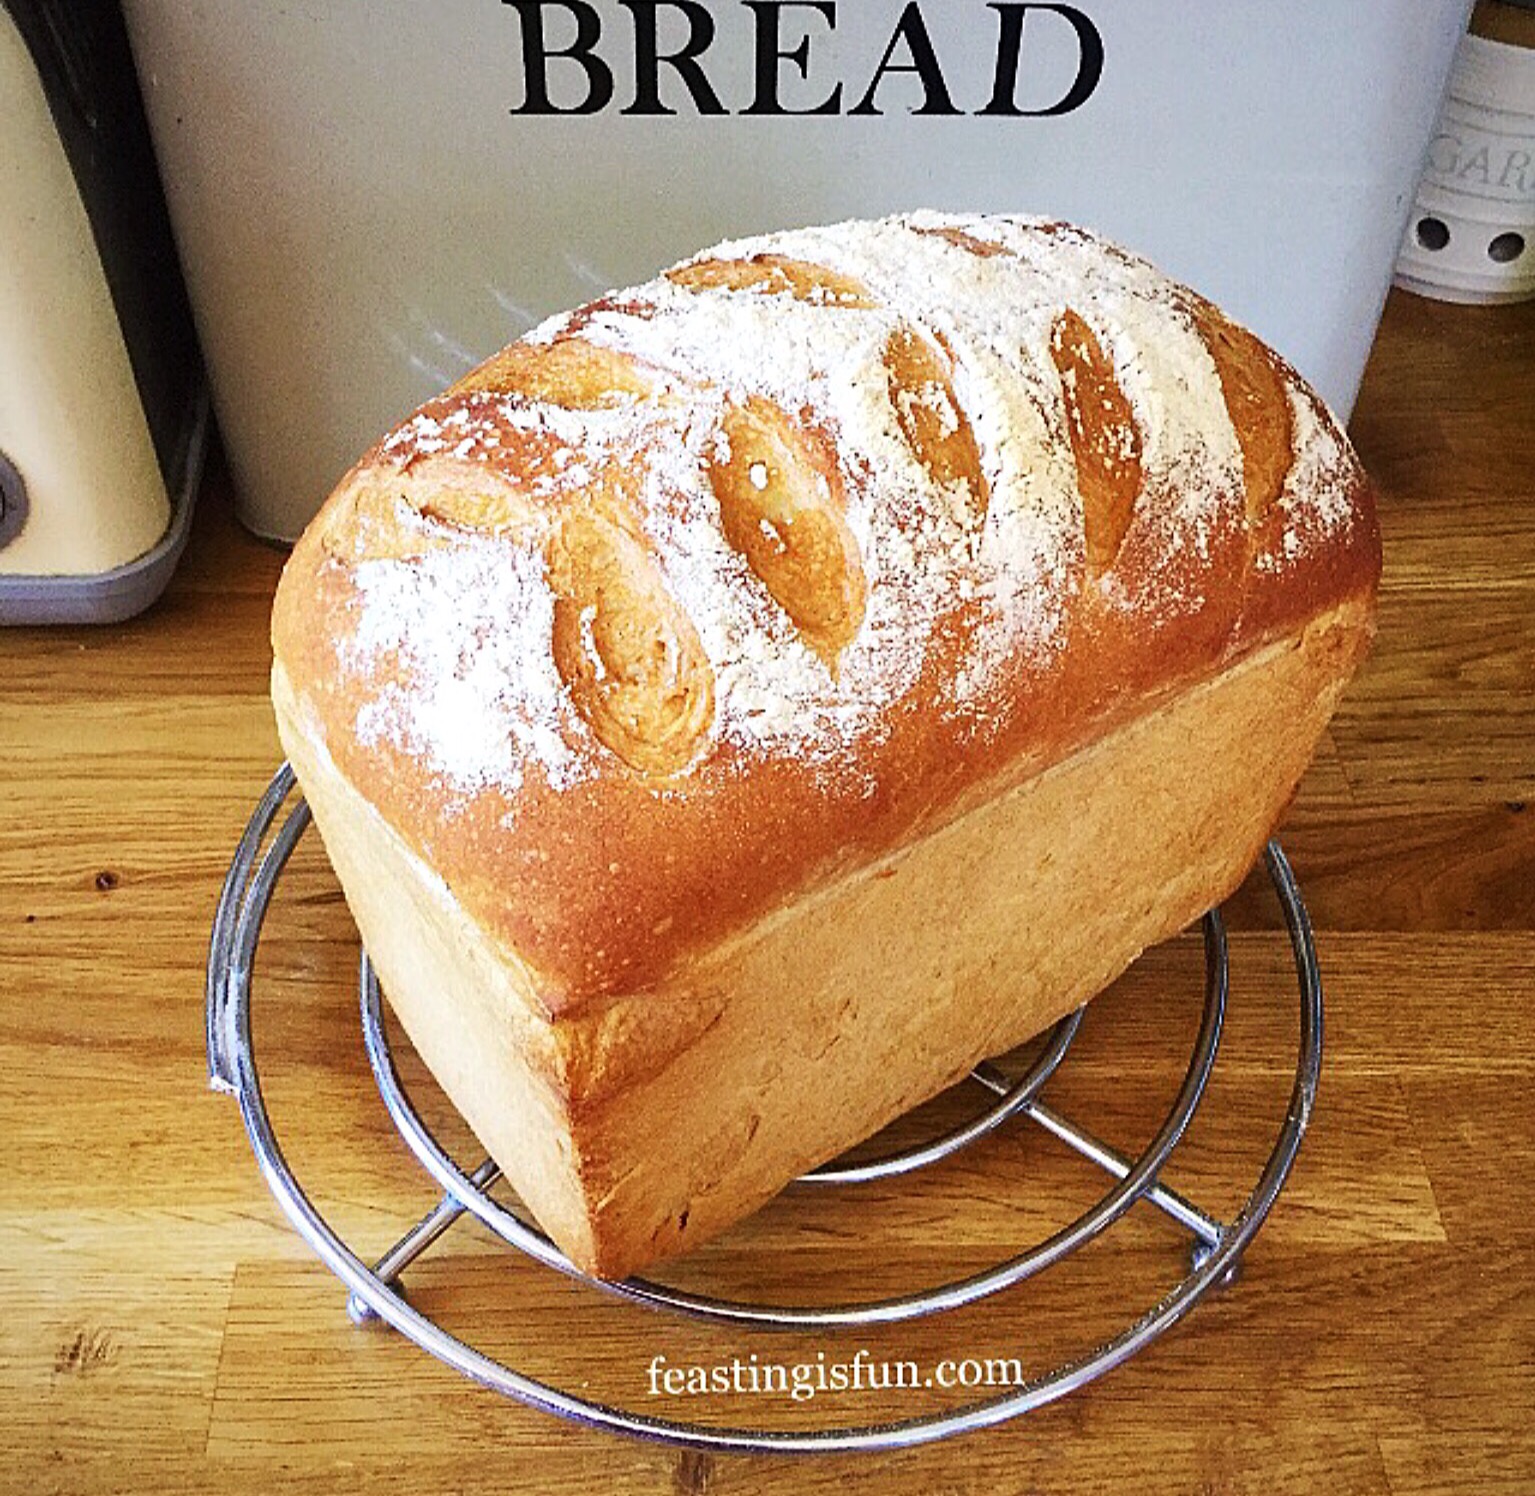
Is there anything better than the smell and taste of freshly baked bread? This Farmhouse White Loaf is utterly delicious. If you’ve never baked bread before, read on and let me encourage you to give it a go.

Baking your own bread is such a rewarding experience. From a few simple ingredients, mixed together, the bread literally grows before your eyes.

This Farmhouse White Loaf is the perfect recipe to start with, if you have never made your own bread before.

You will need a loaf tin to bake your bread in. I recently reviewed a British company, that sells British manufactured bakeware you can read it here.

British Bakeware sell a range of loaf tins, my favourite and the one used for baking this loaf is the 3lb deep farmhouse loaf tin.

Farmhouse white bread loaf


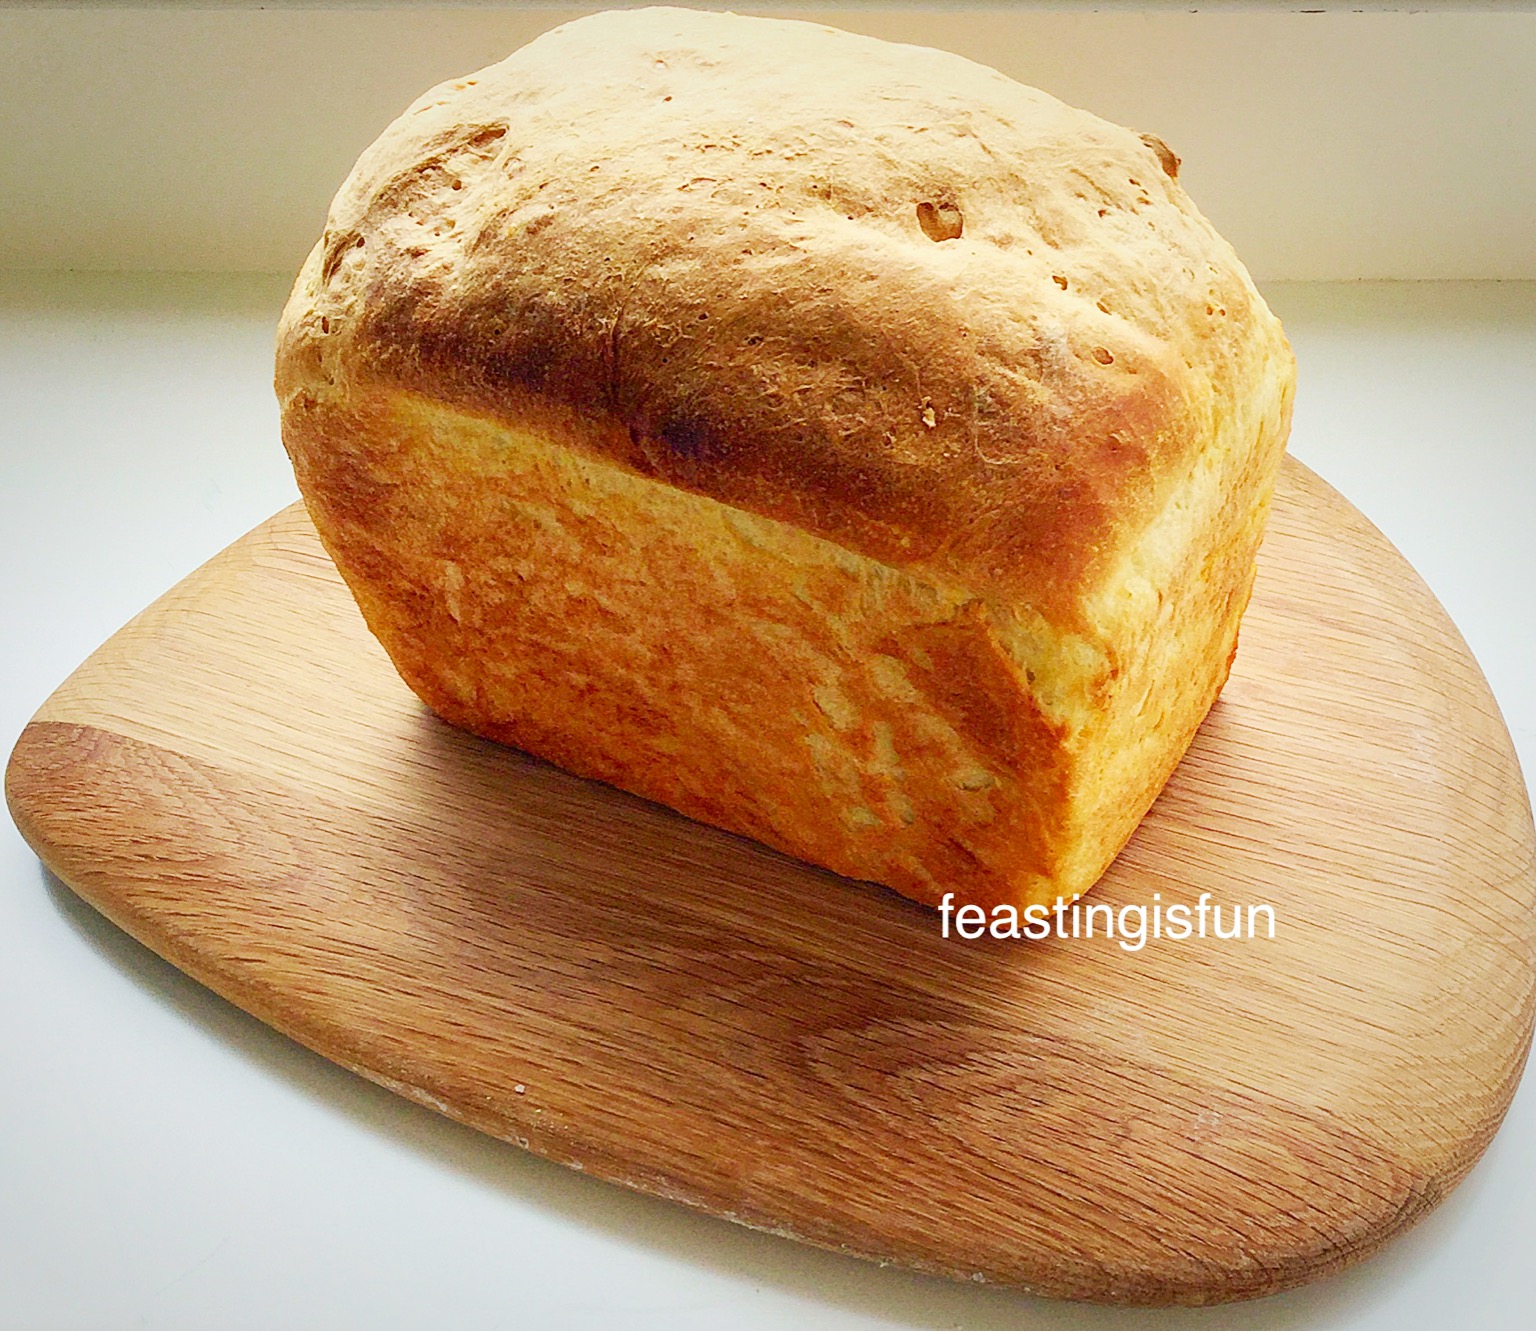
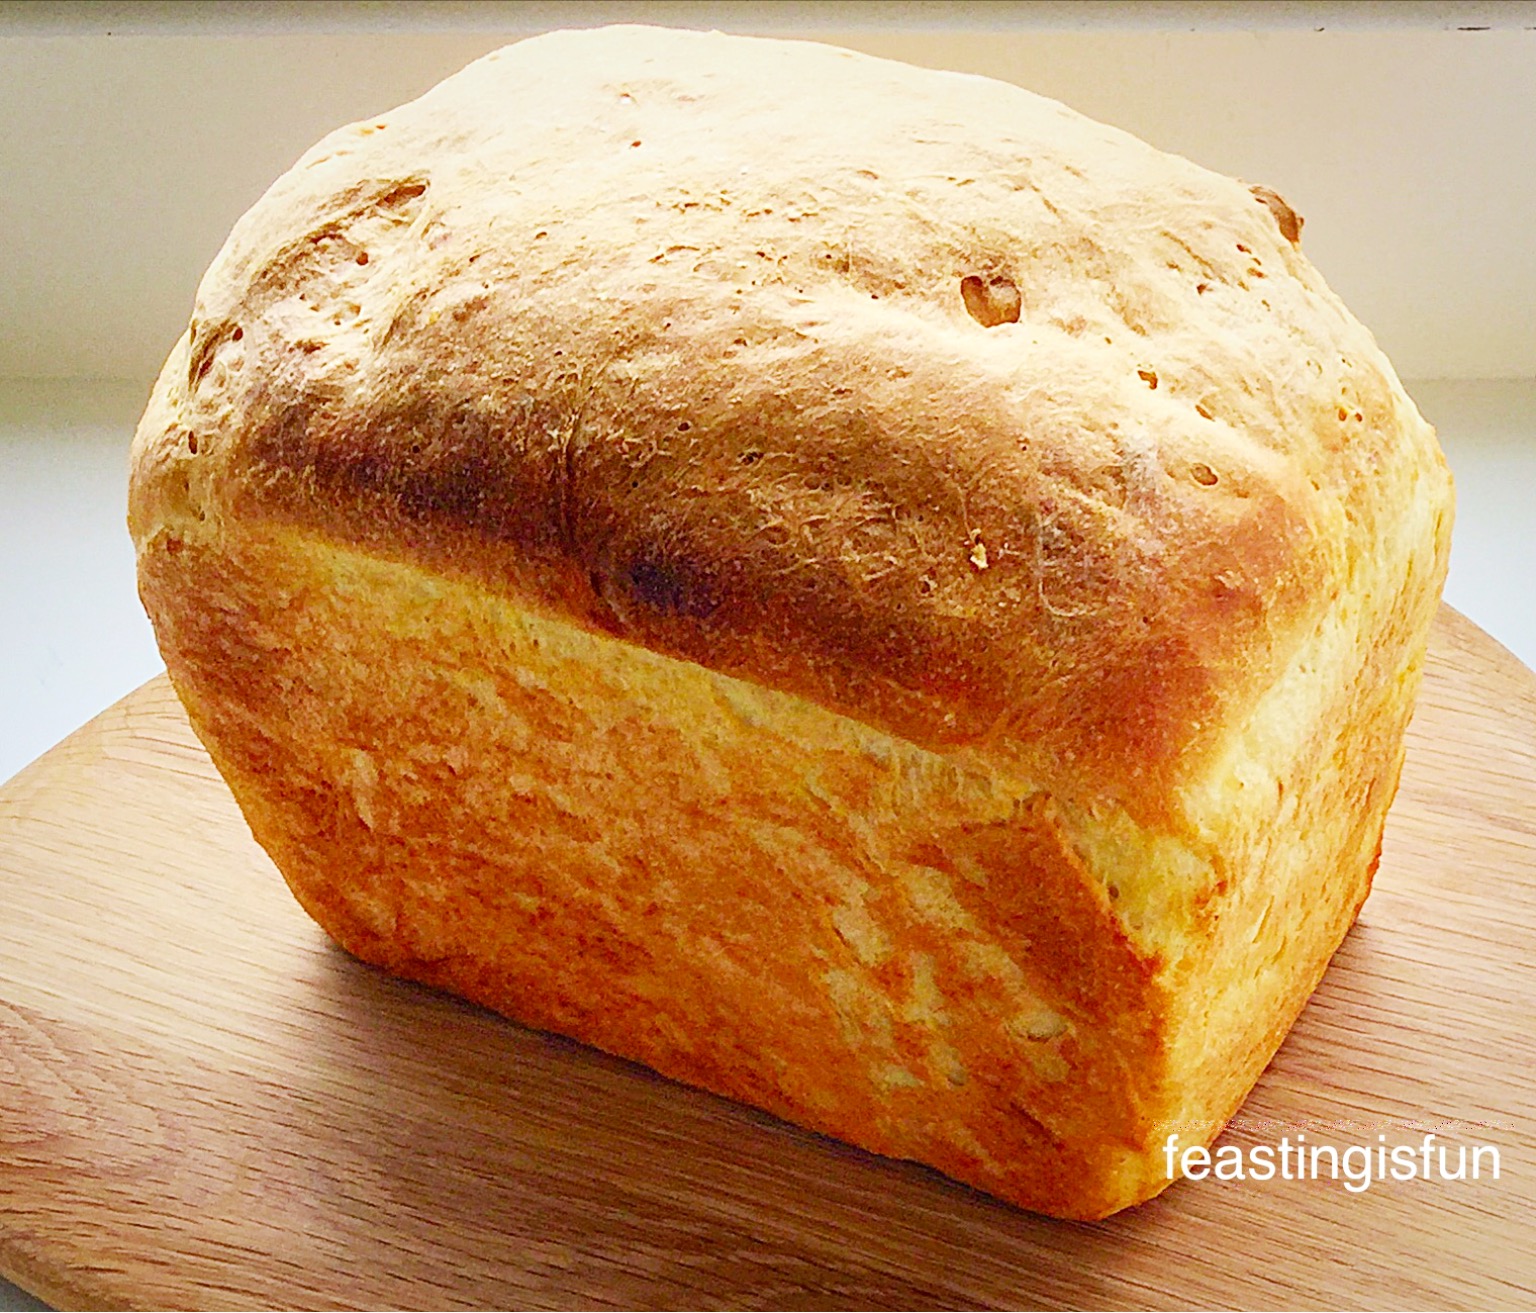
Farmhouse White Loaf – Bread Baked In A Regular Oven

The advantage of having a deep loaf tin is, no muffin topped loaves. In the past I have baked bread in tins that weren’t as deep as this one and the bread rose and billowed out, like a mushroom. I’d have to cut away the sides of the bread, where it had stuck to the outside of the tin. Not they way to bake a great looking loaf!

The instructions given below for making this bread are, by hand (which everyone should do at least once in their lifetime), or using a stand mixer/bread maker to carry out the mixing, kneading and knocking back.

Personally I prefer bread baked in the oven. I have baked many a loaf in a bread maker, however, I never seem to get the gorgeous, crunchy crust, that I achieve with an oven baked loaf. Plus bread maker bread is always a little soft for my liking and there’s the inevitable hole in the bottom of the loaf where the mixing paddle is!

Bread dusted with flour and lightly scored to create a pretty finish once baked.
Farmhouse White Loaf

Bread As It Should Be – Without Unnecessary Additives

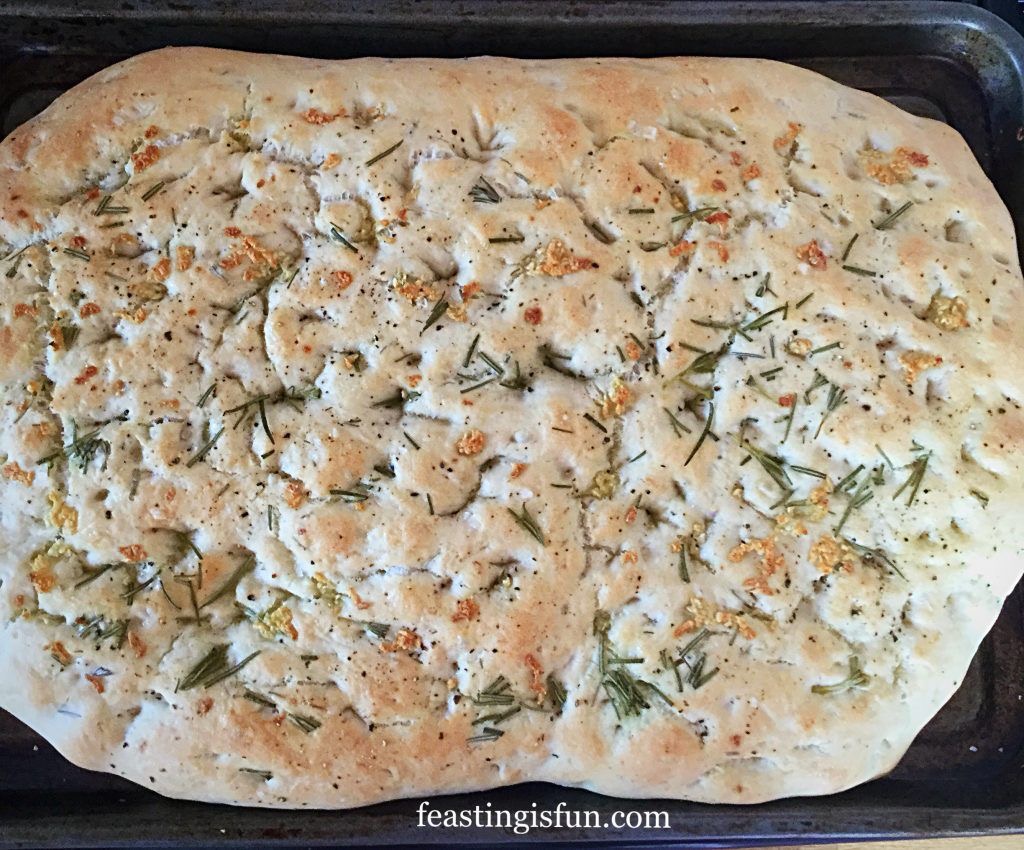
If you like baking bread in a bread maker I am most certainly not going to judge you. Any bread baked at home is infinitely better than plastic wrapped, pre-sliced, mass produced bread! Aside from speciality breads like my Tomato Thyme Garlic Focaccia, bread should contain nothing more than flour, water, yeast, salt, water and a little oil or butter.

Read the ingredients on the back of a shop bought loaf and you will be amazed at all the additives.

Baking your own bread is easy, once you get into a routine. Even when baking by hand, it still only takes 20 minutes, hands on time, to get a loaf ready to be baked. Once you taste real, homemade bread, it’s hard to go back to the bought stuff – that said, I’m a realist and I usually have a bought loaf stashed in the deep freeze for days when my body is playing up (see here). So I won’t judge!!

Farmhouse White Bread Loaf

Helpful Bread Making Tips

Just a quick tip: if you do start to bake bread regularly, it can pay to bulk buy your bread flour. I use organic flour that is stone ground, from Shipton Mill currently I buy it through Amazon UK using their subscribe and save, although Shipton Mill now have their own online shop. Buying in bulk, through Amazon UK, 5 x 2.5kg bags, means that we eat good quality, organic, stone ground British flour, for about 60 pence a loaf!

While I love baking with fresh yeast, the shelf life is very short, so I have used 7g sachets of fast action dried yeast. Alternatively, if you do use fresh yeast, simply double the quantity stated for dried.

Farmhouse White Bread Loaf

Recipe: Makes 1 Large Farmhouse White Bread Loaf

500g/1lb 2oz Strong White Bread Flour – I use Shipton Mill organic white flour

1 x  7g Sachet Fast Action Dried Yeast – I use Allinson Easy Bake in the green packet or pot

1tbsp Honey – alternatively use 1tsp regular sugar

320ml/11oz Tepid Tap Water (approx body temp)

7g Salt – I use Maldon Sea Salt

1 tbsp Rapeseed Oil (Canola Oil) – I use Kentish Oils alternatively add 25g/1oz of unsalted butter.

Farmhouse White Loaf – Making The Bread Dough

The ‘bowl’ is either a large bowl, with which to mix the bread by hand, or the stand mixer/bread maker bowl.

For all methods:

Pour the water into the bowl. Add the honey and yeast. Swish about with clean fingers to activate the yeast.

Add the flour on top of the liquid.

Add the salt and the oil/butter.

Bread Maker

If using a bread maker, set to dough cycle and start the program. Once the cycle is completed re-start for 2 minutes. This ‘knocks back’ the dough. Then remove the dough, shape into an oval/ball and place into a buttered loaf tin. Cover with a damp cloth, leave in a draught free place until doubled in size.

Stand Mixer – with dough hook attachment

If using a stand mixer, attach the dough hook and mix on medium speed until all the ingredients are combined. Continue to mix for a further 5 minutes, until the dough is smooth and elastic. Stop mixing. Scrape the dough from the dough hook and combine with the dough in the bowl. Form into a ball, place back into the bowl. Cover with a damp cloth and leave in a draught free place until doubled in size (approx. 1hour). Once doubled remove the cloth, mix for 2 minutes on medium speed using the dough hook. This ‘knocks back’ the dough. Remove the dough and form into an oval/ball shape, place into a buttered loaf tin. Cover with a damp cloth, leave in a draught free place until doubled in size.

By Hand

If hand mixing, bring all the ingredients together with your hand until they form a doughy mess! Place this dough onto a very lightly floured worktop. Knead for a good 10 minutes. If the dough gets sticky, keep kneading and working it – if you add extra flour the finished bread will be dry. After a good 10 minutes kneading, the dough should have a smooth elasticity. Place the kneaded dough into a buttered bowl, cover with a damp cloth and leave in a draught free place until doubled in size, 1-2 hours.

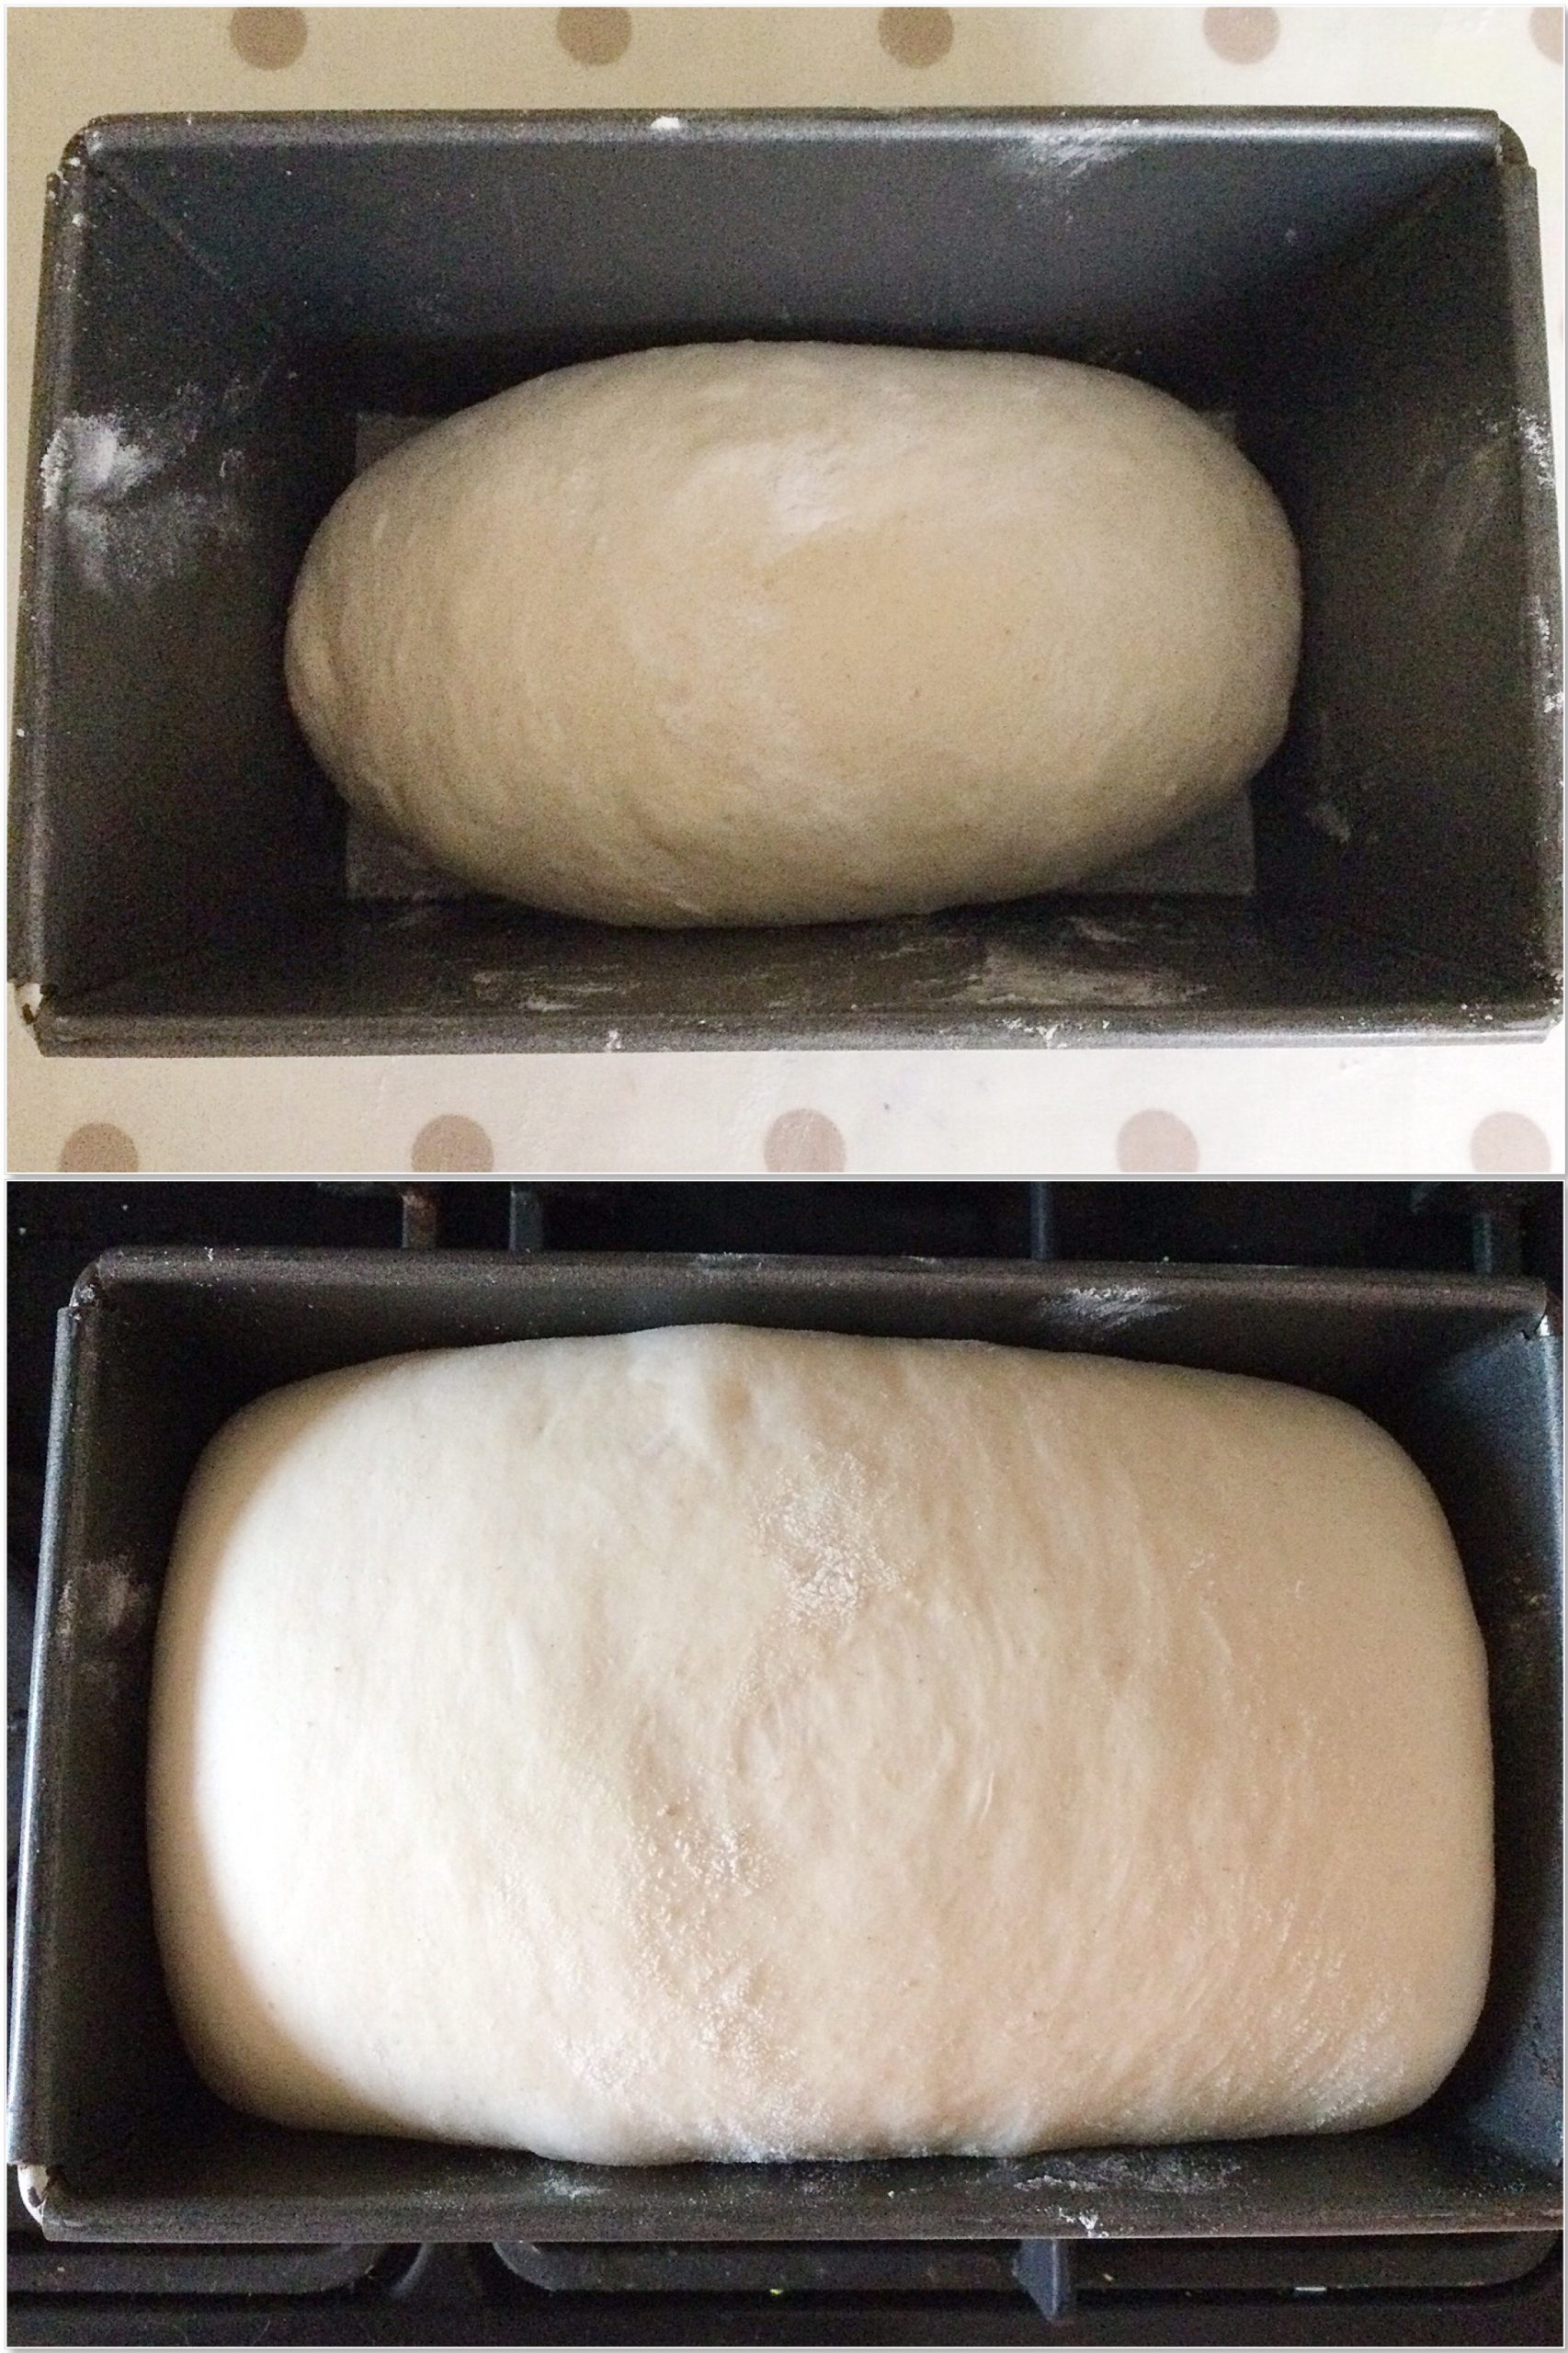
Shaping The Dough Ready For The Second Proof

Ensure the area that you are shaping your dough is draught free.

First of all lightly dust the work surface with flour

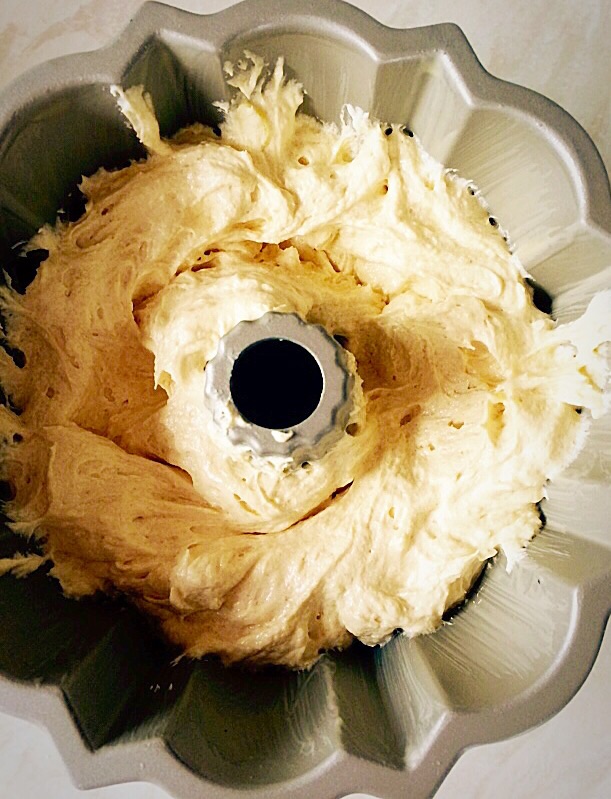
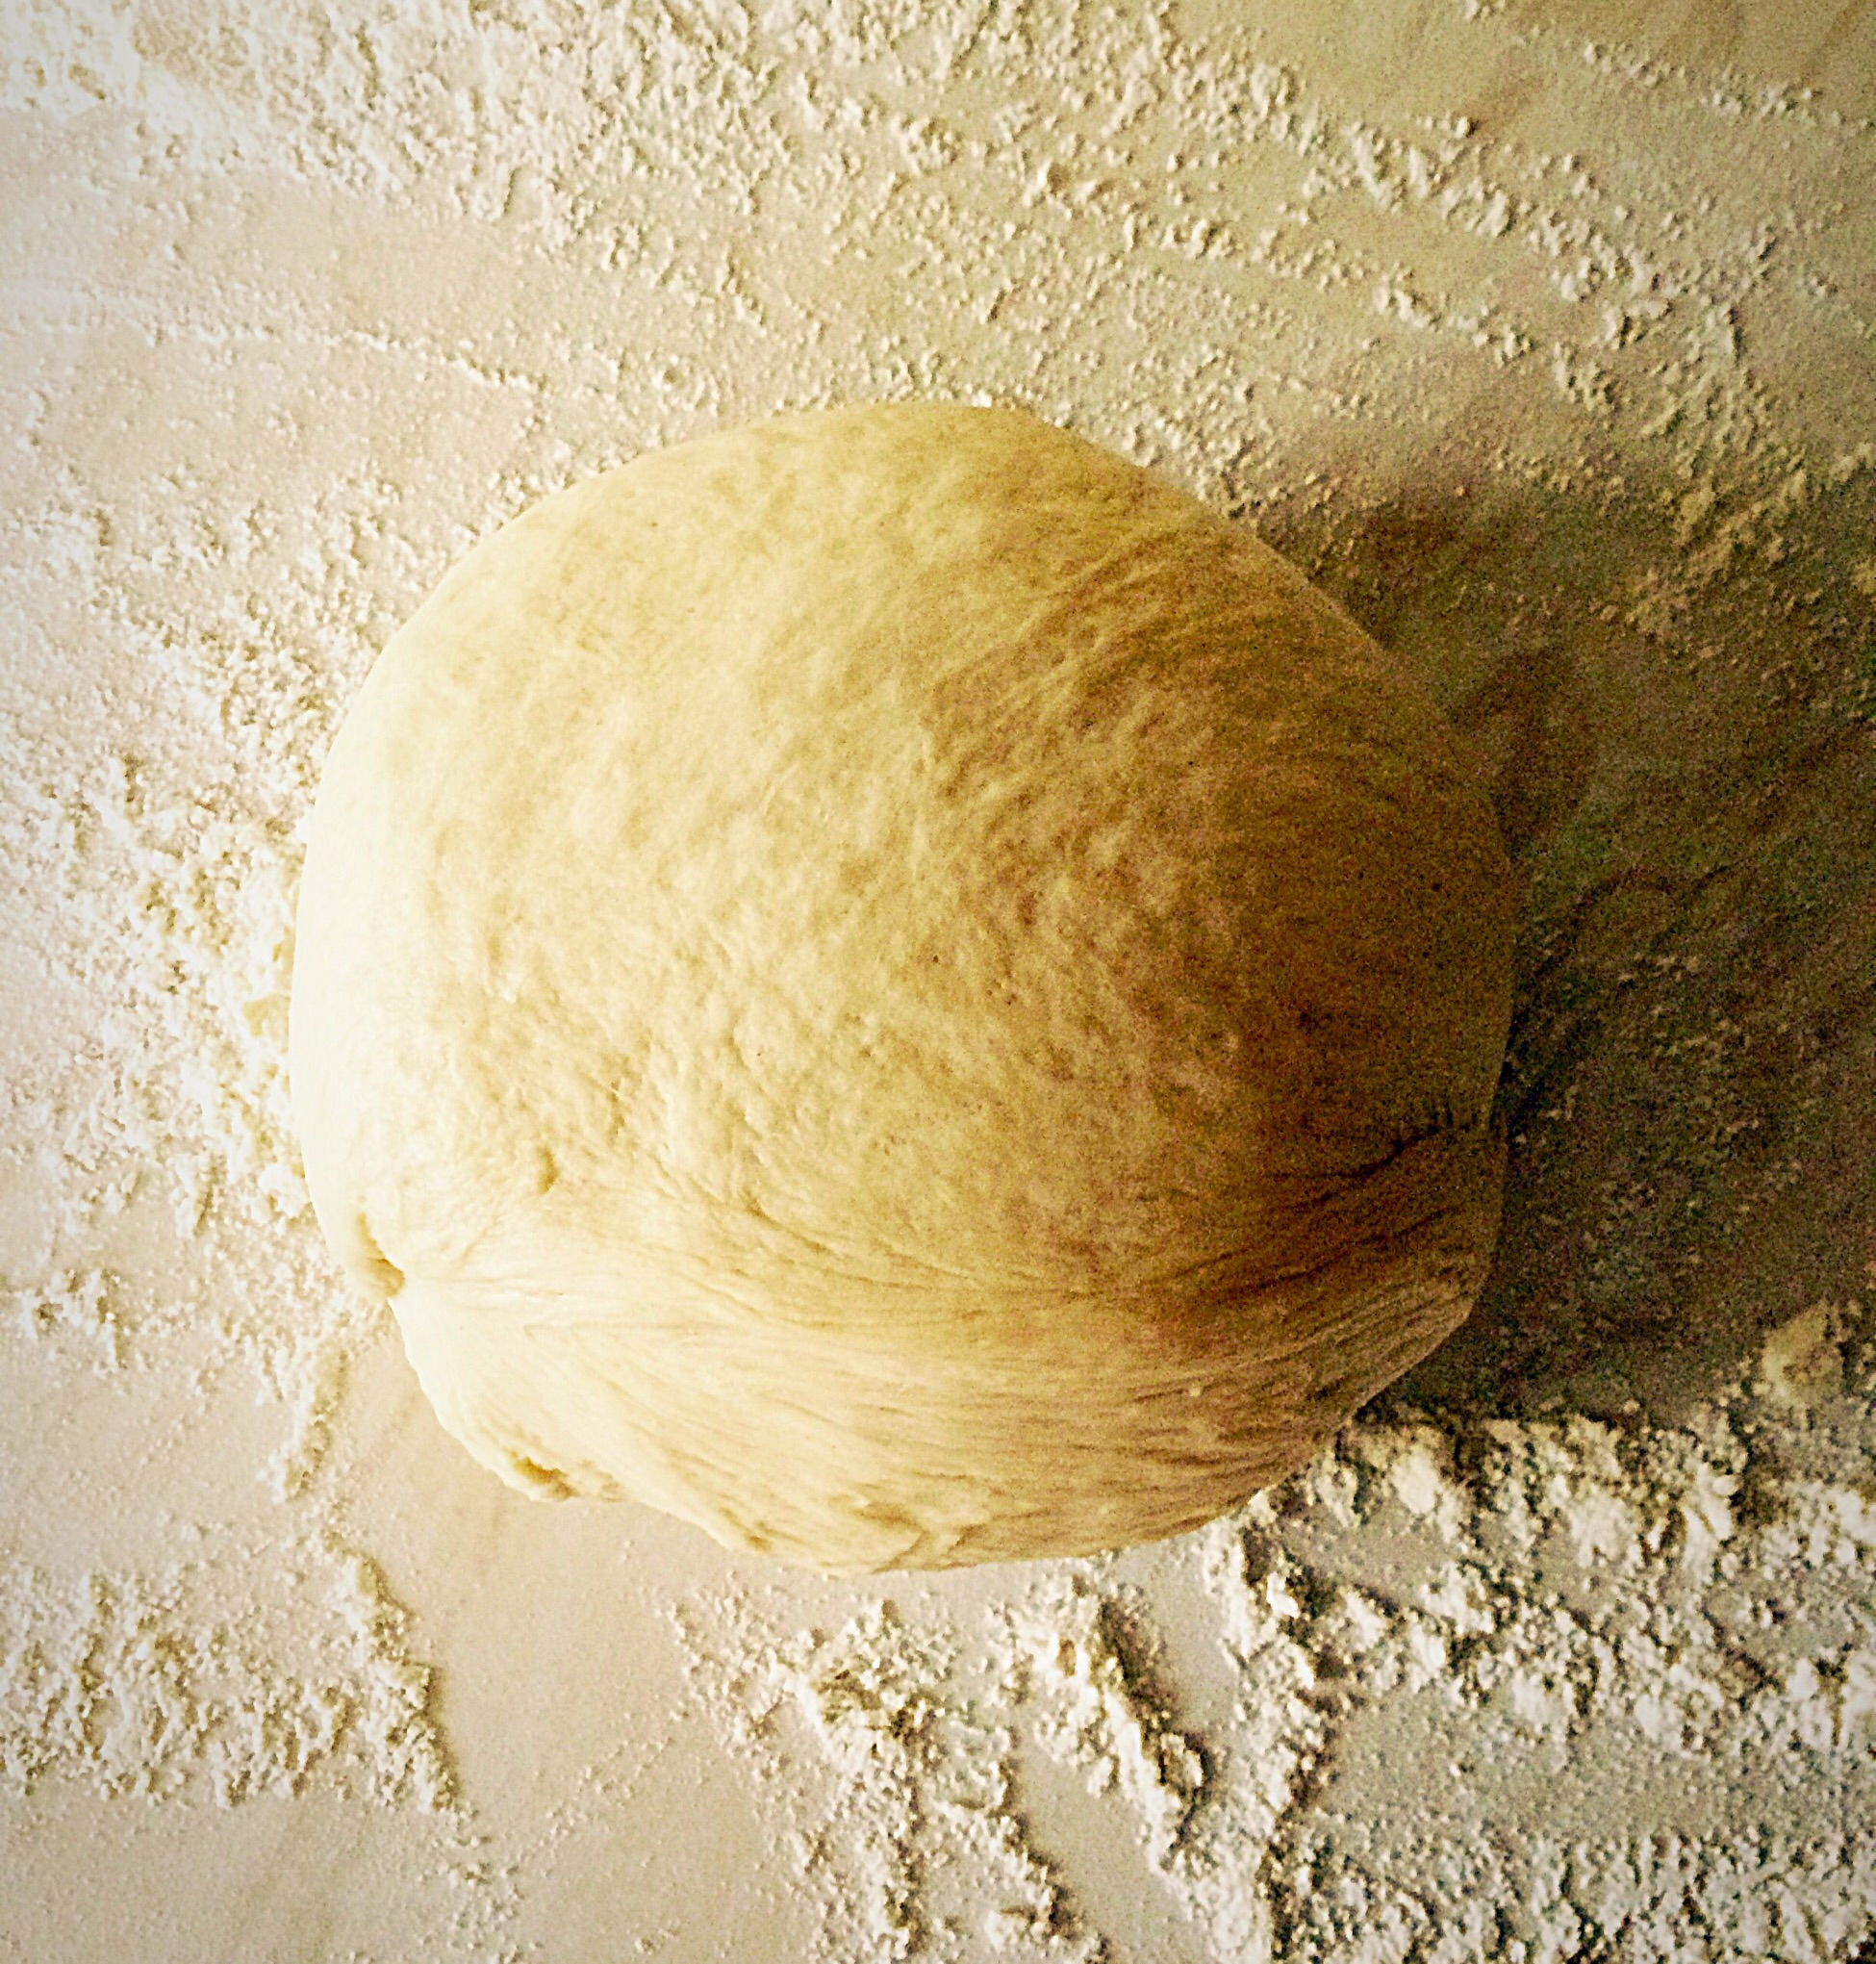
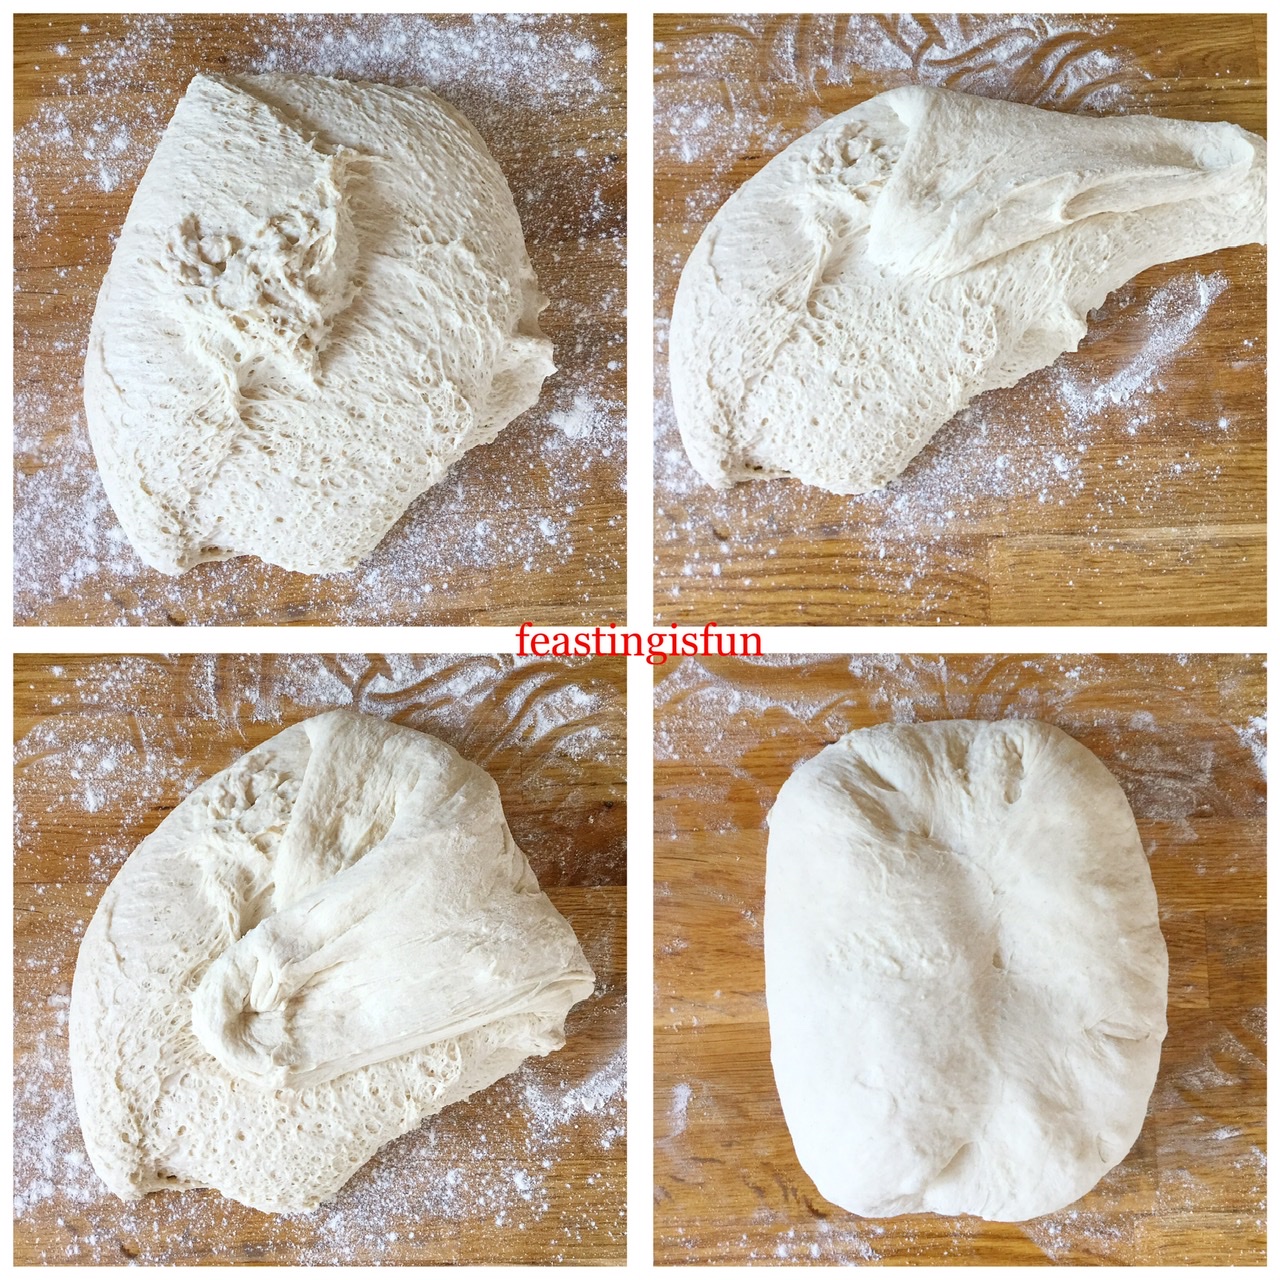
Tip out the dough, from its bowl, so the top of the dough is directly in contact with the worktop. This will help as we start to build tension within the dough.

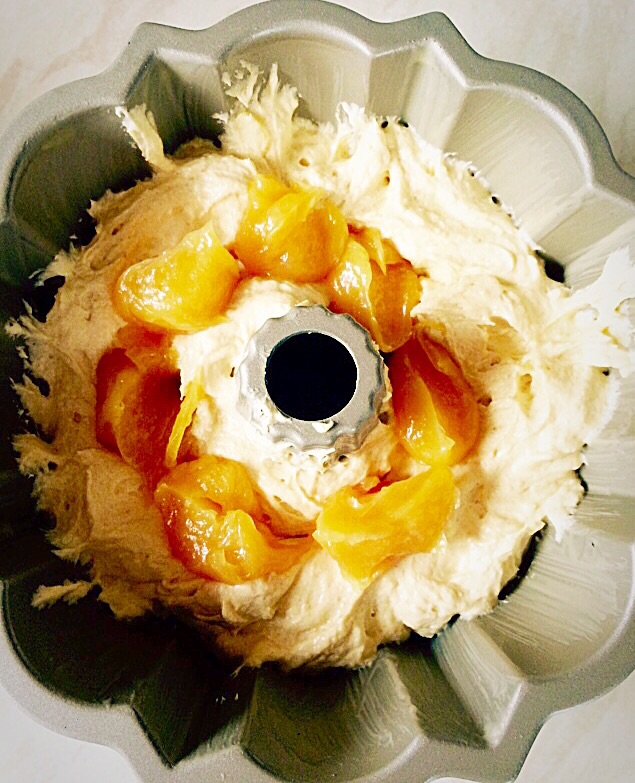
Lightly flour your hands and pull out part of the sticky dough, then press it into the centre of the dough, as seen in the photos below.

Continue this process all the way around the outside of the dough until you have a smooth, rectangular shape, with no sticky sides.

Creating tension across bread dough after the first proof.

Shaping The Loaf

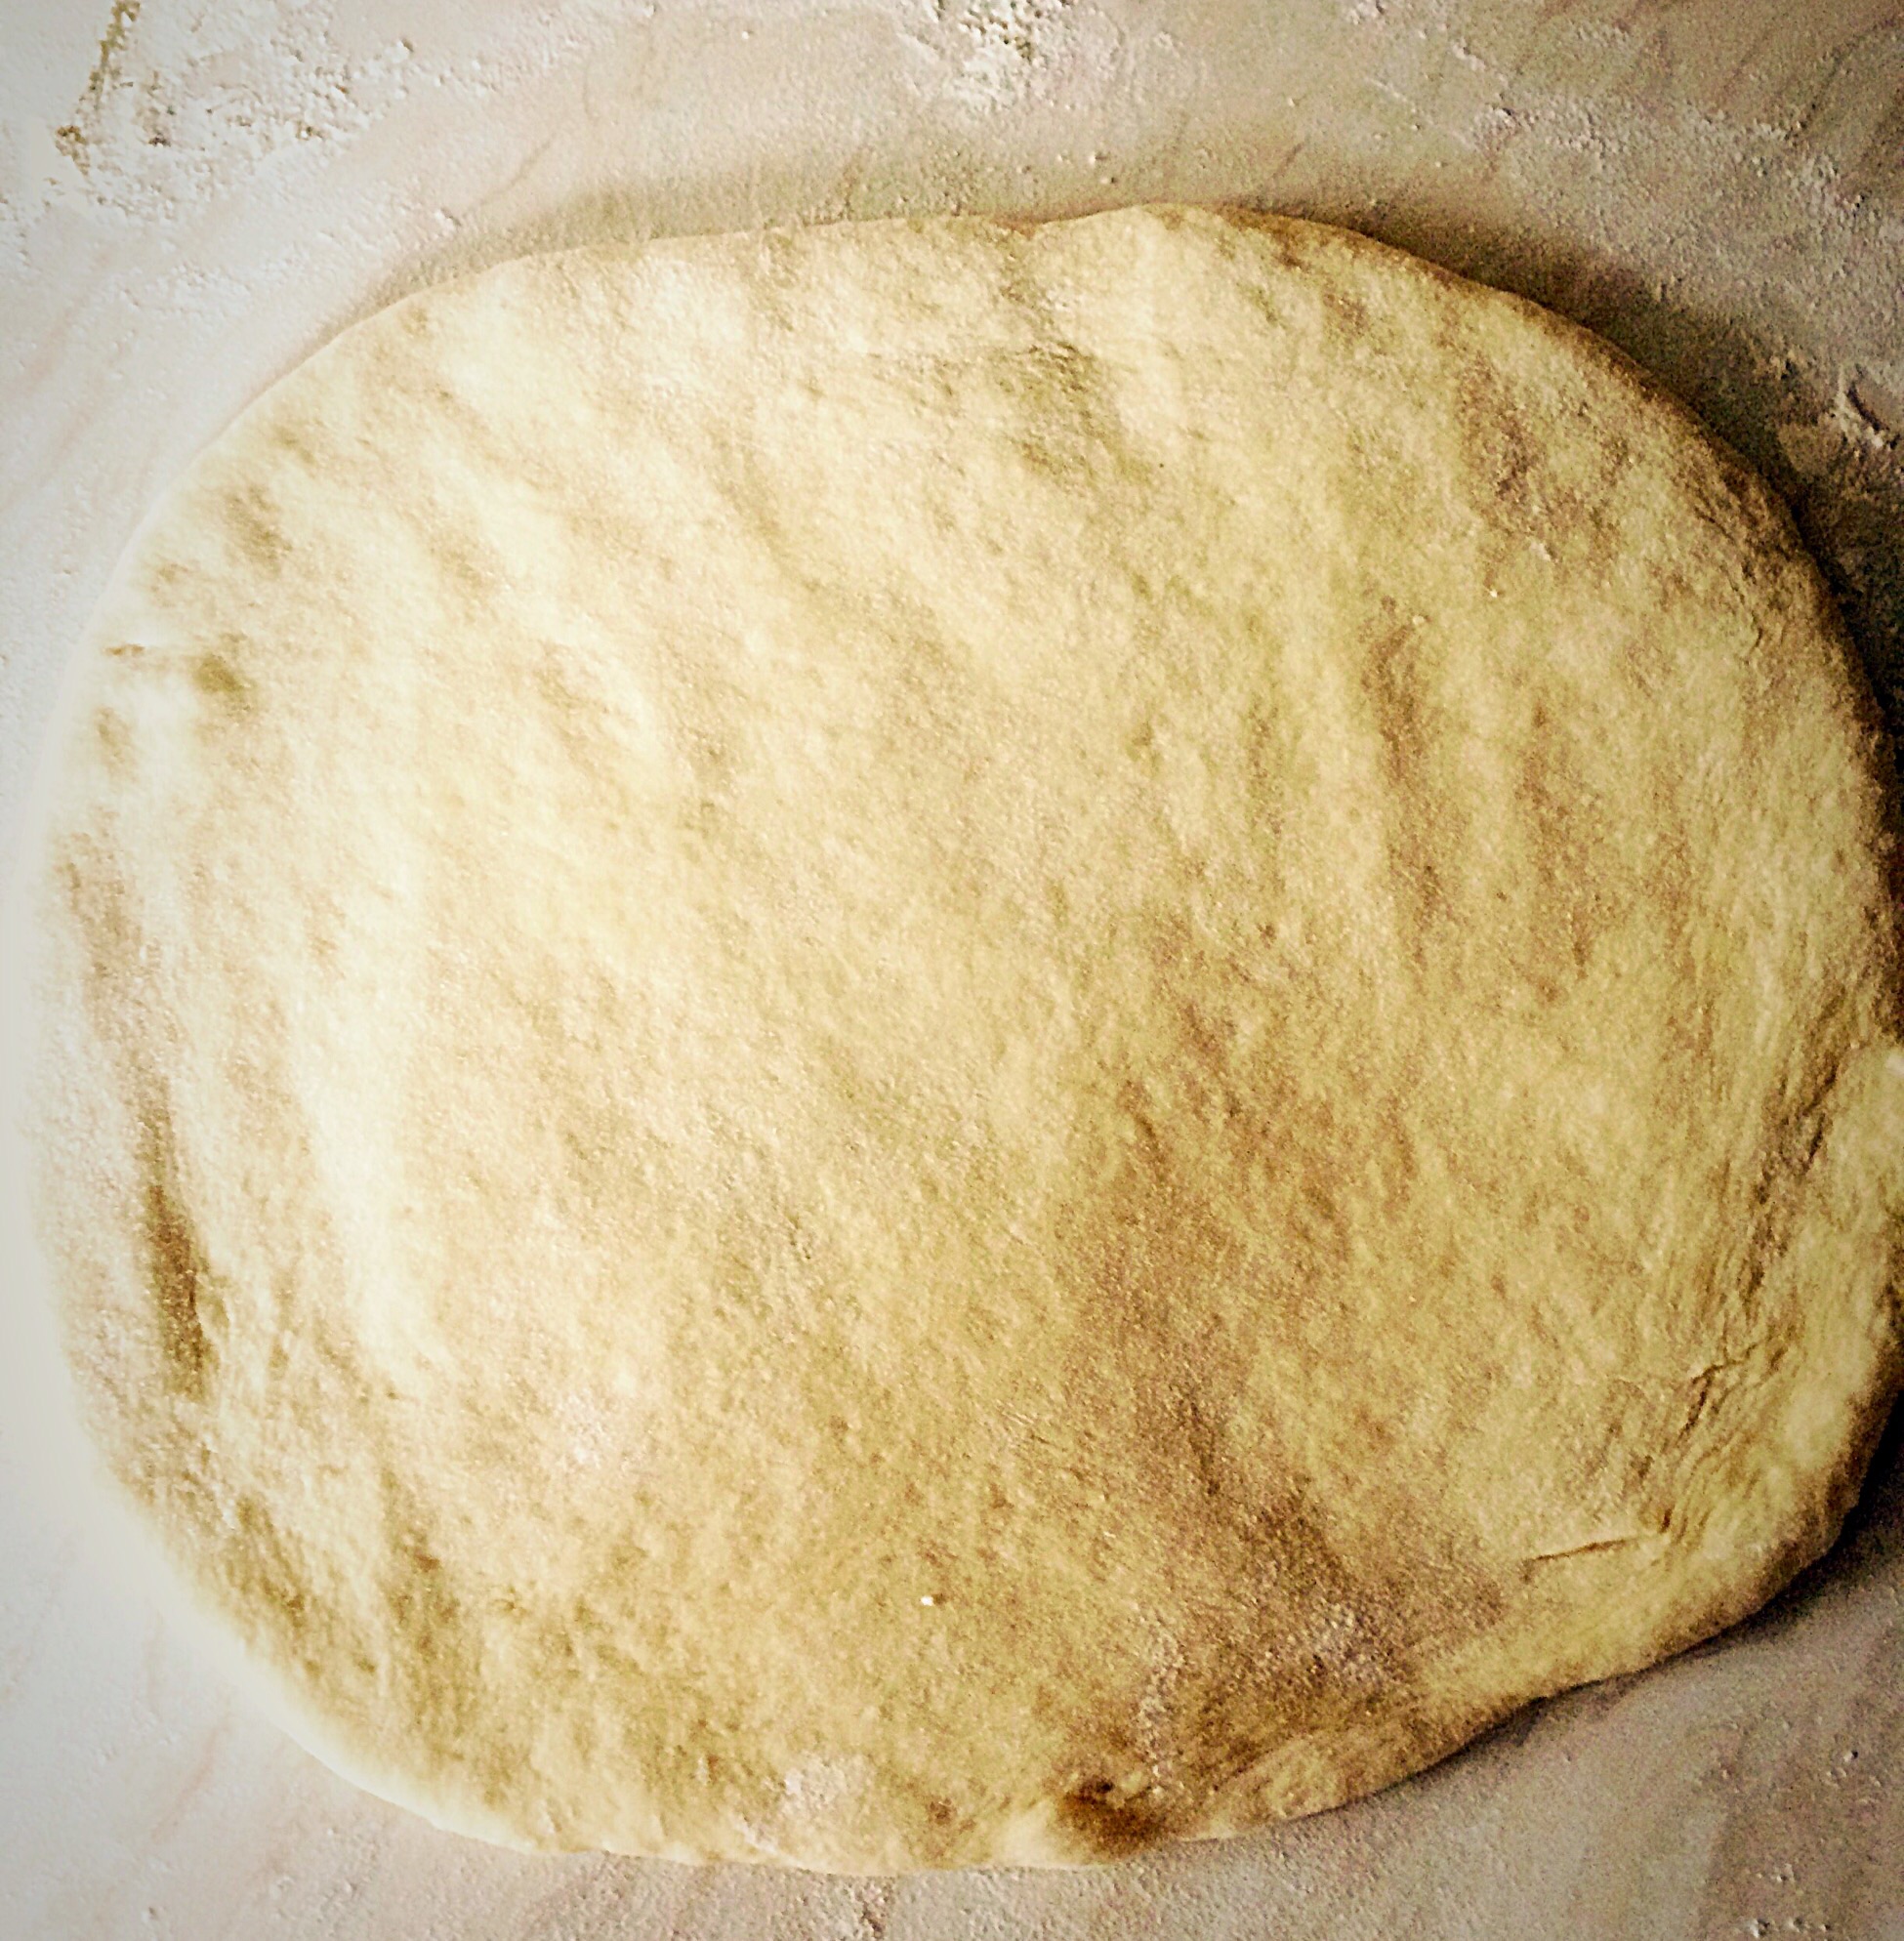
Using your fingers, lightly press the dough out into a square shape, roughly the same width as the length of your dough tin.

Fold the top third of the dough onto itself and then repeat with the bottom third of the dough, pulling it so that it overlaps the first fold.

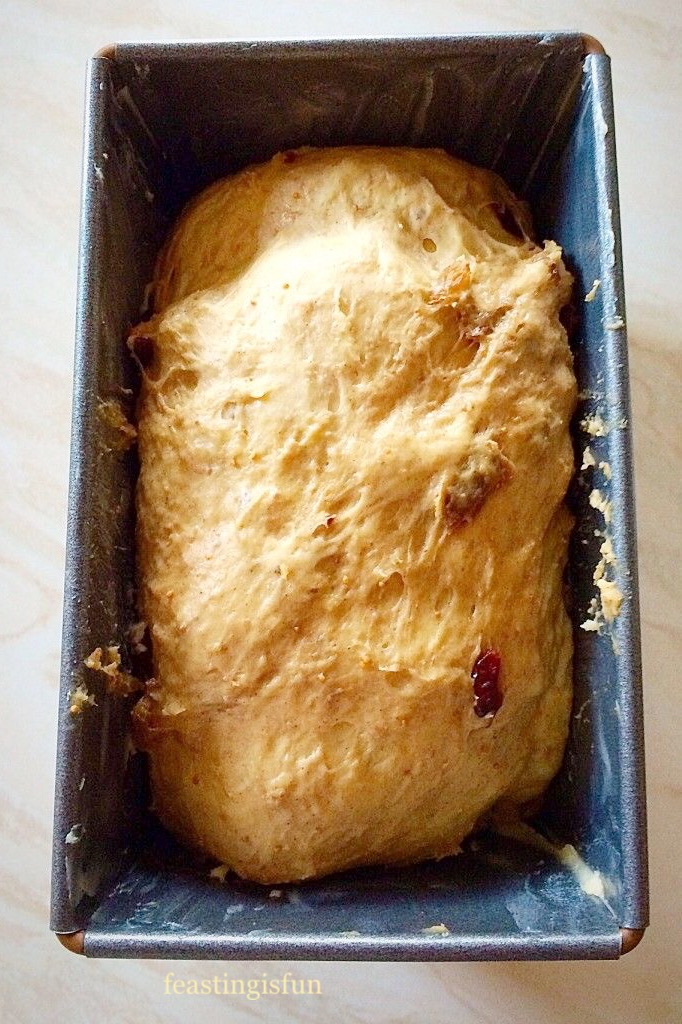
Flip the folded dough over and tuck in the top and bottom to create an oval shape.

Shaping bread dough in stages.

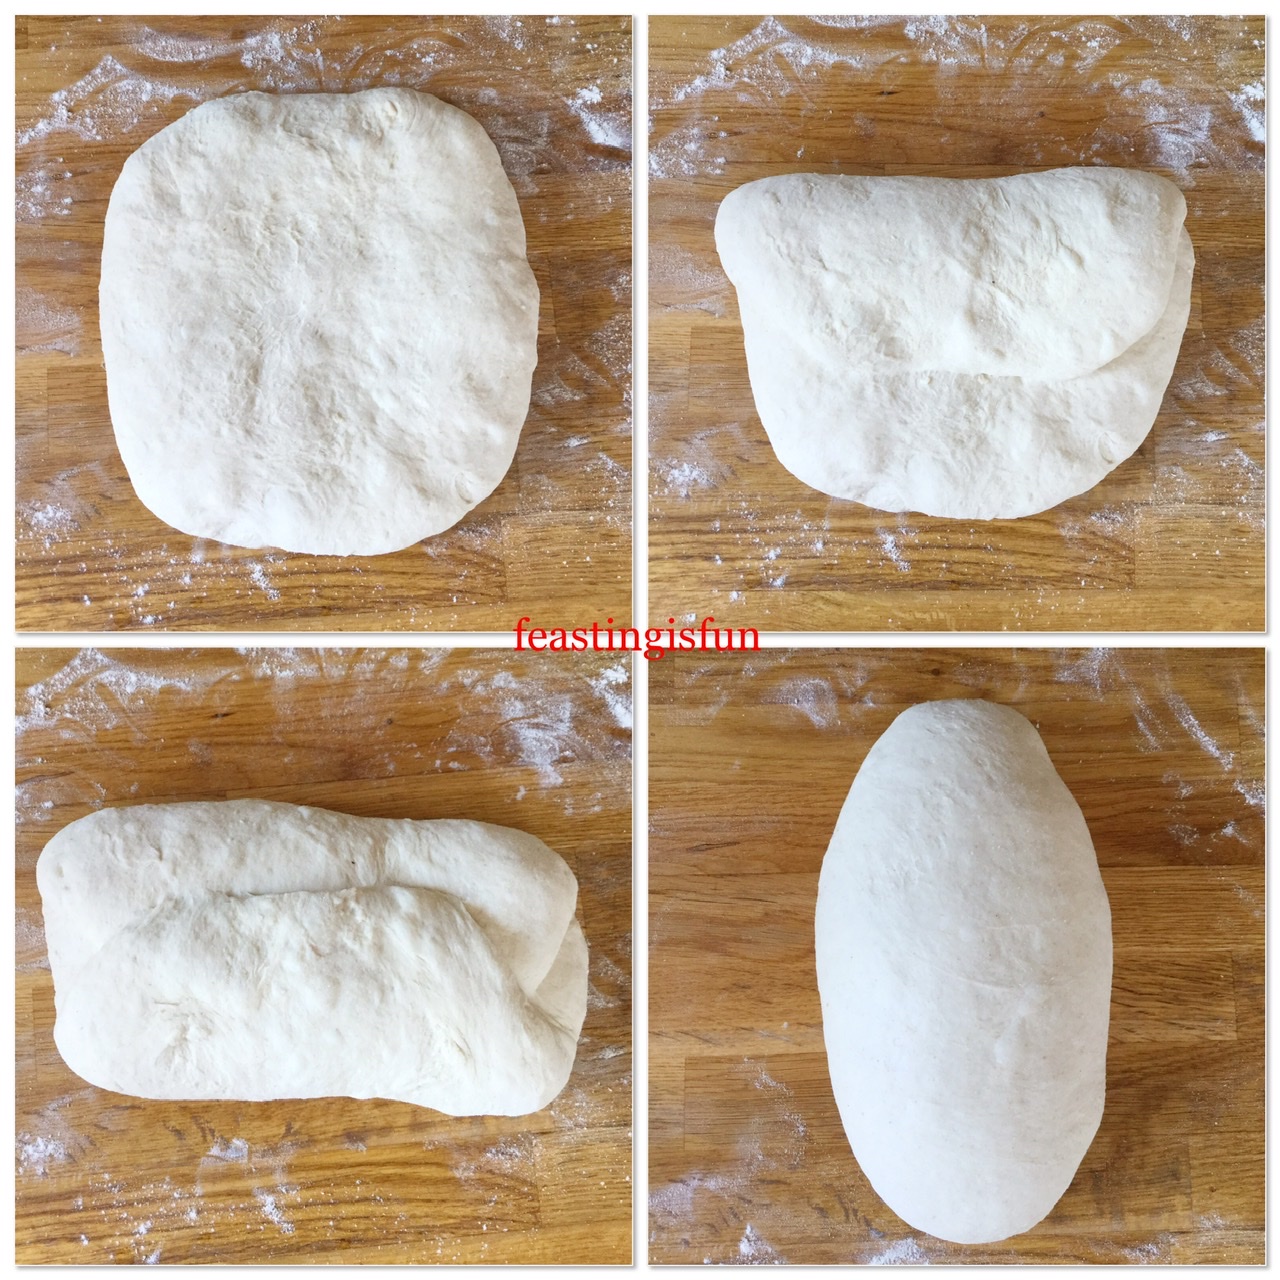
Place the shaped dough, with the seams underneath, into the loaf tin.

Cover with a clean tea towel and leave in a draft free place until doubled in size.

Shaped bread dough in tin before and after second rise.

Baking Your Farmhouse White Loaf

10 minutes before the dough is ready to bake, preheat the oven to 220C/200C fan, gas mark 7, 425F. Also, place an inch (2.5cm) of water in a container and place on the bottom of the oven. This will create steam which allows the bread to rise more (known as oven spring ) before forming a crust.

Also, if desired, score the loaf before placing in the oven.

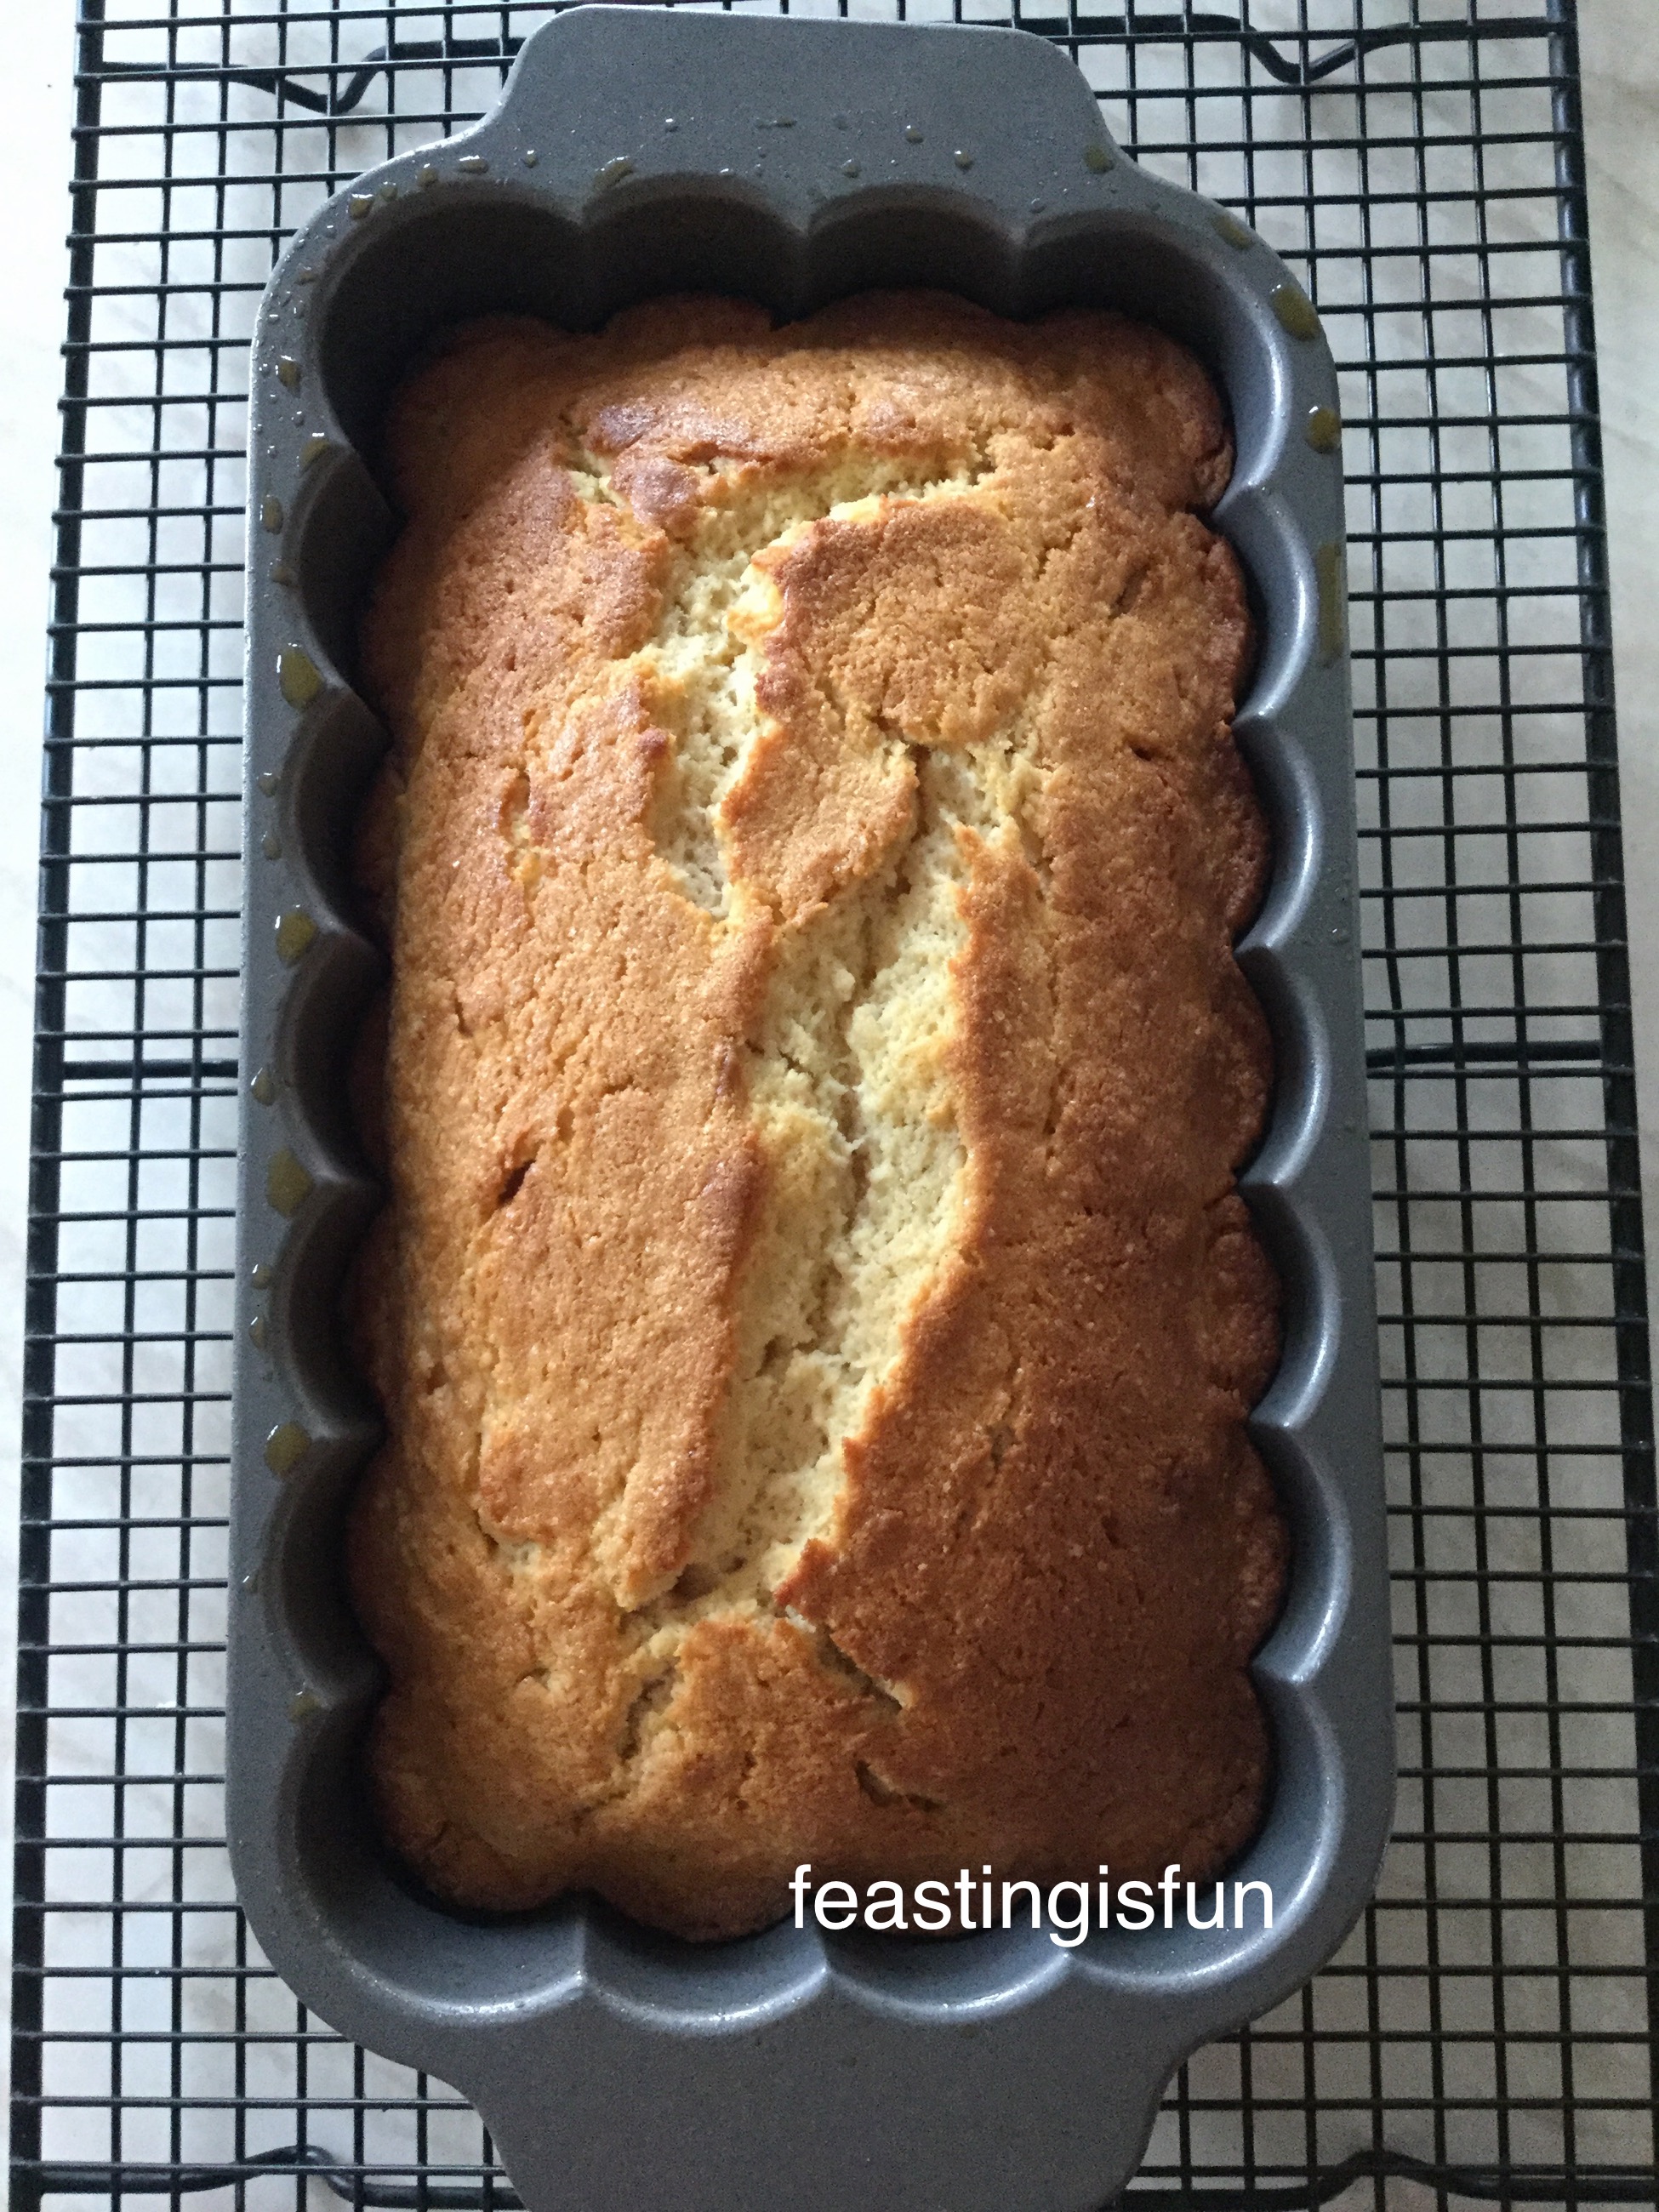
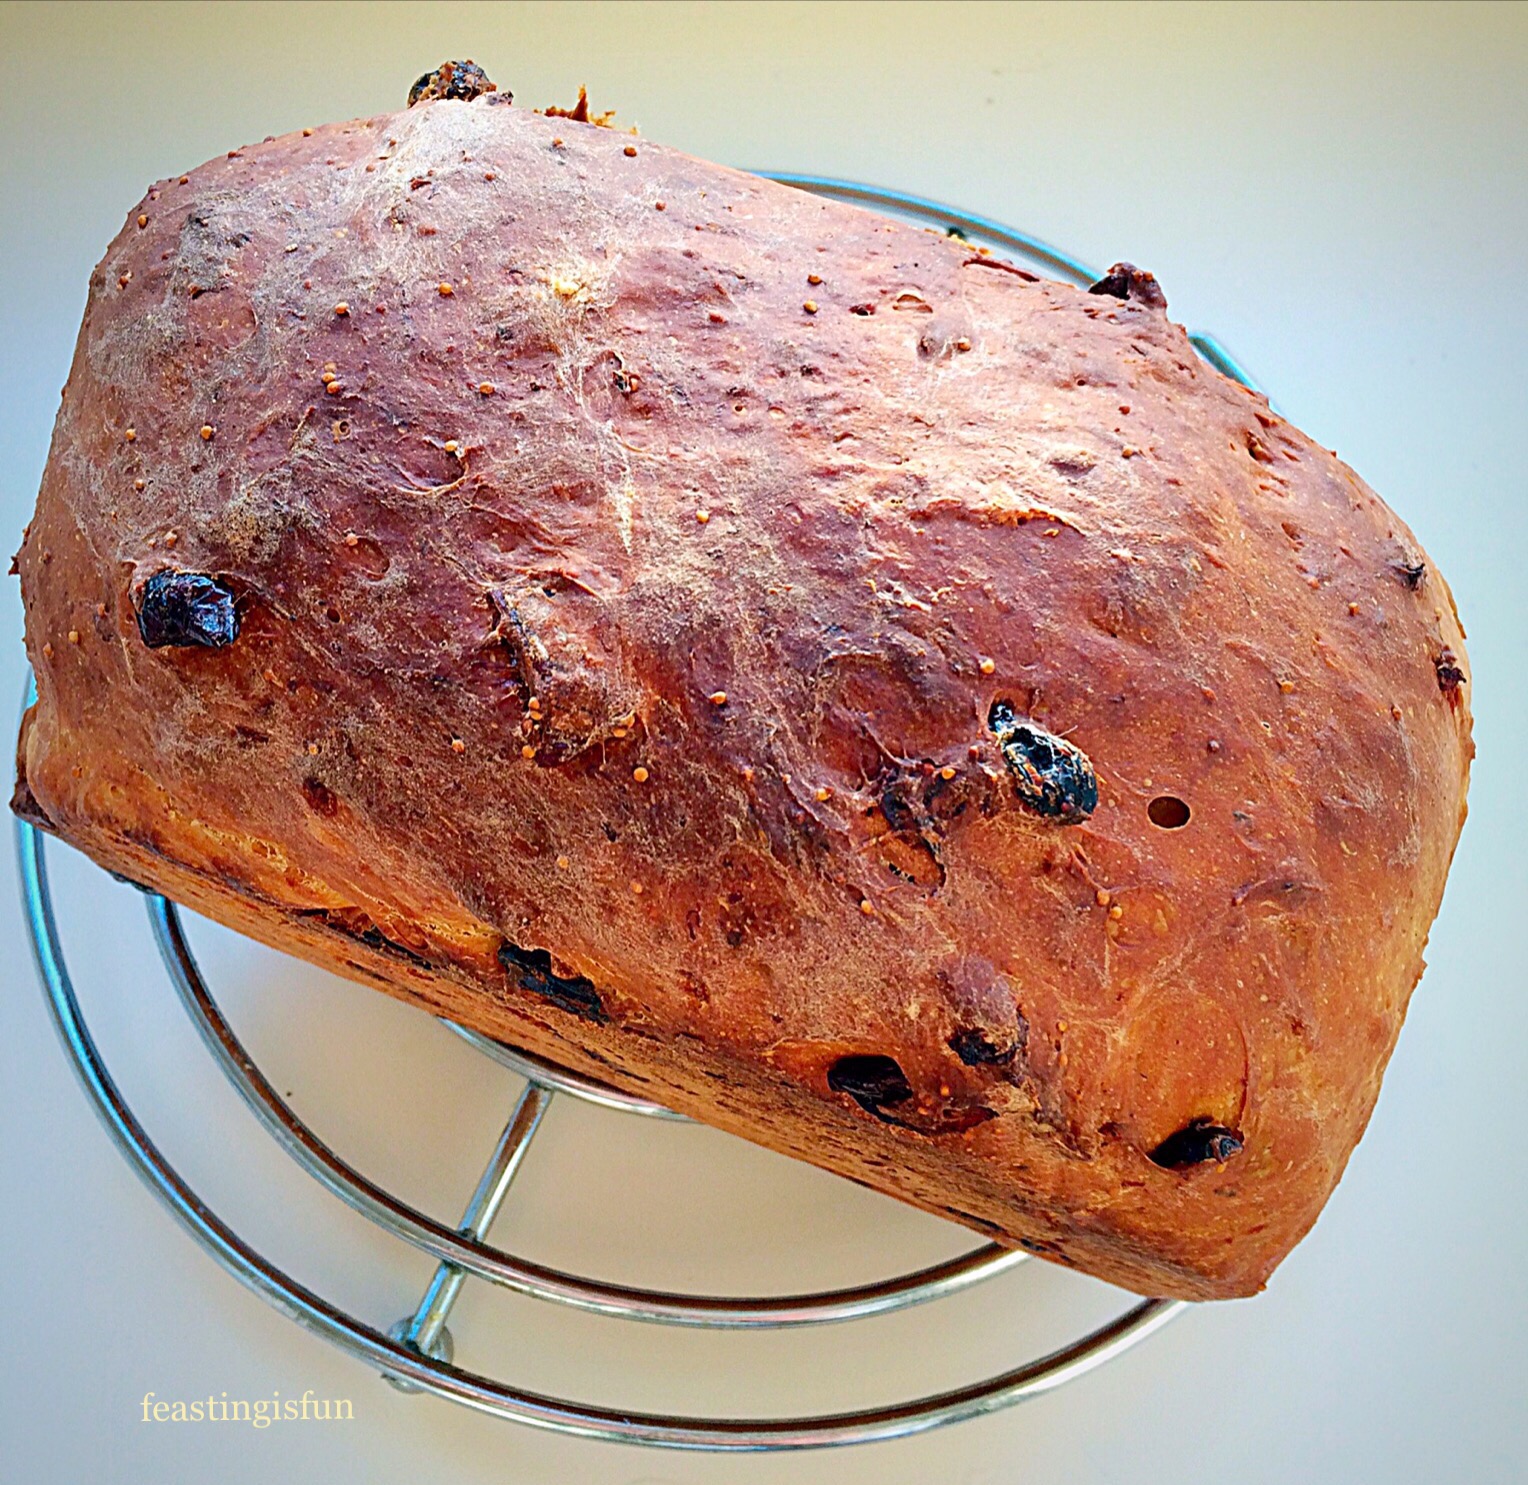
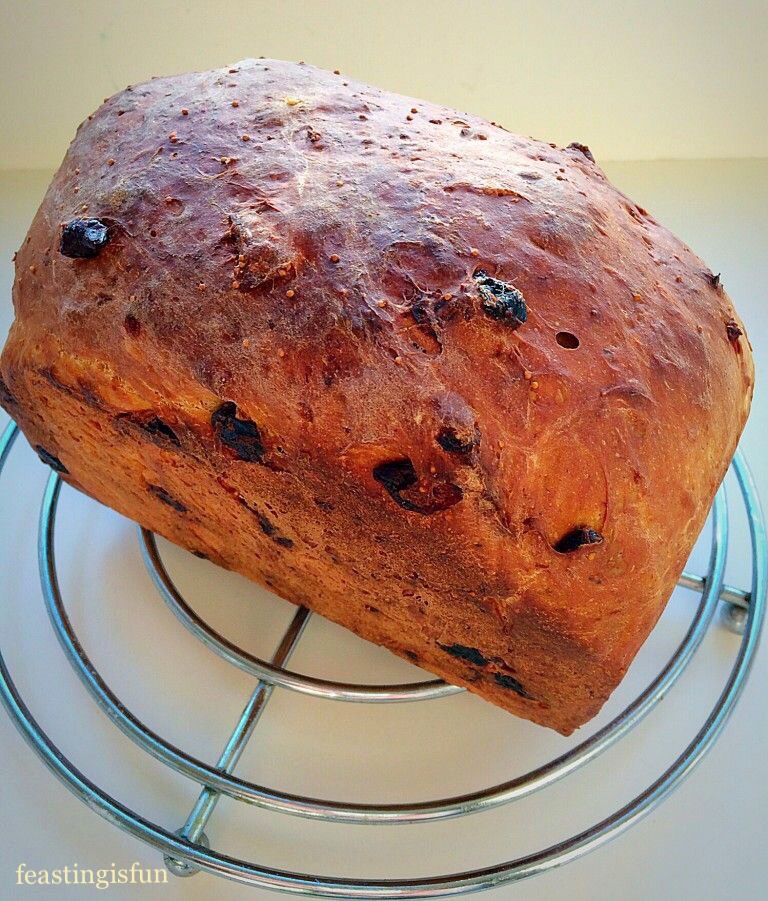
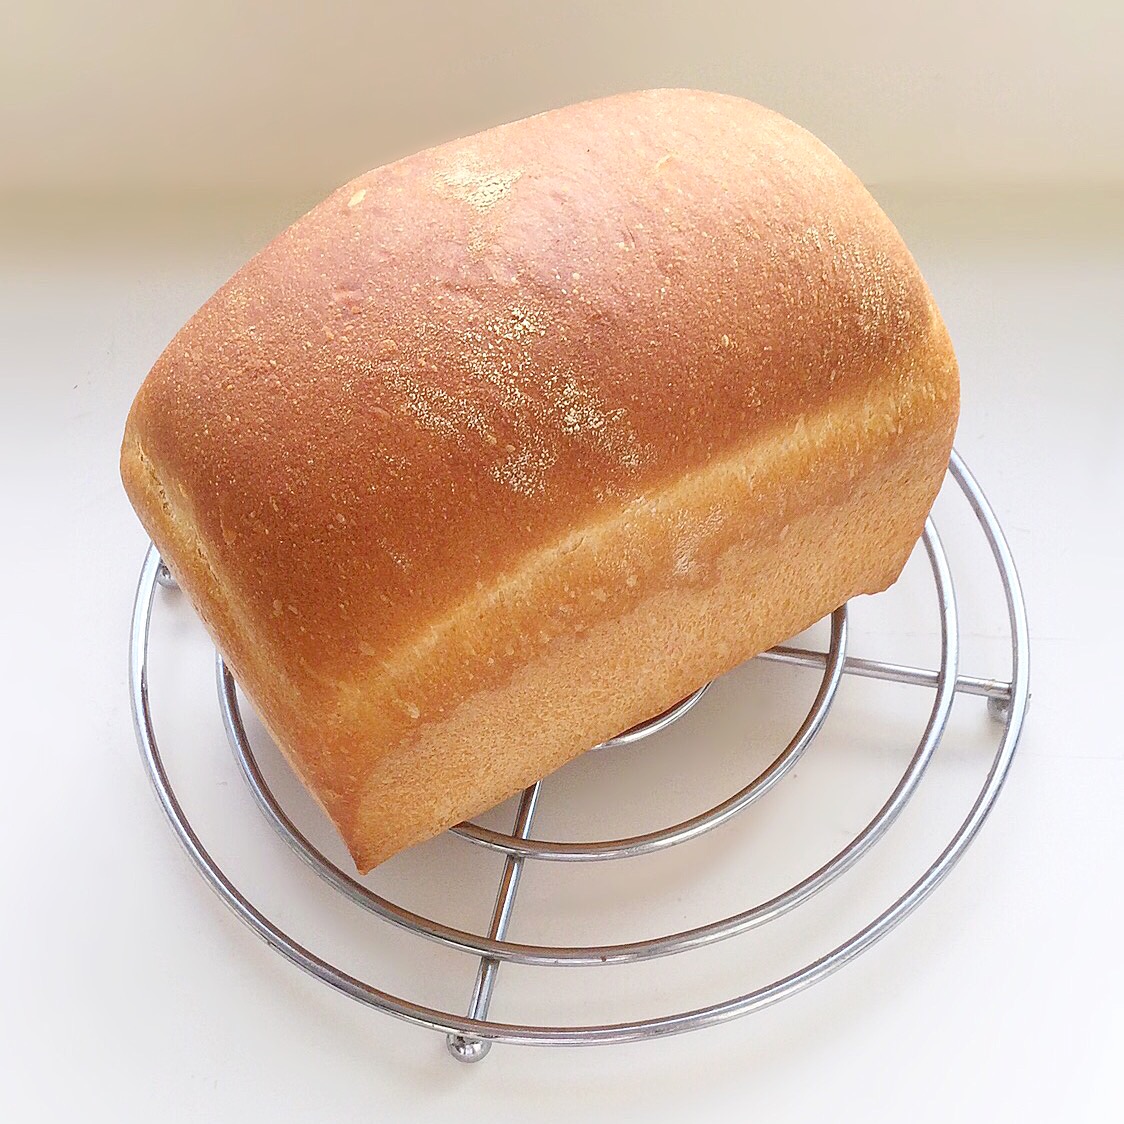
Place the loaf tin into the middle of the oven. Bake for 30 – 40 minutes. Tip the loaf out of the tin.

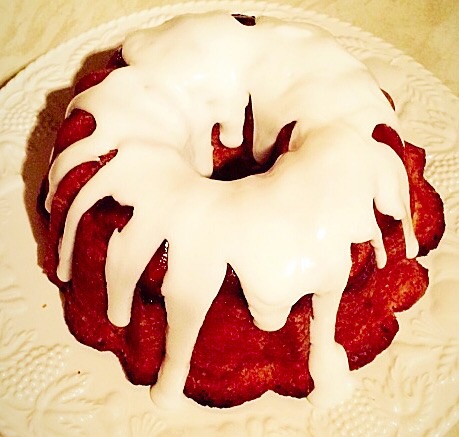
The bread is cooked when it has a deep golden crust and sounds hollow when rapped on the base with your knuckle.

For an extra crusty loaf place the bread directly on the oven shelf and bake for a further 5-10 minutes. Remove from the oven and place on a cooling rack.

Enjoy the wonderful aroma of baking bread as it fills your kitchen. That alone is worth baking this bread for!

Farmhouse White Bread Loaf

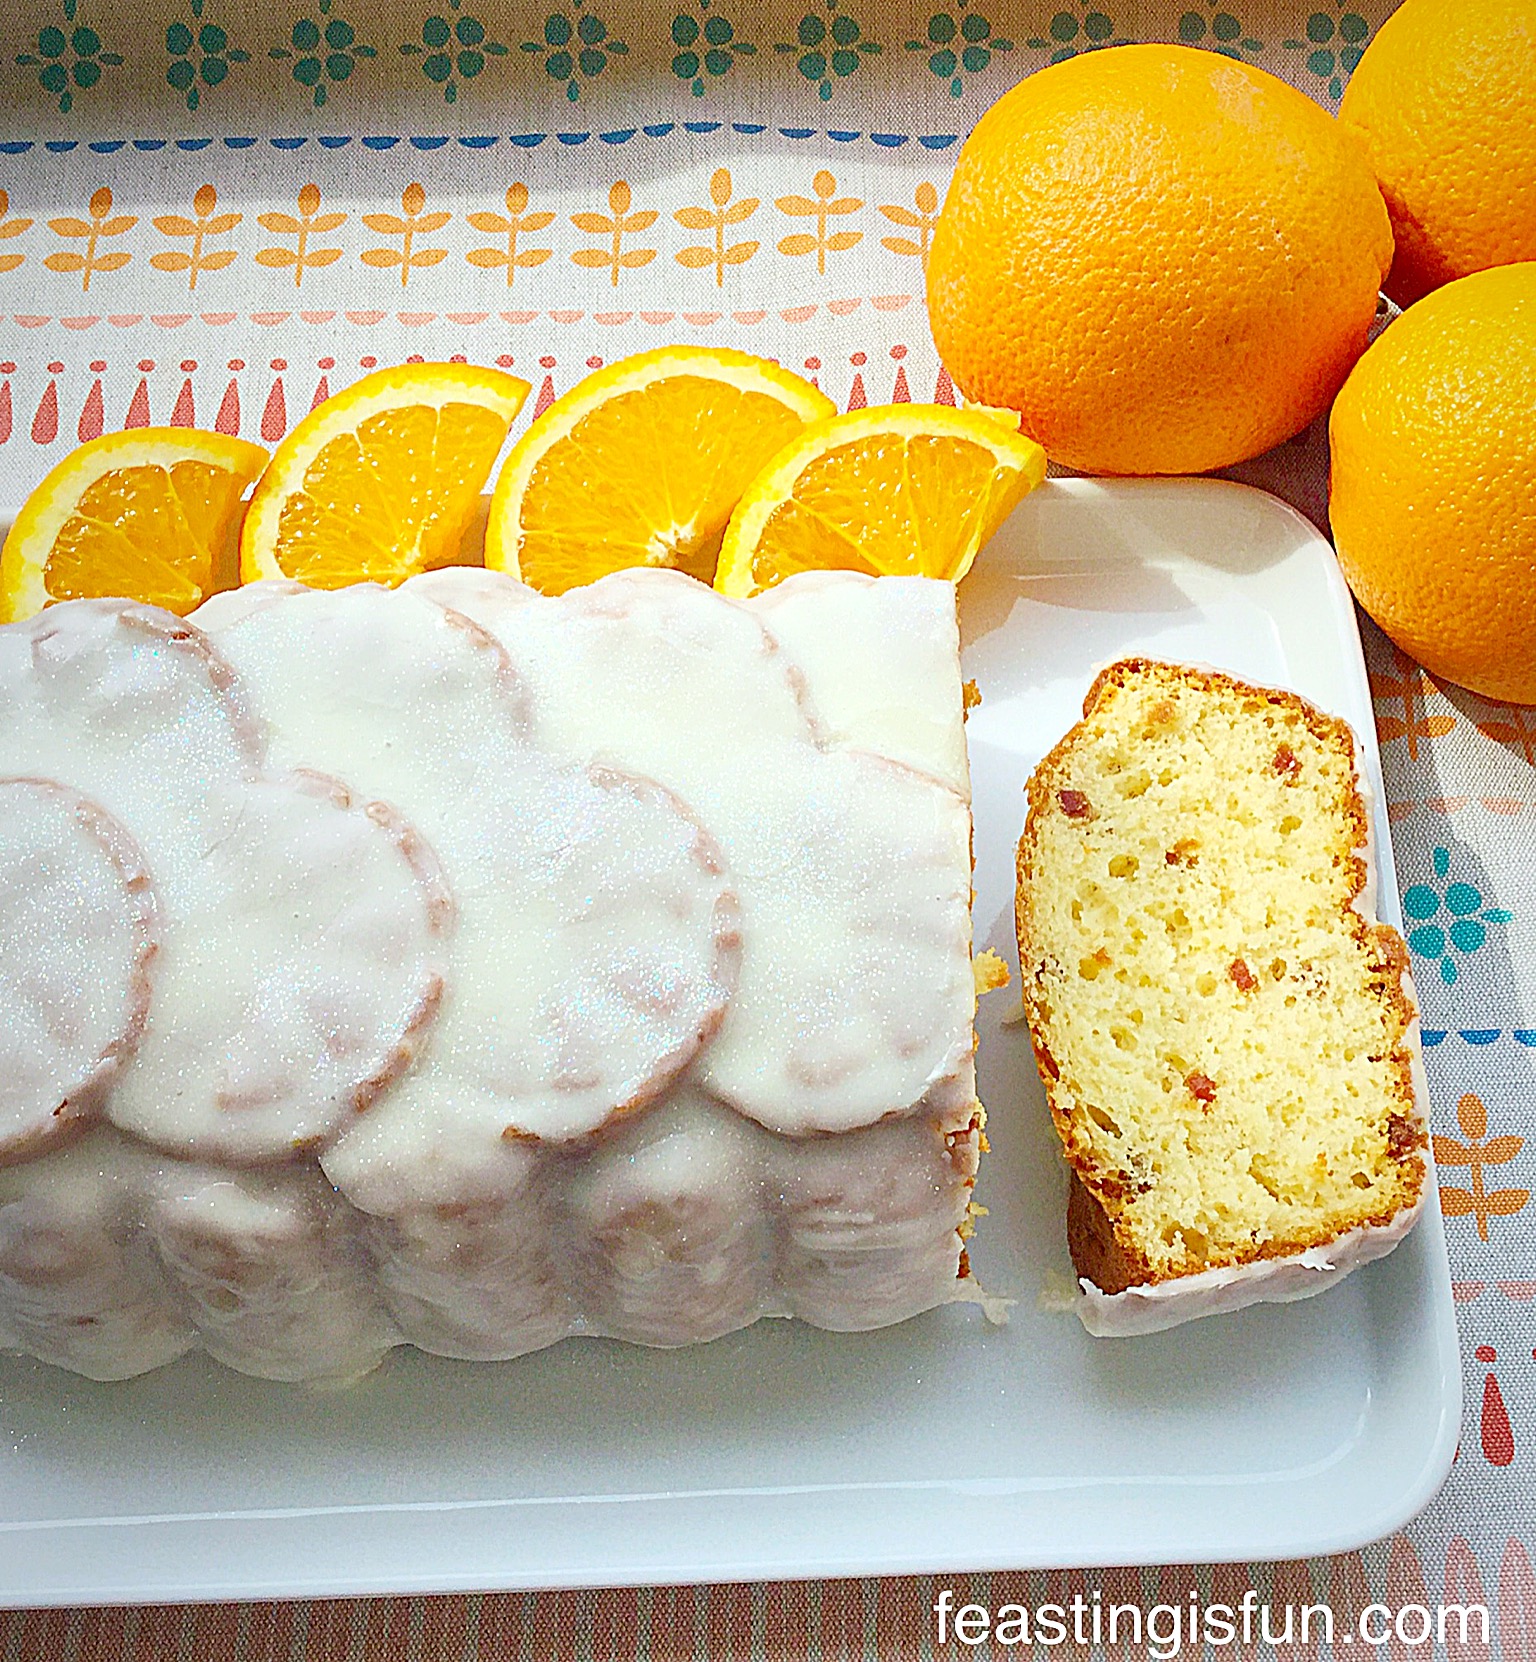
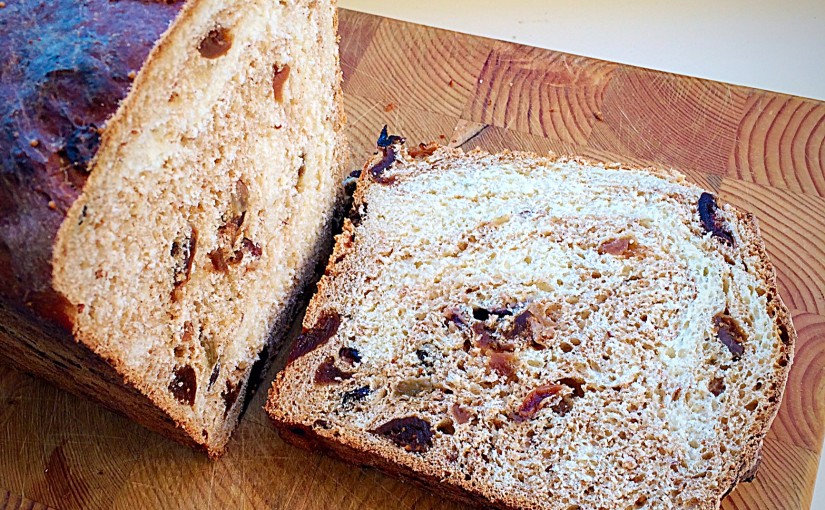
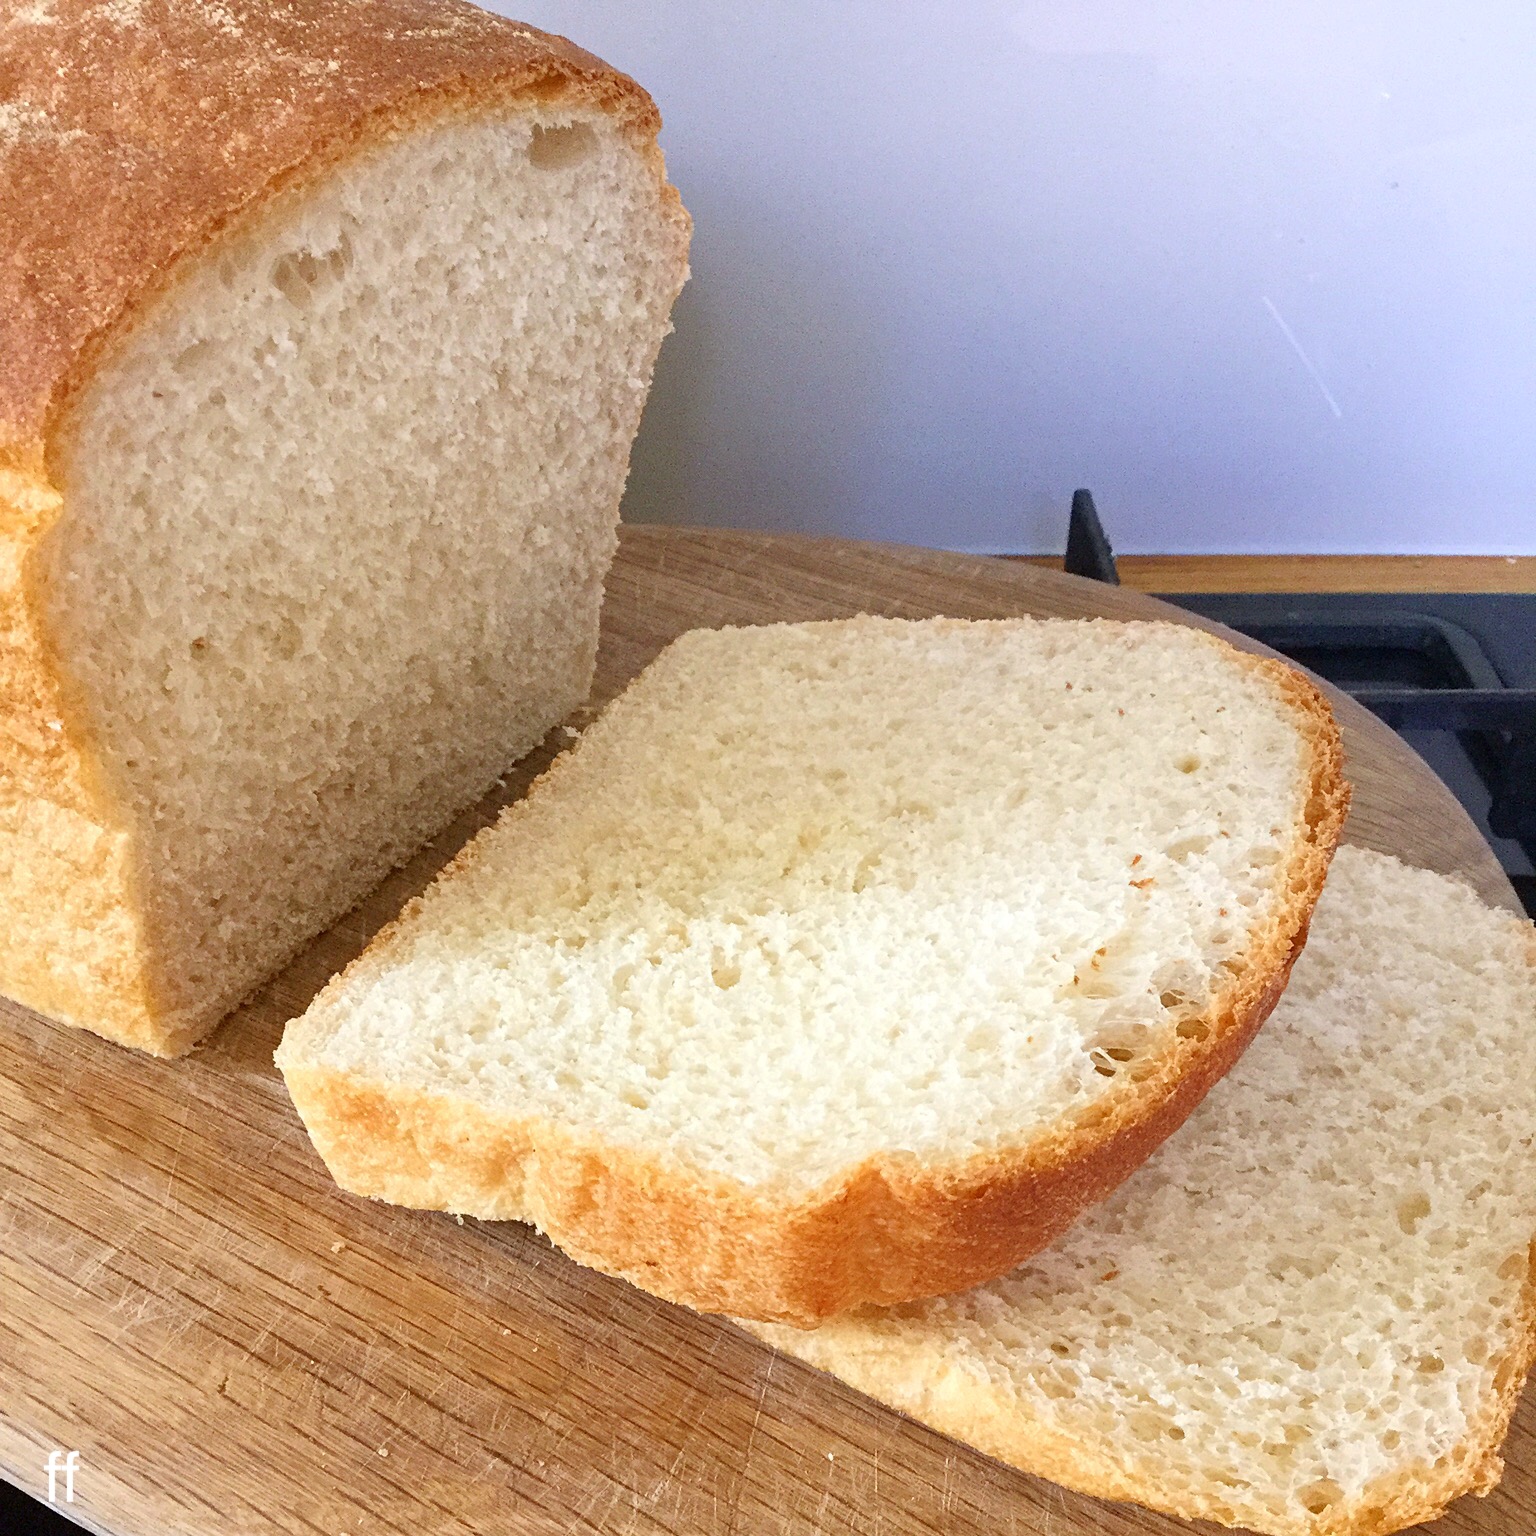
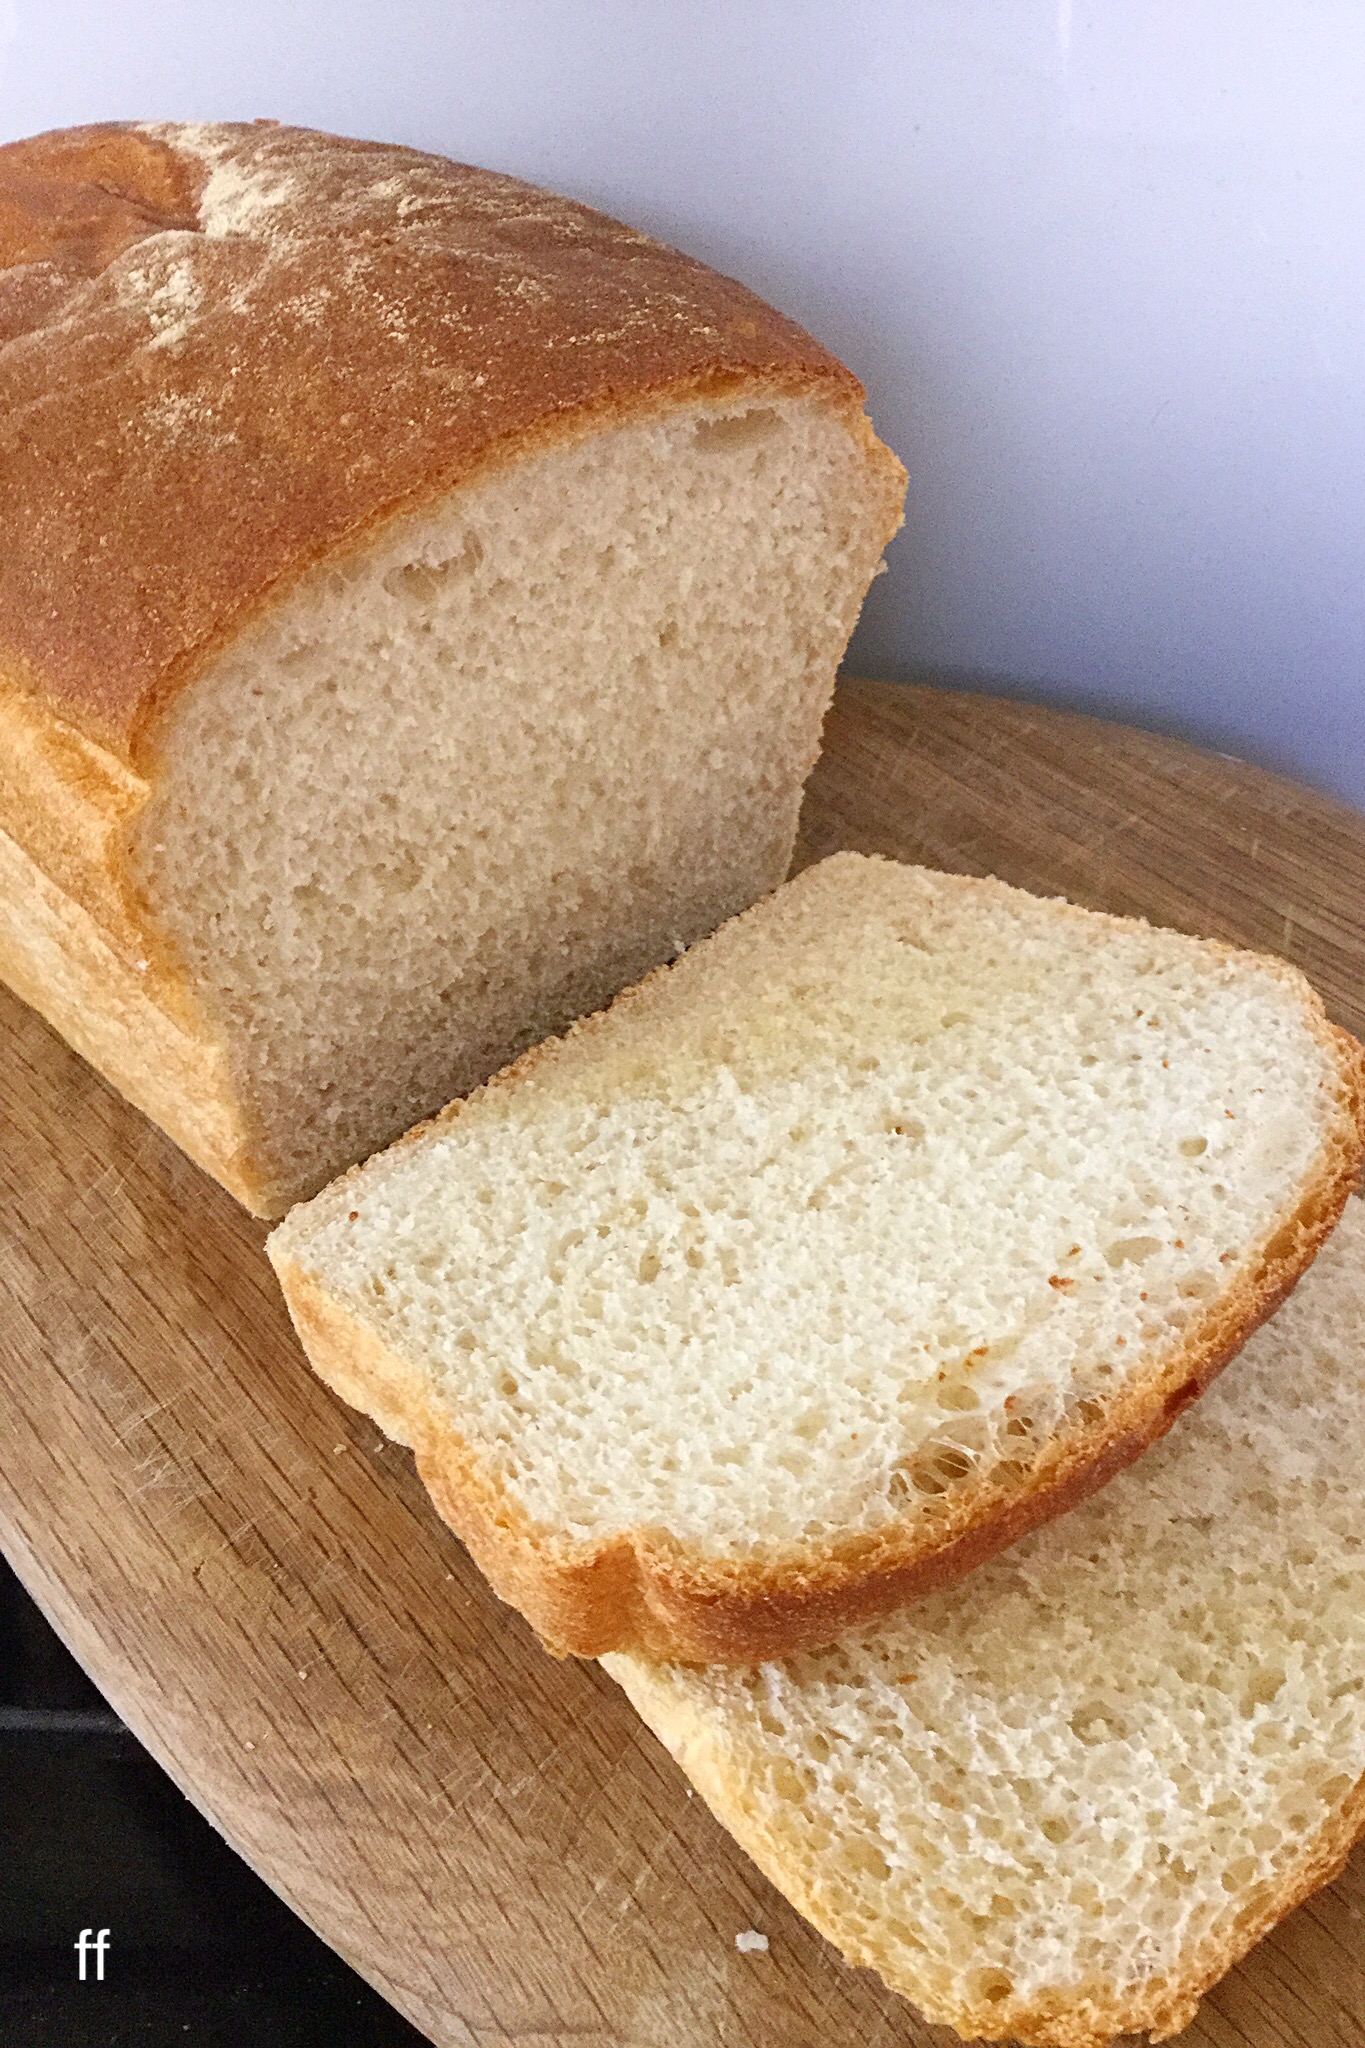
Enjoying Your Farmhouse White Loaf At It’s Best

Allow the Farmhouse White Loaf to cool completely before slicing. I know it is sooo tempting to tear into the hot, freshly baked loaf, but if you do the bread will all squidge (is that a word??) together and be very hard to slice.

Give yourself a big pat on the back for making a cracking loaf!

You deserve it.

White Sandwich Bread sliced
Farmhouse White Loaf

This was not a sponsored post. All opinions are my own and recommendations for products are purely from my own personal experience.

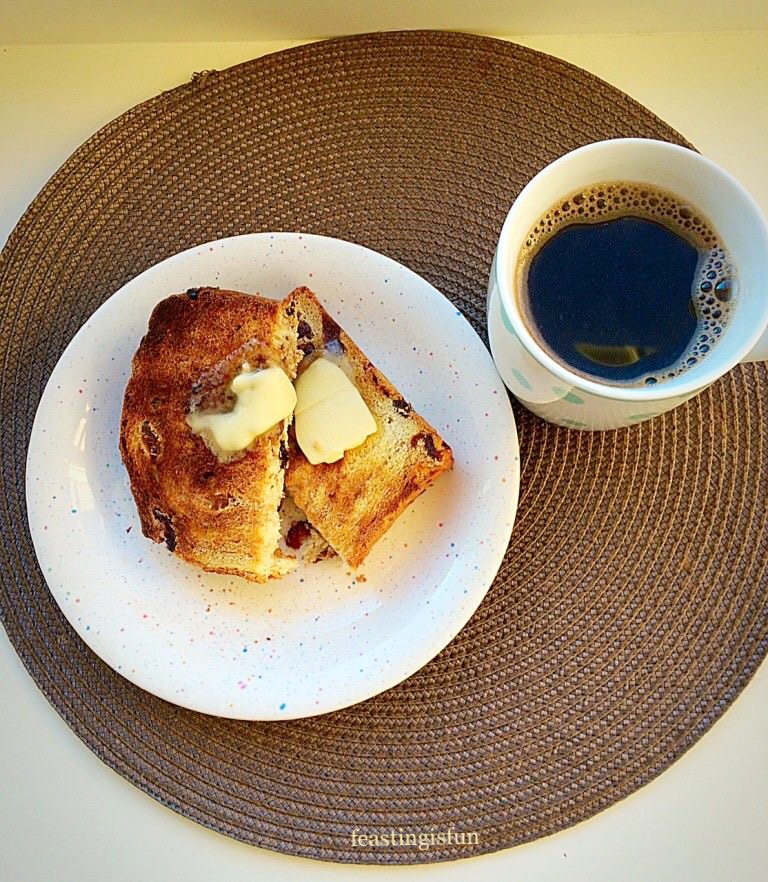
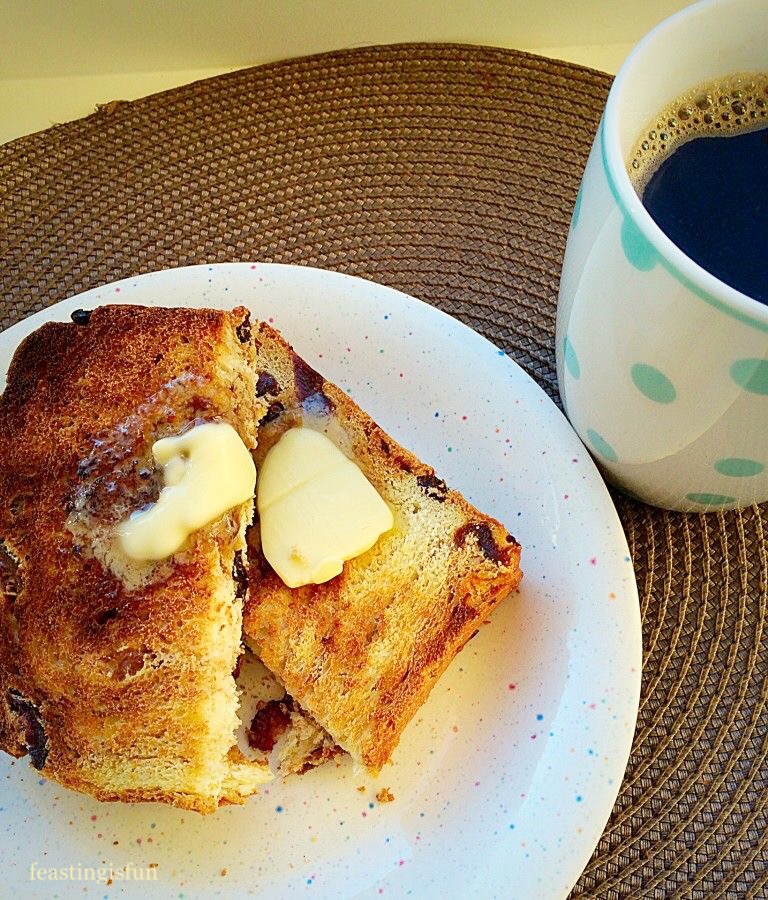
Bread is a staple in so many homes, treat yourself to a home baked loaf and I promise you won’t regret it.

FF Farmhouse White Loaf
A Farmhouse White Loaf slashed after the second prove.

Here To Help You Bake The Perfect Bread

I do not presume to be an expert, however, I have baked a fair few loaves over the years. Please ask if you are having any problems, need guidance or reassuring?

Either leave a comment or tweet (@sammiefeasting) me a question. I will do my very best to help.

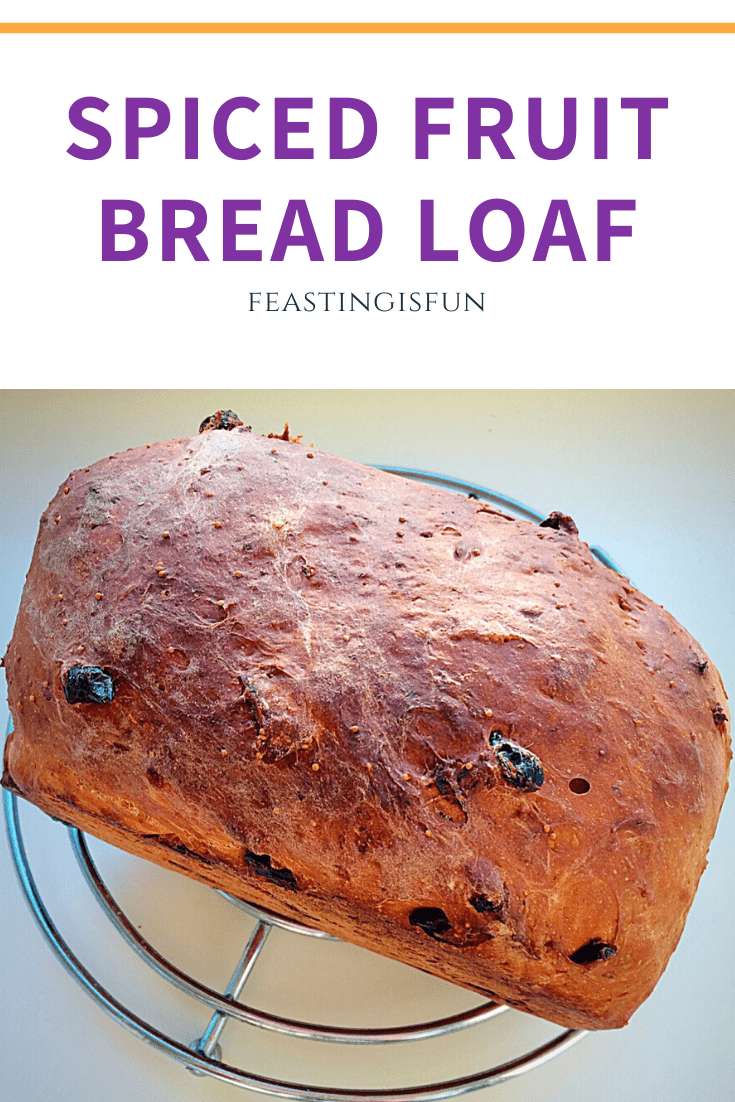
If you have enjoyed this recipe for Farmhouse White Loaf you may like to try these:

Oat Bran White Bread

FF Farmhouse White Loaf
Oat Bran White Bread

Easy Homemade Cottage Loaf

FF Farmhouse White Loaf
Easy Homemade Cottage Loaf

Garlic Rosemary Focaccia Bread 

FF Farmhouse White Loaf
Garlic Rosemary Focaccia Bread

While baking bread is not only a satisfying and tasty experience, it can also work out much cheaper than buying a standard loaf at the shops. Also, you know exactly what has gone into your home baked bread. And, the more bread you make, the better you will become at making it. As you become confident baking a  white loaf you can get creative and try other bread recipes. Although, I should issue a warning, bread making can become addictive!

So, whatever you are making, baking and creating in your kitchens, have fun preparing and sharing your feast.

Sammie xx

No part of this post may be reproduced or duplicated without the written permission of the owner. Please see my
Disclosure Policy.

Freshly baked white bread with descriptive graphics.

Share
Facebooktwitterpinterestlinkedintumblr

Glazed Lemon Bundt Cake

Share
Facebooktwitterpinterestlinkedintumblr

I adore lemons. Their fragrance, flavour and vibrant, sunny colour. So, I have put them to delicious use and made this Glazed Lemon Bundt Cake for you.

Glazed Lemon Bundt Cake

Yet Glazed Lemon Bundt Cake is an entirely different recipe to my Lemon Drizzle Cake.

Yes it still has strips of lemon zest and juice in the batter, making sure you keep topped up on your Vitamin C. In contrast, this cake is more akin to a Madeira Cake, being slightly denser than a sponge. And this is most definitely a good thing.

Also, buttermilk is added in this recipe and it ensures a moist crumb, bursting with lemon flavour.

Glazed Lemon Bundt Cake
The definition from the Bundt pan is stunning on this Glazed Lemon Bundt Cake

In Love With Lemons

So, please can we talk about the glaze for a minute?

Since it is literally TO-DIE-FOR, which I realise is slightly over dramatic, just wait till you taste it!

Because lemon juice when mixed with icing sugar becomes the most wonderful glaze. And that glaze is what we use to cover this cake.

Intensely lemony, not lip puckering though as it is forms the thinnest crust.

The lemon glaze is what first hits your tongue, waking your tastebuds up and alerting them to the buttery, lemon cake that follows. Finally, this cake is lemon through and through.

Glazed Lemon Bundt Cake
Glazed Lemon Bundt Cake look how it sparkles!

So, for all you lemon lovers out there, this is the cake you have been waiting for.

Please don’t worry if you don’t own a Bundt tin, this cake can be baked in an 8″ round tin, or a 2lb loaf tin.

Glazed Lemon Bundt Cake
Look at the fantastic detail on this Citrus Loaf Tin.

The Beauty Of Bundt Tins

I would urge you to invest in a Bundt tin. Since they take any cake batter and turn it into the most beautiful baked cake without you having to do anything. That’s got to be a good thing, right?

All my Bundt tins are by Nordic WareThere are various stockists in the UK so it’s worth shopping around, for both variety and price.

The Citrus Loaf Bundt Tin I used for this cake was bought in the sales from Lakeland for half the retail price. I know they have sold out online now, but it’s worth checking your local branch.

Also Amazon, eBay, TK Max and other retailers,  frequently have Bundt tins at lower prices.

Have I convinced you?

Recipe: Makes 1 Glazed Lemon Bundt Cake – serves 8-10

Cake Release Spray – I use Wilton’s (or melted butter for greasing the tin)

175g/6oz Unsalted Butter –  at room temperature

175g/6oz Caster Suger

200g/7oz Self Raising White Flour (if using Plain flour use 2tsp baking powder not 1/2tsp as stated below)

1/2tsp Baking Powder

1/4tsp Sea Salt – I use Maldon

3 Large Eggs – I use free range

1tsp Vanilla Extract

100ml/4fl oz Buttermilk – left out of the fridge for 1 hour prior to use

2 Lemons – washed

200g Icing Sugar – sift

Optional – white edible glitter

Making The Lemon Cake

Preheat the oven to 180C/160C fan oven, gas mark 4, 350F.

Note: If using melted butter to grease your tin, do so now, ensuring every part of the tin is covered in butter by using a pastry brush. Alternatively Spray your Bundt tin thoroughly with cake release (I do this over the sink).

  • First of all, into a large bowl whisk the butter and sugar together until pale and fluffy.
  • Into a jug add the 3 eggs, buttermilk and vanilla extract. Mix to combine.
  • Zest one of the lemons using a grater or lemon zester.
  • Cut the lemon in half.
  • Add 2tbsp of flour to the bowl, then add the egg/buttermilk mixture from the jug.
  • Whisk until thoroughly combined.

Note: The 2tbsp of flour should stop the mixture from curdling. If it does curdle please don’t worry, it will come back together in the next step.

  • Add the rest of the flour, salt, lemon zest and juice from half a lemon to the bowl.
  • Using a metal spoon gently mix all the ingredients together, until you have a smooth cake batter.
  • Spoon the cake batter into the Bundt tin, lightly pressing to ensure the batter is in every part of the tin.
Glazed Lemon Bundt Cake
Always ensure the Bundt tin is never more than 3/4 full with cake batter.

Baking The Cake

  • Place the tin into the preheated oven and bake for 50-60 minutes.
  • The cake is baked when golden, slightly shrinking away from the sides and an inserted wooden skewer comes out clean.
  • As soon as the cake is baked remove from the oven.
Glazed Lemon Bundt Cake
Place the Bundt tin onto a cooling rack and allow to cool for 10 minutes.
  • After 10 minutes cooling invert the tin onto the cooling rack and leave for 5-10 minutes.
  • Gently lift the tin away from the cake.
Glazed Lemon Bundt Cake
Ta-dah one not yet Glazed Lemon Bundt Cake.
  • Allow the cake to cool completely before glazing.

Making The Glaze And Decorating The Cake

  • Place a tray or a large piece of baking parchment under the cooling rack.
  • Sift the icing sugar into a bowl.
    Juice the remaining lemon half and the other lemon. You need 60mls exactly of lemon juice. If you do not have quite enough top up with tap water.
  • Add the lemon juice to the icing sugar and mix thoroughly until you have a very smooth consistency.
Glazed Lemon Bundt Cake
Slowly spoon the glaze over the top of the cake.
  • Allow the glaze to drip down the sides and then spoon more glaze over uncovered parts of the cake. Taking the excess glaze from the tray underneath and re-spooning it over the cake until it is completely covered.

  • When the glaze has set sprinkle lightly with white edible glitter.

Move the cake onto a serving plate.

Glazed Lemon Bundt Cake
Delicious Glazed Lemon Bundt Cake.

Give yourself a pat on the back for making such a stunning cake!

Yes, alright I know the Bundt tin did most of the work, so why wouldn’t you want to get one??

Enjoy this cake with friends, family, work colleagues, anyone who loves lemon cake. Food tastes infinitely better when shared.

If you have loved baking this Glazed Lemon Bundt cake, here are a few more you might like to try:

Glazed Orange Bundt Cake

Glazed Orange Bundt Cake

Marbled Chocolate Bundt Cake

Marbled Chocolate Bundt Cake


Mini Lemon Drizzle Bundt Cakes

Mini Lemon Drizzle Bundt Cakes

Sammie xx

No part of this post may be reproduced or duplicated without the written permission of the owner. Please see my Disclosure Policy.


Share
Facebooktwitterpinterestlinkedintumblr

Cherry Bakewell Cookies

Share
Facebooktwitterpinterestlinkedintumblr

This post is Pink. Very Pink. And I make no apology for its pinkness, for one simple reason – Cherry Bakewell Cookies. Buttery, almond and cherry cookies, drizzled with almond flavoured icing. If you like Bakewell Tart you will love these cookies.

FF Cherry Bakewell Cookies

Because I have been testing some baking equipment for British BakewareI knew I couldn’t pass up the opportunity to bake cookies, using their large baking tray. Since those of you who regularly pop round here for a chat I mean read, will know I LOVE COOKIES. I really, really love cookies – and – please don’t hate me, I prefer nutty, fruity cookies over chocolate ones. If you love choccie cookies there’s a link at the bottom of the post. I’m so good to you 😉.

Cherry Bakewell Cookies:

But before you click the link to the Chocolate Cookies, just have a peek at these delicious Cherry Bakewell Cookies.

Cherry Bakewell Cookies

Can you imagine biting into this crunchy, buttery, cookie that is filled with flaked almonds, cherries and drizzled with a perfect, not-too-sweet icing?

So have I tempted you to try these scrumptious Cherry Bakewell Cookies? Perfect with milk, or a cup of tea/coffee, especially as it is frrreeeezzzing outside today!

Cherry Bakewell Cookies

One of the reasons I enjoy baking, so much, is that I can whip up a batch of cookies or loaf of bread and I know exactly what has gone into making them. Also I  really enjoy sharing what I bake, beyond our home. By that I mean, surprising our neighbours with a gift of cupcakes, baking a gift to say thank you, or just because.

And these cookies are incredibly easy to make. Once the cookie dough is made, it is rolled into logs, wrapped and chilled in the fridge and then sliced and baked when needed. Alternatively, you could dispense with the almond drizzle, just add the almond extract to the creamed butter and sugar part of the recipe, so that these  retain that proper Bakewell taste and once baked these babies are ready to eat!

Recipe: Makes Approximately 20 Cherry Bakewell Cookies

225g/8oz Unsalted Butter at room temperature

150g/5oz Caster Sugar

275g/10oz Plain White Flour

1/4tsp Salt I use Maldon Salt

1 Large Egg Yolk – I always use free range

1tsp Vanilla Extract

100g/4oz Flaked Almonds

100g/4oz Glacé Cherries roughly chopped

For the drizzle

200g/7oz Icing Sugar

1tsp Almond Extract – available from Nielsen-Massey 

Tap water

Method:

Making the cookie dough:

In a large bowl add the butter, sugar and salt. Whisk until pale and creamy.

Add the egg yolk and vanilla extract (and the almond extract, if not making the drizzle). Whisk together until all the ingredients are combined.

Add the flaked almonds to one side of the bowl, then add the flour to the other side. Put the cherries on top of the flour and gently mix them in the flour with your fingers – this will stop the cherries sticking together and ensure they are distributed evenly throughout the cookie dough.

Cherry Bakewell Cookies

Mix all the ingredients together until they are thoroughly combined.

Cherry Bakewell Cookies
Yummy cookie dough!

Wipe the worktop with a clean damp cloth. Lay some cling film over the damp surface – it should stay in place.

Place half of the cookie dough onto the cling film and roll into a log shape approx 4cm/1.5″ diameter. Repeat with the other half of the cookie dough.

Cherry Bakewell Cookies
Cherry Bakewell Cookie dough log.

Place both cookie logs into the fridge to chill until firm – approx 1 hour.

Baking the cookies:

When the cookie logs are firm enough to slice, preheat the oven to 180C/160C fan, gas mark 4, 350F

Remove the cookie logs from the fridge and slice into 1.5 cm discs.

Cherry Bakewell Cookies
Cherry Bakewell Cookies sliced and ready to bake.

I was testing this Large Baking Tray for British Bakeware however, I would advise lining any baking tray used with baking parchment.

Place the Cherry Bakewell Cookies onto the baking tray, allowing room between each cookie, as they do spread whilst baking.

Place into the oven and bake for 15 minutes. Do not bake for longer as the cookies will become too brittle once cooled.

As soon as the cookies are baked remove from the oven.

Cherry Bakewell Cookies
Cherry Bakewell Cookies allow to cool on the baking tray for 15 minutes.

After 15 minutes cooling transfer the cookies to a cooling rack. I needed to use a palette knife to lift the cookies away from the tray. Lining with baking parchment will avoid scratching your trays.

When completely cooled the cookies are ready to be iced.

Icing the cookies:

First of all, place the icing sugar and almond extract into a bowl. Add tap water, a little at a time (I use a teaspoon to add the water), mixing thoroughly after each addition.

The icing is at the correct thickness when it can hold a figure of eight shape for a moment, when drizzled onto itself with a spoon.

Cherry Bakewell Cookies
Almond flavoured icing, ready for drizzling over the cookies.

You can drizzle the icing over the cookies with a spoon, or fill a disposable piping bag (or plastic freezer bag) with the icing. Snip the end (or corner of the bag), so that there is a small hole. Drizzle a pattern over each of the cookies.

Cherry Bakewell Cookies

Leave the icing to set on the cookies before storing in an airtight container.

Cherry Bakewell Cookies
Do you think you can stop at one?

Now invite some friends round for a cup of tea and a catch up and share these delicious Cherry Bakewell Cookies.

Alternatively pop some in a clear cellphone bag, tie with pretty ribbon and give away as gifts.

I am always hungrier when the weather turns cold. Are you?

If you have enjoyed this recipe for Cherry Bakewell Cookies you may also like these:

Chocolate Dipped Shortbread Heart Cookies 

FF Cherry Bakewell Cookies
Chocolate Dipped Shortbread Heart Cookies

Bakewell Shortbread Bars

FF Cherry Bakewell Cookies
Bakewell Shortbread Bars

Extreme Chocolate Cookies 

FF Cherry Bakewell Cookies
Extreme Chocolate Cookies

So, whatever you are making, baking and creating in your kitchens, have fun preparing and sharing your feast.

Sammie xx

No part of this post may be reproduced or duplicated without the written permission of the owner. Please see my Disclosure Policy.

Share
Facebooktwitterpinterestlinkedintumblr

Vanilla Bean Cupcakes

Share
Facebooktwitterpinterestlinkedintumblr

It’s Sunday, time for a little treat?? So how about these Vanilla Bean Cupcakes? Moist, vanilla flavoured sponge, topped with the lightest, most dreamy vanilla buttercream and a pearl, because you are special.

FF Vanilla Bean Cupcakes

Look how pretty these cupcakes are. So beautiful, that I almost called them antique Vanilla Bean Cupcakes, although I thought better of it. Since I’m pretty sure everyone would have imagined them as hard, mouldy, relics of the past – yep not conjuring up the image I’d like!!!

Especially stunning are these cupcake cases. A wonderful Christmas present from a much loved friend.

FF Vanilla Bean Cupcakes
Vanilla Bean Cupcakes


Thank You For The Presents:

Because I received quite a few cooking and baking related presents last year, for both Christmas and my birthday, using them feel extra extra special. Especially the little, cute, individual cupcake stand , present from my hubby.

Also I was very excited to receive four cookbooks, which I enjoy reading, as if they are novels. Although I very rarely follow a recipe religiously, I gather inspiration and ideas from my ever increasing cookbook collection.

Am I alone in my cookbook obsession collection?  Thought not!!!

Vanilla Bean Cupcakes perfect for afternoon tea.
Vanilla Bean Cupcakes

These Vanilla Bean Cupcakes were the final bake for a review I have been carrying out. So after much discussion with my daughter, regarding flavour combinations, we decided to settle on a classic vanilla sponge, with the addition of vanilla bean paste instead of extract. Yet I kept to vanilla extract for the best buttercream icing ever!

Look at that delicious swirl of buttercream.

The result being, the best cupcakes I have made, this year!

Recipe: Makes 12 deep filled Vanilla Bean Cupcakes or 18-20 standard ones.

For the cupcakes

150g/6oz Caster Sugar

150g/6oz Unsalted Butter at room temperature

1/4tsp Salt – I use Maldon 

150g/6oz Plain White Flour

1.5 tsp Baking powder – I use Waitrose 

1tsp Vanilla Bean Paste – I use Nielsen-Massey 

3 Large Eggs – I always use free range

25ml/1fl oz Whole Milk

Cupcake cases

For the buttercream

400g/14oz Icing Sugar -sieved

200g/7oz Unsalted Butter – very soft

1/8tsp Salt

1tsp Vanilla Extract – I use Nielsen-Massey

3tbsp Boiling Water

Edible pearls or sprinkles for decoration

Method: Preheat the oven to 180C/160C fan oven, gas mark 4, 350F

Making And Baking The Vanilla Bean Cupcakes

  • First of all, into a large bowl add the butter and caster sugar.
  • Whisk the ingredients together until pale and creamy.

Whisk the sugar and butter together until pale and creamy.

  • Add the eggs, milk, vanilla bean extract and salt to the bowl and whisk until fully combined.

Add the eggs, milk, vanilla bean paste and salt to the bowl. Mix to combine be.

  • Sift the flour and baking powder into the bowl.

Sift the flour, baking powder and salt into the bowl.

  • Fold all of the ingredients together.

Fold all the ingredients together until combined. This will ensure the Vanilla Bean Cupcakes are light and fluffy.

  • Spoon the cake batter into each cupcake case so that they are half full.

Fill each cupcake case half way with cake batter.

  • Place the cupcake tray into the middle of the preheated oven and bake for 20 – 25 minutes (a shorter time will be required for smaller cupcakes).
  • The cupcakes are baked when golden brown and spring back when pressed lightly in the centre.
  • As soon as the cupcakes are baked remove the from the oven.
Baked, golden Vanilla Bean Cupcakes.
Vanilla Bean Cupcakes.
  • Allow the cupcakes to cool in the pan for 10 minutes and then place them on to a cooling rack to cool completely.

The Key To Making The Lightest Buttercream Frosting:

  • Place the butter, salt, vanilla extract and butter into a large bowl.

Place the butter, salt, vanilla extract, sifted icing sugar and boiling water into a large bowl.

  • Starting on a low speed whisk all of the ingredients together.

Starting on a low speed, mix all the buttercream ingredients together, gradually increasing the mixer speed.

  • For the very lightest, creamiest buttercream, continue mixing for 10 minutes. The result will be the dreamiest buttercream icing you will ever have tasted.
  • The addition of very hot water to the buttercream mix, stops it from forming a hard crust.

Decorating The Cupcakes:

  • Fit a large piping bag with the tip of your choice – I used a large French star tip.
  • Fill the bag with buttercream and fold over the top of the bag.
  • Using a circular motion, pipe buttercream in a swirl effect, onto the top of each cupcake.
Vanilla Bean Cupcakes swirling, light buttercream, adorns the tops.
Vanilla Bean Cupcakes
  • Finally top each cupcake with an edible pearl, or edible decoration of your choice.
Vanilla Bean Cupcakes an edible pearl provides the finishing touch to these edible treats.
Vanilla Bean Cupcakes

I hope you’ll agree with me, that these cupcakes are elegantly beautiful ?

Usually I cannot wait to sprinkle edible glitter on, well pretty much anything I bake, but these Vanilla Bean Cupcakes looked so perfect after the addition of the pearl, that I managed to restrain myself.

Resulting in a spectacularly elegant cupcake, that tastes every bit as good as it looks.

Vanilla Bean Cupcakes timeless elegance, in cake form.
Vanilla Bean Cupcakes

While carrying out a review of a cupcake tin for British Bakeware, I was impressed with how evenly the cupcakes baked. Also the tin washed clean easily in hot soapy water.

These Vanilla Bean Cupcakes did not last very long in our home, although I did give our neighbours a couple. I believe food tastes better when shared. While I only spent 10 minutes with them, we had a lovely catch up chat and they were thrilled with the cupcakes I gave to them.

If you enjoyed this recipe for Vanilla Bean Cupcakes, then I hope you’ll like these too:

Black Forest Cupcakes

V Black Forest Cupcakes
Black Forest Cupcakes chocolate, cherries and dreamy topping.

Lemon Blueberry Cupcakes 

FF Vanilla Bean Cupcakes
Lemon Blueberry Cupcakes

Pink Heart Topped White Chocolate Cupcakes 

FF Vanilla Bean Cupcakes
Pink Heart Topped White Chocolate Cupcakes

During the winter months especially, weeks, indeed months can easily pass without people living in close proximity, exchanging a word. Furthermore it really is worth taking a few minutes out of each day, once a week, or so, to make the effort to talk to those who live close by.

Are you friendly with your neighbours?

Do you keep a check on elderly or infirm neighbours, especially during the cold, winter months?

Whatever you are making, baking and creating have fun preparing and sharing your feast.

Sammie xx

@sammiefeasting Twitter/Instagram

Share
Facebooktwitterpinterestlinkedintumblr

Spiced Fruit Loaf

Share
Facebooktwitterpinterestlinkedintumblr

Hi, I have a double treat for you today. This absolutely delicious Spiced Fruit Loaf not only tastes amazing, but, the aroma, gently wafting from the oven, makes the whole house smell incredible. Cinnamon and bread filled with tasty dried fruit, baking together.

Who needs air freshener when you can bake this wonderful Spiced Fruit Loaf,


Spiced Fruit Loaf

If you have never baked bread before, bake this!

This Spiced Fruit Loaf is stuffed full of dried fruits. Don’t hide raisin haters! Although there are some dried vine fruits in this loaf (which you can absolutely leave out), there’s also dried cranberries and figs. Soft, golden, dried apricots would be a fantastic addition as well.

Spiced Fruit Loaf

The bread dough is enriched with egg, milk and butter and spiced with cinnamon and ginger. And as if bread baking didn’t smell good enough, this Spiced Fruit Loaf kicks it into another dimension.

A Great Breakfast Bread Loaf

My absolute favourite way to enjoy this bread is toasted, for breakfast. As my nose is assaulted with another spice hit as the bread toasts.

Perfect with a cup of good coffee.

Breakfast with back coffee and toasted fruit bread.
Spiced Fruit Loaf

I have been reviewing some baking products from British Bakeware, including their 3lb loaf pan. Having baked a range of breads I wanted to create something that really did the pan justice.

This Spiced Fruit Loaf does!

Spiced Fruit Loaf sliced and toasted with butter.
Spiced Fruit Loaf

One thick slice of this bread kept me full all morning – and it contains fruit, so it must be good for you. Right?

Everyone in our house was eager to try this tasty breakfast loaf this morning and they were not disappointed. As a mum I’m happier, during these chilly winter months, when they all have a hot breakfast. And I honestly do believe it is the most important meal of the day. So why not make it a tasty one?

Recipe: Makes 1 Spiced Fruit Loaf

500g/1lb 2oz Strong White Bread Flour

1 Large Free Range Egg

Approx 320ml/ just over 1/2 pint Whole Milk at room temperature

1tsp Honey

1 Sachet Fast Action Dried Yeast (7g)

1tsp/7g Salt – I use Maldon

75g/3oz Unsalted Butter plus extra for greasing the loaf pan

2tsp Cinnamon

1tsp Ginger

225g/8oz Dried Fruit – I used equal quantities of vine fruits, chopped dried figs and dried cranberries

You will need a 3lb loaf pan.

Making And Proving The Dough

  • Crack the egg into a jug. Make up to 340mls/12fl oz with milk. Using a fork, lightly beat together to break up the egg.
  • Pour this liquid into the bowl of a bread maker or stand mixer.
  • Add the honey and yeast.
  • Next add the flour.
  • Add the salt to the top of the flour and add the cubed butter.

If using a bread maker start the dough cycle, adding the spices and dried fruit when prompted by the machine, or 5 minutes before the mixing finishes.

If using a stand mixer, attach the dough hook. Mix on medium speed until all the ingredients are combined into a dough. Continue mixing for a further 5 minutes. Stop the mixer and scrape the dough from the hook, back down into the bowl. Add the spices and dried fruit and continue to mix on medium speed for a further 5 minutes. Stop the mixing and scrape all the dough from the hook. Form into a ball, place back into the mixer bowl, cover with a damp cloth and leave in a draught free place until doubled in size – approximately 1 hour.

Butter the loaf pan and set aside.

Knocking Back And Shaping The Dough

When the bread mixer has finished its dough cycle, restart again and allow the machine to mix (knock back) the dough for 2 minutes.

As soon as the dough in the stand mixer bowl has doubled in size, remove the cloth and mix, with the dough hook attached, on medium speed for 2 minutes. Again this knocks back the dough.

  • Turn your knocked back dough out onto a floured surface. It will be very sticky.
  • Press the dough to form a roughly rectangular shape.
  • Fold the bottom third of the dough up and then bring the top third down.
  • Turn the dough over, so that the seam is underneath. Form the dough into a log shape and place into the prepared loaf pan.
  • Finally, cover with a damp cloth and leave in a draught free place until doubled in size – approx 1 hour.

10 minutes before the loaf is ready to be baked preheat the oven to 220C/200C fan  oven, gas mark 7, 425F.

Unbaked spiced fruit bread loaf.
Spiced Fruit Loaf

Baking The Spiced Fruit Bread Loaf

  • As soon as the dough is doubled in size, remove the cloth and bake in the centre of a preheated oven for 30 minutes.
  • The loaf is baked when it has a dark, golden crust and sounds hollow when rapped on the base with your knuckle.
  • When baked, remove the bread from the oven.
  • Turn the loaf out of the pan and place on a cooling rack.
Bread filled with dried cranberries, figs and sultanas and flavoured with cinnamon and ginger.
Spiced Fruit Loaf

Leave to cool completely.

I know you want to tear into this Spiced Fruit Loaf the moment it comes out of the oven, but you shouldn’t. The butter and fruit in this loaf make it particularly squidgy whilst warm.

Trust me! As soon as this beauty is cool it will slice beautifully.

Enjoy as is, smothered in butter, or toasted and buttered.

If you enjoyed this recipe for Spiced Fruit Loaf then you may also like these:

English Muffins

English Muffins

Homemade Chelsea Buns

Homemade Chelsea buns with a lemon icing drizzle.
Homemade Chelsea Buns

Farmhouse White Loaf

Farmhouse style white bread loaf.
Farmhouse White Loaf

I absolutely love the smell and taste of hot cross buns around Easter and if you feel the same I know you too will enjoy this spiced and fruited bread. And a huge advantage to making bread at home is you can add whatever dried fruits you like. For example, I am allergic to oranges, yes it is annoying, but it means I can make Hot Cross Buns at home and leave the offensive ingredient out! Because that’s the beauty of baking at home, you chose what goes into your bakes.

So, whatever you are making, baking and creating in your kitchens, have fun preparing and sharing your feast.

Sammie xx

No part of this post may be reproduced or duplicated without the written permission of the owner. Please see my Disclosure Policy.

Pinterest image of spiced fruit bread loaf with descriptive graphics.


Share
Facebooktwitterpinterestlinkedintumblr

Chocolate Heart Cake

Share
Facebooktwitterpinterestlinkedintumblr

If you love someone and they love chocolate then THIS is the cake to bake for them my Chocolate Heart Cake. So, my hubby’s birthday was at the start of the year AND I didn’t make him a birthday cake.

Chocolate heart cake
Chocolate Heart Cake

While we still had nearly a whole Christmas cake left, we also had chocolate, in all it’s delicious forms, everywhere. Yet my hubby wanted a chocolate cake for his birthday. And I was struggling with the chocolate remnants of Christmas past that were, increasingly, threatening to take over every cupboard and side table in the house.

Breath……in……..and…..out.

Phew I was in danger of being over dramatic there?

What a difference a week makes.

Finally, three teenagers and hubby had made significant inroads on the chocolate abundance. Finally, it was time to bake a cake. Most importantly a chocolate cake!

It was late.   Delayed.   Belated.   Not on time.

There was no getting away from it. As soon as possible I needed to pull out all the stops and come up with an I Love You and I’m sorry it’s late, birthday cake.

And I’m pretty sure I nailed it with this fudgy, moist, rich, Chocolate Heart Cake.

Chocolate Heart Cake

Too near Christmas and this cake would have been too much. Since it is deeply chocolatey cake, slathered in a smooth, yet decadent chocolate ganache, accented with little white chocolate hearts. Because this Chocolate Heart Cake is perfect for all true chocolate lovers.

Find Happiness In Everything

Cake that’s worth the wait

And fortunately for me, my wonderful husband was happy to wait for his cake. Because, not only is he the one and only true love of my life, he is the kindest, most patient, loving man I have ever known.

So girls, don’t settle for second best, or not give proper attention to the man you are with, in the hope that someone better will rock up. As soon as you find someone who loves you, for you, with all their heart, hold on tight and never let go.

Just sayin’.

Back to all matters cake. While I was going to wait until Valentine’s Day to post this recipe, I remembered my heart tin, which I bought very cheaply, in the January sales last year.

So, if you like this cake, want to make it and see a heart tin in the sales, grab that bargain!

Chocolate Heart Cake with birthday candles.

Recipe: Makes 1 Chocolate Heart Cake – serves 10-12

225g/8oz Unsalted Butter at room temperature, plus a little extra to grease the tin

225g/8oz Light Soft Brown Sugar

1/4 tsp Sea Salt – I use Maldon

4 Large Eggs – I use free range

150ml/5fl oz Sour Cream

1tsp Vanilla Extract I use – Nielsen-Massey

125g/5oz Plain White Flour

75g/3oz Cocoa Powder – I use Callebaut

2tsp Baking Powder

75g/3oz Dark Chocolate

75g/3oz Milk Chocolate

150ml/5fl oz Double Cream

50g/2oz White Chocolate

Method: Preheat oven to 180C/160C fan, 350F, gas mark 4

Making the cake

Grease the pan and line the base with baking parchment.

  • First of all grease the tin and line with baking parchment.
  • In a large bowl whisk together the butter and sugar until pale and fluffy.
  • Crack the eggs into a jug, gently whisk to break up. Add the sour cream and vanilla extract to the eggs and stir to combine – wet ingredients.
  • Weigh the flour, cocoa powder, baking powder and salt into a sieve  – dry ingredients.
  • Sift one third of the dry ingredients into the creamed sugar and butter.
  • Add half of the wet mixture to the bowl. Mix gently until combined.
  • Repeat the addition of dry and wet ingredients.
  • Mix until combined and then slowly mix in the last of the dry ingredients.
  • Spoon the cake batter into the tin and smooth the surface.


Spoon the chocolate cake batter into the heart tin.

  • Place the cake into the oven and bake for approximately an hour.
  • The cake is baked when it springs back from a light touch.
  • Don’t worry if there is a slight jiggle to the cake, as long as it springs back when pressed.
  • As soon as the cake is baked remove from the oven.
Chocolate Heart Cake
  • Leave the cake to cool for 30 minutes in the tin.
Chocolate Heart Cake turn the slightly cooled cake out, bottom side up, onto a cooling rack.
Chocolate Heart Cake
  • Turn the cakeout of the tin and place bottom side up on a cooling rack.Take care when turning this cake out, as it is very moist, with an almost ‘brownie like’ texture.
  • Allow the cake to cool completely before decorating.

Decorating the cake

  • Place the double cream, milk and dark chocolate into a heat proof bowl set over a double boiler see here for detailed photos.
  • Stir constantly, removing the bowl from the heat when the chocolate is two thirds melted.  Keep stirring until all the chocolate is melted into the cream.
  • Set aside until slightly cooled and thickened.
  • Place the Chocolate Heart Cake onto a board or cake stand.

Pour the slightly cooled, thickened, chocolate ganache onto the cake.

  • Pour the slightly cooled and thickened chocolate ganache on to the cake.
  • Smooth the ganache over the cake, using a spoon or palette knife, allowing it trust cover the sides.

Smooth the ganache over the top of the cake, allowing it to just edge over the sides.

  • I used the back of a spoon, however, a palette knife would have given a smoother finish.
  • Melt the white chocolate, in a small heatproof bowl, in the microwave, set to medium. Zap in 20 second bursts, stirring after each one, until the chocolate is two thirds melted.
  • Remove from the microwave and continuously stir until the chocolate is melted and smooth.
  • Starting at the centre of the heart dip, drip, using a teaspoon, a small circle of white chocolate onto the cake. Approx. 1cm diameter.
  • Using a cocktail stick and starting just above the circle, drag the stick through the white chocolate to create a wispy heart accent.
Creating the wispy heart decoration.
  • Add as many heart accents as you like. Although the finished cake will look better if decorated in a symmetrical pattern.
  • Finally, move the cake to a cool place to set. During warmer months refrigerate.
Chocolate Heart Cake 

Most importantly, my husband was thrilled with his birthday cake.

Also it not only looked fantastic, but tasted deeply chocolatey too!

If you have enjoyed this recipe for Chocolate Heart Cake here are some others you may like:

Chocolate Sparkle Cake 

FF Chocolate Heart Cake
Chocolate Sparkle Cake

Marbled Chocolate Bundt Cake 

FF Chocolate Heart Cake
Marbled Chocolate Bundt Cake

Malted Marbled Chocolate Cake 

FF Chocolate Heart Cake
Malted Marbled Chocolate Cake

So, whatever you are making, baking and creating in your kitchens, have fun preparing your feast.

Sammie xx

No part of this post may be reproduced or replicated without the written permission of the owner. Please see my Disclosure Policy.


Share
Facebooktwitterpinterestlinkedintumblr

Raspberry Almond Cream Cake

Share
Facebooktwitterpinterestlinkedintumblr

Welcome to a New Year and what better way to celebrate than with my Raspberry Almond Cream Cake.

Raspberry Almond Cream Cake perfect as a celebration cake and for sharing www.feastingisfun.com

This cake was made on December 31st 2015 and was taken to our very good friends, for their New Years Eve party.

It has been so long, too long, since I have been out of the house for anything other than a Doctors or Hospital appointment. We were invited to our friends, ages ago. Having missed out on other family gatherings, I really wanted to see the year out on a positive note.

Raspberry Almond Cream Cake moist, fruity cake www.feastingisfun.com

Taking this Raspberry Almond Cream Cake, as a gift, to our friends house, was also a massive achievement. The cake looked festive, without being too Christmassy. I resisted the urge to sprinkle some edible glitter on the top. Setting the cake on a gold plate seemed beautiful enough.

Raspberry Almond Cream Cake moist sponge layered with cream, jam and fresh fruit www.feastingisfun.com

The almond flavour in the moist sponge, pairs really well with gorgeous, plump, deep crimson raspberries. I tend to find frozen raspberries hold their flavour and shape and are excellent to keep on hand, in the deep freeze, for the winter months. On this occasion, fresh raspberries were available, but I would totally make this again with frozen fruit!

An extra layer of raspberry jam, brought additional flavour and made all the ingredients in this Raspberry Almond Cream Cake ‘sing’.

Raspberry Almond Cream Cake I wish I had a slice of this now www.feastingisfun.com

Usually when baking a layered cake I bake separate sponges, this time however, I baked one gorgeous, almond sponge and cut it in half. The result was an extra moist cake that kept people going back for another slice!!

If making this cake for only adults, I woud certainly have brushed the inside of the cut sponge with some Framboise (raspberry liquer), or alternatively added a splash of delicious almond liquer to the cream!

Here’s how to make this luscious cake!

Recipe: Makes 1 large 10″ Raspberry Almond Cream Cake serves 12

10oz/275g Unsalted Butter – at room temperature

10oz/275g Caster Sugar

8oz/225g Self Raising Flower

2oz/50g Ground Almonds

1/2tsp Baking Powder

1tsp Vanilla Extract – I use Nielsen-Massey 

1tsp Almond Extract

1/4tsp Salt

4 Large Free Range Eggs

2floz/50ml Whole Milk

3oz/75g Almond Flakes – very lightly toasted

2 packets Fresh or Defrosted Raspberries 14oz/400g

15floz/400ml Double Cream

3Tbsp Raspberry Jam

Method: Preheat oven to 175C/160C fan oven

Grease and line the base of a 10″ springform cake pan.

In a large bowl whisk the butter, sugar and salt together until pale and fluffy.

Add one third of the dry mix (flour, ground almonds and baking powder), 2 eggs, half the milk and the vanilla and almond extracts.

Mix until just combined.

Repeat the last step.

Finally add the last third of the dry ingredients and mix until combined.

Place the cake batter into the springform pan.

Bake in the oven for approximately an hour. The cake is baked when it is golden brown and springs back when pressed lightly in the centre.

Once baked remove the cake from the oven and place the pan on a rack to cool for 15 minutes.
After 15 minutes turn out the cake from the pan and leave to cool completely on a cooling rack.

Once the cake is cooled, carefully slice the sponge in half.

Use a serrated bread knife to slice the sponge in half.

Whip the double cream until it just holds a peak.

Spread the raspberry jam over one half of the sponge.

Sort through the raspberries and reserve 12 of the largest, plumpest fruits for the top of the cake.

Spread half of the whipped cream on the other half of the sponge. Add half of the raspberries.

Place the sponge, spread with jam, on top of the cream and raspberry filled sponge.

Raspberry Almond Cream Cake - spread the remaining cream on top of the cake, decorate with Raspberries and sprinkle over the toasted almonds slices. www.feastingisfun.com
Raspberry Almond Cream Cake – spread the remaining cream on top of the cake, decorate with Raspberries and sprinkle over the toasted almonds flakes. www.feastingisfun.com

Keep the cake chilled, removing from the fridge 20 minutes before eating.

Invite round some friends, or alternatively take this cake to your friends house.

You are certain to be a very popular guest if you turn up with this Raspberry Almond Cream Cake!!

All food tastes better when it is shared, none so more than cake, in my humble opinion 😉.

Wishing you all a happy, healthy 2016. May your friendships grow closer over a cup of tea and slice of cake.

If you enjoyed this Raspberry Almond Cream Cake here are some other bakes that you can enjoy sharing –

Strawberries and Cream Cake

Victoria Sponge Cake

Chocolate Sparkle Cake

Sammie xx


Share
Facebooktwitterpinterestlinkedintumblr

Sparkling Snowflake Cake

Share
Facebooktwitterpinterestlinkedintumblr

Merry Christmas one and all. So, it is my pleasure to be sharing this beautiful Sparkling Snowflake Cake with you today.

Vanilla Sparkling Snowflake Cake

This Sparkling Snowflake Cake is stunning and I can take no credit for the beautiful detail. Because the cake is baked in a beautiful Bundt tin made by Nordicware . Amazon, ebay and Lakeland UK are all stockists of Bundt tins, it really is worth shopping around as prices vary. While Bundt tins may not be cheap, treated with care and looked after they will last a life time.

Another beauty of Bundt pans is the beautiful array of delightful shapes available. Although I embellished this Sparkling Snowflake Cake with edible diamonds, a dusting of edible glitter and some piped icing, a dusting of icing sugar would be perfect on it’s own.

Vanilla Sparkling Snowflake Cake

Birthday and Christmas Celebrations

Our youngest daughter should have been a near Christmas baby, however, she obligingly arrived early! So this Sparkling Snowflake Cake was made for her birthday.

Because she isn’t too keen on icing this cake was perfect for her. Resulting in a deliciously moist, vanilla sponge, dusted with flavoured icing sugar. The flavour I used is called Santa’s Snowball, perfect for this beautiful snowflake.

Sparkling Snowflake Cake vanilla sponge dusted with flavoured icing sugar www.feastingisfun.com
Sparkling Snowflake Cake


Using edible diamonds on this cake adds extra sparkle. White, edible, sparkly glitter was also dusted on top of the icing sugar. It is a real shame that it didn’t photograph well, in any light, trust me I tried. Moving the cake aound the house to catch the small amount of sunlight that we get this time of year, shining through the windows. The lengths I will go to trying to get the perfect shot!

So, you’ll have to trust in me that this cake really, really sparkles. It looks so pretty, twinkling like a real snowflake. Although we may not get snow this Christmas, we can certainly make your own!

Sparkling Snowflake Cake catches the light and sparkles like a real snowflake www.feastingisfun.com
Sparkling Snowflake Cake


Here is the Sparkling Snowflake Cake lit by candles for our daughter’s special day. Also, it would make a fantastic alternative to the traditional, fruit laden Christmas Cake. Set on a cake stand, or pretty plate, surrounded by tea light candles which add extra sparkle. Resulting in a glittering, festive feast.

Spending Snowflake Cake stunning with candles www.feastingisfun.com
Sparkling Snowflake Cake

Preparing the Bundt Tin

Here is the incredibly detailed snowflake Bundt tin that I used for this cake, alongside is Wilton bake easy, cake release spray. I cannot emphasise enough how important it is to use cake release spray (or the brush on version) for this tin. I tried this recipe, brushing the tin with melted butter, as I have with previous Bundt bakes and the cake stuck. Badly. It was an epic disaster. And I cried, how silly is that? Finally, determined not to be beaten by a cake tin AND with lots of tips and advice from my Bundt baker friends on Twitter, I rebaked the cake and SUCCESS.

Snowflake Bundt tin and cake release spray.


Now time to share how I made this wonder.

Recipe: Makes one Sparkling Snowflake Cake that will serve 12

225g/8oz Unsalted Butter at room temperature

225g/8oz Caster Sugar

4 Large Eggs

1tsp Vanilla Extract – I use Nielsen-Massey 

225g/8oz Self Raising White Flour

1/4tsp Salt

100g/4oz Icing Sugar

Optional – Edible glitter in the colour of your choice and edible diamonds. Both available from cake decorating shops and Amazon.

Method: Preheat oven to 180C/160C fan, 350F, gas mark 4

First of all thoroughly spray or brush the Bundt tin with cake release. I will not judge if you want to give it a double coating (I did!).

Making the Cake Batter

  • Cream the butter and sugar together in a large bowl until light and fluffy.
  • Add the salt, vanilla extract, one third of the flour and 2 eggs. Mix until just incorporated.
  • Next add another third of flour and the last 2 eggs and mix as before.
  • Finally add the remaining flour and gently mix into the cake batter until incorporated, taking care not to over mix.
  • Spoon the cake batter into the prepared Bundt tin ensuring it is evenly spread into all the points.
Ready to go into the oven.

Baking the Snowflake Cake

  • Place the tin in the oven and bake for 30-35 minutes.
  • The cake is cooked when pressed lightly in the center and it springs back, or an inserted skewer comes out clean.
  • As soon as the cake is baked remove from the oven and place the tin on a cooling rack or trivet.

Allow to cool for 10 minutes in the tin.

  • Leave the cake to cool in the tin for 10 minutes.
  • Invert the Bundt tin on to a cooling rack.

Invert the tin onto a cooling rack.

  • Leave for a further 5 minutes. If the cake doesn’t turn out immediately gently tap the tin and the cake should release.
  • If the cake still will not turn out, gently go around the ouside of the cake with a small palette knife. Re-invert the tin on to a cooling rack, the cake should release easily.
  • Most importantly, the more you use a Bundt tin the more non stick it becomes.
Sparkling Snowflake Cake look at the beautiful detail.
Sparkling Snowflake Cake 

Adding Sparkle to the Snowflake Cake

Sparkling Snowflake Cake dusted with flavoured icing sugar.
Sparkling Snowflake Cake
  • First of all, dust the cake liberally with icing sugar and then sprinkle over edible glitter.
  • I made a small batch of royal icing, lightly tinted pink and piped detail on to the outer points.
  • Finally, place edible diamond in the round dips, as seen in the photo below.
Sparkling Snowflake Cake edible diamonds, edible glitter and piping add an extra special touch to this already beautiful cake.
Sparkling Snowflake Cake


My Sparkling Snowflake Cake is as beautiful as it is delicious. It would make the perfect gift as would the tin. A great tip if you know someone who enjoys baking.

Sparkling Snowflake Cake perfect for Christmas and celebrating www.feastingisfun.com
Sparkling Snowflake Cake 

If you have Disney’s Frozen fans in your household, a touch of blue, or all white and this cake will have them singing “Let it snow!”

Store the cooled cake in an airtight container and eat within 5 days.

If you enjoyed the recipe for this Sparkling Snowflake Cake you may also like these:

Chocolate Christmas Pudding Cookies

FF Sparkling Snowflake Cake
Chocolate Christmas Pudding Cookies

Cream Cheese Pastry Mince Pies

FF Sparkling Snowflake Cake
Cream Cheese Pastry Mince Pies

Snowy Black Forest Roulade 

FF Sparkling Snowflake Cake
Snowy Black Forest Roulade

I especially enjoy baking during the festive season. Rather than relying on shop bought, prepared food (although they have their place), spending time in the kitchen relaxes me. While listening to Christmas carols I am lost in a world of delicious aromas and sparkles. And, since it is the season of goodwill, making cookies and mince pies are a great gift for sharing with family, friends and neighbours. Above all, it is a time to give thanks for the baby Jesus.

Sammie xx

No part of this post may be reproduced or duplicated without the written permission of the owner. Please see my Disclosure Policy. 

Share
Facebooktwitterpinterestlinkedintumblr

Luscious Lemon Bundt Cake

Share
Facebooktwitterpinterestlinkedintumblr

Hello lovely readers. I have a confession to make. A big one. This Luscious Lemon Bundt Cake is definitely not perfect! However it is delicious.

Image showing a cut slice of the Bundt Cake.
Luscious Lemon Bundt Cake perfectly baked by my friend David.

Look at this Bundt beauty. Doesn’t it look lovely, all snowy white? Perfect yes? Now look at the photo below. Oops nope! Well, it stuck – a bit. Just a little bit. Although you would never know from looking at it though, would you? So I’m here today to tell you that us Food Bloggers get things wrong sometimes too. I know exactly what I did wrong with this cake, I’ll explain that to you later.

Luscious Lemon Bundt Cake

Imperfect Is Okay

Most importantly, in our sleek, perfect, Instagram age, I do think it’s important to be real and honest. So my cake stuck, but I fixed it. And I am so glad I did as this Luscious Lemon Bundt Cake is absolutely beautiful and tastes amazing. I have had more serious disasters than this before and I tend to post them on Twitter as ‘Epic Fails’. Like the adaptation on my Sticky Pecan Sultana Buns!

Wanting to use up some of the many apples that we have had from our two trees this year, I decided to incorporate some freshly grated apple into the bun recipe. Firstly, even with the addition of lemon juice, the apples turned a murky brown colour – not great for blog photos. Still I carried on. The buns were very far from sticky. Soggy more like! They were an ‘Epic Fail’!

Luscious Lemon Bundt Cake moist and definitely more-ish. www.feastingisfun.com
Luscious Lemon Bundt Cake

Icing That Covers Any Imperfections

Not all failures are un-mendable though. Only a small part of the bottom (top when turned out) of this cake stuck. This was because I had put the hidden lemon curd layer too near the bottom and it sank through the batter and adhered to the tin.

I have addressed this in the method, so although the photos show exactly how this cake was made, the method corrects the mistakes I made. This also includes over-fillng the Bundt tin! I should have used a bigger tin or left some of the cake batter out, instead of using it all. Bundt tins should never be filled more than three quarters full.

So I hid the stuck bit of cake the best way I could – with icing!!

Thick, luscious, lemon icing, draped over a moist lemon cake with a hidden lemon layer inside. If you like lemon flavours, you will go Bonkers over this Bundt!!

With the new method this cake bakes perfectly, however, whenever you are baking, sometimes things don’t always go to plan. So if there are any hitches that can be covered or concealed, go ahead. Sometimes though, if it’s cooked through but wont hold together, make a big jug of custard and have it for pudding!

Recipe : Makes one 10″ Luscious Lemon Bundt Cake

225g/8oz Caster Sugar

225g/8oz Unsalted Butter (plus 4tbsp extra for greasing the bundt pan)

4 Large Free Range Eggs

225g/8oz Plain White Flour

2tsp Baking Powder

1/4tsp Salt

5tbsp Lemon Curd – I use Waitrose own brand

1 Whole Lemon – scrubbed with a brush under running hot water

225g/8oz Icing Sugar

Method : Preheat oven to 180C/160C fan oven, 350F, gas mark 4

You can use an 8″ Bundt tin (as I did) just don’t use all of the batter – or use a 10″ Bundt tin. (Alternatively called a 6 cup and 10 cup bundt pan from Nordicware).

Making The Lemon Cake Batter And Filling The Bundt Pan

  • First of all melt 4tbsp of butter and thoroughly grease the Bundt tin, using a brush. Alternatively use Wilton cake release/bake easy, taking care to brush the inside of the bundt tin thoroughly so that it is completely covered.
Ensure the Bundt pan is well buttered.
  • Place the caster sugar and butter into a large bowl and beat until light and fluffy.
  • Sift all of the flour, baking powder and salt into the bowl.
  • Add the 4 eggs.
  • Whisk the ingredients together until you have a smooth batter. This is known as the ‘All-in-one method’.
  • Zest the lemon, either using a fine grater or lemon zester (which is what I used), the latter gives delicious long strands of zest, visible in the cake. Squeeze one half of the lemon.
Add the zest of the whole lemon and half of its juice to the batter.
Mix the zest and juice into the cake batter.
Half full the Bundt pan with the cake batter.
Half fill the Bundt pan with the cake batter.
  • As you can see my tin is not half full so just pretend it is.
Spoon the lemon curd on top of the batter, ensuring that it does not touch the side or centre of the Bundt pan.
  • Use a teaspoon to add the lemon curd into the centre of the cake batter.
Cover the lemon curd with the other half of the cake batter, ensuring you do not fill the Bundt ton more than 3/4 full.
Cover the lemon curd with the other half of the cake batter, ensuring you do not fill the Bundt tin more than 3/4 full.
  • As you can see my tin is almost full. This resulted in me having to slice off about 1″ of cake, once it was cooked, to be able to remove the cake from the tin. Don’t overfill the tin.

Baking The Lemon Bundt Cake

  • Place the Bundt tin into the centre of the oven and bake for 50 minutes.
  • Note – a skewer cannot be used to test if the cake is baked because of the lemon curd layer.
  • The cake is baked when it is golden brown, slightly coming away from the sides and with no visable wobble. If you are unsure, return the tin to the oven for a further 5 minutes.
  • As soon as the cake is baked remove from the oven and leave to cool in its tin for 15 minutes and then turn out onto a cooling rack.
Luscious Lemon Bundt Cake allow to cool for 15 minutes before turning out.
Luscious Lemon Bundt Cake you can see where the cake stuck.
  • You can see the area at the top of the photo where the cake stuck. Fortunately I was able to remove the stuck piece of cake and press it back onto the top of the Bundt.
Luscious Lemon Bundt Cake the icing will hide the small area that stuck!!
Luscious Lemon Bundt Cake the icing will cover the area that stuck.

Making The Icing And Decorating The Cake

Add enough icing powder to the lemon juice to create a thick, lump free glaze.

Place the juice of the other half of the lemon into a small bowl. Add 200g of the icing sugar and stir thoroughly. The icing should be very thick and need encouragement to drip. If the icing is not thick enough add the rest of the icing sugar.

Drizzle and drape the thick, lemon icing over the cake. I used 2 teaspoons, one to add the icing and the other to start/stop the drape effect.

Drizzle and drape the thick icing over the cake in an uneven pattern.

Looking at the cake above, nobody would ever guess at the minor mishaps that had taken place!

Luscious Lemon Bundt Cake add some white sprinkles and you have the perfect cake! www.feastingisfun.com

I’m a sucker for sprinkles and sparkles. I finished this cake with some white sugar sprinkles.

Luscious Lemon Bundt Cake absolutely perfect for sharing. www.feastingisfun.com

The taste of this cake was amazing. Very lemony without being over tart, or over sweet. A beautifully moist cake that, as a family, we all loved and needless to say it didn’t last long!

Have you ever had any memorable baking disasters? Have you managed to fix a mishap, without anyone knowing? Do you have any to ‘fix’ tips? Please share them?

If you like the recipe for this Luscious Lemon Bundt Cake then you will may also enjoy these:

Caramel Crunch Chocolate Bundt Cake

A chocolate Bundt Cake covered in chocolate ganache and topped with pieces of crunchy caramel.
Caramel Crunch Chocolate Bundt Cake

Maple Syrup Iced Coffee Bundt Cake

A coffee and walnut Bundt Cake baked in the Heritage pan from Nordicware decorated with a maple syrup drizzle
Maple Syrup Iced Coffee Bundt Cake

Lemon Blueberry Bundt Cake

Lemon and blueberry cake baked in the blossom bundt pan from Nordicware. Covered in a fresh lemon glaze and decorated with small white sugar paste flowers.
Lemon Blueberry Bundt Cake

Baking Bundt cakes is so easy as the bundt pan creates the cake shape as it bakes. So if you are like me and not very confident at decorating cakes, bundt pans are the answer! While the cakes included in this post all have some form of icing or drizzle, they don’t have to be. Because a light dusting of icing sugar, or edible glitter, such as this Chocolate Cherry Chiffon Bundt Cake, is all that is needed to accent the baked cake. So you can be confident of creating a show stopper without the stress of cake decorating!

So, whatever you are making, baking and creating in your kitchens, have fun preparing and sharing your feast.

Sammie xx

No part of this post may be reproduced or duplicated without the written permission of the owner. Please see my Disclosure Policy.

The header and first photograph are curtesy of my friend David Bartonmus, a talented baker among his other talents. Why not take a look at his blog.

Pinterest image with graphics.


Share
Facebooktwitterpinterestlinkedintumblr

Homemade Chelsea Buns

Share
Facebooktwitterpinterestlinkedintumblr

Hi, so it’s mid November and the excitement for Christmas in our house is definitely building. We all love Christmas, even though we still have our daughter’s and my birthday to celebrate in December, before Christmas. These amazing Homemade Chelsea Buns are perfect for baking any time of the year, but especially in the run up to Christmas. The scent of cinnamon and bread, fills the house as these buns bake in the oven.

FF Homemade Chelsea Buns

I love the build up to Christmas. Stir up Sunday when we make our Christmas cake, advent calenders, present shopping, decorations. Spending time with friends and family, getting excited together.

As a family we all love each single thread that pulls together and makes a complete Christmas. The spicy scents, wafting from the kitchen, that evoke memories and shared experiences.

FF Homemade Chelsea Buns
Homemade Chelsea Buns

Creating a surprise

Our children and their parents, love these Homemade Chelsea Buns with a big mug of steaming coffee, or hot chocolate, for breakfast. Unravelling the light, spiced dough and uncovering juicy, plump, sweet, fruits. Sticky and sweet. Traditionally Chelsea Buns are finished with a sprinkle of sugar, however since discovering how good they taste with a lemon drizzle on top I wouldn’t want to make them any other way.

One of my favourite things to do at the weekend is to sneak downstairs, whilst everyone else is still asleep and make something scrumptious for breakfast. and that is exactly what I did a couple of weeks ago. I couldn’t sleep, so I snuck into the kitchen, fuelled by hot cups of tea and baked these Homemade Chelsea Buns.

Everyone was so happy when they awoke to the scent of home cooking and found a big plate of warm buns, waiting to be devoured, on the table.

Unfortunately, due to the early morning light, the photos weren’t great. Shame eh? So I made these again during the day and they were gone by the following afternoon! Happily I had snapped some photos, before they were all munched.

FF Homemade Chelsea Buns
Homemade Chelsea Buns

I wouldn’t want you to limit making these only over the festive season. They are however, a wonderful warm up to full on Christmas cooking and baking.

Recipe: Makes 12 Homemade Chelsea Buns

For the buns

500g/1lb 2oz  Strong White Bread Flour I use Shipton Mill (organic white bread flour)

10g Fast Action Dried Yeas – I use Allinson Dried Yeast in the green tub or sachets

250ml/8fl oz Whole Milk – at room temperature

2 Large Free Range Eggs

25g/1oz Caster Sugar

50g/2oz Unsalted Butter

10g Salt

225g/8oz Dried Mixed Fruits – alternatively, if you are not a fan of vine fruits, dried figs, dates, apricots and cranberries all work extremely well in this recipe.

100g/4oz Soft Light Brown Sugar

4tsp Cinnamon

For the glaze

150g/5oz Icing Sugar

Juice of 1 Lemon

Method: You will need a buttered or baking parchment lined 10″ x 12″ baking tin at least 2” deep (25cm x 30cm x 5cm).

Making the bun dough

In the bowl of a bread maker or a stand mixer, with a dough hook attached, add the milk, lightly beaten egg, caster sugar and yeast.

Add the flour, salt and butter.

Switch the bread maker cycle to dough and press start.

With a stand mixer, lower the dough hook and mix on medium speed until all the ingredients are combined. Continue mixing for a further 10 minutes. Turn the mixer off. Place all the dough into the bowl, cover with a clean cloth and leave until doubled in size – approximately 1-2 hours.

While the dough is proving mix the dried fruit, sugar and cinnamon together in a bowl. Set to one side.

Mix the dried fruit, sugar and cinnamon together.

When the bread maker has completed its dough cycle, restart for 2 minutes, to mix and knock back the dough.

With the stand mixer, once the dough has doubled in size, remove the cloth and turn out the dough on to a floured surface.

Shaping and filling the buns

  • Turn the bread out on to a floured surface and form into a ball.

Turn the dough out onto a floured surface.


  • Roll the dough out into a rectangle 12” x 9” (30cm x 22.5cm)

Roll the dough out into a rectangle.


  • Spinkle over the spiced fruit and sugar mixture so that it evenly covers the dough.

Sprinkle over the fruit/sugar mixture.

  • Roll the dough up as tightly as possible.

Roll up the dough as tightly as possible.

  • Ensure that the seam is underneath.

Ensure the dough seam is underneath.

  • Cut the rolled dough into 12 even portions. I find the easiest way is to cut the dough in half, cut each half in half and then cut each portion into 3.

Slice the rolled dough into 12 even portions.

  • Place the buns into the buttered/lined baking tin.

Pack the Chelsea Buns into a buttered pan.

Cover with a clean cloth, leave in a draught free place until doubled in size – approximately 30-45 minutes.

FF Homemade Chelsea Buns

Baking the buns and adding the lemon drizzle

  • Preheat the oven to 190C/170C fan, 10 minutes before the buns are ready
  • Place the tin in the middle of the oven and bake for 25-30 minutes.
  • The buns are cooked when they are golden and well risen.
  • As soon as the buns are baked remove from the oven.
  • Lift the baked buns out of the tin or use a pallet knife to loosen and lift the buns from the tin.
  • Place on to a cooling rack.
FF Homemade Chelsea Buns
Homemade Chelsea Buns
  • Weigh the icing sugar into a medium bowl. Stir briefly with a balloon whisk to break up any lumps.
  • Add the juice from one lemon.
  • Whisk the mixture together until it is smooth.
  • Either fill a small piping bag with the lemon icing, snip a small hole and pipe the drizzle diagonally across the buns, or use a spoon to drizzle over the icing.
FF Homemade Chelsea Buns
Homemade Chelsea Buns with a lemon icing drizzle.

Time to delve in and devour a bun. They are absolutely delicious warm. Whether it’s a family breakfast around the table, or after a long afternoon walk, these Homemade Chelsea Buns are perfect at any time!

These buns are at their best the day they are made. However a quick and I mean less than 10 seconds, ping in the microwave refreshes them the following day.

If you enjoyed baking these Homemade Chelsea Buns, you may also like:

Knotted Poppyseed Rolls

FF Knotted Poppyseed Rolls
Knotted Poppyseed Rolls

English Muffins

FF English Muffins
English Muffins

Sticky Pecan Sultana Buns

FF Homemade Chelsea Buns
Sticky Pecan Sultana Buns

Creating memories and new traditions is important to me. Food plays a crucial part in that. As we sit round the table for dinner, in front of the telly with snacks, or at the beach with a well packed picnic I am always aware that these will be the times we remember. One special memory, is of a bonfire night, spent with my sister and her family, toasting s’mores around the fire and laughing. That is when feasting truly is fun!

Whatever you are making, baking and creating in your kitchens, have fun preparing and sharing your feast.

Sammie xx

No part of this post may be reproduced or duplicated without the written permission of the owner. Please see my Disclosure Policy.

Sweat yeasted rolls filled with spices and dried vine fruits, overlaid with descriptive text

Share
Facebooktwitterpinterestlinkedintumblr