Prosciutto Wrapped Cheese Puff Pastry Straws

So, who is ready for a super easy, party food recipe? While there are plenty of sweet recipes here on the blog, I prefer food that is more savoury. Given a choice, I will usually choose a cheese board over dessert. While my family always pick a delicious, sweet treat. Also, at parties I much prefer something salty and savoury to compliment my glass of wine or sparkling water. My Prosciutto Wrapped Cheese Puff Pastry Straws tick all of my preferred flavour boxes. So much so, I ate three as soon as they were cool enough!

Easy Party Food Recipes:

Creating easy recipes is a top priority for me. These straws can be made ahead and kept refrigerated or frozen. Since party food can involve lots of little morsels, keeping the recipe simple reduces stress and leaves more room for fun. Because that’s what parties should be, fun! Whether it’s drinks with friends or a full on family bash, these straws are a perfect addition to any occasion.
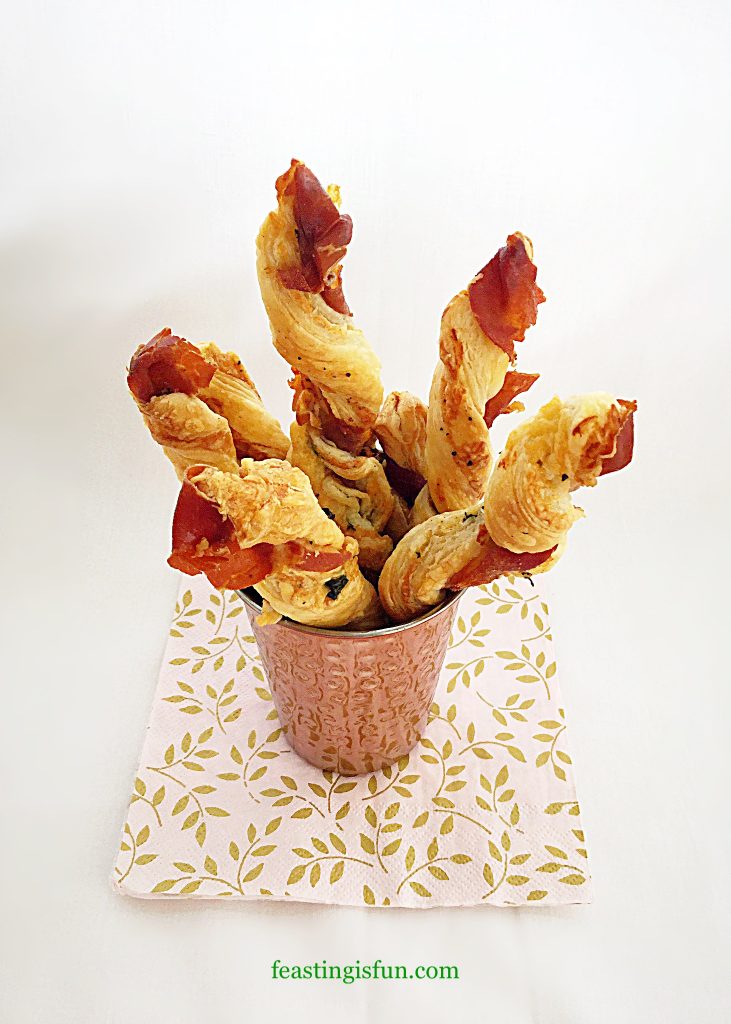
FF Prosciutto Wrapped Cheese Puff Pastry Straws
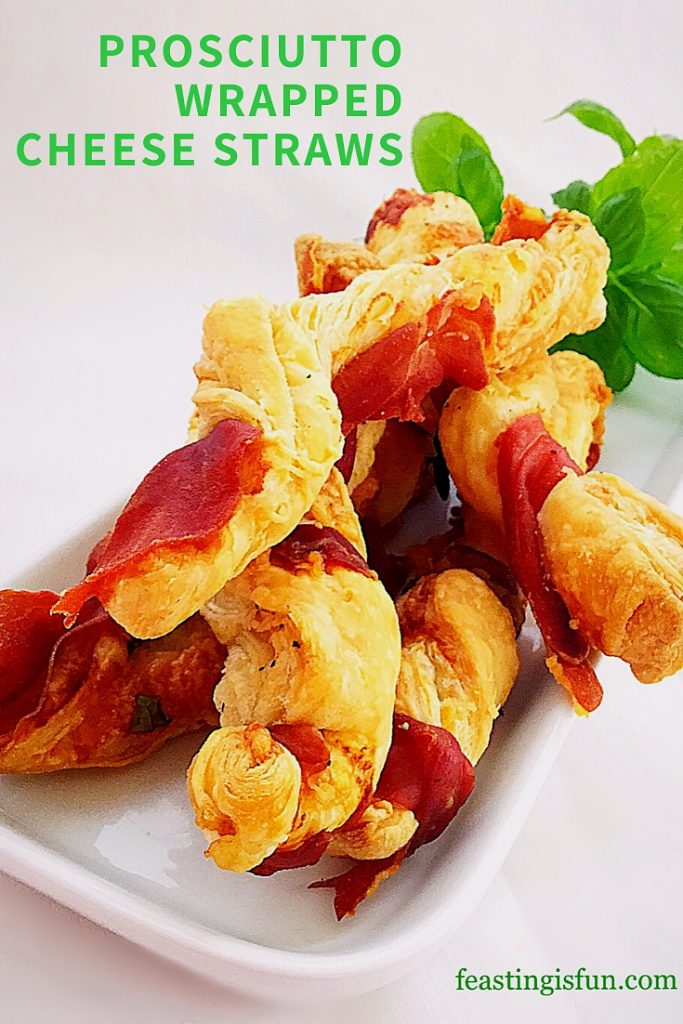
Prosciutto Wrapped Cheese Puff Pastry Straws

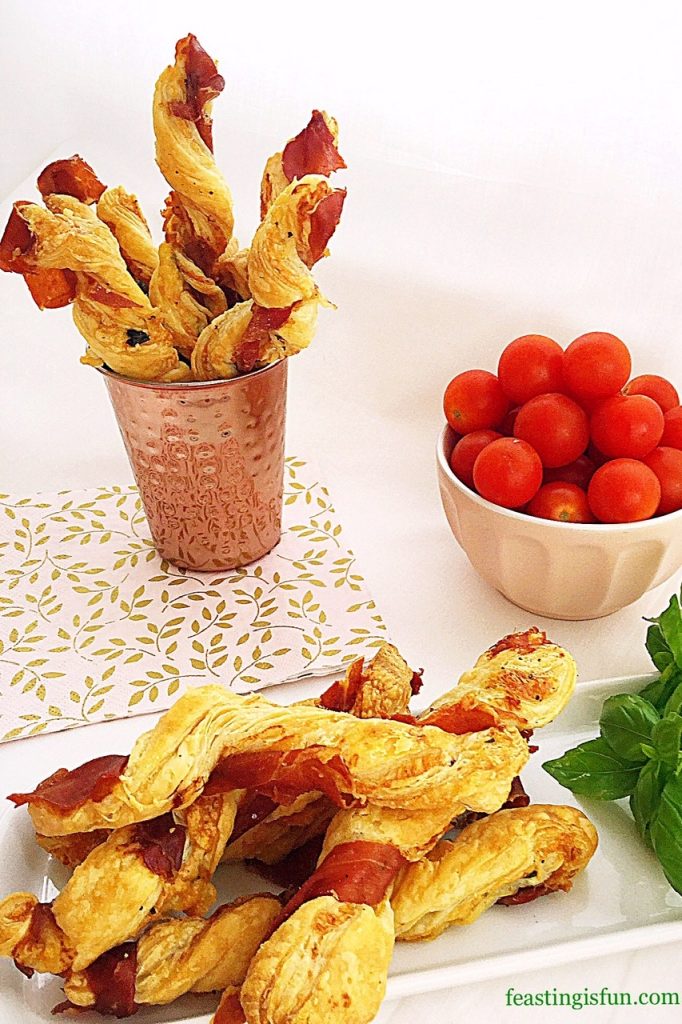
So incredibly easy to make and bake, these straws are filled with grated cheddar and fresh basil. A strip of Prosciutto ham is then twisted around the straw and then baked. As they bake the Prosciutto becomes crisp and salty on the outside with melting cheddar and fresh Basil inside.

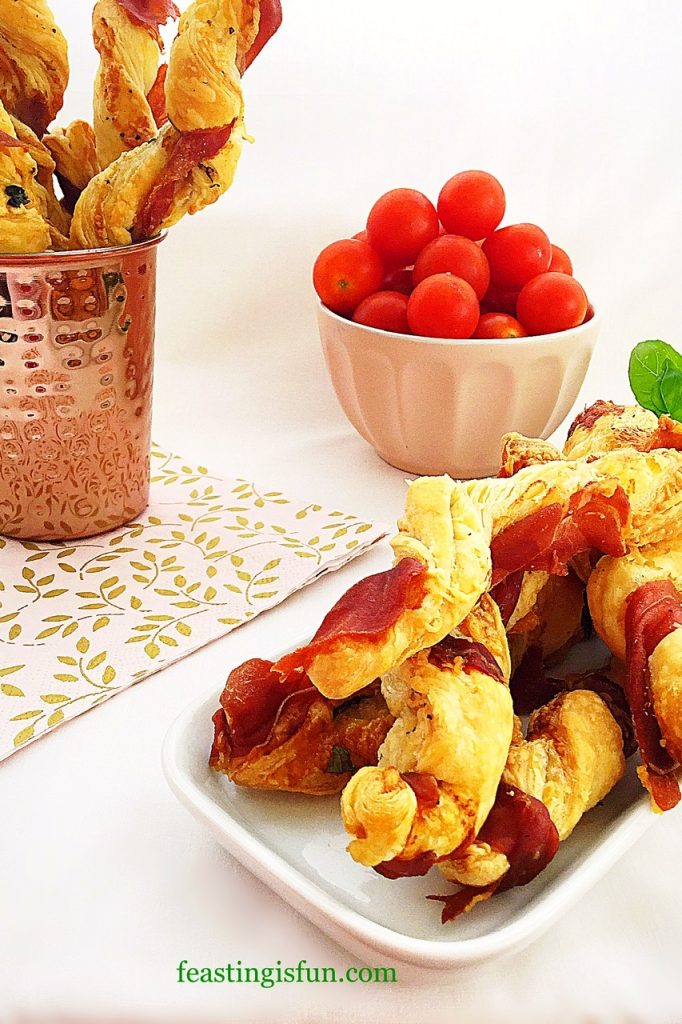
Savoury food snacks displayed on a platter and in a copper cup.

Recipe: Prosciutto Wrapped Cheese Puff Pastry Straws – makes 24

2 x 250g/14oz All Butter Puff Pastry – I use Waitrose own brand. Alternatively use ready rolled pastry, however you may need to adjust the cheese/basil/prosciutto quantities.

100g/4oz Finely Grated Mature (Sharp) Cheddar Cheese – I use Wyke Farms

A Handful of Fresh Basil Leaves – approximately 20 leaves. Alternatively when Basil is unavailable use 1tsp finely chopped thyme or rosemary

12 Slices Prosciutto Ham

Freshly Ground Black Pepper

Making The Cheese Straws:
Preheat the oven to 200C/180C fan, 400F, gas mark 6

  • First of all line 2 large baking trays with baking parchment.
  • Roll the first block of puff pastry into a square, approximately 30cm x 30cm (12in x 12in).
  • Sprinkle half the grated cheddar over the top half of the square.
  • Place half of the fresh basil leaves on top of the cheese.
  • Add some freshly ground black pepper.
  • Fold the bottom half of the pastry up over the cheese and basil.
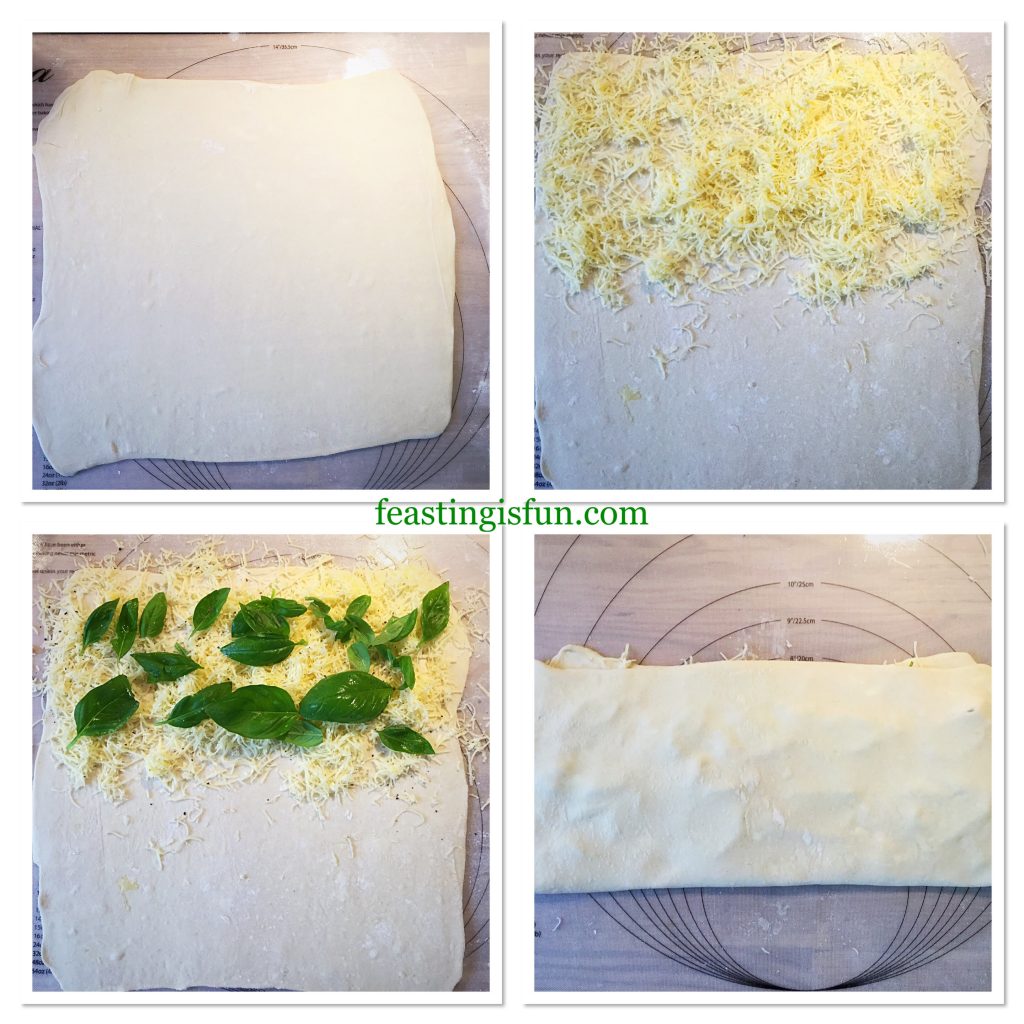
FF Prosciutto Wrapped Cheese Puff Pastry Straws
Filling the pastry with cheese and basil.
  • Use a rolling pin to roll the pastry so that it flattens and becomes smooth.

Portioning The Straws And Wrapping With Prosciutto:

  • Divide the pastry in half using a sharp knife. Then cut each half in half again, you will have four separate pieces.
  • Cut each quarter into 3 strips. Resulting in 12 straws.
  • Tear a piece of prosciutto ham in two lengthways.
  • Place the ham on top of a straw and press at both ends so it sticks.
  • Using both hands twist the pastry so that the prosciutto wraps around.
  • Place the twisted pastry on to a baking sheet.
  • Repeat with the rest of the straws.
  • Roll out the second block of pastry and repeat the process again.
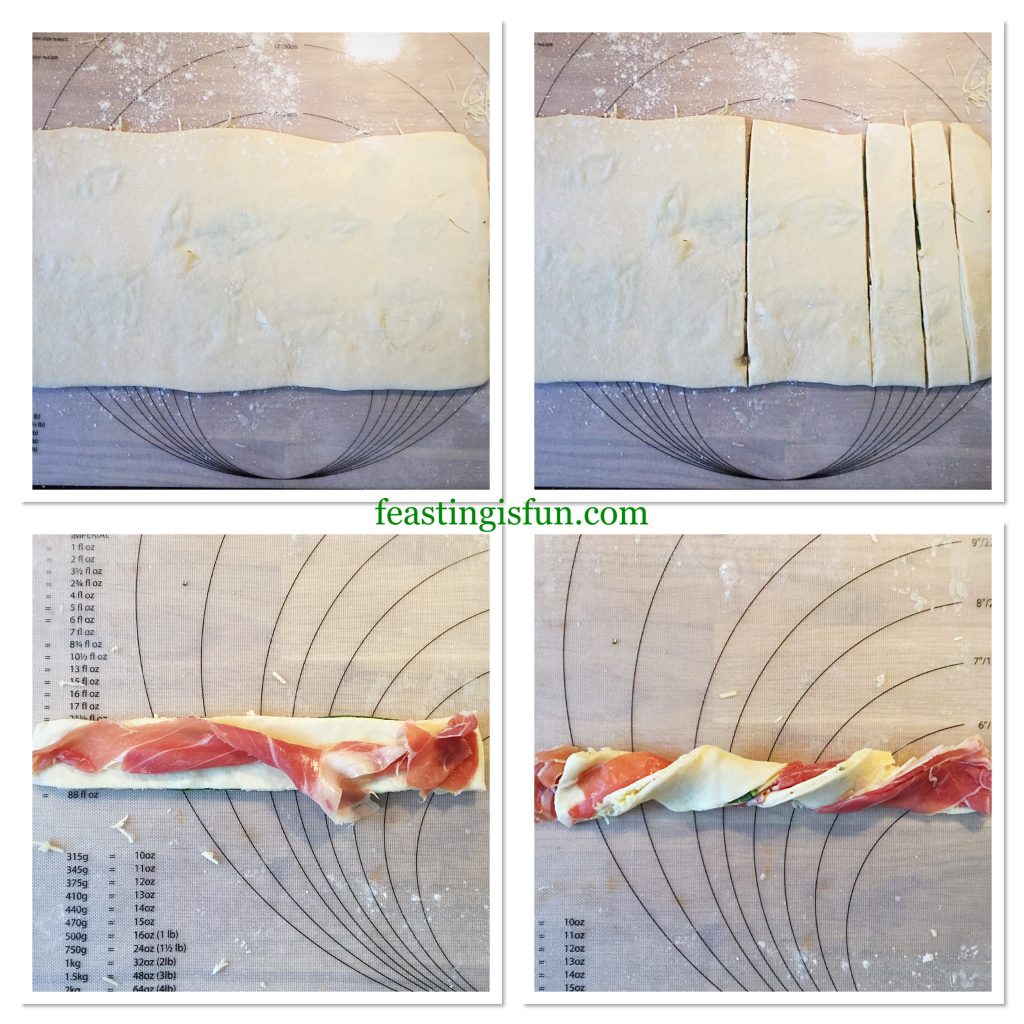
FF Prosciutto Wrapped Cheese Puff Pastry Straws
Cutting the straws and wrapping with Prosciutto.

Baking The Prosciutto Wrapped Puff Pastry Straws:

  • Place the baking trays into a preheated oven and bake for 20-25 minutes until the pastry is golden and the prosciutto is crisp.
  • As soon as the straws are baked remove from the oven and place on a serving plate.
  • Note – if you are planning to freeze the straws, remove from the oven 5 minutes early when the straws are baked, yet not golden..
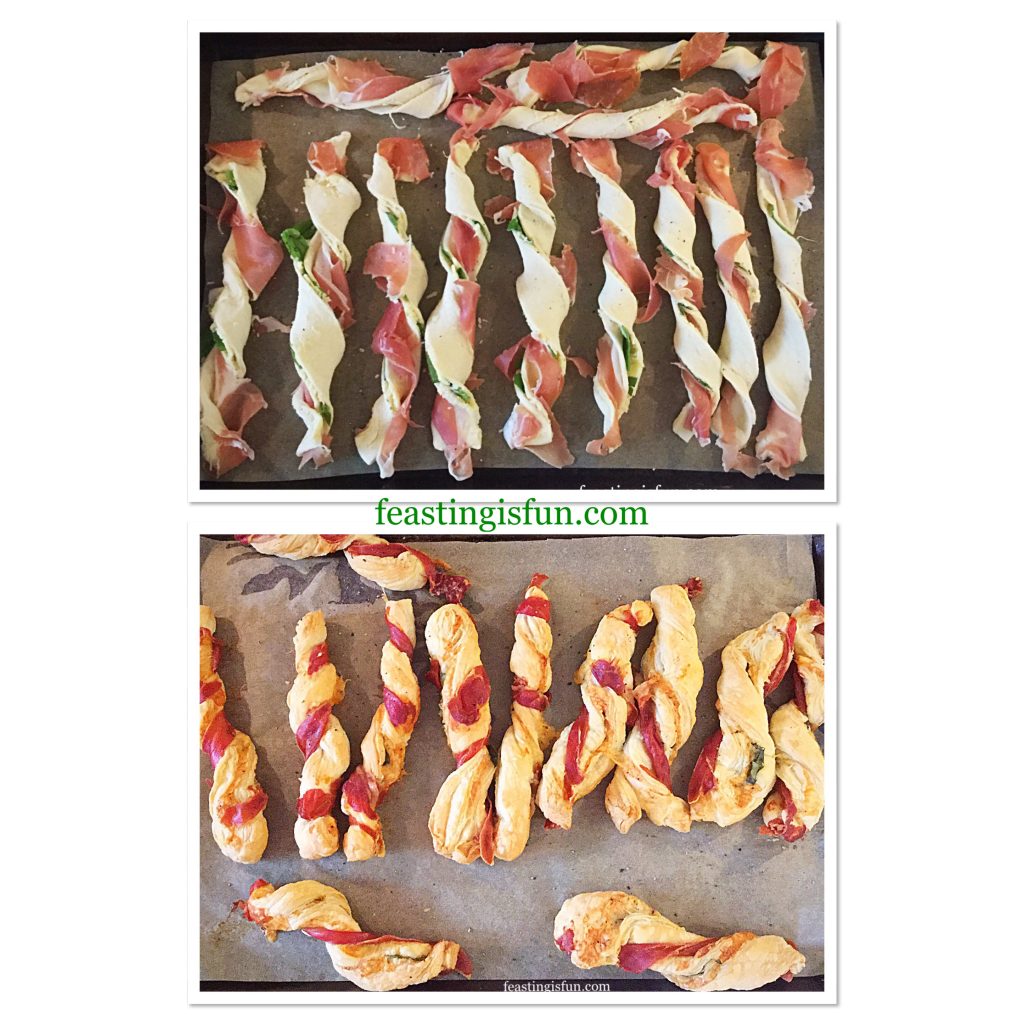
FF Prosciutto Wrapped Cheese Puff Pastry Straws
Baking the Prosciutto Wrapped Cheese Puff Pastry Straws
  • Allow the straws to cool slightly before serving.

Cool, place in an airtight container and refrigerate for up to 2 days. To freeze place in freezer bags or boxes for up to 2 months. To reheat from frozen place in a medium oven for 5-10 minutes.

If you have enjoyed this recipe for Prosciutto Wrapped Cheese Puff Pastry Straws you may also like these:

Mini Sparkenhoe Red Leicester Tarts

FF Prosciutto Wrapped Cheese Puff Pastry Straws
Mini Sparkenhoe Red Leicester Tarts

Spicy Sausage Rolls

FF Prosciutto Wrapped Cheese Puff Pastry Straws
Spicy Sausage Rolls

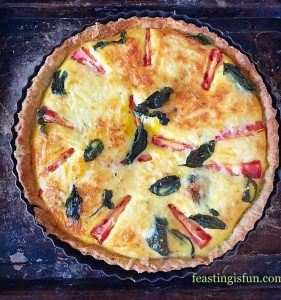
Cheddar Tomato Basil Quiche 

FF Prosciutto Wrapped Cheese Puff Pastry Straws
Cheddar Tomato Basil Quiche

Whether I’m hosting or going out, parties are fun and a great way to catch up with friends and make new ones. Recipes that are easy and also travel well make life easier. These Prosciutto Wrapped Cheese Puff Pastry Straws are ideal for making and taking to parties. Also, as they can be frozen I plan on making a big batch prior to Christmas. Bake the frozen straws into a moderate oven for ten minutes and you have a delicious snack to share with unexpected visitors.

So, whatever you are making, baking and creating in your kitchens have fun preparing and sharing your feast.

Sammie xx

No part of this post may be reproduced or duplicated without the written permission of the owner. Please see my Disclosure Policy.

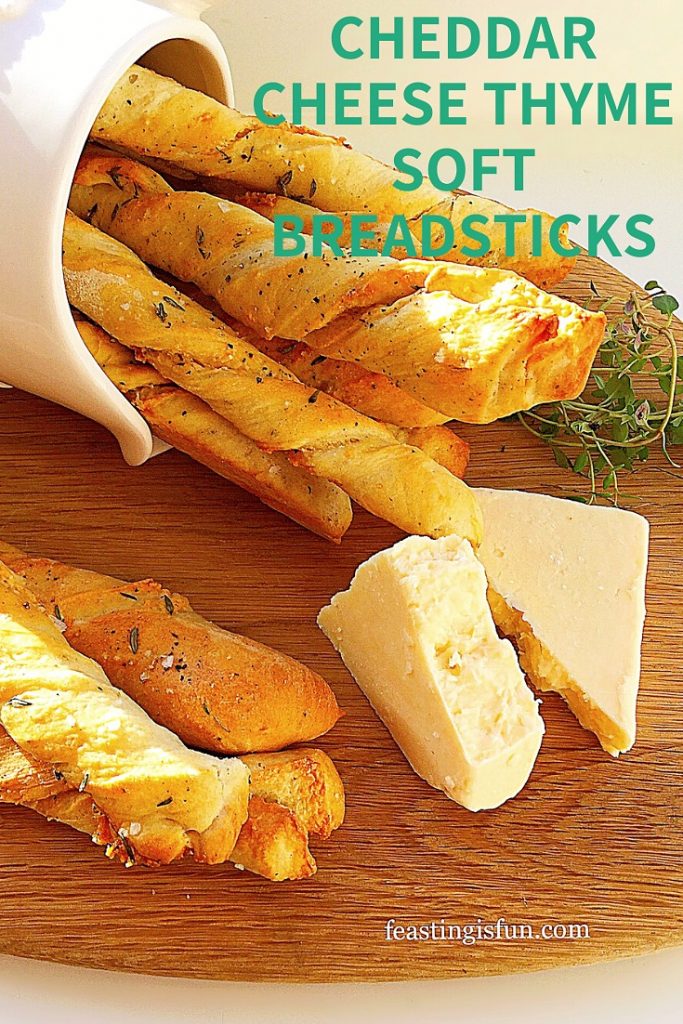
Cheddar Cheese Thyme Soft Breadsticks

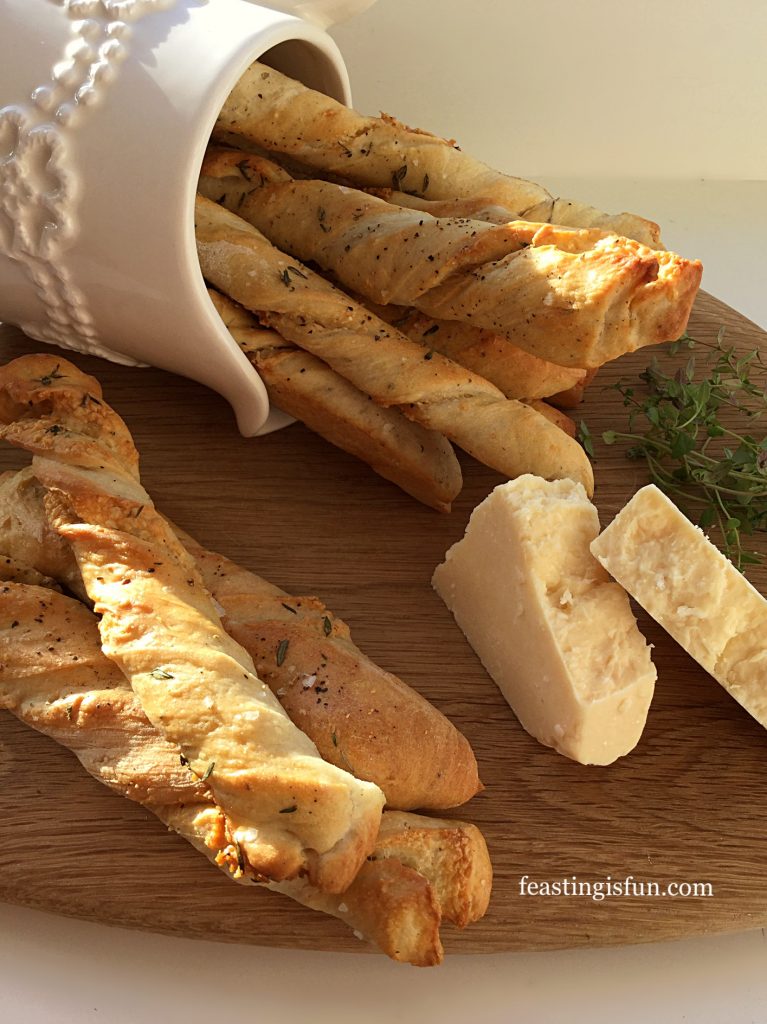
Cheddar cheese is loved by so many, me included and is such a versatile ingredient. Something magical happens to the flavour when it is heated. Becoming more savoury, salty and intense on the palette. Even when eaten with crackers it benefits vastly when left out of the fridge to come up to room temperature. Since winning some Vintage Cheddar in a Twitter competition I wanted to create a new, delicious snack recipe. These Cheddar Cheese Thyme Soft Breadsticks tick every, single, box.

FF Cheddar Cheese Thyme Soft Breadsticks

Cheesy Breadsticks – Delicious And Versatile

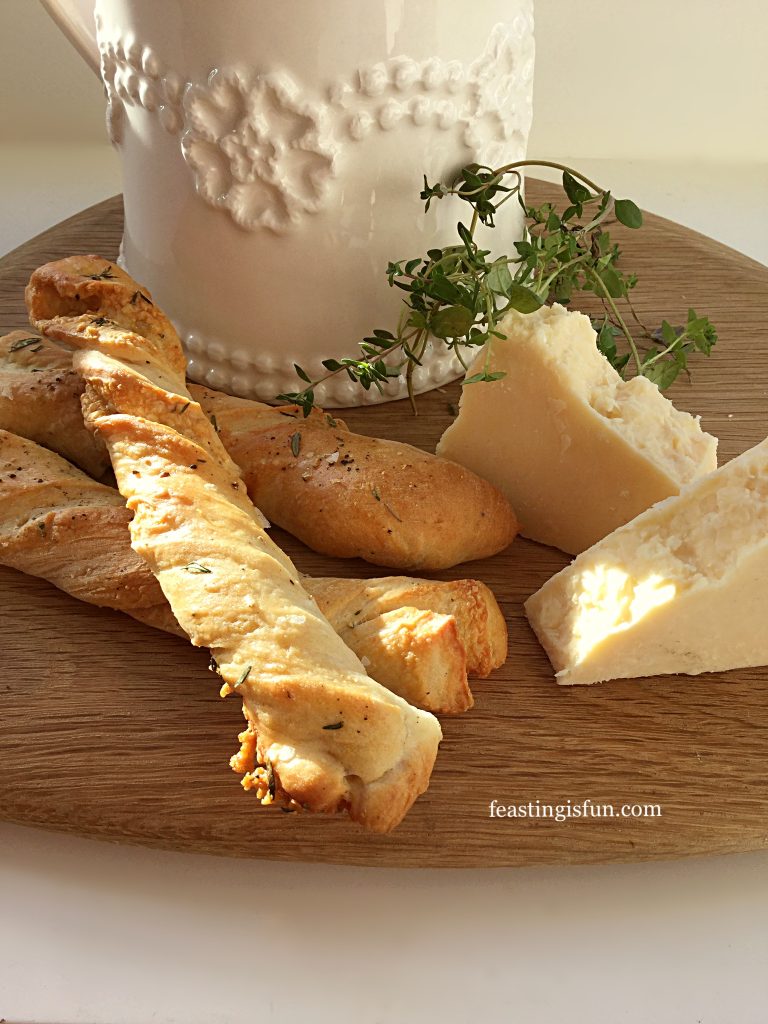
The combination of good quality mature, or vintage cheddar with fresh thyme gives a distinctly savoury flavour to these breadsticks. Also, the addition of Parmesan cheese to the bread dough enhances and reaffirms their cheesy flavour. While pastry cheese straws can be oily at times, that is not the case here. No greasy fingers whilst munching on these!

FF Cheddar Cheese Thyme Soft Breadsticks
Cheddar Cheese Thyme Soft Breadsticks

As well as tasting delicious on their own, these cheesy breadsticks also make a perfect accompaniment to soup, such as Hearty Minestrone Soup. While sounding an unlikely combination, we ate these with a simple beef casserole that had been bubbling away on the hob all day. Not so surprising when Cheddar is often used in the pastry of beef pies.

FF Cheddar Cheese Thyme Soft Breadsticks
Cheddar Cheese Thyme Soft Breadsticks

Recipe: Cheddar Cheese Thyme Soft Breadsticks makes 32

320ml Tap Water at room temperature

7g Dried Yeast – I use Allinson easy bake yeast action

500g Strong White Bread Flour

2 tbsp Olive Oil plus extra for oiling the baking trays

7g Sea Salt plus extra for sprinkling – I use Maldon

50g Parmesan Cheese finely grated

3 tsp Fresh Thyme Leaves plus an add 2 tsp for sprinkling – halve the amount if using dried

1/2 tsp Freshly Ground Black Pepper plus extra for sprinkling on to breadsticks

50g plus an additional 75g Mature Cheddar Cheese – I used Vintage Cheddar from Wyke Farms

1 Free Range Egg beaten with 2 tsp cold water to use as an egg wash

Method:

The method given uses a stand mixer with dough hook attachment to make the dough. Of course this may be made by hand.

Making The Breadstick Dough

  • First of all, weigh the water into the bowl of the stand mixer.
  • Add the dried yeast and flour.
  • Next add the olive oil and salt.
  • Lower the dough hook and mix on low speed for 10 minutes, increasing to medium speed for a further 3 minutes.
  • While the dough is mixing lightly oil 4 large baking trays. Also preheat the oven to 200C/180C fan, 400F, gas mark 6.
  • Stop mixing and check the dough. It should be able to stretch so that light can be seen through it. This is called the windowpane test. If the dough does not pass this test lower the dough hook and continue to mix on medium, stopping and checking every two minutes until it finally passes the test.
  • As soon as the dough is ready stop mixing. Add both the finely grated Parmesan cheese and 50g of the cheddar. Also add 2 teaspoons of fresh Thyme leaves and half a teaspoon of freshly ground black pepper.
  • Lower the dough hook and mix on a low speed for two minutes.
  • Stop the mixer, scrape any dough from the dough hook into the bowl, cover with a cloth and leave in a draft free place until doubled in size.

Flavouring And Shaping The Cheedar Cheese Thyme Breadsticks:

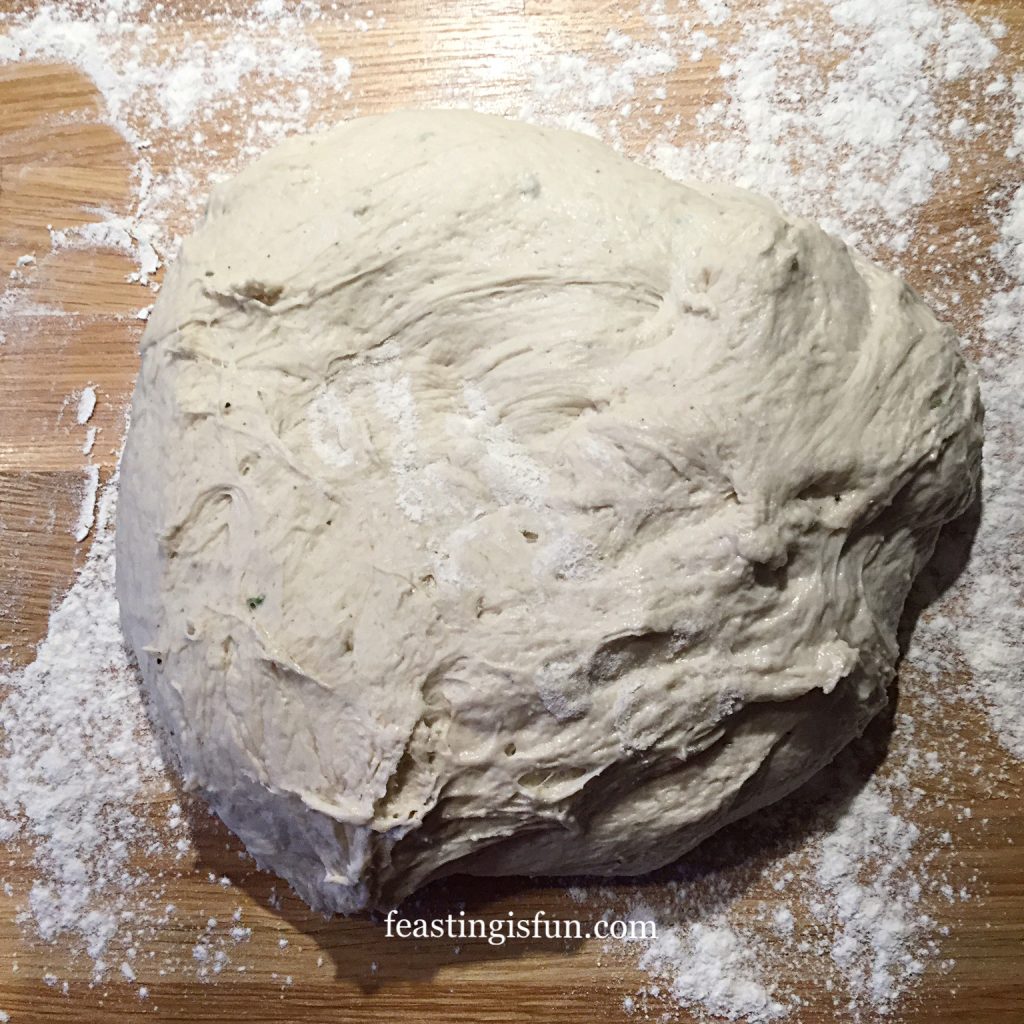
  • Lightly flour the worktop and tip out the dough, so that the top of the risen dough is in contact with the worktop.
FF Cheddar Cheese Thyme Soft Breadsticks
The Cheddar Cheese Thyme Soft Breadsticks Dough
  • Dust the dough with flour and roll out to 50cm x 30cm (20in x 12in).
FF Cheddar Cheese Thyme Soft Breadsticks
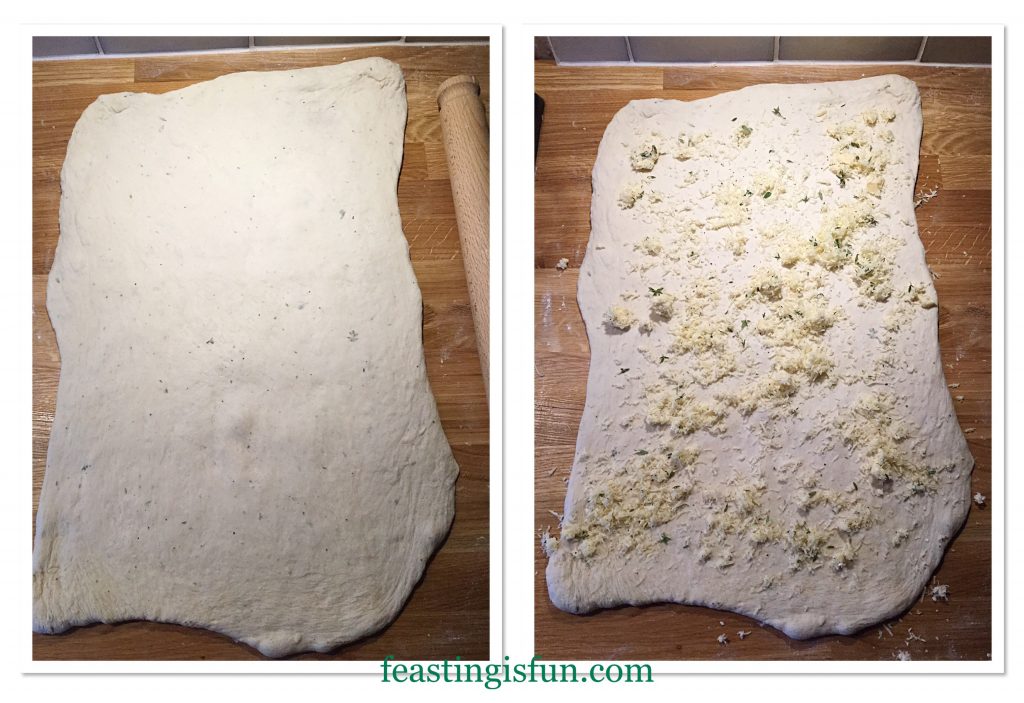
Preparing the dough to become breadsticks.
  • Sprinkle over the rolled out dough, 75g finely grated cheddar and 1 teaspoon of fresh thyme leaves.
  • Fold the dough in half.
FF Cheddar Cheese Thyme Soft Breadsticks
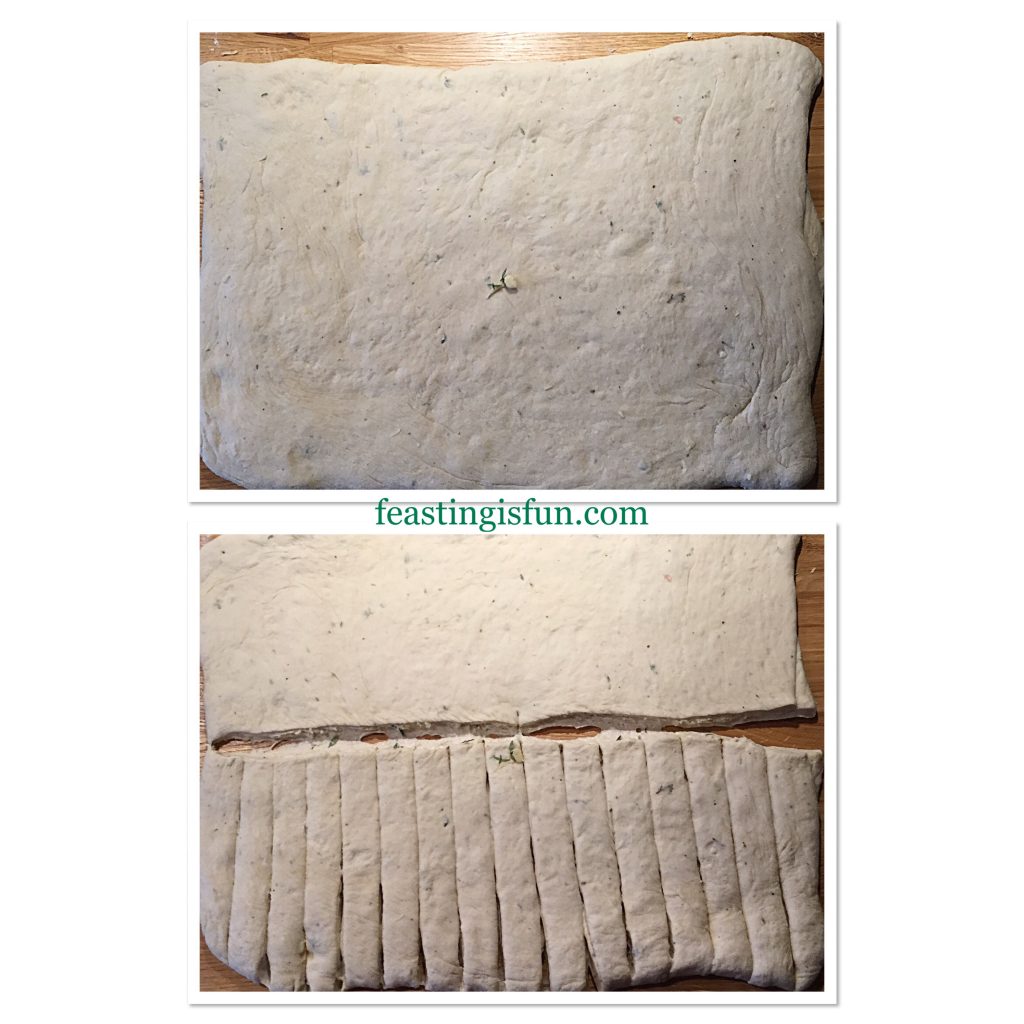
Folding and cutting the dough into breadsticks.
  • Gently roll over the folded dough with a rolling pin, sealing the cheese inside.
  • Cut the dough in half across the middle. Next cut 1cm (1/2in) strips in the dough.
FF Cheddar Cheese Thyme Soft Breadsticks
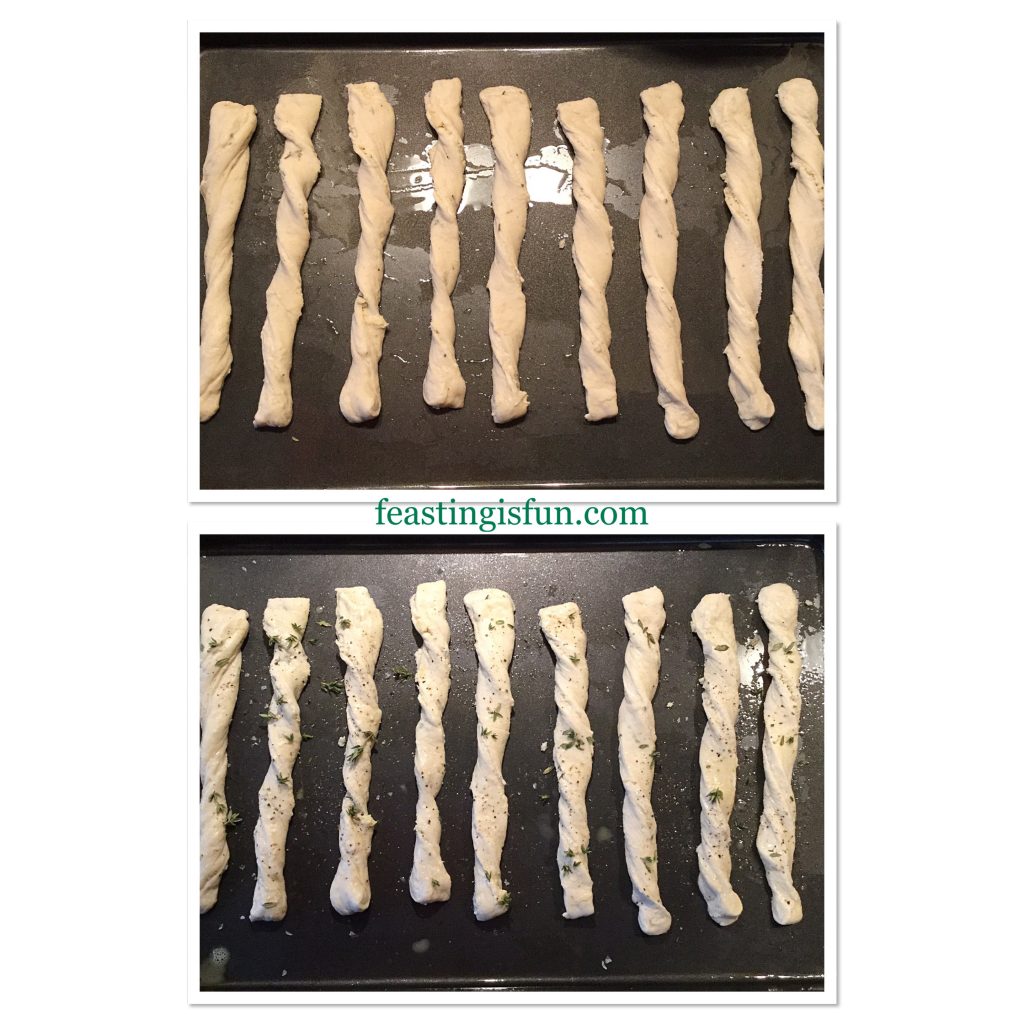
Preparing the breadsticks for baking.
  • Remove one dough strip at a time, stretch and twist it before placing on a prepared baking tray. Press the dough on to the tray to stick, this will hold the twist in place. Place eight breadsticks on each tray.
  • Brush each breadstick lightly with egg wash and sprinkle over 1/2 teaspoon of thyme (for each eight breadsticks). Also grind black pepper and sprinkle a pinch of sea salt over the tray.
  • Place two baking sheets in the preheated oven on separate shelves and bake for 15-20 minutes.
FF Cheddar Cheese Thyme Soft Breadsticks
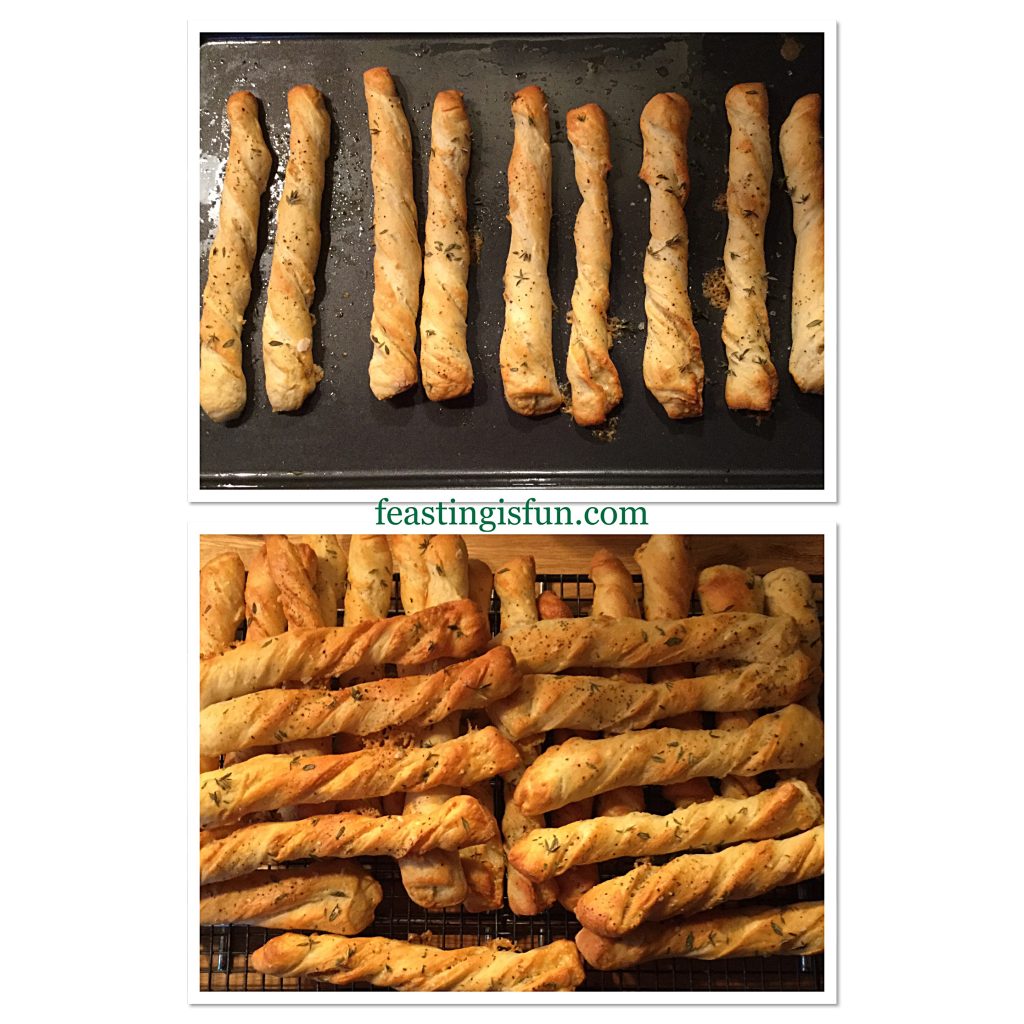
Freshly baked, golden, Cheddar Cheese Thyme Soft Breadsticks
  • The breadsticks are baked when they are a light golden brown.
  • As soon as the breadsticks are baked remove from the oven and place on a cooling rack.
  • Continue with the other half of the dough, cutting, twisting, egg washing and sprinkling and finally baking as before.
FF Cheddar Cheese Thyme Soft Breadsticks
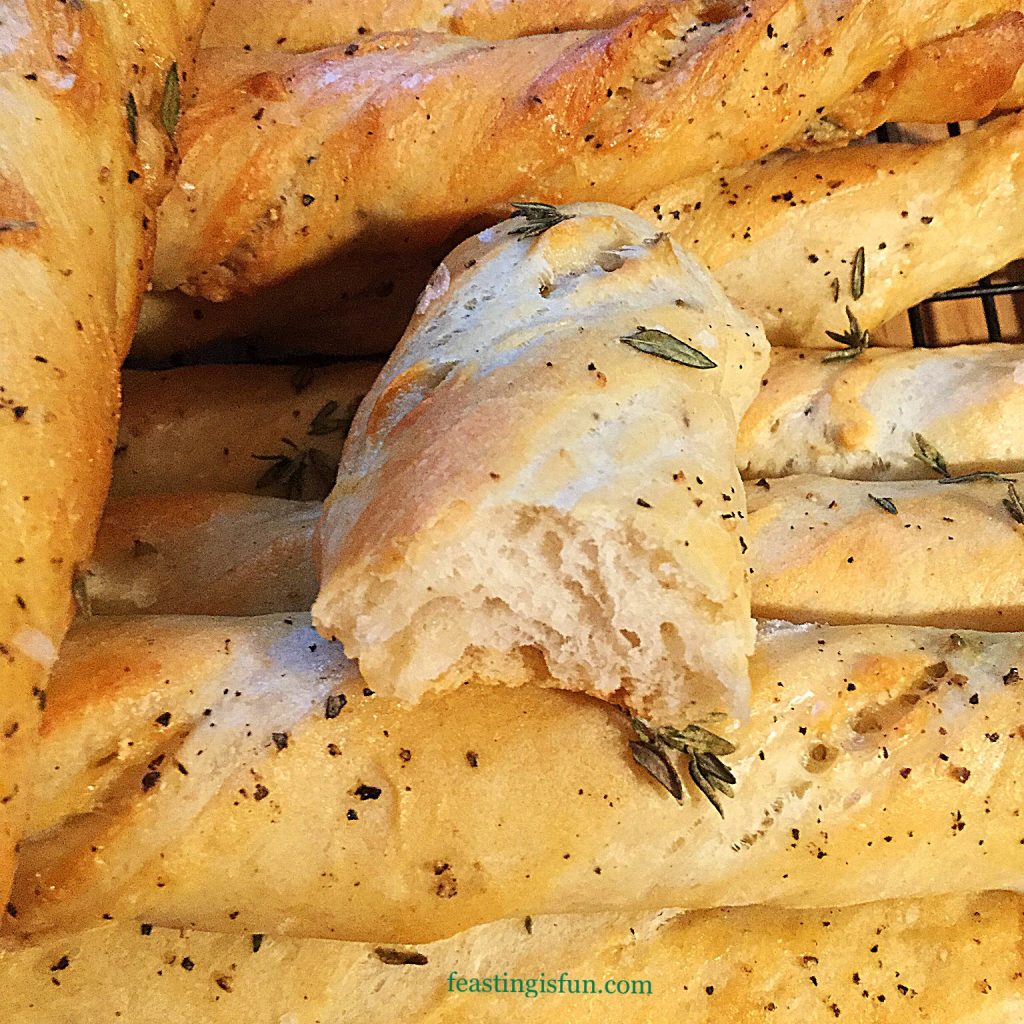
The soft inner crumb of these Cheddar Cheese Thyme Soft Breadsticks.
  • Wait until slightly cooled before biting into one of these deliciously cheesy breadsticks, with its soft, fluffy inner.
FF Cheddar Cheese Thyme Soft Breadsticks
Cheddar Cheese Thyme Soft Breadsticks

Serving And Storing The Breadsticks

Serve slightly warm to allow for the best possible taste experience. At there best enjoyed on the day these are made.

Since this recipe makes a big batch of Cheddar Cheese Thyme Soft Breadsticks, they can be enjoyed at larger gatherings and are ideal for adding to a buffet table.

To make ahead, bake as usual, cool and freeze for up to two weeks. Remove from the freezer when needed, place on a baking tray in a warm oven for 10 minutes to defrost and warm through.

If you have enjoyed this recipe for Cheddar Cheese Thyme Soft Breadsticks you may also like these:

Seeded Multigrain Baguettes

FF Cheddar Cheese Thyme Soft Breadsticks
Seeded Multigrain Baguettes

Baked Cheese Olive Ciabatta Bread

FF Cheddar Cheese Thyme Soft Breadsticks
Baked Cheese Olive Ciabatta Bread

Cheddar Sun Dried Tomato Scones

FF Cheddar Cheese Thyme Soft Breadsticks
Cheddar Sun Dried Tomato Scones

Creating recipes using ingredients that compliment and enhance each other is at the heart of Feasting is Fun. As well as encouraging people to share their bakes. Baking extra to give away, to an elderly neighbour or new family, is easy. Especially when you are in the kitchen already, whipping up a batch of breadsticks, cookies or cupcakes.

Who will you share with?

Whatever you are making, baking or creating in your kitchens, enable fun preparing your feast.

Sammie xx

No part of this post may be reproduced or duplicated without the written permission of the owner. Please see my Disclosure Policy.
 

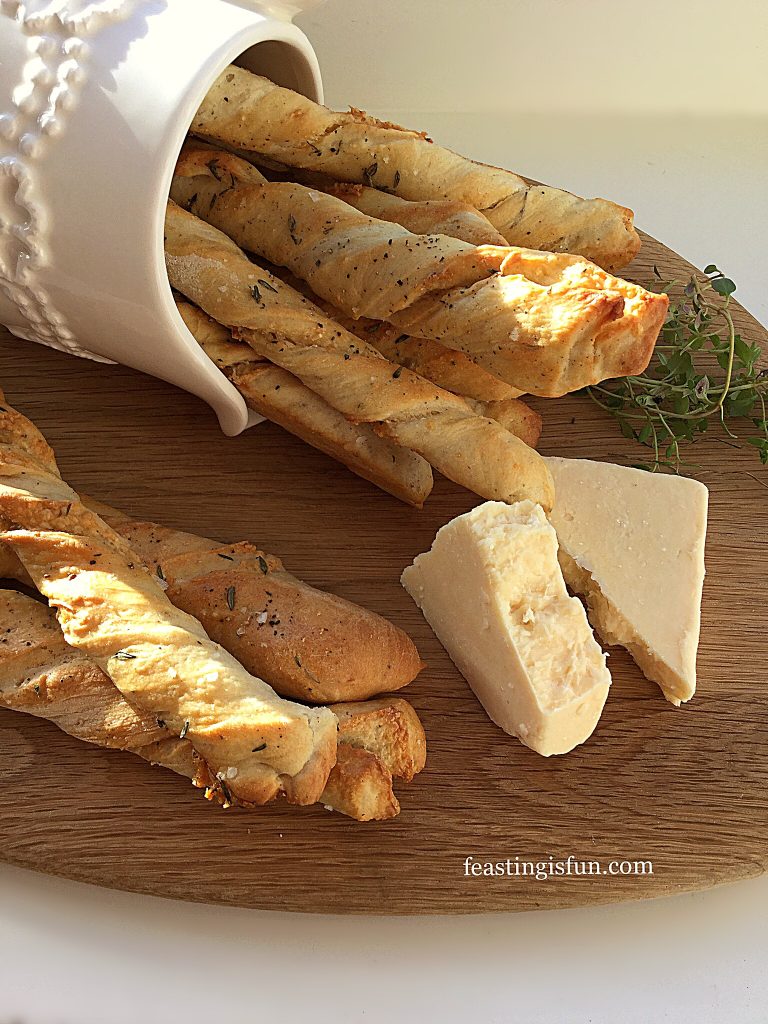
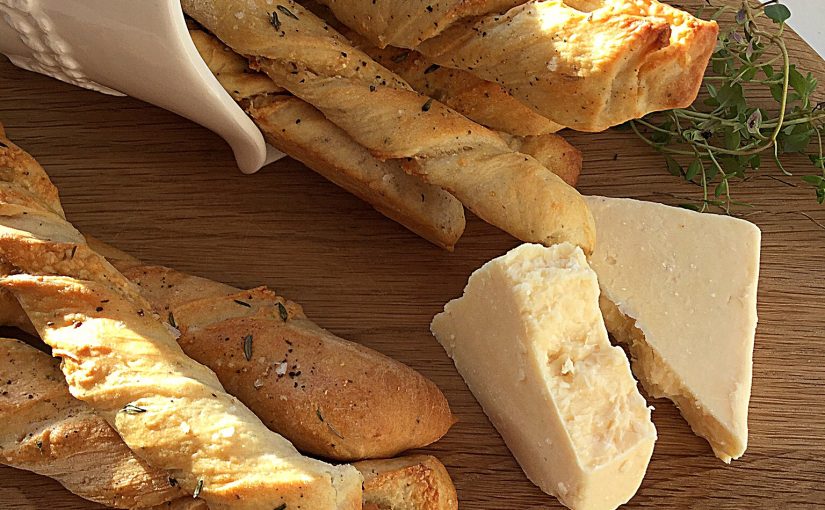
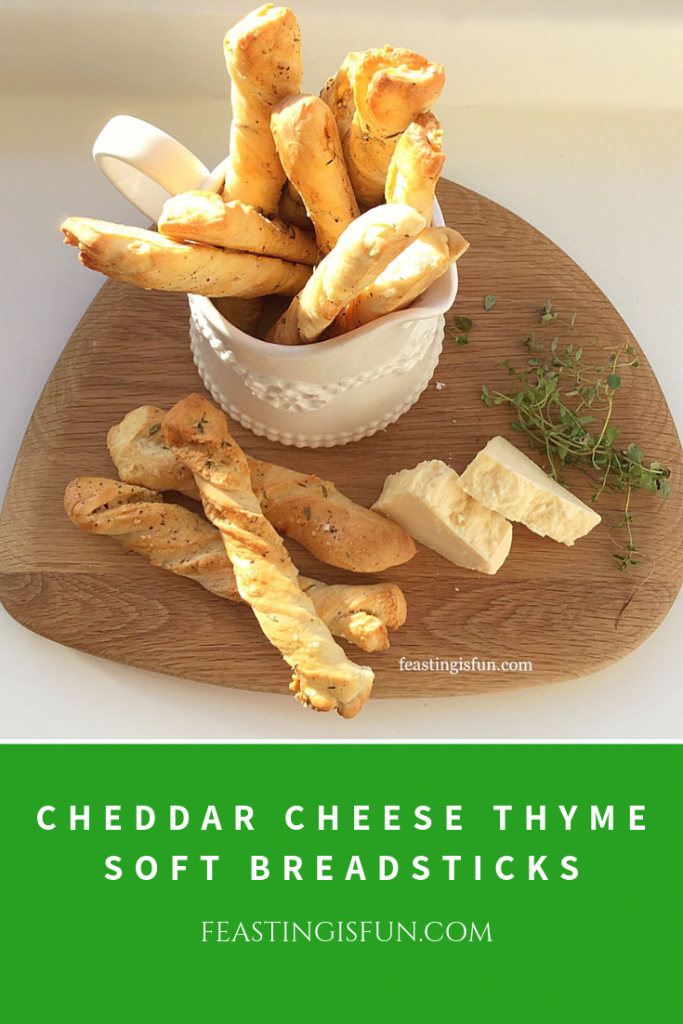
Cheddar and fresh thyme on a wooden board with breadsticks in a cream jug. Sized for Pinterest with descriptive graphics.
Cheddar Cheese Thyme Soft Breadsticks.

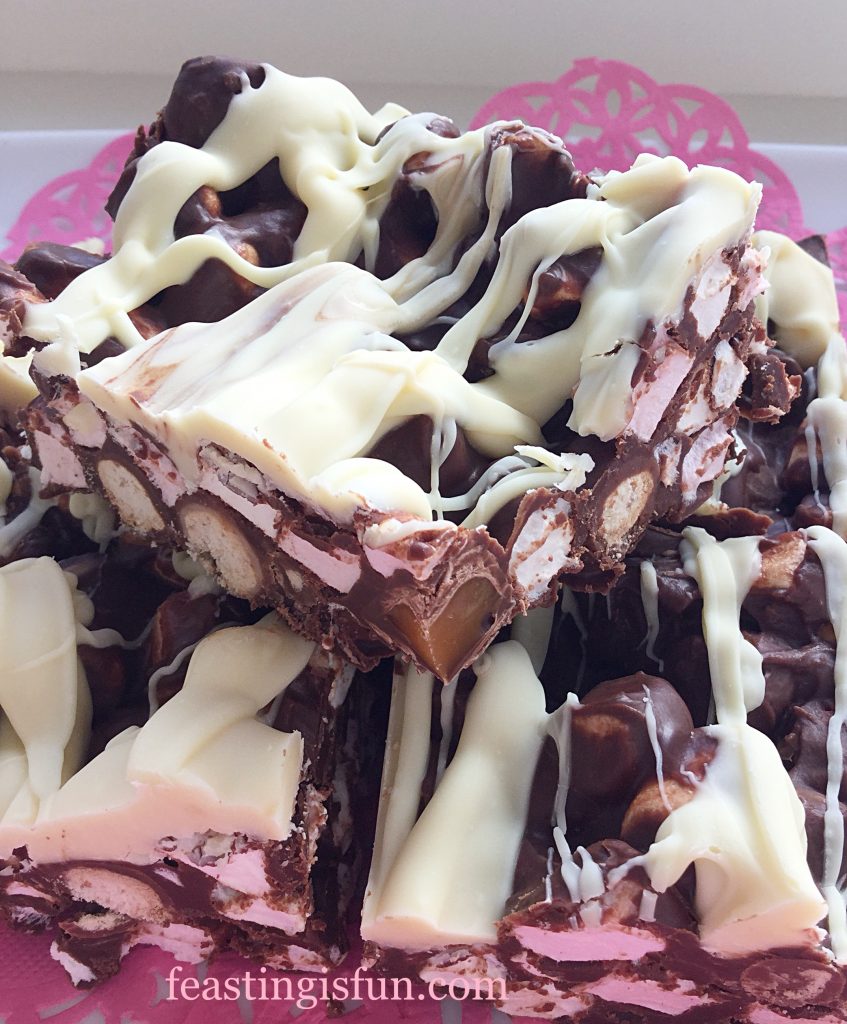
Cherry Bakewell Rocky Road Bars

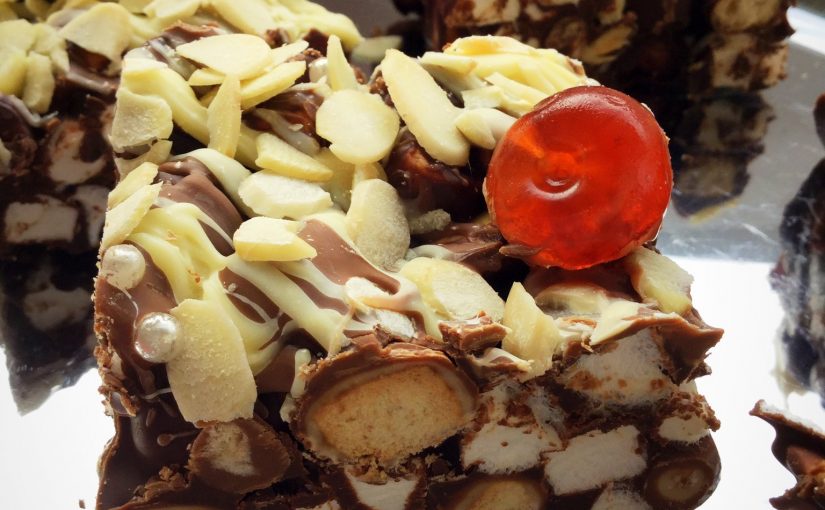
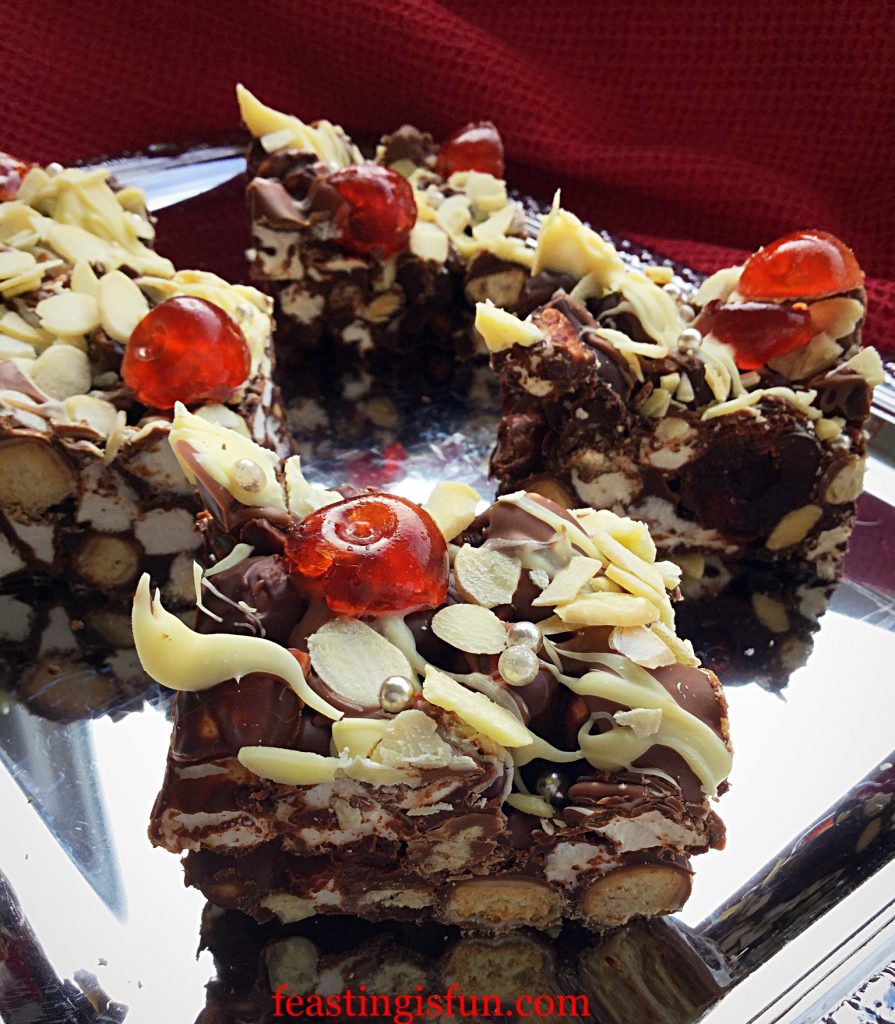
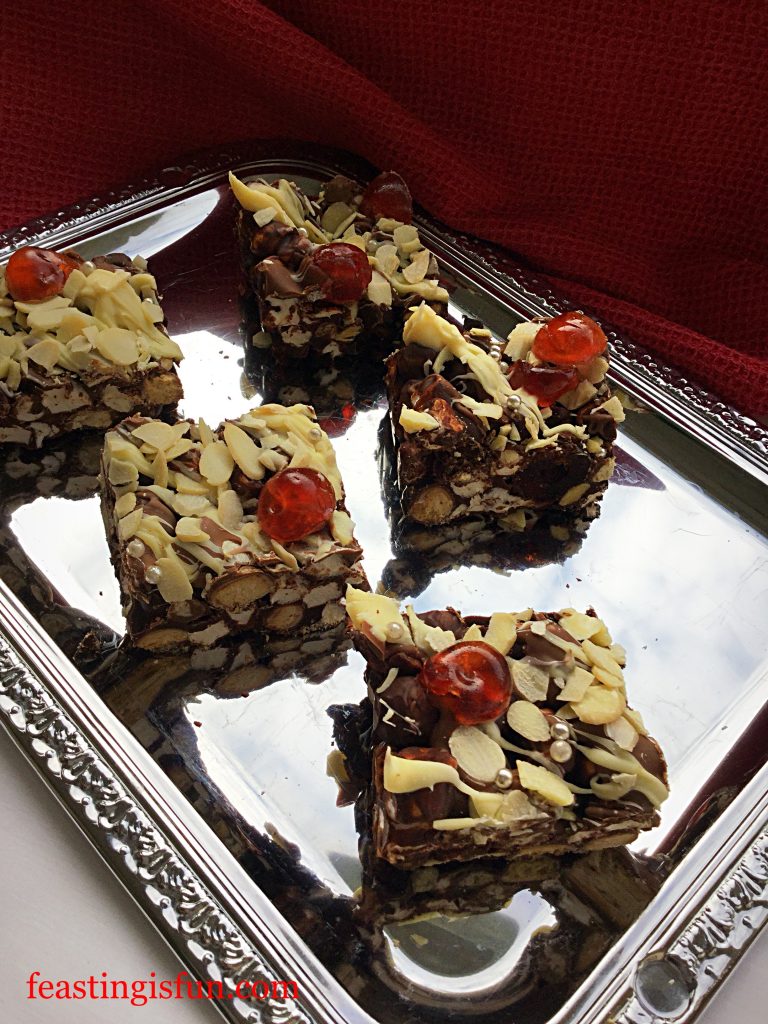
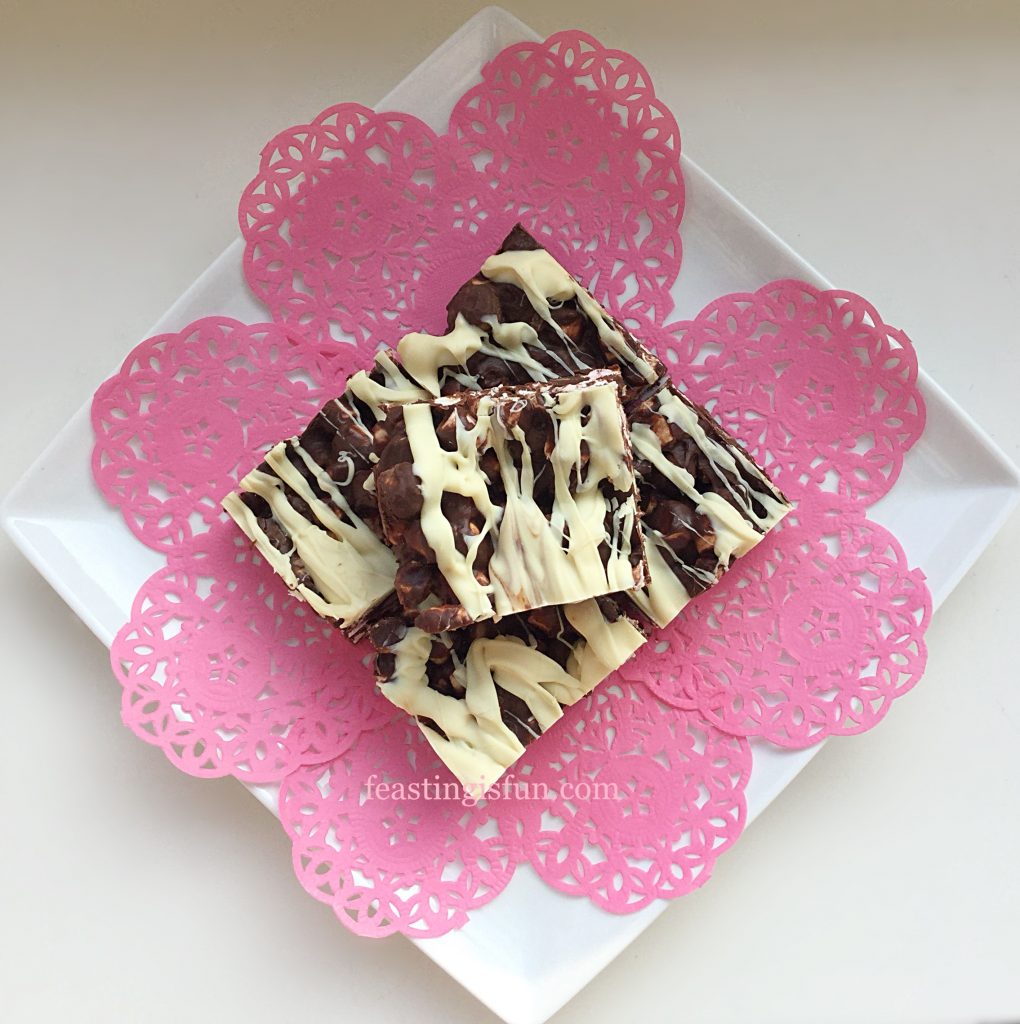
When it comes to entertaining, especially during busy times of the year, it’s really handy to have a few no bake recipes tucked up your sleeve. Also, should you need to transport your creation, something that won’t leak all over the car and travels well is a definite bonus. These Cherry Bakewell Rocky Road Bars tick all the boxes and taste utterly delicious to boot!

FF Cherry Bakewell Rocky Road Bars
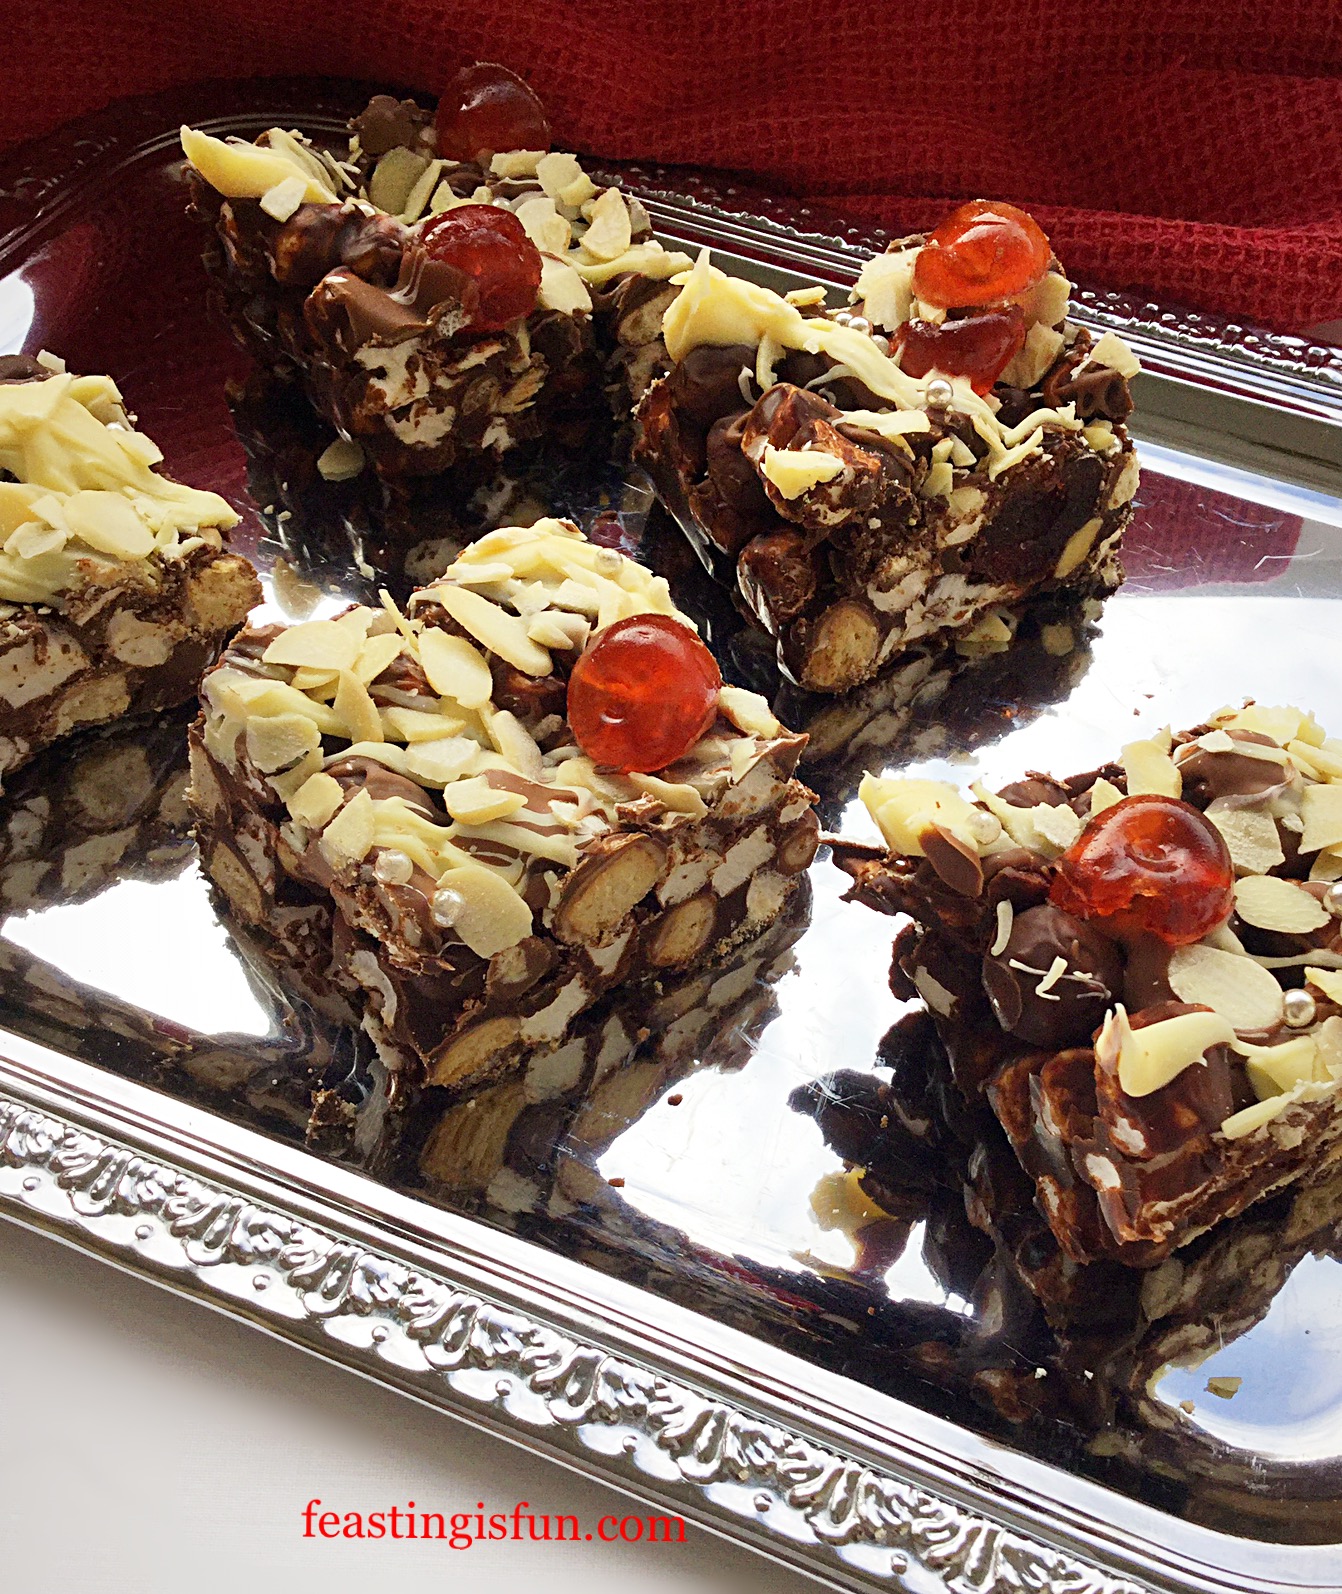
Cherry Bakewell Rocky Road Bars

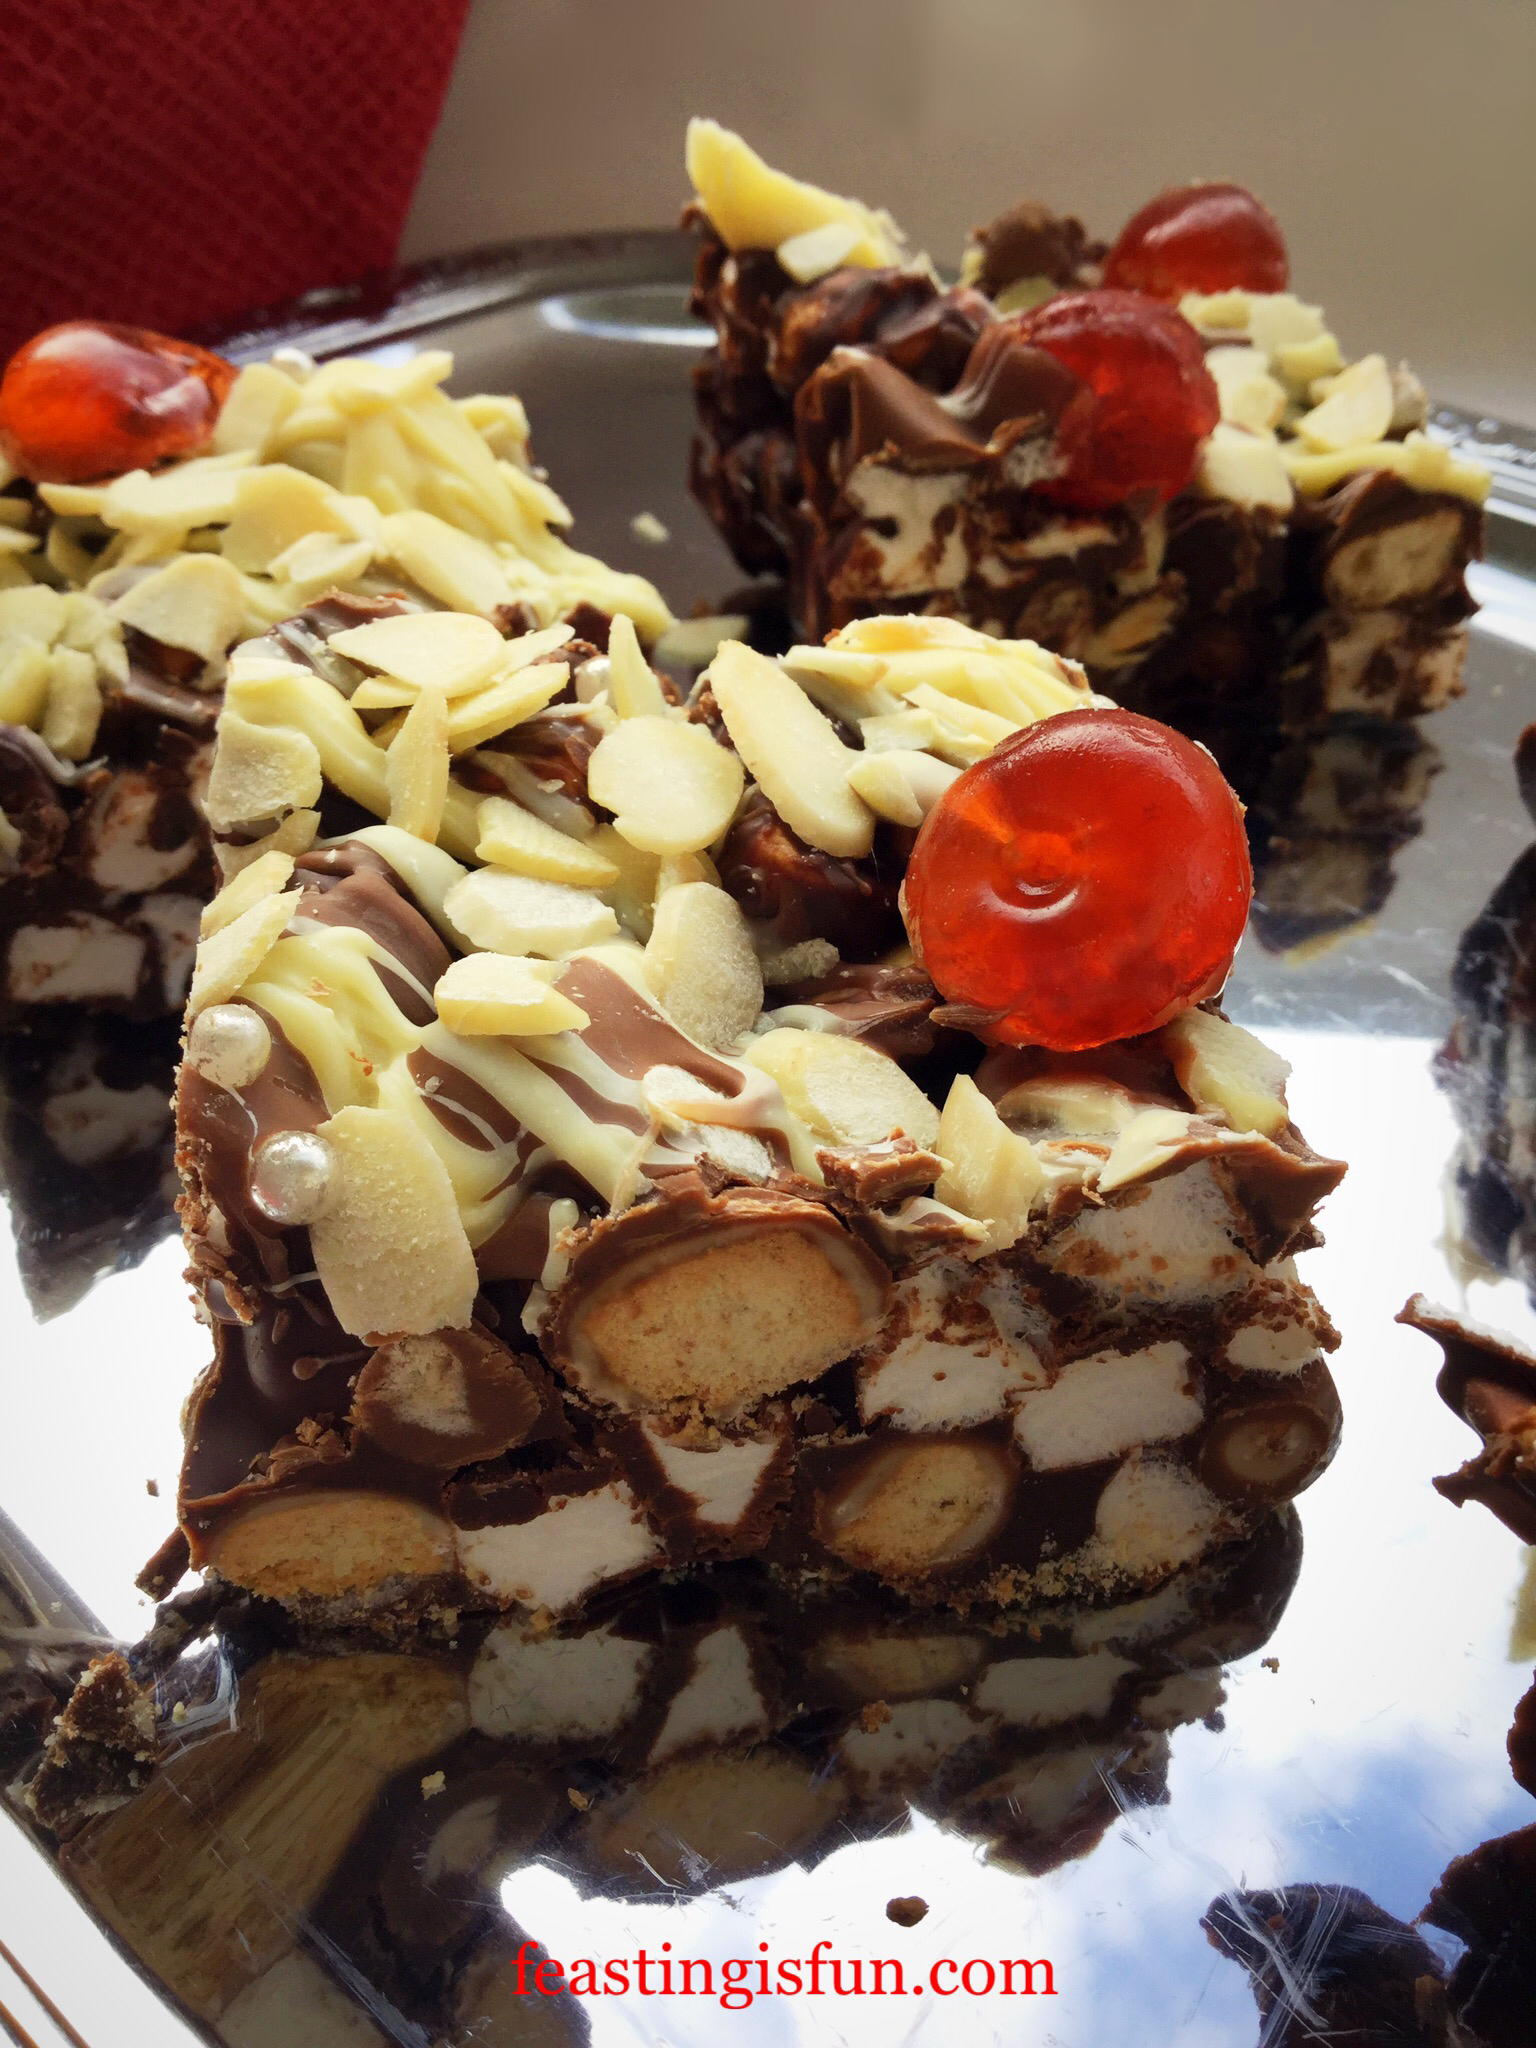
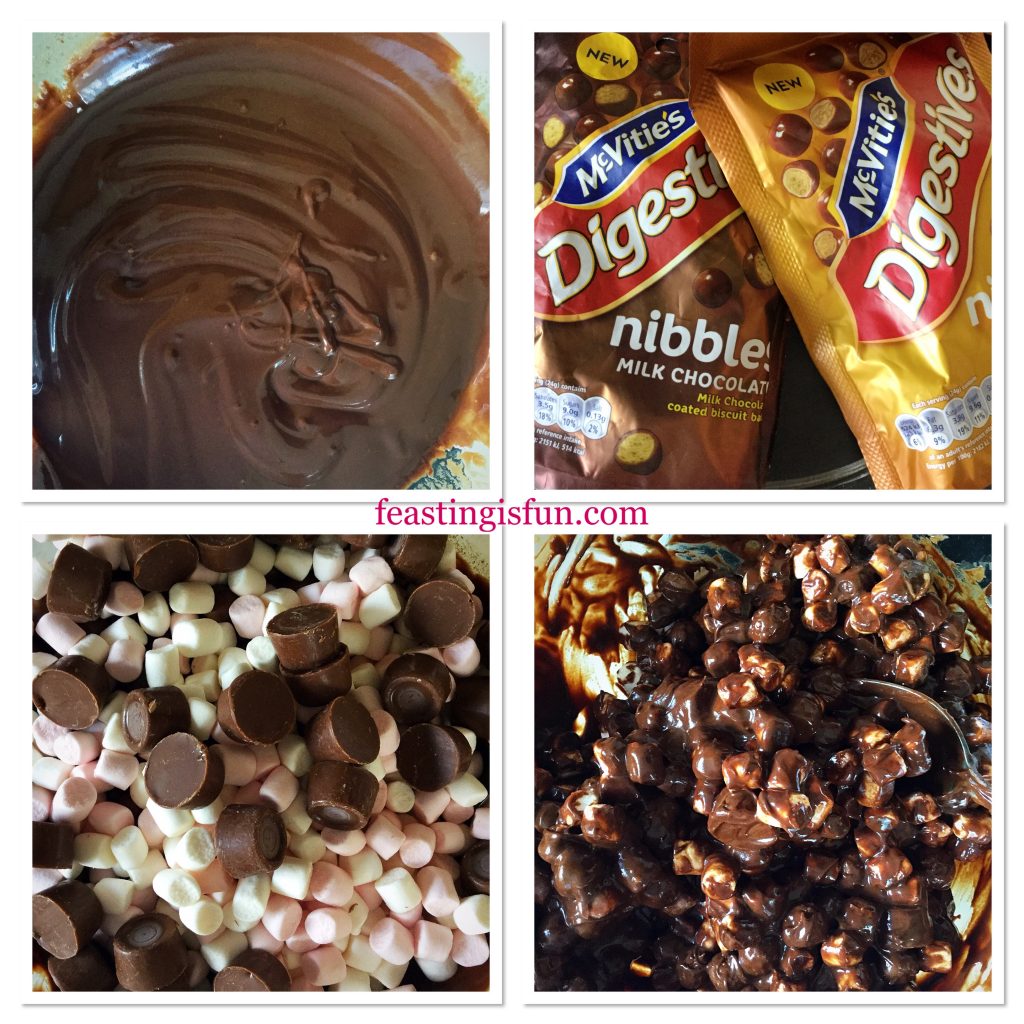
Since McVities Digestive Nibbles became available I take full advantage of skipping the ‘biscuit bashing’ step. Similar to my recipe for Caramel Crunch Rocky Road Bars.Because anything that makes life easier is a bonus in my book. Chocolate covered biscuit balls combine with whole, toasted almonds, providing great crunch and texture. While the glacé cherries and mini marshmallows add sweet chewiness, held together in a thick chocolate sauce.

FF Cherry Bakewell Rocky Road Bars
Cherry Bakewell Rocky Road Bars

Finally each bar is finished with a double chocolate drizzle, flaked toasted almonds, more glacé cherries and sparkling silver balls. Most of all, the combination of ingredients ensures traditional cherry bakewell flavours are in every chewy, crunchy, delightful bite. Resulting in a delicious sweet treat that is as ideal to make and serve at home as it is easy to transport.

FF Cherry Bakewell Rocky Road Bars
Cherry Bakewell Rocky Road Bars

Each one of these Cherry Rocky Road Bars is a feast in itself. Also what better time to share these with friends and family, than over the holiday season? Since sharing food makes it taste so much better, these also make a great edible gift. Pop into cellophane bags tied with festive ribbon and give as gifts. A perfect festive treat.

Recipe: Cherry Bakewell Rocky Road Bars makes 24

For the bars:

200g/7oz Dark Chocolate minimum 70% cocoa solids

200g/7oz Milk Chocolate

100g/4oz Unsalted Butter

1/4tsp Sea Salt – I use Maldon

3tbsp Golden Syrup

100g/4oz Whole Almonds lightly toasted and cooled

3 Packs McVities Digestive Nibbles total 360g available from most supermarkets. Alternatively crush 360g digestive biscuits into roughly 1cm sized pieces

100g/4oz Glacé Cherries

175g/6oz Mini Marshmallows

Optional 1/2tsp Almond Extract – I use Nielsen-Massey

For the topping:

100g/4oz White Chocolate

100g/4oz Milk Chocolate

50g/2oz Flaked Almonds lightly toasted and cooled

50g/2oz Glacé Cherries cut in half

Silver Sugar Balls

Method:

  • First of all line a 22.5cm x 30cm (9” x 12”) deep tin with aluminium foil.
  • Next, into a large microwaveable bowl add the milk and dark chocolate, broken up or chopped into pieces. Also add the butter and sea salt.
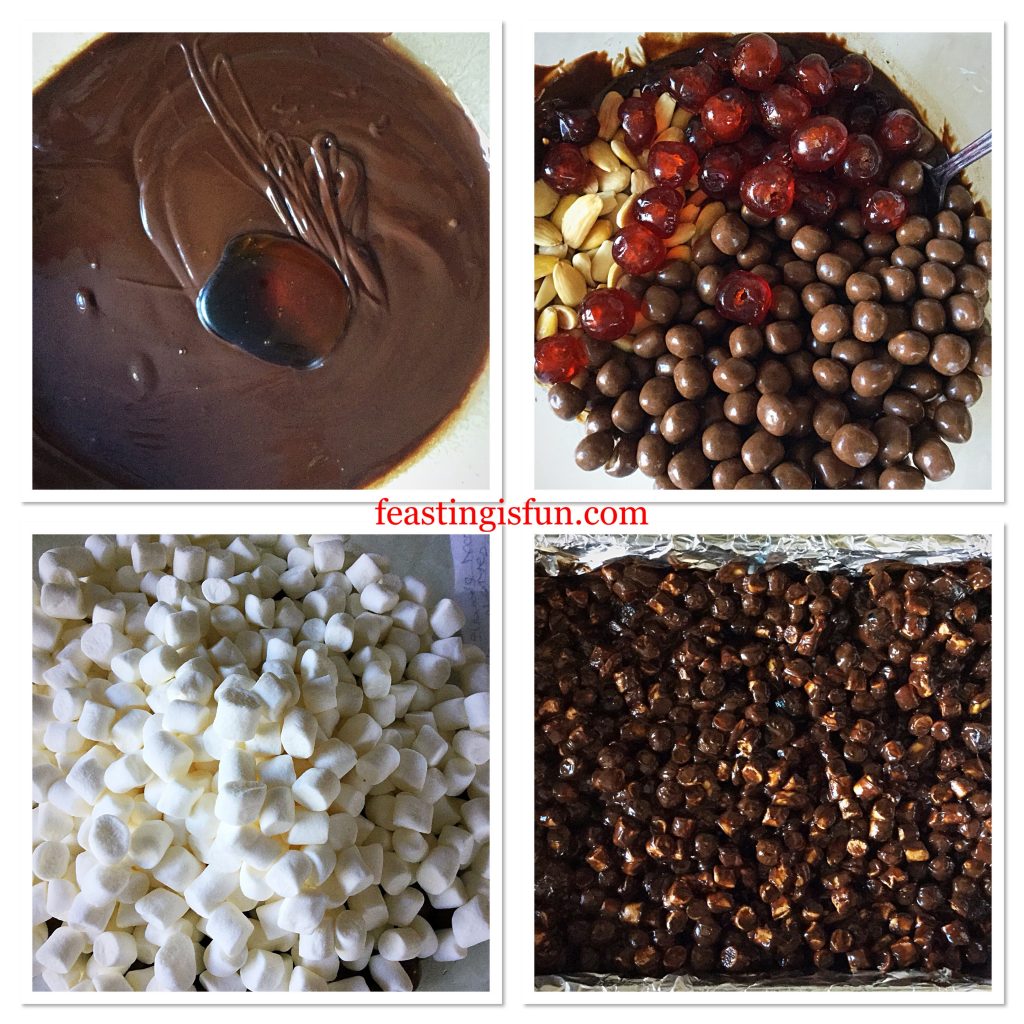
  • Heat the chocolate and butter in the microwave, on medium power for 30 seconds at a time. Stir the mixture between each heating burst. As soon as the chocolate and butter start to melt stir continuously until completely liquid.
  • Add the golden syrup and stir to combine. Stir in the almond extract if using.
  • Into the bowl add the toasted almonds, glacé cherries, digestive nibbles (or broken biscuits). Finally add the mini marshmallows.
  • Mix to combine all of the ingredients, ensuring everything is slicked with the chocolate mixture.
  • Spoon the mixture into the prepared tin, pressing with the back of a spoon and making sure that the tin is filled evenly.
FF Cherry Bakewell Rocky Road Bars
Cherry Bakewell Rocky Road Bars
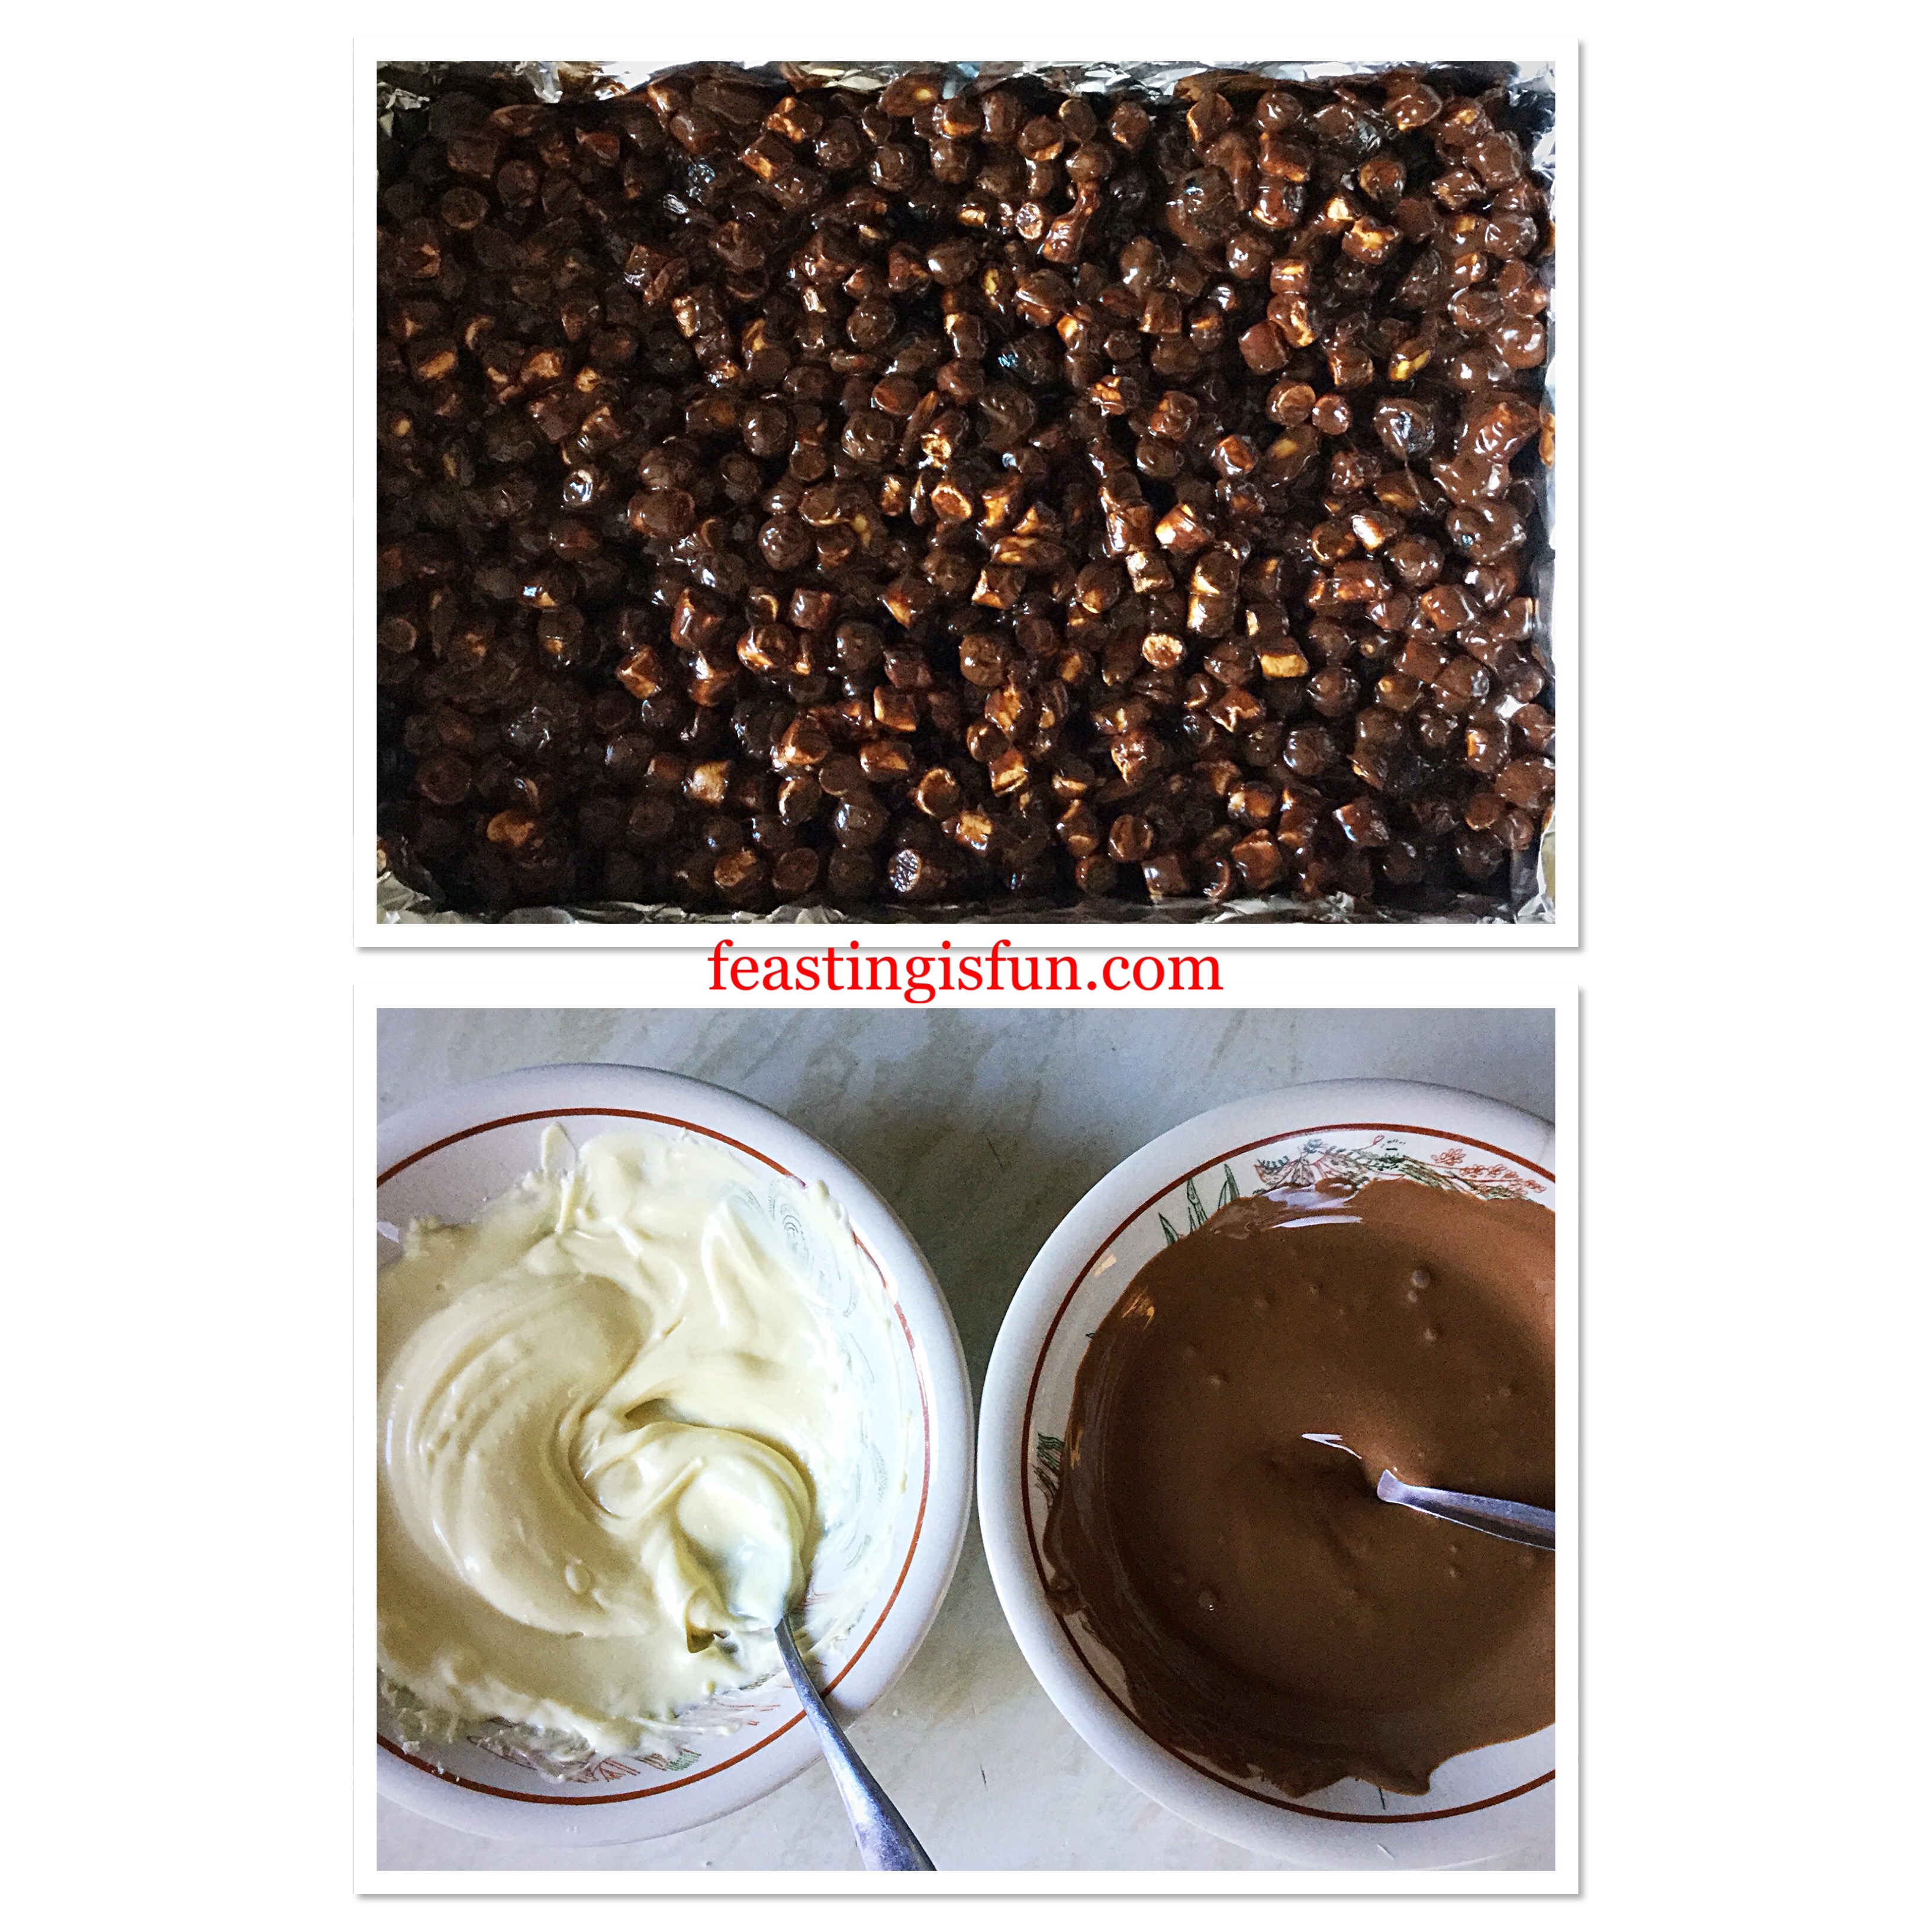
  • Break up the milk and white chocolate and place into separate heatproof, microwaveable bowls.
  • Heat separately, as before, on medium. Stir after each heating burst until the chocolate is completely melted.
FF Cherry Bakewell Rocky Road Bars
Preparing the chocolate drizzle
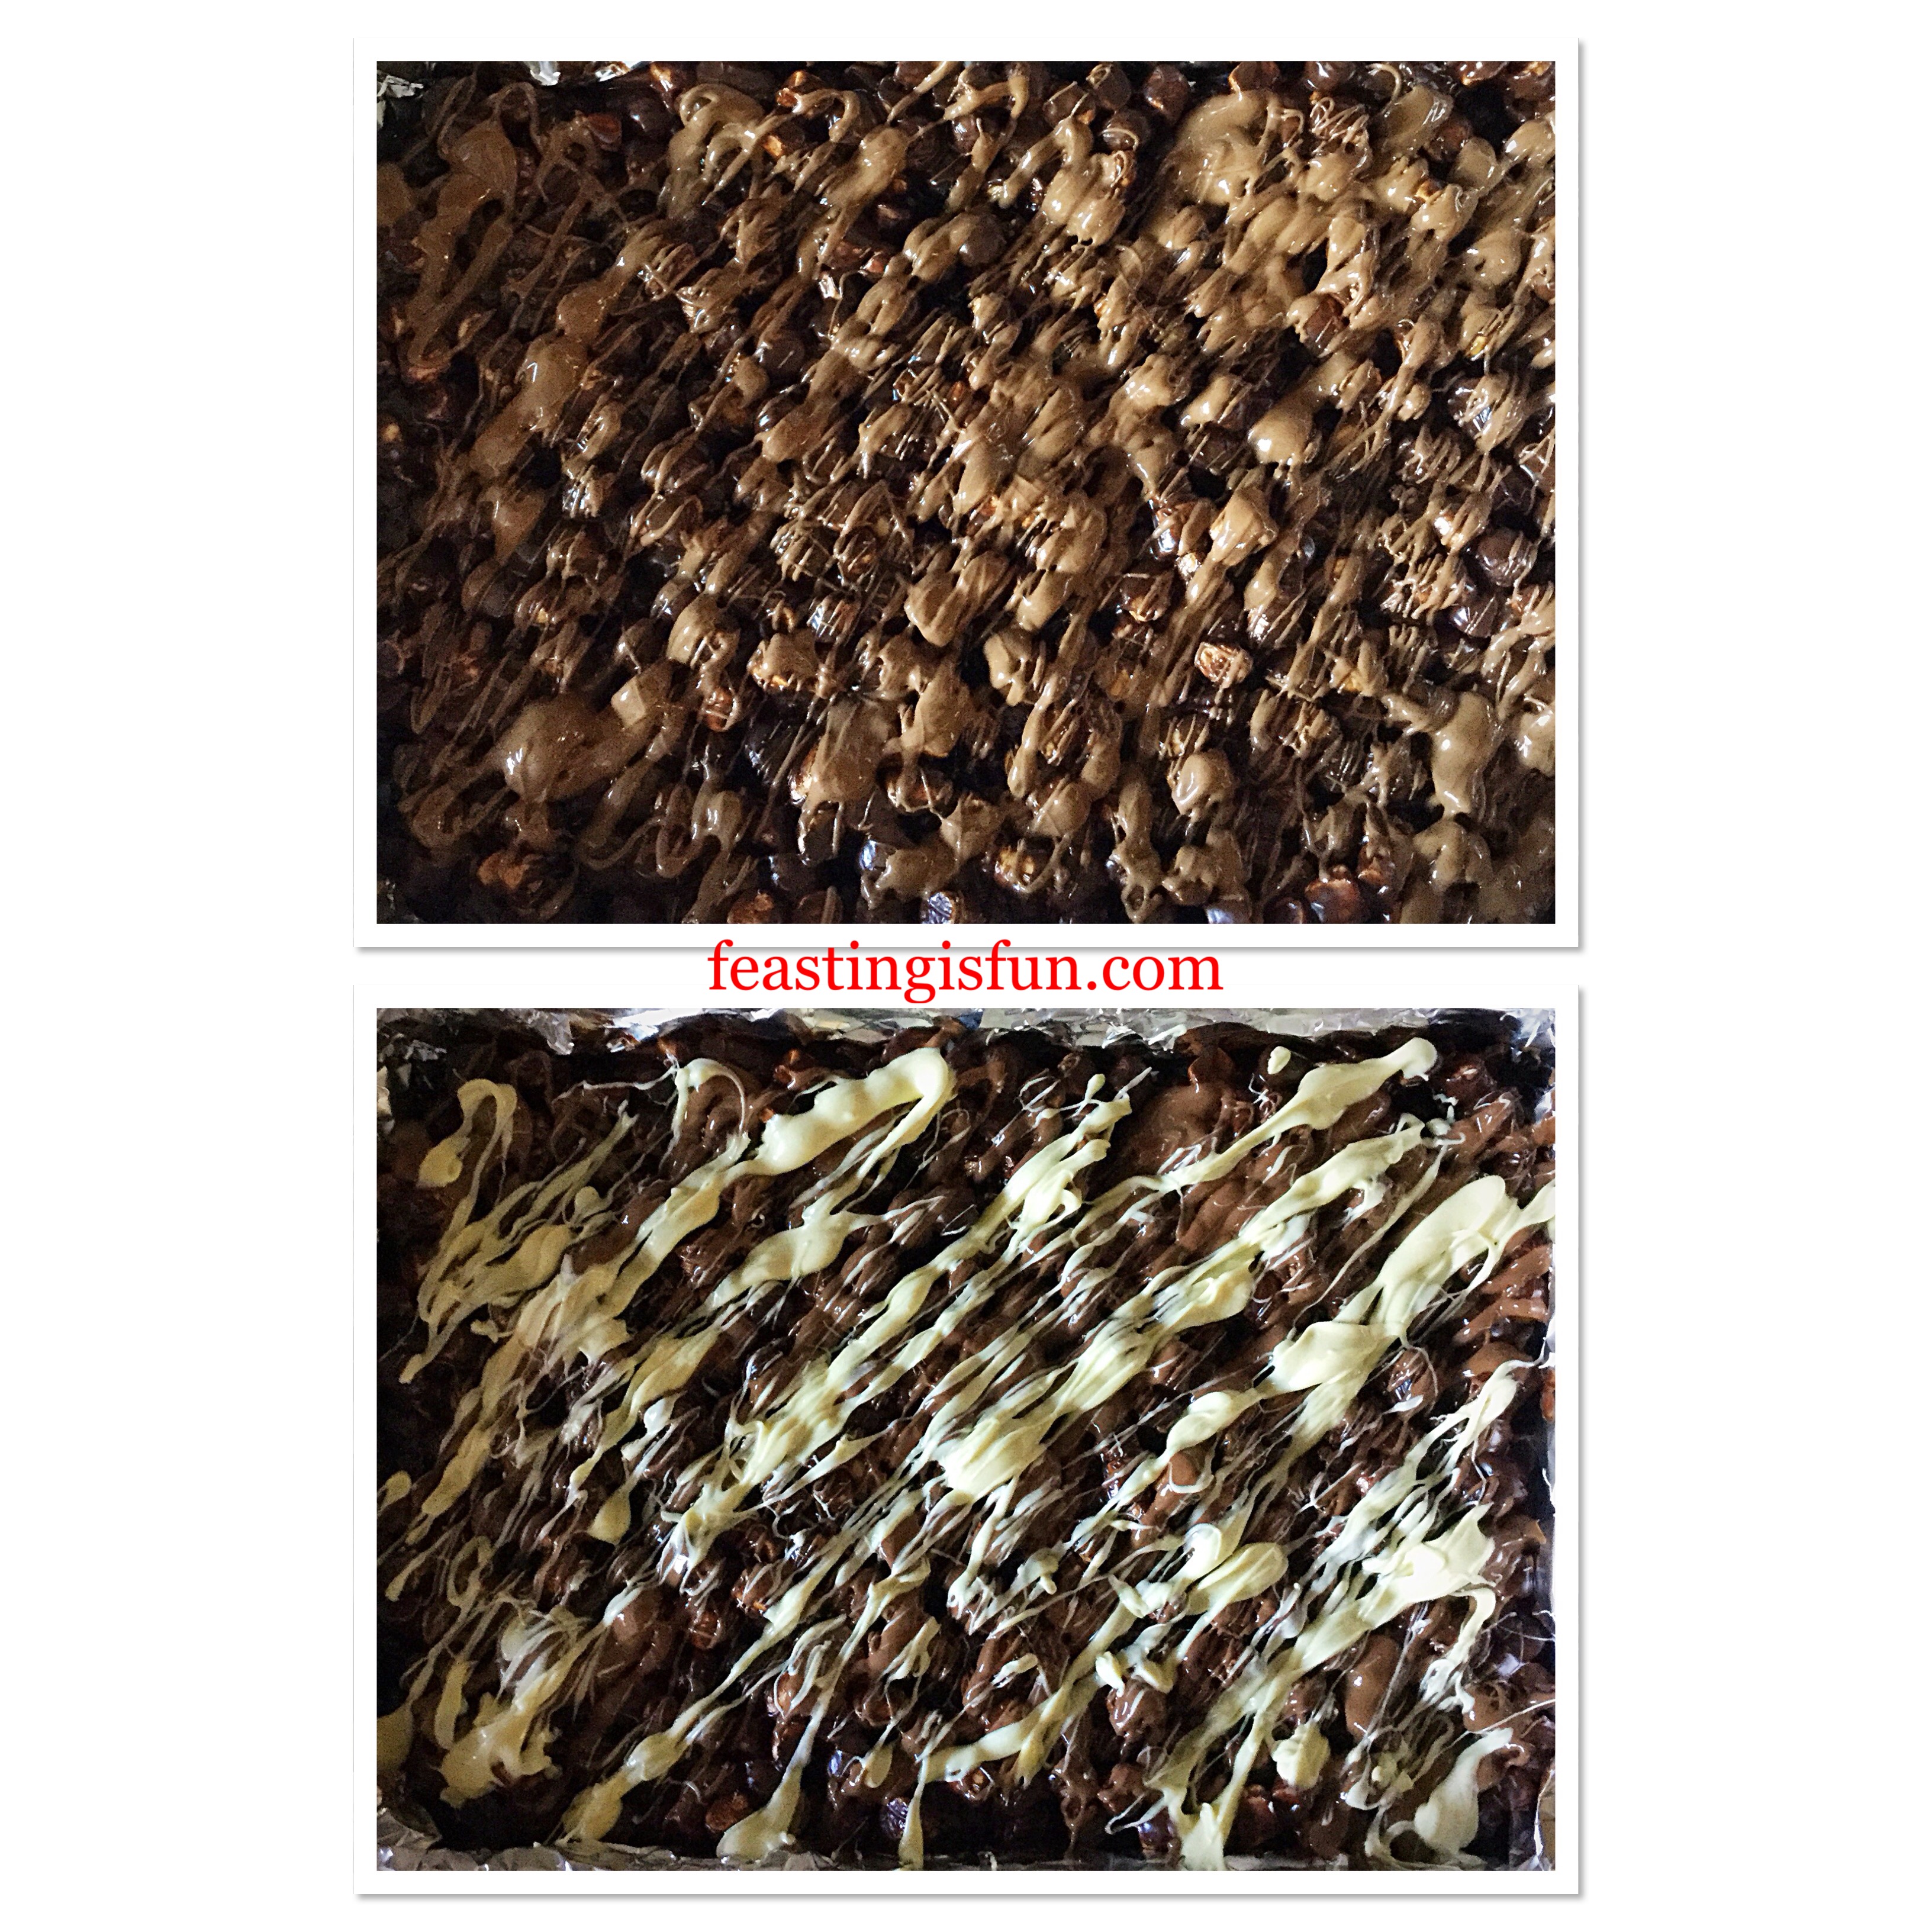
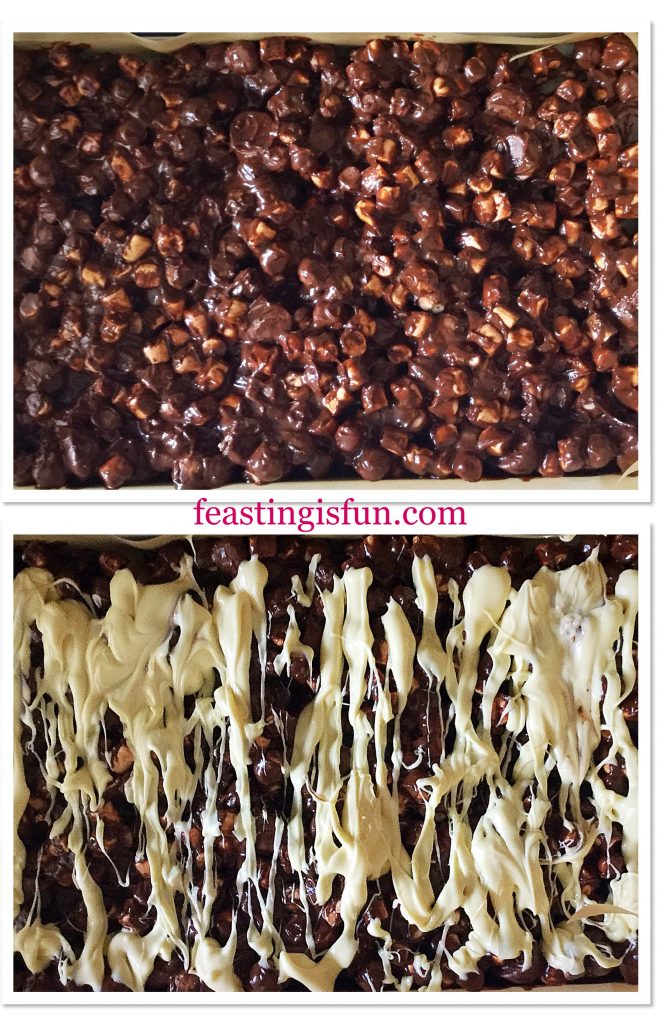
  • Starting with the milk chocolate, use a teaspoon to diagonally drizzle the chocolate over the rocky road.
  • Continue with the white chocolate in the same manner.
FF Cherry Bakewell Rocky Road Bars
Milk and white chocolate drizzle
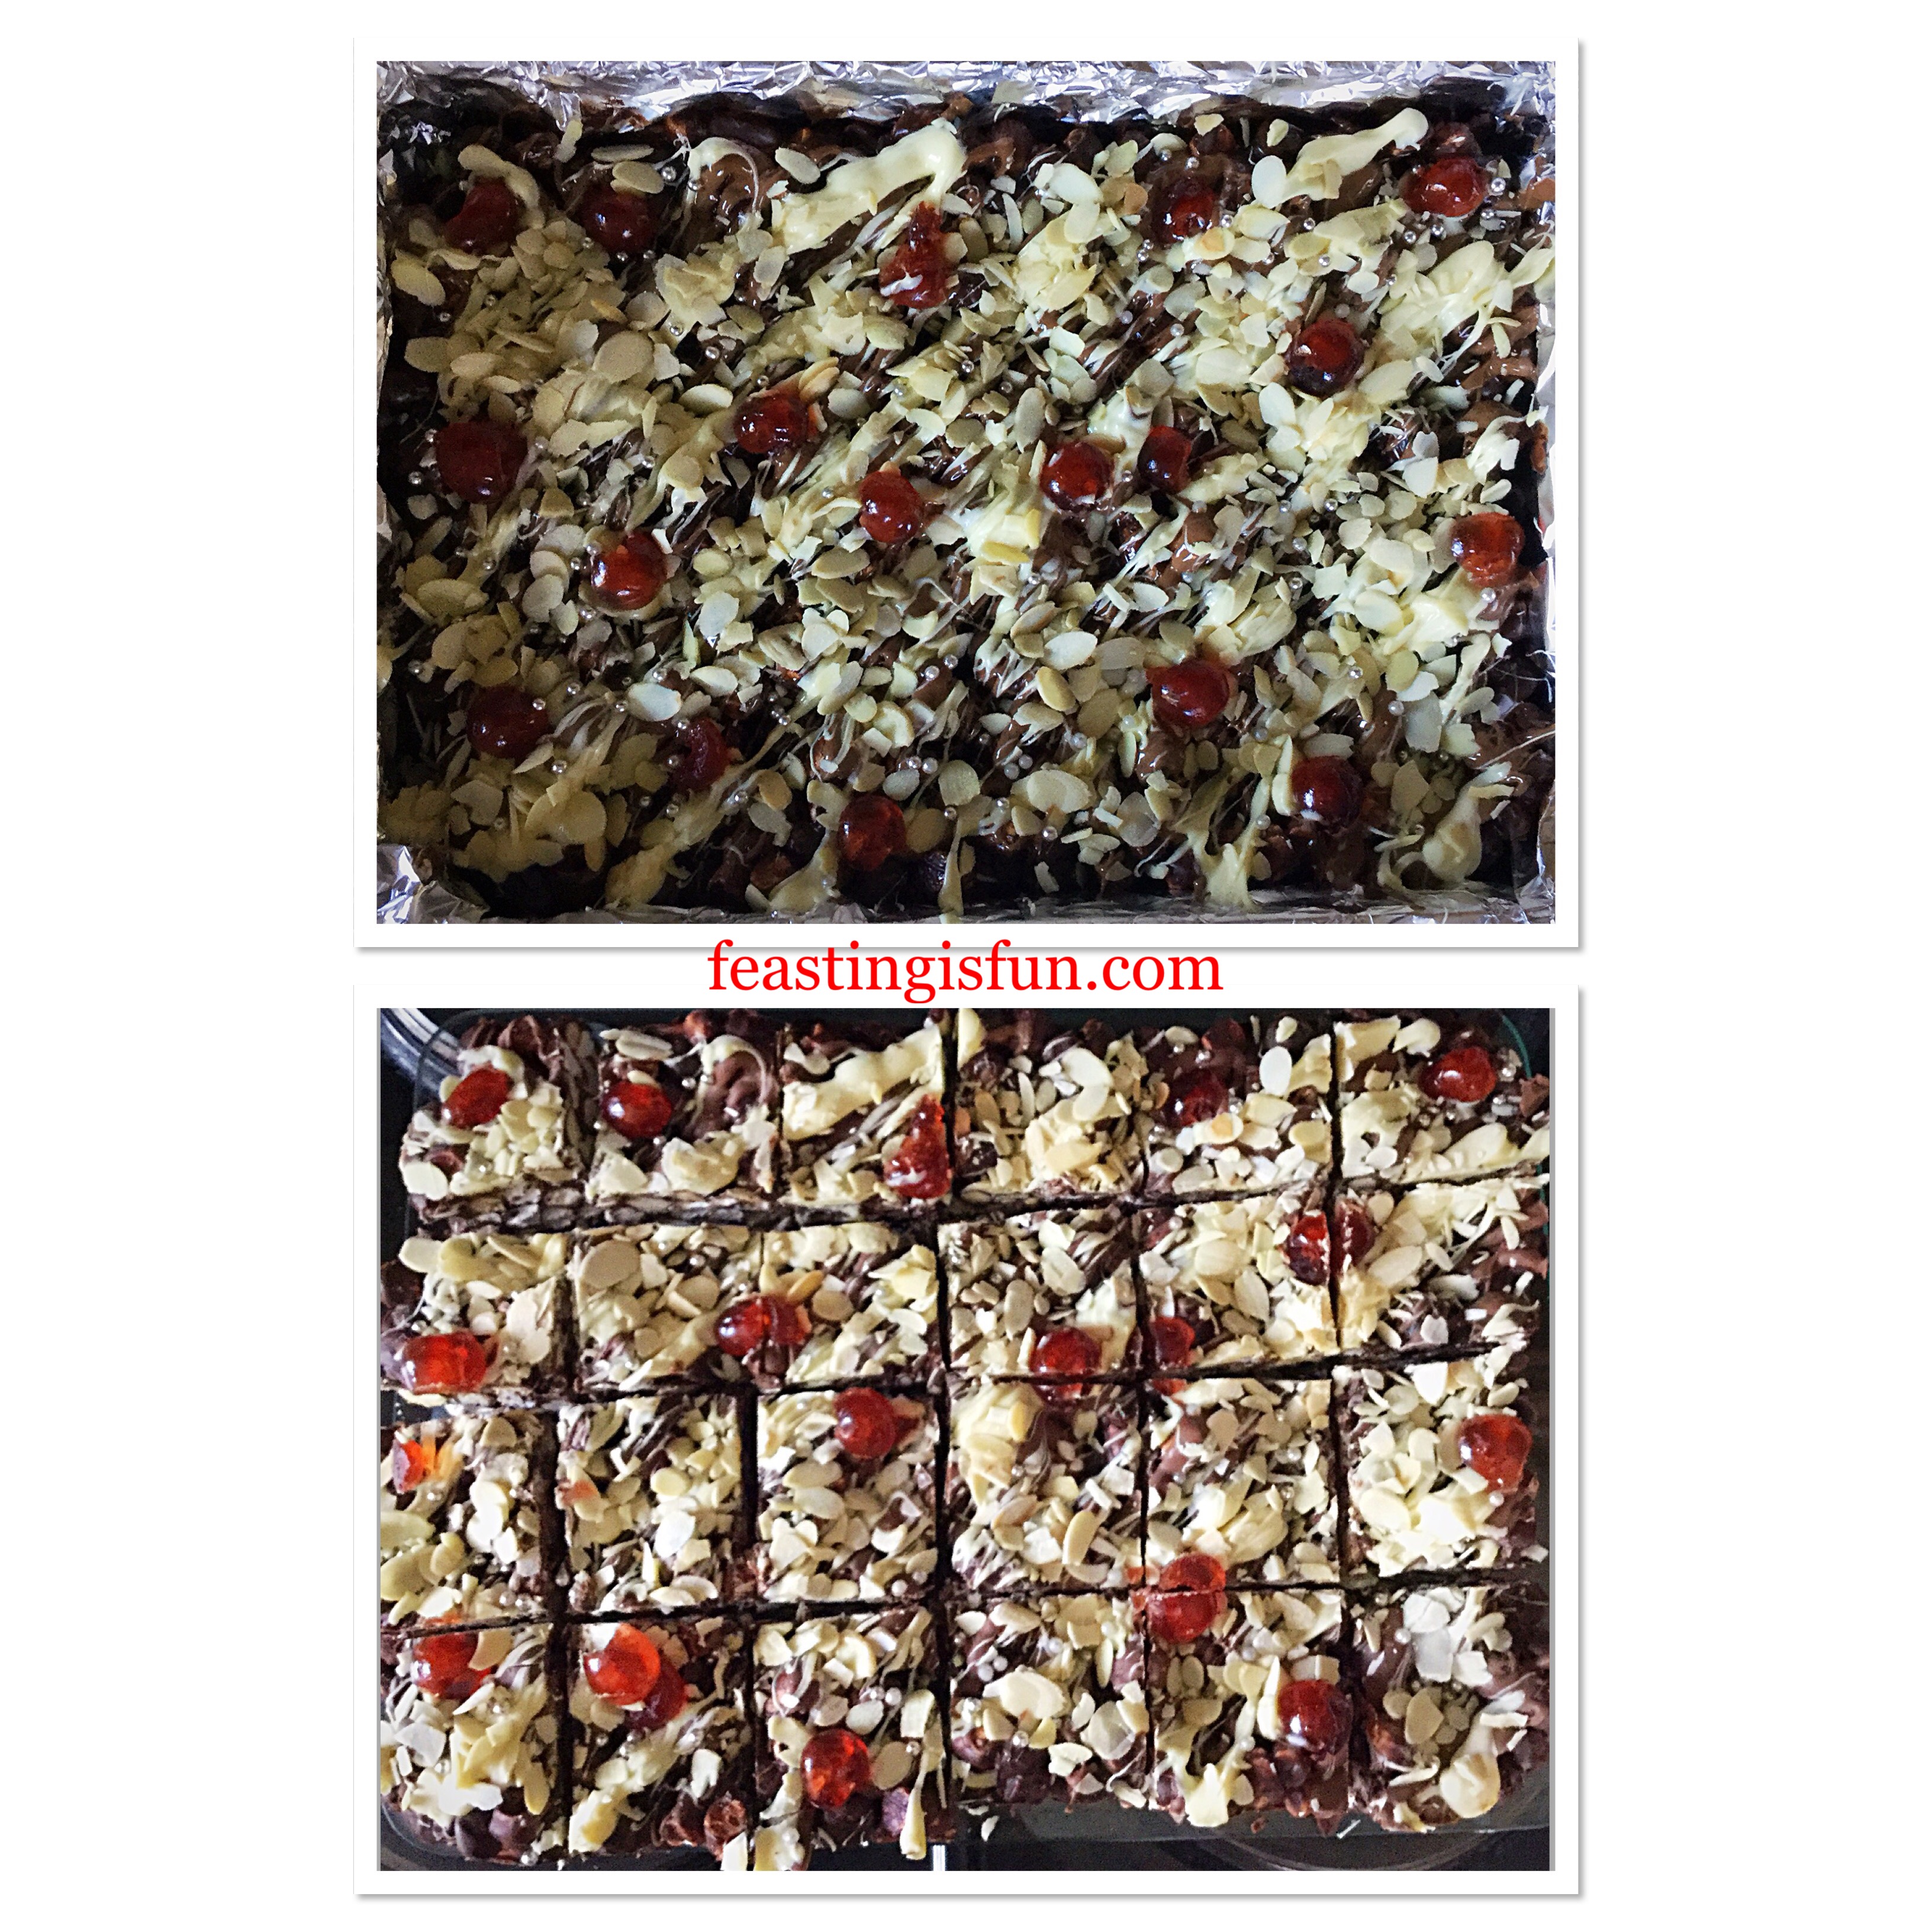
  • While the chocolate is still un-set, sprinkle over the flaked almonds. Place the cherries evenly over the flaked almonds and finally scatter over silver balls for extra sparkle.
FF Cherry Bakewell Rocky Road Bars
Finishing the rocky road and then cutting into even bars.
  • Cover the tin tightly with aluminium foil and place in the fridge, or somewhere cool to set. I actually placed the tin in our very cold porch overnight!
  • Once set, lift the block of marshmallow and chocolate loveliness out of the tin. Peel away the foil and place on to a board.
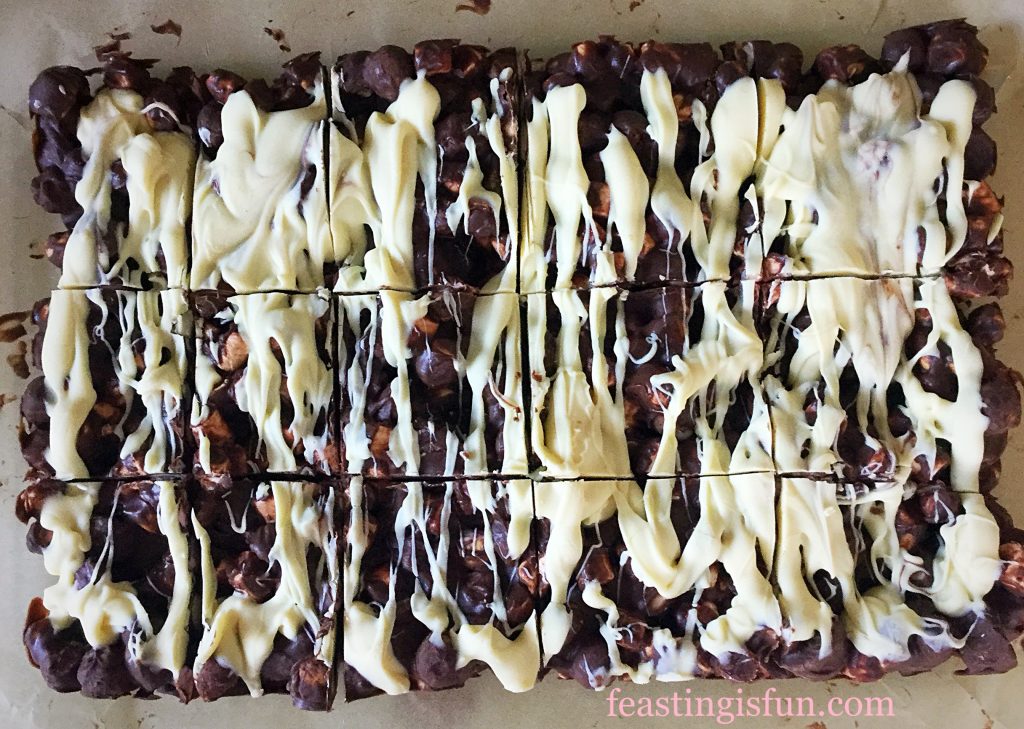
  • Using a sharp knife cut across the width of the block, dividing it into four equal portions. Cut downwards through the middle and then again through the middle of each larger quarter, creating 24 individual bars.
FF Cherry Bakewell Rocky Road Bars
Cherry Bakewell Rocky Road Bars

Serve on a pretty tray or platter. A silver tray highlights the silver balls on top of each bar, giving them a festive look.

Store in an airtight container, keep in the fridge during warmer weather. They will keep for up to one week, if they last that long!

If you have enjoyed this recipe for Cherry Bakewell Rocky Road Bars you may also like these:

Maltesers Popping Candy Cupcakes

FF Cherry Bakewell Rocky Road Bars
Maltesers Popping Candy Cupcakes

Almond Cacao Nib Shortbread Bars

FF Cherry Bakewell Rocky Road Bars
Almond Cacao Nib Shortbread Bars

Double Strawberry Almond Muffins

FF Cherry Bakewell Rocky Road Bars
Double Strawberry Almond Muffins


Making food for others is one of life’s greatest pleasures. Since taking time to create something special to be shared amongst those you love, care and appreciate is not only fun, but also a great way to show that you are thankful to have them in your life. Especially during Christmas time, sharing is important. Helping us to not become self centered and to put others first. For the ultimate selfless act please see Important Stuff.

Whatever you are making, baking and creating in your kitchens, have fun preparing and sharing your feast.

Sammie xx

No part of this post may be reproduced or replicated without the written permission of the owner. Please see my Disclosure Policy.

Maltesers Popping Candy Cupcakes

While thinking of what to name this blog, I wanted to express, succinctly, what cooking, baking, eating and sharing meant to me. Feasting is fun sums all of these things up perfectly. Eating a slice of toasted, homemade bread generously spread with butter, for breakfast is a feast in itself. As much as sitting around a groaning, food laden Christmas dinner table, laughing at cracker jokes with family and friends. While adding a twist to recipes that brings the unexpected. Fun! Maltesers Popping Candy Cupcakes fulfill everything Feasting is Fun stands for.

FF Maltesers Popping Candy Cupcakes

Cupcake – an entire cake to yourself

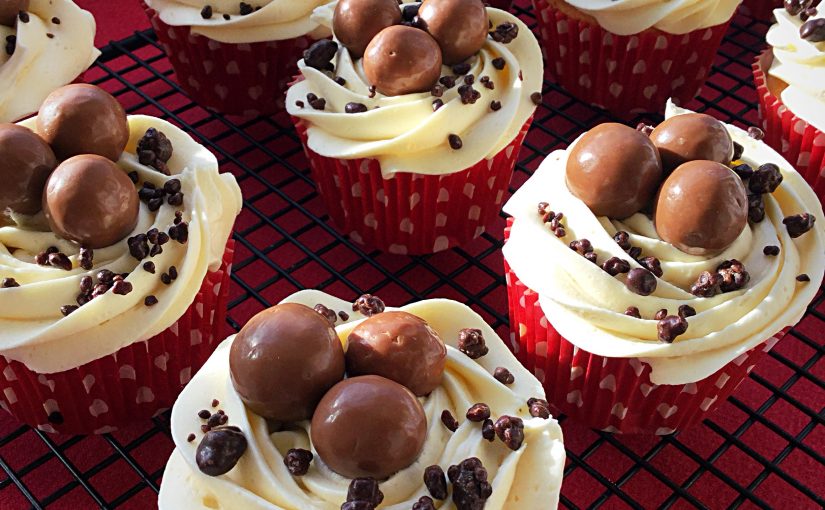
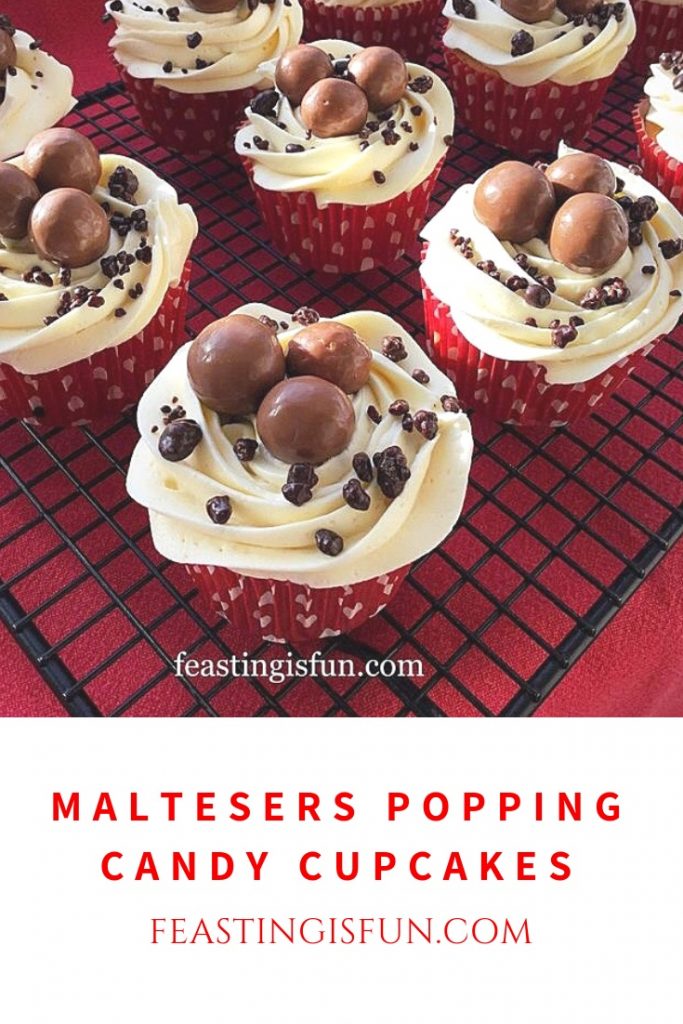
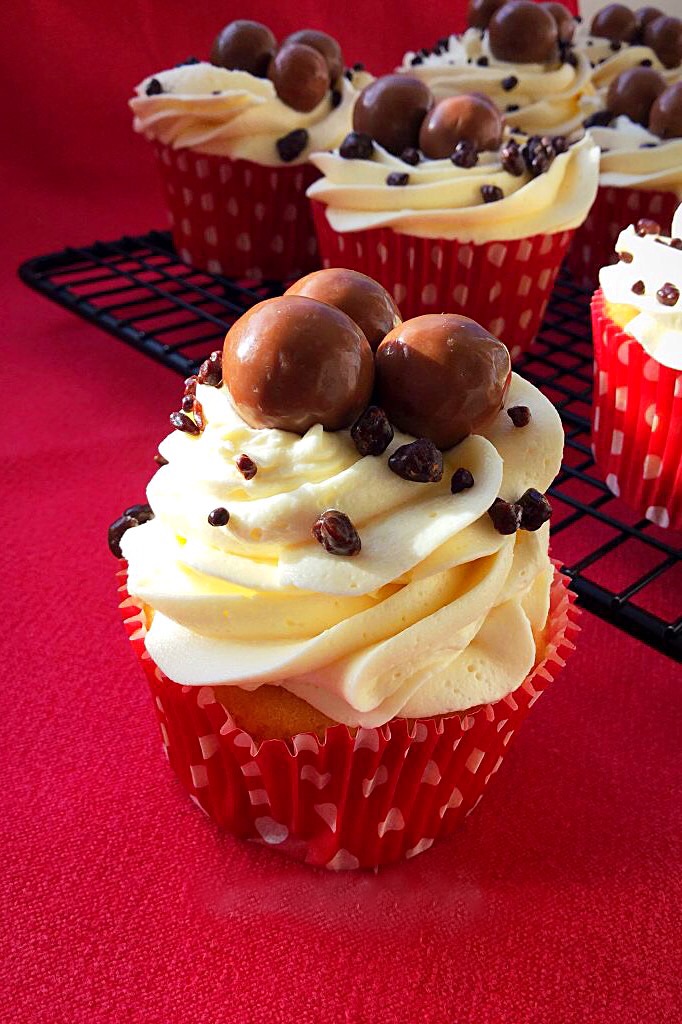
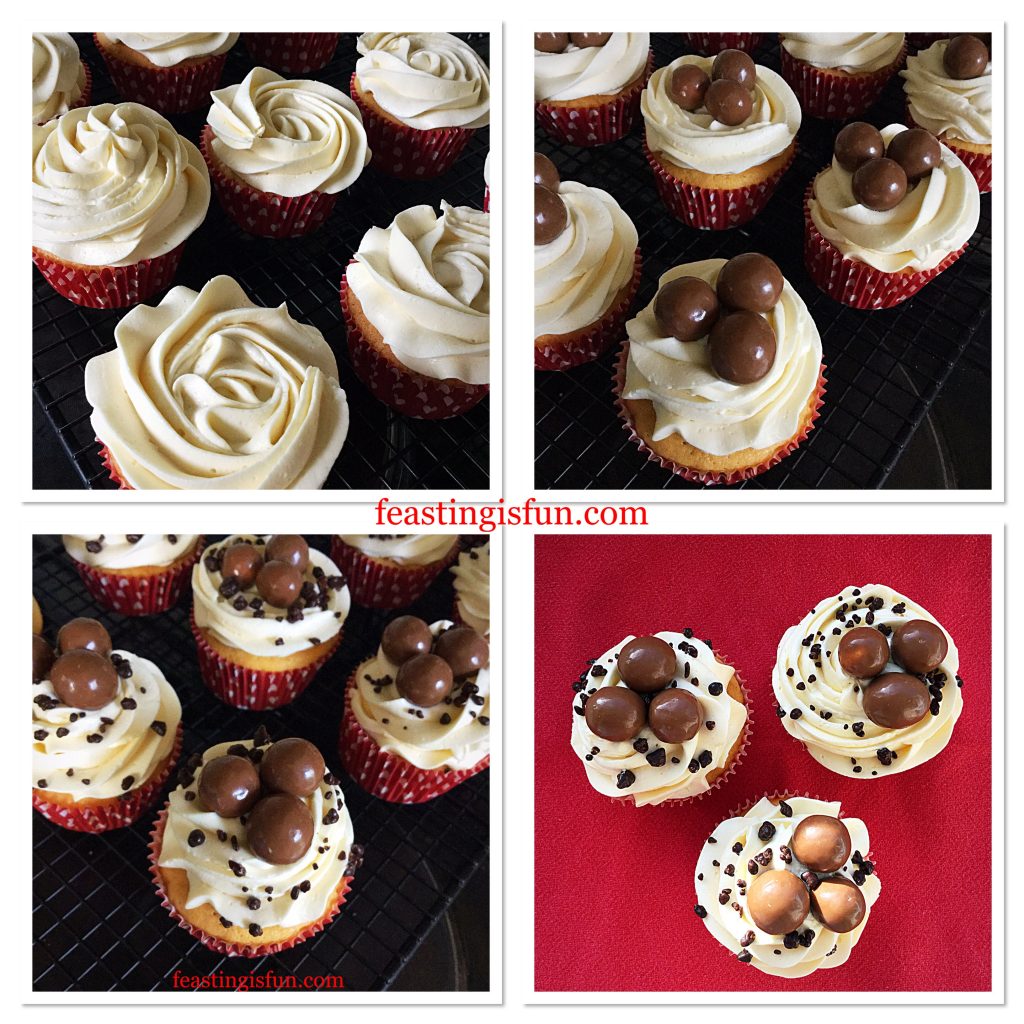
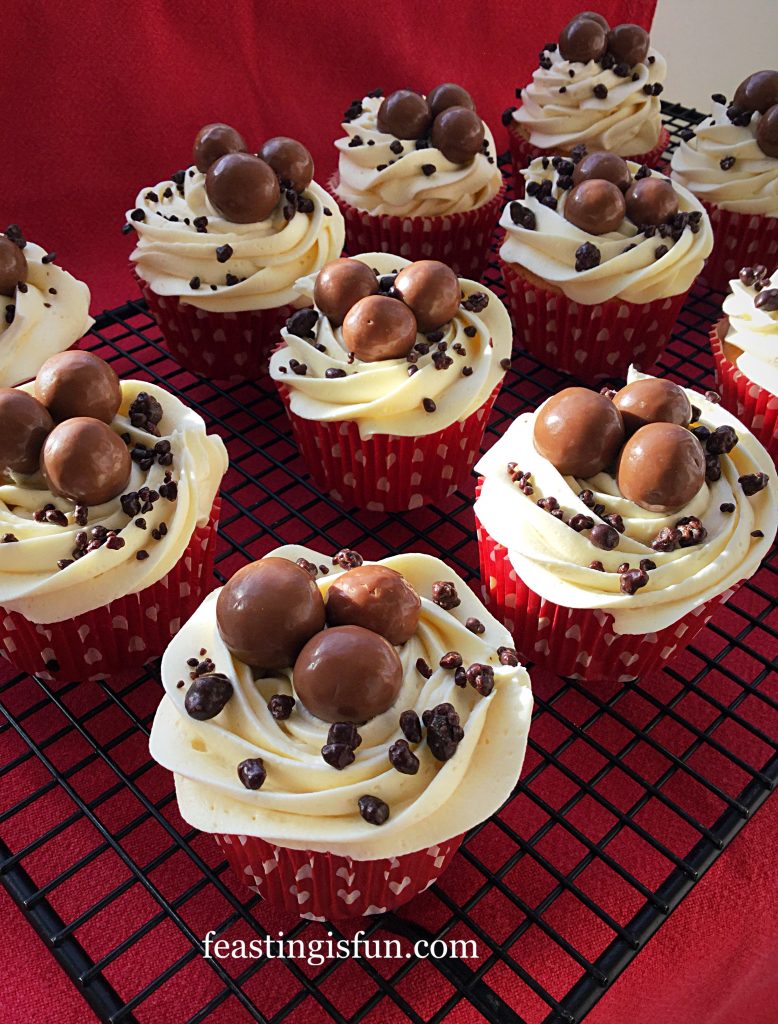
Vanilla sponge cupcakes topped with a swirl of vanilla buttercream and finished with a trio of Maltesers and a sprinkling of chocolate covered popping candy. A pretty, sweet treat that delivers a fun surprise. Popping candy is such a fun addition to any bake. Especially if you don’t warn those parting in this feast. Food that is fun is certainly the best kind.

Maltesers Popping Candy Cupcakes

Since these cupcakes are so easy to make, with no complicated techniques, they can be whipped up, literally, in moments. The recipe makes 12 cupcakes, which is perfect for a quick bake. Yet, it is easily doubled to cater for larger celebrations, such as birthday parties, or cheering up work colleagues on a Monday morning. Most of all, they are utterly delicious, with extra fun sprinkled on.

Maltesers Popping Candy Cupcakes

While the suggestion isn’t to bake and eat cupcakes everyday, I also strongly believe that a special occasion is not the only reason needed to make and eat them. Coffee mornings, the end or indeed middle of an audit at work, showing appreciation, are all good reasons to bake. Most especially bake these fun, tasty, flavour exploding cupcakes.

Recipe: Maltesers Popping Candy Cupcakes makes 12

Cupcakes:

100g/4oz Unsalted Butter softened to room temperature

100g/4oz Caster Sugar

1/8tsp Salt – I use Maldon

1tsp Vanilla Extract – I use Nielsen-Massey

3 Large Free Range Eggs

100g/4oz Plain White Flour

1tsp Baking Powder

Buttercream:

300g/12oz Icing Sugar

1tsp Vanilla Extract

175g/6oz Unsalted Butter at room temperature

1.5tbsp Very Hot Water

Maltesers and Chocolate Covered Popping Candy to decorate.

Method: Preheat oven to 160C/140C fan, 325F, gas mark 3.

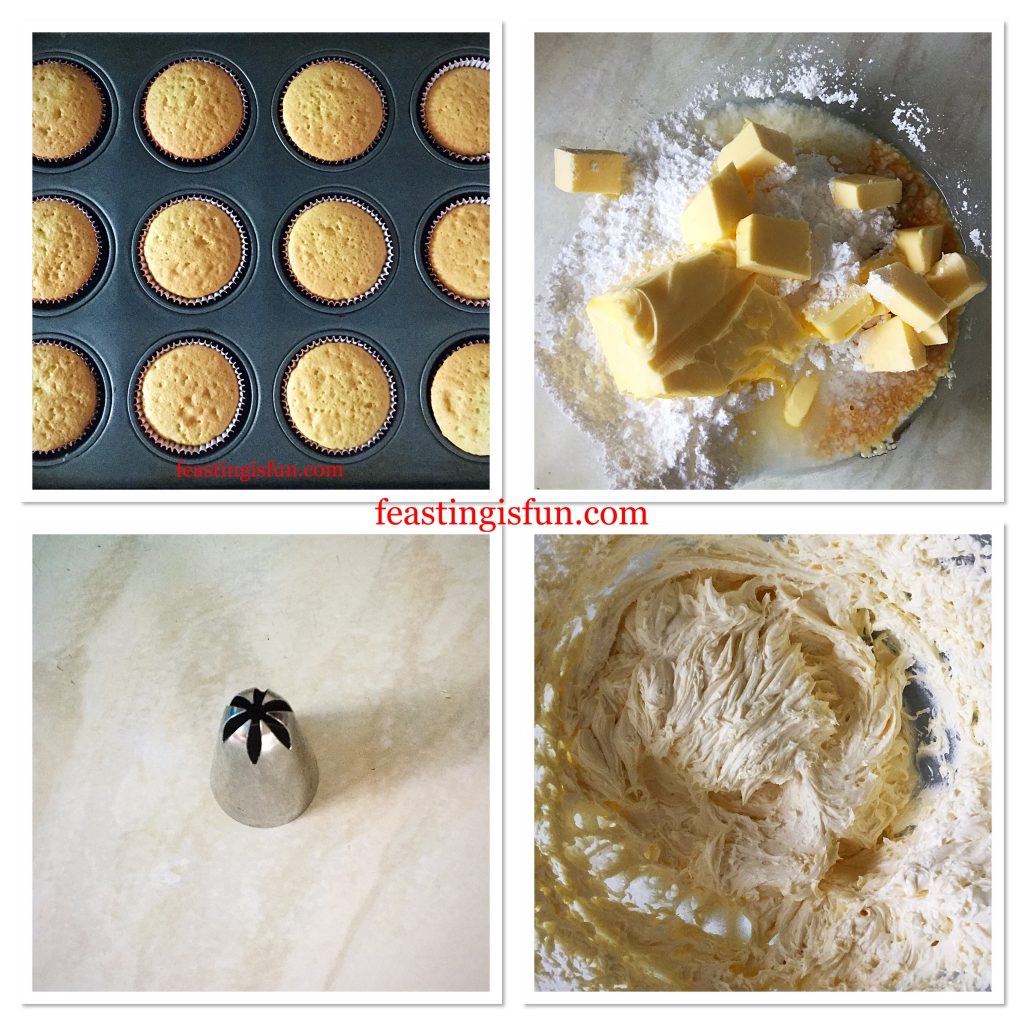
A quick note: When using coloured cupcake cases it really is worth choosing a good make. The cases used here are from a mixed set by Kitchen Craft. During the baking process they do not bleach and lose their colour. Also, I recommend a #2D drop flower decorating tip available from Wilton. This tip creates deep swirls when piping and is ideal for creating a piped rose.

Making the cupcakes

  • First of all, line a deep cupcake or muffin tin with cupcake cases.
  • Next into a large bowl add the butter, sugar and salt. Whisk until fully combined, light and creamy.
  • Add the vanilla extract and whisk thoroughly.
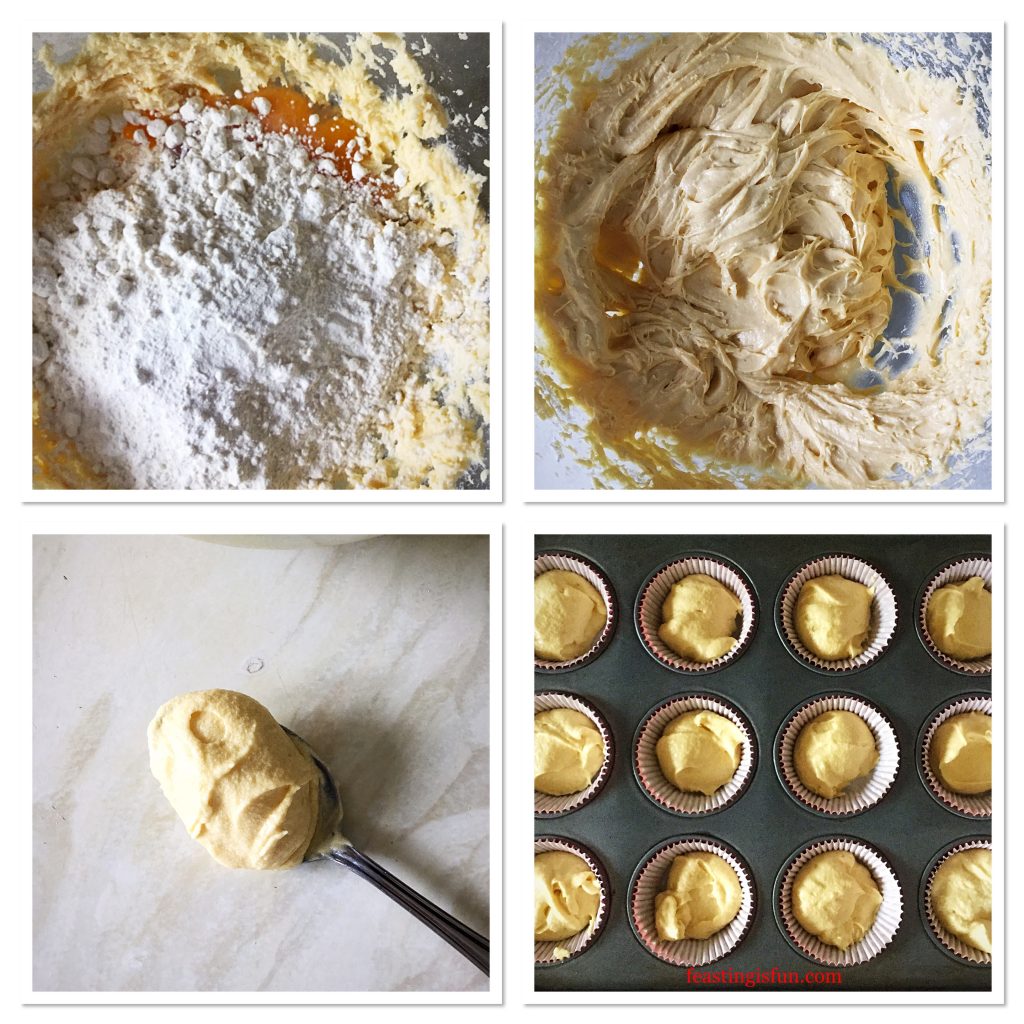
  • Now add the eggs, flour and baking powder. Whisk slowly until everything has come together and no lumps are present. Over whisking will create a tough cake crumb.
  • Scoop a dessert spoonful of cake batter into each cupcake case.
  • Place the cupcakes into the centre of the preheated oven and bake for 25-30 minutes.
FF Maltesers Popping Candy Cupcakes
Making the vanilla cupcake batter.
  • The cupcakes are baked when they are golden in colour and spring back from a light touch.
  • As soon as they are baked remove from the oven.
  • Transfer the cupcakes to a cooling rack.
  • While the cupcakes are cooling make the buttercream frosting.

Making the frosting and decorating the cupcakes

  • Into a large bowl add the icing sugar, butter, vanilla and hot water. Whisk together until very light and creamy.
  • Transfer the whipped buttercream to a piping bag fitted with a #2D Wilton piping tip.
FF Maltesers Popping Candy Cupcakes
Cupcakes baked and vanilla buttercream made.
  • As soon as the cupcakes are completely cooled they can be decorated.
  • Starting in the centre of a cupcake pipe a swirl in the shape of an ‘e’. Continue round creating a rose. Continue piping around and up for a deeper buttercream topping.
  • Place 3 Maltesers on to each cupcake.
  • Finally, sprinkle chocolate covered popping candy over the buttercream.
FF Maltesers Popping Candy Cupcakes
Icing and decorating Maltesers Popping Candy Cupcakes

During warmer weather place the cupcakes into the fridge for an hour. Allowing the frosting to set. Especially if you plan to transport them.

FF Maltesers Popping Candy Cupcakes
Maltesers Popping Candy Cupcakes

Serve as they are, with a smile.

Store in an airtight container and eat within 5 days. During warmer weather keep refrigerated.

If you have enjoyed this recipe for Maltesers Popping Candy Cupcakes you may also like these:

Caramac Frosted Chocolate Cupcakes

Caramac Frosted Chocolate Cupcakes

Coconut White Chocolate Snowball Cupcakes

Coconut White Chocolate Cupcakes
Coconut White Chocolate Snowball Cupcakes

Marasachino Cherry Chocolate Drizzle Cupcakes

Maraschino Cherry Chocolate Drizzle Cupcakes

Cupcakes have withstood time and not lost their appeal. Since they are individual, whole cakes, who wouldn’t enjoy one? Available in an endless number of flavour and frosting combinations, they are perfect for sharing. Also, they are easier to handout and share, in some cases, than a large, cut cake. However you enjoy them, remember that they always taste better when shared.

Whatever you are making, baking and creating in your kitchens, have fun preparing your feast.

Sammie xx

No part of this post may be reproduced or duplicated without the written permission of the owner. Please see my Disclosure Policy.
Caramel Crunch Rocky Road Bars

As much as I enjoy baking, sometimes it is nice being able to whip up a sweet treat, without putting the oven on. Especially these Caramel Crunch Rocky Road Bars, requiring nothing more than a spot of microwave melting and chilling before being ready to eat. Resulting in a perfect, last minute party contribution, or satisfying Saturday evening hunger fest.

FF Caramel Crunch Rocky Road Bars

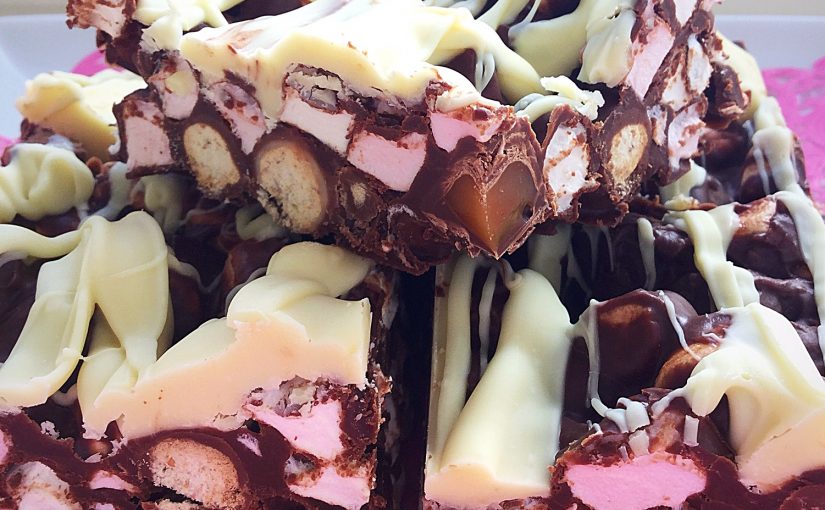
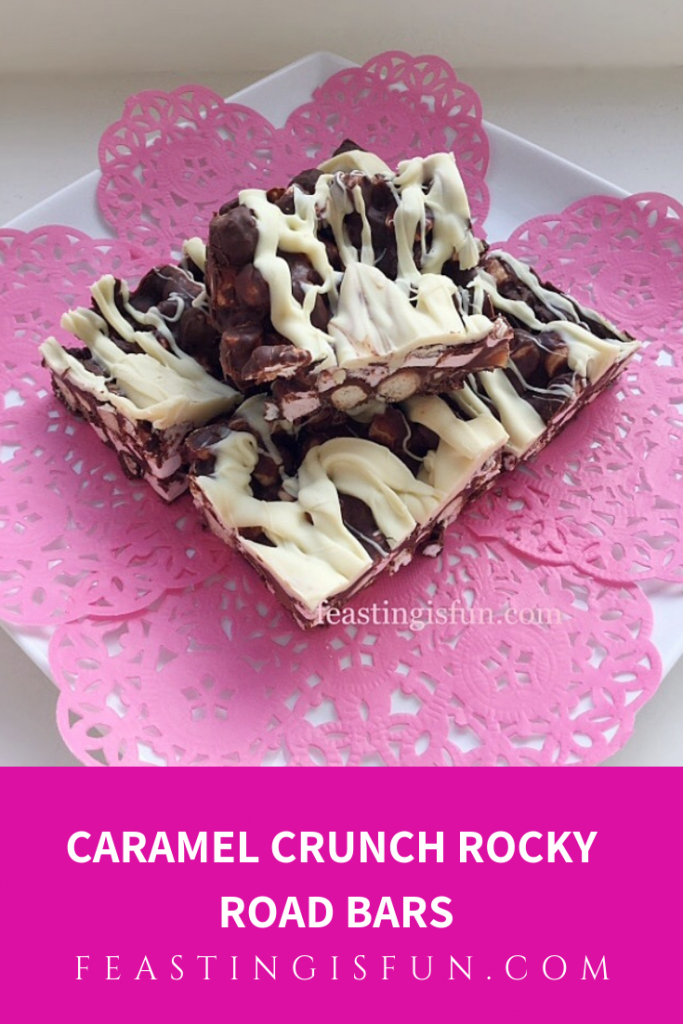
Using two packs of the ‘relatively new’ digestive nibbles gives these bars a really satisfying crunch. While the addition of Rolo’s add a not too sweet caramel bite. Mixed with mini marshmallows and set within a delicious chocolate base, every possible texture pops in the mouth. Crunchy, chewy and melting. The combination of all of the ingredients is incredible. Finished with the perfect white chocolate drizzle.

FF Caramel Crunch Rocky Road Bars
Caramel Crunch Rocky Road Bars.

So quick and easy to make, perfect for sharing.

Recipe: Caramel Crunch Rocky Road Bars makes 12 large or 18 small

200g/7oz Milk Chocolate

100g/4oz Dark Chocolate

100g/4oz Unsalted Butter

2tbsp Golden Syrup

1/4tsp sea salt – I use https://www.maldonsalt.co.uk

150g/5oz Mini Marshmallows

3 packs Rolos approximately 150g

2 Packs McVities Digestive Nibbles – 240g combined available from Waitrose, Sainsburys, Ocado, Tesco. – or 2 large bags of Maltesers. Alternatively substitute with an equal weight of shortbread or digestive biscuits

200g/7oz White Chocolate

Method:

Making the rocky road

  • First of all, line a 20cm x 28cm x 5cm tin (8″ x 11″ x 2″) with baking parchment.
  • Into a large, heatproof, microwaveable bowl add the butter and broken up milk and dark chocolate. Heat in the microwave, on medium power, for 30 second bursts. Stir after each heating burst. As soon as the chocolate and butter are melted remove the bowl from the microwave. And then add the golden syrup and salt. Stir continuously until the mixture is fully combined and glossy.
  • Next add 2 packets of Digestive nibbles.
  • Follow by adding the marshmallows and Rolos.
  • Stir until everything is slicked in chocolate.
FF Caramel Crunch Rocky Road Bars
Combining ingredients for Caramel Crunch Rocky Road Bars.
  • Spoon the mixture into the prepared tin, taking care to fill evenly.
  • Now break up the white chocolate and place into another heatproof, microwaveable bowl. Again, heat on medium for 30 seconds stirring after each heating burst. Take care not to overheat the chocolate. As soon as it starts to melt remove and stir continuously until it is completely liquid.
  • Using a spoon, drizzle the white chocolate over the rocky road mixture in the tin.
FF Caramel Crunch Rocky Road Bars
Filling the tin and drizzling over white chocolate.
  • Place the tin in the fridge for 30 minutes, or until the chocolate has completely set.

Two portion sizes

  • As soon as it is set, remove the slab of rocky road from the tin using a palette knife to lift beneath the baking parchment.
  • Using a sharp knife cut across the width, creating 3 evenly sized portions. Then cut through the centre. For smaller bars divide each half into 9 squares, as on the left. Divide into 6, as on the right, for larger bars.
FF Caramel Crunch Rocky Road Bars
Slicing into bars.

Finally some advice, if you are making these for a party, place in a baking parchment lined, airtight container and hide them!

During warm weather keep in the fridge. While they will keep for up to one week, however I very much doubt, if you have children or teenagers around that you will have any left after 48 hours. I speak from experience.

FF Caramel Crunch Rocky Road Bars
Caramel Crunch Rocky Road Bars.

So incredibly delicious and surprisingly not overly sweet, these Caramel Crunch Rocky Road Bars are perfect for parties and family gatherings.

If you have enjoyed the recipe for Caramel Crunch Rocky Road Bars, then you may also like these:

Chocolate Fudge Double Hazelnut Brownies

FF Caramel Crunch Rocky Road Bars
Chocolate Fudge Double Hazelnut Brownies.

Multi Millionaires Shortbread Squares

FF Caramel Crunch Rocky Road Bars
Multi Millionaires Shortbread Squares.

Chocolate Vanilla Vienesse Finger Biscuits

FF Caramel Crunch Rocky
Chocolate Vanilla Viennese Finger Biscuits.

Over the years I have made many different versions of this recipe. Digestive biscuits work well, when broken up. Because their slightly salty, wholemeal flavour balances the sweetness from marshmallows and chocolate. And Digestive Nibbles have that same quality. While they also bring a uniform shape to the cut bars, resulting in less crumbling when handled.

So whatever you are making, baking and creating in your kitchens, have fun preparing your feast.

Sammie xx

No part of this post may be replicated or copied without the written permission of the owner. Please see my Disclosure Policy.

Caramac Frosted Chocolate Cupcakes

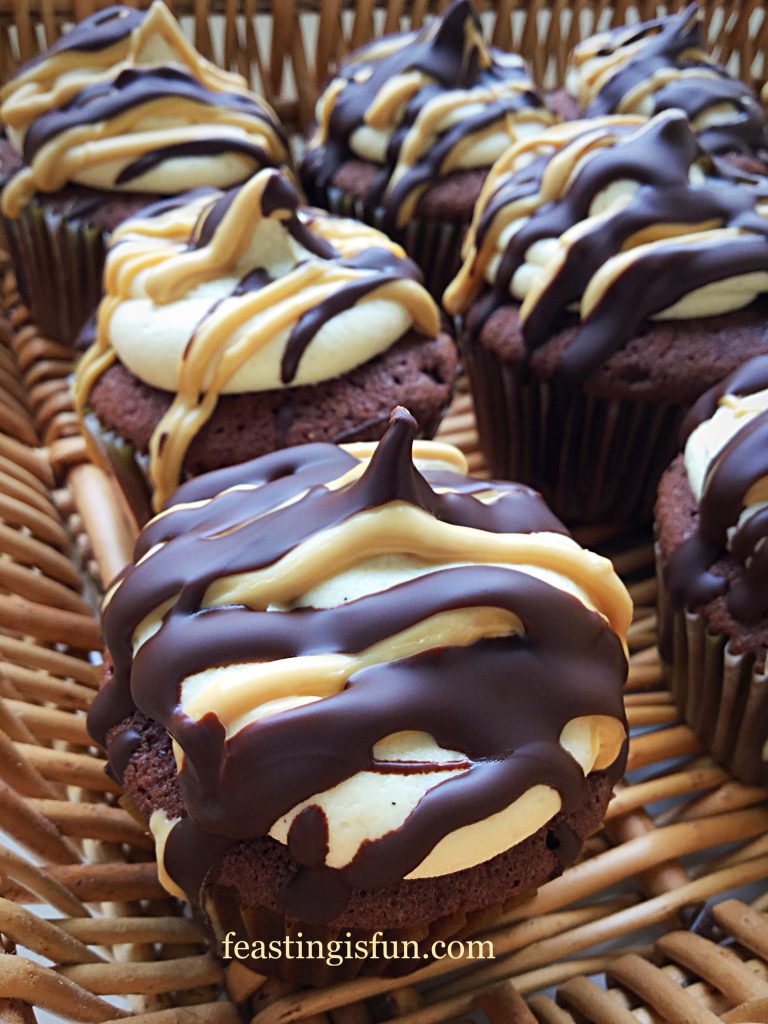
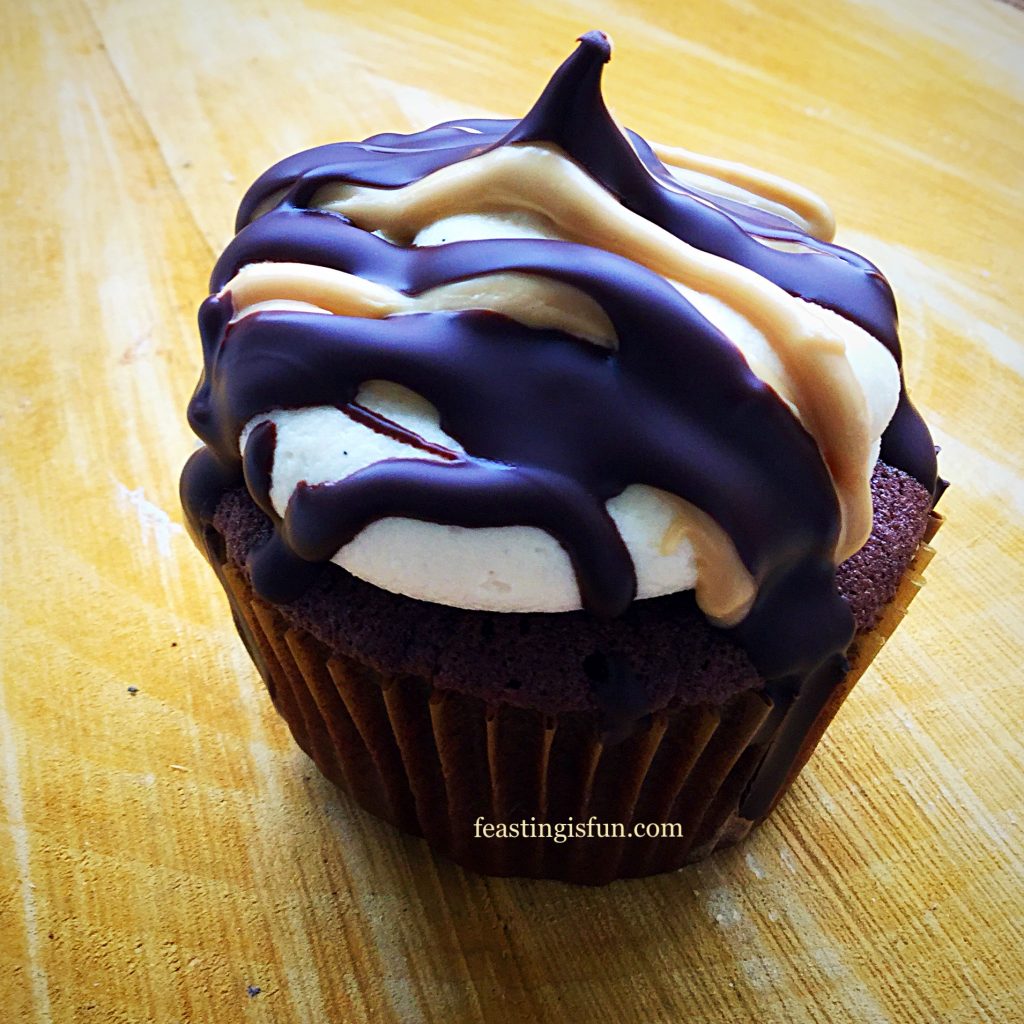
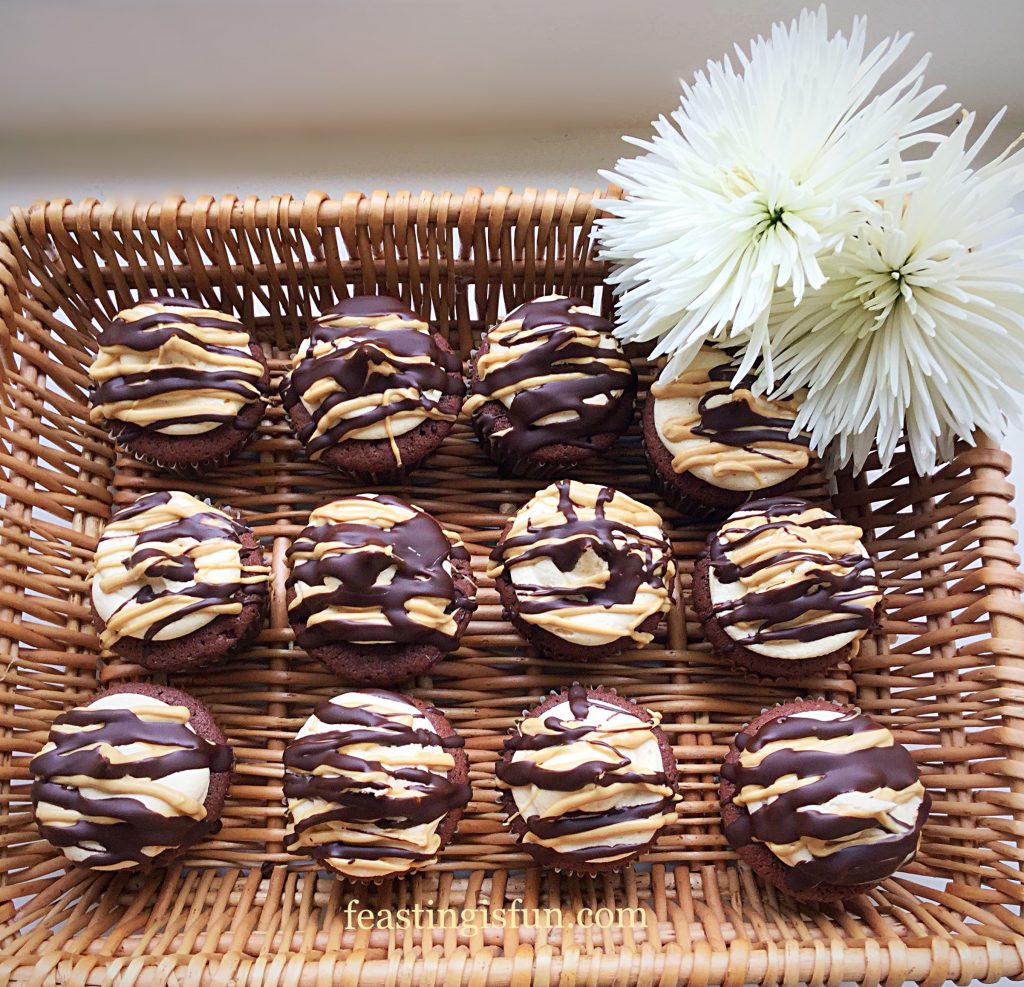
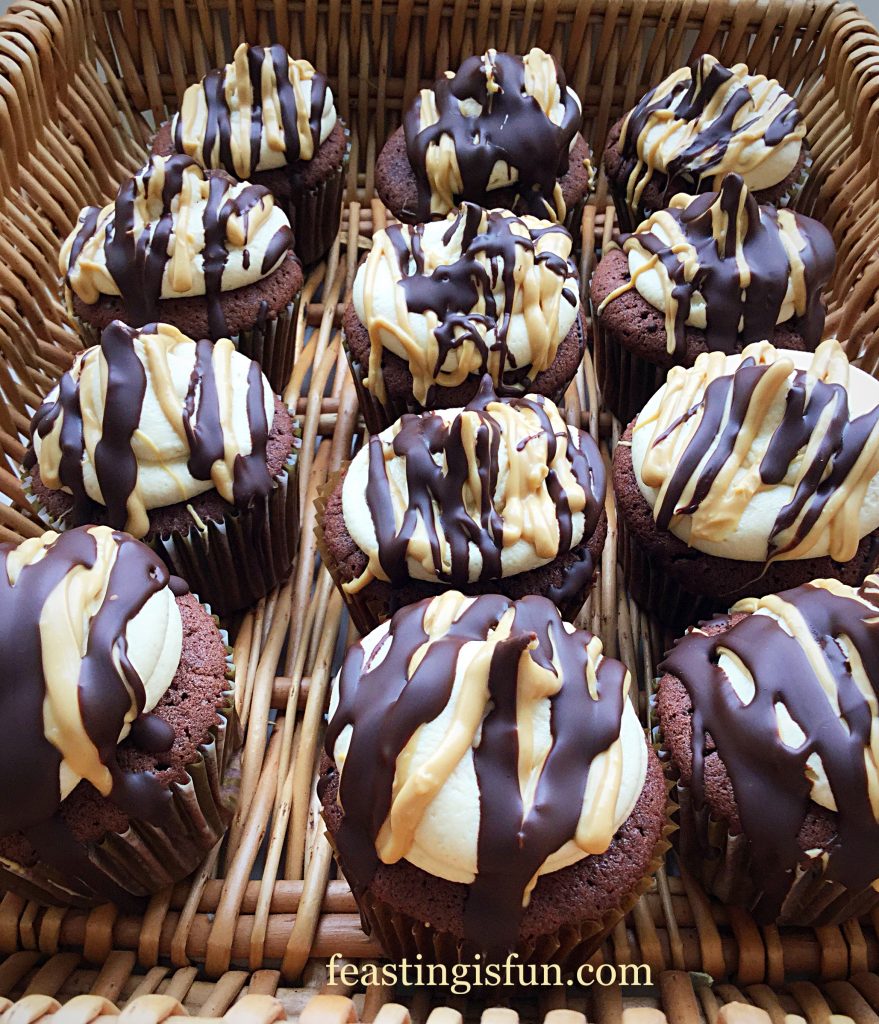
The popularity of cupcakes, since their meteoric rise to stardom, has not waned. While Pinterest has thousands upon thousands of boards dedicated to these individual portion sized cakes. And if you type cupcake recipes into the browser on your computer/phone/tablet you will find endless recipes, for every type of cupcake you could ever want. Or so I thought! While there are recipes for Caramac cupcakes, there aren’t any Caramac and chocolate combinations. Resulting in the creation of these Caramac Frosted Chocolate Cupcakes.

FF Caramac Frosted Chocolate Cupcakes
Caramac Frosted Chocolate Cupcakes.

What Is Caramac?

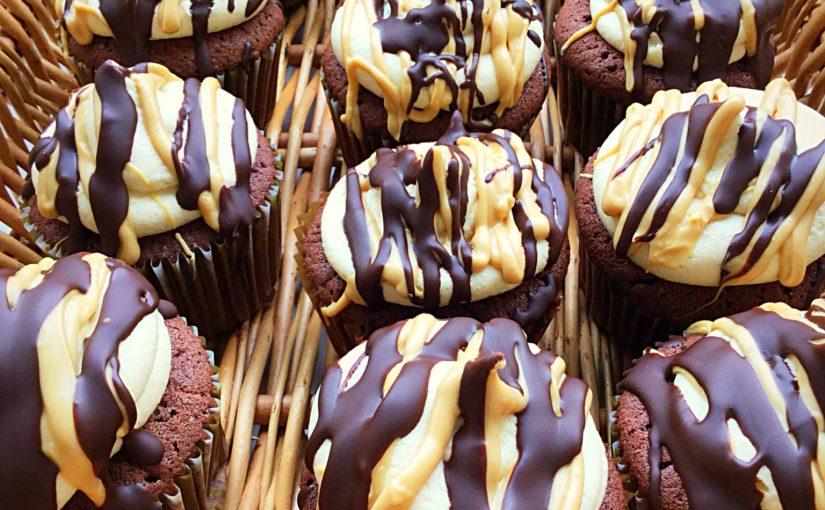
Caramac in itself is a lightly caramel flavoured white chocolate. While it is completely delicious, it tends to be rather sweet. Combining Caramac frosting with a dark chocolate cupcake balances both flavours out. Similarly, with the drizzle. And the bitter dark chocolate is enhanced by the sweet caramel from the Caramac. Resultying in a perfect flavour combination.

FF Caramac Frosted Chocolate Cupcakes
Caramac Frosted Chocolate Cupcakes.

Delicious and very more-ish. So, could you stop at one?

FF Caramac Frosted Chocolate Cupcakes
Caramac Frosted Chocolate Cupcakes.

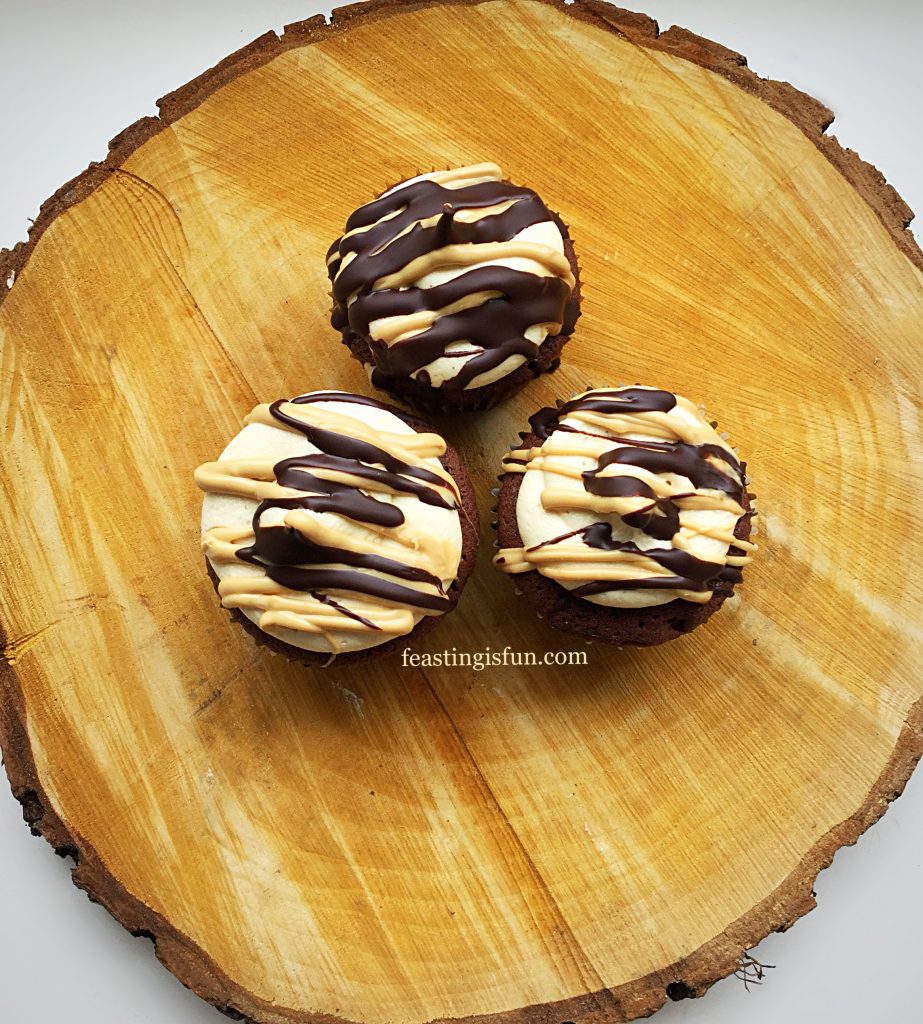
Pretty, individual portions of caramel and chocolate in a cake. These cupcakes are elegant enough to be served for dessert, or alternatively, handed around at a party.

FF Caramac Frosted Chocolate Cupcakes
Caramac Frosted Chocolate Cupcakes.

Recipe: Caramac Frosted Chocolate Cupcakes make 18

For the cupcakes:

175g/6oz Unsalted Butter at room temperature

1/8tsp Sea Salt – I use Maldon

175g/6oz Caster Sugar

1tsp Vanilla Extract – I use Nielsen-Massey

3 Large Ree Range Eggs

150g/5.5oz Plain White Flour

1.5tsp Baking Powder

30g/2.2oz Cocoa Powder – I use Callebaut

3tbsp Milk – whole or semi-skimmed

For the frosting:

275g/10oz Icing Sugar

125g/5oz Unsalted Butter at room temperature

1/4tsp Sea Salt Flakes

2tbsp Very Hot Water from a recently boiled kettle

110g Packet Caramac Buttons

1tsp Vanilla Bean Paste

For the drizzle:

110g Packet Caramac Buttons

100g/4oz Good Quality Dark Chocolate minimum 70% cocoa solids – choppedinto small chunks

Preheat oven to 160C/140C fan, gas mark 3, 325F.

Making The Chocolate Cupcake Batter

You will need two, deep, 12 hole cupcake/muffin tins. Line one tin completely with cupcake cases and the central 6 holes in the other with cupcake cases.

  • First of all, in a large bowl add butter, caster sugar and sea salt. Whisk together until pale and creamy.
  • Sift in the flour, cocoa powder and baking powder. Then add the milk.
  • Whisk together until just combined. The chocolate colour should be uniform and no streaks or lumps present.
  • Scoop a heaped dessert spoonful of cake batter into each cupcake case. Do not worry if the batter doesn’t fill 18 cupcake cases. Mine stretched to 17. Most importantly, each cupcake case should contain equal amounts of cake batter.
FF Caramac Frosted Chocolate Cupcakes
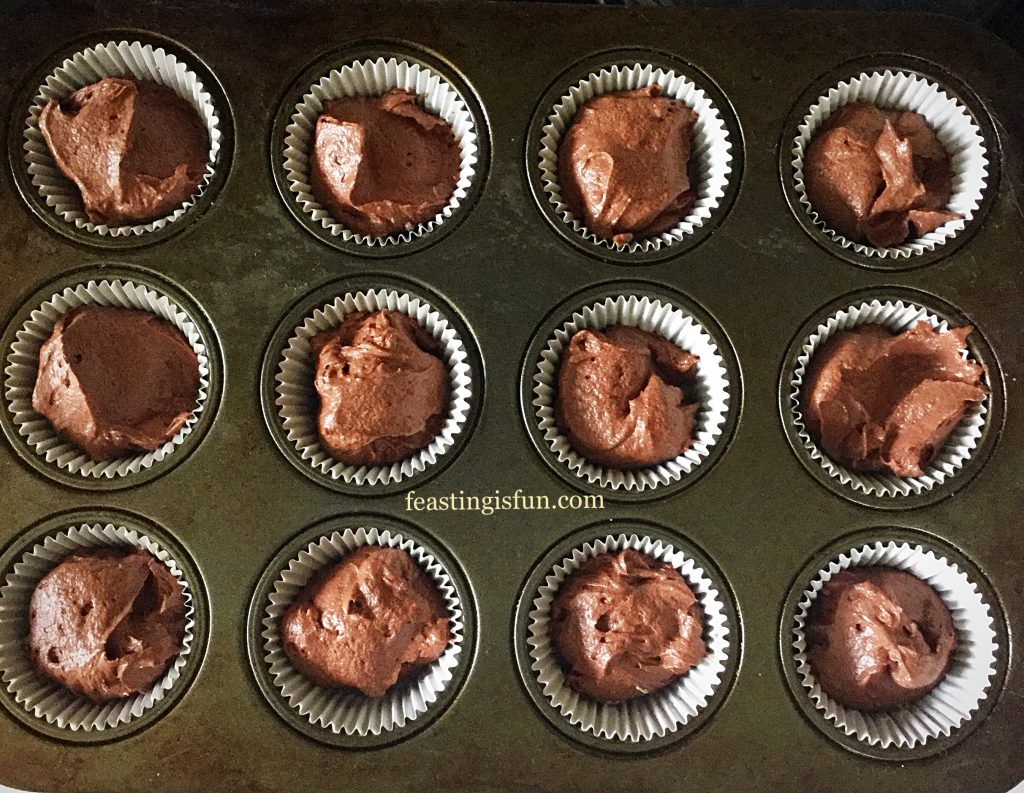
Chocolate cupcakes ready for the oven.

Baking The Caramac Frosted Chocolate Cupcakes

  • Place both cupcake tins, evenly spaced, into the preheated oven. Bake for 20-25 minutes.
  • The cupcakes are baked when they are risen and spring back from a light touch.
  • As soon as the cupcakes are baked, remove from the oven.
FF Caramac Frosted Chocolate Cupcakes
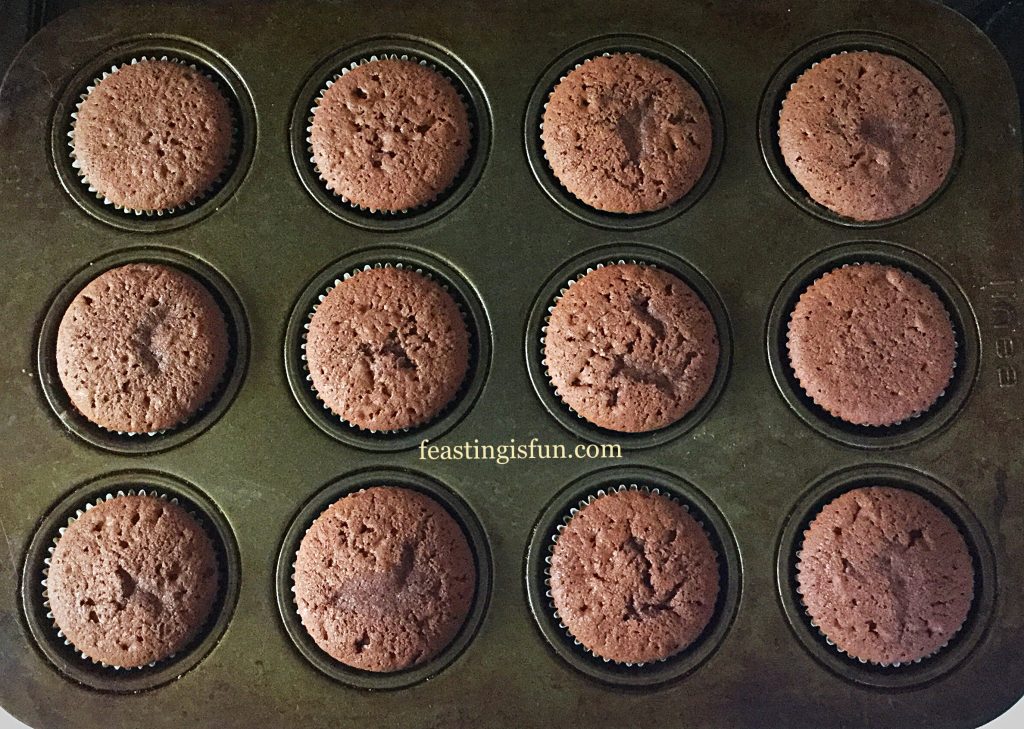
Baked Chocolate Cupcakes.
  • Leave the cupcakes to cool for a couple of minutes in the tin, then remove and place them on to a cooling rack to fully cool.
  • While the cupcakes are cooling, make the buttercream.

Making And Piping The Caramac Frosting

  • Place the Caramac buttons into a heatproof, microwaveable bowl. Heat for 20 second bursts, stirring between each one. Remove from the microwave once the Caramac is completely melted.
  • Into a large bowl add the softened butter, salt and icing sugar. Whisk, adding the hot water whilst the beaters are whisking. Continue whisking until the buttercream is combined, yet still thick in consistency.
  • Finally, add the melted Caramac to the bowl and keep whisking until the mixture is smooth, light and creamy.
  • Into a large piping base fitted with a 1cm round nozzle tip ( I use Wilton number 12 carded round tip ), add the whipped Caramac buttercream.
  • Using both hands to guide, pipe a double swirl. Start in the centre of the cupcake, pipe one swirl, then pipe a second swirl on top. Press the nozzle down into the centre and pull away. Practice on a sheet of parchment paper first and then scrape the buttercream back into the piping bag.
FF Caramac Frosted Chocolate Cupcakes
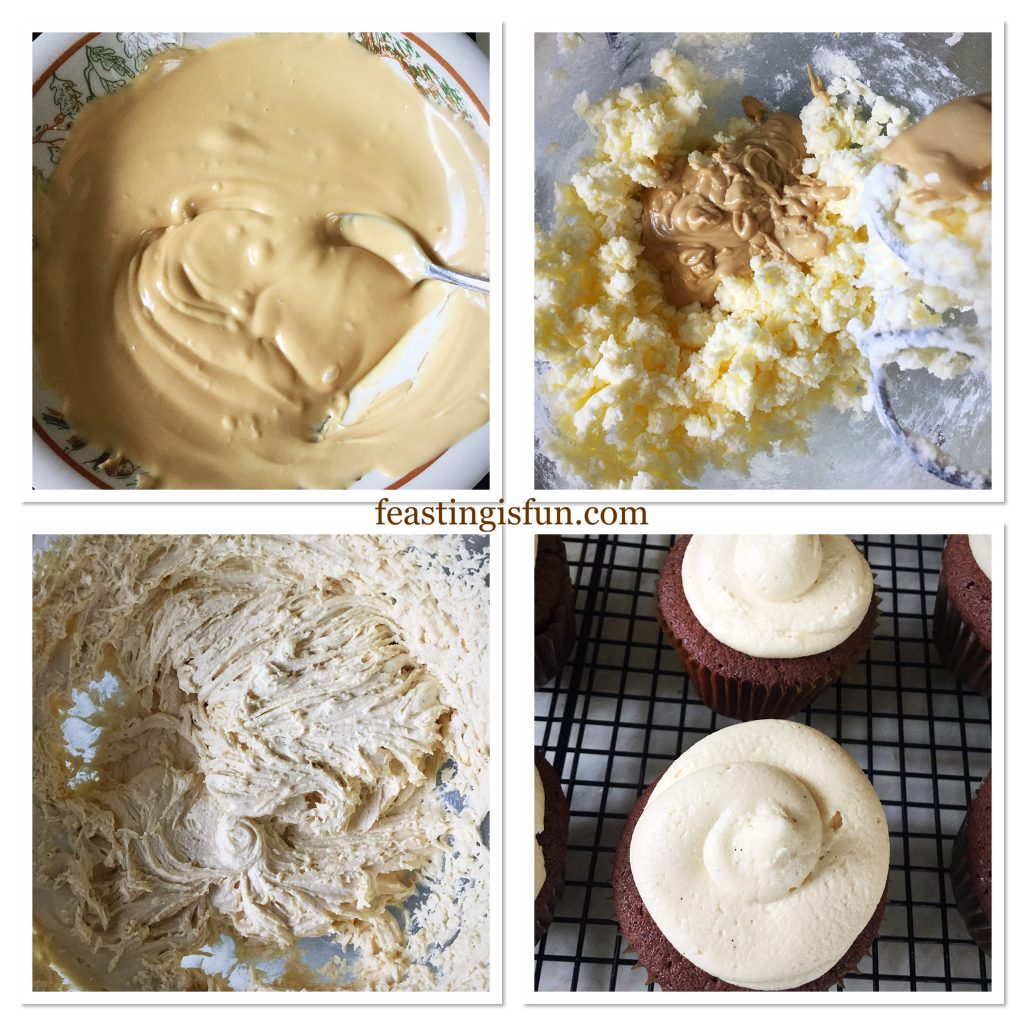
Making the Caramac buttercream and icing the cupcakes.
  • While the frosting on the cupcakes sets, prepare the chocolate and Caramac drizzle.

Adding The Caramac And Chocolate Drizzle

  • Into separate heatproof, microwaveable bowls place the Caramac buttons and then the dark chocolate chunks.
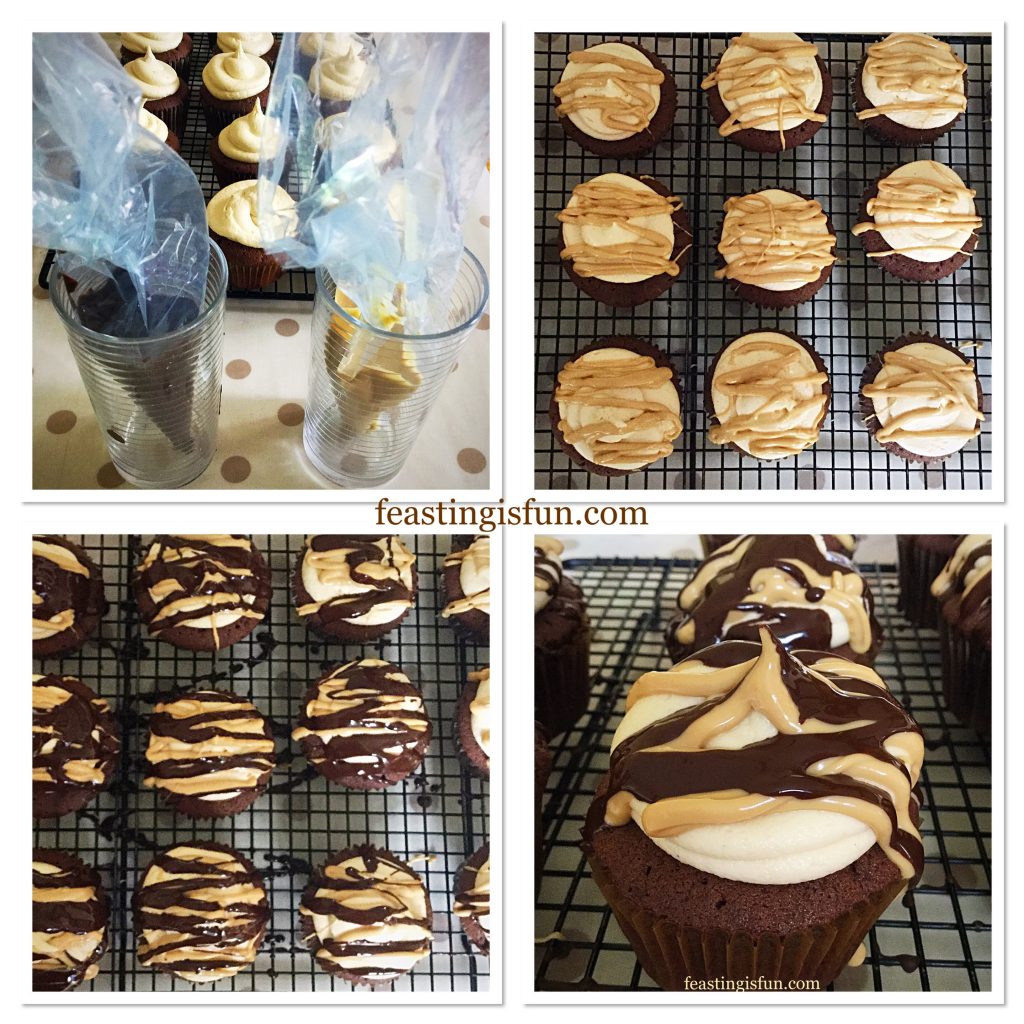
  • Prepare 2 small, disposable piping bags, as seen in the photo. Open up each bag and place into a small tumbler, ensuring the edge of the bag folds over the side of the glass. Doing so makes pouring the melted chocolate/Caramac into the bags easy and reduces the risk of burning yourself with hot, melted chocolate.
  • Heat the chocolate and Caramac as for the frosting, stirring between each 20 second burst in the microwave. Once melted pour into the prepared piping bag.
  • Starting with the Caramac, twist the top of the bag and then snip the end of the bag off, leaving a small hole.
  • Pipe melted Caramac on to each cupcake using a zigzag pattern. Since this is a drizzle, melted Caramac (and also chocolate) can go over the sides of the frosting on to the cupcake.
  • Repeat the same process using the dark chocolate.
FF Caramac Frosted Chocolate Cupcakes
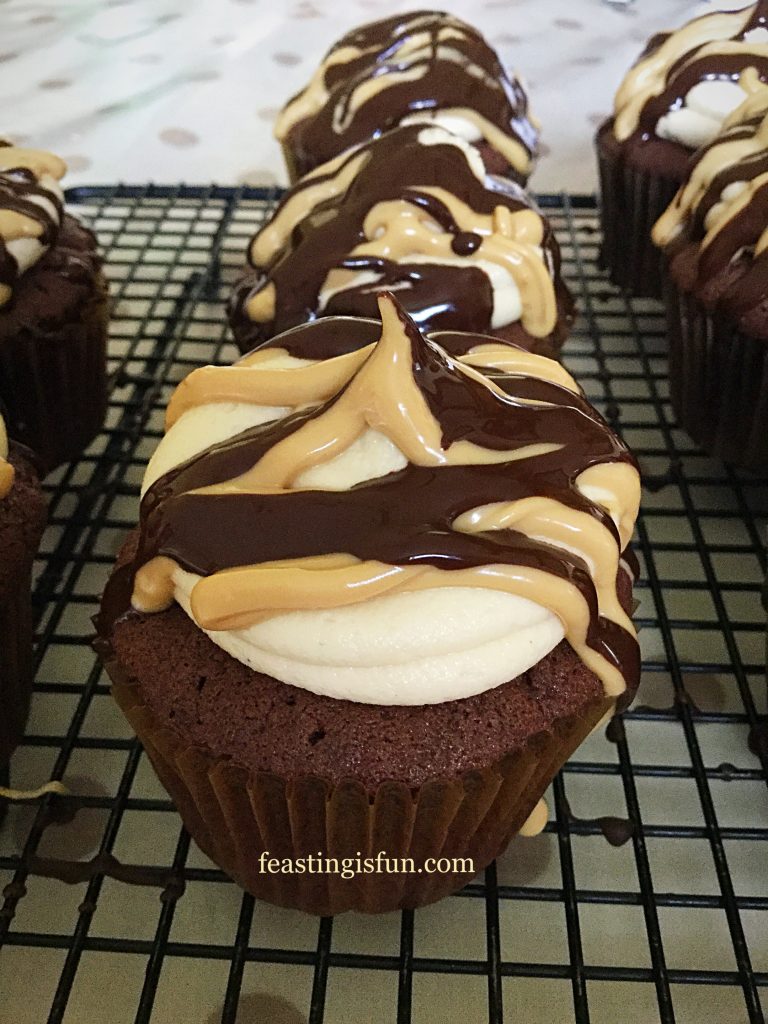
Double Drizzle on Caramac Frosted Chocolate Cupcakes.
  • No two cupcakes will look identical, don’t worry! Rather, each cupcake’s individuality is part of its appeal and charm.
FF Caramac Frosted Chocolate Cupcakes
Piping the chocolate and Caramac drizzle on to the cupcakes.
  • Place the cupcakes somewhere cool to set. During warmer months pop in the fridge for a few minutes.
FF Caramac Frosted Chocolate Cupcakes
Caramac Frosted Chocolate Cupcakes

Cupcakes Are Made For Sharing

So, why not invite friends over and serve these cupcakes with a smile and a hot drink? Alternatively, package some up in a box and take to work to share with your colleagues. Since these cupcakes are so delicious, it really would be a shame not to share them.

Store in an airtight container and eat within 5 days. During very warm weather store in the refrigerator.

If you have enjoyed this recipe for Caramac Frosted Chocolate Cupcakes you may also like these:

Black Forest Cupcakes

FF Caramac Frosted Chocolate Cupcakes
Black Forest Cupcakes

Raspberry Ripple Almond Cupcakes

FF Caramac Frosted Chocolate Cupcakes
Raspberry Ripple Almond Cupcakes

Gingerbread Frosted Ginger Christmas Cupcakes

FF Caramac Frosted Chocolate Cupcakes
Gingerbread Frosted Ginger Christmas Cupcakes

Since the flavour combinations are virtually endless and each cupcake is an individual portion size, it is easy to see how they have remained so popular. In addition, each cupcake, especially when homemade, is unique. Also, they are just so pretty. Whether embellished with sprinkles, drizzles, little figures, flowers or simply piped with buttercream, the appeal of having a cake all to ourselves is such fun. Resulting in the perfect feast.

So, whatever you are making, baking and creating in your kitchens, have fun preparing your feast.

Sammie xx

No part of this blog post may be copied or reproduced without the specific written permission of the owner. Please see my Disclosure Policy .

Mini Sparkenhoe Red Leicester Tarts

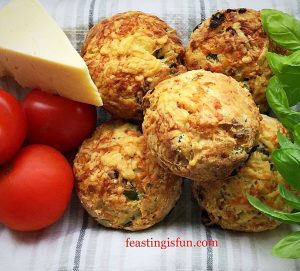
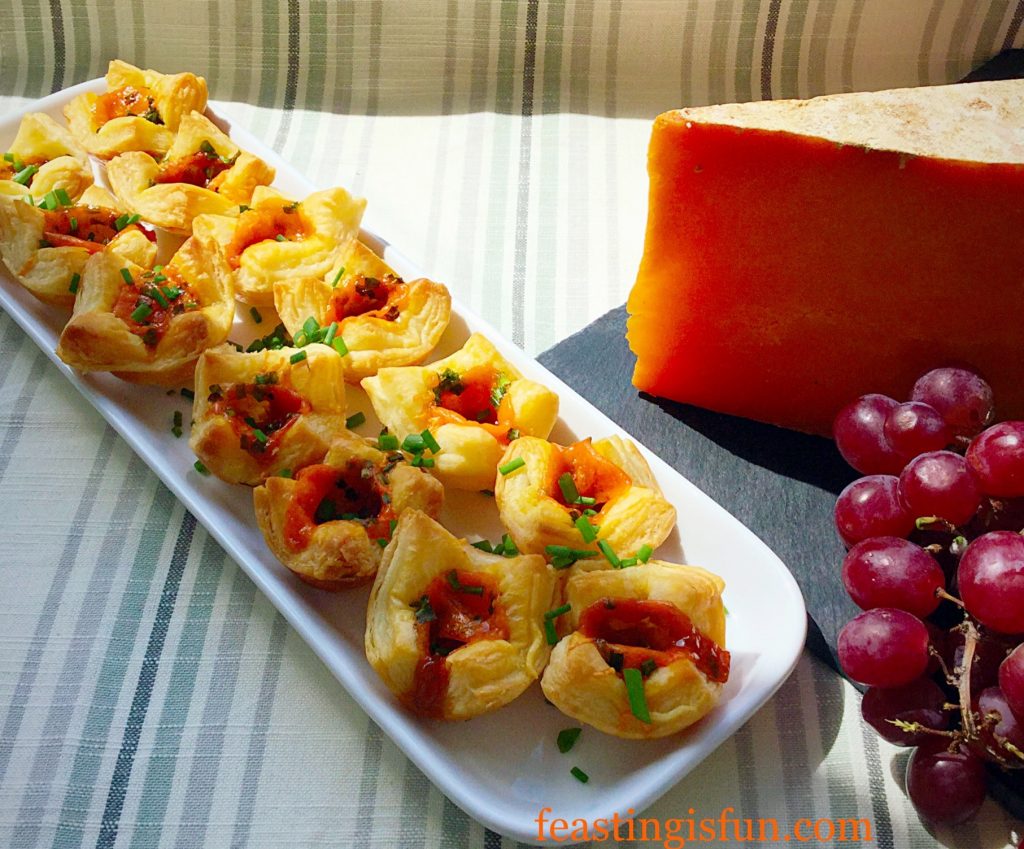
Mini Sparkenhoe Red Leicester Tarts, delicious morsels of light, flaky, puff pastry, filled with onion marmalade and topped with vibrant, melted Sparkenhoe Red Leicester cheese. Resulting in the perfect party canapé.

FF Mini Red Leicester Tarts
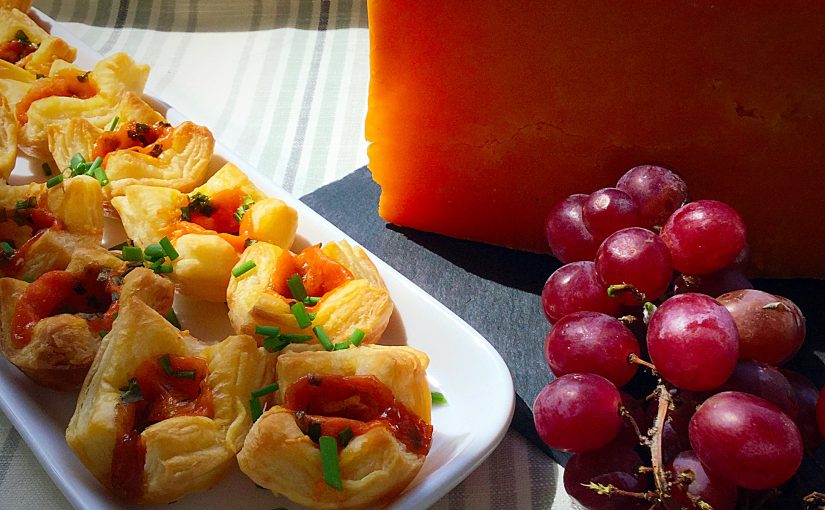
Mini Sparkenhoe Red Leicester Tarts perfect canapés.

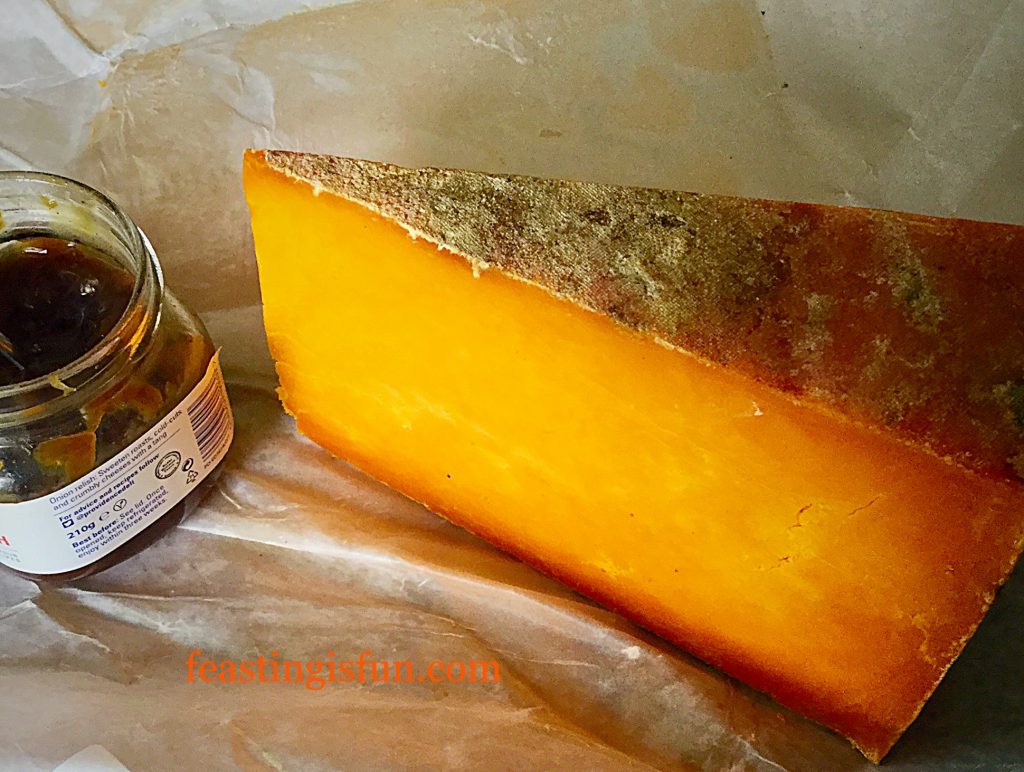
While tasting this cheese, it has a nutty, almost grassy flavour that sets it apart from any similar cheese I have tried before. And a gorgeous golden wedge of unpasteurised cheese coloured using Annatto, a natural plant based dye that imparts it’s characteristic colour. Also, it makes a dramatic addition to any cheese board.

FF Mini Red Leicester Tarts
Sparkenhoe Red Leicester gorgeously golden and full of flavour.

Since this cheese has a firm texture is perfect for slicing and finely grating. Encased in an all butter puff pastry, the grated cheese melts into the onion marmalade and creates the most delightful mini bites.

FF Mini Red Leicester Tarts
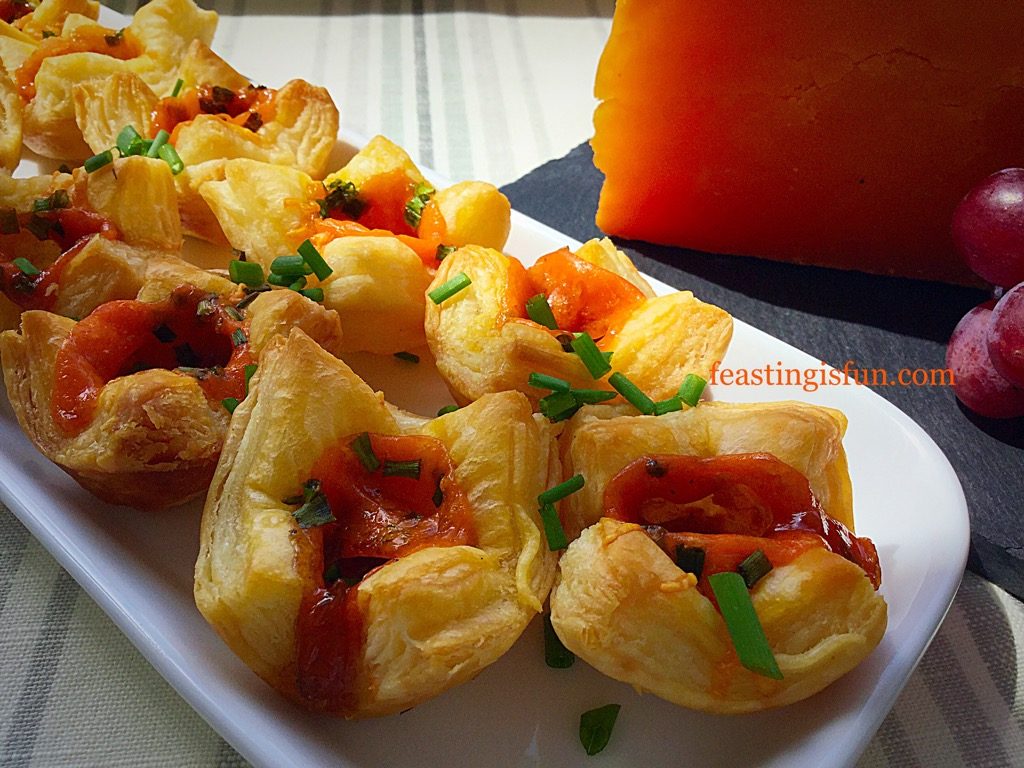
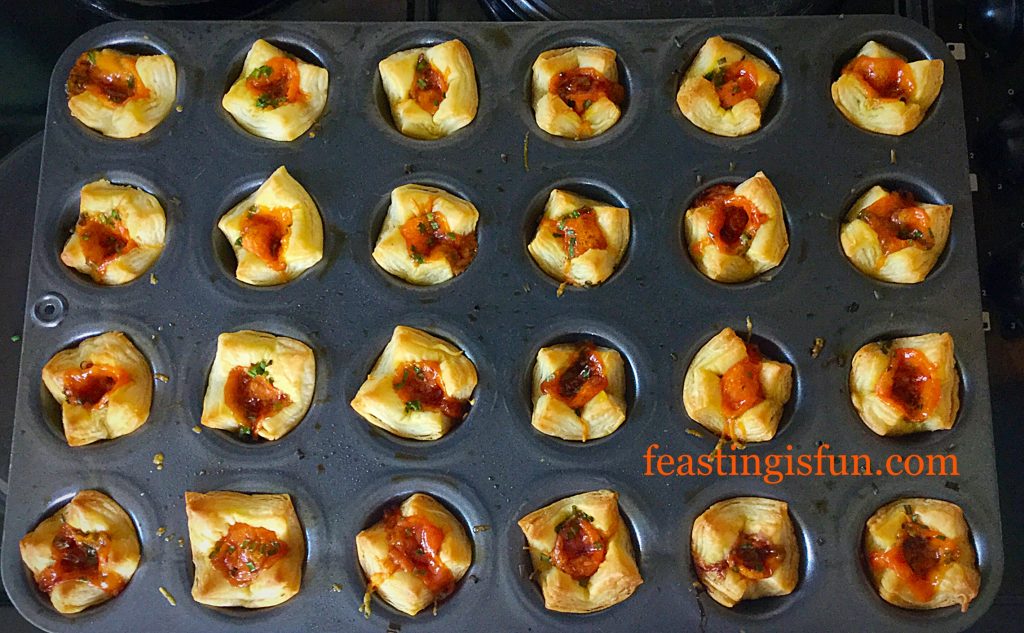
Mini Sparkenhoe Red Leicester Tarts oozing melted cheese.

Topped with chives, that both echo the mild onion marmalade and grassy flavours found in the cheese, these little tarts are perfect to serve as canapés, party food, at a buffet or just for snacking on, warm from the oven with a glass of your favourite wine.

FF Mini Red Leicester Tarts
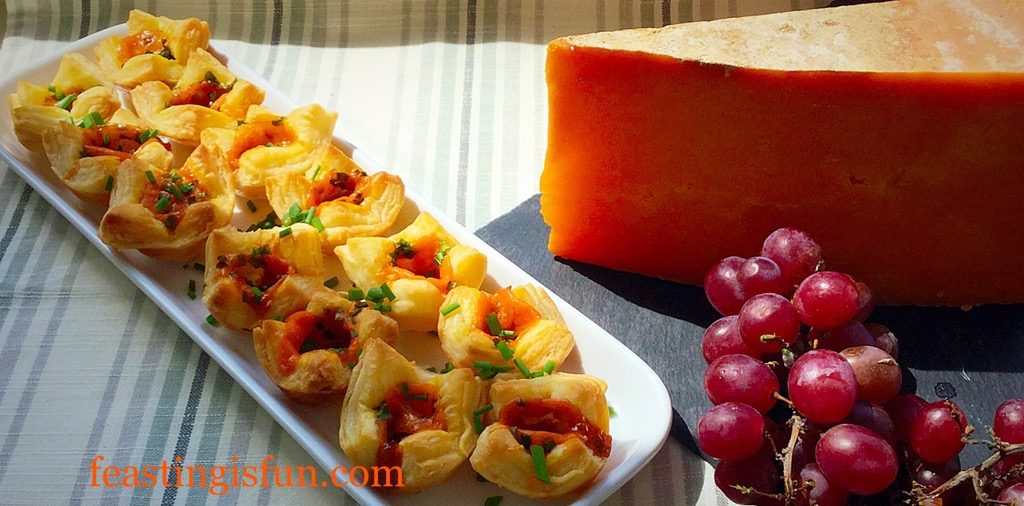
Mini Sparkenhoe Red Leicester Tarts so easy to make.

Made in minutes, these tarts are easy to make, bake in minutes and then  ready to serve.

Recipe: Makes 28-32 Mini Sparkenhoe Red Leicester Tarts 

Note: Sparkenhoe Red Leicester Cheese is UNPASTEURISED

320g Puff Pastry – I used ready rolled puff pastry from JustRol

100g/4oz Sparkenhoe Red Leicester Cheese – available from Pong Cheese

4tbsp Good Quality Onion Marmalade – I recommend Hawkshead Relish Red Onion Marmalade

3tbsp Chives – finely chopped

Method: Preheat the oven to 220C/200C fan, gas mark 7, 425F

You will need a mini muffin tin to make these Mini Sparkenhoe Red Leicester Tarts. Alternatively, use a larger tin to make larger tarts!

Making the puff pastry tarts:

  • First of all, if frozen remove the pastry from the freezer and allow to thaw in the fridge overnight.
  • Cut the rind from the cheese and finely grate.
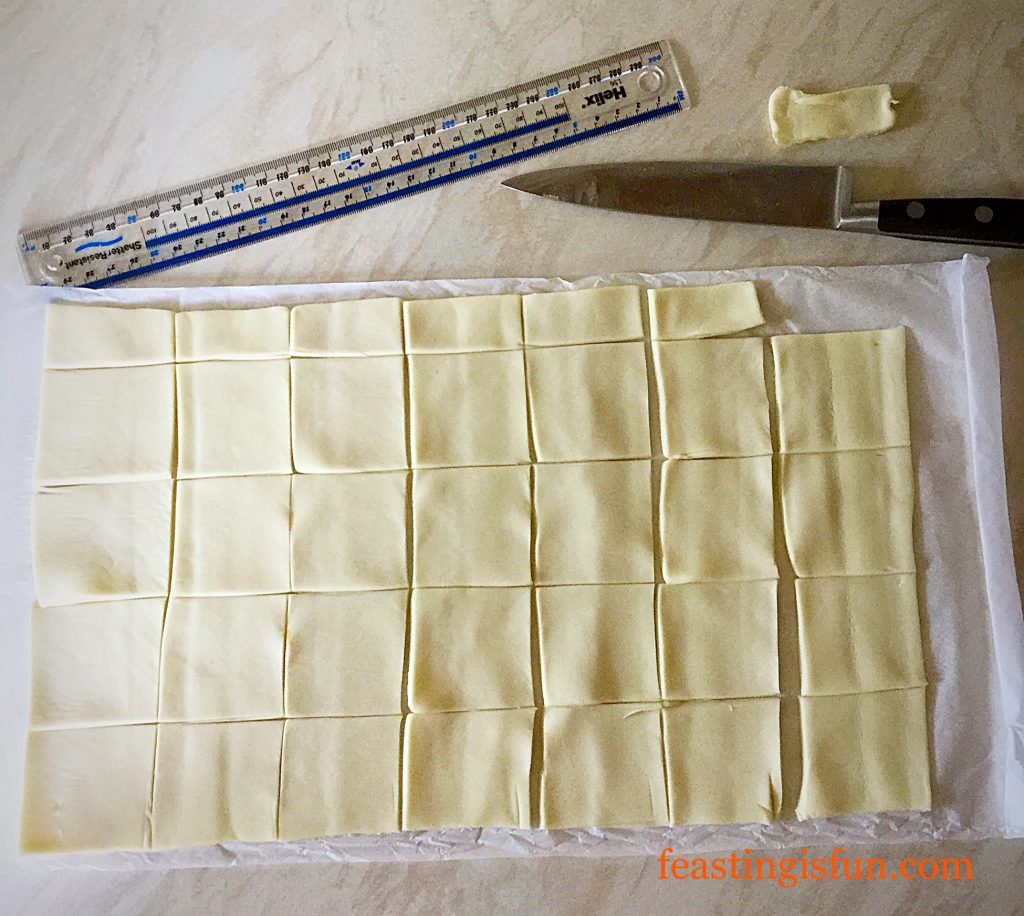
  • Unroll the pastry and cut into 5cm/2″ squares. I actually used a ruler to measure out the squares.
FF Mini Red Leicester Tarts
5cm puff pastry squares cut with a sharp knife.
  • If your mini muffin tin is not non stick then spray with a little oil.
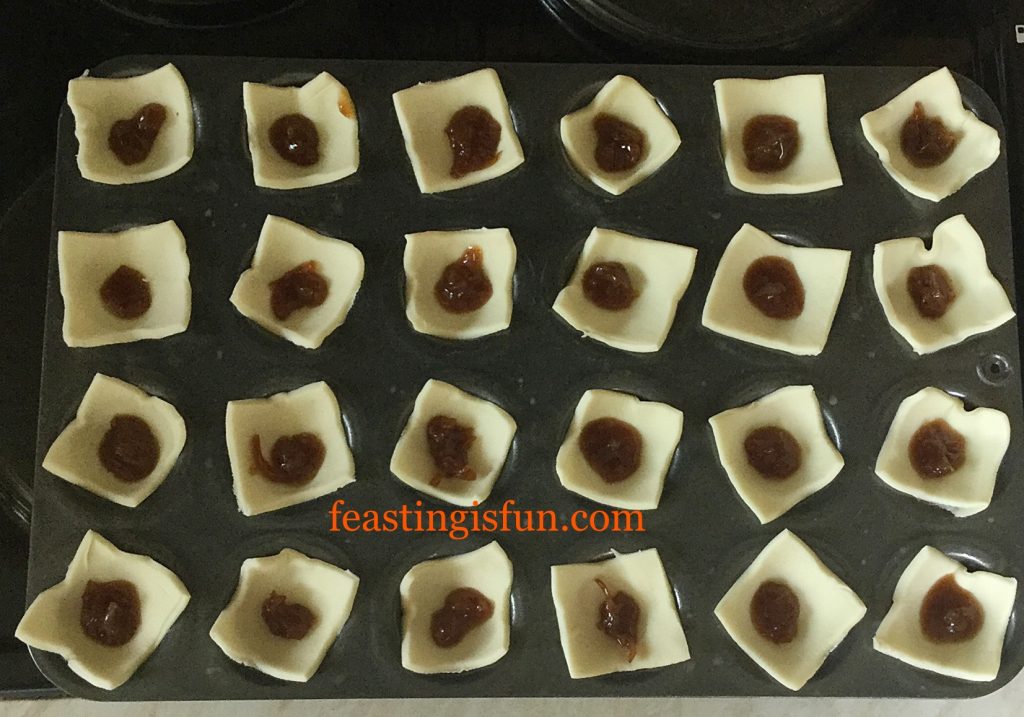
  • Place one pastry square on to each mini muffin hole and press gently so that it dips in and forms a cup.
  • NOTE – I overlapped two of the smaller pastry strips, squeezing them together, from the edge to create more tarts.
  • Add 1/4 teaspoon of onion marmalade to each pastry square.
FF Mini Red Leicester Tarts
Each pastry square forms a little tart shape.
  • Place 1 teaspoon of finely grated cheese on top of the onion marmalade.
  • Snip over a sprinkle of fresh chives.

FF Mini Red Leicester Tarts

Baking the cheesy tarts:

  • Place the tin in the middle of the preheated oven and bake the tarts for 10-12 minutes. They are baked when they are risen, golden and full of bubbling, melted cheese.
  • As soon as the tarts are baked remove from the oven.

FF Mini Red Leicester Tarts

  • Finally, remove the tarts from the tin and place on to a serving platter, if serving immediately, or on to a cooling rack for serving later.
FF Mini Red Leicester Tarts
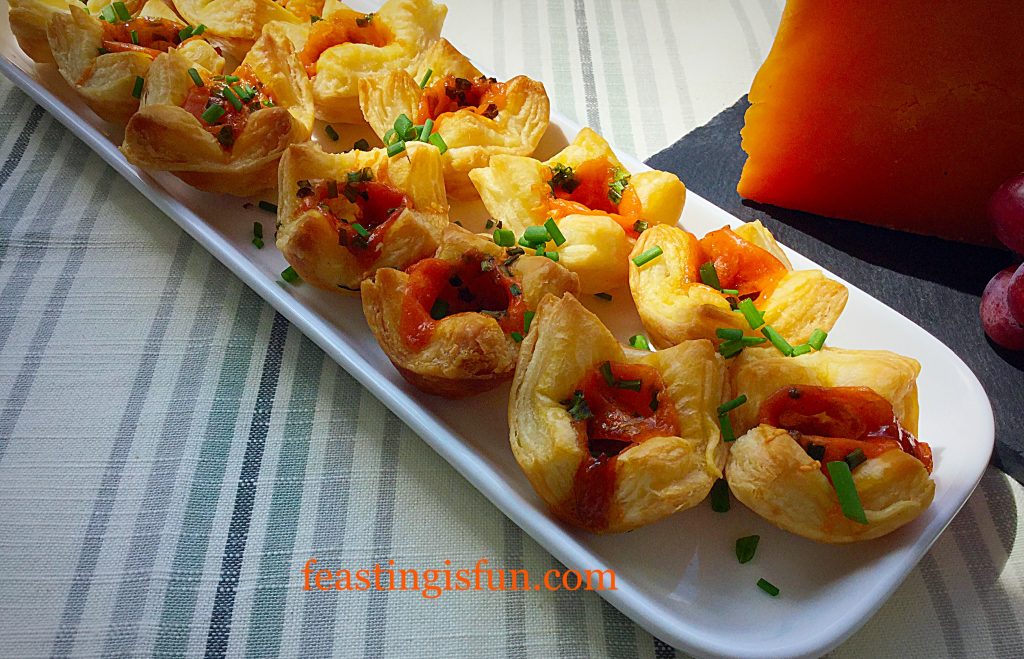
Mini Sparkenhoe Red Leicester Tarts delicious mouthfuls of flavour heaven.

I served these tarts with a few extra chives snipped over for an extra pop of colour.

Served warm these Mini Sparkenhoe Red Leicester Tarts are at their best. Especially as the mild onion flavours pair beautifully with the warm, nutty cheese. Also to make ahead, store in an airtight container for up to three days in the fridge. Refresh by popping on to a baking sheet and into a medium, preheated oven for 5 minutes.

If you have enjoyed this recipe for Mini Sparkenhoe Red Leicester Tarts here are some others you may also like:

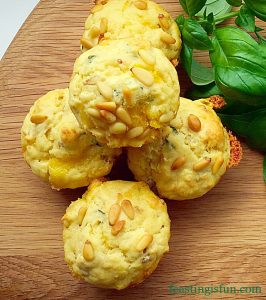
Goddess Cheese Pine Nut Muffins

FF Mini Red Leicester Tarts
Goddess Cheese Pine Nut Muffins.

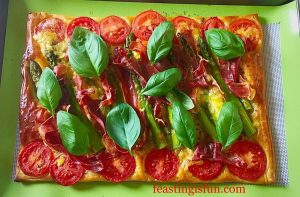
Asparagus Prosciutto Ham Tart

FF Mini Red Leicester Tarts
Asparagus Prosciutto Ham Tart using Goddess Cheese.

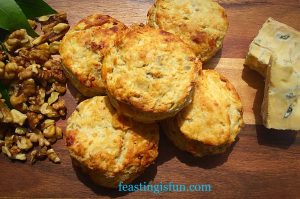
Beauvale Cheese Walnut Scones

FF Mini Red Leicester Tarts
Beauvale Cheese Walnut Scones

Cheese comes in such a variety of textures and flavours. I am thoroughly enjoying experimenting with and using them as  ingredients to create different recipes.

I hope I have inspired you to both make and try different cheeses?

So, whatever er you are making, baking and creating in your kitchens, have fun preparing and sharing your feast.

Sammie xx

Pong Cheese provided me with the cheese for this recipe. All opinions, views, content and photography are my own. Please see my Disclosure Policy.

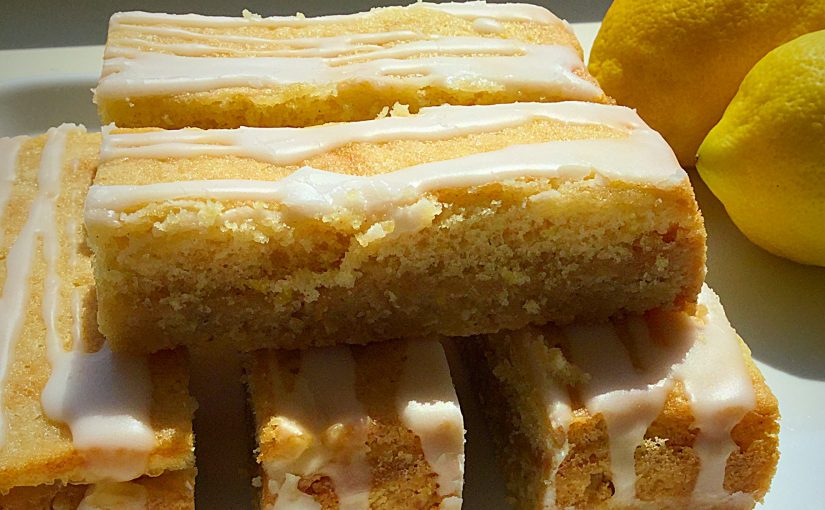
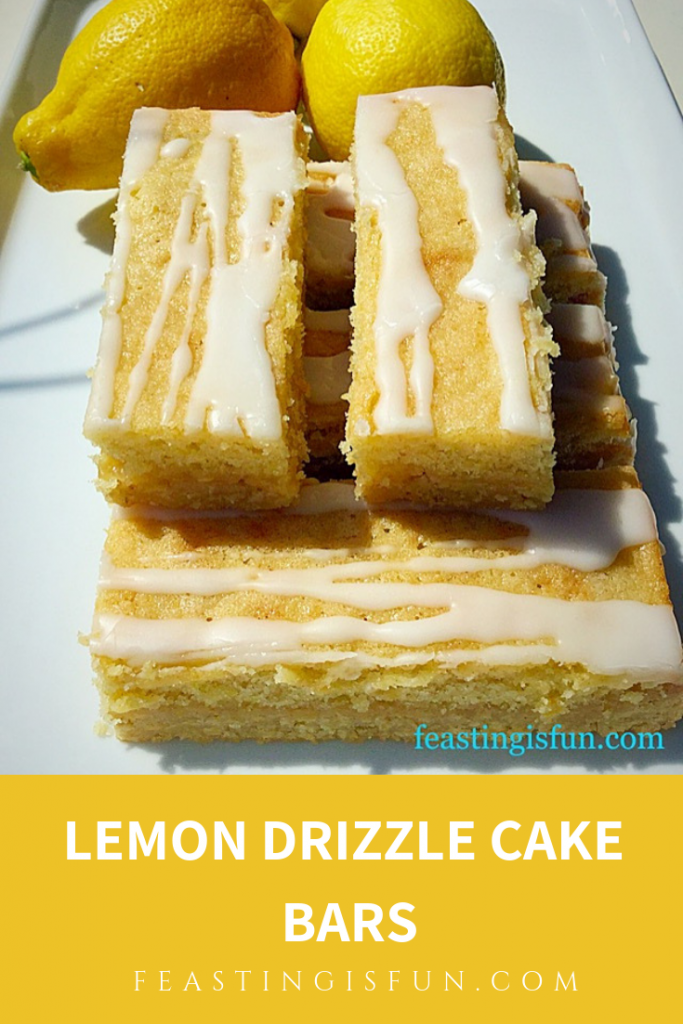
Lemon Drizzle Cake Bars

It is no secret that I love lemon. Whether it be in a glass of Franklin’s tonic water with clinking ice and a slice of lemon, cut into quarters as part of savoury Lemon Thyme Roast Chicken recipe, or even in a sweet bake such as my Lemon Blueberry Bundt Cake. Lemons are very versatile. And they bring sunshine into the kitchen on the dullest day’s. So let me introduce my Lemon Drizzle Cake Bars.

FF Lemon Drizzle Cake Bars

While a sturdy, yet delicious oat biscuit base covered in lemon curd and then topped with the lightest lemon sponge ensures these bars are easy to handle. And a  drizzle of fresh lemon juice icing ensures your tastebuds wake up with a zing. Resulting in a tasty bar that keeps you feeling full for longer because of the oats.

FF Lemon Drizzle Cake Bars
Lemon Drizzle Cake Bars

Especially ideal for picnics, packed lunches, or just as a mid morning or afternoon snack to keep you going until meal time.

Although I really do need to get around to making my own lemon curd, for this recipe I used Waitrose own luxury lemon curd. Because using a good quality lemon curd makes all the difference to the overall flavour.

Lemon Drizzle Cake Bars

Recipe: Makes 16  Lemon Drizzle Cake Bars

For the Oat Biscuit Base:

225g/8oz Unsalted Butter

125g/4.5oz Caster Sugar

1/8tsp Salt – I use Maldon

1tsp Vanilla Extract – I use Nielsen-Massey

1 Large Free Range Egg Yolk

100g/4oz Rolled Oats – not quick cook

125g/4.5oz Plain White Flour

3tbs Lemon Curd – use the best quality one that you can afford

For the Lemon Sponge Layer:

125g/4.5oz Unsalted Butter

100g/4oz Caster Sugar

1/8tsp Salt

1/2tsp Vanilla Extract

2 Large Free Range Eggs

125g/4.5oz Plain White Flour

1tsp Baking Powder

Finely grated zest of 1 Lemon – reserve the juice for the icing

For the Lemon Drizzle Icing:

100g/4oz Icing Sugar

Juice of 1 Lemon

Method: Preheat the oven to 200C/180C fan, gas mark 6, 400F.

Making the Oat Biscuit Base:

  • First of all, line a 28cm x 20cm x 5cm (12″x 8″x 2″) Swiss roll tin with baking parchment. I have found that I am able to line mine without greasing, however, lightly grease the tin if it is easier to keep the parchment in place.
  • In a large bowl beat/whisk together the butter, cream and salt until pale and creamy.
  • Add the vanilla extract and egg yolk and continue to beat/whisk until combined.
  • Add the oats and flour and stir together until combined.
  • Place the biscuit mixture into the lined tin and press into place using clean fingers.
  • Place the tin in the fridge and chill the biscuit mixture for 30 minutes.
  • As soon as it is chilled place the Swiss roll tin in the centre of the oven and bake for 20 minutes.
  • Remove after the 20 minutes has elapsed and turn down the oven temperature to 160C/140C fan, gas mark 3.
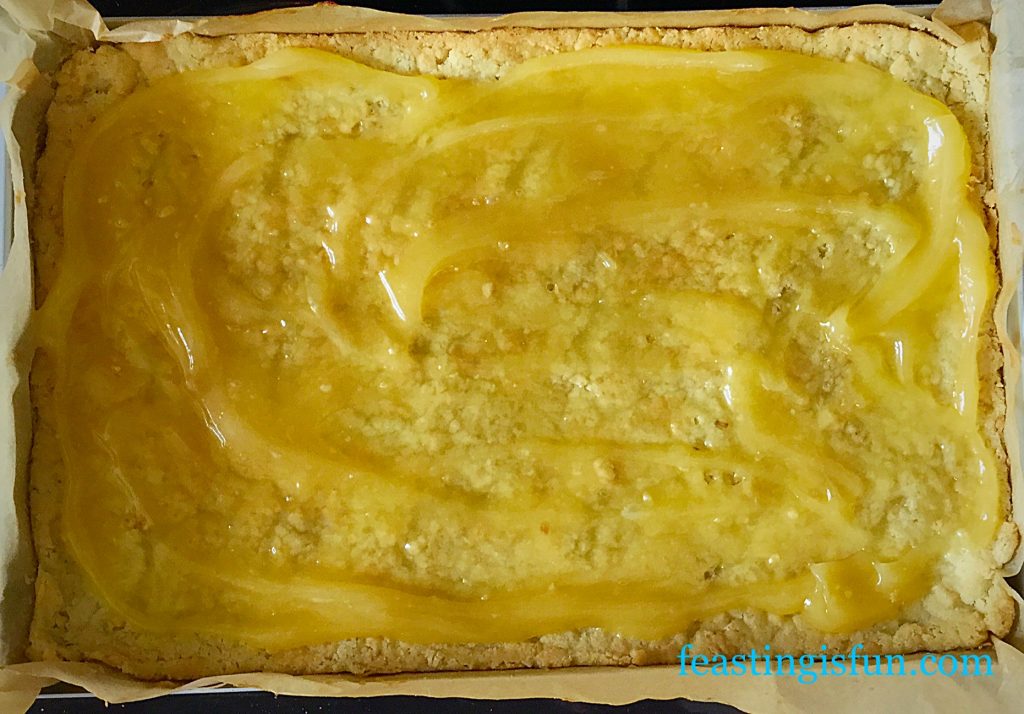
  • Spoon the lemon curd on to the hot biscuit base and spread so that it covers and almost reaches the edges.
FF Lemon Drizzle Cake Bars
This tangy lemon curd layer makes all the difference to the finished bake.

Making the Sponge Layer:

Note: This can easily be made whilst the oat biscuit base is baking.

  • In a large bowl whisk/beat the butter, sugar and salt together until they are pale and creamy.
  • Add the 2 whole eggs and vanilla extract. Whisk/beat until light and foamy.
  • Sift in the flour and baking powder. Add the finely grated zest of 1 lemon.
  • Fold all the ingredients together, using a spoon, until they are just combined.
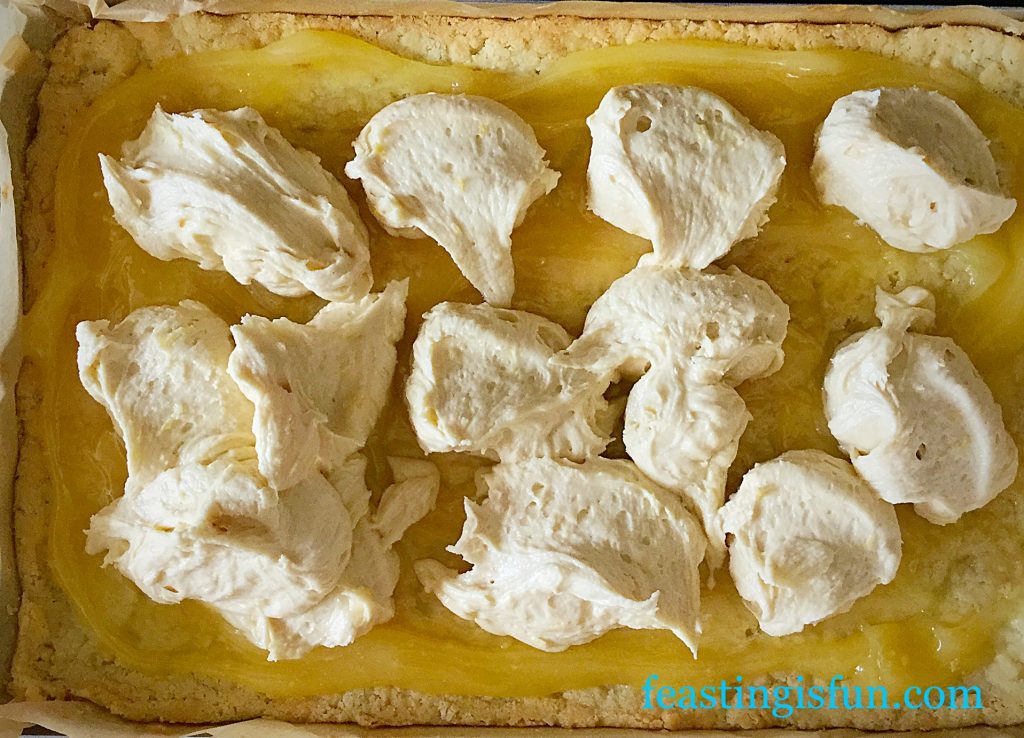
  • Spoon the mixture over the lemon curd coated biscuit base.
FF Lemon Drizzle Cake Bars
Spoon the cake batter evenly over the base.
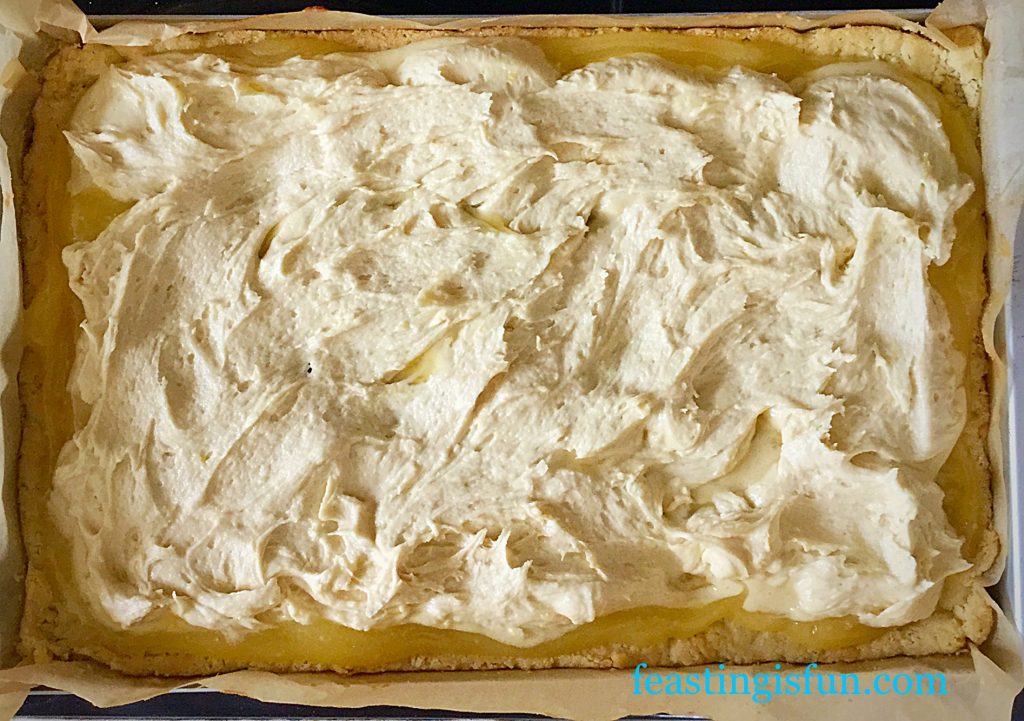
  • Spread the cake batter using the back of a spoon, or an offset spatula, until it covers almost all of the biscuit base.
FF Lemon Drizzle Cake Bars
The lemon cake batter will spread to completely cover the biscuit base whilst baking.
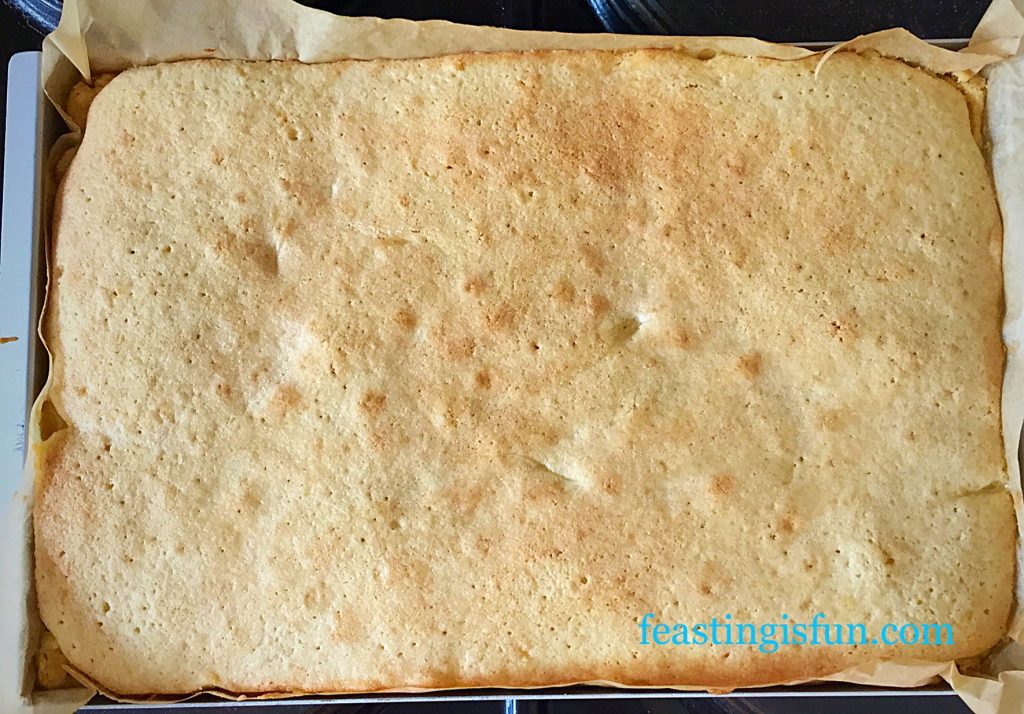
  • Place the Swiss roll tin in the centre of the preheated oven and bake for 30 minutes.
  • The sponge is baked when it springs back from a light touch and is a light golden colour. Don’t worry if it is paler than you expect, the lower baking temperature stops it browning as much as you may be used to.
  • As soon as the sponge is baked remove the tin from the oven, place on a cooling rack and allow the entire bake to cool in the tin.
FF Lemon Drizzle Cake Bars
The entire slab of sponge topped biscuit cooling in it’s tin.
  • When the bake is completely cooled, lift out of the tin, using the baking parchment and a palette knife and place on to a board.
  • Peel back the sides of the baking parchment and tuck them underneath.

Making the Lemon a Drizzle Icing:

  • Sift the icing sugar into a small bowl.
  • Add the juice of one lemon.
  • Mix until you have a smooth, slightly runny paste.
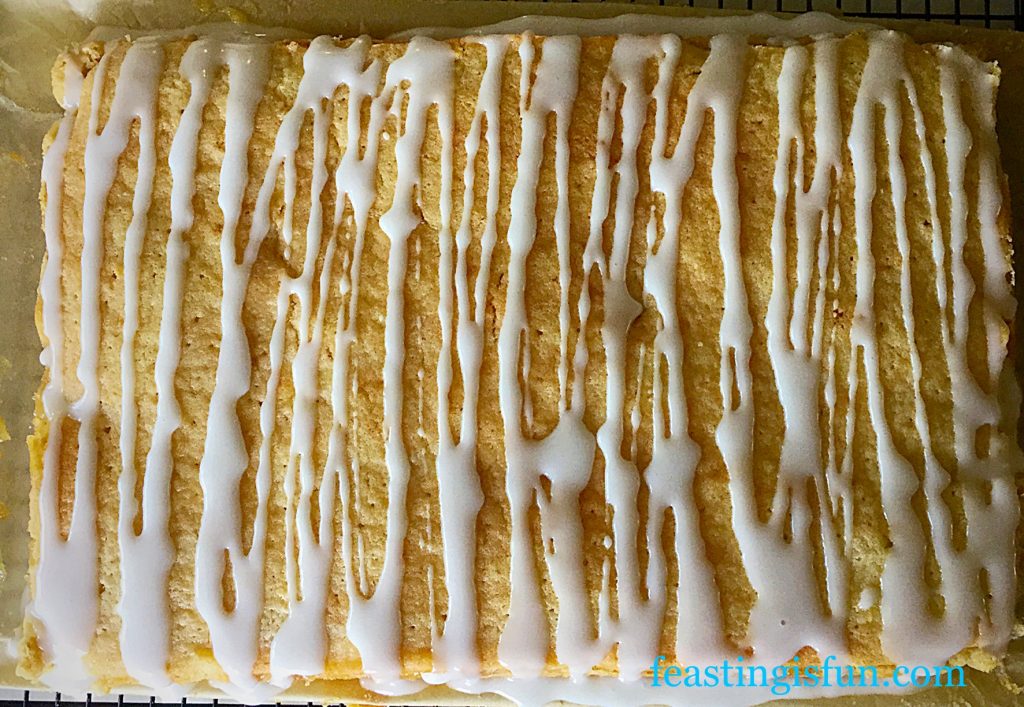
  • Using a spoon, drizzle the lemon icing over the top of the cake/biscuit slab. I prefer a line style drizzle, but you can drizzle your icing however you wish. Let your creative juices flow! Although I do advise against pools of icing gathering on top of the bake.
  • Set your Lemon Drizzle Cake Bars bake to one side to allow the icing to set.
FF Lemon Drizzle Cake Bars
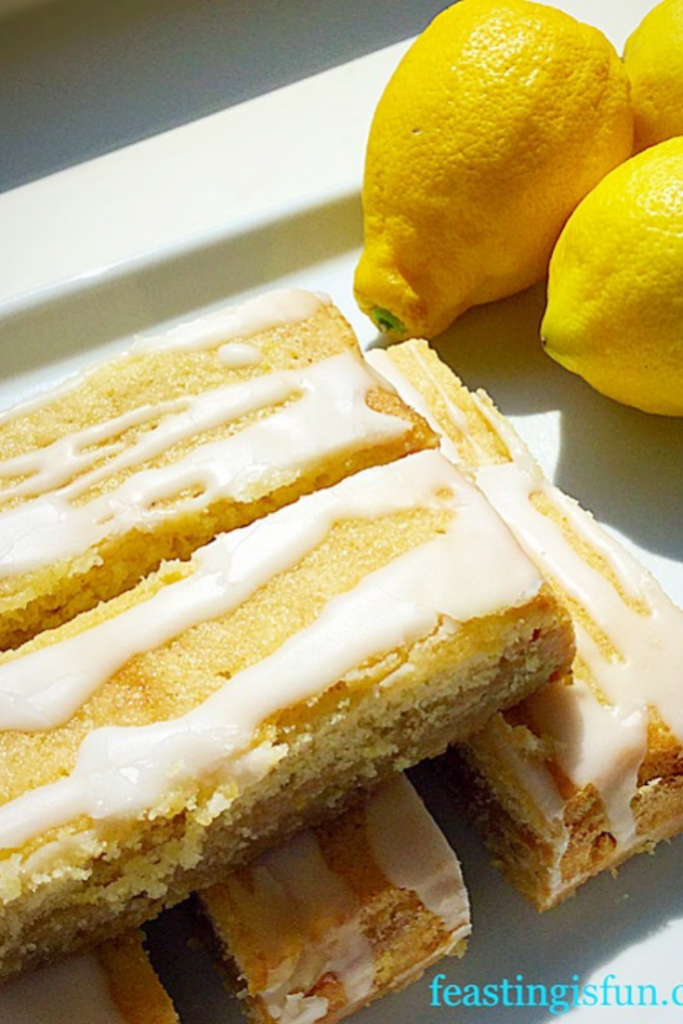
Lemon Drizzle Cake Bars the tart lemon icing gives these a professional finishing touch.
  • Once set you may cut your slab into individual bars.
  • Cut down the length of the bake in the middle.
  • Next cut across the width of the bake, creating four quarters.
  • Cut each quarter into four individual bars.
FF Lemon Drizzle Cake Bars
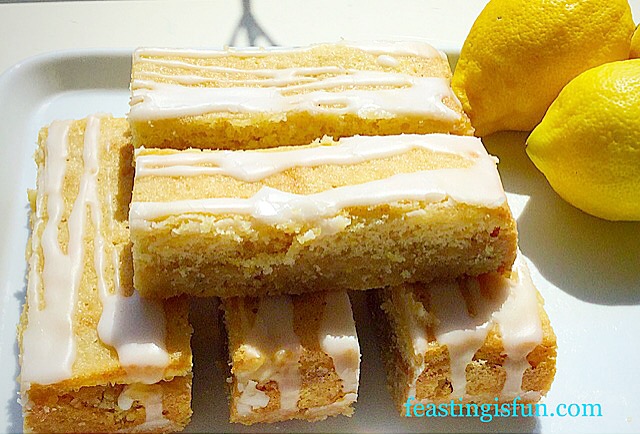
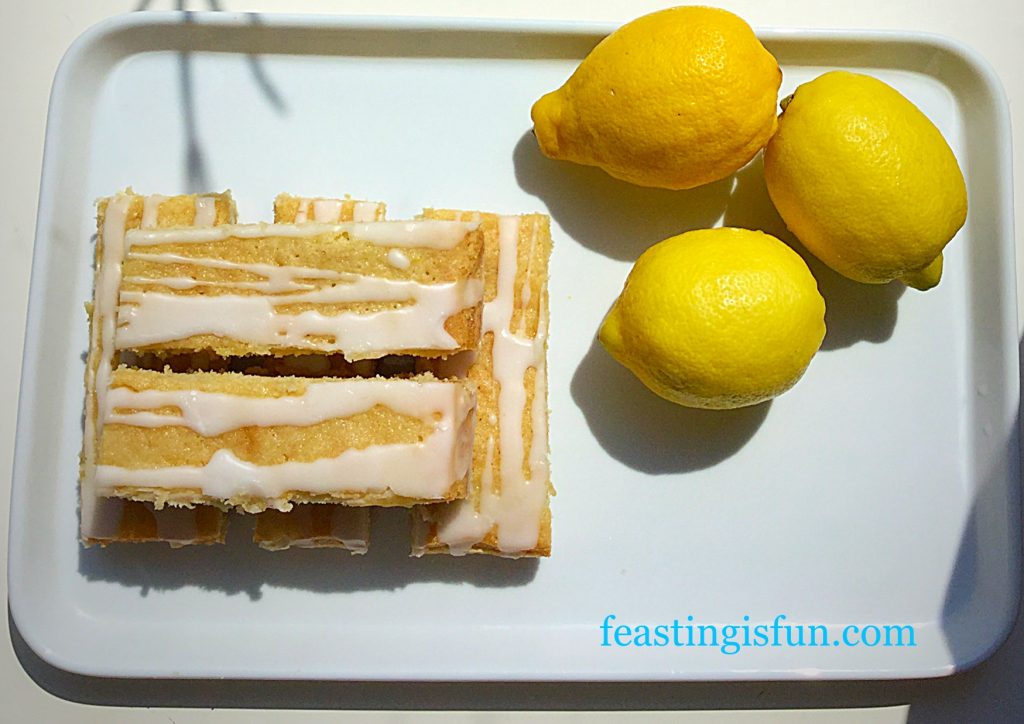
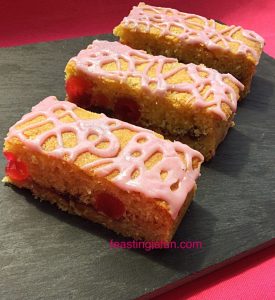
Lemon Drizzle Cake Bars gloriously tempting in the sunshine.

Because of the sturdy and delicious oat biscuit base, these Lemon Drizzle Cake Bars are the perfect, portable food.

Store in an airtight tin (I use old biscuit tins, usually from Christmas), separating layers with pieces of baking parchment and eat with 5 days.

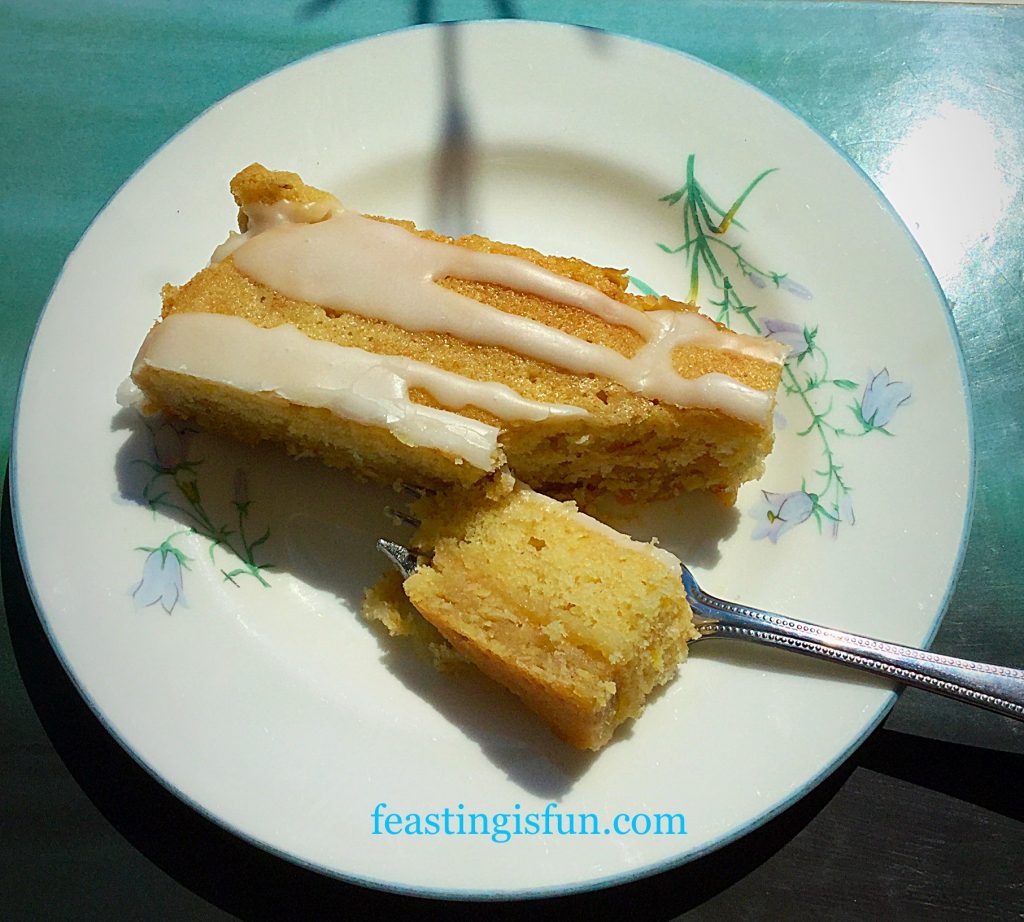
I had one of the Lemon Drizzle Cake Bars with a cup of tea for a rather late lunch and it was incredibly tasty and refreshing. While using good quality Lemon Curd ensures the right balance of tartness within the bar, as does using fresh lemon juice in the drizzle icing. So I highly recommend these delightfully tangy Lemon Drizzle Cake Bars!

FF Lemon Drizzle Cake Bars
Lemon Drizzle Cake Bars perfect for Afternoon Tea.

If you have enjoyed this recipe for Lemon Drizzle Cake Bars, here are a few more you may like too:

Bakewell Shortbread Bars

FF Lemon Drizzle Cake Bars
Bakewell Shortbread Bars

Macadamia Apricot Flapjacks

FF Lemon Drizzle Cake Bars
Macadamia Apricot Flapjacks

Double Cherry Drizzle Oat Bars

FF Lemon Drizzle Cake Bars
Double Cherry Drizzle Oat Bars

Since my family love having something homemade to take to school or work in their packed lunches these bars are ideal. Also I hope I have inspired you to try these delicious Lemon Drizzle Cake Bars. Alternatively, why not bake a batch and take them into the office as a Friday, or mid-week treat for everyone?

Finally, whatever you are making, baking and creating in your kitchen, have fun preparing and sharing your feast.

Sammie xx

No part of this post may be reproduced or duplicated without the written permission of the owner. Please see my Disclosure Policy.
Garlic Cheese Bombs

Who doesn’t love garlic bread, served alongside a great pasta dish, with a glass of something chilled? I certainly do and after seeing a fantastic foodie craze on Pinterest I knew I had to try it. Everyone is mad about these Garlic Cheese Bombs!


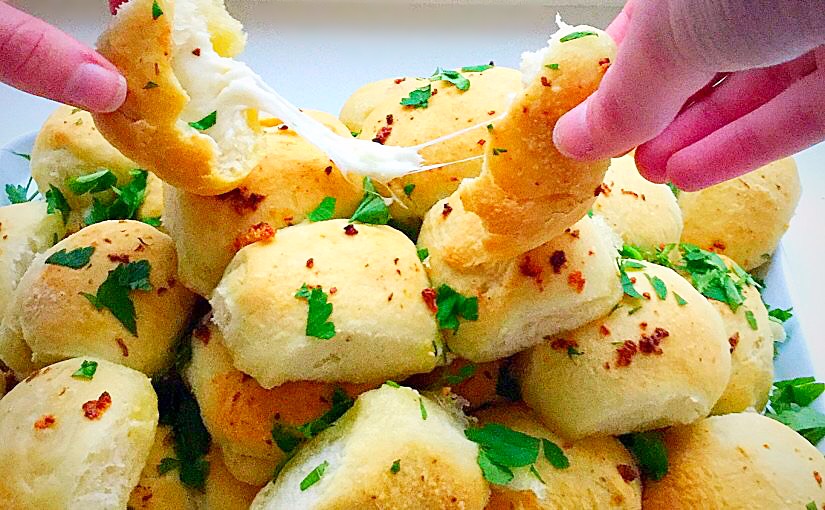
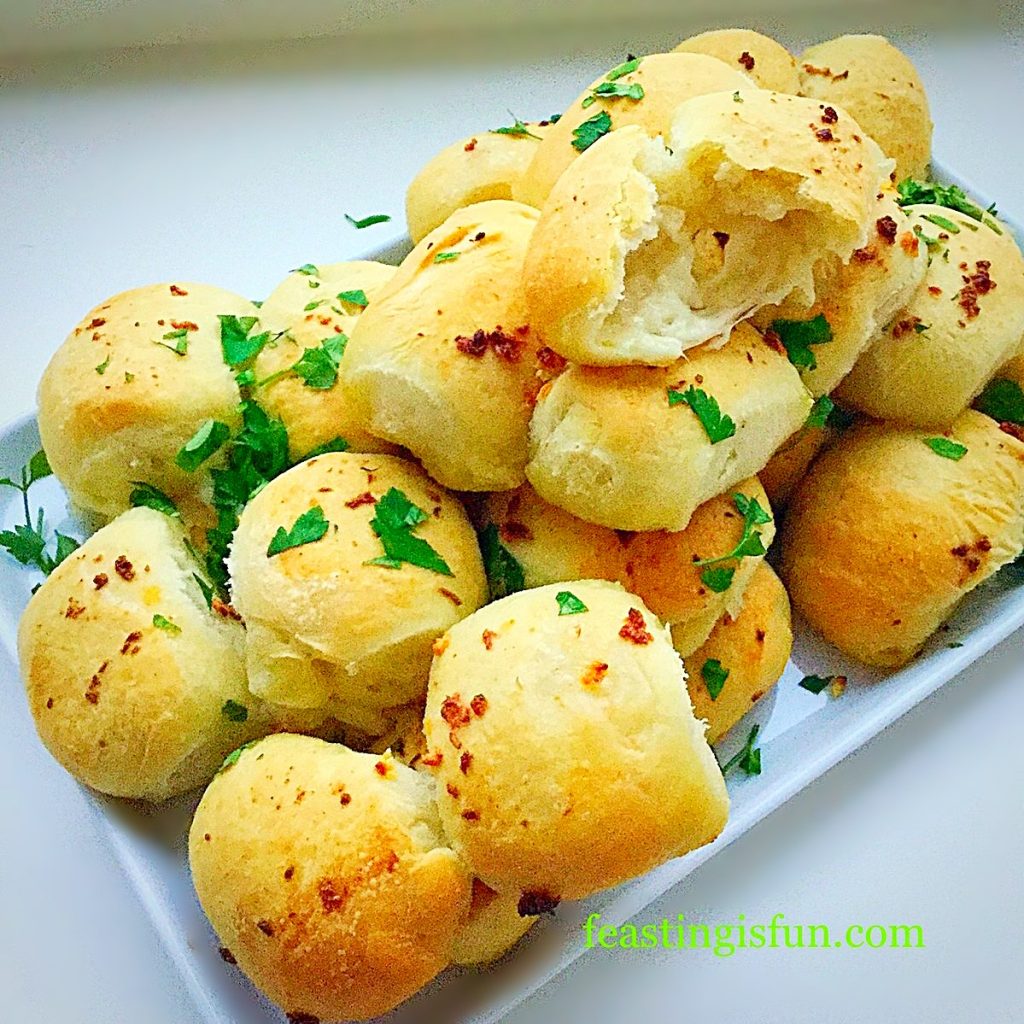
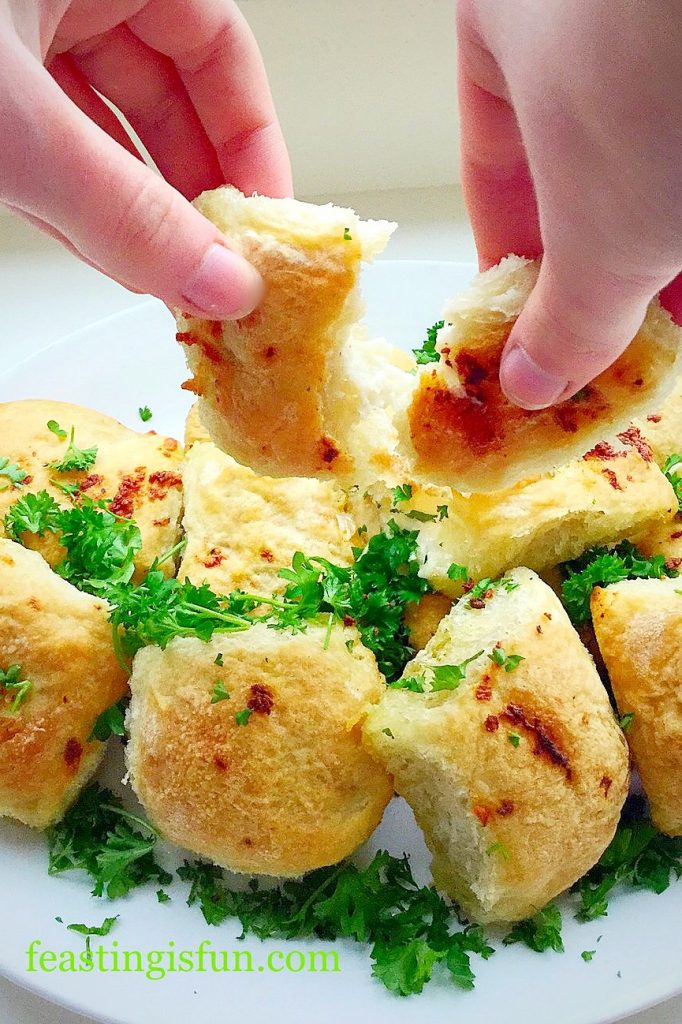
Baked mozzarella stuffed buns being pulled apart to show the gooey, melted cheese.
Garlic Cheese Bombs

In our house these are the BOMB 😉.

Everyone loves it when I make them and having successfully frozen them, uncooked, they are great to have on hand. Fresh or frozen.

Garlic Cheese Bombs
Garlic Cheese Bombs

Honestly these Garlic Cheese Bombs have become such a massive hit in our house. I’m really glad that they freeze well as my family would scoff the whole lot if I baked them all at once. I have learned from the first time I made Garlic Cheese Bombs

Garlic Cheese Bombs

Baking With Children

If you have little ones, they will thoroughly enjoy making these.

The only extra ingredient required to make the Garlic Cheese Bombs is a little patience. Making 30 – 40 individual, little cheese wrapped buns, could be seen as tedious – not here at Feasting is Fun though. We don’t do tedious!! So put on some great music or a play, clear the table and enjoy some therapeutic relaxation, whilst you play with dough!

Before you know it you’ll have two trays full of delicious, homemade, bread buns proving and you can give yourself a smug pat on the back, knowing that one tray is going to be stashed in the deep freeze.

Baking bread is a real passion of mine, second only to my faith see Important Stuff. As this week has been Real Bread Week it seemed fitting to end on a recipe that is fun to make and tastes best when feasting with family and friends.

Garlic Cheese Bombs
Garlic Cheese Bombs

Made From Scratch Versus Using A Bread Mix

I have made these Garlic Cheese Bombs using both my own dough recipe and a Wright’s bread mix. Truthfully and this almost hurts to write this, the children preferred the ones made with the bread mix.

Our children are very honest!!

Personally I think they are both great. The Wright’s bread mix is handy if you’re an infrequent bread baker, or haven’t made bread dough before and want to ensure they turn out great. My dough recipe is for those of us who are happy to make their dough from scratch. That said, there’s room in my kitchen for both.

Recipe: Makes 30 – 40 Garlic Cheese Bombs

1 quantity of dough that’s been proved and knocked back, from either my Farmhouse White Loaf or using Wright’s Baking Premium White Bread Mix

2 Tubs Mini Mozerrella Balls – there are approx 15 – 20 balls per tub

4 Fat Garlic Bulbs – or more if you want an extra garlic kick

100g/4oz Butter

4tbsp Olive Oil

1tsp Sea Salt – I use Maldon

1/2tsp Freshly Ground Black Pepper

Bunch of Fresh Parsley to garnish and add flavour

Making The Garlic Cheese Bombs

You will need a foil freezer/baking tray or 2 if you intend to freeze these.

  • Drain the mozerella balls well and count how many you have.
  • Make up the dough according to your chosen option.
  • Allow the dough to prove until doubled in size and then tip out on to a lightly floured surface.
  • For the very precise among you, weigh the bread dough and then divide that number by the number of mozerella balls. That will tell you exactly how much each piece of dough should weigh.
  • If you are more ‘laissez faire’ about things, like me, simply divide the dough evenly into 3 or 4 equal pieces (depending on whether you have 30 or 40 mozerella balls) and then divide each potion into 10.
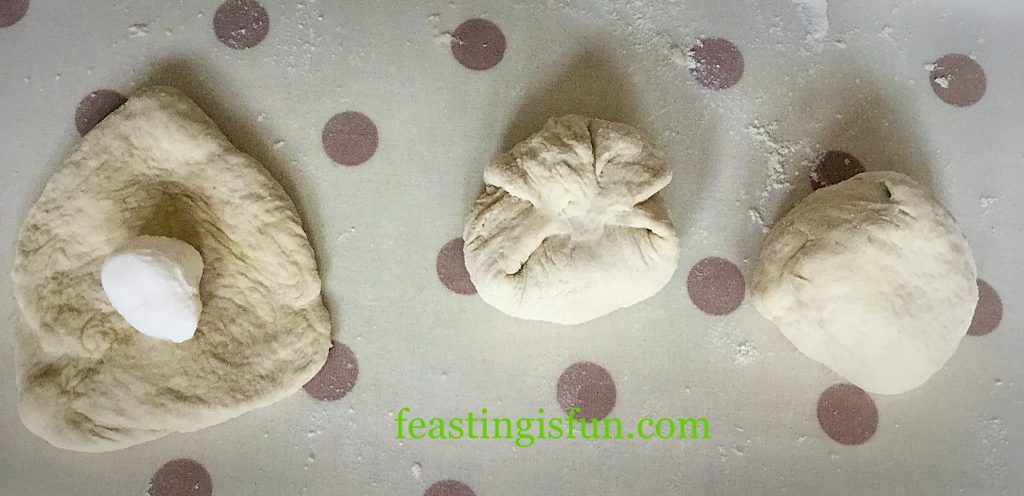
  • Flatten a small portion of dough into a rough circular shape.
  • Place the mozerella ball in the centre of the dough circle.
  • Bring the edges of the dough up so that they cover the cheese and seal by pressing together.
  • Place the Garlic Cheese Bomb seam side down on a lightly oiled baking tray.
FF Garlic Cheese Bombs
After a while you get into a rhythm and the process becomes very relaxing.
  • Continue until all of the Garlic Cheese Bombs have been made, allowing space in between each one the tray so that it has room to rise.
FF Garlic Cheese Bombs
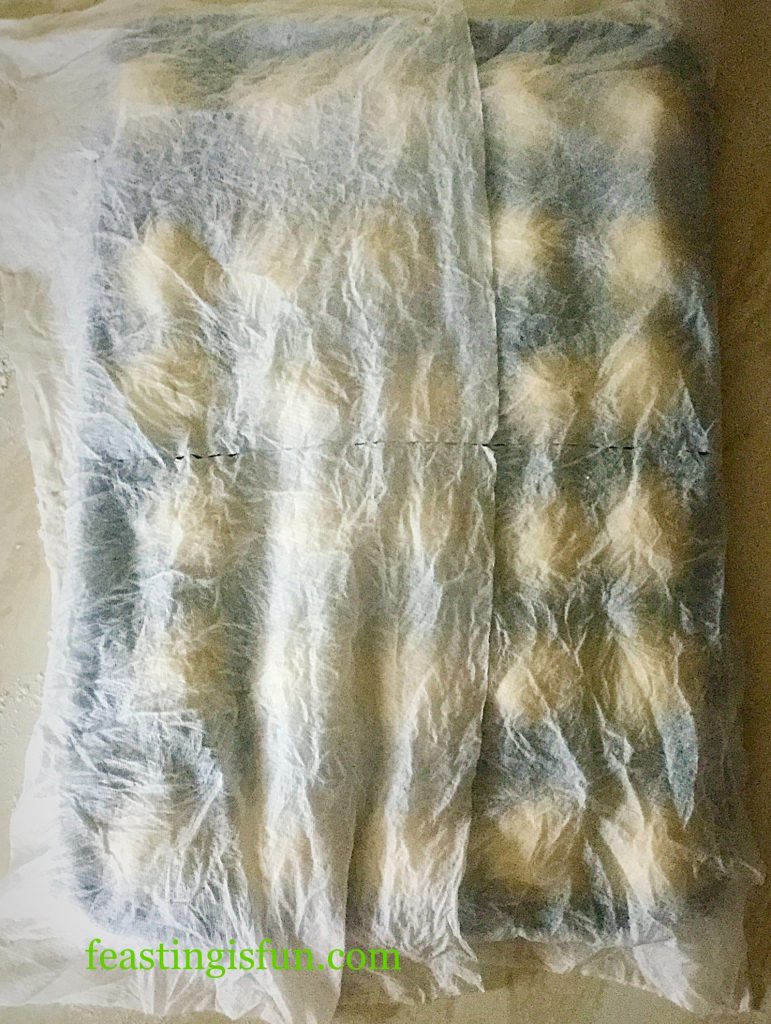
Cover with damp kitchen towel or oiled cling film.


Proving The Buns

  • The Garlic Cheese Bombs in the photo above are from the first batch that I made.
  • Leave until doubled in size.
  • Whilst the rolls are proving, make the garlic butter.
  • Place the butter, oil, crushed/finely minced garlic, salt and pepper into a small saucepan over a low heat.
  • Cook until all the butter has melted. Set to one side.
  • Preheat the oven to 200C/180C fan, gas mark 6, 400F.
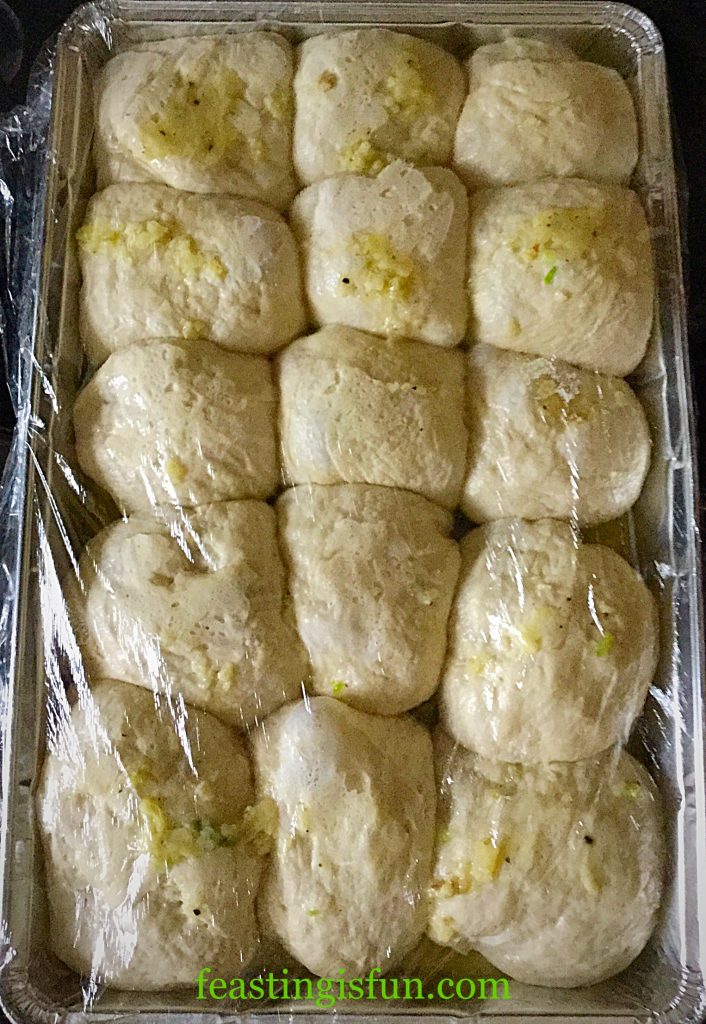
  • When the Garlic Cheese Bombs have doubled in size, remove the damp cloth/cling film and brush liberally, using a pastry brush, with the melted garlic butter.
FF Garlic Cheese Bombs
You’ll be surprised at how much these delicious rolls puff up.

Freezing The Uncooked Bread Rolls

Now is the stage at which the Garlic Cheese Bombs can be frozen. Double wrap the foil tray with freezer safe cling film, label and pop in the freezer. They should be fine for at least one month in the freezer.

Baking The Garlic Cheese Bombs

  • To bake the freshly garlic glazed buns, place into the middle of the oven and bake for 25-30 minutes, or until the rolls are golden brown.
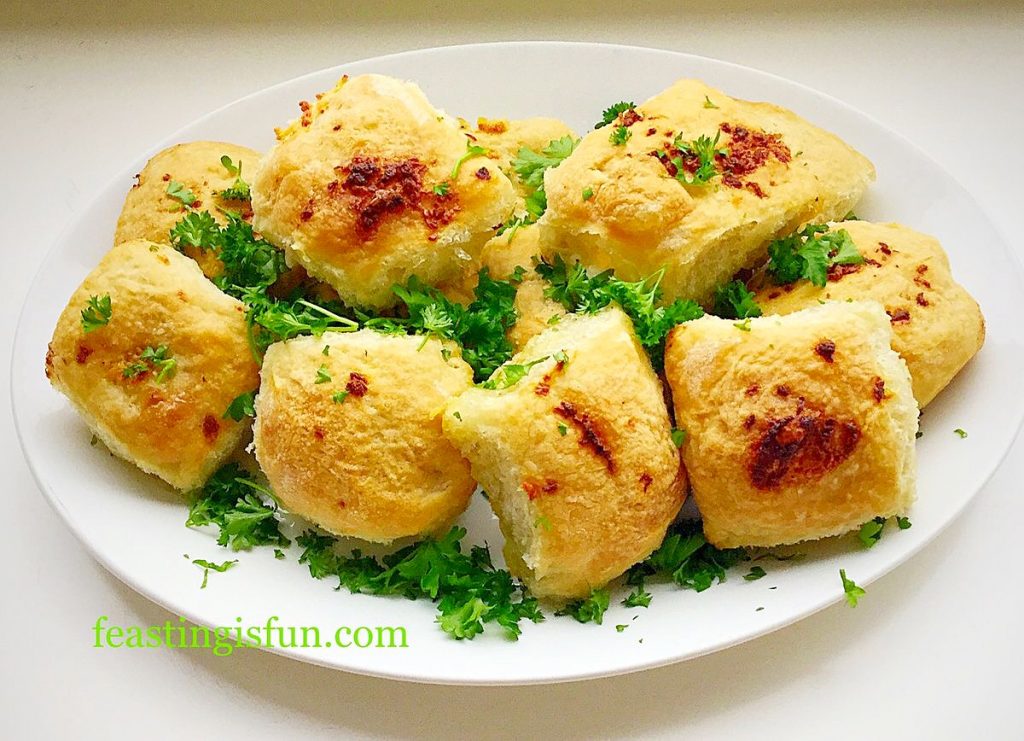
  • When baked remove the tray from the oven and immediately transfer the individual Garlic Cheese Bombs to a serving platter. Be careful as they will be very hot.
  • Pour over any garlic butter left in the tray and garnish with roughly chopped parsley,
  • Leave for 5 minutes before serving to allow thm to cool slightly.
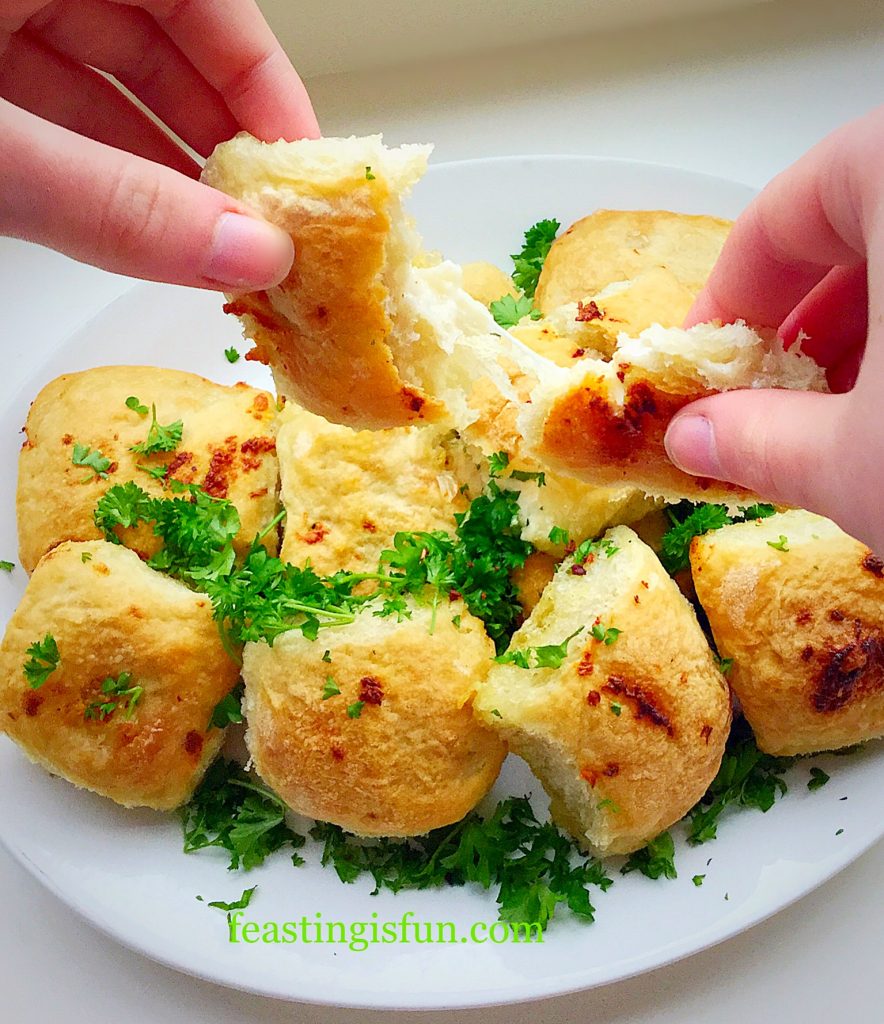
  • Serve with a smile and watch as people break open these golden, light, cheesy rolls, flavoured with garlic butter.

Garlic Cheese Bombs

Baking From Frozen

To bake from frozen, preheat the oven to 190C/170C fan, gas mark 5, 375F. Remove all cling film/foil. Place the frozen rolls into the middle of the oven and bake for 40-45 minutes, until golden and baked through. To test remove a roll and cut in half, if the mozerella is gooey and melted then the Garlic Cheese Bombs are baked. Serve as for freshly baked.

Making Ahead Tips

So you’ve got a party in the evening and you want to make these earlier in the day? I’d suggest making them the day, or even a few days aheadand stashing them in the freezer. Alternatively make them in the morning, glazed with garlic butter before their final prove (it’ll save you stinking of garlic as you great your guests 😉), wrap in cling film and keep in the fridge. Take them out 10 minutes before baking, whilst you preheat the oven and bake as for fresh.

Make ahead recipes are fantastic as they allow you to enjoy spending time with your guests, rather than being stuck, on your own in the kitchen!

If you have loved these Garlic Cheese Bombs, then here are some other recipes you might like to try:

Breadsticks with Garlic and Herb Dipping Oil

Breadsticks with garlic and herb dipping oil.

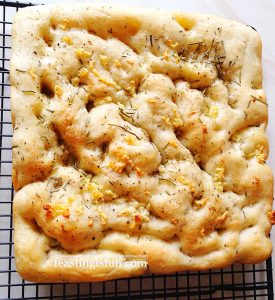
Garlic Rosemary Focaccia Bread

Garlic Rosemary Focaccia Bread

Cherry Tomato Mozzarella Basil Focaccia 

Cherry Tomato Mozzarella Basil Focaccia


I really hope you do try making your own bread. Most bread doughs can withstand a reasonable amount of mistreatment and still turn into fabulous loves, breadsticks, baguettes. The possibilities are endless and nothing, not even chocolate cake such as this White Chocolate Swirl Fudge Cake beats the smell of home baked bread.

Thank you for all you lovely comments, especially on Twitter regarding the great yeast debate – more on that in a future post! It really makes my day to see pictures of you baking my recipes and in most cases they look even better. Which I think is completely brilliant. You all inspire me to try harder and write easy to follow, delicious recipes.

Together we really do make Feasting Fun!

Sammie xx

Wright’s Baking provided me with the Premium White Bread Mix used in this recipe alongside my own bread dough recipe. All opinions, views, content and photographs are my own. Please see my Disclosure Policy.
Spicy Sausage Rolls

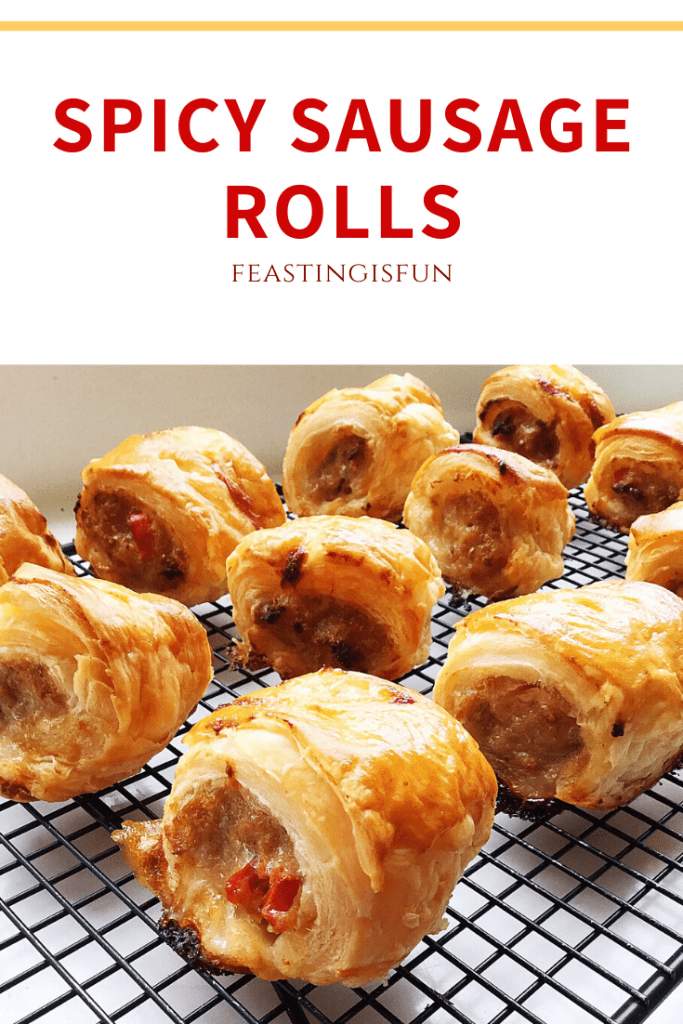
Sunshine, glorious sunshine. It lifts our spirits and makes everyday seem that little bit brighter – literally. Windows flung open, coats discarded, sunglasses at the ready. Who wants to eat lunch, or any meal for that matter, indoors? Not me! Even if my ‘picnic’ is sitting out in the garden with a cool glass of something refreshing and a plate of these jalapeño fired Spicy Sausage Rolls.
For those of you with a more gentle constitution, don’t worry these Spicy Sausage Rolls do not ‘blow your head off!’ Instead they have a gentle warming, fruity heat that lifts an otherwise everyday sausage roll to a whole different level.

The inclusion of some paprika filled chorizo sausage, further elevates the incredible flavour of these picnic favourites. Delicious good quality sausage meat,  mixed with finely chopped jalapeño chilli and just the right amount of chorizo, encased in flaky, all butter puff pastry, makes for the perfect addition to any packed lunch, picnic or easy meal.

Spicy Sausage Rolls change up your daily packed lunch!

If you like sausage rolls, you will absolutely love these Spicy Sausage Rolls!

Spicy Sausage Rolls an easy, tasty,mid week meal.
Spicy Sausage Rolls an easy, tasty, mid week meal.

Using The Freezer To Keep Grocery Costs Down

Puff pastry is such an incredibly handy product to have stashed away in the freezer. All butter is my preferred type, especially for sweet bakes such as my Blackberry Nectarine Tart , however, I do sometimes use the mixed vegetable fat/butter for savoury bakes, especially if it is on offer!

Having chatted to a few of my Twitter friends recently, we all concluded that the cost of groceries seems to have suddenly risen. For me, this means creating recipes that stretch more expensive ingredients that little bit further and also really trying hard to keep food waste to an absolute minimum.

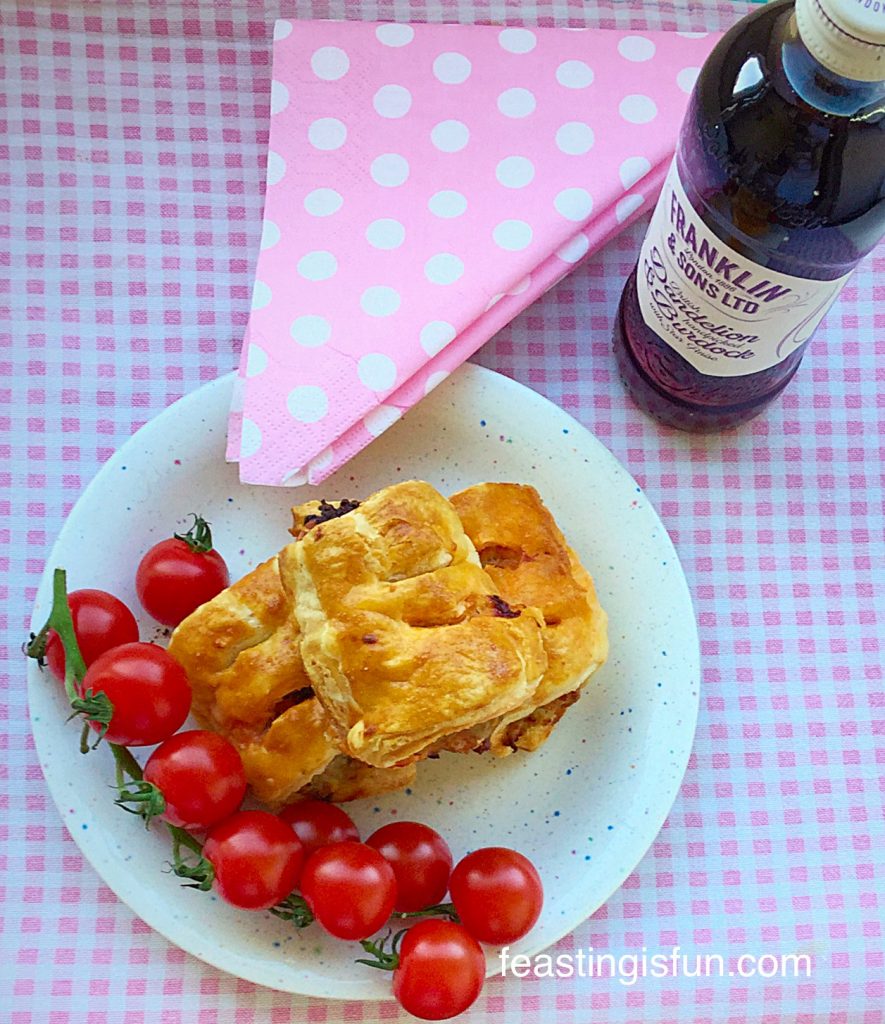
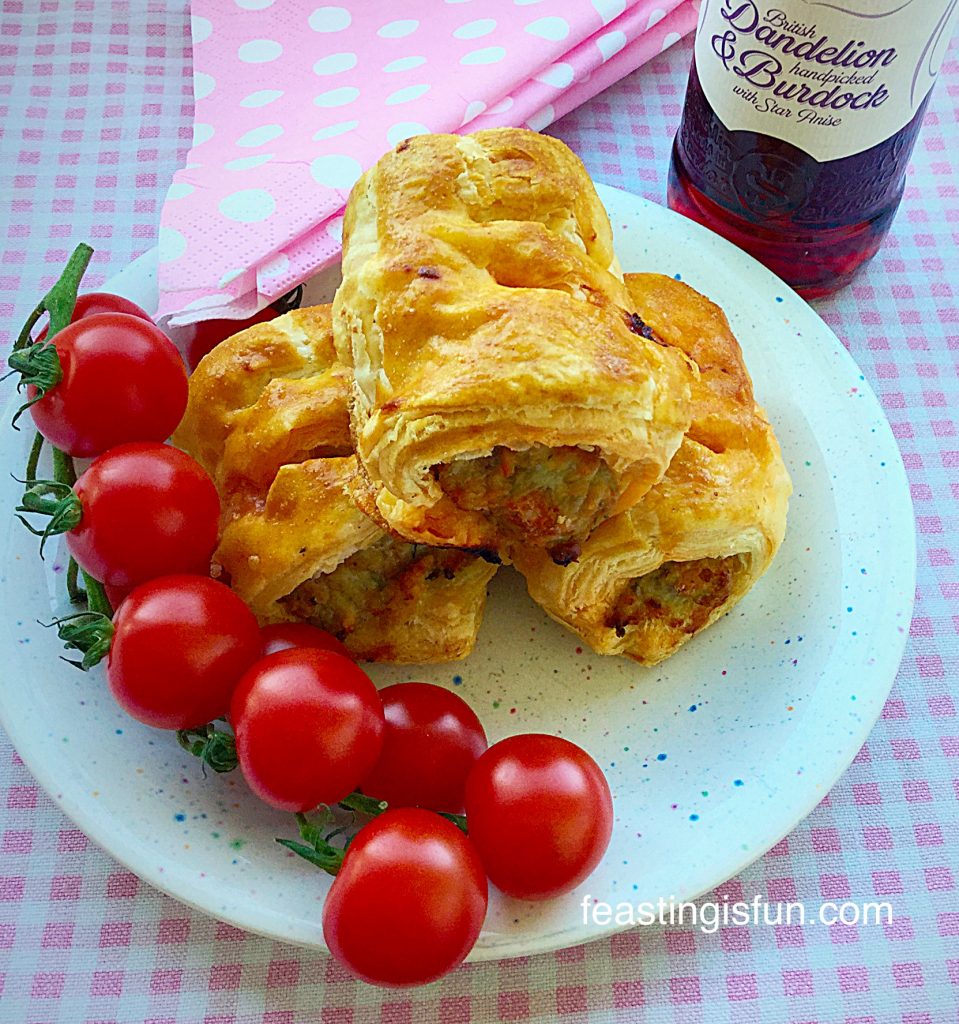
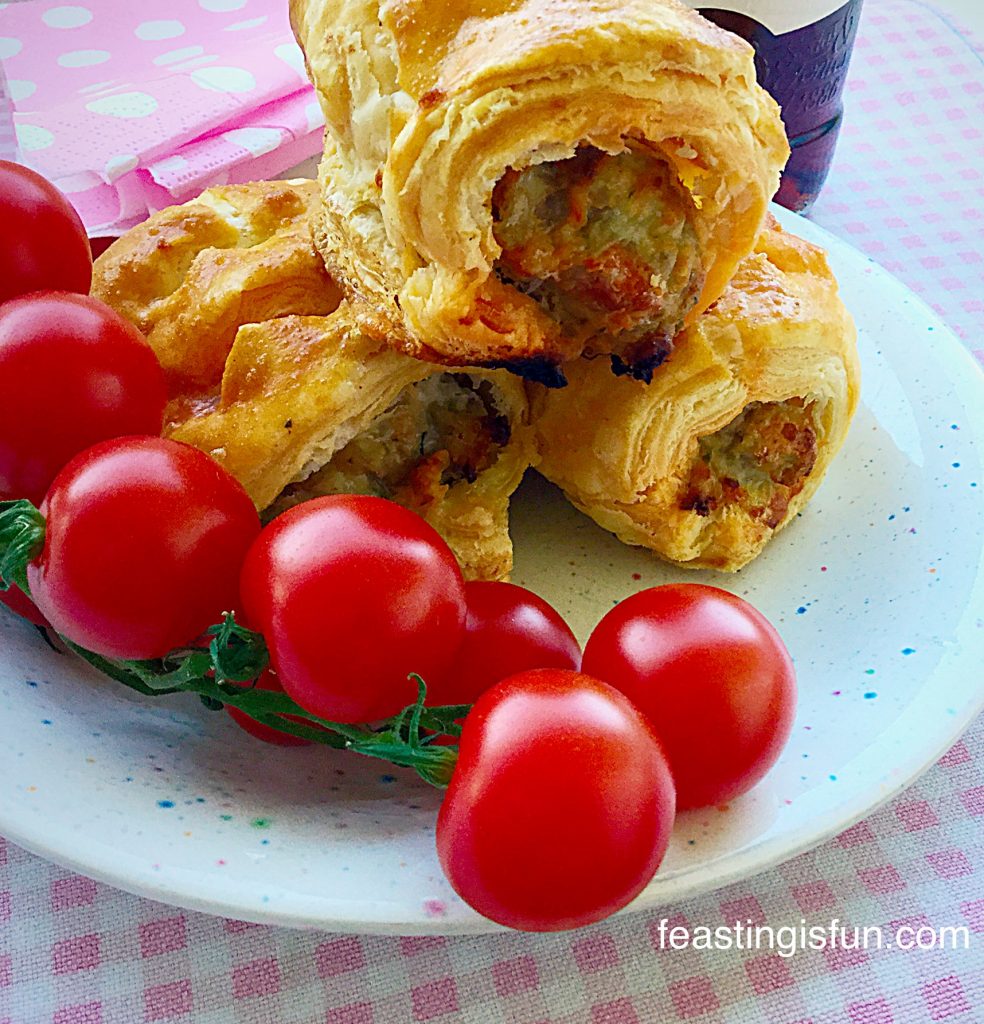
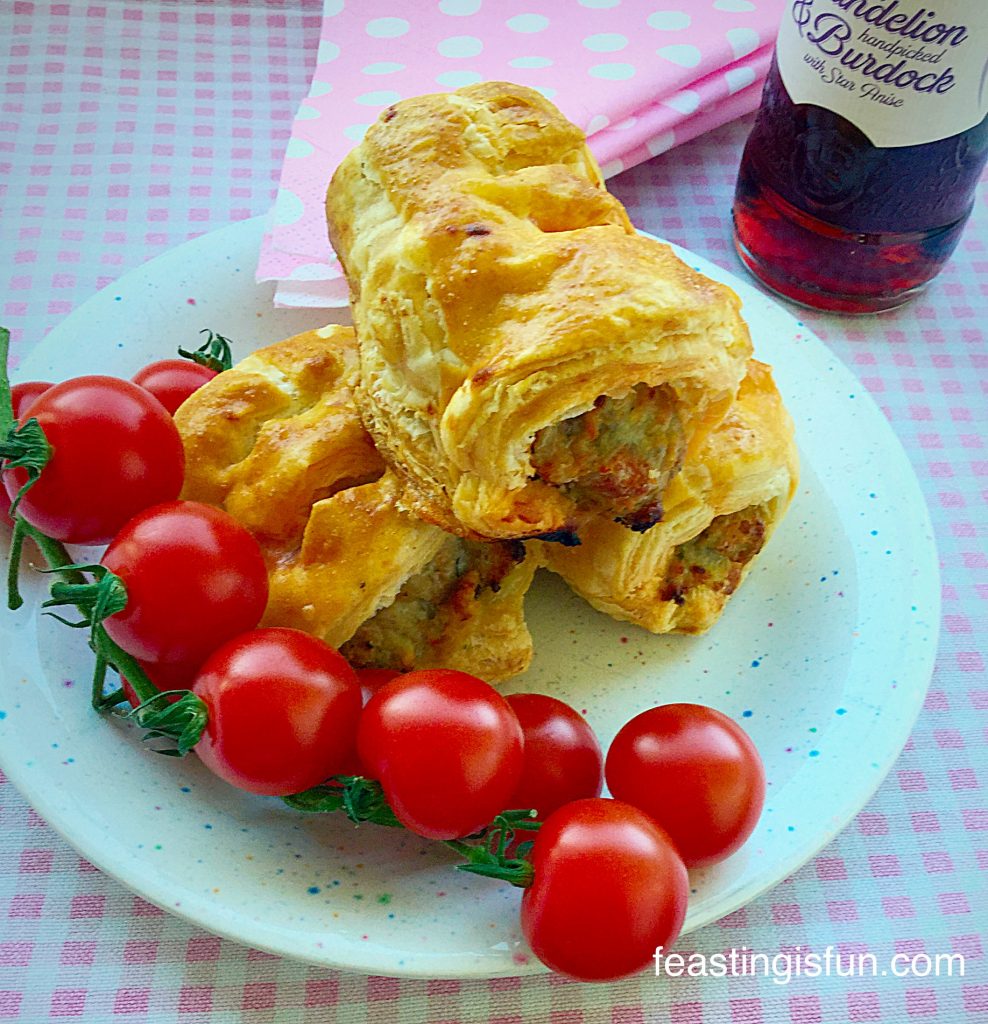
Spicy Sausage Rolls are great with a handful of cherry tomatoes off the vine.

As I spend a lot of time testing recipes and batch baking/cooking in the kitchen, the opportunity for waste can become even greater. Especially if after a few days cooking and baking I then spend the next few days in bed due to my health problems see here.

This is where the freezer becomes my best friend! Having made the Spicy Sausage Rolls on a day where I had also cooked dinner, they were in danger of getting forgotten about, boxed up in the back of the fridge. Of course we shared a couple between us to taste test them and we were not disappointed. After the photos were taken the following day, I popped the remaining sausage rolls in the freezer – keeping a couple out for our daughter and I to share for lunch.

I have no doubt that they will not stay in the freezer long, yet it saves potential waste. Which is primarily, not only good for our planet, but also our grocery budget!

Recipe: Makes 12 Spicy Sausage Rolls

350g/12oz Block of Puff Pastry all butter if possible- defrosted in the fridge overnight if frozen – I used frozen Just Rol all butter puff pastry, alternatively use my fantastic Perfect Butter Shortcrust Pastry recipe.

454g/1lb Pork Sausagemeat – good quality at least 85% Pork, any casings removed

50g/2oz Chorizo Sausage – casing removed

1 Jalapeño Chilli Pepper

1 Medium Free Range Egg – I use Burford Browns Eggs from Clarence Court

Method: Preheat the oven to 200C/180C fan, gas mark 6, 400F.

Making The Spicy Sausagemeat

  • Place the sausage meat into a bowl and add the chorizo sausage pulled into pieces.
  • Remove the seeds and membrane from the jalapeño chilli pepper and chop finely.
  • Add the chopped chilli to the bowl and squish (mix) everything together using clean hands.
Creating The Sausage Rolls

  • Roll out the puff pastry on a clean, flour dusted work top, until it is 30cm x 20cm (15″ wide by 8″ deep).
  • Trim the edges of the pastry and then divide the pastry in half width ways so that you have 2 long strips.
  • Divide the sausage meat mixture in two.
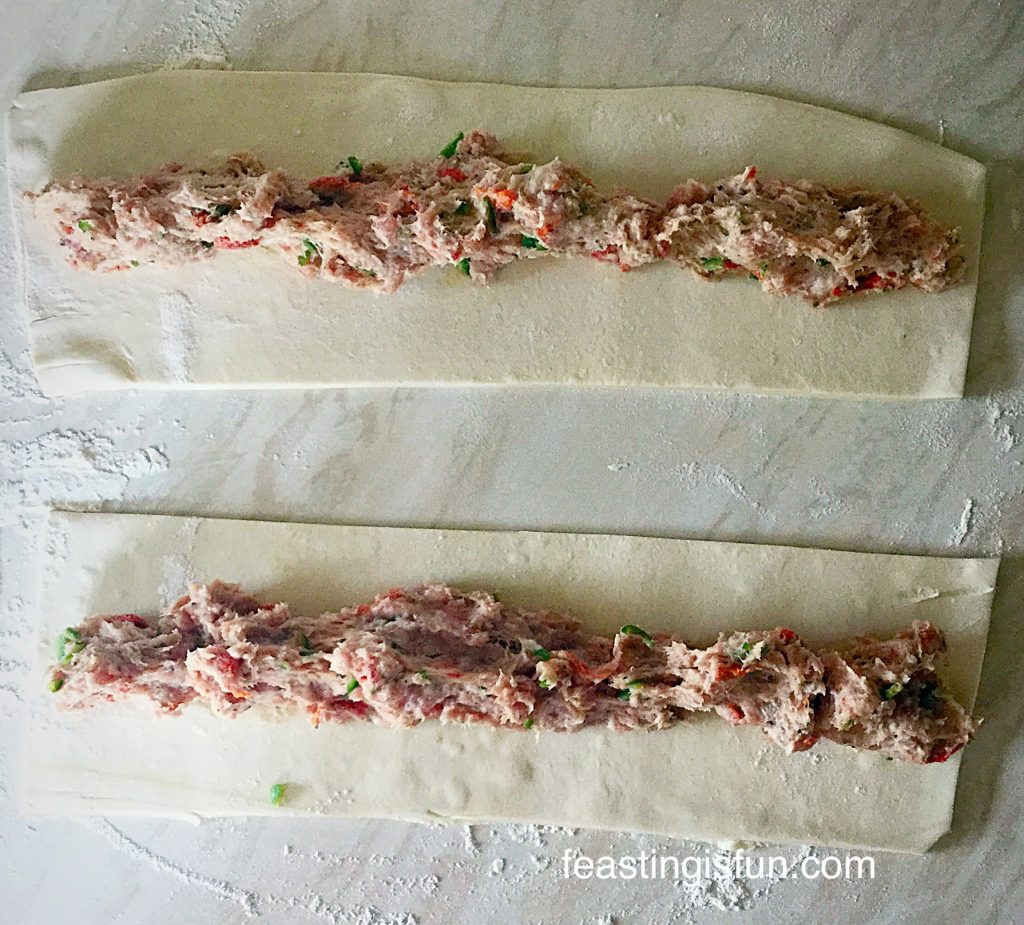
  • Evenly lay the sausage meat down the middle of each length of pastry.
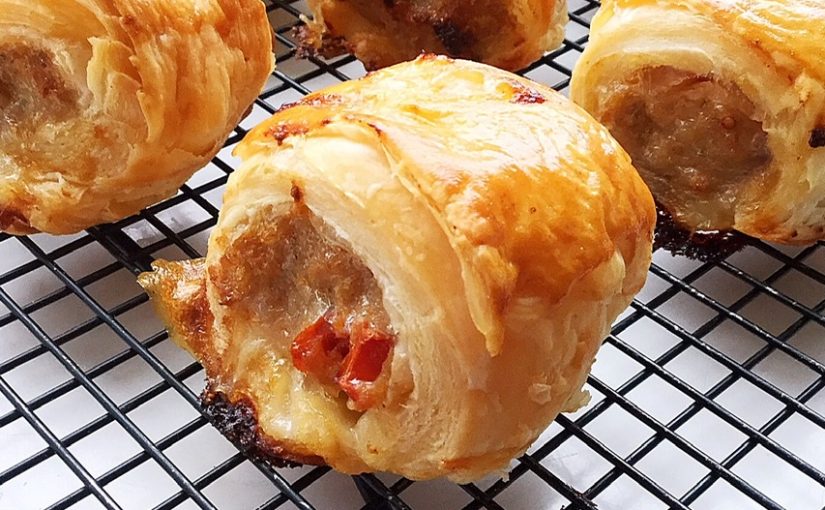
You can see the flecks of green chilli and red chorizo throughout the sausage meat.
  • Crack an egg into a small bowl and whisk with a fork.
  • Using a pastry brush, brush beaten egg down the length of the pastry, either side of the sausage meat.
  • Bring the top edge of the pastry evenly over the sausage meat and continue rolling so that the pastry overlaps (and seals) underneath the sausage rolls.
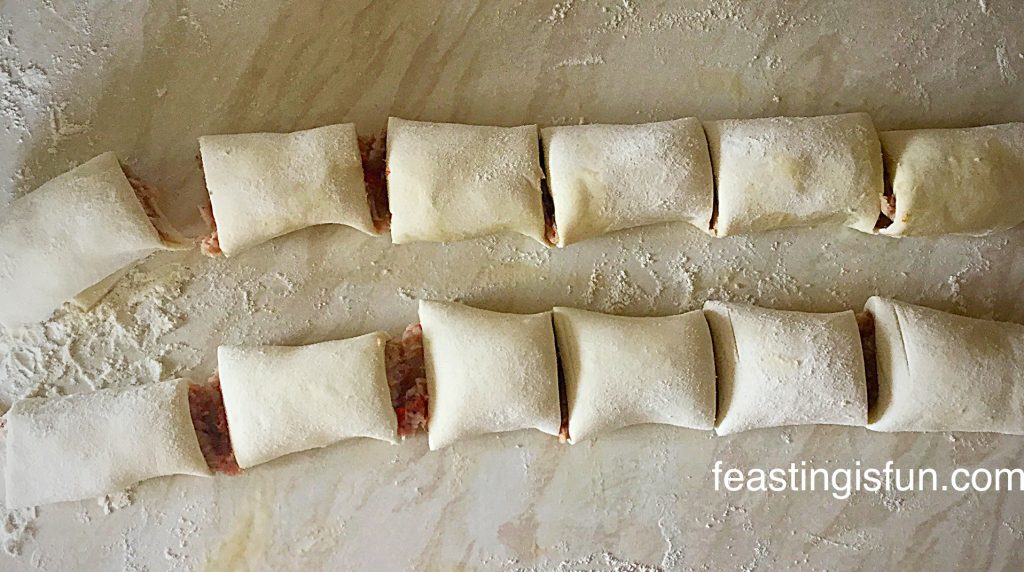
  • Using a sharp knife, cut each long roll in half and then cut each half into 3 even sized sausage rolls. In total you will have 12 medium sized sausage rolls.
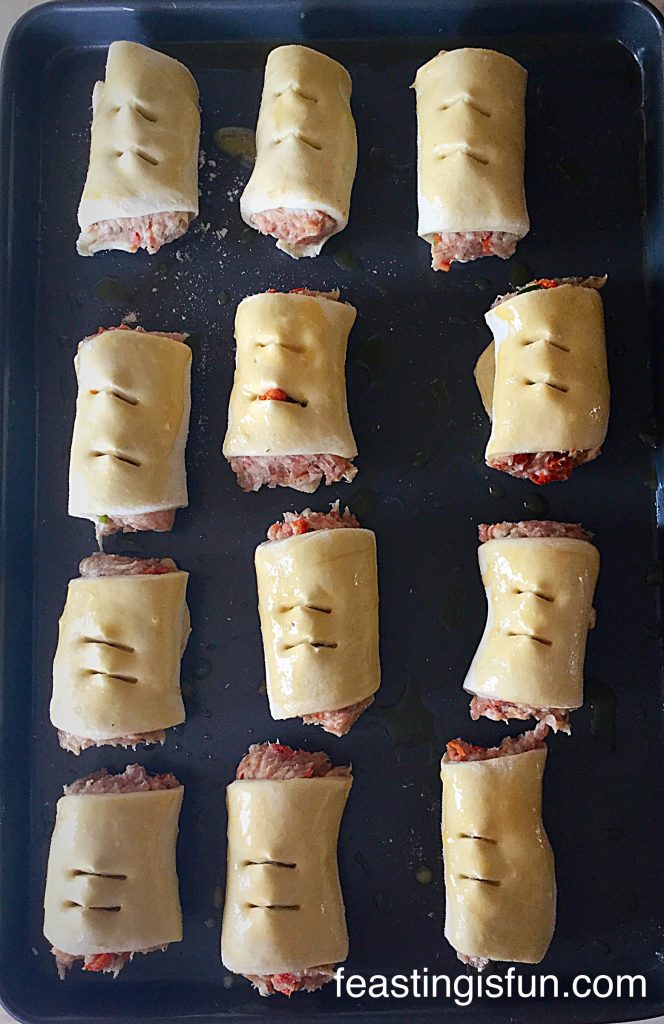
Spicy Sausage Rolls ready for their egg wash and to be baked!
  • Place the sausage rolls on to a lightly oiled baking tray.
  • Brush each sausage roll with the beaten egg – this will give the pastry a wonderful, crisp, golden finish once baked.
  • Finally using a sharp, pointed pair of scissors, snip the top of each sausage roll twice – as can be seen in the picture below.
Spicy Sausage Rolls ready for the oven.

Baking The Spicy Sausage Rolls

  • Place the baking tray into the middle/top part of the oven and bake for 25-30 minutes.
  • The Spicy Sausage Rolls are cooked when the pastry is flaky and golden brown all over. If in doubt cut a sausage roll in half, the meat should be cooked all the way through.
  • Once baked remove the sausage rolls from the oven.
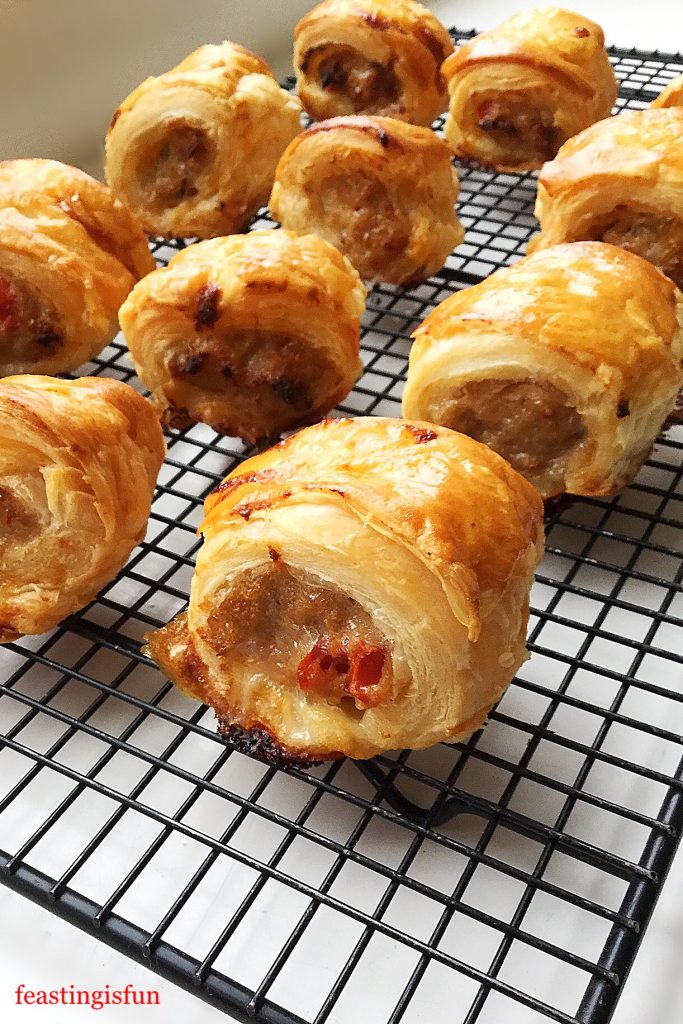
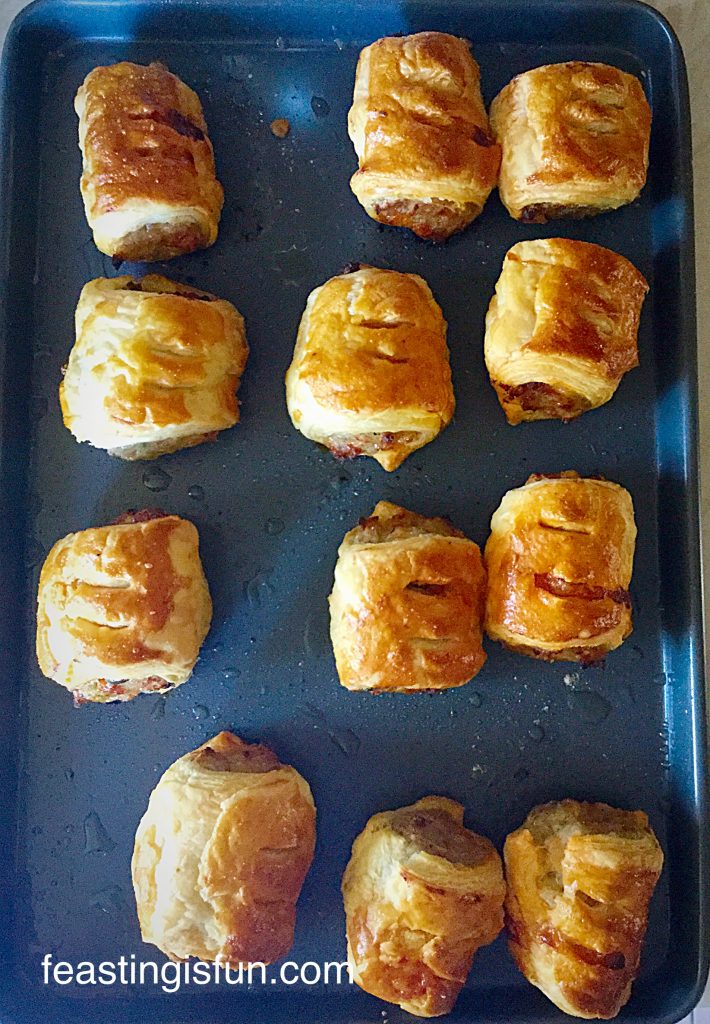
Golden, flaky, hot Spicy Sausage Rolls fresh from the oven.
  • Transfer the baked sausage rolls to a cooling rack and allow to cool slightly before trying!
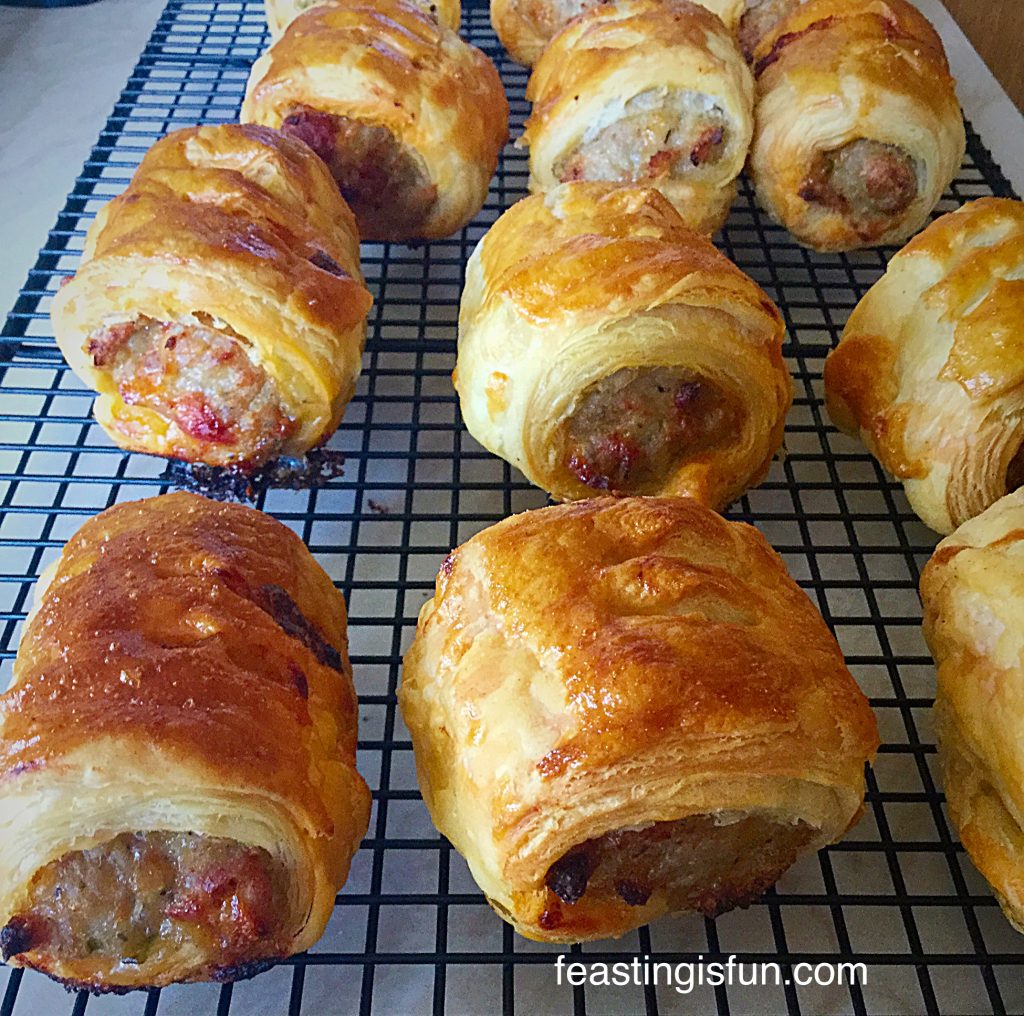
Spicy Sausage Rolls that smell so delicious and inviting.

Perfect eaten hot or cold, with a good chutney, some cherry tomatoes and a glass of something refreshing.

To store, allow to cool completely and then pack into an airtight container and keep in the fridge for up to 5 days. Alternatively, as I did, pack into a freezer bag or box, label and keep in the freezer for one month. Defrost thoroughly and reheat until piping hot in a moderate oven.

Serving The Sausage Rolls

If fresh puff pastry has been used, not frozen, these Spicy Sausage Rolls can also be frozen uncooked. Place some baking parchment on a baking tray, put the sausage rolls on top and then place into the freezer and freeze until solid. Once frozen pack into freezer boxes, separating each layer with baking parchment. To cook, remove as many sausage rolls as required, place onto an oiled baking tray and bake in a preheated oven as before. The sausage rolls will take approximately 45 minutes to bake from frozen. This can be particularly handy over the Christmas holiday period.

Spicy Sausage Rolls
Spicy Sausage Rolls perfect for a Christmas buffet, or any buffet!!

Sorry to mention Christmas, however, in our house a buffet is incomplete without a plate of hot sausage rolls. This year we can really turn the heat up!

Obviously you can control how spicy you make these, as well as the size. I would perhaps make them a little smaller for a buffet spread.

If you have loved these Spicy Sausage Rolls as much as we have you may also enjoy these other recipes:

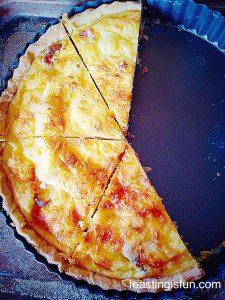
Quiche Lorraine

Spicy Sausage Rolls
Quiche Lorraine bacon, cheddar and egg tart.

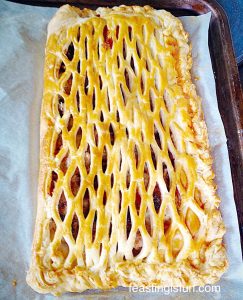
Sausage Plait With A Twist

Spicy Sausage Rolls
Sausage Plait With A Twist

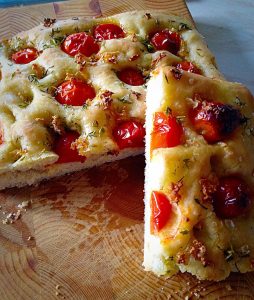
Tomato Thyme Garlic Focaccia Bread

Spicy Sausage Rolls
Tomato Thyme Garlic Focaccia Bread

If you think about it, a buffet is really an indoor picnic!

Who doesn’t love unloading a picnic hamper or walking around a buffet table tasting little morsels of yummy different foods. We have a daughter who would happily eat from a buffet table/picnic hamper most days of the year.

The sun is blazing as I write up this post. Whether you make and bake during the sunshine or snow, have fun feasting with friends, family and neighbours.

Sammie xx