Double Cherry Drizzle Oat Bars

Share
Facebooktwitterpinterestlinkedintumblr

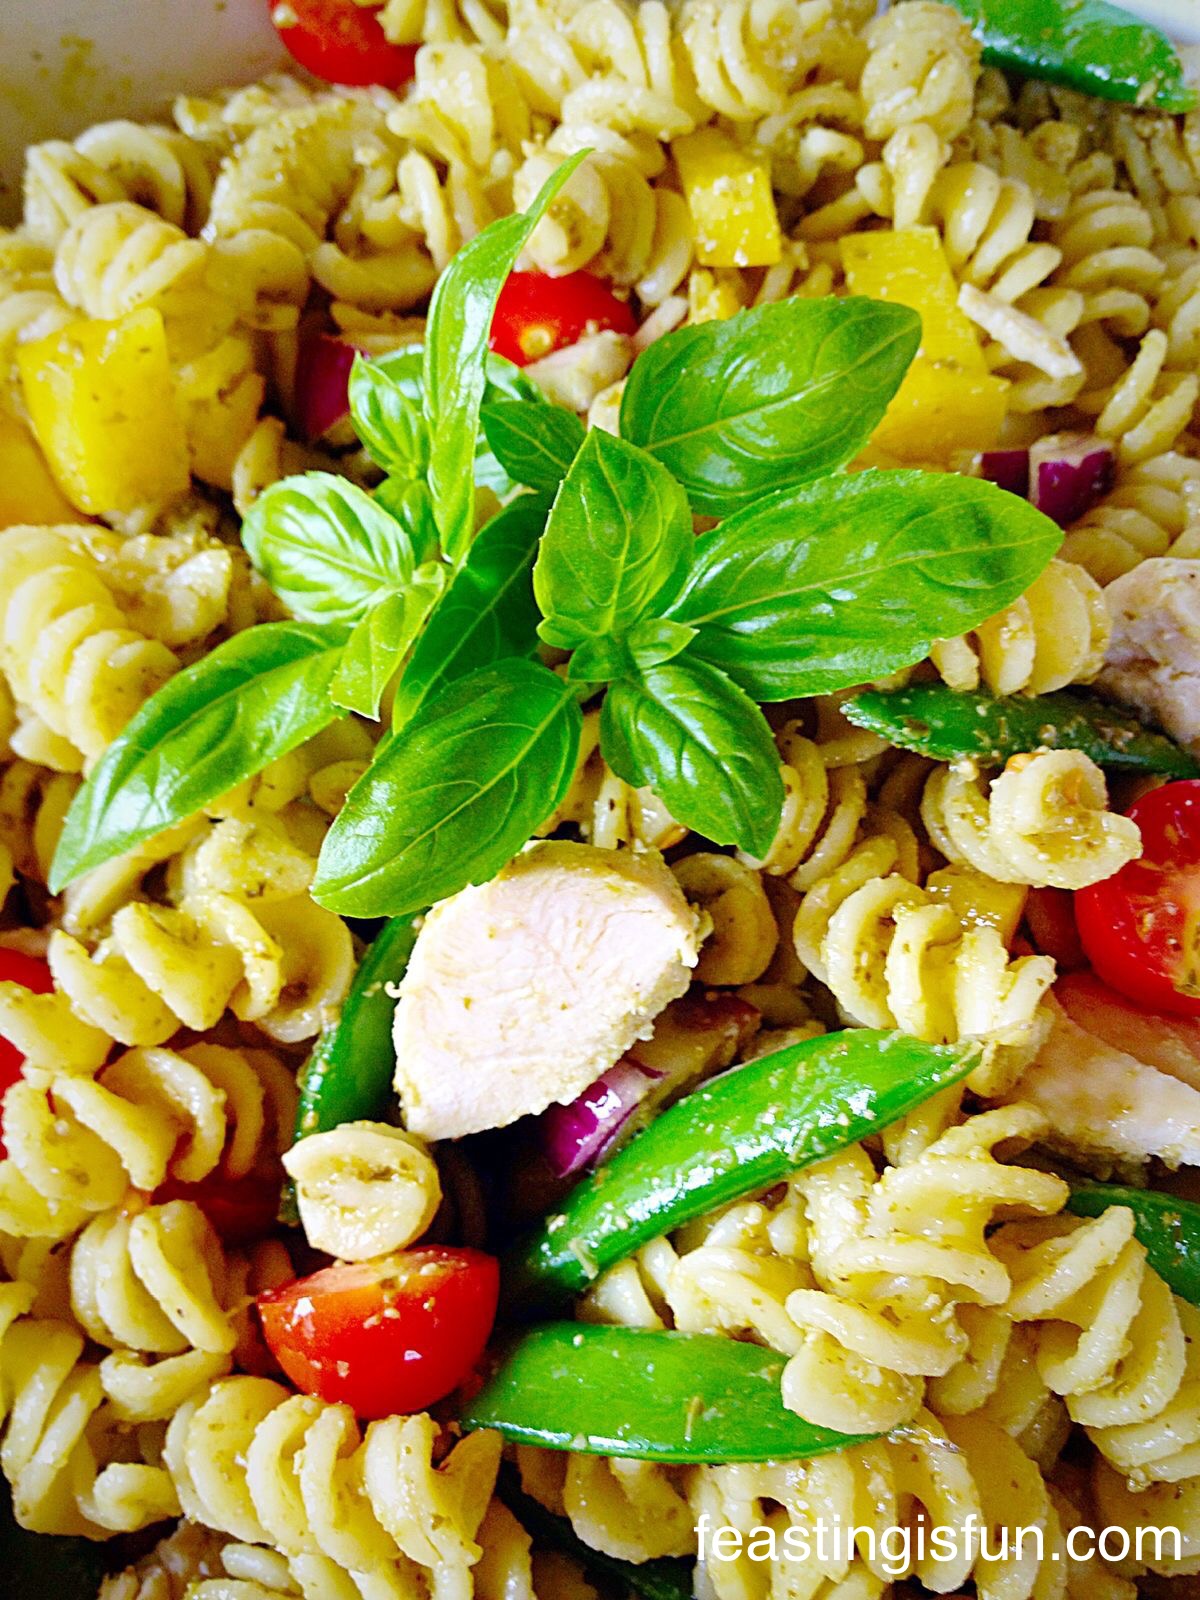
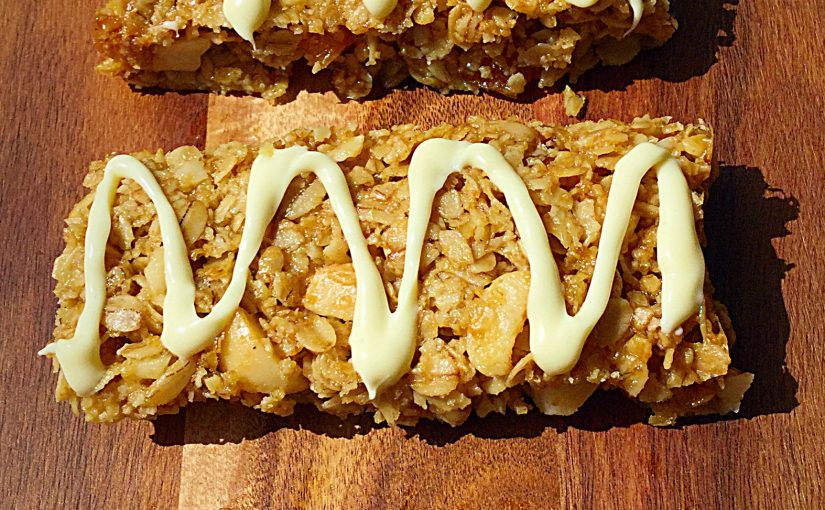
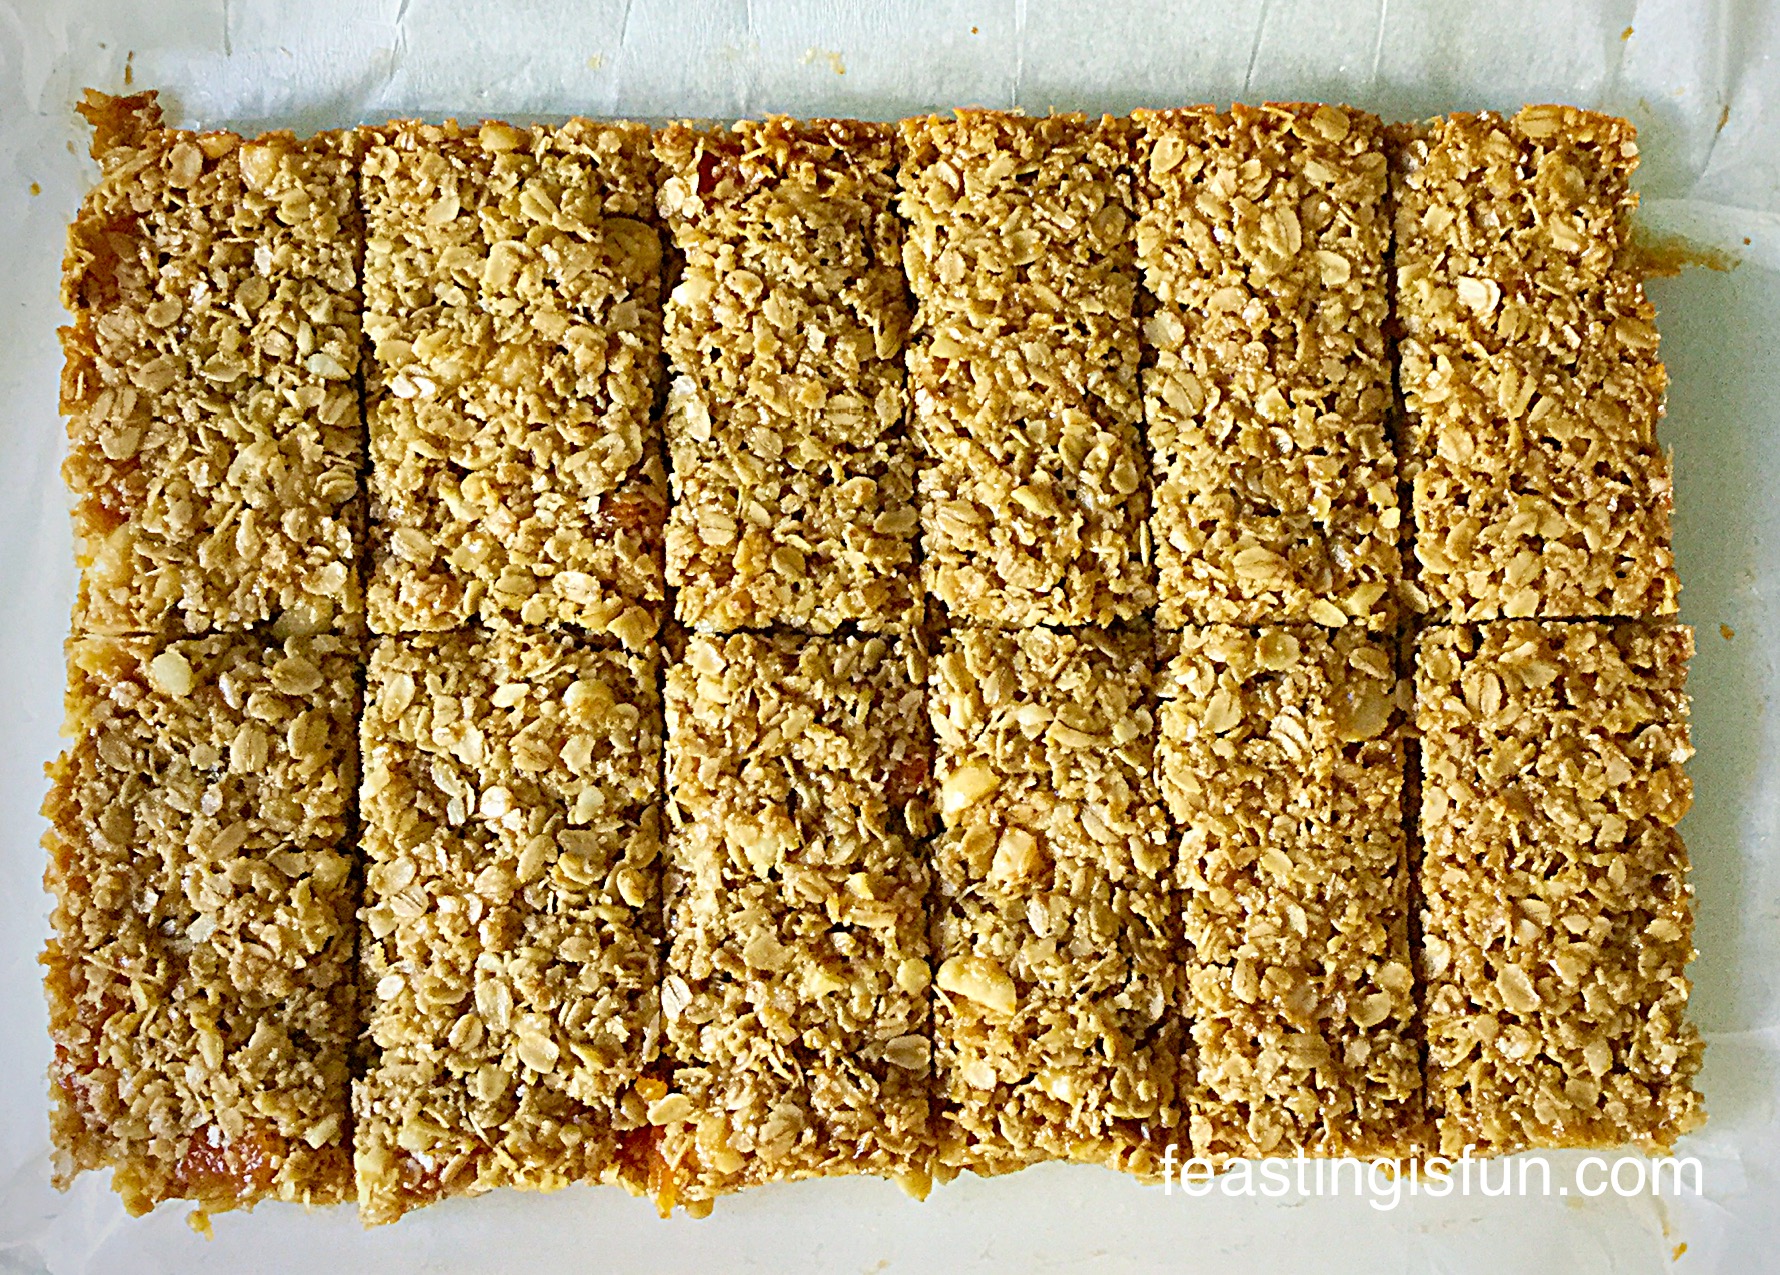
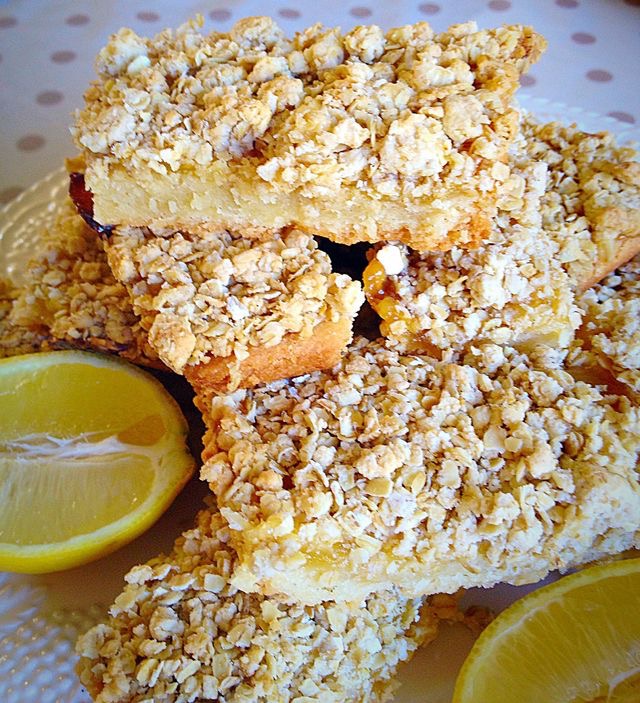
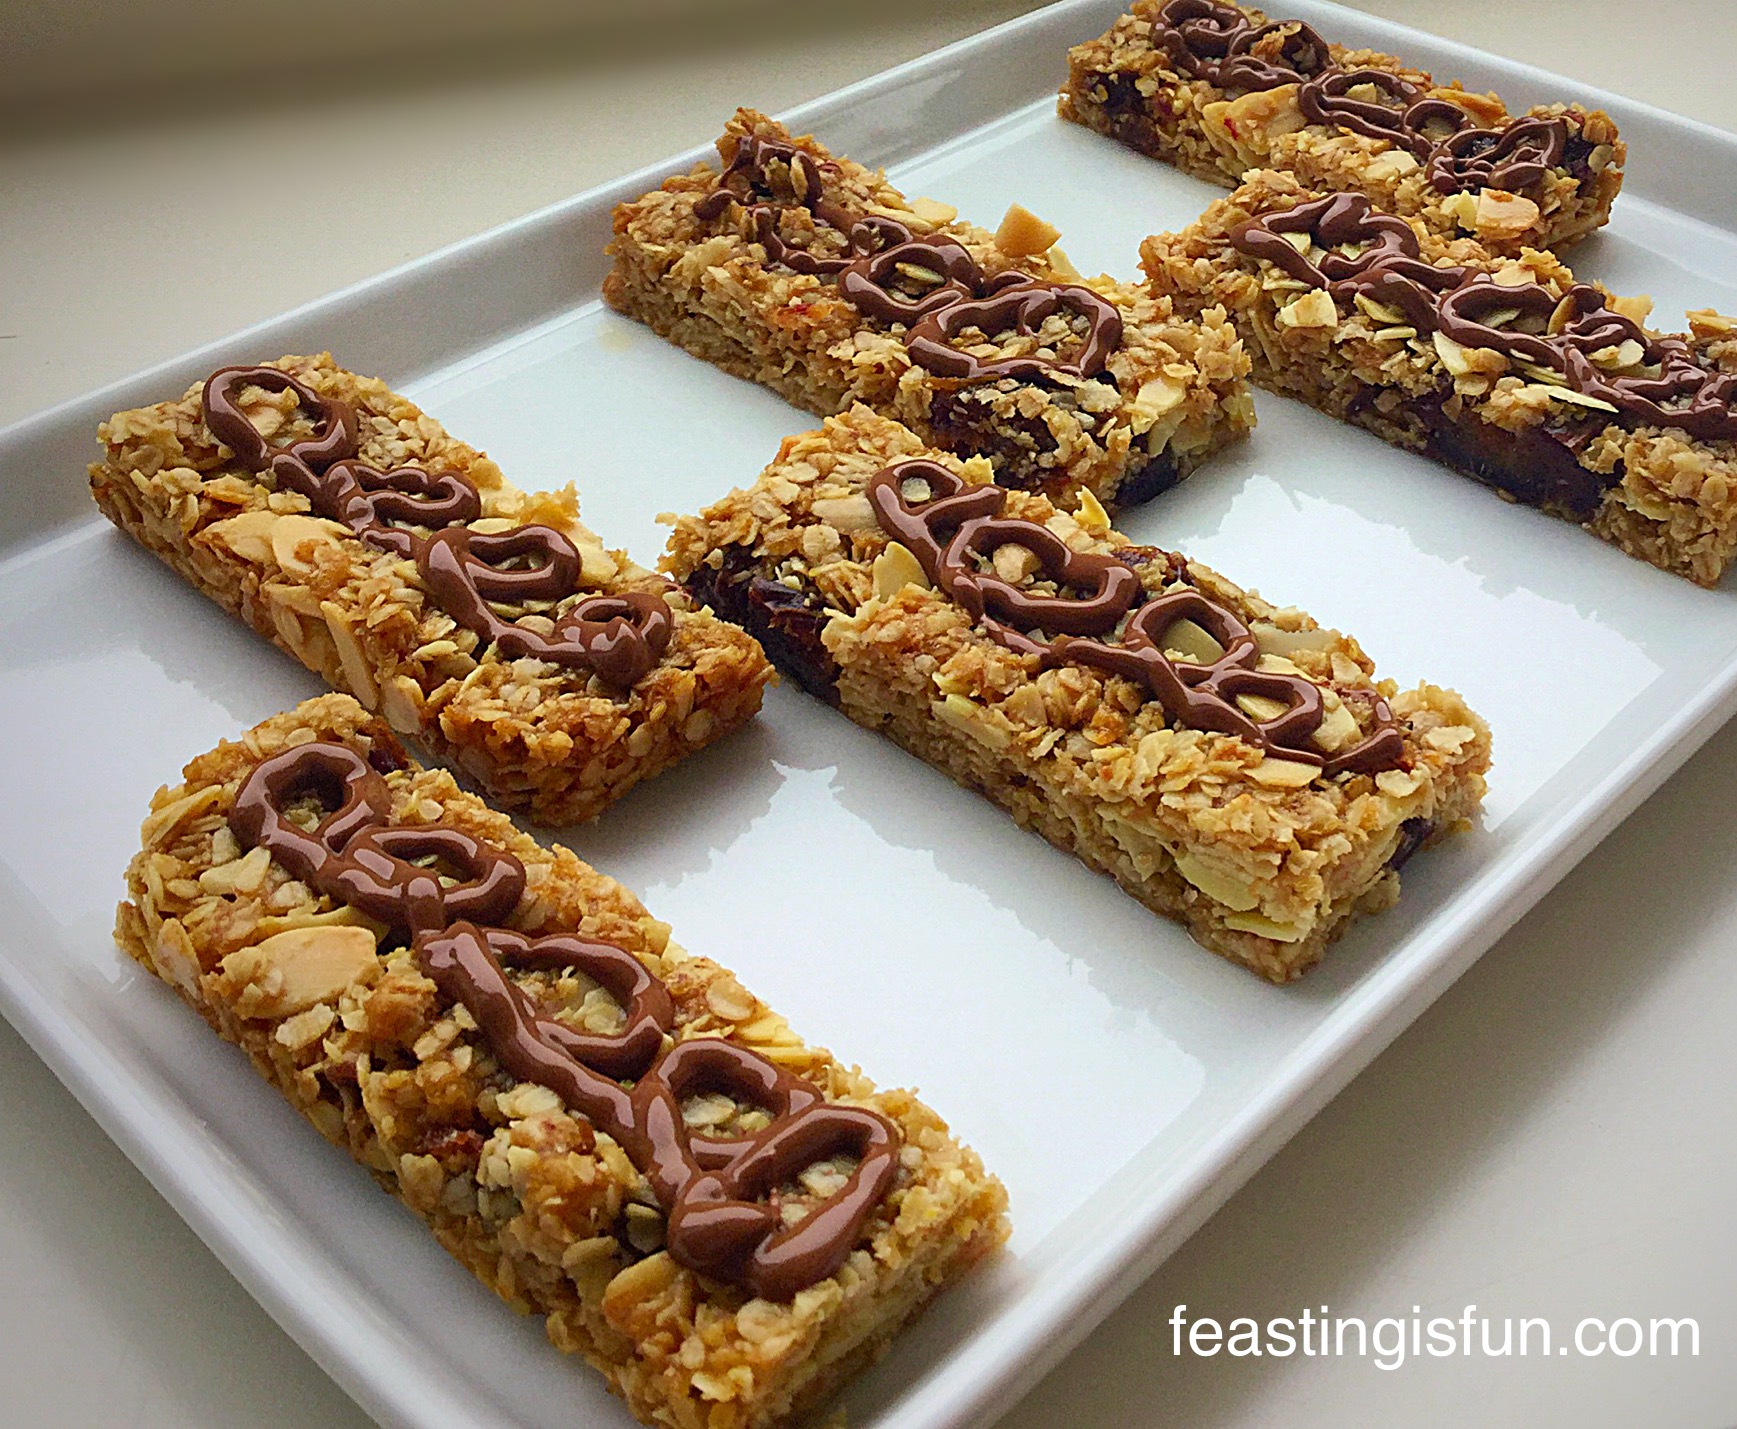
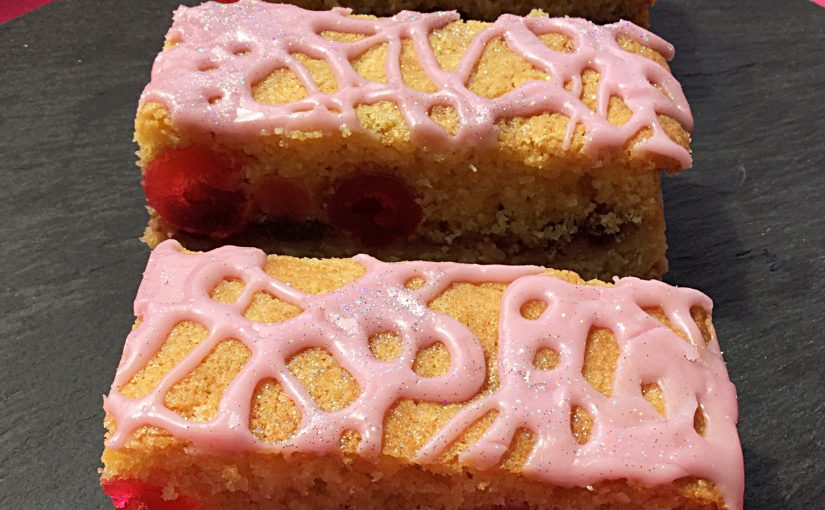
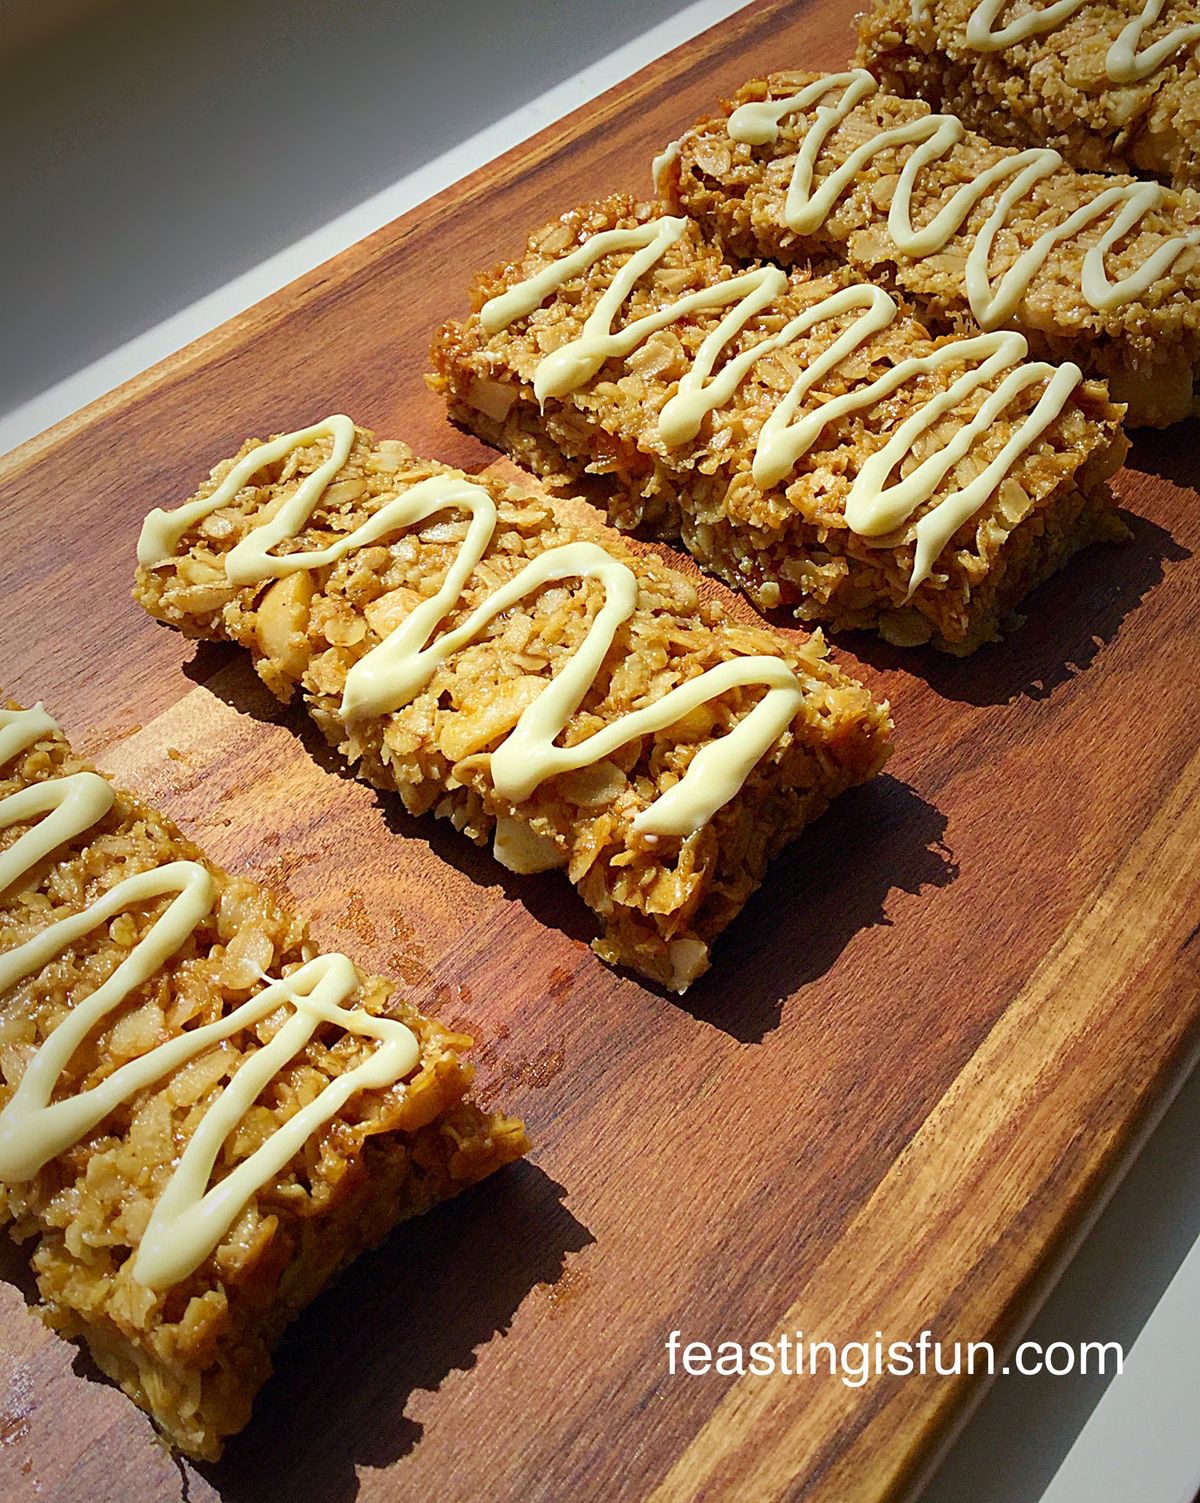
Hi lovelies, thank you so much for stopping by and taking a look at what I’ve been cooking up lately. While the sun is still shining and the sky a most glorious blue colour, my mind is once again on portable food. Picnics, packed lunches, outdoor parties, or even just something to have mid morning with a cup of coffee in the garden. May I present these Double Cherry Drizzle Oat Bars!

FF Double Cherry Drizzle Oat Bars
Double Cherry Drizzle Oat Bars swirly, sparkly deliciousness.

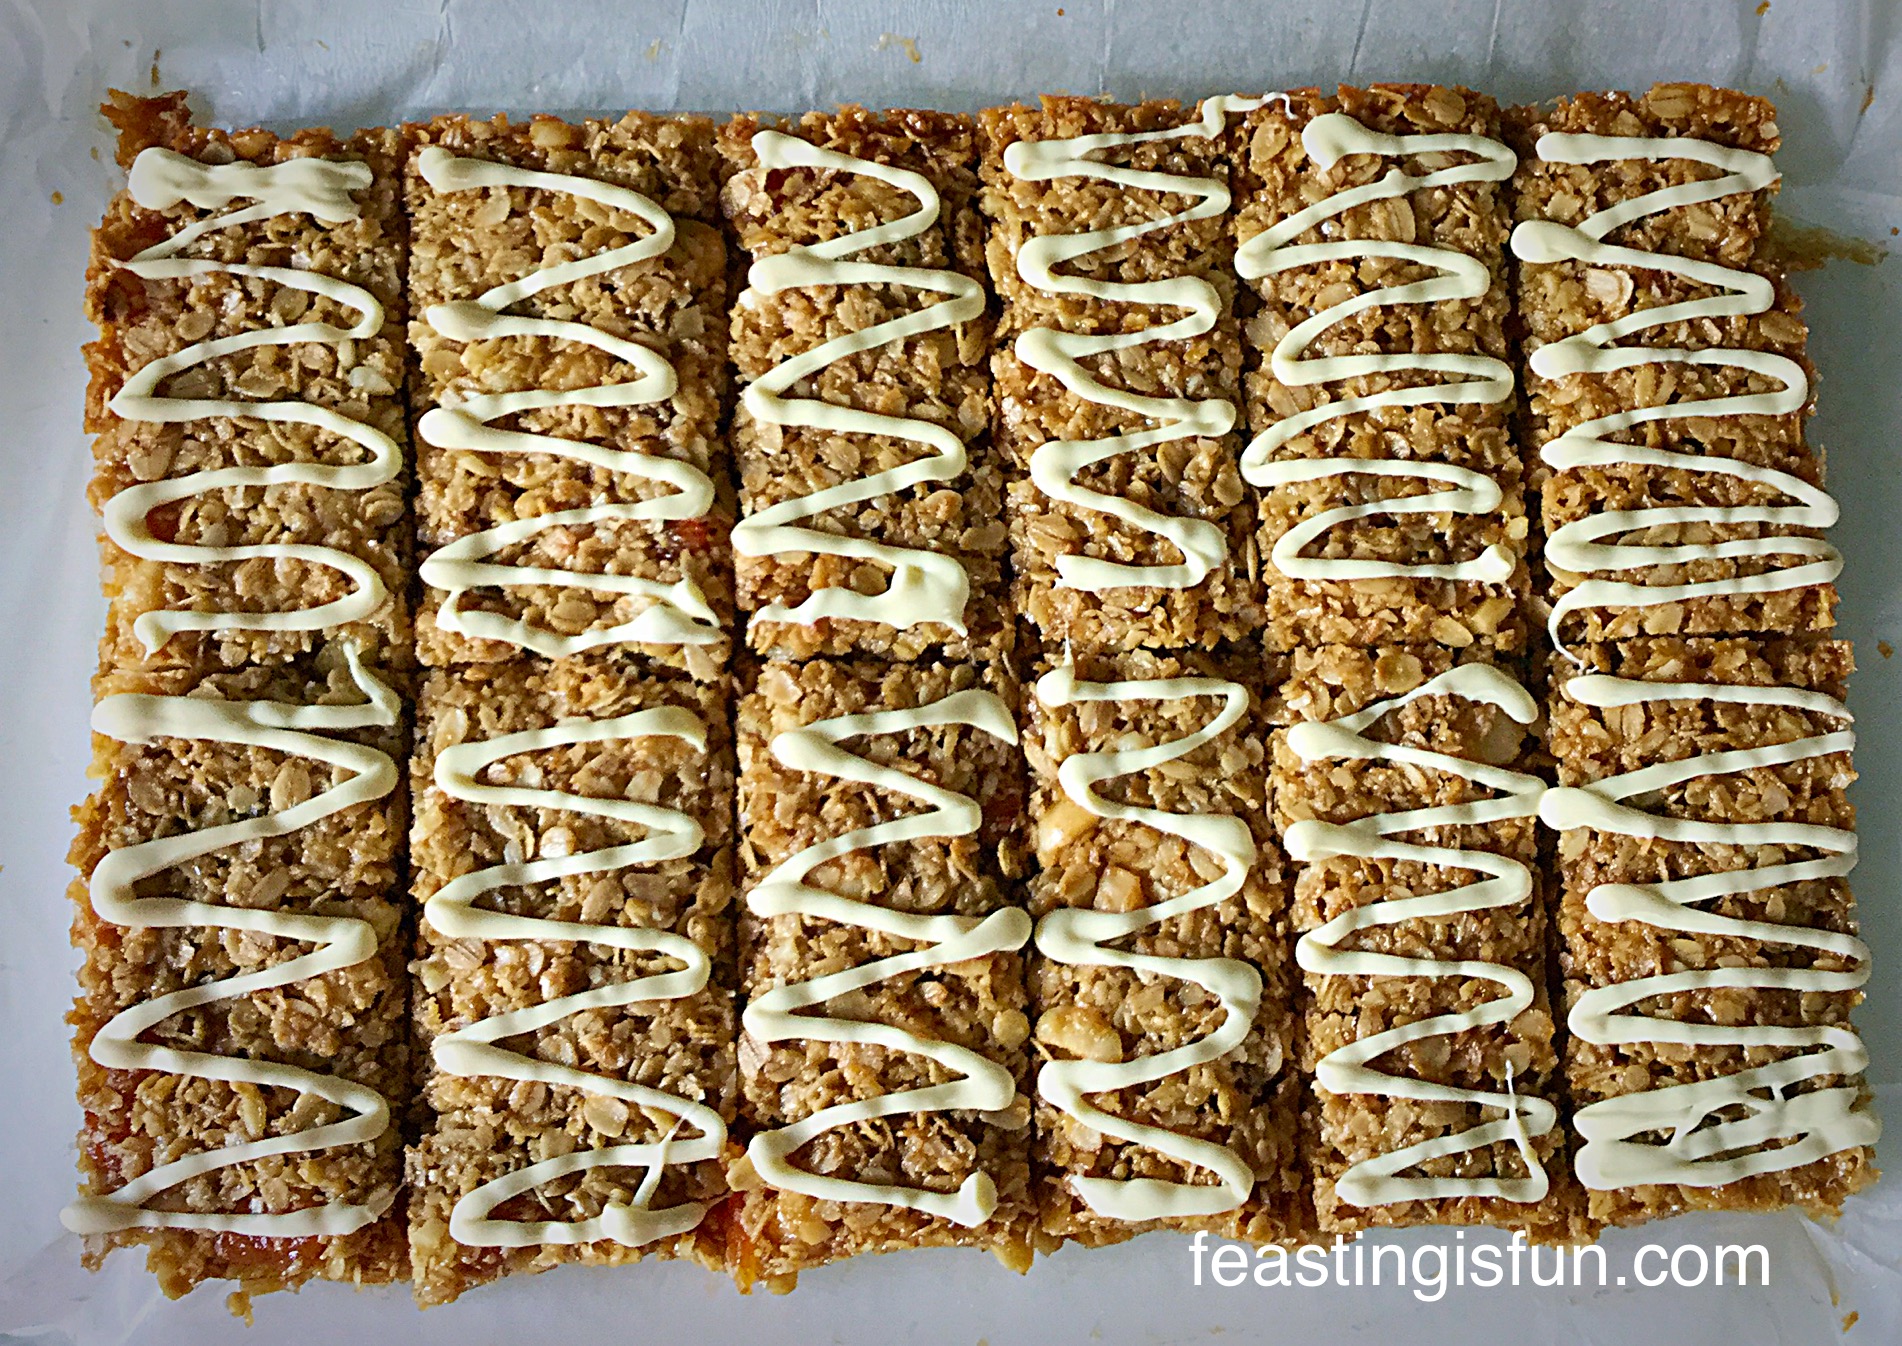
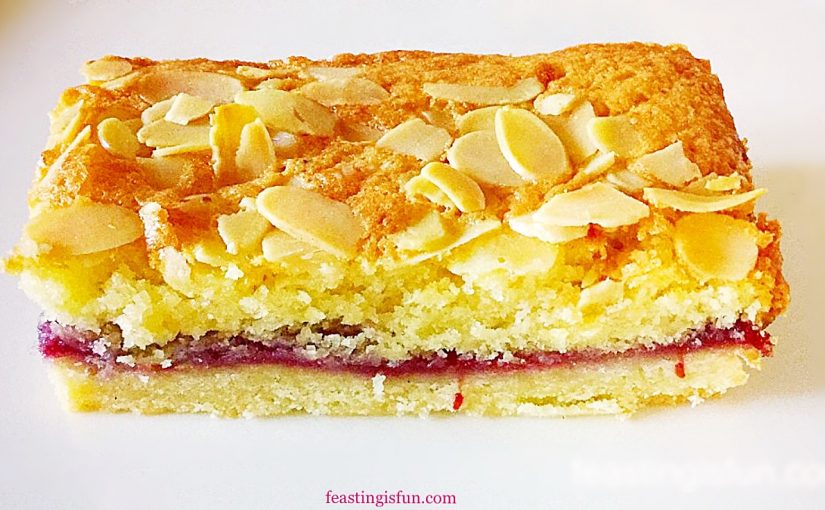
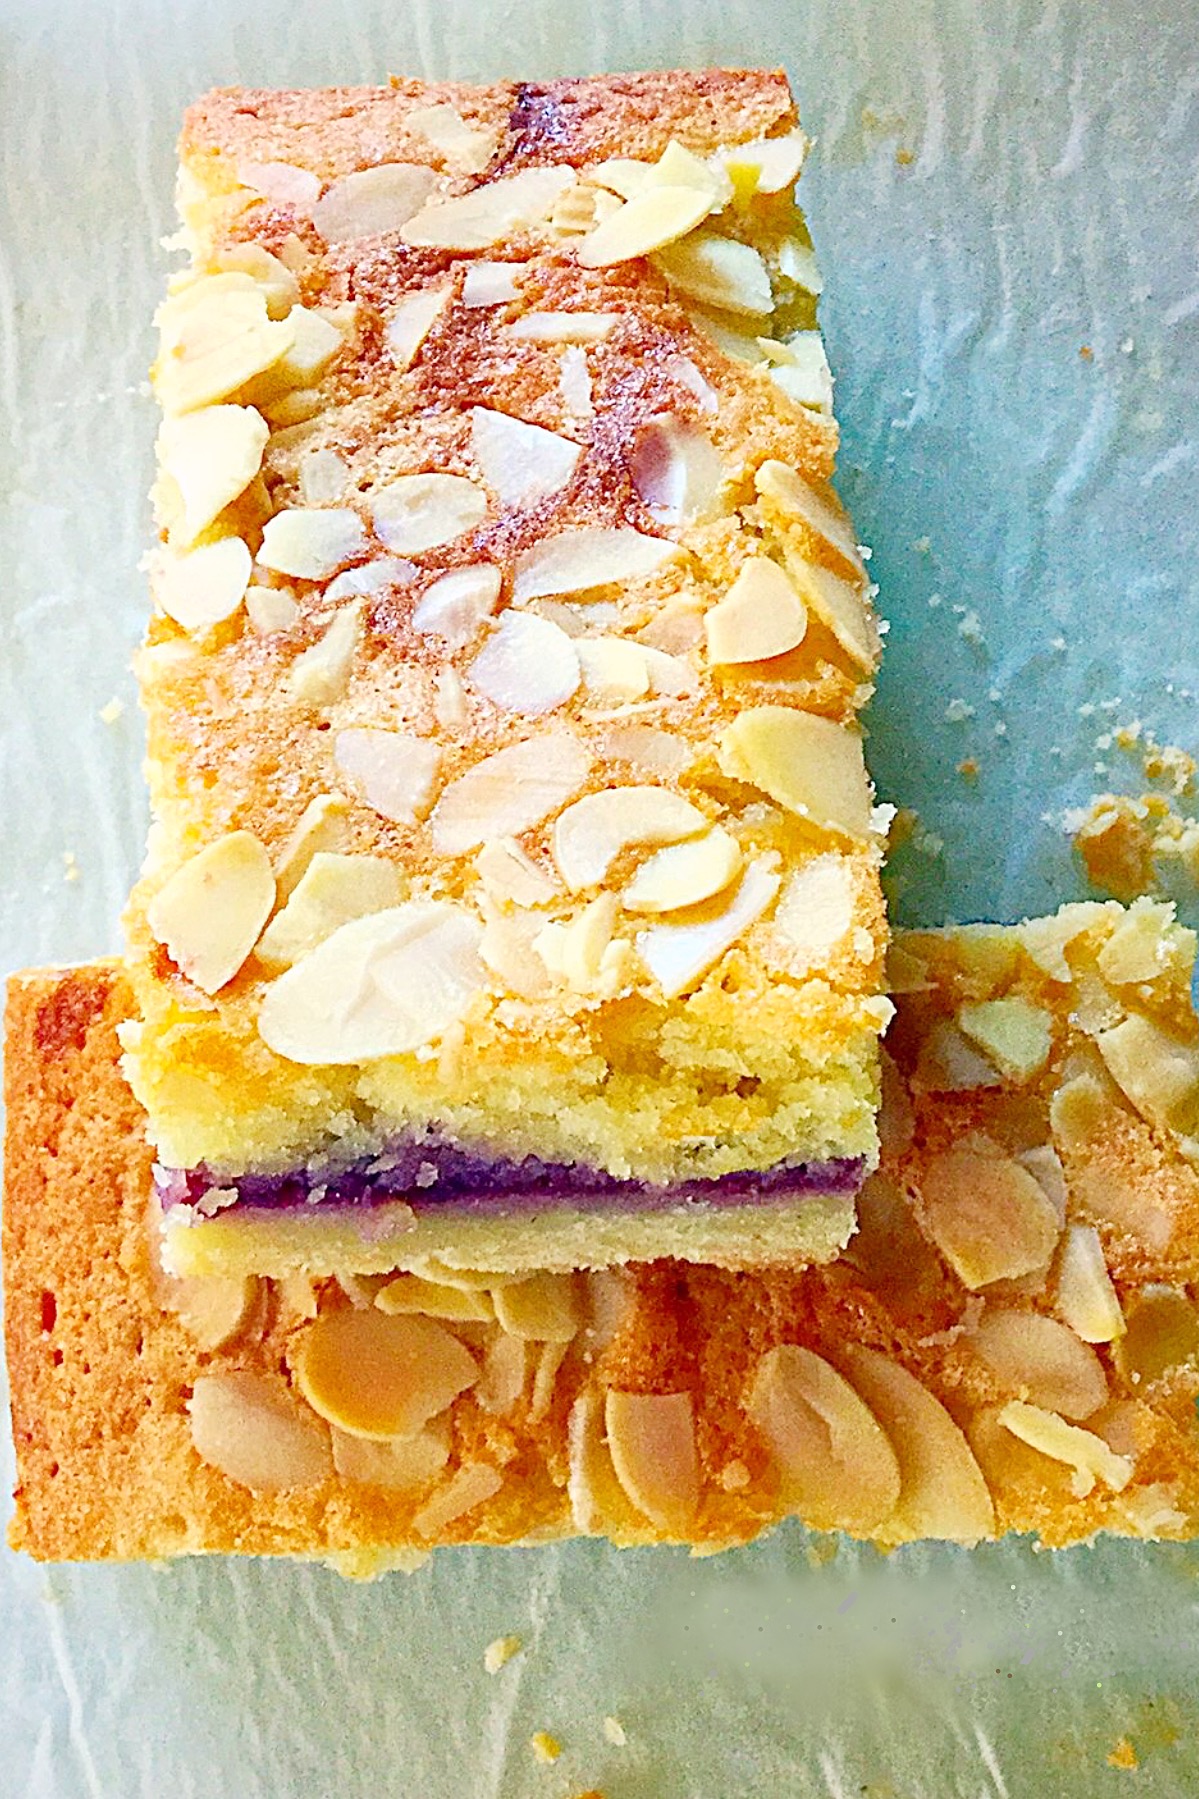
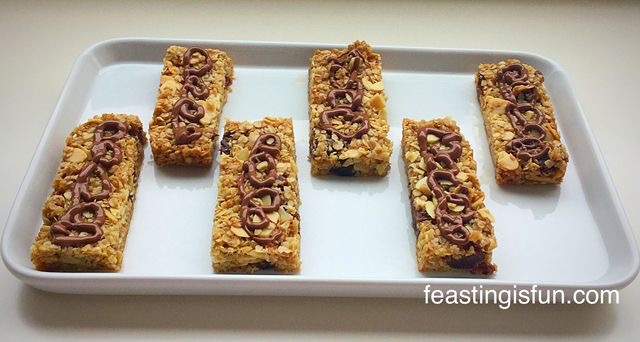
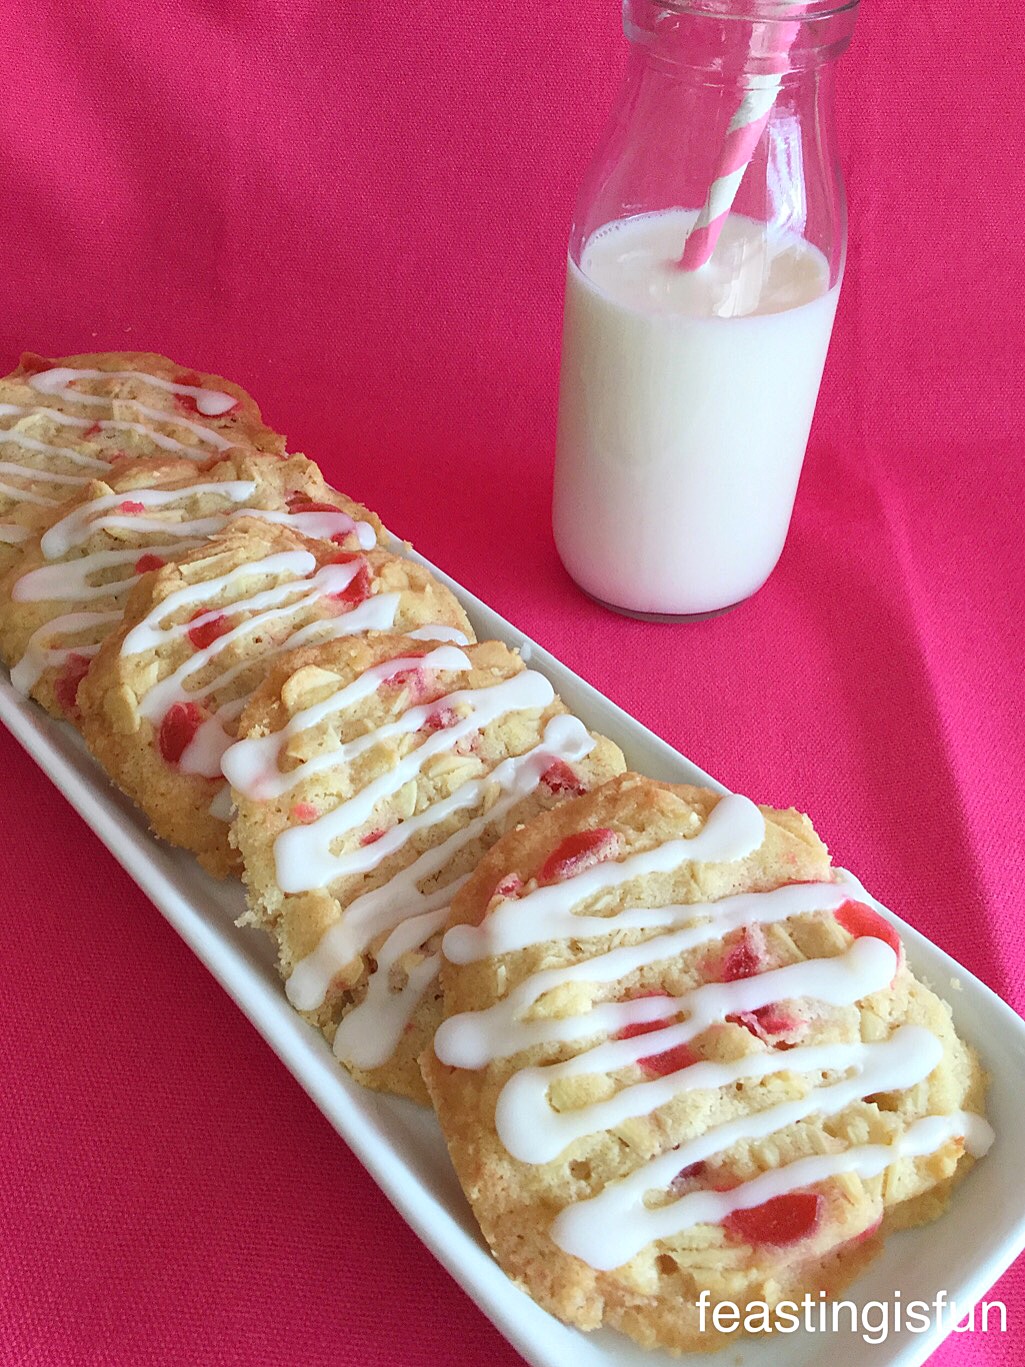
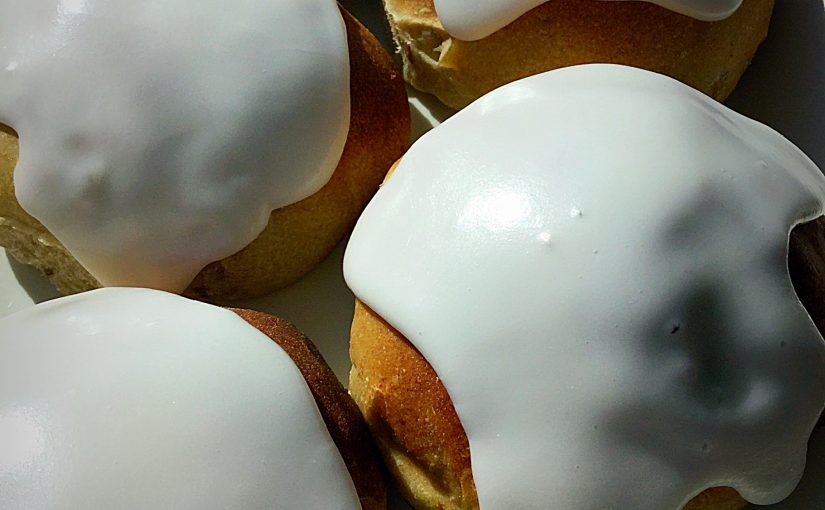
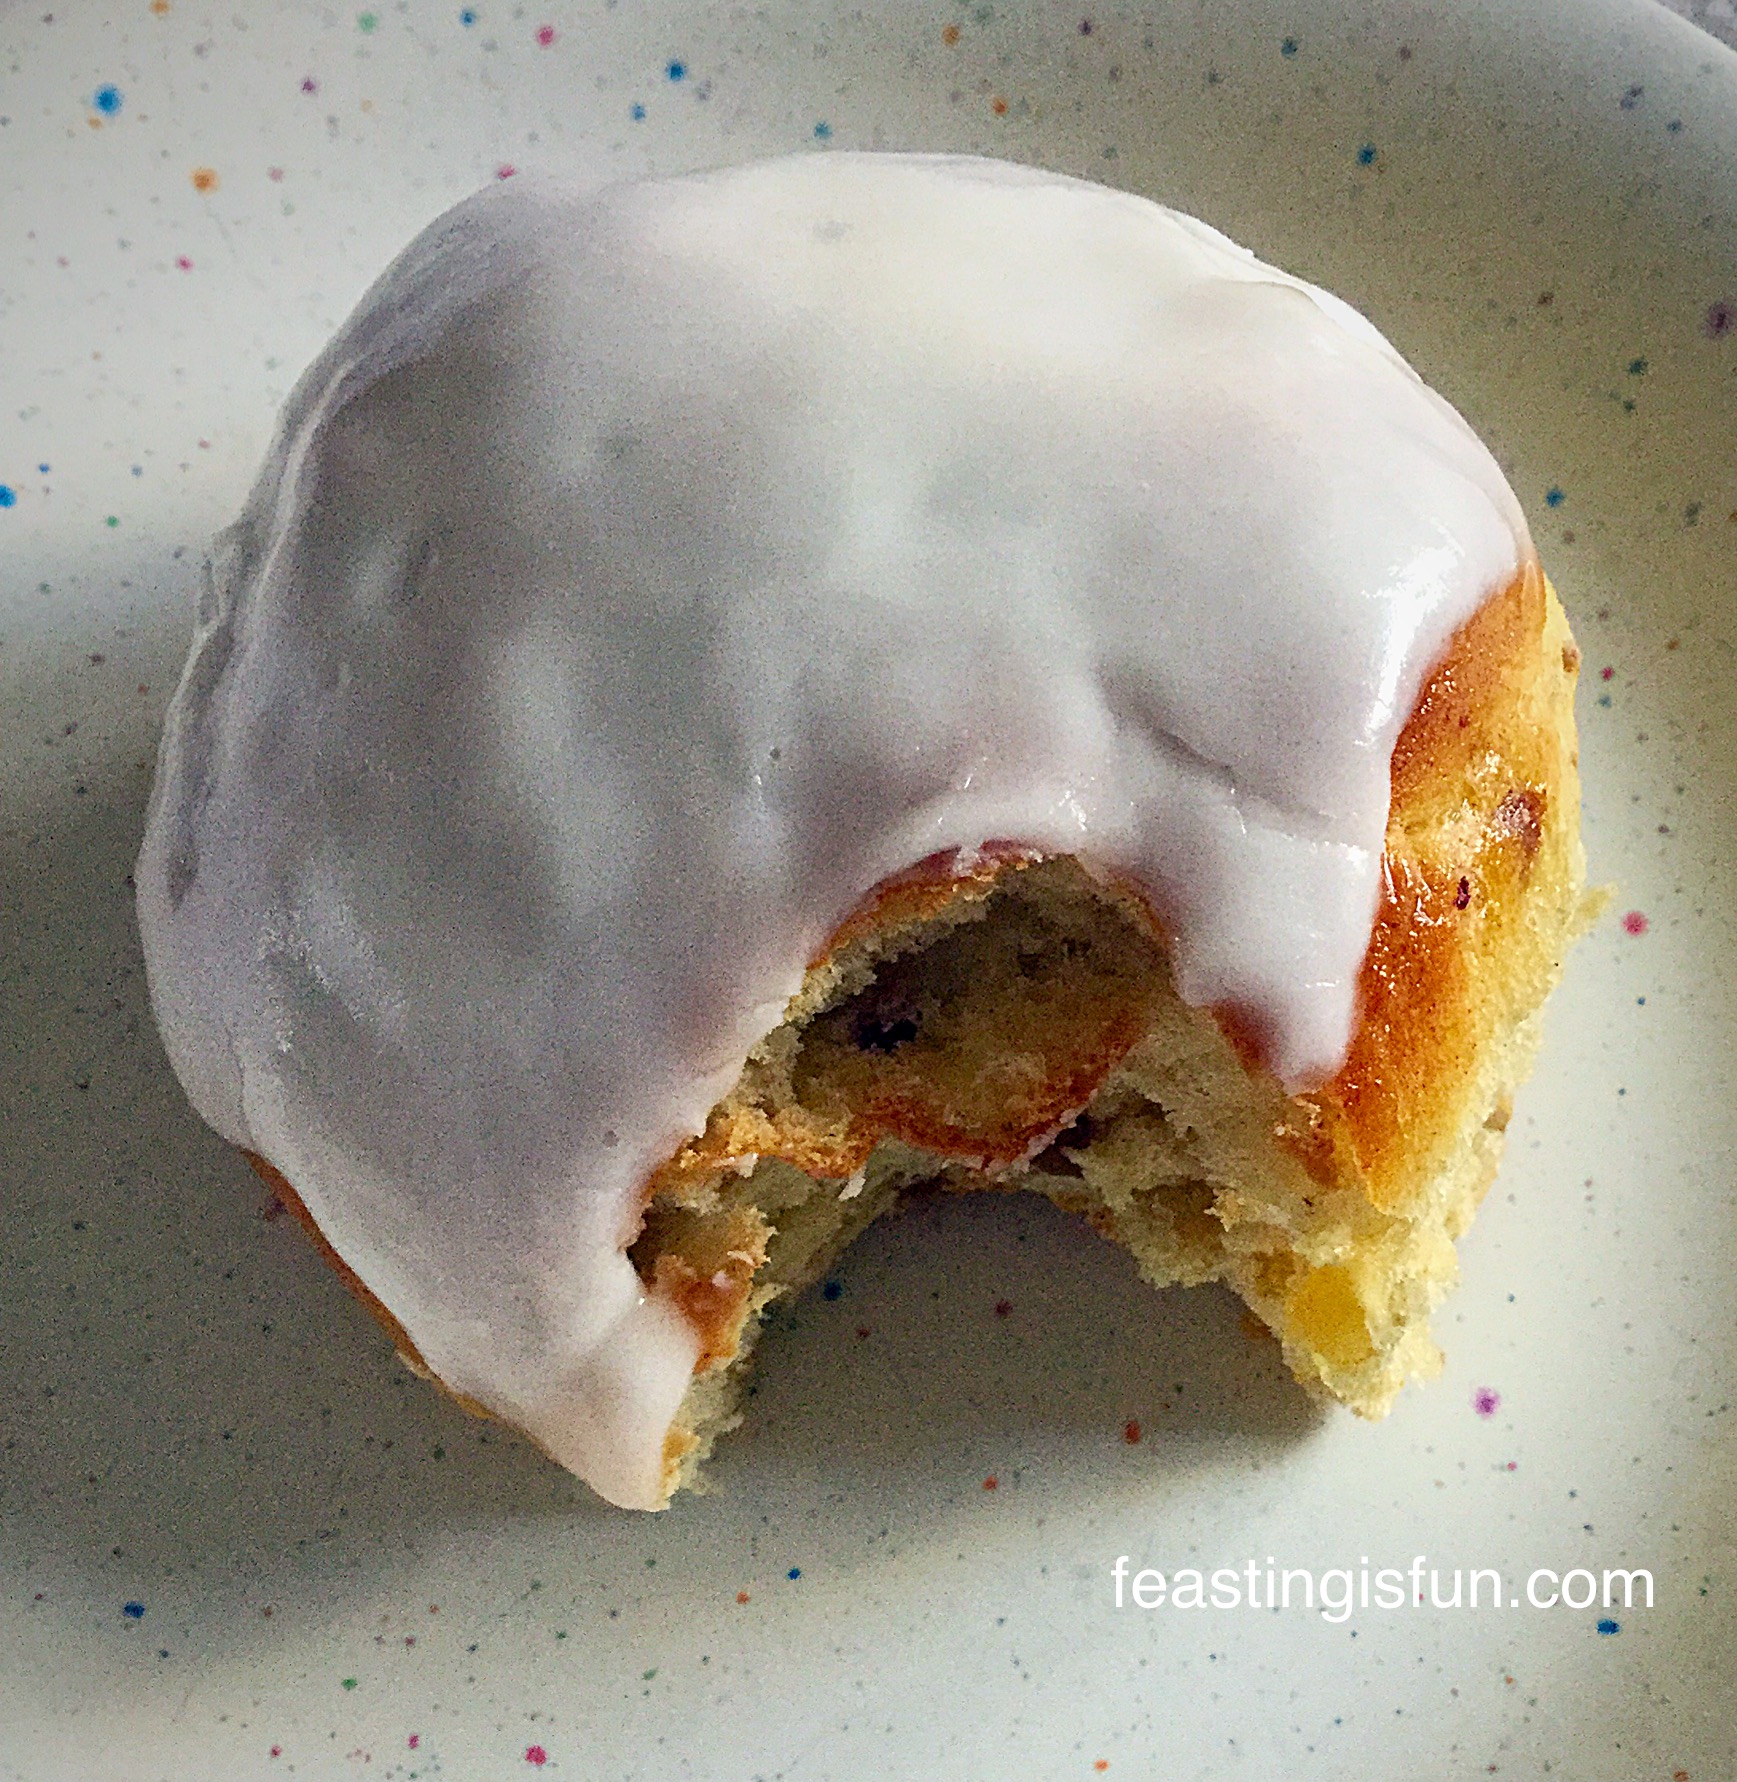
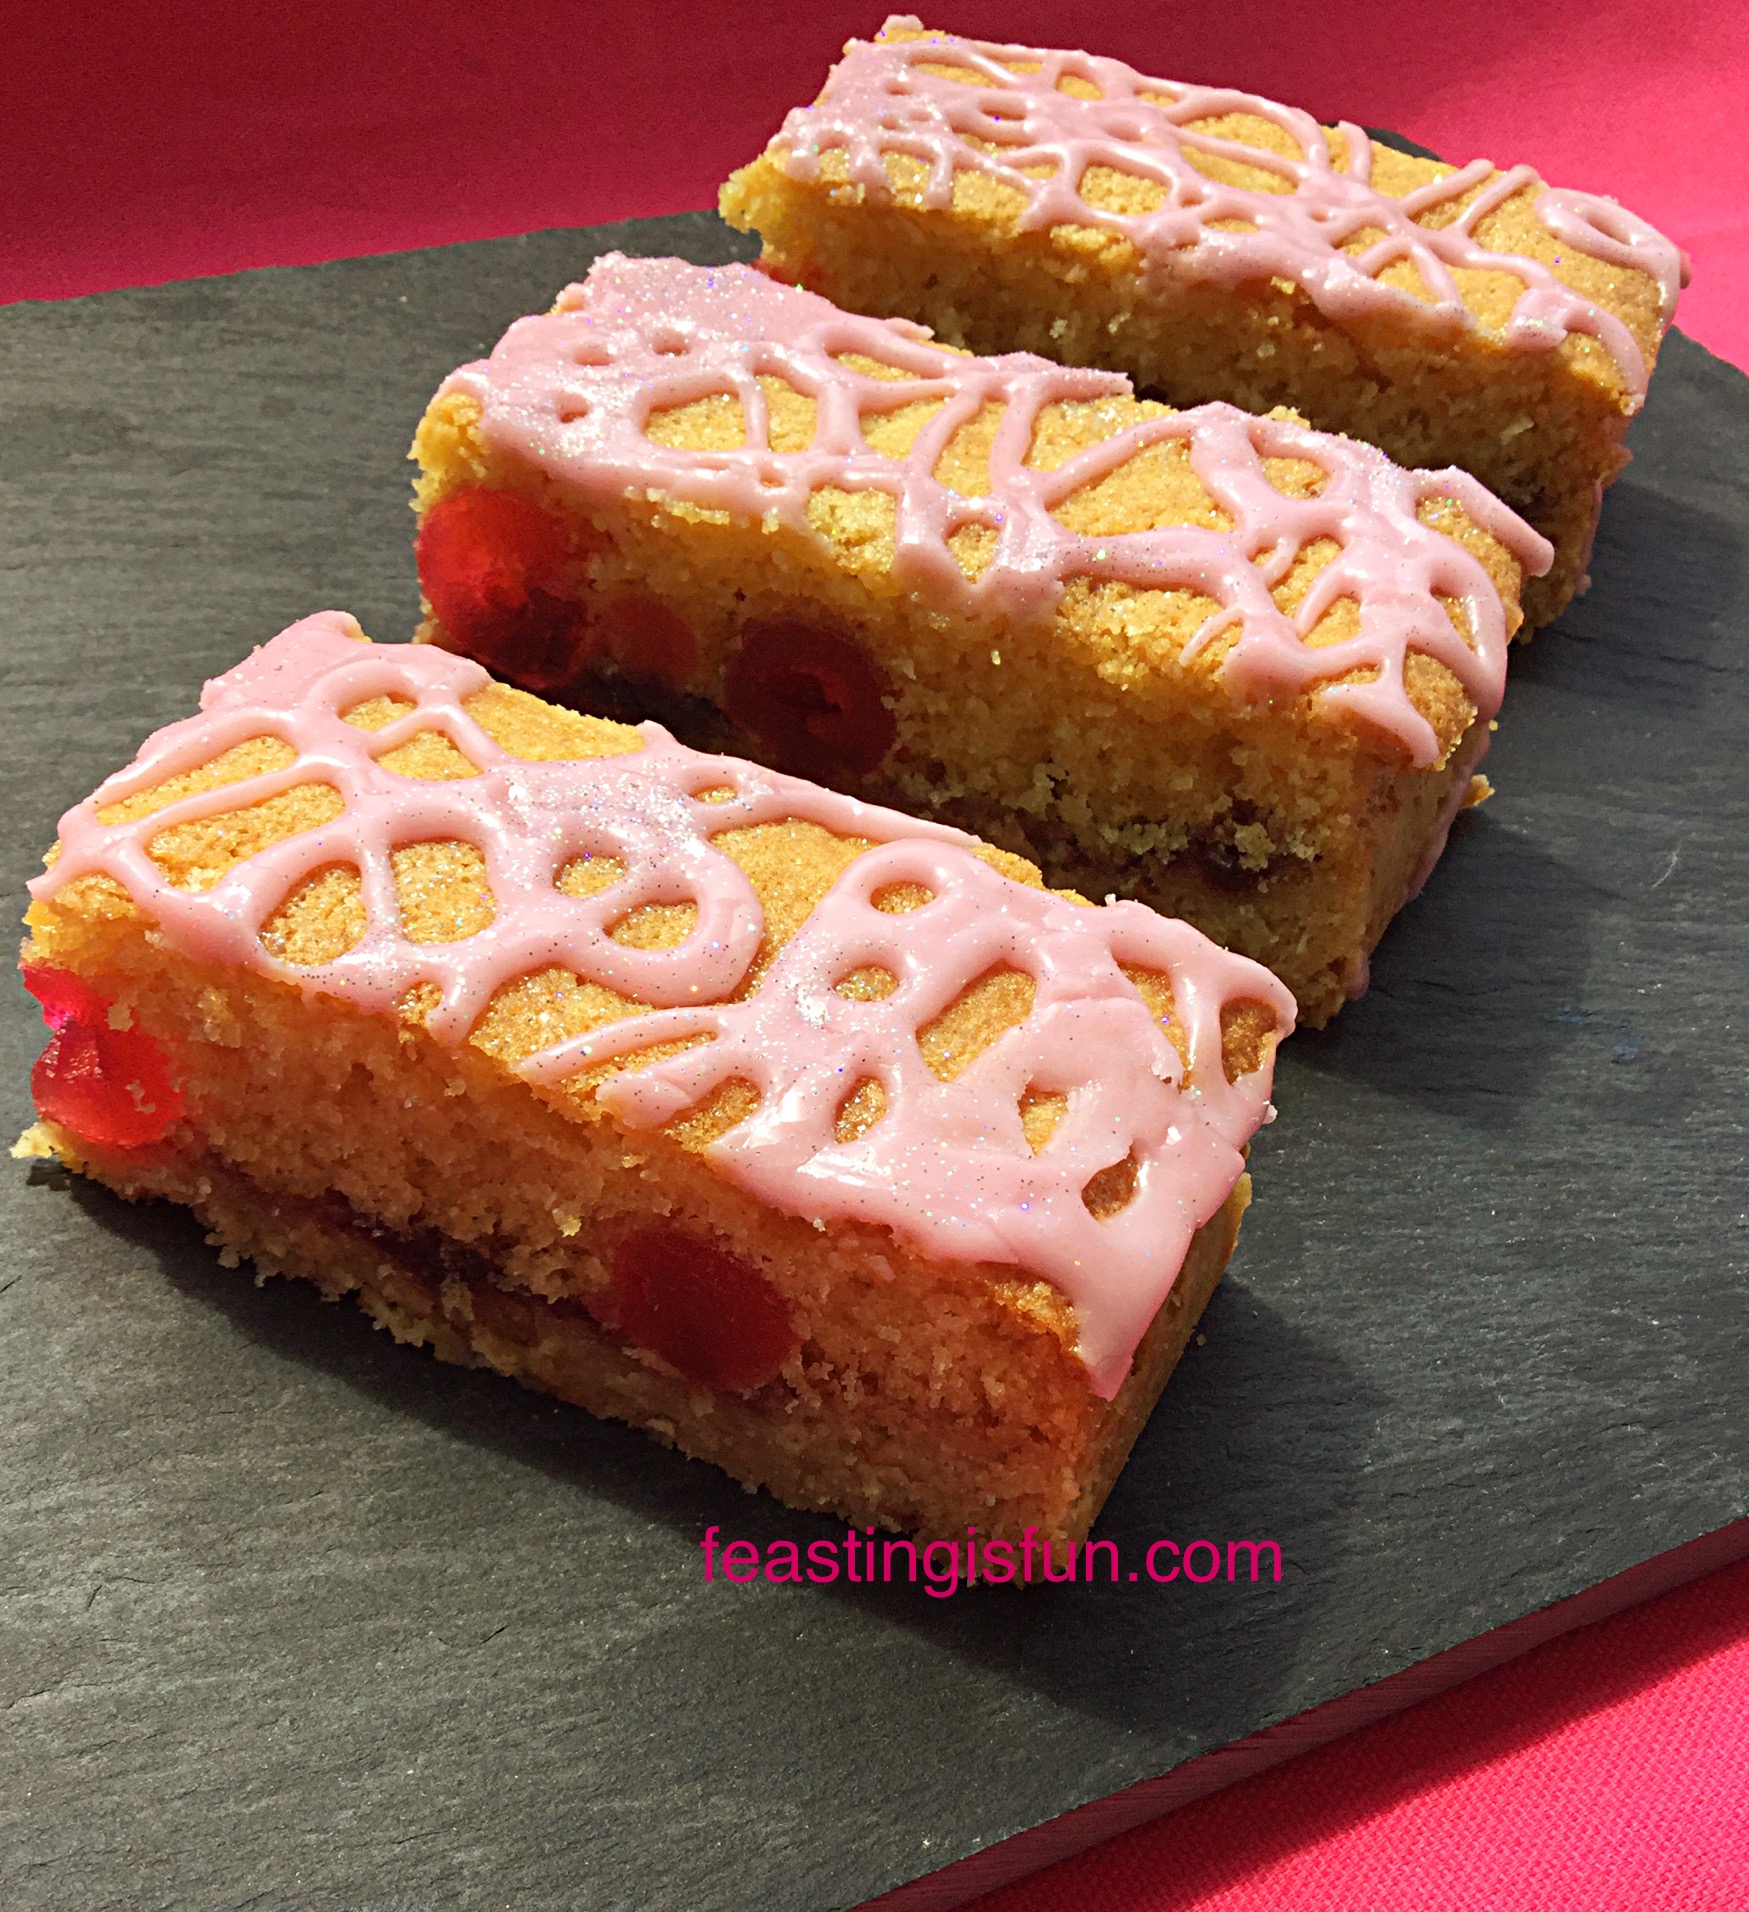
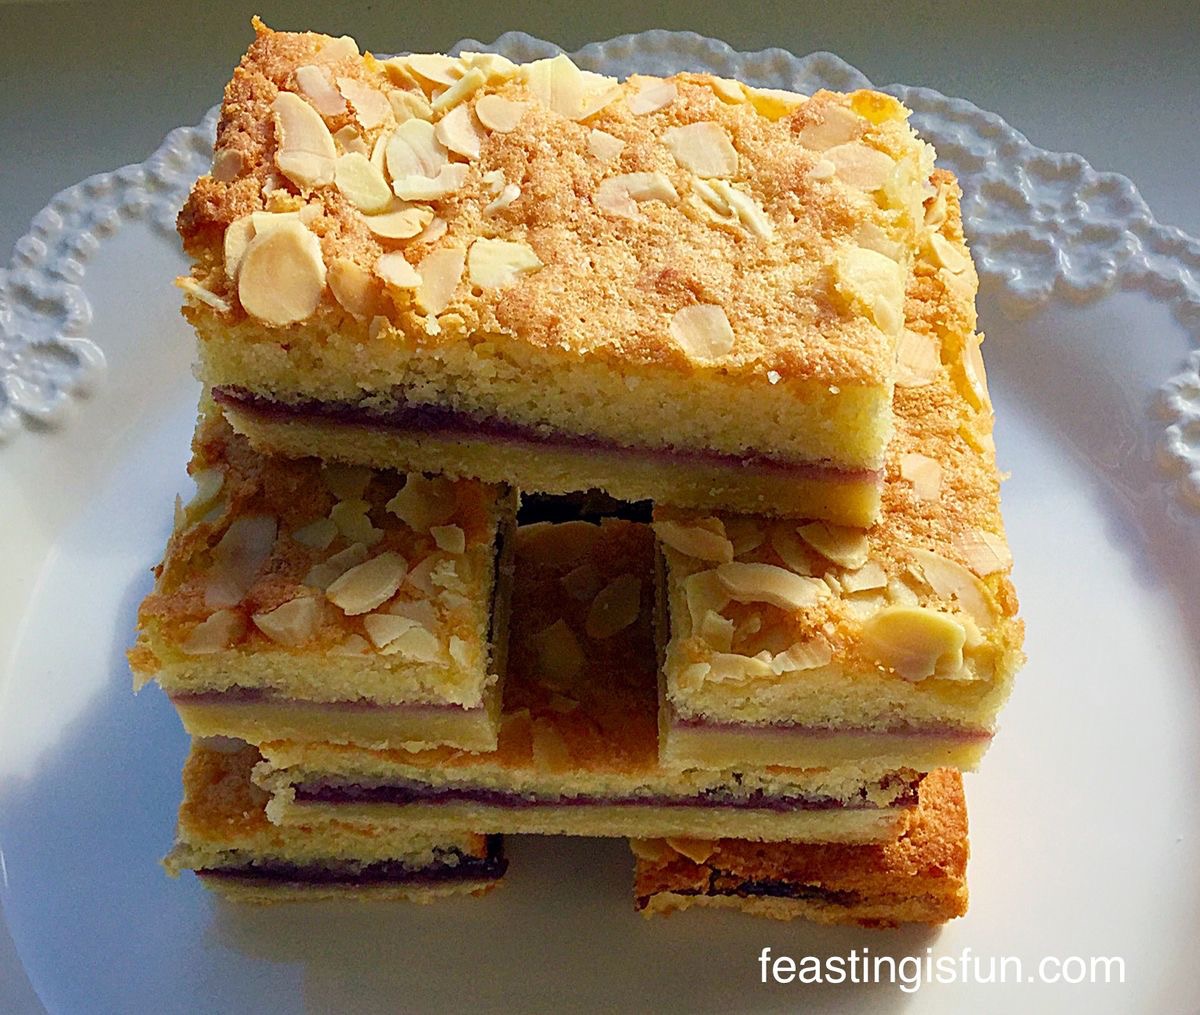
A crunchy oat biscuit provides the base for these delicious bars. Topped with cherry jam and then a thick layer of light, vanilla sponge studded throughout with glacé cherries. The Double Cherry Drizzle Oat Bars are then finished with a drizzle of cherry icing and a sprinkle of edible glitter!

FF Double Cherry Drizzle Oat Bars
Double Cherry Drizzle Oat Bars perfect with a cup of tea.

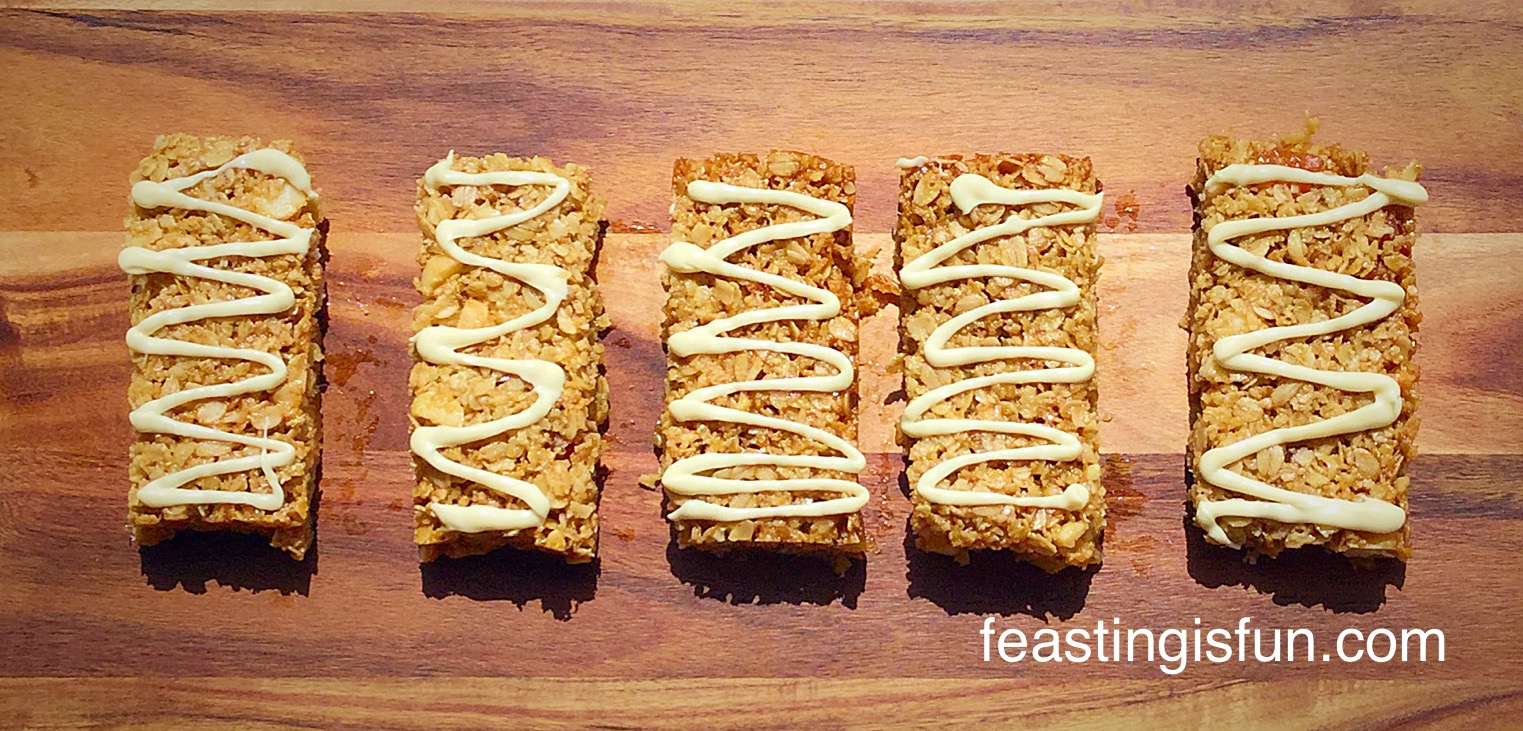
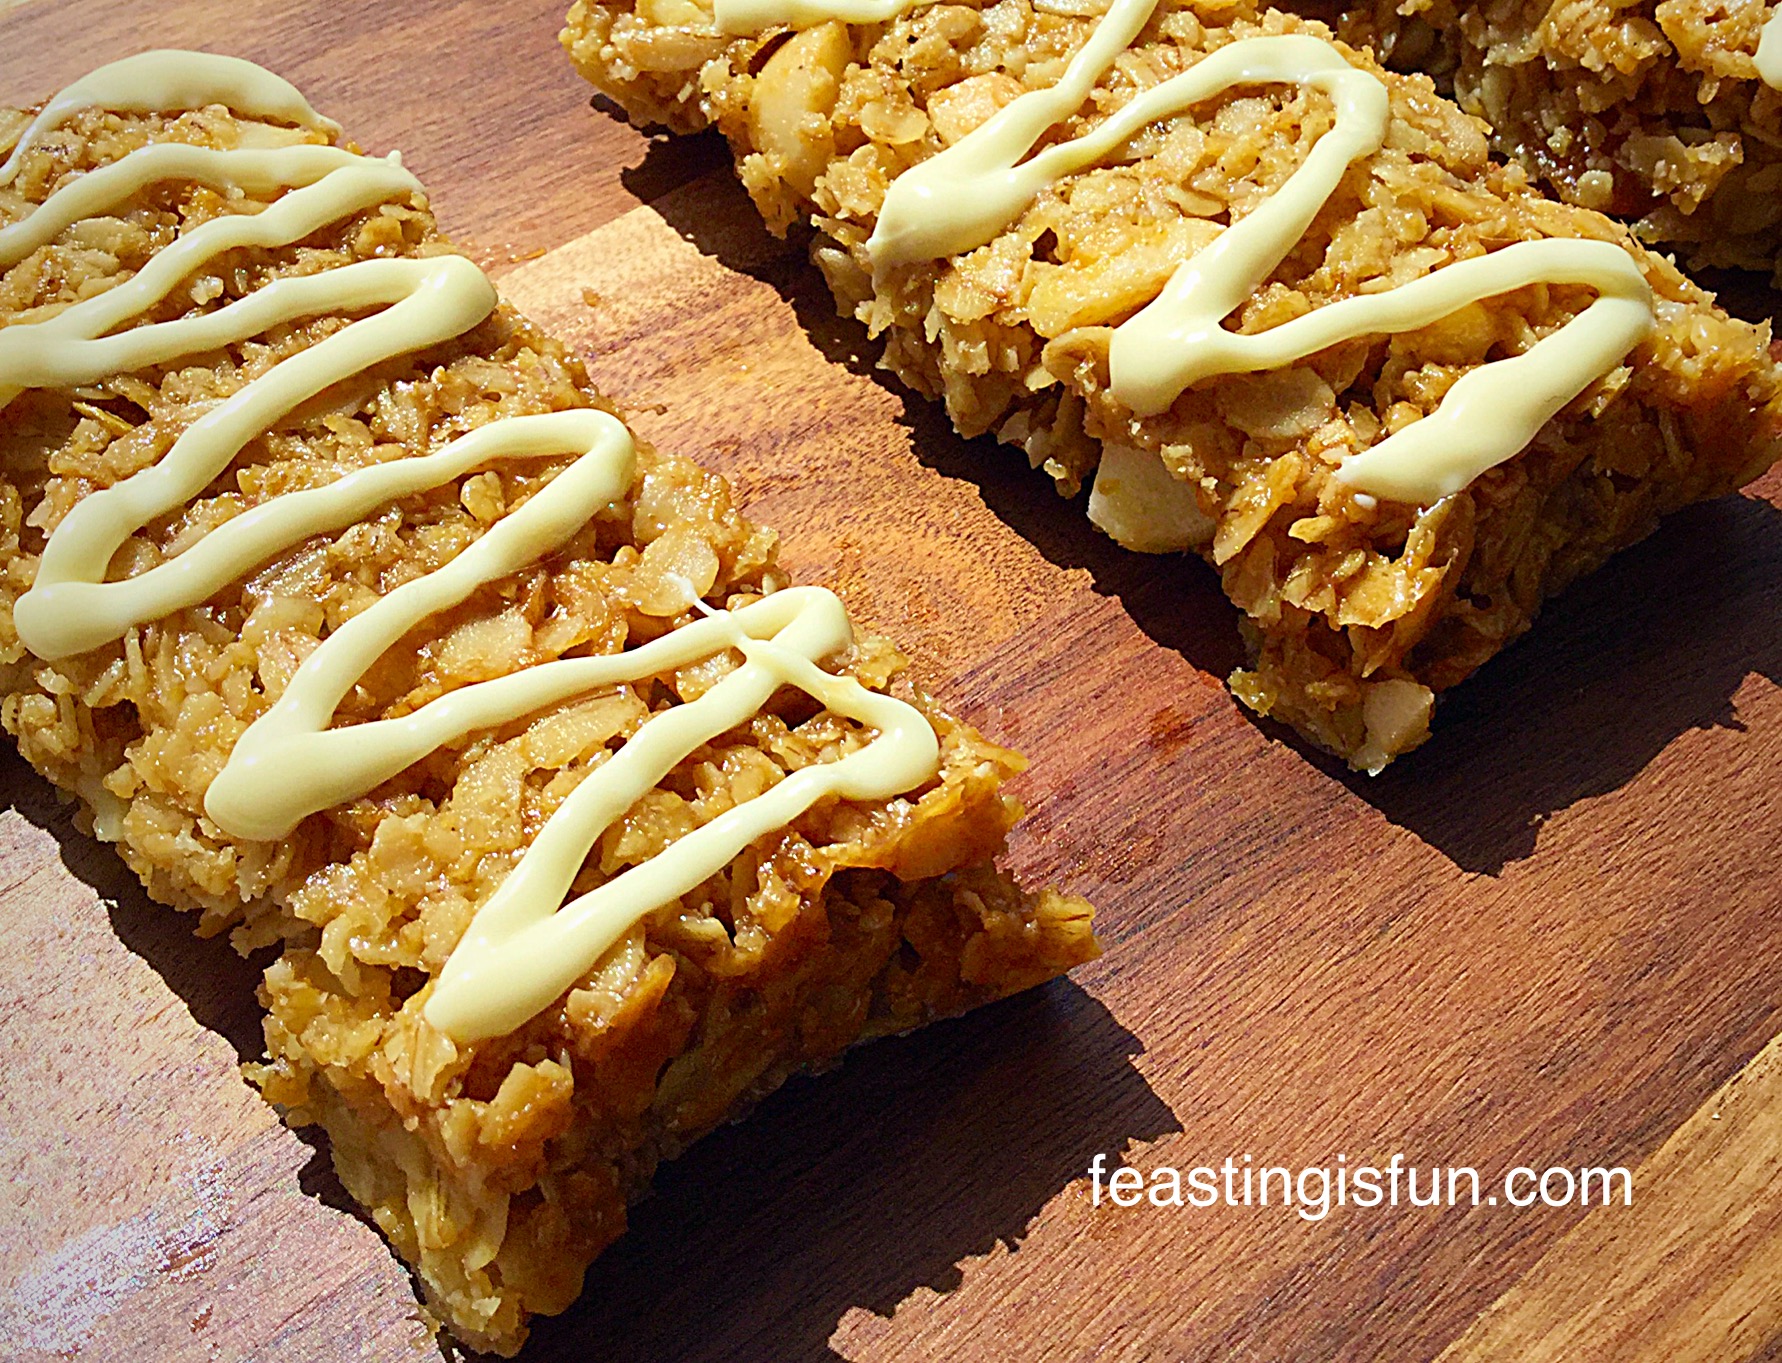
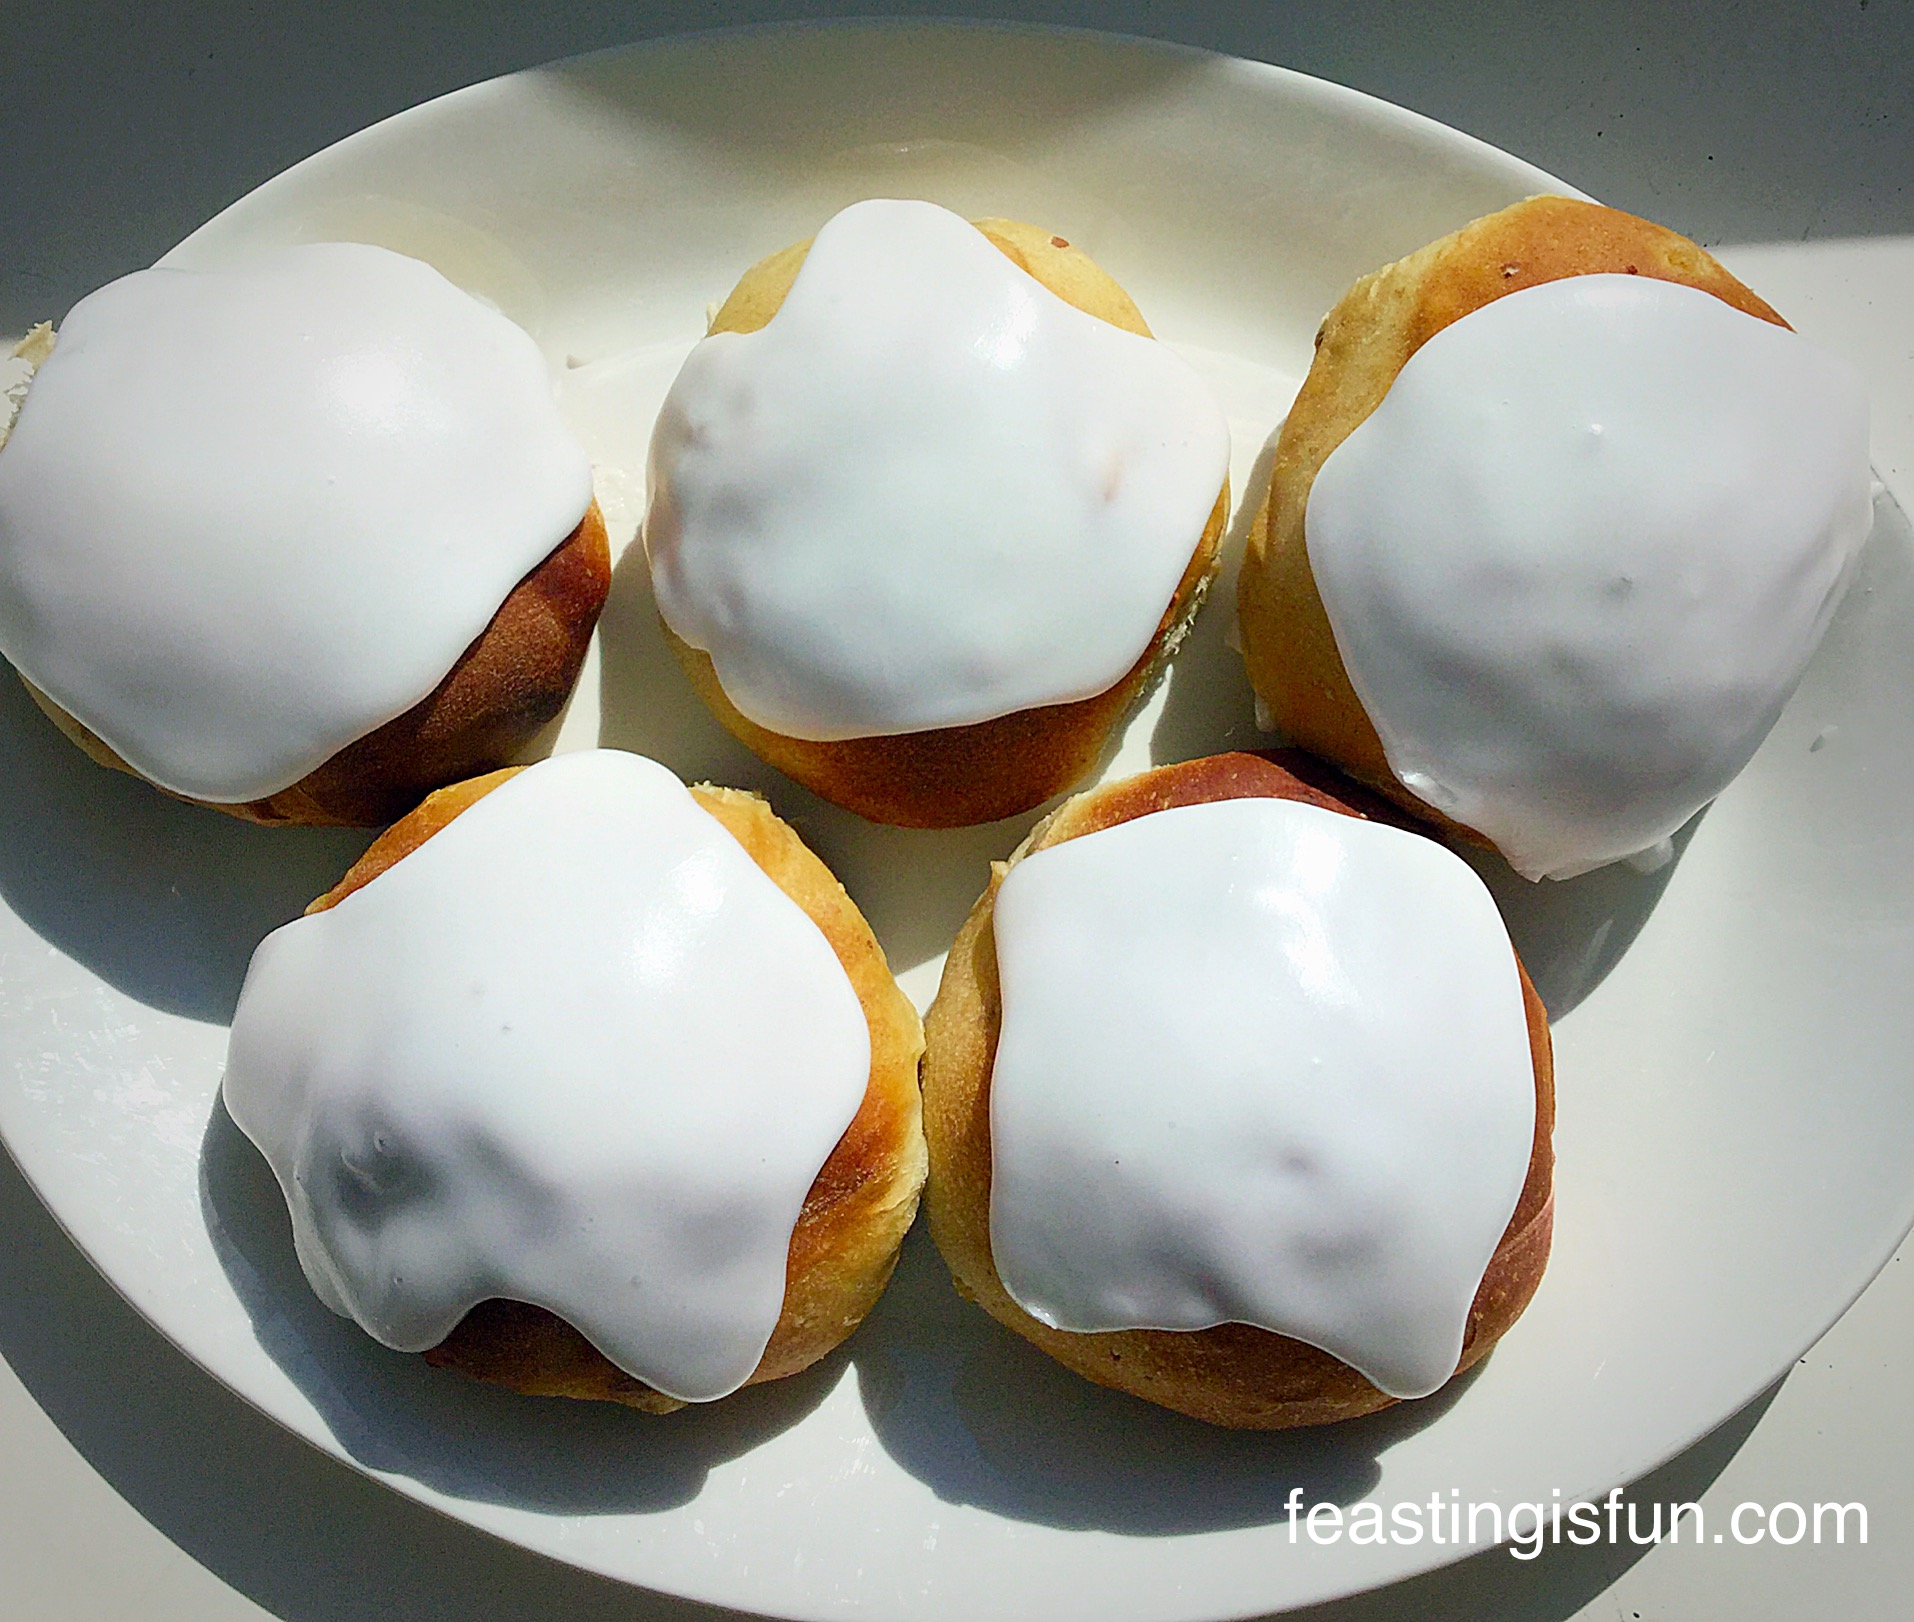
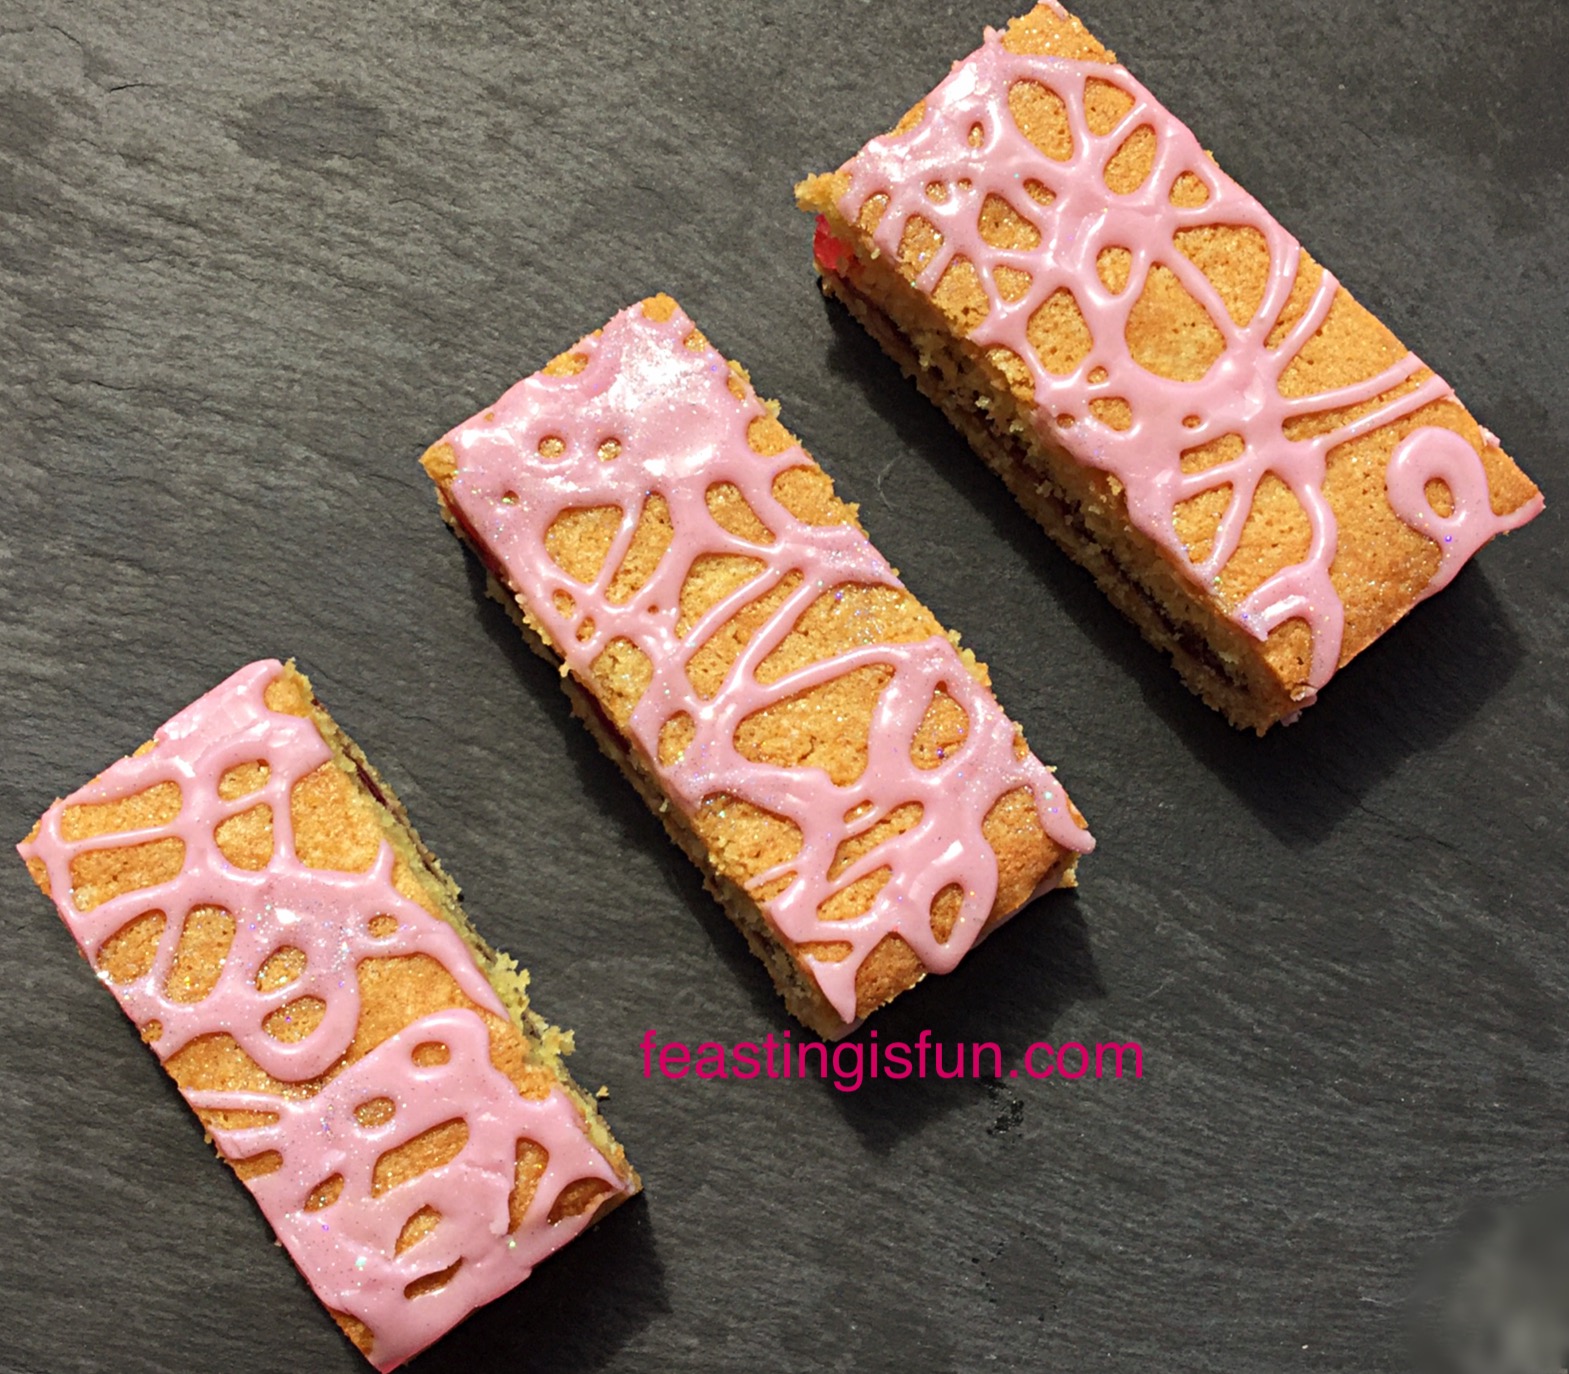
Incredibly tasty, these bars also hold together really well, very important when being packed up for lunch or a picnic.

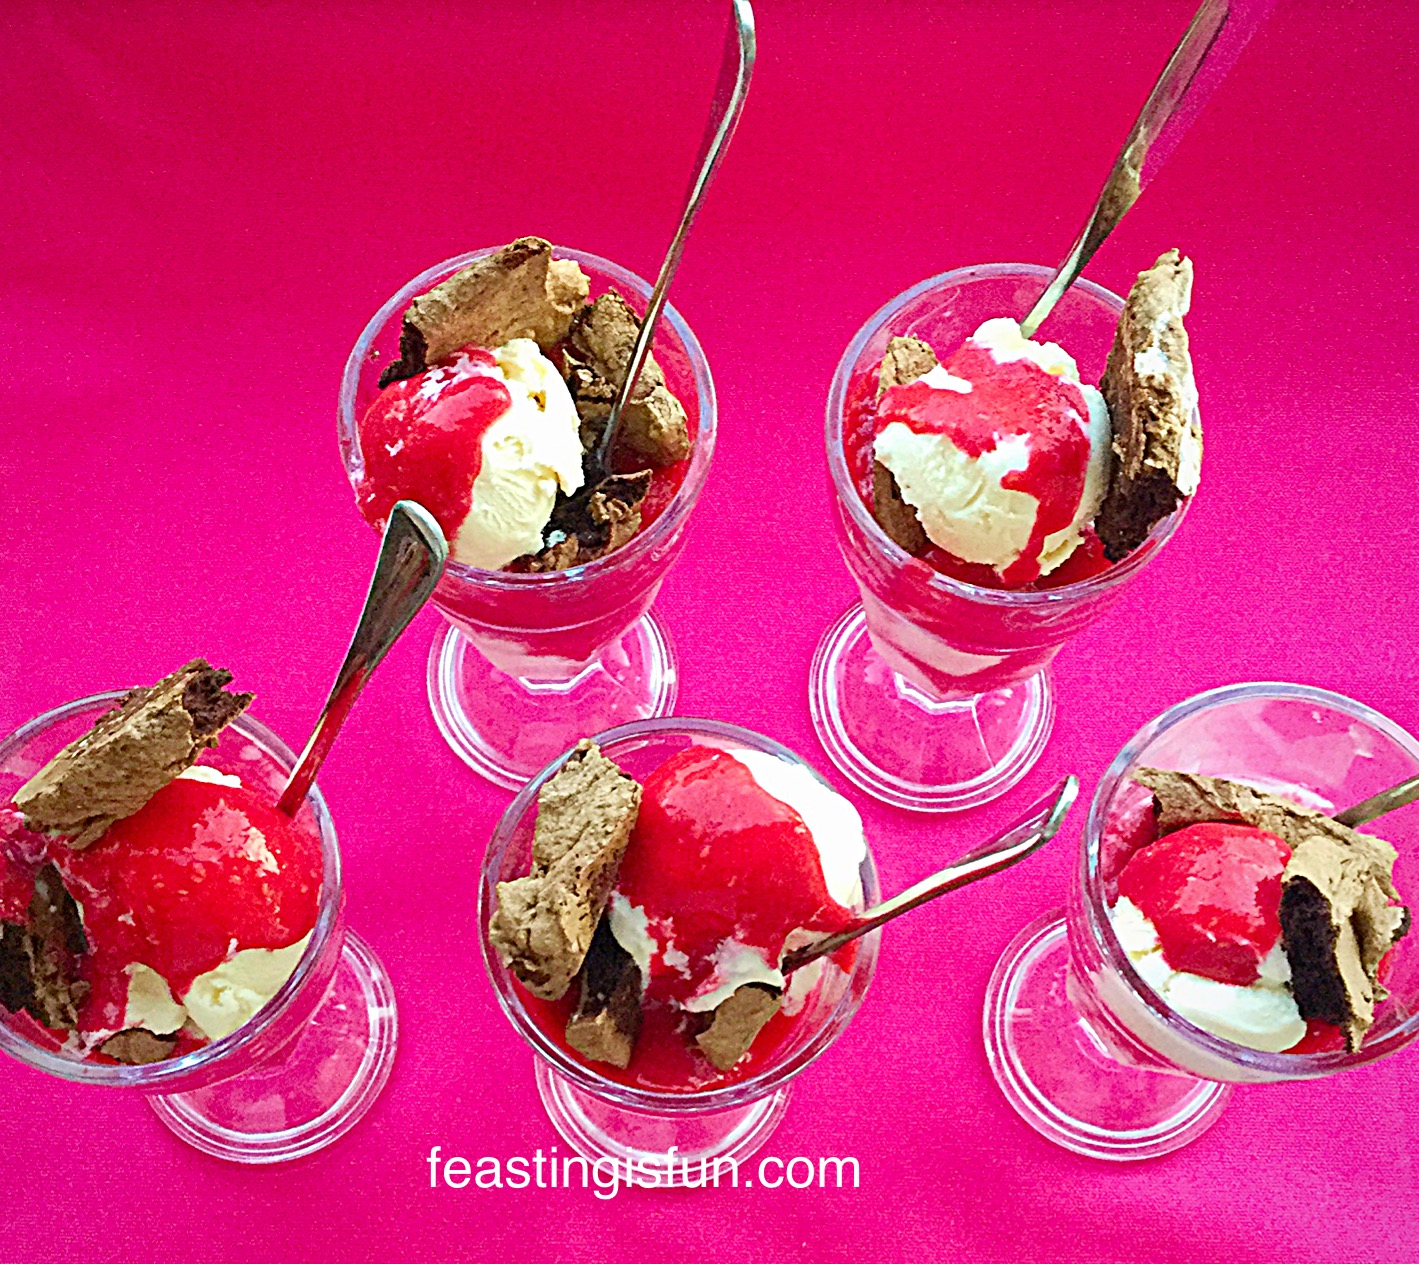
Feel free to sit in the sun with a cup of coffee and one of these Double Cherry Drizzle Oat Bars and simply stare at how beautiful and sparkly they are.

I would!

I did!!

FF Double Cherry Drizzle Oat Bars
Double Cherry Drizzle Oat Bars

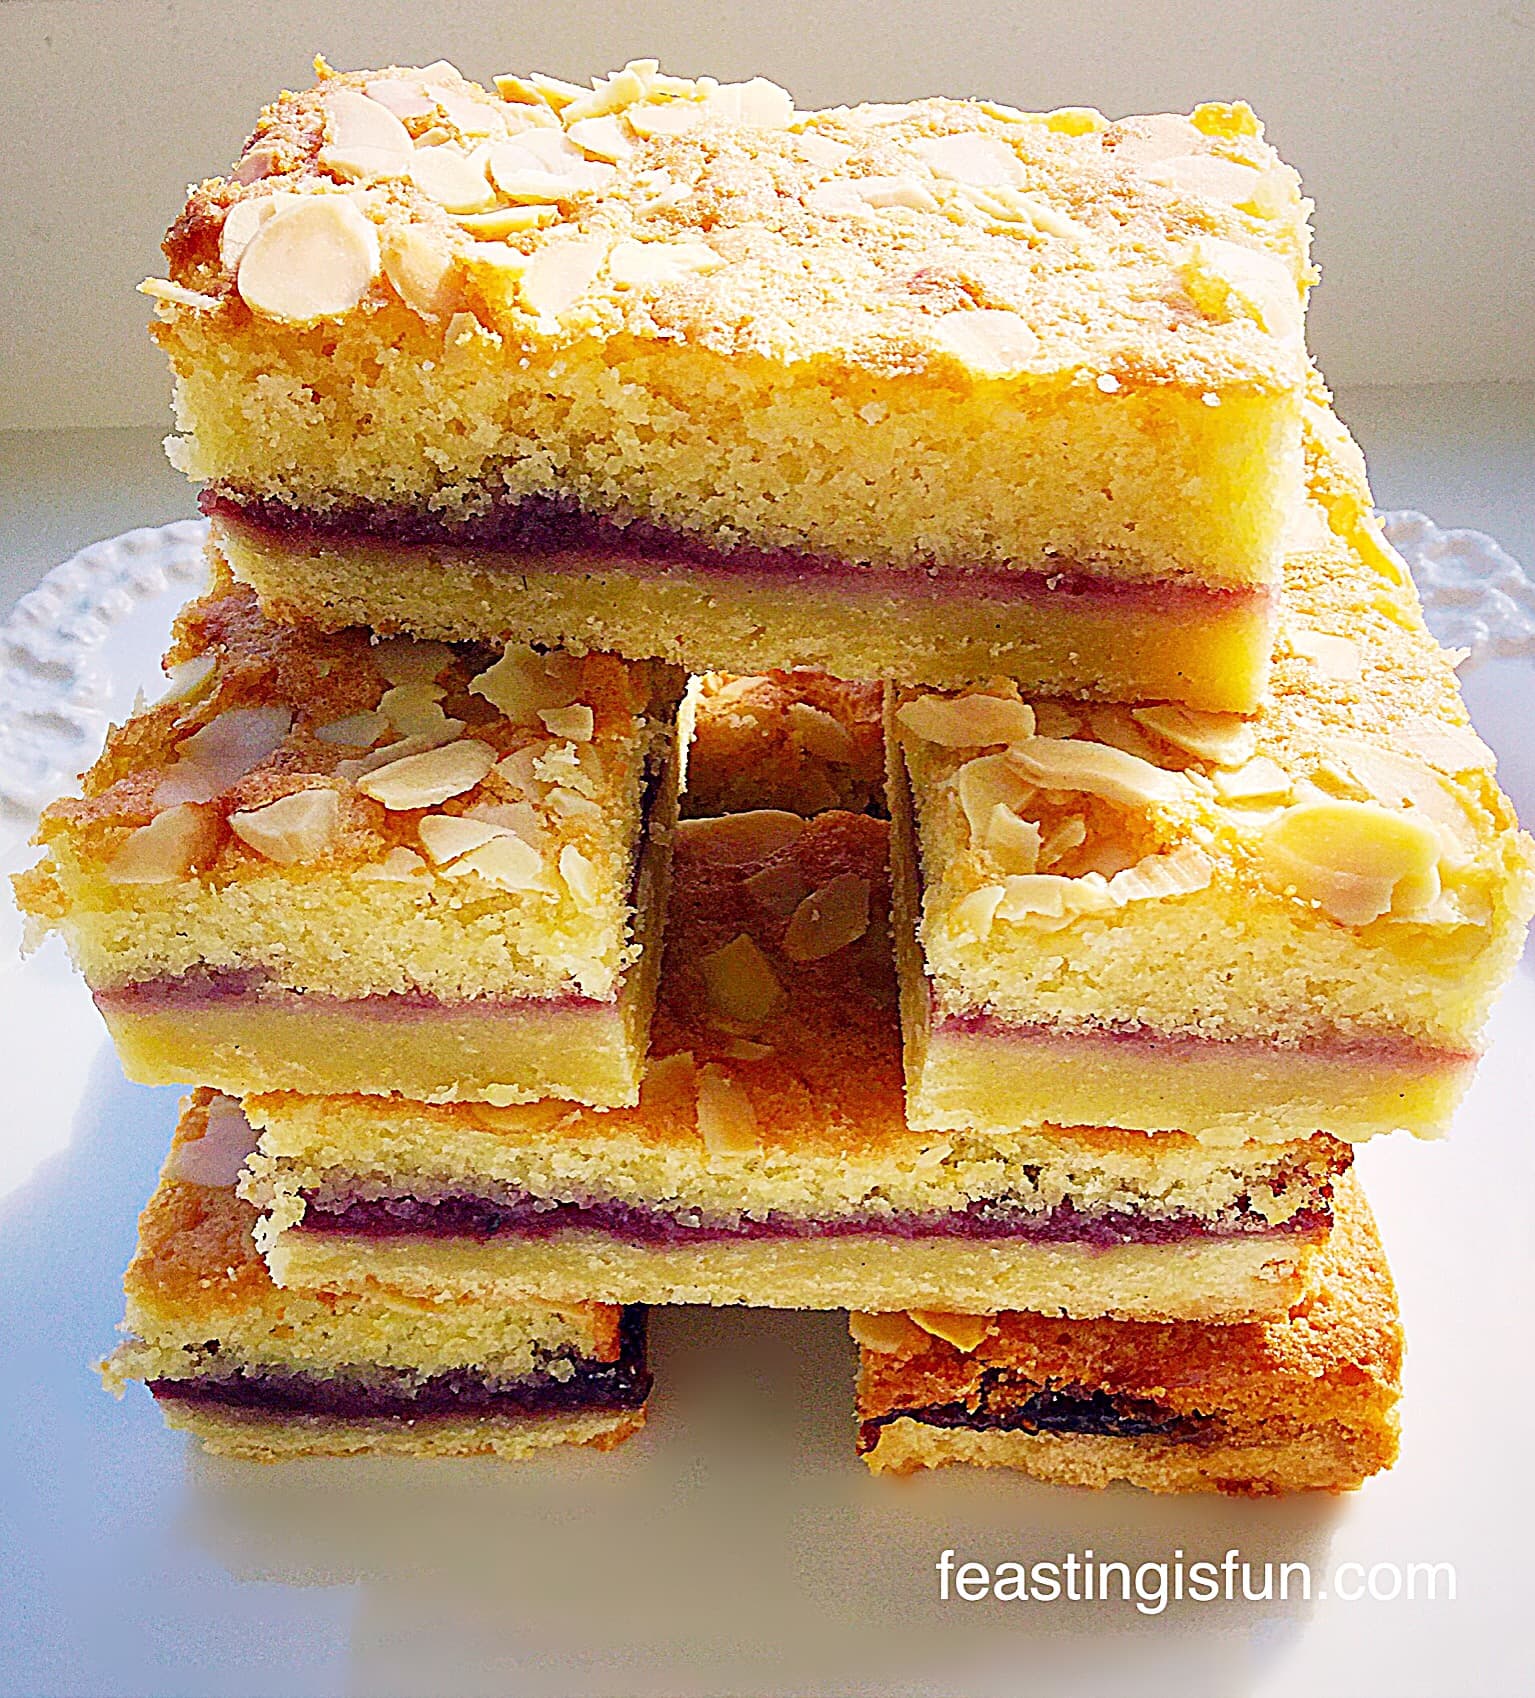
For an afternoon tea, you could easily cut these into 24 smaller, bite sized delights, in fact, if you decide to do that, it may well be worth icing them after they have been cut. That way you can loop the icing around each individual square, making them look even more elegant.

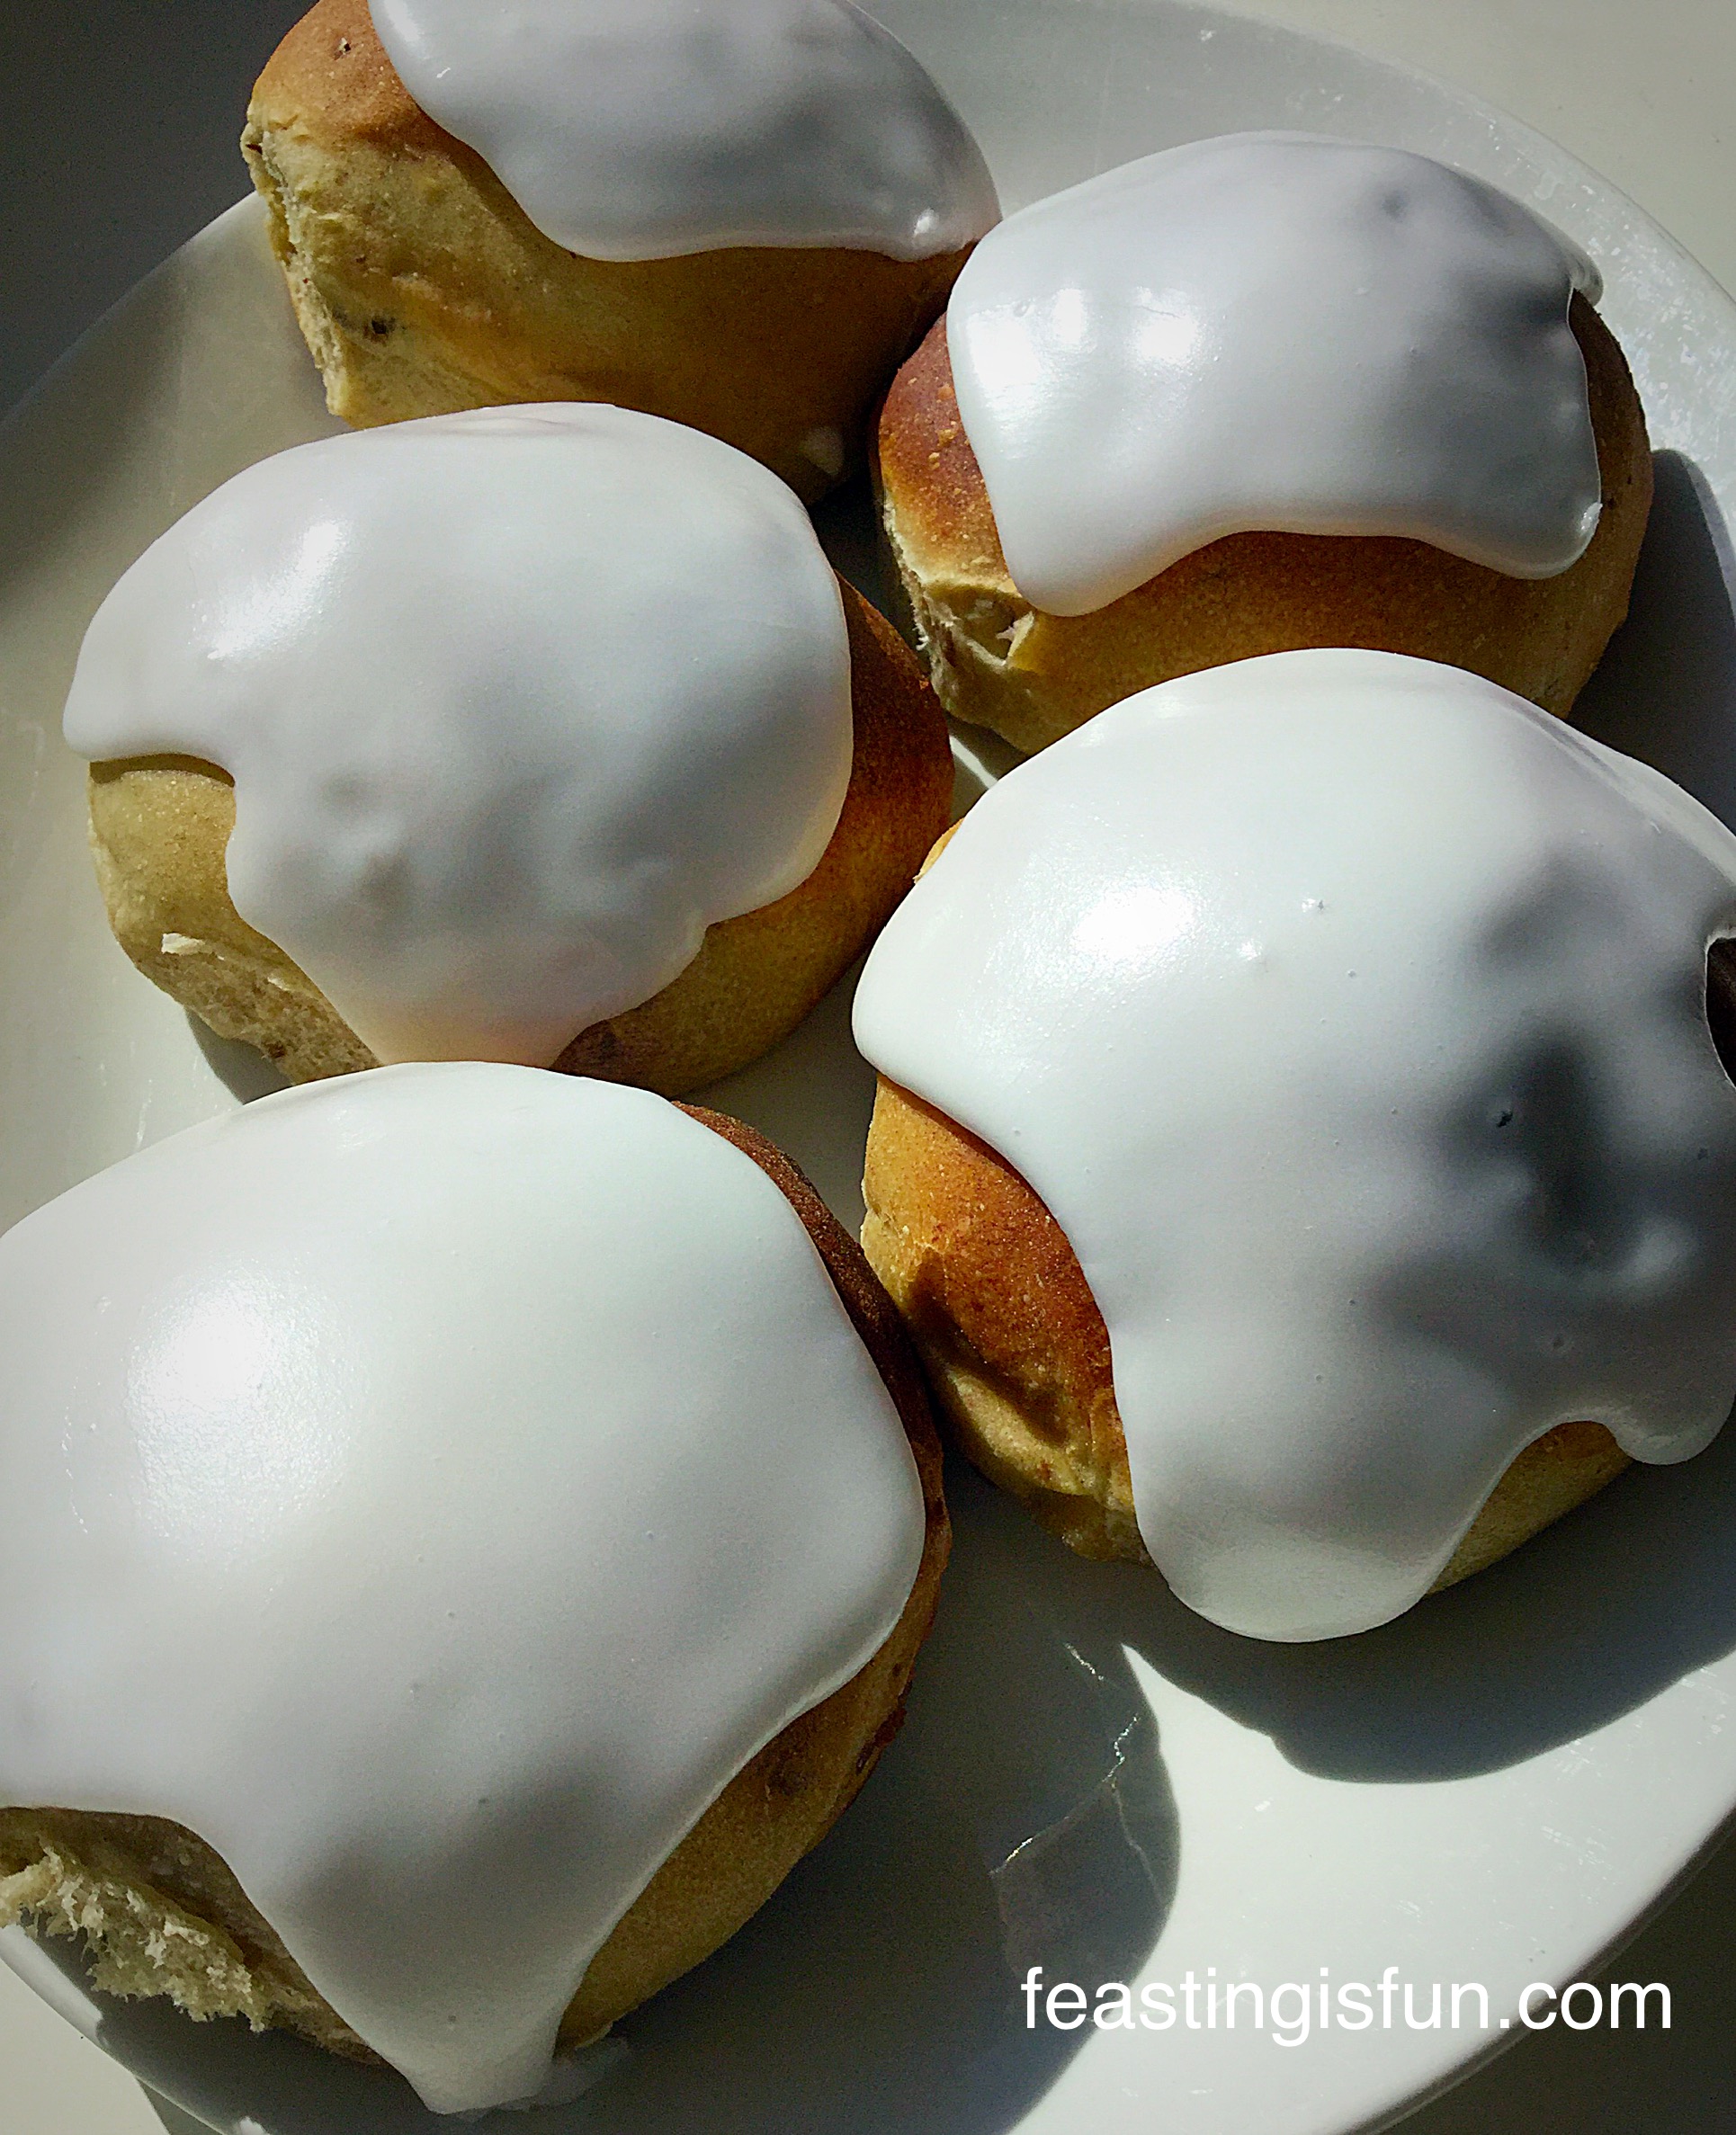
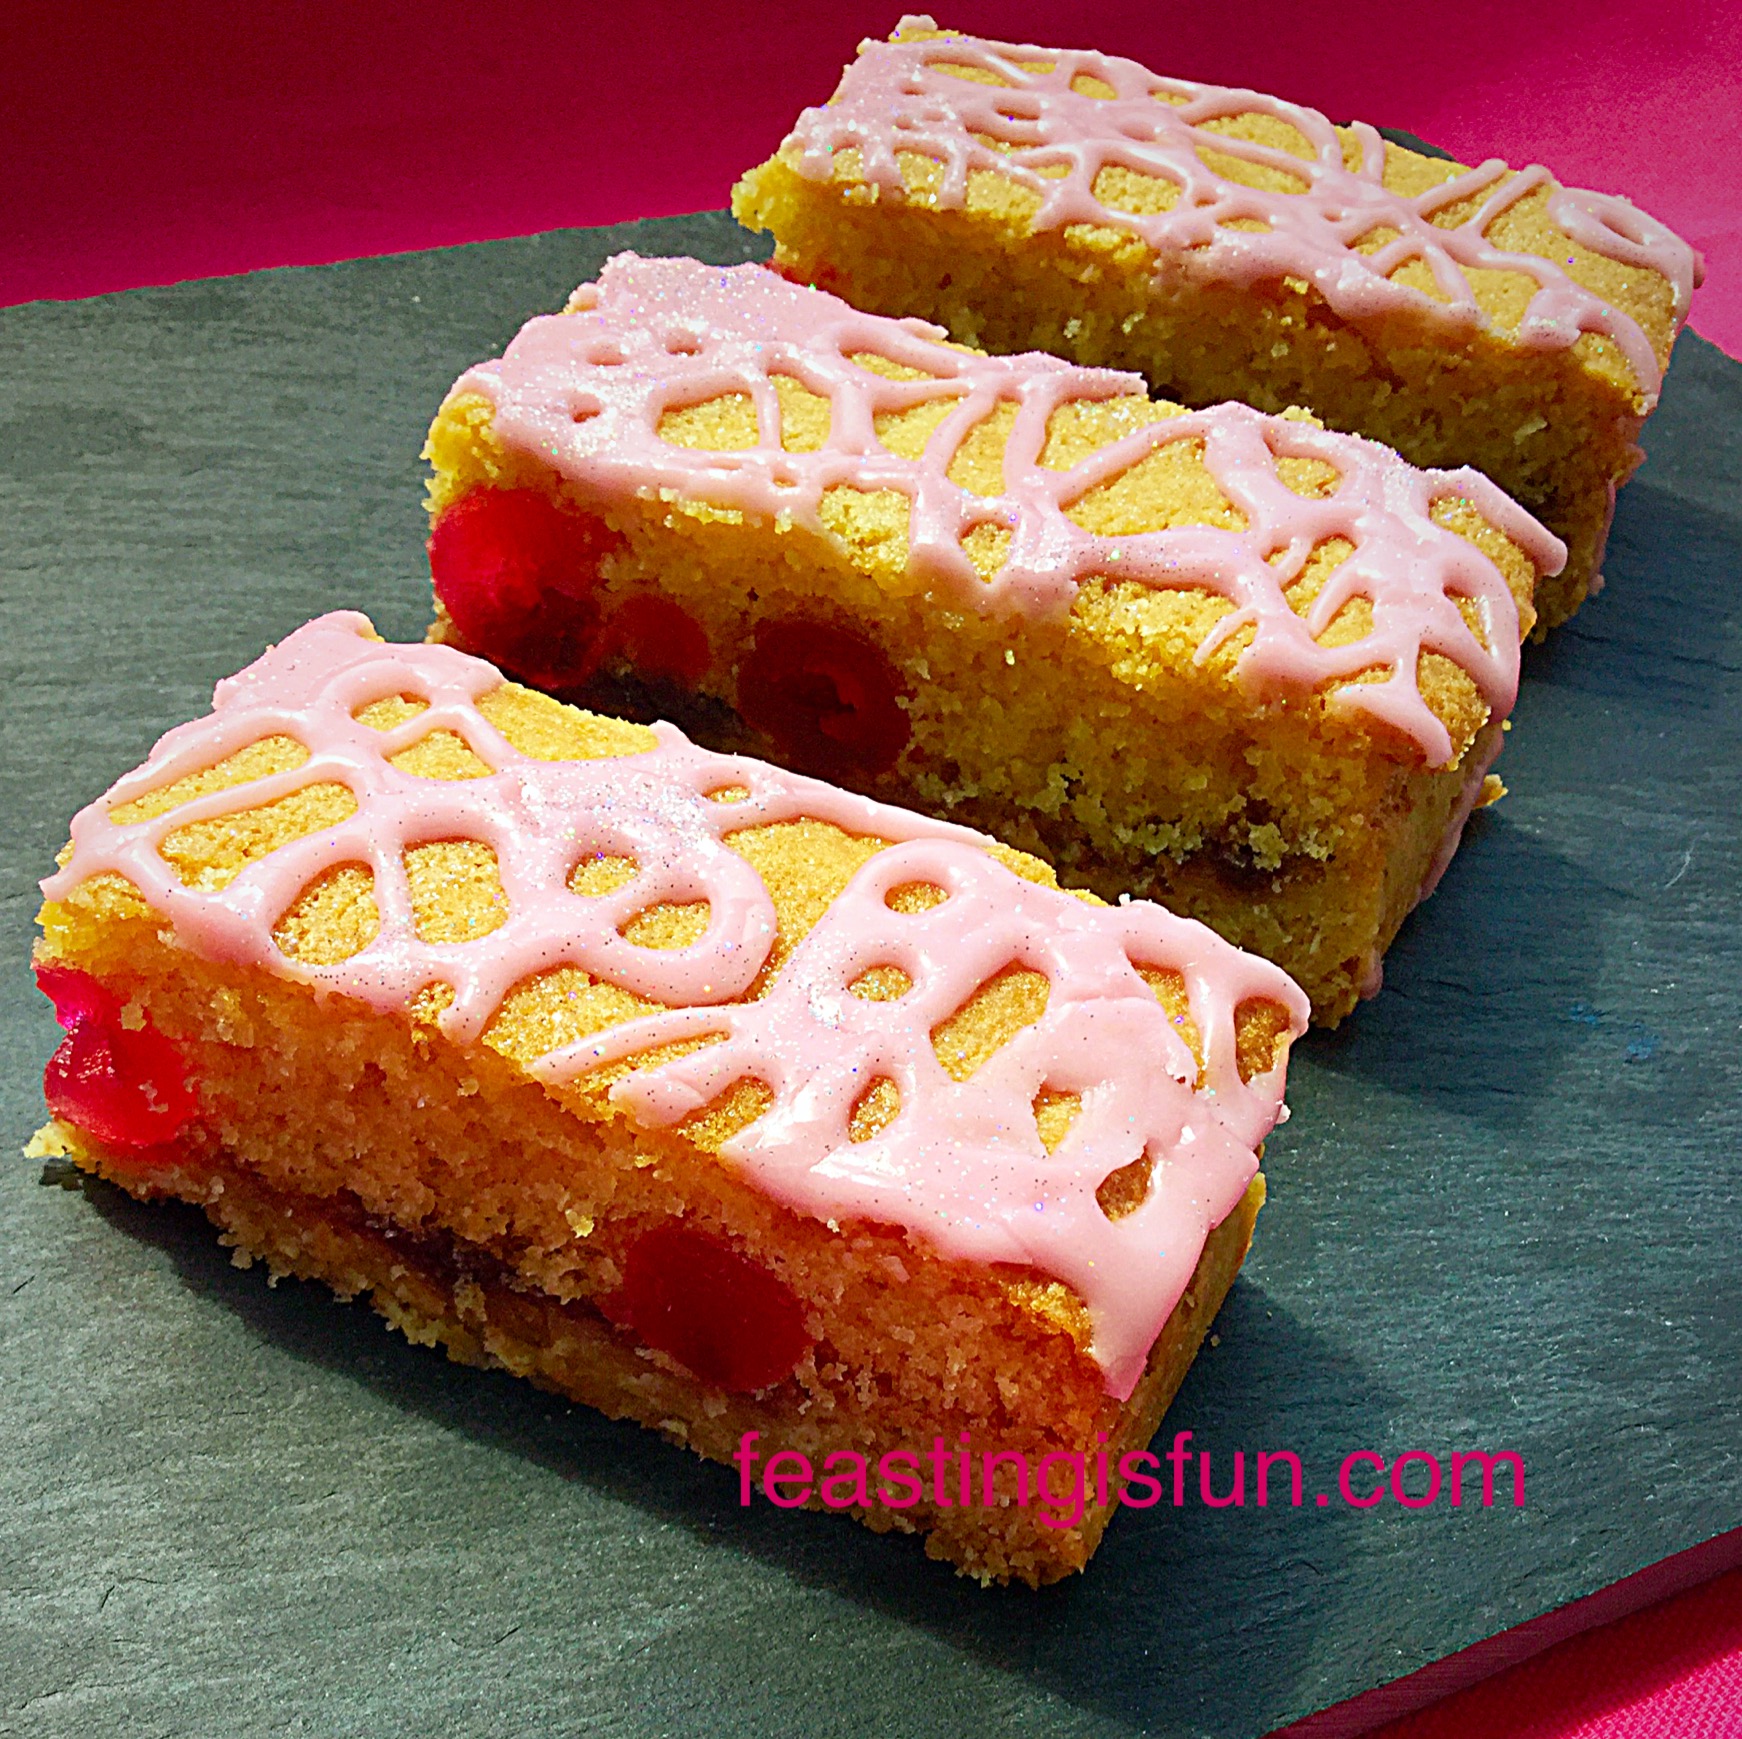
No matter whether you make these as beautiful bars or simple, elegant squares, there is one thing guarenteed and that is they taste amazing.

A perfect combination of pretty and pretty yummy!

Recipe: Makes 16 Double Cherry Drizzle Oat Bars

For the biscuit base:

225g/8oz Caster Sugar

125g/5oz Unsalted Butter – softened to room temperature – plus a little extra for greasing the tin

Tiny pinch of salt – 1/8 tsp – I use Maldon

50g/2oz Rolled Oats – not quick cook – I used Waitrose Essential Porridge Oats

225g/8oz Plain White Flour

1/2 Jar/4tbsp Cherry Jam – I used morello cherry

For the sponge top:

175g/6oz Unsalted Butter – softened to room temperature

175g/6oz Caster Sugar

3 Large Free Range Eggs

1tsp Vanilla Extract – I use Nielsen-Massey

Scant pinch of salt – see biscuit base

175g/6oz Plain Flour

Level 1.5tsp Baking Powder

175g/6oz Glacé Cherries

For the drizzle icing:

100g/4oz Icing Sugar

3tsp Black Cherry Syrup – I use Monin Syrup

if you do not have the syrup simple make up the icing adding a little extra water in lieu of the syrup – a tiny dot of pink food colour gel added will create a similar colour

1/4tsp Almond Extract – I use Nielsen Massey

Optional – edible glitter – I used holographic silver

Preheat the oven to 190C/170C fan, gas mark 5, 375F

Making And Baking The Oat Biscuit Base

  • Lightly grease and line with baking parchment a 28cm x 20cm x 5cm (12″ x 8″ x 2″) swiss roll tin.
  • In a large bowl add the butter and sugar and whisk/beat until pale and creamy.
  • Add the oats, flour and salt and mix gently until the dough just comes together.
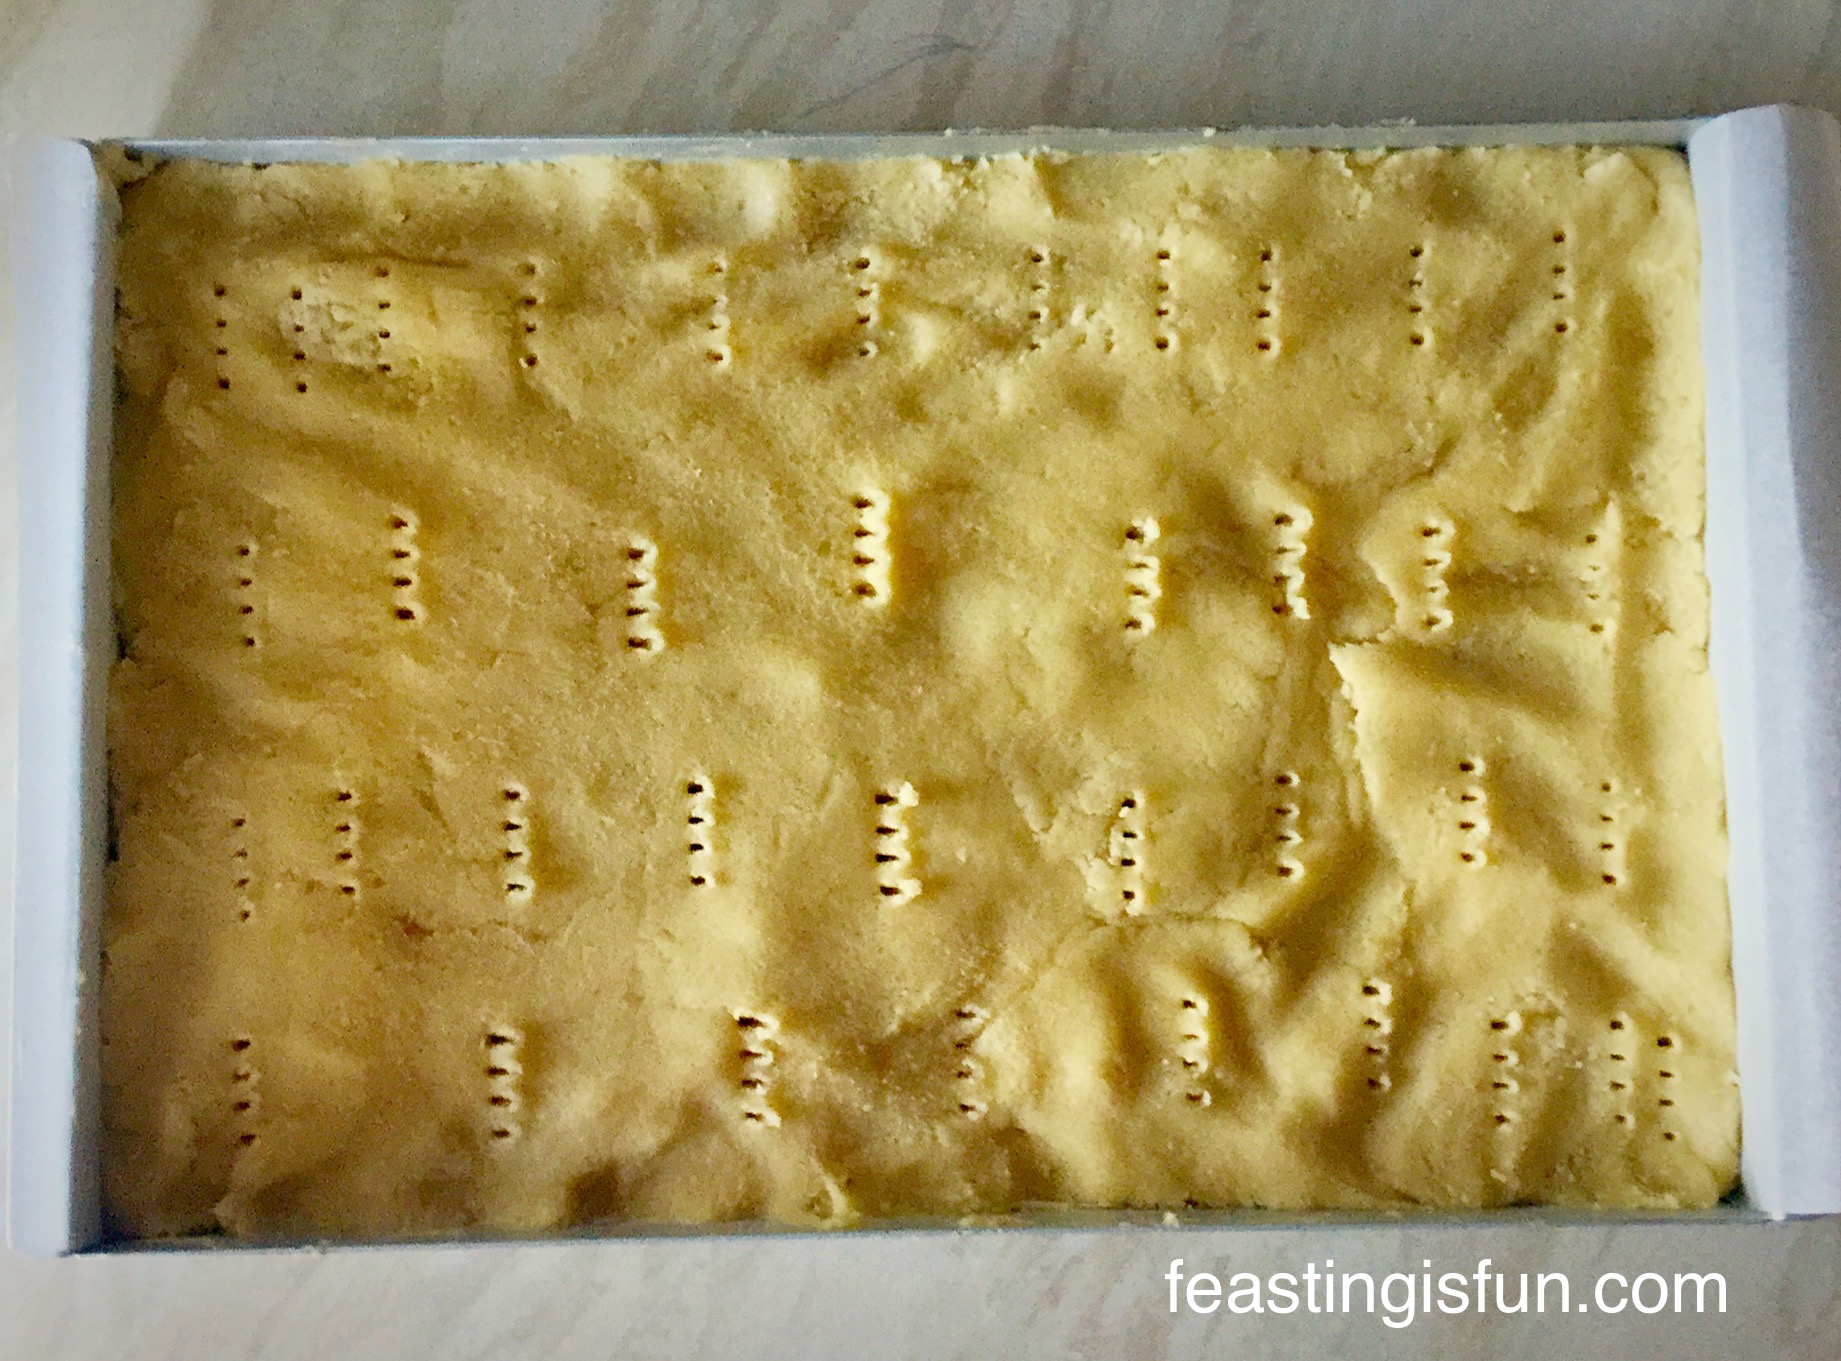
  • Tip the biscuit dough into the prepared pan and press into a single, even layer with your fingers.
  • Place the tin in the fridge for at least 30 minutes to allow the dough to rest.
  • After the dough has chilled place the tin into the centre of the oven and bake for 20 minutes.
  • The biscuit base will be a lovely golden colour. Once the cooking time has elapsed remove the tin from the oven.
FF Double Cherry Drizzle Oat Bars
Beautifully golden oat biscuit base.
  • While the biscuit base is hot spoon over the cherry jam so that it covers the base but does not spread right to the edges.
FF Double Cherry Drizzle Oat Bars
Delicious morello cherry jam spread over the biscuit base.


Reduce the oven temperature to 160C/140C fan, gas mark 3, 325FMAKING.

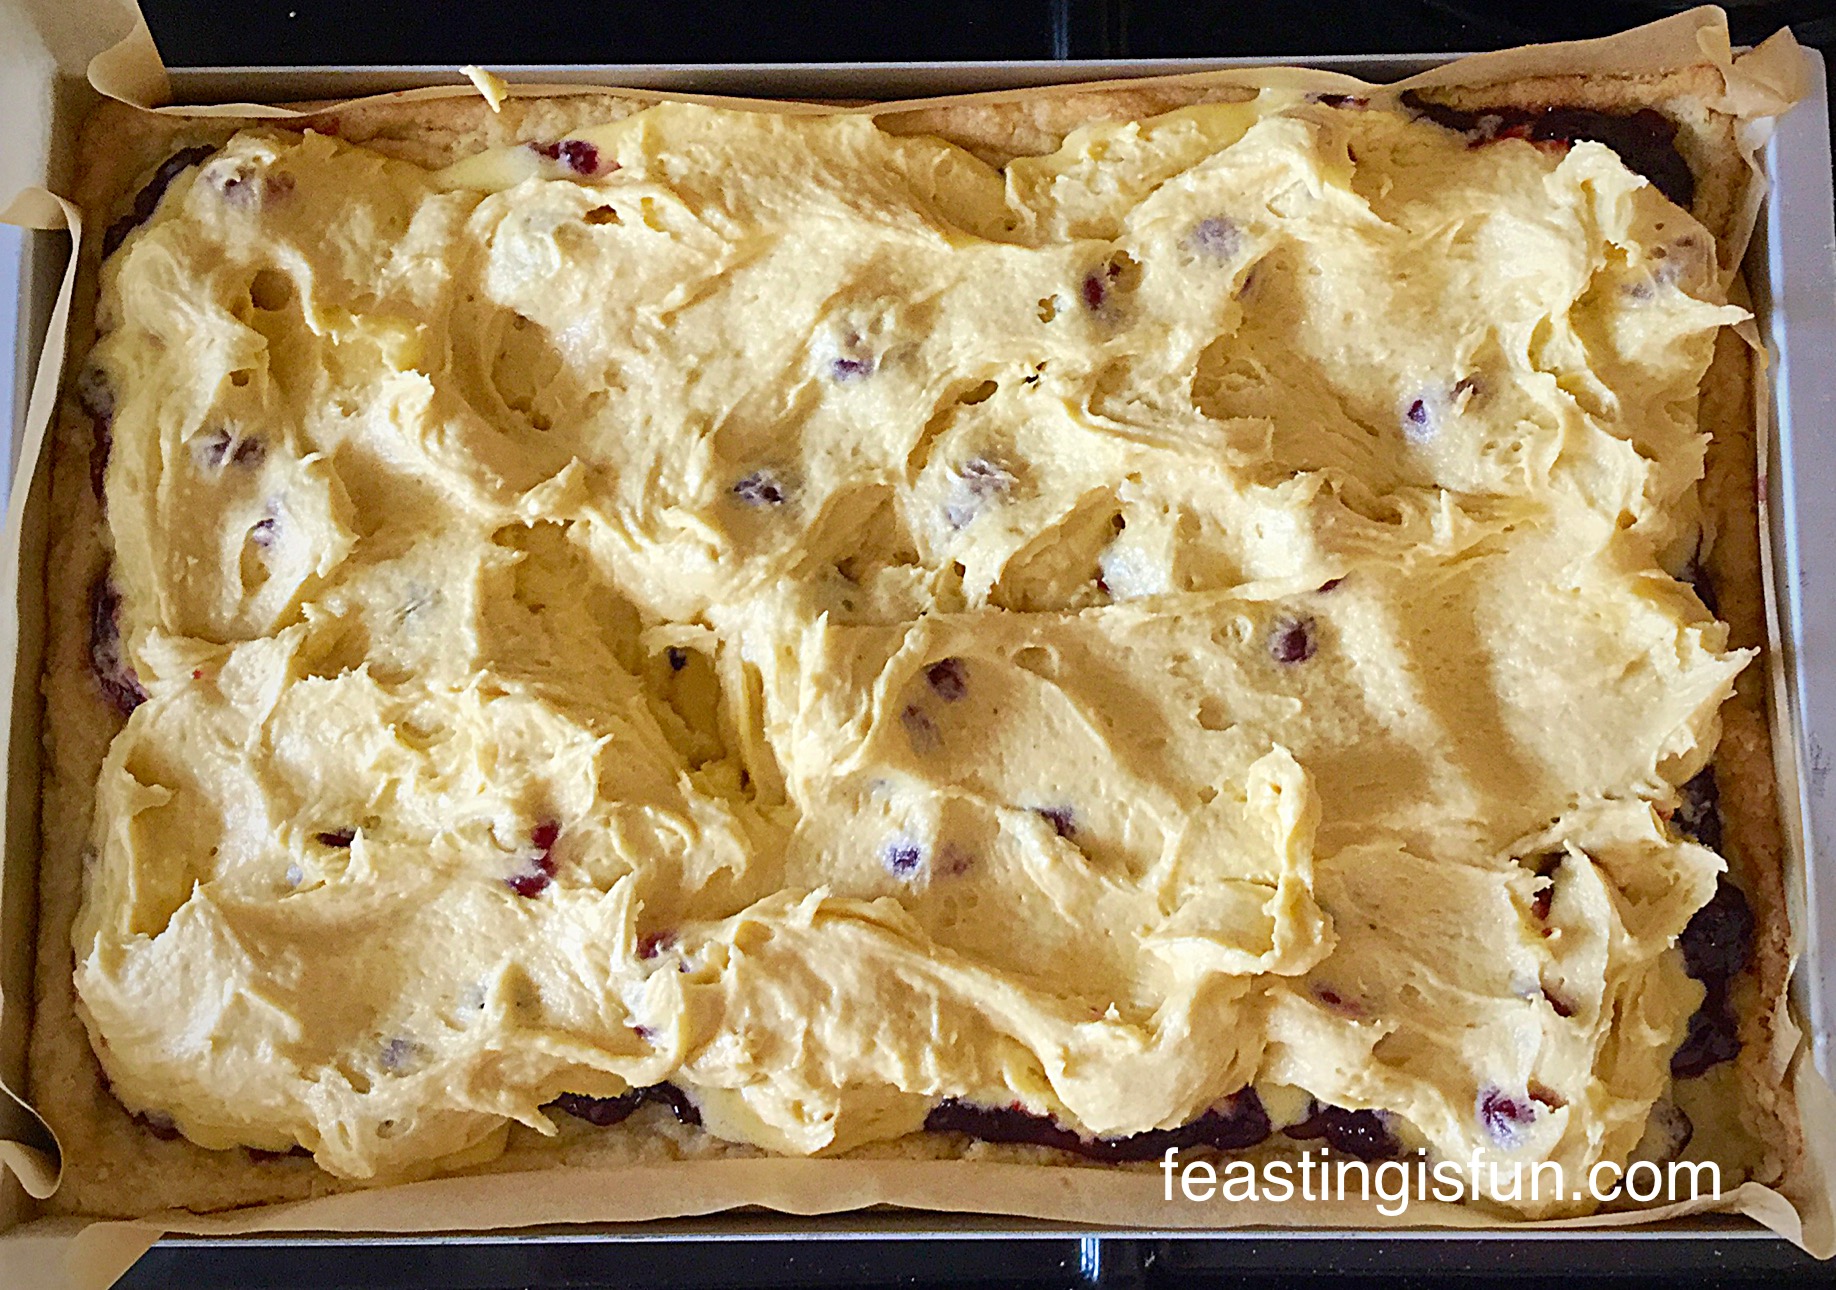
Making And Baking The Cherry Sponge

  • In a large bowl cream together the butter and sugar until pale and creamy.
  • Add all 3 eggs and the vanilla extract. Whisk/beat until combined.
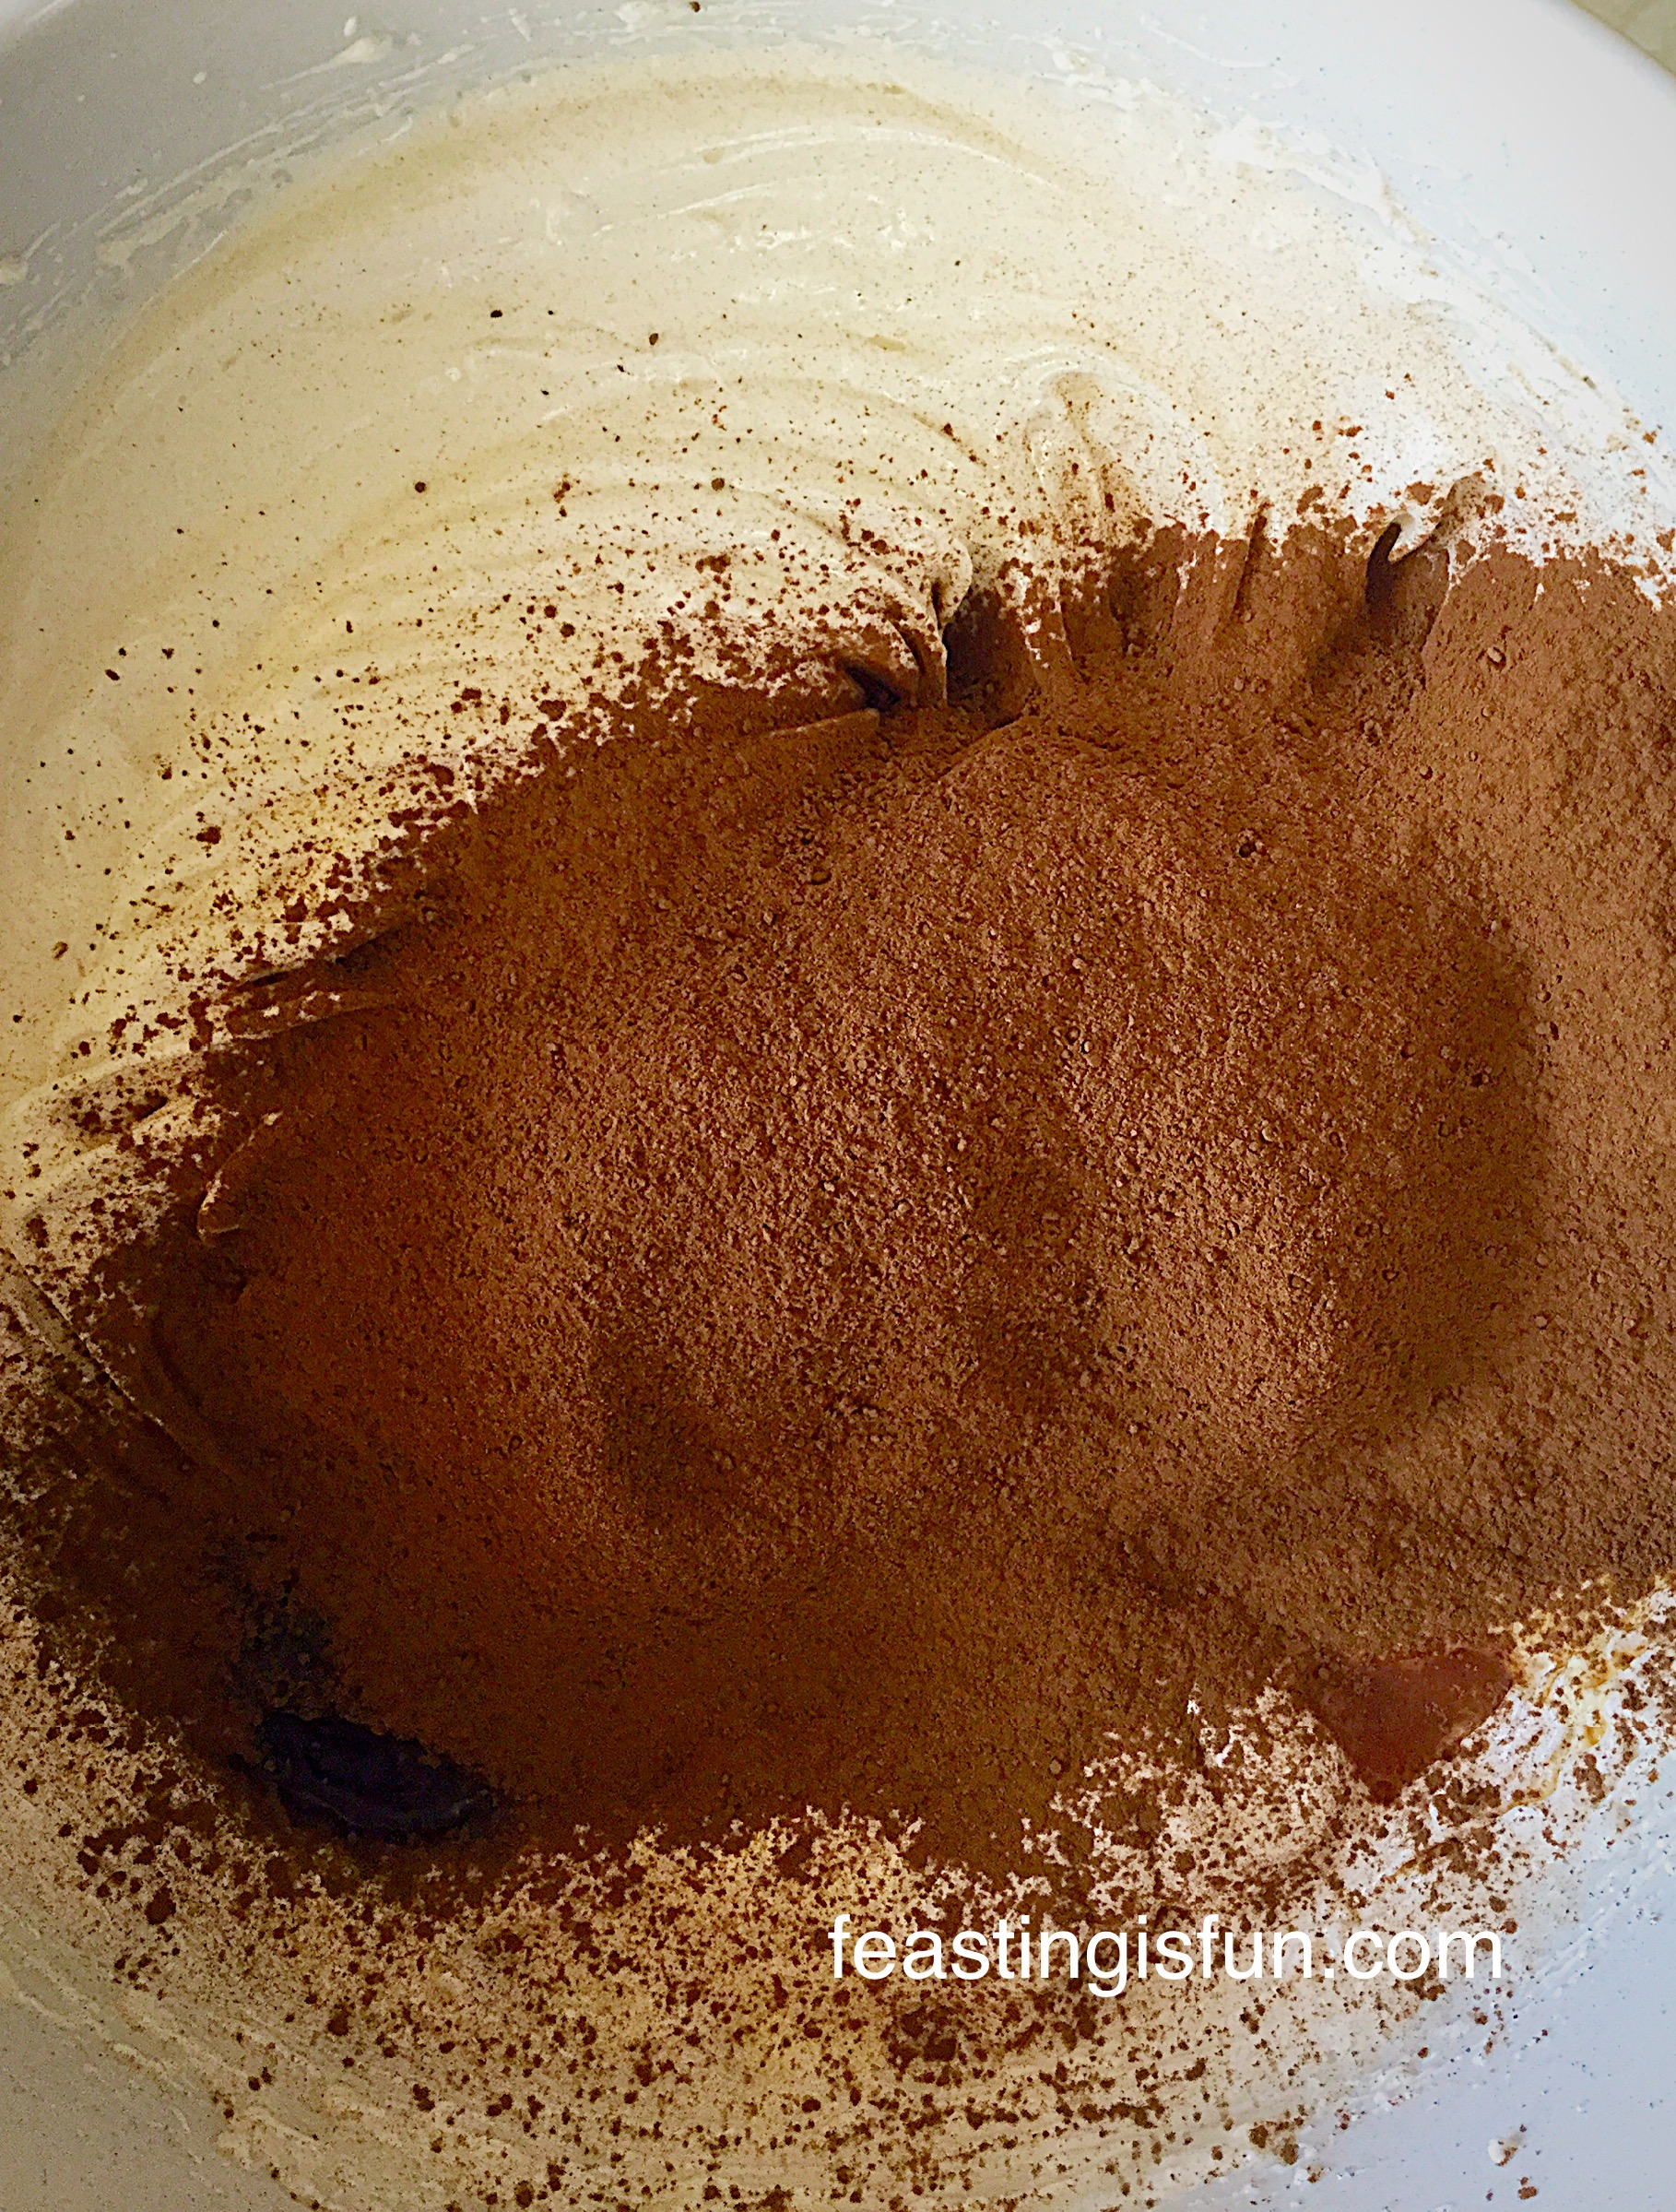
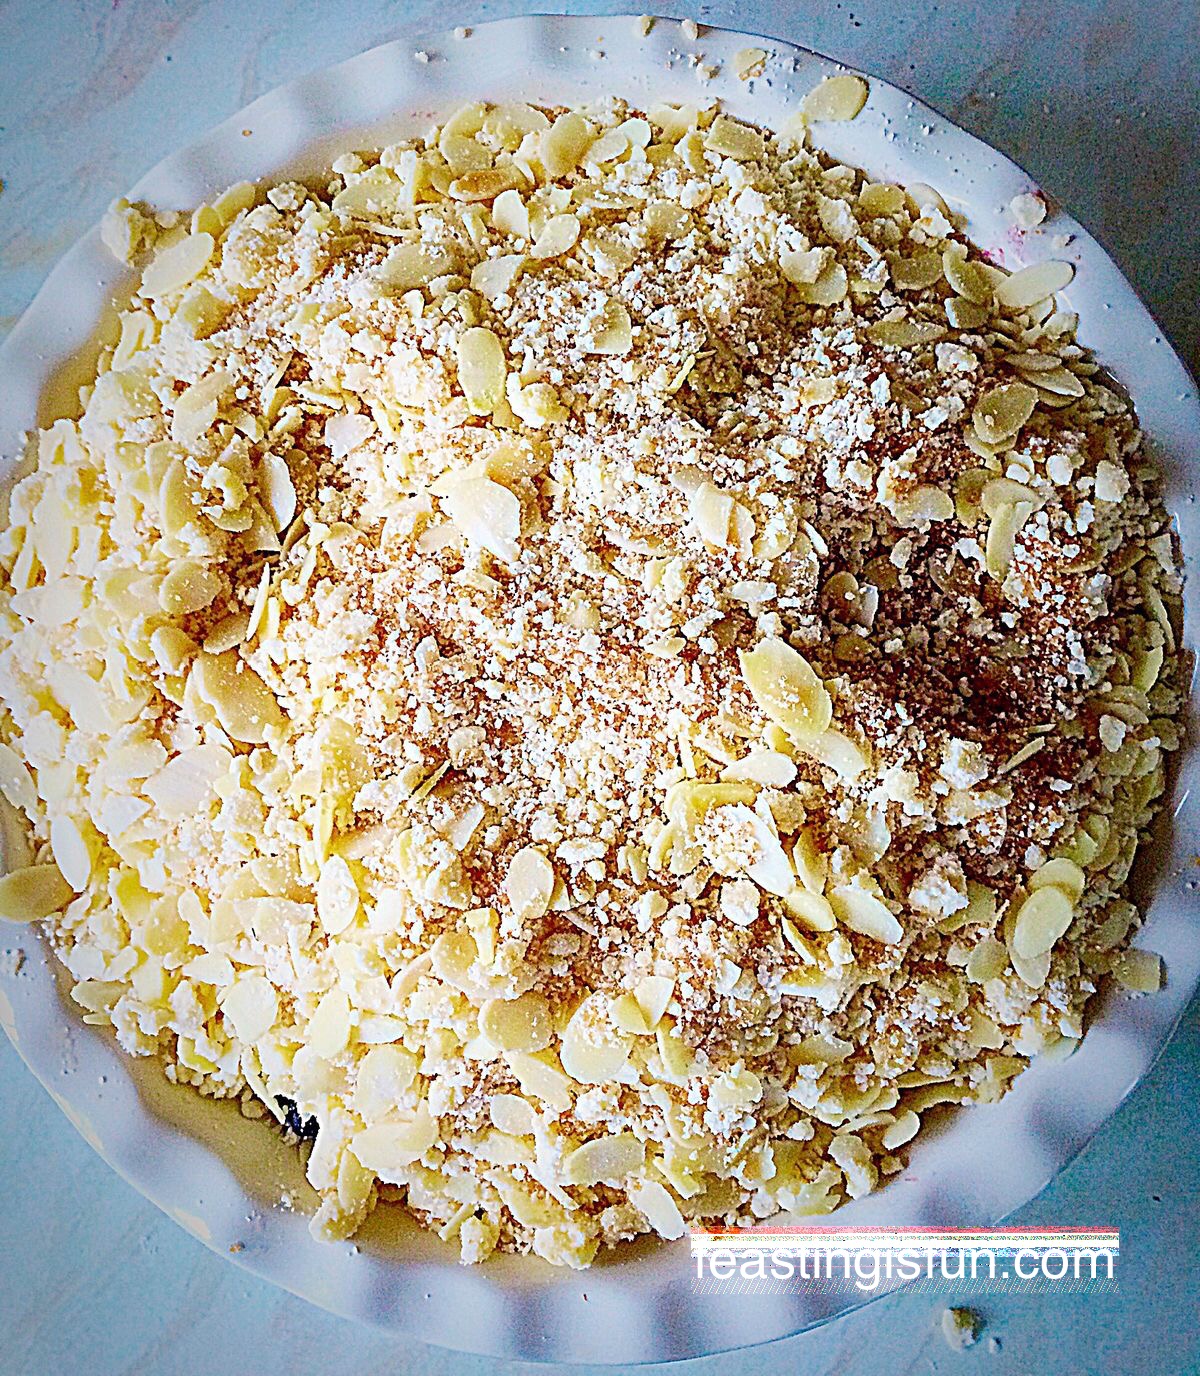
  • Reseve 1 tablespoon of the flour and sift the rest of the flour, salt and baking powder into the bowl.
  • Mix until the ingredients are just combined.
  • In a separate bowl toss the cherries in the reserved flour, this will prevent them sinking to the bottom of the cake whilst baking – although the cake layer in this Double Cherry Drizzle Oat Bars is not very deep, it is a good tip to remember.
  • Add the flour dusted glacé cherries to the cake batter and mix gently so that they are evenly dispersed.
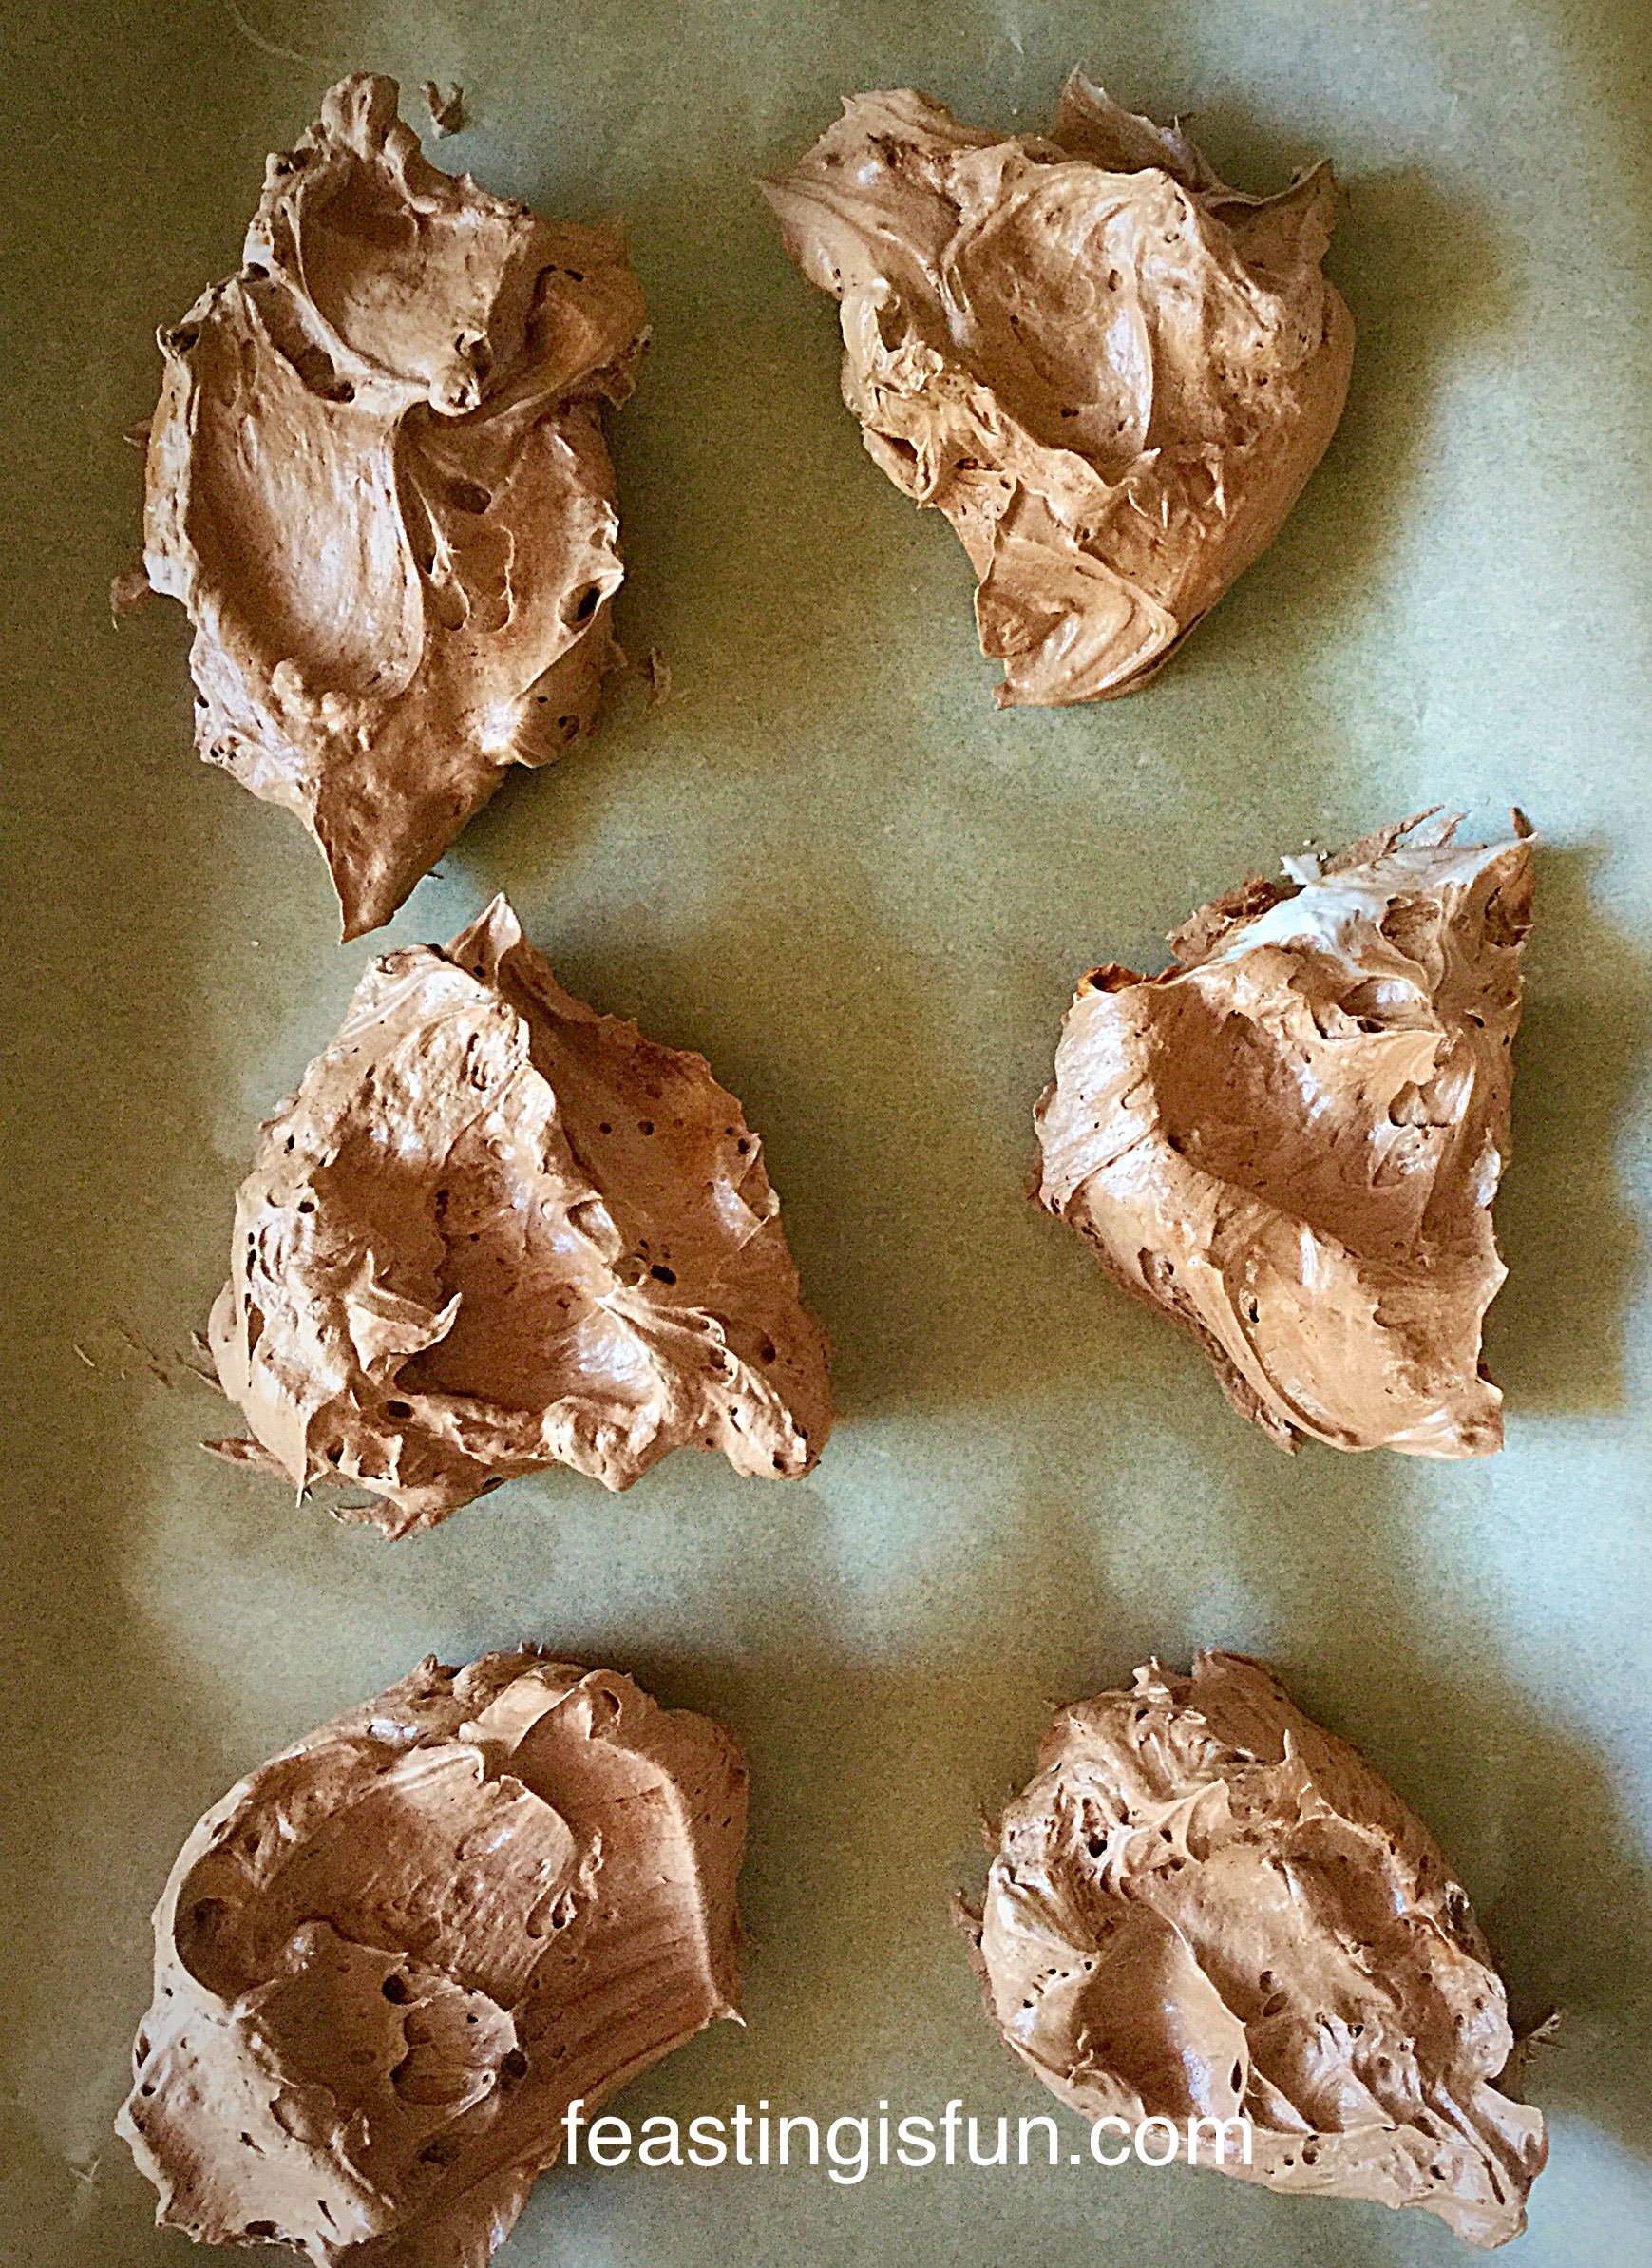
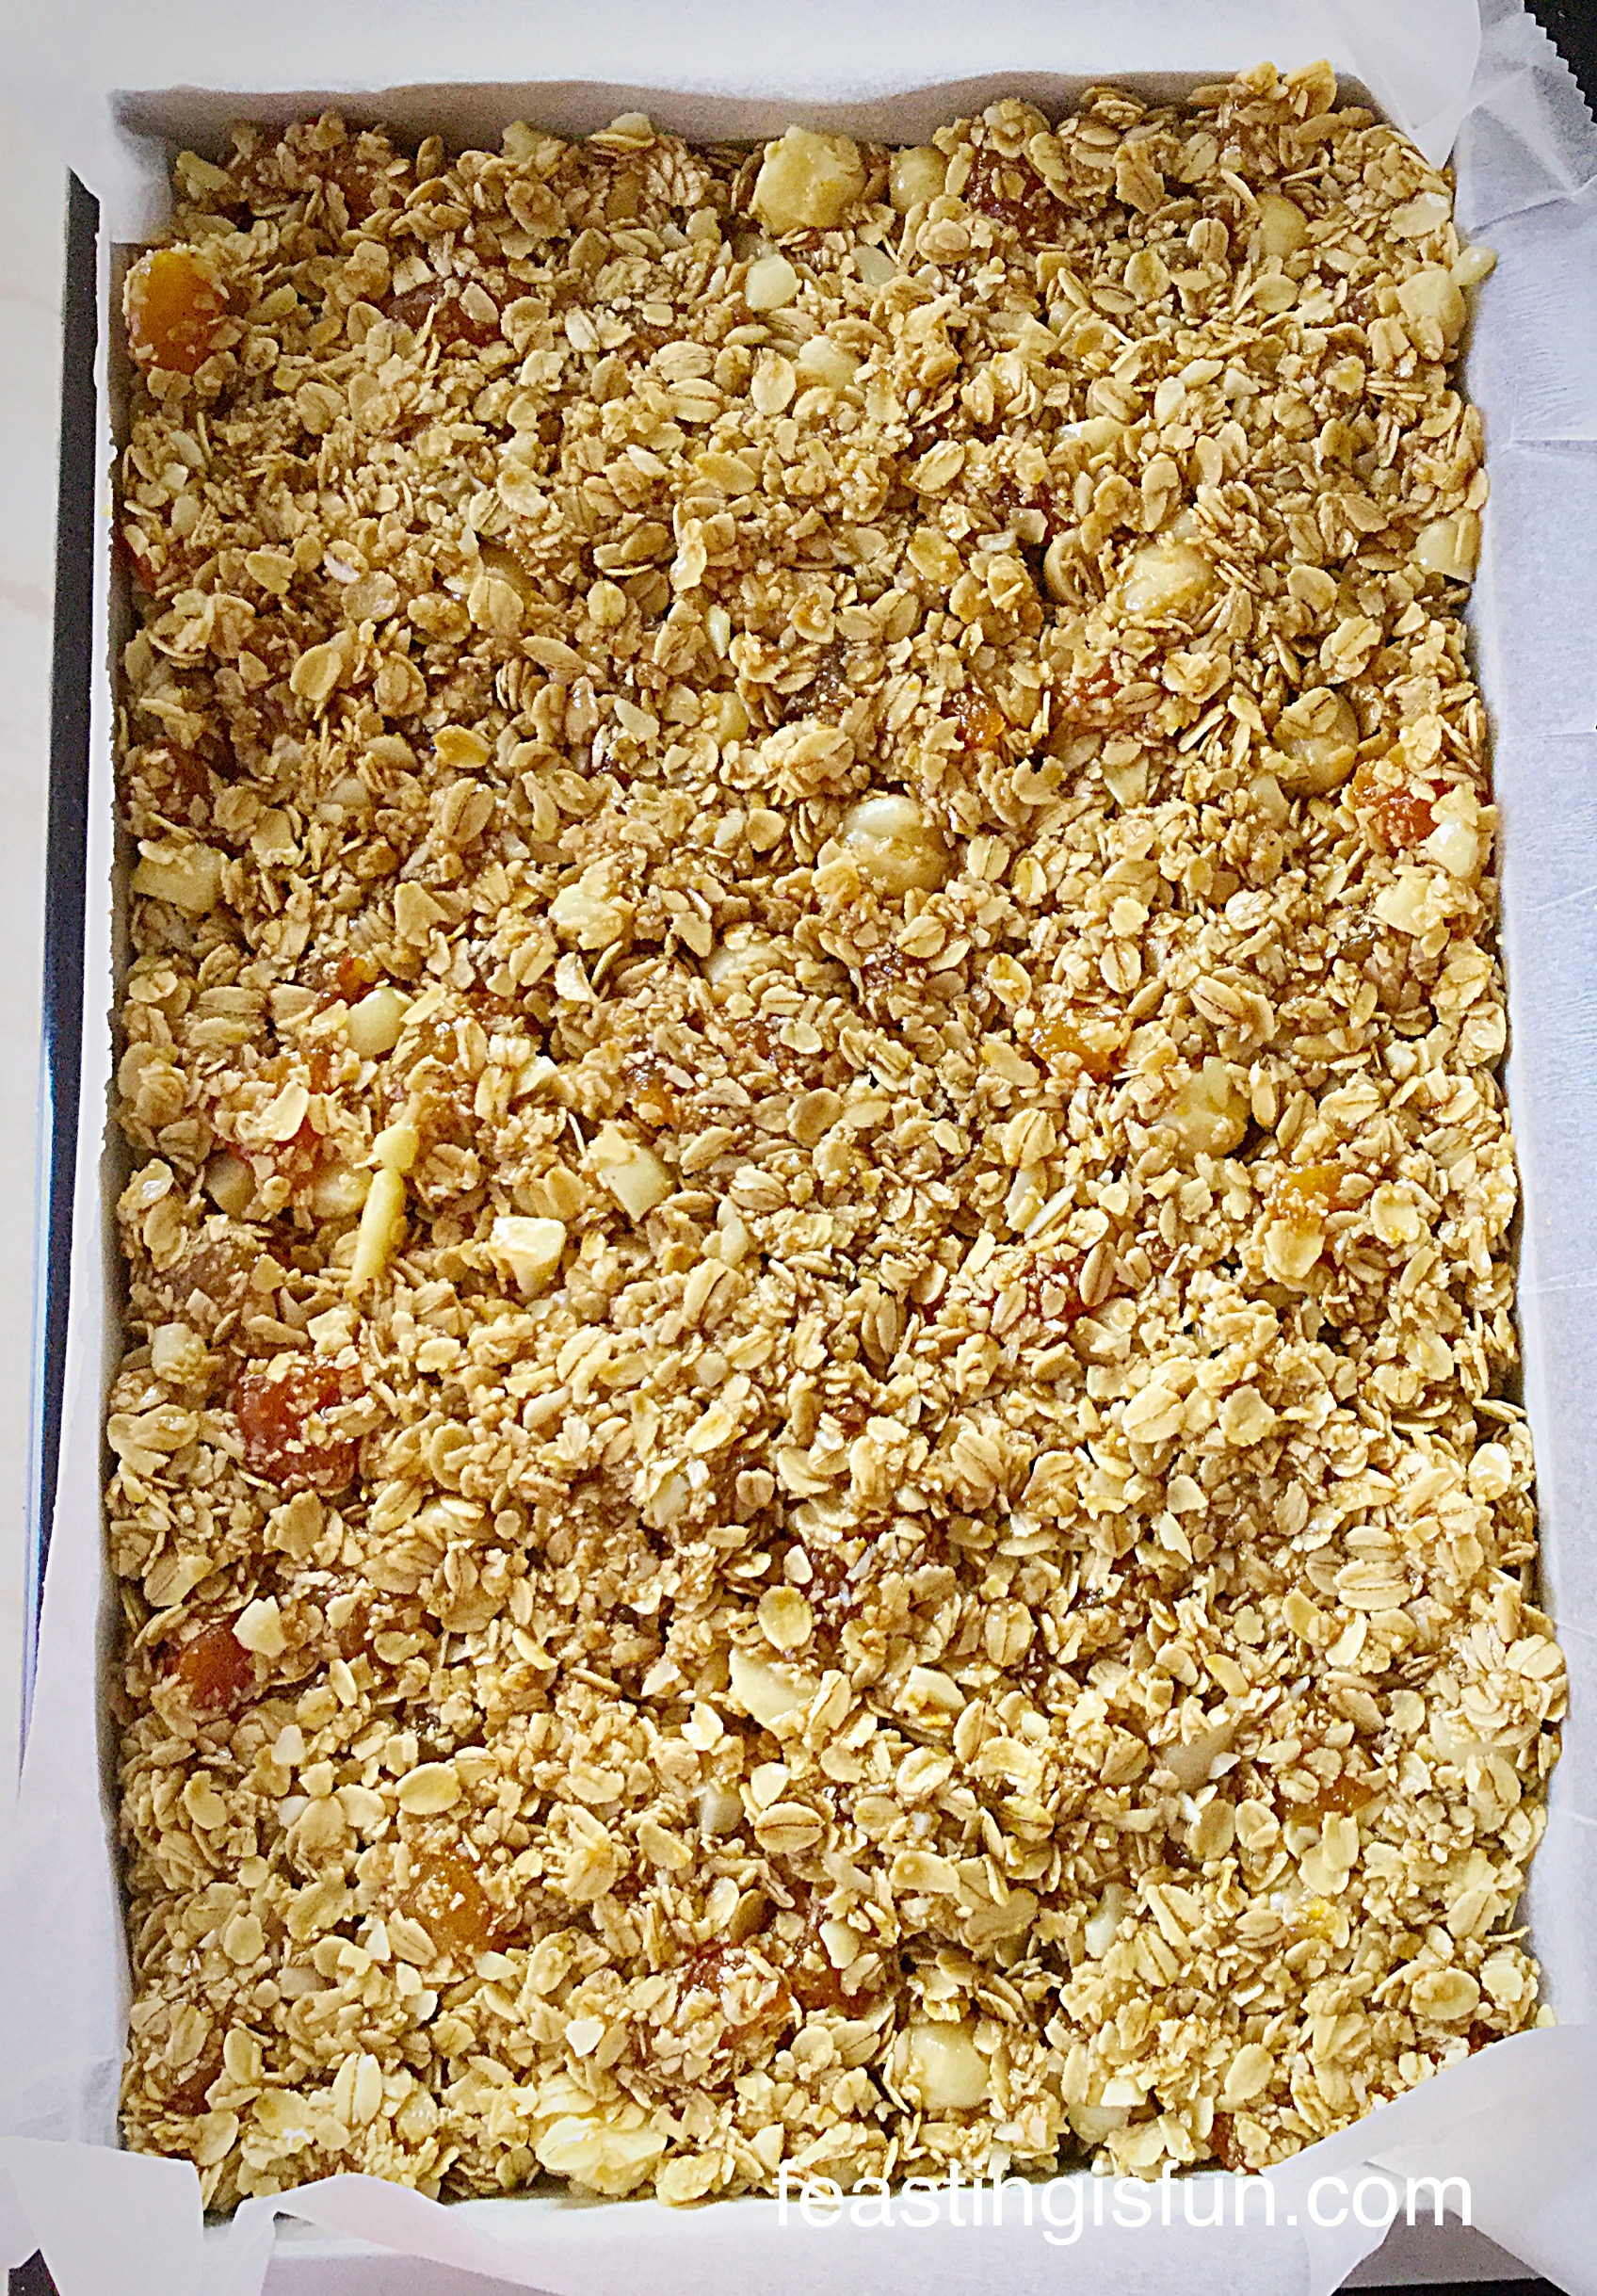
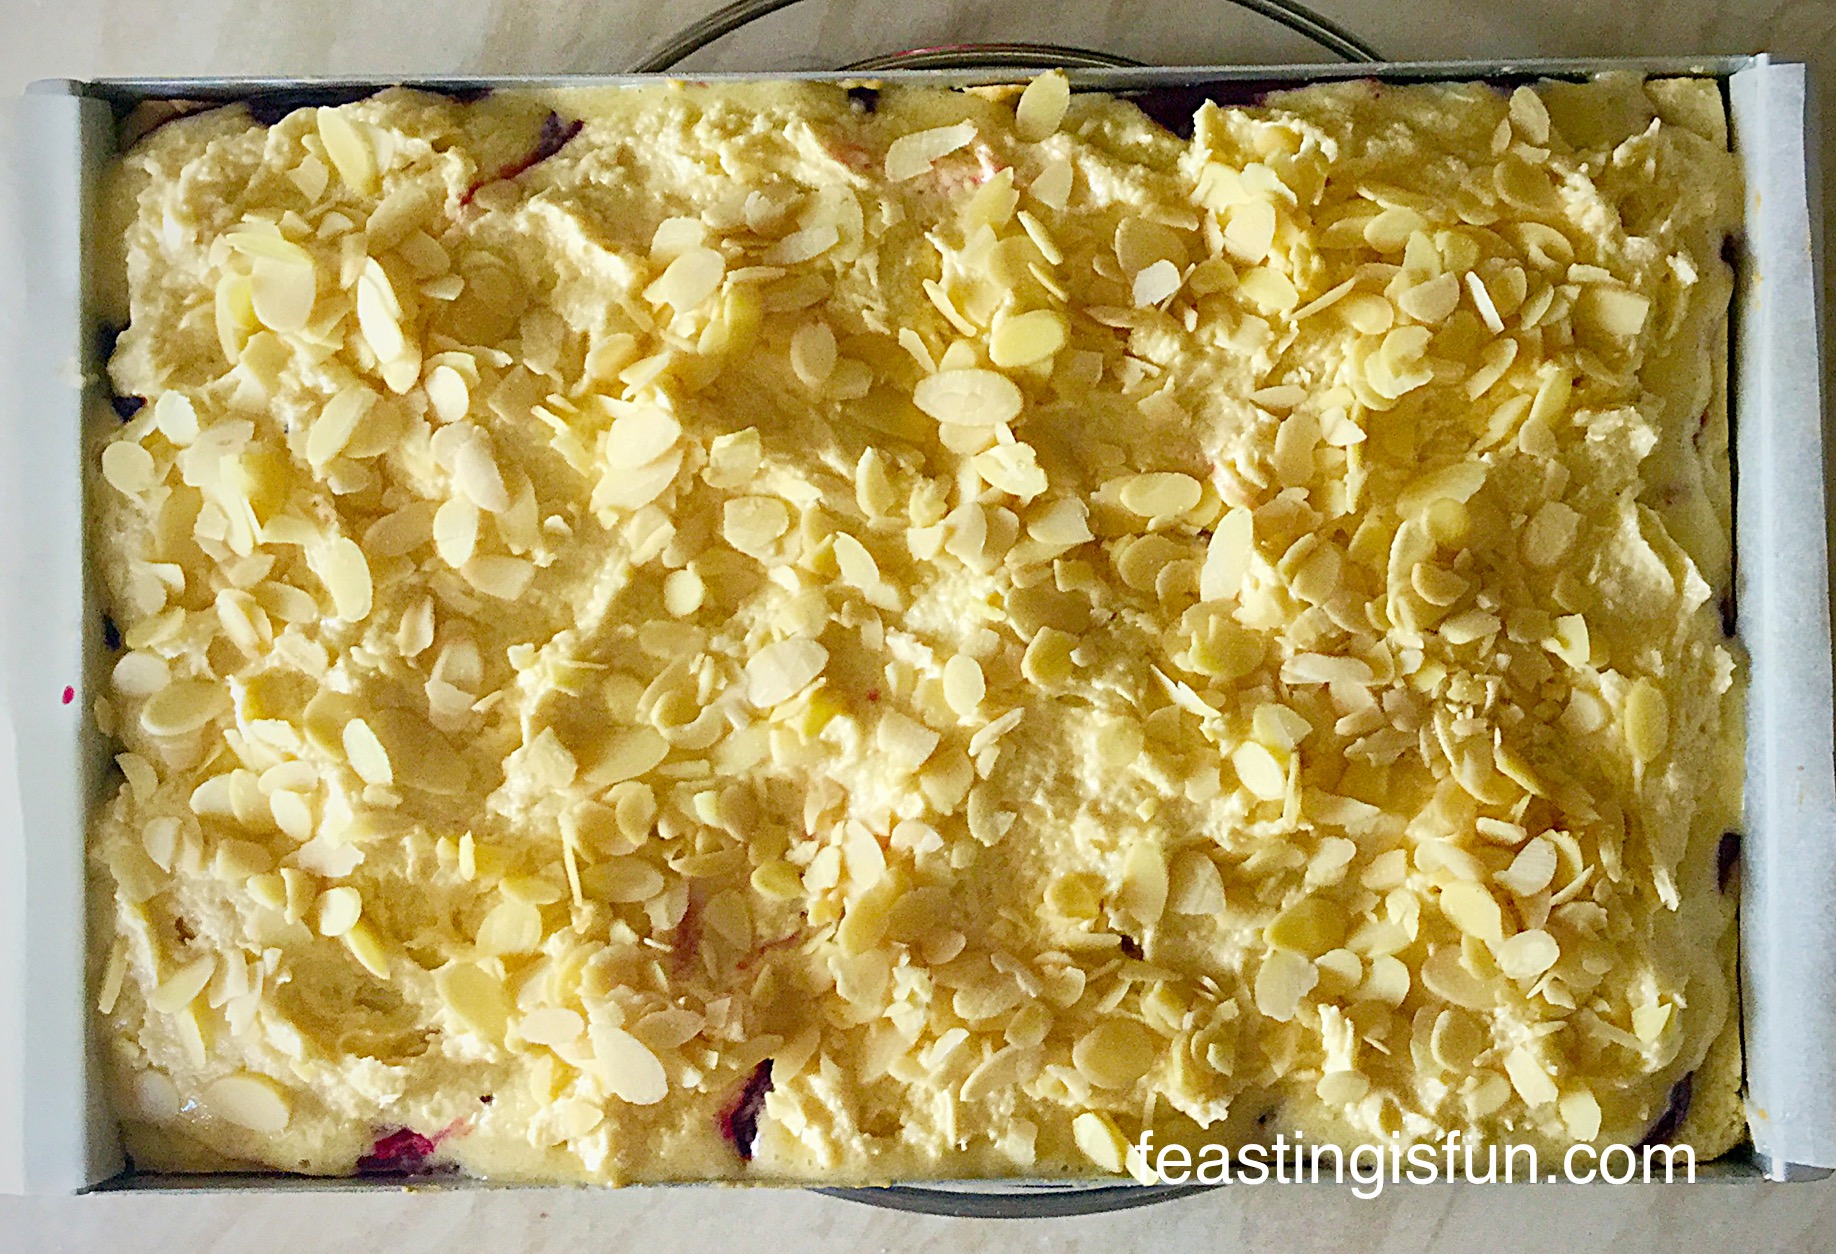
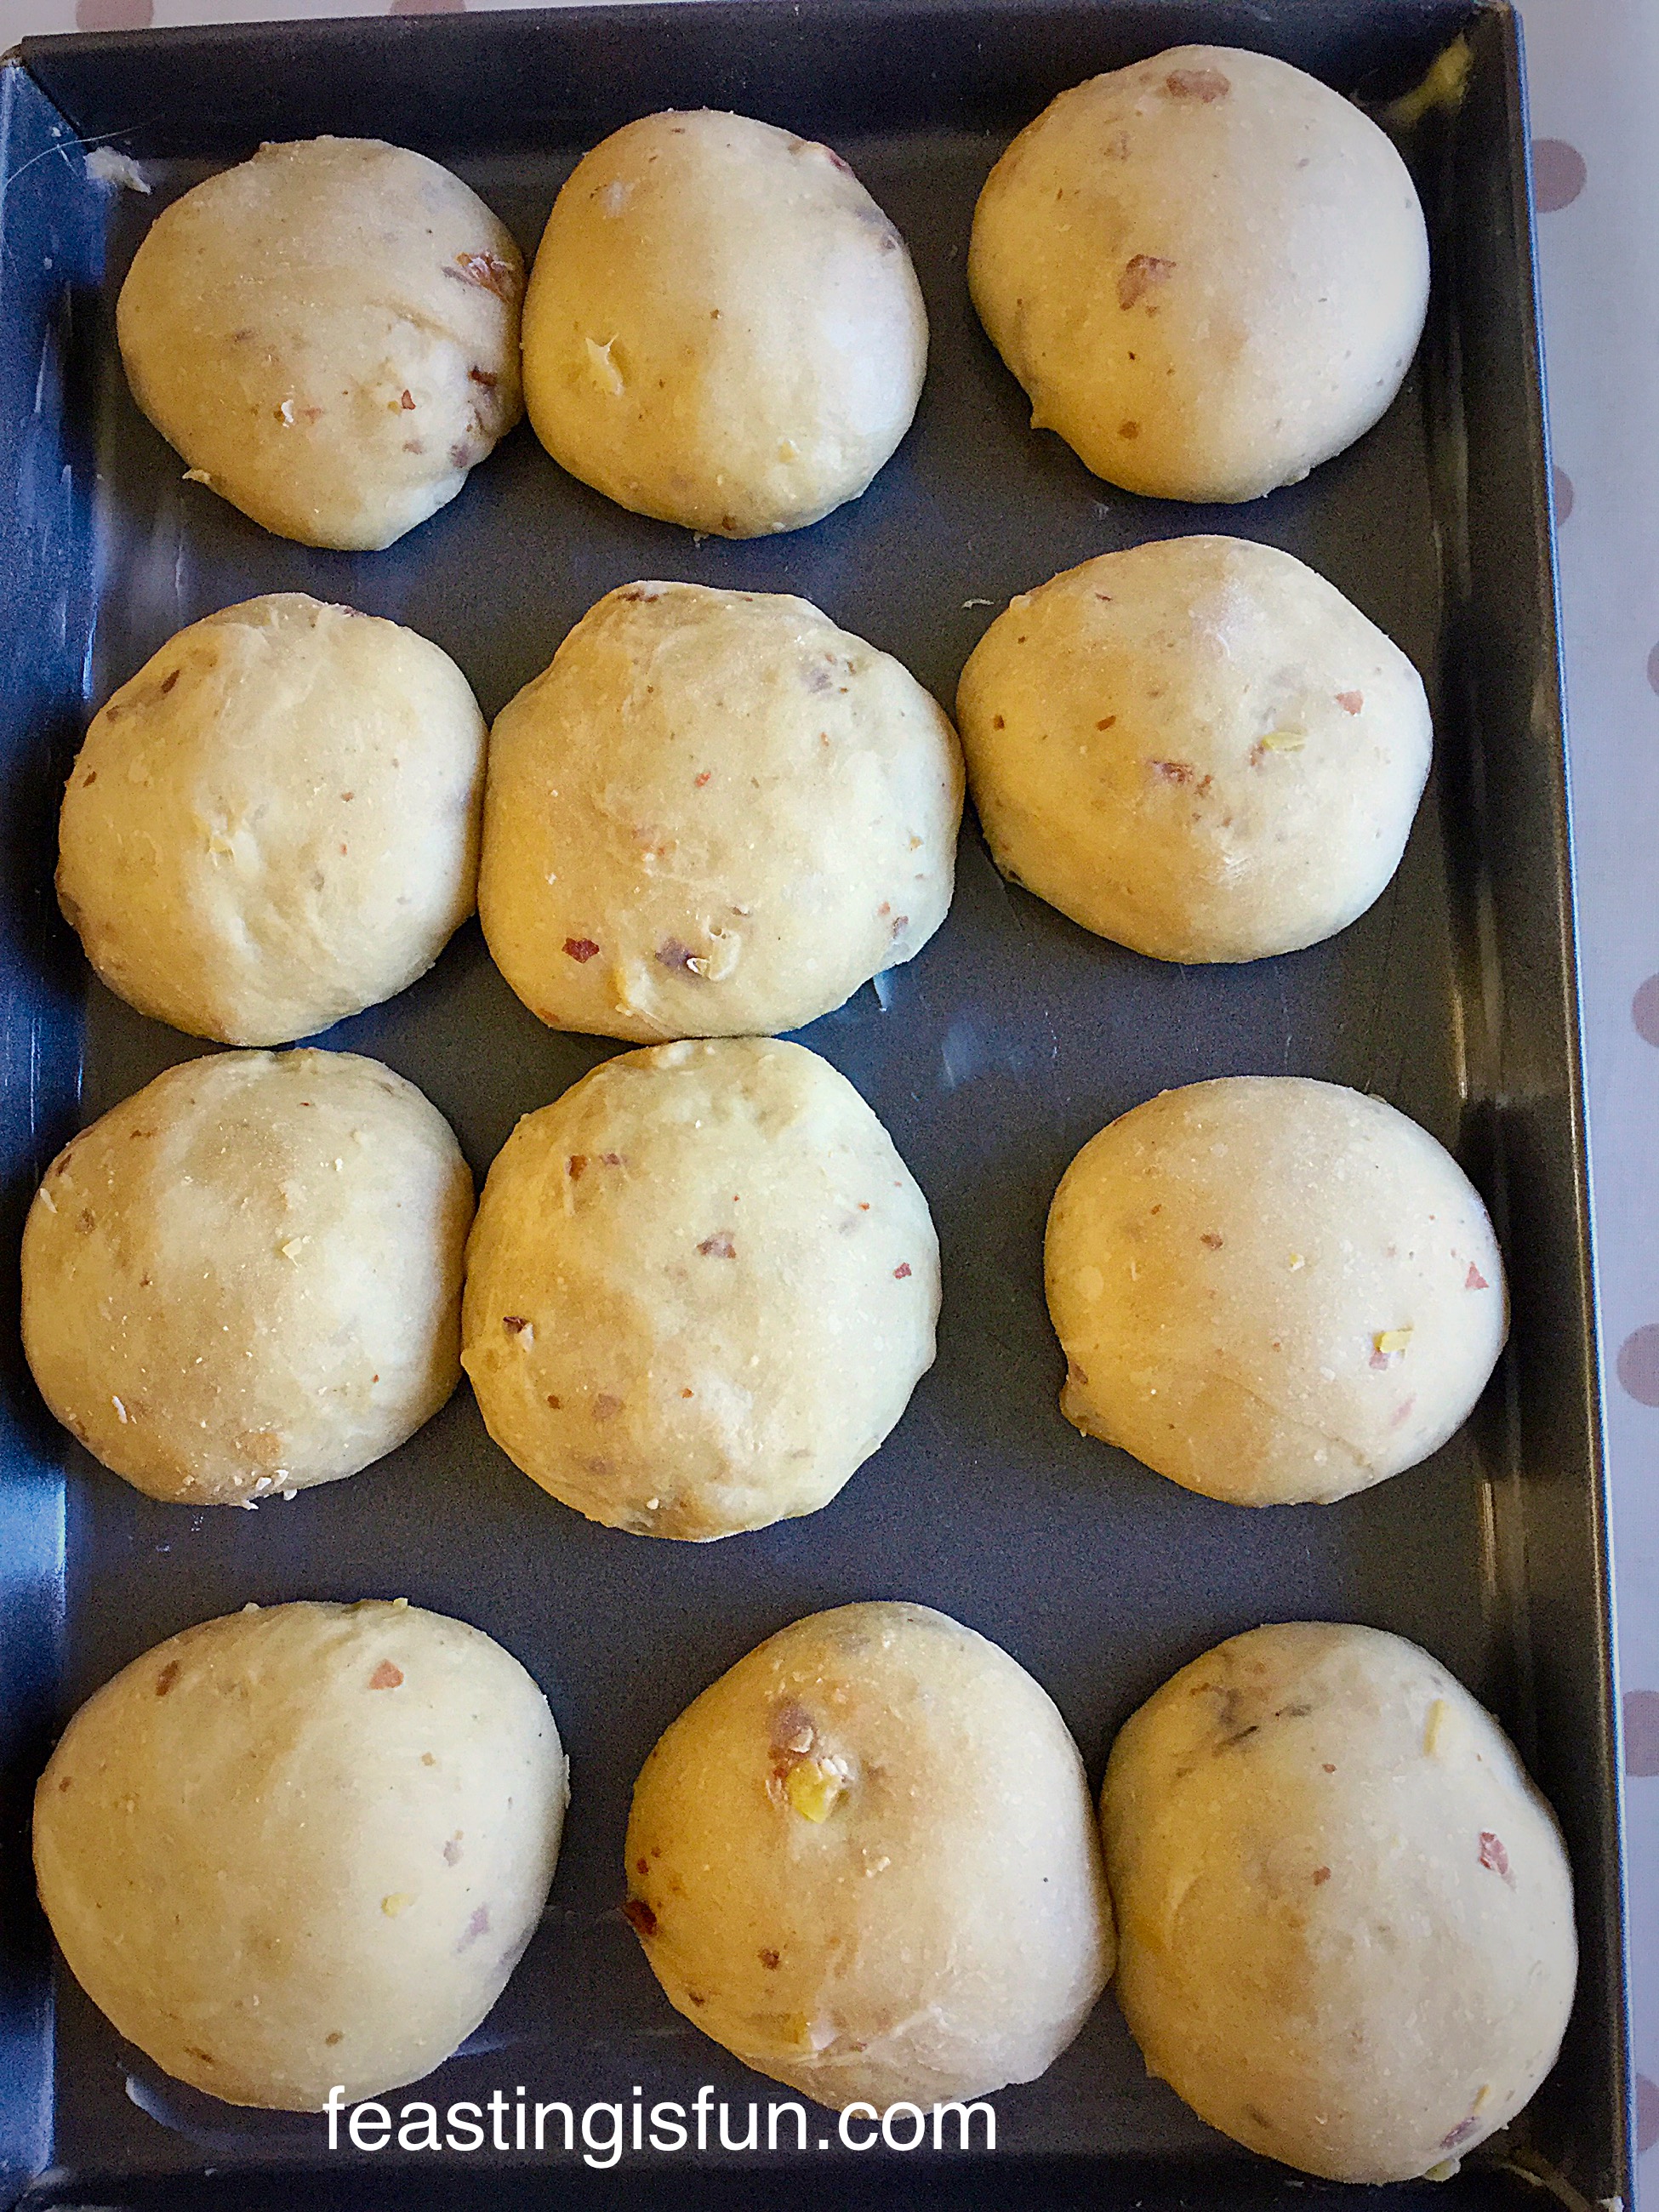
  • Using a spoon, evenly dollop the cake batter over the biscuit/jam base.
  • Spread out the cake batter until it almost reaches the edges – I used the back of a metal spoon. The cake will spread to fill the pan whilst baking.
FF Double Cherry Drizzle Oat Bars
Double Cherry Drizzle Oat Bars ready for the oven.
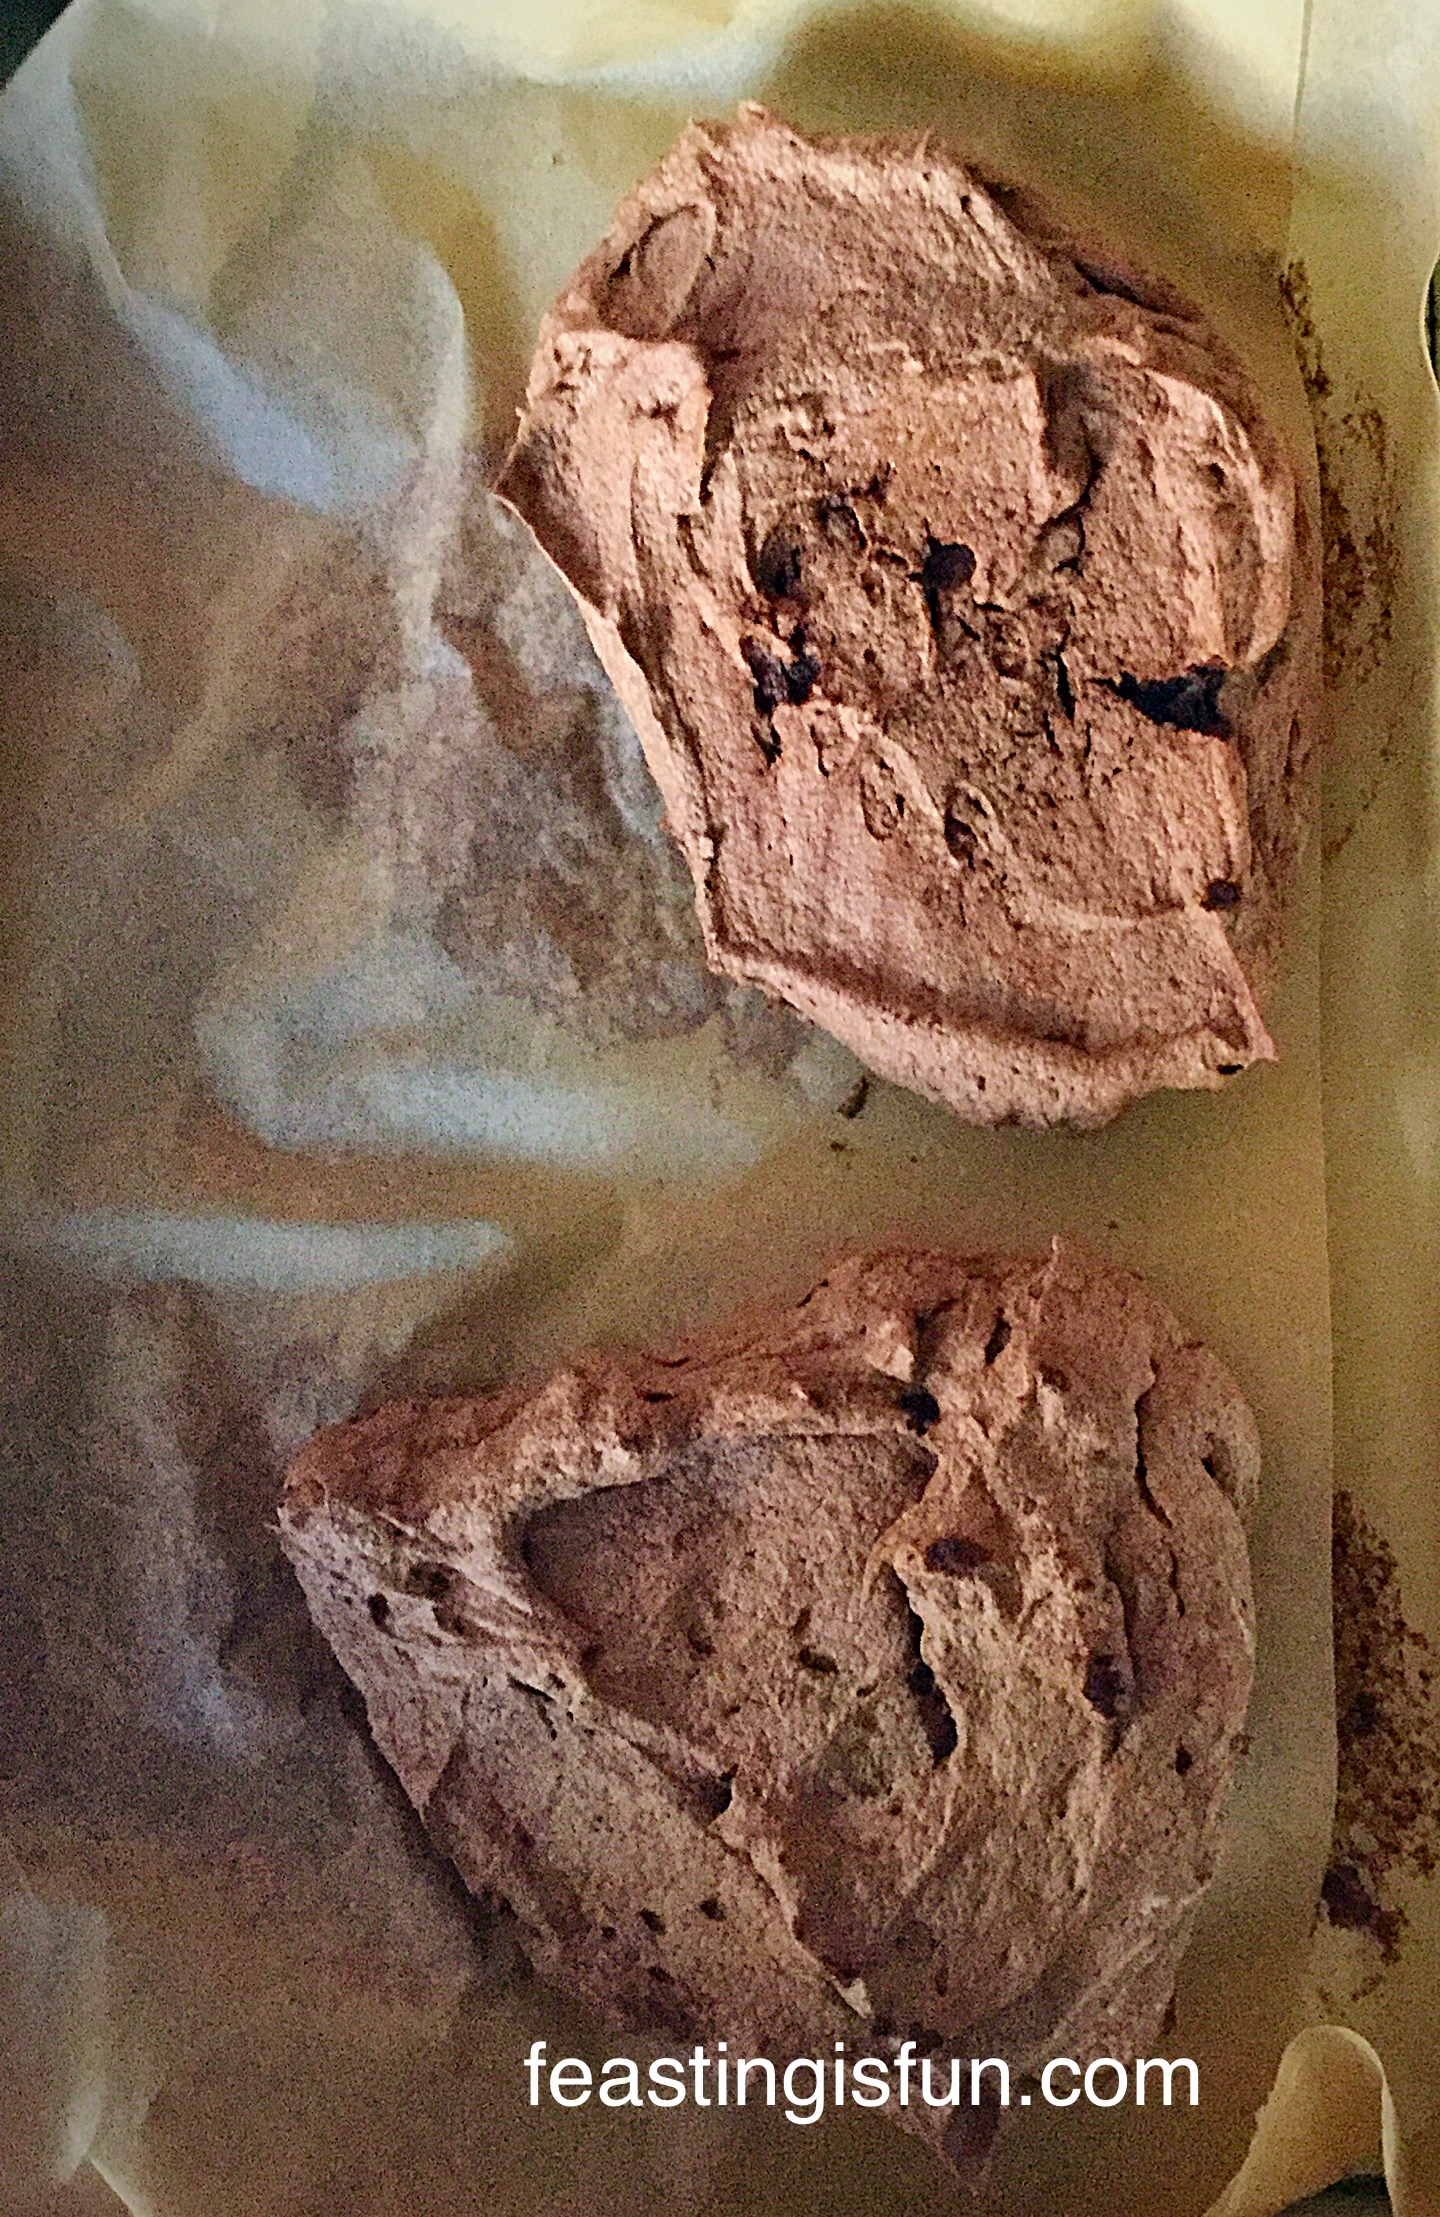
  • Place the tin into the centre of the oven and bake for 30-35 minutes.
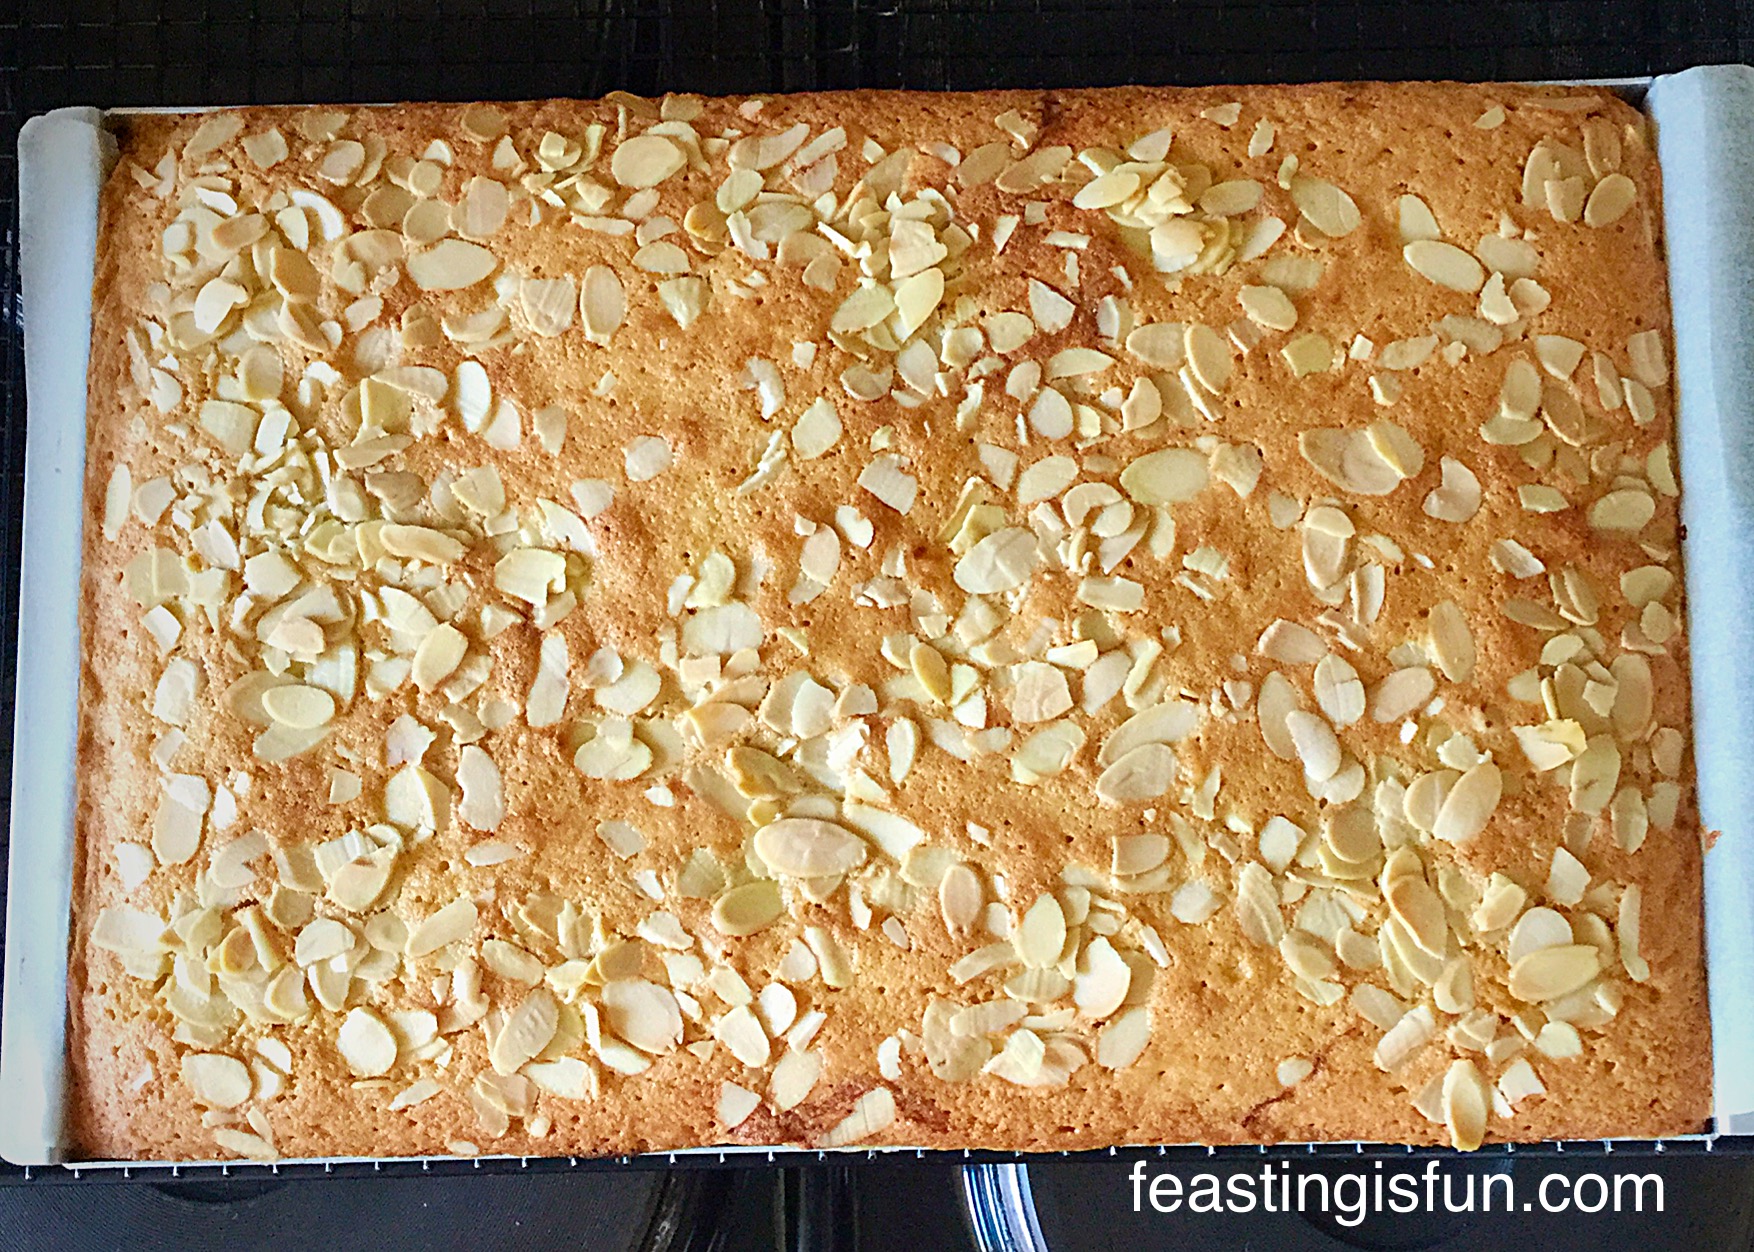
  • The cake layer is baked with it is a golden colour and springs back from a light touch.
  • When baked remove the tin from the oven.
FF Double Cherry Drizzle Oat Bars
Double Cherry Drizzle Oat Bars a beautiful golden colour when baked.
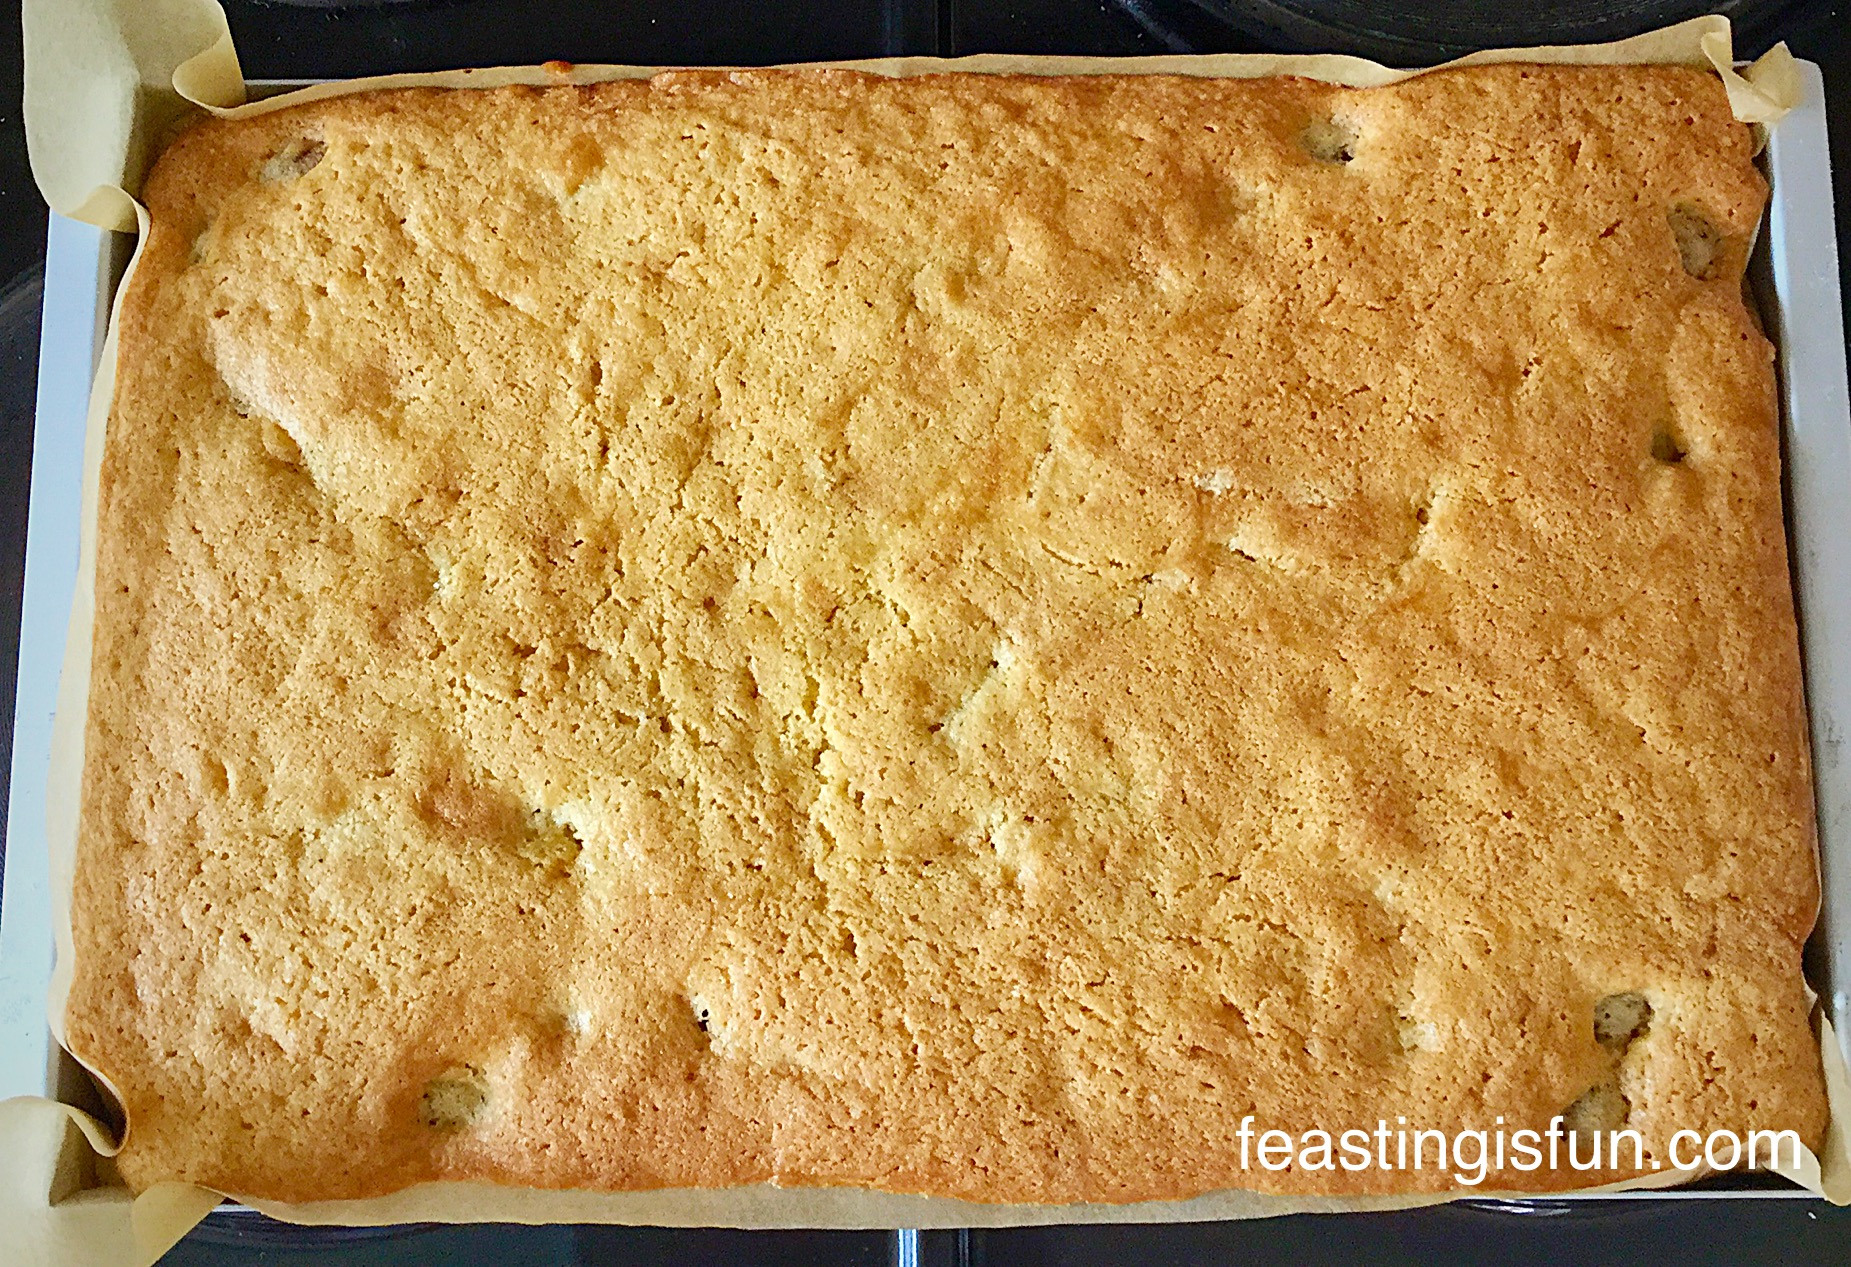
  • Allow the Double Cherry Drizzle Oat Bars to cool completely in the tin.
  • When cooled invert onto a baking rack and carefully remove the baking parchment.
  • Place another cooling rack on top of the tray bake and flip over again, your bake should now be cake side up.

Making The Cherry Drizzle

  • Sift the icing sugar into a medium sized bowl.
  • Add the cherry syrup and stir.
  • Next add 3 teaspoons of cool tap water and the almond extract.
  • Stir to combine. You will have a thick, icing that will just hold it’s shape when piped.
  • Fill a small disposable piping bag with the pink, cherry icing.
  • Snip the very end of, leaving a small hole.
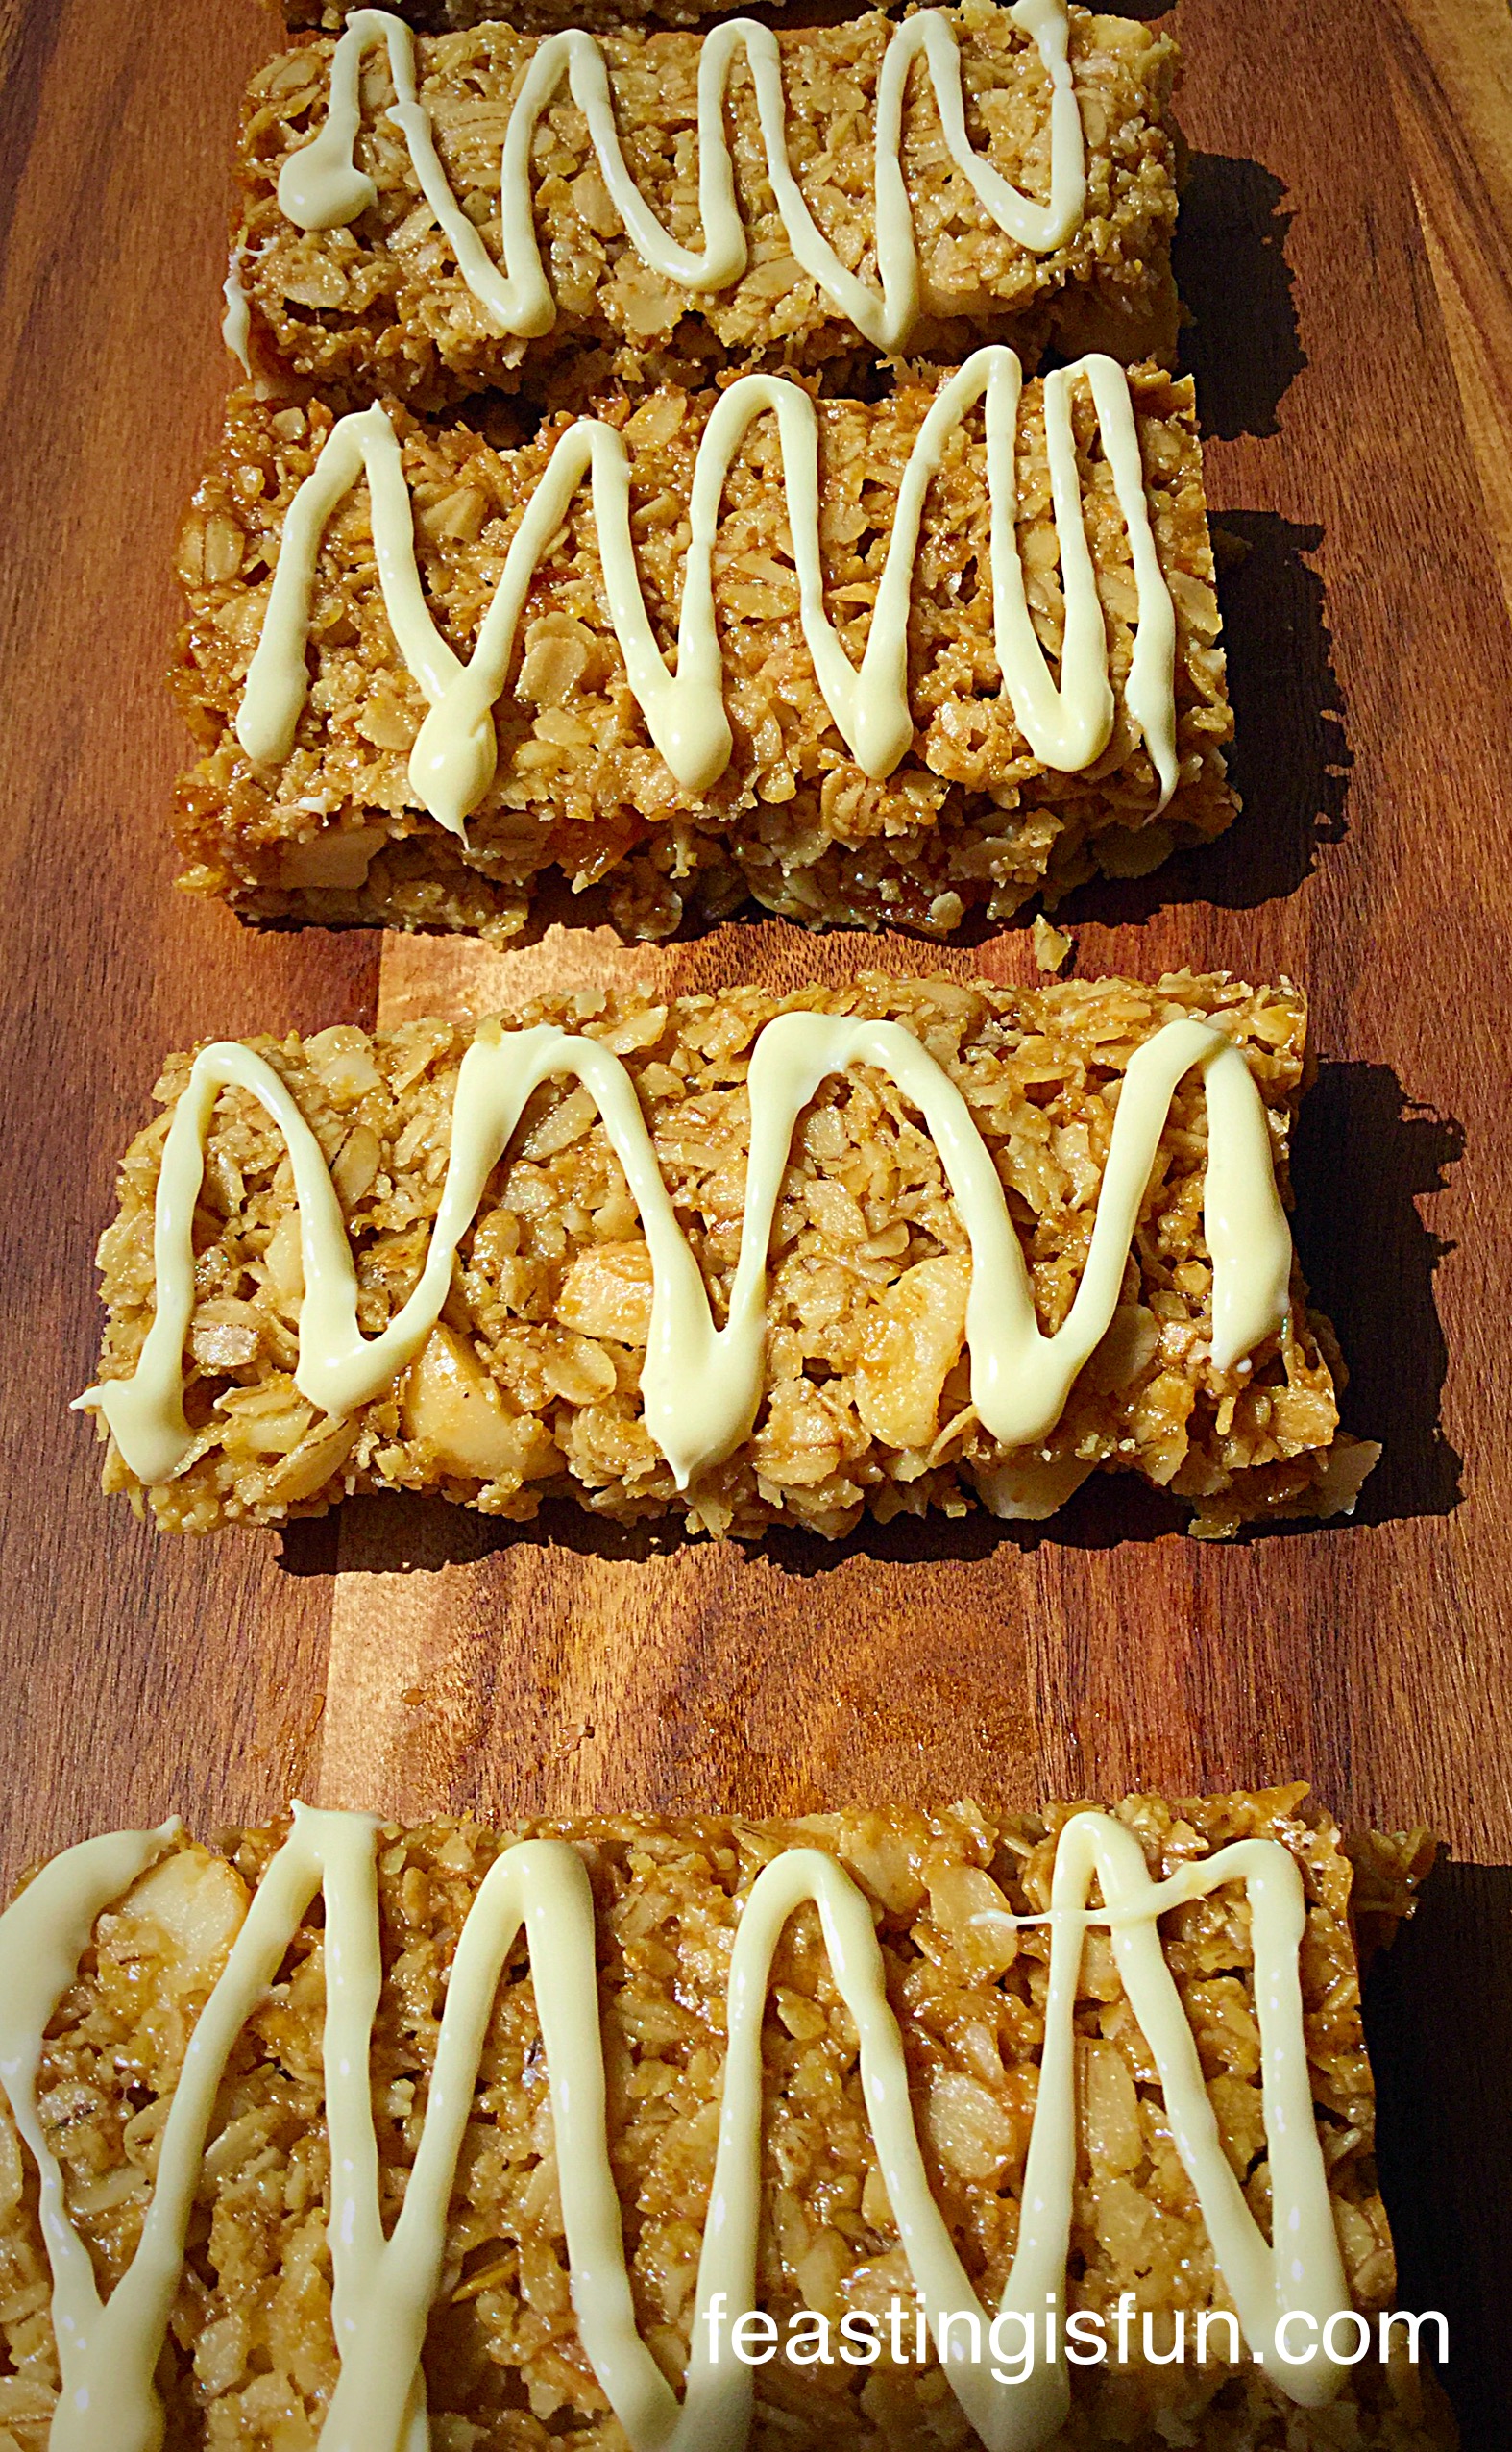
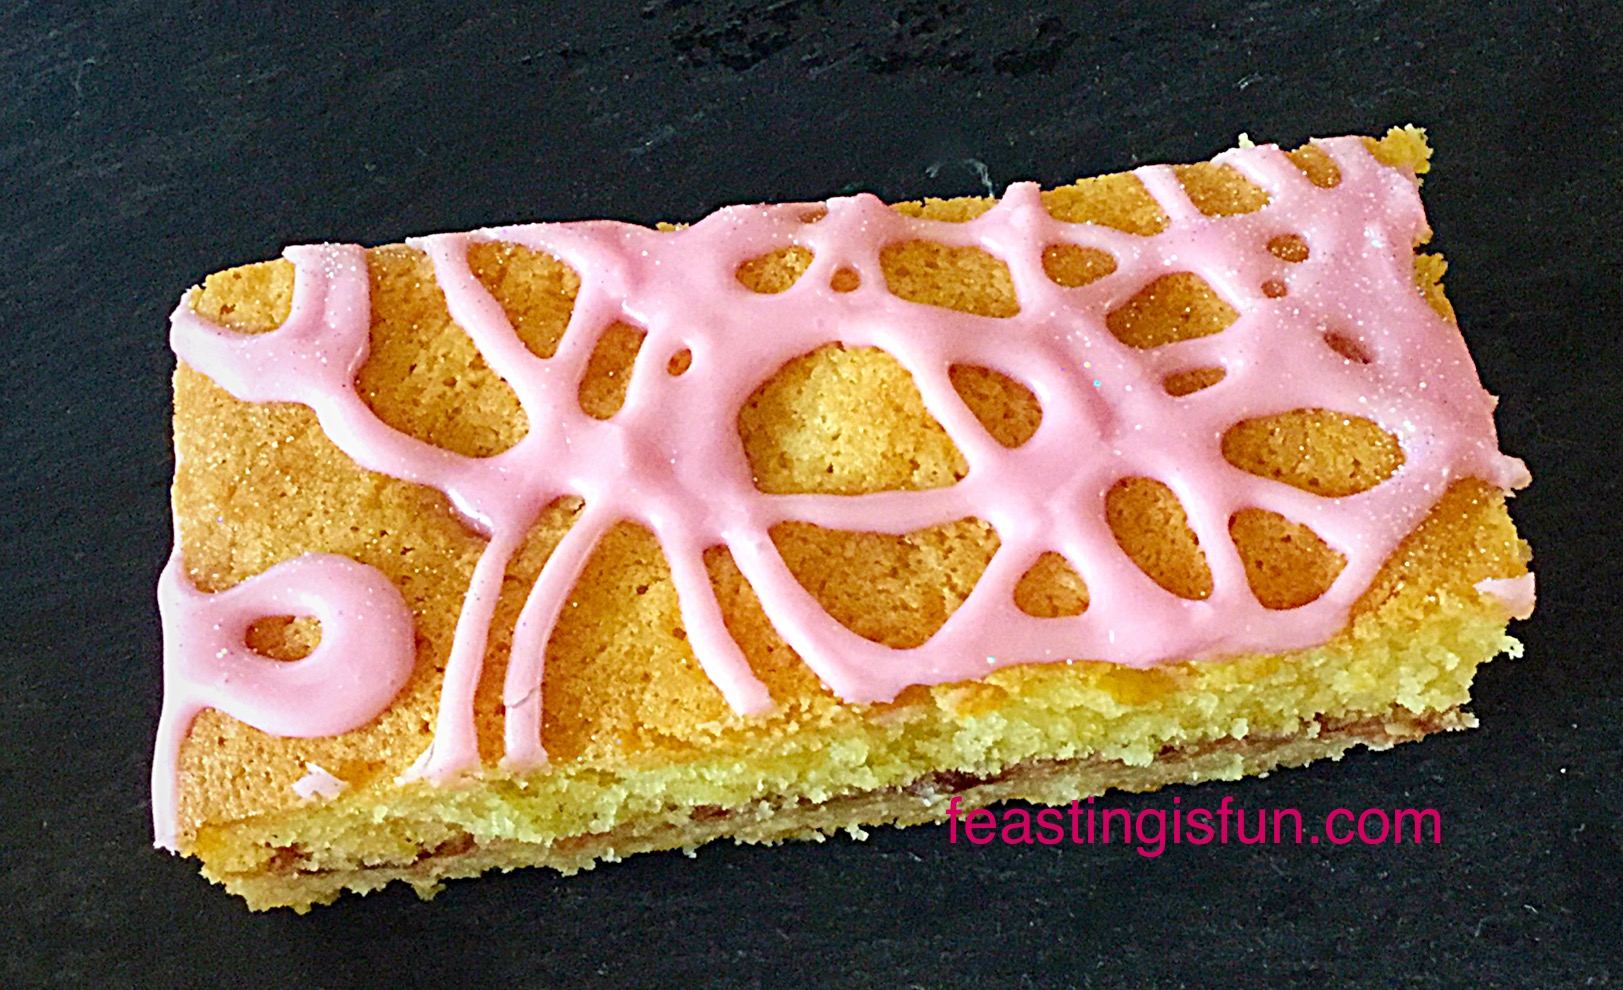
  • Pipe swirls and squiggles all over the top of the tray bake. Alternatively, use a teaspoon to lightly drizzle the icing over.
  • Dust with a sprinkle of your favourite edible glitter, if desired.
FF Double Cherry Drizzle Oat Bars
Double Cherry Drizzle Oat Bars decorated in black cherry swirled icing.
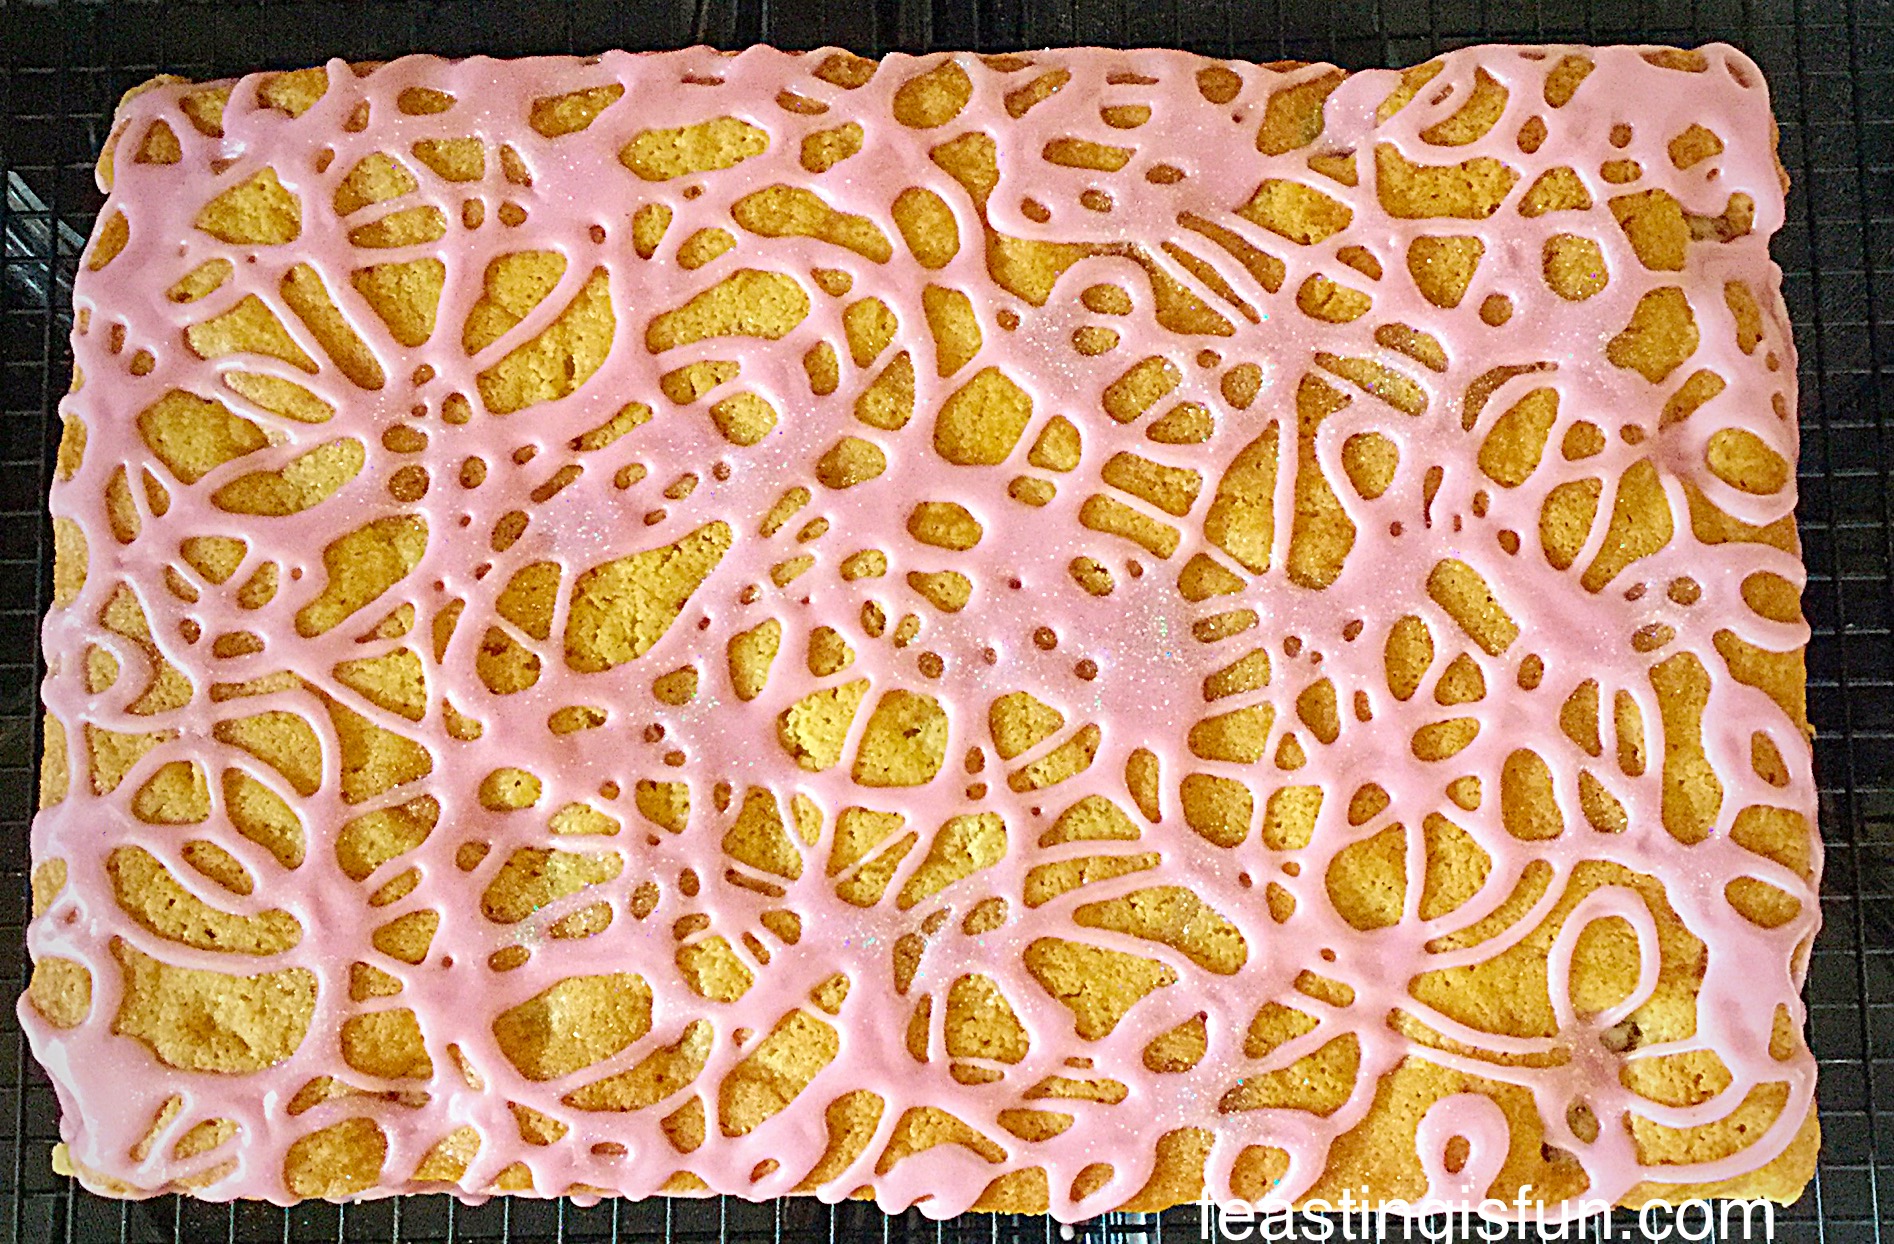
  • Allow the drizzle to completely set before slicing.
  • Transfer the Double Cherry Drizzle Oat Bar slab onto a flat surface. I use a glass kitchen saver, don’t use your best knife for cutting as the glass will blunt it!
  • First of all, cut down the centre length of the bake. Cut across the middle of the width to create 4 quarters. Finally, cut each quarter into 4 bars
FF Double Cherry Oat Bars
Double Cherry Drizzle Oat Bars sparkling in the sunshine.

Take lots of photos of these utterly dazzling Double Cherry Drizzle Oat Bars just because they are so pretty! Also don’t forget to pop a picture on Twitter/Instagram, tag me in and I will retweet, or give you a shout out.

Portable Food

I know in previous posts that I’ve mentioned not taking ‘anything’ iced on picnics, however, these bars are so completely delicious I’m going to make an exception. The nutty flavoured oat base and hint of almond extract in the cherry drizzle work together in complete harmony with the cherry studded sponge creating a perfectly flavour balanced bar. They stop the Double Cherry Drizzle Oat Bars from being too sweet.

Ok so the smart ones among you (that’s everyone, just to be clear), may have notice that these ‘double’ cherry are in fact triple cherry drizzle oat bars. I’d already written most of this post, edited and labelled photos, so I thought I’d throw in the extra one for free 😉

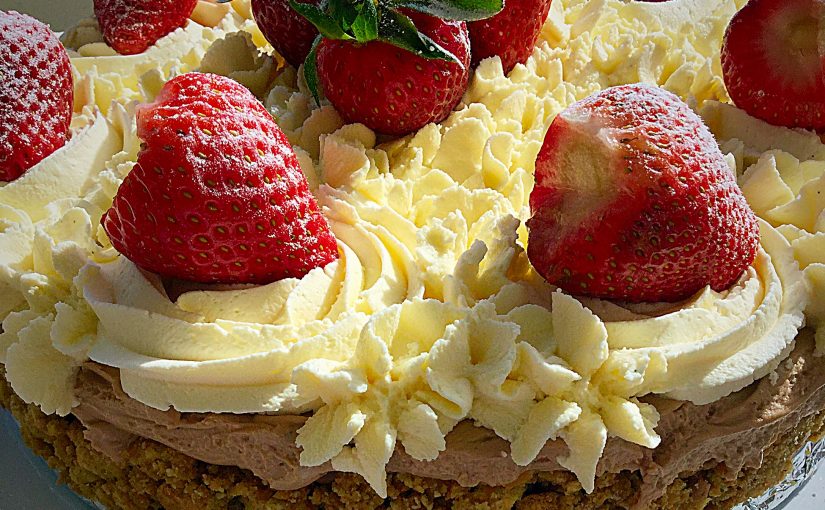
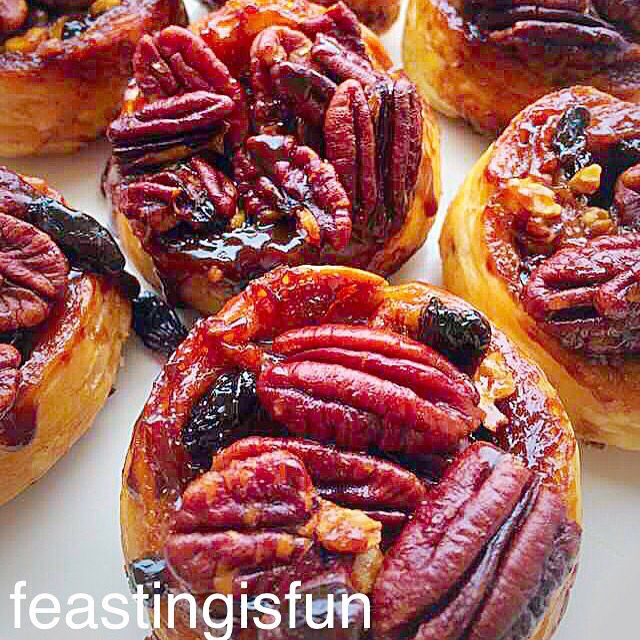
If you have enjoyed these Double Cherry Drizzle Oat Bars, here are some other recipes you may like too:

Macadamia Apricot Flapjacks

FF Double Cherry Drizzle Oat Bars
Macadamia Apricot Flapjacks delicious oaty goodness.

Bakewell Shortbread Bars

FF Double Cherry Drizzle Oat Bars
Bakewell Sortbread Bars utterly yummy.

Sticky Pecan Sultana Buns

FF Double Chocolate Cherry Drizzle Oat Bars
Sticky Pecan Sultana Buns so easy to make and incredibly delicious to eat.

Eating outside, whether on a picnic, at a barbecue or even in the garden, is such a great way of getting together with friends old and new. There is something so informal and relaxing being in the great outdoors. I can see why so many people choose to get married outside, as it’s a great way of mingling a diverse combination of guests in a relatively informal environment.

We are planning a fab get together with our friends and neighbours over the coming weeks, so watch out for fun, feasting and barbecue recipes coming up.

Are you planning on any outdoor get together’s?

Do you enjoy the great outdoors  – even if it’s only your back garden?

Sammie xx

No part of this post may be reproduced or duplicated without the written permission of the owner. Please see my Disclosure Policy.


Share
Facebooktwitterpinterestlinkedintumblr

Chicken Herb Burgers

Share
Facebooktwitterpinterestlinkedintumblr

Ah the sunshine of the last few days has almost tempted me to get the barbecue out. Judging by the delicious aromas wafting across our garden, I am not the only one. Instead I made these Chicken Herb Burgers and we ate them outside!

FF Chicken Herb Burgers

I have never really been a fan of barbecues. The mass produced cheap sausages and burgers in limp, dry buns, has never held any appeal for me. Yet last year when went were on holiday to Devon we had a barbecue to celebrate our eldest daughter’s 16th birthday.

It was a totally awesome barbecue!

The weather was fantastic and so was the food. King prawn kebabs, free range pork sausages, unbelievably good chicken and lime kebabs – all of which I intend to make again this year and share with you. Oh and we skipped buns in favour of pita bread!

These Chicken Herb Burgers would be absolutely awesome cooked on a barbecue. They are equally fantastic cooked in a cast iron skillet, where the searing heat ensures a great golden outer, which left un-disturbed seals in all the fantastic juices and holds the burger together.

Chicken Herb Burgers

Higher Welfare Chicken

Made from 100% additive free, organic/free range, minced chicken, these burgers are meaty and juicy. The only addition is some fresh thyme, garlic and seasoning. No suspect, milky liquid escapes from the burgers whilst cooking, because the minced chicken does not have any liquid added to it, pre-sale, to bulk it out.

Chicken Herb Burgers use premium meat and boy can you taste the difference.

I am well aware that many people feel that they cannot afford to buy organic meat. Yet it is so much better for us. Happy hens fed a natural diet, allowed to roam freely and build muscle as they slowly mature are a million miles away from their mass produced, intensely reared counterparts.

My answer to the increased cost of good organic chicken is simply to eat it less often, ensure that absolutely nothing goes to waste and cherish the flavour of how real chicken should taste!

Chicken Herb Burgers

If you’ve never made your own burgers before, then this recipe for Chicken Herb Burgers is a great place to start 😉

Recipe: Makes 6-8 Chicken Herb Burgers

2 x 454g/2lb Minced Chicken from Graig Farm

3tbsp Olive Oil

1tbsp Fresh Thyme

4 Garlic Cloves

1tsp Sea Salt – I use Maldon Sea Salt Flakes

1tsp Freshly Ground Black Pepper

1tbsp Butter

Method:

Making the burgers

  • Empty both packets of chicken mince into a large bowl.
  • Add the thyme, crushed garlic, 2 tablespoons olive oil, salt and pepper.
FF Chicken Herb Burgers
You can alter the amount of garlic to your preference.
  • Using clean hands squish (mix) all the ingredients together until they are thoroughly combined.
  • Divide the chicken mixture into 6 or 8 equal portions and shape into burger patties using your hands.
  • Place the burgers on to a plate or foil container and chill in the fridge for at least an hour – this helps the Chicken Herb Burgers hold their shape whilst cooking.
FF Chicken Herb Burgers
Chicken Herb Burgers chilled and ready to cook.
  • Heat a cast iron skillet, or heavy bottomed frying pan until searing hot.
  • Add 1 tablespoon of oil and add the chicken burgers, one at a time – take care not to overcrowd the pan.
  • Turn the heat down slightly. The outside of the burgers will sear on contact with the hot pan, however, we don’t want them to burn on the outside whilst remaining raw in the centre.
  • Once placed in the pan do not disturb the burgers for at least 8 minutes. This will allow a nice crust to form on the underside of the burger.
  • After 8 minutes, using a metal spatula, flip each burger over.
FF Chicken Herb Burgers
Chicken Herb Burgers golden, cooked and ready for a brioche bun.

Cooking the Chicken Herb Burgers

  • You can see from the photo above that the chicken burgers really hold their shape well whilst cooking.
  • Cook the burgers for another 5 minutes and then add a little dot of butter to the top of each burger – trust me, this adds an extra layer of flavour and juiciness.
  • Once the butter has melted, cut halfway into a burger to check if it is cooked. The meat should be completely opaque all the way through without even a hint of pinkness – these are chicken burgers and so unlike beef or steak they must be completely cooked through.
  • Once cooked place each burger on a delicious brioche bun (recipe coming up soon) with slices of tomato, red onion and crunchy green lettuce.
  • Add the condiment of your choice – tomato ketchup for me and pop on the lid of the bun.
  • For an extra restaurant style touch secure each burger in its bun with a steak knife.

FF Chicken Herb Burgers

Homemade tastes best

Oh my, these Chicken Herb Burgers are unbelievably good!

They are a million miles away in taste from the local fast food burger joint. The butter added right at the very end of the cooking adds such a delicious buttery finishing note, which works in complete harmony with the succulent, juicy, chicken.

Making your own burgers is so much fun and you can make them as big or small as you like. You may have indeed noticed that there are only 5 Chicken Herb Burgers in this post. Well that’s because I only made 5!! This was a last minute idea for Sunday dinner and we were hungry! I make no apologies, they tasted so amazingly good.

I haven’t found anywhere else that sells chicken mince other than Graig Farm. Saying that I’ve not looked really hard because why would I? Their additive free organic and free range chicken mince is so fantastic, with freezer friendly packaging. I have no reason to look elsewhere!

FF Chicken Herb Burgers
Minced Chicken flat packed and frozen makes defrosting so easy!

Brilliantly packaged to take up minimum freezer space, this chicken mince also defrosts really quickly as well.

If you have loved this recipe for Chicken Herb Burgers you may also enjoy these:

Chicken and Four Cheese Lasagne

FF Chicken Herb Burgers
Chicken Four Cheese Lasagne

Roast Chicken Noodle Soup

FF Chicken Herb Burgers
Roast Chicken Noodle Soup a great way to make an incredible meal from leftovers.

Chicken Pasta Pesto Salad

FF Chicken Herb Burgers
Chicken Pasta Pesto Salad a great all in one dish.

Eating good quality chicken, cooked well. in one of these recipes is a taste experience you will not forget. Trust me it is worth trying – why not find out for yourself?

Thank you for spending time reading this blog. I really do appreciate you all.

Whatever you are making, baking and feasting on, remember that food tastes better when it is shared.

Sammie xx

This is not a sponsored post. I have been buying our meat from Graig Farm for the last four years now and I cannot personally recommend their produce highly enough.

Share
Facebooktwitterpinterestlinkedintumblr

Raspberry Chocolate Ice Cream Sundae

Share
Facebooktwitterpinterestlinkedintumblr

Every time I look at the colour of this Raspberry Chocolate Ice Cream Sundae it makes me smile.

The colours are bright, summery, vibrant and let’s face it beautiful!

So, just wait until you taste this!

FF Raspberry Chocolate Ice Cream Sundae
Raspberry Chocolate Ice Cream Sundae this is a party in a glass!

So, let’s clear one important matter up, this Raspberry Chocolate Ice Cream Sundae does NOT have to only be eaten on Sunday’s!

I know, I can feel your relief. Because this Sundae is so yummy you will definitely want to eat it on other days of the week too.

What Is A Sundae?

Start with the best vanilla ice cream, drape over vibrant, tart and fruity raspberry coulis and add delicious, soft, chocolate meringue all layered in a tall sundae glass. Absolutely the most incredible flavour combination where every ingredient is distinct, yet each works in total harmony as a whole.

FF Raspberry Chocolate Ice Cream Sundae
Raspberry Chocolate Ice Cream Sundae 

You are so going to love this recipe. Apart from making the deeply chocolate meringues, there is no other baking involved!

And, as much as I love baking, I really, really do – sometimes it’s nice to pull together a fabulous dessert where very little effort.

Happy Baking Accidents

In fact this Raspberry Chocolate Ice Cream Sundae came about by accident. Having baked the chocolate meringues I was hoping to make an Eton Mess type dessert. The cream, which was well within it’s use-by-date had gone off, the strawberries were past their best. The whole Eton Mess thing just wasn’t happening – don’t worry it will be made!

Instead I improvised. Typically, when I wing it the result is either amazing or revolting! Fortunately the combination of flavours in this incredible dessert totally, utterly and completely worked.

I mean really, really, really worked!

FF Raspberry Chocolate Ice Cream Sundae
Raspberry Chocolate Ice Cream Sundae share this with everyone.

Don’t you just love it when things turn out better than you could of ever hoped?

Recipe: Makes 6 Raspberry Chocolate Ice Cream Sundae

For the chocolate meringues:

Note: for photos showing step by step pavlova instructions, please see here

3 Large Egg Whites

125g/4.5oz Cater Sugar

1/2tsp Corn Flour

50g/2oz Cocoa Powder

1/2tsp Vanilla Extract – I use Nielsen Massey

1/2tsp White Wine Vinegar

For the raspberry coulis:

300g/11oz Raspberries – I used frozen raspberries from Waitrose

1tbsp Caster Sugar

Juice of a Lemon

Ice Cream – 750ml Vanilla Ice Cream – really good quality ice cream or you can use my recipe for Very Vanilla Ice Cream

Method: Preheat the oven to 160C/140C fan, gas mark 3

Making the chocolate meringues:

Preheat the oven to 160C/140C fan, gas mark 3

  • Line a baking tray with baking parchment.
  • In a large bowl add the 3 egg whites and whisk until they can hold a stiff peak.
  • Continue whisking and addding in the caster sugar one tablespoon at a time.
  • Keep mixing until the egg whites are glossy and the caster sugar has been incorporated.
  • Add the vanilla extract, vinegar, corn flour and sift in the cocoa powder.
FF Raspberry Chocolate Ice Cream Sundae
These meringues are intensely dark and chocolatey.
  • Gently fold the ingredients into the meringue.
  • Dollop 6 clouds of chocolate meringue onto the baking sheet.
FF Raspberry Chocolate Ice Cream Sundae
Chocolate Meringue Clouds ready for the oven.
  • Place the chocolate meringues into the oven an immediately turn the oven temperature down to 140C/120C fan, gas mark 1.
  • Bake the meringues for 40 minutes and then switch off the oven, allow the meringues to cool completely in the oven – this is how they will obtain their brownie like texture.
  • Once completely cooled they can be used straight away, or stored in a tin, separated by baking parchment, where they will keep for 5 days.
FF Raspberry Chocolate Ice Cream Sundae
Chocolate meringues that taste like the best brownies!

Making the raspberry coulis:

  • Place the fresh or frozen raspberries into a medium bowl.
  • Sprinkle over 1 tablespoon of caster sugar.
  • Cover and leave for at least an hour.
  • Tip the raspberries, sugar and juice of a lemon into a blender.
  • Blitz in the blender until you have a super smooth purée.

Assembling the Raspberry Chocolate Ice Cream Sundae:

  • Remove the vanilla ice cream from the freezer 20 minutes prior to assembling the sundaes.
  • Place a scoop of ice cream into each sundae glass.
  • Pour over some raspberry coulis, ensuring that you have a little left for the tops of the sundaes.
  • Add another scoop of ice cream to each sundae glass.
  • Break two thirds off of the chocolate meringue, break up and add on top of the second ice cream layer. Repeat for each sundae.
  • Add a third and final scoop of ice cream on top of the crumbled chocolate meringue.
  • Finish with a final drizzle of raspberry coulis and the final third of the chocolate meringue.
FF Raspberry Chocolate Ice Cream Sundae
Raspberry Chocolate Ice Cream Sundae ready to be eaten and enjoyed.

Serve with a long sundae spoon so that you can reach right down to the very bottom of your sundae glass. You are not going to want to waste any of this utterly luscious, refreshing dessert!

Bargain Buys For Delicious Desserts

I bought these sundae glasses a couple of years ago, in Asda for £1.50 each. I had been wanting some for ages and as a rather clumsy person at times, I needed something sturdy that could withstand me and be used for smoothies, milkshakes and of course sundaes. Plus if I do break one it is cheaper to replace.

We all enjoyed these Raspberry Chocolate Ice Cream Sundaes for dessert today and were amazed a not only the awesome flavour combo, but also how refreshing they are. These are a massive hit and will be enjoyed on many more occasions throughout the warmer months.

Each Raspberry Chocolate Ice Cream Sundae has a 50g serving of raspberries and fresh lemon juice in it – they are virtually a health food 😉

FF Raspberry Chocolate Ice Cream Sundae
Raspberry Chocolate Ice Cream Sundae add spoon and devour.

In the photo above you can see how gloriously dark the inside of the chocolate meringue is – yummy!

Also, true to my promise, I am including more desserts on here – it’s a tough job……

If you have loved this recipe for Raspberry Chocolate Ice Cream Sundae here are a few more you may like too:

Blackberry Chocolate Chunk Ice Cream

FF Raspberry Chocolate Ice Cream Sundae
Blackberry Chocolate Chunk Ice Cream

Strawberry Chocolate Cheesecake

FF Raspberry Chocolate Ice Cream Sundae
No Bake Strawberry Chocolate Cheesecake

Lemony Strawberry Pavlova

FF Raspberry Chocolate Ice Cream Sundae
Lemony Strawberry Pavlova

I never really urge you to try any particular recipe, but in this instance I am. The theme of Feasting is Fun is sharing and I’d be crazy not to encourage you to try these Raspberry Chocolate Ice Cream Sundaes at least once!

The meringues can’t fail as they aren’t meant to be light and fluffy, rather more like a dense brownie texture. Ice cream can be bought and the raspberry coulis is a whizz – literally.

Ooh I should also mention that this is a fab recipe if you have a sore throat – three of us here have sore throats at the moment and this cool, refreshing sundae really soothed.

Whatever you are making and baking in you kitchens this weekend I really do hope you have fun creating a feast to be share.

Sammie xx

Share
Facebooktwitterpinterestlinkedintumblr

Spicy Sausage Rolls

Share
Facebooktwitterpinterestlinkedintumblr

Sunshine, glorious sunshine. It lifts our spirits and makes everyday seem that little bit brighter – literally. Windows flung open, coats discarded, sunglasses at the ready. Who wants to eat lunch, or any meal for that matter, indoors? Not me! Even if my ‘picnic’ is sitting out in the garden with a cool glass of something refreshing and a plate of these jalapeño fired Spicy Sausage Rolls.

For those of you with a more gentle constitution, don’t worry these Spicy Sausage Rolls do not ‘blow your head off!’ Instead they have a gentle warming, fruity heat that lifts an otherwise everyday sausage roll to a whole different level.

The inclusion of some paprika filled chorizo sausage, further elevates the incredible flavour of these picnic favourites. Delicious good quality sausage meat,  mixed with finely chopped jalapeño chilli and just the right amount of chorizo, encased in flaky, all butter puff pastry, makes for the perfect addition to any packed lunch, picnic or easy meal.

Spicy Sausage Rolls change up your daily packed lunch!

If you like sausage rolls, you will absolutely love these Spicy Sausage Rolls!

Spicy Sausage Rolls an easy, tasty,mid week meal.
Spicy Sausage Rolls an easy, tasty, mid week meal.

Using The Freezer To Keep Grocery Costs Down

Puff pastry is such an incredibly handy product to have stashed away in the freezer. All butter is my preferred type, especially for sweet bakes such as my Blackberry Nectarine Tart , however, I do sometimes use the mixed vegetable fat/butter for savoury bakes, especially if it is on offer!

Having chatted to a few of my Twitter friends recently, we all concluded that the cost of groceries seems to have suddenly risen. For me, this means creating recipes that stretch more expensive ingredients that little bit further and also really trying hard to keep food waste to an absolute minimum.

Spicy Sausage Rolls are great with a handful of cherry tomatoes off the vine.

As I spend a lot of time testing recipes and batch baking/cooking in the kitchen, the opportunity for waste can become even greater. Especially if after a few days cooking and baking I then spend the next few days in bed due to my health problems see here.

This is where the freezer becomes my best friend! Having made the Spicy Sausage Rolls on a day where I had also cooked dinner, they were in danger of getting forgotten about, boxed up in the back of the fridge. Of course we shared a couple between us to taste test them and we were not disappointed. After the photos were taken the following day, I popped the remaining sausage rolls in the freezer – keeping a couple out for our daughter and I to share for lunch.

I have no doubt that they will not stay in the freezer long, yet it saves potential waste. Which is primarily, not only good for our planet, but also our grocery budget!

Recipe: Makes 12 Spicy Sausage Rolls

350g/12oz Block of Puff Pastry all butter if possible- defrosted in the fridge overnight if frozen – I used frozen Just Rol all butter puff pastry, alternatively use my fantastic Perfect Butter Shortcrust Pastry recipe.

454g/1lb Pork Sausagemeat – good quality at least 85% Pork, any casings removed

50g/2oz Chorizo Sausage – casing removed

1 Jalapeño Chilli Pepper

1 Medium Free Range Egg – I use Burford Browns Eggs from Clarence Court

Method: Preheat the oven to 200C/180C fan, gas mark 6, 400F.

Making The Spicy Sausagemeat

  • Place the sausage meat into a bowl and add the chorizo sausage pulled into pieces.
  • Remove the seeds and membrane from the jalapeño chilli pepper and chop finely.
  • Add the chopped chilli to the bowl and squish (mix) everything together using clean hands.

Creating The Sausage Rolls

  • Roll out the puff pastry on a clean, flour dusted work top, until it is 30cm x 20cm (15″ wide by 8″ deep).
  • Trim the edges of the pastry and then divide the pastry in half width ways so that you have 2 long strips.
  • Divide the sausage meat mixture in two.
  • Evenly lay the sausage meat down the middle of each length of pastry.
You can see the flecks of green chilli and red chorizo throughout the sausage meat.
  • Crack an egg into a small bowl and whisk with a fork.
  • Using a pastry brush, brush beaten egg down the length of the pastry, either side of the sausage meat.
  • Bring the top edge of the pastry evenly over the sausage meat and continue rolling so that the pastry overlaps (and seals) underneath the sausage rolls.
  • Using a sharp knife, cut each long roll in half and then cut each half into 3 even sized sausage rolls. In total you will have 12 medium sized sausage rolls.
Spicy Sausage Rolls ready for their egg wash and to be baked!
  • Place the sausage rolls on to a lightly oiled baking tray.
  • Brush each sausage roll with the beaten egg – this will give the pastry a wonderful, crisp, golden finish once baked.
  • Finally using a sharp, pointed pair of scissors, snip the top of each sausage roll twice – as can be seen in the picture below.
Spicy Sausage Rolls ready for the oven.

Baking The Spicy Sausage Rolls

  • Place the baking tray into the middle/top part of the oven and bake for 25-30 minutes.
  • The Spicy Sausage Rolls are cooked when the pastry is flaky and golden brown all over. If in doubt cut a sausage roll in half, the meat should be cooked all the way through.
  • Once baked remove the sausage rolls from the oven.
Golden, flaky, hot Spicy Sausage Rolls fresh from the oven.
  • Transfer the baked sausage rolls to a cooling rack and allow to cool slightly before trying!
Spicy Sausage Rolls that smell so delicious and inviting.

Perfect eaten hot or cold, with a good chutney, some cherry tomatoes and a glass of something refreshing.

To store, allow to cool completely and then pack into an airtight container and keep in the fridge for up to 5 days. Alternatively, as I did, pack into a freezer bag or box, label and keep in the freezer for one month. Defrost thoroughly and reheat until piping hot in a moderate oven.

Serving The Sausage Rolls

If fresh puff pastry has been used, not frozen, these Spicy Sausage Rolls can also be frozen uncooked. Place some baking parchment on a baking tray, put the sausage rolls on top and then place into the freezer and freeze until solid. Once frozen pack into freezer boxes, separating each layer with baking parchment. To cook, remove as many sausage rolls as required, place onto an oiled baking tray and bake in a preheated oven as before. The sausage rolls will take approximately 45 minutes to bake from frozen. This can be particularly handy over the Christmas holiday period.

Spicy Sausage Rolls
Spicy Sausage Rolls perfect for a Christmas buffet, or any buffet!!

Sorry to mention Christmas, however, in our house a buffet is incomplete without a plate of hot sausage rolls. This year we can really turn the heat up!

Obviously you can control how spicy you make these, as well as the size. I would perhaps make them a little smaller for a buffet spread.

If you have loved these Spicy Sausage Rolls as much as we have you may also enjoy these other recipes:

Quiche Lorraine

Spicy Sausage Rolls
Quiche Lorraine bacon, cheddar and egg tart.

Sausage Plait With A Twist

Spicy Sausage Rolls
Sausage Plait With A Twist

Tomato Thyme Garlic Focaccia Bread

Spicy Sausage Rolls
Tomato Thyme Garlic Focaccia Bread

If you think about it, a buffet is really an indoor picnic!

Who doesn’t love unloading a picnic hamper or walking around a buffet table tasting little morsels of yummy different foods. We have a daughter who would happily eat from a buffet table/picnic hamper most days of the year.

The sun is blazing as I write up this post. Whether you make and bake during the sunshine or snow, have fun feasting with friends, family and neighbours.

Sammie xx

Share
Facebooktwitterpinterestlinkedintumblr

Blackberry Chocolate Chunk Ice Cream

Share
Facebooktwitterpinterestlinkedintumblr

Today was so beautifully warm and sunny, I simply had to make this Blackberry Chocolate Chunk Ice Cream.

Blackberry Chocolate Chunk Ice Cream

Made with frozen blackberries from last year, this ice cream delivers massively on taste.

To quote Jennifer Aniston “Here’s the science bit”, when eating very cold food, such as ice cream, the flavours are dulled, due to the cold temperature. If you think of strawberries eaten straight from the fridge, they will never taste as good as those that have been left out to warm up a bit, or better, plucked straight from a sun warmed plant.

Likewise, when making ice cream, even a simple Very Vanilla Ice Cream, the flavours need to be more pronounced so that you taste them.

Blackberry Chocolate Chunk Ice Cream

With this creamy, sharp, sweet and tangy Blackberry Chocolate Chunk Ice Cream, you taste every bit of the beautiful blackberries. Sousing them in sugar and lemon juice encourages each berry to release it’s maximum, ripe berry flavour. On it’s own the blitzed, blackberry sauce would be too tart and the berry flavour would be overwhelming, yet mixed into a delicate vanilla ice cream custard and churned until it becomes ice cream, the flavours mellow and meld together, creating one of the most exciting flavoured ice creams ever.

Blackberry Chocolate Chink Ice Cream

Studded with chunks of deep, dark, chocolate that lend not only a slight bitter flavour but added texture this Blackberry Chocolate Chunk Ice Cream becomes complete. Elegant enough to be served in pretty bowls at the end of a meal with nothing else to accompany it.

One thing is certain, this ice cream is certainly one of the best ice creams I have ever tried!

Recipe: Makes approx 1 litre Blackberry Chocolate Chunk Ice Cream

300ml Double Cream

300ml Whole/Semi Skimmed Milk

4 Large Egg Yolks – I always use free range eggs

1tsp Vanilla Extract – I use Nielsen Massey

7tbsp Caster Sugar

Scant pinch of salt – less than 1/4tsp

1tsp Cornflour – I use Doves Farm as it is guaranteed gluten free

Juice of 1 Lemon

300g Blackberries – I used frozen but use fresh in season

100g/4oz Good Quality Dark Chocolate minimum 65% Cocoa solids

Method: Ensure that the freezing part of the ice cream maker has been in the freezer for at least 24 hours.

Please see Very Vanilla Ice Cream for step by step photographs, showing how to make the ice cream custard.

Making The Blackberry Ice Cream Base

  • Place the cream, milk and vanilla extract into a saucepan over medium heat.
  • Add the egg yolks, sugar, salt and cornflour to a large heatproof bowl. Whisk until pale and creamy.
  • The milk/cream needs to reach scalding point. This is when little bubbles appear around the edge of the liquid.
  • When the milk/cream has reached scalding point remove the pan from the heat.
  • Whilst whisking the egg mixture, pour the hot milk/cream into the bowl – do not stop whisking.
  • Once combined tip the custard mixture back into the same saucepan, cooking over a low heat and constantly stirring, until the custard has thickened and coats the back of a wooden spoon.
  • Place a sieve over a clean, heatproof bowl and pour the custard into the bowl, through the sieve.
  • Place cling film directly over the top of the custard so that is touches it. This will prevent a skin from forming.
  • Allow to cool and then place into the fridge to chill.
  • Place the blackberries into a bowl and add the juice of one lemon and one tablespoon of caster sugar. Cover and set aside for 30 minutes.
  • Place the blackberry mixture into a blender and pulse until you have a smooth purée.
  • Pass the blackberry purée through a sieve to remove any seeds.
  • As soon as the ice cream base has chilled remove the cling film and add the blackberry purée.
This ice cream really does have the most beautiful colour.
  • Mix briefly, don’t worry too much as it will be well mixed in the ice cream maker.
  • Transfer the custard mixture to a jug.

Churning Using An Ice Cream Maker

  • Pour the blackberry custard into the ice cream maker (for mine it has to already be churning – check your instructions).
  • Whilst the ice cream is churning chop the dark chocolate into 1cm-ish sized chunks.
  • Churn the Blackberry Ice Cream until it is a thickened, yet soft ice cream.
Beautifully soft whipped Blackberry Ice Cream.
  • Using a soft rubber spatula decant the softly whipped ice cream into a suitable, freezer safe, plastic tub.

Adding The Dark Chocolate Chunks

  • Add the dark chocolate chunks to the blackberry ice cream once it is in the freezer container.
Blackberry Chocolate a Chunk Ice Cream such a delicious combination.
Blackberry Chocolate Chunk Ice Cream such a delicious combination.
  • Stir the dark chocolate chunks through the ice cream so that they are evenly distributed.
FF Blackberry Chocolate Chunk Ice Cream
Blackberry Chocolate Chunk Ice Cream ready for the freezer.
  • Clip on the lid, label and place the Blackberry Chocolate Chunk Ice Cream into the freezer to finish freezing.
  • To serve, remove this ice cream from the freezer a full 30 minutes before serving – unless it really is an extremely hot day, then 20 minutes should suffice.
FF Blackberry Chocolate Chunk Ice Cream
Blackberry Chocolate Chunk Ice Cream

I honestly cannot explain just how good this Blackberry Chocolate Chunk Ice Cream is. Whilst it may look a little more like a sorbet it is in fact delightfully creamy, with a deep berry flavour to match its beautiful colour and studded with dark chocolate crunch that adds another heavenly level of flavour and texture. It cleanses the palette and refreshes, whilst ensuring that you know you have eaten dessert.

In essence it is truly sublime. A million miles away from mass produced, sweet gloopy ice cream, this is the dessert to serve those you truly want to spoil. Not that it is expensive to make, simply that it is an ice cream worth lingering over and savouring.

If you have enjoyed this Blackberry Chocolate Chunk Ice Cream recipe, here are a few others you may enjoy:

Lemon Drizzle Ice Cream 

FF Lemon Ripple Ice Cream
Lemon Ripple Ice Cream

Very Vanilla Ice Cream

Very Vanilla Ice Cream

Strawberry Rose Ice Cream 

Strawberry Rose Ice Cream

Having an ice cream maker definitely makes the process of creating ice cream easier. It results in a much creamier, less icy, softer on the palate, cooling treat.

Unfortunaley whilst making the Blackberry Chocolate Chunk Ice Cream another little piece of the plastic on our ice cream maker broke off – it really is on its last legs. Fortunately however, I will be reviewing a brand new model by Andrew James  over the coming few months, so expect lots of chilled recipes through the summer months.

It really gives me such a thrill reading your comments and I appreciate you taking the time to leave them. Likewise seeing my recipes being baked on Twitter and Instagram literally makes my day. Sharing is the heart of this blog and seeing you share your bakes with me always gives me a boost. Thank you.

Whatever you are making and baking in your kitchens, have fun and enjoy every feast that you create.

Sammie xx

No part of this post may be reproduced or duplicated without the written permission of the owner. Please see my Disclosure Policy.


Share
Facebooktwitterpinterestlinkedintumblr

Macadamia Apricot Flapjacks

Share
Facebooktwitterpinterestlinkedintumblr

I am so loving the longer daylight hours at the moment. Feeling as though I want to make the most of every drop of sunshine. Winter being a distant memory, I’ve been out in the garden, clearing, ready for sowing and planting. Don’t worry I have also been in the kitchen baking and these Macadamia Apricot Flapjacks are the delicious result.

FF Macadamia Apricot Flapjacks

When the weather is warm and the sun is shining I simply love being in the garden. Listening to the chatter and chirruping of birds, feeling the warmth of the sun on my back, our garden becomes my haven again, after the long, cold winter months.

Easy Recipes For Breakfast On The Go

So being able to eat breakfast, or more usually brunch, outside is very much treasured. These Macadamia Apricot Flapjacks are perfect to munch on whilst sitting on our garden bench, hot cup of coffee to hand. Packed with slow energy release oats, they make a tasty, yet filling alternative to toast or cereal.

FF Macadamia Apricot Flapjacks
Macadamia Apricot Flapjacks so good with a cup of good coffee.

This recipe is so simple and quick. A few minutes in the kitchen melting, mixing, baking and cooling means that you can have a great, portable bar, that is perfect for breakfast on the go, packed lunches, getting through the late afternoon energy dip. Plenty of deicious bars to see you through the week.

That has to be a winning recipe – right?

FF Macadamia Apricot Flapjacks
Macadamia Apricot Flapjacks – crunchy, chewy bars of yum!

I love easy recipes – more so during the warmer months, when my passion for cooking and baking is matched by my passion for gardening. Yes I still have to work around my body (see – Living with siezures ), that just makes the time I have even more precious. Whilst in the winter I can happily spend all day – relatively speaking – in the kitchen, during warm spring and summer days my preference is to be outside.

Baking According To The Weather

My hubby jokes that I was born wearing Wellington boots! Whilst I may not be able to do the heavy digging of years past, I still like to get my hands dirty. I’ve also found, especially during the hotter months of summer, baking is best done first thing in the morning. That way there isn’t a hot oven baking bread, mid afternoon, just as the temperature outside is peaking.

Macadamia Nut Dried Apricot Flapjacks
Macadamia Apricot Flapjacks crunchy, chewy and full of flavour.

Easily Made Gluten Free Traybake

Back to the Macadamia Apricot Flapjacks! The macadamia nuts add a buttery crunch to these bars that I absolutely adore, however, I know they can be pricey. A great substitute would be almonds, either flakes or whole almonds that you chop yourself. I have used dried apricots that are the gorgeous tangerine orange of their fresh counterparts, however, if you prefer the darker, unsulphured apricots, use them instead. Good quality rolled oats, absolutely make these flapjacks the stars that they are.

I have specified that these Macadamia Apricot Flapjacks are gluten free, please check the labels of ingredients carefully to ensure that they are so. This is vital when baking for someone on a restricted diet. Their health absolutely cannot be compromised.

Recipe: Makes 12 Macadamia Apricot Flapjacks

250g/10oz Unsalted Butter – plus a little extra for greasing the tin

100g/4oz Golden Syrup (light corn syrup)

1/4tsp Salt – I use Maldon

125g/5oz Light Brown Sugar

325g/11.5oz Rolled Oats (not quick cook) – I used Delicious Alchemy as they are 100% gluten free

150g/5oz Dried Apricots – chopped into rough quarters

100g/4oz Chopped Macadamia Nuts – I buy whole nuts and roughly chop them myself

Optional – 100g White Chocolate – alternatively use milk or dark chocolate

Method: Preheat the oven to 180C/160C fan, gas mark 4, 350F

Making The Flapjacks

  • Grease and line a 8″ x 11″ – 20cm x 28cm swiss roll tin/shallow baking tin, with butter and baking parchment.
  • Into a medium saucepan add the butter and sugar. Warm over a medium heat, stirring until melted.
  • In a large bowl add the golden syrup.
  • Pour the melted butter/sugar mixture into the bowl containing the golden syrup. Stir continuously until combined.
  • Add the oats, chopped apricots and macadamia nuts and stir to thoroughly combine.
  • Tip the mixture into the prepared tin and press down using the back of a metal spoon, until the mixture is one even layer.
FF Macadamia Apricot Flapjacks
The Macadamia Apricot Flapjack mixture compacted into an even layer and ready for the oven.

Baking The Macadamia Nut Apricot Flapjacks

  • Place the tin in the middle of the oven and bake for 20 minutes exactly.
  • The flapjacks will be a light golden colour when baked – do not be tempted to bake them for longer as this will result in them being hard, not chewy!
  • As soon as the flapjacks are baked remove the tin from the oven and allow to cool completely.
  • When completely cooled remove the entire flapjack bake from the tin, using the excess baking parchment to help lift it out.
Macadamia Apricot Flapjacks
Macadamia Apricot Flapjacks ready for the finishing touch.
  • As seen above, cut down the middle length of the bake and then across the width.  Cut each quarter into 3 generous bars – you could cut each quarter into 4 making 16 individual flapjacks in total.
FF Macadamia Apricot Flapjacks
Macadamia Apricot Flapjacks with a drizzle of white chocolate.

Finishing With A Chocolate Drizzle

  • To finish the flapjacks – chop the white chocolate into small pieces and place in a heatproof, microwaveable bowl.
  • Zap for 20 seconds at a time, stirring between each heating session.
  • When the chocolate is half melted, remove from the microwave and stir until completely liquid.
  • Fill a small disposable piping bag with the melted chocolate.
  • Snip off the very end of the bag, creating a small hole.
  • Pipe swirls or zig zags of chocolate onto each flapjack to provide a beautiful finish.
FF Macadamia Apricot Flapjacks
Macadamia Apricot Flapjacks as pretty to look at as they are delicious to eat.

Ooh how completely yummy do these Macadamia Apricot Flapjacks look?

A couple of notes: During the summer, once the flapjack bake has cooled to room temperature, if the ambient temperature is 25C or above, it may be worth popping the tin in the fridge for an hour to allow the flapjacks to completely set. Likewise, unless the flapjacks are stored in the fridge I would leave off the white chocolate drizzle. If these Macadamia Apricot Flapjacks are going to get warm throughout the day, whether in a packed lunch box, or a bag, the white chocolate will melt and create a whole lotta mess!

This is just my advice as a mum of three and wife to hubby who takes a packed lunch to work.

Im just sayin’!!!

Love these Macadamia Apricot Flapjacks? Here are a couple of other recipes you may like to try as well.

Coconut Almond Date Flapjacks

FF Macadamia Apricot Flapjacks
Coconut Almond Date Flapjacks

Bakewell Shortbread Bars

FF Macadamia Apricot Flapjacks
Bakewell Shortbread Bars

Cranberry Walnut Flapjacks

FF Macadamia Apricot Flapjacks
Cranberry Walnut Flapjacks

While spending time in your kitchen, baking and cooking, have you ever thought of making extra and sharing some?

We all have people in our neighbourhood who are lonely and perhaps a little unhappy. Inviting them round for a chat over a cup of tea and delicious slice of cake, or flapjack, may seem such a small thing to us and yet can make the world of difference to someone else’s day.

Time seems to be so precious to many, which is why it is such a valuable gift to give.

Sammie xx

No part of this post may be reproduced or duplicated without the written permission of the owner. Please see my Disclosure Policy.

Share
Facebooktwitterpinterestlinkedintumblr

Strawberry Chocolate Cheesecake

Share
Facebooktwitterpinterestlinkedintumblr

Summer is near, not that you’d know it, with certain parts of the country blanketed in snow and with it heralds the start of the soft fruit season. I do like all fruit, but soft fruits are my favourites; strawberries, raspberries, peaches, nectarines, apricots and plums, as well as many others. To celebrate this I have made this utterly divine Strawberry Chocolate Cheesecake.

Strawberry Chocolate C\heesecake
Strawberry Chocolate Cheesecake the perfect no bake dessert.

No bake cheesecakes are incredibly easy to put together. So whether you’re an experienced home cook, or just starting out, I can guarantee that you can make this Strawberry Chocolate Cheesecake.

All you need, aside from the ingredients is a 10″ (25cm) springform cake pan.

Strawberry Chocolate Cheesecake
A slice of delicious Strawberry Chocolate Cheesecake?

Oh yes please!!

As promised, I am making a conscious effort to include more desserts on Feasting is Fun. I have been making cheesecakes for many years and the recipe has adapted over time. When I was younger I would whip vanilla angel delight into mascarpone and single cream. It makes an utterly delicious cheesecake, however, I can no longer find angel delight in the shops.

This has been a good thing! As good as the cheesecake of years passed was, this Strawberry Chocolate Cheesecake is better!

Whipping melted chocolate into cream cheese and cream gives this cheesecake a wonderful lightness. This Strawberry Chocolate Cheesecake is perfect to serve at any time, however, it is beautifully light after a large Sunday Roast Dinner like my Redcurrant Glazed Roast Lamb.

Strawberry Chocolate Cheesecake
Strawberry Chocolate Cheesecake a delightfully light dessert.

One of the most important parts of a cheesecake to me, is the crust. I don’t want some flimsy – can barely hold it together, low carb nonsense – I need a thick, crunchy base, that is delicious and contributes to the cheesecake as a whole. Digestive biscuits are the answer! Not too finely broken up either. A few small chunks makes for incredible texture against the smoothness of the softly whipped cream cheese and cream.

Strawberry Chocolate Cheesecake
Strawberry Chocolate Cheesecake ooh look at this layer – delicious!

The crunchy, crumbly, golden base also gives this Strawberry Chocolate Cheesecake a very slight, salty hit. Not as salty as pretzels, just enough to balance out the sweet tang of the chocolate cheesecake that covers it. To conclude, this cheesecake is more than the sum of it’s individual parts. Eating a little of each layer together will give your taste buds a flavour party like never before!

Before we start, I should mention that there are a few hours chilling in the fridge required, so it’s best to plan for that. If this cheesecake is needed for the same day, start the base in the morning, if you have a little more warning, I suggest making the base the night before. Actual time spent hands on making this cheesecake is very little, but it’s worth knowing about the chilling times before you start.

Recipe: Makes one Strawberry Chocolate Cheesecake serves 8-10

300g/11oz Digestive Biscuits – Graham Crackers can be used as an alternative

150g/5oz Unsalted Butter

560g/2 tubs Philadelphia Cream Cheese

600ml/1 pint Double Cream

2tsp Vanilla Extract – I use Nielsen-Massey

200g/7oz Milk Chocolate – at least 35% Cocoa – or use plain chocolate if you want a richer chocolate flavour

1tsp Caster Sugar

10 Strawberries – or more

1tsp Icing Sugar to finish

Method: Line the base of a 10″ – 25cm Springform Pan with aluminium foil.

  • Place the digestive biscuits into a freezer bag and whack with a rolling pin until they are almost completely broken up. You can also you a food processor to blitz them, I’m just too lazy to get it out for a few biscuits 😉.
  • In a medium sized saucepan gently melt the butter. Note: if you melt the butter too fast it could spit and burn you, also the butter may burn. I have learnt this from experience!
  • Once the butter is melted, remove the pan from the heat and add the crushed biscuits to the melted butter.
  • Stir well, ensuring all the biscuit crumbs are covered in melted butter.
  • Tip the butter slicked biscuit crumbs into your foil line springform pan.
  • Press the biscuit crumbs into a uniform layer using the back of a metal spoon.
  • Cover the pan with cling film and place into the fridge to chill and set the biscuit layer – I actually made the base the night before – a couple of hours should be sufficient to set the base.
  • Once the base has set the cheesecake layer can be made.
  • Break or chop up the chocolate and place into a heatproof microwaveable bowl.
  • Zap for 30 seconds at a time stirring in between. When almost melted remove from the microwave and keep stirring until completely melted. Set the chocolate to one side.
  • Into a large bowl add the cream cheese, 200mls of double cream and 1tsp of vanilla extract.
  • Whisk until light and creamy – approx 3 minutes.
  • Next, whist whisking add the melted chocolate to the cheesecake mix – it helps if you have someone to hold the whisk whilst you add the chocolate, alternatively add the chocolate in thirds, whisking well after each addition.
  • Spoon the chocolate cheesecake mix on to the biscuit base. Smooth the surface with the back of a spoon.
Strawberry Chocolate Cheesecake
Once you have smoothed the top of the cheesecake lick the spoon!!
  • Cover the pan with cling film and pop back into the fridge for an 2 hours. This allows the chocolate to set the cheesecake layer. The cheesecake layer does not set to a firm consistency, rather it is able to hold its shape and support the whipped cream a strawberries on top.
  • When set and ready to decorate, run a palette knife that has been dipped in very hot water, between the pan and the cheesecake. Place the springform pan on to a large can (of beans or whatever you have in the cupboard) and release the spring latch. Allow the sides of the pan to drop down.
  • Place the cheesecake – still on the foil covered pan base – on to a cake stand or serving plate. Note: I have never successfully transferred an entire cheesecake off of its base, so I cover the base in foil to protect it from knife marks and keep the cheesecake on the pan base!
  • Into a large bowl add the remaining 400mls of double cream, 1tsp vanilla extract and 1tsp of caster sugar. Whisk until the cream holds its shape.
  • Fit a large piping bag with a large star tip – I use Wilton #1M.
  • Fill the piping bag with the whipped cream.
  • Pipe swirl roses – start piping the letter e and continue round – around the outside edge of the cheesecake. Fill in the empty spaces with simple piped stars.
  • Place a strawberry on each of the piped swirls – I removed the green stalks for these – and place three strawberries, with their stems still on, in the centre of the cheesecake.
  • Dust the Strawberry Chocolate Cheesecake with icing sugar – I use a clean tea strainer – and serve.
Strawberry Chocolate Cheesecake
Strawberry Chocolate Cheesecake a fantastically easy, yet sensational dessert.

How enticing does this Strawberry Chocolate Cheesecake look?

It is said that we eat with our eyes first. Well this is certainly a feast to be gazed upon – and then eaten 😉.

This cheesecake travels well too. Simply prepare the cheesecake without the whipped cream and strawberries, take to your destination and complete the decoration there!

Once fully decorated this cheesecake is best eaten straight away, although it will keep for up to two days wrapped in cling film, or stored in an airtight container, and placed in the fridge.

Cheesecake for breakfast anyone??

I hope that you have enjoyed this Strawberry Chocolate Cheesecake recipe, here are some others you may like too:


White Chocolate Strawberry Cheesecake

FF Chocolate Strawberry Cheesecake
White Chocolate Strawberry Cheesecake


Lemony Strawberry Pavlova

FF Chocolate Strawberry Cheesecake
Lemony Strawberry Pavlova


Strawberries and Cream Cake

FF Chocolate Strawberry Cheesecake
Strawberries and Cream Cake


Thank you for all your lovely comments, please keep them coming I love reading your views on what I am posting. Again it is wonderful to see so many of you cooking and baking my recipes and popping a photo on Twitter or Instagram. I always feel genuinely honoured that you have chosen to make one of my recipes.

I am working hard to balance Feasting is Fun with a few more savoury recipes. Is there anything you would particularly like to see more of on here?

Have fun making and baking in your kitchens and enjoying the memories that you are making whilst feasting together with friends and family.

Sammie xx

@sammiefeasting Twitter/Instagram/Pinterest


Share
Facebooktwitterpinterestlinkedintumblr

Bakewell Shortbread Bars

Share
Facebooktwitterpinterestlinkedintumblr

Hello my lovely readers, I have a real star of a recipe today. If you have spent anytime on this site, then you’ll know I’m a bit bonkers about all the flavours in a Bakewell Tart. And so I have made these very delicious Bakewell Shortbread Bars.

A stack of biscuit based baked treats with descriptive graphics for Pinterest


These actually came about by accident, sometimes that’s the best way with recipes! Because I had made some vanilla shortbread dough, which I had planned to turn into chocolate dipped hearts. Anyway, what with one thing and another, I didn’t get around to making them. Update: I have made them and the recipe is here Chocolate Dipped Shortbread Heart Cookies.

So, a couple of weeks ago, on a Sunday, Hubby was running through what we had for packed lunches that week. I hadn’t managed to make any Cranberry Walnut Flapjacks eek – then I had a moment of inspiration. These Bakewell Shortbread Bars are the result of me needing to make something delicious, that also travels well.

Bakewell Shortbread Bars

What a massive hit these have been with my family, ooh and me!

All the flavour of a Bakewell Tart

While the buttery shortbread base gives these Bakewell Shortbread Bars a sturdiness that is needed when food is to be transported. Topped with delicious raspberry jam, giving a hint of tart sweetness and then covered in a light, tender almond sponge with flaked almonds added for crunch, flavour and decoration.

Although I love Bakewell Tart, what I really love about this recipe, is that there isn’t any pie crust to roll out. With a pastry crust I certainly don’t want a big, thick wodge of it at the bottom of my bar, whereas, using shortbread dough I am more than happy to have a decently thick base.

A stack of baked biscuit based, jam filled treats on a white plate.
Bakewell Shortbread Bars

Perfect Picnic Food

Because these Bakewell Shortbread Bars hold together well I will definitely be making them for picnics throughout the warmer months. I am not a fan of packing up food for lunches or picnics that is overly sweet or has any form of icing. I guess it just becomes too much of a bug magnet, or even worse wasps – and both cupcakes and iced cakes simply get too messy. Although our children are in their teens now, I want to relax while eating outside, not constantly dodging bugs or clearing up melted buttercream.

And that is NOT my idea of fun!

Actually, one year that we went to the beach with a big croud of friends, I made a fruit cake and a lemon drizzle cake (I know but the lemon drizzle only had a little bit of icing). I pre-cut them, popped the cakes into tins and mid afternoon we all had a cup of tea and slice of cake. I remember it being a very relaxing happy day and these Bakewell Shortbread Bars would certainly have travelled well and been enjoyed. A must bake for this year’s beach outings!

Now when I say this recipe is simple, it really is, the only slight faff is pre-cooking the shortbread. And I only say slight, because whilst the shortbread is cooking it is the perfect time to whip up the sponge.

Recipe: Makes 12 Bakewell Shortbread Bars

For the shortbread:

225g/8oz Unsalted Butter – softened to room temperature plus 1tbsp for greasing the tin

150g/5oz Caster Sugar

1tsp Vanilla Extract – I use Nielsen-Massey

1 Large Egg Yolk – I always use free range

275g/10oz Plain White Flour

1/4 tsp Sea Salt I use Maldon

For the cake batter:

175g/6oz Unsalted Butter – softened to room temperature

175g/6oz Caster Sugar

3 Large Free Range Eggs

1tsp Vanilla Extract

3/4 tsp Almond Extract

100g/4oz Ground Almonds

50g/2oz Plain White Flour

1tsp Baking Powder

Pinch of salt

175g/ Approx 1/2 Standard Jar of Raspberry Jam – I use Hartley’s

50g/2oz Flaked Almonds

Method: Preheat the oven to 180C/160C fan, gas mark 4, 350F.

You will need a swiss roll tin 28cm x 20cm x 5cm (12″ x 8″ x 2″) greased with butter and lined with baking parchment.

Making the shortbread base:

  • In a large bowl whisk/beat the butter and sugar together until pale and creamy.
  • Add the vanilla extract and egg yolk and whisk/beat until combined.
  • Sift the flour and salt into the bowl.
  • Mix using a spoon until the dough comes together.
  • Tip the dough out on to some cling film. Wrap up the dough into a disc shape and place in the fridge to chill for 30 minutes.
  • Once chilled break the dough up into large pieces and place them into the prepared tin.
  • Using clean hands, press the shortbread dough into the tin so that it forms a uniform layer.
  • Dock the shortbread dough using a fork.
FF Bakewell Shortbread Bars
The shortbread base ready for the oven.
  • Place the tin into the centre of the oven and bake for 10 minutes.
  • Remove the tin after 10 minutes and spread the jam over the part cooked shortbread. Leave a small gap between the jam and the edge of the shortbread.
  • Turn the oven temperature down to 160C/140C fan, gas mark 3, 325F.
FF Bakewell Shortbread Bars
The part cooked shortbread is slathered in raspberry jam.

Making the almond cake batter, assembling the Bakewell Shortbread Bars and then baking them:

  • In a large bowl whisk/beat the butter and sugar until pale and creamy.
  • Add the vanilla and almond extract and the 3 whole eggs. Whisk/beat for 1 minute.
  • Add the flour, baking powder, ground almonds and salt.
  • And then mix slowly until the batter is just combined.
  • Spoon the cake batter over the jam coated shortbread.
FF Bakewell Shortbread Bars
Almond sponge is spooned on top of the raspberry jam covered shortbread.
  • Use an offset palette knife, or the back of a spoon to carefully spread the cake batter so that it almost covers the top of the shortbread, Don’t worry it will spread out during baking,
  • Sprinkle over the flaked almonds.
Bakewell Shortbread Bars
Ready for the oven. 
  • Place the tin into the centre of the oven and bake for 25-30 minutes. It is fully baked when the top is golden and feels firm to the touch.
  • As soon as it is baked remove the tin from the oven and allow to cool completely in the tin.
FF Bakewell Shortbread Bars
How gorgeous does this look?

Portioning the Bars

  • When completely cold run a knife around both long sides of the tin.
  • Using the spare parchment paper, lift the cake covered shortbread free from the tin.
  • Cut down the middle length of the bake.
  • Then cut across the width, in the middle.
  • Now cut each quarter into 3 bars.
  • Use a palette knife to lift the Bakewell Shortbread Bars free from the baking parchment.

Flaked almond tops almond sponge followed by raspberry jam and a shortbread base. Cut into bars that are ideal for picnics and packed lunches.

How great do these Bakewell Shortbread Bars look? They can also be cut into squares for tasty party bites.

Store them in an airtight container for up to 5 days.

See! So easy to make. And such a brilliant addition to a packed lunch, picnic or just to have with a cup of tea or coffee.

I love recipes that are easy, yet produce stunning results. This is one of those recipes. Because all of the flavours work so well together, a buttery shortbread base, sweet and tart raspberry jam topped with almond sponge. The perfect combination. Finally you can have your cake and cookie all in one tasty Bakewell Shortbread Bar!

If you have enjoyed these Bakewell Shortbread Bars, here are some other recipes you might like to try:

Cranberry Walnut Flapjacks

FF Bakewell Shortbread Bars
Cranberry Walnut Flapjacks perfect to grab and go.

Coconut Date Almond Flapjacks

FF Coconut Date Almond Flapjacks
Coconut Date Almond Flapjacks healthy food to go.

Oat Topped Lemon Shortbread Bars

FF Bakewell Shortbread Bars
Oat Topped Lemon Shortbread Bars

Do you have favourite recipes for making good food to go?

Also, thank you for taking the time to leave a comment. I really appreciate it and love reading them. If you are on Twitter or Instagram please pop a photo up and tag me in. I love to see what you are baking and making in your kitchens and will happily retweet your pictures.

So, whatever you are making, have lots of fun making your feasts and sharing with friends and family.

Sammie xx

No part of this post may be reproduced or duplicated without the written permission of the owner. Please see my Disclosure Policy.

You may also like these:

Cherry Bakewell Cookies

Cherry and almond cookies.
Cherry Bakewell Cookies


Share
Facebooktwitterpinterestlinkedintumblr

Chocolate Cherry Cupcakes

Share
Facebooktwitterpinterestlinkedintumblr

Yay it’s the weekend and I have the most fabulous treat for you. These absolutely delicious, 100% gluten free, Chocolate Cherry Cupcakes.

FF Chocolate Cherry Cupcakes
Chocolate Cherry Cupcakes deliciously gluten free treats.

I’m so excited I could almost burst! Delicious Alchemy sent me some of their Vanilla Sponge Cake Mix to try. All of their products are 100% gluten free and so, with friends that cannot tolerate gluten, I was excited and intrigued to see how well this packet mix performed.

My first project was to remake my delicious Marshmallow Frosted Mango Cupcakes. The cake mix was made as per the packet instructions and I added 100g of mango before filling the cupcake cakes. Once baked and cooled I topped the cupcakes with Marshmallow Frosting. The cupcakes on tasting were deliciously light, tender and moist, with mango distributed evenly throughout each cake. A firm 9 out of 10 marks was given by all of the taste testers who had also tried my original recipe!

FF Chocolate Cherry Cupcakes
Marshmallow Frosted Mango Cupcakes made with gluten free vanilla cake mix.

Delicious Alchemy are currently running a Crowdfund project, raising funds to create a book for people living on a restricted diet. Why not take a look at their website to find out more and see how you too can a be part of this fantastic project.

Offering my baking skills to help raise awareness for Delicious Alchemy’s Crowdfund Project, led to me creating these delightful Chocolate Cherry Cupcakes, ooh and a bit of playing with fondant and alphabet cutters 😉.

FF Chocolate Cherry Cupcakes
Chocolate Cherry Cupcakes proudly supporting people who live on a gluten free diet.

Sugar and Crumbs sell a range of naturally flavoured icing sugars, cocoa, baking ingredients and baking equipment. All of their flavoured icings and cocoas are gluten free! To make these Chocolate Cherry Cupcakes I used their Chocolate Cherry Cocoa added to a Delicious Alchemy Vanilla Sponge Mix. Then topped each cupcake with a buttercream frosting using Black Forest Icing Sugar.

The result, a firm 10 out of 10!

Well they are Chocolate Cherry Cupcakes and chocolate makes everything better right 😉.

FF Chocolate Cherry Cupcakes
Chocolate Cherry Cupcakes gluten free and finished with a white chocolate heart.

Feasting is fun is an inclusive blog. The theme of sharing being it’s very backbone. Creating recipes that more people can enjoy appeals to the nature of who I am as a person. Supporting Delicious Alchemy in their Crowdfund by making these Chocolate Cherry Cupcakes was the very least I could do.

NOTE: All of Delicious Alchemy’s products are gluten and dairy free. The recipe below uses milk, butter and eggs.

Recipe: Makes 18 Chocolate Cherry Cupcakes

1 packet of gluten free Vanilla Sponge Mix from Delicious Alchemy

50g Cocoa Powder – I used Sugar and Crumbs cherry cocoa

180g Unsalted Butter – softened to room temperature

3 Free Range Eggs

60ml/4tbsp Whole Milk

250g Black Forest Icing Sugar

50g Cocoa

100g Plain Icing Sugar

200g Unsalted Butter – softened to room temperature

Approximately 3tbsp Hot Water

Optional – 200g White Chocolate for the chocolate heart decorations – alternatively ensure any decoration is gluten free

Method: Preheat the oven to 160C/140C fan, gas mark 3

  • Line 2 cupcake tins with 18 cupcake cases.
  • Add the softened butter, eggs, vanilla sponge mix, flavoured cocoa and milk to a bowl.
  • Whisk until you have a smooth cake batter – approximately 2 minutes.
  • Divide the cake batter evenly between the cake cases.
  • Place the cupcake tins in the oven and bake for 20-25 minutes. The cupcakes are cooked when they are firm and spring back from a light touch.
  • Once baked remove the cupcakes from the oven.
  • Allow the cupcakes to cool, either in their tin or transferred to a cooling rack, before icing.
FF Chocolate Cherry Cupcakes
Gluten Free Chocolate Cherry Cupcakes.

To make the buttercream frosting:

  • Place the softened butter into a large bowl.
  • Sift in the flavoured icing sugar, cocoa and plain icing sugar.
  • Add 2 tablespoons of hot water from a recently boiled kettle.
  • Whisk, starting on a very slow speed and gradually increasing, until the buttercream is light and creamy – add in the extra tablespoon of hot water if the buttercream is too stiff.
  • Fit a large piping bag with a large star nozzle – I use Wilton’s #1M.
  • Fill the piping bag with the buttercream.
  • To pipe rose swirls, start with the nozzle just above the centre of the cupcake, pipe an e shape and then continue round.
FF Chocolate Cherry Cupcakes
Chocolate Cherry Cupcakes with swirls of frosting.

To make the white chocolate hearts:

  • Chop up the chocolate into small pieces.
  • Place two thirds of the chocolate into a heatproof, microwaveable bowl.
  • Zap for 20 seconds at a time stirring in between.
  • When the chocolate is melted, remove from the microwave and immediately add the last third of chopped chocolate.
  • Stir continuously until all of the chocolate is melted. This method is a cheat’s way of tempering chocolate and helps prevent any white marks (bloom) appearing on the cooled chocolate.
  • Spoon the melted chocolate into the heart mould, tapping the mould after every three hearts are filled, to bring air bubbles to the surface.
  • Leave the chocolate to set somewhere cool. You can chill the mould in the fridge.
FF Chocolate Cherry Cupcakes
White Chocolate Hearts to decorate the cupcakes.
  • Once the white chocolate hearts are firm, press out from the mould, ensuring you have cold hands for handling them, so as not to mark them.
  • Place a chocolate heart on the top of each cupcake.
FF Chocolate Cherry Cupcakes
Chocolate Cherry Cupcakes perfect for sharing.

These gluten free Chocolate Cherry Cupcakes are so pretty and very delicious. Whilst eating one of these tasty treats I could honestly not tell any difference to ‘regular’ wheat flour cupcakes. Yet the great thing is that more people can enjoy these!

FF Chocolate Cherry Cupcakes
Chocolate Cherry Cupcakes will you help?

I thoroughly enjoyed making (and eating 😀) these cupcakes and supporting Delicious Alchemy in their Crowdfund campaign. Raising awareness for others who cannot eat freely and creating an ultimate guide to living with dietary restrictions is very close to my heart. Whilst I am able to eat wheat flour, having been a life long sufferer of migraines, there are certain foods that I too have to avoid.

Do you have dietary restrictions?

Are there recipes that you would like converted into gluten free versions?

Let me know and if I can help I absolutely will xx.

If you have enjoyed these gluten free Chocolate Cherry Cupcakes here are some other gluten free recipes you may like:

Lemony Strawberry Pavlova

FF Chocolate Cherry Cupcakes
Gluten Free Lemony Strawberry Pavlova

Autumn Apple Almond Cake

FF Chocolate Cherry Cupcakes
Gluten Free Autumn Apple Almond Cake

Almond Blackberry Pear Crumble

FF Chocolate Cherry Cupcakes
Almond Blackberry Pear Crumble gluten free

All of the above recipes are 100% gluten free and I have happily served them to guests who were not aware that wheat flour had not been used!!

Feasting on delicious homemade food should be fun. With these recipes more people can bake at home with confidence. Whilst supermarkets may provide a limited selection of gluten free products, they will never be as tasty as homemade. Having a gluten free cake mix in the cupboard means you can whip up a gluten free treat, for visitors with a restricted diet, without having to re-stock your baking cupboard!

Please let me know if I can help with the questions above?

Sammie xx

Delicious Alchemy provided me with the vanilla sponge mix for this post. All opinions, views, content and photographs are my own. I did not receive any payment for writing this post. Please see my Disclosure Policy.

Share
Facebooktwitterpinterestlinkedintumblr

Date Ginger Iced Buns

Share
Facebooktwitterpinterestlinkedintumblr

Easter seems such a long time ago now and yet I still find myself missing the adventure of creating new hot cross bun flavours. So, instead I took one of my favourite flavour combinations this year, the Ginger Date Hot Cross Bun and played around with it. The result is these utterly yummy Date Ginger Iced Buns.

FF Date Ginger Iced Buns
Date Ginger Iced Buns full of fruit and flavour.

A sweet yeasted bun packed with medjool dates, stem ginger and freshly grated nutmeg. Baked until golden brown and then slathered with thick glacé icing.

These Date Ginger Iced Buns are sticky, not overly sweet, finger licking portions of loveliness.

I adored the flavour combination when I made the hot cross buns, but knew I needed to vamp up the recipe. When toasting hot cross buns, the heat enhances the flavour, as these buns were to be eaten cold I knew I’d have to pack more flavour in. After making these three times I am finally happy with the recipe.

FF Date Ginger Iced Buns
Date Ginger Iced Buns with a hint of nutmeg.

Playing around with recipes is part of the fun of being a food blogger. When Waitrose ran a competition on Twitter for new hot cross bun flavours I was absolutely in my element and went on to make a couple of my suggestions, including the Cherry Bakewell Hot Cross Buns.

Over the recent months, experimenting in the kitchen with new recipes, carrying out reviews and writing this blog, has really helped me. My body is still completely messed up, with me having around sixty seizures a week, yet focusing on my blog, although not easy at times, has definitely given me a sense of accomplishment.

It is hard not to become frustrated and I frequently do, that is when I re-read all of the lovely comments you leave. Today I am really struggling with pain, which means it’s hard to concentrate on writing these words – yet this recipe is so good, so delicious, that I really want to share it with you so that you can make the Date Ginger Iced Buns over the weekend.

I write this not to elicite sympathy from you, simply to explain what my reality is – see Adapting to a new normal. Sometimes life isn’t all sunshine and roses. Usually the kitchen is my retreat, somewhere to escape to as a distraction, yet today my bed is my sanctuary.

On a more positive note, one of the most enjoyable reviews has been using the delicious medjool dates from The Medjool Date Co. This recipe has used the last of the dates, sob. They are completely addictive and utterly divine. I might have made more recipes had I not snaffled so many whilst cooking and baking with them!

I will definitely be getting more of these delicious medjool dates. Their sticky, not overly sweet flavour is so versatile in cooking/baking and they are wonderful to snack on too. I highly recommend them.

Recipe: Makes 12 Date Ginger Iced Buns

550g/1lb 4oz Strong White Bread Flour

160ml Whole Milk – warmed to body temperature

120ml Tepid Water

2 Large Eggs – I use free range

1tbsp Honey

10g/1.5 Sachet Fast Acting Dried Yeast

10g/ approx 1tsp Salt

50g/2oz Unsalted Butter

200g/8oz Medjool Dates – pitted and chopped to medium dice

3 Balls of Stem Ginger – removed from the syrup and finely diced

1/2tsp Freshly Grated Nutmeg

For the glace icing:

400g/14oz  Icing Sugar

2tbsp Syrup from the stem ginger jar

Method:

This method is for use with a bread maker or stand mixer, if you wish to make by hand please do, the quantities are the same, make sure you knead the dough for 10 minutes before adding the fruit.

The ‘bowl’ refers to the bowl of a stand mixer or the mixing compartment of a bread maker.

  • Add both the milk and water to the bowl.
  • Next add both eggs, the honey and yeast.
  • Swish about with clean fingers to mix.
  • Now add the flour on top of the liquid mixture.
  • Place the salt and butter on top of the flour.

For a bread maker, set the cycle to dough and press start. When prompted by the machine, or 5 minutes before mixing stops, add the chopped dates, finely diced stem ginger and nutmeg. Allow the bread maker to complete the dough cycle.

When the bread maker has completed the dough cycle, ensure the dough has doubled in size, if not wait until it has. Then re start the dough cycle for 2 minutes, this will ‘knock back’ the dough for you.

For a stand mixer attach the dough hook. Start mixing on a low speed. Once the contents of the bowl resemble dough continue to mix on medium/slow speed for 5 minutes. Stop the mixer. Scrape all the dough, from the hook, into the bowl. Add the chopped dates, finely diced stem ginger and nutmeg . Lower the dough hook and mix on medium speed for a further 5 minutes.

After the 5 minutes mixing is complete, stop the mixer. Scrape all the dough back into the bowl, it will be very sticky – don’t worry. Cover with a damp cloth and leave in a draught free place until doubled in size – 1 – 1 1/2 hours.

Once the stand mixer dough has doubled in size, lower the dough hook and mix on medium speed for 2 minutes, this will ‘knock back’ the dough for you.

Shaping the buns:

  • Tip the dough out on to a clean, floured surface.
  • Divide the dough in half and then divide each half into 6 portions. You can use scales if you want to be absolutely accurate.
  • Flour your hands well, this dough is sticky.
  • Form each portion of dough into a ball shape.
  • Place on to a buttered baking tray, leaving space in between each bun to allow it to rise.
  • When all the buns are shaped cover the baking tray with a clean tea towel. Leave in a draught free place until the buns are doubled in size – approx 1 hour.
  • When the buns are almost doubled, preheat the oven to 200C/180C fan, gas mark 6.
FF Date Ginger Iced Buns
Beautifully risen buns ready for the oven.
  • When the buns have doubled in size place the baking tray into the centre of the oven and bake for 20-25 minutes.
  • Enjoy the smell of these delicious buns baking in your oven. There’s a reason, during the build up to Easter, that you smell Hot Cross Buns as soon as you walk into a supermaket!!!
  • The buns are baked when they are golden brown and sound hollow whe rapped on the base with you knuckle.
  • Once baked remove the buns from the oven and immediately transfer them to a cooling rack.
FF Date Ginger Iced Buns
Golden baked, fruit filled buns.
  • Leave the date and ginger buns to cool completely before icing.

To make the glace icing:

  • Sift the icing sugar into a bowl and add the syrup from the stem ginger jar.
  • Add just enough water 2-3tsp to the bowl to make a very thick, but still spoonable paste.
  • Using a dessert spoon, carefully swirl some of the thick icing on to each of the buns. The icing will drip very slightly.
  • Allow the Date Ginger Iced Buns to set on the cooling rack.

Now it’s time to put the kettle on as all of your neighbours will soon be knocking at your front door, drawn in by the tantalising aroma of freshly baked fruit buns!!

FF Date Ginger Iced Buns
Date Ginger Iced Buns sweet fruit filled delights that you want to bite!

A quick tip, if these aren’t all to be snaffled straight away, is to pop half of them into a freezer bag – un-iced. They can be frozen for up to a month. Defrost fully before icing, or skip the icing and enjoy the buns toasted. with lashing of butter.

The freshly iced buns will keep for 24 hours in an airtight container. I use an old biscuit tin.

FF Date Ginger Iced Buns
Date Ginger Iced Buns perfect for afternoon tea!

Do let me know if you try this recipe. I love getting feedback on my recipes.

If you have enjoyed these yummy Date Ginger Iced Buns you may also like these other recipes using dates:

Coconut Almond Date Flapjacks

VC Coconut Almond Date Flapjacks
Coconut Almond Date Flapjacks a slow release energy bar wherever you are.

Ginger Date Hot Cross Buns

RT Ginger Gate Hot Cross Buns
Ginger Date Hot Cross Buns a complete taste sensation.

Morrocan Lamb Stew

FF Morrocan Lamb Stew
Morrocan Lamb Stew flavored with middle eastern spices and medjool dates.


The Medjool Dates were truly a feast in themselves, yet I also found them so versatile in the kitchen. Keep your eyes open for more delicious date recipes on Feasting is Fun!

Whatever you make or bake in your kitchens this weekend,I reallythat hope you have fun and enjoy sharing your feast with others.

Sammie xx

The Medjool Date Company provided me with the dates for this recipe. All views, opinions and content contained within this post are my own. Please see my Disclosure Policy.


Share
Facebooktwitterpinterestlinkedintumblr