Oat Chocolate Chip Cookies

Share
Facebooktwitterpinterestlinkedintumblr

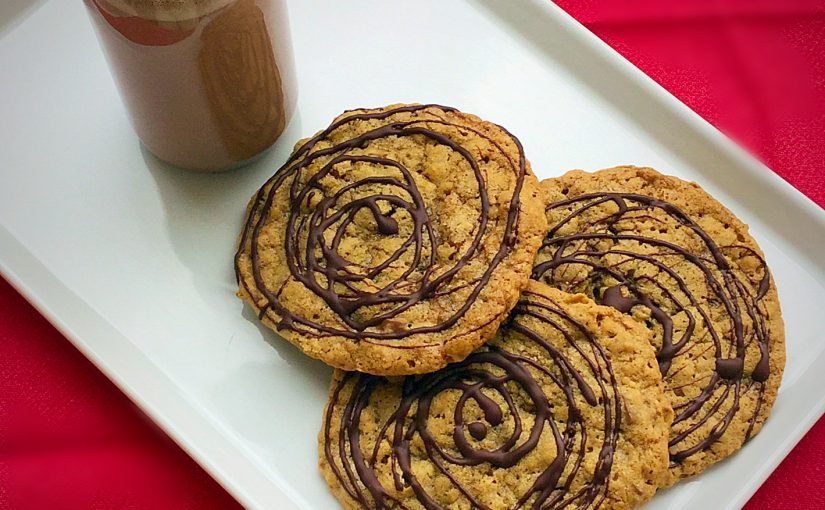
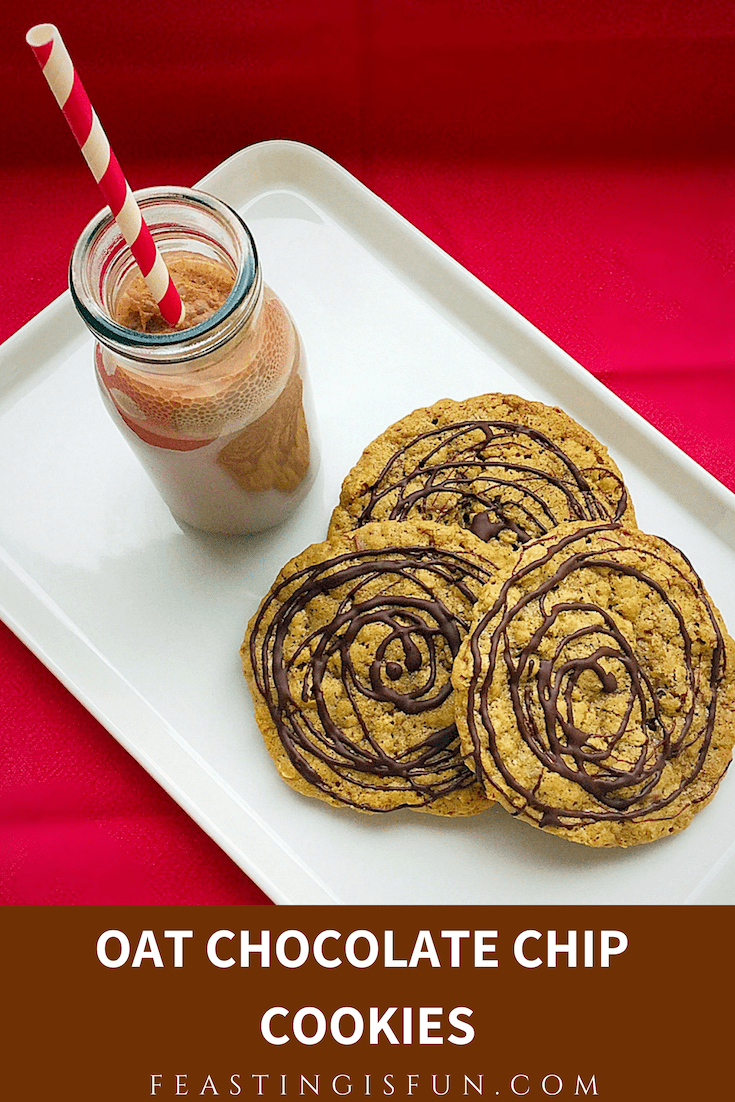
So, if you’ve spent a little time on this blog, you’ll know that I am a self confessed Cookie Monster. And cookies are my favourite go to sweet treat. Perhaps that’s why there are 21 cookie recipes on here! Anyway I try to keep on the oat/nut/fruit side of things but I craved CHOCOLATE! So I caved and made these unbelievably good Oat Chocolate Chip Cookies.

Oat Chocolate Chip Cookies

They are so good!

Oat Chocolate Chip Cookies

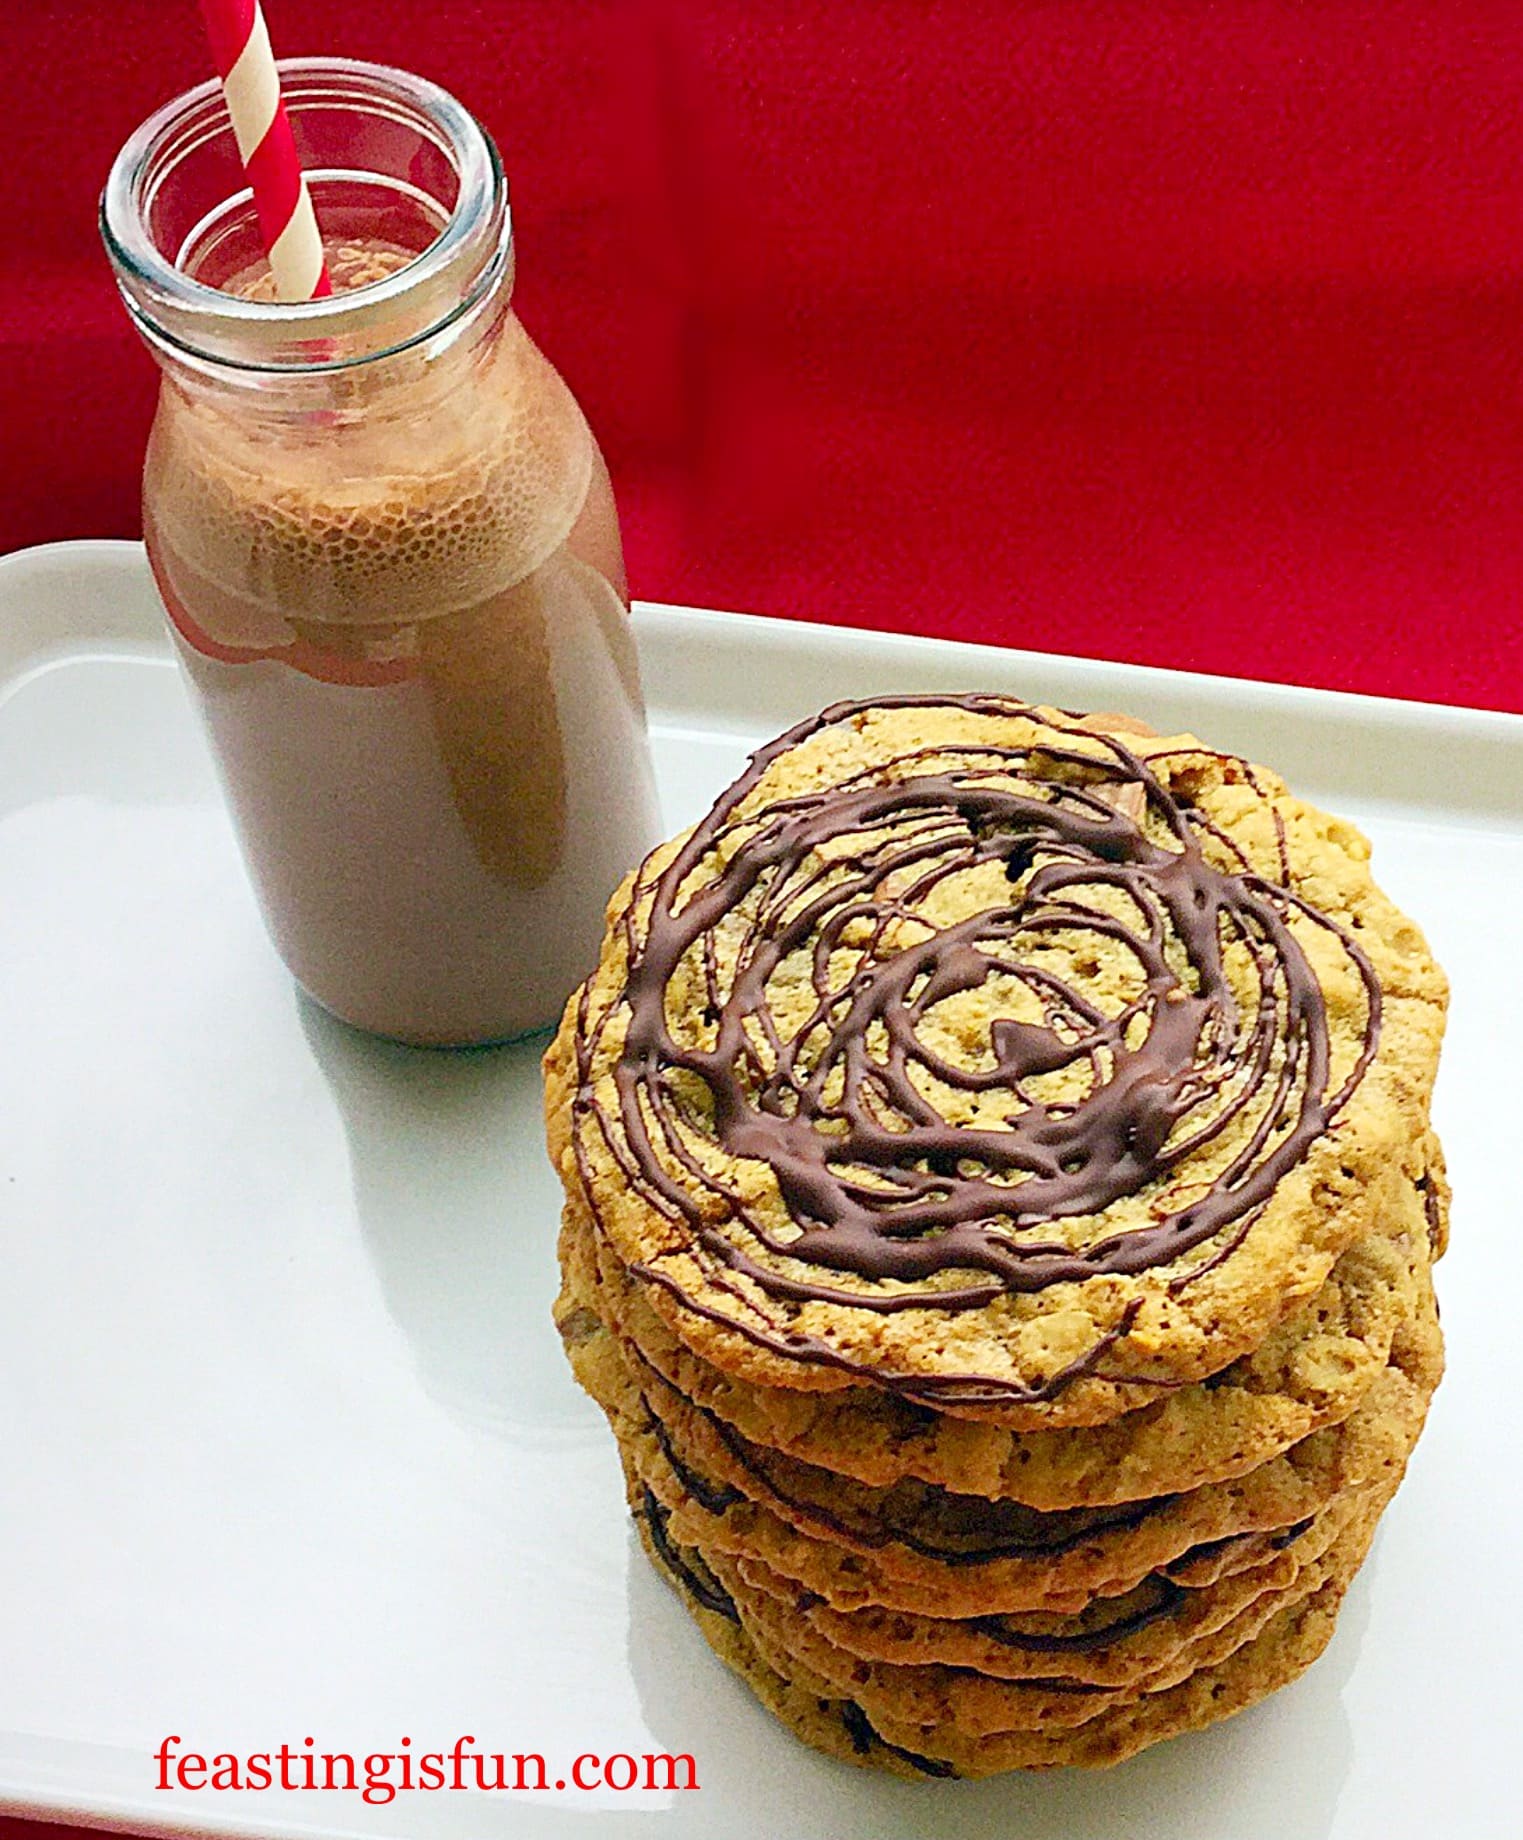
Oh yes I did. I totally stacked a piles of these very yummy Oat Chocolate Chip Cookies. Because what’s better than one cookie? A whole stack of them!

So there you go, that’s my kind of maths.

Also adding oats to cookies does two important things; it nudges them slightly more toward the healthier end of the nutritional spectrum and it gives them a wonderful, chewy, almost nutty flavour.

Oat Chocolate Chip Cookies

A Family Of Cookie Lovers

While you all know how much I love and adore my family. I have the best hubby in the world, who has all but given up his office, so that I can store baking equipment. Bundt tins take up a lot of room you know! Also there’s my Star and Snugs, our two gorgeous girls who, help me so much. Whether it’s cooking dinner, cleaning, vacuuming and much more. Last but definitely not least is our little man, who isn’t so little anymore so I’ll call him by his best friends nickname, Bob. He is growing into a loving and strapping lad who is always ready to help, especially fixing things. And Bob has definitely inherited his paternal Grandad’s capability with his hands.

So you see I love them all – but – they also are cookie monsters. Which is fine I make food to be eaten, except out of this batch of 18 cookies I only ate 1. It didn’t help that I’d spent a few days in bed (see here ) after making these. While I appreciate that they bring me cups of tea, however, as I’d ordered some shortie biscuits, which I love, they brought those with my hot drink. So it was only a few days later, when I was able to venture downstairs that I realised they’d all gone!

A stack of Oat Chocolate Chip Cookies
Oat Chocolate Chip Cookies

I was sad for a teeny tiny moment and then very thankful and flattered that my lovely family had enjoyed them so much.

Family, My Biggest Supporters

Since they are my biggest supporters, along with extended family, it really gives me a warm, fuzzy feeling inside knowing I’ve made them something that they  have really enjoyed. Although, being stuck in bed is not fun, knowing there is a tin full of cookies downstairs in the kitchen, helps me to feel that I am more present, than in reality I am.

Recipe: Makes 16-18 Oat Chocolate Chip Cookies

225g/8oz Soft Light Brown Sugar – I used Billingtons

150g/5oz Unsalted Butter- at room temperature

2tsp Vanilla Extract – I use Nielsen-Massey

1 Large Free Range Egg – plus

1 Large Free Range Egg Yolk

175g/6oz Plain White Flour

100g/4oz Plain Rolled Oats – not quick cook

1/2tsp Bicarbonate of Soda

Pinch of Salt

150g/5oz Milk Chocolate Chips or Chunks

50g/2oz Dark Chocolate 70% cocoa

Method: preheat the oven to 170C/150C fan, gas mark 4, 350F

Making The Oat Cookie Dough

  • First of all, line 3 large baking trays with baking parchment.
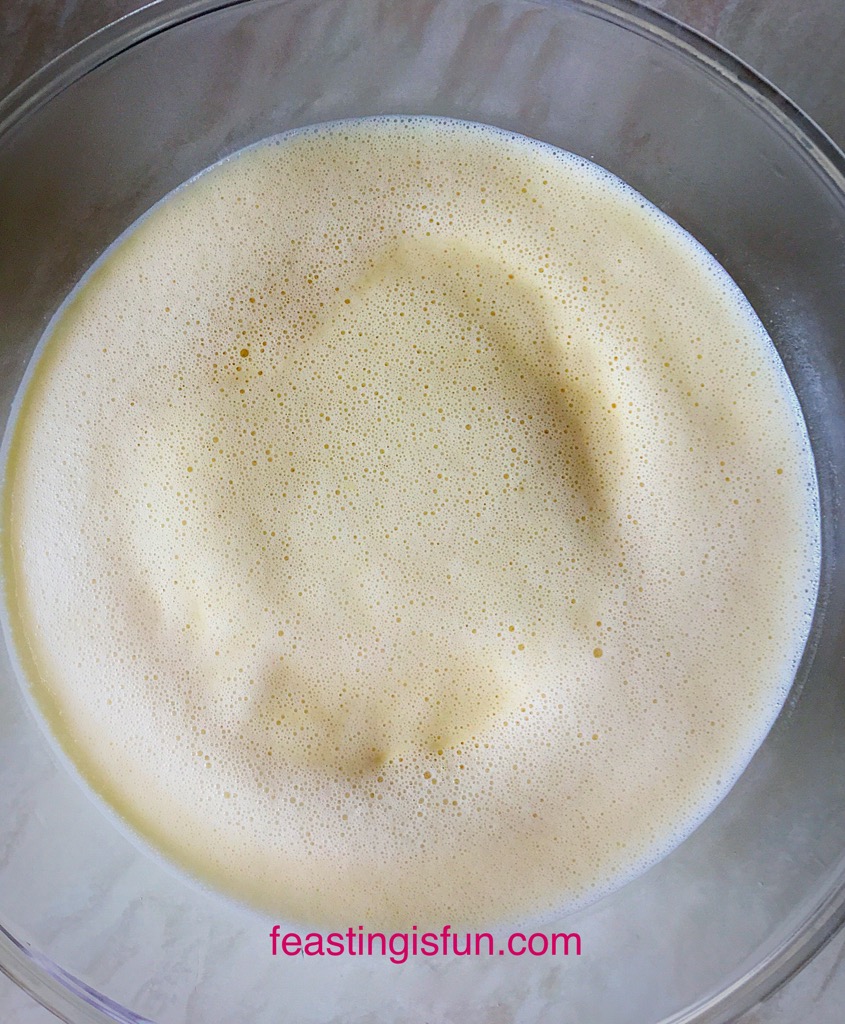
  • Place the sugar and butter in a large bowl and whisk/beat for 5 minutes until pale and creamy – whisking for 5 minutes here and then after adding the eggs is very important to the finished texture of the cookie.
  • Add the vanilla extract and the eggs and continue whisking/beating for a further 5 minutes.
  • Sift in the flour, bicarb. salt and add the oats.
  • Add the chocolate chips.
  • Fold all the ingredients together until you have uniform cookie dough.
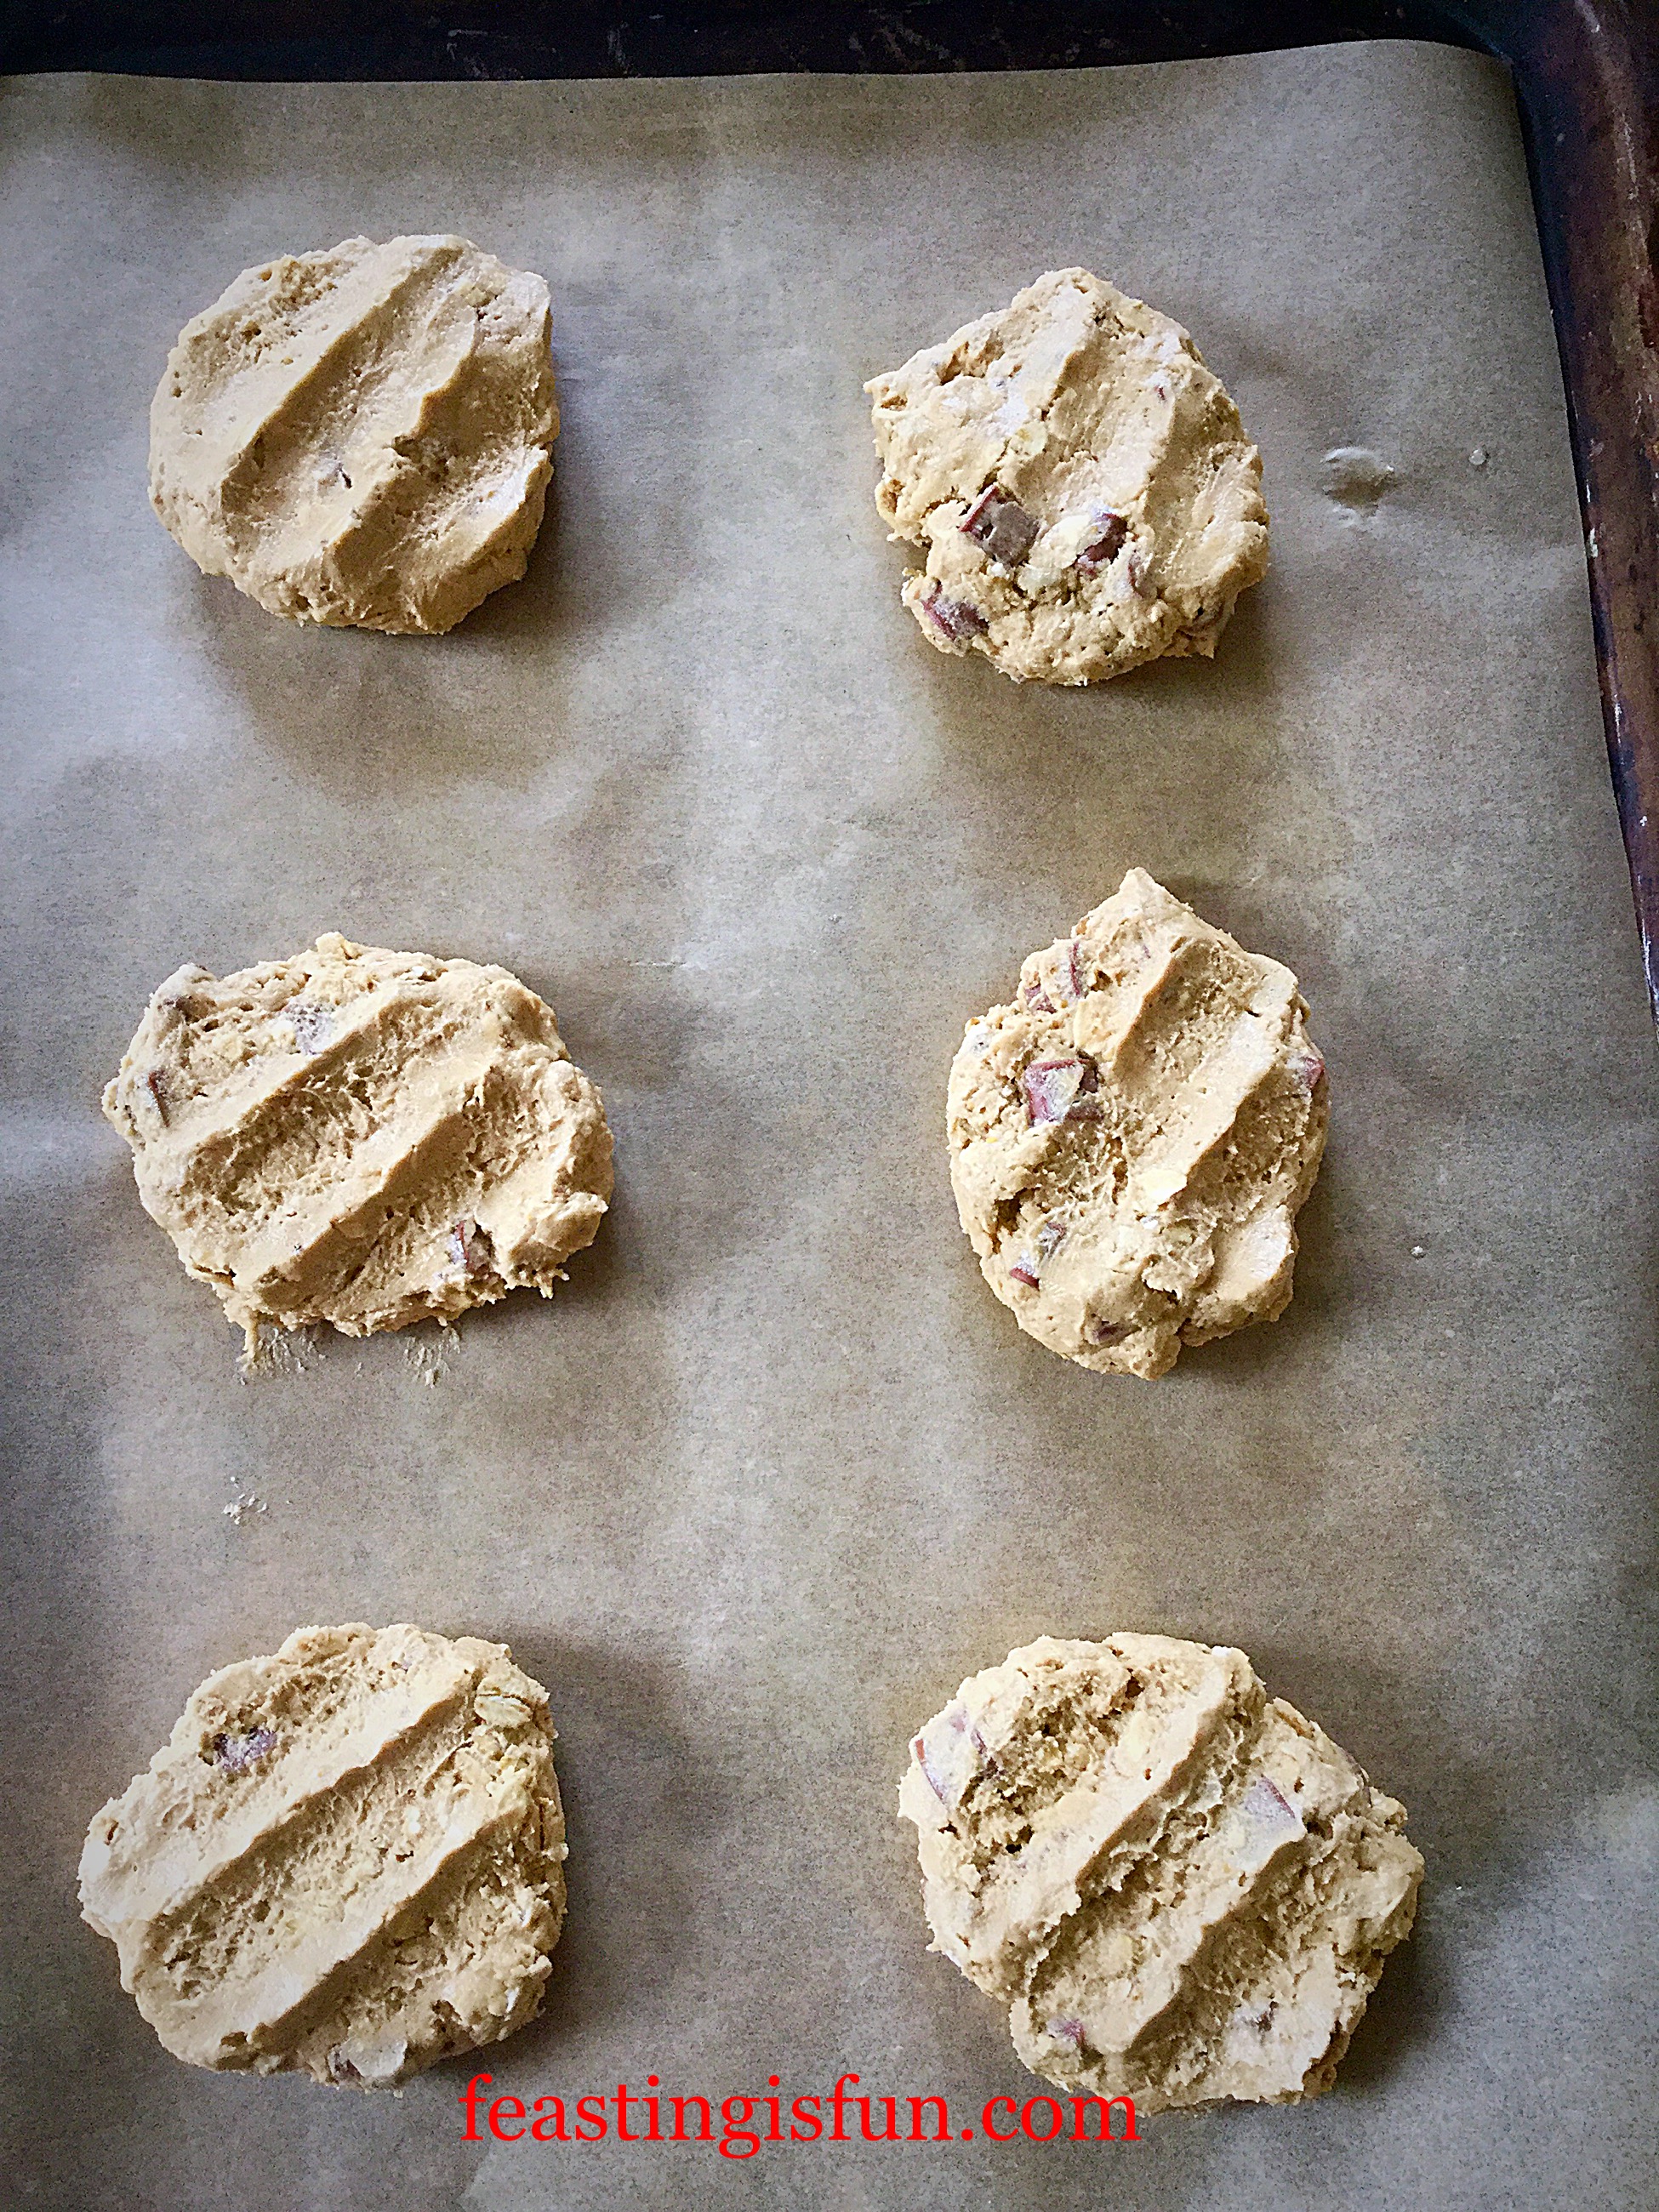
  • Using a medium sized ice cream scoop, or a spoon and your hands, scoop/roll 5cm/2″ ball of cookie dough and place onto the baking tray.
FF Oat Chocolate Chip Cookies
Cookie dough balls.
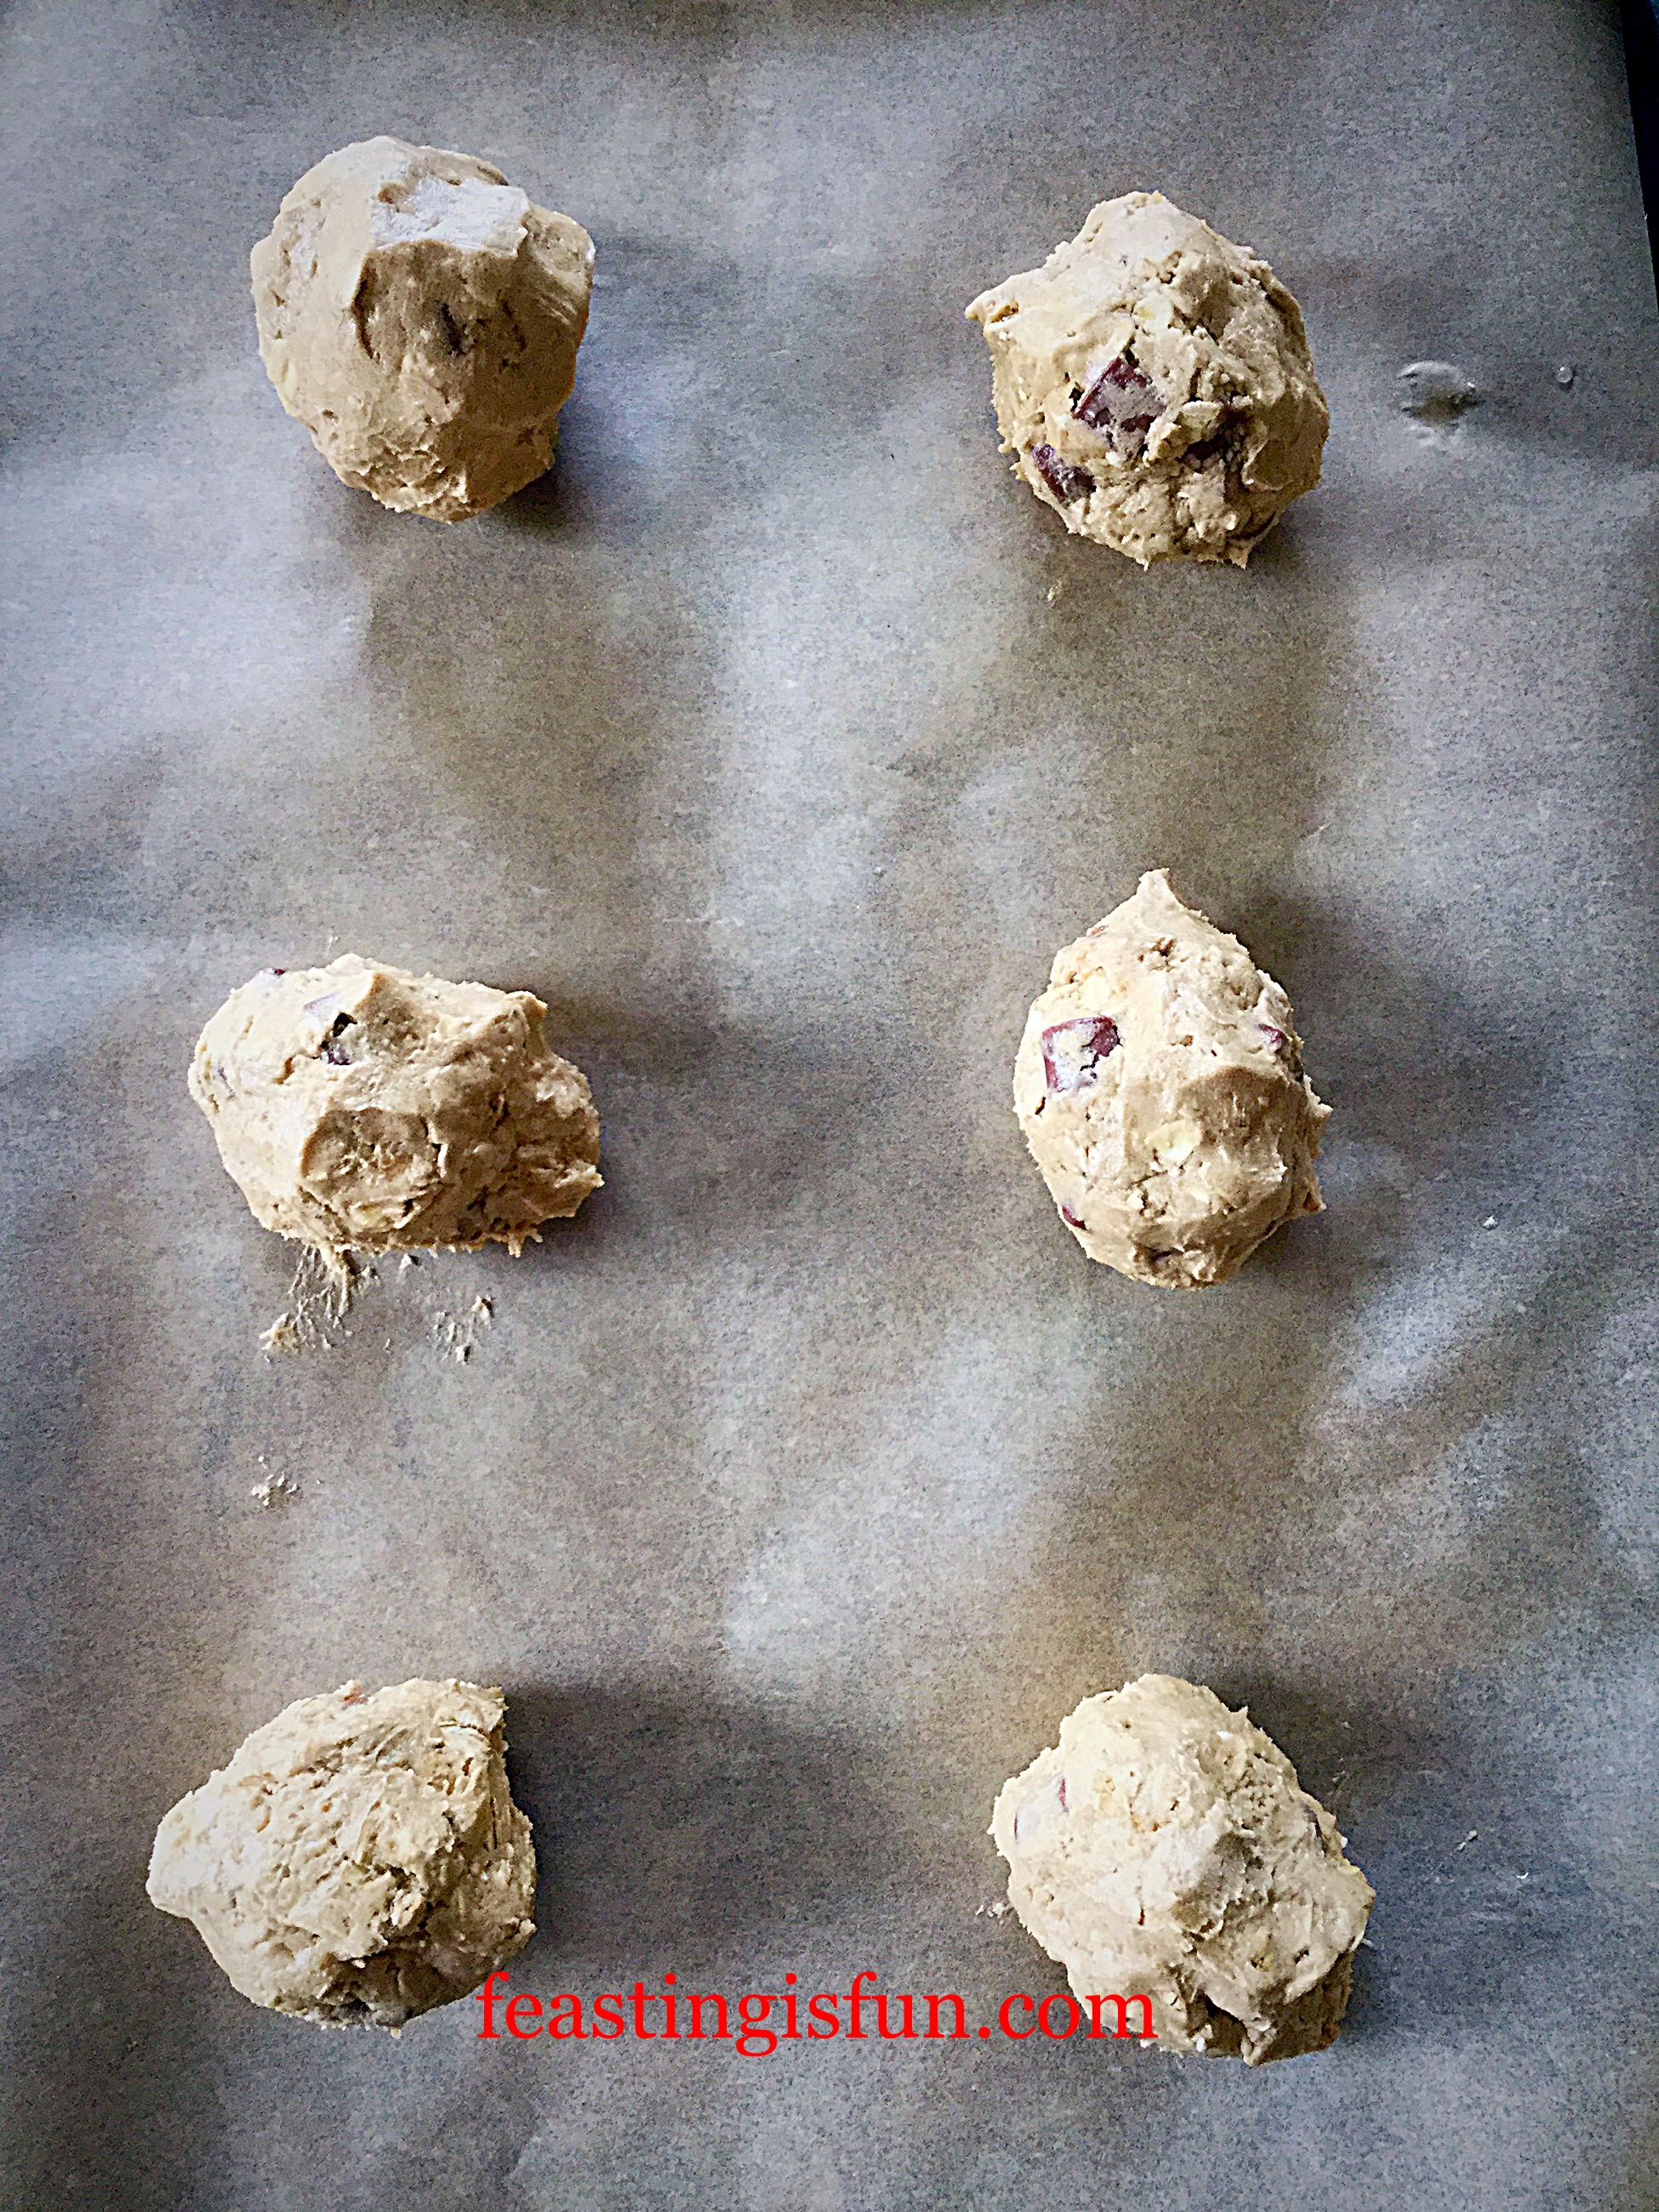
  • With slightly dampened fingers (it stops the cookie dough sticking to them), press down on each ball to flatten slightly.
FF Oat Chocolate Chip Cookies
Oat Chocolate Chip Cookies ready for the oven.

Baking The Oat Chocolate Chip Cookies

  • Place the baking trays in the centre and lower parts of the oven. I rotate mine halfway through baking.
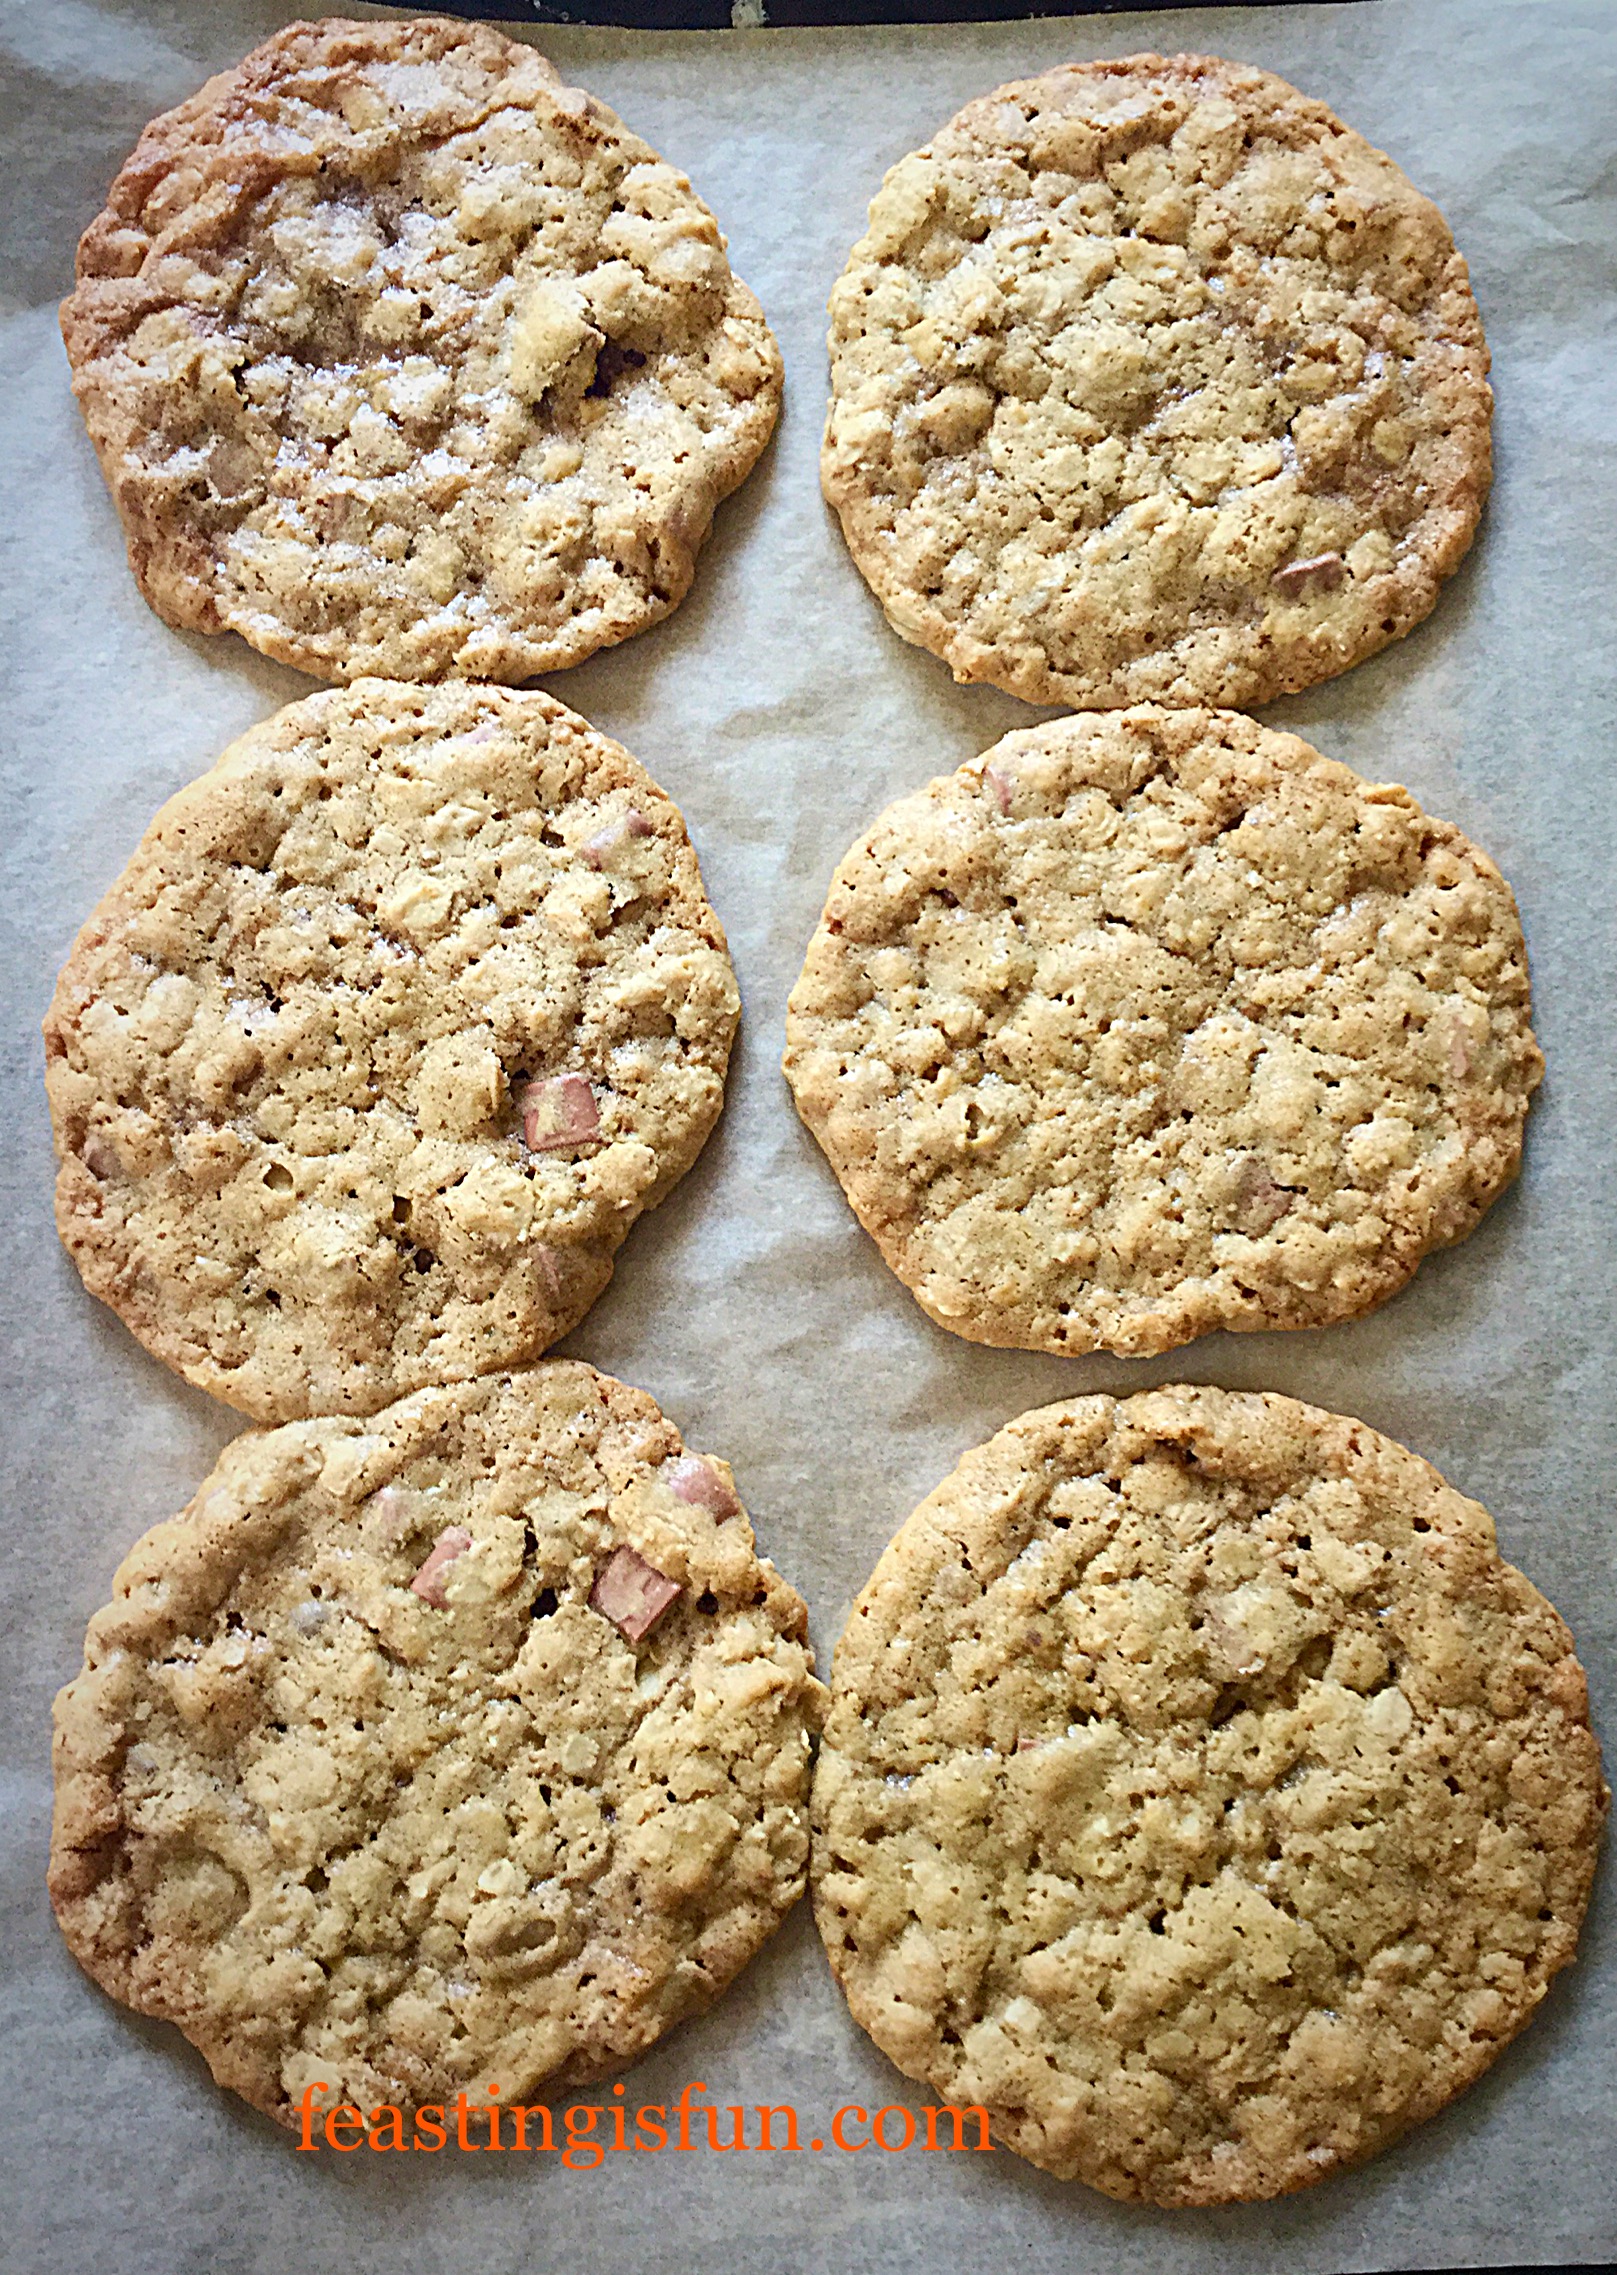
  • Bake for 15-20 minutes. The cookies are baked when they have spread out and are golden brown.
  • As soon as the cookies are baked remove the cookies from the oven. Because they will still be very soft, leave on the baking tray to cool and set.
FF Oat Chocolate Chip Cookies
Oat Chocolate Chip Cookies baked and cooling on the tray.


  • As soon as they are cooled lift each cookie free of the baking parchment, use a palette knife to slide underneath the cookie first. Place the cookie back on the baking parchment.

Adding The Dark Chocolate Swirl

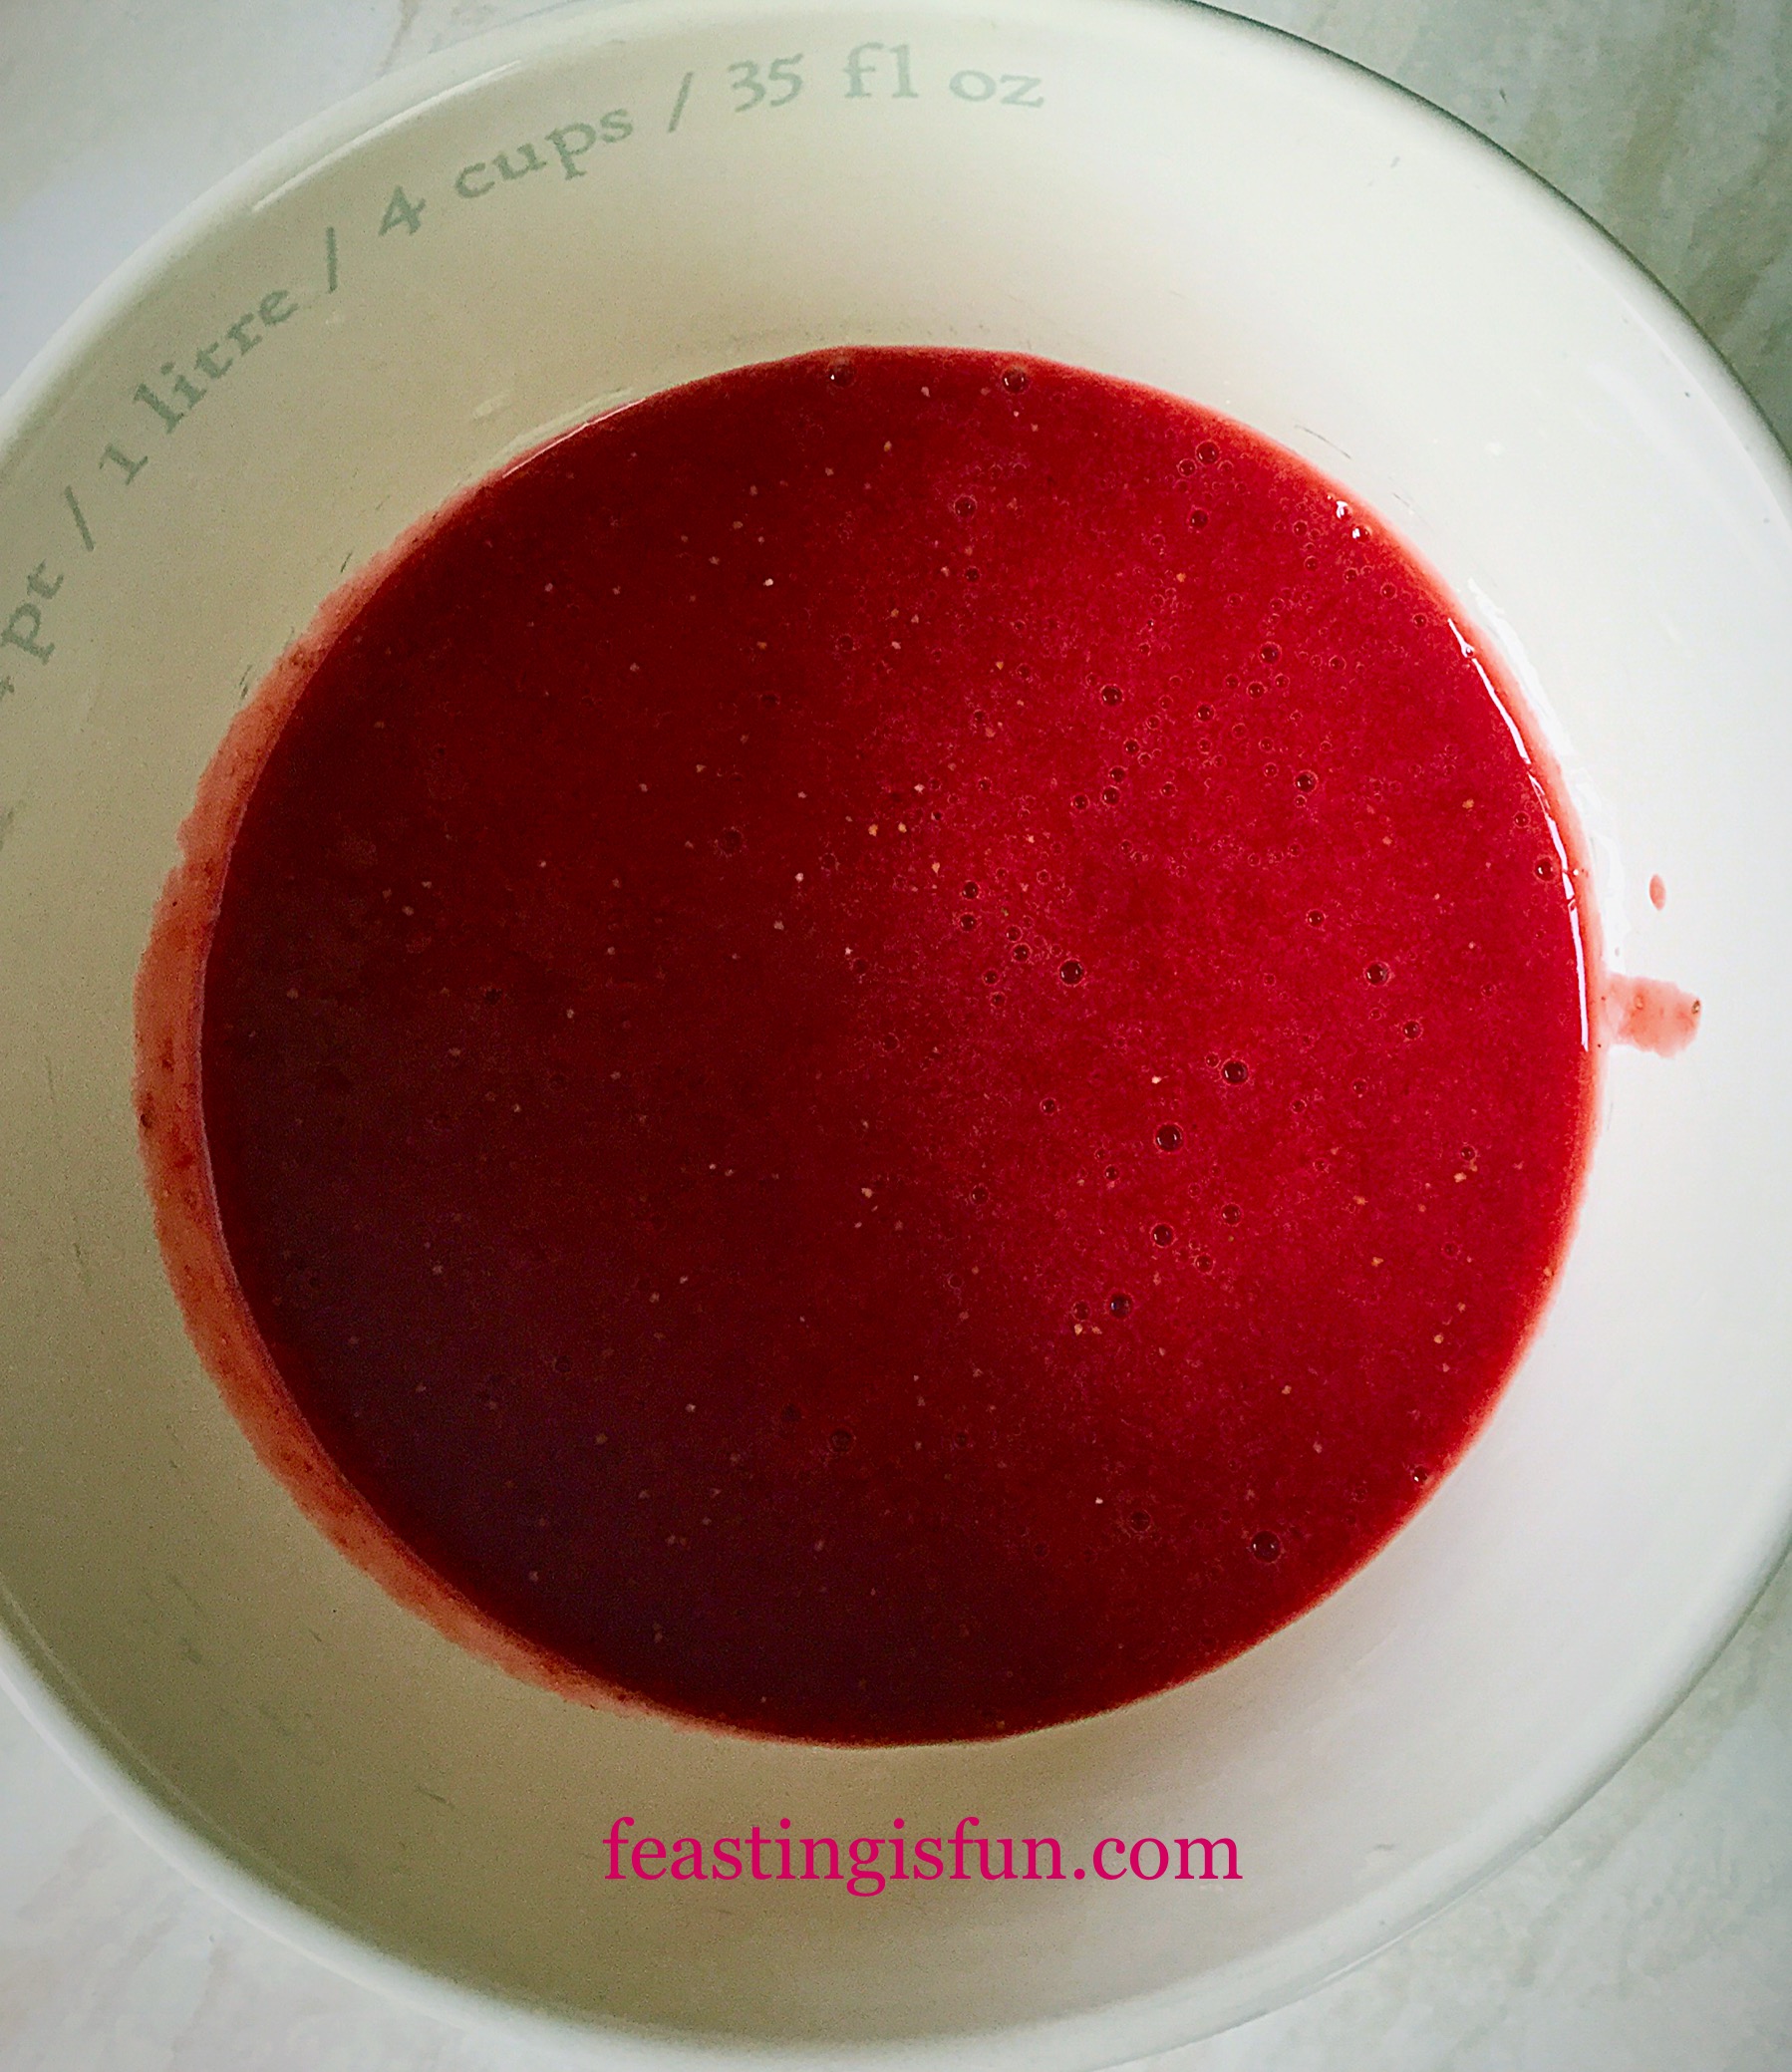
  • In a heatproof, microwaveable bowl add the chopped/broken up dark chocolate.
  • Zap for 20 seconds in the microwave stirring after each heating session. When the chocolate is almost melted remove from the microwave and continue stirring until fully melted.
  • Pour the liquid chocolate into a small disposable piping bag.
  • Snip the very end of the piping bag off, creating a small hole.
  • Pipe swirls onto each of the cookies. Use all of the chocolate up, simply pipe over the swirls again.
FF Oat Chocolate Chip Cookies
Oat Chocolate Chip Cookies with swirls of dark chocolate.
  • Set the cookies to one side to allow the chocolate to cool and set.
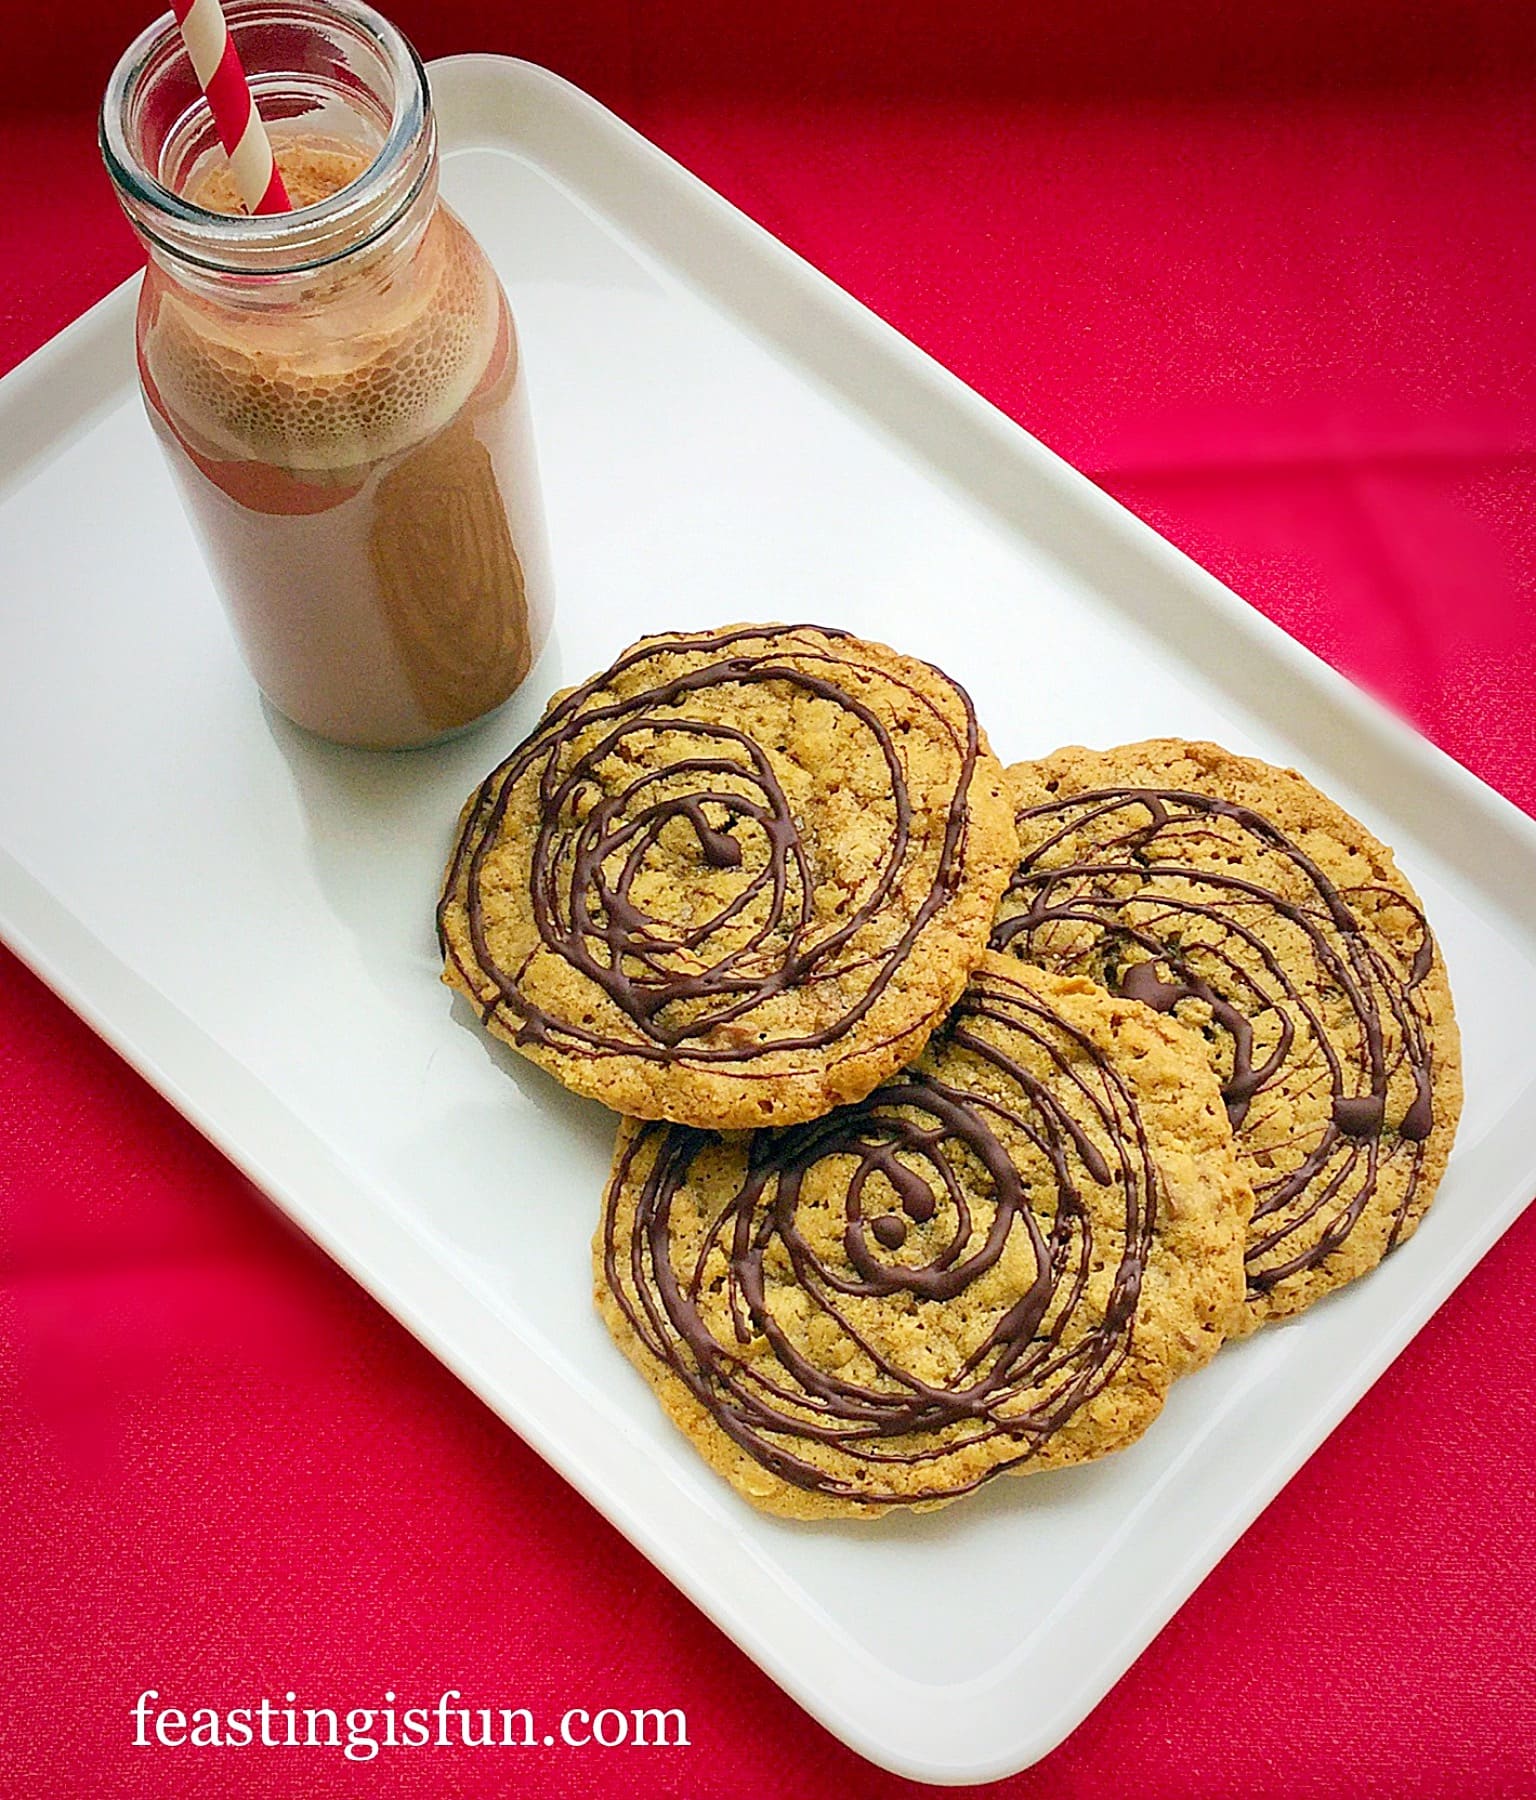
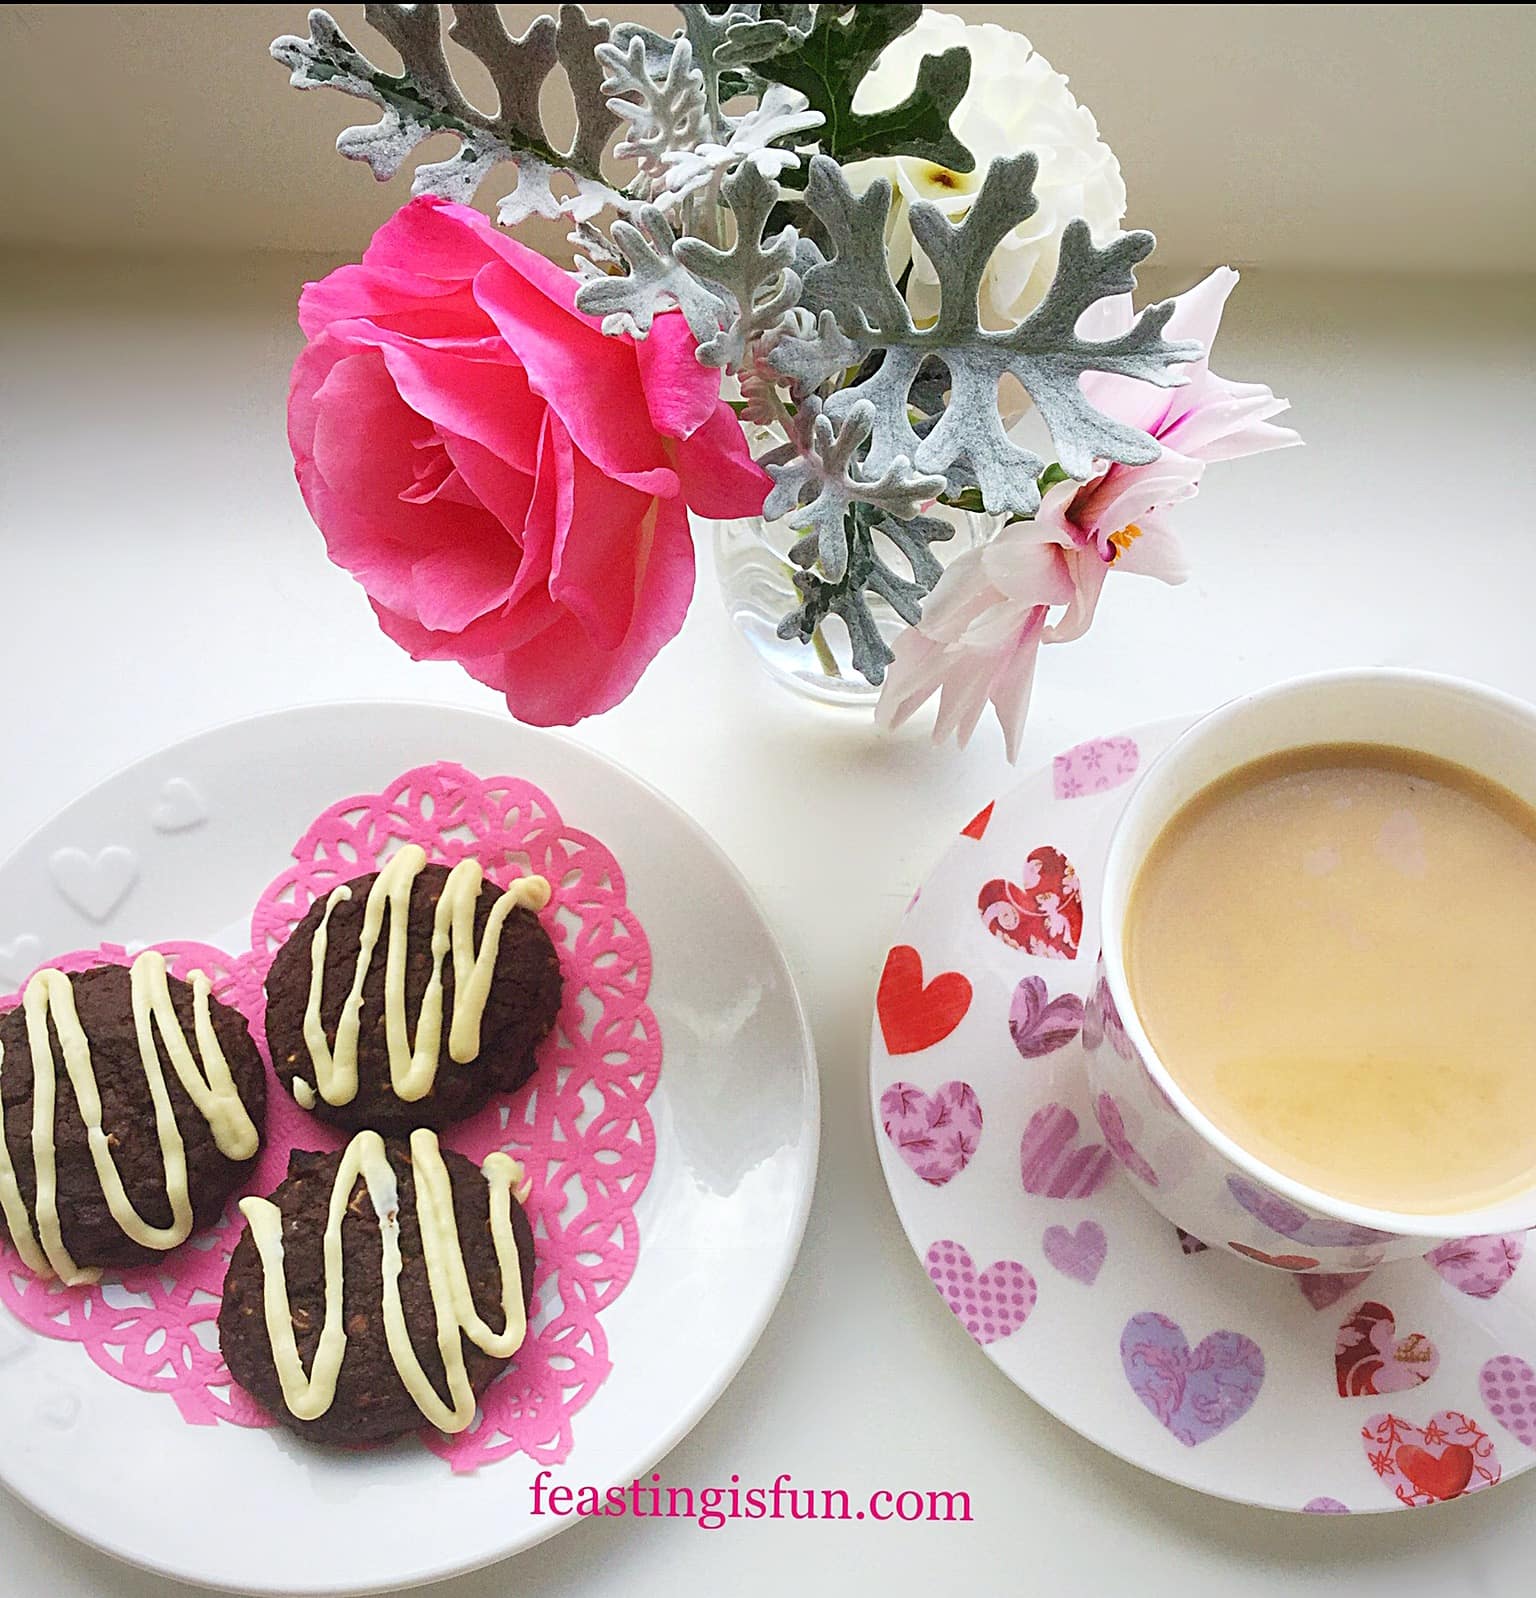
  • As soon as the chocolate is set, pop the kettle on, invite a neighbour round and spend some time chatting over a cup of coffee and delicious Oat Chocolate Chip Cookies.

In the United States and Canada where my friend Liz lives, they carry out cookie exchanges during the holiday season – usually from Thanksgiving through to Christmas. I love that idea! Baking up batches of cookies, sharing, swapping, making new friends, remembering old friends. Liz is an amazing cook and her attention to detail always leaves me impressed.

What do you think, should we have a cookie/biscuit exchange here?

Not because it’s ‘another American custom’ simply because it’s a great idea?

If you have enjoyed these Oat Chocolate Chip Cookies you may also like these:

Double Chocolate Nut Spelt Cookies

Double Chocolate Nut Spelt Cookies

Caramac Caramel Cookies

FF Oat Chocolate Chip Cookies
Caramac Caramel Cookies delicious chewy bites of nostalgia.

Rolo Chocolate Cookies

FF Oat Chocolate Chip Cookies
Rolo Chocolate Cookies chewy bites of cookie heaven.

Thank you to everyone who reads this blog. I really do appreciate you. It’s been wonderful seeing all the bake photos that you have been putting up on Twitter and Instagram. Please keep them coming and if you every have any questions about a particular recipe, either leave a comment, or probably for a quicker response send me a Tweet.

We have a three day bank holiday weekend coming up. So, whatever your plans, I hope that they involve lots of smiles, laughter, fun and feasting with friends, family and neighbours.

Sammie xx

No part of this post may be reproduced or duplicated without the written permission of the owner. Please see my Disclosure Policy.

Share
Facebooktwitterpinterestlinkedintumblr

Strawberry Ripple Ice Cream

Share
Facebooktwitterpinterestlinkedintumblr

I love ice cream. In fact I love it so much that I really enjoy making my own. There are endless flavour possibilities and combinations AND it’s made with real cream. Also no extra additives are needed. Today I bring you Strawberry Ripple Ice Cream.

FF Strawberry Ripple Ice Cream
Strawberry Ripple Ice Cream perfect on a hot sunny day.

Dreamy, creamy strawberry ice cream, with an intense strawberry syrup rippled through. This isn’t any ordinary ice cream, this is THE best Strawberry Ripple Ice Cream you could ever imagine.

And you too can make it at home. Because it’s so easy!

You make a vanilla custard, make a strawberry coulis, mix, freeze and that’s when the magic happens!

Ok so there’s a tiny little bit more to it than that, but preparation time for this delicious ice cream is about 15 minutes.

FF Strawberry Ripple Ice Cream
Strawberry Ripple Ice Cream you know you want to dig in?

Loving My Ice Cream Maker

I love properly churned ice cream, by that I mean ice cream that is mixed whilst it freezes. It allows the ice crystals to stay really small and results in the creamy texture we all associate with ice cream.

Hand holding an ice cream cone with descriptive graphics.

As our old ice cream maker is literally on it’s last legs, I have a new one from Andrew James it can be found here and has won a coveted Which Best Buy Award. While I’ve said before that any new piece of kitchen kit needs to earn it’s place in my kitchen, I’d say if you love ice cream, it definitely worth buying an ice cream maker. Since they are fairly small appliances and I keep the ‘frozen’ bowl part permenantly in the freezer, whilst the other parts stay in the box.

FF Strawberry Ripple Ice Cream
Bring out a tub of this Strawberry Ripple Ice Cream and see the smiles appear!

Because the ice cream custard base pretty much stays the same and then you can add whatever flavours. The flavour combinations are limitless! Therefore, having an ice cream maker in our kitchen for me, is essential.

Easy Gluten Free Dessert

For those of you on a gluten free diet, ensure the corn flour that you use is certified gluten free, then you can happily make these delicious, dreamy treats. should be able to enjoy ice cream, so for those of you with lactose/dairy/egg intolerance I will be working on some extra recipes so that you too can enjoy this delightful, cooling treat during the summer.

Supporting British And Local Farmers

There is one thing that I do feel passionately about and that is good quality, seasonal produce. And if you grow your own fruit even better! Using British frozen fruit, which I do often during the colder months is a great alternative, as is using tinned fruit. I use tinned peaches to make my Peach and Banana Smoothie in the winter and it tastes utterly delicious. That doesn’t mean I don’t eat some imported produce, but here in the UK we have incredible ‘Pick Your Own’ farms, farmers markets and even some supermarkets that stock local produce.

I guess what I’m saying is, life is about balance. If we can support our Britsh farmers and even grow some of our own fruit and veg (watch out or an exciting new gardening diary, coming soon on this blog) we are not only getting the freshest produce, picked at it’s peak, but also supporting our farmers and local producers too.

FF Strawberry Ripple Ice Cream
Strawberry Ripple Ice Cream

Recipe: Makes 1 litre Strawberry Ripple Ice Cream

400g British Strawberries

2tbsp Framboise – raspberry liquer – substitute with apple juice if preferred

1tbsp Fresh Lemon Juice

8tbsp Caster Sugar

300ml Double Cream

300ml Milk – whole or semi-skimmed

1tsp Corn Flour (also known as corn starch) – I use Dove Farm

4 Large Free Range Egg Yolks – the egg whites can be frozen for up to one month  (perfect for making Lemony Strawberry Pavlova)

1tsp Vanilla Extract – I use Nielsen-Massey

Method: Ensure the ‘frozen’ part of your ice cream maker has been in the freezer for at least 24 hours – or according to manufacturers instructions.

Making the Ice Cream Custard Base:

For step by step photographs of how to make the ice ceram custard base please see here

  • First of all pour the milk and cream into a heavy based saucepan over a medium heat.
  • In a heatproof bowl add the egg yolks, 6 tablespoons of caster sugar, vanilla extract and corn flour. Whisk until pale and frothy.
  • As soon as the cream/milk in the pan has reached scalding point, small bubbles appear around the edge of the milky liquid, remove the pan from the heat.
  • With the whisk on slow speed gently pour the hot milky liquid into the bowl with the whisked egg yolks.
  • Once combined tip the whole mixture back into the saucepan and cook over a low heat until the custard thickens and covers the back of a wooden spoon.
  • Pour the hot custard into a heatproof bowl, through a fine sieve
  • Place cling film directly on top of the custard to stop a skin from forming.
  • Allow the custard to cool slightly before placing the bowl in the fridge to chill.
FF Strawberry Ripple Ice Cream
Ice Cream base ready to be covered in cling film.

Making the Strawberry Coulis and Sauce:

  • Wash the strawberries and pat dry with a clean tea towel.
  • Remove all of the green stems (hull) and place the strawberries into a blender.
  • Add 1 tablespoon of caster sugar, the framboise (or apple juice) and lemon juice.
  • Pulse and then blend on a high speed until you have a very smooth purée.
FF Strawberru Ripple Ice Cream
Fresh strawberry coulis.
  • Pour half of the strawberry coulis into a small saucepan and add 1 tablespoon of caster sugar.
  • Cover the other half with cling film and place in the fridge.
  • Gently bring the strawberry coulis in the saucepan up to a boil and continue to let it bubble until reduced by half. You will be left with an intensely strawberry, jam like syrup. Pour into a bowl to cool.

Churning the Strawberry Ice Cream

  • First of all, set your ice cream maker up as per the instruction manual.
  • Pour the non concentrated strawberry coulis into the custard base and stir.
  • The pour the strawberry ice cream base into the machine maker and churn until you have a thick, but not solid, ice cream. Mine took approximately 20 minutes to curn to a thick, yet still soft, ice cream.
  • Stop the ice cream maker and remove the lid.
FF Strawberry Ripple Ice Cream
Creamy, thick strawberry ice cream.
  • Remove the plastic churning paddle and lick off all the soft ice cream to ensure it tastes good!
  • Using a silicone spatula transfer the ice cream to a suitable, freezer proof, ice cream tub.
  • Pour over the concentrated strawberry syrup and using a wooden spoon handle, ripple the intense strawberry syrup through the ice cream.


FF Strawberry Ripple Ice Cream
Strawberry Ripple Ice Cream such an intense strawberry colour.
  • Finally clip on a lid and place the Strawberry Ripple Ice Cream into the freezer to completely firm up, 4-8 hours.
  • To serve, remove the ice cream from the freezer 10 minutes before serving. The small amount of alcohol added, stops this ice cream from setting completely solid.
  • Scoop into a waffle cone or bowl and enjoy!
FF Strawberry Ripple Ice Cream
Strawberry Ripple Ice Cream creamy, with an intense ripple of strawberry running through!

Keeping My Summer Cool With Fruity Ice Cream

Ice Cream has to be right up, at the top, on my list of summer comfort foods. Whether it’s a sweltering hot day and I just want to cool down, or Wimbledon is on telly and I’m dragging out dinner, because the match is too good to miss. A cooling scoop of ice cream, in a cone, hits the spot.

If you haven’t tried making ice cream before, yet love it as much as I do, why not get an ice cream maker? You can play around with flavours, textures and make whatever combination you like!’

If you have enjoyed this recipe for Strawberry Ripple Ice Cream you may also like these:

Blackberry Chocolate Chunk Ice Cream

FF Strawberry Ripple Ice Cream
Blackberry Chocolate Chunk Ice Cream a great flavour combination.

Raspberry Chocolate Ice Cream Sundae

FF Strawberry Ripple Ice Cream
Raspberry Chocolate Ice Cream Sundae can be eaten any day of the week 😉

Very Vanilla Ice Cream

FF Strawberry Ripple Ice Cream
Very Vanilla Ice Cream great for sandwiching between two cookies!


Ice Cream is such a great dessert option for summer barbecues, where people have feasted on deliciously cooked fish and meat. It is portable in cones, and brings out the kid in everyone. As a result it is the perfect dessert for sharing with friends and family. Especially as I have yet to find someone who dislikes ice cream!

Whatever you are making, baking and creating in your kitchens, have fun preparing and sharing your feast.

Sammie xx

Andrew James UK Ltd provided me with this ice cream maker, for the purposes of review. All opinions, views, content and photography are my own. I was not paid to write this post. Please see my Disclosure Policy

Share
Facebooktwitterpinterestlinkedintumblr

Lemon Thyme Roast Chicken

Share
Facebooktwitterpinterestlinkedintumblr

In every cook book I own and there are a lot of them, roast chicken features as an easy, everyday roast. While I completely agree that it is easy, I want to take my roast to the next level. First of all I start with a great, free range bird, fresh herbs and tangy lemon and what you get is my Lemon Thyme Roast Chicken.

FF Lemon Thyme Roast Chicken

A cook’s view on animal welfare:

Now don’t get me wrong, I love roast chicken, as long as it’s a good bird. By that I mean free range or organic. Not only am I concerned for the welfare of the chicken during its life, the additional antibiotics and fast growing make me shudder. Buying well bred, slow growing birds not only ensures a better quality of life for the chicken, the resulting taste, when cooked, couldn’t be more different to a standard, supermarket chicken.

I have mentioned before our decision, as a family, to eat less meat, but what we do eat must be of good quality. And yes that means paying more. Making the meat go further helps with the cost, but ultimately it is our personal choice. Especially with less additives/antibiotics and a happier lifetime, each chicken we eat is cooked with respect for the bird and I aim to waste nothing.

FF Lemon Thyme Roast Chicken
Lemon Thyme Roast Chicken

Grow your own herbs:

I grow a lot of our own herbs in tubs and in the garden. While rosemary and thyme are probably my most frequently used herbs. Also being hardy I can still pick them in the winter, along with bay and sage. Most supermarkets sell freshly potted herbs at a great price. Next time you are doing your weekly shop, grab a couple of pots, plant them into larger tubs, or the ground (only plant mint in a pot – it’s a thug in the ground!).

As you can see from the photo above, my thyme is just starting to flower. Pretty, tiny pink flowers that are fine to leave on the stalks and add extra interest when used as a garnish.

Roast Chicken – start with the right bird:

So let me encourage you to buy, or should I say invest in a slower growing free range/organic bird and a pot of fresh herbs. I buy all of our meet from Graig Farm in Wales and have done so for the last few years. Chicken used for this recipe came from them and the taste was noticeably better than a mass produced, supermarket bird. The only way you’ll know is by tasting the roasted chicken.

With free delivery on all orders over £100 and a new customer discount, it is well worth taking at look at their website here. I generally buy our meat in bulk and then fill the freezer. Since I find buying larger joints of meat works out more economical and bigger cuts of meat, especially on the bone, taste so much better. I realise there are 5 of us in our house, so let me reassure you that they sell a wide range of meats, in different cuts and sizes. Also if there’s something you’d like and they don’t list it, give them a ring. Especially as Graig Farm’s customer service is excellent and they always try to accommodate each individual customer’s requests.

Recipe: Make one 2.2kg/5lb Lemon Thyme Roast Chicken, serves 8

2.2kg/5lb Chicken – preferably organic or free range – ours was from Graig Farm

1 Fresh Unwaxed Lemon – scrub in hot water if waxed

Approx 10 Sprigs of Fresh Thyme

1tbsp Olive Oil

Sea salt – I use Maldon and Freshly Ground Pepper to season

Optional – 6 rashers smoked streaky bacon – again preferably organic or free range

Method: Preheat the oven to 200C/180C fan, gas mark 6, 400F

Preparing the chicken for roasting:

  • Remove the chicken from the fridge 1 hour prior to roasting.
  • Take the giblets out of the cavity and pat the outside dry with kitchen roll.
  • Sprinkle a generous pinch of sea salt and freshly ground pepper into the chicken’s cavity.
FF Lemon Thyme Roast Chicken
As the chicken cooks the lemon and thyme flavours gently permeate throughout the meat.
  • Cut a lemon in half and insert into the chicken cavity.
  • Push the fresh thyme into the cavity with the lemon.
  • Place the chicken in a roasting dish that is just big enough to hold the bird.
  • Rub 1 tablespoon of olive oil all over the outside of the chicken.
  • Sprinkle sea salt and freshly ground black pepper all over the chicken’s outside.
  • Lay strips of streaky bacon across the bird.
  • Also tuck the giblets down the side of the bird. Because when roasted these will add massive flavour to any gravy or stock.
FF Lemon Thyme Roast Chicken
Covered in streaky bacon that will baste the bird as it is cooking adding extra flavour.
  • Next tightly cover the chicken in aluminium foil.

Roasting the chicken:

  • Place the chicken into the middle of the oven and roast for 1 hour 40 minutes.
  • After the roasting time has elapsed remove the chicken from the oven.
  • Remove the aluminium foil and cooked bacon rashers – cook’s perk!
  • Baste with the juices and place back into the oven for a further 20 minutes to crisp up the skin.
  • IMPORTANT NOTE: the cooking times are based on 20 minutes per pound of meat, plus an extra twenty minutes. For a 5lb chicken like this one, the roasting time is 1 hour 40 minutes, plus an extra 20 minutes – adjust your timings to fit the weight of your bird.
  • Remove the chicken from the oven at the end of it’s cooking time.
  • Press a sharp knife into the thickest part of the chicken’s thigh. The chicken is cooked if the juices are clear. If there is ANY hint of pink pop the chicken back into the oven and retest after 15 minutes.
  • As soon as the chicken cooked remove from it’s roasting tin and place on a board or serving platter. Use the leftover juices in the tin to make a lemon and thyme flavoured gravy.
  • Cover the chicken loosely with aluminium foil and allow to rest for 20 minutes (or up to an hour).
FF Lemon Thyme Roast Chicken with fresh herbs and lemon
Lemon Thyme Roast Chicken

Serving the Lemon Thyme Roast Chicken:

Serve the Lemon Thyme Roast Chicken with traditional roast potatoes and seasonal vegetables, or in the summer with hunks of good, homemade fresh bread like this Farmhouse White Loaf  and a crisp green salad.

A delicious twist on a favourite roast, this Lemon Thyme Roast Chicken will awaken your taste buds and leave you wanting more!

If you’ve enjoyed the recipe for this Lemon Thyme Roast Chicken, here are few few more you might like:

Chicken Herb Burgers

FF Lemon Thyme Roast Chicken
Chicken Herb Burgers ultimate summer barbecue food!

Chilli Lime Chicken Kebabs 

FF Lemon Thyme Roast Chicken
Chilli Lime Chicken Kebabs

Chicken and Four Cheese Lasagne

FF Lemon Thyme Roast Chicken
Chicken and Four Cheese Lasagne delicious comfort food.

Do you love Roast Chicken?

What is your opinion on organic versus standard?

It has been amazing to see so many of you putting up photos on Twitter and Instagram where you have made my recipes. Honestly I cannot express the gratitude I feel, when you place your trust in me. Ingredients cost money, which is why I test each recipe thoroughly to ensure you have the best possible chance of success when following them.

Seeing your makes and bakes keeps Feasting is Fun at the heart of what this blog is all about. Having fun whilst making and baking in your kitchens and then feasting and sharing with family, friends and neighbours.

That makes me smile!

Sammie xx

This is not a sponsored post. Please see my Disclosure Policy.

Share
Facebooktwitterpinterestlinkedintumblr

Garlic Cheese Bombs

Share
Facebooktwitterpinterestlinkedintumblr

Who doesn’t love garlic bread, served alongside a great pasta dish, with a glass of something chilled? I certainly do and after seeing a fantastic foodie craze on Pinterest I knew I had to try it. Everyone is mad about these Garlic Cheese Bombs!


Baked mozzarella stuffed buns being pulled apart to show the gooey, melted cheese.
Garlic Cheese Bombs

In our house these are the BOMB 😉.

Everyone loves it when I make them and having successfully frozen them, uncooked, they are great to have on hand. Fresh or frozen.

Garlic Cheese Bombs
Garlic Cheese Bombs

Honestly these Garlic Cheese Bombs have become such a massive hit in our house. I’m really glad that they freeze well as my family would scoff the whole lot if I baked them all at once. I have learned from the first time I made Garlic Cheese Bombs

Garlic Cheese Bombs

Baking With Children

If you have little ones, they will thoroughly enjoy making these.

The only extra ingredient required to make the Garlic Cheese Bombs is a little patience. Making 30 – 40 individual, little cheese wrapped buns, could be seen as tedious – not here at Feasting is Fun though. We don’t do tedious!! So put on some great music or a play, clear the table and enjoy some therapeutic relaxation, whilst you play with dough!

Before you know it you’ll have two trays full of delicious, homemade, bread buns proving and you can give yourself a smug pat on the back, knowing that one tray is going to be stashed in the deep freeze.

Baking bread is a real passion of mine, second only to my faith see Important Stuff. As this week has been Real Bread Week it seemed fitting to end on a recipe that is fun to make and tastes best when feasting with family and friends.

Garlic Cheese Bombs
Garlic Cheese Bombs

Made From Scratch Versus Using A Bread Mix

I have made these Garlic Cheese Bombs using both my own dough recipe and a Wright’s bread mix. Truthfully and this almost hurts to write this, the children preferred the ones made with the bread mix.

Our children are very honest!!

Personally I think they are both great. The Wright’s bread mix is handy if you’re an infrequent bread baker, or haven’t made bread dough before and want to ensure they turn out great. My dough recipe is for those of us who are happy to make their dough from scratch. That said, there’s room in my kitchen for both.

Recipe: Makes 30 – 40 Garlic Cheese Bombs

1 quantity of dough that’s been proved and knocked back, from either my Farmhouse White Loaf or using Wright’s Baking Premium White Bread Mix

2 Tubs Mini Mozerrella Balls – there are approx 15 – 20 balls per tub

4 Fat Garlic Bulbs – or more if you want an extra garlic kick

100g/4oz Butter

4tbsp Olive Oil

1tsp Sea Salt – I use Maldon

1/2tsp Freshly Ground Black Pepper

Bunch of Fresh Parsley to garnish and add flavour

Making The Garlic Cheese Bombs

You will need a foil freezer/baking tray or 2 if you intend to freeze these.

  • Drain the mozerella balls well and count how many you have.
  • Make up the dough according to your chosen option.
  • Allow the dough to prove until doubled in size and then tip out on to a lightly floured surface.
  • For the very precise among you, weigh the bread dough and then divide that number by the number of mozerella balls. That will tell you exactly how much each piece of dough should weigh.
  • If you are more ‘laissez faire’ about things, like me, simply divide the dough evenly into 3 or 4 equal pieces (depending on whether you have 30 or 40 mozerella balls) and then divide each potion into 10.
  • Flatten a small portion of dough into a rough circular shape.
  • Place the mozerella ball in the centre of the dough circle.
  • Bring the edges of the dough up so that they cover the cheese and seal by pressing together.
  • Place the Garlic Cheese Bomb seam side down on a lightly oiled baking tray.
FF Garlic Cheese Bombs
After a while you get into a rhythm and the process becomes very relaxing.
  • Continue until all of the Garlic Cheese Bombs have been made, allowing space in between each one the tray so that it has room to rise.
FF Garlic Cheese Bombs
Cover with damp kitchen towel or oiled cling film.


Proving The Buns

  • The Garlic Cheese Bombs in the photo above are from the first batch that I made.
  • Leave until doubled in size.
  • Whilst the rolls are proving, make the garlic butter.
  • Place the butter, oil, crushed/finely minced garlic, salt and pepper into a small saucepan over a low heat.
  • Cook until all the butter has melted. Set to one side.
  • Preheat the oven to 200C/180C fan, gas mark 6, 400F.
  • When the Garlic Cheese Bombs have doubled in size, remove the damp cloth/cling film and brush liberally, using a pastry brush, with the melted garlic butter.
FF Garlic Cheese Bombs
You’ll be surprised at how much these delicious rolls puff up.

Freezing The Uncooked Bread Rolls

Now is the stage at which the Garlic Cheese Bombs can be frozen. Double wrap the foil tray with freezer safe cling film, label and pop in the freezer. They should be fine for at least one month in the freezer.

Baking The Garlic Cheese Bombs

  • To bake the freshly garlic glazed buns, place into the middle of the oven and bake for 25-30 minutes, or until the rolls are golden brown.
  • When baked remove the tray from the oven and immediately transfer the individual Garlic Cheese Bombs to a serving platter. Be careful as they will be very hot.
  • Pour over any garlic butter left in the tray and garnish with roughly chopped parsley,
  • Leave for 5 minutes before serving to allow thm to cool slightly.
  • Serve with a smile and watch as people break open these golden, light, cheesy rolls, flavoured with garlic butter.

Garlic Cheese Bombs

Baking From Frozen

To bake from frozen, preheat the oven to 190C/170C fan, gas mark 5, 375F. Remove all cling film/foil. Place the frozen rolls into the middle of the oven and bake for 40-45 minutes, until golden and baked through. To test remove a roll and cut in half, if the mozerella is gooey and melted then the Garlic Cheese Bombs are baked. Serve as for freshly baked.

Making Ahead Tips

So you’ve got a party in the evening and you want to make these earlier in the day? I’d suggest making them the day, or even a few days aheadand stashing them in the freezer. Alternatively make them in the morning, glazed with garlic butter before their final prove (it’ll save you stinking of garlic as you great your guests 😉), wrap in cling film and keep in the fridge. Take them out 10 minutes before baking, whilst you preheat the oven and bake as for fresh.

Make ahead recipes are fantastic as they allow you to enjoy spending time with your guests, rather than being stuck, on your own in the kitchen!

If you have loved these Garlic Cheese Bombs, then here are some other recipes you might like to try:

Breadsticks with Garlic and Herb Dipping Oil

Breadsticks with garlic and herb dipping oil.

Garlic Rosemary Focaccia Bread

Garlic Rosemary Focaccia Bread

Cherry Tomato Mozzarella Basil Focaccia 

Cherry Tomato Mozzarella Basil Focaccia


I really hope you do try making your own bread. Most bread doughs can withstand a reasonable amount of mistreatment and still turn into fabulous loves, breadsticks, baguettes. The possibilities are endless and nothing, not even chocolate cake such as this White Chocolate Swirl Fudge Cake beats the smell of home baked bread.

Thank you for all you lovely comments, especially on Twitter regarding the great yeast debate – more on that in a future post! It really makes my day to see pictures of you baking my recipes and in most cases they look even better. Which I think is completely brilliant. You all inspire me to try harder and write easy to follow, delicious recipes.

Together we really do make Feasting Fun!

Sammie xx

Wright’s Baking provided me with the Premium White Bread Mix used in this recipe alongside my own bread dough recipe. All opinions, views, content and photographs are my own. Please see my Disclosure Policy.

Share
Facebooktwitterpinterestlinkedintumblr

Swirl Lime Drizzle Cake

Share
Facebooktwitterpinterestlinkedintumblr

If you love cake, especially the fruity citrus types, then you must try this Swirl Lime Drizzle Cake. A light, slightly tingly-on-the-tongue cake treat that is perfect for sharing!

FF Swirl Lime Drizzle Cake
Swirl Lime Drizle Cake utterly beautiful and equally delicious.

This cake is so pretty, I really cannot stop looking at. Light sponge, flavoured with the juice and zest of fresh limes, draped in a tangy lime glaze and finished with sugar flowers.

When Is A Cake Pan A Bundt Pan?

I adore Bundt pans. Their beautifully detailed moulding creates a beautiful cake without the need for excessive decoration. I have the Heritage Bundt pan from Nordic Ware, which is very similar to this swirl silicone cake mould.

Nordic Ware own the trademark name ‘Bundt’ in this country. So although this beautiful Swirl Lime Drizzle Cake may look similar to a traditional Bundt pan, technically it cannot be called a Bundt cake.

The name of this creation – Swirl Lime Drizzle Cake – accurately describes exactly what this cake it. Yet only a bite can really covey the tongue tingling, luscious lime flavours, locked within it’s beauty.

Alternatively, this cake can be bake in a greased and lined 2lb loaf pan. Baking times may vary.

FF Swirl Lime Drizzle Cake
Swirl Lime Drizzle Cake full of zesty citrus flavour.

Citrus Flavours

Although Lemon Drizzle Cake is one of my favourite cakes, I have fallen in love with the lime flavour in this swirl cake. In contrast to the sharp, tangy lemon this Swirl Lime Drizzle Cake delivers a great, fresh, citrus flavour, that is softer on the palette. Lime has a rounder, less sharp flavour than lemon with added floral notes to it. Resulting in each bite of cake being gently filled with luscious flavour.

Because fresh lime juice is added to the drizzle glaze your tastebuds are immediately awakened on biting into a slice of this cake. And then golden, buttery sponge with a hint of lime and visible flecks of lime zest throughout the cake, give a pleasant rounded cake flavour.

FF Swirl Lime Drizzle Cake
Swirl Lime Drizzle Cake the silicone mould creates the beautiful shape.

The beautiful mould that was used to bake this cake was from the Bake Box. A monthly box full of baking equipment, recipe cards and instructions.

FF Swirl Lime Drizzle Cake
A monthly subscription that will expand you baking knowledge and teach you new techniques.

Bake Box Review

Each box contains:

  • Inspirational theme
  • 6-8 bespoke bakeware items
  • 1 Specialist colour, dust or glitter
  • Unique recipes with a creative twist
  • 6 Full colour recipe cards

Each box is available on a monthly subscription at £14.99 (rrp £40). Personally I think this Bake Box is a great way to learn new techniques and at an amazing price. Also I am considering buying this as a subscription for my daughter’s birthday. So, why not a look at their website, Bake Box 3 has a back to nature theme!


FF Swirl Lime Drizzle Cake
Swirl Lime Drizzle Cake baked with the mould from Bake Box 1.

Recipe: Swirl Lime Drizzle Cake serves 8

225g/8oz Caster Sugar – plus 2tbsp butter for greasing the mould

225g/8oz Unsalted Butter – at room temperature

5 Large Free Range Eggs

225g/8oz Plain White Flour- sifted

2tsp Baking Powder

1/4tsp Sea Salt – I use Maldon

2 Fresh Limes

250g Icing Sugar

Optional – sugar flowers and coloured sprinkles

Method: Preheat the oven to 160C/140C fan oven, gas mark 3, 325F.

Preparing The Silicone Mould And Making The Cake Batter

  • First of all, melt 2 tablespoons of butter. Brush the inside of the mould with butter, ensuring every part of the cake mould is buttered. Set to one side.
  • Place the sugar, butter and salt into a large bowl and whisk/beat until pale and creamy.
  • Add 1/3 of the sifted flour and 2 eggs. Whisk/beat until just combined.
  • Repeat the last step.
  • Sift the last of the flour and baking powder into the bowl. Add the last egg, the finely grated zest of 2 limes and the juice of half a lime.
  • Mix gently until everything just combines.
  • Spoon the mixture into the prepared cake mould and fill no more than two thirds full.
FF Swirl Lime Drizzle Cake
Swirl Lime Drizzle Cake ready for the oven.

Baking The Swirl Cake

  • Place the filled cake mould on to a baking tray and place in the middle of a preheated oven
  • Bake for an hour. The cake is baked when an inserted skewer comes out clean.
  • As soon as the cake is baked remove from the oven.
FF Swirl Lime Drizzle Cake
Swirl Lime Drizzle Cake a beautiful even bake.
  • Allow the cake to cool until just warm, in the silicone cake mould.
  • When just warm carefully turn the cake out onto a cooling rack.
FF Swirl Lime Drizzle Cake
Swirl Lime Drizzle Cake the mould gives the cake such a beautiful pattern.

Preparing The Lime Drizzle And Decorating The Cake

  • Sift 250g of plain icing sugar into a bowl.
  • Add enough lime juice, squeezed from the zested limes, to produce a thick, yet just dripping, paste.
  • Ensure you have a clean baking tray under the cooling rack.
  • Carefully spoon over the lime drizzle, scooping drizzle from the tray underneath by sliding the cooling rack along, until the entire cake is completely covered in lime drizzle icing.
  • Add little sugar flowers and/or sprinkles, whilst the icing is still tacky.
  • Set aside to allow the icing to set.
FF Swirl Lime Drizzle Cake
Swirl Lime Drizzle Cake sure to impress everyone as it tastes as good as it looks!

Perfect for afternoon tea, or a celebration. This Swirl Lime Drizzle Cake certainly stands out, both for its swirl shape and delightful soft, lime flavour.

Because of the slightly softer flavour that lime has, it works beautifully in this cake. A beautiful Spring cake that can be eaten throughout the year. And the only rule is, this cake must be shared. Since it is too good to keep it all to yourself!

If you have enjoyed this Swirl Lime Drizzle Cake here are some other recipes you may like to try:

Glazed Lemon Bundt Cake

FF Swirl Lime Drizzle Cake
Glazed Lemon Bundt Cake

Mini Lemon Drizzle Bundt Cakes

FF Swirl Lime Drizzle Cake
Mini Lemon Drizzle Bundt Cakes

Lemon Blueberry Bundt Cake

FF Swirl Lime Drizzle Cake
Lemon Blueberry Bundt Cake

I hope that you’ll agree, Bundt style cake moulds and genuine Bundt Pans really do produce beautifully patterend cakes, without any extra work from the baker.

That had got to be a good thing – right??

So, whatever you are making and baking in your kitchens, be sure to have lots of fun and create a feast worth sharing, As food always tastes better when it is shared.

Sammie xx

Bake Box provided me with box 1 from their monthly subscription, for the purposes of review. All opinions, views, content and photographs are my own. Please see my Disclosure Policy.

Share
Facebooktwitterpinterestlinkedintumblr

White Chocolate Swirl Fudge Cake

Share
Facebooktwitterpinterestlinkedintumblr

Today it is National Devil’s Food Cake Day! Who knew there was such a thing? Not me! So, never one to shy away from a challenge, I decided it was time that this cake had a makeover. Meet my White Chocolate Swirl Fudge Cake.

FF White Chocolate Swirl Fudge Cake
White Chocolate Swirl Fudge Cake more chocolate is always a good thing.

I have taken the classic Devil’s Food Cake and given it a makeover!

Having a packet of Wright’s Baking Chocolate Fudge Cake Mix to hand meant that making and baking this cake was so easy. The only change I made was using 60ml of melted butter, rather than the oil stated on the packet. The reason for doing this – well I had completely run out of vegetable oil.

Improvisation should be my middle name!

FF White Chocolate Swirl Fudge Cake
White Chocolate Swirl Fudge Cake oh you so want to make this.

Creating THE Best Chocolate Fudge Icing EVER:

While the cakes were cooling I thought about the icing. Chocolate ganache, the mixture of chocolate and double cream was what I needed for this cake.

Or so I thought!

It would seem adding Rolo’s to hot, chocolate ganache, where they melt and become one, utterly fudgey icing, was a brilliant idea!

I have them occasionally 😉

FF White Chocolate Swirl Fudge Cake
White Chocolate Swirl Fudge Cake look at how glossy the chocolate fudge icing is.

As the chocolate fudge icing cools, assuming you have some left after eating it from the bowl with a spoon, it retains a beautiful, glossy shine. The sun came out as I took these photos and the cake looked stunning.

As beautiful as this cake looked, draped in all it’s glorious chocolate fudge icing, it needed a lift.

Now I know there will be Devil’s Food Cake purists who disagree with the addition of dreamy, white chocolate swirls. That is why I have called this cake White Chocolate Swirl Fudge Cake – take off the swirls and you have a great Devil’ Food Cake.

Personally I love the white chocolate swirls. I think they make the cake look classier, plus they add a great vanilla taste, which rounds out the dark chocolate fudge icing.

So I’m keeping them. If you want to leave them off that’s your choice and I will not judge you.

Recipe: Makes one White Chocolate Swirl Fudge Cake serves 10

1 Packet Wright’s Baking Chocolate Fudge Cake Mix – alternatively you can use the chocolate cake recipe from this recipe – Chocolate Honeycomb Sponge Cake 

60mls Vegetable Oil or Melted Butter – plus a little extra for greasing the cake tins

300g Dark Chocolate – I use Callebaut callets (which are mini buttons suitable for melting. I buy the from Amazon)

300mls Double Cream

4 Packet Rolo’s

50g White Chocolate

Method: Preheat the oven to 160C/140C fan, gas mark 3, 325F.

Making And Baking The Chocolate Fudge Cake:

  • First of all, grease 2 x 8″/20cm sandwich cake tins and line the bases with baking parchment.
  • Make up the chocolate fudge cake mix according to the packet instructions.
  • Divide the cake batter evenly between the 2 sandwich tins.
  • Place on the middle shelf of the oven.
  • Bake for 30 minutes. The cake is cooked when it springs back from a light touch.
  • Once baked remove the cakes from the oven and place the tins on to a cooling rack.
  • When the cakes are warm turn them out on to the cooling rack and allow to cool completely before icing.

FF White Chocolate Swirl Fudge Cake

    Chocolate Fudge Cakes cooling.

Making the Chocolate Rolo Fudge Icing:

  • Fill a small saucepan with approximately 1 inch of water and place over a low heat.
  • Break or chop up all of the dark chocolate and place into a heatproof bowl that sits on top of the small saucepan.
  • Add the double cream and place the bowl on top of the saucepan, ensuring the bottom of the bowl does not touch the water. This is called a double boiler.
FF White Chocolate Swirl Fudge Cake
Double cream and chocolate melting together in a double boiler.
  • When the chocolate has completely melted and combined with the cream, add the 4 packets of Rolo’s.
FF White Chocolate Swirl Fudge Cake
Stir the Rolo chocolates into the hot chocolate ganache.
  • Once the Rolo’s have melted remove the bowl from the pan – be careful as it will be hot.
  • Continue stirring the chocolate fudge icing to help it cool down and thicken.
  • When the icing is cooled, but still pourable, it is time to assemble the cake.

Icing The White Chocolate Swirl Fudge Cake

  • Place the bottom cake, right side up onto a cake board or stand.
  • Pour over enough chocolate fudge icing so that when spread, using a palette knife, it almost reaches the edge of the chocolate cake.
FF White Chocolate Swirl Fudge Cake
A pool of glossy, chocolate fudge icing, that will sit in the middle of your cake.
  • Place the top half of the cake, right side up, on top of the icing filled bottom half.
  • Gently pour over the the chocolate fudge icing, starting in the middle. When the icing has reached the edge pour more icing around the outside edge so that it drips down and covers the sides.
  • Use a palette knife that has been kept in a jug of hot water and then wiped with a clean, dry cloth, to smooth the icing around the sides of the cake.
  • Set the cake to one side to set. In very hot weather place in the fridge to set.
FF White Chocolate Swirl Fudge Cake
Such a beautiful mirror shine with this chocolate fudge icing.

Creating The White Chocolate Swirls:

  • When the icing is set – note it will not set hard like chocolate – you can decorate your cake.
  • Break up the white chocolate and place into a heatproof, microwaveable bowl and zap for 20 seconds at a time, stirring after each zap, until the chocolate is almost melted. Remove from the microwave and keep stirring until you have liquid, vanilla scented, white chocolate.
  • Pour the melted chocolate into a small, disposable piping bag.
  • Snip off the very end and pipe swirls around the outside edge of the cake, Let your creativity flow and swirl away!
FF White Chocolate Swirl Fudge Cake
White Chocolate Swirl Fudge Cake allow the swirls to set.

This White Chocolate Swirl Fudge Cake is the perfect cake for feasting and sharing. It’s not everyday we make a cake like this, so when we do, invite all your friends and family round for some fun and cake!

FF White Chocolate Swirl Fudge Cake
White Chocolate Swirl Fudge Cake look at the gorgeous layers of chocolate fudge icing.

Decadent, rich, deep chocolate cake, with layers of THE best chocolate fudge icing, finished with elegant swirls of white chocolate.

Devil’s Food Cake you’ve had your day – this cake is on another level!

If you know a chocolate lover, make this cake for them.

Got a friend who is down in the dumps, make this cake for them.

Want to show someone how much you care, make this cake for them.

Do you know someone who loves baking, but is a bit short of cash? Print off this recipe and buy the ingredients and gift it to them.

FF White Chocolate Swirl Fudge Cake
White Chocolate Swirl Fudge Cake perfect with Wright’s chocolate fudge cake mix.

White Chocolate Swirl Fudge Cake – is the cake to bring a smile to people’s faces.

Who will you make smile??

If you have enjoyed this White Chocolate Swirl Fudge Cake then you may also like these recipes:

Glazed Orange Bundt Cake

FF White Chocolate Swirl Fudge Cake
Glazed Orange Bundt Cake using Wright’s new orange cake mix.

Classic Coffee Walnut Cake

FF White Chocolate Swirl Fudge Cake
Classic Coffee Walnut Cake an easy recipe from scratch.

Double Cherry Drizzle Oat Bars

FF White Chocolate Swirl Fudge Cake
Double Cherry Oat Bars oat shortbread with cherry jam and a cherry filled vanilla sponge top.

Feasting is Fun is all about sharing. I create great recipes for you to use and bake with and in doing so, hopefully encourage you to share your makes and bakes with others.

Never under estimate the power of a small, handmade gift. It can change a person’s day, make a family smile, or even make a lonely person feel cared for.

I hope you have fun making and baking in your kitchens. Thank you so much for sharing all of your bakes on a Twitter and Instagram, please keep them coming. I also love reading your comments, thank you for taking the time to write them.

So, whatever you are making, baking and creating in your kitchens, have fun preparing and sharing your feast!

Sammie xx

No part of this post may be reproduced or duplicated without the written permission of the owner. Please see my Disclosure Policy.


Share
Facebooktwitterpinterestlinkedintumblr

Chocolate Brownie Raspberry Cheesecake

Share
Facebooktwitterpinterestlinkedintumblr

Chocolate Brownie Raspberry Cheesecake. Whipped mascarpone cheese with fresh raspberries over a deep, chocolate ganache topped brownie base.

If I had known you were coming I would have made this elegant Chocolate Brownie Raspberry Cheesecake.

Chocolate Brownie Raspberry Cheesecake

How pretty does this cheesecake look?

And you can make it too, with the additional help of an IfIKnewYouWereComing Artisan Chocolate Brownie Baking Box! Alternatively, you can follow my recipe below for an easy brownie base.

A slice of Chocolate Brownie Raspberry Cheesecake

I love the gorgeously dense and fudgey brownie base to this cheesecake. Because chocolate and raspberry flavours work so well together this Chocolate Brownie Raspberry Cheesecake really is a dream dessert.

Why a brownie base?

Recently our youngest daughter revealed that she really didn’t like the traditional biscuit that usually is on the base of a cheesecake. YET she does love the creamy, top part. Therefore this cheesecake was made with her in mind.

Since she absolutely loves brownies I decided to make a cheesecake with a brownie base. Also adding a layer of deep, dark chocolate ganache to the top of the brownie base to stop the base from becoming soggy. While this too adds another chocolate layer!

Each ingredient comes in a separate package all I neede to do was add butter and eggs and follow the recipe!
Each ingredient comes in a separate package all I needed to do was add butter and eggs and follow the recipe!

Brownies this kit form

I was impressed with the ingredient packaging and the instructions provided with the Artisan Chocolate Brownie Bake Box. While baking these brownies was very similar to making my own homemade brownies, except someone had already weighed the ingredients out for me! So all I needed to do was add butter and eggs.

Chocolate Brownie Raspberry Cheesecake fudgey chocolate base covered in light raspberry mousse cheesecake.

This Chocolate Brownie Raspberry Cheesecake is utterly stunning to look at and even more delicious to eat.

The whipped, mousse like, raspberry cheesecake layer, isn’t overly sweet. Also, with an added splash of raspberry liquer and vanilla notes from the white chocolate, this dessert is an awesome combination of flavours.

Layered together, with a final swirl of the best quality dark chocolate, this cheesecake may be my favourite dessert yet?!!

Chocolate Brownie Raspberry Cheesecake

Recipe: Chocolate Brownie Raspberry Cheesecake serves 10-12

1 Brownie Bake Box from IfIKnewYouWereComing

(alternatively use half of my Chocolate Fudge Brownie Bites) recipe

115g Unsalted Butter

2 Large Free Range Eggs

300g/Raspberries I use frozen Raspberries from Waitrose when they are out of season

4tbsp Caster Sugar

2tbsp Framboise – raspberry liquer  – can be substituted for cassis or fresh apple juice

150g Dark Chocolate

300ml Double Cream

500g Tub Mascapone Cheese

100g White Chocolate

Method: Preheat the oven to 200C/180C fan, gas mark 6, 400F.

Making the Brownie Base:

  • First of all, line the base of a 10″ (25cm) Springform cake tin with the parchment backed, tin foil provided.
  • Follow the recipe card provided to make the brownies.
  • Pour the brownie mixture into the springform tin and tap against the work top twice to release any trapped air bubbles.
  • Place the tin in the oven and bake according to the instructions – my brownie base took 15 minutes to bake.
  • As soon as the base is  baked remove the tin from the oven and place on a cooling rack. Allow to cool completely.
Delicious brownie base studded with dark chocolate chips.

Making the Chocolate Ganache:

  • In a heatproof bowl add 100g dark chocolate and 100ml of double cream.
  • Place the bowl on top of a small saucepan that contains approximately an inch of barely simmering water – this is called a double boiler.
  • Stir the chocolate and cream together until the chocolate has completely melted and the mixture is thick and glossy.
  • Pour the chocolate ganache over the cooled brownie base.
  • Smooth to an even layer using the back of a metal dessert spoon.
  • Place in the fridge until the ganache has set.
Glossy chocolate ganache not only adds an extra layer of deliciousness, but also stops the brownie base from becoming soggy.

Making the raspberry cheesecake filling

  • Place the raspberries, caster sugar and framboise (or apple juice) into a blender.
  • Pulse until you have a smooth, deep cerise, thick raspberry coulis. Set to one side.
  • Break up the white chocolate and place into a heatproof microwaveable bowl.
  • Zap for 20 seconds at a time, stirring in between, until the chocolate has almost melted.
  • Remove from the microwave and continue stirring until completely melted. Set to one side.
  • In a large bowl add the tub of mascarpone cheese and 200mls of double cream.
  • Using a hand mixer, whisk until fully combined.
  • Pour the raspberry coulis into the cheesecake mix and whisk until fully incorporated.
  • Next pour in the melted white chocolate.
  • Whisk all of the cheesecake ingredients together until light and creamy.
  • Spoon the raspberry cheesecake on to the cold, set, chocolate ganache covered brownie base in the springform tin.
  • Smooth the top of the raspberry cheesecake to ensure a flat, even finish.
  • Cover the cheesecake with cling film and place in the fridge for at least 2 hours to allow to set.
Once you have smoothed the top of the cheesecake you can lick the spoon 😉
  • Remove the cheesecake from the fridge.
  • Run a palette knife between the outside edge of the cheesecake and the iside of the springform tin.
  • Place the springform tin centrally on a large tin of beans (or something equally as sturdy).
  • Release the springform catch and gently encourage the sides of the tin to fall away from the base.
  • Place the Chocolate Brownie Raspberry Cheesecake on to a serving plate or cake stand – the base will still be attached, don’t worry that’s fine.
  • Use a palette knife, that has been kept in a jug of boiling water, to smooth the top and sides of the cheesecake.

Decorating the cheesecake

  • Melt 50g of dark chocolate in a microwaveable, heat proof bowl, as before.
  • Pour the melted chocolate into a small, disposable piping bag.
  • Snip off the very end of the piping bag to create a small hole.
  • Pipe swirls of chocolate all around the edge of the cheesecake and larger loops in the centre. Continue piping over the swirls around the edge until the chocolate is all used.
Chocolate Brownie Raspberry Cheesecake so beautifully decorated and yet so easy to achieve.

Now stand back and look at the beautiful Chocolate Brownie Raspberry Cheesecake that you have made and decorated.

Such a simple piping technique and yet incredibly elegant. Resulting in a cheesecake that is perfect for adding the wow factor to any dinner party or celebration. Pale pink and chocolate brown are a classic colour combination, ensuring this dessert looks elegantly appetising.

While the taste and texture of the brownie base was perfect, exactly like homemade. So I would definitely recommend it, especially if you bake only at weekends or for special occasions. Also, all the ingredients come pre-weighed, so you can easily make and bake brownies in under 30 minutes!

A delicious dessert with a slice in the foreground.
Chocolate Brownie Base Topped With Raspberry Cheesecake.

If you have enjoyed this Chocolate Brownie Raspberry Cheesecake then you may also like these recipes:

White Chocolate Strawberry Cheesecake

FF Chocolate Brownie Raspberry Cheesecake
White Chocolate Strawberry Cheesecake.

Strawberry Chocolate Cheesecake

FF Chocolate Brownie Raspberry Cheesecake
Strawberry Chocolate Cheesecake.

Blackberry Nectarine Tart

Blackberry Nectarine Tart


I like to make cheesecakes all year round. Especially as frozen raspberries ensure that a glimpse of Summer can be seen and enjoyed, in the midst of the colder months. Likewise, fruit tarts can also be easily made using frozen and store cupboard ingredients. Ensuring dessert is only a short bake away!

So, whatever you are making and baking in your kitchens, have fun feasting on all your creations.

Sammie xx

IfIKnewYouWereComing supplied me with the Artisan Chocolate Brownie Bake Box for this recipe. All opinions and views are my own. Please see my Disclosure Policy.

Share
Facebooktwitterpinterestlinkedintumblr

Franklins Fruity Summer Drink

Share
Facebooktwitterpinterestlinkedintumblr

Franklins Fruity Summer Drink a delicious, refreshing drink packed full of fruit and flavour. Alcohol free this fun drink is perfect for picnics, parties, barbecues and summer gatherings! Summer is almost here. In fact a few days ago I was convinced it had arrived early, but the weather was just teasing us Brits! During the brief, sunny, warm spell I created a fantastically fruity, refreshing tipple bursting with Summer flavour. Have a glass of Franklins Fruity Summer Drink on me!

Franklins Fruity Summer Drink the perfect tipple for enjoying outdoors.

Bursting with flavour, Dandelion and Burdock gives this fabulous drink wonderful spicey base notes, lifted by the slightly sour Scicillian Lemon Tonic and  sweetened by juicy, ripe, British strawberries.

Franklins Fruity Summer Drink is incredibly easy to make, using nothing more than fresh fruit and Franklin & Sons soft drinks.

Franklins Fruity Summer Drink refreshing and alcohol free, this drink can be enjoyed any time of the day or night!!

Since you may recognise this drink as looking incredibly similar to a well known British summer tipple?

That was the idea! To create a non alcoholic version of a very traditional summer drink, associated with Wimbledon, picnics, summer parties and Polo matches, held across our beautiful, British Isles.

Franklins Fruity Summer Drink is perfect for those who want to have fun, yet cannot, or choose not to drink alcohol.

Franklins Fruity Summer Drink packed with fresh fruit and ice.

I love a glass of something wonderfully refreshing, clinking with ice and full of flavour, whilst sitting in the garden or attending a family barbecue on a hot, summery day.

Franklins Fruity Summer Drink is incredibly thirst quenching, delicious and so pretty to look at too!

While the addition of fresh mint is not used simply for garnish. It’s fresh, clean flavour works so well with the fruit and Franklin’s soft drinks combination, to lift this from a great summer drink to a must have Summer drink.

Make this once and you will have friends and family begging you for the recipe!

Franklins Fruity Summer Drink making the most of our British Summer.

Whilst arranging a party with family and friends, no longer will it be –

“Who is bringing the beer, wine, and oh we should probably get something in for the drivers?” the first question on everyone’s lips will be –

“Who’s bringing the Franklin’s?”

Franklins Fruity Summer Drink it's simple not a summer party without a jug of Franklin's fun.
Franklins Fruity Summer Drink it’s simply not a summer party without a jug of Franklin’s fun.


Recipe: Makes approximately 1 litre Franklins Fruity Summer Drink

300g British Strawberries

1tbsp Caster Sugar

275 ml 1 x Franklin’s Bottle Dandelion and Burdock

600ml 3 x Franklin’s Sicilian Lemon Tonic

200ml 1 x Franklin’s Tonic Water

Ice cubes

1 of each Lemon, Lime, Orange

1/2 Cucumber

Handful of Mint leaves  – plus extra to garnish

Method: Making the Mocktail

  • Hull and quarter the fresh strawberries and place in a bowl.
  • Sprinkle over 1 tablespoon of caster sugar. Cover and allow to sit for at least 30 minutes or up to 2 hours (if they are prepped earlier then cover the bowl in cling film and pop in the fridge for up to 8 hours).
  • Note: Having made Franklins Fruit Summer Drink twice, I would suggest assembling the drink at least 15 minutes before serving. This gives the mint and fruits time to release their oils/juices and really give the drink a fuller flavour.
  • Slice all of the citrus fruits, halving if very large.
  • Slice the cucumber and cut each slice in half.
  • Fill a large jug 1/4 full with ice cubes.
  • Add half of the sliced citrus fruit, cucumber and strawberries to the jug.
  • Pour in the bottle of Dandelion and Burdock, 2 bottles of Sicillian Lemon Tonic and Tonic Water.
  • Stir with a long spoon (sundae spoons are great).
  • Take a hanful of mint leaves and gently scrunch them up in your hand. This will help them to release their wonderful oils.
  • Add the mint leaves to the jug and give a final stir.
  • Top up with extra Sicilian Lemon Tonic, strawberries and citrus/cucumber slices, until the jug is almost completely full.
  • We are going for a look of abundance here, this is a party in a jug after all!!!
  • Allow the drink to sit for 15 minutes. If possible double up on the quantities and keep a ready made jug in the fridge
  • To serve, pour the Franklins Fruity Summer Drink into tall, highball glasses, ensuring each glass receives a generous serving of fruit. Top each drink with a sprig of mint and serve with a smile 😉
Franklins Fruity Summer Drink serve with sunshine, good company and great food.

Remembered Flavours

I love sparkling water, with ice and a slice of lemon, yet I have become completely hooked on Franklins Fruity Summer Drink. I think it’s because it is not sickly sweet, like some soft drinks can be.

When I found out that Franklin & Son Ltd. made Dandelion and Burdock, THE drink of my childhood I was uncontrollably excited and yes it tastes just as good as it did back when I was a nipper!

Everyone who has tried Franklins Fruity Summer Drink has loved it and some have mistaken it for another well known, alcoholic summer drink! What is great about this drink, is that those who do not drink alcohol can still have a glass full of refreshing, thirst quenching liquid that will have the ‘drinkers’ begging for a taste.

I love the odd glass of champagne at special occasions, yet due to my medication, I really cannot drink alcohol, apart from the odd sip. Finally I have created a drink that allows me and others to party with the best, instead of sitting on the sidelines nursing a super sweet warm cola.

Franklins Fruity Summer Drink is THE drink of Summer 2016 and onwards.

Whatever your plans make sure you have a freezer full of ice, fresh fruit in the fridge and a case or two of Franklins soft drinks, ready to create the ultimate summer party in a glass!

Top Tip: If you are going on a picnic, place some  plastic still water bottles in the freezer over night. Pack the sliced fruit and strawberries into plastic containers. Pack the frozen water bottles around the Franklin soft drink bottles. Pop some mint into a plastic jug with a lid and remember to pack plastic glasses. Assemble as above, pouring away (or drinking) any defrosted water and then using a heavy implement to break up the ice in the plastic bottles (cricket bats are good!).

You now have the drink of this Summer wherever you go – beach, park, woods, anywhere!

Franklins Fruity Summer Drink serve this and you will be the hostess with the mostest!

Here’s looking forward to a Summer filled with fun, feasting, family, friends and Franklins Fruity Summer Drink.

If you have enjoyed this recipe for Franklins Fruity Summer Drink you may also like these:

Fresh Strawberry Simple Syrup

FF Franklins Fruity Summer Drink
Fresh Strawberry Simple Syrup

Blueberry Banana Superfood Smoothies

FF Franklins Fruity Summer Drink
Blueberry Banana Superfood Smoothies

Sammie xx

Franklin & Sons Ltd.  provided me with the drinks for this post. All opinions, views and content are my ow. Please see my Disclosure Policy.

Share
Facebooktwitterpinterestlinkedintumblr

Lighter Wholemeal Loaf

Share
Facebooktwitterpinterestlinkedintumblr

Bread is an everyday staple for a lots of people around the world, especially here in the U.K. Yet finding a loaf that is light, tasty, with added fibre can be hard. So, look no further my friends, as I present tasty, Lighter Wholemeal Loaf of bread.

FF Lighter Wholemeal Loaf

And I must admit I am a bit of a ‘bread head’ – does that make me sound cool? By that, I mean that I adore most breads, providing they are well made, do not contain additives and have a flavour of their own that contributes to the final dish. Especially if that is a simple slice of buttered toat.

Since I do not live near an Artisan Bakery, where freshly baked bread, in all its array of shapes and flavours can be purchased, I make our bread at home instead.

Lighter Wholemeal Bread full of flavour.
Lighter Wholemeal Bread

Extra Flavour And Extra Goodness From Your Bread

This Lighter Wholemeal Loaf is one of our family’s favourite breads. Also, this bread slices beautifully, so is perfect for packed lunches, or toasted for breakfast and then slathered in homemade jam.

While I have 100% wholemeal bread recipes such as my Wholemeal Cob Loaf and Wholemeal Loaf, if I’m honest, as delicious as they are, having the same bread every single day can get a bit boring. So I like to switch things up a bit, keeping our taste buds interested and in reality, ensuring our teenagers eat a decent portion of their lunch.

And they say variety is the spice of life!

Lighter Wholemeal Loaf just add butter for a delicious feast.
Lighter Wholemeal Loaf

While eating bread I want it to contribute to the flavour of the whole dish. Most importantly, it shouldn’t, mustn’t, simply be be a limp carrier for other flavours. While the butter and cheddar cheese, used in the photo above, adds great flavour to a sandwich, the bread’s texture and flavour adds an additional element to the sandwich.

And this sandwich, with the addition of some Red Onion Marmalade, truly is one of my favourite lunches. Since each component adds flavour and varying  texture, so that as a whole, the resulting sandwich is incredibly appetising and filling.

Lighter Wholemeal Loaf a heart, flavour packed lunch.
Lighter Wholemeal Loaf

Start The Bread Making Journey Using Good Quality Flour

I use a mixture of stone ground, organic strong wholemeal and white flour from Shipton Mill to make this Lighter Wholemeal Loaf. Shipton Mill traditionally mill their flours between large grinding stones, using the flow of river water for as a source of energy. Resulting in flour that is consistently excellent, while it’s production is sympathetic to and works in harmony with the environment.

In order to guarantee consistent, excellent results when making this Lighter Wholemeal Loaf, this recipe has been thoroughly tested, with the resulting loaf being approximately one third wholemeal flour. Since a 2:1 combination of Strong White to Strong Wholemeal flour gives a great, nutty, wholesome flavour, while also keeping the bread light enough for everday use. And, it is a great way of adding extra fibre into your own and your familiy’s diet, especially if their preference is for white bread.

Recipe: Makes one Lighter Wholemeal Loaf

150g/5oz Strong Wholemeal Flour – preferably organic plus a little extra for dusting the work top.

350g/12oz Strong Unbleached White Flour – preferably organic

360ml Tepid Tap Water

7g/1 Sachet Dried Yeast

1tsp Honey

7g/1tsp Sea Salt – I use Maldon Sea Salt Flakes

25g/1oz Unsalted Butter

Method:

The ‘bowl’ is either a large bowl, with which to mix the bread, by hand, or the stand mixer/bread maker bowl.

Making And Proving the Dough Using Three Different Methods

For all methods:

  • First of all, pour the water into the bowl. Add the honey and yeast. Swish about with clean fingers to activate the yeast.
  • Now add the flour on top of the liquid.
  • Add the salt and the butter.

When using a bread maker, set to dough cycle and start the program. As soon as the cycle is completed re-start for 1 minute. This ‘knocks back’ the dough.

If using a stand mixer, attach the dough hook and mix on medium speed until the ingredients are combined. Continue to mix for a further 5 minutes, until the dough is smooth and elastic. Stop mixing. Scrape the dough from the dough hook and combine with the dough in the bowl. Form into a ball, place back into the bowl. Cover with a damp cloth and leave in a draught free place until doubled in size (approx. 1hour). Gently punch the dough to knock it back.

Alternatively when hand mixing, bring all the ingredients together with your hand until they form a doughy mess! Place this dough onto a very lightly floured worktop. Knead for approximately 10 minutes. If the dough gets sticky, keep kneading and working it. Avoid adding extra flour as this can result in a tough loaf. After a further 5-10 minutes kneading, the dough should have a smooth elasticity. Finally, place the kneaded dough into a oiled bowl, cover with a damp cloth and leave in a draught free place until doubled in size, 1-2 hours. Knock back as for stand mixer.

Shaping The Dough

To shape the dough: Tip the knocked back the dough out onto a lightly floured surface. Gently flatten the dough into an oval/rectangle shape.

Flatten out the dough into a rough oval.

  • Fold the top third of the flattened dough over.

Fold the top third of the dough over.

  • Next fold the bottom third of the dough up and slightly over the previous fold.

Bring the bottom third of the dough up.

  • Rotate the dough by a quarter, gently flatten out and repeat the folding process.
  • Repeat the turning and folding twice more, ensuring the last turn and fold is quite tight. This folding technique does not take long and unlike pastry, this bread dough can withstand being moved and worked. Most importantly the purpose of turning and folding is to build a good structure within the dough.
  • As soon as the folding and turning is complete turn the dough over so that it is seam side down.
  • Place into a greased 3lb loaf tin. Cover with a tea towel and leave in a warm, draught free place until doubled in size.
  • Finally, sprinkle some wholemeal flour over the top of the dough. Since this gives a nice, rustic finish to the baked bread. Omit this stage if you want a glossy finish to your bread – see below.

Neat, tightly folded dough ready for its second prove.

The dough can take between 45 minutes and a couple of hours to double in size, depending on the ambient temperature and humidity.

Baking The Lighter Wholemeal Bread

  • While the dough has it’s final prove, preheat your oven to it’s hottest setting.
  • 5 minutes before your loaf is due to be baked, fill a tray with ice cubes and place on the lowest shelf in the oven. The hot, steamy environment will help the dough to rise even further before the crust sets (this is known as oven spring) and helps bake a crusty loaf.
Lighter Wholemeal Loaf beautifully risen and ready for the oven.
Lighter Wholemeal Loaf
  • Place the loaf into the centre of a preheated oven and immediately reduce the oven temperature to 220C/200C fan, gas mark 7. Bake the Lighter Wholemeal Loaf for 30 minutes.
  • The bread is baked when it is a golden brown colour and sounds hollow when rapped on the base of the loaf with your knuckle.
  • As soon as the bread is baked remove from the oven and immediately tip out onto a cooling rack. Alternatively, for a thicker crust, place the loaf directly onto the oven rack and bake for a further 10 minutes.
Lighter Wholemeal Loaf such a delicious and versatile bread.
Lighter Wholemeal Loaf

Advantages Of Homemade Bread

First of all, the smell of freshly baked bread is unbelievably good. Our postman really likes delivering to us in the morning, as that tends to be when the bread is either baking or cooling! And the flavour beats anything you can buy from a supermarket.

Do not be surprised if your neighbours pop in, just for a chat, as they catch a whiff of freshly baked bread escaping from your house!

Rub a used butter wrapper over the top for a glossy finish.

This Lighter Wholemeal Loaf will keep in a bread bin for up to 3 days. To freeze, ensure the bread is completely cold and wrap tightly in cling film. Fresh bread can be frozen for up to 3 months. To defrost, remove all the cling film and allow the loaf to stand on a large trivet or a cooling rack at room temperature, until fully defrosted.

I like to refresh frozen bread, this simply involves preheating the oven to 220C/200C fan, gas mark 7. As soon as the bread has fully defrosted, spray it lightly with tap water and place directly onto the middle oven shelf for 10-15 minutes. After removing from the oven allow the loaf to cool and it will taste like it has been freshly baked that day! I won’t tell!

If you have enjoyed this recipe for Lighter Wholemeal Loaf, then I have some others you may like too:

Farmhouse White Loaf

FF Lighter Wholemeal Loaf
Farmhouse White Loaf

Oat Bran White Bread

Oat Bran White Bread

Knotted Poppyseed Rolls

FF Lighter Wholemeal Loaf
Knotted Poppyseed Rolls perfect for picnics.

Using a bread maker or stand mixer to carry out the kneading part of making bread dough isn’t cheating. Since hand kneading some incredibly sticky Brioche dough for 20 minutes at the weekend, it has really taken it’s toll on my body, especially my thumb joints. So, if using kitchen appliances enables us to eat better quality, homemade bread, that is also much cheaper than it’s shop bought counterpart, why not?

I hope that the detailed, yet easy steps in this recipe have encouraged you to bake your own bread. And you may find that once you start it is impossible to go back to mass produced, plastic wrapped loaves!!

Also, I’m always willing to answer any questions you may have with this, or any of my other recipes. Either leave a comment, or for a quicker reply message me on  Instagram or X (formerly Twitter).

Whatever you are making, baking and creating I your kitchens, have fun preparing and sharing your feast.

Sammie xx

Finally, this is not a sponsored post. I have been buying Shipton Mill flour for almost as long as I have been baking my own bread.

No part of this post may be reproduced or duplicated without the written permission of the owner. Please see my Disclosure Policy.


Share
Facebooktwitterpinterestlinkedintumblr

Hearty Minestrone Soup.

Share
Facebooktwitterpinterestlinkedintumblr

Who loves a one pot dish? I know I do. When I am busy baking, gardening, or let’s be honest, having some chill time in the garden and catching some rays – knowing that dinner is already made can really take the pressure off. So in the spirit of sharing, that is Feasting is Fun, may I present to you my Hearty Minestrone Soup.

For the record, may I just say that I LOVE SOUP!!

Because honestly, the number of recipes on this site simply doesn’t reflect how many times I make soup, both for lunch and dinner.

I am definitely working on rectifying that.

Soup for any season

I have never held with the notion that soup is simply for eating during Winter and the colder months. Even though today it has been quite a warm, humid day and yet this Hearty Minestrone Soup really has hit the spot for dinner.

Also being able to make this soup earlier in the day, has left me free to carry out some much needed recipe write ups, secure in the knowledge that dinner has already been made.

The smoked bacon provides a delicious, yet subtle background flavour to this vegetable packed meal. If you are a vegetarian simply leave out the meat and opt for vegetable stock instead.

Seasonal comfort in a bowl

Following some initial research I have found that there isn’t actually a set recipe for minestrone soup. Italian in it’s origins, it varies from region to region and no doubt household to household. The key to making this soup the very best meal, is to use the best quality, seasonal ingredients that you can afford.

Let’s be honest, this is an incredibly budget friendly meal.

Even a full English Breakfast wouldn’t feed six people using a few rashers of bacon!

While I have listed specific vegetables and quantities in the recipe below, please feel free to switch things up and use whatever seasonal, abundant vegetables are available. I am very much hoping to recreate a version of this Hearty Minestrone Soup at the end of the Summer, with produce grown in our garden.

Exciting times ahead!

The new garden diary section on Feasting is Fun will be up and running soon. The aim being to help and encourage you to grow a few salad items and vegetables in containers. The reward is immense when you can actually pick your own produce from the garden and then use your ingredients in a recipe.

Recipe: Hearty Minestrone Soup serves 6

1 Large Spanish Onion

125g/6 Rashers Smoked Streaky/Back Bacon – I love the bacon from Graig Farm

3 Large Carrots

2 Sticks of Celery

6 Cavelo Nero Leaves – alternatively use cabbage or kale

3 Cauliflower Florets

2 Garlic Cloves

1/2tsp Chilli Flakes – adjust according to taste

4tbsp Tomato Purée

1 Chicken Stock Cube – vegetable stock can be substituted

100g/4oz Spaghetti – small pasta can be substituted

Sea Salt and Freshly Ground pepper to season.

Large handful of fresh Basil Leaves – cut into thin strips

Method: Making the soup

  • First of all the olive oil to a large, heavy based pan and place over a medium heat.
  • Finely dice the onion, add to the pan and cook until the onion turns translucent.
  • Next add the roughly chopped bacon and continue to cook until the bacon is starting to crisp.
  • Finely chop both the carrots and celery and then add to the pan.
  • Cook for a further 5 minutes and then add the minced garlic.
  • After 1 minute add hot water from a recently boiled kettle and the tomato purée.
  • Scrape any caramelised brown bits from the bottom of the pan, these are packed with flavour.
  • Thinly slice the cavalo nero and cauliflower. Add both of these to the soup.
  • Crumble in the stock cube and add the chilli flakes.
  • Ensure that the saucepan you are using is two thirds full by adding extra hot water from the kettle.
  • Break up the spaghetti into roughly 2.5cm/1″ pieces and add to the soup.
  • Add a good amount of freshly ground, black pepper and 1/2 teaspoon of sea salt flakes (1/4tsp if using free flowing table salt).
  • Bring the soup to the boil and then reduce to a simmer and cook for an additional 30 minutes.
Hearty Minestrone Soup reducing over a low heat.
  • After the cooking time has elapsed check the soup for seasoning and adjust as necessary.

To serve, ladle the soup into deep bowls, sprinkle over ribbons of fresh basil and add thick slices of homemade bread, such as this Farmhouse White Loaf.

Make ahead and freeze

This Hearty Minestrone Soup can be kept in the fridge for 3 days or frozen for up to 3 months. Cool the soup completely and then ladle into individual freezer safe, plastic containers. Label and pop in the freezer. I prefer to freeze soup in individual portions as it is easier to remove just one portion, during the week for lunch.

To reheat, run hot tap water over the bottom of the sealed, frozen container. Remove the lid, the frozen, solid block of soup should release easily into a saucepan. Add a splash of hot water from the kettle and gently cook over a low heat until the soup has defrosted. Increase the heat to ensure that the soup is piping hot. Serve as for fresh soup.

I have been making versions of this soup for years, however, I think the addition of the cavelo nero added such a depth of flavour, this may be my favourite version so far!

If you like soup and have enjoyed this Hearty Minestrone Soup, here are some other soup recipes you might like to try:

Roasted Garlic Butternut Squash Soup

FF Hearty Minestrone Soup
Roasted Garlic Butternut Squash Soup a great vegetarian dish.

Roast Chicken Noodle Soup

FF Hearty Minestrone Soup
Roast Chicken Noodle Soup another inexpensive meal.

Carrot Soup

FF Hearty Minestrone Soup
Carrot Soup simply a hug in a bowl.

While writing the post for the unbelievably delicious Chicken Herb Burgers, I talked about the relative cost of buying good quality meat and how I’d rather pay more, for non intensively reared animals, off setting this by eating great meat less often. As a result this recipe contains a mere 6 rashers of bacon and feeds six people. And that, for me, is balance.

Do you have a favourite soup recipe – homemade or canned?

Do you view soup as a meal in itself, or simply an appetiser or light lunch?

Have fun making and baking in the heart of your home and thank you for the wonderful comments and fantastic photos that you are putting on Twitter and Instagram. I never take for granted the trust you place in me when following any of my recipes, which is why I try my hardest to get them right before I share them here, on Feasting is Fun.

Sammie xx

No part of this post may be reproduced or duplicated without the written permission of the owner. Please see my Disclosure Policy.

Share
Facebooktwitterpinterestlinkedintumblr