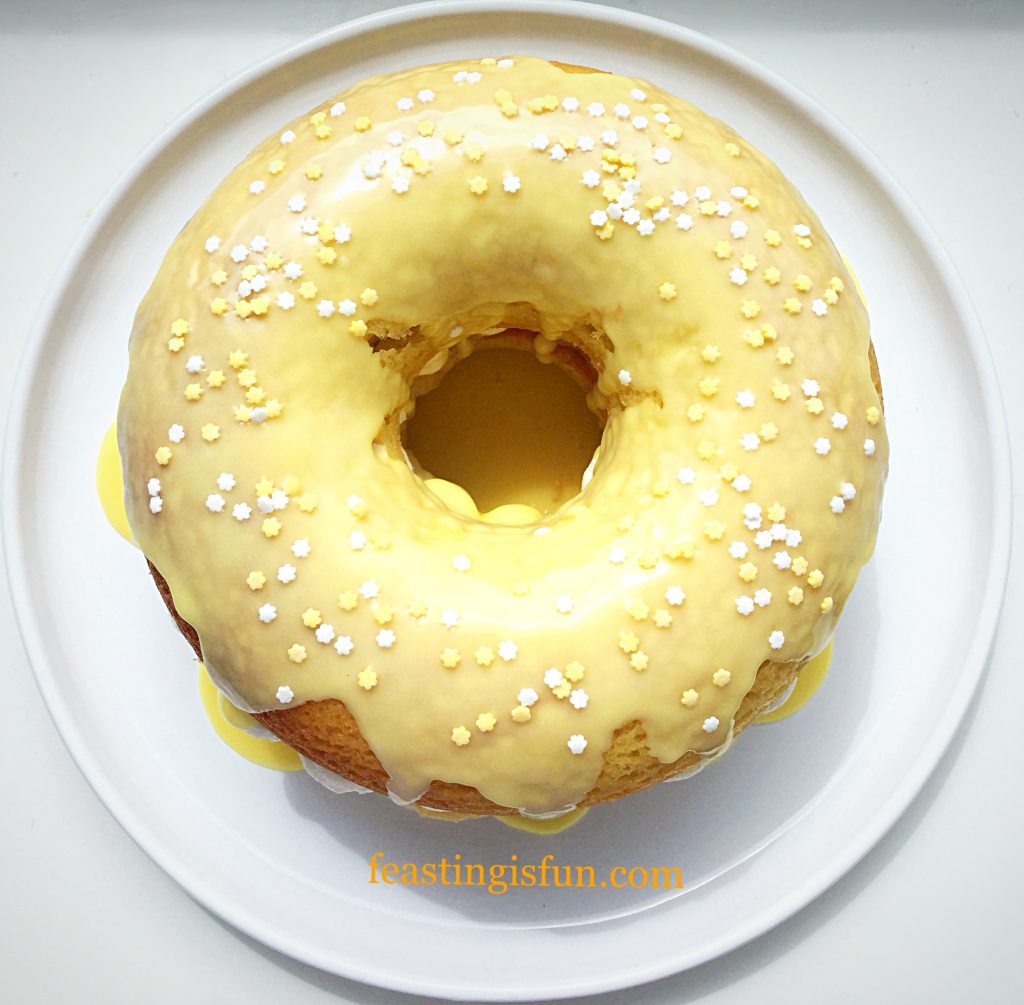
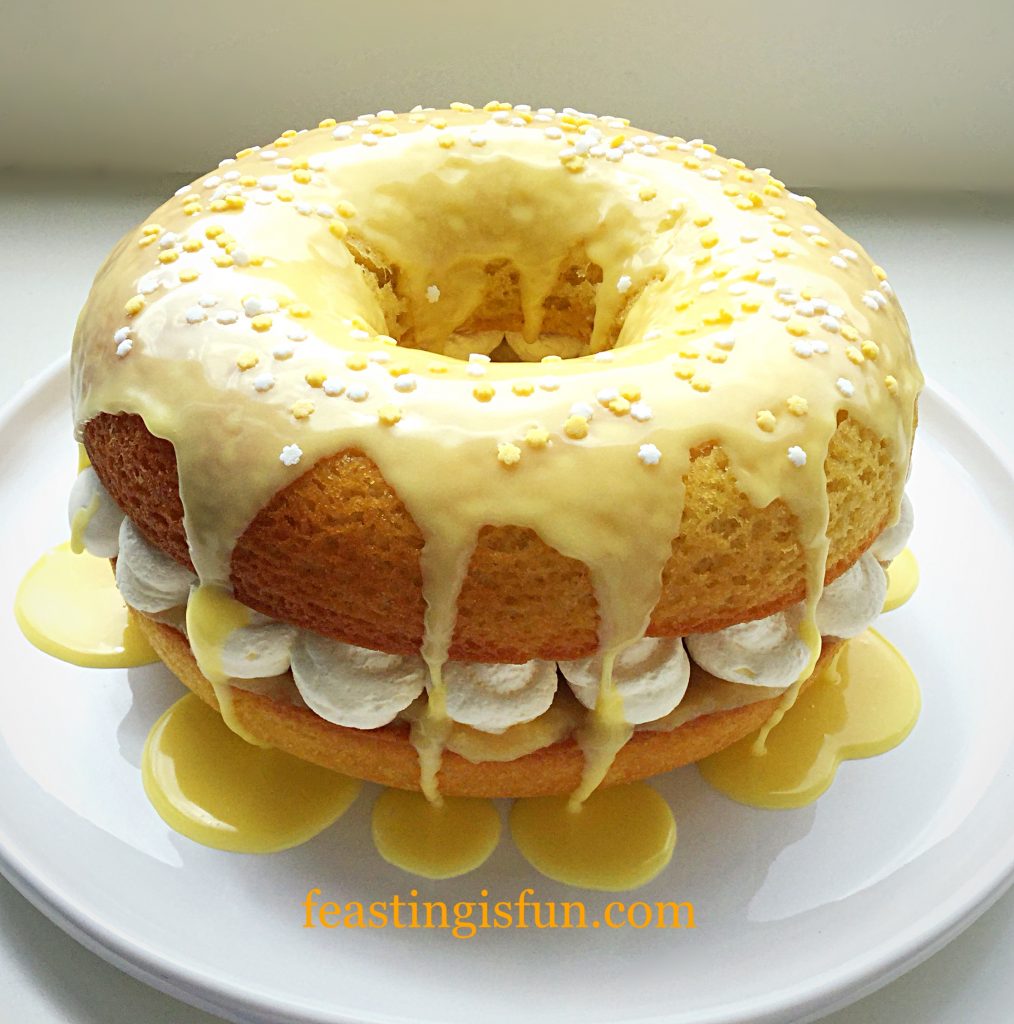
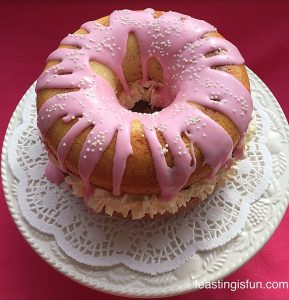
Lemon Lime Gin Heart Bundt Cake

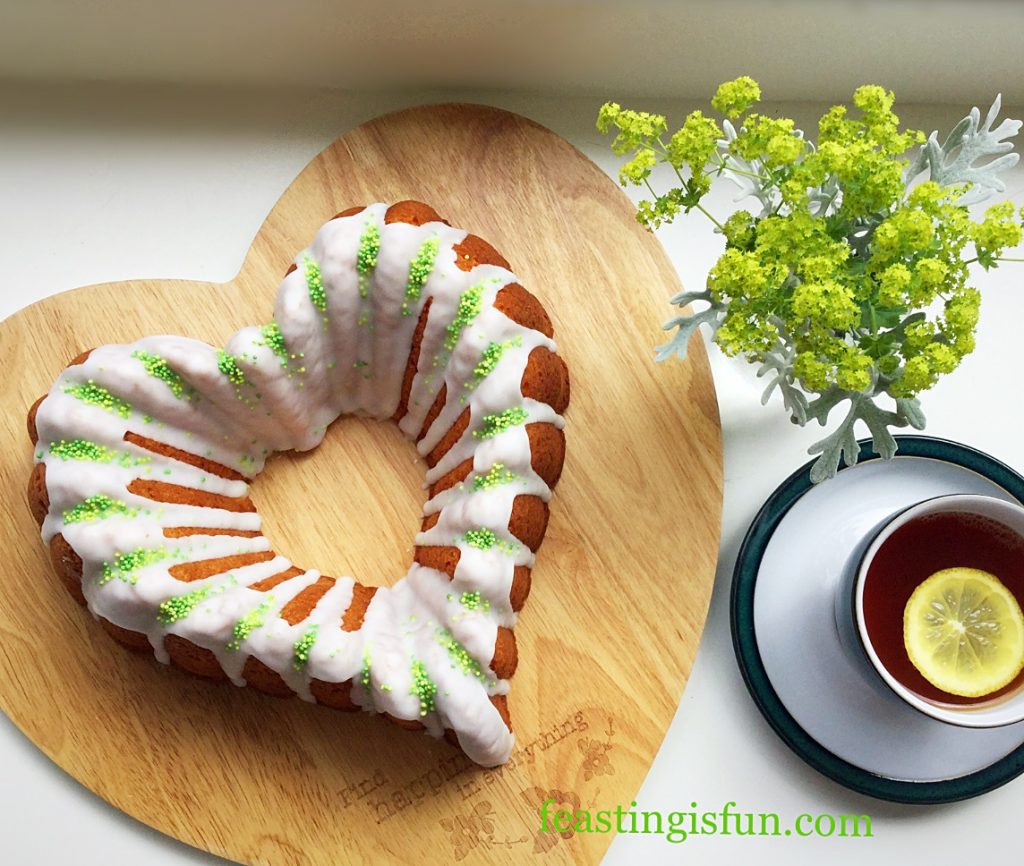
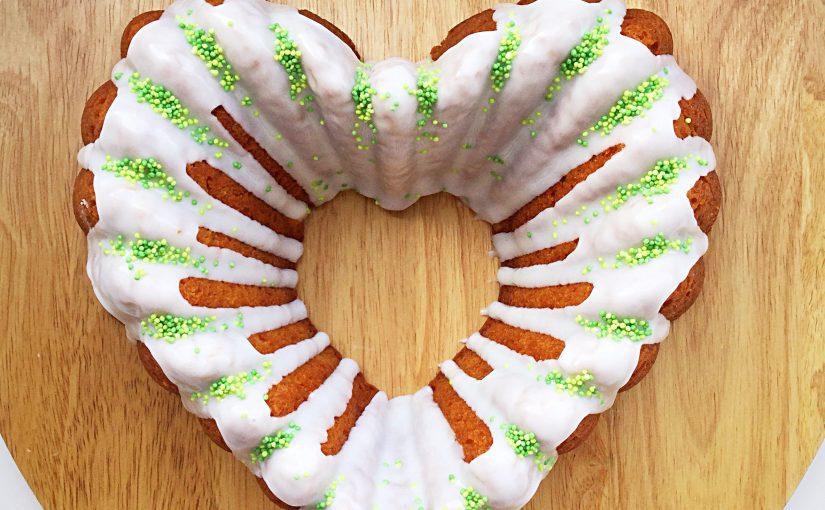
I love Bundt Pans. Their detailed and versatile shape, moulds cakes into edible replicas of the pan. Of course, if you are still at the beginners stage of cake decorating, the finished cake needs no more than a dusting of icing sugar. Since I have baked more than a few Bundt cakes, I have become more adventurous with how they are decorated. This Lemon Lime Gin Heart Bundt Cake is glazed carefully with a thick icing and finished with sprinkles.
FF Lemon Lime Gin Heart Bundt Cake
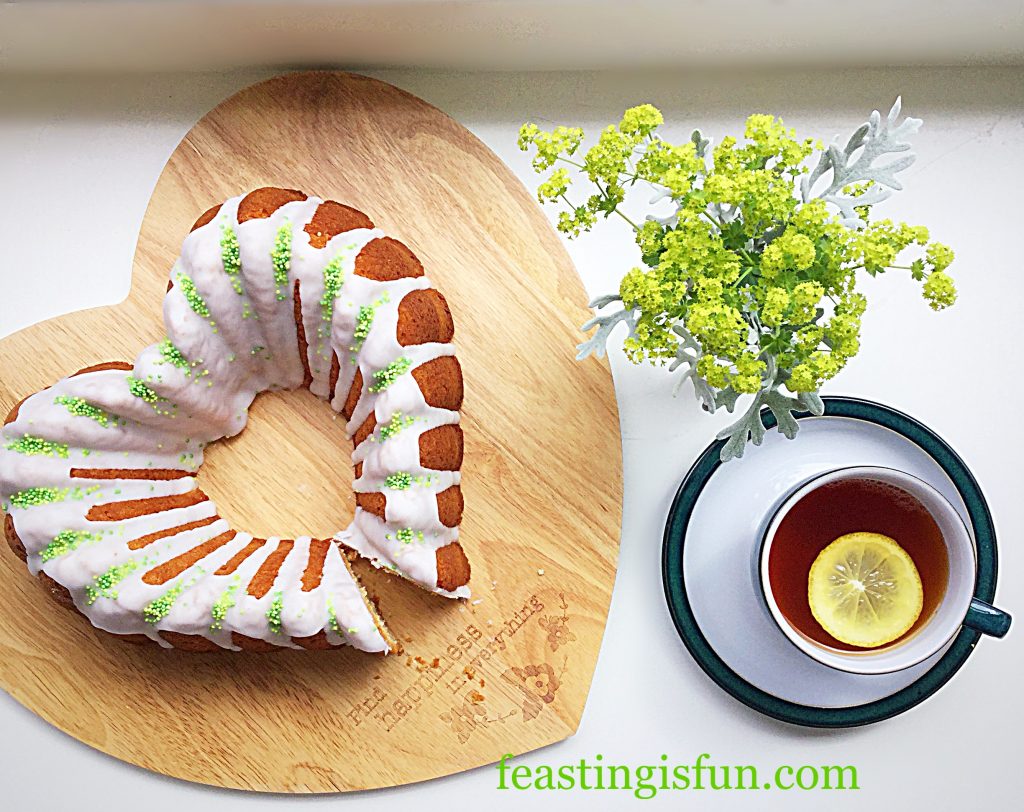
Lemon Lime Gin Heart Bundt Cake perfect with lemon tea.

Bundt pans are available in all shapes and sizes. From small bundtlettes such as Mini Lemon Drizzzle Bundt Cakes to larger sized pans, such as Heart Engagement Bundt Cake. While solid pans are available, Bundts are generally recognised by the hole in the centre. Here in the U.K Nordic Ware own the copyright to name Bundt tin/pan. Therefore only cake’s baked in one of their pans can accurately and legally be called a Bundt cake.
FF Lemon Lime Gin Heart Bundt Cake
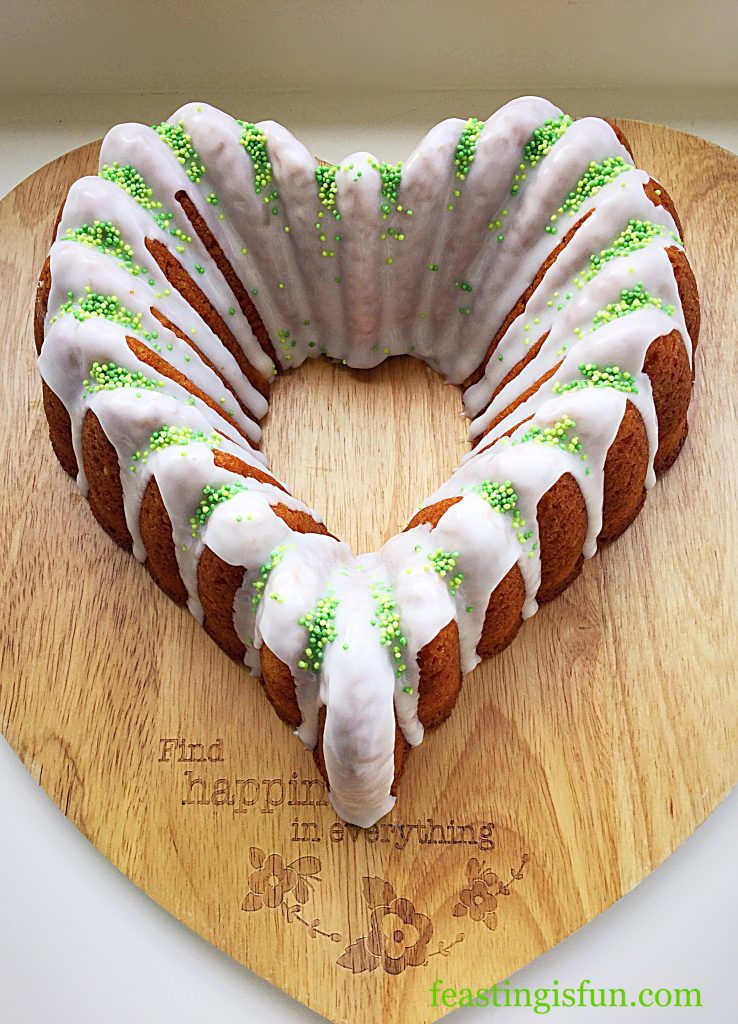
Lemon Lime Gin Heart Bundt Cake the icing emphasises the detail of the cake.

For this cake one whole lemon and lime are used in the recipe. The fragrant zest adds flavour and balance to the gin baked in the cake. While thick, white icing, made using the juice of the zested fruits, provides a sharp, citrus tang. Finally, green and yellow sprinkles hint at the cake’s flavour.
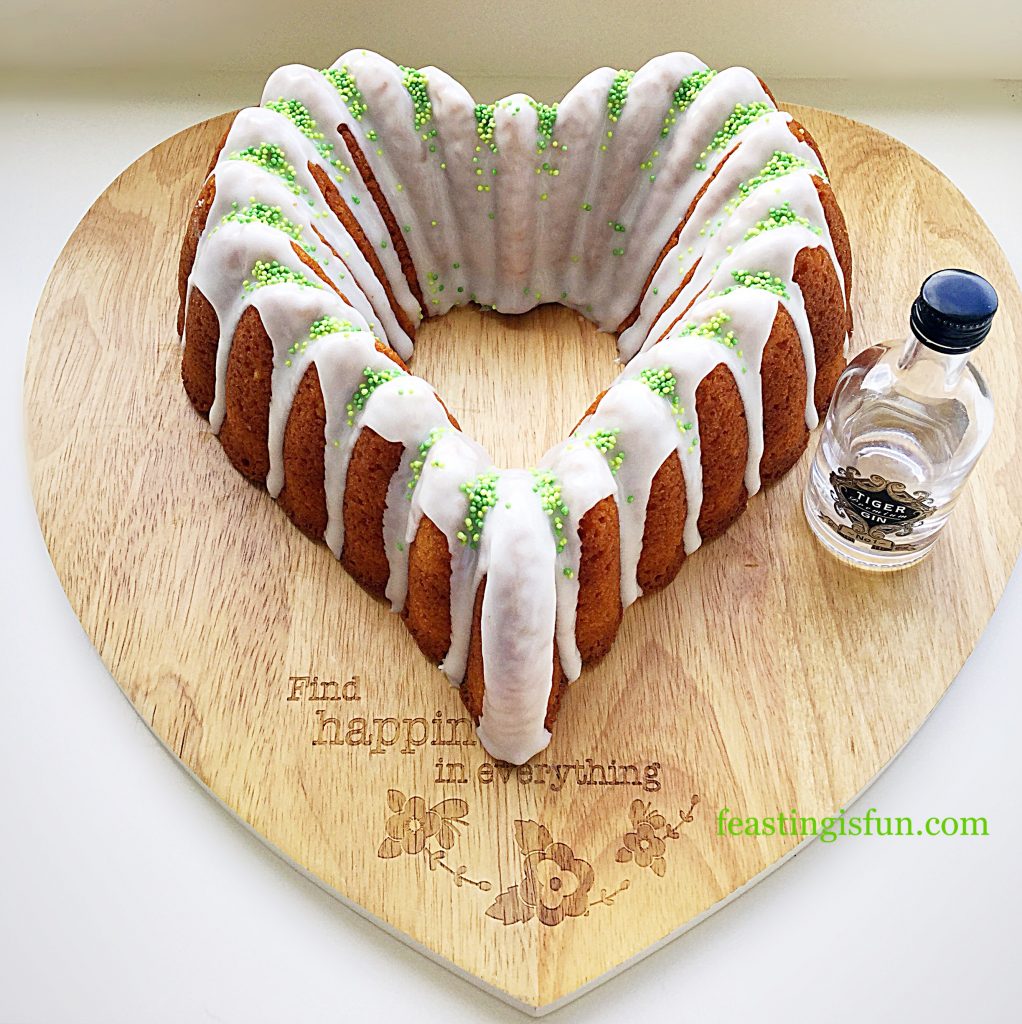
FF Lemon Lime Gin Heart Bundt Cake
Lemon Lime Gin Heart Bundt Cake the perfect flavour combination.

Tiger Gin has underlying orange citrus notes. Incorporating this with the lemon and lime gives this cake a unique citrus flavour. Yet it is the botanicals added in the process of making this gin that really linger on the palette.
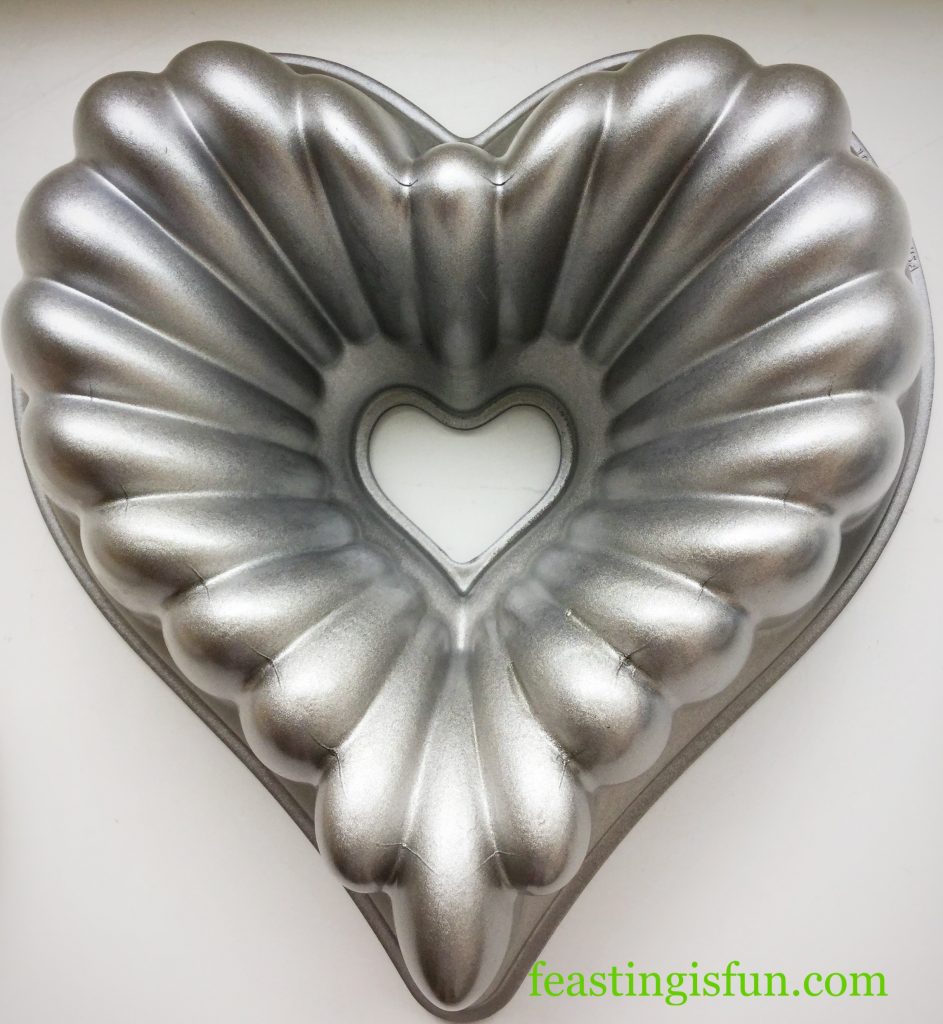
FF Lemon Lime Gin Heart Bundt Cake
Elegant Heart Bundt Pan

Recipe: Lemon Lime Gin Heart Bundt Cake serves 10-12

200g/7oz Unsalted Butter at room temperature

200g/7oz Caster Sugar

1/4tsp Salt

30mls/2tbsp Gin plus extra for icing – I use Tiger Gin

5 Large Free Range Eggs

100g/4oz Natural Plain Yoghurt

1tsp Vanilla Extract – I use Nielsen-Massey

250g/5.5oz Plain White Flour

2tsp Baking Powder

1 Lemon – scrubbed

1 Lime – scrubbed

400g/14oz Icing Sugar

Sprinkles in coordinated colours

Method: Preheat the oven to 170C/150C fan, gas mark 3

If new, wash the Bundt Pan in hot soapy water. Do not use anything abrasive to clean it. Dry and prior to use spray with cake release. I use Wilton. ensuring the inside is completely covered.

  • Into a large bowl add the butter, sugar and salt. Whisk until pale and creamy.
  • Now add the eggs, yoghurt, gin and vanilla extract – wet ingredients.
  • On top of the wet ingredients sieve the flour and then baking powder.
  • Zest both the lime and lemon. Place the zest into the bowl.
  • This cake uses the all-in-one method. Whisk slowly until all the ingredients are just combined. Give the mixture a final mix with a spoon before carefully pouring into the prepared Bundt Pan.
  • Place the Bundt into the centre of the oven and bake for 50-60 minutes.
  • The cake is baked when it is golden and coming away from the sides of the pan. Also an inserted skewer will come out clean.
  • Remove the cake from the oven and allow to cool for 10 minutes.
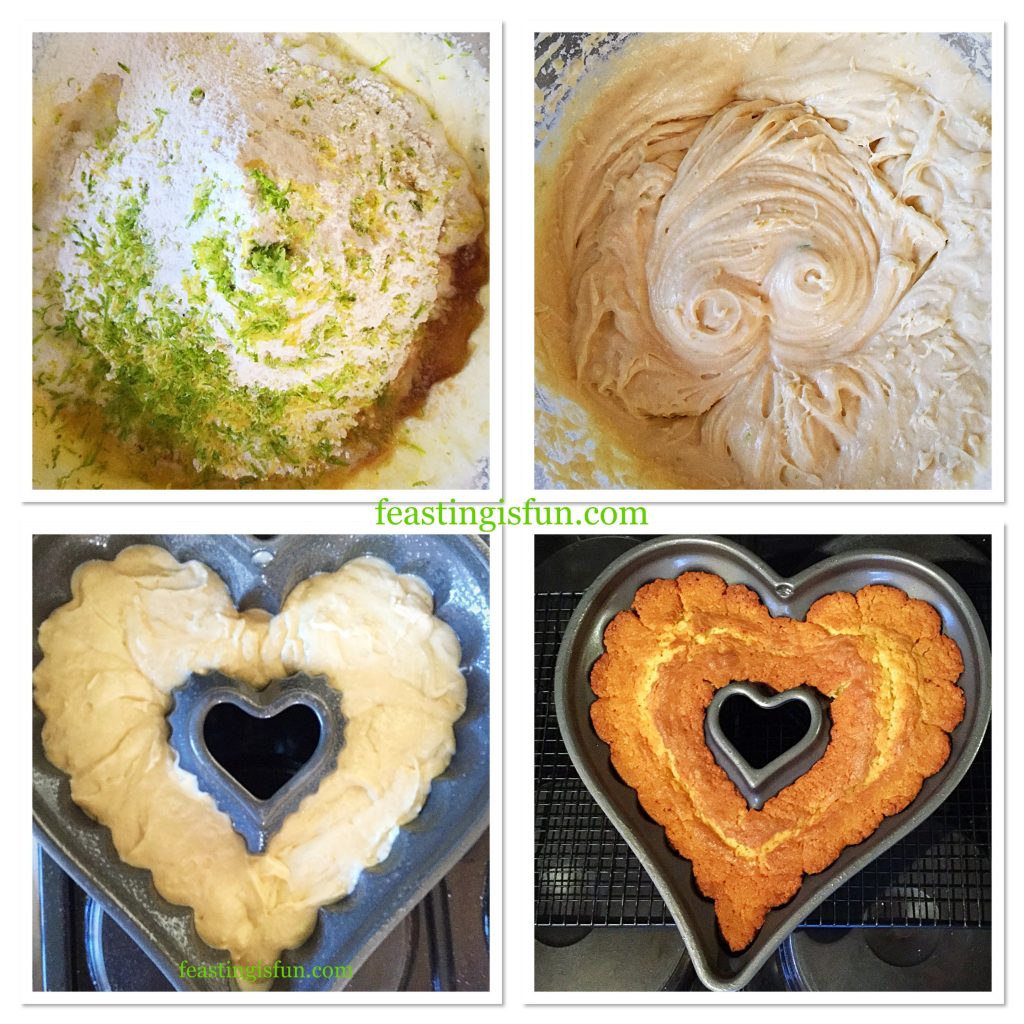
FF Lemon Lime Gin Heart Bundt Cake
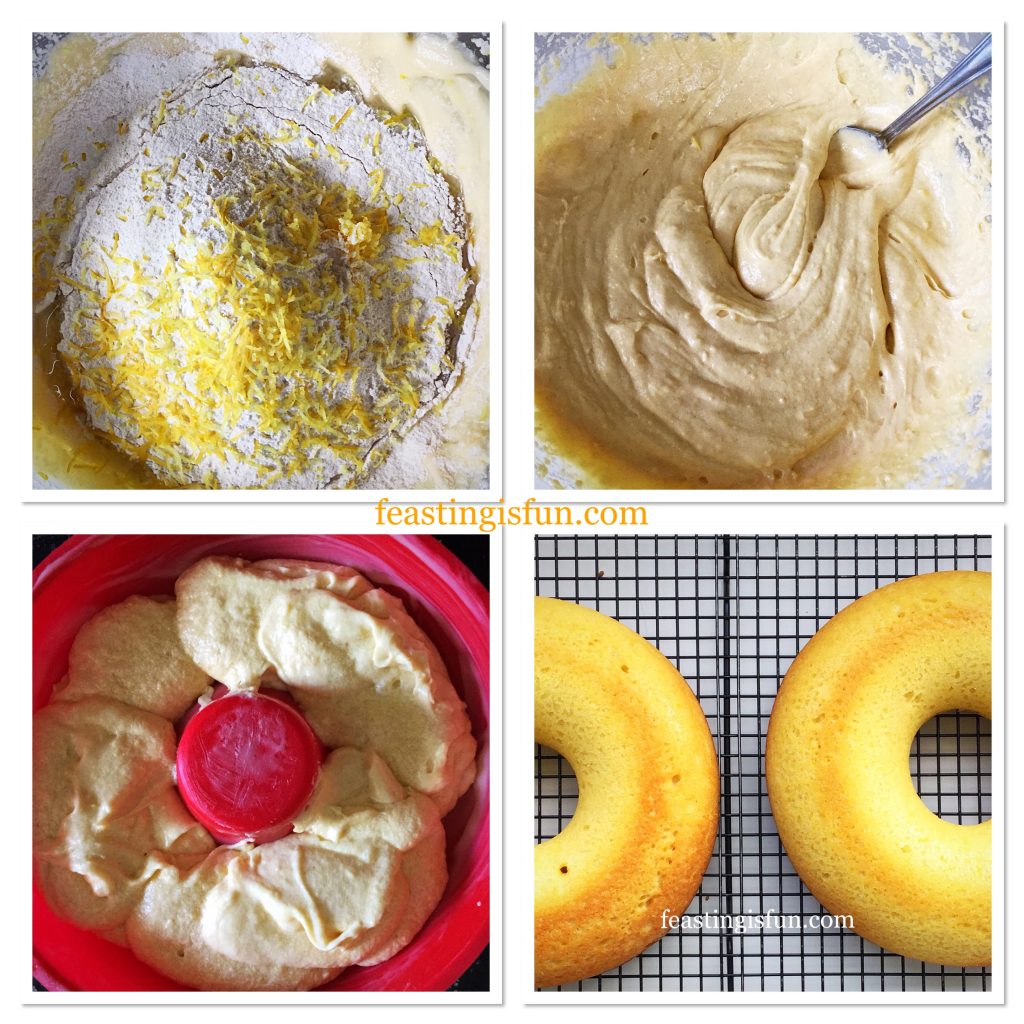
Preparing the cake batter, filling and baking the Lemon Lime Gin Heart Bundt Cake.
  • After 10 minutes cooling in the tin, turn the cake out on to a cooling rack.
  • Leave the cake to cool completely before decorating.
  • While the cake is cooling prepare the icing.
  • Sift the icing sugar into a medium sized bowl.
  • Next, if using gin in the icing add one tablespoon at first. Now add the juice of both the lemon and lime until it reaches a very thick, yet still drops from the spoon, consistency.
  • As soon as the cake is cooled it can be decorated.
  • Place the cooling rack over, with the cake on it, a larger baking tray. This will catch the drips from the icing.
  • Spoon the icing over the top of the cake, encouraging it to drip down the sides of the cake.
  • Continue to add icing in this way until each of the dips, in the heart pattern, have icing dripped on them.
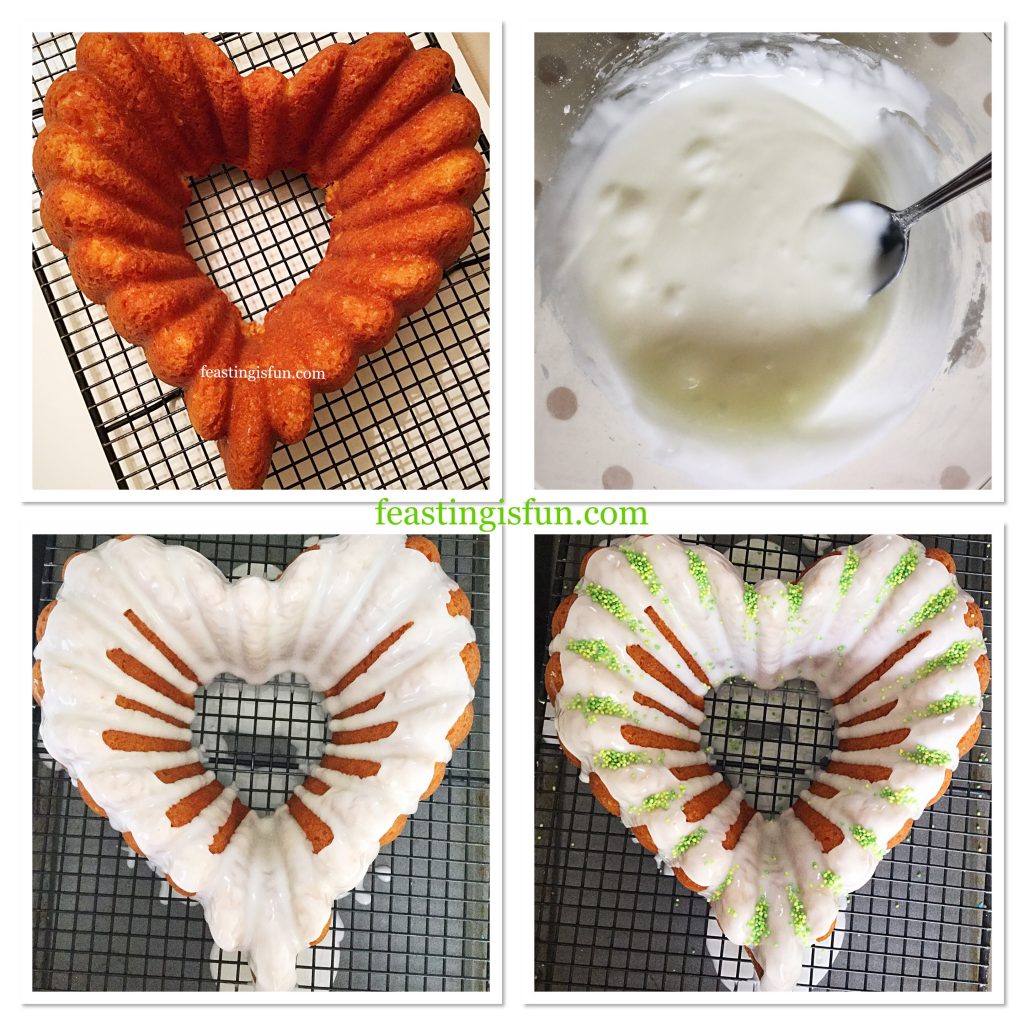
  • Take care to completely cover the inside of the heart indentation at the top and the outside of the heart point at the bottom – see photos.
  • Carefully place sprinkles across the top of the heart. Again use the photograph for guidance.
  • Allow the cake to set for 5 minutes.
FF Lemon Lime Gin Heart Bundt Cake
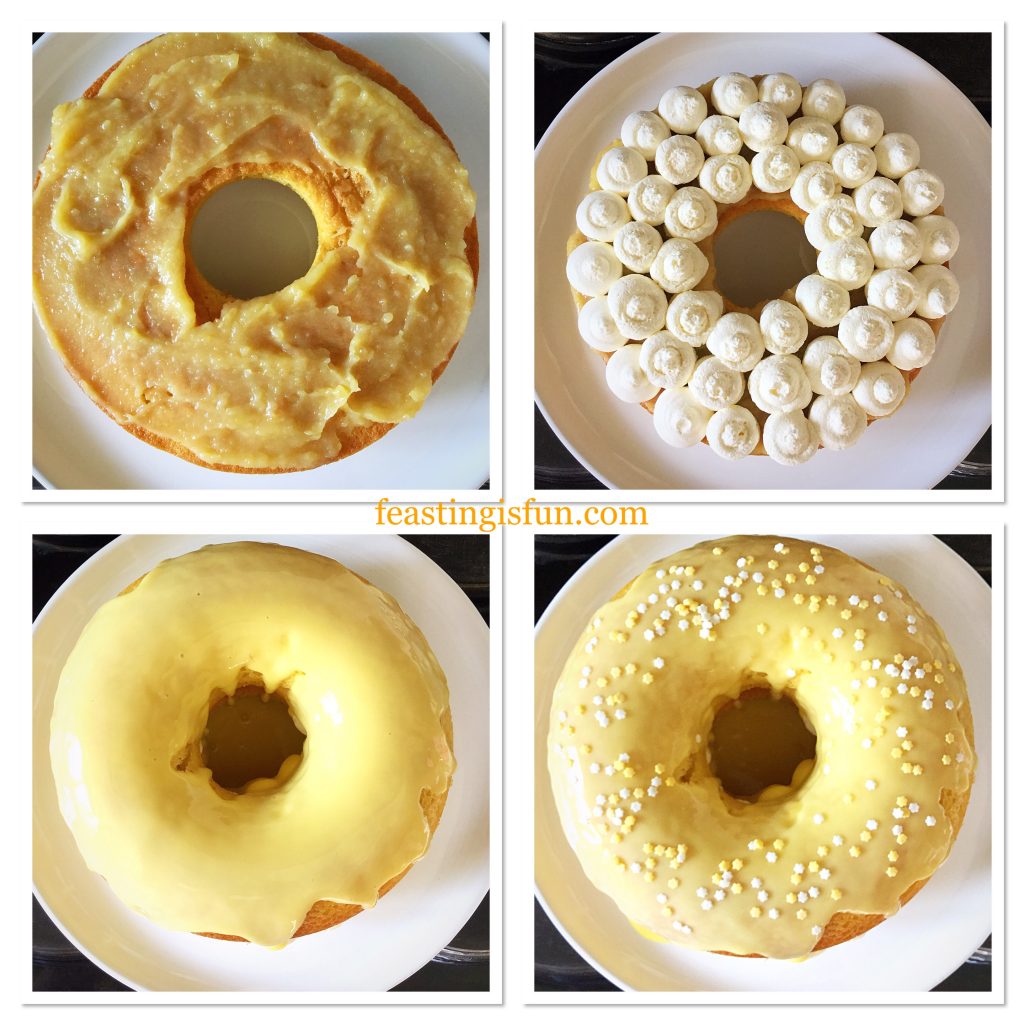
Step by step photos showing how to decorate the cake.
  • Gently run a palette knife under the cake, separating any icing that may be stuck to both cake and rack.
  • Transfer the cake to a suitable plate or cake stand and leave to fully set.
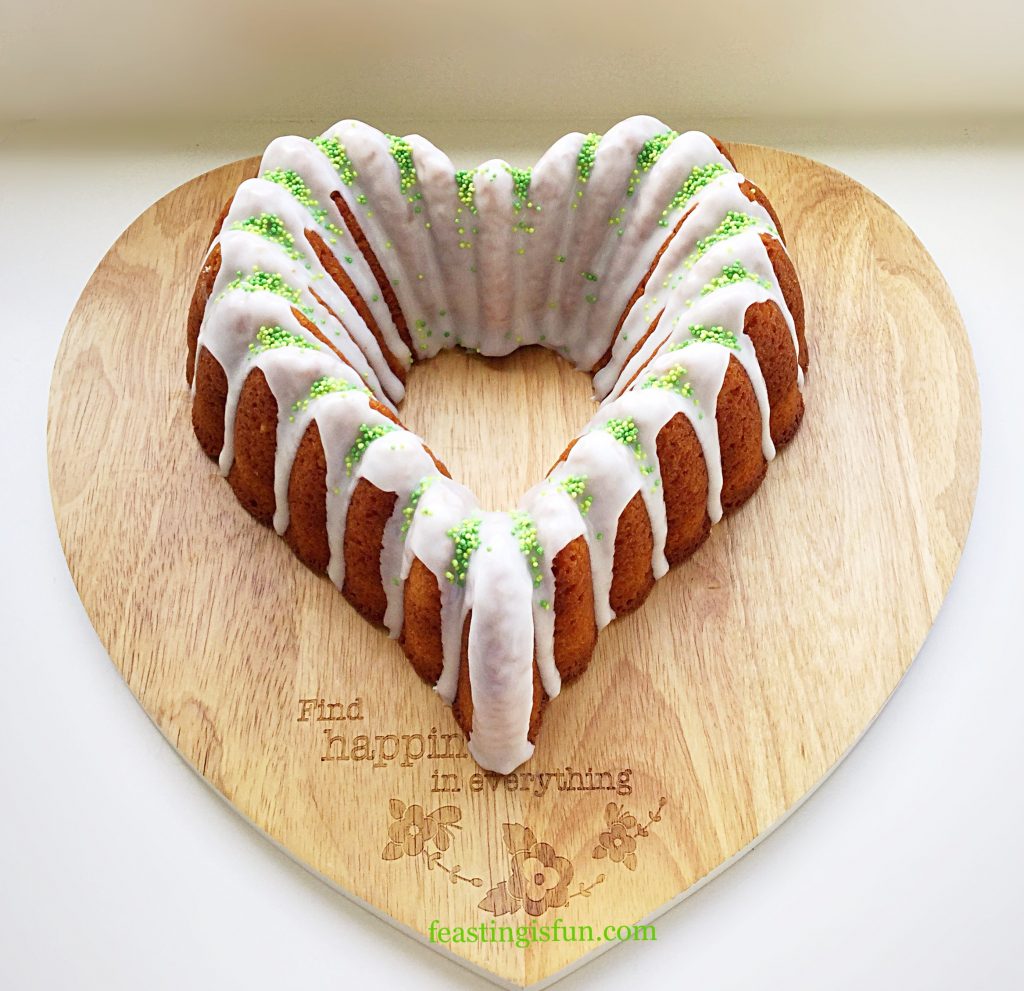
FF Lemon Lime Gin Heart Bundt Cake
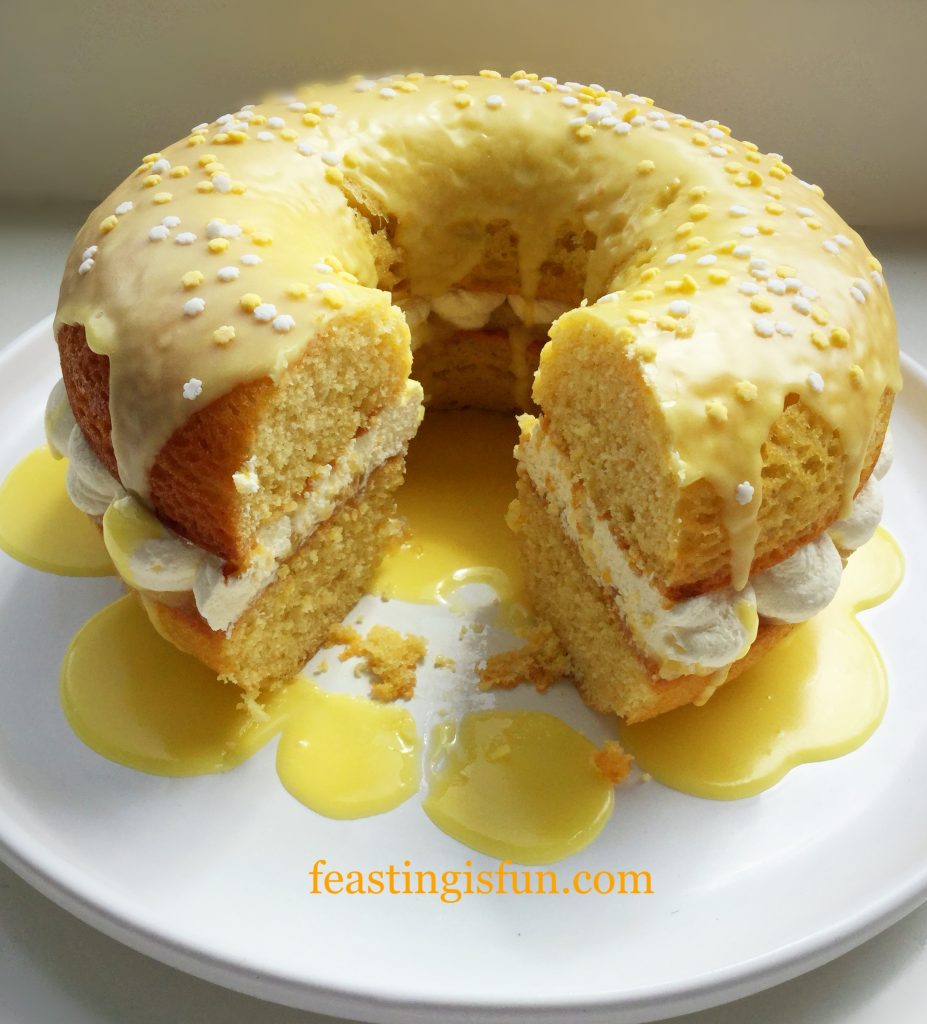
Lemon Lime Gin Heart Bundt Cake set and ready to serve.

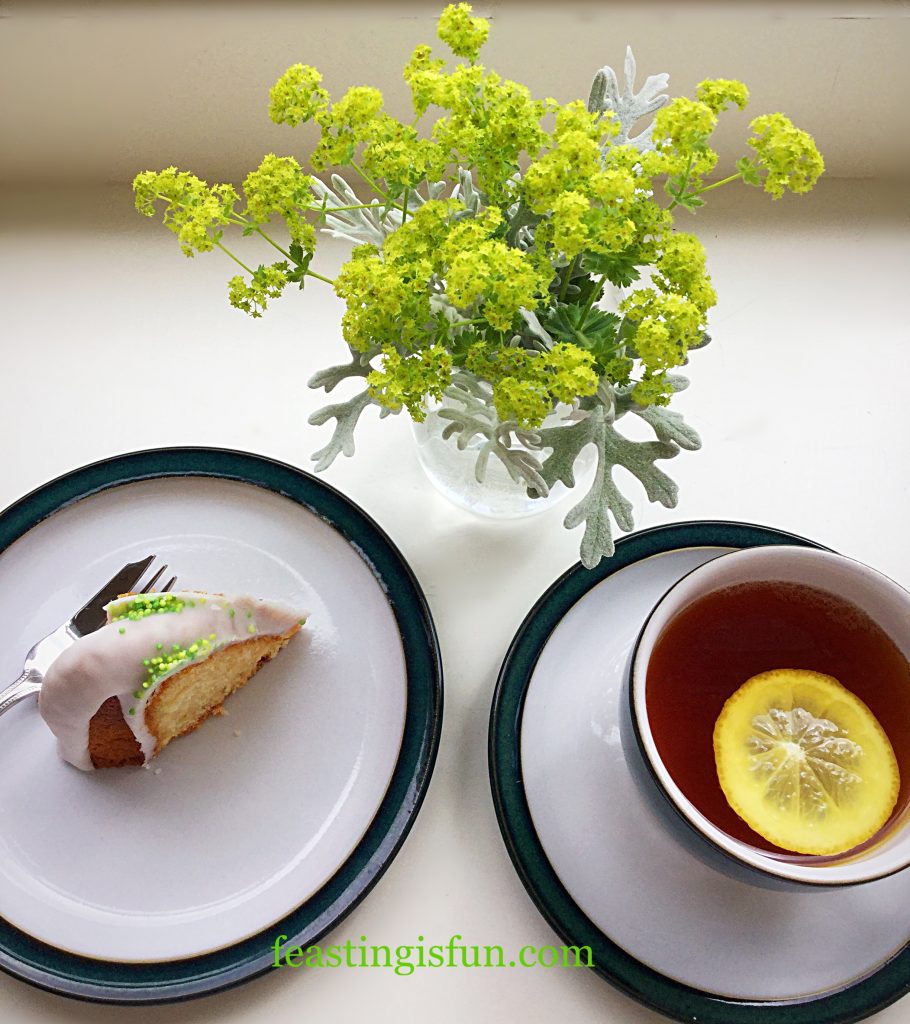
Served sliced with a delicious cup of lemon tea and of course a smile!
FF Lemon Lime Gin Heart Bundt Cake
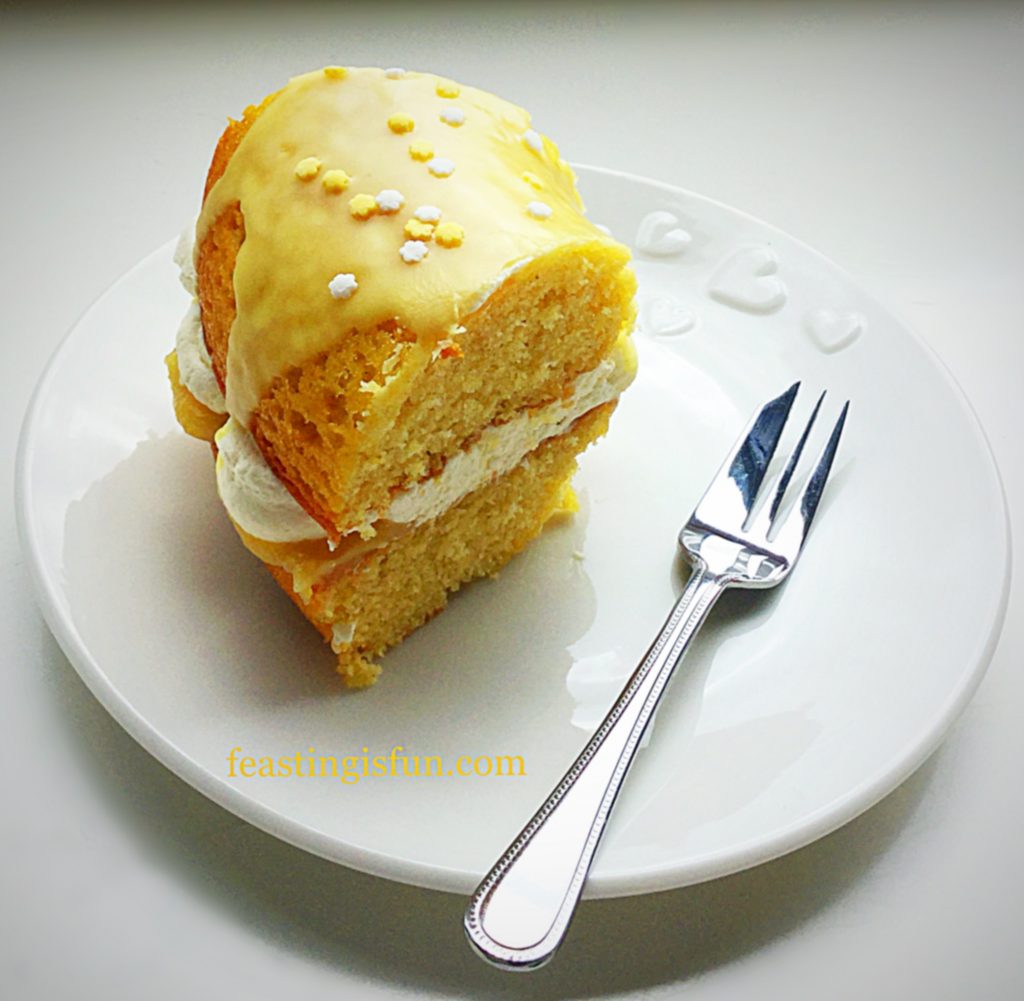
A tasty, tangy slice of Lemon Lime Gin Heart Bundt Cake.
FF Lemon Lime Gin Heart Bundt Cake
Lemon Lime Gin Heart Bundt Cake eat with your eyes first!

This cake will keep for up to four days in an airtight container. The cake was made the evening prior to icing and stored wrapped in baking parchment. In my opinion the cake is better the day after it is made.

If you have enjoyed this recipe for Lemon Lime Gin Heart Bundt Cake, then you may also like these:

Maple Syrup Iced Coffee Bundt Cake
FF Lemon Lime Gin Heart Bundt Cake
Maple Syrup Iced Coffee Bundt Cake

Chocolate Sunflower Bundt Cake
FF Lemon Lime Gin Heart Bundt Cake
Chocolate Sunflower Bundt Cake
Lemon Blueberry Bundt Cake

Lemon Lime Gin Heart Bundt Cake
Lemon Blueberry Bundt Cake

Baking is fun. Especially when you gain a little experience and confidence. Mixing flavours, experimenting with different cake tins and Bundt Pans. Creating a feast that will surprise people. Making friends, family and neighbours smile. Almost half of this cake has now gone. Slices sent on paper plates, with a pretty napkin, to unsuspecting, yet thoroughly grateful neighbours, this afternoon.

Sharing is so important at Feasting headquarters. Indeed we all believe that food tastes better when it is shared.

Sammie xx

No part of this post may be copied without my express, written permission. Please see my Disclosure Policy for details.

NOTE: If baking with alcohol, you must be at least 18 years old, here in the U.K.

I am entering this cake for Bake of the Week hosted by: Jenny and Helen at
Mummy Mishaps

Casa Costello

FF Lemon Lime Gin Heart Bundt Cake

Cheddar Sun Dried Tomato Scones

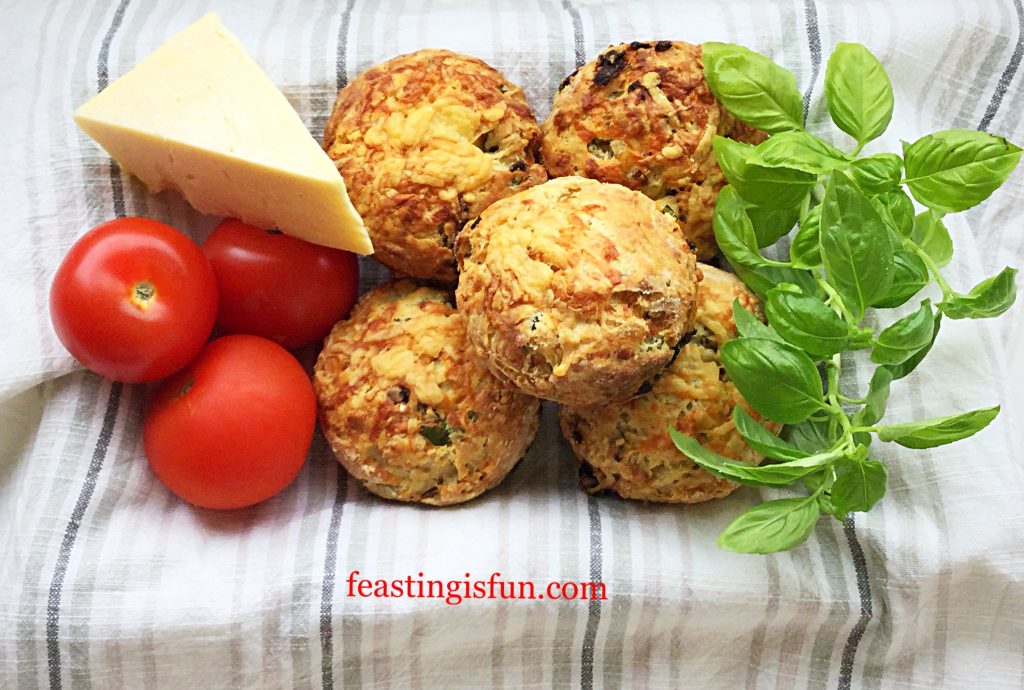
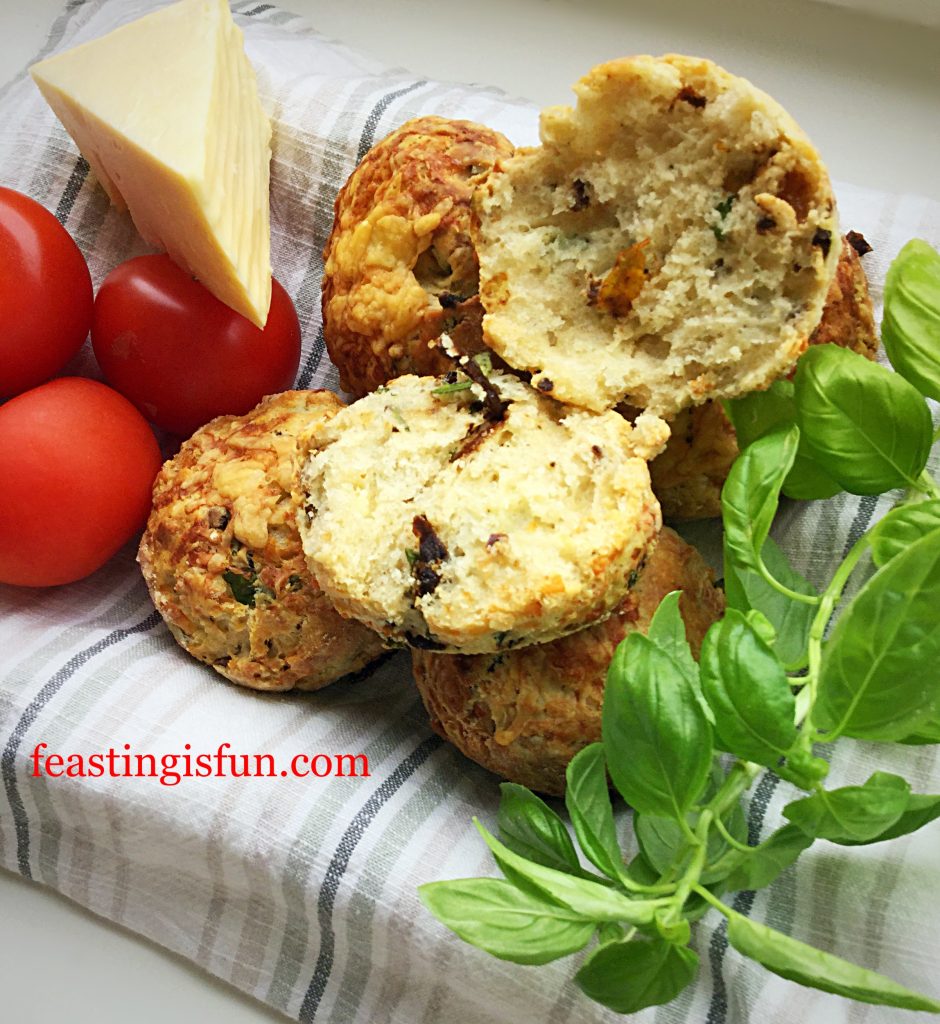
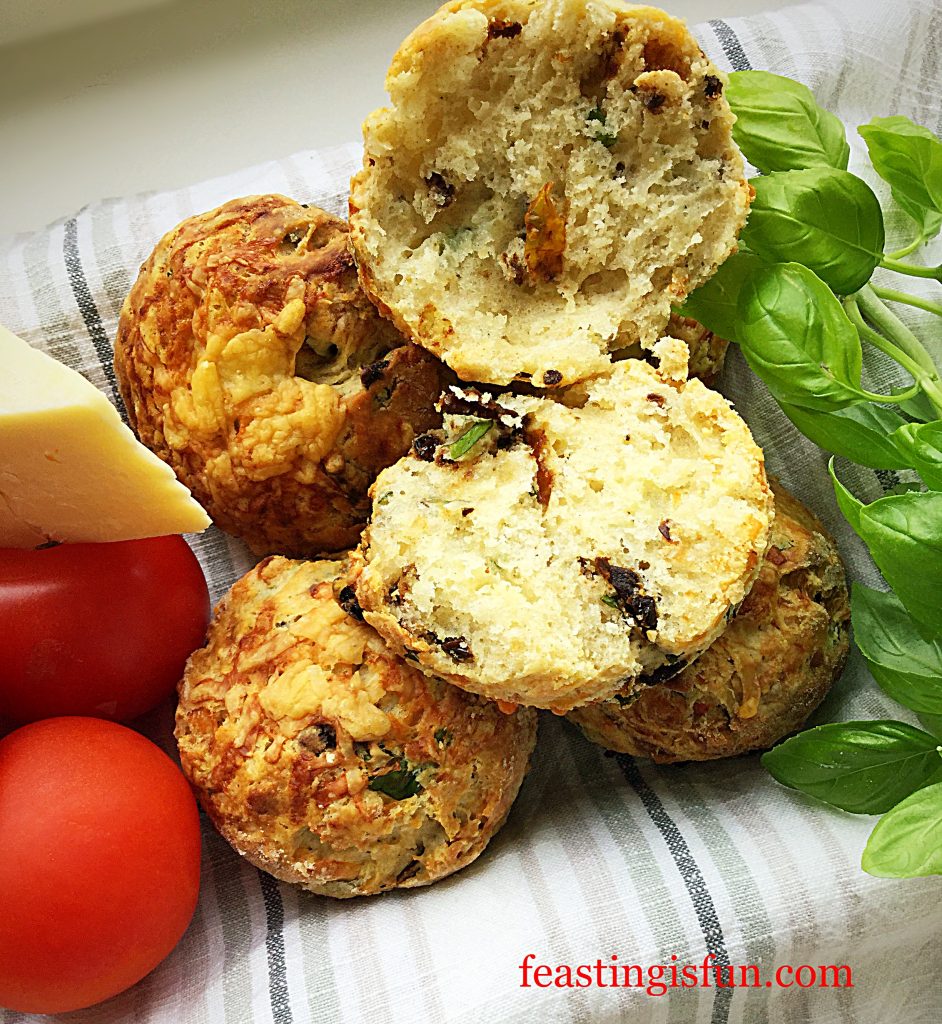
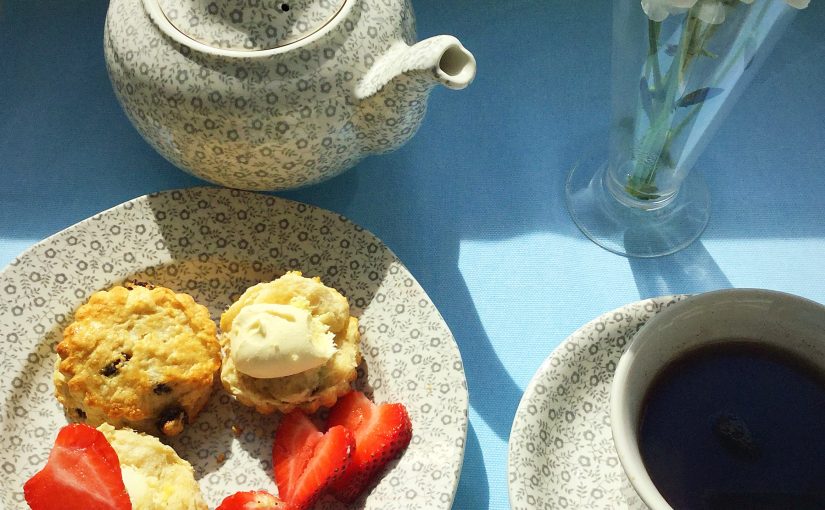
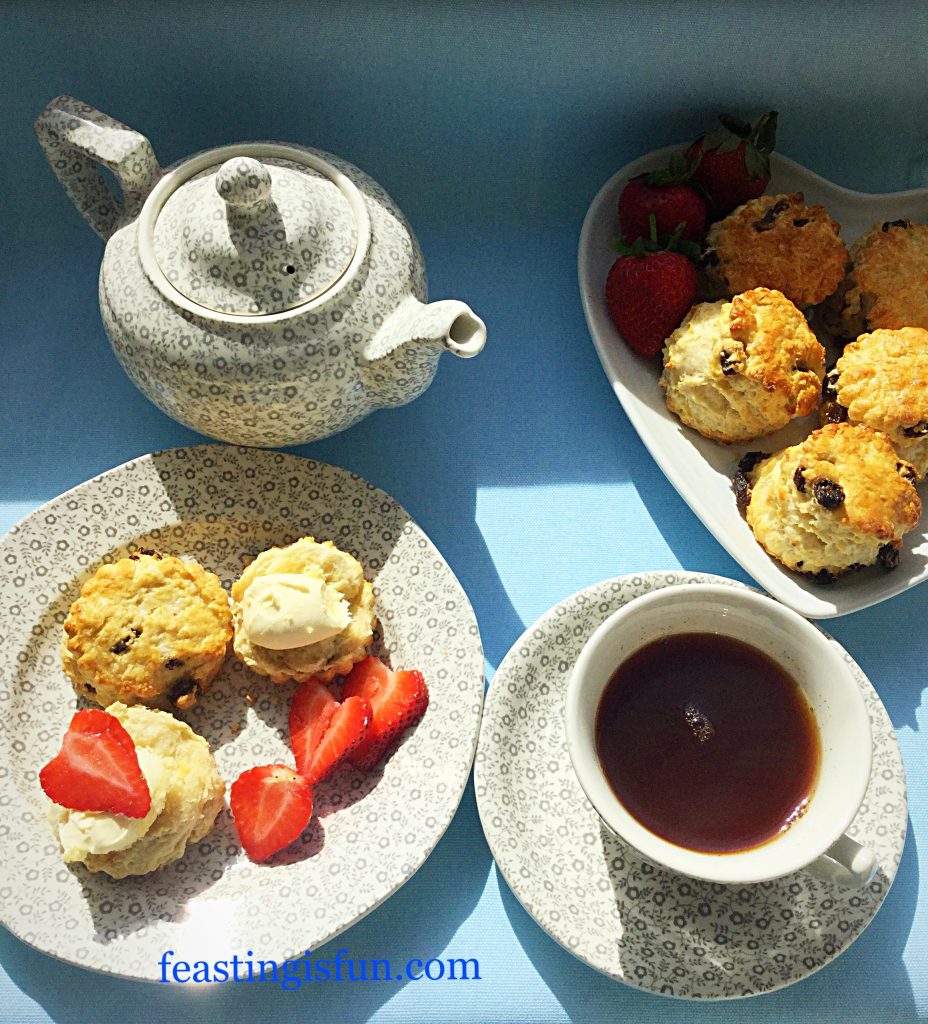
Cheddar Sun Dried Tomato Scones are the best savoury scones made at Feasting headquarters so far. Sharp, mature cheddar pairs beautifully with the sun dried tomatoes and the addition of fresh basil completes the final flavour. These scones need no addition as they are moist and light.
FF Cheddar Sun Dried Tomato Scones

Two things are really important when making these scones. First of all, use great ingredients. That doesn’t mean everything has to be top of the range, but buy the best mature cheddar you can afford. While the final flavour is not overpowering, using a mild cheddar results in a bland tasting scone. Also keeping your hands light, while making the scone dough will result in a light scone. Because if you work the dough too much the baked scones will be heavy.
FF Cheddar Sun Dried Tomato Scones
Cheddar Sun Dried Tomato Scones it’s hard to stop at one!
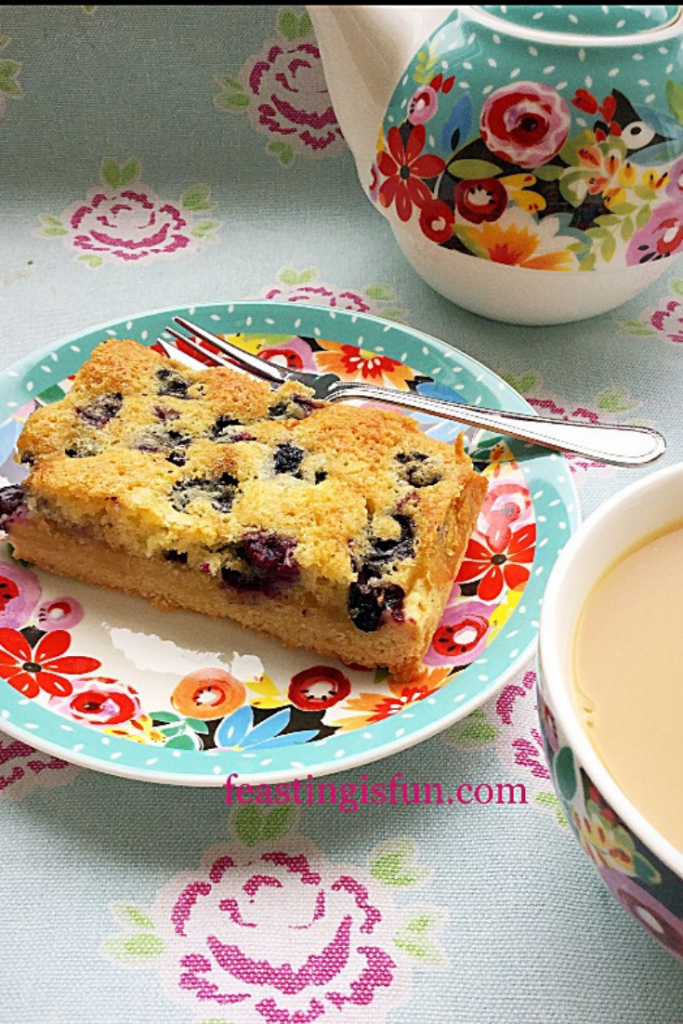
Since the sun dried tomatoes add a depth of savoury flavour to the finished scone, they are crucial to the recipe. Dry packaged are best, however if they are only available in oil that’s okay. Simply remove slightly more than the recipe calls for and drain them thoroughly using kitchen towels. While their deep, unique flavour and texture will still work in this recipe.

FF Cheddar Sun Dried Tomato Scones
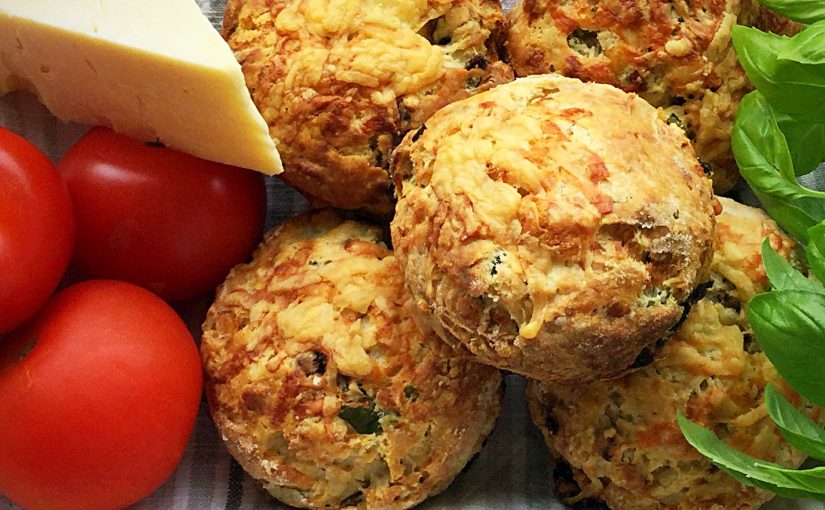
Cheddar Sun Dried Tomato Scones the cheese melts into the scone, yet the basil and tomatoes are still visible.

Time to get baking!

Recipe: Cheddar Sun Dried Tomato Scones makes 10-12

450g/1lb Plain White Flour

3tsp Baking Powder

25g/1oz Trex – solid vegetable fat kept very cold
50g/2oz Unsalted Butter kept very cold

250mls Whole Milk straight from the fridge – plus a little extra for brushing the tops of the scones

150g/5oz Freshly Grated Mature/Sharp Cheddar – I used Wyke Farm mature cheddar

50g/2oz Sun Dried Tomatoes preferably not in oil

Handful of Fresh Basil Leaves – approx. 10 large leaves.

1/4tsp Sea Salt Flakes – I use Maldon

Good grinding of Black Pepper to taste

Method: Preheat oven to 220C/200C fan, 425F, gas mark 7,

You will need two large baking trays lined with baking parchment and a 5cm/2″ plain round cutter.

Making The Cheddar Scone Dough

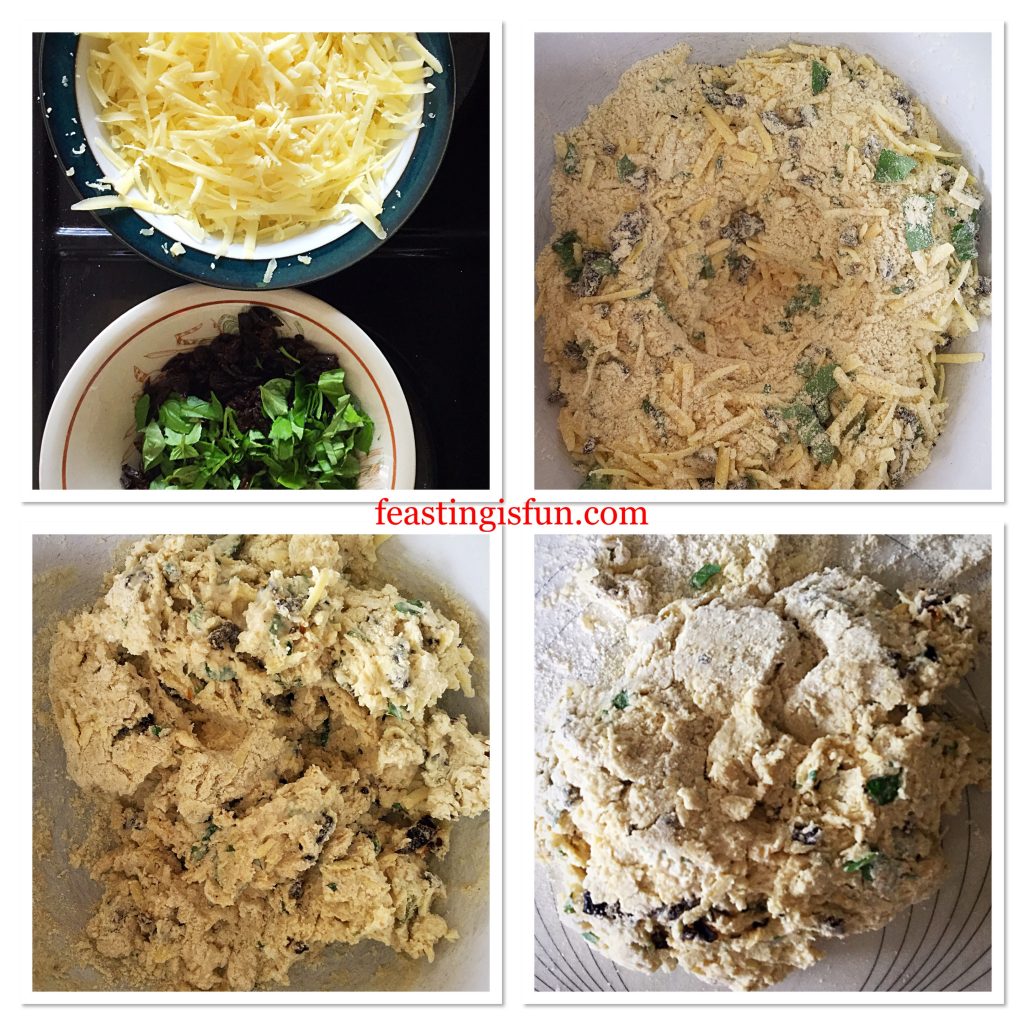
  • First of all prepare the ingredients. Grate the cheese and chop, or snip the sun dried tomatoes and basil into similar sized pieces – see photo.
  • Add your flour, baking powder, salt and a good grinding of black pepper to a large bowl. Use a balloon whisk to blend the ingredients together.
  • Next add both the fats and blend them into the flour using a pastry cutter. Alternatively rub the fat into the flour using your fingers. Finally the flour should have a breadcrumb appearance with some larger, pea sized, pieces of fat visible.
  • Add one third of the grated cheese to the bowl. Use your fingers to toss the cheese in the flour. This coats the cheese and stops it from clumping. Repeat with half of the remaining cheese. Set the unused cheese to one side.
  • Now do the same with the sun dried tomatoes and fresh basil, tossing them in the flour to coat them.
  • Make a well in the centre of the bowl and pour in the cold milk.
  • Stir the ingredients together with a dinner knife, until they form a rough dough.
  • Use your hand, shaped like a claw to pull all the ingredients together.
  • Tip the scone dough on to a lightly floured work top.
FF Cheddar Sun Dried Tomato Scones
Making the Cheddar Sun Dried Tomato Scones dough.

Shaping The Dough And Cutting Out The Scones

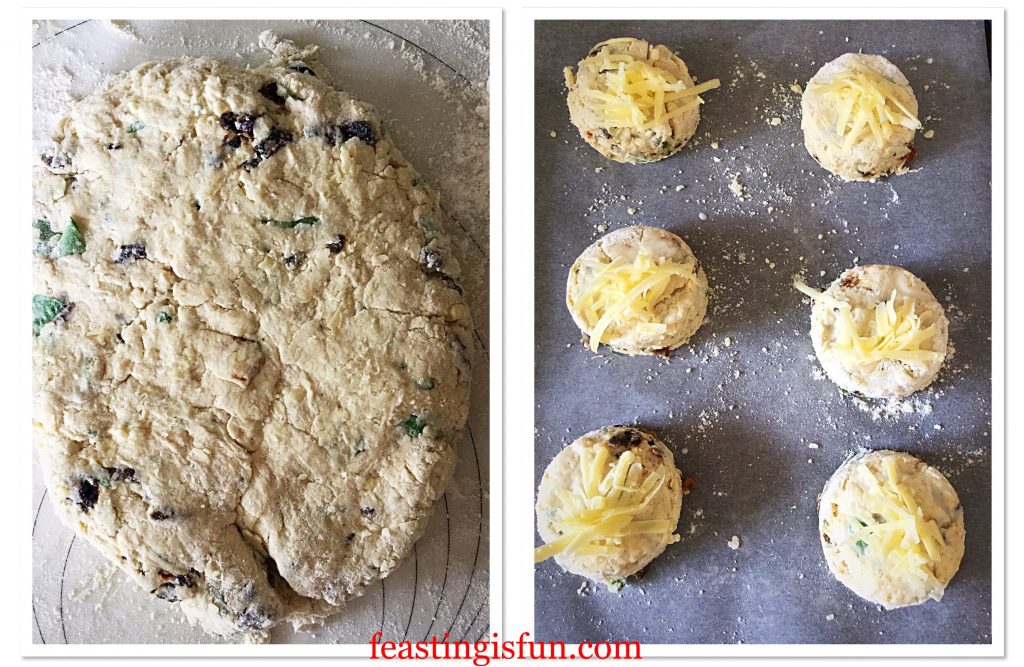
  • Bring the dough together with your hands and pat into a rough circle approximately 1 inch/2.5cm deep.
  • Thoroughly flour the round cutter and cut out the scones. NOTE: Do not twist the cutter as you push through the dough as this will result in uneven/lopsided final bakes. Place the scones on to the lined baking trays.
  • Brush the top of each scone with milk and add a little of the remaining cheese.
FF Cheddar Sun Dried Tomato Scones
Shaping the dough and cutting out the scones.

Baking The Cheddar Sun Dried Tomato Scones

  • Place the baking trays into the preheated oven and bake for 20-25 minutes.
  • The scones are baked when they are a golden colour and similar to bread sound hollow when rapped on the base with a knuckle.
  • As soon as they are baked remove the scones from the oven.
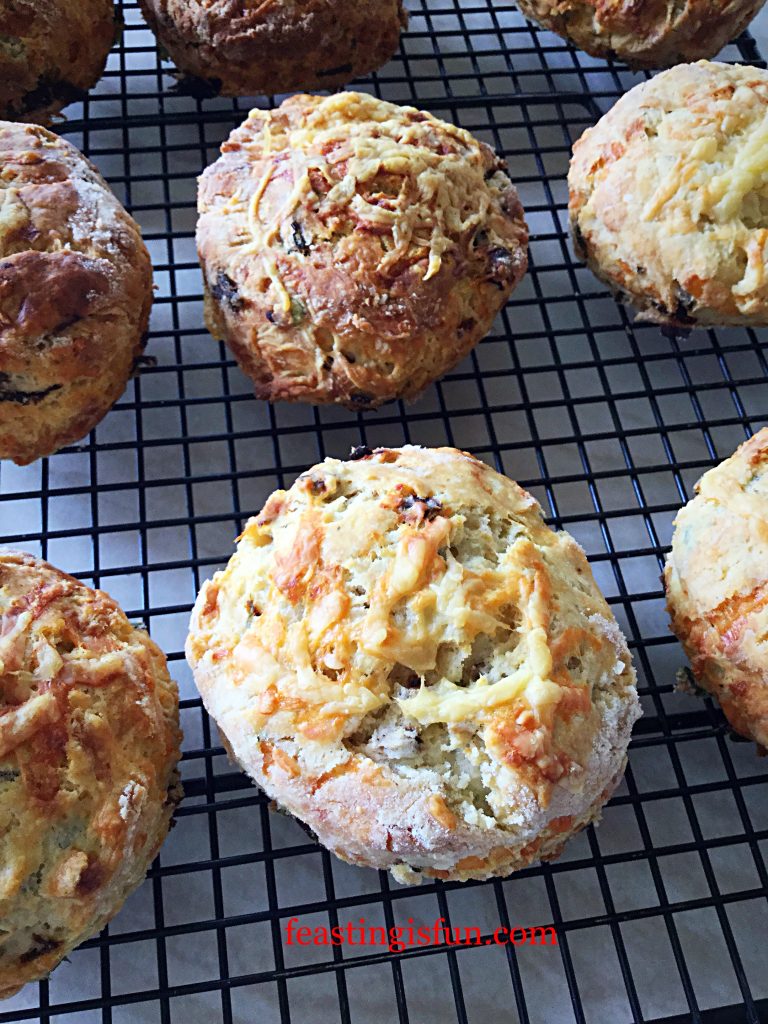
  • Immediately place the scones on to a cooling rack, using a clean tea towel to transfer them as they will be very hot.
FF Cheddar Sun Dried Tomato Scones
Cheddar Sun Dried Tomato Scones cooling on a rack.

Since these scones are at their absolute best when still slightly warm, there is no need to wait for them to completely cool before tasting!

FF Cheddar Sun Dried Tomato Scones
Cheddar Sun Dried Tomato Scones delicious split with a little butter!

While delicious eaten warm, cool completely before packing into an airtight container to store.

Also the scones can be made ahead, cooled and packed into freezer bags. They will keep for up to one month in the deep freeze. Ideal for making ahead.

If you have enjoyed this recipe for Cheddar Sun Dried Tomato Scones you may also like these:

Beauvale Cheese Walnut Scones

FF Cheddar Sun Dried Tomato Scones
Beauvale Cheese Walnut Scones.

Super Light Scones

FF Cheddar Sun Dried Tomato Scones
Super Light Scones

Goddess Cheese Pine Nut Muffins

FF Cheddar Sun Dried Tomato Scones
Goddess Cheese Pine Nut Muffins

Cheddar Sun Dried Tomato Scones, such a delicious combination of flavours and texture. Also perfect for making ahead and freezing, ready to pop in the oven on a low heat when unexpected guests arrive. Make ahead recipes are my all time favourites. Especially as I never know from one day to the next how my body will be. Fortunately it’s always nice to know that there is good, homemade food in the house.

So, whatever you are making, baking and creating in your kitchens, have fun preparing and sharing your feast.

Sammie xx

No part of this post may be copied. Please see my Disclosure Policy.

Double Chocolate Exam Busting Cupcakes

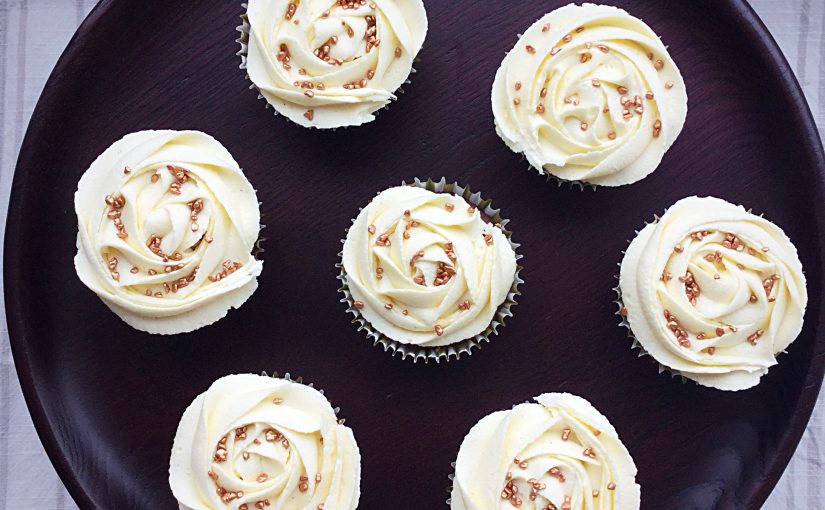
If you are a parent and have children, you will know that from year 6, exams become an important part of their lives. Whether it’s SATS, GCSE’s, A Levels. College or University exams. The end game always focuses on tests or exams. Since today is the start of GCSE’s here in England these Double Chocolate Exam Busting Cupcakes, are designed to lift the spirits and fill the tummies of all students sitting their exams.

FF Double Chocolate Exam Busting Cupcakes
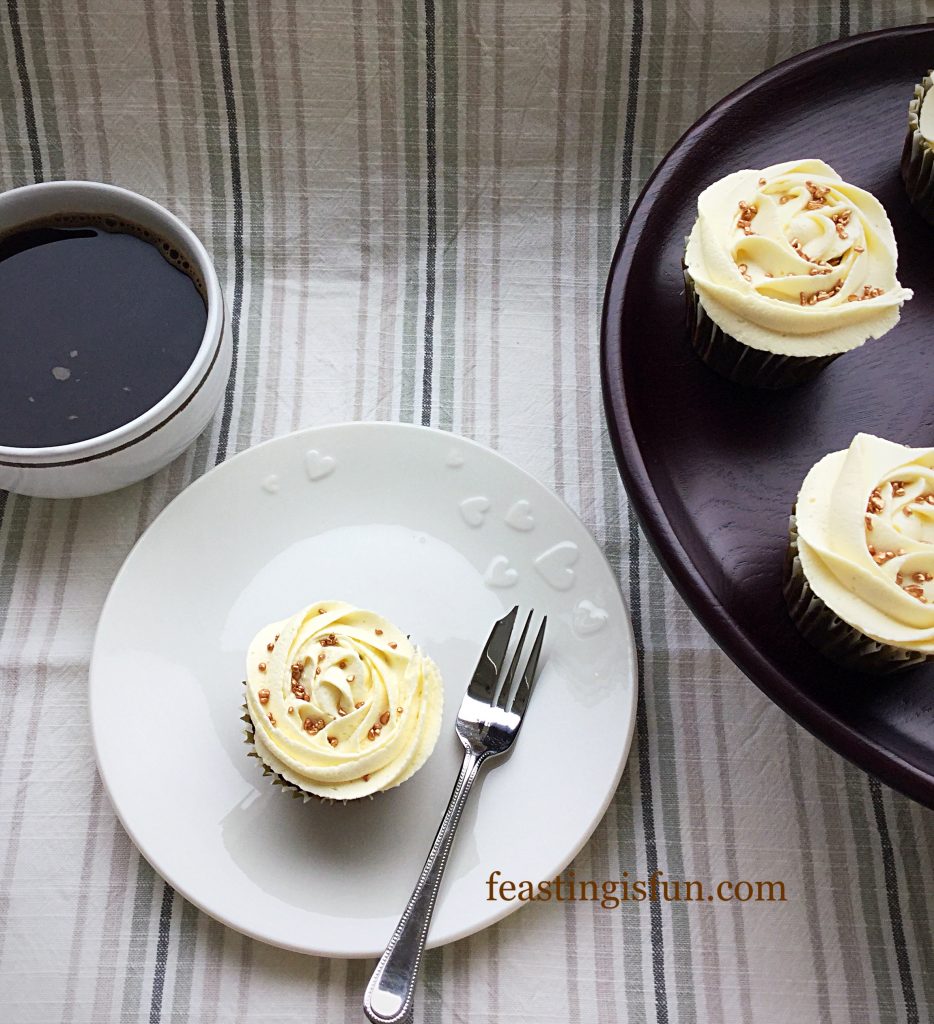
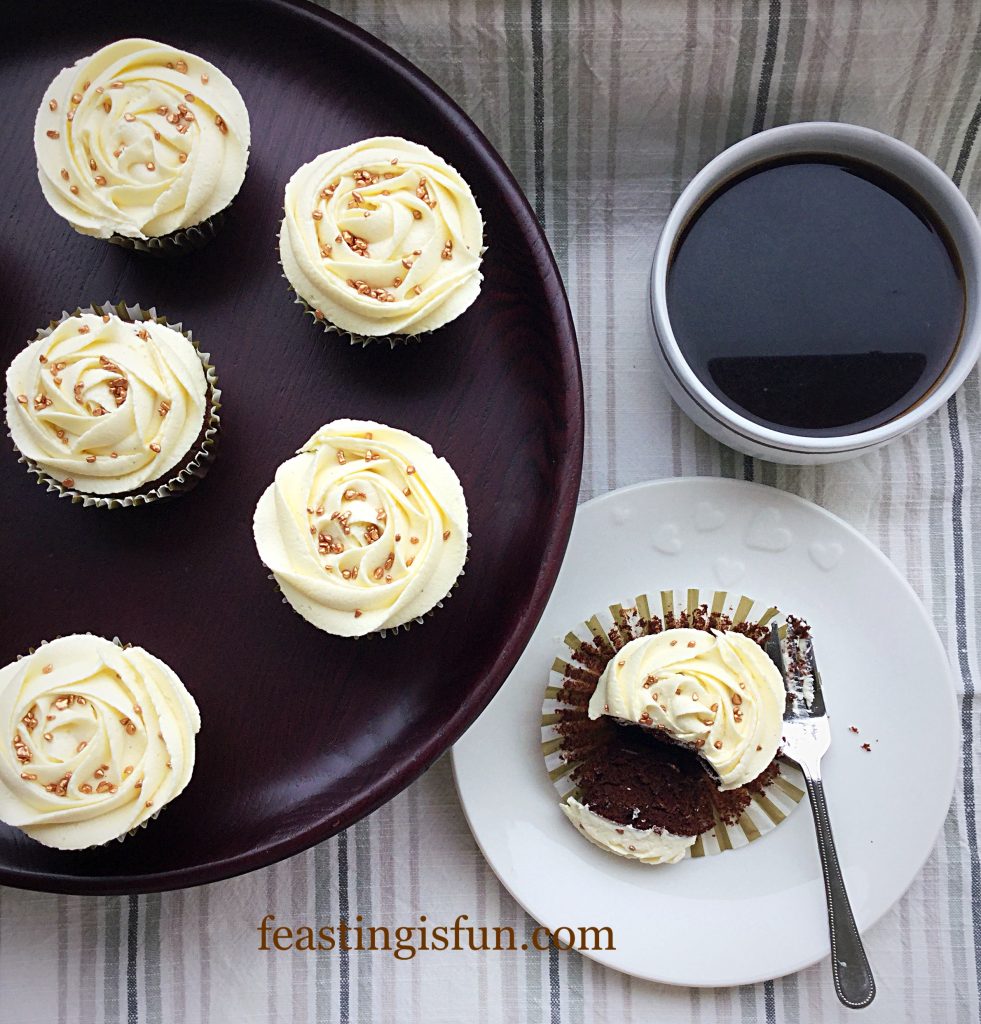
Double Chocolate Exam Busting Cupcakes with coffee – study fuel!

Of course these cupcakes could and should be made all year round, such is their delicious simplicity. Chocolate cake topped with the ultimate white chocolate vanilla frosting. Perfect for chocolate lovers everywhere.

FF Double Chocolate Exam Busting Cupcakes
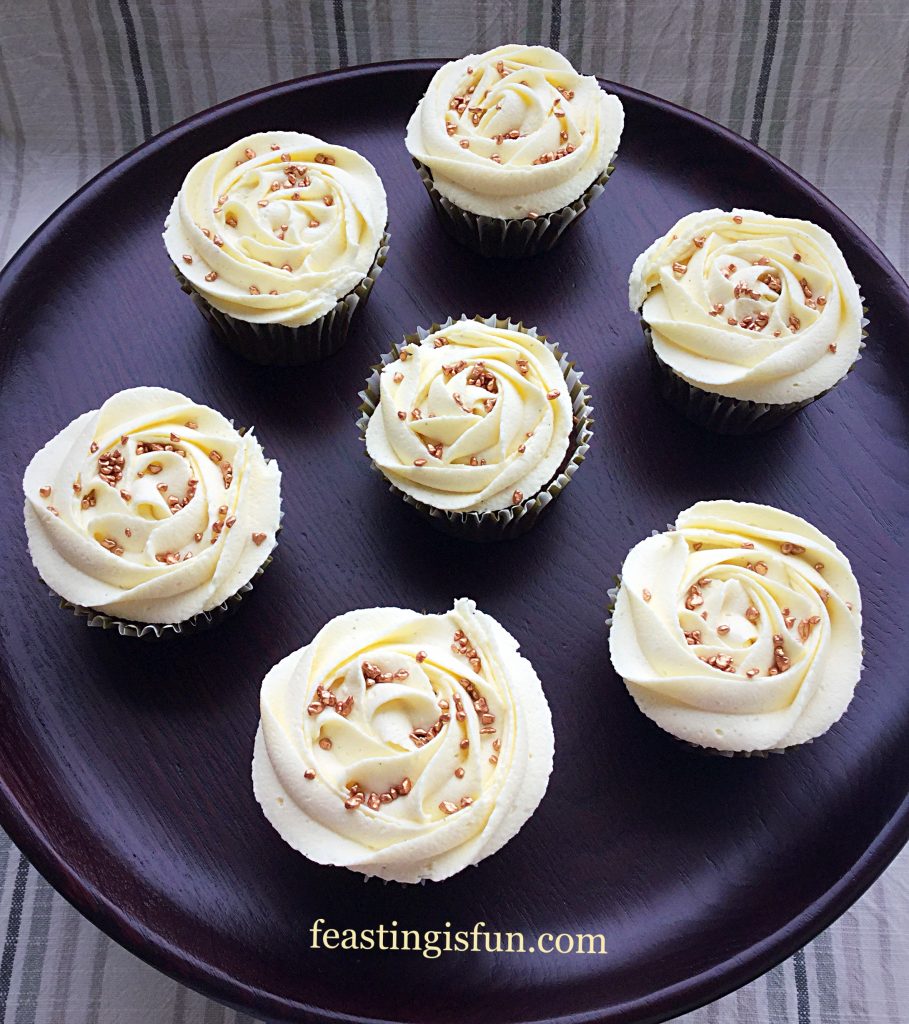
Double Chocolate Exam Busting Cupcakes the reflect balance of flavours.

A quick bake

Since these cupcakes can be made, from start to finish in under an hour, they are also handy for short notice or unexpected guests. Likewise they can be whipped up, literally, in moments. The comforting aroma of home baking, wrapping around your weary children, like a cosy, soft blanket, when they arrive home.

FF Double Chocolate Exam Busting Cupcakes
Double Chocolate Exam Busting Cupcakes comfort at the ready.

While my hard working teens are sitting and studying for their exams, I can be found in the kitchen. Busy rustling up delicious, sustained energy food and lots of treats. The amount of energy burned up during studying is vast. Since this can be a tough time of year for them, their usual ‘healthy’ food intake is topped up with extra yummy goodies!

Recipe: Double Chocolate Exam Busting Cupcakes makes 12

100g/4oz Unsalted Butter – softened to room temperature

50g/2oz Caster Sugar

50g/2oz Light Brown Sugar

1/4tsp Salt – I use Maldon

1tsp Vanilla Extract – I use Nielsen-Massey

3 Large Free Eggs

60g Plain White Flower

1tsp Baking Powder

40g Cocoa Powder – I use Callebaut

For the frosting:

150g/5oz Icing Sugar

75g/3oz Unsalted softened to room temperature

1tsp Vanilla Bean Paste

100g/4oz White Chocolate

Sprinkles of your choice

Method: Preheat the oven to 160C/140C fan, gas mark 3

First of all line a 12 hole cupcake tin with cupcake cases.

Making the cupcakes

  • Into a medium sized bowl add the butter, both sugars and salt. Beat together until the mixture is free from lumps and smooth.
  • Now add the vanilla extract and all three eggs.
  • Sift in the flour, cocoa and baking powder.
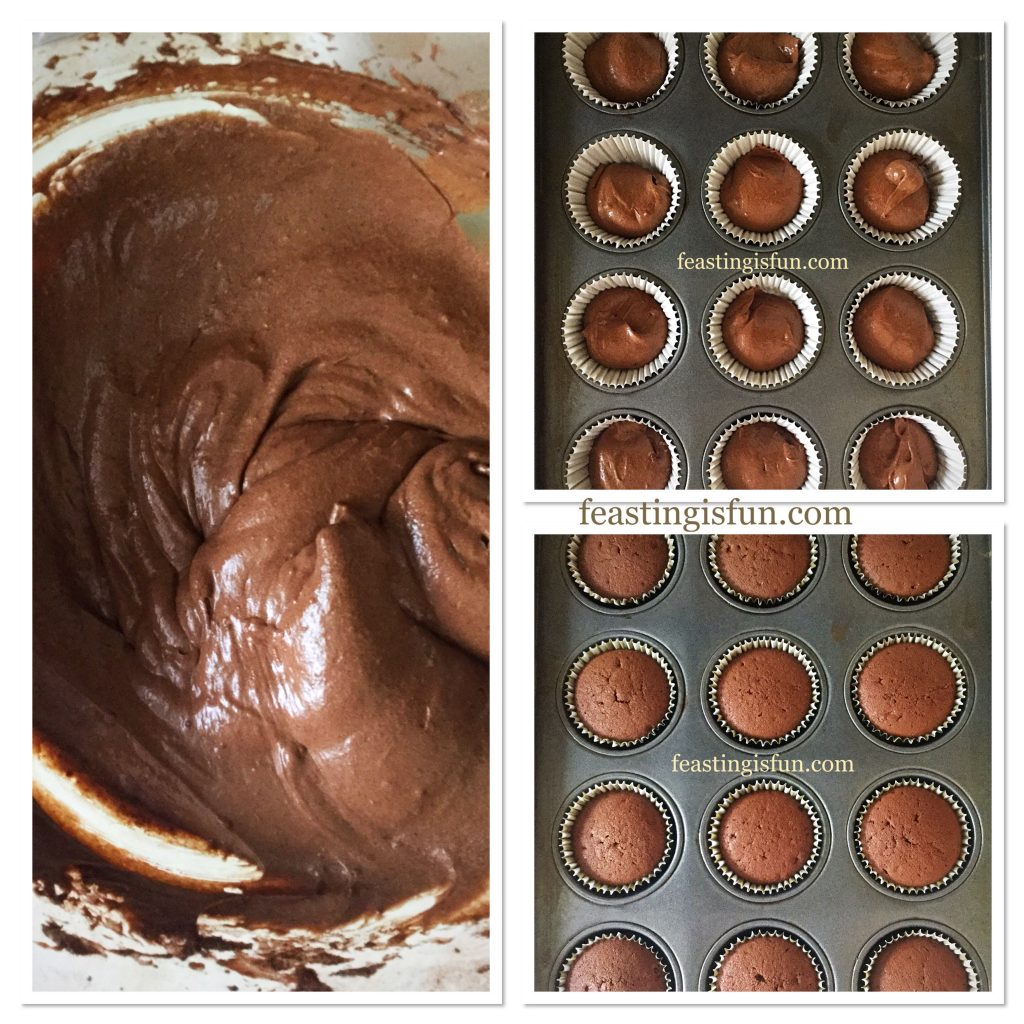
  • Beat/whisk all of the ingredients together until fully mixed.
  • Divide the mixture between the 12 cupcake cases – approximately one dessert spoonful of mixture per case.
  • Place the cupcake tin into the centre of the preheated oven and bake for 25-30 minutes.
  • The chocolate cupcakes are baked when they spring back from a light touch.
  • When baked remove from the oven and allow to cool for 10 minutes  before transferring to a cooling rack. Allow to fully cool.
FF Double Chocolate Exam Busting Cupcakes
Making, filling and baking chocolate cupcakes

Preparing the frosting and decorating the cupcakes

  • Note – due to the high chocolate content of the frosting it is advisable to make it directly before piping, while it is soft.
  • Firstly, break up the white chocolate and place in a heatproof, microwaveable bowl. Set to one side.
  • Into a separate bowl add the icing sugar, butter and one teaspoon of very hot water, from a recently boiled kettle. Whisk until almost combined.
  • Place the bowl with the white chocolate into the microwave. Heat for 20 seconds, stirring in between, until the chocolate is liquid.
  • Pour the warm, melted chocolate in with the butter and icing sugar mixture.
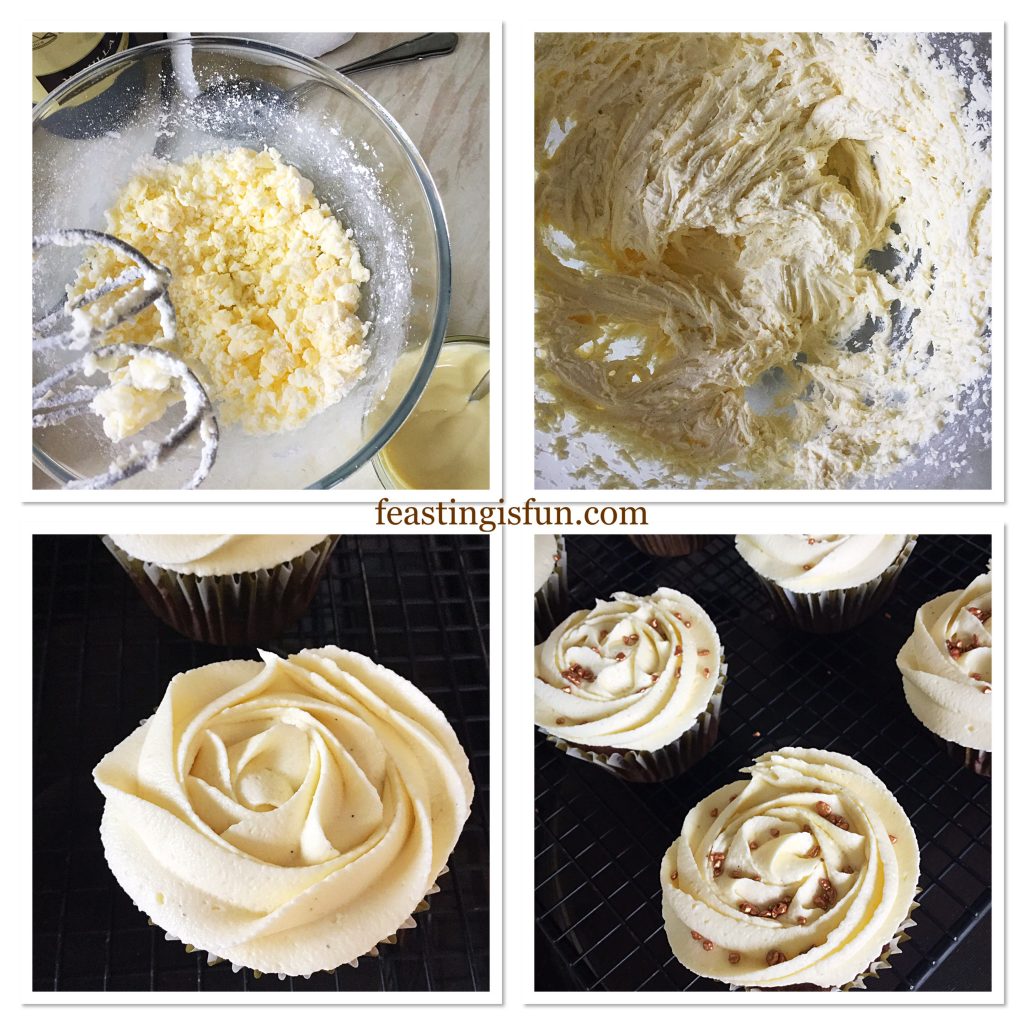
  • Whisk the ingredients together immediately and then continue to whisk until the frosting is light and fluffy. During the whisking add the vanilla bean paste.
FF Double Chocolate Exam Busting Cupcakes
Making the frosting, piping and decorating the chocolate cupcakes.
  • Fit a large piping bag with a large closed star piping nozzle.
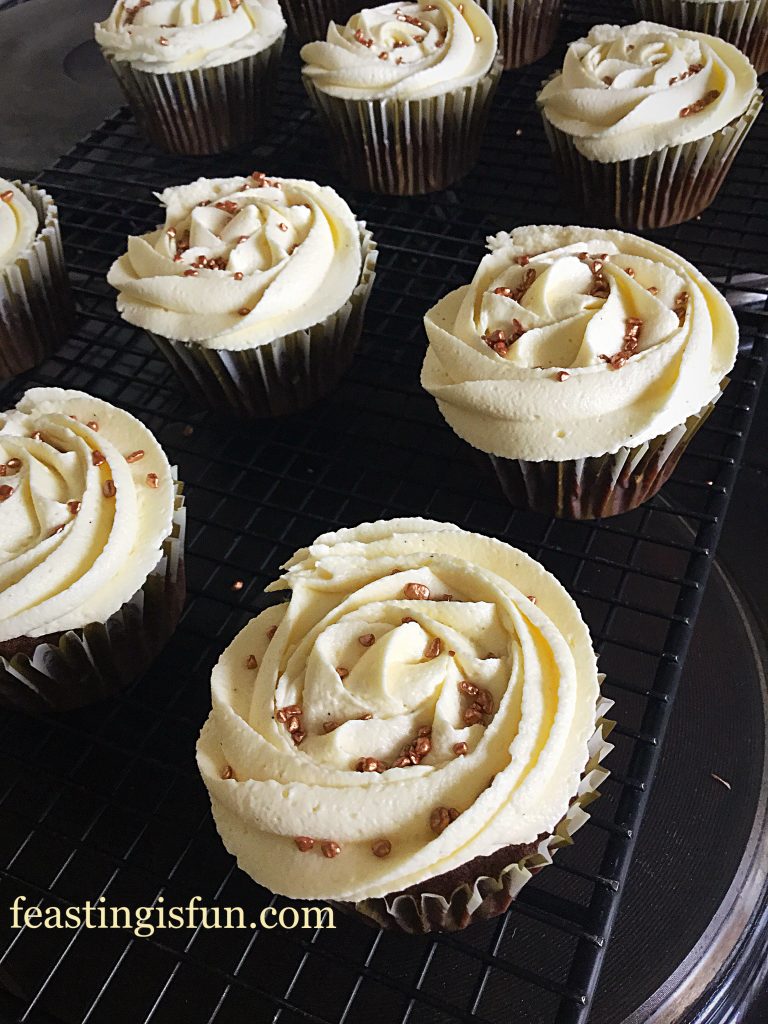
  • Fill the piping bag with the frosting and proceed to pipe rose swirls on each cupcake. Starting in the centre of the cupcake, pipe the shape of an ‘e’ then continue around until the cupcake has a complete swirl on top.
  • Finally, sprinkle over your choice of decoration.
FF Double Chocolate Exam Busting Cupcakes
Double Chocolate Exam Busting Cupcakes so good!

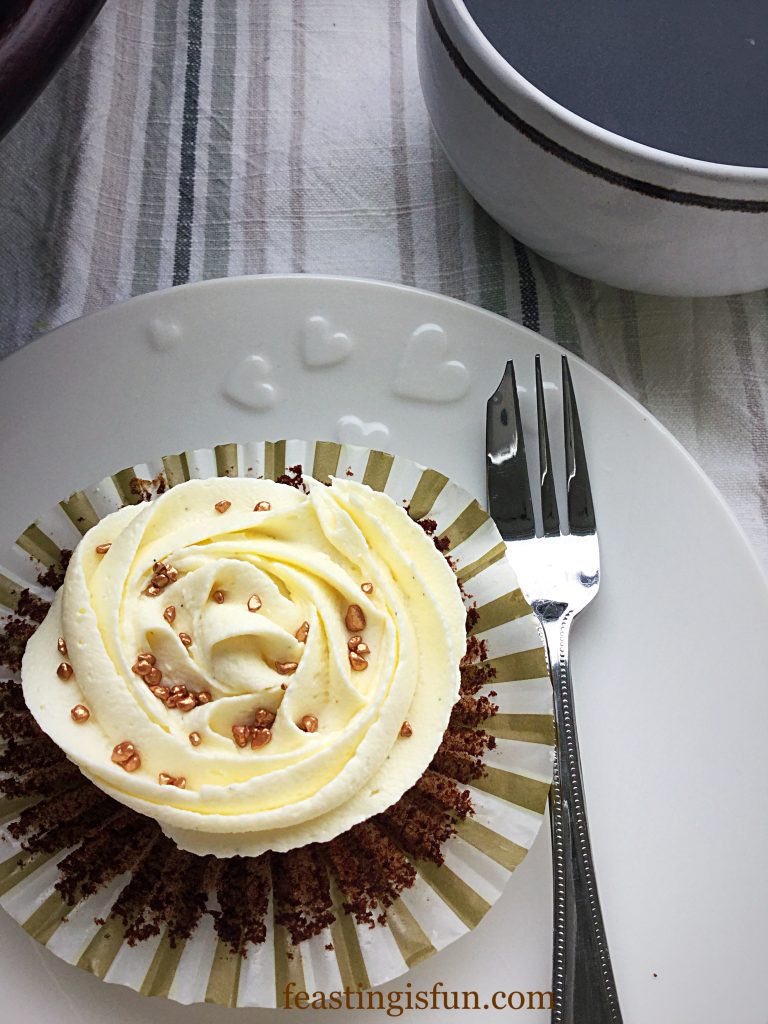
Serve with a hug, smile and a hot drink!

FF Double Chocolate Exam Busting Cupcakes
Double Chocolate Exam Busting Cupcakes much needed.

Store these cupcakes in an airtight container where they will last for three days.

If you have enjoyed this recipe for Double Chocolate Exam Busting Cupcakes you may also like these:

Marshmallow Frosted Mango Cupcakes

FF Double Chocolate Exam Busting Cupcakes
Gluten Free Marshmallow Frosted Mango Cupcakes

Maraschino Cherry Chocolate Drizzle Cupcakes

FF Double Chocolate Exam Busting Cupcakes
Maraschino Cherry Chocolate Drizzle Cupcakes

Cheer Up Chocolate Chip Cookies

FF Double Chocolate Exam Busting Cupcakes
Cheer Up Chocolate Chip Cookies

While cupcakes are delicious, the cookies are for those meltdown moments when the pressure is simply too much. Firstly, so that whoever reads this blog post realises that they aren’t on their own. Sometimes it all gets too much. Fresh air, good music and a break all help. As do hugs, talking and simply letting it all out.

Wishing anyone taking exams, all the very best. If you do your best, no one can expect more of you than that x.

Sammie xx

Lemon Drizzle Whipped Cream Filled Giant Doughnut

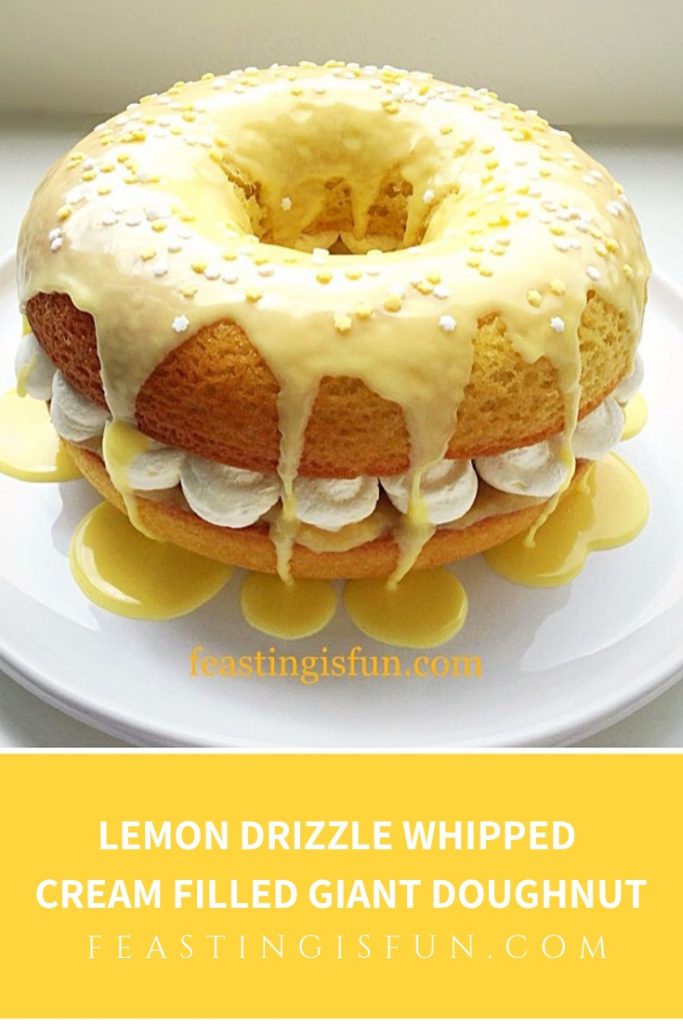
Lemon Drizzle Whipped Cream Filled Giant Doughnut, perfect any time of the year. Most especially when shared with friends and a great cup of tea. Recently having seen a list of the most popular cakes depending on season, there wasn’t any surprise when Lemon Drizzle made all four lists.

FF Lemon Drizzle Giant Doughnut

Lemon Drizzle A National Favourite

Since this week is National Doughnut Week, a baked giant doughnut was the desired way to celebrate in our home. Honestly though, it’s never difficult eating a doughnut! Still this had to be a celebratory doughnut. As mentioned before, lemon drizzle is not only the Nation’s favourite, it is ours too, here at home.

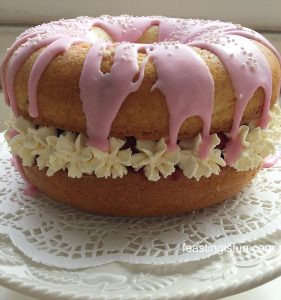
Large baked lemon doughnut filled with whipped cream and topped with a lemon drizzle icing.
Lemon Drizzle Whipped Cream Filled Giant Doughnut

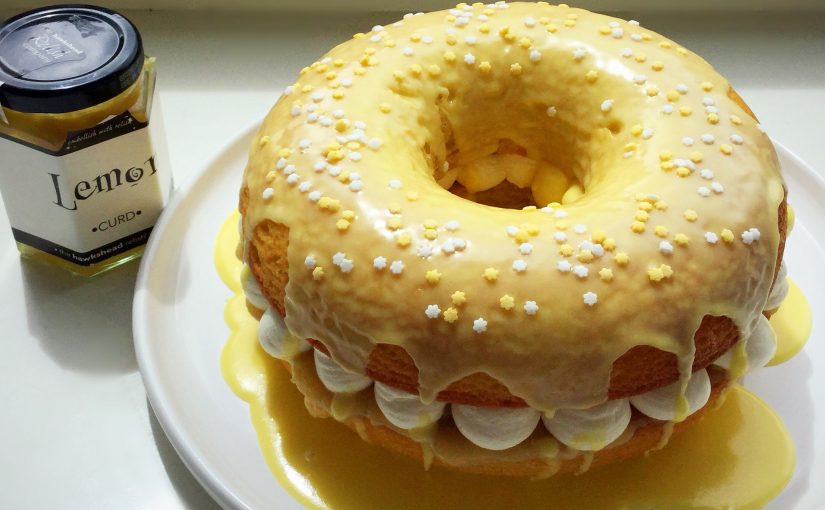
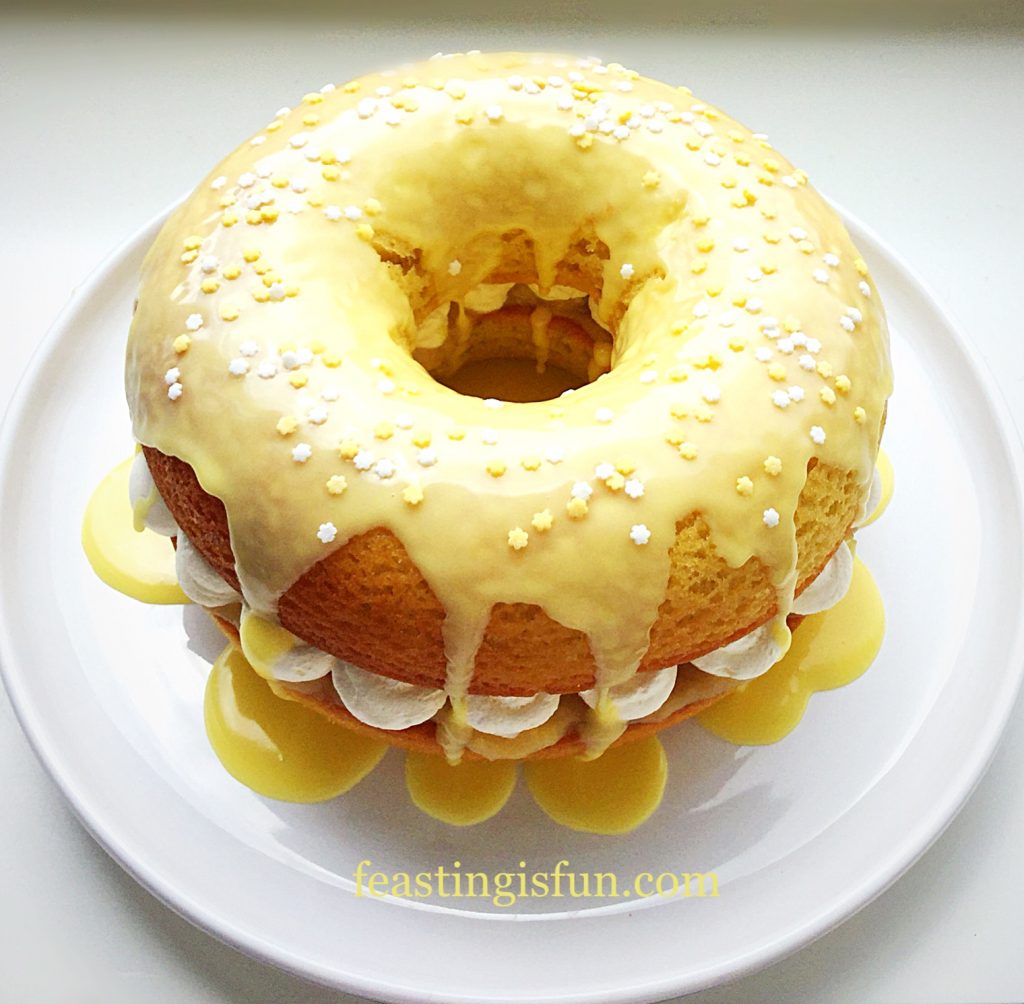
Light, lemon sponge, filled with the best lemon curd from Hawkshead Relish piped, whipped cream. Topped with another deliciously lemon sponge and then drizzled in fresh lemon icing. Finally, finished with colour co-ordinating sprinkles, for fun and added crunch.

FF Lemon Drizzle Whipped Cream Filled Giant Doughnut
The whipped cream cuts through the delicious tart lemon flavours.

Giant Doughnut Or Sandwich Cake?

The silicone moulds needed to bake this giant doughnut are available online, Amazon or from Lakeland. Inexpensive and easy to use, I can guarantee you will not regret buying. Alternatively, this doughnut can also be baked in two 7-8″ sandwich, cake tins. Perhaps add the moulds to a birthday or Christmas list?

FF Lemon Drizzle Whipped Cream Filled Giant Doughnut
Lemon Drizzle Whipped Cream Filled Giant Doughnut dessert anyone?

Due to the flavour and presentation of this bake, it is perfect to serve for dessert, or any time you have friends or family pop round.

Recipe: Lemon Drizzle Whipped Cream Filled Giant Doughnut serves 8-10

200g/7oz Unsalted Butter softened to room temperature – plus a little extra to grease the moulds

200g/7oz White Caster Sugar

1/8th tsp Salt – I use Maldon

5 Large Free Range Eggs

1tsp Vanilla Extract – I use Nielsen-Masey

200g/7oz Plain White Flour

2tsp Baking Powder – note Waitrose is gluten free

1 Large Lemon scrubbed clean – zest of whole lemon and juice of half used in the Sponge batter

Filling and Icing:

3-4 tbsp Lemon Curd – I use Hawkshead Relish

1/2 juiced lemon – see above

200g/7oz Icing Sugar

Optional – Yellow Gel Food Colouring – I use Wilton

300ml Double/Heavy Cream

Sprinkles of your choice

Method: Preheat the oven to 160C/140C fan, gas mark 3, 325F

Making And Baking The Lemon Doughnut Halves

  • First of all, grease the silicone moulds well, with softened butter.
  • Now into a large bowl add the caster sugar, butter and salt. Whisk/beat until very pale and fluffy.
  • Next, add the vanilla extract, lemon juice and sift in the flour and baking powder. Lastly add the lemon zest.
  • Finally mix all of the ingredients on slow, or by hand. This is called the all-in-one method and works particularly well with this recipe.
  • Divide the mixture between the two moulds and place them on separate baking trays.
  • Place the baking trays, evenly spaced in the preheated oven.
  • The doughnut sponge will take between 30 and 40 minutes to bake.
  • The sponge is baked when golden in colour and springs back from a light touch.
  • Once baked remove the moulds from the oven. Allow to cool for 5 minutes and then turn out the doughnut sponge halves onto a cooling rack.
  • While the sponges are cooling, the lemon drizzle icing can be made.
FF Lemon Drizzle Whipped Cream Filled Giant Doughnut
Creating, making and baking the giant doughnut.

Decorating The Lemon Drizzle Whipped Cream Filled Giant Doughnut

  • Weigh the icing sugar into a bowl containing the juice of half a lemon.
  • If desired add the tip of a cocktail stick, which has been dipped in yellow gel food colouring.
  • Stir vigorously, ensuring a uniform colour. If the icing seems too thick to drizzle add a drop more lemon juice or cold tap water.
  • Cover the icing with cling film placed directly in contact with the top of the yellow icing. Doing so stops the icing from drying out.
  • For the whipped cream, pour 300mls of cold cream into a bowl. Whisk lightly until the cream just holds a stiff peak.
  • Place the whipped cream into a piping bag fitted with a round piping nozzle, approximately 1cm diameter. Place the piping bag into the fridge until needed.
  • When the sponges are completely cool, decide which one will be the top and the bottom of the doughnut.
  • Place the bottom doughnut sponge, flat side up on a serving plate.
  • Spoon the lemon curd on top and spread with a knife so that it covers evenly.
  • To pipe the whipped cream, firstly see the picture below. Start just inside the outside edge, piping single ‘blobs’ around the outside. Continue with two more rows of piped cream, until the base is prettily covered.
  • Now place the top of the doughnut evenly on to the base.
  • Spoon the lemon drizzle on to the top sponge, leaving any drips as they add to the finished look.
  • Scatter sprinkles over the drizzle icing while it is still wet.
FF Lemon Drizzle Whipped Cream Filled Giant Doughnut
Building and decorating the Lemon Drizzle Whipped Cream Filled Giant Doughnut.
  • Serve this delicious doughnut chilled and with a smile.
FF Lemon Drizzle Whipped Cream Filled Giant Doughnut
A generous slice of Lemon Drizzle Whipped Cream Filled Giant Doughnut.
FF Lemon Drizzle Whipped Cream Filled Giant Doughnut
Lemon Drizzle Whipped Cream Filled Giant Doughnut

If you have enjoyed this recipe for a Lemon Drizzle Whipped Cream Filled Giant Doughnut then you may also like these:

Strawberry Whipped Cream Giant Doughnut

FF Lemon Drizzle Whipped Cream Filled Giant Doughnut
Strawberry Whipped Cream Giant Doughnut comes with a Gluten Free recipe included.

Chocolate Hazelnut Baked Giant Doughnut

FF Lemon Drizzle Whipped Cream Filled Giant Doughnut
Chocolate Hazelnut Baked Giant Doughnut.

Raspberries and Cream Giant Doughnut

FF Lemon Drizzle Whipped Cream Filled Giant Doughnut
Raspberries Cream Giant Doughnut.

I hope these delicious recipes have shown how versatile the silicone doughnut moulds can be?

The gluten free recipe for the Strawberry Doughnut, also works well for both the Raspberry and Lemon Drizzle doughnuts. Please ensure that any decorations, baking powder are certified gluten free. I am sure that anyone on a restricted diet, would be thrilled with a giant doughnut as a birthday cake!

So, whatever you are making, baking and creating in your kitchens, have fun preparing and sharing your feast.

Sammie xx

No part of this post may be reproduced or duplicated without the written permission of the owner. Pleased see my Disclosure Policy.

National Doughnut Week is 11-18 May 2019. And proceeds from doughnuts sold during this week are donated to The Children’s Trust, which supports children with brain injury. Why not bake some doughnuts and take them to work, selling slices to colleagues and donating the proceeds?


Fruit Filled Butter Scones

Today it is Mother’s Day here in the U.K. A day where we celebrate mums, aunts, grandmothers and other significant women in our lives. My Grandma had a hugely positive input into my upbringing. Indeed it was at her apron strings that I learned the basic fundamentals of baking, that I still employ today. On the day prior to any beach trip, picnic, or family celebration, she would be found, busy baking in the kitchen. I am certain she would enjoy these Fruit Filled Butter Scones.

FF Fruit Filled Butter Scones
Fruit Filled Butter Scones perfect with Afternoon Tea.

While Afternoon Tea consists of small cakes, pastries, finger sandwiches and other sweet or savoury nibbles. Yet, scones, clotted cream and jam are essential element. Also small plates are used as it is small portions that are served. Enough to keep you going until dinner, yet not enough to spoil the main meal later in the day.

FF Fruit Filled Butter Scones
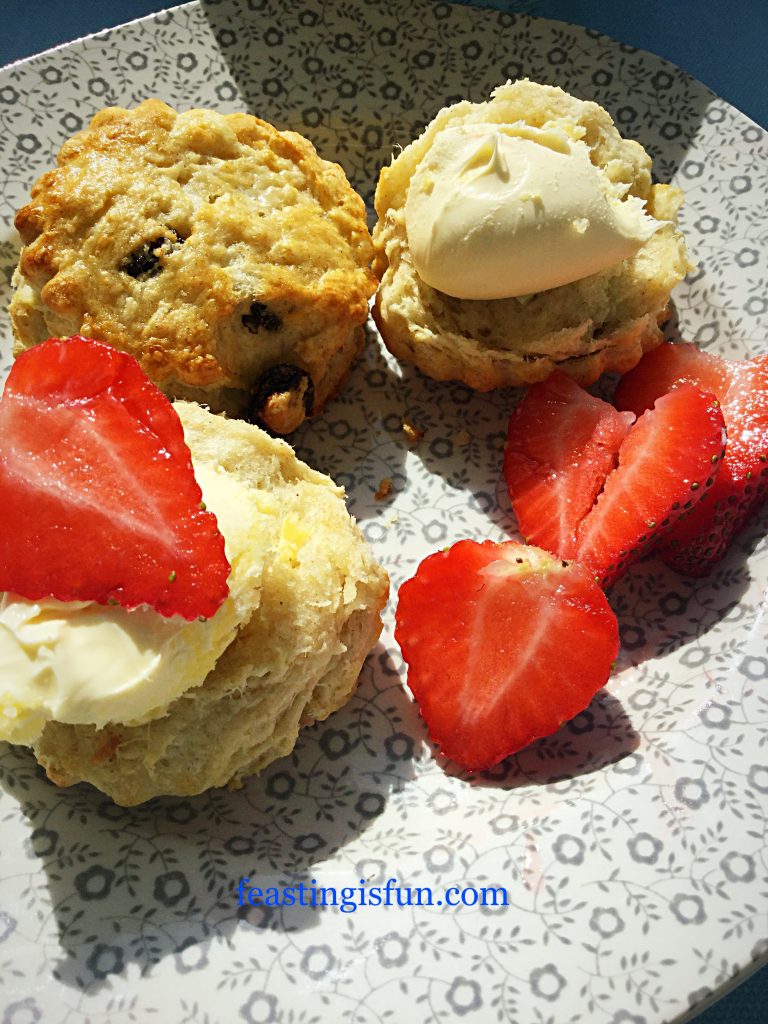
Fruit Filled Butter Scones served with clotted cream and strawberries.

Even young children, supervised by an adult of course, can easily make these scones. Also if you choose not to have clotted cream, these are light, not dry or claggy. So, perfect to eat unaccompanied. Since both the fat and sugar levels are fairly low, they can also be enjoyed by those watching their weight. Or simply want to eat two!

FF Fruit Filled Butter Scones
Flaky layers within the Fruit Filled Butter Scones

Did I mention that they take approximately half an hour from make to bake. So, what’s stopping you?

Recipe: Fruit Filled Butter Scones makes 12 scones

200g/7oz Plain White Flour

2tsp Baking Powder

50g/2oz Cold Unsalted Butter cut into cubes

1/4tsp Salt – I use Maldon

2tbsp Caster Sugar

75g/3oz Sultanas

165mls Buttermilk – alternatively add 1tsp/5mls of lemon juice to 160mls of milk and stir. Wait 5 minutes before using.

1 Free Range Egg plus one tablespoon of milk combined for the egg wash

Method: Preheat the oven to 220C/200C fan, gas mark 7, 425F.

Making the scones

Prior to starting line a large baking tray with baking parchment.

  • First of all, sift the flour, baking powder and salt together in a large mixing bowl. If using sea salt crumble straight into the bowl.
  • Next add in the cubed butter and rub into the flour, or cut into the flour using a pastry cutter. The mixture should resemble breadcrumbs with some pea sized lumps of butter present.
  • Now add in the caster sugar and mix lightly.
  • Make a well in the centre of the ingredients and pour in the buttermilk. Follow by mixing with a butter knife 4-5 times.
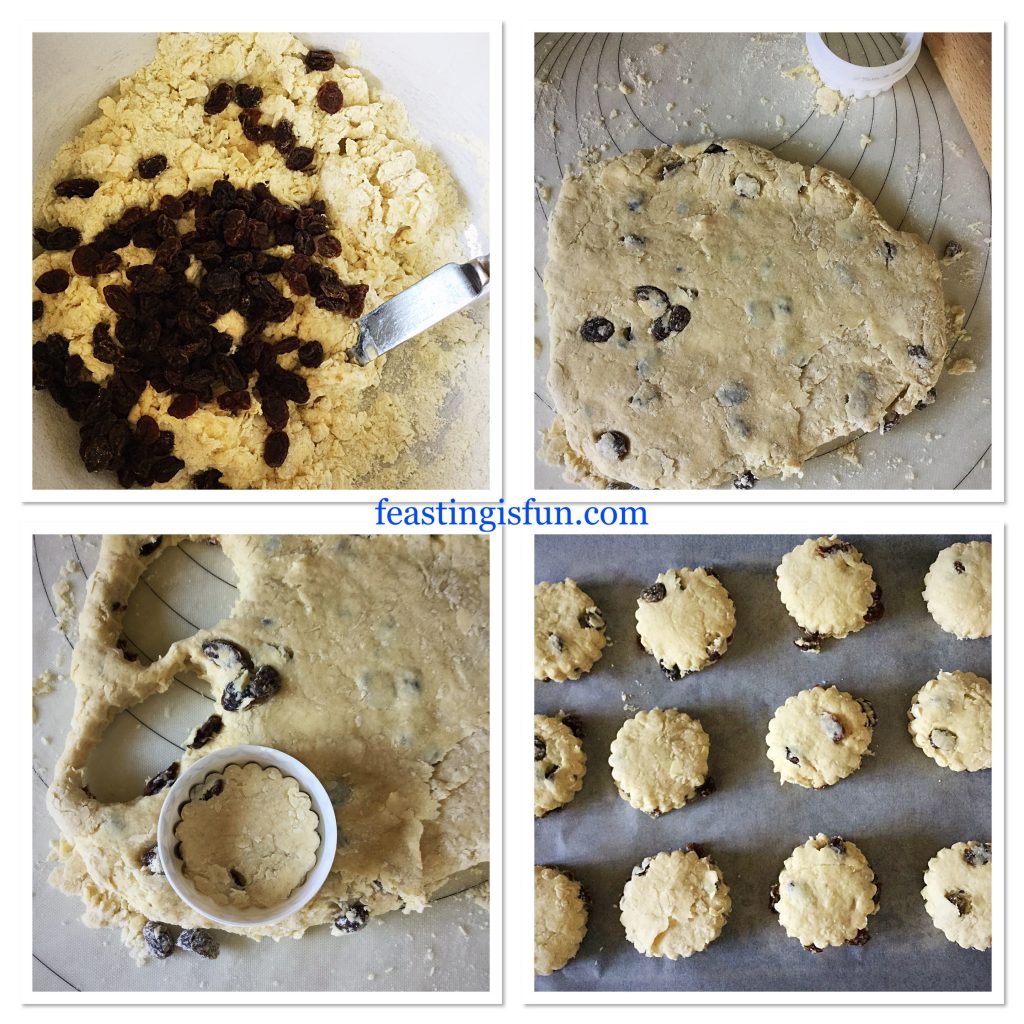
  • Add the sultanas and bring the scone dough together with one hand.
  • Tip the dough out on to a lightly floured, clean surface.
  • Knead the dough lightly until it forms a disc. Gently roll out the disc until it is 2.5cm/1 inch thick.
  • Use a 4cm/just under 2 inch deep cutter to cut out the scones. Do not twist the cutter when pushing down, as this can affect the rise.
  • Place each cutout scone on to the lined baking tray.
  • Combine leftover scone dough pat out and cut out more scones. Continue until all of the dough has been used.
FF Fruit Filled Butter Scones
Making and cutting out the Fruit Filled Butter Scones.

Baking the Scones

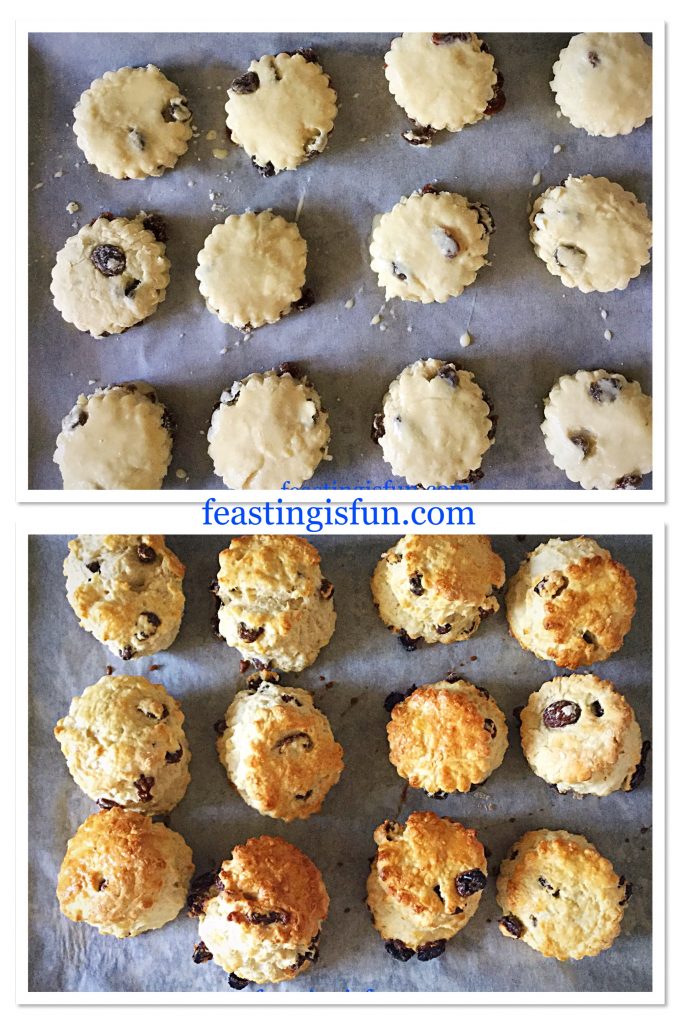
  • Brush the top of each scone with egg wash and then place in the top of the oven to bake for 15-20 minutes.
FF Fruit Filled Butter Scones
Egg washed and then baked.
  • The scones are baked when they are golden, well risen and sound hollow when tapped on the base.
  • As soon as they are baked remove from the oven.
  • Transfer the scones on to a cooling rack.
FF Fruit Filled Butter Scones
Fruit Filled Butter Scones cooling on a rack.

Serve slightly warm or cold. Since these scones have sultanas in, they can be eaten as is, with butter or clotted cream. Also, fresh fruit is nice served alongside. Rather than one single tea, why not offer a selection, including fruit teas.

FF Fruit Filled Butter Scones
Fruit Filled Butter Scones with tea and fresh fruit.

Most of all serve with a smile.

If you have enjoyed these Fruit Filled Butter Scones, you may also like these:

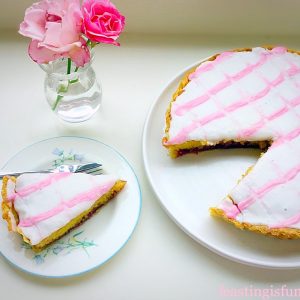
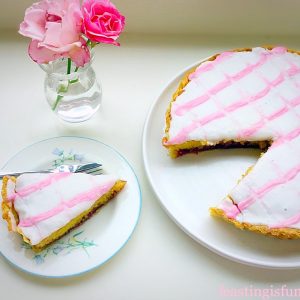
Iced Bakewell Tart

Iced Bakewell Cake
Iced Bakewell Cake

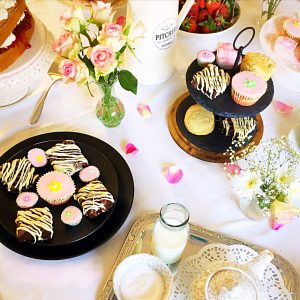
Mother’s Day Afternoon Tea

Afternoon Tea
Afternoon Tea
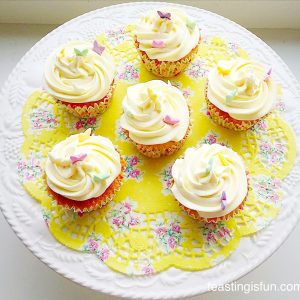
Gluten free marshmallow frosted mango cupcakes
Marshmallow Frosted Mango Cupcakes – GLUTEN FREE

Marshmallow Frosted Mango Cupcakes


Since creating the Mother’s Day Afternoon Tea for Steamer Trading, I have enjoyed continuing to create small, bitesize treats. I absolutely love having making a selection of mini treats. As well as being able to have a little taste of everything, afternoon tea is the perfect opportunity to share. Feasting with family and friends, enjoying conversation and most of all fun. For me sharing it with those I love, building bonds and creating new memories.

So, whatever you are making, baking and creating in your kitchens, have fun preparing and sharing your feast.

Sammie xxx

No part of this post may reproduced or duplicated without the written permission of the owner. Please see my Disclosure Policy.


Steamer Trading Host Mother’s Day Afternoon Tea

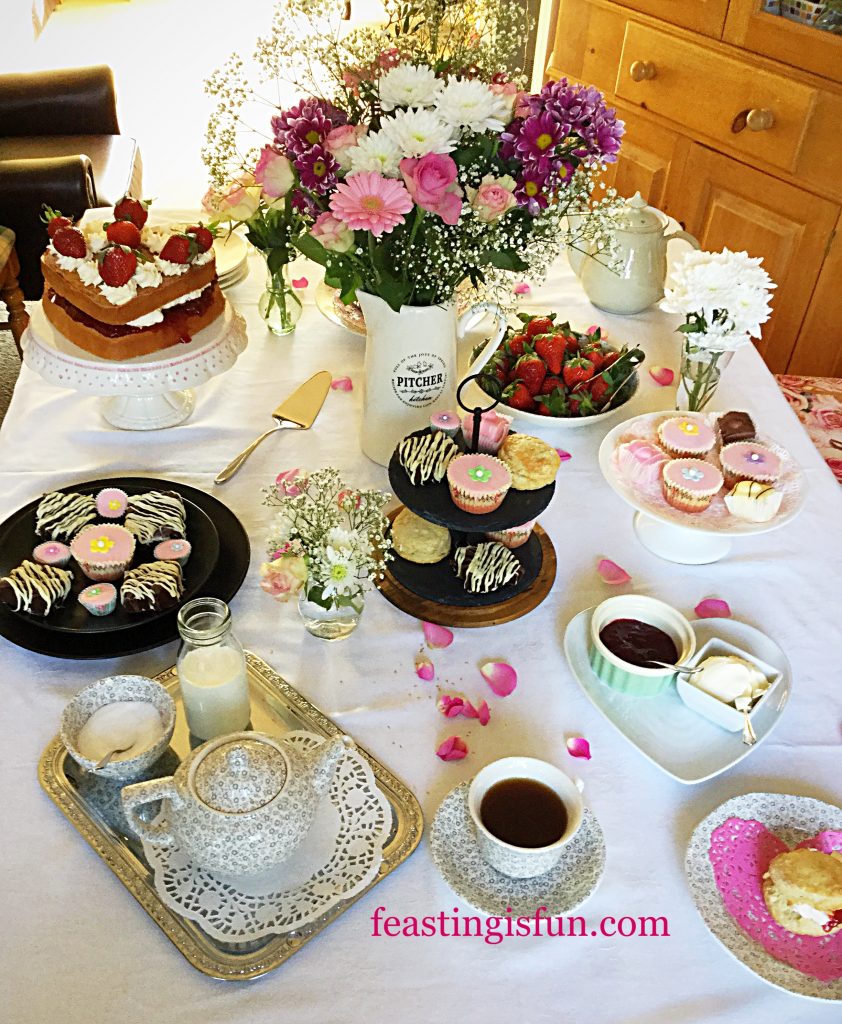
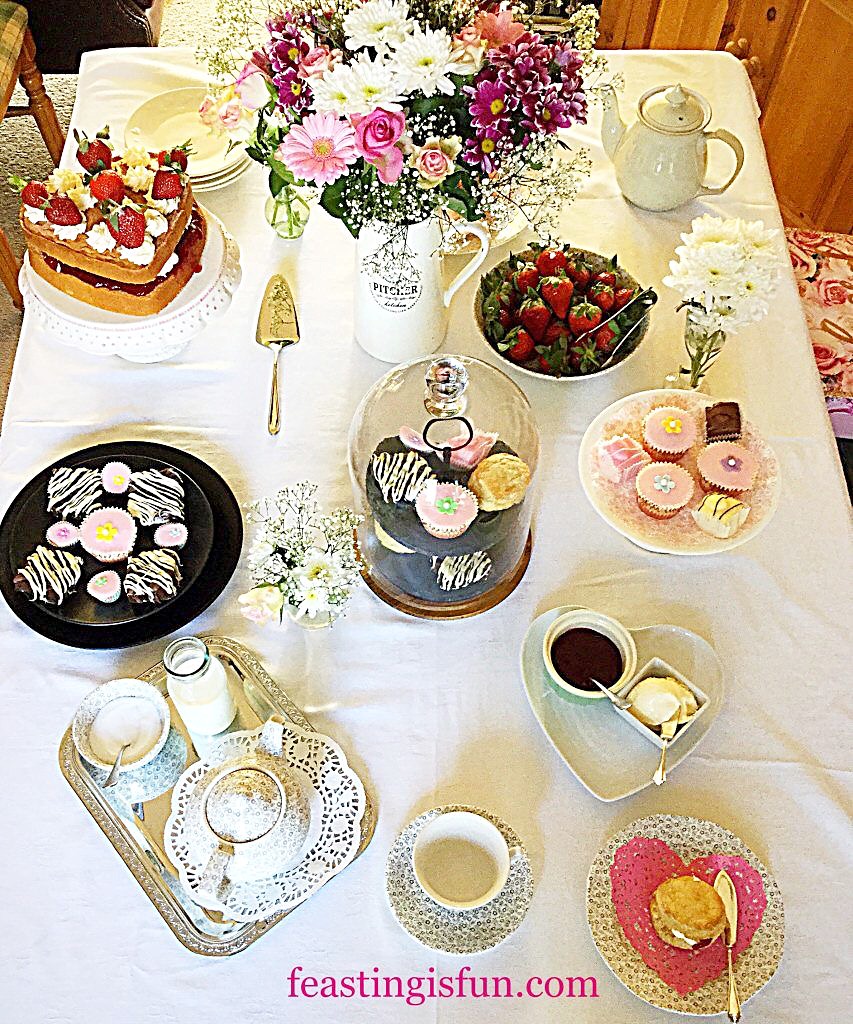
Mother’s Day will soon be upon us. Sunday March 26th 2017 here in the U.K. To help celebrate Mothering Sunday, Steamer Trading asked me to help them set up an Afternoon Tea. I jumped at the opportunity, knowing that the quality and variety of kitchen and cookware they sell is outstanding. While also confident that some easy bakes would partner perfectly with beautiful table and bakeware. See for yourself how Steamer Trading Host Mother’s Day Afternoon Tea.

FF Steamer Trading Host Mother's Day Afternoon Tea
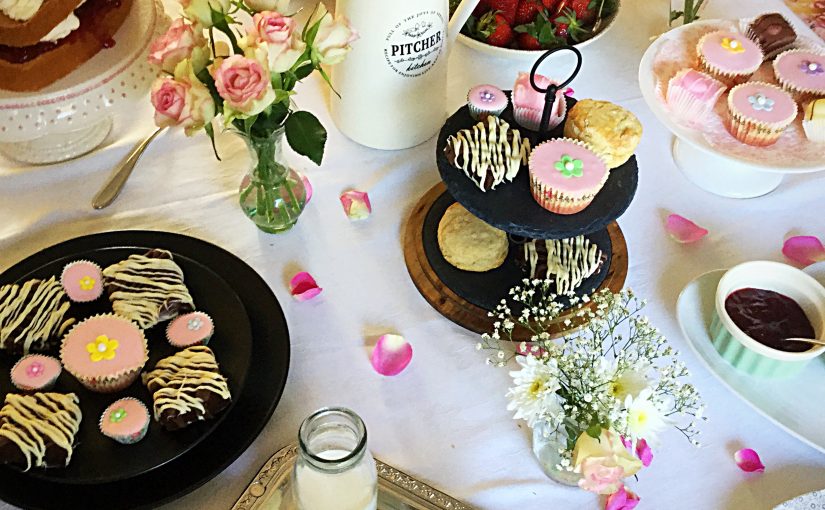
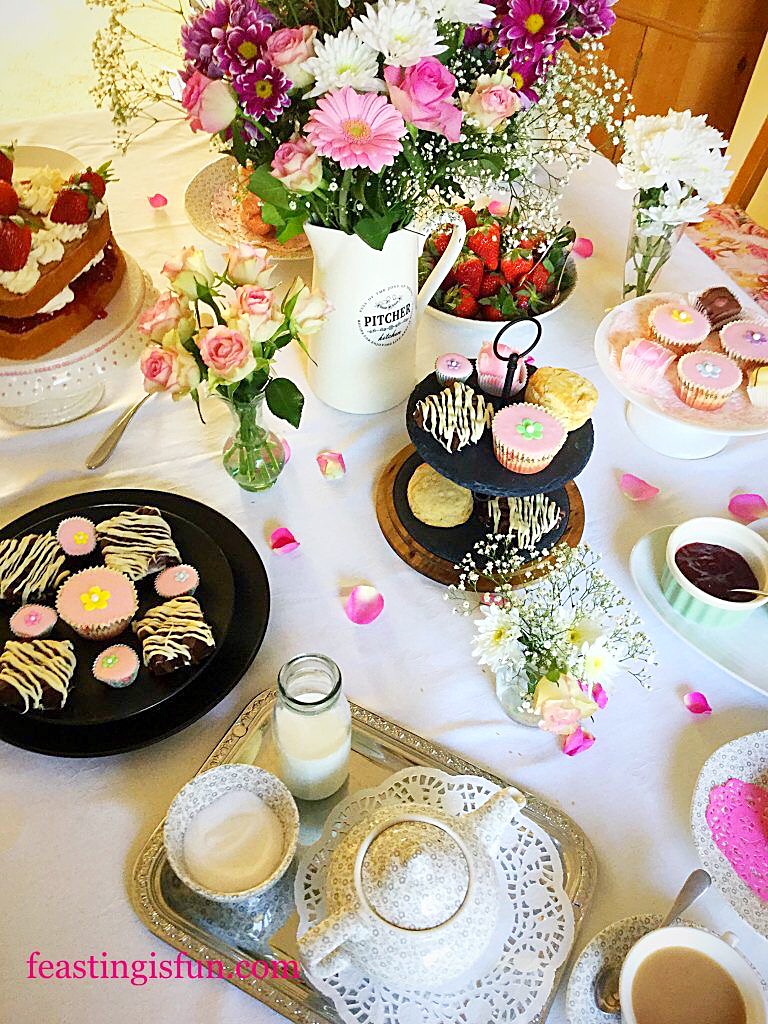
Steamer Trading Host Mother’s Day Afternoon Tea beautifully laid out delightful sweet treats.

Homemade cakes and treats always taste much better than shop bought. If, however, baking is an area where confidence is lacking here’s the perfect solution. Buy a few pretty cakes and then make the scones, Super Light Scones . Since this recipe is the easiest on Feasting is Fun and guaranteed to bring a smile to Mum’s face. Add a pot of luxurious clotted cream and strawberry jam to turn this Afternoon Tea into a real feast!

FF Steamer Trading Host Mother's Day Afternoon Tea
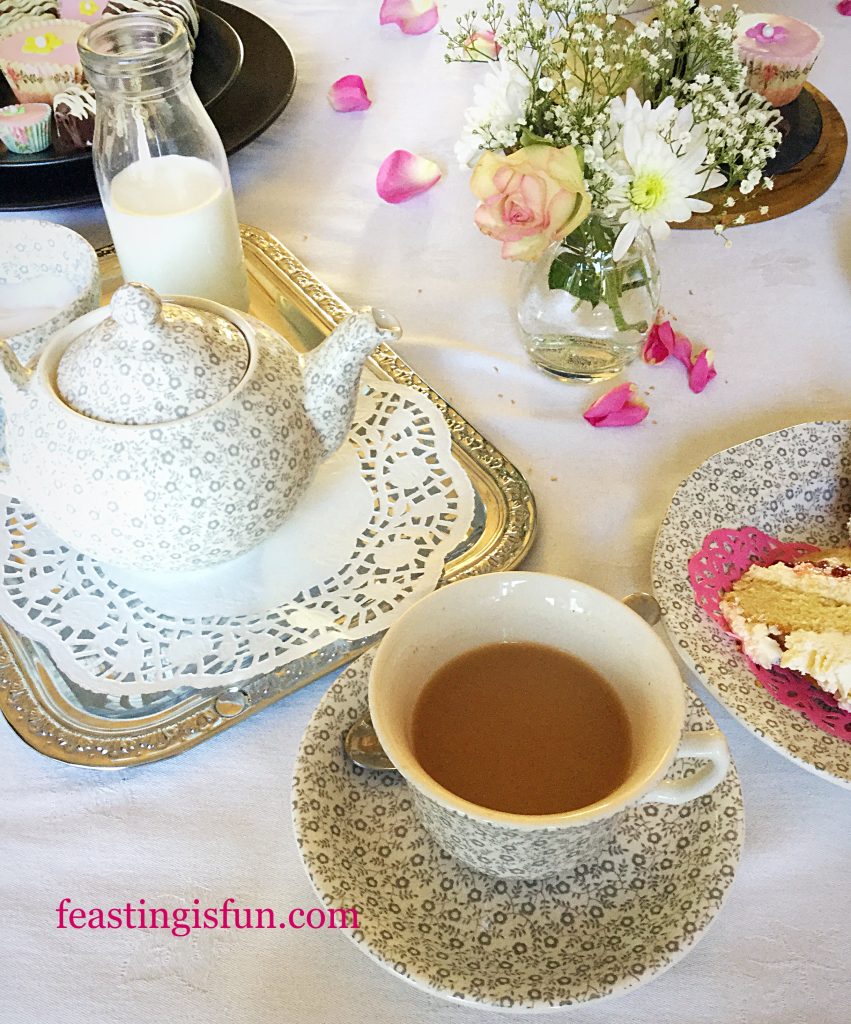
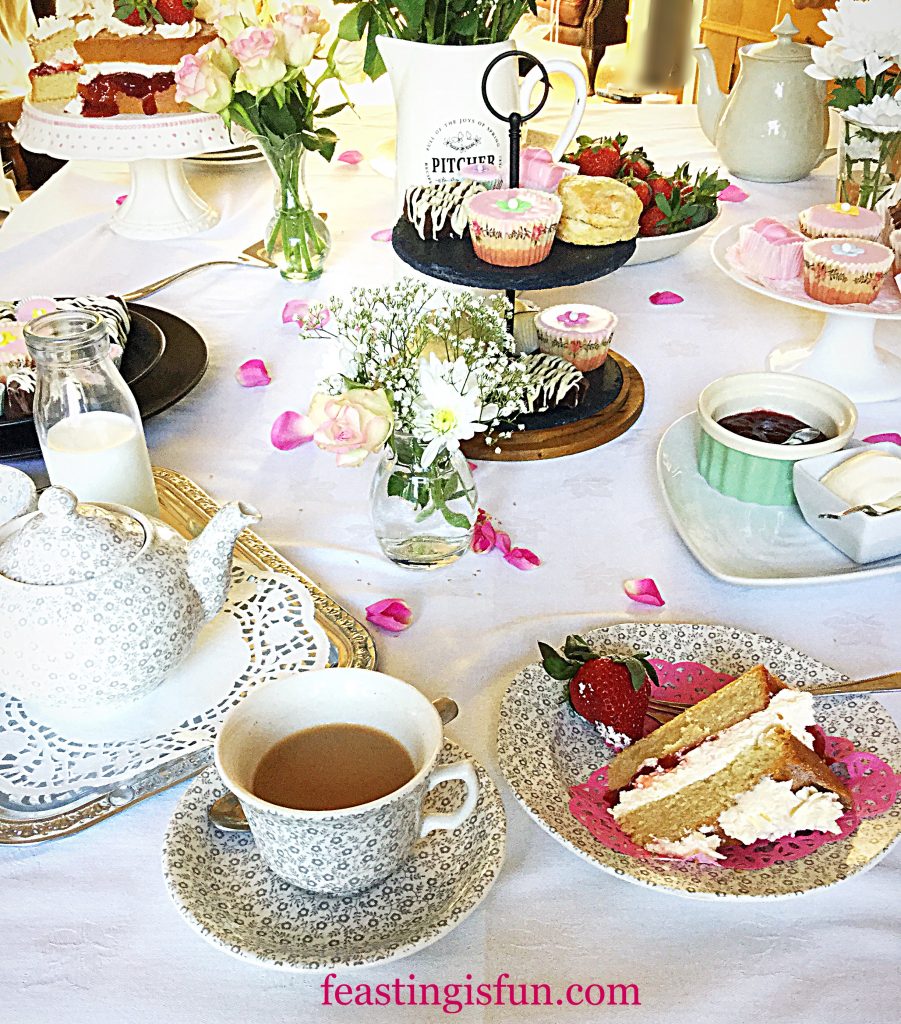
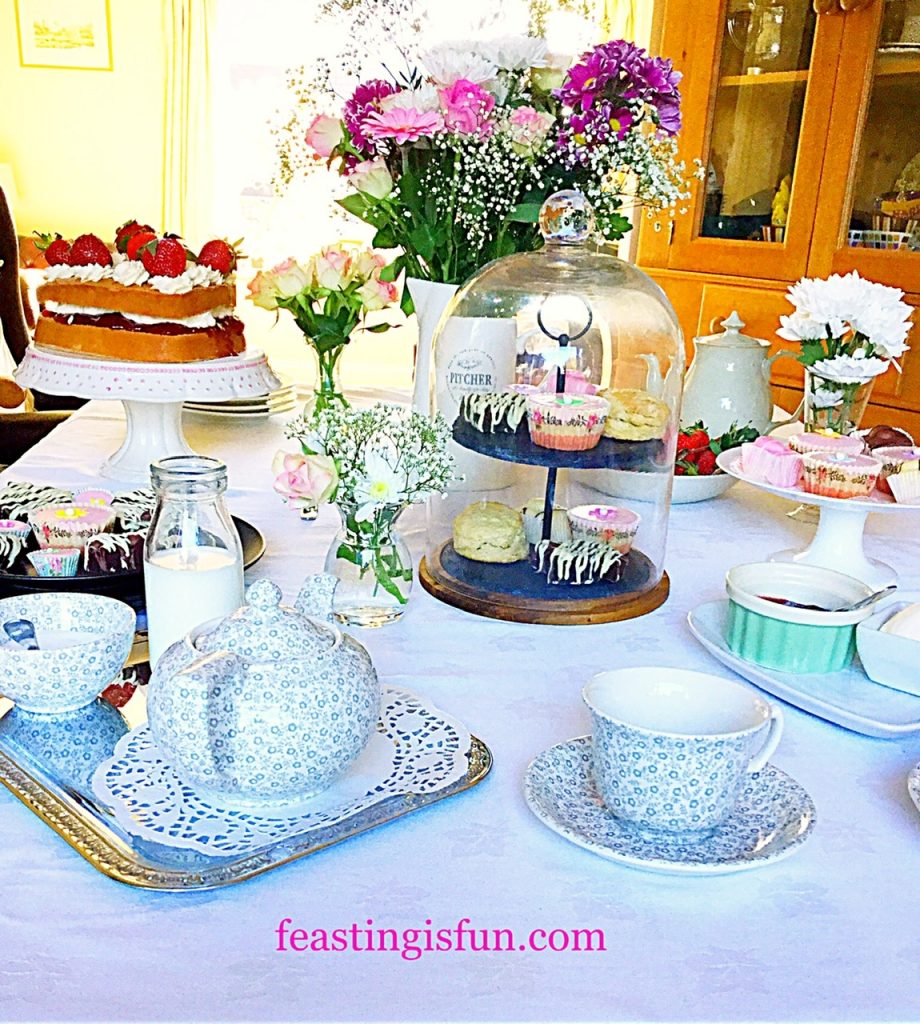
Afternoon Tea using the Burleigh Felicity tea set

Afternoon Tea Needs A Tea Set

No Afternoon Tea is complete without a beautiful tea set. Having been sent a Burleigh Felicity Teapot I decided to start a collection. Tea cup and saucer, large dinner plate, side plate, pasta bowl and finally a sugar bowl. All bought to start my own collection. As a result I am now building a complete set. The pattern and style have a timeless quality and style.

FF Steamer Trading Host Mother's Day Afternoon Tea
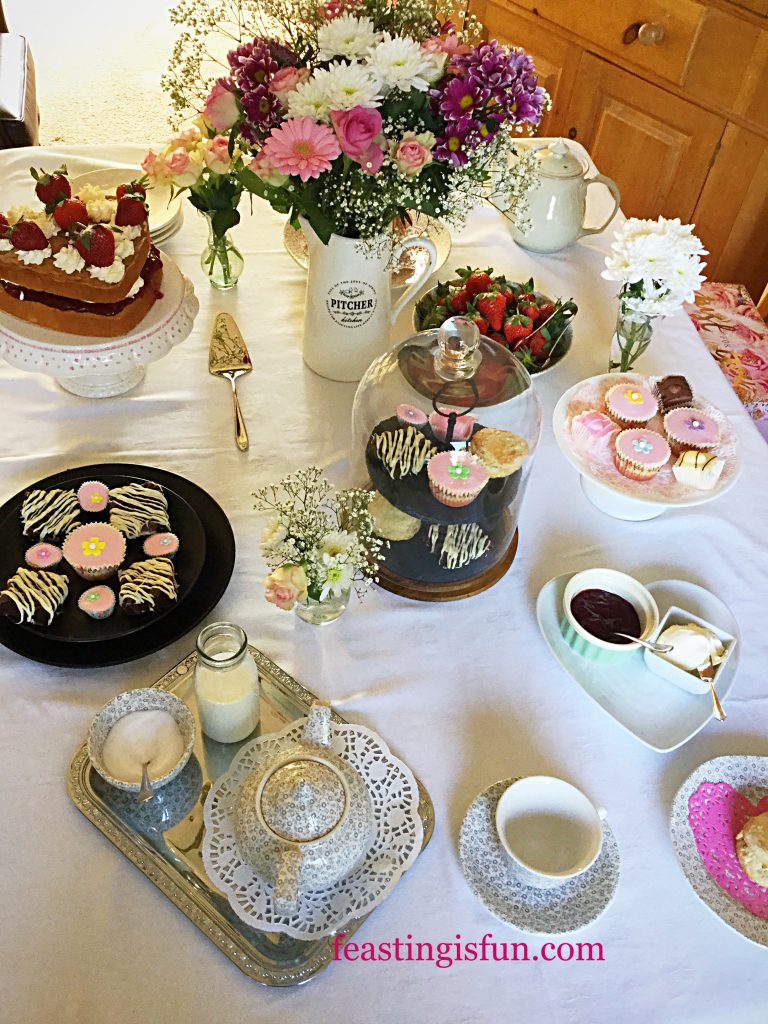
The domed two tier cake stand takes centre stage.

Putting Afternoon Tea On Display

Within the items sent to me is this Domed Slate Cake Stand. Perfect for keeping bugs out and cakes fresh. Since the slate cake stand also stands alone, the wooden base and dome may also be used to display another tasty item. Maybe cheese and crackers. Most of all, the packaging keeps the cake stand and dome well protected between use. While the slate is sturdy and creates a solid background on which to display the cakes.

FF Steamer Trading Host Mother's Day Afternoon Tea
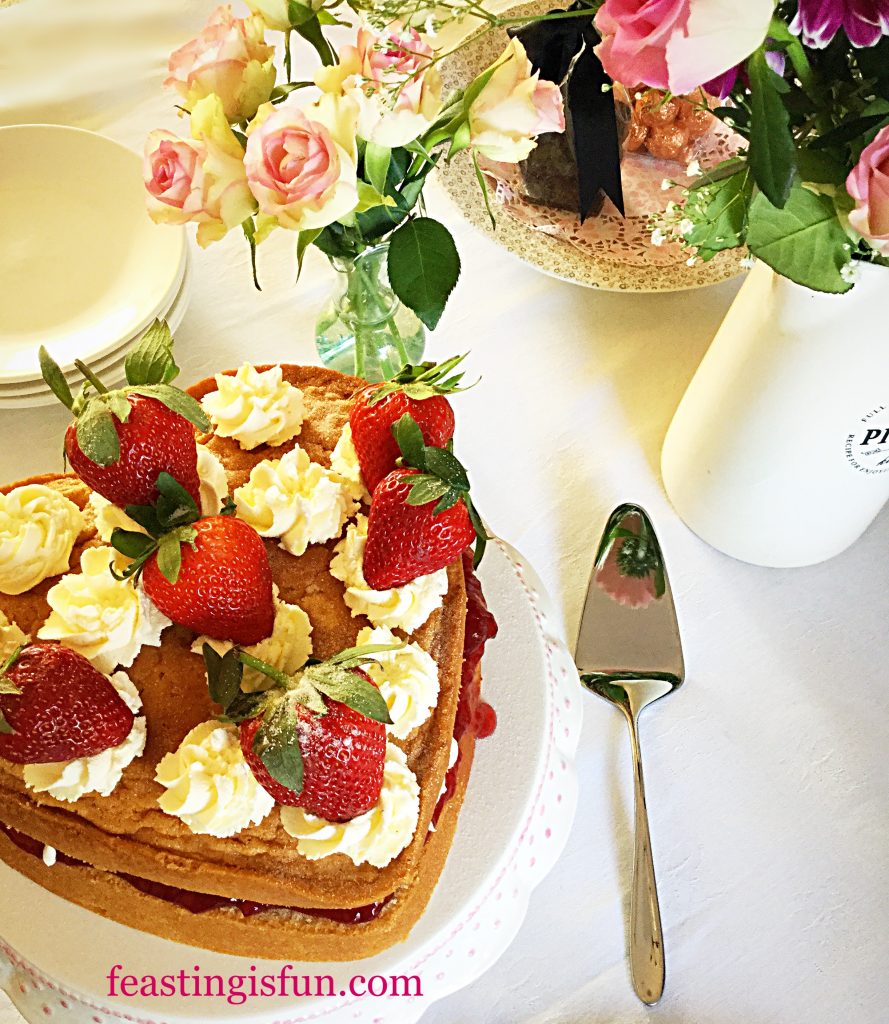
Heart shaped Strawberry and Cream Victoria Sponge.

Baked And Served With Love

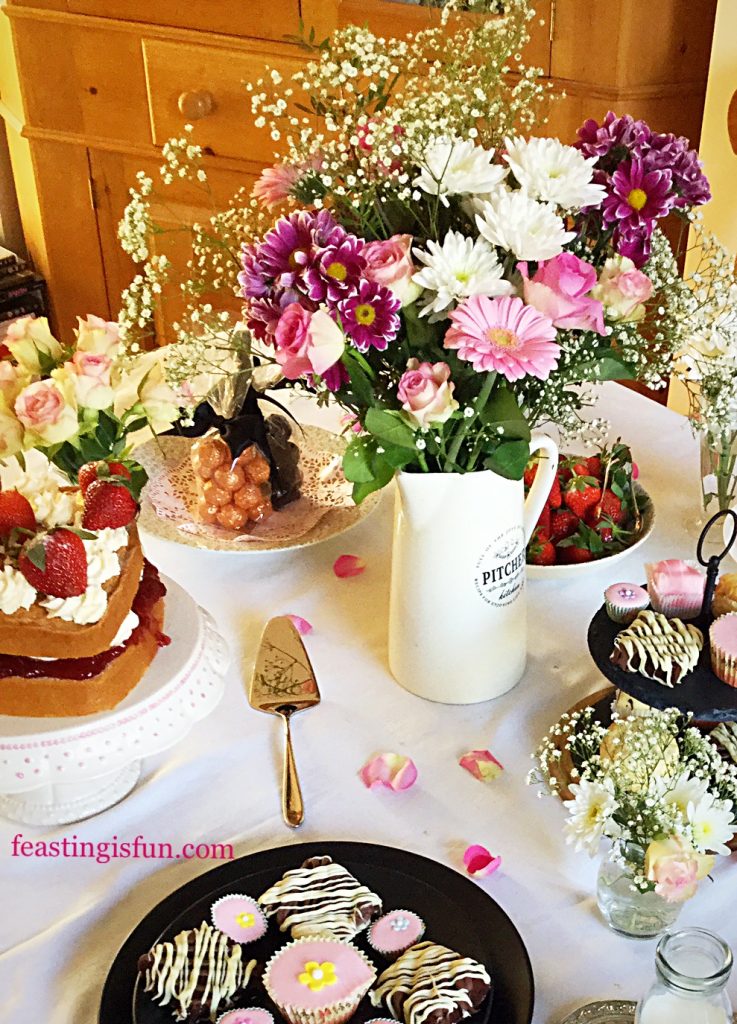
Pictured above is Sophie Conran Cake Server. Highly polished, with a simple, smooth design. As beautiful sitting on the table as it is practical in serving the Heart Shaped Strawberry and Cream Victoria Sponge Cake. Baked using the  Springform Heart Tin. In addition to baking cakes, because of the springform element, this tin would be especially good for creating cheesecakes.

Afternoon Tea table laid out with cakes, tea, flowers, fruits and chocolates.
A beautifully laid out Afternoon Tea.

Bowls of fresh strawberries with both large and smaller vases of flowers enhance not only the table setting, but add to the special theme of Mother’s Day. Also, they can be wrapped up, alongside any leftover cakes and scones, for Mum to take home with her. As a result Mum receives a double treat. After all, Mother’s Day is a special day, set aside to thank Mothers.

FF Steamer Trading Host Mother's Day Afternoon Tea
Tiny little Turkish Delight cakes along with regular cupcakes add quaintness to the pretty table setting.

Bite Size Cakes

Since being sent Masterclass Mini Muffin Tin, I made tiny, pixie cupcakes. Turkish Delight in flavour, their larger cupcake cousins were also baked. Impressed with the strength, non stick coating and durability of the mini muffin tin, I will definitely look to this brand for larger fairy cake and cupcake tins.

FF Steamer Trading Host Mother's Day Afternoon Tea
Treat Mum to a special Afternoon Tea in your own home.

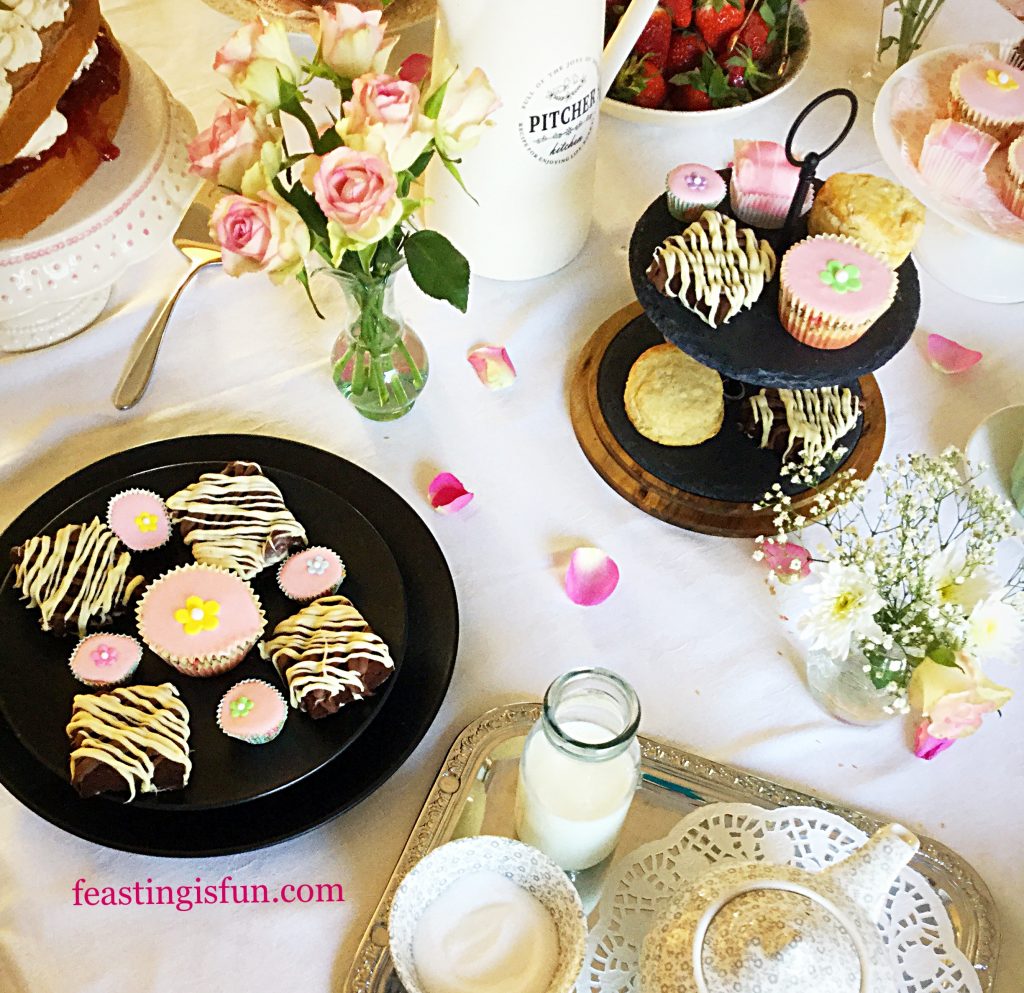
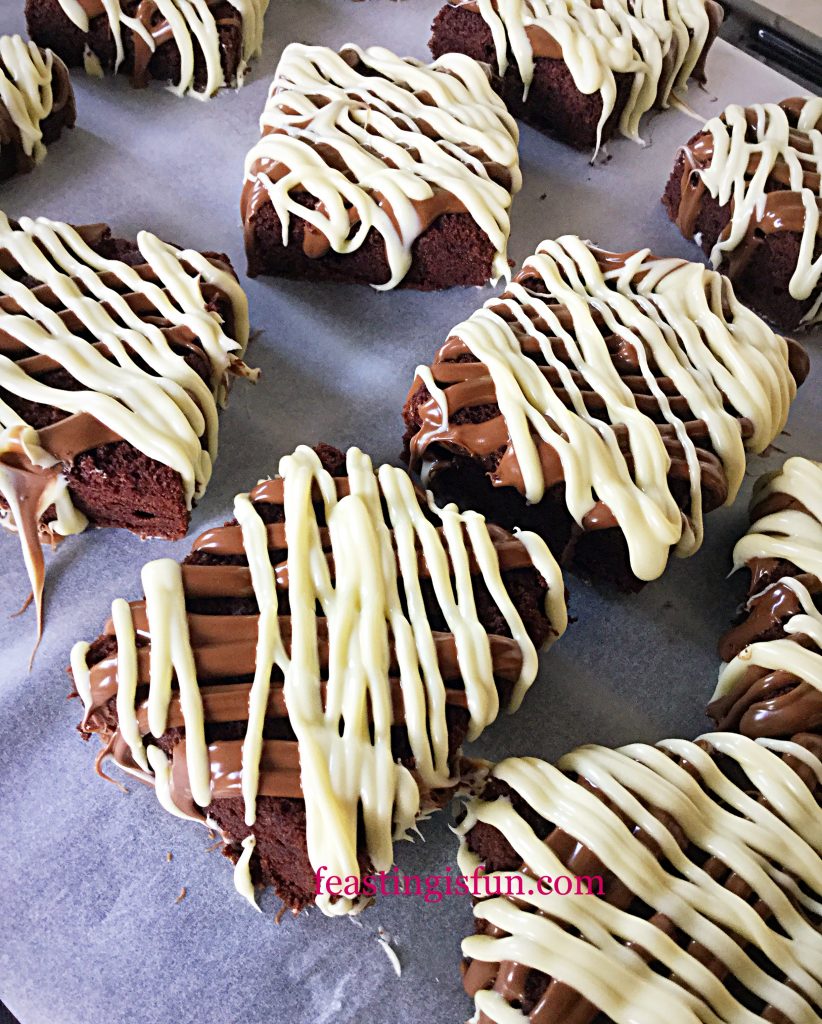
Finally, no Mum, or Afternoon Tea is complete without a touch of chocolate. Chocolate Drizzle Cake Squares are easy to make and even easier to eat!

Recipe: Chocolate Drizzle Cake Squares makes 15

175g/6oz Unsalted Butter – softened

175g/6oz Caster Sugar

1/4tsp Salt – I use Maldon

3 Large Free Range Eggs

1tsp Vanilla Extract – I use Nielsen-Massey

75g/3oz Good Quality Cocoa Powder

125g/4.5oz Plain White Flour

1.5tsp Baking Powder

200g Bar Each of Milk and White Chocolate

Making And Baking The Chocolate Cake Squares

Preheat the oven to 160C/140C fan, gas mark 3, 325F.

  • Lightly grease, with butter a 28cm x 20cm x 5cm ( 12″ x 8″ x 2″ ) tin and line the base with baking parchment.
  • In a large bowl add the butter, sugar and salt. Whisk until pale and fluffy.
  • Next add the eggs, vanilla extract and milk. Then sift in the cocoa, flour and baking powder on top. Whisk slowly until all of the ingredients are combined.
  • Spoon the chocolate cake batter into the prepared tin. Smooth the batter so that it fills the tin evenly.
  • Place the tin in the centre of the oven and bake for 25-35 minutes.
  • The cake is baked when it springs back form a light touch. It will also be coming away for the sides of the tin.
  • As soon as the cake is baked remove the tin from the oven and set to one side to cool.
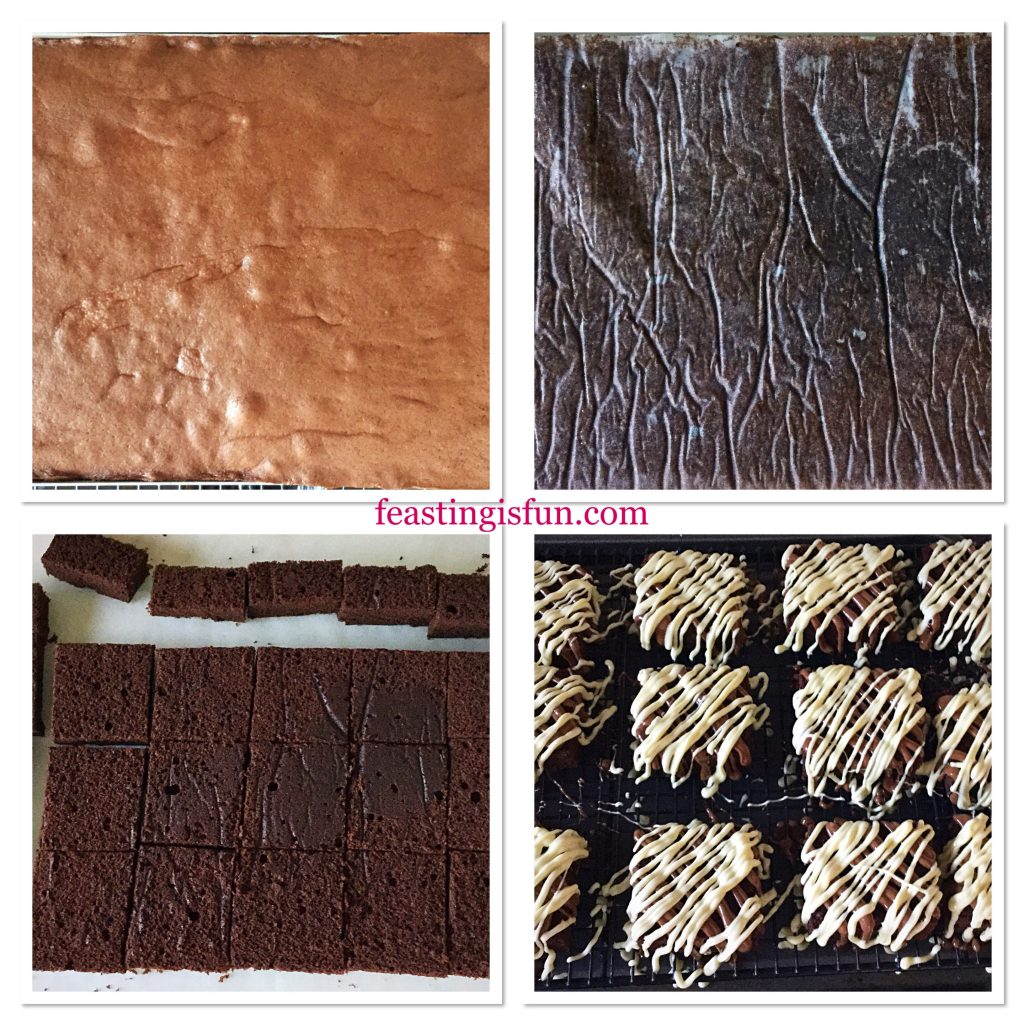
  • When the cake has cooled, tip out on to a parchment lined, flat board.
  • Remove the parchment from the base of the cake and for afternoon tea portions, slice the cake into 15 x 2″ (5cm) squares.
FF Steamer Trading Host Mother's Day Afternoon Tea
Chocolate Drizzle Cake Squares

Decorating The Cake Squares

  • Place the cake squares on a cooling rack placed over a large baking tray.
  • Into separate, heatproof, microwaveable bowls, break up the white and then the milk chocolate.
  • Place one bowl at a time into the microwave. Heat for 30 seconds at a time, stirring after each zap.
  • When both the white and milk chocolate are completely melted transfer into 2 medium disposable piping bags.
  • Start with the milk chocolate, snip the very end of the piping bag off leaving a small hole. Pipe in a zigzag pattern across all of the chocolate cake squares.
  • Turn the baking tray and pipe as before, except you will now be piping across the chocolate milk, forming a criss-cross pattern.
  • Allow the chocolate to partially set and then transfer the chocolate squares to a clean piece of baking parchment, on a tray and leave to one side to set. Note – in warmer weather it may be necessary to place in the fridge for a few minutes to allow to set.
  • Store in a baking parchment lined container, using parchment to separate layers.
  • These Chocolate Drizzle Cake Squares will last up to 4 days in an airtight container.
FF Steamer Trading Mothers Da Afternoon Tea
Chocolate Drizzle Cake Squares perfect to serve with Afternoon Tea.

Different types of cake provide a beautiful setting and greater sense of variety.

Afternoon Tea table set out.
Steamer Trading Host Mother’s Day Afternoon Tea


Finally Remember

While the tableware and homemade goodies look beautiful set out for Aternoon Tea, here are some added little touches that take it to the next level.

Doillies – in contrasting and complimenting colours.

Fresh flowers – placed in large and/or small vases. Clean jam jars make inexpensive vases and flowers picked from the garden can look beautiful.

Rose petals – one rose had a limping flower head. Break off the petals and scatter around the table.

Bowls of fresh fruit. Strawberries are always popular and provide balance to the cake and scones.

Cellophane bags of truffles, tied with a complimenting ribbon, add an extra wow factor.

FF Steamer Trading Host Mother's Day Afternoon Tea
Complimentary bags of truffles enhance the look of the table.

Lastly, don’t panic. Relax, enjoy yourself and your Mum will too. And, if you can’t bake then buy the cakes. Afternoon Tea on Sunday 26th March is about celebrating Mother’s. Your Mum, important female figures in your life, will be thrilled and honored that you took the time to celebrate them, with Steamer Trading helping you to Host Mother’s Day Afternoon Tea.

Afternoon Tea table laid out.
Afternoon Tea

I hope that you have enjoyed Steamer Trading Host Mother’s Day Afternoon Tea, here are some recipes you may also enjoy:

Maraschino Cherry Chocolate Drizzle Cupcakes

Afternoon Tea
Maraschino Cherry Chocolate Drizzle Cupcakes

Iced Bakewell Tart

Afternoon Tea
Iced Bakewell Tart

Chocolate Vanilla Viennese Finger Biscuits

Chocolate Vanilla Viennese Finger Biscuits

So, whatever you make, bake and create to celebrate Mother’s Day, have fun enjoying you feast.

Sammie xx

Steamer Trading gifted me the five items directy linked to their site. All opinions, views, content and photography are my own. I was not paid for writing this post. Please see my Disclosure Policy.

Maraschino Cherry Chocolate Drizzle Cupcakes

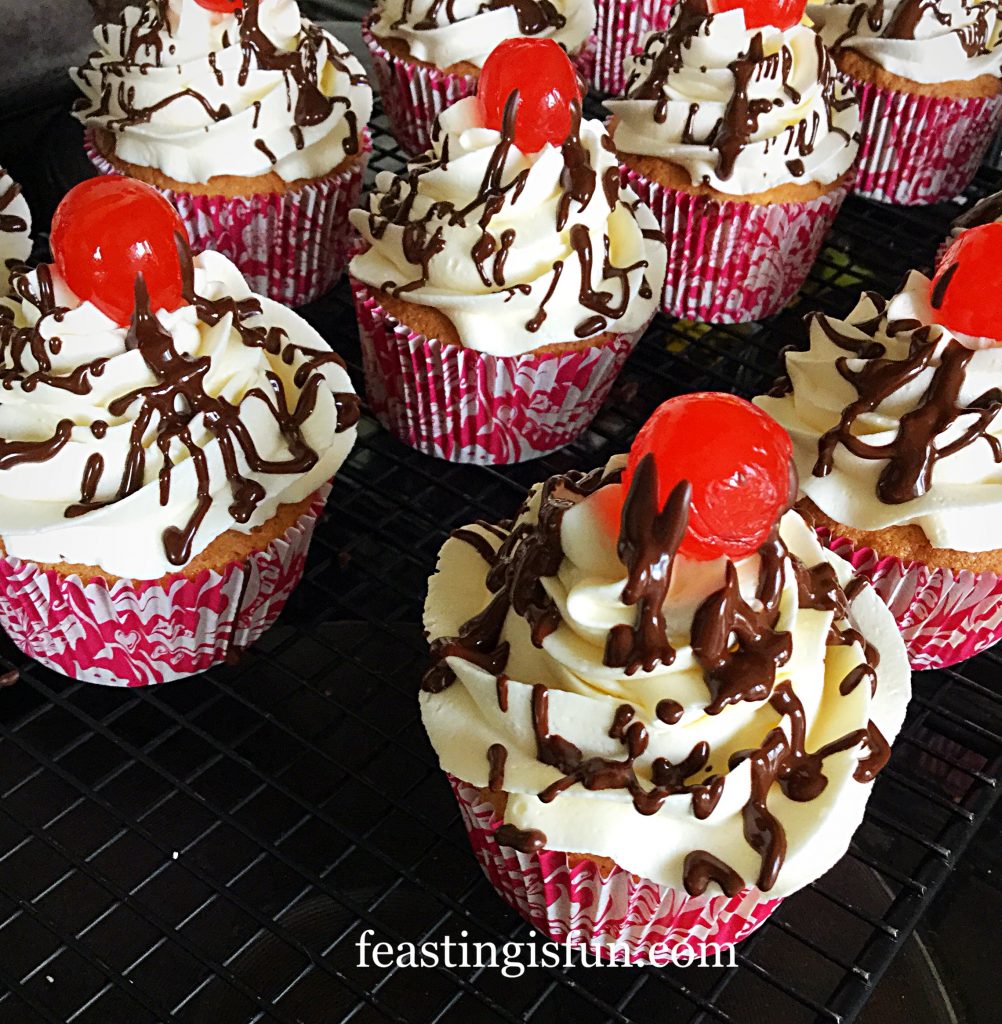
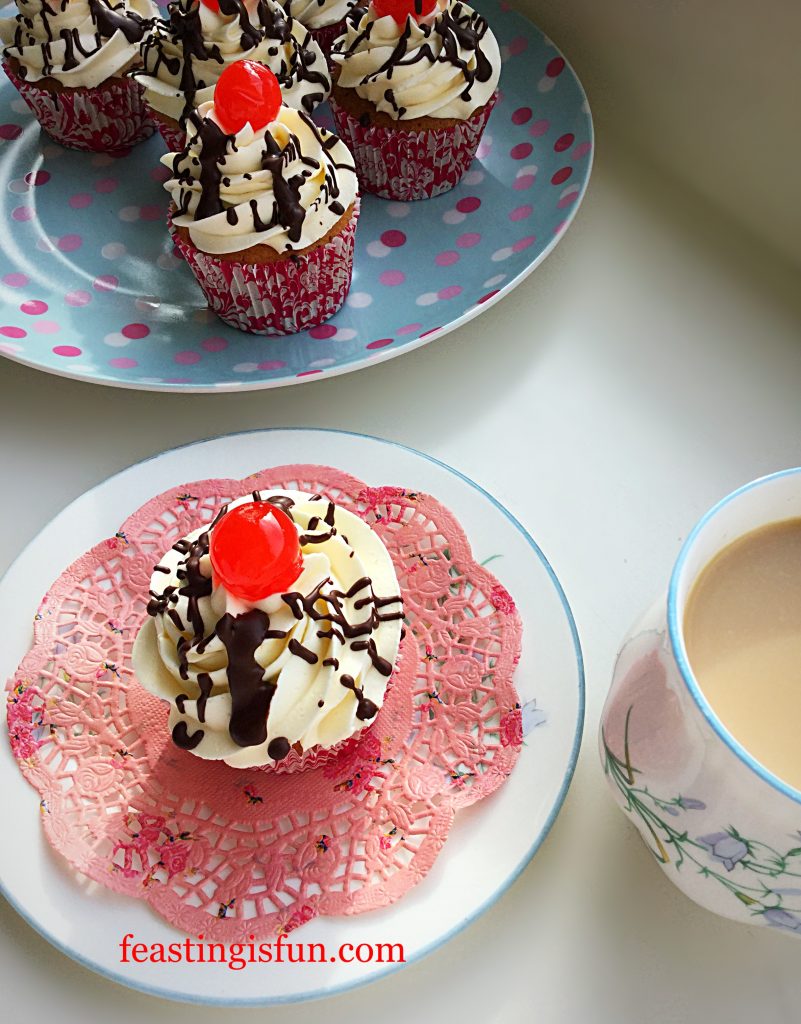
Who doesn’t love a cupcake? A beautifully decorated, perfectly portioned, whole cake to yourself. While I’m known for encouraging people to share, here on Feasting is Fun, that’s not a problem with these cupcakes. Because they taste so incredible, you will want to share these, with those you love. And my Maraschino Cherry Chocolate Drizzle Cupcakes are perfect for sharing.

FF Maraschino Cherry Chocolate Drizzle Cupcakes
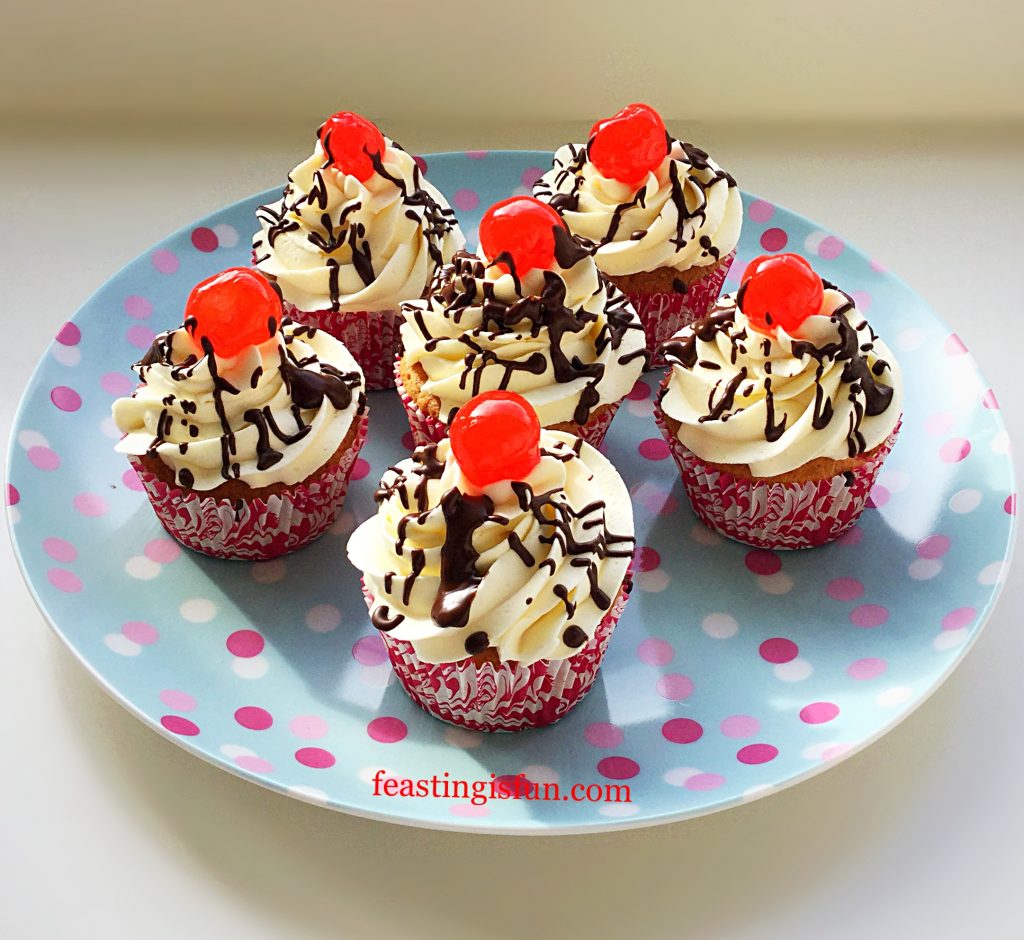
Maraschino Cherry Chocolate Drizzle Cupcakes beautifully delicious.

Cupcakes are great for those who struggle to share. Indeed I used to not be as keen on sharing when I was younger. Nowadays, however, if you visit, knock on the door, clean the windows, etc I am more than willing to give you a cookie or cupcake. Since cupcakes come as a complete package, they are easier to share. Our window cleaners and post lady were very appreciative of these Maraschino Cherry Chocolate Drizzle Cupcakes that I gave them today.

FF Maraschino Cherry Chocolate Drizzle Cupcakes
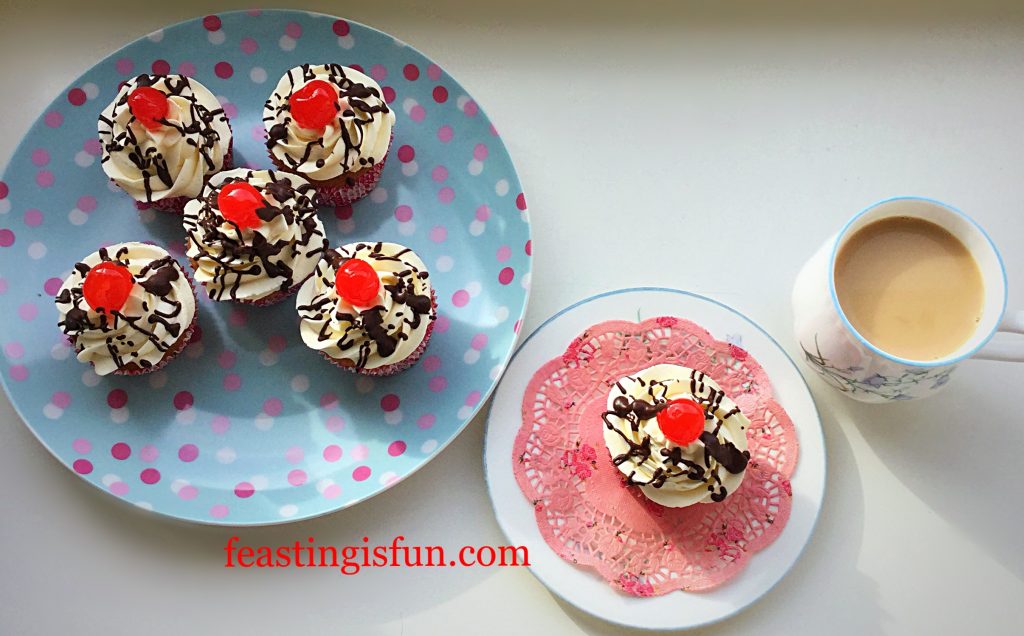
Maraschino Cherry Chocolate Drizzle Cupcakes great with Afternoon Tea.

Light sponge tinged pink with chopped maraschino cherries, topped with a swirl of frosting and a whole cherry. Dark chocolate is drizzled over the frosting. Resulting in a perfect balance of flavours. Most importantly, the dark chocolate tempers the sweet frosting and compliments both the cherry and almond flavours.

FF Maraschino Cherry Chocolate Drizzle Cupcakes
Maraschino Cherry Chocolate Drizzle Cupcakes so cheerful.

The unique flavour of maraschino cherries can be tasted through every single bite of these cupcakes. Adding almond extract to the frosting emphasises their flavour too. Substituting glacé cherries wouldn’t give the same result. Maraschino cherries are easily found in the supermarket. Usually near the alcoholic drinks section!

FF Maraschino Cherry Chocolate Drizzle Cupcakes
Maraschino Cherry Chocolate Drizzle Cupcakes pretty perfect!

Since these cupcakes are each topped with a bright red cherry, they would also make a great ‘Red Nose Day’ bake!

Recipe: Maraschino Cherry Chocolate Drizzle Cupcakes makes 12

125g/4.5oz Unsalted Butter softened

125g/4.5oz Caster Sugar

1tsp Vanilla Extract

2tsp Liquid from the maraschino cherry jar.

1/4tsp Salt – I use Maldon

50g/2oz Maraschino Cherries plus 12 whole cherries to top the cupcakes

150g/5oz Plain White Flour

1.5tsp Baking Powder

For the frosting and decoration:

400g/14oz Plain White Icing Sugar

200g/7oz Unsalted Butter softened

1tsp Almond Extract – I use Nielsen-Massey

2tbsp Very Hot Water – from a recently boiled kettle

50g/2oz Dark Chocolate minimum 70% Cocoa

Method: Preheat the oven to 160C/140C fan, gas mark 3, 325F.

Making And Baking The Cherry Cupcakes

  • First of all, line a cupcake or muffin tin with 12 cupcake cases.
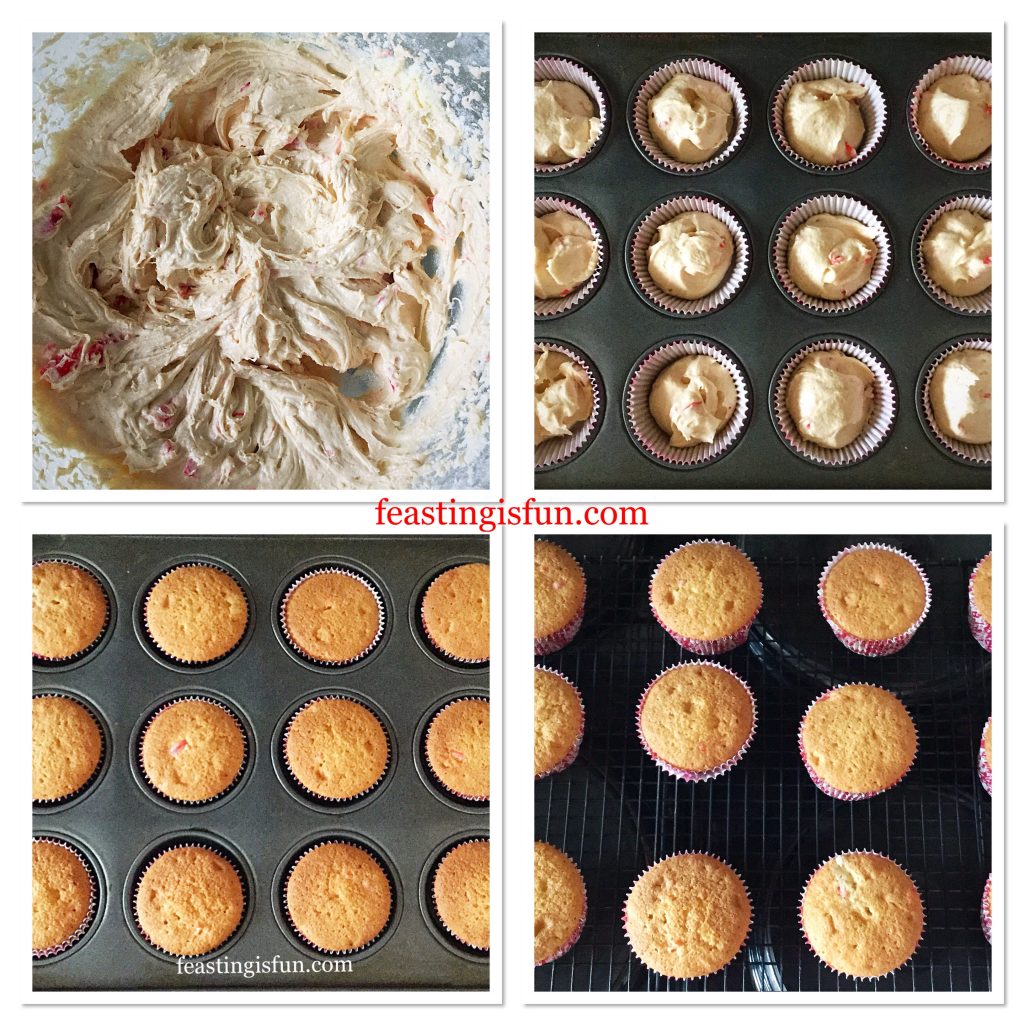
  • Remove 12 nicely shaped, maraschino cherries from the jar and place on to kitchen towel to drain. Weigh out slightly more than 50g of cherries and place into a bowl. Tip away any excess liquid that collects in the bowl. Follow, by cutting the cherries in the bowl into small pieces and set to one side.
  • Next, into a large bowl add the sugar, butter and salt. Beat until pale and creamy.
  • Add the vanilla extract and 2 teaspoons of liquid from the cherry jar and beat into the mixture.
  • Using the ‘all in one’ method, add the eggs to the bowl and then sift in the flour and the baking powder. Finally add the chopped cherries and gently mix the ingredients together until they are combined.
  • Fill each cupcake case with one dessert spoonful of cake batter.
  • Place the tin into the centre of the preheated oven and bake for 25-30 minutes.
  • The cupcakes may look a little darker than usual. This is due to a combination of the cherries in the batter and the liquid from the jar added to the cake batter.
  • They are fully baked when the sponge springs back from a light touch, or an inserted toothpick comes out clean.
  • As soon as the cupcakes are baked remove from the oven.
  • Remove the cupcakes from the baking tin and place on a cooling rack.
FF Maraschino Cherry Chocolate Drizzle Cupcakes
Making the batter, filling the cases and baking the cupcakes.

Making The Whipped Buttercream And Piping It Onto the Cupcakes

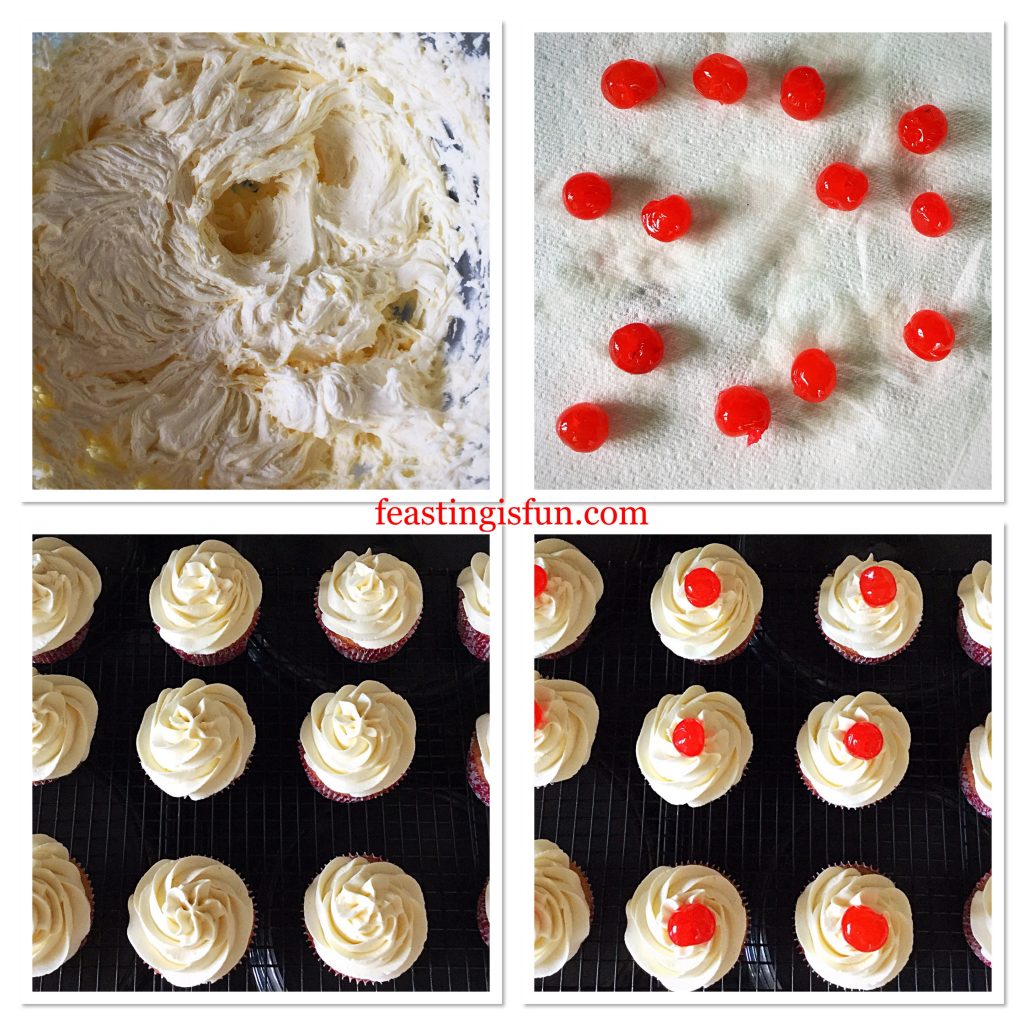
  • While the cupcakes are cooling make the buttercream frosting.
  • Into a large bowl add butter and then sift in the icing sugar.
  • Next add the hot water and almond extract.
  • Start whisking on a very slow speed, until the butter and icing sugar have combined.
  • Gradually build the whisking speed to high. Continue whisking until the frosting is pale and fluffy.
  • Spoon the frosting into a piping bag that has been fitted with a large star tip. I use a Wilton #1M.
  • Starting at the outside edge, on the top of the cupcake pipe a complete swirl. As the next swirl overlaps, lift the piping bag to bring the swirl inwards. Continue piping in swirls, finishing in the centre, by pulling the bag away. Similar to piping a Mr Whippy ice cream.
  • Continue until all of the cupcakes have been piped with frosting. Do not worry if there is a little buttercream left in the piping bag.
  • Finally, place a cherry on top of each cupcake.
FF Maraschino Cherry Chocolate Drizzle Cupcakes
Making the frosting, piping and decorating the cupcakes with maraschino cherries.
  • Allow the icing to set on the cupcakes.

Making The Chocolate Drizzle And Decorating The Cupcakes

  • While the cupcakes are setting, make the chocolate drizzle.
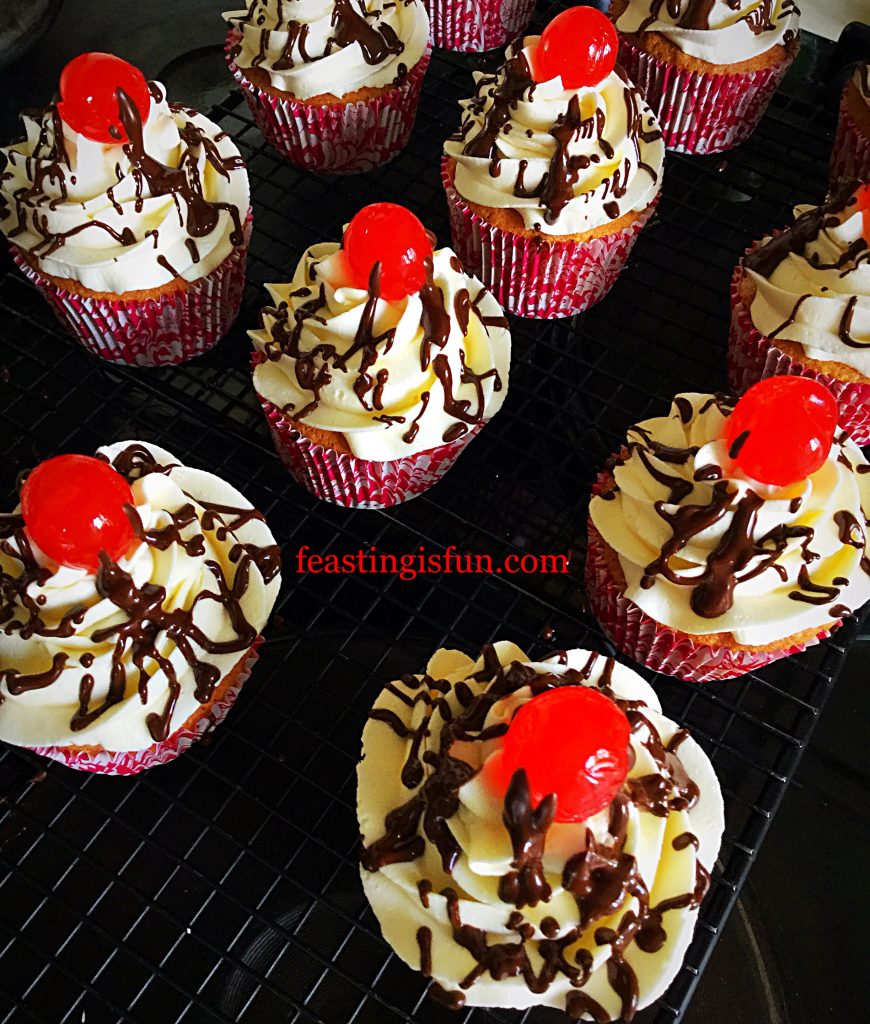
  • Break up, or chop the chocolate and place into a small, heatproof, microwaveable bowl. Heat for 20 seconds at a time, in the microwave. Making sure to stir the chocolate after each heating. When the chocolate has completely melted pour into a small, disposable piping bag.
  • Snip the very end of the bag off and drizzle chocolate over each cupcake.
FF Maraschino Cherry Chocolate Drizzle Cupcakes
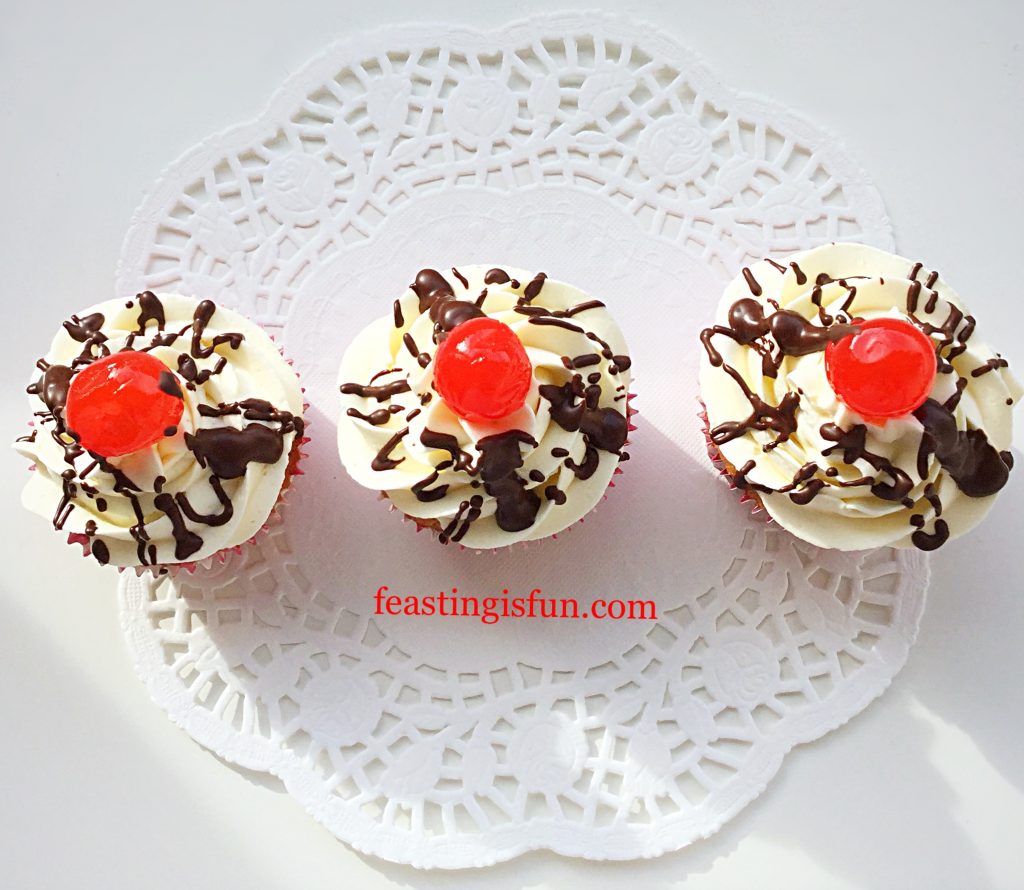
Maraschino Cherry Chocolate Drizzle Cupcakes melted dark chocolate drizzle adds the finishing touch.

Finally, allow the chocolate to set before serving these Maraschino Cherry Chocolate Drizzle Cupcakes.

FF Maraschino Cherry Chocolate Drizzle Cupcakes
Maraschino Cherry Chocolate Drizzle Cupcakes

These cupcakes will last for 5 days if kept in an airtight container, refrigerate during warm weather. Although, it is very doubtful, once shared that they will last that long!

If you have enjoyed this recipe for Maraschino Cherry Chocolate Drizzle Cupcakes you may also like these:

Lemon Blueberry Cupcakes

FF Maraschino Cherry Chocolate Drizzle Cupcakes
Lemon Blueberry Cupcakes

Marshmallow Frosted Mango Cupcakes

FF Maraschino Cherry Chocolate Drizzle Cupcakes
Marshmallow Frosted Mango Cupcakes with a gluten free option.

Coconut White Chocolate Snowball Cupcakes

FF Maraschino Cherry Chocolate Drizzle Cupcakes
Coconut White Chocolate Snowball Cupcakes

Sharing baked goodies, not only makes others happy, it also keeps waistlines from expanding! While selling my own bakes is not something I ever wish to do, sharing them allows me to follow my real passions. First of all sharing and also recipe development, mixing flavours, textures, being creative, giving away baked treats actually helps me. Resulting in smiles all round!

So, whatever you are making, baking and creating in your kitchens, have fun preparing and sharing your feast.

Sammie xx

No part of this post may be reproduced or duplicated without the written permission of the owner. Please see my Disclosure Policy.

Chocolate Hazelnut Baked Giant Doughnut

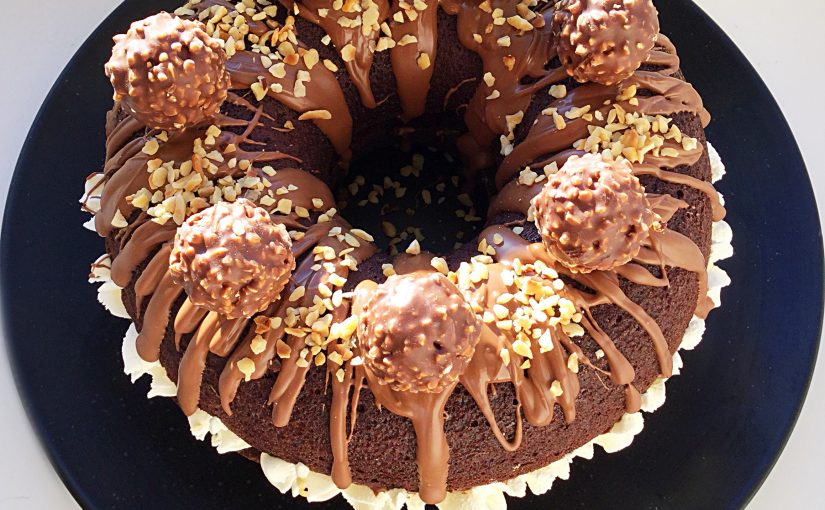
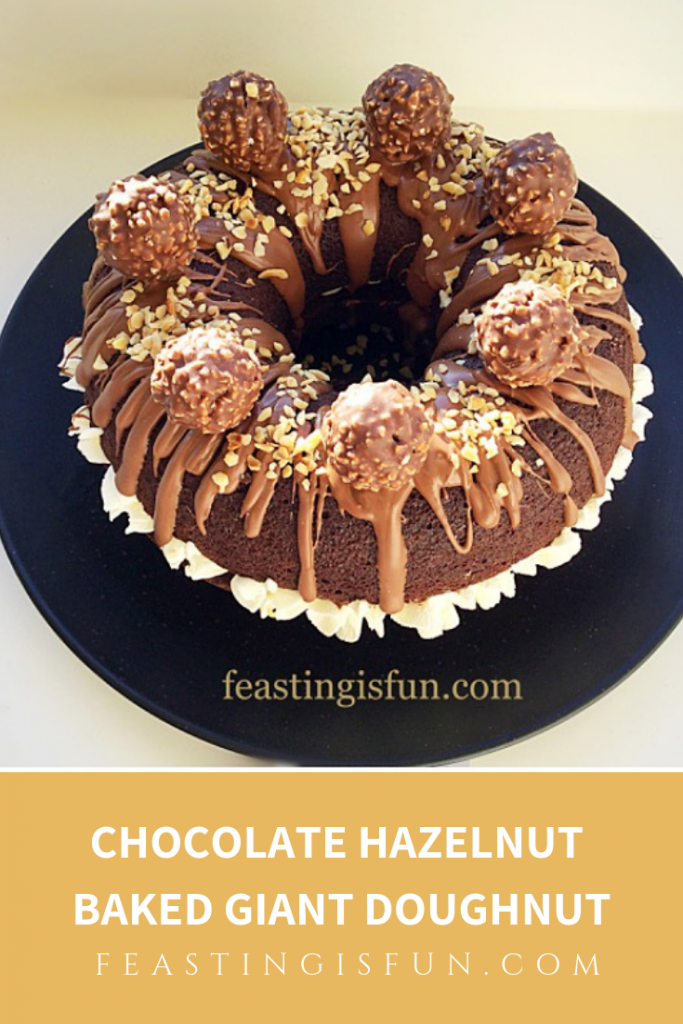
While I enjoy eating chocolate, after the festive season, unwrapping and eating another choccie, can, lose its appeal. And yes I realise that I’m probably in a minority here! Since wasting chocolate is not an option that cannot even be considered, incorporating it into bakes and desserts seems the perfect answer. So, I present to you my Chocolate Hazelnut Baked Giant Doughnut.

FF Pinterest Image with graphics

While using Fererro Rocher to top this bake, another Christmas chocolate was also used for the drizzling. Look away now if you love Teddy Bears. Because I used a whole Lindt Christmas jumper bear, melted down. Saying this is an indulgent bake, would be to understate. Serving this for dessert, will, without a doubt, bring about happy smiles and much excitement.

FF Chocolate Hazelnut Baked Giant Doughnut
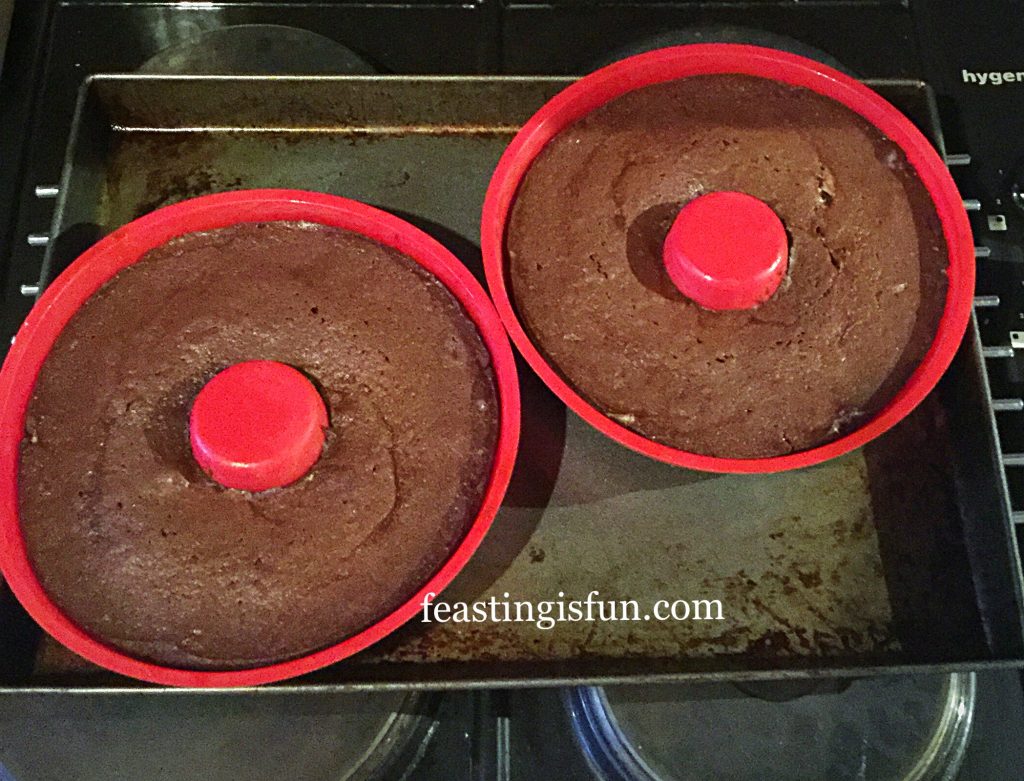
Chocolate Hazelnut Baked Giant Doughnut sandwiched together with whipped cream and chocolate hazelnut spread.

Creating a giant, baked doughnut, using silicone moulds, readily available online – mine were bought from Lakeland, makes an unusual and fun change from a sandwich cake. Alternatively, if you cannot source the moulds, this recipe can be baked in two, greased and lined 6 – 7 inch sandwich tins. Baking time will be approximately the same.


FF Chocolate Hazelnut Baked Giant Doughnut
Chocolate Hazelnut Baked Giant Doughnut perfect for sharing.

While a single, regular doughnut is perfect for one person, this giant doughnut is perfect for sharing. Since it is my belief that all food tastes better when it is shared, surely this can only be a good thing!

Recipe: Chocolate Hazelnut Baked Giant Doughnut serves 8

For the Doughnut Sponge

200g/7oz Unsalted Butter – softened, plus extra to grease moulds

200g/7oz Caster Sugar

1/4tsp Salt – I use Maldon

6 Large Free Range Eggs

1tsp Vanilla Extract – I use Nielsen-Massey

100g/4oz Plain White Flour

75g/3oz Cocoa Powder – I use Callebaut

1.5tsp Baking Powder

Filling and Topping the Doughnut 

200ml/8fl oz Double Cream

3tbsp Chocolate Hazelnut Spread – I use Jim Jams Spreads

100g/4oz Milk Chocolate

2tbsp Chopped Roasted Hazelnuts

8 Fererro Rocher or other chocolate to decorate

Method: Preheat the oven to 160C/140C fan, gas mark 3, 325F

Making And Baking The Chocolate Doughnut Batter

  • First of all, grease the insides of the doughnut moulds with softened butter. Then place them on a baking tray, ensuring that they don’t touch. The silicone mould could easily be misshapen if pressed.
  • To make the batter, start by placing the butter, salt and sugar into a large bowl. Whisk/beat together until pale and creamy.
  • Next add all 6 eggs and the vanilla extract.
  • Now sift the cocoa powder, plain flour and baking powder into the same bowl.
  • Whisk/beat all the ingredients until they have just come together. Use a spatula to scrape down the sides of the bowl then give the batter a final mix.
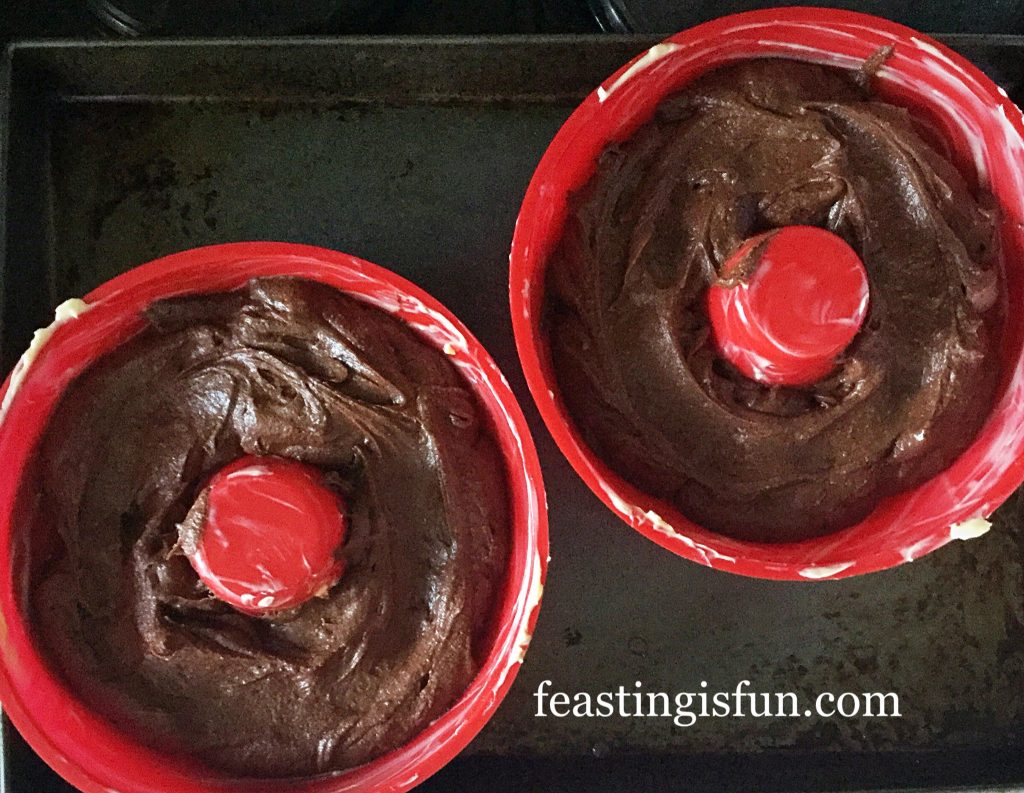
  • Divide the batter equally between the two moulds. Finish by smoothing the surface of the batter to ensure an even bake.
FF Chocolate Hazelnut Baked Giant Doughnut
Silicone giant doughnut moulds filled, ready for the oven.
  • Place the baking tray, with the moulds on, into the centre of the oven and bake for 35-45 minutes.
  • The sponge is baked when it feels firm to touch and springs back when lightly pressed.
FF Chocolate Hazelnut Baked Giant Doughnut
Chocolate Hazelnut Baked Giant Doughnut perfect flat tops from low and slow baking.
  • Allow to cool for 5 minutes in the moulds and then turn the doughnut halves out on to a cooling rack. Cool completely before decorating. Since this doughnut was baked in the evening, it was stored, with baking parchment underneath and between, in an airtight container. Ready to be filled and decorated the next day.

Assembling The Giant Doughnut

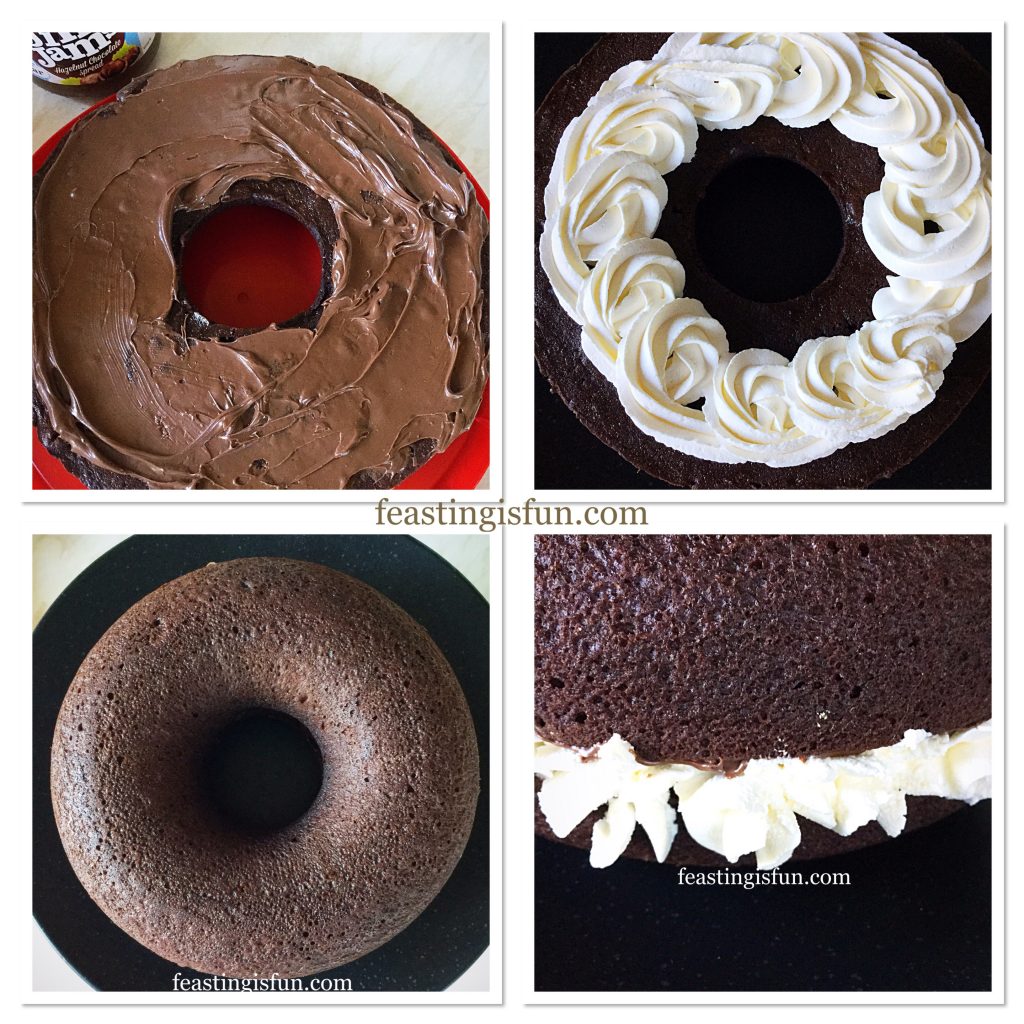
  • First of all, pour the double cream into a large bowl and whisk until it just starts to thicken. Continue whisking slowly until it just holds its shape. Take care not to over whisk so that it becomes stiff, this will make it difficult to pipe.
  • Now take the half that is to be the top part of the doughnut and spread the chocolate and hazelnut spread evenly on to the flat underside.
  • Place the bottom half of the doughnut, flat side up, on to the plate or stand on which it is to be served.
  • Fill an icing bag fitted with a large star tip – I use Wilton #1M – with the whipped cream. Pipe a swirl pattern on to the bottom doughnut – as seen in the pictures. Alternatively you can spoon the cream on to the doughnut.
  • Place the top half of the doughnut on to the bottom half.
  • Pipe cream stars all around the centre, where the two halves meet. This creates a beautiful finish.
FF Chocolate Hazelnut Baked Giant Doughnut
Assembling the Chocolate Hazelnut Baked Giant Doughnut.

Decorating The Doughnut

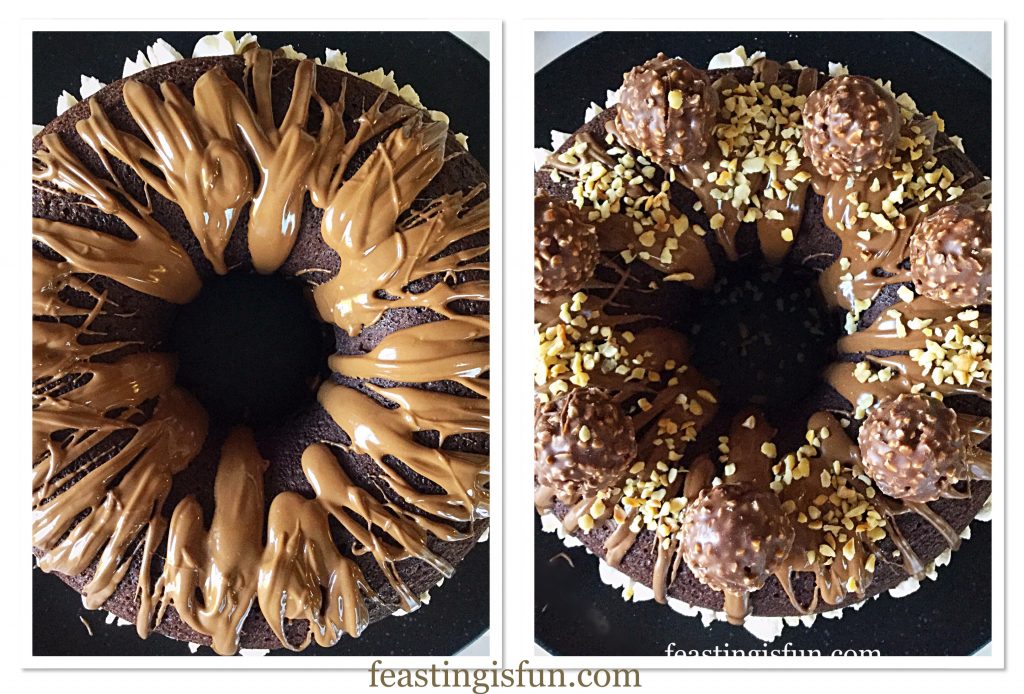
  • Break or chop the chocolate into small pieces and place into a heatproof, microwaveable bowl. Zap in the microwave for 30 seconds at a time, stirring, between each heating. As soon as the chocolate starts to melt remove the bowl and continue stirring until the chocolate is liquid.
  • Drizzle the chocolate, using a teaspoon, over the doughnut.
  • Next, working quickly before the chocolate sets, add the unwrapped Fererro Rocher to the top of the doughnut. Holding each one in place for a few seconds so that it sticks to the chocolate.
  • Sprinkle over the toasted, chopped hazelnuts and allow the chocolate to fully set before serving.
FF Chocolate Hazelnut Baked Giant Doughnut
Warm, drizzled chocolate adorned with Fererro Rocher and toasted, chopped hazelnuts.

As soon as the chocolate is set this Chocolate Hazelnut Baked Giant Doughnut is ready to be served.

FF Chocolate Hazelnut Baked Giant Doughnut
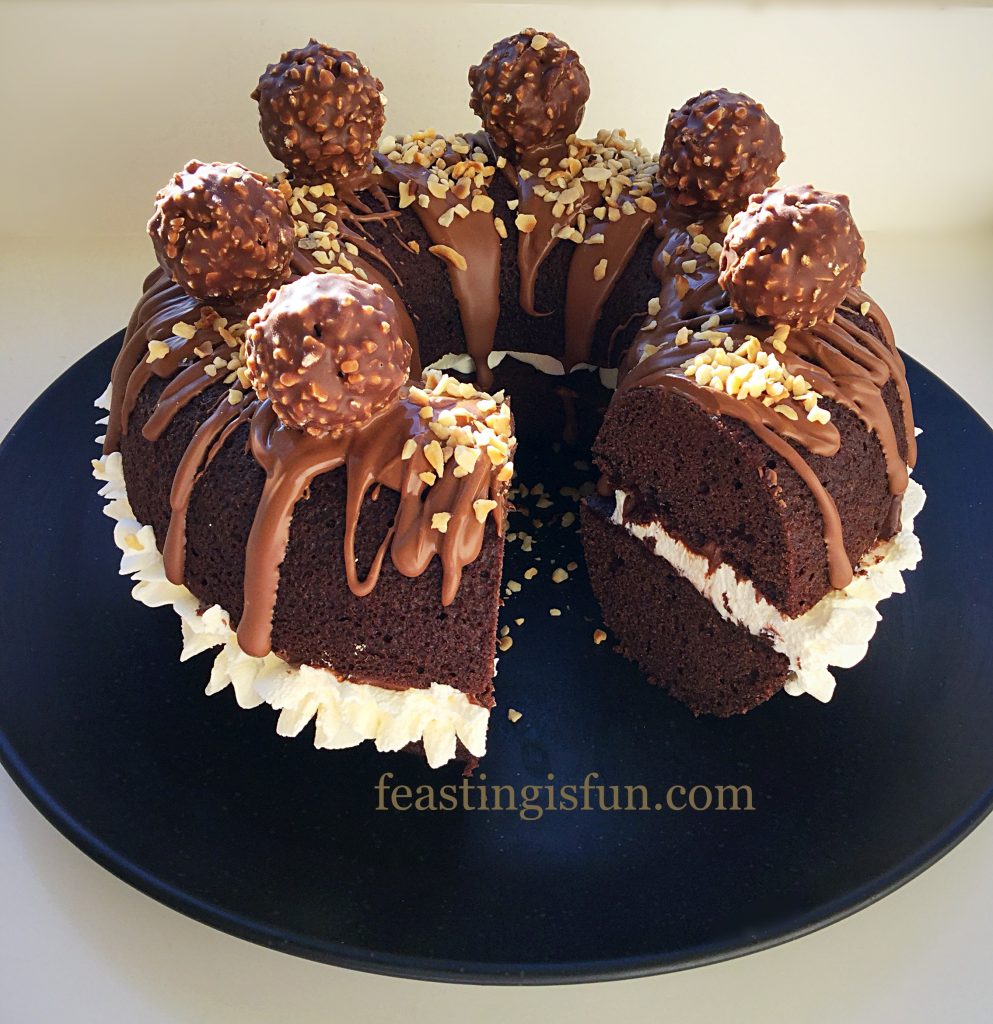
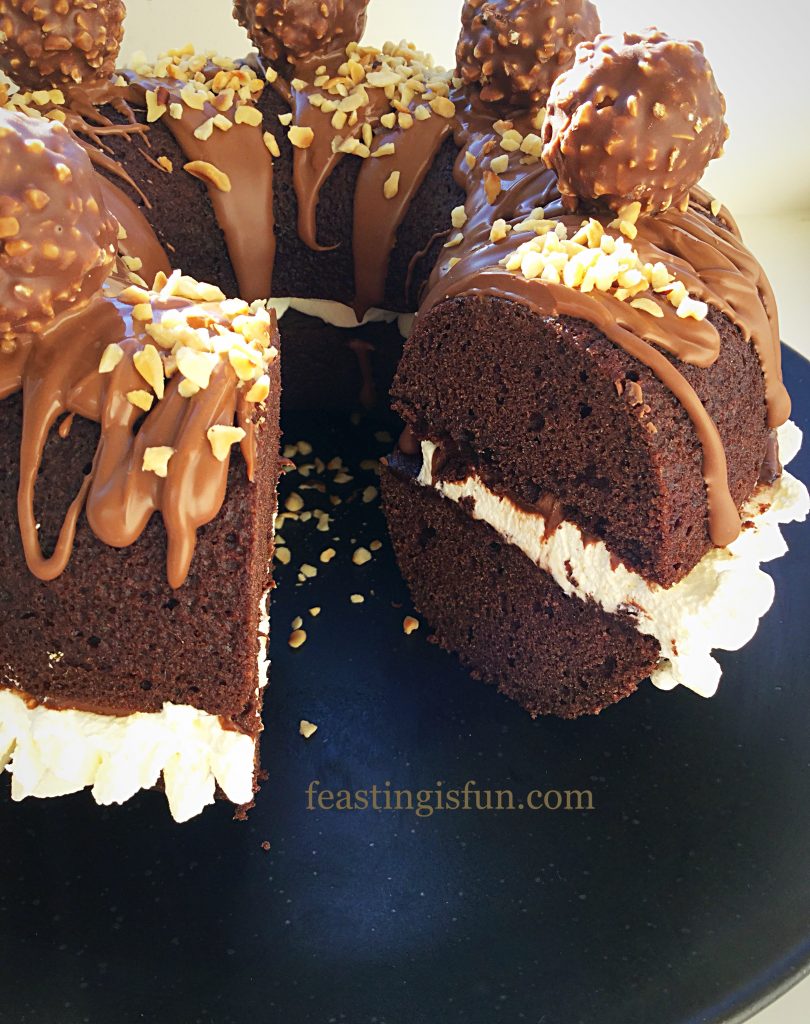
Chocolate Hazelnut Baked Giant Doughnut so inviting.

To serve, cut using a sharp knife, wiping the knife clean, between each cut, will keep the slices tidy. The sponge, whipped cream and chocolate hazelnut layers are clear to see.

Store any leftovers in an airtight container in the fridge. While best on the day assembled, this doughnut will keep for up to 2 days.

If you have enjoyed this recipe for Chocolate Hazelnut Baked Giant Doughnut you may also like these:

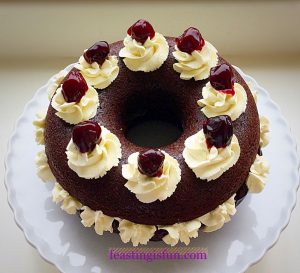
Black Forest Giant Doughnut

FF Chocolate Hazelnut Baked Giant Doughnut
Black Forest Giant Doughnut

Strawberry Whipped Cream Giant Doughnut

FF Chocolate Hazelnut Baked Giant Doughnut
Strawberry Whipped Cream Giant Doughnut gluten free recipe option available.

Raspberries Whipped Cream Giant Doughnut

FF Chocolate Hazelnut Baked Giant Doughnut
Raspberries Whipped Cream Giant Doughnut

Since something as simple as a silicone giant doughnut mould can create such fun and show stopping desserts, I highly recommend them. Most of all, if you serve up a Giant Doughnut as dessert to dinner guests, they are not only likely to be impressed, but also inquisitive about how it is made.

Baking should be fun, creative and adventurous. Most importantly, it should be shared.

Sammie xx

No part of this post may be reproduced or duplicated without the written permission of the owner. Please see my Disclosure Policy.

Blueberry Lemon Shortbread Cake Bars

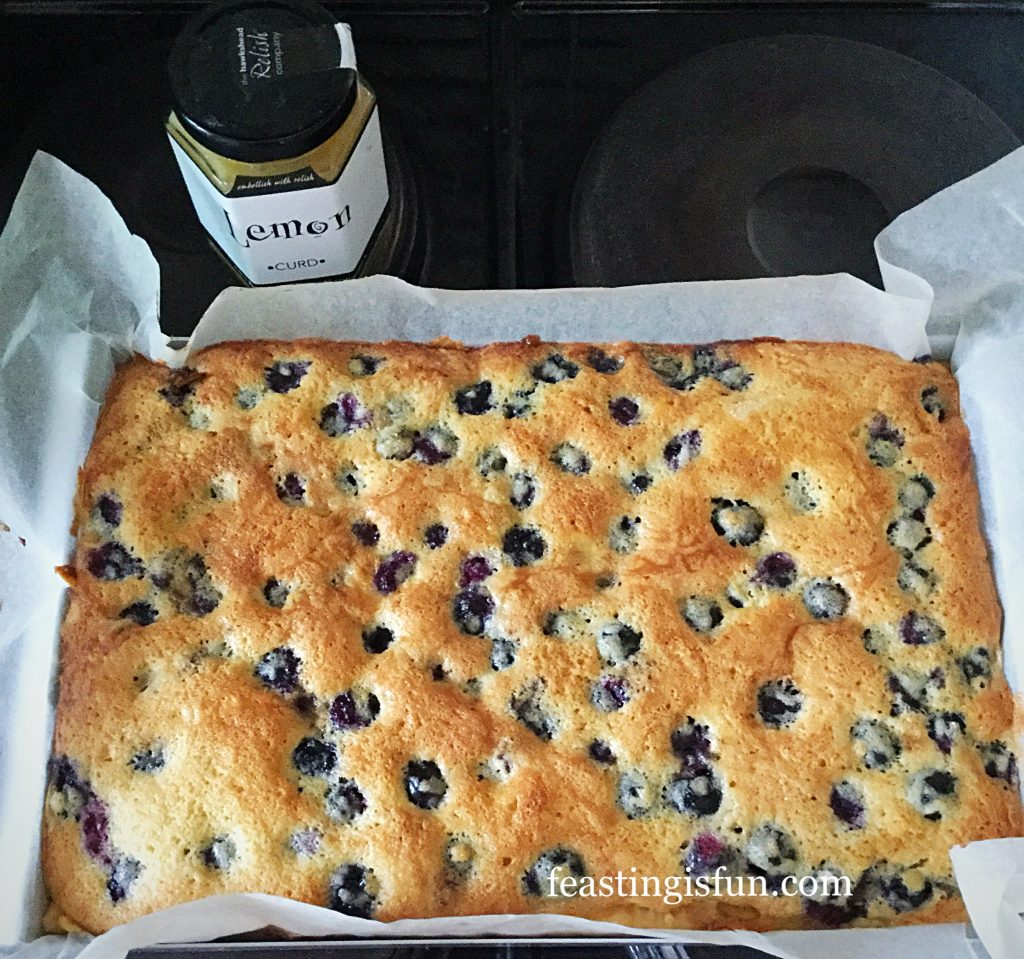
In an ideal world, all food consumed by myself and our family would be homemade. Yet reality dictates that is not always feasible. However, certain products, made with natural ingredients make that dream, a step closer. For example, the lemon curd used in my Blueberry Lemon Shortbread Cake Bars, tastes as good, if not better than that made at home. Resulting in a delicious recipe, made one stage easier by a product already available.

Afternoon tea for one, with descriptive graphics.


Bakes That Travel Well

Creating bakes that are sturdy enough to withstand transport in a school backpack or briefcase can have its challenges. However, these shortbread base bars easily remain intact during transit. Since hubby does not always have time for a set lunch break, knowing he has something he can munch with a coffee makes me happy. And, of course, he functions better when his energy is topped up too.

There are a variety of traybakes here, on Feasting is Fun, including Lemon Drizzle Cake Bars and Macadamia Apricot Flapjacks. While some are considered more ‘healthy’ than others. With respect, anything cooked at home, using good quality ingredients and made with love, is, in my opinion far better than a mass produced product with a shelf life of months!

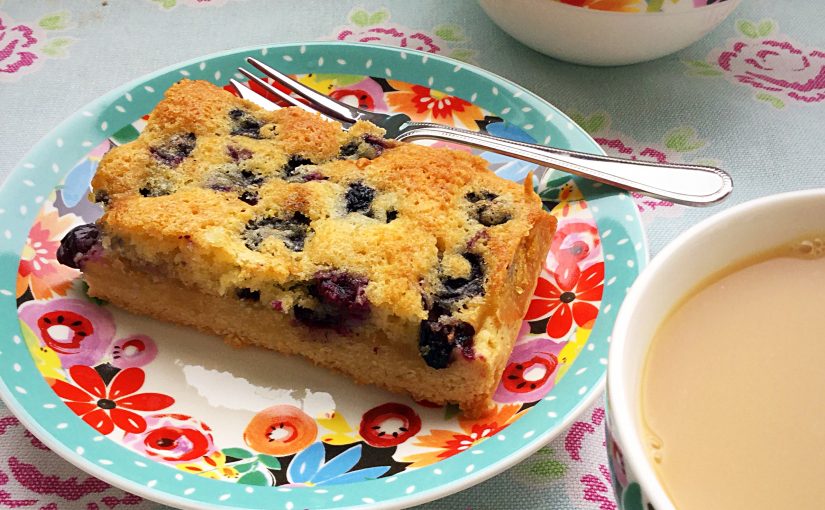
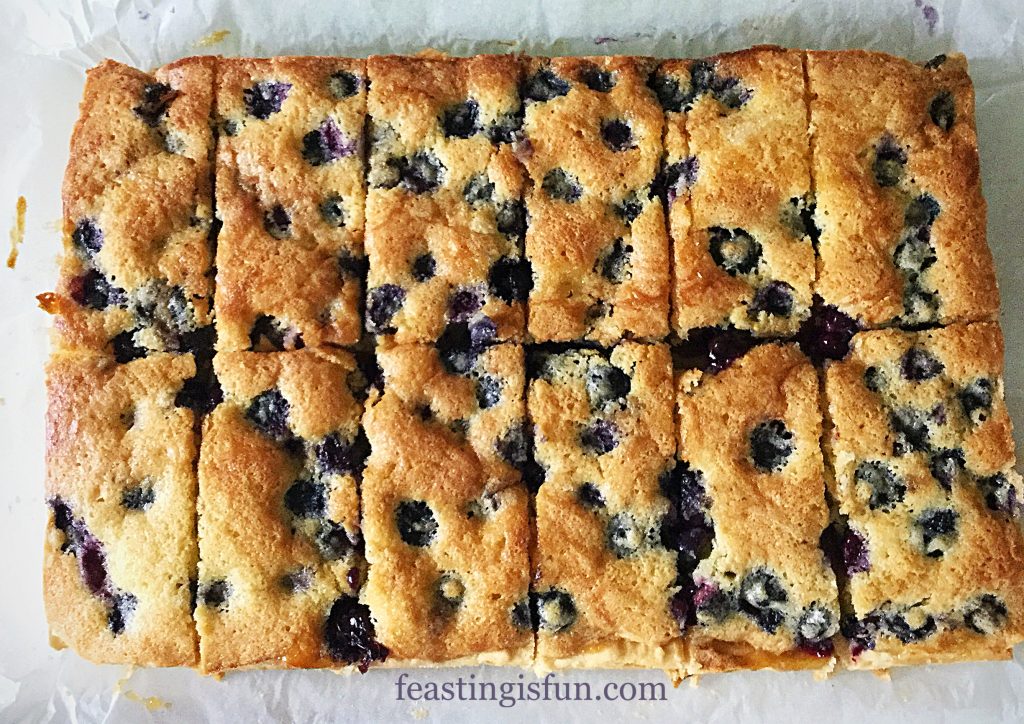
Biting into a bar really is a taste and texture sensation for your tongue and tastebuds. And each blueberry, when baked, turns into its own little pod of jam. Yet without the added sweetness of preserves. Finally, the cake layer, moist and light contrasts beautifully with the tang of lemon and defined shortbread base. Resulting in a complete mouthful of joy with each bite.

Recipe: Blueberry Lemon Shortbread Cake Bars makes 12

Shortbread Base

225g/8oz Unsalted Butter softened

150g/5oz Caster Sugar

1/4tsp Salt I use Maldon

275g/10z Plain White Flour

1tsp Vanilla Extract I use Nielsen-Massey

1 Large Free Range Egg Yolk

For the Sponge Topping

4-5 tbsp Lemon Curd I use Hawkshead Relish

100g/4oz Unsalted Butter softened

100g/4oz Caster Sugar

2 Large Free Range Eggs

100g/4oz Plain White Flour

1tsp Baking Powder

200g/7oz Fresh Blueberries

Finely Grated Zest of 1 Lemon

Method: Preheat the oven to 160C/140C fan, gas mark 3, 325F

Line a 20cm x 28cm x 5cm (8″ x 11″ x 2″) tin with baking parchment, ensuring the parchment is higher than the sides of the tin. The tin does not need to be greased first.

Making And Baking The Shortbread Base:

  • Place the softened butter, salt and sugar into a large bowl. Whisk or beat until the mixture is pale and creamy.
  • Next, add the egg yolk and vanilla extract. Continue to beat until all ingredients are completely incorporated.
  • Now sift the flour into the bowl and then, using a spoon gently mix all the ingredients until they just come together.
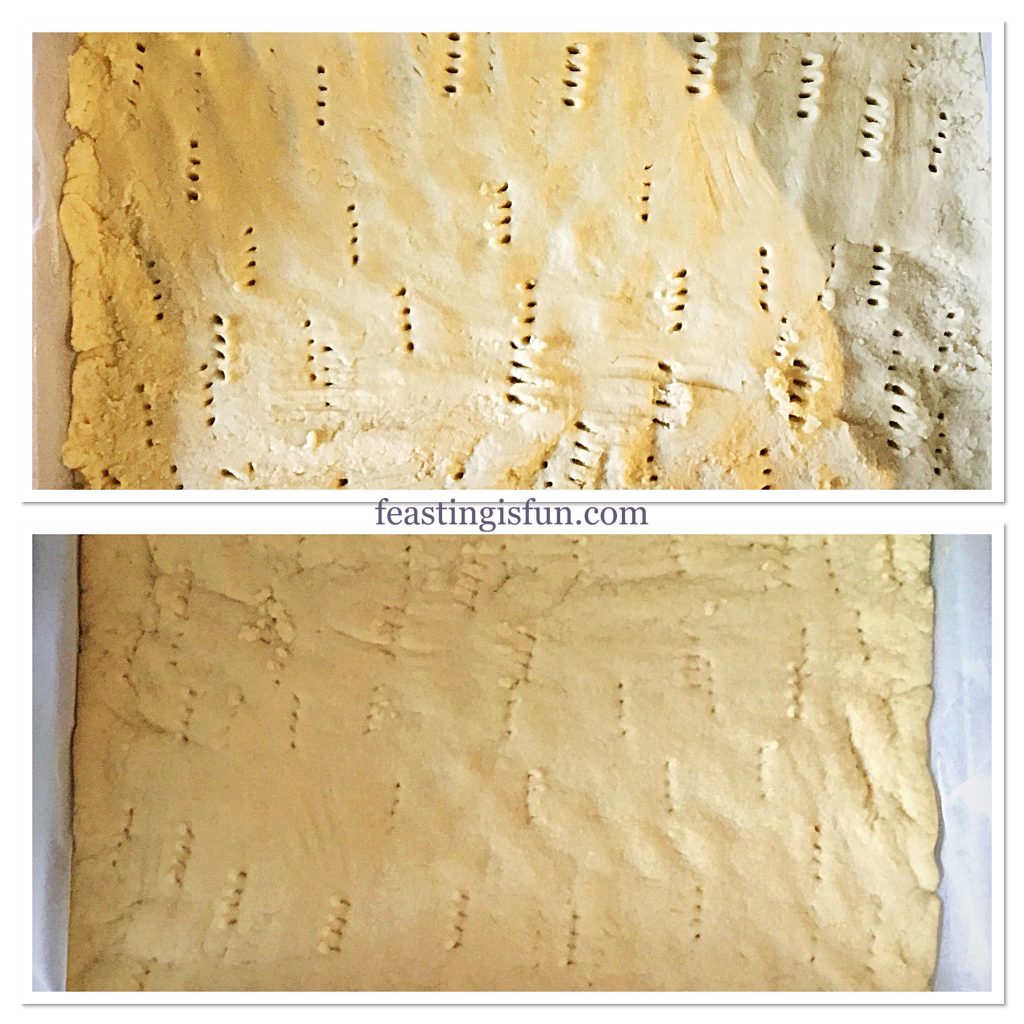
  • Spoon the shortbread mixture into the lined tin and then press into an even layer using your fingers. Use a fork to prick holes, known as docking, into the shortbread. This allows any steam to escape and create a golden base.
  • Place the tin into the centre of a preheated oven and bake for 25 minutes. Until the top is just turning golden.
  • While the shortbread is baking make the sponge topping – see below for instructions.
  • As soon as the shortbread is baked remove from the oven. It is important to note that the shortbread is not fully cooked at this point.

FF Blueberry Lemon Shortbread Cake Bars

Making the Sponge Topping

  • While the shortbread is baking the cake batter can be made.
  • Into a large bowl, as before, add the butter and sugar. Whisk/beat until pale and creamy.
  • Next add the two eggs and continue whisking until the mixture is completely combined.
  • Now sift the flour and baking powder into the same bowl. Then add the blueberries and the lemon zest.
  • Using a metal spoon, fold the ingredients together gently, to minimise breaking up the blueberries. Set to one side.

Assembling And Baking The Blueberry Lemon Shortbread Cake Bars

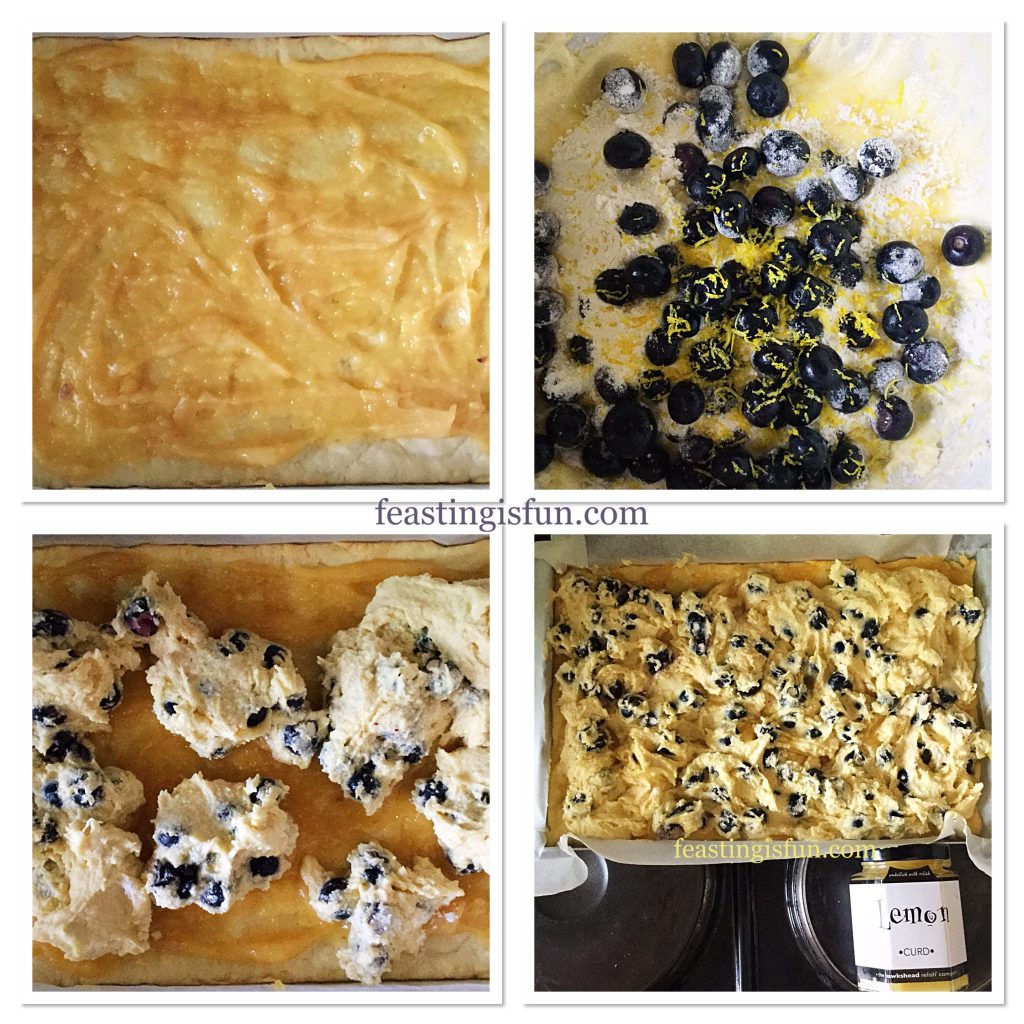
  • As soon as the shortbread base is baked allow to cool for 5 minutes. Then spoon over the lemon curd, spreading so that it covers the base, yet doesn’t quite reach the edges.
  • Spoon over the cake batter. Dolloping it fairly evenly across the base. Finally, gently spread the batter so that it covers the base. Pay particular attention to the edges. Aiming to seal in the lemon curd, by ensuring the cake batter is in contact with the shortbread around the entire edge.

FF Blueberry Lemon Shortbread Cake Bars

  • Place the tin back into the centre of the oven and bake for 40-50 minutes. The lower and longer baking results in an even bake with a flat surface.
  • The Blueberry Lemon Shortbread Cake Bars are baked when the top is golden in colour and is firm to touch. As soon as it is baked remove from the oven and allow to cool in the tin.
FF Blueberry Lemon Shortbread Cake Bars
The finished bake cooling

Cutting The Bars Into Individual Portions

  • When completely cooled, remove the entire traybake from the tin. A fish slice or large palette knife is useful. Ease the knife under the bake, using it to lift and support as you move the traybake to a flat surface.
  • Using a sharp knife cut halfway through the width of the bake. Wipe the knife between each cut, this avoids spoiling the bake.
  • Following this first cut, now cut downwards, dividing the bake into four equal quarters.
  • Finally, cut each quarter into three equal sized bars.

FF Blueberry Lemon Shortbread Cake Bars

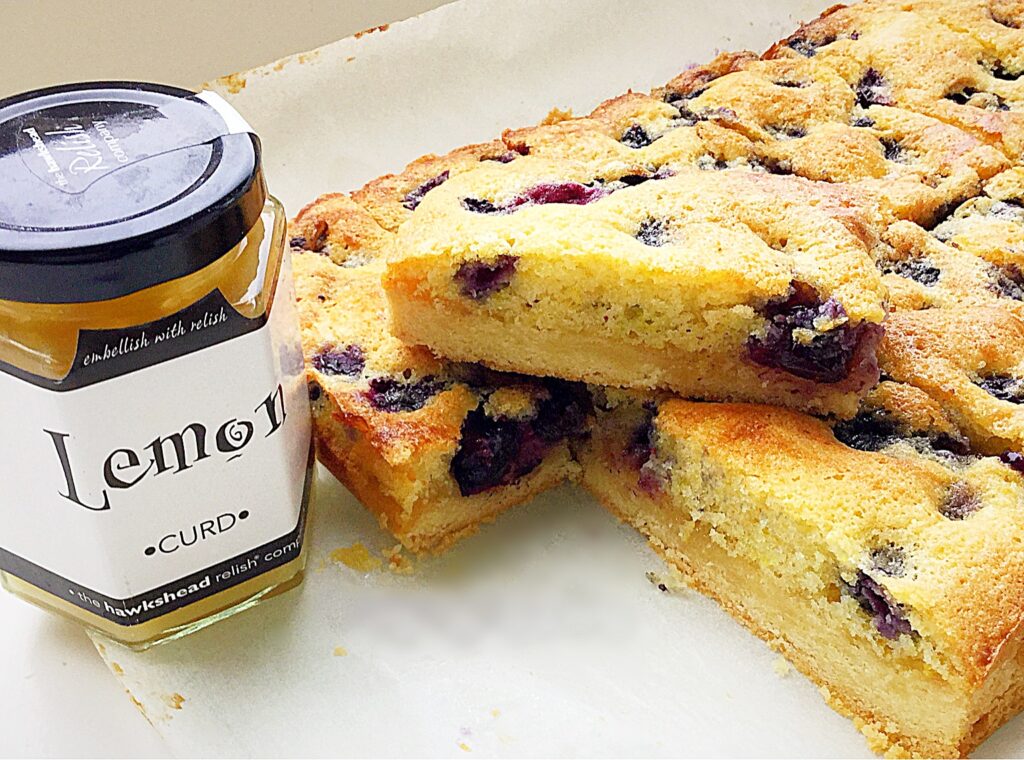
The lemon curd is perfect in these bars.

FF Close up image.
Blueberry Lemon Shortbread Cake Bars

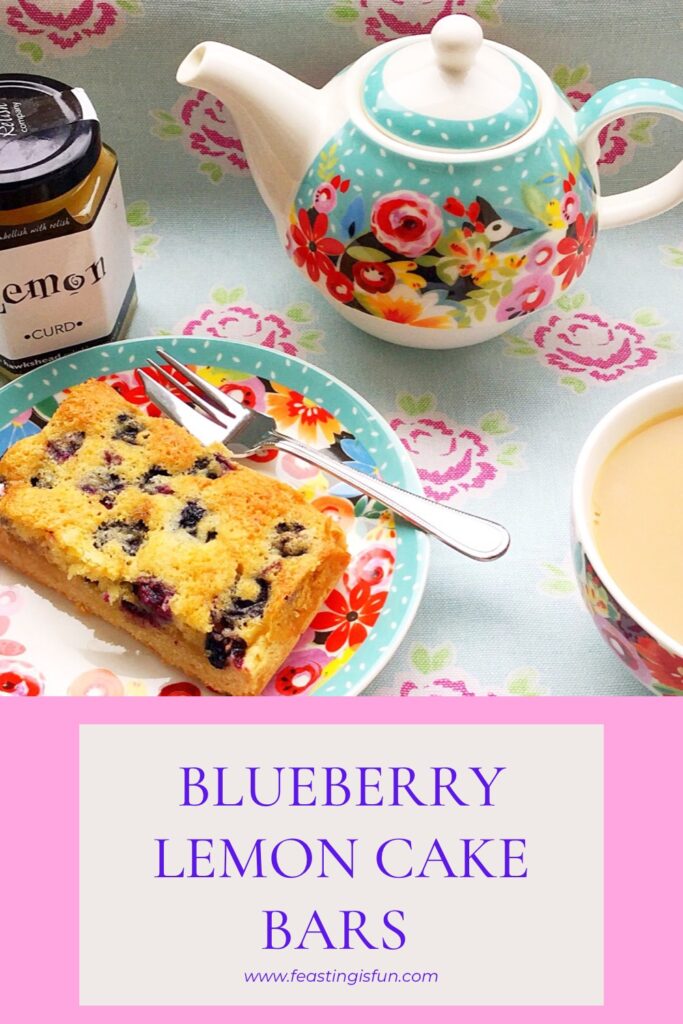
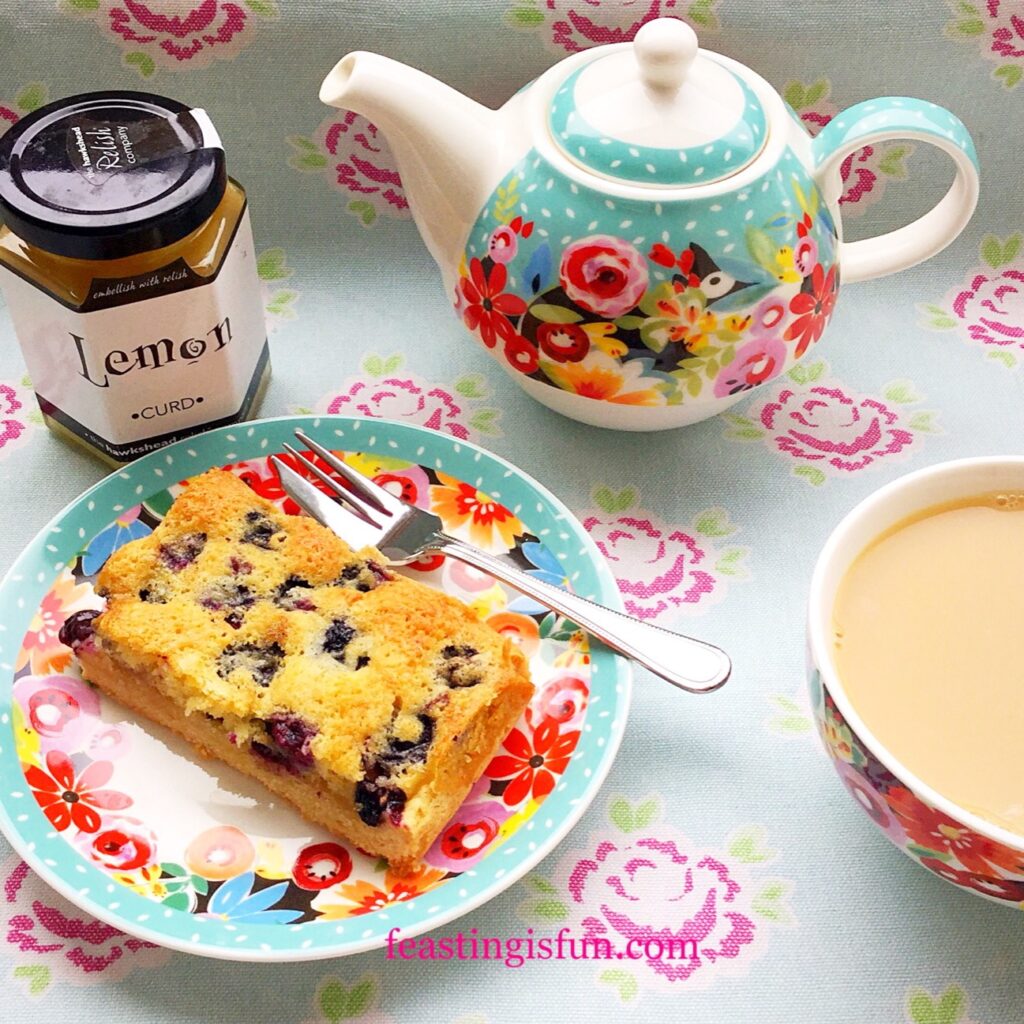
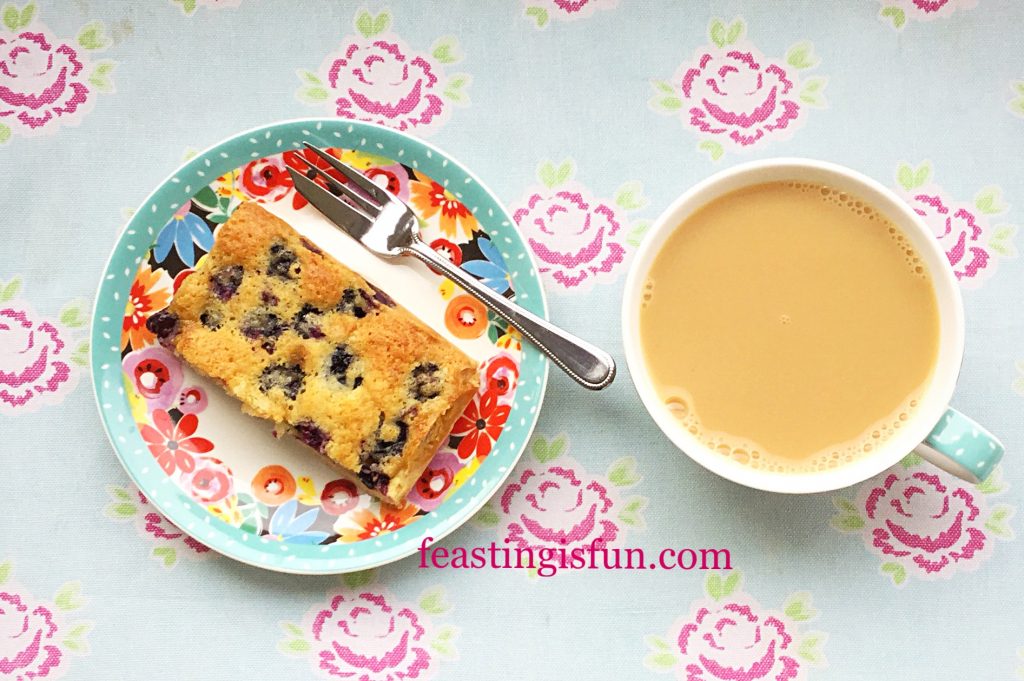
Serve the Blueberry Lemon Shortbread Cake Bars with a cup of tea, on some cheerful china, with a smile.

FF Blueberry Lemon Shortbread Cake Bars

Store in an airtight container. They will keep for 4 days. During warm weather, storing in the fridge is advised.

If you have enjoyed this recipe for Blueberry Lemon Shortbread Cake Bars you may also like these:

Cranberry Walnut Flapjacks

FF Blueberry Lemon Shortbread Cake Bars
Cranberry Walnut Flapjacks

Double Cherry Drizzle Oat Bars

FF Blueberry Lemon Shortbread Cake Bars
Double Cherry Drizzle Oat Bars

Bakewell Shortbread Bars

FF Blueberry Lemon Shortbread Cake Bars
Bakewell Shortbread Bars


Baking and cooking good, wholesome food for my family is very important to me. It truly is one of the ways that I show them my love. Knowing in the middle of a busy day that my hubby has something made with love, by me, to help him through. Well, it doesn’t get better than that when we are apart from each other. The oohs and aahs as each family member returns at the days end, to the comforting kitchen aromas, ensures they know that they are truly home.

Love, inquisitiveness and creating are the main motivational factors behind all of my cooking. What are yours?

Sammie xxx

Please see my Disclosure Policy.


Cherry Bakewell Soda Bread

Nothing smells better than the aroma of homemade bread, baking in the oven. As many of my regular readers will know, I adore making bread. Yet sometimes, time is the enemy. Especially if it’s needed for breakfast and we have run out. The solution is to bake this beautiful and delicious Cherry Bakewell Soda Bread.

FF Cherry Bakewell Soda Bread
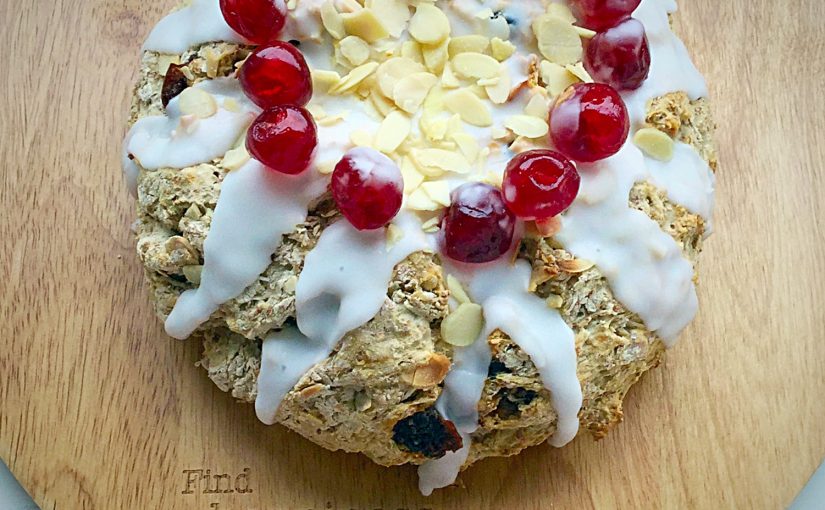
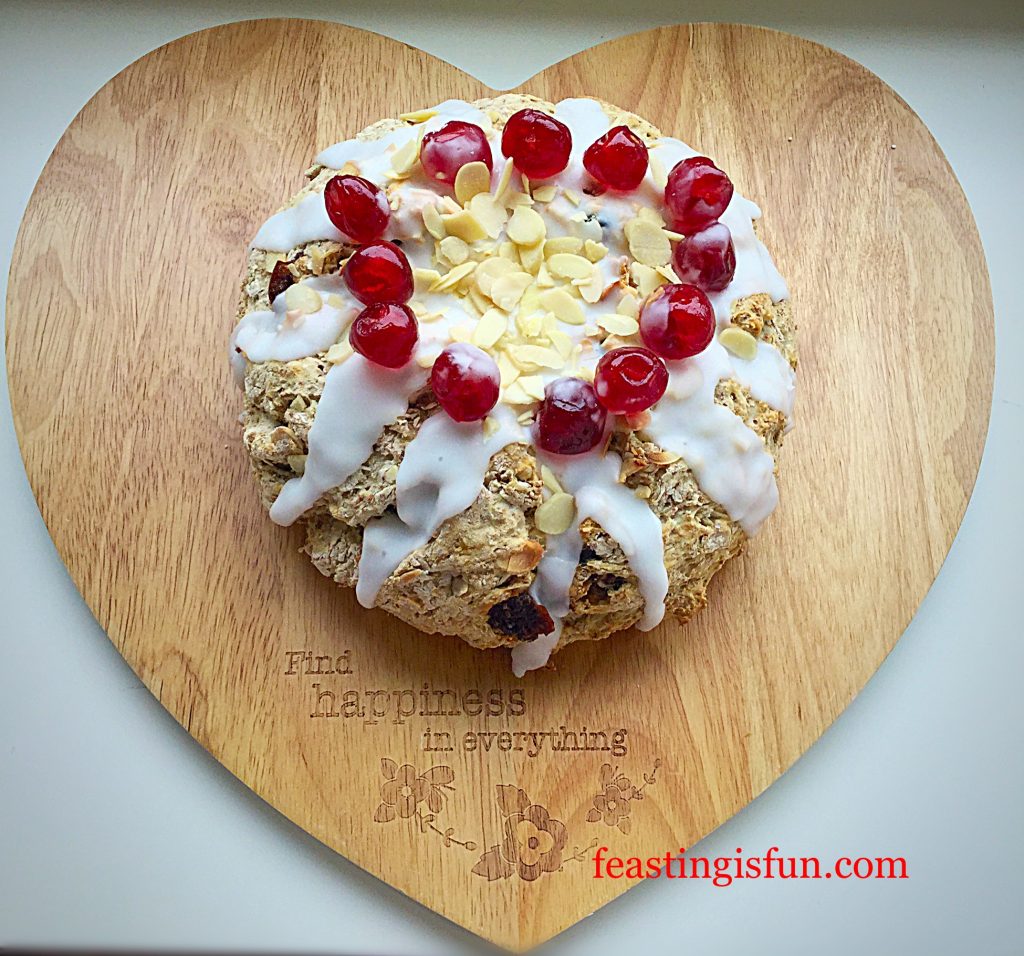
Cherry Bakewell Soda Bread crowned with cherries.

An un-yeasted bread, made even easier by using a packet of Wrights Scofa Bread Mix. All this tasty loaf requires is a little mixing, shaping and popping in a preheated oven to bake. The addition of cherries and flaked almonds gives this loaf the wow factor. Especially with the almond flavour icing, temptingly drizzled over the loaf and finished with ruby red, glacé cherries.

FF Cherry Bakewell Soda Bread
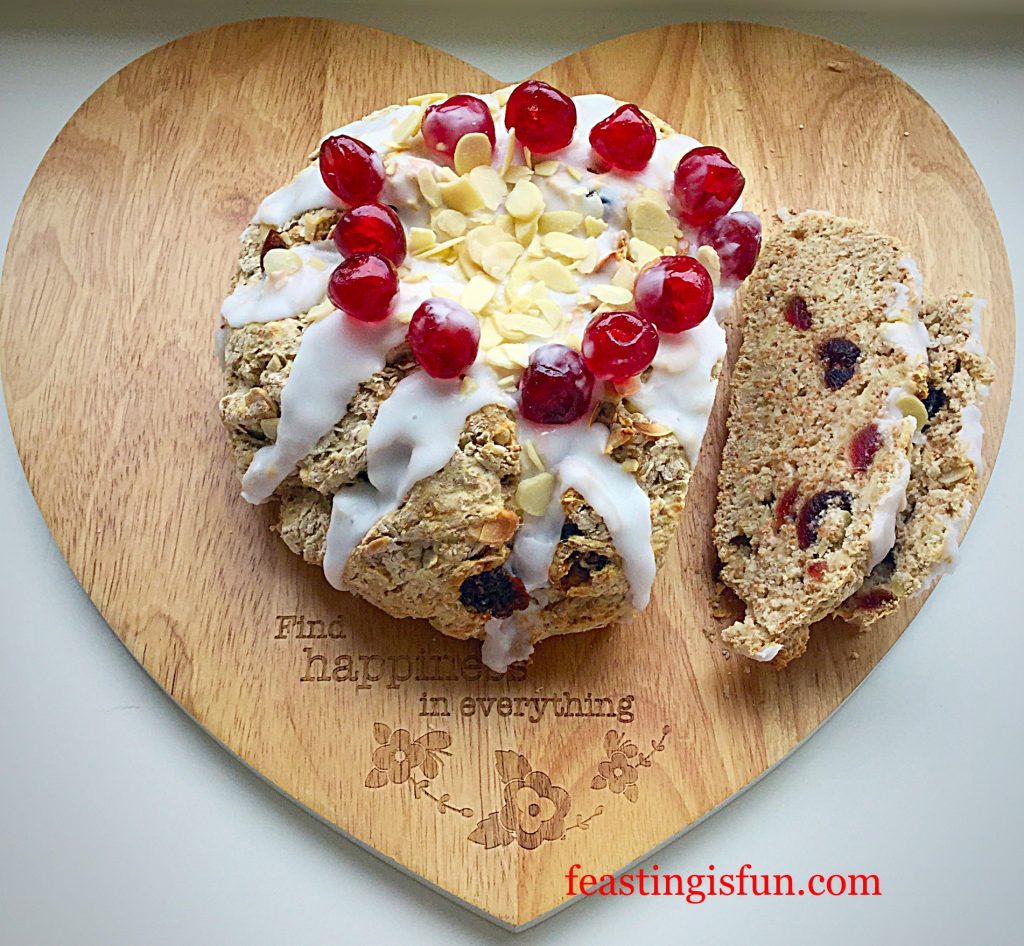
Cherry Bakewell Soda Bread hearty and delicious.

Since this loaf takes less than 45 minutes from start to baked, it is perfect for lazy weekend breakfasts. Still, if you are in a real rush, ditch the icing and crown of cherries and serve this sliced, warm from the oven, with butter if desired.

FF Cherry Bakewell Soda Bread
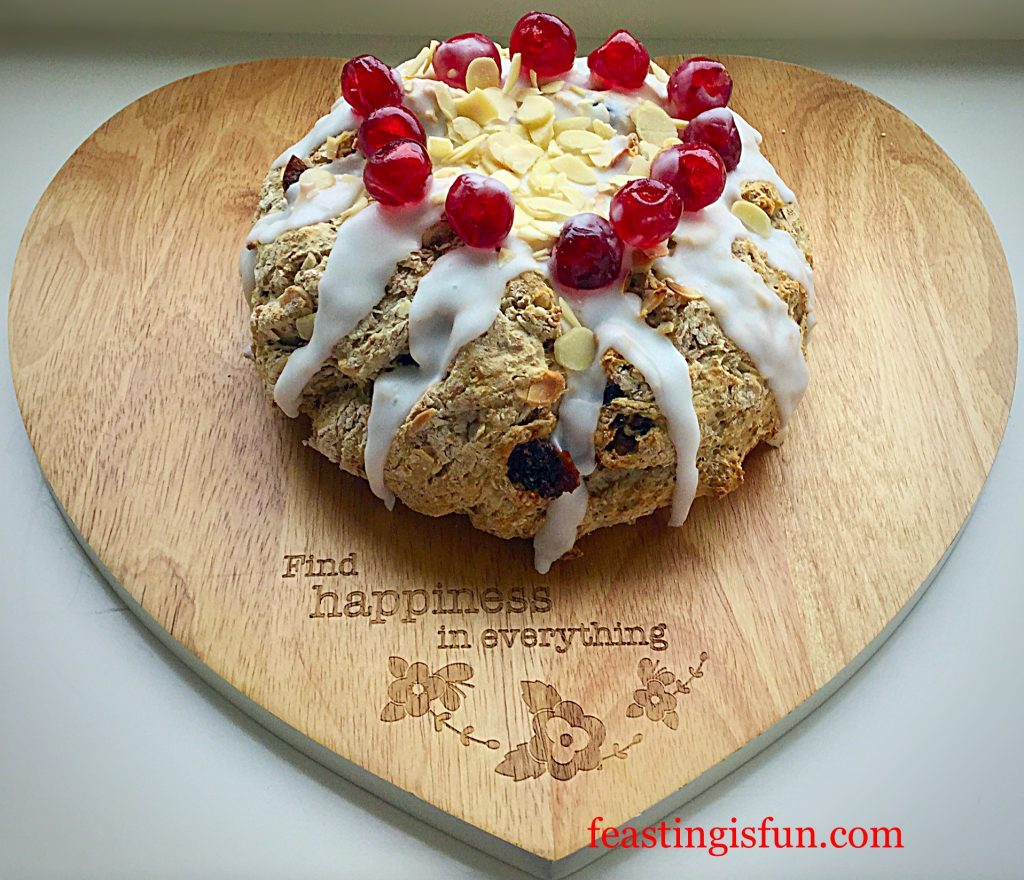
Cherry Bakewell Soda Bread perfect for afternoon tea.

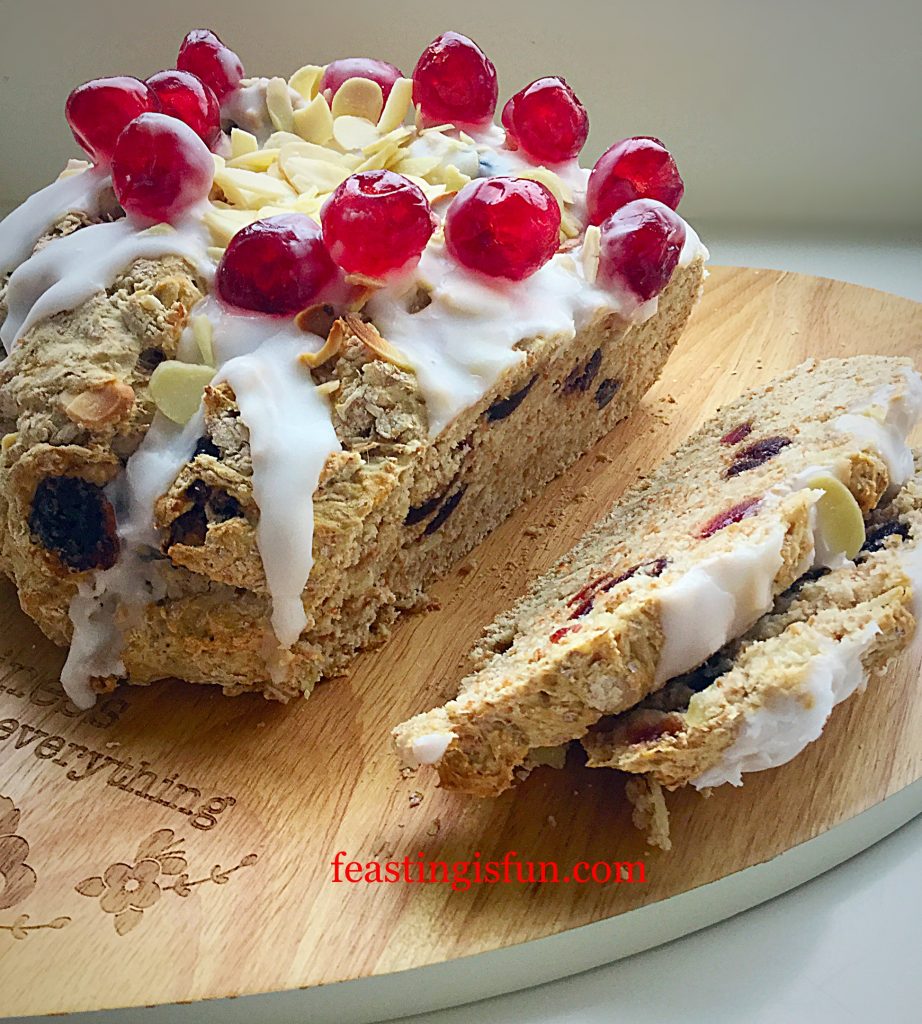
While this bread can be made and baked in under an hour, leaving to cool allows for simple, yet stunning decoration. Thick, almond icing, draped over the rustic loaf, simply topped with jewelled cherries. Creating a sensation for the eyes as well as the palette. Cooled and sliced, I found this delicious, hearty loaf needed no further addition. Each bite full of almonds, cherries and rustic, wholemeal bread.

Recipe: Cherry Bakewell Soda Bread

1 Packet Scofa Bread Mix available from Wrights Baking

Cold Water

150g/5oz Glacé Cherries

100g/4oz Flaked Almonds

3tsp Almond Extract – I use Nielsen-Massey

200g/7oz Sifted Plain Icing Sugar

Method: Preheat the oven to 220C/200C fan, gas mark 7.

  • First of all, remove 12 whole glacé cherries and set them to one side for decoration.
  • Next cut all the remaining cherries in half.
  • Place the volume of water, as specified on the packet, into a large bowl.
  • Add 1 teaspoon of almond extract to the water. Swirl to mix.
  • Add the entire packet of Scofa Bread Mix.
  • Now add the cherry halves on top of the bread mix, lightly dusting them with the mix to stop them sticking together.
  • Reserve one tablespoon of flaked almonds for decoration and add the rest to the bowl.
  • Use a wooden spoon to stir the mixture until it comes together.
  • Tip the dough out on to a lightly floured work top and shape into a round.
  • Place the shaped dough on to a greased baking sheet.
  • Cut a deep cross into the dough, if not icing, sprinkle the remaining almonds over the bread.
  • Next place in the centre of a preheated oven.
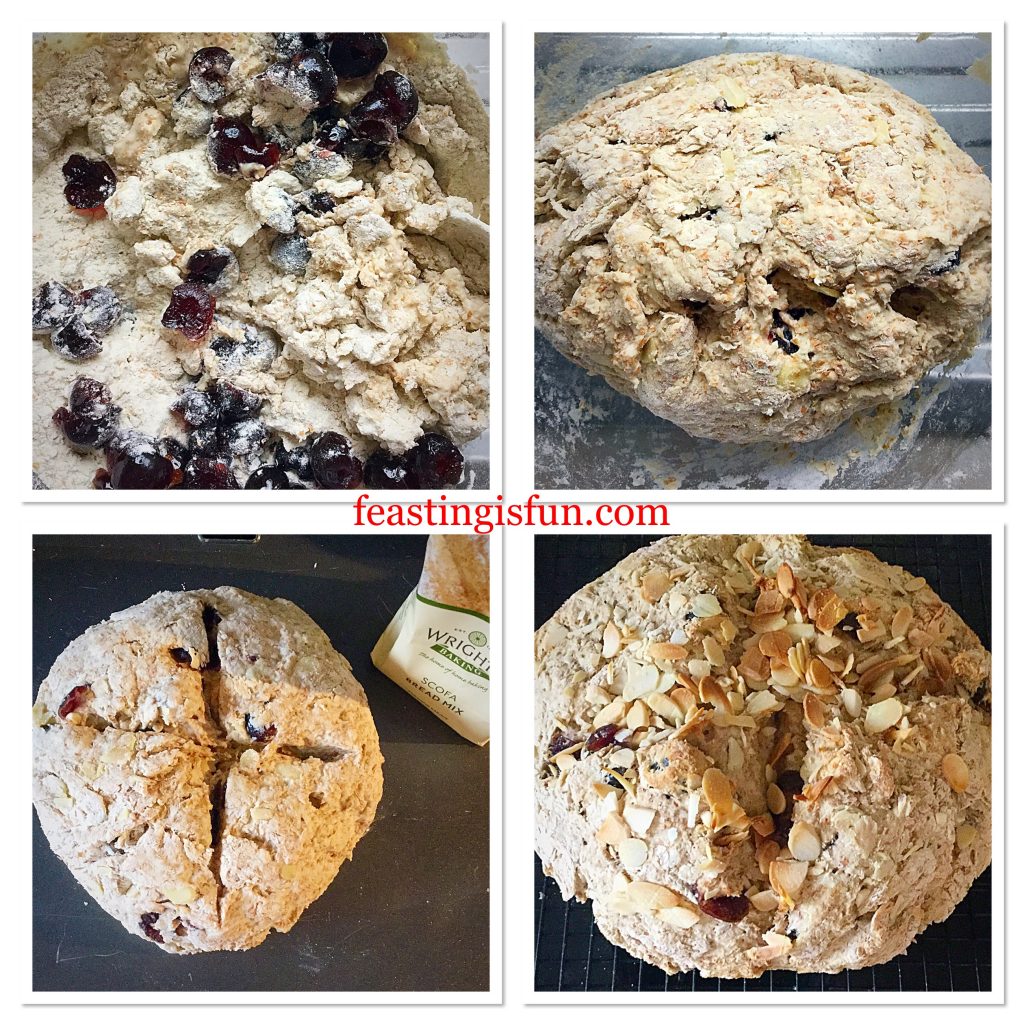
  • Bake the bread for 30-35 minutes. Once baked it will sound hollow when rapped on the base with your knuckle. Note – this baking time is slightly longer than specified on the packet. This is due to the addition of cherries and almonds.
  • Once baked remove the bread from the oven and place on a cooling rack.
FF Cherry Bakewell Soda Bread
Making, shaping and baking the Cherry Bakewell Soda Bread
  • Note – the bread doesn’t change colour very much whilst baking.
  • Allow the bread to completely cool before icing and decorating.
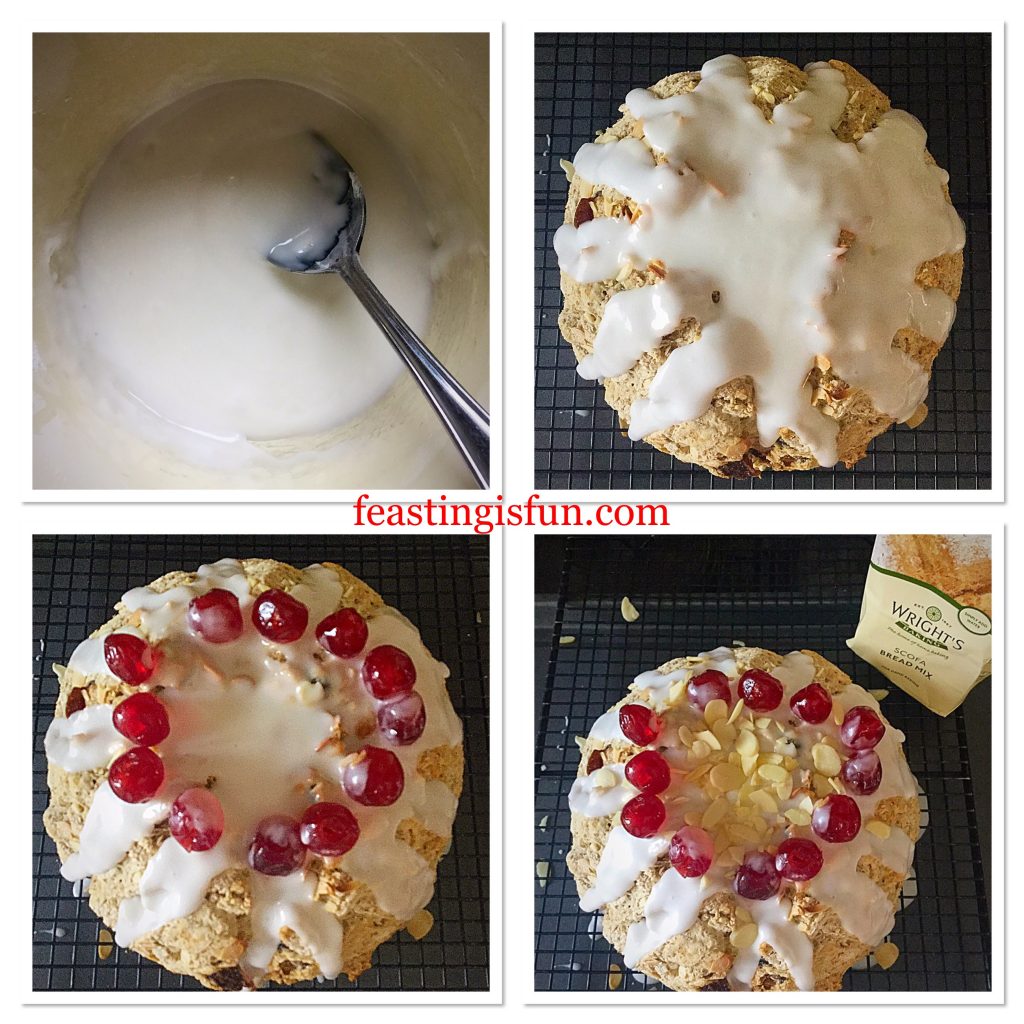
  • To make the icing: Add 2 teaspoons of almond extract to the sieved icing sugar. Now add enough water, approximately one tablespoon, to the icing and stir. It should be a thick paste that can hold a figure of eight for a few seconds.
  • Place the cooling rack with the bread on it, over a baking tray, to catch any drips.
  • Start in the centre. Spoon thick icing over the bread, encouraging it to drape down over the sides of the loaf.
  • Continue until the bread is evenly drizzled with the icing.
  • Next, place the reserved cherries on top of the bread, forming a crown-like circle.
  • Finally, scatter the reserved almond flakes over the bread.
FF Cherry Bakewell Soda Bread
Icing and decorating the Cherry Bakewell Soda Bread
  • Set the decorated bread to one side to allow the icing to set.
FF Cherry Bakewell Soda Bread
Cherry Bakewell Soda Bread deliciously easy to make.

Serve this delicious bread sliced, for breakfast, lunch of afternoon tea. In fact, it is perfect for anytime of the day.

Store in an airtight container. This bread is at its best when eaten wishing 24 hours of baking. That shouldn’t be too much of a problem!

If you have enjoyed the recipe for this Cherry Bakewell Soda Bread you may also like these:

Ginger Date Hot Cross Buns

FF Cherry Bakewell Soda Bread
Ginger Date Hot Cross Buns

Christmas Spiced Fruit Loaf

FF Cherry Bakewell Soda Bread
Christmas Spiced Fruit Loaf

Toffee Banoffee Waffles

FF Cherry Bakewell Soda Bread
Toffee Banoffee Waffles

Making something different for breakfast at the weekend is a real treat. Whilst most of my baking is made from scratch, the convenience of having good quality packet mixes in the cupboard cannot be denied. Balancing time spent together as a family with, the time it takes to create a feast, is important.

Do you make breakfast more of a treat at the weekend?

After all, it is the most important meal of the day?

Sammie xx

Wrights Baking supplied me with the mix to create this recipe. All views, content and photography are my own. Please see my Disclosure Policy.