Maltesers Malted Chocolate Loaf Cake

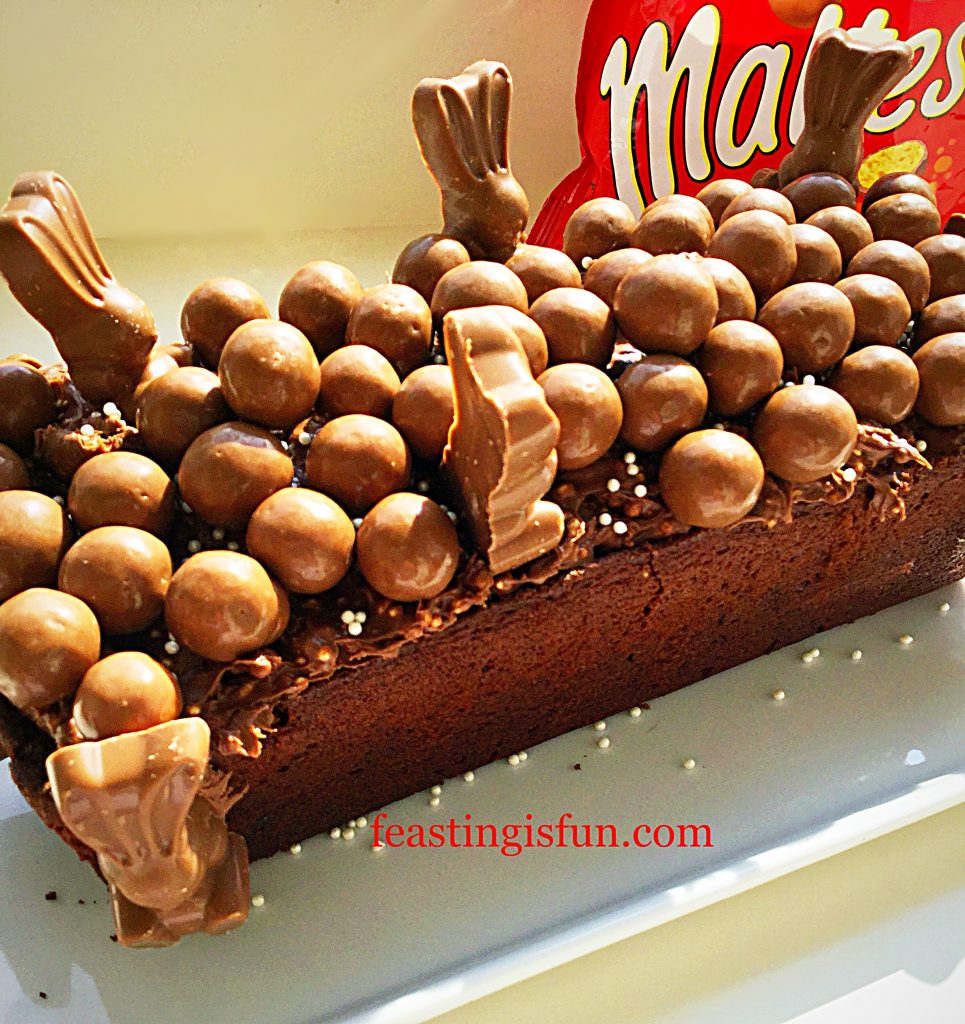
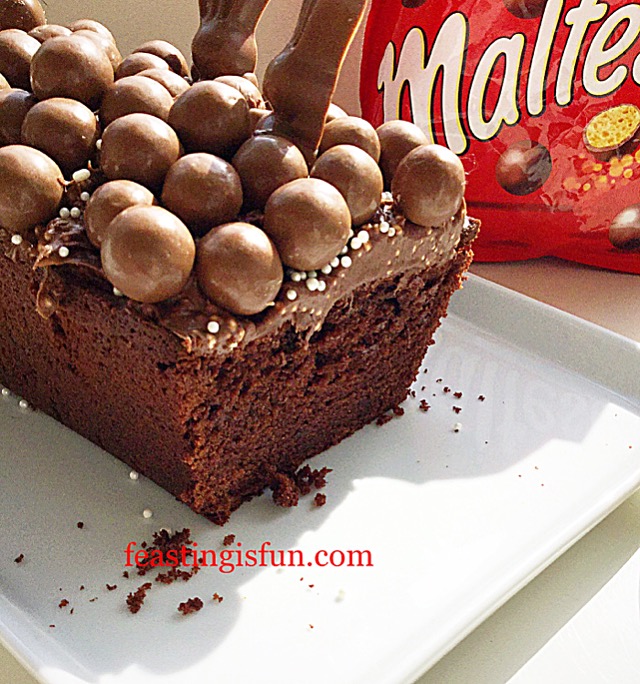
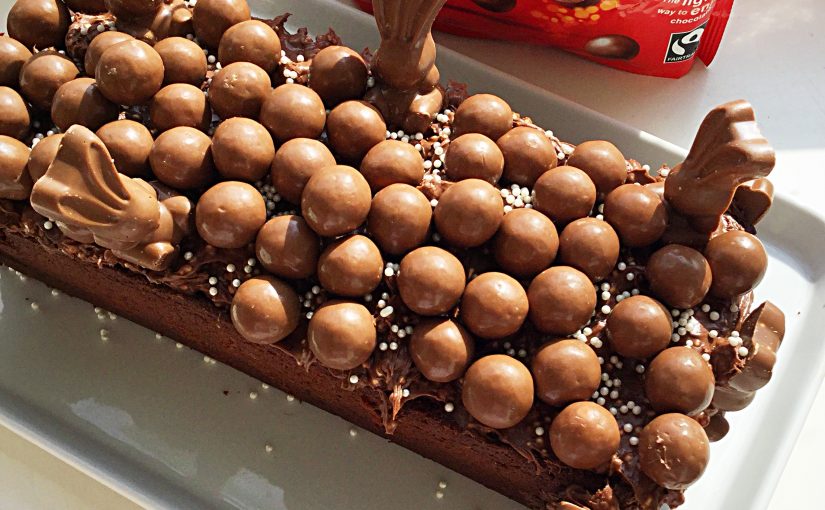
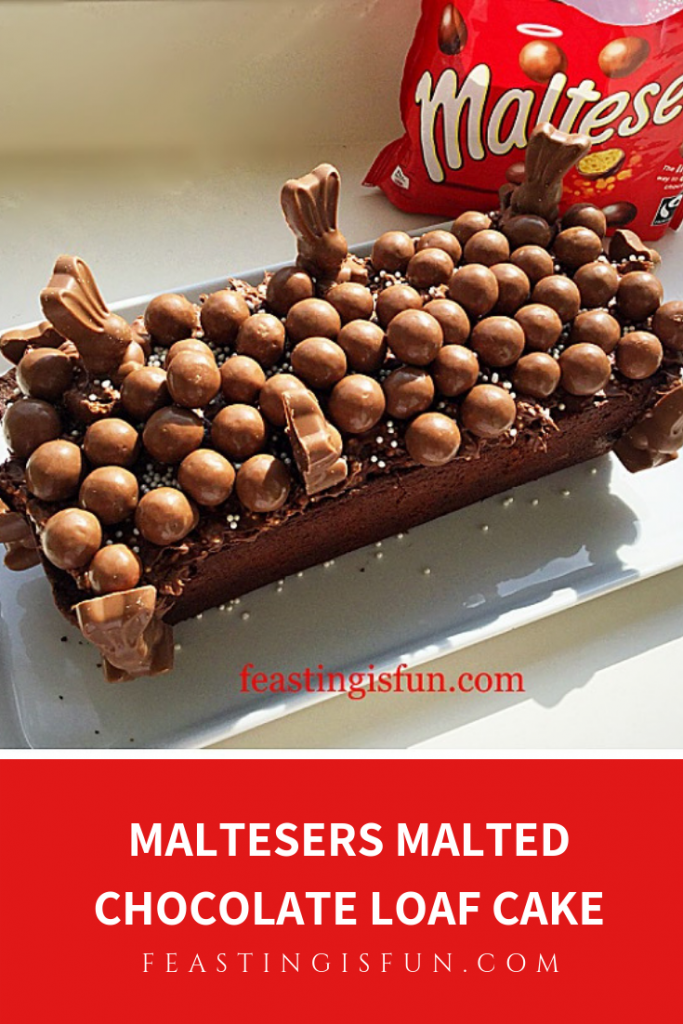
Easter was only a couple of weeks ago. Time flies. Yet fortunately, Maltesers bunnies don’t! Since I had these cute, chocolate bunnies leftover from Easter, I decided to bake a loaf cake and use them to decorate. While also having a large bag of Maltesers and a whole jar of Maltesers spread, the resulting Maltesers Malted Chocolate Loaf Cake is for Maltesers lovers everywhere.

FF Maltesers Malted Chocolate Loaf Cake


Since my Double Chocolate Chip Loaf Cake recipe is very reliable, that is where this recipe started. Although a few ingredients were changed to suit the flavour of this cake. While still wonderfully moist, malt powder adds another level of flavour to the chocolate. And Maltesers spread, topping the cake in a thick layer, is all the ‘icing’ that’s needed. Finishing with crunchy, Maltesers adds taste, texture and fun. Resulting in a cake that tastes of Maltesers all the way through.
FF Malteser Malted Chocolate Loaf Cake
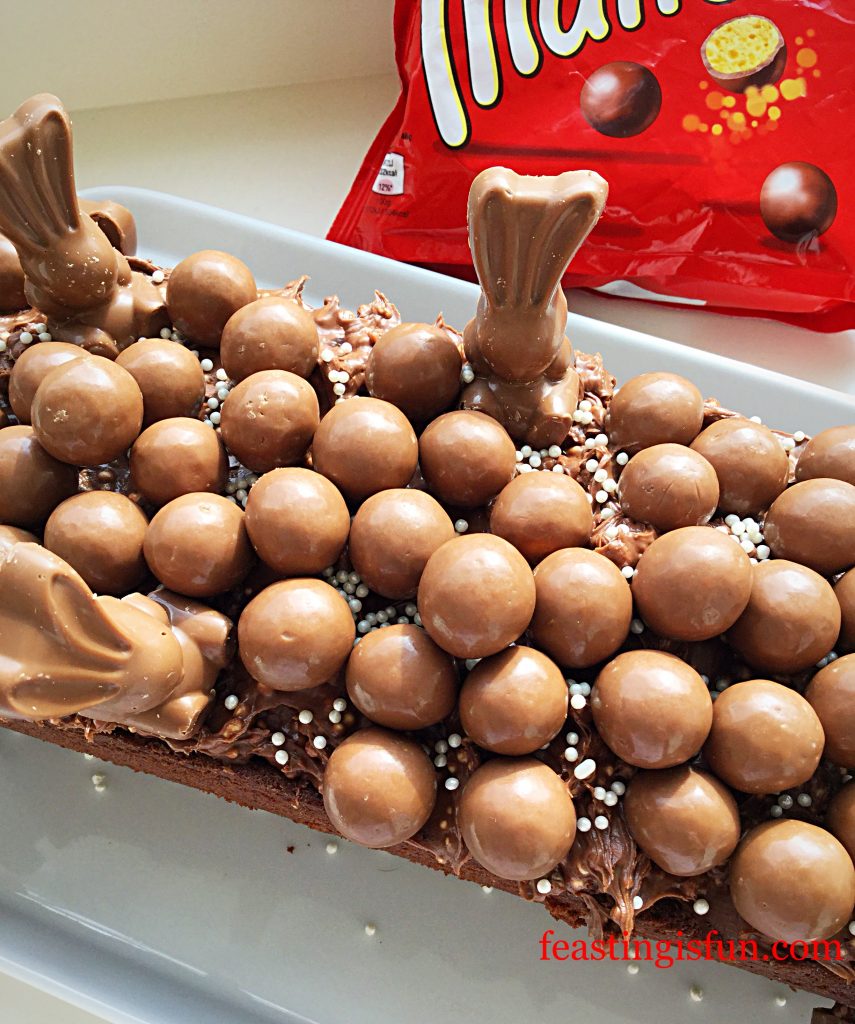
Maltesers Malted Chocolate Loaf Cake with added chocolate bunnies for Easter.

Finally, the addition tiny, white pearls echo the Maltesers crunch that is in the chocolate spread, on top of the cake.
FF Maltesers Malted Chocolate Loaf Cake
Maltesers Malted Chocolate Loaf Cake

Recipe: Maltesers Malted Chocolate Loaf Cake serves 8-10

For the cake

175g/6oz Unsalted Butter softened

175g/6oz Light Brown Sugar

1/4tsp Salt –  I use Maldon

3 Large Free Range Eggs

1tsp Vanilla Extract – I use  Nielsen-Massey

100g/4oz Full Fat Yoghurt

50g/2oz Cocoa Powder

2tbsp Malted Drink Powder – I use Horlicks

125g/5oz Plain White Flour

2tsp Baking Powder

To decorate

I jar Malteaser Chocolate Spread. Alternatively use your favourite chocolate spread

1 Large Family Bag or Box of Maltesers – if you are particularly partial to Maltesers add an extra bag!

Small pearl or silver edible balls

Optional – Packets of Maltesers Chocolate Bunnies, as many as needed – only available at certain times of the year.

Method: Preheat the oven to 160C/140C fan, gas mark 3, 325F

Making And Baking The Malted Chocolate Cake

For this bake you will need a 2lb loaf tin. Grease thoroughly with butter and line the base with baking parchment.

  • First of all sift the flour, cocoa powder and baking powder together in a bowl. Then add the two tablespoons of malt powder. This is the dry mix.
  • Into a large bowl add the butter, sugar and salt. Beat until the mixture is fully combined and has very few lumps.
  • Next add the three eggs to the bowl, the vanilla extract and also the yoghurt. Beat for one minute to break up the eggs.
  • Gently tip in the dry ingredients and beat slowly until all the ingredients have combined. Switch to a large spoon and stir, ensuring the entire cake batter is fully combined.
  • Since the batter is quite thick, spoon it carefully into the loaf tin, smoothing the top, for an even bake.
  • Place the tin into the centre of the oven and bake for 45-55 minutes.
  • The cake is baked when it is firm to touch and an inserted skewer comes out clean.
  • As soon as the cake is baked remove the cake from the oven and allow to cool fully in the tin.
  • When cooled, carefully turn the cake out of the tin, removing the baking parchment from the base.
FF Malteser Malted Chocolate Loaf Cake
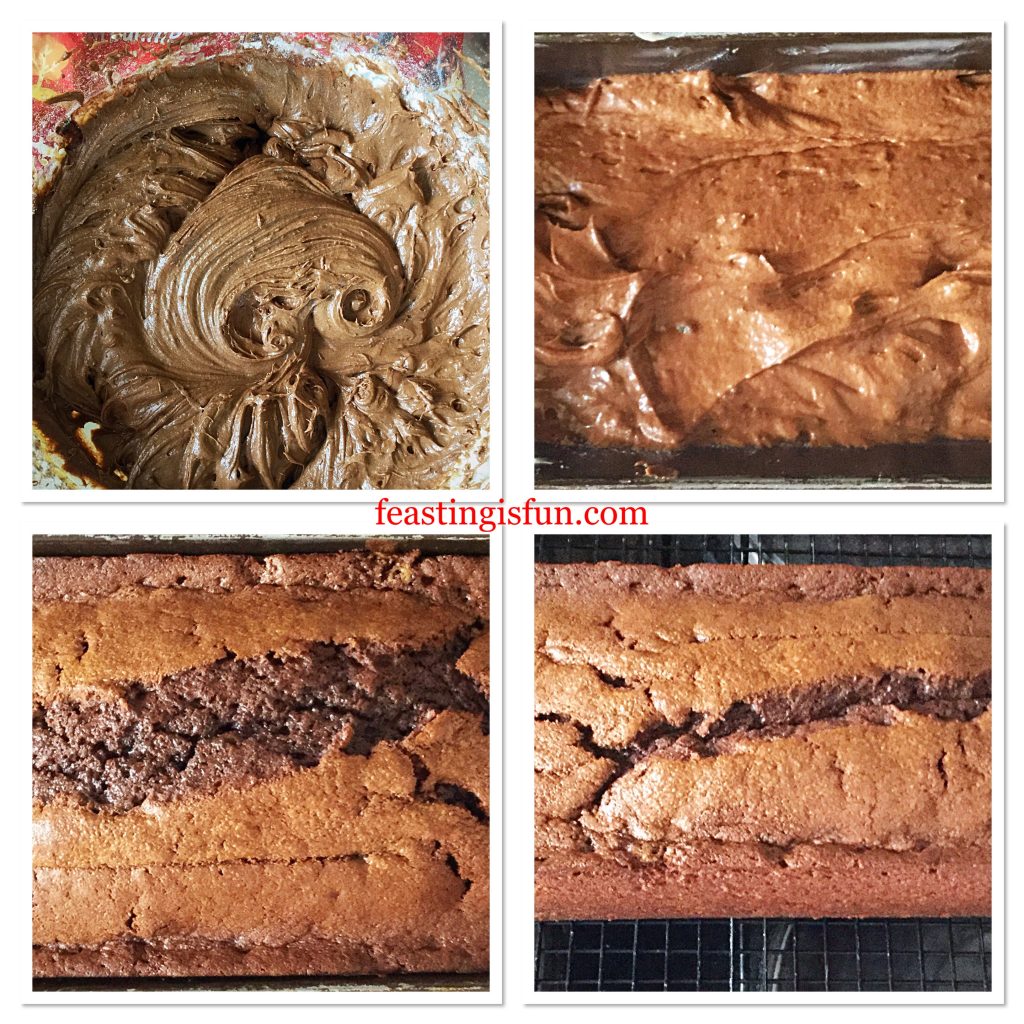
Making the cake batter, filling the tin and the finished, baked cake.

Decorating The Loaf Cake

  • When ready to decorate, place the loaf cake on a plate or stand.
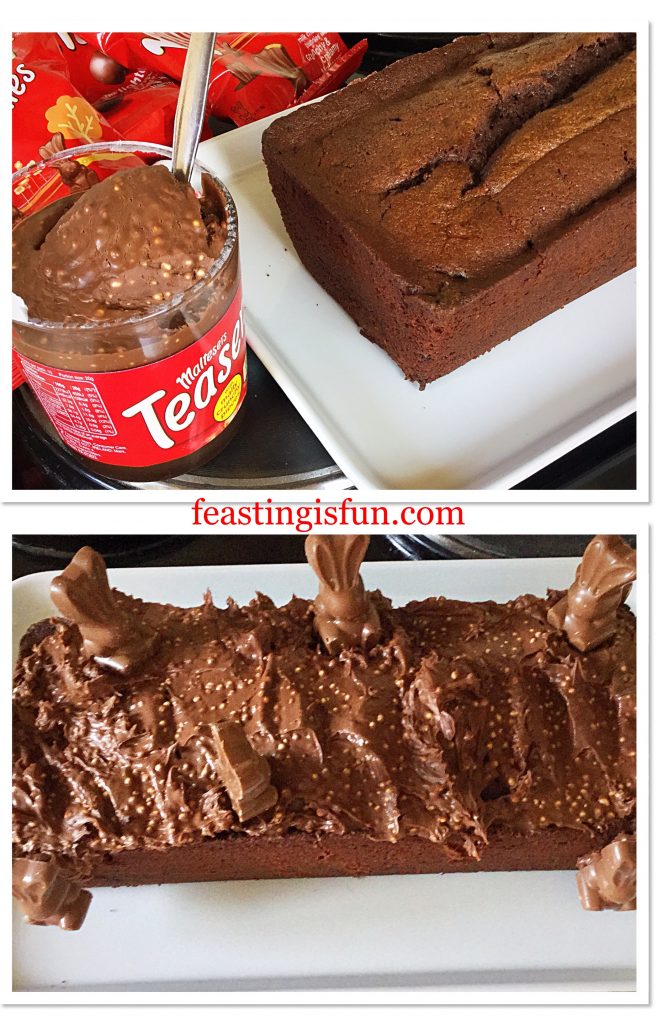
  • Using a palette knife, spread the entire contents of the Maltesers jar on top of the cake.
  • If using bunnies, these can be attached to the side of the cake using some of the spread.
  • Cover the top of the cake with Maltesers. Add as many as you can fit on.
  • Finally sprinkle over the tiny pearl/silver balls.
FF Malteser Malted Chocolate Loaf Cake
Decorating the cake.

And, the finished cake!

FF Malteser Malted Chocolate Loaf Cake
Maltesers Malted Chocolate Loaf Cake ready to share.

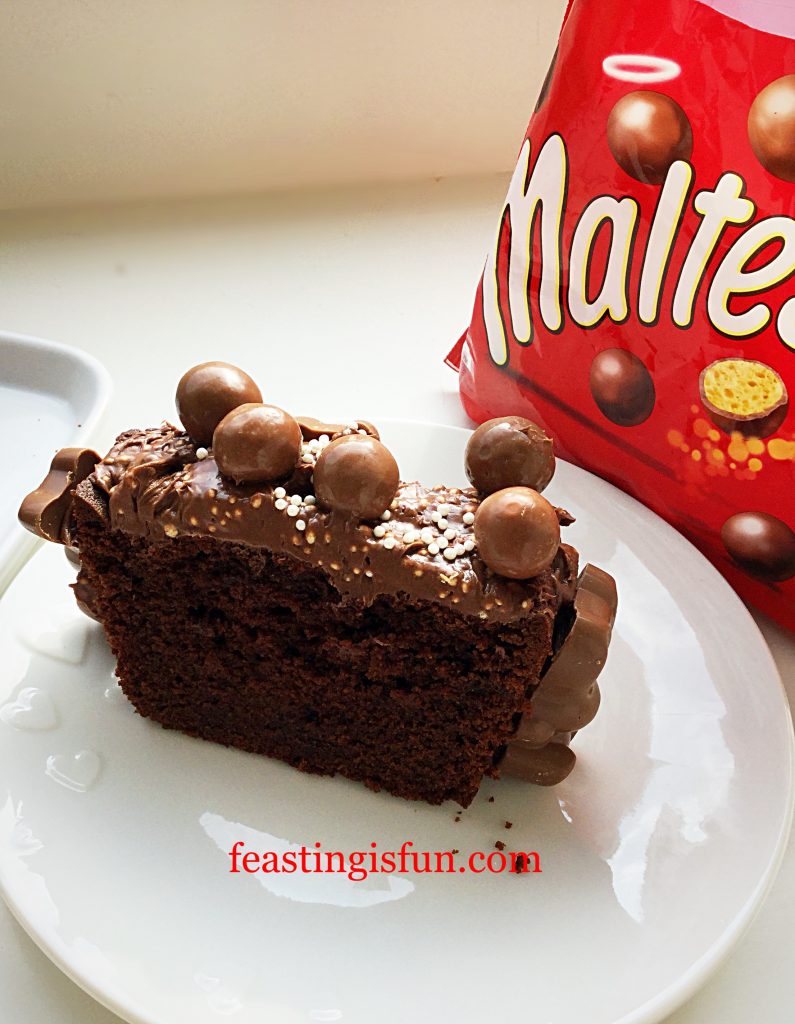
To serve slice and serve with a smile.
FF Malteser Malted Chocolate Loaf Cake
A slice of Maltesers Malted Chocolate Loaf Cake

Finally, this cake will keep for up to 5 days in an airtight container, on a planet where nobody lives.

Since it only lasted 2 days here at home!

If you have enjoyed this recipe for Maltesers Malted Chocolate Loaf Cake you may also like these:

Chocolate Marble Celebration Cake 
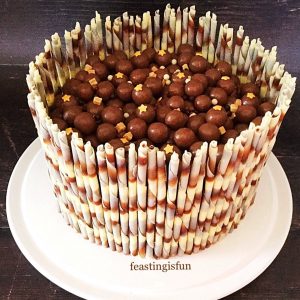
Chocolate Marble Celebration Cake

Golden Egg Chocolate Sponge Cake
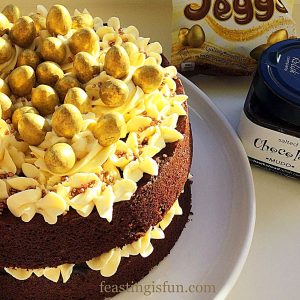
Golden Egg Chocolate Sponge Cake

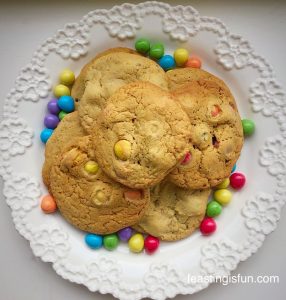
Chocolate Monster Mini Egg Cookies
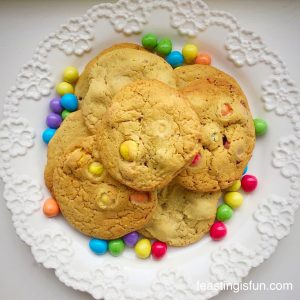
Chocolate Monster Mini Egg Cookies

Because Easter is celebrated once a year, these recipes are all designed to be adaptable. While Maltesers are easy to obtain, in the other bakes Smarties, M & M’s, or any other chocolate can be used. Yet, due to the liquid content of caramel, or creme eggs, it is advisable to freeze these, prior to using them in a bake. As a result any frozen substitutes will bake beautifully.

So, I hope that you had an enjoyable Easter and wish you all the very best with your making, baking and creating.

Sammie xx

No part of this post may be reproduced or duplicated without the written permission of the owner. Please see my Disclosure Policy.
 

Golden Egg Chocolate Sponge Cake

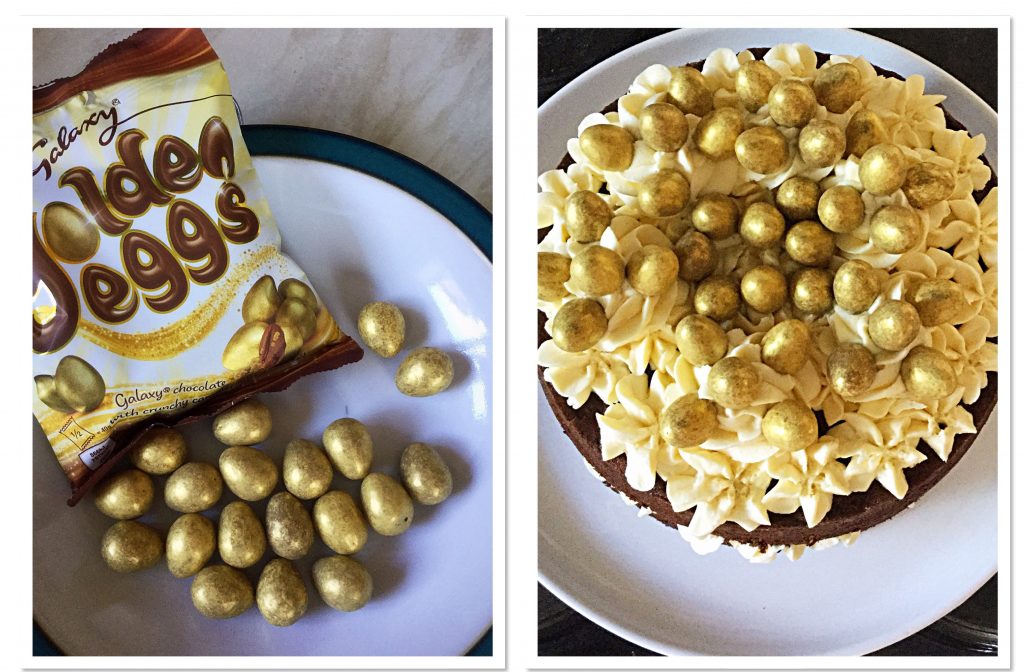
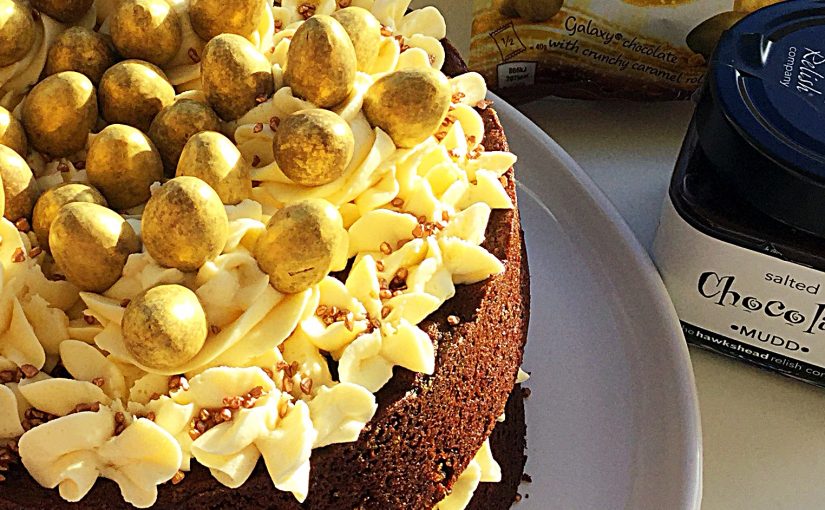
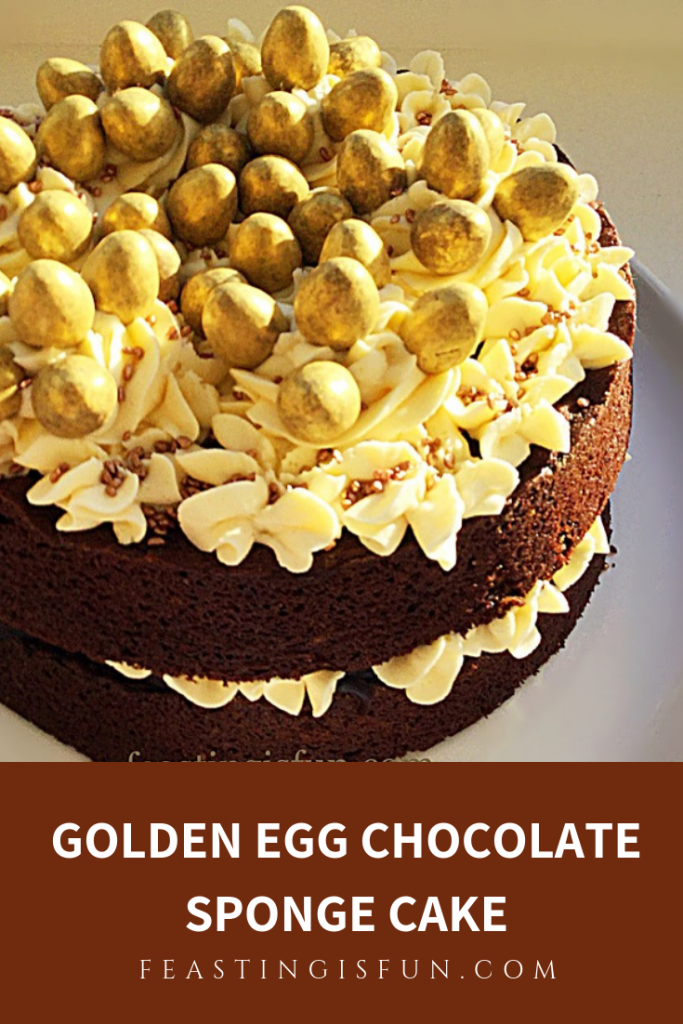
Easter is nearly upon us. Shops are filled with fluffy bunnies, chocolate chicks and all manner of chocolate eggs. While surveying the vast selection, I found Galaxy Chocolate Golden Mini Eggs. And they are perfect for decorating an Easter celebration cake. Especially my Golden Egg Chocolate Sponge Cake.

FF Golden Egg Chocolate Sponge Cake

The reason for Easter

Easter Sunday is the Christian celebration of new life. Although Jesus had died two days prior, hanging on a cross. Yet when His friends went to visit Him the following Sunday, the tomb where He had been placed was empty. Shocked and outraged, one of the women spoke to the gardener, wanting to know where He had gone. The response came “Why look for the living among the dead.”

As the prophecies had foretold, Jesus Christ, Son of the Living God, had risen from the dead. He had overcome death. Forever. So that we, may have life, in Him. Hence the chicks and eggs, bunnies and lambs in the shops, represent new life. Gold, for me on this cake, represents the King of Kings and Lord of Lords. Jesus. He who could not be contained by death. Even though He was brutally punished and died wearing a crown made from thorns. Is now alive, bearing the scars of death, yet as alive as you and I. Please see Important Stuff.

FF Golden Egg Chocolate Sponge Cake
Golden Egg Chocolate Sponge Cake

While celebrating over Easter, take a moment, to think about what it means to you. As you make and bake this cake, remember the love, His love, that He offers you. Even now, as Easter is treated as an extra holiday. Consider the real truth behind it. With Jesus their is always hope, without Him, who do you place your hope in?

FF Golden Egg Chocolate Sponge Cake
Golden Egg Chocolate Sponge Cake what does Easter mean to you?

Recipe: Golden Egg Chocolate Sponge Cake serves 8-10

225g/8oz Unsalted Butter softened

225g/8oz Light Brown Sugar

1tsp Vanilla Eaxtract – I use Nielsen-Massey

1/4tsp Salt -I use Maldon

5 Large Free Range Eggs

100ml Buttermilk

150g/5oz Plain White Flour

75g Cocoa Powder – I use Callebaut

2tsp Baking Powder

For frosting and decorating:

3-4tbsp Salted Chocolate Spread – I use Hawkshead Relish new MUDD spread

alternatively use a chocolate spread of your choice.

200g/7oz Unsalted Butter

400g/14oz Plain Icing Sugar

1tsp Vanilla Extract

2tbsp Hot Water – from a recently boiled kettle

2 x 80g bags Galaxy Mini Golden Eggs

Optional – gold/copper sprinkles

Method: Preheat the oven to 160C/140C fan, gas mark 3, 325F

Grease 2 x 20cm/8″ sandwich tins with butter. Line the base of each tin with baking parchment.

Making and baking the chocolate sponge cakes

  • First of all, place a sieve over a bowl. Then sieve the flour, baking powder and cocoa powder into the bowl. Set the bowl to one side. Dry ingredients.
  • Next, place the eggs and buttermilk into a jug. Whisk lightly using a fork. Wet ingredients.
  • Place the butter, brown butter and salt into a large bowl. Beat until well combined and free from lumps.
  • Next add the vanilla extract. Continue to beat until incorporated.
  • Take the jug of wet ingredients and pour on to the butter mixture. Then add the sifted dry ingredients.
  • Beat the ingredients in the bowl gently, scraping down the sides of the bowl halfway through. Continue to beat the ingredients until fully combined.
  • Divide the chocolate sponge batter equally between the two prepared cake tins.
  • Place the cake tins into the centre of the preheated oven and bake for 40-50 minutes.
FF Golden Egg Chocolate Sponge Cake
Making and baking the chocolate sponge cakes.
  • The cakes are baked when they spring back from a light touch and a cake tester comes out clean.
  • As soon as the cakes are baked remove them from the oven.
  • Allow the cakes to cool in the tin for 20 minutes and then tip them out on to a cooling rack.
  • Once cooled carefully remove the baking parchment from the base of each cake.

Making the frosting and decorating the cake:

  • While the cakes are cooling the buttercream frosting can be made.
  • Place the butter into a large bowl, or the bowl of a free standing mixer with paddle attachment.
  • Next add 1 teaspoon of vanilla extract.
  • Now whisk or beat the butter until it is softer and pale.
  • Add all of the icing sugar to the bowl and 2 tablespoons of very hot water.
  • Start mixing very slowly and then as the butter and icing sugar start to combine increase the mixing speed. Continue until the frosting is light and fluffy.
  • Fit a large icing bag with a large closed star, or drop flower piping nozzle. I have a Wilton  #2D piping nozzle.
  • Fill the piping bag with the whipped buttercream.
  • Place the bottom of the cake on to a plate.
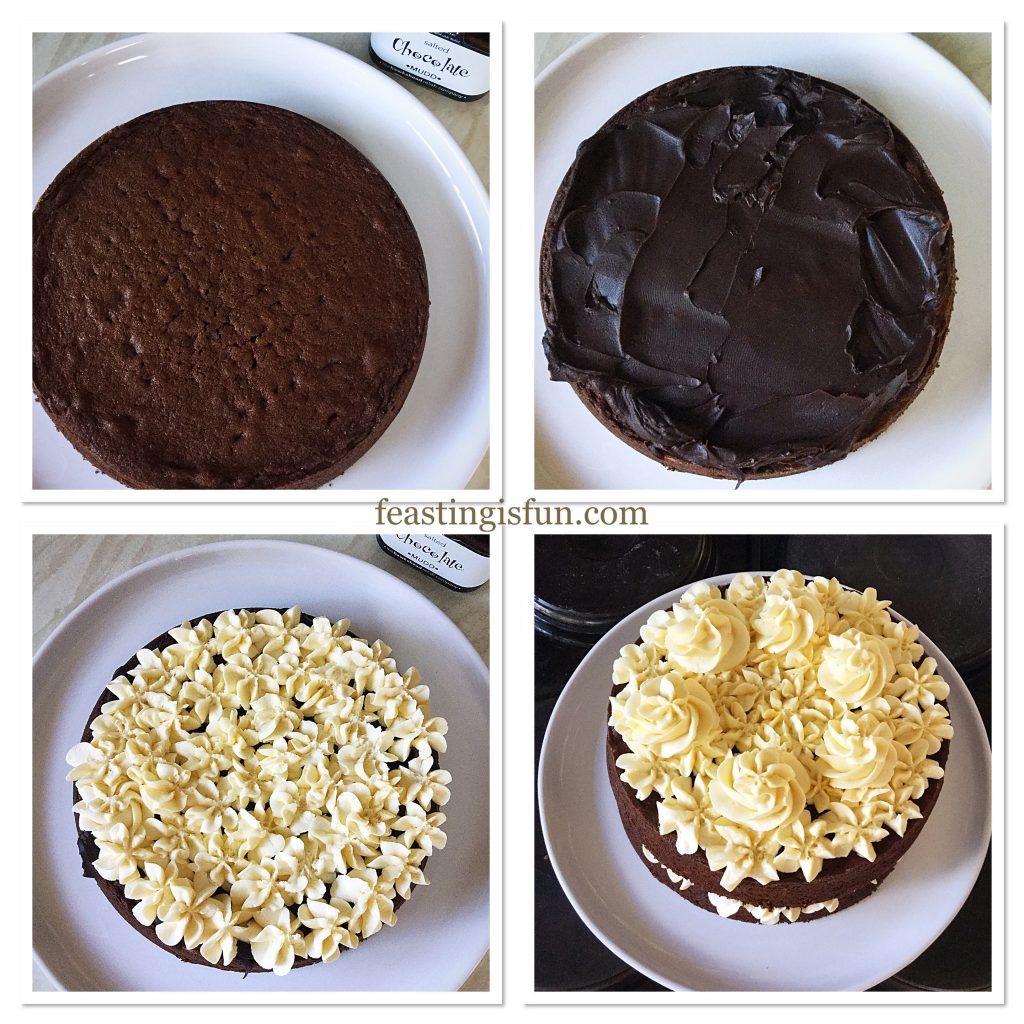
  • Spread the Salted Chocolate Spread over the cake. Follow by piping the buttercream so that it covers the spread. Start at the outside edge of the cake, piping in circles until the centre is reached.
  • Place the top of the cake evenly on to the bottom.
FF Golden Egg Chocolate Sponge Cake
Filling and frosting the cake.
  • Pipe buttercream on to the top of the cake, in the same way the base was covered.
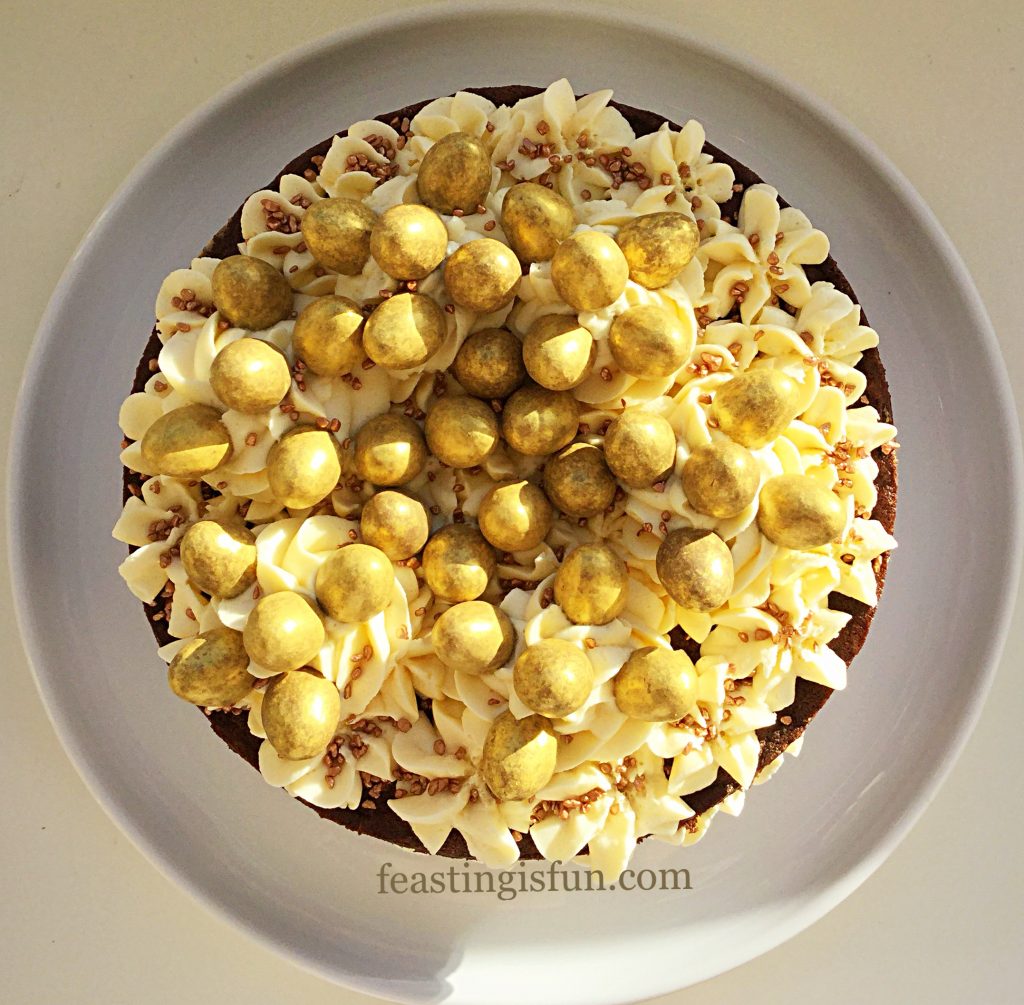
  • And then pipe 6 swirls, slightly set in from the edge of the cake. See the photograph below.
FF Golden Egg Chocolate Sponge Cake
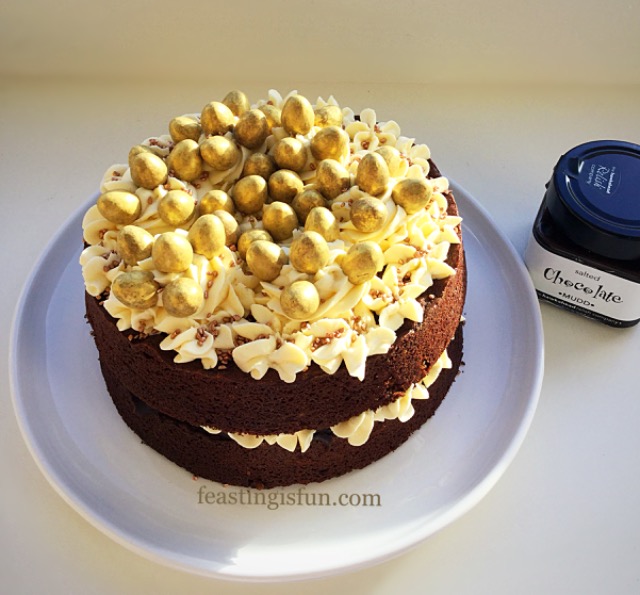
Golden Egg Chocolate Sponge Cake fully decorated.
  • Finally, decorate the top of the cake with the mini golden eggs and sprinkles.
FF Golden Egg Chocolate Sponge Cake
Golden Egg Chocolate Sponge Cake

And the cake is now ready to be served.

Serve with a smile to friends and family. Alternatively gift the cake to someone special.

This cake will keep in an airtight container for up to 5 days. Refrigerate is the weather is hot.

If you have enjoyed this Easter recipe for Golden Egg Chocolate Sponge Cake you may also like these:

Vanilla Mini Nest Egg Cupcakes

FF Golden Egg Chocolate Sponge Cake
Vanilla Mini Egg Nest Cupcakes

Hot Cross Buns

FF Golden Egg Chocolate Sponge Cake
Hot Cross Buns easy and delicious to make at home.

Chocolate Monster Mini Egg Cookies

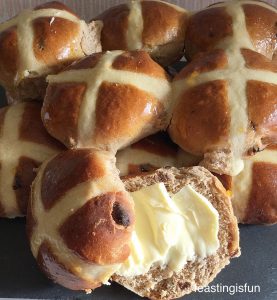
FF Golden Egg Chocolate Sponge Cake
Chocolate Monster Mini Egg Cookies

While celebrating Easter is especially important to me, having a real, everyday relationship with Jesus is more important. Rather than dealing with life on my own, He is always there. Because of what He endured on the cross and in His life, Jesus  understands. So as well as being my Saviour, He is also my friend.

So, whatever you are making, baking and creating in your kitchens, have fun preparing and sharing your feast.

Sammie xx

Hawkshead Relish gifted a jar of Salted Chocolate Spread to me. This is not a sponsored post. All views, opinions, content including photographs are my own. The entire content of this post is covered by Copyright and I.P. laws. Please see my Disclosure Policy.

Fruit Filled Butter Scones

Today it is Mother’s Day here in the U.K. A day where we celebrate mums, aunts, grandmothers and other significant women in our lives. My Grandma had a hugely positive input into my upbringing. Indeed it was at her apron strings that I learned the basic fundamentals of baking, that I still employ today. On the day prior to any beach trip, picnic, or family celebration, she would be found, busy baking in the kitchen. I am certain she would enjoy these Fruit Filled Butter Scones.

FF Fruit Filled Butter Scones
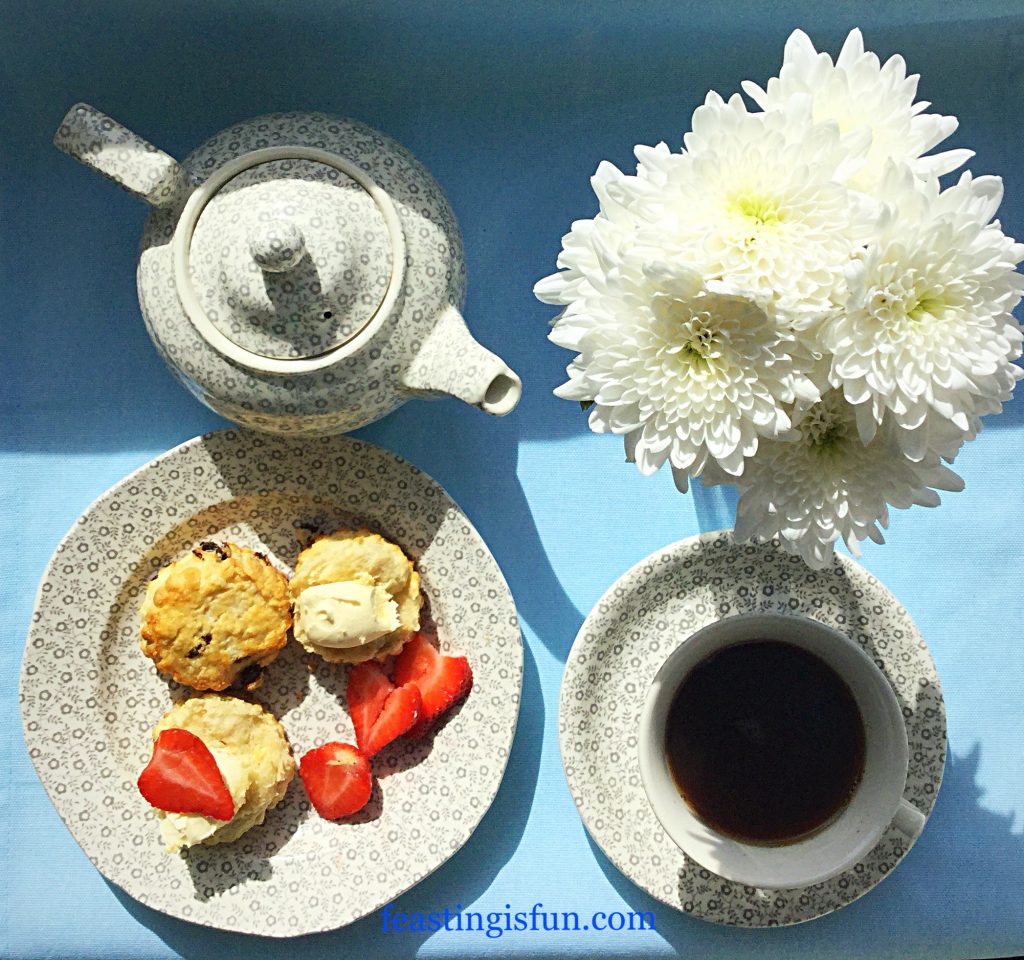
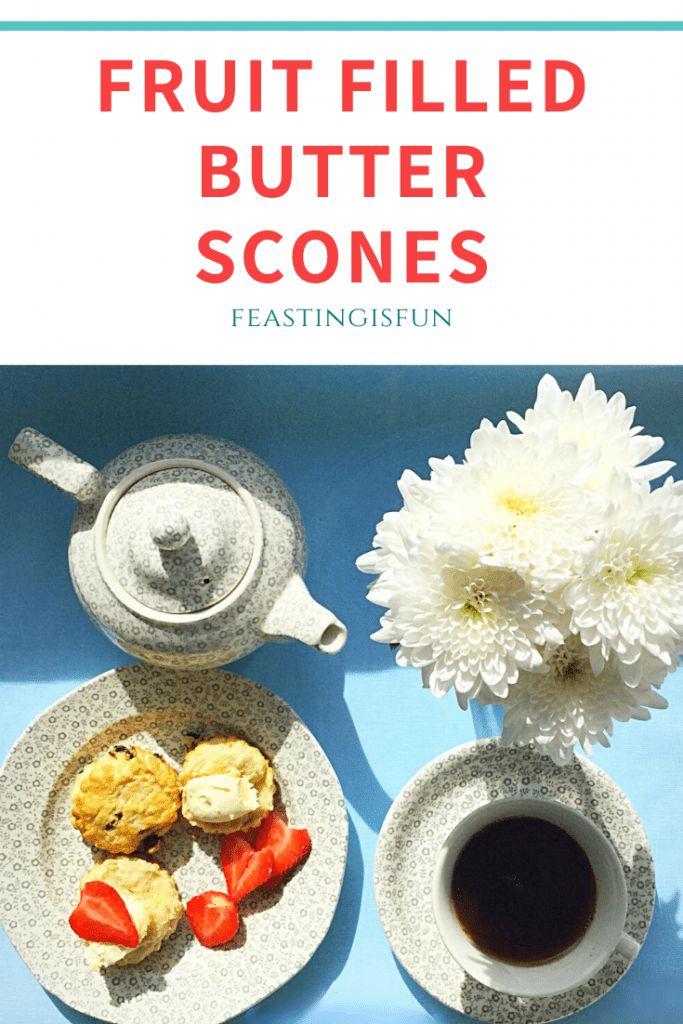
Fruit Filled Butter Scones perfect with Afternoon Tea.

While Afternoon Tea consists of small cakes, pastries, finger sandwiches and other sweet or savoury nibbles. Yet, scones, clotted cream and jam are essential element. Also small plates are used as it is small portions that are served. Enough to keep you going until dinner, yet not enough to spoil the main meal later in the day.

FF Fruit Filled Butter Scones
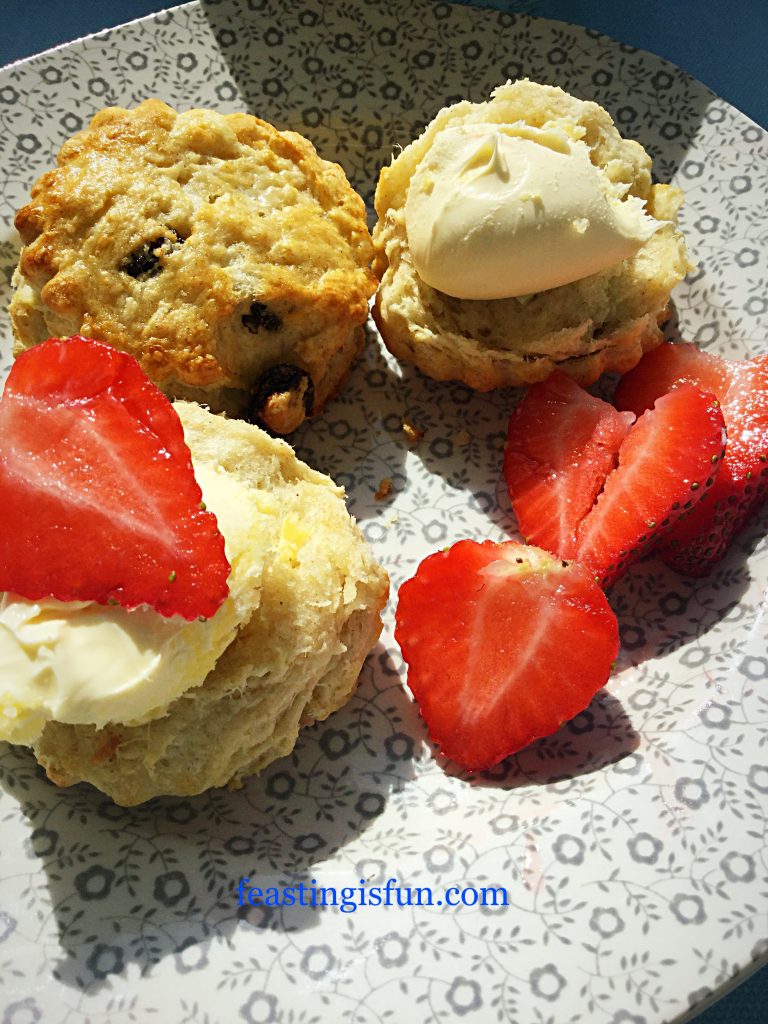
Fruit Filled Butter Scones served with clotted cream and strawberries.

Even young children, supervised by an adult of course, can easily make these scones. Also if you choose not to have clotted cream, these are light, not dry or claggy. So, perfect to eat unaccompanied. Since both the fat and sugar levels are fairly low, they can also be enjoyed by those watching their weight. Or simply want to eat two!

FF Fruit Filled Butter Scones
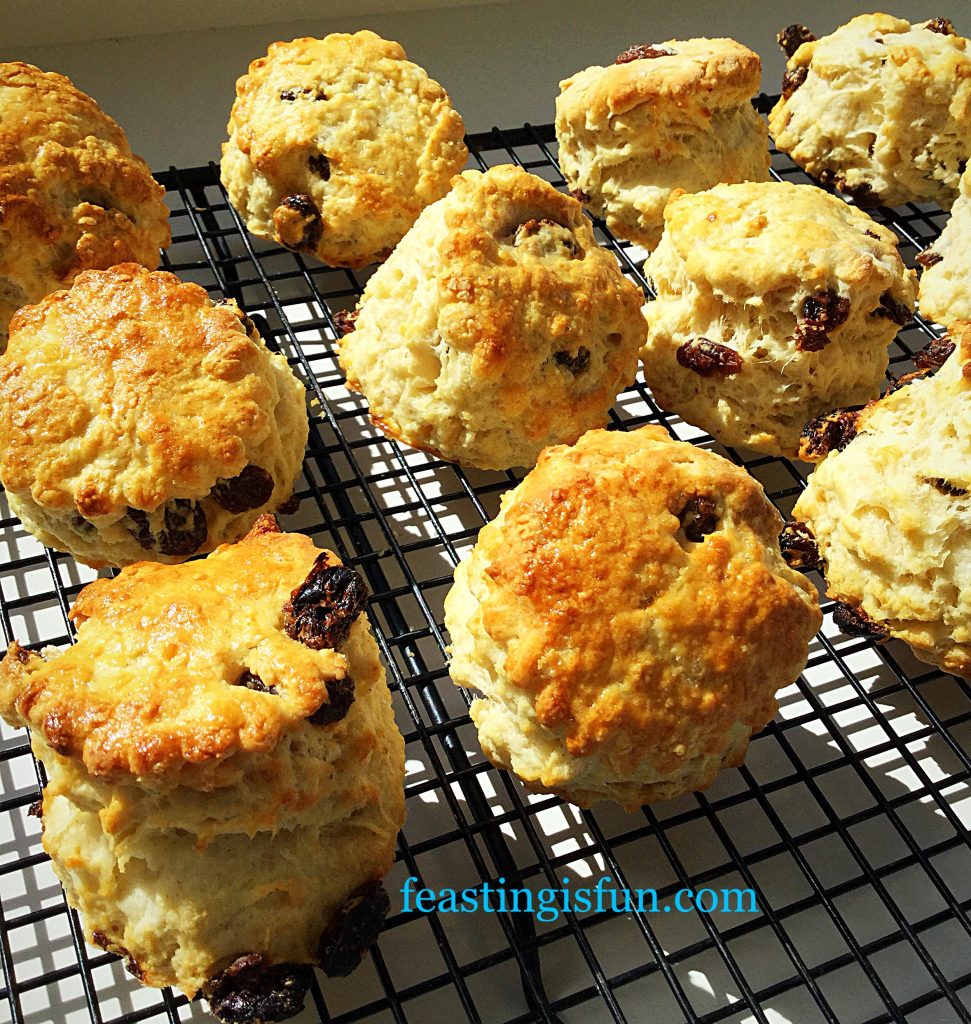
Flaky layers within the Fruit Filled Butter Scones

Did I mention that they take approximately half an hour from make to bake. So, what’s stopping you?

Recipe: Fruit Filled Butter Scones makes 12 scones

200g/7oz Plain White Flour

2tsp Baking Powder

50g/2oz Cold Unsalted Butter cut into cubes

1/4tsp Salt – I use Maldon

2tbsp Caster Sugar

75g/3oz Sultanas

165mls Buttermilk – alternatively add 1tsp/5mls of lemon juice to 160mls of milk and stir. Wait 5 minutes before using.

1 Free Range Egg plus one tablespoon of milk combined for the egg wash

Method: Preheat the oven to 220C/200C fan, gas mark 7, 425F.

Making the scones

Prior to starting line a large baking tray with baking parchment.

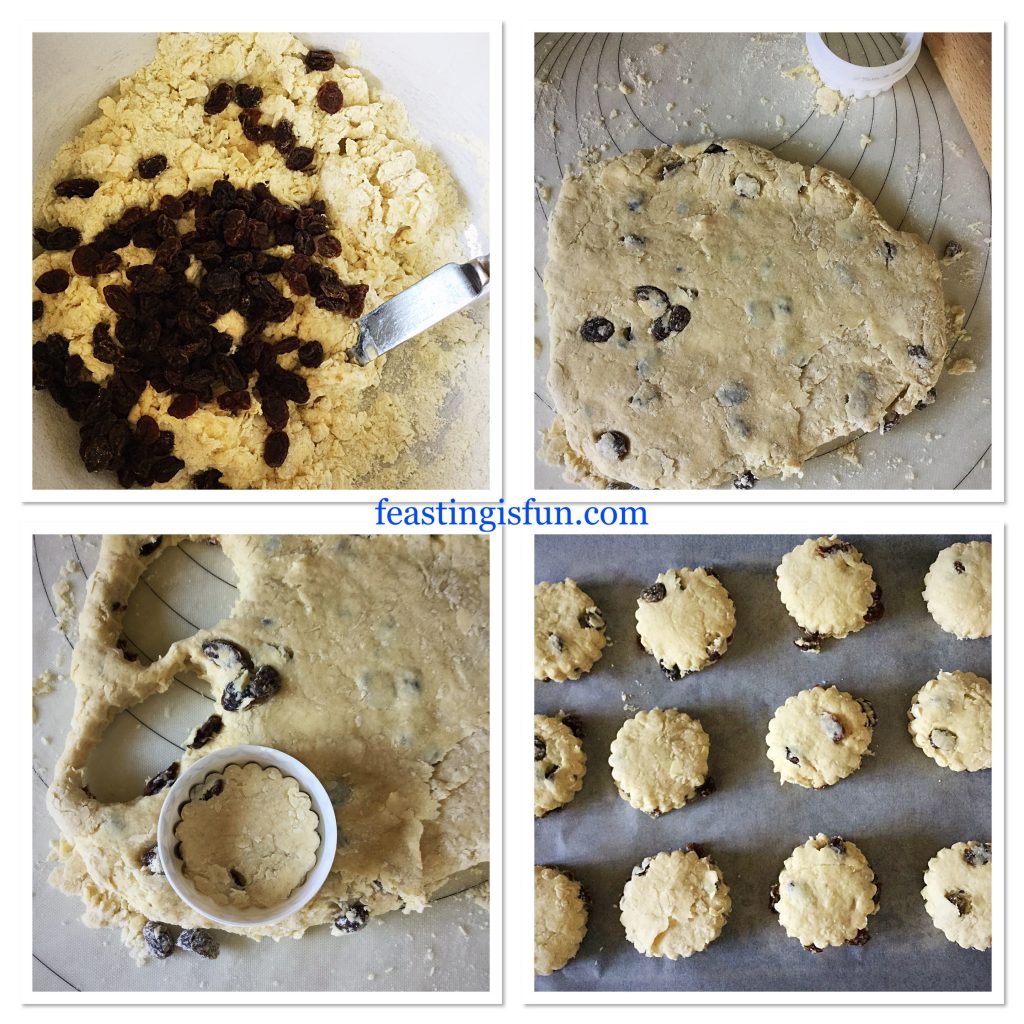
  • First of all, sift the flour, baking powder and salt together in a large mixing bowl. If using sea salt crumble straight into the bowl.
  • Next add in the cubed butter and rub into the flour, or cut into the flour using a pastry cutter. The mixture should resemble breadcrumbs with some pea sized lumps of butter present.
  • Now add in the caster sugar and mix lightly.
  • Make a well in the centre of the ingredients and pour in the buttermilk. Follow by mixing with a butter knife 4-5 times.
  • Add the sultanas and bring the scone dough together with one hand.
  • Tip the dough out on to a lightly floured, clean surface.
  • Knead the dough lightly until it forms a disc. Gently roll out the disc until it is 2.5cm/1 inch thick.
  • Use a 4cm/just under 2 inch deep cutter to cut out the scones. Do not twist the cutter when pushing down, as this can affect the rise.
  • Place each cutout scone on to the lined baking tray.
  • Combine leftover scone dough pat out and cut out more scones. Continue until all of the dough has been used.
FF Fruit Filled Butter Scones
Making and cutting out the Fruit Filled Butter Scones.

Baking the Scones

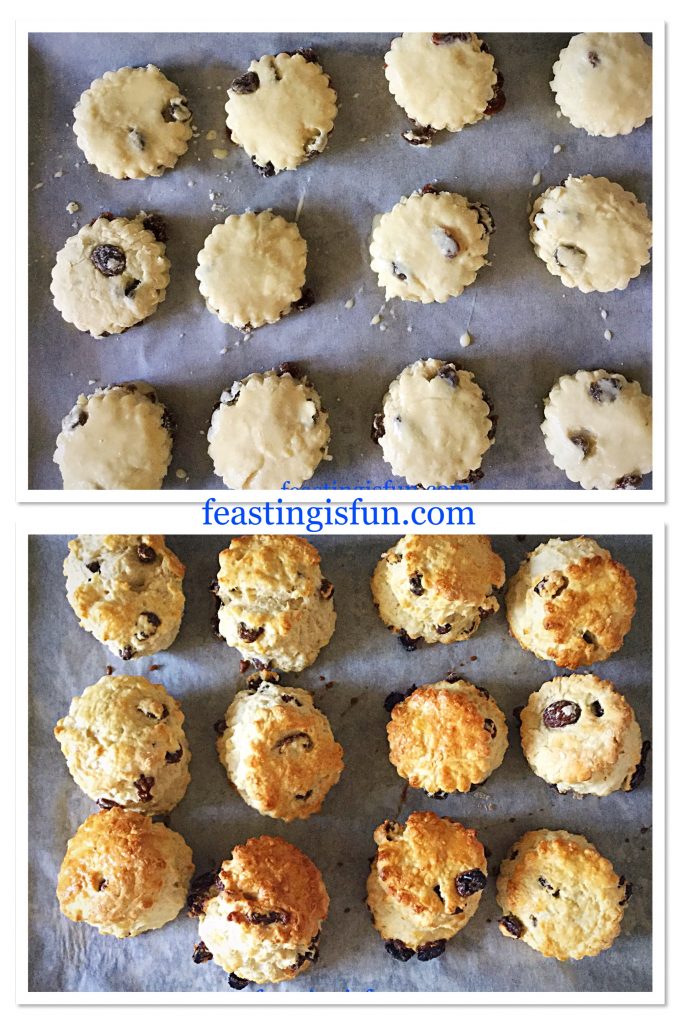
  • Brush the top of each scone with egg wash and then place in the top of the oven to bake for 15-20 minutes.
FF Fruit Filled Butter Scones
Egg washed and then baked.
  • The scones are baked when they are golden, well risen and sound hollow when tapped on the base.
  • As soon as they are baked remove from the oven.
  • Transfer the scones on to a cooling rack.
FF Fruit Filled Butter Scones
Fruit Filled Butter Scones cooling on a rack.

Serve slightly warm or cold. Since these scones have sultanas in, they can be eaten as is, with butter or clotted cream. Also, fresh fruit is nice served alongside. Rather than one single tea, why not offer a selection, including fruit teas.

FF Fruit Filled Butter Scones
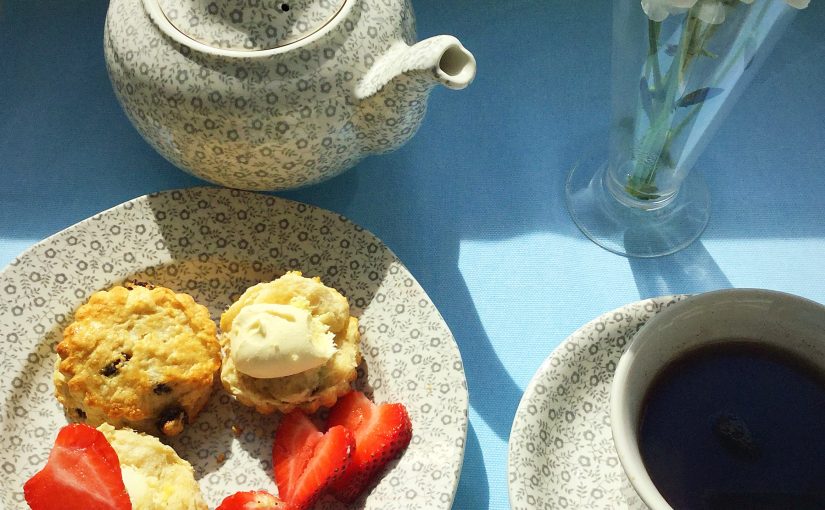
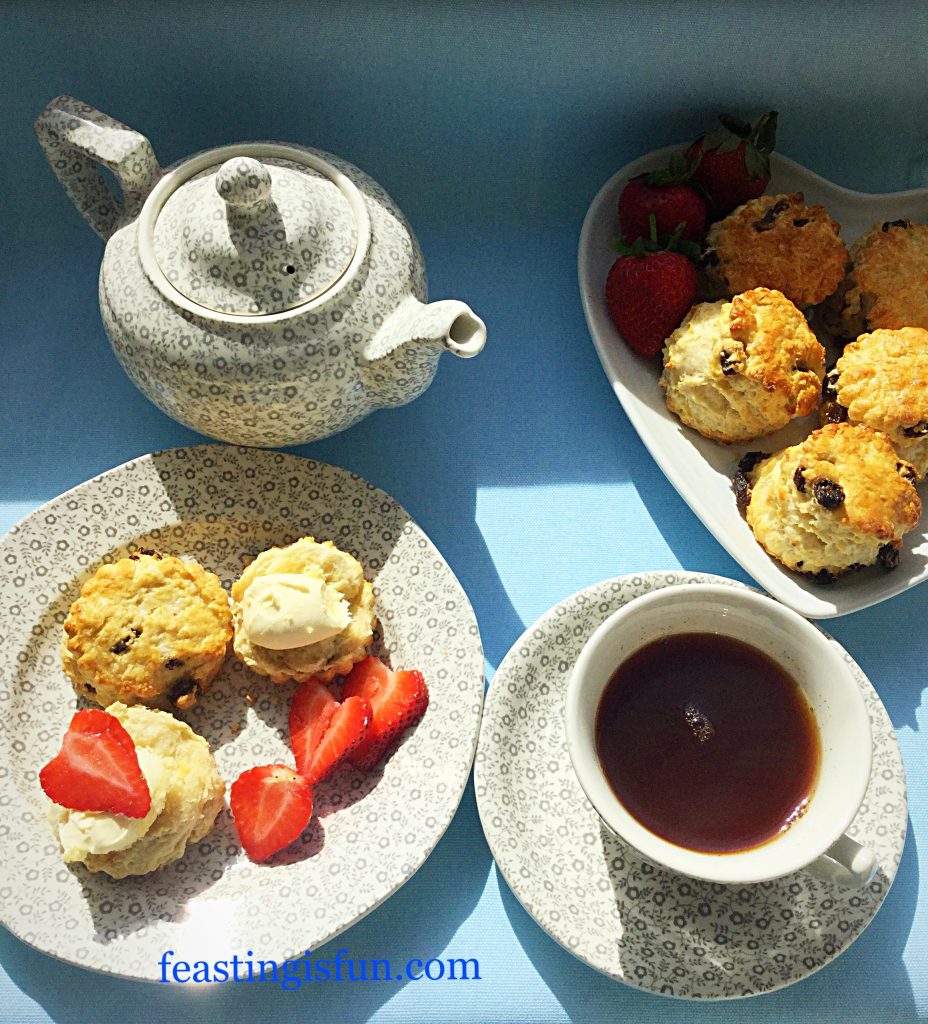
Fruit Filled Butter Scones with tea and fresh fruit.

Most of all serve with a smile.

If you have enjoyed these Fruit Filled Butter Scones, you may also like these:

Iced Bakewell Tart

Iced Bakewell Cake
Iced Bakewell Cake

Mother’s Day Afternoon Tea

Afternoon Tea
Afternoon Tea
Gluten free marshmallow frosted mango cupcakes
Marshmallow Frosted Mango Cupcakes – GLUTEN FREE

Marshmallow Frosted Mango Cupcakes


Since creating the Mother’s Day Afternoon Tea for Steamer Trading, I have enjoyed continuing to create small, bitesize treats. I absolutely love having making a selection of mini treats. As well as being able to have a little taste of everything, afternoon tea is the perfect opportunity to share. Feasting with family and friends, enjoying conversation and most of all fun. For me sharing it with those I love, building bonds and creating new memories.

So, whatever you are making, baking and creating in your kitchens, have fun preparing and sharing your feast.

Sammie xxx

No part of this post may reproduced or duplicated without the written permission of the owner. Please see my Disclosure Policy.


Steamer Trading Host Mother’s Day Afternoon Tea

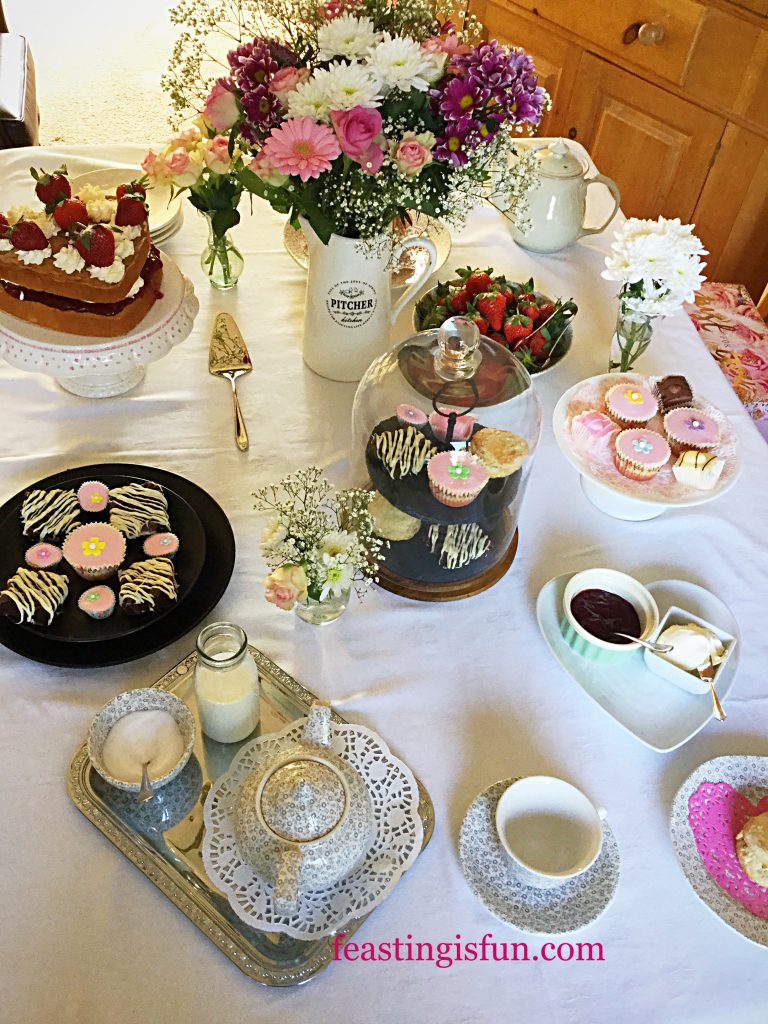
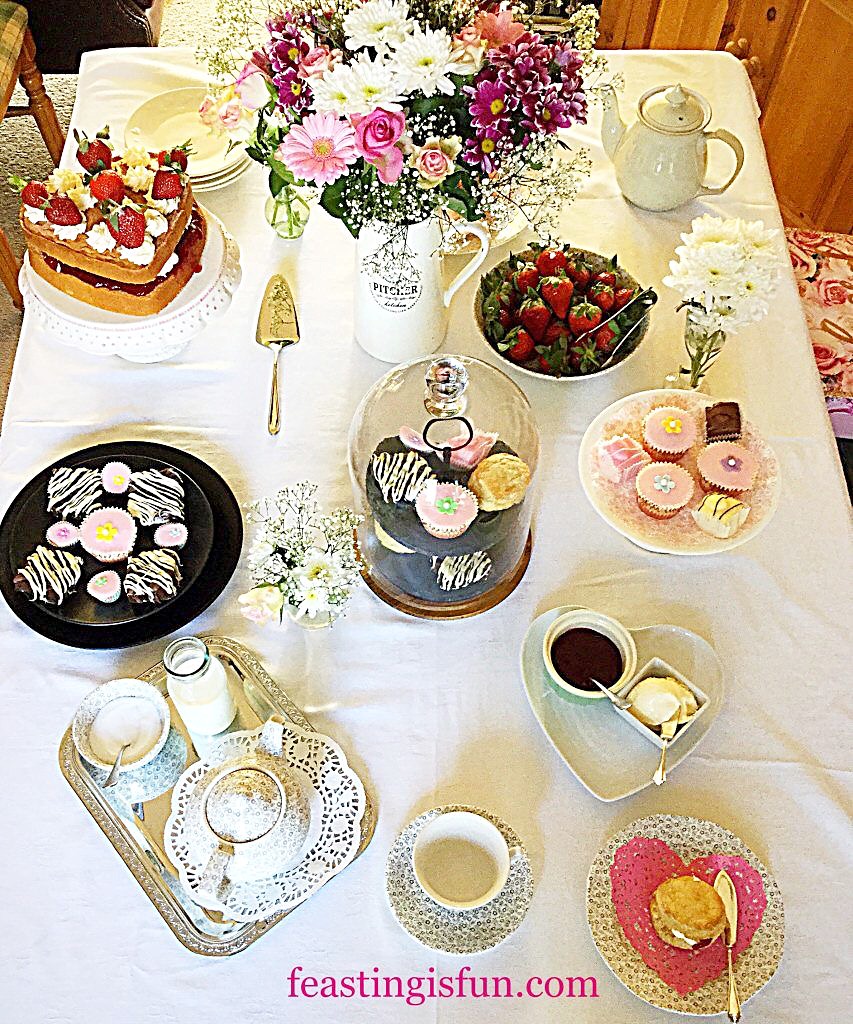
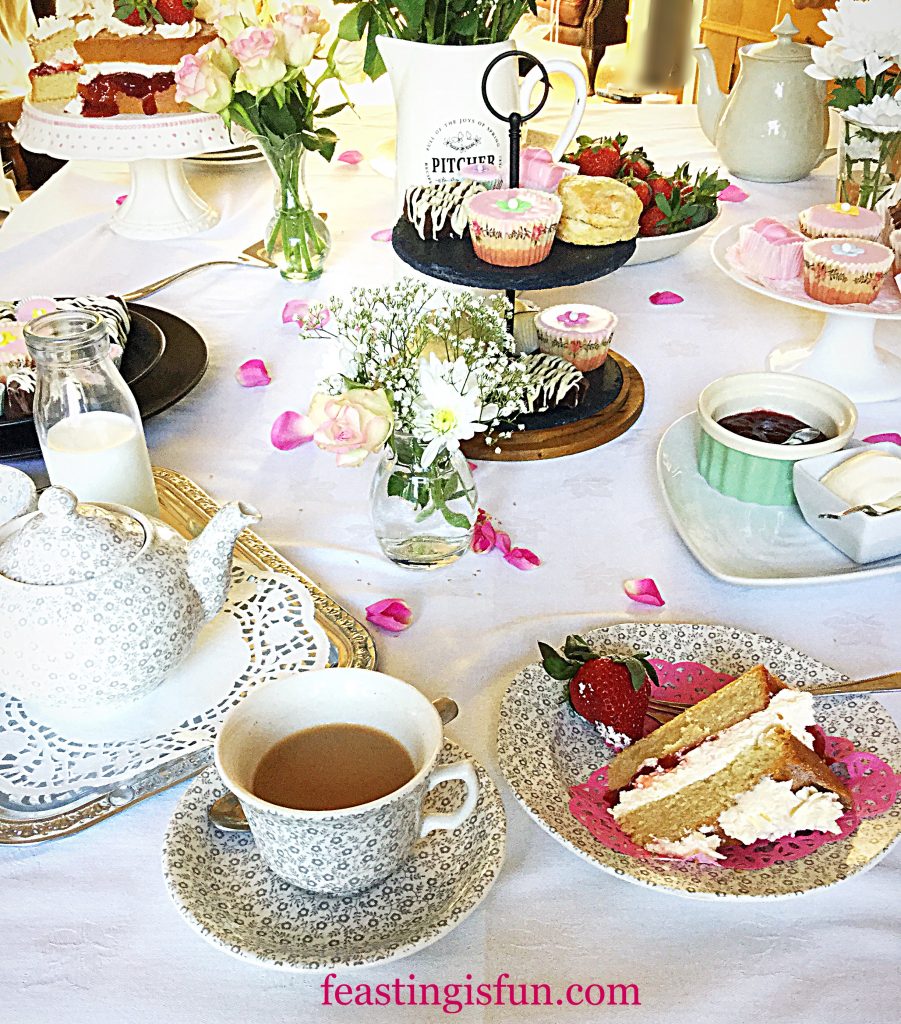
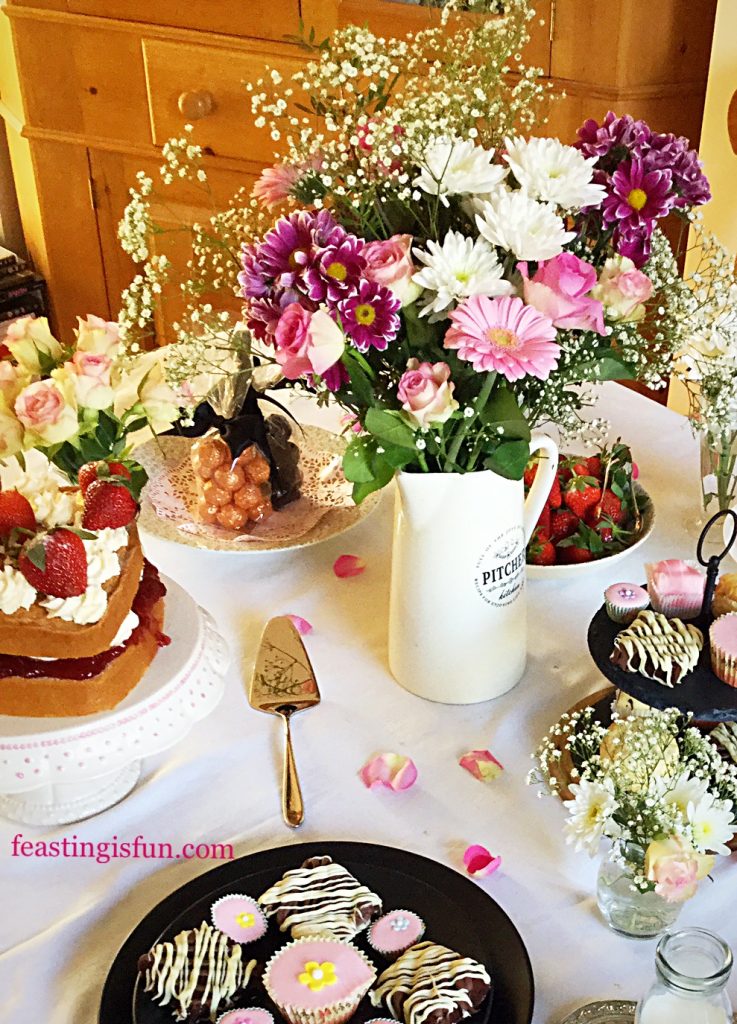
Mother’s Day will soon be upon us. Sunday March 26th 2017 here in the U.K. To help celebrate Mothering Sunday, Steamer Trading asked me to help them set up an Afternoon Tea. I jumped at the opportunity, knowing that the quality and variety of kitchen and cookware they sell is outstanding. While also confident that some easy bakes would partner perfectly with beautiful table and bakeware. See for yourself how Steamer Trading Host Mother’s Day Afternoon Tea.

FF Steamer Trading Host Mother's Day Afternoon Tea
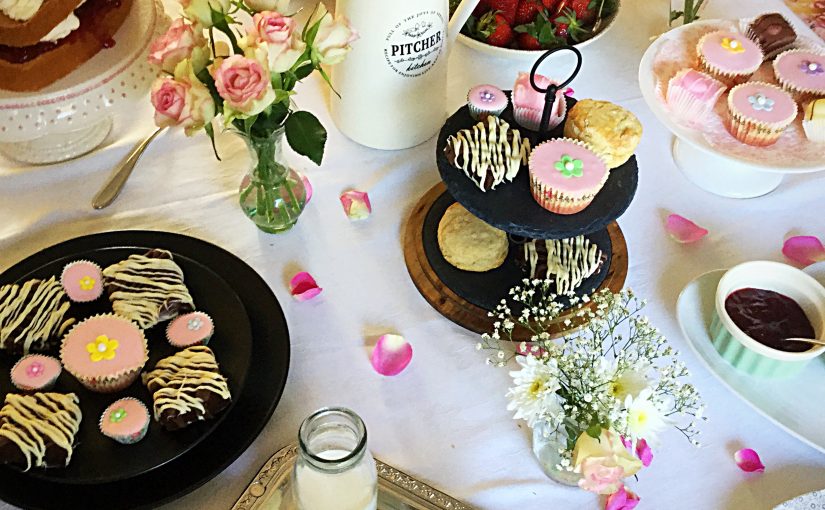
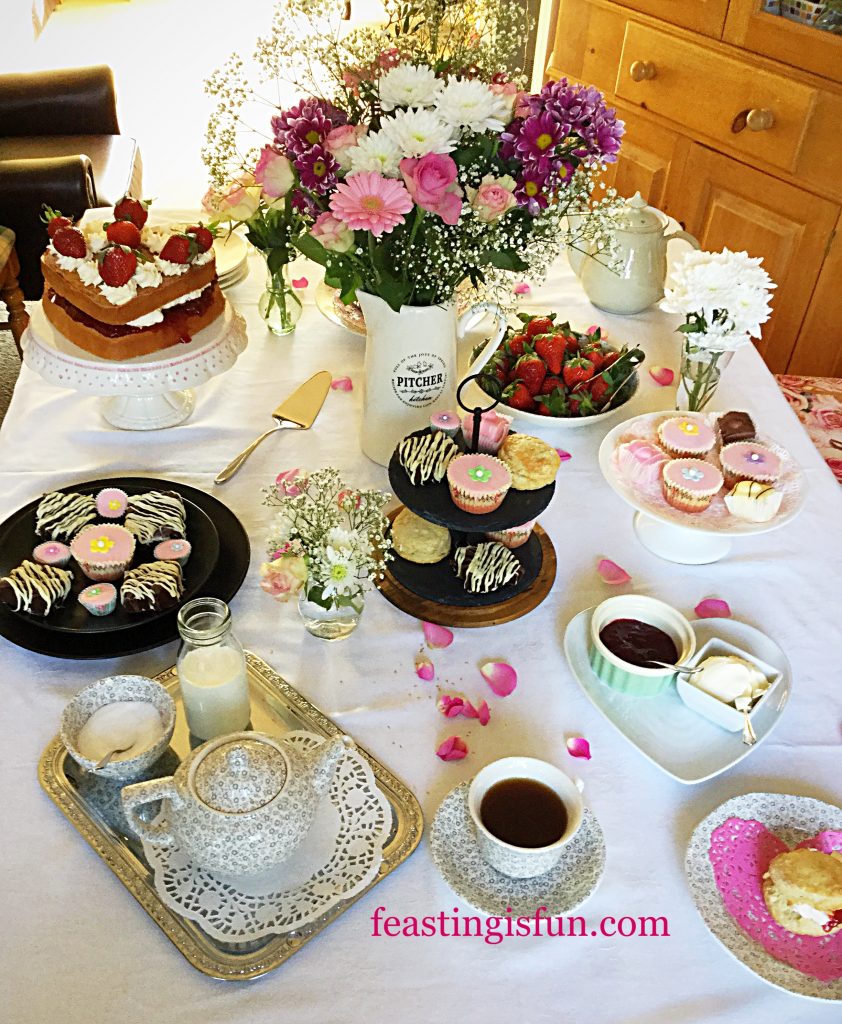
Steamer Trading Host Mother’s Day Afternoon Tea beautifully laid out delightful sweet treats.

Homemade cakes and treats always taste much better than shop bought. If, however, baking is an area where confidence is lacking here’s the perfect solution. Buy a few pretty cakes and then make the scones, Super Light Scones . Since this recipe is the easiest on Feasting is Fun and guaranteed to bring a smile to Mum’s face. Add a pot of luxurious clotted cream and strawberry jam to turn this Afternoon Tea into a real feast!

FF Steamer Trading Host Mother's Day Afternoon Tea
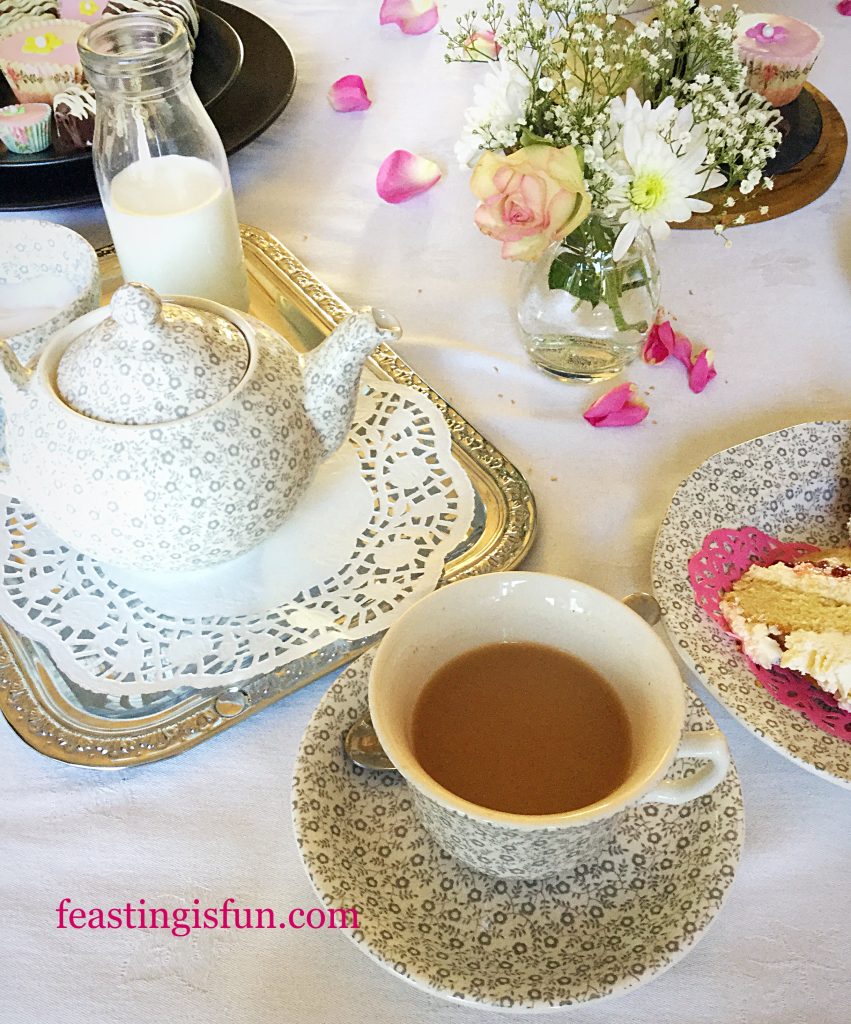
Afternoon Tea using the Burleigh Felicity tea set

Afternoon Tea Needs A Tea Set

No Afternoon Tea is complete without a beautiful tea set. Having been sent a Burleigh Felicity Teapot I decided to start a collection. Tea cup and saucer, large dinner plate, side plate, pasta bowl and finally a sugar bowl. All bought to start my own collection. As a result I am now building a complete set. The pattern and style have a timeless quality and style.

FF Steamer Trading Host Mother's Day Afternoon Tea
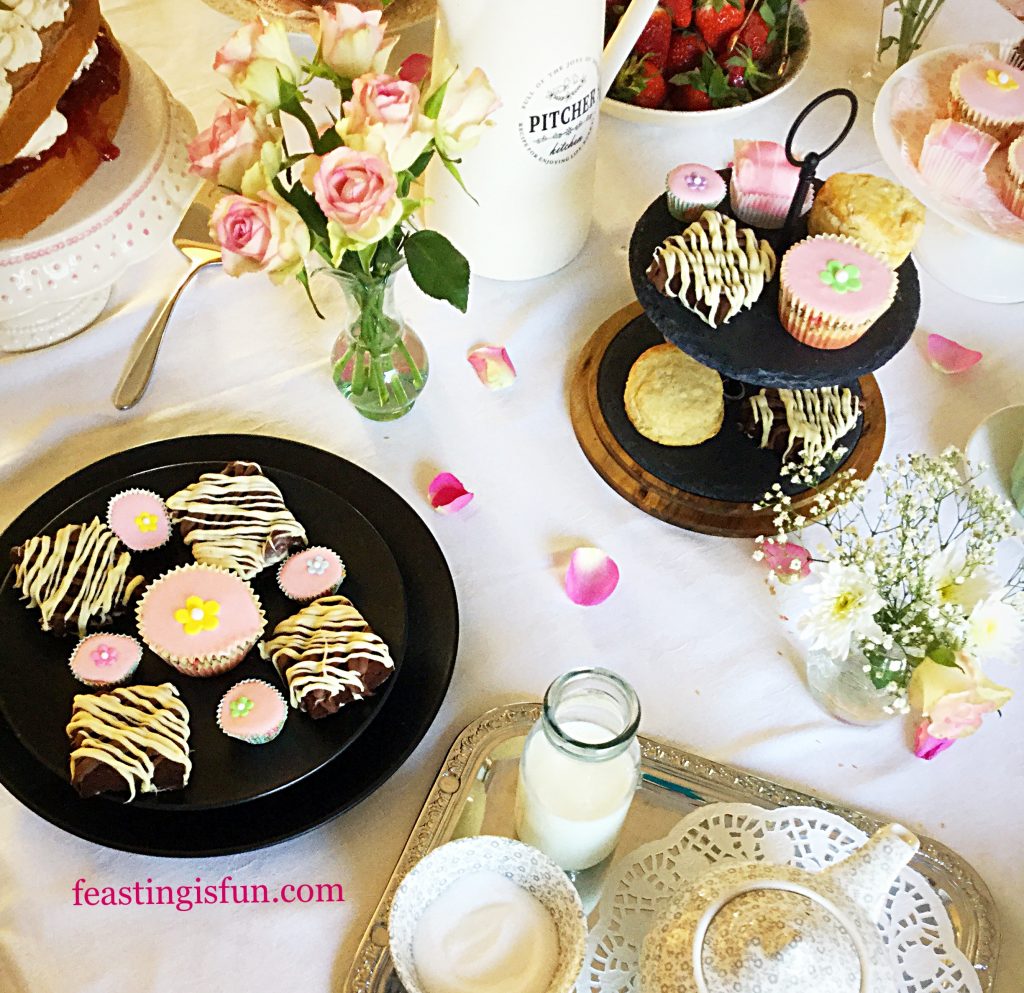
The domed two tier cake stand takes centre stage.

Putting Afternoon Tea On Display

Within the items sent to me is this Domed Slate Cake Stand. Perfect for keeping bugs out and cakes fresh. Since the slate cake stand also stands alone, the wooden base and dome may also be used to display another tasty item. Maybe cheese and crackers. Most of all, the packaging keeps the cake stand and dome well protected between use. While the slate is sturdy and creates a solid background on which to display the cakes.

FF Steamer Trading Host Mother's Day Afternoon Tea
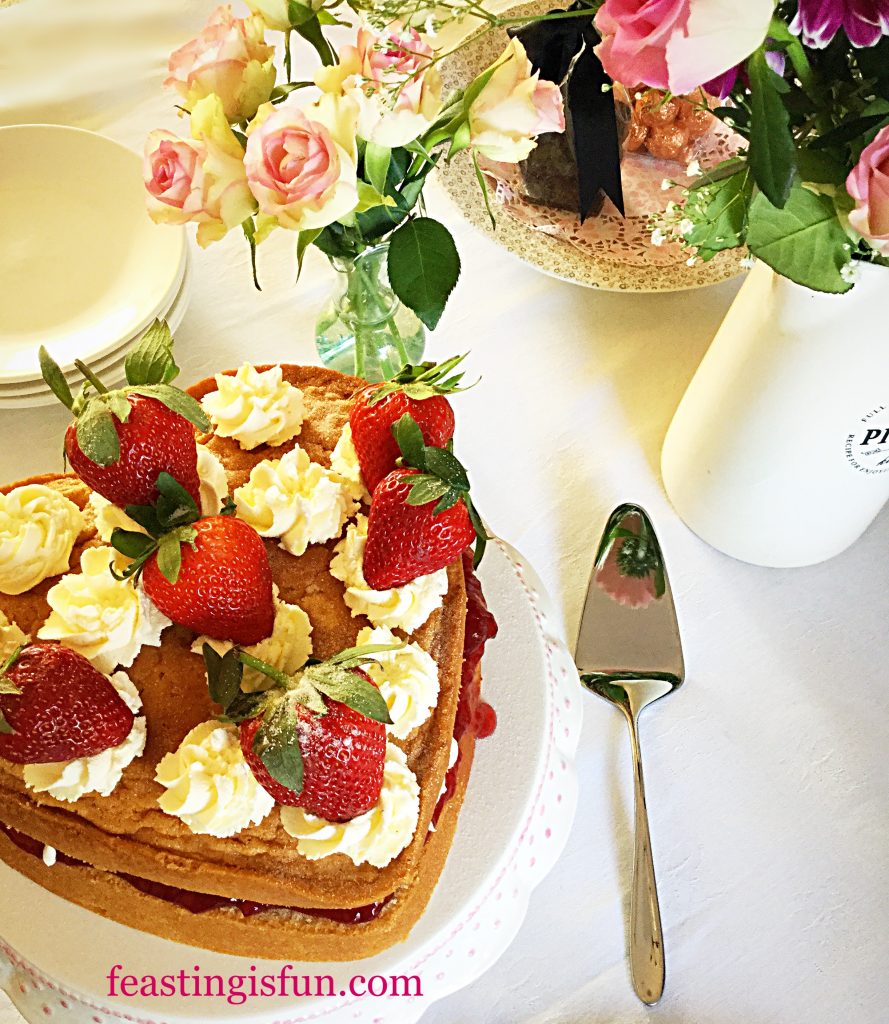
Heart shaped Strawberry and Cream Victoria Sponge.

Baked And Served With Love

Pictured above is Sophie Conran Cake Server. Highly polished, with a simple, smooth design. As beautiful sitting on the table as it is practical in serving the Heart Shaped Strawberry and Cream Victoria Sponge Cake. Baked using the  Springform Heart Tin. In addition to baking cakes, because of the springform element, this tin would be especially good for creating cheesecakes.

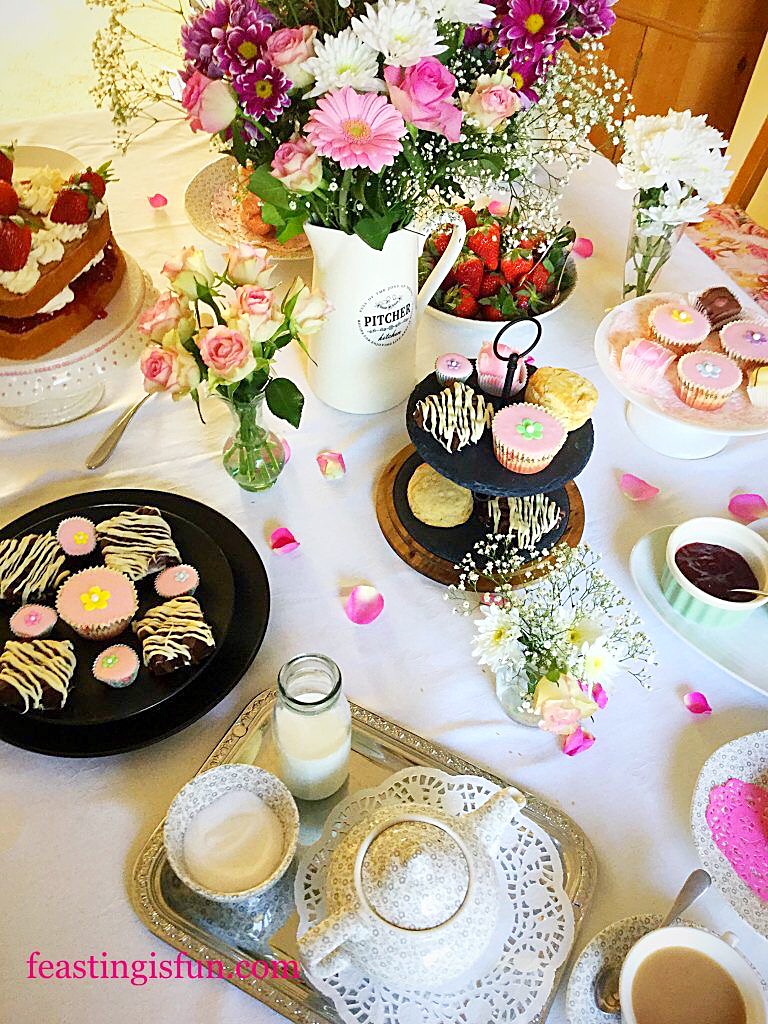
Afternoon Tea table laid out with cakes, tea, flowers, fruits and chocolates.
A beautifully laid out Afternoon Tea.

Bowls of fresh strawberries with both large and smaller vases of flowers enhance not only the table setting, but add to the special theme of Mother’s Day. Also, they can be wrapped up, alongside any leftover cakes and scones, for Mum to take home with her. As a result Mum receives a double treat. After all, Mother’s Day is a special day, set aside to thank Mothers.

FF Steamer Trading Host Mother's Day Afternoon Tea
Tiny little Turkish Delight cakes along with regular cupcakes add quaintness to the pretty table setting.

Bite Size Cakes

Since being sent Masterclass Mini Muffin Tin, I made tiny, pixie cupcakes. Turkish Delight in flavour, their larger cupcake cousins were also baked. Impressed with the strength, non stick coating and durability of the mini muffin tin, I will definitely look to this brand for larger fairy cake and cupcake tins.

FF Steamer Trading Host Mother's Day Afternoon Tea
Treat Mum to a special Afternoon Tea in your own home.

Finally, no Mum, or Afternoon Tea is complete without a touch of chocolate. Chocolate Drizzle Cake Squares are easy to make and even easier to eat!

Recipe: Chocolate Drizzle Cake Squares makes 15

175g/6oz Unsalted Butter – softened

175g/6oz Caster Sugar

1/4tsp Salt – I use Maldon

3 Large Free Range Eggs

1tsp Vanilla Extract – I use Nielsen-Massey

75g/3oz Good Quality Cocoa Powder

125g/4.5oz Plain White Flour

1.5tsp Baking Powder

200g Bar Each of Milk and White Chocolate

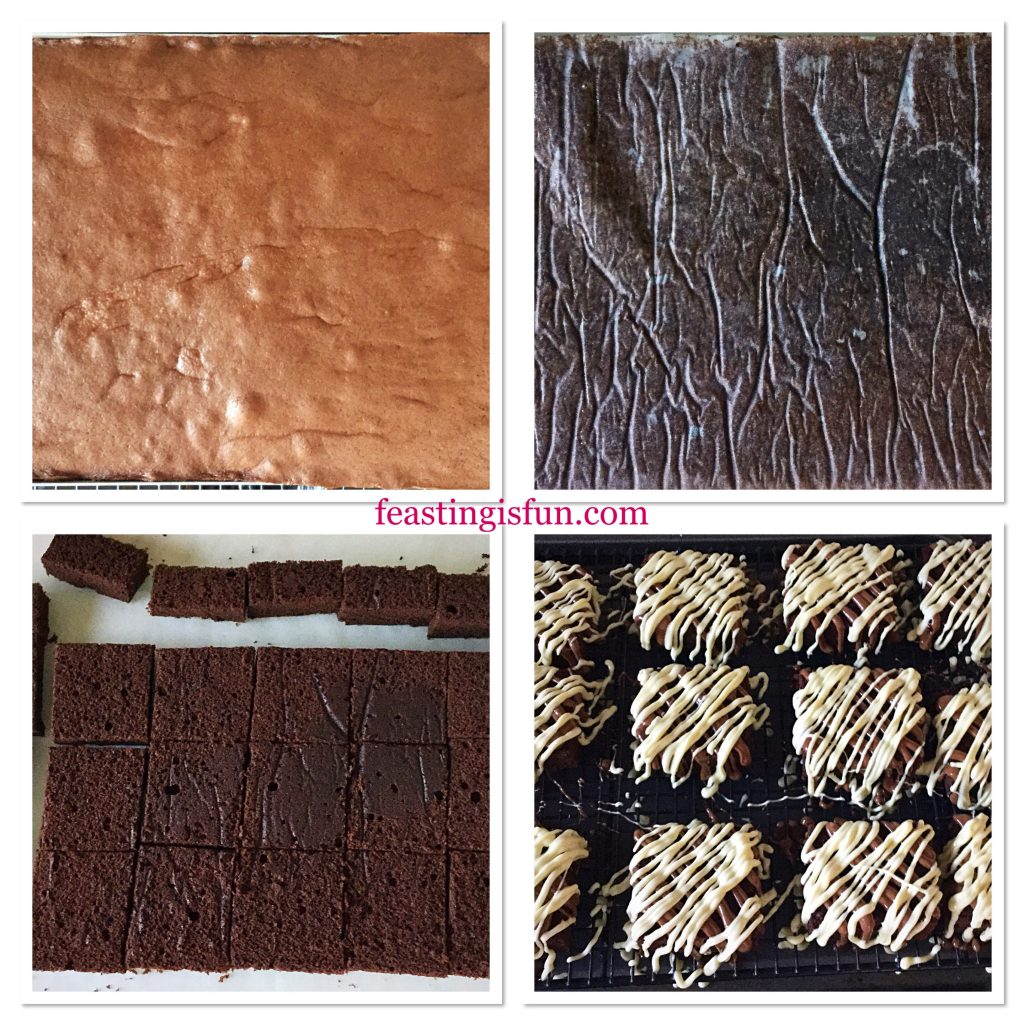
Making And Baking The Chocolate Cake Squares

Preheat the oven to 160C/140C fan, gas mark 3, 325F.

  • Lightly grease, with butter a 28cm x 20cm x 5cm ( 12″ x 8″ x 2″ ) tin and line the base with baking parchment.
  • In a large bowl add the butter, sugar and salt. Whisk until pale and fluffy.
  • Next add the eggs, vanilla extract and milk. Then sift in the cocoa, flour and baking powder on top. Whisk slowly until all of the ingredients are combined.
  • Spoon the chocolate cake batter into the prepared tin. Smooth the batter so that it fills the tin evenly.
  • Place the tin in the centre of the oven and bake for 25-35 minutes.
  • The cake is baked when it springs back form a light touch. It will also be coming away for the sides of the tin.
  • As soon as the cake is baked remove the tin from the oven and set to one side to cool.
  • When the cake has cooled, tip out on to a parchment lined, flat board.
  • Remove the parchment from the base of the cake and for afternoon tea portions, slice the cake into 15 x 2″ (5cm) squares.
FF Steamer Trading Host Mother's Day Afternoon Tea
Chocolate Drizzle Cake Squares

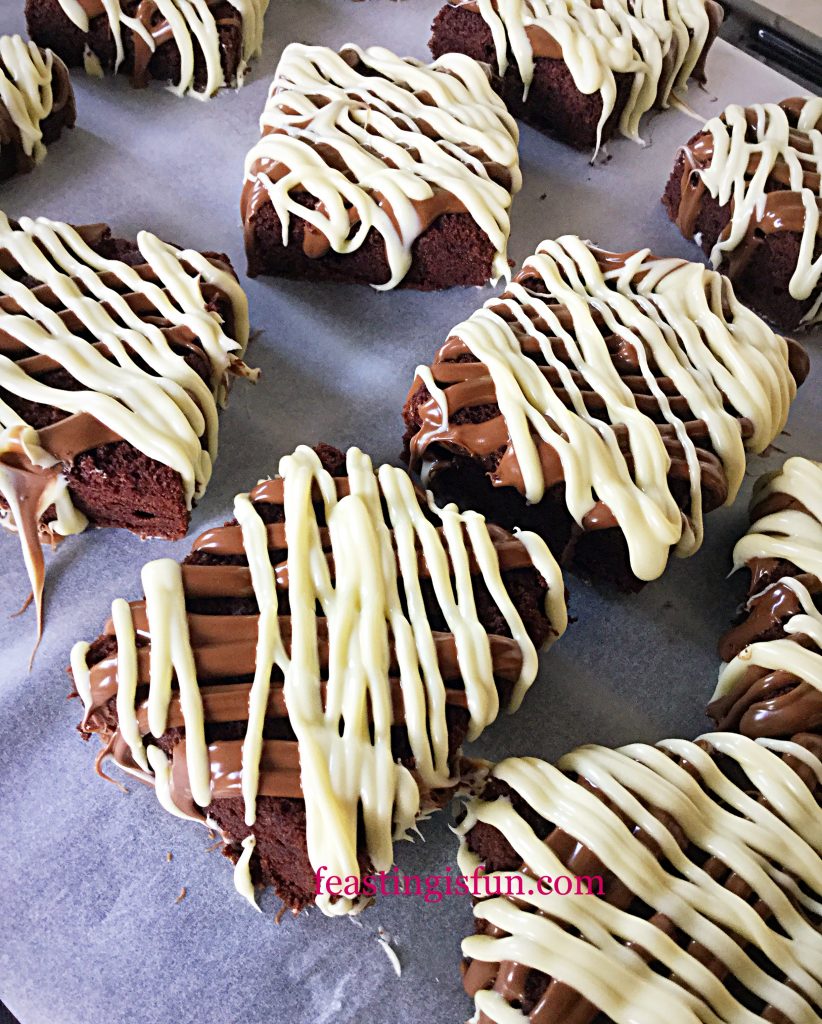
Decorating The Cake Squares

  • Place the cake squares on a cooling rack placed over a large baking tray.
  • Into separate, heatproof, microwaveable bowls, break up the white and then the milk chocolate.
  • Place one bowl at a time into the microwave. Heat for 30 seconds at a time, stirring after each zap.
  • When both the white and milk chocolate are completely melted transfer into 2 medium disposable piping bags.
  • Start with the milk chocolate, snip the very end of the piping bag off leaving a small hole. Pipe in a zigzag pattern across all of the chocolate cake squares.
  • Turn the baking tray and pipe as before, except you will now be piping across the chocolate milk, forming a criss-cross pattern.
  • Allow the chocolate to partially set and then transfer the chocolate squares to a clean piece of baking parchment, on a tray and leave to one side to set. Note – in warmer weather it may be necessary to place in the fridge for a few minutes to allow to set.
  • Store in a baking parchment lined container, using parchment to separate layers.
  • These Chocolate Drizzle Cake Squares will last up to 4 days in an airtight container.
FF Steamer Trading Mothers Da Afternoon Tea
Chocolate Drizzle Cake Squares perfect to serve with Afternoon Tea.

Different types of cake provide a beautiful setting and greater sense of variety.

Afternoon Tea table set out.
Steamer Trading Host Mother’s Day Afternoon Tea


Finally Remember

While the tableware and homemade goodies look beautiful set out for Aternoon Tea, here are some added little touches that take it to the next level.

Doillies – in contrasting and complimenting colours.

Fresh flowers – placed in large and/or small vases. Clean jam jars make inexpensive vases and flowers picked from the garden can look beautiful.

Rose petals – one rose had a limping flower head. Break off the petals and scatter around the table.

Bowls of fresh fruit. Strawberries are always popular and provide balance to the cake and scones.

Cellophane bags of truffles, tied with a complimenting ribbon, add an extra wow factor.

FF Steamer Trading Host Mother's Day Afternoon Tea
Complimentary bags of truffles enhance the look of the table.

Lastly, don’t panic. Relax, enjoy yourself and your Mum will too. And, if you can’t bake then buy the cakes. Afternoon Tea on Sunday 26th March is about celebrating Mother’s. Your Mum, important female figures in your life, will be thrilled and honored that you took the time to celebrate them, with Steamer Trading helping you to Host Mother’s Day Afternoon Tea.

Afternoon Tea table laid out.
Afternoon Tea

I hope that you have enjoyed Steamer Trading Host Mother’s Day Afternoon Tea, here are some recipes you may also enjoy:

Maraschino Cherry Chocolate Drizzle Cupcakes

Afternoon Tea
Maraschino Cherry Chocolate Drizzle Cupcakes

Iced Bakewell Tart

Afternoon Tea
Iced Bakewell Tart

Chocolate Vanilla Viennese Finger Biscuits

Chocolate Vanilla Viennese Finger Biscuits

So, whatever you make, bake and create to celebrate Mother’s Day, have fun enjoying you feast.

Sammie xx

Steamer Trading gifted me the five items directy linked to their site. All opinions, views, content and photography are my own. I was not paid for writing this post. Please see my Disclosure Policy.

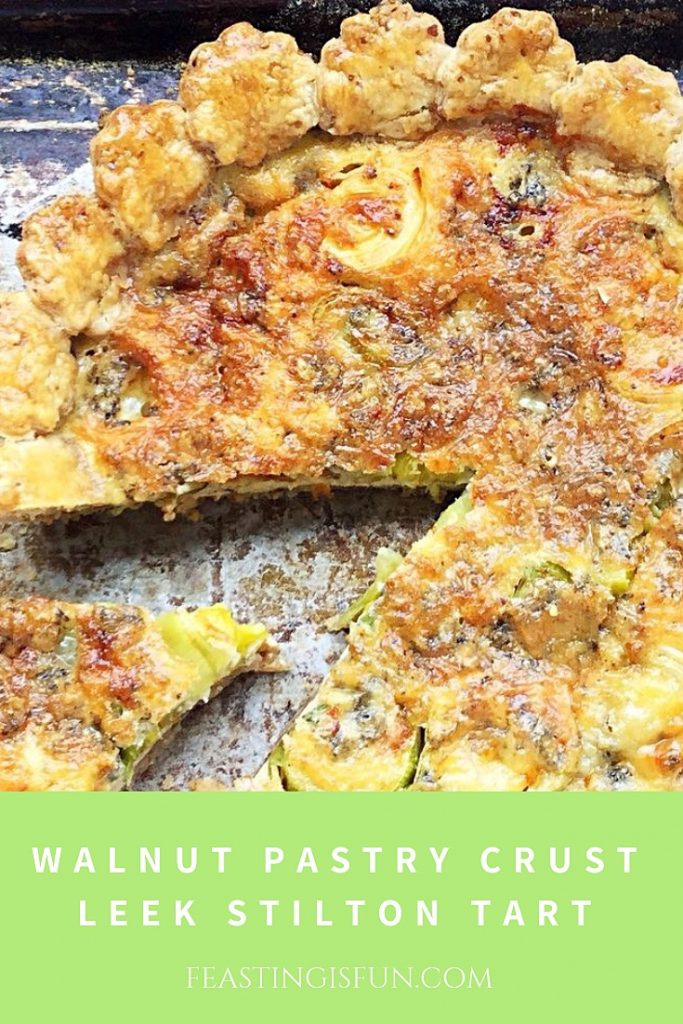
Walnut Pastry Crust Leek Stilton Tart

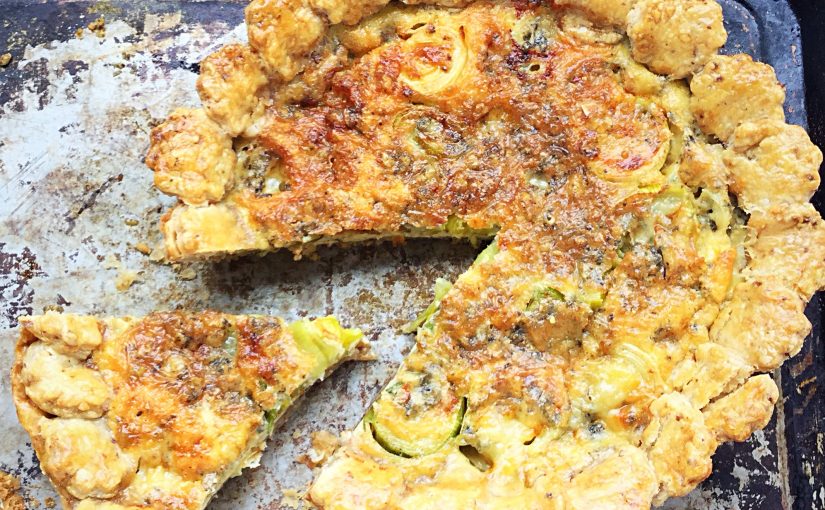
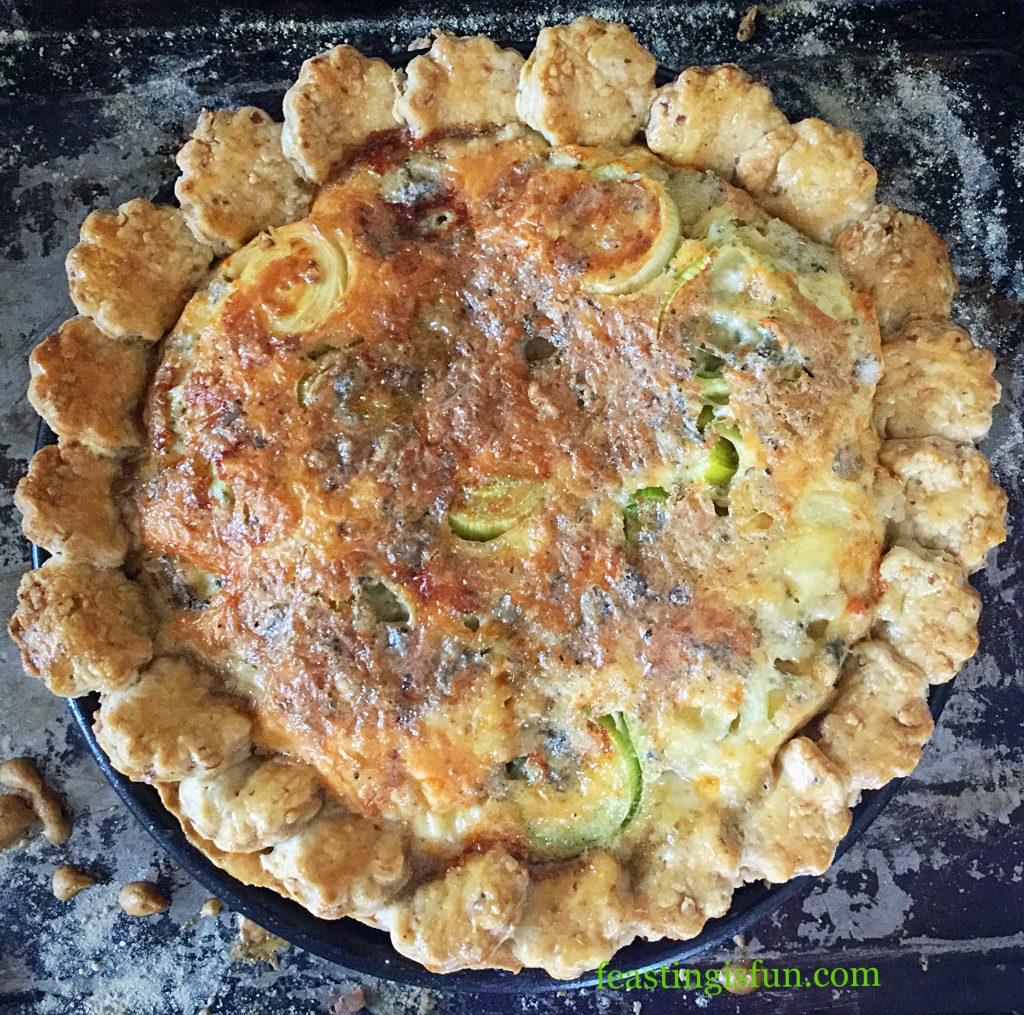
Some ingredients, when cooked together, simply bring out the best in each other. As is the case with this Walnut Pastry Crust Leek Stilton Tart. Also, the leek’s subtle onion flavour is enhanced by the crumbled Stilton cheese, in an egg and cream custard base. The nutty pastry crust provides the perfect crunchy texture and flavour. A delightful balance, that is a treat to our tastebuds.

FF Walnut Pastry Crust Leek Stilton Tart

A marriage of flavours

While the chopped walnuts give the pastry a rustic, wholemeal look, it is, in fact light and crumbly. Adding additional flavour to the finished bake. Likewise, the crumbled Stilton cheese mellows on baking. Providing a salty contrast to the mild egg custard. Surprisingly, the mild onion flavour of the leeks doesn’t get lost in this tart. Rather, it brings everything together and sings on the tastebuds, above the other flavours.

FF Walnut Pastry Crust Leek Stilton Tart
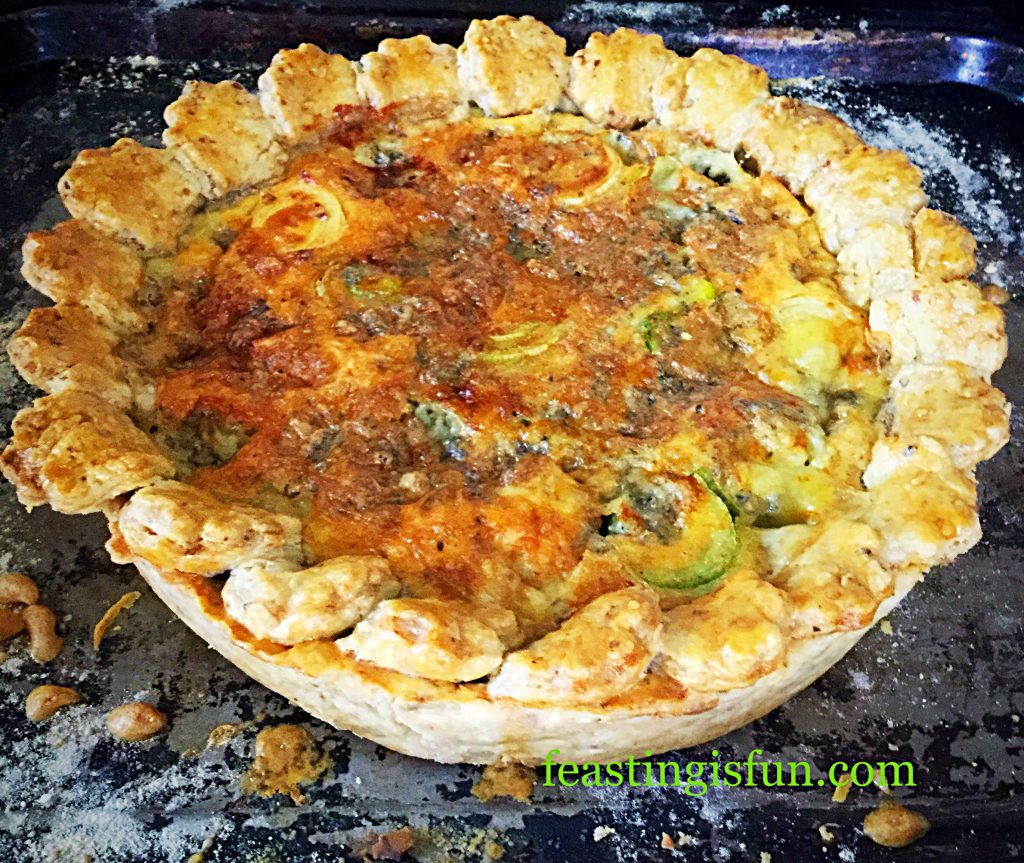
Walnut Pastry Crust Leek Stilton Tart a feast for the eyes.

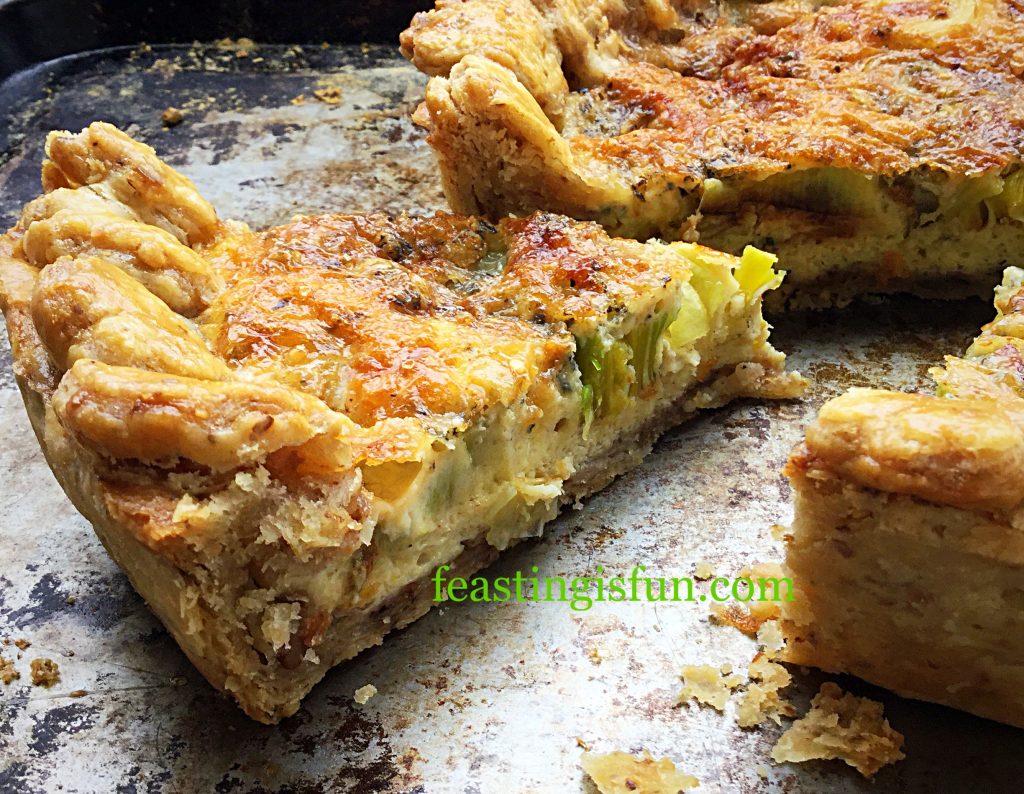
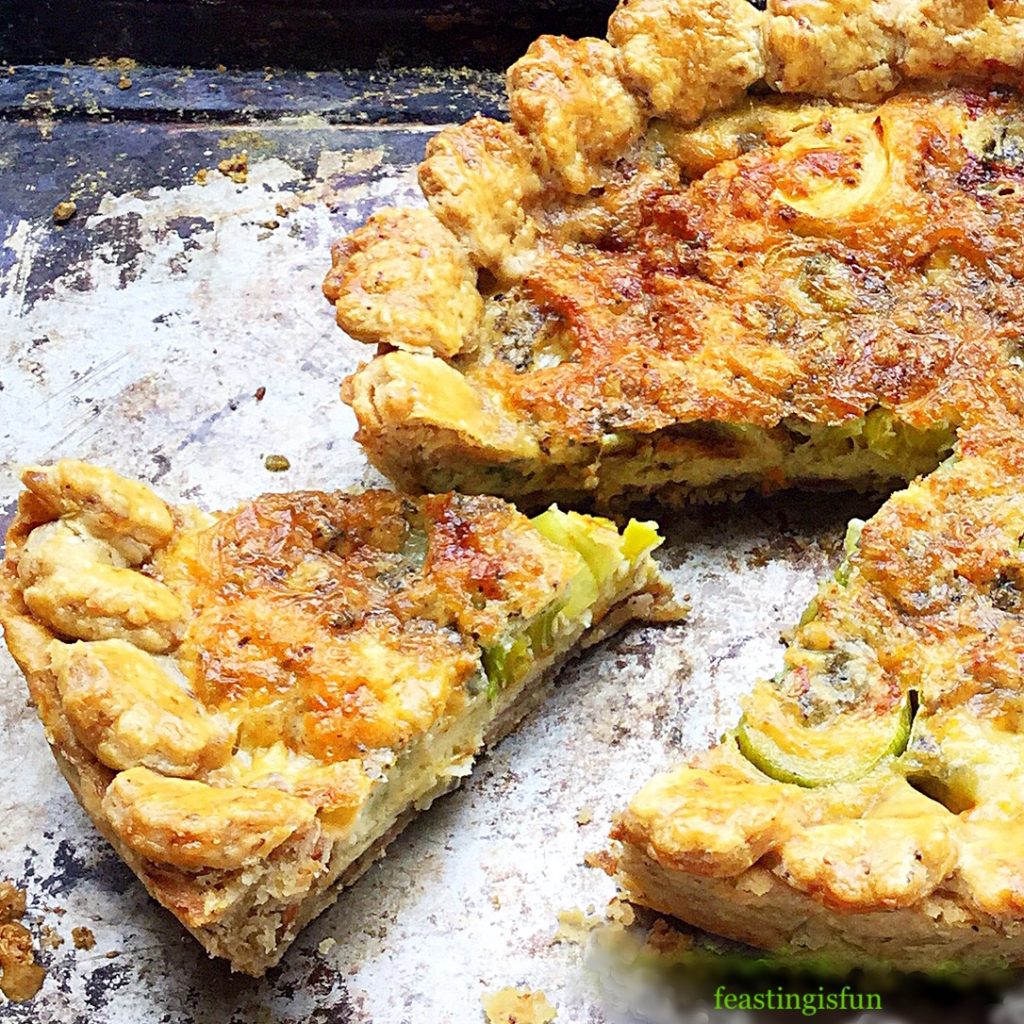
Slices of leek are sautéed gently, before placing in the tart. This not only ensures they are soft in the baked tart, but also concentrates the flavour. While baking, the rings separate and rise up through the tart. Also ensuring that each bite has tasty fresh, green leek in it.

FF Walnut Pastry Crust Leek Stilton Tart
Walnut Pastry Crust Leek Stilton Tart crunchy and creamy.


This tart is perfect for a light lunch, with salad, or as a main meal with a hot, buttered jacket potato. Also, it makes perfect picnic or buffet food, as it can be served at room temperature. The added nutmeg is barely noticeable, yet enhances all of the tart’s flavours. Leave it out and the finished bake tastes as though it is missing something. I encourage you to include it, freshly grated, if possible!

Recipe: Walnut Pastry Crust Leek Stilton Tart serves 4-6

For the pastry

200g/7oz Plain White Flour

50g/2oz Walnuts – finely chopped

1/8tsp Salt – I use Maldon

1/8tsp Freshly Ground Black Pepper

125g/4.5oz Cold Unsalted Butter

60mls Cold Tap Water

For the filling

100g/4oz Stilton Cheese

1 Large Leek

4 Large Free Range Eggs – plus 1 extra for the egg wash

3tbsp Double Cream

1/4tsp Nutmeg

1/4tsp Freshly Ground Black Pepper

Method:

A loose bottom tart tin that is approximately 25cm wide x 5cm deep or 10″ x 2″ is needed for this recipe.

Making The Walnut Pastry Crust

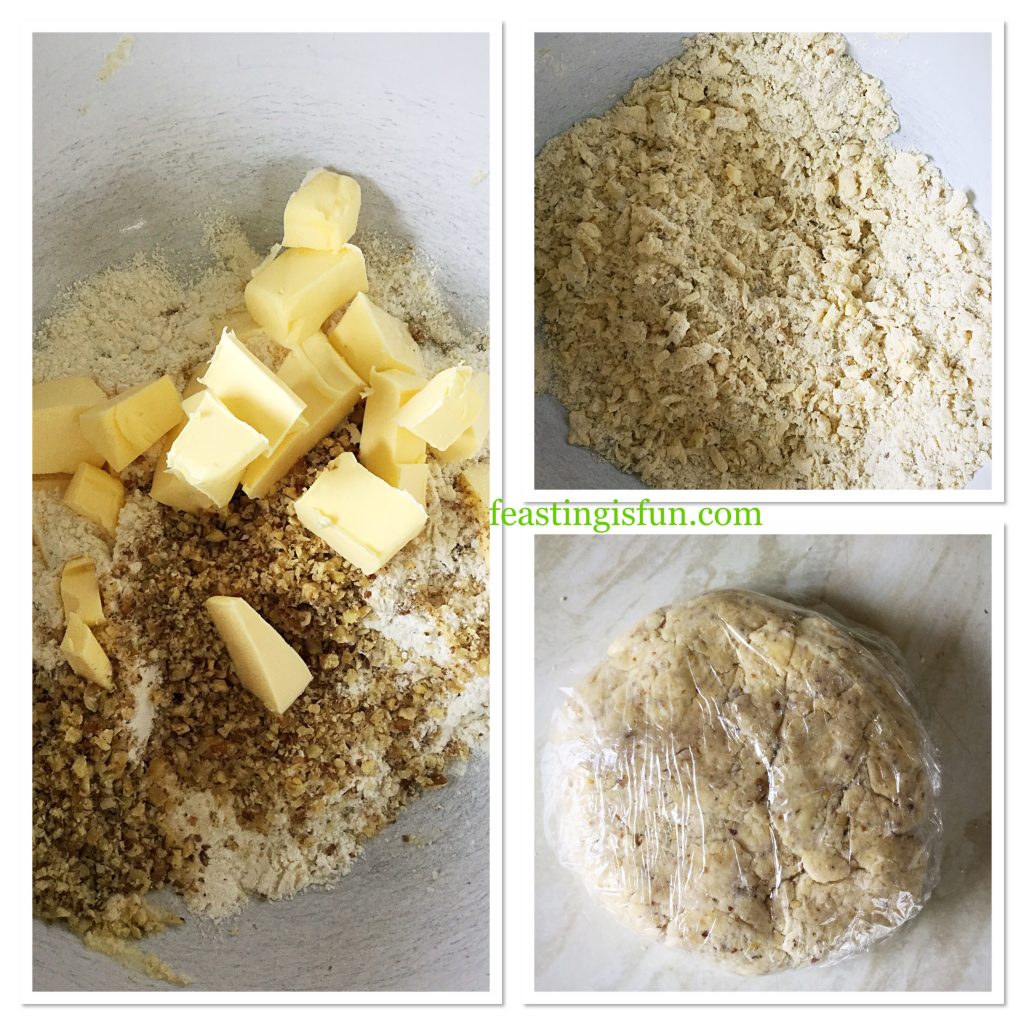
  • First of all, in a large bowl add the flour, chopped walnuts, salt, pepper and diced, cold butter. Then using your hands, or a pastry cutter, rub/cut the butter into the flour until the mixture resembles bread crumbs with pea sized chunks of butter present.
  • Now make a well in the centre of the mixture and add the cold tap water 10mls at a time. Using your hand, fingers bent and shaped like a claw, mix the dough after each addition. Work quickly to avoid the dough warming up and becoming oily. You may not need the full amount of water specified. Stop adding water once the dough comes together to form a rough ball. Set the bowl to one side.
  • Wipe the worktop with a clean, damp cloth. Then place the cling film (approximately the size of a large baking sheet) directly on to the damp surface. It will ‘stick’ and not move around.
  • Finally, tip the walnut pastry dough on to the cling film. Knead the dough lightly into a disc shape. Avoid working the pastry for too long as this will result in a hard, tough, crust.

Chilling the pastry

  • Wrap the pastry disc in the cling film and place in the fridge for at least 30 minutes, or until it is chilled. Making pastry the night before use allows it to chill thoroughly before rolling out.

FF Walnut Pastry Crust Leek Stilton Tart

    Making the Walnut Pastry Crust.
  • 10 minutes before rolling out the pastry, preheat the oven to 220C/200C fan, gas mark 7, 425F.
  • If you wish, lightly butter your tart tin, I never do. Place the tart tin on to a baking tray and put to one side.

Rolling out the pastry

  • Place the chilled pastry on to a clean worktop and roll out evenly, until it is a slightly larger circle than the combined width and depth of the tin. Approximately 30cm/11″ in width.
  • Roll the pastry around the rolling pin and transfer to the tart tin. Allow the pastry to settle into the tin. DO NOT stretch it as it will only shrink while baking.
  • Ensure the tin is fully lined and then trim away any excess pastry.
  • Dock the base of the pastry tart with a fork and then line with baking parchment. Fill the lined tart with baking beans, or ceramic balls and place into the top of the oven.
  • Bake the pastry for 15 minutes, then remove from the oven and lift out the baking parchment and beans.
  • Return the tart to the oven and bake for a further 5 minutes.

Layering the leeks and Stilton

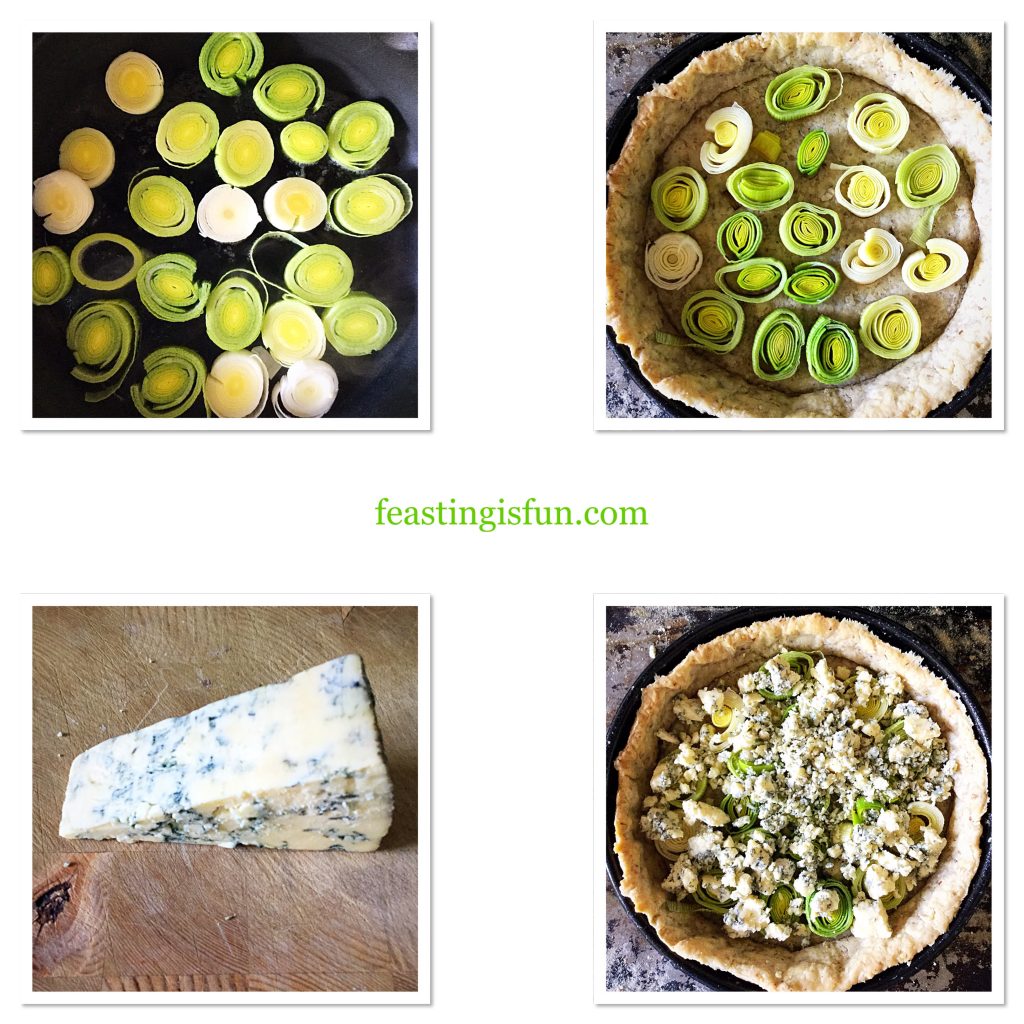
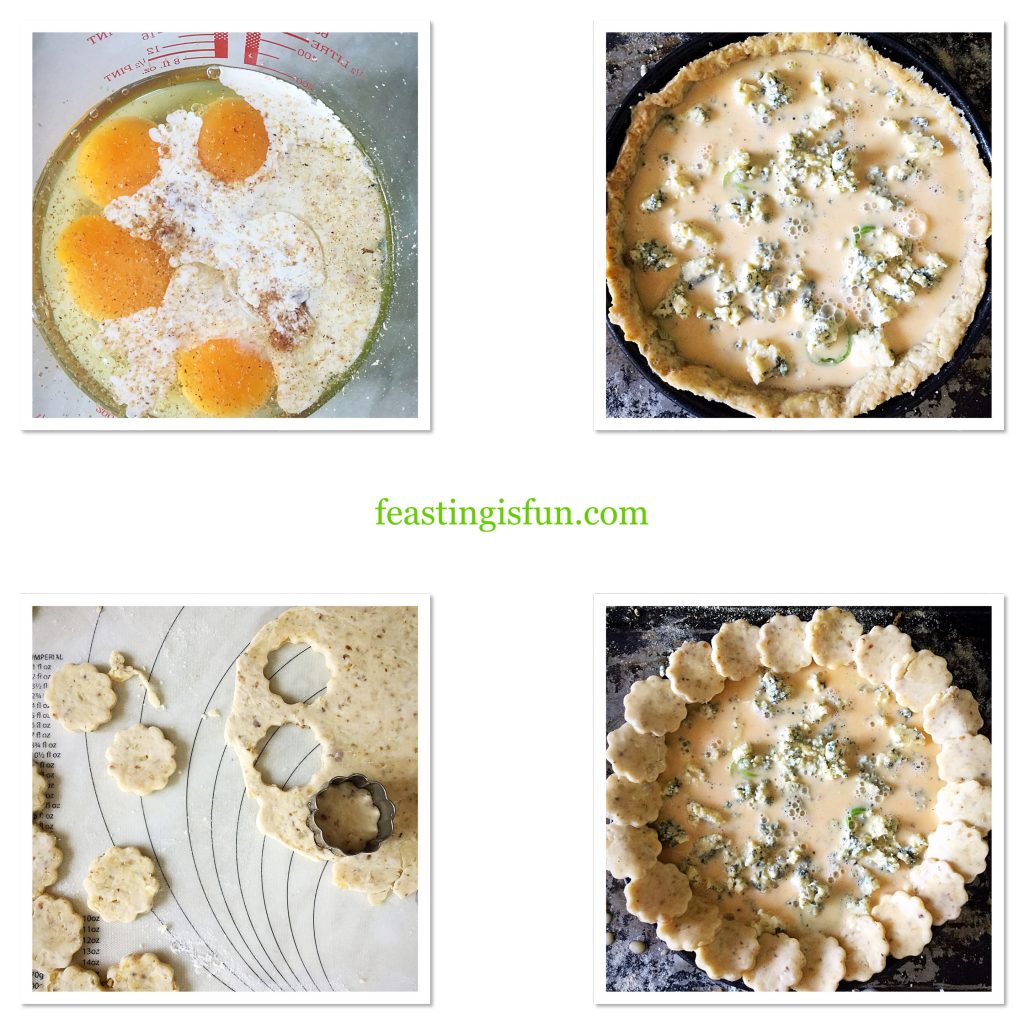
FF Walnut Pastry Crust Leek Stilton Tart
Preparing the Leek and Stilton filling.
  • While the pastry is baking, prepare the leek. Strip the outer 2 layers, cut off the root end and top, then rinse thoroughly with cold water.
  • Cut the leek into whole rings, approximately 1cm deep and the gently sauté in a dry pan over a medium/low heat for 10 minutes, or until slightly softened.
  • Remove the pastry shell from the oven when baked.
  • Carefully transfer the whole leek rings to the tart shell. Add any odd pieces of leek around the whole rings in the tart.
  • Cut the rind away from the Stilton. Now, using a fork, break up the Stilton, on a board, into crumbs. Sprinkle the crumbs over the leek  in the tart shell.
  • Reduce the oven temperature to 200C/180C fan, gas mark 6, 400F.
FF Walnut Pastry Crust Leek Stilton Tart
Preparing the egg custard and decorating the tart.

Making and adding the egg custard

  • Crack 4 eggs into a large jug. Add the double cream, nutmeg and pepper. Whisk together using a fork, until the mixture is uniform.
  • Pour the egg custard carefully into the pastry tart.
  • Carefully, as the tart is still warm, run a piece of butter around the top perimeter of the tin. This will stop any pastry decorations sticking.
  • Gather together the pastry offcuts. Roll to the thickness of a one pound coin.
  • Use a 1 inch/2.5cm approx. cutter to cut out about 25-30 circles. These will be placed around the edge of the tart.
  • Break an egg into a small bowl, add 1tsp of cream or milk and whisk together. This is the egg wash.
  • Take the first cutout and with a pastry brush, dipped in egg wash, brush both sides of the circle. Place the circle on to the edge of the tart. The centre of the circle should be in contact with the edge of the tart. Continue, using the same egg wash method and placing the 2nd circle so that just overlaps the first disc.
  • Keep going until the whole perimeter of the tart case is covered. I used 22 pastry discs. The number you need will depend on the size of your tart, how much the discs overlap and other variables.
  • Finally, when the decorations are in place, pour any leftover egg wash into the tart. As long as there is room.

Baking The Walnut Pastry Crust Leek Stilton Tart

  • Place the tart carefully into the centre of the oven and bake for 40-50 minutes. The tart is baked when there is no wobble in the centre, the filling has set and the egg custard is golden.
  • When fully baked remove the tart from the oven and allow to cool before removing from the loose bottom tart tin.
FF Walnut Pastry Crust Leek Stilton Tart
Golden Walnut Pastry Crust Leek Stilton Tart

This tart is delicious served warm for lunch or dinner, Also is is very tasty eaten cold or at room temperature, making it ideal for summer picnics and buffets.

It will keep for up to 3 days, stored in a container or, wrapped in cling film and kept in the fridge.

Leek Stilton Tart

If you have enjoyed this recipe For Walnut Pastry Crust Leek Stilton Tart you may also like these:

Smoked Bacon Asparagus Quiche

Smoked bacon asparagus quiche.
Smoked Bacon Asparagus Quiche

Bath Soft Cheese Chilli Tarts


Bath Soft Cheese Chilli Tarts

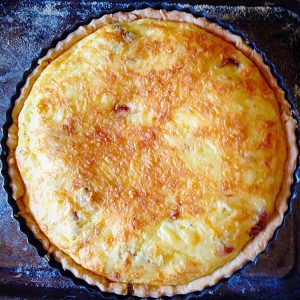
Quiche Lorraine

Quiche Lorraine
Quiche Lorraine

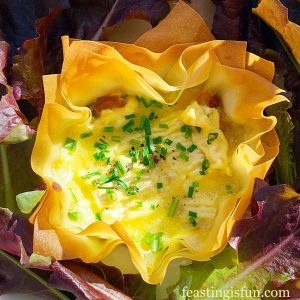
Homemade quiche and tarts taste a million times better than most shop bought varieties available. Seasoning, ingredients and indeed the pastry can all be tailored to our own personal tastes. While I haven’t taken on the challenge of Filo Pastry yet, shortcrust is incredibly easy, see Perfect Butter Shortcrust Pastry.

Whether served with a jacket potato and salad for a substantial meal, or grabbing a slice to eat whilst on the go, tarts and quiches are easy to make. They are also very satisfying to eat.

Do you have a favourite flavour combination for quiches and tarts?

Whatever you are making, baking and creating in your kitchens, have fun.

Sammie xx

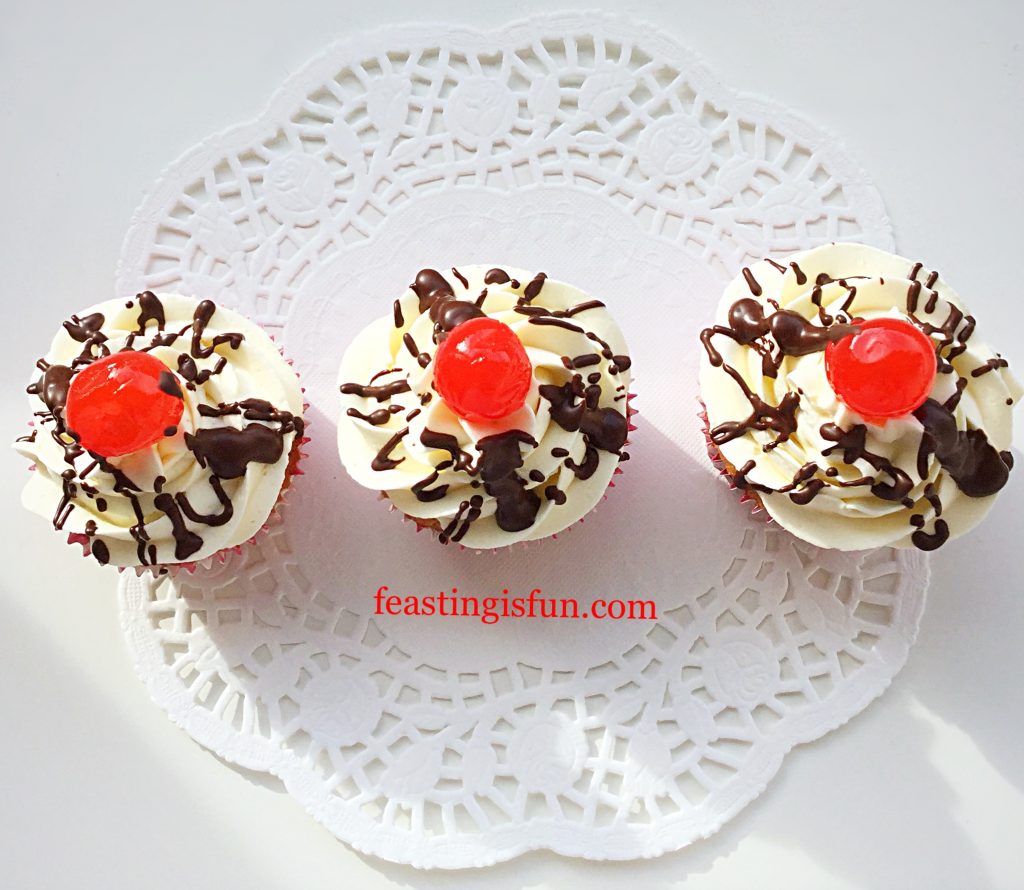
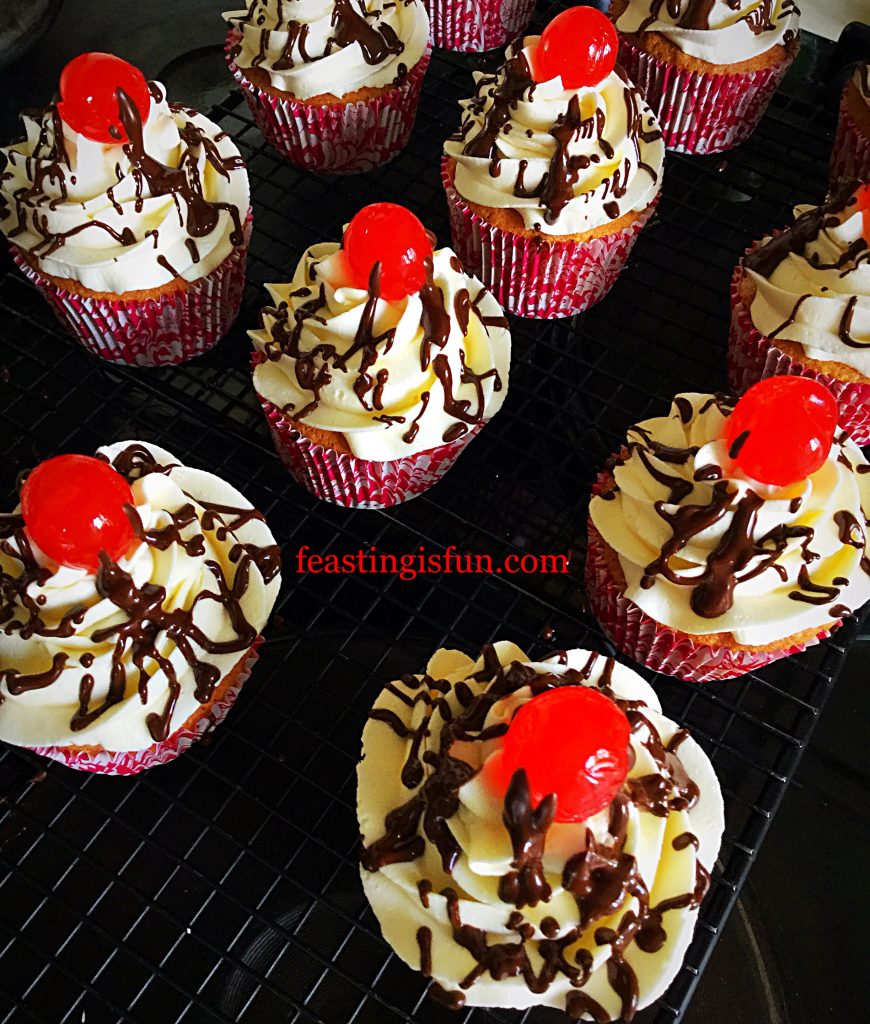
Maraschino Cherry Chocolate Drizzle Cupcakes

Who doesn’t love a cupcake? A beautifully decorated, perfectly portioned, whole cake to yourself. While I’m known for encouraging people to share, here on Feasting is Fun, that’s not a problem with these cupcakes. Because they taste so incredible, you will want to share these, with those you love. And my Maraschino Cherry Chocolate Drizzle Cupcakes are perfect for sharing.

FF Maraschino Cherry Chocolate Drizzle Cupcakes
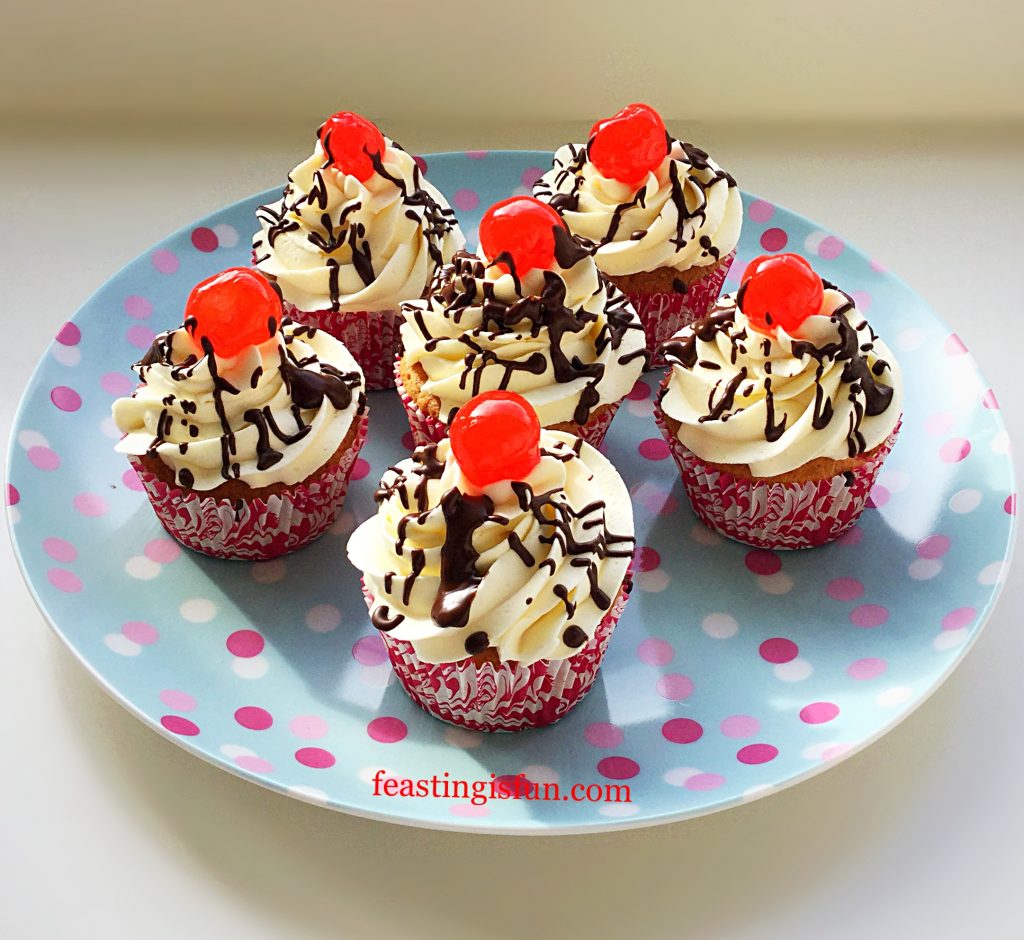
Maraschino Cherry Chocolate Drizzle Cupcakes beautifully delicious.

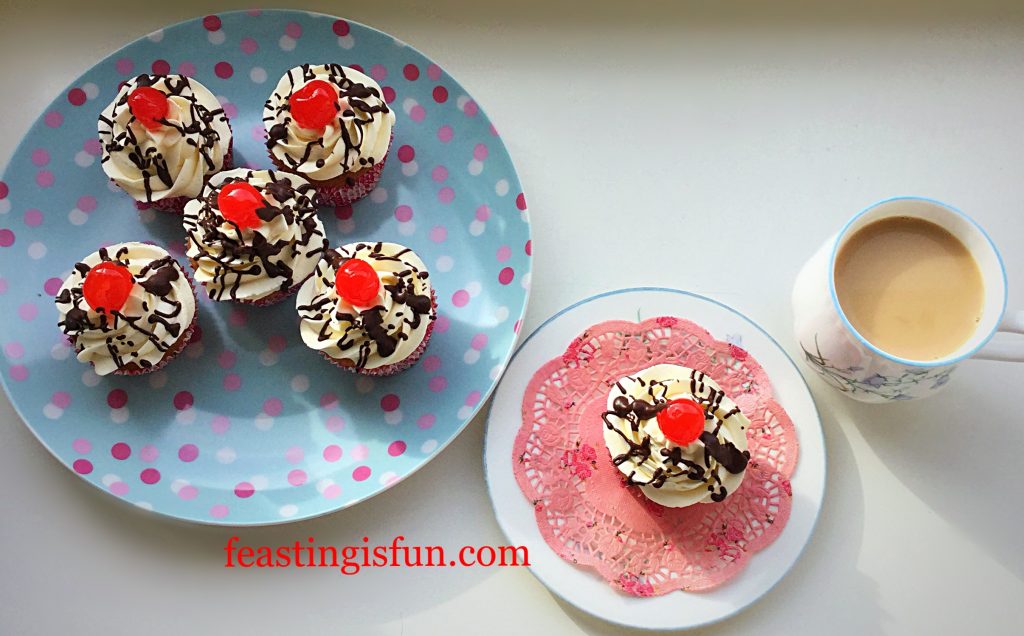
Cupcakes are great for those who struggle to share. Indeed I used to not be as keen on sharing when I was younger. Nowadays, however, if you visit, knock on the door, clean the windows, etc I am more than willing to give you a cookie or cupcake. Since cupcakes come as a complete package, they are easier to share. Our window cleaners and post lady were very appreciative of these Maraschino Cherry Chocolate Drizzle Cupcakes that I gave them today.

FF Maraschino Cherry Chocolate Drizzle Cupcakes
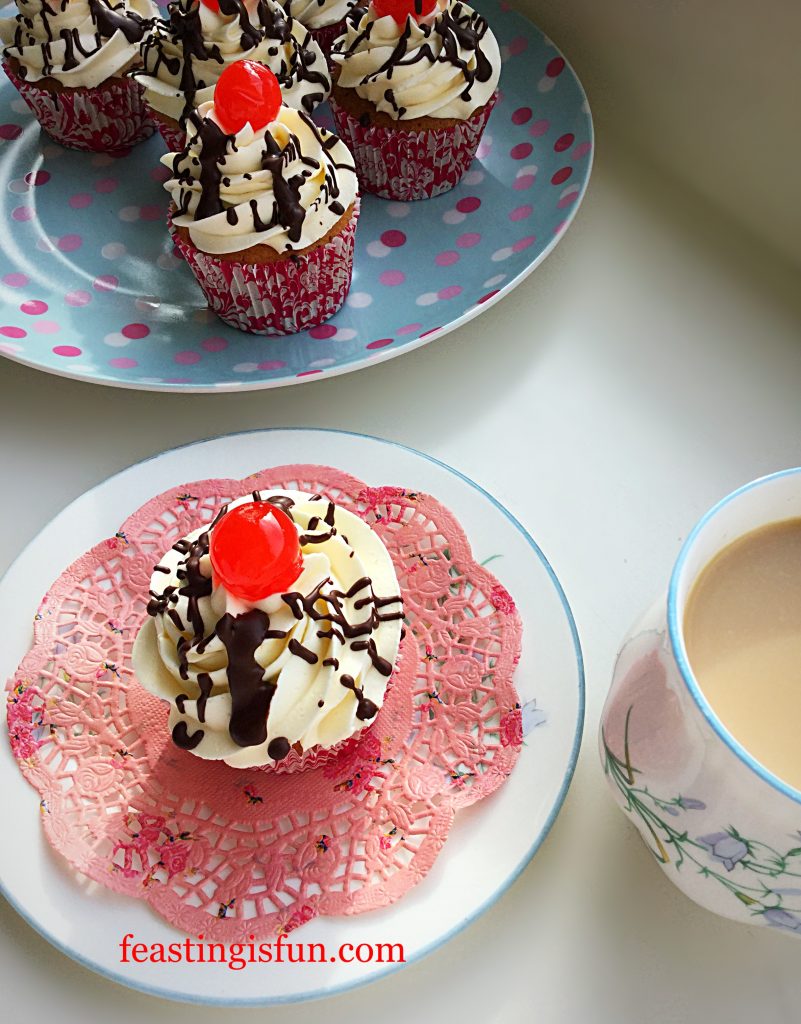
Maraschino Cherry Chocolate Drizzle Cupcakes great with Afternoon Tea.

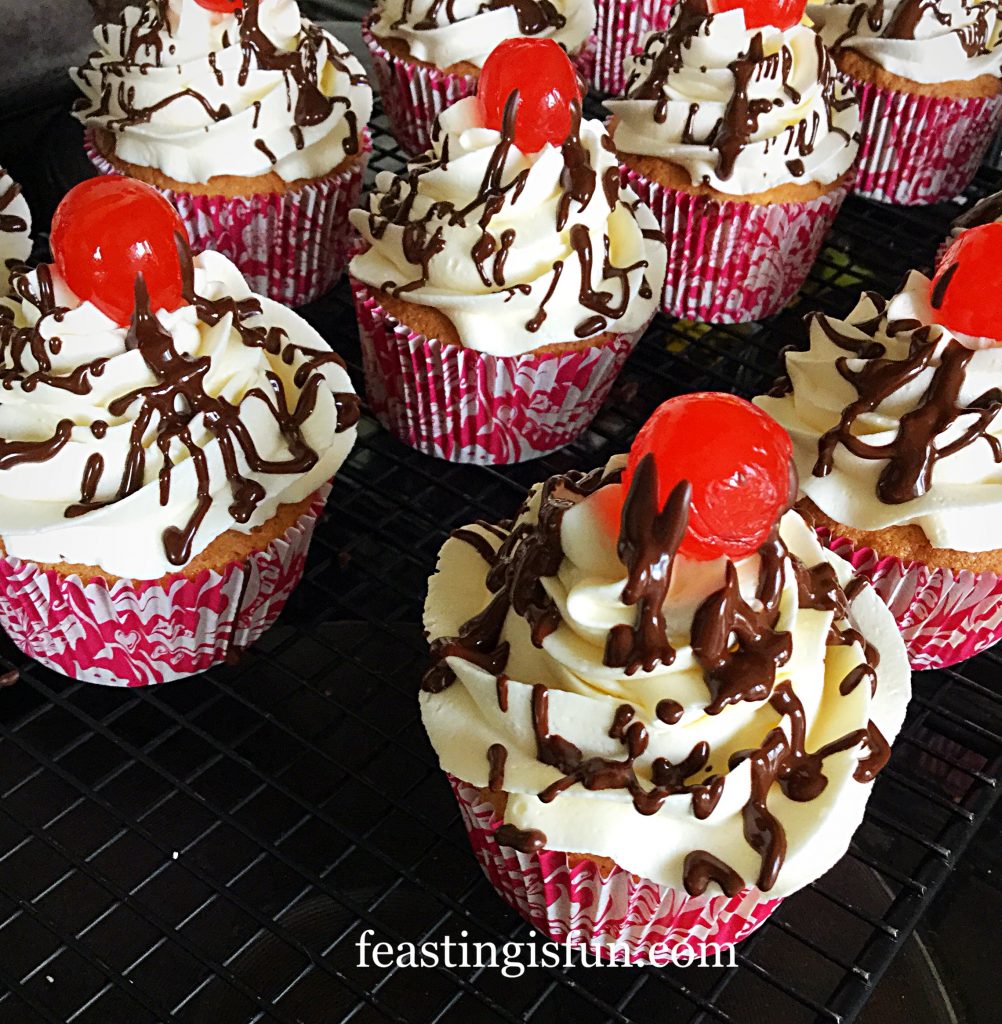
Light sponge tinged pink with chopped maraschino cherries, topped with a swirl of frosting and a whole cherry. Dark chocolate is drizzled over the frosting. Resulting in a perfect balance of flavours. Most importantly, the dark chocolate tempers the sweet frosting and compliments both the cherry and almond flavours.

FF Maraschino Cherry Chocolate Drizzle Cupcakes
Maraschino Cherry Chocolate Drizzle Cupcakes so cheerful.

The unique flavour of maraschino cherries can be tasted through every single bite of these cupcakes. Adding almond extract to the frosting emphasises their flavour too. Substituting glacé cherries wouldn’t give the same result. Maraschino cherries are easily found in the supermarket. Usually near the alcoholic drinks section!

FF Maraschino Cherry Chocolate Drizzle Cupcakes
Maraschino Cherry Chocolate Drizzle Cupcakes pretty perfect!

Since these cupcakes are each topped with a bright red cherry, they would also make a great ‘Red Nose Day’ bake!

Recipe: Maraschino Cherry Chocolate Drizzle Cupcakes makes 12

125g/4.5oz Unsalted Butter softened

125g/4.5oz Caster Sugar

1tsp Vanilla Extract

2tsp Liquid from the maraschino cherry jar.

1/4tsp Salt – I use Maldon

50g/2oz Maraschino Cherries plus 12 whole cherries to top the cupcakes

150g/5oz Plain White Flour

1.5tsp Baking Powder

For the frosting and decoration:

400g/14oz Plain White Icing Sugar

200g/7oz Unsalted Butter softened

1tsp Almond Extract – I use Nielsen-Massey

2tbsp Very Hot Water – from a recently boiled kettle

50g/2oz Dark Chocolate minimum 70% Cocoa

Method: Preheat the oven to 160C/140C fan, gas mark 3, 325F.

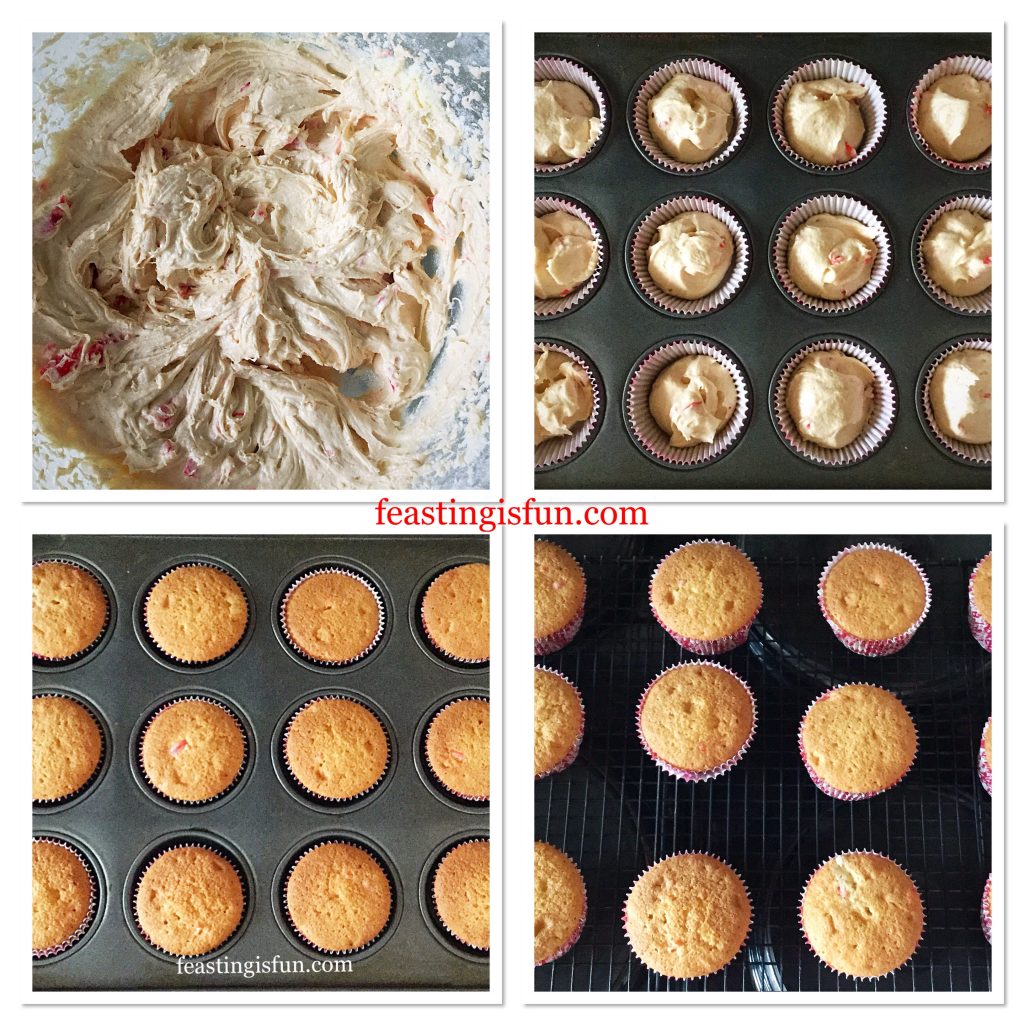
Making And Baking The Cherry Cupcakes

  • First of all, line a cupcake or muffin tin with 12 cupcake cases.
  • Remove 12 nicely shaped, maraschino cherries from the jar and place on to kitchen towel to drain. Weigh out slightly more than 50g of cherries and place into a bowl. Tip away any excess liquid that collects in the bowl. Follow, by cutting the cherries in the bowl into small pieces and set to one side.
  • Next, into a large bowl add the sugar, butter and salt. Beat until pale and creamy.
  • Add the vanilla extract and 2 teaspoons of liquid from the cherry jar and beat into the mixture.
  • Using the ‘all in one’ method, add the eggs to the bowl and then sift in the flour and the baking powder. Finally add the chopped cherries and gently mix the ingredients together until they are combined.
  • Fill each cupcake case with one dessert spoonful of cake batter.
  • Place the tin into the centre of the preheated oven and bake for 25-30 minutes.
  • The cupcakes may look a little darker than usual. This is due to a combination of the cherries in the batter and the liquid from the jar added to the cake batter.
  • They are fully baked when the sponge springs back from a light touch, or an inserted toothpick comes out clean.
  • As soon as the cupcakes are baked remove from the oven.
  • Remove the cupcakes from the baking tin and place on a cooling rack.
FF Maraschino Cherry Chocolate Drizzle Cupcakes
Making the batter, filling the cases and baking the cupcakes.

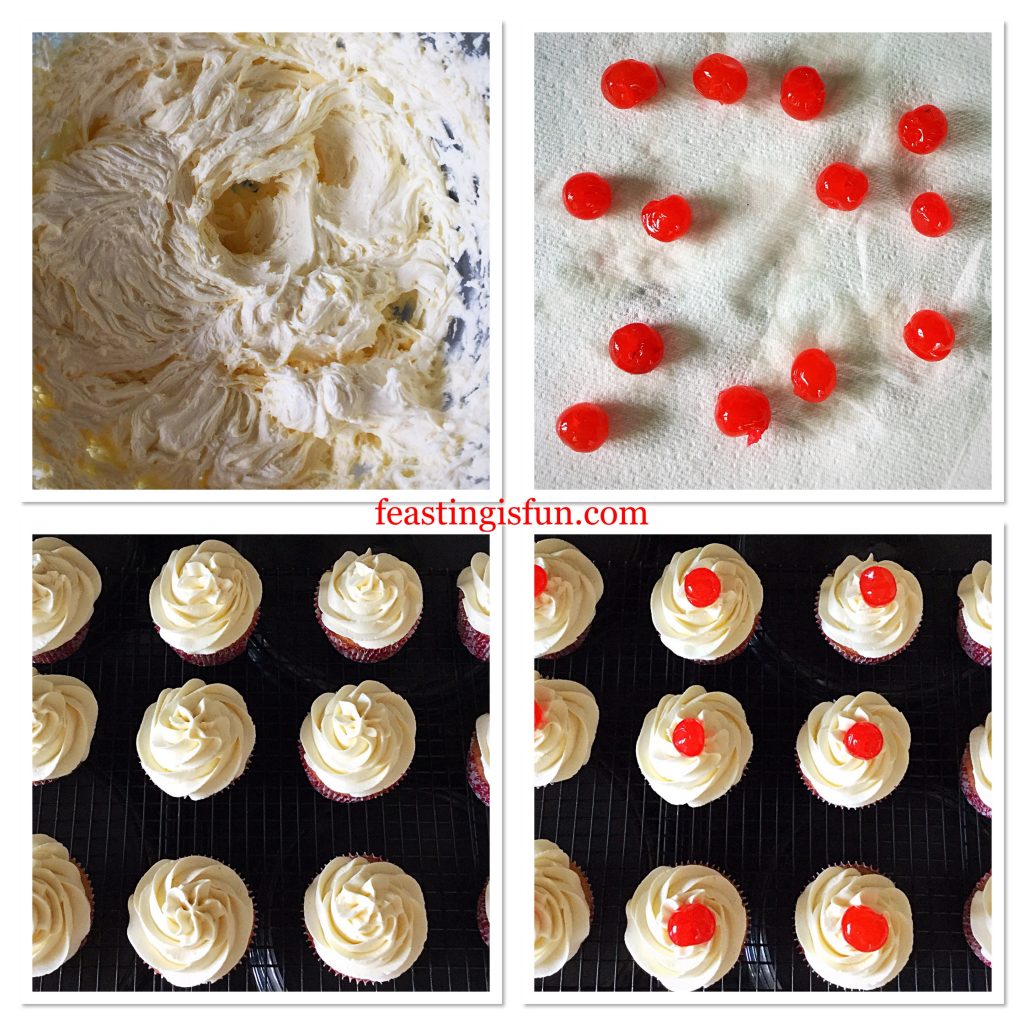
Making The Whipped Buttercream And Piping It Onto the Cupcakes

  • While the cupcakes are cooling make the buttercream frosting.
  • Into a large bowl add butter and then sift in the icing sugar.
  • Next add the hot water and almond extract.
  • Start whisking on a very slow speed, until the butter and icing sugar have combined.
  • Gradually build the whisking speed to high. Continue whisking until the frosting is pale and fluffy.
  • Spoon the frosting into a piping bag that has been fitted with a large star tip. I use a Wilton #1M.
  • Starting at the outside edge, on the top of the cupcake pipe a complete swirl. As the next swirl overlaps, lift the piping bag to bring the swirl inwards. Continue piping in swirls, finishing in the centre, by pulling the bag away. Similar to piping a Mr Whippy ice cream.
  • Continue until all of the cupcakes have been piped with frosting. Do not worry if there is a little buttercream left in the piping bag.
  • Finally, place a cherry on top of each cupcake.
FF Maraschino Cherry Chocolate Drizzle Cupcakes
Making the frosting, piping and decorating the cupcakes with maraschino cherries.
  • Allow the icing to set on the cupcakes.

Making The Chocolate Drizzle And Decorating The Cupcakes

  • While the cupcakes are setting, make the chocolate drizzle.
  • Break up, or chop the chocolate and place into a small, heatproof, microwaveable bowl. Heat for 20 seconds at a time, in the microwave. Making sure to stir the chocolate after each heating. When the chocolate has completely melted pour into a small, disposable piping bag.
  • Snip the very end of the bag off and drizzle chocolate over each cupcake.
FF Maraschino Cherry Chocolate Drizzle Cupcakes
Maraschino Cherry Chocolate Drizzle Cupcakes melted dark chocolate drizzle adds the finishing touch.

Finally, allow the chocolate to set before serving these Maraschino Cherry Chocolate Drizzle Cupcakes.

FF Maraschino Cherry Chocolate Drizzle Cupcakes
Maraschino Cherry Chocolate Drizzle Cupcakes

These cupcakes will last for 5 days if kept in an airtight container, refrigerate during warm weather. Although, it is very doubtful, once shared that they will last that long!

If you have enjoyed this recipe for Maraschino Cherry Chocolate Drizzle Cupcakes you may also like these:

Lemon Blueberry Cupcakes

FF Maraschino Cherry Chocolate Drizzle Cupcakes
Lemon Blueberry Cupcakes

Marshmallow Frosted Mango Cupcakes

FF Maraschino Cherry Chocolate Drizzle Cupcakes
Marshmallow Frosted Mango Cupcakes with a gluten free option.

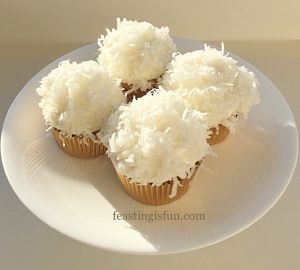
Coconut White Chocolate Snowball Cupcakes

FF Maraschino Cherry Chocolate Drizzle Cupcakes
Coconut White Chocolate Snowball Cupcakes

Sharing baked goodies, not only makes others happy, it also keeps waistlines from expanding! While selling my own bakes is not something I ever wish to do, sharing them allows me to follow my real passions. First of all sharing and also recipe development, mixing flavours, textures, being creative, giving away baked treats actually helps me. Resulting in smiles all round!

So, whatever you are making, baking and creating in your kitchens, have fun preparing and sharing your feast.

Sammie xx

No part of this post may be reproduced or duplicated without the written permission of the owner. Please see my Disclosure Policy.
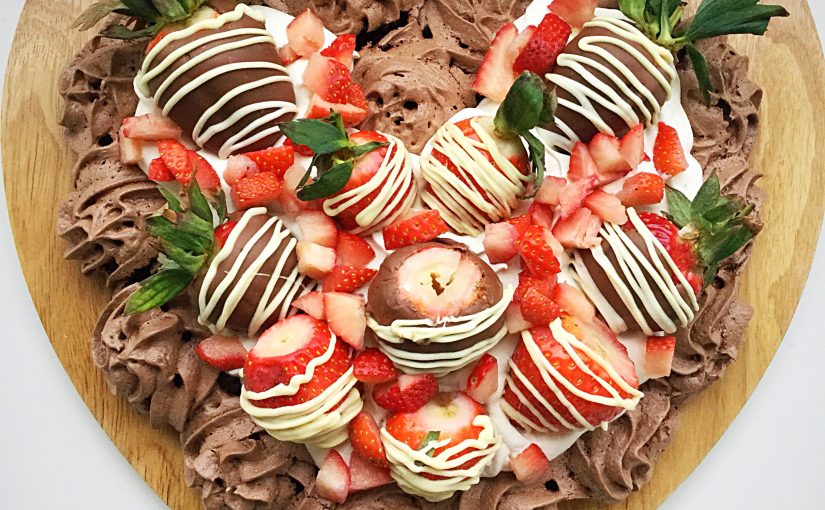
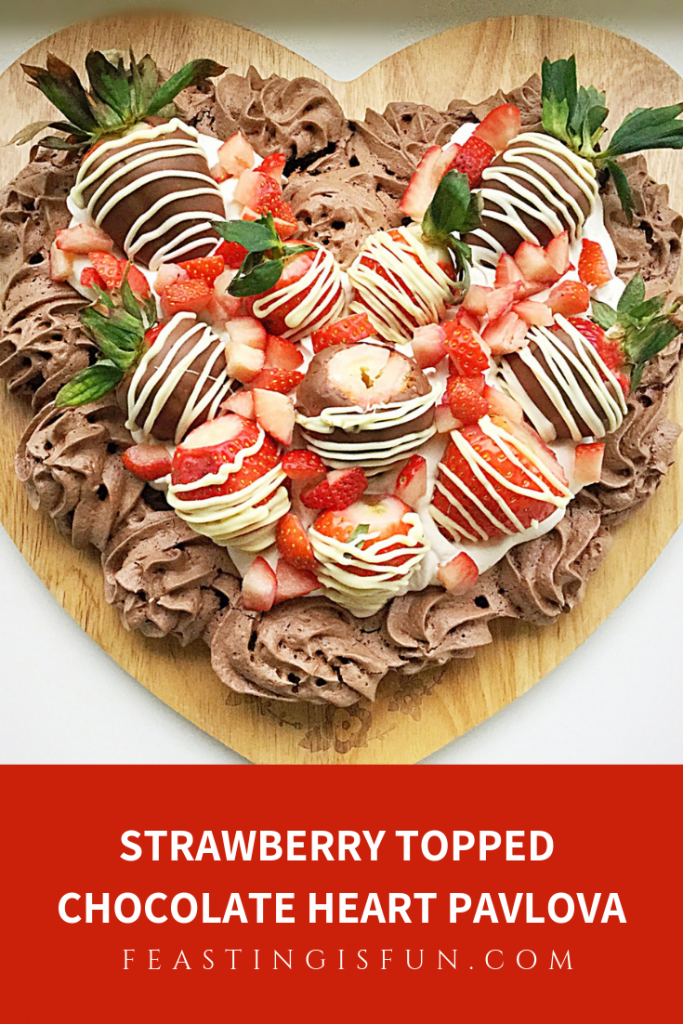
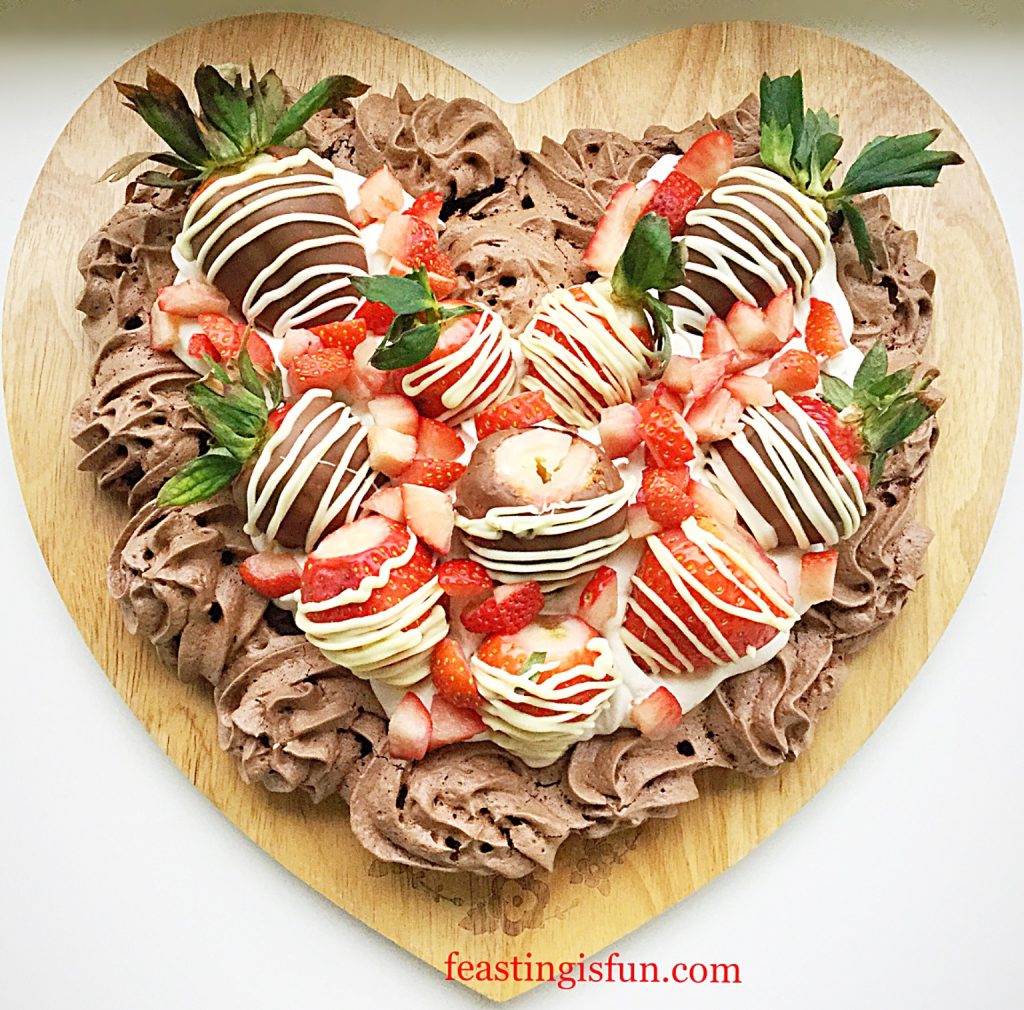
Strawberry Topped Chocolate Heart Pavlova

Strawberry Topped Chocolate Heart Pavlova has a delicious crisp outer shell, with a deep, brownie-like inner, topped with whipped cream and chocolate dipped strawberries. Ultimately, this is the perfect dessert to share with those you love. And did I mention that it’s also Gluten Free!

FF Strawberry Heart Topped Chocolate Pavlova

I adore pavlova. Both making and eating it! Because this chocolate heart pavlova is as pretty as it is easy to make. So, simply follow the recipe and instructions and you too can bake this beautiful dessert.

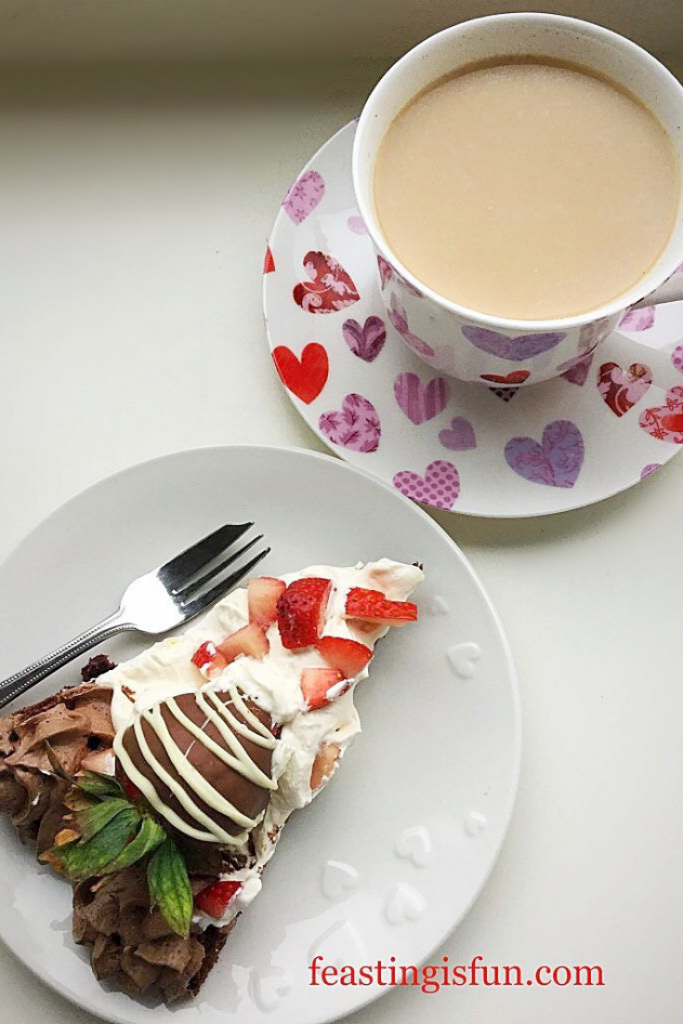
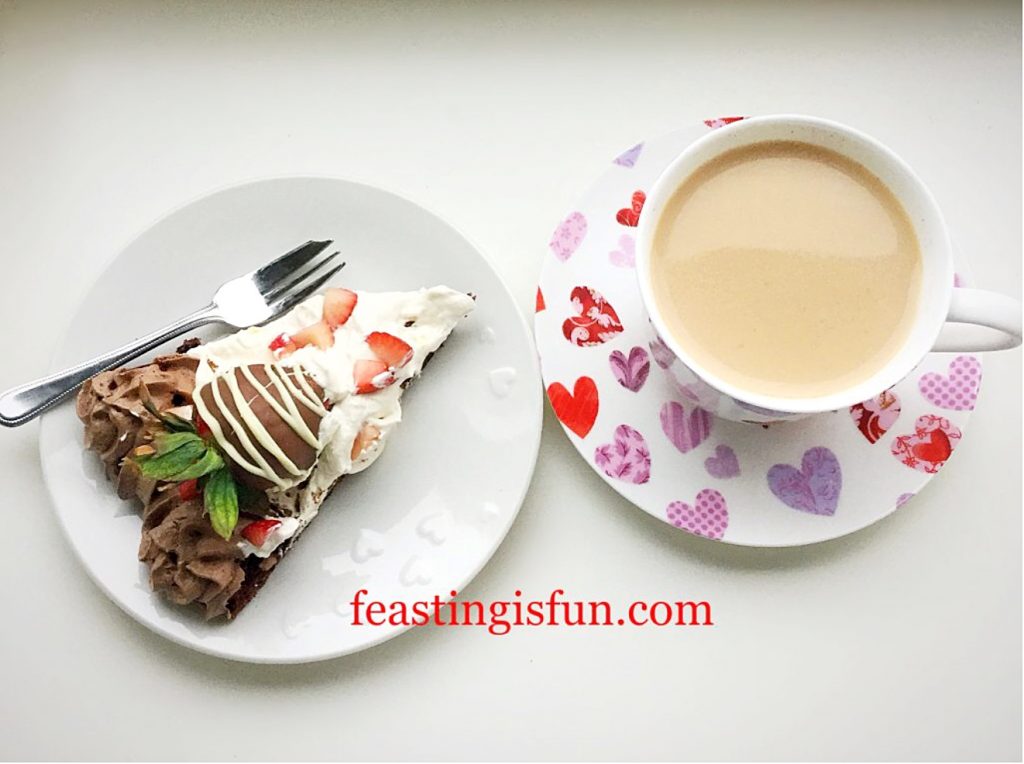
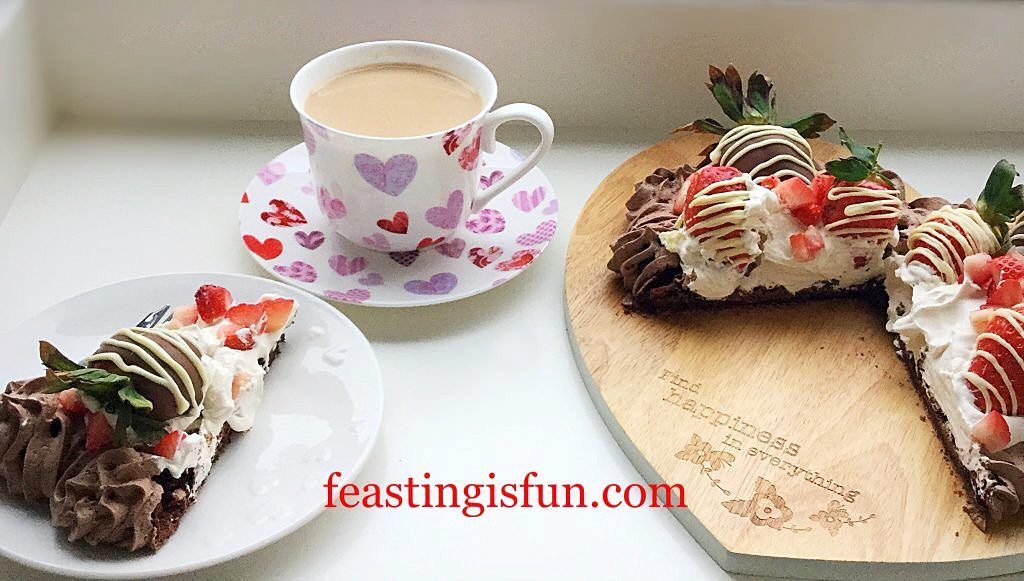
A slice of Pavlova with a cup of tea.

Celebrating love

Last week we celebrated Valentine’s Day. So, I set about creating something that would be perfect to share with those I love. Although, every recipe posted on Feasting is Fun, is designed to be shared! Since hearts, strawberries and chocolates are all associated with February 14th, they are all incorporated in this recipe. Resulting in a beautiful and tasty dessert that should not be confined to one day of the year, in my opinion. It is definitely worth making anytime love is being celebrated.

FF Chocolate Heart Pavlova
Strawberry Topped Chocolate Heart Pavlova

For this pavlova I piped the meringue heart and added swirls around the outside, defining the heart shape. So, if I can make this pavlova, then so can you. Most importantly it really isn’t difficult to do, and it creates a pretty finish. Also, this heart pavlova contains only cocoa, not chunks of chocolate, making it possible to pipe. Resulting in meringue mixture that resembles a light, airy mousse. And once baked it keeps it’s shape perfectly. Yum!

FF Strawberry Topped Chocolate Heart Pavlova
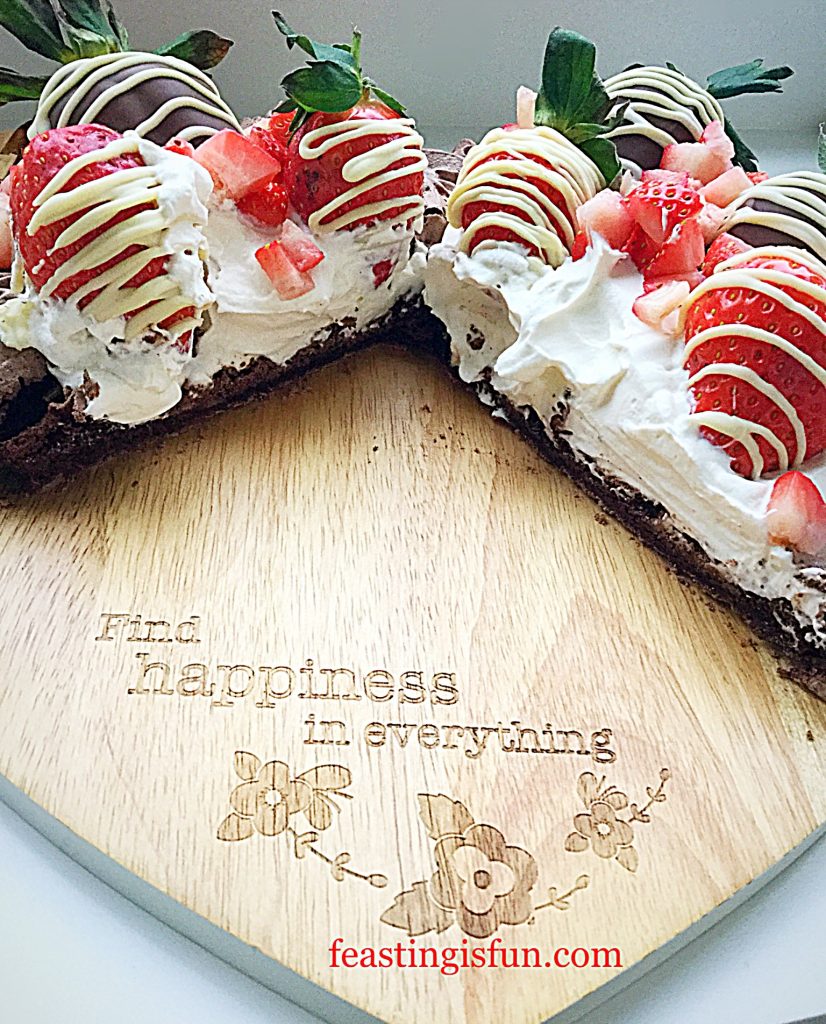
Strawberry Topped Chocolate Heart Pavlova each layer distinct.

I adore the way that whipped double cream tops the chocolate pavlova, rather like a down duvet covers a bed. Since it moulds and fills the pavlova’s contours. While creating a soft, velvety contrast to the crisp and fudgey pavlova. Finally, chocolate dipped strawberries add a touch of decadence, crowning this dessert with their contrasting colours.

FF Pavlova and tea
A slice of pavlova served on heart embellished china.

One mouthful of this delightful, gluten free dessert and your tastebuds are lost to the complimenting flavours and contrasting textures. And one serving provides plenty of time to fully appreciate this beautiful pavlova. Although I promise not to tell if you go back for seconds!

Recipe: Strawberry Topped Chocolate Heart Pavlova serves 6-8

4 Large Free Range Egg Whites – use the yolks to make lemon curd

200g/7oz Caster Sugar

1tsp Balsamic Vinegar

Scant 1/4tsp Salt – I use Maldon 

50g/2oz Cocoa – I use Callebaut

1tsp Corn Flour – I use Doves Farm

300mls/ 1/2 pint Double Cream

400g Fresh Strawberries – I use British strawberries whenever possible

100g/4oz Milk Chocolate

50g/2oz White Chocolate

Method: Preheat the oven to 200/180C fan, gas mark 6, 400F.

Making the meringue:

Prior to starting this recipe ensure the bowl used to mix the meringue is scrupulously clean. Wipe around the inside of the bowl with half a lemon to ensure no fat is present. Because the presence of fat, or oil will stop the egg whites from whipping up and incorporating air.

Also line a large baking tray with baking parchment. Draw a large heart on the reverse of the parchment with pencil, approximately 25cm wide by 27.5cm high, 10″w x 11″h.

  • First of all, pour the egg whites into the large clean, prepared bowl.
  • Whisk until the egg whites hold a stiff peak.
  • Continue whisking on high, adding the sugar one tablespoon at a time until it is all incorporated. The meringue should be white and glossy, holding a stiff peak. Rub a little of the meringue between your finger and thumb, it should feel smooth. If at all gritty, continue whisking, as not all of the sugar is dissolved into the egg white. Continue until the mixture is smooth.
  • While the egg whites are whisking fit a large piping ba with a large, open star nozzle, I use Wilton  #1M.
  • As soon as the meringue has been whisked sift in the corn flour and cocoa. Then add the balsamic vinegar and salt.
  • Using a large, clean, metal spoon fold all of the ingredients together carefully. Taking care not to knock out the air that has been whisked into the egg whites.
  • Place four dots of meringue in the corners of the baking tray, then place the baking parchment on top. This will hold the baking parchment in place.

Creating the heart shape and baking the Pavlova:

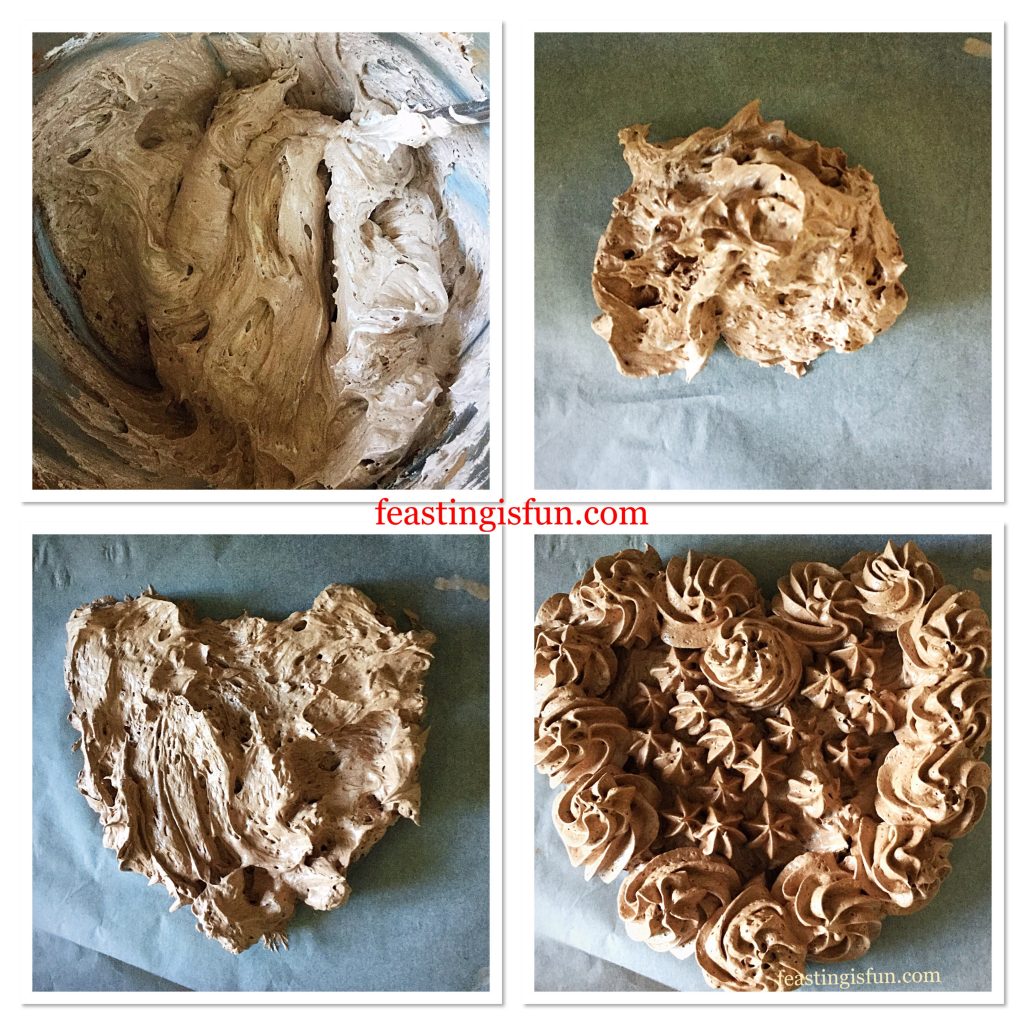
  • Place a large spoonful of chocolate meringue into the centre of the heart. Spread the meringue with a palette knife, so that it fills the heart outline. There is no need to be too precise as it will be piped over.
  • Fill the piping bag with the remaining chocolate meringue.
  • Pipe swirls around the outline of the heart, leaving the bottom point and the top dip until last. Pipe a swirl at the bottom of the heart and then the top dip. Next pipe stars, inside the heart, on the base.
FF Strawberry Topped Chocolate Heart Pavlova
Making and creating the chocolate heart pavlova.
  • Place the pavlova into the centre of the oven and immediately reduce the heat to 160C/140C gas mark 3, 325F. Do not open the oven door whilst baking!
  • Bake for 1 hour exactly. After the baking time has elapsed turn the oven off and open the oven door a fraction, so that the pavlova cools slowly. I place a wooden spoon between the door and the oven.

Chocolate covered strawberries

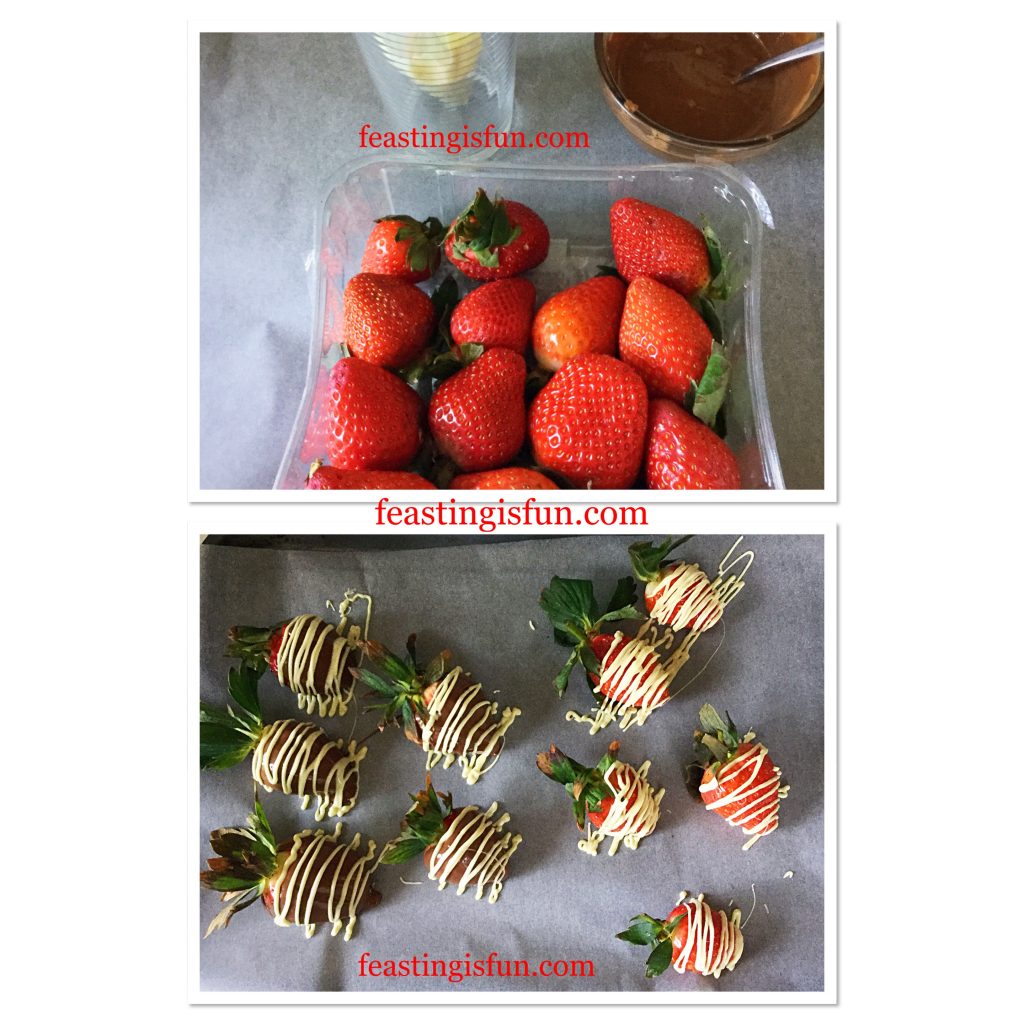
  • While the pavlova is cooling the prepare the chocolate strawberries. Into separate, small heatproof, microwaveable bowls, break up and add the milk and white chocolate, separately. Zap for 20 seconds at a time in the microwave, stirring in between, until the chocolate has melted. Spoon the melted white chocolate into a small piping bag.
FF Strawberry Topped Chocolate Heart Pavlova
Preparing and decorating the strawberries.
  • Select 10 of the biggest strawberries and leave their tops on. Dip 5 of the large strawberries into the milk chocolate, using a teaspoons to help fully cover them. Place the dipped strawberries on to some baking parchment. Also keeping the strawberries refrigerated helps the chocolate set quickly, especially during warm weather.
  • Next pipe lines across the 5 chocolate covered strawberries and also the 5 un-dipped ones, this gluten free recipe also uses chocolate strawberries. Leave to set on the baking parchment. In warm weather place in the fridge for a couple of minutes.

Filling And Decorating The Strawberry Topped Chocolate Heart Pavlova

  • As soon as the pavlova is completely cooled remove from the oven.
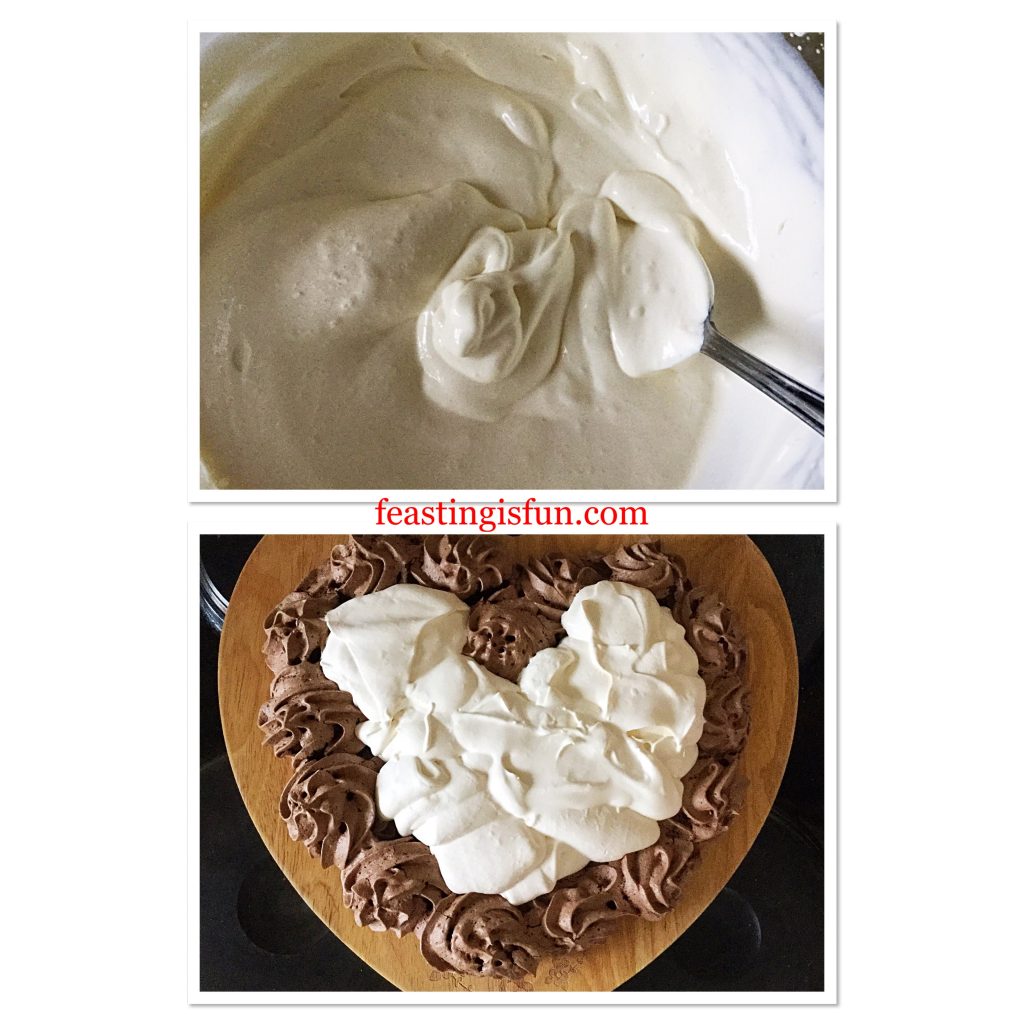
  • Pour the cream into a bowl and whisk until it has thickened but is not stiff.
  • Gently run a palette knife under the pavlova to loosen it from the baking parchment. Place the pavlova on to a flat plate, or stand from which it is to be served.
  • Spoon the cream inside the shell of the pavlova.
FF Strawberry Topped Chocolate Heart Pavlova
Preparing the cream and filling the pavlova.
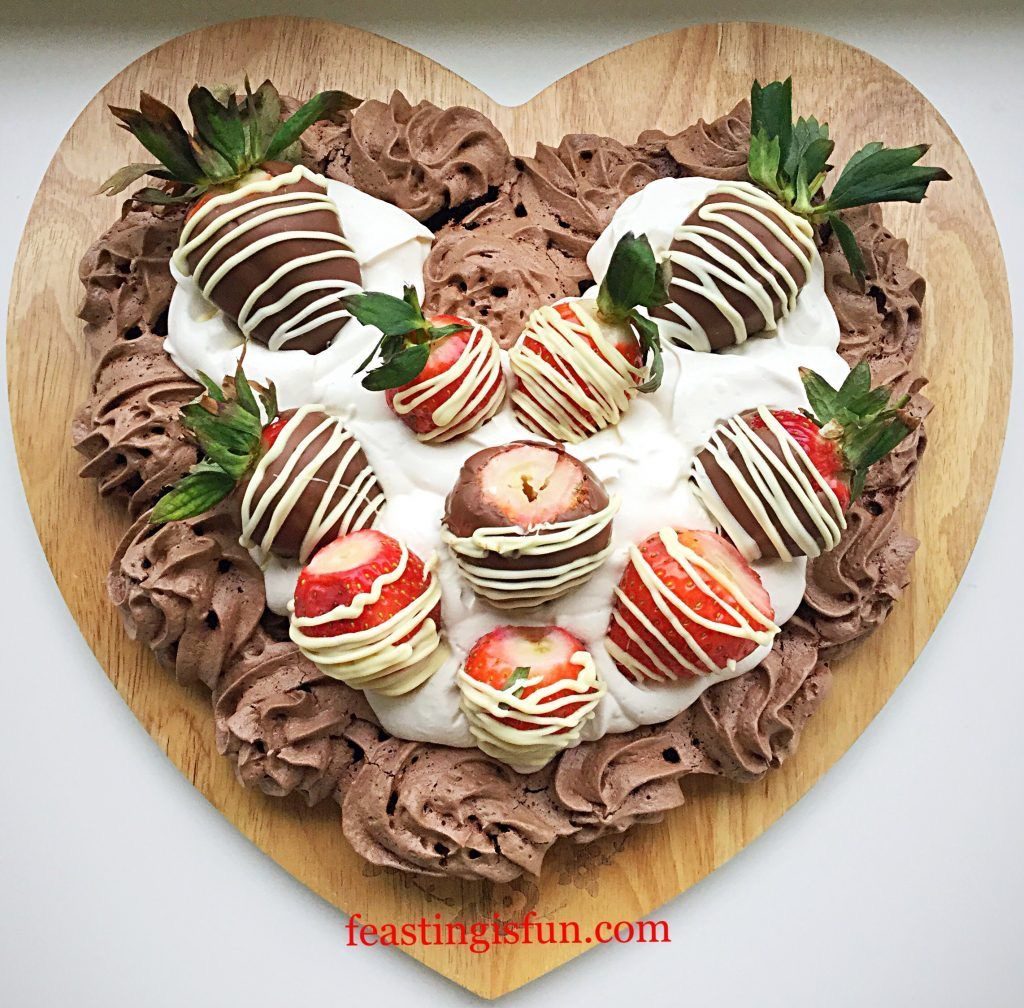
  • Arrange the chocolate dipped strawberries on the top of the cream, removing the tops if necessary.
FF Strawberry Topped Chocolate Heart Pavlova
Almost finished!
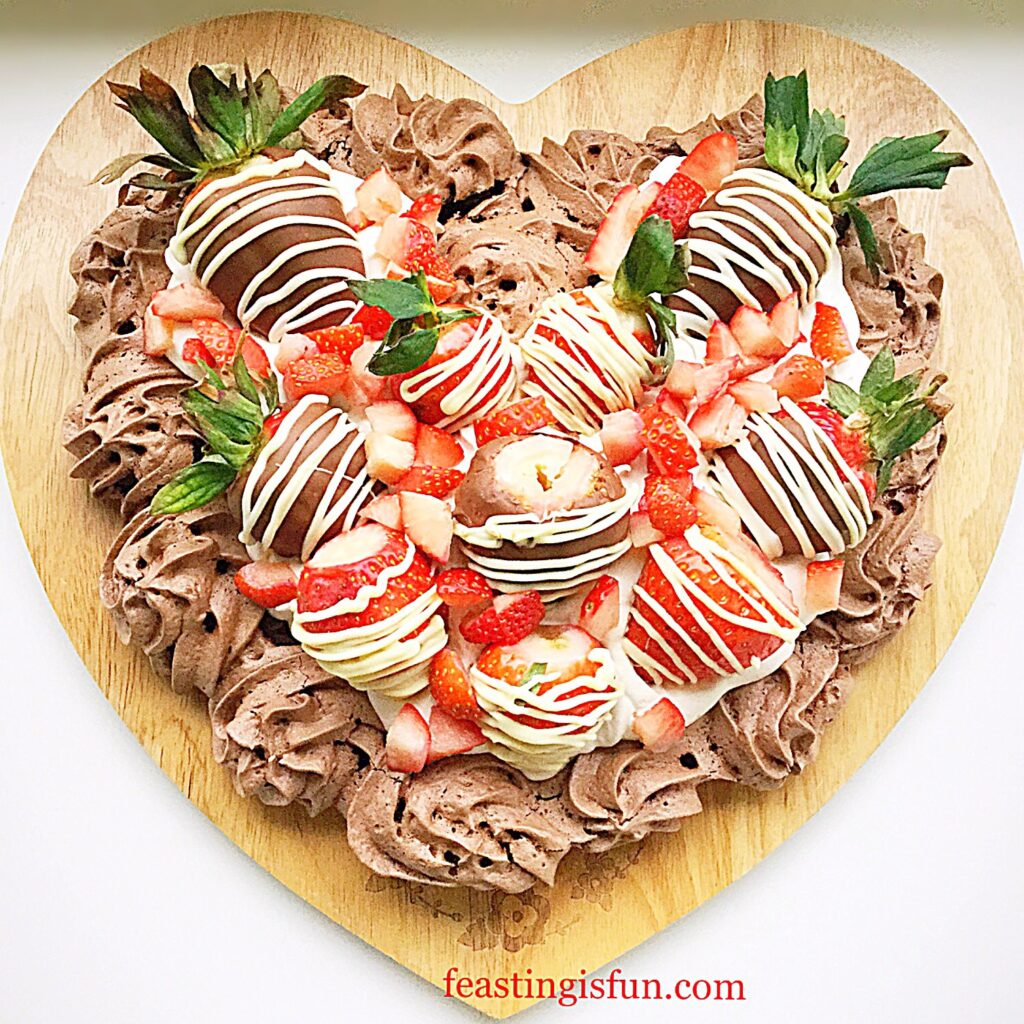
  • Chop the remaining strawberries into fairly small pieces and sprinkle them around the whole strawberries. Alternatively, use whatever berries are in season at the time of making.

Finally all that is needed is someone to share this stunning dessert with. Because all food tastes better when shared!

FF Strawberry Topped Chocolate Heart Pavlova
Strawberry Topped Chocolate Heart Pavlova

Serve sliced, ensuring each portion has a chocolate strawberry.

This Strawberry Topped Chocolate Heart Pavlova is at its best eaten on the day assembled. Although the pavlova can be made the day before and left to cool, overnight in the oven. Also, the strawberries can be prepared 4 hours ahead and left in a cool place or placed in the fridge. Likewise the cream can be prepared at the same time as the strawberries and left in the fridge, it may need a quick whisk to bring it back to the consistency required.

The Pavlova will last, covered in foil, in the fridge for 2 days after assembly.

If you have enjoyed this recipe for Strawberry Topped Chocolate Heart Pavlova you may also like these:

Raspberry Coulis Drizzled Mixed Berry Pavlova

FF Strawberry Topped Chocolate Heart Pavlova
Raspberry Coulis Drizzled Mixed Berry Pavlova

Lemony Strawberry Pavlova

FF Strawberry Topped Chocolate Heart Pavlova
Lemony Strawberry Pavlova

Raspberry Chocolate Pavlova

FF Strawberry Topped Chocolate Heart Pavlova
Raspberry Chocolate Pavlova

Creating recipes that are accessible to as many people as possible is important to me. So, all of the pavlova recipes on this blog are gluten free. Therefore, serving a naturally gluten free dessert to friends and family ensures that everyone feels special. And hopefully no one feels that they have been ‘too much bother’ due to dietary limitations they may have. Resulting in a relaxed inclusive meal that everyone can share in and enjoy.

So, whatever you are making, baking and creating in your kitchens, have fun preparing and sharing your feast.

Sammie xx

No part of this post may be reproduced or duplicated without the written permission of the owner. Please see my Disclosure Policy.
Cinnamon Plaited Brioche Bread

If you are a frequent visitor to this blog, you will know how much I enjoy making bread. While I am very happy to let kitchen appliances carry out the hard work, indeed for this loaf they are necessary, shaping the dough is always fun to do by hand. Since I first tried an eight strand plaited loaf last year, I have become hooked on intertwining lengths of dough and observing the final, baked result. This Cinnamon Plaited Brioche Bread is delicious and easy to make.

FF Cinnamon Plaited Brioche Bread
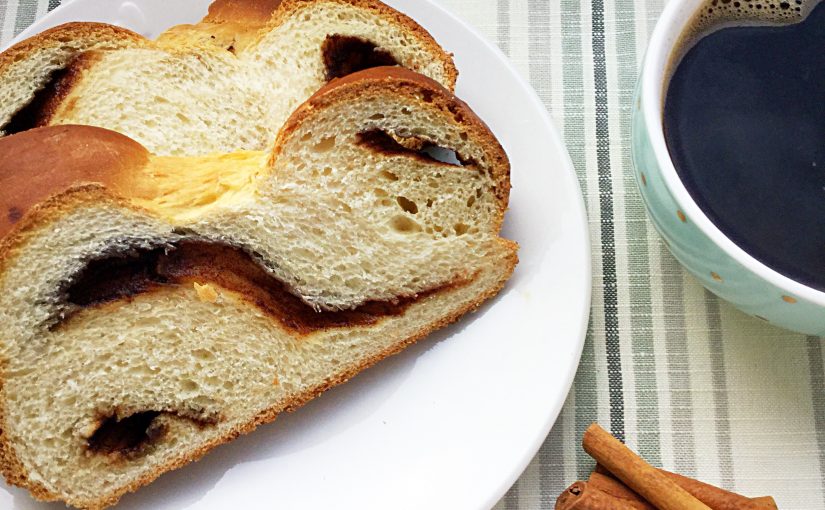
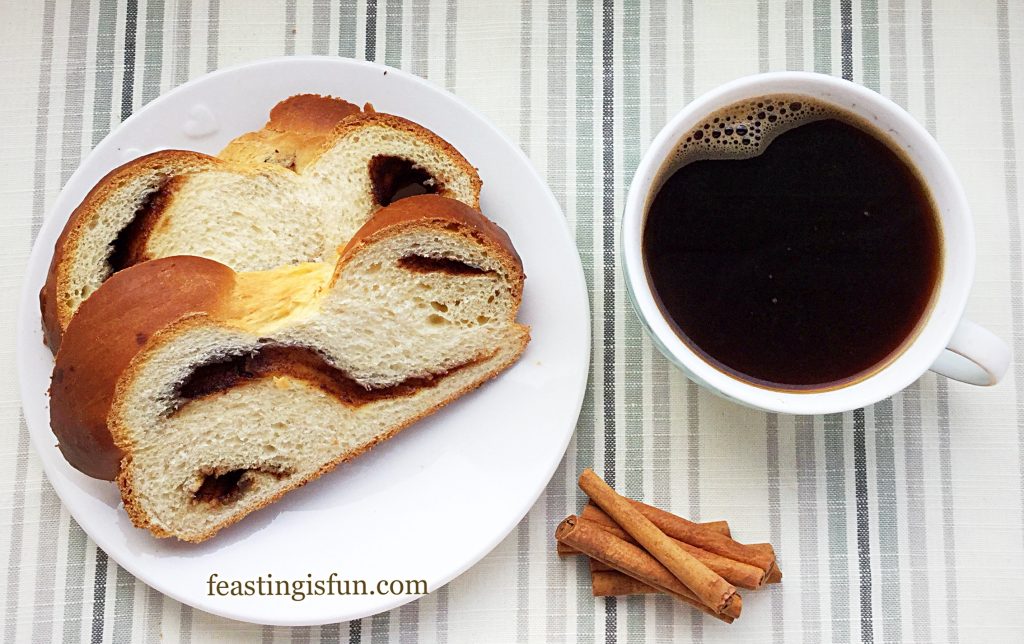
Cinnamon Plaited Brioche Bread a delicious breakfast.

Having re-tested the recipe and technique I have full confidence that you too can make this delicious bread. Even if you have never plaited before, the step by step photographs will show you how. Such a small amount of extra effort and you will be rewarded with a stunning loaf. While the smell of cinnamon dough, baking, will have you counting the minutes until your first slice!

FF Cinnamon Plaited Brioche Bread
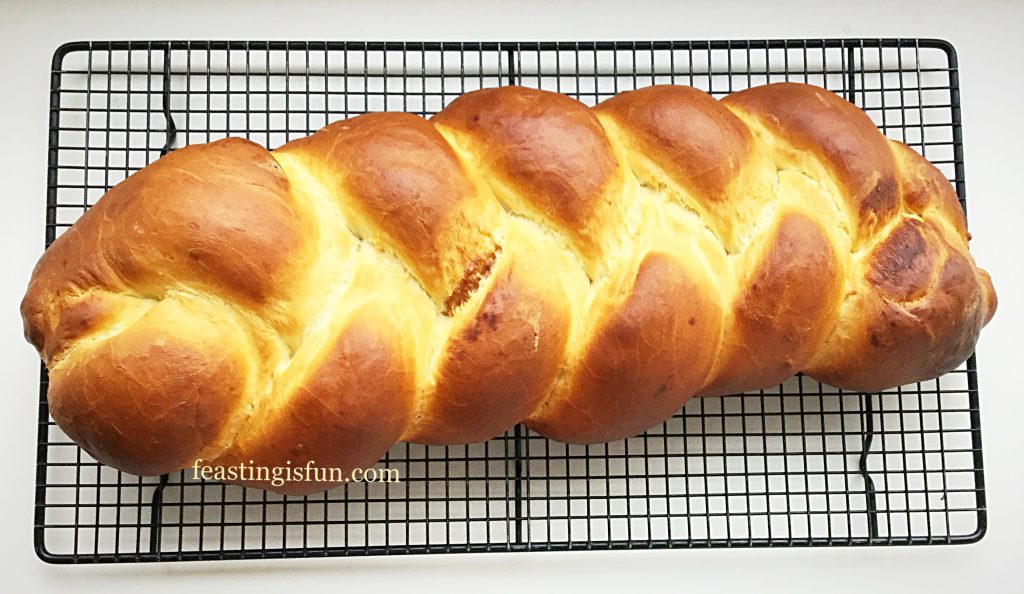
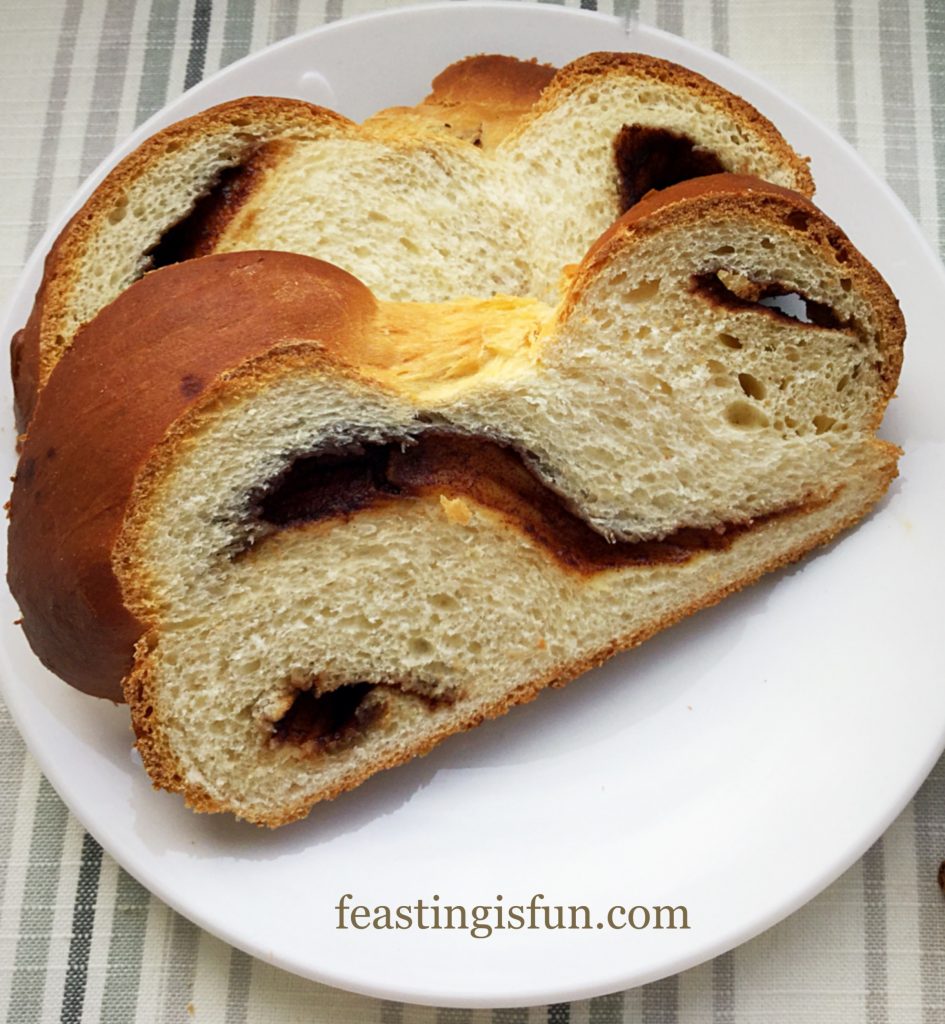
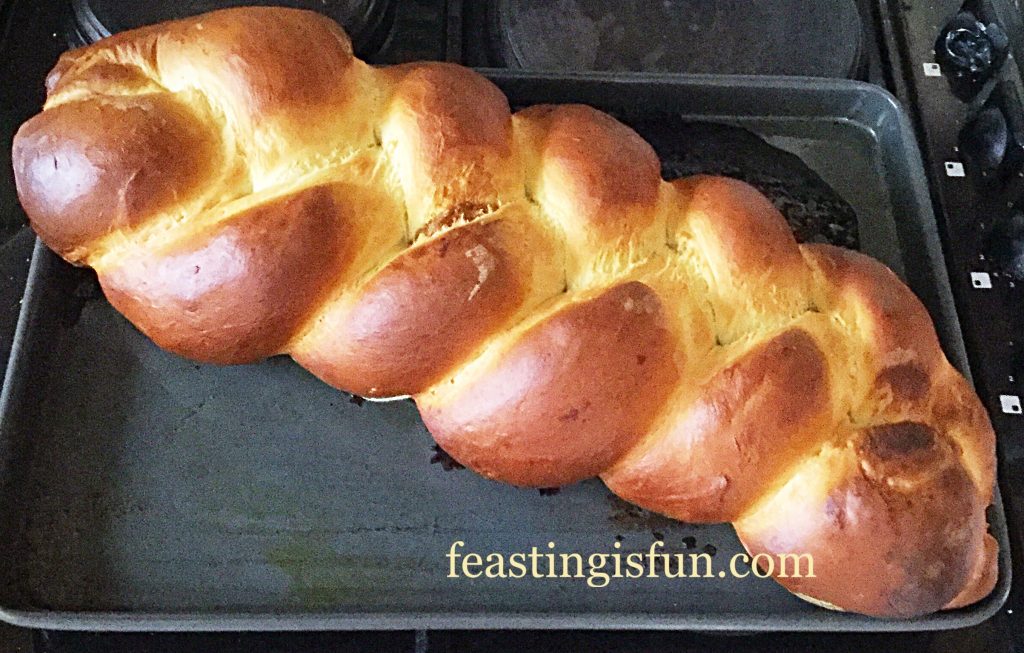
Cinnamon Plaited Brioche Bread golden and bronzed with a hidden inner.

How Ingredients Affect The Final Bake

When baking, it always pays to use the very best ingredients available. However, not everyone’s budget can stretch to premium ingredients. If you can make one change here, I strongly recommend using free range, or organic eggs. Their golden yolks are what help give this loaf its amazing colour. Both in the bread itself and the egg wash, brushed on before baking. Resulting in both the golden and bronzed baked crust.

FF Cinnamon Plaited Brioche Bread
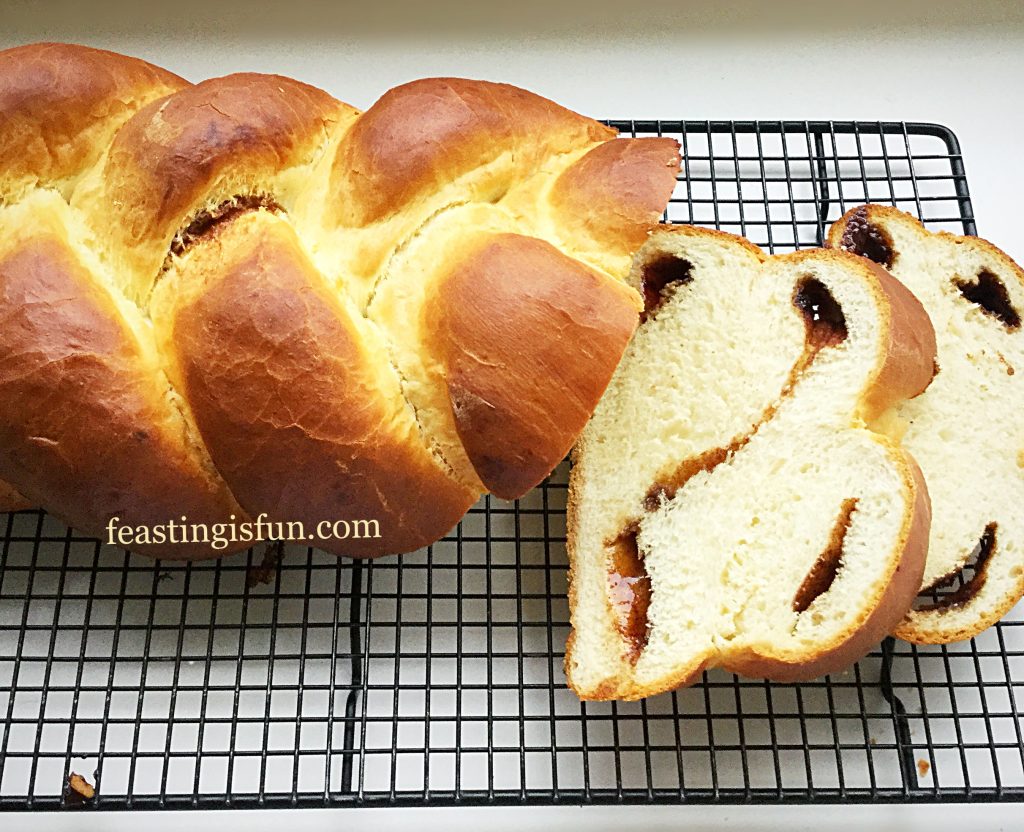
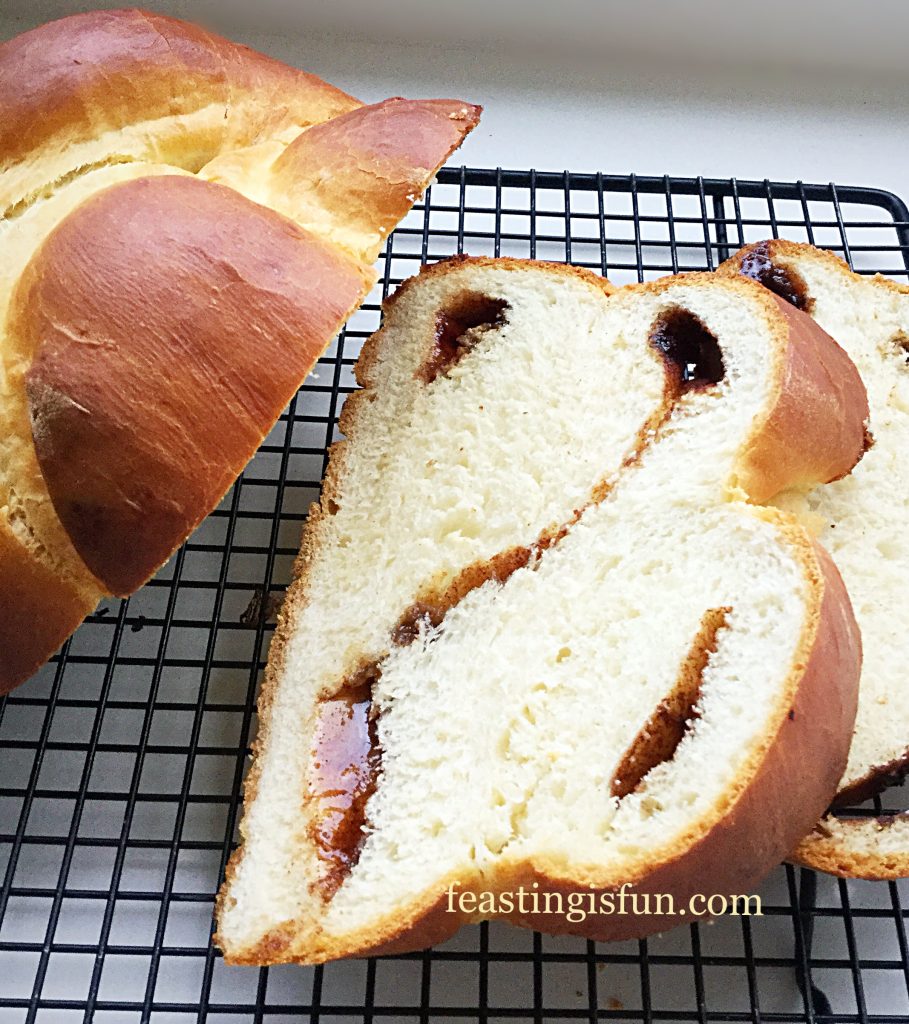
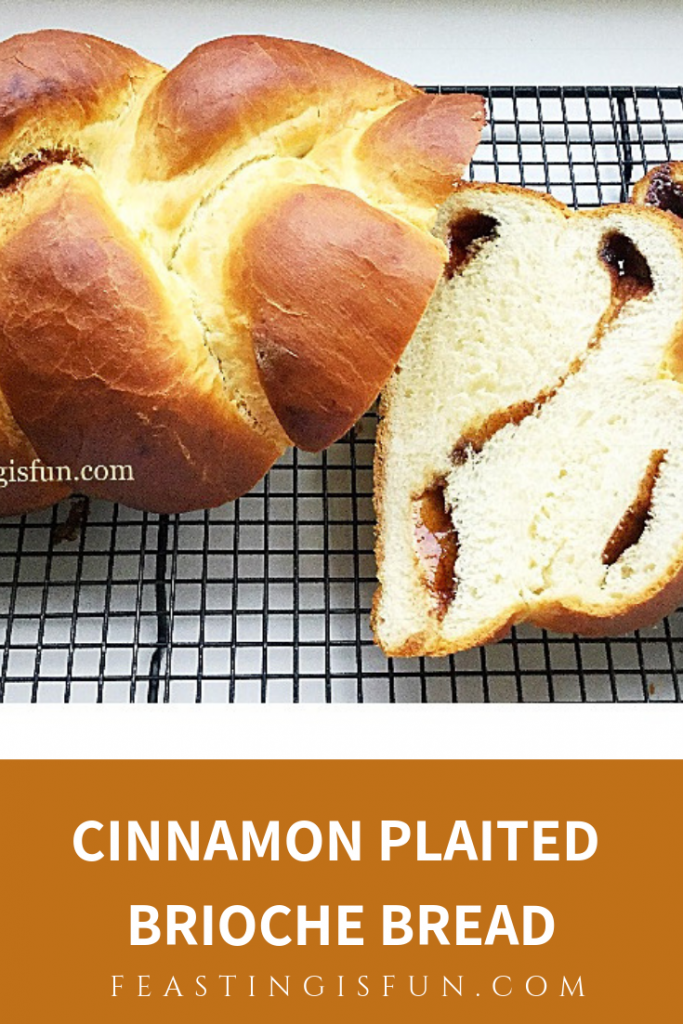
Cinnamon Plaited Brioche Bread beautiful inside and out.

Serving this bread, sliced for breakfast or as an afternoon treat with a hot drink, is sure to brighten anyone’s day. Since it is a large loaf, why not take it to work, pre-sliced and share with your colleagues? Since all food tastes better when it is shared, that is the only way to improve this bread. Simply by sharing it.

FF Cinnamon Plaited Brioche Bread
Cinnamon Plaited Brioche Bread simply delicious.

Recipe: Cinnamon Plaited Brioche Bread 

300mls Whole Milk

2 Large Free Range Eggs

1tsp Caster Sugar

10g Dried Yeast – I use Allinson in the green tub or sachets

600g/1lb 5oz Strong White Bread Flour – I use Shipton Mill

50g/2oz Unsalted Butter

10g Salt – I use Maldon

For the cinnamon filling:

75g/3oz Light Muscavado Sugar – I use Billington’s

4tsp Cinnamon

1 free range egg plus 1tbsp milk to brush over the loaf.

Method:

The method given for making this Cinnamon Plaited Brioche Bread uses a dough hook fitted to a stand mixer. The enriched dough is very, very sticky, prior to its first prove. Using a stand mixer ensures that the dough is kneaded properly. Resulting in a light textured crumb once baked.

Making The Brioche Bread Dough

  • First of all ensure that your kitchen is warm. It will really benefit the yeast, during the dough making process.
  • Measure the milk into a jug and warm in a microwave for 20 seconds. Ideally the milk should be body temperature 37C. However, do not overheat as it may kill the yeast.
  • Pour the milk into the bowl of a stand mixer.
  • Crack 2 eggs into the jug and add these to the milk in the bowl. I always break eggs into a separate container first. If any shell escapes it can then be removed and also, extremely occasionally, should an egg be bad, it will not spoil the whole recipe.
  • Next add the sugar and yeast. Swish the liquid about with clean fingers to break up the eggs and mix lightly.
  • On top of the liquid mix add the flour.
  • Now add the butter and salt.
  • Lower the dough hook into the bowl and mix on the slowest speed for 5 minutes. Then, gradually increase the speed to medium and mix for a further 5 minutes.
  • After the mixing time has elapsed stop the mixer.

The Windowpane Test

  • Remove a small piece of dough and stretch it between your fingers. The dough is kneaded when it can be stretched so thinly that light can be seen through it. This is called the windowpane test.
  • If the dough tears before it can be fully stretched, lower the dough hook and continue mixing, checking every 3 minutes, until it passes the windowpane test.
  • Once the dough passes the windowpane test it is ready to prove. Scrape the dough from the dough hook and allow to drop into the bowl. Cover the bowl with a clean tea towel and place somewhere warm and drought free.
  • Allow the dough to prove until doubled in size – approximately 1 hour.
  • While the dough is proving grease a large baking tray with butter. Also, into a small bowl, weigh out the sugar and add the cinnamon. Stir to mix and break up any large sugar lumps using your fingers. Set to one side.

Shaping The Dough And Adding The Cinnamon Mix

  • Once doubled in size turn the dough out on to a lightly floured surface. Use your hand, or a dough scraper to remove all of the dough.
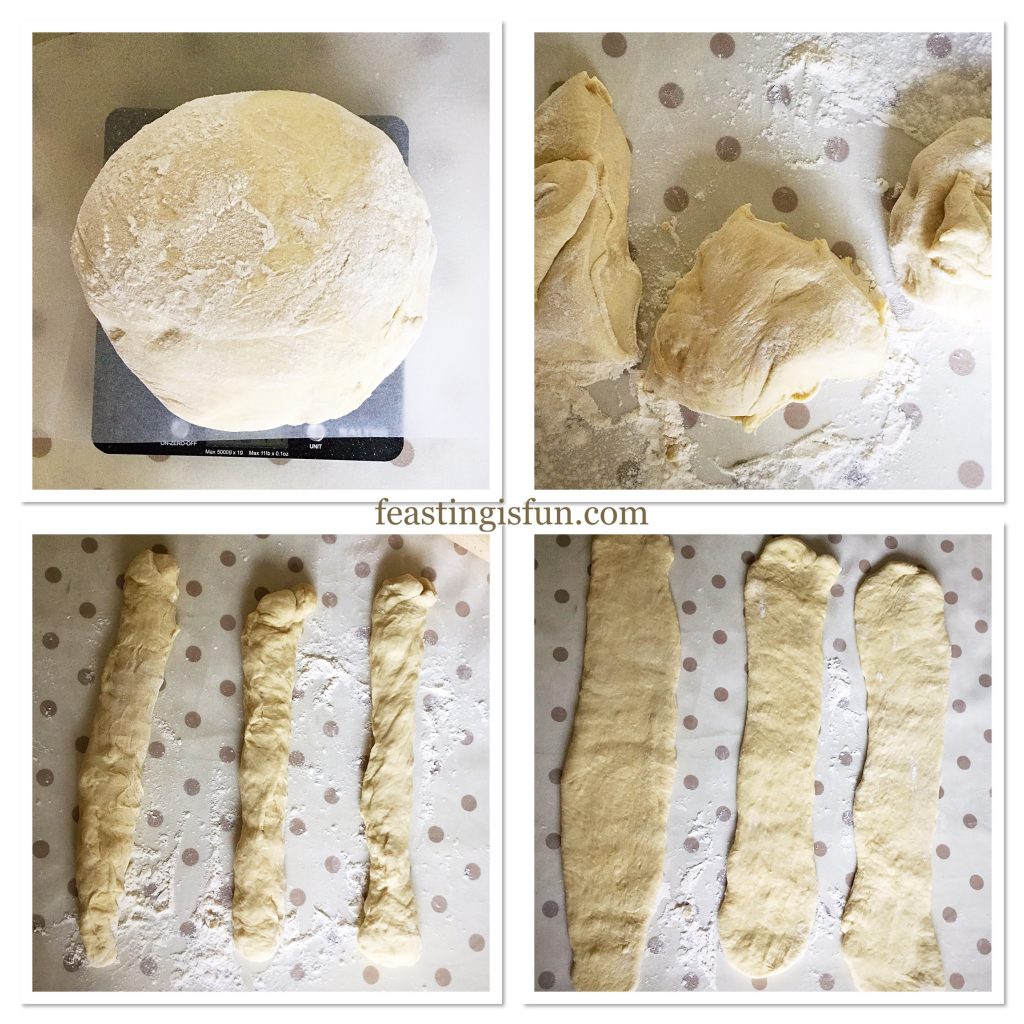
  • Shape the dough into a round and then weigh it. I use digital scales, placing the dough on to a piece of baking parchment. Make a note of the weight of the dough. Now divide that figure in 3.
  • Cut the dough into 3 pieces that are equal in weight.
  • Roll each piece of dough into a length and then flatten, using your hands or a rolling pin. Each flattened length of dough should measure 50cm/20″.
FF Cinnamon Plaited Brioche Bread
Preparing three dough strands for the cinnamon/sugar filling.
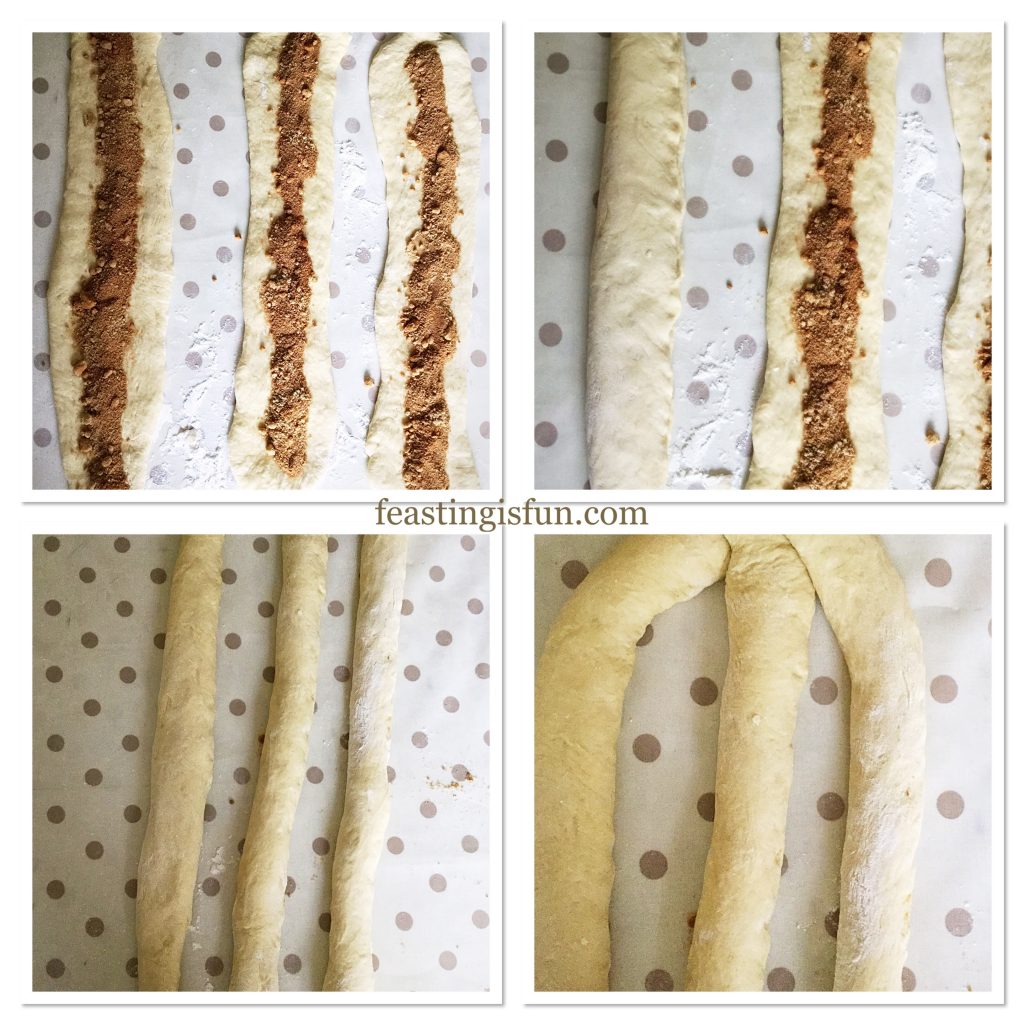
  • Sprinkle the sugar/cinnamon mixture down the middle of each piece of dough. Dividing it equally between three strands.
  • Dab a little tap water down the right side of the first strip of dough. Now bring the left side over and pinch to secure the sides together. Similar to making a sausage roll.
  • Continue until all three lengths of dough have their filling securely encased.
  • Roll each length of dough so that the join is underneath and not visible.
  • Join all three lengths of dough at the top. Place on top of each other and pinch together to secure.
FF Cinnamon Plaited Brioche Bread
Filling, securing and attaching the top of the plait.

Plaiting The Cinnamon Brioche Bread

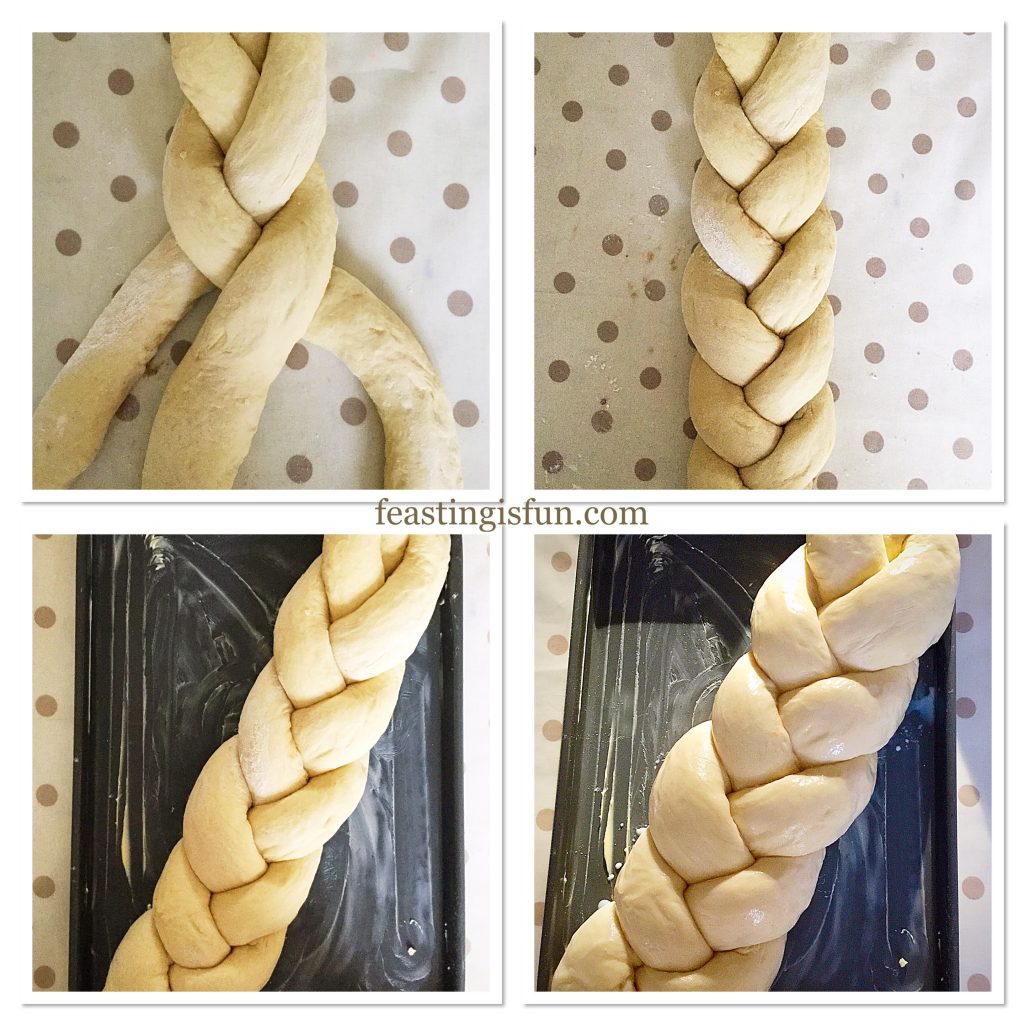
  • Starting from left to right, number the strands 1, 2 and 3. Number 1 strand will always be to the left, 2 in the middle and 3 on the right.
  • Pass strand 1 over strand 2.
  • Now pass strand 3 over strand 2. Ensure the strands are not pulled tight and there should be no gaps.
  • Repeat the past two steps until the plait is finished. (Strand 1 over 2, then strand 3 over strand 2 and repeat.)
  • Pinch the bottom 3 strands together so that they are secure and look tidy.
  • Lift the plait using both hands at either end and place diagonally on to the greased baking tray.
  • Cover with a clean tea towel and leave, as before, in a draught free place.
  • While the plaited dough is proving preheat the oven to 240C/220C gas mark 9, 475F. Break an egg into a bowl, add the tablespoon of milk and whisk with a fork to mix.
  • Once the plaited dough has doubled in size use a soft pastry brush and carefully brush the egg wash over.
FF Cinnamon Plaited Brioche Bread
Plaiting and placing the brioche on to a baking tray before the egg wash.

Baking The Cinnamon Plait

  • Place the egg washed Cinnamon Plaited Brioche Bread into the centre of the preheated oven and bake for 10 minutes. Then reduce the oven temperature to 220C/200C fan, gas mark 7, 425F. Continue to bake for a further 15-20 minutes.
  • The bread is baked when a deep, golden crust has formed and the base sounds hollow, when rapped with a knuckle.
  • Once baked remove the bread from the oven.
FF Cinnamon Plaited Brioche Bread
Beautifully baked Cinnamon Plaited Brioche Bread.
  • Slide a pallet knife under the baked bread, then carefully transfer to a cooling rack.
FF Cinnamon Plaited Brioche Bread
Cinnamon Plaited Brioche Bread cooled and sliced, revealing the hidden centre of each strand.

Allow the loaf to cool to body temperature before slicing. Attempting to slice while the bread is still hot will compact the bread. Also eating freshly baked, hot bread, is not good for our digestion!

Serve sliced with a smile and a complimenting drink.

FF Cinnamon Plaited Braided Brioche Bread

Placed in a bread bin, or wrapped loosely in foil, once fully cooled, this loaf will last up to three days. It can be toasted, although I’d advise not to use a toaster due to the sugar present. Under a grill, or even better, in front of a log fire, this bread makes excellent toast!

If you have enjoyed this recipe for Cinnamon Plaited Brioche Bread you may also like these:

Large White Bloomer

FF Cinnamon Plaited Brioche Bread
Large White Bloomer

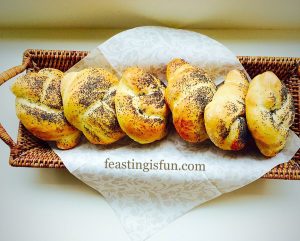
Knotted Poppyseed Rolls

FF Cinnamon Plaited Brioche Bread
Knotted Poppyseed Rolls

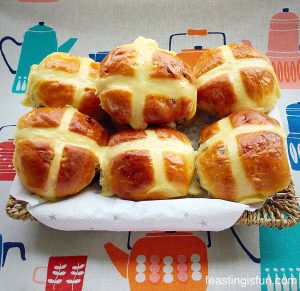
Ginger Date Hot Cross Buns

FF Cinnamon Plaited Brioche Bread
Ginger Date Hot Cross Buns

Homemade bread is the most luxurious food, for me, to bake. Enticing smells as it is baking, make our house feel like a home. Appreciative comments when a fresh loaf is on the table, to be served with dinner, or for breakfast, make me smile. Not for the accolade, or indeed achievement, from others, of having made my own loaf. Simply the fact that I am giving my family, delicious, additive free, tasty bread, is enough to keep me baking.

So, whatever you are making, baking and creating in your kitchens, have fun preparing and sharing your feast.

Sammie xx

No part of this post may be reproduced or duplicated without the written permission of the owner. Please see my Disclosure Policy.
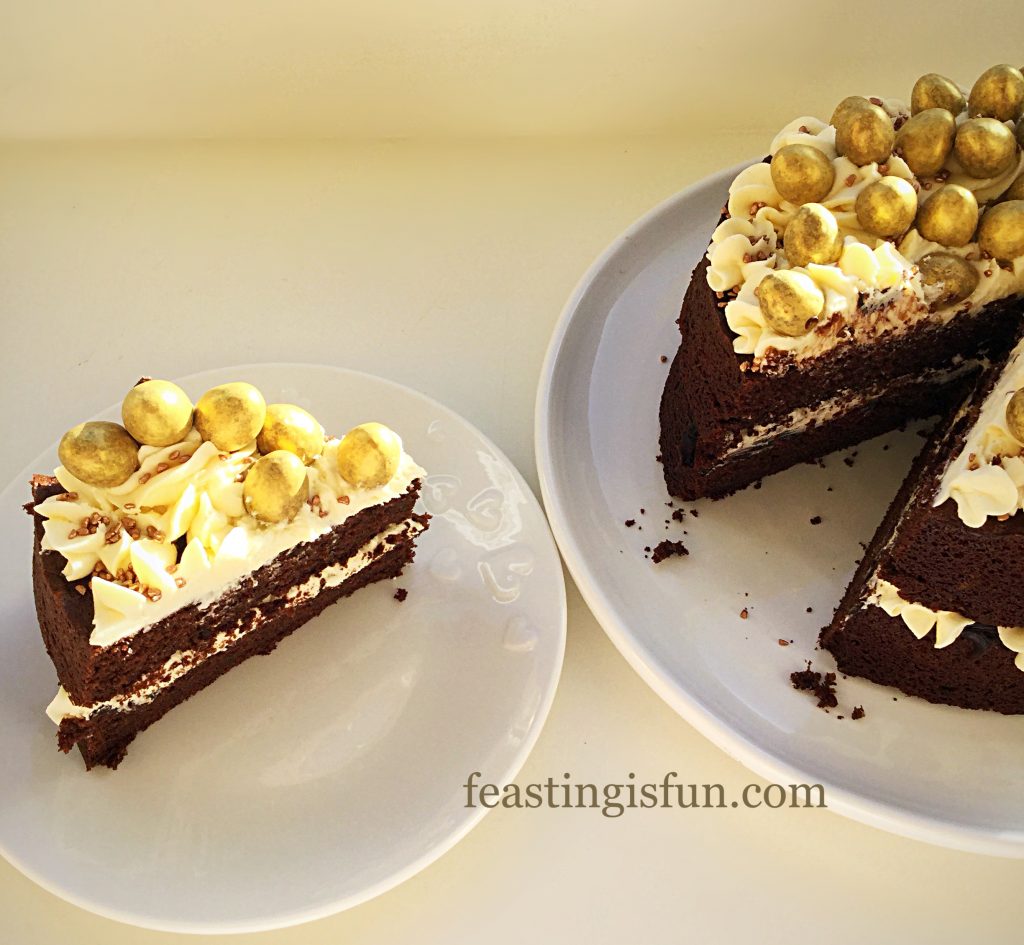
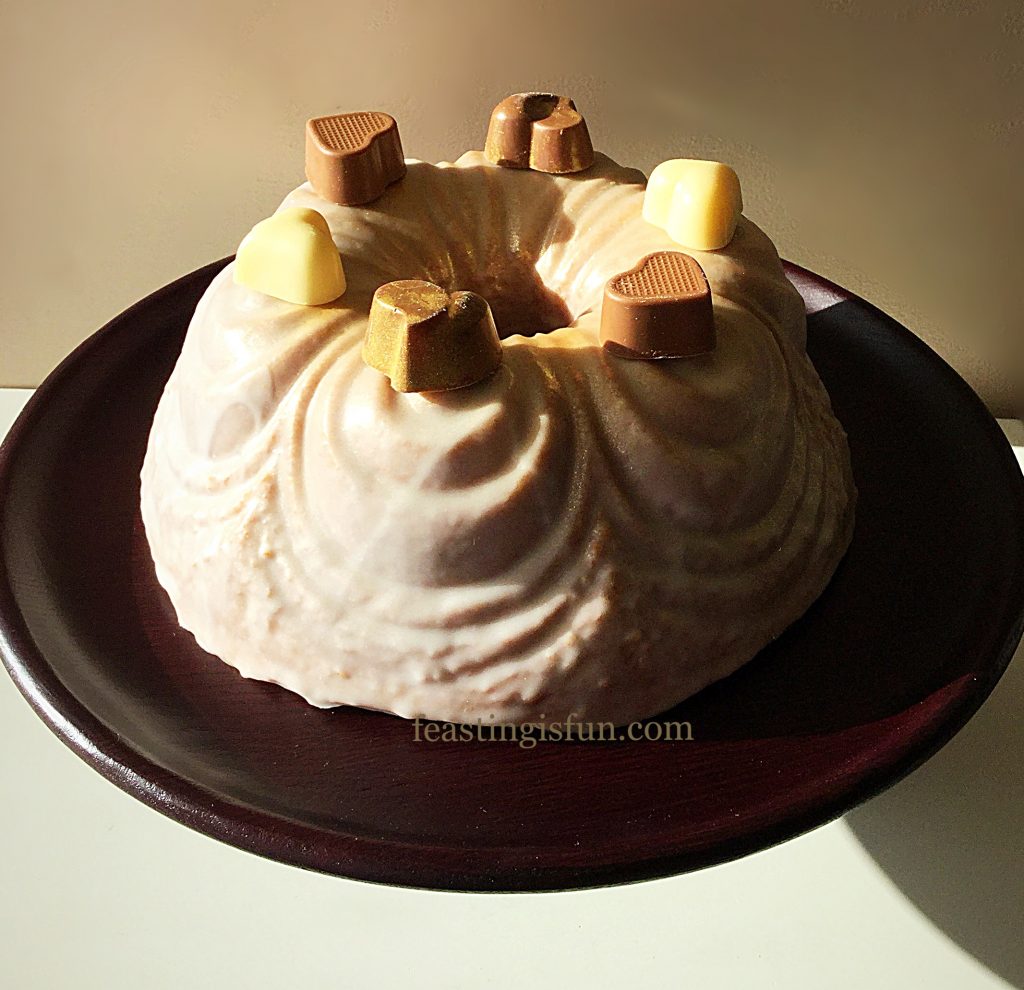
Chocolate Heart Topped Rose Bundt Cake

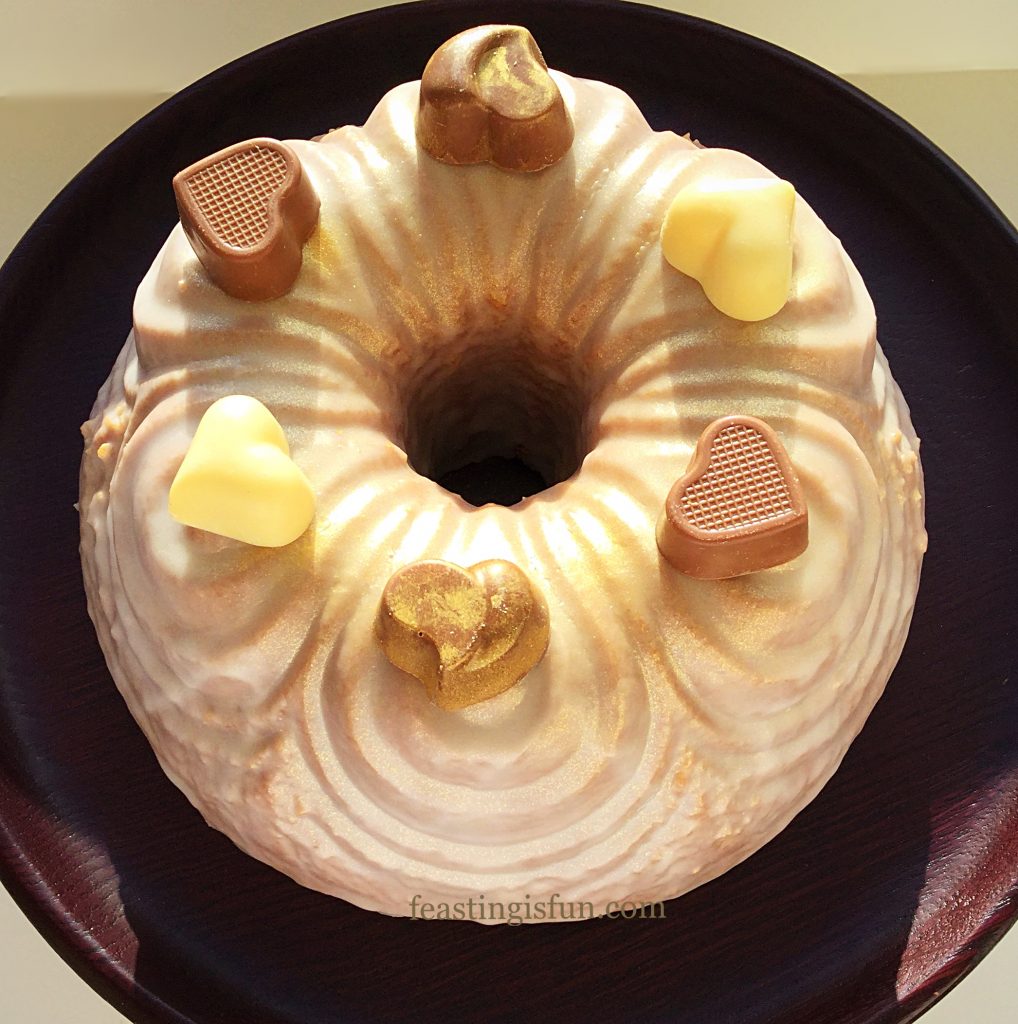
Valentine’s Day is nearly upon us and whether you subscribe to red hearts, roses and all things lovey-dovey, or not, walk down any high street and you can’t fail to avoid it. For me, each day is about expressing my love to those around me. Most importantly my hubby, our children and then my beautiful sister and her amazing family. Whether you celebrate February 14th as a specific day to show people your love, or choose other days, every single day, this Chocolate Heart Topped Rose Bundt Cake is sure to be well received.

FF Chocolate Heart Topped Rose Bundt Cake
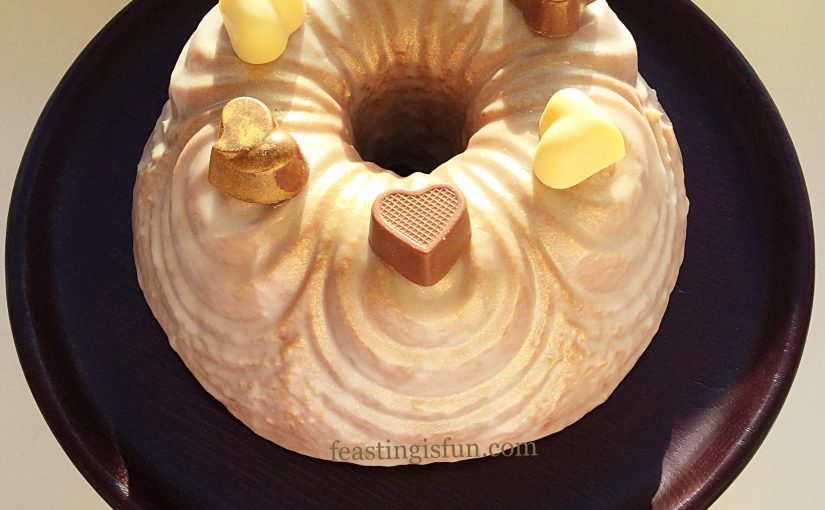
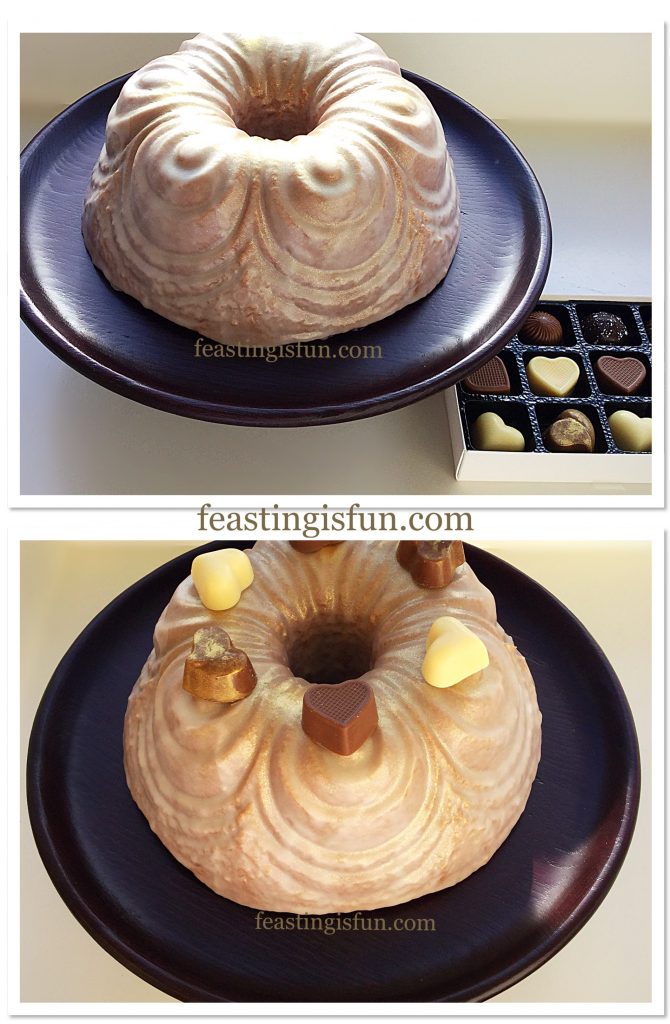
Chocolate Heart Topped Rose Bundt Cake shimmering in the sunlight.

Love, for me is about showing someone I’ve thought of them. It can be a small act of making a cup of tea and a kiss, or it can be a grander gesture, such as buying theatre or concert tickets. One way I like to show loved ones that I’ve thought of them is to bake or cook for them. Making their favourite meal, baking cookies such as these Chocolate Heart Cookies, all adds to the love in our home.

FF Chocolate Heart Topped Rose Bundt Cake
Chocolate Heart Topped Rose Bundt Cake says “I love you”.

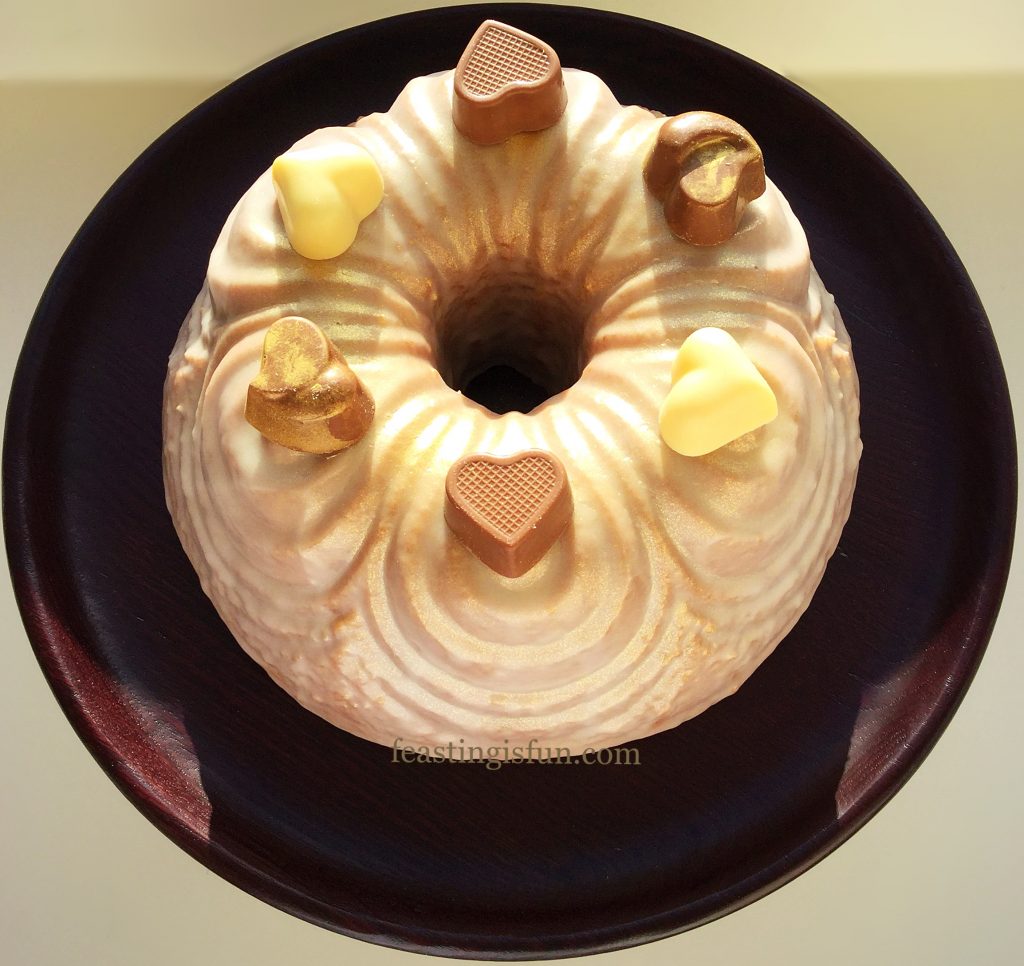
Something absolutely guaranteed to win most people round is chocolate. Having been sent a beautiful selection of chocolates from Lloyd’s Chocolatiers, I wanted to show them off. As the chocolate hearts are filled with delicate whipped creams, caramel, praline or divine caramel, they provide the perfect decoration to this lightly flavoured cake. Easily removed when served, they create a stunning addition to any plate.

FF Chocolate Heart Topped Rose Bundt Cake
An elegant dessert plate accessorised with heart chocolates.

Made with love. Served with love. These beautiful and varied chocolate hearts create a stunning dessert plate. This definitely says “I love you”.

FF Chocolate Heart Rose Bundt Cake
Chocolate Heart Topped Rose Bundt Cake

While baking a chocolate cake may seem an obvious choice, I instead decided to choose a flavour to compliment the chocolates. Keeping the rose flavour subtle within the cake also stops it from overpowering the chocolates. Since the aim is, that each should compliment the other. Finishing with an un-flavoured glaze and dust of glitter, takes this cake from pretty to elegant.

Recipe: Chocolate Heart Topped Rose Bundt Cake serves 8-10

For the cake batter:

275g/10oz Unsalted Butter softened

275g/10oz Caster Sugar

1/4tsp Salt – I use Maldon

2tsp Vanilla Bean Paste – or Vanilla Extract

6 Large Free Range Eggs

1tsp Rose Extract – I use Nielsen-Massey

300g/11oz Plain White Four

2tsp Baking Powder

100g Full Fat Natural Yoghurt- I use Yeo Valley

For the icing and decoration:

450g/1lb White Unflavoured Icing Sugar

100mls Cold Tap Water

Edible Glitter – I use My Cake Decor gold glitter pump spray

Chocolate Hearts

Method: Preheat the oven to 160C/140C fan, gas mark 3

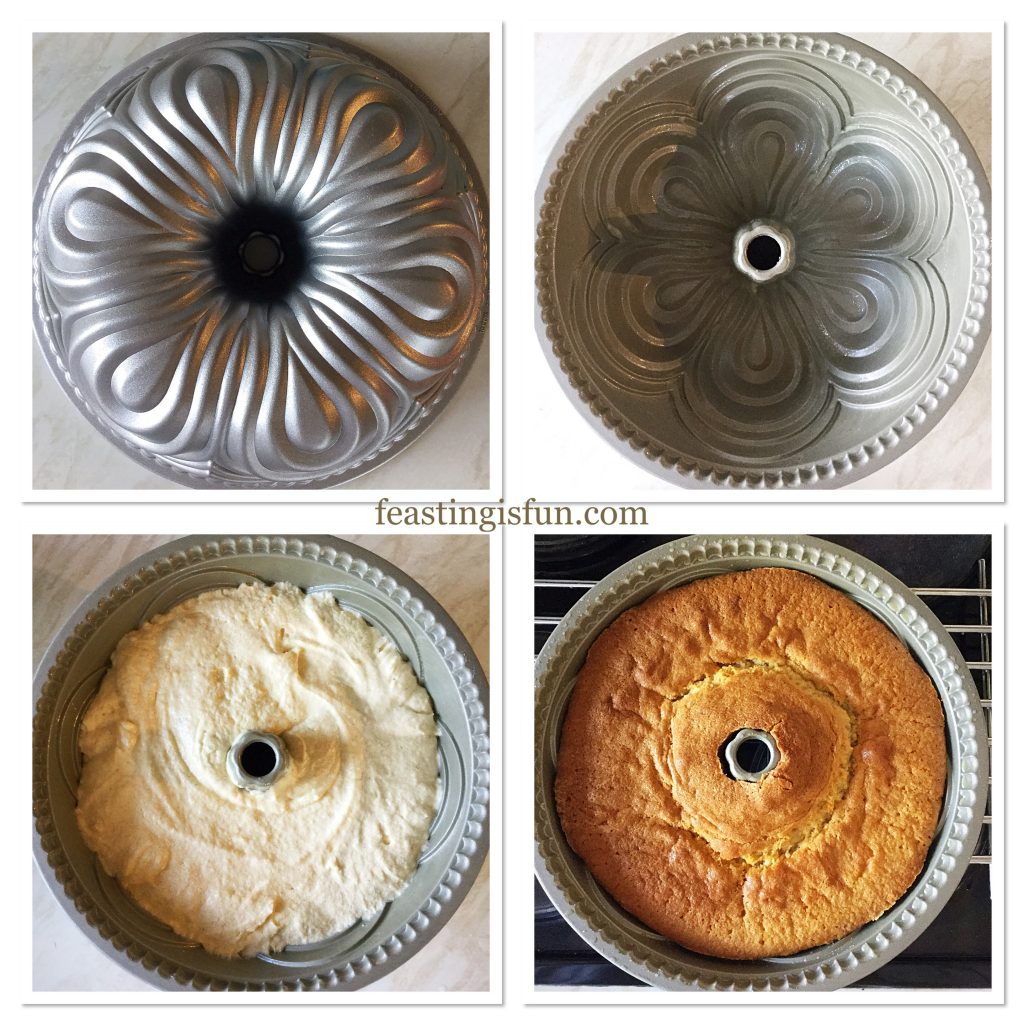
First of all, ensure the Bundt pan is clean and dry. Shake the can or bottle well. Spray, or brush Wilton cake release thoroughly using a soft pastry brush. Note – if the weather is cold the liquid in the bottle may be difficult to squeeze out and brush. Stand the bottle in a jug of hot water for 10 minutes, shake well and use.

  • Making the cake batter: Into a large bowl add the softened butter, sugar and salt.
  • Whisk/beat together until well combined, pale and creamy.
  • Next, into a separate bowl, sieve the flour and baking powder together – dry ingredients.
  • Into the creamed butter bowl add the vanilla paste, rose extract and 2 eggs. Then add one third of the dry ingredients. Mix until just combined.
  • Add a further 2 eggs, another third of the dry ingredients and mix as before.
  • Finally, add the last 2 eggs, yoghurt and the last third of the dry ingredients. Mix until thoroughly combined, however take care not to over mix.
  • Spoon the cake batter into the prepared Bundt pan, pressing down as you do. Smooth the top of the batter with a spoon.
  • Place the Bundt pan in the centre of the oven and bake for 1hr – 1hr 15 minutes.
  • The cake is baked when it is golden in colour, shrinking away from the sides of the pan and an inserted skewer comes out clean.
  • Once baked remove the cake from the oven.
FF Chocolate Heart Topped Rose Bundt Cake
Preparing the Bundt pan, filling and baking the cake.
  • Allow the cake to cool in the tin for 10 minutes.
  • Now turn out the Bundt cake on to a cooling rack.
  • Leave the cake to cool completely before icing.
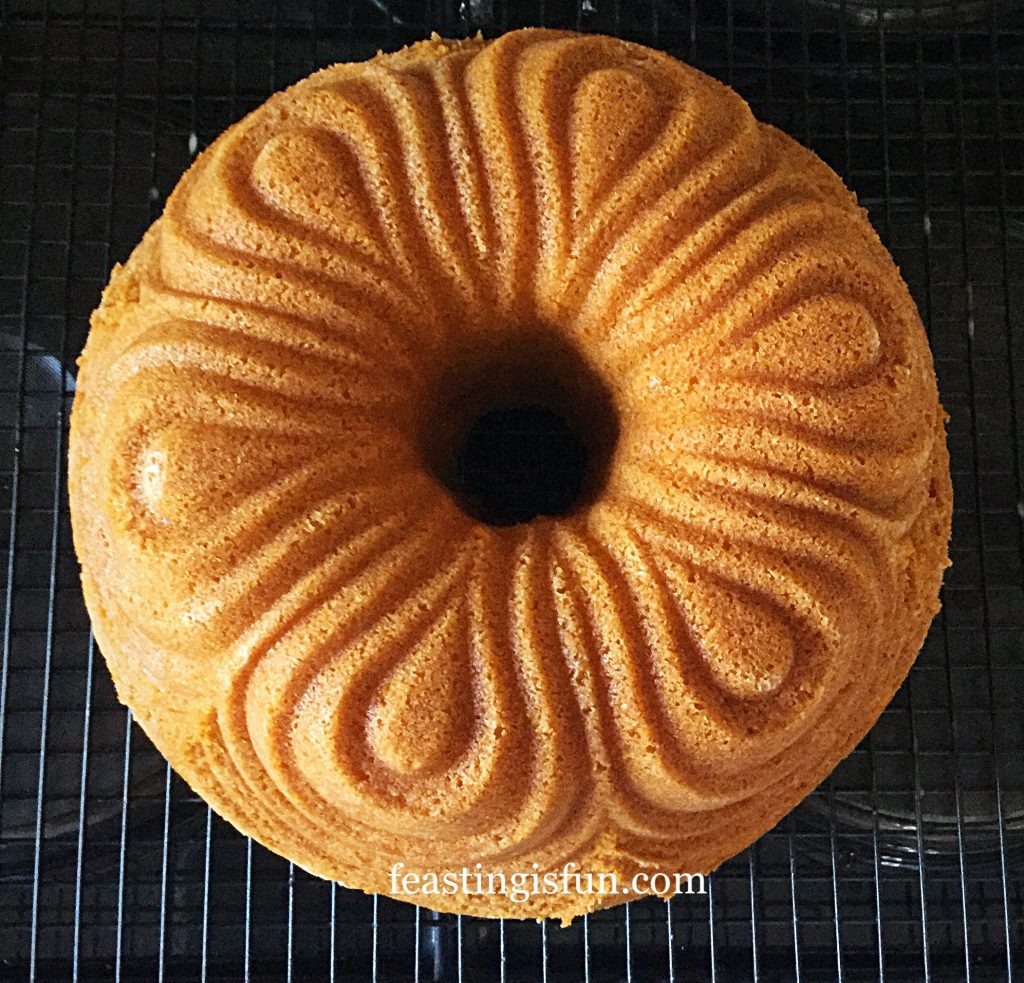
FF Chocolate Heart Topped Rose Bundt Cake
Beautiful definition from the Chiffon Bundt.
  • While the cake is cooling, make the glacé icing.
  • Sift the icing sugar into a bowl.
  • Add the water and stir thoroughly, until a smooth consistency is achieved.
  • When cool, place the cake on the cooling rack, over a clean baking tray. This will catch any excess icing drips.
  • Start to spoon the icing over the top of the cake, working your way around the cake.
  • Continue to spoon icing through the central hole and around the outside until the cake is fully covered.
  • Leave the icing to naturally drip from the cake and finally set.
  • If using, dust the cake with edible glitter.
  • Move the cake on to a serving plate or stand.
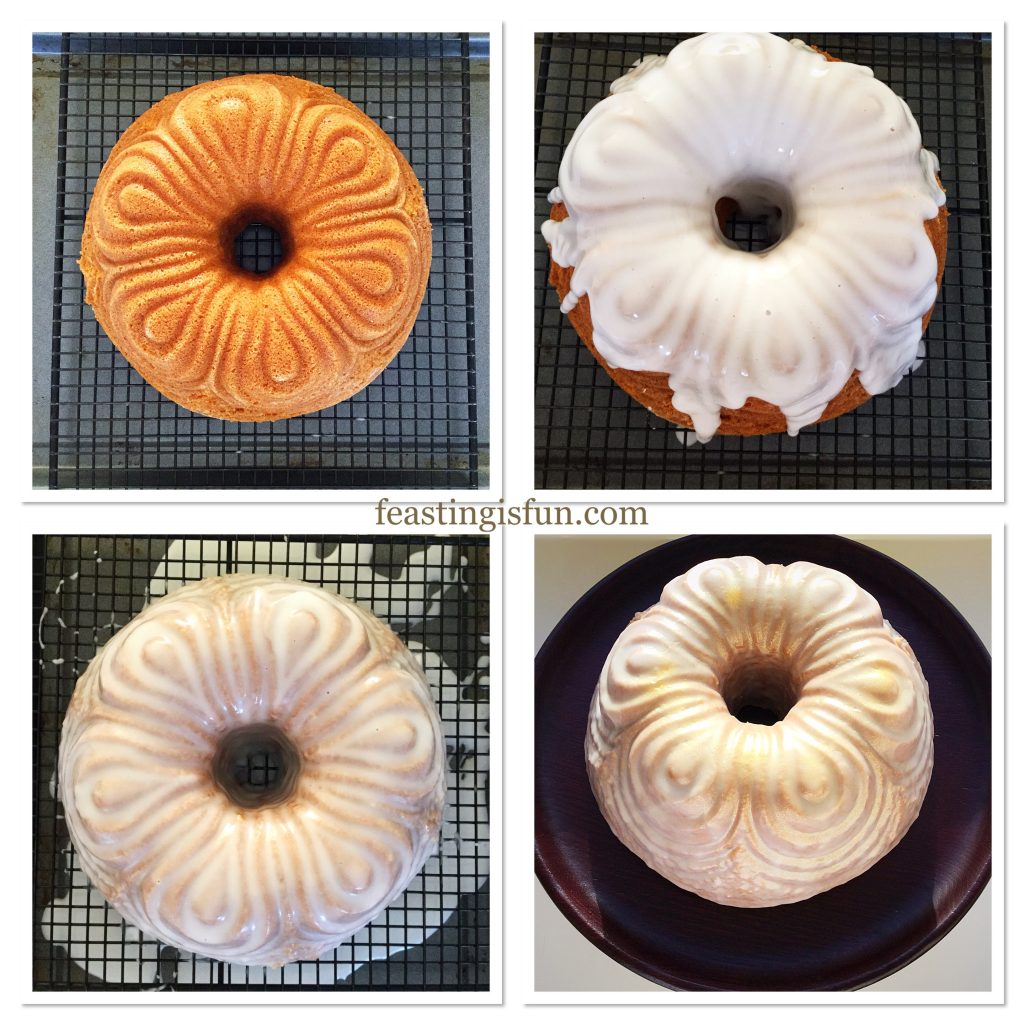
FF Chocolate Heart Topped Rose Bundt Cake
Covering the cake with icing and dusting with glitter.
  • Place the chocolate hearts on top of the cake, reserving some for serving alongside.
FF Chocolate Heart Topped Rose Bundt Cake
Chocolate Heart Topped Rose Bundt Cake adorned with delightful chocolates.

Serve with love and a smile.

The cake will keep in an airtight container for up to 5 days. If it lasts that long.

If you have enjoyed this recipe for Chocolate Heart Topped Rose Bundt Cake then you may also like these:

Maple Syrup Iced Coffee Bundt Cake

FF Chocolate Heart Topped Rose Bundt Cake
Maple Syrup Iced Coffee Bundt Cake

Strawberry Sweetheart Cake

FF Chocolate Heart Topped Rose Bundt Cake
Strawberry Sweetheart Cake

Lemon Blueberry Bundt Cake

FF Chocolate Heart Topped Rose Bundt Cake
Lemon Blueberry Bundt Cake

Nordic Ware have a range of different shapes and styles of Bundt Pans. Since they are not cheap they are an investment worth looking after. Especially, if like me, cake decorating isn’t your strongest point. Yet, if looked after properly, the detailed Bundt Pans will last you a lifetime. Because each cake baked has love stirred into it, nothing else can compare with the taste. Ultimately they pay for themselves, with magnificent cakes that aren’t bought from a bakery.

On Valentine’s Day and everyday, I wish you love, health, peace and happiness.

Sammie xx

LLoyds Chocolatiers sent me the chocolate hearts to try. All content, photography, views and opinions are my own. Please see my Disclosure Policy.
 

Chocolate Hazelnut Baked Giant Doughnut

While I enjoy eating chocolate, after the festive season, unwrapping and eating another choccie, can, lose its appeal. And yes I realise that I’m probably in a minority here! Since wasting chocolate is not an option that cannot even be considered, incorporating it into bakes and desserts seems the perfect answer. So, I present to you my Chocolate Hazelnut Baked Giant Doughnut.

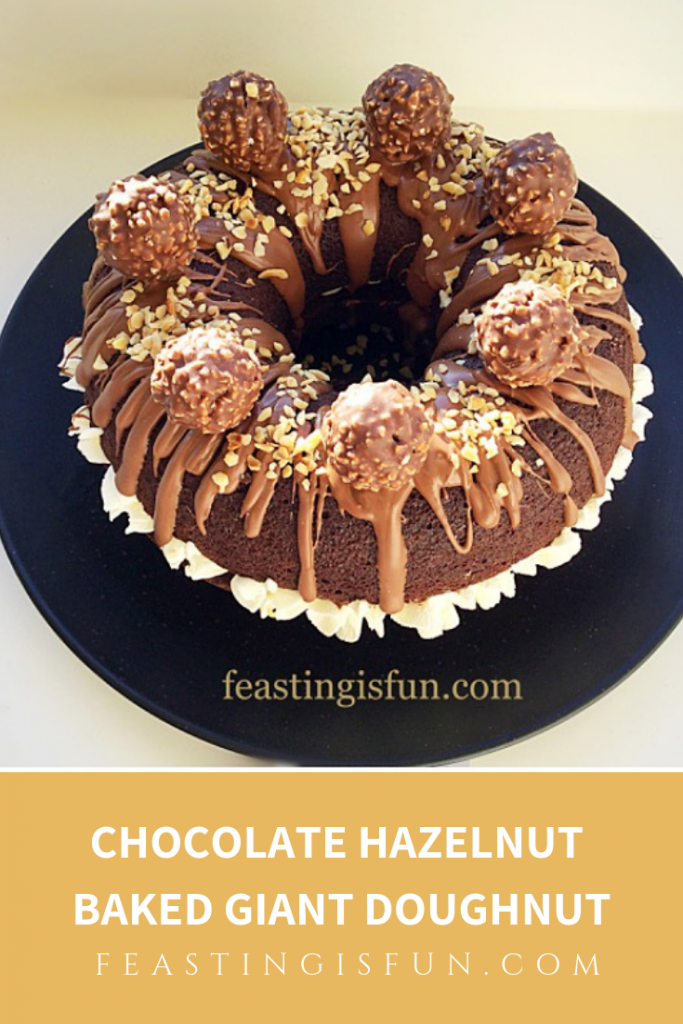
FF Pinterest Image with graphics

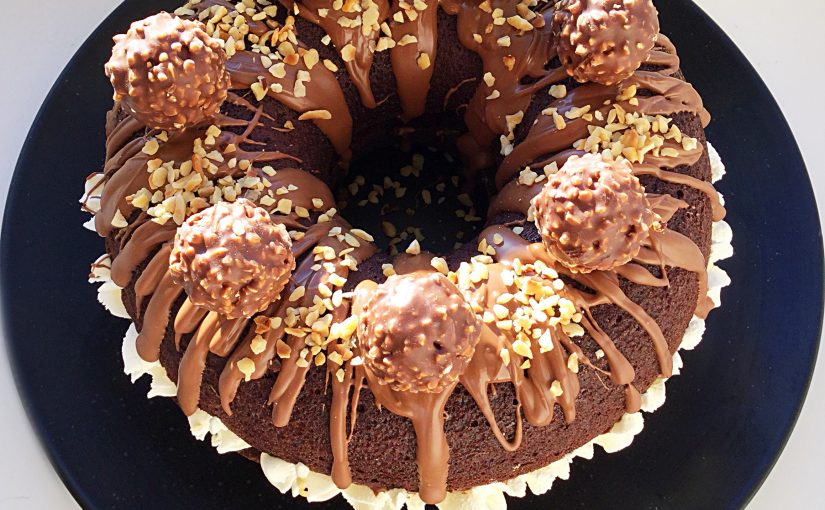
While using Fererro Rocher to top this bake, another Christmas chocolate was also used for the drizzling. Look away now if you love Teddy Bears. Because I used a whole Lindt Christmas jumper bear, melted down. Saying this is an indulgent bake, would be to understate. Serving this for dessert, will, without a doubt, bring about happy smiles and much excitement.

FF Chocolate Hazelnut Baked Giant Doughnut
Chocolate Hazelnut Baked Giant Doughnut sandwiched together with whipped cream and chocolate hazelnut spread.

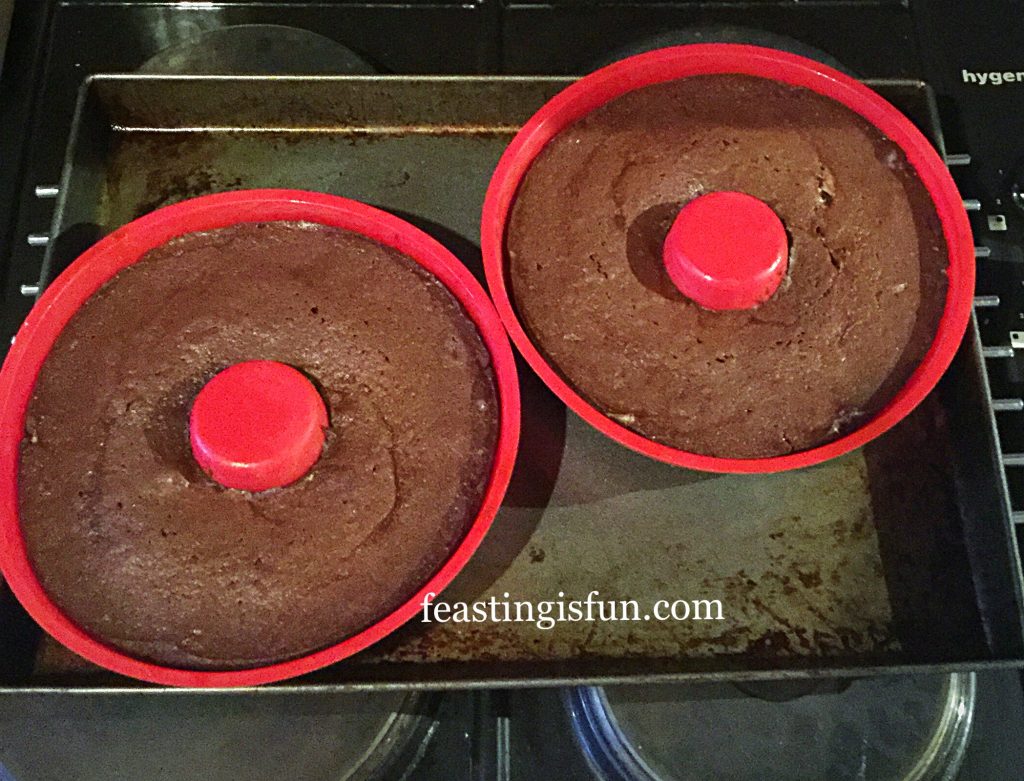
Creating a giant, baked doughnut, using silicone moulds, readily available online – mine were bought from Lakeland, makes an unusual and fun change from a sandwich cake. Alternatively, if you cannot source the moulds, this recipe can be baked in two, greased and lined 6 – 7 inch sandwich tins. Baking time will be approximately the same.


FF Chocolate Hazelnut Baked Giant Doughnut
Chocolate Hazelnut Baked Giant Doughnut perfect for sharing.

While a single, regular doughnut is perfect for one person, this giant doughnut is perfect for sharing. Since it is my belief that all food tastes better when it is shared, surely this can only be a good thing!

Recipe: Chocolate Hazelnut Baked Giant Doughnut serves 8

For the Doughnut Sponge

200g/7oz Unsalted Butter – softened, plus extra to grease moulds

200g/7oz Caster Sugar

1/4tsp Salt – I use Maldon

6 Large Free Range Eggs

1tsp Vanilla Extract – I use Nielsen-Massey

100g/4oz Plain White Flour

75g/3oz Cocoa Powder – I use Callebaut

1.5tsp Baking Powder

Filling and Topping the Doughnut 

200ml/8fl oz Double Cream

3tbsp Chocolate Hazelnut Spread – I use Jim Jams Spreads

100g/4oz Milk Chocolate

2tbsp Chopped Roasted Hazelnuts

8 Fererro Rocher or other chocolate to decorate

Method: Preheat the oven to 160C/140C fan, gas mark 3, 325F

Making And Baking The Chocolate Doughnut Batter

  • First of all, grease the insides of the doughnut moulds with softened butter. Then place them on a baking tray, ensuring that they don’t touch. The silicone mould could easily be misshapen if pressed.
  • To make the batter, start by placing the butter, salt and sugar into a large bowl. Whisk/beat together until pale and creamy.
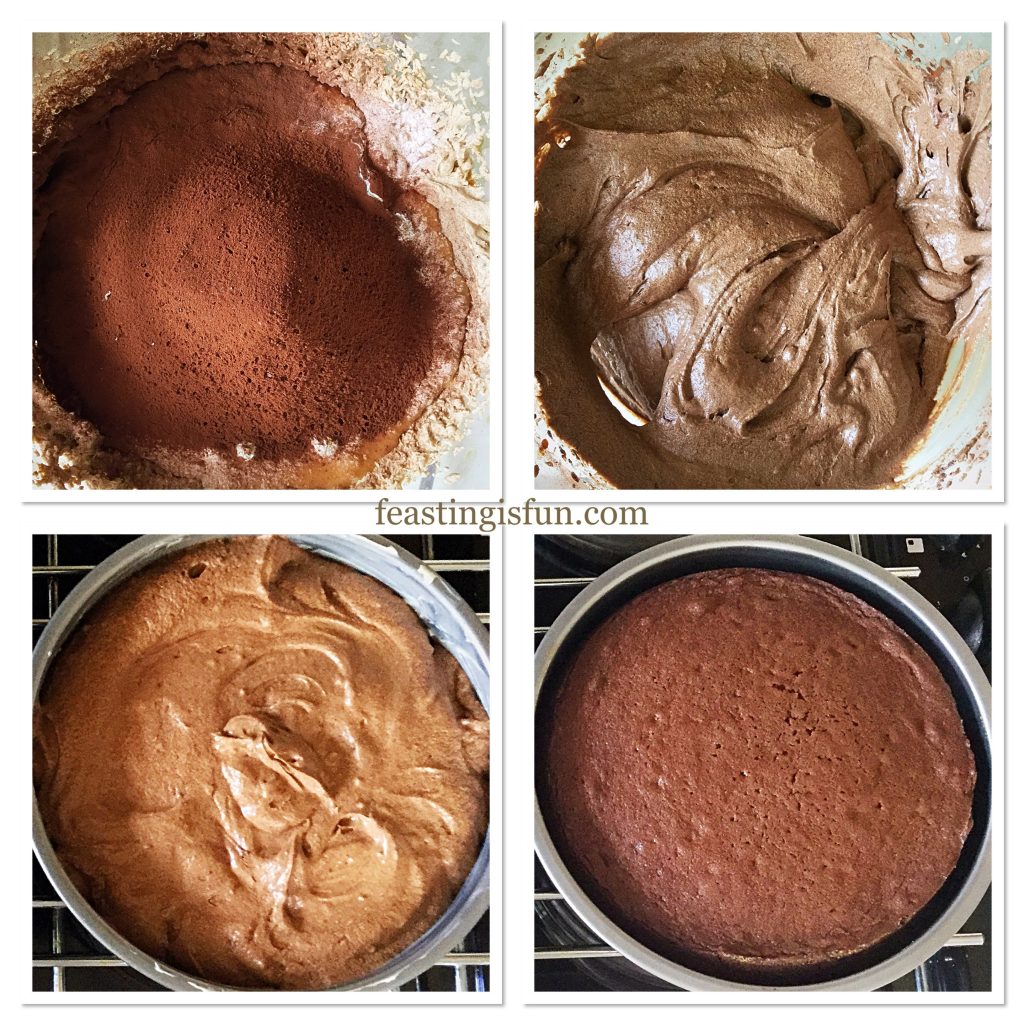
  • Next add all 6 eggs and the vanilla extract.
  • Now sift the cocoa powder, plain flour and baking powder into the same bowl.
  • Whisk/beat all the ingredients until they have just come together. Use a spatula to scrape down the sides of the bowl then give the batter a final mix.
  • Divide the batter equally between the two moulds. Finish by smoothing the surface of the batter to ensure an even bake.
FF Chocolate Hazelnut Baked Giant Doughnut
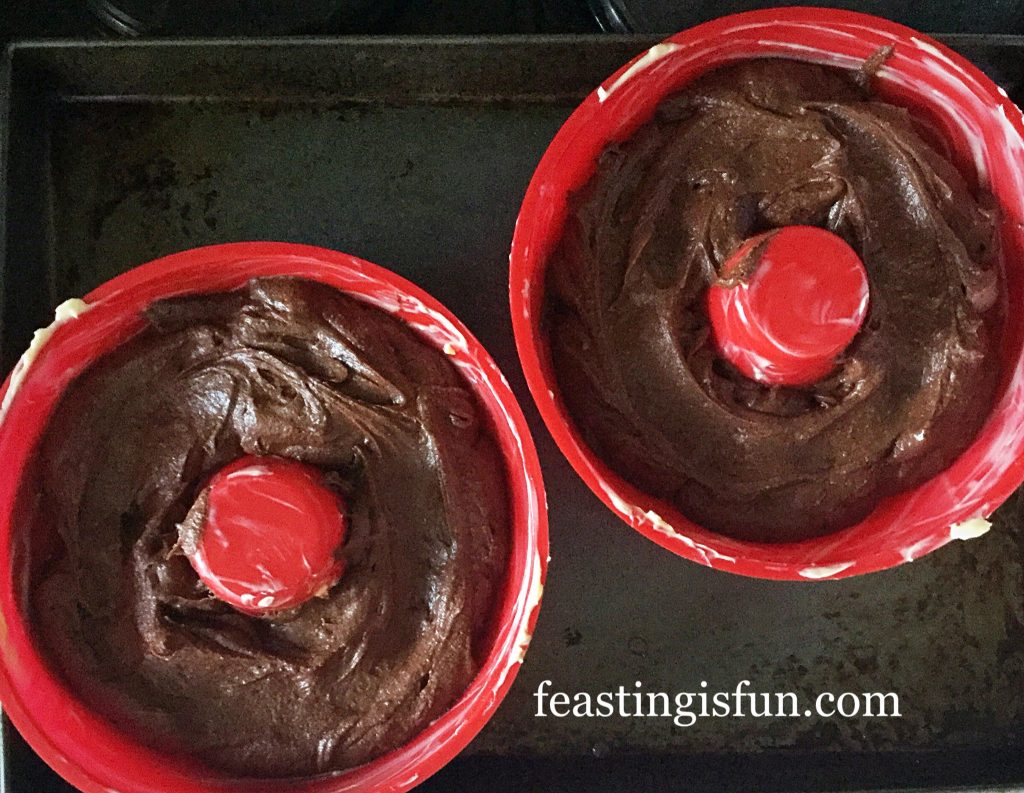
Silicone giant doughnut moulds filled, ready for the oven.
  • Place the baking tray, with the moulds on, into the centre of the oven and bake for 35-45 minutes.
  • The sponge is baked when it feels firm to touch and springs back when lightly pressed.
FF Chocolate Hazelnut Baked Giant Doughnut
Chocolate Hazelnut Baked Giant Doughnut perfect flat tops from low and slow baking.
  • Allow to cool for 5 minutes in the moulds and then turn the doughnut halves out on to a cooling rack. Cool completely before decorating. Since this doughnut was baked in the evening, it was stored, with baking parchment underneath and between, in an airtight container. Ready to be filled and decorated the next day.
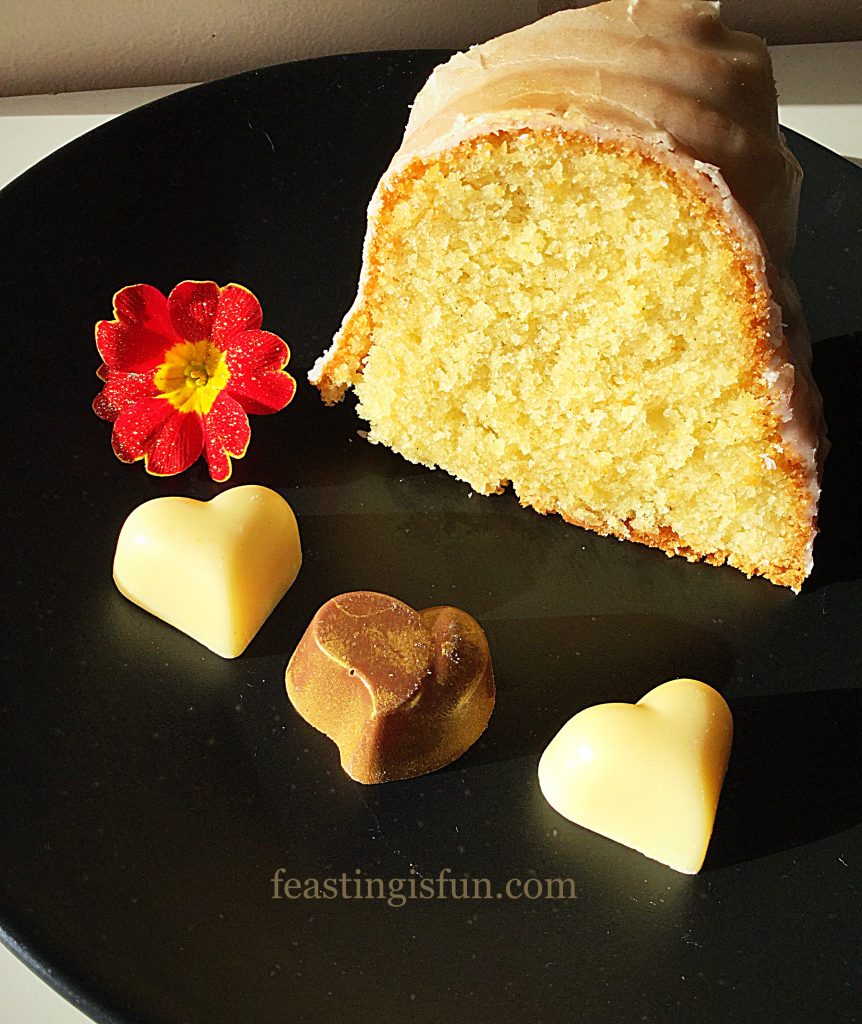
Assembling The Giant Doughnut

  • First of all, pour the double cream into a large bowl and whisk until it just starts to thicken. Continue whisking slowly until it just holds its shape. Take care not to over whisk so that it becomes stiff, this will make it difficult to pipe.
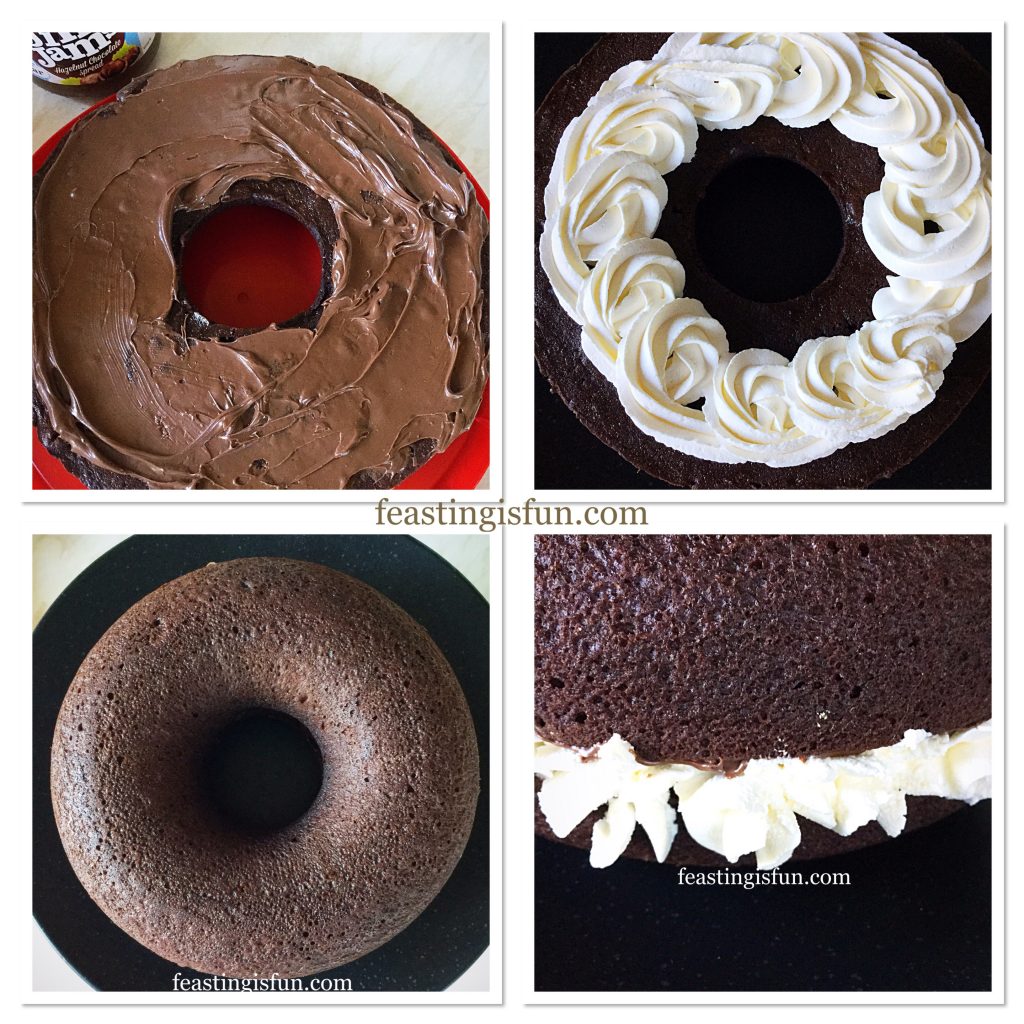
  • Now take the half that is to be the top part of the doughnut and spread the chocolate and hazelnut spread evenly on to the flat underside.
  • Place the bottom half of the doughnut, flat side up, on to the plate or stand on which it is to be served.
  • Fill an icing bag fitted with a large star tip – I use Wilton #1M – with the whipped cream. Pipe a swirl pattern on to the bottom doughnut – as seen in the pictures. Alternatively you can spoon the cream on to the doughnut.
  • Place the top half of the doughnut on to the bottom half.
  • Pipe cream stars all around the centre, where the two halves meet. This creates a beautiful finish.
FF Chocolate Hazelnut Baked Giant Doughnut
Assembling the Chocolate Hazelnut Baked Giant Doughnut.

Decorating The Doughnut

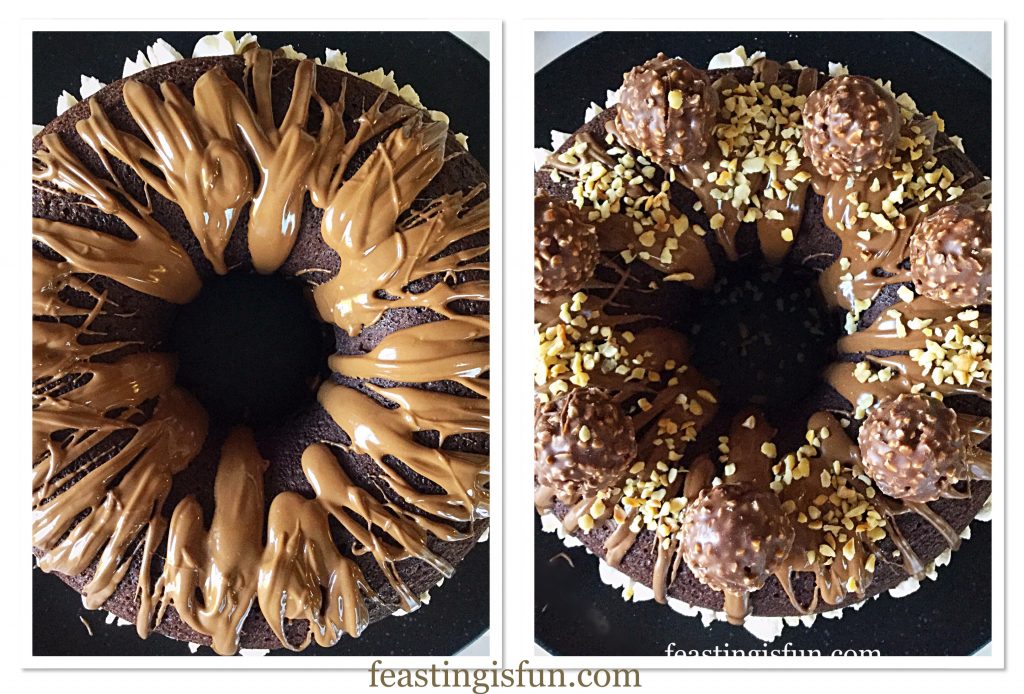
  • Break or chop the chocolate into small pieces and place into a heatproof, microwaveable bowl. Zap in the microwave for 30 seconds at a time, stirring, between each heating. As soon as the chocolate starts to melt remove the bowl and continue stirring until the chocolate is liquid.
  • Drizzle the chocolate, using a teaspoon, over the doughnut.
  • Next, working quickly before the chocolate sets, add the unwrapped Fererro Rocher to the top of the doughnut. Holding each one in place for a few seconds so that it sticks to the chocolate.
  • Sprinkle over the toasted, chopped hazelnuts and allow the chocolate to fully set before serving.
FF Chocolate Hazelnut Baked Giant Doughnut
Warm, drizzled chocolate adorned with Fererro Rocher and toasted, chopped hazelnuts.

As soon as the chocolate is set this Chocolate Hazelnut Baked Giant Doughnut is ready to be served.

FF Chocolate Hazelnut Baked Giant Doughnut
Chocolate Hazelnut Baked Giant Doughnut so inviting.

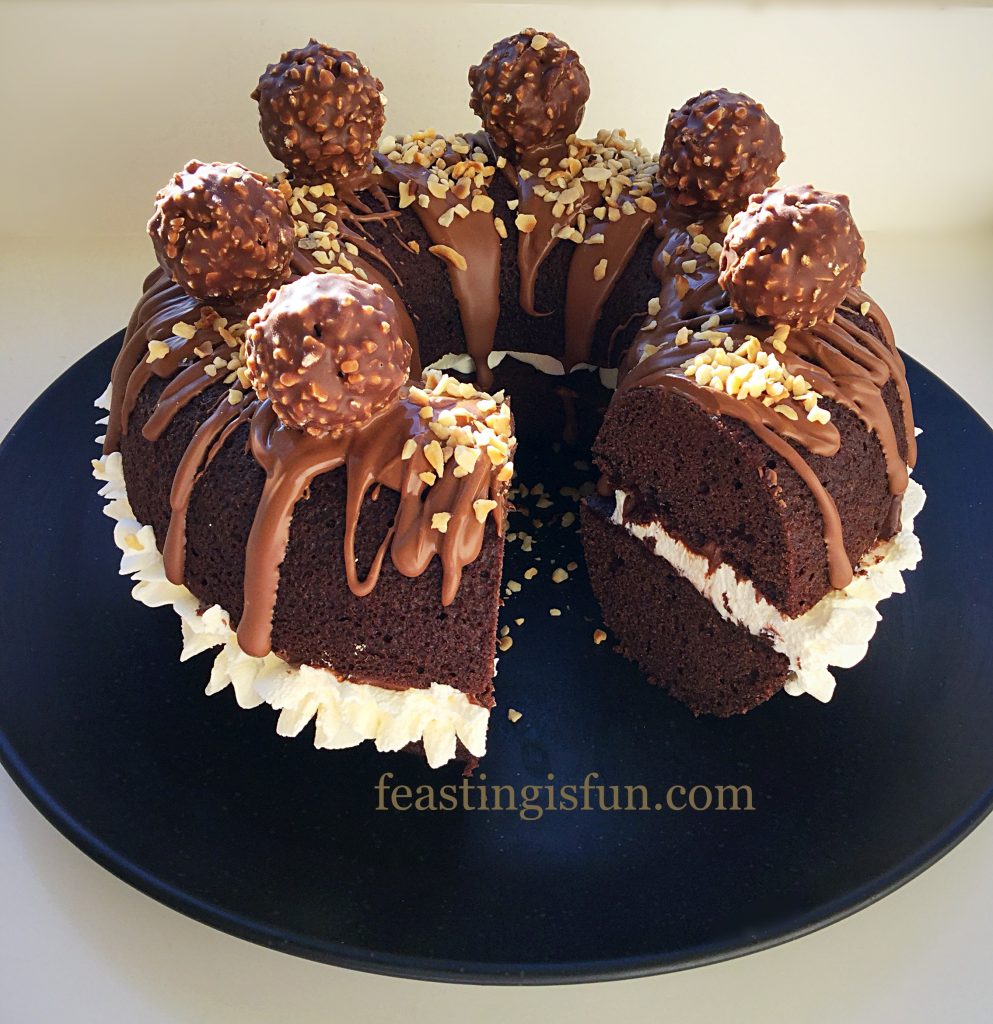
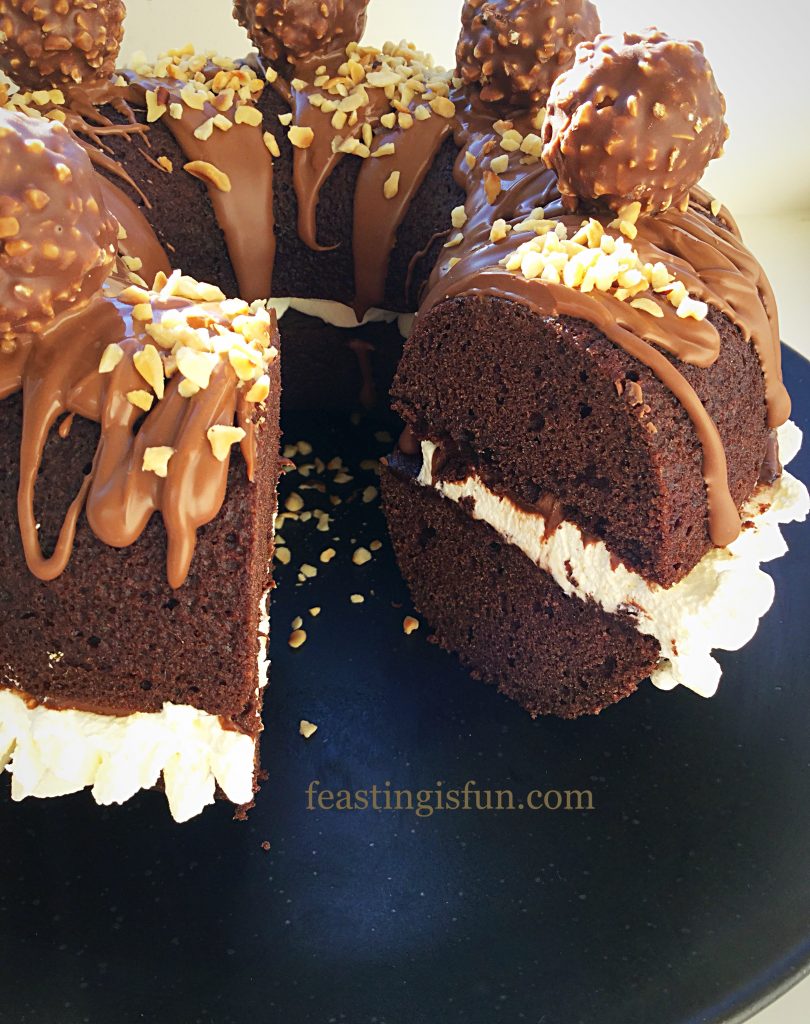
To serve, cut using a sharp knife, wiping the knife clean, between each cut, will keep the slices tidy. The sponge, whipped cream and chocolate hazelnut layers are clear to see.

Store any leftovers in an airtight container in the fridge. While best on the day assembled, this doughnut will keep for up to 2 days.

If you have enjoyed this recipe for Chocolate Hazelnut Baked Giant Doughnut you may also like these:

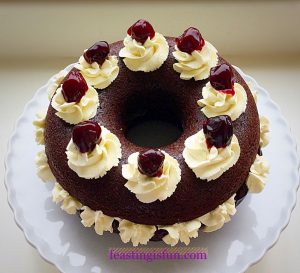
Black Forest Giant Doughnut

FF Chocolate Hazelnut Baked Giant Doughnut
Black Forest Giant Doughnut

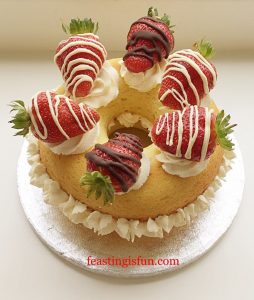
Strawberry Whipped Cream Giant Doughnut

FF Chocolate Hazelnut Baked Giant Doughnut
Strawberry Whipped Cream Giant Doughnut gluten free recipe option available.

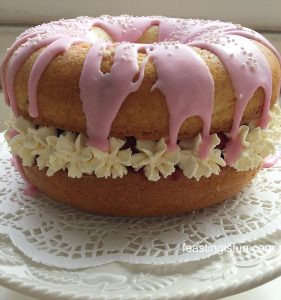
Raspberries Whipped Cream Giant Doughnut

FF Chocolate Hazelnut Baked Giant Doughnut
Raspberries Whipped Cream Giant Doughnut

Since something as simple as a silicone giant doughnut mould can create such fun and show stopping desserts, I highly recommend them. Most of all, if you serve up a Giant Doughnut as dessert to dinner guests, they are not only likely to be impressed, but also inquisitive about how it is made.

Baking should be fun, creative and adventurous. Most importantly, it should be shared.

Sammie xx

No part of this post may be reproduced or duplicated without the written permission of the owner. Please see my Disclosure Policy.