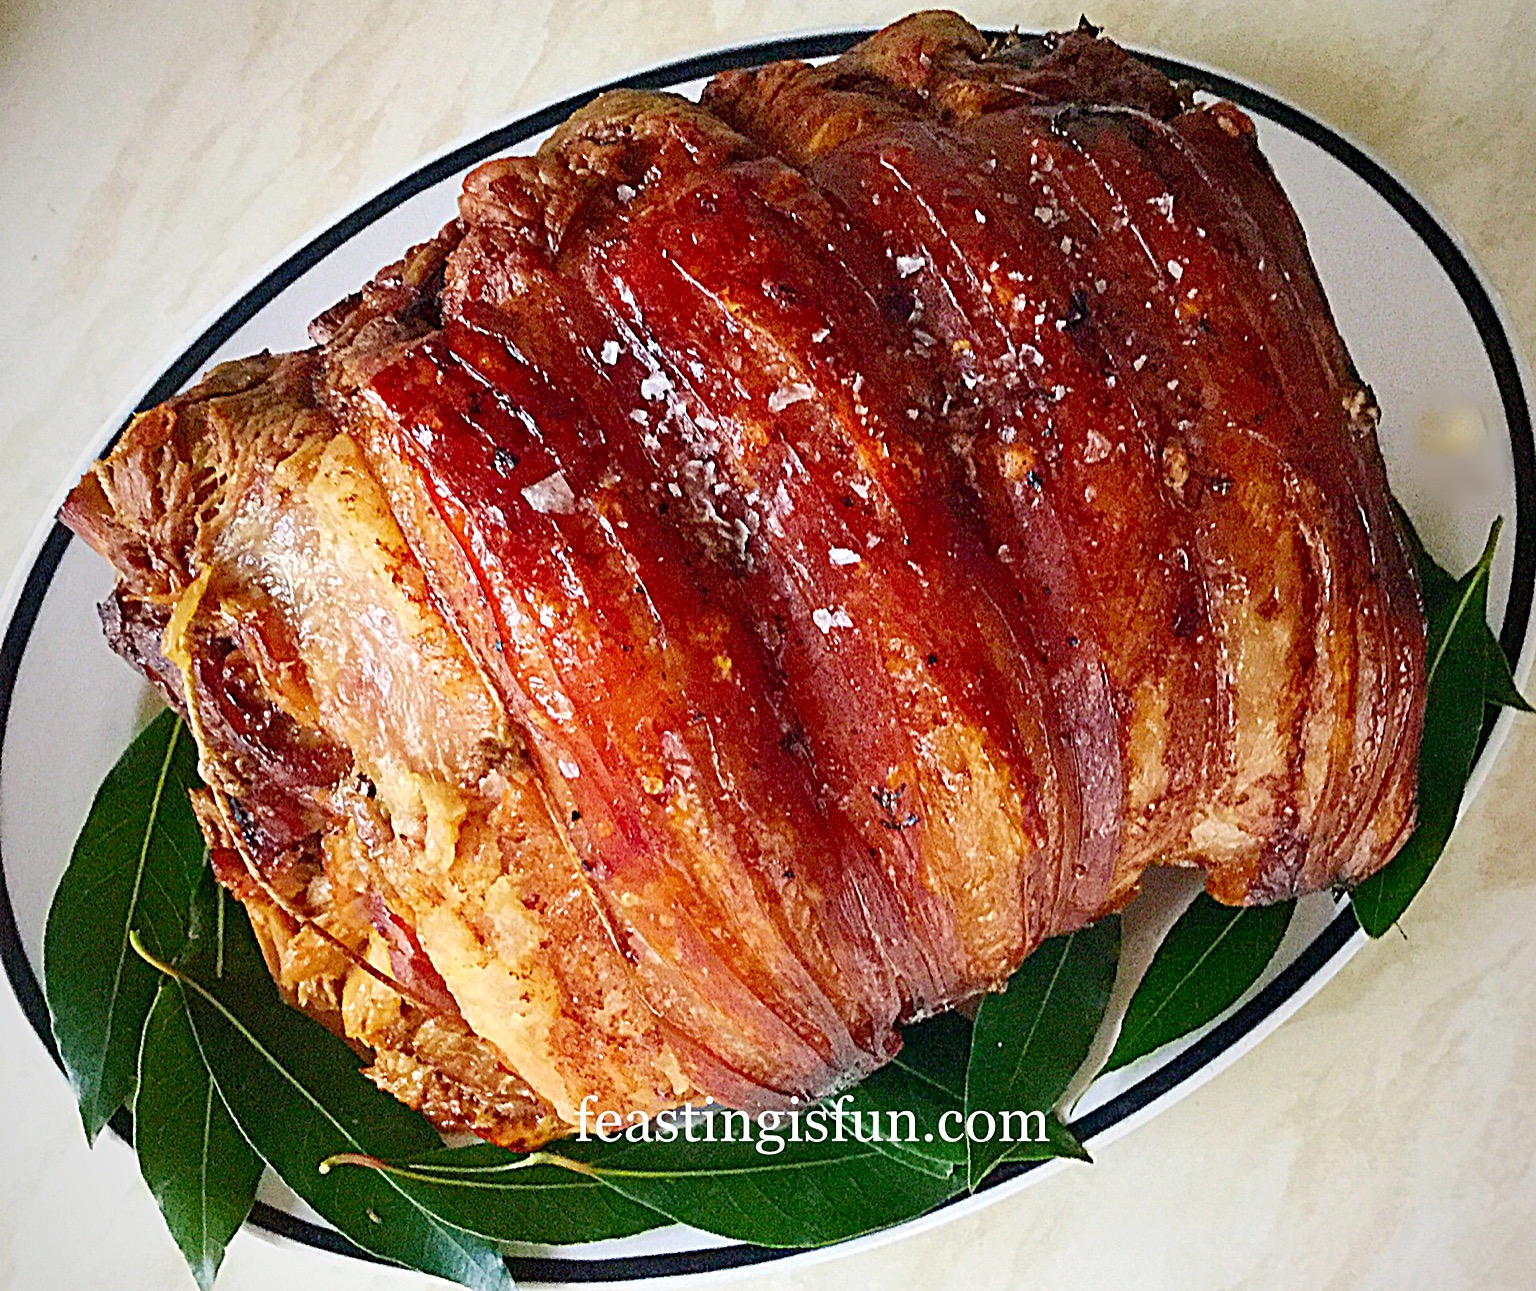
I really enjoy roasting a large joint of meat. Especially as it really feels as though I am preparing a feast, it also is difficult to over cook the meat. And this Slow Roasted Cider Pork is so easy to cook, with incredible flavour!
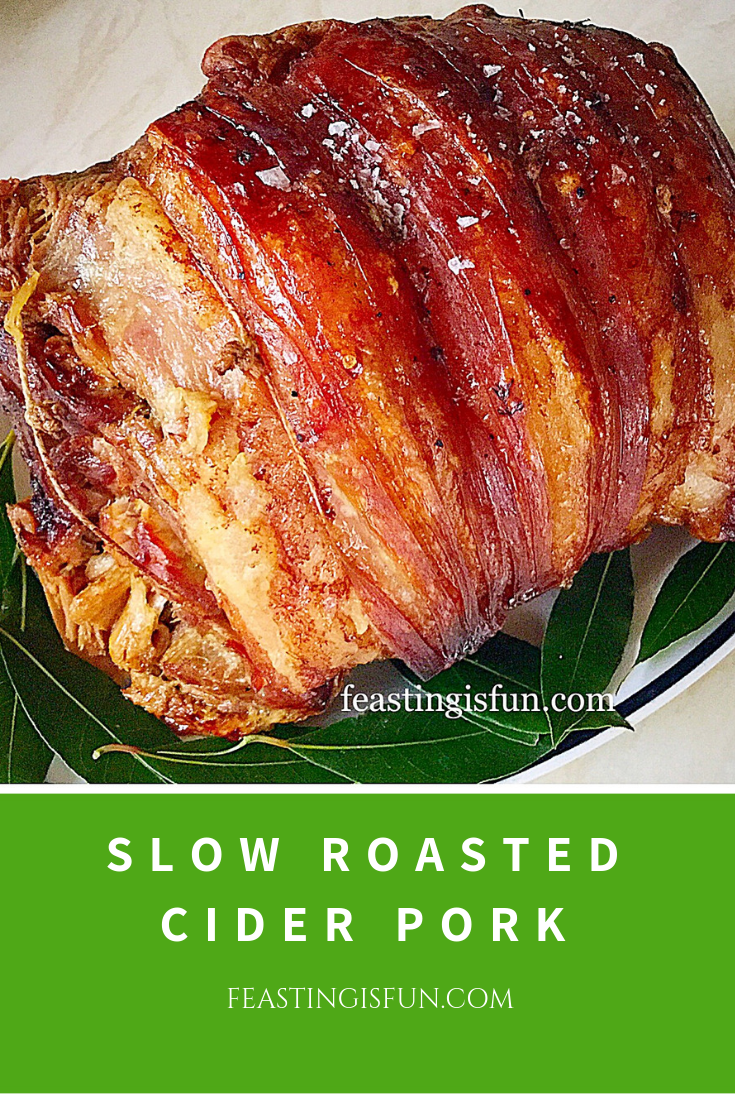
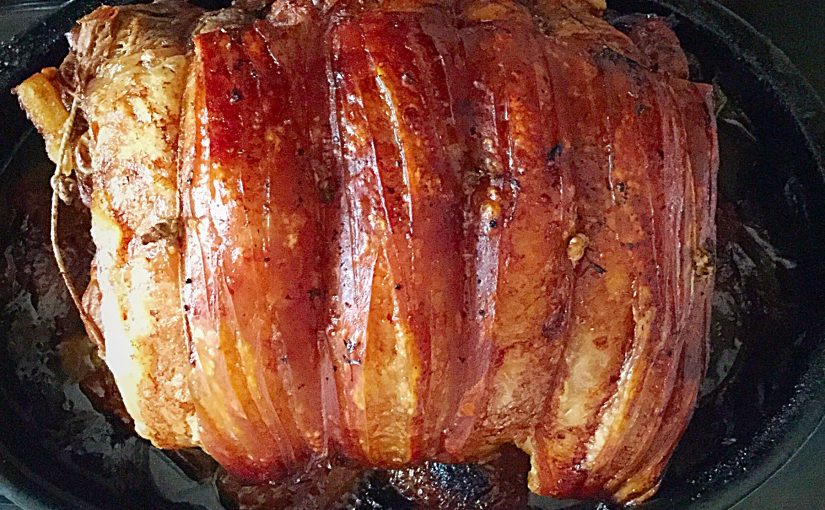
This beautiful, bone in, tied shoulder of Pork came from Graig Farm . While it weighed 4kg and was a whopper of a joint, it can be used in so many ways.
Cooked on a bed of fresh herbs and onions, with a bottle of Thatcher’s Gold Cider poured under it, the Pork, tightly wrapped in aluminium foil, cooks slowly and steams in the herby, apple cider.

Pork shoulder is used here in this recipe. As the joint comes from the front shoulder of the pig, it needs long, slow cooking, to break down the the muscle. The result is effectively pulled Pork. So please don’t expect to carve this joint, as it literally falls apart once cooked.
Oh and have I mentioned how easy it is to cook this Slow Roasted Cider Pork?
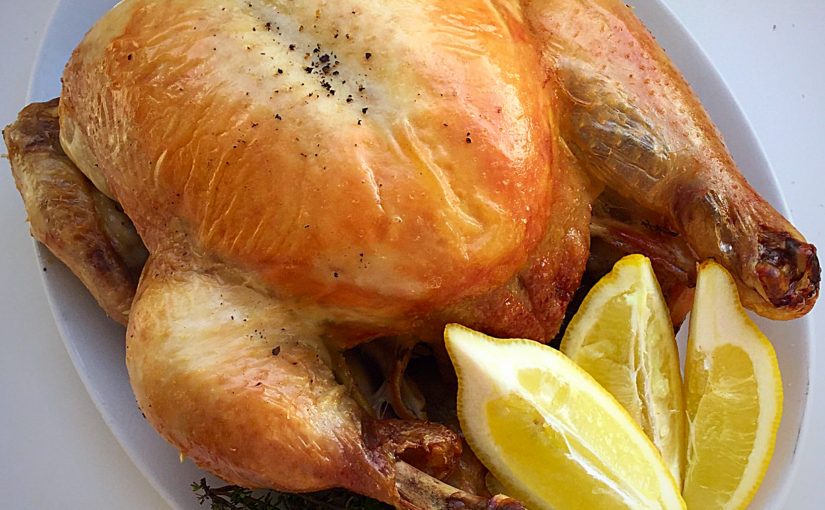
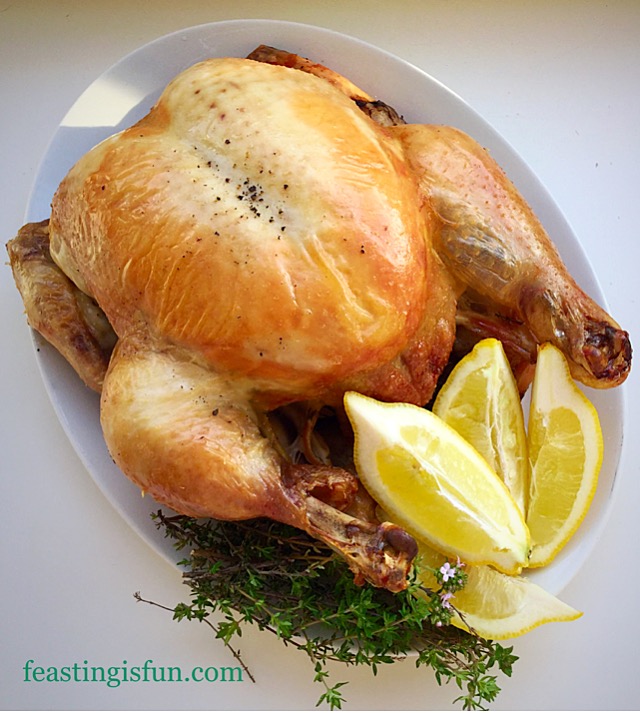
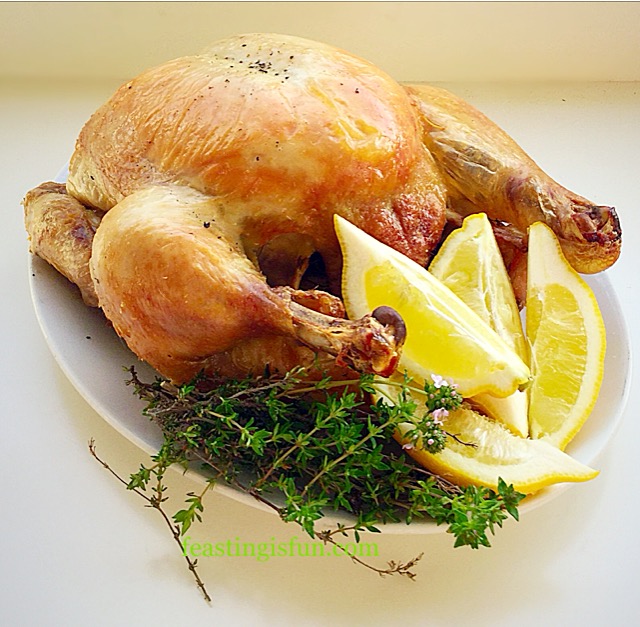
Slow Roasted Pork For Sunday Dinner
Also once prepped you pop it in the oven and just let it do it’s gloriously tasty, deliciously melting, cooking. An especially easy recipe if you’ve got a busy day ahead.
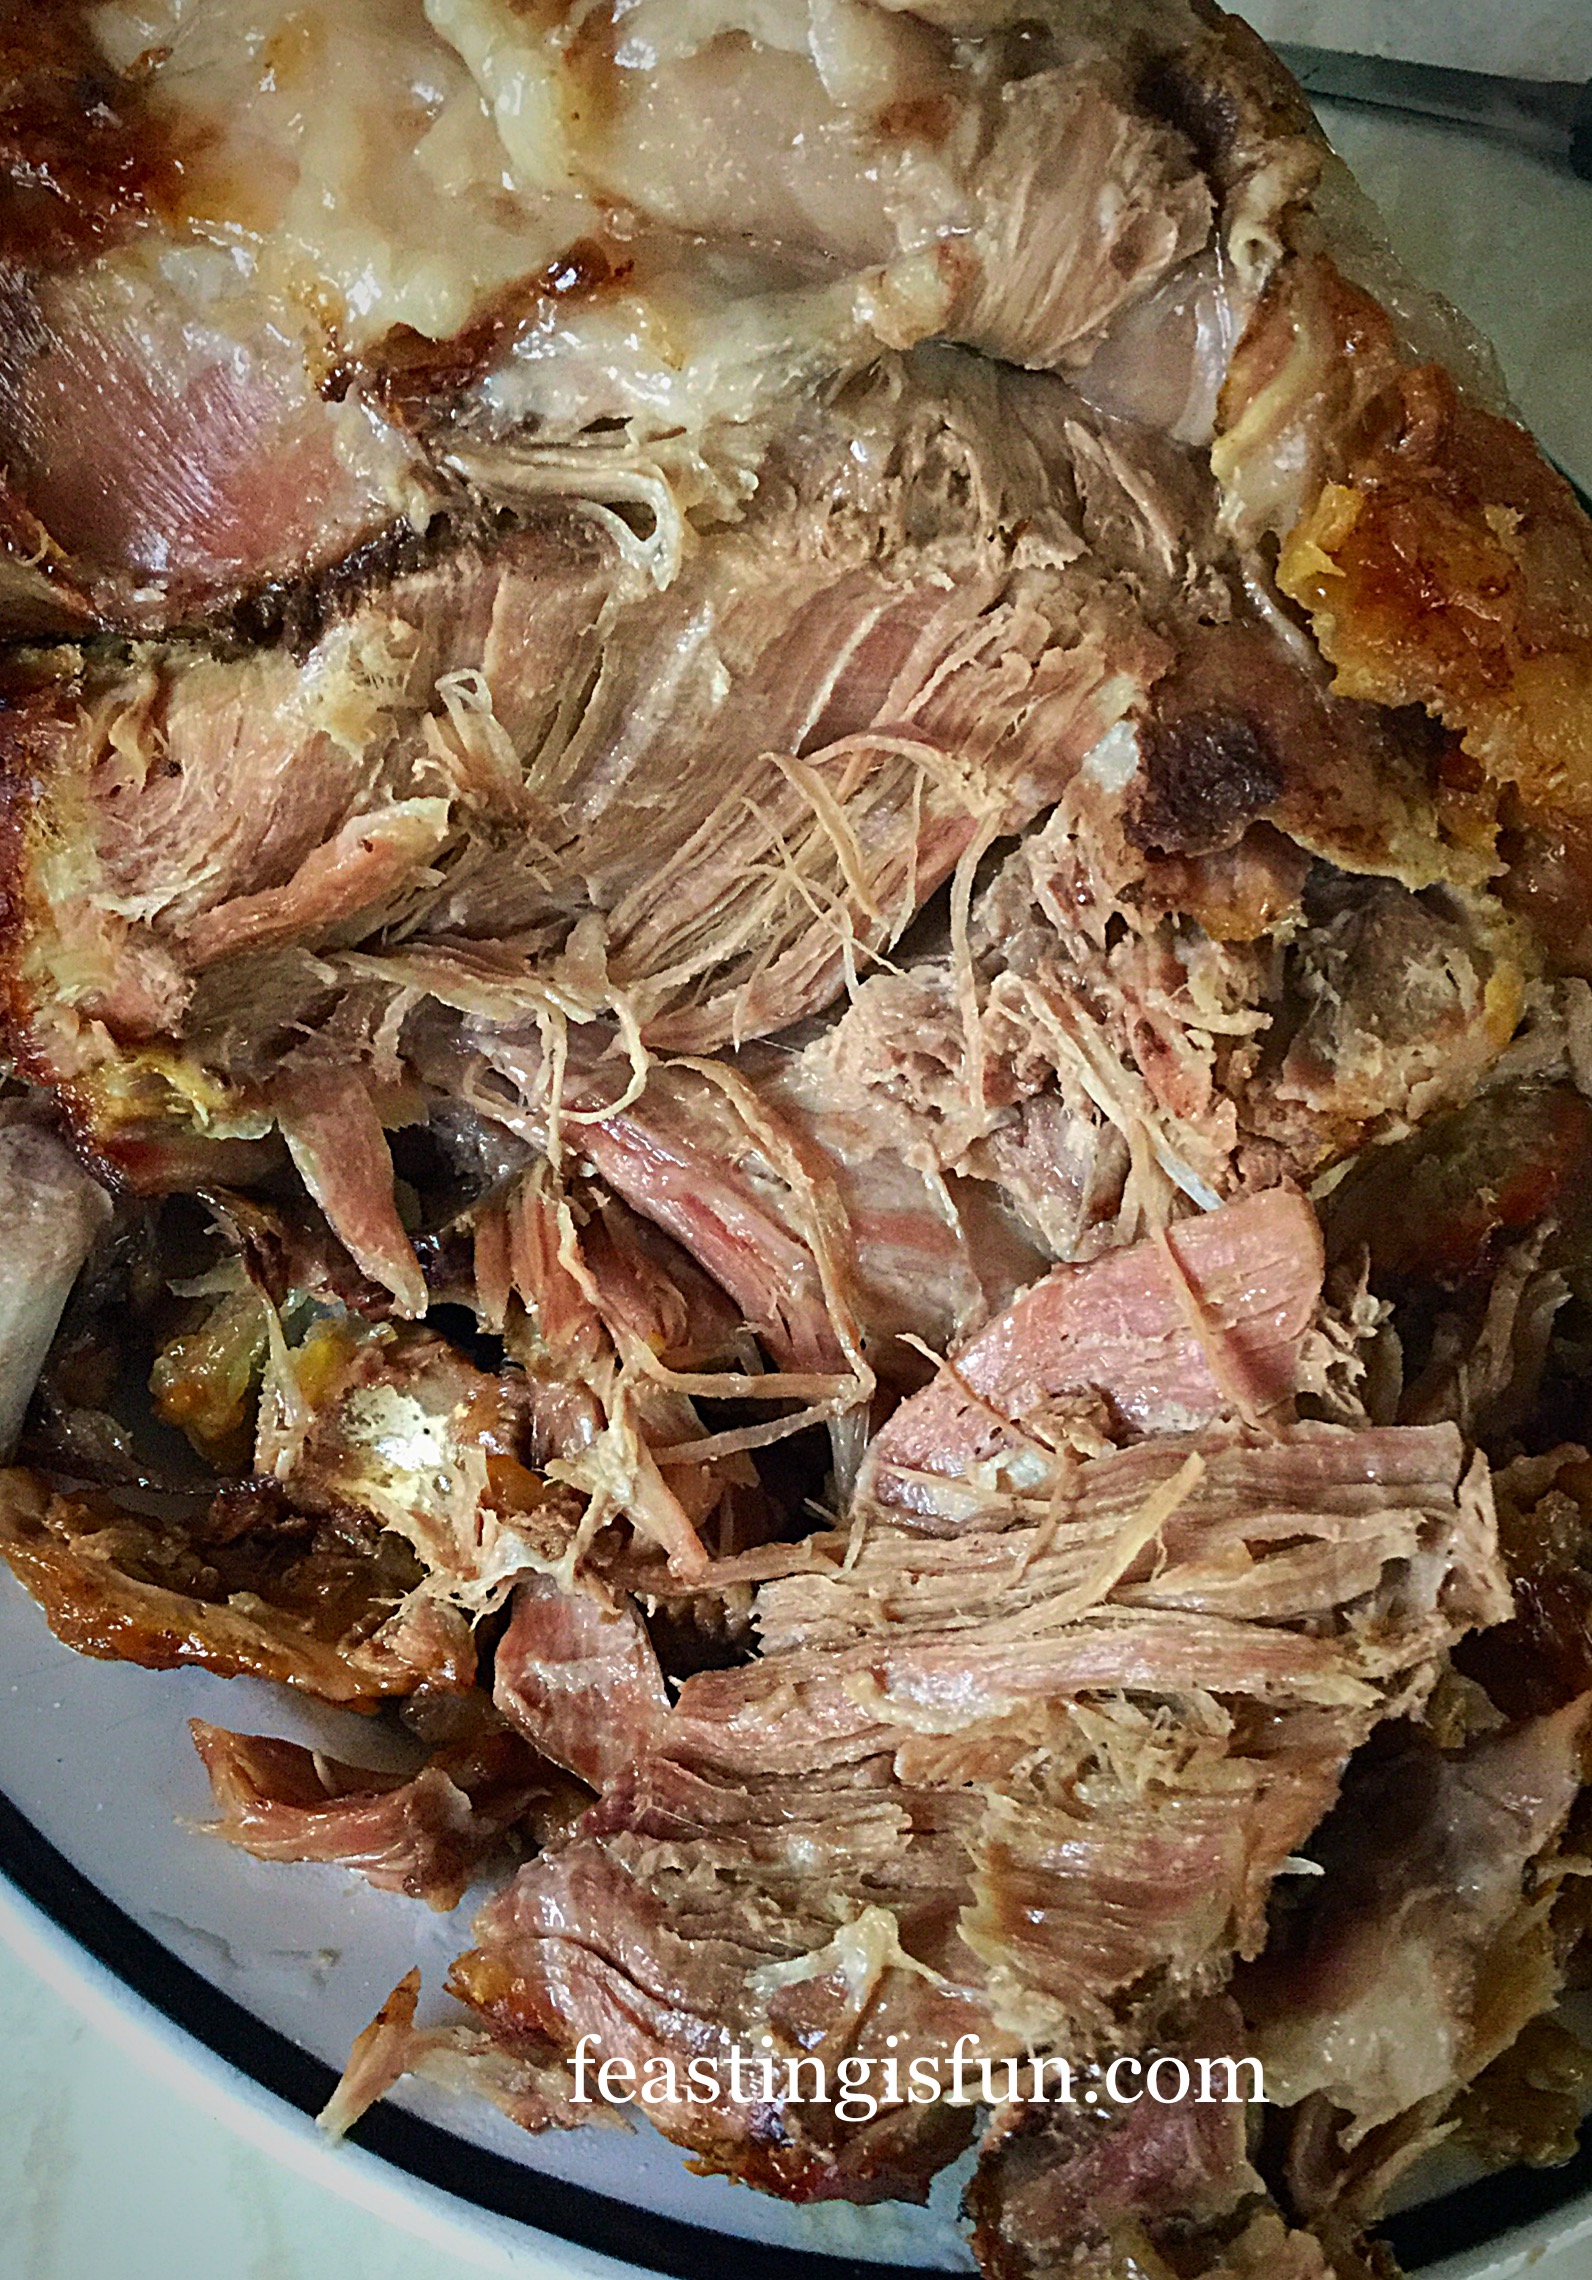
The bones literally pulled clean out from the pork.
From this one joint you can go on to make other dishes in the week. So watch out for my Chipotle Pulled Pork Fajita’s coming soon .
Some people can’t be bothered with the hassle of cooking a Sunday Roast. For our family it is not only tradition, but also provides leftovers for meals during the week such as my Roast Chicken Noodle Soup.
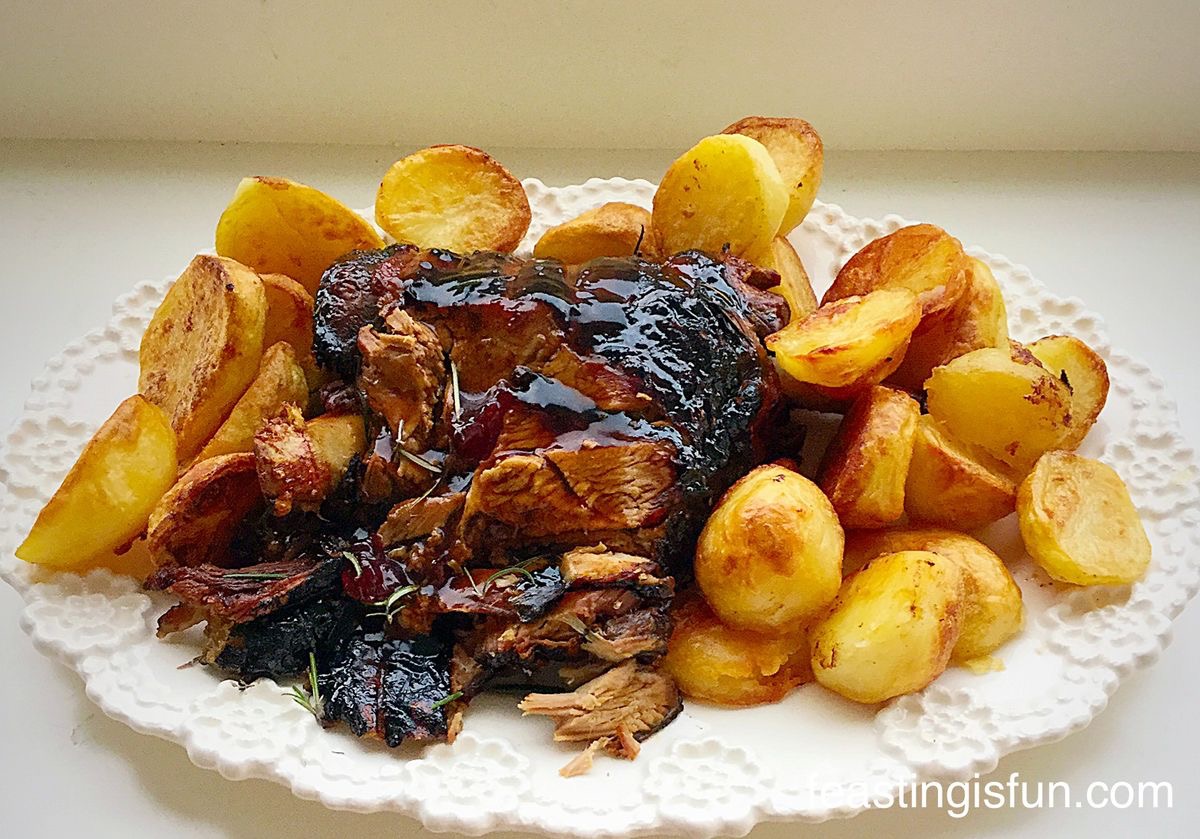
Slow Roasted Cider Pork can be served with the traditional Sunday sides of roast potatoes and vegetables, or Mashed Potatoes for the ultimate comfort meal. Since there are dozens of ways to serve pulled pork, I intend to add plenty more recipes to this blog!
Feeding a crowd
This one joint would easily feed 15-20 people, depending on how you were serving it. Also the pork I used for this joint was organic. I can honestly say that the flavour is far superior to the pale, mass produced alternative. Economically, this meal made four dinners for a family of five. And so, with three growing teenagers in our home, that counts as five adults in my book.
Because this Slow Roasted Cider Pork goes such a long way, that certainly helps with the economics of buying such a large joint. As I’ve said before we are not a big meat eating family, so the meat we do eat goes further. Take a look at Graig Farm’s website, there is 10% off for new customers and they always have special offers on. They are a family run farm who genuinely care for the animals that they rear.
Since I have been buying meat from them for the last few years, I can honestly say I’ve never had a bad meal, cooking with their meat.
This is not a sponsored post. I paid fair and square for the Pork Shoulder, I honestly really like their farming ethos, they are very nice people and their meat is outstanding!
Recipe: Slow Roasted Pork Shoulder
3-4Kg Bone in Pork Shoulder Joint – if cooking a smaller joint reduce the temperature to 120C
Fresh Herbs – I used Bay leaves, Sage, Thyme and Rosemary – woody herbs work best
1 Large Onion – peeled and cut into quarters (or 2 small onions halved)
1 Bottle Cider 500ml I used – Thatcher’s Gold
Sea Salt – I use Maldon
Freshly Ground Black Pepper
Method: Preheat the oven to 200C/180C fan, gas mark 6, 400F
Preparing the pork joint
- First of all, remove the pork from the fridge 1 hour before cooking. Remove all packaging set on a large plate and pat dry with kitchen roll.
- In the base of your roasting tin add the fresh herbs and onions quarters.
- Pour in the bottle of cider.
- Sit the pork joint on top of the onions and herbs.
- Sprinkle over freshly ground pepper, rub sea salt and a little fresh thyme into the skin.
 Slow Roasted Cider Pork
- I know you can’t see the cider I poured it under the pork after it was placed in the tin!
- Cover the pork with aluminium foil, making sure that it does not touch the actual joint. Crimp the foil tightly around the edge of the tin so that it seals in the pork and cider.

Slow roasting the pork joint
- Place the roasting tin into the lower part of the oven and allow to cook at the preheated temperature for 30 minutes.
- After 30 minutes has passed reduce the oven temperature to 150C/130C fan, gas mark 2 and cook for a further 6 hours.
- You can take the joint out after 3 hours and baste with the herby cider juices as I did. Remember to tightly cover with foil before putting back into the oven.

- So, if you want to go out for the day, please don’t worry about the basting. The steamy, herb infused, cider atmosphere in which the pork cooks will still be deliciously full of flavour.
- After 6 hours has elapsed remove the joint from the oven and check how tender it is. I simply pull at the meat with a fork, if it comes away easily the park is cooked.
- Increase the oven temperature up to it’s original preheated level and remove the foil. Place the pork back in the oven for 20-30 minutes to crisp up the crackling and create the crusty pork ‘bark’ at each end of the joint.
- When the skin is crispy up and you have crunchy crackling remove the pork from the oven. See *note below
- Remove the pork joint from the tin and place on a platter or carving board.
Resting and serving the pork
- Being extra careful as it is very hot, snip and remove any string, before using scissors to cut away the crackling. For extra crunchy crackling I then pop it on a shallow tray and place back in the oven to continue to crisp, while the roast potatoes cook.
- Cover the pork with foil and allow to rest for at least 30 minutes.
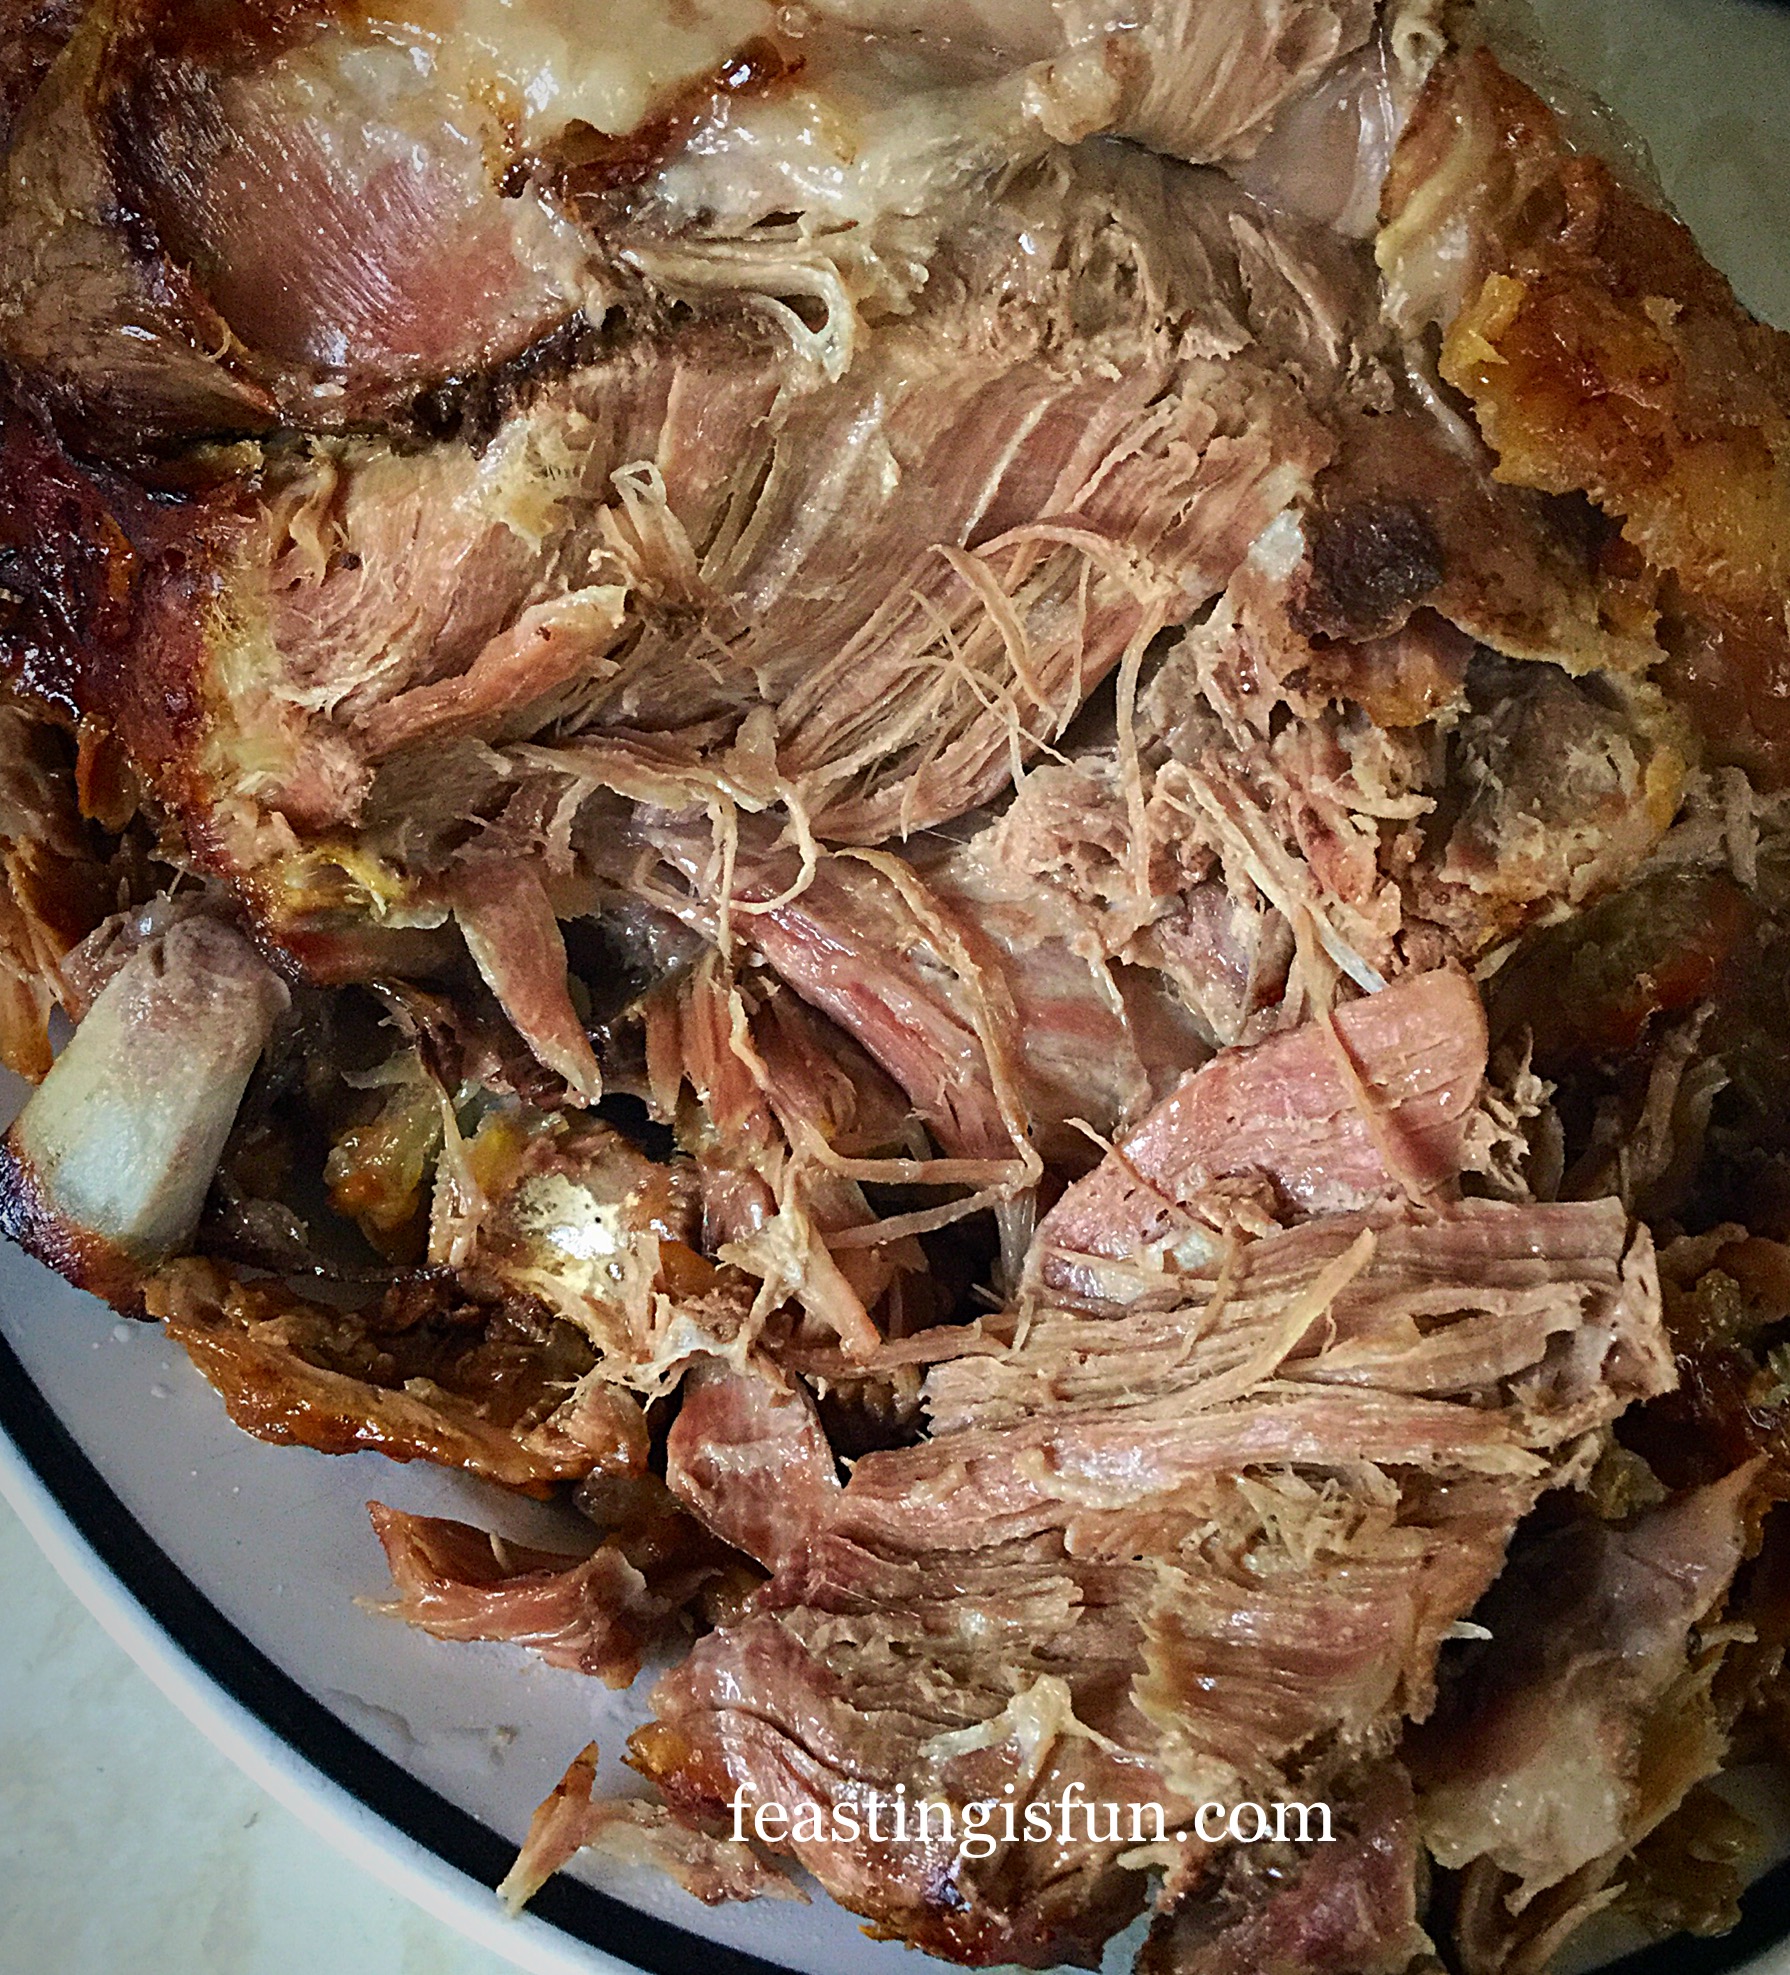
- Using two forks pull the pork apart and pull out the bones, they will come out cleanly.
 You can see how cleanly the bone came out on the left.
Serve the Slow Roasted Cider Pork with roast potatoes and seasonal vegetables and enjoy the soft, tender meat and crunchy, tasty cracking.
Finally, this melt in the mouth pork is perfect to roast a crowd. So invite all your family round, get everyone to pitch in with a dish and enjoy fun, feasting, friendship and laughter together. Since there is nothing like a good meal and great company to help people relax and unwind.
If you have enjoyed this recipe for Slow Roasted Cider Pork you may also like these:
Redcurrant Jelly Glazed Roast Lamb
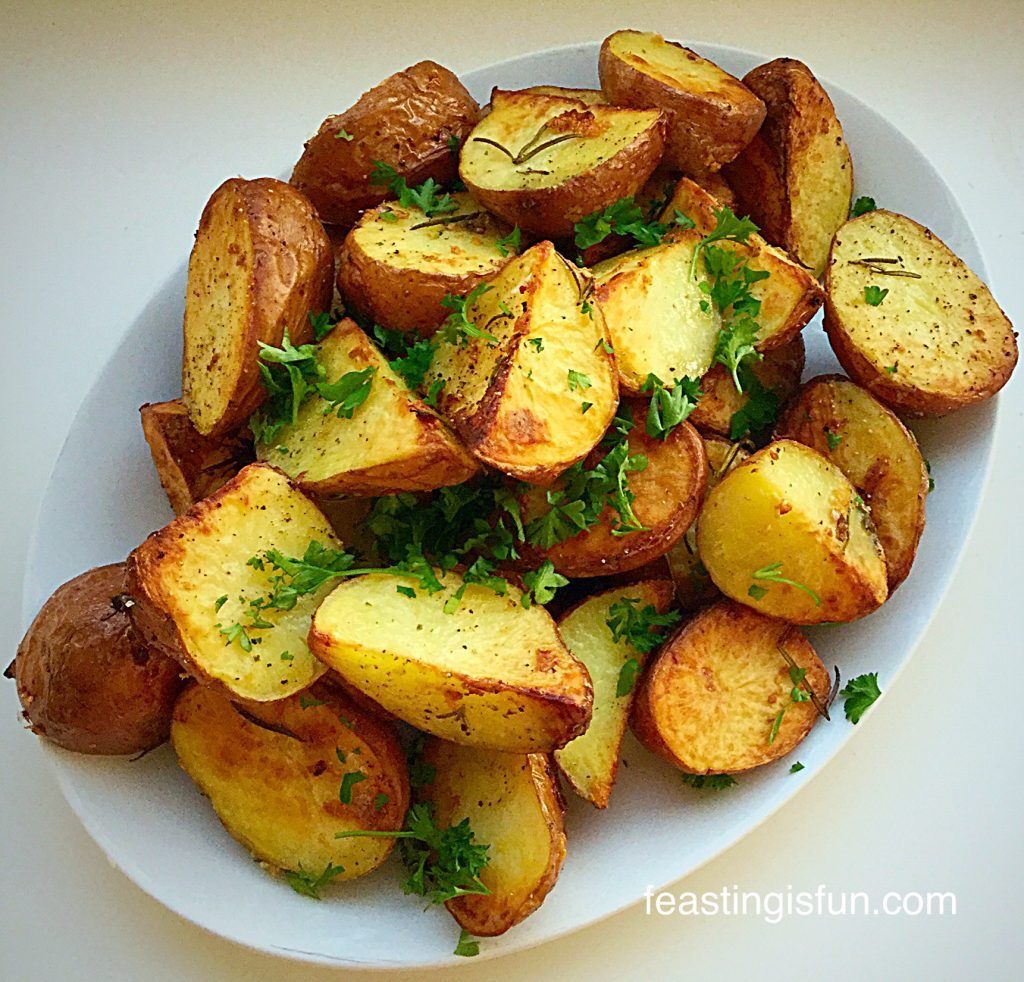
Garlic Rosemary Roast Potatoes
Do you enjoy cooking a roast for all the family, or is it too much hassle?
Thank you for all your photos and feedback via the comments section, Instagram and Twitter. I really do appreciate you making and baking my recipes and love to see how they turn out, so please keep the pictures and comments coming.
Whatever you are making and baking the Bank Holiday Monday, I hope you have fun creating your delicious feasts and sharing your wonderful bakes with lots of smiles.
Sammie xx