Cherry Bakewell Soda Bread

Nothing smells better than the aroma of homemade bread, baking in the oven. As many of my regular readers will know, I adore making bread. Yet sometimes, time is the enemy. Especially if it’s needed for breakfast and we have run out. The solution is to bake this beautiful and delicious Cherry Bakewell Soda Bread.
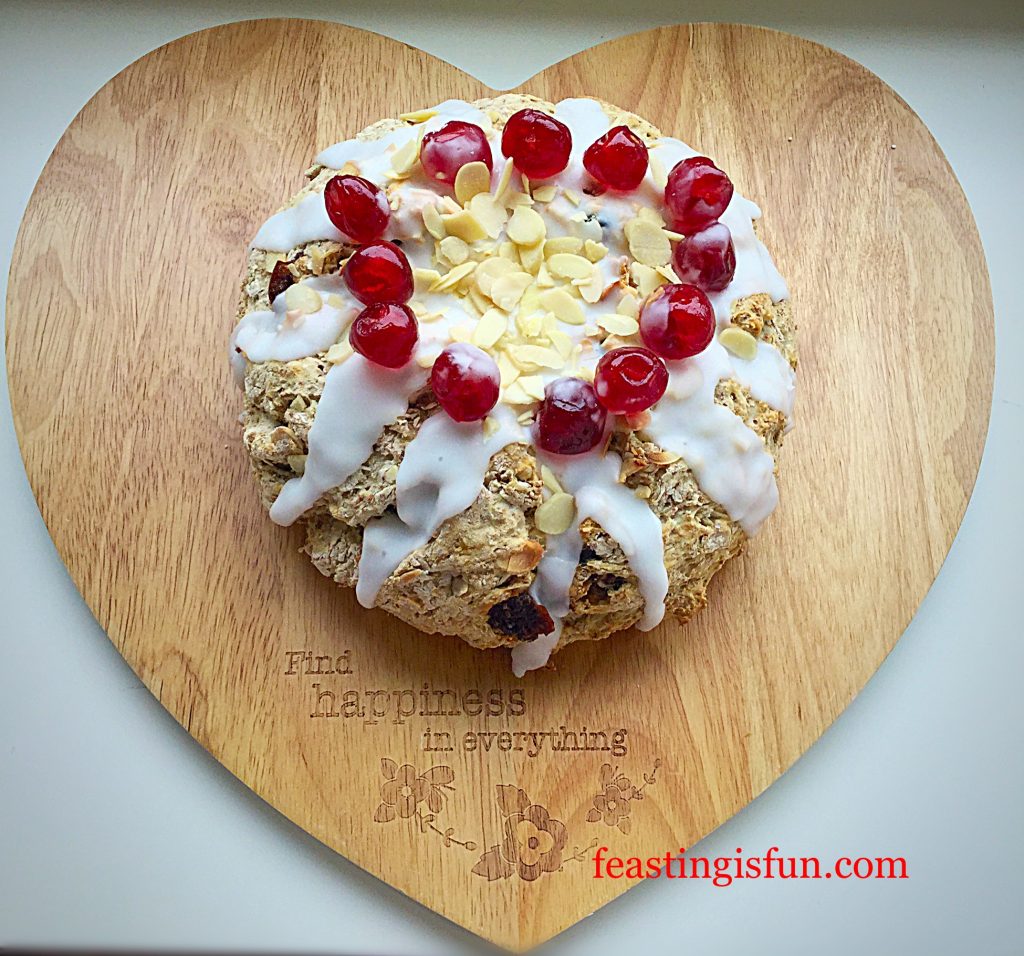
FF Cherry Bakewell Soda Bread
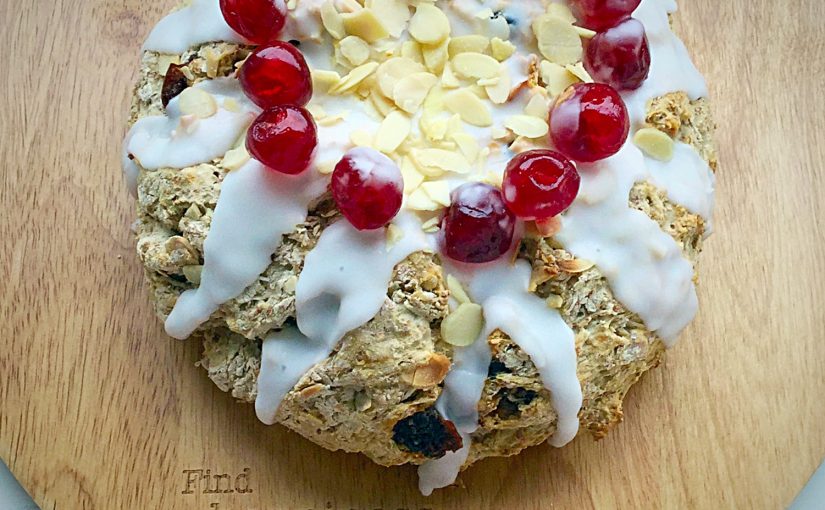
Cherry Bakewell Soda Bread crowned with cherries.

An un-yeasted bread, made even easier by using a packet of Wrights Scofa Bread Mix. All this tasty loaf requires is a little mixing, shaping and popping in a preheated oven to bake. The addition of cherries and flaked almonds gives this loaf the wow factor. Especially with the almond flavour icing, temptingly drizzled over the loaf and finished with ruby red, glacé cherries.
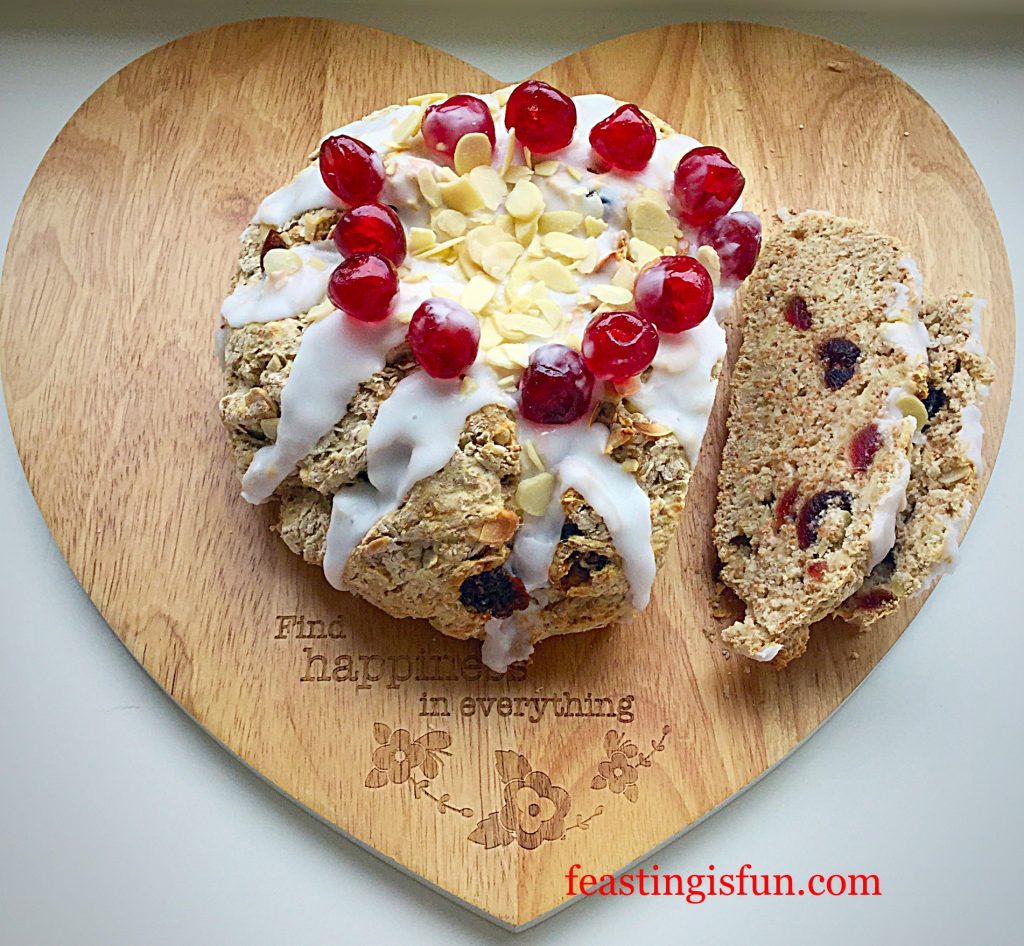
FF Cherry Bakewell Soda Bread
Cherry Bakewell Soda Bread hearty and delicious.

Since this loaf takes less than 45 minutes from start to baked, it is perfect for lazy weekend breakfasts. Still, if you are in a real rush, ditch the icing and crown of cherries and serve this sliced, warm from the oven, with butter if desired.
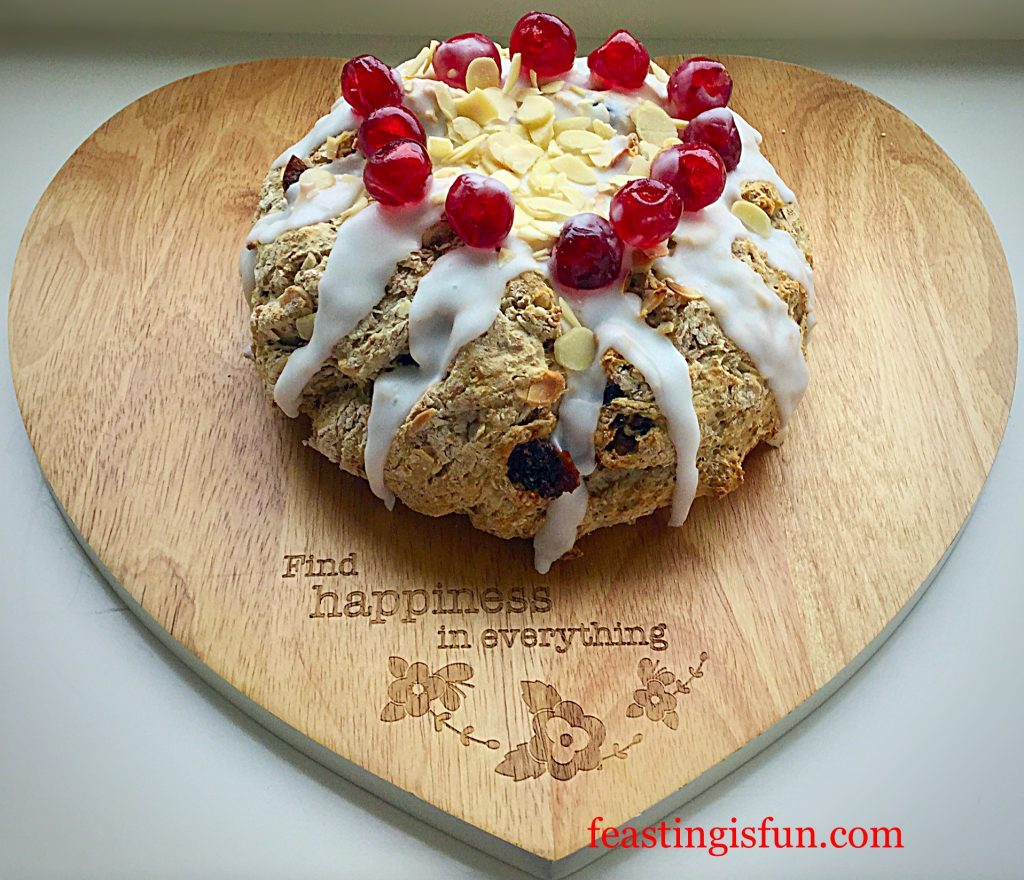
FF Cherry Bakewell Soda Bread
Cherry Bakewell Soda Bread perfect for afternoon tea.

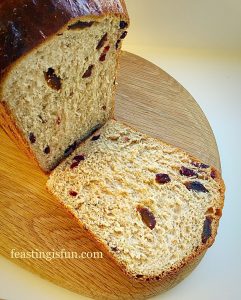
While this bread can be made and baked in under an hour, leaving to cool allows for simple, yet stunning decoration. Thick, almond icing, draped over the rustic loaf, simply topped with jewelled cherries. Creating a sensation for the eyes as well as the palette. Cooled and sliced, I found this delicious, hearty loaf needed no further addition. Each bite full of almonds, cherries and rustic, wholemeal bread.

Recipe: Cherry Bakewell Soda Bread

1 Packet Scofa Bread Mix available from Wrights Baking

Cold Water

150g/5oz Glacé Cherries

100g/4oz Flaked Almonds

3tsp Almond Extract – I use Nielsen-Massey

200g/7oz Sifted Plain Icing Sugar

Method: Preheat the oven to 220C/200C fan, gas mark 7.

  • First of all, remove 12 whole glacé cherries and set them to one side for decoration.
  • Next cut all the remaining cherries in half.
  • Place the volume of water, as specified on the packet, into a large bowl.
  • Add 1 teaspoon of almond extract to the water. Swirl to mix.
  • Add the entire packet of Scofa Bread Mix.
  • Now add the cherry halves on top of the bread mix, lightly dusting them with the mix to stop them sticking together.
  • Reserve one tablespoon of flaked almonds for decoration and add the rest to the bowl.
  • Use a wooden spoon to stir the mixture until it comes together.
  • Tip the dough out on to a lightly floured work top and shape into a round.
  • Place the shaped dough on to a greased baking sheet.
  • Cut a deep cross into the dough, if not icing, sprinkle the remaining almonds over the bread.
  • Next place in the centre of a preheated oven.
  • Bake the bread for 30-35 minutes. Once baked it will sound hollow when rapped on the base with your knuckle. Note – this baking time is slightly longer than specified on the packet. This is due to the addition of cherries and almonds.
  • Once baked remove the bread from the oven and place on a cooling rack.
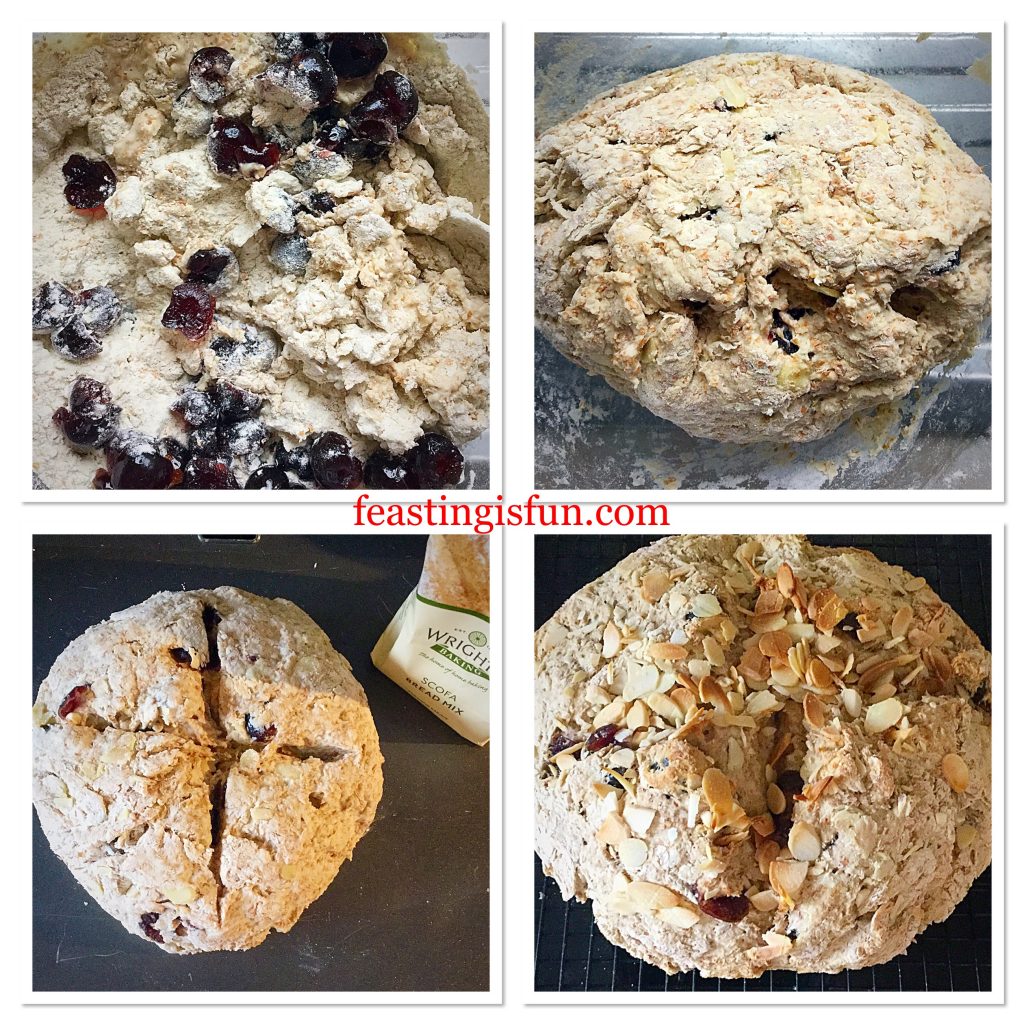
FF Cherry Bakewell Soda Bread
Making, shaping and baking the Cherry Bakewell Soda Bread
  • Note – the bread doesn’t change colour very much whilst baking.
  • Allow the bread to completely cool before icing and decorating.
  • To make the icing: Add 2 teaspoons of almond extract to the sieved icing sugar. Now add enough water, approximately one tablespoon, to the icing and stir. It should be a thick paste that can hold a figure of eight for a few seconds.
  • Place the cooling rack with the bread on it, over a baking tray, to catch any drips.
  • Start in the centre. Spoon thick icing over the bread, encouraging it to drape down over the sides of the loaf.
  • Continue until the bread is evenly drizzled with the icing.
  • Next, place the reserved cherries on top of the bread, forming a crown-like circle.
  • Finally, scatter the reserved almond flakes over the bread.
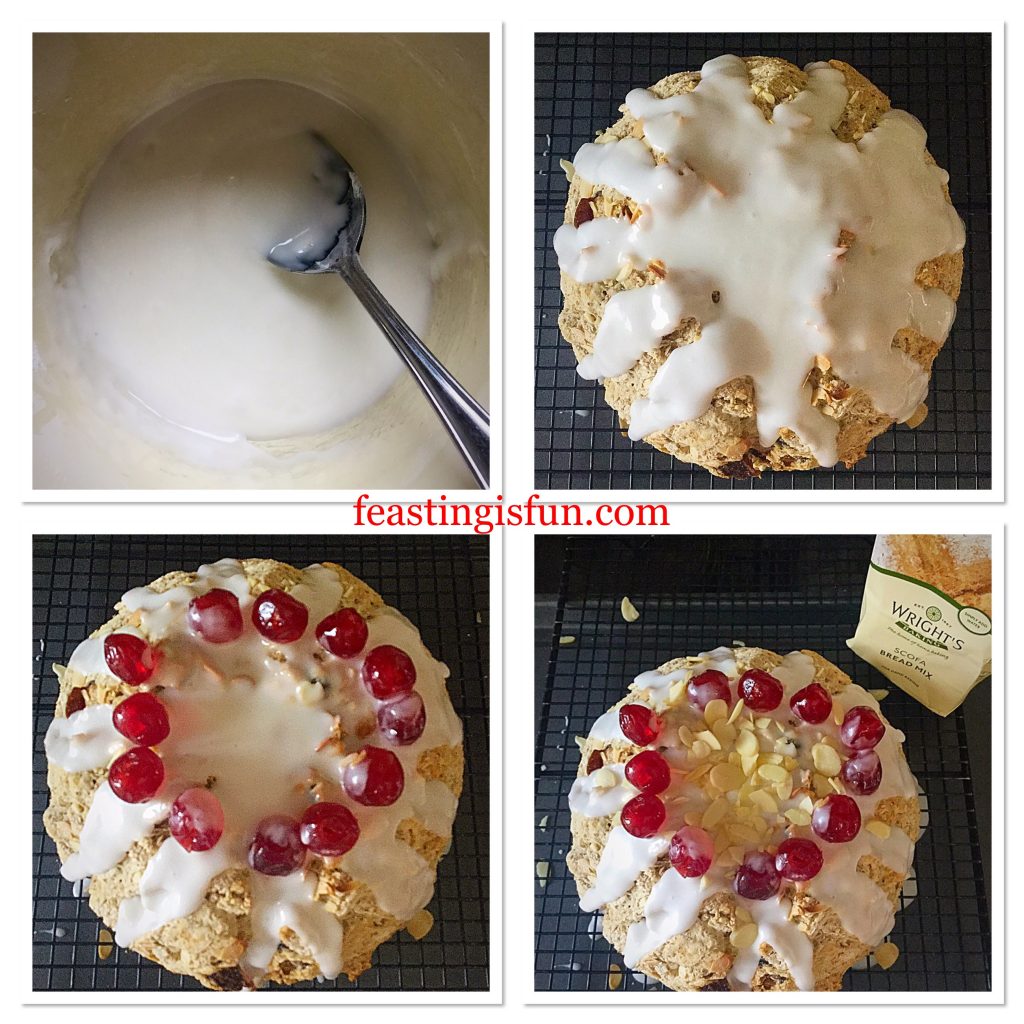
FF Cherry Bakewell Soda Bread
Icing and decorating the Cherry Bakewell Soda Bread
  • Set the decorated bread to one side to allow the icing to set.
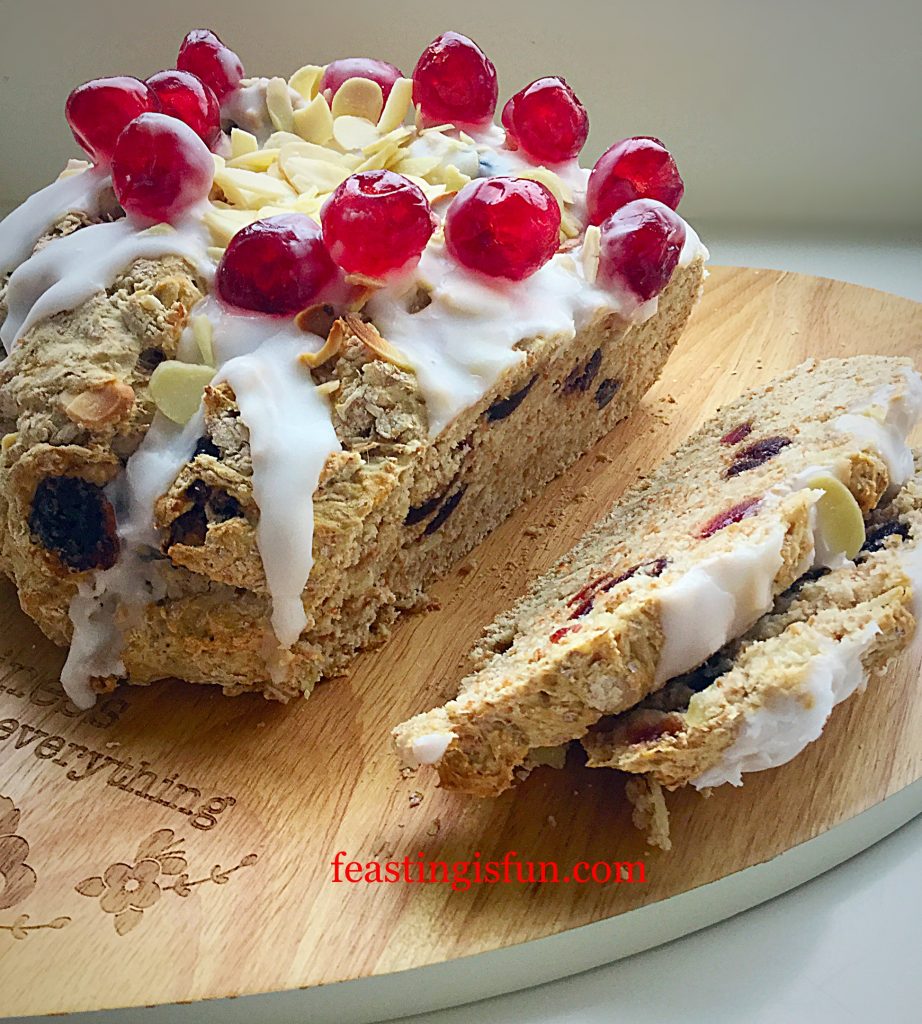
FF Cherry Bakewell Soda Bread
Cherry Bakewell Soda Bread deliciously easy to make.

Serve this delicious bread sliced, for breakfast, lunch of afternoon tea. In fact, it is perfect for anytime of the day.

Store in an airtight container. This bread is at its best when eaten wishing 24 hours of baking. That shouldn’t be too much of a problem!

If you have enjoyed the recipe for this Cherry Bakewell Soda Bread you may also like these:
Ginger Date Hot Cross Buns

FF Cherry Bakewell Soda Bread
Ginger Date Hot Cross Buns

Christmas Spiced Fruit Loaf

FF Cherry Bakewell Soda Bread
Christmas Spiced Fruit Loaf

Toffee Banoffee Waffles

FF Cherry Bakewell Soda Bread
Toffee Banoffee Waffles

Making something different for breakfast at the weekend is a real treat. Whilst most of my baking is made from scratch, the convenience of having good quality packet mixes in the cupboard cannot be denied. Balancing time spent together as a family with, the time it takes to create a feast, is important.

Do you make breakfast more of a treat at the weekend?

After all, it is the most important meal of the day?

Sammie xx

Wrights Baking supplied me with the mix to create this recipe. All views, content and photography are my own. Please see my Disclosure Policy.
Coconut White Chocolate Snowball Cupcakes

Today is the first day of December. Visits from Jack Frost over the last few nights and Winter has well and truly arrived. Sparkling pavements and frosted windscreens add to the beauty of crystal clear, blue skies. Inspired by the frosty weather I made these Coconut White Chocolate Snowball Cupcakes. 

FF Coconut White Chocolate Snowball Cupcakes
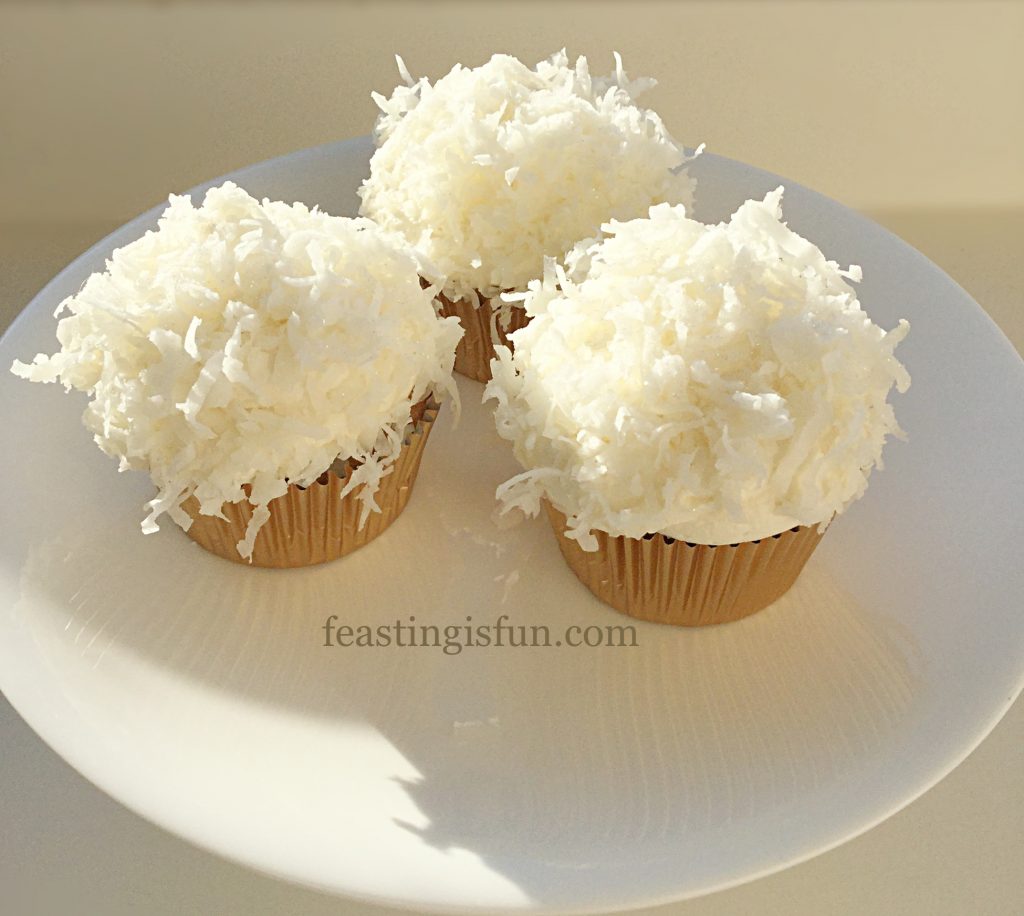
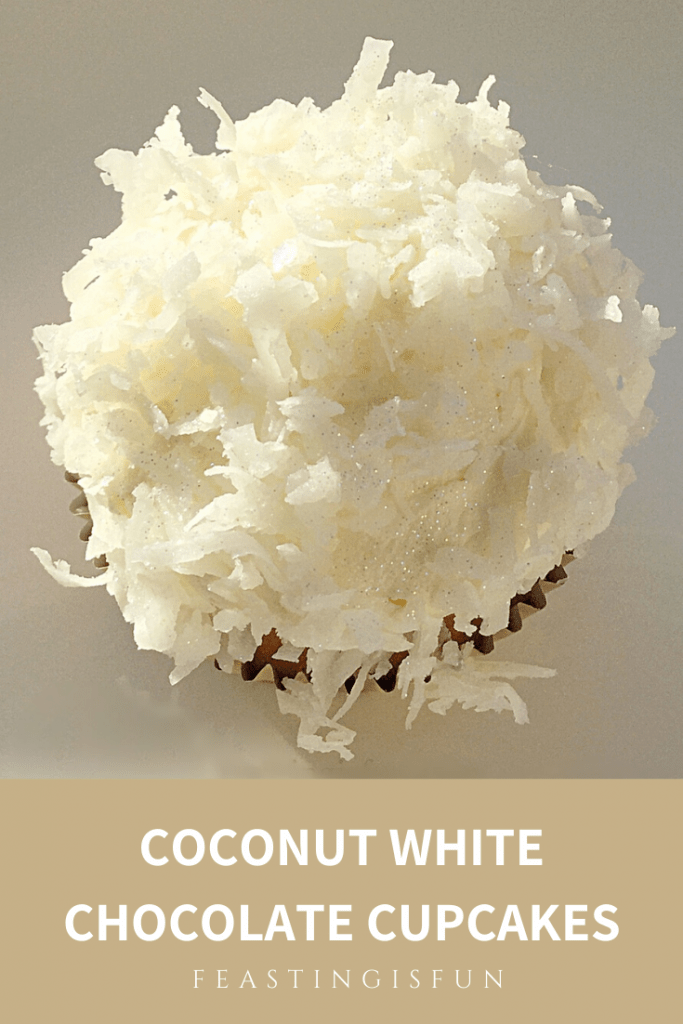
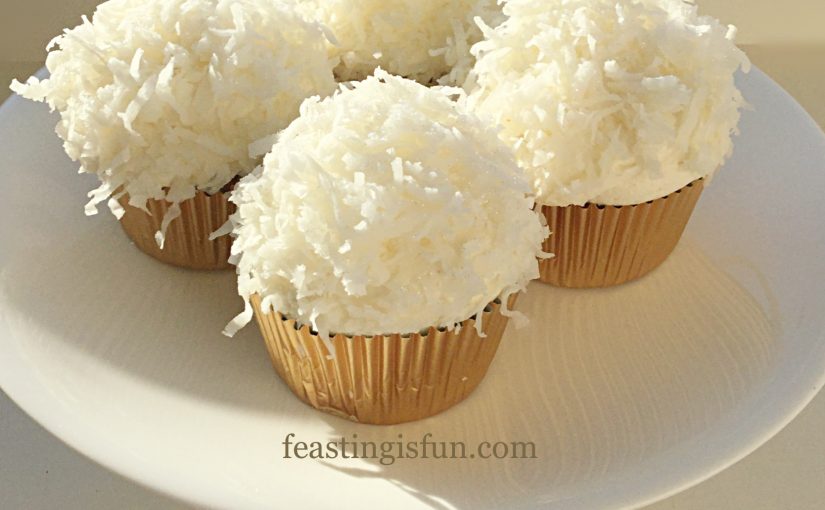
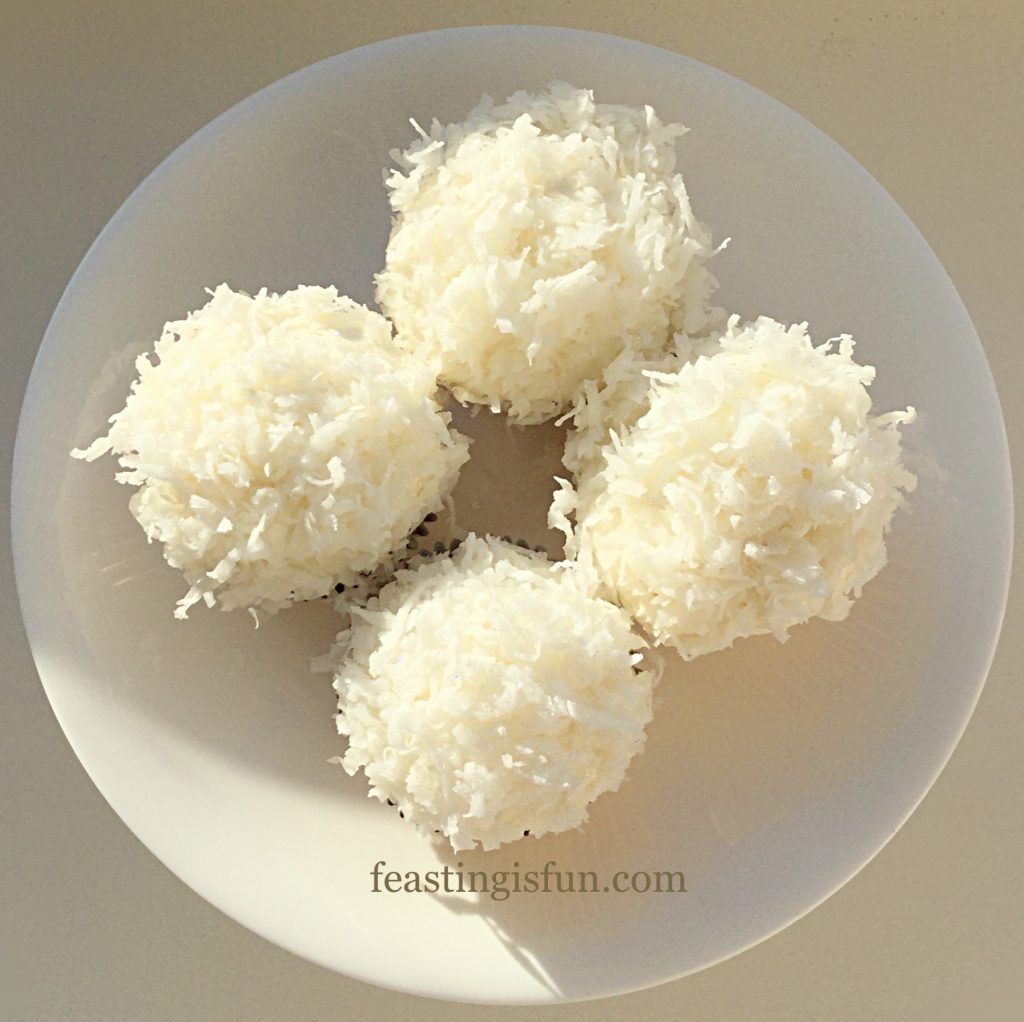
Coconut White Chocolate Snowball Cupcakes these are definitely not for throwing!

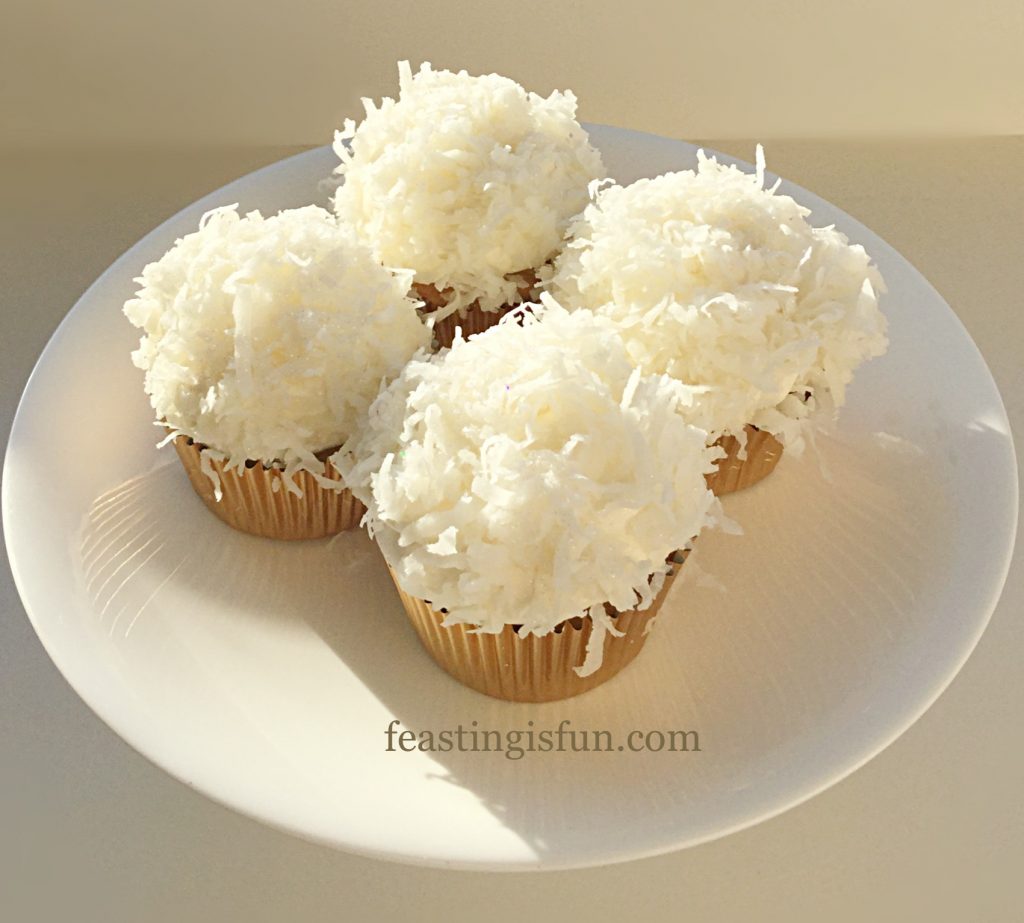
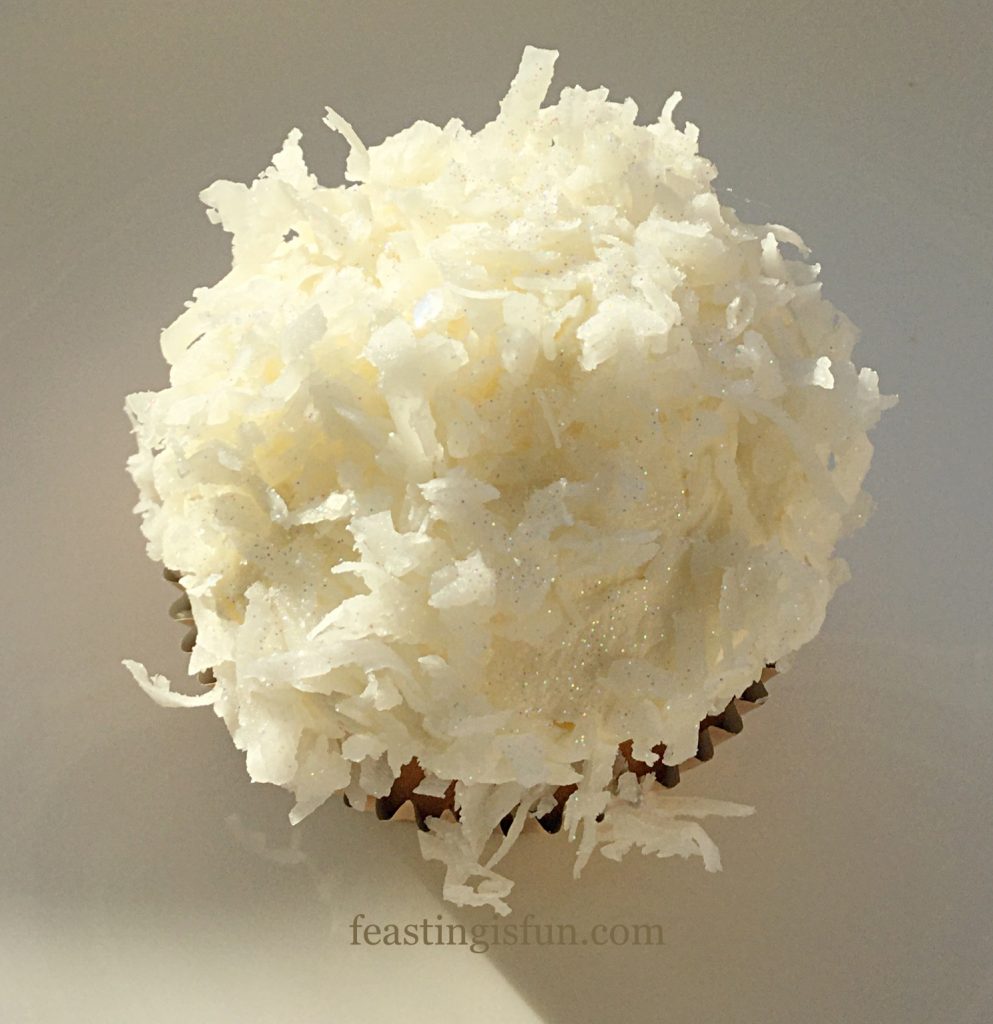
Vanilla and coconut sponge, topped with a whipped, white chocolate buttercream. Ooh that got your attention! And a complete covering of sweetened coconut and dusting of edible Magic Sparkles finishes the decoration. If you like coconut, I can guarantee you’ll love these cupcakes.

FF Coconut White Chocolate Snowball Cupcakes
Coconut White Chocolate Snowball Cupcakes full of flavour.

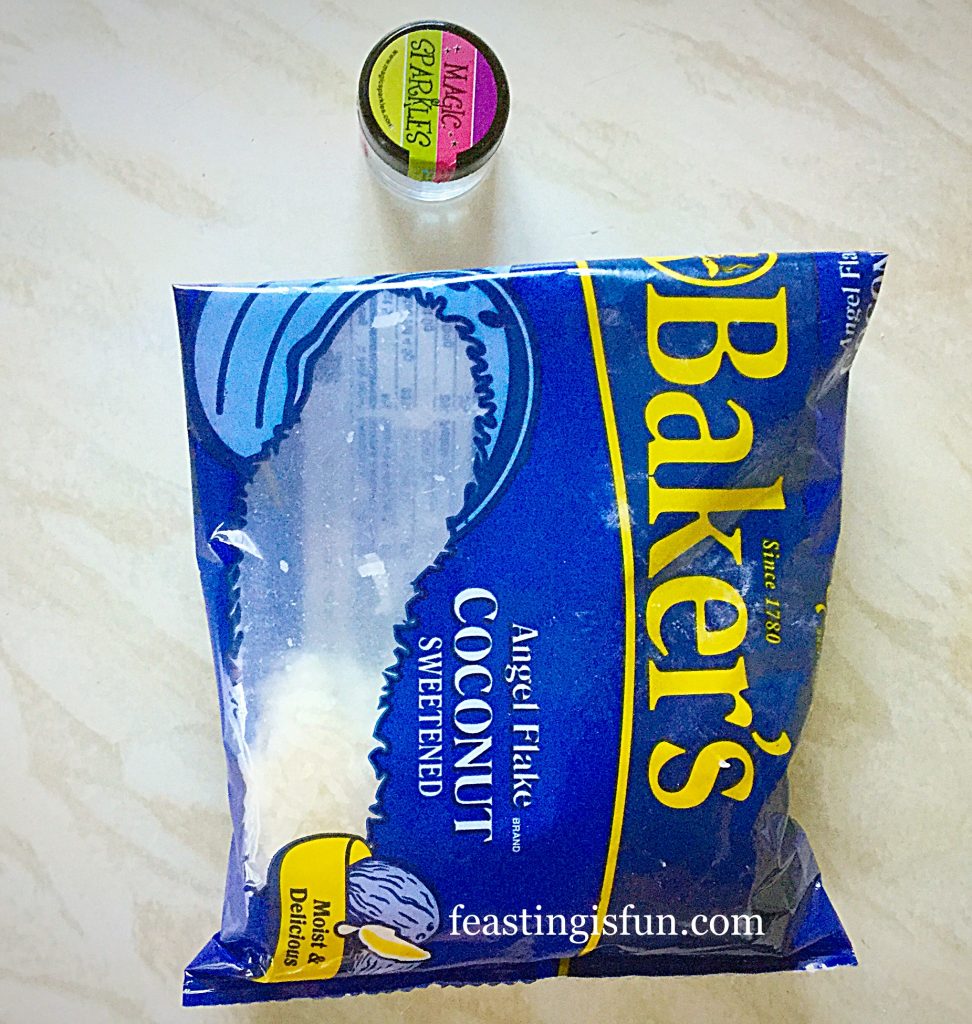
Using Sweetened Shredded Coconut

While there is a potential for these cupcakes to be overly sweet, I can assure you that they are not. Since the sweetened ‘Angel Flakes’ coconut is not, as one would imagine, overly sweet. Rather, the taste is predominantly that of pure coconut, with a little addition of sweetness to enhance the flavour. Resulting in a perfectly balanced, delightful cupcake.

I have been unable to source the ‘Angel Flakes’ from regular shops or supermarkets. However, it is readily available to buy online, from Amazon. Desiccated coconut is a real no no for me. In fact, I find it much sweeter than the coconut used here. Of course, if you like the flavour, then feel free to substitute it in this recipe. Likewise, if you can get hold of freshly grated coconut, that also can be used.

FF Coconut White Chocolate Snowball Cupcakes
Coconut White Chocolate Snowball Cupcakes delicious any time of the year.

These cupcakes are a delicious bake for over the festive season. So, why not bake up a batch and share them with your work colleagues or friends? I have yet to meet anyone who doesn’t enjoy a delicious, homemade cupcake. And, as Christmas is the season for sharing, wouldn’t it be wonderful if we could extend that season throughout the whole year?

Recipe: Coconut White Chocolate Snowball Cupcakes makes 12

For the cupcake sponge:

125g/4.5oz Unsalted Butter – softened

125/4.5oz Caster Sugar

Scant pinch of salt – I use Maldon

1/2tsp Vanilla Extract – I use Nielsen-Massey

3 Large Free Range Eggs

125g/4.5oz Plain White Flour

1.5 tsp Baking Powder

50g/2oz Sweetened Shredded Coconut

2-3tbsp Milk

For the frosting:

400g/14oz Icing Sugar

200g/7oz Unsalted Butter softened

1tsp Vanilla Extract

2tbsp Very Hot Water

100g/4oz White Chocolate

For the decoration:

Approximately 200g/7oz Sweetened Shredded Coconut

Edible glitter

Method: Preheat the oven to 170C/150C fan, gas mark 3.5, 325F

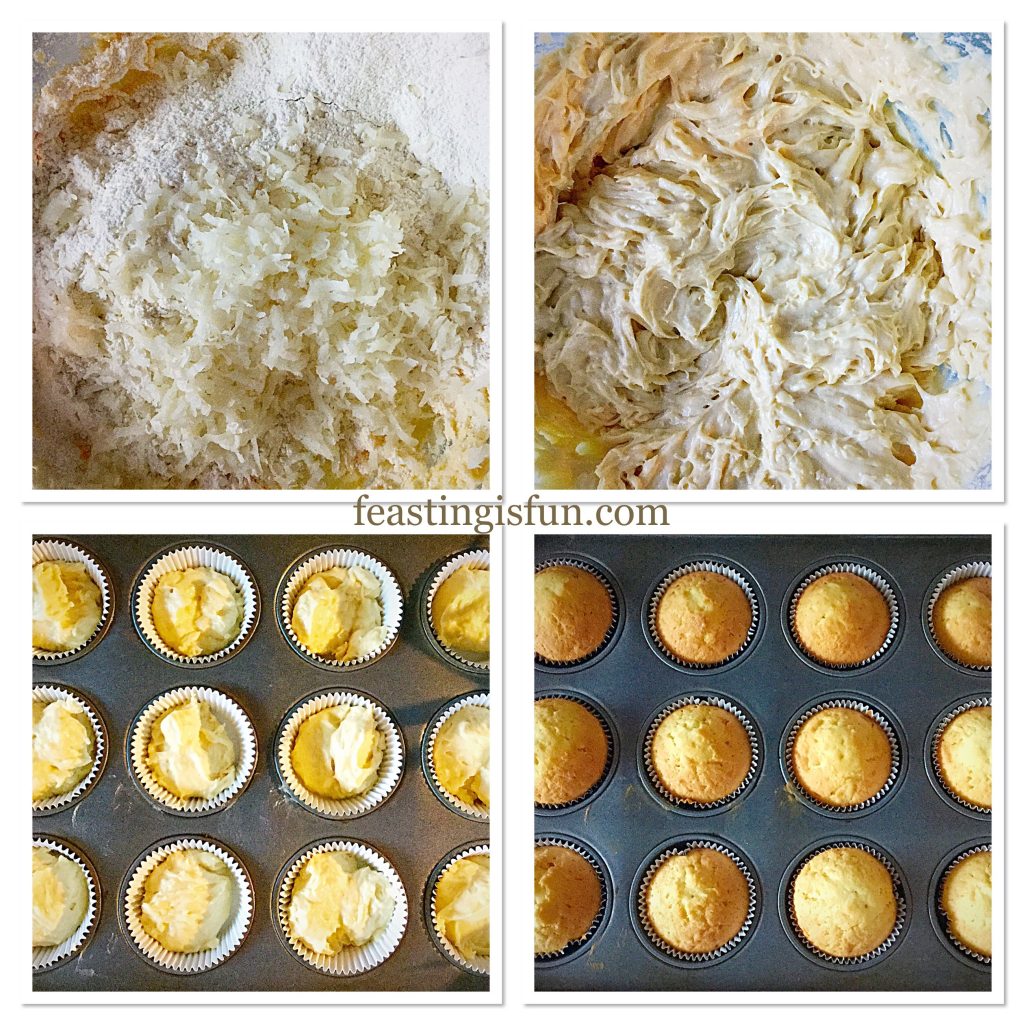
Making And Baking The Coconut Cupcakes

  • First of all, line a 12 hole cupcake tin with cupcake cases.
  • Next, in a large bowl add the butter, sugar and salt. Whisk until light and creamy.
  • Now add all 3 eggs and the vanilla extract. Then sift in the flour and baking powder. Next add the coconut and whisk until everything is just combined, adding 2 or 3 tablespoons of milk to achieve a soft, dropping consistency.
  • Place a dessertspoon of cake batter into each cupcake case.
  • Finally, put the cupcake tin into the centre of the preheated oven and bake for 20-30 minutes.
  • The cupcakes are baked when they are risen, golden and spring back from a light touch.
  • As soon as the cupcakes are baked, remove from the oven.
FF Coconut White Chocolate Snowball Cupcakes
Making the cupcake batter, filling the cases and baking the cupcakes.
  • Baking the cupcakes at a slightly higher temperature results in a domed rise. This is deliberate, as it helps the shape of a snowball later when icing and covering.
  • Remove the hot cupcakes from the tin and place on to a cooling rack.

Making The White Chocolate Frosting And Piping Onto The Cupcakes

  • While the cupcakes are cooling make the buttercream icing.
  • First, place the softened butter into a large bowl and then sift in the icing sugar. Now add 2 tablespoons of very hot water from a recently boiled kettle and one teaspoon of vanilla extract.
  • Whisk, starting on a slow speed and then gradually increasing, whipping until the buttercream is light and fluffy. Set to one side.
  • Next, break up the white chocolate and place in a heatproof, microwaveable bowl. Zap for 20 seconds at a time, stirring in between, until the chocolate starts to melt. Remove the bowl from the microwave and stir continuously. The residual heat will continue to melt the remaining chocolate.
  • Once the chocolate is completely melted pour it into the buttercream.
  • Now whisk the buttercream and chocolate together, gradually increasing the speed, until the frosting is fully combined and cooled.
  • Fit a piping bag with a round piping tip approximately 12mm in diameter.
  • Fill the bag with the whipped, white chocolate, buttercream. Set to one side.
  • Remember to wait until the cupcakes are completely cooled before icing.
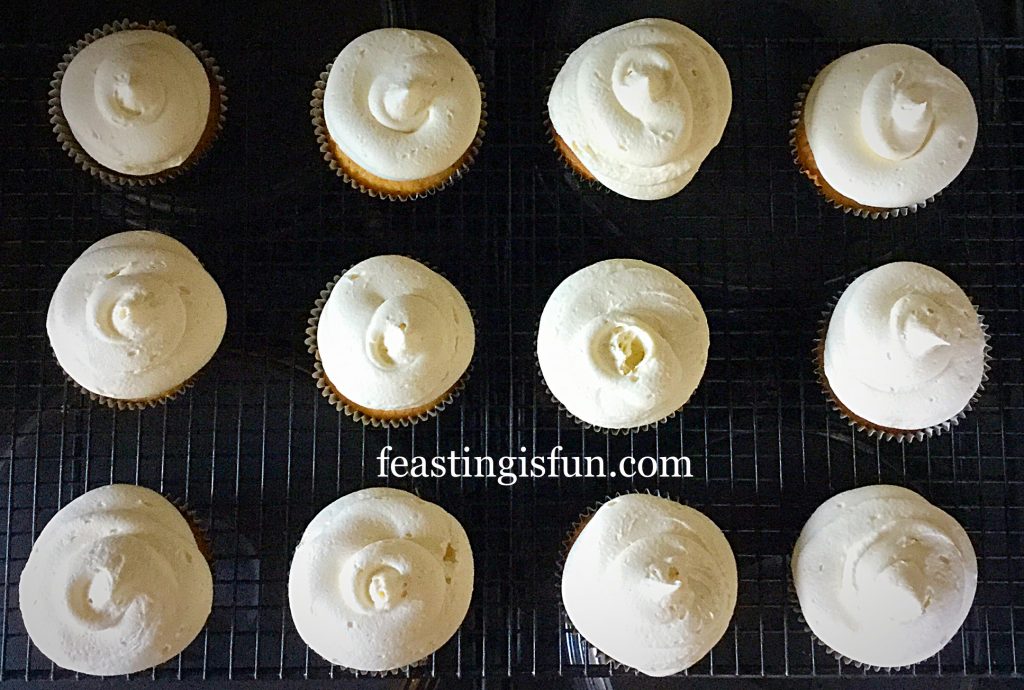
  • To ice the cupcakes, start in the centre and pipe a double swirl (one on top of the other), keeping an even pressure on the piping bag. Continue until all of the cupcakes have been iced.
FF Coconut White Chocolate Snowball Cupcakes
Swirled white chocolate frosting on top of each cupcake.

Decorating The Cupcakes

FF Coconut White Chocolate Snowball Cupcakes
Sweetened Coconut and Magic Sparkles3 used to cover the cupcakes.
  • Next, weigh out the sweetened coconut into a bowl and break any clumps apart with your fingers.
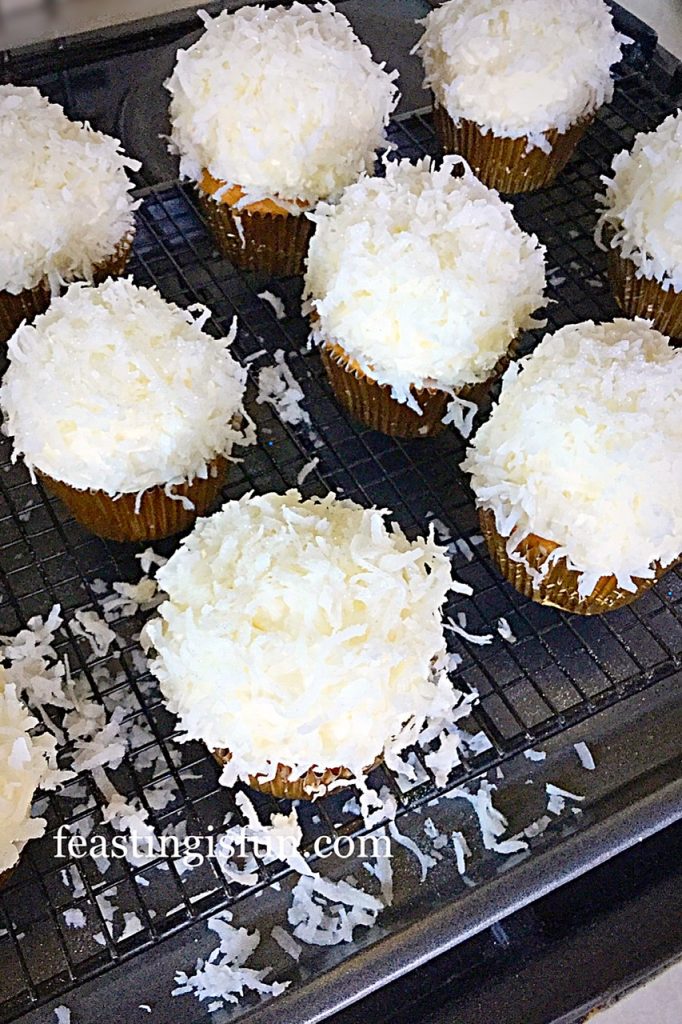
  • To cover the first cupcake, hold it in your hand over the bowl of coconut. Use your other hand to cover the sides of the frosting with the coconut, gently pressing so that it sticks. Rotate the cupcake until the sides are covered with coconut, letting any excess drop back into the bowl. Now sprinkle a good amount over the top of the cupcake. Again pressing lightly so that it sticks to the buttercream. Continue until all of the cupcakes are covered in coconut.
  • Next, sprinkle over the edible sparkles. Add as much glitter as you like!
Coconut White Chocolate Snowball Cupcakes, decorated with a snowy, festive theme.

These delicious, fun cupcakes are ready to serve straight away. To store, place in an airtight container and eat within 4 days. Although they are at their very best eaten within the first 24 hours of making.

FF Coconut White Chocolate Snowball Cupcakes
Coconut White Chocolate Snowball Cupcakes too good to keep to yourself!

If you have enjoyed this recipe for Coconut White Chocolate Snowball Cupcakes you may also like these:

Gingerbread Frosted Ginger Christmas Cupcakes

FF Coconut White Chocolate Snowball Cupcakes
Gingerbread Frosted Ginger Christmas Cupcakes

Maple Syrup Frosted Apple Cupcakes

FF Coconut White Chocolate Snowball Cupcakes
Maple Syrup Frosted Apple Cupcakes

Marshmallow Frosted Mango Cupcakes

FF Coconut White Chocolate Snowball Cupcakes
Marshmallow Frosted Mango Cupcakes can be made gluten free.

While baking these coconut cupcakes with the festive season in mind, they would be a delicious treat at any time of the year. Because, baking to share, with love stirred in abundance, also makes a delicious treat for family, friends, or work colleagues. And food always tastes better when it is shared, these cupcakes are ideal for sharing.

So, whatever you are making, baking and creating in your kitchens, over this festive season, I hope you have lots of fun and laughter preparing and sharing your feast.

Sammie xx

Christmas Spiced Fruit Loaf

Christmas is only four weeks away and I am thoroughly enjoying the build up. Especially when it comes to creating new recipes to share with you here. And food is a big part of our Christmas, with tradition dictating our ham is cooked on Christmas Eve, as well as fresh sausage rolls and mince pies. While this year there will also be a Christmas Spiced Fruit Loaf on offer for breakfast on the big day itself. Filling the house with scents of Christmas spice, as it is sliced and toasted.

FF Spiced Christmas Fruit Loaf
Christmas Spiced Fruit Loaf delicious toasted for breakfast.

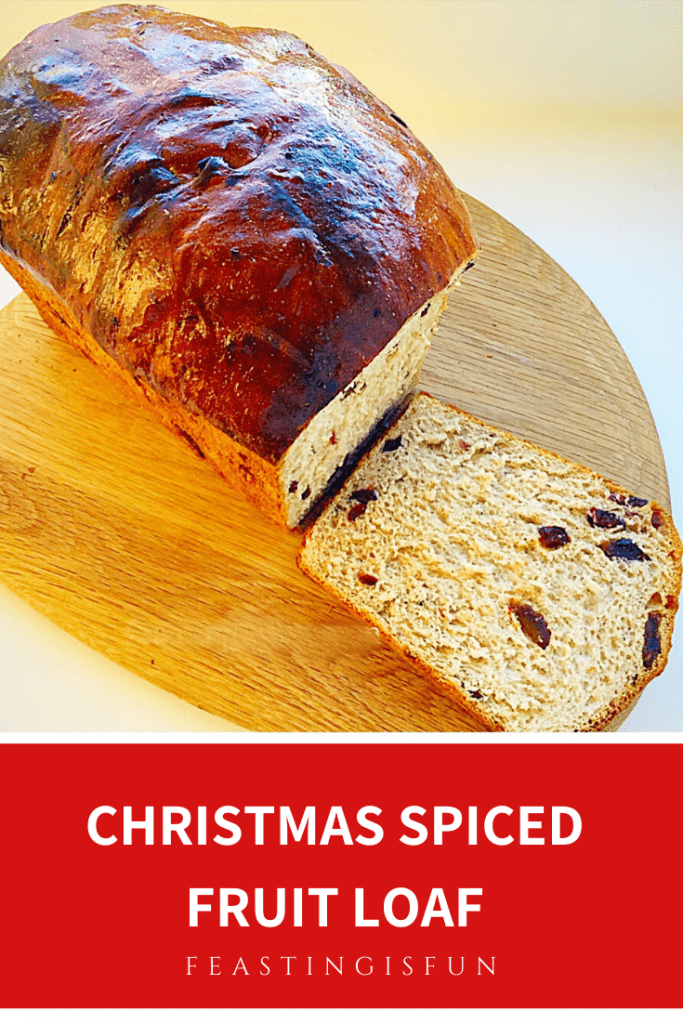
Packed full of dried fruits including dates, cherries and cranberries, in a brioche style loaf. While the added milk, eggs and butter used in a Brioche give it a wonderfully soft crumb. Delicious eating sliced as is, or toasted and slathered in butter, this loaf really does smell and taste of Christmas.

Creating a flavour packed sweet bread loaf

Most importantly use the best quality ingredients such as the Medjool Dates from The Medjool Date Company, certainly enhances the taste of this loaf. While sweeter than my Spiced Fruit Loaf, it does not hold back on the Christmas spices of Cinnamon, Ginger, Nutmeg and Allspice. Resulting in the most amazing aroma, filling the kitchen and then the house, as this beautifully bronzed loaf bakes.

FF Christmas Spiced Fruit Loaf
Christmas Spiced Fruit Loaf perfect with a cup of tea mid afternoon.

Baked in the British Bakeware, 3lb Farmhouse Loaf Tin, this fruited bread never sticks. And the deep sides of the tin ensure the dough is supported as it rises. Resulting in an evely risen loaf, without a muffin top. And the advantage is a great shaped loaf that is easy to slice and fit in the toaster. Also, this loaf tin has become a treasured piece of kitchen bakeware.

Recipe: Christmas Spiced Fruit Loaf

2 Large Free Range Eggs

Approx 320mls Whole Milk – to make volume to 350mls when added to eggs

1tsp Caster Sugar

7g Easy Bake Dried Yeast – I use Allinson in the green container/sachets

500g/1lb 2oz Strong White Flour

50g/2oz Unsalted Butter – at room temperature and cut into cubes plus extra for greasing the loaf tin

7g Salt – I use Maldon

1tsp Vanilla Bean Paste – I use Nielsen-Massey

2tsp Ground Cinnamon

1tsp Ground Ginger

1tsp Freshly Grated Nutmeg

1/2tsp Ground Allspice

100g/4oz Medjool Dates – I like The Medjool Date Co.

100g/4oz Dried Cranberries

50g/2oz Glacé Cherries

1 Egg whisked with a teaspoon of water for the egg wash

Method:

A stand mixer was used to make and knead the dough for this loaf. You may choose to make this by hand, however, the dough is incredibly sticky. So using a mixer is recommended.

Making the Christmas spiced fruit dough

  • First of all, measure 320mls of milk into a microwaveable jug. Zap on full power for 20 seconds. Stir and check the temperature, it should be the same as body temperature.
  • Into the slightly warmed (not fridge cold) milk add 2 whole eggs. The volume should be 350mls. Tip away any small excess of milk.
  • Pour the milk and eggs into the large bowl of a stand mixer.
  • Next add the sugar and yeast. Stir with a sooon to break up the eggs and mix the ingredients.
  • Now add the flour, on top of the liquid ingredients. This forms a barrier so that the yeast does not come into direct contact with the next addition, salt.
  • Add the salt and cubes of butter.
  • Fit a dough hook to the stand mixer and mix on a slow speed for 10 minutes.
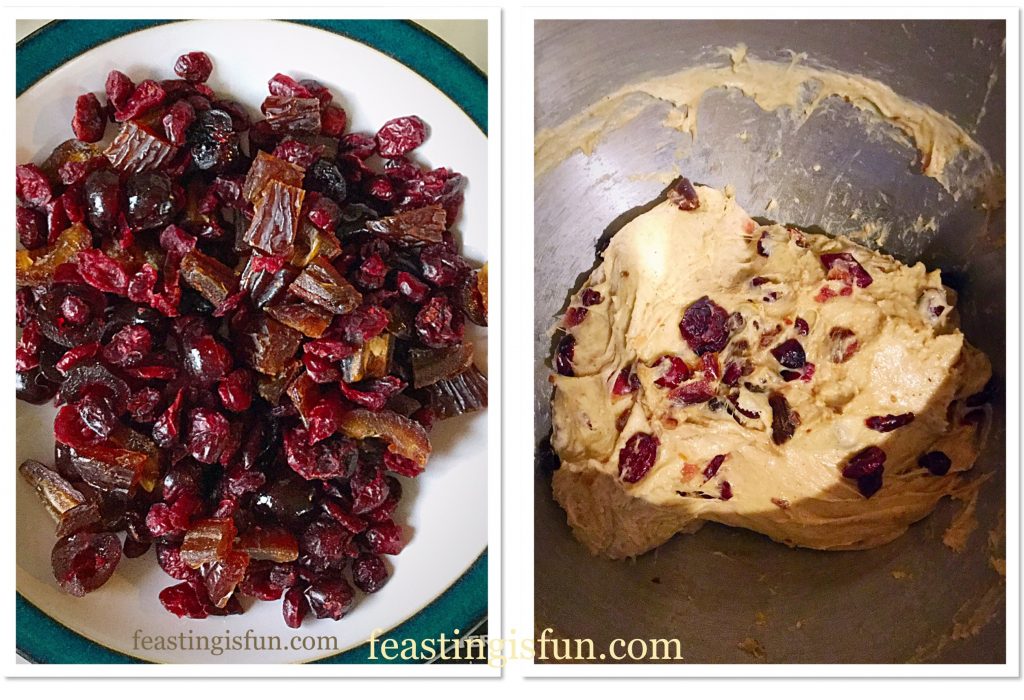
  • While the dough is mixing prepare the fruit; remove stones from the dates and cut in half, cut each half into four pieces. Next cut each glacé cherry into quarters. Place the cranberries, cherries and dates in a bowl together.
  • After 10 minutes of mixing, stop the mixer and lift the dough hook. Remove a small piece of dough and stretch it. The dough is properly kneaded when it can stretch, without tearing, thinly enough to see light through it. This is called the windowpane test. If the dough tears, lower the dough hook and continue mixing for a further 2 minutes, after which test it again.

Adding fruit and spices to the dough

  • As soon as the dough passes the windowpane test, add the fruit and spices.
  • Lower the dough hook and mix again on low speed for a further 2 minutes.
  • After the fruit is incorporated stop the mixer and lift the dough hook.
  • Use clean fingers to scrape the dough from the hook and place it in the bowl.
FF Christmas Spiced Fruit Loaf
The prepared fruit and dough ready for it’s first prove.
  • Cover the bowl with a clean tea towel and place it somewhere warm and away from draughts.
  • Now leave the dough to double in size.
  • NOTE: The presence of spices will slow down the action of the yeast. Therefore, the dough may take longer, up to 2 hours or more, to double in size.

Shaping the dough and proving for a second time

  • While the dough is proving thoroughly grease a 3lb deep farmhouse loaf tin with butter.
  • When the dough has at least doubled in size, scrape it out on to a lightly floured surface.
  • Press the dough into a rough rectangular shape. Now fold the bottom third up and then fold the top third down, so that it slightly overlaps the previous fold.
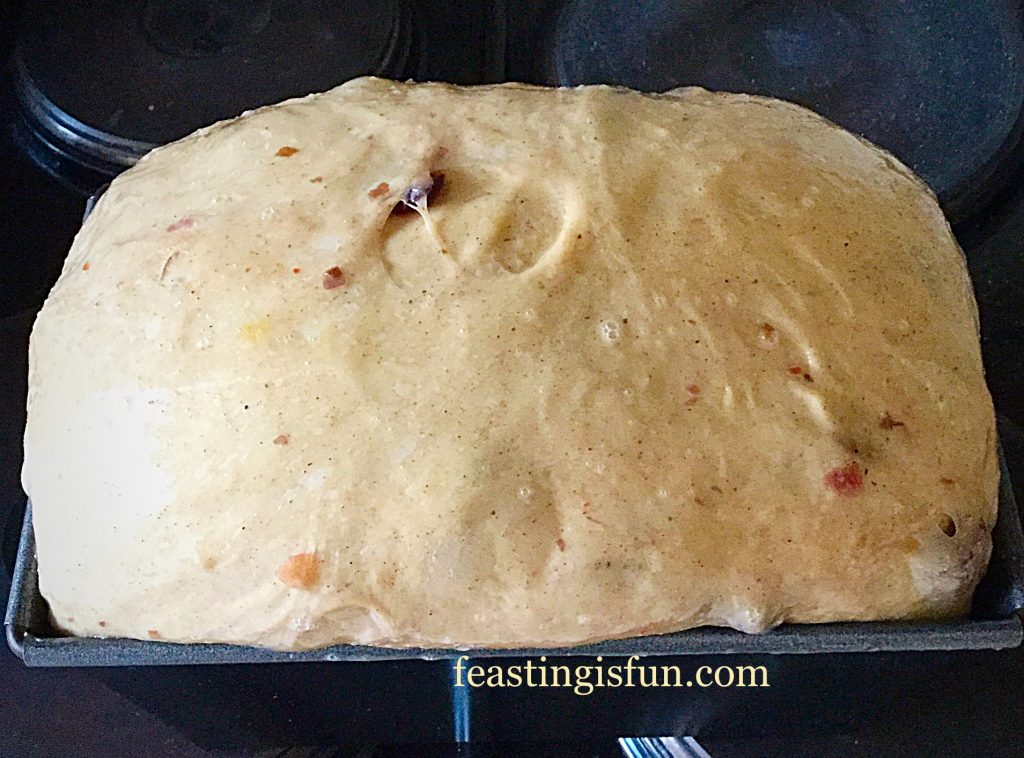
  • Finally, tuck either end under, so that you have an oval-ish shape. Place the shaped dough into the buttered loaf tin. Cover with the same tea towel as before and leave, as before until doubled in size.
  • While the dough is proving preheat the oven to 220/200fan, gas mark 7, 425F.
  • As soon as the dough has doubled in size, remove the tea towel. Using a pastry brush lightly brush over the egg wash.

Baking the Christmas Spiced Fruit Loaf

FF Christmas Spiced Fruit Loaf
Christmas Spiced Fruit Loaf ready for the oven.
  • Now place the loaf carefully into the centre of the preheated oven. Bake for 10 minutes before reducing the oven heat to 200C/180C fan, gas mark 6, 400F.
  • Continue baking for a further 20 minutes and then remove the loaf from the oven.
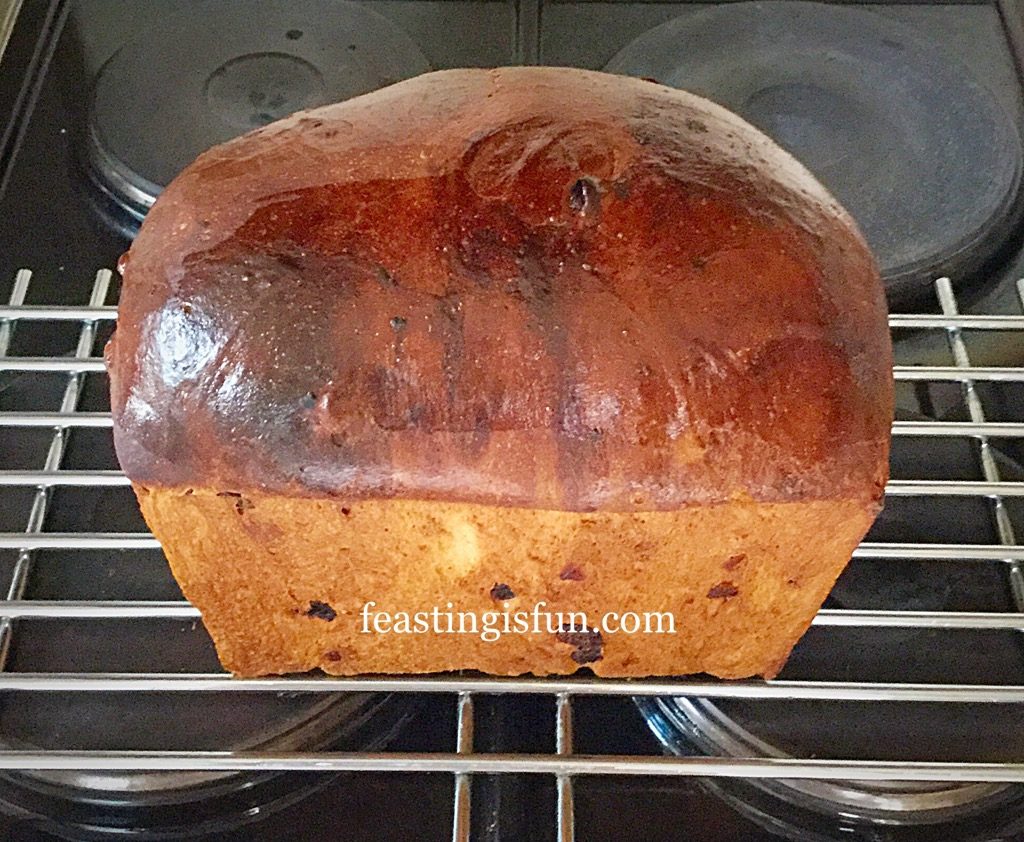
  • Turn the loaf out on to a cooling rack. Rap the base of the loaf with your knuckle. The bread is baked if the rapping produces a hollow sound. If not, place the loaf, on its side back in the oven and check every 5 minutes until it is fully baked.
FF Christmas Spiced Fruit Loaf
Christmas Spiced Fruit Loaf fresh from the oven.

Allow the Christmas Spiced Fruit Loaf to fully cool before slicing.

This fruited loaf will last for 3 days in a proper bread bin. Serve sliced, as is, or slice and toast for a delicious, fruit and spice filled breakfast.

Enriched festive bread filled with dried vine fruits and Christmas spices.

If you have enjoyed this recipe for Christmas Spiced Fruit Loaf you may also like these:

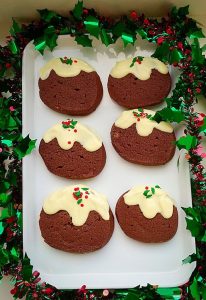
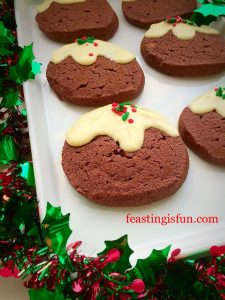
Chocolate Christmas Pudding Cookies 

FF Christmas Spiced Fruit Loaf
Chocolate Christmas Pudding Cookies

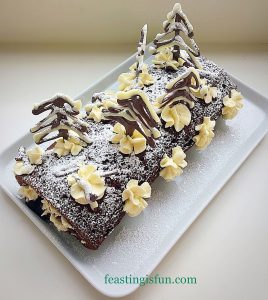
Snowy Black Forest Roulade 

FF Spiced Christmas Fruit Loaf
Snowy Black Forest Roulade – with GLUTEN FREE option.

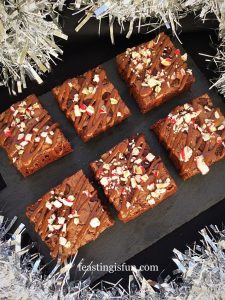
Peppermint Candy Cane Topped Brownies

FF Spiced Christmas Fruit Loaf
Peppermint Candy Cane Topped Brownies


Since you are setting the stand mixer up to make this fruited loaf, why not double up the ingredients and make two loaves? Sharing is inherently part of Christmas. I can think of no better reason, than to give one loaf away. Surely anyone would be happy to receive the gift of a freshly baked, Christmas Spiced Fruit Loaf!

So, whatever you are making, baking and creating in your kitchens, have fun and remember food always tastes better when it’s shared.

Sammie xx

No part of this post may be reproduced or duplicated without the written permission of the owner. Please see my Disclosure Policy.

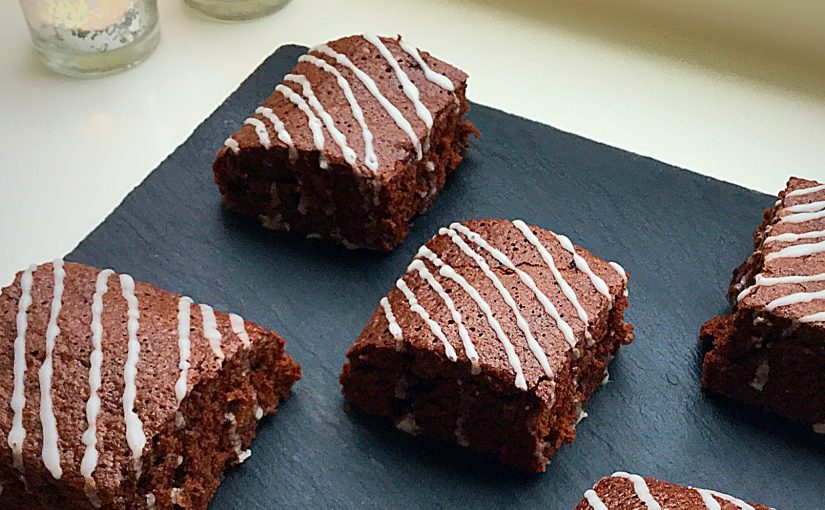
Dark Chocolate Ginger Brownies

Baby it’s cold outside! The second of two storms is currently battering the southern half of the British Isles. While gale force winds and squally showers are battering outside, baking makes indoors warm and cosy. Especially when the aroma of these Dark Chocolate Ginger Brownies escapes from the oven. A brilliant and tasty way to warm up the day.

FF Dark Chocolate Ginger Brownies
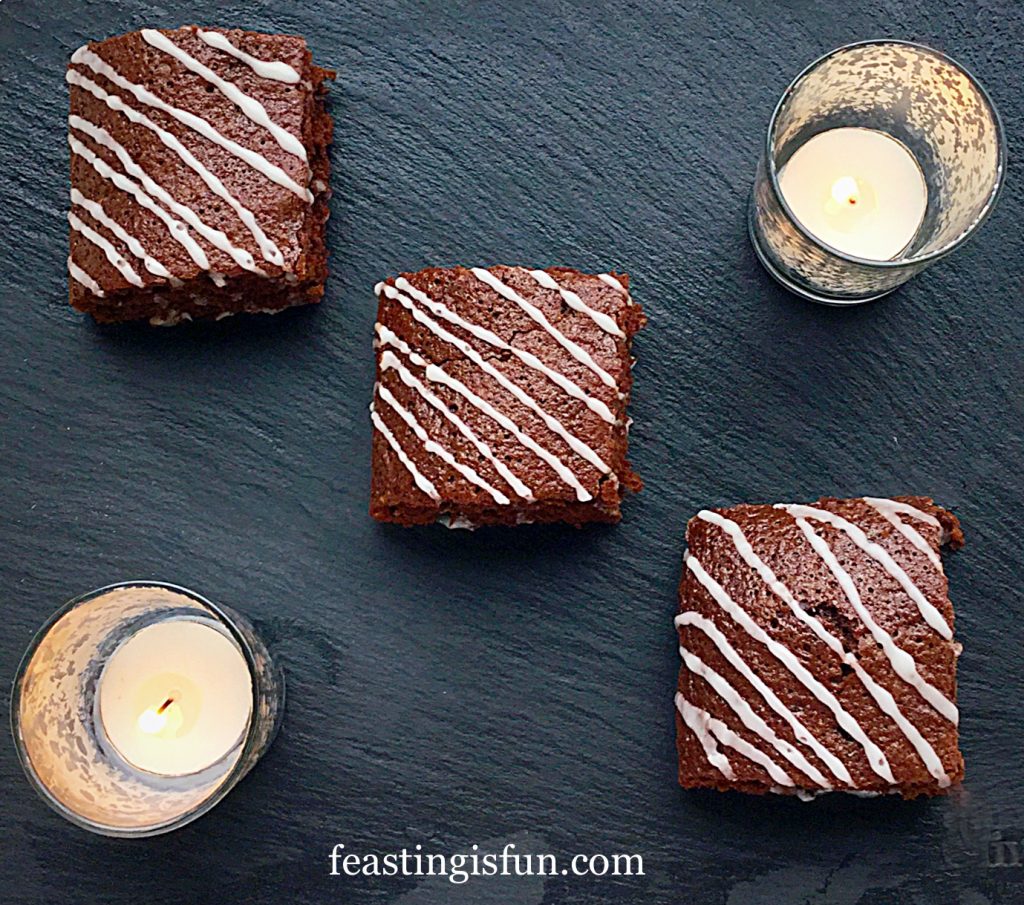
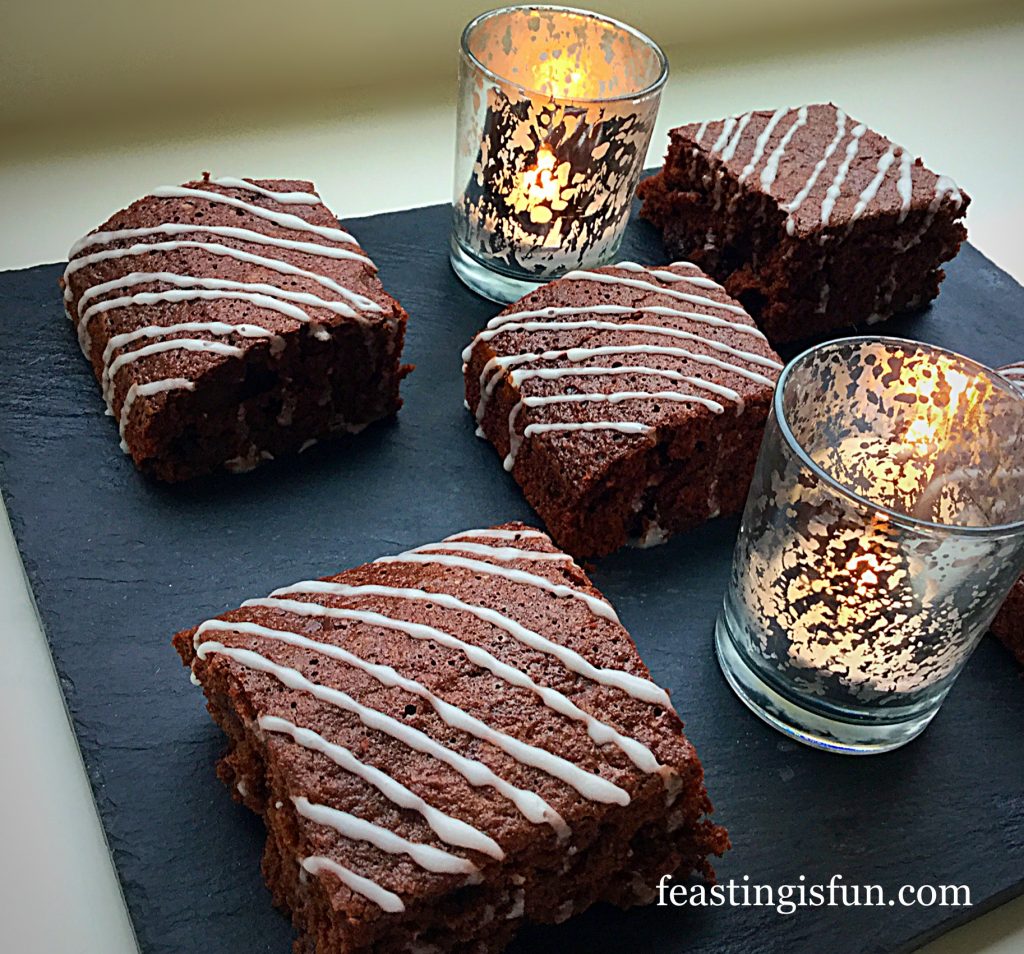
Dark Chocolate Ginger Brownies a deliciously warming treat.

Since discovering Sugar and Crumbs gingerbread flavour icing sugar, I have become a little obsessed with all things ginger flavoured. Wanting to create a winter spiced brownie, I decided to substitute the flavoured icing sugar for some of the treacly dark sugar in the recipe. Having been sent some Dark Chocolate Ginger Thins from Beech’s Chocolates, to try, I couldn’t resist adding some to the brownie batter. Resulting in a deep, dark chocolate brownie with a background warmth from the gingerbread sugar and nuggets of ginger chocolate studded throughout.

FF Dark Chocolate Ginger Brownies
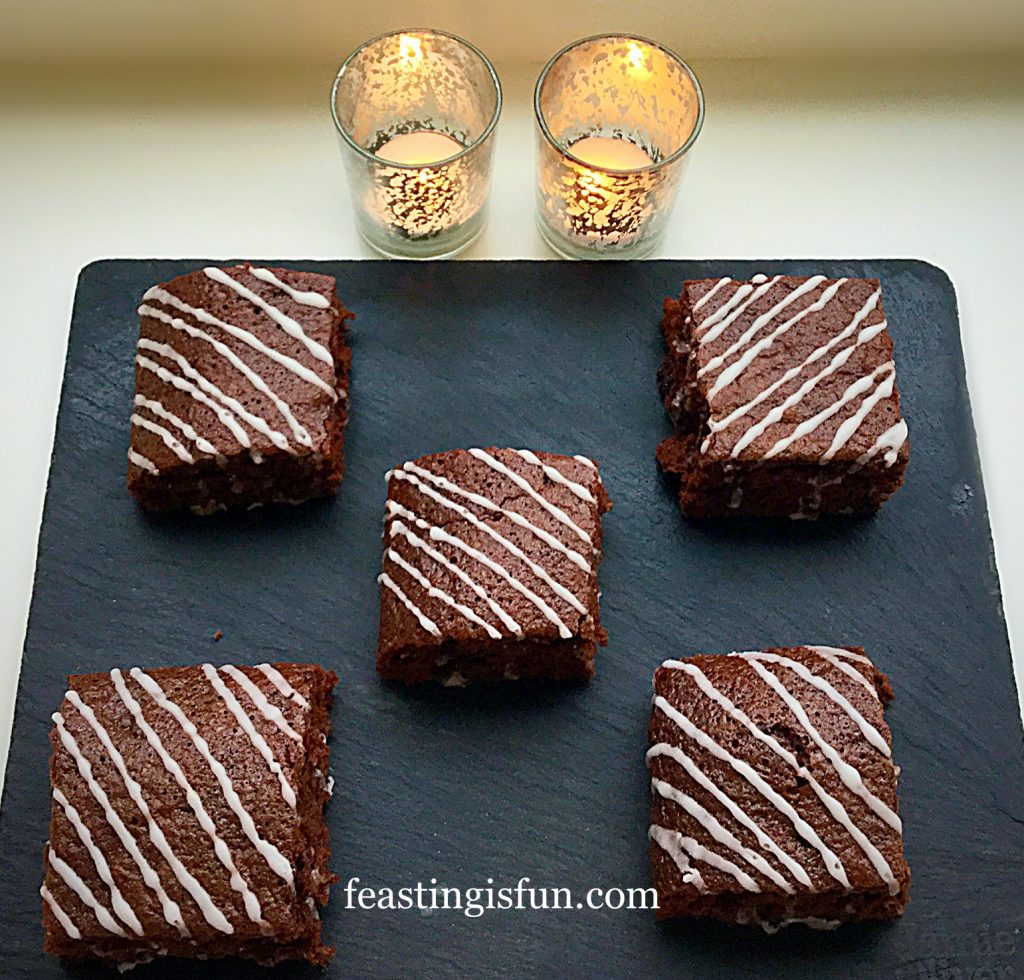
Dark Chocolate Ginger Brownies perfect for sharing.

While not as dense, or fudgey as regular gingerbread and brownies, these squares are perfect as they are. Bordering on cake-like, yet not light and fluffy, these squares tick all the boxes. Sweet, but not overly so. Chocolatey, yet not cloying. Warming, without being overwhelming. Perfectly balanced flavours that satisfy with every bite.

FF Dark Chocolate Ginger Brownies

    Dark Chocolate Ginger Brownies a delicious comforting treat.

So easy to make and bake, these brownies also make a delicious edible gift. Ensure the icing is set, then pop a few into a pretty tin, or cellophane bag tied with ribbon. All food tastes better when shared. Homemade treats have the extra luxury of love mixed into them. Now that is something that cannot be bought!

Recipe: Dark Chocolate Ginger Brownies makes 15

150g/5oz Unsalted Butter

225g/8oz Dark Brown Muscavado Sugar

50g/2oz Gingerbread Icing Sugar available from Sugar and Crumbs see *note

1/8tsp Salt – I use Maldon

50g/2oz Cocoa Powder – I use Callebaut

150g/5oz Plain White Flour

1/2tsp Sodium Bicarbonate

4 Large Free Range Eggs

1tsp Vanilla Extract – I use Nielsen-Massey

100g/4oz Dark Chocolate Ginger Thins – available from Beech’s Fine Chocolates

*note – if flavoured icing sugar is unavailable use 275g/10oz of D/B Muscavado sugar and add 2tsp of ground ginger to the sieved flour.

For the icing:

100g/4oz Gingerbread Flavour Icing Sugar – if not available use plain icing sugar.

Method: Preheat the oven to 180C/160C fan, gas mark 4

You will need a 28cm x 20cm x 5cm (12″ x 8″ x “2) traybake tin lined with aluminium foil.

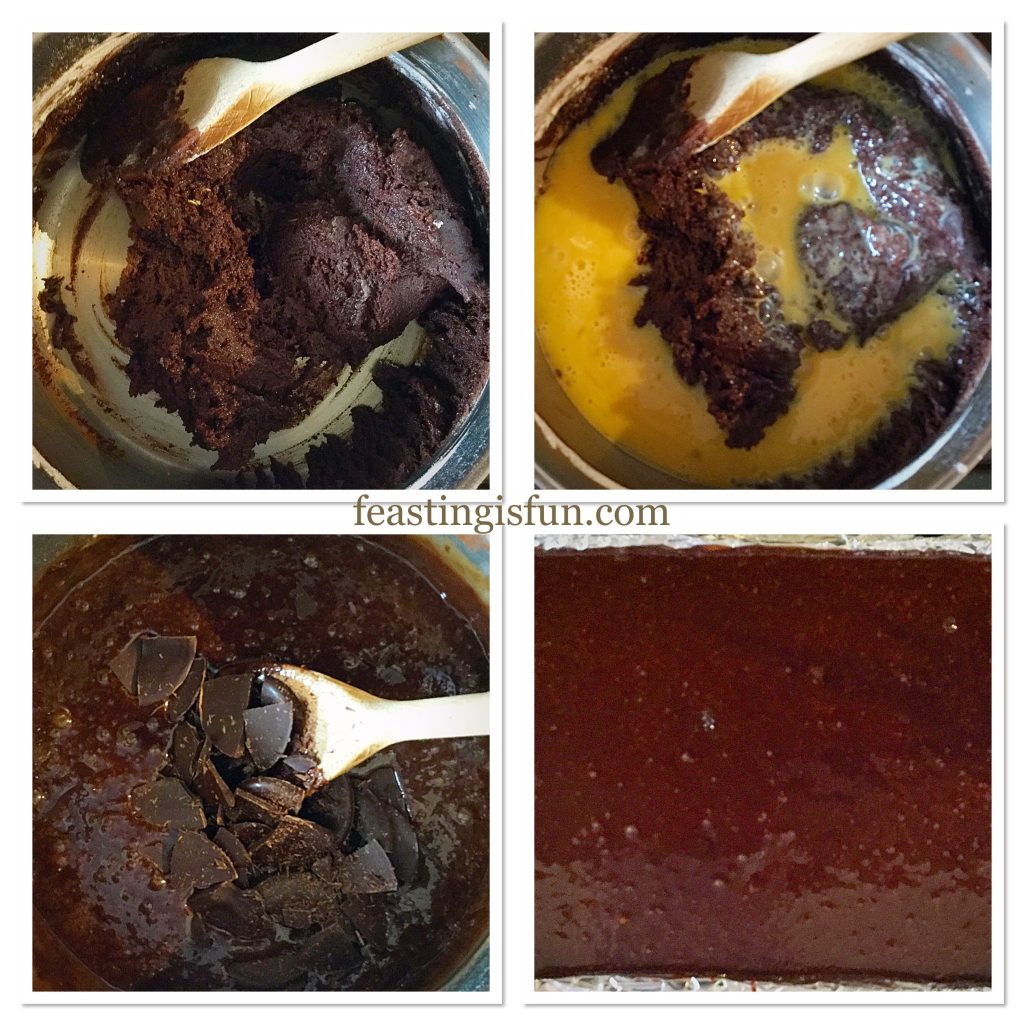
  • First add the butter, both types of sugar and salt to a heavy bottomed large saucepan. Place over a medium heat and stir constantly until the butter is melted.
  • Take the pan off the heat and add the cocoa powder, stirring until it is thoroughly combined. Set the saucepan to one side to cool slightly.
  • While the pan is cooling, crack the eggs into a jug, add the vanilla extract and whisk lightly to combine – liquid ingredients.
  • Next sift the flour and sodium bicarb. into the saucepan. Stir to combine. The mixture will be quite stiff, that is normal.
  • Now pour the liquid ingredients into the saucepan and stir thoroughly until the brownie batter is thoroughly combined.
  • Roughly chop the ginger chocolate and add to the saucepan. Stir a couple of times to distribute evenly.
  • Finally pour the brownie batter into the prepared tin. Give the tin a couple of sharp raps against the work top. This will bring any bubbles to the surface.
FF Dark Chocolate Ginger Brownies
Making the brownie batter and filling the tin.
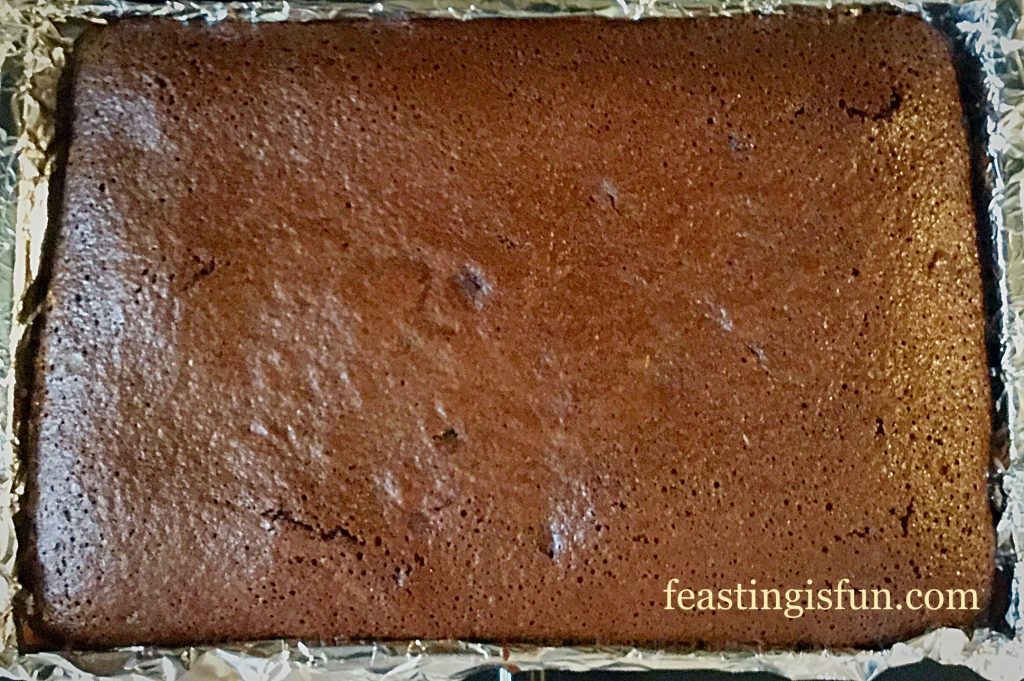
  • Place the tin in the centre of the oven and bake for 20-25 minutes. Halfway through the baking time, open the oven door and rap the tin against the shelf. This really helps to stop the brownies becoming too airy and cake-like.
  • The brownies are baked when the top is set and there is not hint of wobble in the centre.
  • Once baked, remove the tin from the oven and allow the brownies to completely cool in the tin.
FF Dark Chocolate Ginger Brownies
Dark Chocolate Ginger Brownies baked and cooling in the tin.
  • While the brownies are cooling, make the gingerbread icing.
  • First, sift the icing sugar into a medium sized bowl, then add a teaspoon of water. Stir, adding extra water, drop by drop, until you have a thick, drizzling consistency.
  • Spoon the icing into a small piping bag. Alternatively, cover the bowl with cling film and you can use a spoon to drizzle the icing.
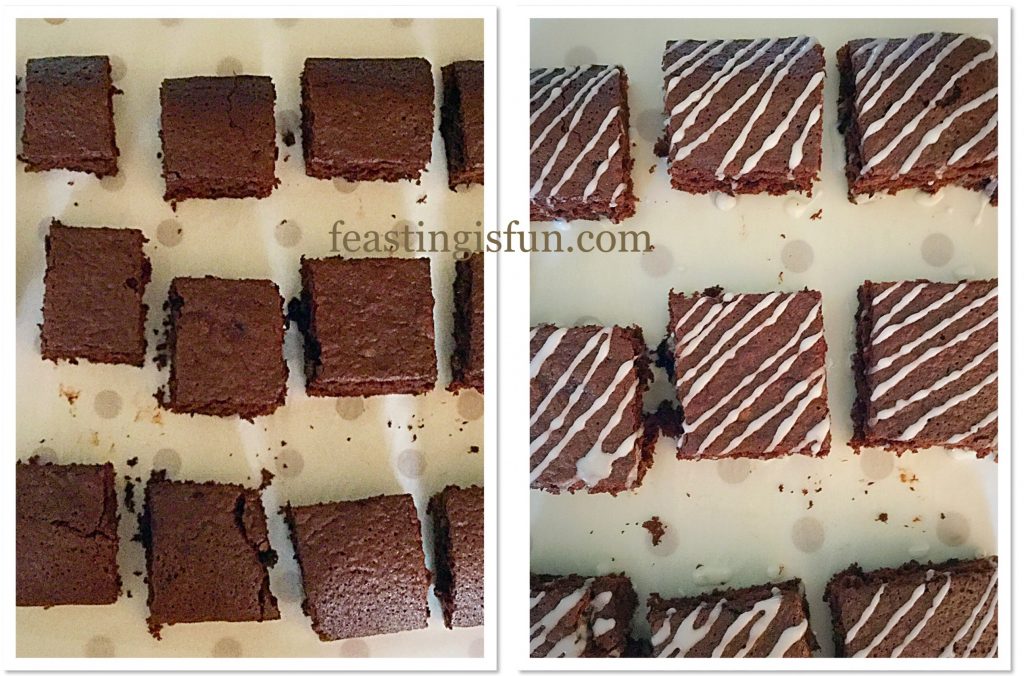
  • When the brownies are completely cooled, lift the entire slab from the tin, using the foil to help. Peel the foil carefully away from the baked brownie and place on to a large piece of baking parchment. Now cut the brownie into 15 equal sized squares. First cutting across the width, diving into 3 and then cutting across at 5 equal intervals to create 15 individual brownie squares. Spread the squares out so that each one can be iced individually.
  • Next, snip the end from your piping bag to leave a very small hole. Pipe diagonal lines across each brownie, or lightly drizzle the icing using a teaspoon.
FF Dark Chocolate Ginger Brownies
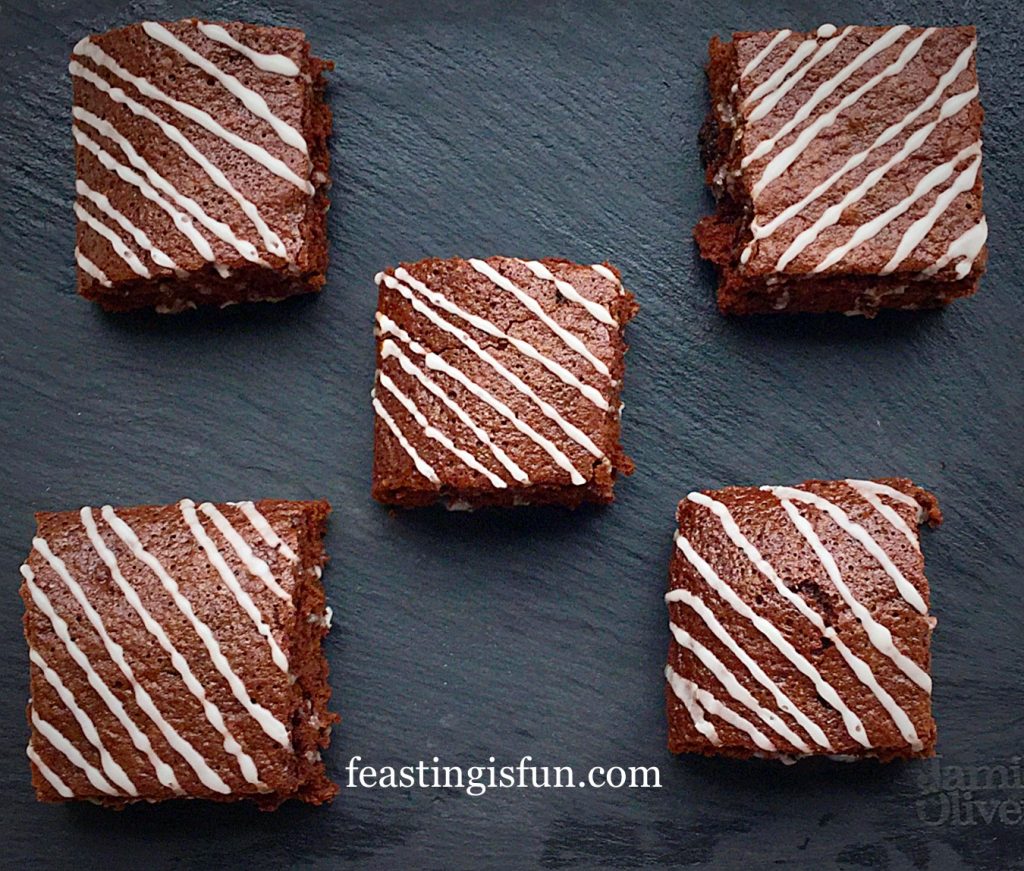
Dark Chocolate Ginger Brownies finished with piped icing.

Leave the icing to set before serving, or storing in an airtight container for up to 5 days.

FF Dark Chocolate Ginger Brownies
Dark Chocolate Ginger Brownies the piped icing gives them a professional finish.

These Brownies are delicious served just as they are, with a hot drink and a smile. However, if you really want to turn them into a fantastic dessert, warm briefly (10 seconds in the microwave) and serve with a scoop of you favourite ice cream!

If you have enjoyed these Dark Chocolate Ginger Brownies then you may like these too:

Chocolate Christmas Pudding Cookies

FF Dark Chocolate Ginger Brownies
Chocolate Christmas Pudding Cookies

Gingerbread Frosted Ginger Christmas Cupcakes

FF Dark Chocolate Ginger Brownies
Gingerbread Frosted Ginger Christmas Cupcakes

Chocolate Sparkle Cake

FF Dark Chocolate Ginger Brownies
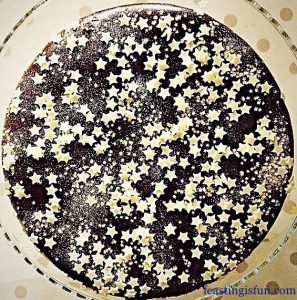
Chocolate Sparkle Cake

Whether you bake these Dark Chocolate Ginger Brownies as a treat for yourself and you family, or to take into school or work to share with friends, they are sure to be a big hit. Homemade bakes taste infinitely better, unless you live close to a great bakery. Sharing our bakes shows others that they are valued in our lives. Regardless of their situation, someone has thought of them. I personally, cannot think of a better reason to get in the kitchen and bake!

Whatever you are creating, making and baking in your kitchen, have fun and remember to stir some extra love in.

Sammie xx

Beech’s Chocolates sent me the dark chocolate ginger thins to try. This is not a sponsored post. All opinions, views, photographs and content are my own. Please see my Disclosure Policy.
 

Gingerbread Frosted Ginger Christmas Cupcakes

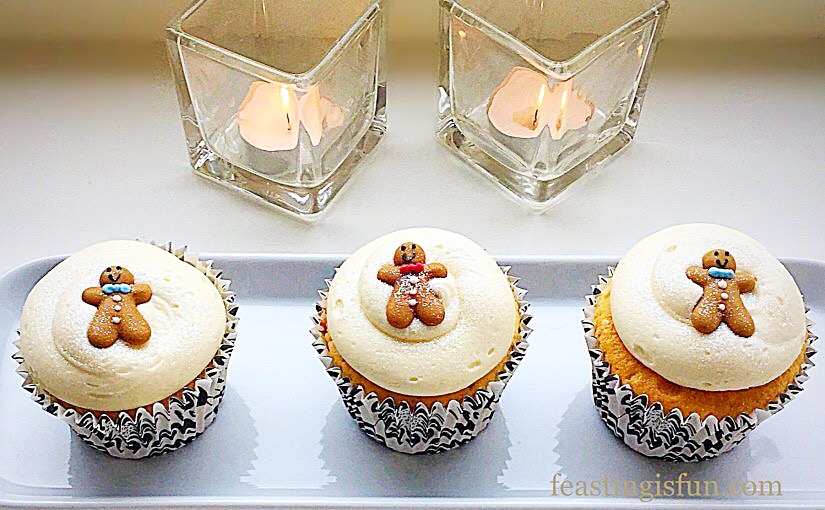
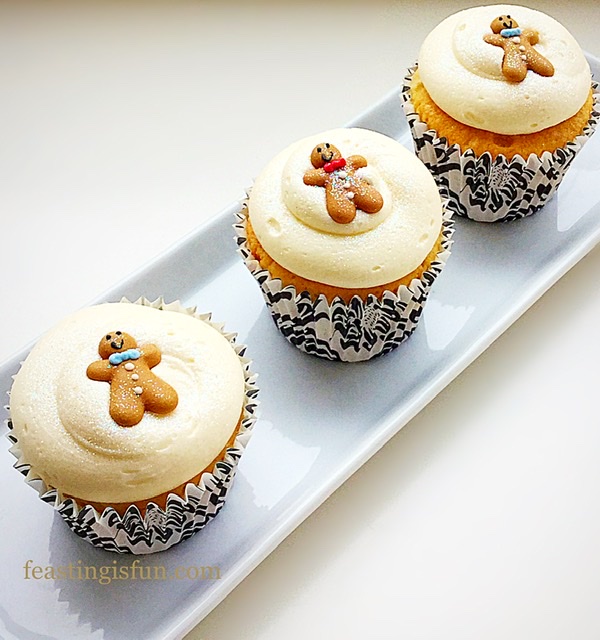
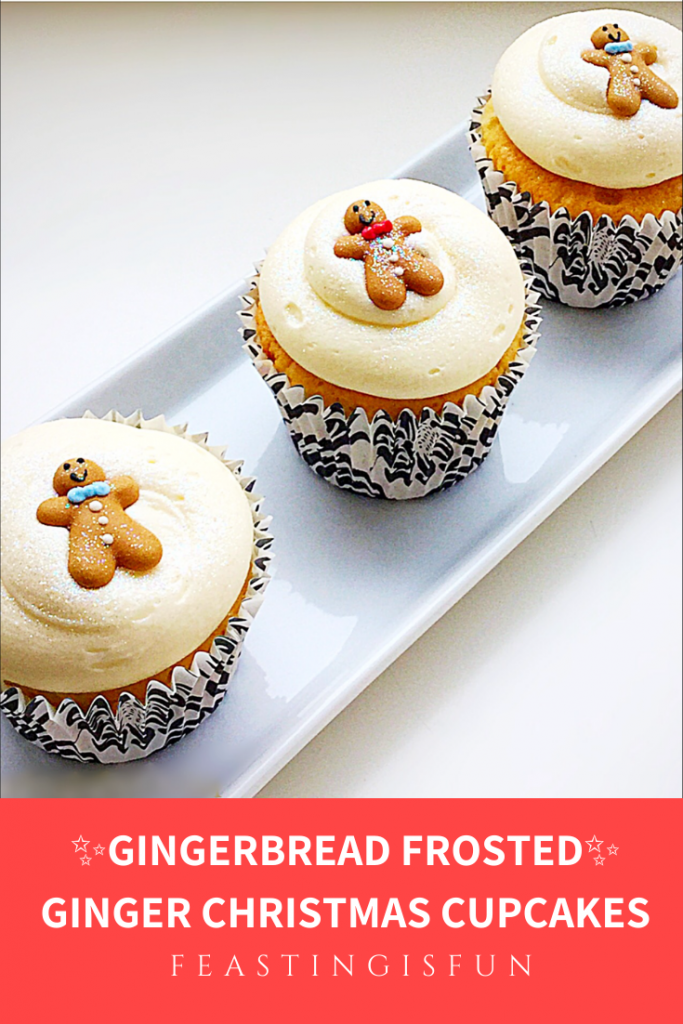
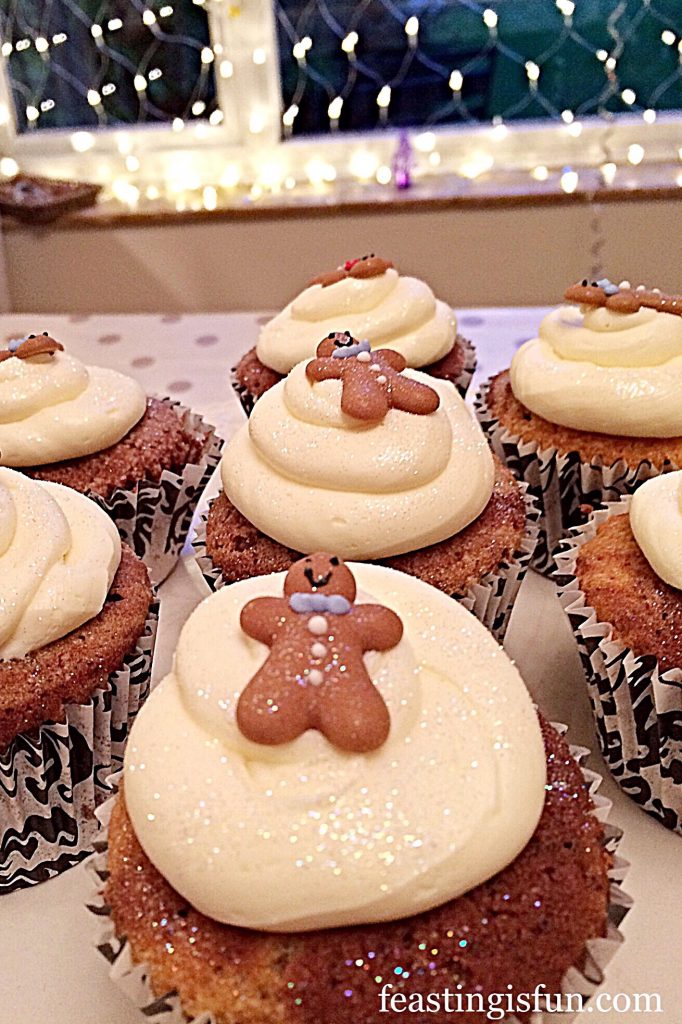
Happy holidays to all of my lovely readers of Feasting Is Fun. Today’s recipe for Gingerbread Frosted Ginger Christmas Cupcakes topped with mini gingerbread men, I hope will excite you and add some festive cheer to your day.

FF Gingerbread Frosted Ginger Christmas Cupcakes

Is anyone else else excited about Christmas? For me a large part of the fun of Christmas is in the build up. Getting the children to write Christmas lists, putting up decorations and ordering our turkey and ham from Graig Farm. Finally making the Christmas cake, yet knowing it can’t be eaten until Christmas Day is always hard on certain members of the family. So, I baked these Gingerbread Frosted Ginger Christmas Cupcakes. Perfect festive sweet treats to enjoy, during the build up to the big day!

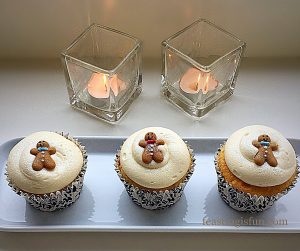
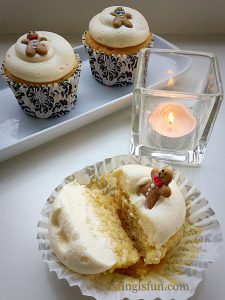
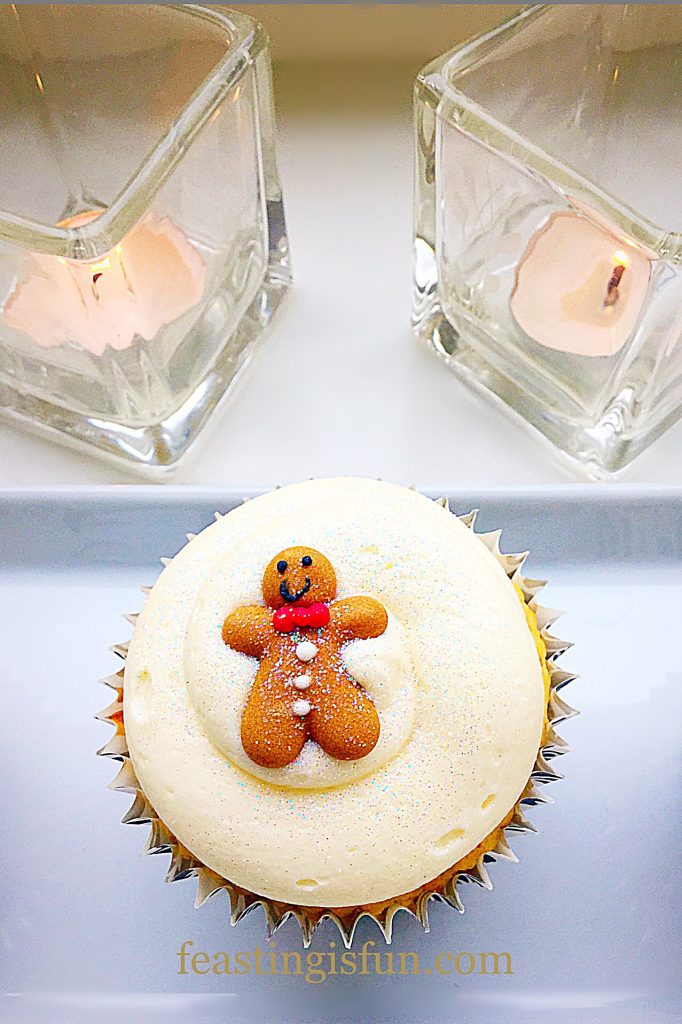
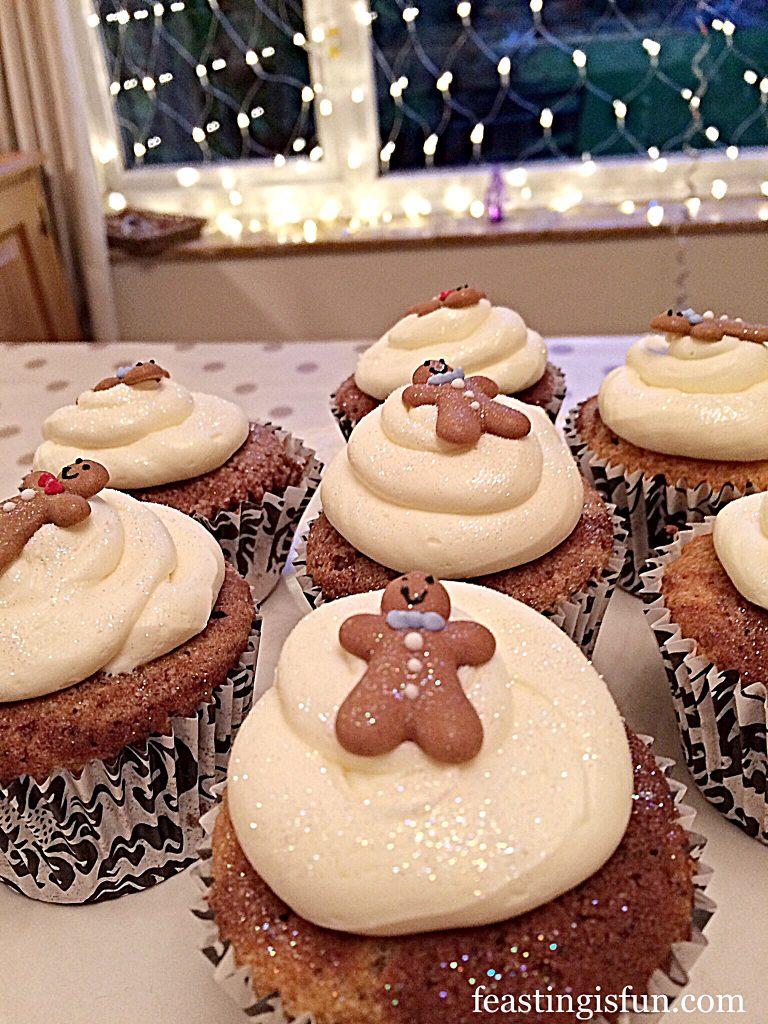
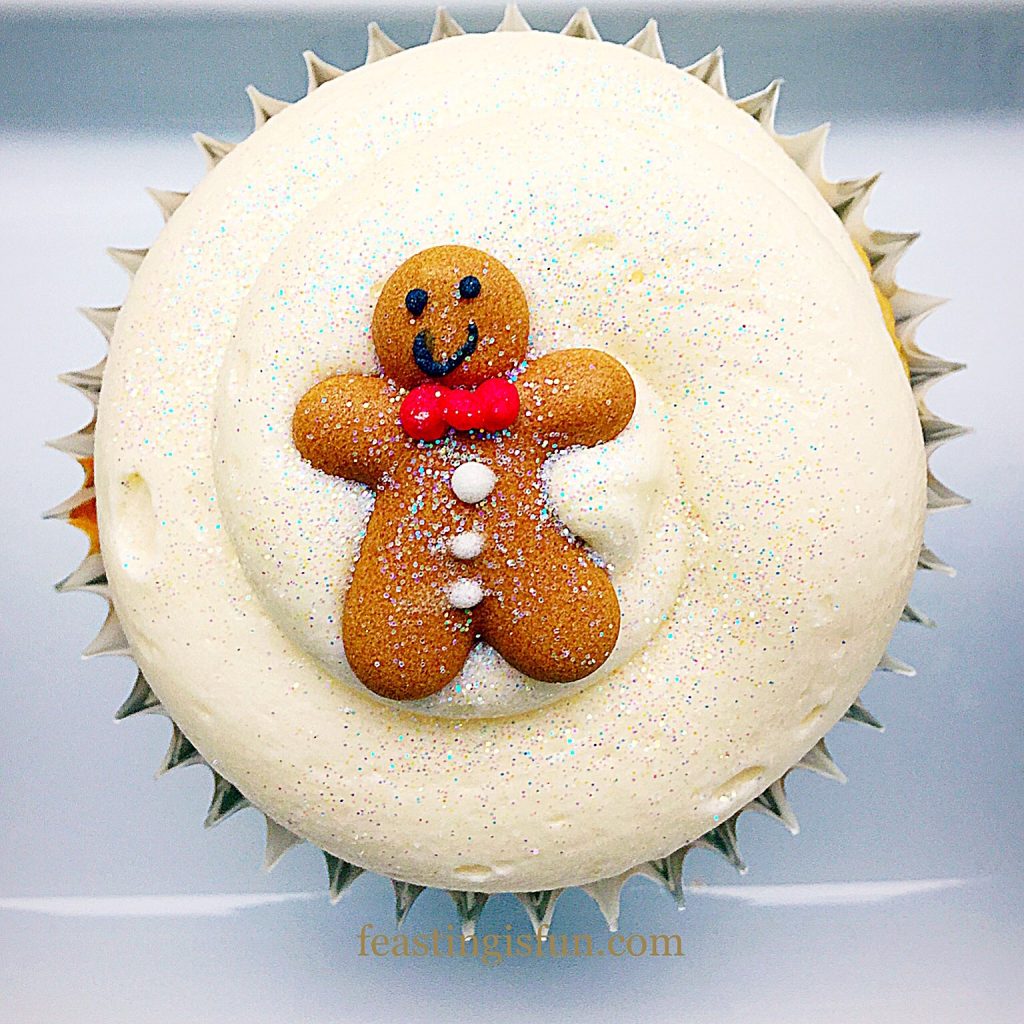
Single, individual spiced sponge with miniature festive person on to of the icing.

Warning, the frosting on these cupcakes is truly addictive! Because it really, REALLY, tastes of gingerbread and once you’ve tasted it I can guarantee that you will want more. And so, in order to provide balance, the cupcake itself is only lightly spiced with ginger. The final combination of both cake and frosting is absolutely perfect. Warming, sweet and not heavy, these really are the perfect festive, sweet treat.

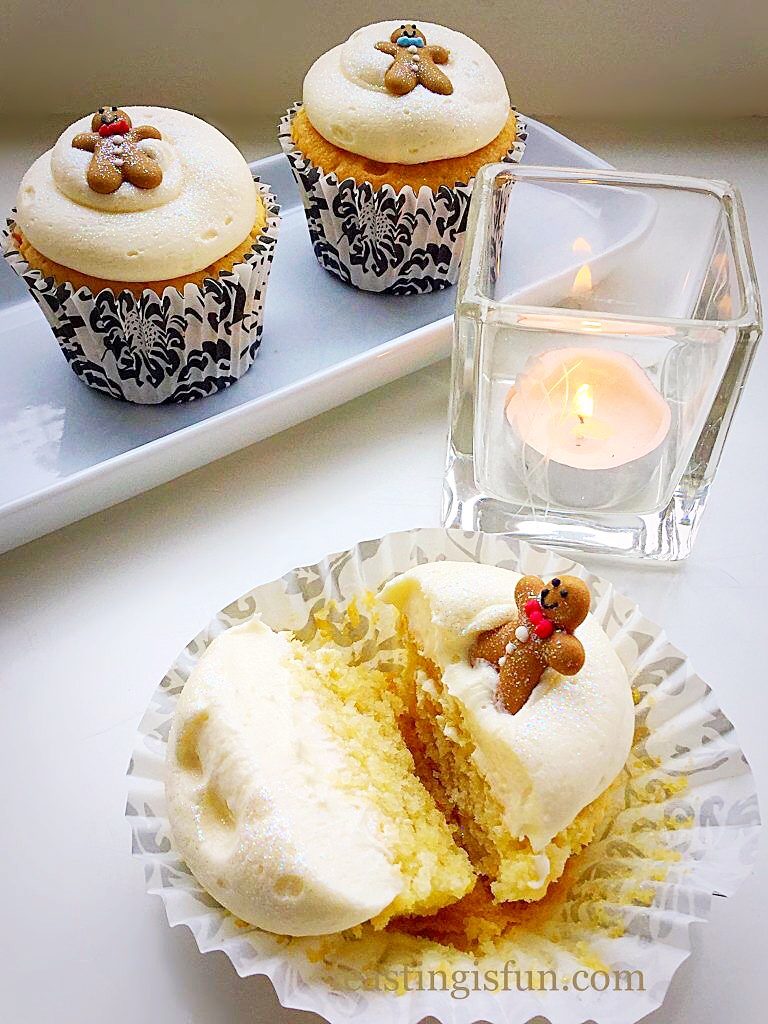
A single small, spiced, festive individual cake with two candles alight behind it.
Gingerbread Frosted Ginger Christmas Cupcakes

Because these cupcakes are so yummy, they disappear very quickly. Always a good sign when everyone in the family absolutely loves them. And I have a feeling that making these may well become a Christmas tradition like so many other things have, in our home.

Christmas Traditions

Traditions include, decorations going up on December 1st, making mince pies then giving them to our neighbours whilst carol singing and cooking the ham on Christmas Eve. Also, tracking Santa Claus’ schedule, whilst munching on cheese straws and playing cards, have all become Christmas traditions. Each as important as putting out a drink, mince pie and carrot, before bed, on the night before Christmas.

Three festive spiced individual sponges topped with spiced whipped buttercream and a little man.
Gingerbread Frosted Ginger Christmas Cupcakes

Each of the traditions has crept upon us, unplanned. If something has been done two years in a row, the children automatically dictate that it is now a tradition. So, this year, I think I will make some Gingerbread Frosted Ginger Christmas Cupcakes to hand out whilst carol singing, alongside the warm mince pies. We are blessed to call our neighbours friends, so sharing homemade goodies with them, whilst they listen to our singing is always fun!

Do you have family traditions at Christmas? I’d love to hear about them.

Recipe: Gingerbread Frosted Ginger Christmas Cupcakes makes 12

For the cupcakes:

175g/6oz Unsalted Butter softened

175g/6oz Caster Sugar

3 Large Eggs – I use free range

1/8tsp Salt – I use Maldon

1tsp Vanilla Extract – I use Nielsen-Massey

2tsp Baking Powder

175g/6oz Plain White Flour

1tsp Ground Ginger

For the frosting:

500g/1lb 2oz Gingerbread Natural Flavoured Icing Sugar from Sugar and Crumbs

alternatively use the same quantity regular icing sugar (confectioners sugar) and add 2tsp of ground ginger

250g/9oz Unsalted Butter softened

2tbsp Very Hot Water

Mini Gingerbread Men (made by Culpitt and White Edible Glitter to decorate both available online from Amazon.

Preheat the oven to 160C/140C fan, gas mark 3, 325F.

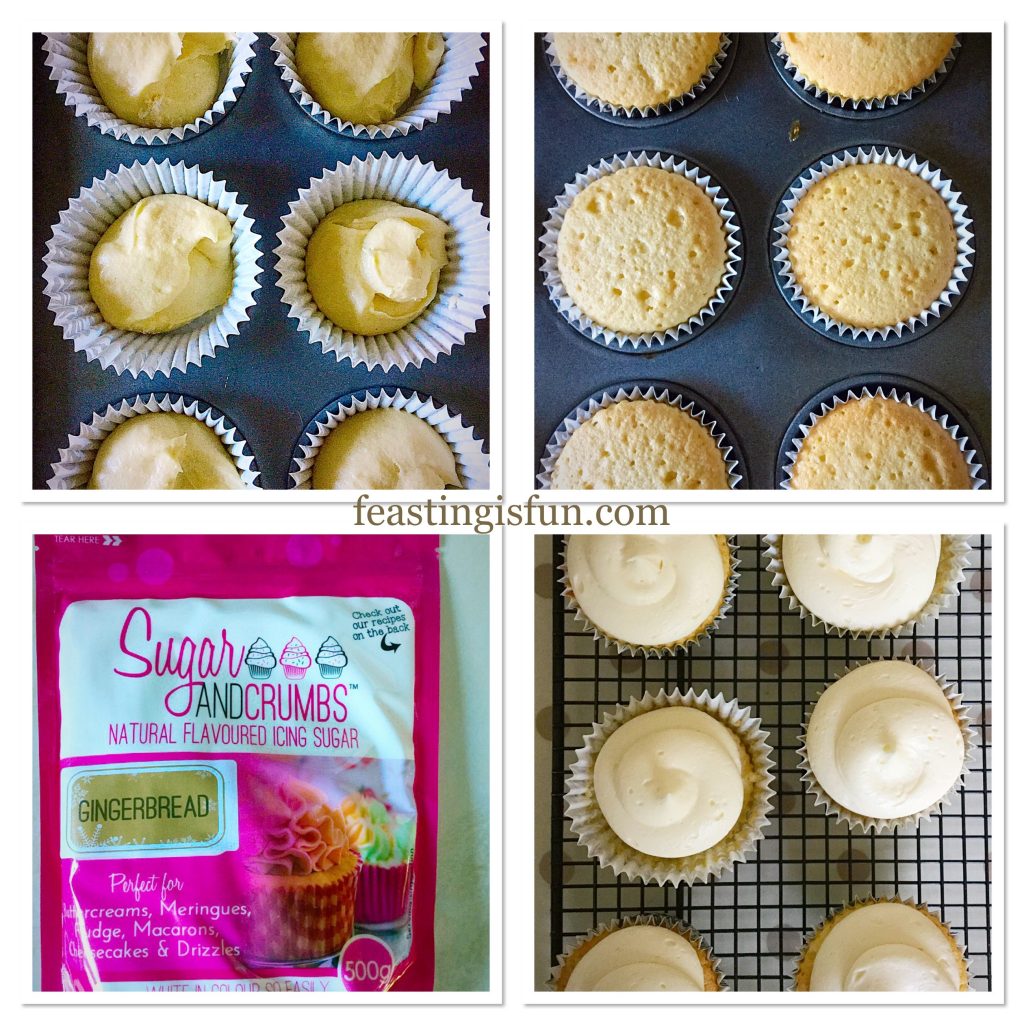
Making and baking the cupcakes:

  • First of all, line a cupcake tin with 12 deep cupcake/muffin cases
  • Next, in a large bowl add the butter, sugar and salt. Whisk, gradually increasing the speed, until pale and creamy.
  • Now add the vanilla extract and whisk until fully incorporated.
  • Into the bowl add the eggs and sift in the flour, baking powder and ground ginger. Then mix together until just combined. Over mixing can result in a tough, not light and airy, cupcake.
  • Spoon the cake batter into the cupcake cases, taking care to ensure that they are evenly filled.
  • Place the tin into the centre of the preheated oven and bake for 40-45 minutes. Once baked each cupcake will spring back from a light touch. The cupcakes will be soft and fairly pale, this is because they have been cooked at a low heat to ensure a flat top.
  • As soon as the cupcakes are baked from the oven. Carefully take each cupcake out of the tin and place on a cooling rack. Allow the cupcakes to cool completely before icing.

FF Gingerbread Frosted Ginger Christmas Cupcakes

Making the frosting and decorating the cupcakes:

  • So, to make the icing; place the softened butter into a large bowl and sift the icing sugar on top of it. Next add 2 tablespoons of very hot water from a recently boiled kettle. Whisk, starting on a very slow speed and gradually increasing to a high speed. Continue until the icing is very light and creamy.
  • Fit an icing bag with a Wilton round piping tip #12, or use a large disposable piping bag. Fill the bag with the whipped, gingerbread frosting. If using a disposable bag without a tip, snip off the end to leave a 7mm diameter hole – approximately.
  • Check the cupcakes to ensure they are completely cooled, then begin piping the frosting. Keeping an even pressure on the bag pipe a double swirl. One on top of the other, pressing down in the centre before pulling away at the end.
  • Continue piping until all of the cupcakes are frosted.
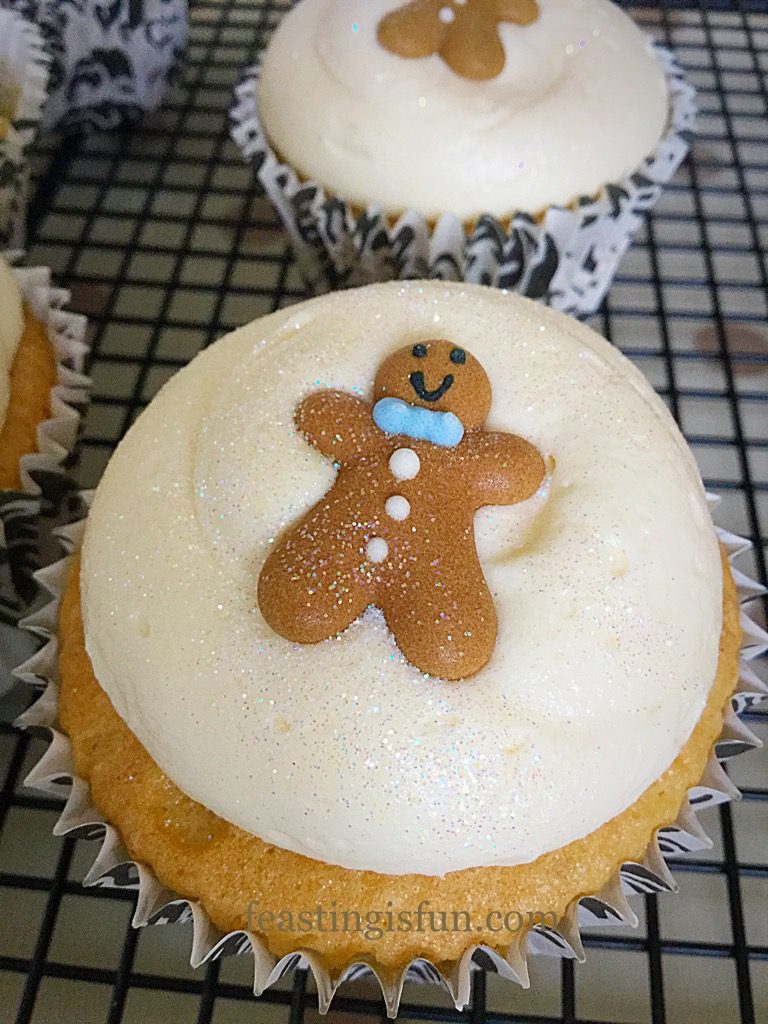
  • Place a gingerbread man or woman in the centre of the frosting.
  • Finally, finish by sprinkling each cupcake with a dusting of edible glitter.

FF Gingerbread Frosted Ginger Christmas Cupcakes

Store the cupcakes in an airtight container. They will keep for up to 4 days, however, you’ll be lucky if they last that long, unless you hide them 😉.

Individual spiced sponge cut through to show inner crumb.
Light and fluffy cupcake sponge.

Serve each cupcake with a smile.

If you have enjoyed this recipe for Gingerbread Frosted Ginger Christmas Cupcakes here are some other festive recipe you may like:

Chocolate Christmas Pudding Cookies

FF Gingerbread Frosted Ginger Christmas Cupcakes
Chocolate Christmas Pudding Cookies

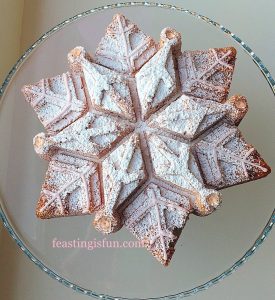
Sparkling Snowflake Cake

FF Gingerbread Frosted Ginger Christmas Cupcakes
Sparkling Snowflake Cake

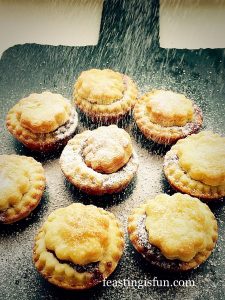
Cream Cheese Pastry Mince Pies

FF Gingerbread Frosted Ginger Christmas Cupcakes
Cream Cheese Pastry Mince Pies

While it is nice enjoying the build up to Christmas Day, the excitement of children, unexpected guests, the hope of snow, it is also important to remember the true meaning of Christmas.

A baby boy, born of a virgin mother, Emmanuel – God with us. Jesus may not have been born on December 25th, yet that is the day we choose to remember His birth. So, amongst all of the hustle and bustle surrounding Christmas, it is important to remember why we celebrate it. Please see Important Stuff for more information.

So, whatever you are making, baking and creating in your kitchen, have fun preparing and sharing your feast.

Sammie xx

Note – this is not a sponsored post. I genuinely love Sugar and Crumbs products. No part of this post may be reproduced or duplicated without the written permission of the owner. Please see my Disclosure Policy.


Individual spiced cakes baked for the festive season, topped with spiced, whipped buttercream and a small decoration associated with the holidays. Sized for Pinterest with descriptive graphics.
Christmas lights and decorations in the background set the scene for a tray of festive spiced bakes which sparkle.

Creamy Low Fat Mushroom Soup

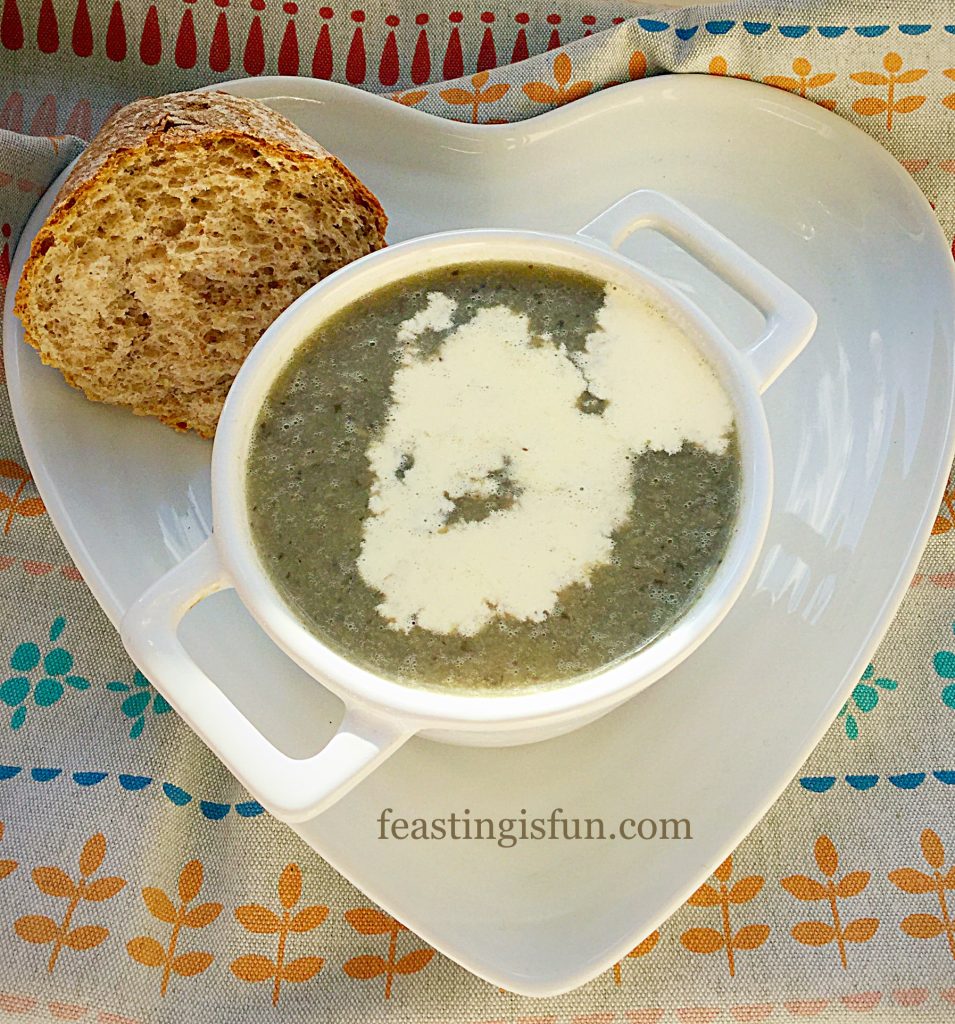
Autumn is well and truly here. Golden and red leaves, flutter like confetti to the ground. The perfect time of year for walks in the park or woods. Also, it is the season for fungi and mushrooms. If you go foraging, whilst out on a walk, make sure you have a guide, or book, to ensure you only pick what is edible. The mushrooms for this Creamy Low Fat Mushroom Soup came from the supermarket where they are available all year round.

FF Creamy Low Fat Mushroom Soup

Being able to buy mushrooms all year round means that this soup can also be made whenever you want. Since this soup is incredibly easy to make and completely delicious, you may find yourself making it year round!

FF Creamy Low Fat Mushroom Soup
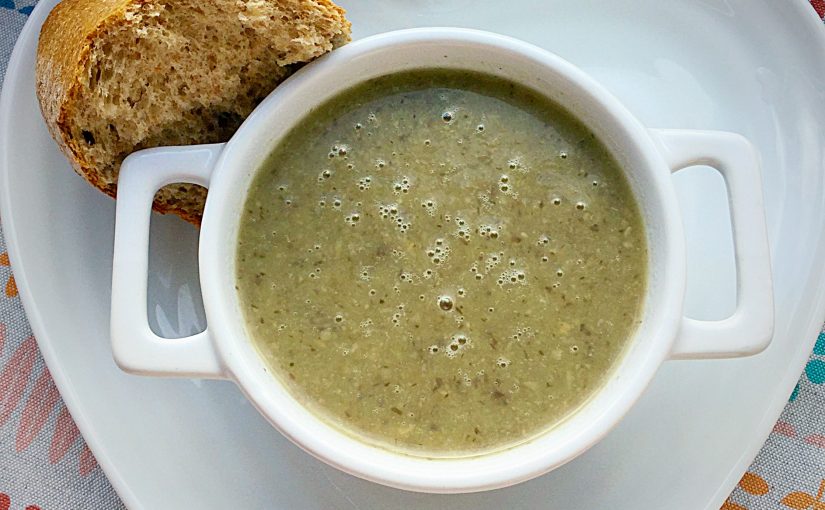
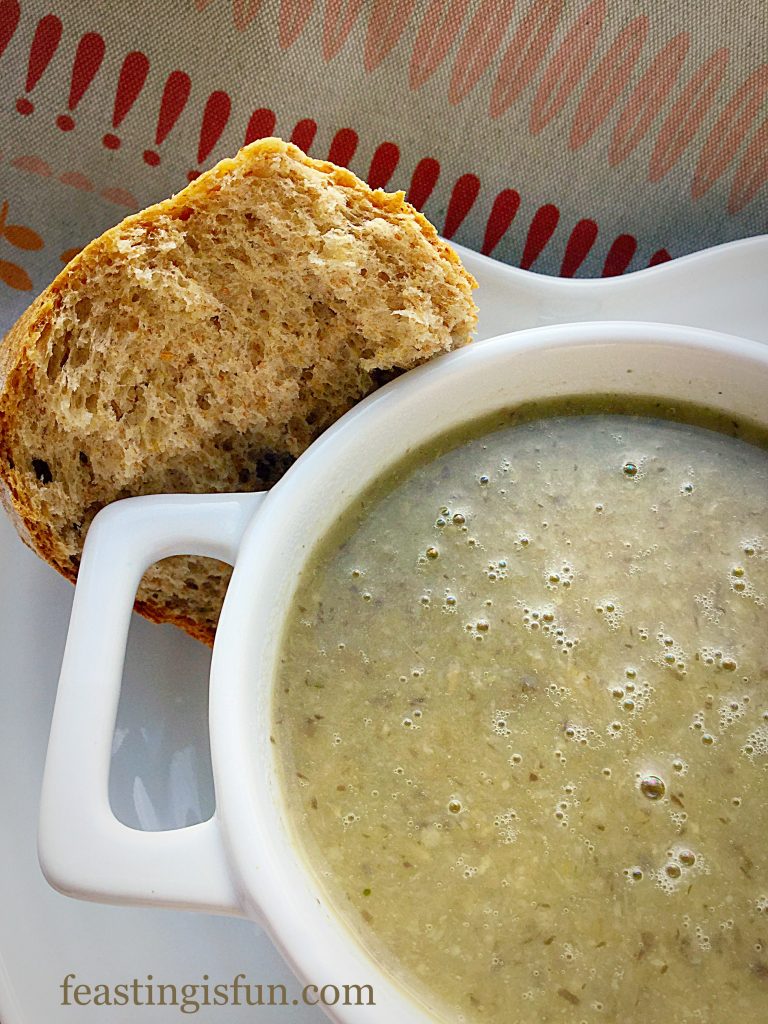
Creamy Low Fat Mushroom Soup perfect with rustic wholemeal bread.

Mushrooms And Their Unique Flavour

While I used white, button mushrooms for this recipe, chestnut, or portobello would also taste delicious. Sautéing the mushrooms slowly, ensures that they release their deep, earthy flavour. As a result, the finished soup has a rich mushroom flavour, that is not heavy. Sneaking in a potato not only thickens the soup, it also gives it beautiful creamy texture too.

FF Creamy Low Fat Mushroom Soup
Creamy Low Fat Mushroom Soup add a splash of cream if you dare 😉

Ok so I added a swirl of cream, just to see what it would add to this soup. While it does add an extra luxurious note, perfect for special occasions, or dinner parties, the soup doesn’t need it. For example in my Leek and Potato Soup the cream really rounds out the flavour and texture. Whereas here, with the mushroom soup, the creaminess is already present.

FF Creamy Low Fat Mushroom Soup
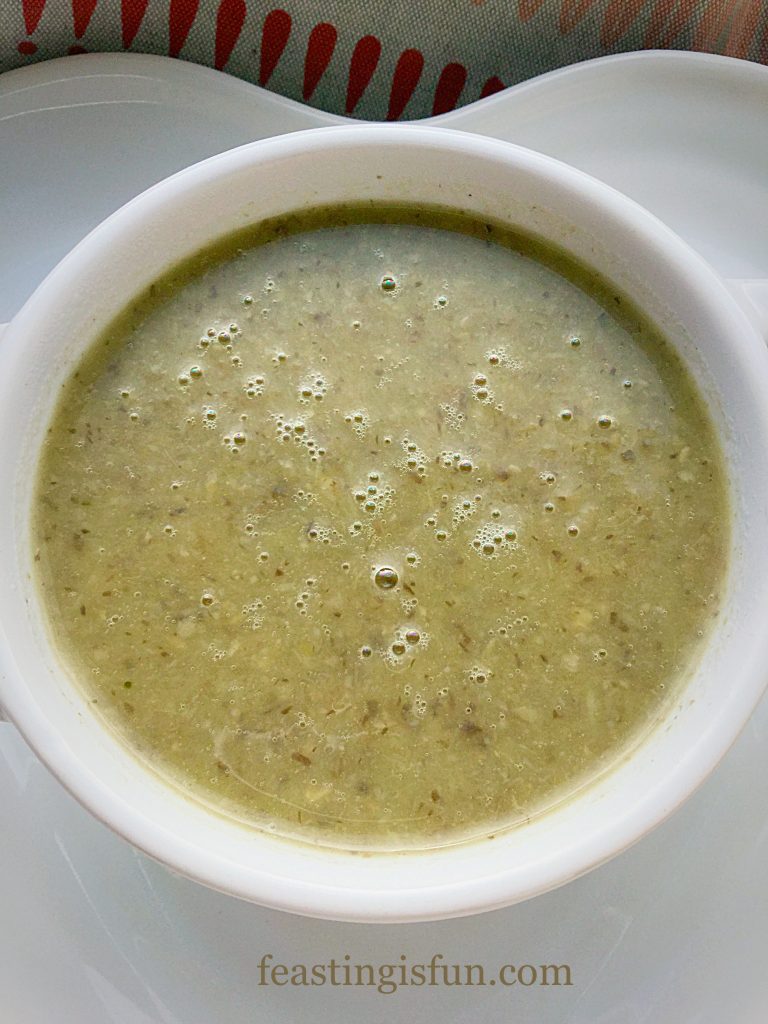
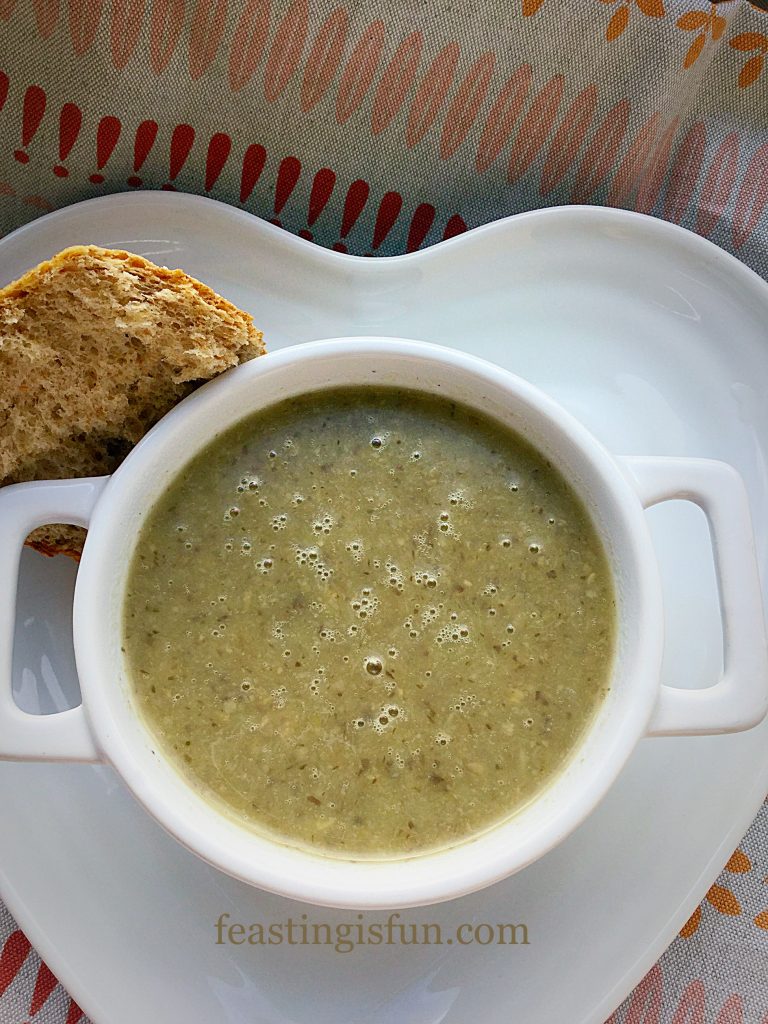
Creamy Low Fat Mushroom Soup so full of healthy flavour.

Full of flavour and texture, an immersion blender is used to ‘cream’ this soup. Rather than whizzing the soup to a completely smooth consistency, very small chunks are left in to give a better, more interesting texture. However, you may purée the soup to whatever consistency you desire.

Recipe: Creamy Low Fat Mushroom Soup serves 4 people

1 Leek washed and trimmed

1tbs Butter – alternatively you may use olive oil

300g Mushrooms

1 Medium Sized Floury Potato

1 Vegetable/Chicken Stock Cube – I use Knorr

1L Very Hot Water – from a kettle

1/4tsp Freshly Ground Black Pepper

1/4tsp Sea Salt – I use Maldon

Making The Mushroom Soup

  • First, place a heavy bottomed soup pan on to the hob, over a medium heat. Now add the butter.
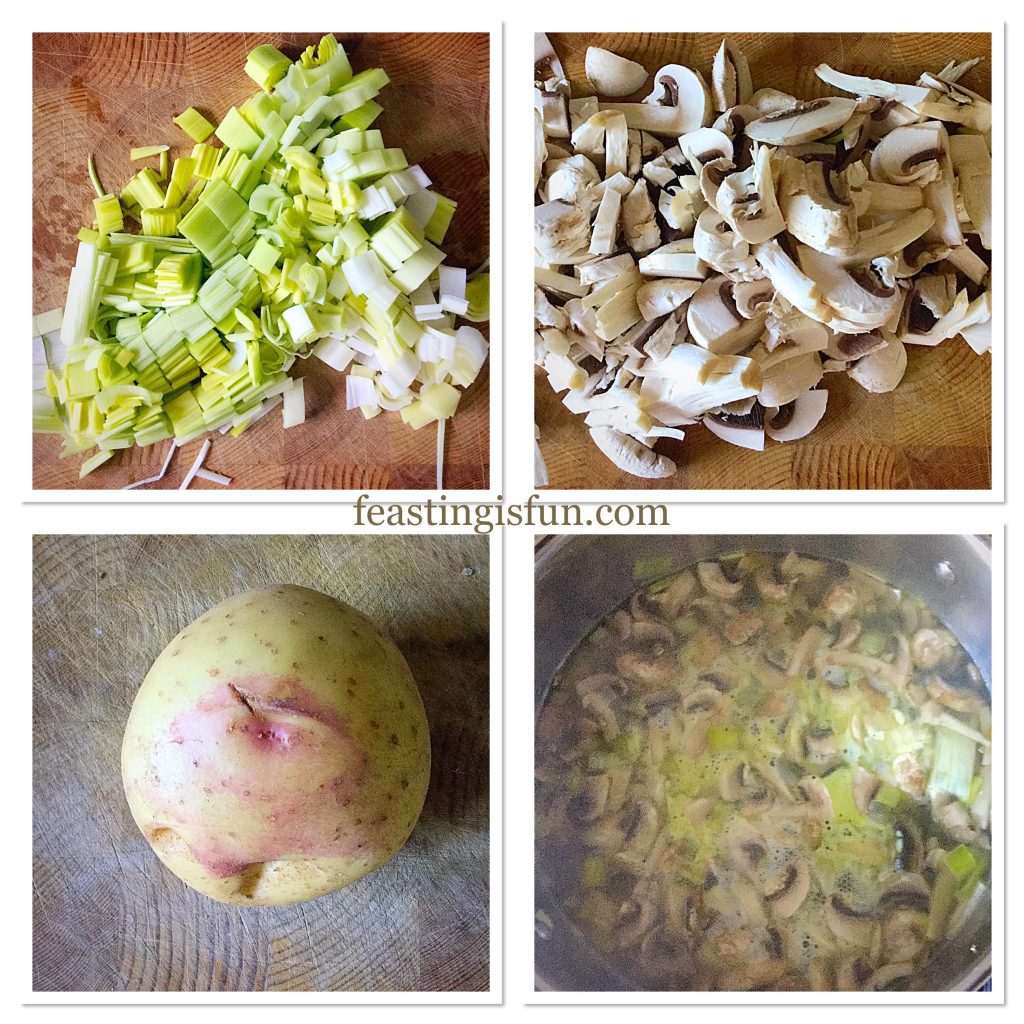
  • While the butter is melting chop the leek into a medium dice – approximately 1cm pieces.
  • Once the butter has melted add the chopped leek to the pan and sauté for 3-4 minutes until they become soft.
  • Meanwhile slice the mushrooms and then cut the slices in half.
  • Next add the sliced mushrooms to the softened leeks.
  • Lower the heat slightly and continue to cook the mushrooms and leeks for a further 10 minutes, until the mushrooms are soft.
  • Peel and medium dice the potato, then add it to the saucepan.
  • Now add 1 litre of very hot water, from the kettle and a stock cube. Stir, put on the lid and allow to simmer for 30 minutes.
FF Creamy Low Fat Mushroom Soup
Preparing the soup.
  • After simmering for 30 minutes, remove the saucepan from the heat.
  • Make sure you are wearing an apron for the next step. I speak from soup splattered experience!
  • Use an immersion blender to blend the soup until it is almost smooth. One of the benefits of using this method to blend soup is, it allows you to feel, as well as see, how smooth the soup is. Also, if you do not have an immersion blender, a standard blender will still blend the soup well. Take care not to overfill the blender and allow the soup to cool slightly before using this method.
  • Check the soup for seasoning and adjust as necessary.

Serving The Soup

To serve, warm the soup and serve with thick chunks of rustic bread, such as my homemade Seeded Cob Loaf.

FF Creamy Low Fat Mushroom Soup
Creamy Low Fat Mushroom Soup a delicious way to warm up!

Each mouthful of this soup is a treat to your tastebuds. Perfectly balanced flavour that is nutritious and delicious.

This soup will keep, cool and place into an airtight container, keep in the fridge for up to 4 days. Alternatively, freeze in single portions and eat within a month.

If you have enjoyed the recipe for my Creamy Low Fat Mushroom Soup you may also like these other healthy and low fat soup recipes:

Carrot Soup

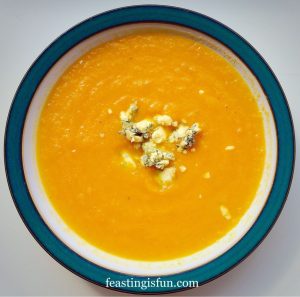
Carrot Soup in a bowl with crumbled Stilton cheese on top.
Carrot Soup

Roast Chicken Noodle Soup

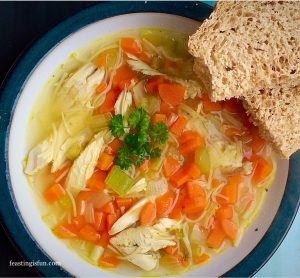
Roast Chicken Noodle Soup served with rustic homemade bread.
Roast Chicken Noodle Soup

Roasted Garlic Butternut Squash Soup

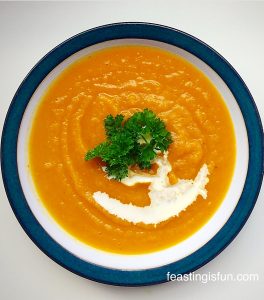
Roasted Garlic Butternut Squash Soup served in a bowl with curly parsley to garnish.
Roasted Garlic Butternut Squash Soup

Homemade soup is so easy to make. Also, the reward, far outweighs the minimum effort needed to prepare and cook the soup. Delicious, good for you and incredibly soothing on cough ravaged, sore throats, which seem in abundance at this time of year. While eating this soup, you can almost feel it doing you good.

Do you have a favourite soup recipe?  Please let me know as I love new ideas, old ideas, any ideas that taste great!

So, whatever you are making, baking and creating in your kitchens, have fun preparing and sharing your feast.

Sammie xx


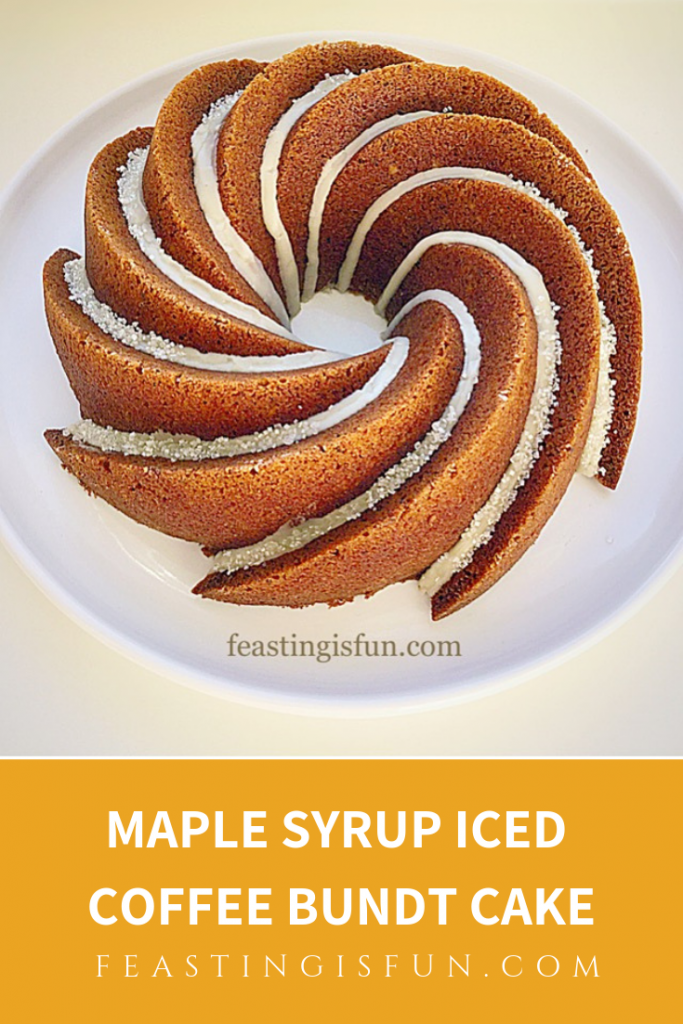
Maple Syrup Iced Coffee Bundt Cake

Baking for someone I love has to be one of my favourite things to do. Especially when the recipient is my wonderful Father-in-law. Even more so when it is to celebrate his birthday. While I usually make him a Coffee and Walnut Cake, however, this year I’ve kept all of his favourite flavours and baked them into this beautiful Maple Syrup Iced Coffee Bundt Cake.

FF Maple Syrup Iced Coffee Bundt Cake

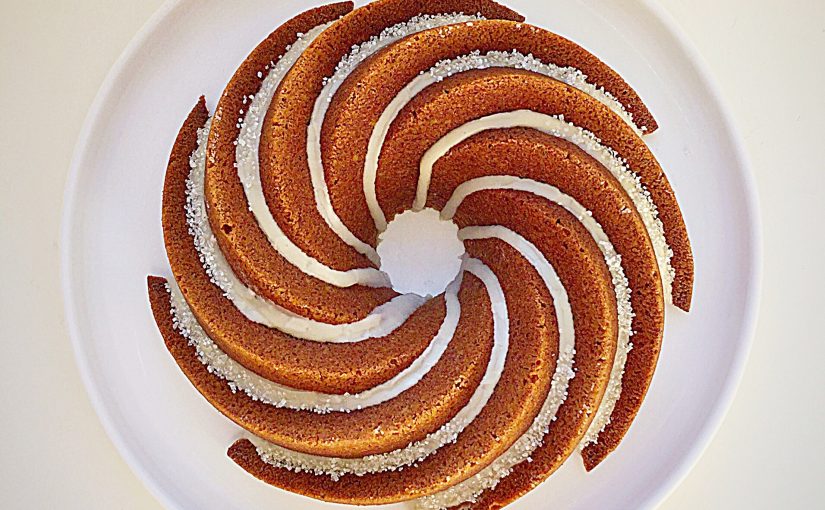
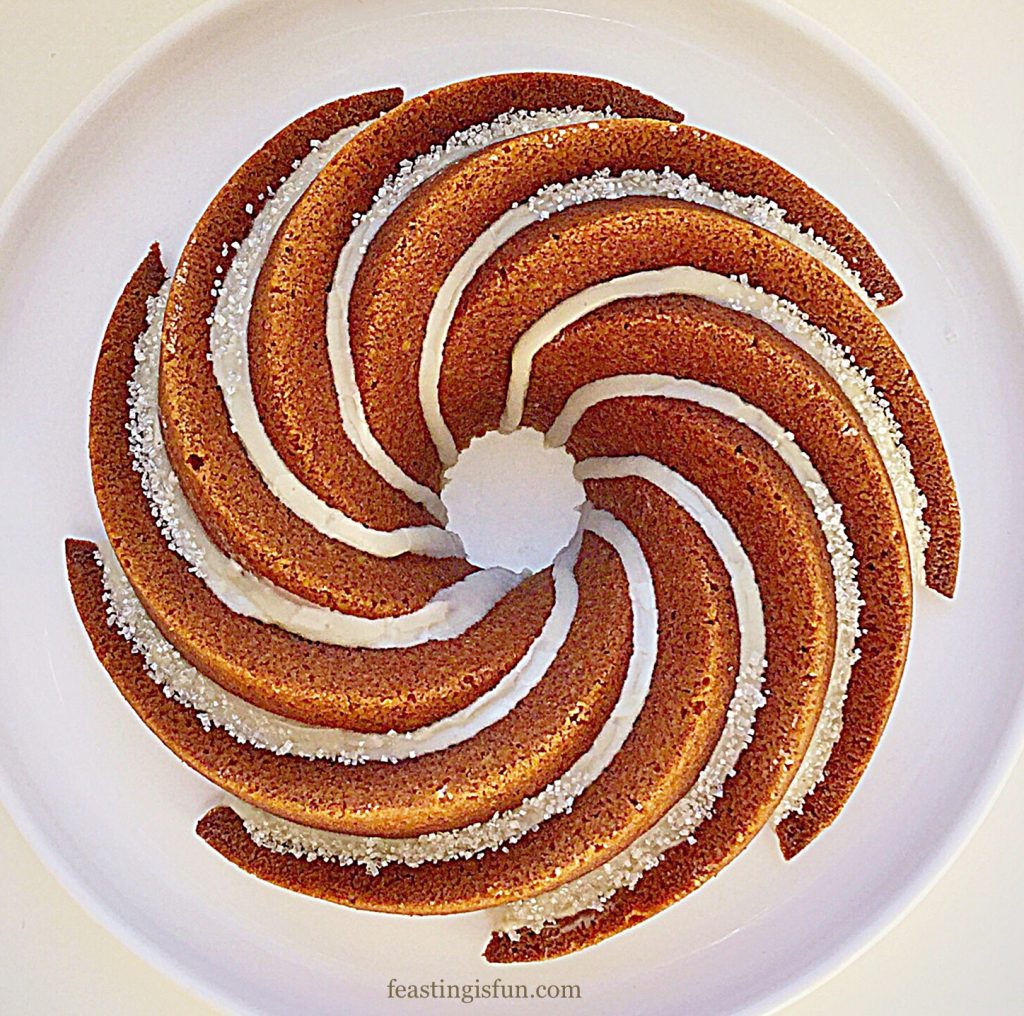
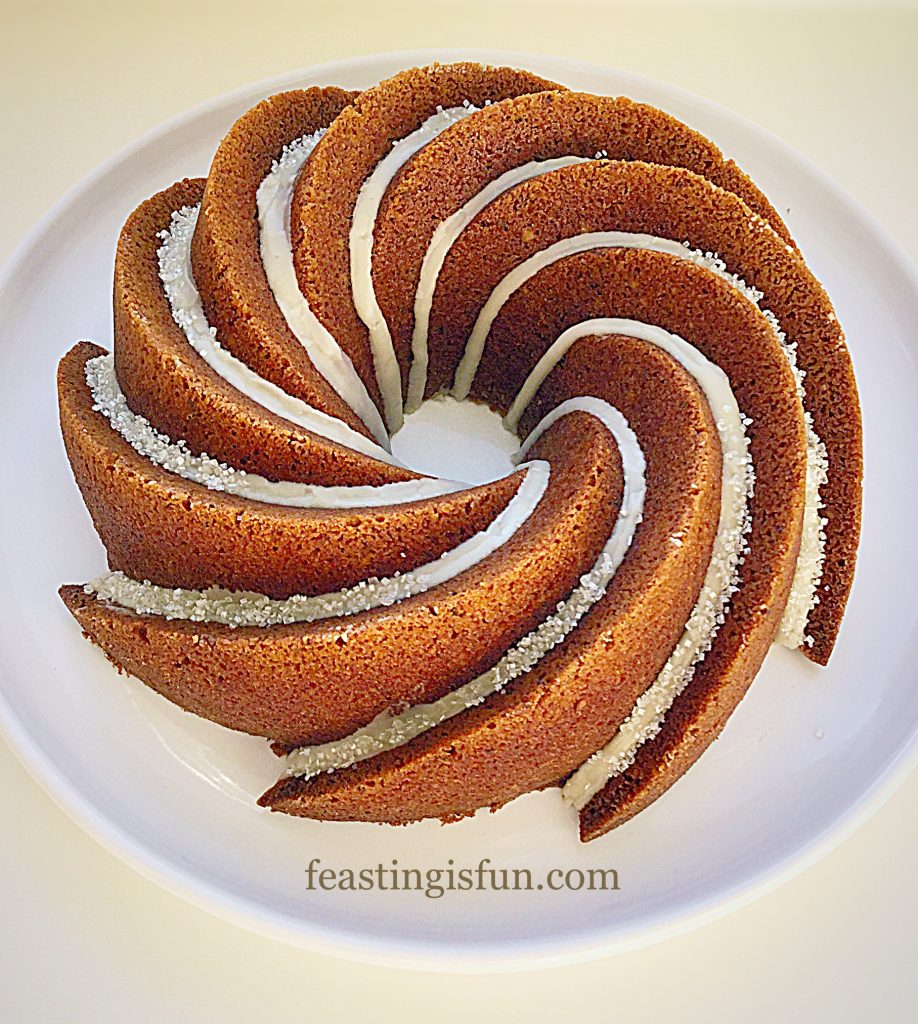
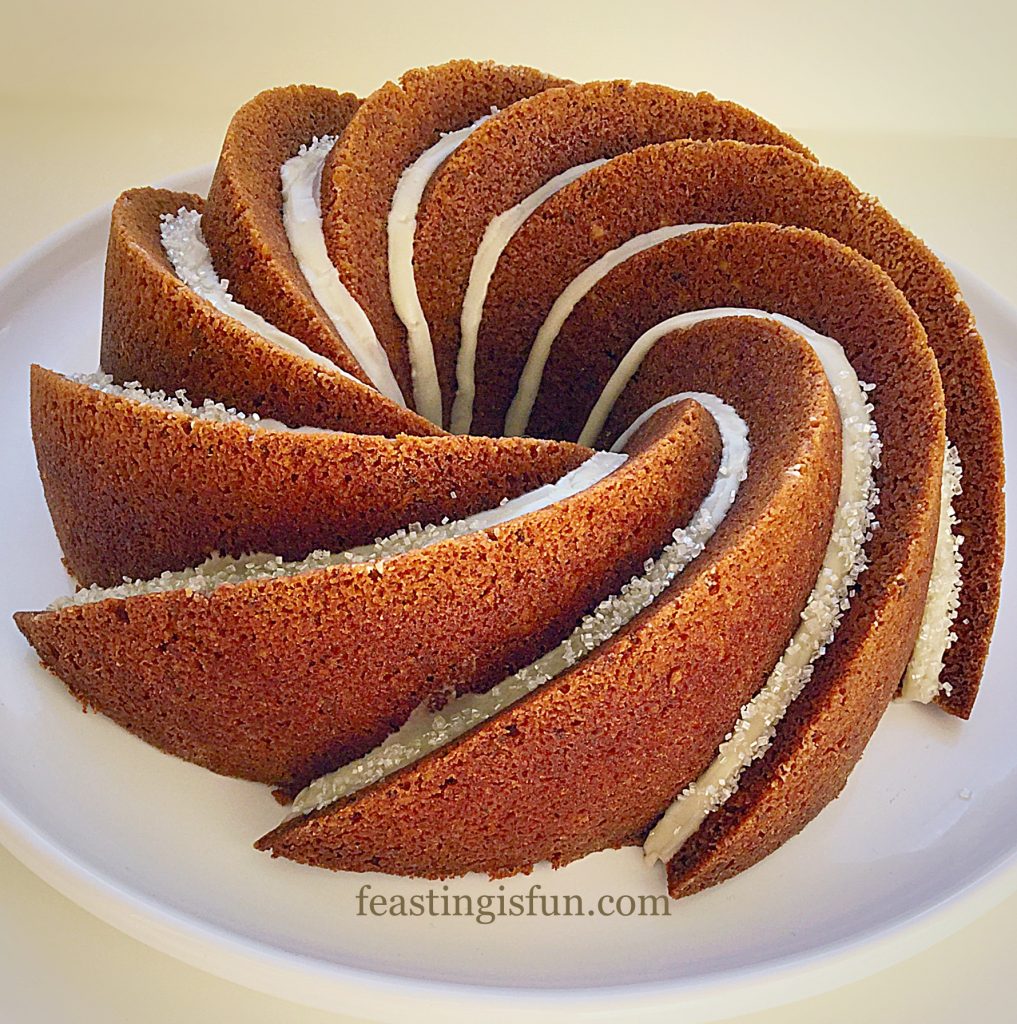
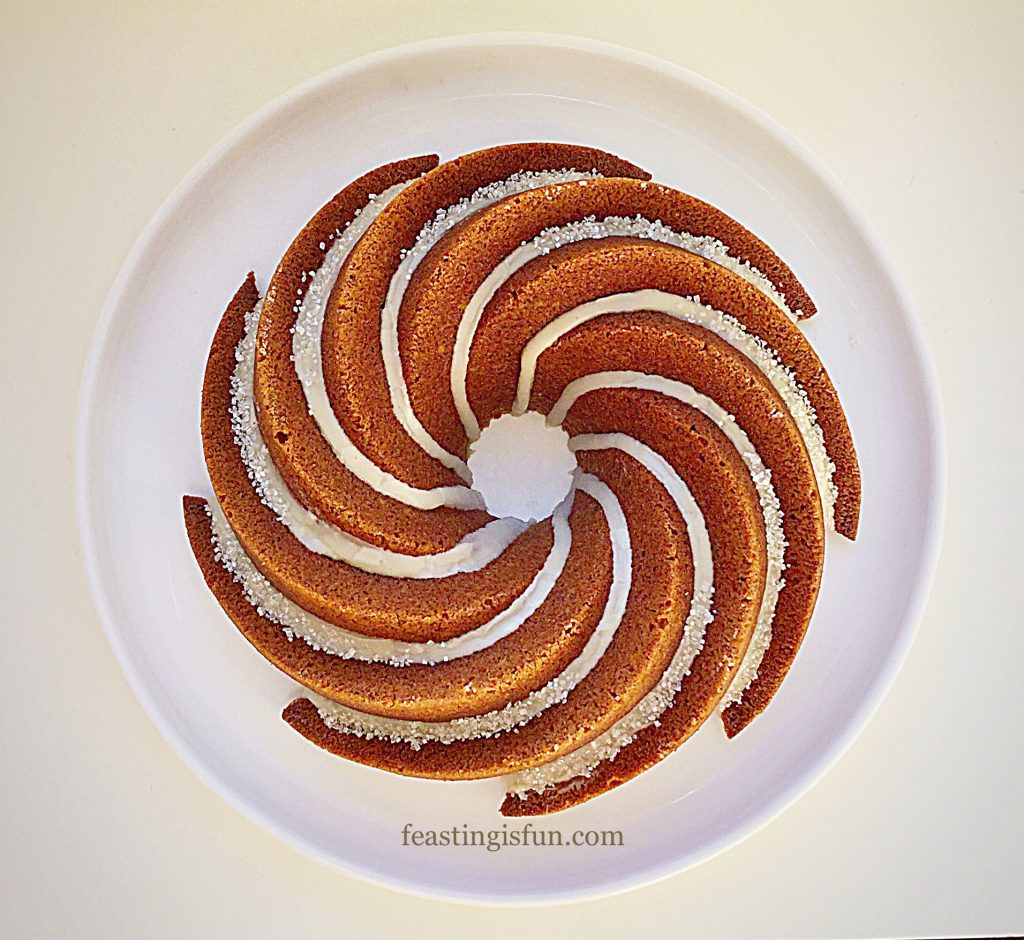
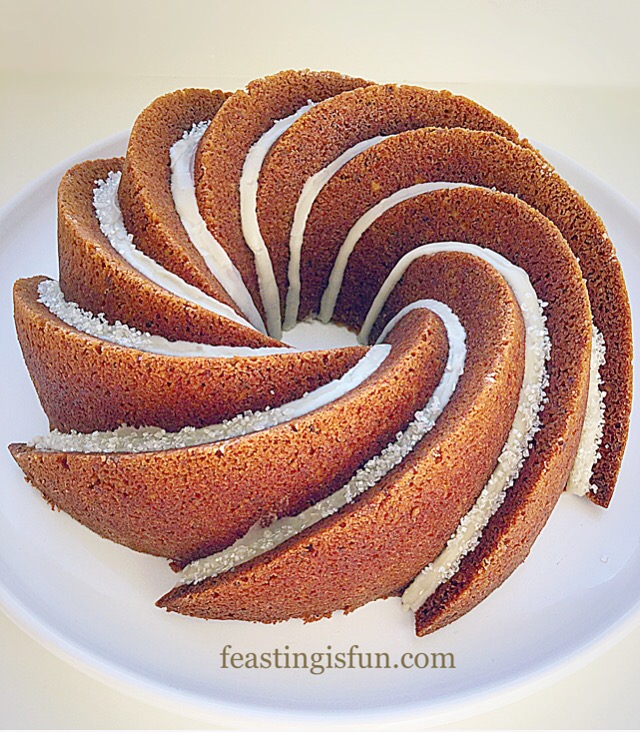
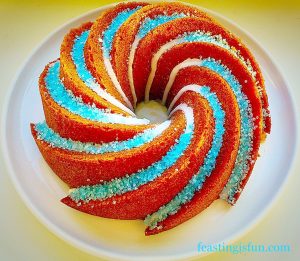
Using the Heritage Bundt tin from Nordic Ware, this cake is literally a twist on a classic, popular cake. While the distinct mould of the tin creates an incredible, swirl shaped coffee cake, which is defined with the maple syrup icing. Resulting in a stunningly outstanding cake.

FF Maple Syrup Iced Coffee Bundt Cake
Maple Syrup Iced Coffee Bundt Cake mesmerising.

An incredibly moist and delicious cake, that includes walnuts, it is also lump free. Chopping the walnuts very finely ensures their nutty flavour mixes well with the coffee and spices. While the maple syrup icing adds another layer of flavour. Resulting in a light, not heavy sponge, that tastes fantastic.

FF Maple Syrup Iced Coffee Bundt Cake
Maple Syrup Iced Coffee Bundt Cake full of flavour.

My Father-in-law is a very special and incredibly talented man. Much loved and respected, I consider myself to be very blessed to be part of his family. He is a wonderful Dad and Grandad, with a gentle sense of humour. And our children love to hear stories of his past adventures which span many centuries. Especially those of his time as a Pirate!!

FF Maple Syrup Iced Coffee Bundt Cake
Maple Syrup Iced Coffee Bundt Cake dazzling.

No candles are needed to light up this dazzlingly, delicious cake.

Recipe: Maple Syrup Iced Coffee Bundt Cake serves 10-12

250g/9oz Unsalted Butter – softened to room temperature

250g/9oz Soft Light Brown Sugar

1/4tsp Sea Salt – I use Maldon

1tsp Vanilla Extract – I use Nielsen-Massey

2tsp Camp Coffee or 1.5tsp Instant Coffee – dissolved in 1tsp water

5 Large Free Range Eggs

100g/4oz Plain Natural Yoghurt

75g/3oz Walnut Halves or pieces – chopped or processed until they are very fine. Similar in texture to ground almonds

1/4tsp Freshly Grated Nutmeg

1/4tsp Cinnamon

200g/7oz Plain White Flour

3tsp Baking Powder

150g/5oz Icing Sugar

3tbsp Maple Syrup – I like Pure Maple

White, silver or golden sprinkles

Making And Baking The Bundt Cake

Preheat the oven to 160C/140C fan, gas mark 3, 310F.

Note: I always use Wilton cake release to guarantee a clean, sharp edged finish. Apply using a soft pastry brush, taking care to ensure every part of the Bundt tin is evenly covered. Alternately brush on melted butter in the same manner, followed by a light coating of flour.

  • First of all, prepare the Bundt tin as per the instructions above.
  • Whisk the softened butter, sugar and salt together in a large bowl for at least 5 minutes. The mixture should be light and creamy.
  • Add the vanilla extract and the eggs to the bowl. Continue whisking until all of the ingredients are well mixed.
  • Now add the yoghurt, but do not stir.
  • Next add the finely chopped walnuts, then sift in the flour, baking powder and spices.
  • Use a metal spoon to fold all of the ingredients together until they are fully combined.
  • Spoon the cake batter into the prepared Bundt tin, pressing down to ensure the tin does not have any air gaps. Smooth the top of the batter.
  • Place the Bundt tin into the centre of the preheated oven and bake for 50-60 minutes.
  • To test if the cake is fully baked, insert a wooden skewer. The cake is baked when the skewer comes out clean. Also the cake should spring back from a light touch and have shrunk away from the sides of the Bundt tin.
  • As soon as the cake is baked remove the from the oven. Leave the cake to cool in the tin for 5-10 minutes.
  • Finally, turn the Bundt cake out on to a cooling rack and allow to cool completely before icing.
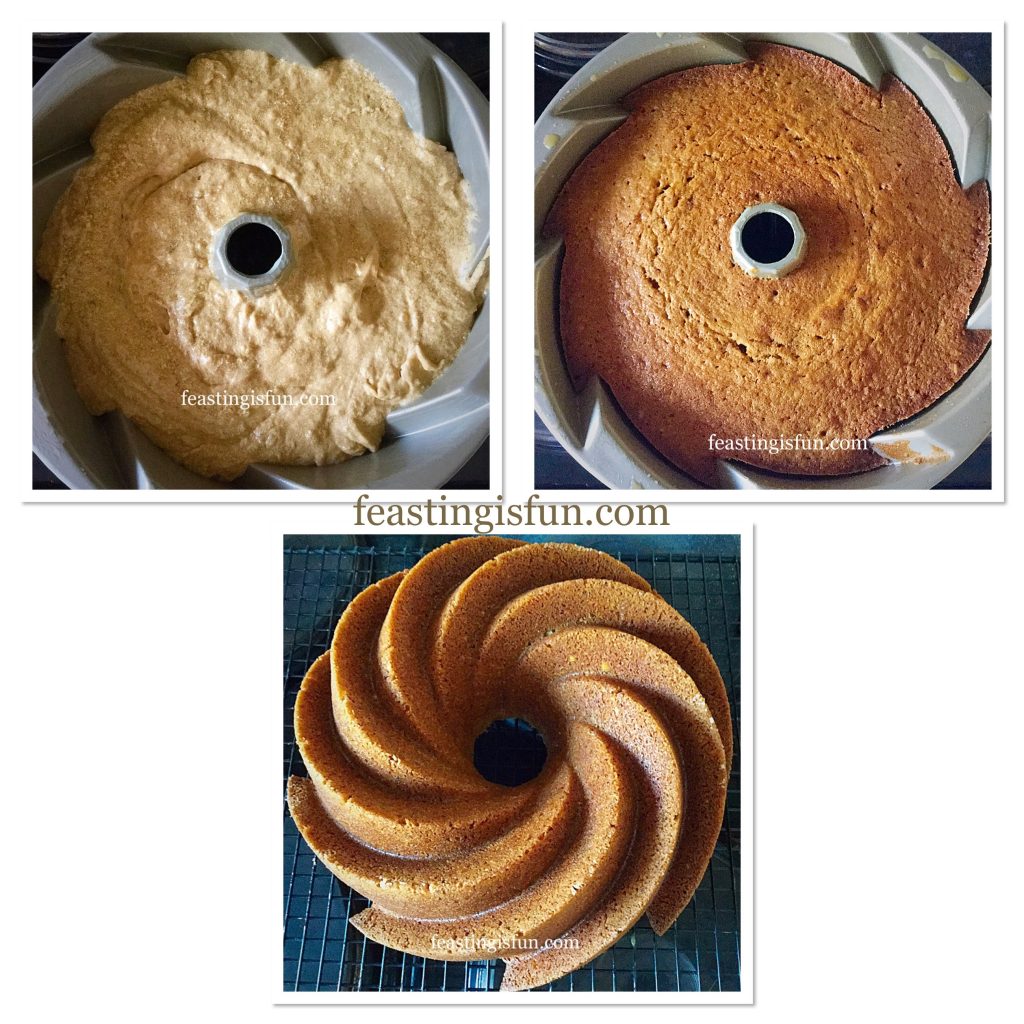
FF Maple Syrup Iced Coffee Bundt Cake
Filling the tin, baking and turning out the Bundt Cake.

Adding The Decoration

  • First, sift the icing sugar into a bowl.
  • Add the maple syrup and stir well. And then add up to one tablespoon of cold, tap water. Stir well so that the icing is a smooth, fairly thick consistency.
  • Fill a small, disposable piping bag with the maple syrup icing.
  • To ice the cake, first place the cooling rack over a large baking tray. This will allow any excess icing to drip through.
  • Snip the very end of the piping bag off, leaving a 3-4mm hole.
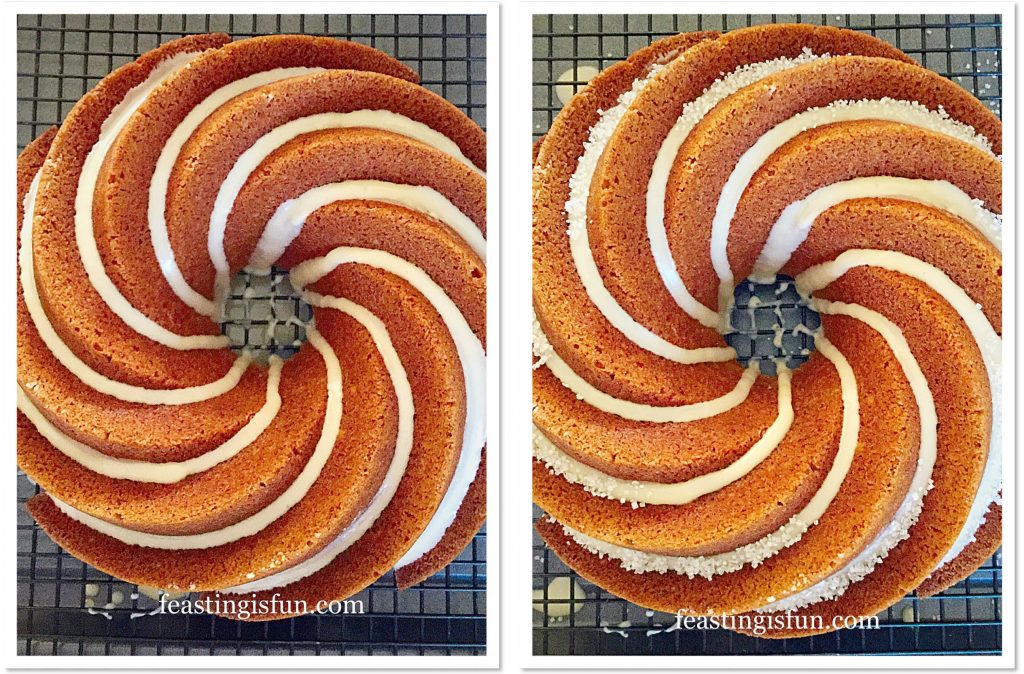
  • With the cake in front of you, follow the line of one swirl and pipe the icing along it. Double back on yourself, piping over the original line to ensure an even finish.
  • Continue in the same manner until all of the swirls have been iced.
  • Finish the decoration by adding sprinkles on top of the icing. Start at the bottom and finish approximately two thirds of the way up the cake. Most importantly, make sure the sprinkles all finish at the same point.
FF Maple Syrup Iced Coffee Bundt Cake
First the icing, then add the sprinkles.

To serve, place the cake on to a plate or cake stand. Since I do not have a cake lifter, two palette knives, positioned either side of the cake, make easy work of moving the cake.

FF Maple Syrup Iced Coffee Bundt Cake
Maple Syrup Iced Coffee Bundt Cake ready to serve.

No waiting needed! Since the icing sets pretty quickly, simply slice and serve, with a smile. Especially if baking for a celebration. It has been said, a celebration without a cake is simply a meeting.

FF Cake baked in Heritage Bundt Pan
Maple Syrup Iced Coffee Bundt Cake

If you have enjoyed the recipe for this Maple Syrup Iced Coffee Bundt Cake then you may also like these:

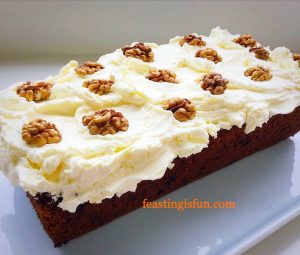
Mascarpone Topped Carrot Cake

Mascarpone Topped Carrot Cake

Fluted Chocolate Lemon Marble Cake

Fluted Chocolate Lemon Marble Cake

Boozy Lemon Drizzle Bundt Cake

Boozy Lemon Drizzle Bundt Cake


Although shop bought cakes may be convenient, nothing compares to the taste of a home baked one. And supermarkets definitely do not bake love into a cake unlike cakes baked at home. Most importantly, when made with love and given with a smile, homemade cakes are unique gift.

So, whatever you are making, baking and creating in your kitchens, have fun preparing a feast. Finally, remember that food tastes better when it is shared.

Sammie xx

No part of this post may be reproduced or duplicated without the written permission of the owner. Please see my Disclosure Policy.


Red Velvet Mini Tiered Heart Cakes

Some days you have to bake love into your day. Whether that means actually getting in the kitchen and physically baking, or metaphorically adjusting yourself – literally putting on love. Today, as the results of the 2016 United States of American presidential election were revealed, I had to do both. First of all, I had to pray, give all my fears to God and accept His peace, then I made myself bake. More specifically, bake these Red Velvet Mini Tiered Heart Cakes.

FF Red Velvet Mini Tiered Heart Cakes
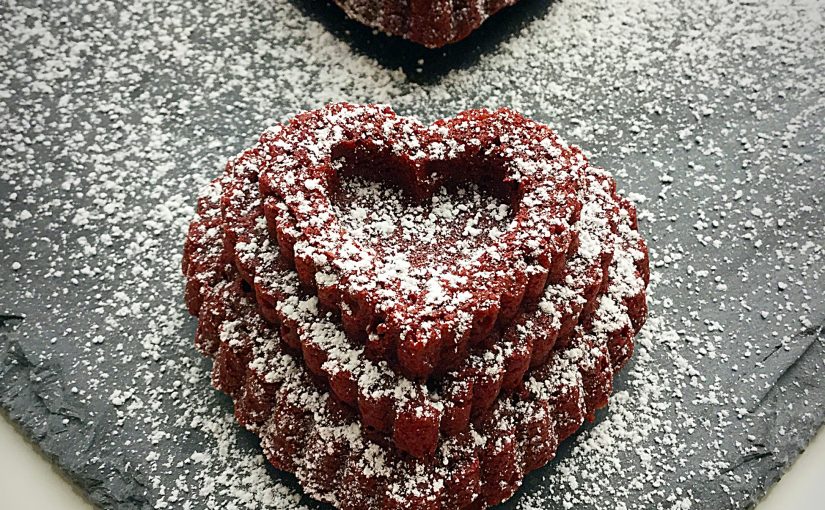
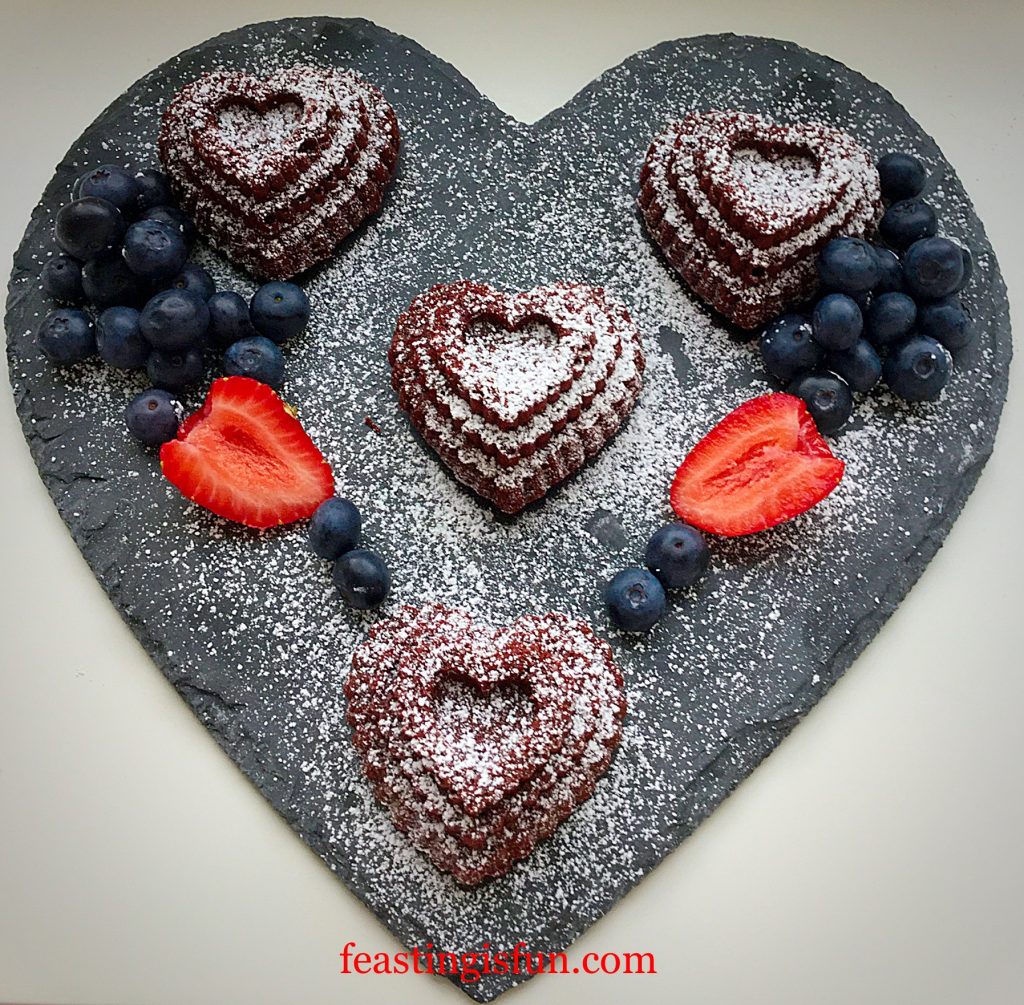
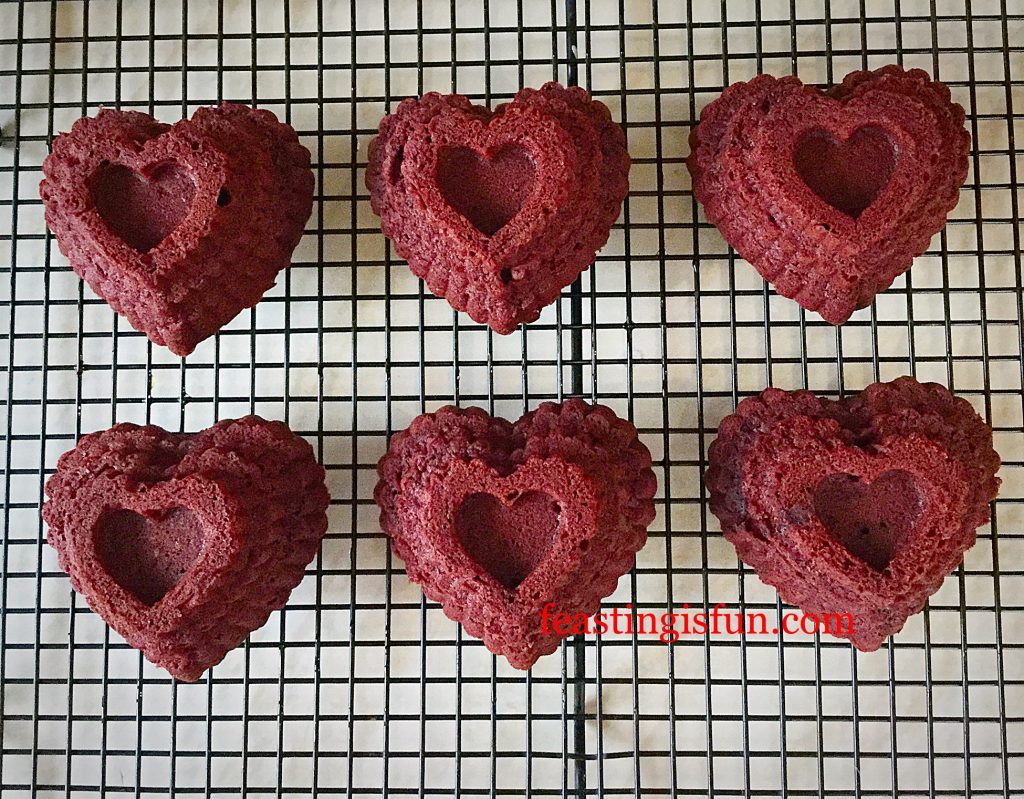
Red Velvet Mini Tiered Heart Cakes stunning individual cakes.

Oh these cakes are so good. Since making these cupcakes , I’ve wanted to try another red velvet recipe. Having recently bought the tiered heart mini Bundt pan from Sugar and Crumbs and considering the shock I, along with many others were in this morning, it seemed the perfect tin to use. A visual reminder that pure love always overcomes fear, no matter how frightened we may become.

Red Velvet Mini Tiered Heart Cakes
Red Velvet Mini Tiered Heart Cakes 3 tiers of love in a cake.

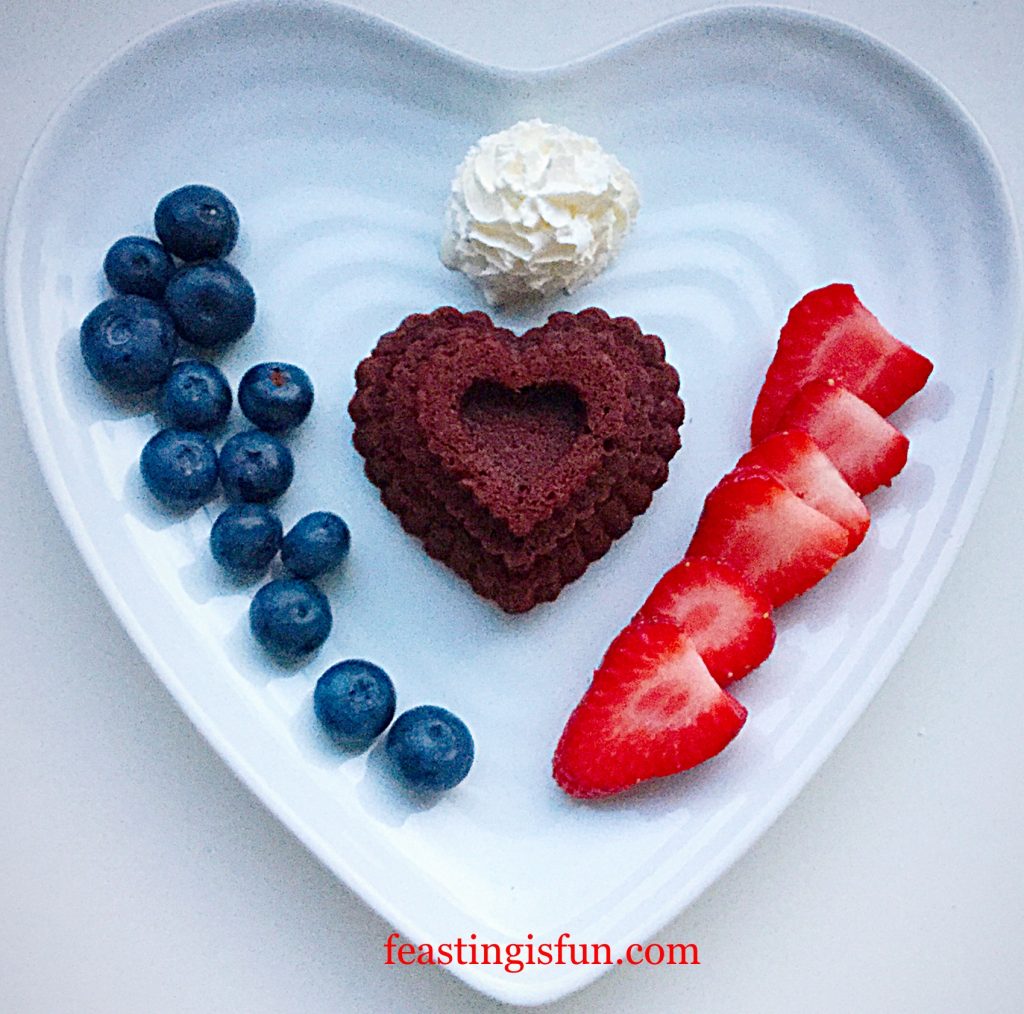
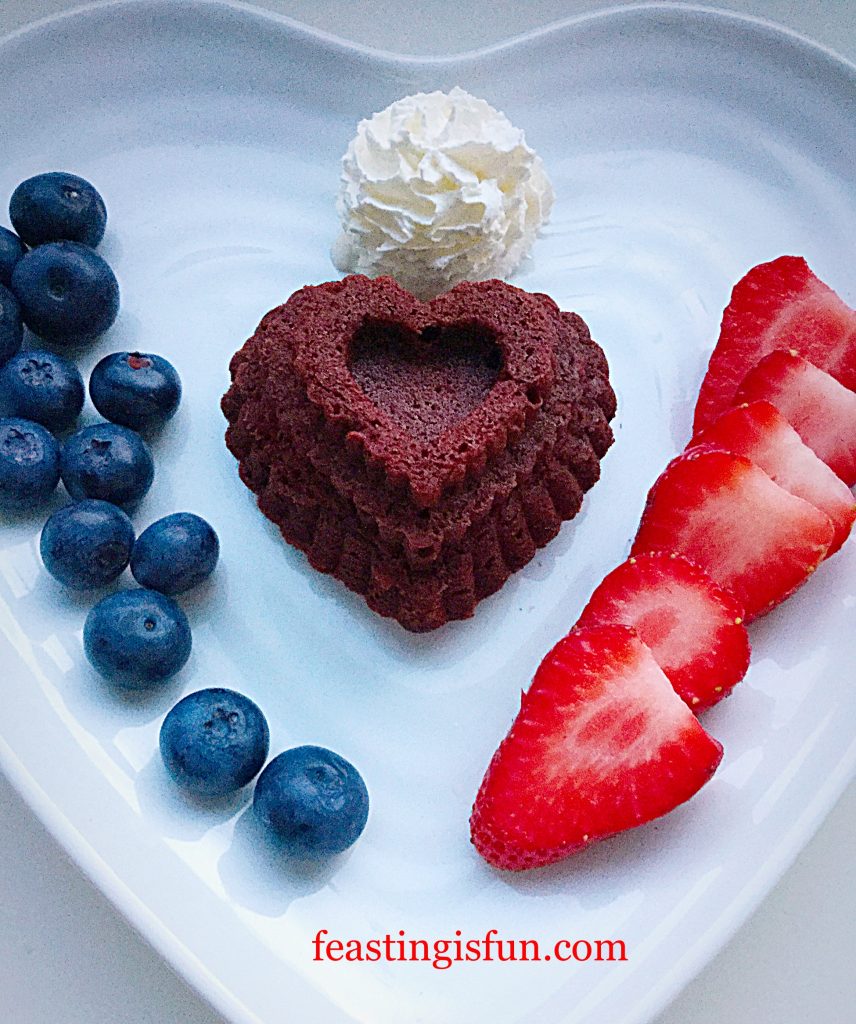
Perfectly detailed, these tiered heart cakes taste ridiculously good. If you are in a bad mood these cakes will cheer you up. Their deep chocolate flavour, in a rich, fudgey cake, pairs beautifully with fresh berries. Truthfully the red, white and blue theme was planned. Representing the colours of the American flag and what their constitution stands for. While praying, baking and then photographing these cakes, I could feel the worry and fear lift from me.

FF Red Velvet Mini Tiered Heart Cakes
Red Velvet Mini Tiered Heart Cakes such a deliciously elegant dessert.

The relief of being able to hand over my worries and fears to our Awesome Heavenly Father is immeasurable. To know that He abides by His written word, which states in 1 John 4:18 “There is no fear in love; but perfect love casts out all fear…

Recipe: Red Velvet Mini Tiered Heart Cakes makes 12

Note: To grease the individual cake moulds I recommend Wilton cake release.

150g/5oz Unsalted Butter softened to room temperature

150g/5oz Caster Sugar

1/8tsp Salt – I use Maldon

2 Large Free Range Eggs

150g/5oz Sour Cream

1tsp Vanilla Extract – I use Nielsen-Massey

150g/5oz Plain White Flour

50g/2oz Cocoa Powder

2tsp Baking Powder

1/4tsp Red Food Colouring Gel – I use Wilton

Method: Preheat the oven to 160C/140C fan, gas mark 3.

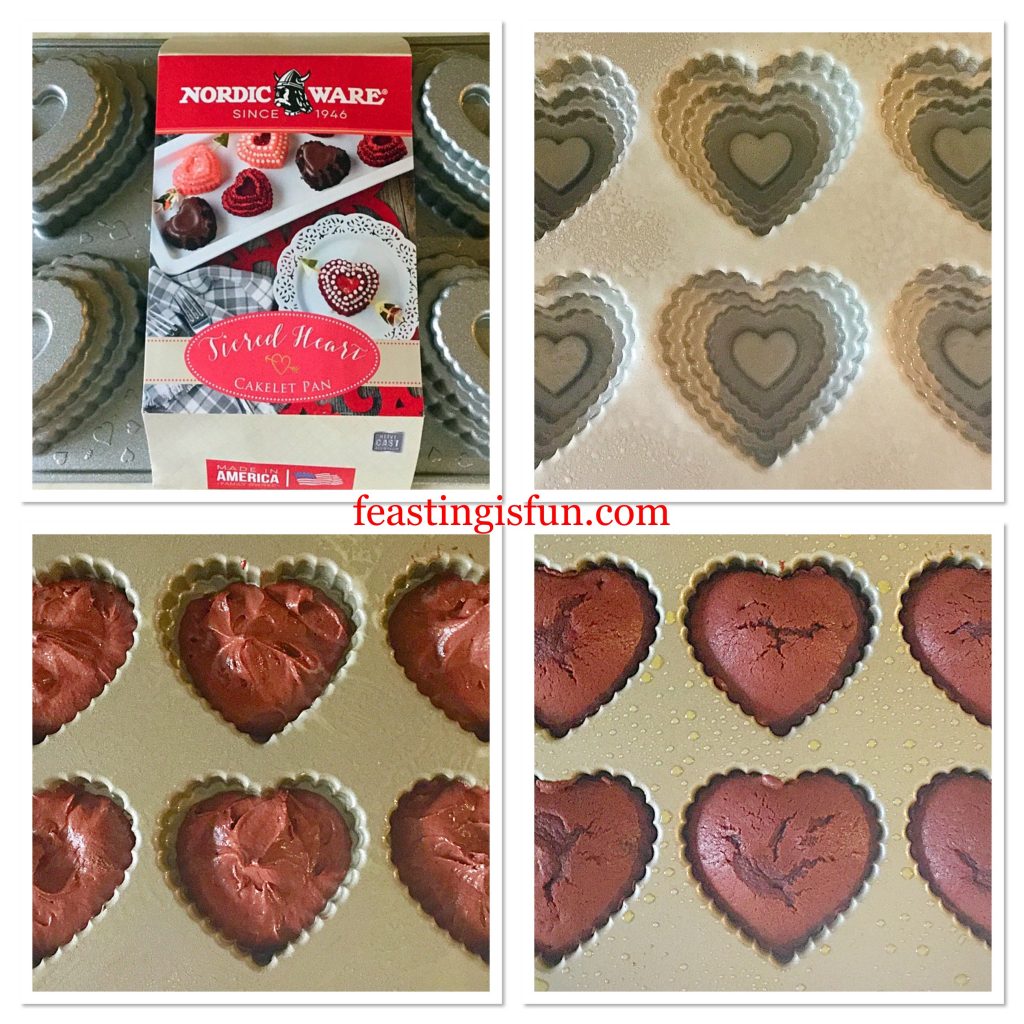
  • First of all, it is important to prepare the Bundt pan correctly. Spray or pour cake release into each mould. Use a pastry brush to ensure every part of the cake mould is covered. Because this mould is very detailed, it needs care taking over this stage.
  • Next, into a large bowl add the sugar, butter and salt. Whisk/beat these ingredients together until they are pale and creamy. This is known as the ‘creaming’ method.
  • Next add the eggs, sour cream, vanilla extract and food colouring. Sift in the flour, cocoa and baking powder.
  • Using a spoon or electric whisk, mix all of the ingredients together until they are thoroughly combined. This is know as the ‘all in one’ method.
  • To fill the individual cake moulds, carefully spoon the red velvet cake batter into the mould so that it is three quarters full. Continue until all six moulds are equally filled.
  • Now place the Bundt pan in the centre of the oven and bake for 15-20 minutes.
  • The cakes are baked when they spring back from a light touch, alternatively insert a wooden cocktail stick (so that it doesn’t damage the pan) and if it come out clean the cakes are done.
  • Once baked, remove the cake pan from the oven.
FF Red Velvet Mini Tiered Heart Cakes
Preparing, Filling and baking the cakes.
  • Allow the cakes to cool for 5 minutes in the tin before turning them out on to a cooling rack.
FF Red Velvet Mini Tiered Heart Cakes
Red Velvet Mini Tiered Heart Cakes turned out on to a rack to cool.

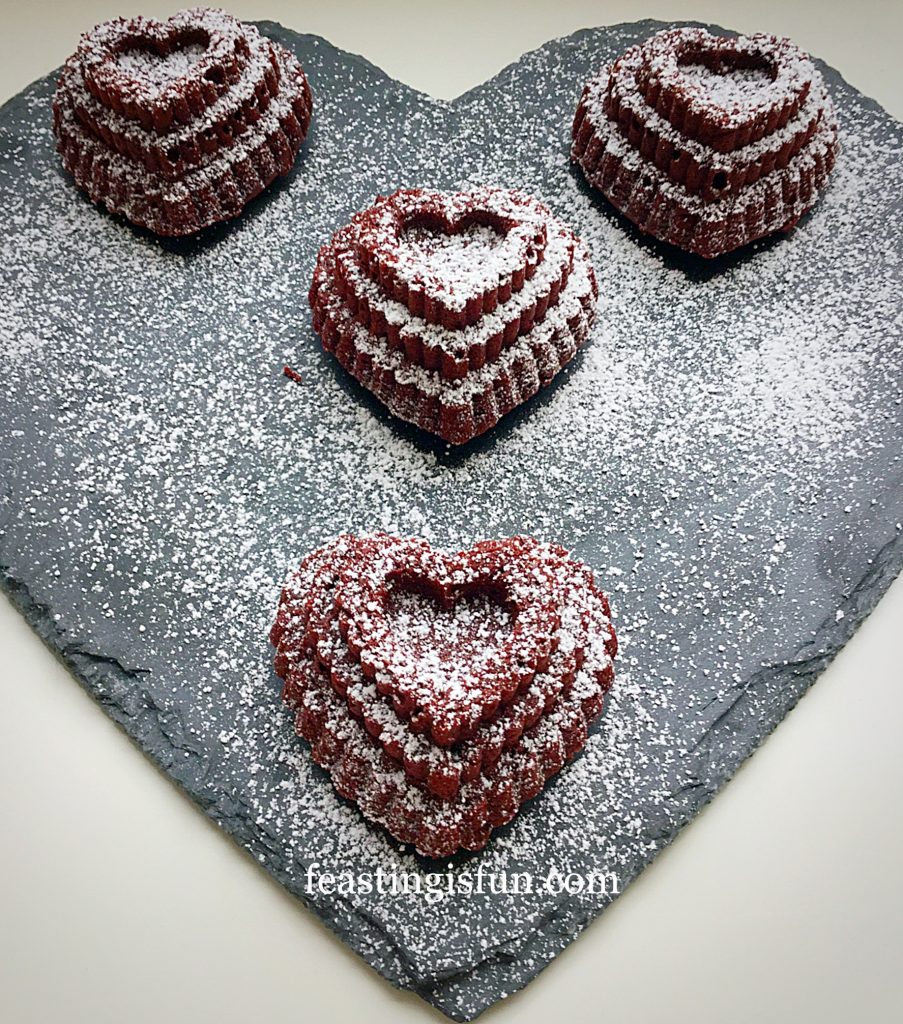
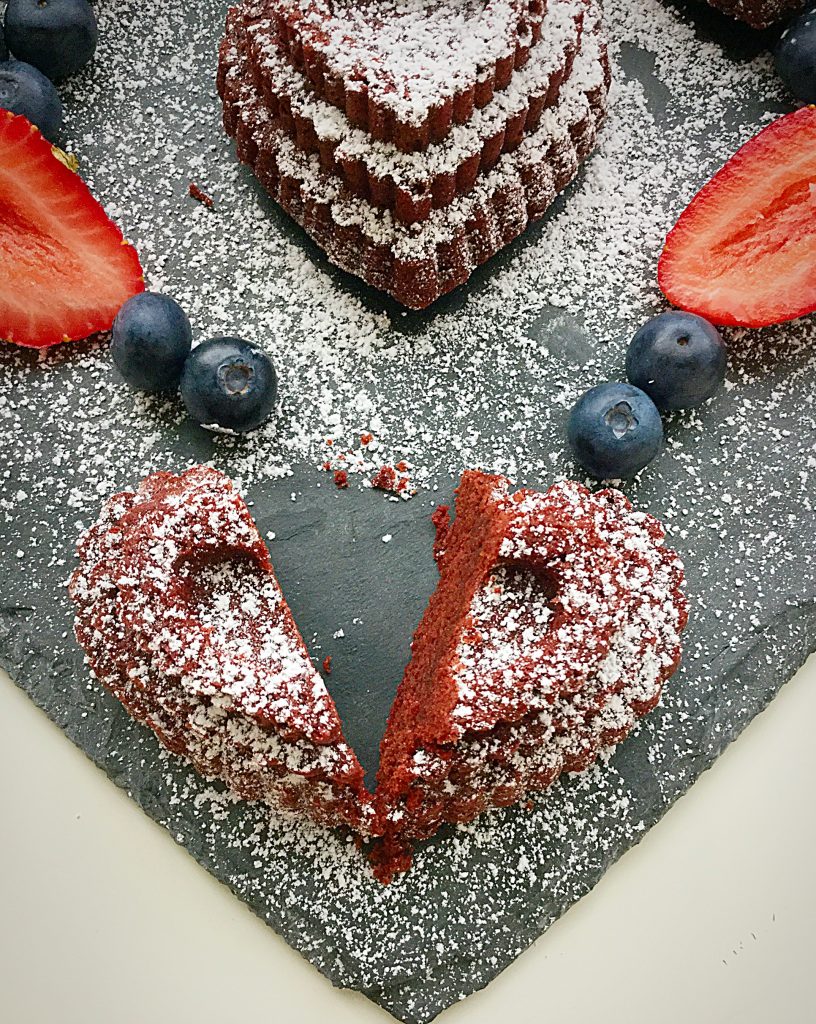
While allowing to cool you could make some Boozy Berry Sauce, to serve with these cakes. Alternatively some fresh berries and whipped cream, turn these pretty cakes into a stunning dessert. Also a light dusting with icing sugar shows up these cakes incredible detail.

FF Red Velvet Mini Tiered Heart Cakes
A sprinkling of icing sugar brings out the detail of these cakes.
FF Red Velvet Mini Tiered Heart Cakes
An elegant and enticing dessert.

A truly tasty recipe that is versatile!

If you have enjoyed these Red Velvet Mini Tiered Heart Cakes you may also like these:

Mini Lemon Drizzle Bundt Cakes

FF Red Velvet Mini Tiered Heart Cakes
Mini Lemon Drizzle Bundt Cakes.

Maple Syrup Frosted Apple Cupcakes

FF Red Velvet Mini Tiered Heart Cakes
Maple Syrup Frosted Apple Cupcakes

Mini Chocolate Fudge Bundt Cakes

FF Red Velvet Mini Tiered Heart Cakes
Mini Chocolate Fudge Bundt Cakes – tip if you aren’t able to get the cake mix, use the recipe from the tiered heart cakes leaving out the food colouring.


Finally, change can be unsettling for everyone. Interestingly, in the bible, the words “do not fear” and “fear not” feature very frequently. Jesus did not come to promise us a life that was all plain sailing. Clearly not! Since He knew there would be circumstances and situations that would cause us to worry. The key is to hand that anxiety to Him in prayer and in turn accept His Peace, which surpasses our understanding.

Ultimately, not worrying, is, in my experience an active ongoing experience. Rather like forgiveness, sometimes we have to keep forgiving, likewise we also need to continue to hand all things to God in prayer. Giving thanks for all He has brought us through and trusting Him to see us through again.

If you would like to know more about my Christian faith please see Important Stuff.

Sammie xx

Baked Whole Epoisses De Bourgogne

Baked Whole Epoisses De Bourgogne bubbling, gooey, pungent cheese.

Do you like cheese? Then you will love this rich, melted Baked Whole Epoisses De Bourgogne, perfect for dipping, dunking and feasting on.

FF Baked Whole Epoisses De Bourgogne
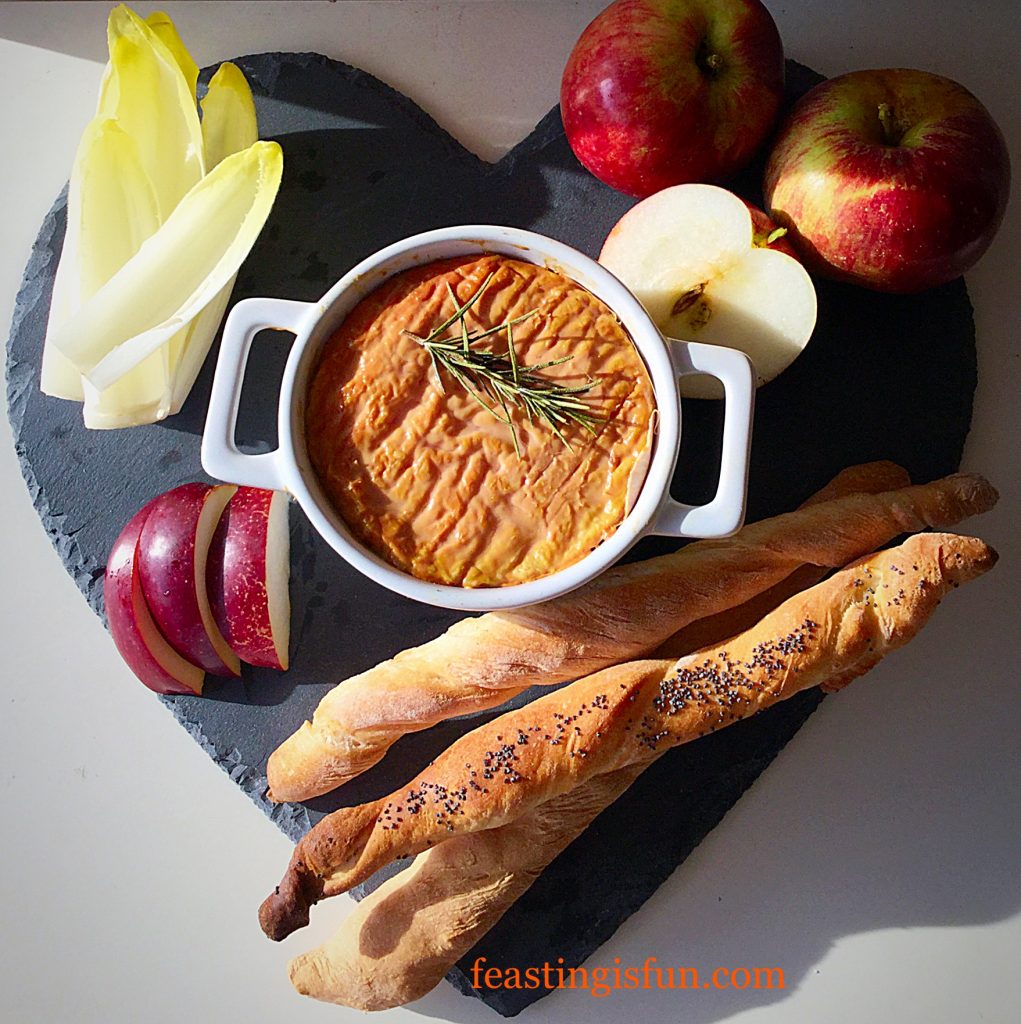
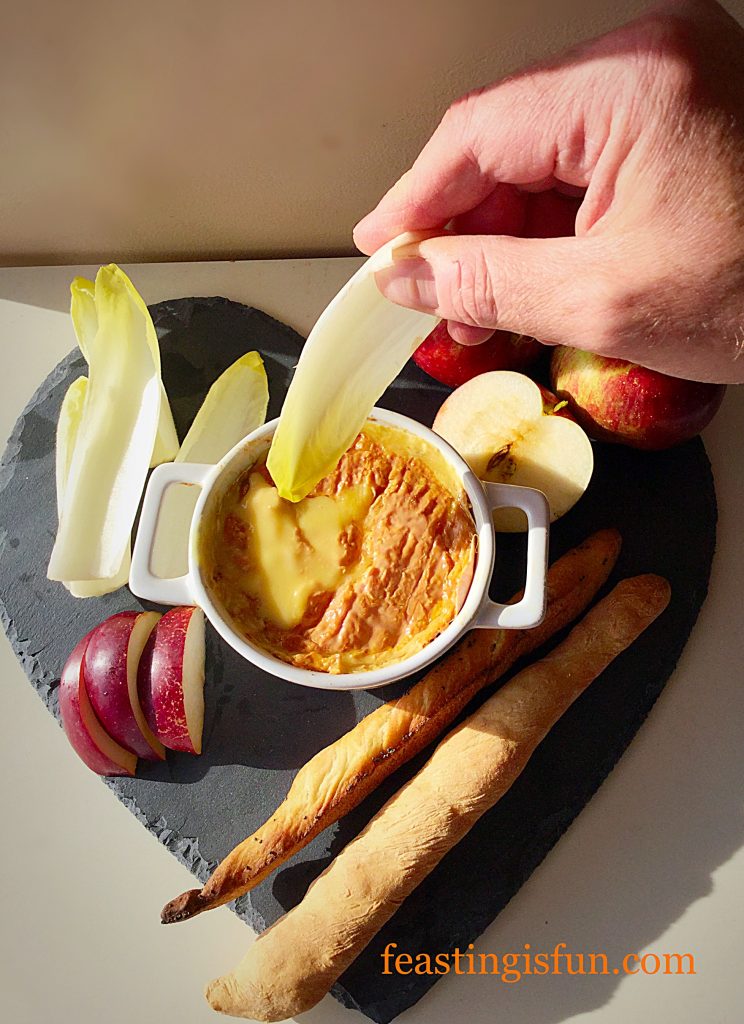
Baked Whole Epoisses De Bourgogne with homemade breadsticks, apple and chicory.

When asked by Pong Cheese to bake this heady Epoisses De Bourgogne, I knew that I would need my hubby’s help. First, I needed a hand model and also I absolutely knew he would relish the taste of this incredible cheese. A semi-soft to soft, pasteurised cow’s cheese, washed in Marc De Bourgogne, creating a spicy, pungent cheese. Most importantly, this incredible cheese is only made in the Burgundy region of France and therefore has an AOC – authentication of origin certificate.

FF Baked Whole Epoisses De Bourgogne
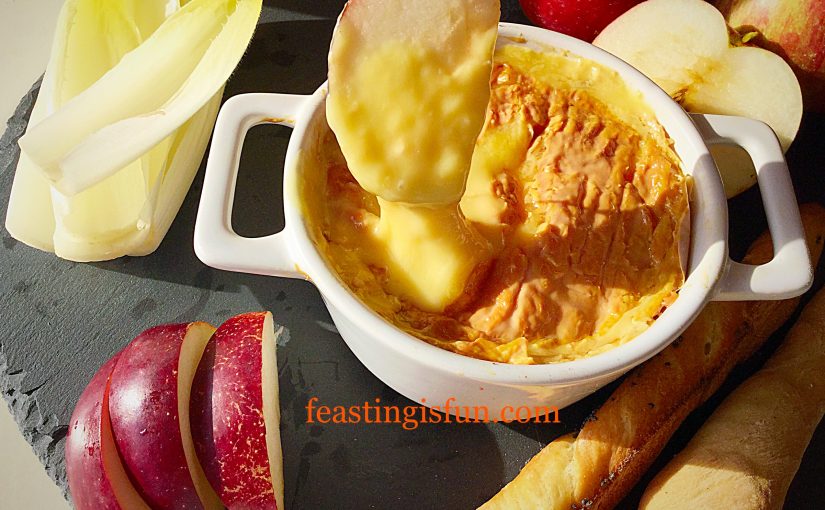
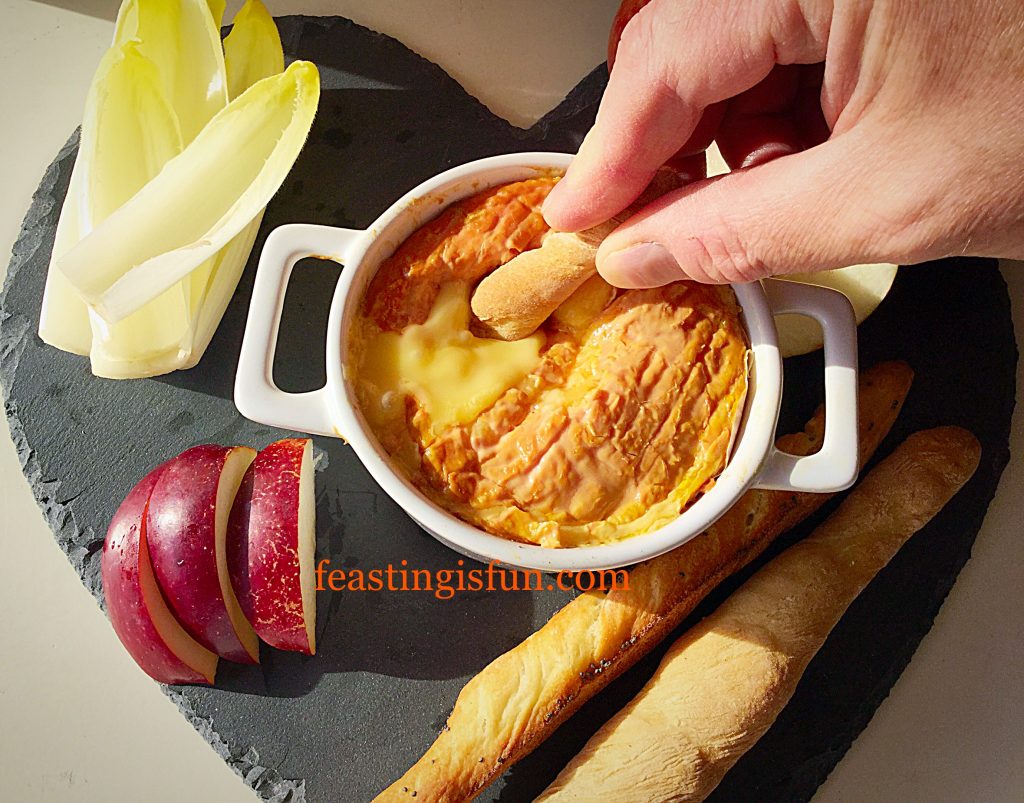
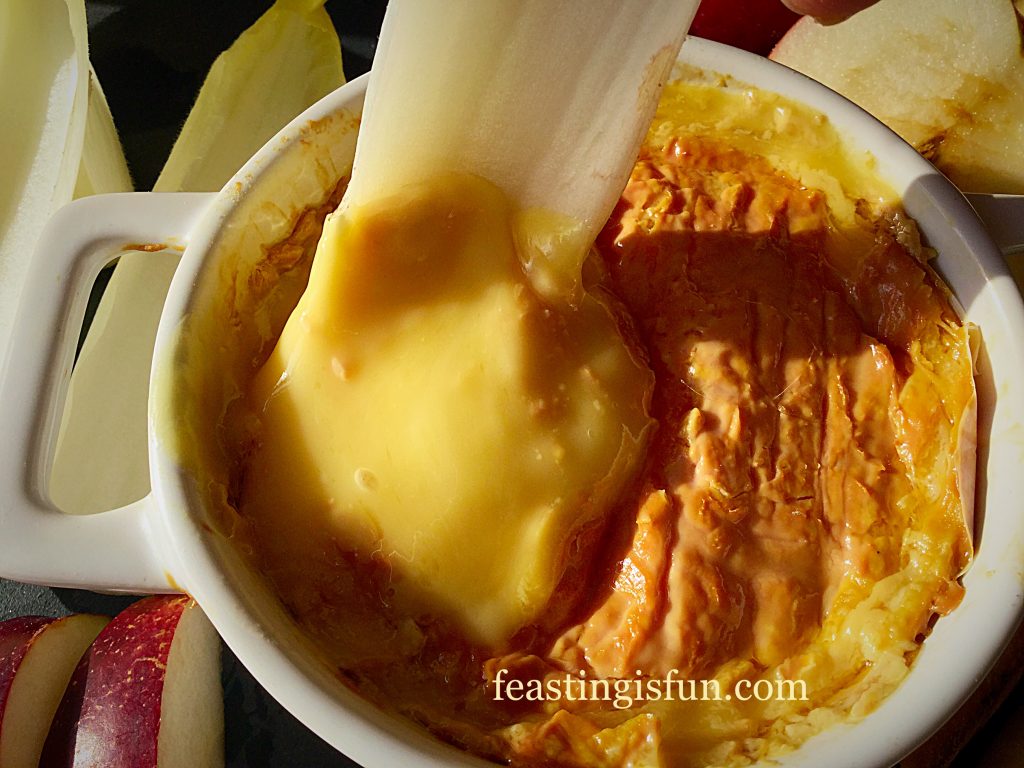
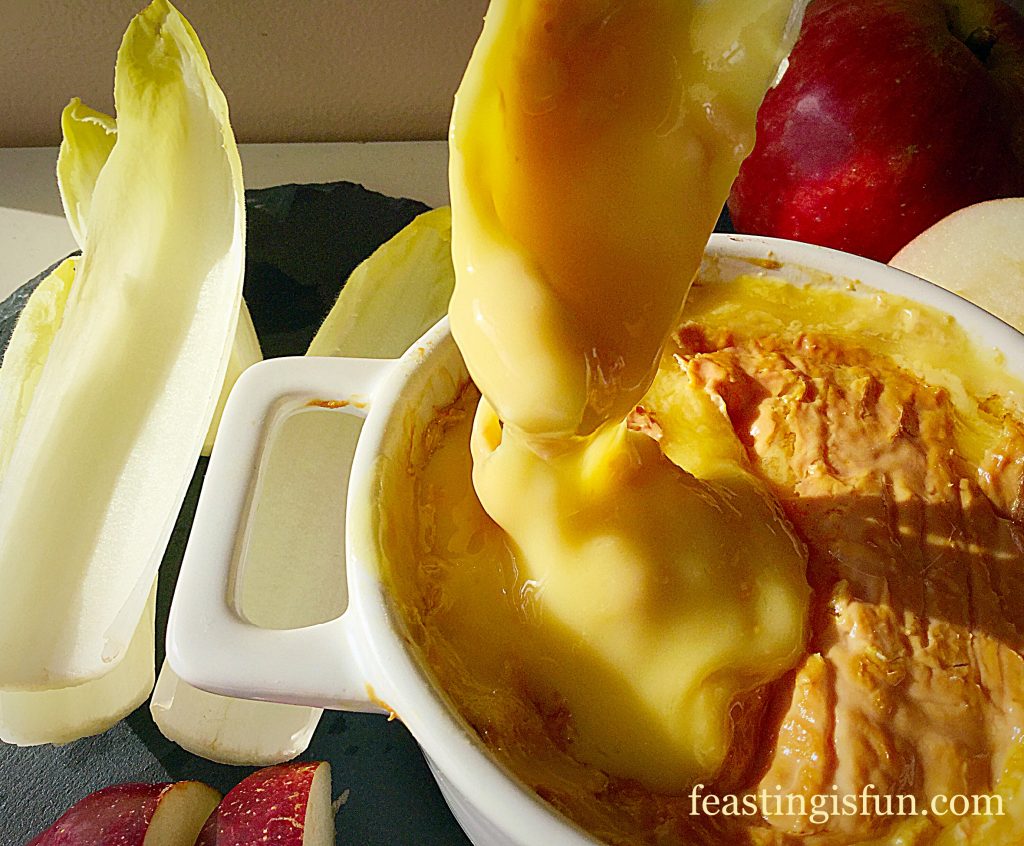
Baked Whole Epoisses De Bourgogne breaking through into the molten cheese.

Homemade breadsticks break through the crust to reveal the warm, bubbling, unctuous cheese below. The full taste is revealed when eaten with bread. Salty, spicy and pungent, any cheese lovers dream.

FF Baked Whole Epoisses De Bourgogne

Chicory, with it’s crunch and slightly bitter flavour is a perfect accompaniment to the melted cheese. While sweet, red apple provides contrast to the saltiness of the cheese. This for me was my favourite flavour pairing, my husband preferring the full flavour of the cheese, unhindered by the breadsticks.

FF Baked Whole Epoisses De Bourgogne

While, this is hardly a recipe, the method and increased flavour of the cheese, means it is extremely worthwhile taking the extra step to bake it.

Recipe: Baked Whole Epoisses De Bourgogne

250g Whole Epoisses De Bourgogne available from Pong Cheese

Sprig of rosemary  – either fresh from the garden or order a plant from most supermarkets such as Waitrose

Breadsticks, chicory, apple, pear, crackers for dunking

Method: Preheat the oven to 180C/160C fan, gas mark 4, 350F.

Baking The Cheese

You will need an ovenproof dish that is about the same size as the Epoisses. A Camembert dish will be fine, any bigger and the cheese will spread as it bakes.

  • First, remove all of the packaging from the Epoisses.
  • Next place the whole cheese into the ovenproof dish, laying a sprig of rosemary on the top.
  • Now place the ovenproof dish on to a baking tray and place in the middle of the preheated oven.
  • Bake the cheese for 15 minutes, or until you can see it bubbling around the side of the dish.
  • Once baked remove the baking tray, with the bubbling cheese in its dish, from the oven.
  • Allow the cheese to sit for a couple of minutes as it will be extremely hot.

Serve the cheese in its dish with a selection of fresh fruit, vegetables and bread or crackers. Most of all share with good company and an excellent glass of wine!

FF Baked Whole Epoisses De Bourgogne
Baked and ready for enjoying.

Sharing this baked cheese, either with a group of friends, or with the one that you love, infinitely improves the whole experience of eating it. Since memories are created and observations exchanged, whilst feasting together.

If you have enjoyed this recipe you may also like these:

Bath Soft Cheese Chilli Tarts

FF Baked Whole Epoisses De Bourgogne
Bath Soft Cheese Chilli Tarts an ideal appetiser or light lunch.

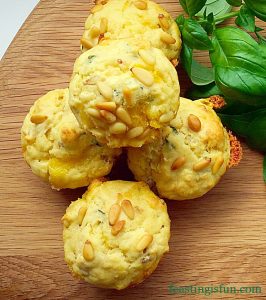
Goddess Cheese Pine Nut Muffins

FF Baked Whole Epoisses De Bourgogne
Goddess Cheese Pine Nut Muffins glorious flavour & texture.

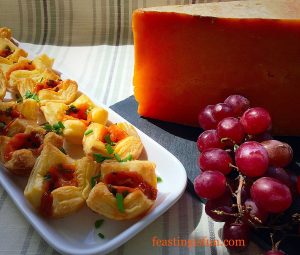
Mini Sparkenhoe Red Leicester Tarts

FF Baked Whole Epoisses De Bourgogne
Mini Sparkenhoe Red Leicester Tarts a delicious canapé.

Cheese is such a versatile ingredient. Whether baked and eaten as is, piled on top of chilli pickle in a crunchy filo tart, or simply eaten cold with crackers, it remains one of my favourite ingredients. As with most things that have a relatively high fat content, their flavour truly comes alive when heated. Baking the Epoisses De Bourgogne certainly brought all of its delicious and interesting flavours to the fore.

Do you enjoy using cheese as an ingredient?

Have fun baking, making and creating in your kitchens, preparing a feast.

Sammie xx

Pong Cheese supplied me with the Epoisses De Bourgogne for this recipe. All opinions, views, photographs and content are my own. Please see my Disclosure Policy.
Maple Syrup Frosted Apple Cupcakes

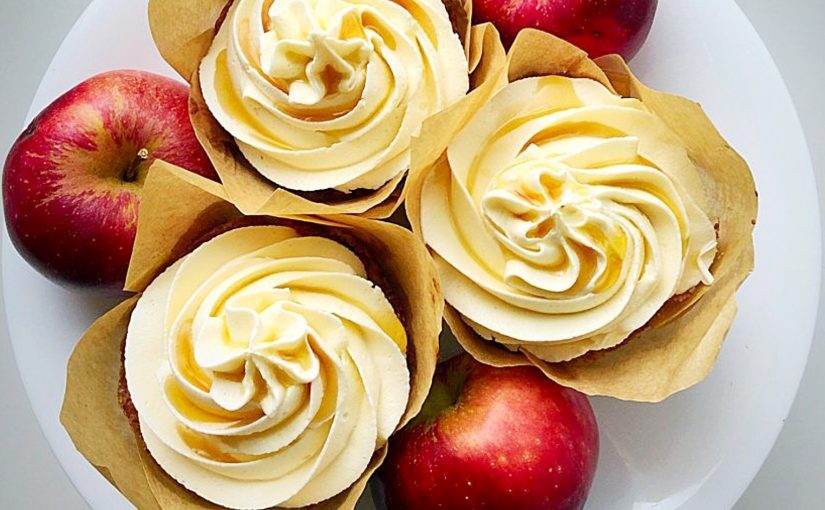
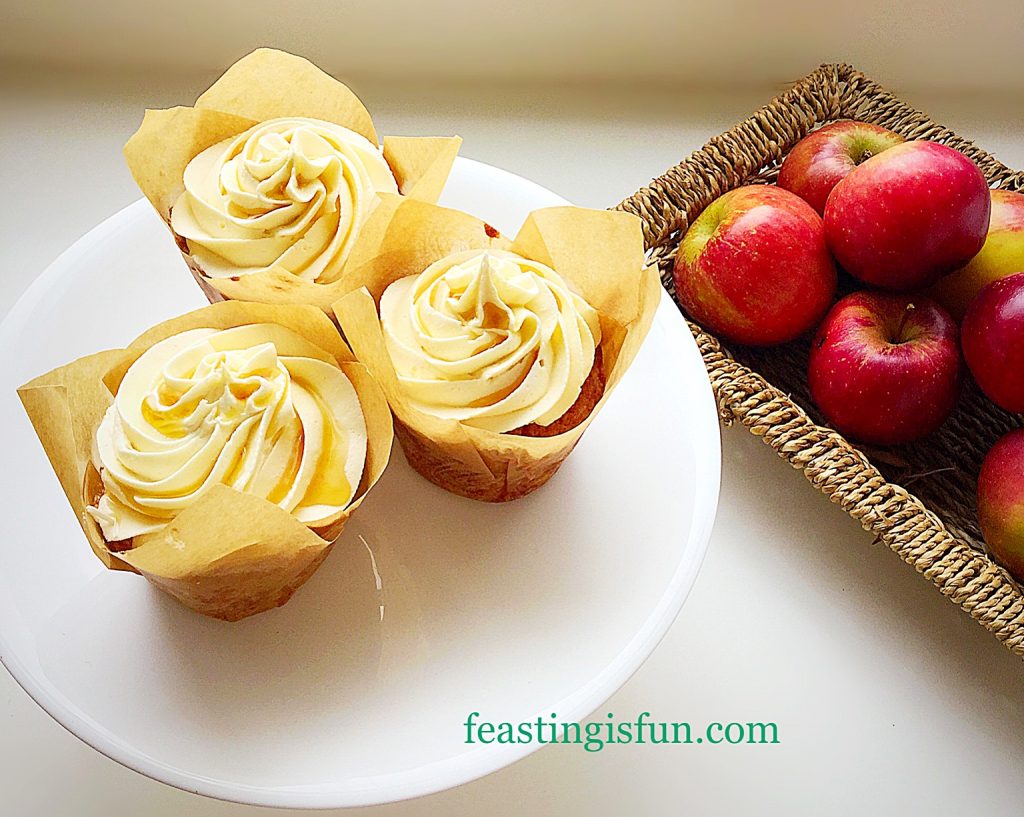
Today we are celebrating National Apple Day here in the U.K. Since there are two trees groaning under the weight of their abundant apple harvest in our back garden, an apple bake is needed. And a gift of maple syrup sparked inspiration  resulting in these Maple Syrup Frosted Apple Cupcakes. Finally, the finished result is better than I could imagine.

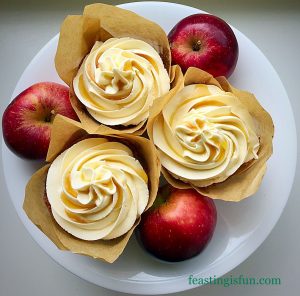
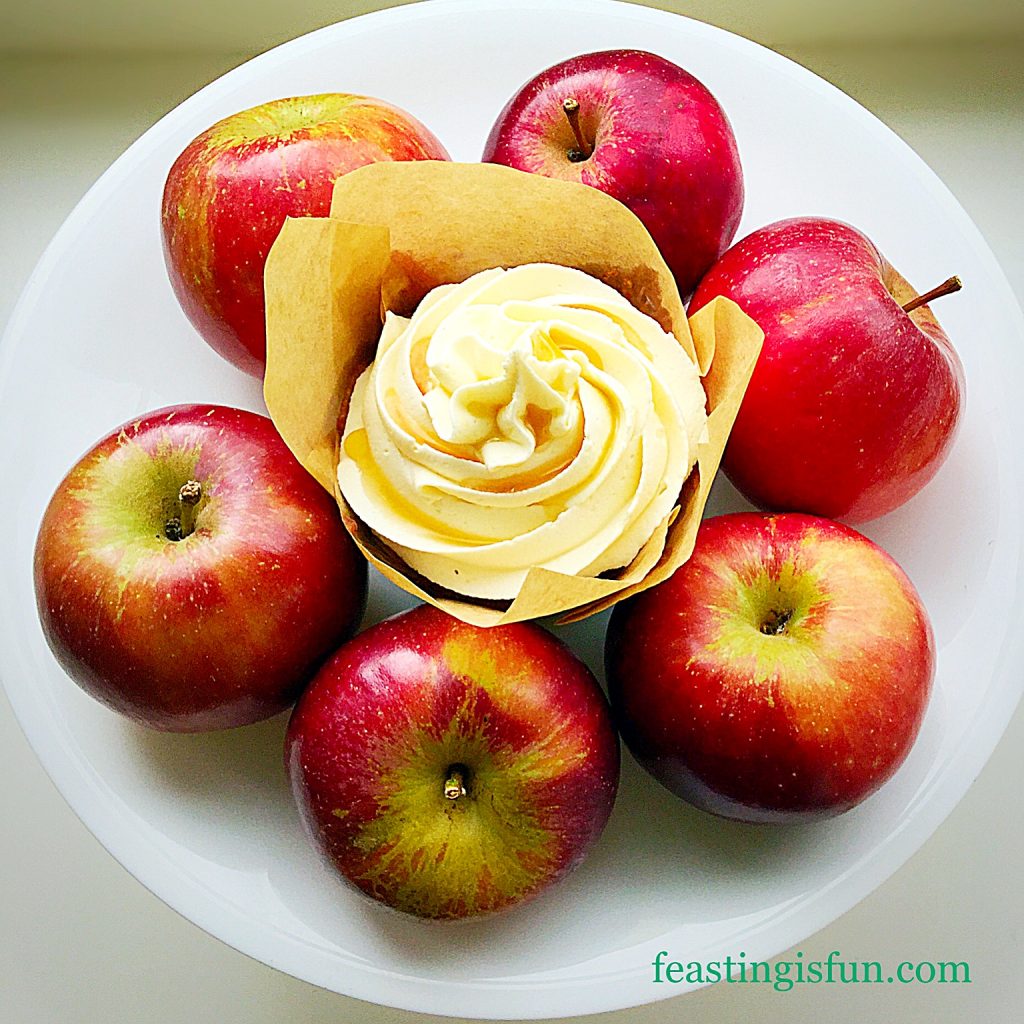
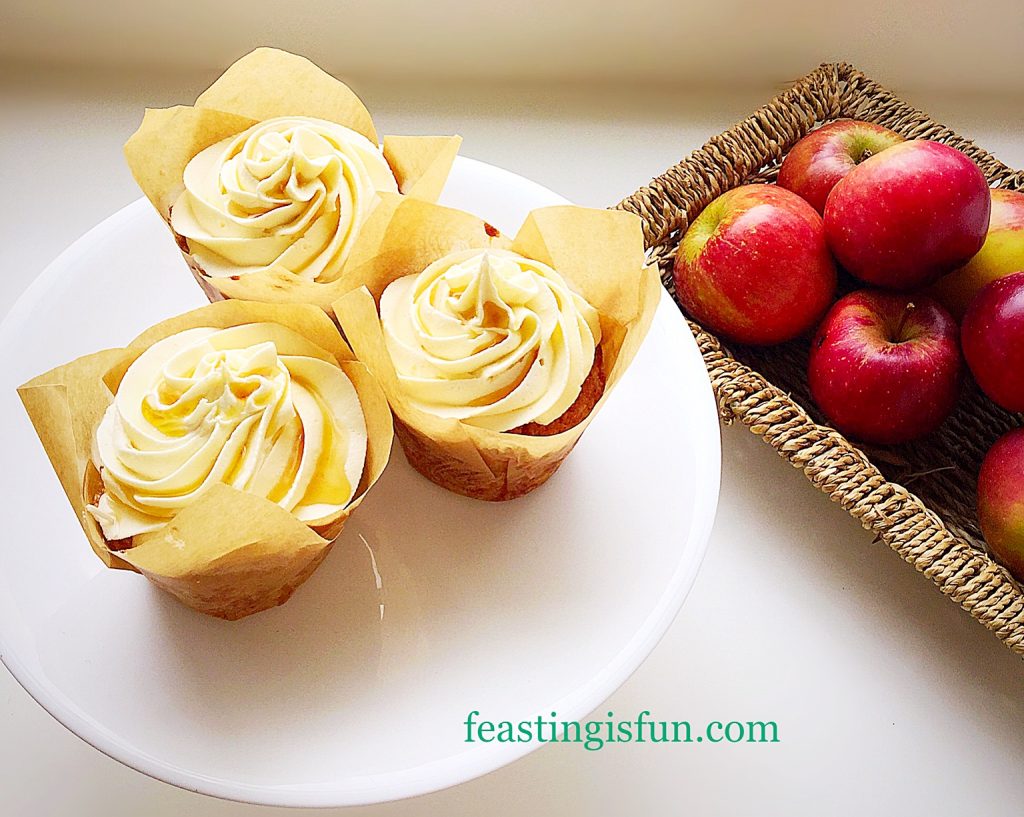
Three small cakes on a white plate next to a basket full of red fruit.
Maple Syrup Frosted Apple Cupcakes

One apple tree produces Spartan apples. Tennis ball sized, shiny red-green apples that are deliciously crunchy, sweet and ideal for little people hands! While the other apple tree variety is unknown. Sharper in taste than the Spartans, they are similar to a slightly sweeter version of Granny Smith apple. Also they are slightly larger with a similar colour that when rubbed becomes shiny. And fortunately, both apples are great for eating and cooking. Resulting in a combination of both being used for these cupcakes.
A single small cake on a white plate surrounded by the red-green fruit that are used in this recipe.
Maple Syrup Frosted Apple Cupcakes

Apples, The Core Of These Cupcakes:

Unlike Granny Smith apples, both varieties brown easily when sliced/grated and exposed to the air. While the grated apple be tossed in some fresh lemon juice, which would have prevented discolouration, I didn’t want to do this for two reasons. First of all, the lemon flavour would change the cupcake flavour, possibly overpowering the apple and frosting. Also, the lemon juice would have added moisture, resulting in a wetter batter, where the apple may not have kept it’s even distribution. Grating the apples into the cake batter keeps any discolouration to a minimum.

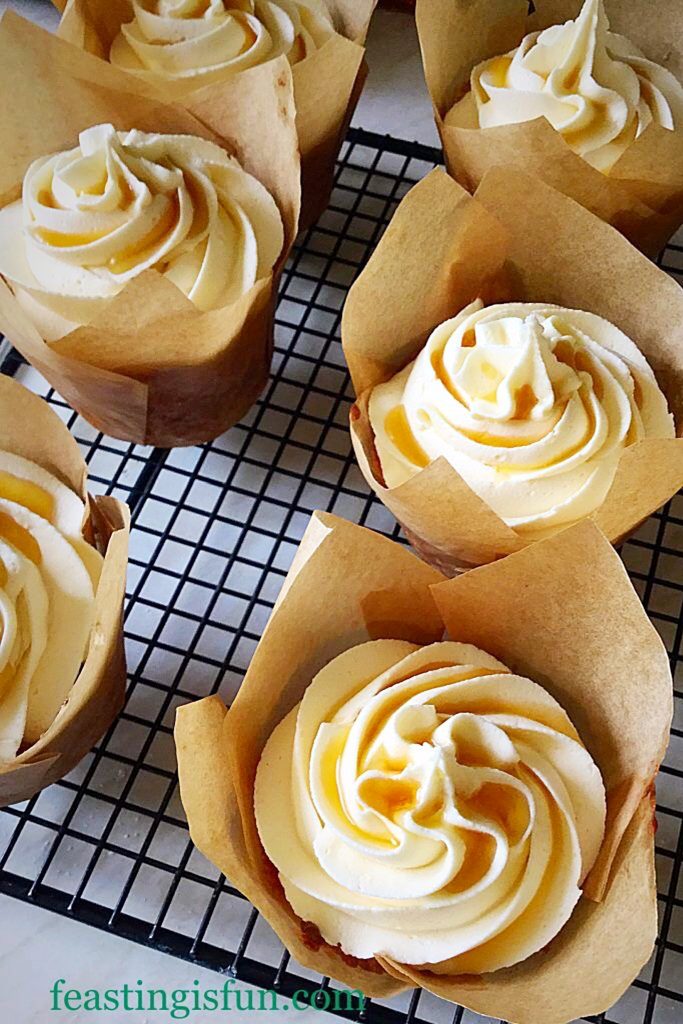
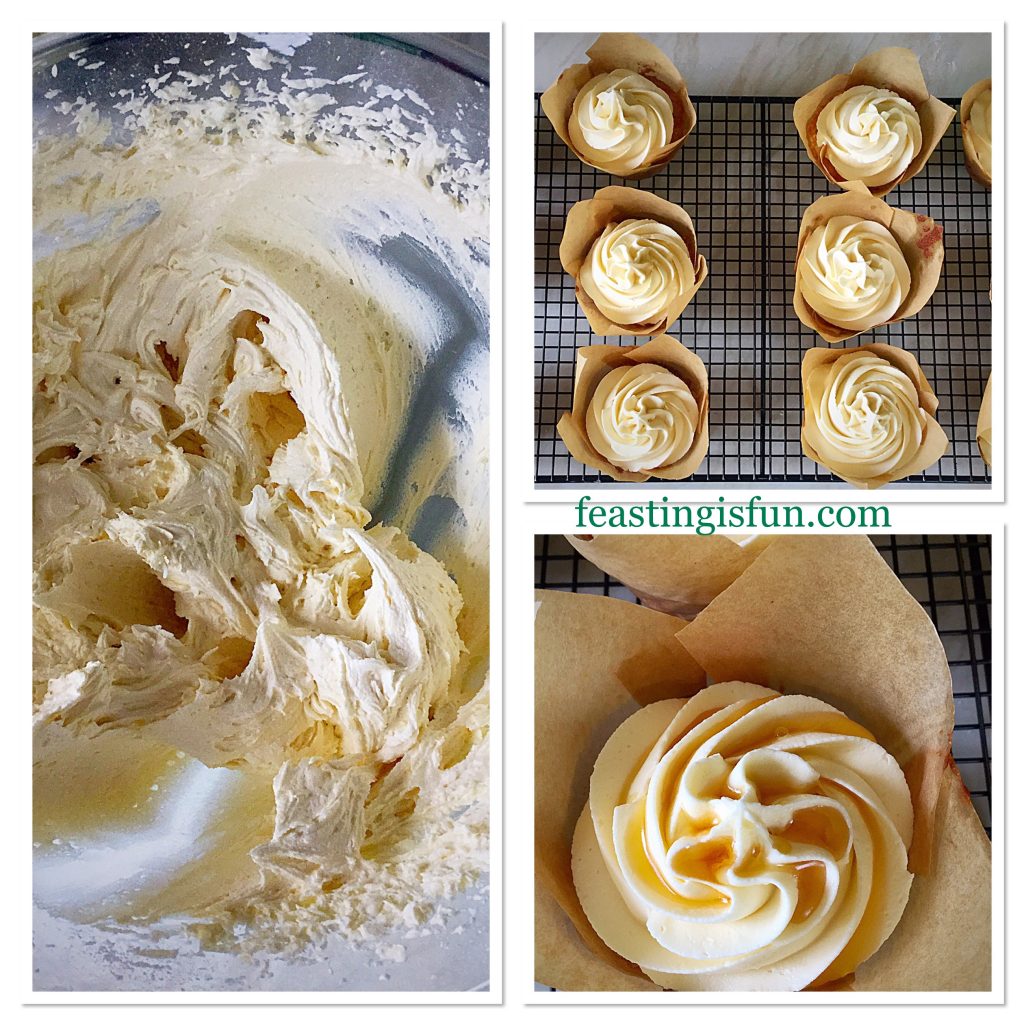
Freshly baked and frosted small cakes in caramel coloured tulip wrappers on a cooling rack.
Maple Syrup Frosted Apple Cupcakes

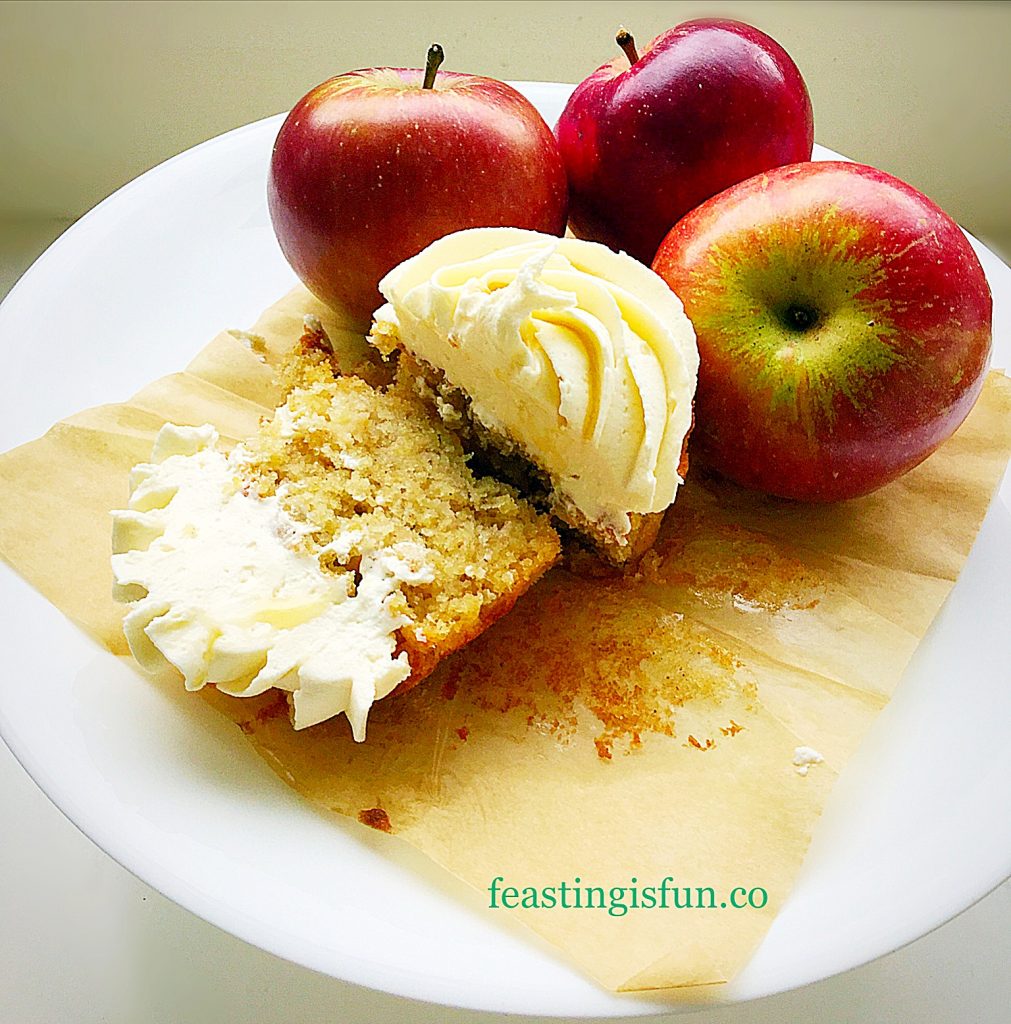
Preparing the cake batter first and then adding the grated batter works really well. As it ensures each cupcake has plenty of evenly distributed apple within a light, moist crumb. Without the maple syrup frosting, these could easily be served as muffins, in which case the addition of some toasted pecan or walnut pieces would bring added flavour and texture. Tasting these cupcakes with the dreamy frosting means I could not possibly eat them any other way now!

A small cake cut in half to shown even distribution of fruit in the bake.
A Maple Syrup Frosted Apple Cupcake cut in half.

Maple syrup frosting. Just think on those words for a moment!

Initially I had worried that the addition of maple syrup to a buttercream frosting would result in a too sweet topping. Instead, the opposite happened, with the maple syrup adding a very slight smoky, creamy flavour. Resulting in the sweetness of the unflavoured frosting being dumbed down. As a result, the final flavour paired beautifully with the lightly spiced apple cupcake.

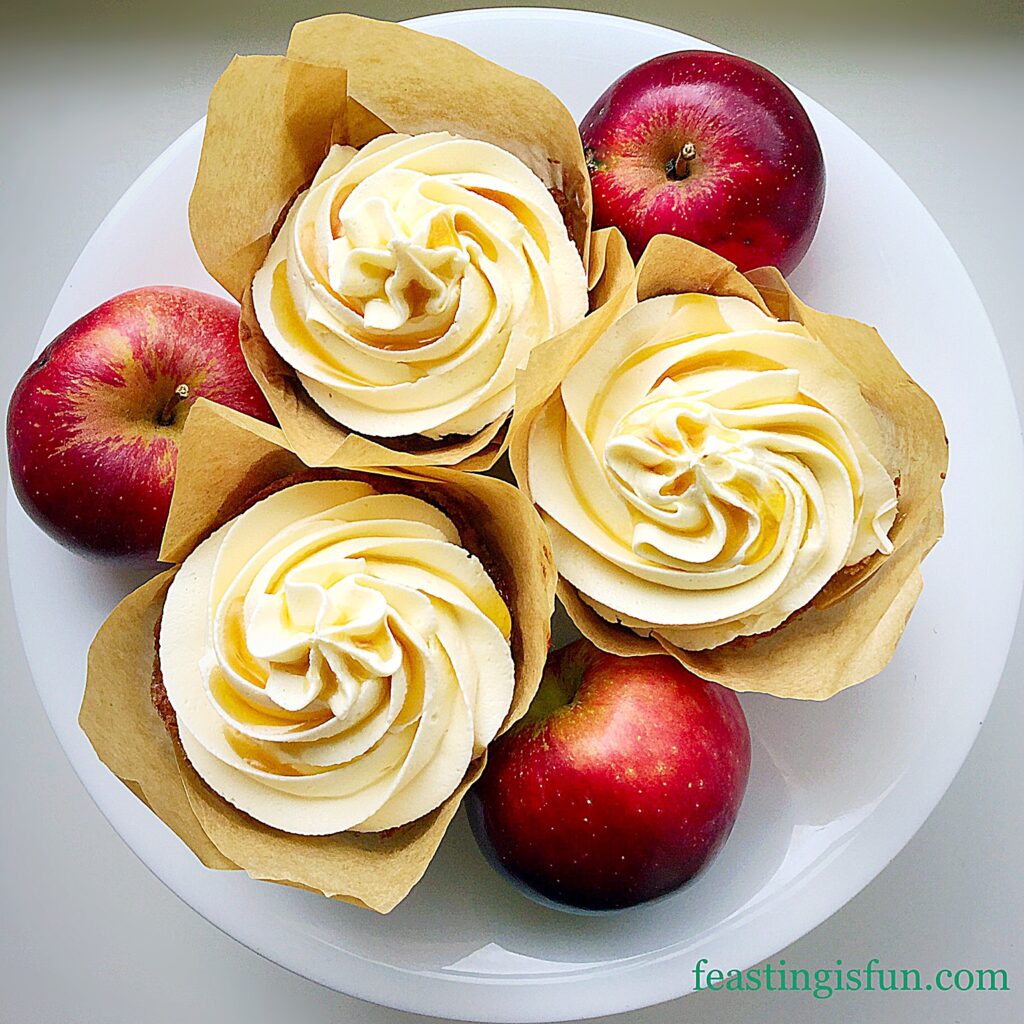
Maple syrup swirled frosting on apple cupcakes.

Recipe: Maple Syrup Frosted Apple Cupcakes – makes 12

Cupcake Ingredients:

175g/6oz Unsalted Butter at room temperature

175g/6oz Soft Light Brown Sugar

1/8th tsp Salt – I use Maldon

3 Large Free Range Eggs

1tsp Vanilla Extract – I use Nielsen-Massey

200g/7oz Plain White Flour

3tsp Baking Powder

1/2tsp Cinnamon

200g/7oz Grated Eating Apple – approximately 3-4 peeled apples

Frosting Ingredients: you may have extra frosting left over

250g/9oz Salted Butter very soft, ideally removed from the fridge the night before

500g/1lb 2oz Sifted Icing Sugar

1tsp Vanilla Extract

2tbsp Maple Syrup – use real maple syrup not maple syrup flavouring

1tbsp Very Hot Water from a recently boiled kettle

Extra Maple Syrup to drizzle over the finished cupcakes

Method: Preheat the oven to 180C/160C fan, gas mark 4, 350F.

Making And Baking The Cupcakes:

  • First of all, line a 12 hole deep muffin tin with tulip cupcake wrappers, or deep muffin cases.
  • Next in a large bowl add the butter, sugar and salt. Whisk/beat them together until they are very pale and creamy.
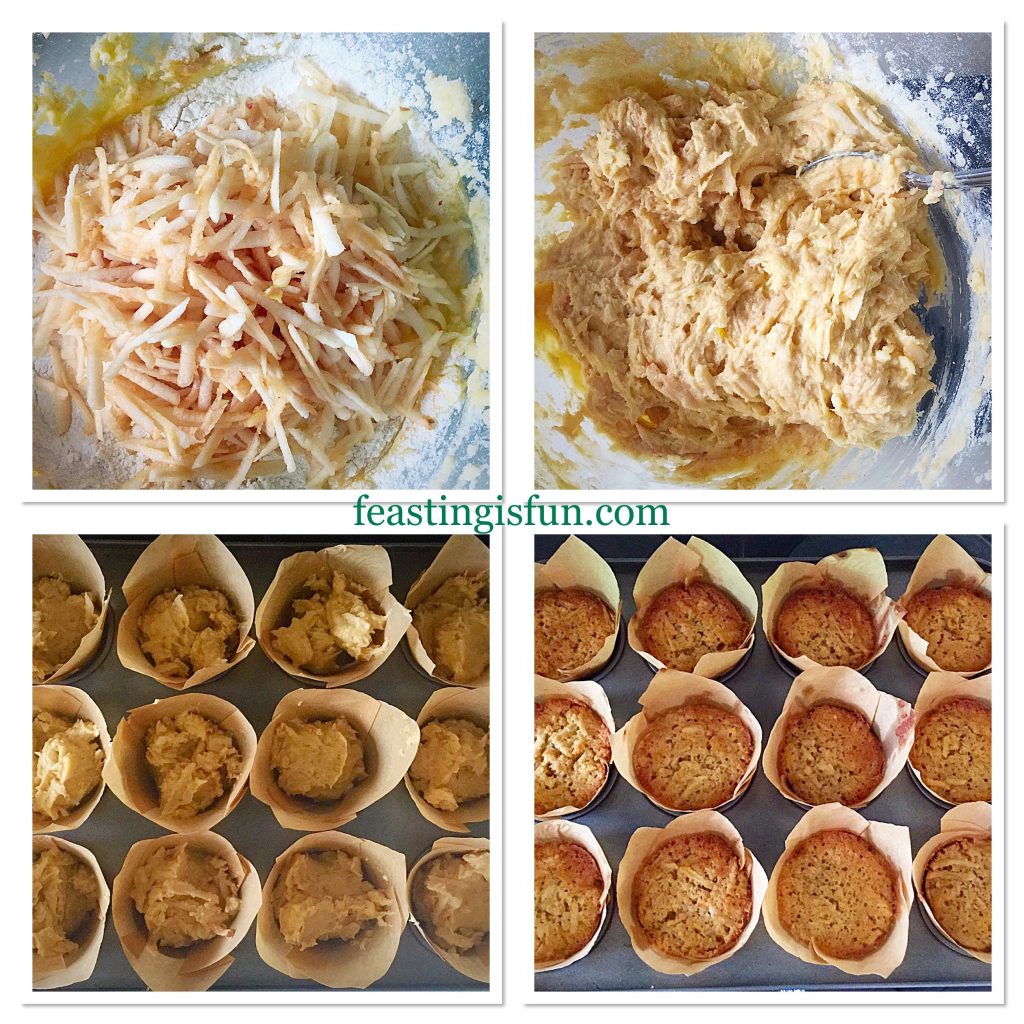
  • Add the vanilla extract and all 3 eggs to the bowl. Whisk/beat briefly to partially mix the ingredients, without the risk of them curdling – no more than 30 seconds.
  • Now sift the flour, baking powder and cinnamon into the bowl. Set the bowl to one side.
  • Working quickly, yet carefully, peel and grate 200 grams of apple.
  • Add the grated apple on top of the flour, in the large bowl and using a spoon mix all the ingredients together, until they are just combined.
  • Next, using a dessert spoon, place a heaped spoonful of cake batter into each of the cupcake wrappers. Finish by dividing any remaining batter between the twelve cases, so that they are all equally filled.
  • Finally place the tin in the middle of the preheated oven and bake the cupcakes for 25-35 minutes.
  • The cupcakes are baked when they spring back from a light touch. Use an inserted skewer to check if they are baked, if it comes out clean they are ready to remove from the oven.
  • As soon as the cupcakes are baked remove them from the oven and leave them in the tin to fully cool, regardless of which type of wrapper/case has been used.
FF Maple Syrup Frosted Apple Cupcakes
The stages of making the cupcake batter, through to filling and baking them.
  • Allow the cupcakes to fully cool before frosting them.

Making The Frosting And Decorating The Cupcakes:

  • First, add the very soft butter to a large bowl.
  • Then sift the icing sugar into the bowl.
  • Next add the vanilla extract, maple syrup and very hot water.
  • Finally whisk the ingredients, starting slowly and increasing in speed, until you have a smooth, creamy, light buttercream.
  • Fit a large piping bag with a large star piping nozzle – Wilton #1M.
  • Fill the piping bag with the maple syrup frosting.
  • Start in the centre of each cupcake pipe swirls, so the entire top of the cupcake is covered and then, continue to pipe, bringing the tip back to the centre and finishing with a star, as the nozzle is pulled away.
  • Continue to pipe frosting until each cupcake is generously topped with frosting.
  • To finish the decoration, drizzle approximately 1/2 teaspoon of maple syrup on to the top of the frosting, allowing the drizzle to drip around the frosting swirls.
FF Maple Syrup Frosted Apple Cupcakes
Maple Syrup Frosted Apple Cupcakes ready to be served.

Maple Syrup Frosted Apple Cupcakes a taste of Autumn in a cupcake! If you enjoy the season of Autumn, or Fall as it’s also known, take a look at this non food related post Autumn The Most Beautiful Season.

Maple Syrup Frosted Apple Cupcakes

Baking these cupcakes certainly makes the most of seasonal fruit. Since there are plenty of apples freely available I will be making again. Another reason to bake them is also so they can be shared. While none of our friends or neighbours expect deliveries of cake, it is an extra special way of sharing our abundance of apples, which are also given away.

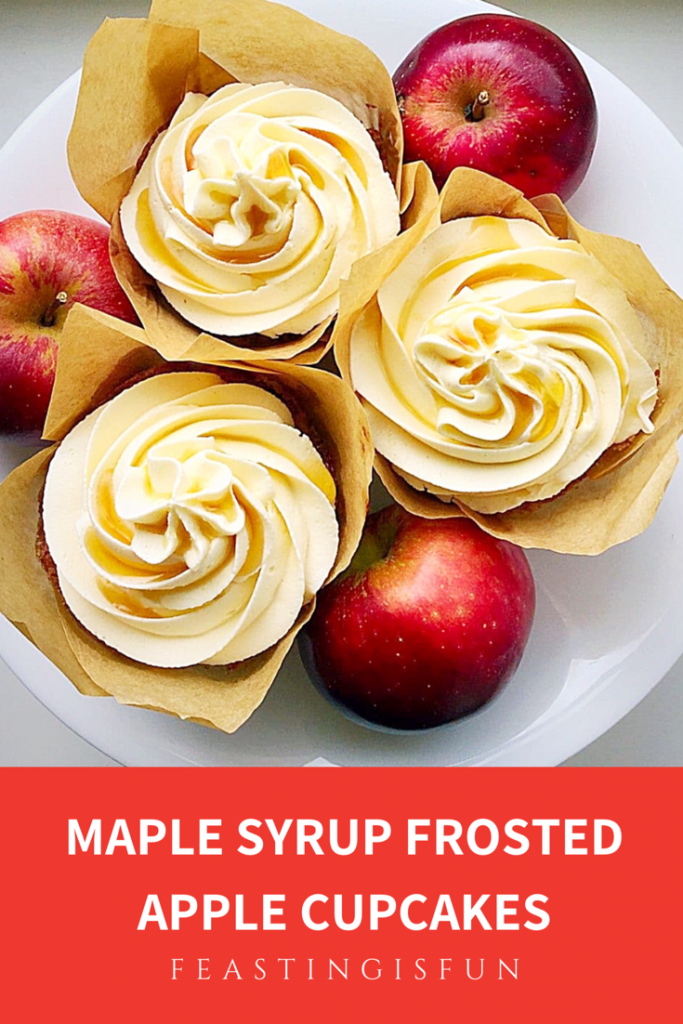
Lightly spiced apple cupcakes in tulip wrappers, topped with creamy, piped frosting and a drizzle of maple syrup on a speckled white plate with apples.

If you have enjoyed the recipe for these Maple Syrup Frosted Apple Cupcakes you may also like these:

Autumn Apple Almond Cake

Gluten free large cake topped with flaked almonds. A slice is cut and pulled slightly away from the Autumn inspired cake.
Gluten Free – Autumn Apple Almond Cake

Crazy Caramel Carrot Cake

Crazy Caramel Carrot Cake - a bundt style carrot cake drizzled with caramel and top with pecan nuts.
Crazy Caramel Carrot Cake

Cinnamon Drizzle Apple Walnut Cake Bars

Fruit and nut cake bars drizzled with cinnamon icing and finished with contrasting white sugar nibs.
Cinnamon Drizzle Apple Walnut Cake Bars

I enjoy baking and find the process very relaxing. And creating new recipes is also be very rewarding, especially as I get to share them here, on Feasting Is Fun. Firstly as a personal achievement and also because of the pleasure my baking brings to others. Watching faces full of pleasure as they bite into a delicious treat, big smiles when a friend receives a birthday bake and gracious thanks from a busy, tired family upon receipt of a homemade lasagne, all bring me a deep sense of joy. Life is for sharing and if my small contribution encourages others to do the same, well then, this blog, Feasting is Fun, will have served its purpose.

Do you share your makes and bakes?

Sammie xx

No part of this post may be reproduced or duplicated without the written permission of the owner. Please see my Disclosure Policy.